


GuntherMT
-
Posts
2,213 -
Joined
-
Last visited
Content Type
Profiles
Forums
Gallery
Events
Posts posted by GuntherMT
-
-
-
Thanks again Keith.
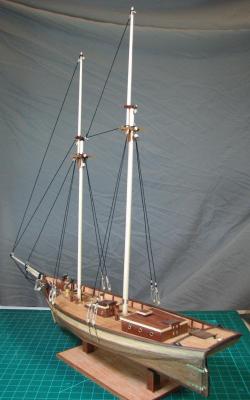
I'm still undecided on how to proceed, but I took the evening off and went out with some friends, so still have the gaffs & booms to make, so I've still got a little bit of time to think about it. I could always stitch the sails on, and if they look like crap, cut them off!
I did indeed approach this build in a fairly fast/reckless manor, but in turn, I did learn a lot of lessons that I hope to apply to the AVS build, which I will try to take a lot more time and care with at each step, in order to improve the quality of the build, now that I have gotten my initial 'excitement' at that new hobby out of the way on the Carmen (which is still turning out fairly decent looking, in spite of myself).
The tips and advice of you and Russ in this thread have been invaluable, and I appreciate all the feedback from both of you, and everyone else who has dropped in to offer tips and/or encouragement.
-
Good morning all,
For my Carmen build, I'm thinking I would like to finish her without sails, but I'm unsure of what changes need to be made to the running rigging to do this.
The kit design uses the sails themselves for most of the spans, rather than having a rope extend all the way the length of the sails (this is a schooner).
I've looked for examples of schooner rigs without sails, but haven't found any great examples with enough detail that I am able to get a really good feel for what should and should not be present for a sail-less display.
The parts that do not attach to the sails are pretty straight forward, but should I be running ropes between the gaff and boom where the trailing edge of the sail would be? What about the jib sails? Should there be a rope from the foremast to the bowsprit and jib boom where these three sails would be? Same question would apply to the triangular topsails as well.
Thanks!
-
Thanks Keith, those pictures are very illuminating.
I'm considering just going without sails, just need to figure out what the running rigging should look like for static display without sails. I've never been looking forward to the sails, just because the stitching is something that I don't think I can do in any way that would look decent at all (the long running stitches every 1/2" or so for the entire sail surface area), and because of the 'looks' thing as well.
-
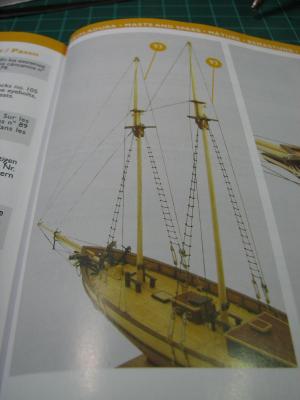
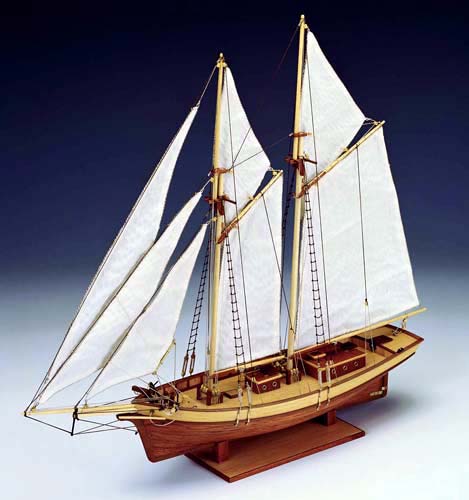
Apparently Constructo decided to ignore that bit of information. The kit design has the sails attached to the gaff and boom (actually sewn directly to them with loops of rope), but not to the mast directly, just to the bolt-rope.
Here is the 'finished kit' picture from the Constructo website (same picture as is on the box):

As you can see, even though it's a fairly small photo, there are clearly no hoops around the masts. Oh well, yet another lesson learned!
If I don't do sails, then I would need to figure out how to do at least some of the running rigging without them, and there is no plan at all for that, although some of it is fairly easy to figure out.
-
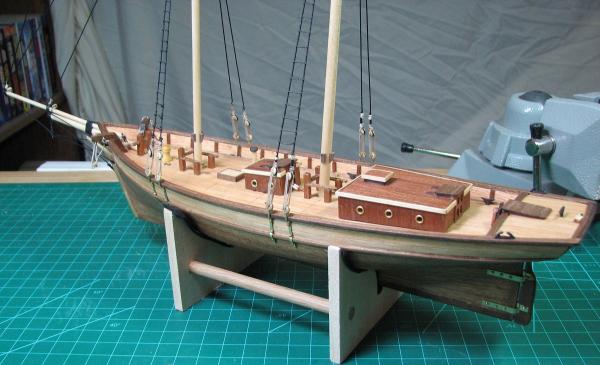
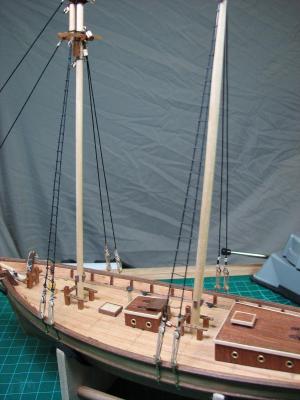
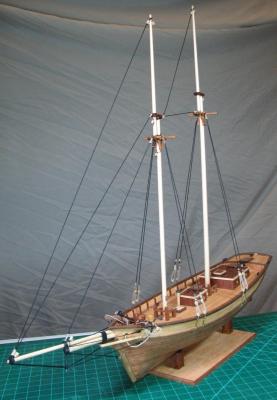
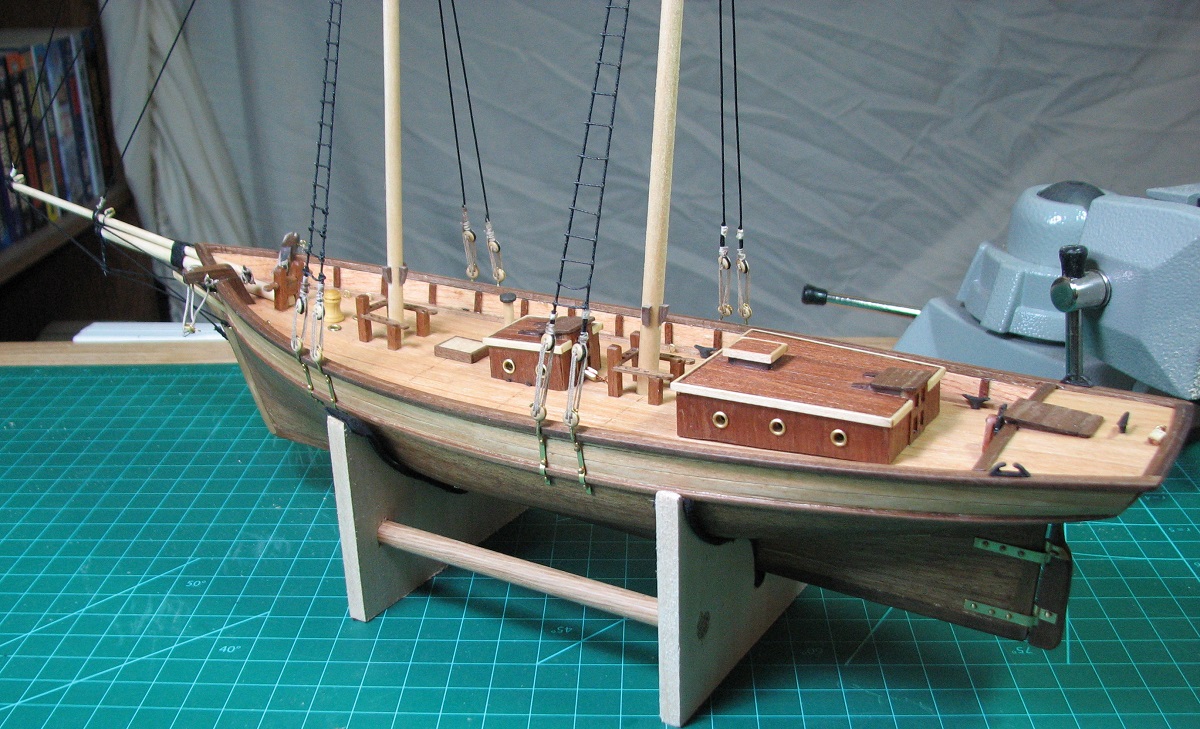
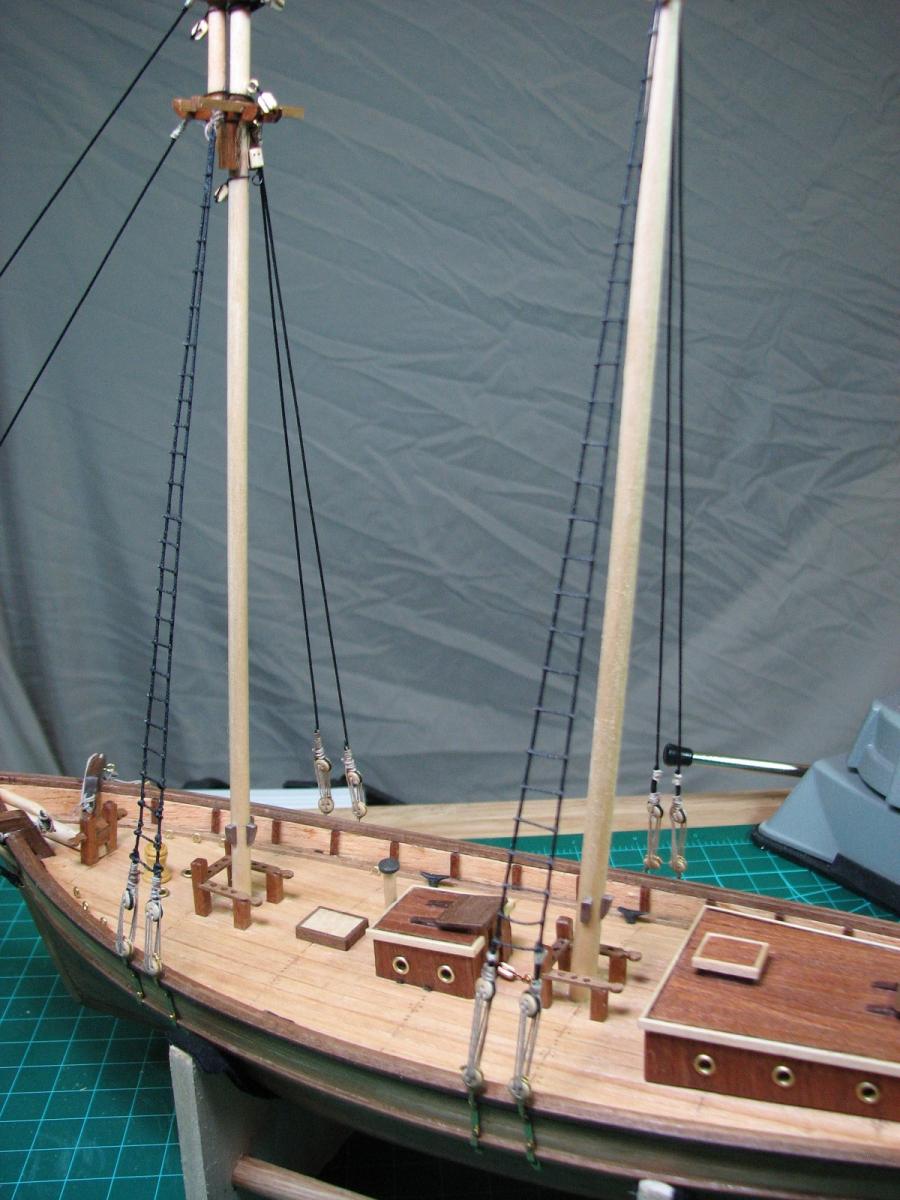
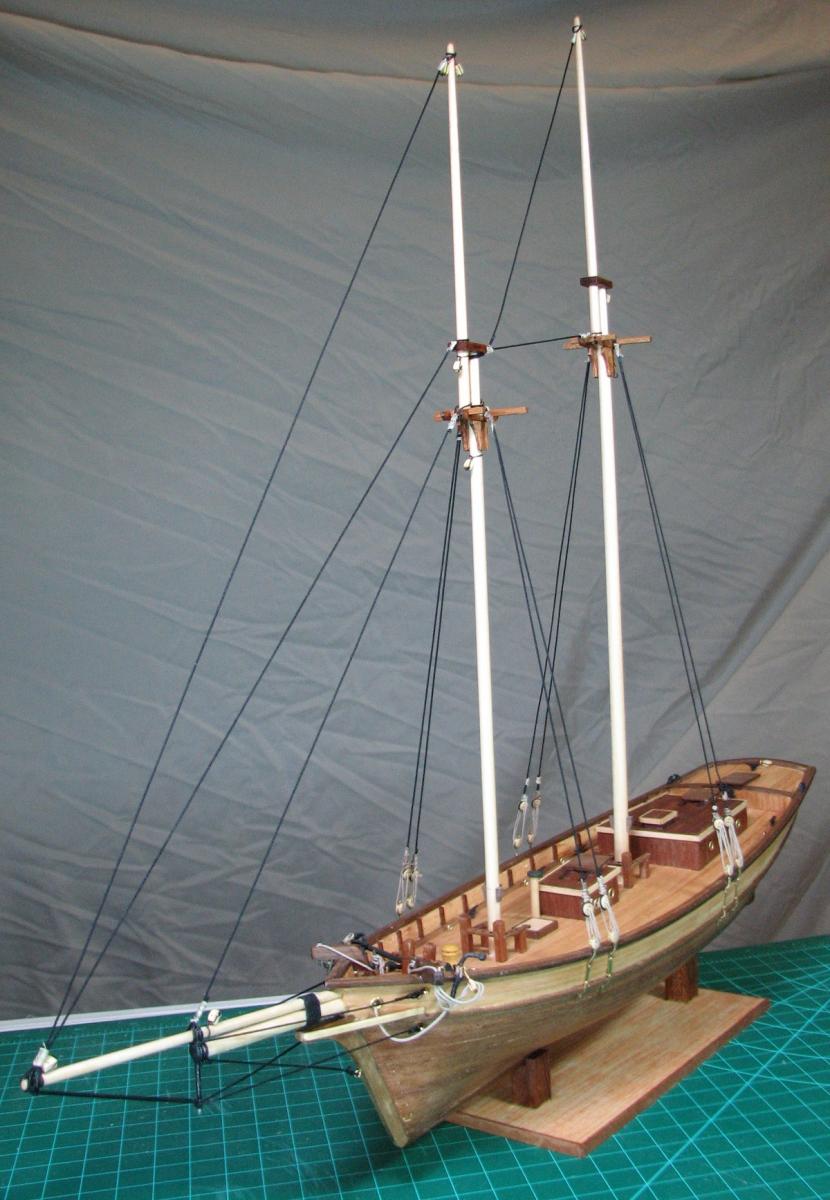
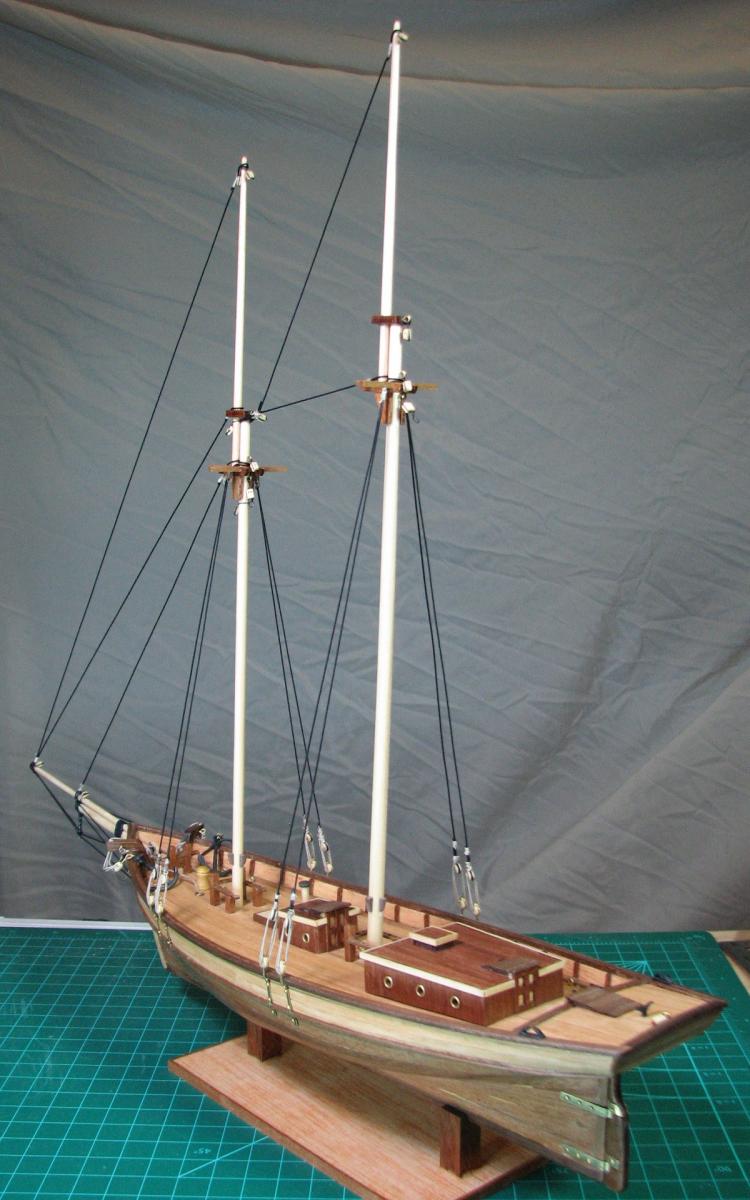
Main mast backstay is done, which completes the standing rigging.
I can build the booms and gaffs now, but after that I will be at the point where I need to decide what I'm going to do with the sails. Just the thought of hand-stitching them has me ready to quit (I do not have a sewing machine before you ask). I know I've read a few things about people using pencils or other ways of 'faking' the stitching, just need to go find some of those now and read up on them again now that I'm nearing that point.
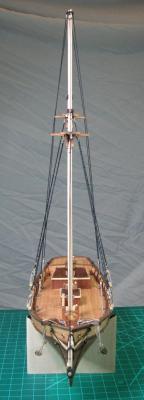
Here she is with all the standing rigging.
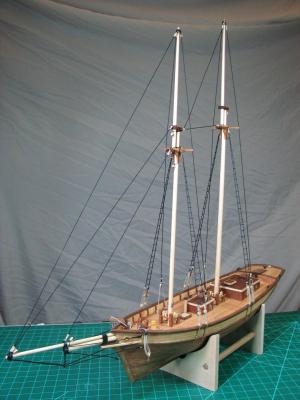

And bow on, got the masts pretty close.
-
Very nice looking planking job there.
-
That's a great planking for your first one. Mine was terrible in comparison, and after sanding and finishing, looks just fine, so yours should be gorgeous when you finish it up.
-
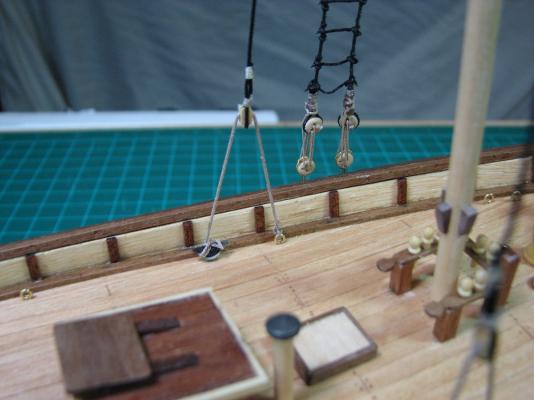
Pictures to go along with the previous post.
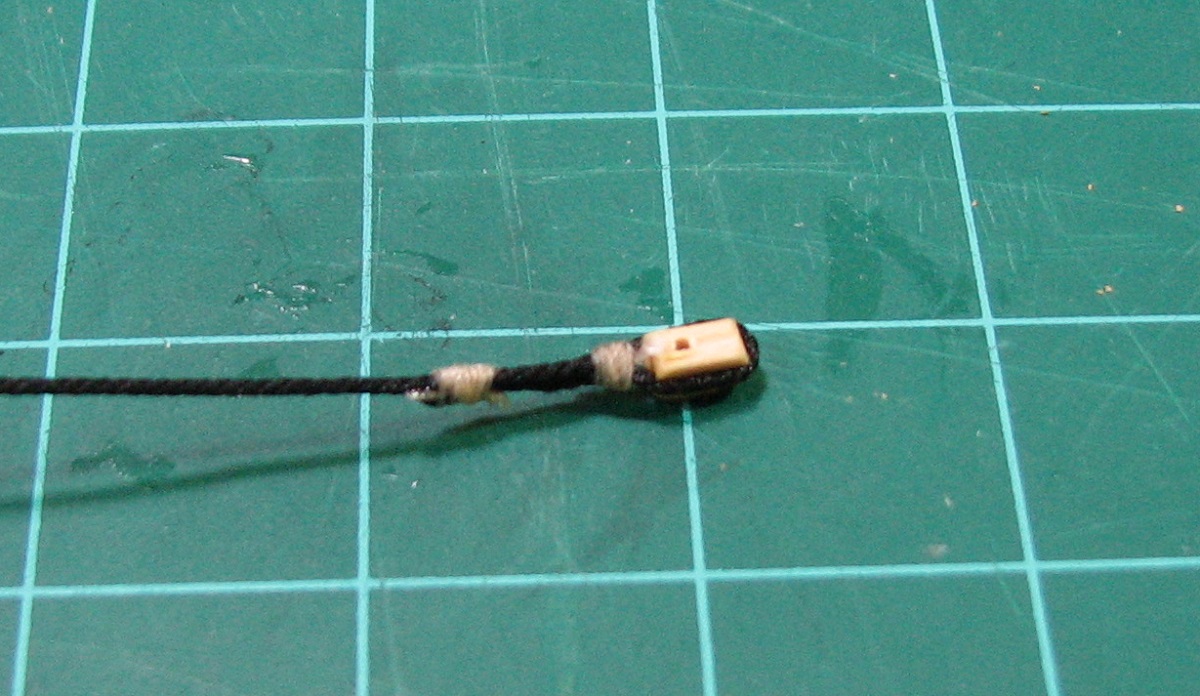
I did my first rope stropped block. Fairly happy with it.

The offending line. Is it the topmast shroud?

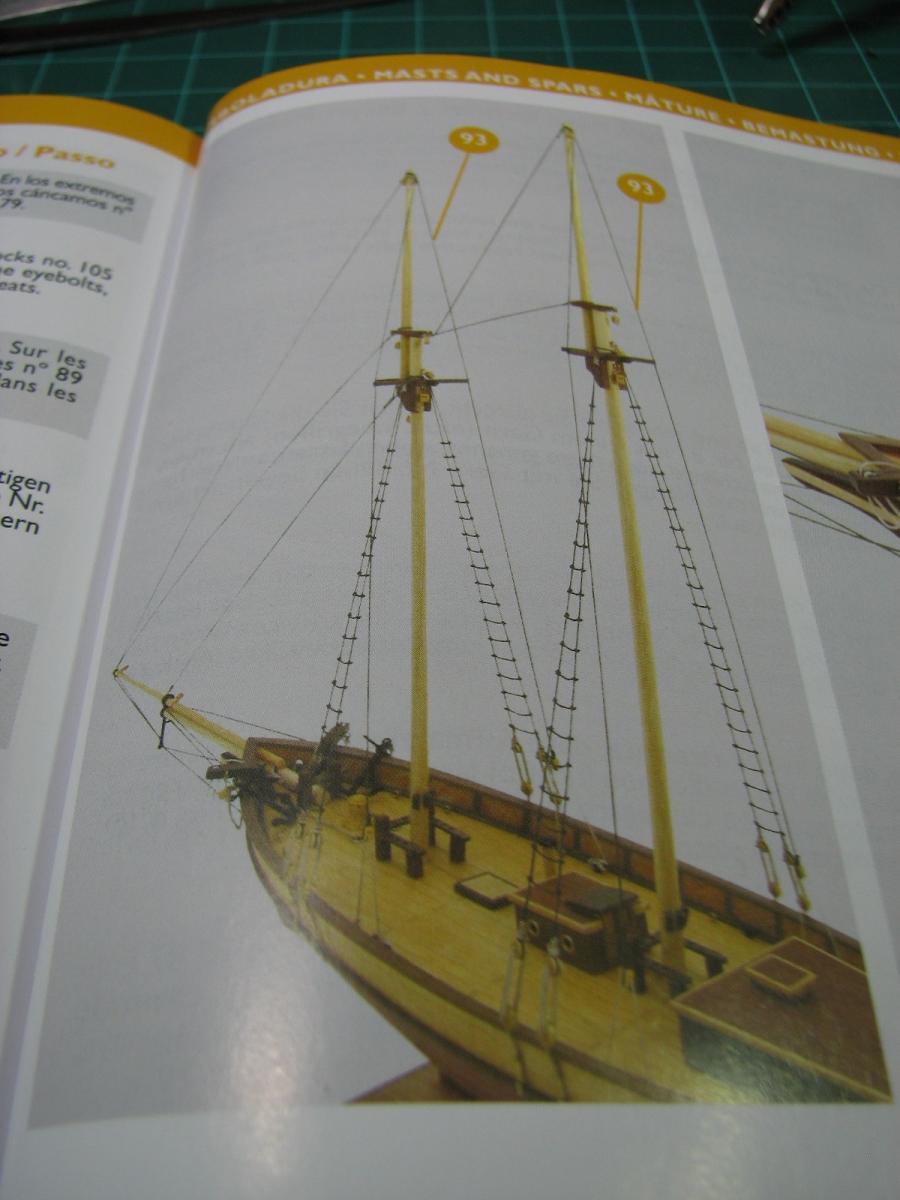
And here is all I have to go off of in the instructions:
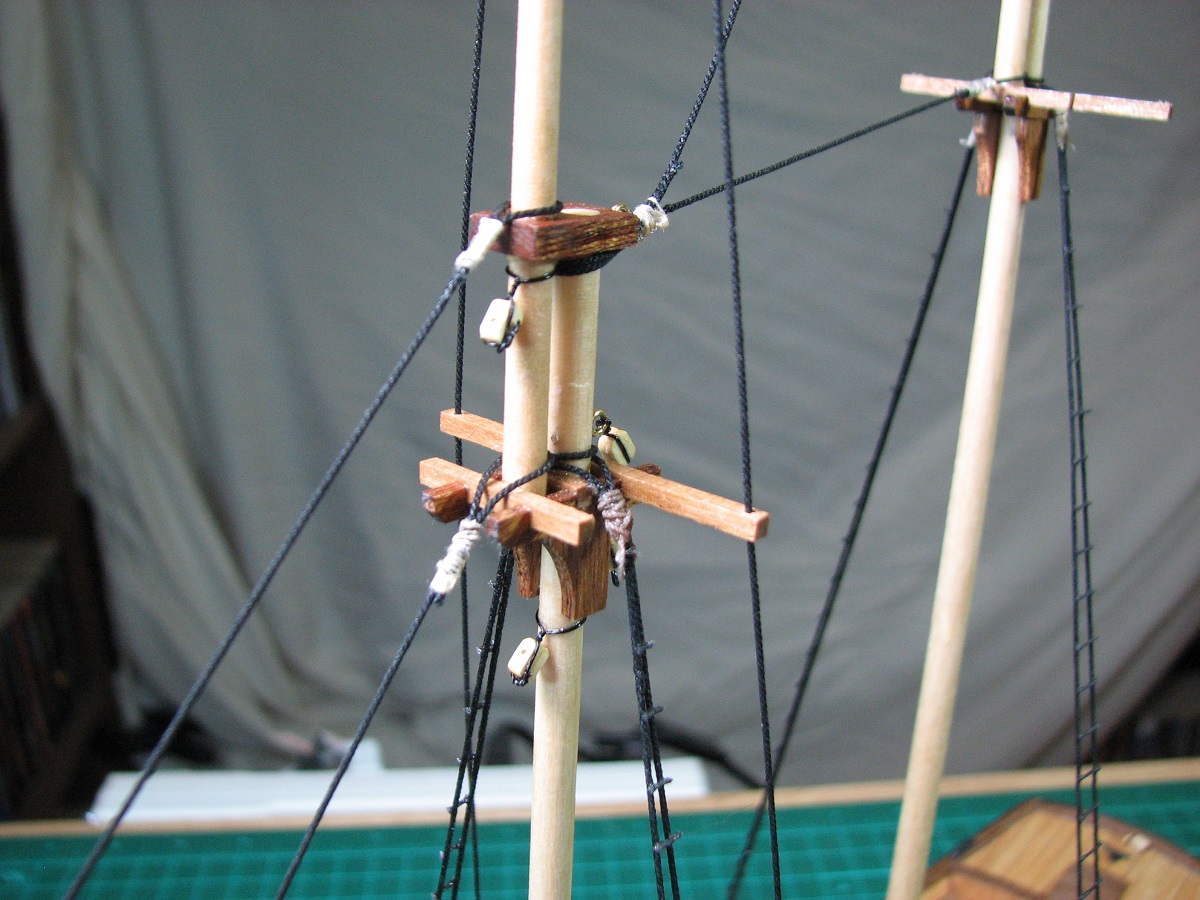
Here is what I did, for better or worse.

And the deck attachments.

Now I get to do another one just like this for the main mast.
Russ - see that you replied while I was typing this. Thanks!
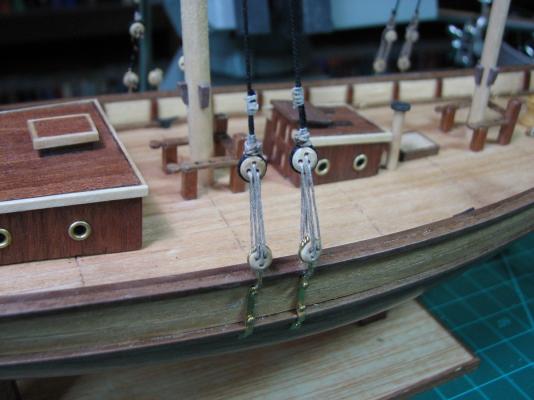
So is this a 'shifting backstay', or is that just the name for the deck attachment method? It does make sense to me that it would be two separate ropes, just for ease of replacement if nothing else.
- The Sailor, piperjoe, themadchemist and 1 other
-
 4
4
-
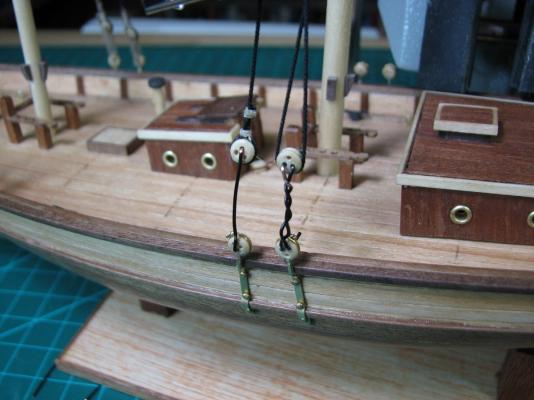
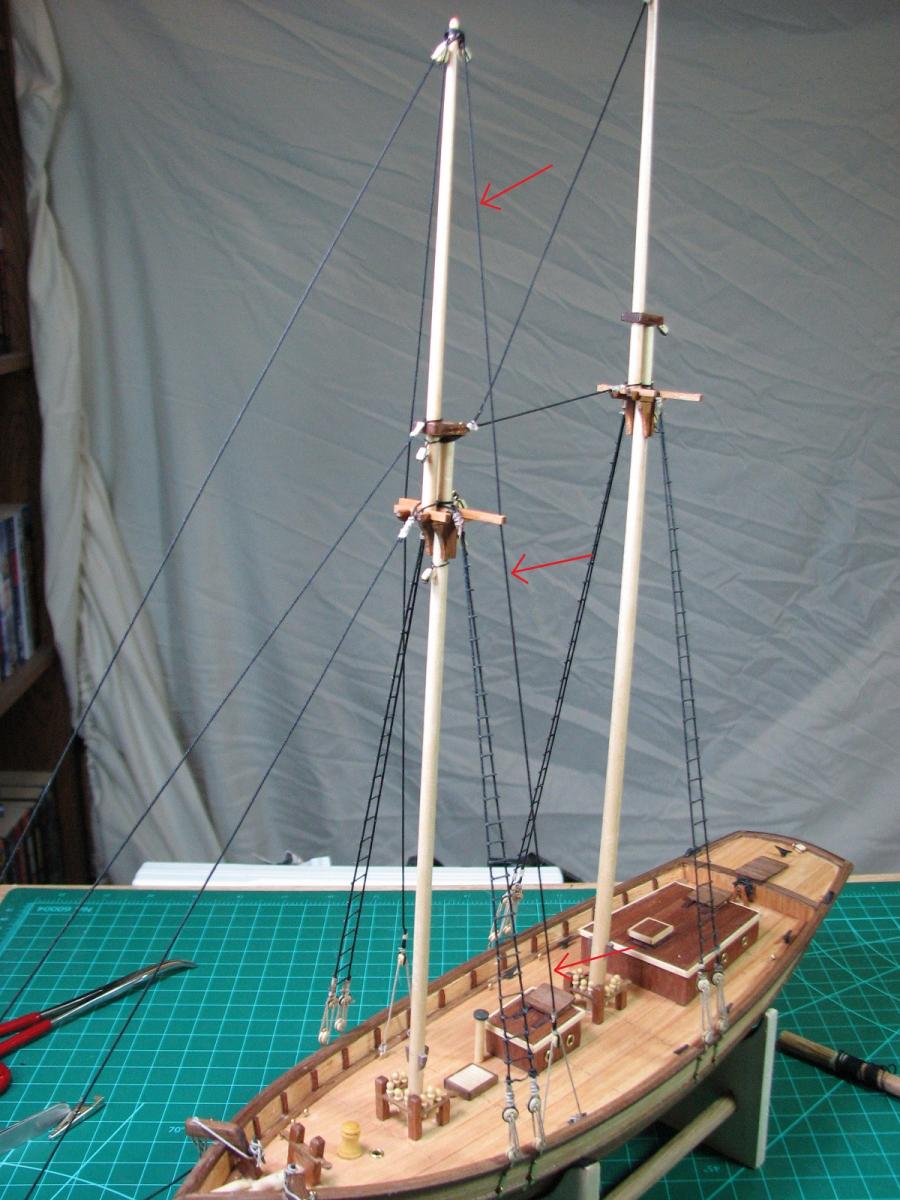
So I'm working on the standing rigging, and I'm running into a hard time finding pictures and references for the little details I'd like to have for this rig. There are a bunch of things for square riggers, but not much I've been able to find for this particular schooner rig.
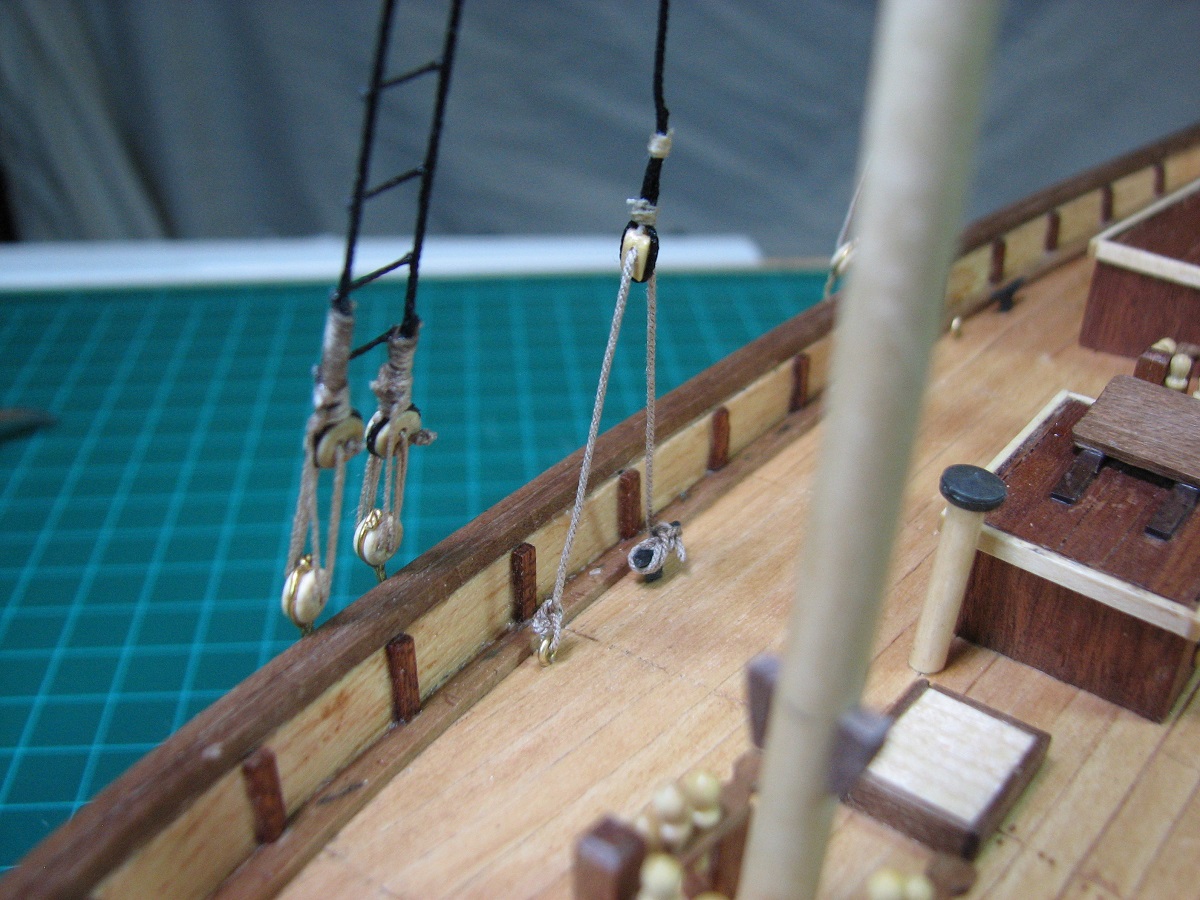
The line that runs from the very tip of the mast down across the tips of the cross-tree (spreader?) and then gets attached to the deck via another line which is belayed to a cleat. On a square rigger it seems that this would be the topmast shroud, but on a square rigger they don't go all the way to the deck. On the other schooner rigs I've been able to find detailed pictures of, the line doesn't run across the tips of the cross-tree, instead just taking a straight run to the deck.
The detail I can't seem to find, is how the line is retained at the ends of the cross-tree. From what I can tell of the pictures of the rigs I've found, it appears to just run through a hole in the end of the cross-tree, but of course there is no reference to this at all in the plans or instructions. I eventually just went ahead and drilled little holes at the tips of the cross-trees to run the line through, and I have the first one on. Running it through the crosstree makes rigging the line a huge pain in the posterior, as only one end can have the block rigged off the ship, and the other end has to be rigged at just the right length to match it after attaching the top to the mast (another location where they fail to give any sort of direction on how to attach it - "attach a loop to the top of the mast".. yea, thanks for that helpful instruction Constructo.
I'm wondering if the proper way wouldn't be to attach the two sides as completely separate lines, with served loops at the masthead. Not going to do it that way on this one, but it doesn't seem like they would have actually made the top-mast shroud a single line running to the top of the mast and back down the other side, but it might be.
-
Thanks for those great closeup pictures, they really helped me understand what all those things actually do now!
-
Constructo doesn't make it easy. I have to look in numerous places to figure out where and how each line goes. I have to refer to the outside websites all if you have provided me, also. I even had to cut and paste several of Constructo's drawings since one half of the bowsprit was on one sheet and the other half on another drawing! Who says model ship building was easy? I feel like a detective.
I have some issues figuring out where lines go for rigging the Carmen, and it's a much simpler ship. I can only imagine how terrible Constructo's plans are for a square rigged ship.
Good luck Rich!
-
-
Looks great. Man those little pe parts. I have a hard time dealing with the fiddly little parts at 1:80 scale (pretty sure I spend as much time looking for blocks I've dropped on the floor as I do actually rigging them), I think I'd just lose everything into the carpet forever at 1:400!
-
-
Several times while fighting with the ratlines and the other rigging yesterday, I nearly knocked the ship off of the wobbly stand that came with the kit. So, not feeling like tackling the other side of the ratlines at the moment, and needing a more stable platform, I decided I would try my hand at cobbling together a better stand to work off of.
The local hobby shop had a basswood plank that was originally 1/4" x 4" x 24", but someone had broken it off at the 17.5" mark somehow, so the shop had it marked down and I grabbed it for a buck, having no idea what I'd do with it. I grabbed that plank, and a 5/8" oak dowel that I found at Lowes, and went to work with a scroll saw and my Dremel tool. Much sanding, fitting, and drilling later..

It works great, and with some finishing, will probably be what I actually display the Carmen on when it is finished, rather than the flimsy kit stand that supports only via the keel. I glued on some black velvet that I had used years ago to cover some ugly wood & bricks that were used for a large aquarium stand. I'll trim that tomorrow after the glue has had a chance to dry well.
And here is what the ratlines look like currently after the super-glue instead of knots system. I brushed on some acrylic clear flat to cover up the shiny glue.
Tomorrow after work I'll get back to the ratlines, and depending on time maybe work on the standing rigging some more.
- Hawk42, themadchemist and piperjoe
-
3
-
Thanks Russ,
I probably should have ordered some line in .005 or .008 to do this, but as you may have noticed, I'm kind of impatient.

I played with using thread, which is fairly close to the right size, but it just didn't look right to me, although the knots worked just fine.
After I finish the other side I'll get some pictures and everyone will get to see how the 'cheating' ratlines look.
-
So I have decided that I am not a big fan of ratlines.

The kit has only one size of black line, so I only got one size of black from Syren. I began the ratlines using this line, but after 4 I decided that they were ugly as all get-out, just way out of scale. So I raided the AVS kit for the smallest non-thread line in that kit, as I've decided I'm going to rig the AVS in dark brown standing rigging instead of black.
This line looks better, but the knots were simply impossible. The line from the AVS kit is some sort of non-cotton that refuses to keep a knot tight. Neither overhand knots or clove hitches would stay tight, even long enough to get my little tiny single strand rat line done, and as the knots kept opening up, it was impossible to keep the lines even and not be pulling the shrouds in or pushing them out. Soaking the line in water, or even 50/50 white glue and water didn't make any difference. The only way I found that would work was to tie a knot, hit it with super glue, and then hold the knot while it dried enough to hold it tight, but that made doing any adjustments impossible.
After just four of these, I just gave up completely, started cutting off short bits of the line, and just supergluing them directly to the shrouds. It's not "right", but it looks better than the mess I was making trying to tie this terribly uncooperative line onto the shrouds. If I hadn't already decided to replace the AVS kit line with Syren line, this experience would have made that decision for me I do believe. Once the glue has completely dried, I use nail-clippers to trim the ends off.
I wasted the entire day fighting with the rat lines, and at the end of it, I've only got two of the four completed, and nothing else accomplished.
I did get some syringes in the mail today, so glue application should get better now.
-
That's nice work on the trail board. Excellent painting!
-
-
Looks like a very nice start!
-
This is interesting, and brings up a question for new modelers like myself. How do you know when a line should be served, and where? There is no serving mentioned in my current build kit at all, but I could see how the lines where the standing rigging loops over the masts would have probably been a place where they would have been served.
Is this just something that you need to research, or is it included in the rigging plan (or instructions) on better kits?
-
-
I wasn't feeling well this morning so I took the day off work, and played miniature ship builder on and off all day. I have to say that it's a lot more exciting than I ever thought it could be to see her turning into an actual ship now that I'm at a point where her lines come together into the whole.
I stole something I saw in one of the books, build logs, or links that I've read over the last weeks, and tried a couple of little jig things to hold the shrouds in place on the mainmast. Wish I'd remembered/though of this on the foremast, as those shrouds are sort of uneven. I may go back and redo the foremast, but in all likelyhood I'll just keep on trucking and apply the lessons learned to the AVS.
First shrouds on the mainmast, applying the jigs and the stuff discussed here earlier with Russ. Thanks Russ, I think these look better. I still need to reduce the size of the seizing even more, and add a third 'middle' one, but this is progress!
And with all of them completed.

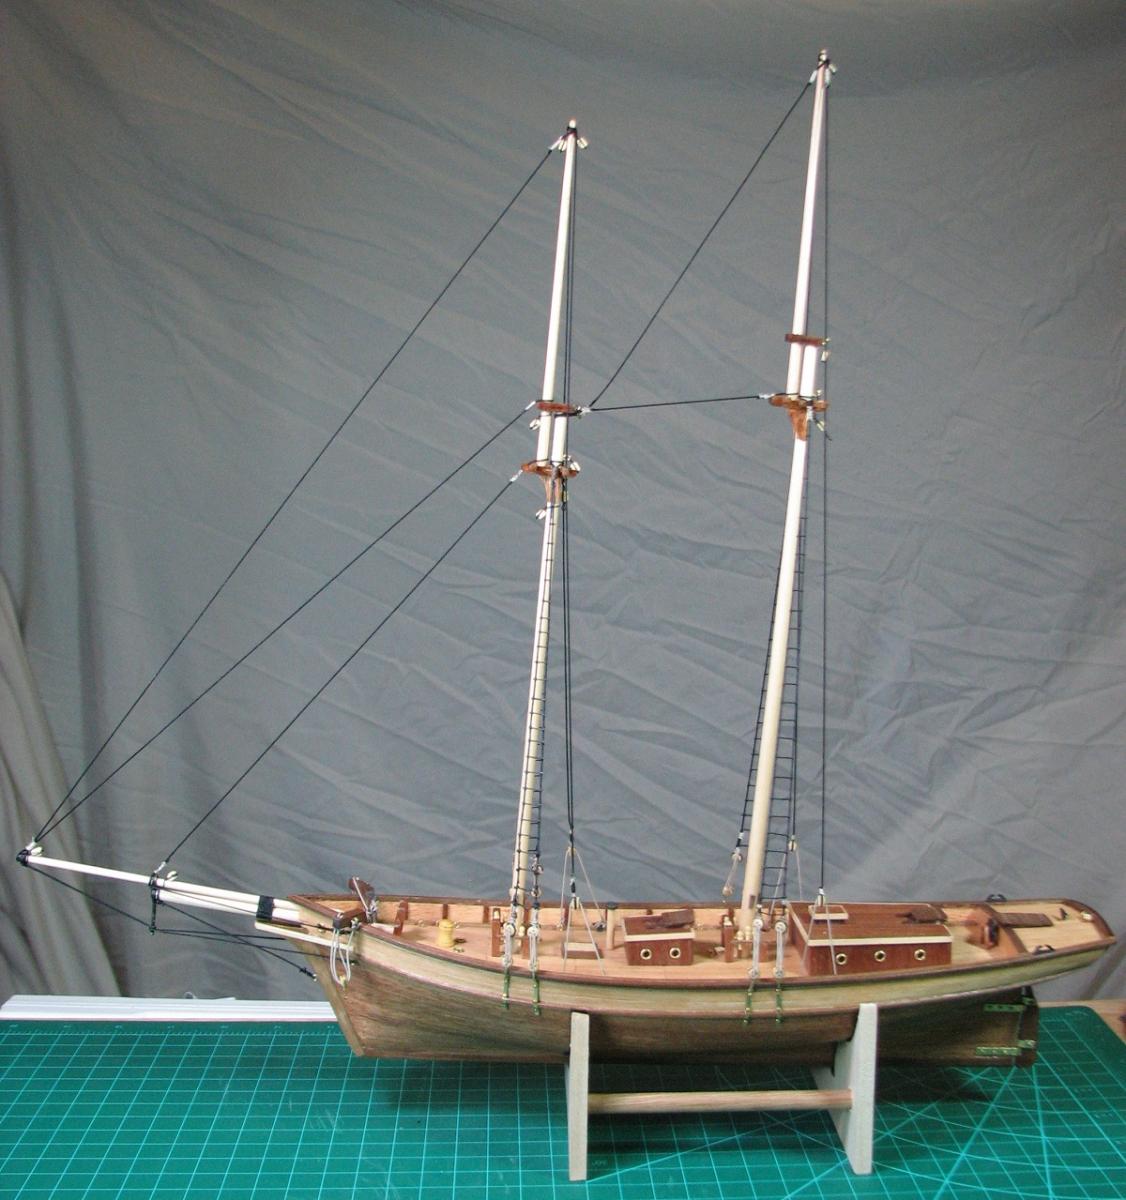
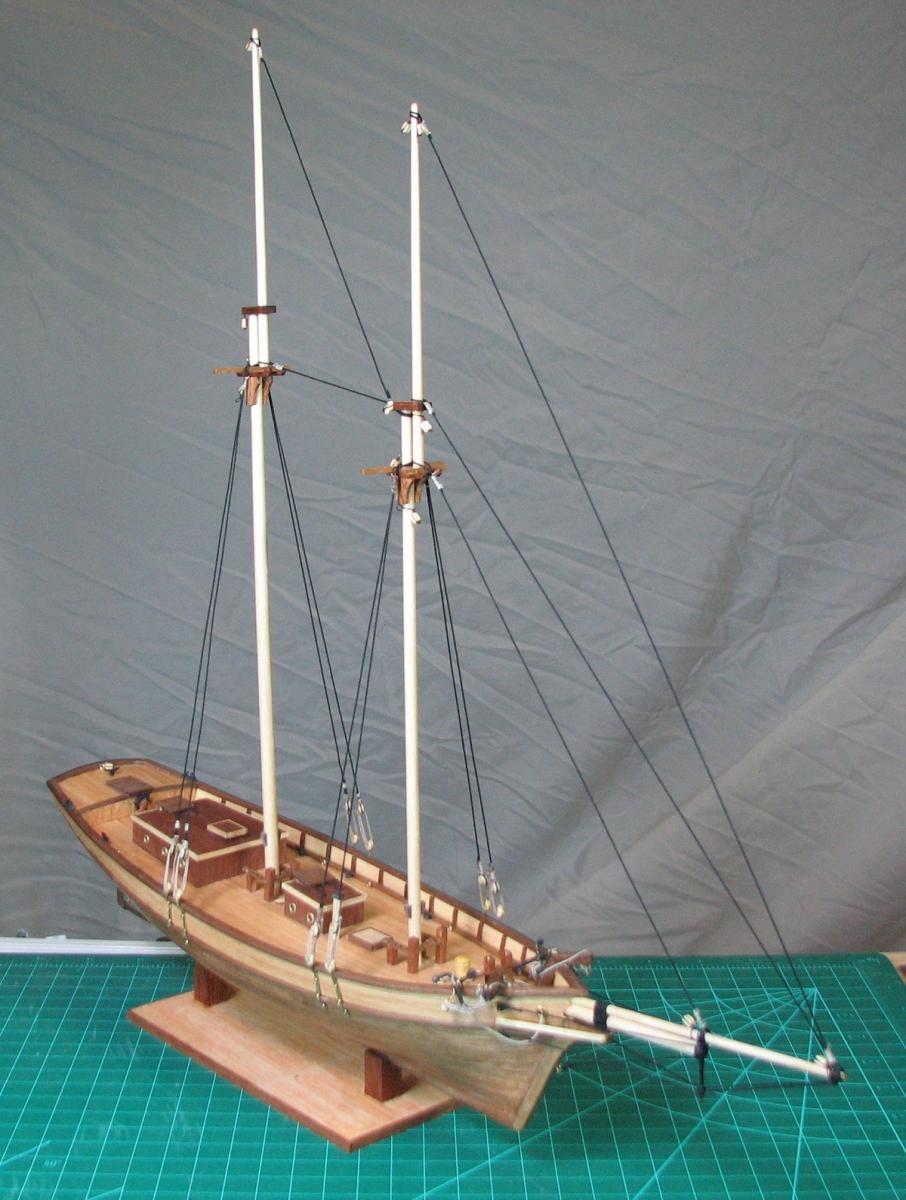
Added a backdrop since the rigging is pretty hard to see in pictures with the dark wood and books as a backdrop.
Currently looks like so...

Next I start putting in the ratlines, and then will work on the rest of the standing rigging. Getting close to needing to decide on whether or not to deal with the sails. Also, I haven't even started building the yards, so that's back to woodworking for a while to do those.
Thanks everyone that is visiting, liking or commenting. Feel free to criticize, everything I learn on this one is something I can do better next time!
- piperjoe, themadchemist, Bobstrake and 1 other
-
4


Oak for masts?
in Masting, rigging and sails
Posted
Good day all,
I'm curious why I've never seen any logs mention the use of oak for mast material. I'm certainly no expert on period masts, but what I read many years ago would seem to indicate that masts were mostly of either oak or pine, and a quick Google search seems to back my memory up on that - http://www.thesparshop.org/resources.php
I can also remember from way back in my high-school days when I read a great deal about the sailing ships of the American Revolution and the War of 1812, lines about the 'forests of oak' when referring to fleets in port.
Is this true, or am I misinformed?
I ask because I found some very nice oak dowels in the local Lowe's store, in various sizes, and I would think they would make much nicer looking masts than the plain white'ish wooden dowels that are included in the kits I've seen.
Thanks,