


GuntherMT
-
Posts
2,213 -
Joined
-
Last visited
Content Type
Profiles
Forums
Gallery
Events
Posts posted by GuntherMT
-
-
Thanks Alistair,
And thanks for the likes everyone.
I do plan on stern fillers, but not until after I've done the rest of the work on the stern, just to make sure I don't put anything in my own way back there.
I realize that I could have gotten the steel blocks (or something else similar) cheaper, but at the time I was looking for an add-on to an order to qualify for a coupon code I had, so I just threw them on. I'm kind of spoiled in our current 'Amazon' world where I can look at stuff online, click buttons, and then one day after work come home and find a boxy of goodies on my doorstep.

-
Great patience, it looks amazing.
-
Thanks Dragzz and Steve,
In some of your pics from the 25th, you are using some sort of steel blocks. What are they and where can one find them? Thanks.
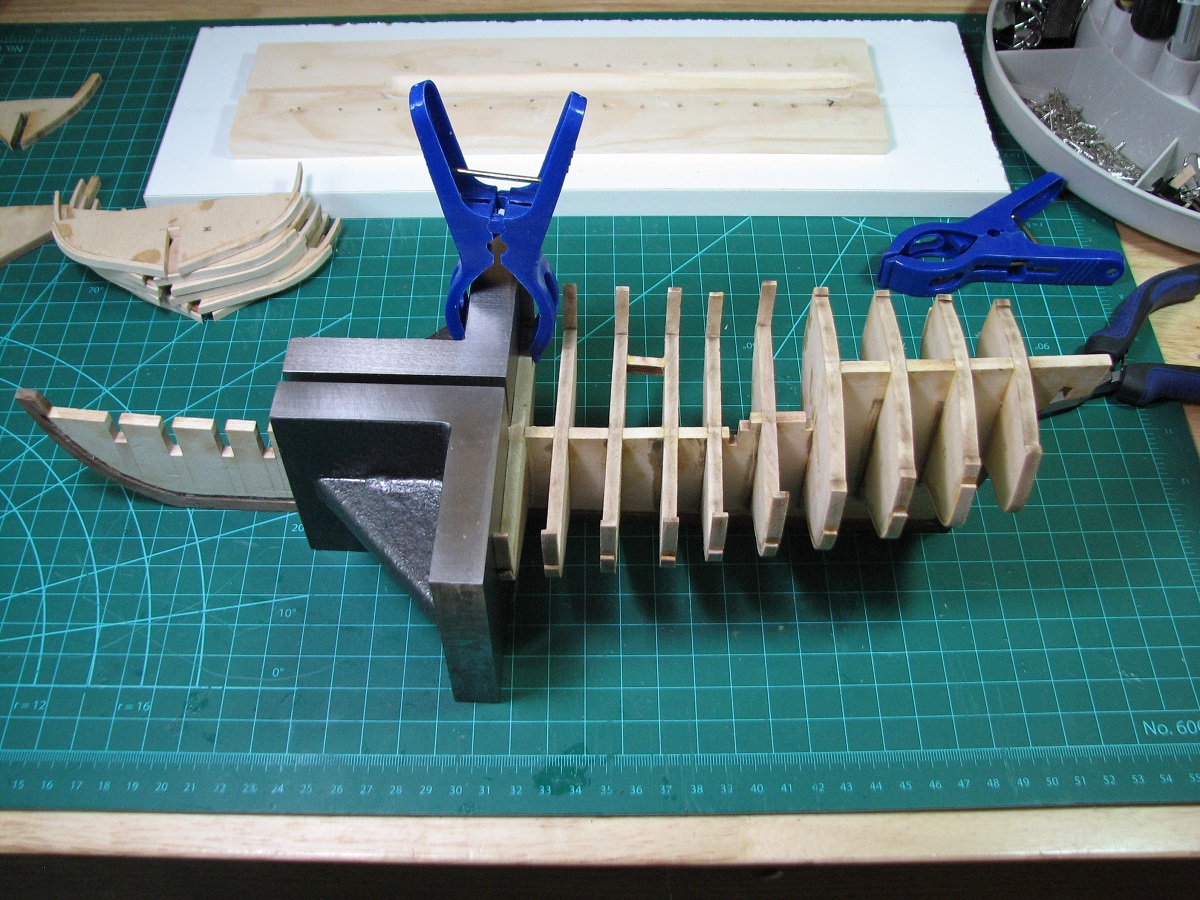
Those are 'Angle Plates' from Micro Mark ( http://www.micromark.com/3-x-3-x-3-inch-angle-plate,7134.html ). This is the first time I've used them, and I'm not sold on their value vs. the cost. I did get them on sale so didn't spend full price, but they are still fairly pricey when I think that the Lego/Duplo block solutions I've seen would work just as well, at least for this part of the job. I don't have kids, so didn't have any of those blocks around to steal.
On the other hand, they are heavy flat pieces of steel that can be used as weights and nice flat surfaces, and I didn't have anything like that before, so they will have other uses than just as a nice squaring tool.
-
Nicely done. Congratulations on crossing the finish line with a beautiful model.
-
Thank you Slog.
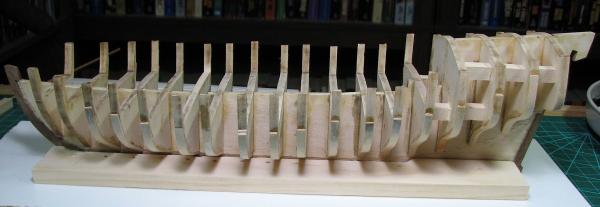
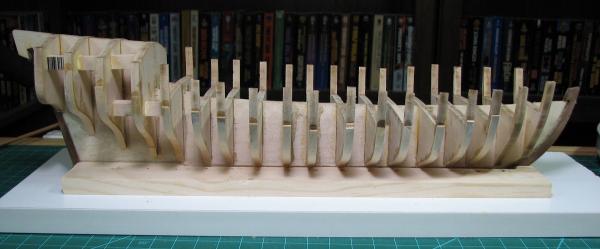
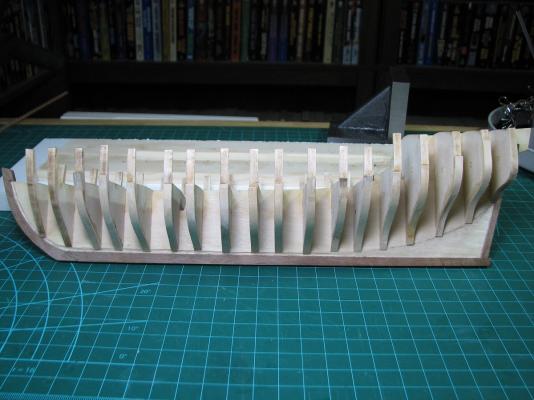
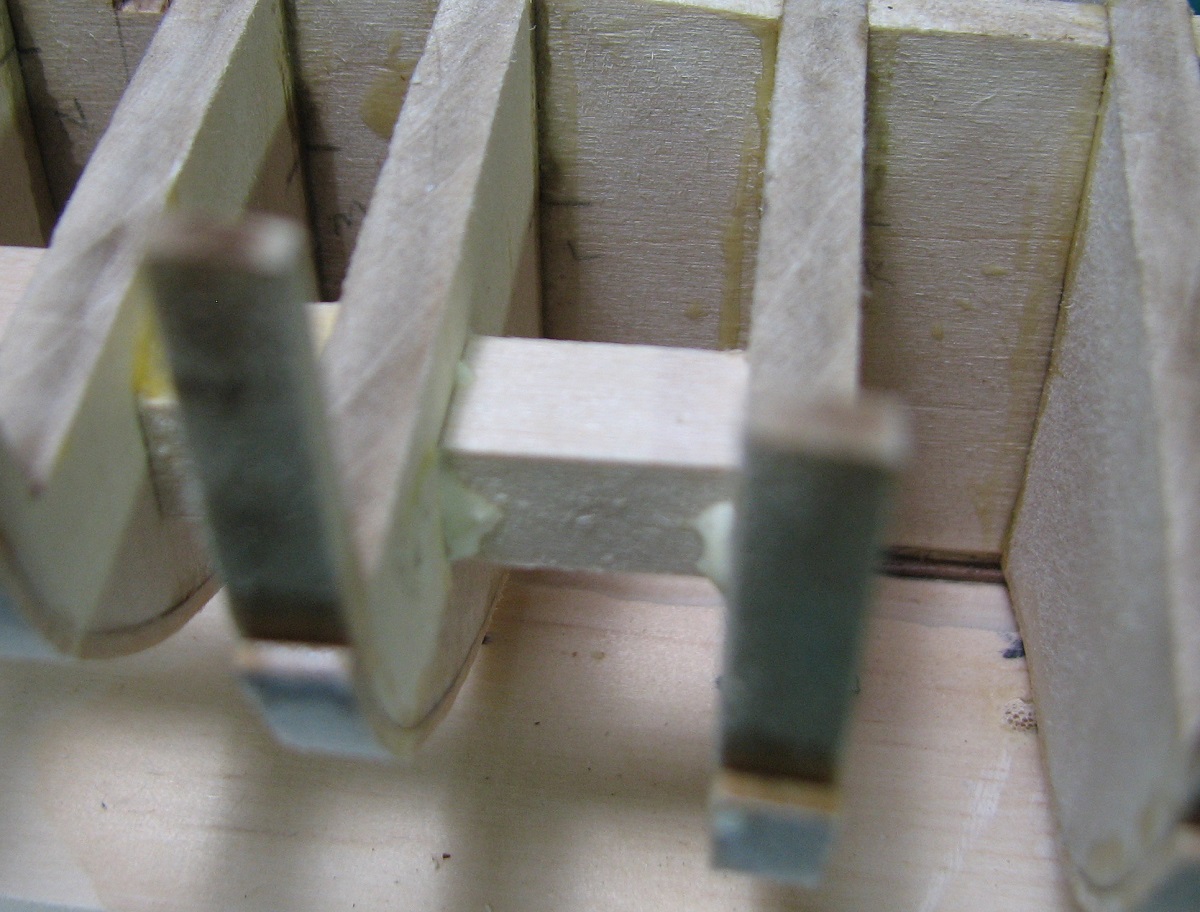
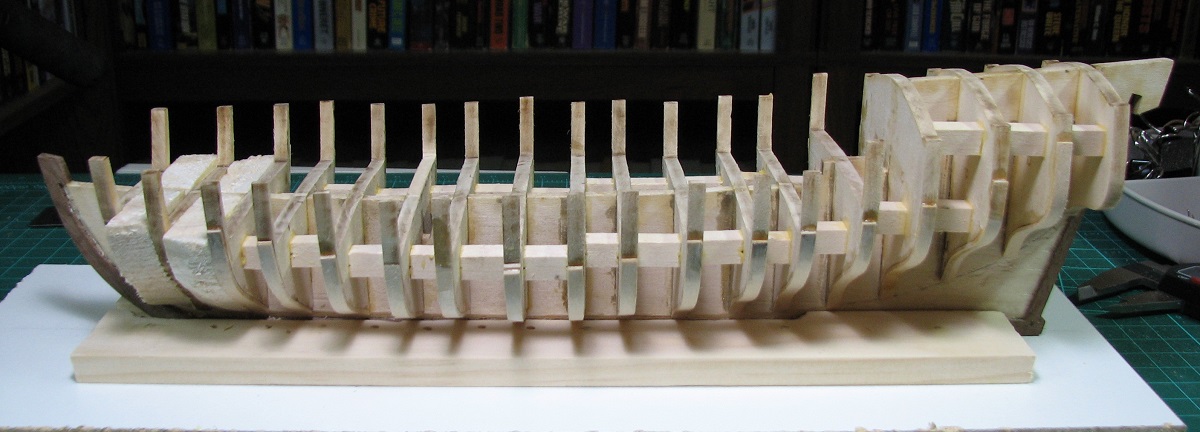
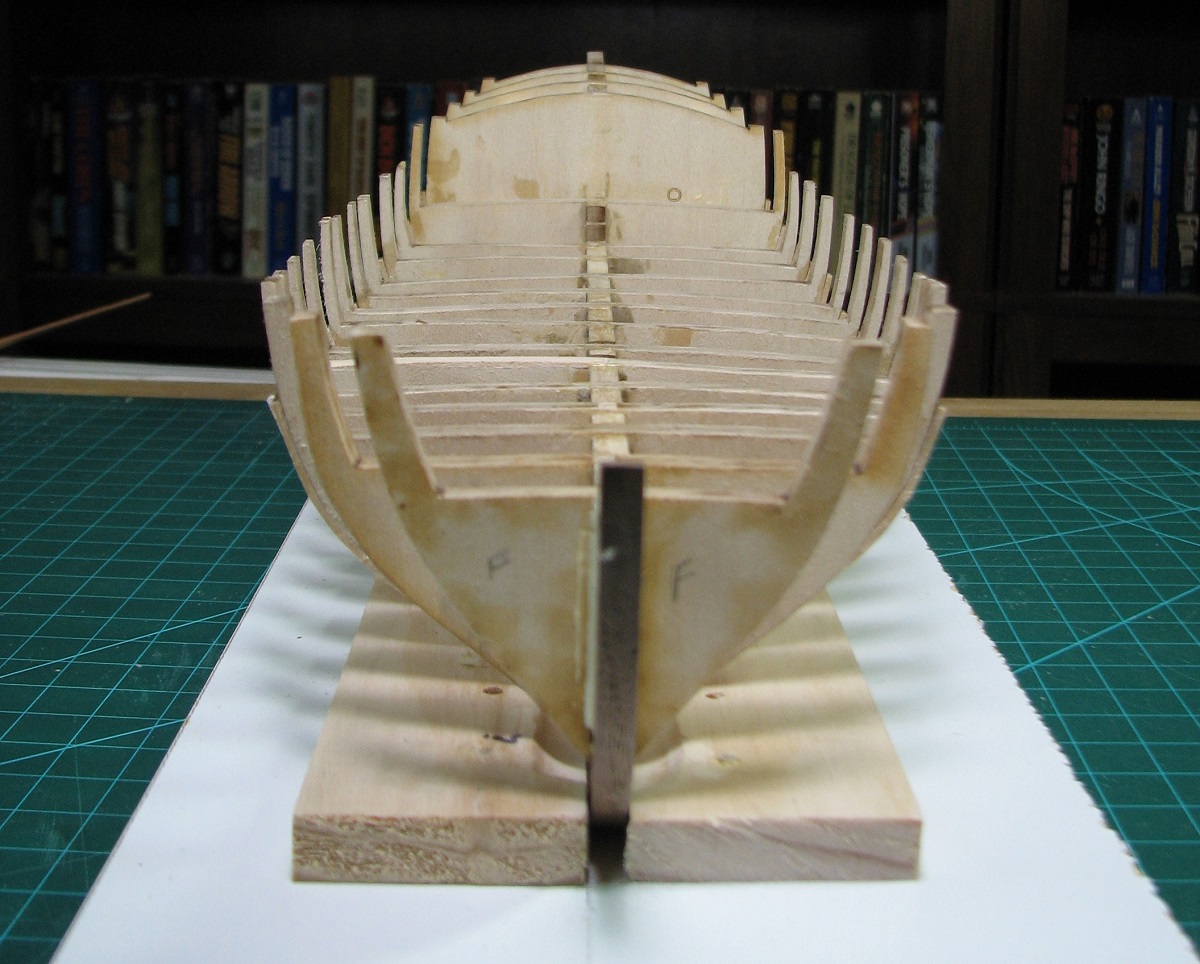
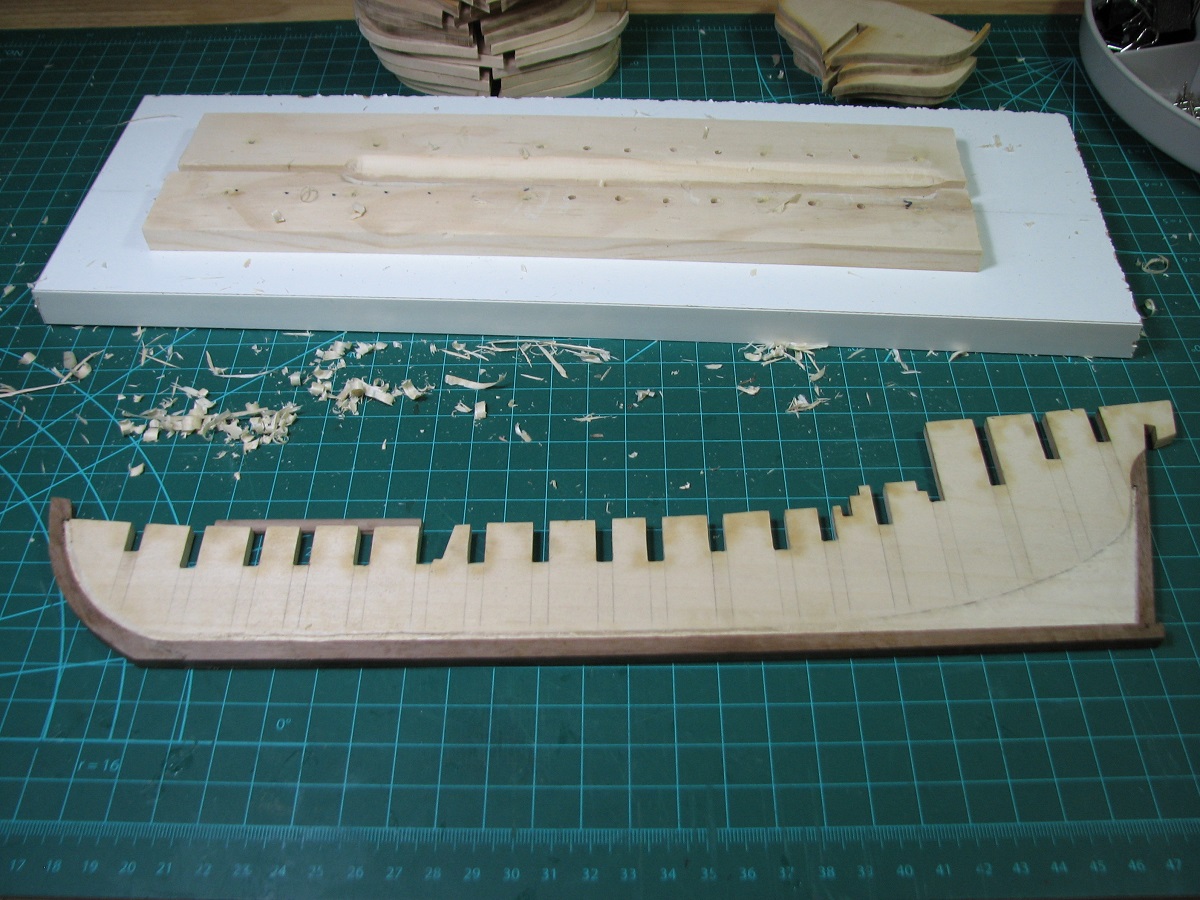
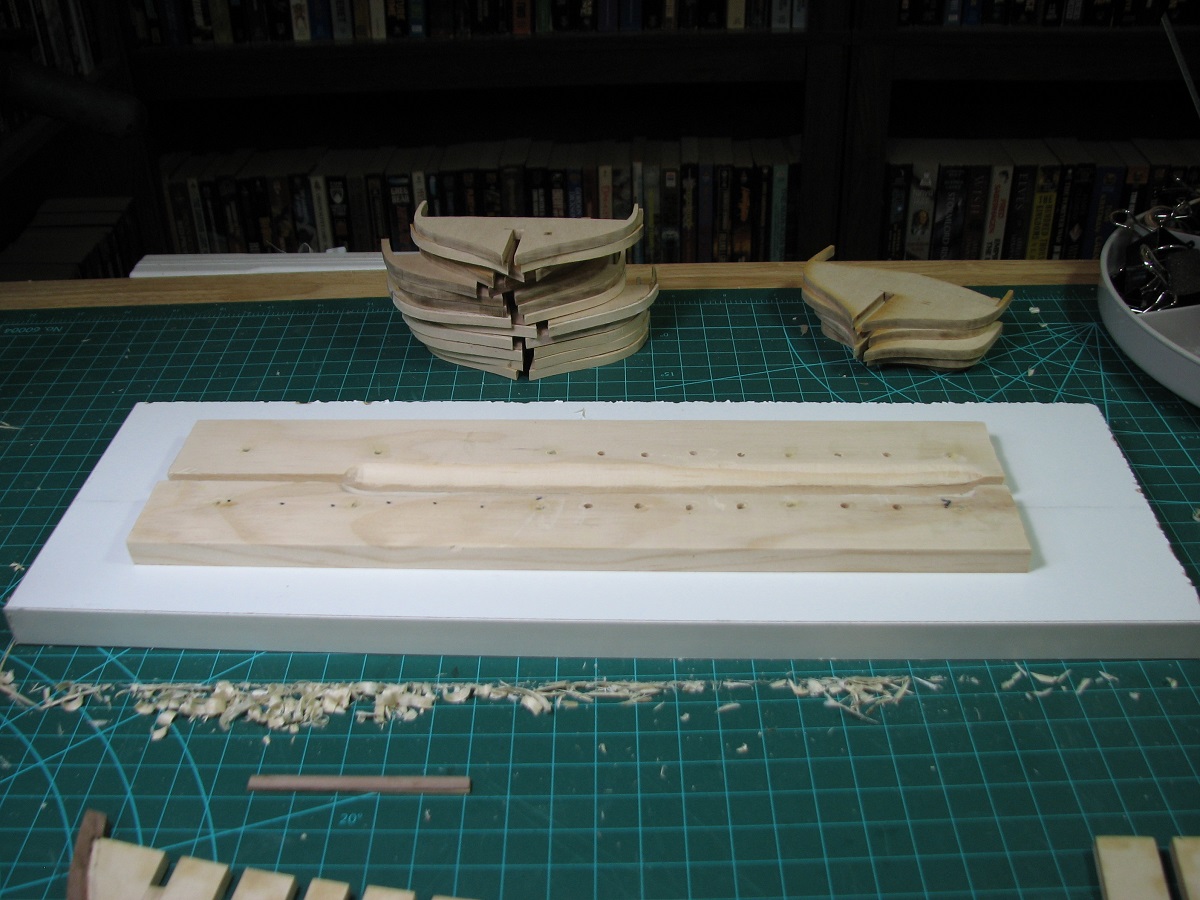
I've finished the reinforcement blocks finally, although I chose to completely fill the final two gaps at the bow rather than use the blocks, in order to help me see the 'flow' of the hull up there when I get to fairing.
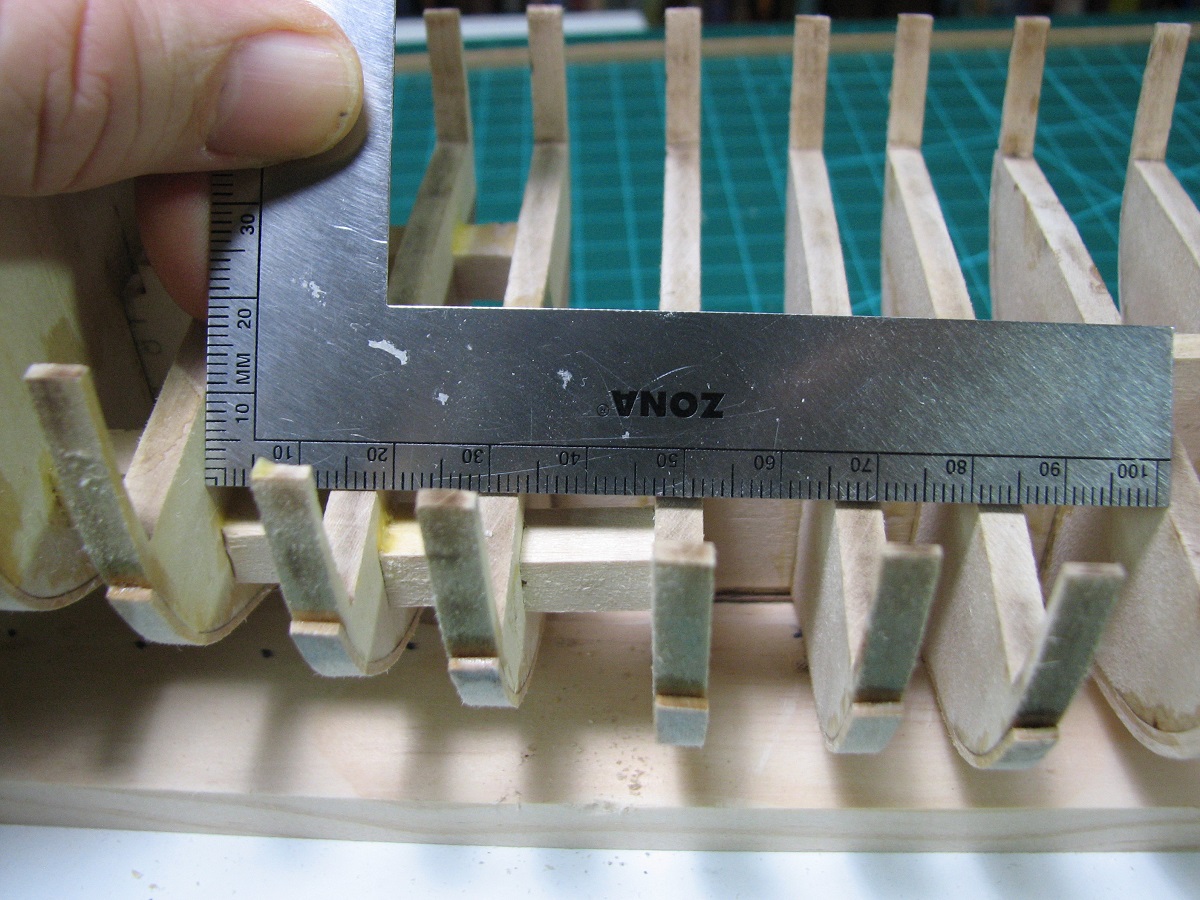
While doing the reinforcement blocks, I used the opportunity to correct any minor out of square issues with the bulkheads. I did this by measuring at multiple points along the top of each bulkhead, always taking my measurements off of bulkhead 'O' which I took great care to square up with all the stern bulkheads and the keel.

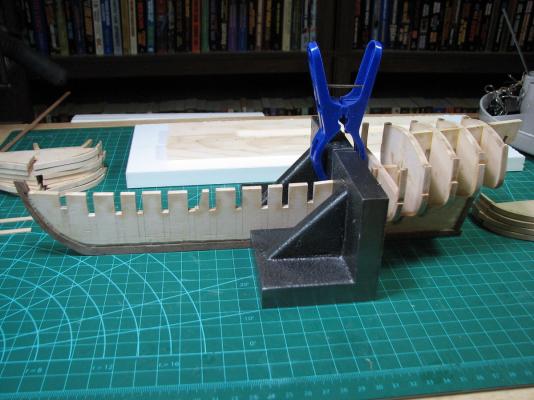
After measuring to determine if I needed any adjustments to the bulkheads, I would cut individual blocks and then fine tune them until they caused the measurements from bulkhead 'O' to be right where I wanted them, and equal on both sides. I was having some issues where the addition of the glue prior to final fitting would actually change my measurements slightly, so I devised a technique to apply the glue after fitting the blocks in place, so that I did not need to compensate for the glue thickness on the ends of the blocks.
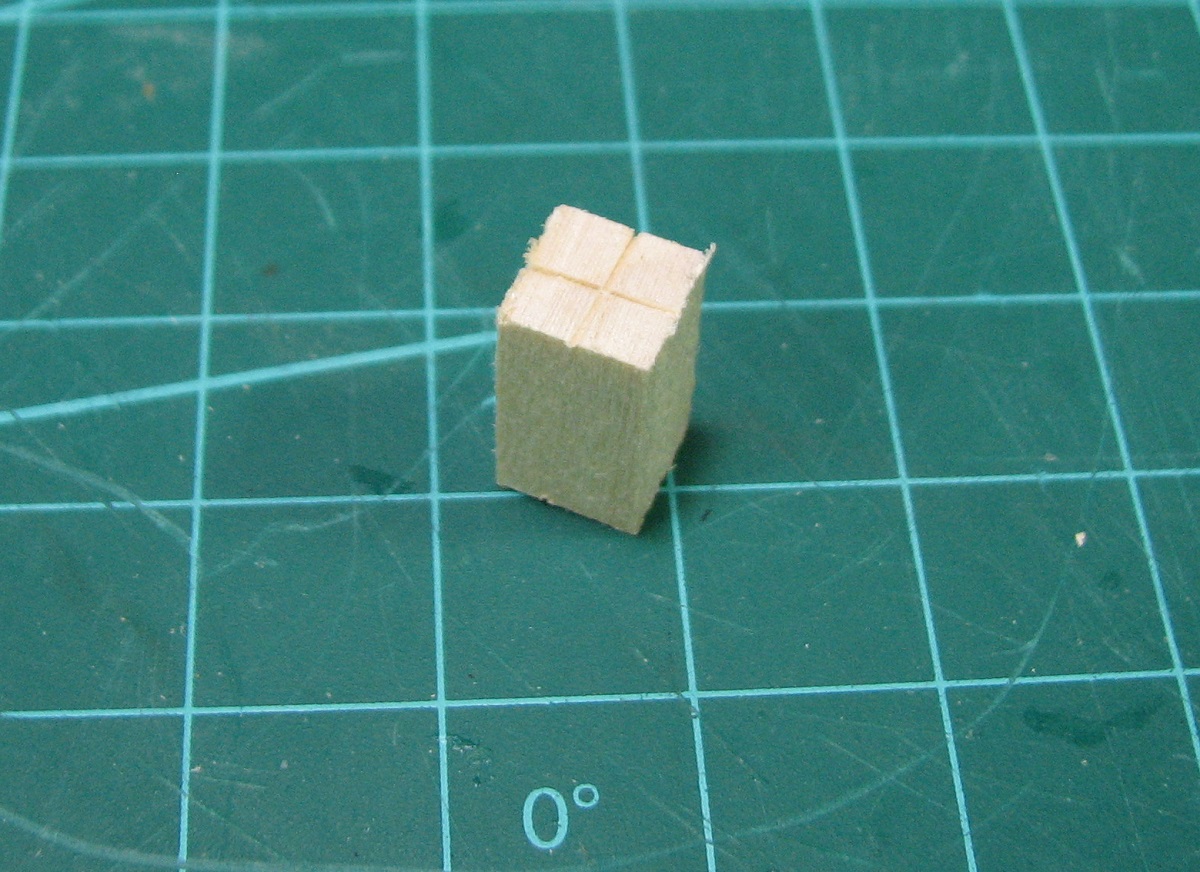
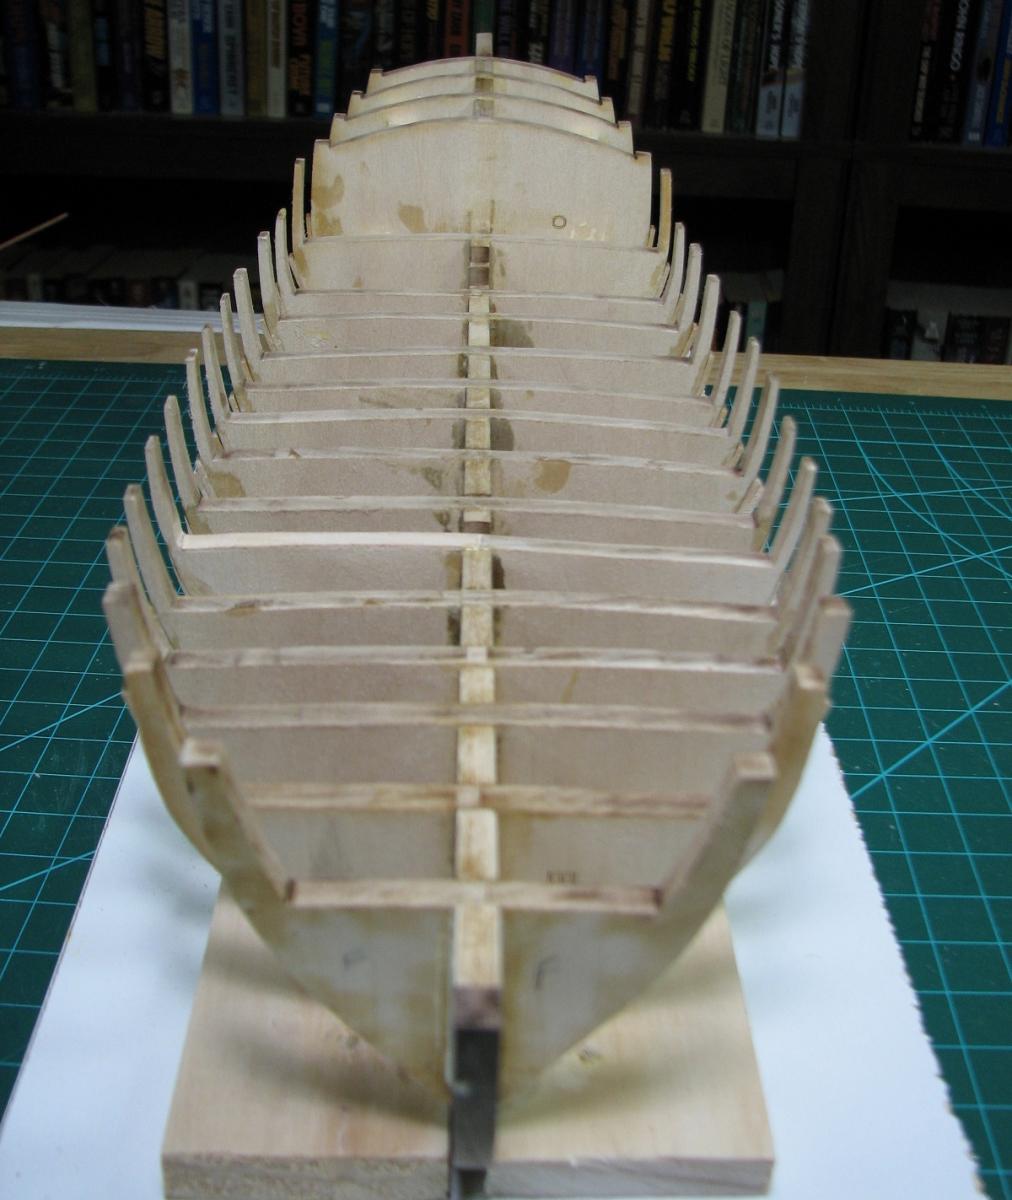
After my final measurements and test fitting was complete, I cut a 'cross' into both ends of the block with a razor saw.

I would then slightly widen the leg of the cross that would be 'outboard', and then place the block without glue, and hold it in place (if needed) with needle nose pliers, while I used a syringe to inject the glue into the cross via the slightly wider leg.
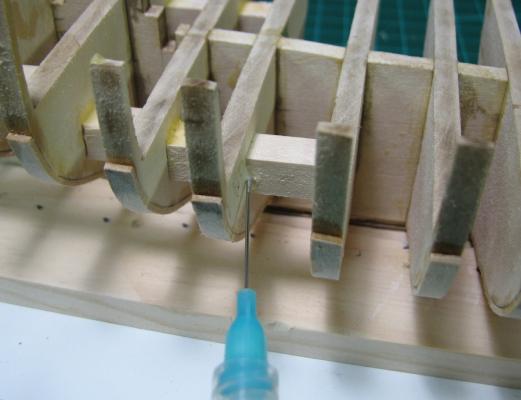
As can be seen here, the glue would flow through the cross, and would almost always bubble out of each of the other three points almost equally.
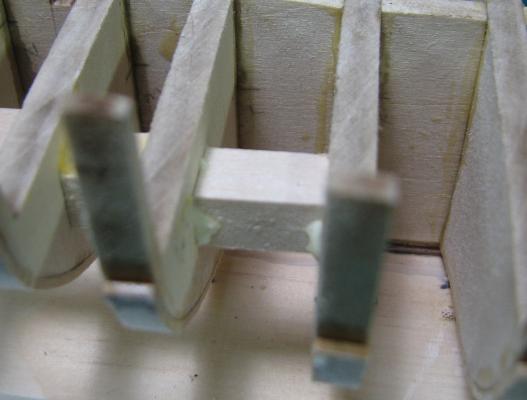
This method seemed to work quite well, and I had no measurement changes between the final test fit, and the glued in blocks after starting this system. After the glue had set for a couple minutes I would then use the syringe to lay a 'bead' of glue around all four edges of the block where it laid against the bulkheads. Testing several blocks that were completely dried shows that they have plenty of strength with this system.
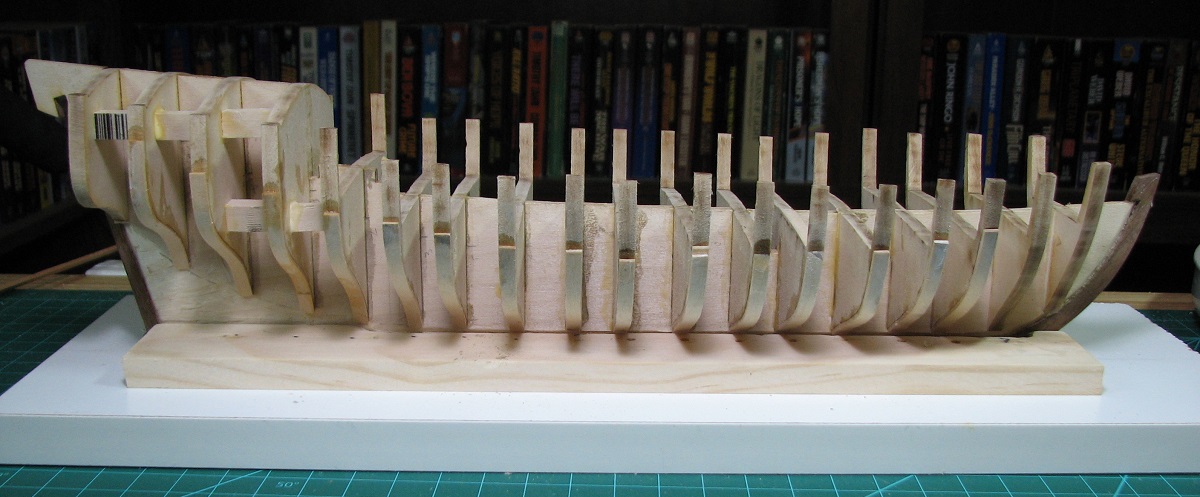
After inserting the last two spaces with filler blocks, this is where I'm currently at.

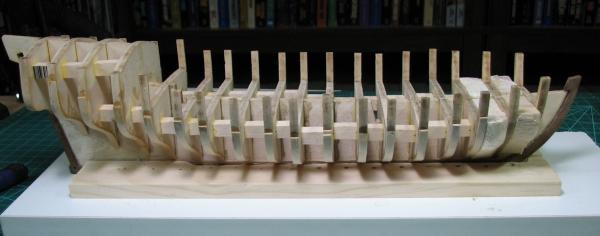
Every bulkhead is even with bulkhead 'O' along at least 3 points on each side, to less than 0.5mm now with all reinforcements in place.
Next I'll begin to work on the sub-decks braces and sub-decks for fitment, and the bow fillers I think.
- bart430, hexnut, Captain Slog and 16 others
-
 19
19
-
Those anchor rings look fantastic. Little details like that will add up to make the build really stand out I bet.
-
-
That is a fantastic looking planking job Vasa.
-
-
-
Thanks Ken, and yes there is quite a bit of fairing to do before laying the deck. I plan to do that after all of the reinforcement blocks are placed.
-
Thanks Rich, and I got your message and sent him an email.
Alistair, thanks for the tip - I could probably use that same filler that messed up the Carmen hull so much, as it's very light colored (which was the problem with it in that scenario on walnut). I'll do some testing with that.
Fairly brief update tonight, spent most of the day at a charity event so not much time on the ship.
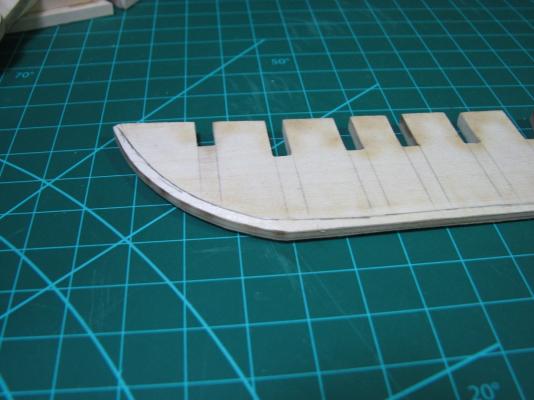
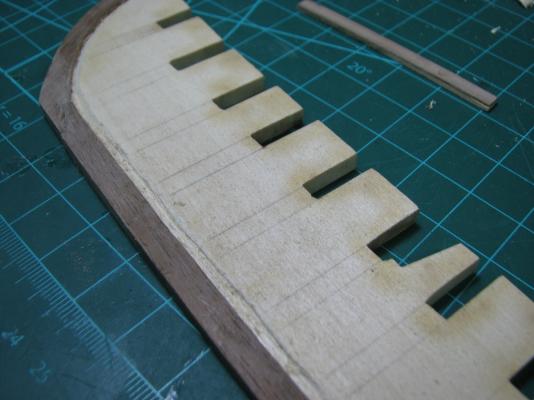
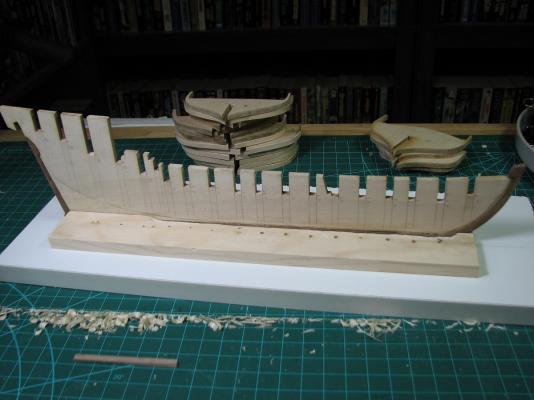
I finished gluing in all the bulkheads, and I have started placing reinforcing blocks between the bulkheads. I'm using 5/16" square basswood for the blocks. I was going to use balsa, but it's just as expensive as basswood, so I just got basswood figuring it will always be useful to have extra basswood bits around.
After last nights update, I decided to do "one more bulkhead" before bed. Yea, I'm dumb that way. I managed to get distracted after gluing it in place and setting the blocks against it, and left it so long that the excess glue got onto the blocks and glued the bulkhead to both blocks. I broke both sides of the bulkhead trying to get them apart. Because the center slot was solid, and the breaks were both clean, I drilled a hole through the center of the now solid slot, drilled a hole into both sides and pinned the broken pieces all back together with a single long pin made from a toothpick. After the glue dried, I think it's the strongest bulkhead I have now.


- WackoWolf, CaptainSteve, BareHook and 11 others
-
14
-
-
-
Thanks Ken. I am planning to place supporting blocks in between the bulkheads before I work on sanding the tops of the bulkheads for the sub-deck placement, which will be done before I work on the fairing for the planking. I want to make the structure as rigid as possible for that work so my ham-fists don't break more bulkheads, hopefully.
-
Hi Frank! I guess that the MS kits have issues with bulkhead alignments. Oh well, I guess they have to make it a challenge somehow, other than including the worst rigging line in the history of the universe.
Some photos to catch up with my text.
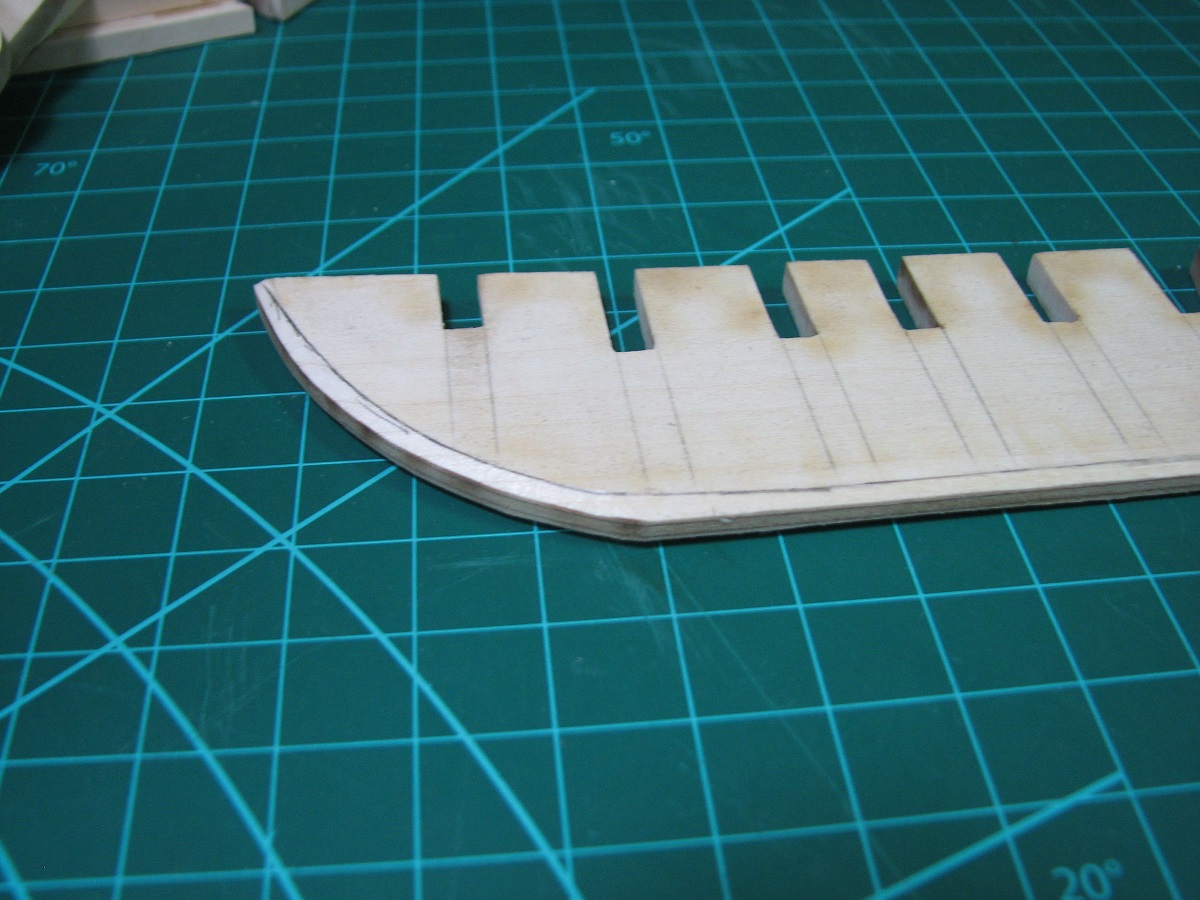
Work on pre-cutting the rabbet prior to installing the keel.

Installed the keel, stem, and sternpost. The stem had to be done twice since it shifted when I left it to dry overnight. The sternpost required that the slot in the keel be re-made, as it was out of position. I've read that this seems to be a common issue with the kit. Took some sanding to get the sternpost to fit decently.


After the keel was dried for a while, I finished the rabbet. I did this using a suggested method of using a piece of planking made up with both the basswood inner, and walnut outer plank stuck together for sizing. Doing this I think I have a larger rabbet than is indicated anywhere in order to make it fit right. Guess I'll find out later how it works out.
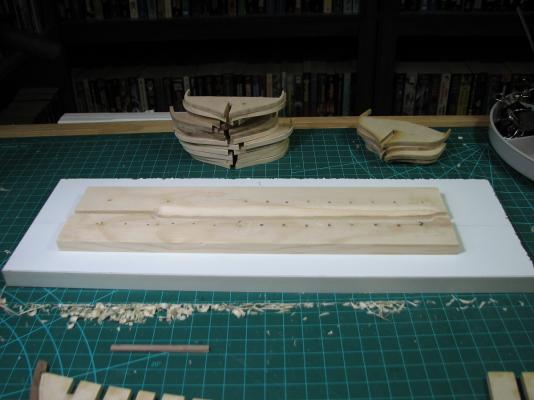
Jpett started a thread yesterday in Wood Tips reminding me that I needed to make a build board, so I chopped up a piece of MDF shelf, and made a thing.
Finished attaching all of the shims to the bottom of the bulkheads. After some thought I decided not to extend the shims all the way up the extensions, as I think that will make fairing more difficult, as I won't have a baseline of the extensions to work from.
And then, I began fitting bulkheads. Started at the rear, let each bulkhead dry for 30 minutes or so (using Titebond wood glue - it sets up pretty solid in 30 minutes).

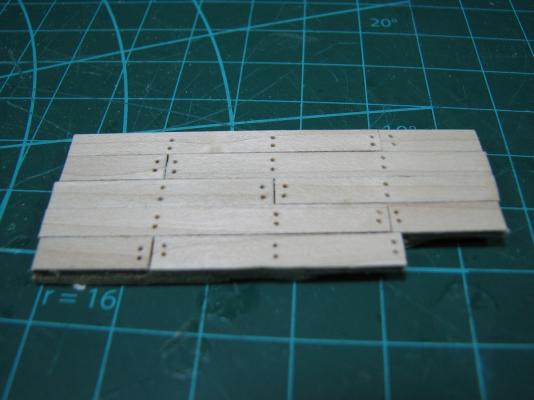
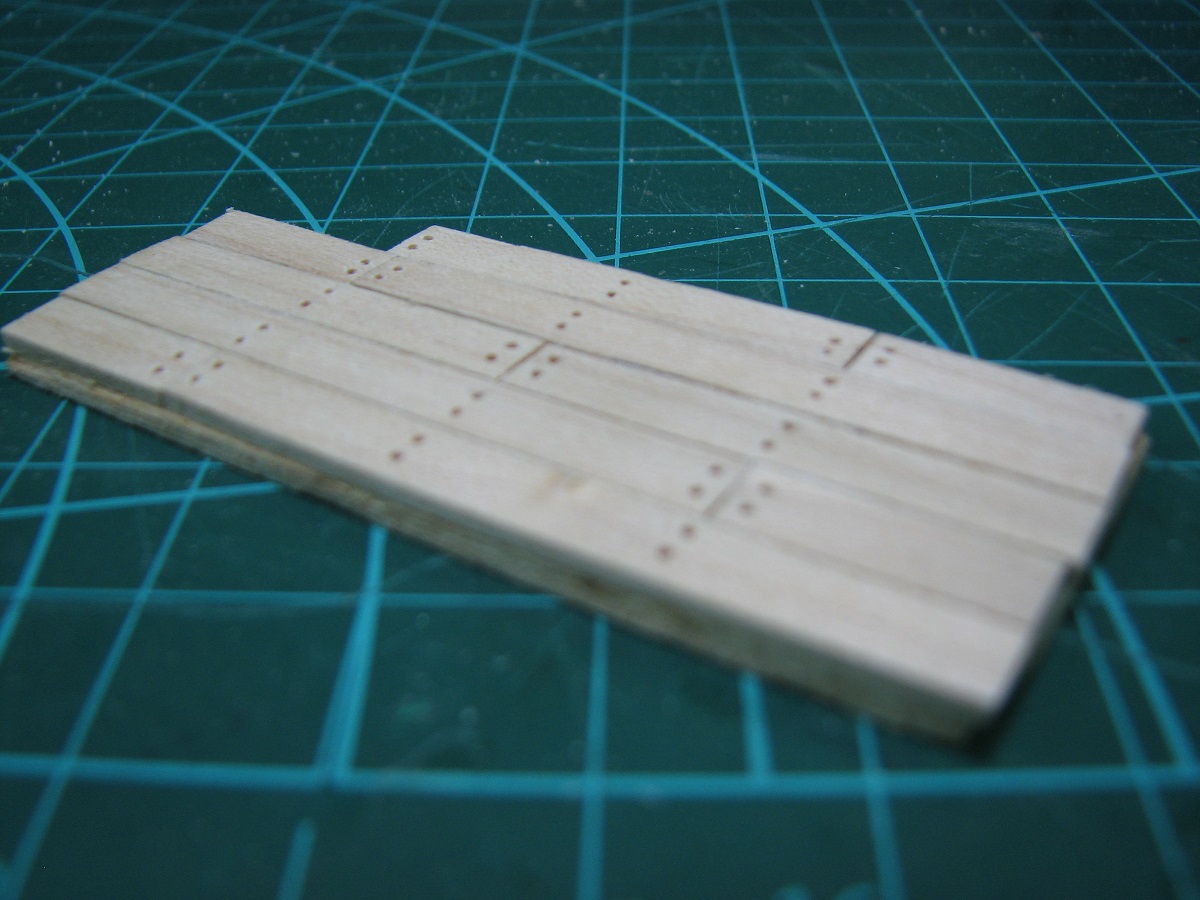
While I was waiting on the bulkheads to dry, I chopped up a piece of maple strip and made a test decking bit to see how maple might look like if I can't get Holly in a timely manner. I need to work on my planking techniques before I get to the real thing. Not sure what to use for the nail holes (i.e. what to fill them with) at this point.

Apparently I also need to work on getting the subject matter into the focused area of the shot!
Plugging away at the bulkhead mounting, hope to have them all finished tomorrow.
-
Hey Brett, you just made me smack my forehead, as the way you thought I was doing it might have actually made more sense than the way I actually did it. I shimmed the bottom of every bulkhead, not the top. I had a couple of bulkheads that also needed to be shimmed up to the deck level.
I've finished the rabbet already. I did it the way Bob Hunt shows in his chapter 1 pdf, I cut it down about halfway, then glued on the keel (which I had to redo because the stem 'slipped' somehow after I set it up to dry), and then after the keel was on, I finished the rabbet. I think I may have cut it too deep, as I was doing it by test fitting a section of planking (both layers), and to get it to fit like the illustration shows, took it pretty deep. This will be fine once it's got the actual planking on it for strength, but right now I'm treading lightly on anything related to the keel.
I also managed to break a bulkhead (bulkhead "L") at the keel notch. I clued it and clamped it in place a few hours ago. Since it broke right at the edge of the keel, and not all the way through, I think it should be fine, as it will not only be glued to the bulkhead where it broke, but the length of the notch where it fits over the keel as well. Again, once it's reinforced it should be solid.
-------------
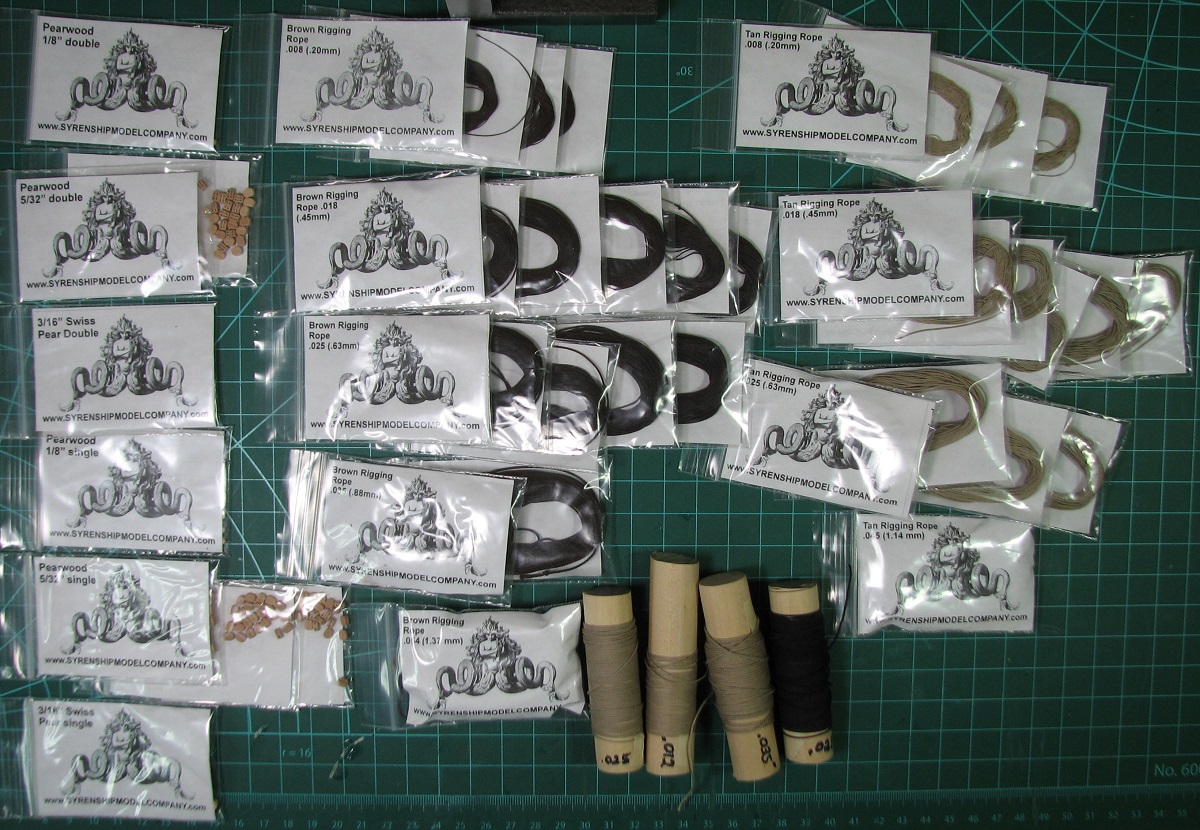
Alistair - yea, I've sort of come to that realization, especially when it comes to the rigging line, as the stuff in both the Constructo and the MS kits are complete garbage (in very different ways). I may end up doing a ropewalk if I keep this up, but I'll need to research thread sources and how to figure out how to size it and everything else if I go that route down the road.
---------------
Tony - thanks for dropping in. I'm single with no significant other, and apparently way too much free time on my hands and I don't watch TV. This allows me to spend far too much time with whatever my current hobby of choice is. I don't think I'm working all that fast (at least not on the AVS, I certainly rushed the Carmen in retrospect), it's simply that I have plenty of time to spend on this.
The bulkhead shimming, cutting the rabbet, gluing the keel, and now mounting the first 7 bulkheads has been a pretty significant time investment (no actual values, I don't keep a log), but I'm able to drop 4-6 hours an evening, and as much time as I want on the weekends, so I can move forward more easily than someone with a family and other responsibilities in their life who must spread that same amount of hobby time over 4 or 5 times as many days as I do.
-
Thanks for dropping in Paul, and for the kind words.
In retrospect, I think I got incredibly lucky with the Carmen, as when I first started I knew nothing about how to square up the bulkheads and properly fair the hull. The fact that my complete lack of doing any of the right things at that point in the build never came back to really bite me and wreck the entire effort can be attributed purely to dumb luck I believe.
A ship with the complexity of the Endeavour is still a number of builds off for me I believe. I'm not sure I have the patience to take on a build that I know in advance would take me a year or more. I have an idea of what my next couple of builds might be, but for now I'm just going to concentrate on doing the AVS the correct way, and learn the proper methods of doing things to be applied going forward.
Best of luck on Endeavour, I'll be looking for it!
-
If this one isn't "worthy" of going in the gallery, then I fear nothing I ever build will meet the criteria of being "worthy". Your Sovereign of the Seas is incredible, and someday I hope to have put together a model that is even close to as nice looking.
So yea, you can put me in the 'You should put this in the gallery - with lots of photos' column.
- edmay, CaptainSteve, maggsl_01 and 2 others
-
5
-
-
-
She's looking great Brett. Hopefully when I get that far my planking will be good looking enough that I have a hard choice as to whether or not to paint!
-
So I do believe that you lot of scallywags in this community have completely warped my concept of what exactly a "kit" for building a model is...

- Salty Sea Dog, jml1083, riverboat and 15 others
-
18
-


Armed Virginia Sloop by GuntherMT - FINISHED - Model Shipways - scale 1:48
in - Kit build logs for subjects built from 1751 - 1800
Posted
Made some more progress today. Weekends with no plans are pretty good for getting stuff done if I actually work on stuff!
Began by fairing the poop deck, which was pretty easy, just a sanding block needed here.
The notches were not correct in the sub-deck, so I had to adjust them. The deck was too short as well, but looking ahead to the deck finishing, you end up cutting the leading edge of the sub deck off later to place a trim piece there, so I just shifted the sub-deck rearward and adjusted the notches accordingly, rather than having to trim it off later.
Used more pieces of the basswood deck planking material that I won't use for the build to 'clamp' the sub deck rather than using nails or pins.
Then installed the support beams for the quarter deck and the rear of the main deck. Used a little collar pin that I think I got from Micro-Mark to hold the forward quarter deck beam in place while the glue dried. Got them sometime after I could have used them on the Carmen because they looked like they might be pretty useful, and this is the first time I've used one.
After this, the fun part began. Fairing the main deck. This was quite a challenge, as the bulkhead extensions really get in the way of doing much work with a reasonable sized sanding block, and I was quite worried I'd break one off. I ended up putting a fine grinding stone on the Dremel tool, and held it vertically using the 'flat' face of the stone (cylindrical shaped stone) to grind away on each bulkwark top, and measuring with a plank that extended most of the length of the deck.
The bulkhead F that I had shimmed up, I ended up completely sanding down the shim back to the bulkhead material, and then ended up shimming the other side of that bulkhead. The best laid plans and all. At the end I had added full shims to the top of 4 bulkheads, and half-shims to another couple before I was happy with how the plank laid from the center line out to each set of extensions.
After a lot of notch trimming, and breaking off a few pieces of the edge of the very fragile sub deck, I got it glued on, and clamped with the same 'plank & rubber band' system I used on the other sub-decks.
The odd streak near the center line of the main deck is just a dark spot in the wood. When I first saw that on the pictures, I do admit to having a bit of a panic moment, wondering how I had a big split in the deck without noticing it.
Next I'll begin fairing work on the hull, and working on the stern transom.