


GuntherMT
-
Posts
2,213 -
Joined
-
Last visited
Content Type
Profiles
Forums
Gallery
Events
Posts posted by GuntherMT
-
-
Thanks for the tip on the Dremel. I already have one, forgot to put it on the list. I have been thinking about how best to construct a cradle to hold it securely in position on my table. I don't think I want to be operating it in one hand while holding the part in the other. Seems like a recipe for disaster.
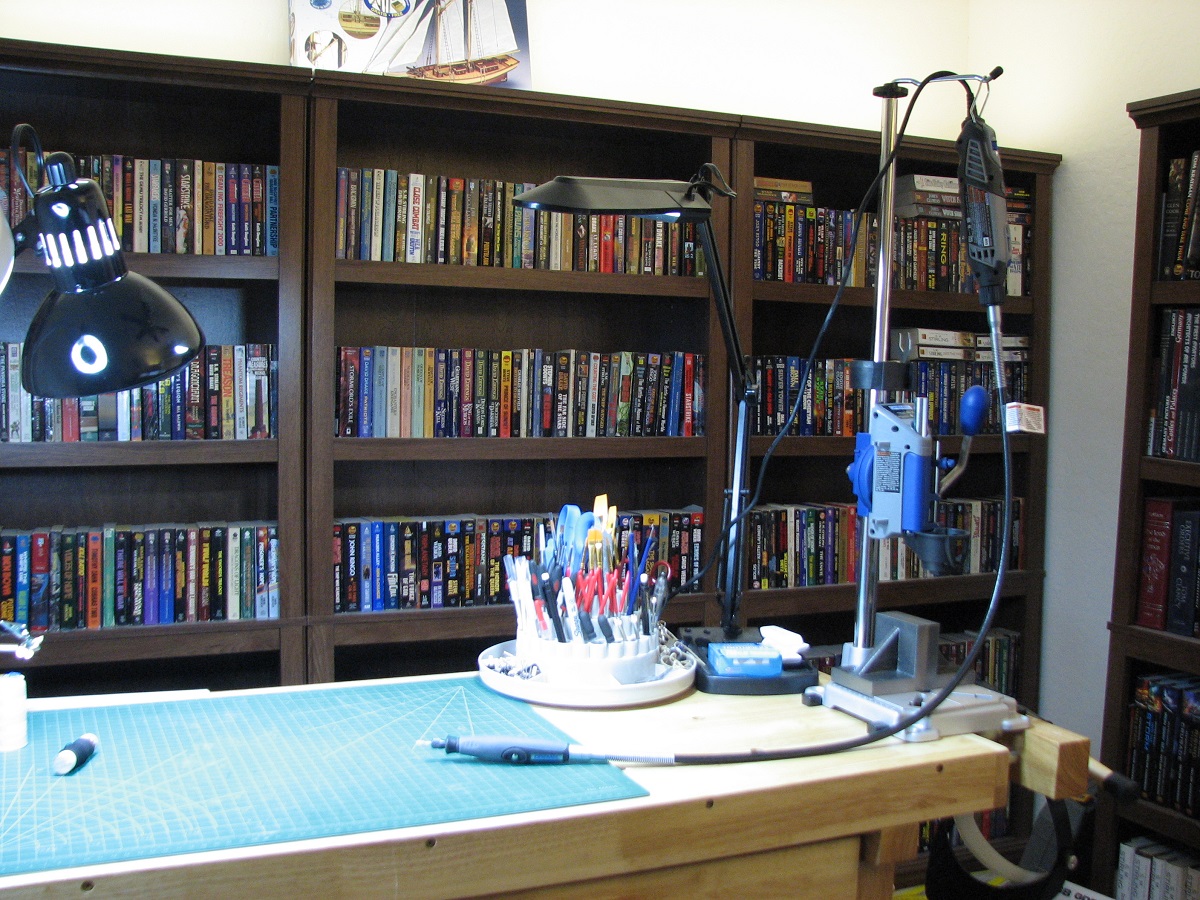
The best thing I've ever gotten for my Dremel was the flex-shaft attachment. Very easy to hold the much smaller and comfortably shaped end of the flex tool, and clamp the Dremel into a vise, or rig a hanger for it, as they say the flex end should remain lower than the Dremel tool.
Here is mine so you can see what I'm talking about. I have mine supported by a Dremel drill press workstation which is clamped into the end-vise on my work bench instead of being permanently mounted somewhere.

-
Beautiful work Brian, a truly impressive first build. Whats next?

Thank you Alfons. My next build is an AVS, the build log has been opened, but nothing is actually started yet.
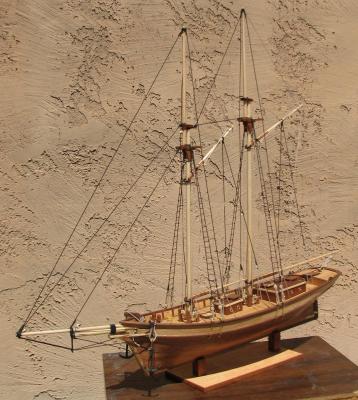
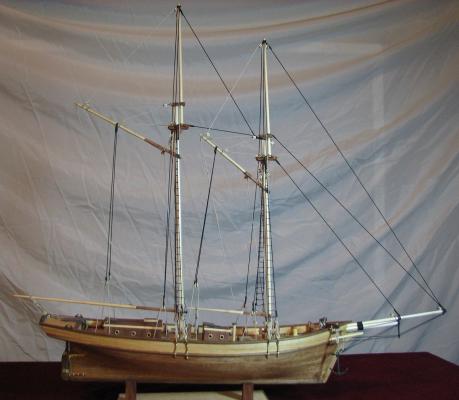
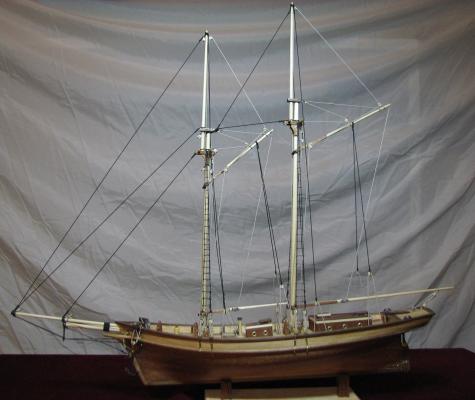
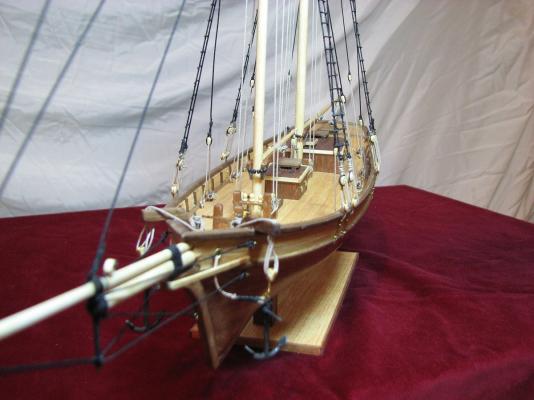
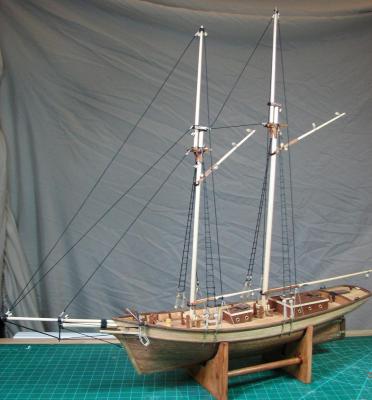
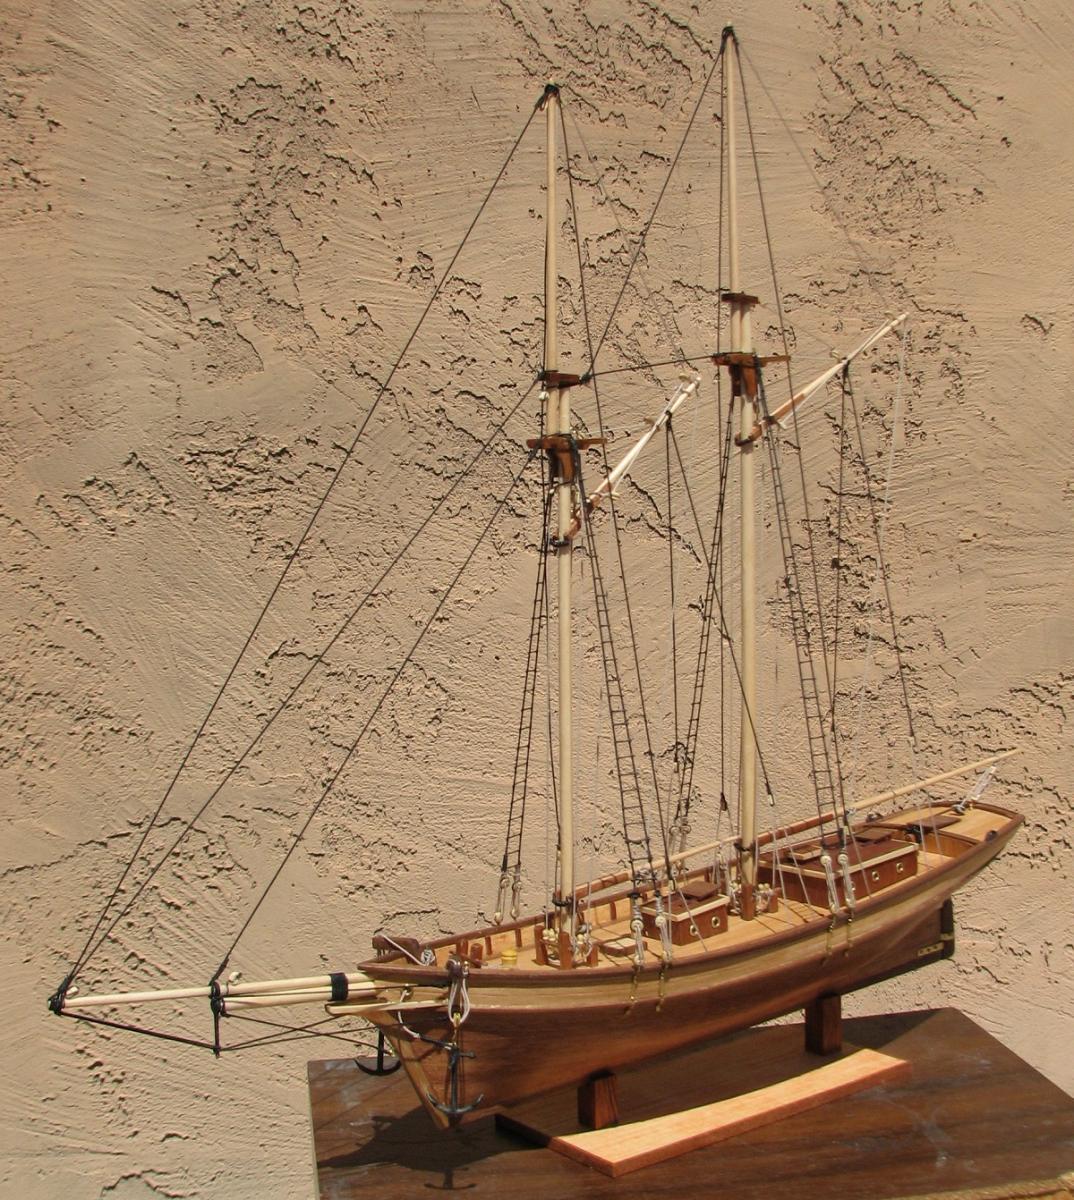
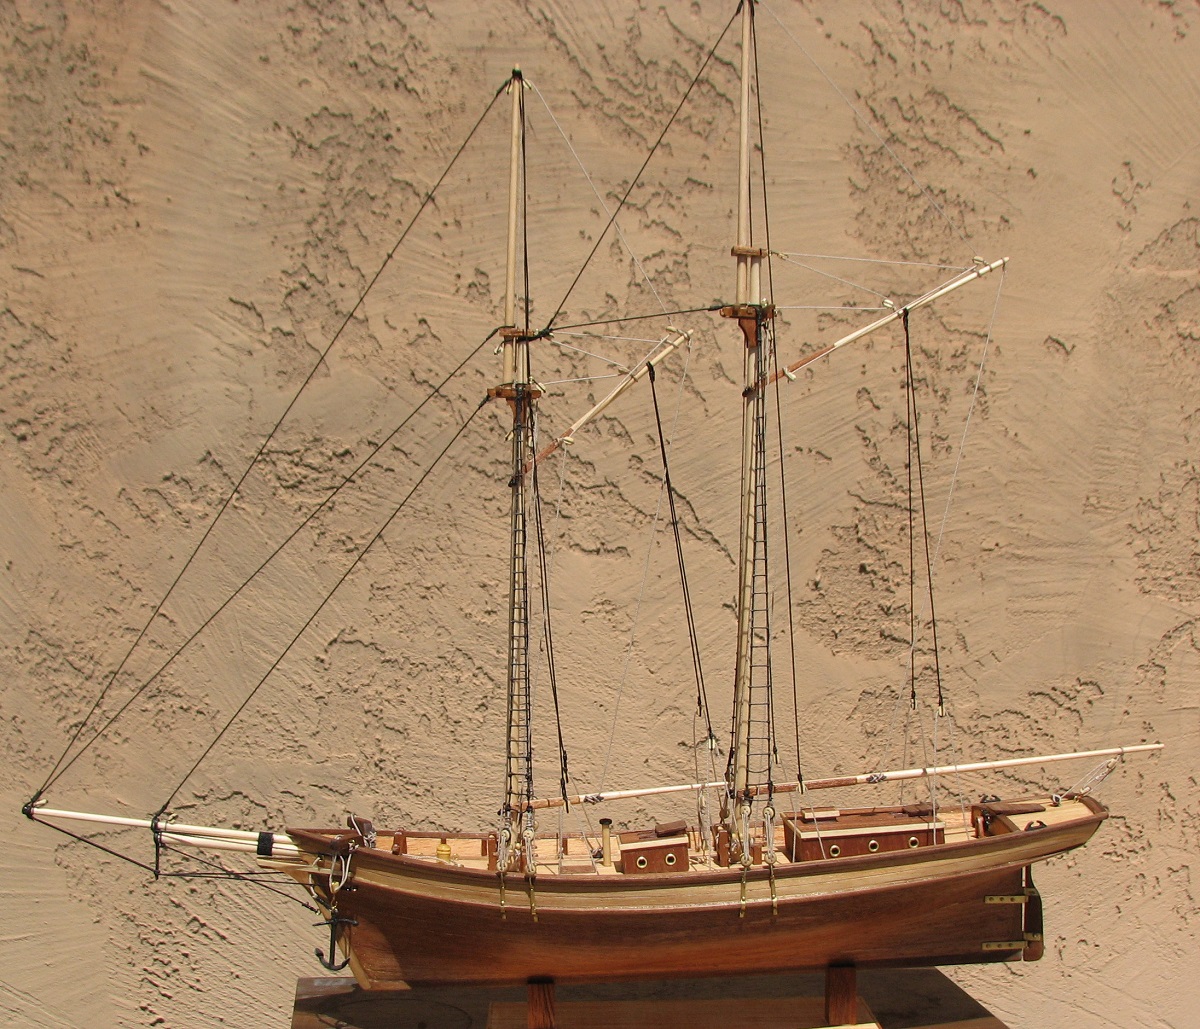
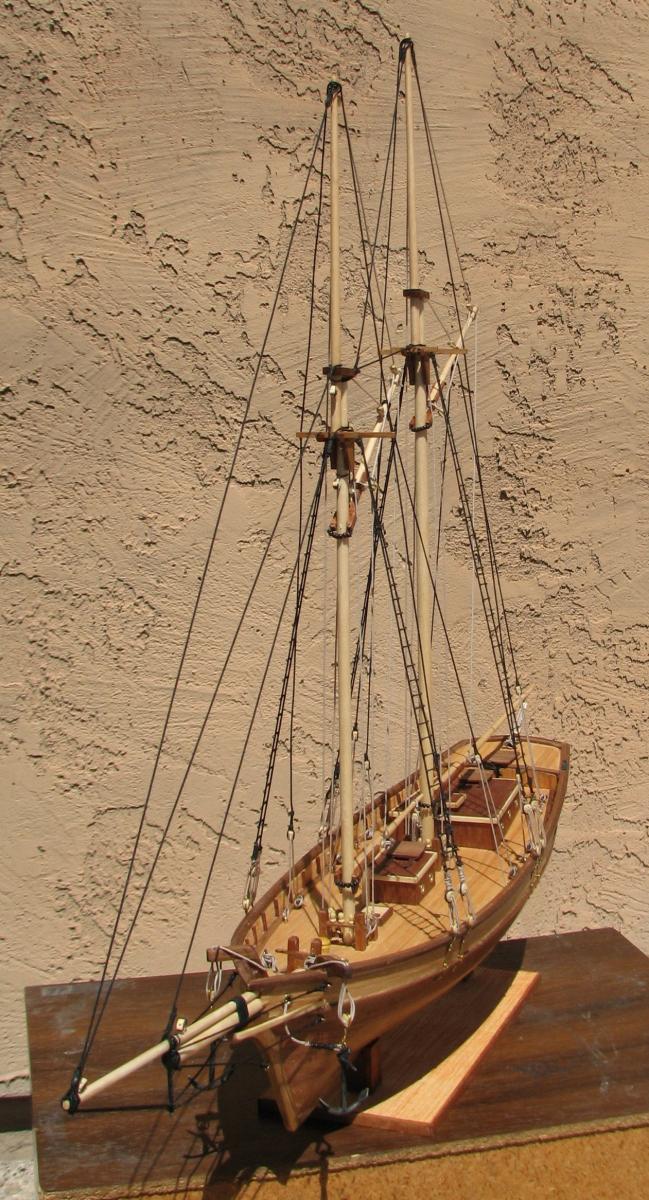
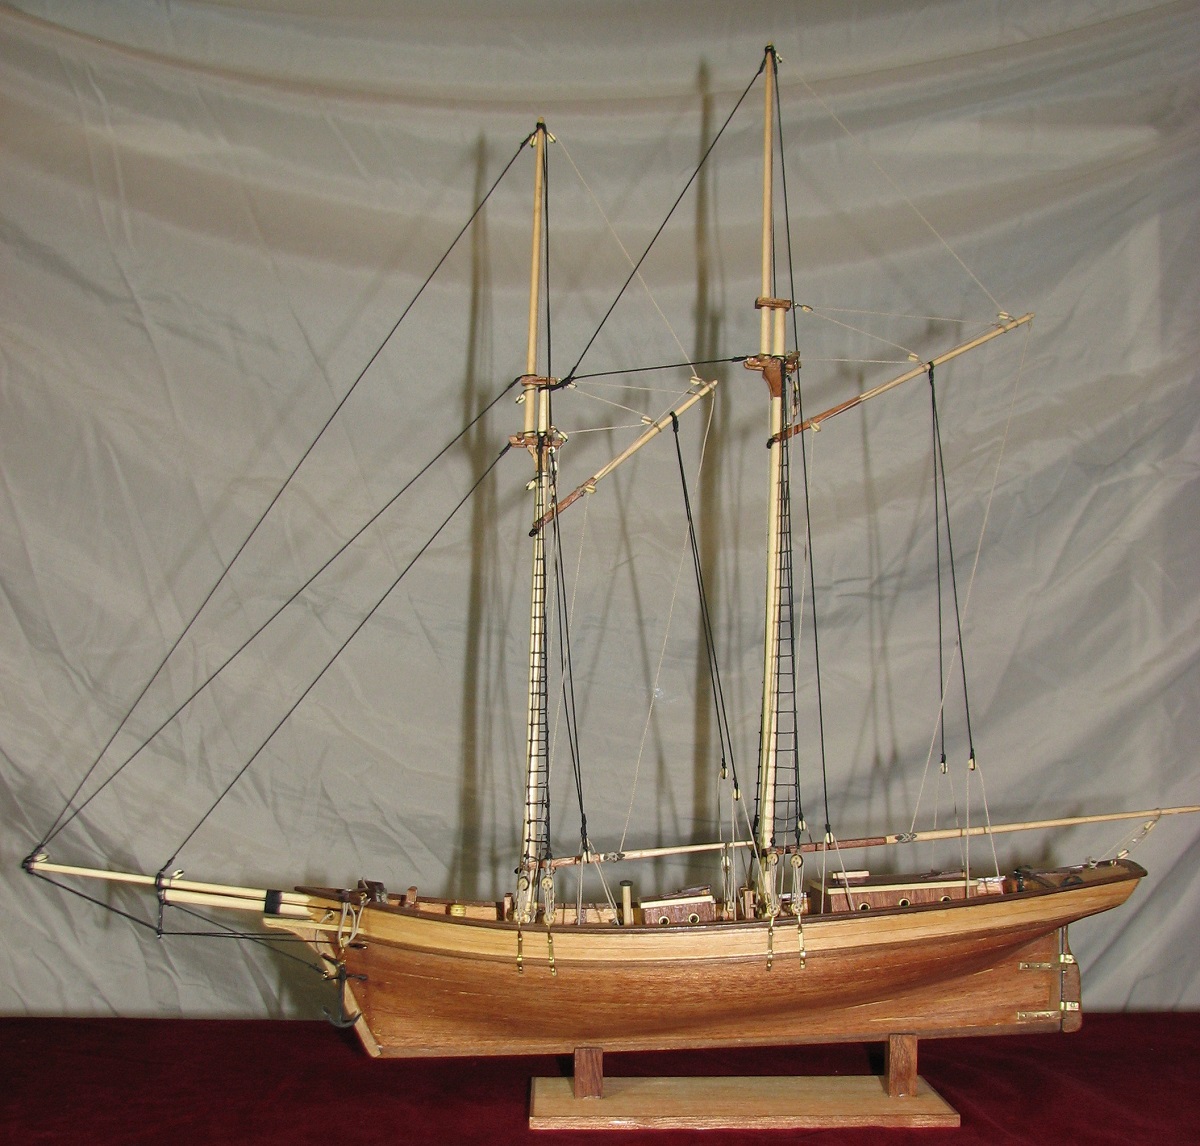
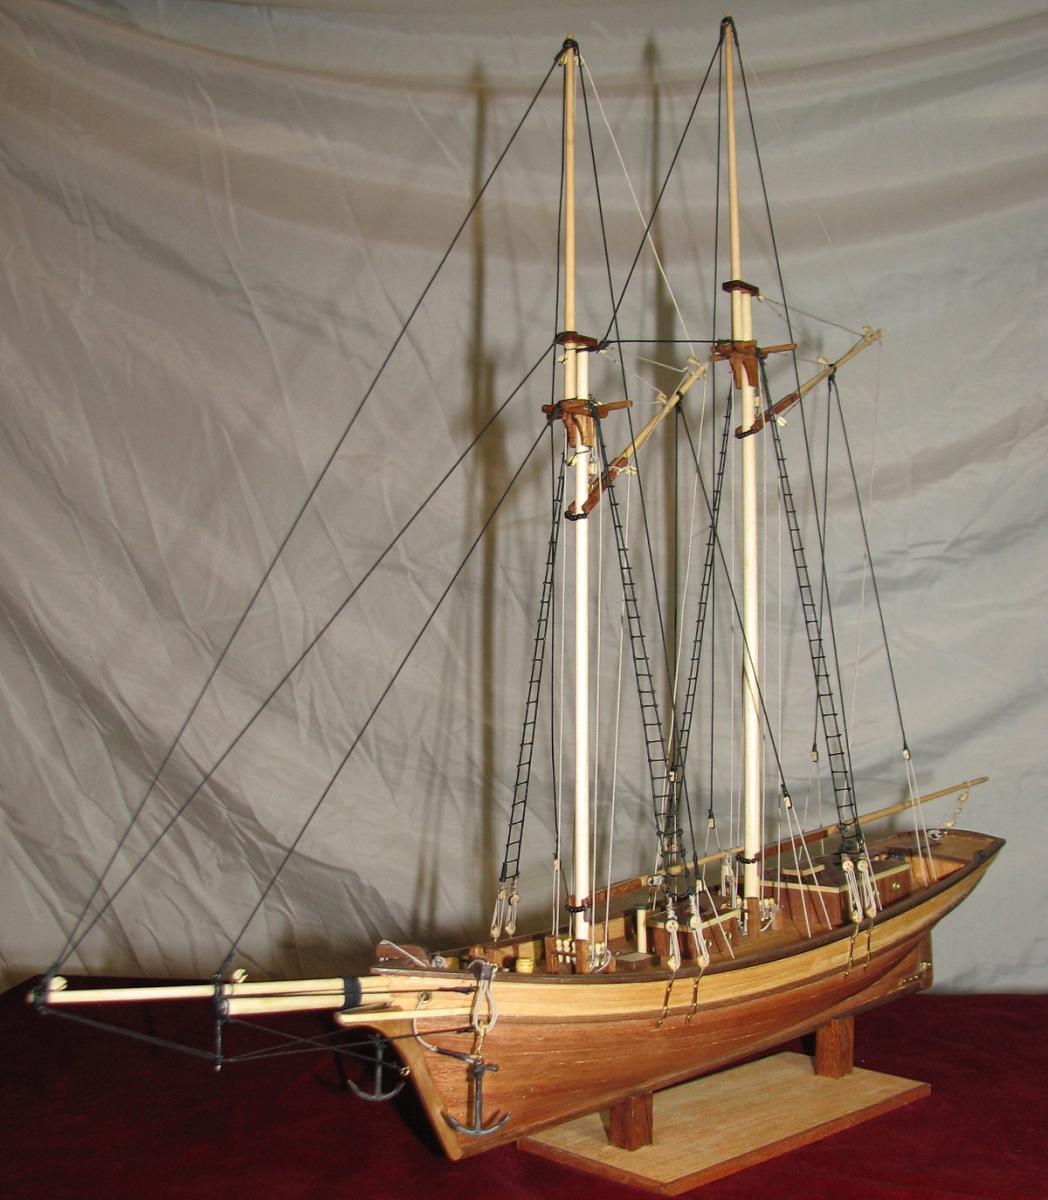
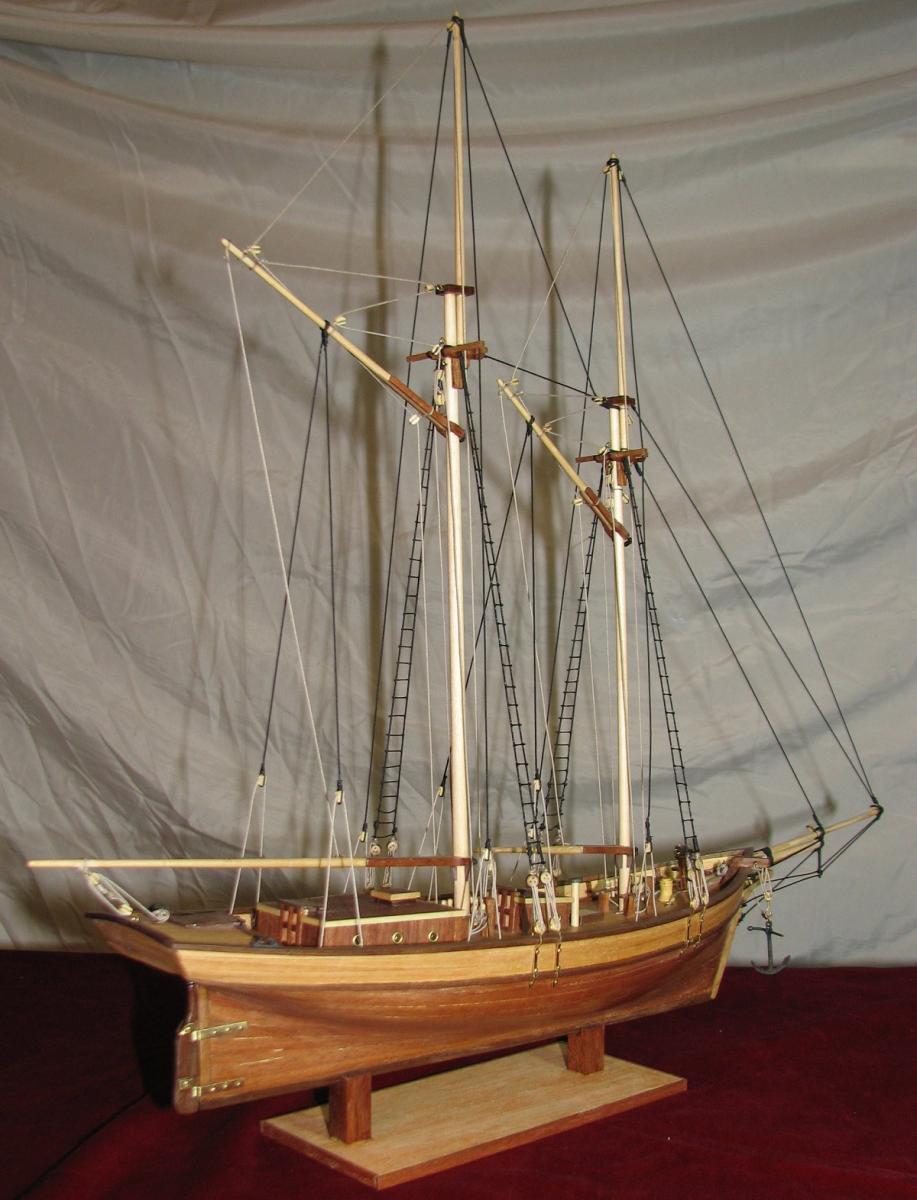
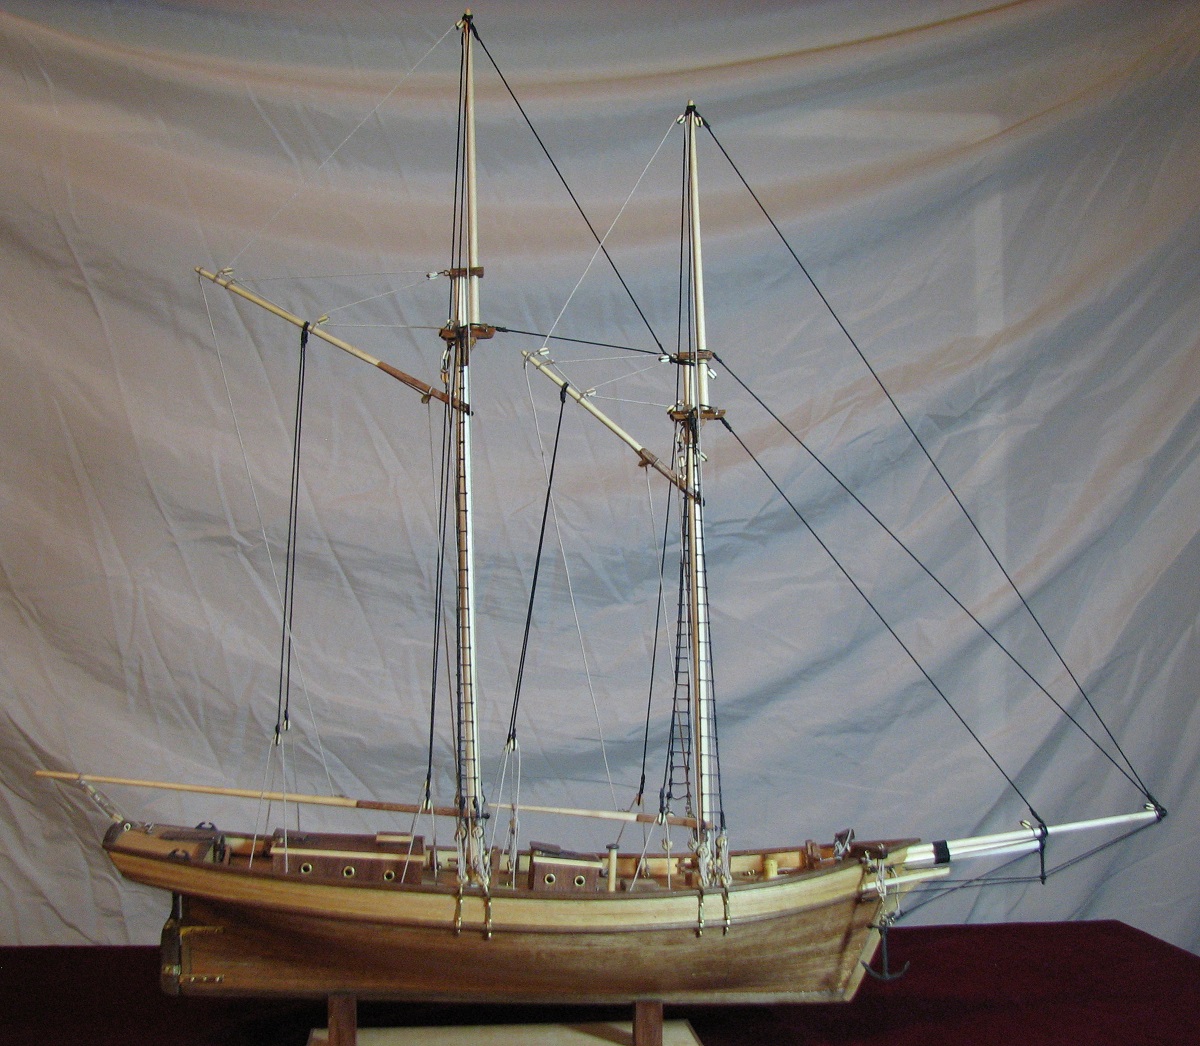
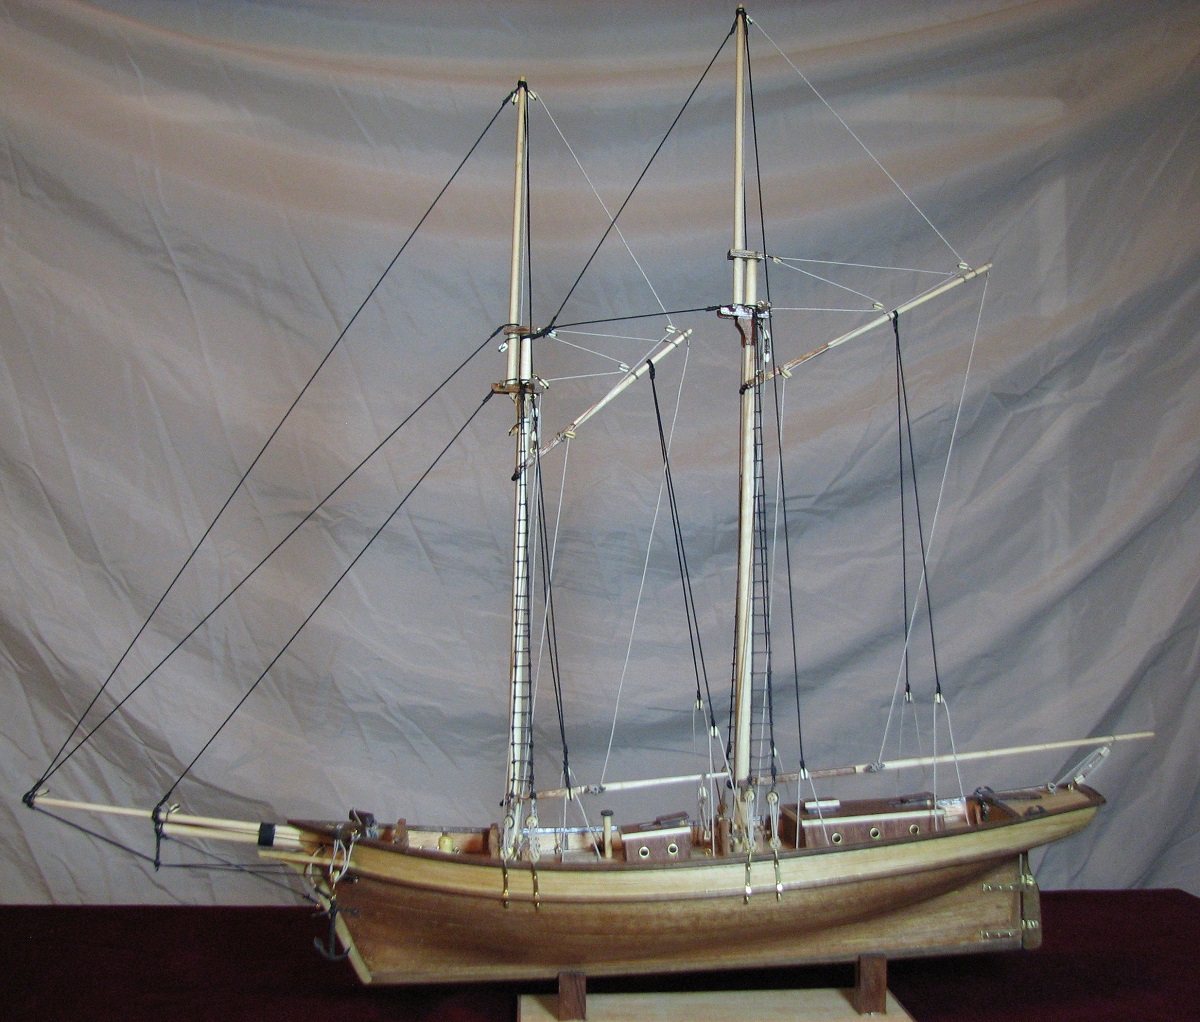
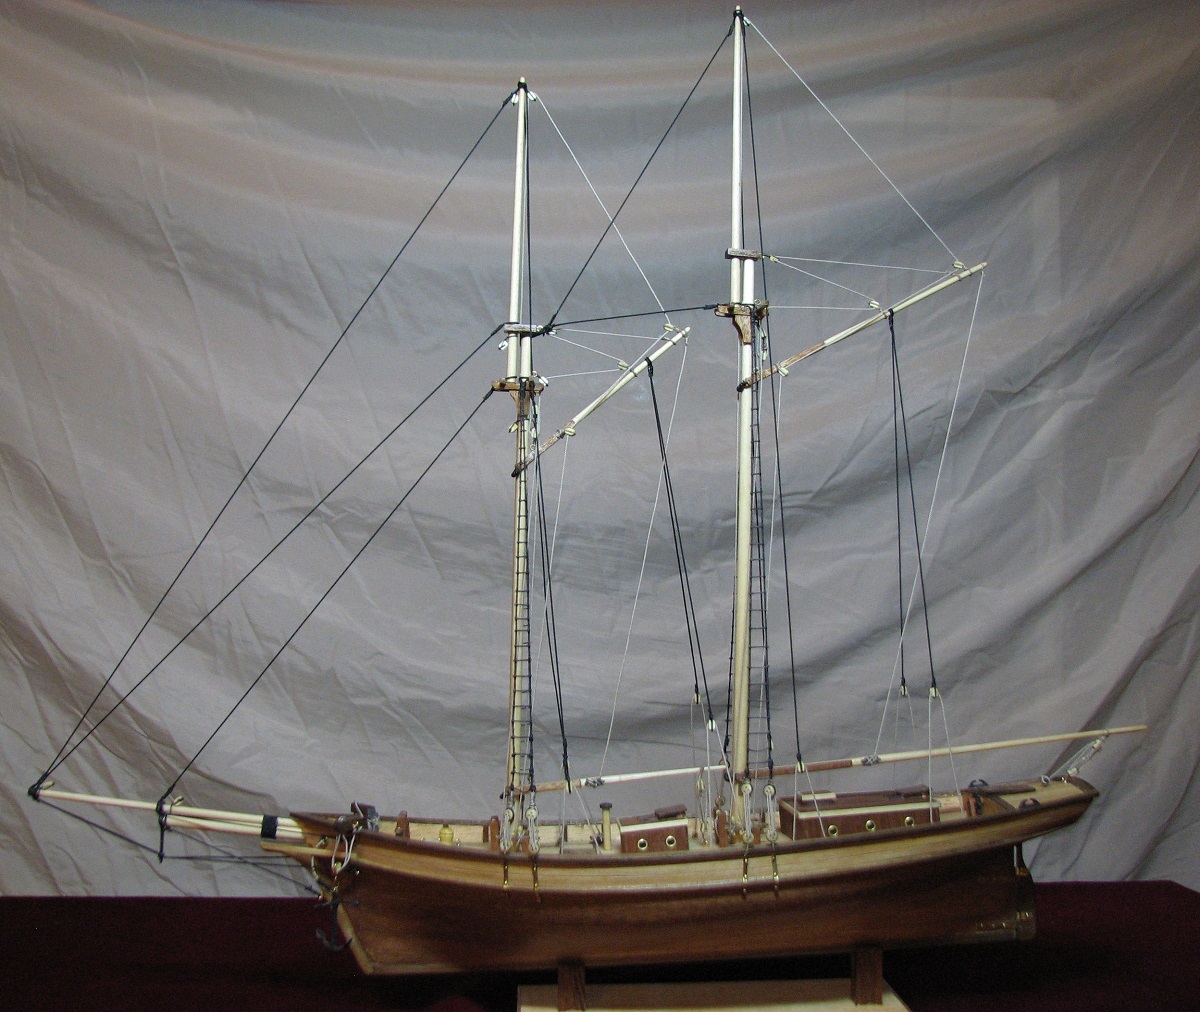
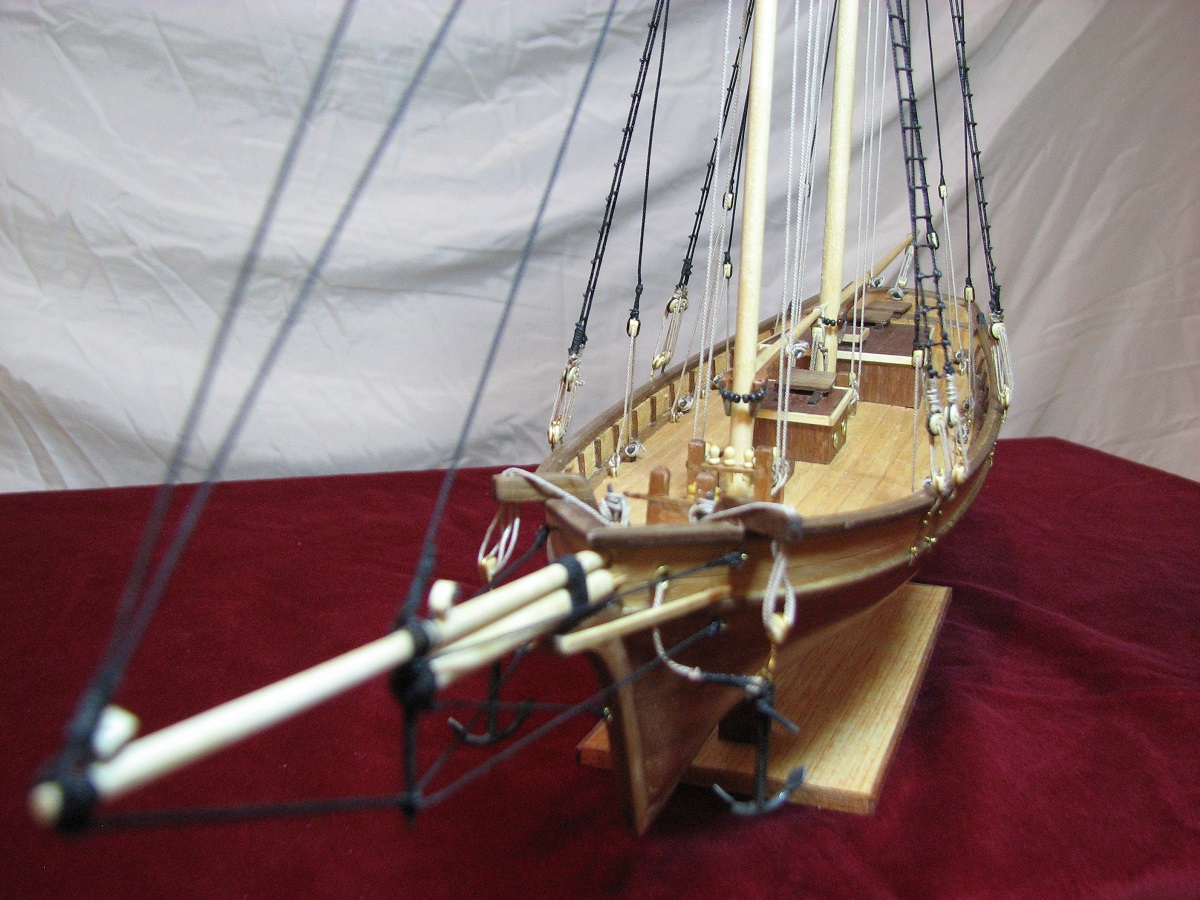
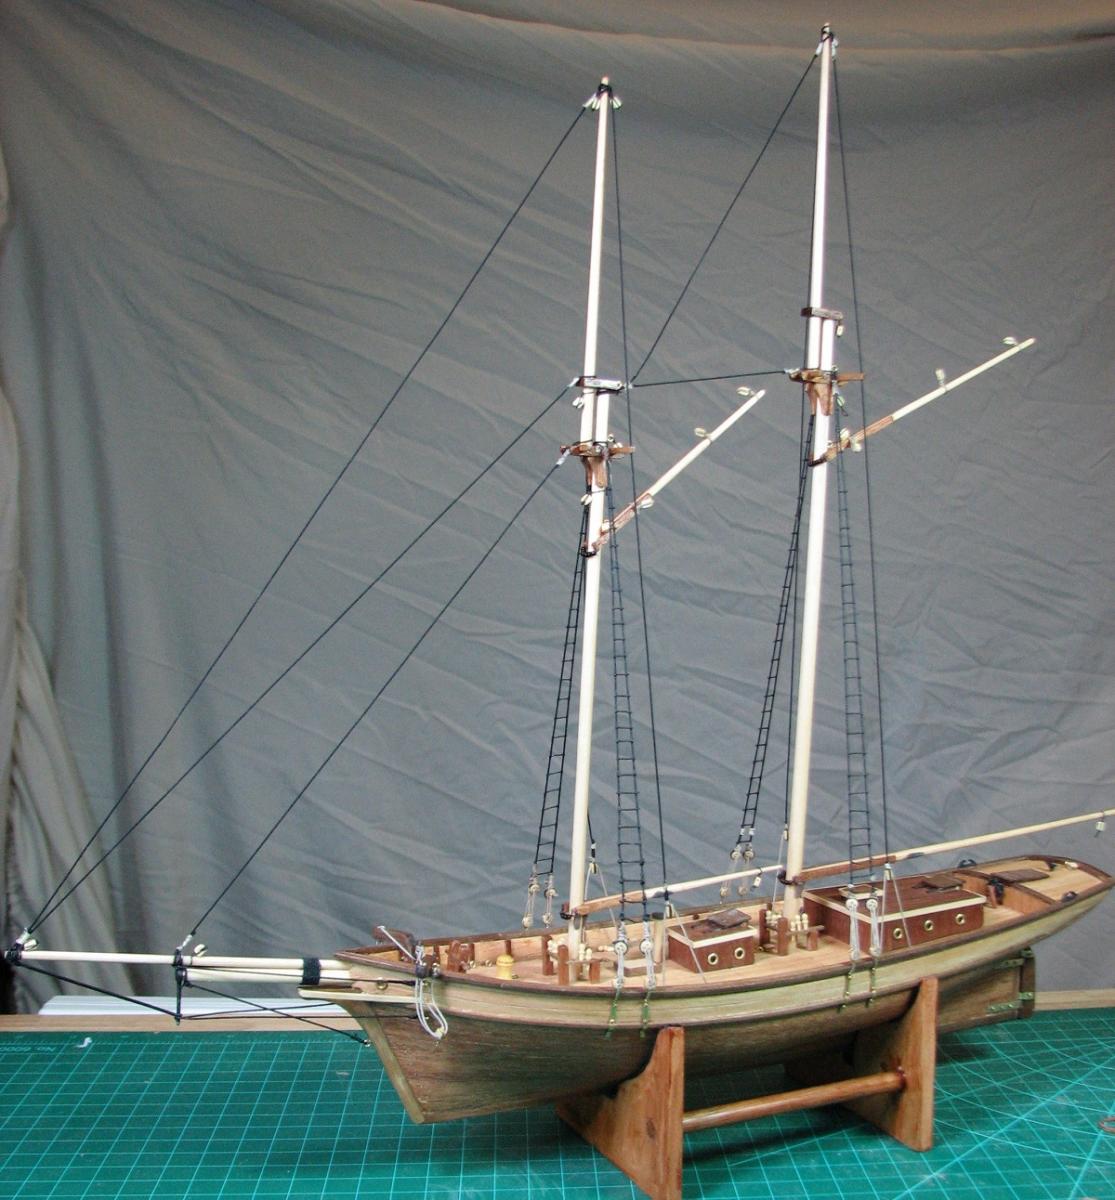
Went out during lunch and snapped a few pictures, most of them were terribly out of focus and poorly framed because the sunlight makes it impossible to actually see the viewscreen on my old camera, but a few were ok, so I'll put them up as the final photos of the Carmen here. Unfortunately my stucco house backdrop makes the running rigging all but disappear in the photos. Oh well.


-
Spectacular build, I'm amazed that this is your first wooden ship. Your carpentry skills are certainly finding a home with this!
-
Hello Mark,
Welcome, and as someone only a month into this hobby myself, I'm following along with all of the builds. Will be nice to see how the Philly goes for you, have fun with it!
-
Thanks for visiting gentlemen!
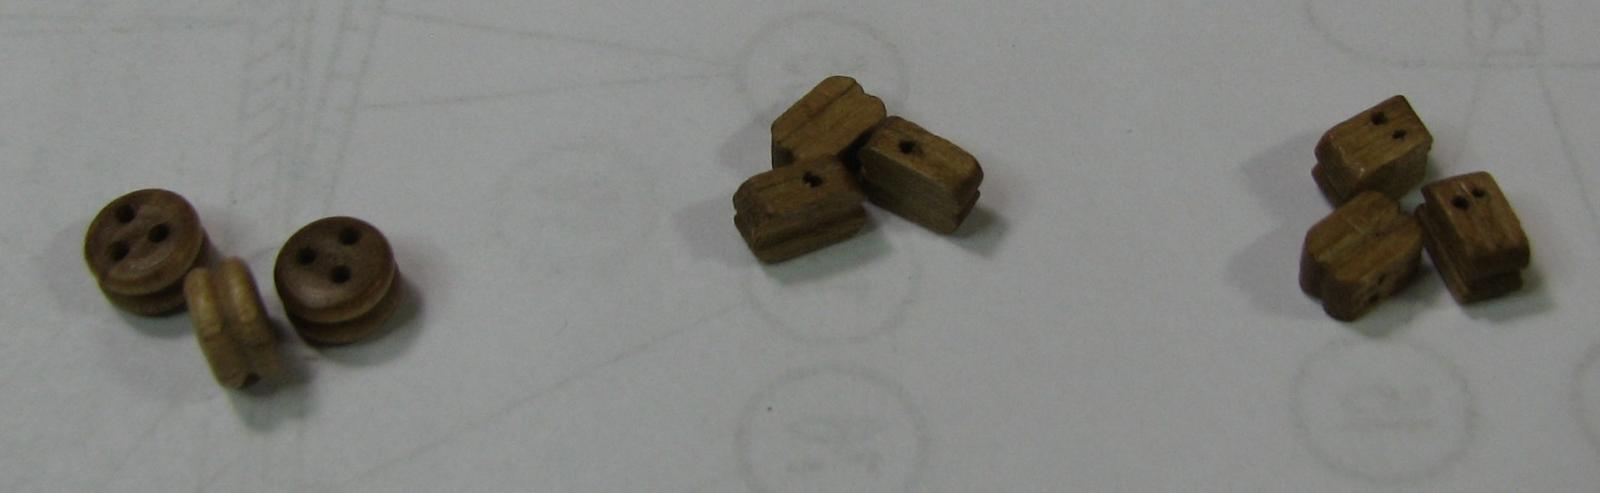
Alistair, your AVS is simply amazing. Going to be quite the tough act to follow! I notice you suggest replacing the rope (I already have Syren rope for this build) the blocks, and the deck.
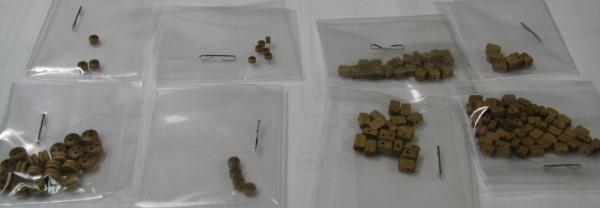
The blocks in the kit really look quite nice, although my only 'live' point of reference is the blocks from the Carmen kit by Constructo that I just finished. What do you use to determine that the blocks are 'bad' relative to Chuck's? Here are the kit parts - the deadeyes and little round things really look good to me, the blocks are a bit uneven, so maybe worth upgrading.

By the 'deck', are you referring to the false deck, or the planking material, and what did you use? I know I've read on some logs that replacing the false deck plywood with basswood is a good investment for fitment reasons, and of course many people seem to upgrade the deck planking to holly or some other material.
-
Edit: Adding an index
Section 1 - Pre-planking work.
Fairing bulkhead tops and placing sub-decks
Shimming bulkhead extensions and fairing
Knights heads and first planks
Section 2 - First planking and surrounding work.
Section 3 - Wales and inner bulwarks
Wales part 2 and spirketing plank 1
The black strake & inner bulwarks painting
Scuppers and inner bulwarks painting
Outer bulwarks 2nd planking and more painting
Outer bulwarks 2nd planking and Cap Rail
Section 4 - Outer painting and 2nd planking below wales.
Section 5 - Deck & furniture
Deck planking complete - tree nailing
Rigging the Cannons - beginning
Rigging the Cannons - continued
Rigging the Cannons - rope coils
Section 6 - Masts & Standing Rigging
Bowsprit sheaves & main mast construction
Swivel Gun soldering - mount, yoke, handles.
Main mast standing rigging begins
Section 7 - Running Rigging
Sidebar - San Diego Festival of Sail trip (link to other thread)
------------------------------
Beginning of build log:
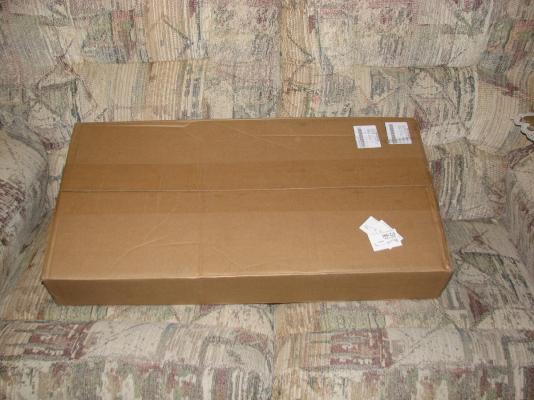
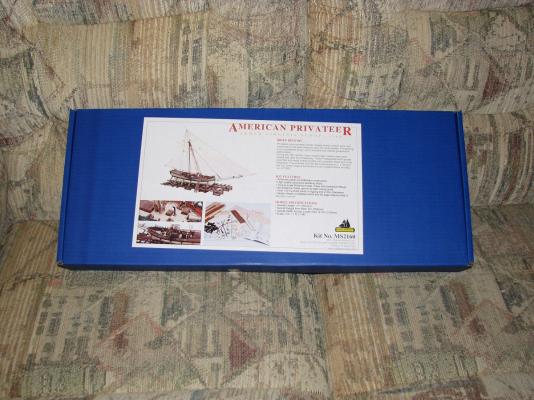
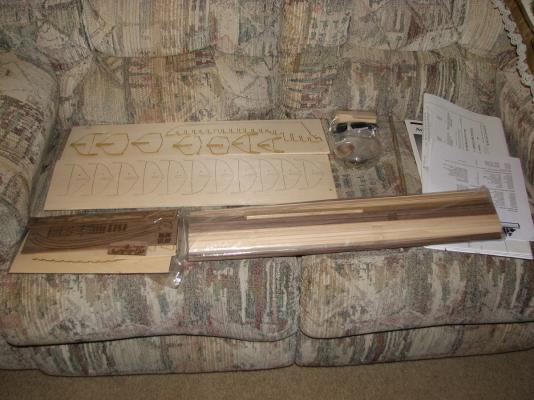
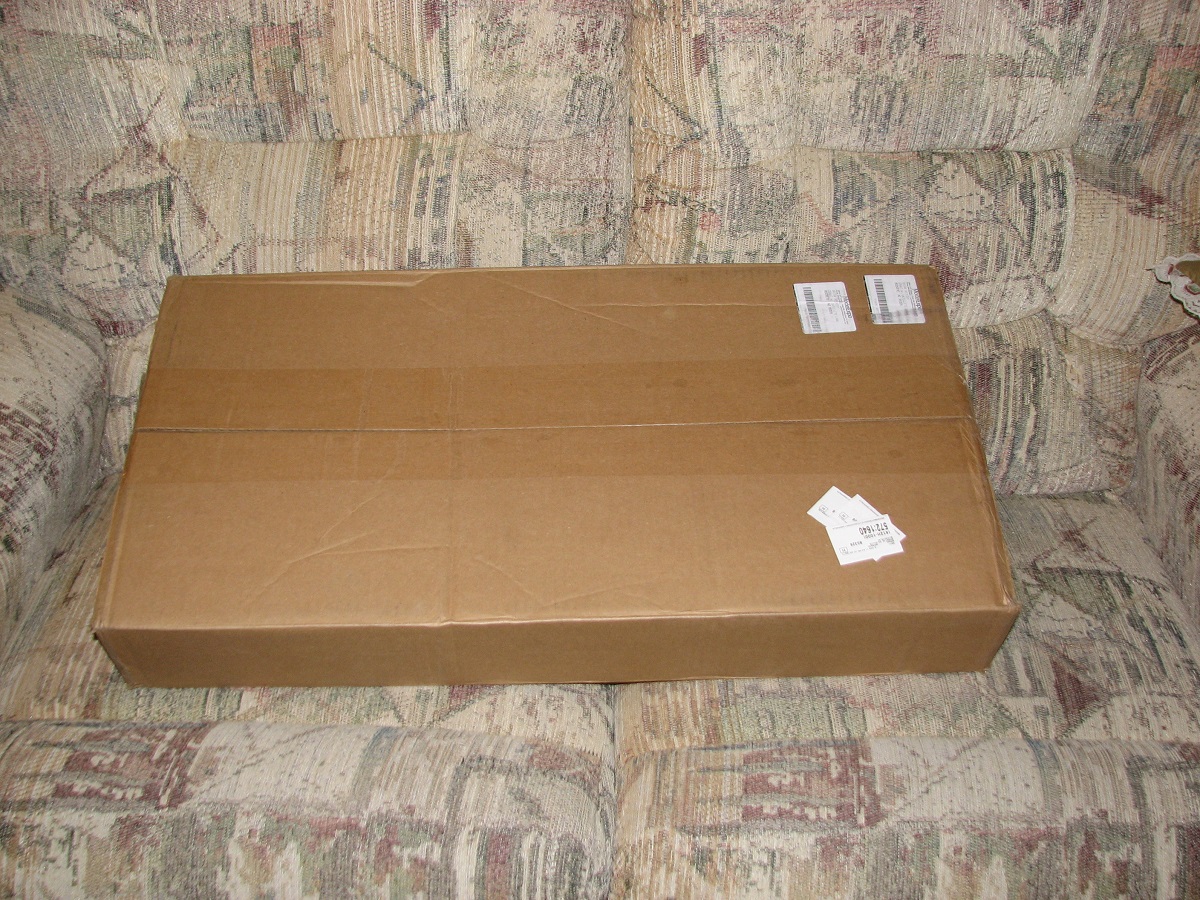
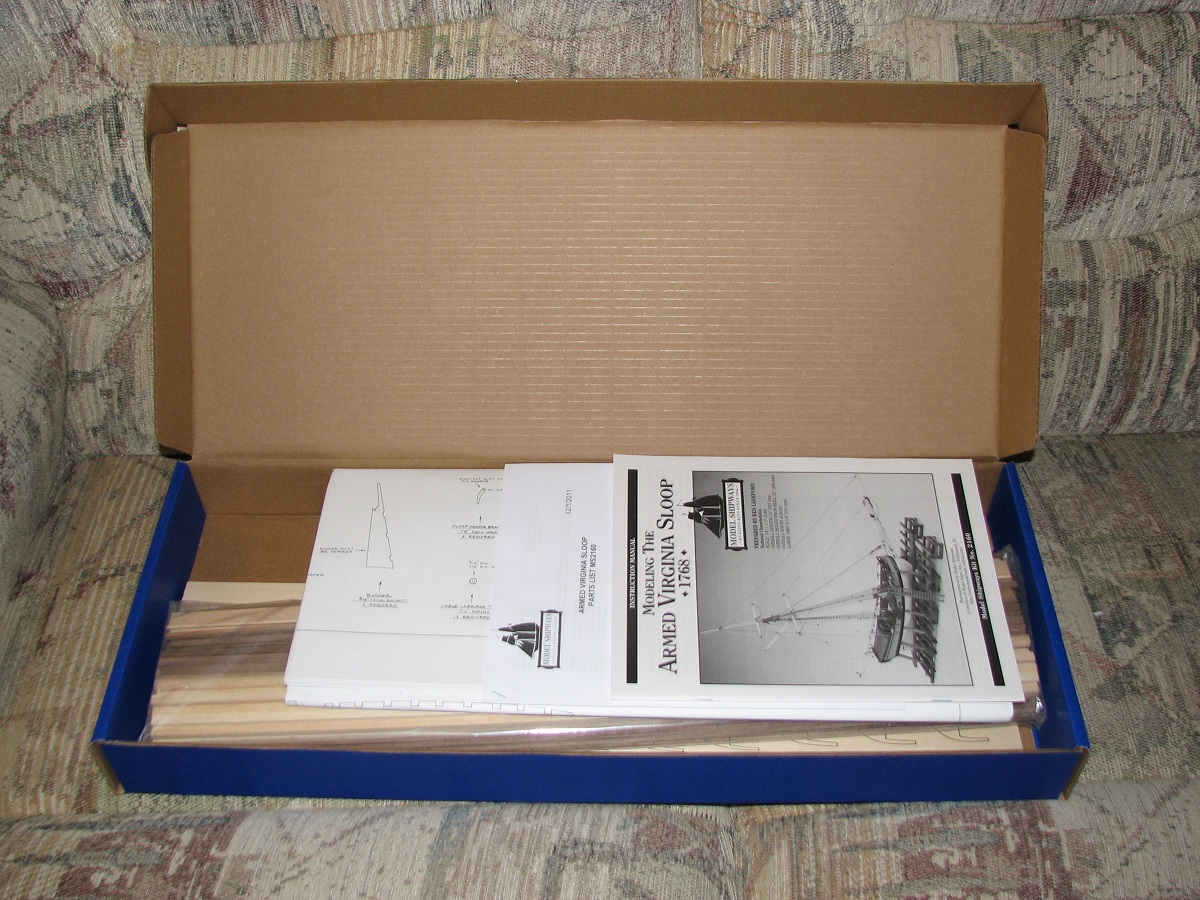
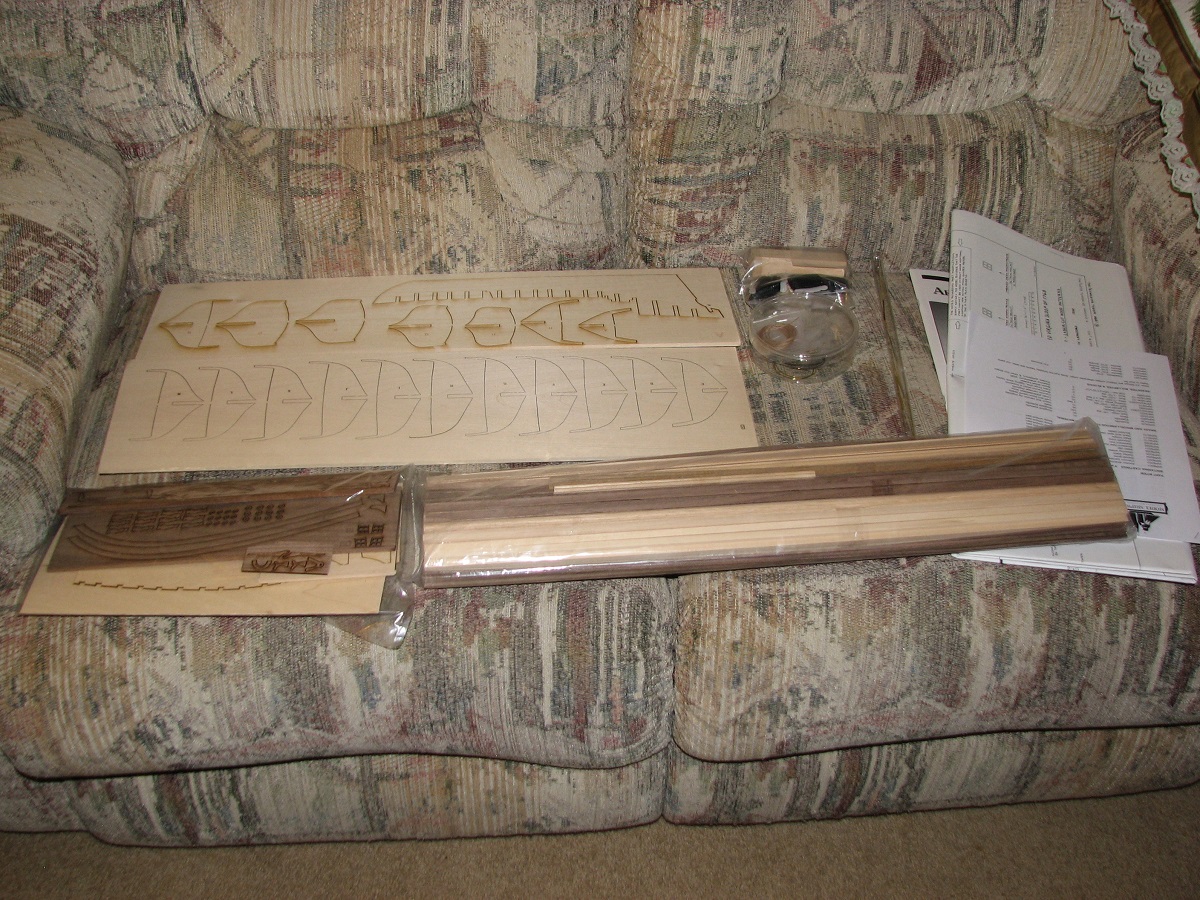
Just starting up the log with what appears to be the traditional 'unboxing' post. This was actually done on September 6th, but I did not see any point in opening a build log while I was still working on the Carmen, as I'm not going to attempt to do multiple builds at once yet (no room, even if I wanted to).
I took inventory using the parts list included, and everything seems to be ship-shape. I will likely not actually begin working on this until the weekend, as I've got an idea for a display stand for the Carmen to take to my office (my not at home office), and now that I'm done building the Carmen, I want to read through the instructions and some build logs for the AVS before I begin.
Until then, here are the unboxing photo's.

-
I'm sure the suspense between posts was killing you. Heh.
For the running rigging without sails, there is no plan in the kit, and not enough blocks to really do it right in a lot of areas (like the bowsprit done like the AVS). I looked at all sorts of different schooner build photos that were done without rigging in the gallery, and just sort of winged it.
I posted earlier that I was short 3 single blocks. Well, it turned out that I was actually not short 3, but only 1, and that one was a block that I dropped sometime last week, and I've never been able to find it. The other two were attached to the booms where I actually should have installed double blocks. Woops. I cut off the singles and installed doubles in their place, leaving me only short the 1 block. I sanded down a double block to single thickness, and unless you know which block to inspect up close, there is no way to tell, so success!
I also decided that the 'natural' seizing on all of the standing rigging just looked weird to me, so I changed it all to black.
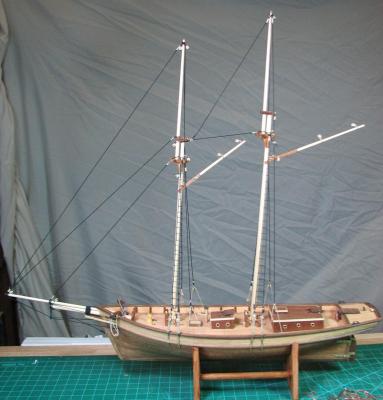
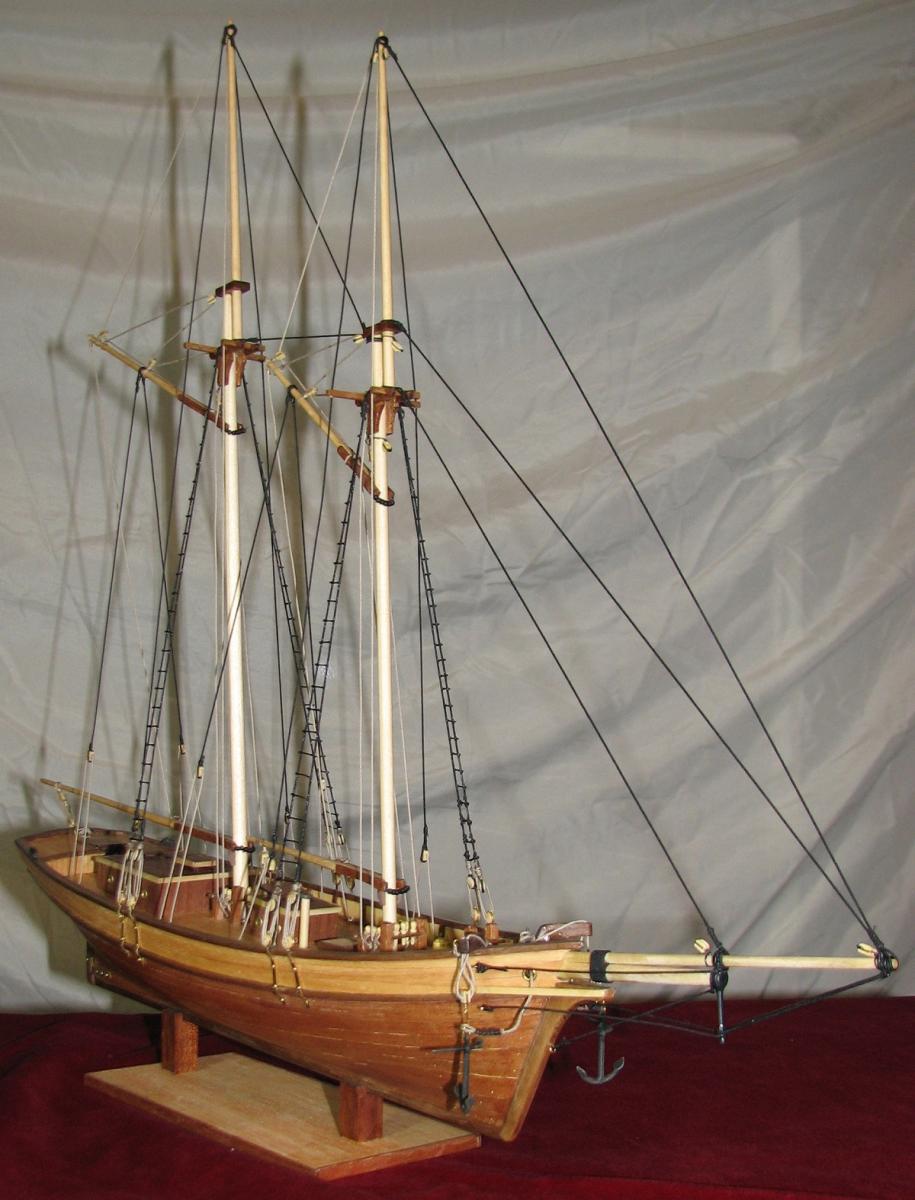
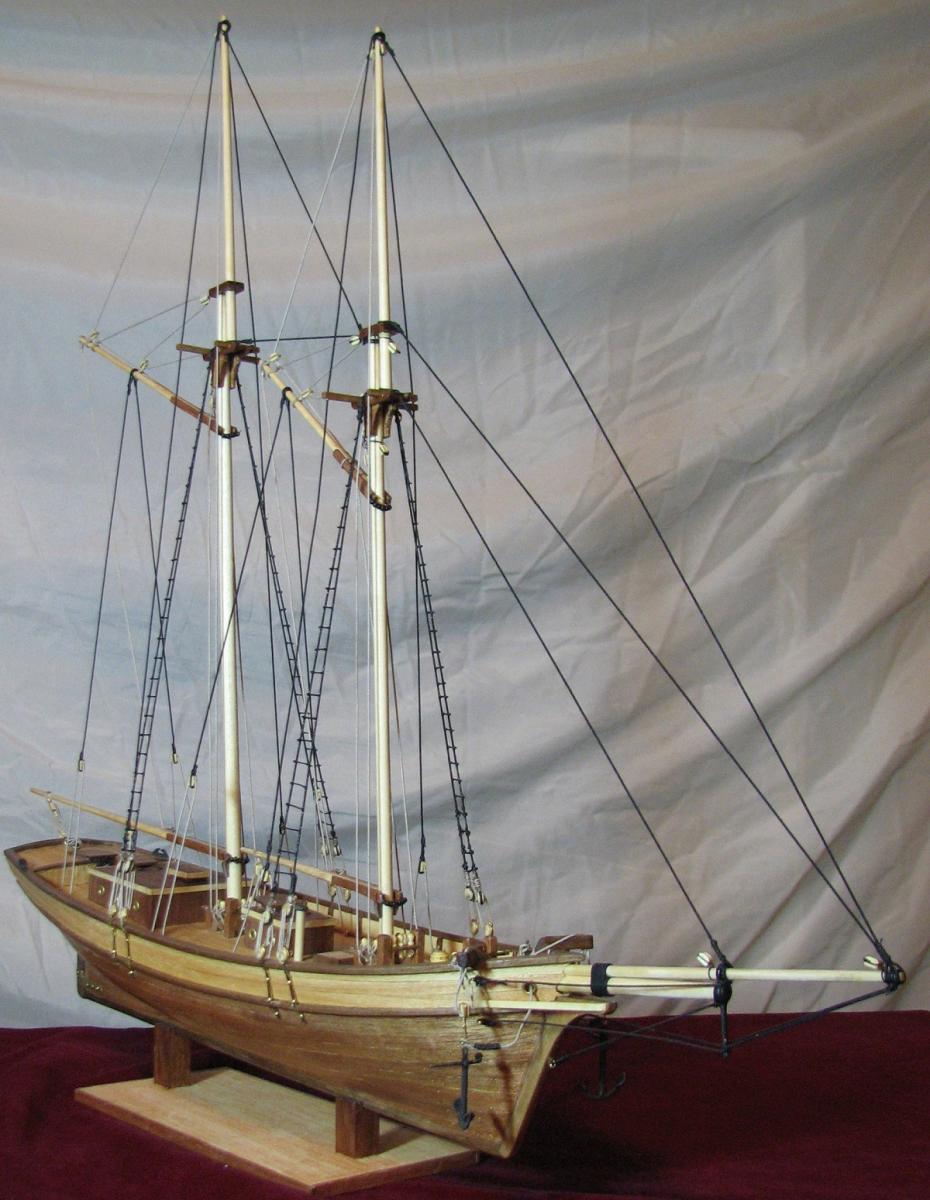
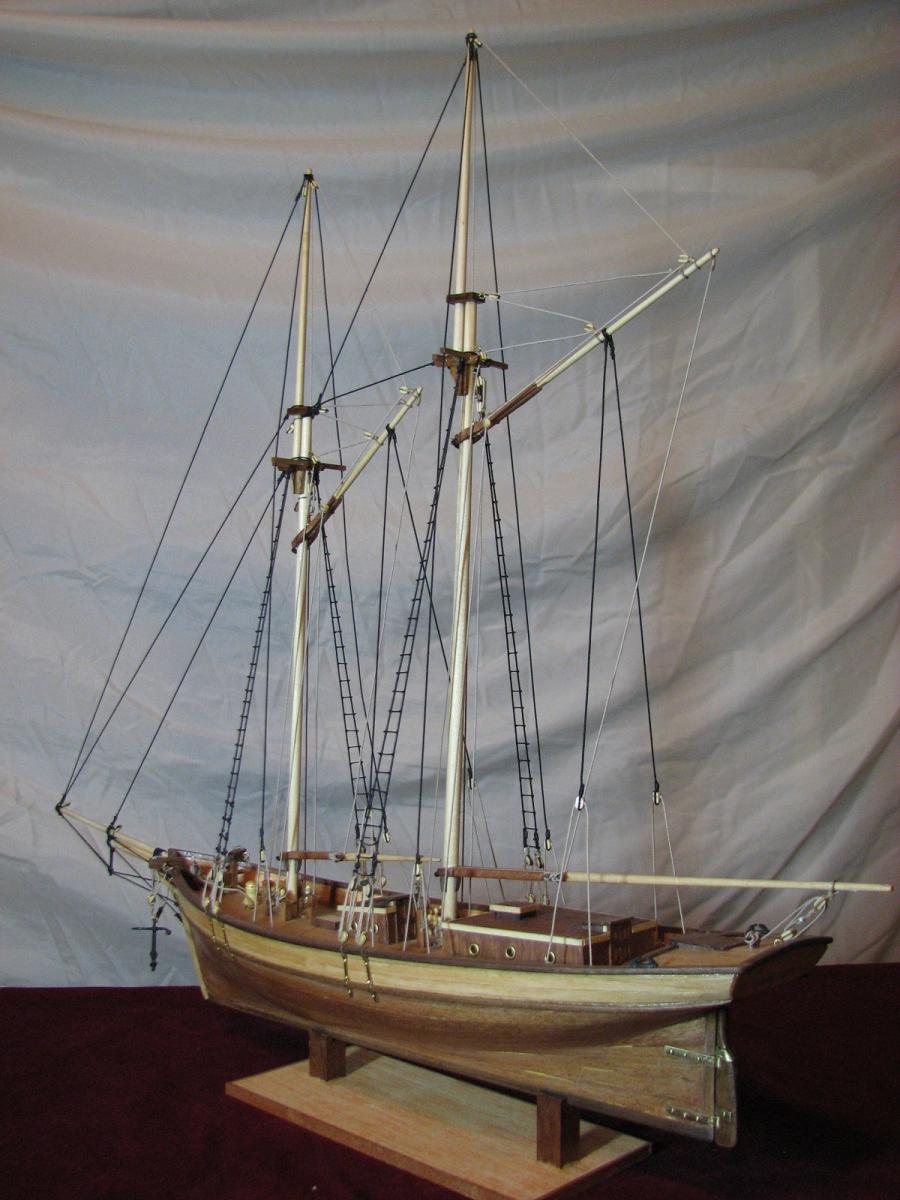
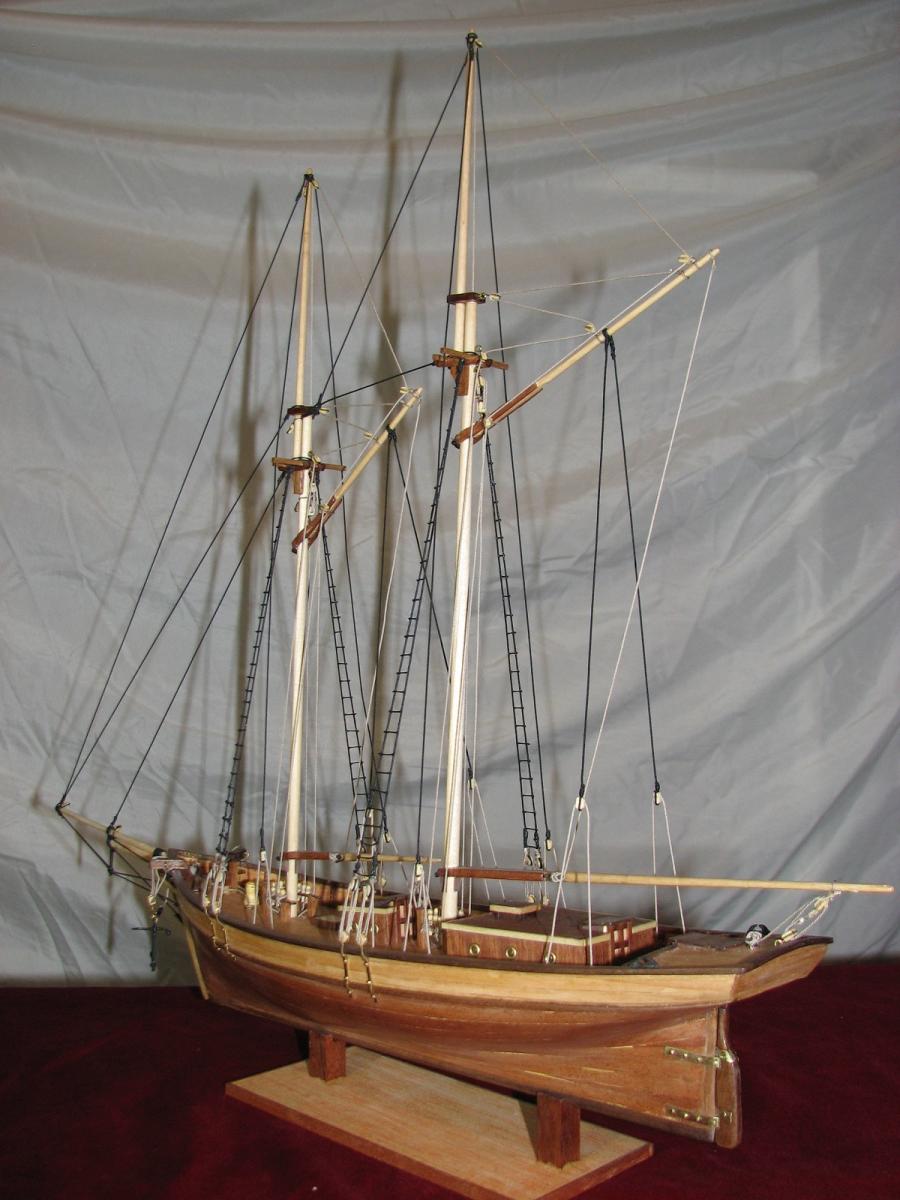
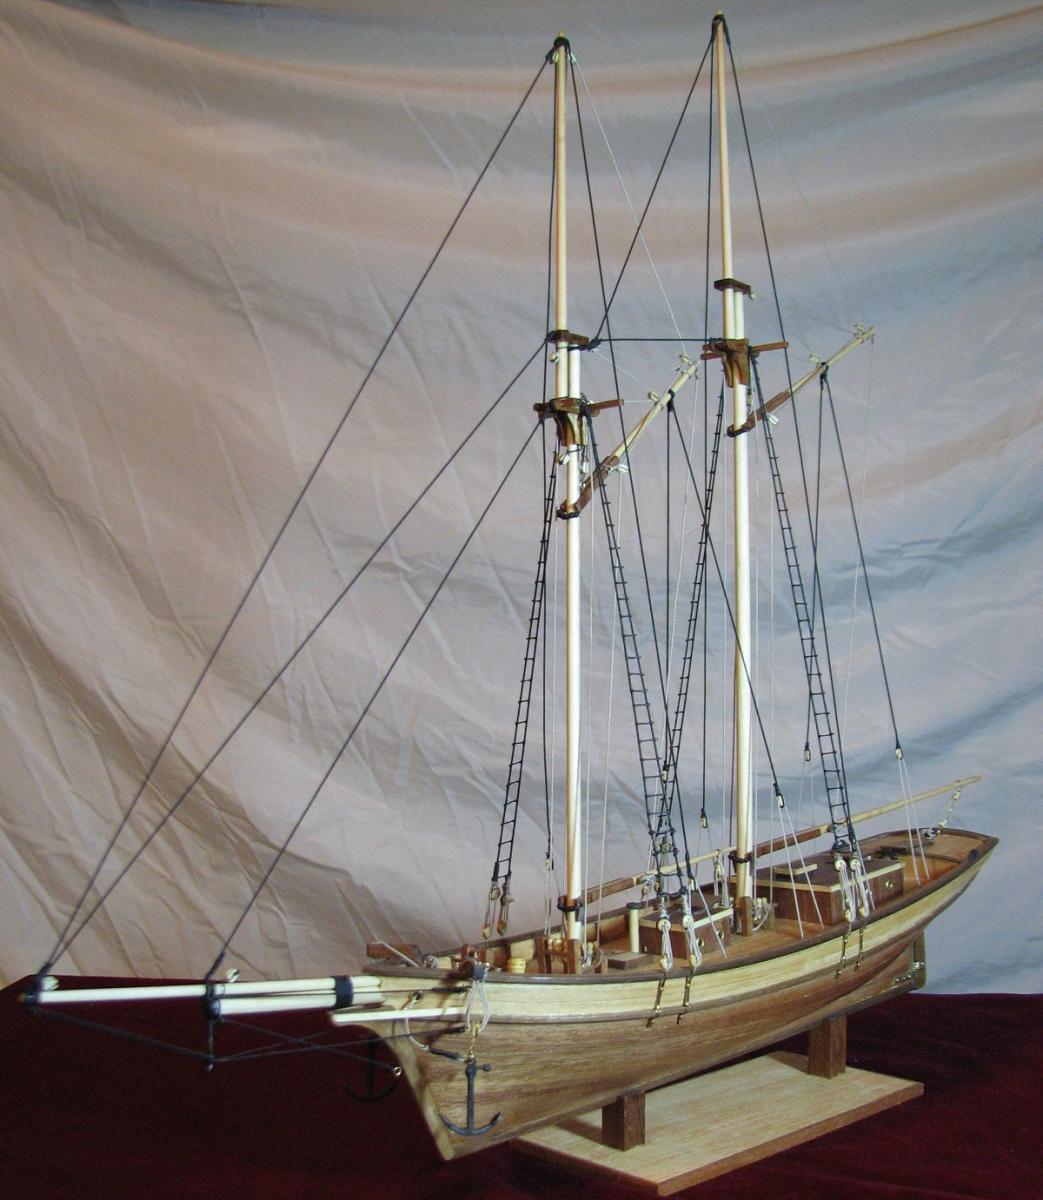
After one marathon rigging session, I present to you..
The finished Carmen!


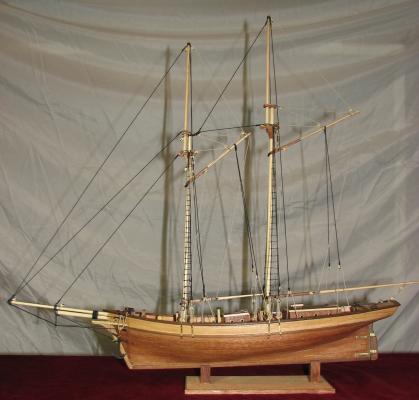
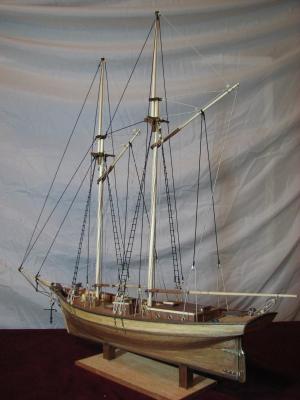


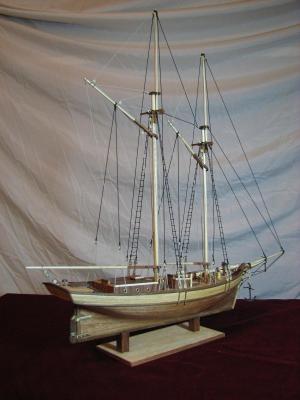
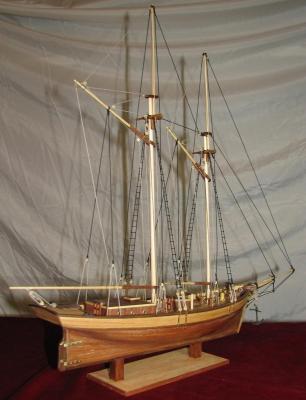


I'm obviously not a photographer, nor do I have a 'real' camera. Mixture of flash and no flash without great lighting. I should try to take some better photo's outside at lunch tomorrow if the hurricane doesn't actually decide to hit us.
-
Update for the last couple days.
So when I started test fitting the yards it occurred to me that holding the proper angle was going to be really difficult using the rigging, let alone making sure they stayed straight front to rear, so I drilled some holes and added pins.
Test fitting, pins worked great, look ma, no glue (or hands)!
I didn't care for the "tie a rope between the jaws with square knots" method of yard attachment the kit instructed, so I got some small black glass beads and put them on with thread. I've decided after this that people who do beading for fun must be more insane than people that build little wooden ships.
And mounted the yards in preparation for doing the running rigging, since I've decided not to do sails on this build.
And, after taking this picture, I started working on the rigging, and completely forgot to take any progress photos.
Oh well, next post will show the end of this evenings progress...
- Alfons, WackoWolf, themadchemist and 1 other
-
 4
4
-
That's a lot of ropes and knots!
Square rig is going to be a big step up in that department. Not sure if I'm looking forward to that given the 'interesting' time I'm having with my little schooner rig.
Very nicely done David, she's certainly something you can display proudly.
-
Thanks Keith, that is an interesting setup. Based on the noise it was making while working on this kit, I think my drill is not long for this world however!
So I'm looking at the running rigging, and it turns out that my run of having 'extra' parts in this kit has come to an end. I am short 3 single blocks. I do have 3 extra deadeyes and 3 extra double blocks. I may try to sand down a double block and see if it will work as a single.
-
-
A new build I haven't seen before (well, an older build I suppose, but new to me). I've never seen the Astrolabe before, interesting how the first planking is not extended into the bow and stern filler. Will be interested to see how that works as you complete it.
Great job so far, it's looking fine!
-
Went back and looked at your planking on the 3rd page, as I had skipped through that fairly fast when I first started following this log (there are just so many logs and so little time!). Wow, what an amazingly patient and analytical approach, but it turned out great! I'll have to re-read this a few times when I tackle my next project's planking.
-
Thank you for the kind words Testazyk, S.Coleman, and Lawrence.
Lawrence, after reading through your Victory build over the last month, I'm fairly stunned that you could get anything at all out of my little Carmen build, but if indeed it helps you in some small way, then that makes me quite happy.
Had a terrible 2.5 hour commute home tonight, and have a teleconference with the India group in about 15 minutes (one of many downsides of having part of your team almost exactly 1/2 way around the world, a 12.5 hour time difference), so I doubt I'll make much progress this evening, but I have a few details I would like to get done in preparation for the booms and gaffs to make their permanent home on the ship.
I've decided to finish her without sails at this time, as I am just not up to all the stitching lines in the sails right now, and I think she looks great without sails, so the addition of the yards, and some running rigging should make for a nice display I think.
-
Hi Jon. Great looking build, but I have a question regarding the kit selection itself.
The Mamoli kit is significantly more expensive than the MS kit, but I have not found a comparison between them. As they are the same scale I am curious as to what the reason is for the much higher cost of the Mamoli kit and wondered if you could shed some light on this.
Thanks, and again, great build and log.
-
The spars look very good. The tapering appears to be correct. So often spars are not tapered enough, but yours came out very well.
Russ
Thanks Russ,
I owe it to another member here - I used a method from Bob's (bhermann) Bluenose build log. I marked the dowels at multiple points and transferred the size mechanically to the dowel at that point from the plans using the caliper. I then used sandpaper (for two of them chucked into a drill, and for the two shorter ones, I just sanded by hand while slowly turning the dowel) to sand them down to the marks. I then laid them on the plans directly to compare and finish.
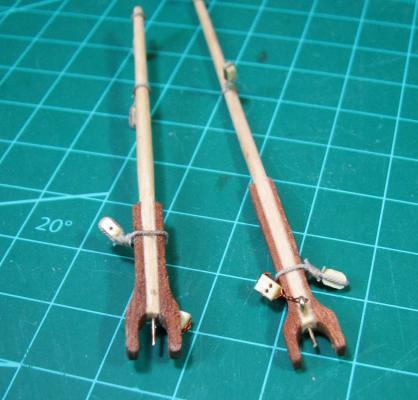
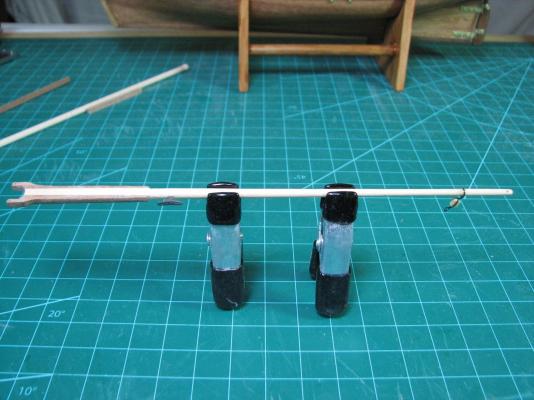
In this picture you can see all the bits and pieces, and the main boom has had the taper points transferred, but not yet sanded.
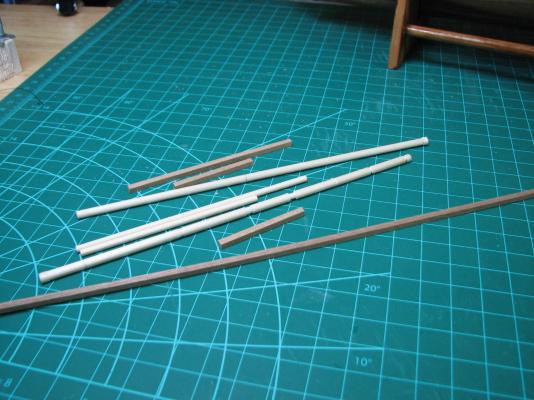
This method worked very well for me, but I still want a lathe.

-
Just a bit of progress from this weekend and this evening, as I was working on moving lots of stored stuff (10 years worth of storage room accumulation) in preparation for a new hobby room.
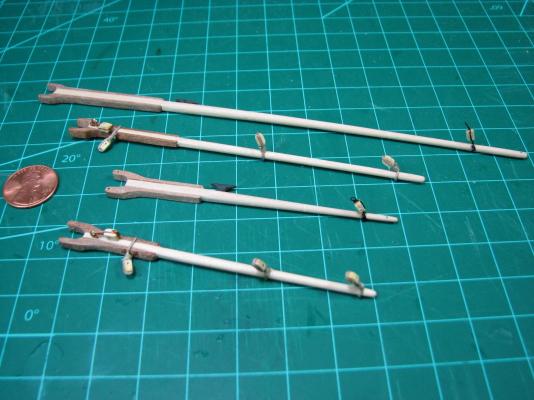
I had tapered the gaffs and booms, and glued the jaws?, clamped them, and left them to dry on Saturday. I completed the boom shaping yesterday, and then tonight I shaped the gaffs, and rigged all 4 pieces.
These display an interesting 'history' of my block stropping, and I'm leaving them as is just for my own interest. First, the double blocks were stropped with the kit's copper wire to the eyebolts per the instructions. Second, after I got the blackened wire, the single blocks on the booms were stropped with the blackened wire in place of the bare copper. Third, tonight I read about the 'figure eight' rope stropping technique for attaching blocks to yards, and used that technique for the 6 single blocks attached to the gaffs. The rope system is really nice, and fast, and looks pretty good too!
Here are the completed pieces before varnishing.
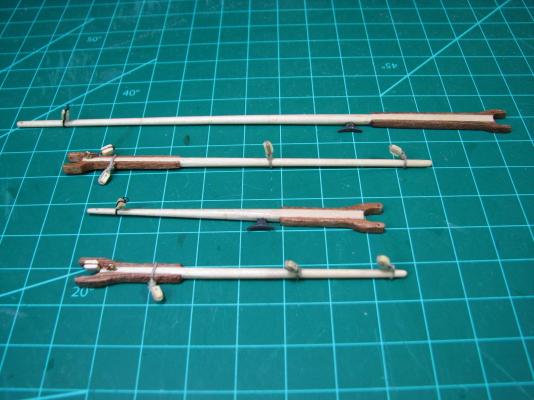
And now, complete and drying.
- canoe21, Bindy and themadchemist
-
3
-
Thanks glued. It's only clean because it's my library and office, so I'm trying to keep it from becoming a pile of sawdust while I'm working on turning another room into a dedicated hobby room that isn't filled with bookshelves and computers.
-
Beautiful, both of them.
-
Fantastic job, very amazed that this is your first build.
-
Spectacular ship you've built Andy.
-
Very first thing you do in your first build is scratch build a part. Nice start!
I don't know the answer to your glue question, but I'm sure someone will chime in about that. Welcome and I look forward to seeing your skiff take shape.
-
Oak is unsuitable for modelling use because its thick grain looks our of scale.
Thank you Brian. That makes perfect sense, but never even occurred to me!
-
Thanks for the kind words, as well as some great words of wisdom Keith.
Thanks for all the likes Joe!
Spent most of the day working on cleaning out the future hobby room, and went to dinner with family, but in between and after those things, I finished the main boom. Very happy with how it came out, although I came very close to taking down too much material on one of the side pieces and wrecking the entire thing. I also managed to put that simple little single block on wrong 3 times, but it's finally on right.
Those holes where it wraps the mast are just tiny, as the material there just isn't thick enough to drill reasonable size holes, so there is no way I'll be able to use the .028 rope like the kit says to hang the mast (it's just knotted on both sides with square knots and tied around the mast in the instructions). I'll have to use thread, or possibly the .012 rope (the holes are .018). Having seen some other builds with this sort of boom assembly, I think I may try to find some beads and make a 'proper looking' attachment with the smaller rope and some beads.
I did also manage to get the hole at the tip of the boom at an odd angle, but I don't think that will show.


Corsair by teloo - OcCre - scale 1:80 (first build)
in - Kit build logs for subjects built from 1501 - 1750
Posted
The rope coils look great.