HOLIDAY DONATION DRIVE - SUPPORT MSW - DO YOUR PART TO KEEP THIS GREAT FORUM GOING! (89 donations so far out of 49,000 members - C'mon guys!)
×


hornet
-
Posts
690 -
Joined
-
Last visited
Content Type
Profiles
Forums
Gallery
Events
Everything posted by hornet
-
I have tossed up using wax on a number of past builds. Haven't tried it as yet. May not now if it is a dust attractant. As for fighting the fuzzies, I just rub a drop of PVA glue between thumb and forefinger and run it up the line after fitting. Wouldn't do it if the line wasn't under tension. Don't know if this is considered an acceptable practise or not, but it works for me.
-
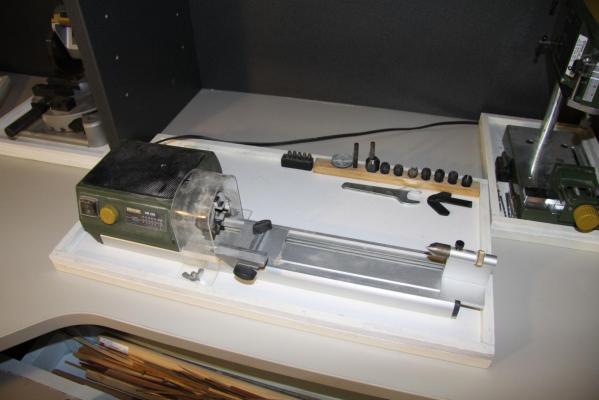
I have the Proxxon Lathe too. It's great for small jobs like masts, spars and pedistals. I have successfully used it to shape masts and spars on half a dozen builds. Dowel slides right through the main body of the lathe so you can work on reasonably long lengths. I tend to do my shaping with various grades of glasspaper checking constantly with my vernier calipers. I have my lathe mounted permanently on a tray that has a lip around it.Tthis means I can pull it foward and back depending on whether I am using it or not - it also minimises dust. I also made a perspex cover for the chuck (sold separately) so I don't take the skin off my knuckles when working close to it.
-

Simulated caulking
hornet replied to Nirvana's topic in Painting, finishing and weathering products and techniques
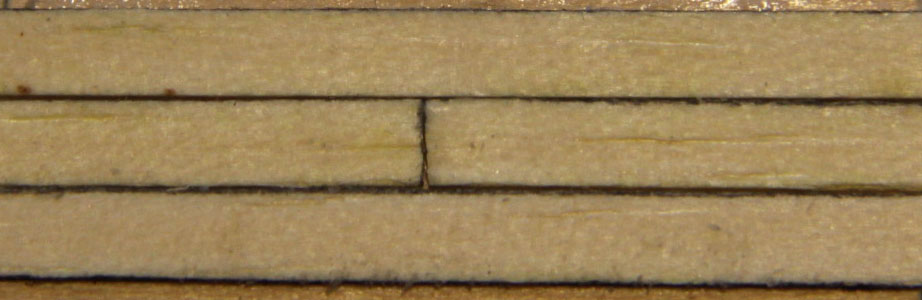
I have tried a number of methods of simulating caulking. I found that pencil graphite smudged too much when sanded. I used the marker pen method for a while - it worked OK. I've now come up with a quicker and (I think easier) method. Purchase a liquid shoe polish (in the colour of your choice) but get one with the foam applicator on the end. Load the shoe polish into the foam applicator by squeezing the bottle while holding the foam applicator in a tissue. Mount the polish bottle (foam applicator end up) in a vice so that it is stable and slide the plank along the foam applicator - I find I have more control if I slide the plank along the foam rather than the foam along the plank (don't push down on the plank or the polish will go onto the face of the plank) The polish dries very quickly so you can glue it to the deck immediately. I only `caulk' one side and one end of each plank.
-
water way?
hornet replied to jhl's topic in Planking Techniques's Click Here for Topics dedicated to planking!!!!
Thanks Druxey, that makes sense. I have just started the Caldercraft 'HMS Supply' ' and am doing a little research for future reference. The plans or this model do not include waterways and the three build logs on this site don't appear to have included them either. I might add them though. -
water way?
hornet replied to jhl's topic in Planking Techniques's Click Here for Topics dedicated to planking!!!!
Hope this isn't a dumb question, but was/ is there any set formula or convention for the spacing of the drain holes in the waterways? -
Treenail detail option?
hornet replied to S.Coleman's topic in Building, Framing, Planking and plating a ships hull and deck
Thanks SJSoane, I often think I spend more time thinking of ways to make modelling easier than I do actually modelling!! -
Treenail detail option?
hornet replied to S.Coleman's topic in Building, Framing, Planking and plating a ships hull and deck
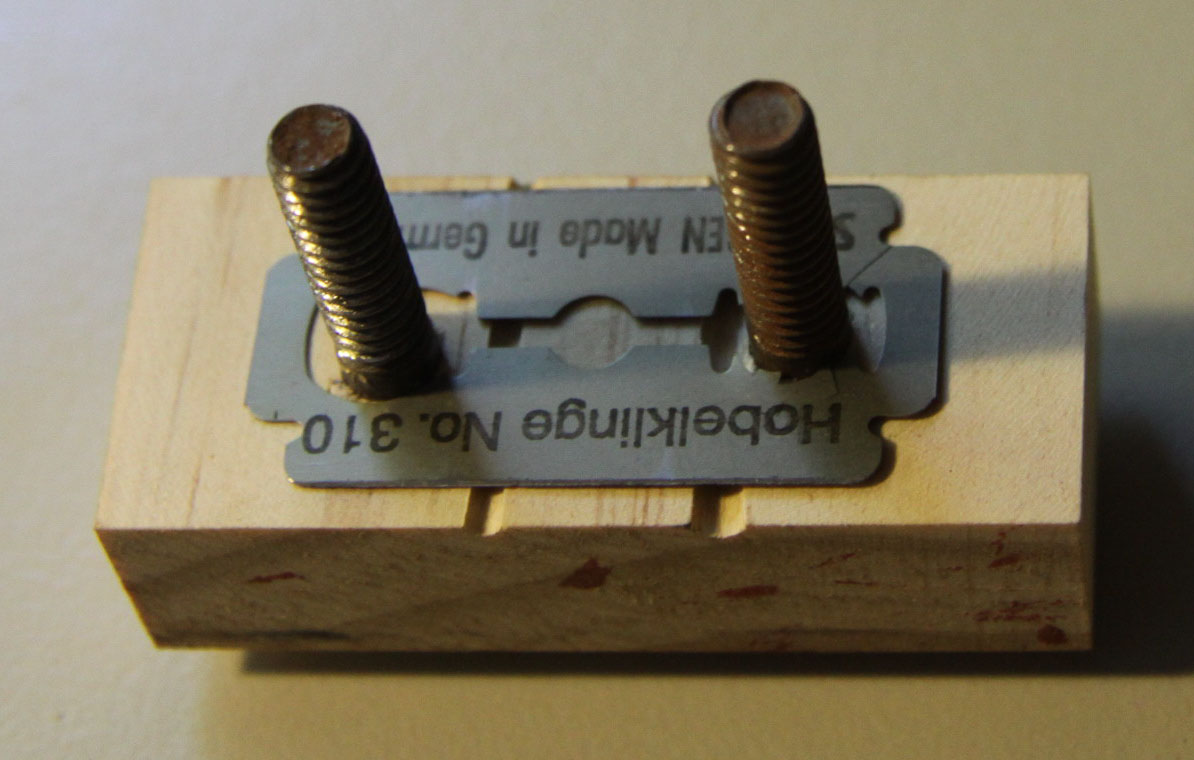
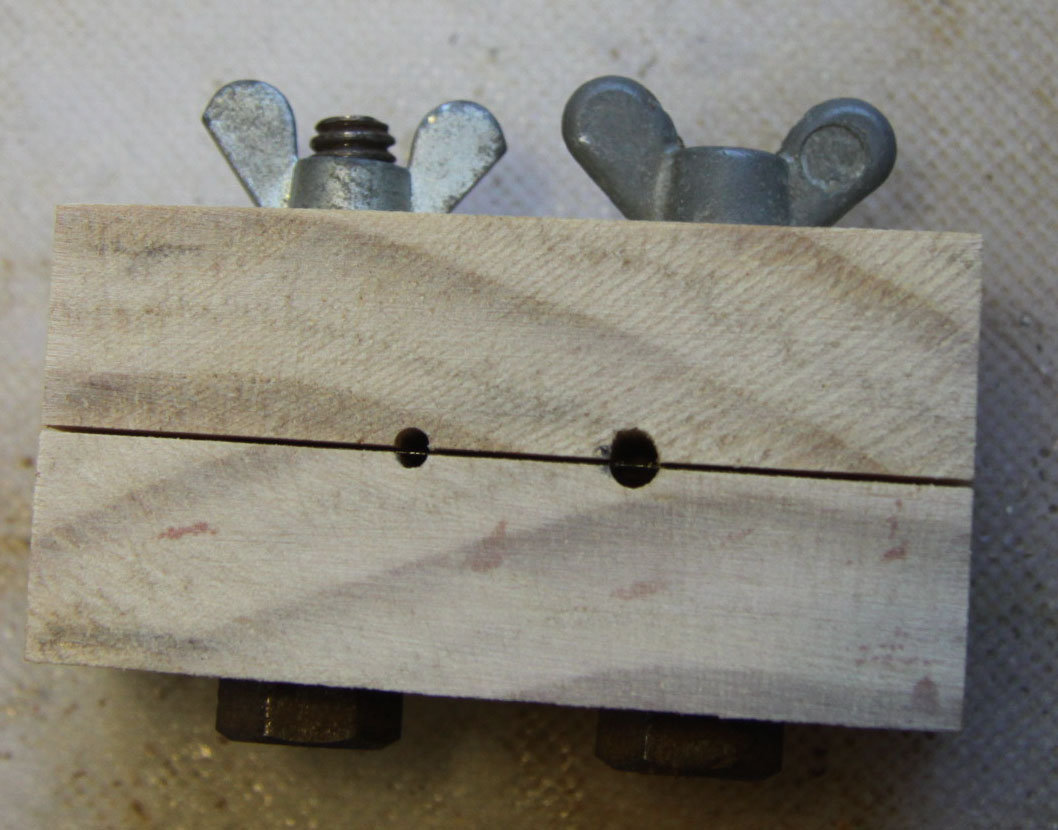
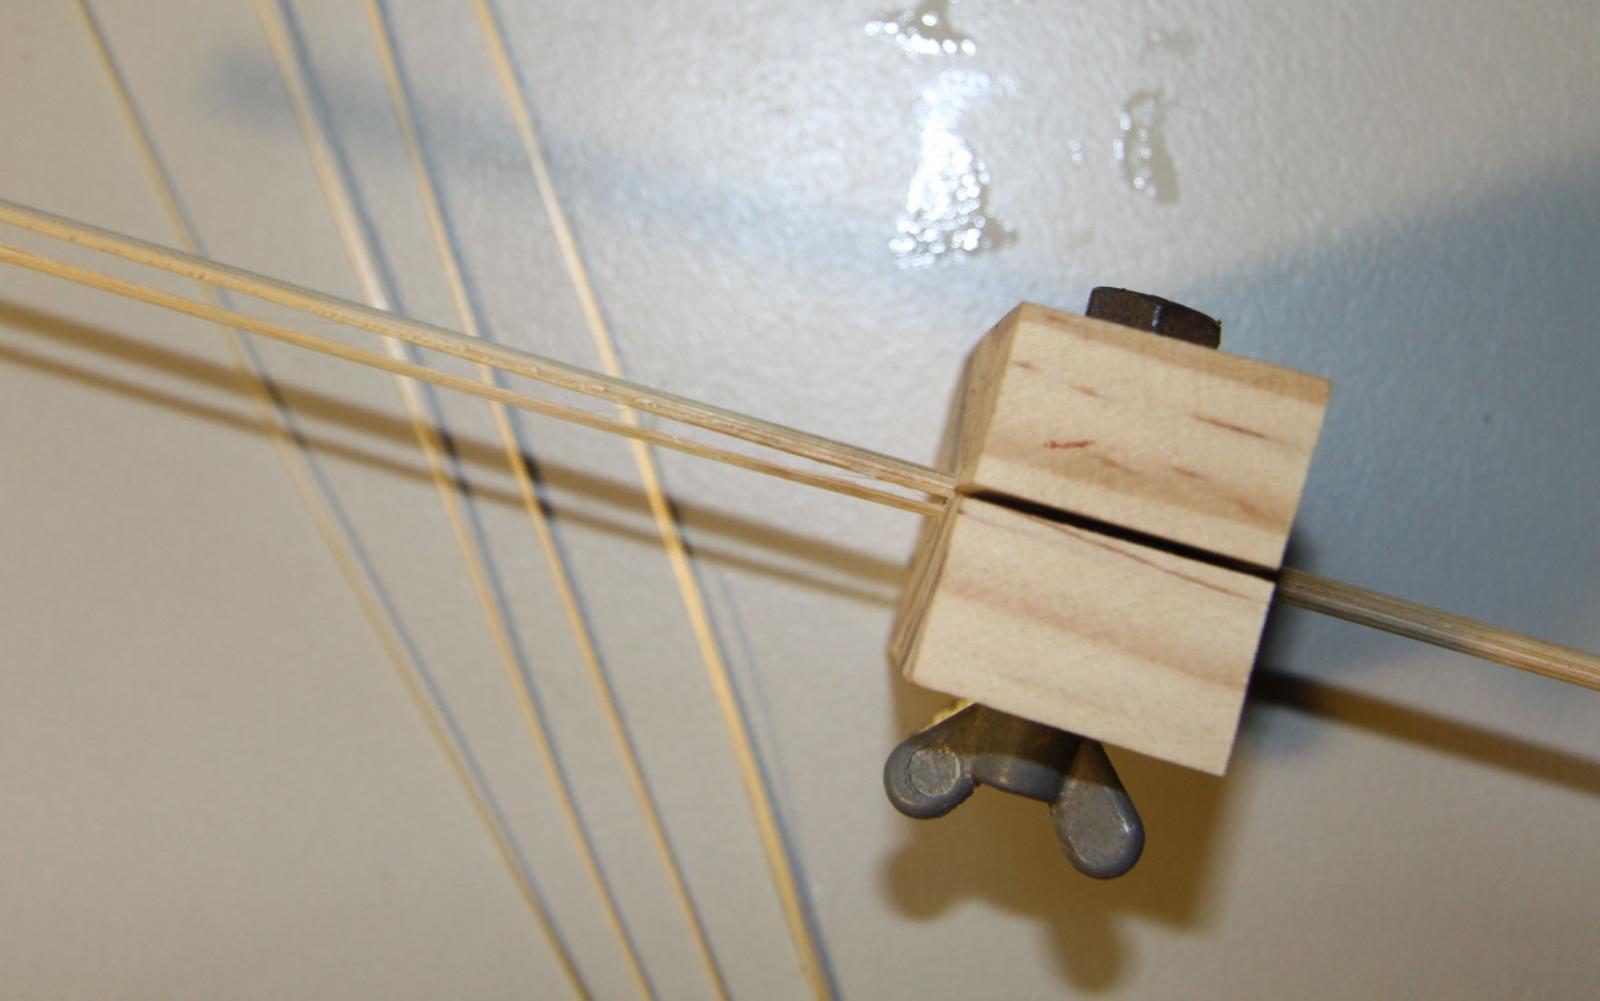
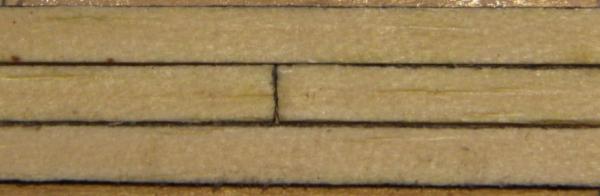
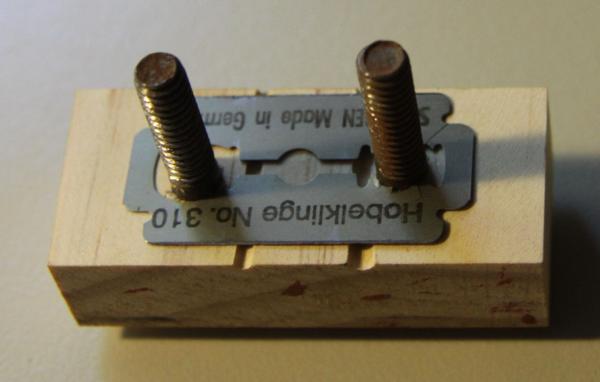
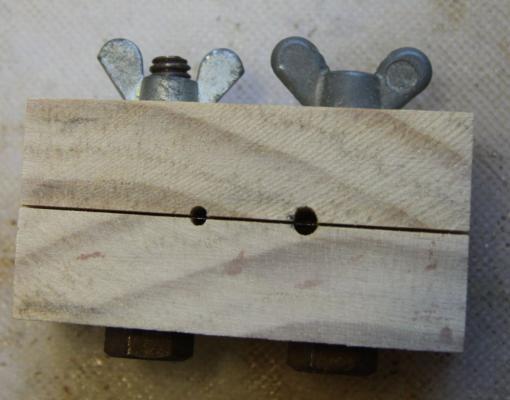
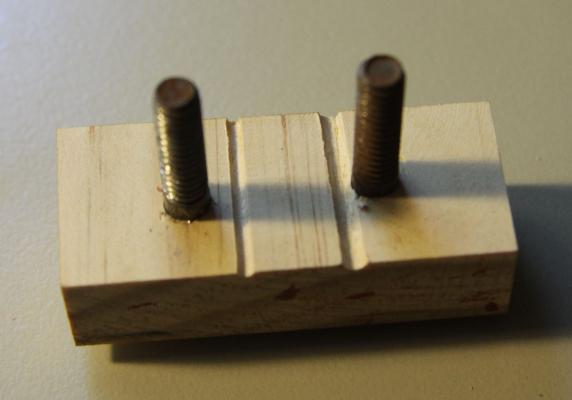
I agree with Brian C - The Model Machines Drawplate is brilliant - one of my favourite non powered toys!! I have used bamboo BBQ skewers to treenail/Trennel/trunnel on my last two builds. I think tree nailing and another dimension to the hobby and, if done well, looks great. I found that the bamboo skewers went through the drawplate well, but had to be sliced longitudinally several times in order to fit into the larger holes. This meant slicing with a hobby knife. I found this to be a pain for two reasons. Firstly getting the hobby knife to slice evenly along the length of the skewer was sometimes difficult. Secondly I tended to cut, stab and splinter myself with the knife & bamboo slivers - klutz!! I ended up making a simple jig to halve, quarter and then further divide the skewer if necessary - without blood and swearing!!!(see pics below) The Byrnes Drawplate - an engineering masterpiece!!! - take 2 identical pieces of pine which are slightly bigger than a razor blade and drill 2 holes through them (clamp together for drilling so holes line up perfectly in both) - insert bolts which will be fitted with wing nuts for quick adjustment - Fit both pieces of wood together and tighten wing nuts - Drill a hole (about the same size as a bbq skewer) down the centre of the 2 pieces of wood - make sure that half the hole you drill is in each piece of wood. - a bench mounted drill will achieve much more accurate results than a hand held one. - Do the same with a smaller drill bit - for use once you have quartered your skewer. - fit your razorblade over the bolts - slide the top half of the jig over the bolts and tighten with the wing nuts - the jig can be adjusted by tightening or loosening the wing nuts - this will accommodate any slight variation in skewer diameter. - Push then pull the skewer over the razor to produce an even slice. Happy tree nailing!!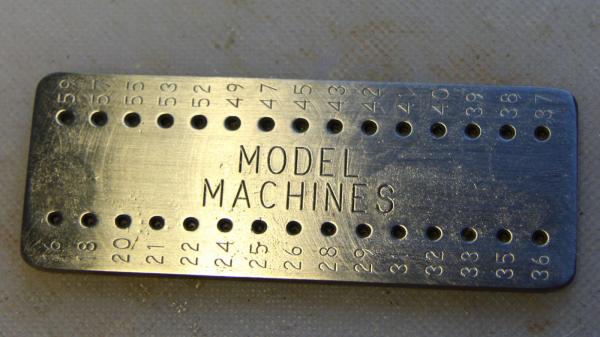
- 23 replies
-
- 26
-

-
Another idea for replacement cannon balls could be lead `split shot' used for weighing down floats in some forms of fishing (I am a keen angler) They come in `dial packs' of various sizes - based on the size of shotgun shot (I think) I know that they are `split' but could be gently squeezed back together then filed or sanded smooth. Shotgun shot are NOT easy to obtain in some countries anymore e.g. - Australia!! These are cheap and far easier to obtain. Just a thought The link below shows an example of a dial pack of split shot - it's from an Aussie website but I'm sure they would be available all over - in one form or another. http://www.motackle.com.au/dinsmore-super-soft-shot-3105986.html
-
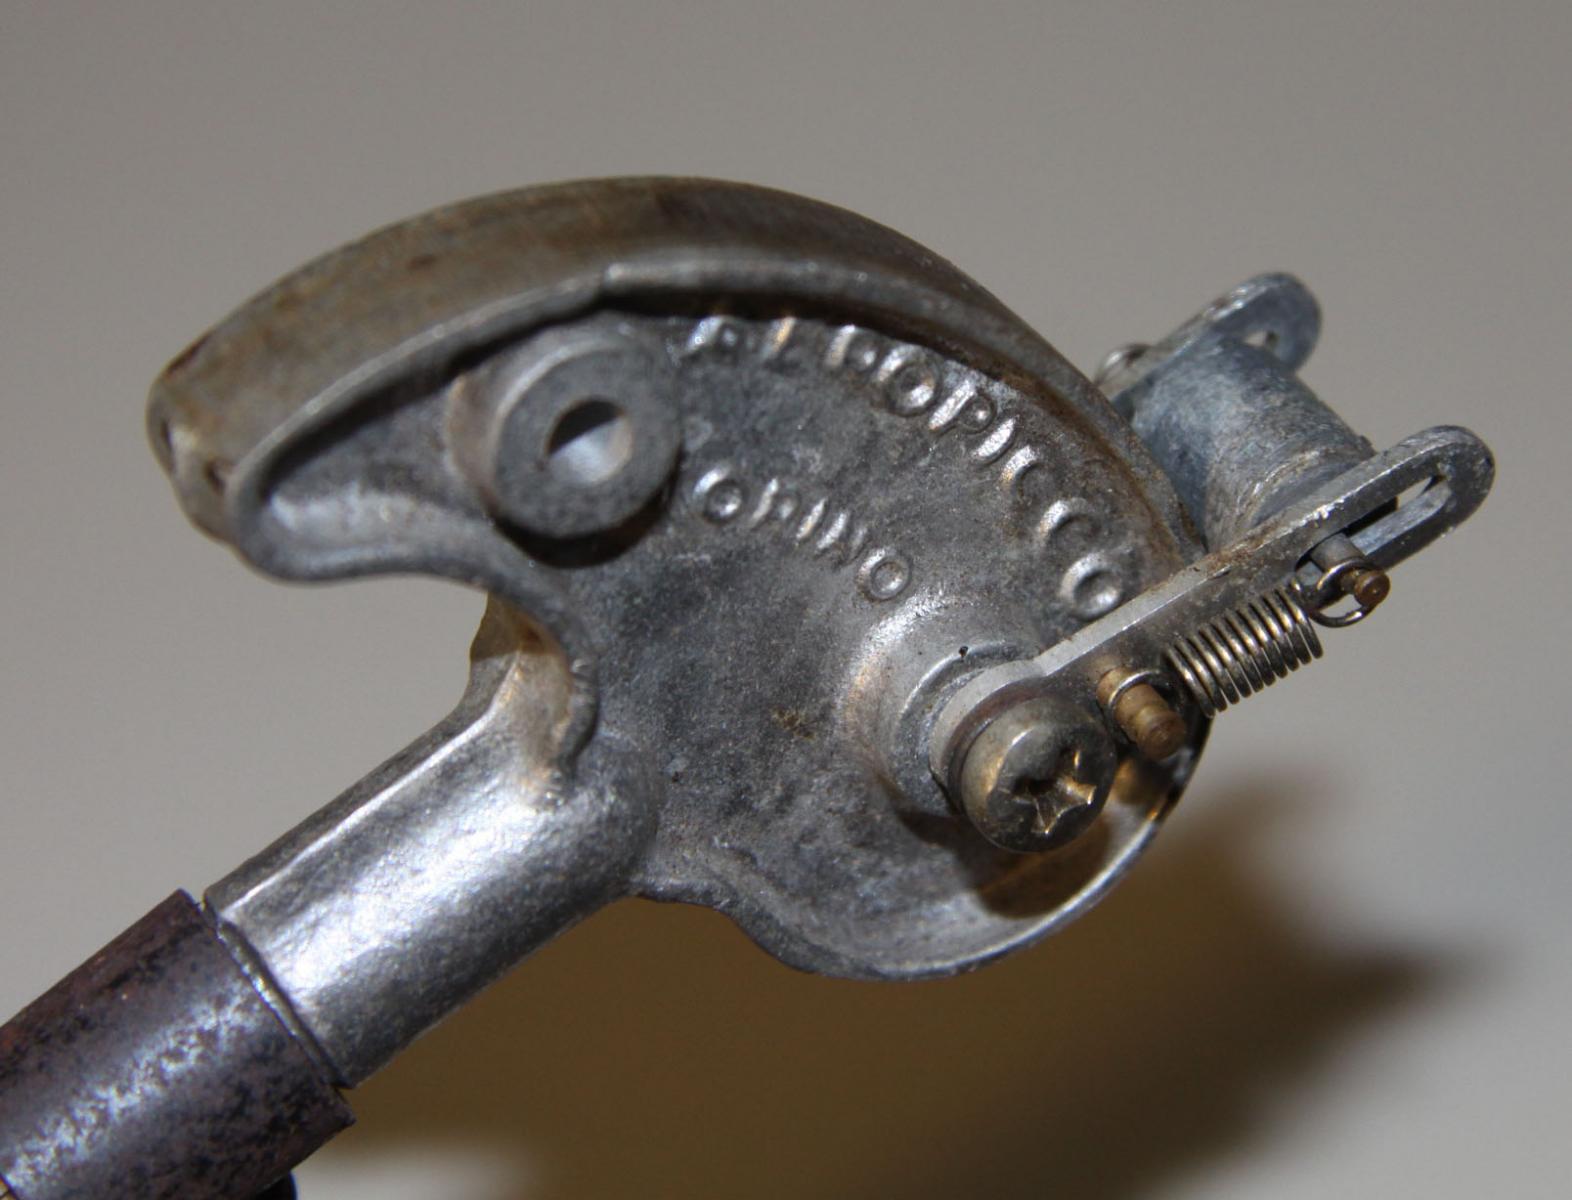
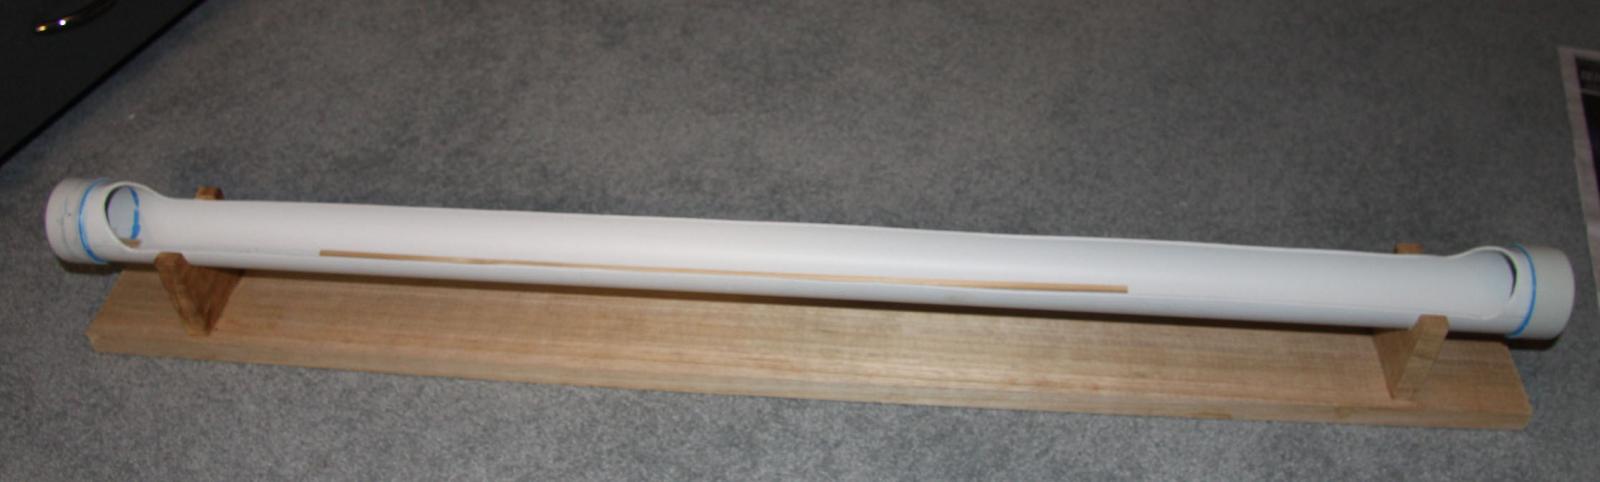
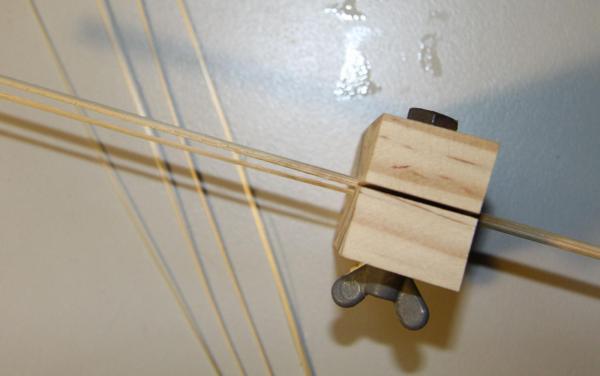
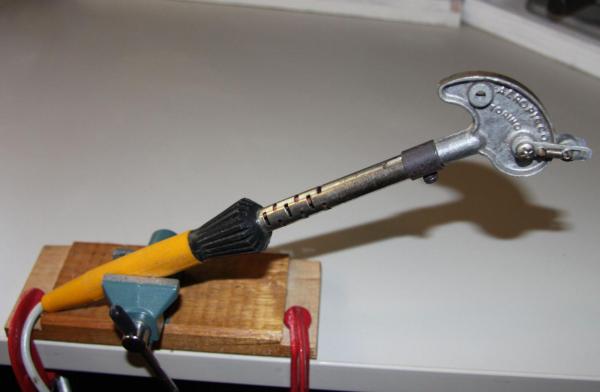
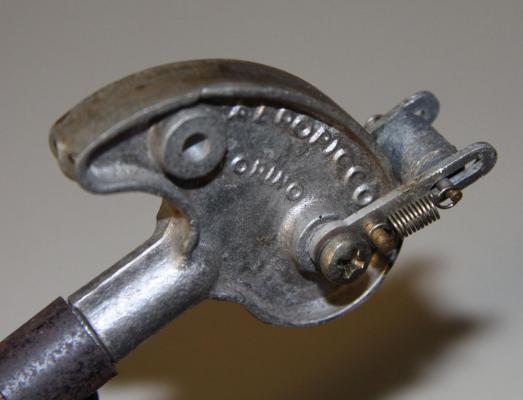
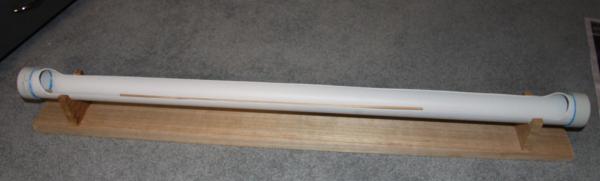
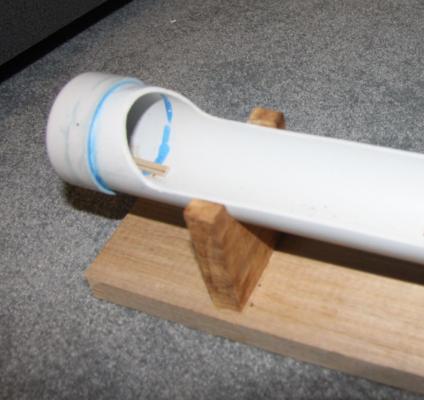
I purchased an Aeropiccola plank bender about 30 years ago and it is still going strong. I am not sure if it is still obtainable but the great feature of it is a spring mounted roller which presses the plank to, and follows the curve of the heating iron. (See pic) I usually mount it in a vice and it is necessary to raise and lower the spring mounted roller with a pair of pliers because of the heat, but it has worked well - even on very rounded bows - for years. I always dampen the planks first - usually about 20 - 30 minutes in warm water, mount on the hull while still wet (using plank clamping screws) . I then remove when dry, glue and remount on the hull. I too used to use a thermos to soak planks but found that sometimes I needed both ends of the plank damp as I needed to produce a curve at both ends. Using a bath was one option for soaking long planks, then I came up with the following idea. It is a long piece of poly pipe which a cut in half but curved up at each end so as the end of the pipe remains intact. I then glued the appropriate sized cap to each end and mounted it on a timber stand. I intend to put a tap in one end for drainage when I get time. It works well and sits happily on my workbench when it is `planking time'
-
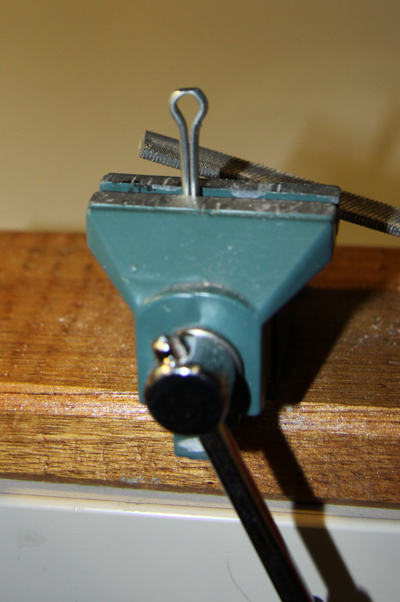
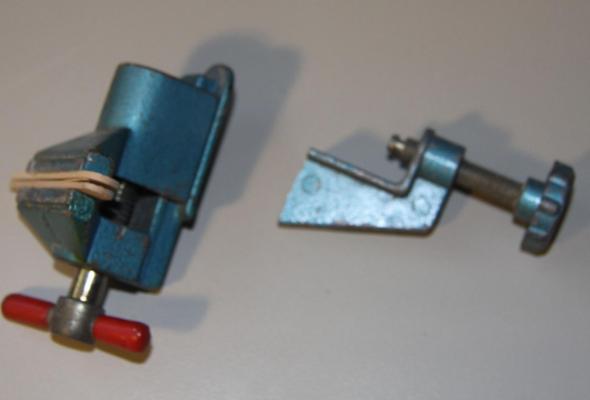
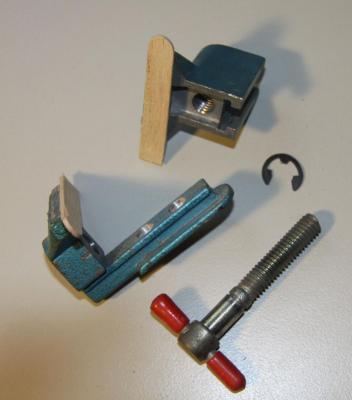
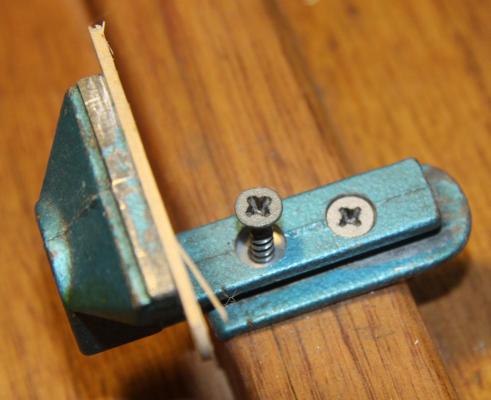
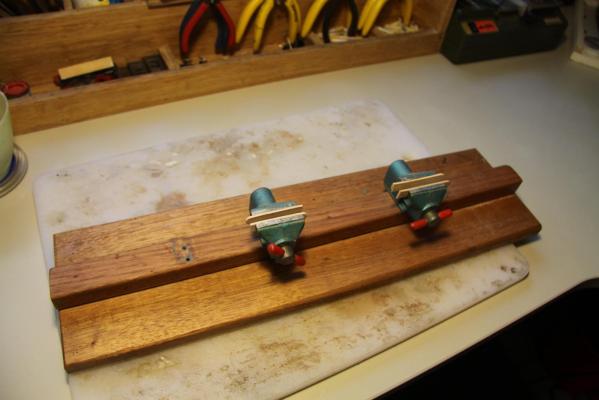
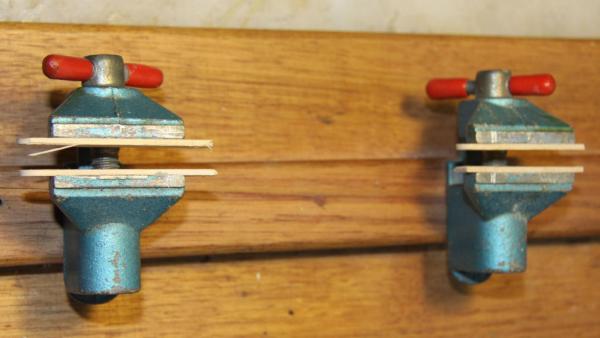
Don't know if this will help any but I will post anyway I looked into purchasing a keel clamp a few years ago and found them to be too expensive - for what they were offering. I decided to make my own. It is a cheap alternative. It doesn't rotate or tilt, but to be honest, I found I didn't have a great need for these functions. It just holds the model firmly upright, is portable or can be G-Clamped to a workbench. Hope the idea is of some use. - Purchase a couple of cheap hobby vices - they are available from a multitude of places for very few $$$ - Use a hacksaw to neatly slice off the clamp section. Grind or file so you end up with a flat surface (not difficult as they are all made with a fairly soft alloy. - disassemble the top of the vice by removing the circlip behind the front jaw. - Countersink two holes into the base of the vice - construct a timber base long enough to accommodate a range of keel lengths - screw the vices to the base ensuring that they line up with each other. I have glued pieces of ice block sticks to the jaws to avoid keel damage. If I have to accommodate a longer/ shorter keel, I simply drill a new set of holes in the base of the keel clamp and relocate the vices. I have used it in the completion of 6 models so far. I suppose you could use more vices to clamp a particularly large model, but I have found that two works well enough on everything so far - up to and including the Corel Victory.
-
A very, very impressive build!! The detail is remarkable. I am particularly impressed with your paintwork. I assume you used Admiralty Paints?? If so, did you use acrylic or enamel? Was an airbrush involved or did you paint everything with a brush?
-
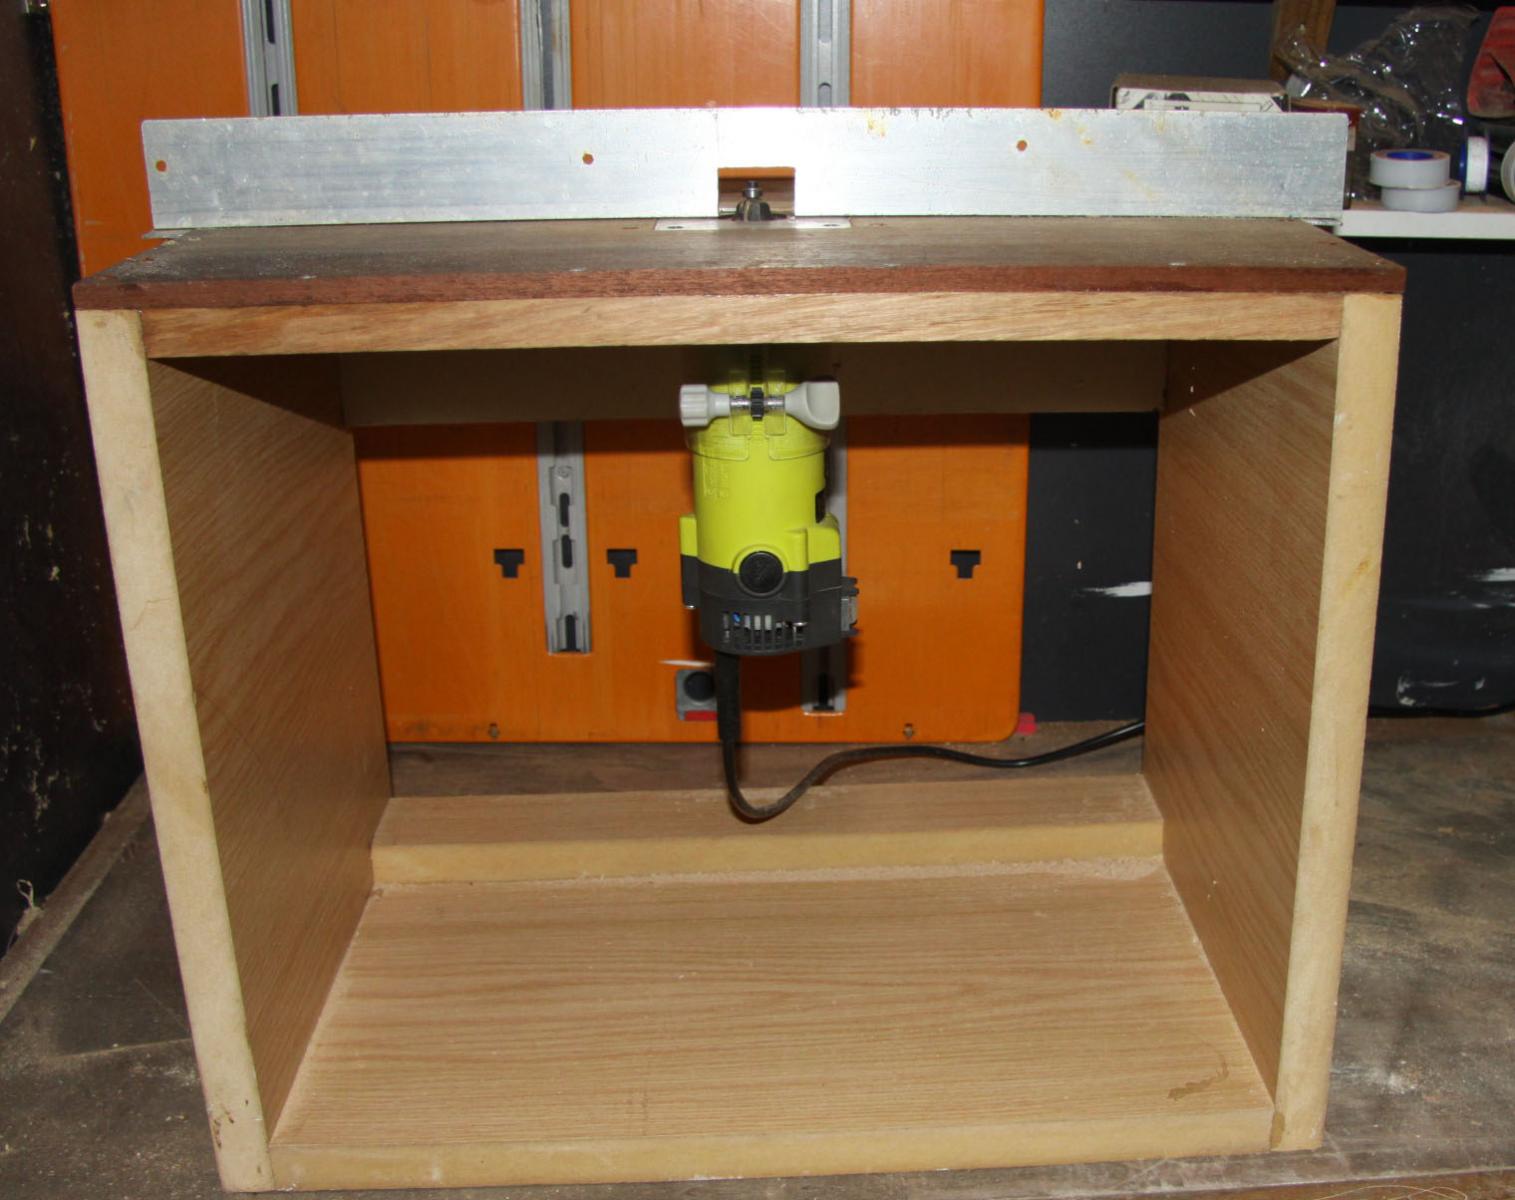
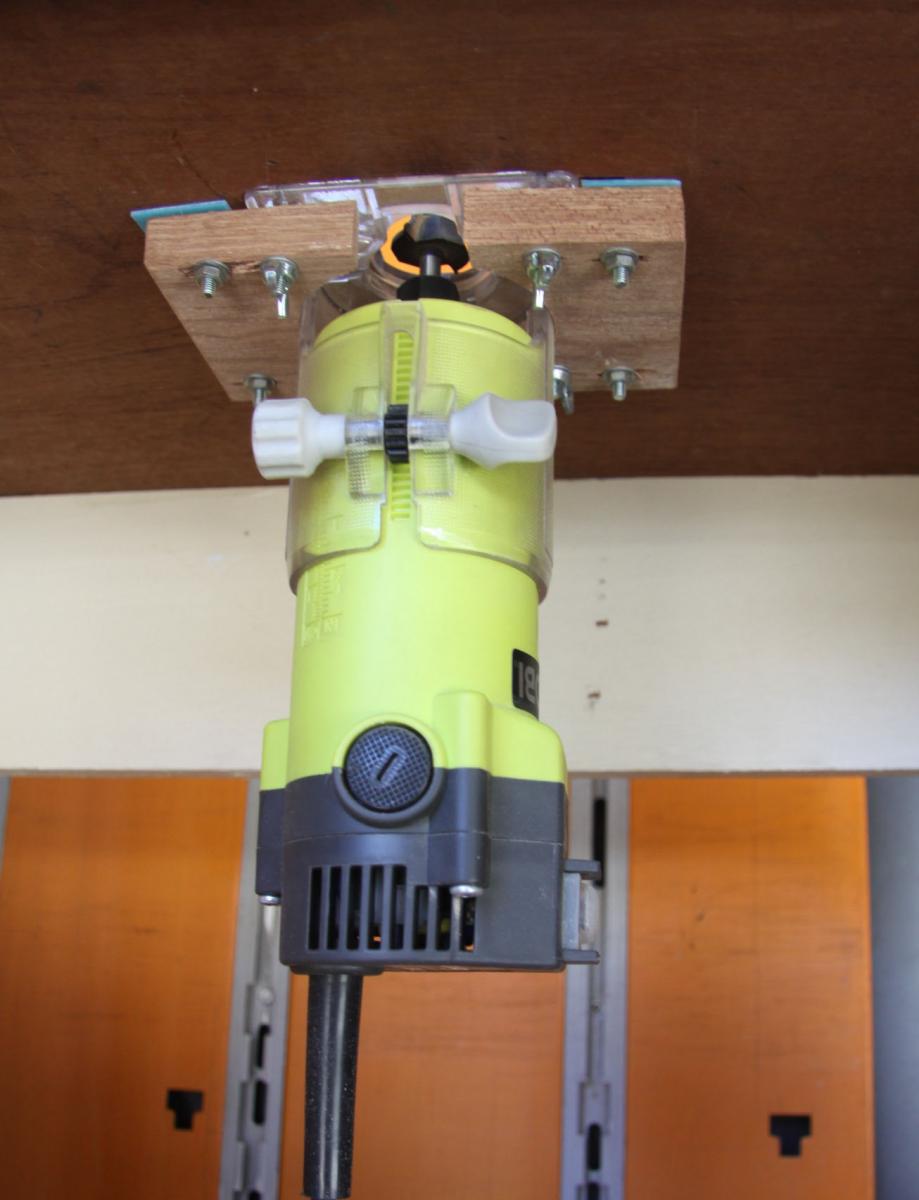
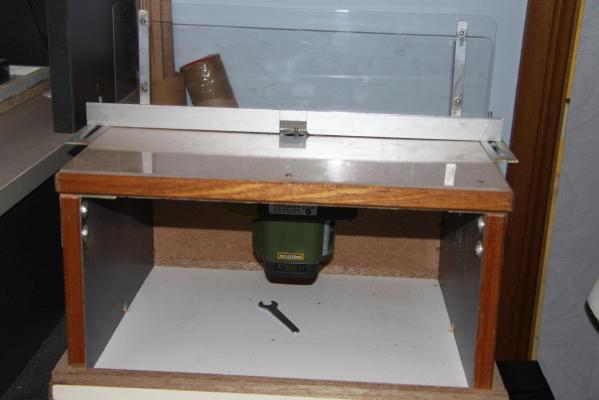
I have the Triton Work Centre and the Triton 2400w saw to go with it - beast of a thing! The only time it would be useful for ship modelling was if you were building 1:1 - or maybe Noah's Ark!! I looked at the plunge router and table but the cost and limited amount of use I would have for it meant that couldn't justify its purchase (very unusual for me! ) I have however purchased a Ryobi 350W Trimmer/Router (model EVT359RG). It was inexpensive ($100 at Bunnings) and easy to mount into a homemade table similar to the one I made for the Proxxon Mini Plunge Router. I use it to make display bases for my models - which are outrageously priced in hobby stores! - It paid for itself after 3 bases! [ The pedestals I knock up on my proxxon wood lathe


-
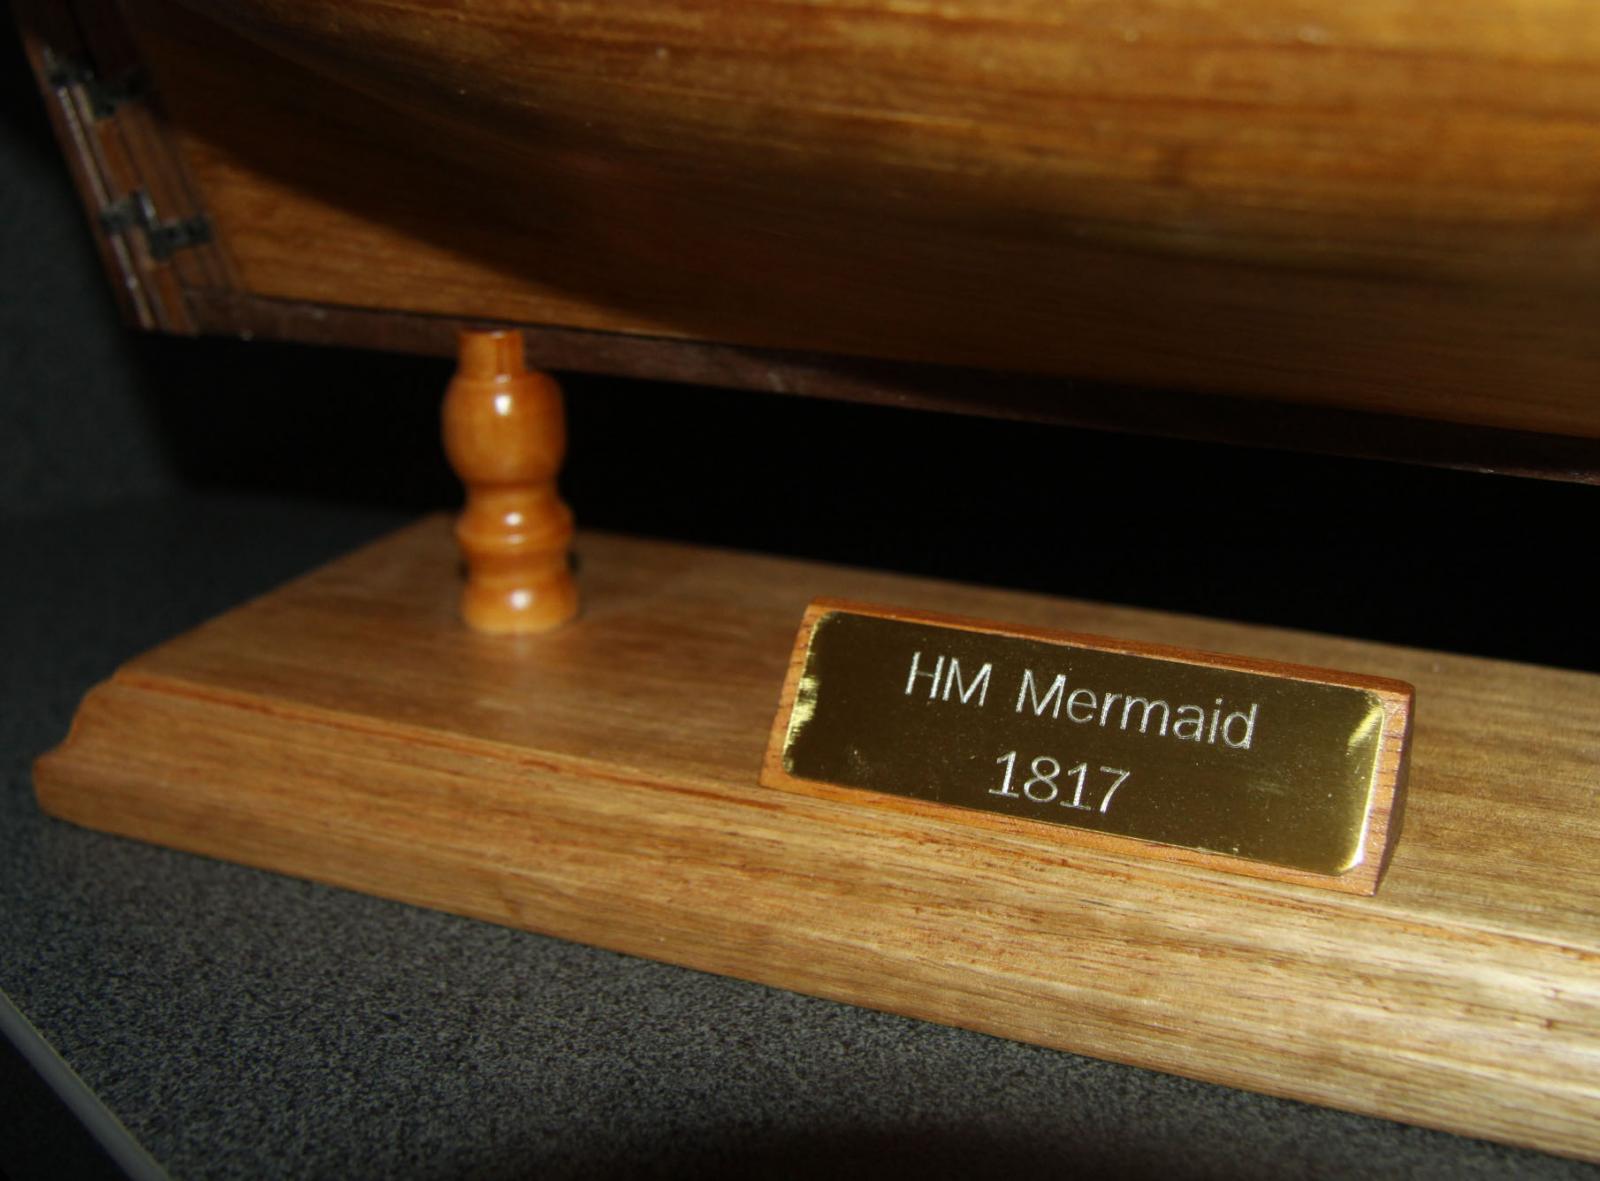
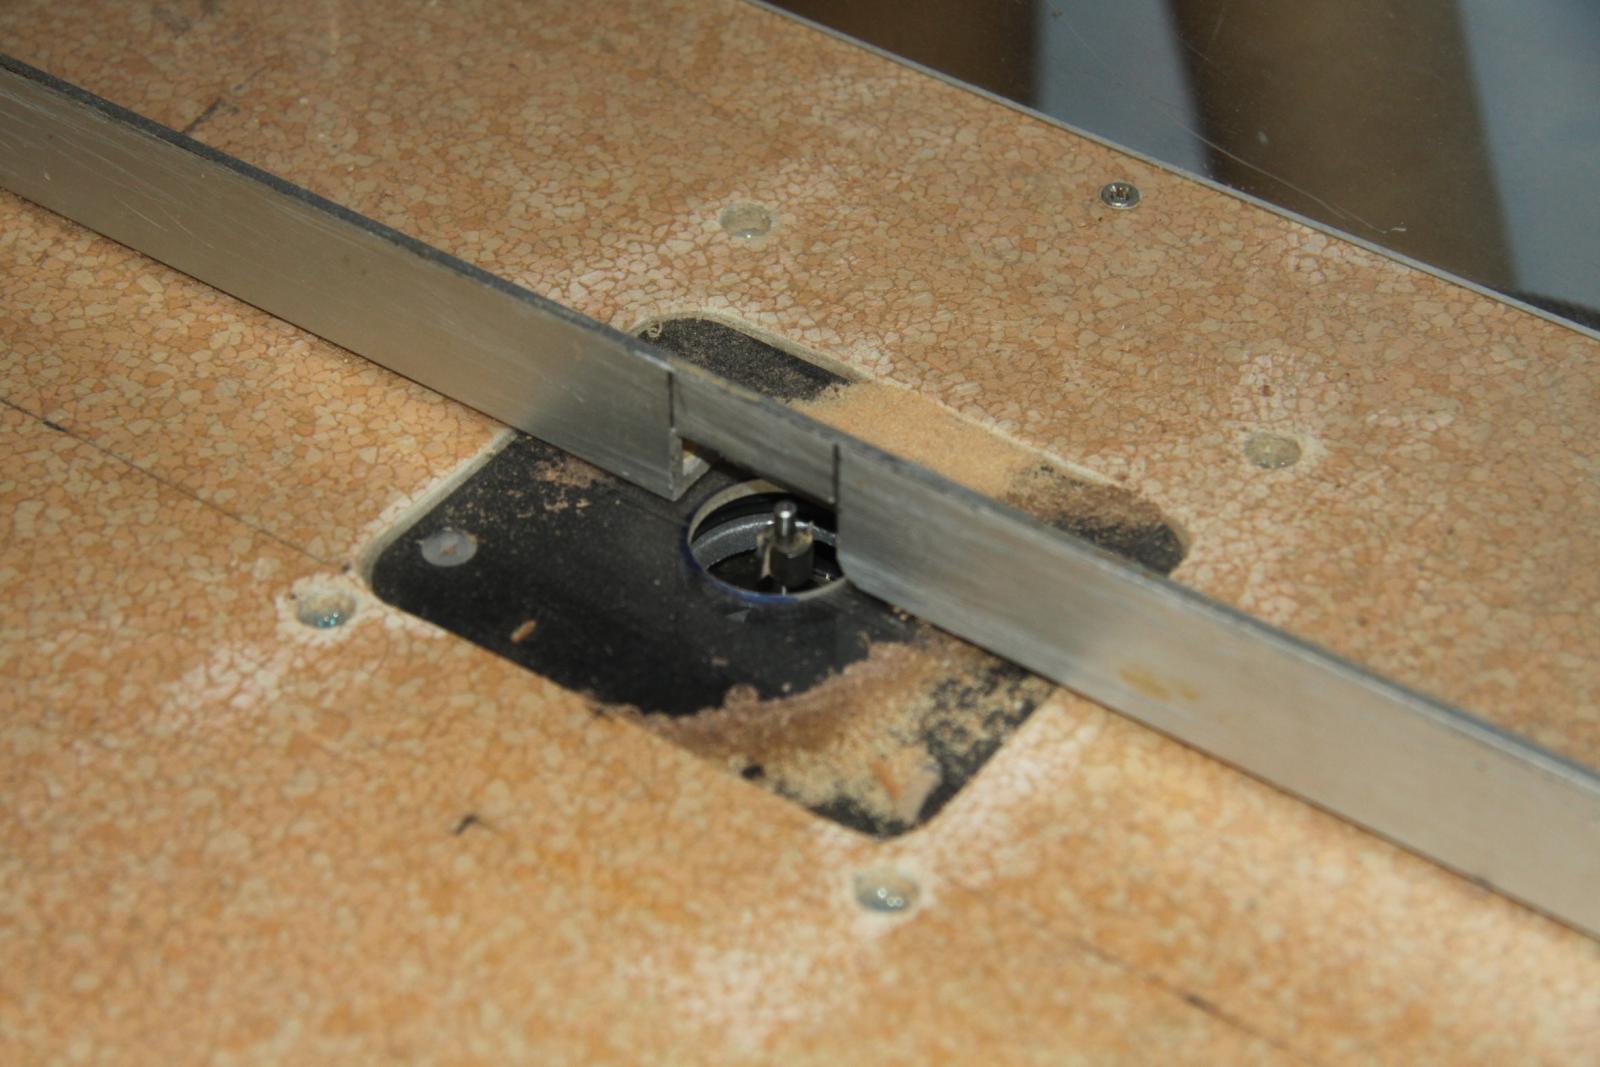
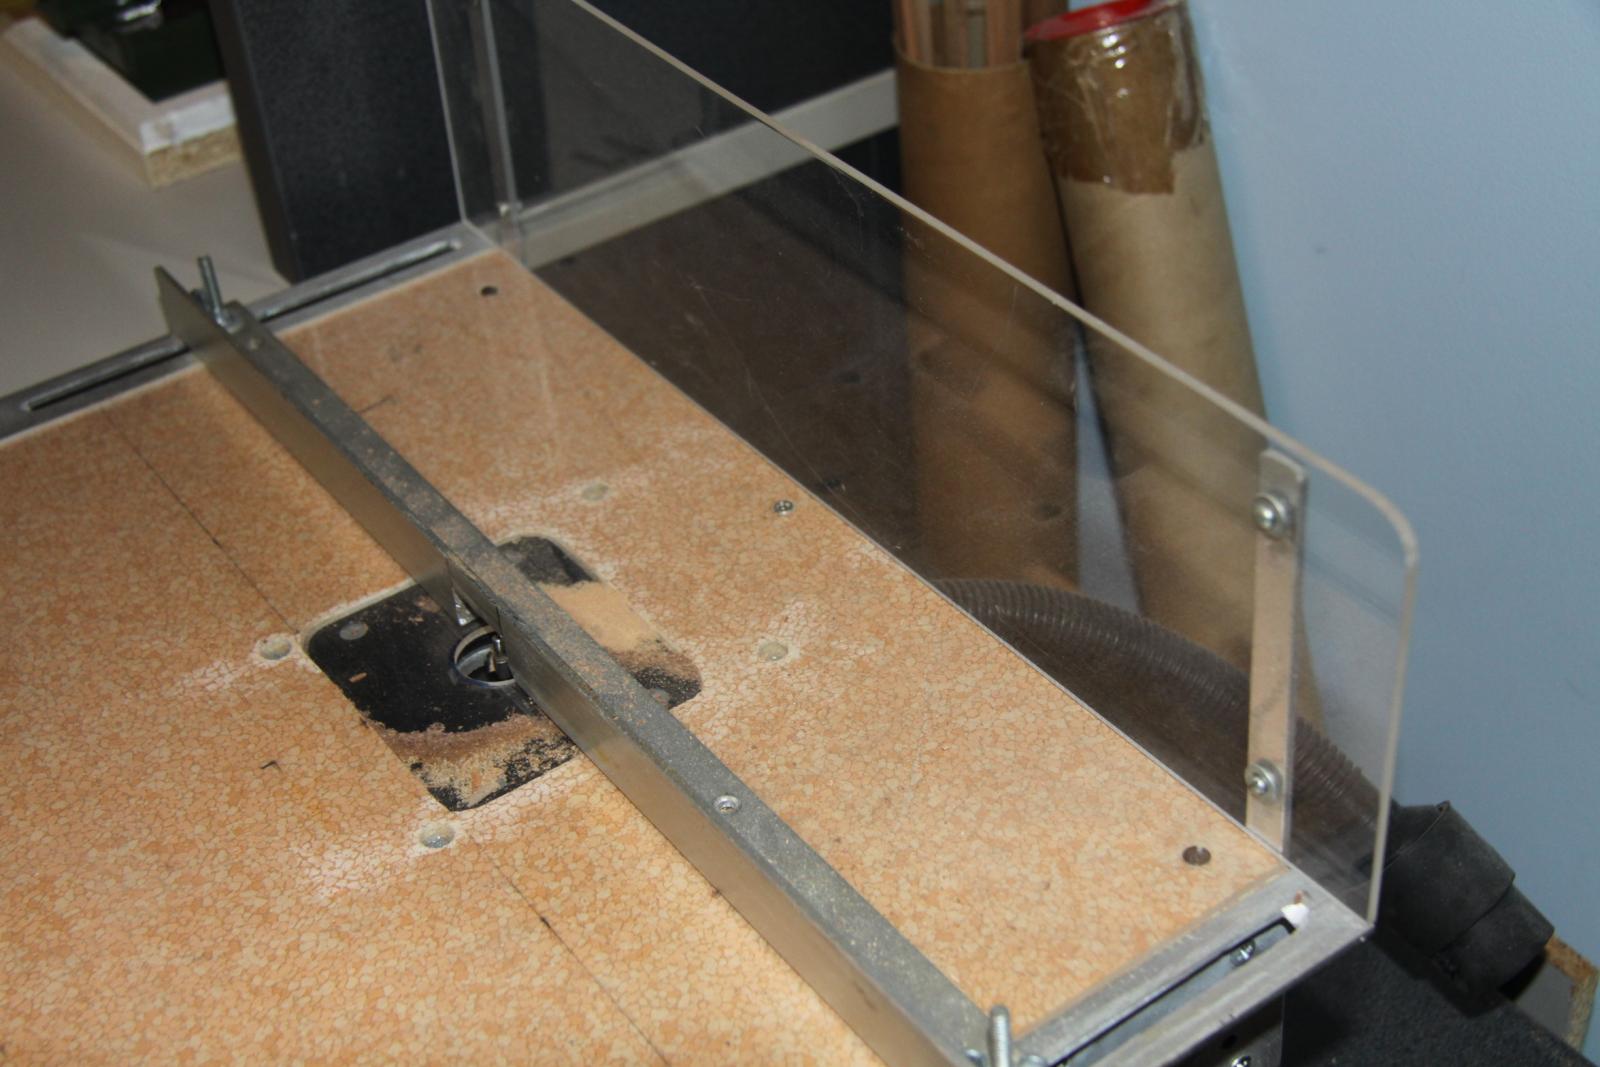
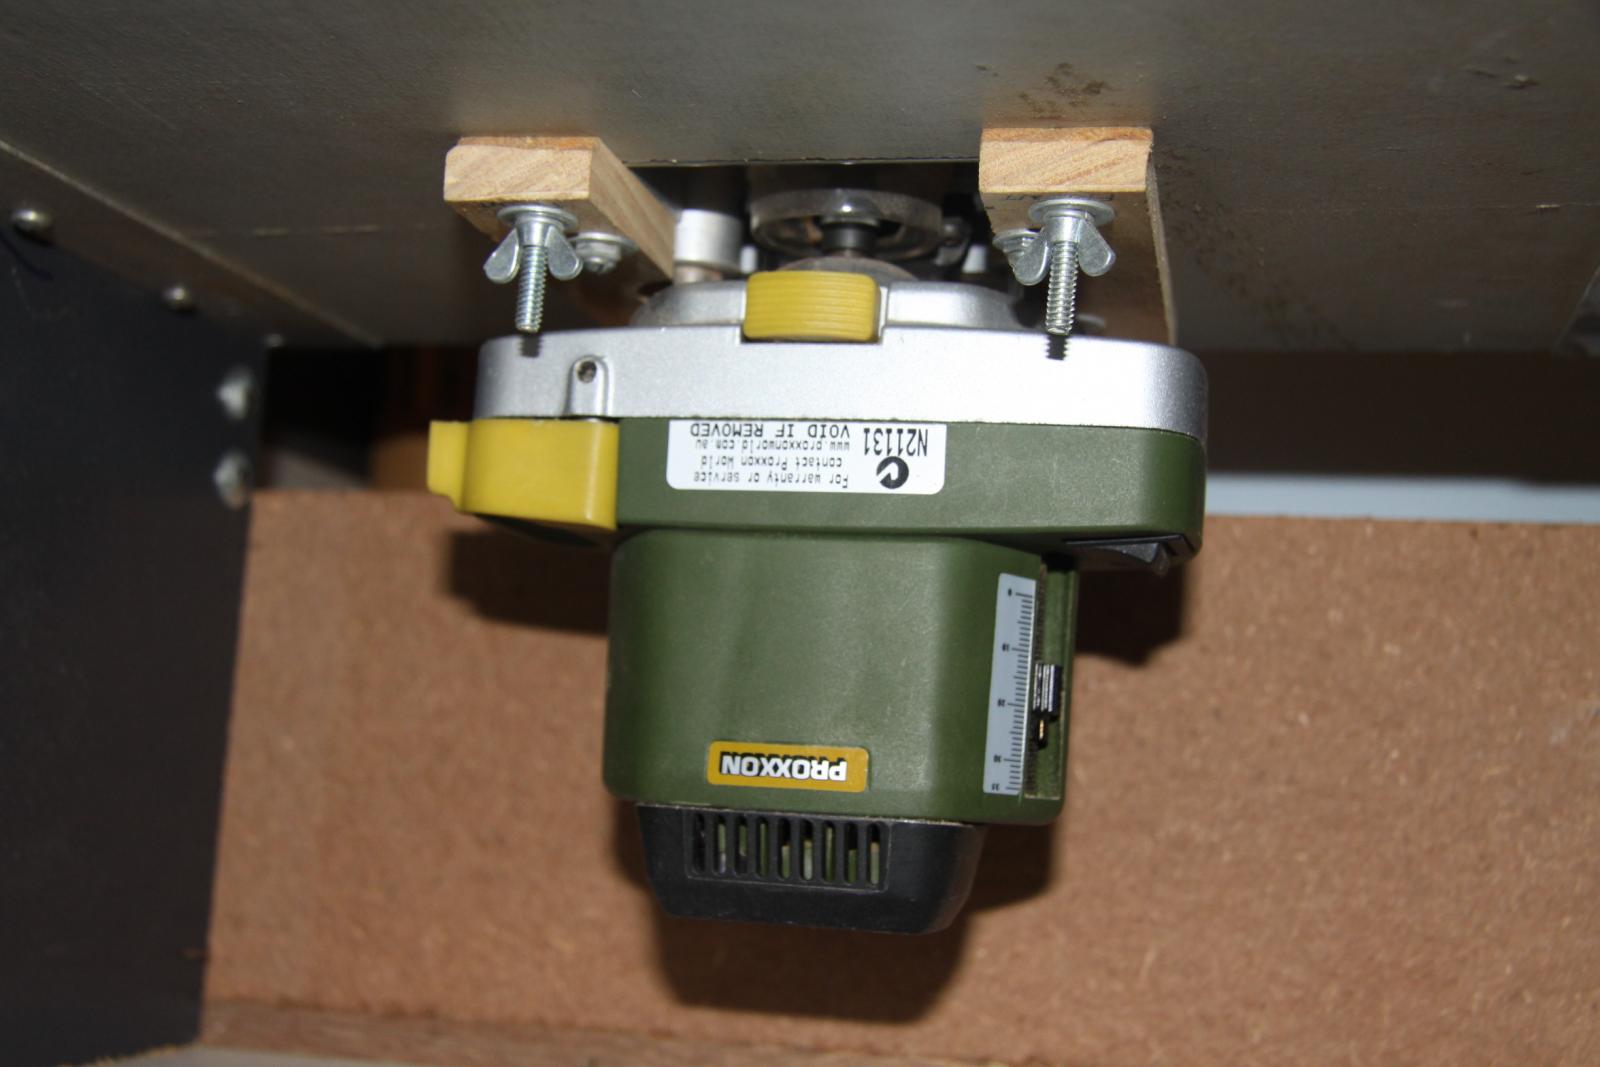
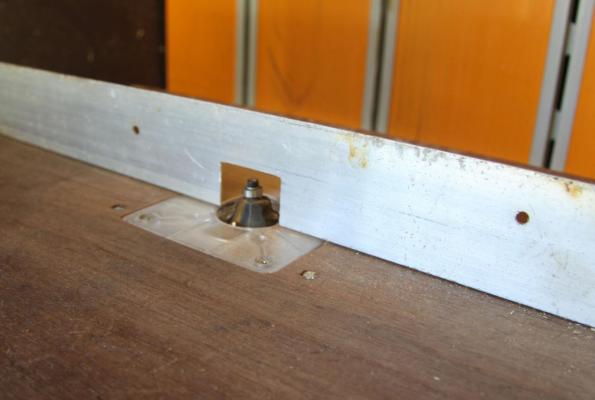
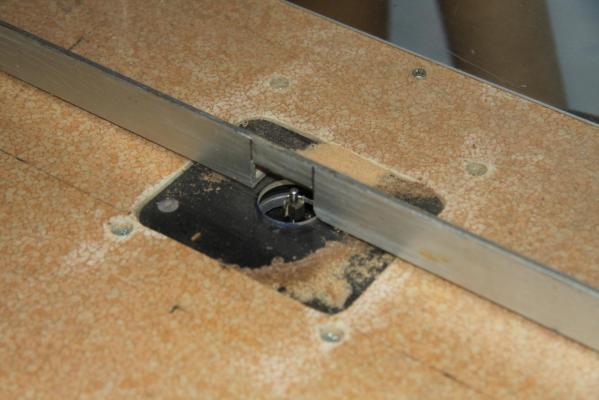
I have a number of Proxxon tools (9) and am very happy with them. I have mounted my Proxxon Router into a home made router table. It works well. I have used Perspex on the table top and to contain sawdust at the rear of the table. It hooks into a vacuum cleaner. The aluminium fence is adjustable with a couple of wing nuts. The Router is easy enough to mount and access for height adjustment It is great for fine cuts such as the steps to my Cutter Mermaid which were 2 x 2mm


-
I purchased the Corel 'Victory' many years ago. The quality of components was very good, in my opinion. But the instructions were atrocious! Being only my third build ( I bit of a little more than I could chew!!) I would not recommend this kit unless you were very experienced - unless the quality of instructions has improved! I eventually finished it (nearly 15 years after purchase!)
-
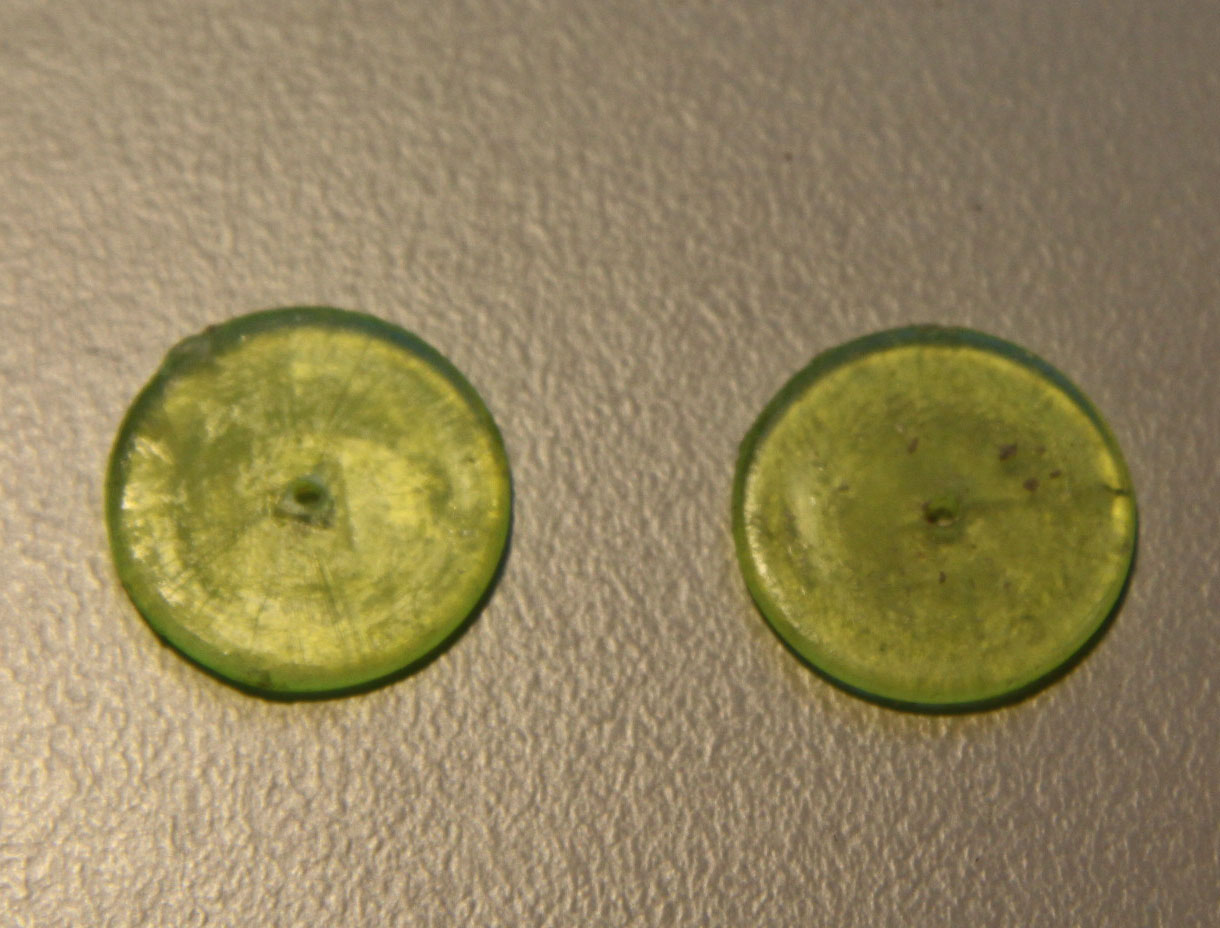
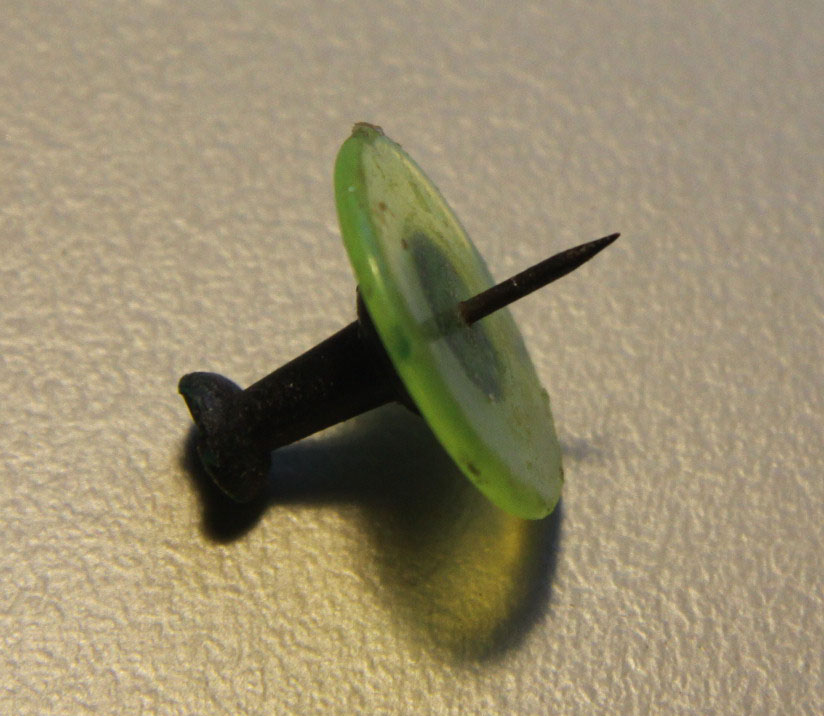
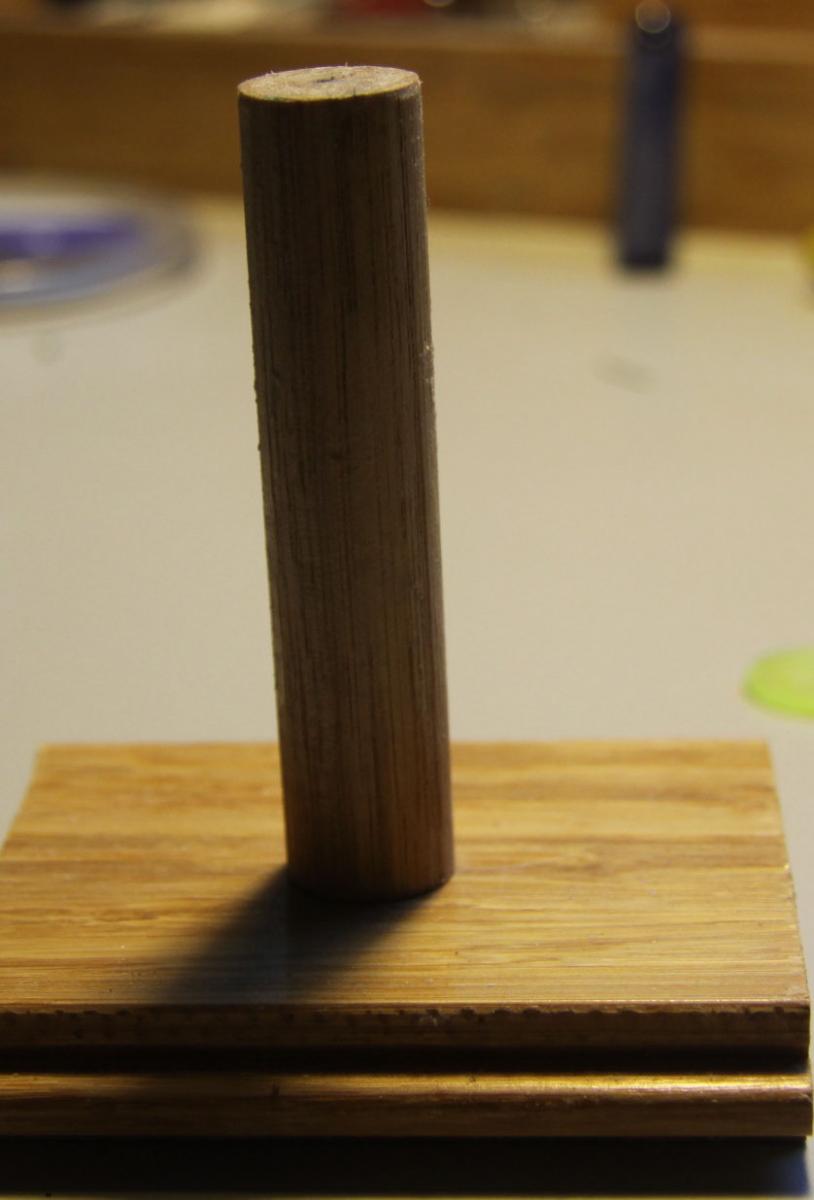
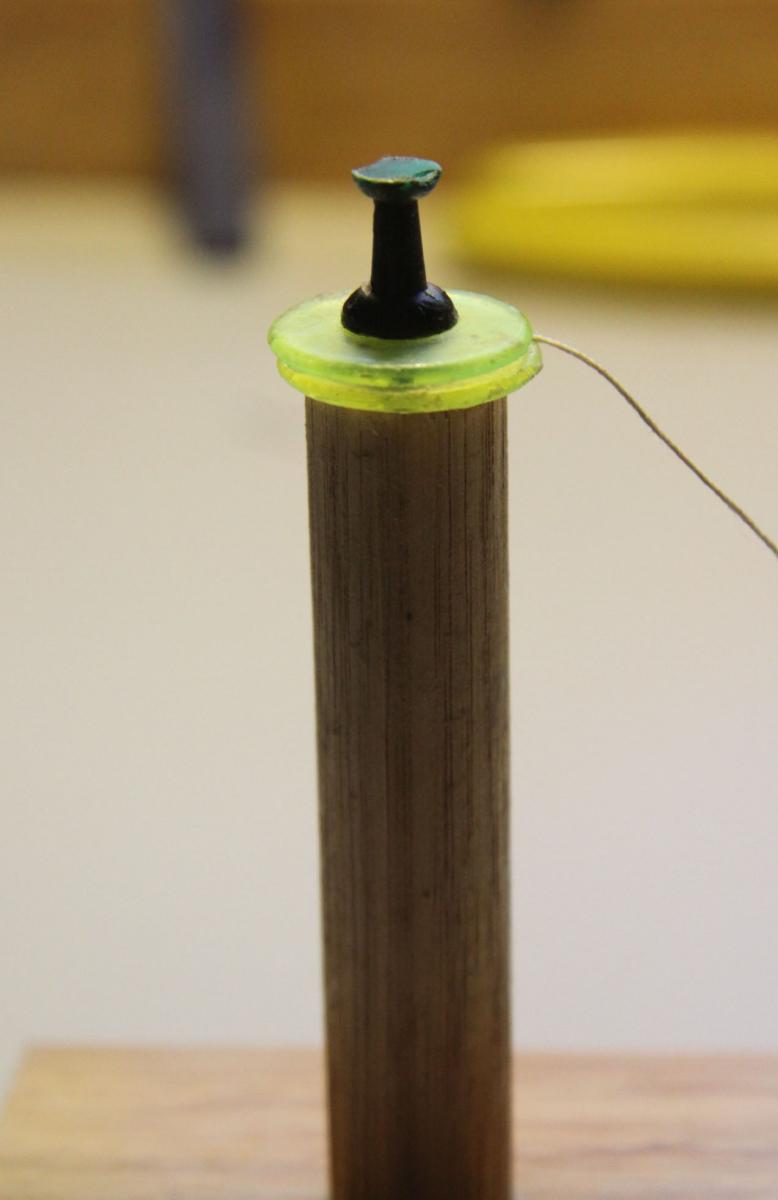
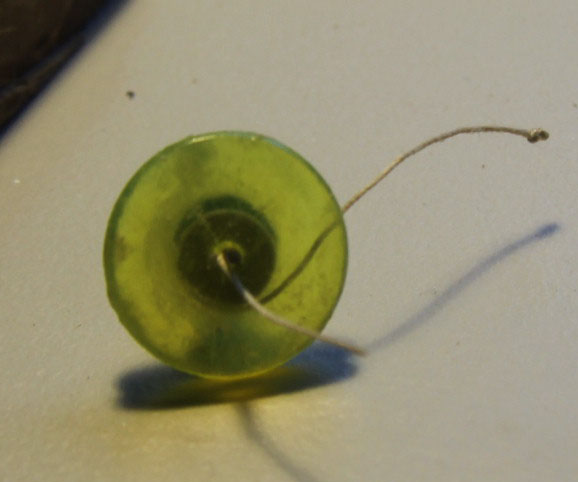
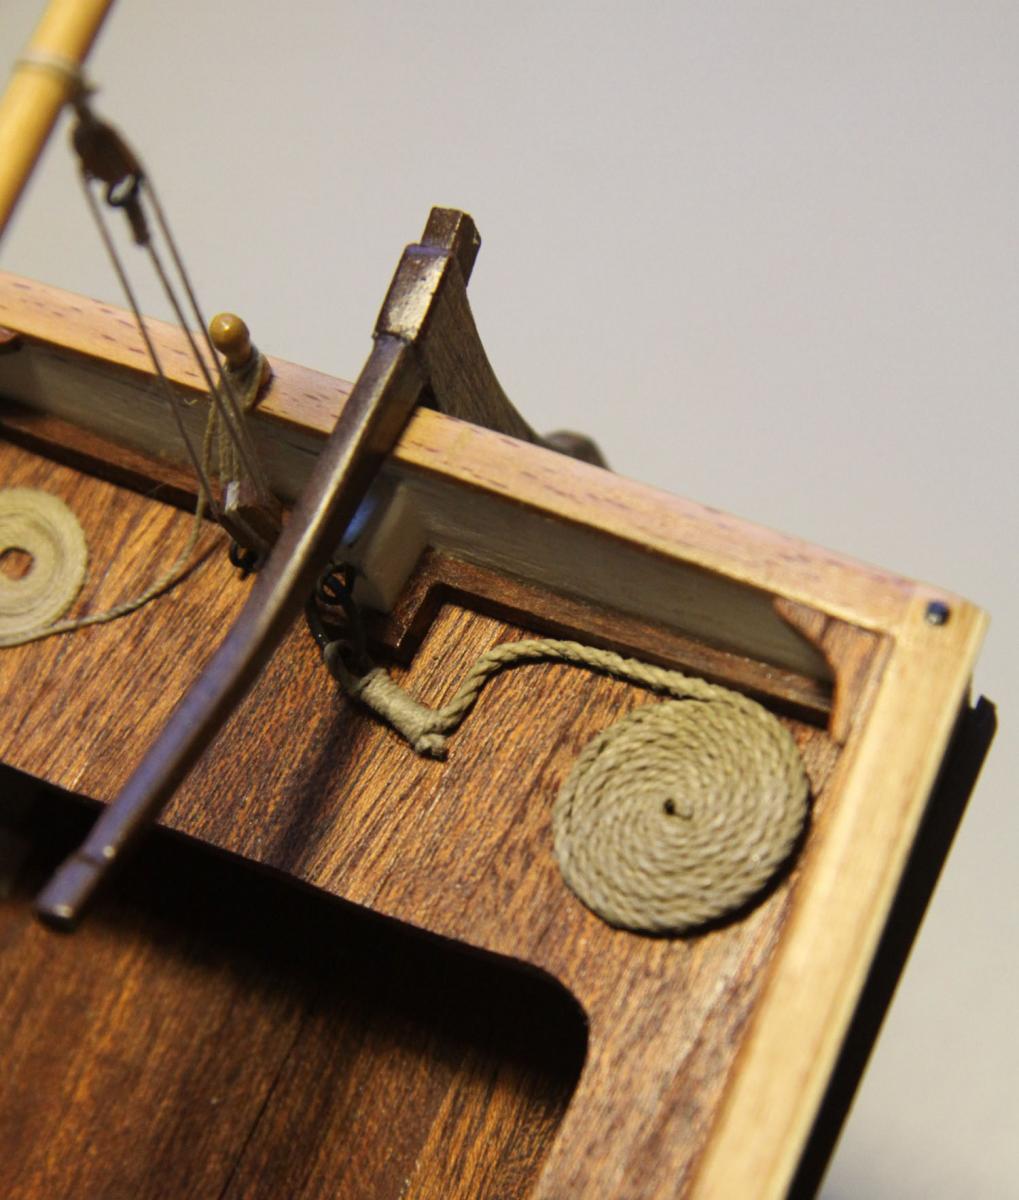
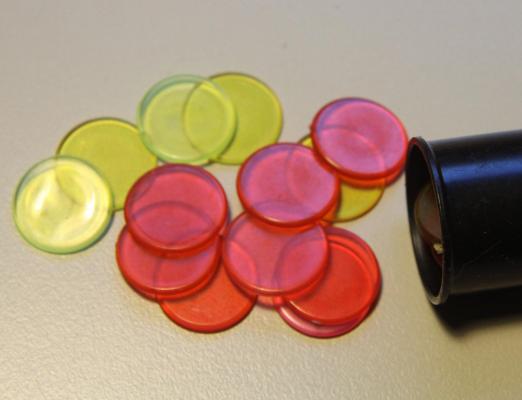
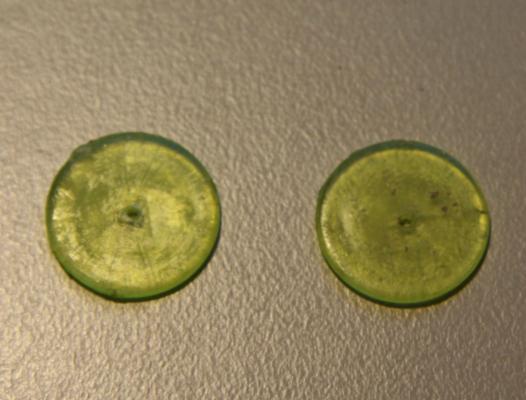
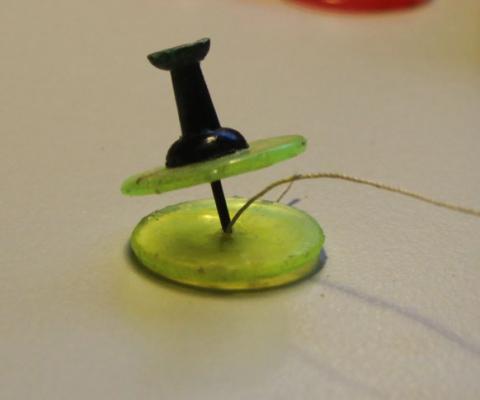
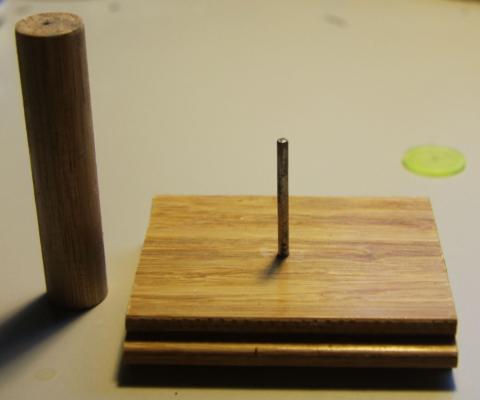
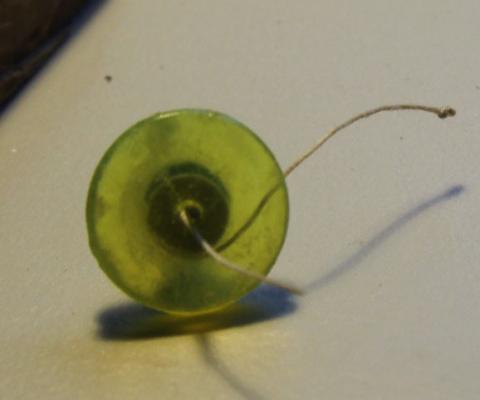
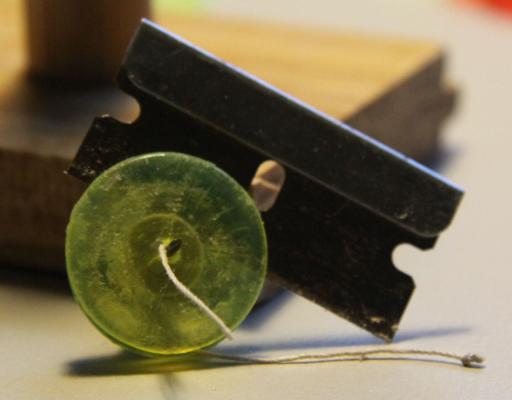
I have a put together a similar method of rope coiling. I think these could be a more permanent solution. I have made a number of these `rope coilers' so I can coil multiple ropes and save time. These are `counters' used in primary school to help with maths. (I'm a teacher) They are available on ebay for about $5.00 per 100 (AUS) The beauty of them is that they are transparent so you can see what you are doing! (just search for transparent coloured counters - on ebay) Take two counters and drill a small hole in the centre of each (just large enough to push a push pin through) superglue a push pin to one of the counters. After soaking your rope in a solution of white glue and water, thread the end of it through the counter that does not have the push pin attached. Then push the other counter (with the push pin) through the hole in the bottom counter.( This traps the rope so it won't come loose when you turn it. Now you need to make something on which to mount your rope coiler. I nailed a nail (with the pointy end removed) through a base board. I then drilled a hole through the centre of a piece of dowel which was then placed over the nail . The dowel was loose enough to rotate on the nail. Now place the rope coiler on top of your rotating dowel rod. I have drilled a small hole in the top of the dowel and forced the push pin down so it is firm but the gap between the two counters is enough for the rope to go through (this is adjustable depending on the diameter of the rope being coiled) . Rotate the dowel with one hand while feeding the line between the two counters in a even fashion with the other hand (you can see through the transparent counter to check that all is well!) When complete, remove the rope coiler from the top of the dowel and allow to dry overnight. You can then make more - if you have made multiple rope coilers. After the coil is dry, carefully remove it from the coiler by cutting and levering from the coiler - which can then be reused. Because the counters are thicker and sturdier than a piece of plastic taken from packaging, you will get no flexing and a more uniform result .You now have a good looking rope coil.


- 43 replies
-
- 16
-
-
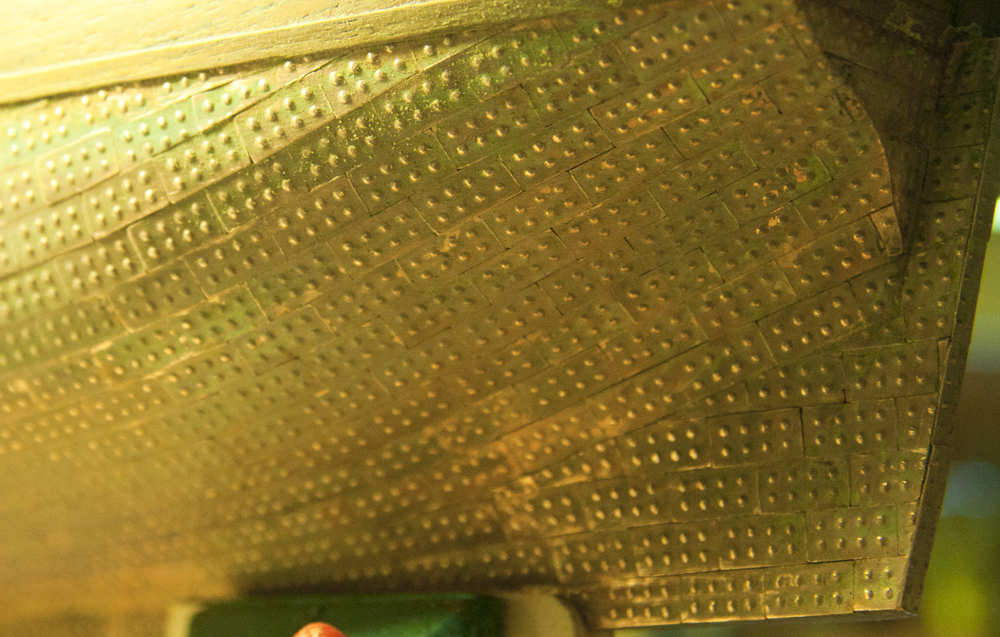
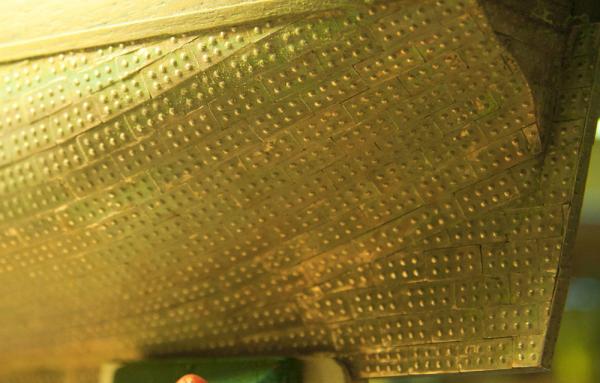
I have just completed my first hull coppering attempt. Started small by coppering the hull of the Sloop Norfolk by Modellers Shipyard. I wanted to get a green patina effect but did not want it to take forever and I didn't want to use ammonia or acid as part of the process. I did some research and came up with JAX Green Patina - available on Ebay. I found that the most tedious pat of the process was cleaning the plates. I tried debonder but it was not too successful and I was afraid of using too much of it for fear of loosening the plates. I had been very careful not to use too much glue when fitting the plates so there was not much to clean up. I ended up scraping the worst away (very gently) with a hobby knife then going over the entire model lightly with a fine wire wheel on my dremel. I then used some steel wool and finished up with white vinegar to remove greasy fingerprints. I applied two coats of JAX Green Patina and then lightly rubbed back with steel wool. I did not want too bright a green colour, just a fairly even green tinge. I was happy with the results.


-
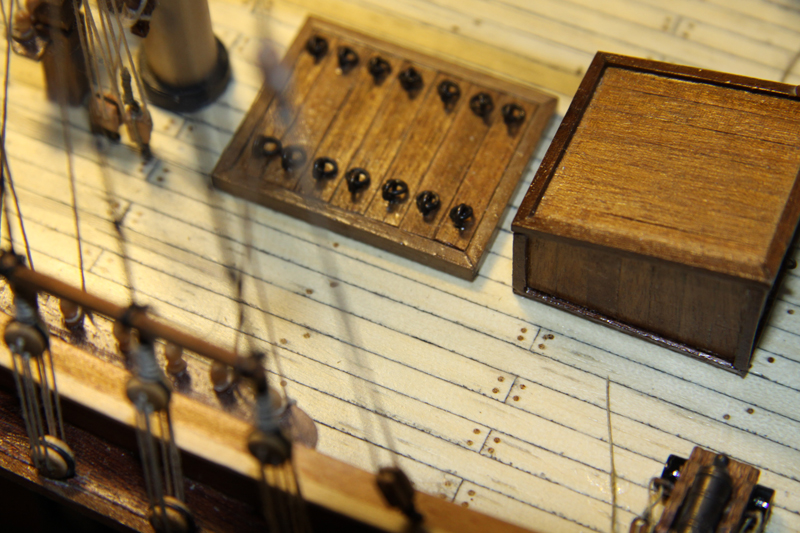
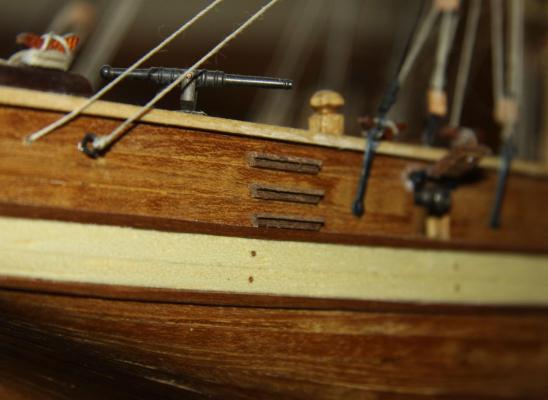
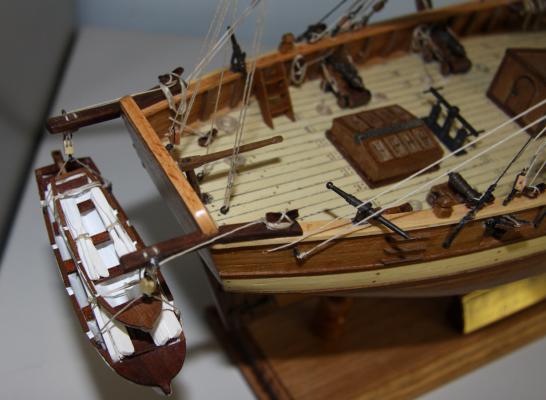
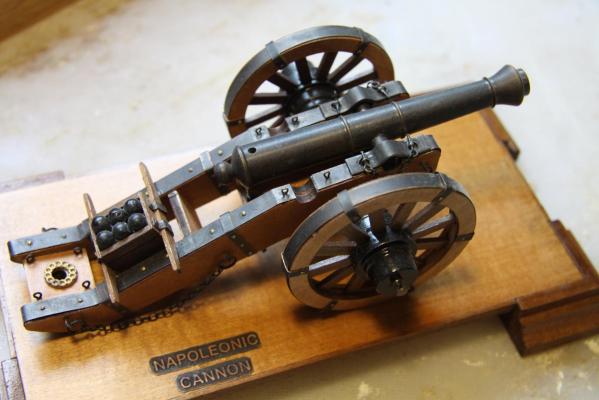
I have found Birchwood Casey Brass Black Metal Finish to work quickly and effectively on all copper and brass fittings. Some fittings and cannon may need to be given a rub over with very fine emery paper as they are sometimes covered with a clear coat which stops the blackening working. Some require more soaking than others, but the finish looks better than painting (in my opinion) I found soaking the item in white vinegar - to remove any blemishes or greasy finger marks - prior to the blackening agent was effective. Make sure you are in a well ventilated area as this stuff will take your breath away! The pic following is the stern of the HM Mermaid. Pumps, cannon and other fittings have all been blackened with Birchwood Casey. The Napoleonic Cannon was treated with the same.
-
Excellent Build Log Dan! My current build - The Norfork - is my fifth Modellers Shipyard kit. I'm not sure that the current kit quality has improved significantly since you built yours though. I too find myself building/replacing many components from solid timber rather than using the ply supplied. I have also just discovered that the filler blocks have been left out of my Norfolk kit as well - not a major problem but still annoying (and not the first time I've had a kit arrive from Modeller's Shipyard minus bits!) .It's not as though the kits are particularly cheap either! I also hate the fact that the plans are not to scale. I recall in an earlier model - the Perseverance I think - not having my brain switched on and cutting a mast to the length shown on the plan rather than the correct length! Not a major mistake, but also annoying. While I'm having a whinge - Why do they supply flags for their kits which are printed on paper? - cheap, cheap, cheap! I had to send to England for some proper ones because the replacement ones from MSY were only printed on one side!! I have built these kits mainly because they relate to Australian Maritime History ( The Norfolk wreck is actually somewhere in Newcastle Harbour) and I think it's great to have a local Australian company producing models appropriate to this country, but I think the Norfolk will be my last....... might try something from Jotika/Caldercraft, they look to be of better quality and are similarly priced. THERE!!! Got it all off my chest!!!!
- 147 replies
-
- 1
-
-
- norfolk
- modellers shipyard
- (and 1 more)
-
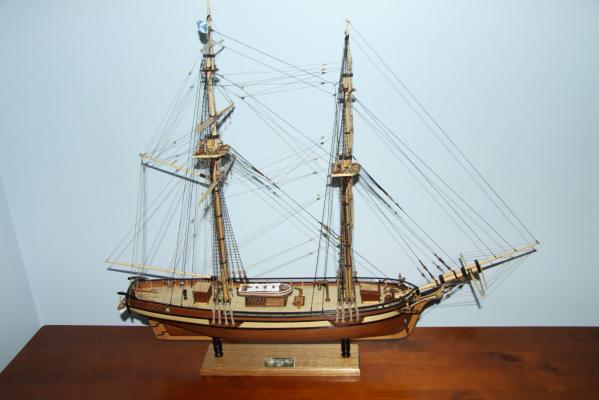
More completed Perseverance Pics from Hornet .......
-
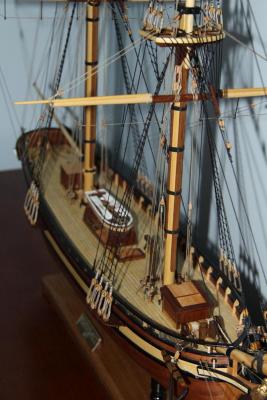
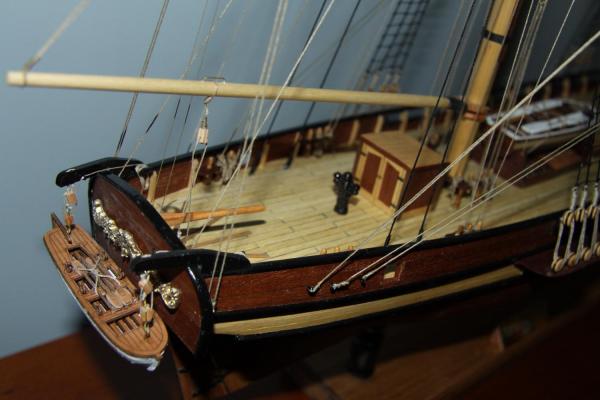
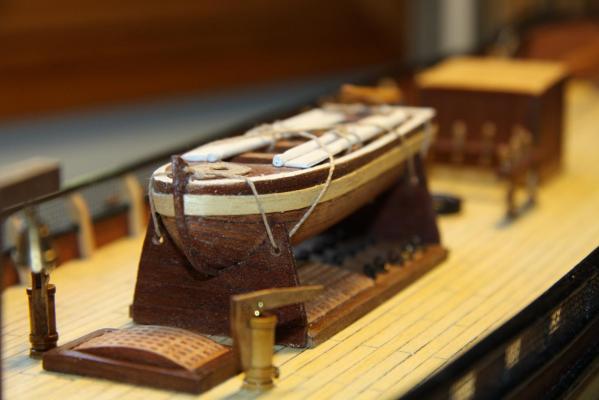
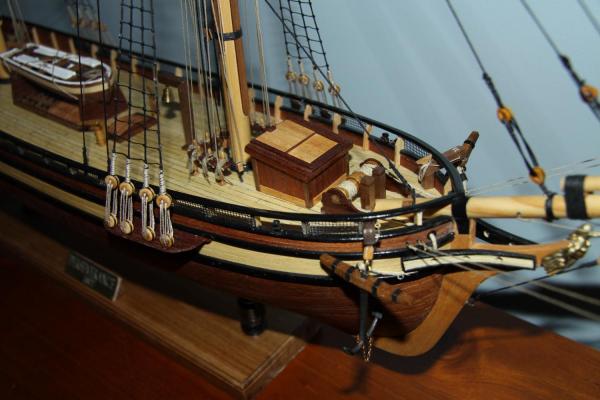
I completed the kit Perseverance some time ago (see attached photo) I was quite happy with the plans, both on paper and video - although I found some of Leon Griffiths methods a little `rough and ready.' I completed the standard kit so it did not have the copper plates. I did make a couple of adjustments to the kit however. The dowel supplied for the bowsprit was 12mm (the same as the lower masts). I felt that this was a bit too big and replaced it with 10mm. I also reduced the height of the main companionway by about 15mm. To my eye it looked like an outback dunny as it was in the plan. I also used only one lifeboat on the deck and planked it. It was very difficult to find any other references during the build. The only one I could find was a photo of an old model used as a trophy in a Sydney yacht club. The companionway on this model was a completely different shape to that in the kit. I have completed a number of kits from the Modeller's Shipyard ( Mermaid, Schooner of Port Jackson, Sirius Life Boat) and I a currently working on the Norfolk. Generally speaking they are of quite good quality. I have made some modifications to all these kits - usually replacing ply components with solid timber. However, I would have to agree with Danny - they don't like it if you express any criticism of their kits!! Cheers Hornet
-
These photos probably aren't in the right order (bit of a techno-cretin) Hope they give the general idea Since I posted this, I have invested in a Byrnes Draw Plate. One of my best investments yet. Beats all other methods of making tree nails hands down (in my humble opinion)


-
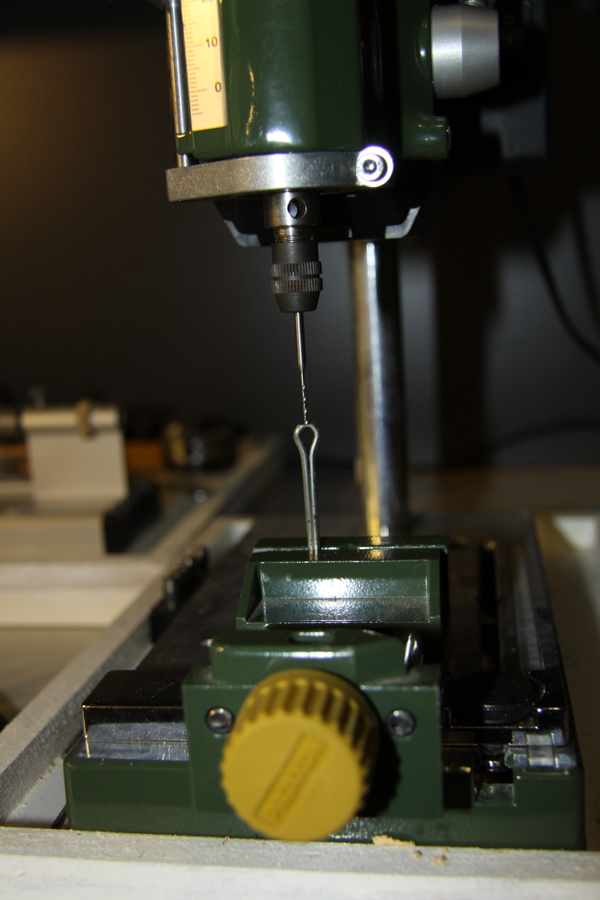
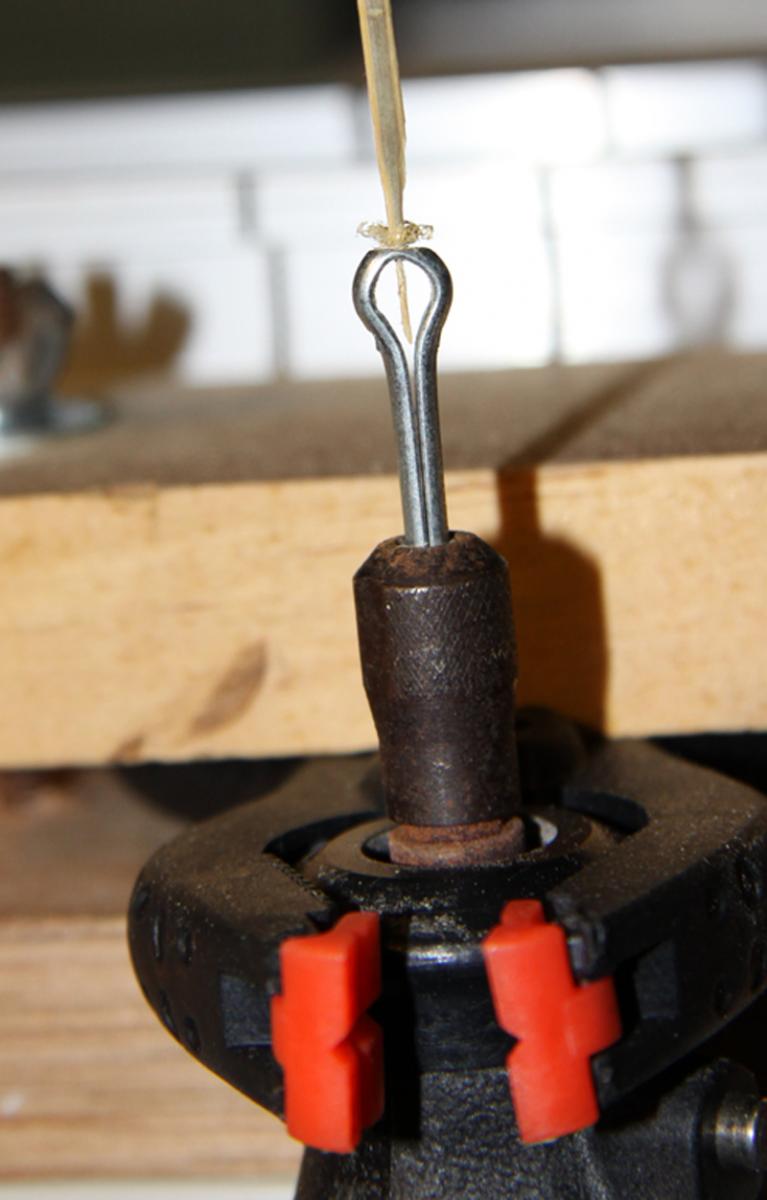
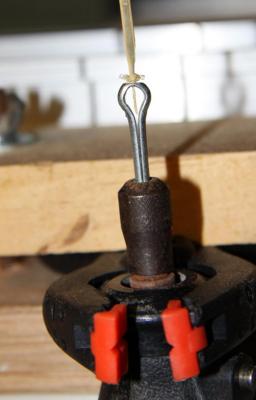
Hi, my first post. I have completed a number of builds over the years but only recently attempted treenailing. My method was as follows: Take a cotterpin/splitpin about 40mm long. File the top of the pin so it is a flat surface. Drill an appropriate sized hole in the flattened surface. I have a Proxxon Drill press and have used 0.5, 0.8 and 1.0mm bits. Mount the cotter pin in a Dremel Multitool and then mount the dremel onto the workbench so the cotter pin faces upwards. I use bamboo skewers as my treenails. I split them longways into four sections and roughly sharpen the end so it can be guided into the hole that I have drilled in the end of the cotter pin. Switching the Dremel to a relativey high speed allows the bamboo to be forced through the hole and the appropriately sized treenail is extruded through the bottom - each treenail is about 0.5 - 0.8mm long (but long enough to do the job). The hole in the cotter pin usually stays sharp enough to get a hundred or so treenails cut. I'm going to experiment using a stainless cotterpin next time as this may have a longer lifespan.