hornet
-
Posts
690 -
Joined
-
Last visited
Content Type
Profiles
Forums
Gallery
Events
Everything posted by hornet
-

CA adhesive, which one do you use?
hornet replied to Modeler12's topic in Masting, rigging and sails
Zap a gap medium for applying copper plating. CA gel for other small jobs - I use one in a tube, it is cheaper than the dispenser type you have in your picture. However, I use it very sparingly as the fumes affect me if I forget to put on a mask. I mostly use a quick drying wood glue. -
Excellent news!!!!!!! :)
-
Filler Blocks
hornet replied to Jimz66's topic in Building, Framing, Planking and plating a ships hull and deck
I have used balsa as filler blocks. I found it worked better for pinning planks into if several coats of thinned wood glue were soaked into it and allowed to dry first. This made it a firmer base. -
Is a waterline marker useful?
hornet replied to CharlieZardoz's topic in Modeling tools and Workshop Equipment
I've got the same one shown in your photo. In my opinion the base - which is just plastic - is too light. It works OK but if I had my time over I think I would do more research before buying one. -
Truly awful question (thread from kits)
hornet replied to achuck49's topic in Masting, rigging and sails
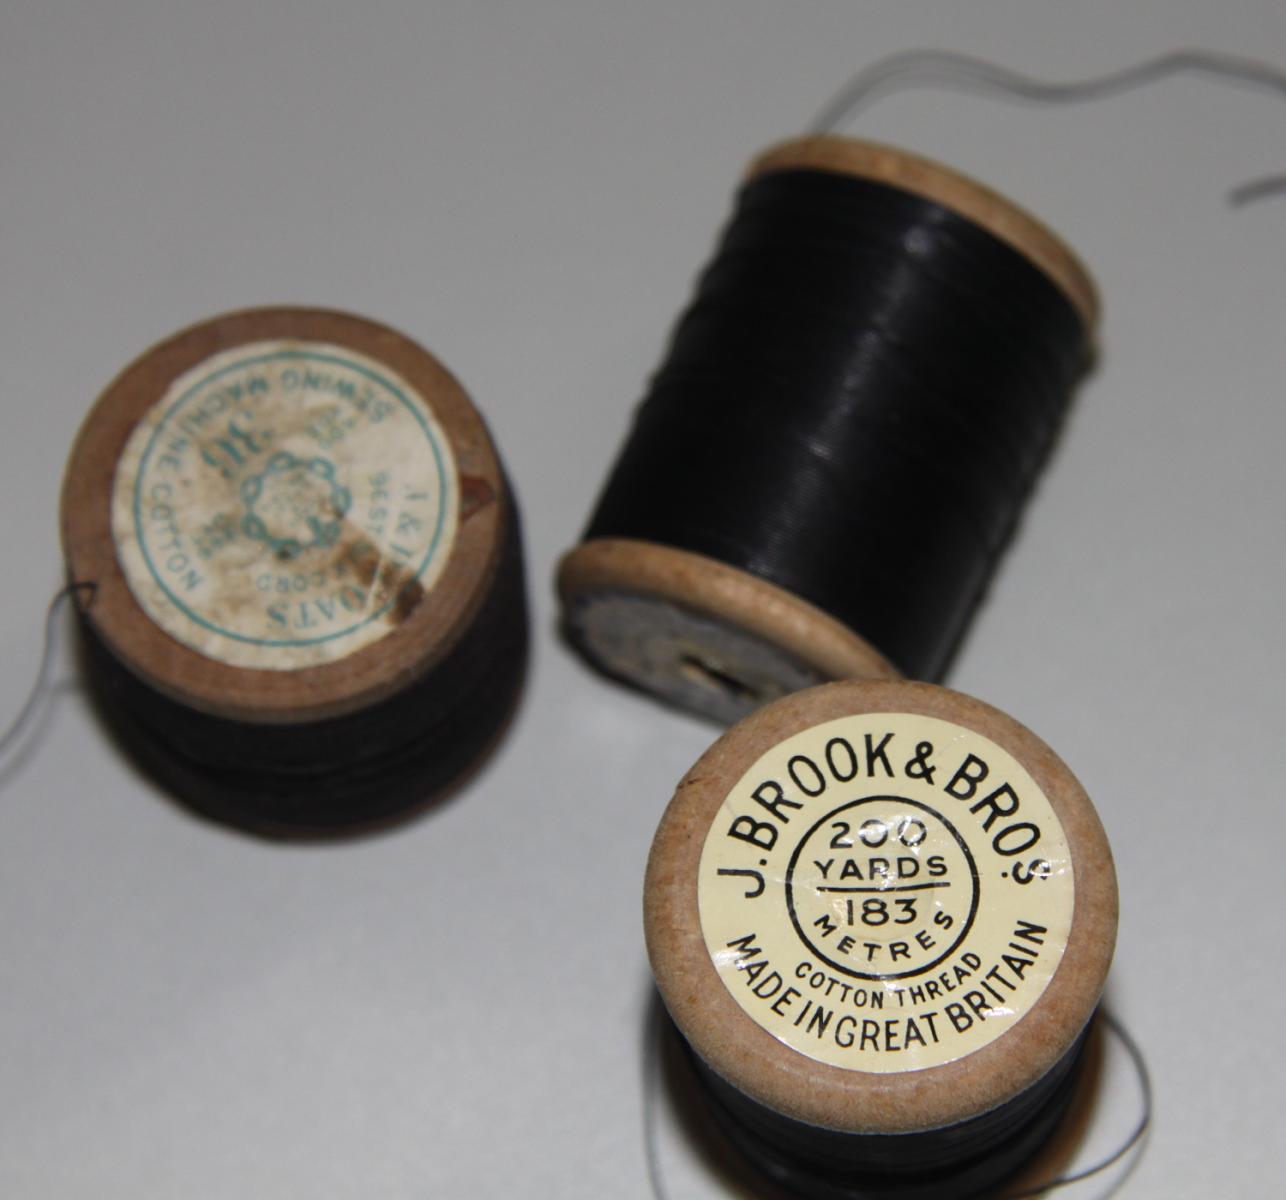
If you think untangling rope is difficult, try fine braided fishing line - now there is a nightmare. I have found that the combination of a lot of patience (as model builders we are all patient people.... aren't we???) combined with tweezers and picking tools from the dental set I bought from Ebay a while ago worked quite well. I am also a strong believer in removing kit supplied thread from the card or plastic bag (on/in which it is often supplied) and transferring it to old fashioned cotton reels. Although still quite cheap, for some reason they have become collectable and are often found in antique/collectable shops. I have got some really good cotton thread from these sources in the past.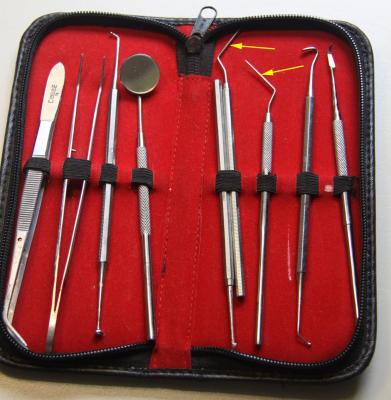

-
I have built a couple of models which were similar in design. On one these I glued the 'false keel' onto the bottom of the keel at the start and then clamped it. The problem I then had was that this 'false keel' broke away from the main keel because of the lateral forces which were applied during building ie - Me leaning on the thing!!! I corrected this by reglueing, predrilling and then fixing the false keel to the main keel piece with 5 or 6 small brass screws. This then became a very sturdy base which kept the keel from warping when clamped. As far as getting the bulkheads square to the keel, as has been said before on this site, Lego blocks clipped together to the appropriate size then clamped in place are very effective as they are sturdy and always a perfect right angle.
-
You are correct there Brian. I have done he same with the Caldercraft Supply that I am working on at the moment. Replaced stem post, rudder, tiller with solid timber and scratch built the winch mechanism which, to me, did not look correct as supplied by Caldercraft.
- 24 replies
-
- 1
-

-
- Modellers Shipyard
- Mary Byrne
- (and 1 more)
-
Hi Duncan. I too found that I used many of the plywood parts in Modellers Shipyard kits as templates and built these parts from solid timber - usually walnut. The result was much more pleasing. Your 'practise' technique for rigging is most interesting. I have not seen that done before!!
-
Paint brush verses air brush
hornet replied to medic's topic in Painting, finishing and weathering products and techniques
I go along with Keith, satin for me too. I have used both satin and flat in the past. -
Paint brush verses air brush
hornet replied to medic's topic in Painting, finishing and weathering products and techniques
I started using an airbrush about 6 months ago. I use acrylics. Once you get your paint consistency and pressure right, you won't go back. Cleanup is easy. I also polyurethane with the airbrush. I use a 50-50 mix of poly and low odour turps and it works well. For painting acrylics I use a double action airbrush but for applying the poly I use a cheap single action airbrush. If you decide to go with an airbrush, make sure you get a compressor with a tank. It is quieter and you get a more consistent result. Make sure you have a moisture trap installed as well. I agree with NMBROOK about applying thin coats and sanding back between each. One of the big advantages of using an airbrush is the ability to apply very thin coats. I use a mix of 50% paint and 50-50 distilled water and clear windex. Even with 5 - 6 coats you can still see the wood grain - something I like. As to painting parts before assembly, If you are going to airbrush you will need to do this. I agree with S.Colman, plan ahead and paint what you can before you assemble. On my current build - HMS Supply, I have painted all planks (that needed painting), stern facia, fore deck facia, stem post, rudder, capping rails, and deck furniture with an airbrush before fitting. There are still a lot of places that I use a brush, for example window frames, but I'm sold on using my airbrush!! -
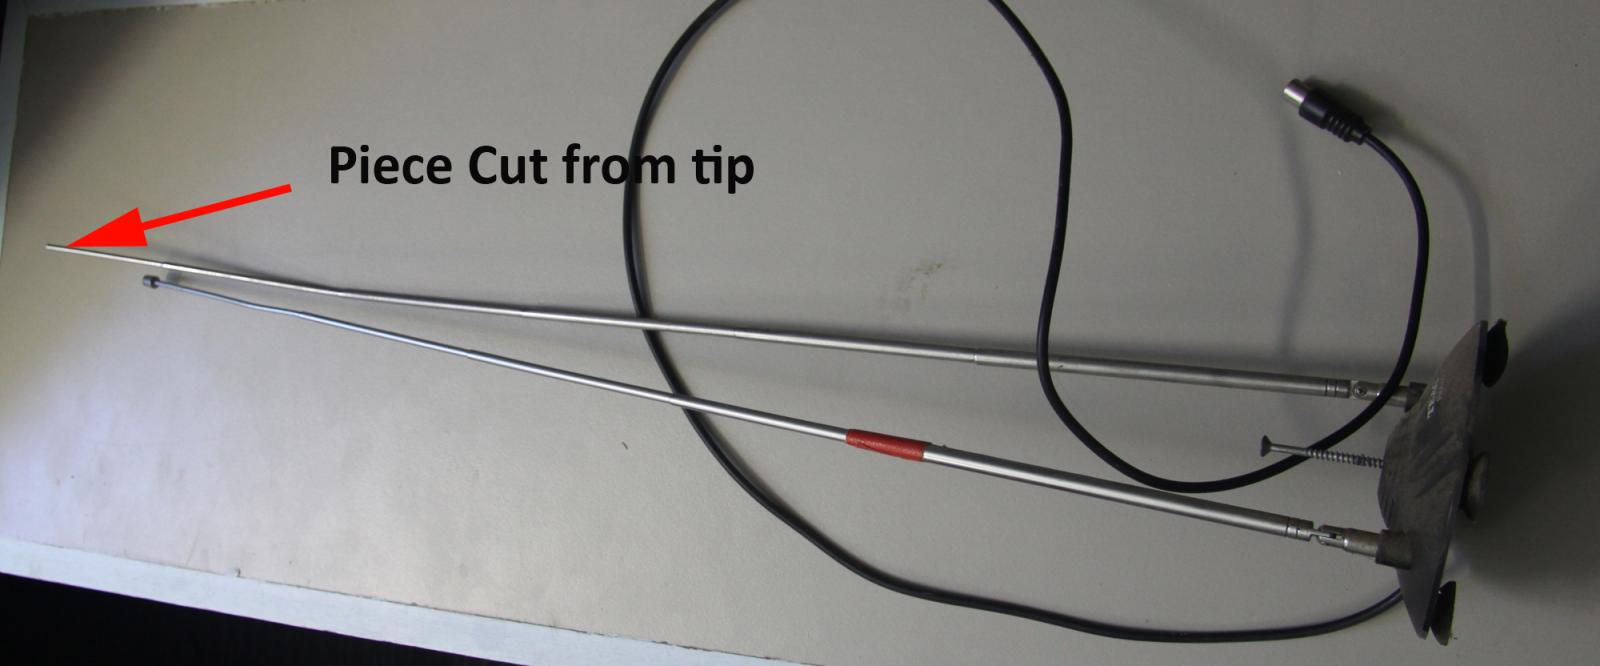
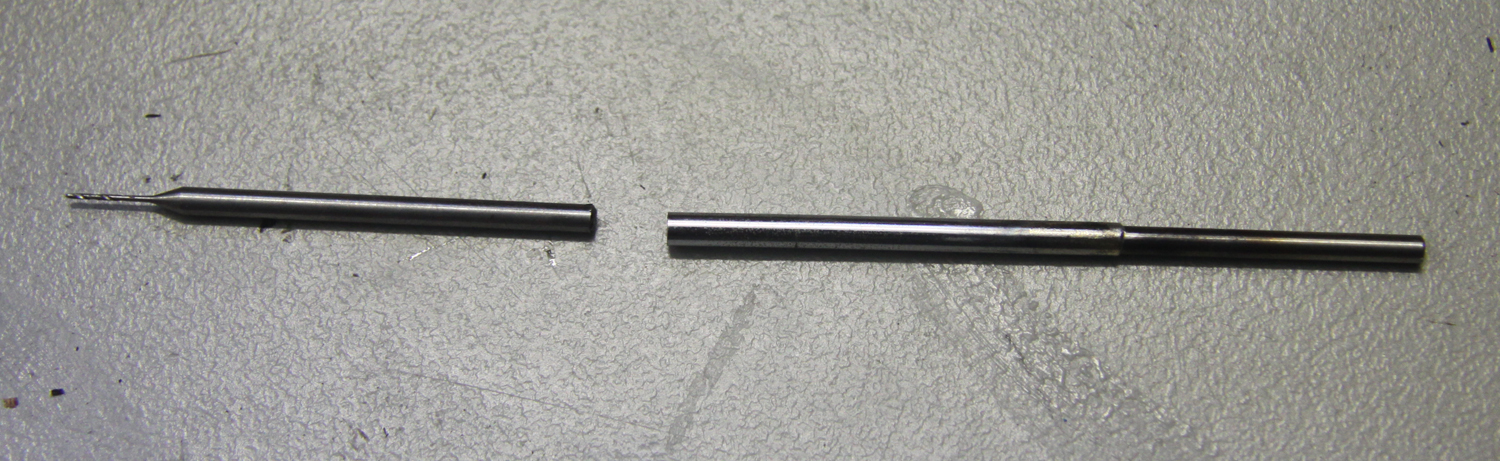
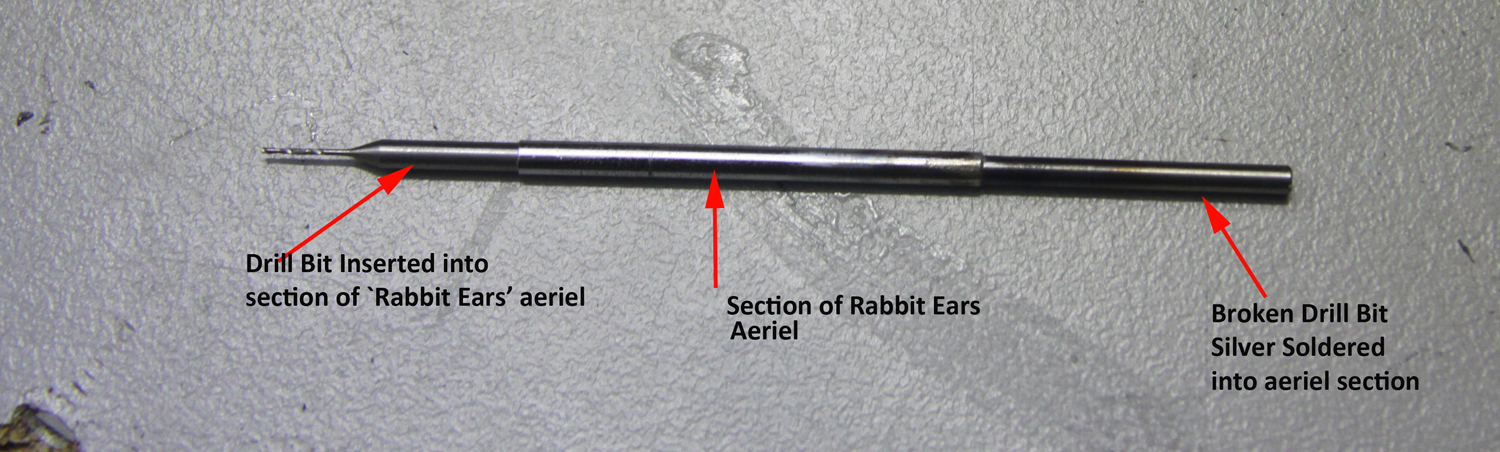
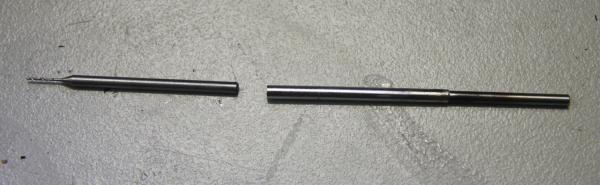
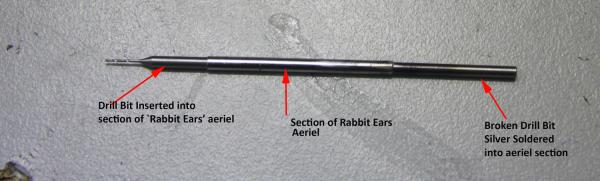
I needed to drill some holes in a position where I could not get the dremel. A drill bit extension was required. Taking an old `Rabbit Ears' TV aeriel that I had lying around, I found that the shaft of my proxxon drill bits fitted snugly into a section that I cut from the end. The fact that these telescopic `Rabbit Ears' sections taper, means that a section could be found and cut to fit most drill bit diameters. I then inserted a broken proxxon drill bit into one end and silver soldered it in place. The drill bit I wanted to use also fitted snuggly in the opposite end. I found that it was a tight enough fit to use `as is' but if too loose, it could be soldered into place as well.

- 396 replies
-
- 7
-
-
- Idea
- Bright Idea
- (and 1 more)
-
Sorry to disagree with you Janos, but if you read Duncan's initial posts he said that there were some errors with the kit. He also said that Modeller's Shipyard did not admit to all these errors. This struck a chord with me as I and others on this forum have had similar experiences with Modeller's Shipyard. Duncan's issues seemed to be minor and yes, it appears he is satisfied with Modeller's Shipyards response. THIS IS GREAT!!! Maybe complaints from members of this forum, including myself, have made them think more about their customer service. When I initially read his thread I thought he had just started the build (rather than producing the build log after completing the build - as I later realised) for this reason I also mentioned the problem I had with the Modellers Shipyard plans NOT BEING TO SCALE - something that had tripped me up in the past. Because this was his first build I felt that I should mention this to Duncan as well as it is, in my opinion, a relevant issue. I mentioned Miniature Steam and Float a Boat to Duncan because they are good companies which I was directed to by other members of this site. I see nothing wrong with giving a new member some 'good oil' on Aussie Suppliers - particularly those who provide excellent prices and service. You have every right to disagree with me and express your equally valid opinions but I don't have to agree with you. Best wishes. P.S sorry Duncan if you too feel I have hijacked your build log. It was never my intention. I will say no more on this matter and look forward to following your build.
- 24 replies
-
- 2
-
-
- Modellers Shipyard
- Mary Byrne
- (and 1 more)
-
Duncan, I also found that the use of contact cement was very difficult. Not to mention rather smelly. I now use Aquadhere Interior Quickset. I normally put a small dob of CA gel glue on the end of the plank to hold it while the aquadhere sets . This only takes a couple of minutes at most. The advantage of doing it this way is that you can move or remove the plank if needed before the glue sets. This is not possible when you use contact cement. Cleanup is also much easier. Cheers
-
In addition I would like to add that I have supported Modellers shipyard SUBSTANTIALLY over the years. If you look at my signature you will see that 11 of the 12 completed builds were actually Purchased from Modellers Shipyard. I have also purchased many of their DVD's. I estimate that I have spent well in excess of $4000 with the company. My point is that in recent years, in my opinion, their competitiveness and customer service has slipped. I make no apology in pointing this out. Part of being a member of this forum, in my opinion is not only to suggest ideas and ask questions, but to point out shortcomings in the suppliers we have used. In that way new members, or those looking for a new build can shop with far more confidence than was the case before MSW. If you check other threads on this site, you will find that I am an equal opportunity whinger! I gave Caldercraft/JoTika a hammering for poor service as well. Incidentally, Modeller's Shipyard sent their members a survey to complete last year. This may indicate that they are starting to realise that they mayhave a problem. I hope that they use this survey to improve their business. That being the case, I would again be happy to shop with them. P.S. Thank you Duncan for the heads up on Hobby Habit. I will check them out.
- 24 replies
-
- 1
-
-
- Modellers Shipyard
- Mary Byrne
- (and 1 more)
-
Call it as I see it Janos, and I'm not the only one. Happy new year!!!!!!
- 24 replies
-
- 1
-
-
- Modellers Shipyard
- Mary Byrne
- (and 1 more)
-
Duncan Modellers Shipyard has been around for a long time. They were originally called Coastal Distributors and operated out of Nowra. I bought my first model, the Golden Hind, in about 1984. They are now located west of Sydney and have new owners. Unfortunately, in my opinion, they have not realised that the Internet and online shopping has made the sale of model kits, components, tools and accessories very competitive. If you are interested in another build, have a look at Miniature Steam in Melbourne. They sell Caldercraft kits at very competitive prices. While you are at it, check out the Float A Boat Website (also in Melbourne). They sell a great range of gear.
- 24 replies
-
- 1
-
-
- Modellers Shipyard
- Mary Byrne
- (and 1 more)
-
As you can see from my signature, I have built a number of Modeller's Shipyard kits. Their Instructions are usually OK but be careful, they are often NOT drawn to scale. Take careful note of the measurements provided, don't just cut from drawings on the plan. I came a cropper when cutting a mast for one of my builds. I measured it from the drawings on the plan and it ended up being too short. Stupid mistake I know, but it wouldn't have happened if, like most other kit manufacturers, the plans were drawn to scale!!!!! As to them not admitting to errors or omissions in kits, you are not the first (not by a long shot) to encounter this problem with this manufacturer.
- 24 replies
-
- 1
-
-
- Modellers Shipyard
- Mary Byrne
- (and 1 more)
-
Miniture machine screw sizes
hornet replied to grsjax's topic in Metal Work, Soldering and Metal Fittings
Now that is a truly beautiful piece of work!!! Thank you for sharing! -
The Proxxon KS230 is around $200. I have one and it is ok for general cutting but not accurate enough to consistently rip planks. I'm not sure there would be anything available to do what you want for that sort of money. If there is, I'd be interested to know myself!
-
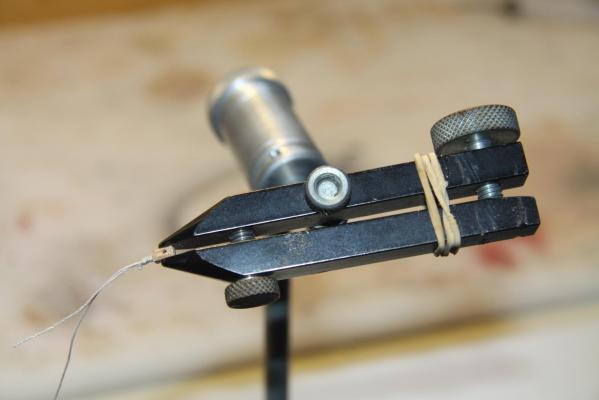
Get yourself a cheap fly tying vice - used for making flys in flyfishing. There are lots available on EBay. It will grip any block (or any other part for that matter) firmly and allow you both hands free to work. For really small blocks use in combination with a magnifier on a stand.
- 49 replies
-
- 13
-
-
I have the Caldercraft Bounty 'on the shelf'. It will be my next build. I am currently working on the Caldercraft 'Supply'. The second planking walnut planks on this kit were poor quality but the rest of the kit was quite Ok. I have looked through my Caldercraft Bounty Kit and the timber in it is much better than that supplied with 'Supply' - maybe because it was quite a lot more $$$$. It comes standard with copper plates and the plans seem quite good. So as Geoff says, take a look!
-
Miniture machine screw sizes
hornet replied to grsjax's topic in Metal Work, Soldering and Metal Fittings
Hi Pat, Any chance you could post more pics of your friend's Chris Craft. It looks great from the one photo you have posted already. -
Looks very interesting. His other books on Cook, Flinders and Bligh may be worth investigating as well.
-
Miniture machine screw sizes
hornet replied to grsjax's topic in Metal Work, Soldering and Metal Fittings
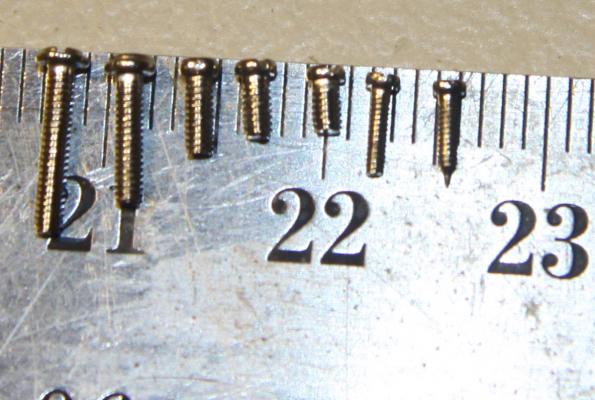
WOW, 0.5mm now that is amazing. The only way I can manage to find the smaller ones I've used when they have dropped onto the floor is with a magnet. I have had about a 75% recovery success rate (that is on a carpeted floor) -
Miniture machine screw sizes
hornet replied to grsjax's topic in Metal Work, Soldering and Metal Fittings
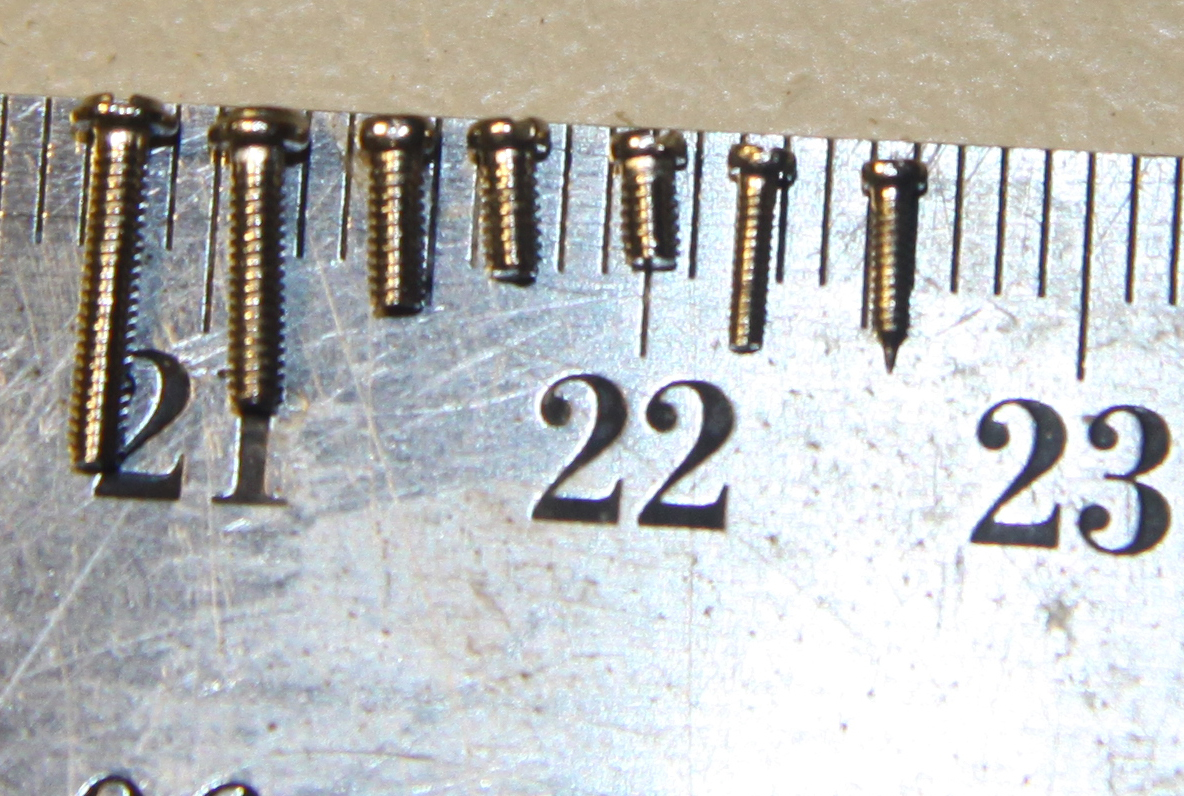
The screws in the box I got ranged from about 1.2 mm in diameter down to about 0.75mm in diameter. This is 0.03 inches. I guess if you wanted smaller you would have to pay the price, but 0.75mm is pretty tiny!!!