


Rick01
-
Posts
637 -
Joined
-
Last visited
Content Type
Profiles
Forums
Gallery
Events
Posts posted by Rick01
-
-
Suggestion - add a few holes for belaying pins in the knees, it's surprising how many belaying points are actually needed when you look at a full rigging plan. Otherwise looking good. Not the best shot but you can just make them out here (top right section).
Don't forget the binnacle that you can also just make out in the original plan.
Rick
-
57 minutes ago, Cabbie said:
Hi rick by cleaning up I was referring to cleaning with a solvent(very carefully) to take
glue and the black pencil off.
👍
Rick
-
Looks really good Jay - nice solution to your problem and the cup burr has worked well.
I've actually only had one 4 week period in my life without cats (with my surname it's not really surprising) and that was when we migrated to Aus. by ship. My latest addition is someone else's reject rescued from the local pound, his only problem is that he talks constantly if I'm not around so I'm in immediate trouble after spending any time in the workshop 1/ with my wife because of Benny; and 2/ With Benny for not being where he could find me! He's learnt pretty quickly where he shouldn't go but that doesn't stop the occasional foray just to show who's boss. 🙂
Rick
- src and vossiewulf
-
 2
2
-
15 hours ago, vossiewulf said:
I can only hope the new one doesn't decide that ship parts are prey items like yours did.
Having been bossed by 12 cats over my adult lifetime there's one thing I have learnt and that's the fact that you just have to go with the flow with these guys.They all seem to have their own ideas of fun, all with one common theme "pay attention to me NOW" 😉 Luckily my workshop is not in the house and they are banned from it for their own safety - but really I can't imagine life without one or two hanging about to boss me around.
Rick
-
Don't start trying to clean up until you've finished the complete side. I found that going down that route I cleaned an area then planked some more then cleaned again - including the previously cleaned area!! A bir counter productive. 🙂
Rick
-
21 minutes ago, Cabbie said:
Would it look silly just to copper on one side.
Shouldn't be a problem - you can display it one side one week, t'other side the next week. 😉 If you copper it will you also "weather" the copper plates? I feel that shiny copper plating may look a little odd .
Rick
-
-
You may find the walnut isn't flexible enough - it does tend to splinter easily. The decking timber however can almost be tied in knots if you soak it long enough.
Rick
-
21 minutes ago, JamesBhm said:
I need to build out the thickness of the overhang areas on each side, then bend some wood to trim/cap it all the way around. I’m a bit worried about that part.
You'll need a lot of soaking in water and I'd use something like the .6 mm decking in 2 or 3 layers to handle it.
Rick
-
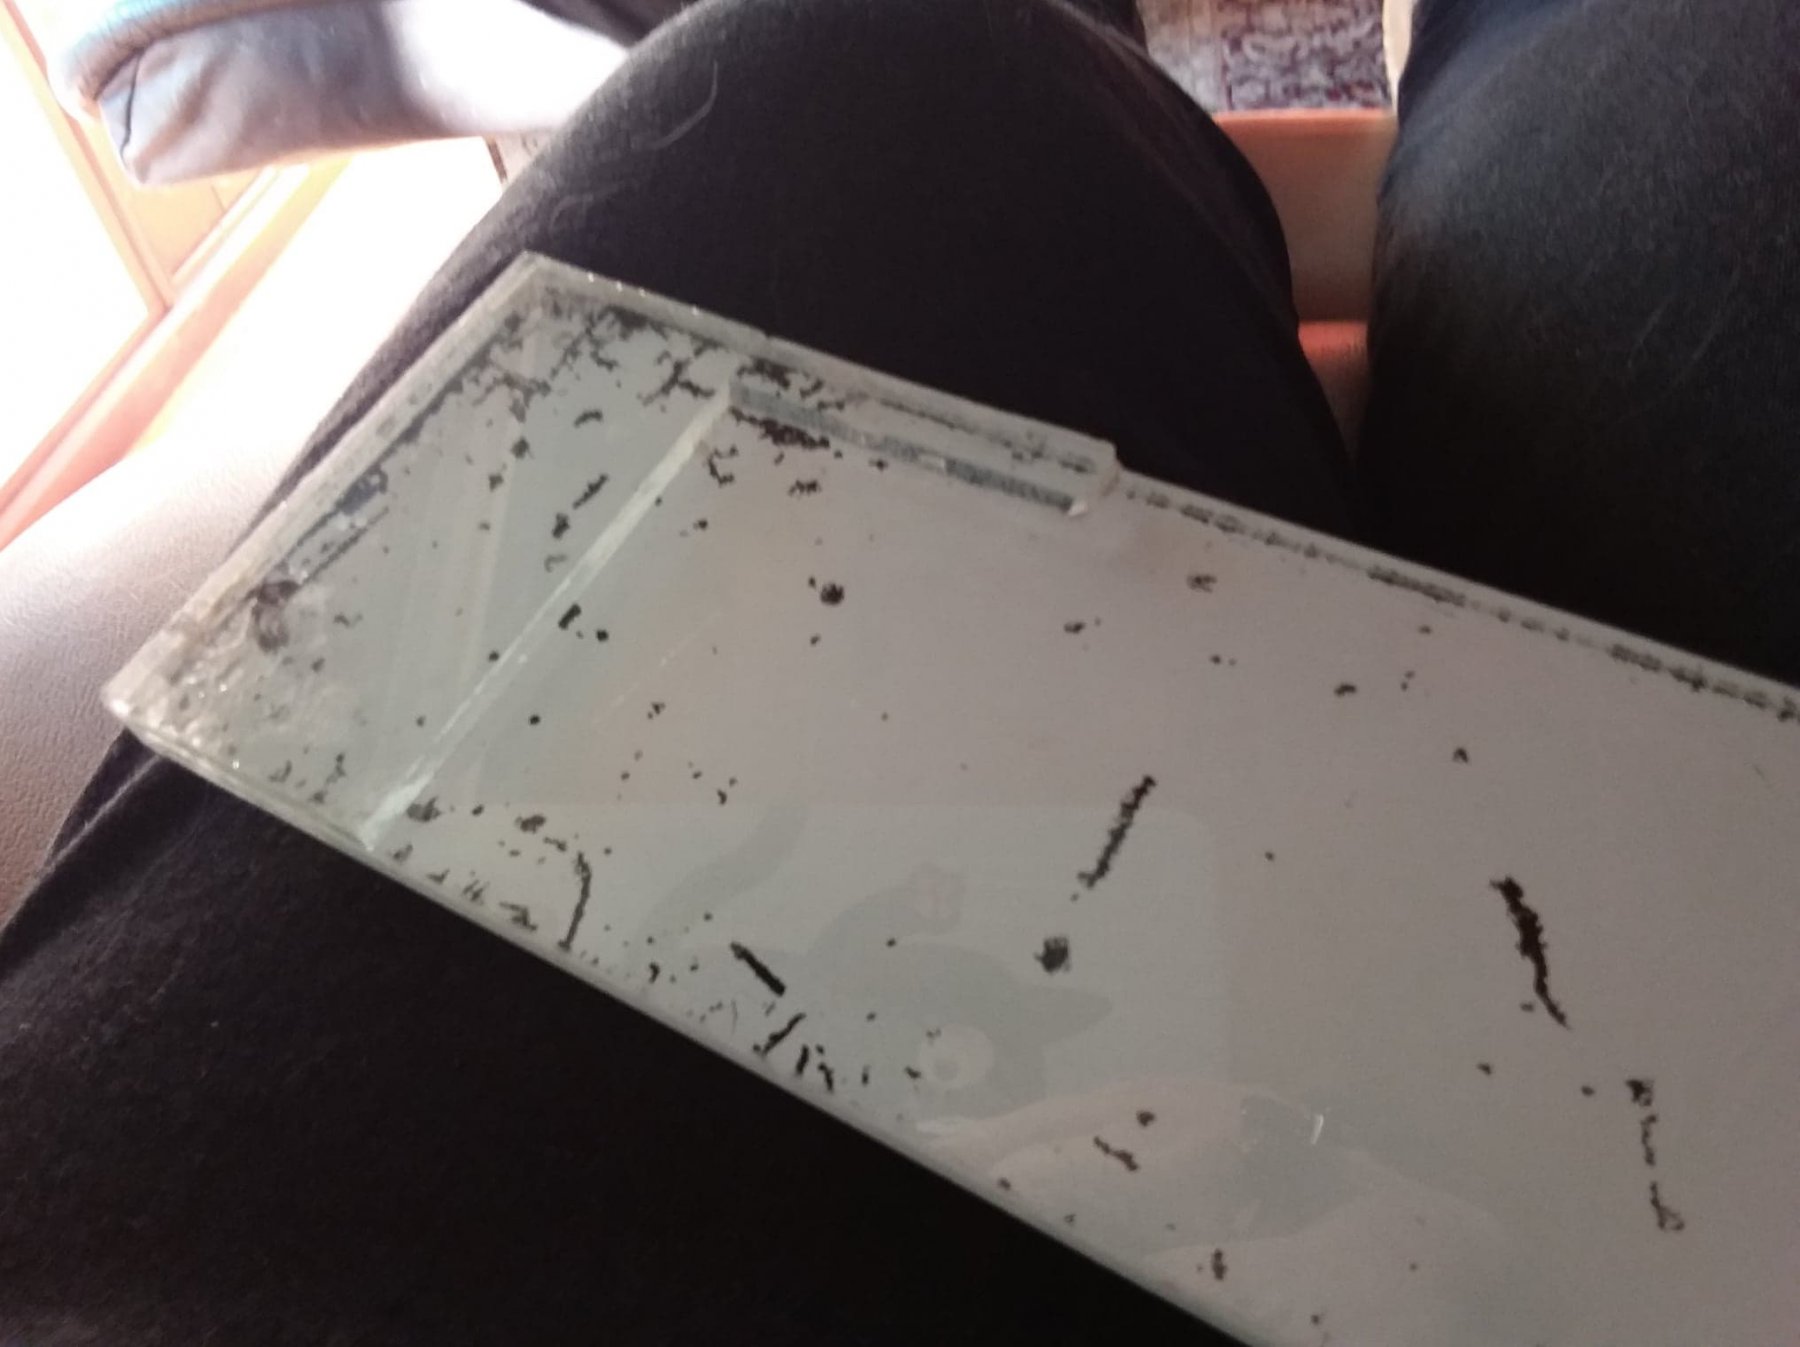
This is it. It's a bit left over from an old fish tank, 5mm glass 300 mm long and about 75mm wide.
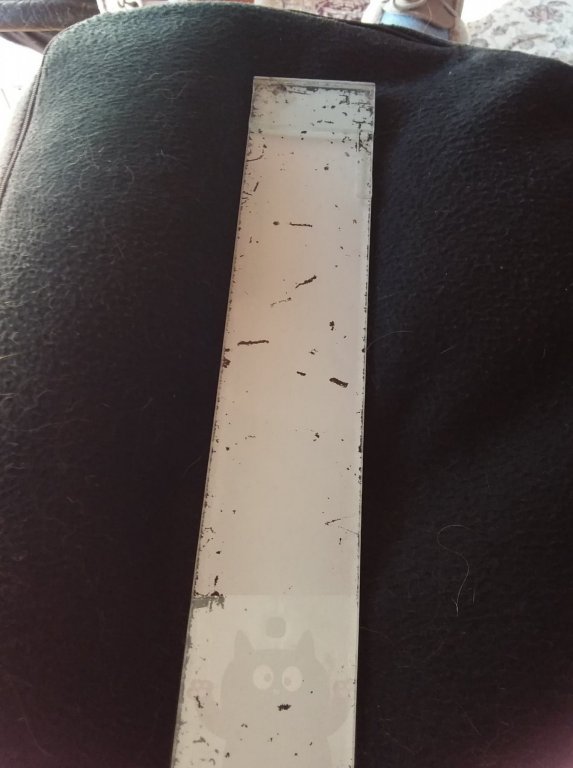
I occasionally spray the reverse white to help seeing what I'm doing on it which is why it looks a bit battered.
 This end has a couple of bits glued on at right angles, very useful when setting up things like hold/hatch covers. You can also use it to mix paints etc. and it cleans very easily using a razor blade as a scraper.
Rick
-
-
13 hours ago, JamesBhm said:
Rick, would that upper squaresail be referred to as a flying topsail or is that something different? The log makes references to the gaff topsail, squaresail, and flying topsail. I understand the first two but wasn't quite sure on the flying topsail.
Funny but I was just about to sit down and make a comment about the "flying" sails having remembered a short discussion I had on this site very early in my build. When you look at the watercolours where she's under sail you can see that the gaff topsail is flying - that is unattached to the mast other than by a hoist (think that's the correct term) and in sketch 6 similarly the upper square sail. This really makes the job easier (unless you are going to mount sails) as both yards would only be hoist when actually using those sails (anyway that's my understanding as the word flying indicates that the yard is unattached to the mast). Basically it probably needs a little extra research on how these were hoist and where a couple of extra blocks would be attached to the mast head to handle them. Any other people following this build have any ideas?
Rick
-
Hell of a load of work to study there. 5 and 6 seem to show the flying gaff plus an upper square sail pretty clearly - it's surprising she didn't topple over with all that canvas spread. I'm looking forward to your finished item, even though it means I may have to re-model mine. Most of what you've found just didn't seem to be around when I was doing my research!
Rick
-
I ended up using a small drop of superglue on the brass then coating the whole thing with a good dose of a clear water base satin varnish. I seems to help secure the straps (just don't put any pressure on them afterwards 😉 ). As to Dockyard supervisors how did you manage to go so long without another boss? I also lost mine April last year but could only go six months before another applied for the job.
Rick
-
I used a wash of PVA glue on the cable eventually to get it looking reasonably authentic. It's quite frustrating otherwise.
Rick
-
-
Or do as I did - ditch the ply keel (along with most of the rest of the ply) make a solid false keel, cut the rabbets and install at first planking. This was only my second build but I didn't find making solid timber parts that hard even though my woodworking lessons were pre "Cuba Crisis" .
26 minutes ago, JamesBhm said:Chris, sounds like a lot of "battle damage" for a survey vessel!
Over in Aus. between local natives and Javanese pirates our survey vessels did suffer the occasional bit of "battle damage",
Rick
-
I'd suggest that for your first you look at something like the Endeavour's Long Boat. It'll give you a basic lesson in planking, rigging, mast tapering and a chance at mucking up without costing you a fortune. There are a number of builds here including mine below my signature. Get that under your belt then go for a cutter before attempting a multi-mast build would be my recommendation.
Rick
- Keith Black, Bob Cleek, mtaylor and 2 others
-
5
-
If you haven't already take a look at the cutters on this page https://modelshipworld.com/gallery/category/4-gallery-of-contemporary-models-from-museums-and-private-collections/?sortby=album_last_img_date&albumPage=2 The gun ports are all over the place. I'd dummy mount a cannon to ensure you've the clearance to mount one without fouling the port lid at full elevation. I'm pretty sure I had to fiddle with mine just because of this.
Rick
-
3 hours ago, Cabbie said:
Does it matter if the channels sit on the wales?,
Given that effectively they're acting as spacers only I wouldn't have thought the position overly important structurally ( I may be wrong as I'm not a shipwright however!)
3 hours ago, JamesBhm said:.the transom davits don't appear in all of the drawings. Would those have been removable
Given that they are required to support a fairly heavy ship's boat that could well be half full of water I'd say that common sense says not demountable or at least not very easily done.
As for the wales - the upper wale would seem to protect the gun port(s) with the lower providing an overall protection. Only my thoughts but I tend to look at things and where no simple answer is apparent then I try applying a sort of "it makes sense" attitude.
Rick
-
14 hours ago, horschtl said:
I decided to follow the manual and not Ricks suggestion to do steps in the order 8, 11, 9, 10. This was a bad decision. For anyone building this model, do it in the way Rick suggests…It worked out nevertheless, but it would be much easier the other way around
I'm having a quiet giggle at this - we always hope others will learn from our mistakes but not always 😉. I was spitting chips fitting those thwarts!!
Rick
-
That's pretty much how my davits sit. The angle in them should end up such that they are parallel aft of the transom. I did away with the kit ones and crafted my own as I really hated the use of ply everywhere. One comment on the last pic at Careening bay. Is it an original King sketch or do I read the left hand note on it as saying "From a sketch by King" ? If the latter I'd not rely on it as much as an original King sketch.
Rick
-
2 hours ago, Cabbie said:
probably never catch up to
builders like yourselves.
Of course you will, it's just a matter of hanging in and practicing. You will also learn quickly how to strip errors down and rebuild or otherwise disguise mistakes!!
Rick
-
"Monkey fist" I believe. It's only there because Aussie O H & S guys don't want some member of the public impaling themselves on it. 😉
Rick
- popeye the sailor, vossiewulf and src
-
3

HM Cutter Mermaid 1817 by JamesBhm - Modellers Shipyard - Scale 1:48 - first build
in - Kit build logs for subjects built from 1801 - 1850
Posted
I made 3 x .6mm holes in each knee, left off the belaying points in the instructions and used the pins instead - made more sense to me. I also occasionally look at it and wonder if I should have fitted a "horse" for the boom control instead of the fixed eyebolt the instructions use. There is plenty of evidence for the use of this for small vessels during this period. Check this one of mine, it's a slightly later build (1817) but a similar size vessel. https://modelshipworld.com/topic/15624-topsail-schooner-enterprize-by-rick01-scale-148-first-wooden-scratch-build-finished/page/2/
Rick