


Rick01
-
Posts
637 -
Joined
-
Last visited
Content Type
Profiles
Forums
Gallery
Events
Posts posted by Rick01
-
-
I've had a bit of a hunt around the internet and it seems a 6lb carronade barrel is around 43" in length, scaled down this would be about 22mm, nearest I can find in model fittings is Caldercraft's 18lb carronade in 1:64 scale at 22.6 mm with a full base and fittings. Looks like I'll have to order these in. At least buying in the UK I avoid GST 😉
Rick
-
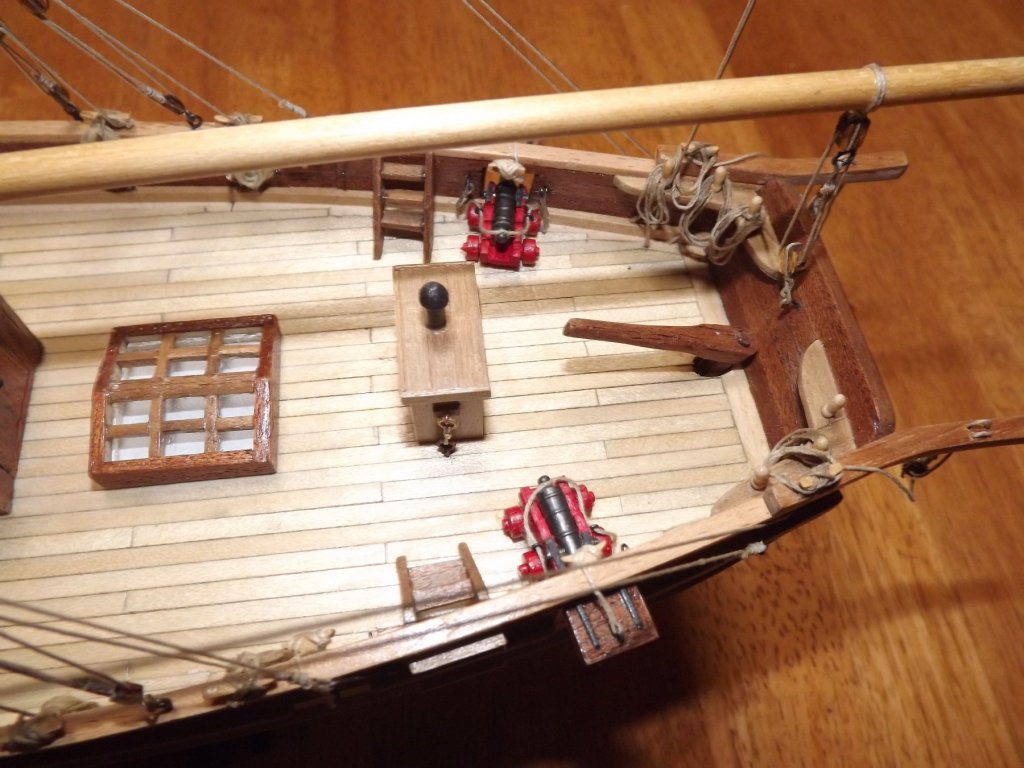
If you're feeling brave you can cheat with these type of fittings and use a heavy black paper impregnated with PVA glue. Give the appearance of iron fittings and is a hell of a lot easier to fit/fix. By the way I'm looking at getting mie out of it's case and doing some re-modelling. I did a quick scan through King's log and it seems that she was fitted with 6lb carronades so out with the 4lb cannon. I also cannot find any cutters ever fitted with gun port lids so they're coming off. Companionway needs to be turned around and I'll be fitting bars to my skylight. Probably do another check of the rigging as well, although I'm pretty happy with it (at the moment).
Rick
-
Have a look at the cutters in https://modelshipworld.com/gallery/category/4-gallery-of-contemporary-models-from-museums-and-private-collections/ page 2 . You'll notice that the boom at the mast is sitting there purely due to weight. If you've a problem with the kit not sitting down properly then maybe a touch of glue where the yoke sits on the mast will solve your problem.
Rick
-
-
Hi Eric - welcome (and a quick Heads up).
It sounds as if you're going from a good basic starter (as I did) straight to one of the more complex kits available. Hopefully you'll build a couple of others between as the skills learnt in the first build will realistically only be of minimal use on the Victory. Obviously I don't know your skill level but just wanted to give you a warning in case you suddenly find you've bitten off more than you can chew. 😉
Rick
-
If you look closely at King's cut-away sketch you'll see that he has shown a similar companionway (I've just noticed that I faced mine in the opposite direction to the one Ollie installed need to revisit the model for some amendments!). I used a similar construction to his for my skylight. 2mm glass with frames glues to the glass to give the appearance of separate panes.

Rick
-
-
Have you tried the UK National Maritime Museum? I've a permanent short-cut there for cutters in general https://collections.rmg.co.uk/collections.html#!csearch;authority=subject-90254;collectionReference=subject-90254;innerSearchTerm=cutter;start=0 . Should be worth checking out.
Rick
-
2 hours ago, Cabbie said:
Thanks Rick, From my point of view I don't know what a flying jib is, so
you had better post it.
On the kit plans there's a topsail yard fig. 31 Doesn't exist on any of Kings sketches that I've seen but a flying jib does.
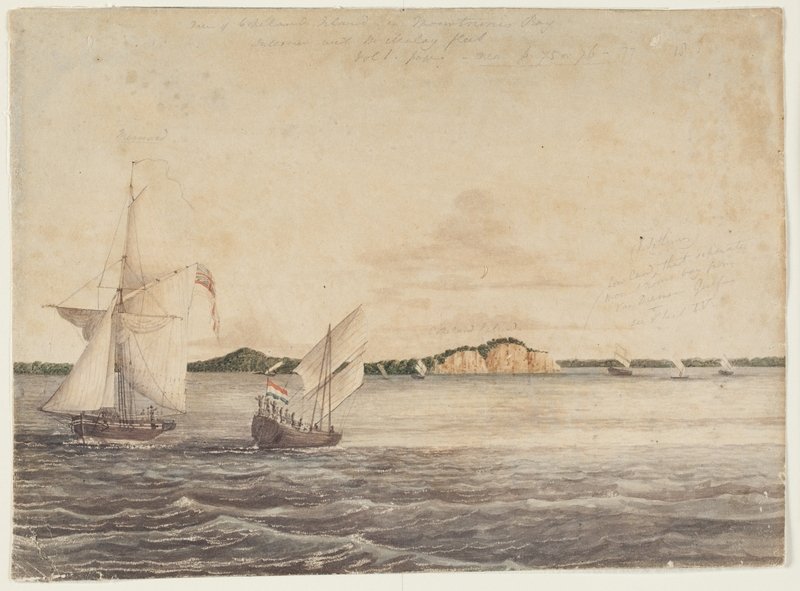
It shows pretty well here

and this modern representation of the Mermaid also illustrates it. It's a free flying spar with sail attached hoist(I'm guessing) via block at the masthead.
By the way, here's a three section binnacle which can be scaled down if needed.
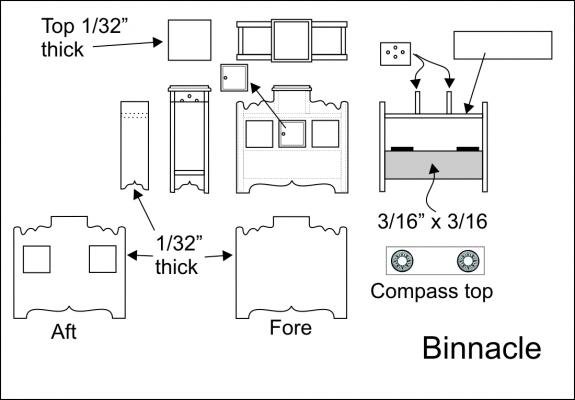
Sorry to hijack your thread James but I hope these do help.
Rick
-
On 6/20/2019 at 7:13 PM, Cabbie said:
I was trying to find a much harder way to work out a size.
Don't know if you James or Chris have got a hi res version of this cut-away. If not here it is, blows up very well and really helps with positioning deck furnishings, rigging and flying jib etc.
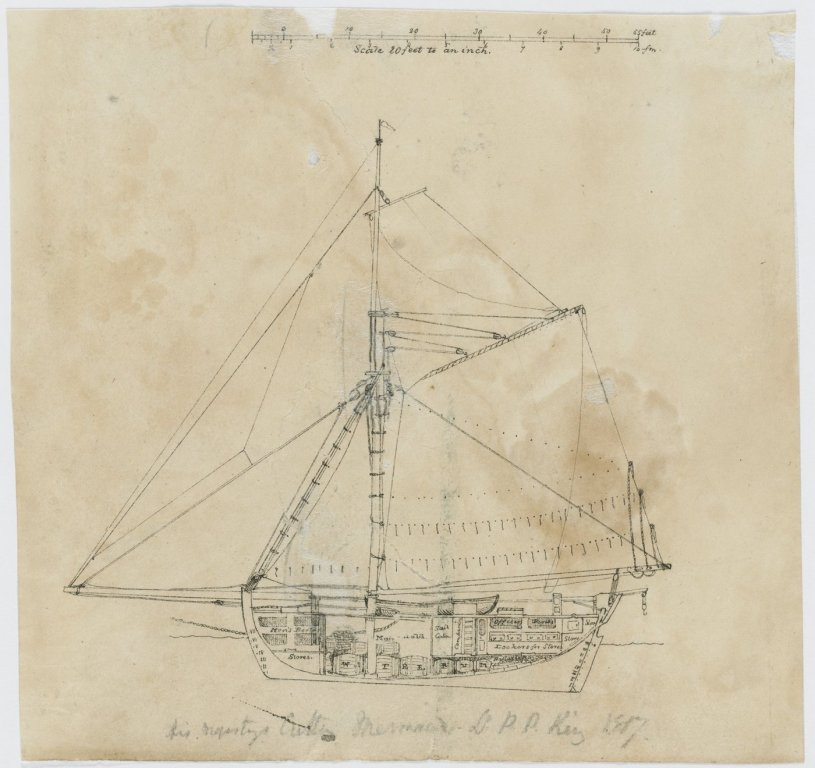
I've a couple more somewhere showing flying jibs a bit better. Just ask and I'll post them if needed.
Rick
- Mirabell61, JamesBhm and Cabbie
-
 3
3
-
3 hours ago, Cabbie said:
it looks an absolutely marvelous kit, huge instruction book,
extremely comprehensive, should be an absolute delight to build.
Think I may nick over to your place tonight Chris and check it out. If I bring my version of "Mermaid" with me we can compare notes!! 😉
Rick
-
Given that we know the length of the deck and the binnacle may be seen on King's cutaway sketch, you just need a pair of dividers to obtain the height and width of the binnacle. Set the dividers at the measurement you want then walk them down the length of the deck, a quick division will give an approximation for you. As for breadth just go with something that looks proportional that will hold a compass and a light either side.
Rick
-
-
3 hours ago, JamesBhm said:
The total height of the bulwarks is just a tad high, so I may have to recess the bowsprit just a bit more when I get to it.
Sounds as if you fell foul of the same problem another couple of us did. Nowhere in the plans does it say that the bulwarks are around 1mm higher one end to the other, so if you install with the high end to the bows then you have this problem of the bowsprit sitting too high. I did have a "discussion" with Modellers Shipyard over this and they did say that this would be noted in their next print of the instructions but as far as I can tell it's never happened.
Rick
-
Ouch - I missed that completely when I looked at it. Rudder's not going to work too well that way round.
Rick
-
I dropped mine down the depth of the cap rail and added my interpretation of the ring. Another point of interpretation in both sketches is the anchor cable/chain. It appears to me almost as if it's a chain rather than cable unless King was showing it as a thick cable by putting lines on it. I ended up with cable but still look at the pictures from time to time and wonder.
Rick
-
2 hours ago, Cabbie said:
one particular mob here are schockers about doing a prompt delivery,
if not loosing it for weeks.
Not Startrack by any chance? Around our way they throw the parcels into corners that you can't easily access!
Rick
- mtaylor, chris watton, Cabbie and 1 other
-
4
-
Not from what I've been able to see. It appears to be a complete hoop bolted to the stem with the bowsprit put through it.
It's clearer on this build. https://modelshipworld.com/topic/3958-hm-colonial-cutter-mermaid-by-olliechristo-finished-modellers-shipyard/page/24/?tab=comments#comment-204180
Rick
-
-
32 minutes ago, Cabbie said:
I wonder what holds it down?
There's a little gizmo called (I think) a spectacle. Basically an iron hoop going round the bowsprit and bolted to the prow. You can just make it out on this contemporary model https://modelshipworld.com/gallery/image/10960-p1000982s/
Rick
-
-
-
-
2 hours ago, JamesBhm said:
I've got plans to reconfigure the deck layout a bit as well
That definitely needs doing. The kit plans bear little resemblance to the diagram King drew.
Rick


HM Cutter Mermaid 1817 by JamesBhm - Modellers Shipyard - Scale 1:48 - first build
in - Kit build logs for subjects built from 1801 - 1850
Posted
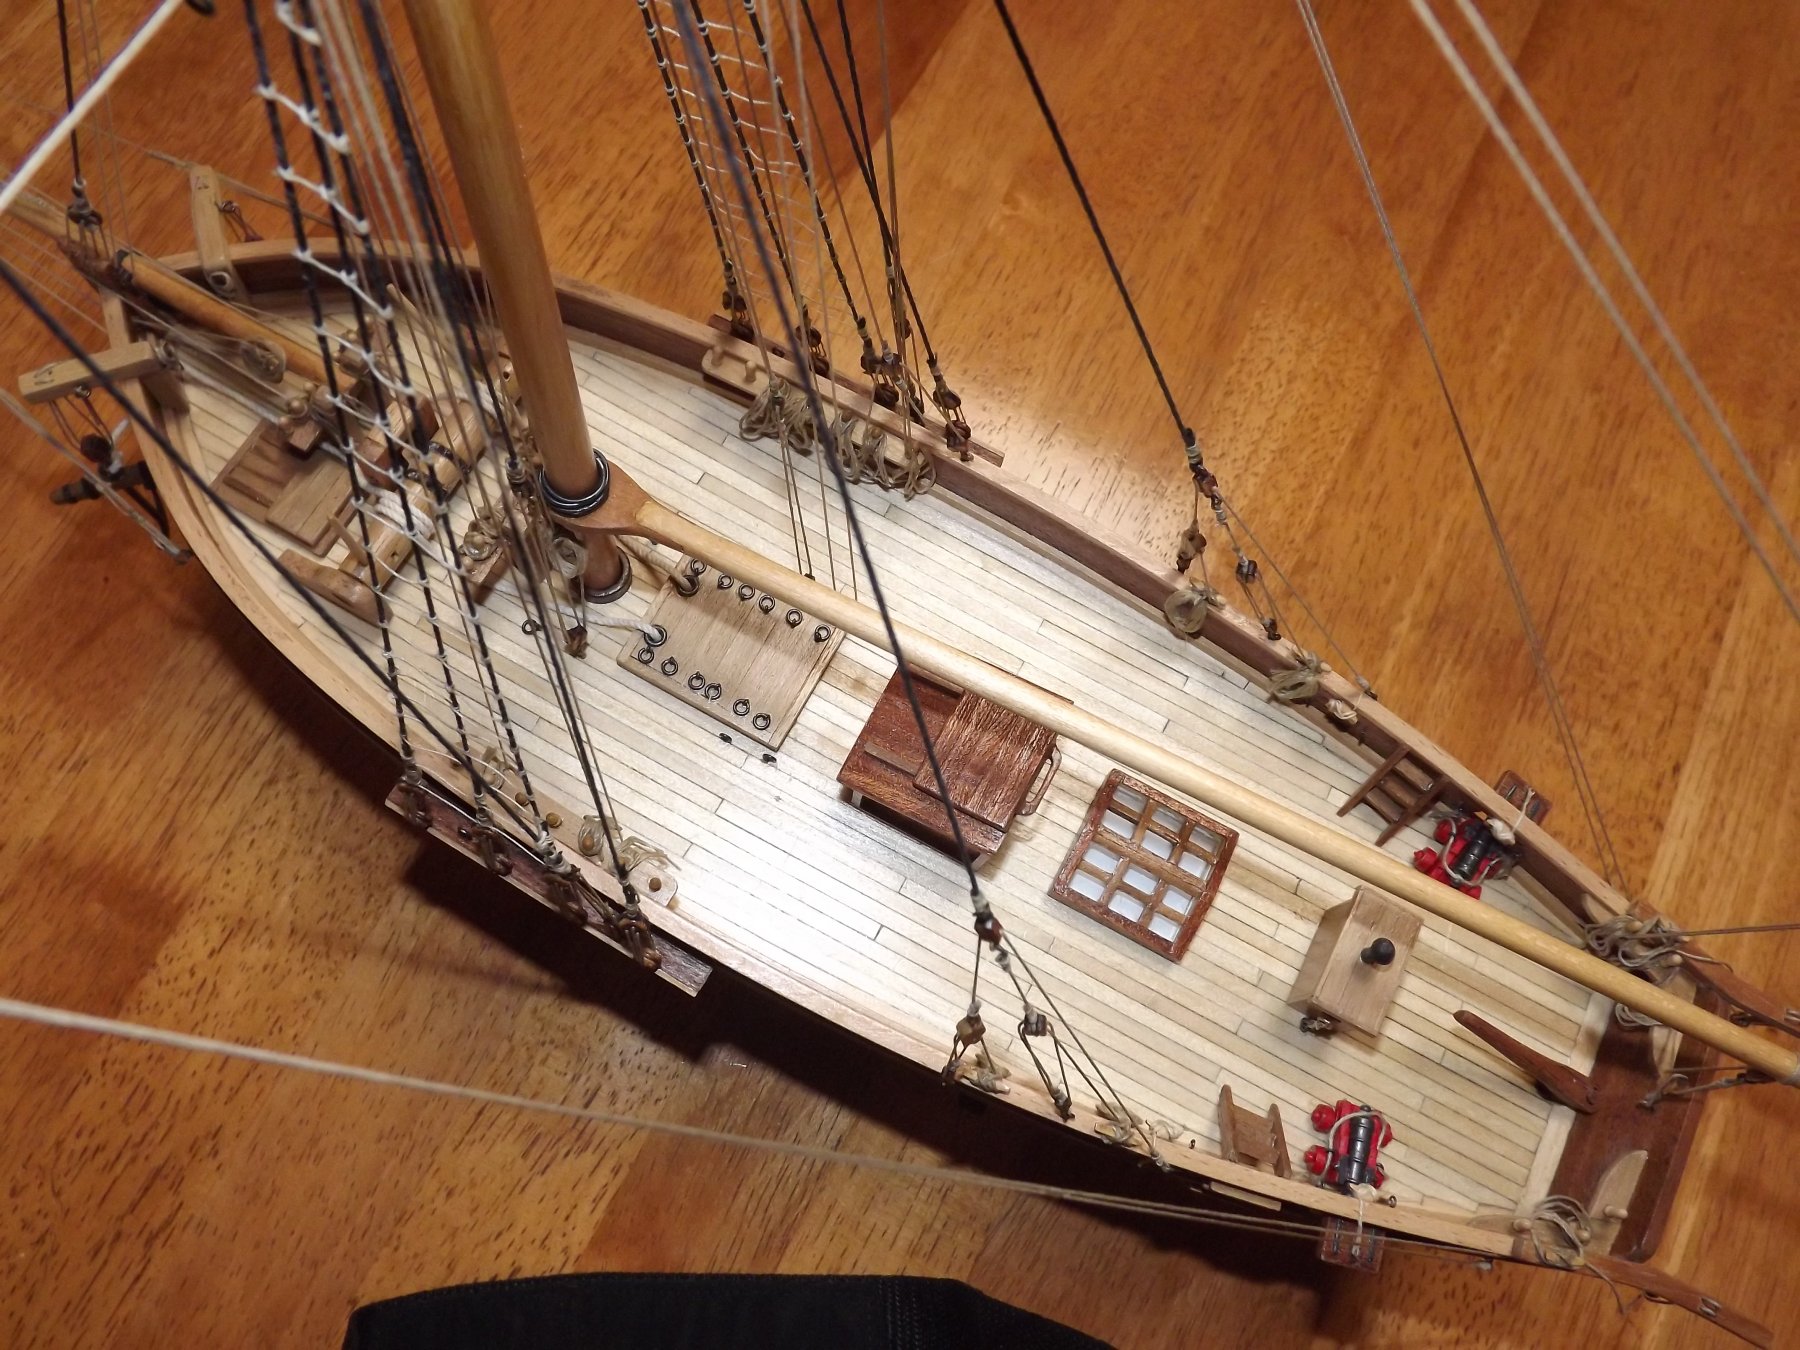
Thanks for the tip on the carriage rather than slide and for the Careening Bay note also. The deck furniture really needs some time playing with as the kit is so far from King's own sketch, as soon as I've peeled my model out of it's case (takes two people to lift it off the ship) I'll photo the deck as is for you and show the companionway before I turn it round.
Rick