


ca.shipwright
-
Posts
483 -
Joined
-
Last visited
Content Type
Profiles
Forums
Gallery
Events
Posts posted by ca.shipwright
-
-
-
-
Hello David,
Just a question to day. I was getting ready to start building masts and compared the mast section lengths on the Corel plans to the AOS. It appears that the AOS sections are considerably longer then the Corel plans. Did you find this as well?
Regards,
-
-
Greetings again,
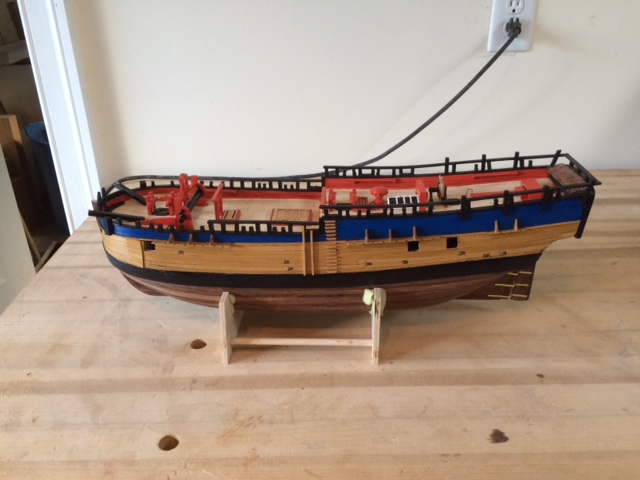
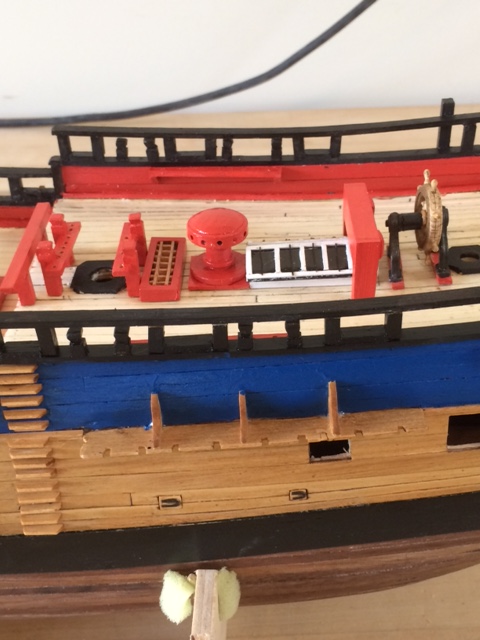
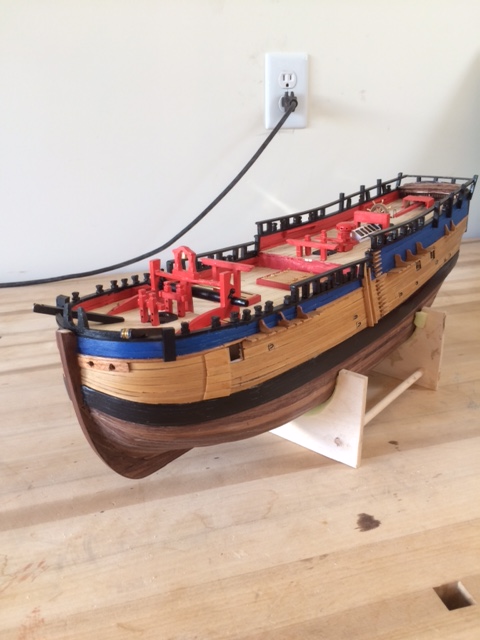
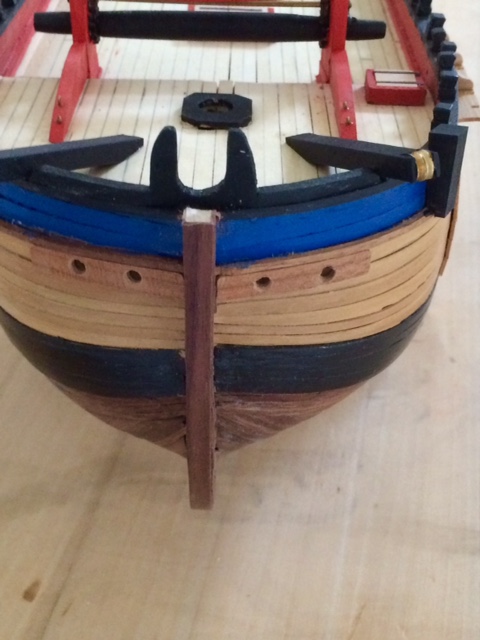
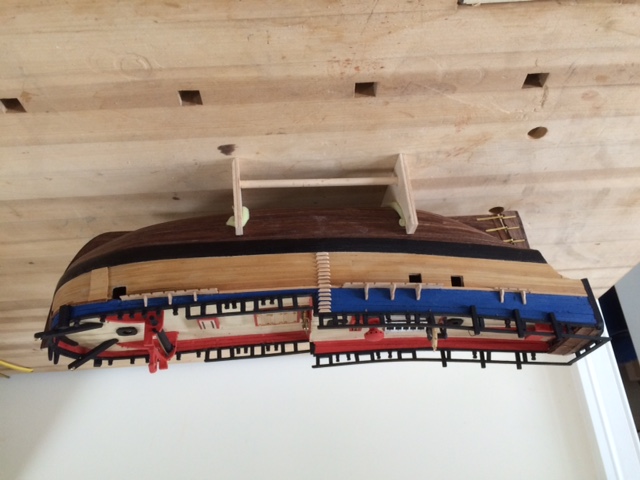
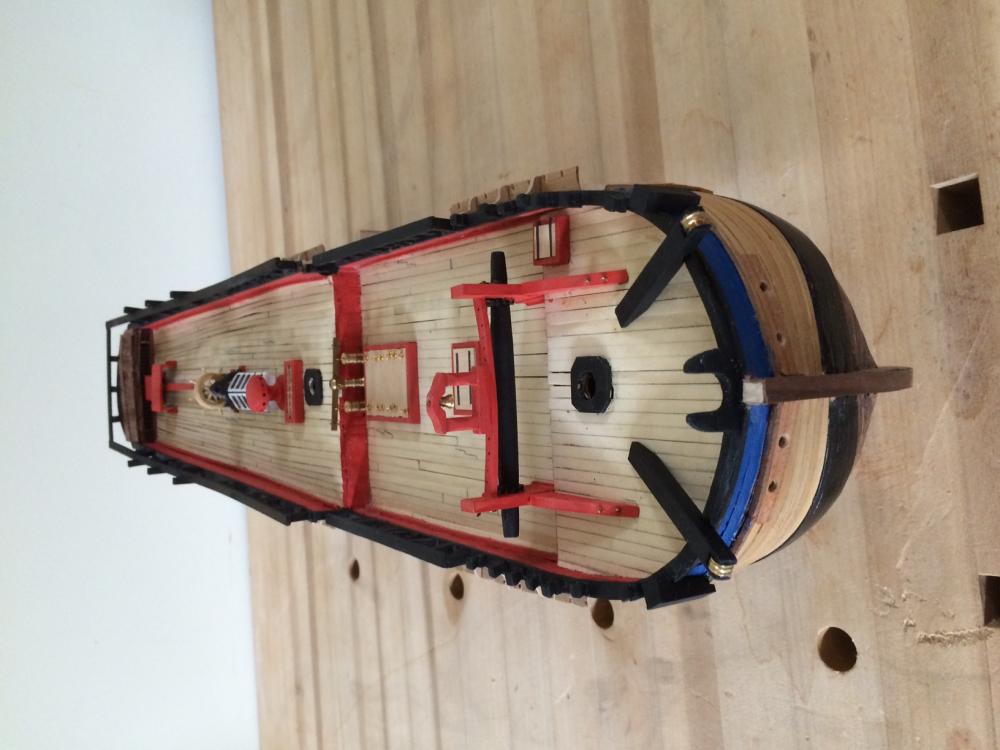
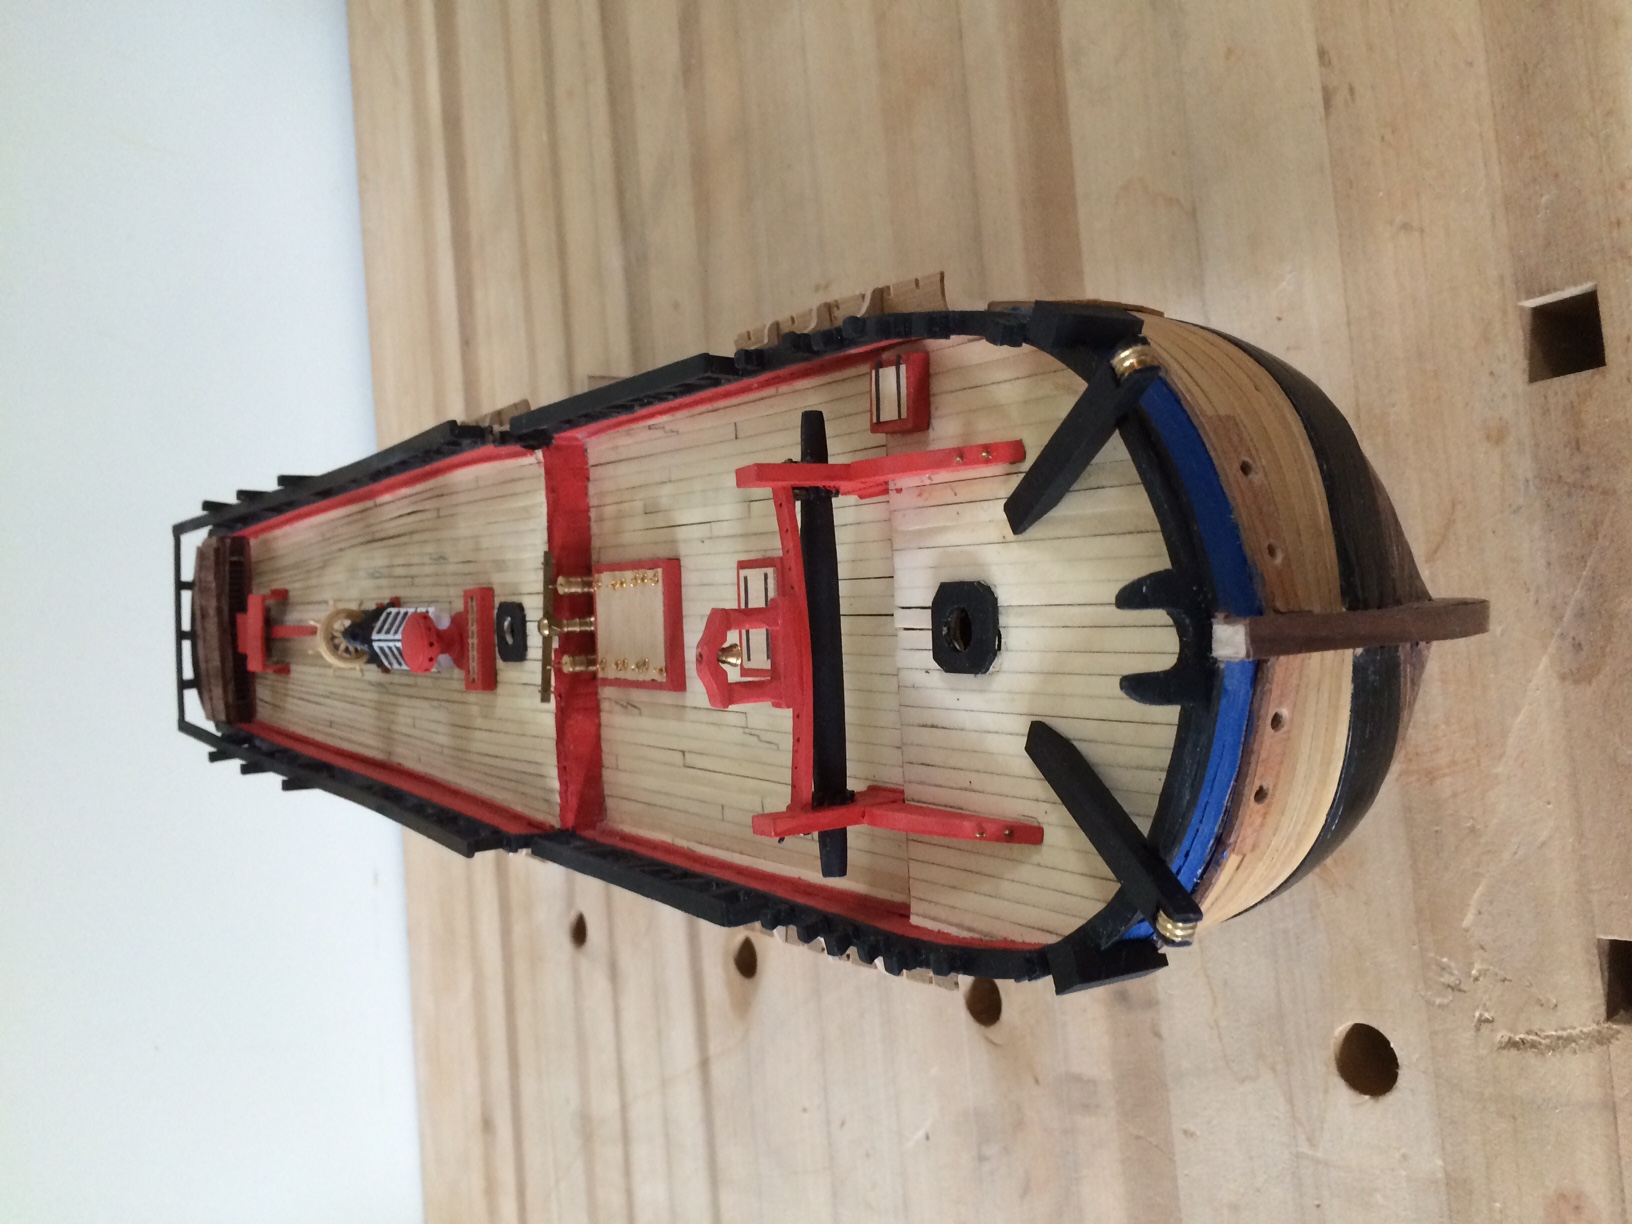
A lot of progress to report since the last post. I have finished the hull with the exception of the 3 large port covers (3 each P&S).
All of the deck furniture, pin rails, gangway stairs, rubbing boards, light and air port covers have all been installed. The paint has been tidied up. This appears to be an ongoing project. A coat of Wipe on Poly applied to everything above the wales.
I am thinking about stringing all of the chain plate parts on a thin line and spray painting them with Model Master flat black aerosol. I don't know how this will work for the britainia metal. Any ideas would be welcome.
It was a very good week. I even figured out how to turn the pictures right side up- no more having to stand on your head.
Photos to follow
Looks like I have some more tidying up to do.
Regards
- Captain Slog, GrantGoodale, dashi and 6 others
-
 9
9
-
Jesse,
Your killing me. Every time I walk past the Syren box, it feels like something is grabbing me by the throat. As soon as I finish my Endeavour, or probably while I am still rigging which begins in a day or so, I will start my Syren. I hope I enjoy the build because everything I do will have to measure up to your Syren, (not a chance), the Gold Standard of Syren building.
A joy to watch your ship take shape
By the way, what are you using to take your great photos, especially the close ups?
Regards
-
-
-
Dave,
Your level of detail is just astounding! One day...........
-
-
-
-
Greetings everyone,
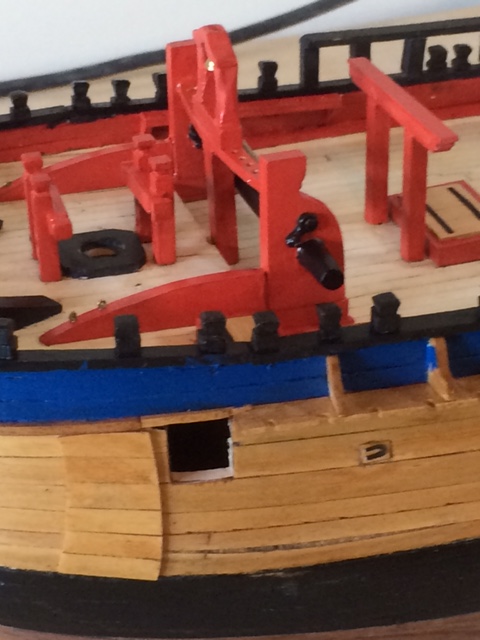
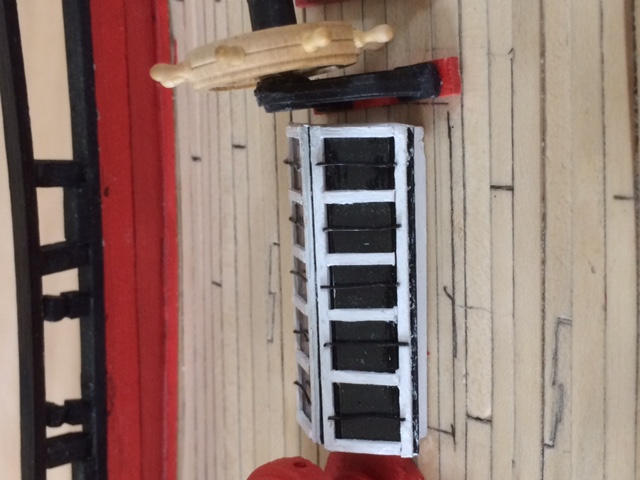
Some progress to report, finally. Built and installed most of the deck furniture. Left to go are the pumps and the bumpkins. The hatches, cat heads, skylight, windlass, swivel gun stocks, rudder, knightheads and gangway ladders. The windlass is an abbreviated version. I could not figure out how to cut the square holes. When I laid all of the deck furniture out, they didn't want to fit. It appears that my afterdeck is too short, I can't find the reason. If I have to, I will leave out a hatch just aft of the main mast.
This is what happens when you bounce back and forth between two sets of plans- Corel and AOS. When will I ever learn!!!!!!!!!
There appears to be an asymmetry in the foredeck, The ships bell doesn't mount centered- a little to starboard.
This journey began as a replica of HMB Endeavour, it progressed to a Corel "kit bash", now it will wind up as a representation of a ship that sailed during that period. As Dirty Harry (Clint Eastwood) said, "a man's go to know his limitations." I am rapidly learning mine.
Next up will be the dreaded chain plates and dead eyes on the hull, using the long gun assembly as breaks, followed by beginning the masts and bowsprit.
I have now idea what happened with photos 2, 3 and 4. I know I didn't stand on my head.
photos follow
Regards,
- dashi, cristikc, Captain Slog and 3 others
-
6
-
Hervie,
Step by step is extremely valuable for all of us less than master shipbuilders. Thanks for the extra effort to take all those pictures and writing the details in the log. It is amazing how the different approaches used by modelers all seem to get excellent results. Comes from looking at a problem from a different prospective. Kudos to all that share.
Regards
- EJ_L, Ryland Craze and Pogy647
-
3
-
-
-
-
E.J.,
Your model is coming along wonderfully.
la Couronne was the model ship that got me into this hobby. I thought it was beautiful beautiful and very unique. I especially liked the round fighting tops and the bow configuration. Needless to say, my skills were way short of this undertaking. Nevertheless, I bought it and it sets waiting for me to buildup my confidence. One day soon, I hope.
Regards
-
Hi Darrell,
This is where my ignorance shows. I never realized that unlike cannon, cannonades are sled mounted, as opposed to carriage mounted. This sets up a little different rigging pattern. Do not the carronades have an inhaul line as do cannons?
Thanks for all the info.
Regards
-
Thanks Dave,
I'll see if my Canon camera will accommodate this method.
Regards
-
Beautiful work. How do you not slop up the model as you work? It seems that mine is always getting touched up in some way or another.
To all:
If the gun crews load and service these guns via the muzzle, wouldn't the breach rope have to allow the gun to recoil far enough inboard that the crew could get to the muzzle? All of the models I have seen have a breach rope that barely allows the muzzle to clear the bulwark. What am I missing? Thanks
Regards
-
Dave,
Great work on the catheads and bumpkins. The photos are really professional quality. How do you get such great results. Thanks for sharing the source for the cathead carvings. I'm sure a lot of Endeavours will be sporting them soon.
On another note:
I have been following Endeavour build logs by many folks. They include kits by AL, Constructo, Corel, a partwork, and Caldercraft. It truly amazes me that a ship as well documented as HMB Endeavour is, has such differences in the different kits. Thank goodness for the AOS.
Regards,
-
Pete,
If you are building the ship in a home made cradle, try putting a wedge under the aft cradle piece sliding in deeper until you get the proper mast rake- you are raising the stern. Transfer all to the drill press table and drill on the mast markings. A lot easier than building a separate jig for a one time job.
Regards
-
"When do I cut the hole in the deck for the masts" seems to be a very common question.
Here is one solution:
Take your center keel and lay it on the full scale side view of the ship. Draw an extension of the mast on the center keel down to the level of the bulkhead slots. Or, as close as you can without interfering any of these slots. Make the slot the diameter of the mast. Now glue two pieces of scrap to either side of this slot making sure not to interfere with any of the bulkheads.
Cut a tenion on opposite sides of the mast making sure that the sides of the tenion are parallel. The width of the tenion should be the same as the thickness of the center keel less a hair so that it can be inserted and removed easily.
This slot will give you the proper rake of the masts and keep them centered vertically on the hull. Bevel the end of the tenion and the top of the tenion to match the line of the center keel.
Remember to add the depth of the center keel slot and the thickness of the deck to the nominal length of the lower mast.
The mast should like something like this
Side View
\ \
\ \ <--- mast
\ \ < --- deck line
\ \ <-- tenion
\ \
Front View
l l
l l
l l
l l
l l
l l
This sounds a lot more complicated than it is. I hope someone finds this useful.
Regards
US Brig Syren by hervie - Model Shipways - Scale 1:64
in - Kit build logs for subjects built from 1801 - 1850
Posted
Nice work Hervie.
Acetone will debond CA glue. Just keep dripping it into the joint, wiggle gently and it will open the glued piece. Much less damaging to the adjoining piece also.
Regards