
MORE HANDBOOKS ARE ON THEIR WAY! We will let you know when they get here.
×


KeithAug
-
Posts
3,867 -
Joined
-
Last visited
Reputation Activity
-

 KeithAug got a reaction from jlefever in Altair 1931 by KeithAug - FINISHED - Scale 1:32 - schooner
The deck (and hence the hull top line) has a significant bow from stem to stern. I therefore decided not to try and follow the deck to hull intersection with the 1st plank. Also the first plank was being laid at a small distance from the hull / deck intersection to take the later installation of the bulwark.
The line of the 1st plank was marked using a flexible straight edge which I made from .060 inch plastic.
Having marked the line I placed a number of pins along it to act as stops against which to accurately locate the 1st plank. The first plank was then installed using PVA wood glue and held in place by notice board pins while drying.
At .060 inch thick the first plank wasn't as flexible as I would have liked and so I decided to thin down succeeding planks progressively thinning each plank by .002 inch (reducing the planking thickness .050 inch by the 6th plank). Another departure from a previous post is that I found that I only had .250 inch x 3 inch x 48 inch obechi. I ordered up some .200 inch but decided to progress the planking using what I had. I will revert to the narrower planks where the hull curvature becomes more pronounced.
The first 5 rows of planking have gone on well and I haven't felt the need to do any tapering thus far.
The natural flow of the 1st plank left the stern in need of additional planks and before proceeding with the stern I marked a straight edge for the uppermost (nearest the deck) plank. I checked that the line for the upper plank was identical on both sided of the hull using my improvised height gauge (on the right of the picture)
I then installed the top plank on each side.
I then infilled the remainder of the stern using tapered planks.
-
 KeithAug got a reaction from KORTES in Altair 1931 by KeithAug - FINISHED - Scale 1:32 - schooner
Much sanding - but now complete. It took about half a day per side using 60 grit emery cloth attached to my home made sanding block - in one of the pictures. The reshaping of some of the frames (mentioned earlier) proved to be necessary. Marking the edges of the frames was very helpful as a sanding guide and the sanded hull passed the "hand undulation check". The frames in the area of the hull at the top of the rudder proved to be incorrectly shaped and i will sort this out prior to 1st planking. I have attached a photo of the real thing to show what I need to reproduce.
-
 KeithAug got a reaction from PeteB in Altair 1931 by KeithAug - FINISHED - Scale 1:32 - schooner
Balsa Infill Prior to Planking
I find infilling between frames with balsa eases the planking operation. Also I quite enjoy the process as it’s a bit of a challenge creating the 3 dimensional shapes necessary to nest between frames while conforming to the profile of adjacent infill pieces. All the balsa is ½ inch plank 3 inches wide by 18 inches long. I needed 12 planks to complete the hull – cost me £12 on ebay.
I use a disc sander for shaping – mine has been modified to take the miter gauge from my Byrnes saw. A simple and cheap way of getting an acceptably accurate disc sander.
Having completed the rough fairing of the frames I re-marked the edges of the frames with the felt tip pen. This would give me the guide for final sanding once the balsa infill was complete.
I find filling alternate frame gaps with balsa has the benefit of allowing me to progress while the previously completed and glued balsa infill dries (I use a PVA wood glue). Also at this stage I roughly shape the infill using a rasp leaving about 1/16 inch of balsa proud of the adjacent frames – for final finishing with sandpaper.
I then infill the remaining frame gaps before finishing the rough shaping with the rasp.
-
 KeithAug reacted to Julie Mo in Endeavour by KeithAug - FINISHED - Amati - Scale 1:35 - after 1989 restoration - J Class
Thank you, Keith, for both the instructions and the welcome back. I took a break from the house remodel and once I got my hands back on the model, it felt good. I found out I still had the desire to dive back in. I feared being away so long that I might have lost interest. I didn't.
Thanks again for the help!
-
 KeithAug got a reaction from Julie Mo in Endeavour by KeithAug - FINISHED - Amati - Scale 1:35 - after 1989 restoration - J Class
Hello Julie welcome back.
Having completed the balsa backing I sanded it level with the deck frames.
I did the first planking working from deck level to keel.
I then fitted and glued the deck in place.
I then fitted the deck edge plank.
I then sanded the 1st planking. The edges of the plywood deck and deck edge plank being sanded as I sanded the hull planking.
I then did the 2nd planking.
The advantage of this sequence is that the second planking comes all the way up to deck level and covers the edges of the plywood and deck edge plank.
I think you could adopt the above sequence and use the first plank to correct your dip by sitting the deck on the plank locally with a bit of shimming on top of the frames to support it.
-
 KeithAug got a reaction from Piet in La Salamandre by tadheus - 1:24
Tadheus
lovely work and very realistic.
-
KeithAug reacted to wyz in Altair 1931 by KeithAug - FINISHED - Scale 1:32 - schooner
Hand tools only? Those are two mighty nice looking completed models, and proof to all that fancy power tools and special jigs aren't necessary to produce works of art. They are beautiful. The schooner Altair is progressing nicely too. On a vessel with such pretty lines you are doing a fantastic job on the planking. I love your work.
Tom
-
KeithAug reacted to Jörgen in Altair 1931 by KeithAug - FINISHED - Scale 1:32 - schooner
Thank you for the photos and your kind words Keith. Your Frigate is just outstanding, a masterpiece.
-
 KeithAug got a reaction from Zarkon in Altair 1931 by KeithAug - FINISHED - Scale 1:32 - schooner
Hi Jorgen
Thanks of the feedback.
You clearly have skill - with practice you will be soon be achieving the quality of work you aspire to.
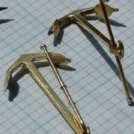
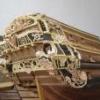
For many years I had relatively simple tools - here are a couple of models I produced with only hand tools and a model makers hand drill.
The tug was my first model - a kit.
The frigate was my second - scratch build
-
 KeithAug got a reaction from cabrapente in Altair 1931 by KeithAug - FINISHED - Scale 1:32 - schooner
Hi Jorgen
Thanks of the feedback.
You clearly have skill - with practice you will be soon be achieving the quality of work you aspire to.
For many years I had relatively simple tools - here are a couple of models I produced with only hand tools and a model makers hand drill.
The tug was my first model - a kit.
The frigate was my second - scratch build
-
 KeithAug got a reaction from thomaslambo in HMS Bounty by thomaslambo - Artesania Latina – Scale 1:48
Boyd
This is a lovely build and I love your attention to detail and quality of work.
-
KeithAug reacted to Jörgen in Altair 1931 by KeithAug - FINISHED - Scale 1:32 - schooner
This is amazing Keith. I want to be on that level someday. And your tools get me jealous
Br
Jörgen
-
 KeithAug got a reaction from mattsayers148 in HMS Bounty by thomaslambo - Artesania Latina – Scale 1:48
Boyd
This is a lovely build and I love your attention to detail and quality of work.
-
 KeithAug got a reaction from Altduck in Endeavour by Passer - FINISHED - Amati - 1:80 - first build - Americas Cup J Class
Nicely done Jorgen. She looks great.
-
 KeithAug got a reaction from mtaylor in Endeavour by KeithAug - FINISHED - Amati - Scale 1:35 - after 1989 restoration - J Class
Jorgen
Sometimes its easier to work at large scale. I thought your build was excellent given the scale challenges.
-
 KeithAug got a reaction from Nirvana in Altair 1931 by KeithAug - FINISHED - Scale 1:32 - schooner
Hi Thomas (or is it Boyd?)
Thank you for the positive comment. I'm in the slow build phase at the moment but I should improve pace as we move towards autumn.
-
KeithAug got a reaction from Nirvana in Altair 1931 by KeithAug - FINISHED - Scale 1:32 - schooner
Hello Bedford
Thank you for the comments on the planking. Its nice to get positive feedback from someone who knows a thing or two about planking.
Keith
-
 KeithAug got a reaction from CaptainSteve in HMS Bounty by thomaslambo - Artesania Latina – Scale 1:48
Boyd
This is a lovely build and I love your attention to detail and quality of work.
-
KeithAug got a reaction from cabrapente in Altair 1931 by KeithAug - FINISHED - Scale 1:32 - schooner
Appart from doing other stuff I have found a bit of time to progress the planking.
On my last post I had started attaching the taper planks.
I progressed the taper planks which started having the desired effect of filling the area of maximum beam while limiting the degree of bending in the stiff direction of the plank. I also planked the end of the keel in front of the rudder position.
You may remember form a previous post I had marked the hull and identified where i would get to if I had pressed on with parallel planking (red line). Also you may recall that i wanted to end up at the black line. The plan worked reasonably well as illustrated by the photographs.
I did have to do a fairly complicated adjustment by letting in a fillet pieces at one position on each side. See 4th plank down on the next photo.
Much of the tricky planking is now done and most of the remaining planks will parallel, supplemented by finely tapered wedges to fill out the rear of keel.
-
KeithAug got a reaction from Nirvana in Altair 1931 by KeithAug - FINISHED - Scale 1:32 - schooner
For interest - here is what the real thing looks like.
Hopefully the model will do the original justice.
-
KeithAug got a reaction from KORTES in Altair 1931 by KeithAug - FINISHED - Scale 1:32 - schooner
Thank you Mark and John for your supportive comments.
I have been progressed a little with the hull 2nd planking.
I find it is quite easy to over think the planking and I prefer to just get on with it and let the planks tell me when they are finding it difficult to follow one another. In this case this started to occur after the 8th / 9th parallel plank. At this stage I marked off the hull as though I would continue with parallel planks. This produced the red line on the photo. I concluded that planking to the red line (even if it was possible) would produce a quite unrealistic planking effect on the keel so I drew the black line to represent where I wanted the planks to fall.
Measuring the space between the lines gave me an indication of how much "extra" planking width I would have to find at the waist - .495 inch (about 3 plank widths) in this case.
I now need a cunning plan for manufacturing a reasonable number of accurately formed taper planks. I feel a bit of experimenting coming on.
-
KeithAug reacted to Jörgen in Endeavour by KeithAug - FINISHED - Amati - Scale 1:35 - after 1989 restoration - J Class
Keith, your Endeavour looks fabulous. Very very nice and it is so much bigger than mine...
Jörgen
-
KeithAug got a reaction from KORTES in Altair 1931 by KeithAug - FINISHED - Scale 1:32 - schooner
Praying for Rain!
Its been some time since my last post. My dear daughter purchased a flat in London in a property built in 1880. It needs a degree of refurbishment and I have been appointed to the post of chief joiner/painter. With that and the garden bursting into spring life I have had little time for my favourite pastime. However today I was at home and thankfully it rained so the yacht took a minor step forward.
I needed to mahogany plank the inside of the bulwarks to represent the detail of the original. See photo
I cut the planks 12"x0.2"x.032" on the circular saw using a .032 thick zero kerf slitting saw blade. The finish was almost polished!
I needed 10 planks to complete the whole process.
I used paper to create the template for the stern.
Having had my modelling fix I now return to house refurbishment - yawn!!!!
-
KeithAug got a reaction from Nirvana in Altair 1931 by KeithAug - FINISHED - Scale 1:32 - schooner
Appart from doing other stuff I have found a bit of time to progress the planking.
On my last post I had started attaching the taper planks.
I progressed the taper planks which started having the desired effect of filling the area of maximum beam while limiting the degree of bending in the stiff direction of the plank. I also planked the end of the keel in front of the rudder position.
You may remember form a previous post I had marked the hull and identified where i would get to if I had pressed on with parallel planking (red line). Also you may recall that i wanted to end up at the black line. The plan worked reasonably well as illustrated by the photographs.
I did have to do a fairly complicated adjustment by letting in a fillet pieces at one position on each side. See 4th plank down on the next photo.
Much of the tricky planking is now done and most of the remaining planks will parallel, supplemented by finely tapered wedges to fill out the rear of keel.
-
KeithAug reacted to Bedford in Altair 1931 by KeithAug - FINISHED - Scale 1:32 - schooner
Absolutely love her lines and you are doing her justice, beautiful planking