Cathead
-
Posts
3,526 -
Joined
-
Last visited
Content Type
Profiles
Forums
Gallery
Events
Everything posted by Cathead
-
 Thanks! I appreciate the feedback, especially given how beautifully yours turned out.
- 64 replies
-
- 4
-

-
- 18th century longboat
- model shipways
- (and 1 more)
-
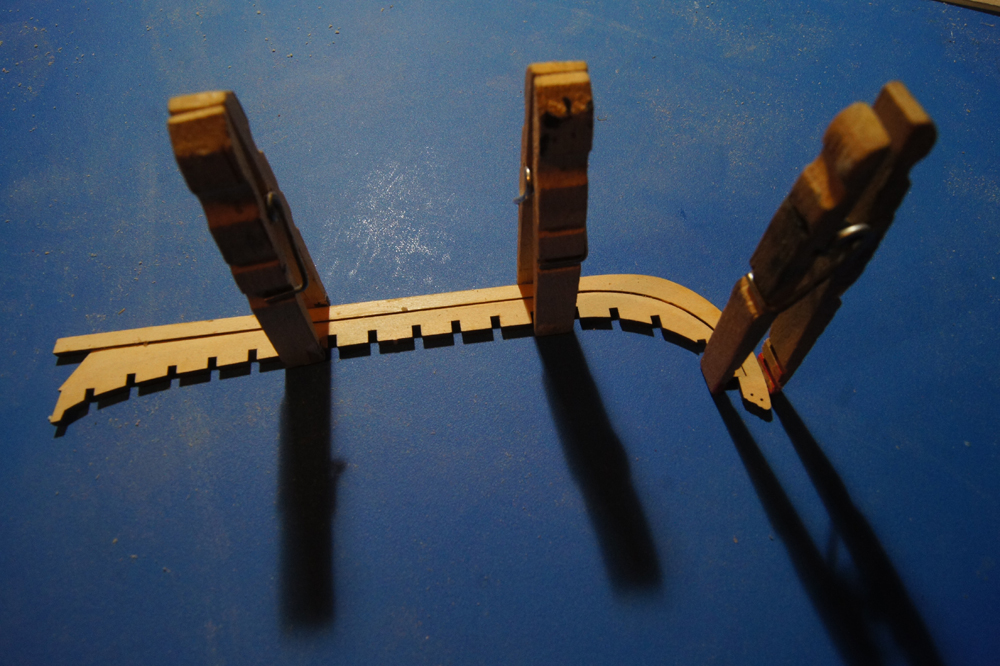
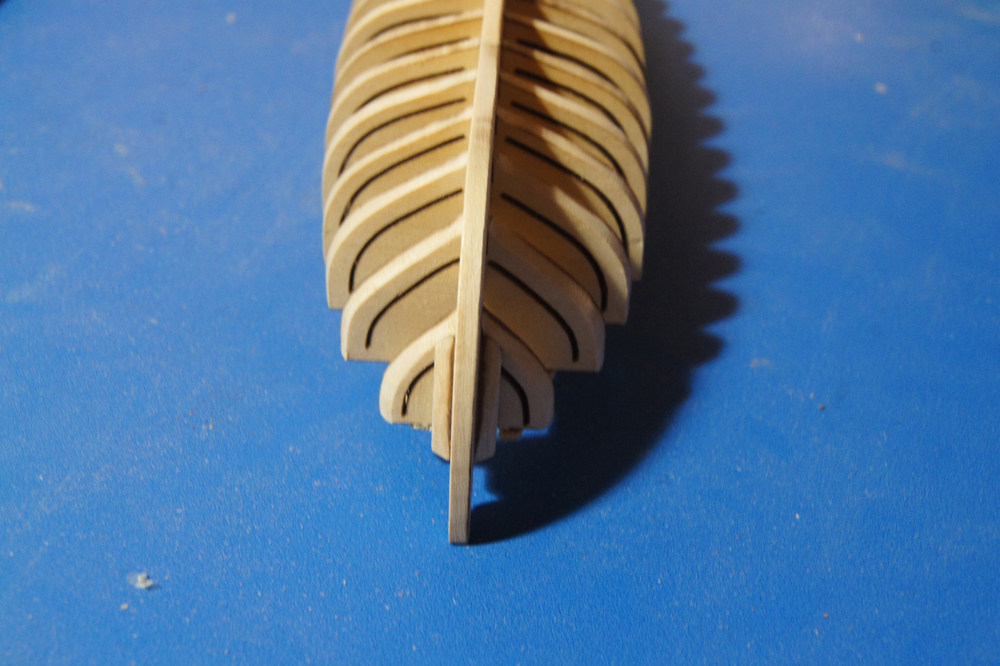
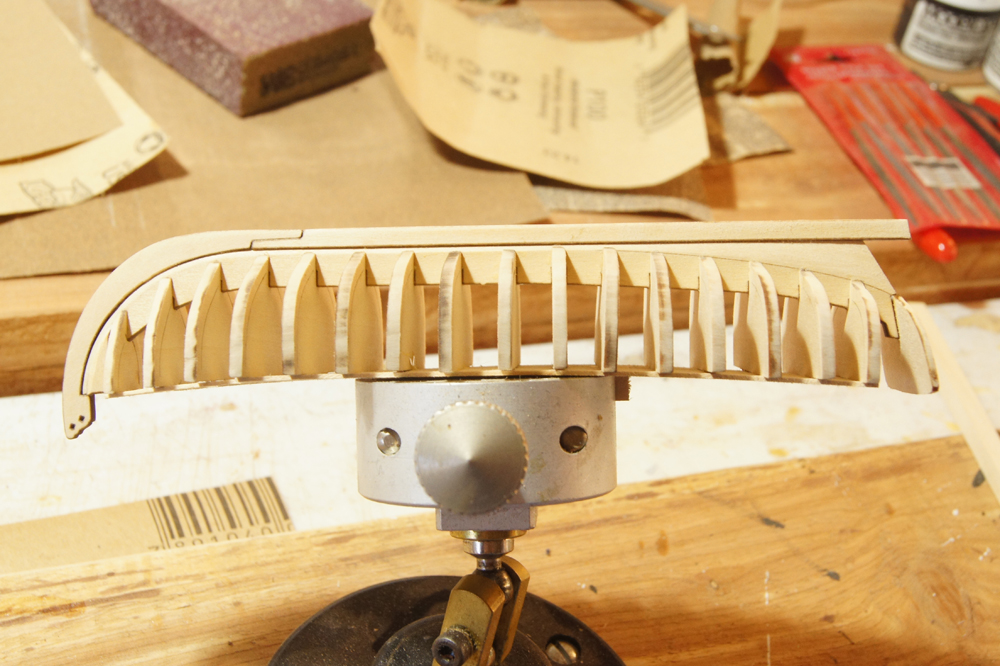
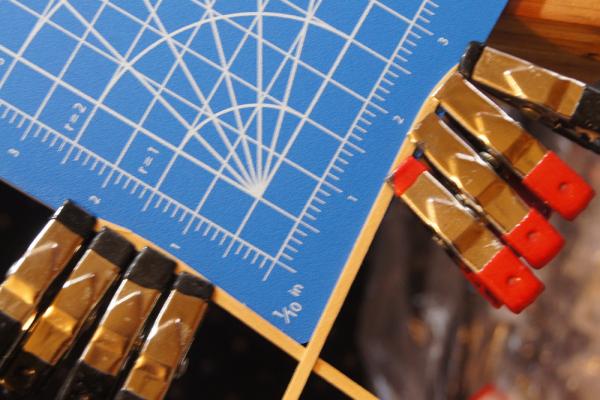
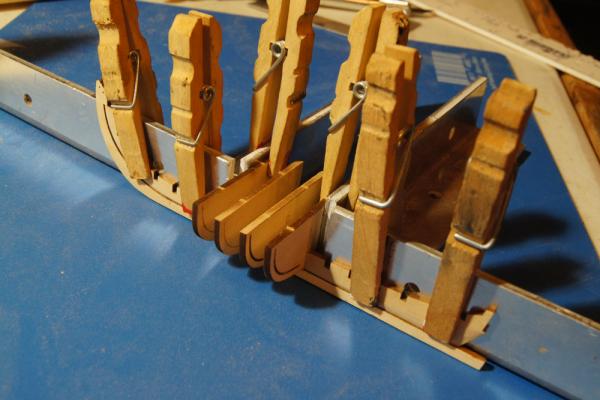
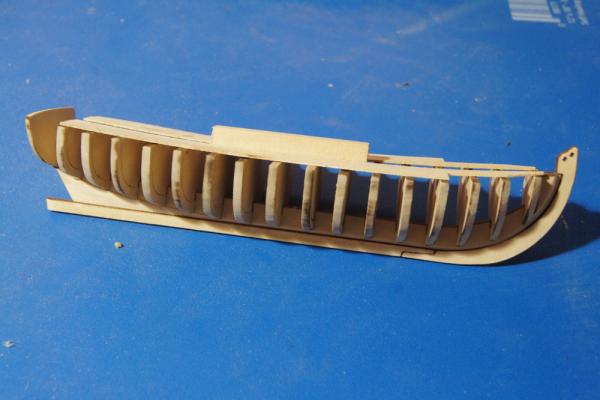
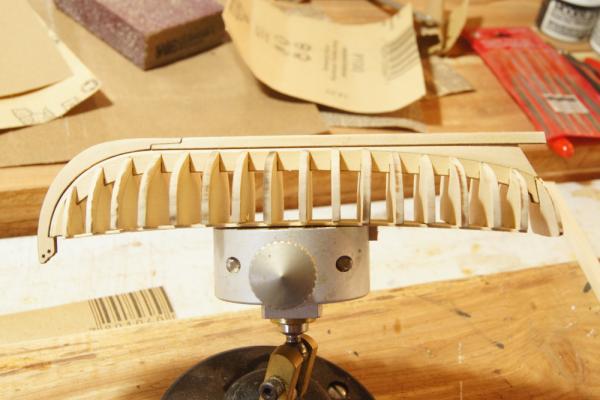
Sometimes mood is everything. By Friday evening, I was feeling a tad frustrated, having struggled over and over to get my planking right. I'd decided to do things properly, so carefully removed my first attempt, re-faired the frames, and started over. The first plank went on fine again, but I just wasn't getting the hang of bending the planks in three dimensions, and things kept either buckling or not lining up. Finally I just went to bed. This morning, I took a deep breath and started anew, changing focus to the garboard planks and the next strake up. These allowed me to practice solely edge-bending a plank, and I started to get the hang of it a bit, so went back to work on the sub-sheer strakes again. I was having fun and feeling good again, and something finally clicked, at least a little. I also realized after some experimentation, that I may have over-faired one of the forward bulkheads. Gluing in a little filler strip and filing it to shape definitely helped with forming the planks properly. A fresh approach let me see that, whereas the night before I was just bulling ahead with blinders on. The results, as of this afternoon, are definitely below the standard of the best builders here, but I think are satisfactory for me. There are still some odd gouges, dents, and humps in a few places, but I think these will fade with sanding, painting, and the overall completion of the model. They show up well in the harsh light and shadows of close-up photography, but won't be as obvious in the general display conditions of the finished model. I think. Bow view, with the sheer strake now set lower. I gave the planks a quick, rough sanding but there's more work to be done. Side view. I think I've gotten the hang of edge-bending planks around the garboard strake. It's too bad this part will be painted, while the upper bow will be stained, because things look better down here. Bottom view. Not sure if it shows, but I've been using a tick strip to lay out the course of the remaining planks. Edge-bending planks. It's taken some practice to get this right, especially without denting the soft planks too badly. I used the edge of my cutting map, as the rough surface gives the clamps more purchase. I've learned to turn any such plank upside down, so any clamp marks are on the inside where they won't be as visible. Does anyone see further faults or problems, other than those I've already pointed out (a few humps and nicks in the planks, for example)? I'm looking forward to filling this in, now that I'm finally understanding more about how to do it. I wanted this kit to teach me more, and it sure is!
- 64 replies
-
- 10
-
-
- 18th century longboat
- model shipways
- (and 1 more)
-
Spreaders really are a tedious thing to model. I didn't enjoy that part of the Bertrand. Really nice modelling of the damage. When do you shove a big piece of kindling through the bow to simulate the fatal snag?
-
Hmm...tough call. Wouldn't be THAT much work to take these first two off and start over.
- 64 replies
-
- 5
-
-
- 18th century longboat
- model shipways
- (and 1 more)
-
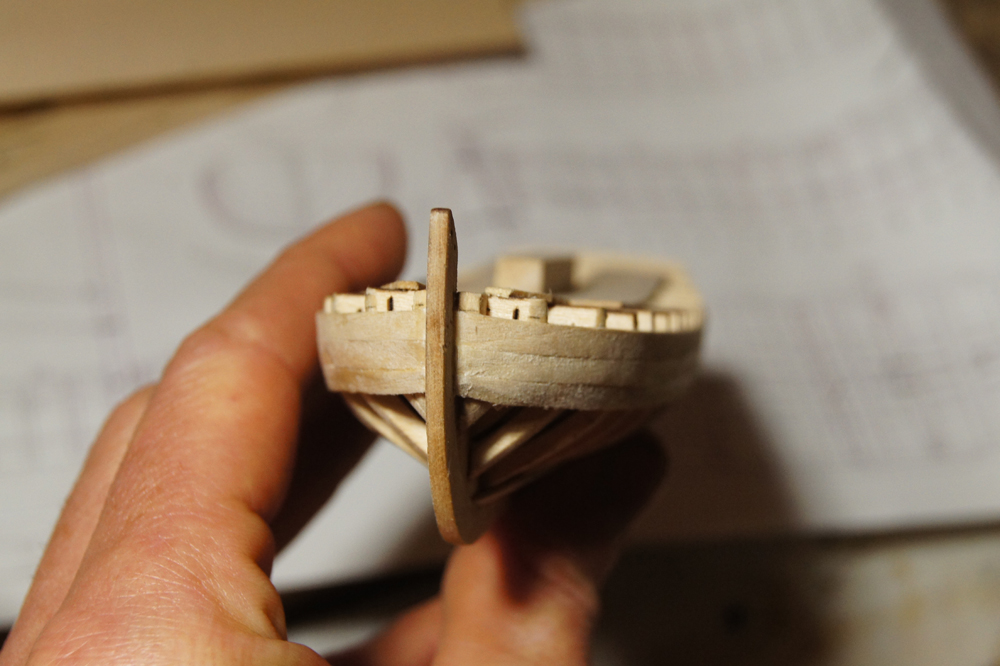
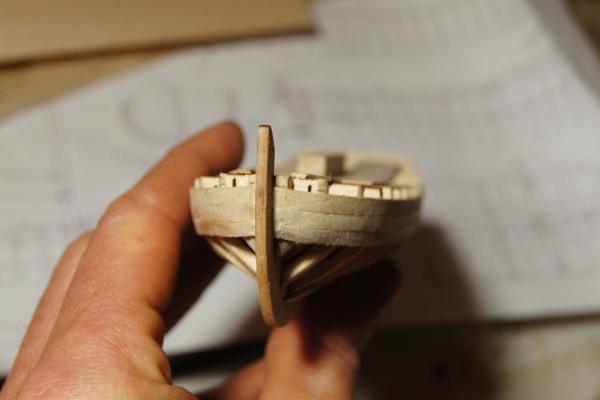
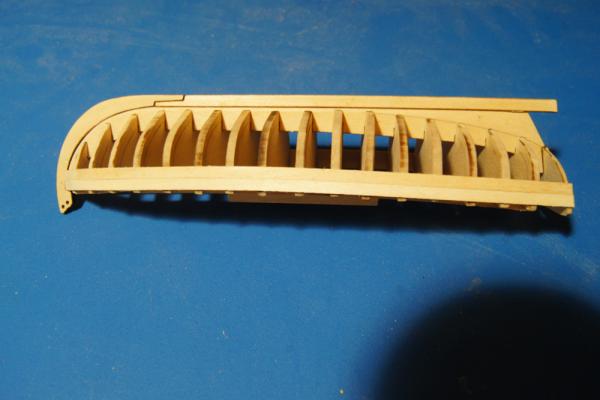
The first two strakes are done; I felt they went on smoothly and looked good. Then I discovered that I'd made a significant mistake. Despite obsessively rereading various build logs and the instructions, I did something wrong. Can you tell what it is? That's right, I was supposed to leave a gap above the sheer strake, at the stem, to allow for the cap rail to fit. Now that I see it, it's obvious in many other logs, on the plans, and in the instruction photos. I have the rest of the strake set out just right, a bit below the tops of the bulkheads, but without thinking I ran the sheer strake all the way up the stem to the end of the rabbet. It's supposed to look like this. I'm not the first to do this. Stuntflyer did the same thing, and in fact I discovered my error by reading his log, which I apparently hadn't before. I got to that point, and my stomach lurched. However, the ensuing discussion makes it clear that it's a reasonable fudge to just sand down the sheer strake to create that notch/platform for the cap rail, as Stuntflyer did here. His model came out beautifully. So that's what I'm going to do, unless anyone has advice to the contrary? Does the rest of the planking look correct, or are there other concerns that would suggest I should take these two off and start over before I'm in too deep?
- 64 replies
-
- 10
-
-
- 18th century longboat
- model shipways
- (and 1 more)
-
Model railroad folks have spent a lot of time playing with getting water right. You might do some hunting in Model Railroader and other resources. I can't recall a specific article to recommend, but I know I've seen very good representations. I think the best I've seen is people who apply various acrylic surfaces to glass or other subsurfaces, which can be textured as they dry slowly to create small ripples and waves. Color is really important, too. Way too many people go with a form of blue; even if water can sometimes look blue in real life, it almost never looks realistic on a model. The eye can tell the difference. A glossy, wet-looking surface on a subtle, dark green/black/brown looks much better. If the Red River was anything like other Western rivers, you couldn't go wrong with a good muddy chocolate color.
-
Glenn, your port/starboard display idea sounds excellent to me. It fits with the rest of your plan for the model.
-
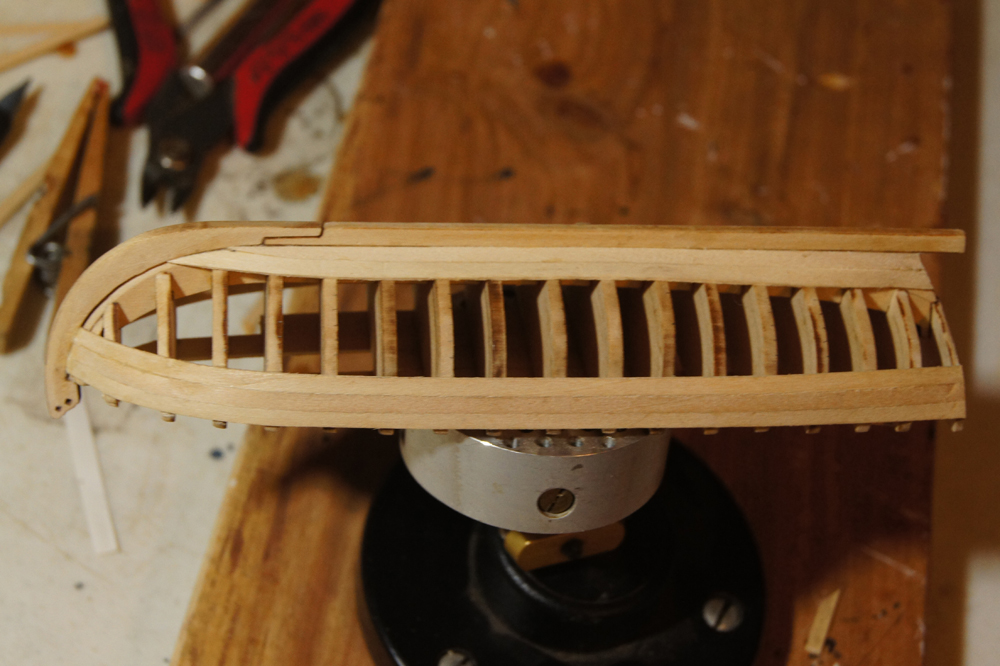
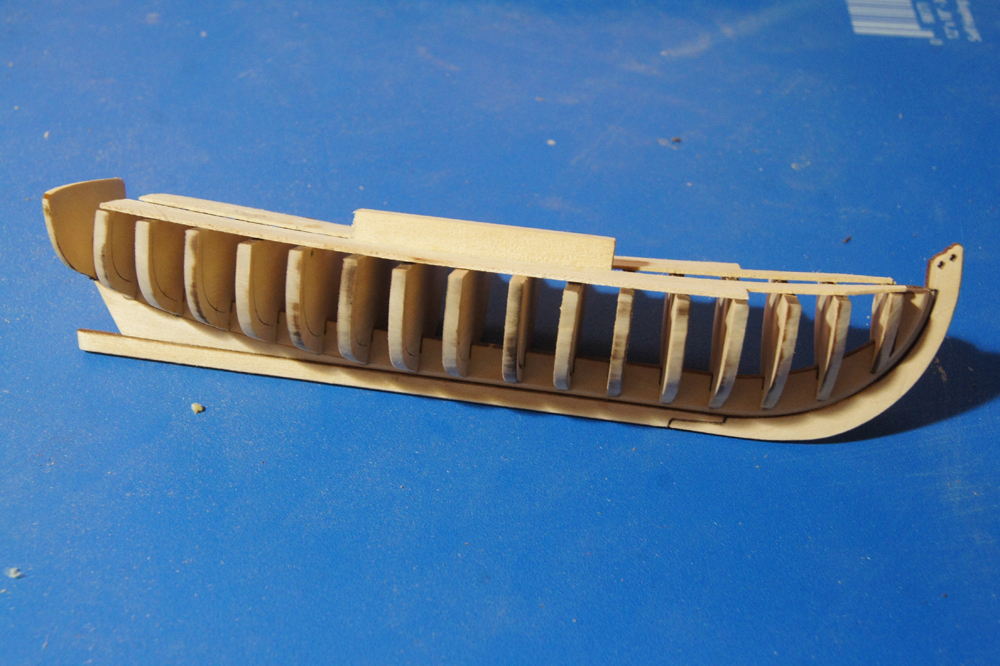
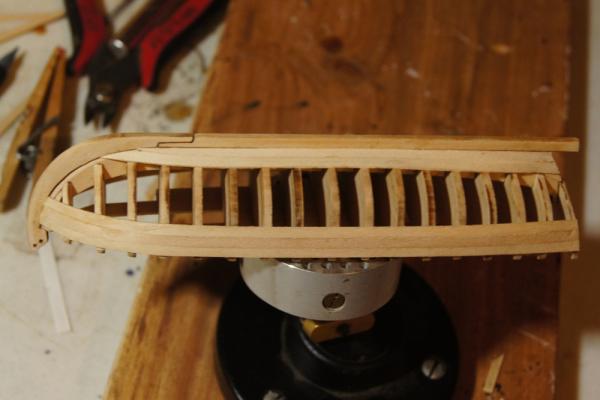
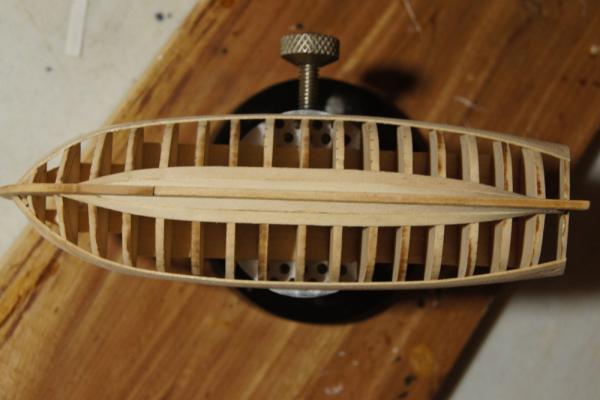
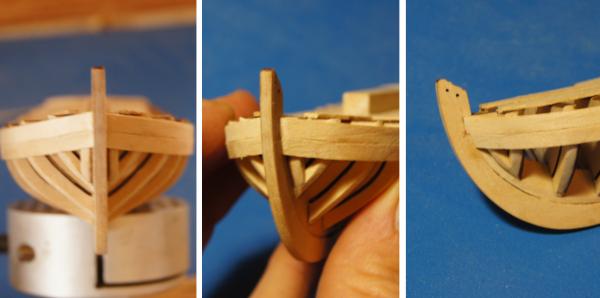
Huzzah for weekends! Assembling the keel. I made a paper pattern to transfer the rabbet line to the non-marked side. Attaching the bulkheads. I didn't feel like assembling a build board that wouldn't be used beyond this step, so I came up with this approach instead. The keel is clamped to two large squares, which in turn hold each bulkhead square. I started amidships and worked out, doing two bulkheads at a time. I had previously traced square lines on each bulkhead, and used a third square to ensure each one was vertical relative to the keel, along with the eye test. This worked really well. For the last few small bulkheads, when there wasn't enough keel/stem left to clamp to, I just did it by eye and it came out fine. Stiffening the bulkheads. I used thin scrap left over from another project, and glued a thick square in the middle, the use of which will soon become apparent. I made sure that all the braces stayed within the part that will be removed. I also attached the bow fillers at this stage. Here's the frame, transom attached, all faired. It's a gorgeous day here, sunny and warm, so I simply sat on my porch and sanded away, cradling the hull in my hand and lap. Nothing beats full sun for detail work. Closeup of the bow after fairing. Does it look right? Test strakes seem to fit well. And here's why I attached that square chunk on top. It's sized to fit in my handy movable cradle, so that I can plank the hull while rotating it and holding it in any orientation I desire. I'm happy to say I haven't broken the stem yet, and I'm hopeful I can avoid it for good now that the worst handling is over. Anyone see anything wrong before I start planking?


- 64 replies
-
- 10
-
-
- 18th century longboat
- model shipways
- (and 1 more)
-
Wow. So pretty. Glenn, I'm curious. I assume you're going to have to cut the wheels down, too, as steamschooner said. What is the reason for building the fly and paddle wheels whole and then chopping them, versus using your CAD and mill to just make them precisely cut off in the first place?
-
Good progress. Are you planking the other decks the same way as the main?
-
Looking forward to seeing what you come up with.
-
Lovely! I'm working to catch up on some build logs, as I just started this myself. Very nice work.
- 100 replies
-
- 3
-
-
- model shipways
- 18th century longboat
- (and 1 more)
-
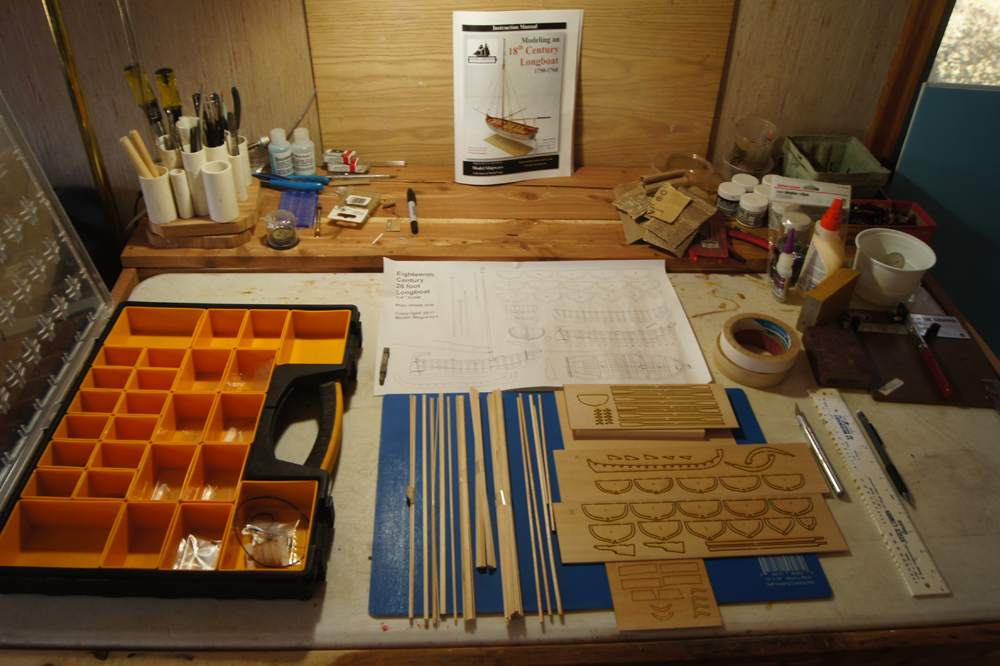
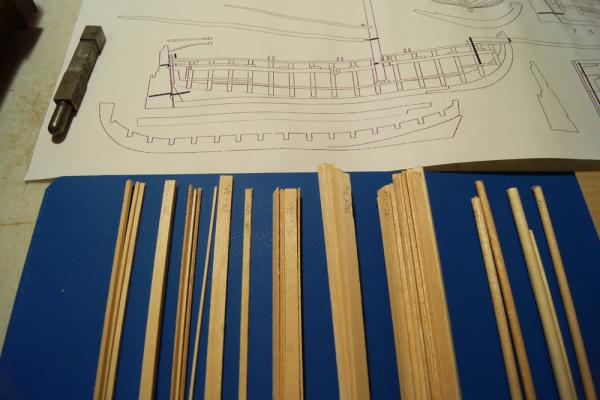
Ahoy, it's yet another longboat! Last fall, looking ahead to the completion of my steamboat Bertrand scratchbuild, I wanted my next project to fulfill three goals: have good instructions to give my brain a rest, let me develop & practice skills like planking & rigging before tackling a larger ship project, and not be too large. I settled on this little model back in September, when Model Expo had their special offer to buy any kit 50% off, then send them photos of the completed model within a year to get the other 50% in store credit. I bought the two naval cannon kits and this one, figured that I'd have Bertrand done by the end of the year, and should be able knock those three out in the remaining nine months. Well, here it is about March, and the two cannons are done with the longboat underway. So in effect, this is a "free" kit if I can finish it by September. I think that's plenty doable. Here's the kit laid out on my reasonably organized workspace, a plastic "market" table set into a cedar frame I built from the abundant red cedar we log & mill on our farm. My mind doesn't think easily in small fractions of an inch, so I took a pencil and labelled the end of each wood strip or bundle as I worked out its identity on the parts list. This way, every time I want a piece, I won't have to measure a bunch of different strips to figure out which one I want. Light pencil is easy to remove as needed. We're about to head down and visit the Arkansas in-laws, so not much more will get done in the next week, but I'm too excited to get started not to at least post the log. This will be a fun change of pace from the Bertrand, and will be a nice complement to the MS Bounty Launch I built before that; there's even a space on a bookshelf reserved for the finished model. Thanks in advance to any of you who tune in; I hope I can add something to the collected knowledge of this great kit.

- 64 replies
-
- 10
-
-
- 18th century longboat
- model shipways
- (and 1 more)
-
Experience with BlueJacket metal toners?
Cathead replied to Cathead's topic in Metal Work, Soldering and Metal Fittings
I used the pewter black on the castings and the brass black on the brass fittings. -
Experience with BlueJacket metal toners?
Cathead replied to Cathead's topic in Metal Work, Soldering and Metal Fittings
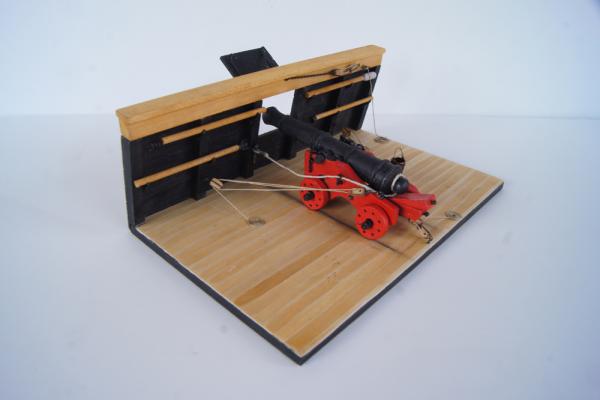
So I've now tested the BlueJacket blackeners, using a variety of metal parts from the Model Shipways naval cannon kit, and am quite pleased with the results. I scrubbed all the pieces in warm soapy water, then soaked them in white vinegar before rinsing and drying. Then I tested the blackening solutions. The bottle instructions suggest diluting the solution 1:10; I wasn't sure which direction this meant (one parts solution to ten parts water, or vice versa), so I wrote BlueJacket. As you might expect, I got a swift and helpful response: It is ten parts water to 1 part solution. That ratio is really flexible.Some people use it full strength, and others really dilute it a lot. The10:1 blackens the metal in about 5 minutes or so. Make sure to clean theparts first. Here's what the blackened parts looked like after my first attempt (all were soaked for several minutes up to 15): The pewter parts didn't fully blacken, but turned a deeper shade of grey-black. The true metal parts blackened beautifully, especially the chains. I really like how the cannon barrel turned out; the blackening kept the rough texture of the metal intact, whereas paint seals it into a glossy smooth finish. It wasn't dark enough for me, so I gave it a thin wash of black paint, which preserved the texture but achieved the right color: Compare to the very similar carronade kit, on which I used paint alone, needing several coats to fully color the metal: This latter gun has a much shinier appearance that I don't like as much as the blackened and washed long gun. Not sure how well it shows in these photos, but it's very obvious in person. I preferred the effect so much, that I removed my painted chain from the carronade kit and replaced it with extra blackened chain. I did find that the blackening had a tendency to rub off on parts that were handled a lot, so I tried to use tweezers as much as possible. Also, I didn't notice any odor or other such problems, nice since I work in my living room. So for whatever it's worth, I was very happy with these two products as a novice getting started with blackening metal.

- 16 replies
-
- 10
-
-
The lights are a nice touch, that's something I've never played with. And yes, the next deck up is the boiler deck, despite not hosting the boilers.
-
Great explanation, Glenn. I'm quite happy to be refuted so convincingly! It certainly makes Heroine an even more special "transitional form" in the evolution of river boats.
-
Question: I notice on the flywheel plans that the spokes are mirror-image; there are eight spokes that line up perfectly as if there were just four that magically went all the way through. Whereas on numerous actual paddle wheels I've seen, there are odd numbers of spokes (13 on Bertrand if I recall correctly). Any idea, from an engineering perspective, how or why designers settled on the number and orientation of spokes for flywheels or paddlewheels? Also, at the level of accuracy you're achieving, I'm now expecting those boilers to work by the time you're done!
-
Thanks for that photo, I can see the structure planking now. And I agree that I like the look of decks done that way, though I'm hardly unbiased. Adding lighting is very neat.
-
The first photo made me jump, as the paddle was backward, but I let out a sigh of relief when I saw you were just test-fitting it. Good progress. I can't tell from the photo, are those structures already planked, or does that happen next?
-
Experience with BlueJacket metal toners?
Cathead replied to Cathead's topic in Metal Work, Soldering and Metal Fittings
Ordered some, will report on results. Travelling right now. Thanks! -
I would like to learn to blacken metal properly, and have read through many threads on MWS regarding various blackening agents. A few references have been made, that Bluejacket sells their own version, but I haven't found any reviews or clear experiences stated. How does their product compare to the other options like Casey's or Jax? The Bluejacket website is not very helpful, as it doesn't include any information beyond a title: PN0051 Pewter Blk (blackens Britannia) $8.50 PN0052 Brass Black (copper,too) $8.50 It says "directions included", but I wouldn't mind knowing what I'm getting into before ordering blind. Are these for soaking or brushing on? How toxic or fume-producing? I do my modelling in my living room, so would like to minimize the nastiness used. If there is a thread or clear report on Bluejacket that I missed, I'm sorry. I searched both the Paint and Metal forums for "blacken" and read all the results as far as I know.