


thomaslambo
-
Posts
384 -
Joined
-
Last visited
Content Type
Profiles
Forums
Gallery
Events
Posts posted by thomaslambo
-
-
Hi Ken,
Wow, I see you're getting some sage advise from excellent builders

I'm experiencing the same problem with my AL Bounty build. After checking the planks carefully I find many, if not most, are cut across the grain...making then very difficult to work with. I made the painful ($$) choice to replace them....along with the dowels trying to pose as masts
My compliments on your fine progress
- GLakie, mattsayers148, Canute and 1 other
-
 4
4
-
Dimitris,
Really nice work on the pin rails. And the white caps on the Bowsprit adds contrast as well as matching the other white pieces on the main deck and hull...well done
- Dimitris71 and Omega1234
-
2
-
Al,
I would agree with you...but actually I think you know I was joking
I'm putting more focus on nice detail then Historic accuracy.
As an example; I think we all know the Bounty had copper plating on the hull the day it left on it's doomed voyage. The records clearly note the Royal Navy had the hull plated as part of the re-fit. But I have no intention of plating the hull with copper because I think wood looks much nicer (assuming I don't trash the planking job)

- Dimitris71 and mattsayers148
-
2
-
Keith,
I admire your honesty....it's funny, sometimes mistakes/disasters can lead to other innovative ideas and results
I've seen a few other Bounty builds that had a single Launch on the main deck as well, and I really like the look...less crowded and more streamlined (the heck with Historical accuracy)
Al,
You're very kind to be sure....and it's a pleasure collaborating with you on this build my friend
-
Nils, thank you so much for nice comments...you sir are an inspiration yourself and I follow your builds with wonderment
Steve and Matt,
What can I say, you guys were the ones that pulled me over to the dark side...true masters of detail
Your Launches are amazing...and half the fun of this hobby is researching and learning about these incredible ships
Now the fun begins...planking the main deck and the hull

-
Gentlegiant, Greg, Keith and Dimitris...thanks very much for the kind words.
Greg, I'm glad you can use some of my tips...and I appreciate people that take the time to read the narratives
Keith, yours and Captain Al's Bounty builds is what motivated me to build this model. I also liked the fact that you left off the Jollyboat and added details to the Launch.
Thanks for the many detail ideas I got from you
-
I've been doing quite a bit of research over the past 4 weeks. But I was able to make some good progress.
Here are three items I completed
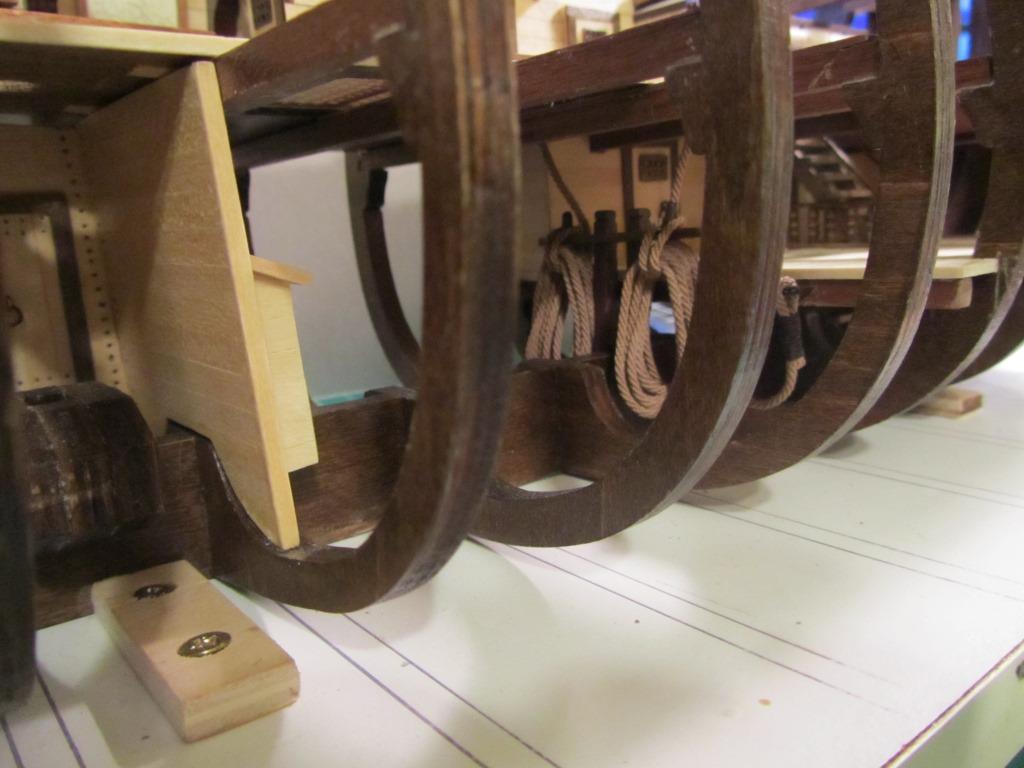
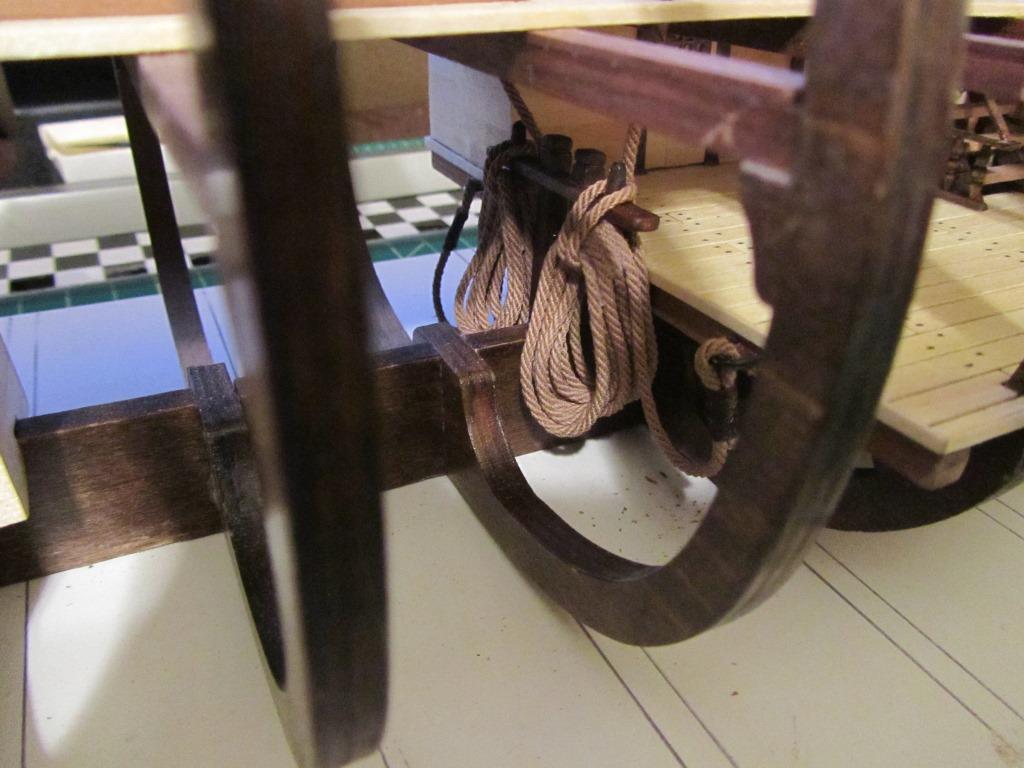
A custom built anchor rope rack installed on the lower decks.
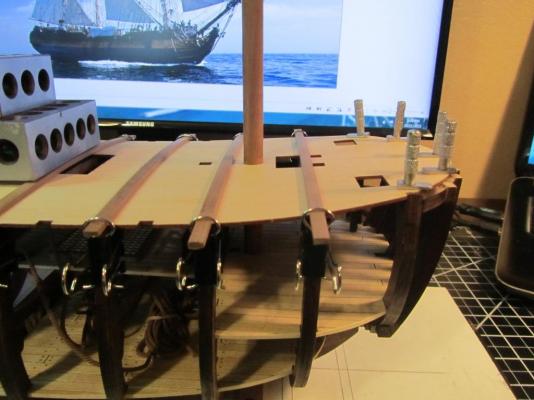
Installation of the main deck.
Construction of the Launch, which was a nice diversion from the primary build… motivated by Captain Al and a couple errors he found
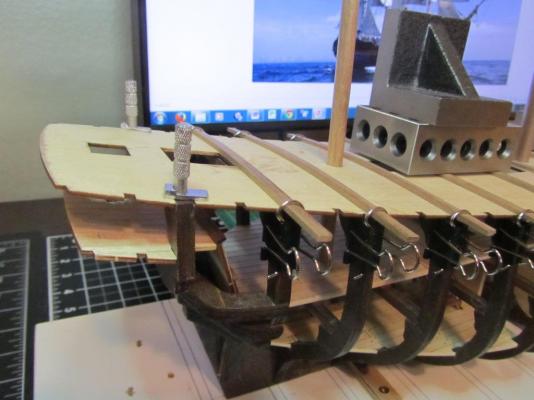
Note: A big thanks to MattS and CaptainSteve for information provided on the Launch…as well as inspiration from their awesome MS Bounty Launch build logs.Anchor rope rack, rope coils, and the bitts and bitter end:
This was the last detail item I needed to finish and install prior to gluing up the main deck. This particular item (along with a couple others) could not be installed after the main deck and hull planking was completed.
I definitely took liberties on where I placed the rack and bitts and bitter end …as I wanted to place them where they could be seen.
I built a custom rack with belay pins to hang the ropes on. The rack is mounted on the back side of the lower deck in the Bow. With the rack posts secured to the keel and lower deck beam.
I used a jig to coil and train the Anchor ropes in a similar fashion seen on many of the 18th century ships.
The Anchor rope is Syren product - Light Brown Rigging Rope .062 (1.57mm).
I also secured the end of the rope (the bitter end) to large metal rings (bitts) bolted to the deck beams.
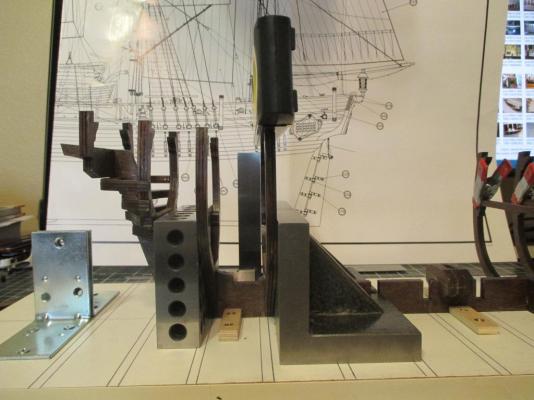
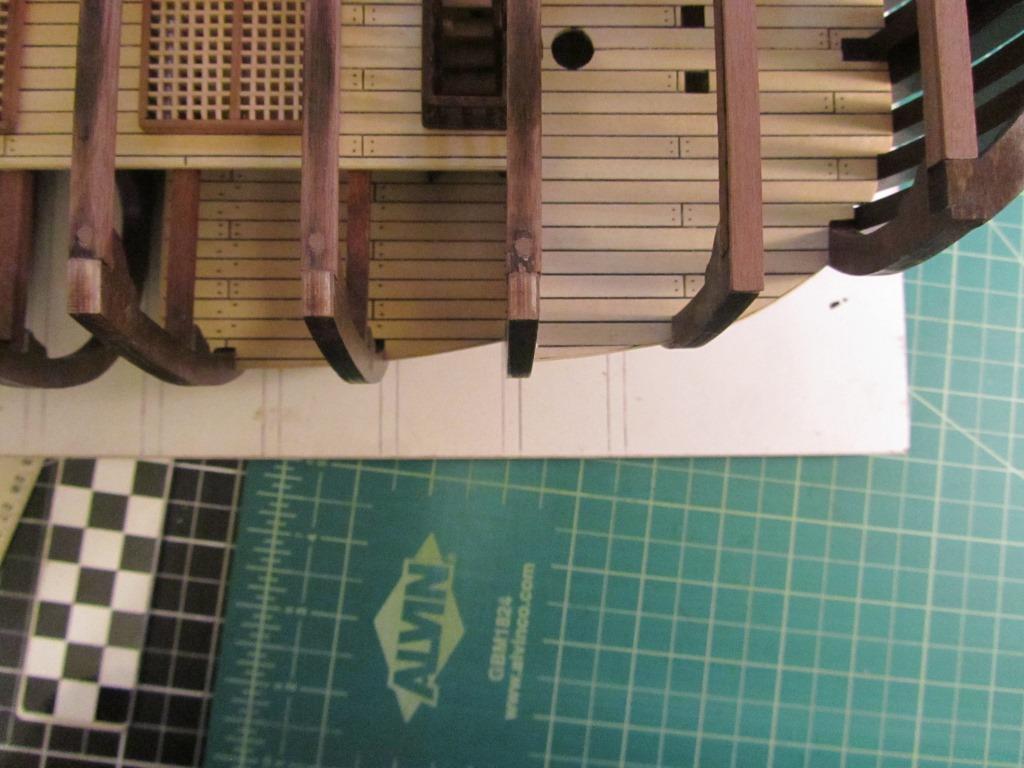
Install the main deck:
This took 30 minutes to glue up.
I used modified binder clips that were originally intended for hull planking. But as I was considering the best way to hold the deck in place it occurred to me they were perfect for the job (with the addition of wood strips laid across the deck, held tightly in place by the clamps on each side of the frame).
In the bow and stern I used metal planking clamps (they have threaded screws that hold them in place - small pilot holes were drilled for the screws).
I also left the masts in place to be sure the deck stayed aligned.
Note, the ease of installation for the main deck I would attribute to the effort that went into squaring and leveling the tops of the frames as the keel was laid.
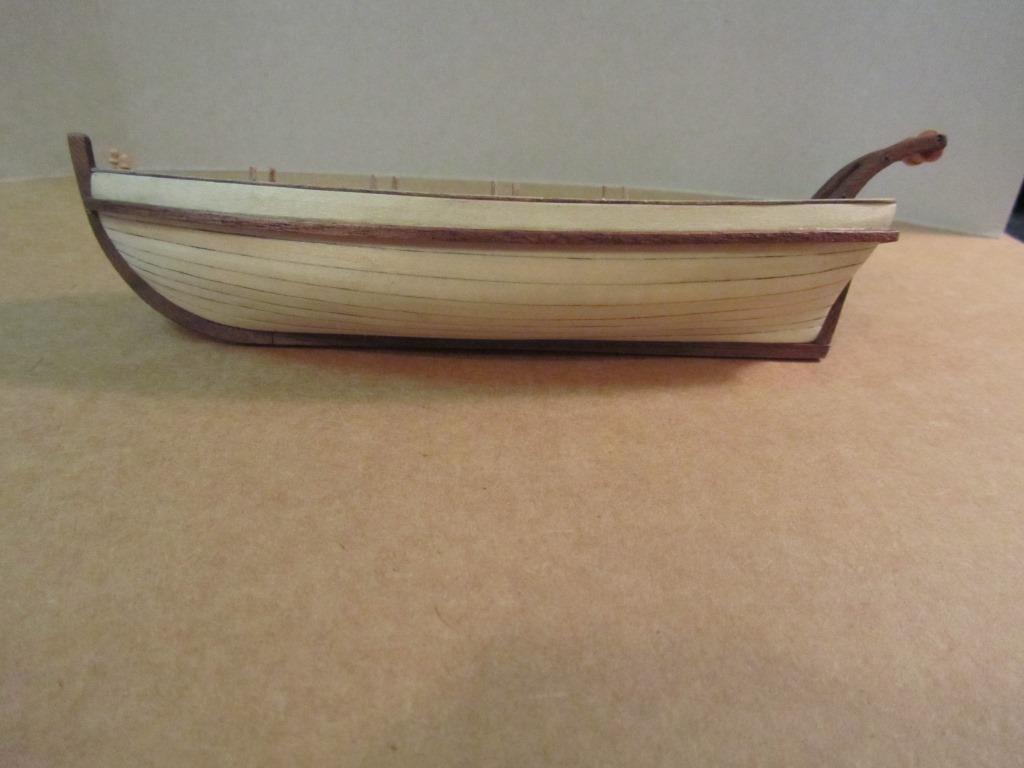
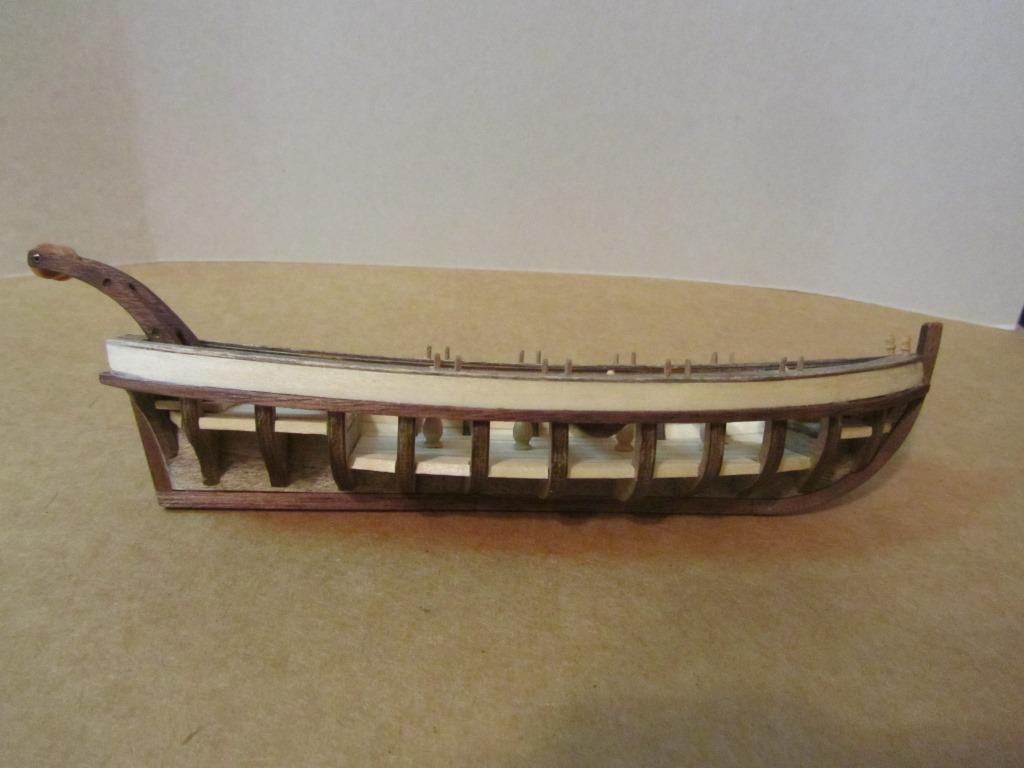
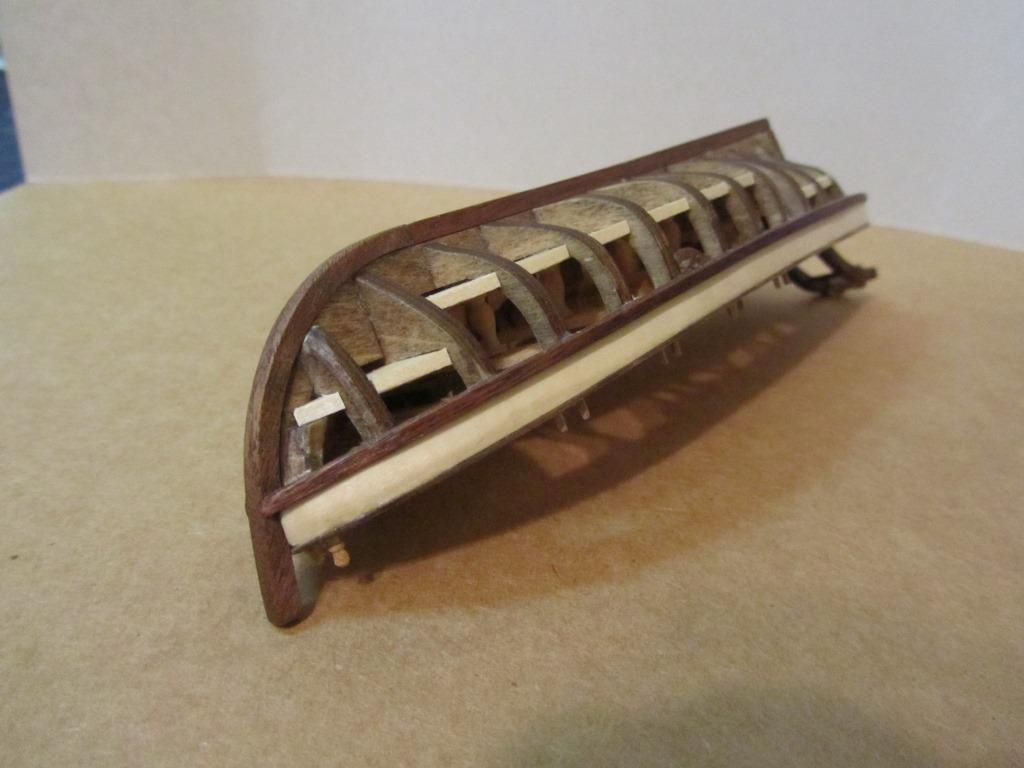
Launch construction:
The little launch was a fun build
Note; I'm not going to use the Jollyboat because I don't like the look of the stacked launches. Instead, I'll add additional details to the interior of the launch (rudder, sails, oars, etc).
I made the following modifications to the launch:
1 Changed the top rails to be flat to allow Oar guide pins to be installed (instead of notches in the side rails). Along with adding a three piece top rail overlay that I stained dark to enhance the look.
2 Added a small grading panel to the bow.
3 Modified the Windlass crane in the stern (AL refers to it as a Capstan – ????). Either way, I shortened the support arms according to some information MattS used on his Launch build.
4 Covered the plywood deck edges with basswood strips as done on the Mother Ship.
5 Added several Belay Pins along the thwarts and top rails.
6 Planked the lower deck as opposed to scribing plank lines in the wood.
Here are some pictures of the above work….
Anchor rack and coiled ropes
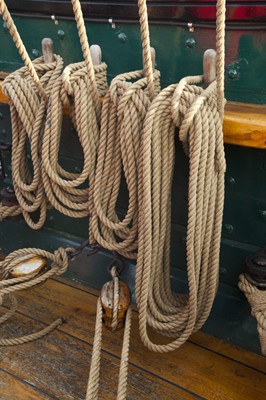
This is the rope look I was trying to simulate
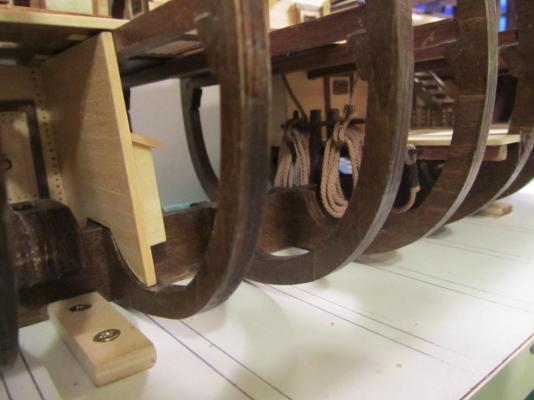

Note "the bitter end" connection to the "bitts" ring
Main deck install

Note; I installed dowels in all the frame/cross beam joins as I did on the lower and middle deck levels
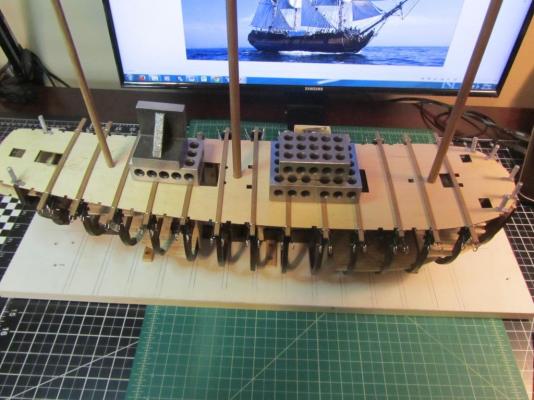
Modified binder clamps using wood planks across the deck to hold it down
Completed Launch


Here is a plan sheet that shows the two sections of the Windlass - the wench and crane arms. You can see the rope that runs from the wench to the crane arm roller

Note the basswood trim covering the plywood edge on the floorboard deck
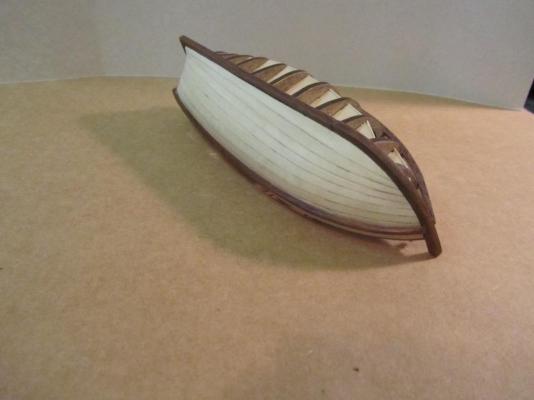

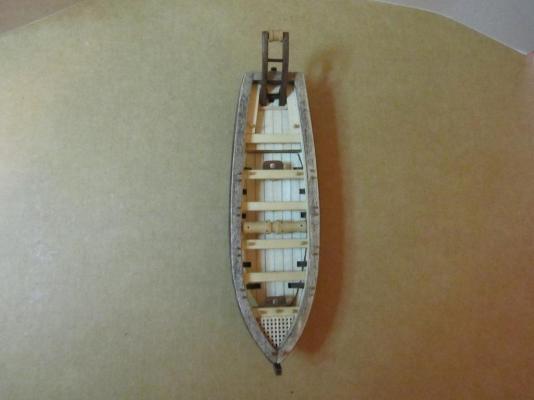
Note; the shortened crane arm support in the stern (AL refers to this part as the Capstan). Also the grating in the Bow.
-
It'll be a beautiful touch of detail and well worth a trip to the dark side
- dgbot, mattsayers148, mtaylor and 2 others
-
5
-
Well done on the ropes Brian...I've been down the same path recently
Gotta love Danny's build log...thanks for the tip
- zoly99sask, GuntherMT and GLakie
-
3
-
I would agree with Keith, the decks are the primary parts of the structure that strengthen the otherwise delicate/flimsy frames. I actually put dowels in every frame/crossbeam joint (on every level) to further strengthen the hull structure.
Double planking would be the next best thing to using plywood.
And I agree with Ulises as well, the planking will cover a multitude of sins
-
Sounds like a good plan
Will you make cardboard templates first?
-
So sorry to hear about the missing deck pieces.
Have you tried working through the vendor you purchased the model from to get replacement parts?
-
-
Nenad,
Beautiful work on the panels for the deck houses....and I also have many unplanned Jewelry Boxes
Looking forward to seeing the finished work
- mtaylor, SawdustDave, CaptainSteve and 4 others
-
7
-
Hi Duff,
I've had my eye on this manufacturer....I'll follow your build with keen interest
- Canute, John Allen and mtaylor
-
3
-
-
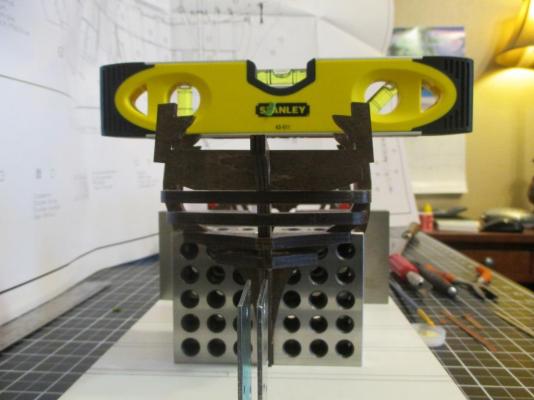
Good to see you started a build log.
This is a critical step in the build as others have said, so take your time making sure the frames are square to the keel as well as checking the vertical alignment. Then check the top of the frames for being level across the width of each frame (use a level).
Unlike the stronger bulkhead type, these frames are very flexible as Keith mentions prior to laying all the decks so special care must be taken.
Once I had the whole frame dry fitted (all the frames prior to gluing) I set both the lower and middle decks in place to help check alignment of the frames.
As I was gluing each frame up I continued to check the tops of each frame with my level. This is important to be sure your main deck will flow evenly over the top of all the frames. I also laid the main/top deck across all the frames to see how it looked to my eye.
I totally agree with Keith that you can use the lower deck to help align the frames (and use the middle deck as well).
Good luck with the build
Here is are a couple of pictures of my frames as I glued them up (using squares and blocks, as well as a level across the tops of each frame as they were glued up.
-
Dimitris,
Really beautiful upgrade on the racks
- Dimitris71 and Omega1234
-
2
-
We thank everyone for all the information (Al and myself are collaborating on parts of our HMS Bounty builds).
I thought I'd post the description of these terms....this is all new to me, and perhaps other beginners will appreciate the information as well.
I'm thinking the "bitts" aren't always placed in the same location?
Bitt or bitts: A post or pair mounted on the ship's bow, for fastening ropes or cables.
Bitter end: The last part or loose end of a rope or cable. The anchor cable is tied to the bitts; when the cable is fully paid out, the bitter end has been reached.
-
Is the hull cut away to show the interior?
Yes, the starboard side of the model is open for viewing, which is why we're interested in how the rope was stored in the hold/lower decks (it will be seen). Most builders of this model have coiled the rope and placed it on the lower deck in the Bow (just above the hold).
I'm curious, when the Anchors were being used (for any reason) were the ends of the ropes tied off (an anchor stop if you will) to avoid the possibility of loosing the Anchor?
-
Just beautiful Matt
You could go fishing with those puppies
- GLakie, Salty Sea Dog, mattsayers148 and 1 other
-
4
-
Hi guys.... I too am building the AL Bounty kit, as a few of you know, having visited and kindly commented on my own log. I too own a wonderful little Papillon; her name is Winnie and she has blessed my wife and I for more than 7 years now. Three guys building the same ship, and all owning Papillons. Spooky, ain't it? My enjoyment and success with this kit would be greatly diminished if not for these build logs and the wisdom contained in them. I never begin a new phase without checking to see what my fellow shipwrights have done at the same stage.
Hi Maturin,
Thanks for coming aboard...and good luck with your build
- mattsayers148, Dimitris71, bryanc and 1 other
-
4
-
I just finished the small Bounty Launch (goes on the main deck of this model). I used 1.0 mm basswood (kit supplied wood) to plank it...it's very thin and doesn't allow much sanding. Under no circumstances would I use it on a single layer plank job for the larger Bounty hull.
The Swiss Pear I'm going to use is 3/32 inch thick (slightly thinner than 2 mm). Personally, I wouldn't go any thinner...this is what a couple of experienced builders recommended to me.
- mattsayers148, Dimitris71 and bryanc
-
3
-


HMS Bounty by thomaslambo - Artesania Latina – Scale 1:48
in - Kit build logs for subjects built from 1751 - 1800
Posted · Edited by thomaslambo
Bob and Harry,
The micro detail level of model ship building is definitely a challenge....I fall back on my model railroad and airplane experience for help
I thank you both for the very kind words, the enjoyable conversations we had, and the help you're both given me
Also, I thank everyone that hit the like button