Izzy Madd
-
Posts
382 -
Joined
-
Last visited
Content Type
Profiles
Forums
Gallery
Events
Everything posted by Izzy Madd
-
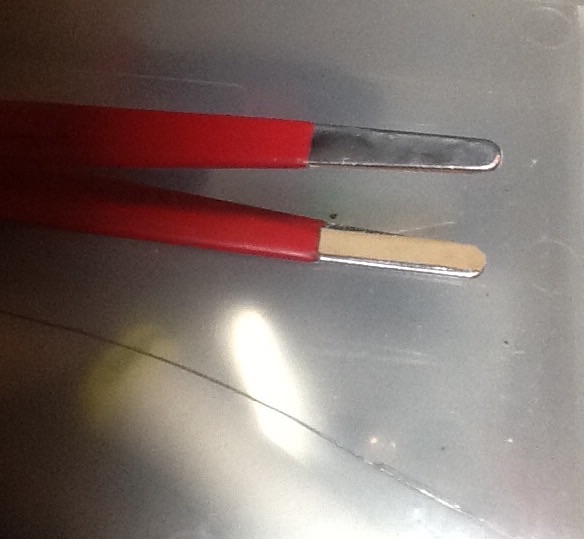
 RUBBER BANDS Frustrated by cheap tweezers? Broken another spar because those tweezers just don't grip? Failed to thread that rigging because those darn tweezers just don't meet right. Well struggle no more for here at the bargain price of, "catch the postman before he throws them on the floor" a one time offer ending never. Simply mug your nearest post man or if your lucky like me post woman. And grab a rubber band or two. Then using some good old CA just glue UNSTRETCHED strips to the tips and no more slipping! No more not meeting! And no more excuses for not doing that rigging right! A 100. % satisfaction or no money back result.works every time you do it right. Anyone needing advice on how it's done see below or send me any paper money you may have and you'll finally see the light...
- 396 replies
-
- 8
-

-
- Idea
- Bright Idea
- (and 1 more)
-
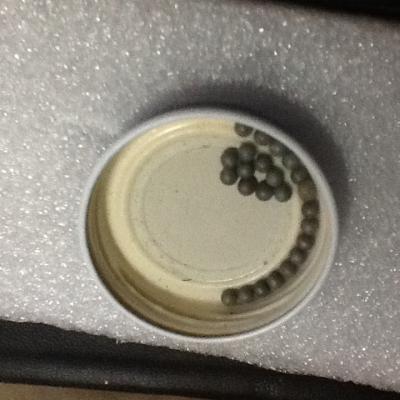
DENTURE TABLETS I wouldn't try drinking it as it becomes acetic acetone after soaking. Safe but not for drinking and taste like liquid steel. A quick thought for those not sure or only wants bit at a time. The main ingredient of denture tablets is... ...That's right citric acid. The second most commercially produced chemical in the world. And sadly I can't quite remember the first but it's just as useful and harmless. So make mine a double iron bru. Well they did say it was made with girders. Perhaps that's how?
- 396 replies
-
- 2
-
-
- Idea
- Bright Idea
- (and 1 more)
-
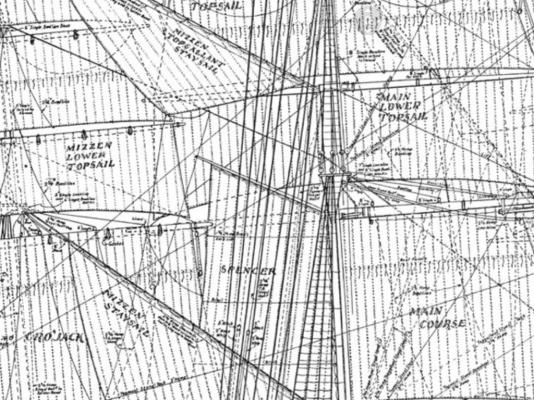
Hi Question for whom so ever wishes to answer it. Having reached the halfway point of tying the shroud lines on my mini CS. I'm reminded of one of the earliest tip I got on this forum. "Replace the masts/spars". Which make plenty of sense when you pick one up and flex it. They bend like they are made out of toffee. But. And here I have a clash of info. I've worked with woods of all kinds since the age of eleven. And I've seen a piece of wood that would snap if flexed more than five degrees tied into a knot. With nothing more than water soap and time. So wood can be just as flexible. Now obviously I've had to study the standing lines on lots of different plans as the baby is so simplified that the rigging is almost as different as it could be. When compared to the real thing. But even at this scale. Or perhaps more so. The more line that are added and there are many all designed to hold the masts and spars where they should be. The more rigid the entire mast arrangement gets. And looking at the running lines as well they are all using leverage to hold the multitude of acres of sheets up top even when wet and a full wind in them. And no ones worked out how to swap a wooden mast for a steel one whilst sailing around the cape at 17 knots. So my question is the wood work above decks is flexible on these models but is it really any more flexible than the real thing? Because As far as I can see there is enough lines to haul an elephant up to the crows nest. Without so much as a creak never mind a snap. Are the line which did the same thing on the originals actually sufficient to hold everything up and stable? Especially when you consider a redwood pine, which was why was used up till the USA changed hands, can bend to 45 degrees before snapping. Which with all this rope work no plastic mast or spar is going anywhere near that. I don't want to start a war just curious as to what others have experienced
-
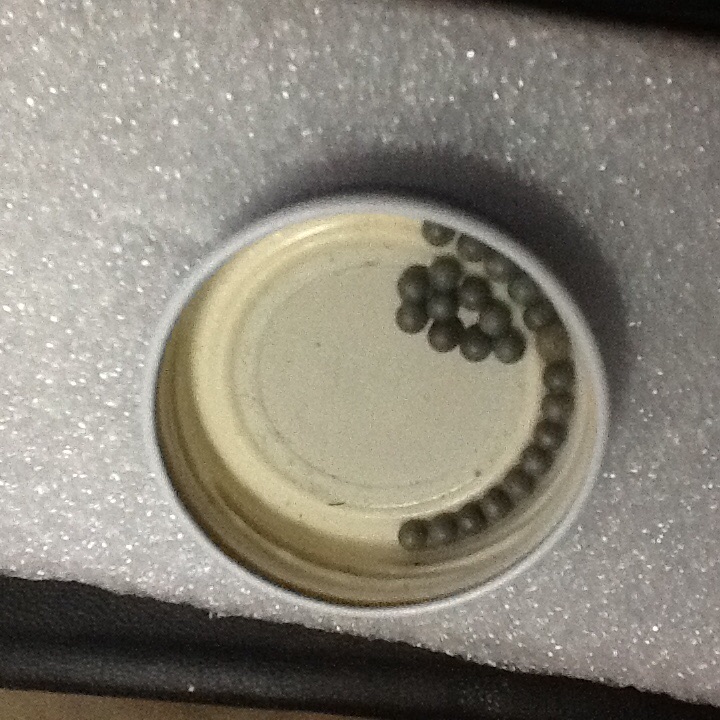
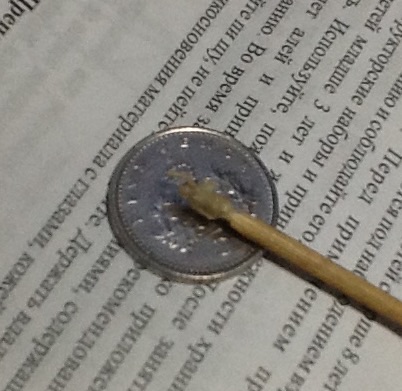
I can confirm lemon juice does work as do soft drinks. Anything containing citric acid. If you want a very quick reaction hot vinegar or very warm citric acid in water. It's VERY cheap just £2 for enough to blaken a whole ship will also fetch galvanising off steel but that takes about a week. Two things though items MUST be fully covered or you'll get bad pitting where it sits on the surface. Also a gentle stir to remove bubbles as they form helps keep the finish smooth. And the finishe is a very good rust proofing. As its a passive form of rust ferric tri oxide." These were bright steel when I did them. Just left them for a week in a cup full of water and a 5-10ml of citric acid. A quick stir every day. And watch them darken until the colour is right just make sure they are dried quickly. A radiator is best. As the patina needs to dry out before it becomes effective. But these 1/8th bearings were done over a year ago. And I've been using them to clean inside of glass bottles. And there still good. Citric acid is now used instead of hydrochloric acid by the steel industry. As it can be poured down the drain and no toxic effects. Apart from a sting if you have a cut. I forgot to say the pictures are of bearings that have a coating of talc as it dries them faster after cleaning glass. As hydrophloric acid deadly stuff not only dissolves glass but steel and any calcium it can soak into. Main point is they are normally darker
- 396 replies
-
- 5
-
-
- Idea
- Bright Idea
- (and 1 more)
-
FUSE WIRE not really a subject for boats unless perhaps set in the future but for dioramas great fuse wire thinnest you can get. Then twist equally together. The another piece of slightly thicker fuse wire. And twist the first double twist about the final piece. To create that twisted look and almost the feel without the spikes. Fir finer scale twist a double or single wire around a core without the first twists. And adjust the spacing if needed after by sliding between gloved fingers. Also it's the spiral tha creates the look. Hope this helps someone.
- 396 replies
-
- 3
-
-
- Idea
- Bright Idea
- (and 1 more)
-
While watch parts are great for very fine detail if you want something bigger clocks are great and cheap as everyone is going electric(these still have gigs just fewer and plastic). But BEWARE. The spring on clocks is a time bomb and WILL slice finger of given chance. So don't open the winding drum unless well protected. And then only if you must.
- 396 replies
-
- 2
-
-
- Idea
- Bright Idea
- (and 1 more)
-
Cutty Sark by NenadM
Izzy Madd replied to NenadM's topic in - Build logs for subjects built 1851 - 1900
If your talking about the stuff I think you are I've got some for my model got the idea from Dafi. But befor applying it you turn it over its possible to create raised rivets on the front by using either a roller used in leather work. Not the stitch punch, or even a blunt pin. On a sheet of har rubber like neoprene. Then when it's turned over to the facing side hay presto lots of lovely rivets. And you won't even have to fire up the forge. If you want I can send you a length to try out just pm me. Almost forgot Happy birthday and I hope the admiral is feeling better.- 4,152 replies
-
- 1
-
-
- cutty sark
- tehnodidakta
- (and 1 more)
-
Certainly is a beautiful piece of work you should be very proud. I especially like the little details like the food and sword.
- 625 replies
-
- 4
-
-
- bounty launch
- model shipways
- (and 1 more)
-
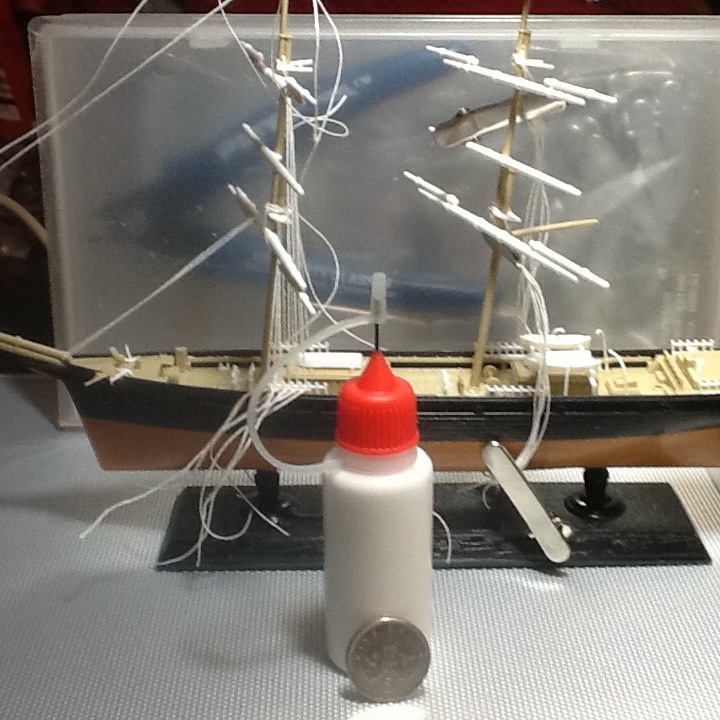
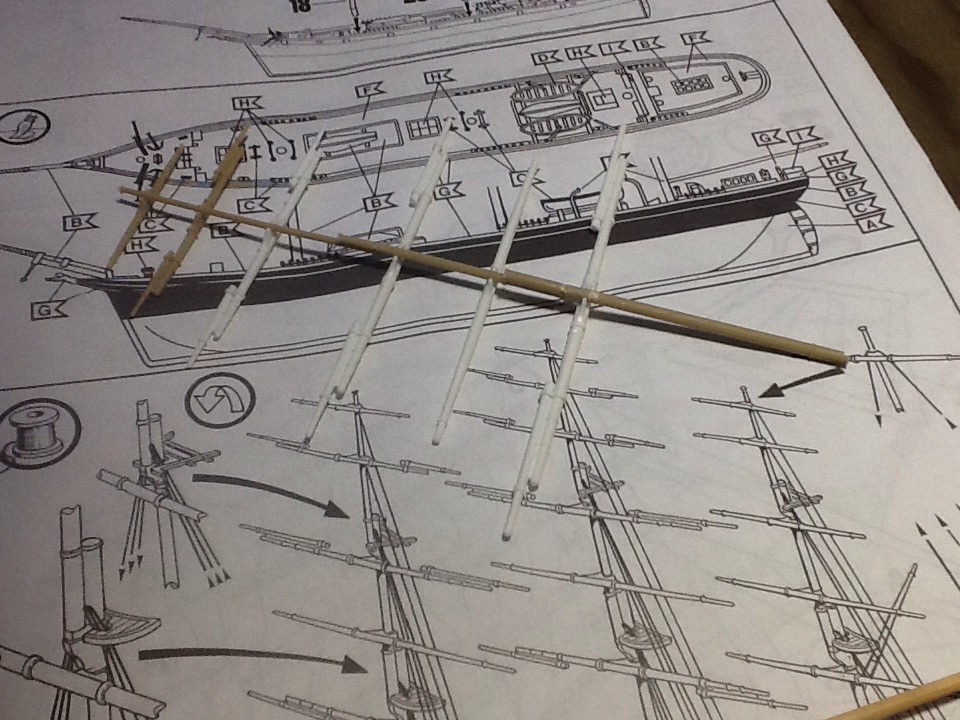
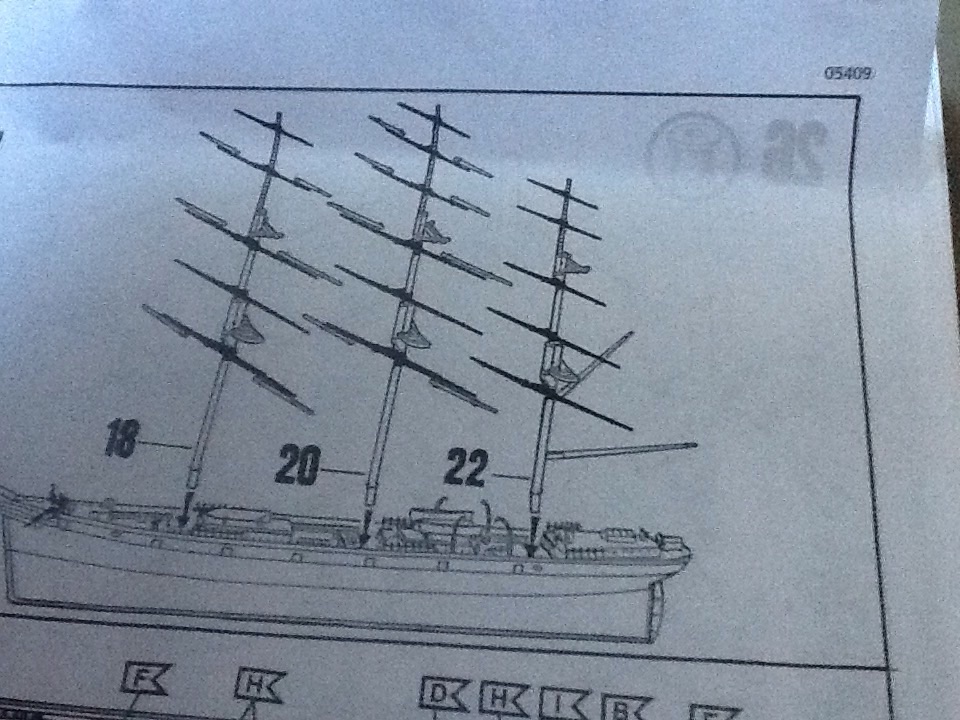
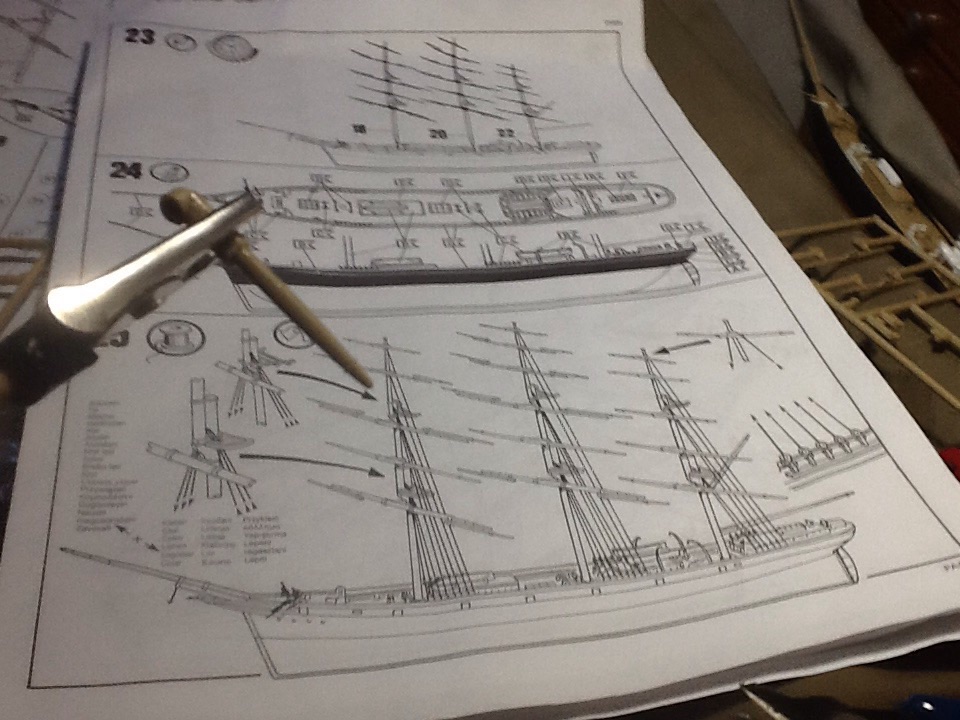
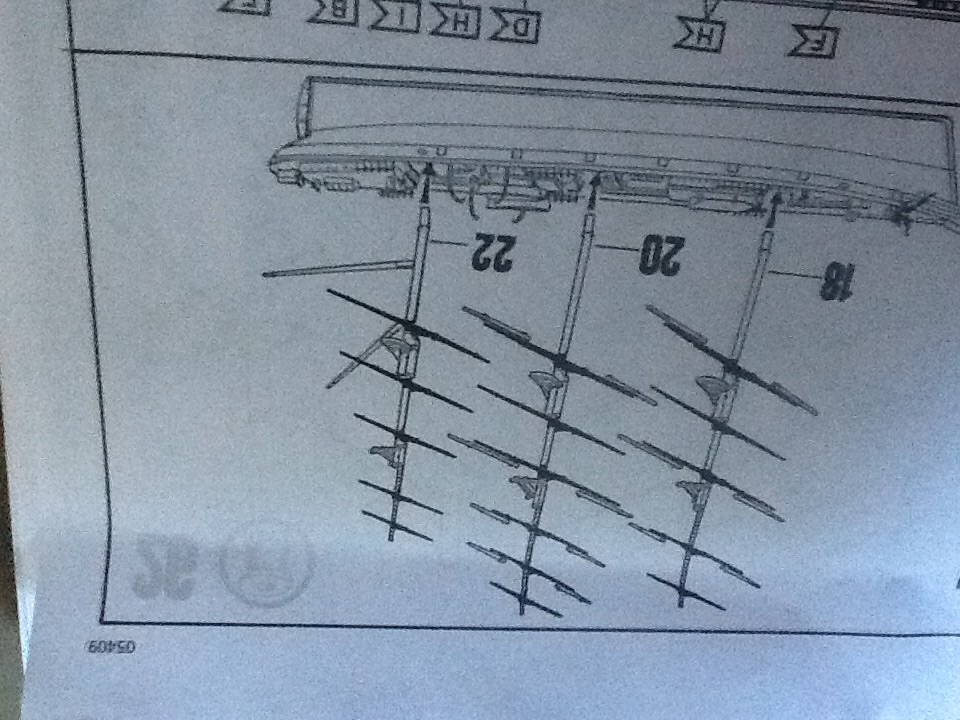
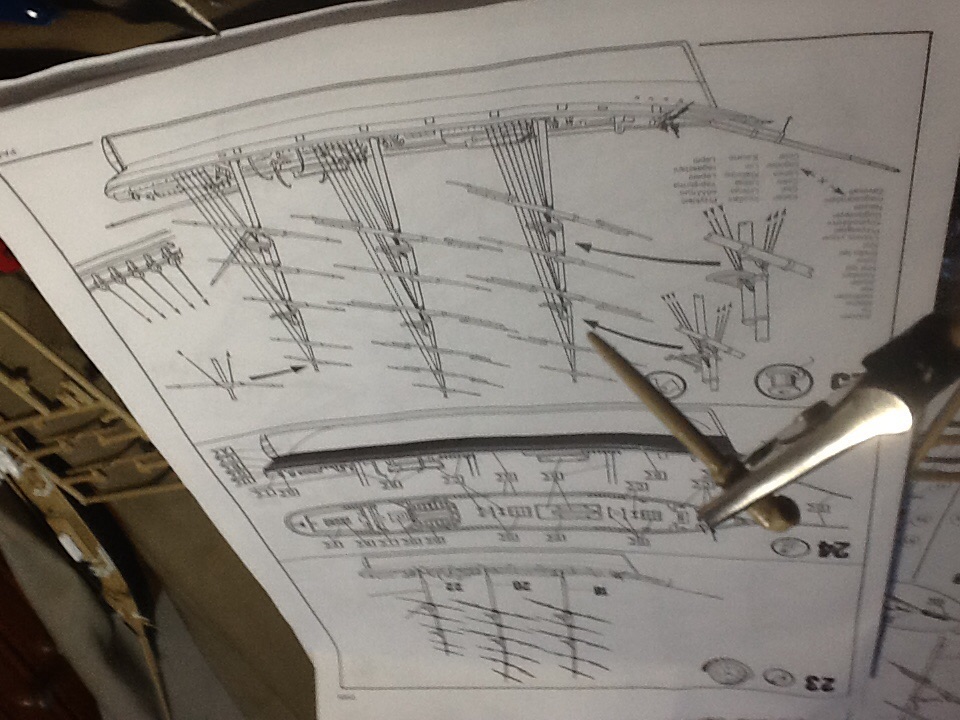
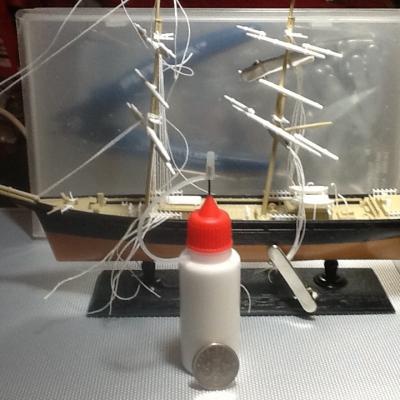
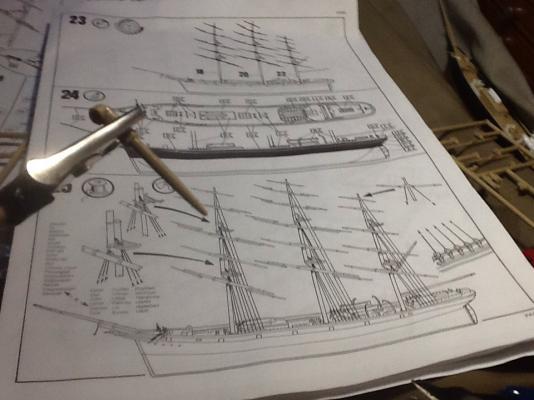
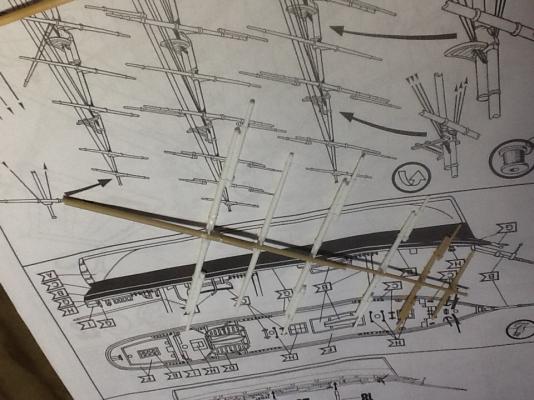
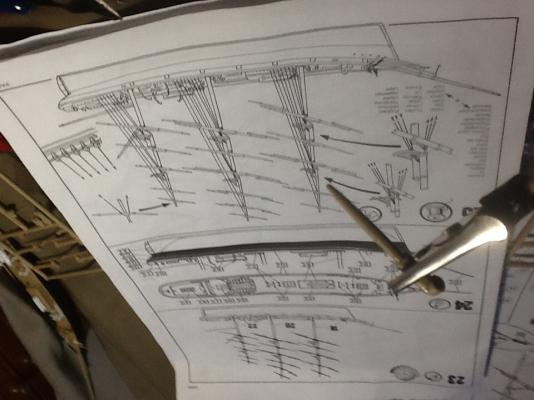
Why is it that the when the models start getting smaller so do the tools. Even the glue bottle has shrunk... Seriously ish though it's simpler to use the 0.5mm nozzle on these to glue the lines with. Which as you can tell I prefer PVA sometimes diluted 4:1 glue to distilled water. And a drop of good old TCP to stop the mould. And of course the baby in the background half her masts and some rigging. It's so much easygoing to fit the shroud lines before fitting the mast.
- 79 replies
-
- 3
-
-
- cutty sark
- airfix
- (and 1 more)
-
Cutty Sark by NenadM
Izzy Madd replied to NenadM's topic in - Build logs for subjects built 1851 - 1900
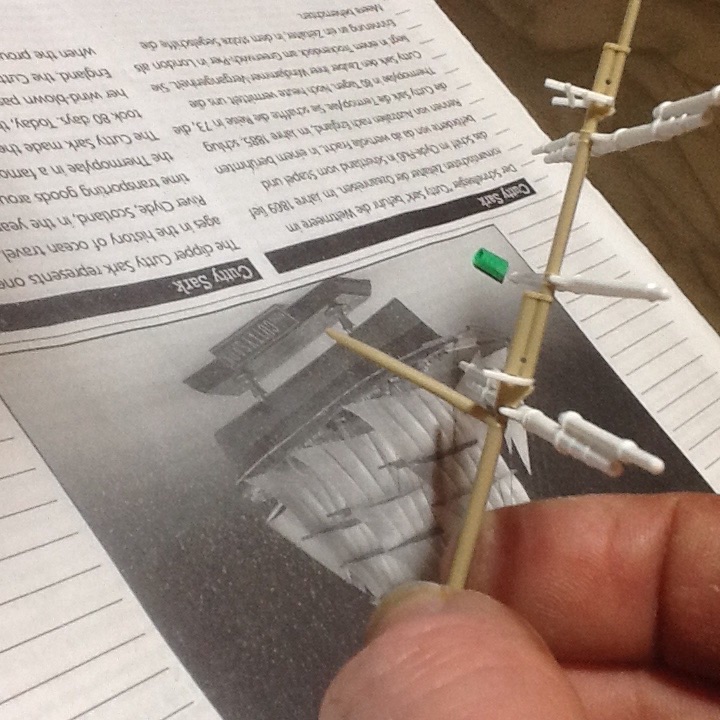
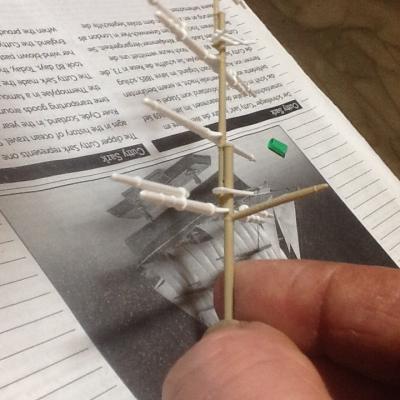
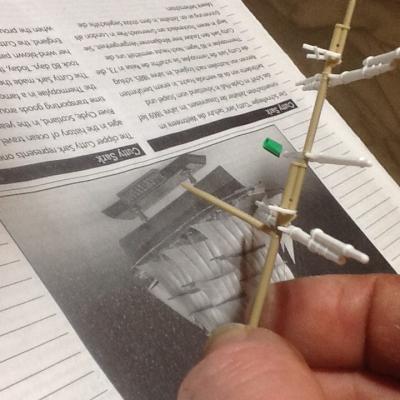
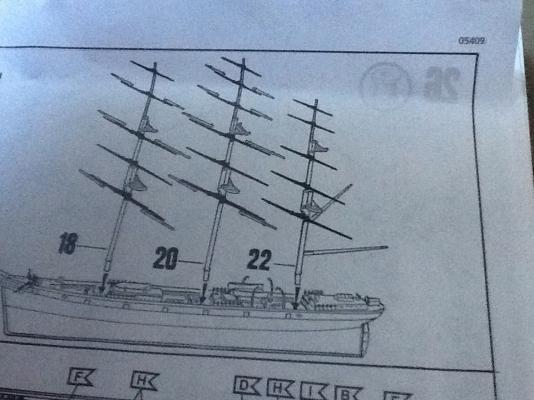
Hi, While I still retain something like sanity. One thing I've learnt from the 1/350 tonight. Whilst threading what passes for ratlines on it. Which is just the vertical lines. It's so much easier to thread them off the hull as you can turn the mast which ever is best which would be impossible with the masts on the hull especially with all three masts to work around. Also you'll need at least three times the line you expect.partly from wastage but mostly from leaviyenough to tie. As even though the line is to scale, or not. The knots still take as much line to tie them as do the full sized knots. And my fingers haven't figured out how to scale them selves down. Also i hope you were a good boy scout and learnt your knots. Although the main one you'll need is the dead mans knot. And don't use CA to fix your knots as it will just wick down the line and you'll end up with fixed curves :-) best to use PVA which is also good for getting rid of those pesky knots the makers use when the thread breaks. Because when a knot passes through a pinch point it fluffs up. One last thing, as yours will be a virgin line rig, I hope your good at "cat and mouse"???? And don't forget your brightest nail varnish... -
Cutty Sark by NenadM
Izzy Madd replied to NenadM's topic in - Build logs for subjects built 1851 - 1900
Great work though. Definitely going that extra mile. If you haven't tried it "rub n buff" if good stuff and may have saved you scorching as its a wax base designed for the speciel FX trade. To make anything even a paper towel look like what ever metal you like.- 4,152 replies
-
- 1
-
-
- cutty sark
- tehnodidakta
- (and 1 more)
-
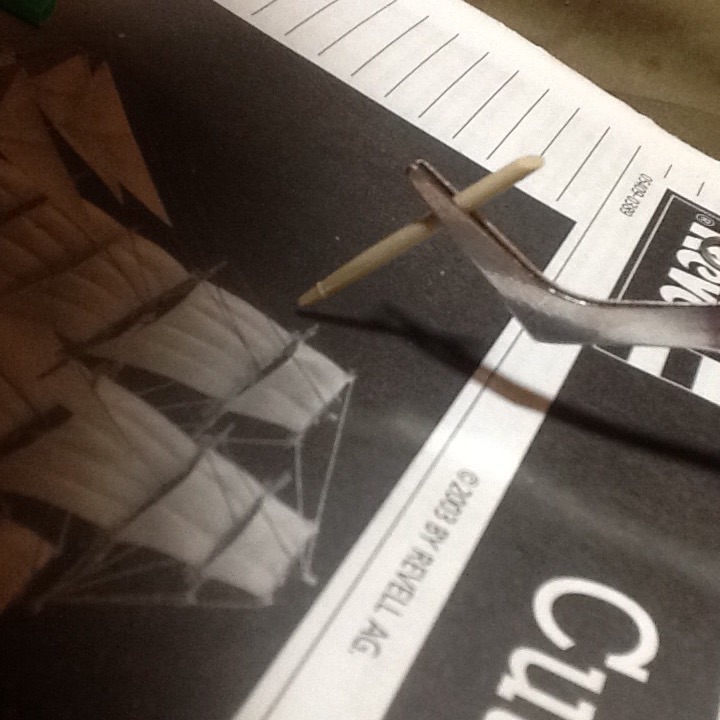
As for hair from me I'm in line with your self I'm afrai. And no pets. I did wonder about monofilament lines. Never thought about feathers. I'll see how it looks could be interesting at least. As far as the rigging goes yes it's very simplified and I was going with that as this is very much an instant gratification thing and just for fun. And I may not even add a tail but I'm going to "try" painting Nannie if I don't sneeze and loose her. As you can see she is rather on the wee side But as for the miss guided amputation Here's the new prosthetic after refinements And here's the patient after surgery. Not bad even if I do say my self. Not in line with you chain work. But nice for a bit of fun. It certainly puts the 1/130 into perspective. And how complex they really are. As as they get bigger there are always smaller things that need including that didn't show at smaller scales.

- 79 replies
-
- 2
-
-
- cutty sark
- airfix
- (and 1 more)
-
It does leave me with one dilema though. I needed something for the horses tail. Which Nenad provided the answer to. But as this is three times smaller what on earth can I use this time...
- 79 replies
-
- 1
-
-
- cutty sark
- airfix
- (and 1 more)
-
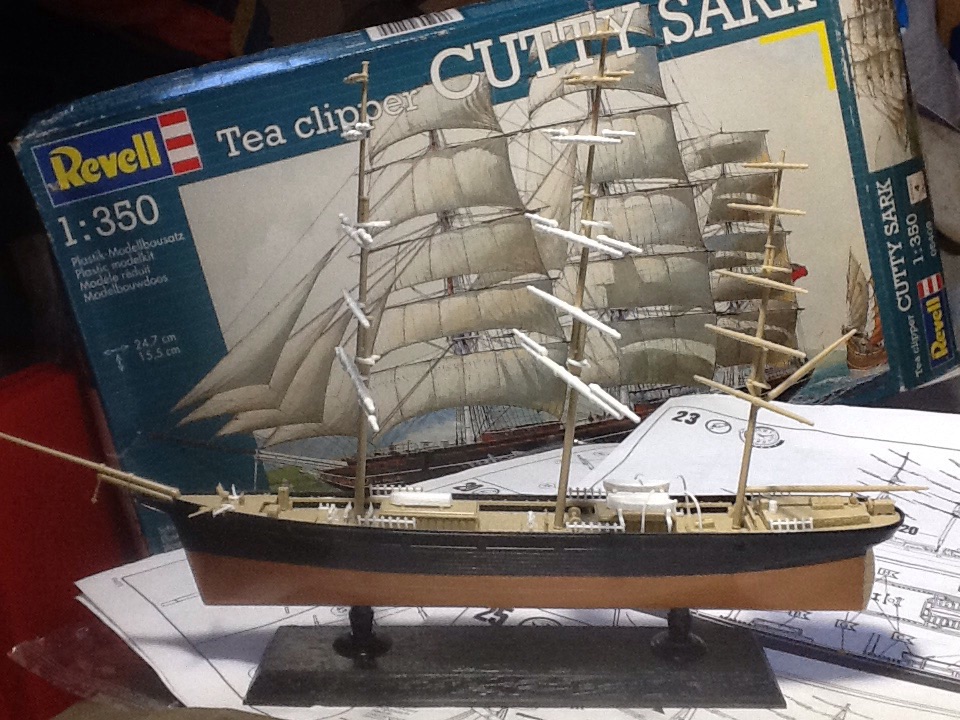
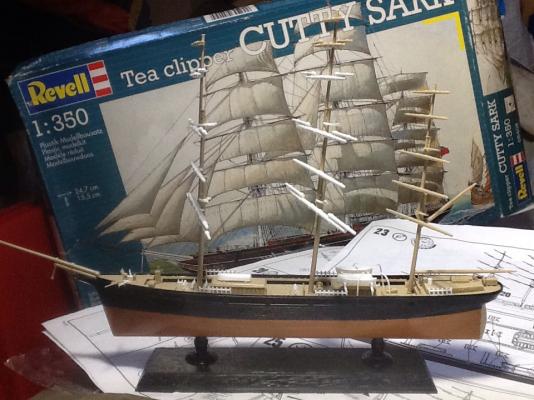
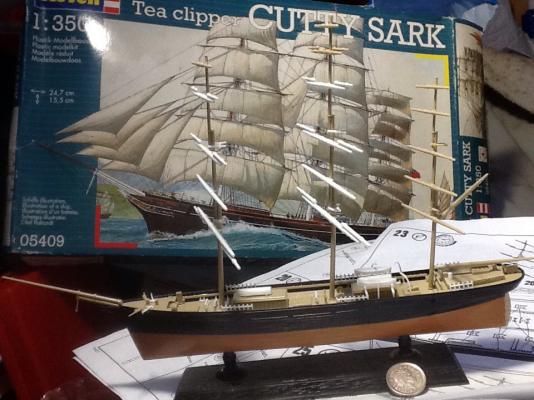
Well as promised, pre restorative surgery. The latest addition to Madd Hatter line of ships. And here with a small donation towards the restoration fund(5p) And I can confirm its a bouncing baby girl weighing in at never ask a lady that question. And 24.7cm long and 15.5cm high.
- 79 replies
-
- 3
-
-
- cutty sark
- airfix
- (and 1 more)
-
Here's the the pics the right way up the instructions the amputated Campbell's plans the victim, sorry patient Normal service will be resumed after sufficient suffering has been inflicted upon the patient. And I've had turn at "tapping the admiral"


- 79 replies
-
- 2
-
-
- cutty sark
- airfix
- (and 1 more)
-
Evening everyone. It seems the Gods have stopped smiling down on me... Why ist it after countless checks of the instructions and pictures. And after you've made that cut you know your going to regret later. That you think "oh I'll just check Campbell's drawings" And then and only then do you find that... ...yes that piece should be there‽ So I end up having to do some drastic micro plastic surgery. Ah well at least it's good practice. Sorry the images are upside down. No it's not the after effects of last night. It's my iPad being a right bollard.

- 79 replies
-
- 1
-
-
- cutty sark
- airfix
- (and 1 more)
-
Good evening my fellow modelers of all things nautical. I've come up against several problems tonight. First of all as its Saturday night. Does anyone know if it's possible to be prosecuted for being intoxicated and in charge of a pair of tweezers. Hic I've had one or two tots Secondly. Can boats mate? Only I had one model of the Cutty Sark yesterday now I've got two but the second is only six inches high They are worse than rabbits. I must admit that the second is utterly SOOB not even a drop of paint. For now at least. Mind you it's only young yet I'll wait till it grows up a bit. As its only 1/350 scale. But apart from the fact that the parts are more lively than me. One of the God must like me as I'm in let's say less than perfect situation. Doing this wee baby on my knee. I've had at least two piece trying to go into the abyss that is the graveyard of lost parts. Both of which would make Dafi's tic-tac look like a hot air balloon. And both bits were dragged back kicking and screaming to be stuck on deck. It was one of those occasions when the word "bollards" is most appropriate So I shall resume my nautical duties and when I can figure out which way to point the camera I'll post some images of the newborn and it's mum. So it's three sheets to the wind for me. And away anchors me hearties ⚓
- 79 replies
-
- 3
-
-
- cutty sark
- airfix
- (and 1 more)
-
Cutty Sark by NenadM
Izzy Madd replied to NenadM's topic in - Build logs for subjects built 1851 - 1900
Knotted cotton thread and rub n buff? Best wishes for the Admiral -
Cutty Sark by NenadM
Izzy Madd replied to NenadM's topic in - Build logs for subjects built 1851 - 1900
Sorry to hijack your posts but it's the simplist was to answer this I hope. This sounds like a job for a model train enthusiast as they are used to working in miniature as well as metals. I suspect brass to be a better metal but ask the experts locally. Try your local model shop for some contacts. You'll probably find one or two names keep being recommended theses are often the best to approach as they have been recommended by users. Never be afraid to use others knowledge. It will only increase your own and improve your finished piece.- 4,152 replies
-
- 4
-
-
- cutty sark
- tehnodidakta
- (and 1 more)
-
Cutty Sark by NenadM
Izzy Madd replied to NenadM's topic in - Build logs for subjects built 1851 - 1900
Whilst ships were frequently classed as cargo ships if they were payed enough the captain would give up his cabin and take over the next one down and so on. In order to earn extra money taking passengers. And was in fact better paying, by the pound, than taking cargo as it was all in secret. All be it an open one. So there would have been numerous passengers who would have been female. As male passengers would have pitched in with the crew unless they payed triple the fee for female passengers.- 4,152 replies
-
- 2
-
-
- cutty sark
- tehnodidakta
- (and 1 more)
-
Cutty Sark by NenadM
Izzy Madd replied to NenadM's topic in - Build logs for subjects built 1851 - 1900
Also if you are interested I've got the full Campbell plans I can send you. I tried to message you with them but the system wouldn't allow me to- 4,152 replies
-
- 1
-
-
- cutty sark
- tehnodidakta
- (and 1 more)
-
Cutty Sark by NenadM
Izzy Madd replied to NenadM's topic in - Build logs for subjects built 1851 - 1900
On the images you've outlined the word closet and w.c. As these refer to the same thing "toilets" then it seems that's what they were.- 4,152 replies
-
- 1
-
-
- cutty sark
- tehnodidakta
- (and 1 more)
-
Cutty Sark by NenadM
Izzy Madd replied to NenadM's topic in - Build logs for subjects built 1851 - 1900
HI, Nenad I was just looking for some info on the anchor chain layout for CS and came across this image While it's not brilliant it does say clearly that the 'paint' lockers are in fact the heads. Just thought I'd let you know hope it's of interest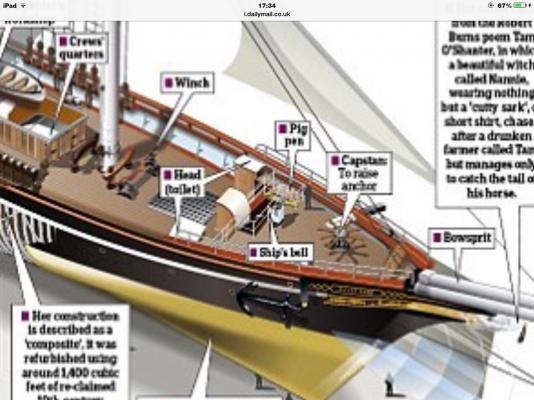
- 4,152 replies
-
- 1
-
-
- cutty sark
- tehnodidakta
- (and 1 more)
-
As they gave me my money back its neither here nor there it's still a good strong straight edge and as you say it's simpler and more accurate to use tha middle and I've a specific rule for depth anyway. That's when I'm not just guessing
-
Cutty Sark by NenadM
Izzy Madd replied to NenadM's topic in - Build logs for subjects built 1851 - 1900
Hi,Nenad its looking great, if you can't get the vacuume to blow try using a straw and your lungs it will shift most. I look forward to meeting your dwarves, sounds like they are great for the really small jobs so long as they clean up after the bear Hi, Popeye Mins the 1/130 version and the chain gates are separate as it happens I've got some 1mm x 1mm chain and some 1mm x 1.5mm chain and I'm going to see which looks about right. I'll try to send some images later. And thankfully I learnt many years ago about gluing to soon so I've a small pile of part painted and waiting to be glued including the foredeck. So it's just a matter of drilling and passing the chain through. After I've blackened it as its copper. But that's soon fixed with a little brimstone and fire. Keep up the great work Nenad. Perhaps one day I might just pluck up the curragh to scratch build. Trouble is I'd spend all my time remaking parts until they were just right. And probably never get any further than the keel- 4,152 replies
-
- 3
-
-
- cutty sark
- tehnodidakta
- (and 1 more)