HOLIDAY DONATION DRIVE - SUPPORT MSW - DO YOUR PART TO KEEP THIS GREAT FORUM GOING! (Only 27 donations so far out of 49,000 members - C'mon guys!)
×

Gaetan Bordeleau
-
Posts
1,307 -
Joined
-
Last visited
Content Type
Profiles
Forums
Gallery
Events
Everything posted by Gaetan Bordeleau
-
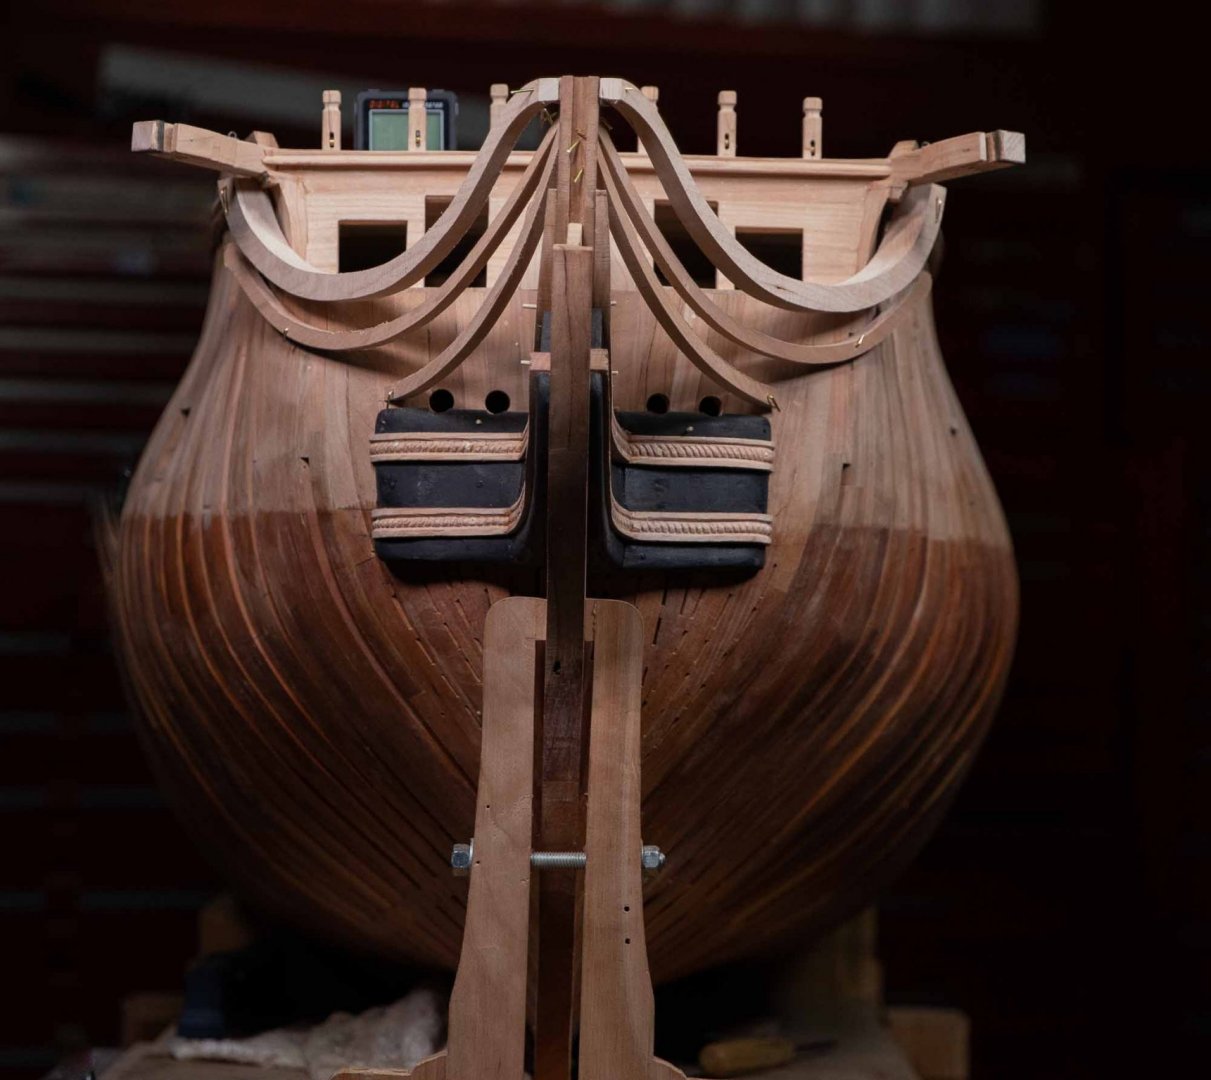
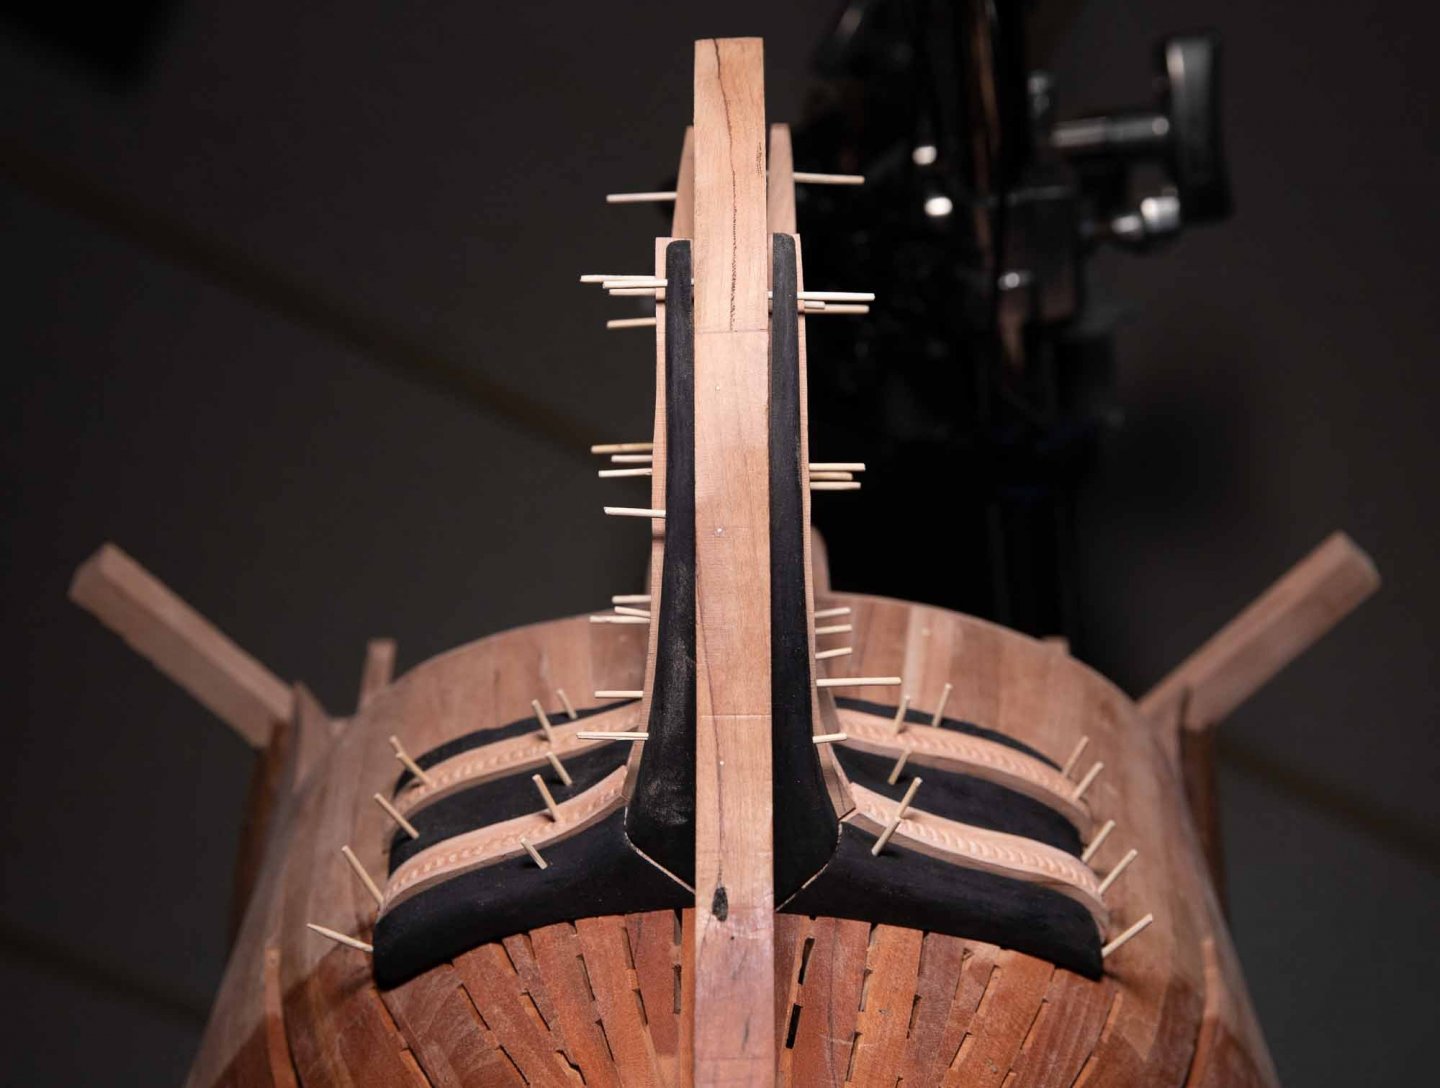
 I compared the front of your 74 with the one of a french 74. the french apparently are much more elongated.
 -
You are very generous, I would cut in 2, at least, so below .003". If I turn a part ,005" that fit to another one, I would consider that I mist this part. Grinding is more precise and can easily go under .001" But every time you add a 0 in precision, you will add few 0 in the price. Here is an example; Spindle Run Out at the Chuck Mounting Taper is within 0.0002″ https://cameronmicrodrillpress.com/sensitive-manual-micro-drill-presses/new-cameron-214-series/
-
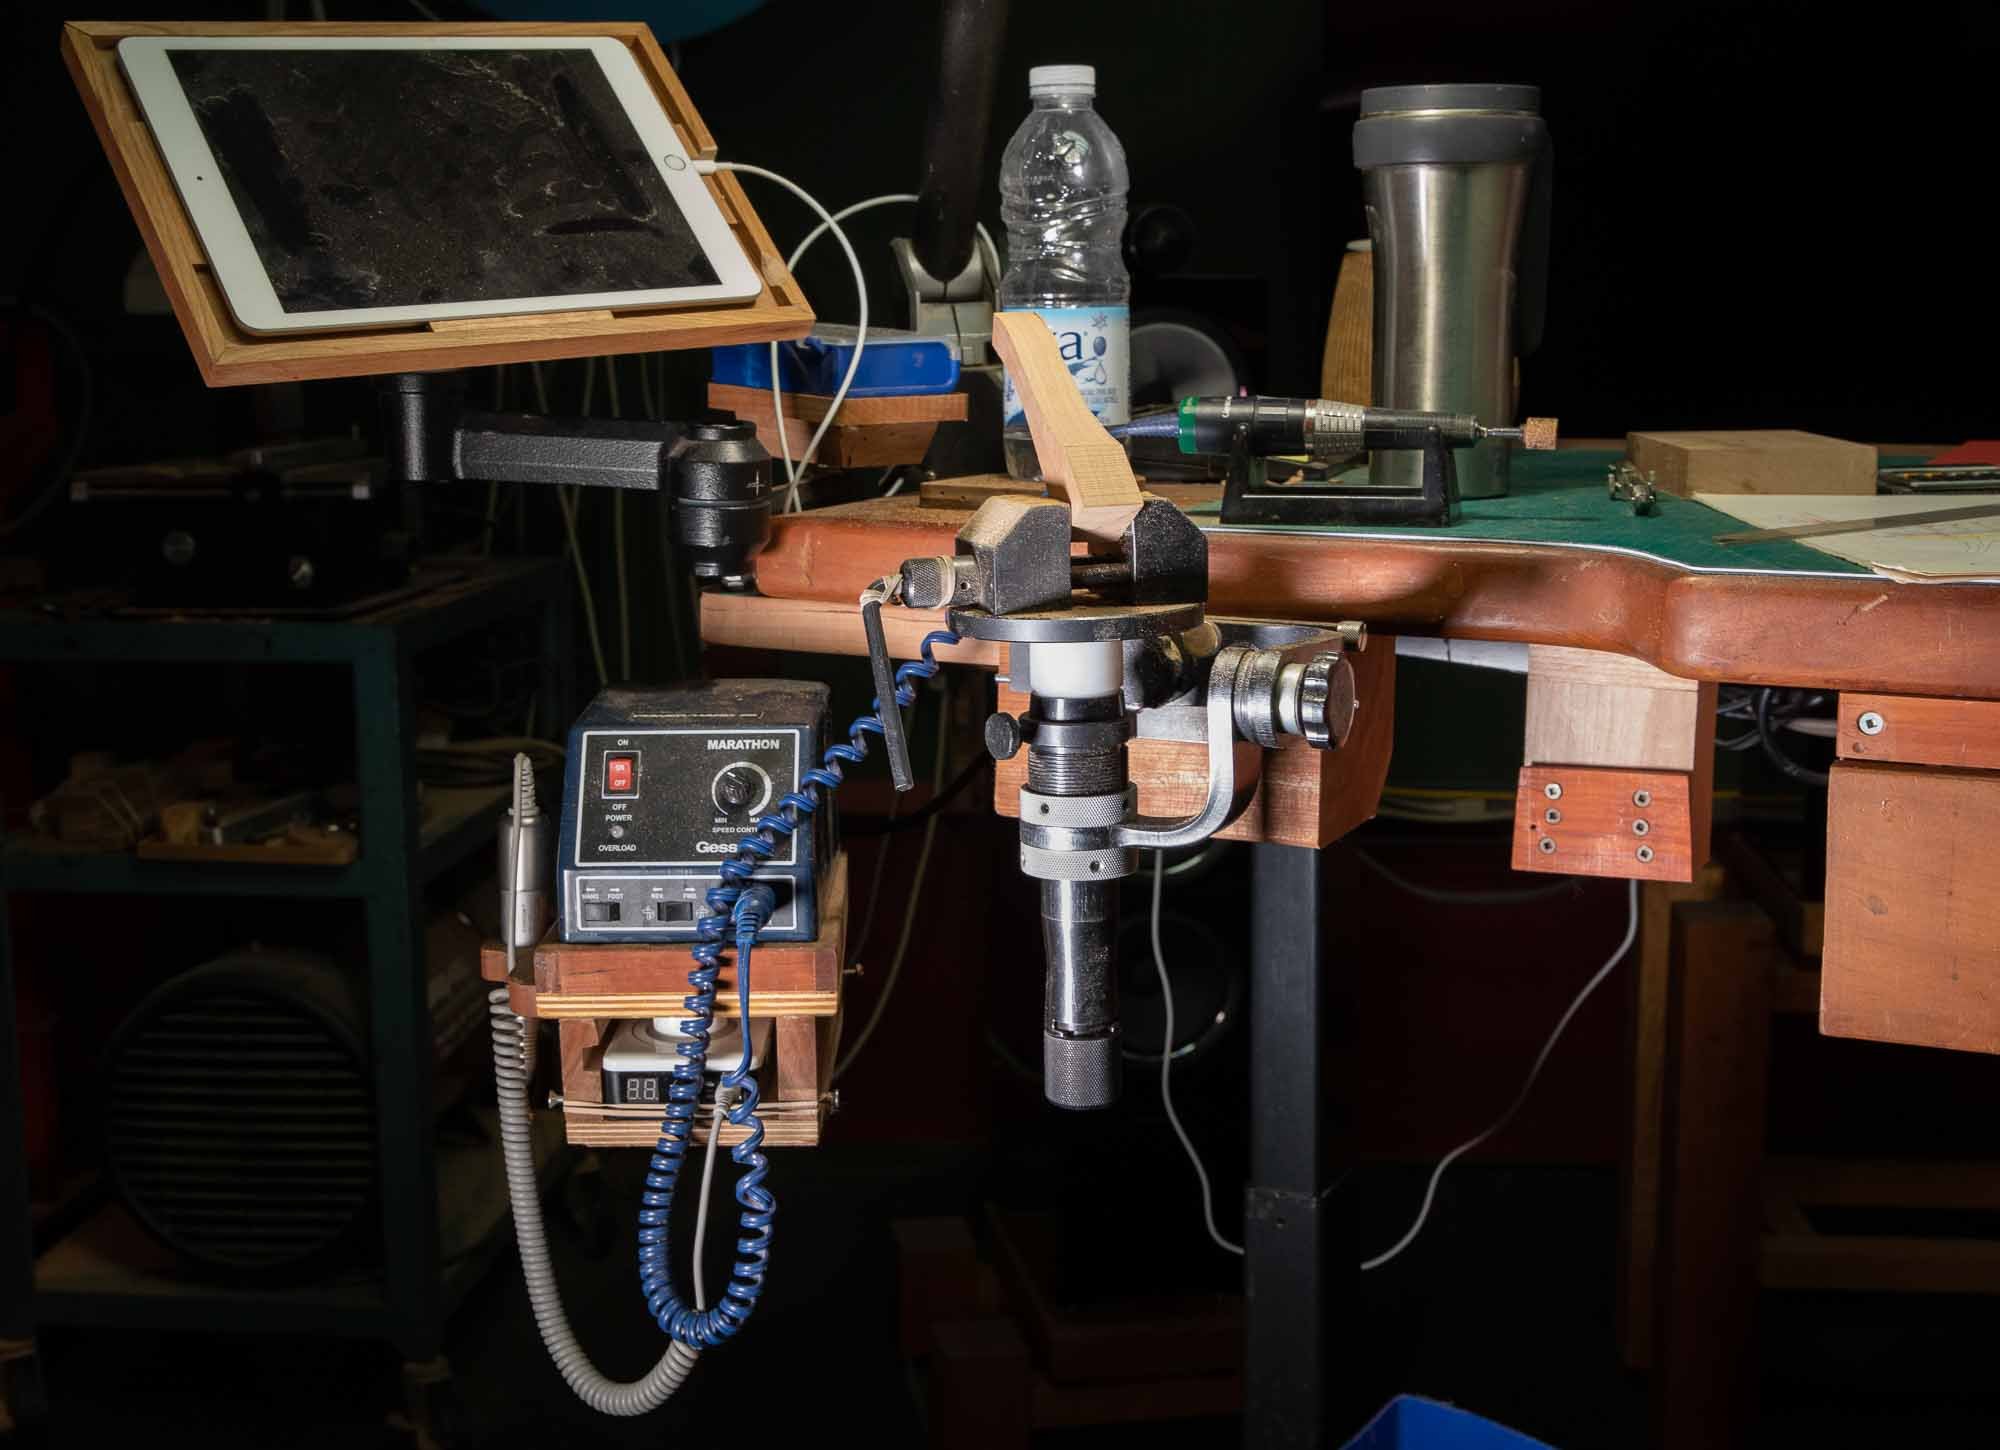
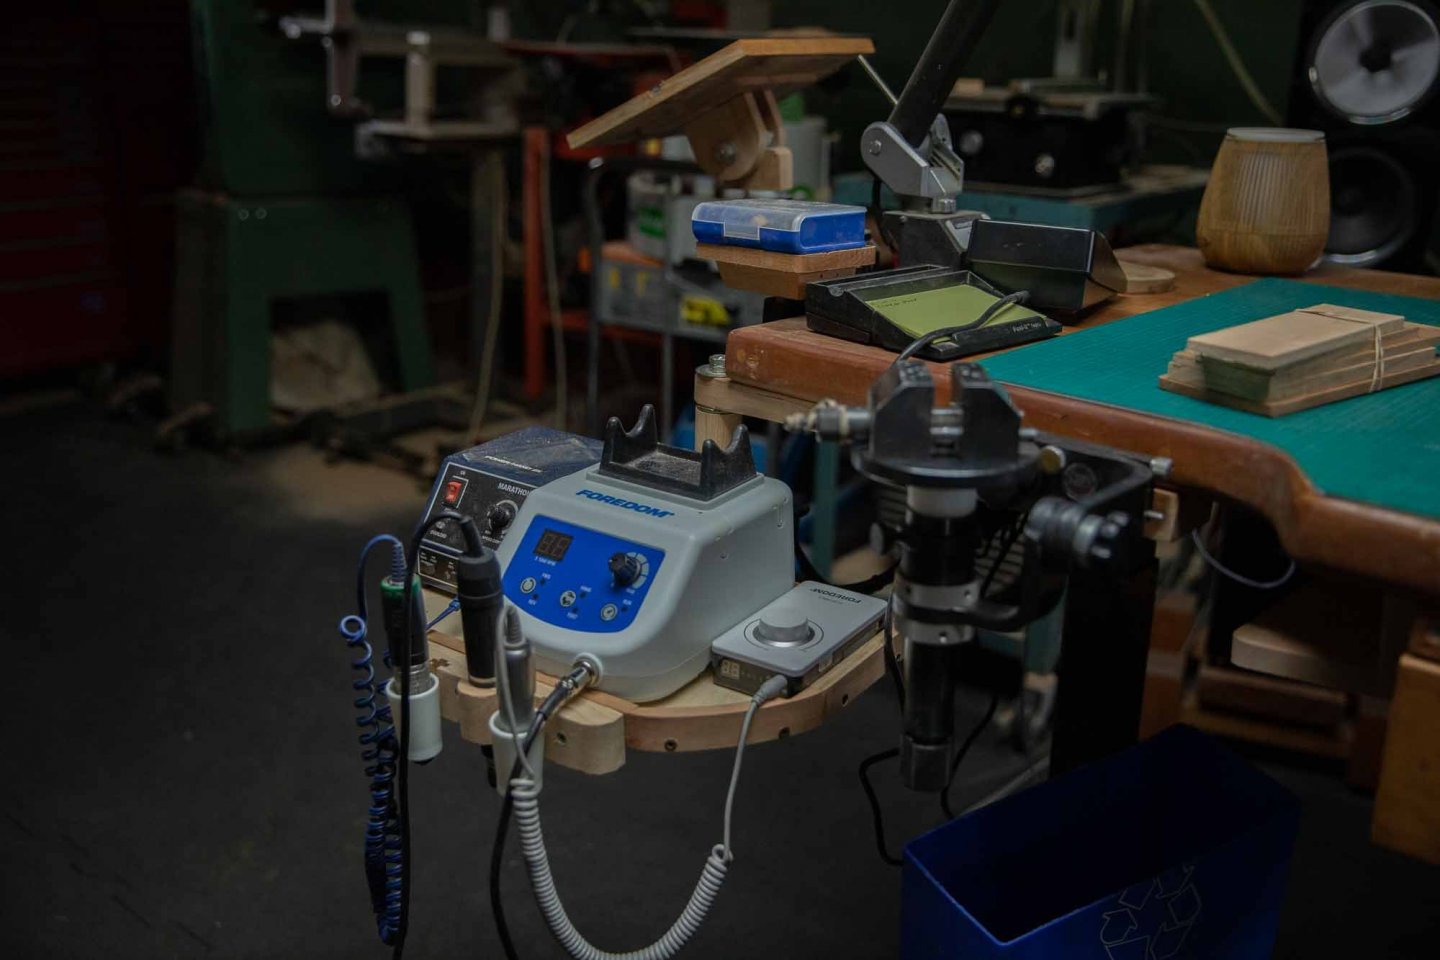
Thank you Mark and Mark. Recently I tried 2 new micromotors from Foredom. The main differences are the rpm and the torque. The portable is light, turns at 30000 rpm and has little torque. It is easy to stop it if you push too hard. The small ones (Foredom and Geswein)are execllent for carving. The second one turns up to 50000 rpm, very useful for metal and has much more torque. I also have a flex shaft from Foredom but I did not use it for many years. In comparison, flexshaft are harder to handle and you do not have as much control like you have with micromotors.


-
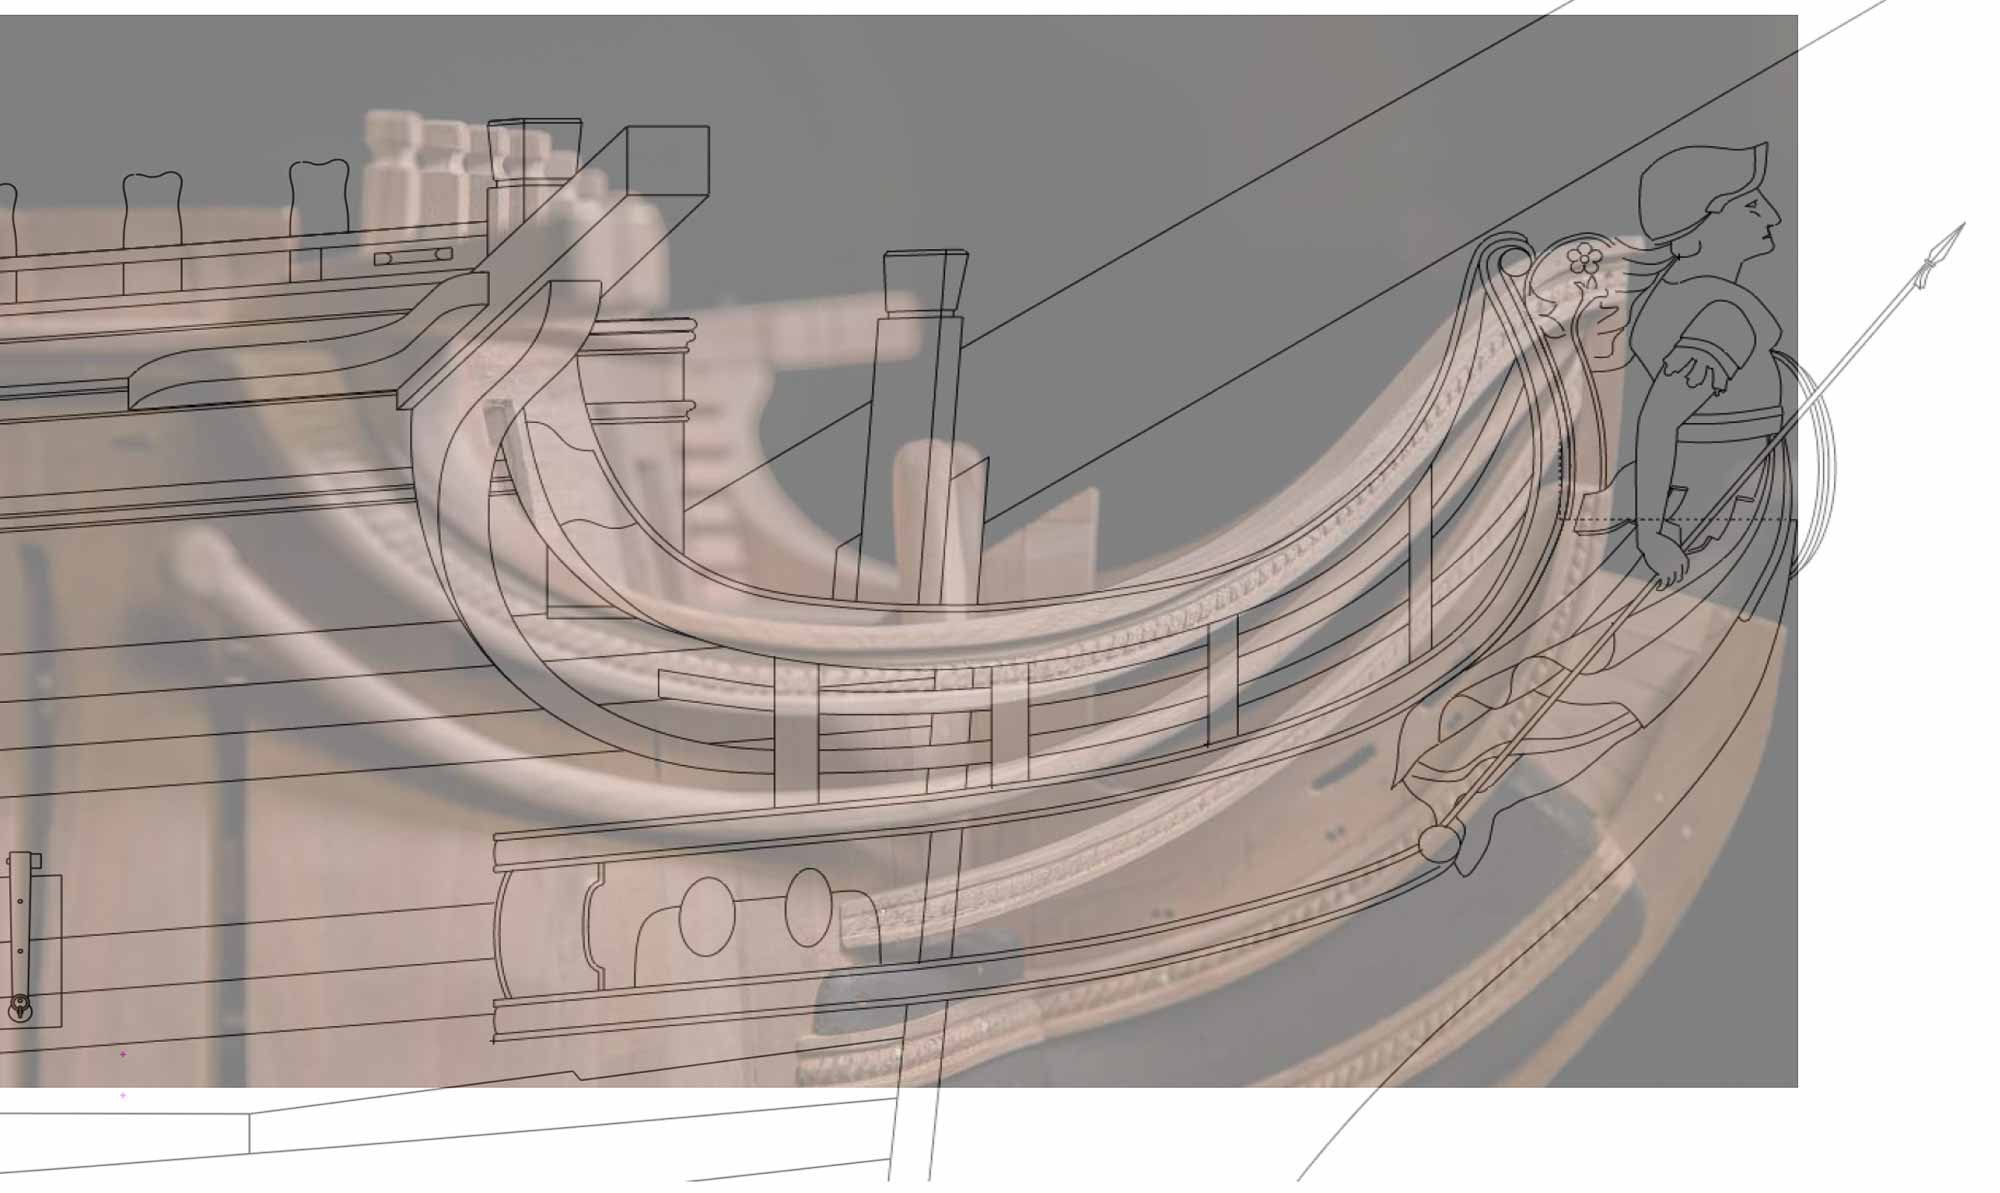
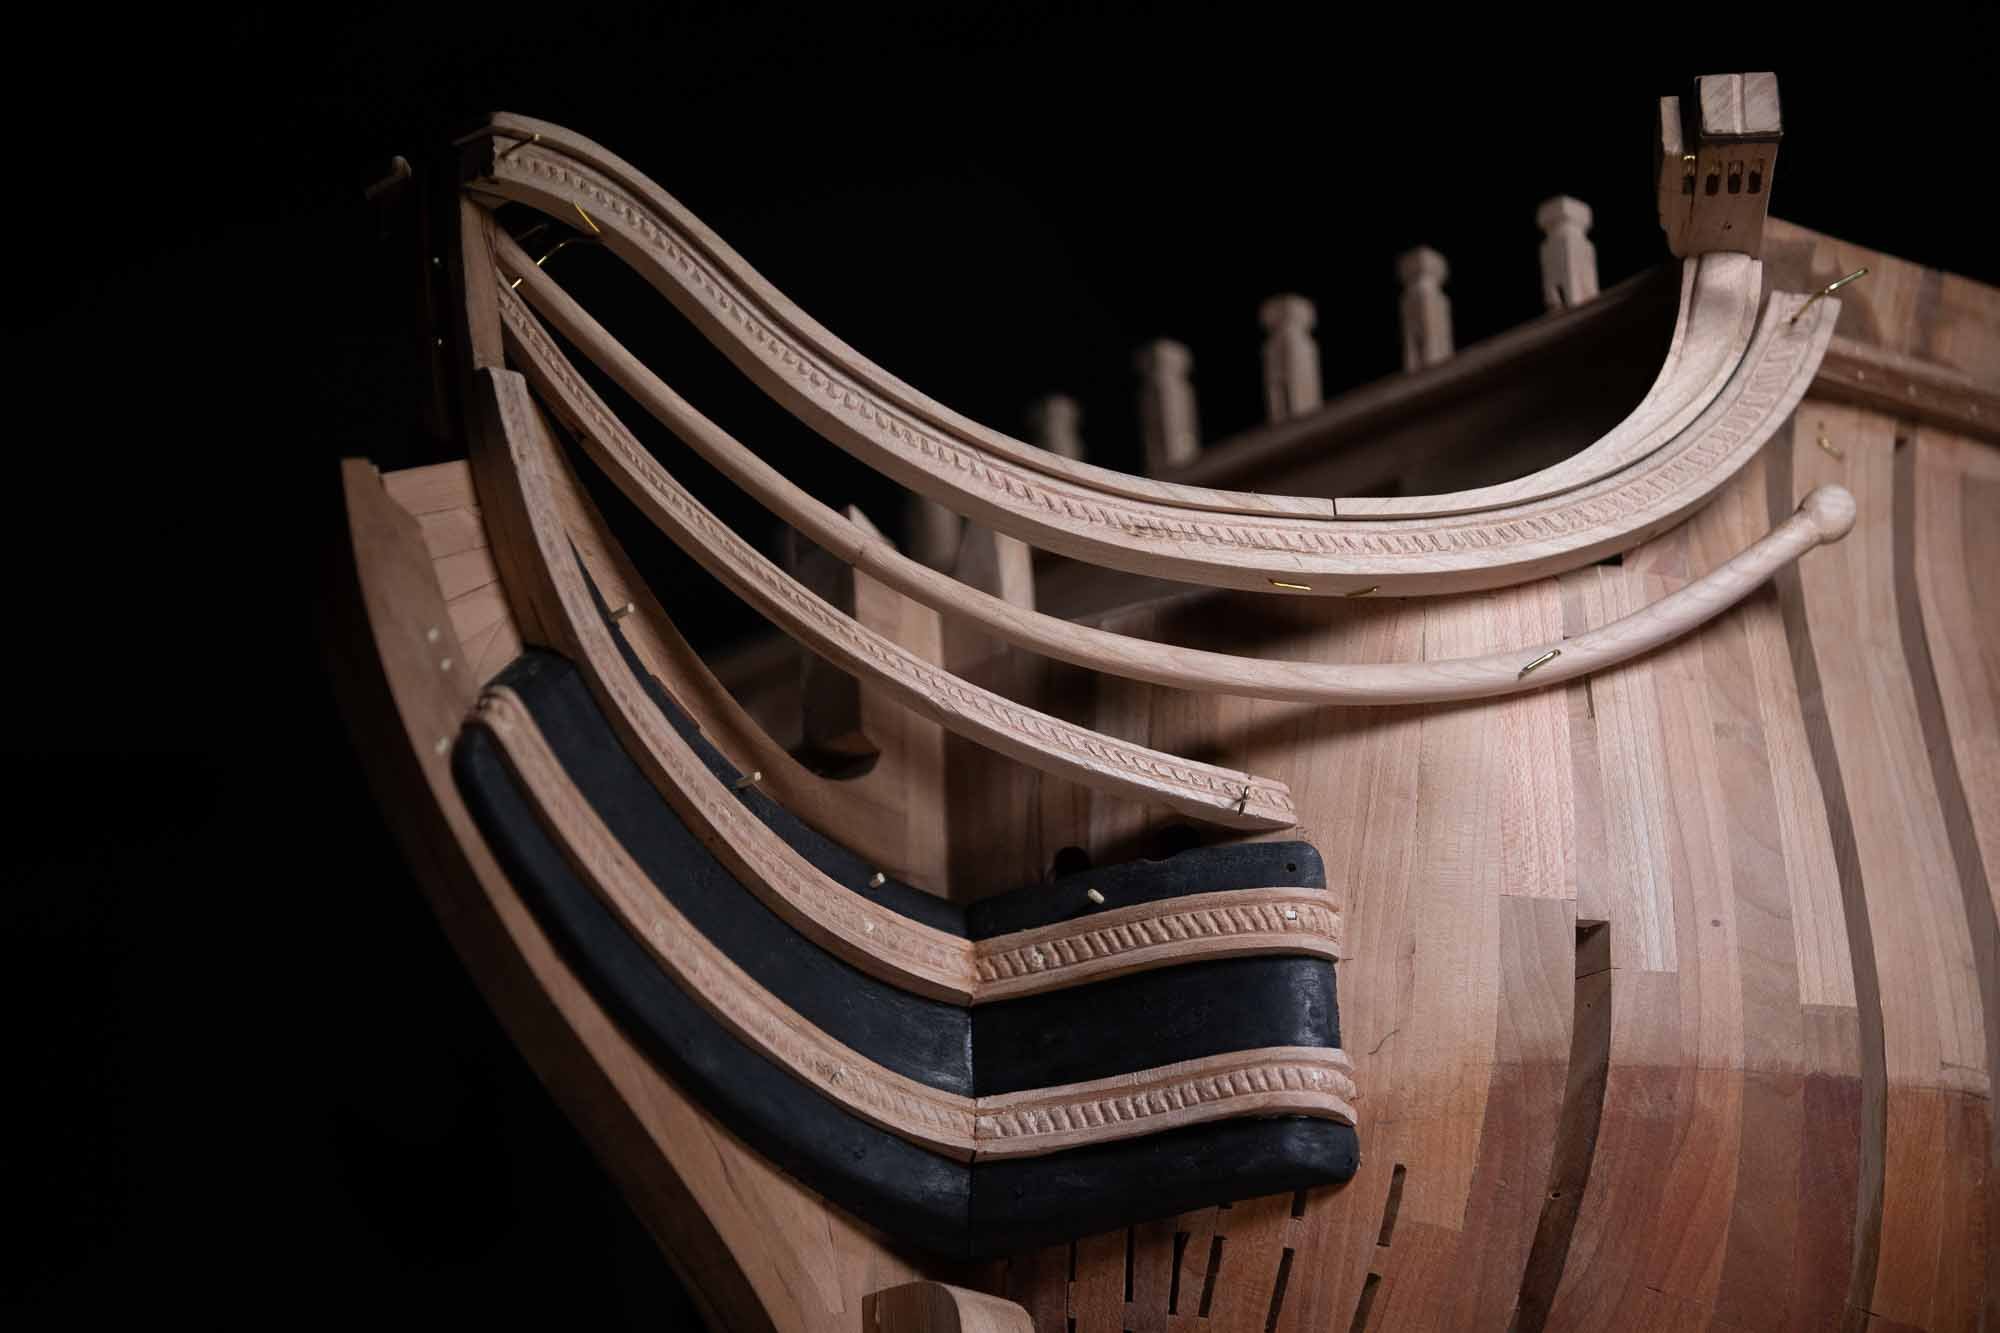
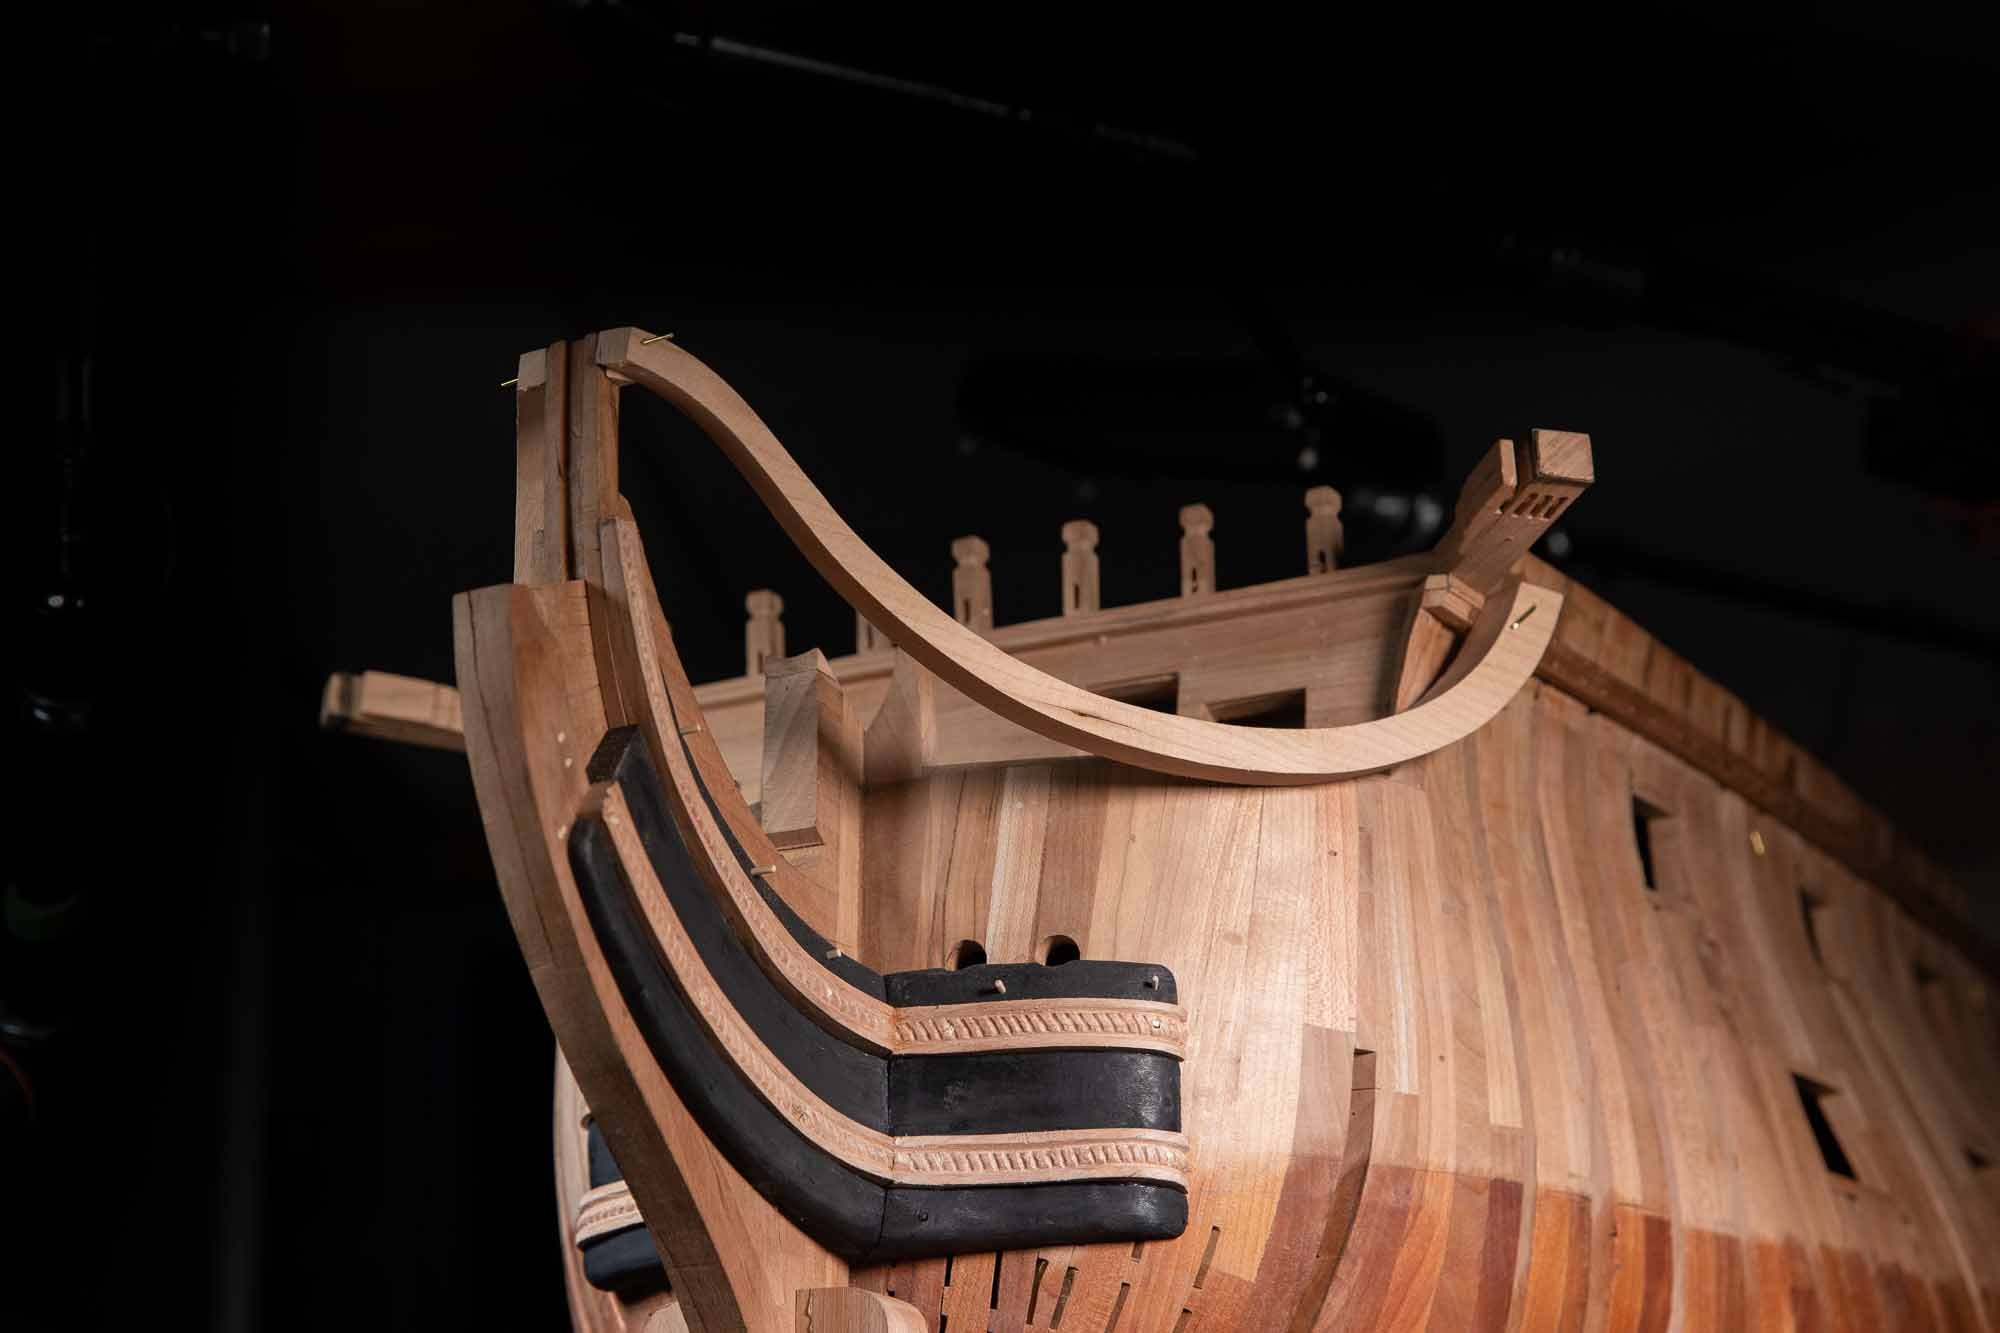
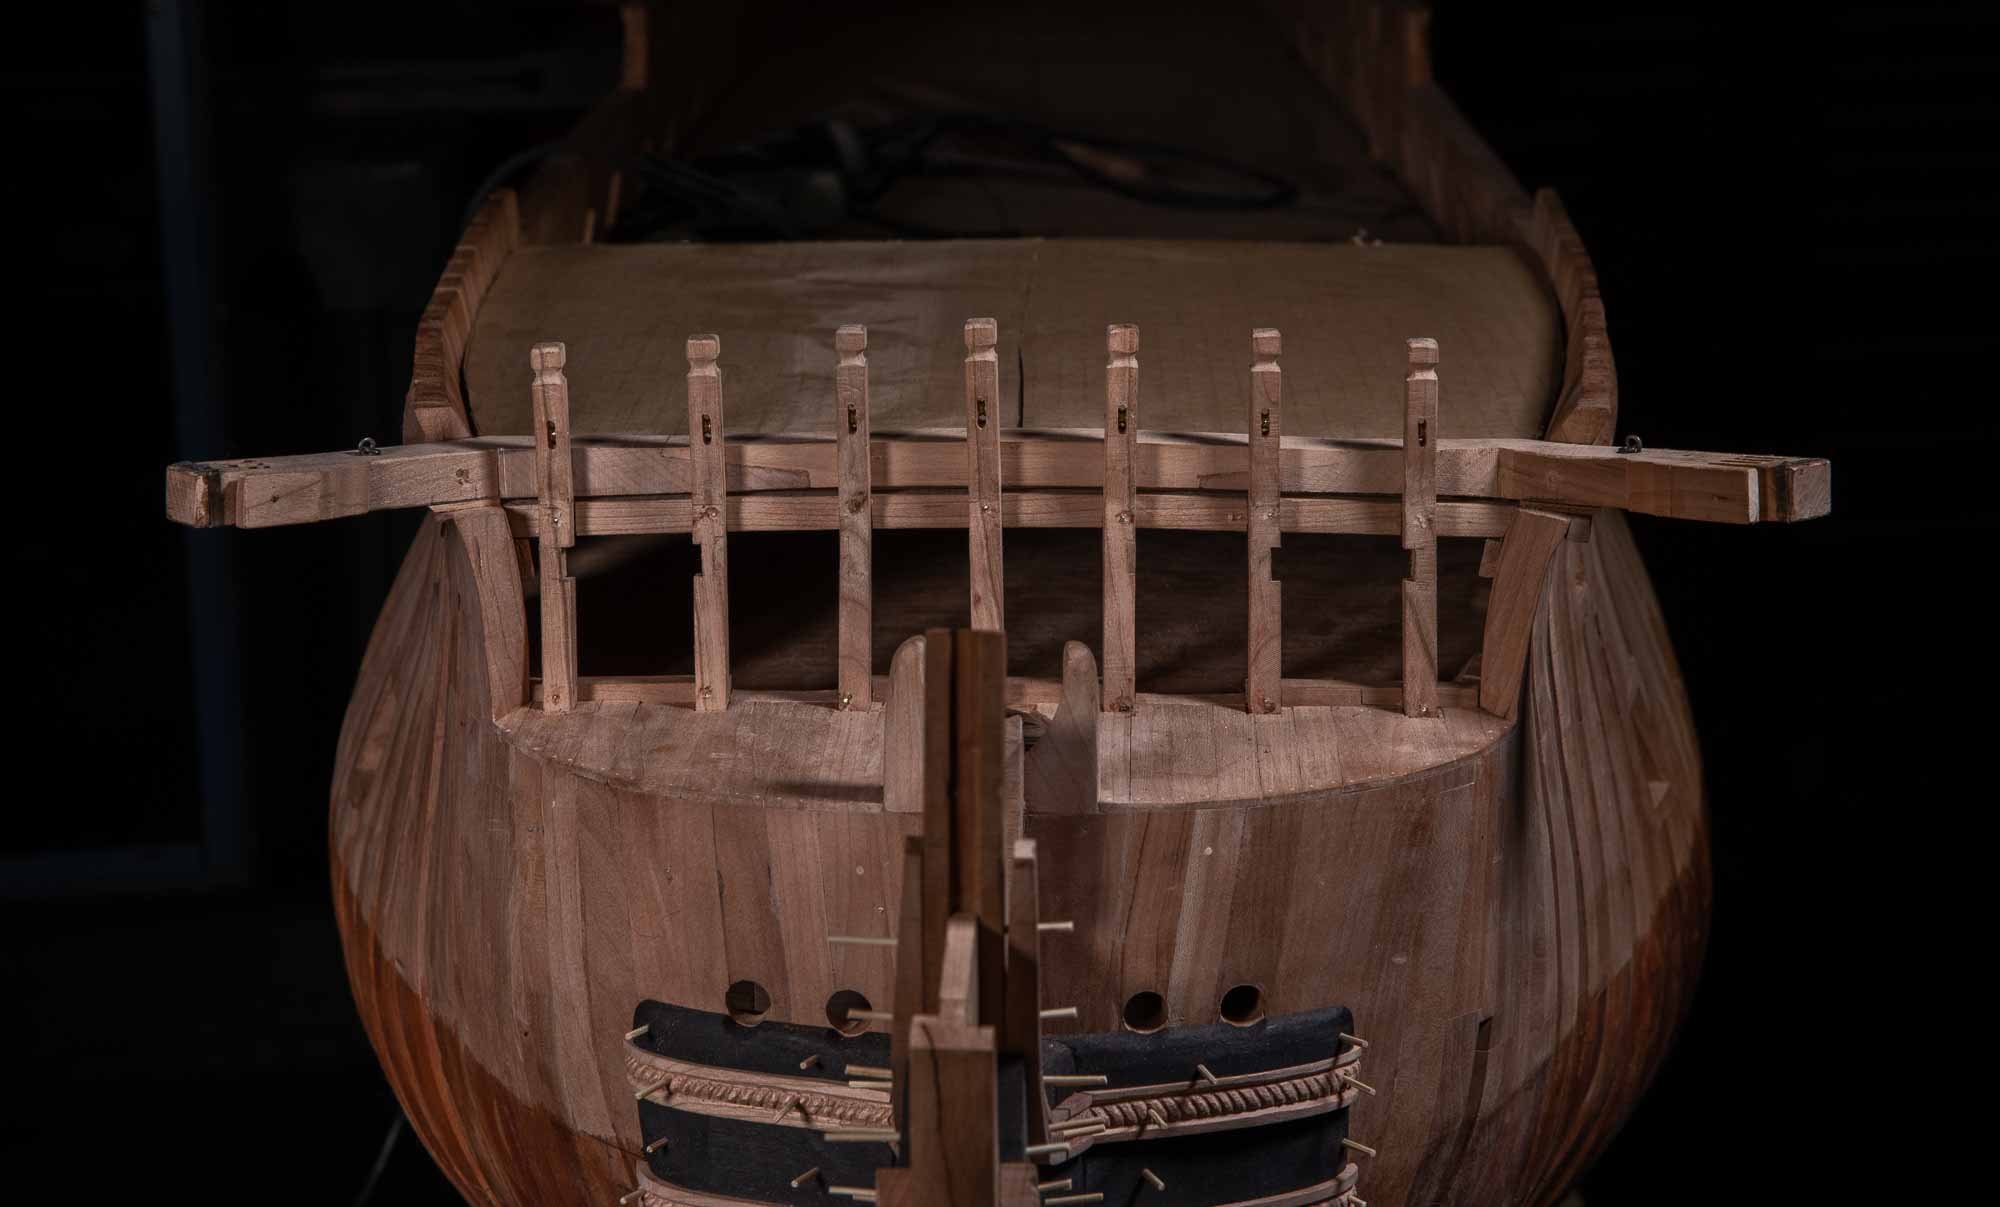
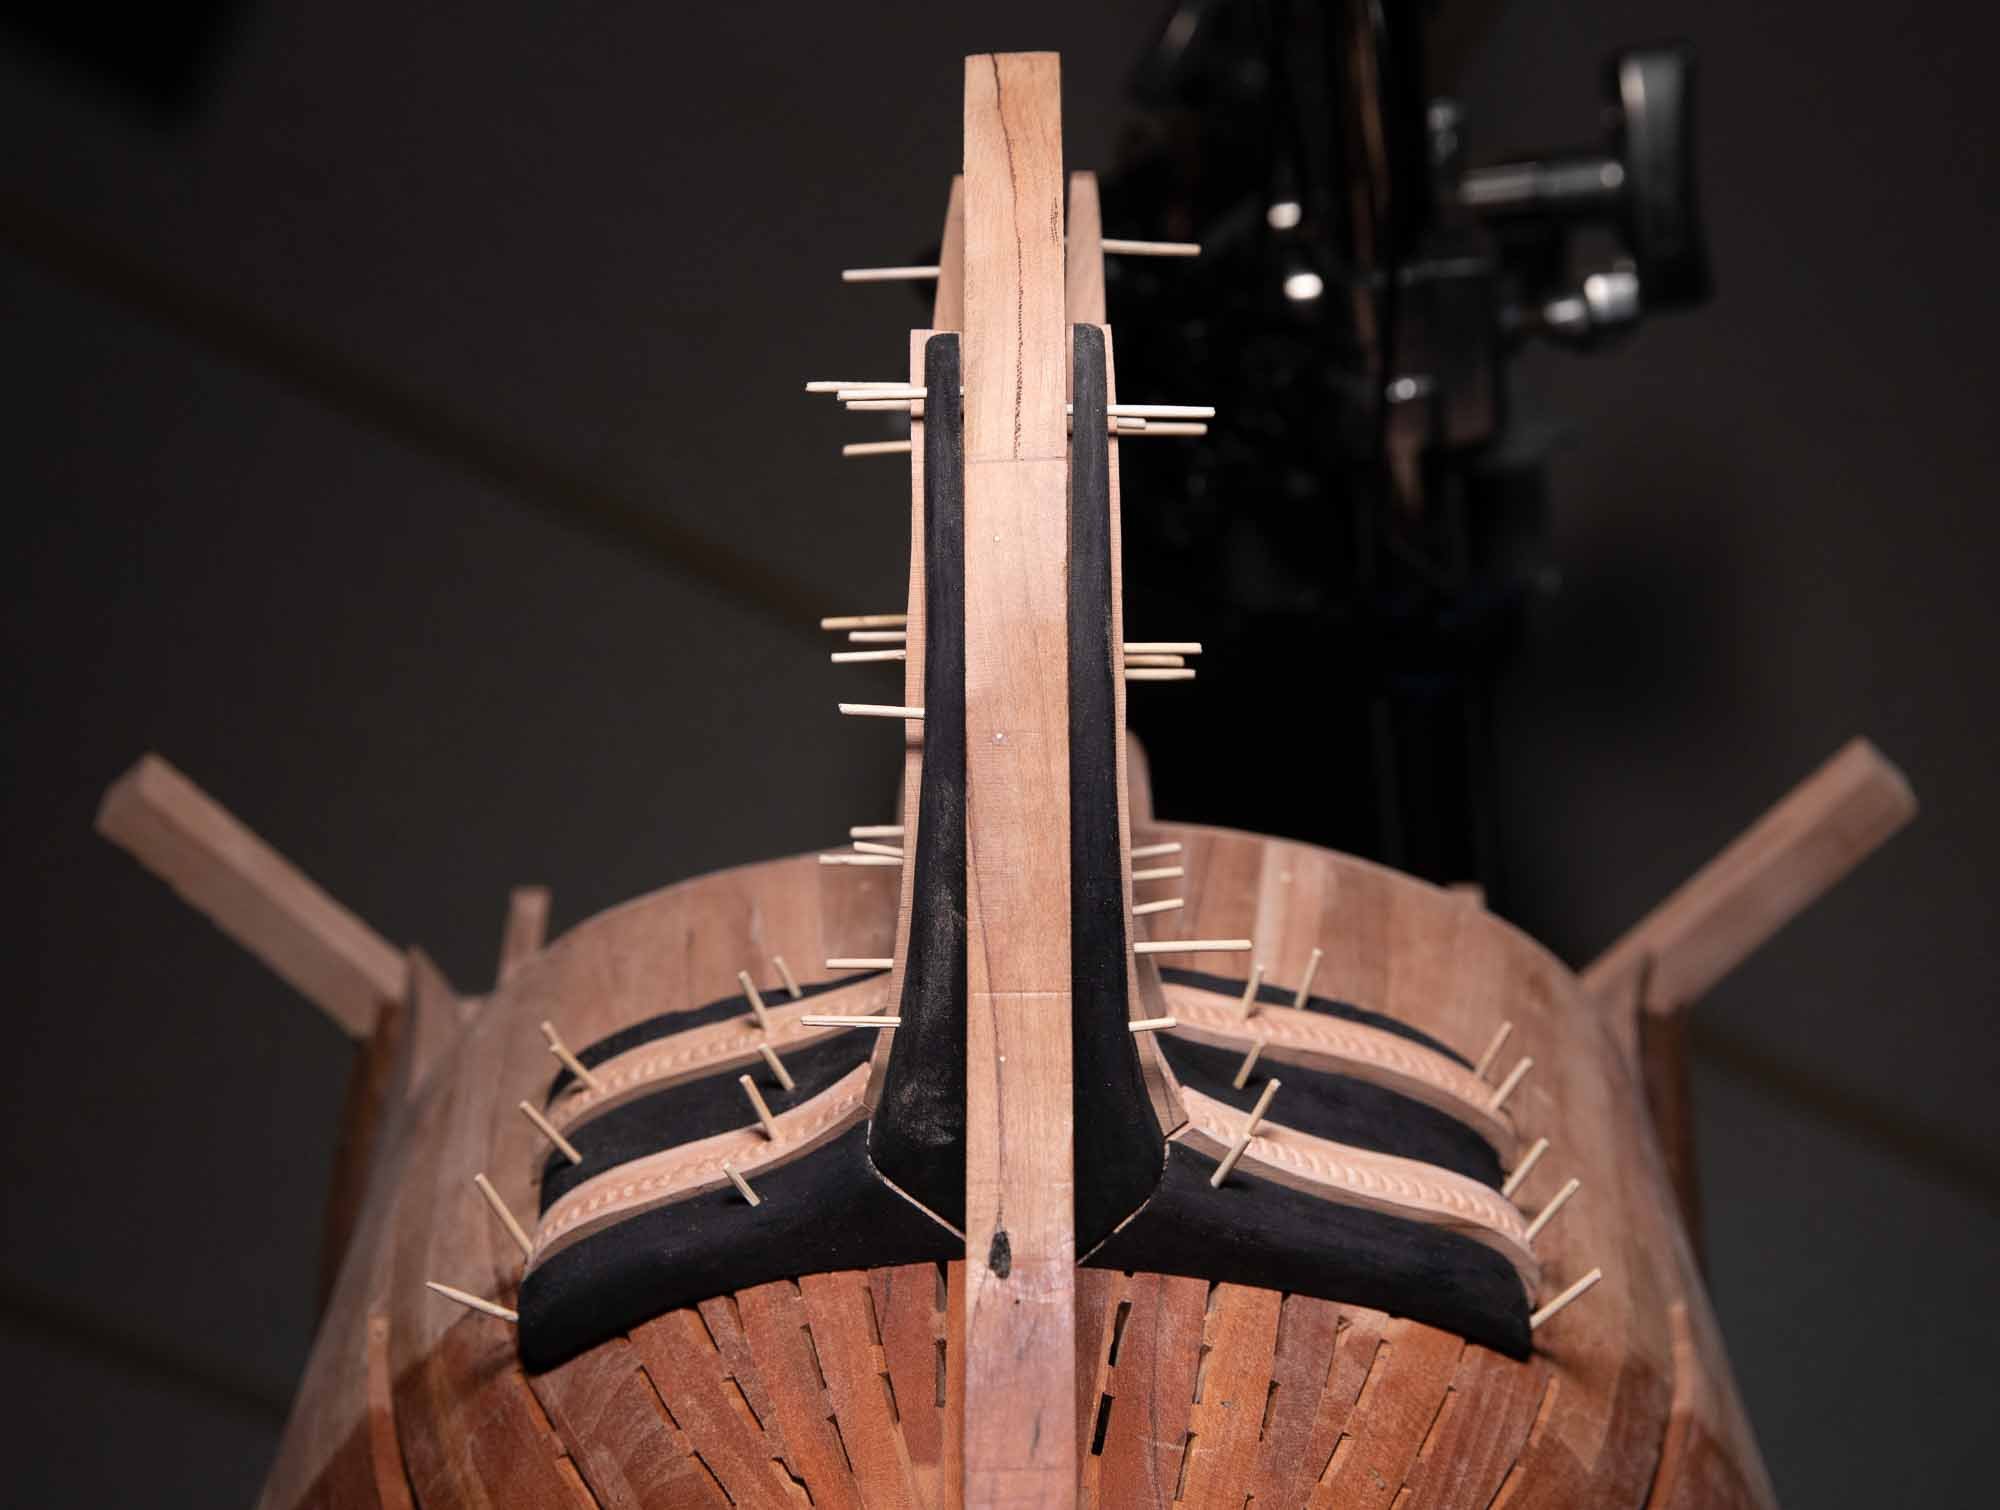
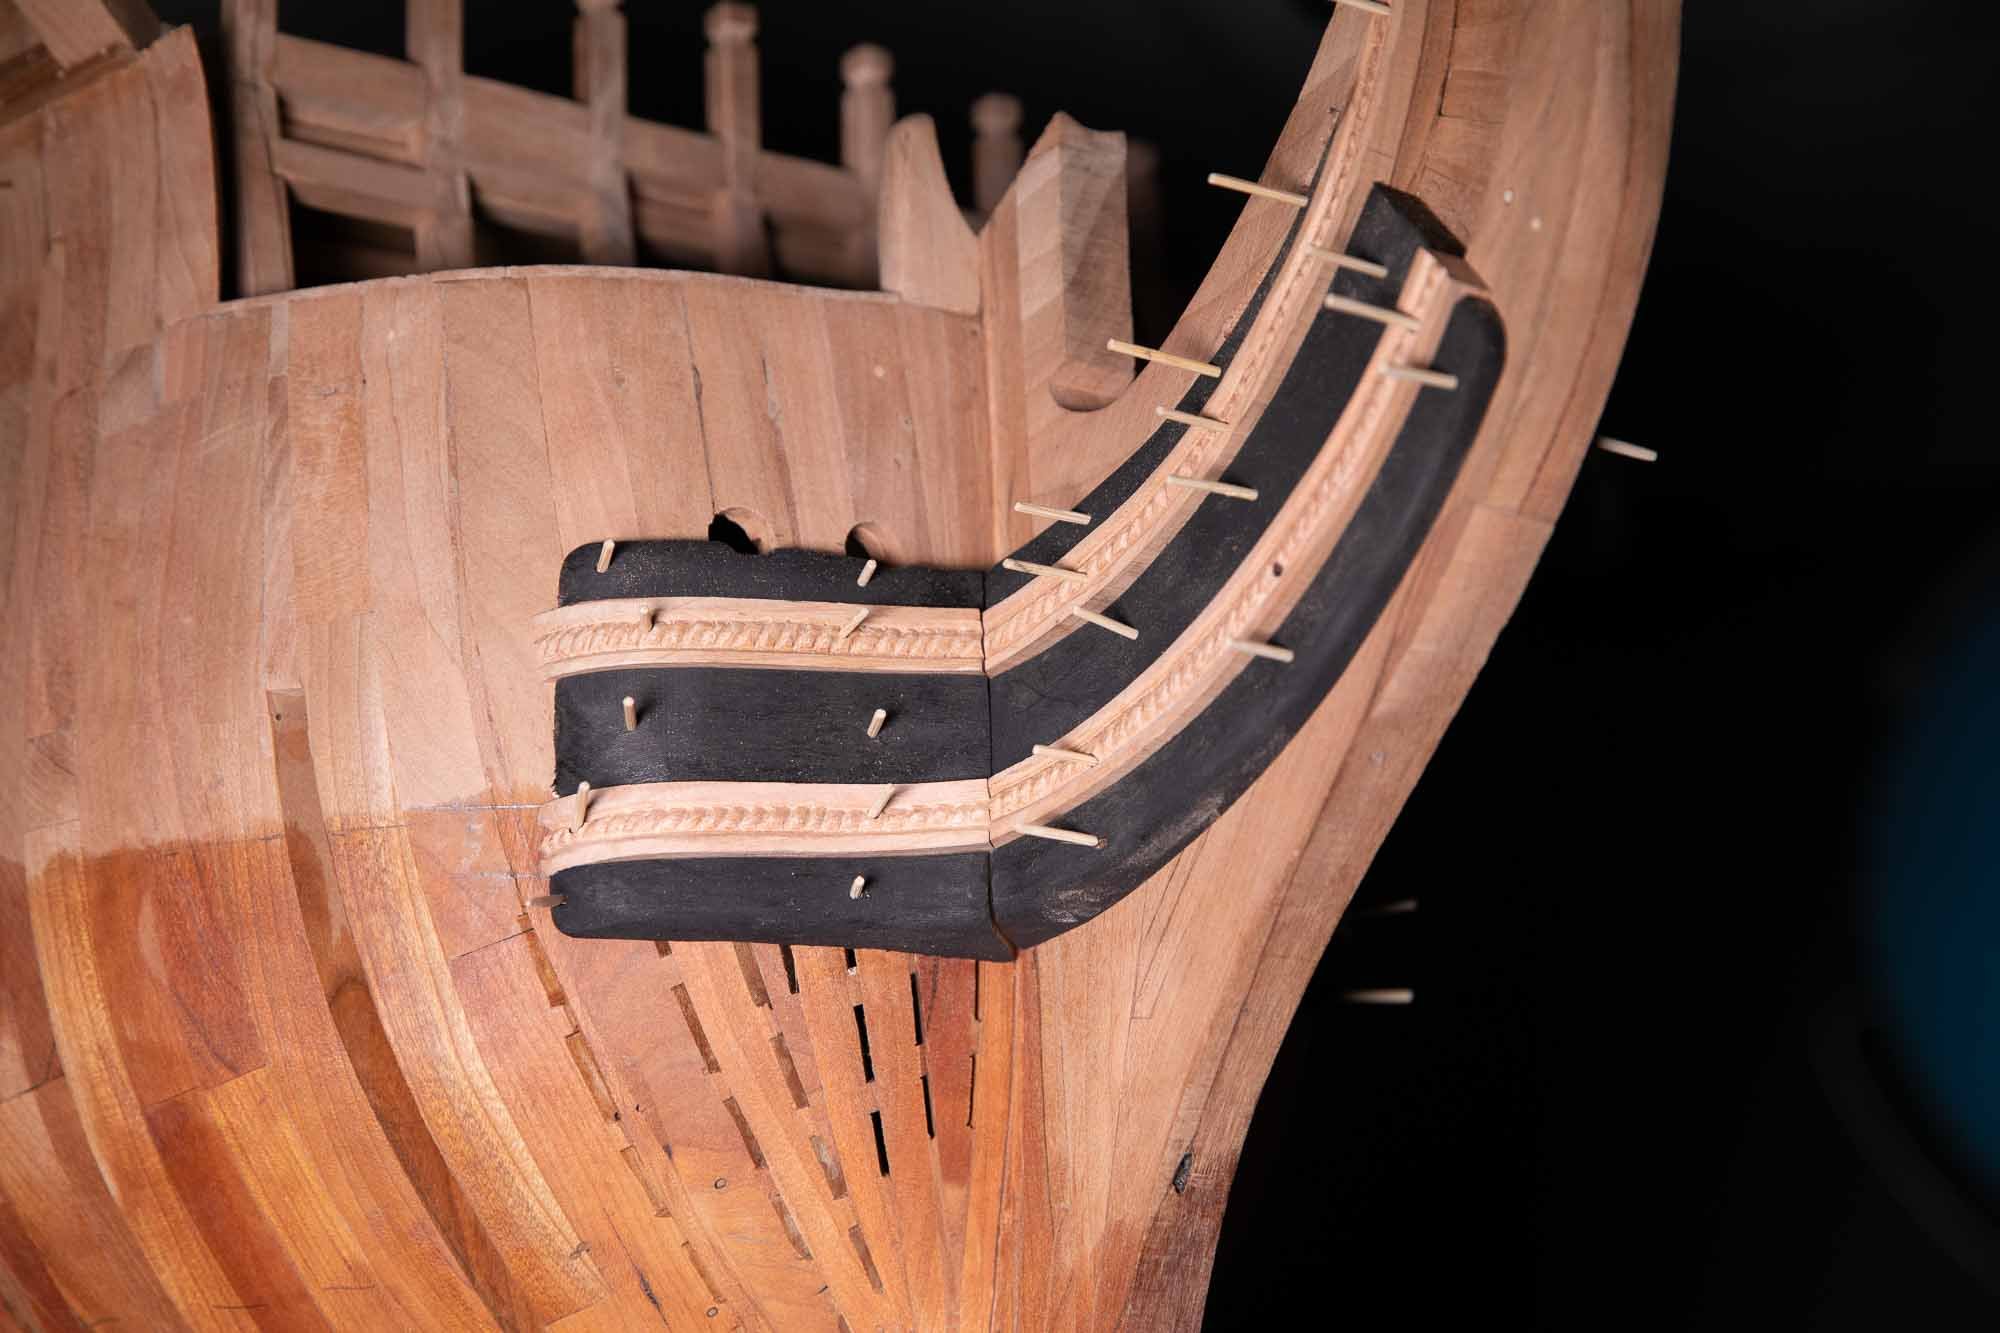
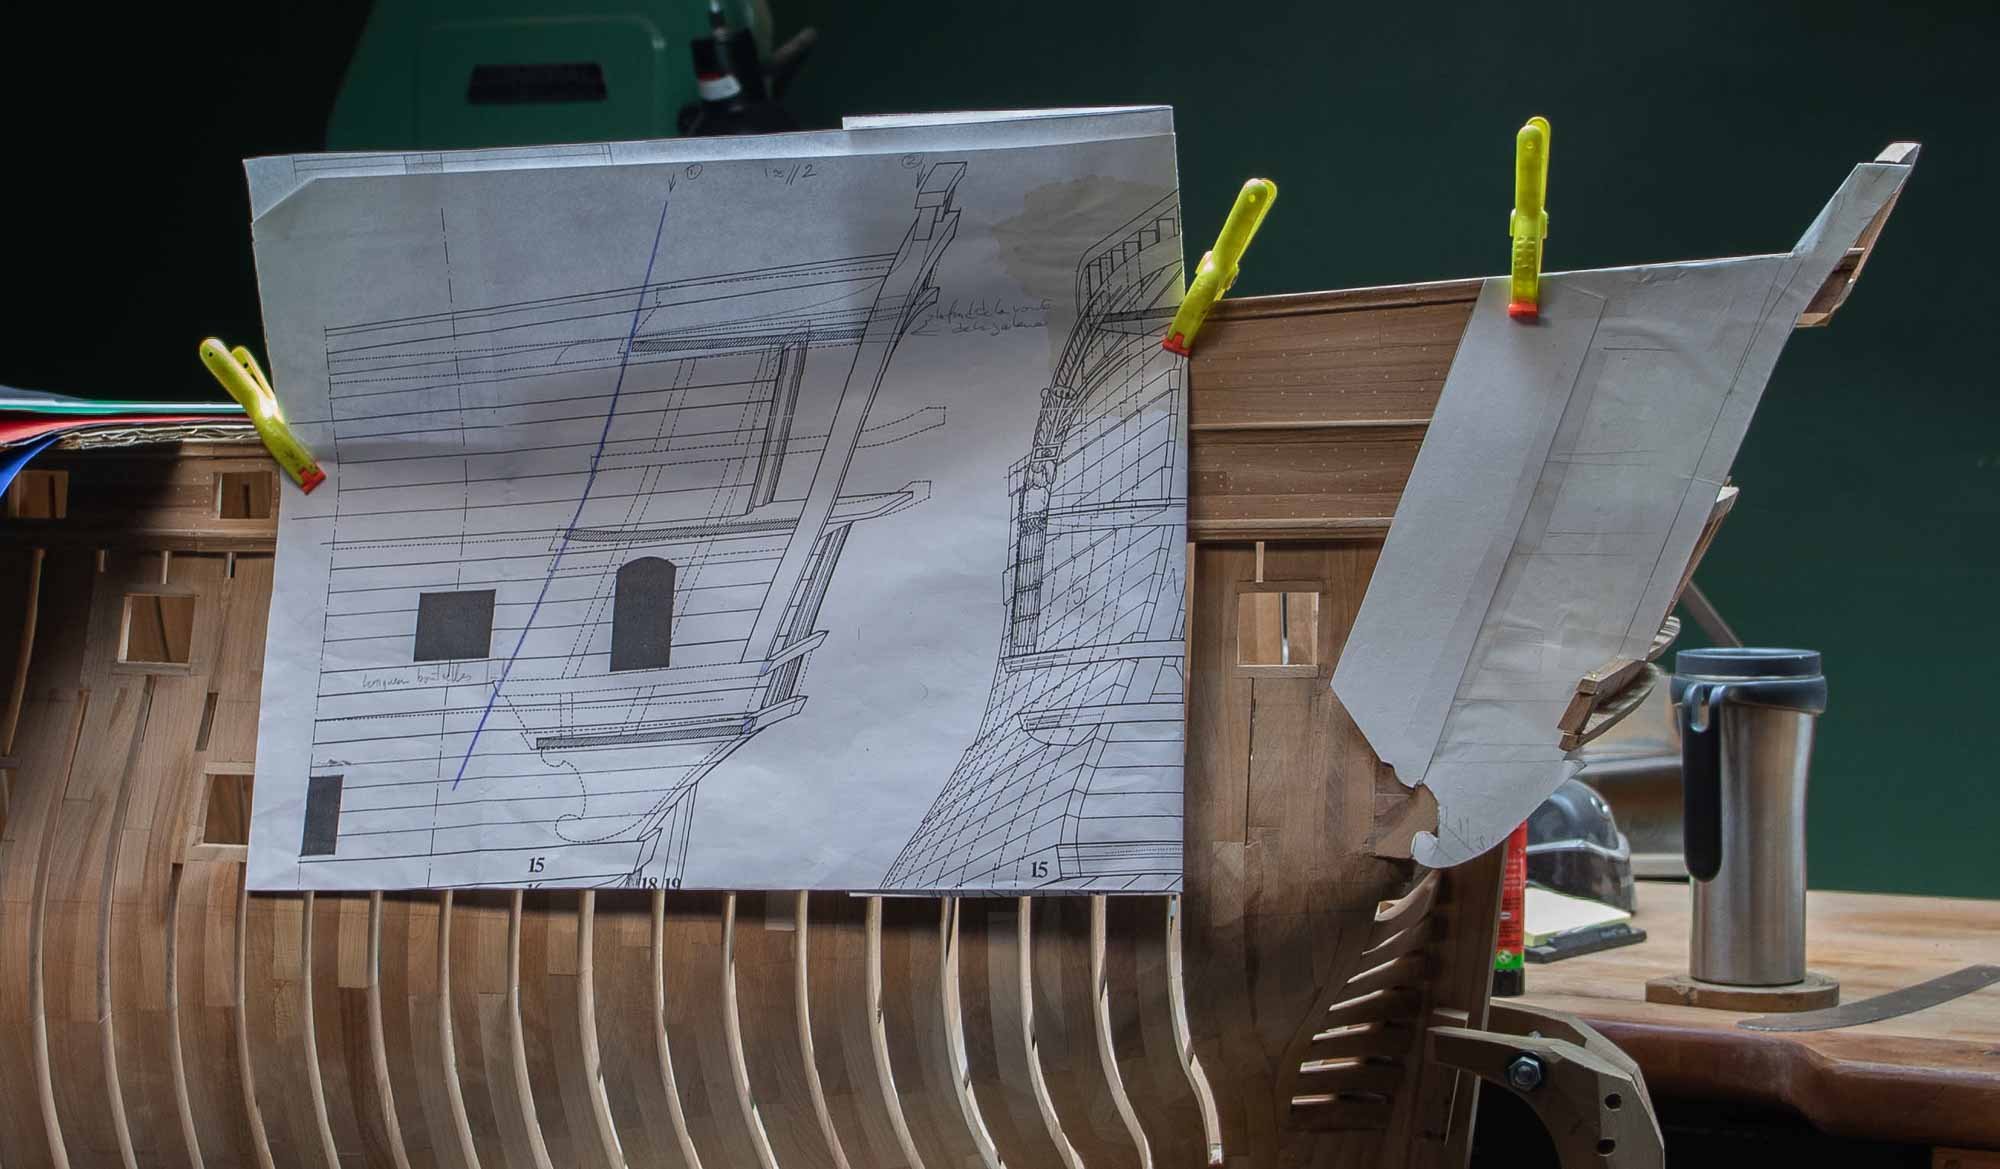
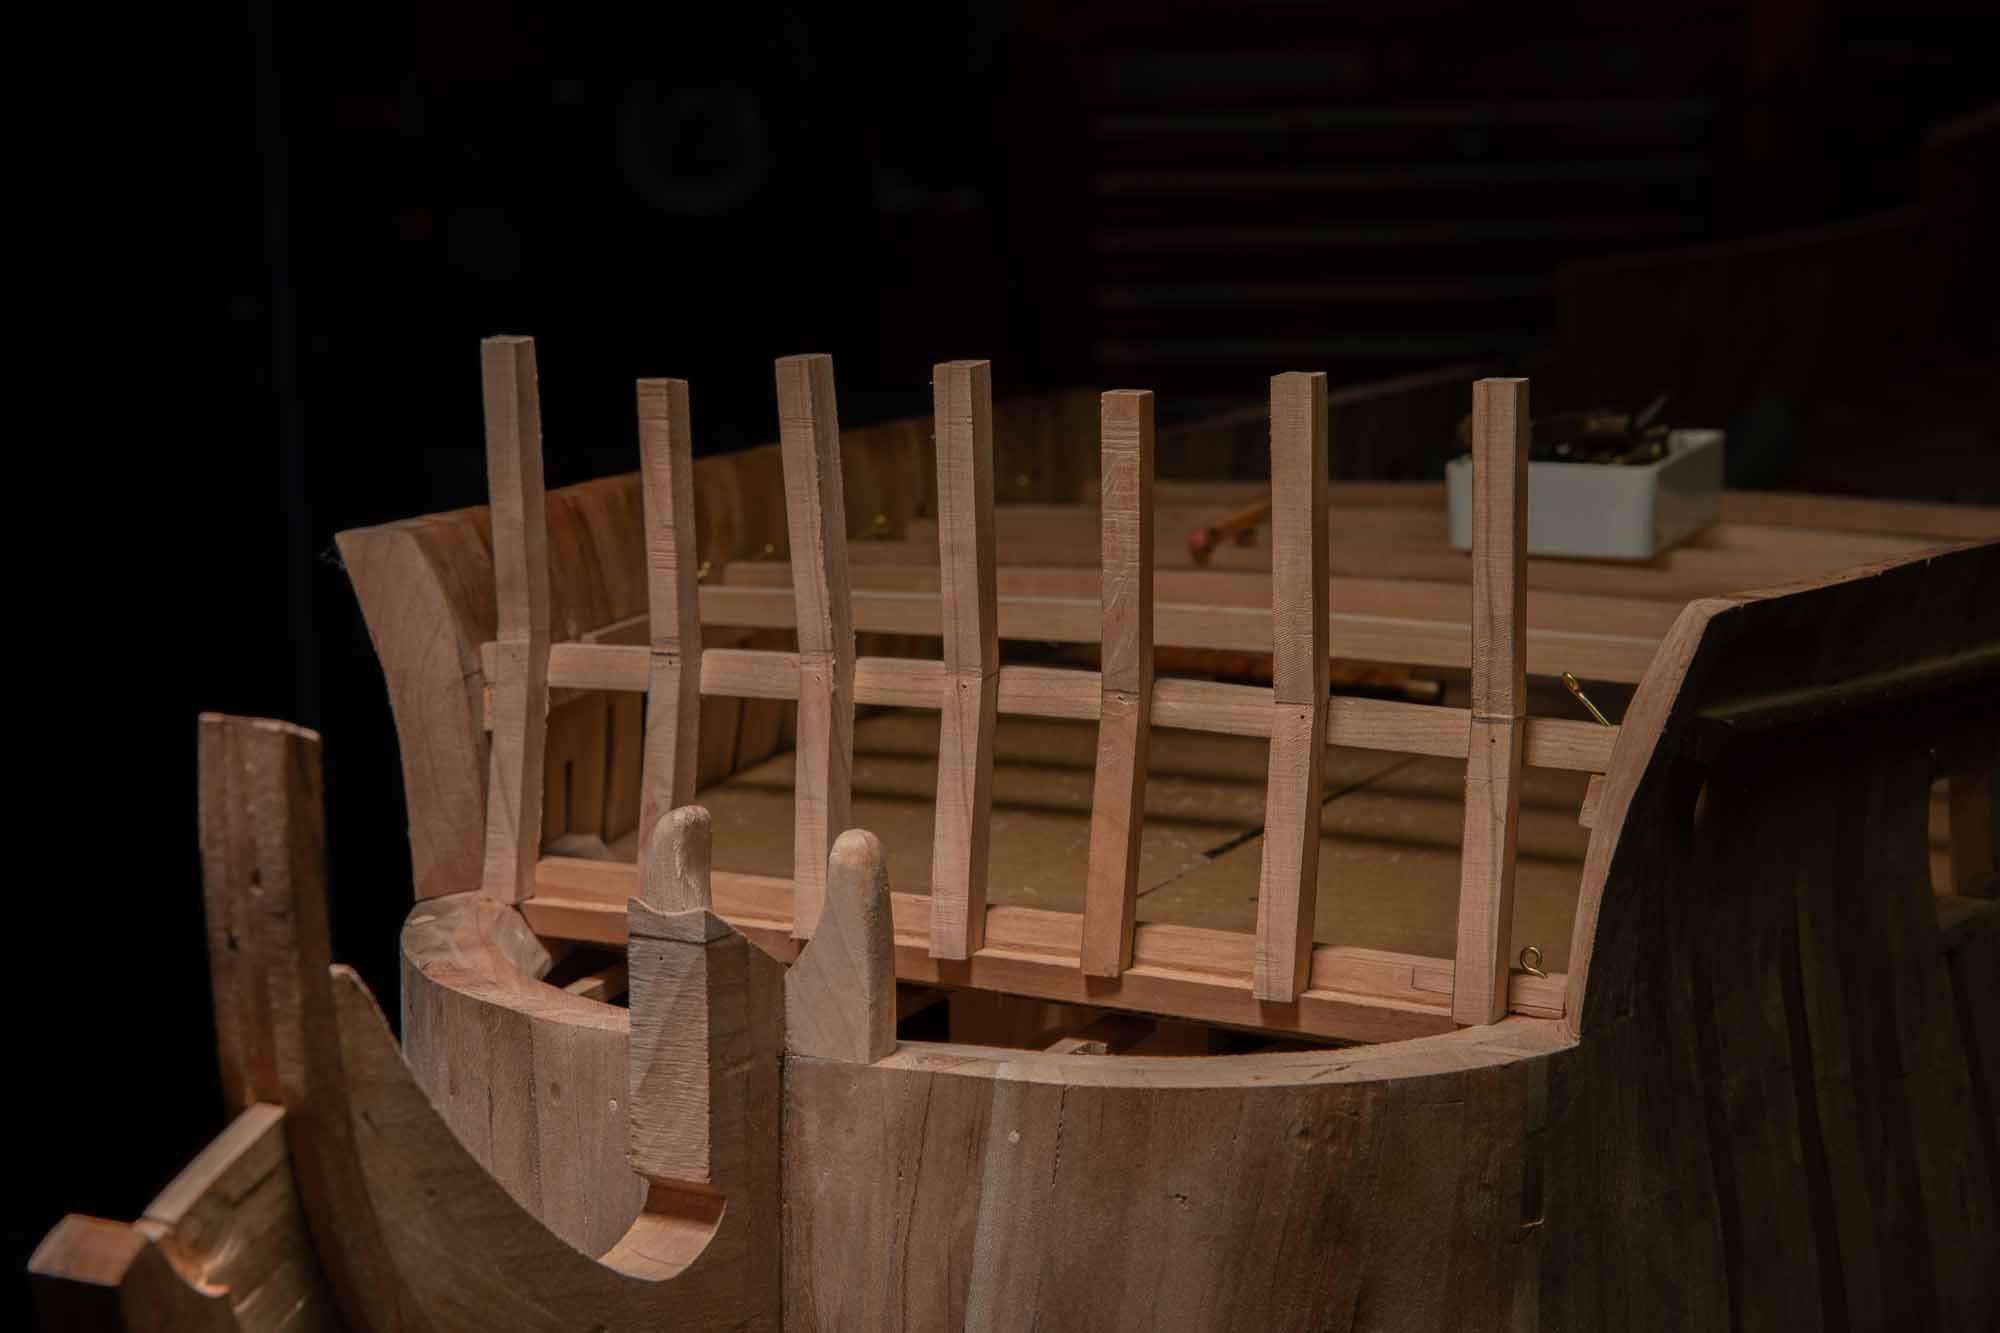
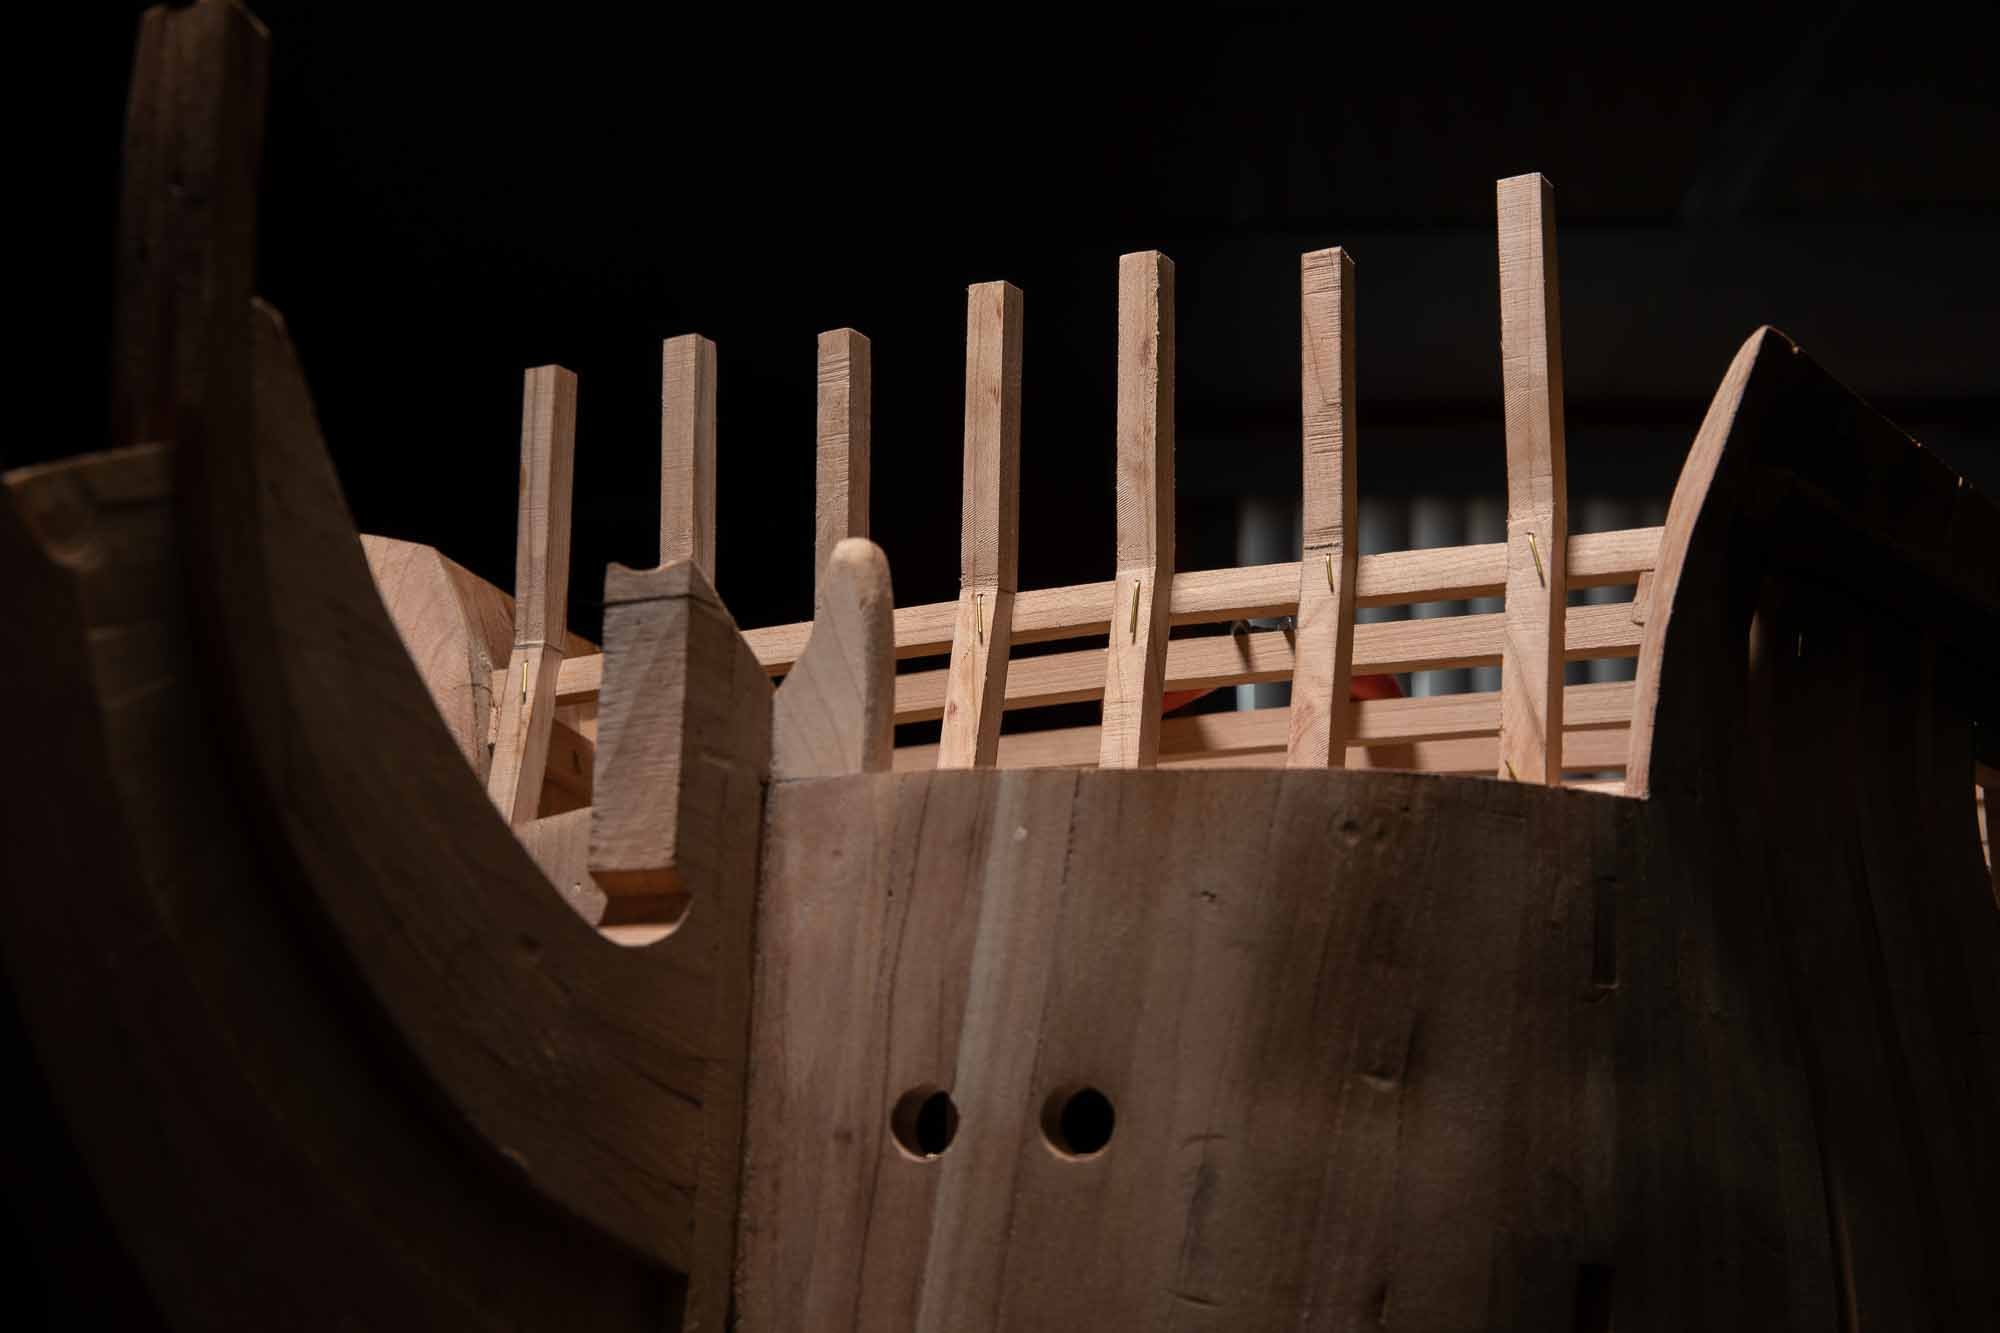
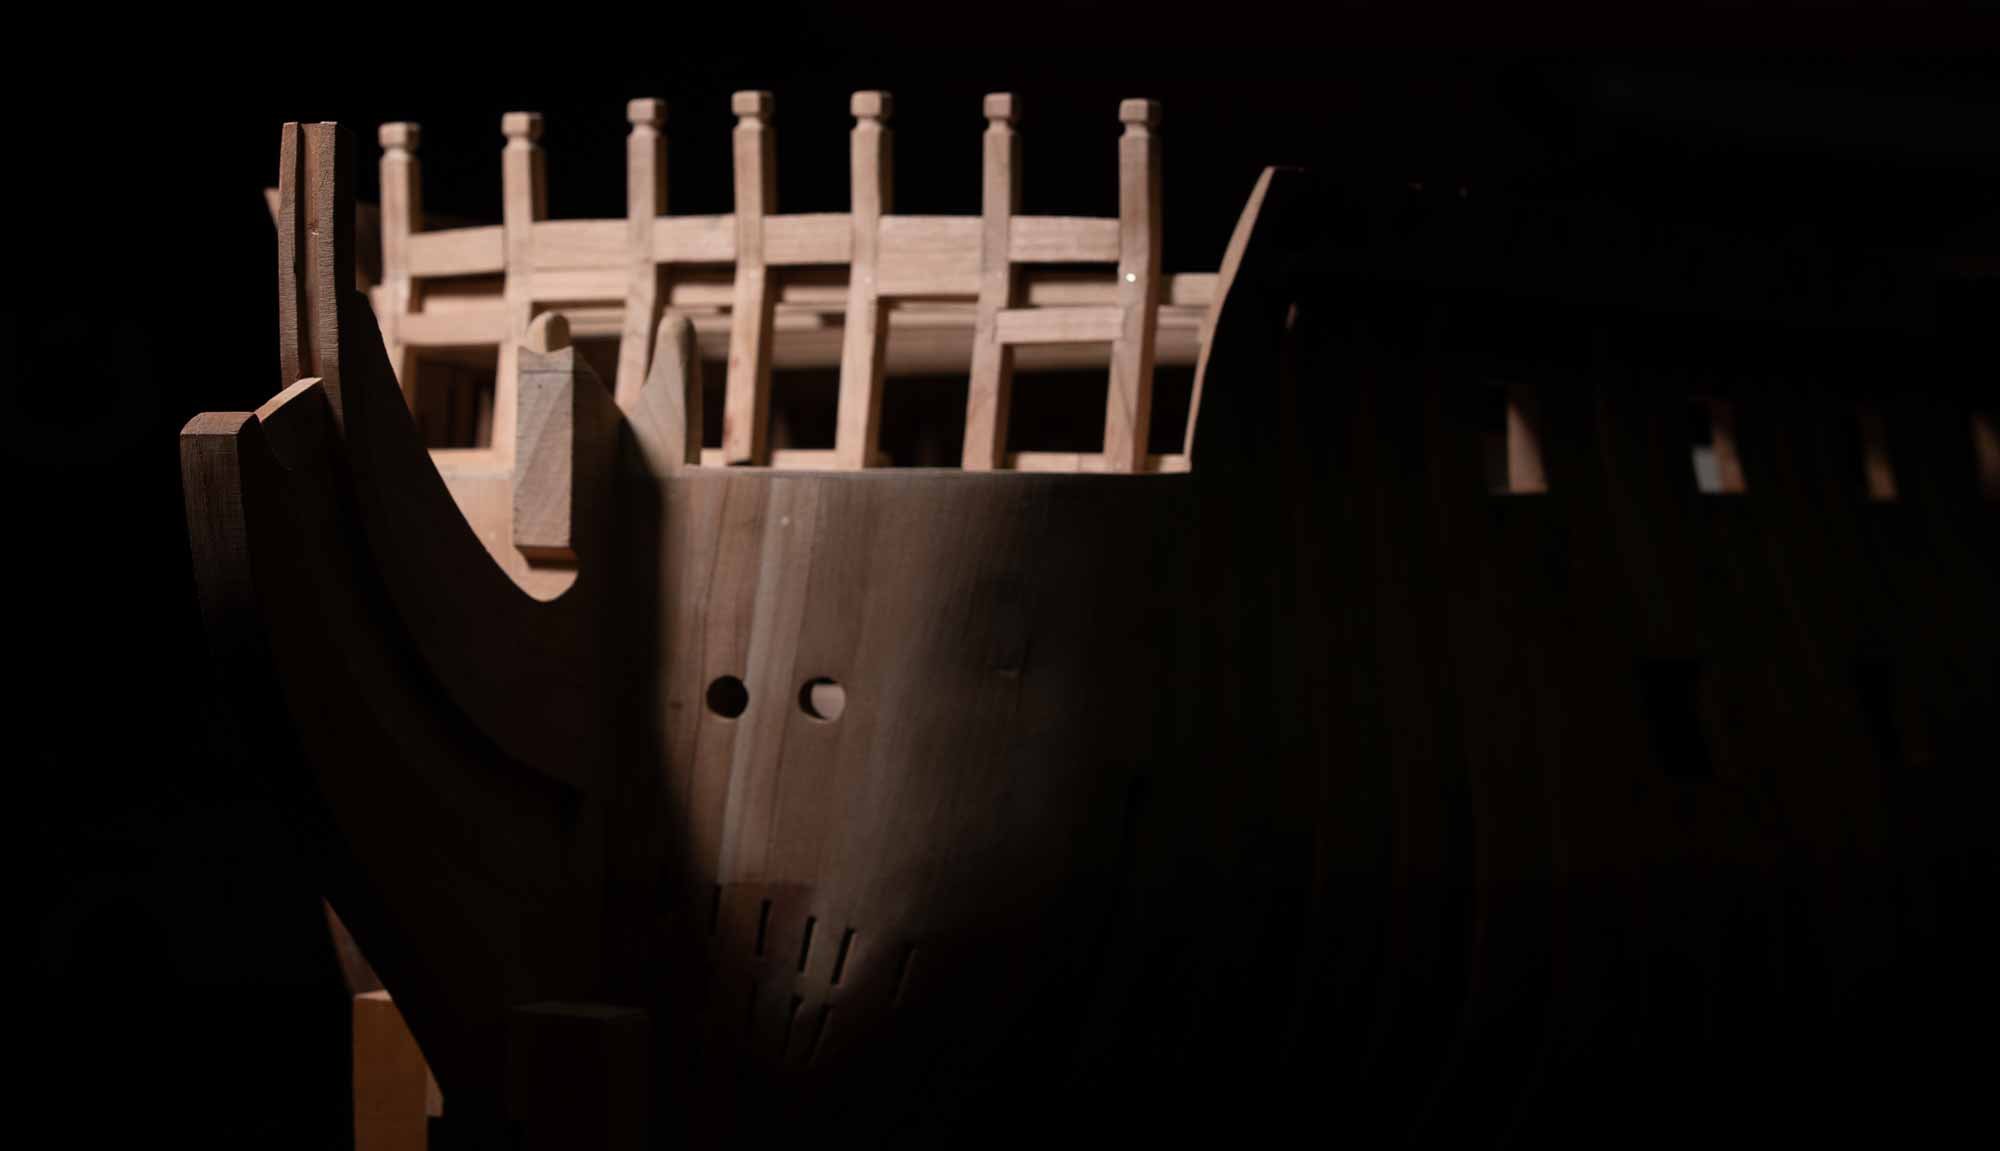
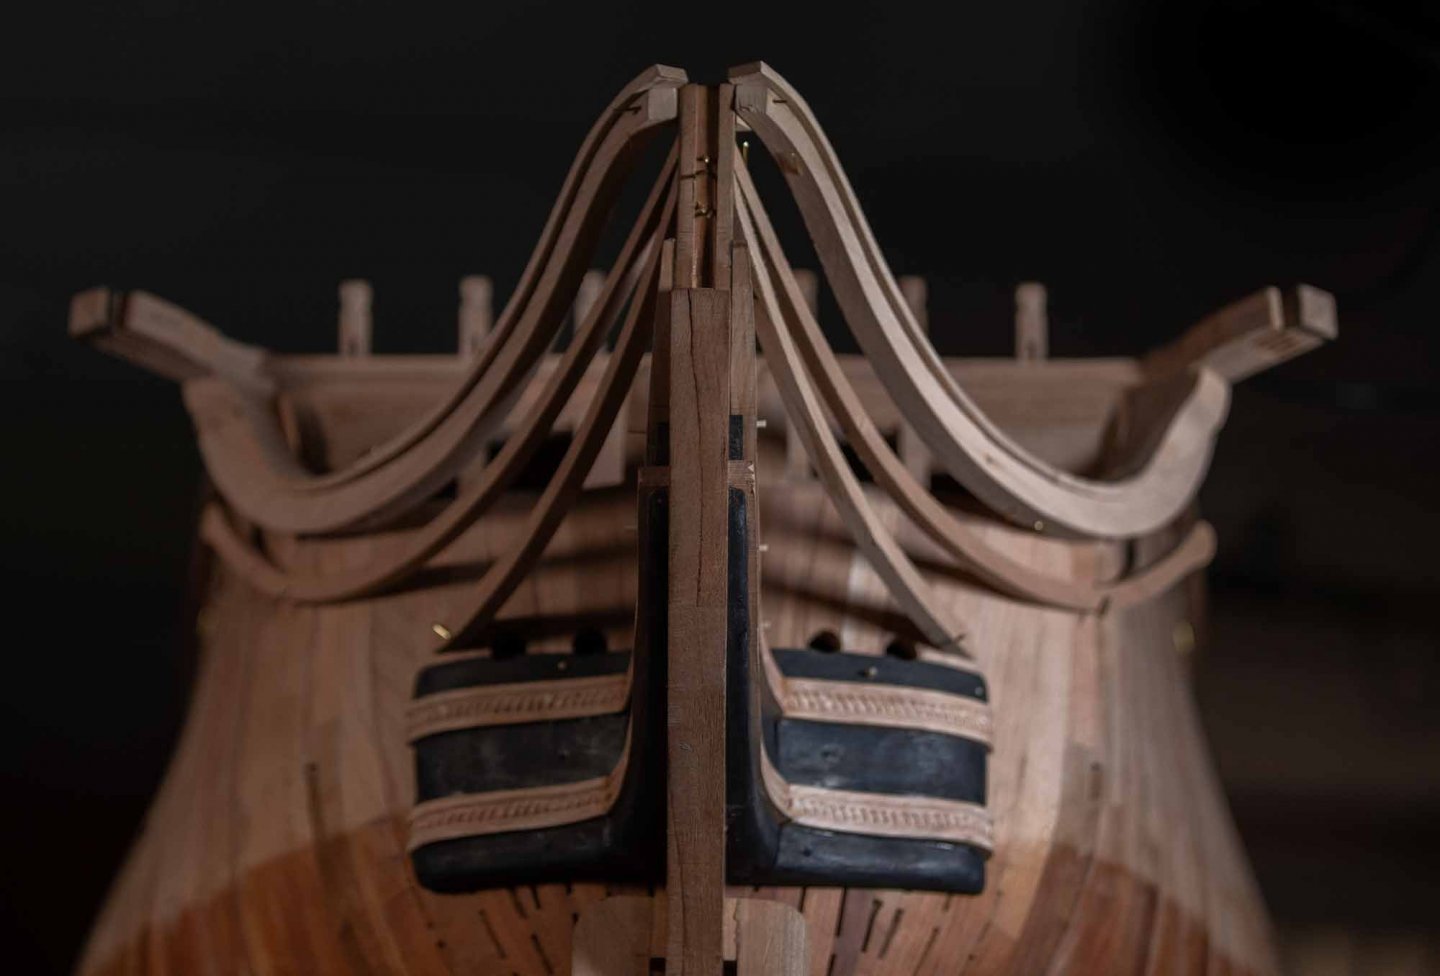
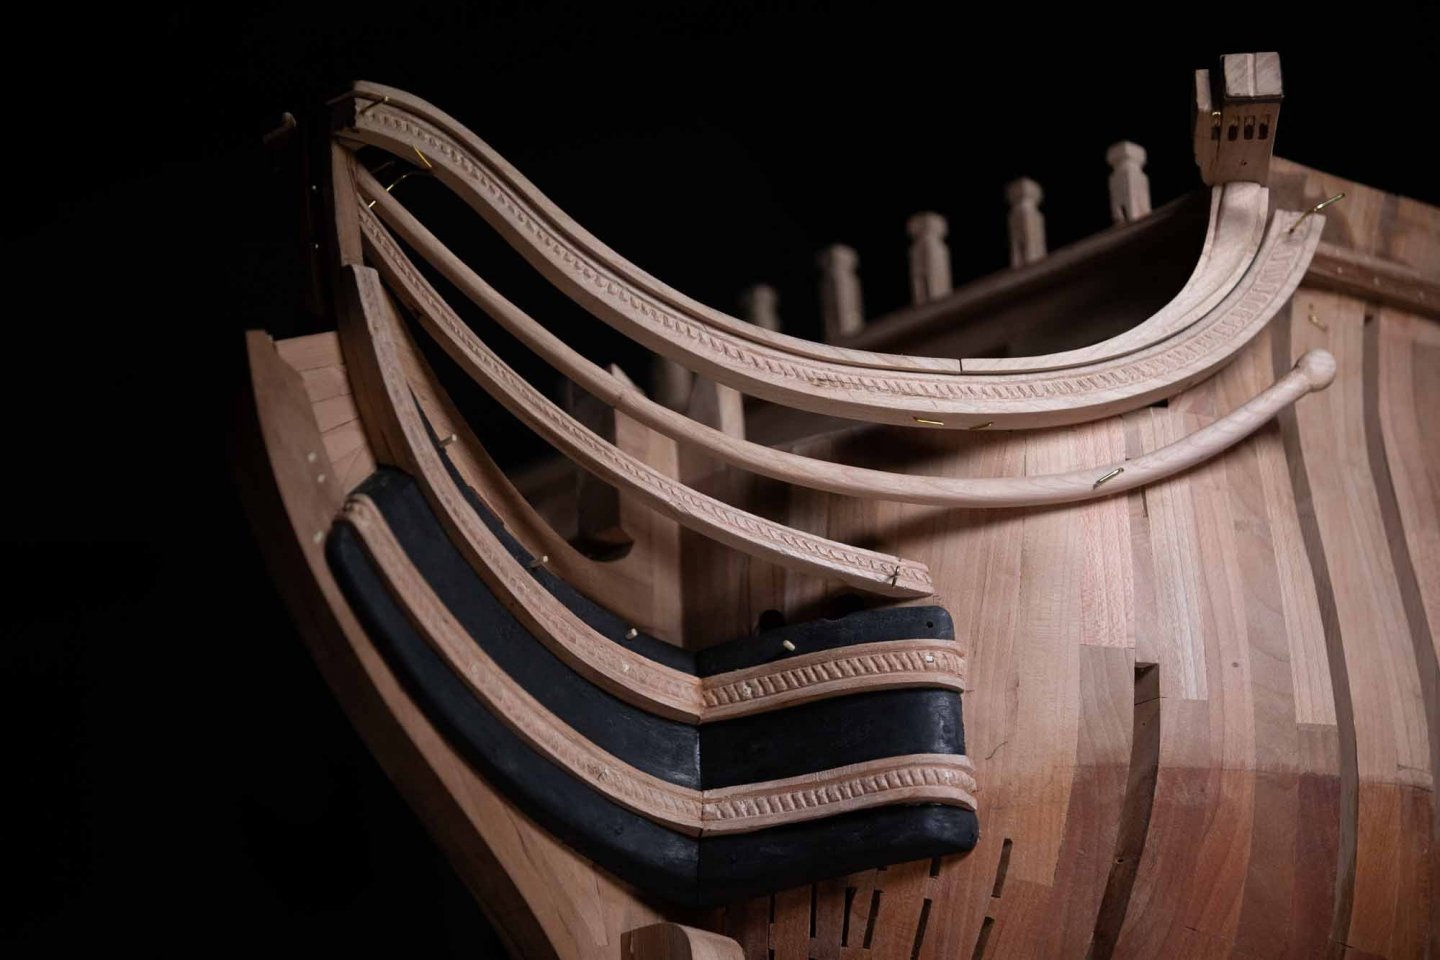
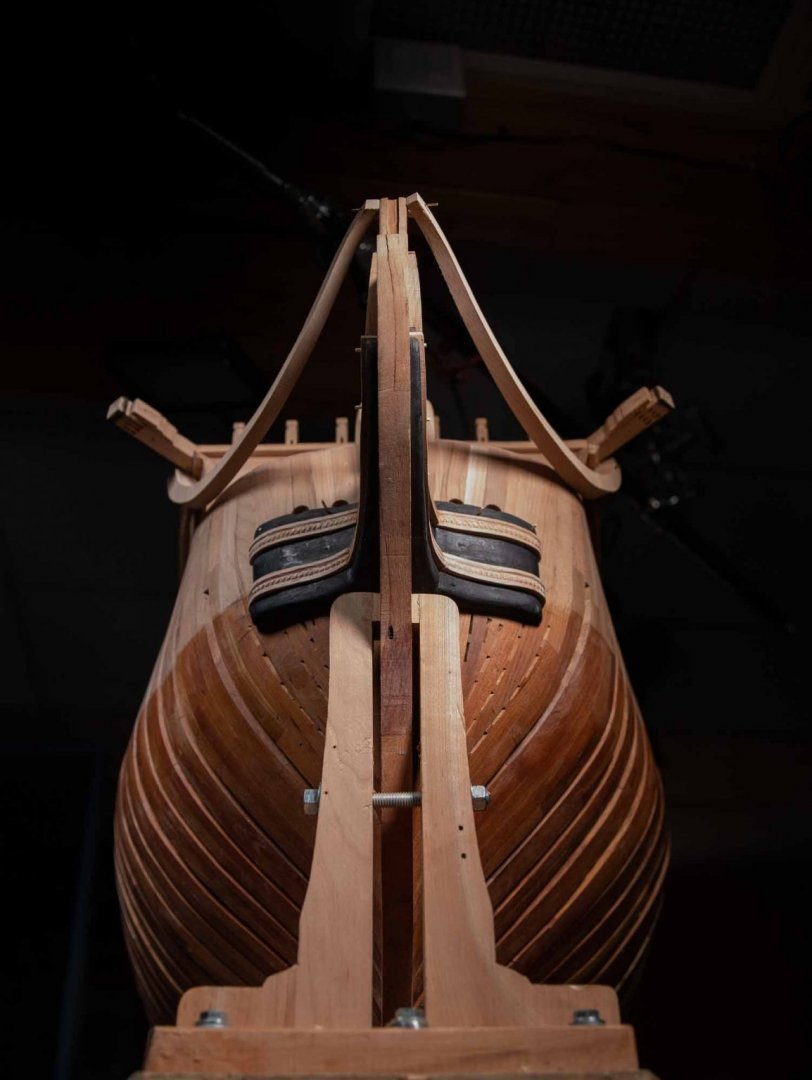
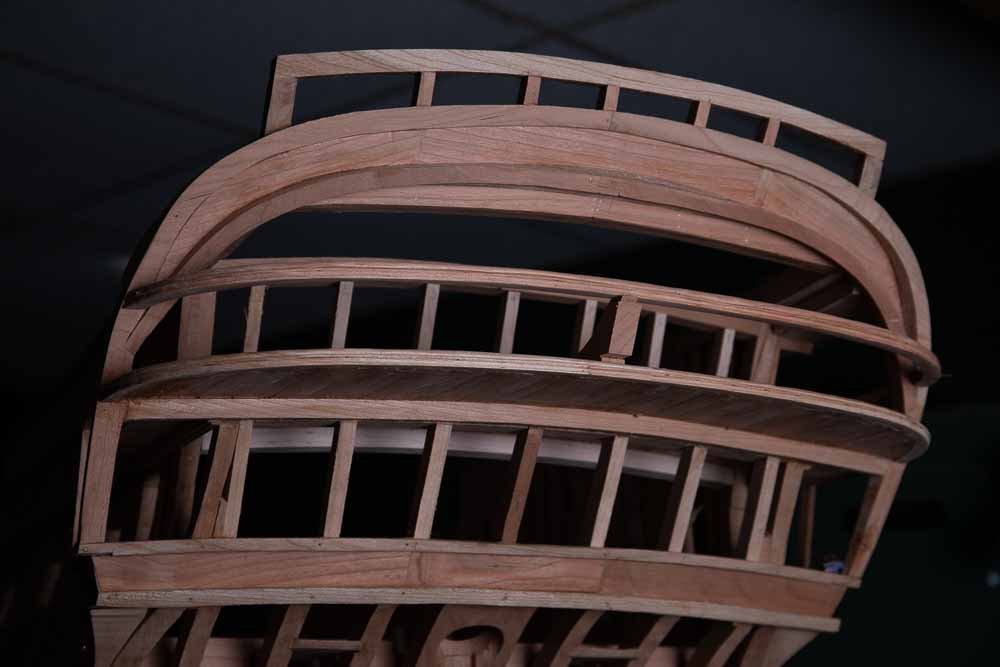
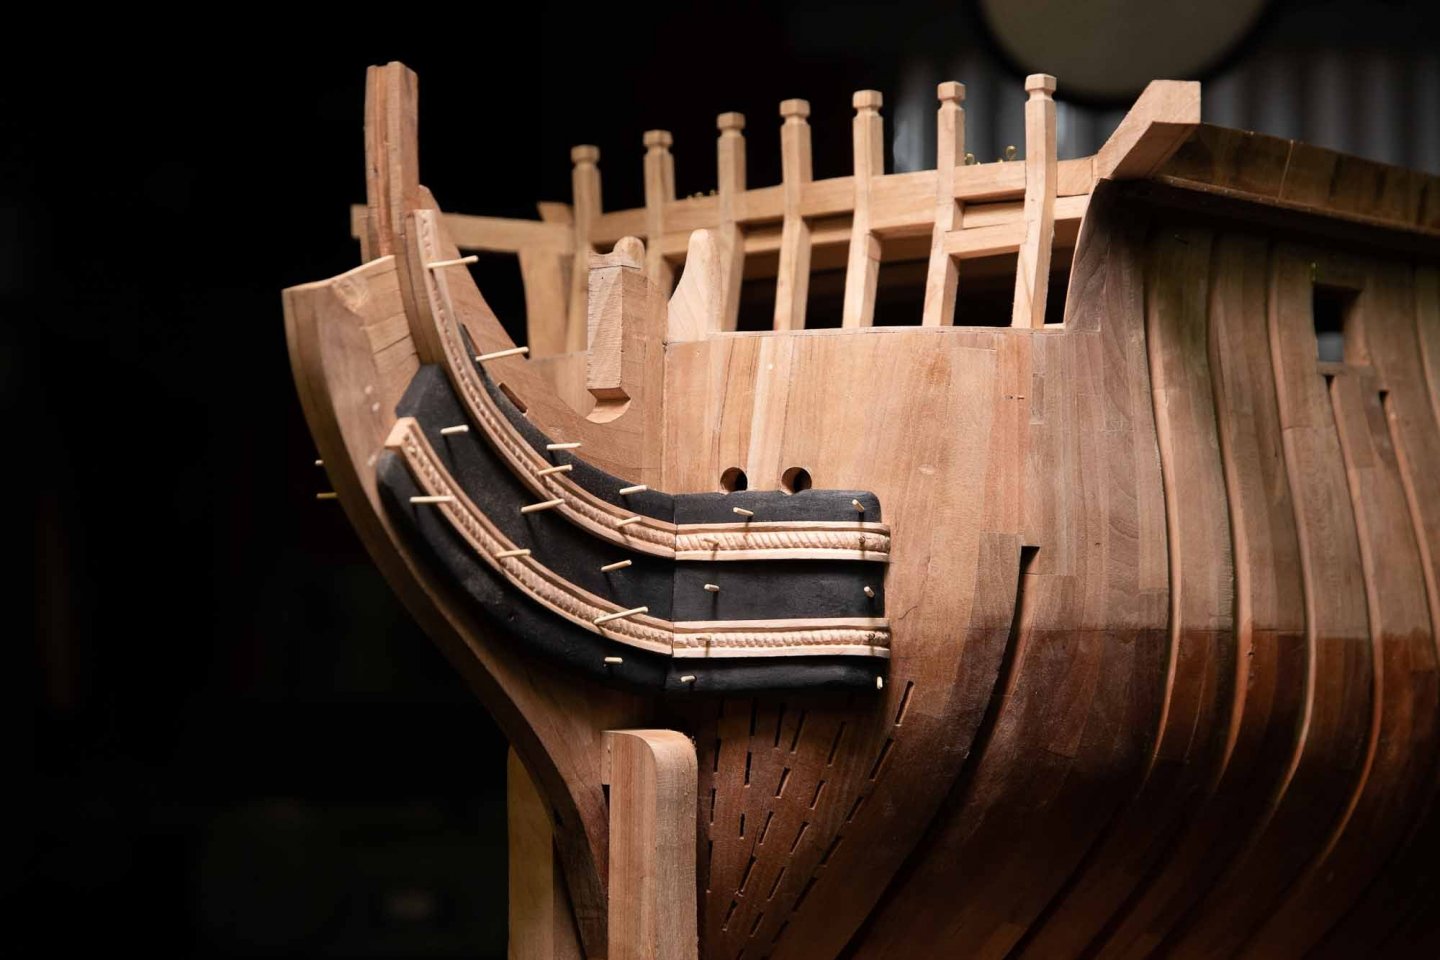
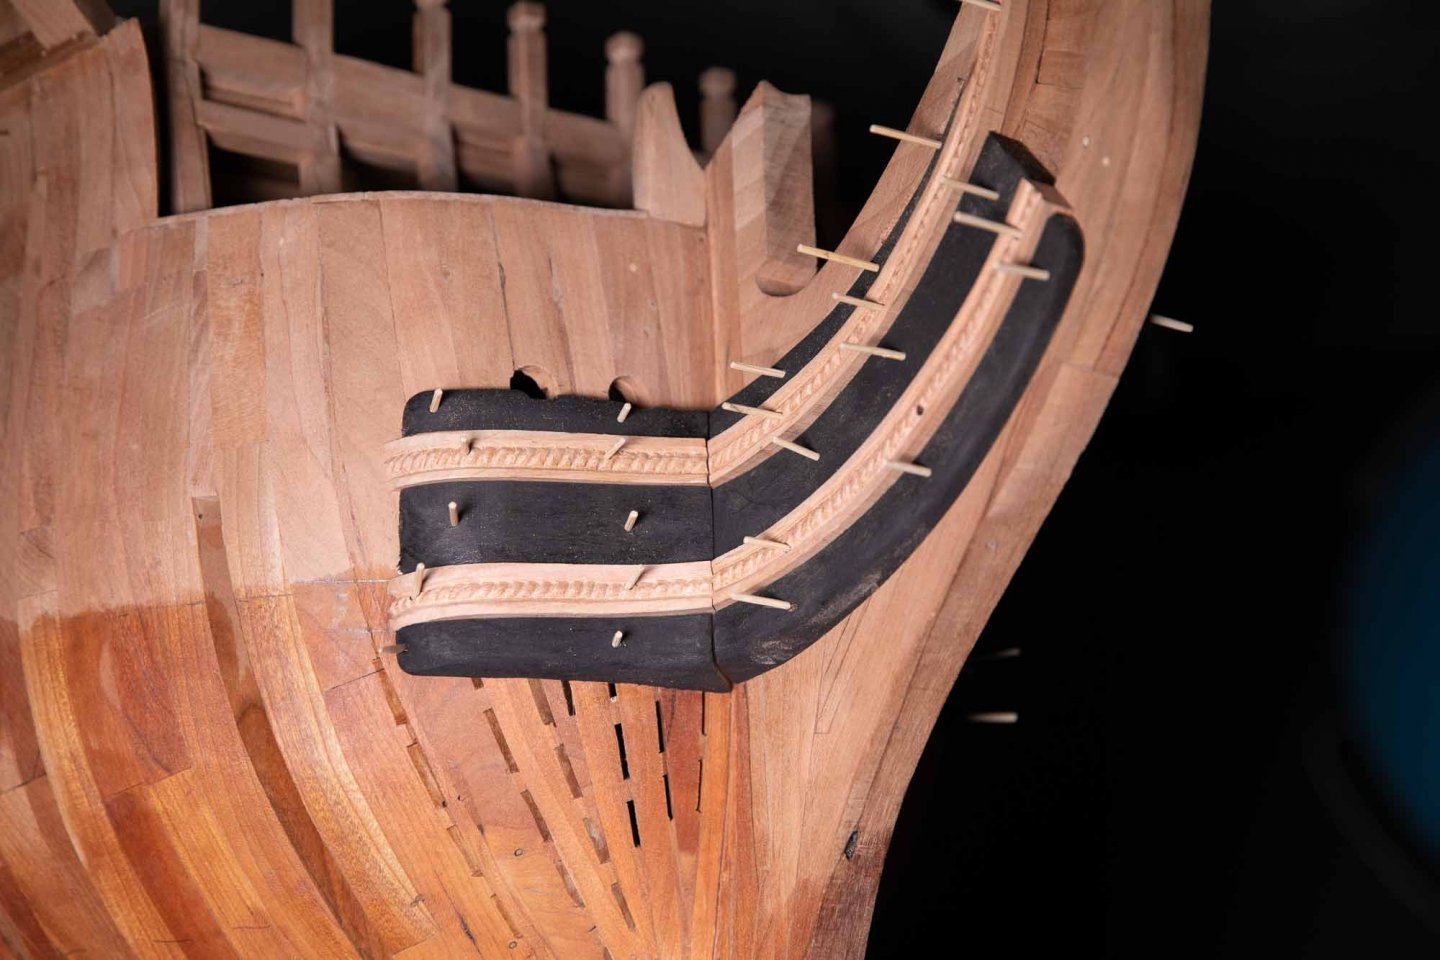
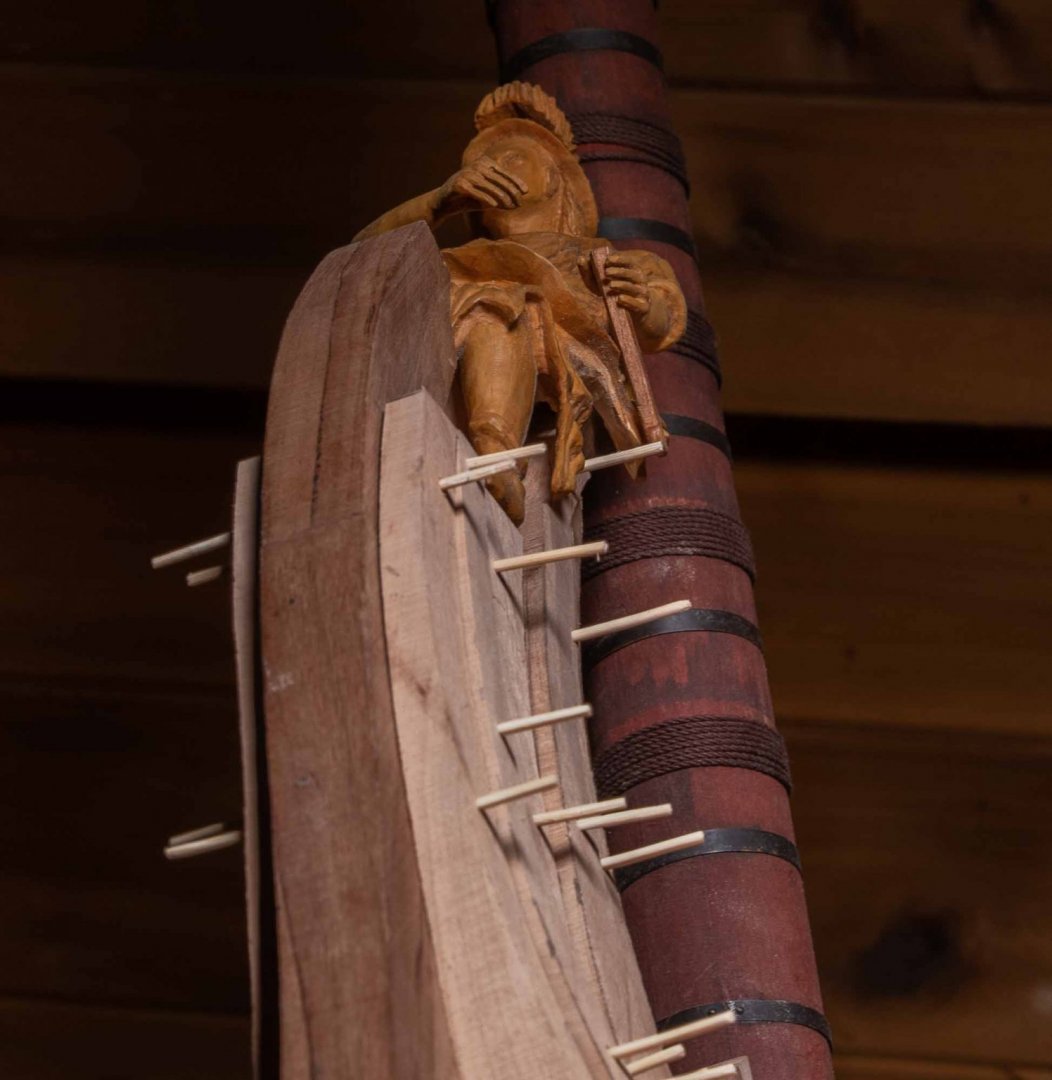
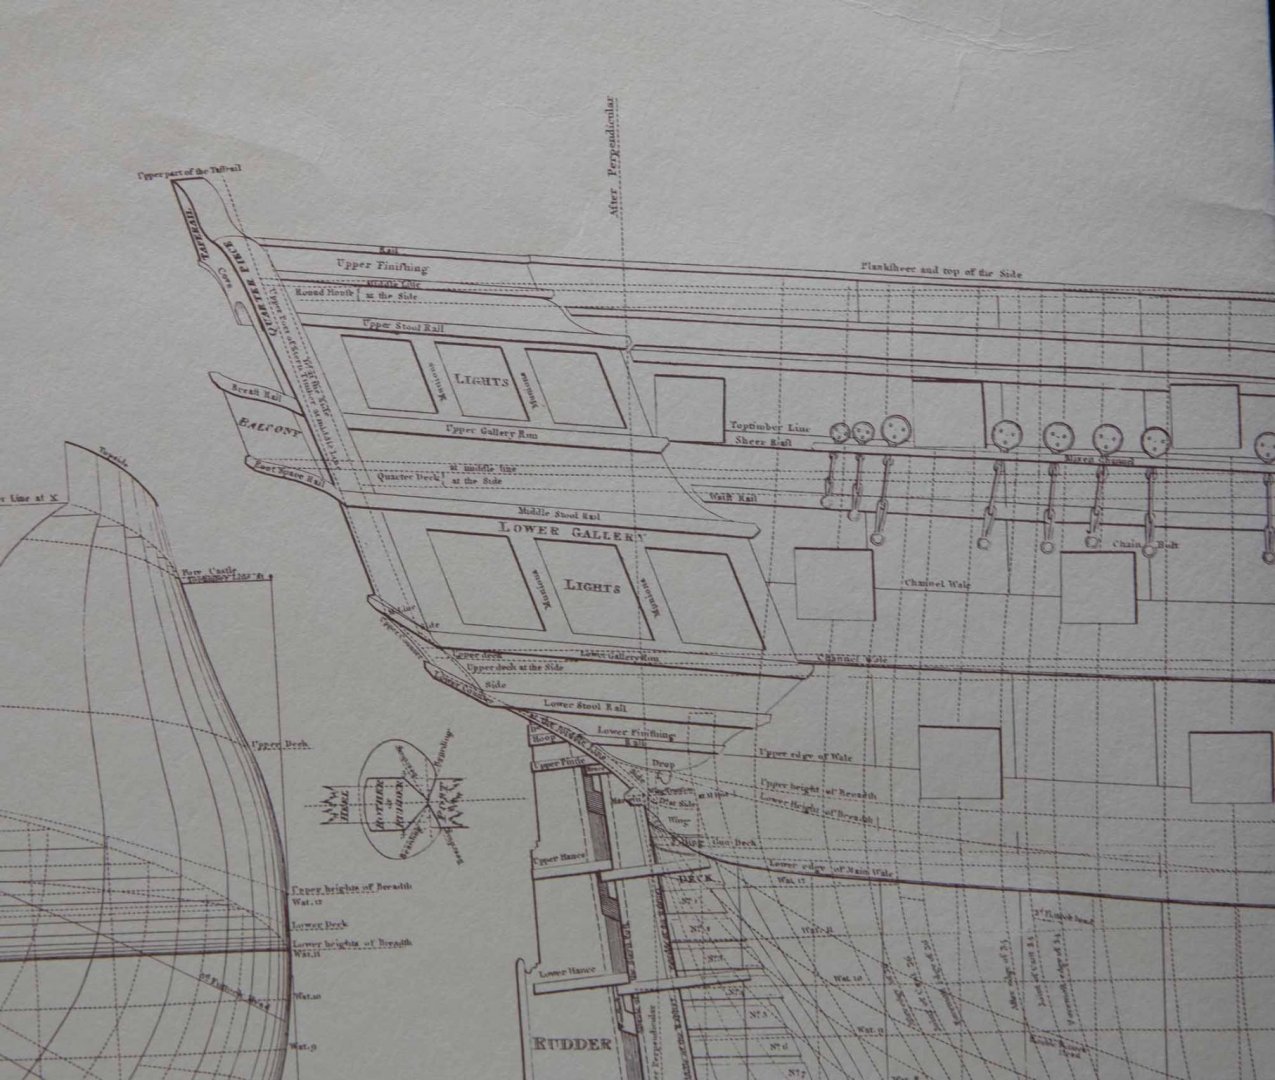
For the next weeks, i have to make some curves. For this section, there are no real obligations to follow exactly the plans. This is why Boudriot says: It only has to please the eye.

-
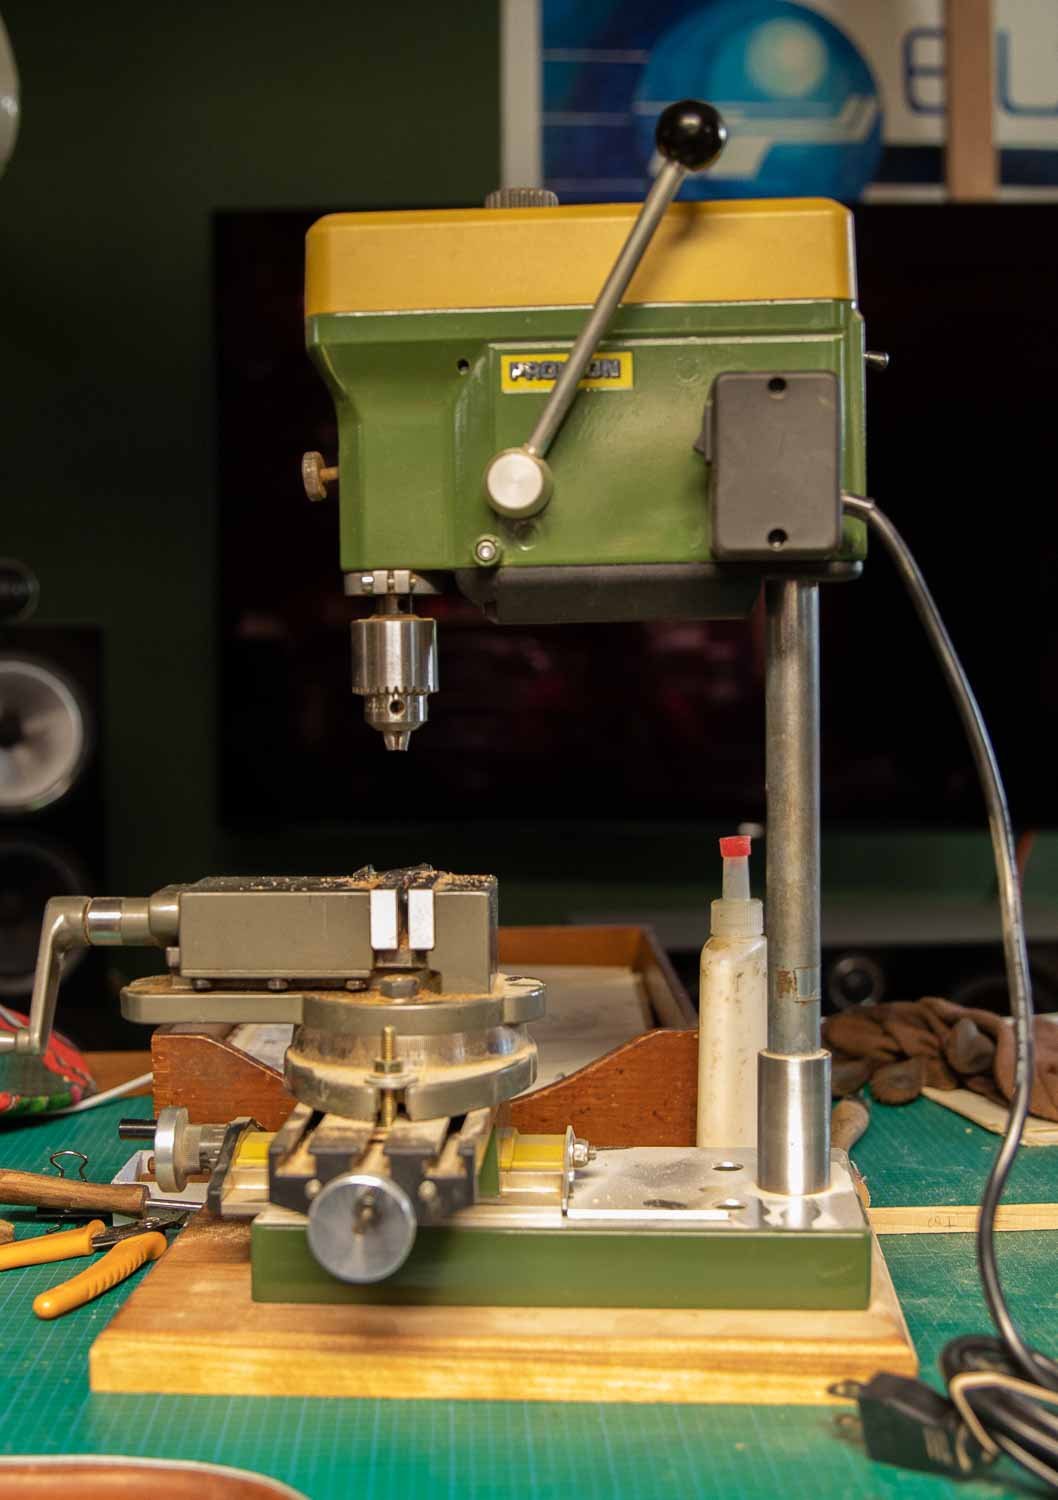
another way is to add an extension between the bar and the base the extension could have many forms here is an example

-
I use one similar by Proxxon with xy table and vise. Changed the post for a taller one.
-
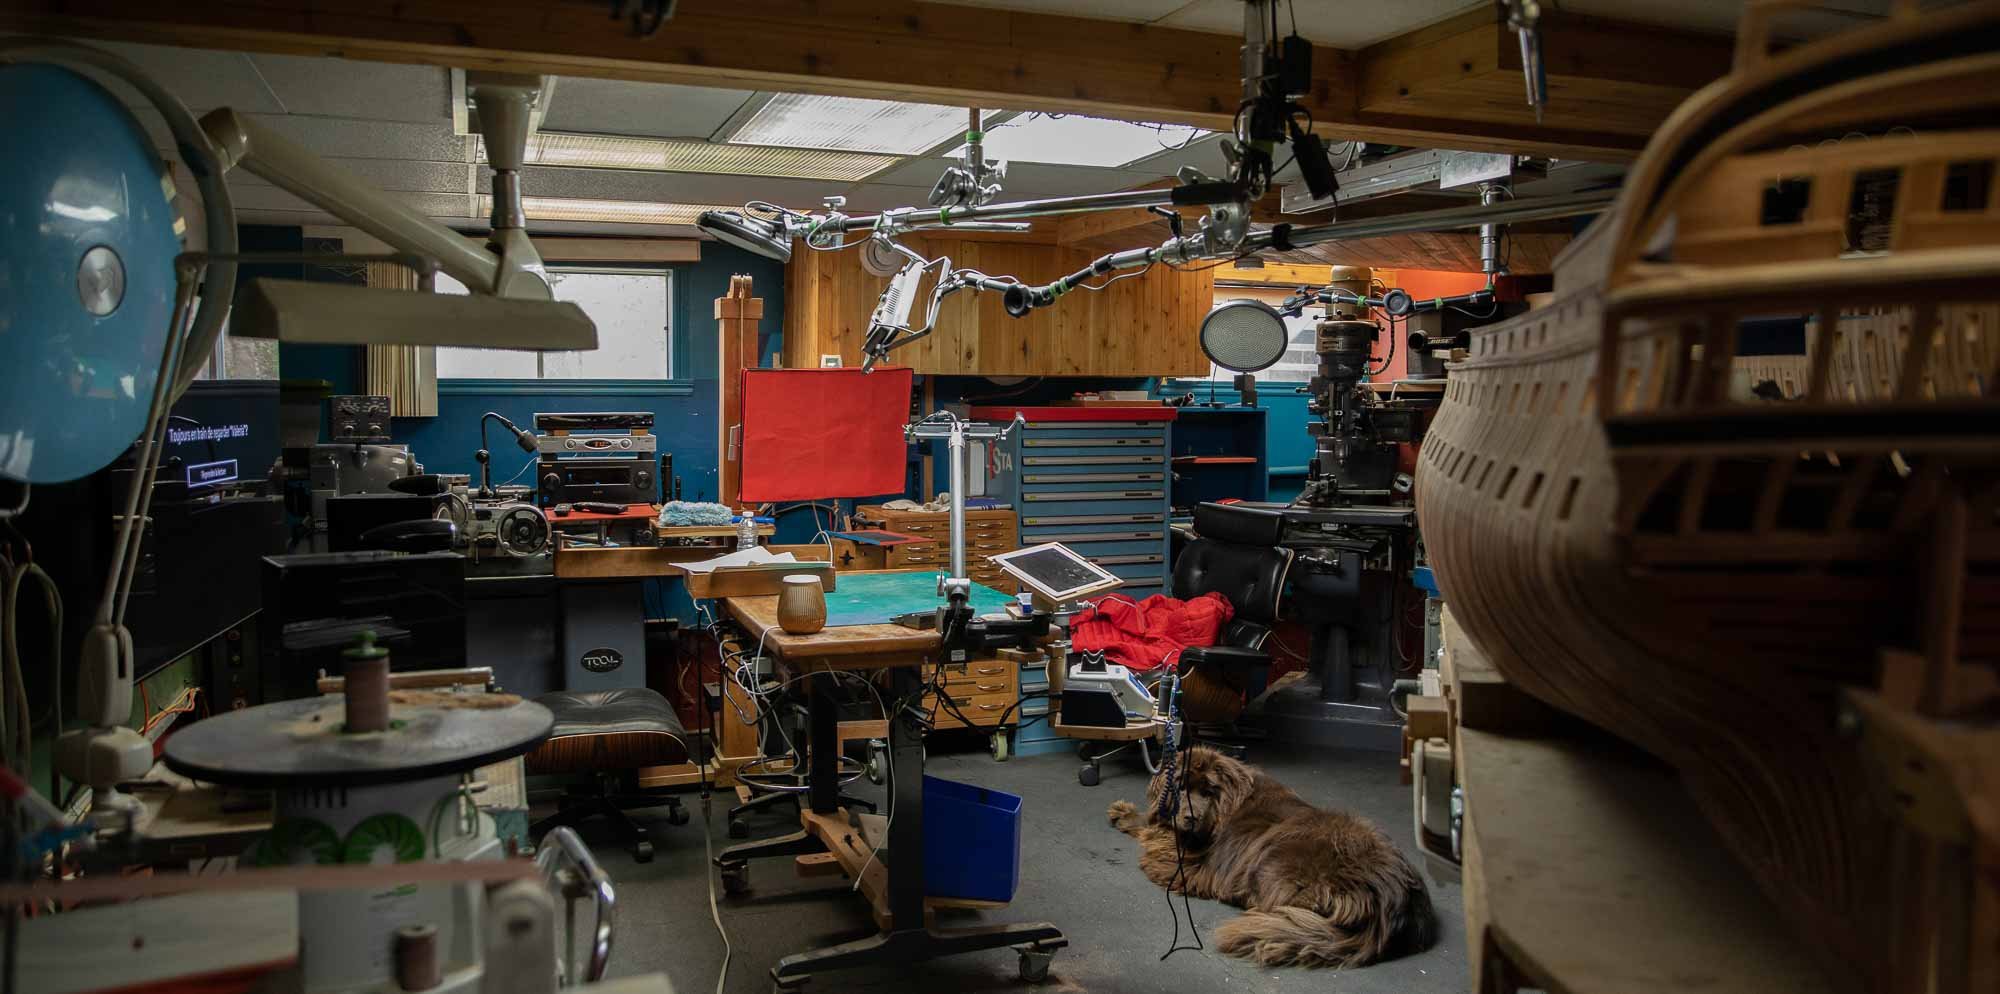
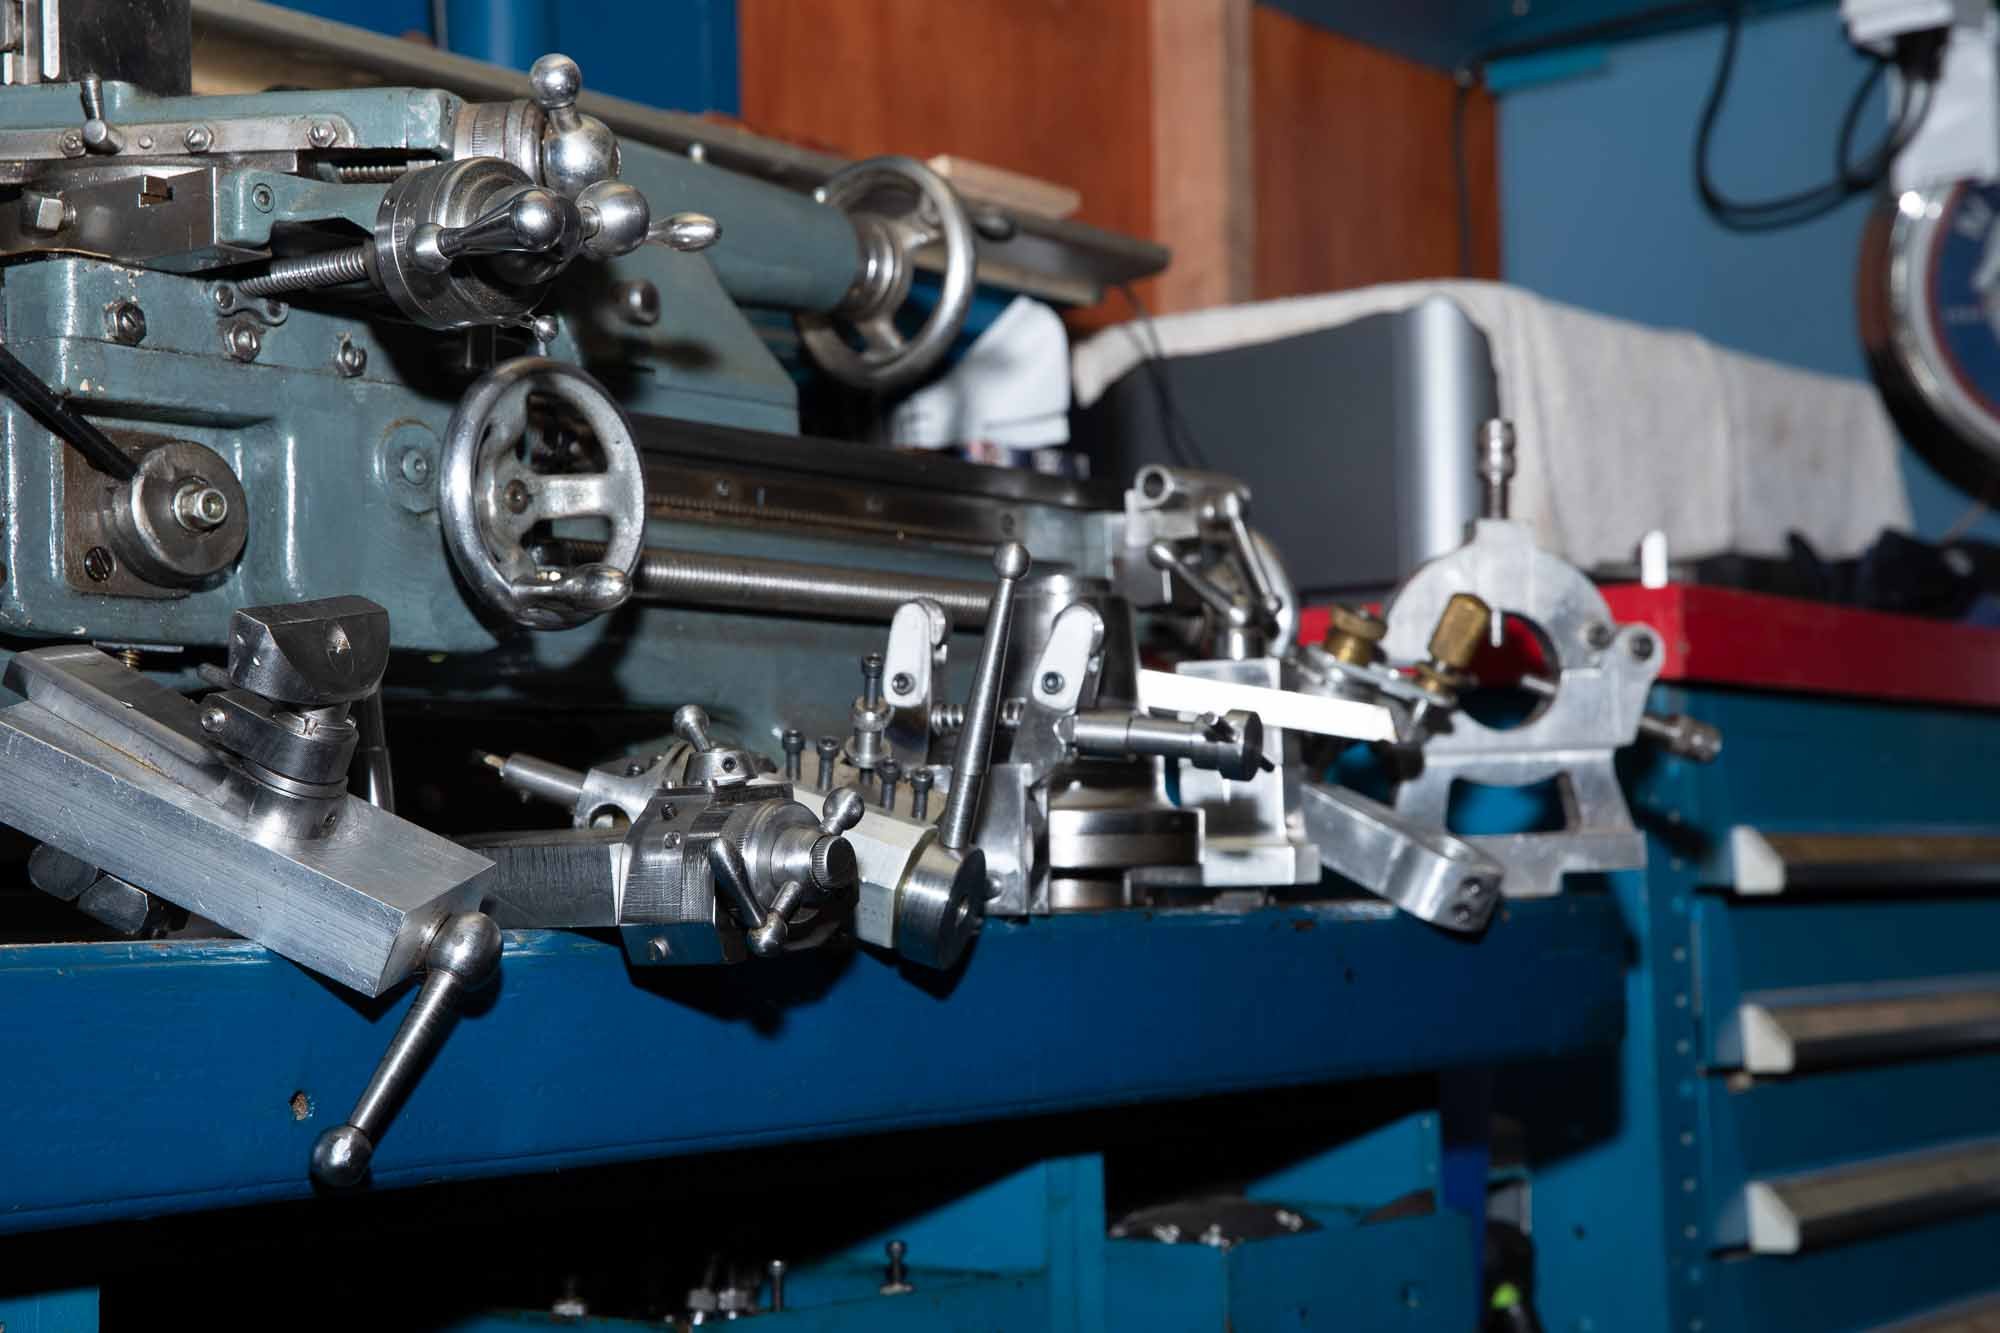
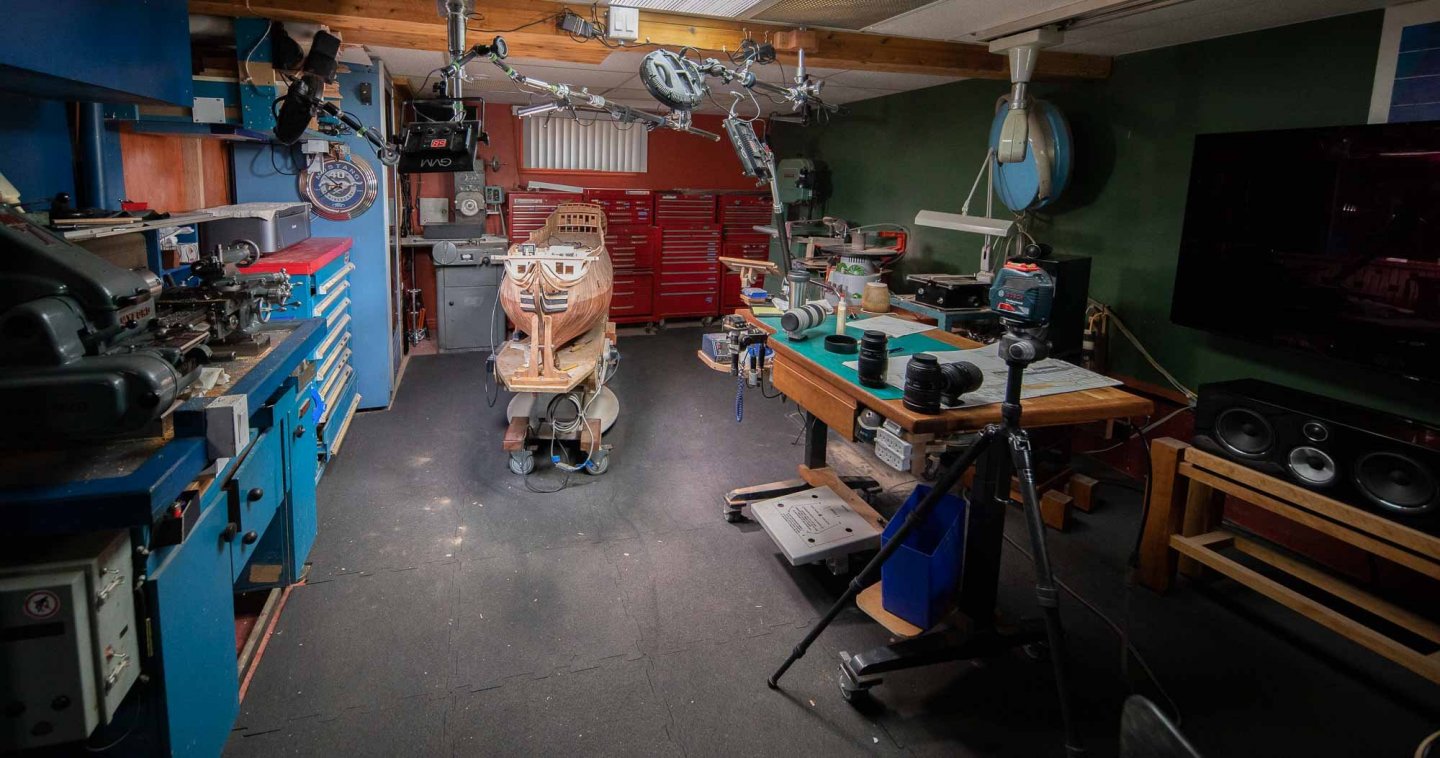
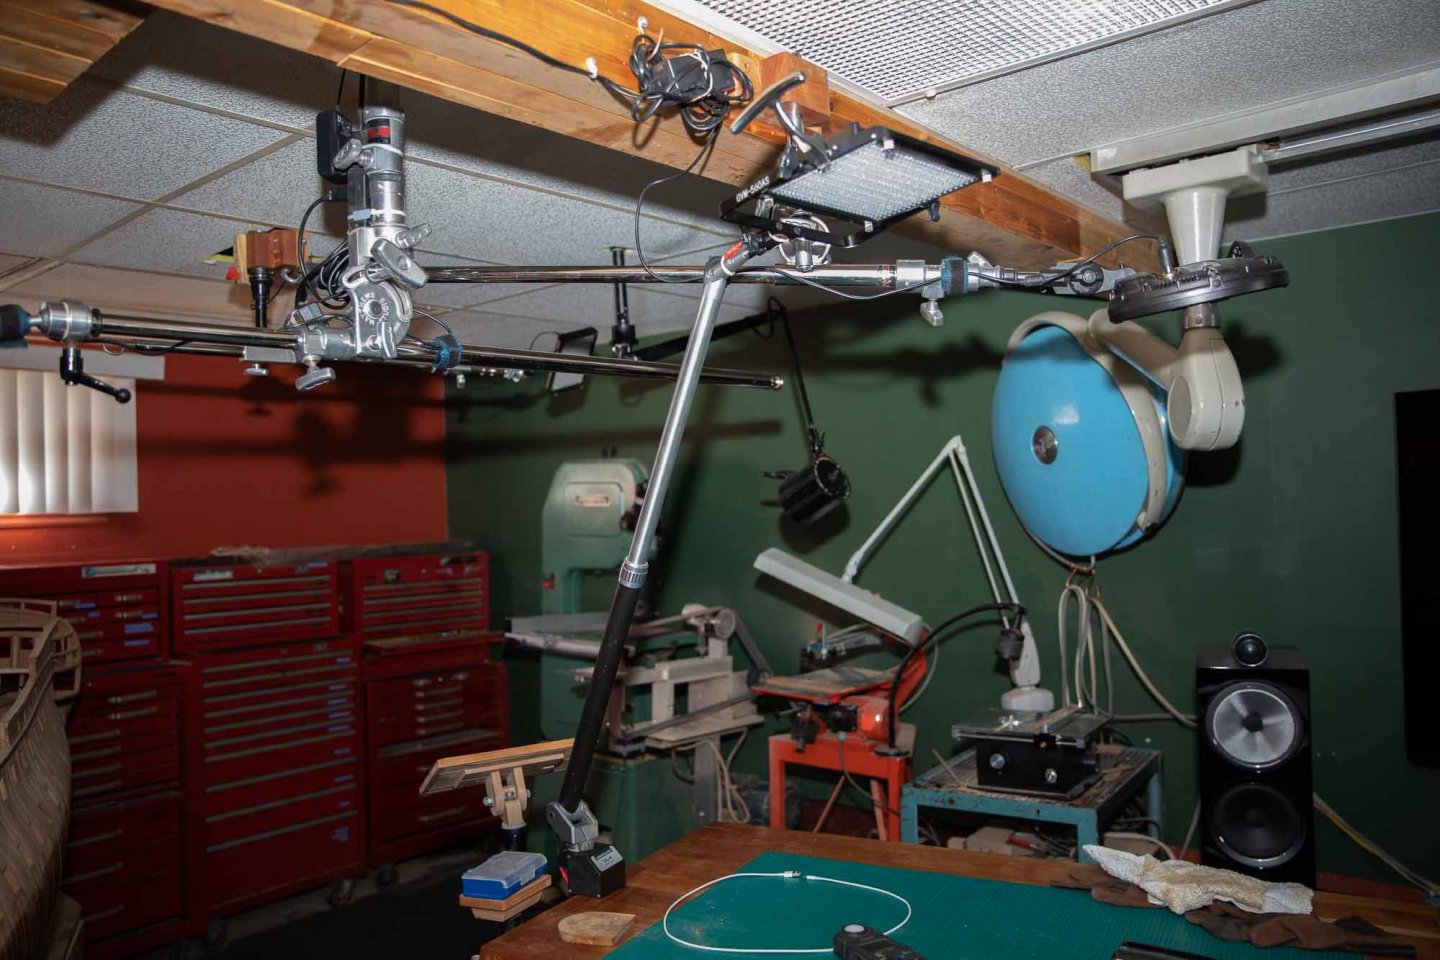
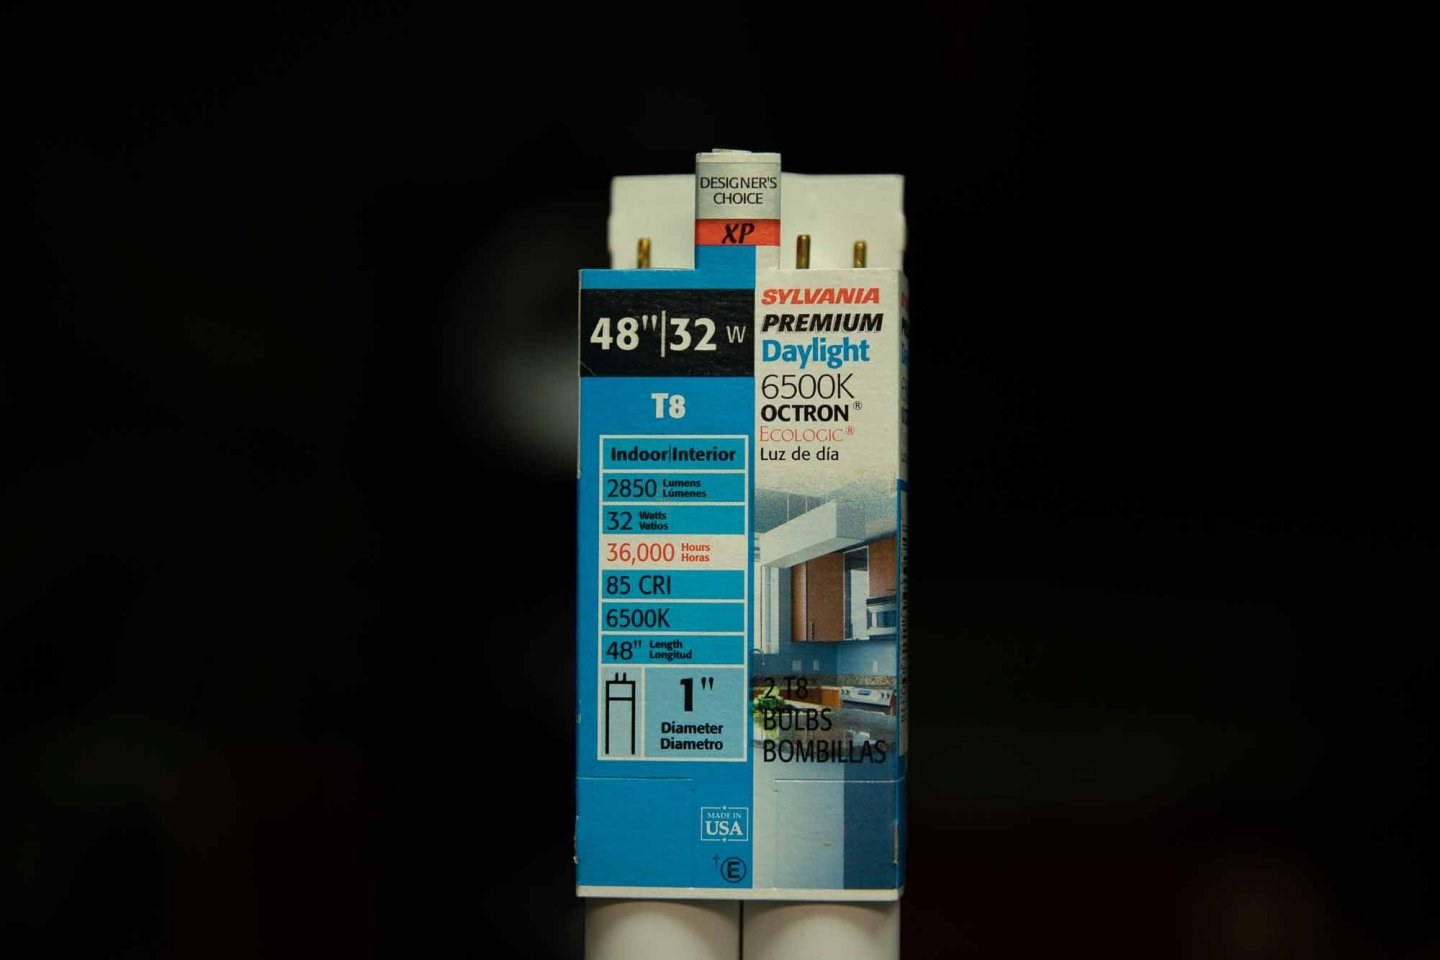
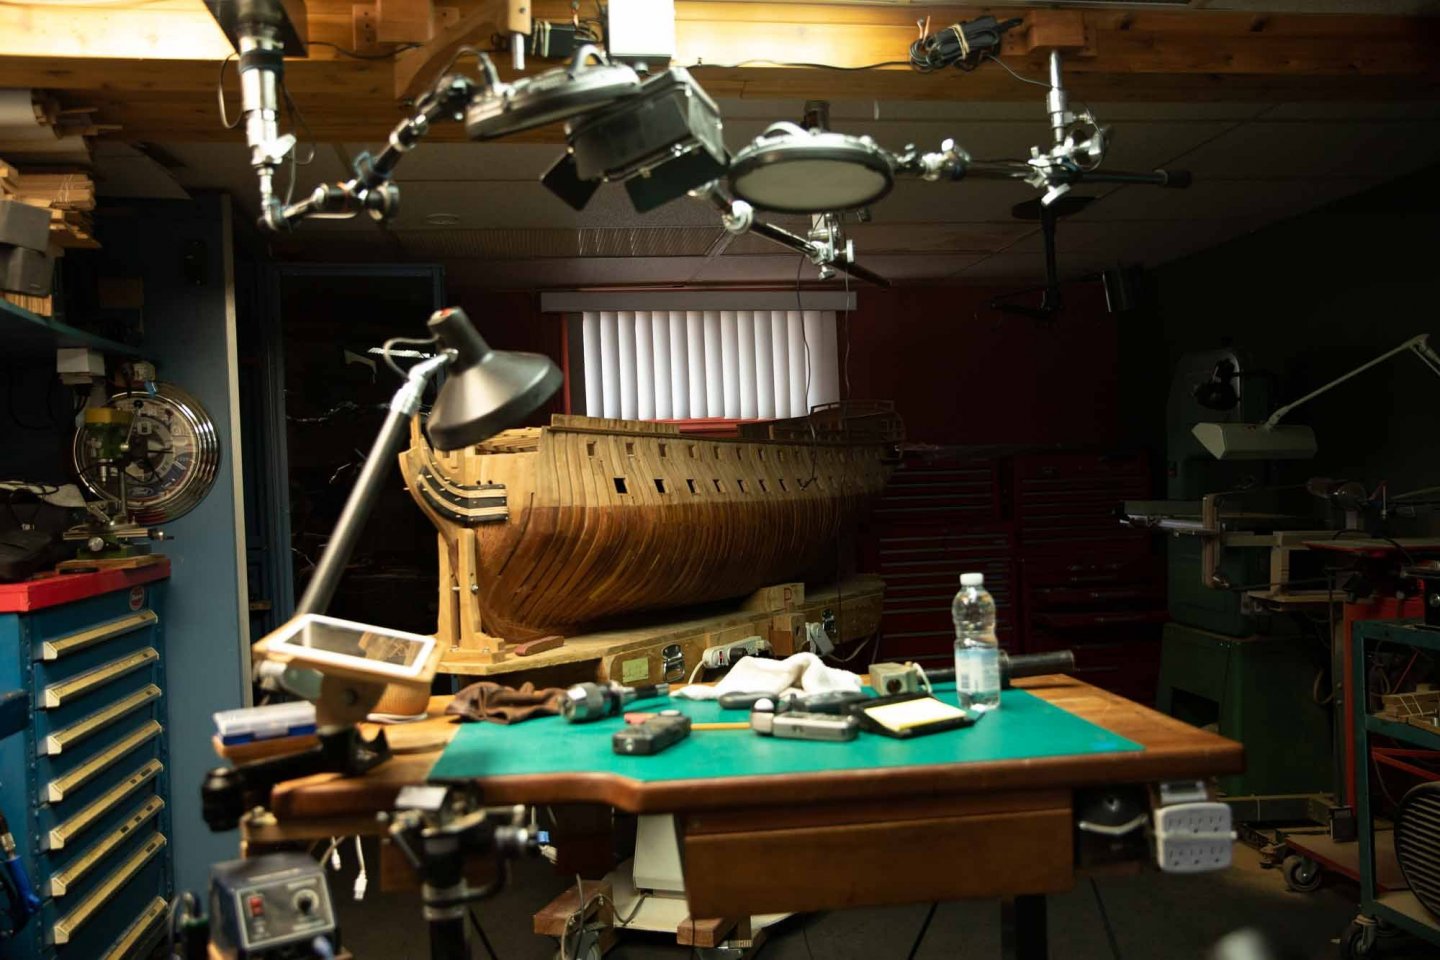
The tool I used the most this week is the lathe. To turn sheaves and to make adaptors for the light fixtures. Some last words on this not so popular subject, the lighting update is complete at about 75 %. On a photo you can see the difference between fluorescent and LED tube 4 feet. The lumens are higher for the fluorescent and the Kelvin are slightly higher for the LED. Even if both are rated at 6500 none goes that high. I did put in the garbage my dentist and medical exam lamps. Both had halogens and any are in the race anymore to see clearly. I bought few years ago for $5 a used Vemco Vemcolite VL-4 telescoping drafting lamp. I kept the stand and replaced the lights( fluorescent and bulb) by a LED light. I also added an handle saved from the dentist lamp. A final word on lighting, at the same distance, a LED fixture is roughly twice as bright than LED tube 4', Kelvin are about the same; this is true for the lights Im measured.


-
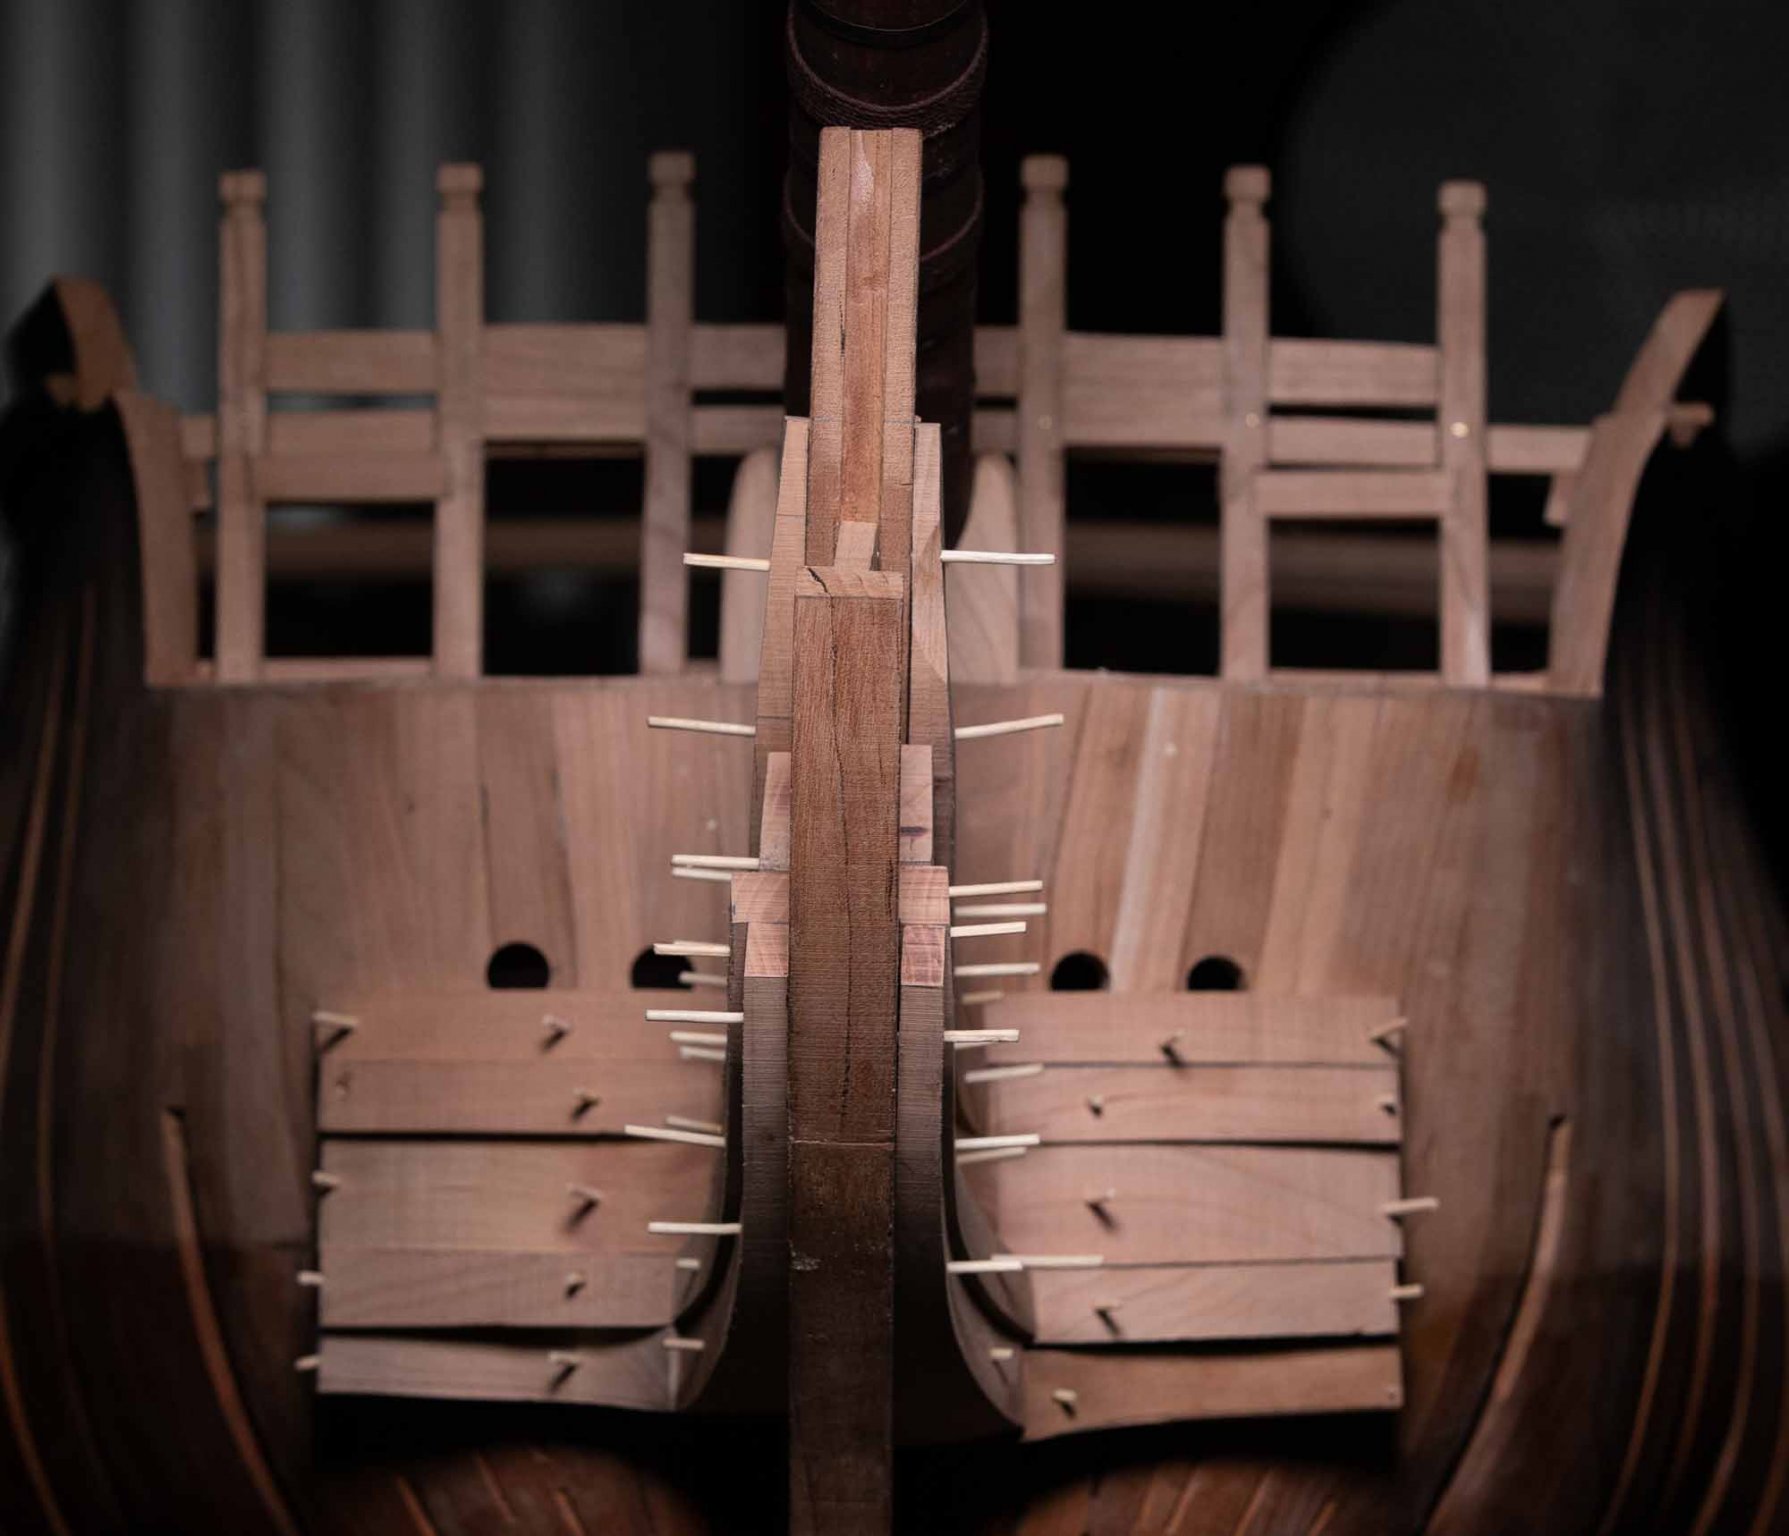
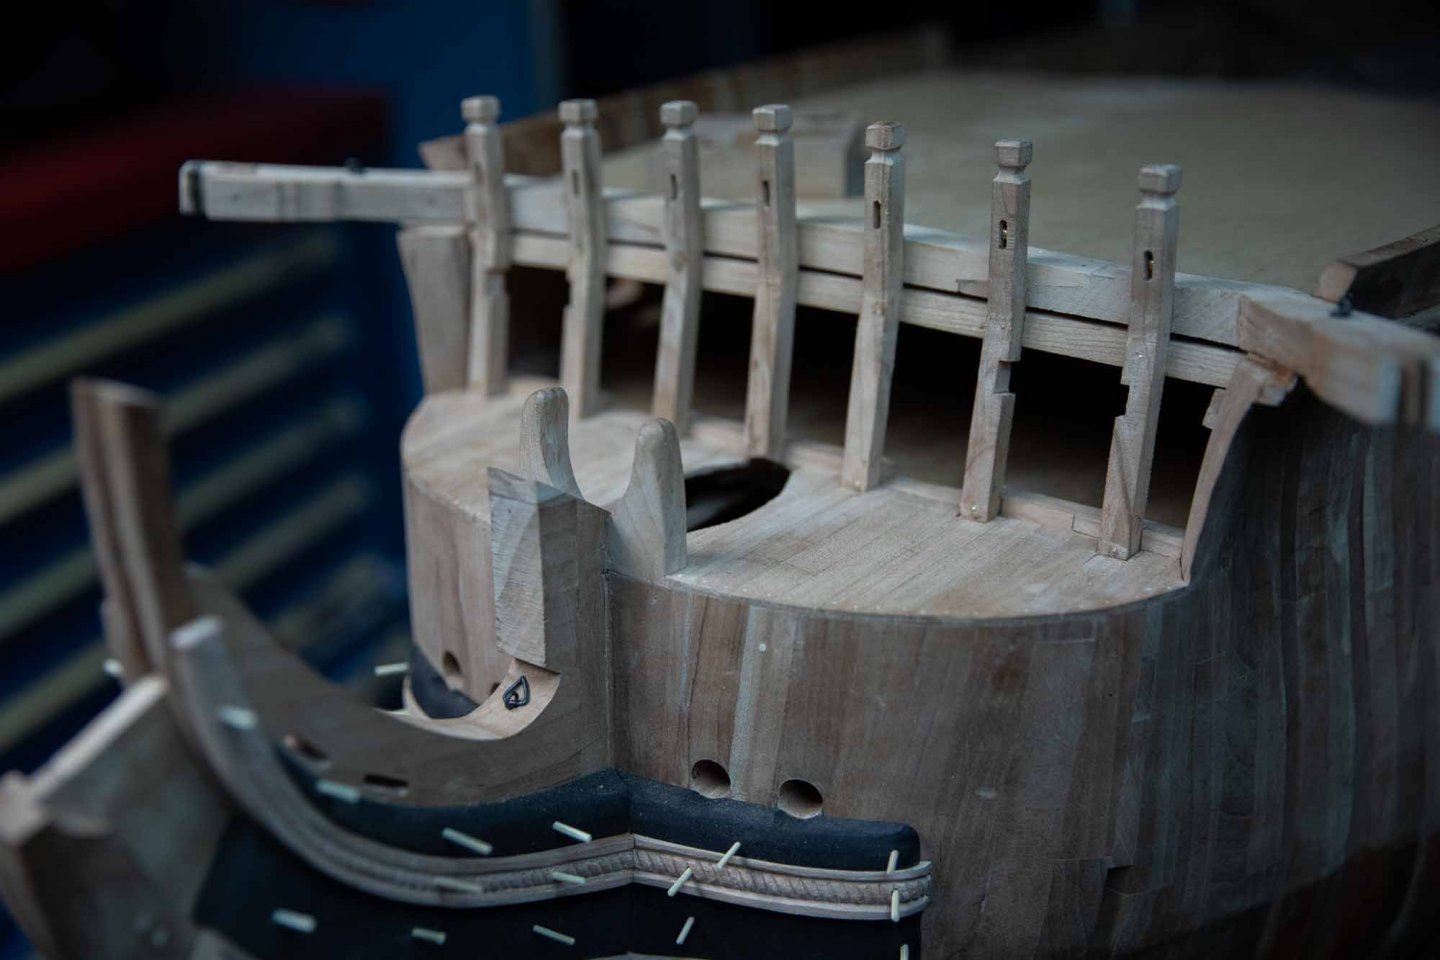
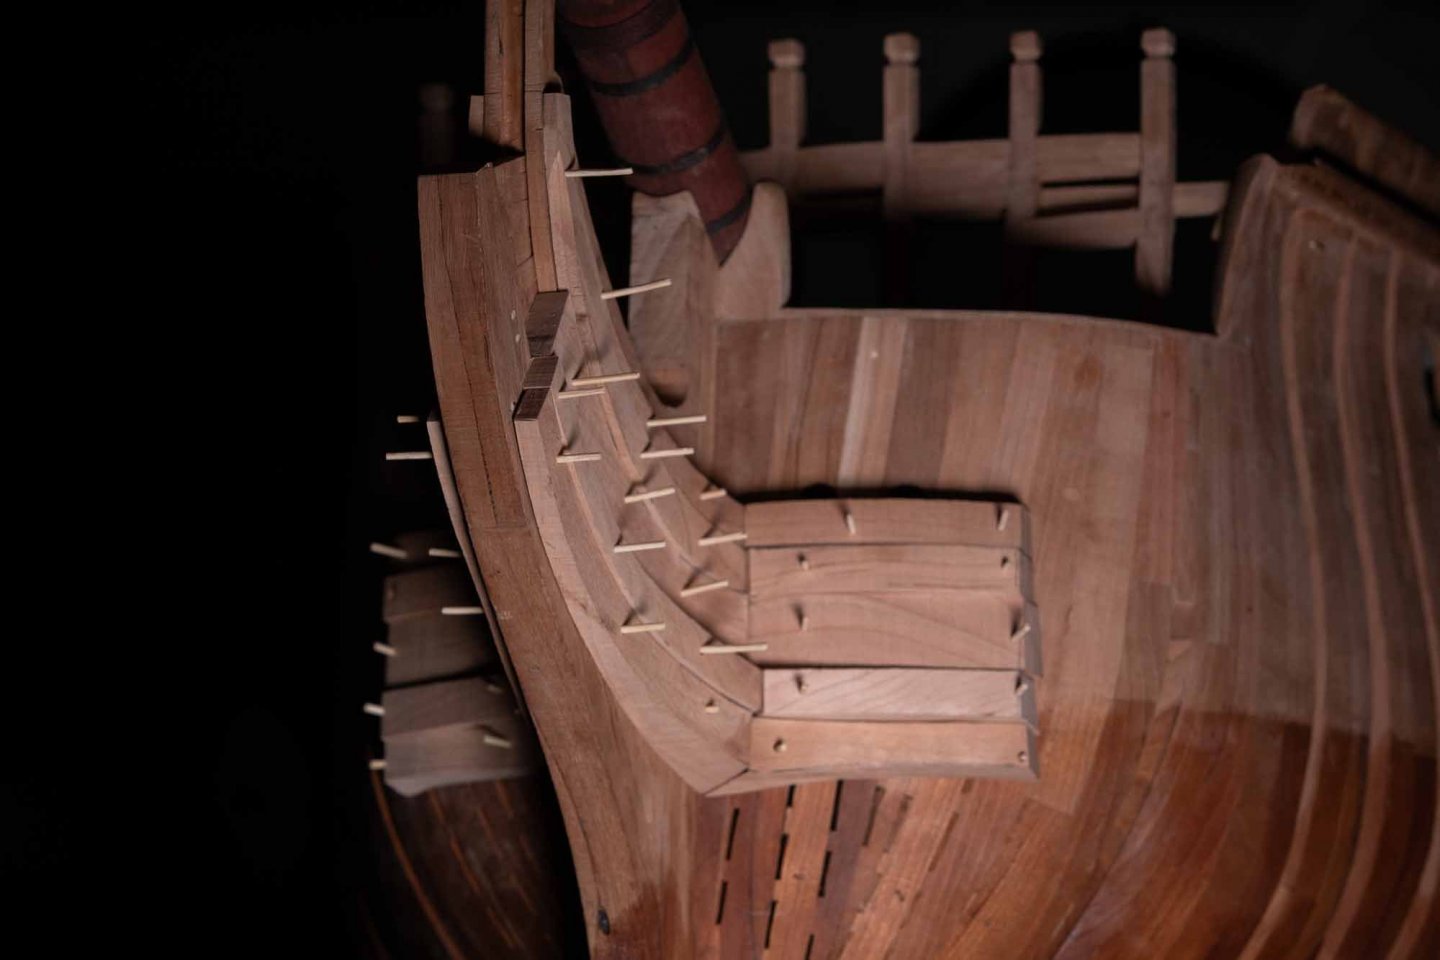
I learned something very interesting with the 74 by Boudriot. Often when I build, I think as a home builder. On the stern of the 74, many moldings are not installed directly, they are installed on a "structure". Exactly as we would build a door.: a structure to hold the door, moldings all around the perimeter and the door itself. This "holding structure" make it easier to see it and build.
-
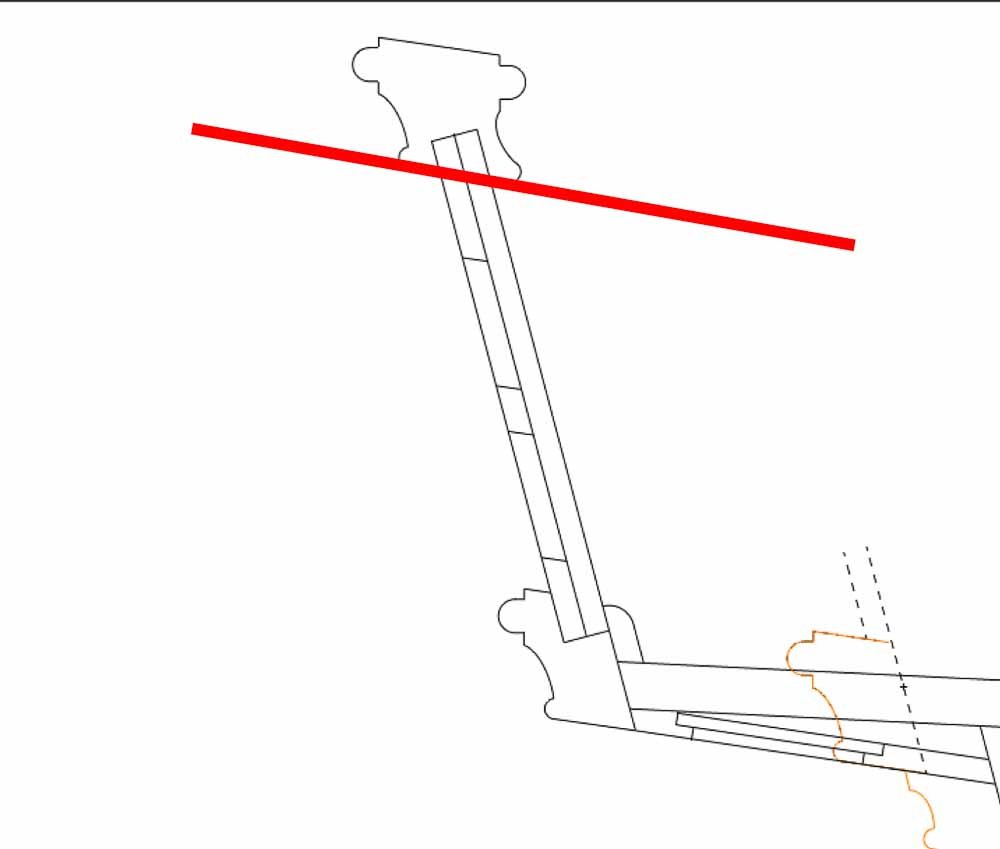
Hi Mark, your perception of the details is outstanding as an architect. I would like to have a book for the construction of the Bellona with such attention to the details. I have a simple word of caution. I did not studied the Bellona, but I like to see your vision. As I see it, you use 2 different models and I think it is dangerous. These models were made by different peoples with different experience and different vision to build the models. Working on the stern requires precision and sometimes even if we do our best, it does not want to fit. Here is an example, as a modeler I would never want to do a notch in the moulding, I would cut the window at an angle so that it fits below the moulding. Just to shape the molding is already a big task and meeting half the angle for 2 moldings is easier to do on the construction site than on the drawings.
-
scroll saw small delicate job, and precise job... when no vibration band saw big jobs rough and thick
-
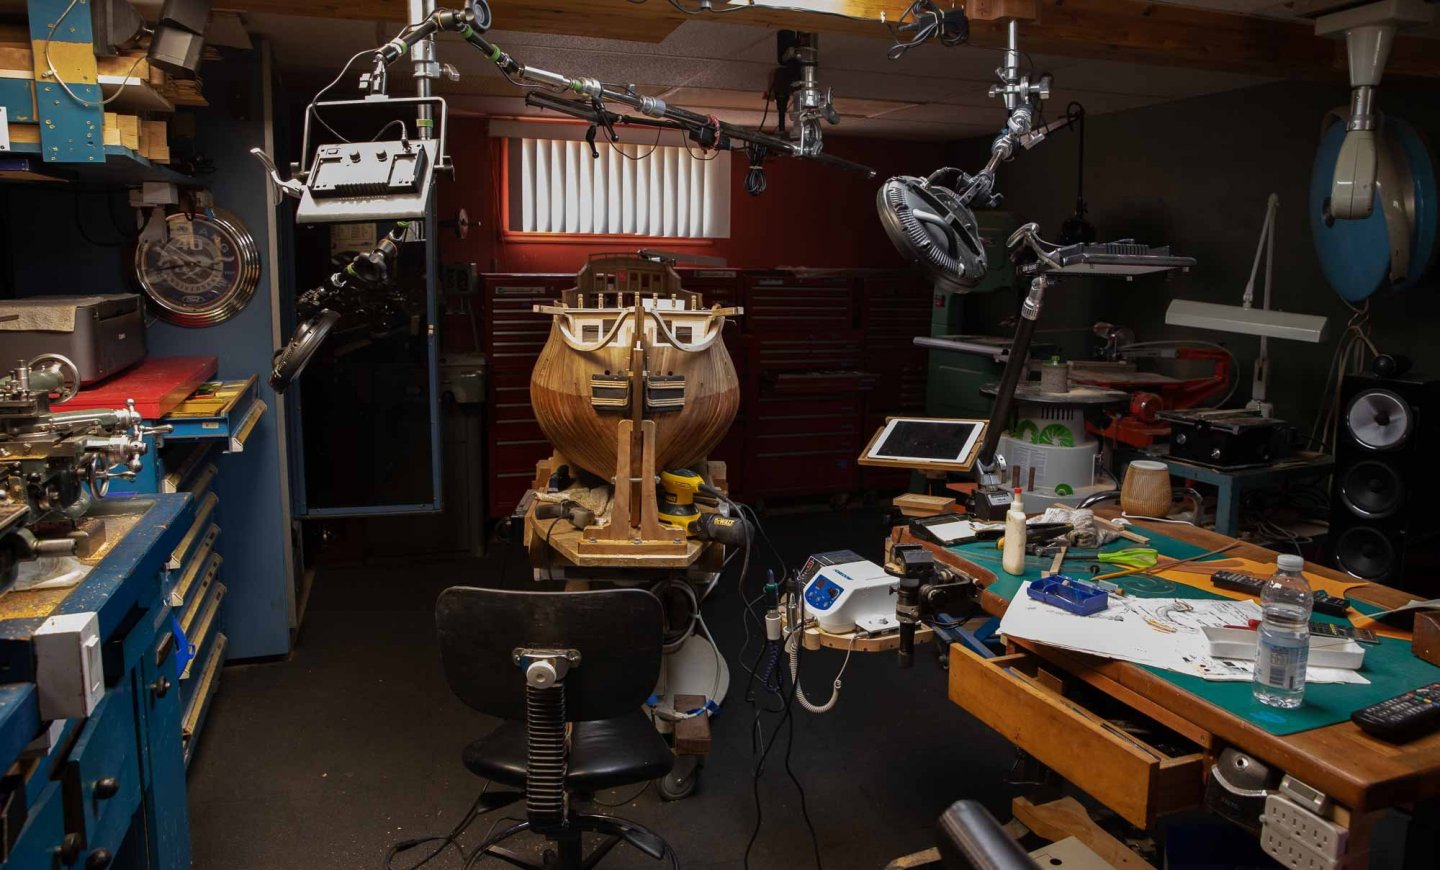
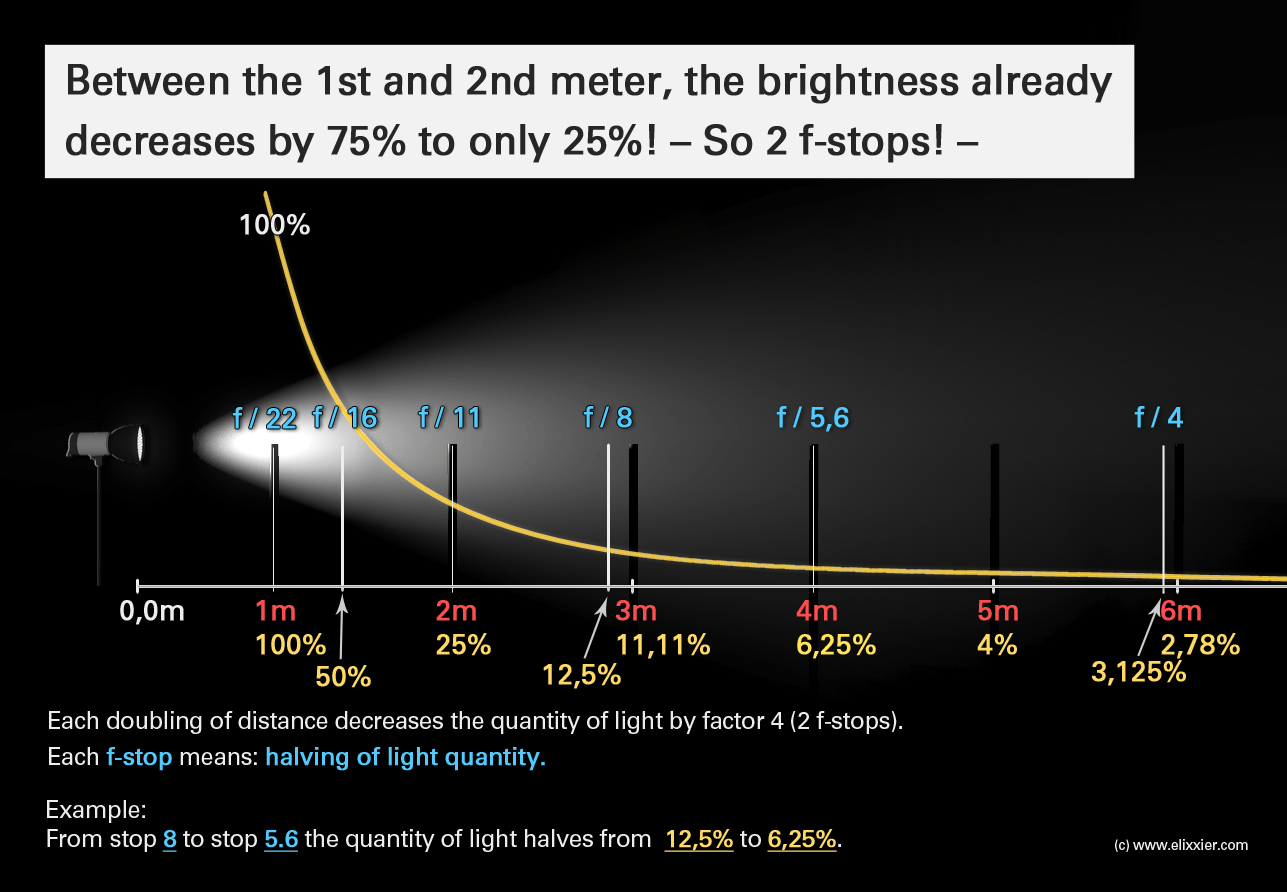
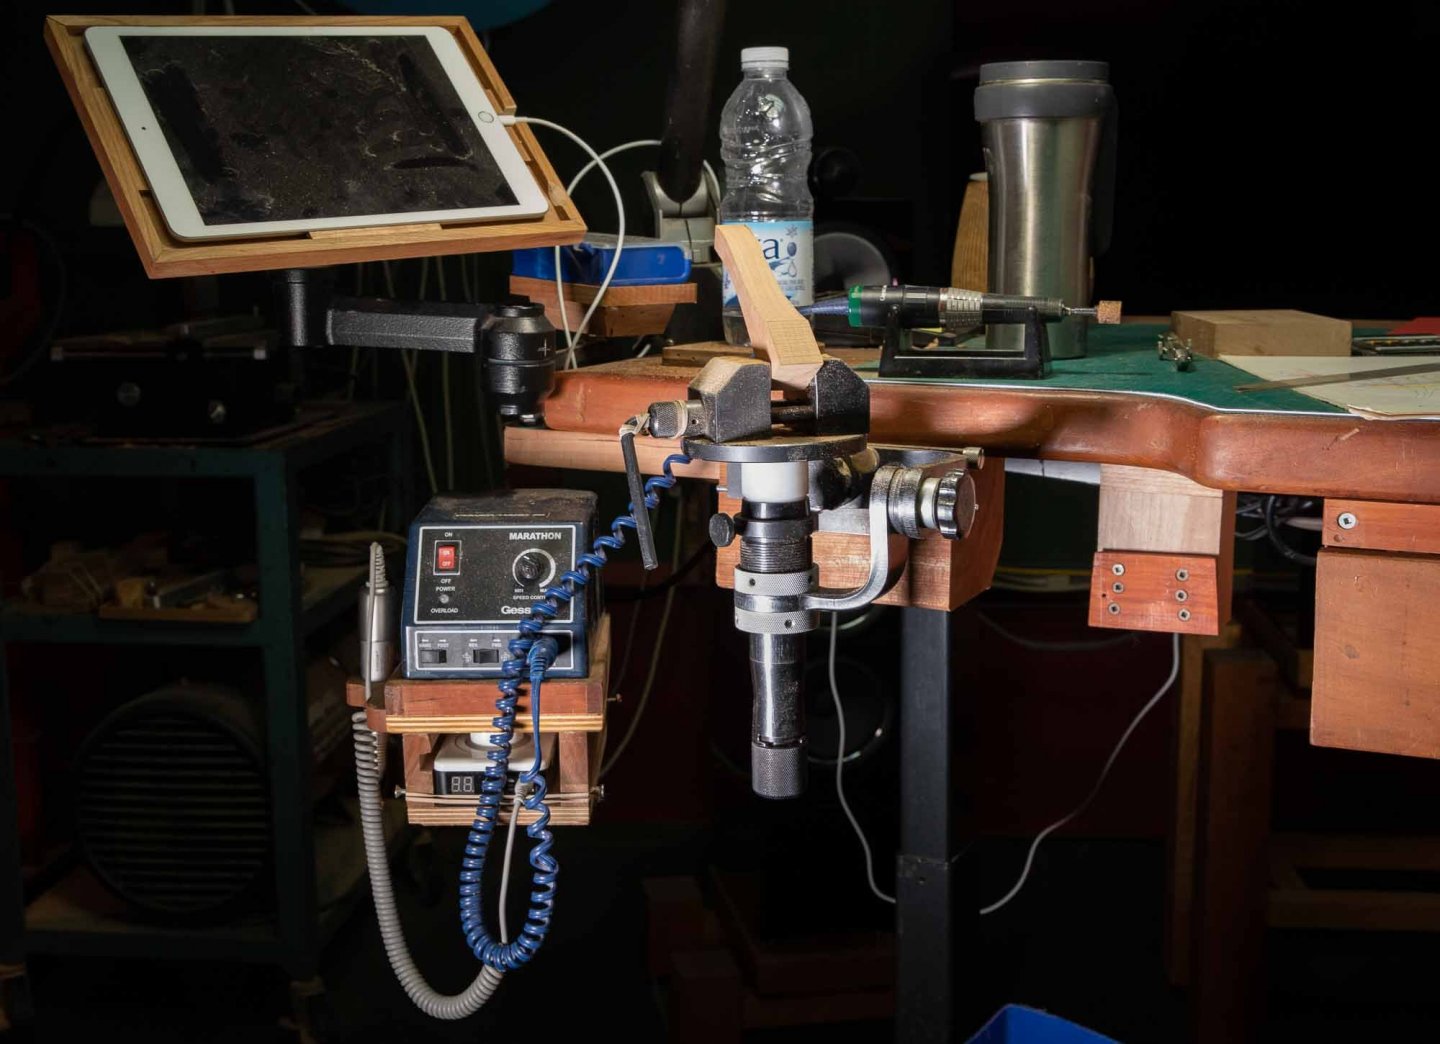
Thank you Jorge and Rick Trying to understanding lighting. We know that LED is a good step to recreate outside lighting. Actually, I use T8 4 feet long. Specifications are 6500 K and 2850 lumen. I think these spec are wrong. If I measure temperature I will reads around 4000K. As for a standard bulb where we knew how much bright the bulb would be by the wattage; 15 watts, 60, 100. For the T8, 32 watts does not help me much. the intensity of the Fluorescent T8 is written in lumen, 2850 for this one. Intensity is one thing but if you do not write at which distance the reading is done, it is dishonest because the distance plays a major factor in the formula of inverse square law in photography: The intensity of light is inversely proportional to the square of the distance. We can see an example in the second photo. When you move away from the double of the distance, every time, the intensity decreases more than the double. In fact as we can see in the third photo, the light decreases extremely rapidly in the first feet as we can observe the yellow curve. This is for this exact reason that I can take a photo white a light source very close to the model ship boat and have a dark background behind the model. There is another variable which affects the intensity of the light: the number of LED bulbs. I did modify some tripods fixtures to install these on the ceiling. I also bought new LED lights That I will receive soon I hope. In the 4th photo, we can read that more LED means more intensity that we read in Lux or foot candle.The temperature in Kelvin stays the same. When I use the Sekonic C-500R to read the Kelvin outside on a sunny day I read 4300. Roughly, if we go lower, the image will be red and if we go higher than this middle point higher than 4300 K the image will be blue. I think that it is for this reason that that we can add a blue filter in glasses when we use the computer screen. For this same reason, we begin to read that the blue Light of some kind of LED lights can be harmful for the eyes as in the following example (in french). https://ici.radio-canada.ca/nouvelle/1169994/del-lumiere-bleue-effets-nefastes In the last photo, the set up that is in progression. In conclusion, there is a world apart when you can see which part you are working and this, you cannot understand if you use just a simple incandescent light of 60 watts; which is literally like working in the dark.


-
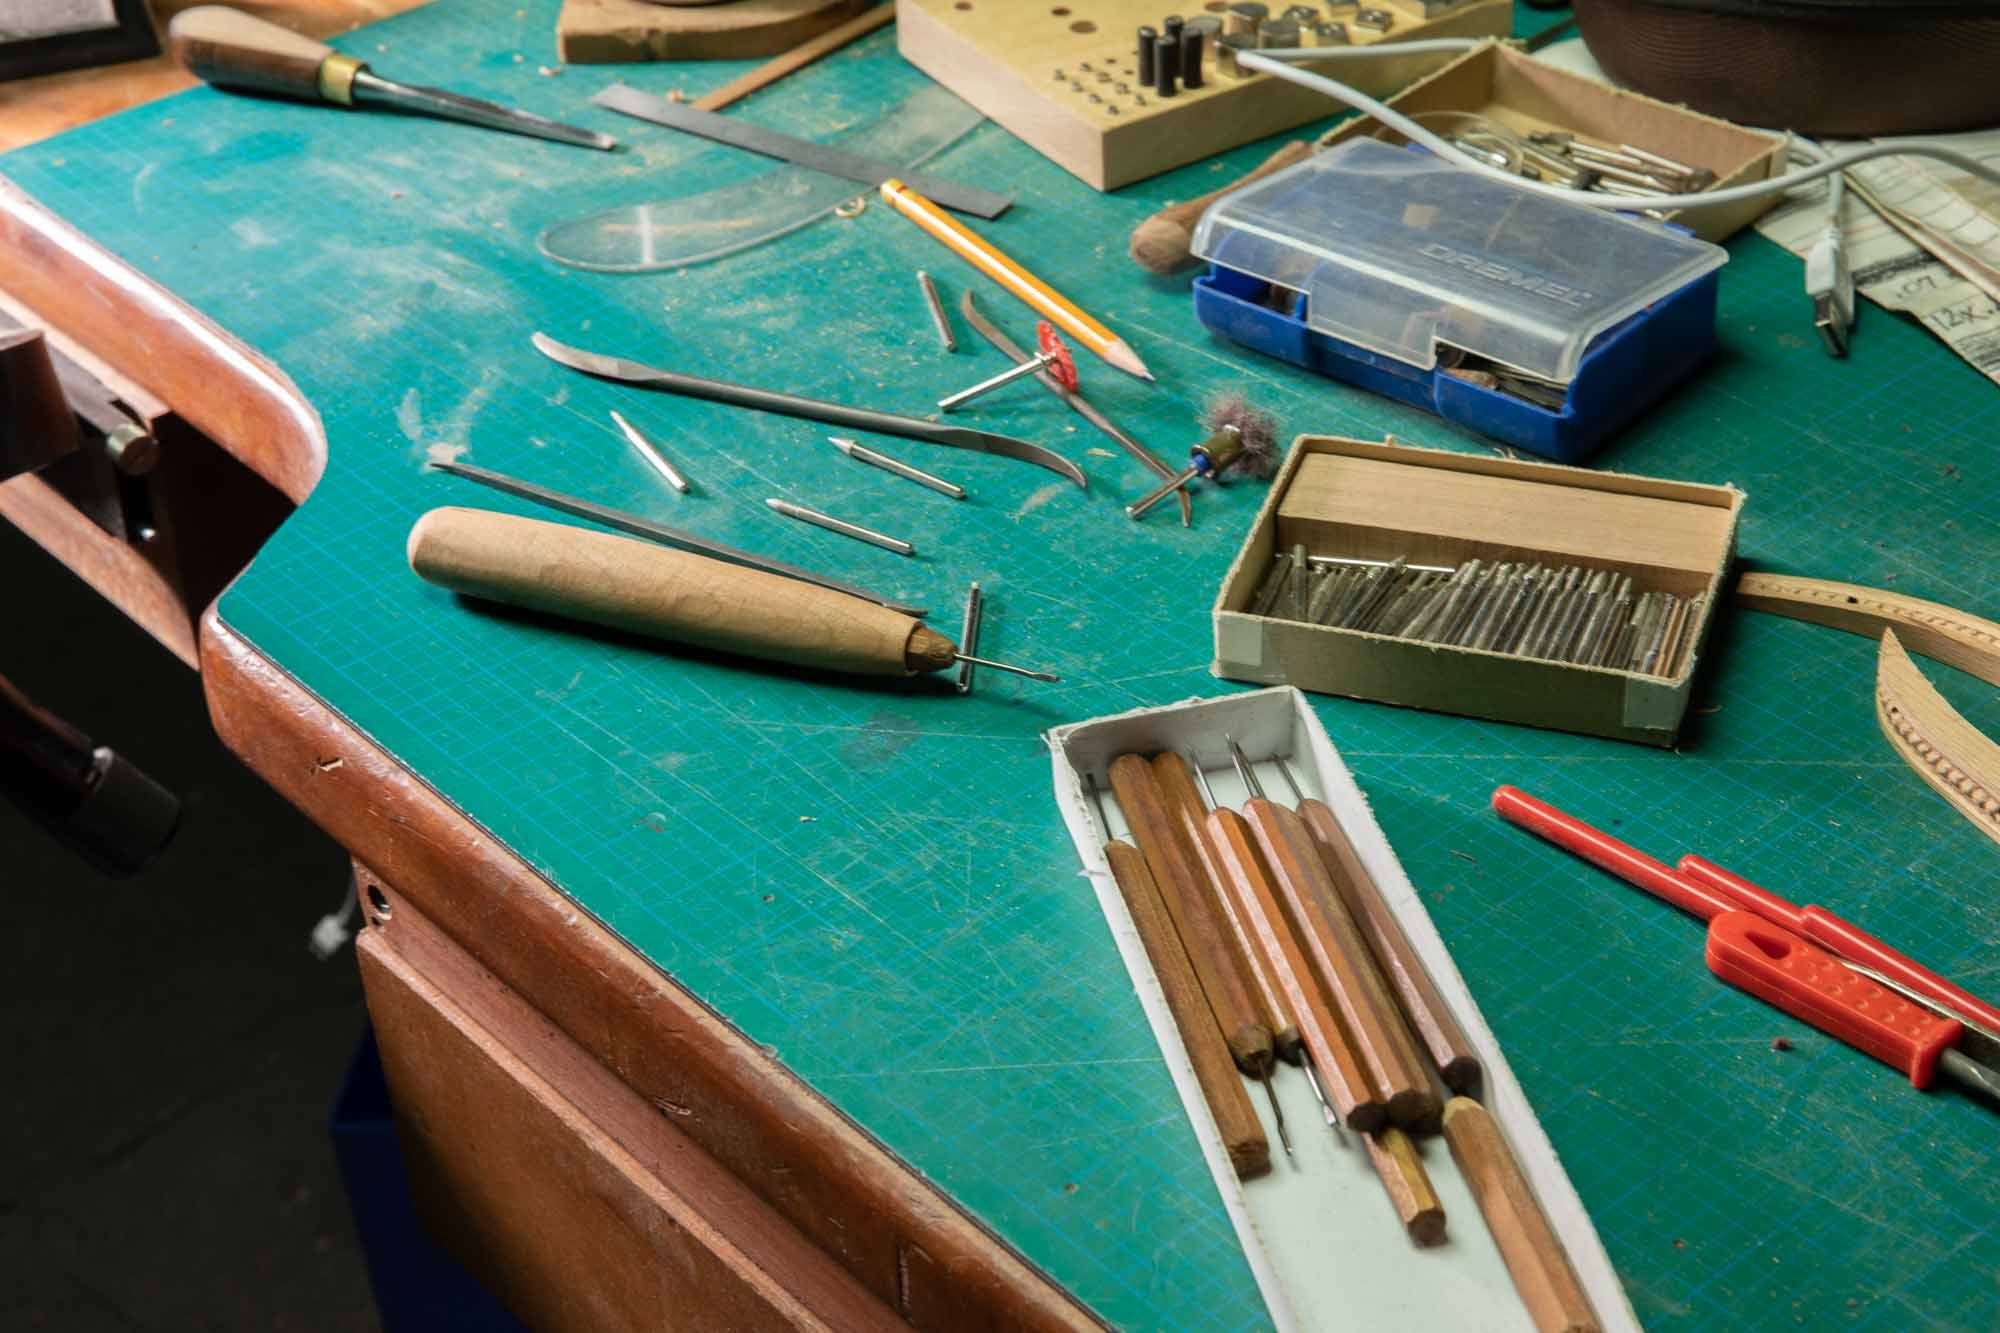
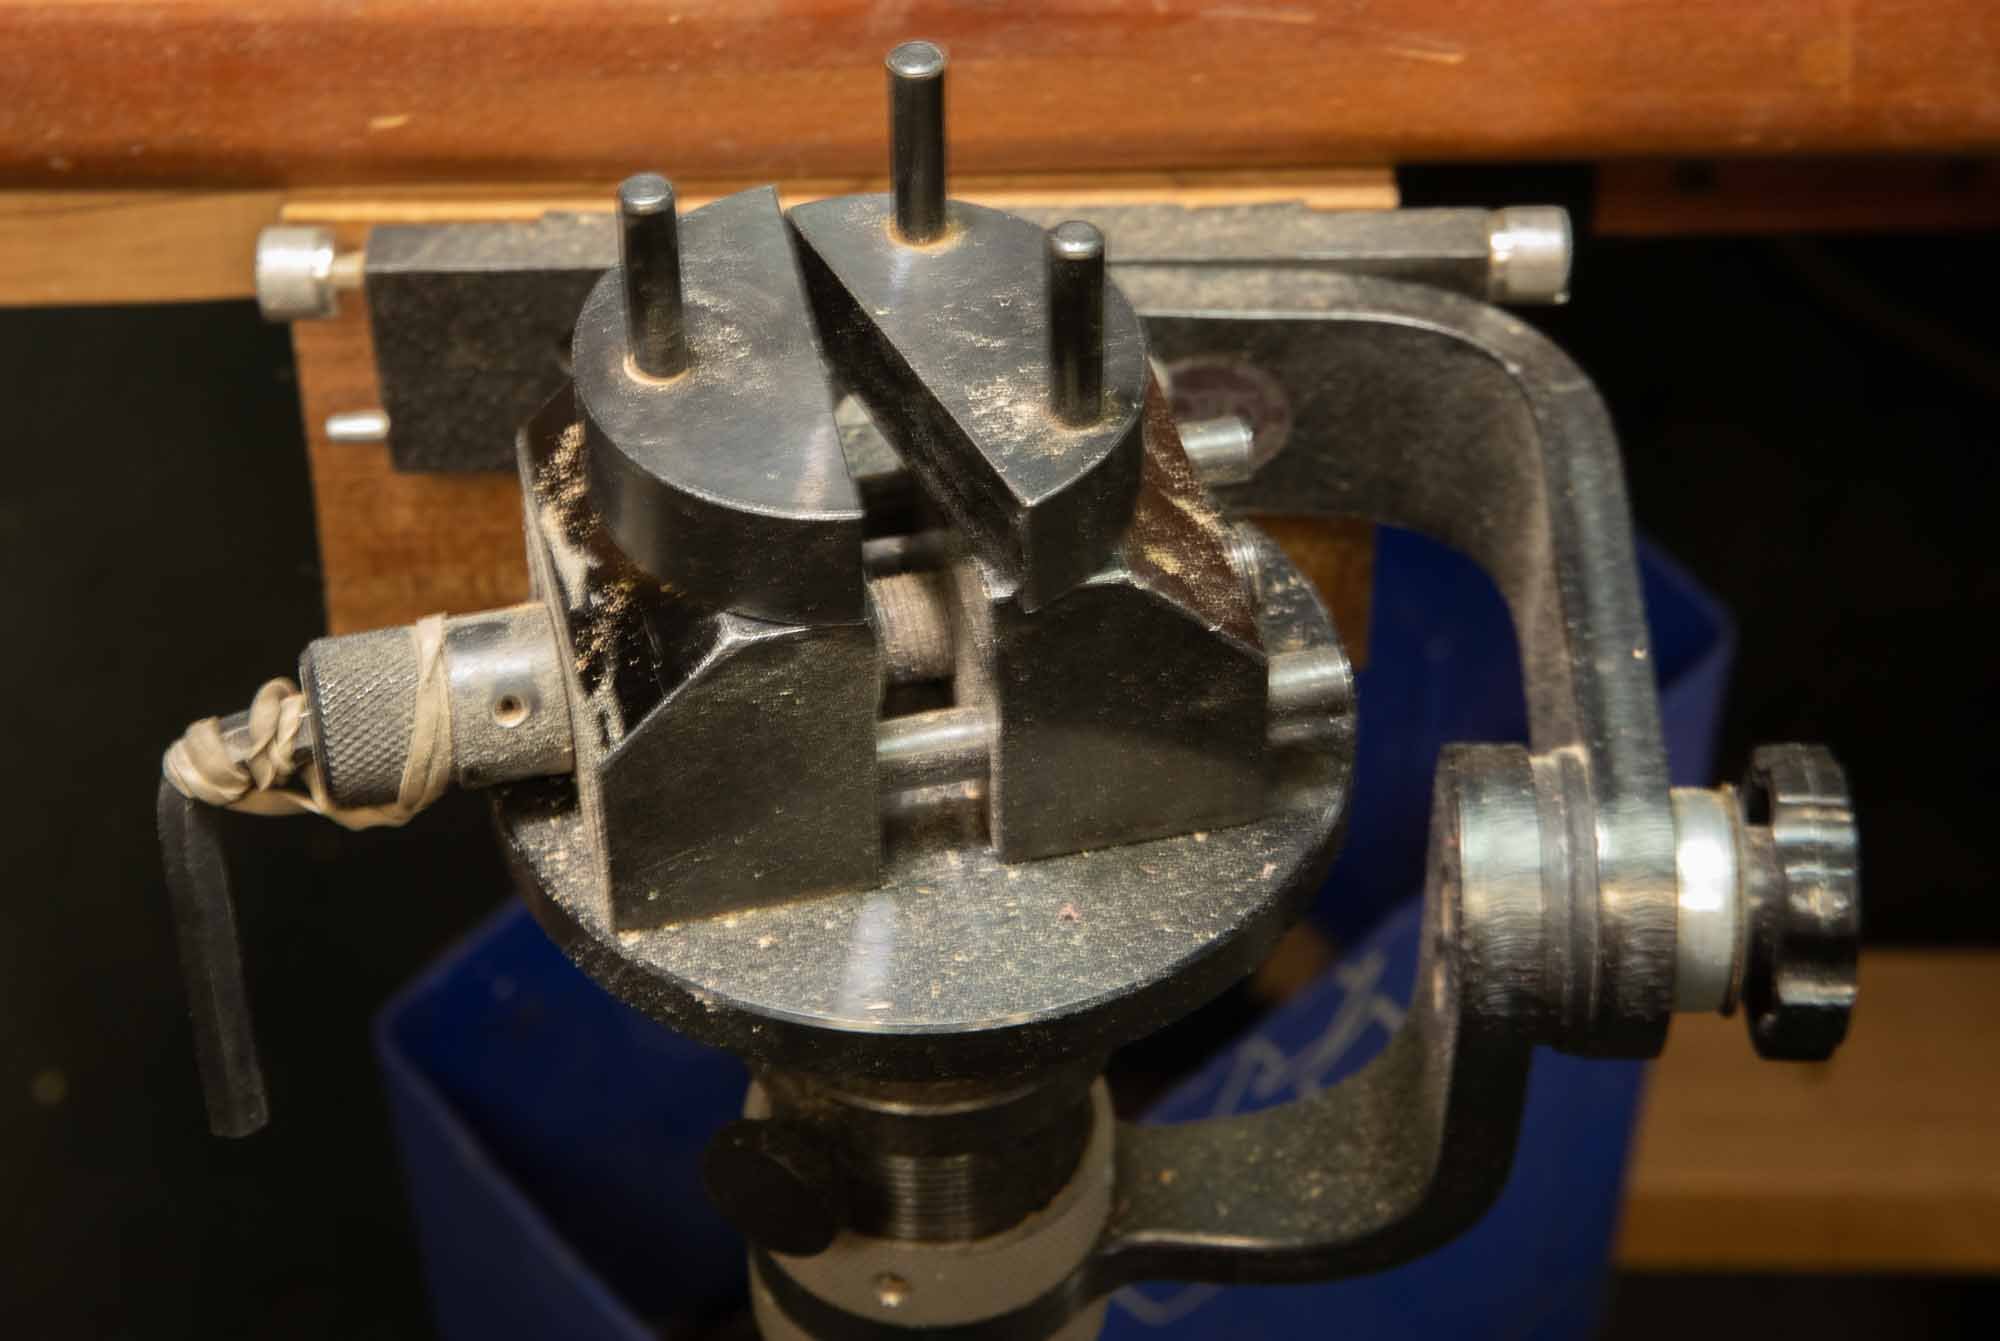
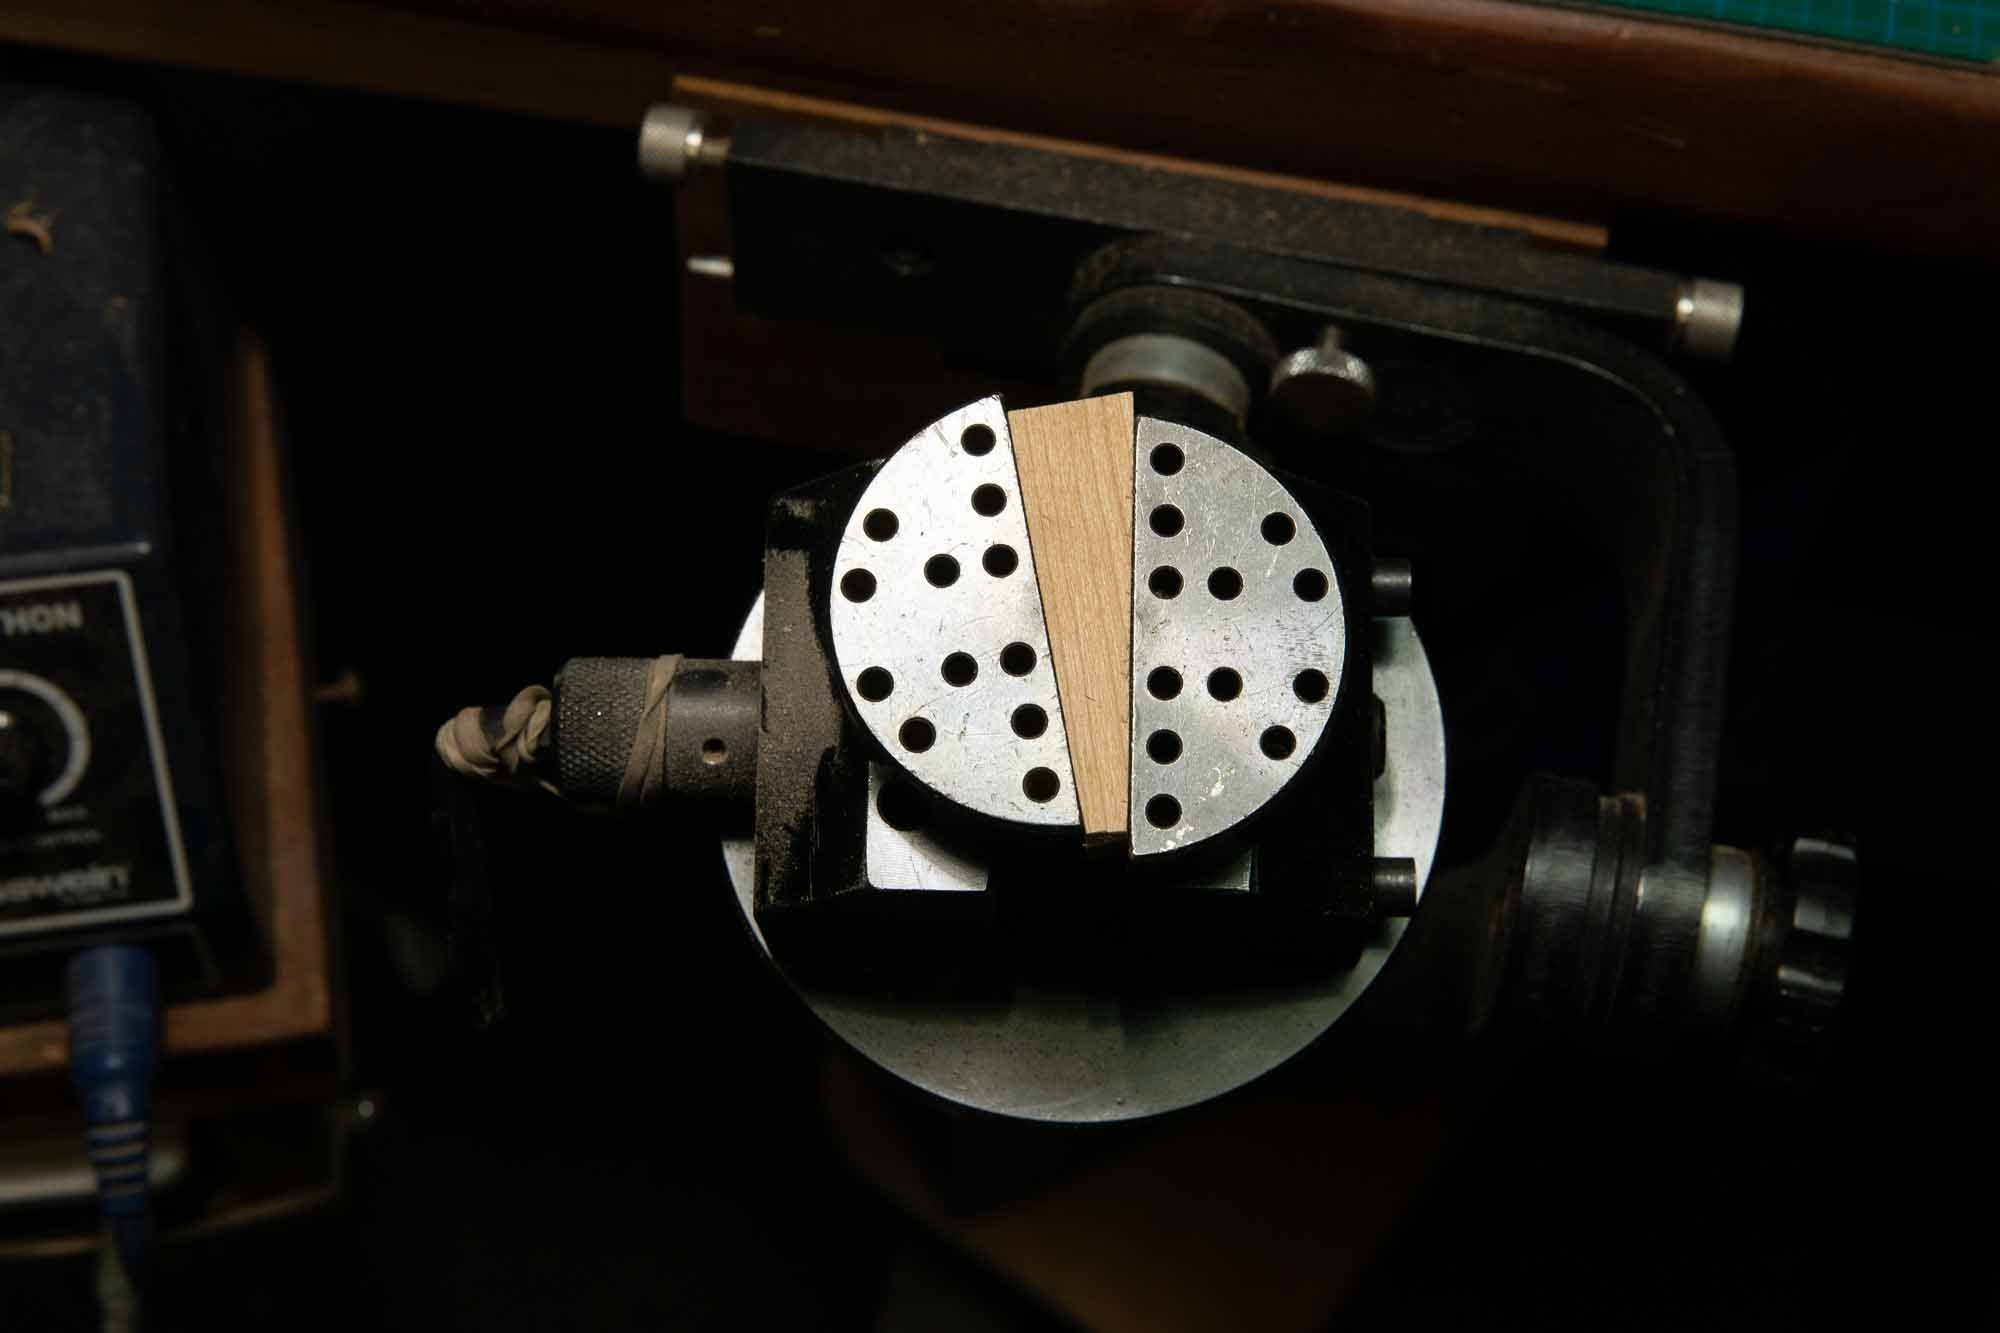
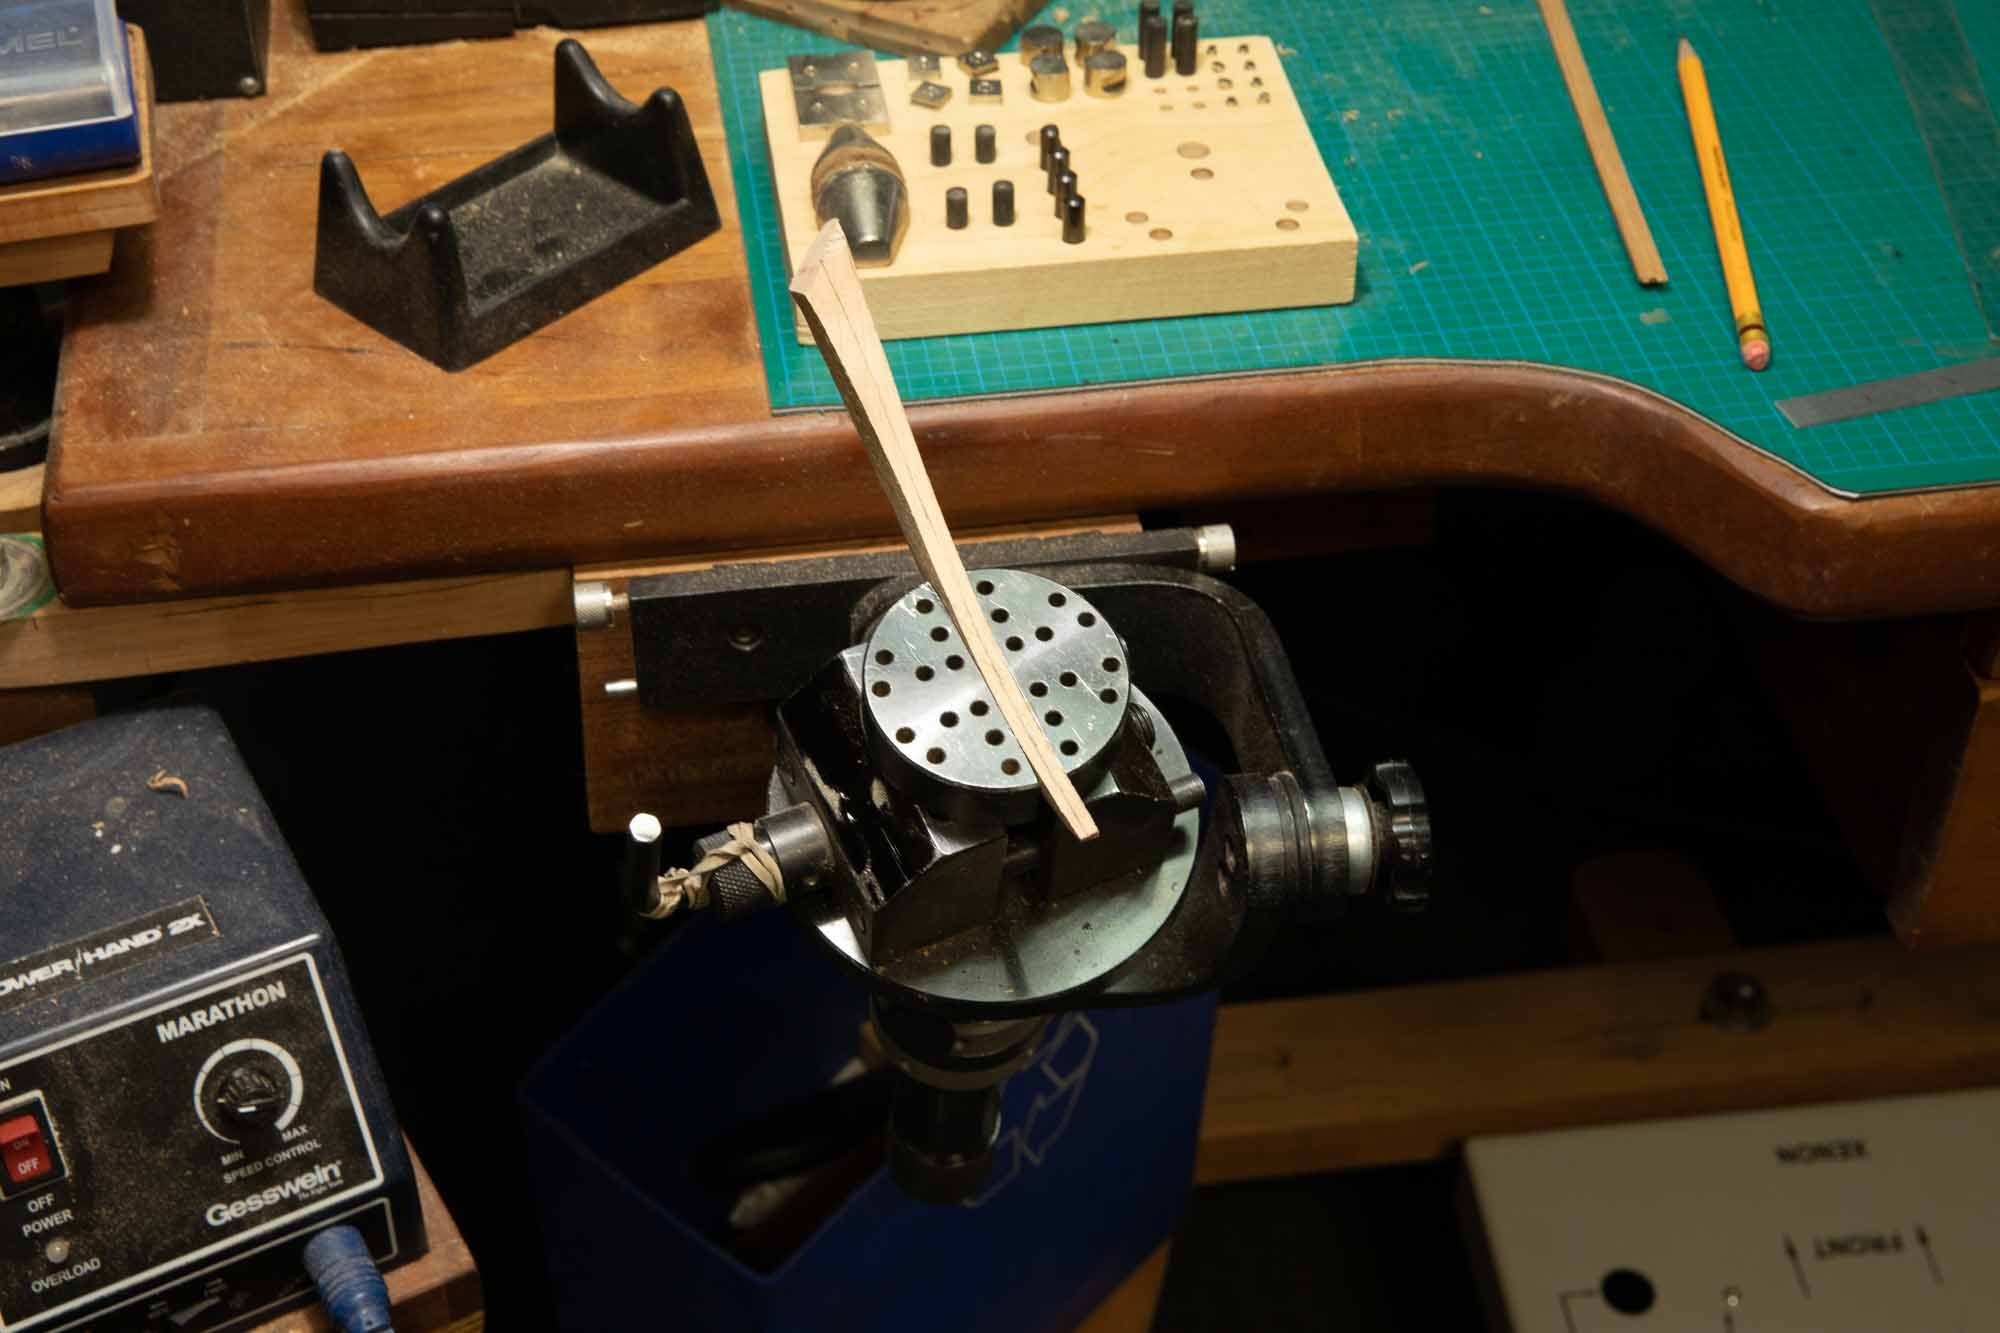
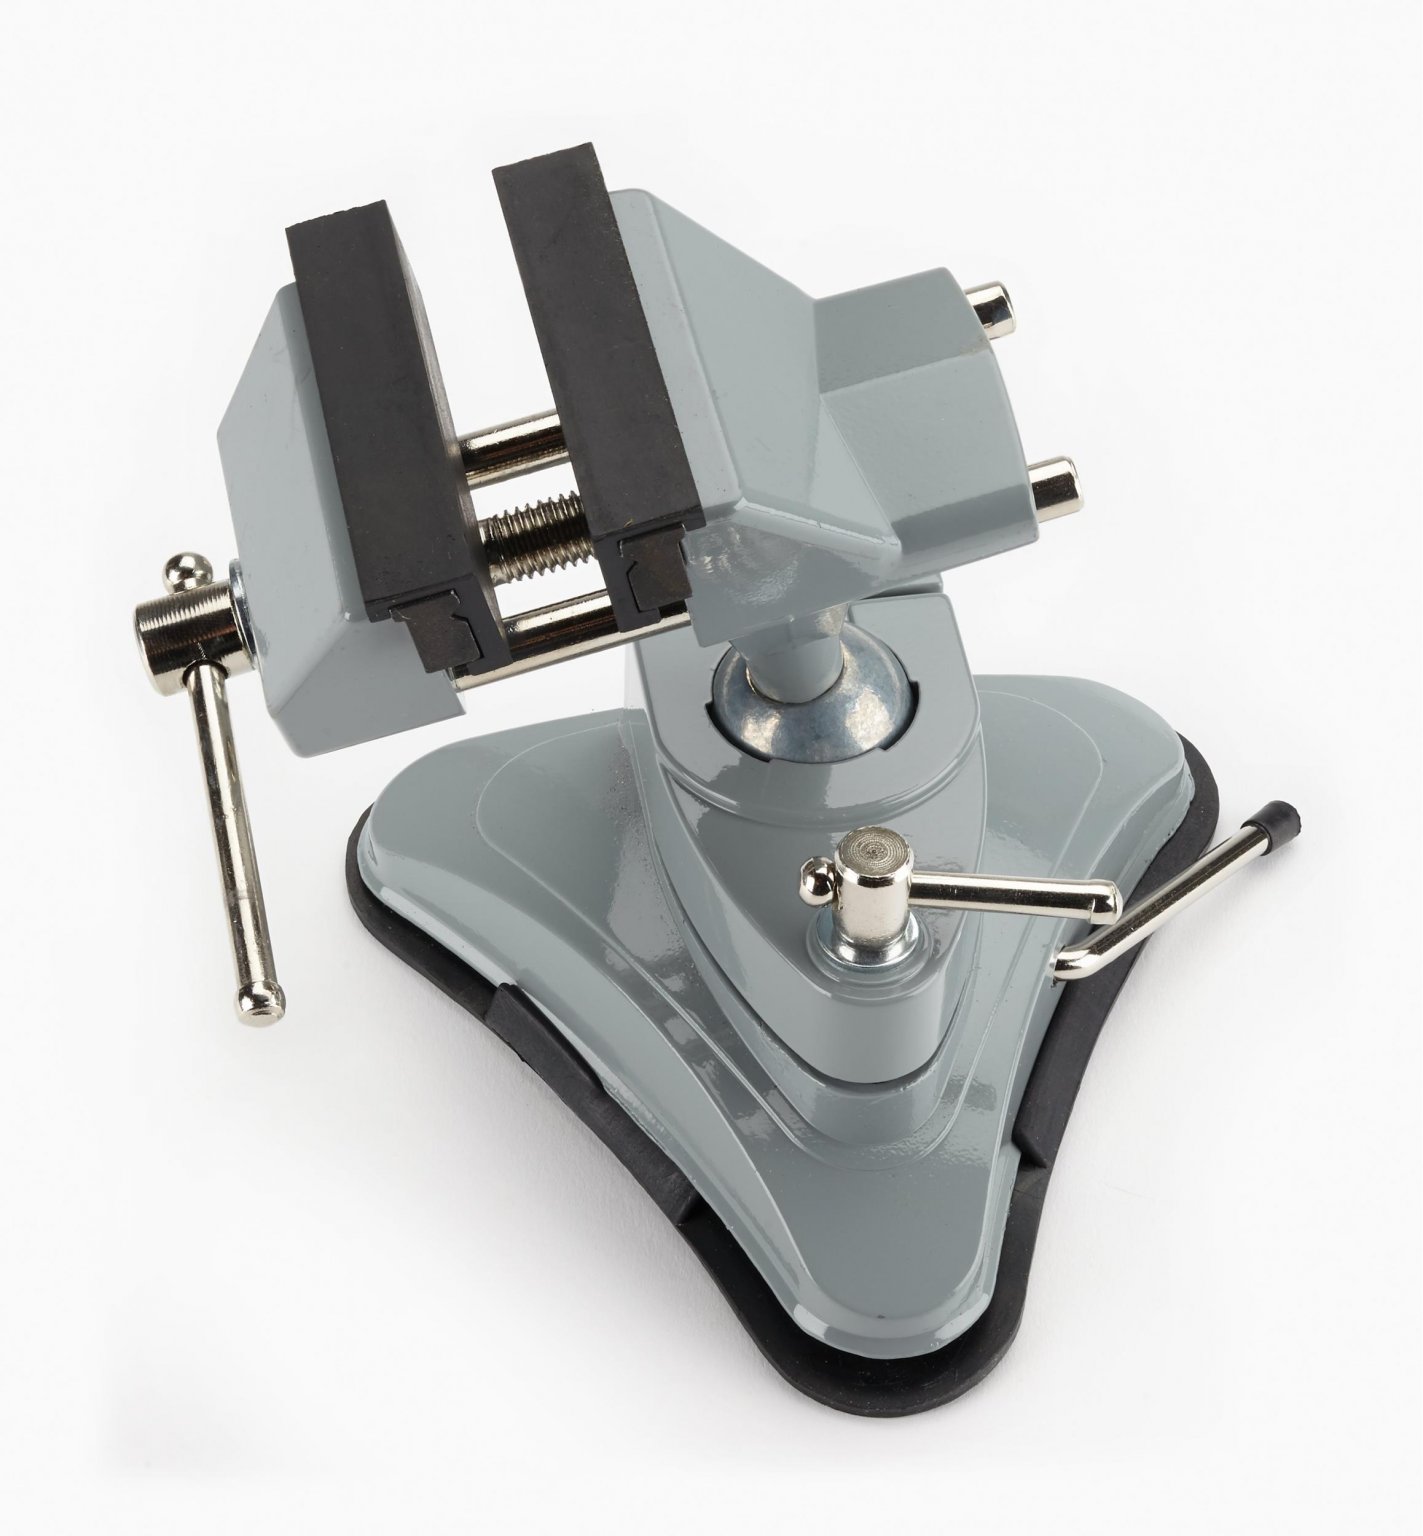
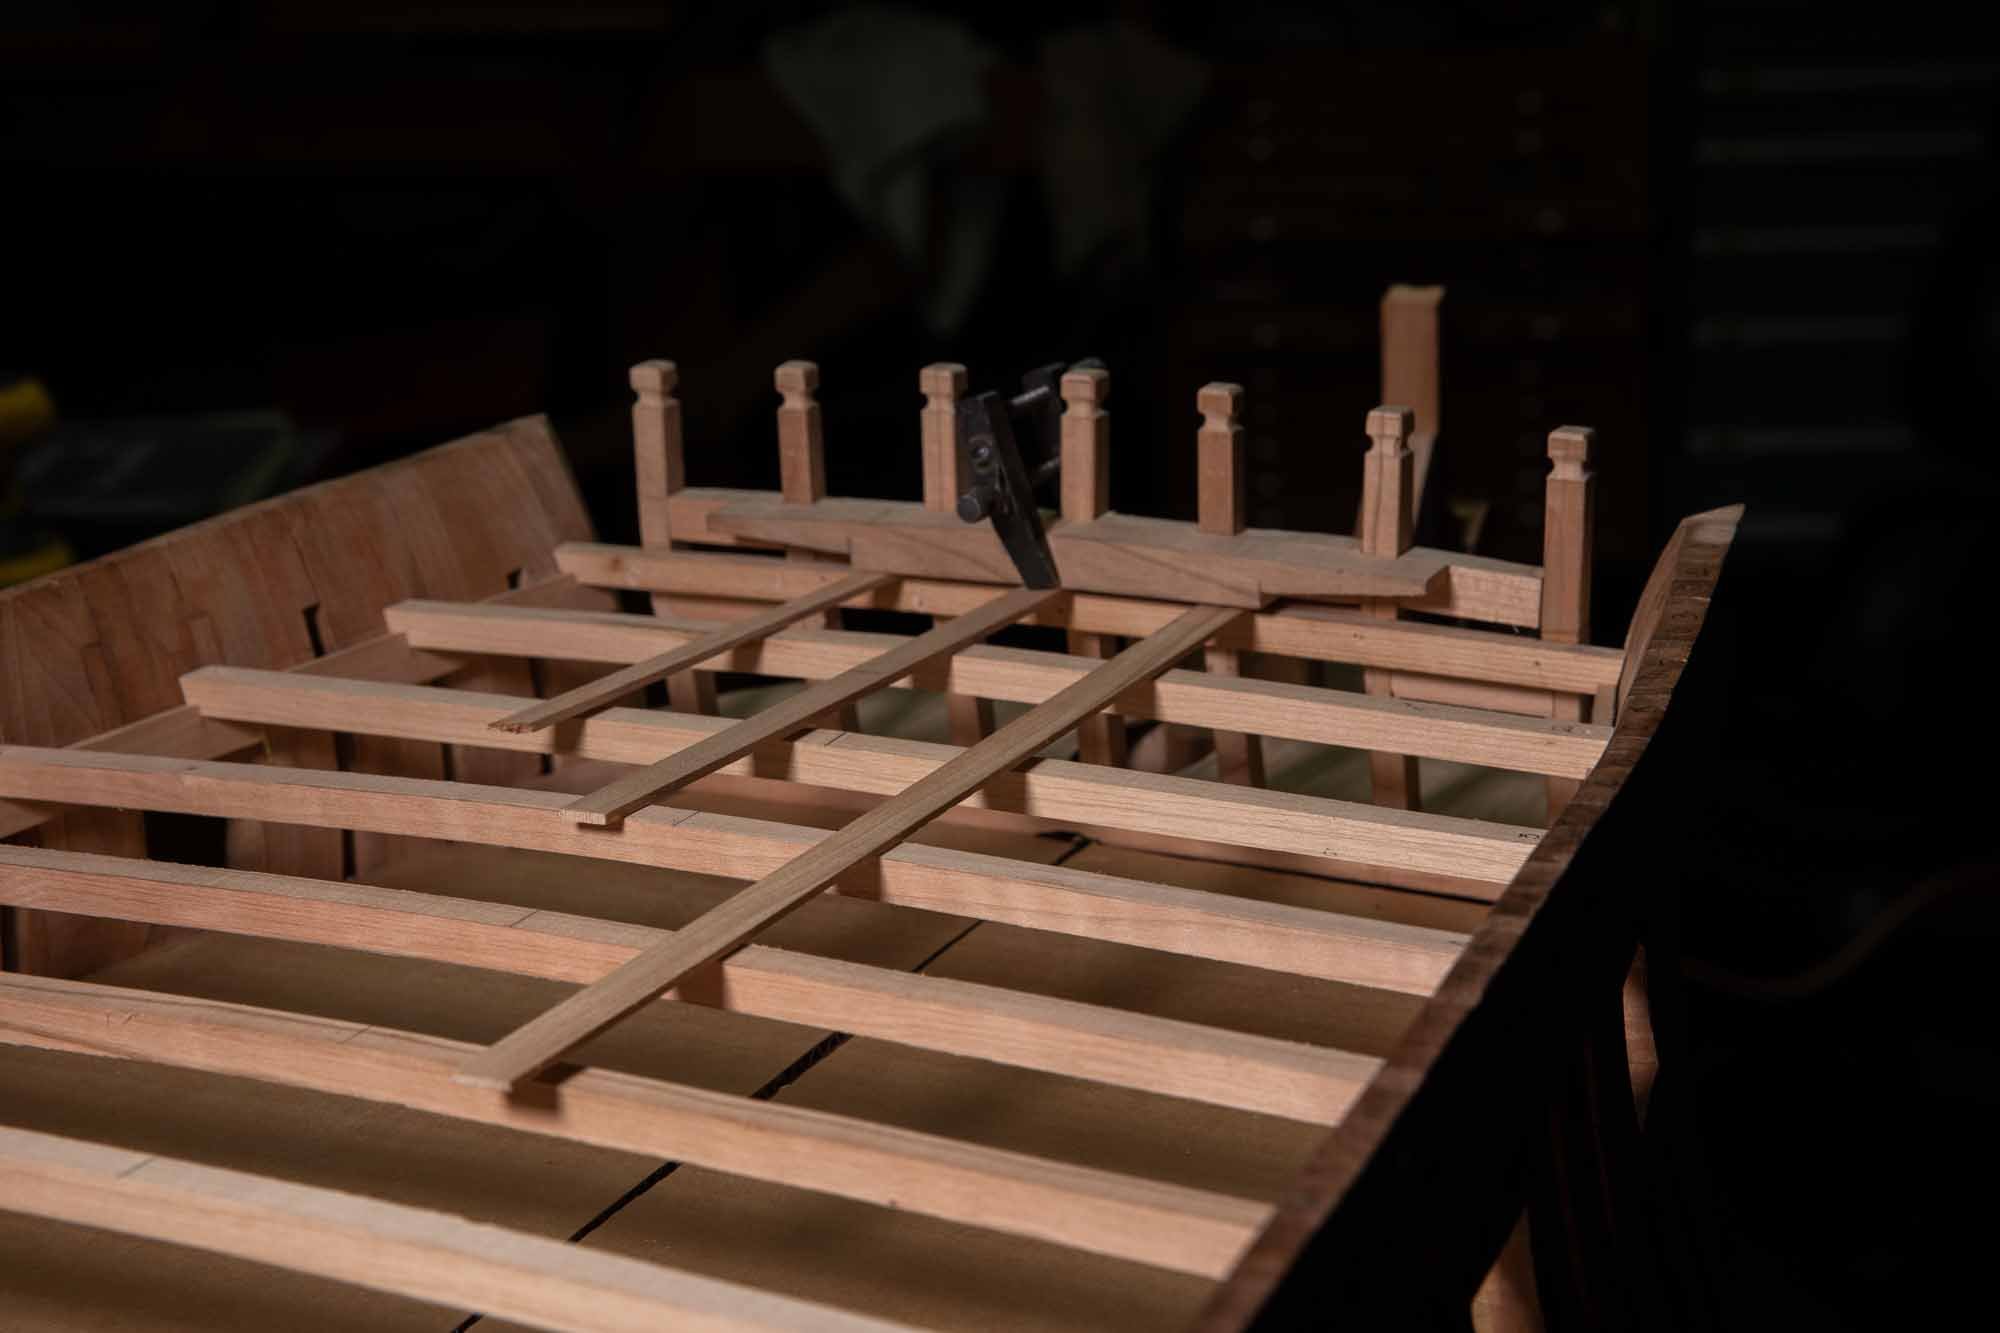
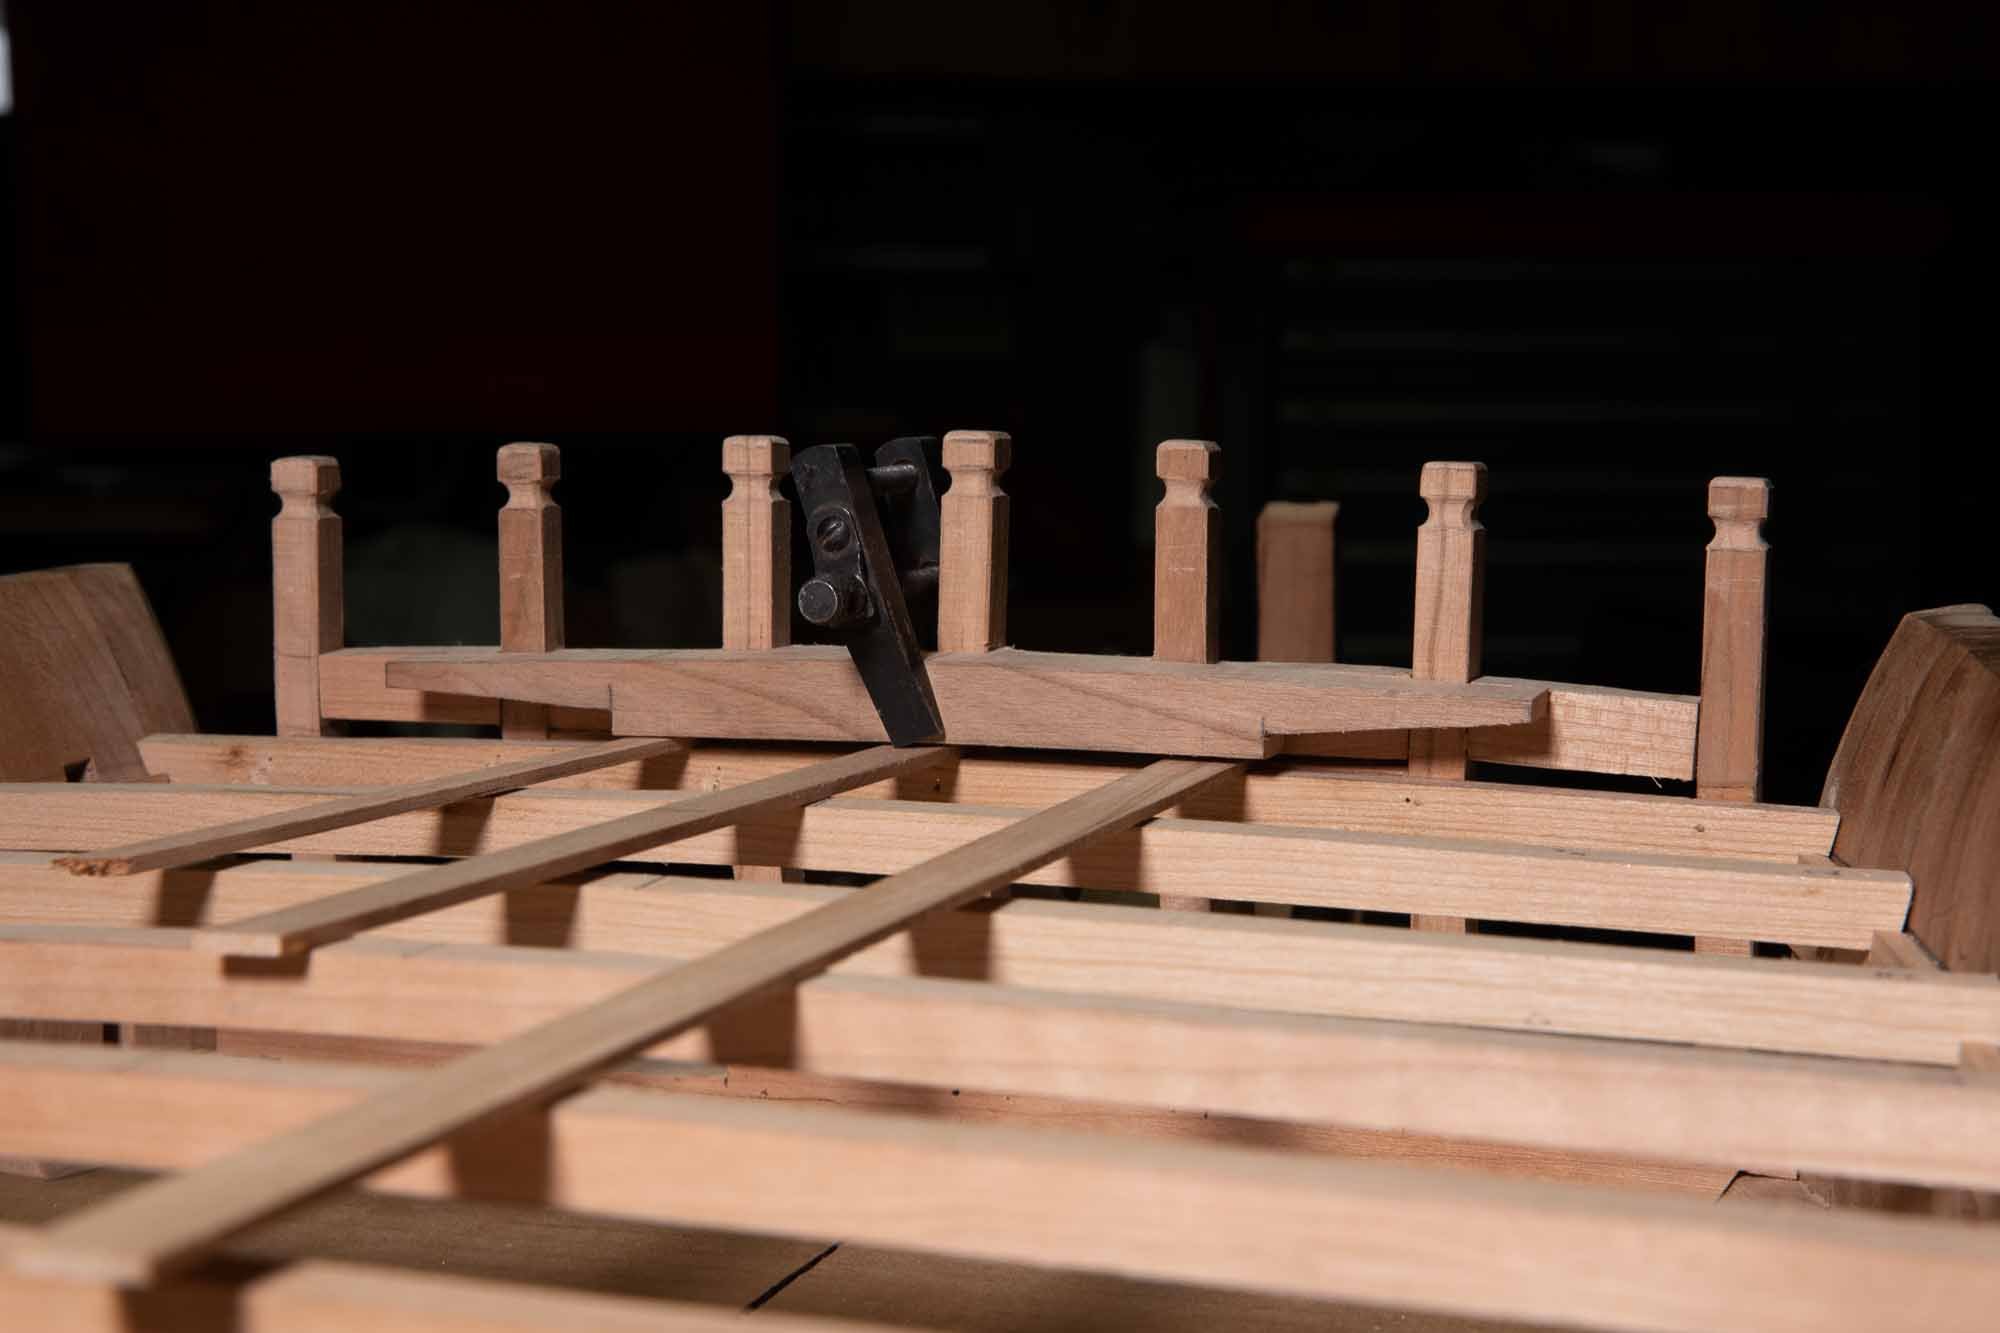
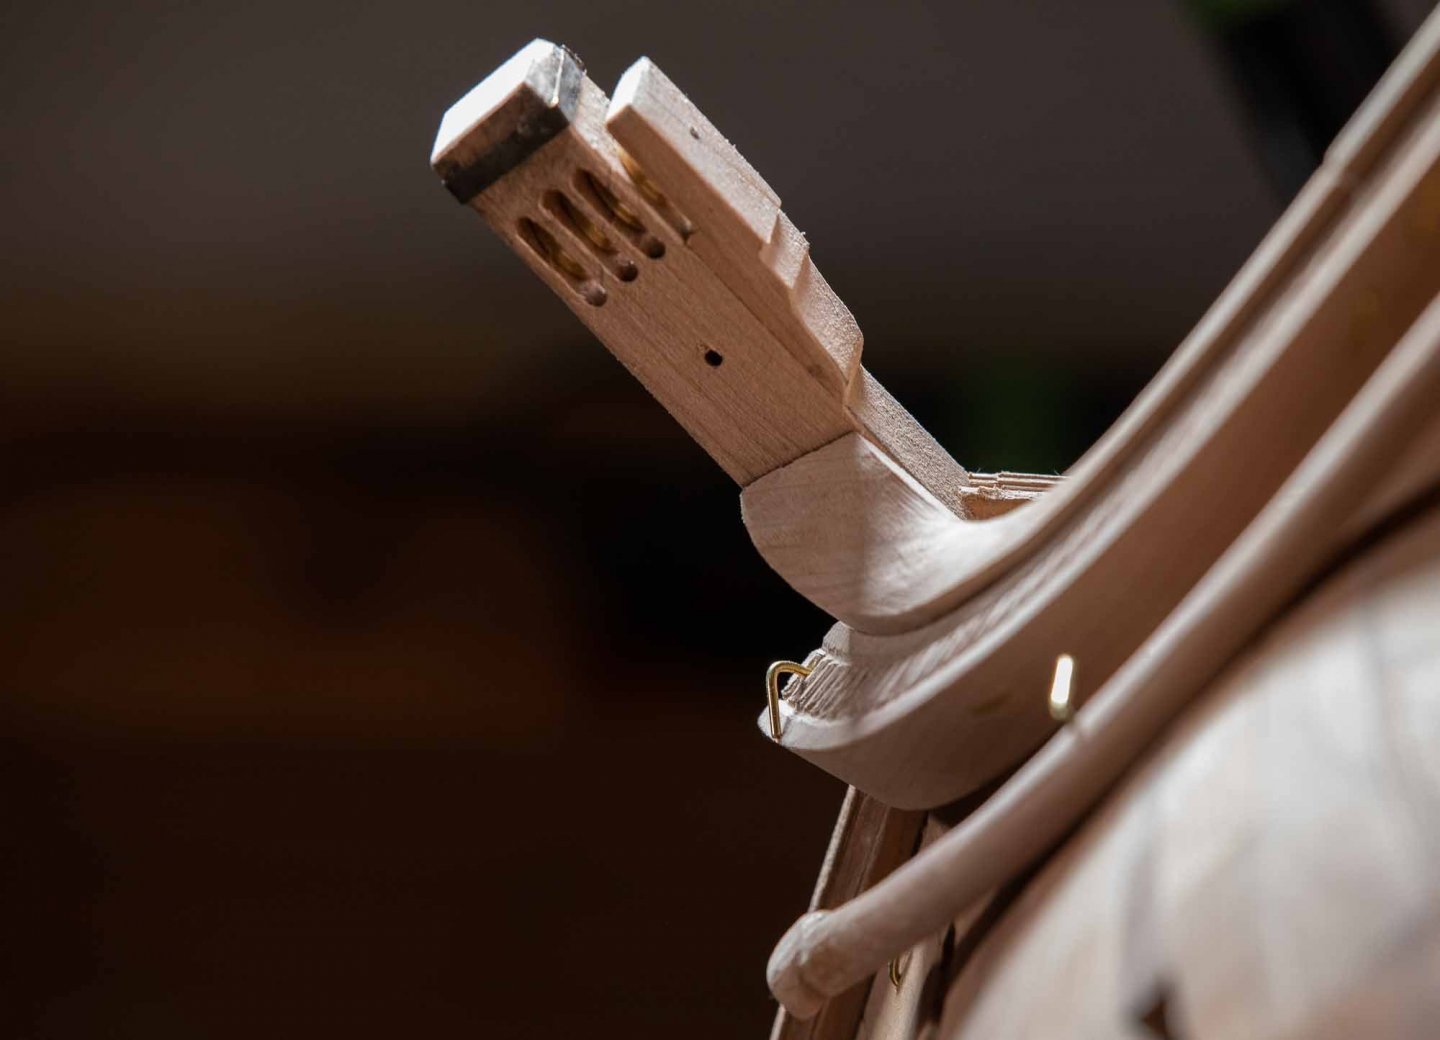
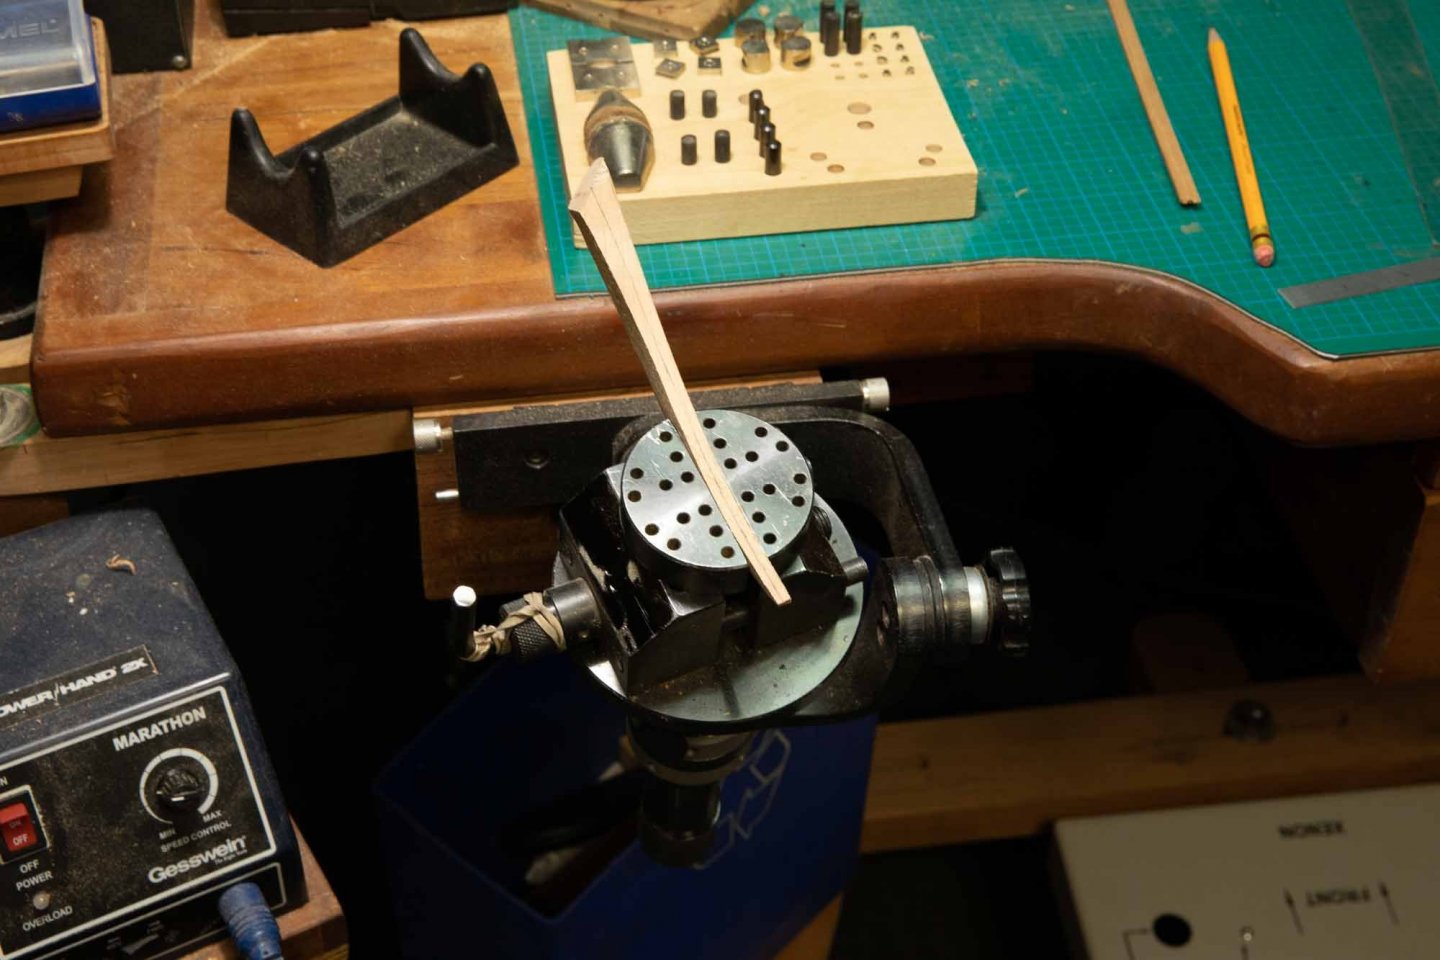
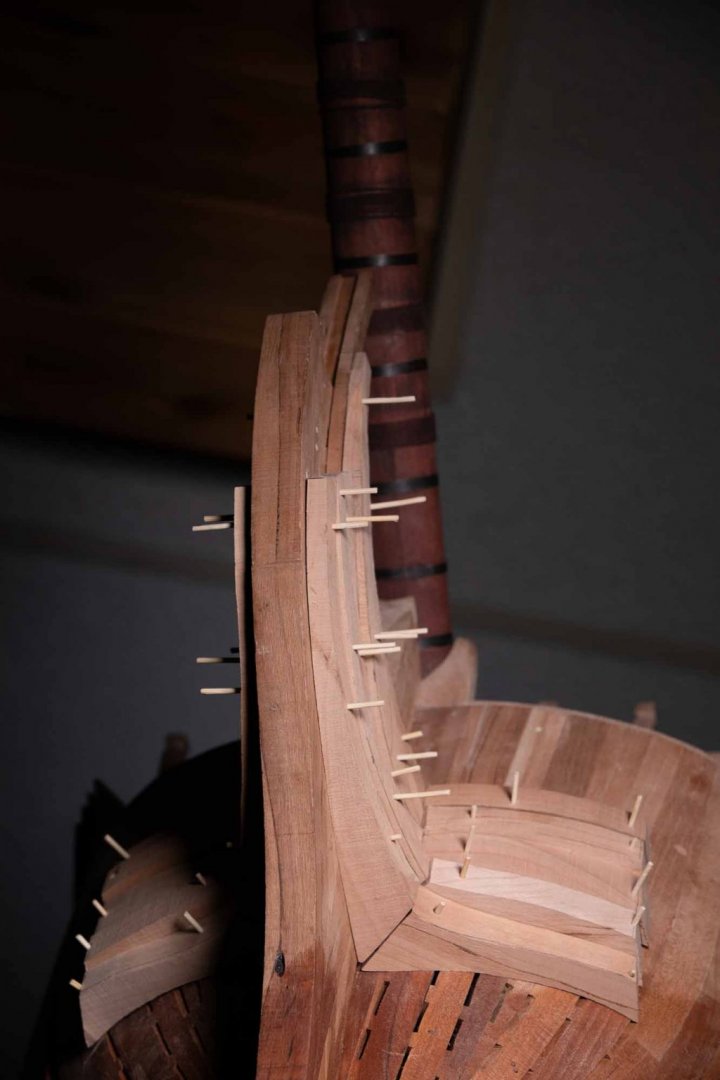
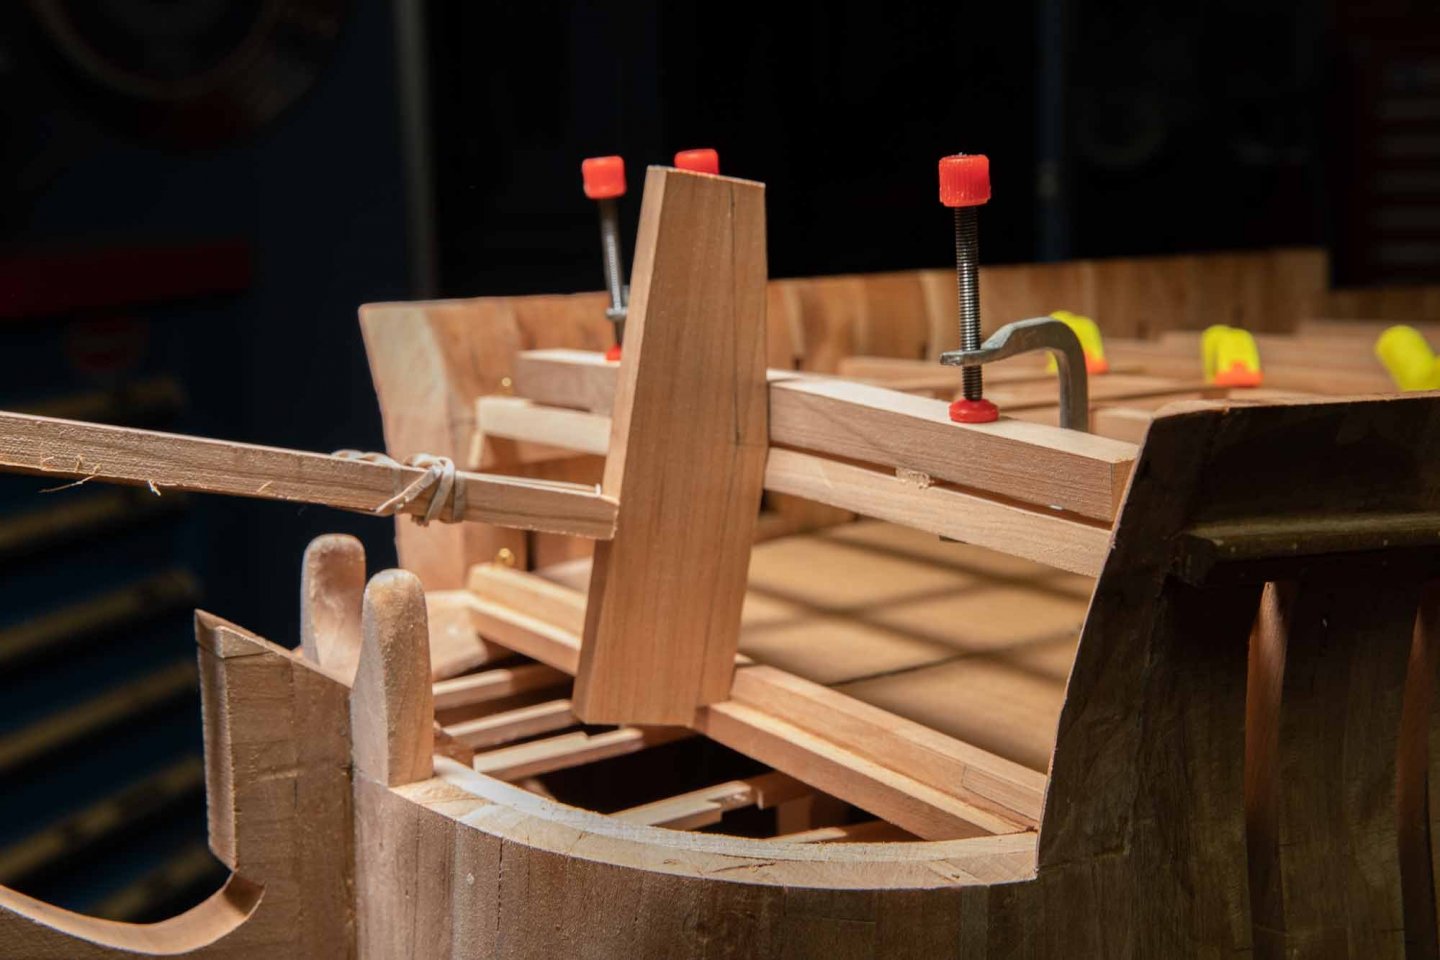
Few notes about the tools. First, using a small knife with a small handle is harder to control. So I sanded a bigger one, much more comfortable. Second photo. It is a set of jaw which can be installed on the top of the other vice. Do you know why one side has 2 pin to secure it, and the other side has only one? Third photo, the answer; to hold a tapered part. If the part is parallel, it also works because the pin is in the center. Photo 4, many parts of the present assembly are tapered, so it was useful. Parts are done, ready to glue.


-
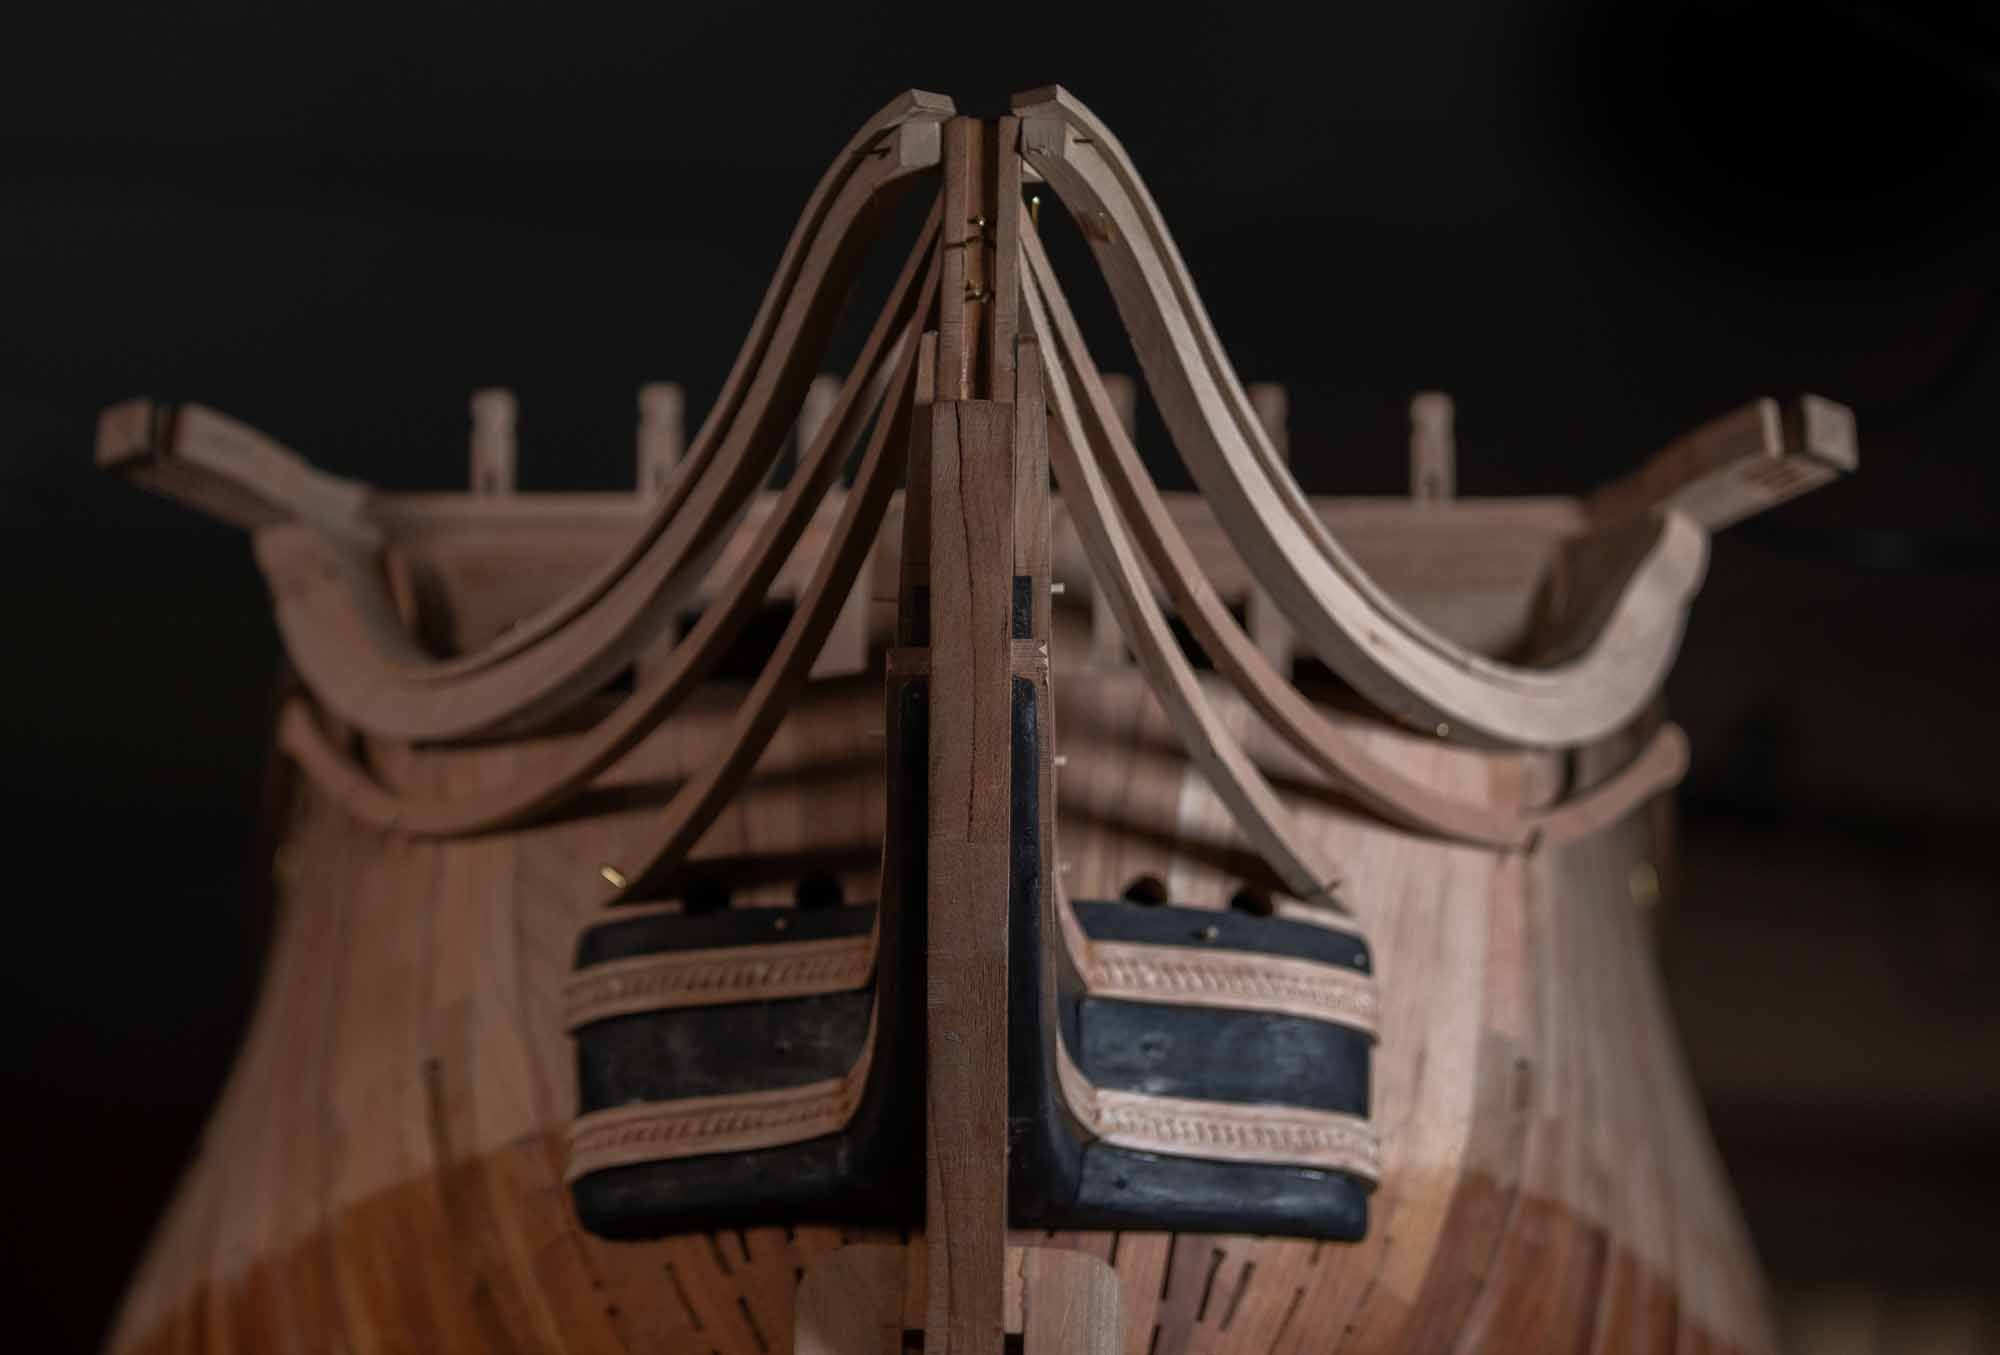
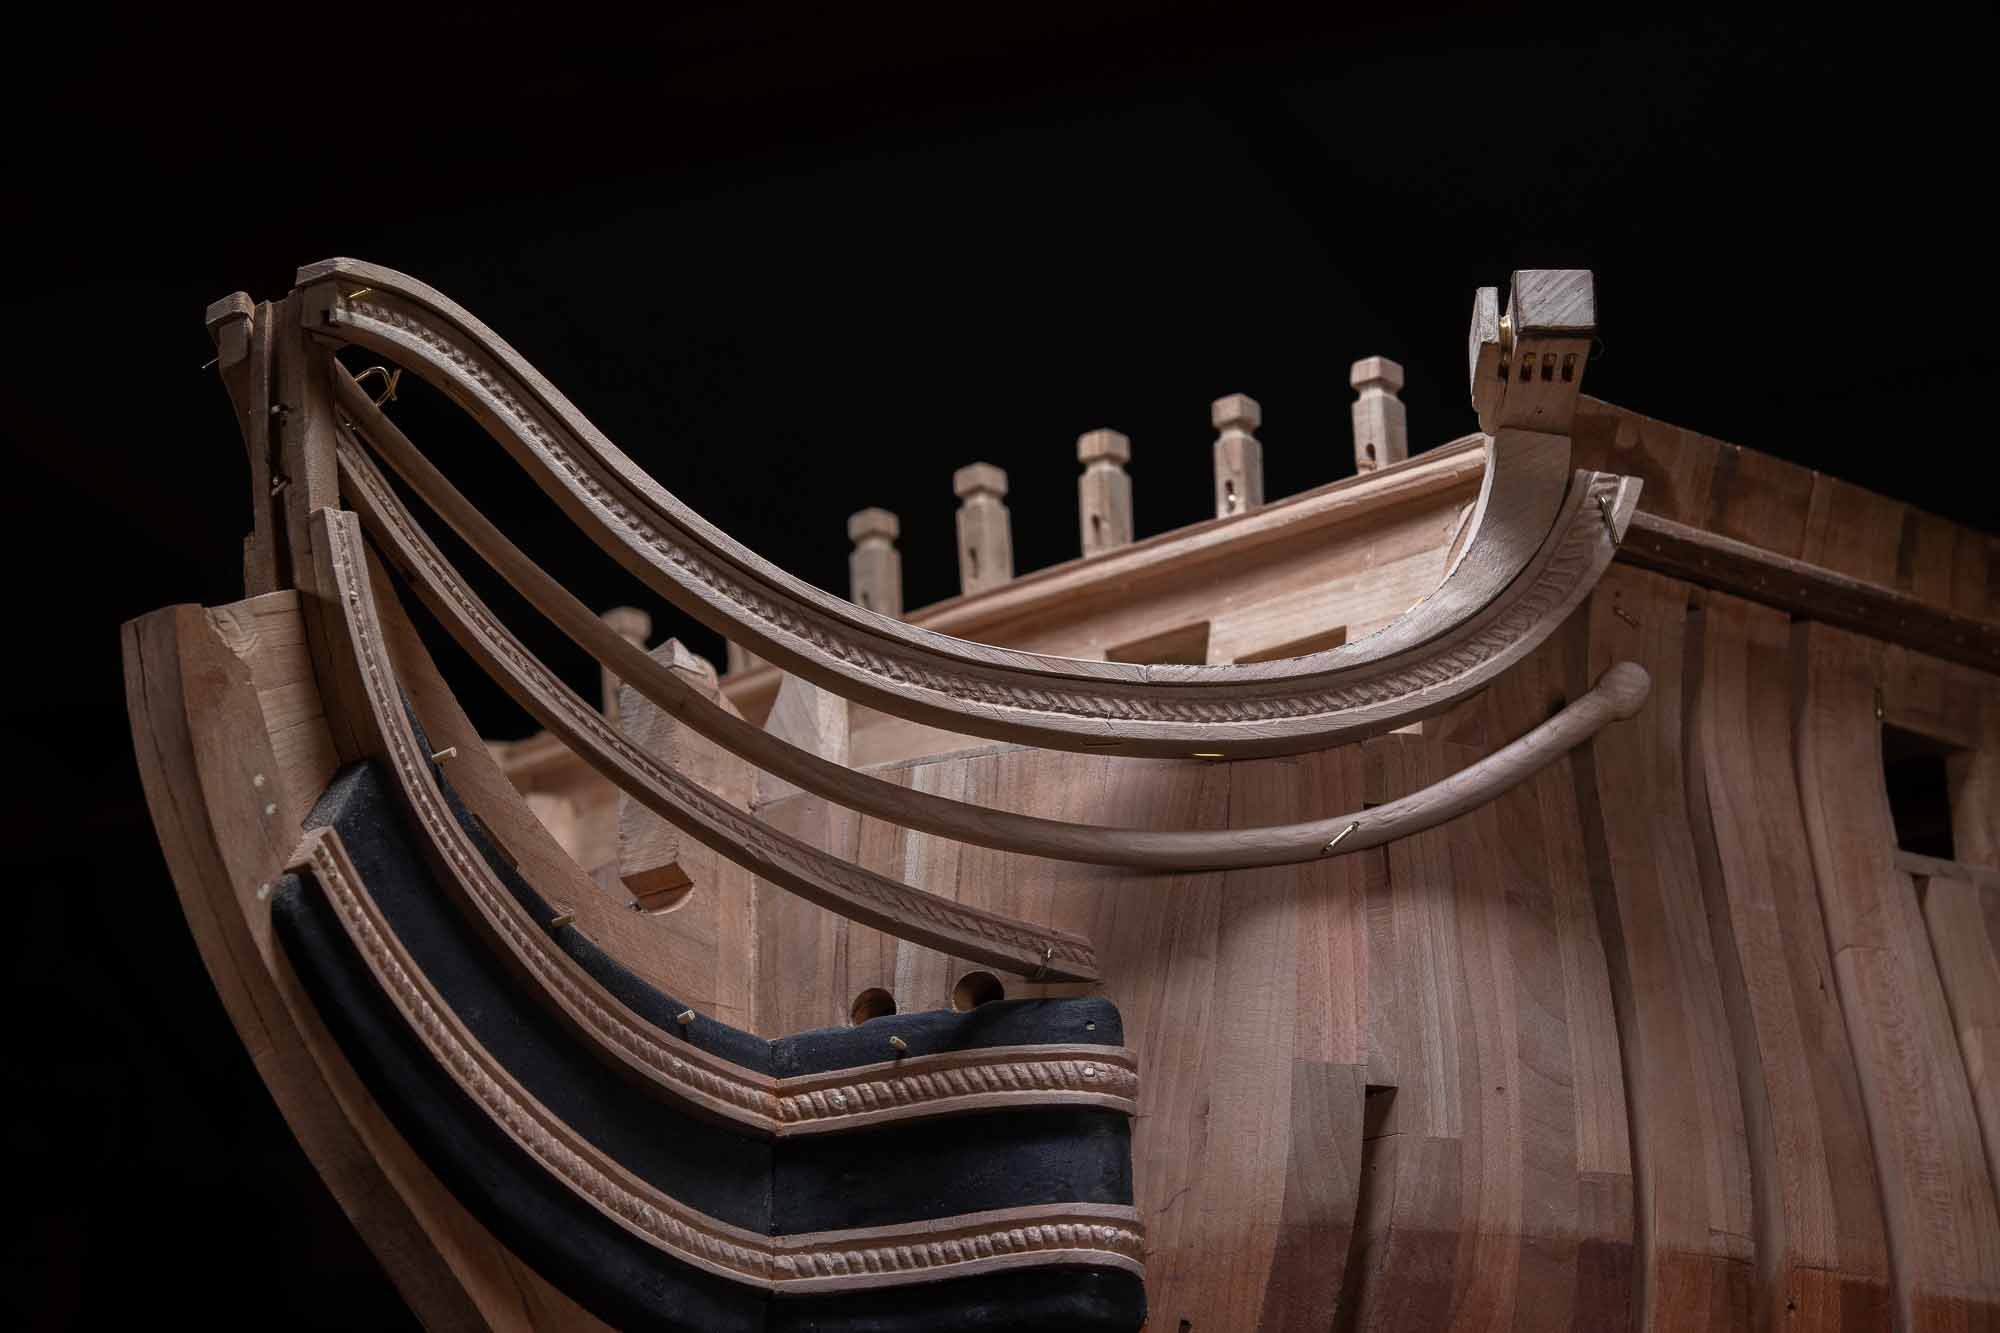
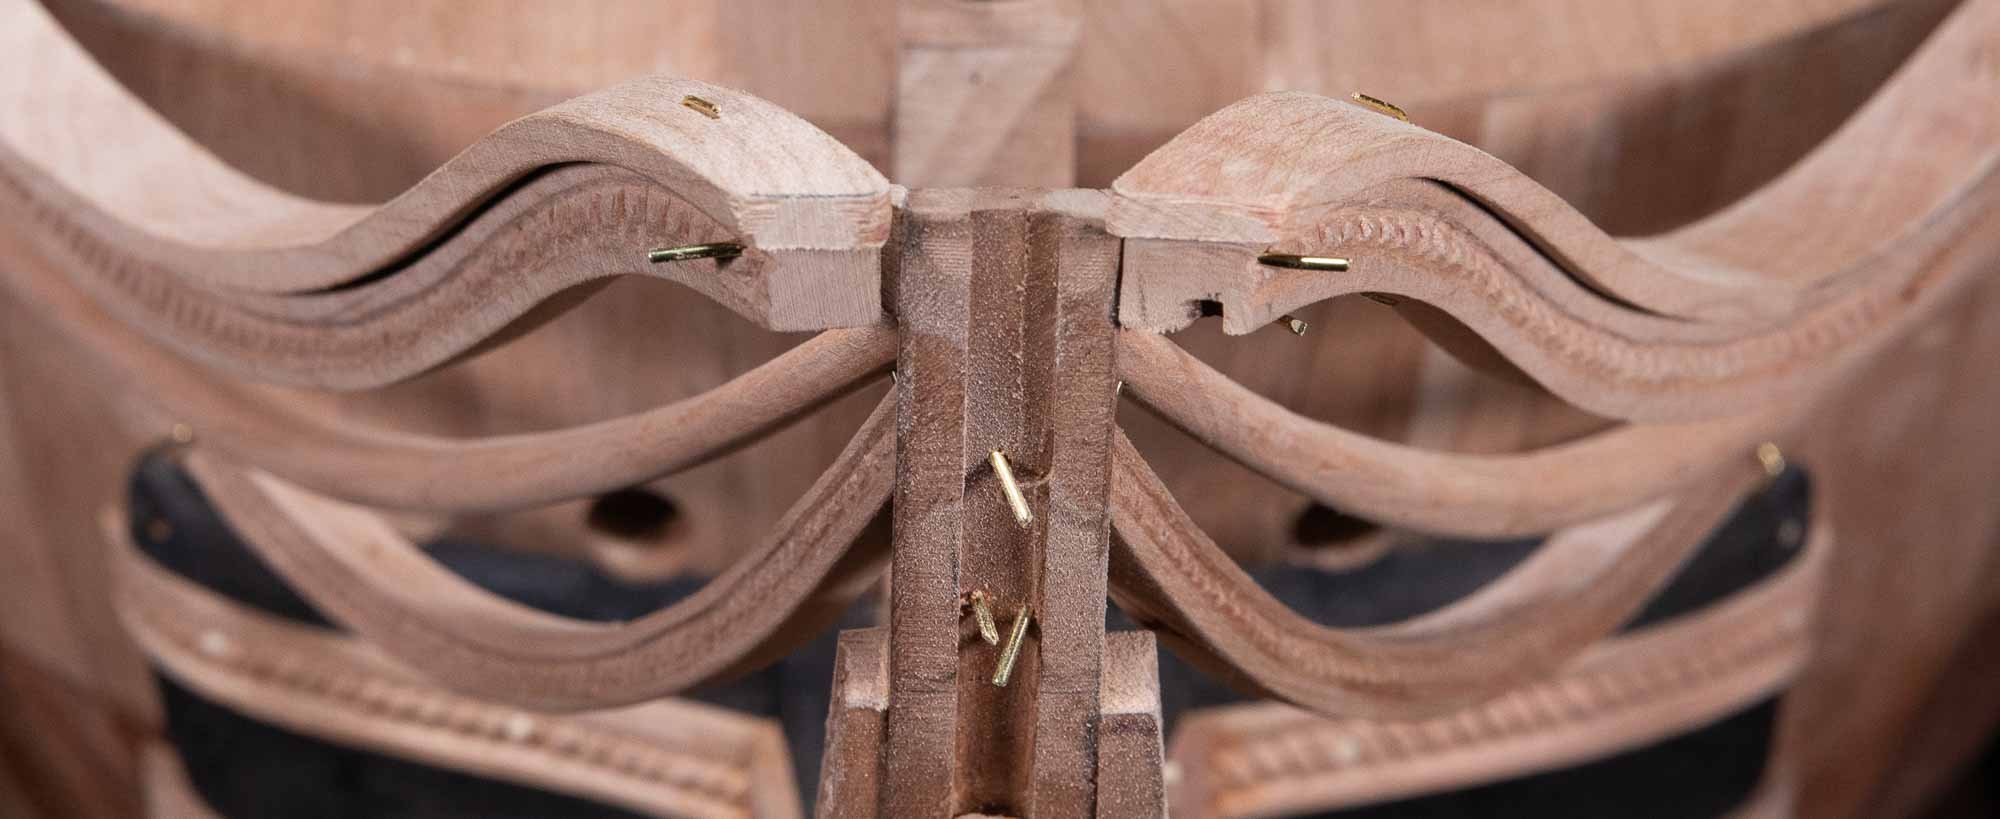
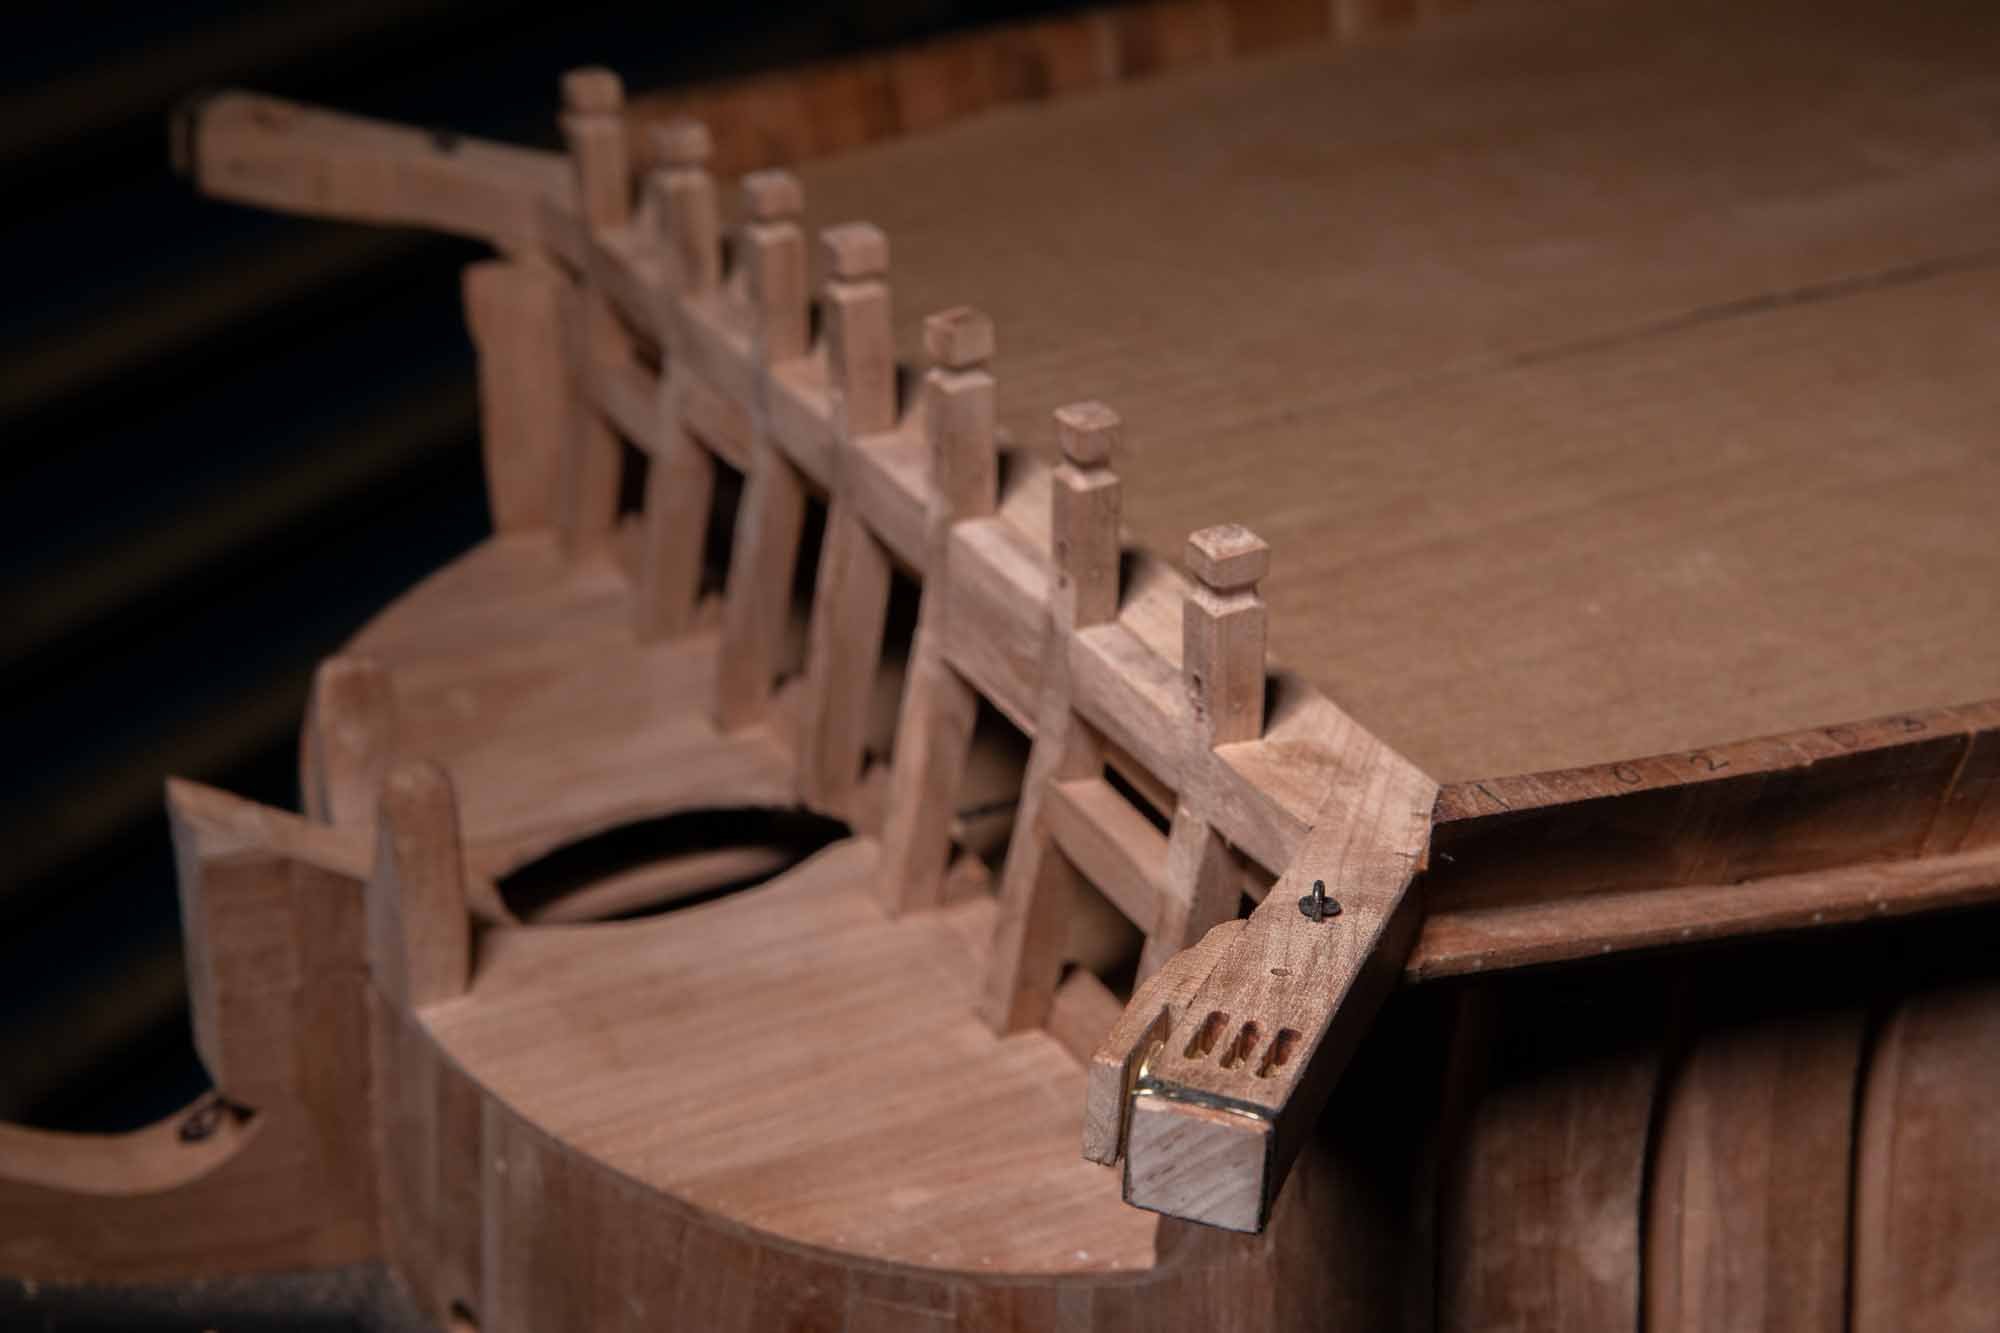
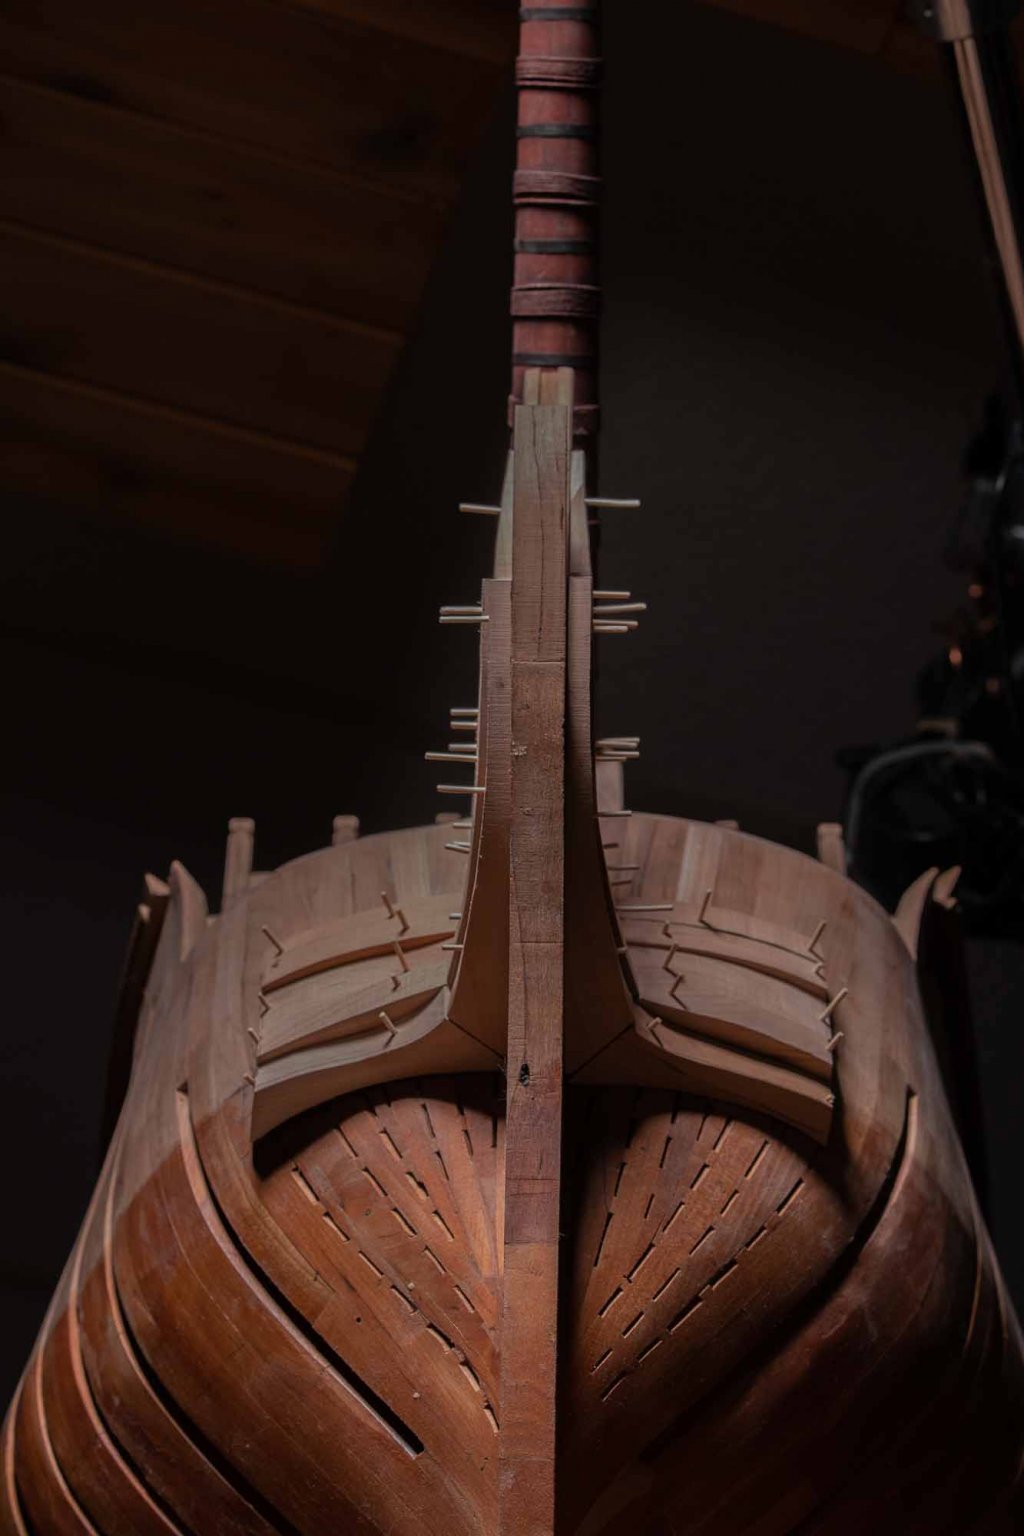
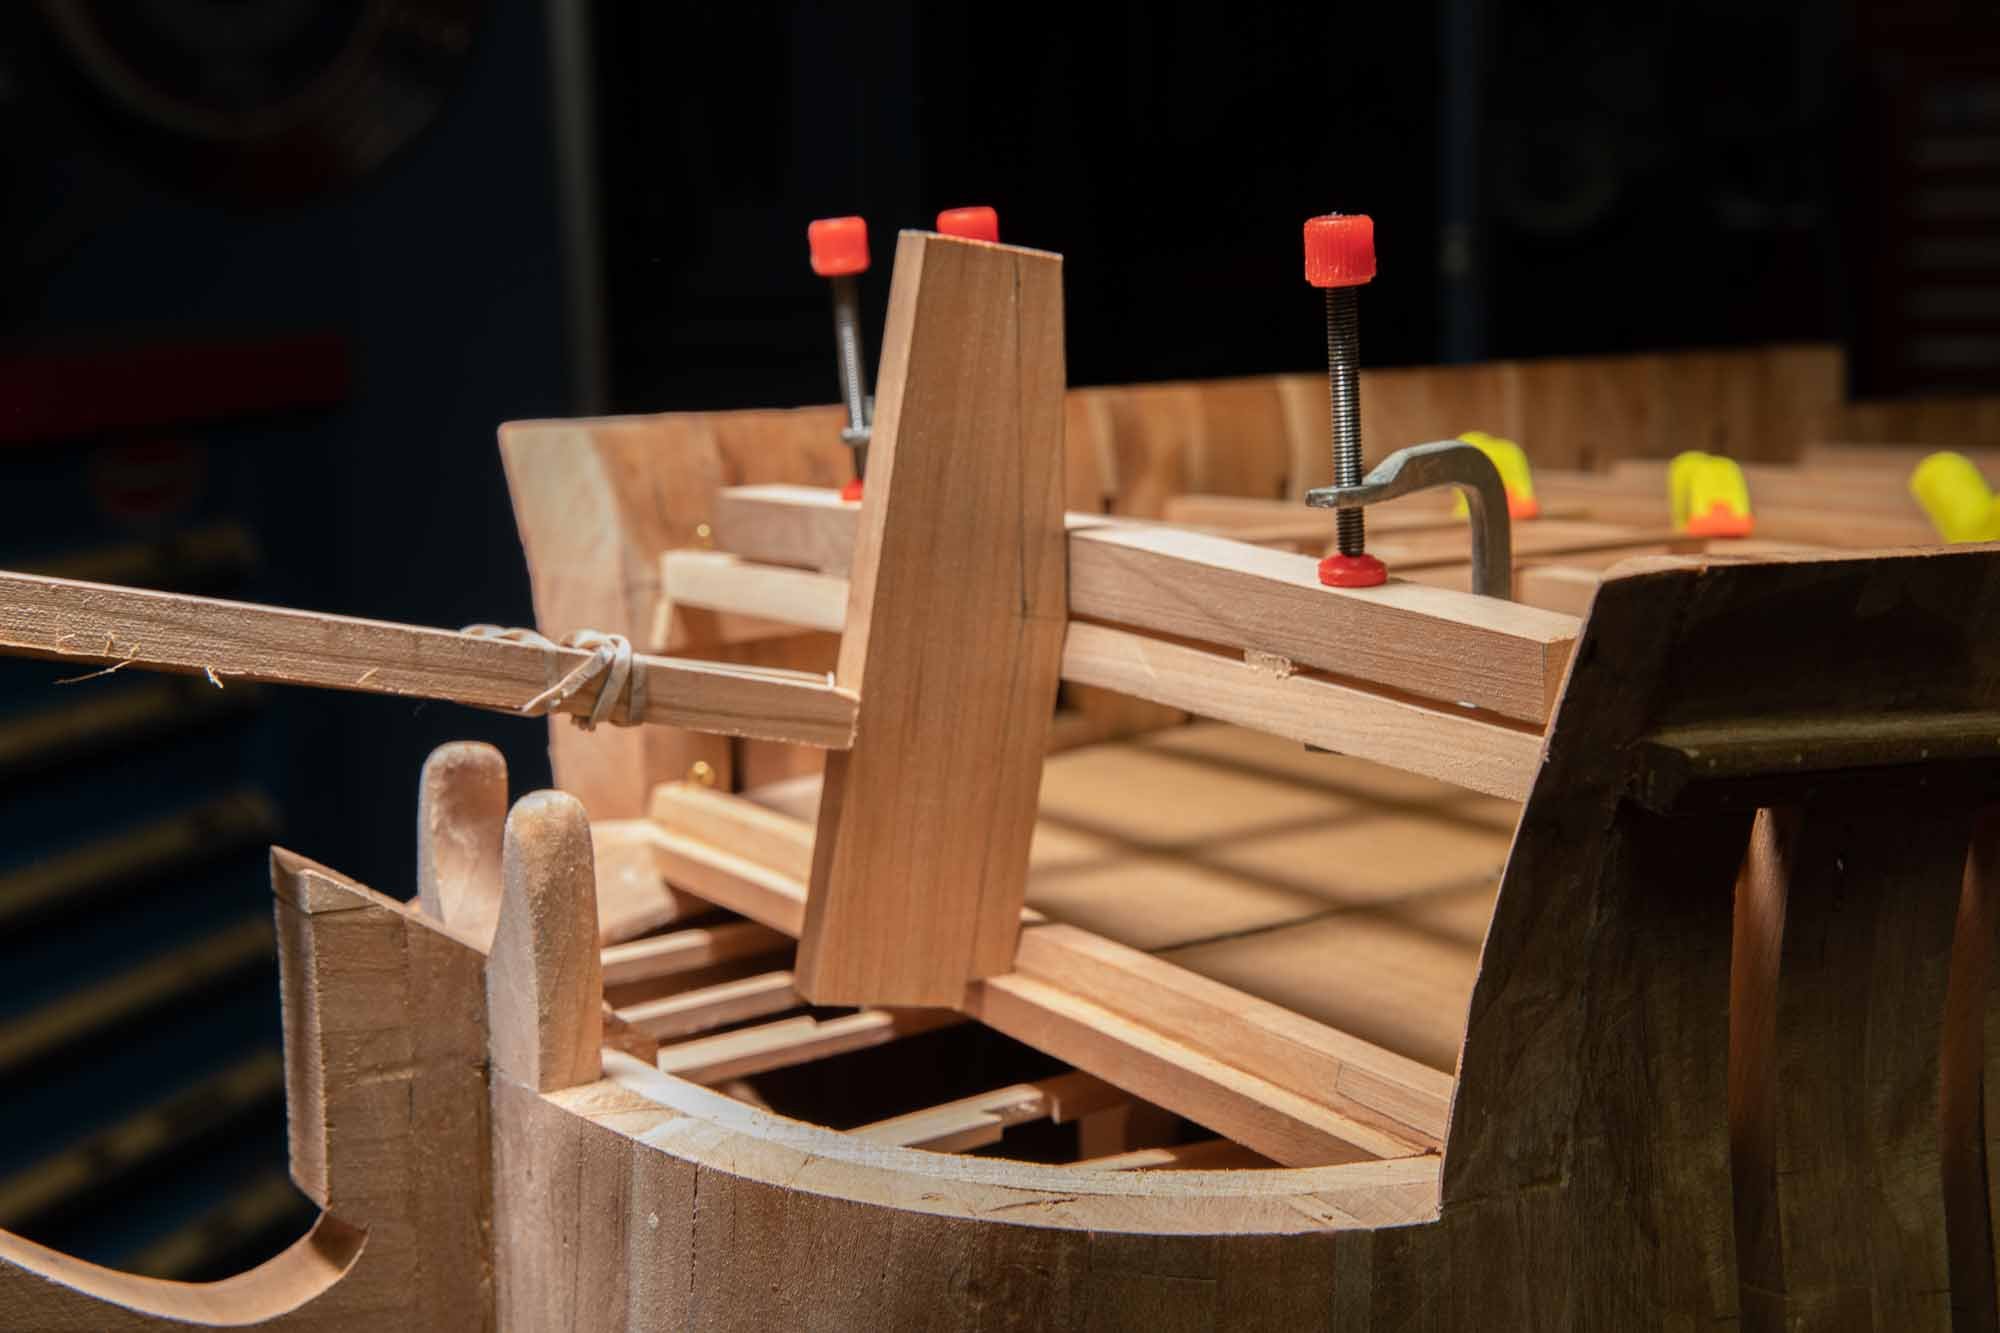
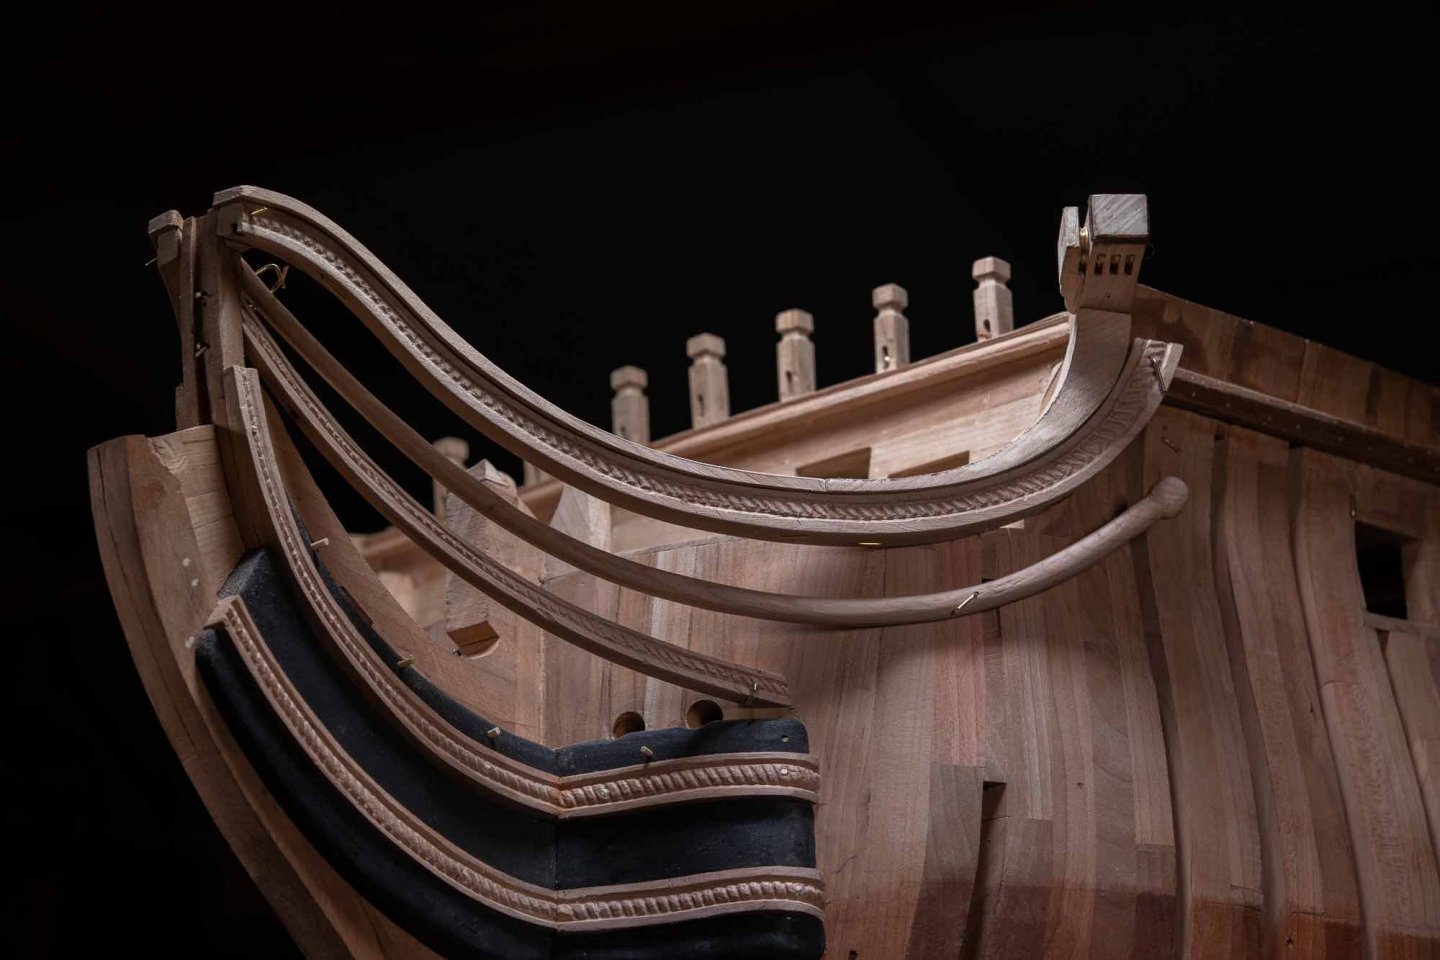
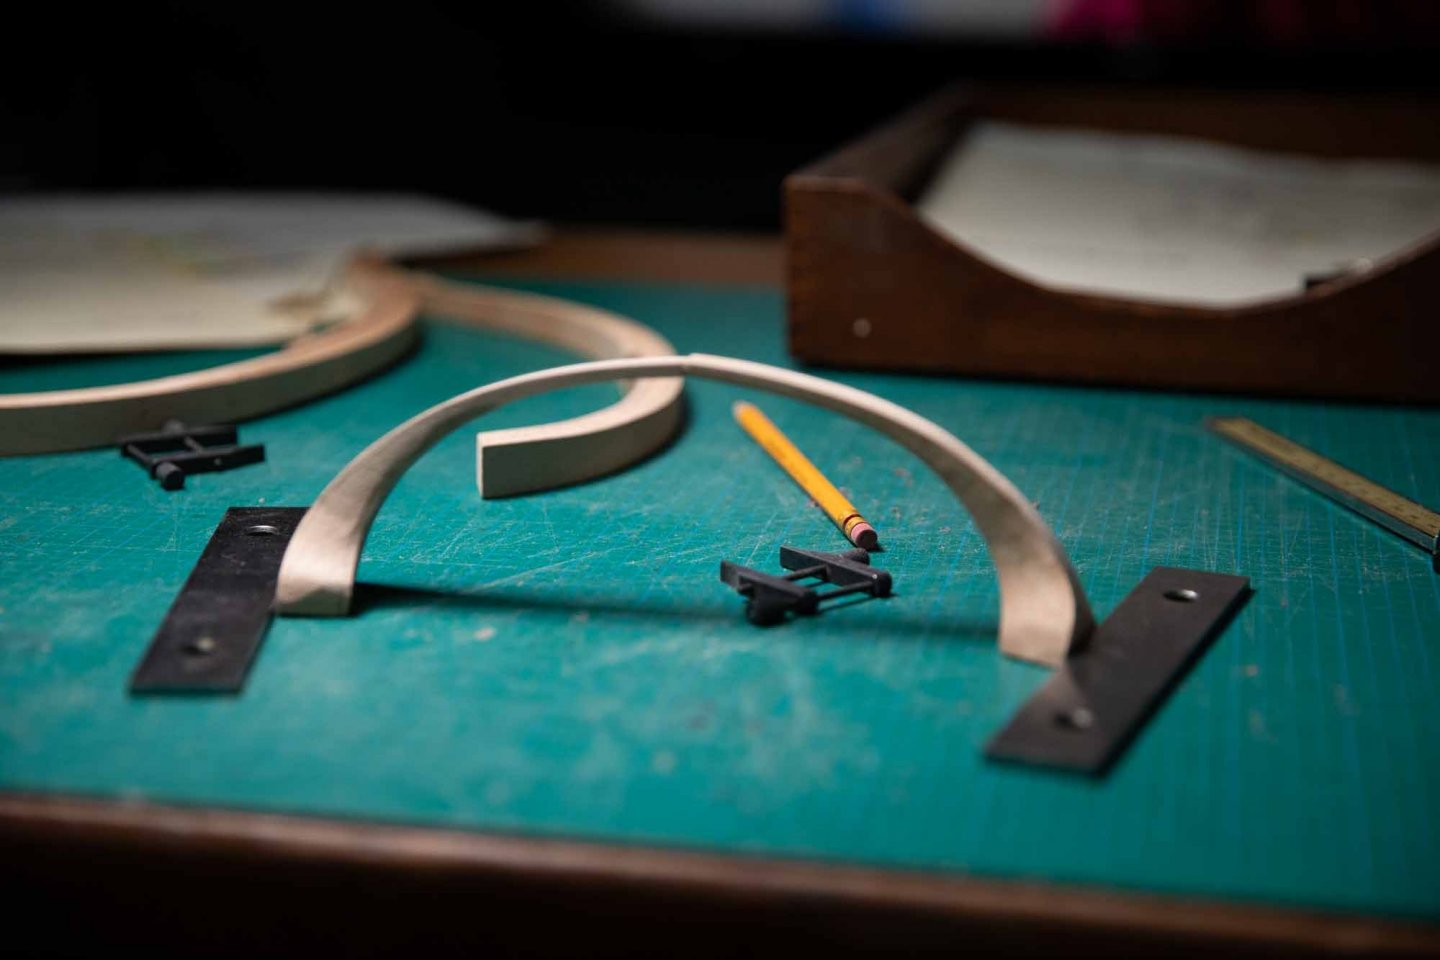
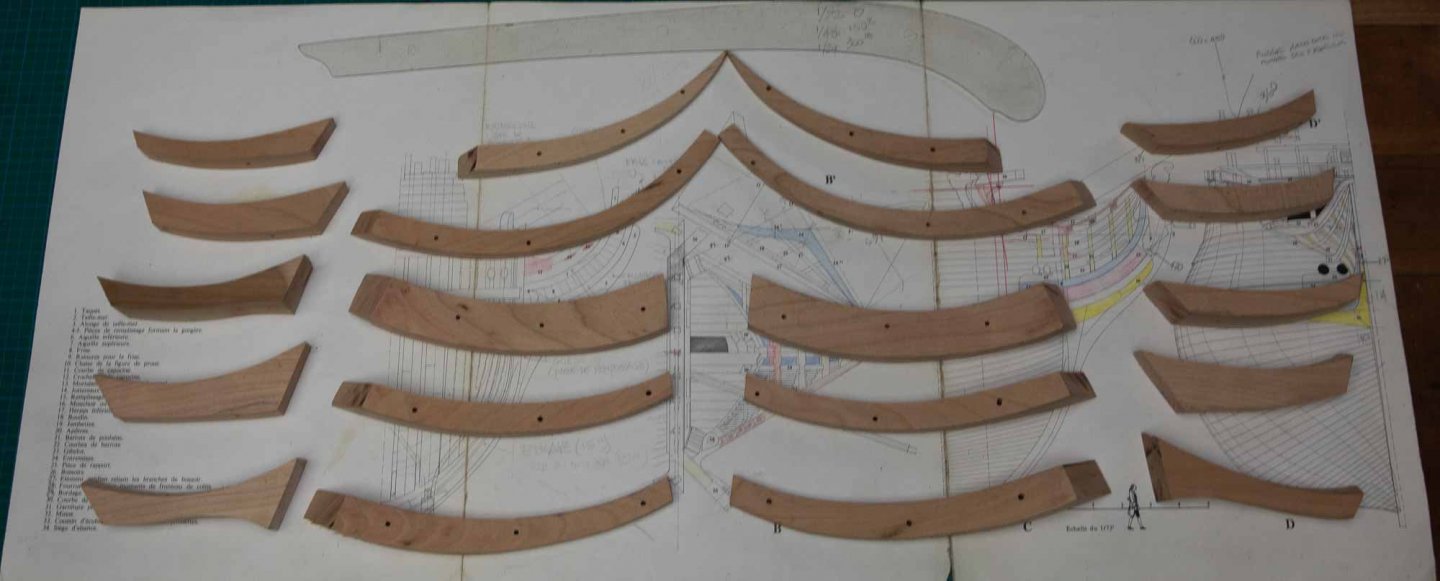
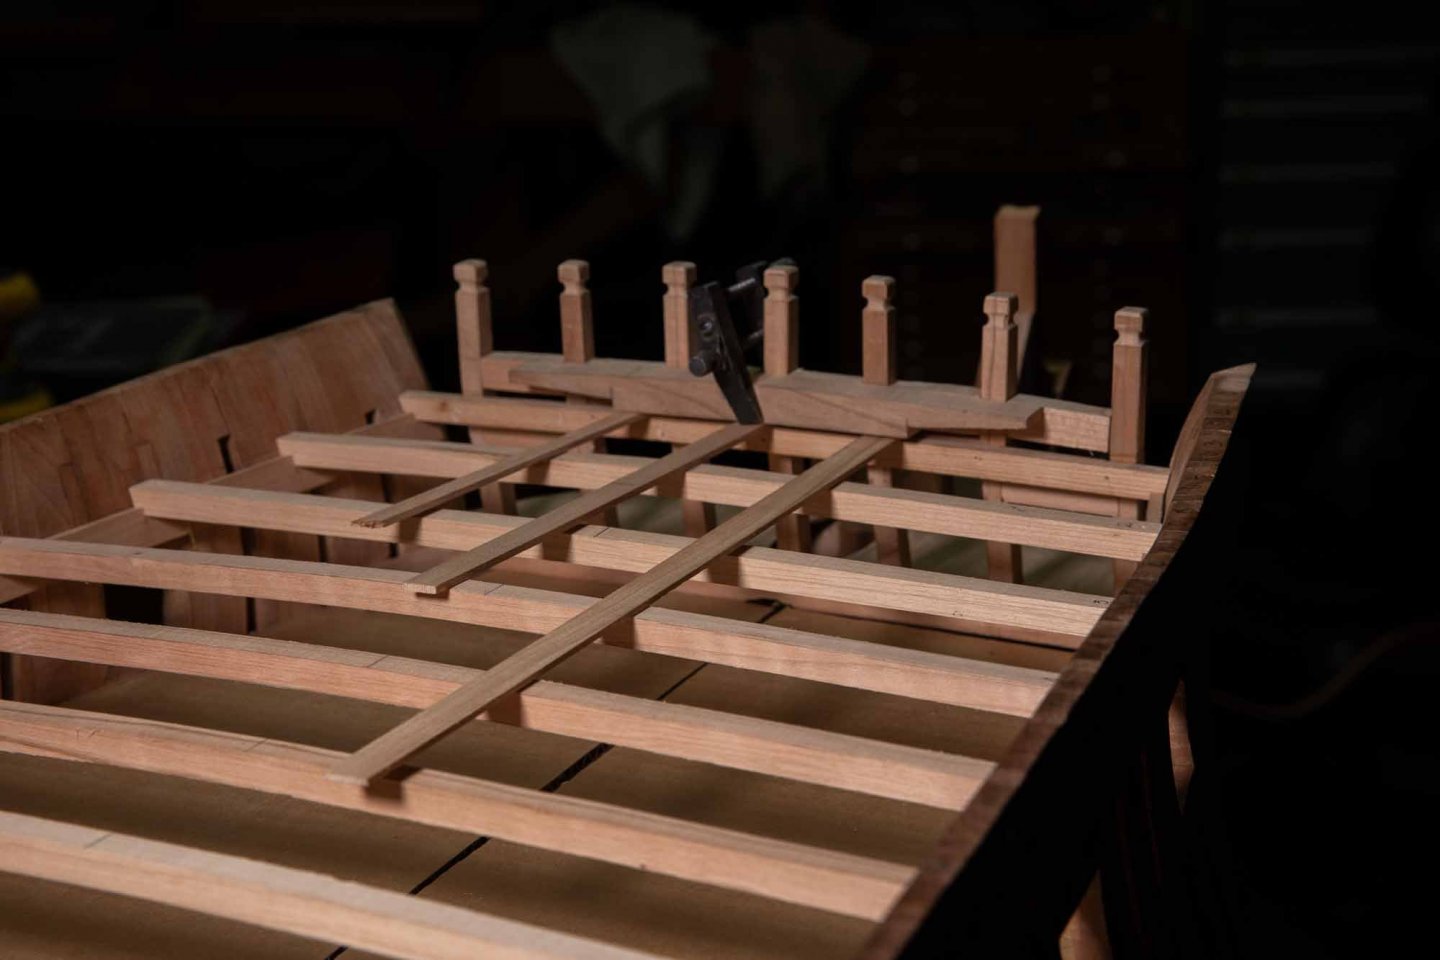
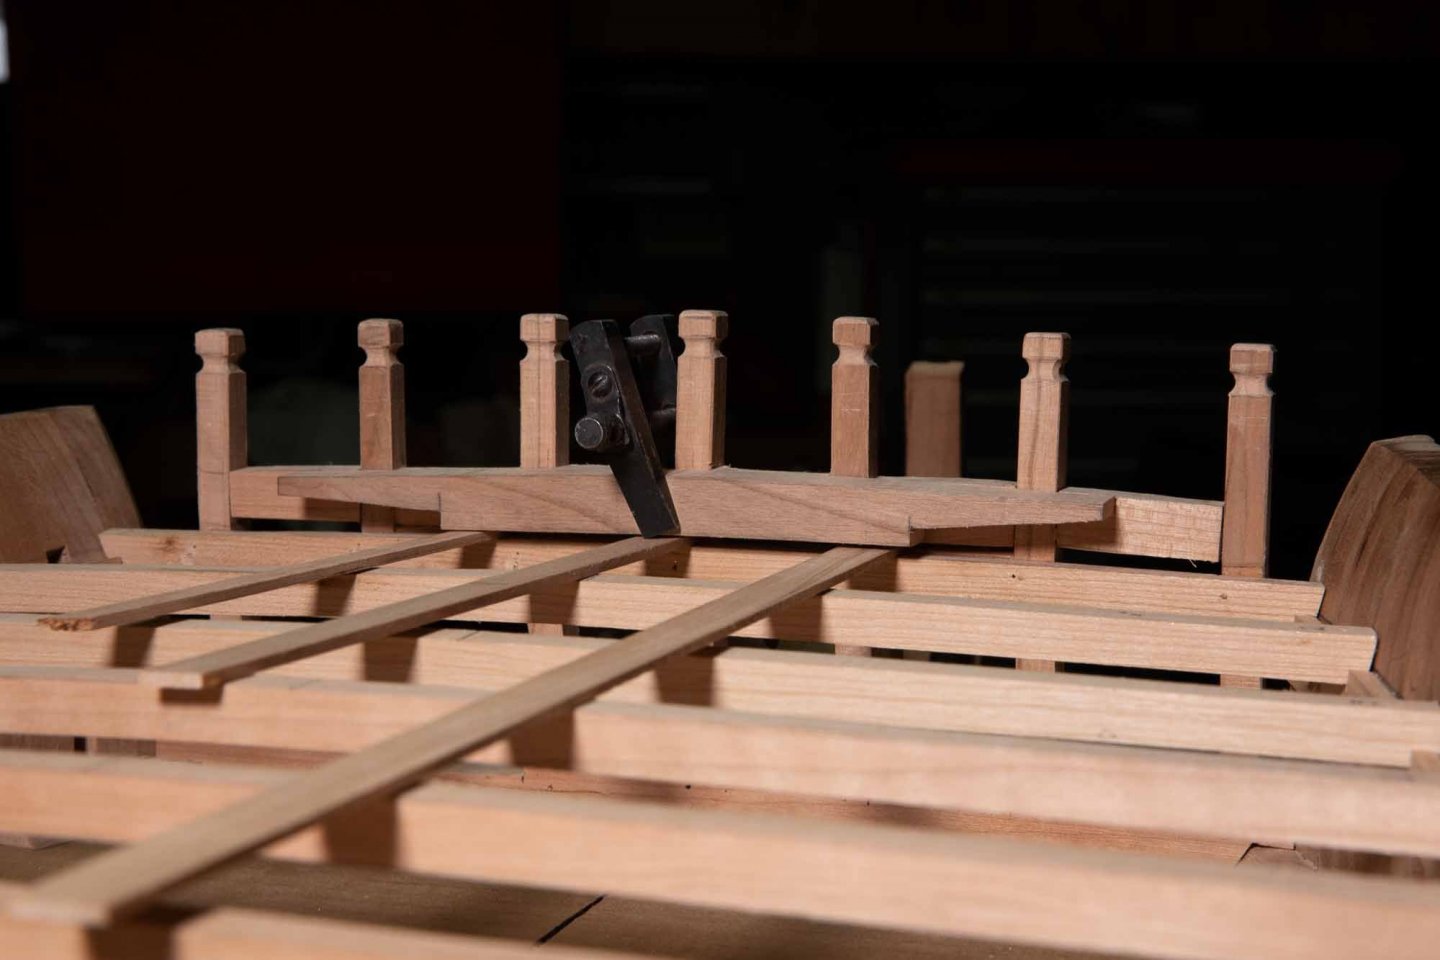
This week , I began to work on 10 pieces and I am still fitting these in relation to each other. If I would keep all the parts that I missed, I would have kept a lot this week. Often, a piece itself was good but in relation to another one, it was good. On the last photo, we can see my preferred curve that I use.

-
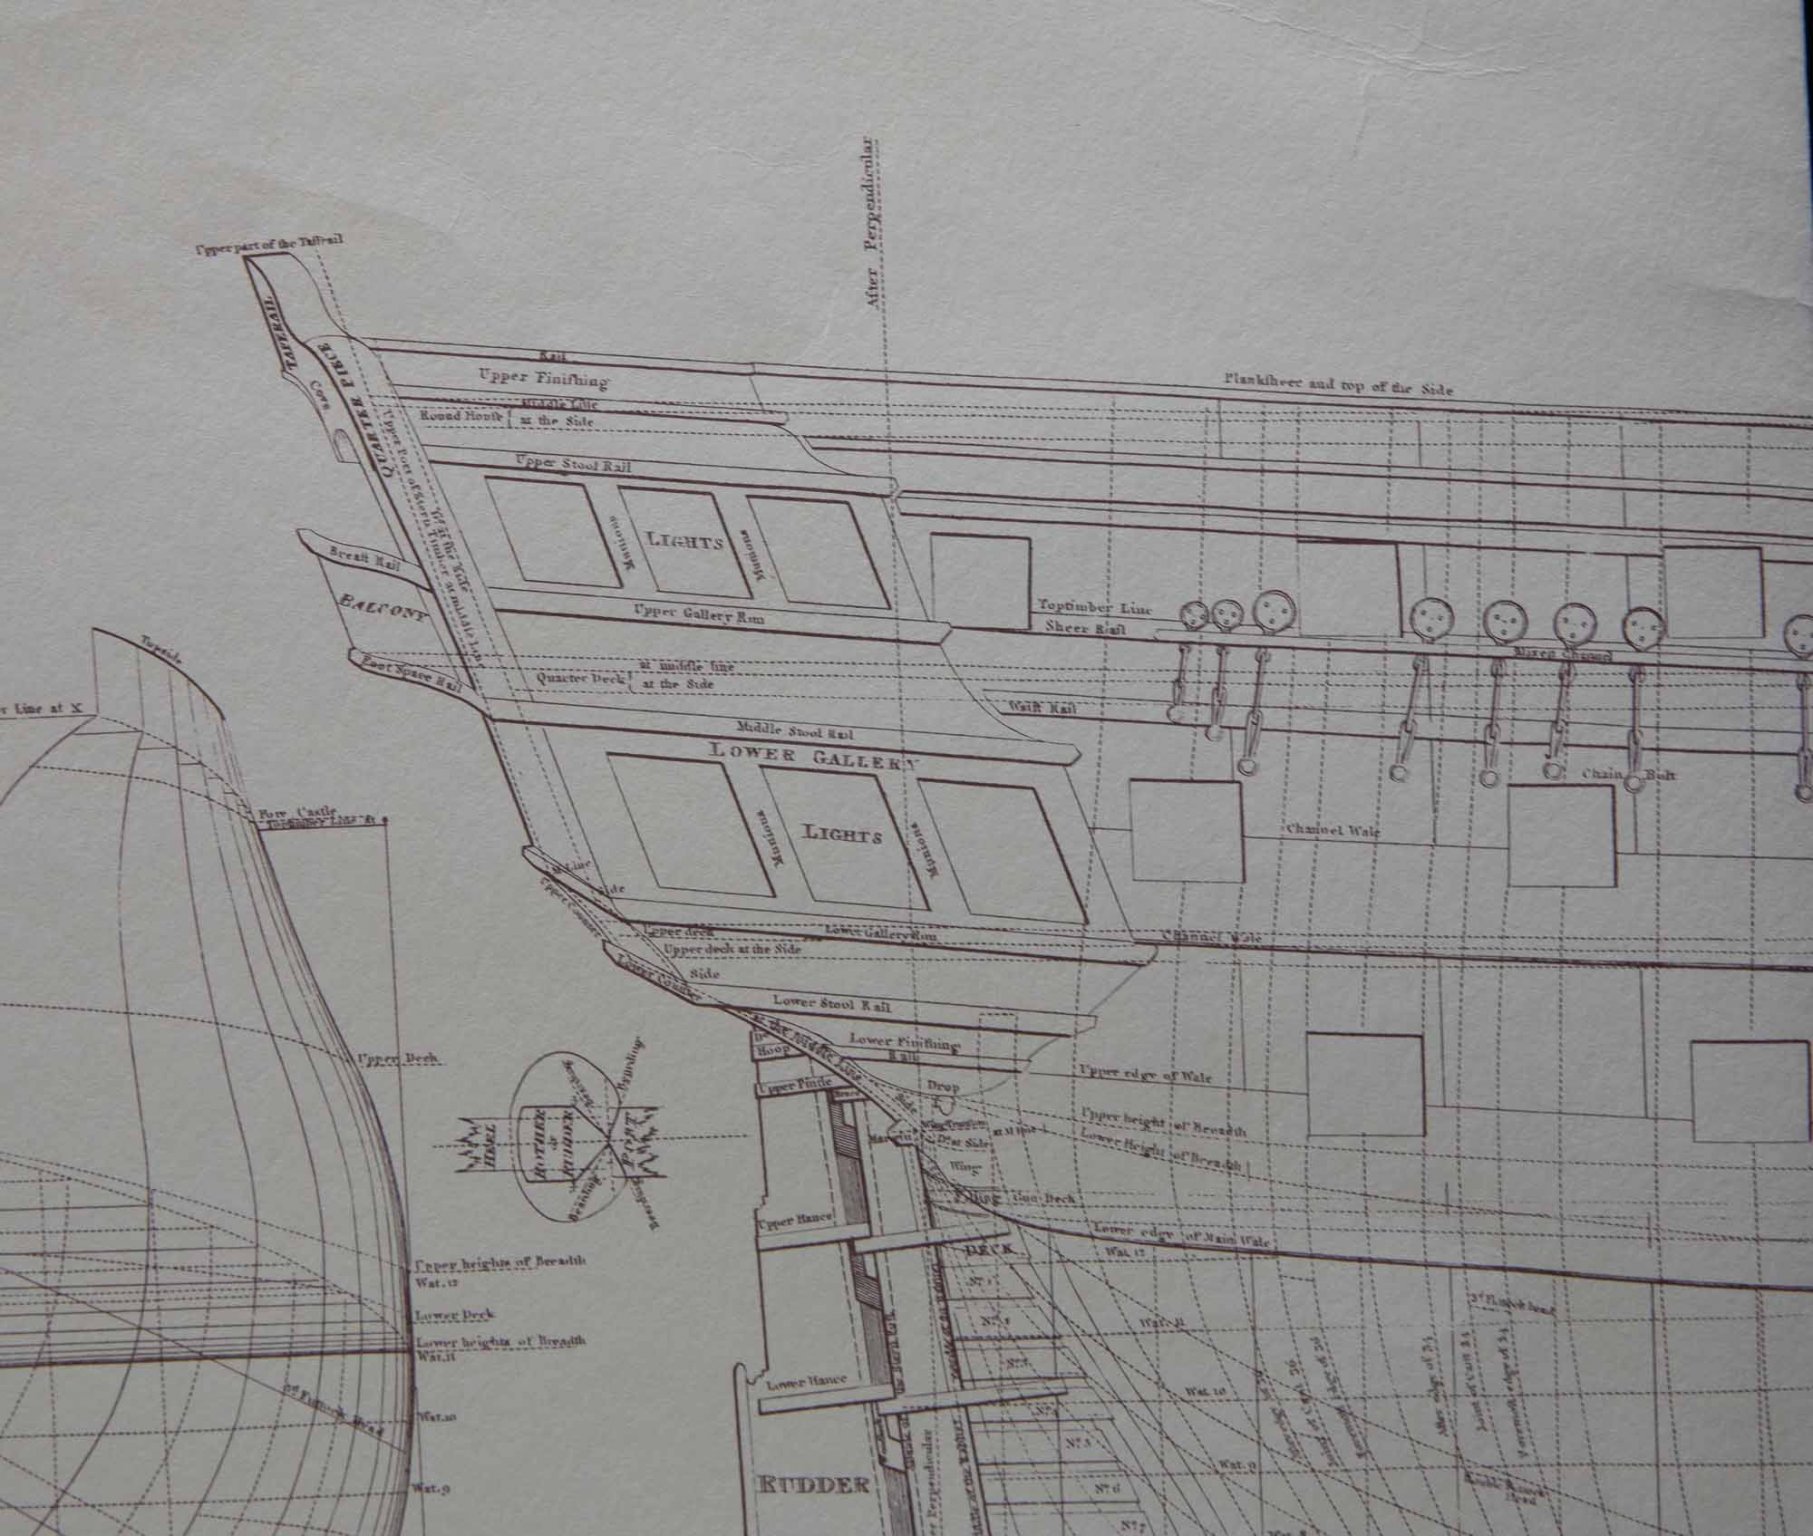
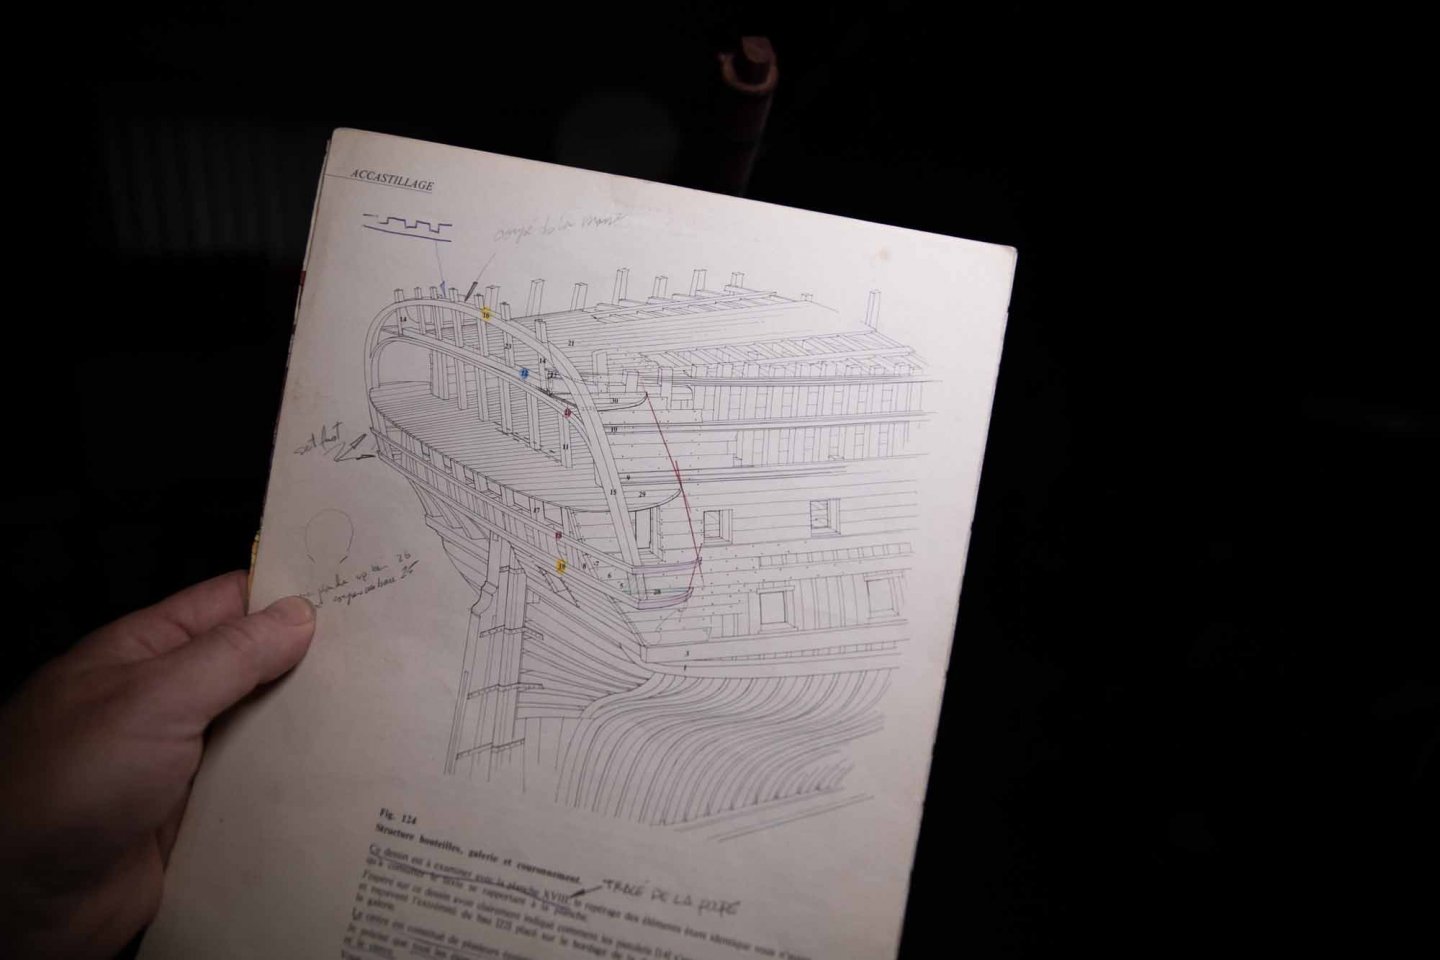
It is kind of strange that it is still to do for English ships. For the French ships' Boudriot filled that gap, almost 50 years ago. Just to give an example, few weeks ago, I was checking the plans for the knighthead. Not only, did he shows it, but he also shows it at different stages of its construction. There is a factor which is is very helpful that you should also consider, Assembly sequences which helps to visualize the angles to reach.

-
from Steel plates I do not know about the English practices, it is easier to build the French ones, everything aligns.
-
Hand Planing fixture
Gaetan Bordeleau replied to Bitao's topic in Modeling tools and Workshop Equipment
Hi hyw,

-
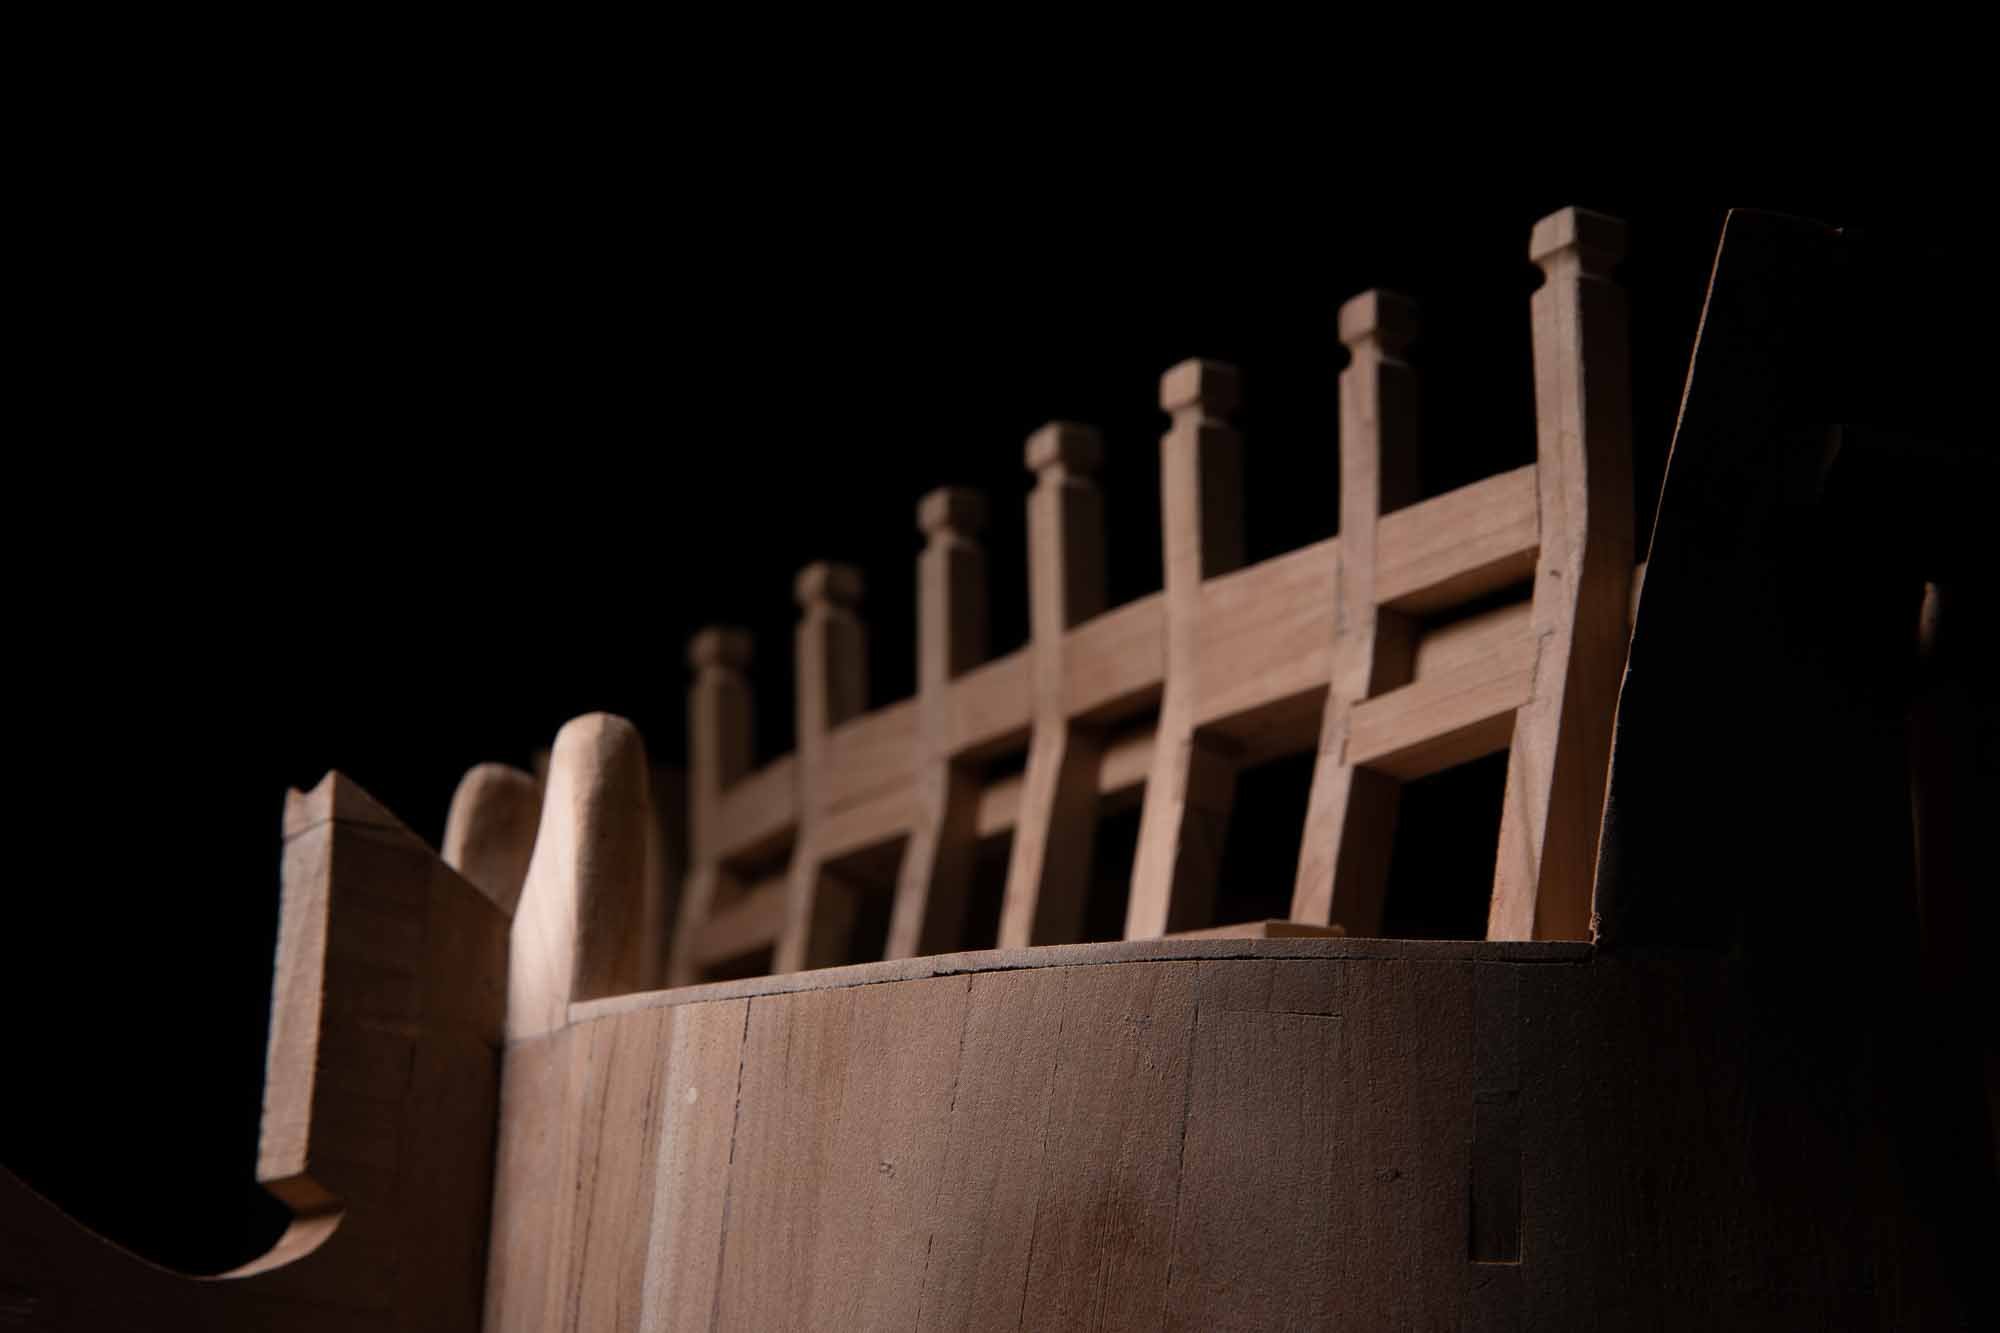
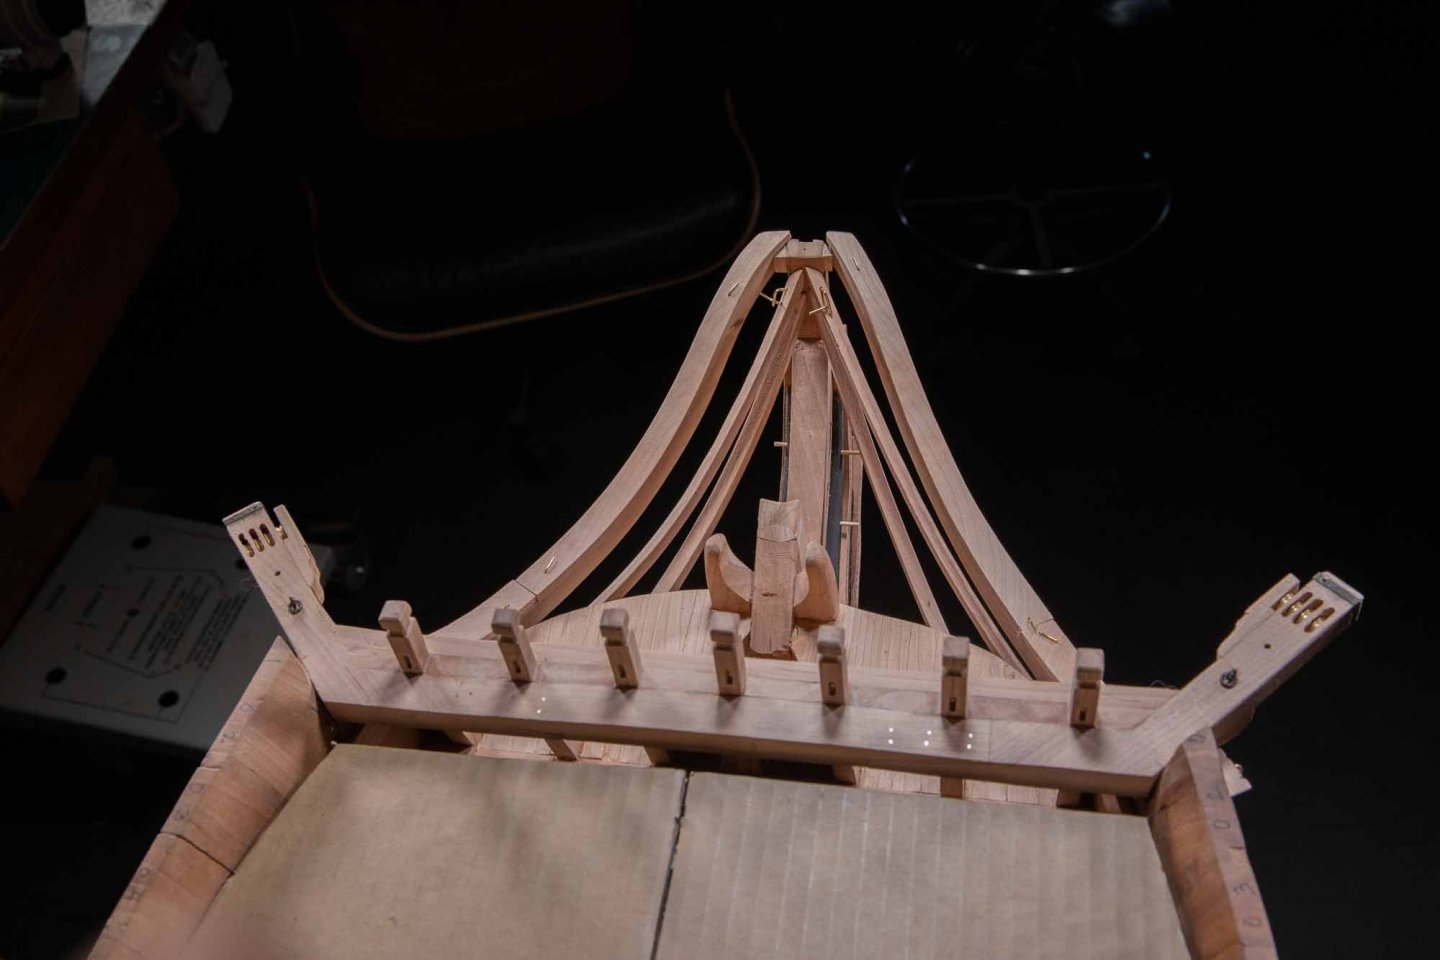
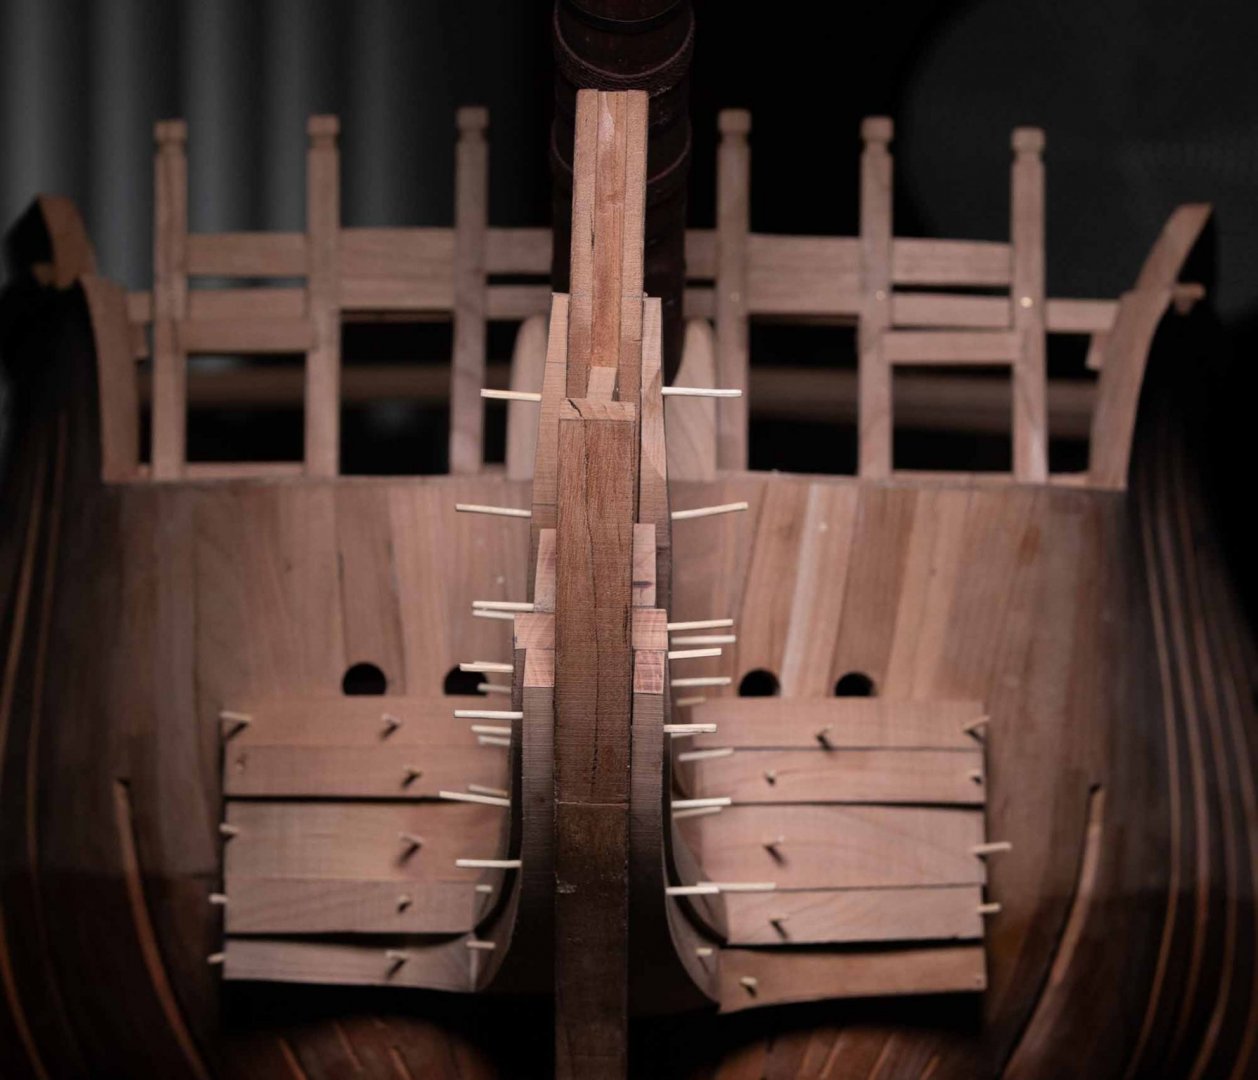
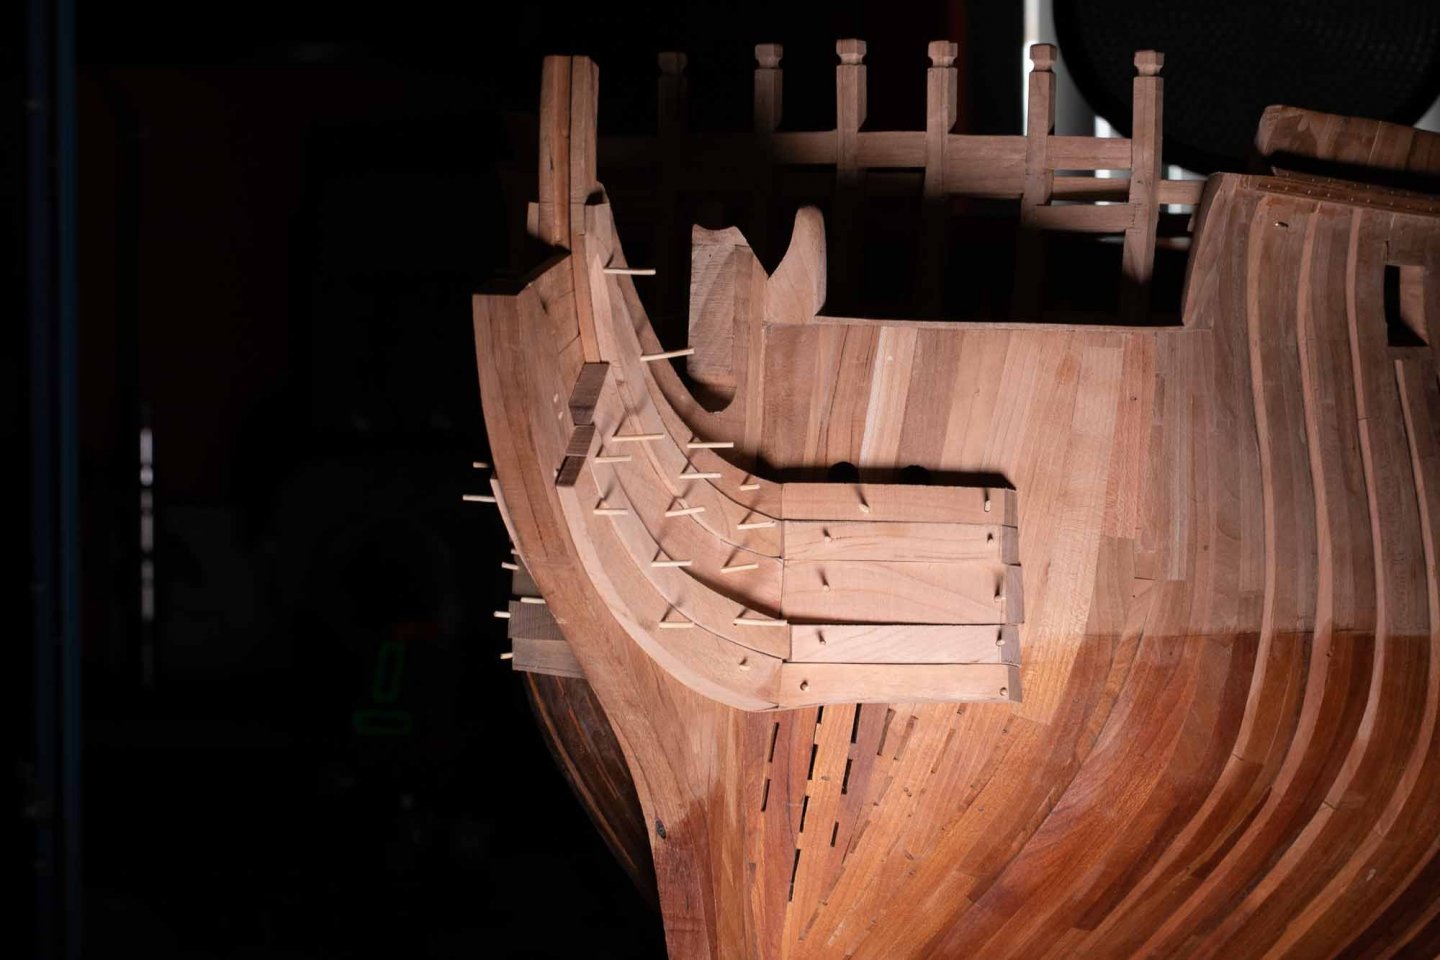
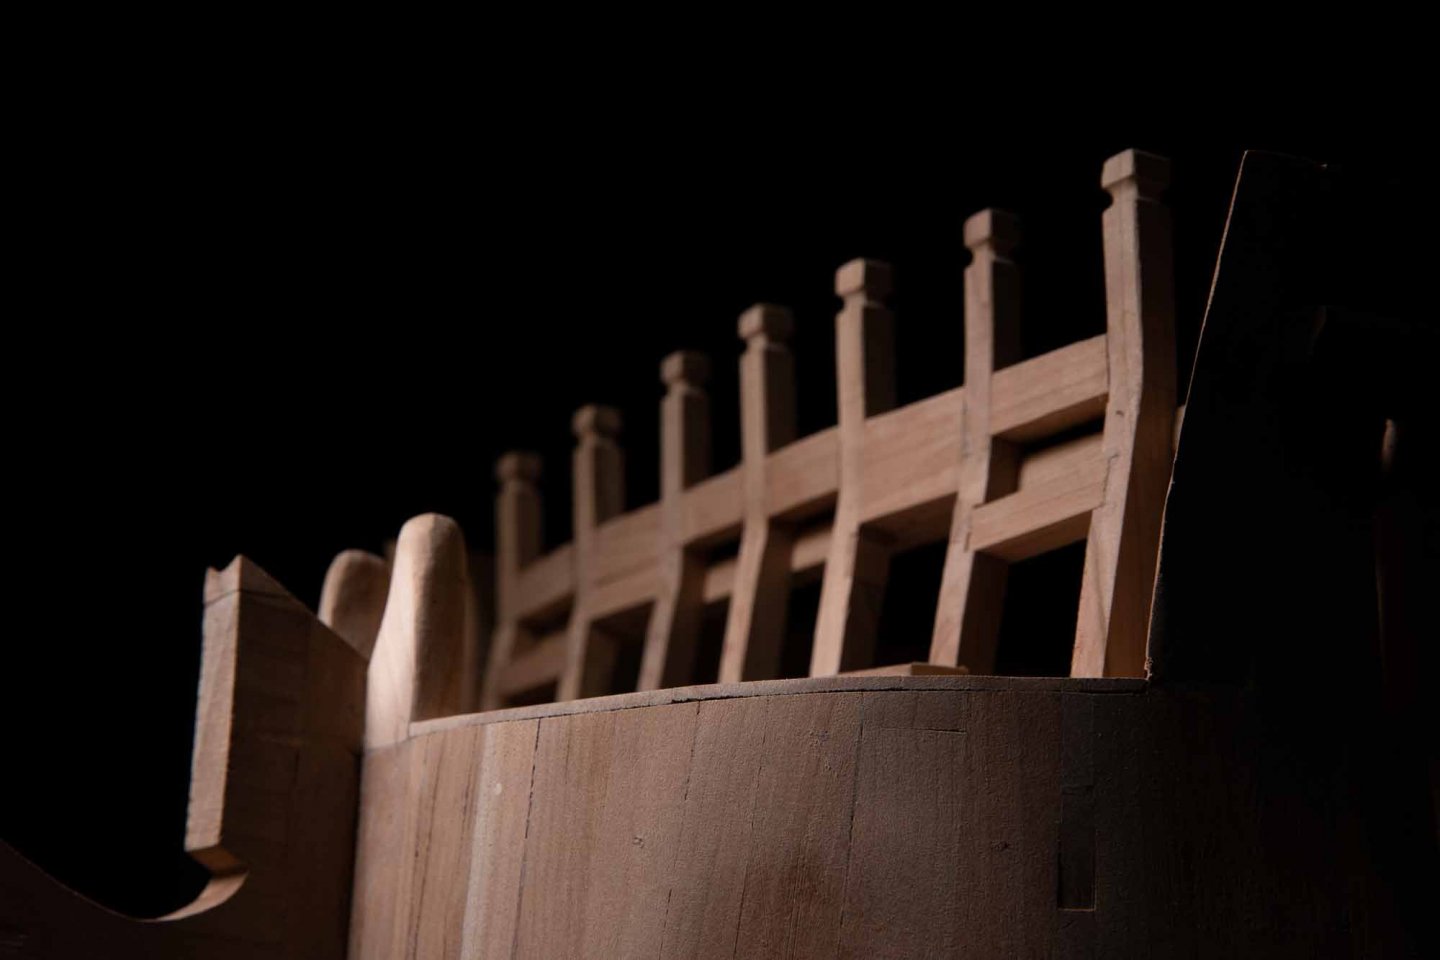
Post are shaped in angle. It is a lot of fitting to align everything. I planked the front balcony, 1 of the reasons, because it can be very tricky to go to get a small tool that felted in the bottom of the hold.


-
With all these books, be careful, it could be dangerous for you to buy an even bigger lathe, like a tool room lathe to build tools. But even if can turn a cube on a lathe, a milling machine is also necessary. I remember at the beginning of the learning on how to use a lathe... many hours of fun.
-
There are 2 main tools to use for metal; a lathe and a mill. These tools are expensive but even more expensive are the accessories because you need a lot of it. So it is easy to buy a lathe for $1000 and it is also easy to buy $1000 of tools. When you buy a lathe or a mill, you should double the price you want to spend, the other half being for the tools. By example a 3 jaw chuck with a precision of ,001 would cost $100 and if you want a 3 jaw chuck with a higher precision you will have to add another 0 to the price. That was a big reason why I did make many accessories myself, because I did not have the money to buy these new. On the blue flange, I built all what you see and I built many others. On the previous page of this log, I showed few examples of the books I did read to learn machining and at the same time building tools.
-
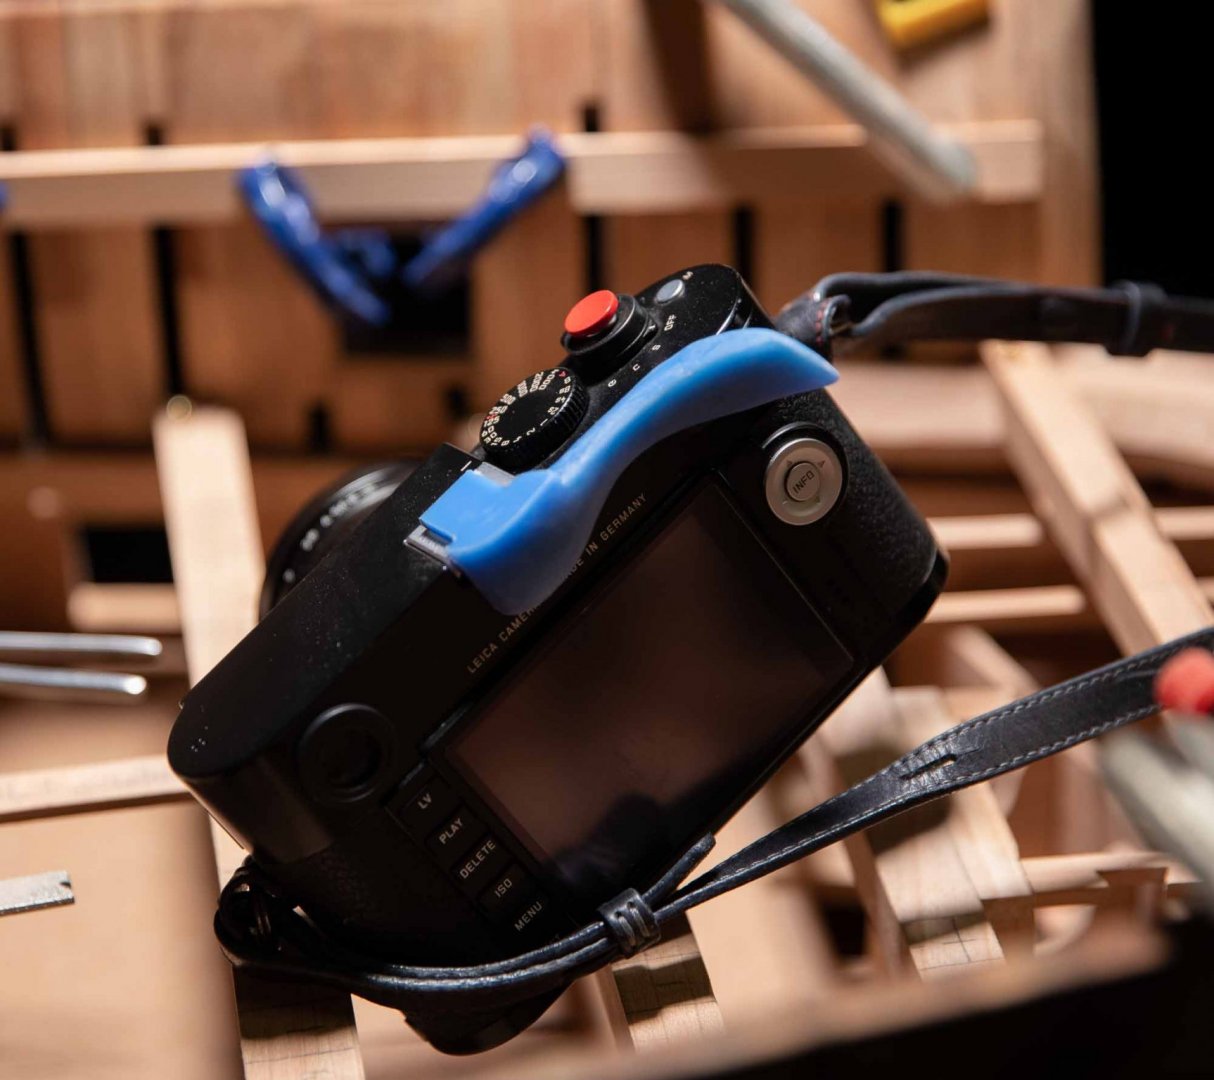
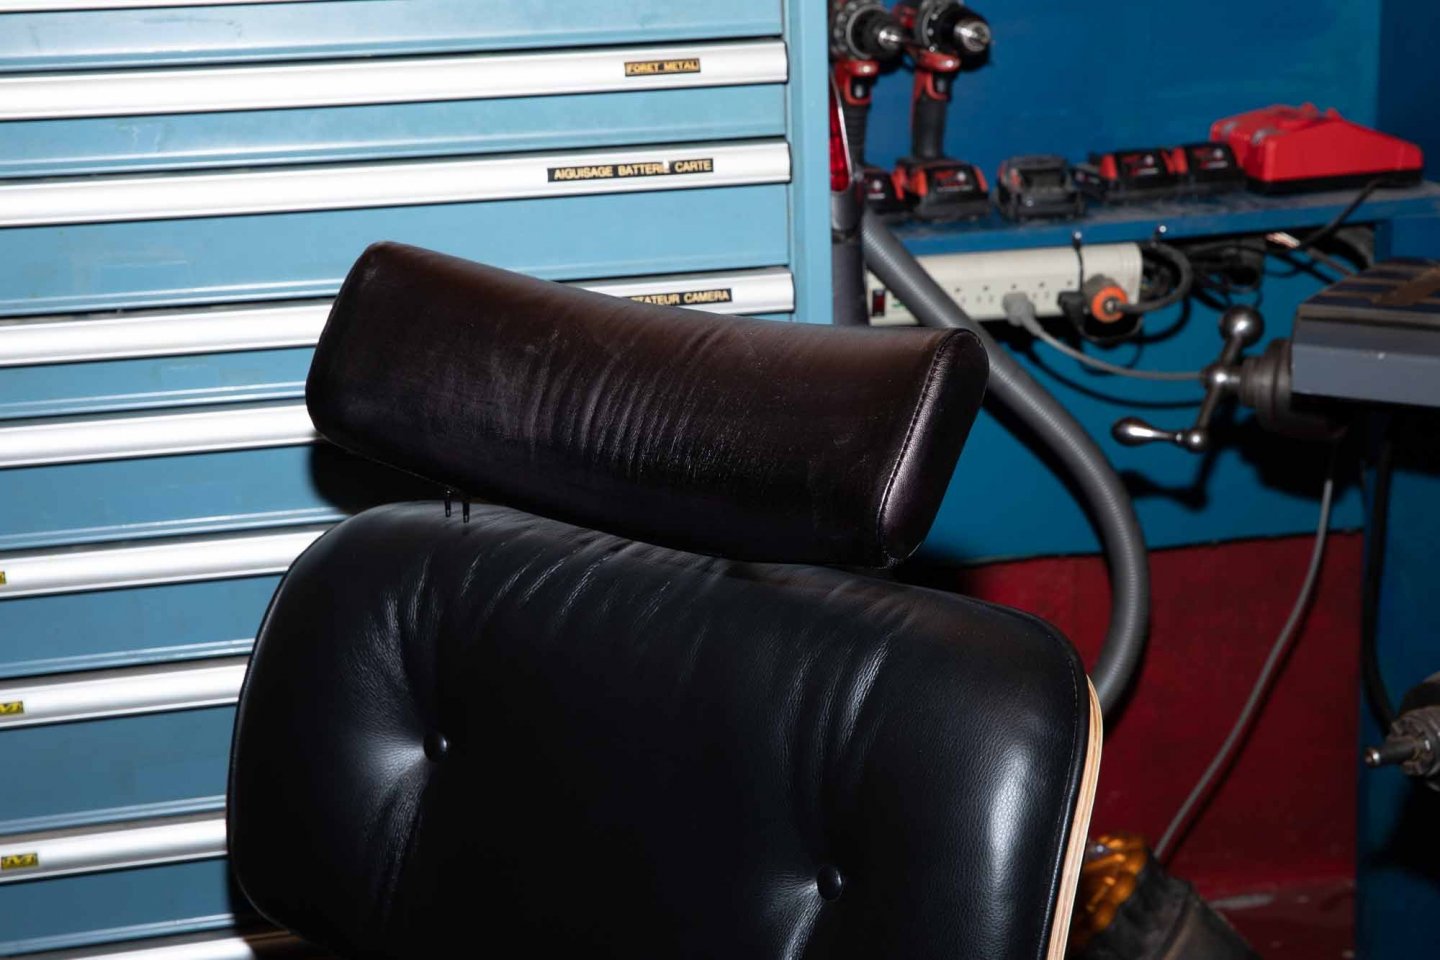
I did some furniture for fun. If I would do others, I would like to do lounge chairs. There are a lot of other things I would like to do like life size carvings. In fact, I have always like to work with wood. My father was building houses so I had access to all the tools and I did try most of them. The strangest accessory I remember he had is rosin but I do not remember what he used it. I would have loved to do the job you had when you were young. Working with wood is very satisfying. Working with metals is a very different world. It is more a dirty job. Hands are never clean. Machining is a long precision process. I did fabricate tools for the lathe and the mill while 10 years. The idea was to build tools to build more complex tool to build even more complex tools and it was going in a spiral like this. About 10 years ago, after building tools for about 10 years, I stopped because I had no more goals of building tools, even if there was still a long way to go. Then, I came back to model ship building. I put a photo as example. Occasionally, I like to mill some tools. But now, I rarely use steel, when metal is required, I prefer aluminium and when it possible I prefer to use plastic. Here s what i did this week: a plastic thumb to help to hold the camera and I did adapt an existing head rest to a lounge chair. The most difficult part was that the leather was red and I changed it to black. It is the first time I tried to change the leather color.

-
I would have loved to build furniture for the king. On the other side, I sold few ones. All the buyers had a similar point, money was no object.
-
Let me tell you few stories: I told a curator museum in Quebec province that I had models ships and he answered this: Before making a decision about these models, I would need some historical and documentary information concerning their origin, the name of the model maker, the place where they are kept, in what context they were made, etc. Also, can I also know the nature of your intention concerning these objects, donation, sale, or other? If I answered I give you these "objects". he answered I take everything. If I answered these "objects are for sale, he would not bother to answer. So, he did not even bother to answer Here is another one with a man who had a museum in Ontario, he came to see the model ships at home. He has many ship models in his collection with mainly 2 sources: models made in l' île Maurice and models given by peoples. His sales key was something like: Do you want your artist work to survive? To him I answered: If you buy at least one, I will give you as many models as you want. How many model did he has now, from me? Finally, a last one, one of my friend, also model maker gave in consignment model ship he made. He sold 3. The buyer said that for the first models he cannot give you very much because your name has no value, but he will give you more when you will be well known. He sold for him a model for $75,000 US and how much did he gave to the builder? 1/3 Seeing that, I guess that the name of the man who sold the model ship for my friend has a lot of value! You just need a 8 feet long wall at least.
-
The same problem arrived twice before and there is no separate room free. This is the third 1/24 model ship and when it will be finish, for the third time, I do not know where it will go. I did not have a separate room and I do not have a separate room now. So for this one, I have no clue where It will go. There is one, behind a movie screen and the other one in the basement. The pleasure is in the building process. Ounce the model ship is completed, there is only one thing to do; build another one. In a way, it could go to the garbage and I would not mind. The pleasure is in the building process and what happens to the model, after, is not really important, but having fun to cut curves, it is important.