HOLIDAY DONATION DRIVE - SUPPORT MSW - DO YOUR PART TO KEEP THIS GREAT FORUM GOING! (Only 27 donations so far out of 49,000 members - C'mon guys!)
×


Gaetan Bordeleau
-
Posts
1,307 -
Joined
-
Last visited
Content Type
Profiles
Forums
Gallery
Events
Everything posted by Gaetan Bordeleau
-
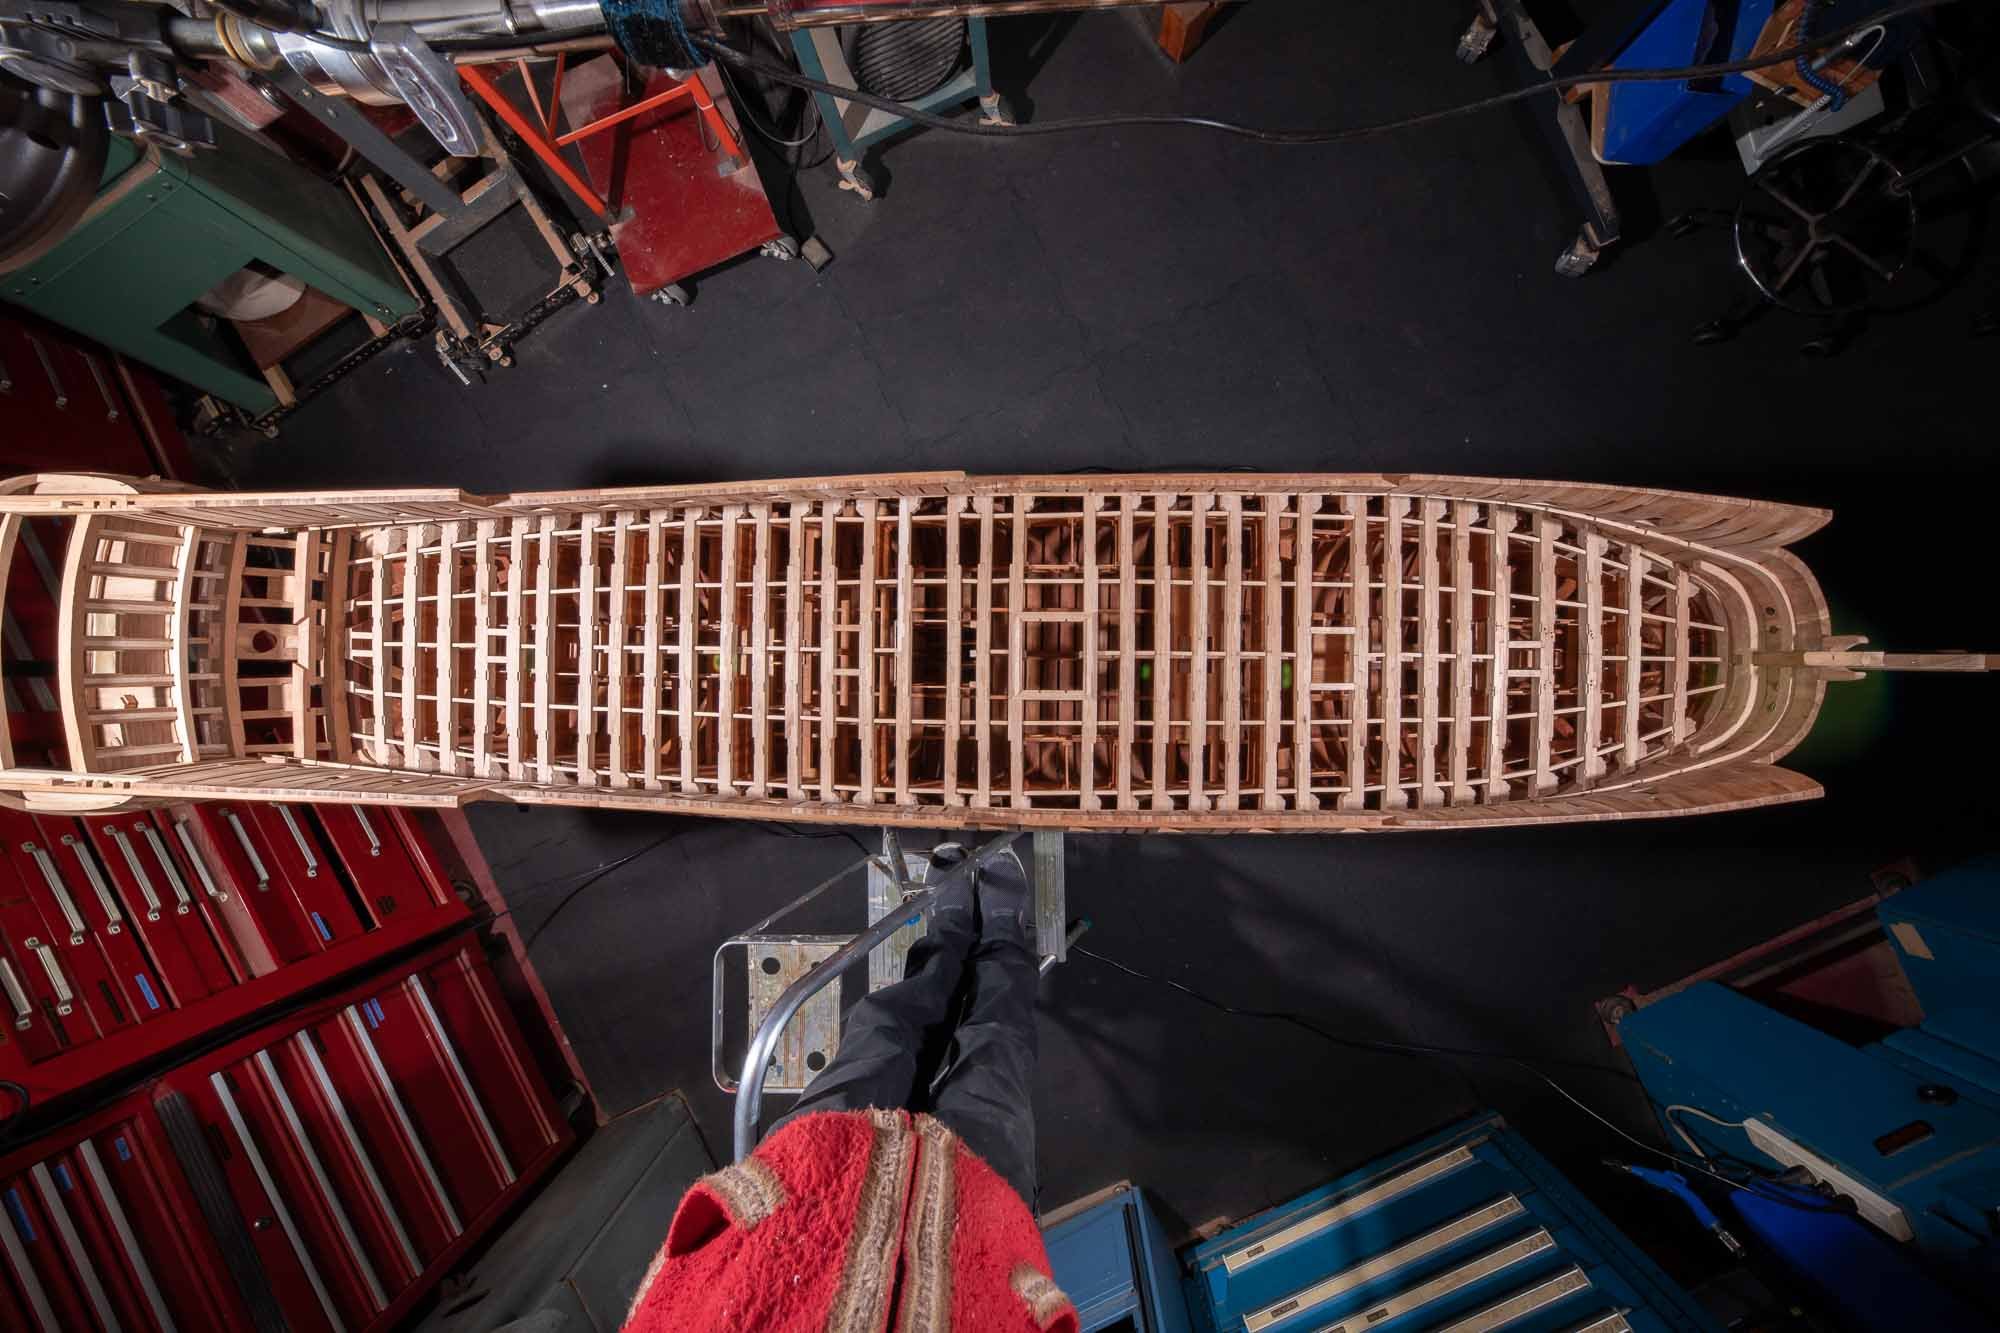
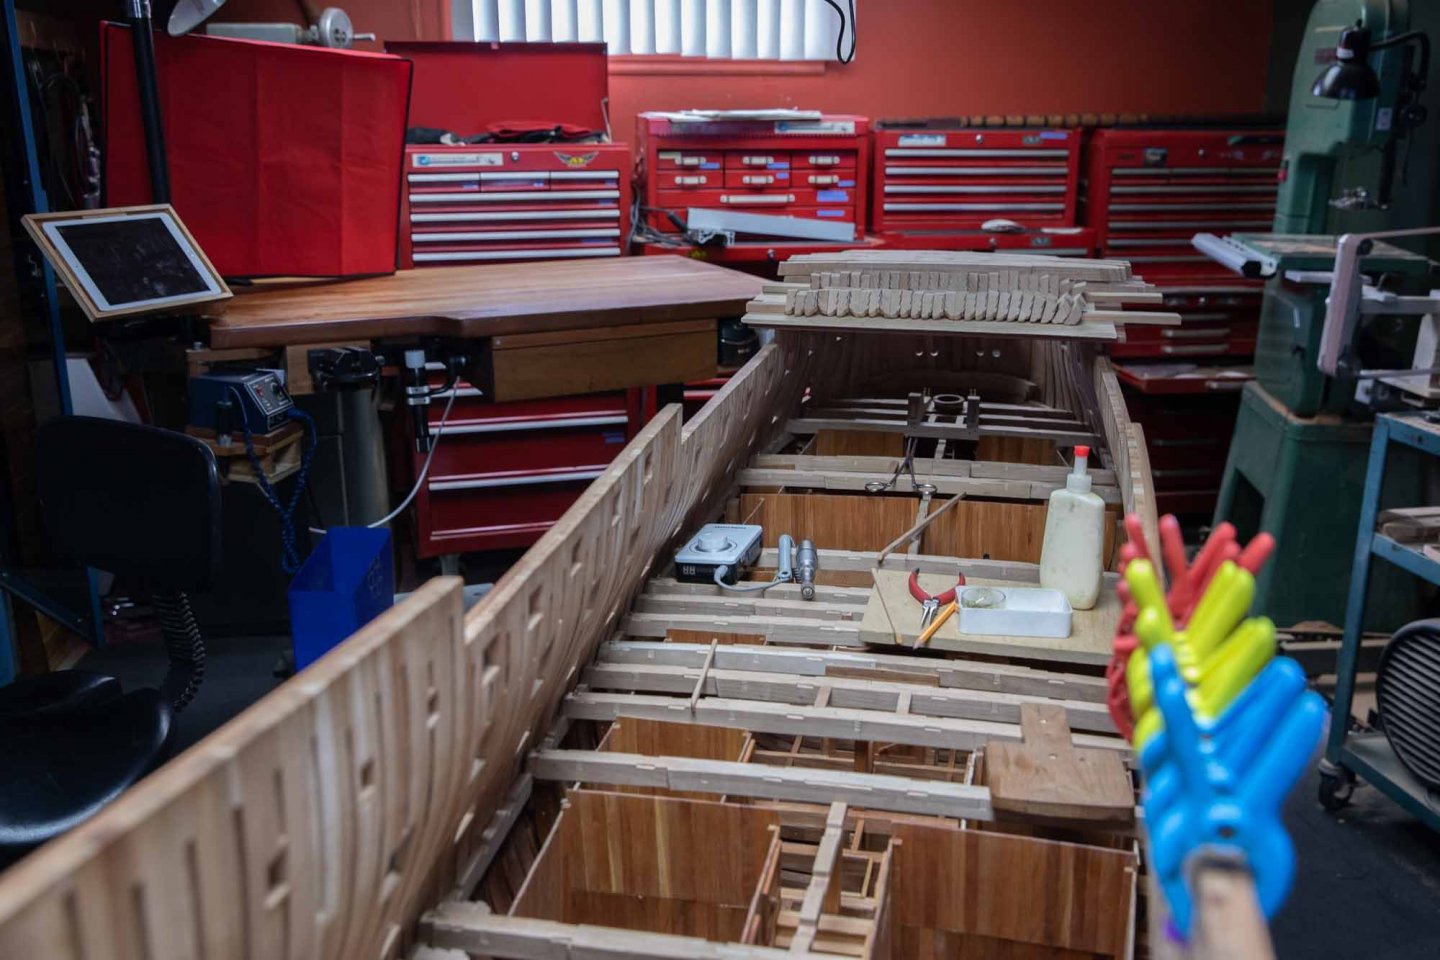
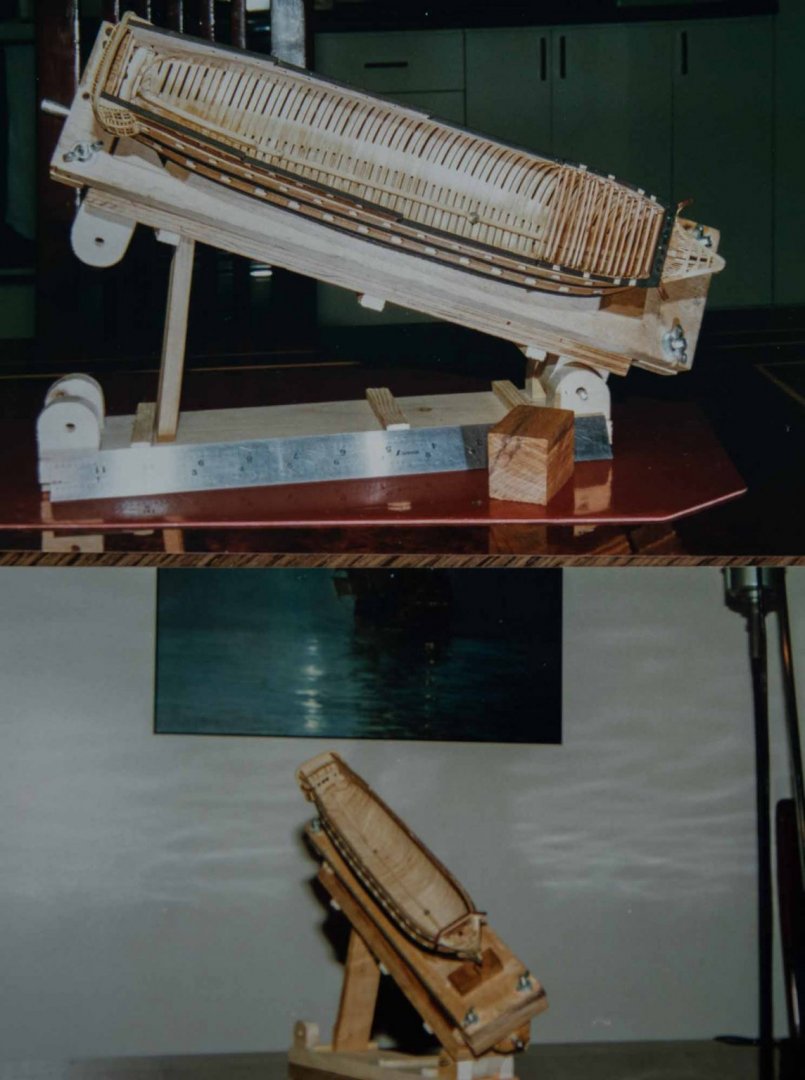
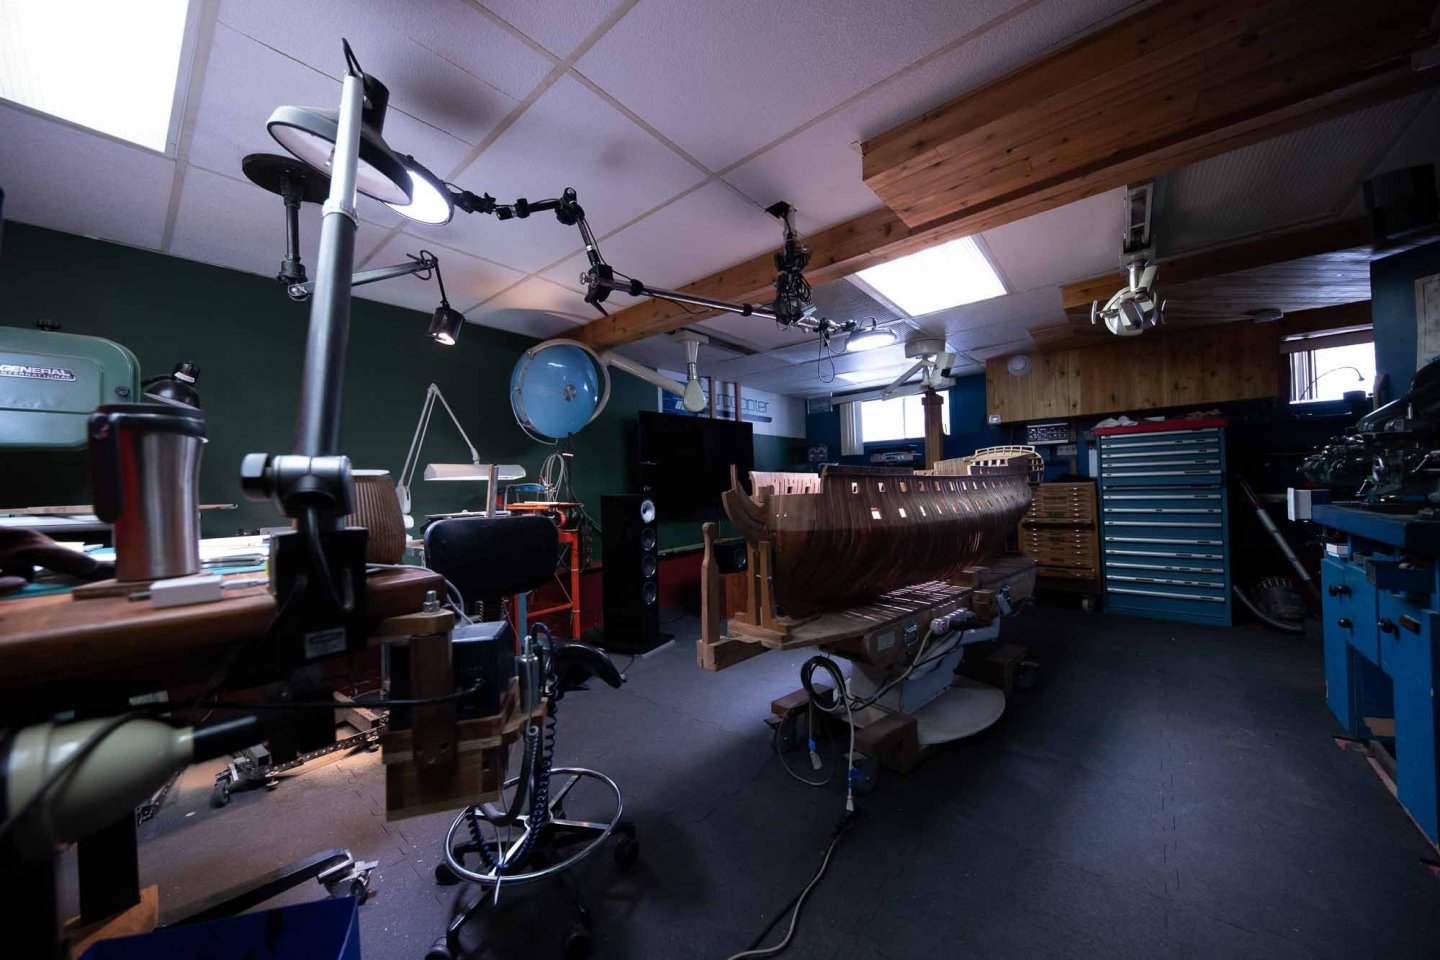
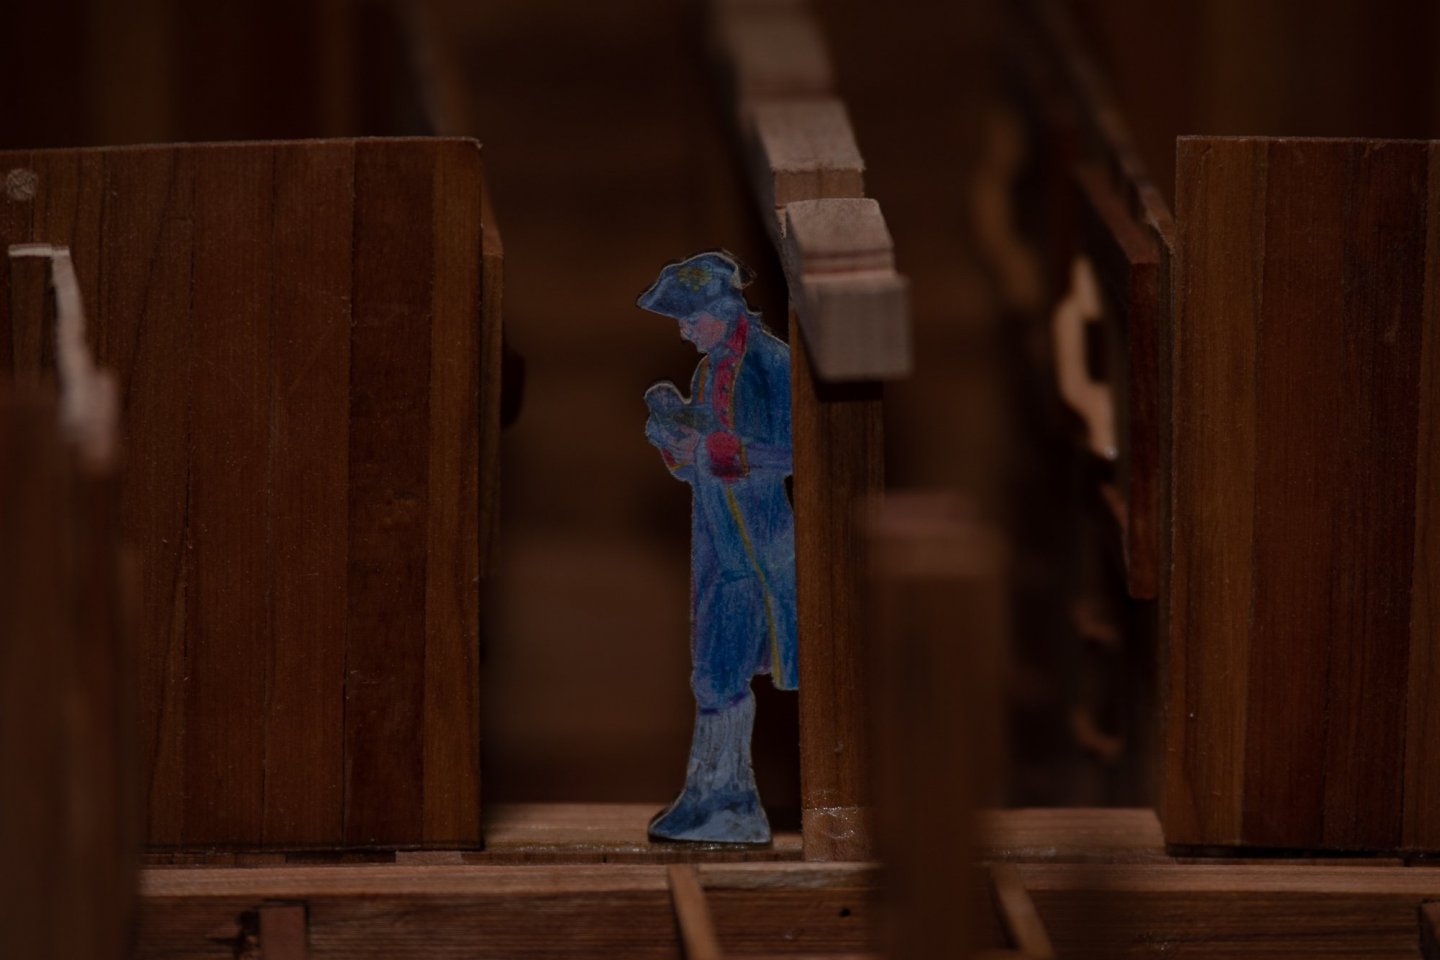
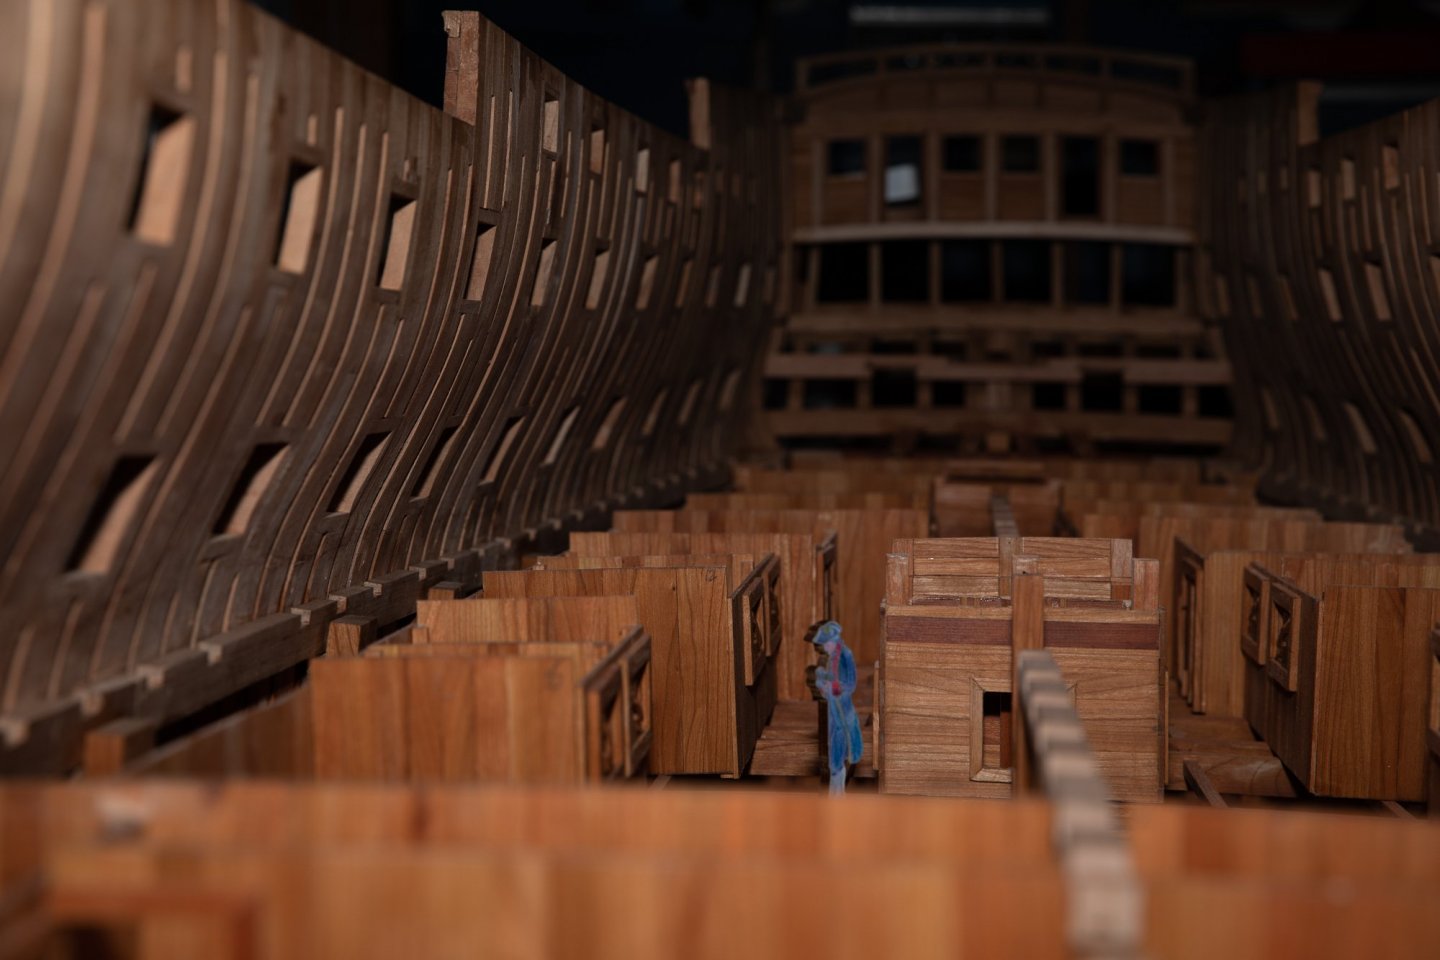
 This week progress, few photos. I will be working in the front of the model for the next months. In various contents in the forum, that I looked these last weeks, I was surprised how many over engineer model ship building, making a simple job, taking 10 times longer but not with results 10 time better.
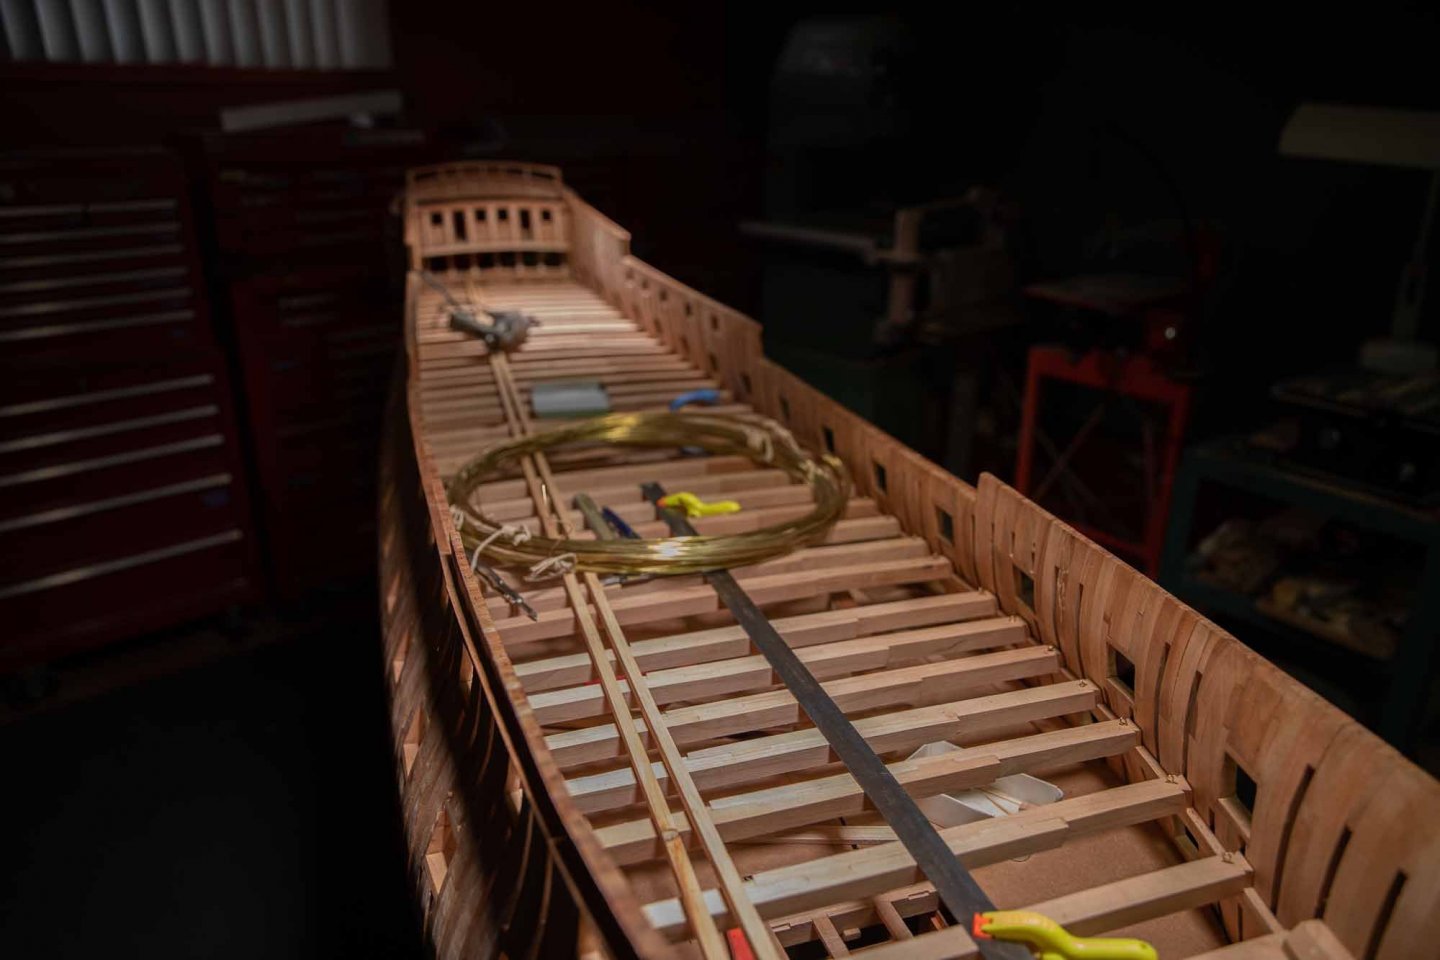

-
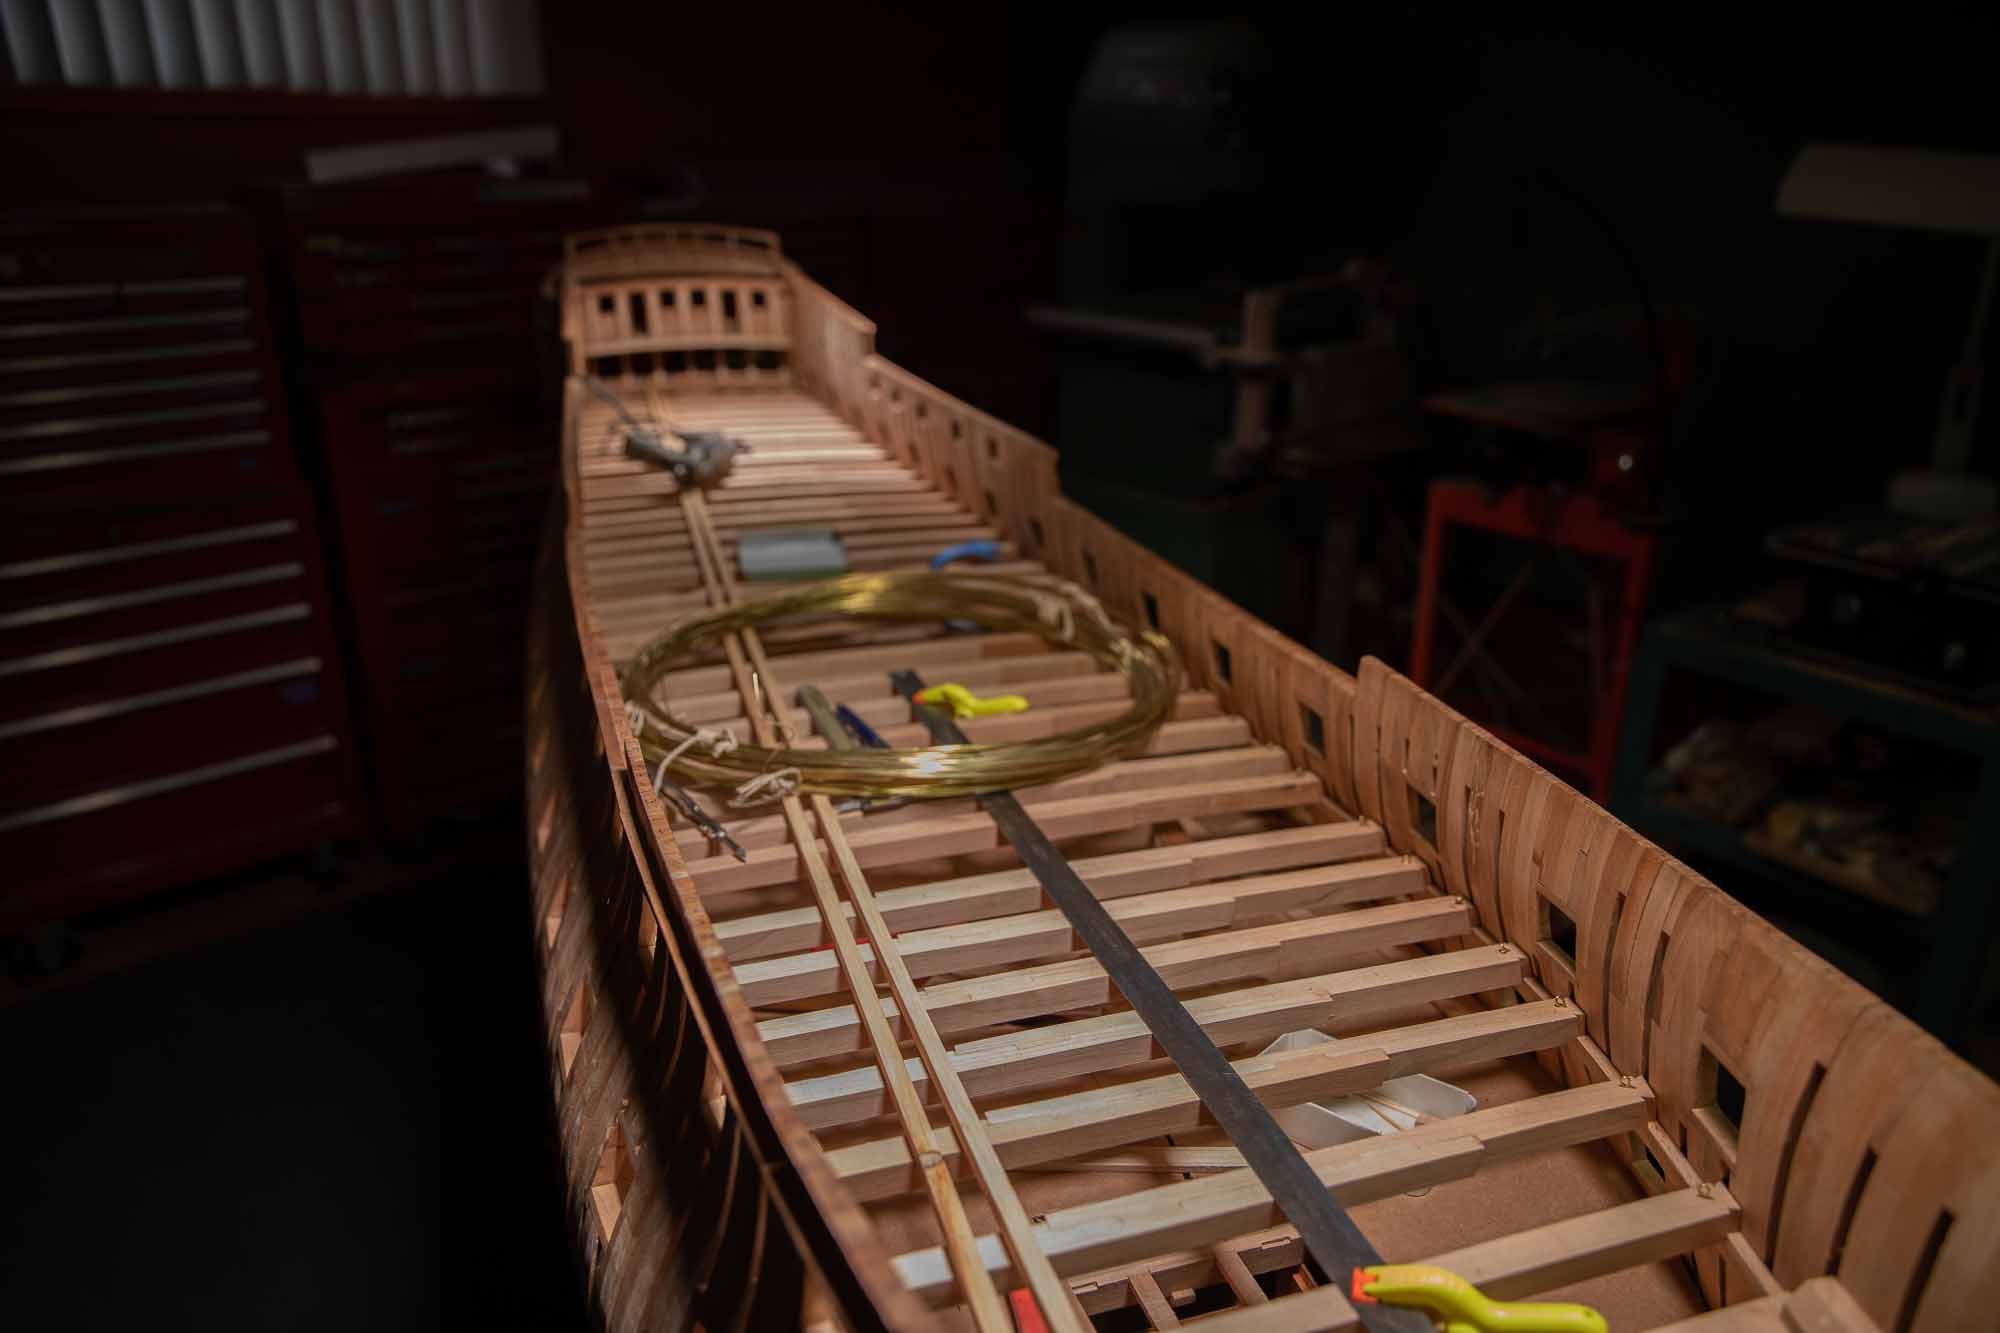
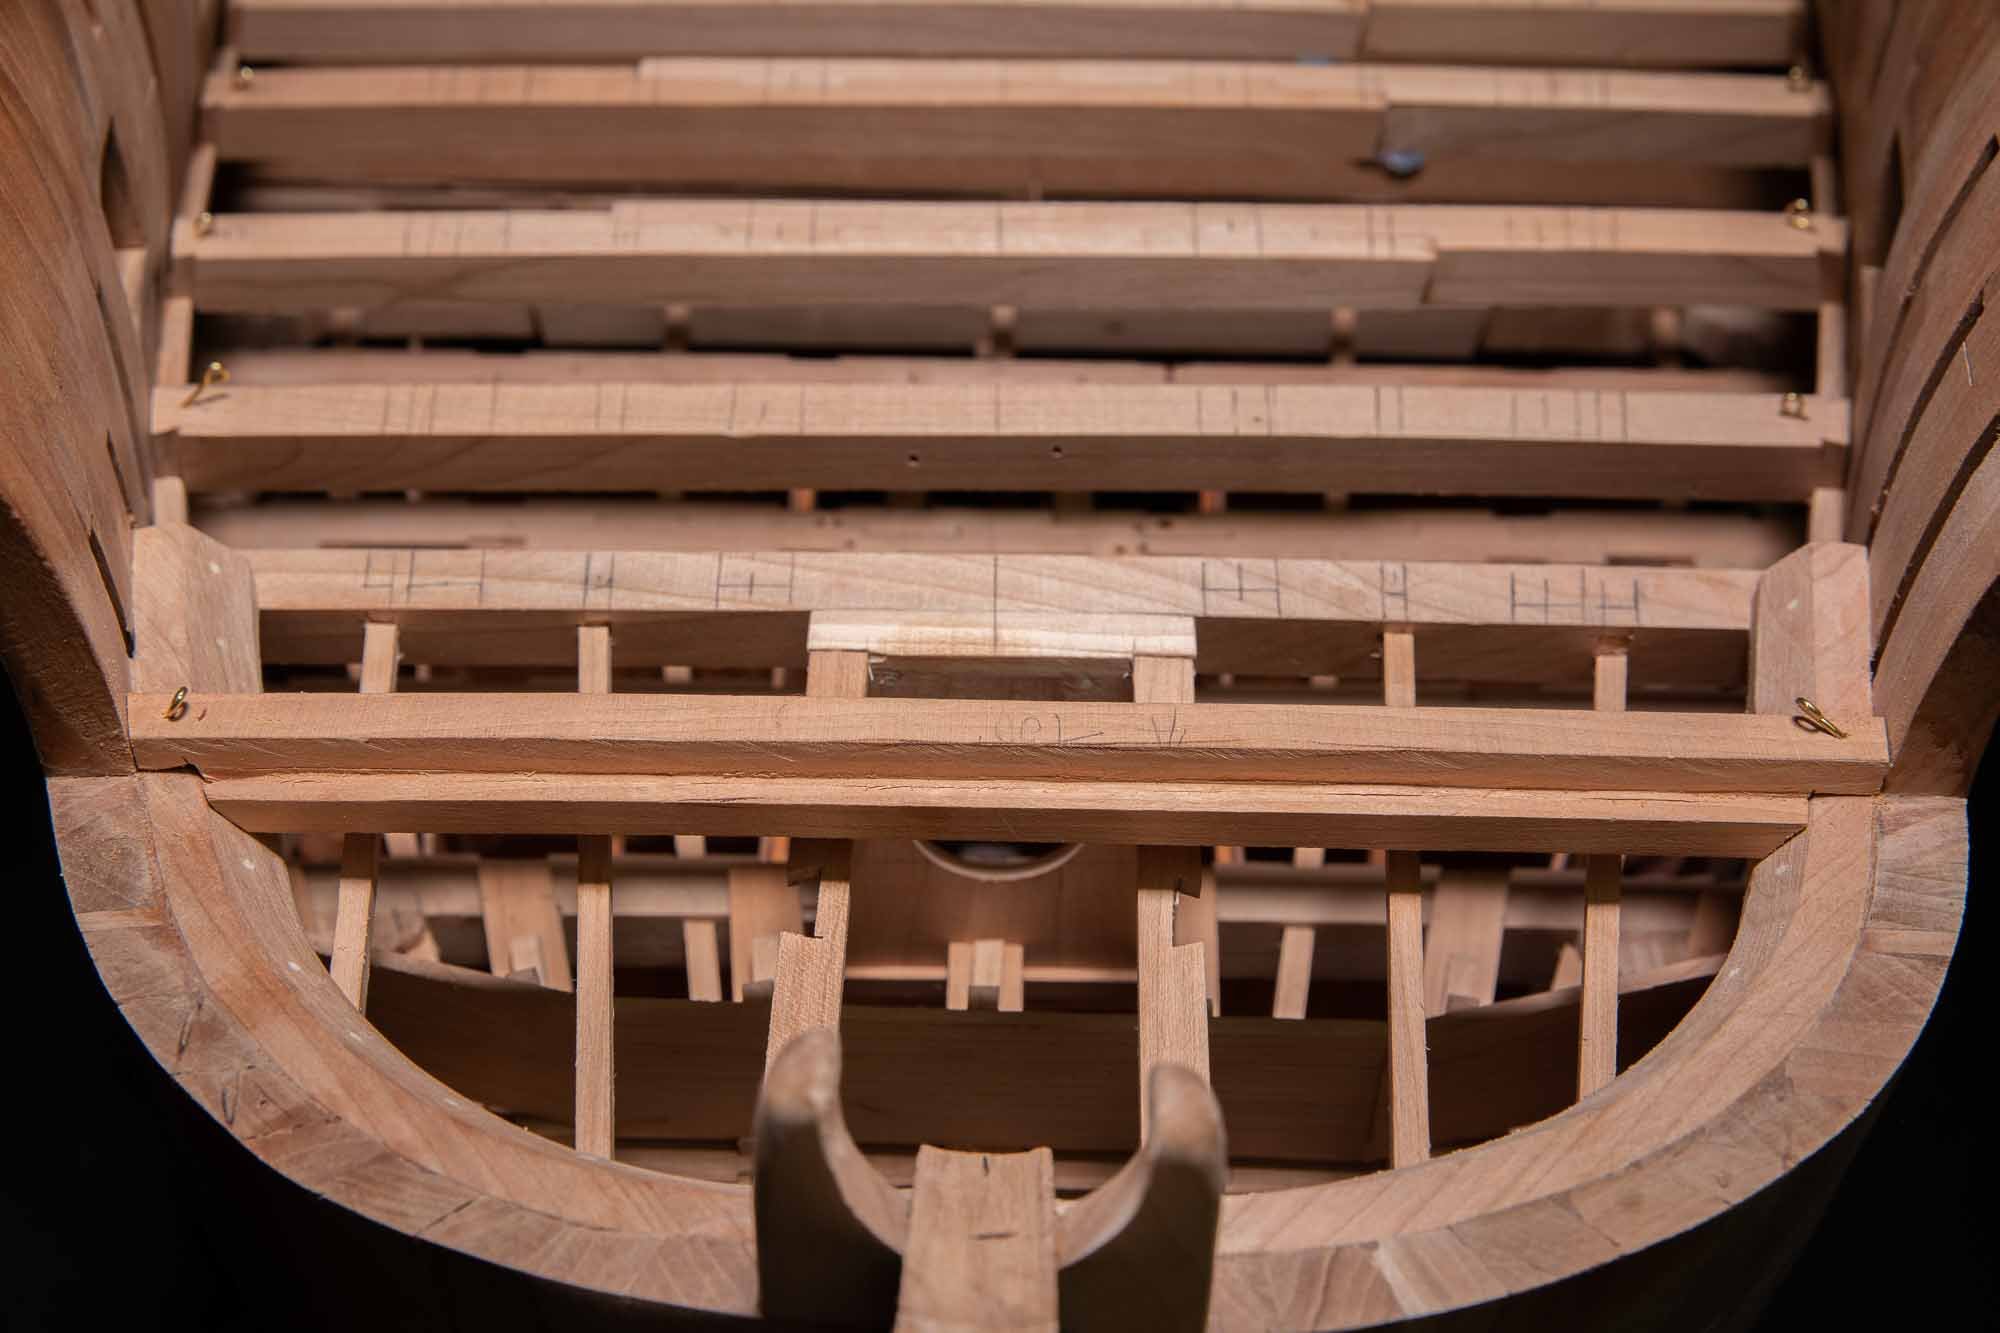
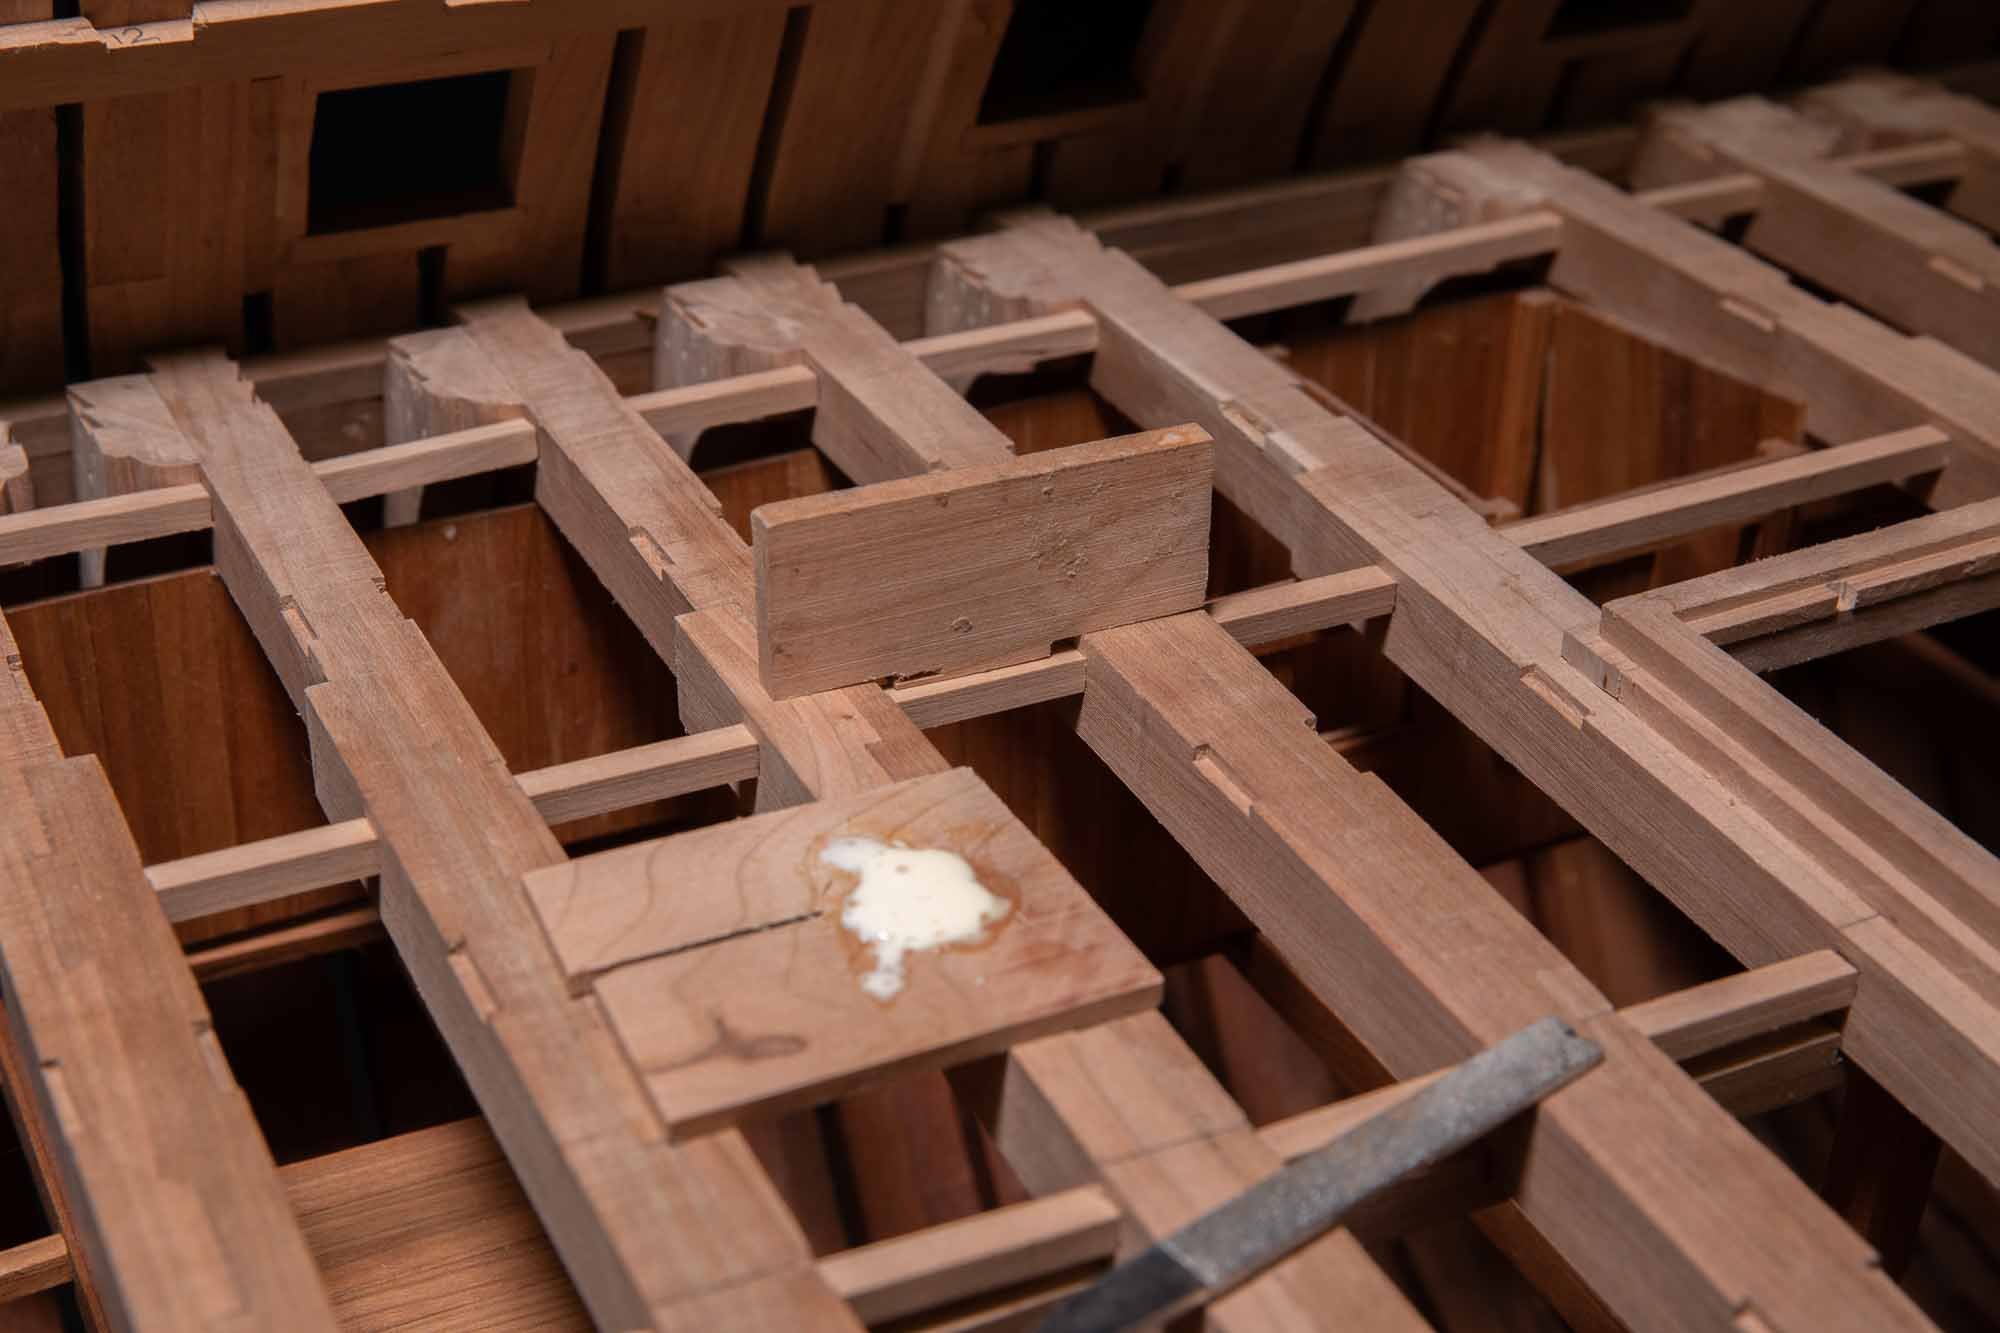
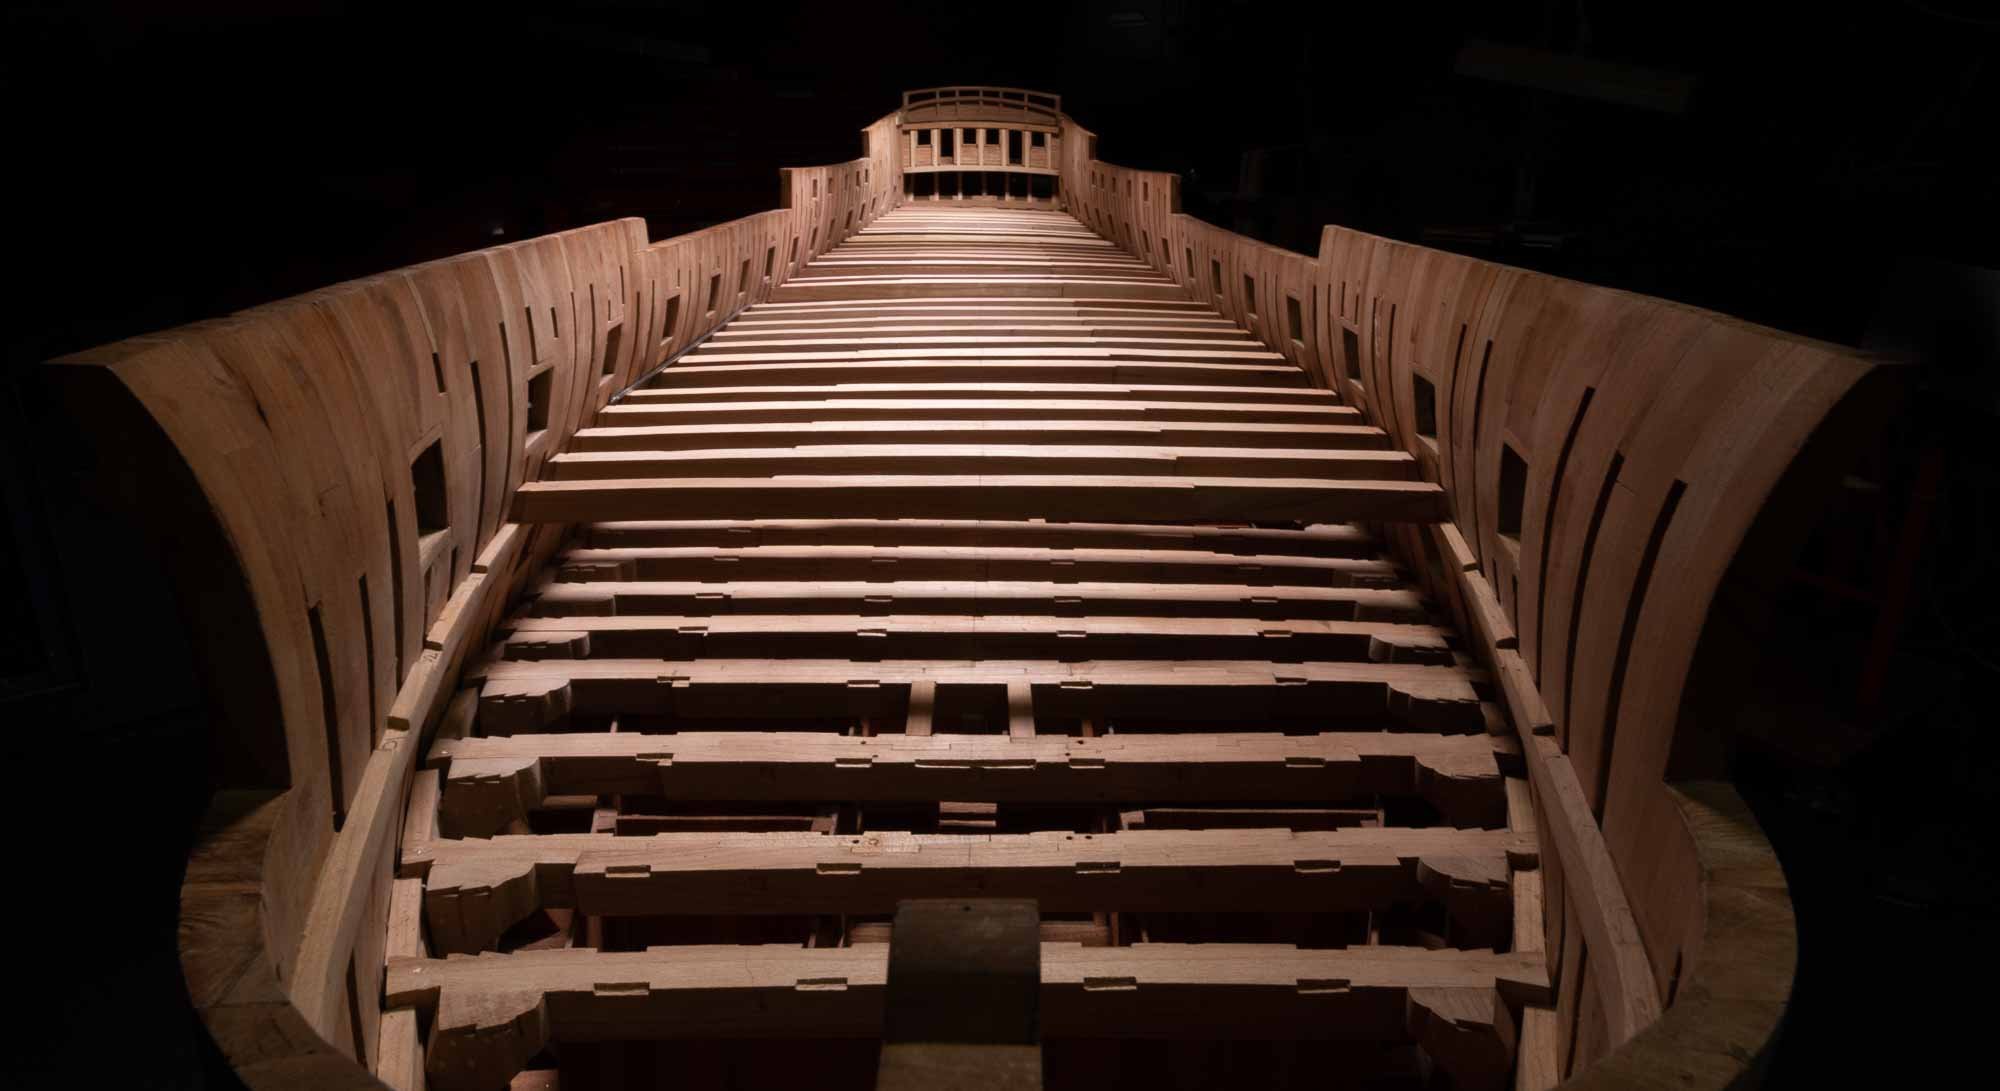
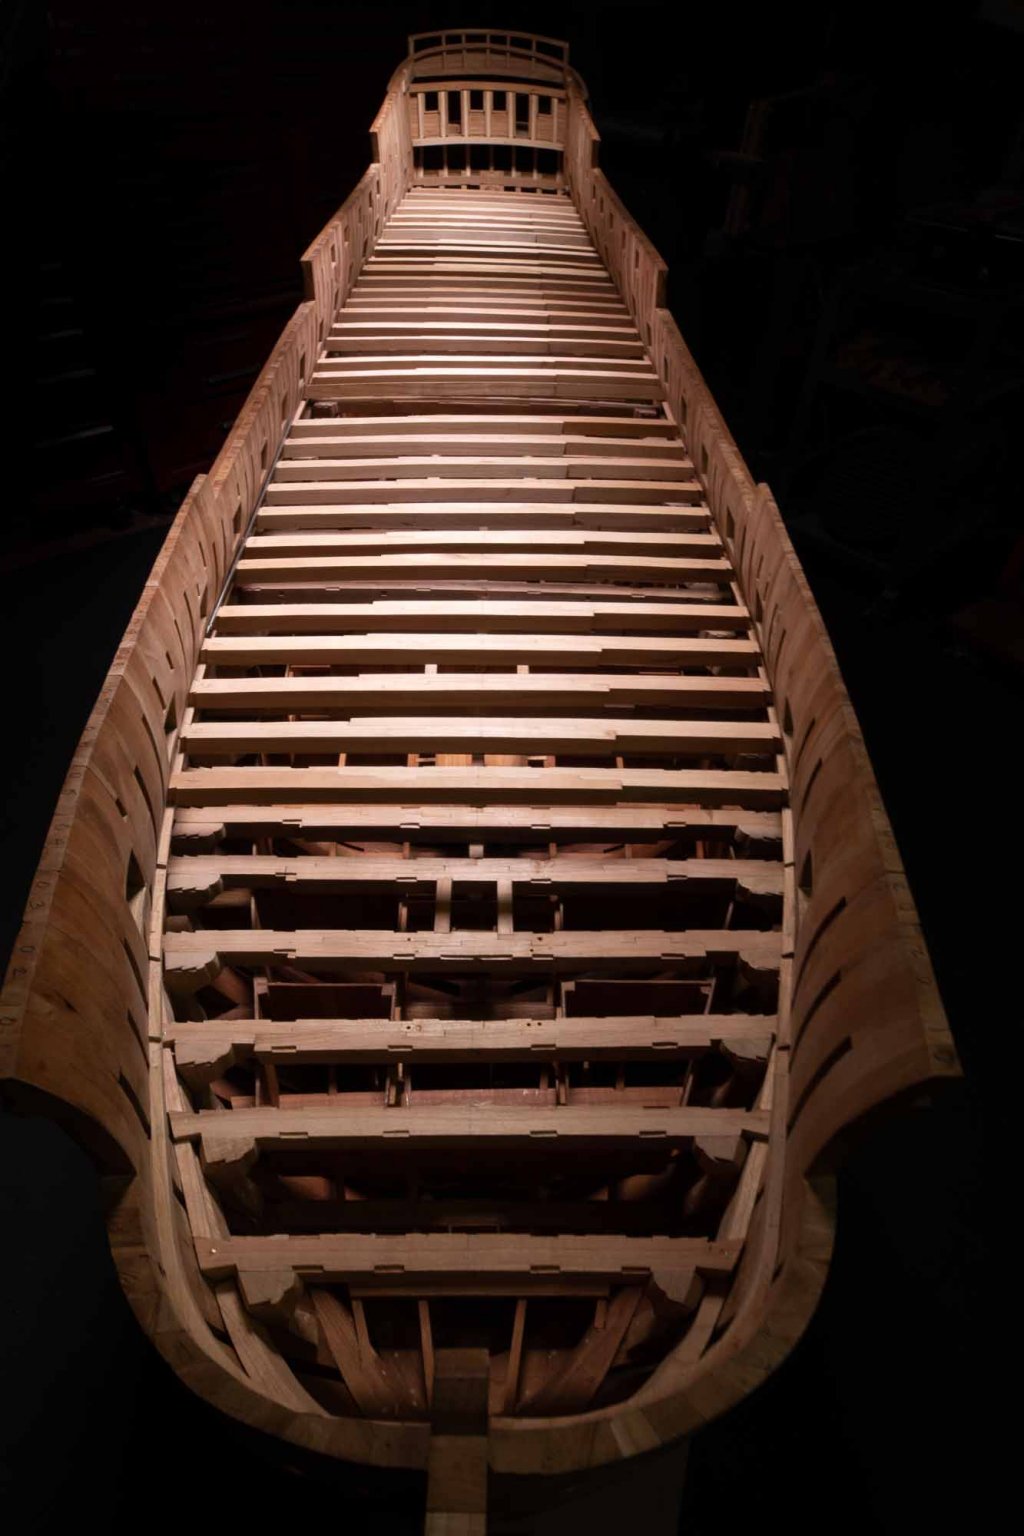
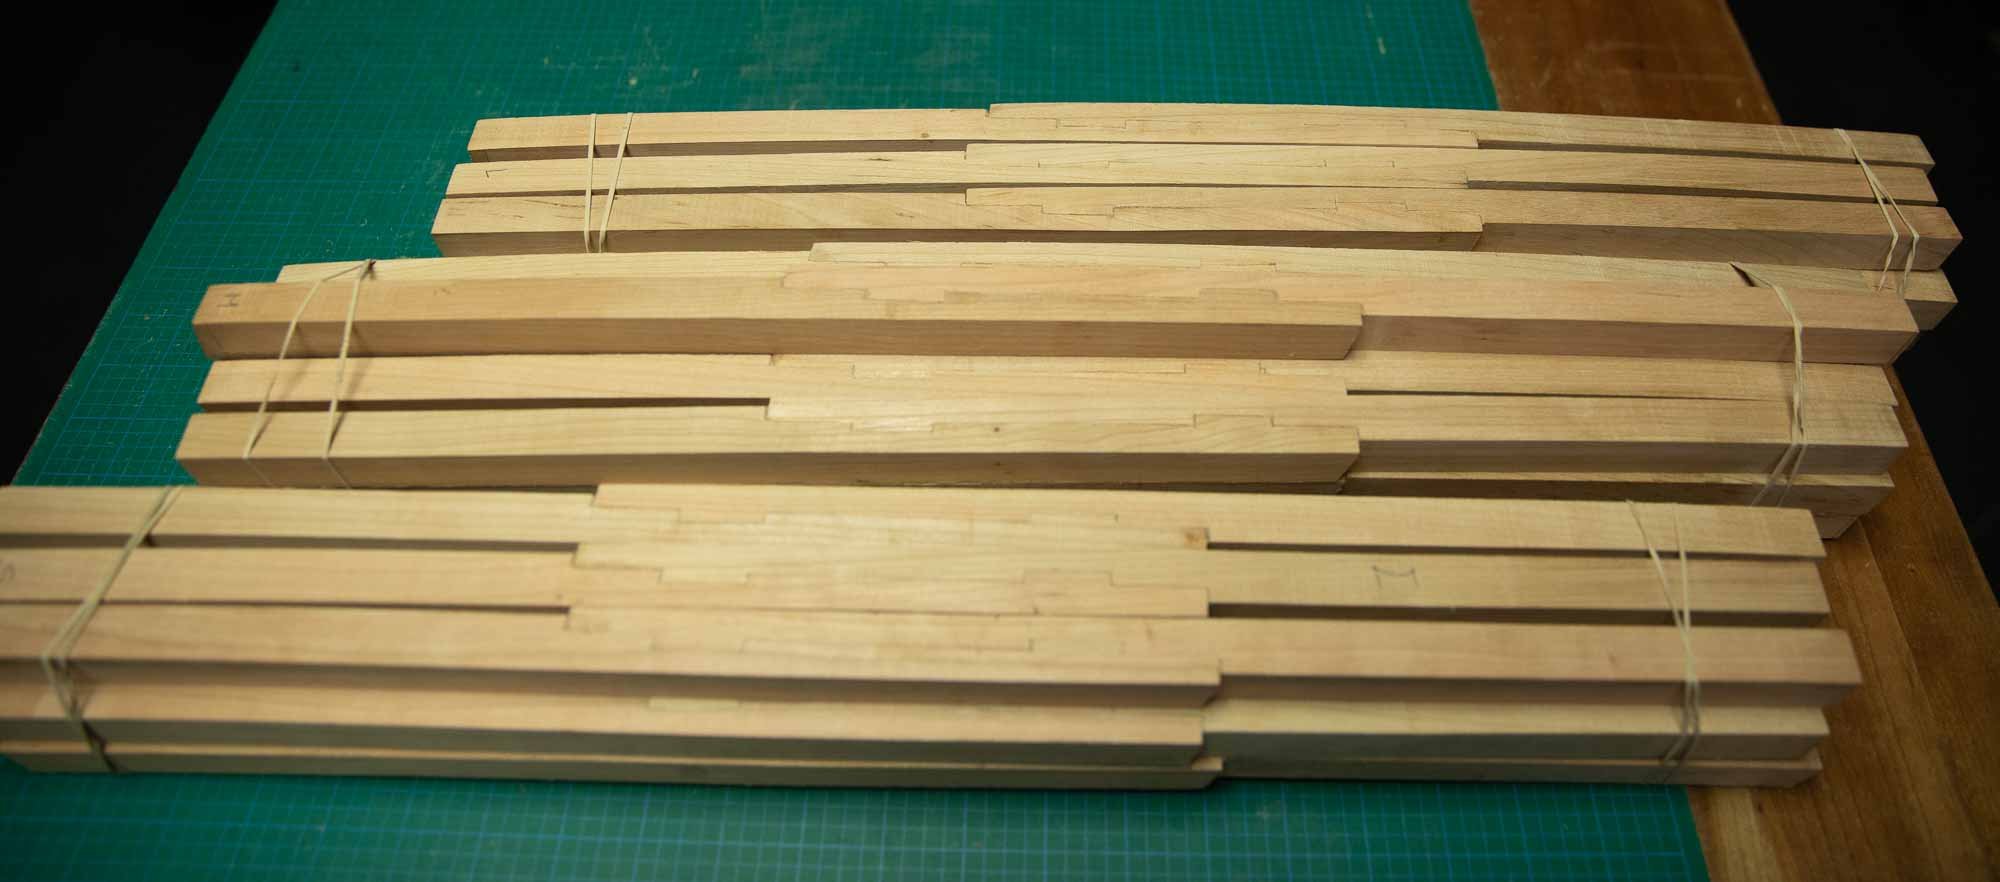
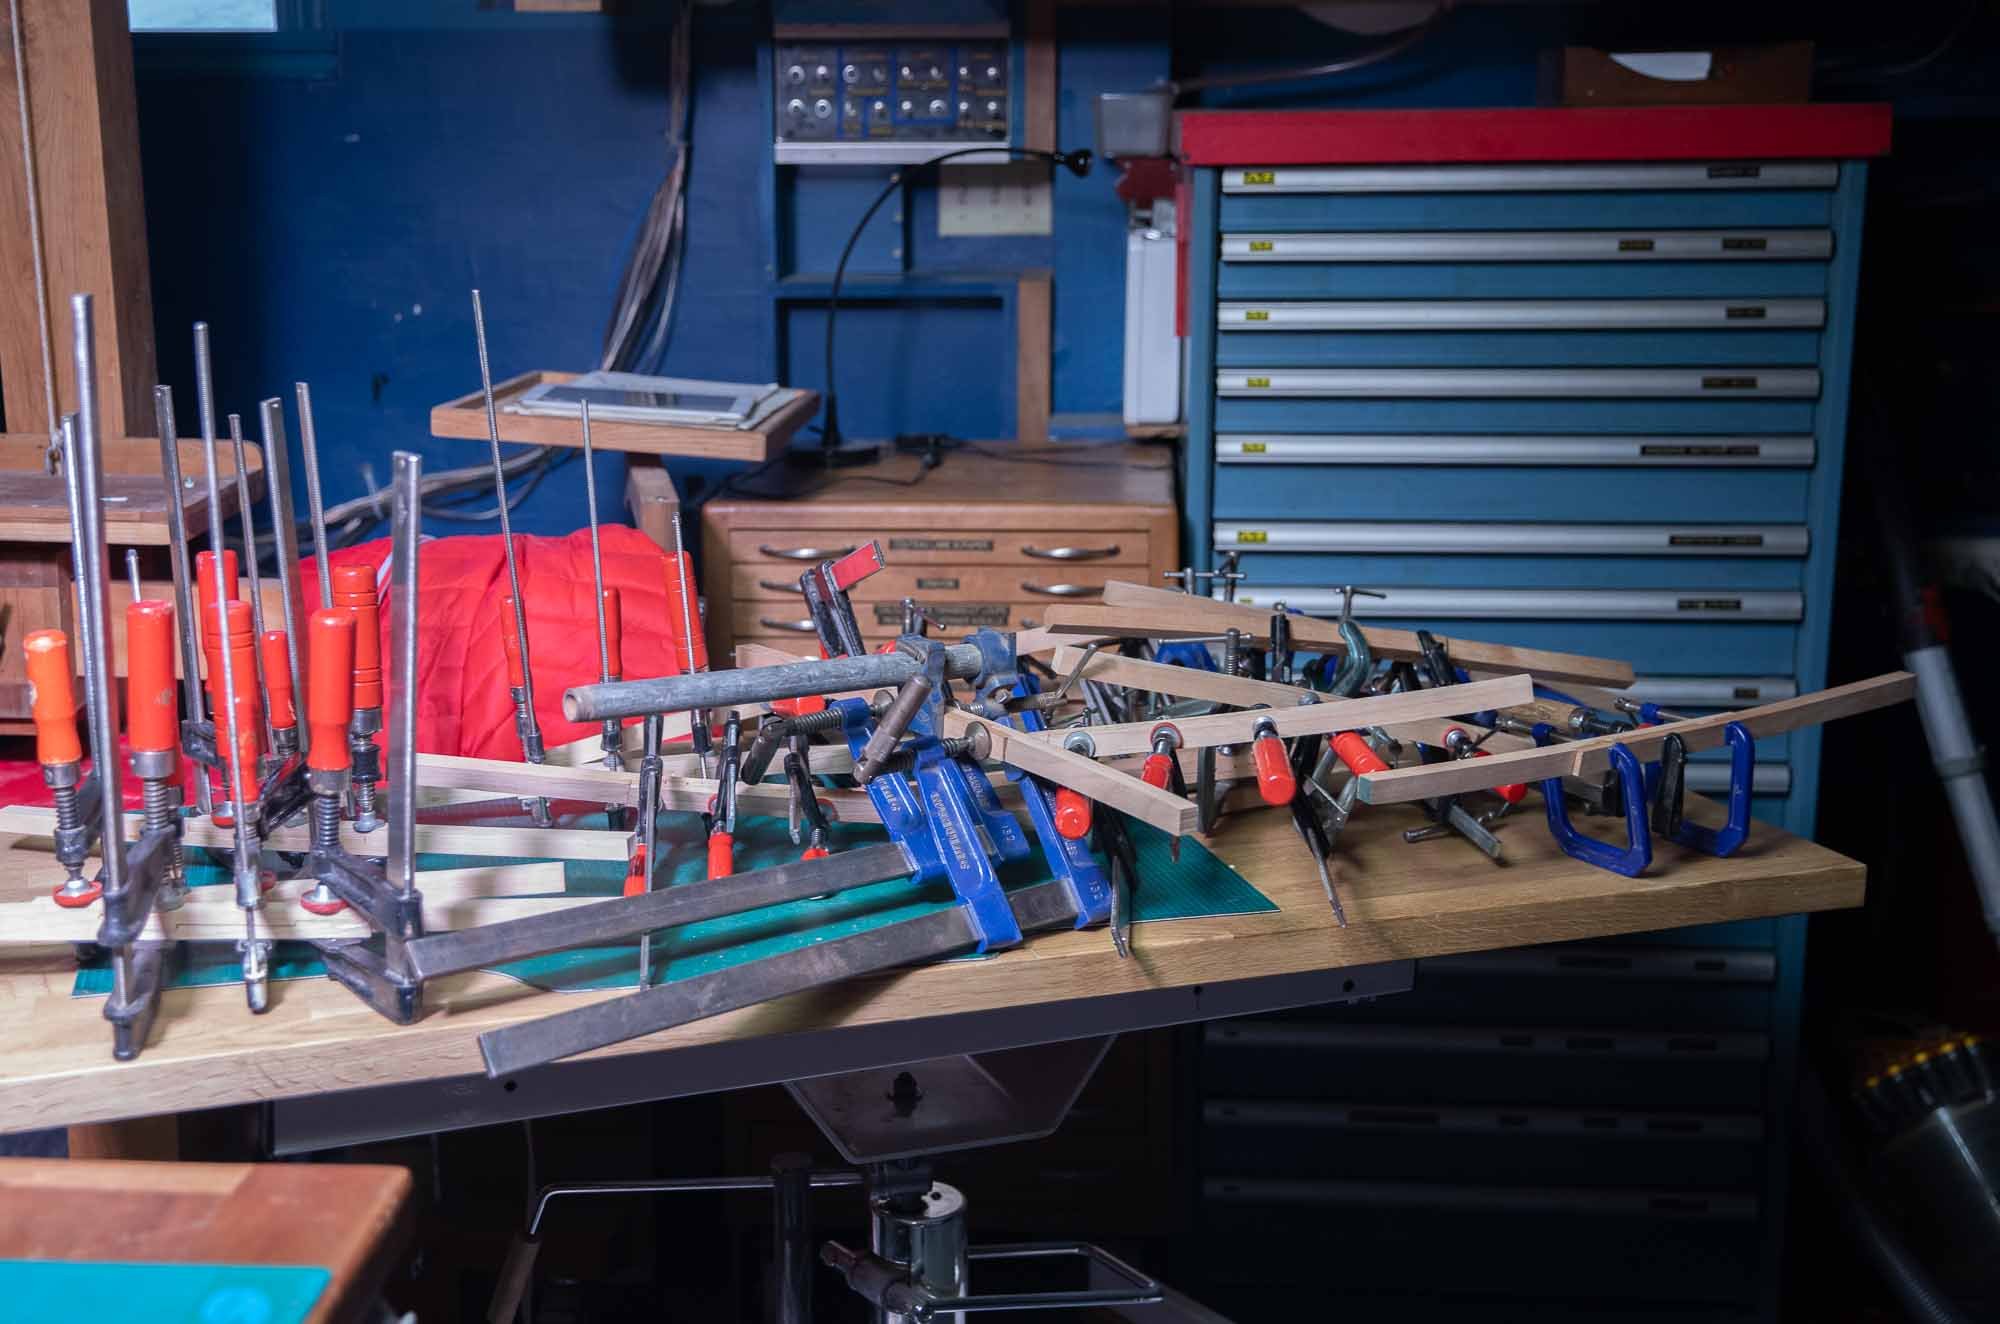
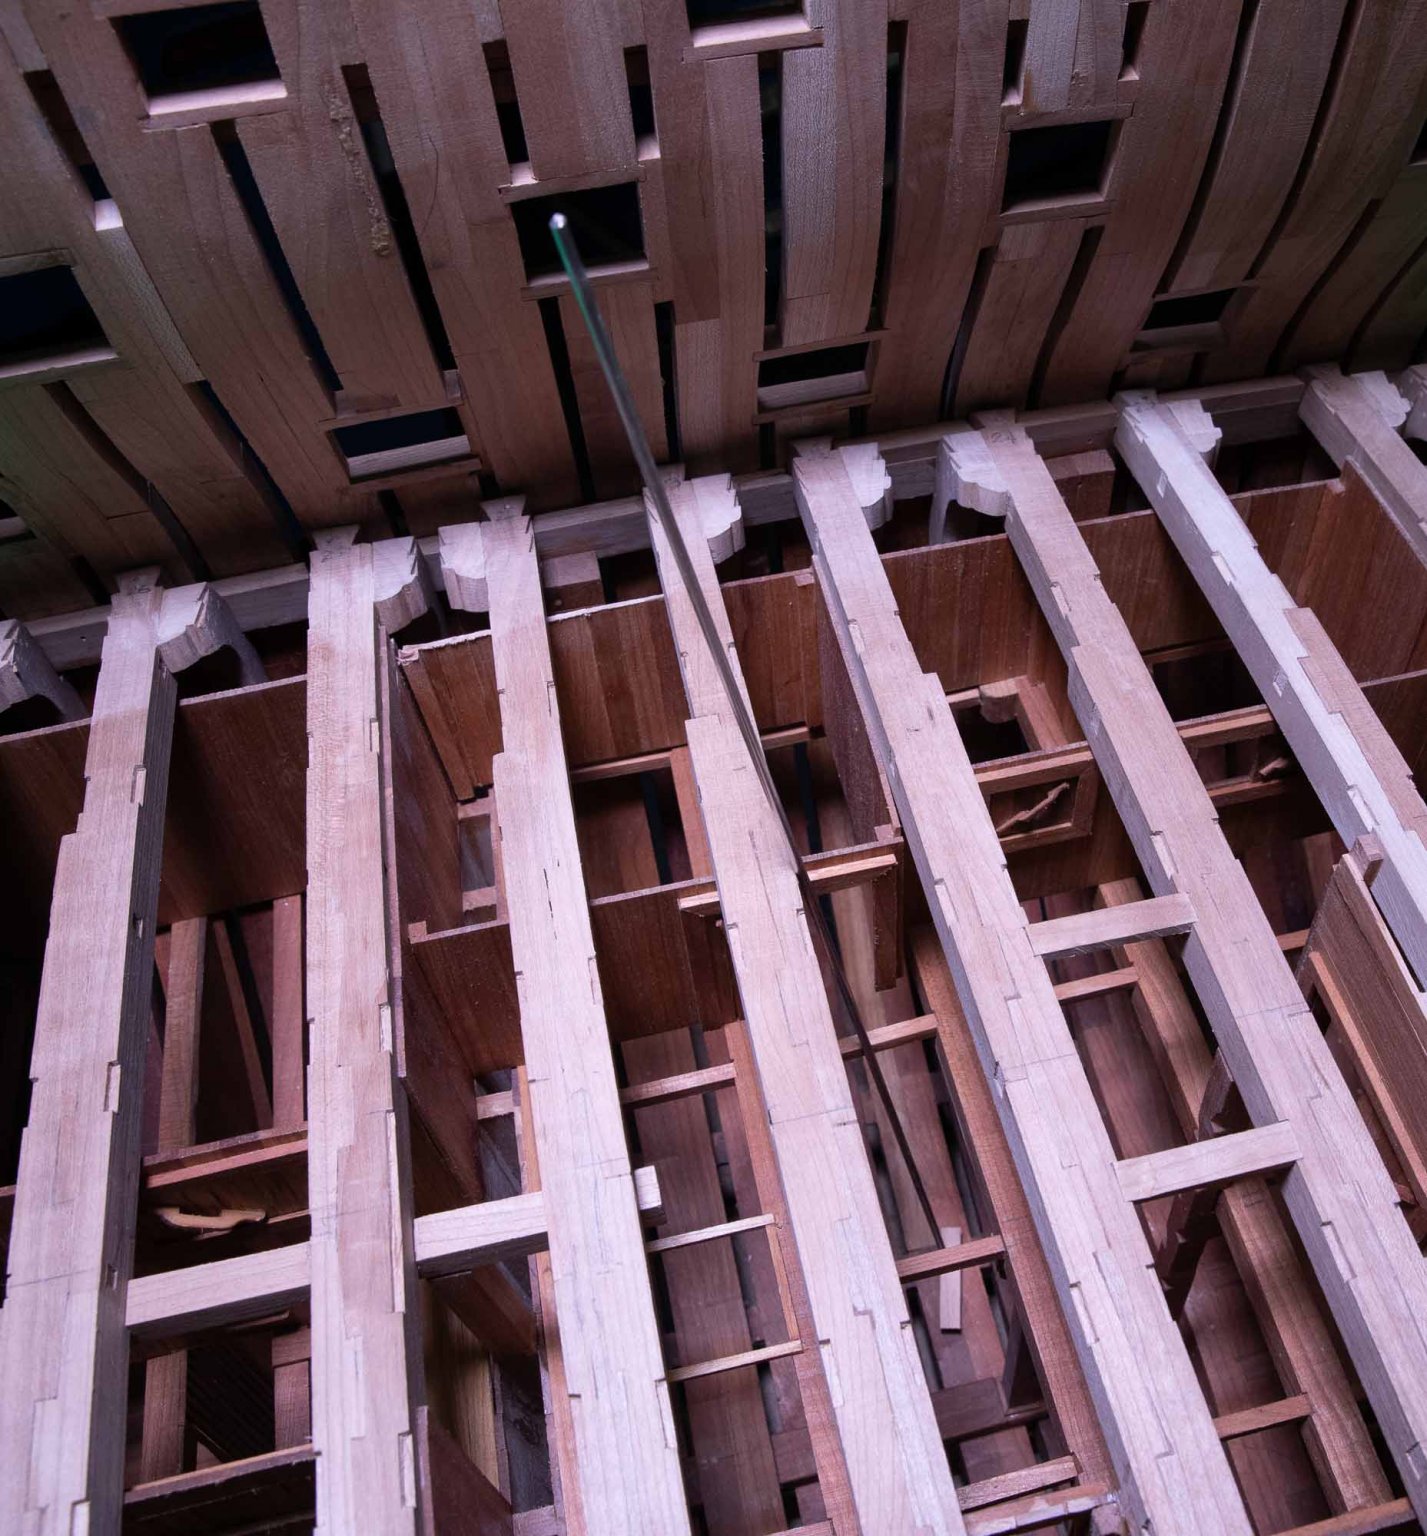
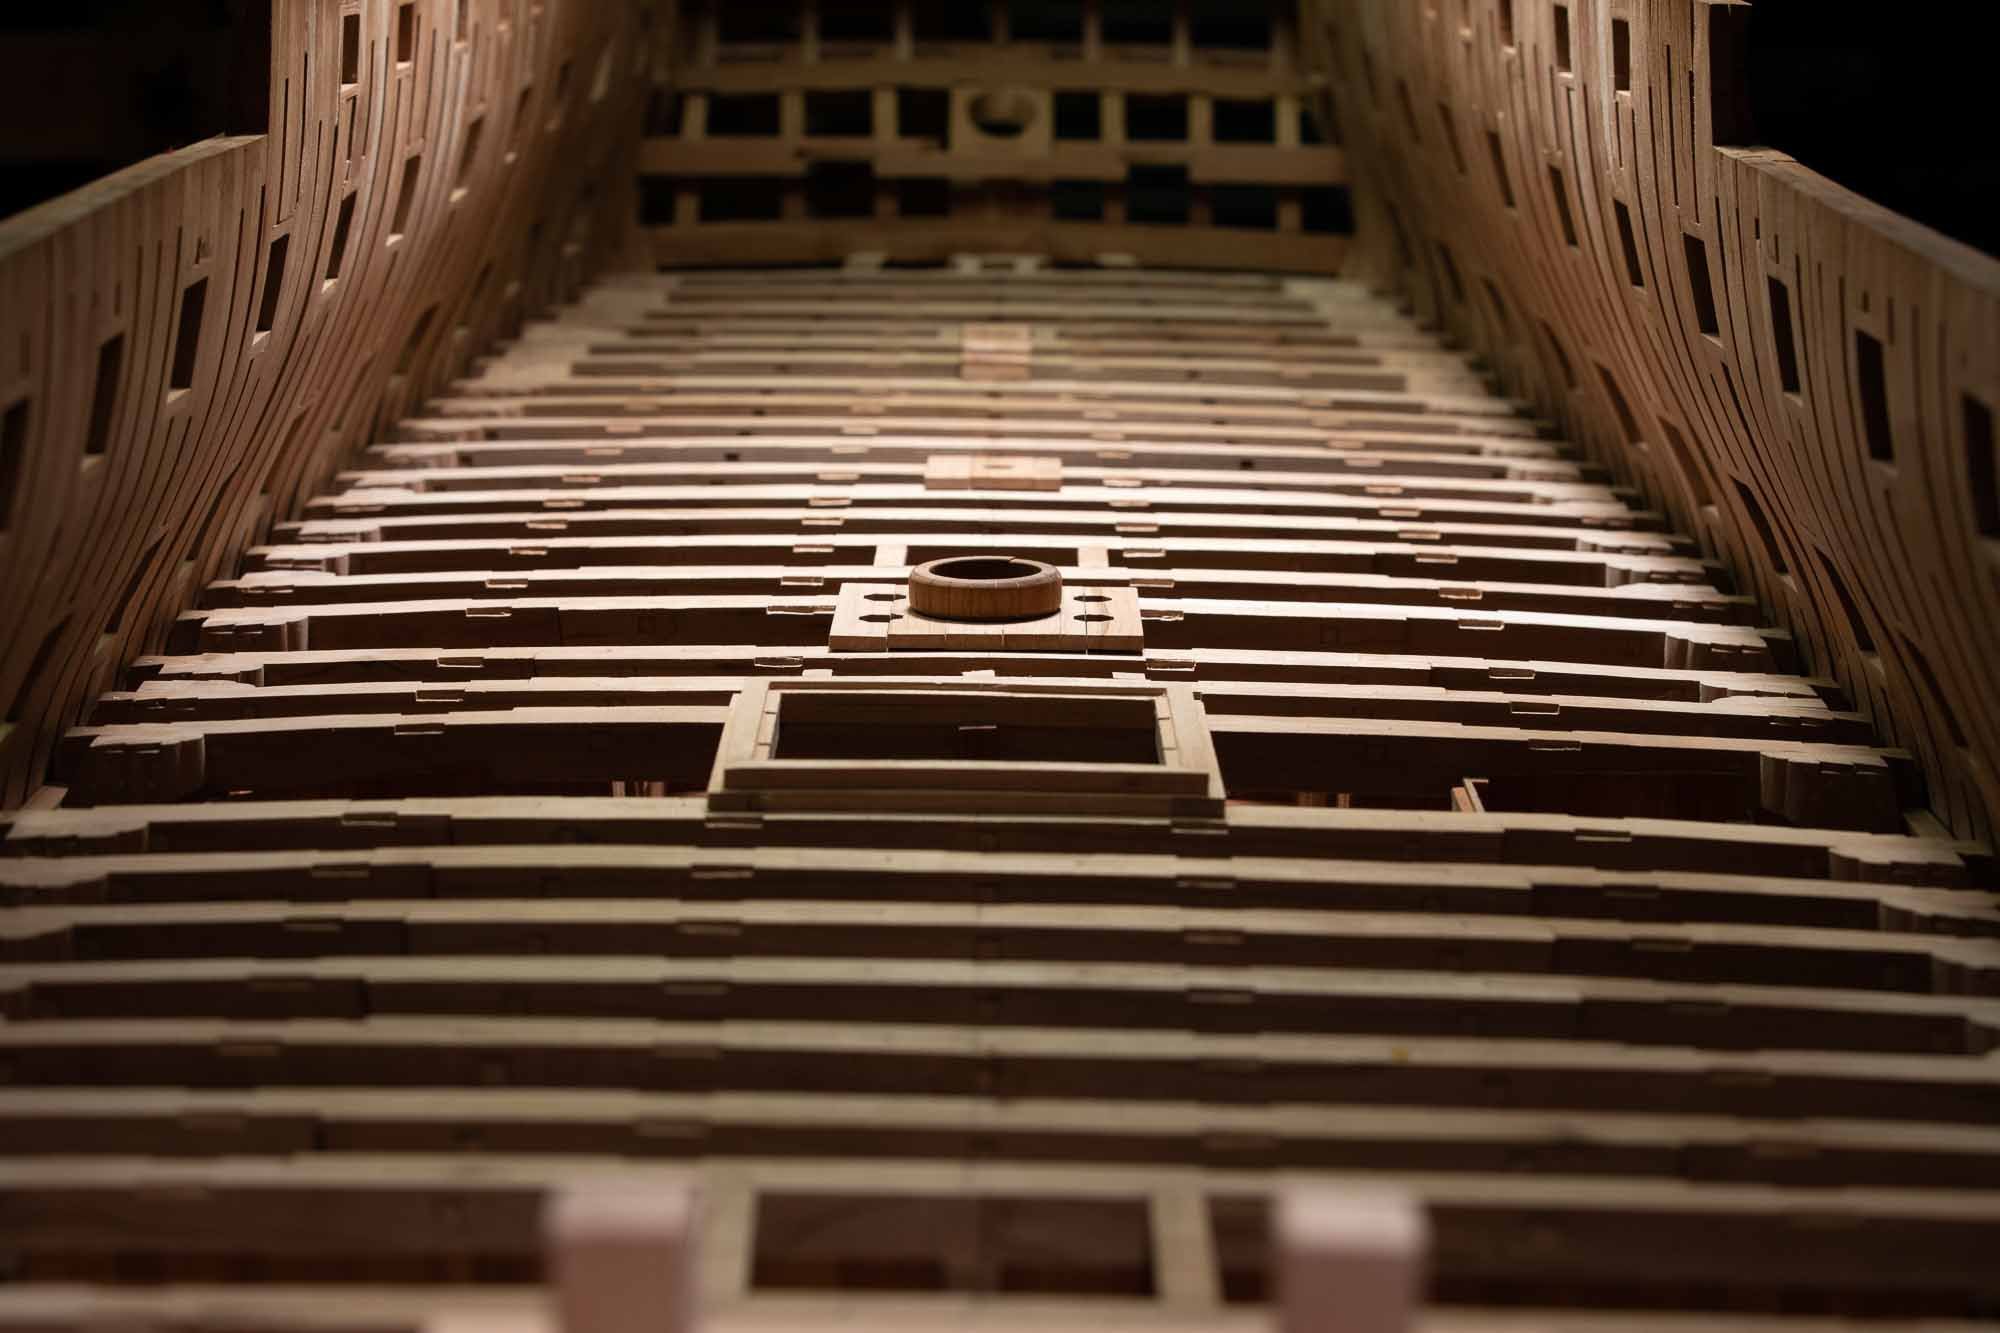
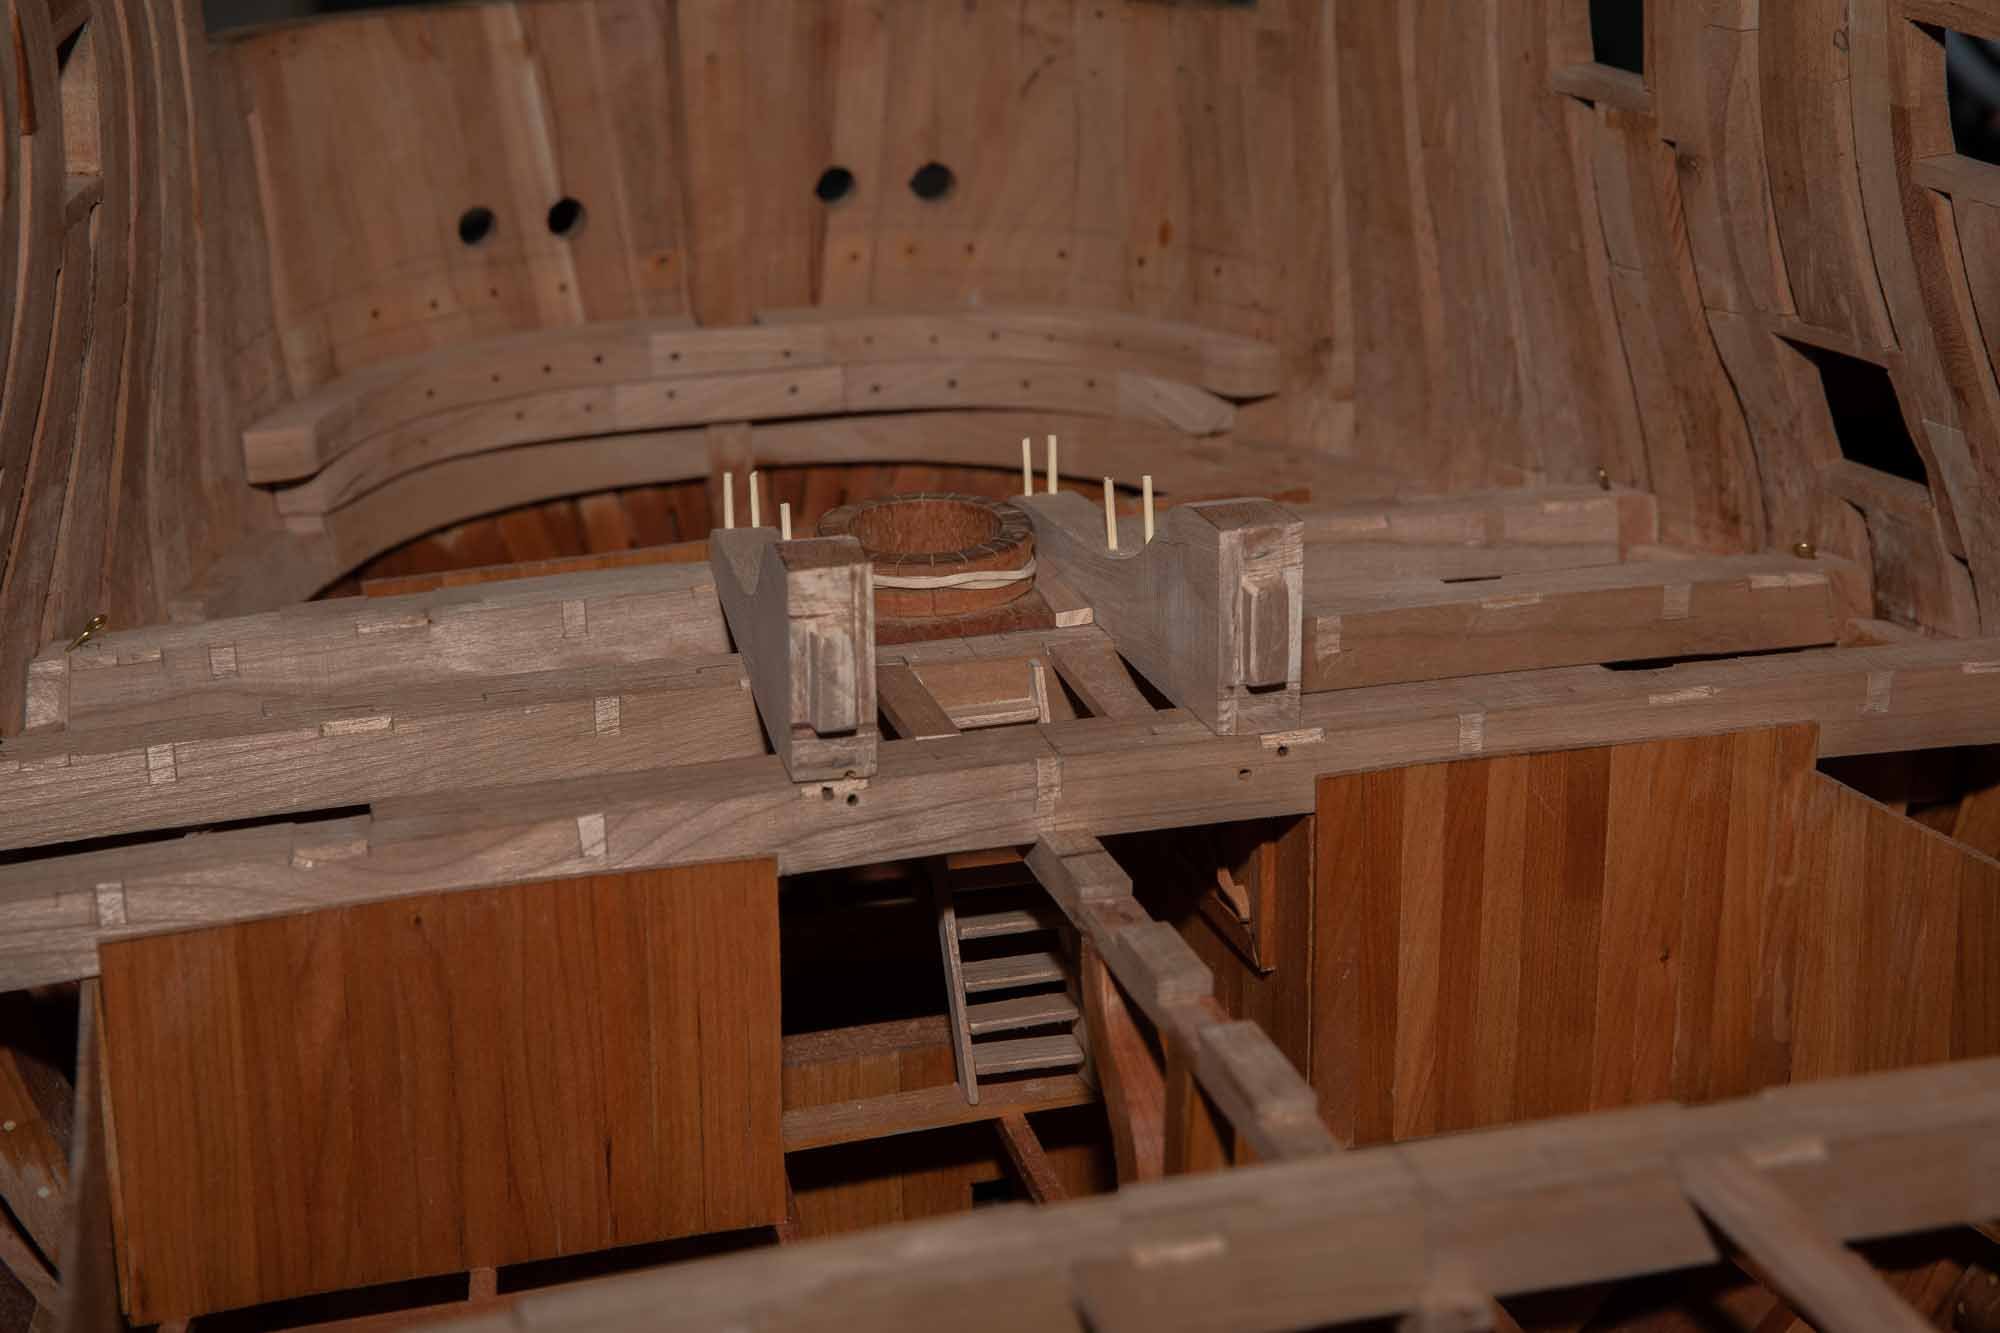
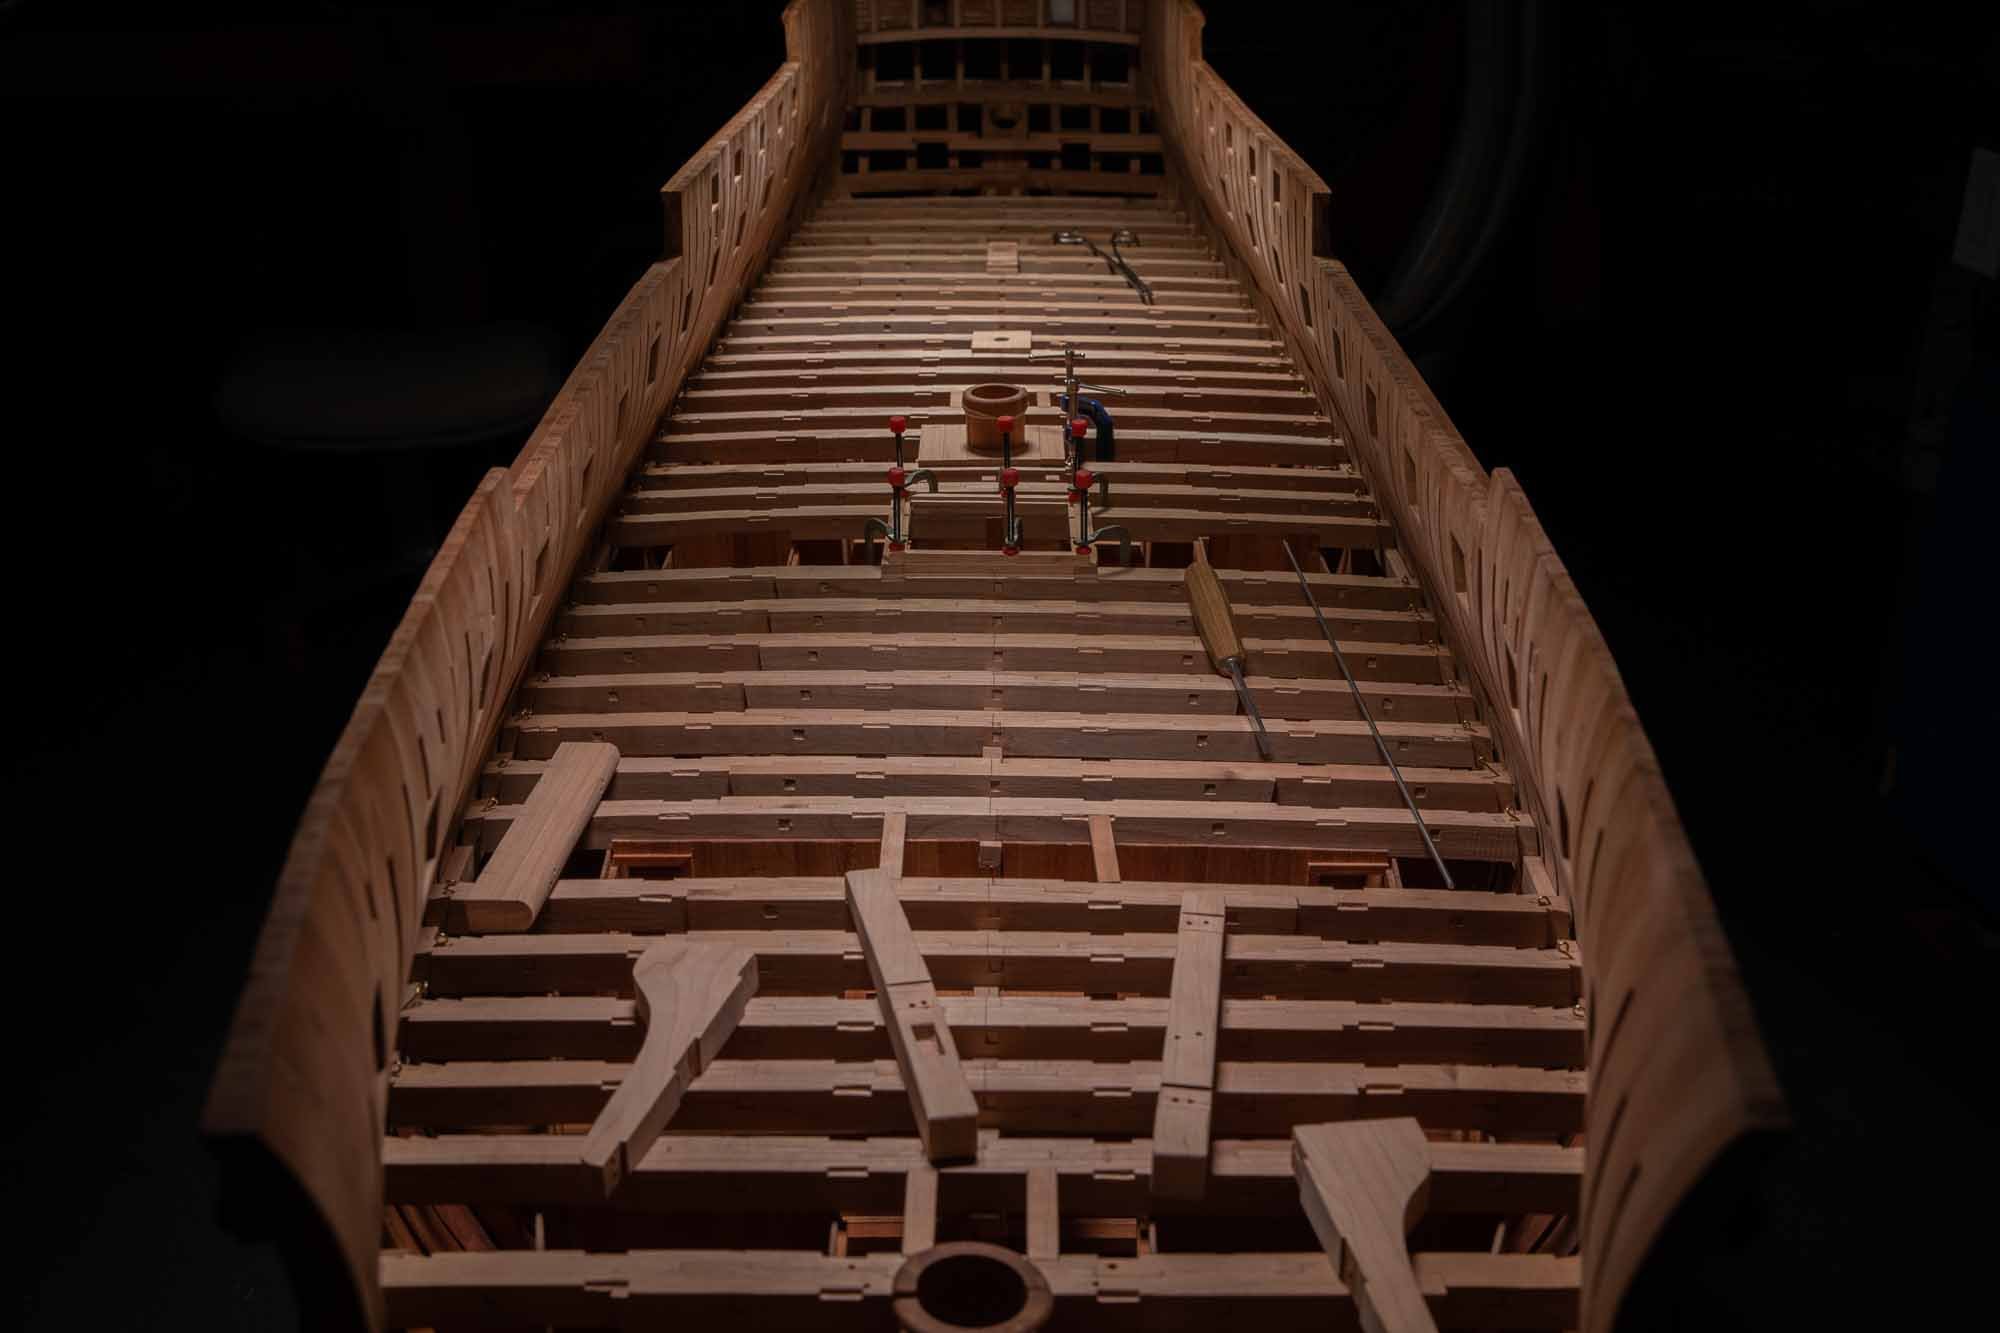
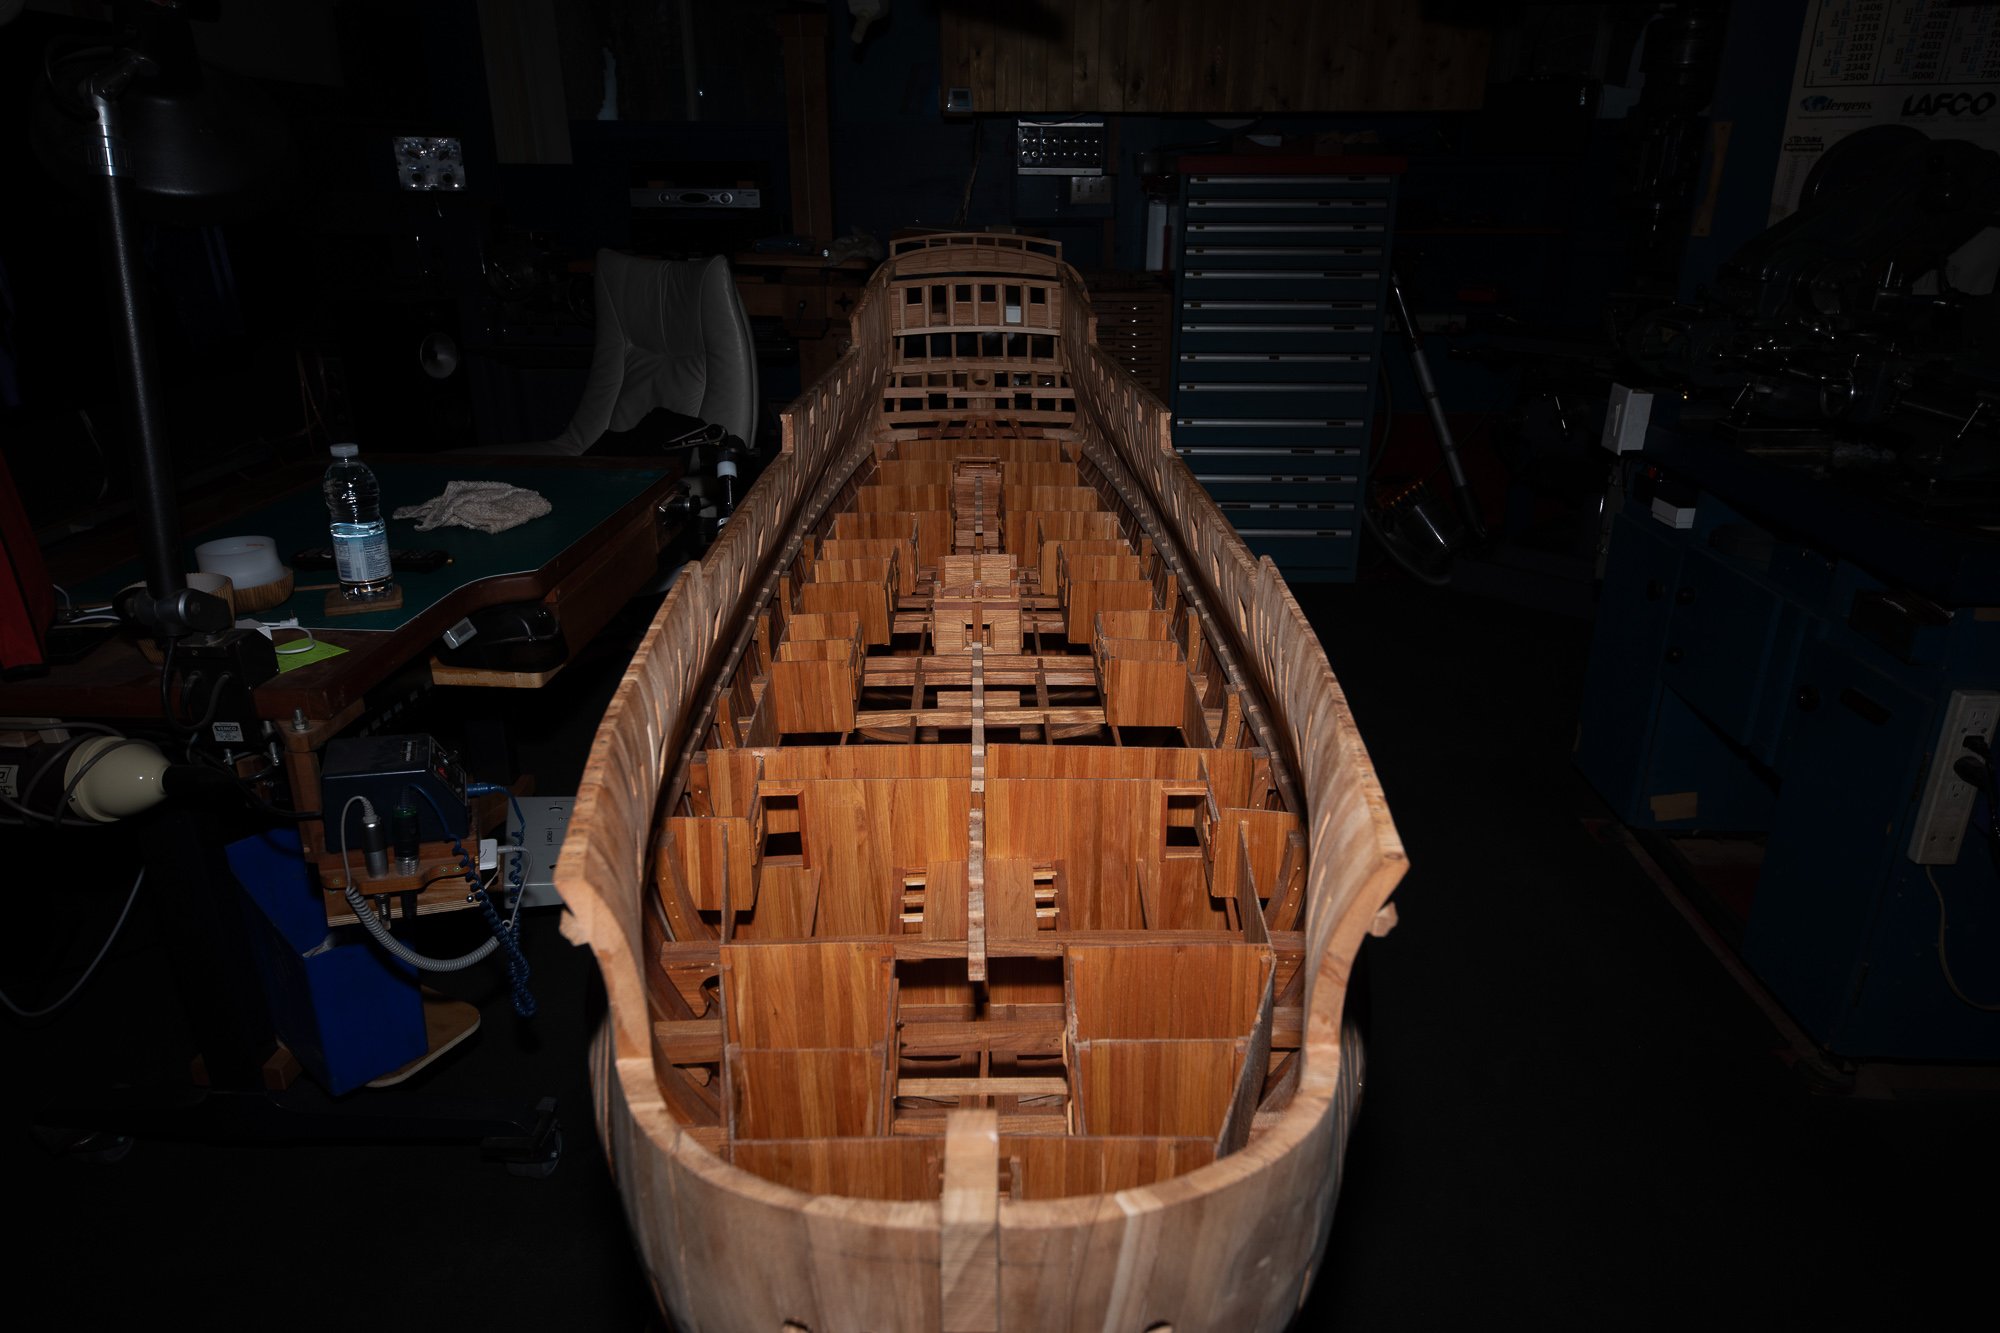
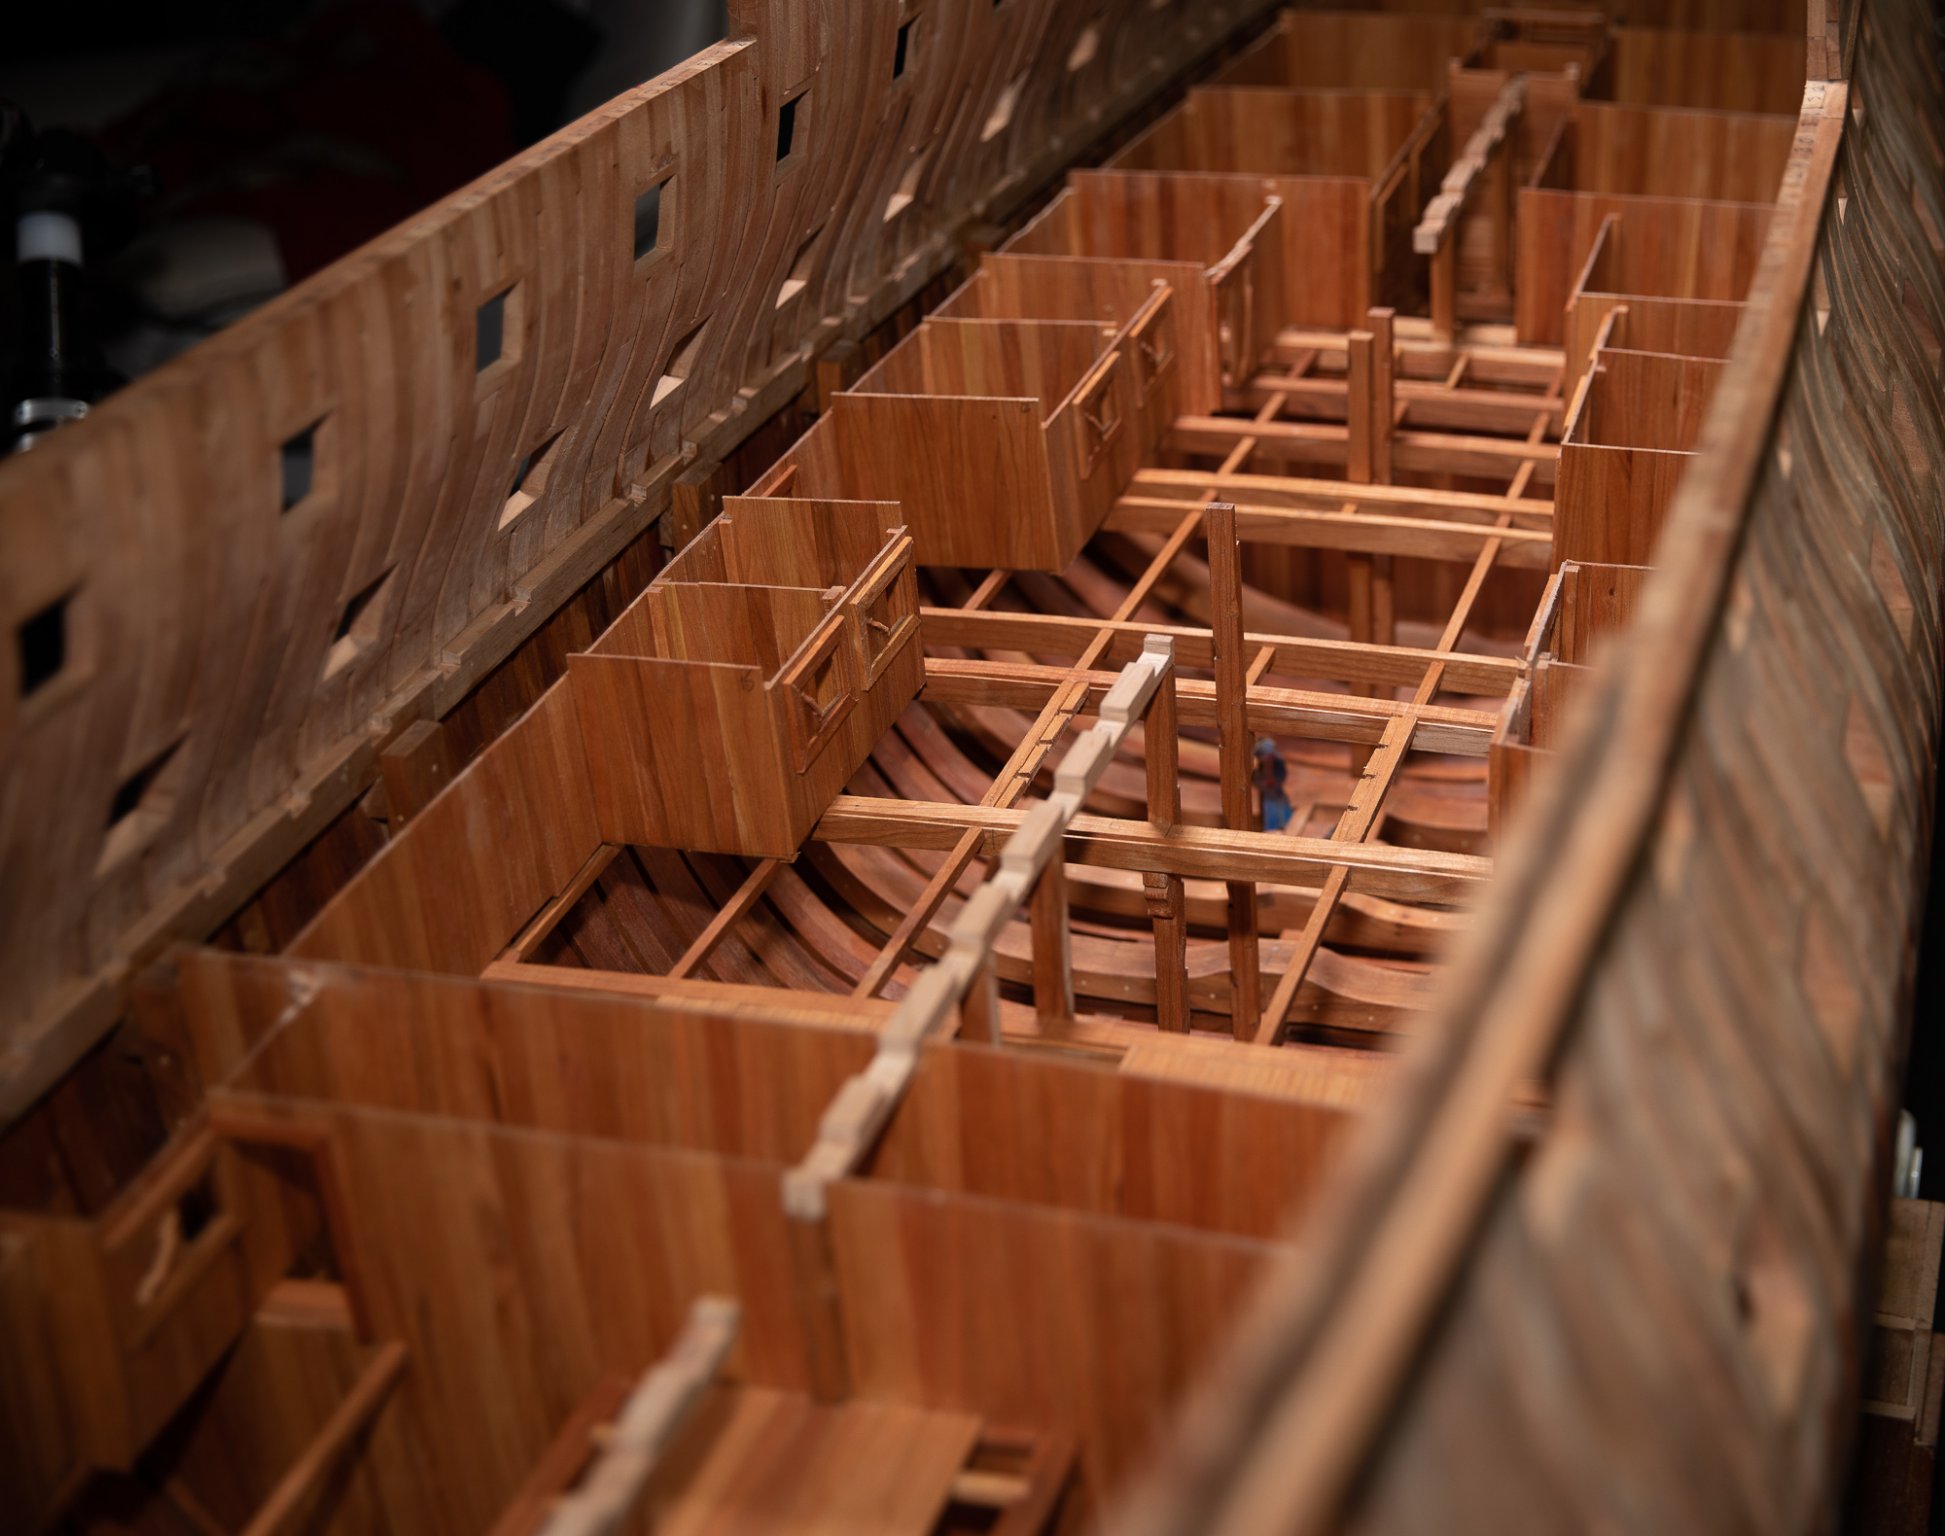
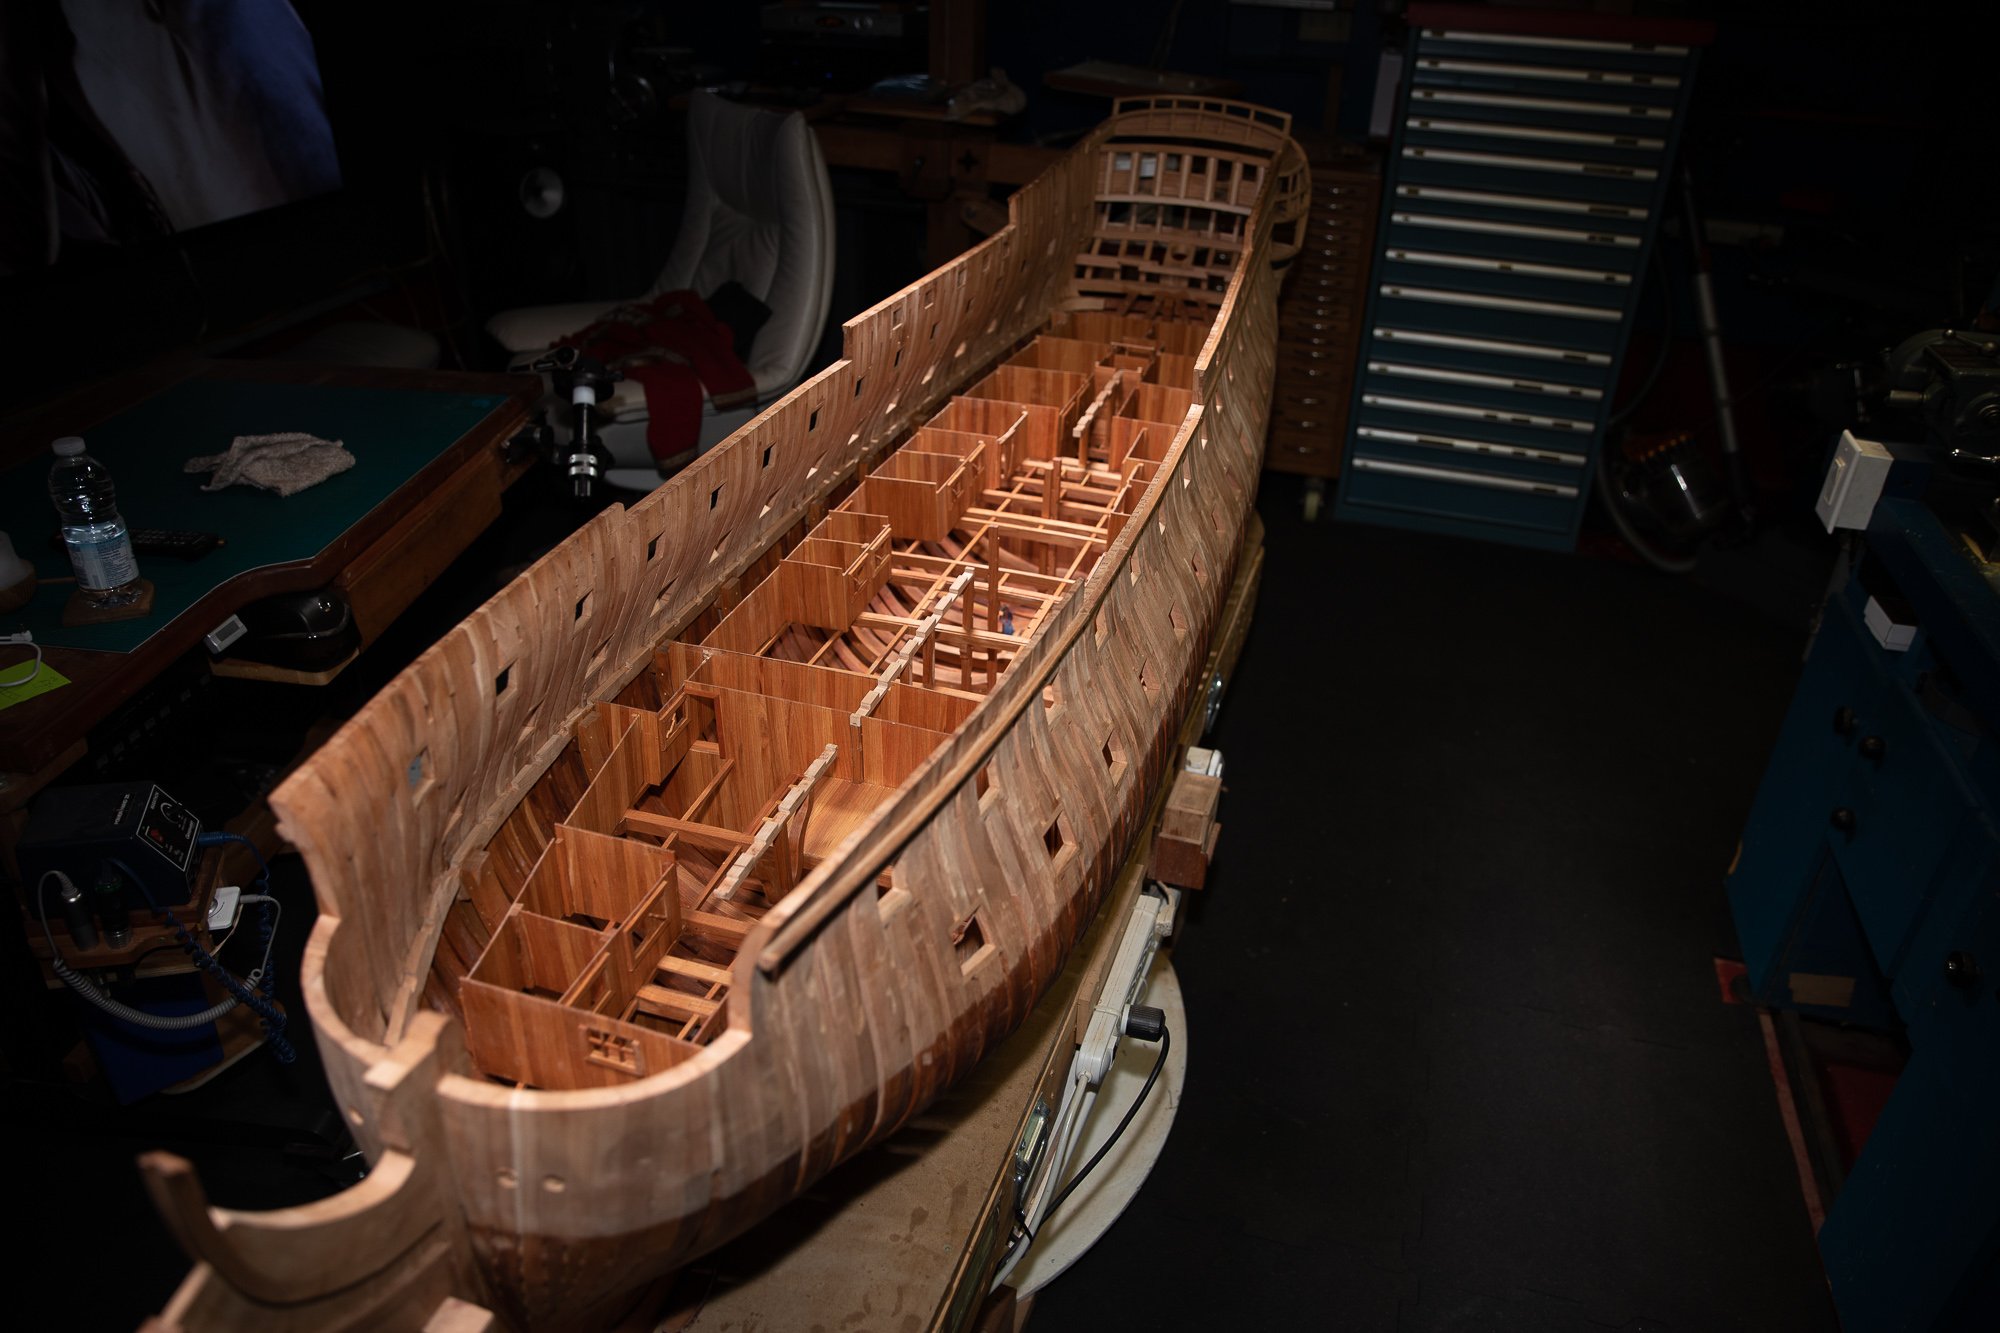
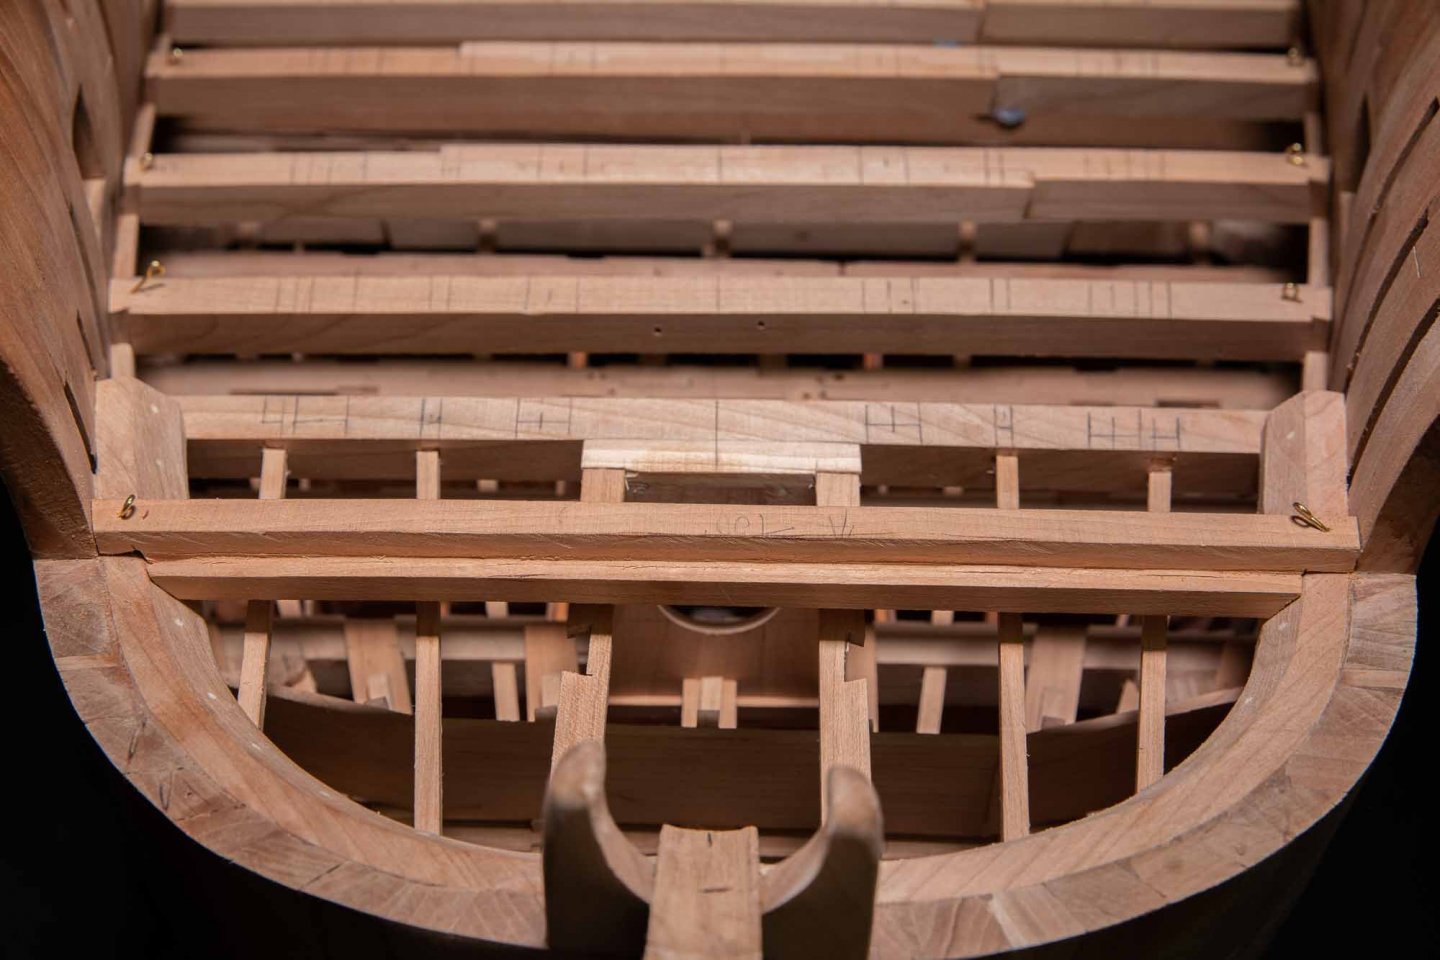
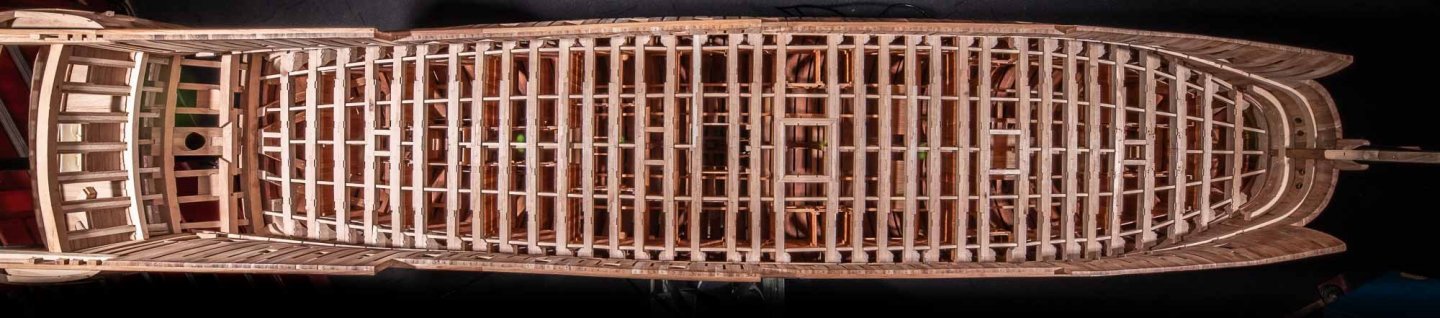
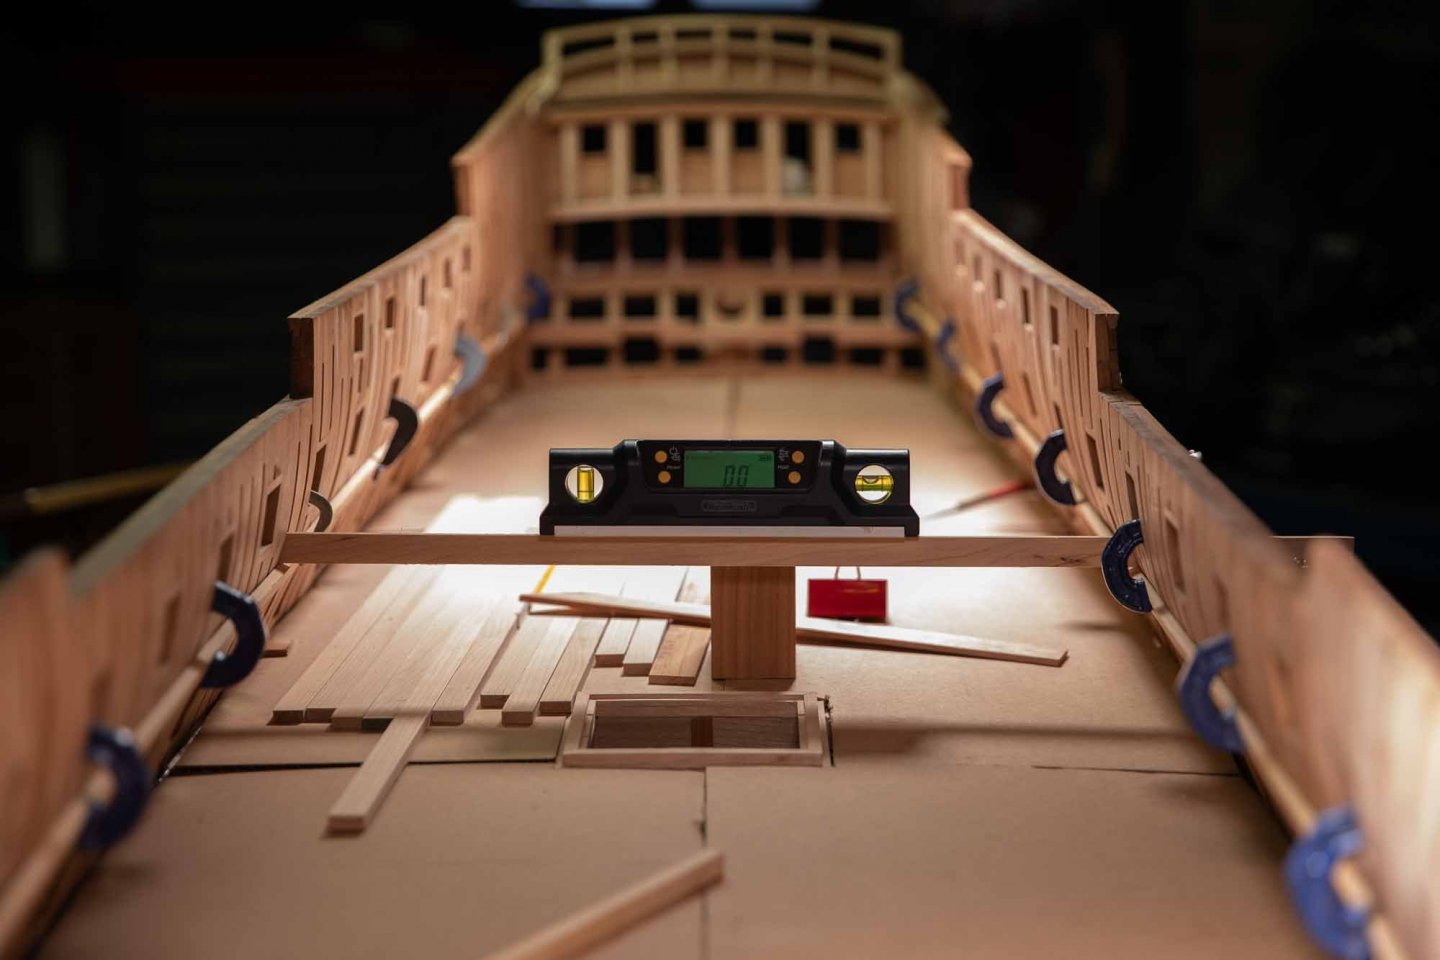
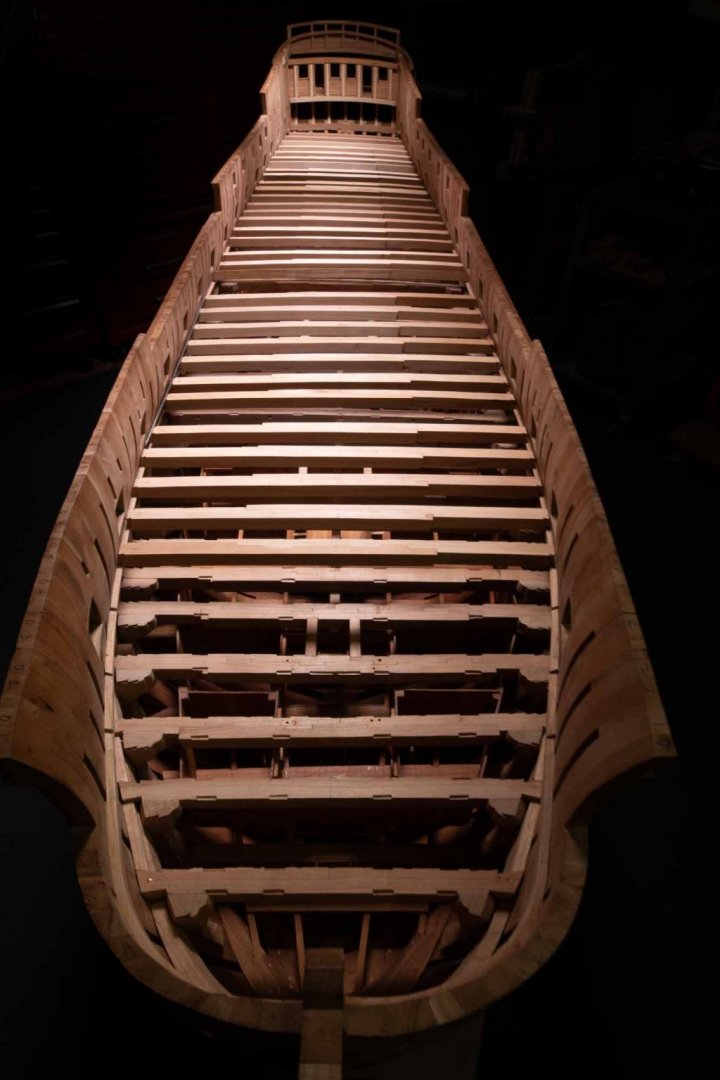
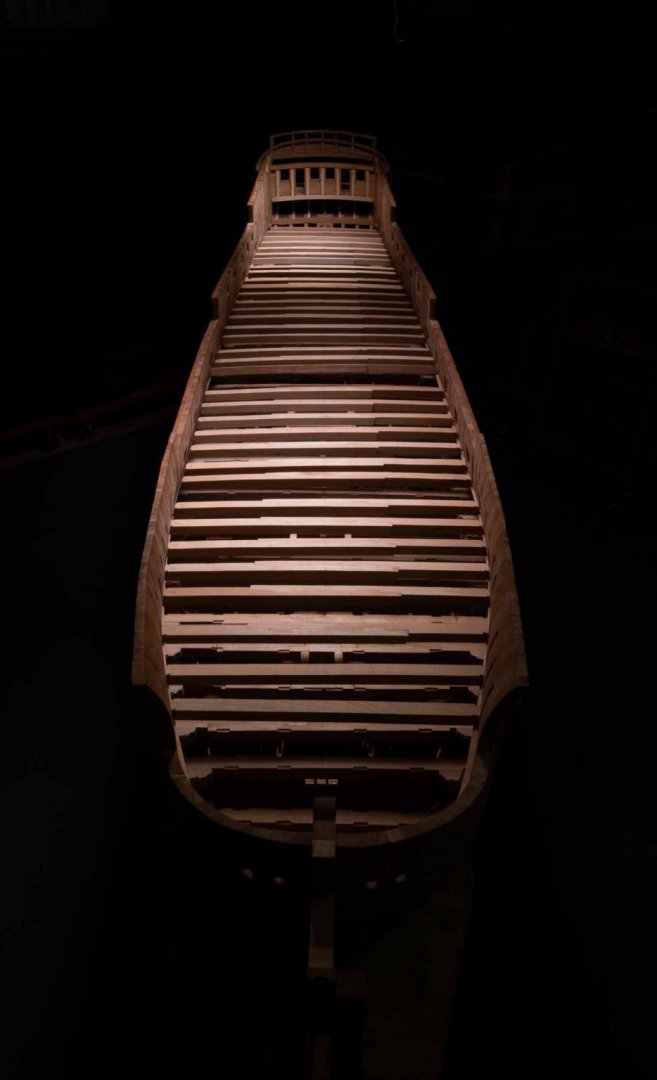
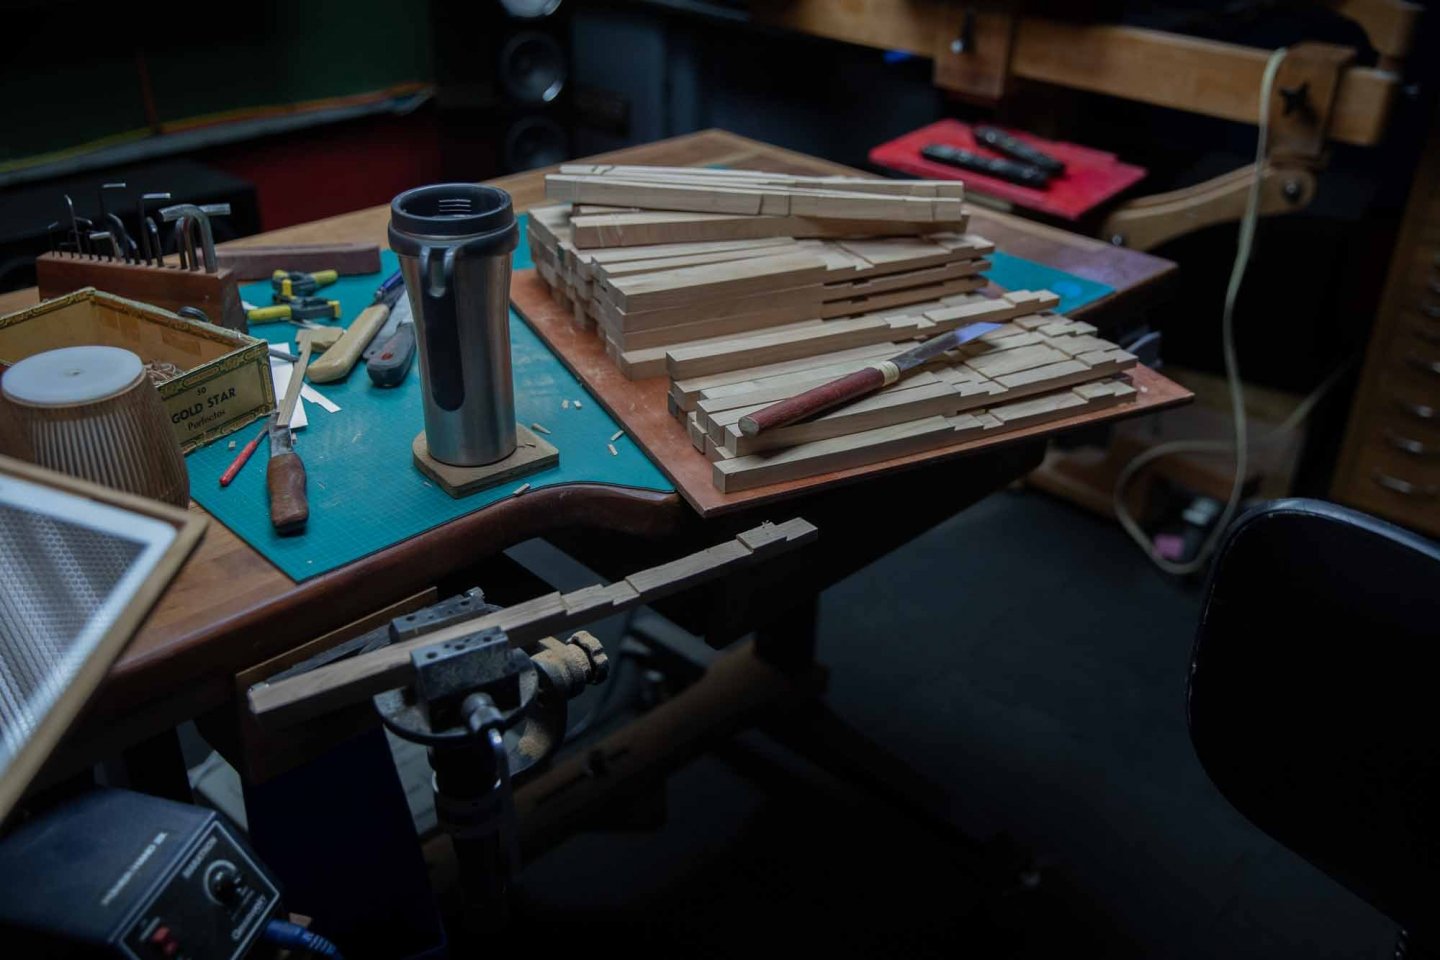
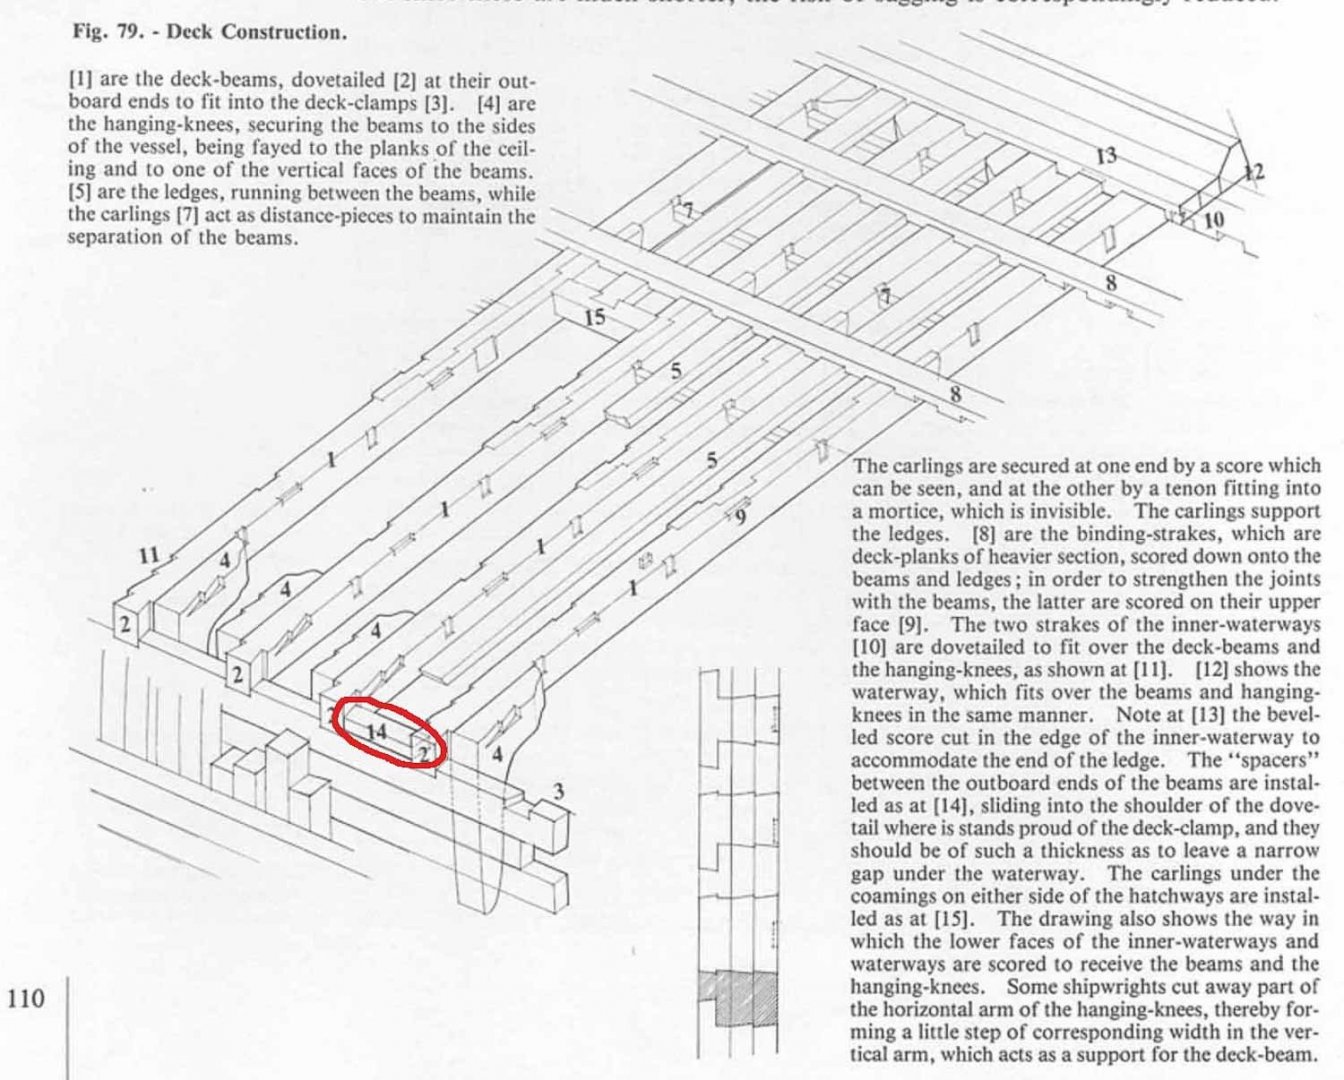
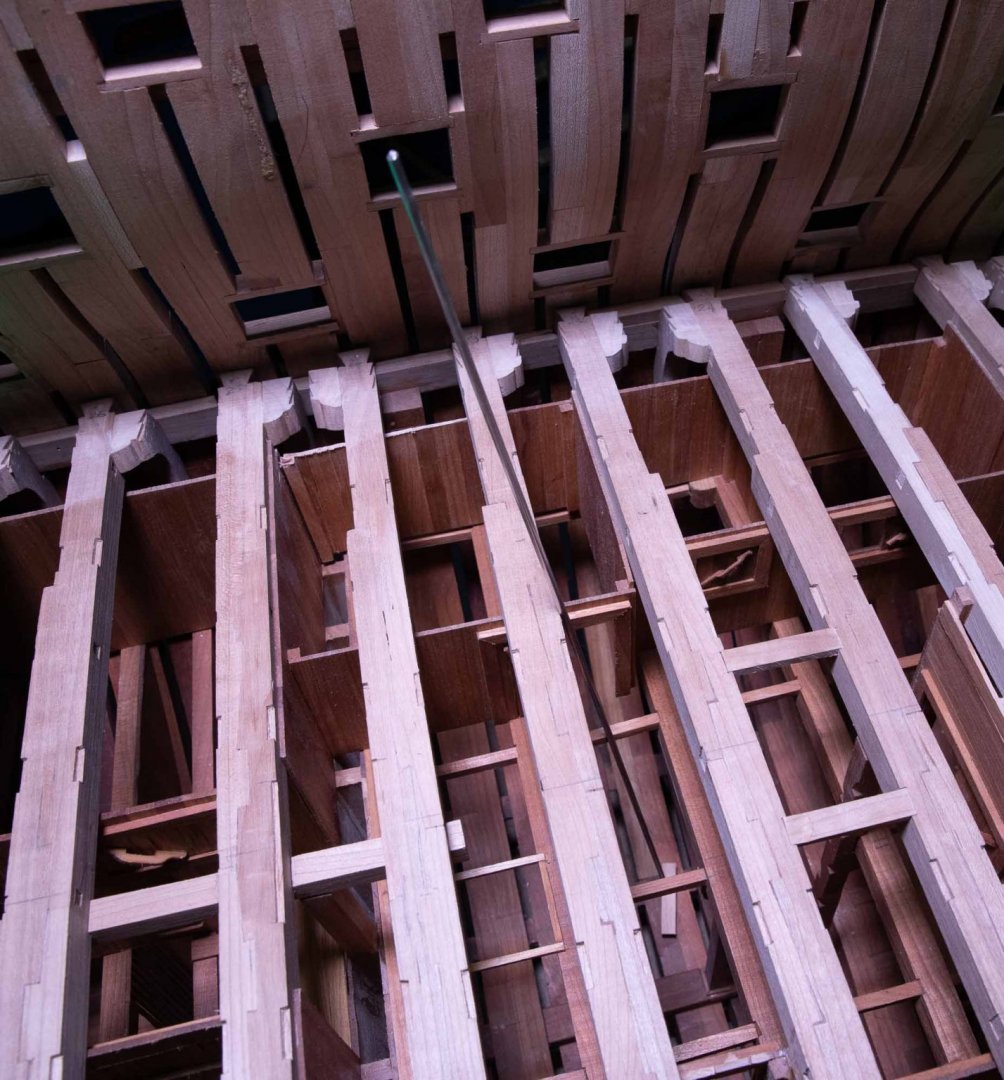
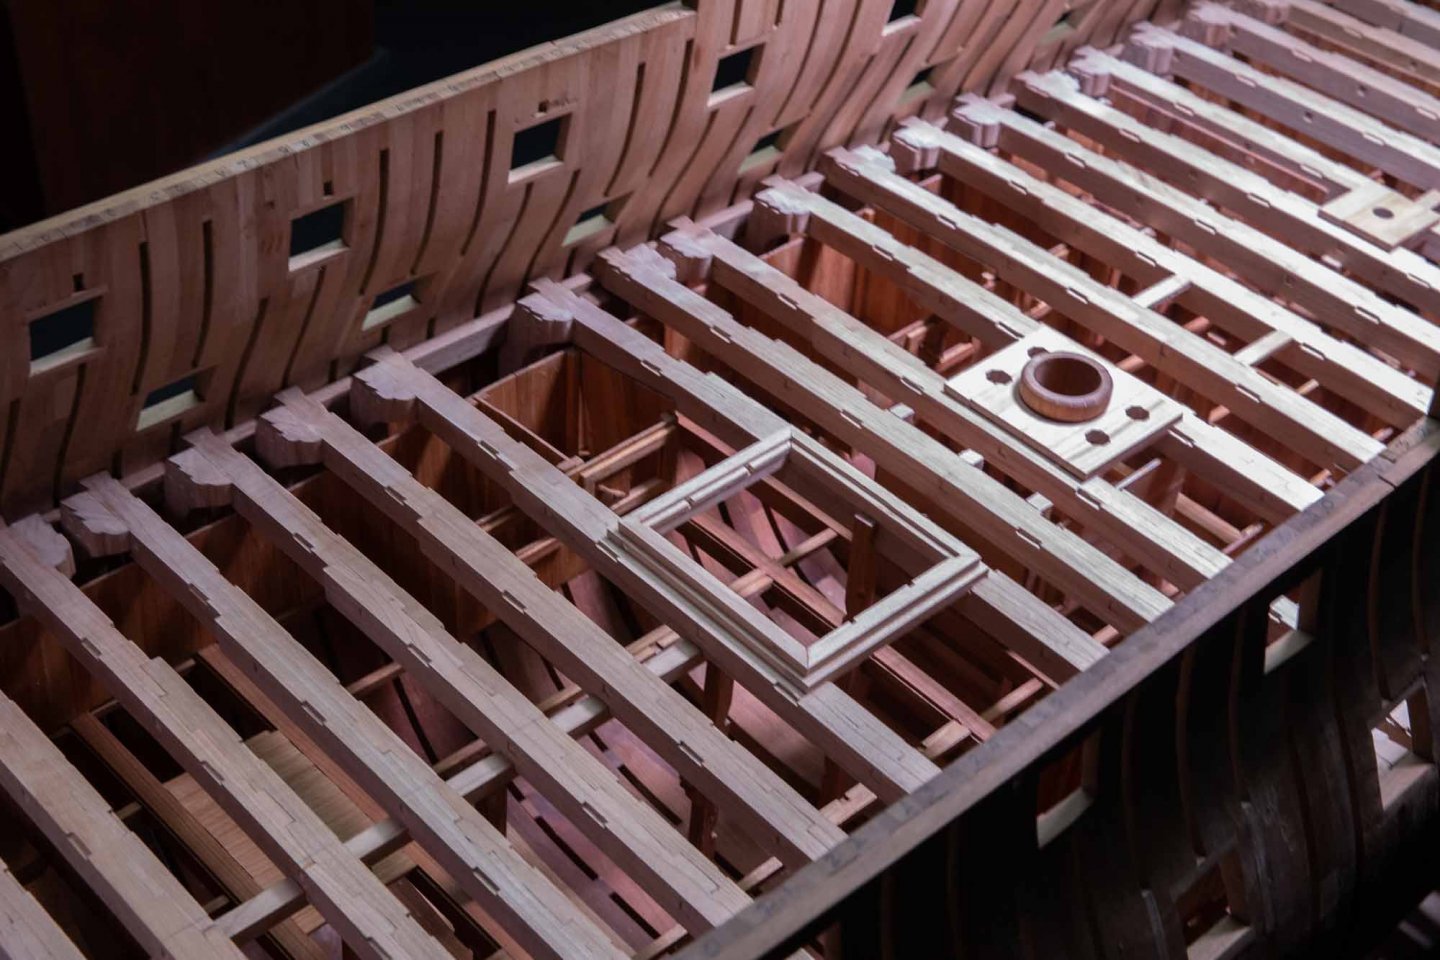
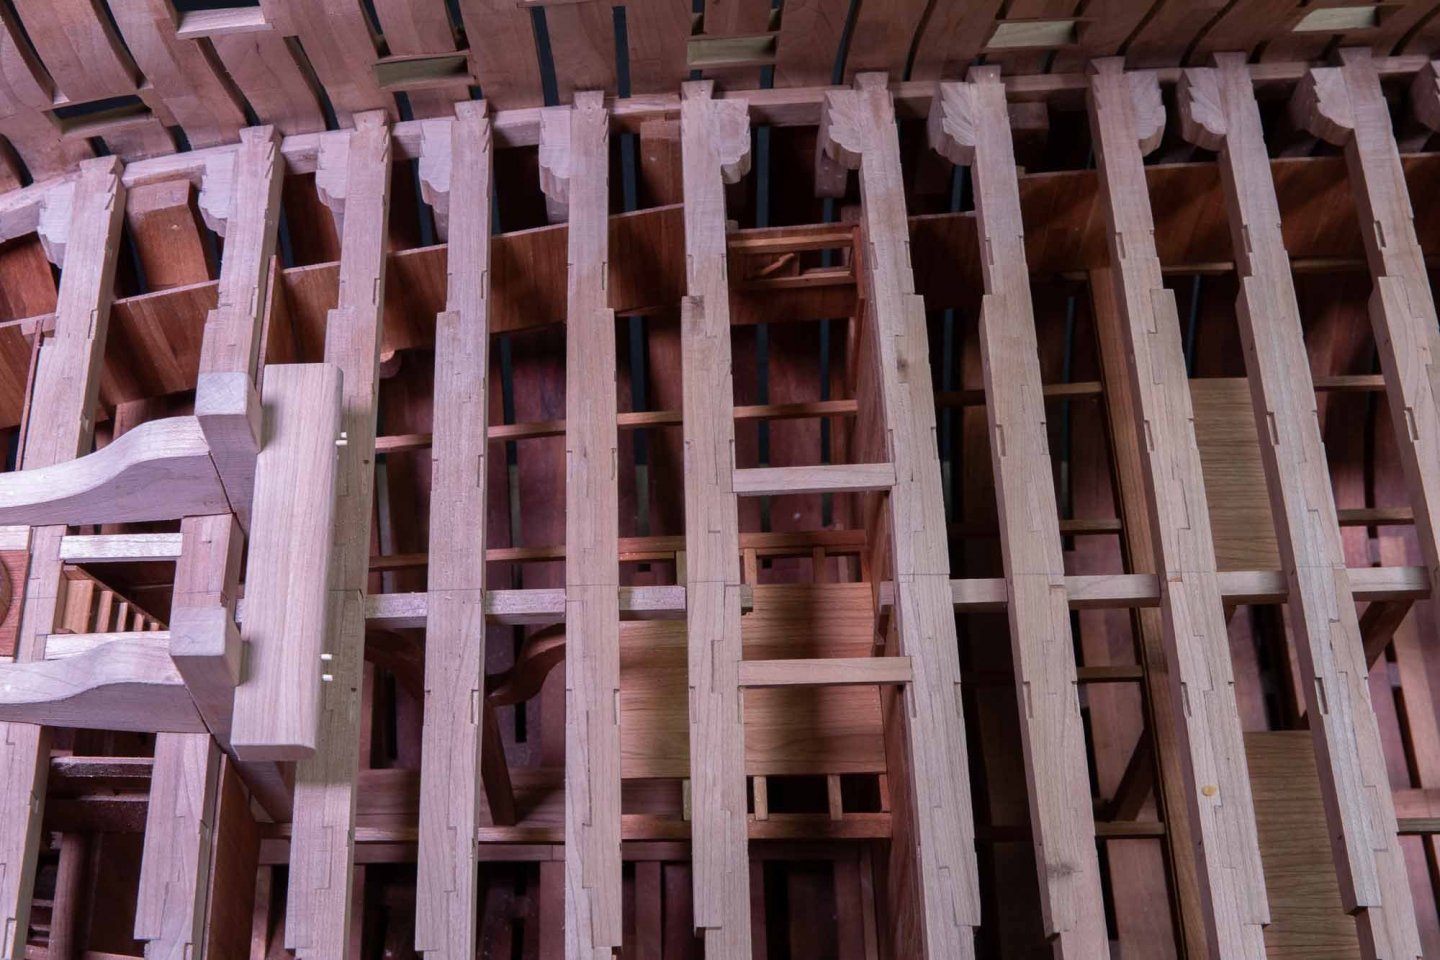
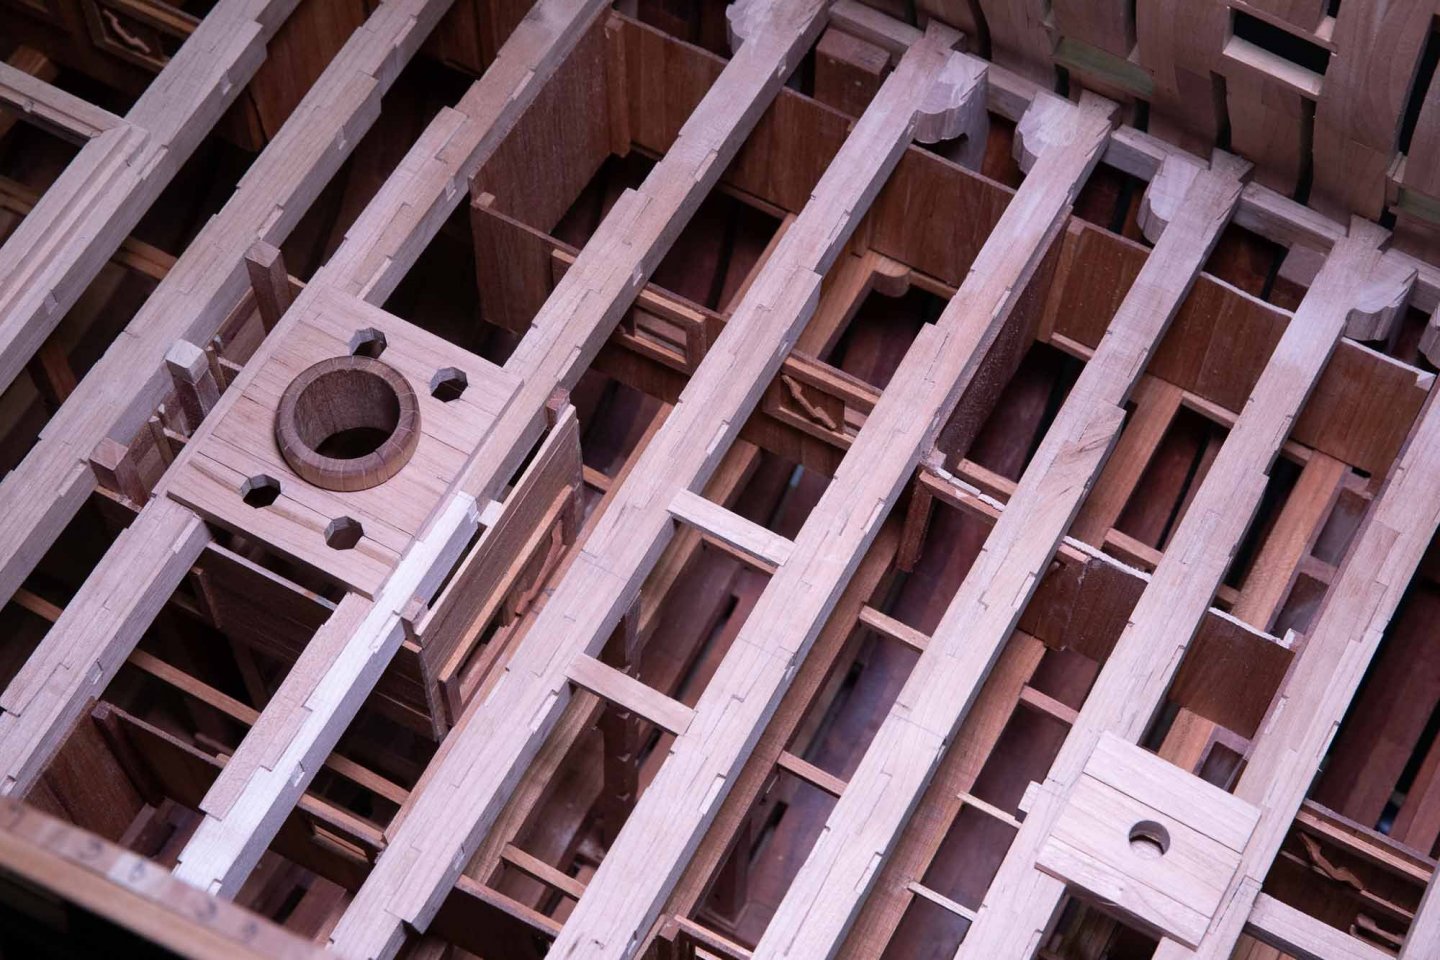
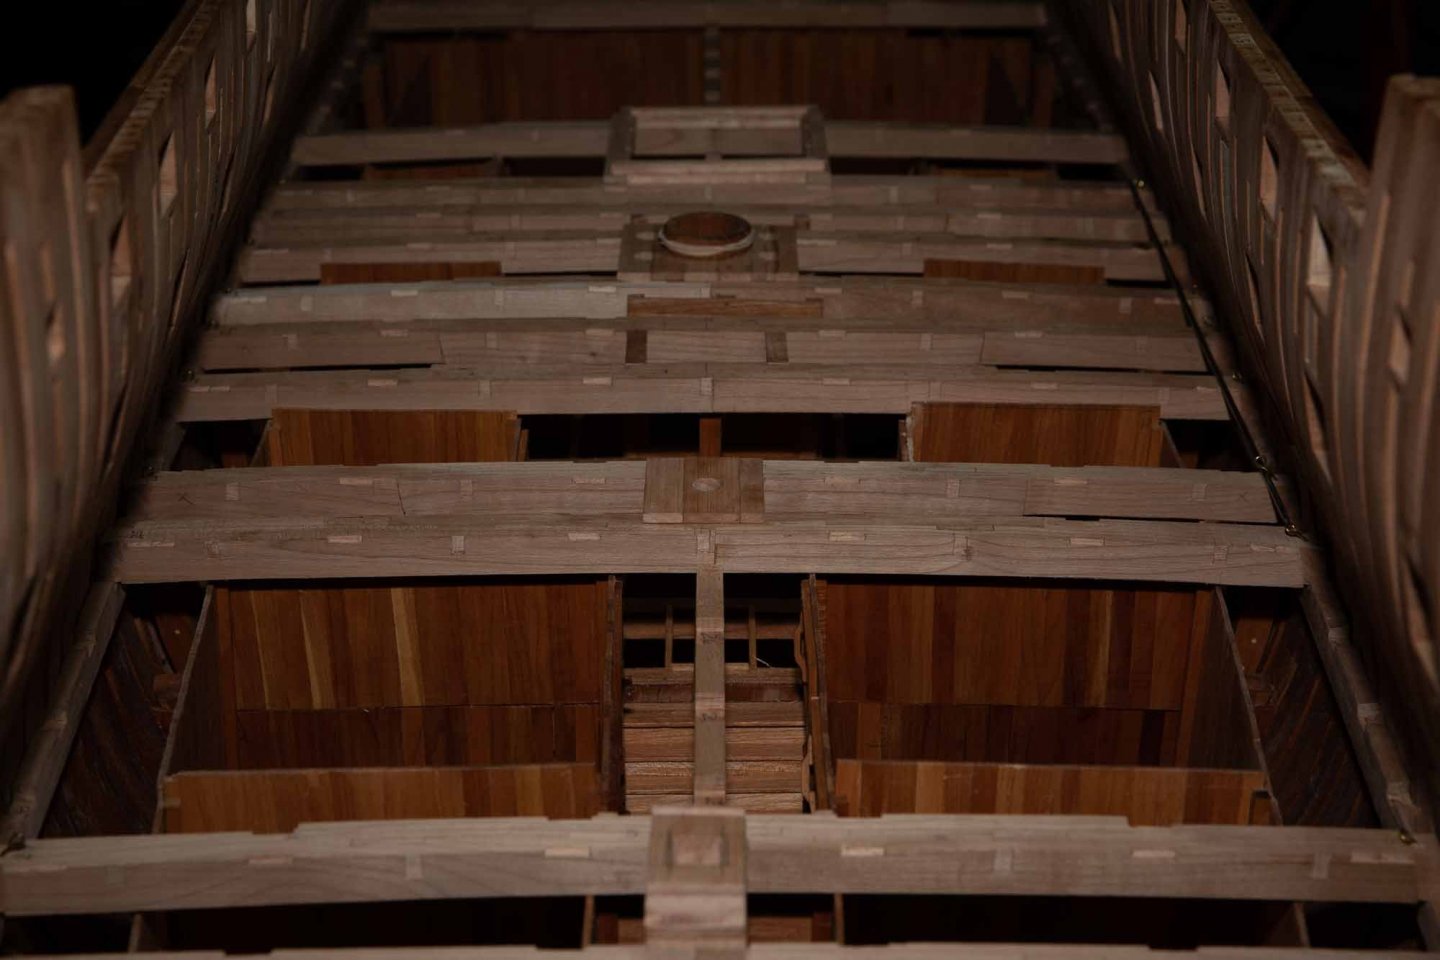
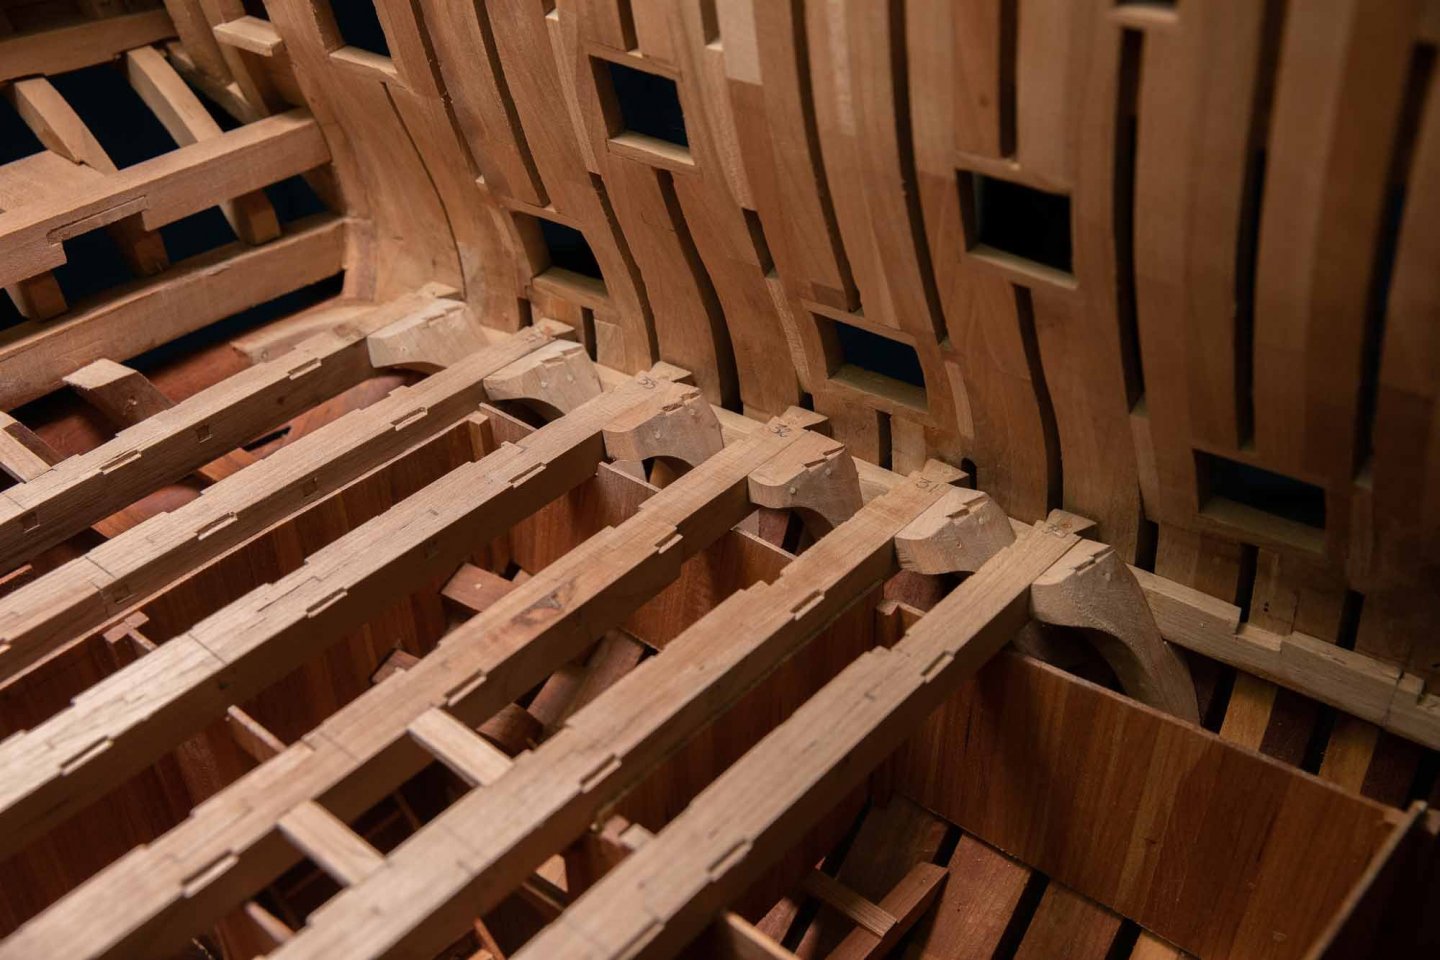
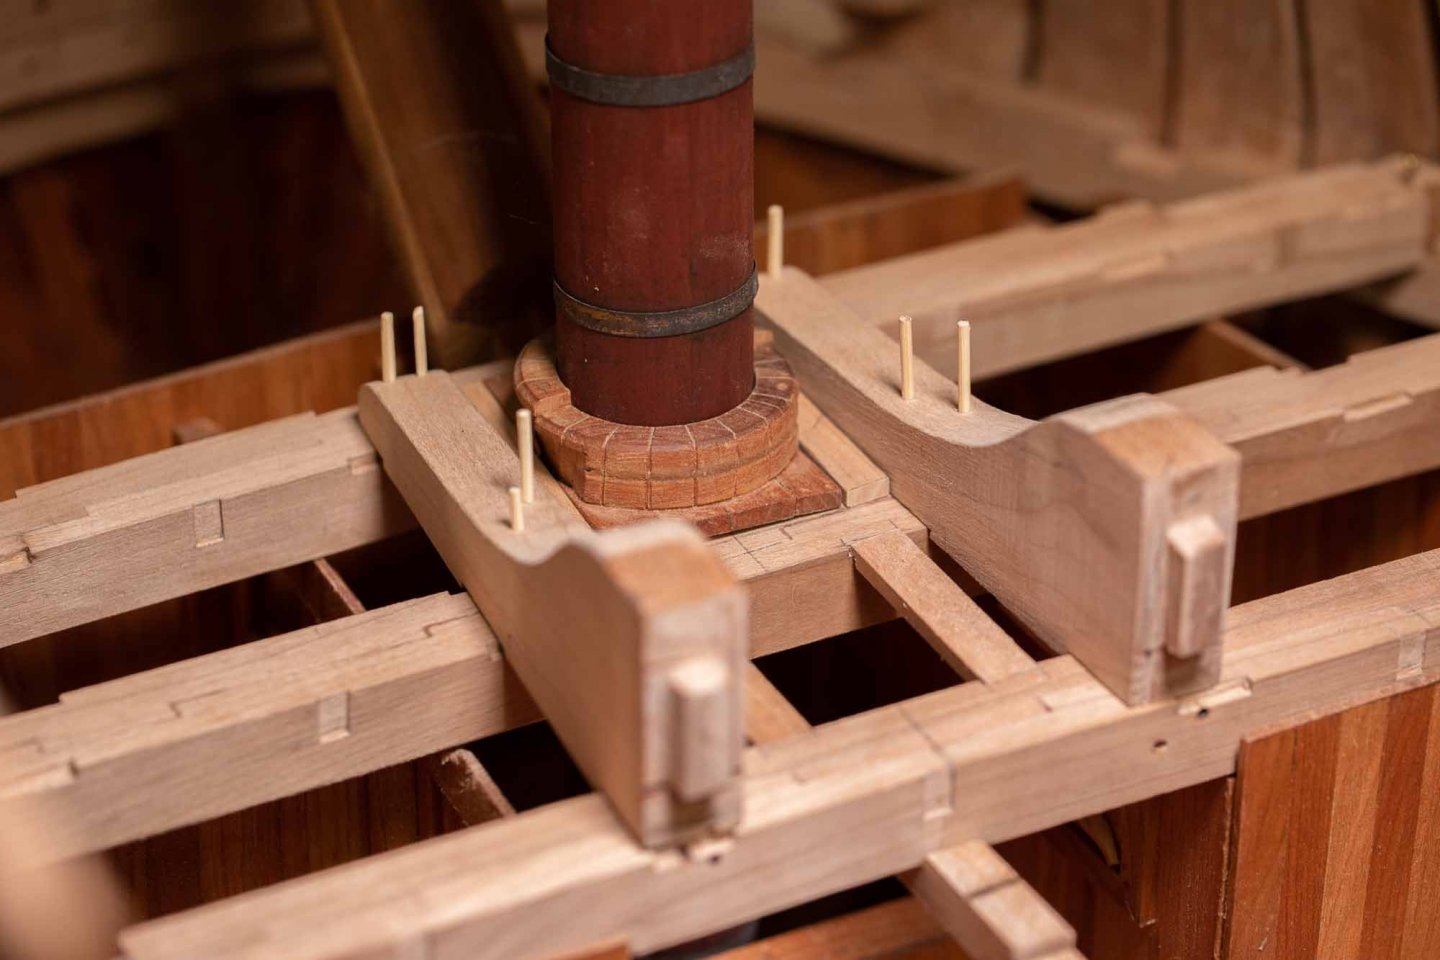
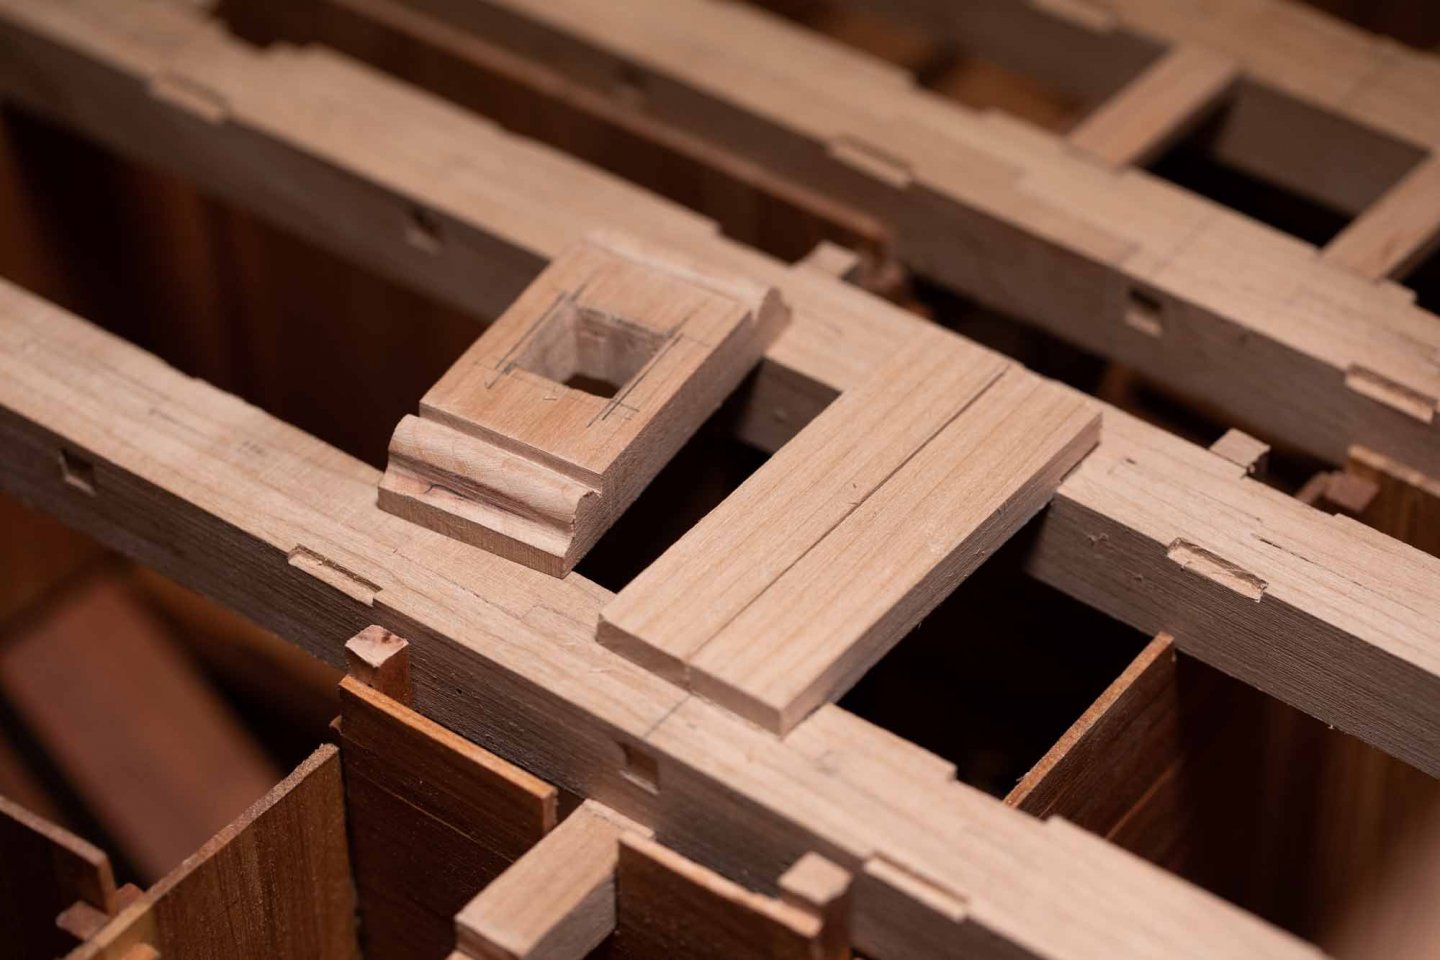
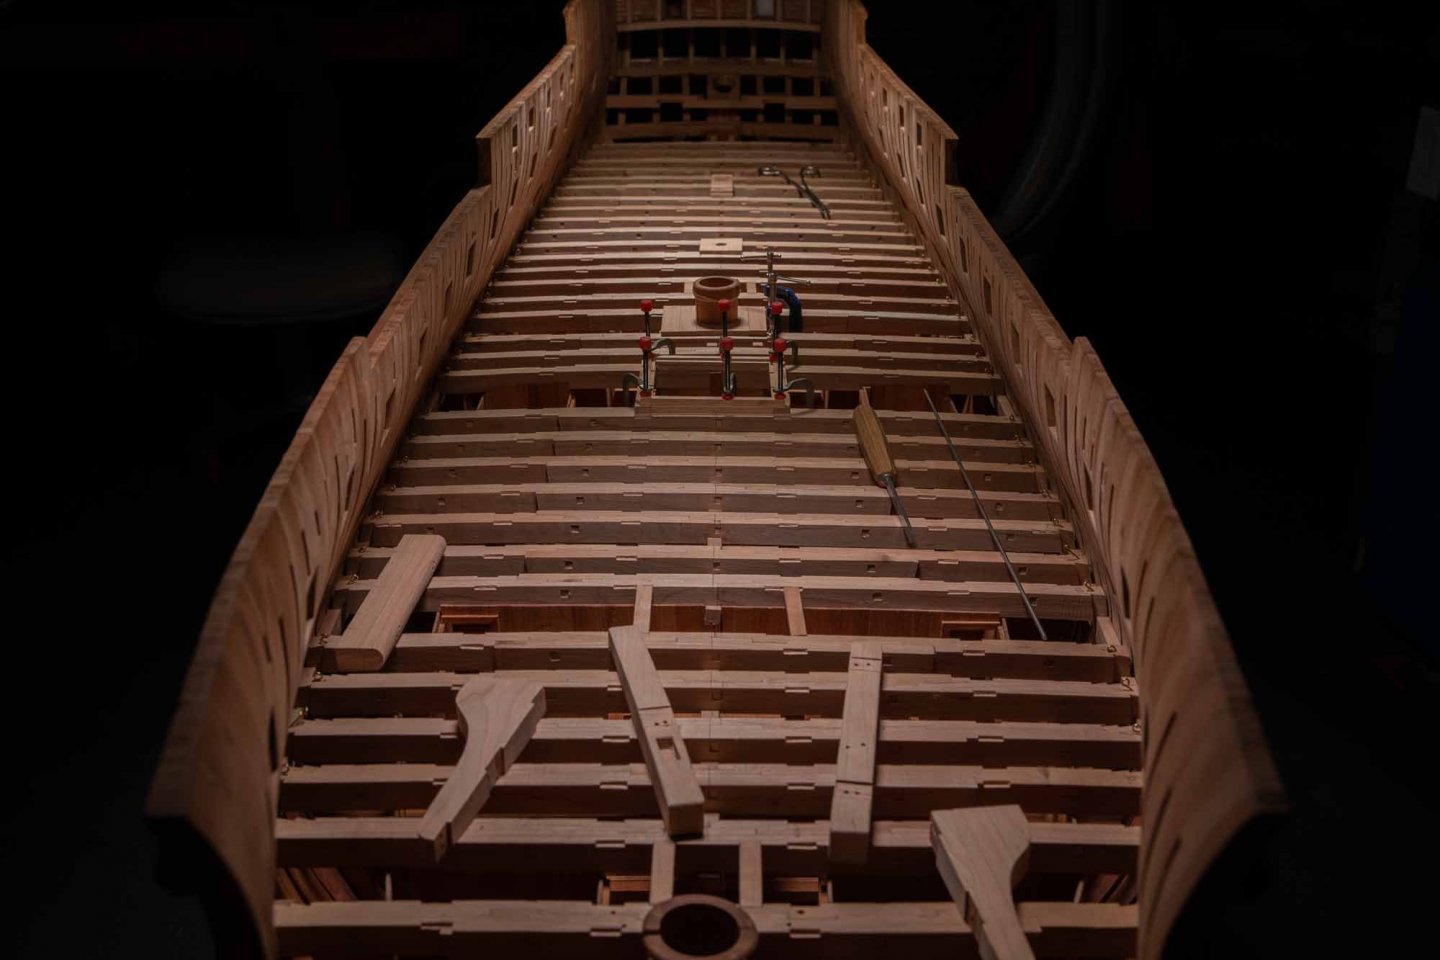
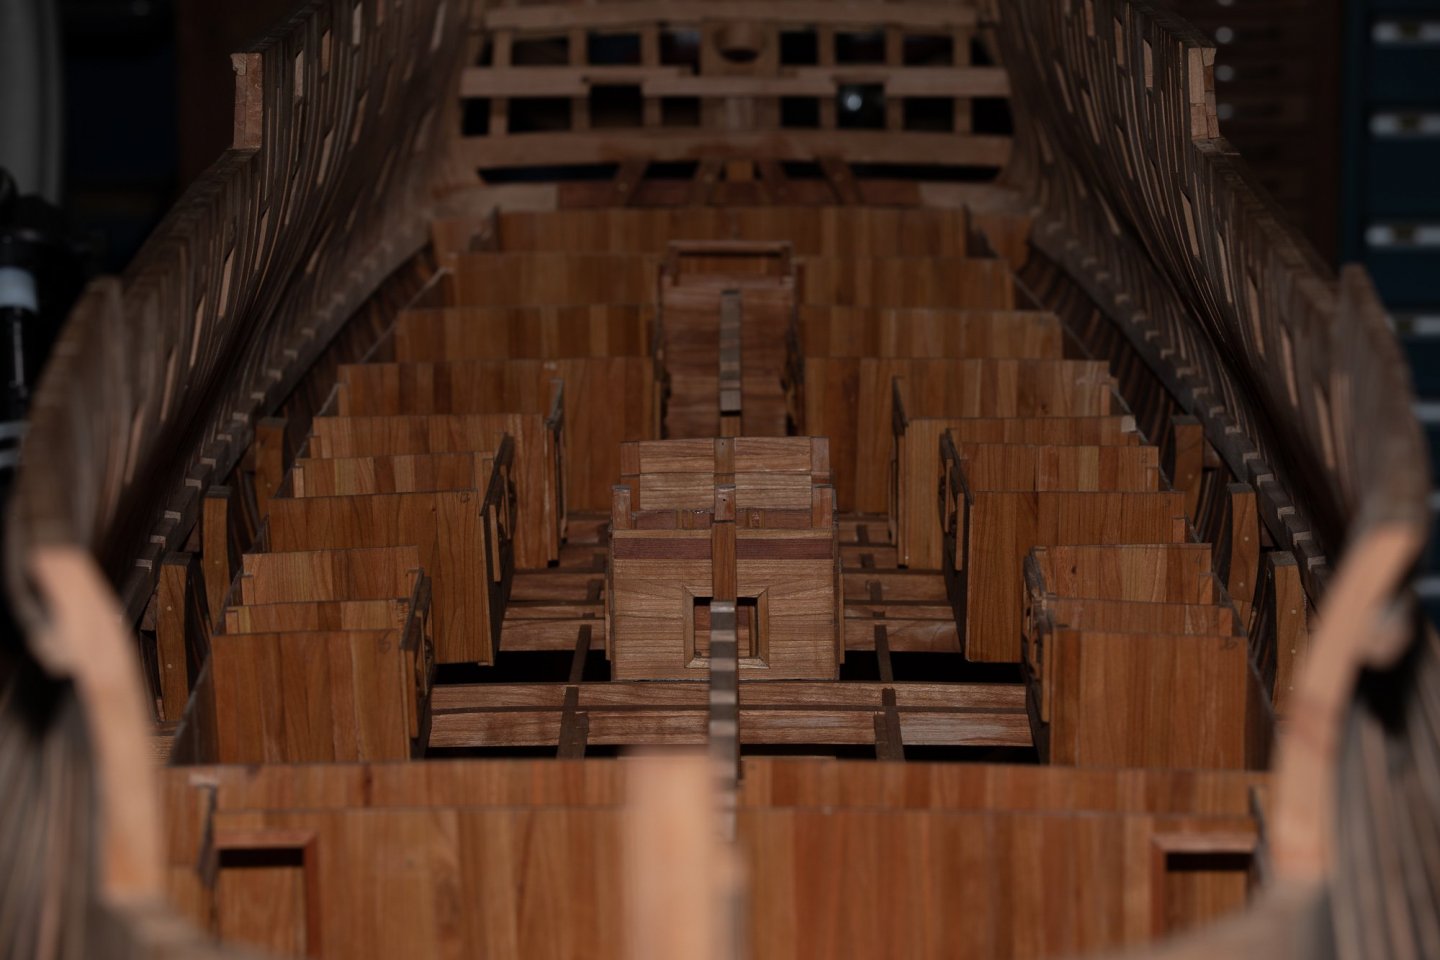
There was 2 things to do before being able to work on the first deck. Cut the beams for the second deck because some parts will be adjusted in relation with some deck beams. These are all done at the same time. It will save a lot of time this way. Just think how much time if it was done only as needed; set the tools before and after 35 times. Also a greater uniformity is reached by doing all these by similar steps in the construction. Carlings between the deck beams needs also to be fit. On a photo, we can see a simple jig to test the height of installation for each one. Even though they are suppose to fit in notches, it is easy to change the height, so the jig helps for the height regularity.


-
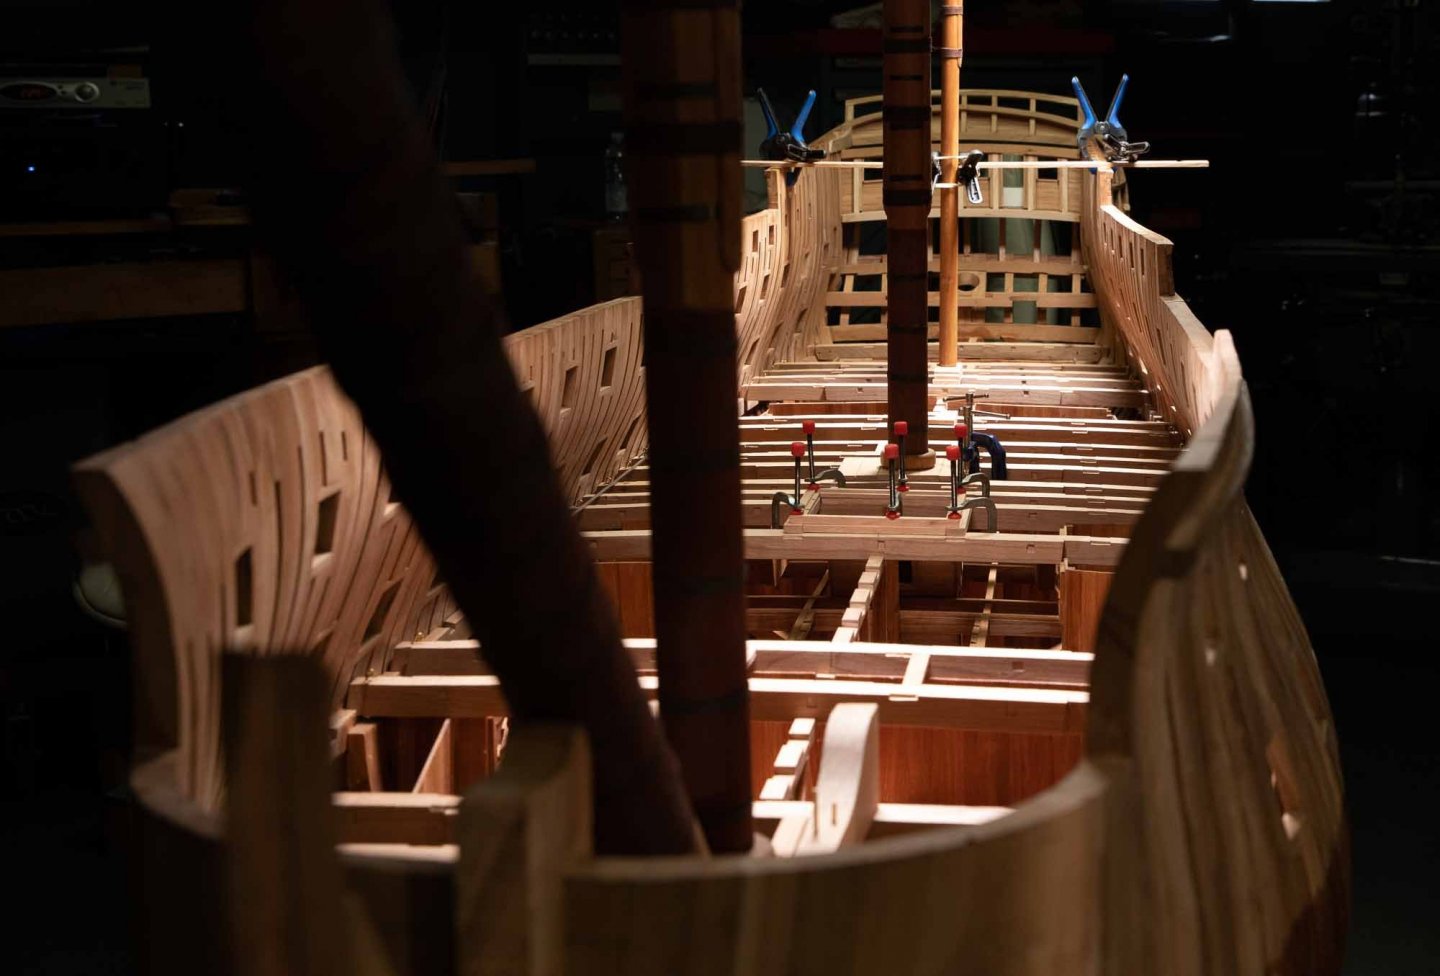
Second deck beams are needed to install few parts of the first deck. The rails which support the deck beams are installed parallel. Also, they follow the line of the gun deck openings. The front parts of these beams are not curved. At this thickness, it would need to be steamed or laminated. The fastest way is to cut the shape from a whole plank. It takes a lot of wood but it is easy to sand at the good thickness. This way, no stress in the plank. Then, you installed the deck beams of the second deck.


-
Portable mini led light
Gaetan Bordeleau replied to Moab's topic in Modeling tools and Workshop Equipment
There are better alternatives, 2 examples, a LED bulb twice as bright than 800 lumens and the LED light for video, more than 10 times as bright. The price of the LED bulb lower than $17. You need at least something brighter than 1000 lumen.
-
Again , as comparison, french 74 also had false windows, no glass, the wall behind was painted in black. These windows made you believe that is was bigger than what it really was, not only on the sides but in the back also in the back.
-
Hi Jaager, When somebody ask me How much wood do you need to build a model, the best answer I could find is: twice the volume of the model. Also I think that staring from a lumber, over 60 % is lost when cutting and recutting the planks. It would be very difficult to calculate the exact quantity of lumber we need because losses are difficult to calculate. Here is how I guess the quantity: when I buy $1000 of cherry wood at the beginning of a project, I know how much I have left at the end; so the difference is how much it took.
-
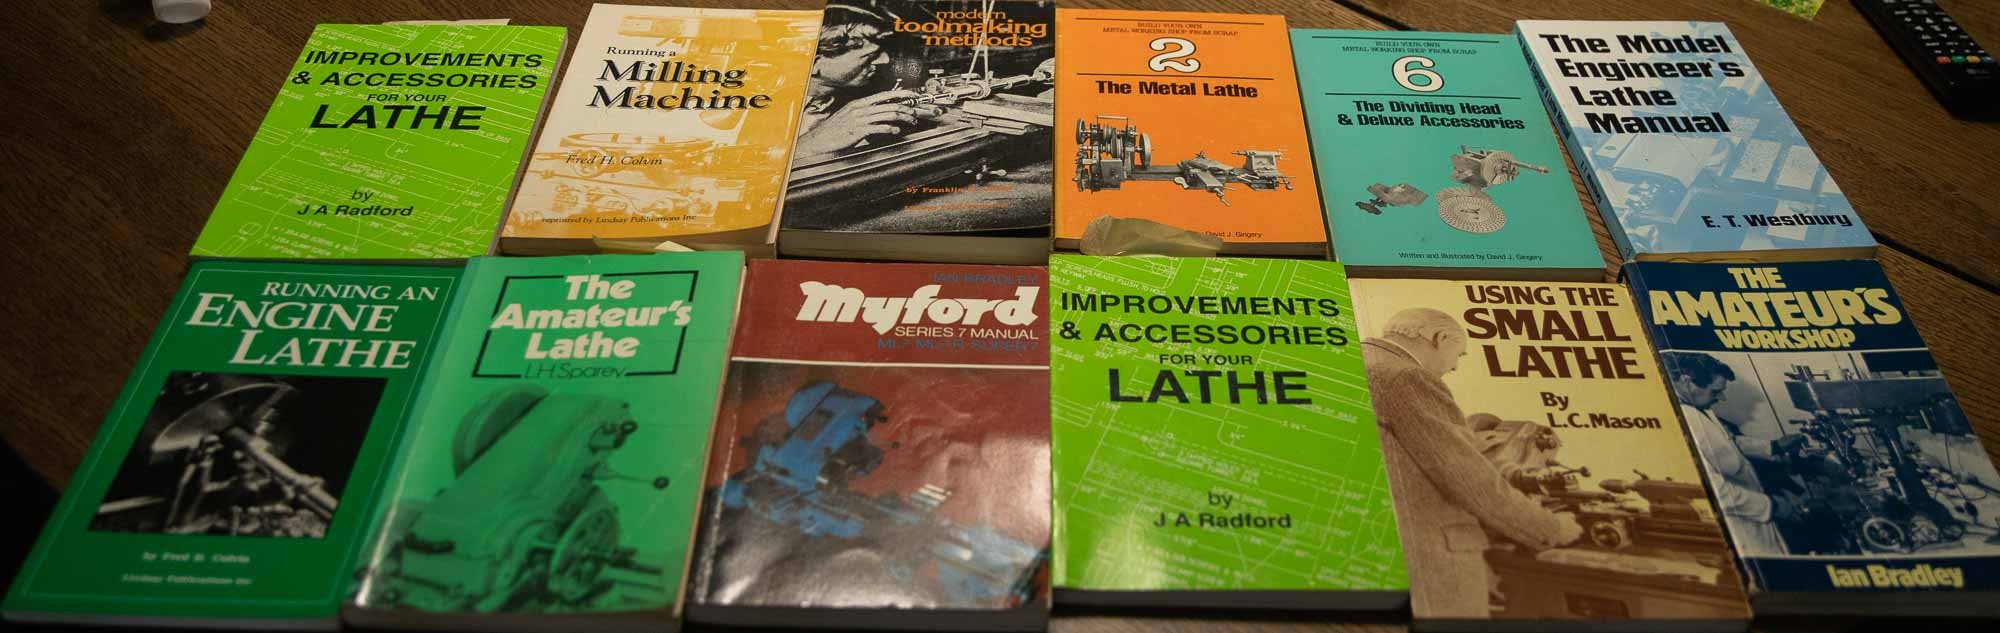
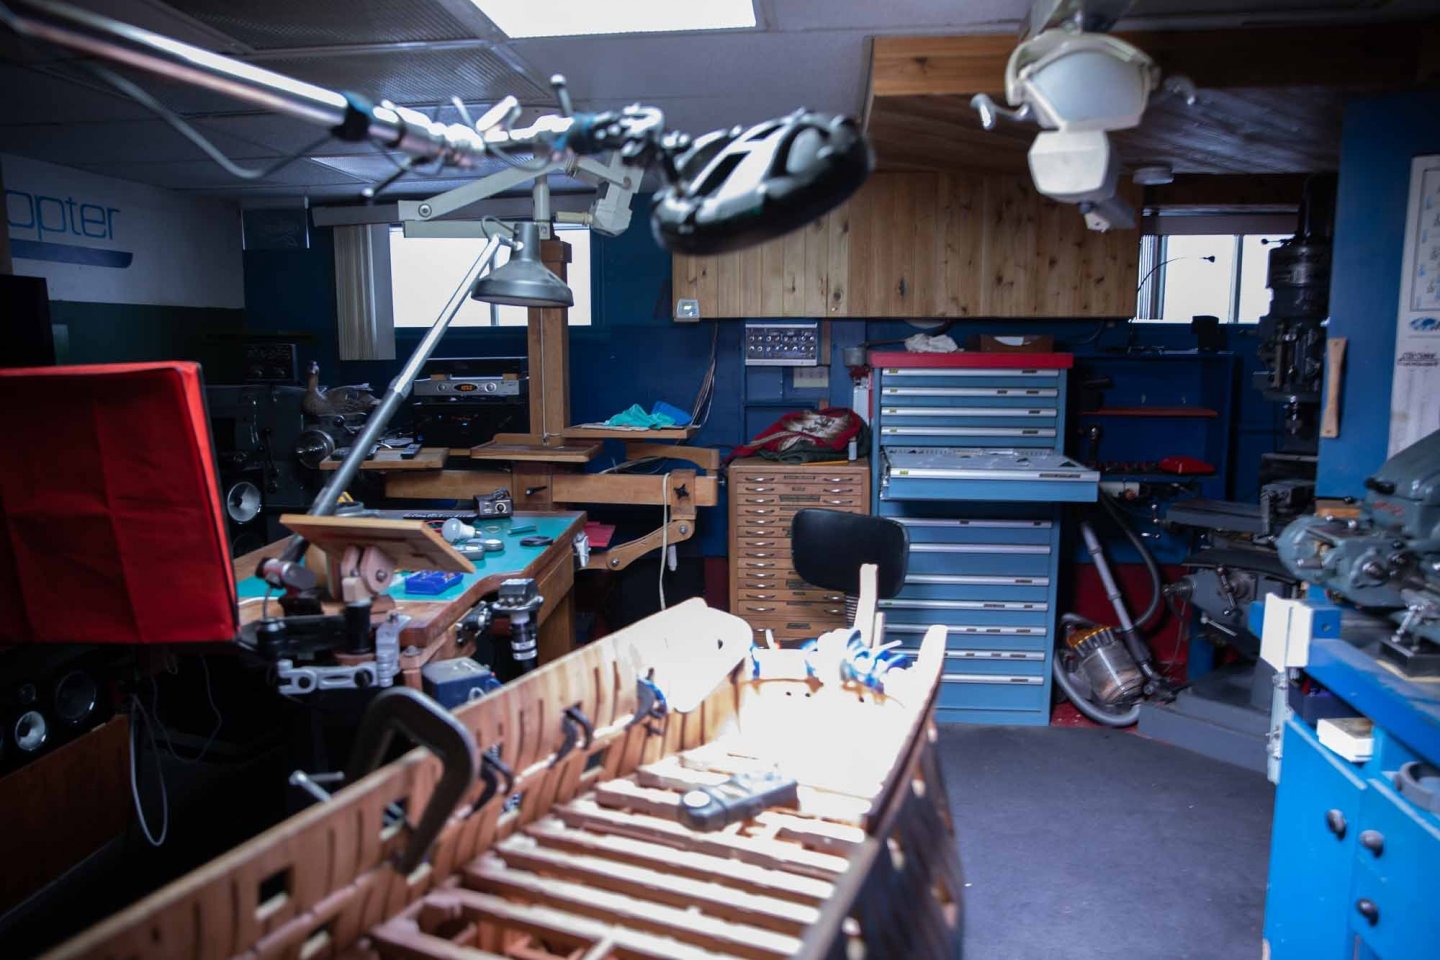
Hi Eric. Your question is very large. If a machinist is somebody fabricating tools, there is a good chance he will be using a milling machine first and a lathe after. These are 2 important machines to know the parts. After you will know to use the accessories for these 2 machines. If you enter in this spiral you will want after to build a few tools. To build a tool, you will need other tools and this can go a long way. Working with wood usually smells good. Working with metals rarely smell good. you will have dirty hands if you do not use gloves and the dullest part of it is the cleaning after, but it can be very interesting! I joined a photo for introduction: Hi Mark, I guess the more joints, the stronger it is. I think it is a Kugihiki from Lee Valley: https://www.leevalley.com/en-gb/shop/tools/hand-tools/saws/japanese/58686-japanese-detail-saws This tool works so well! this the best razor saw I tried.
-
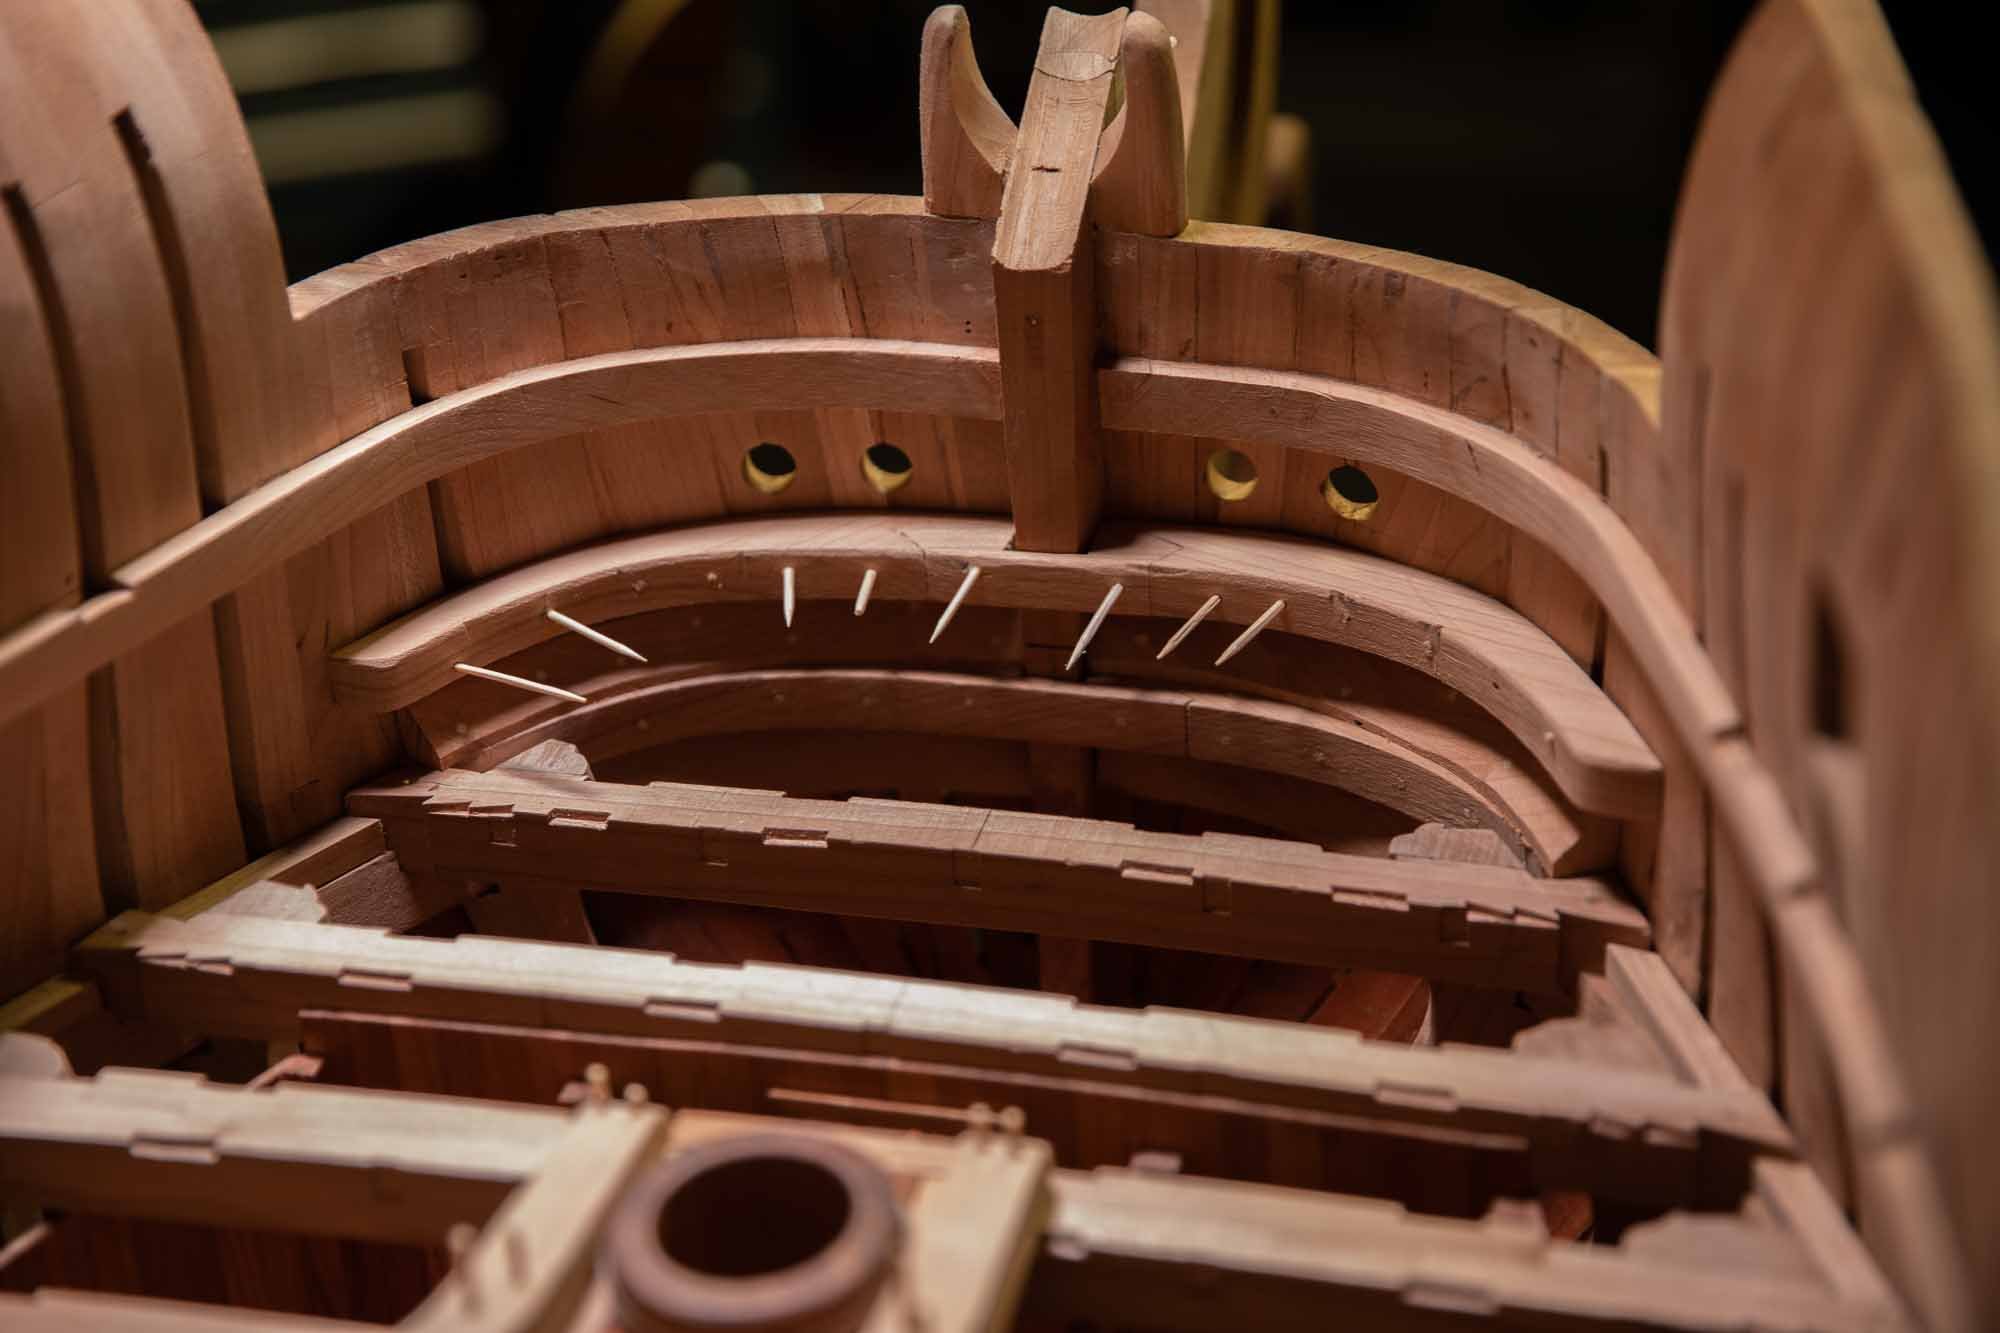
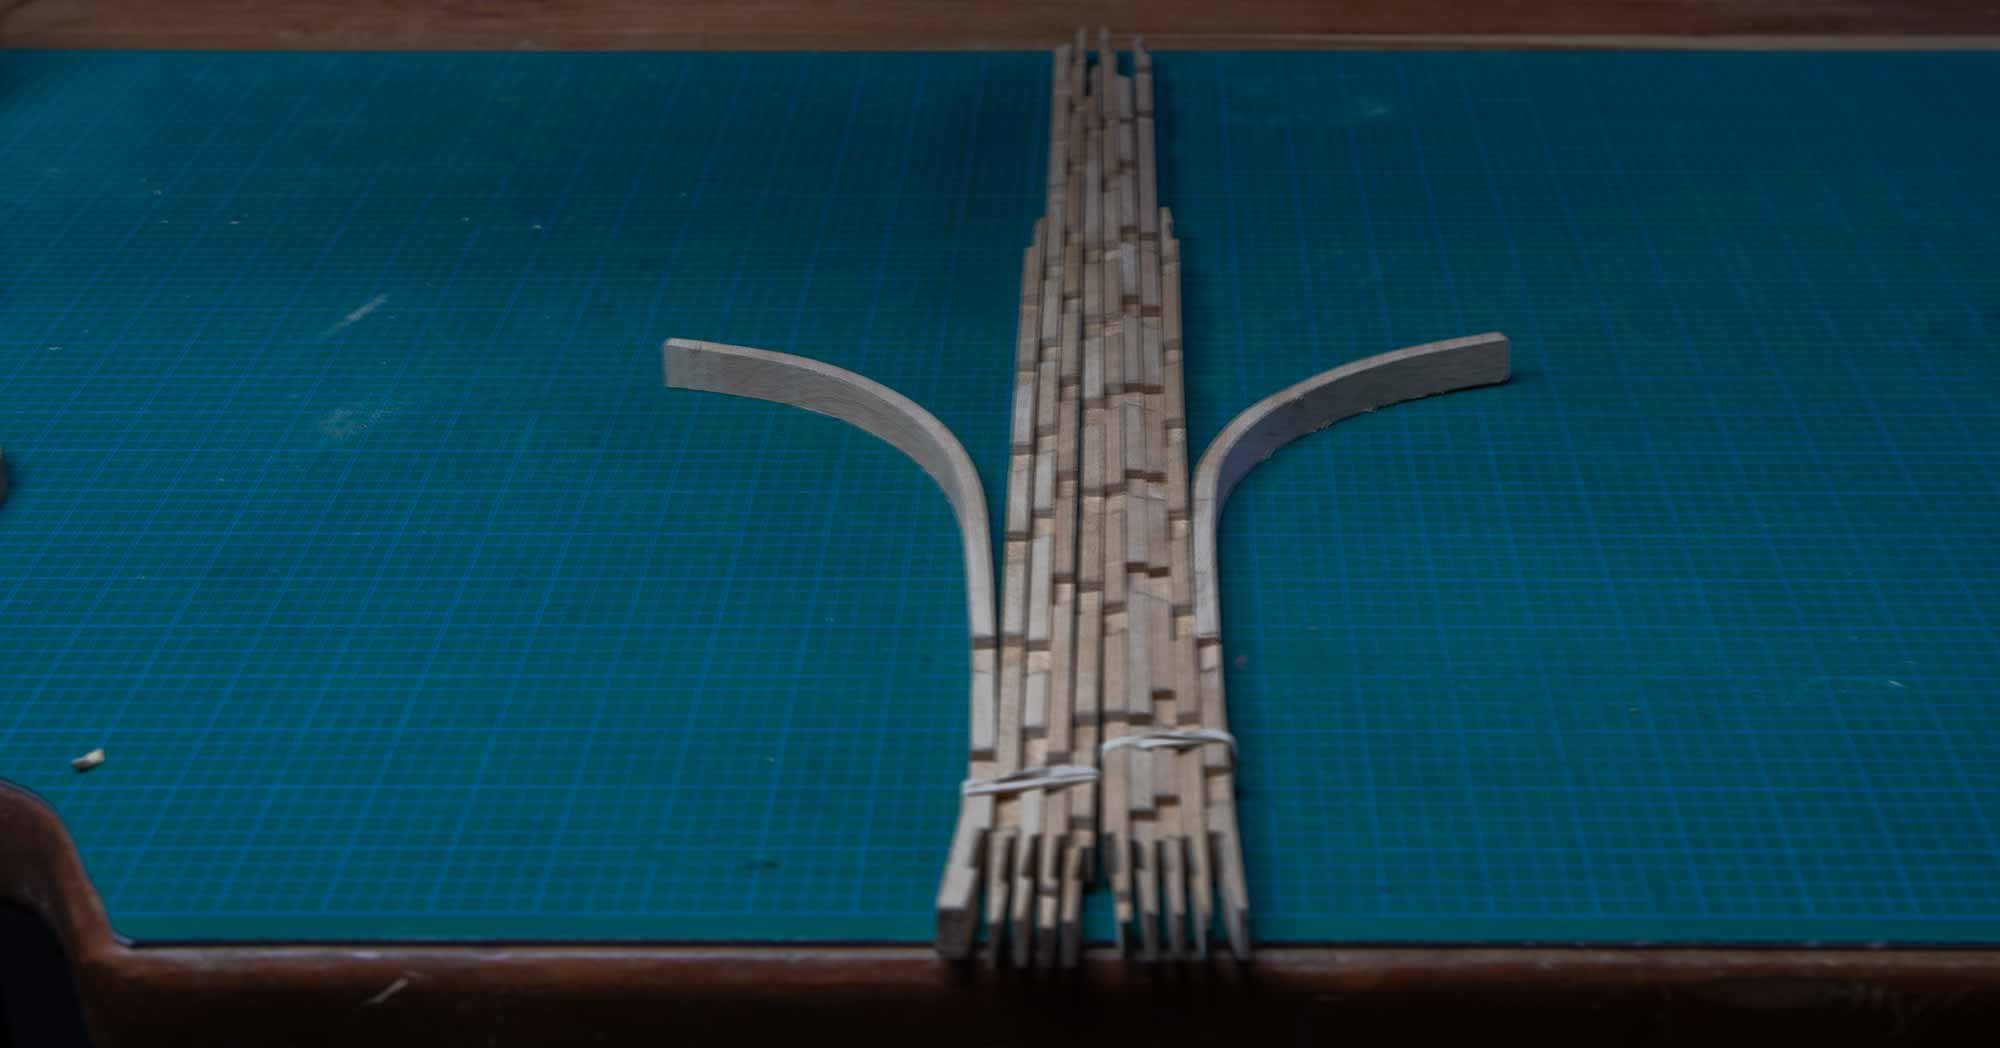
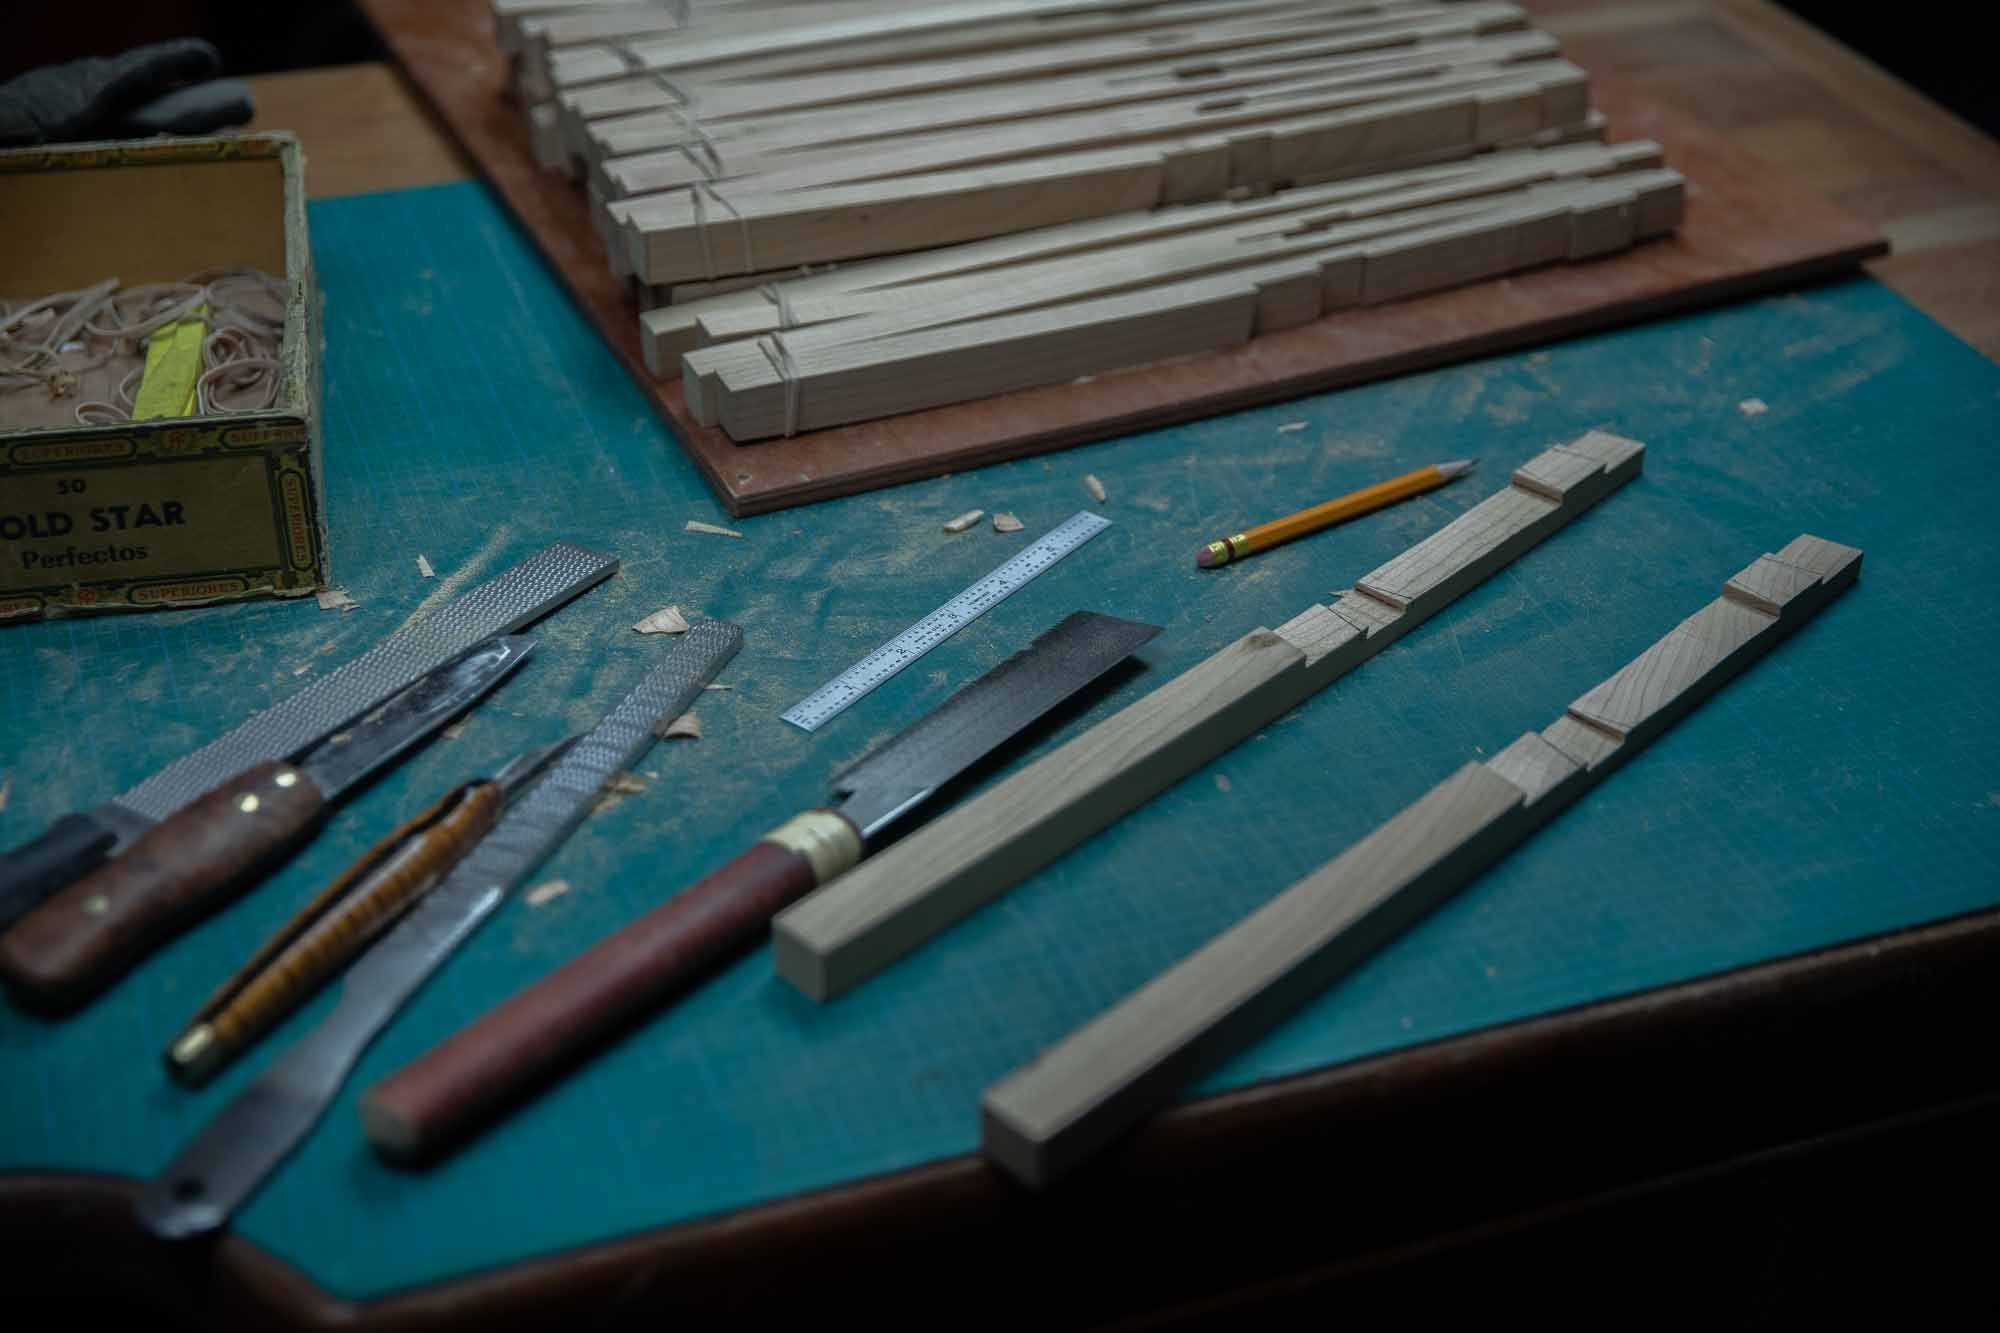
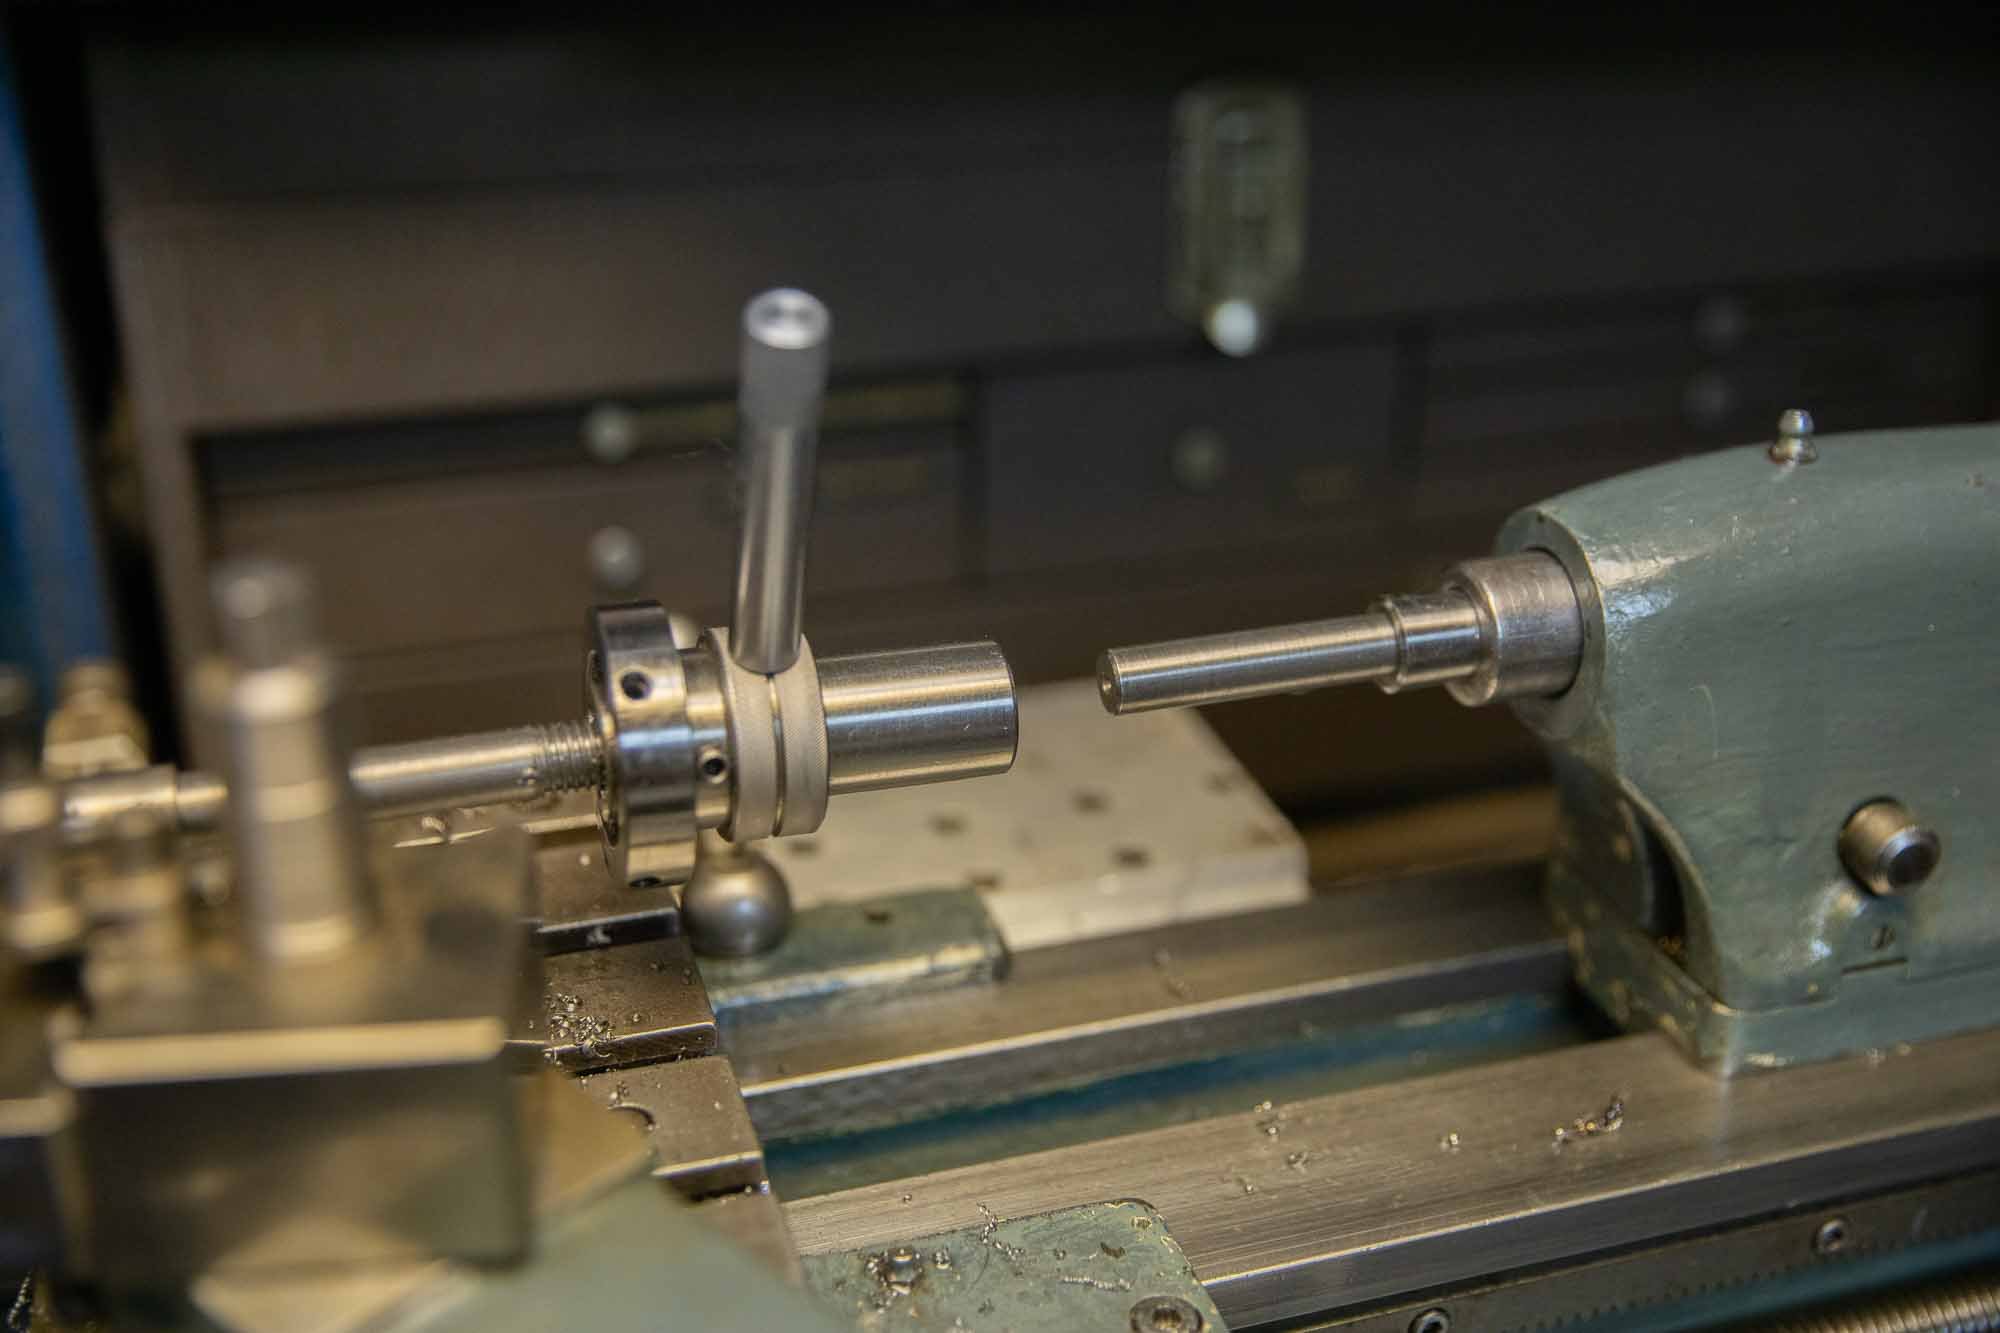
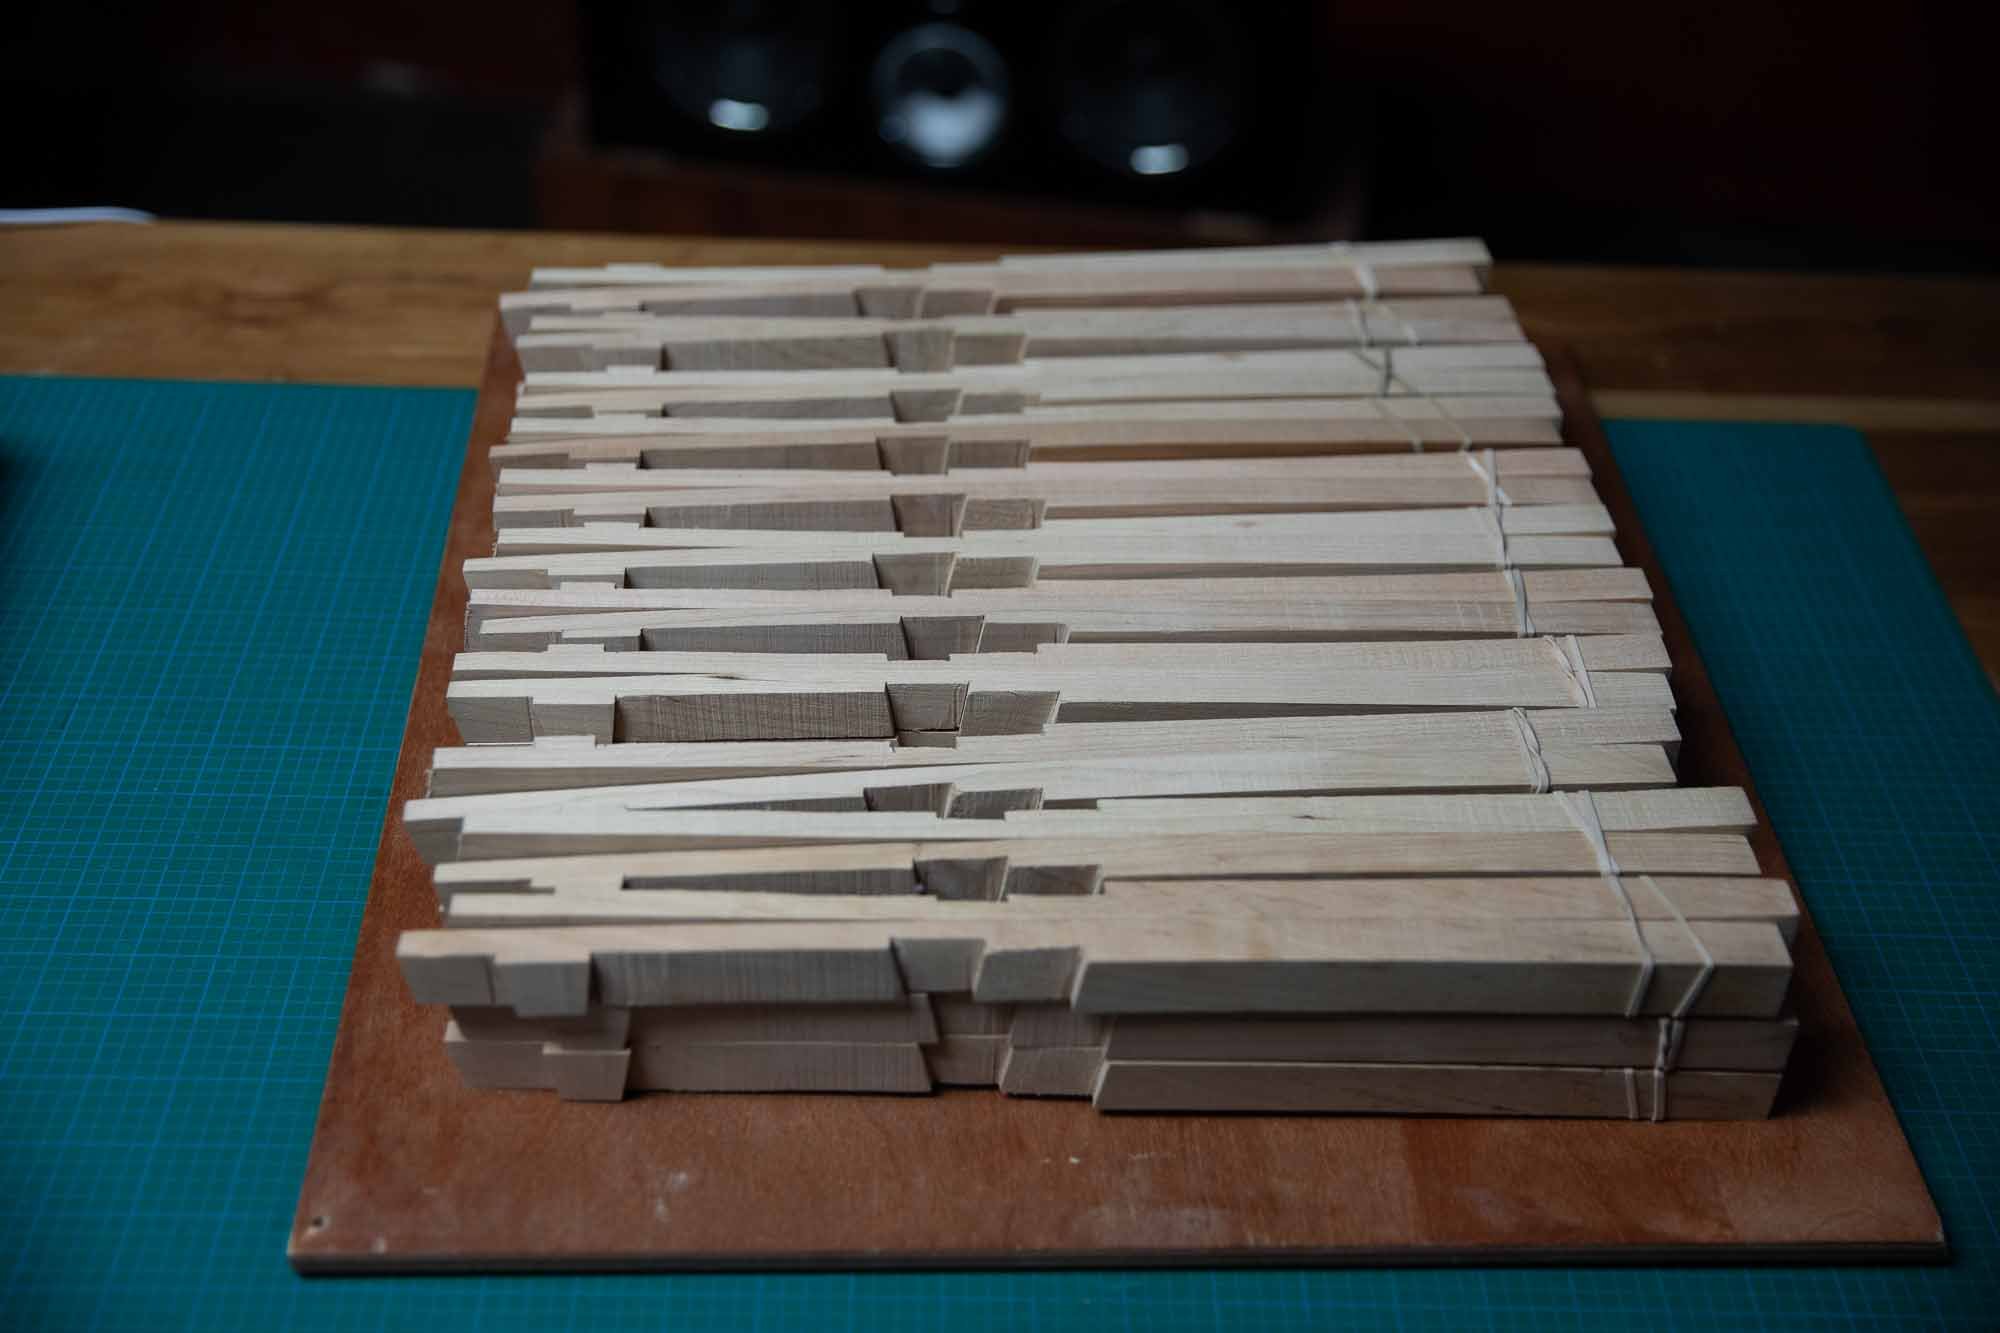
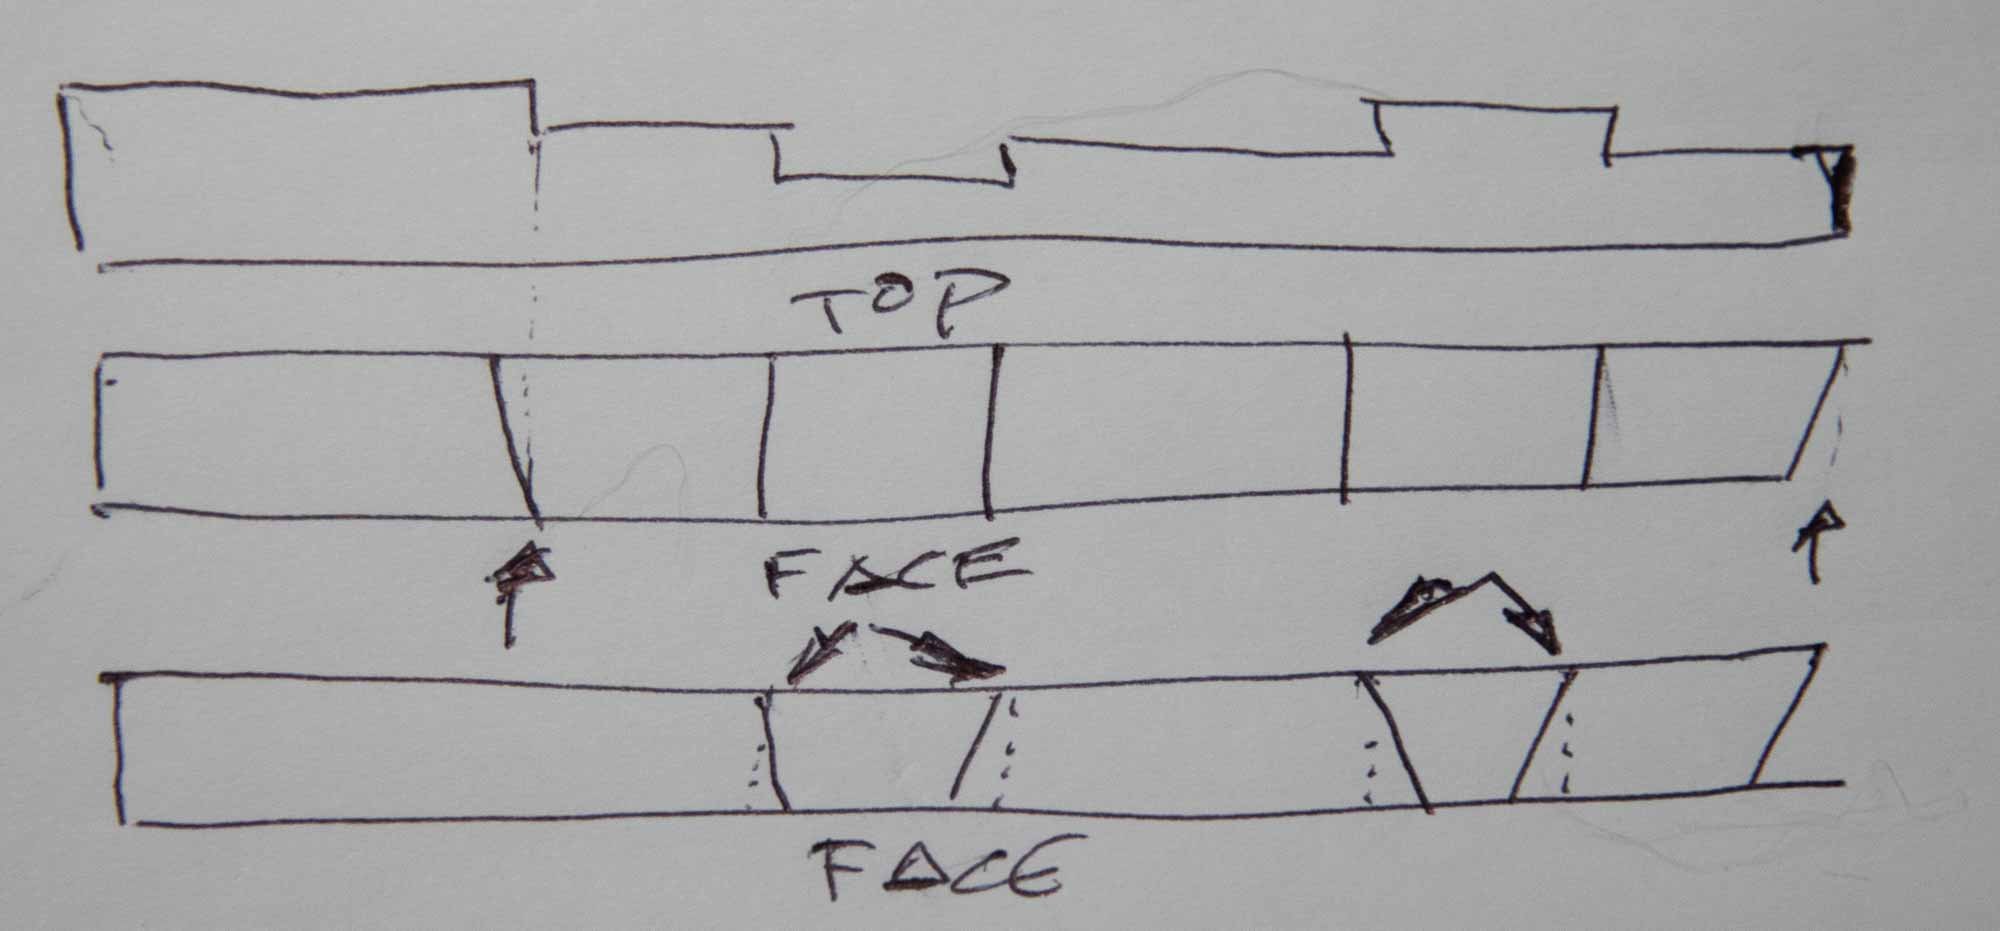
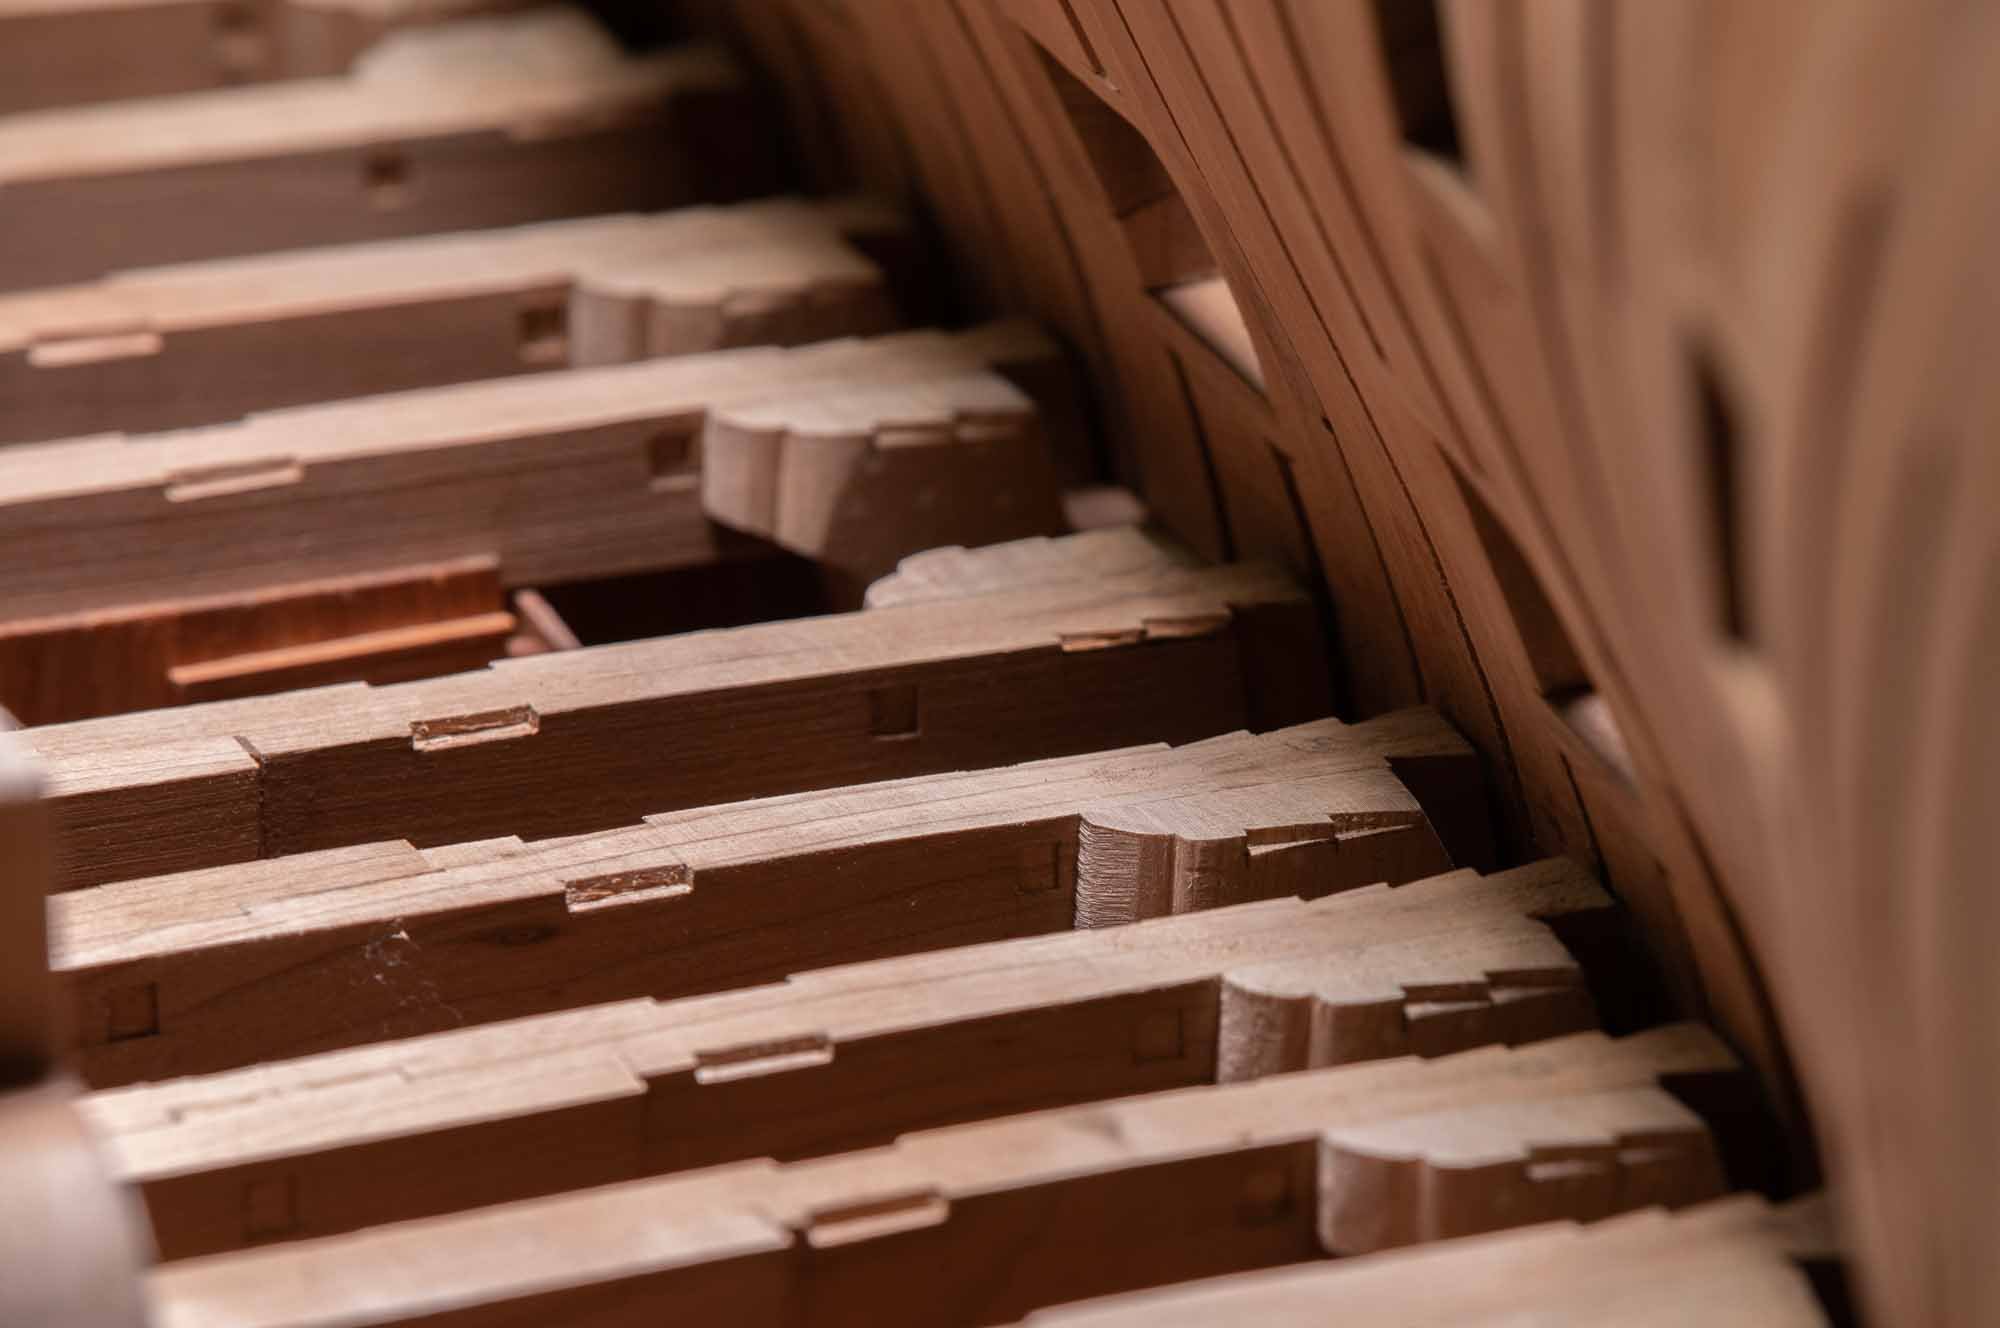
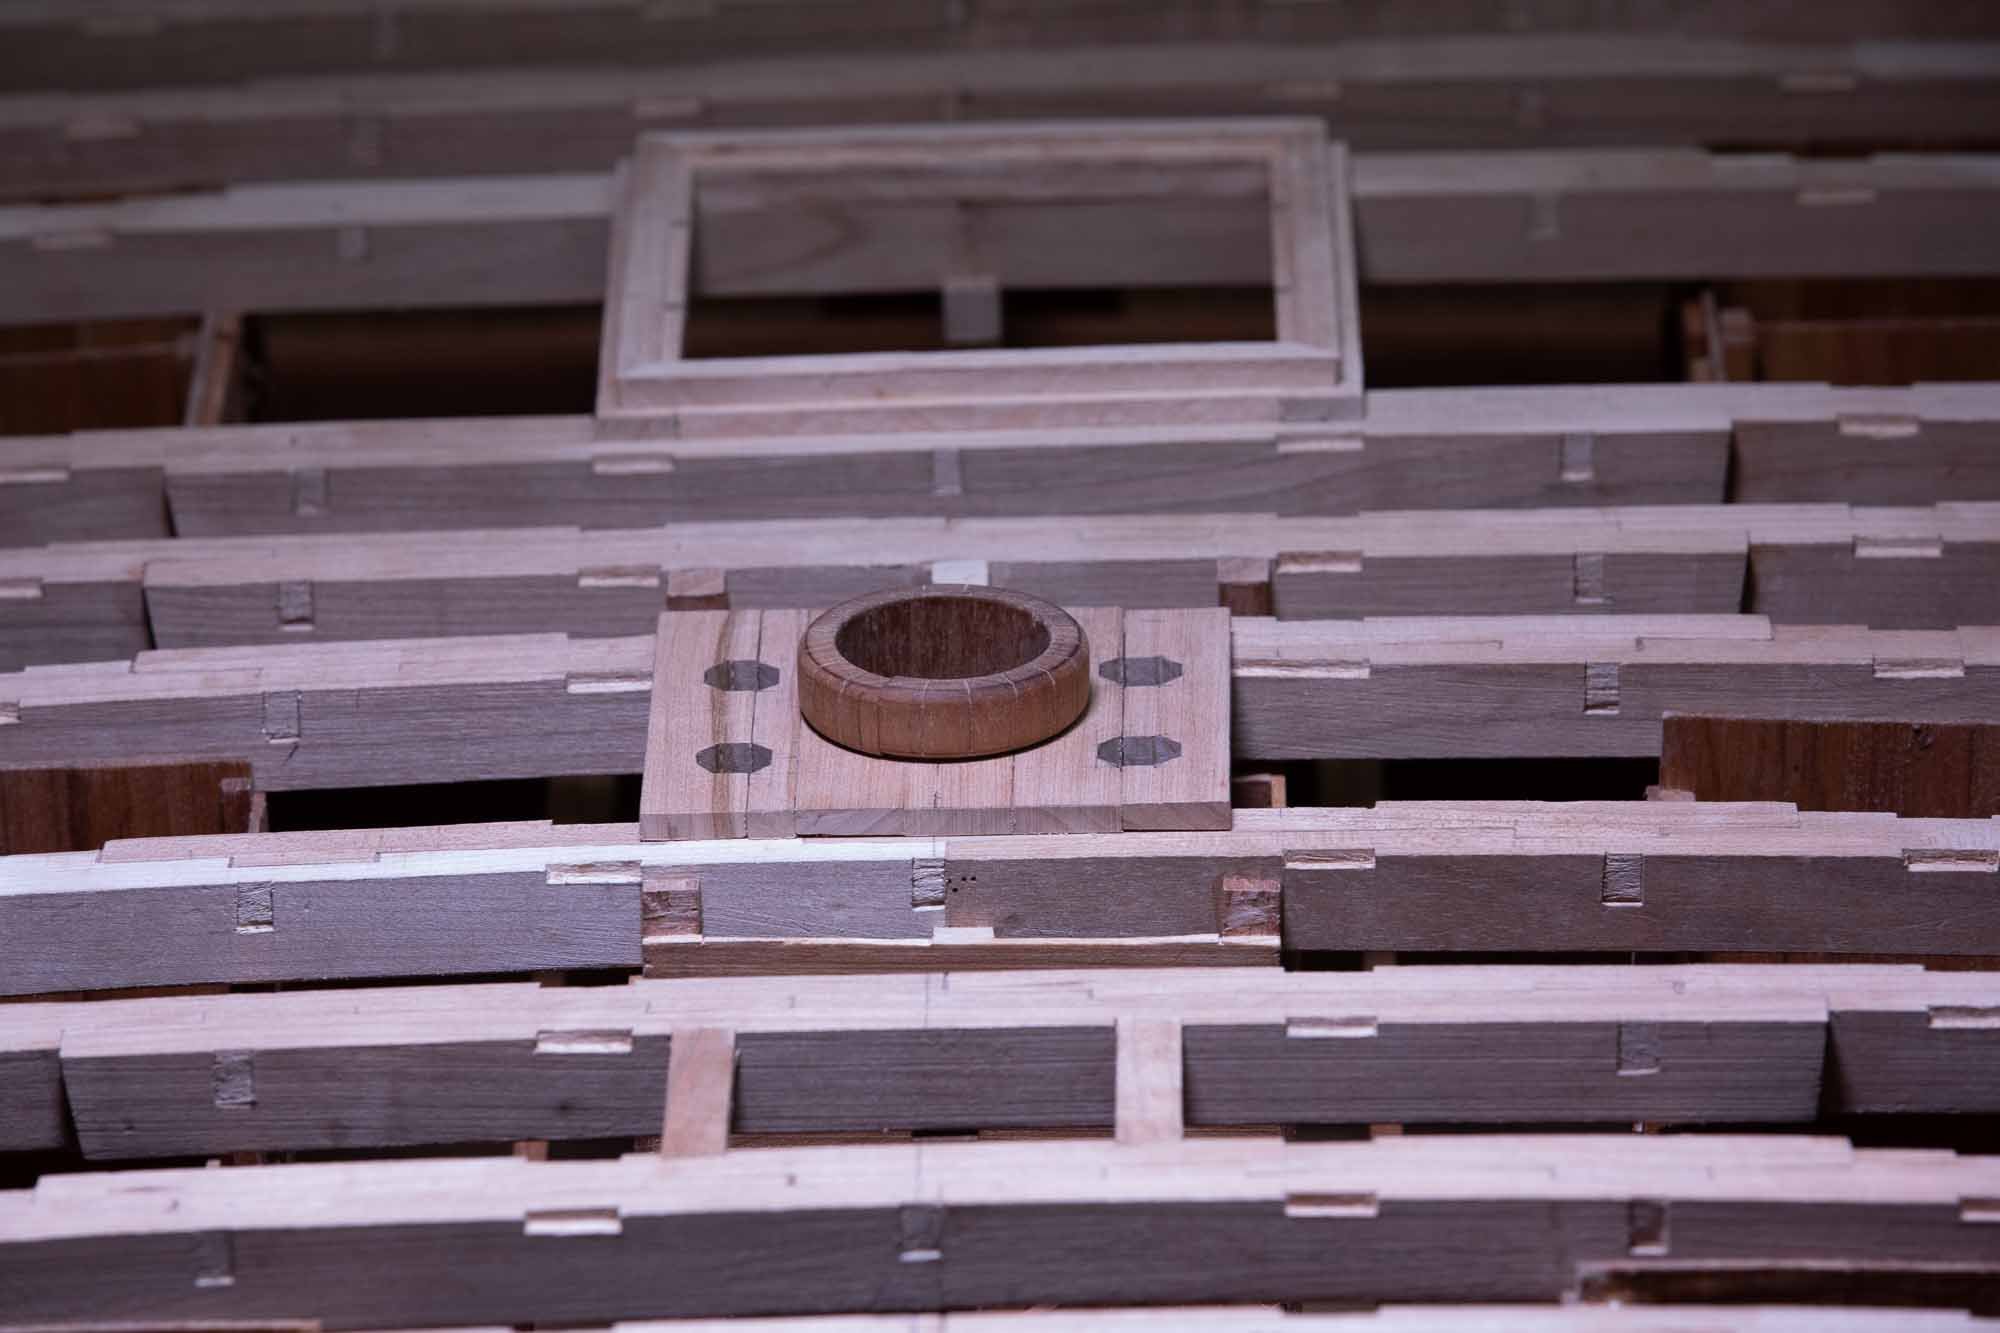
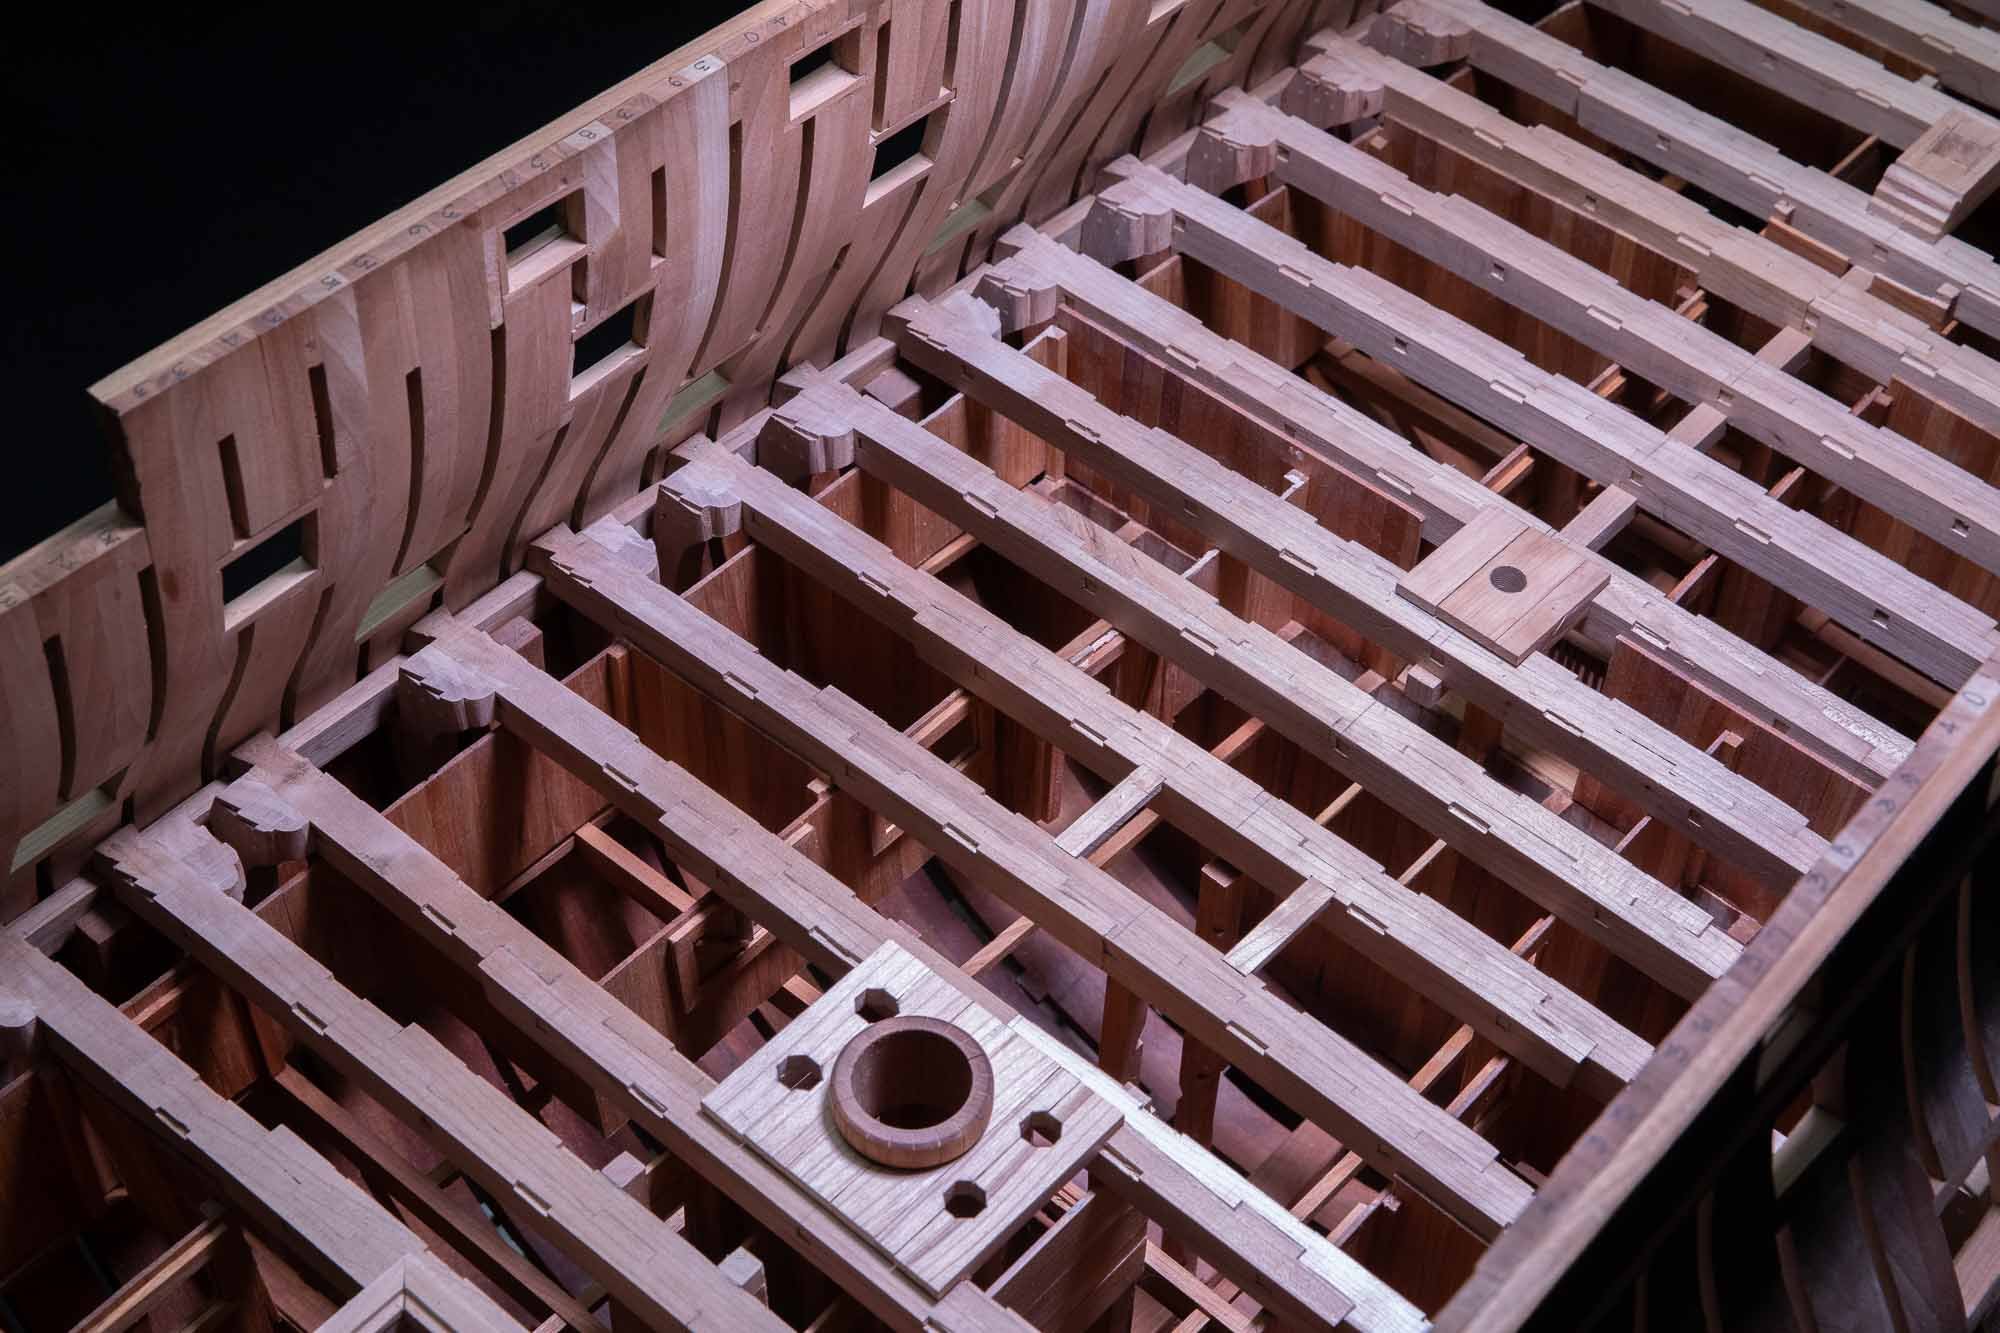
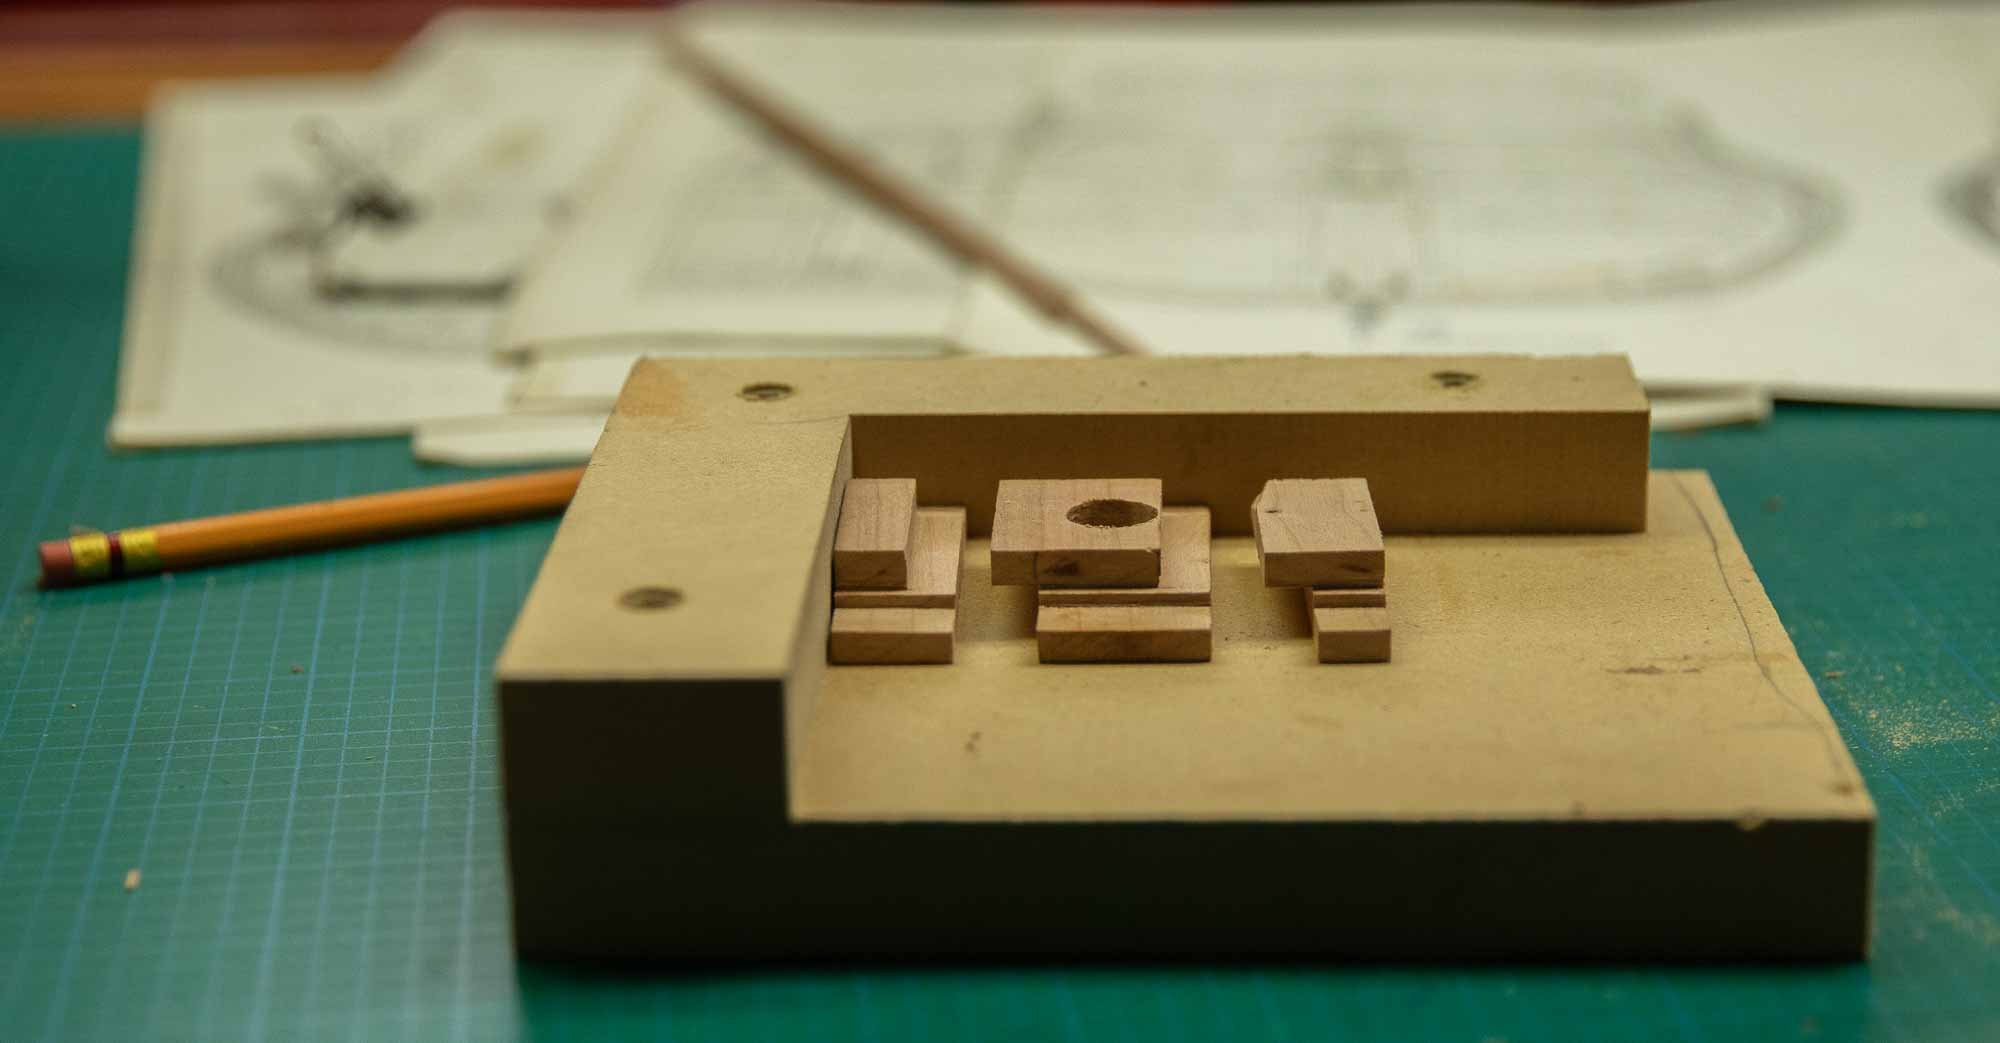
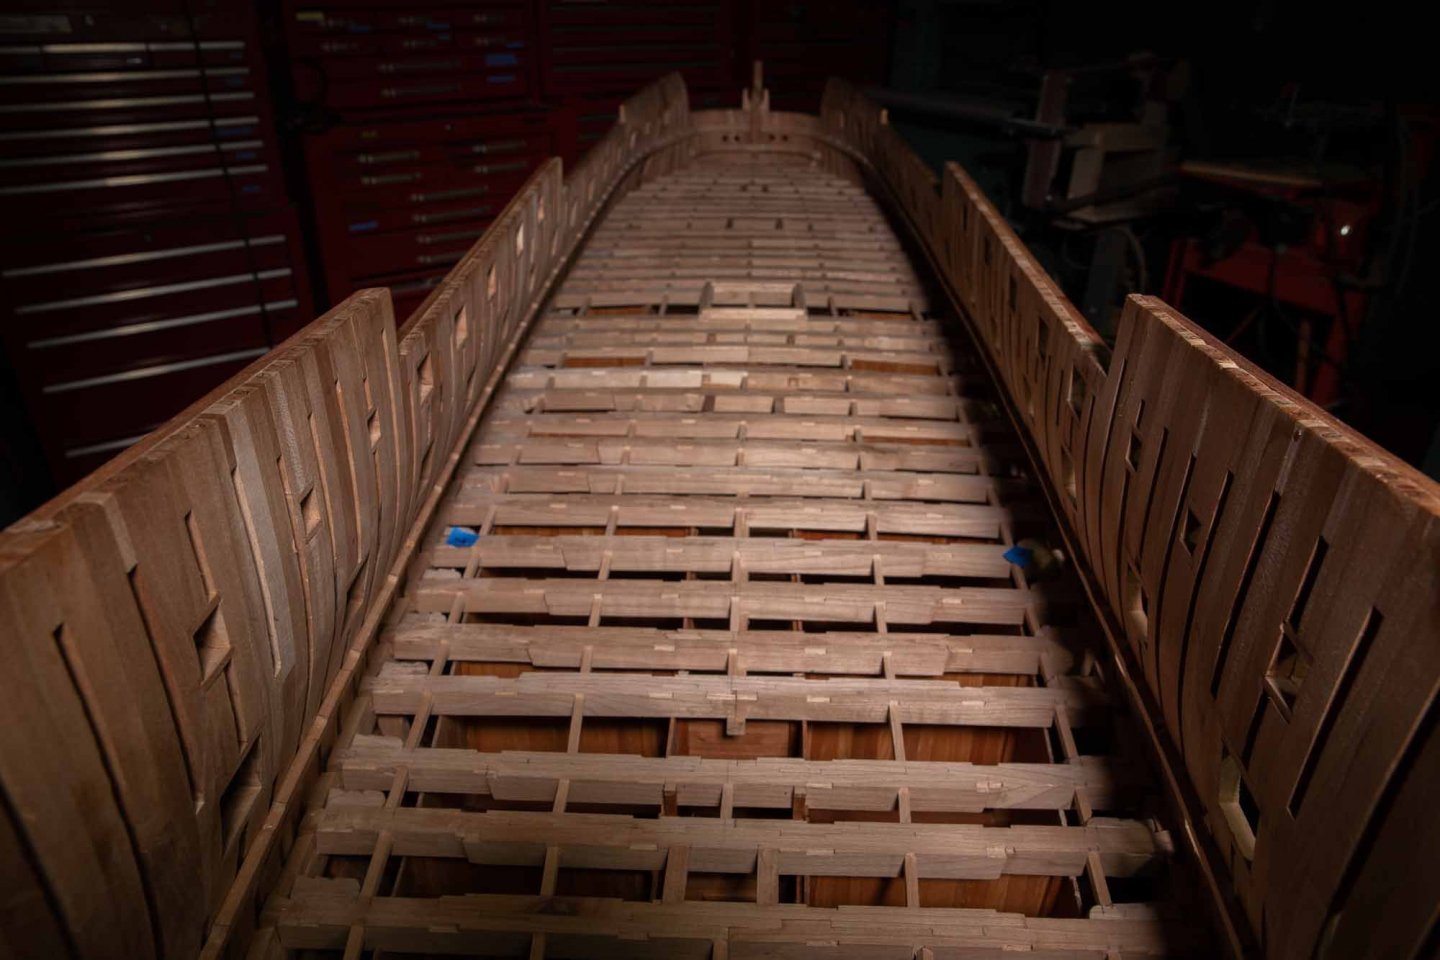
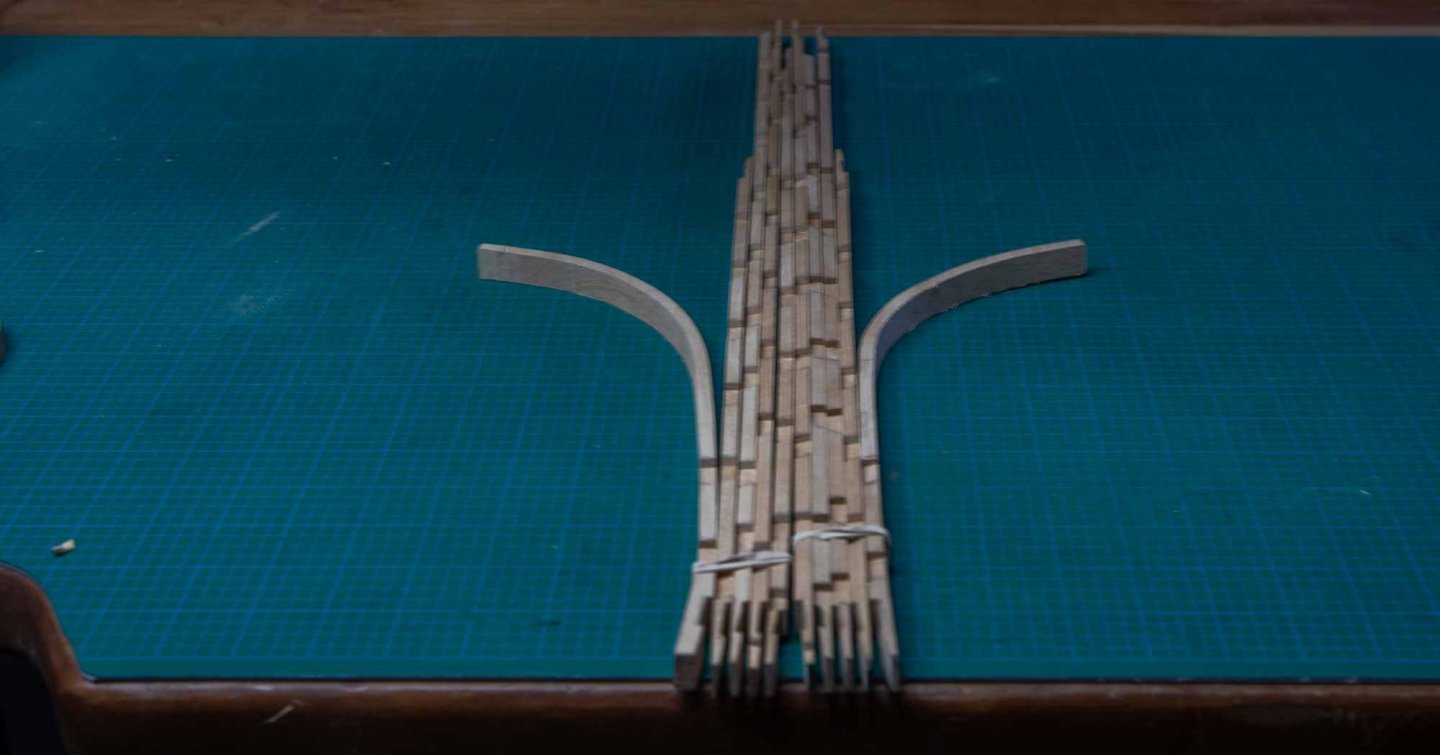
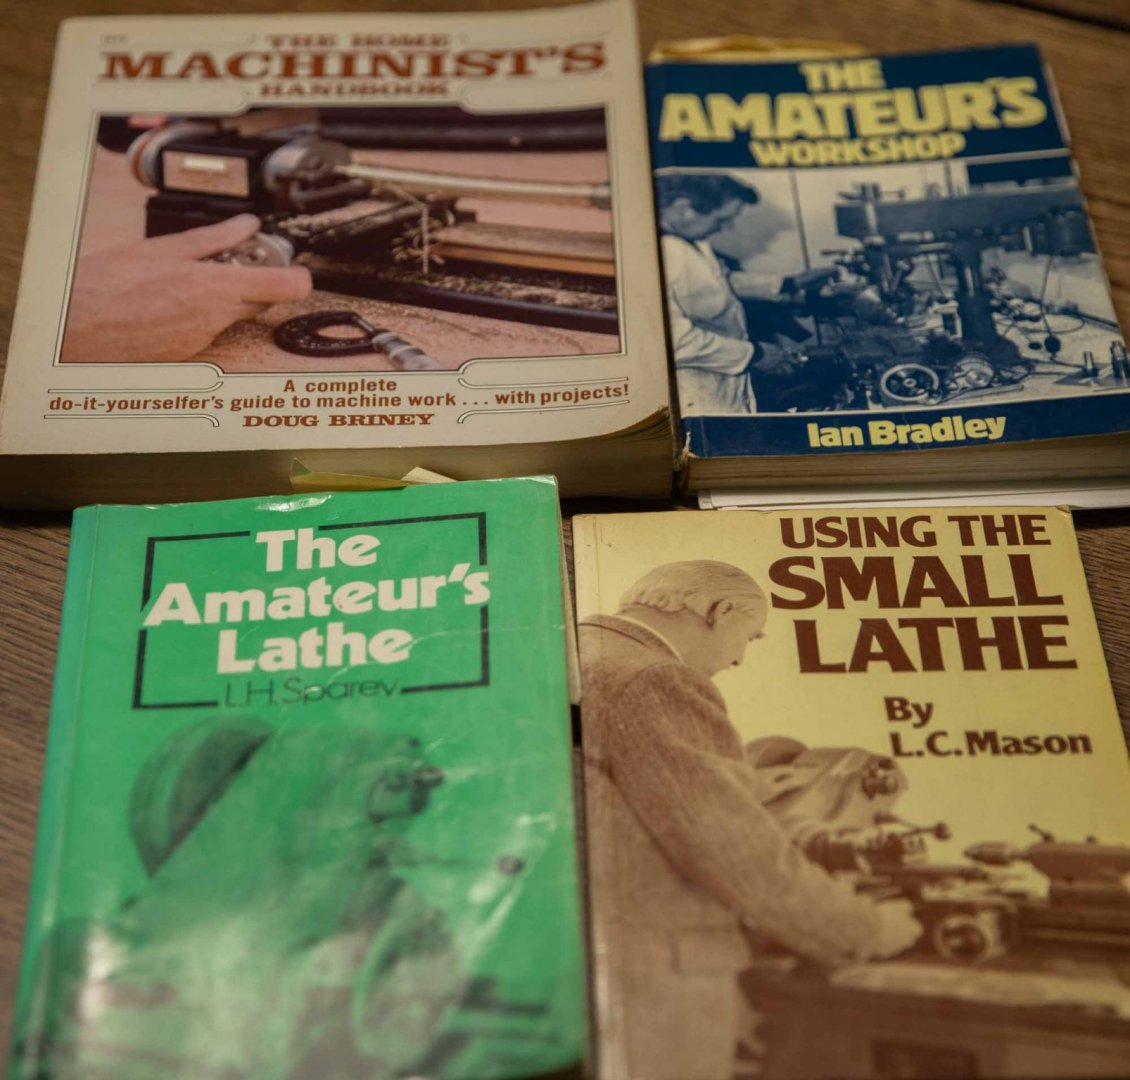
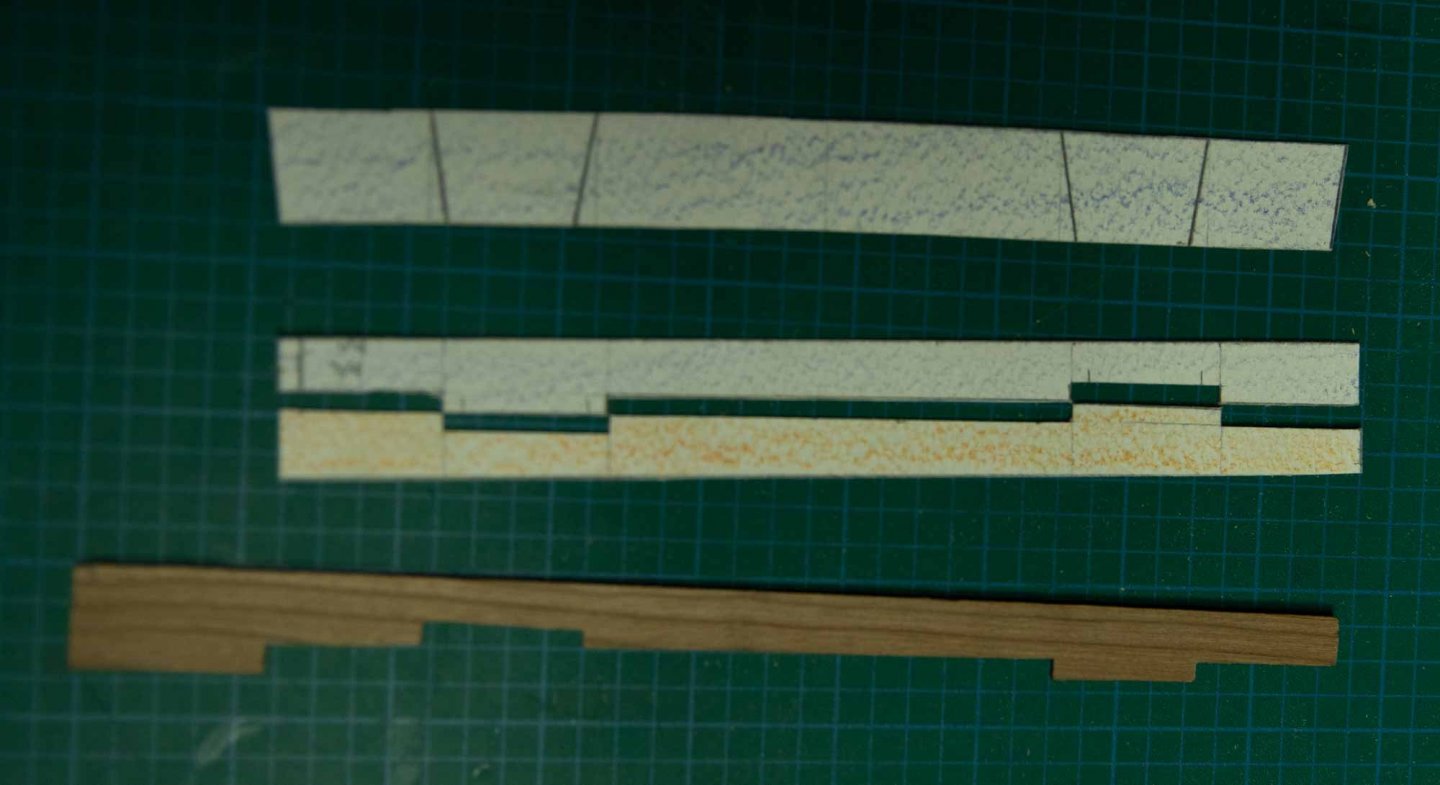
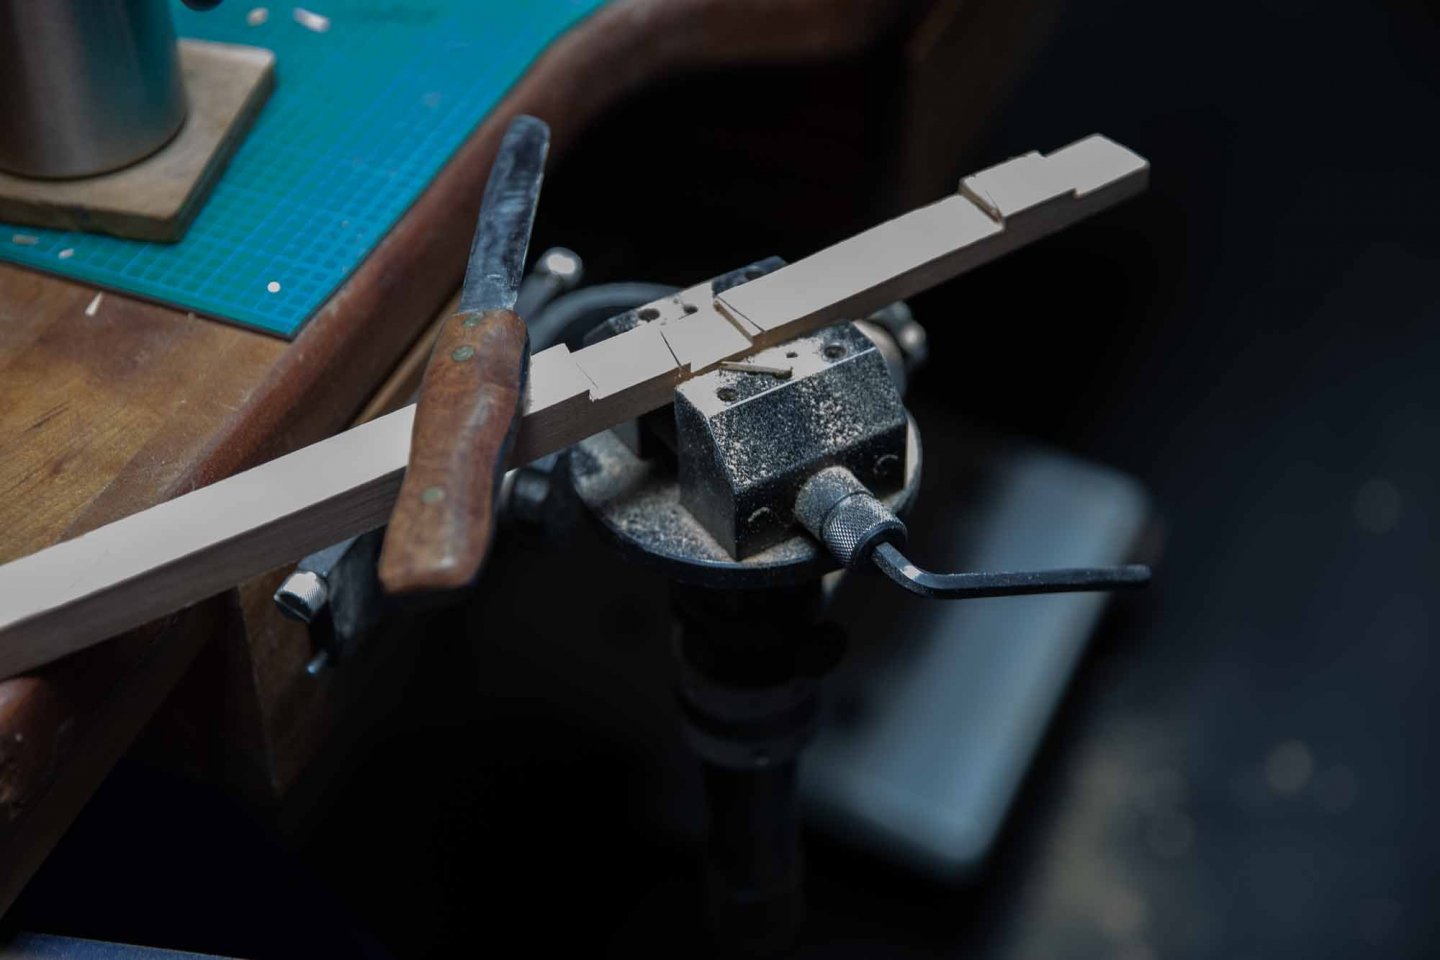
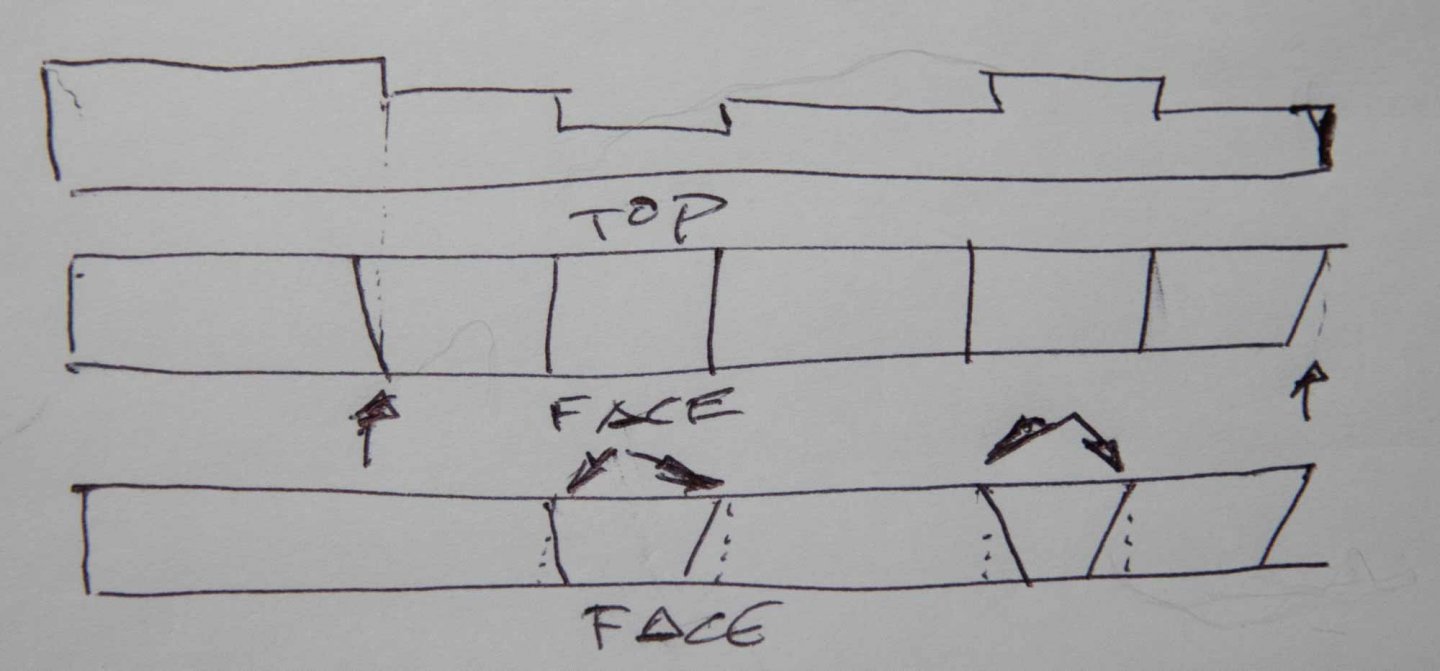
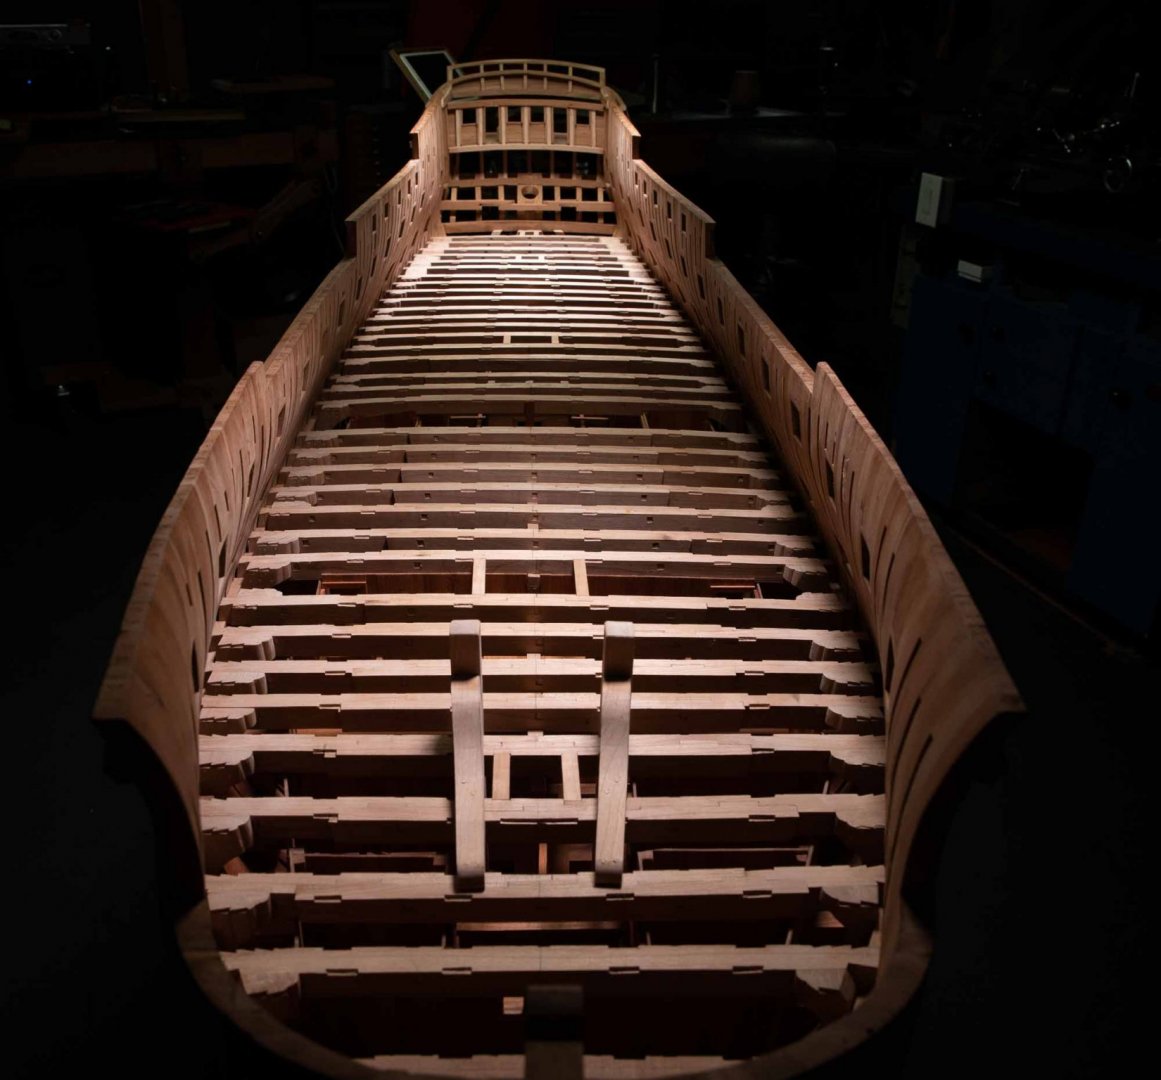
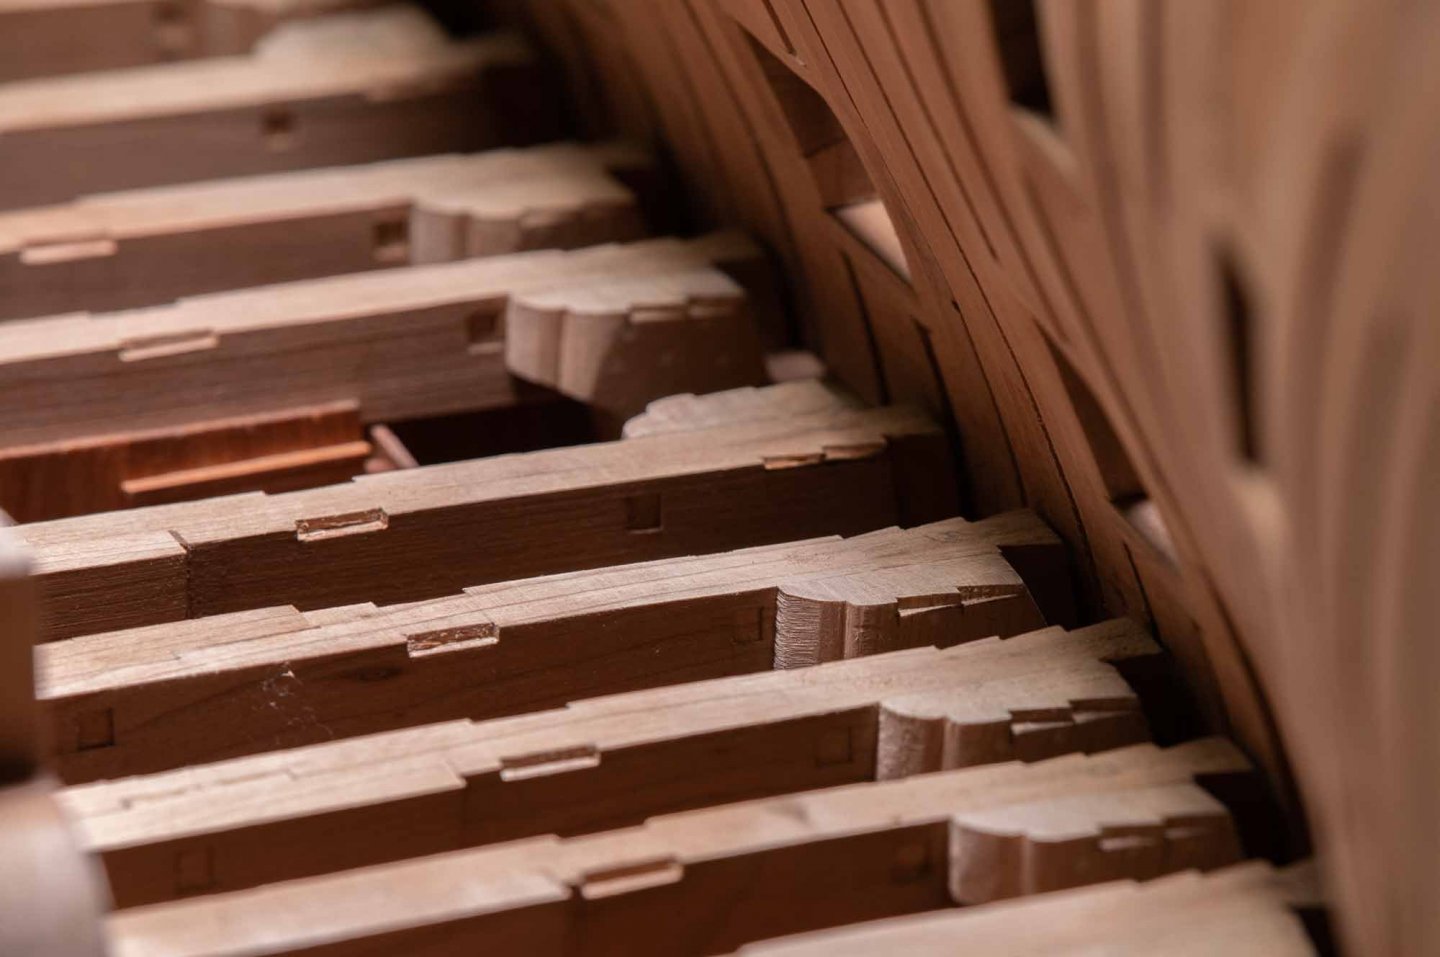
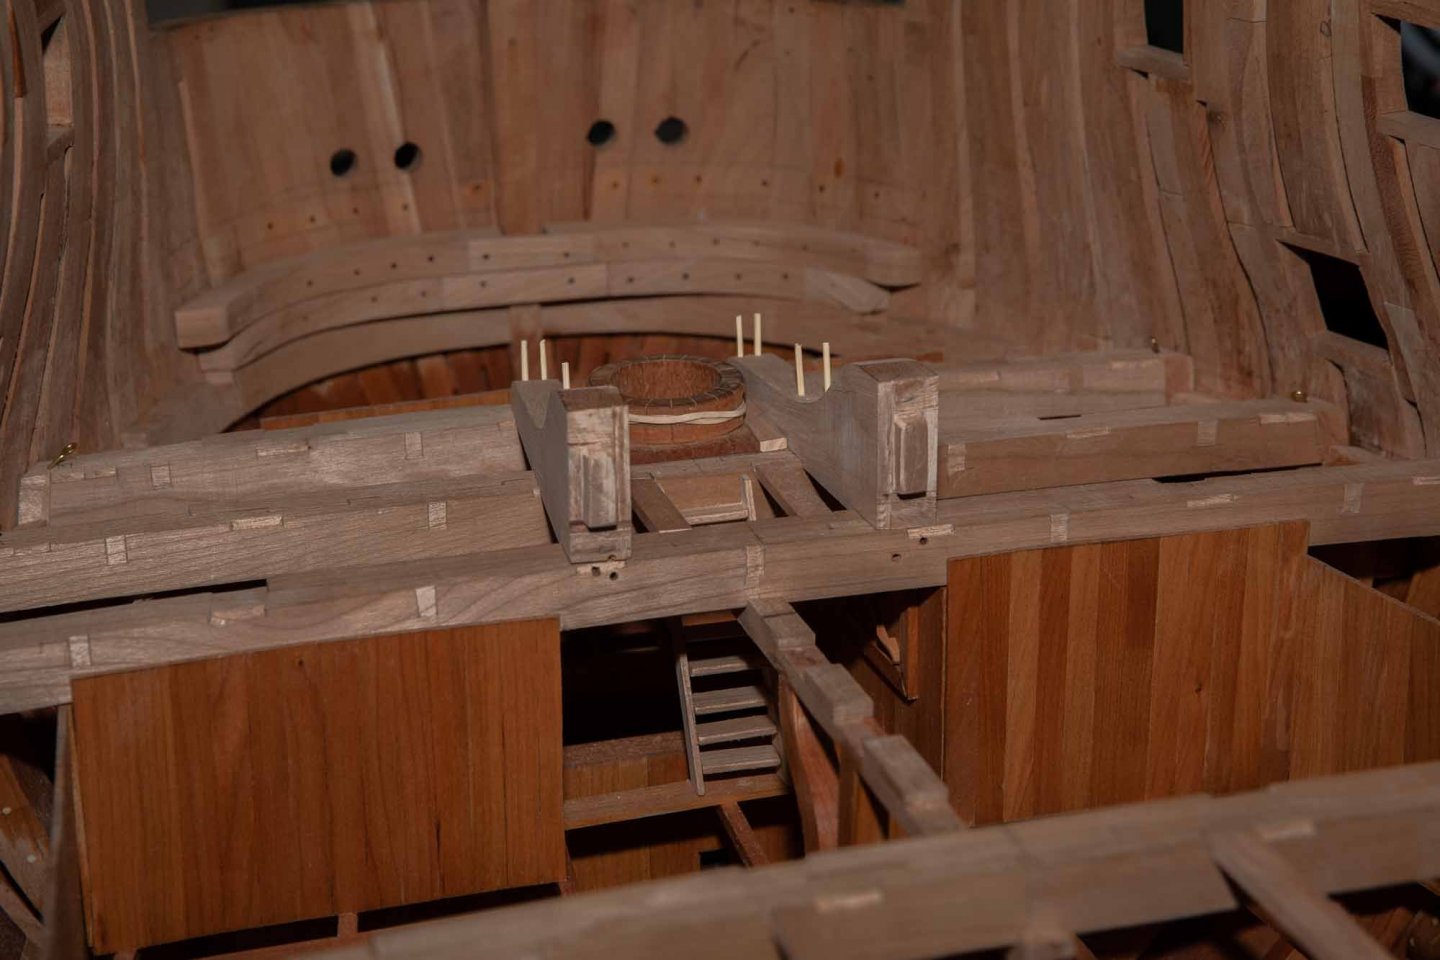
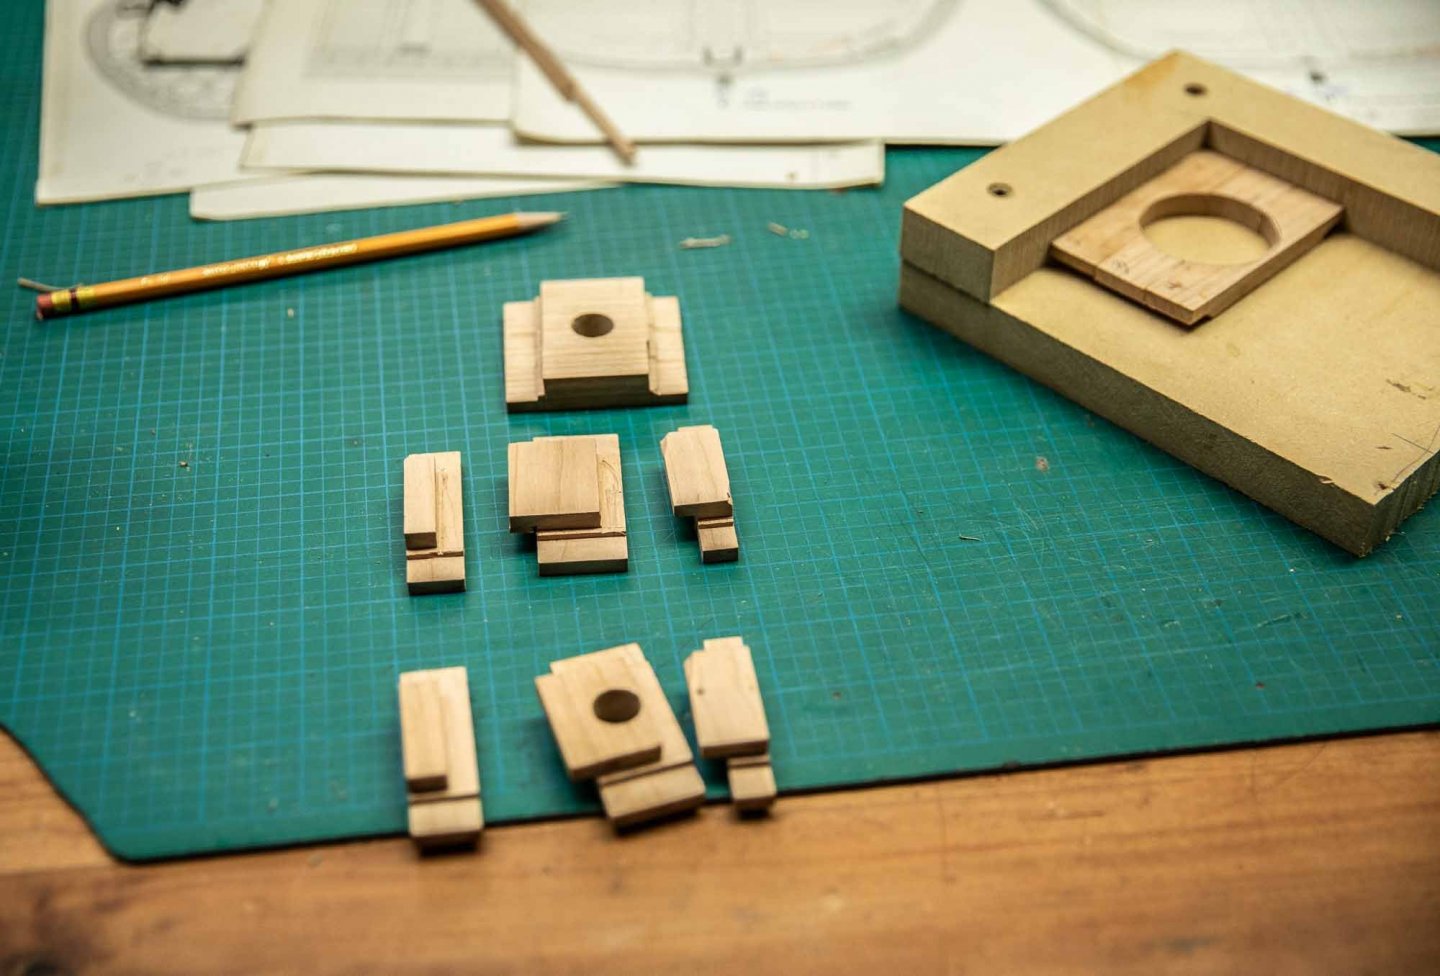
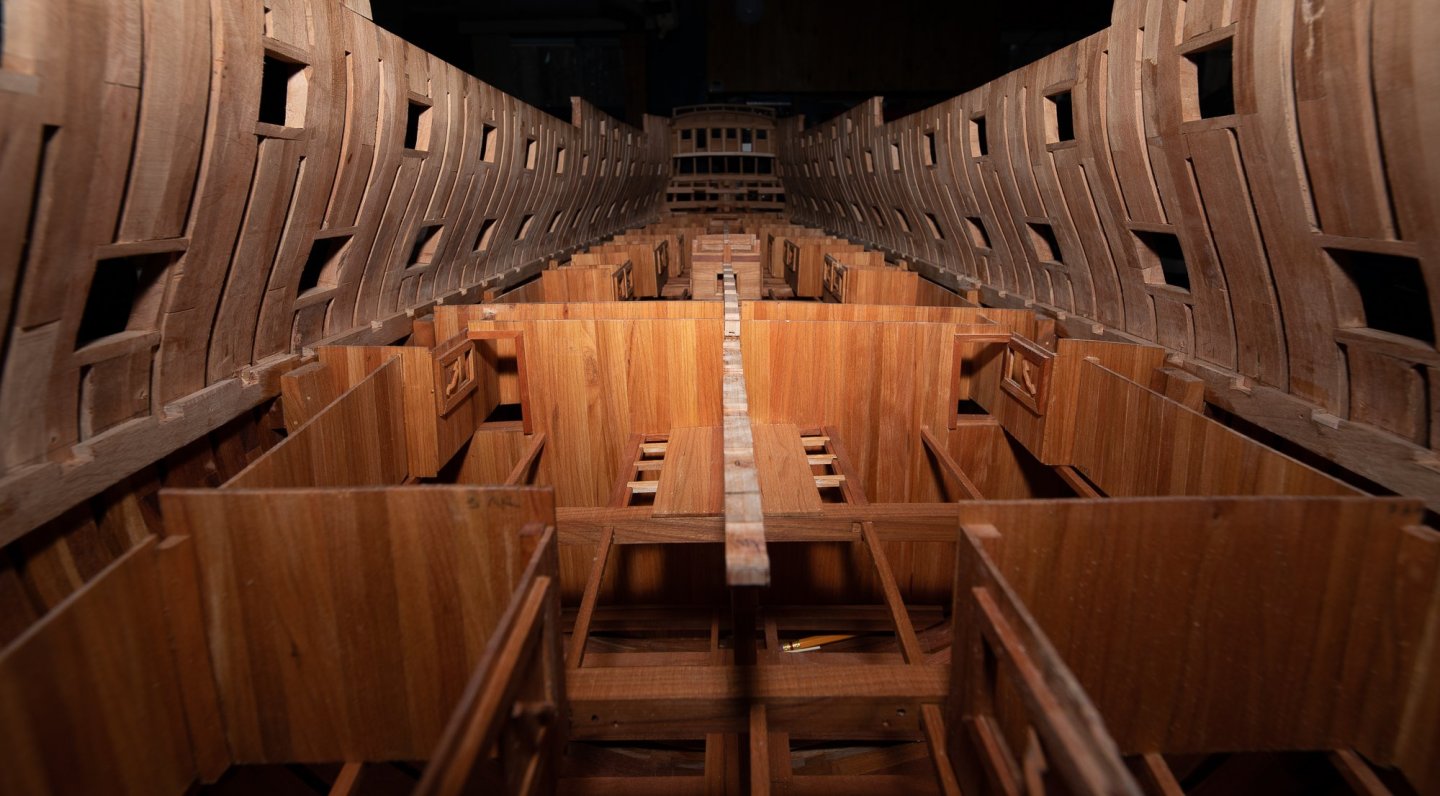
There are 35 deck beams for the second deck. Each one is made of 2 identical parts. Each part is traced on wood with a stencil. First the stencil is made of heavy paper then transferred on a wood sheet. It is adjusted until it fits the "good size" then all the parts are done with this stencil. The 70 parts are cut from a front view, then 2 notches by part are cut, as we see in the first drawing of 3. After, both extremities are cut at angle and the 2 halves are set face to face to set the exact length. Finally on the third part of the drawing, notches are cut at angles. To set the width of each one, again the 2 halves are set one in front of the other and references are noted for the exact width of the top and bottom notches. The 2 deck beams are then adjusted to fit together. When all the sets will be complete, a final adjustment will be done before gluing. When there is a large number of parts to do, it is easier to proceed by step rather than doing 1 beam complete at the time. By using steps, it is easier to concentrate on 1 operation at the time. This way it is easier to control the fabrication. While sanding parts, a shaft from the belt sander broke. Another on was turned on the lathe. The threading made at one end was made with na small jig helping to make sure that the threads were well centered around the shaft. It is also possible to turn the threads with the gearbox but this method is faster. The jig which was used came from 1 of these books. With these books and some other, I learned ,machining with the milling and the lathe and a good exercice was to make few tools which were much more less costly than to buy.


-
Bench Top 5" Disk Sander
Gaetan Bordeleau replied to DocBlake's topic in Modeling tools and Workshop Equipment
Belt sander to sharpen knife usually have a belt of 2 inches by 72 inches. It is use for the rough sharpening and the final sharpening is made on a stone. The speed for a belt sander for metal is faster than the speed used for the wood. Belt sanding for wood gives a much better finish than a disk sander, especially when you sand in the same direction as the wood grain. For this reason, I do not use disk sander. -
Without a doubt, the 3D model will be of great help to understand intricate details of the construction of the Swann. There is now a wide source of documentation to build the The HMS Swann class sloop: Books from David and Greg plans from the museum and now, a 3D model. It is almost perfect, but I would add a synthesis to all this magnificent work: for this last element, it would be a kind of AOL series book containing exclusively plans. I think that the plans could be extract from the work of the 3d drawings. Like this, it would be very easy to find all the plans in one place without having to search in the 4 books or in the plans from the museum.
-
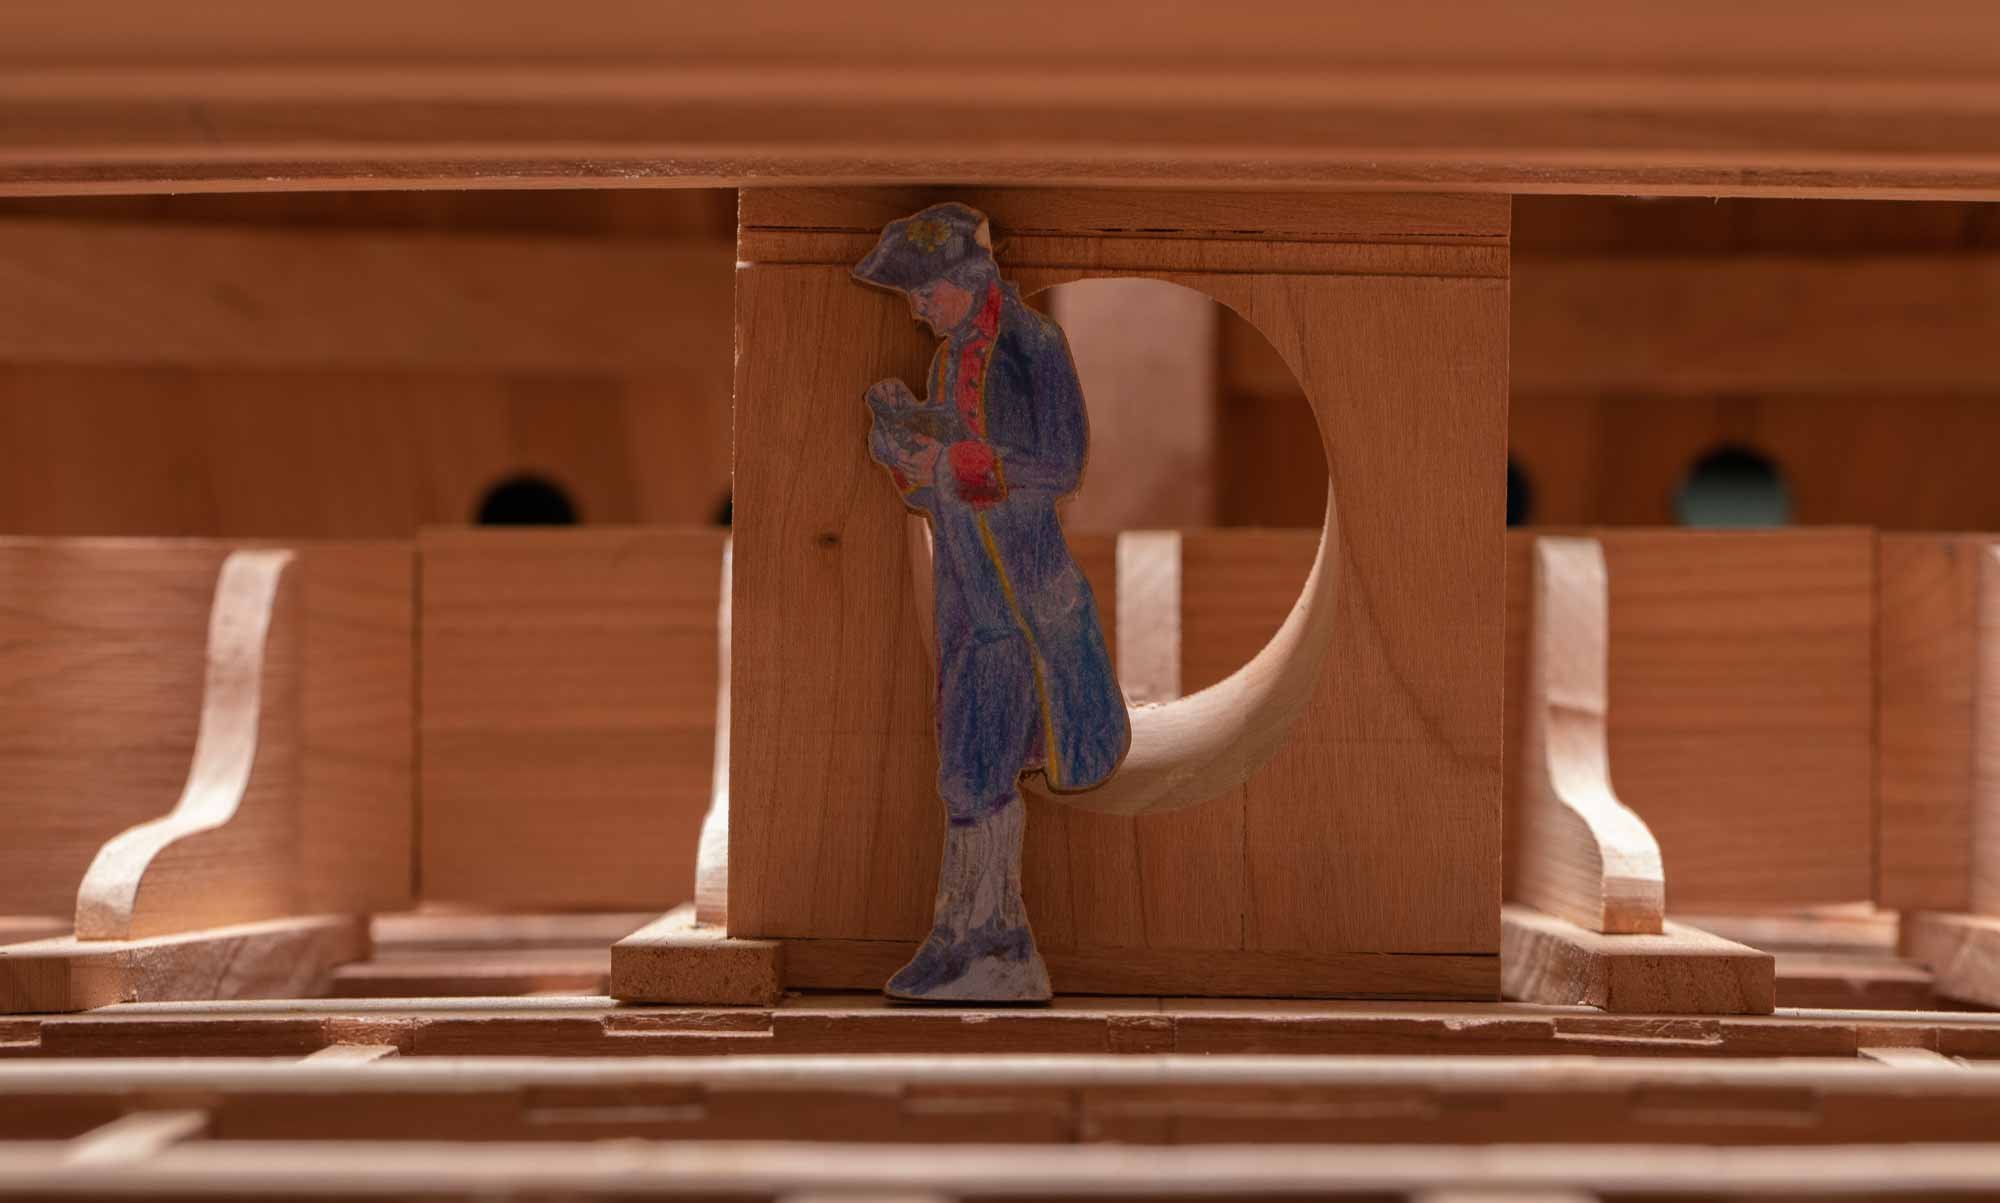
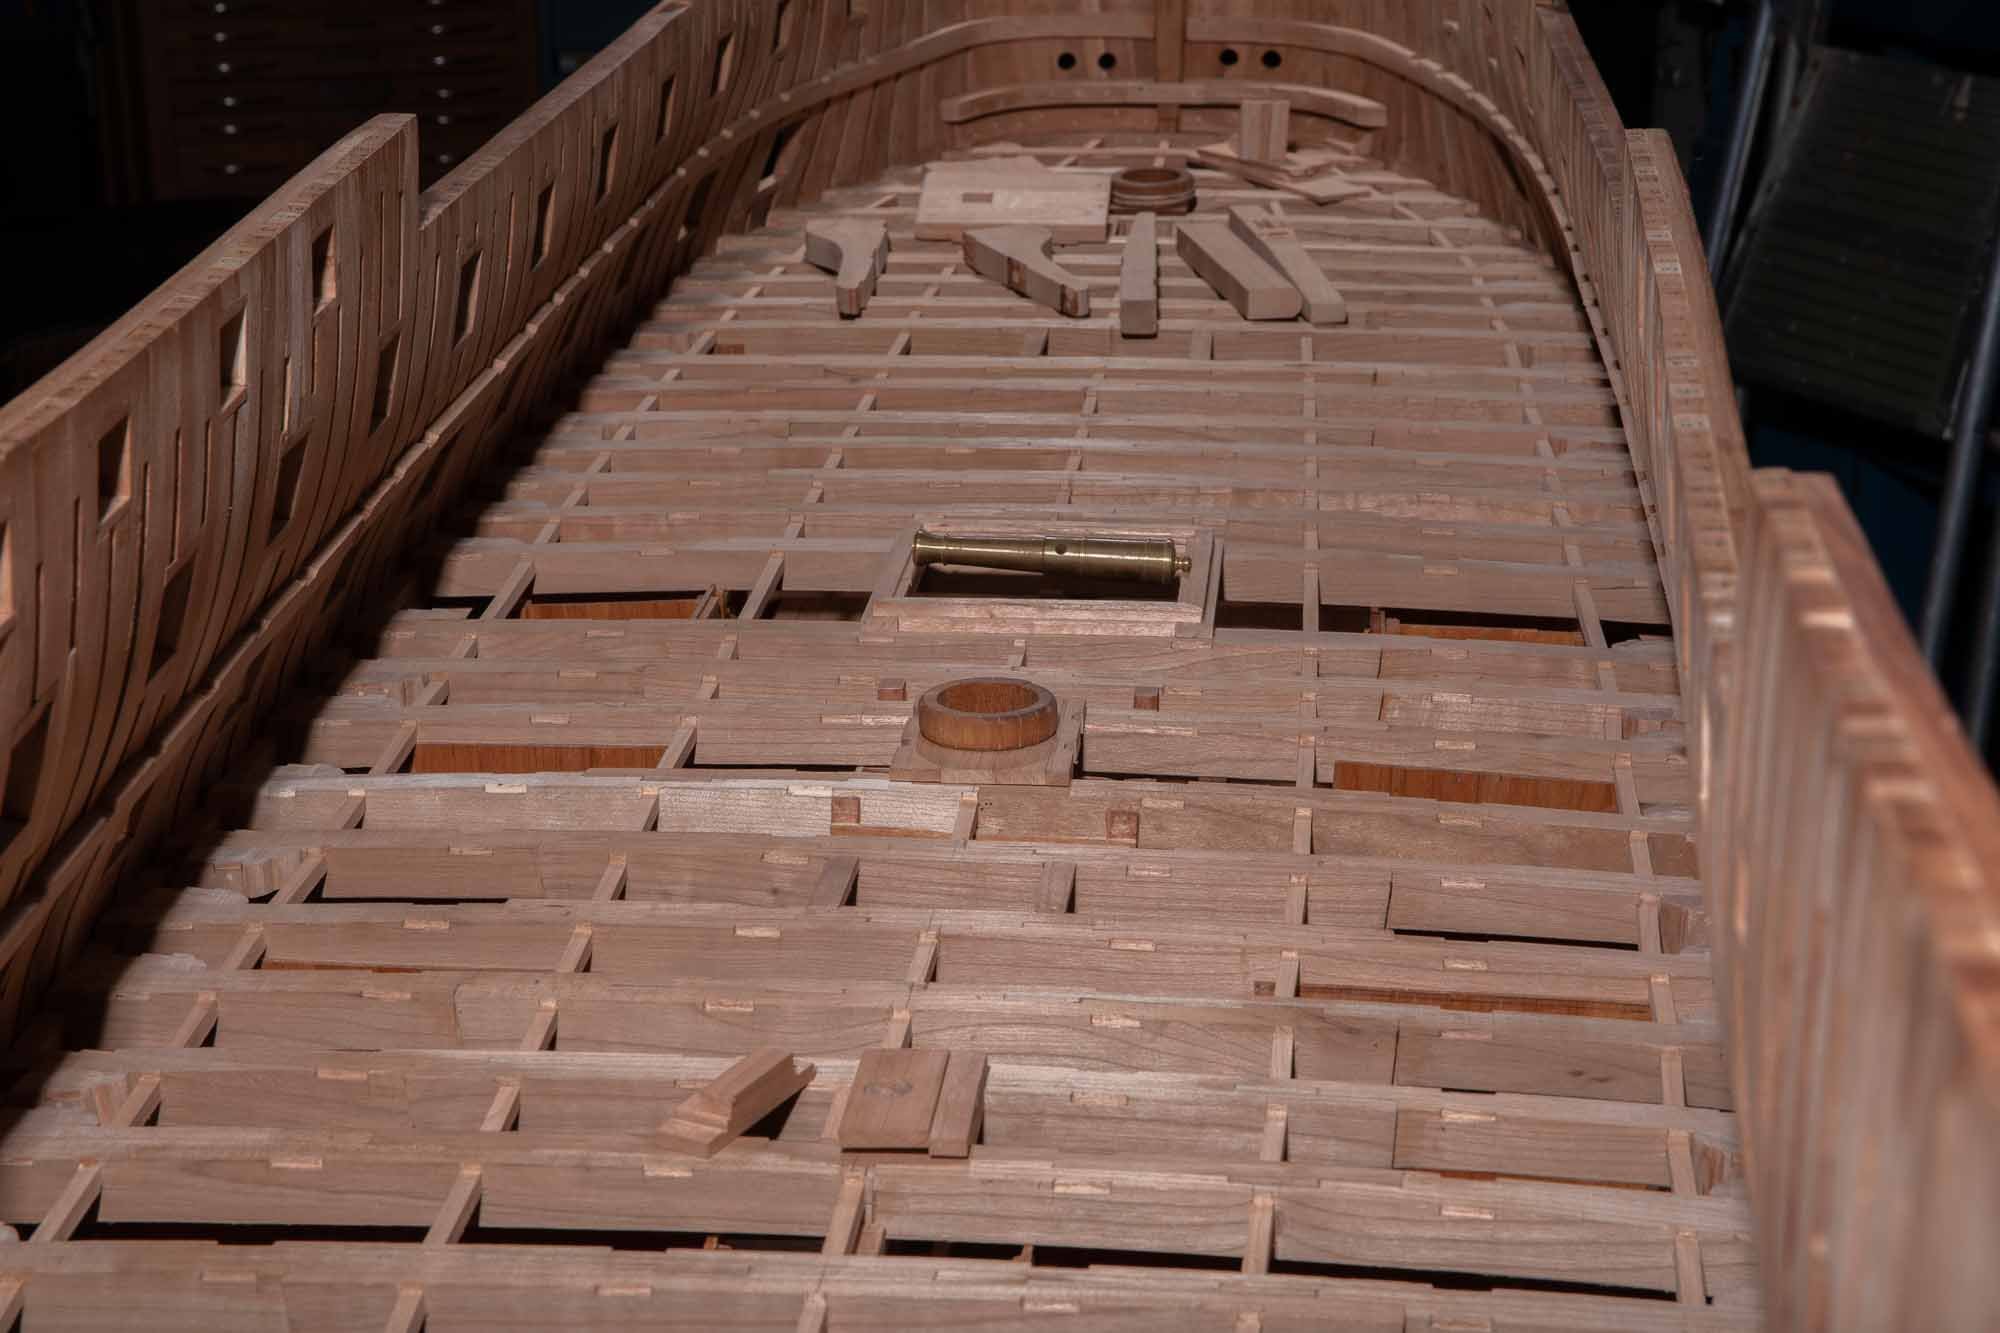
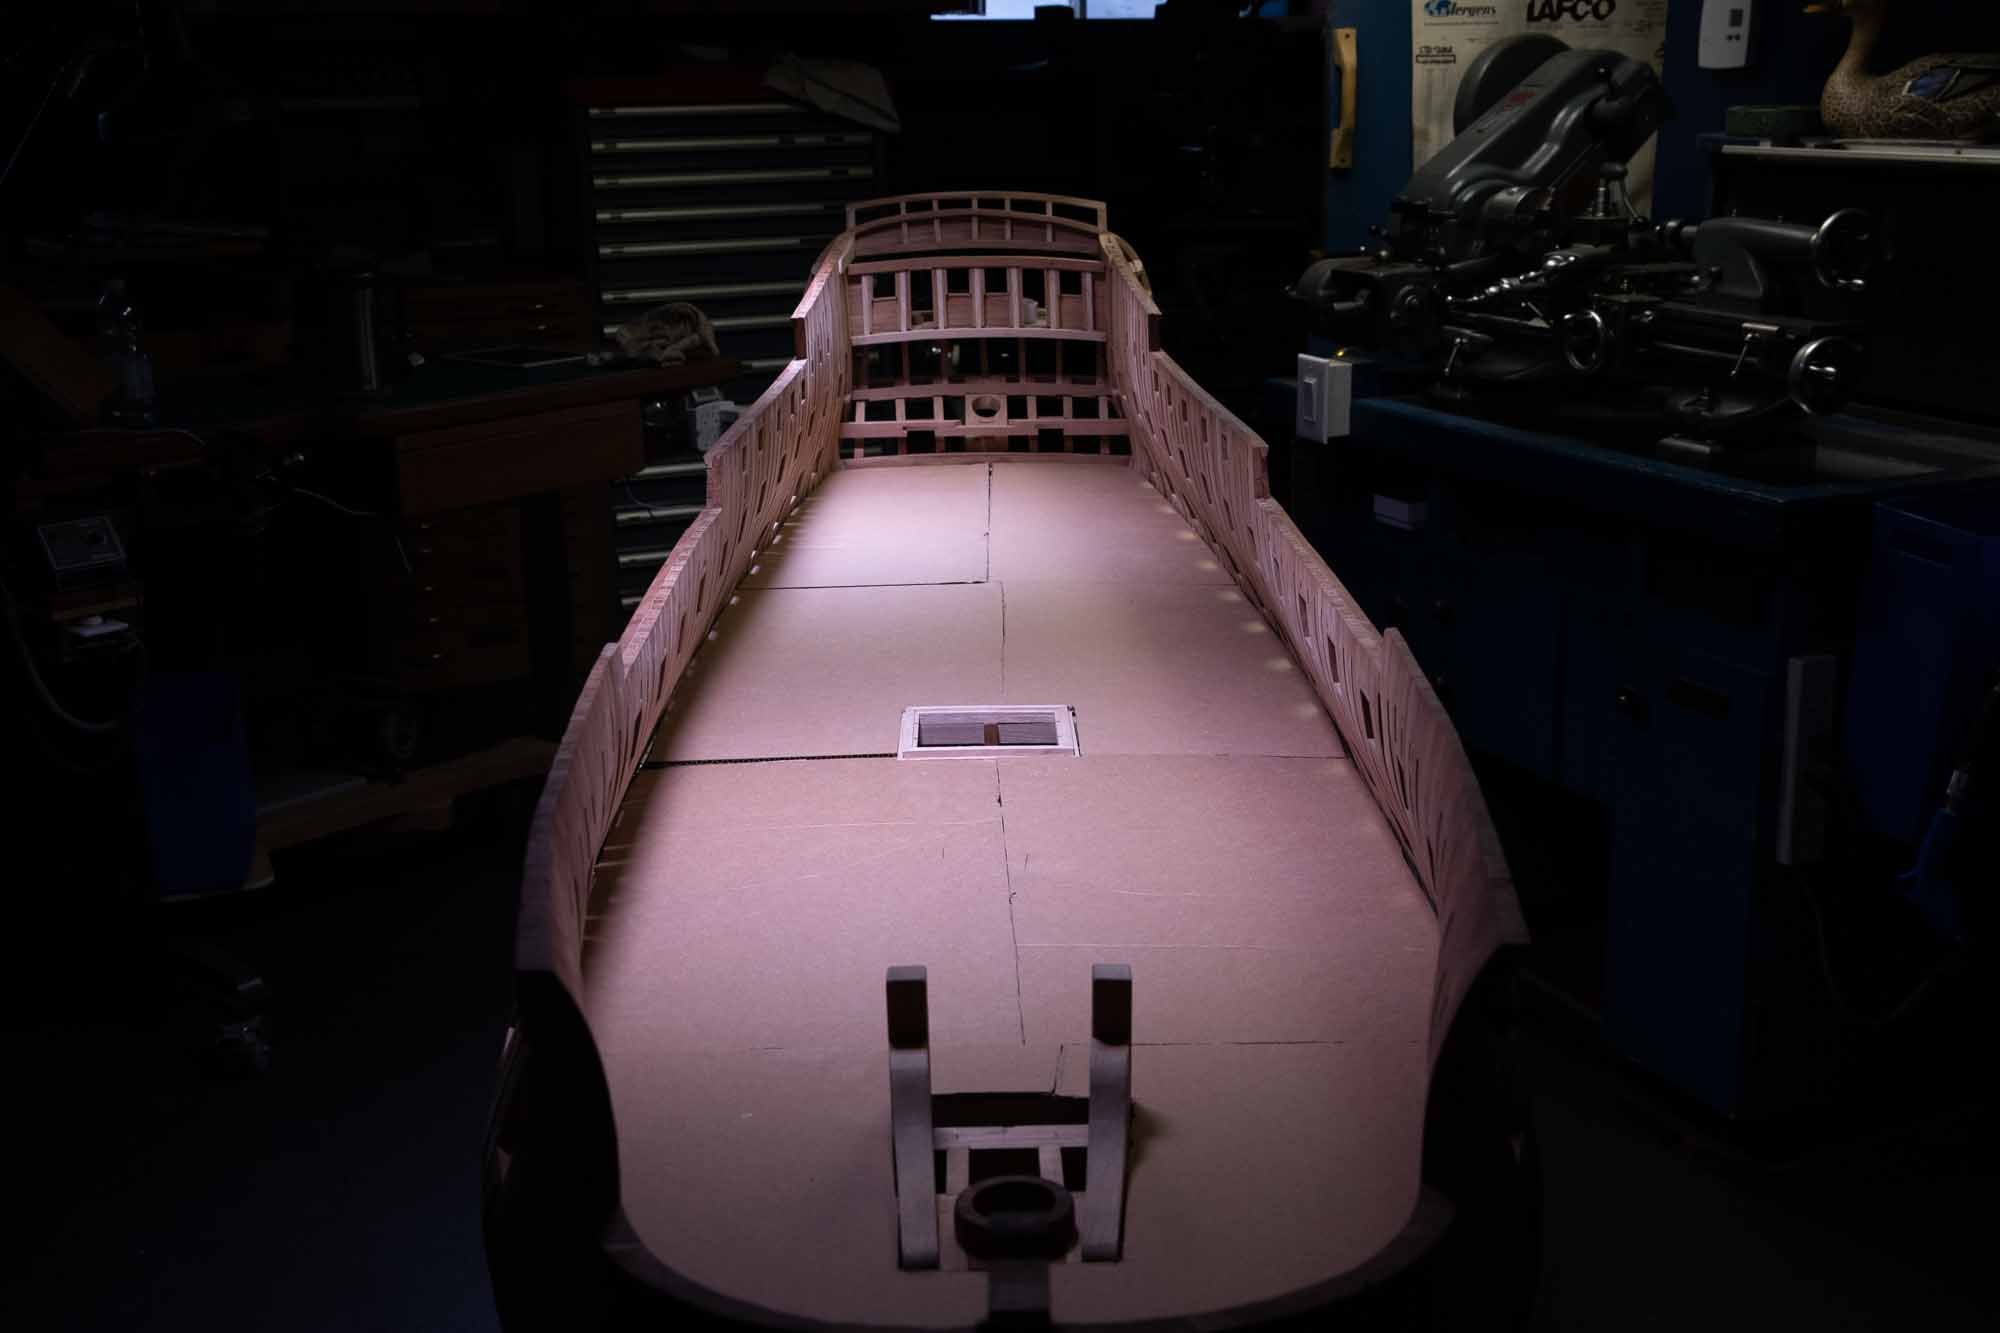
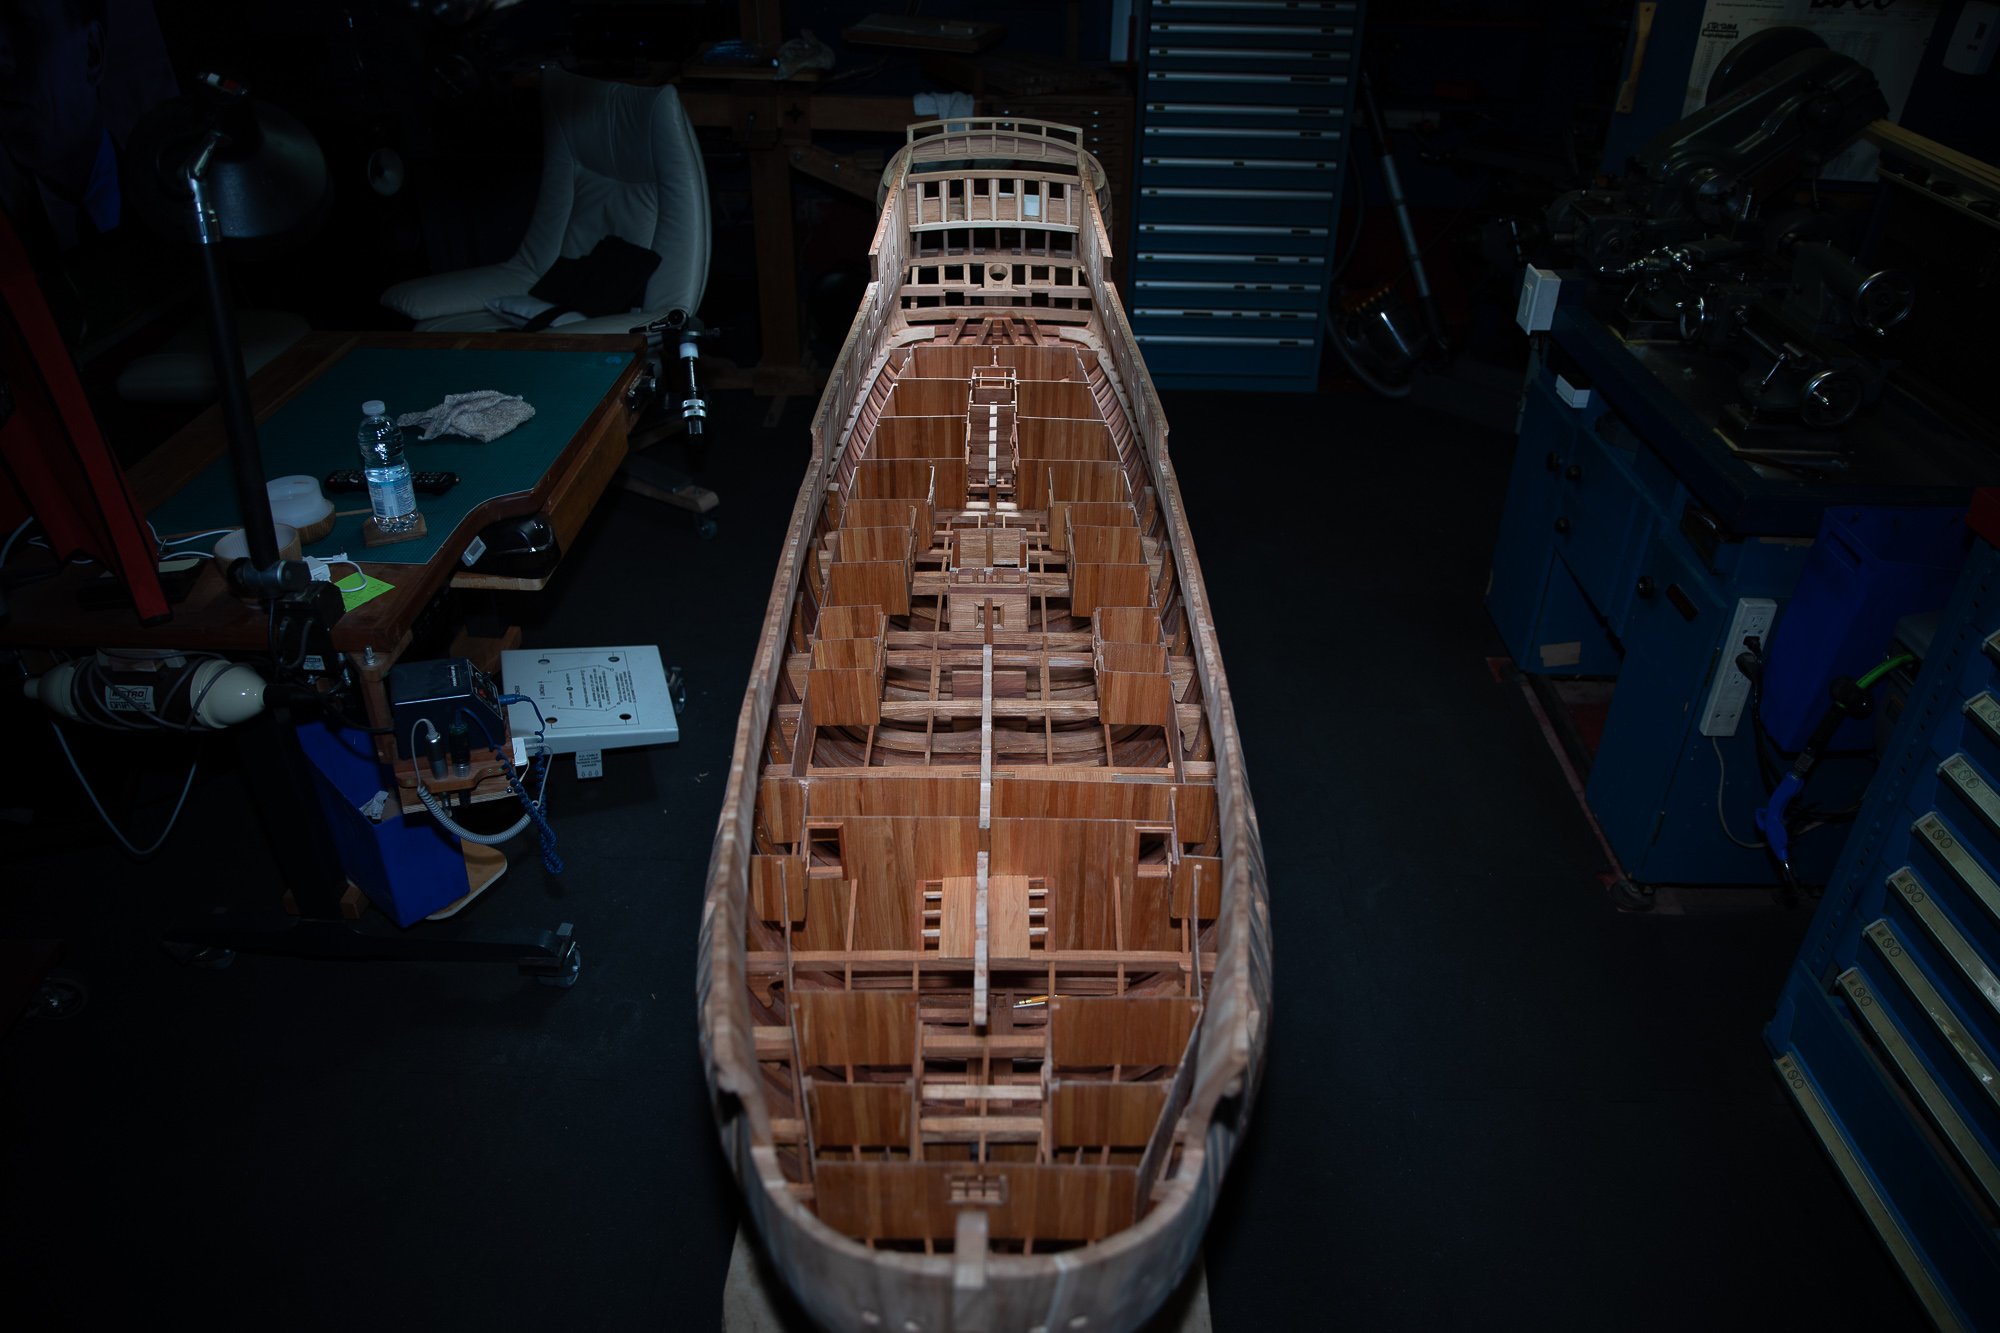
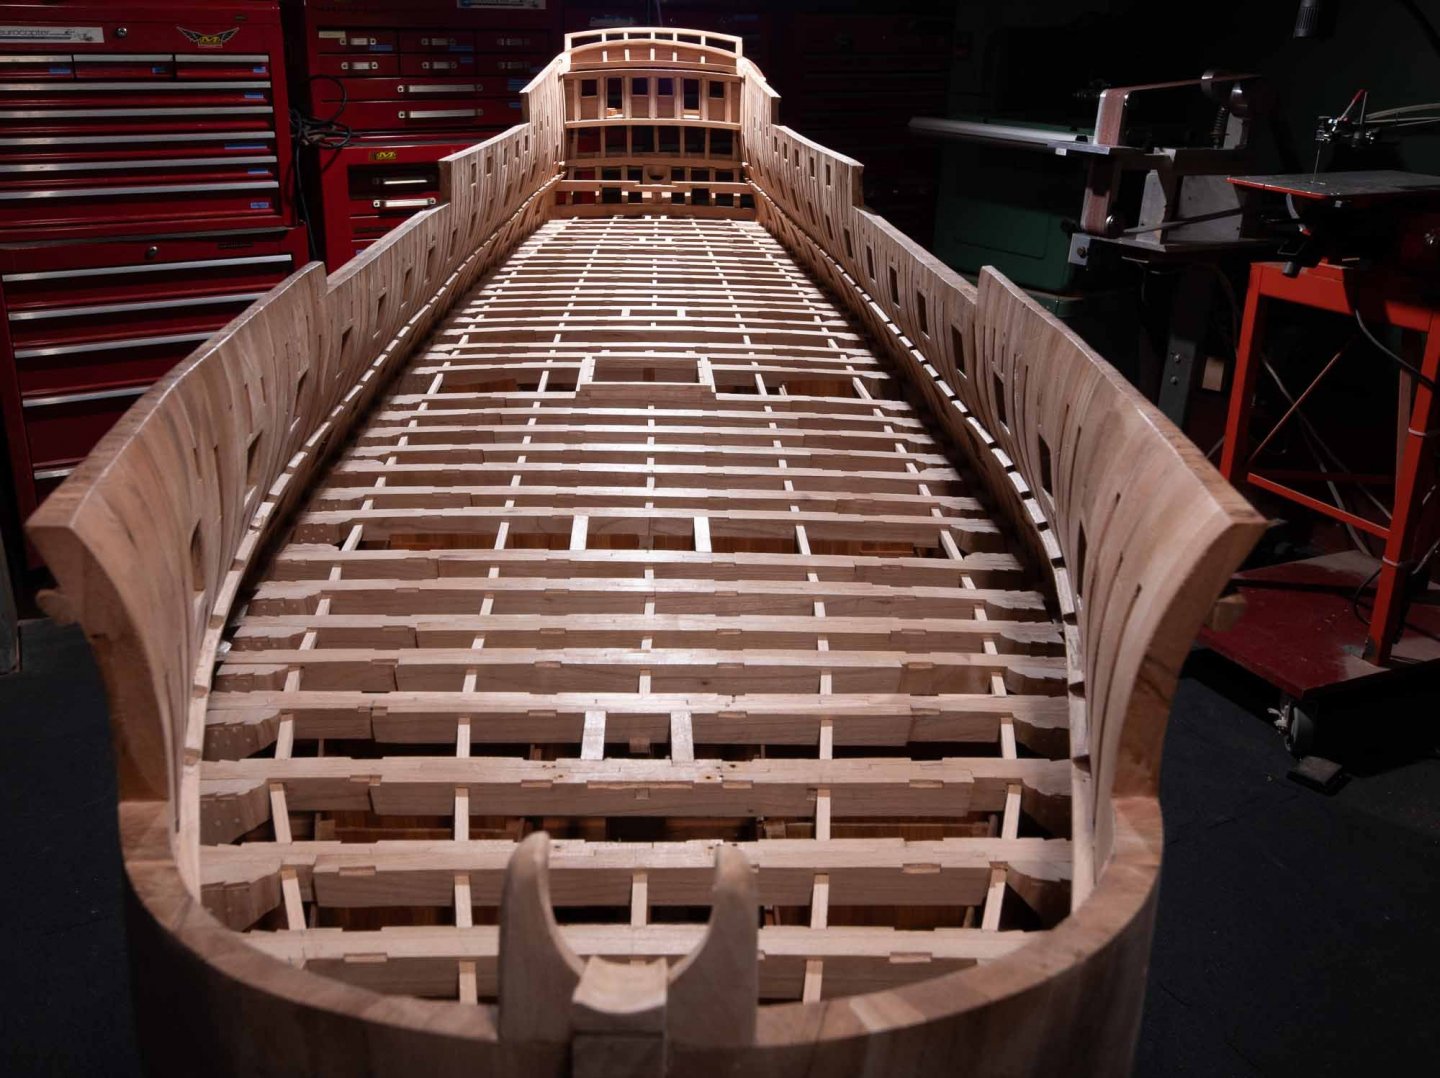
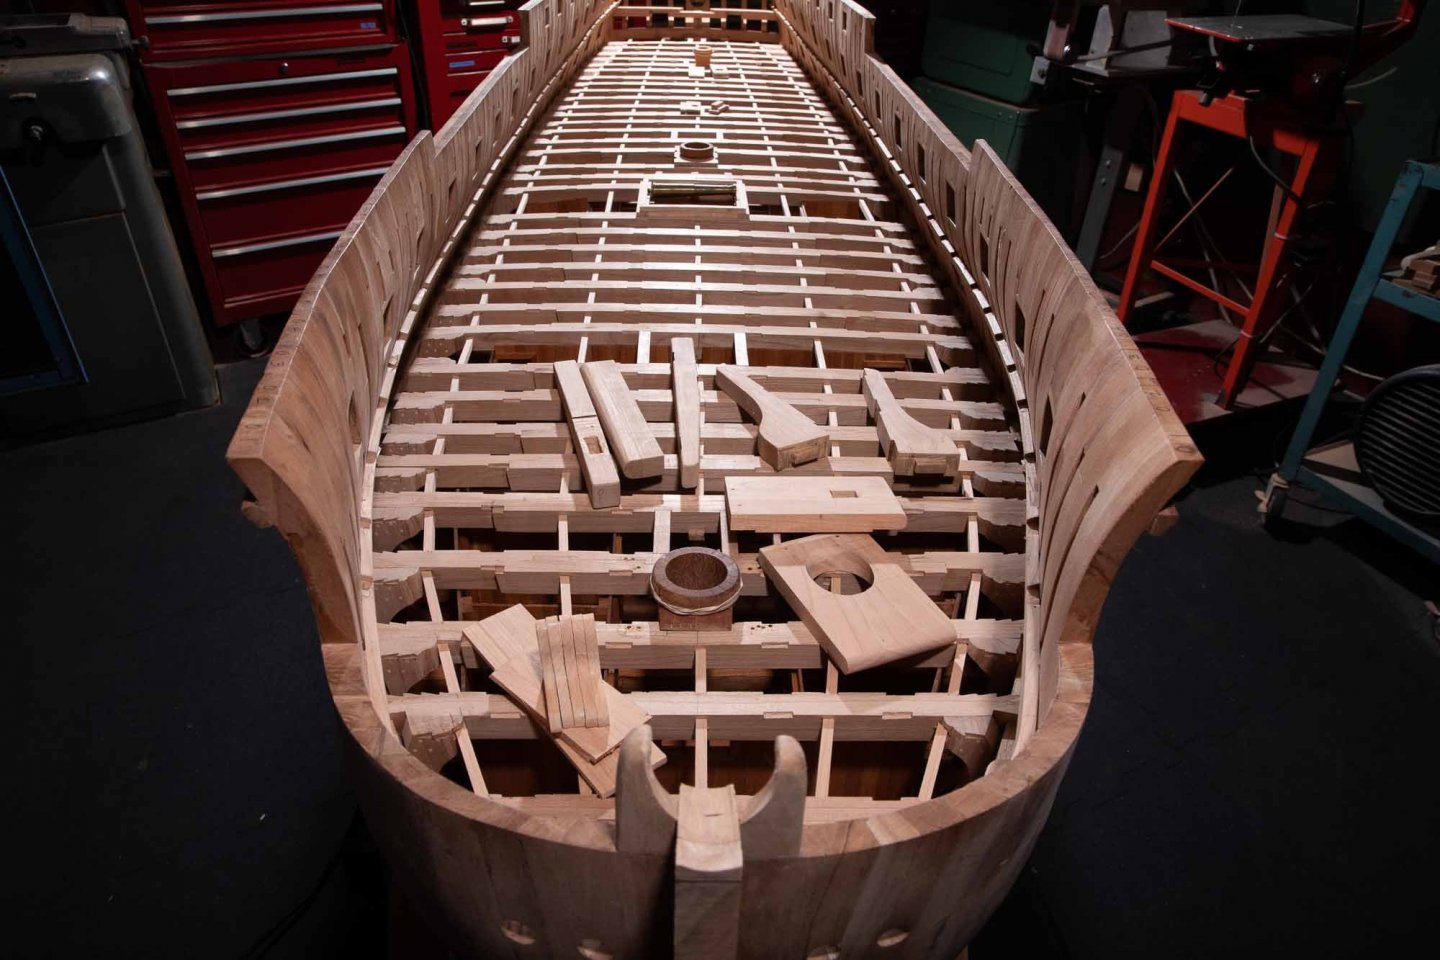
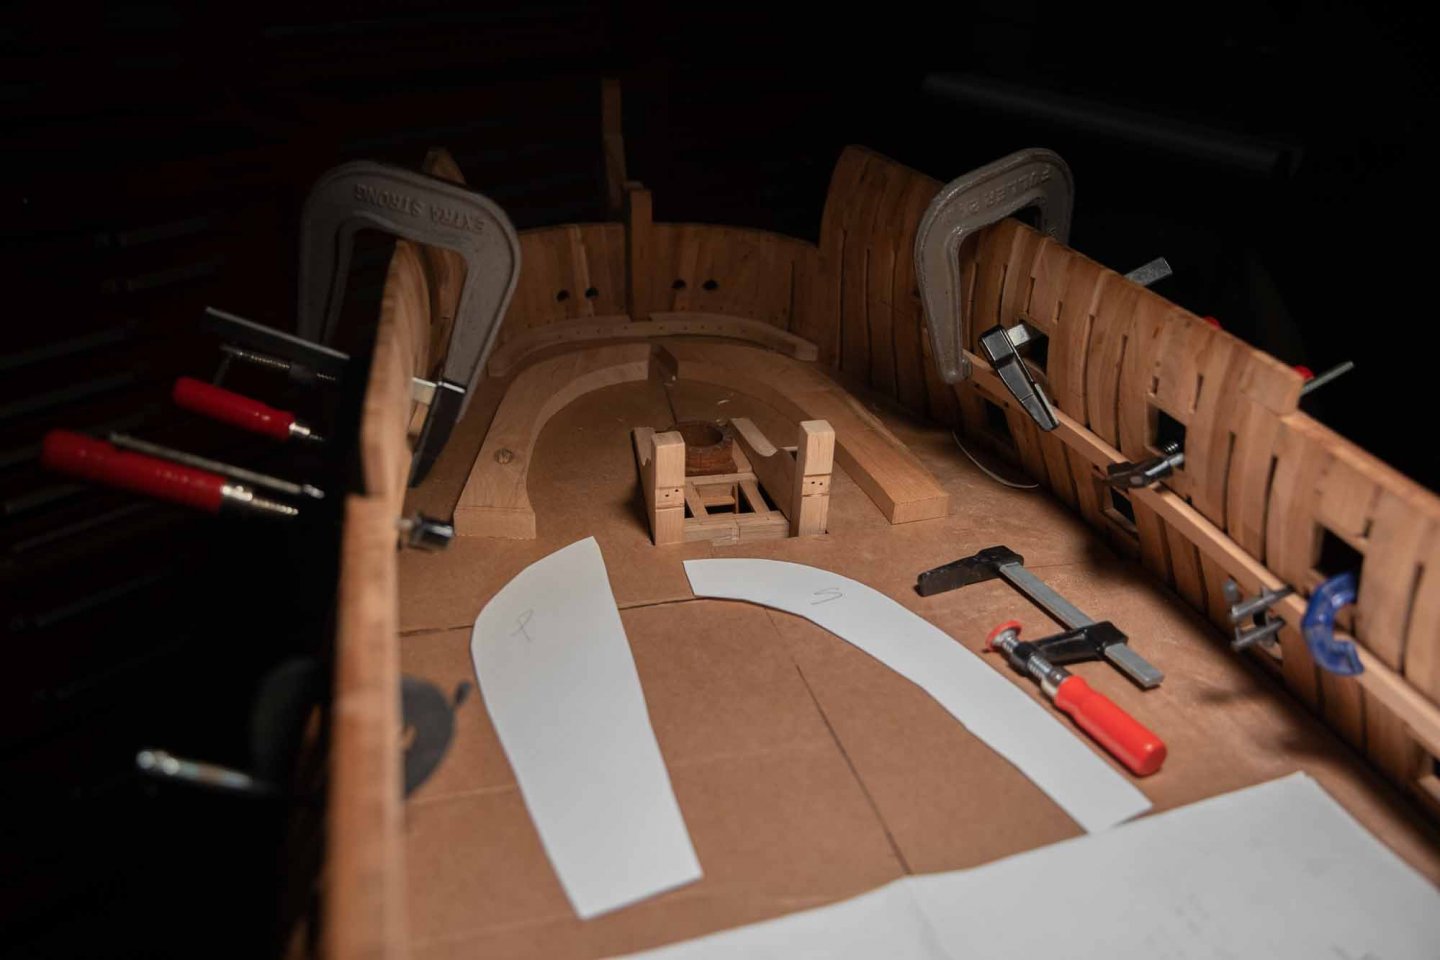
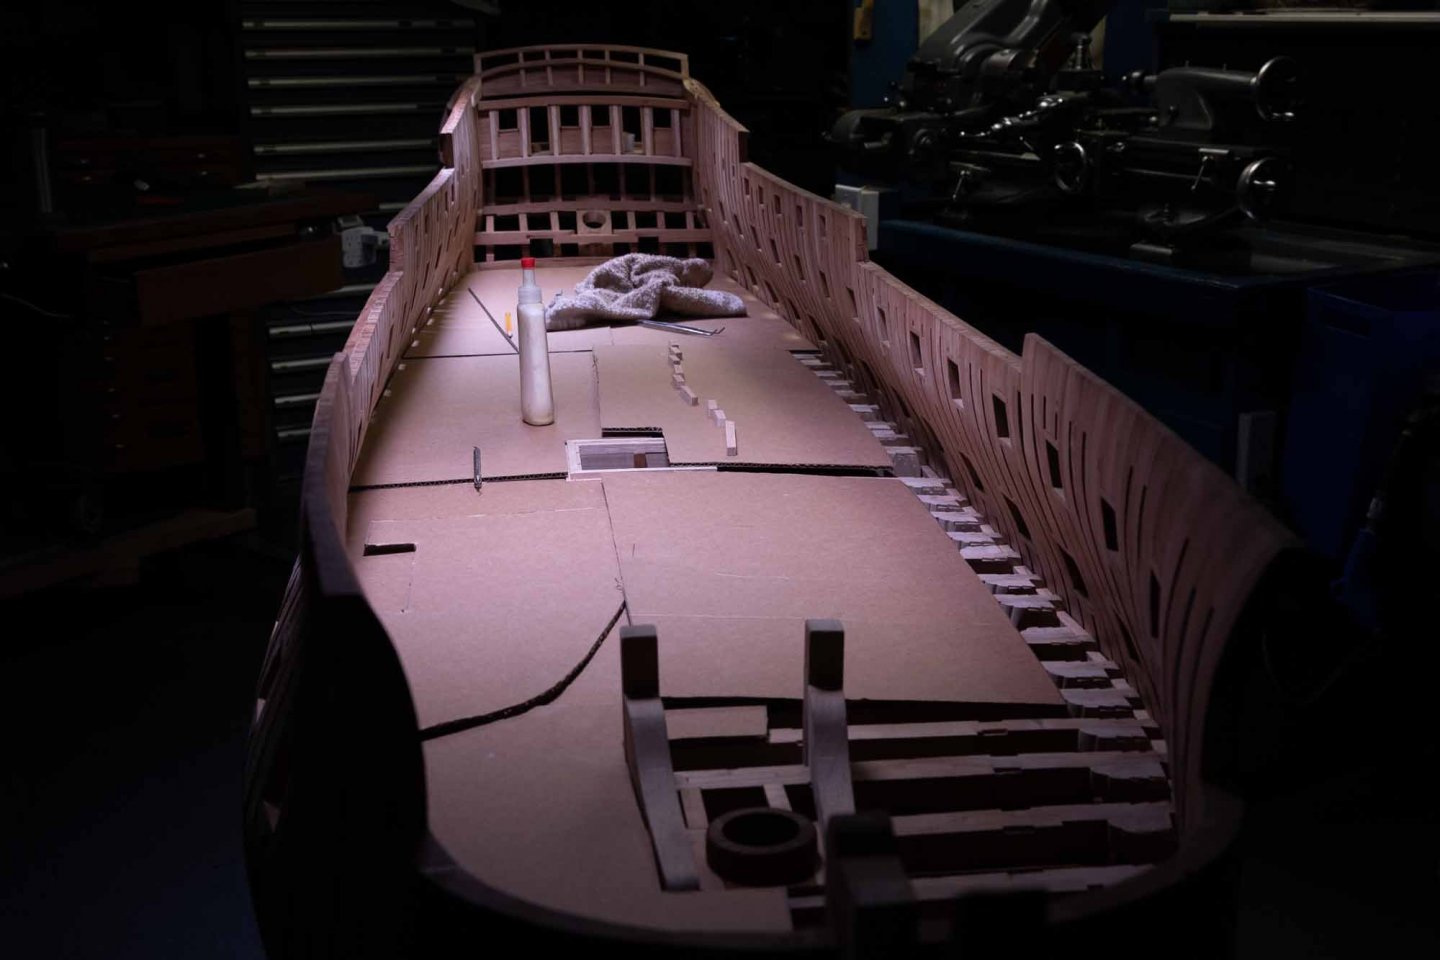
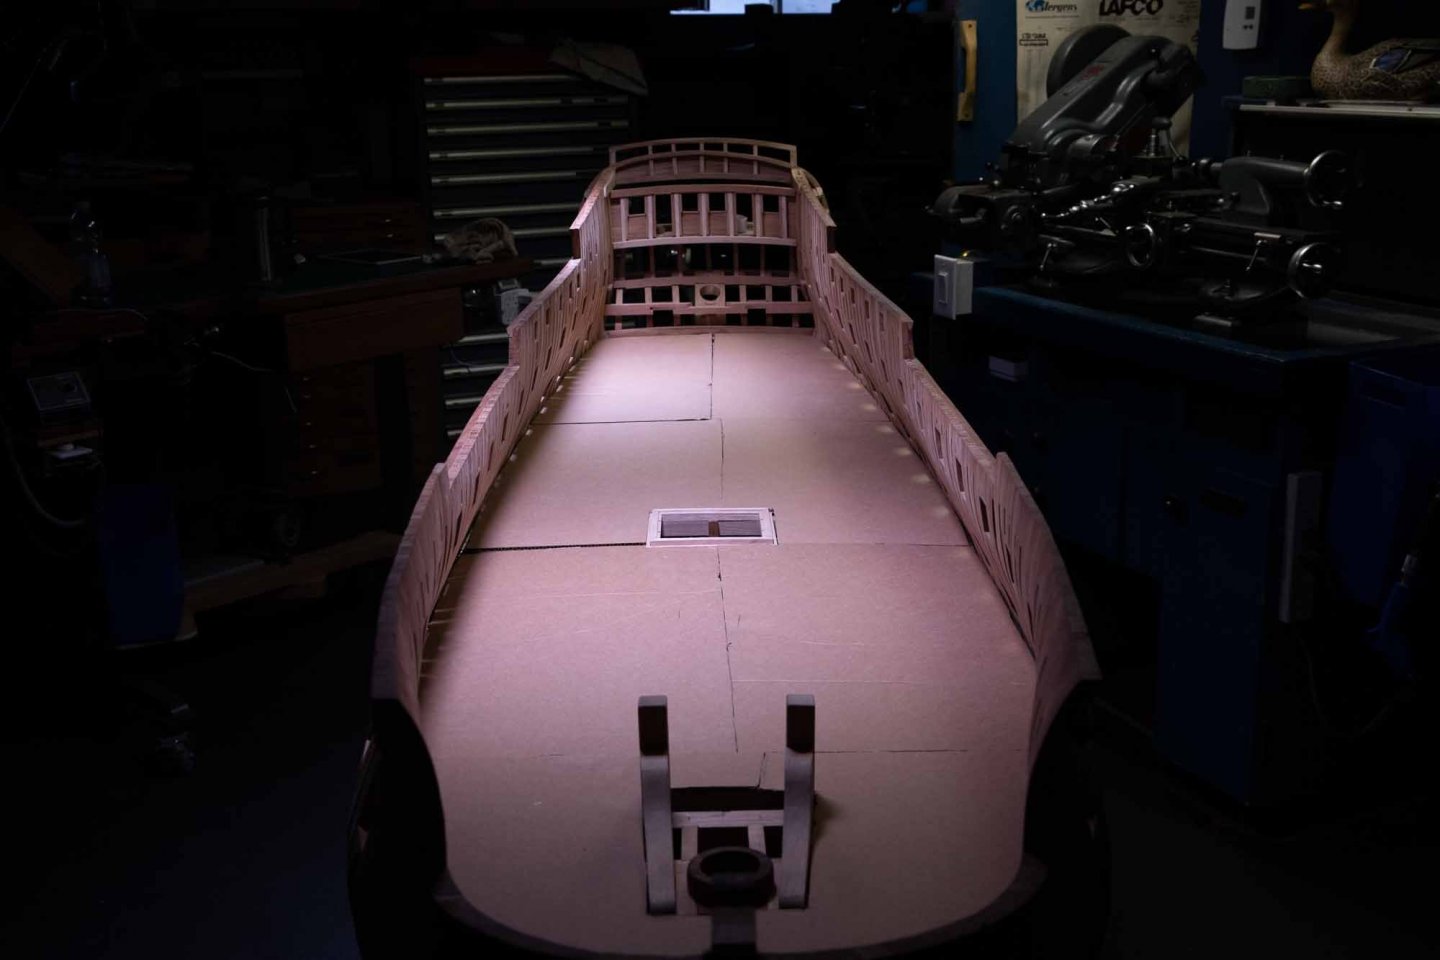
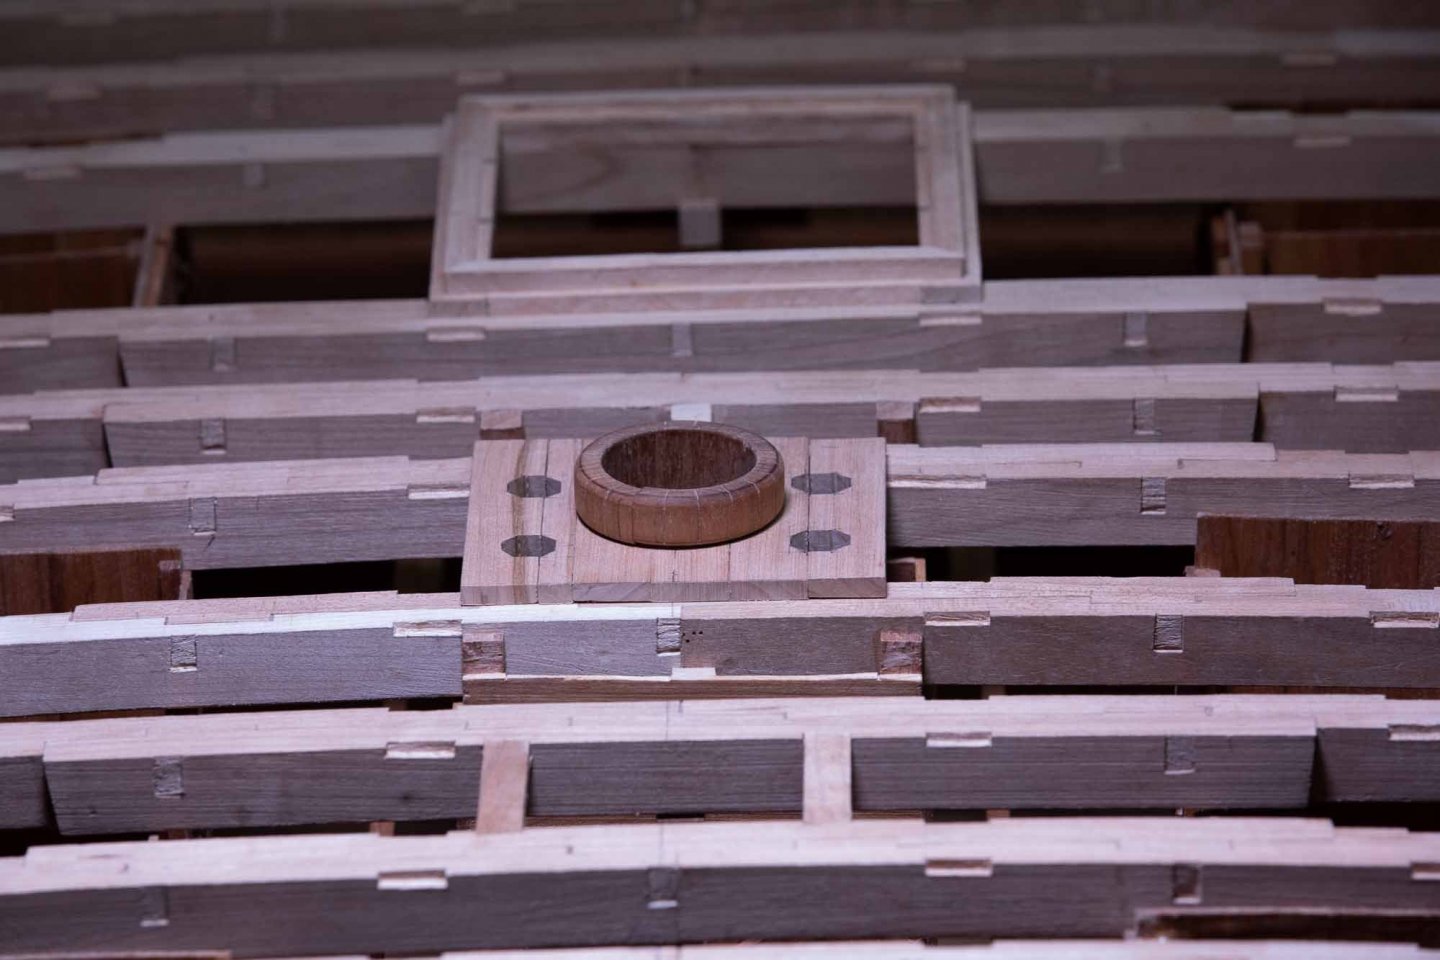
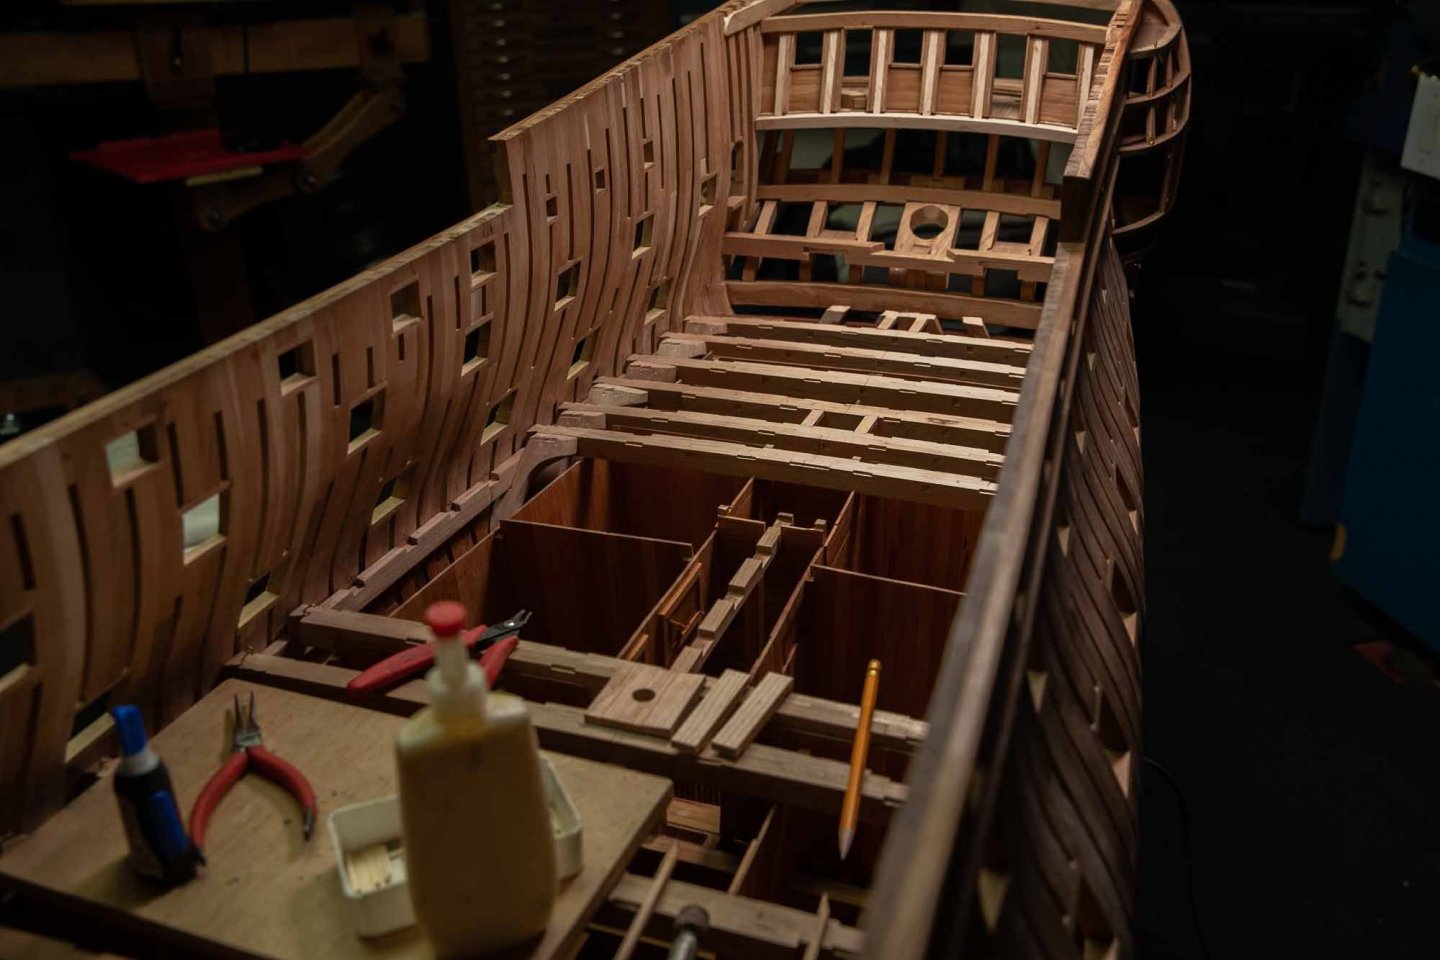
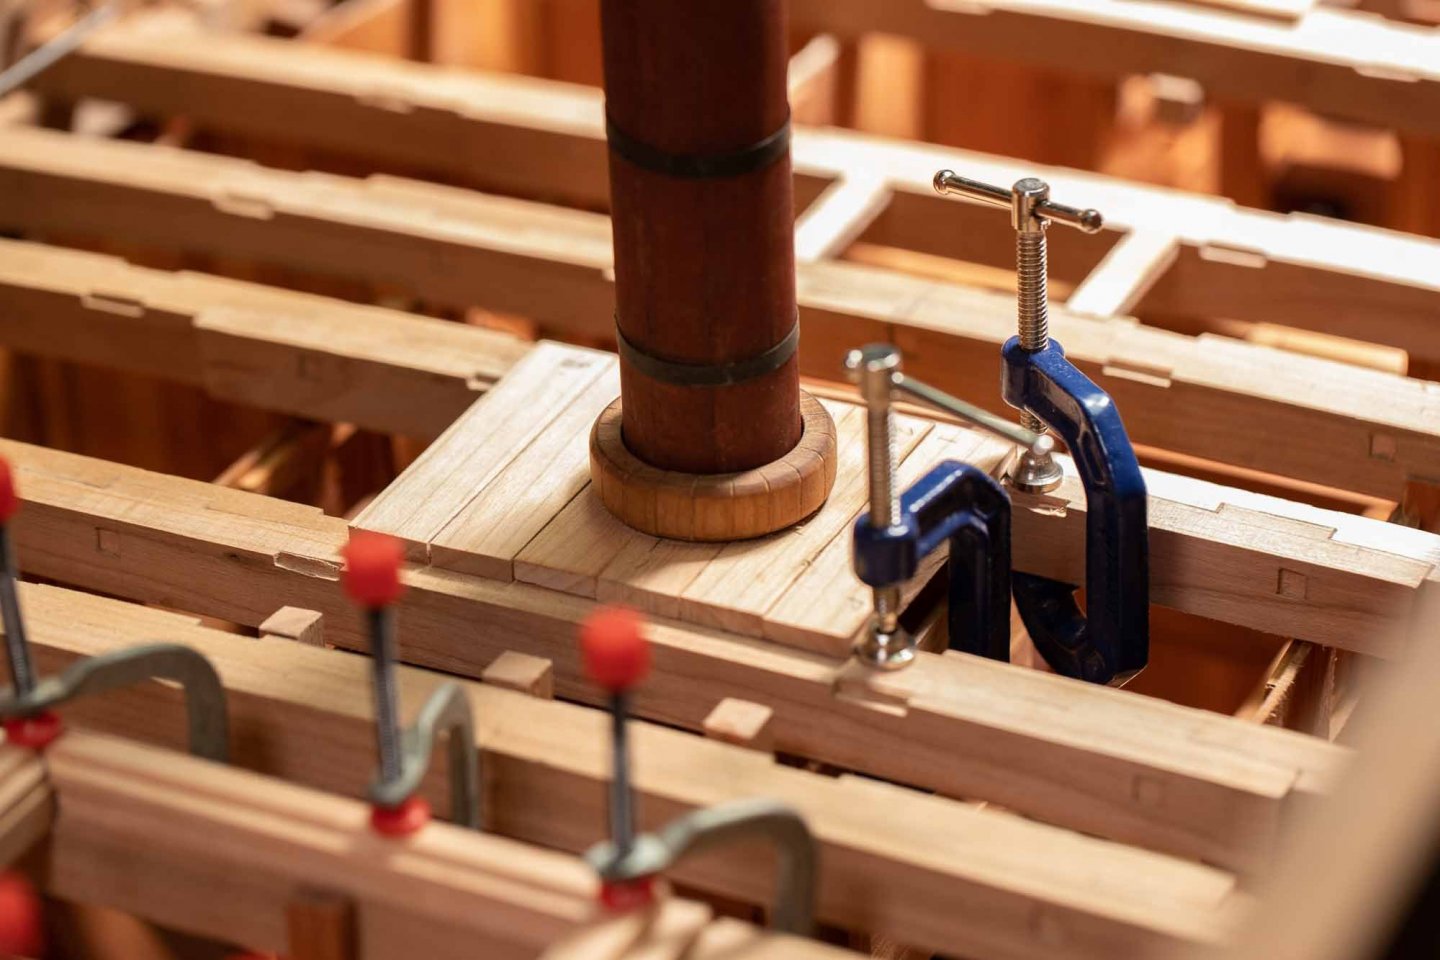
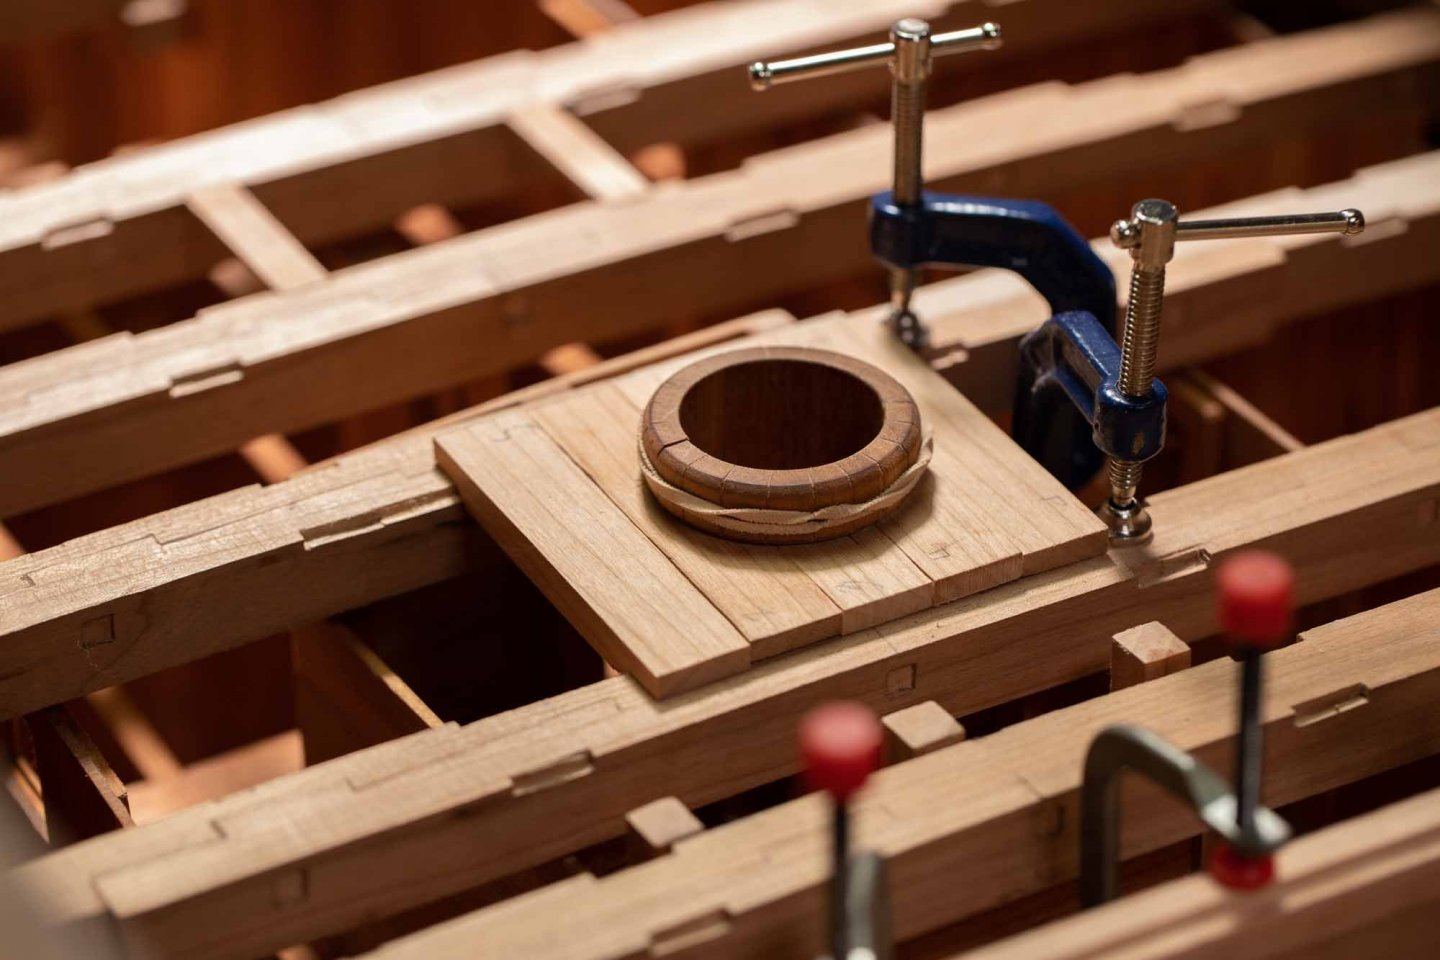
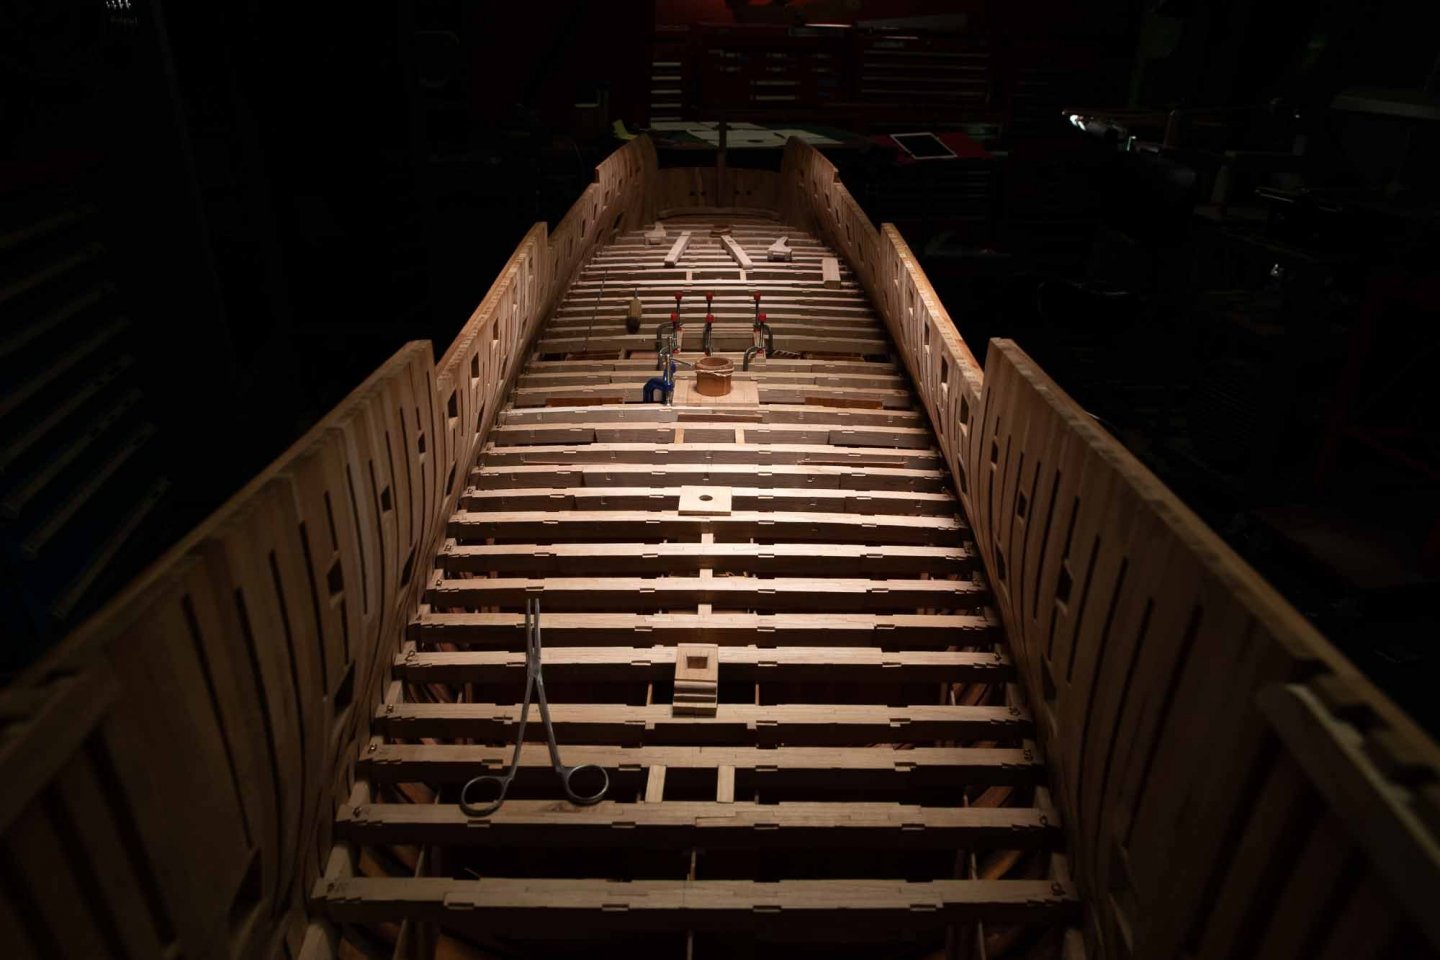
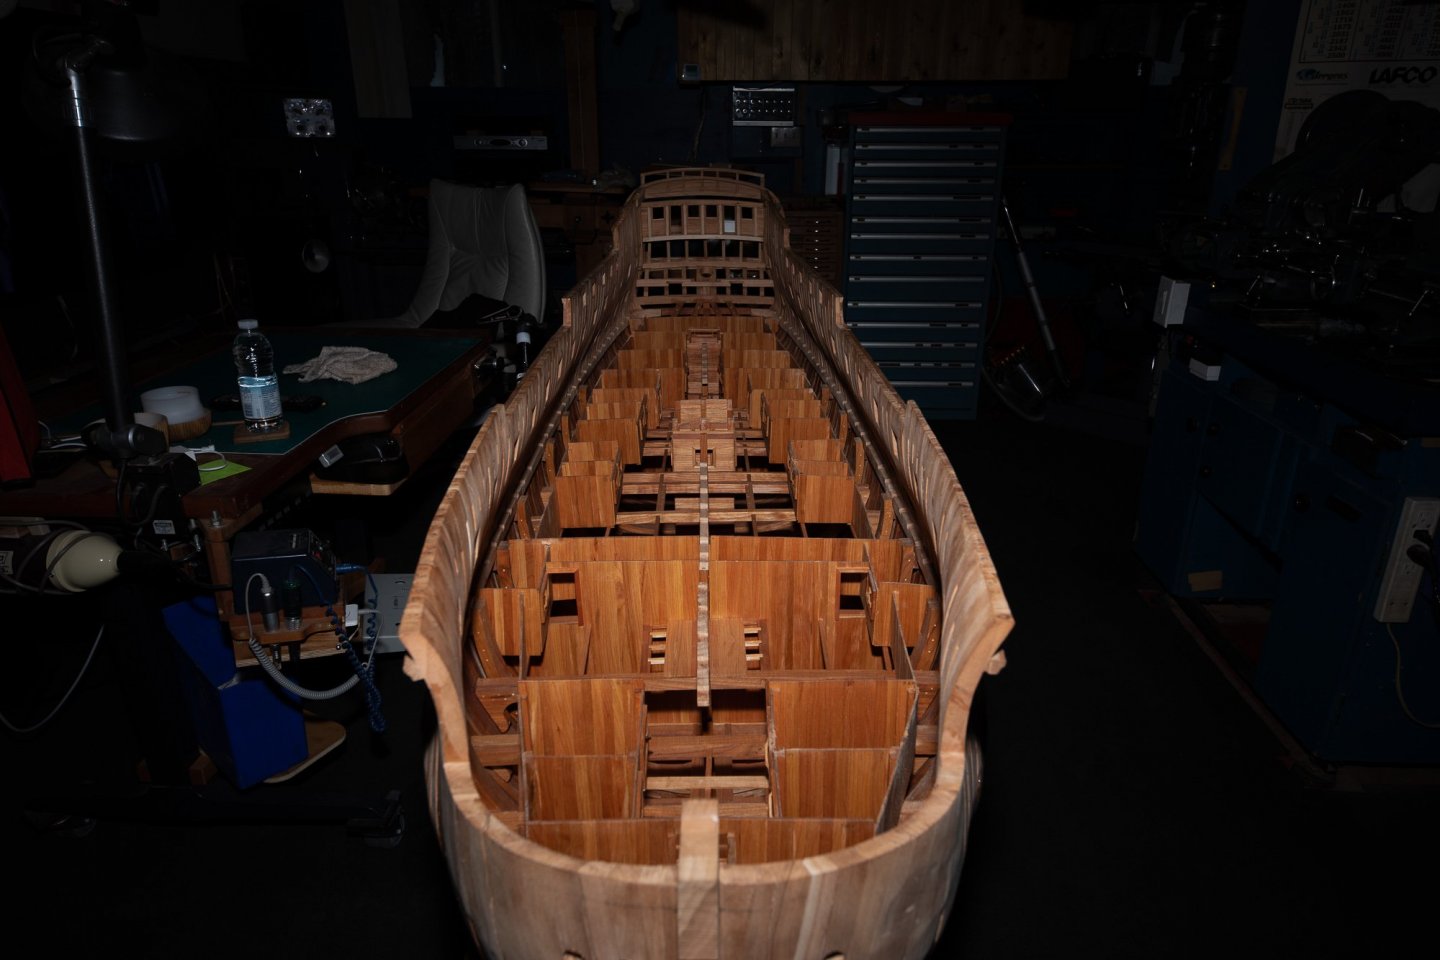
As we can see on the drawing, # 14, there are spacers between deck beams to help to maintain the deck beams in place. After the installation of the spacers, I did cut cardboard to cover the first deck, to begin after the construction of the deck beams of the second deck. On the third photo, we can see a long steel rod with a sharp point at one end to sting a wood part when I drop one on the bottom. Unfortunately, I cannot turn the mode l upside down every time I drop a part.

-
If I had to buy only 1 tool, that would be it and I would put every thing on wheels.
-
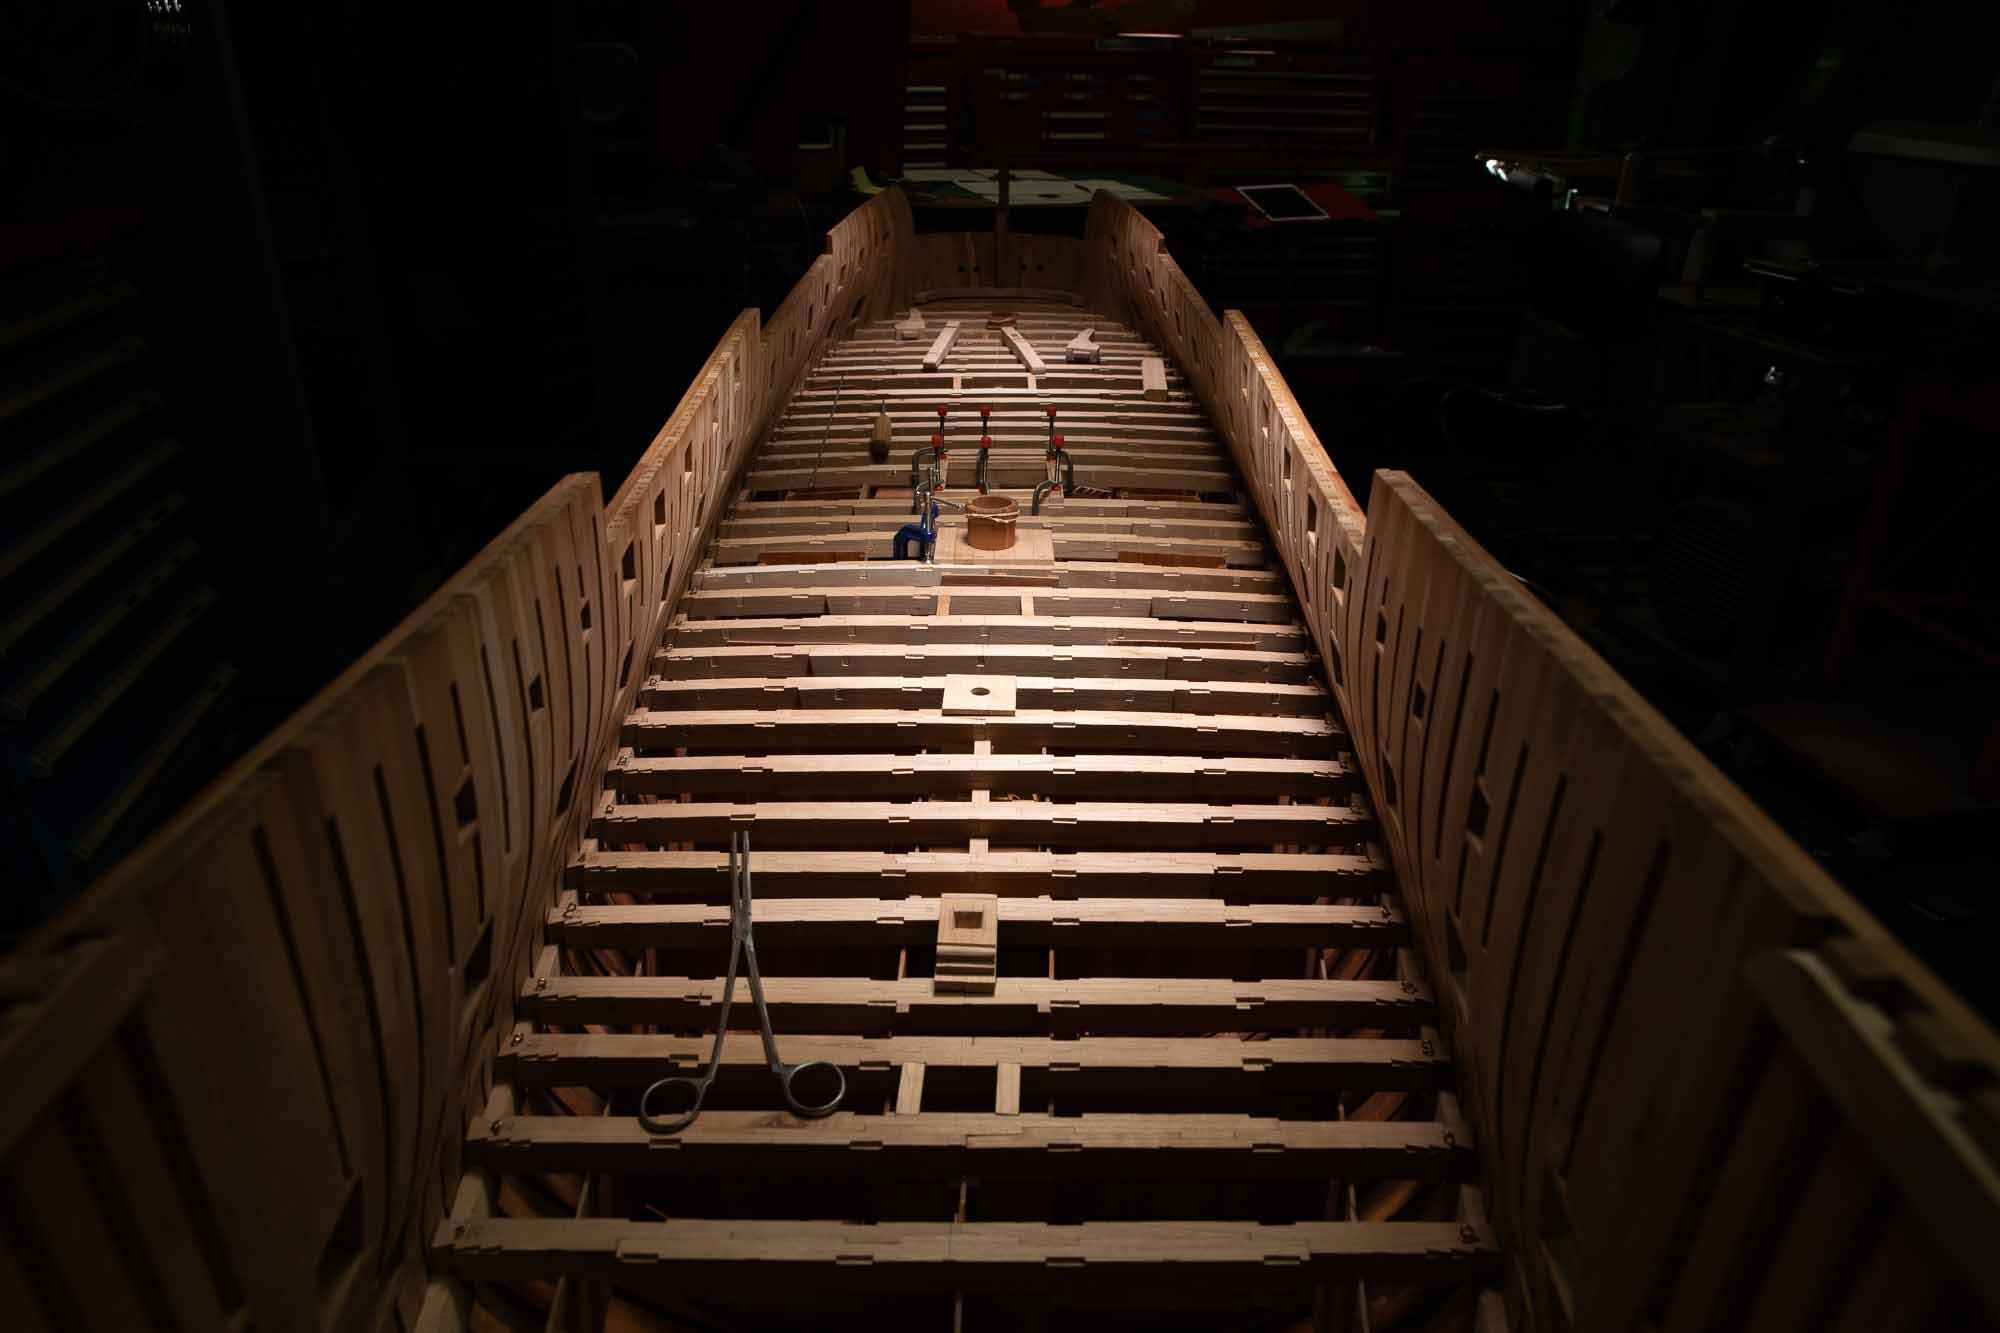
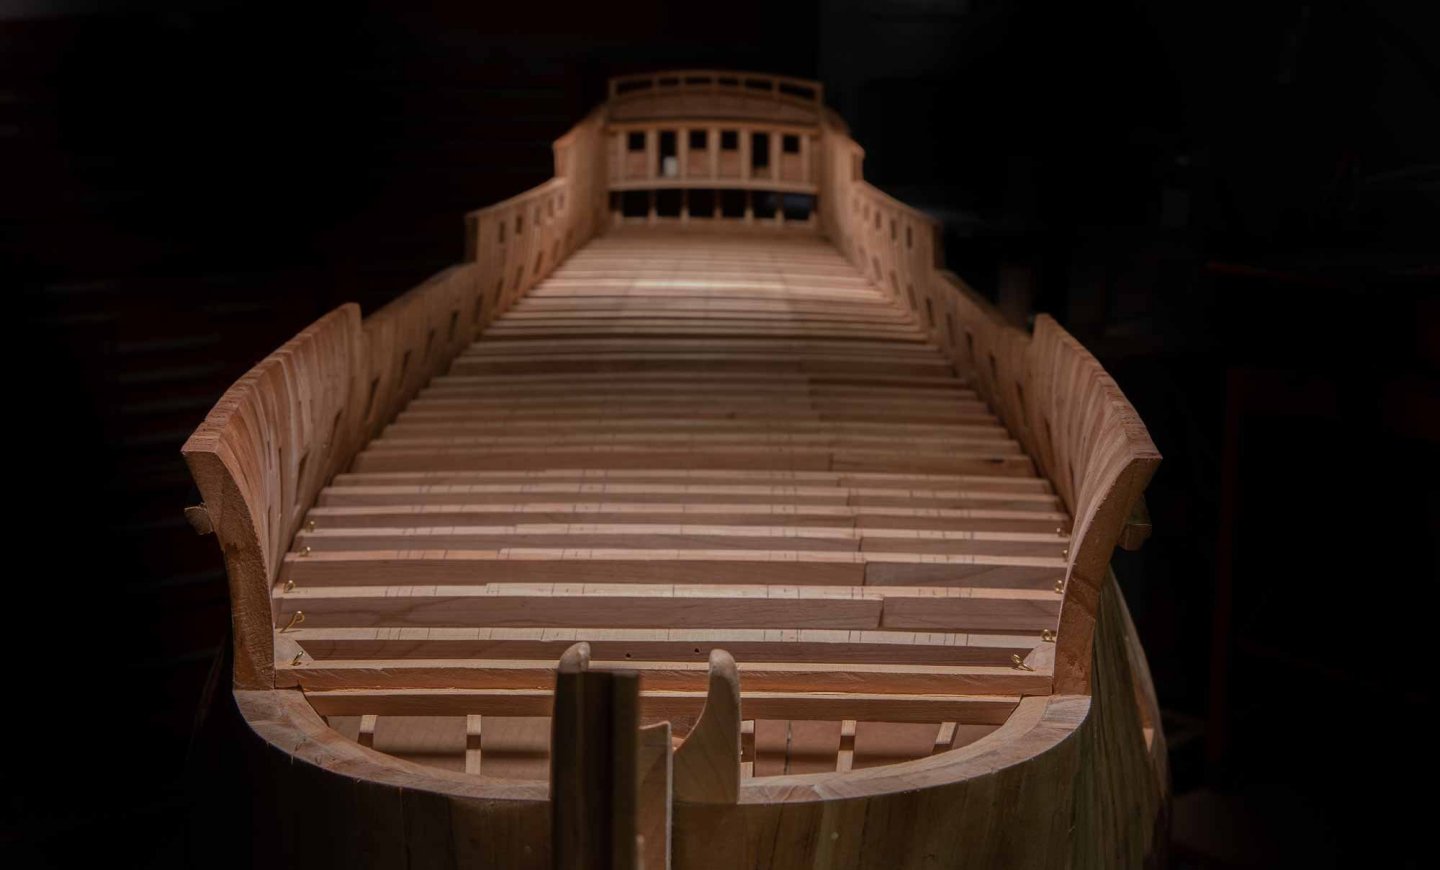
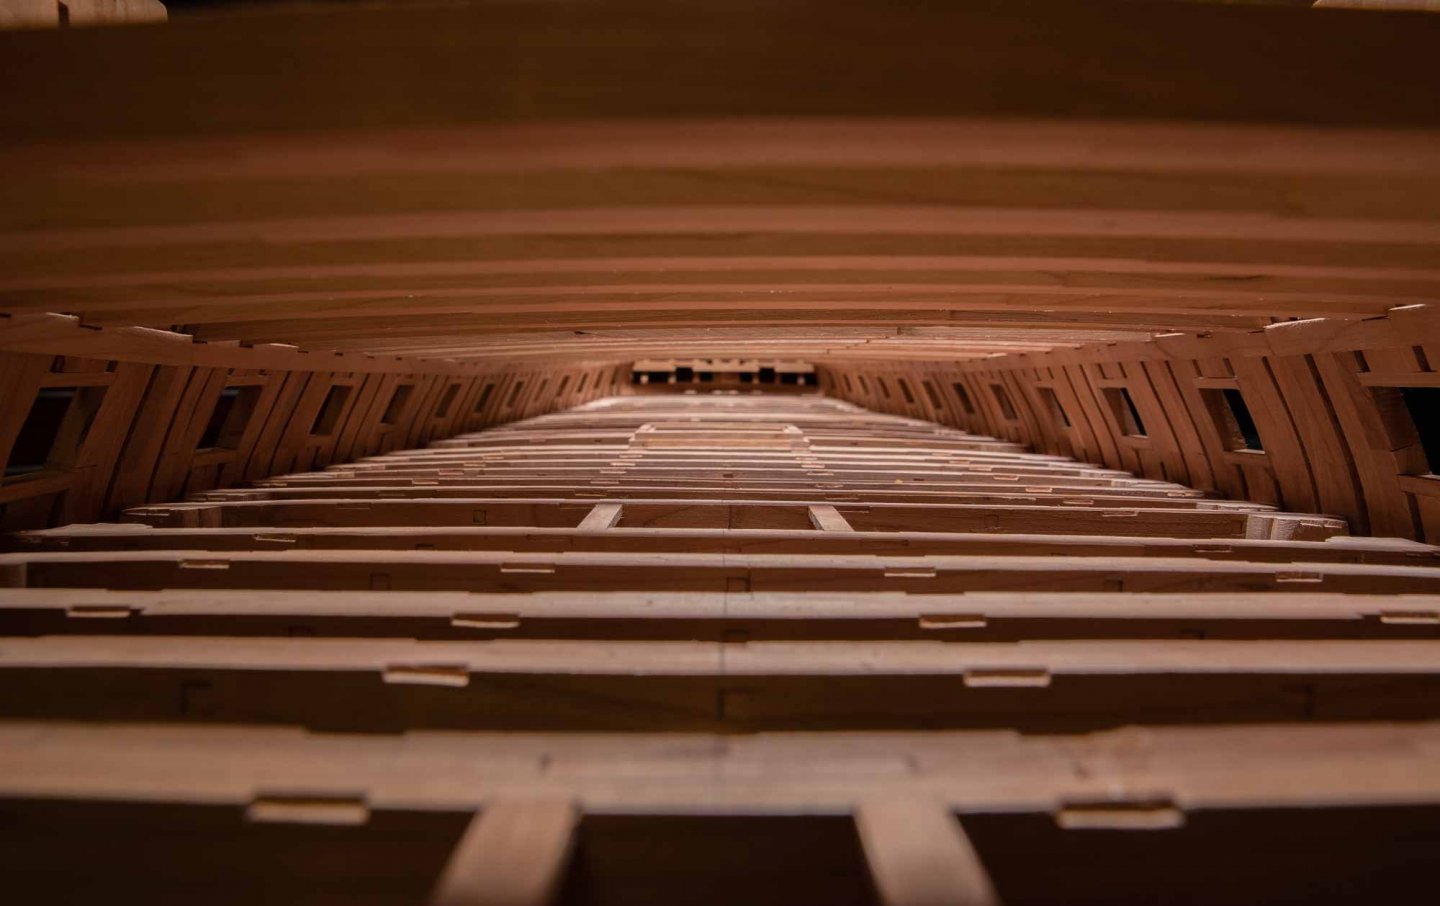
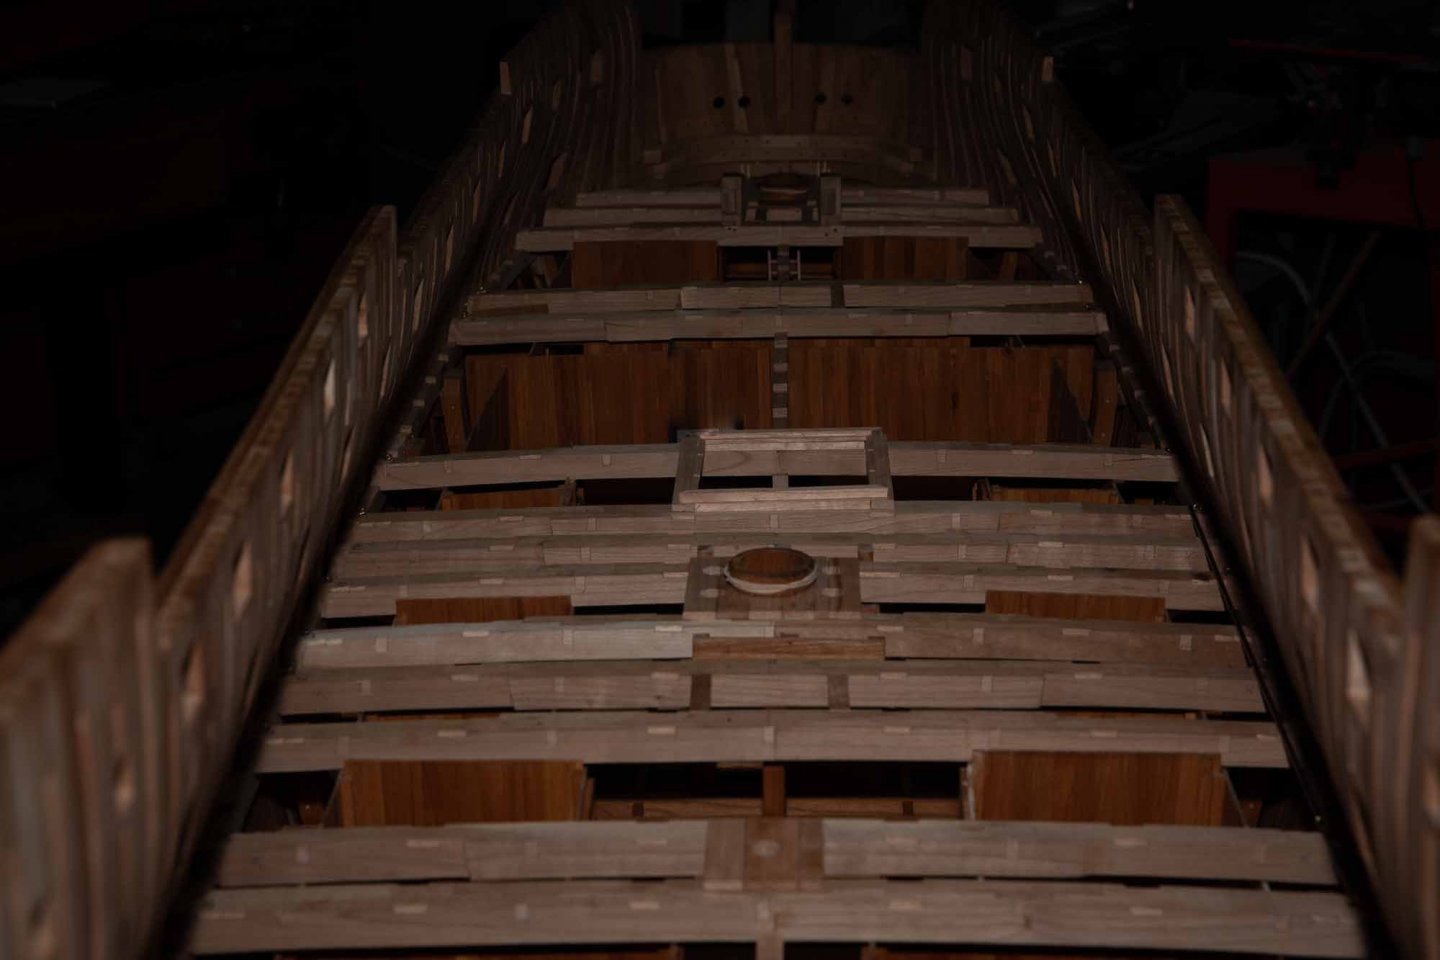
Finally, I glued the deck beams of the first deck.


-
while doing some cleaning; here is a build log in 3 pictures taken from old pictures: French 74 guns at 1/192 scale.

-
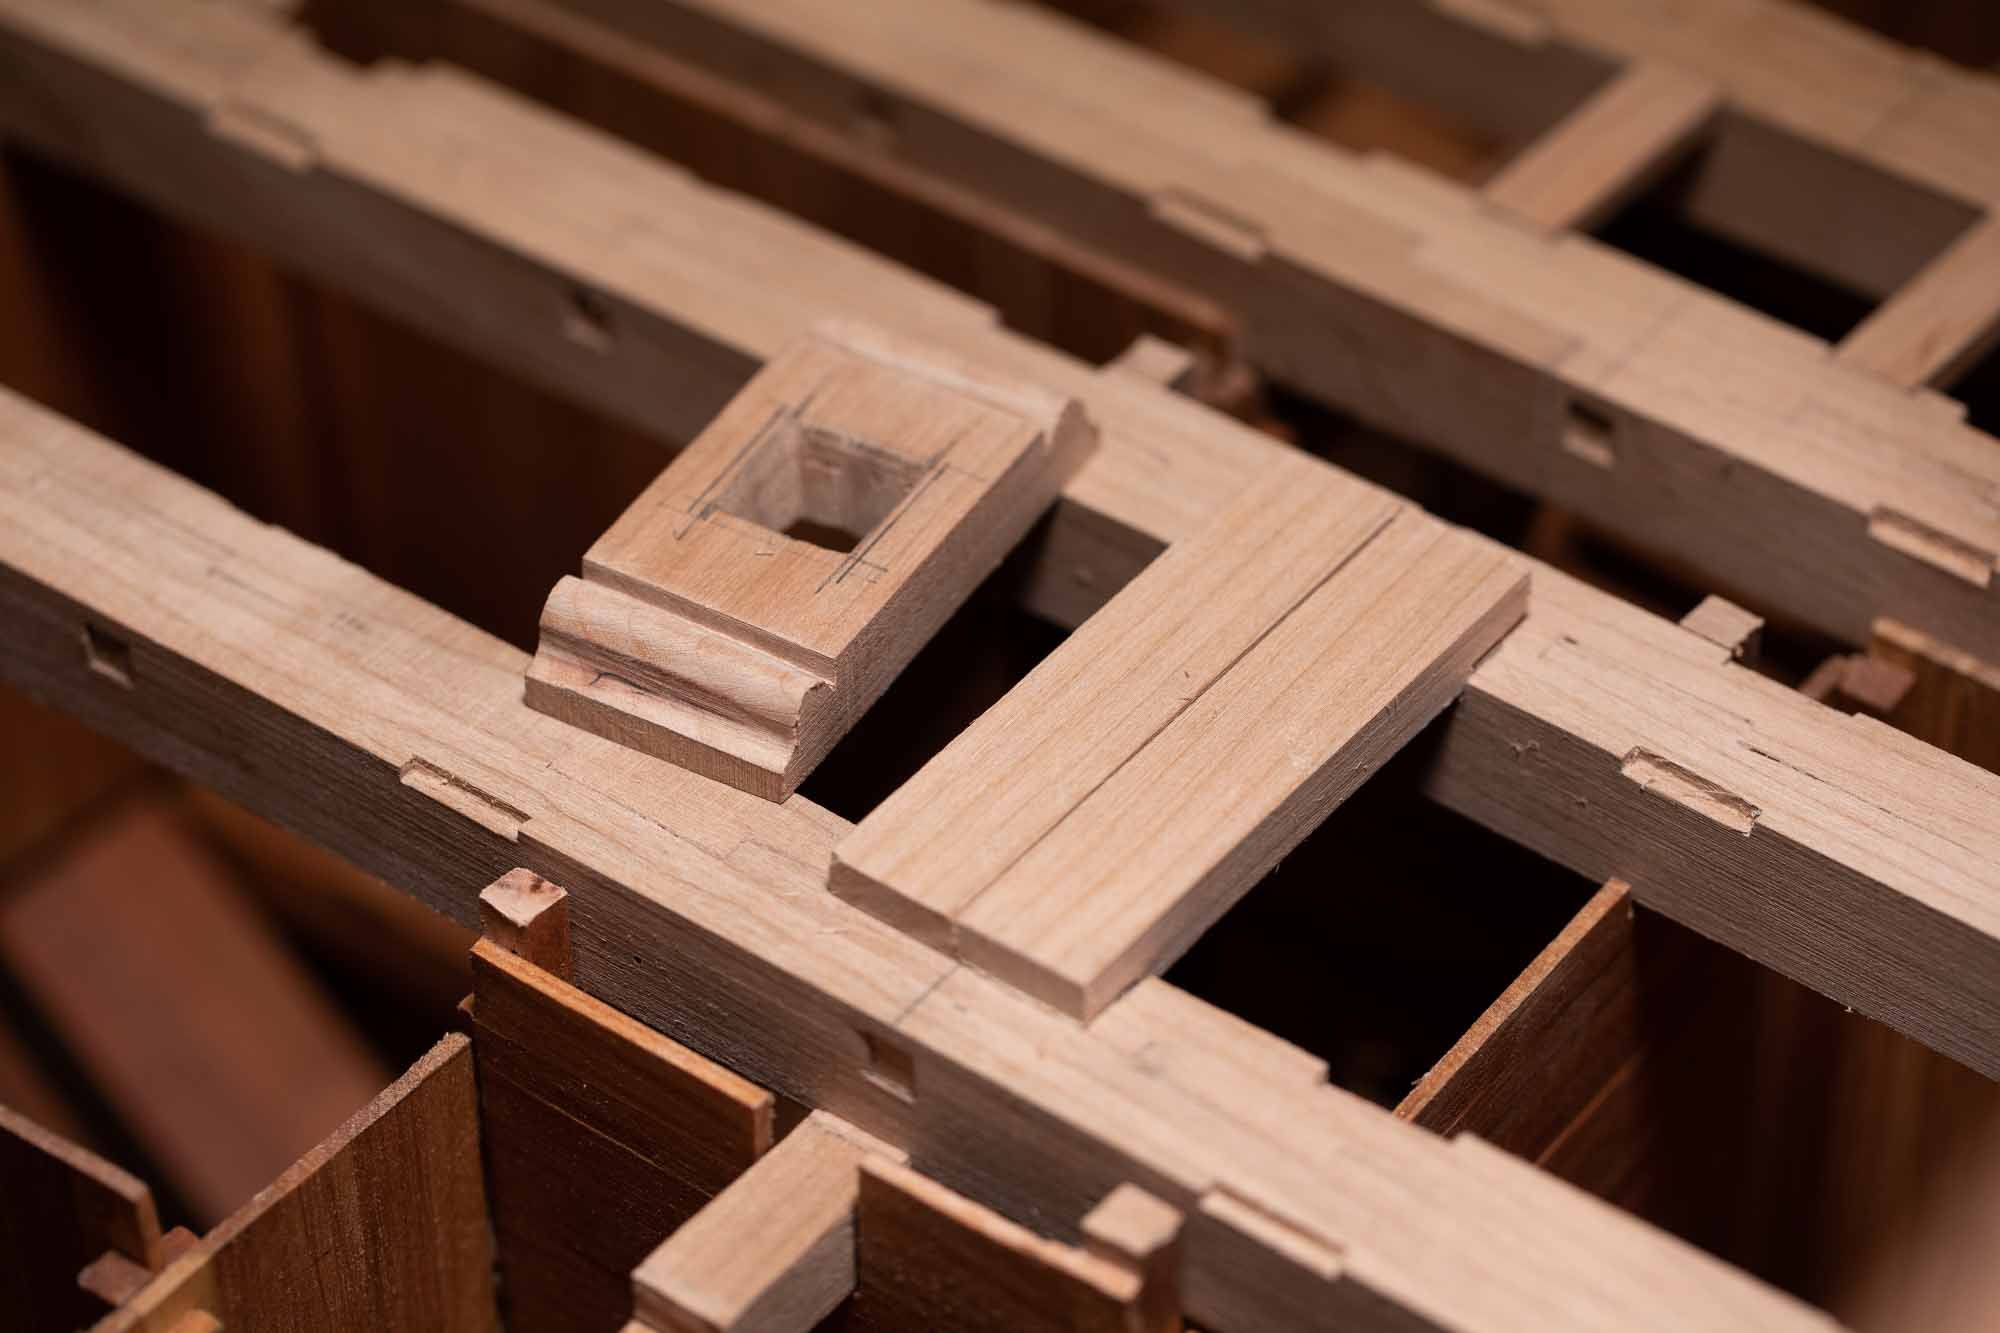
Notches in the beams are finished. They are done before gluing the deck beams. Now gluing all these parts began.
-
Rockwell Bladerunner
Gaetan Bordeleau replied to selittle's topic in Modeling tools and Workshop Equipment
A jig saw will destroy ... about every plank at a small scale. It is made to cut thicker than about 1/4 inch. The right tool for the right job, for a model ship at small scale, is a scroll saw. -
The last one weighed was 130 pounds, about 60 kilos
-
Sometimes it is difficult to make a part. This one, I did it 3 times. The first, I did not see the front view, so I mist an important detail. The second time, I did not use the scroll saw but the table saw, to achieve greater precision but more difficult to position the part. I took the measures between the blade and the fence but it did not work well. Third try, still on table saw, but this time, measures were taken the other side of the blade. It was easier to achieve better precision this way, probably because a better vision of the part to cut. Sometime, it is difficult to make a part and sometime it is difficult to find a good way to do it

-
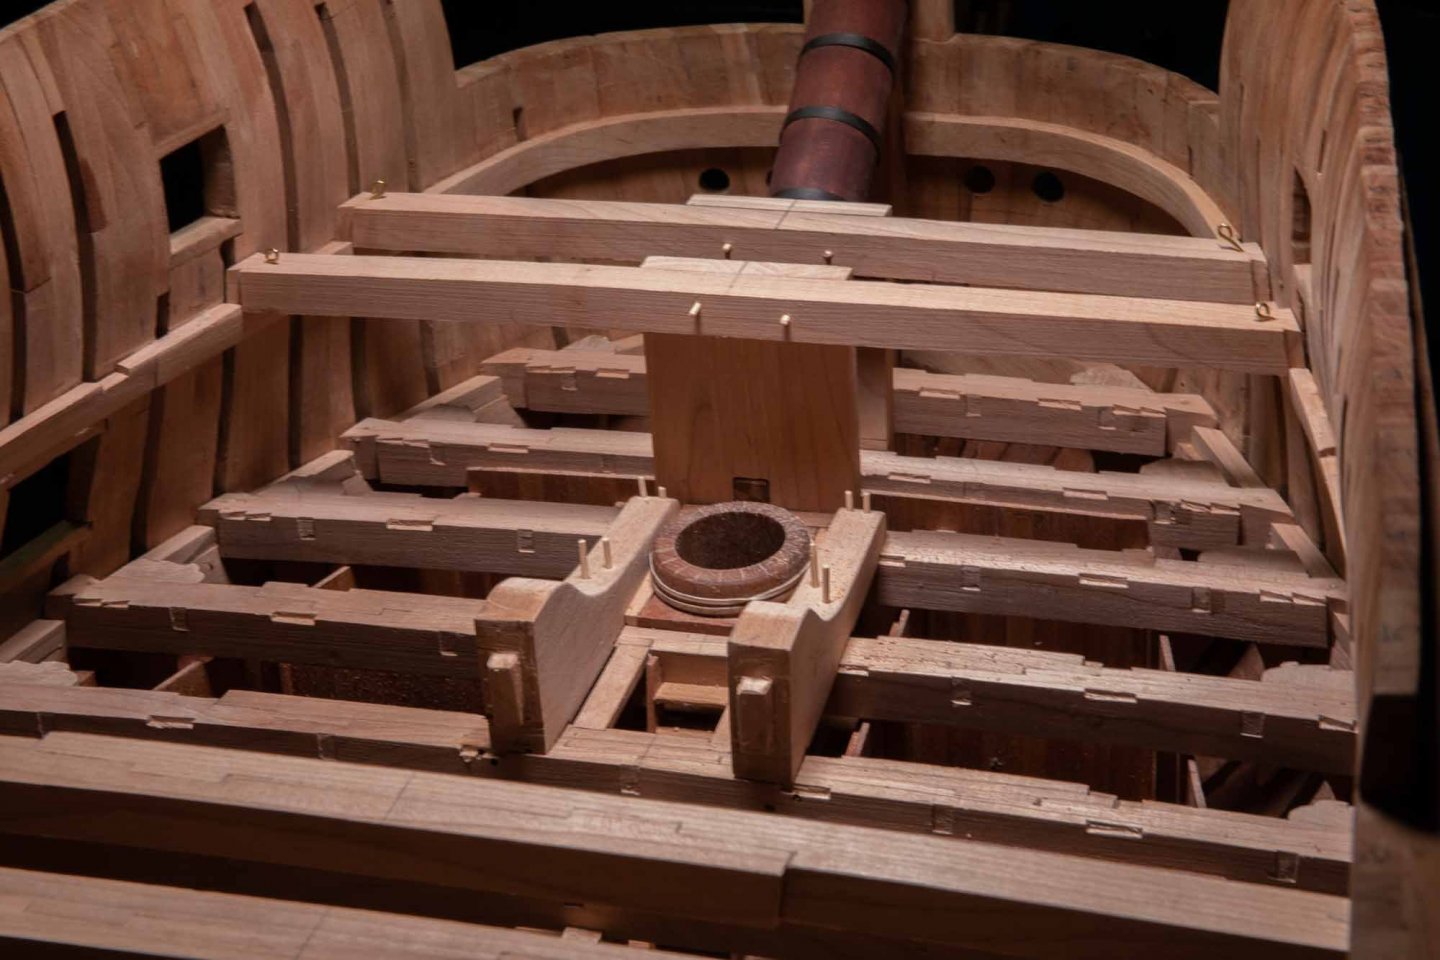
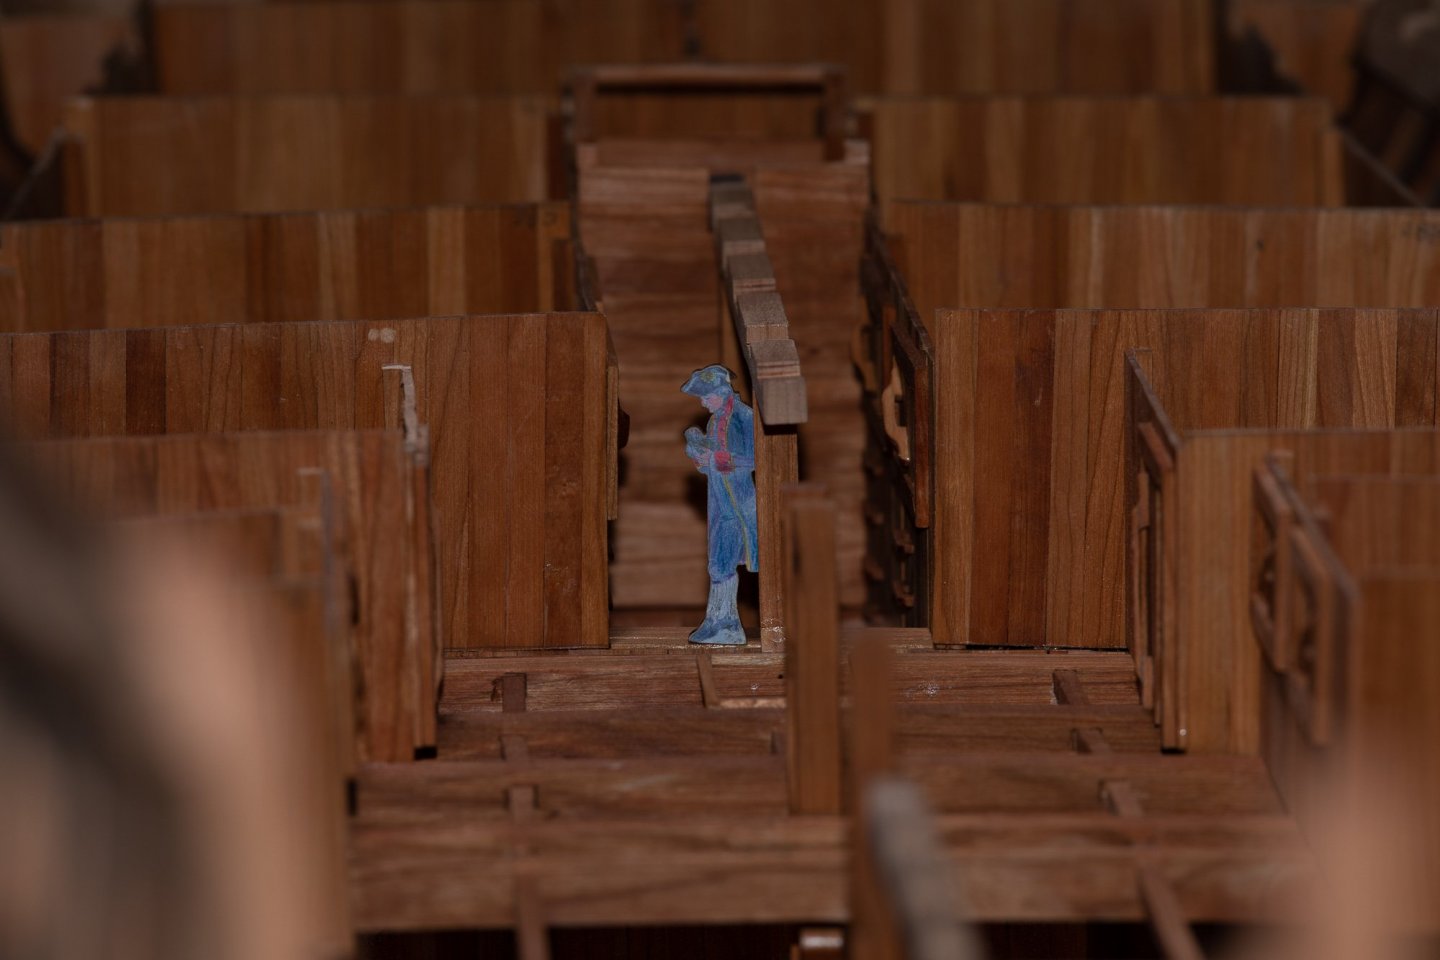
I just finished a major upgrade of speakers and settings. The last step is to choose a music provider Spotify or Tidal. Few other sets of notches are done on the deck beams, it is much easier while the deck beams are not glued yet. My helper was very happy to be photographed.


-
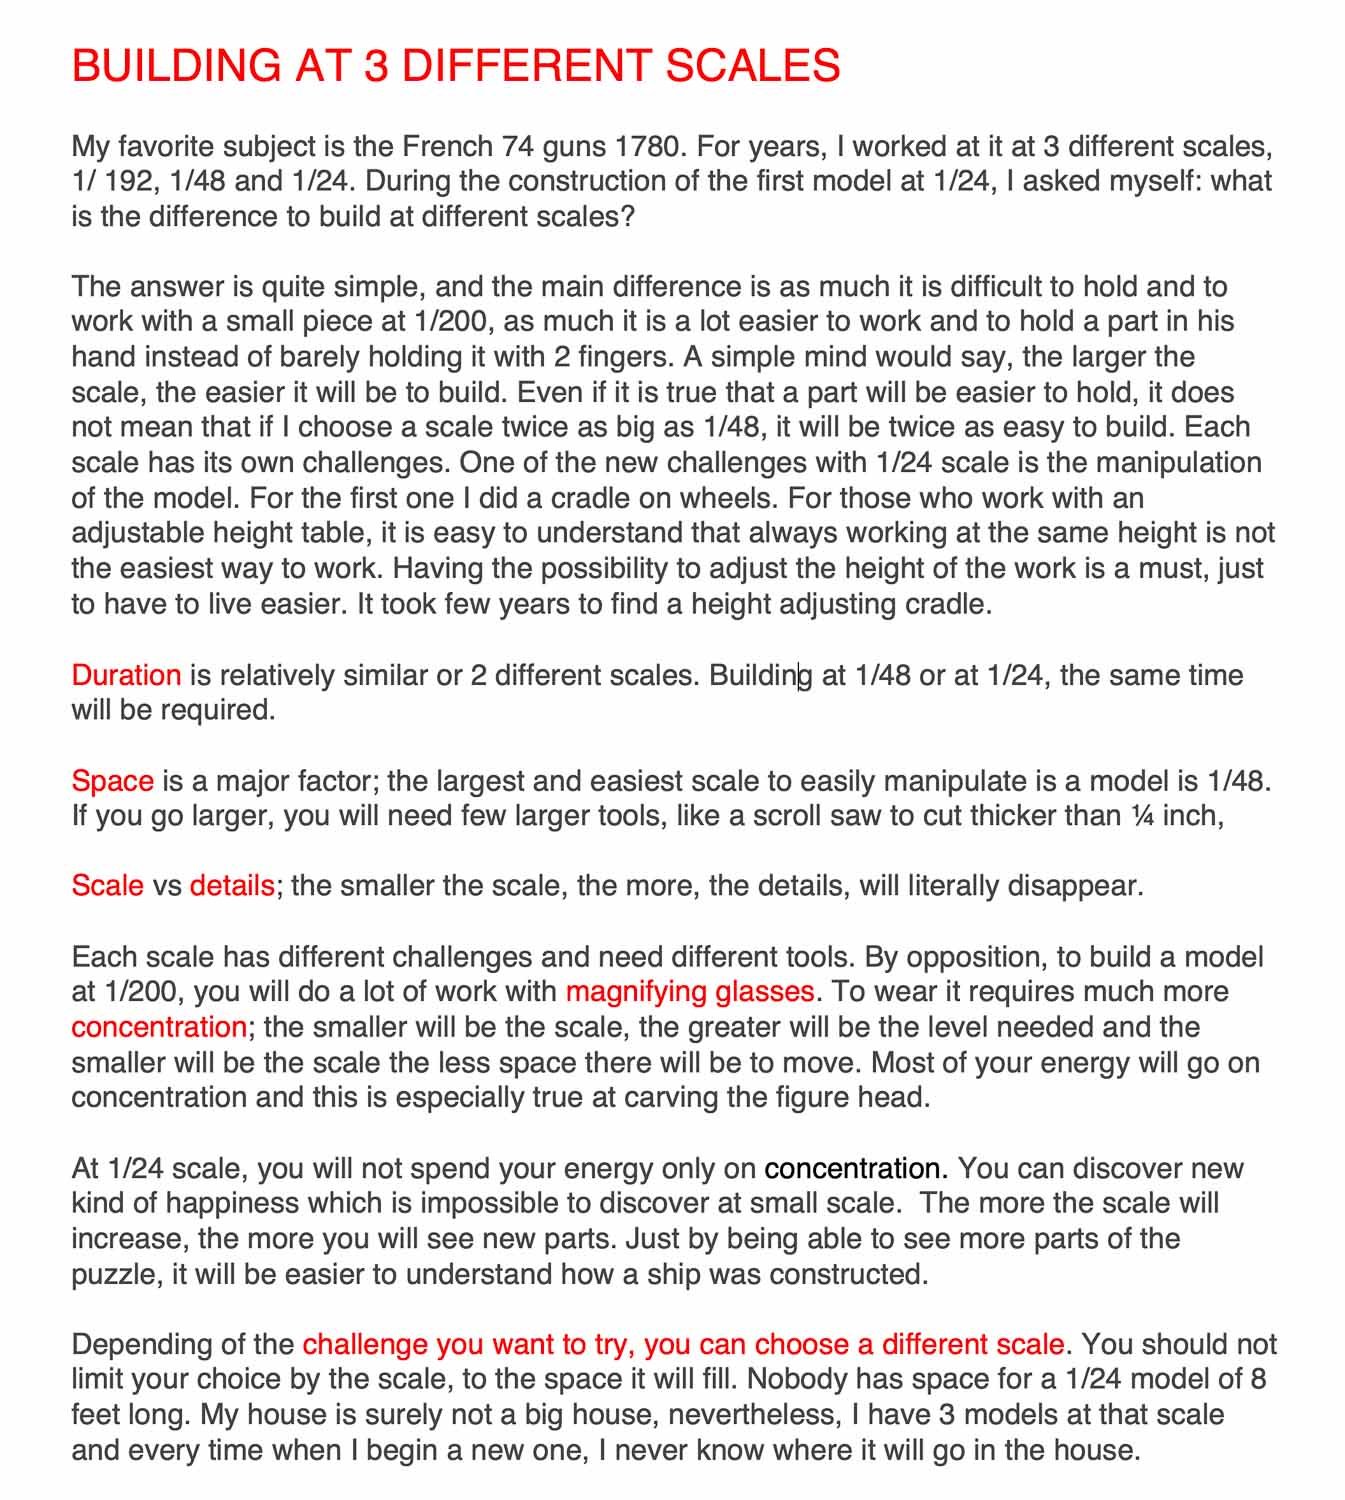
Thank you all for your appreciation This morning, I tried to dig another layer to try understanding the difference of working at different scales.

-
Between 1 /192 up to 1/24 scale, the main difference is: as much it is difficult to hold and to work with a small piece at 1/200, it is a lot easier to work and to hold a part in his hand. The smaller the scale, the more the details will literally disappear. Duration is relatively similar for 2 different scale. Space is a major factor; the largest and easiest scale to easily manipulate a model is 1/48. If you go larger, you will need few larger tools to cut and sand, Dremel will not be enough. Each scale has different challenges and need different tools. By opposition, to build a model at 1/200, yo will do a lot of work with magnifying glasses. To wear these require much more concentration; the smaller will be the scale, the greater will be the level needed and there will be almost no space to move the knife. Most of your energy will go on concentration. At 1/24 scale, you do not to spend your energy only on concentration. You can discover new kind of happiness which is impossible to discover at small scale. You will see more clearly, a lot of new details and you will be able to understand more how a real ship was build. Depending of the challenge you want to try, you can choose a different scale. You should not limit your choice of the scale, to the space it will fill. Nobody has space for a 1/24 model of 8 feet long. My house is surely not a big house, nevertheless, I have 3 models at that scale and every time, I begin a new one, I never know where it will go in the house.
-
Thank you and some photos:


-
The best fence for an: an easy-to-set high-precision table saw fence would be to set the Accuriser instead of the plain fence. It is much faster to use than a micrometer and it is as much precise. The way it works: first you set the fence close to the desired width, then you micro adjust with the diagonal fence.