HOLIDAY DONATION DRIVE - SUPPORT MSW - DO YOUR PART TO KEEP THIS GREAT FORUM GOING! (Only 13 donations so far - C'mon guys!)
×


Gaetan Bordeleau
-
Posts
1,307 -
Joined
-
Last visited
Content Type
Profiles
Forums
Gallery
Events
Everything posted by Gaetan Bordeleau
-
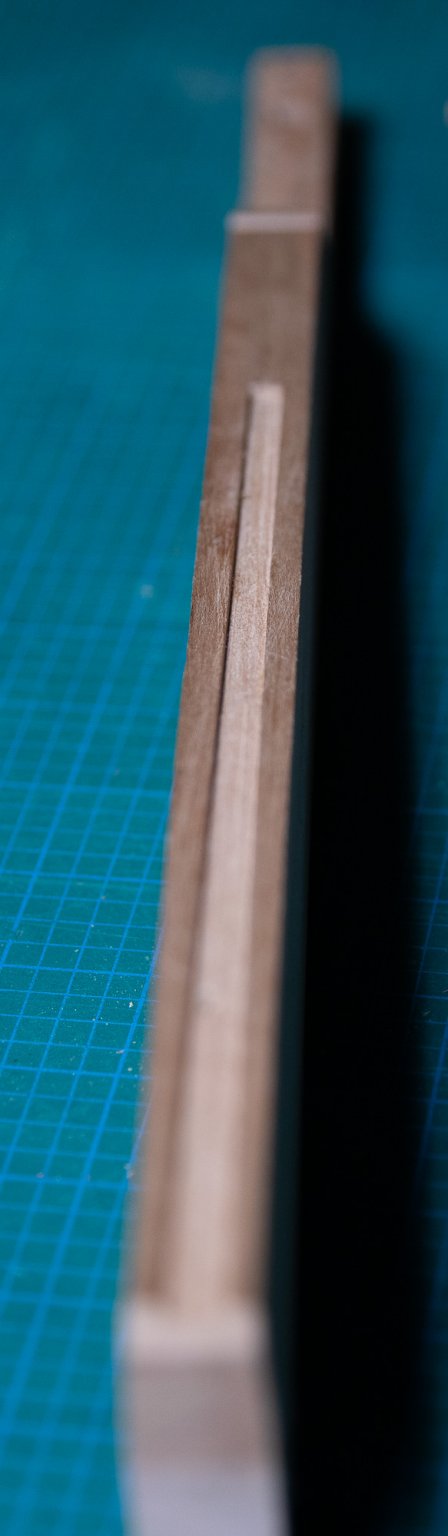
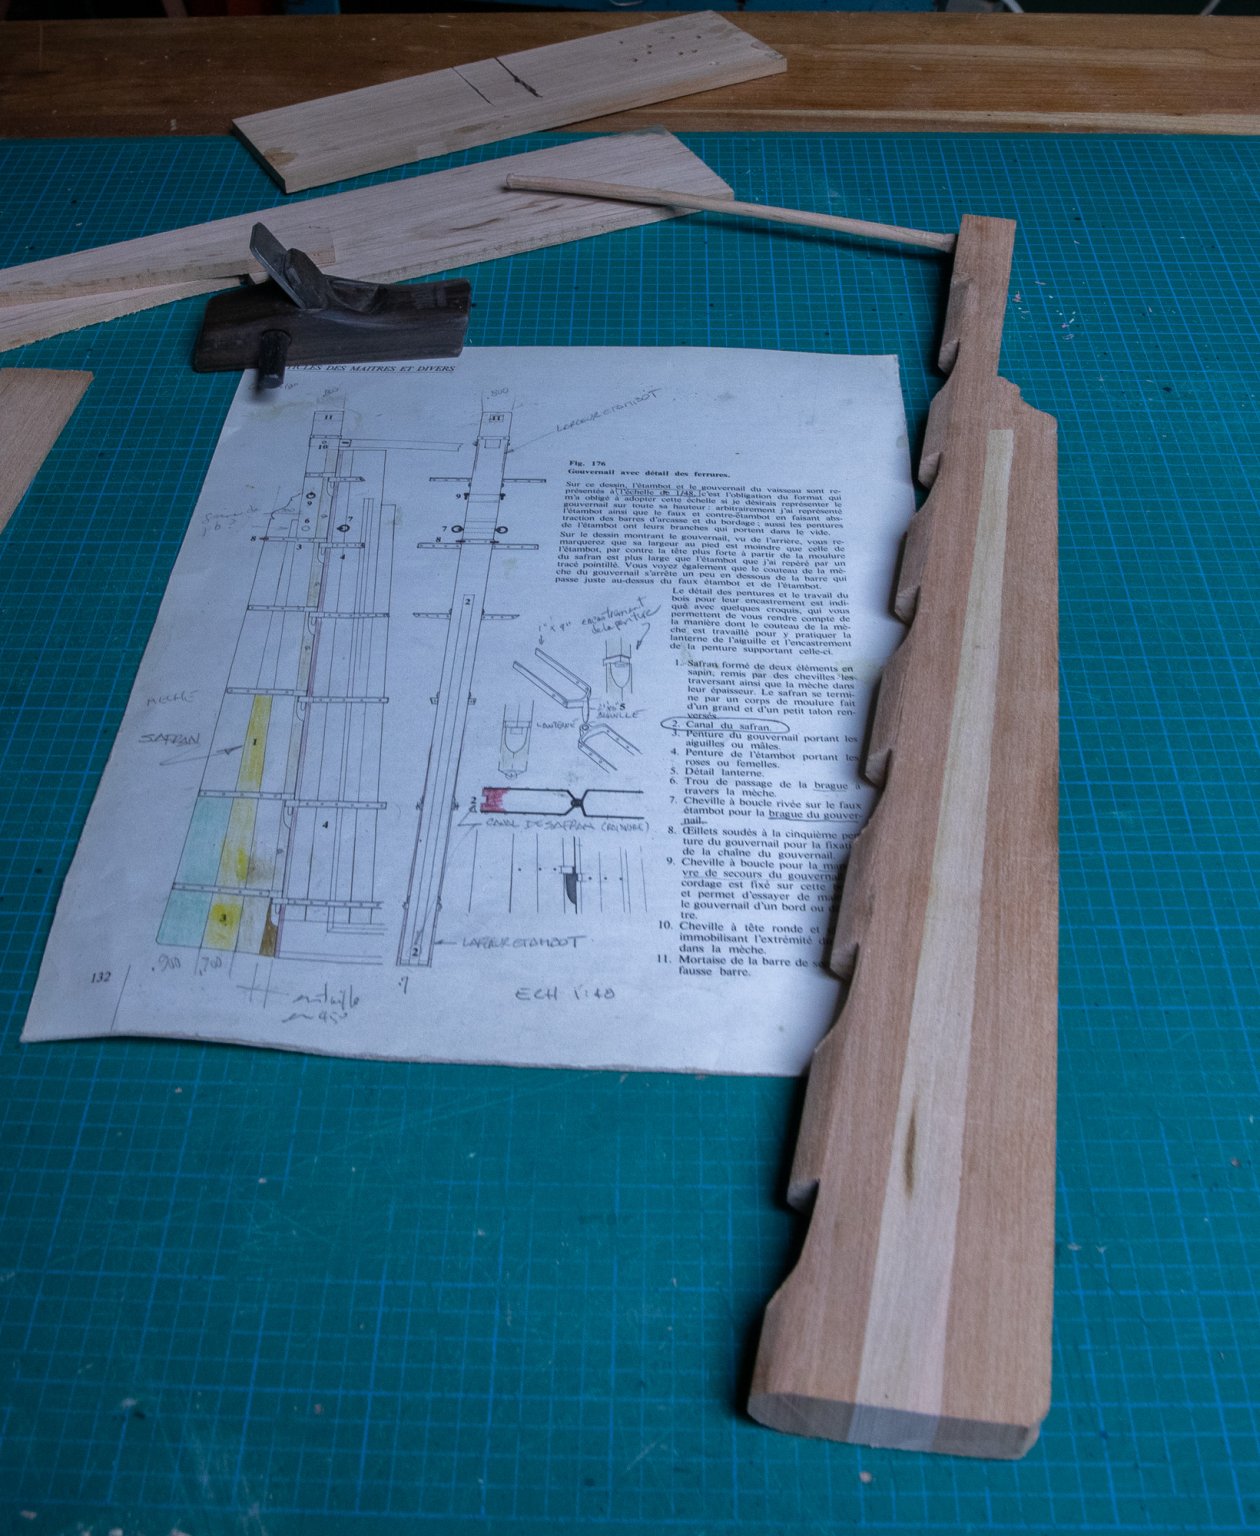
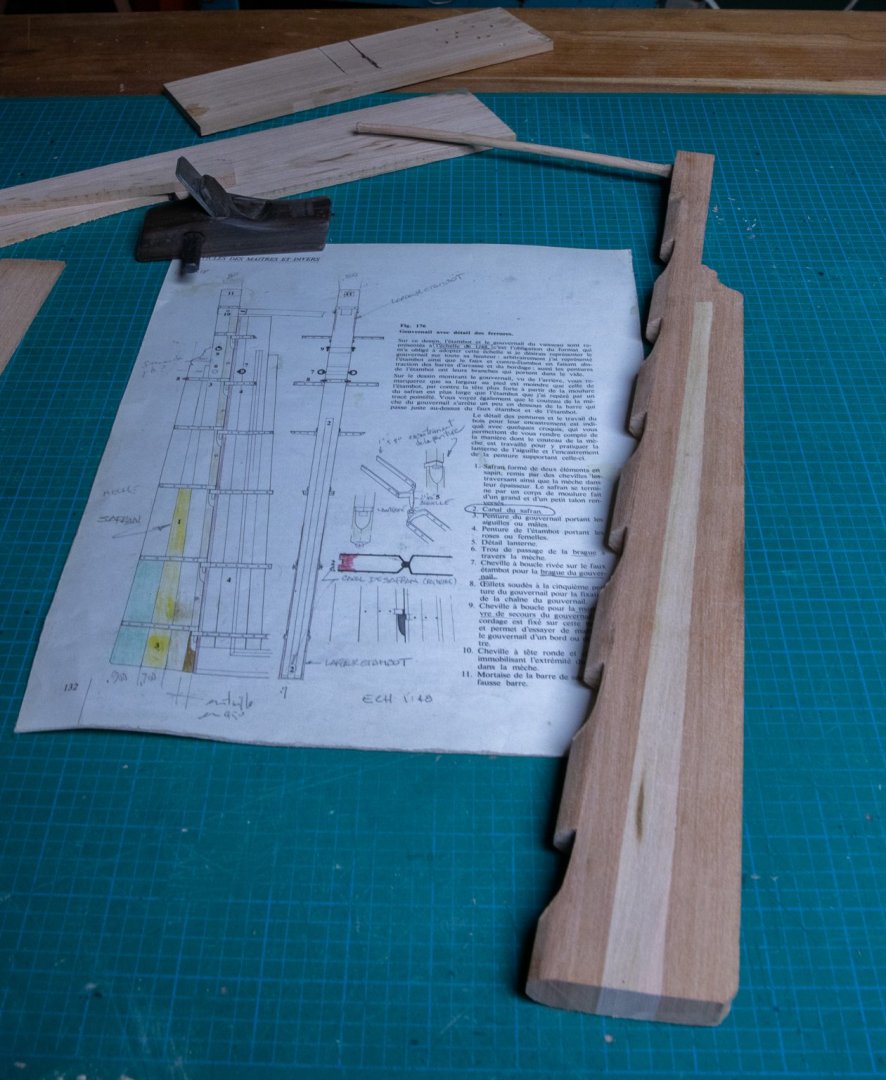
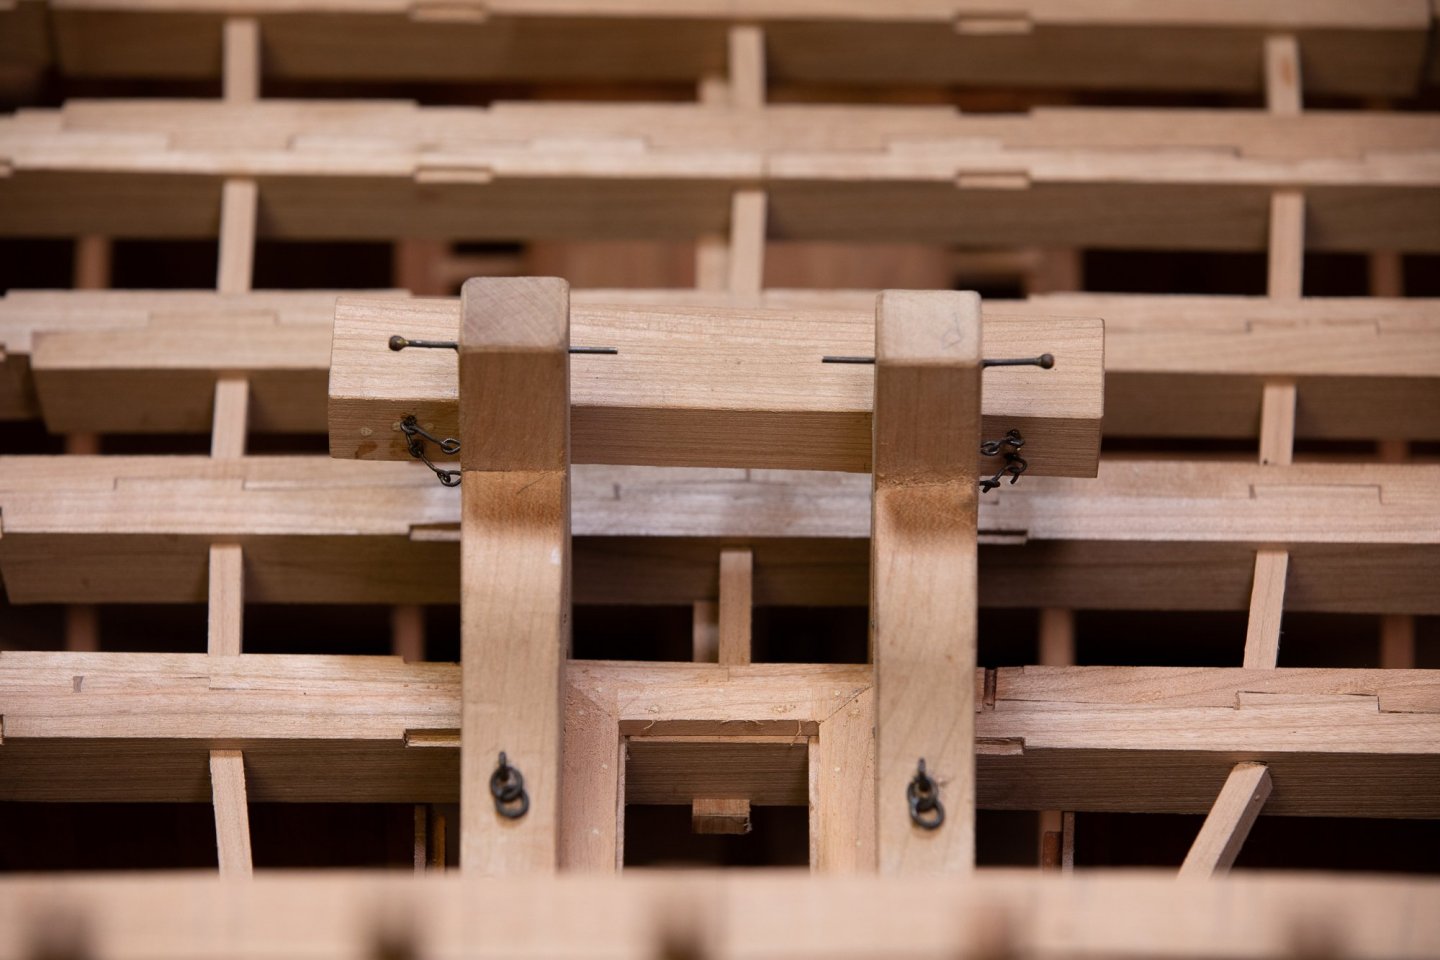
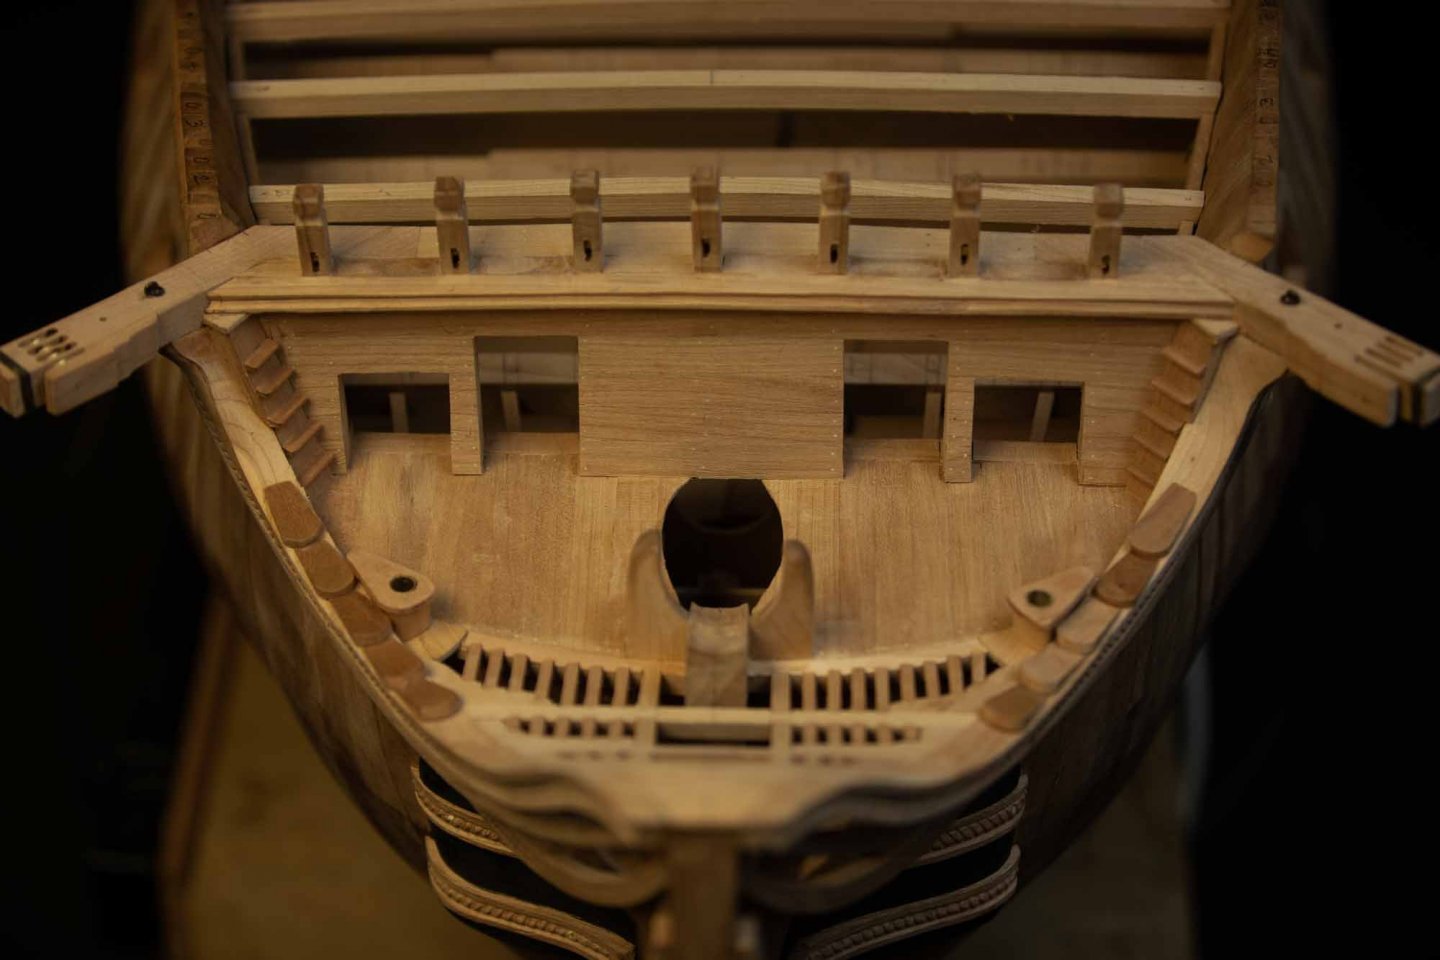
 Thank you Allen, Karl, the rudder was made with 3 big trees like the 3 paper bands to the right. Big nails hold the parts together (The forth part would be fragile to these nails). The number 1 shows a 45 degrees bevel which also is drawing as if there was a fourth part. If you look the drawing from Boudriot, you will see that the hinges are at 45 degrees too. Jaager, I do not have the journal, if you could show us a picture, it could be nice.
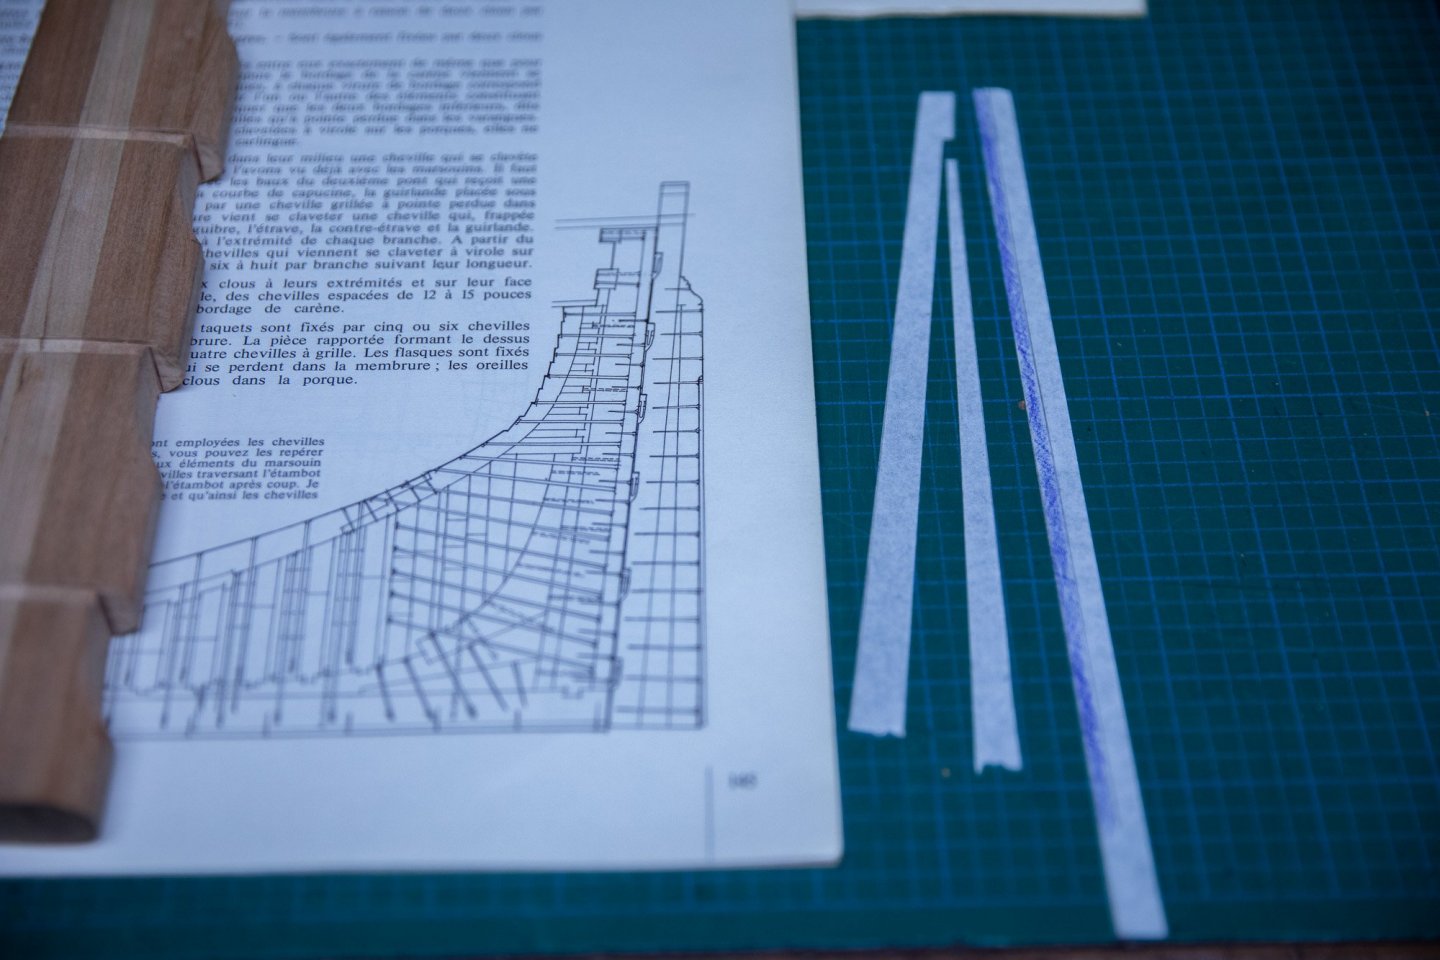
-
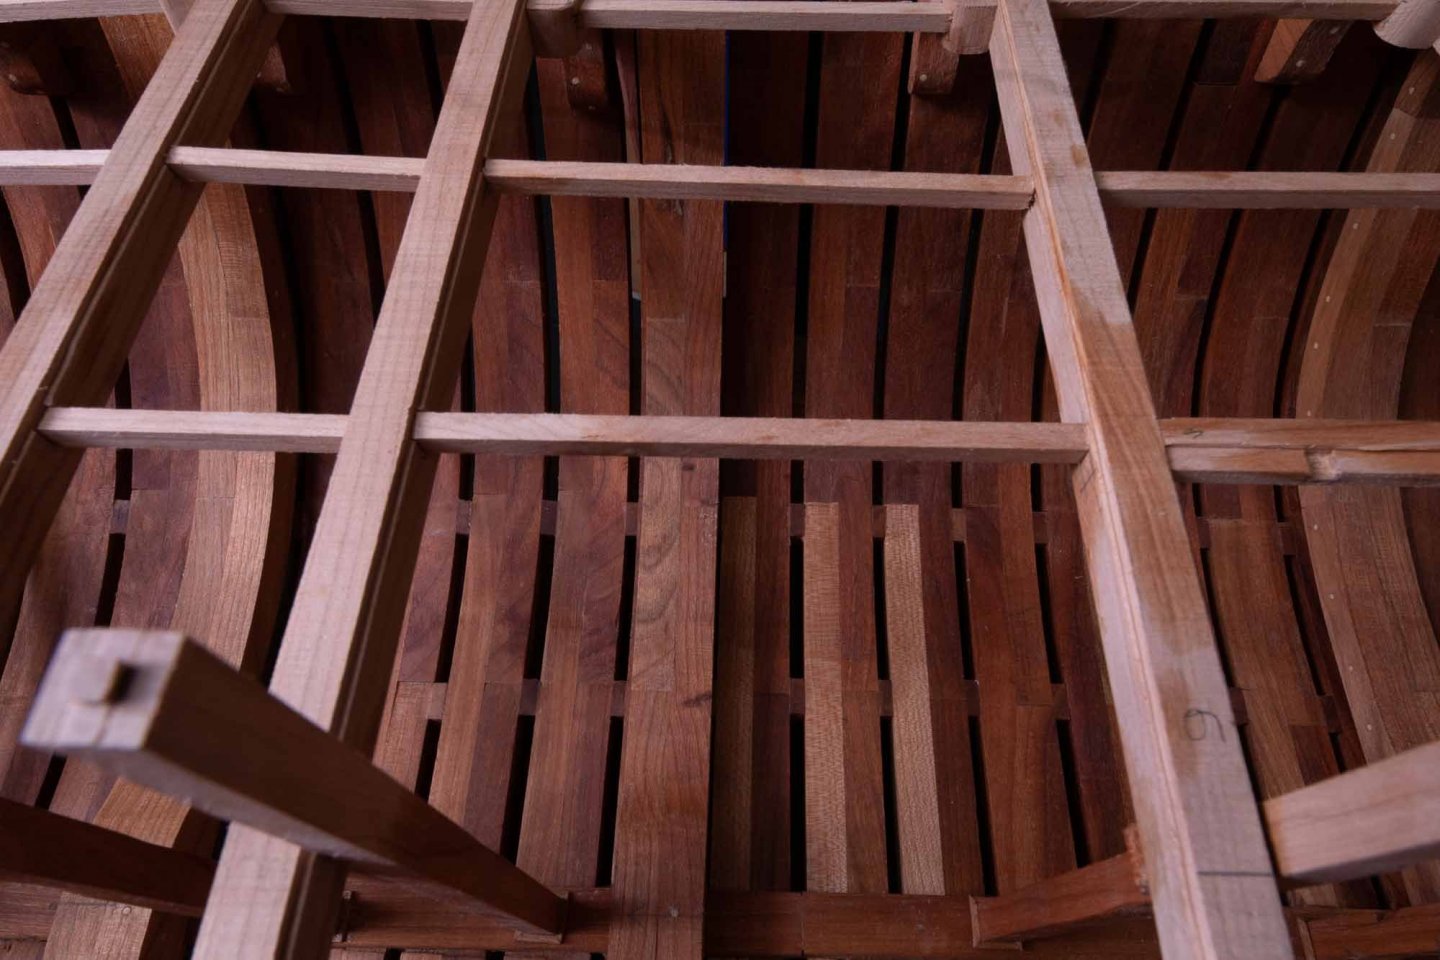
I tried at least 100 kind of wood for model ship building... but at the end I use only cherry wood. I buy big quantities of cherry for model ship building. About 40% is suitable for planking. 55% is suitable for frames and the rest. Less than 3% is not suitable to use when the grain is perpendicular to the length of the planks. Easy to works and very easy to sand. It sands like European pear wood which is the favorite of many peoples, but is has no wood grain and wood by nature have a wood grain. But at the end, the choice of the wood is a personal taste and some wood, mainly the hard woods and the fruit woods, for their crisper edges and close grain are usually the favorites. The wood grain of the myrtle looks like good to use . In fact, most often fruit woods are good to use. The ideal wood would have a wood grain similar to oak but at a much smaller scale. Even if the real ships were made from oak, oak wood grain at smaller scale is way too big.
-
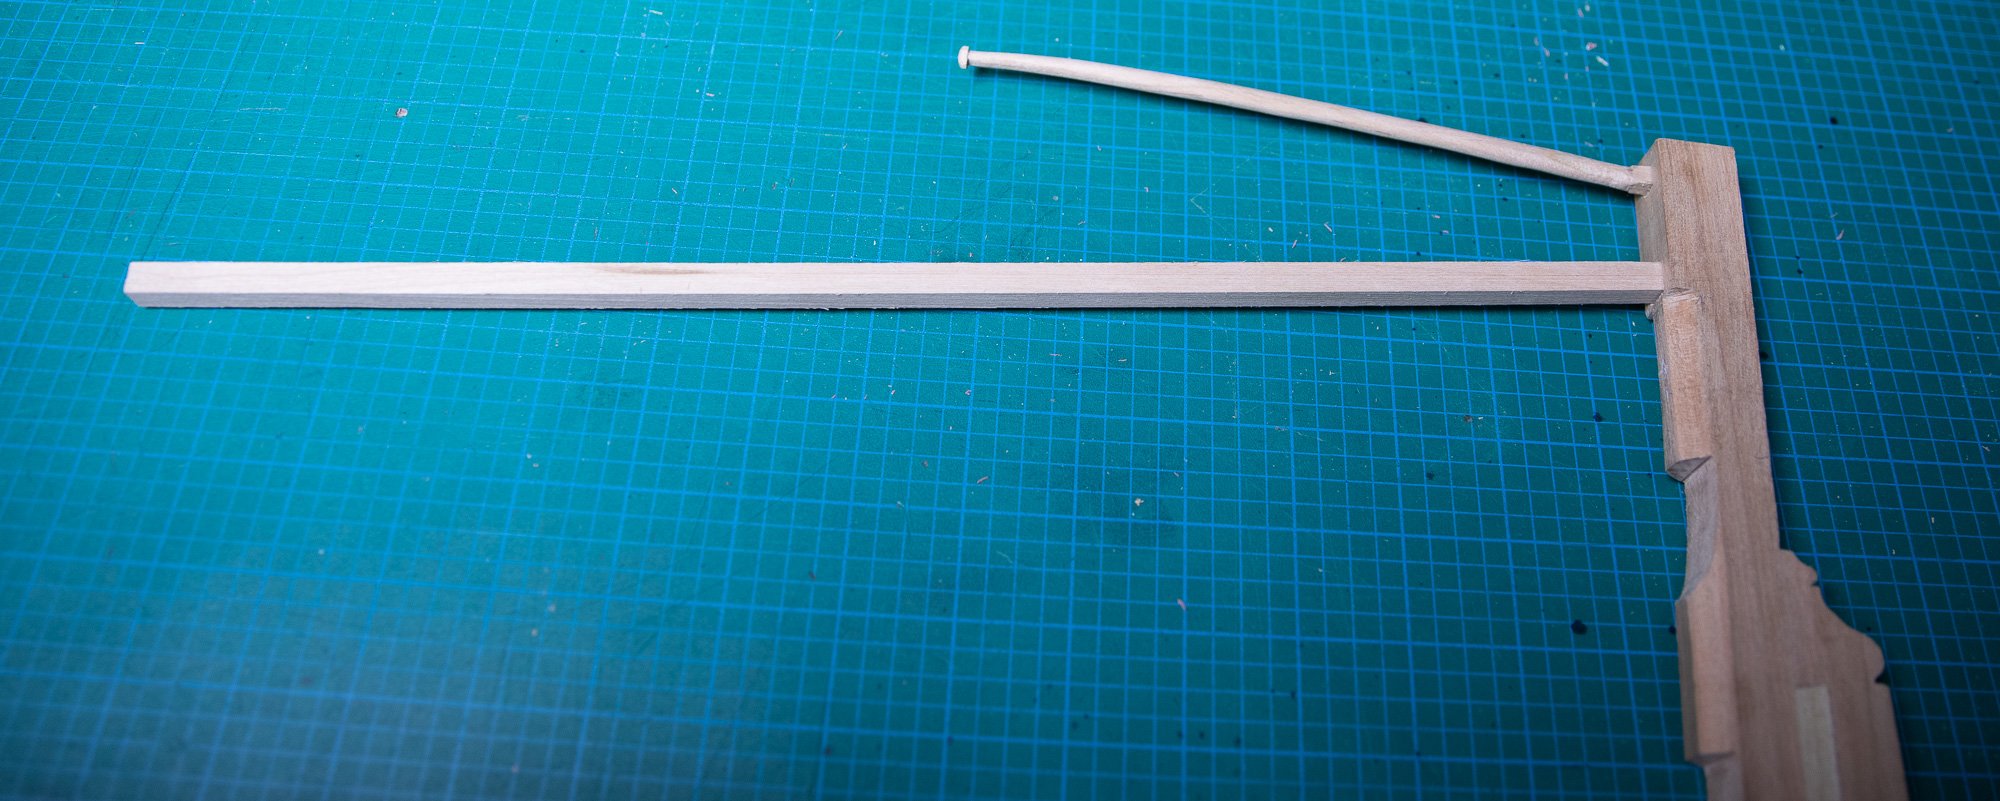
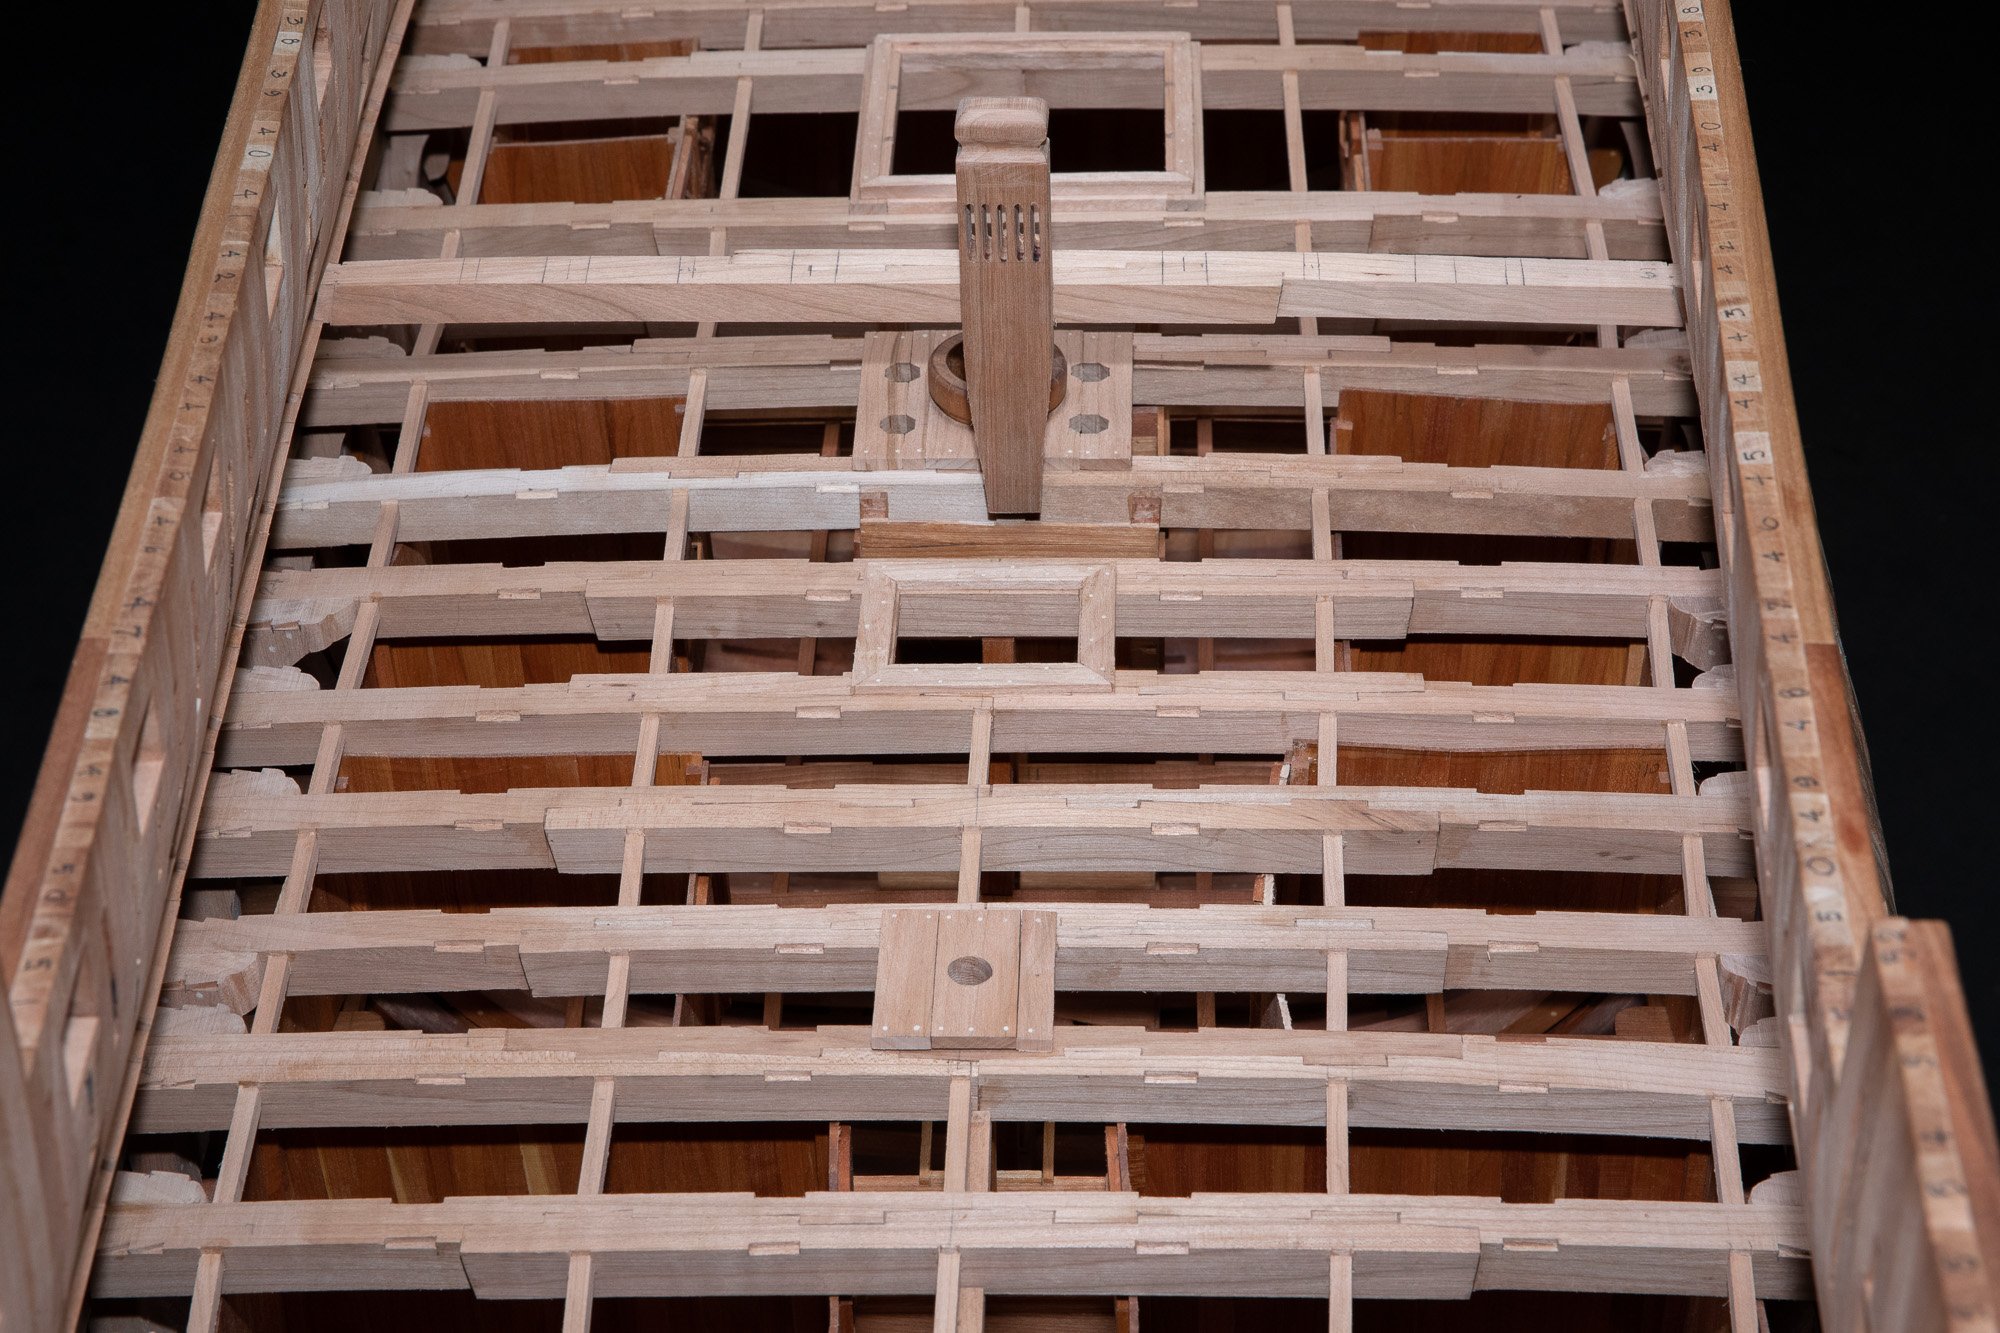
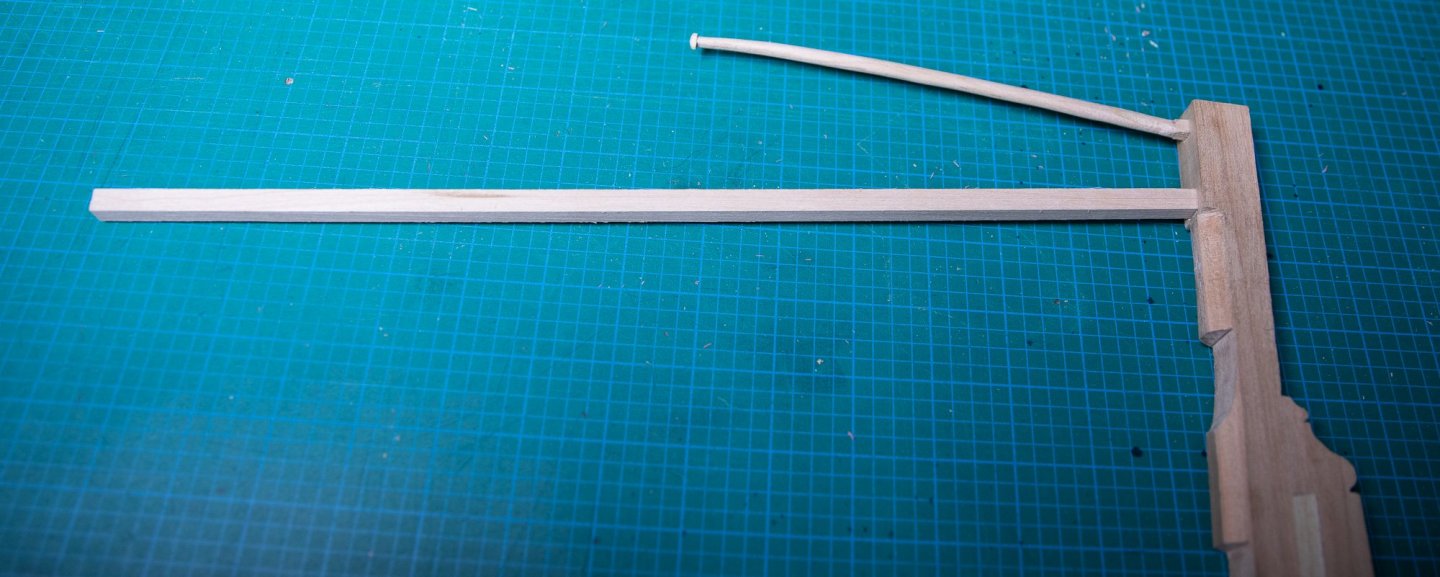
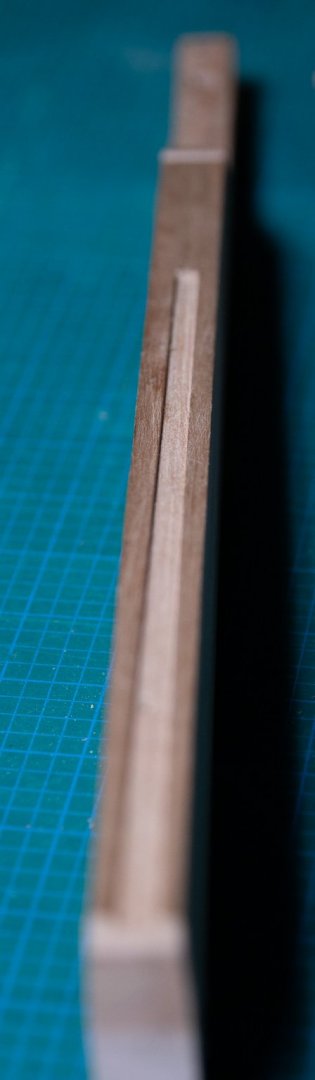
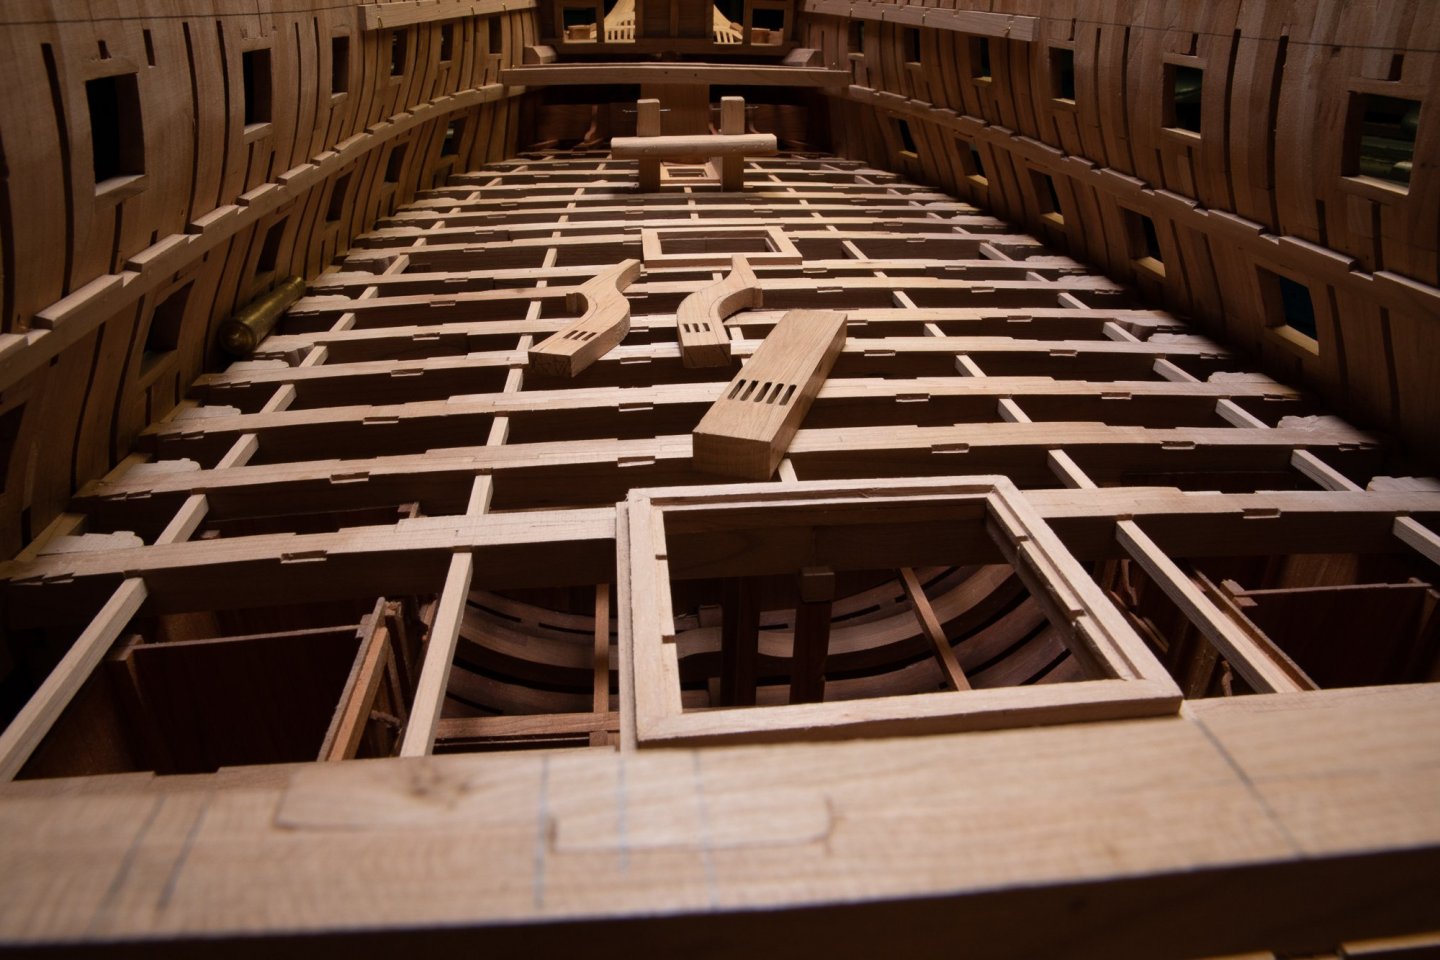
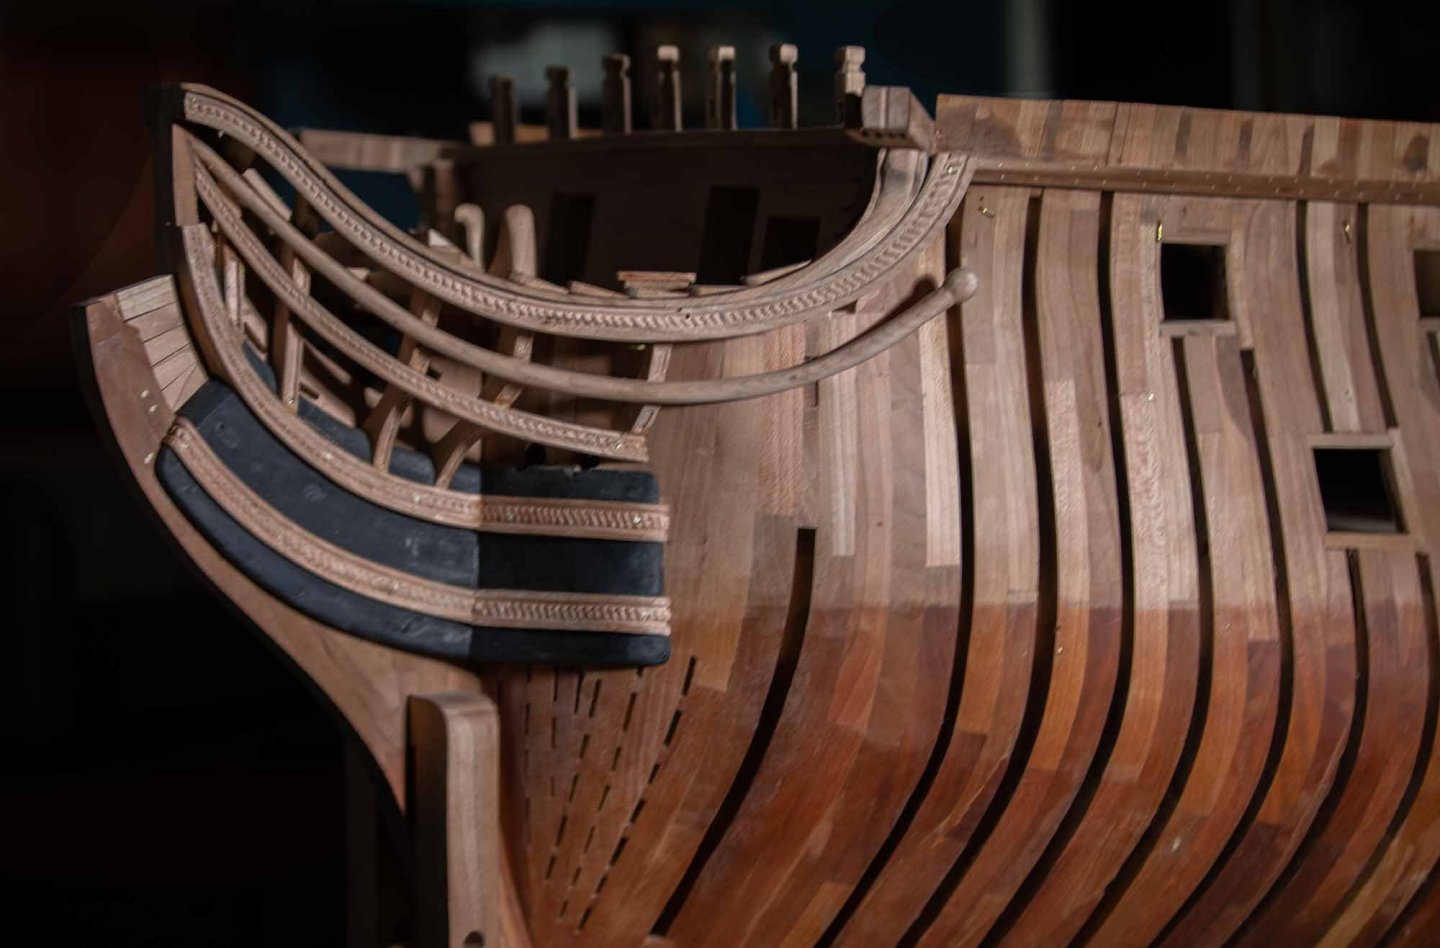
Thank you very much Mark. You know, the best thing about trying to explain in writing a fact, is that it also helps you to understand. There is a groove on the back of the rudder. It is supposed to improve the efficiency of its control by maintaining the current of water in its extension. The rudder is controlled by the tiller. If the tiller breaks, a hand controlled tiller can be installed. The wood parts of the rudder are almost complete. The metal parts will be next.


-
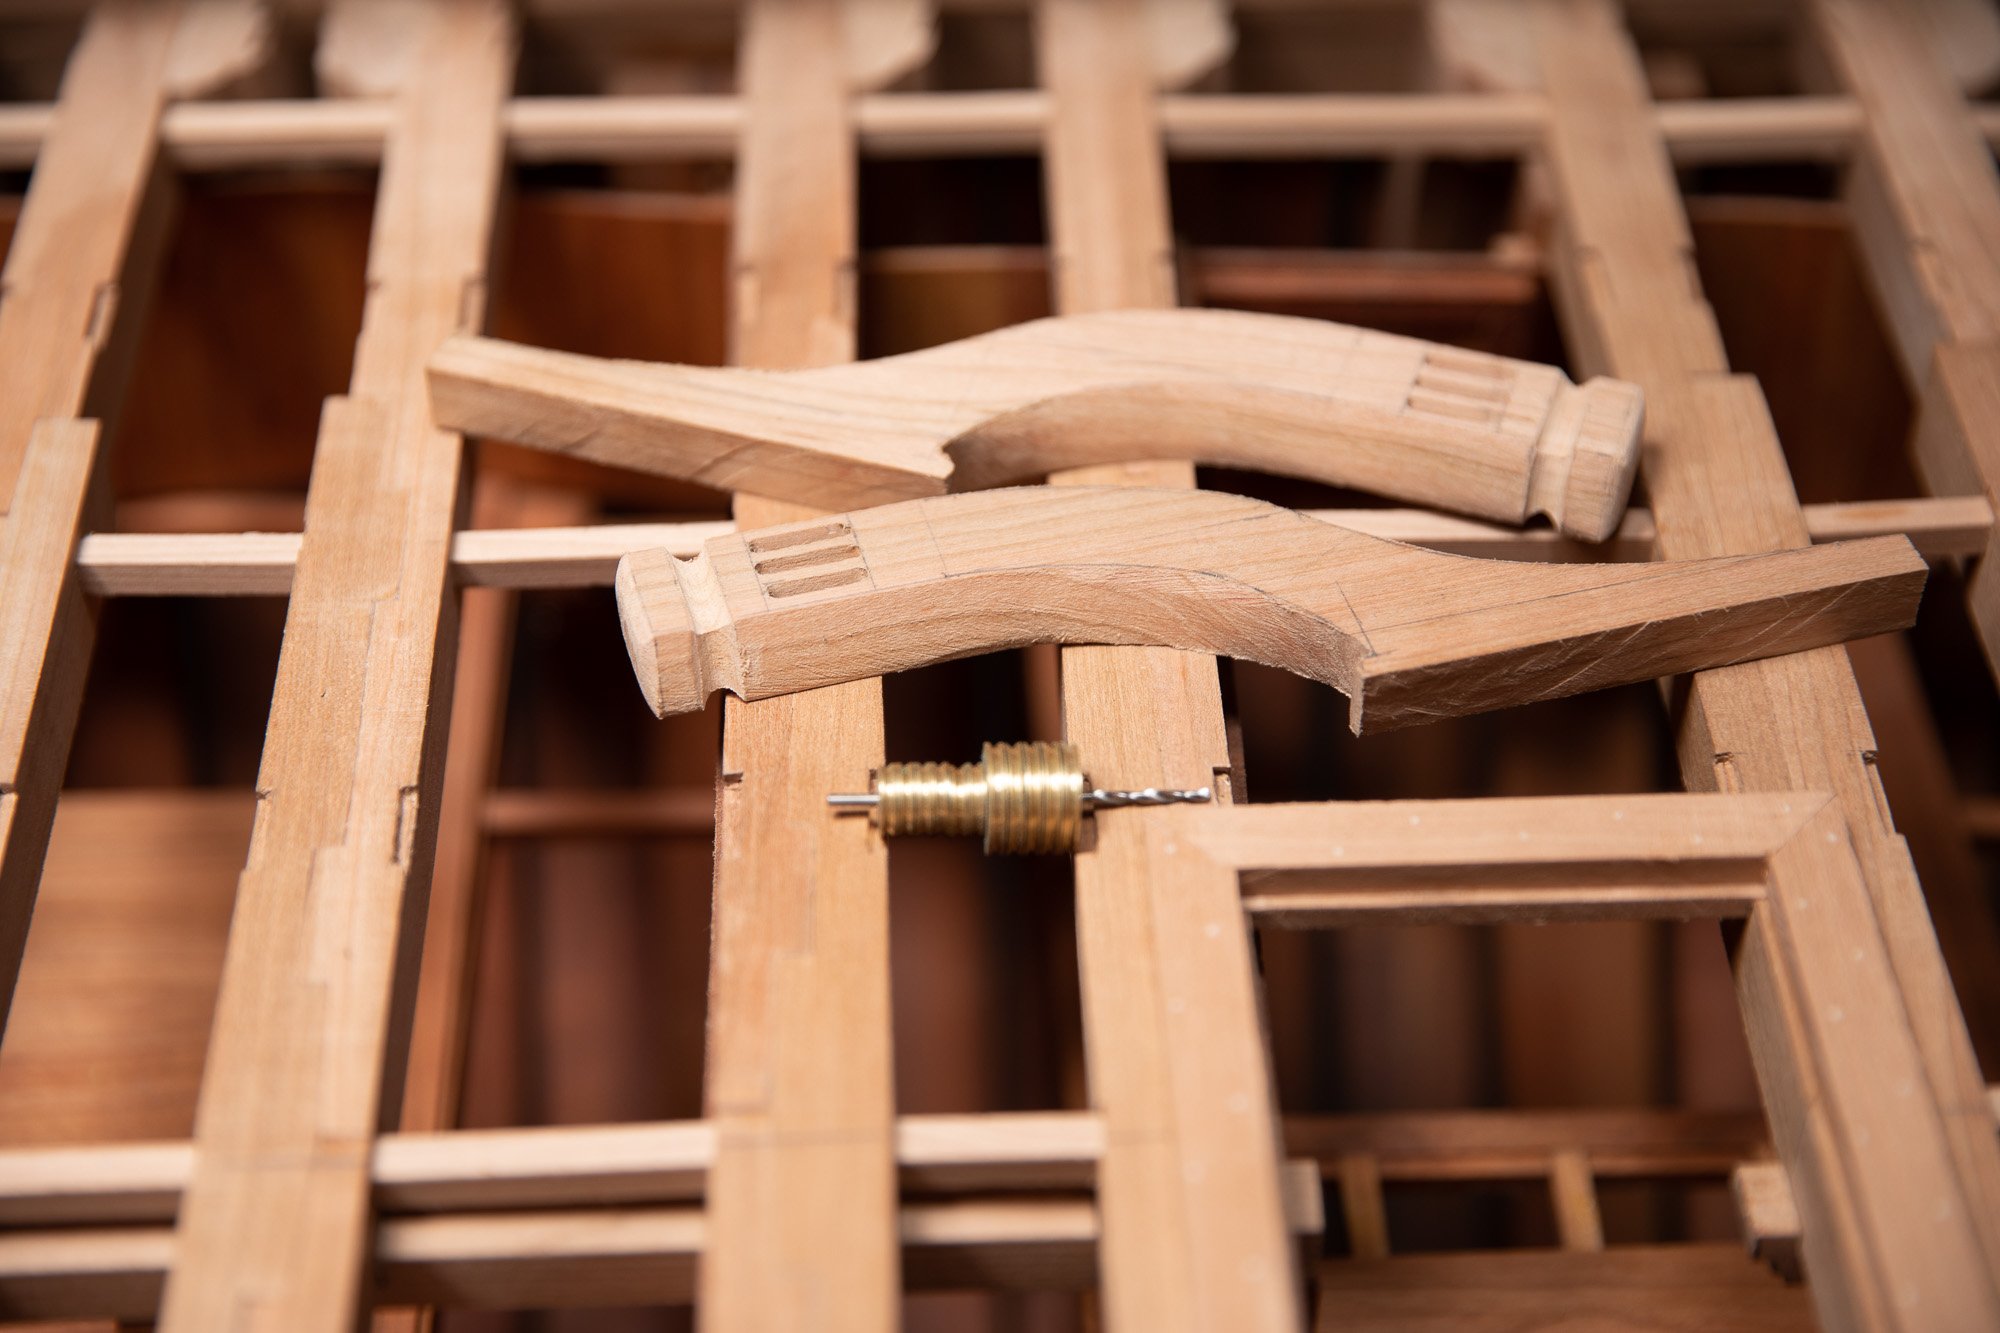
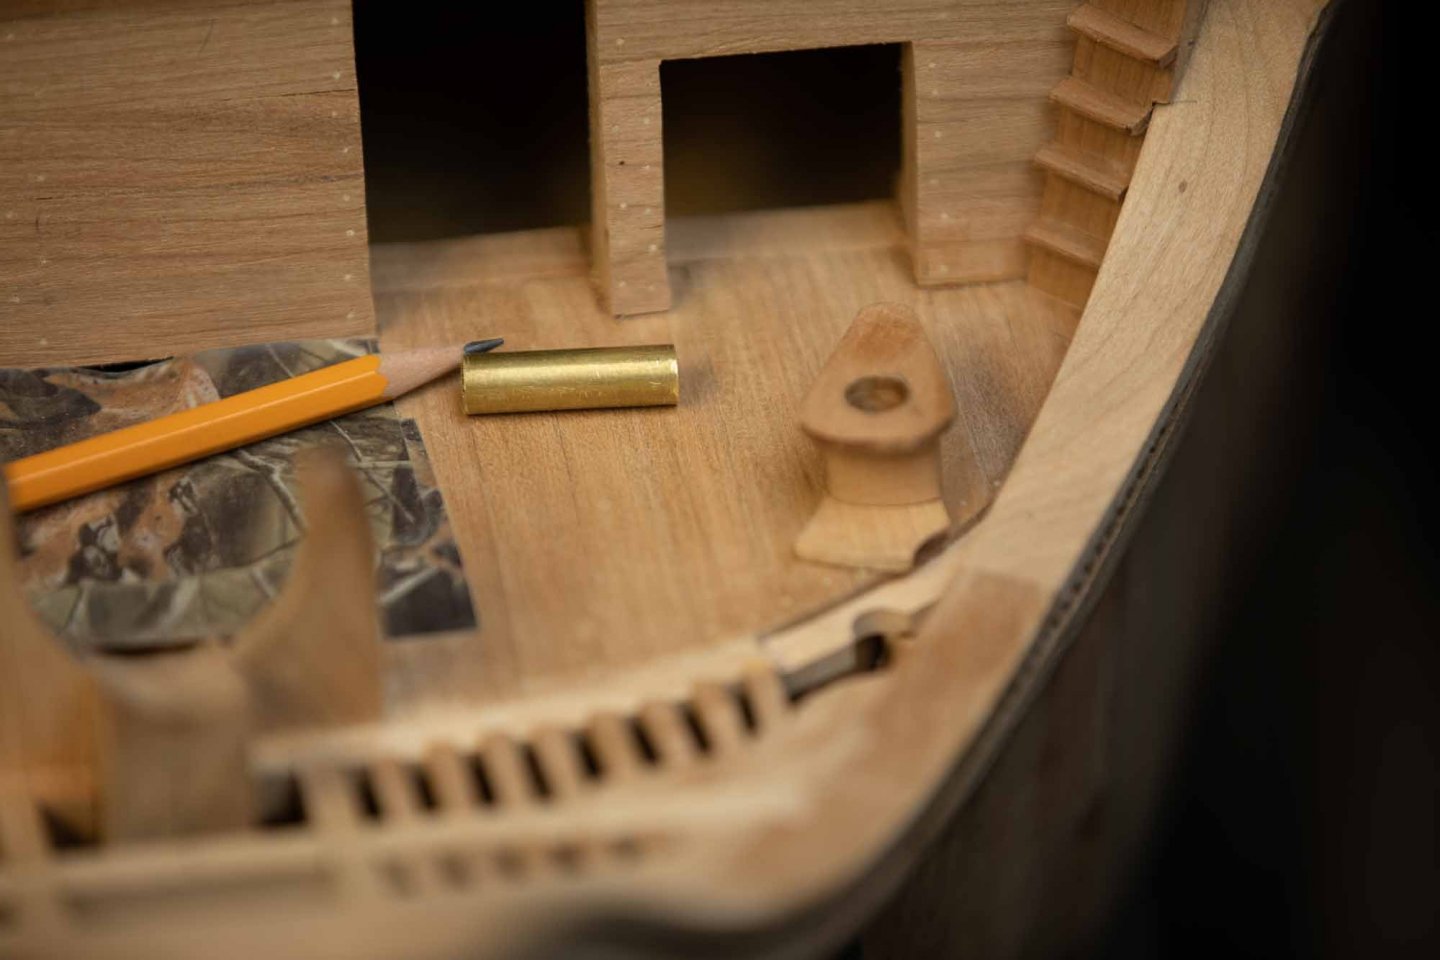
The worst way to do it is to drill immediately at the right size. You can drill about up the half and finish by sanding with little drums or files.
-
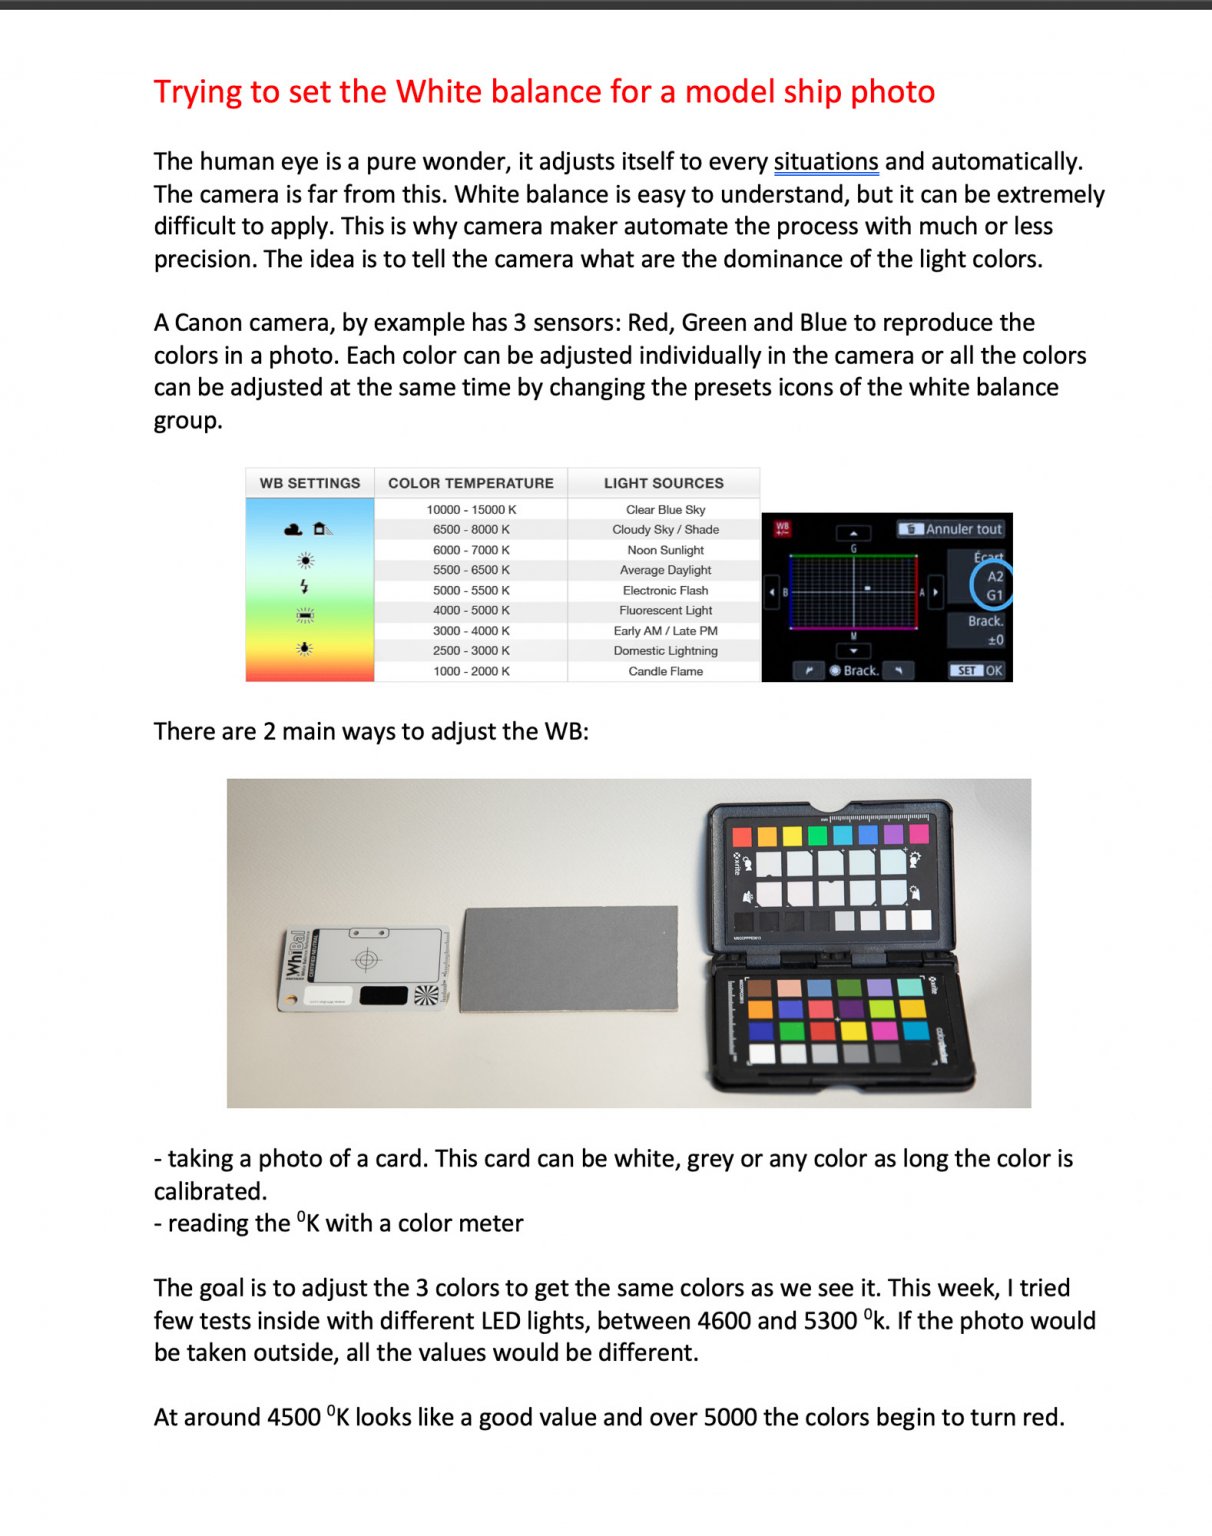
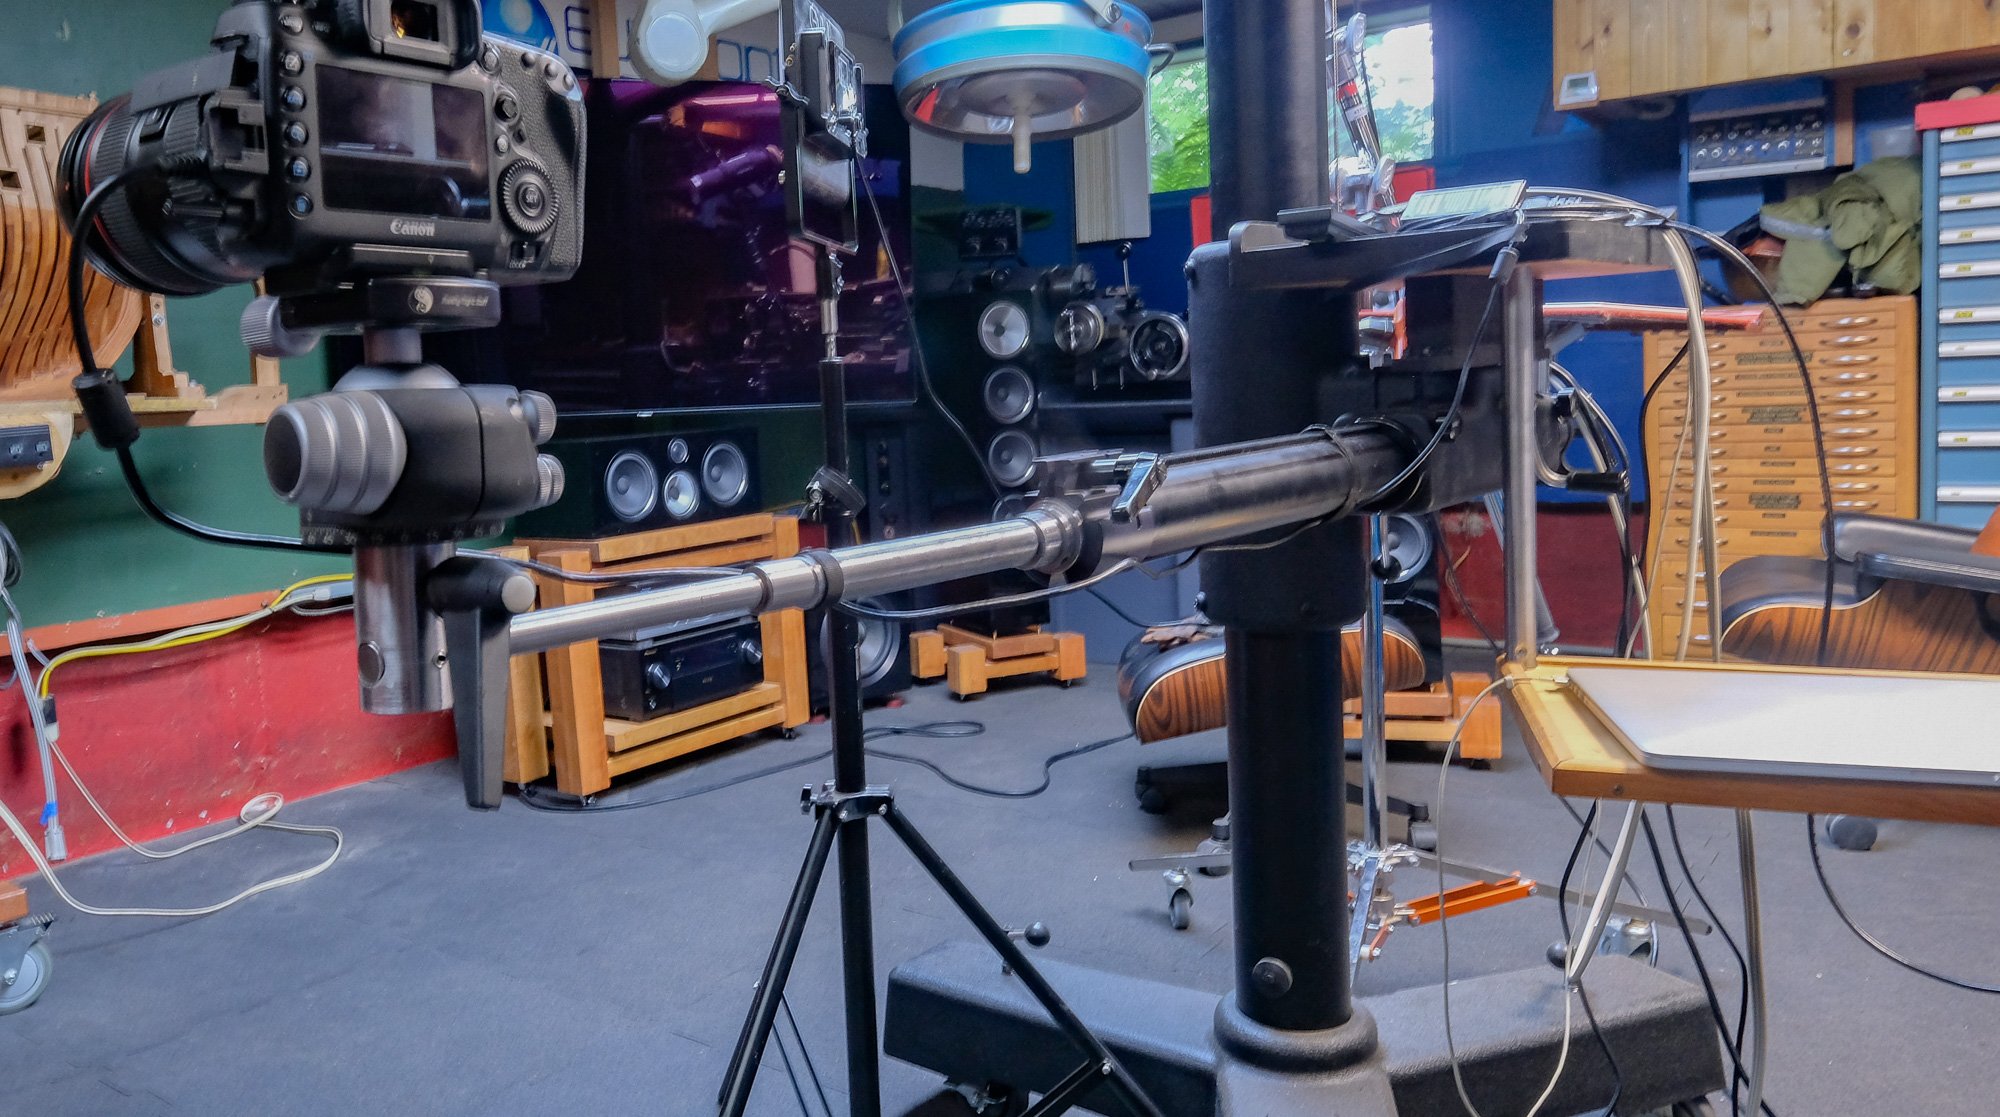
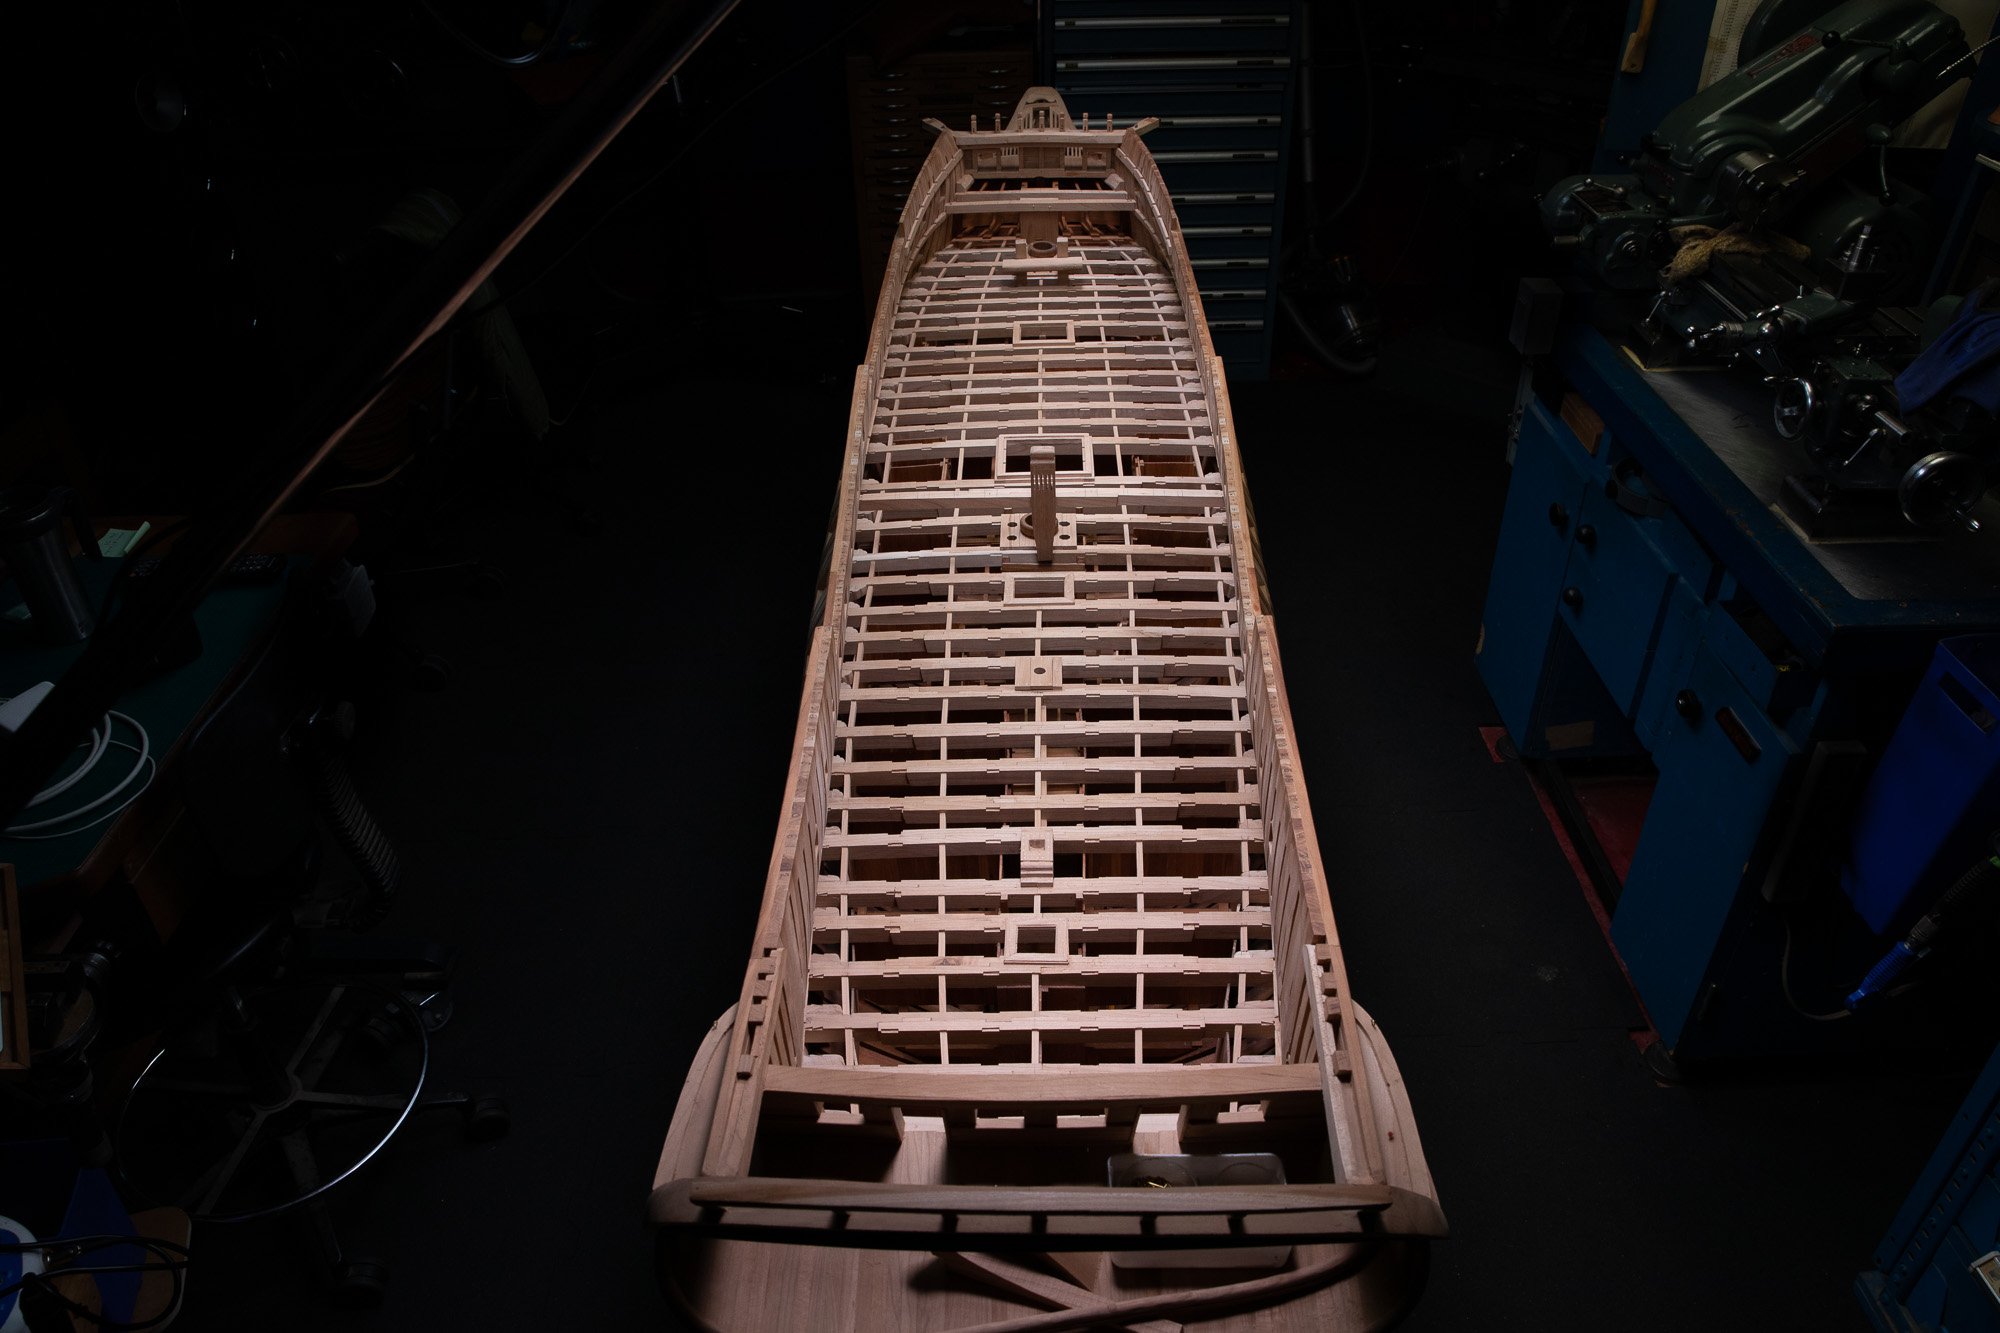
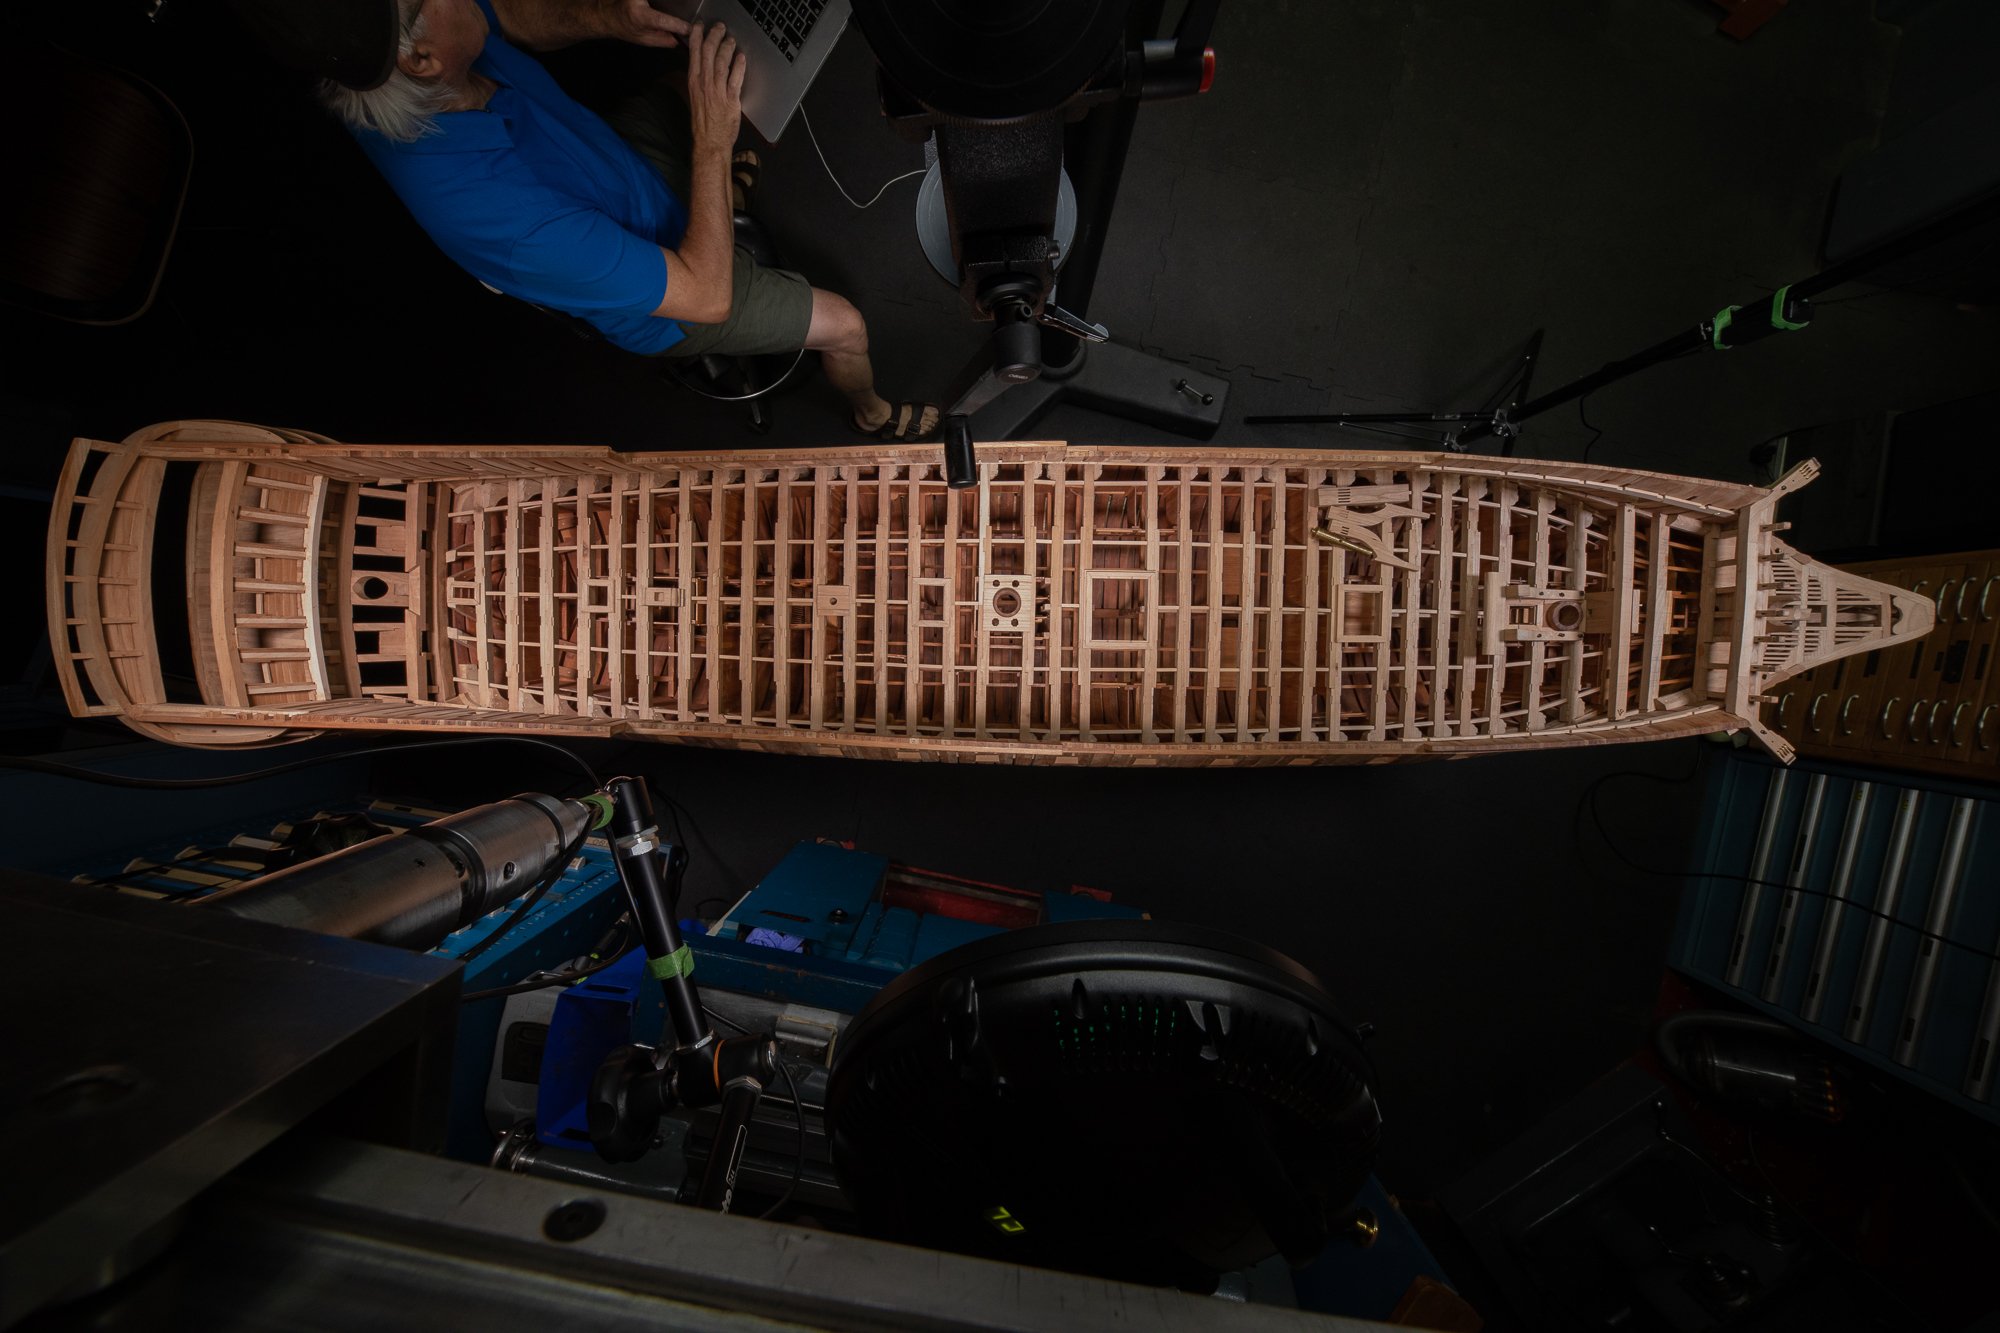
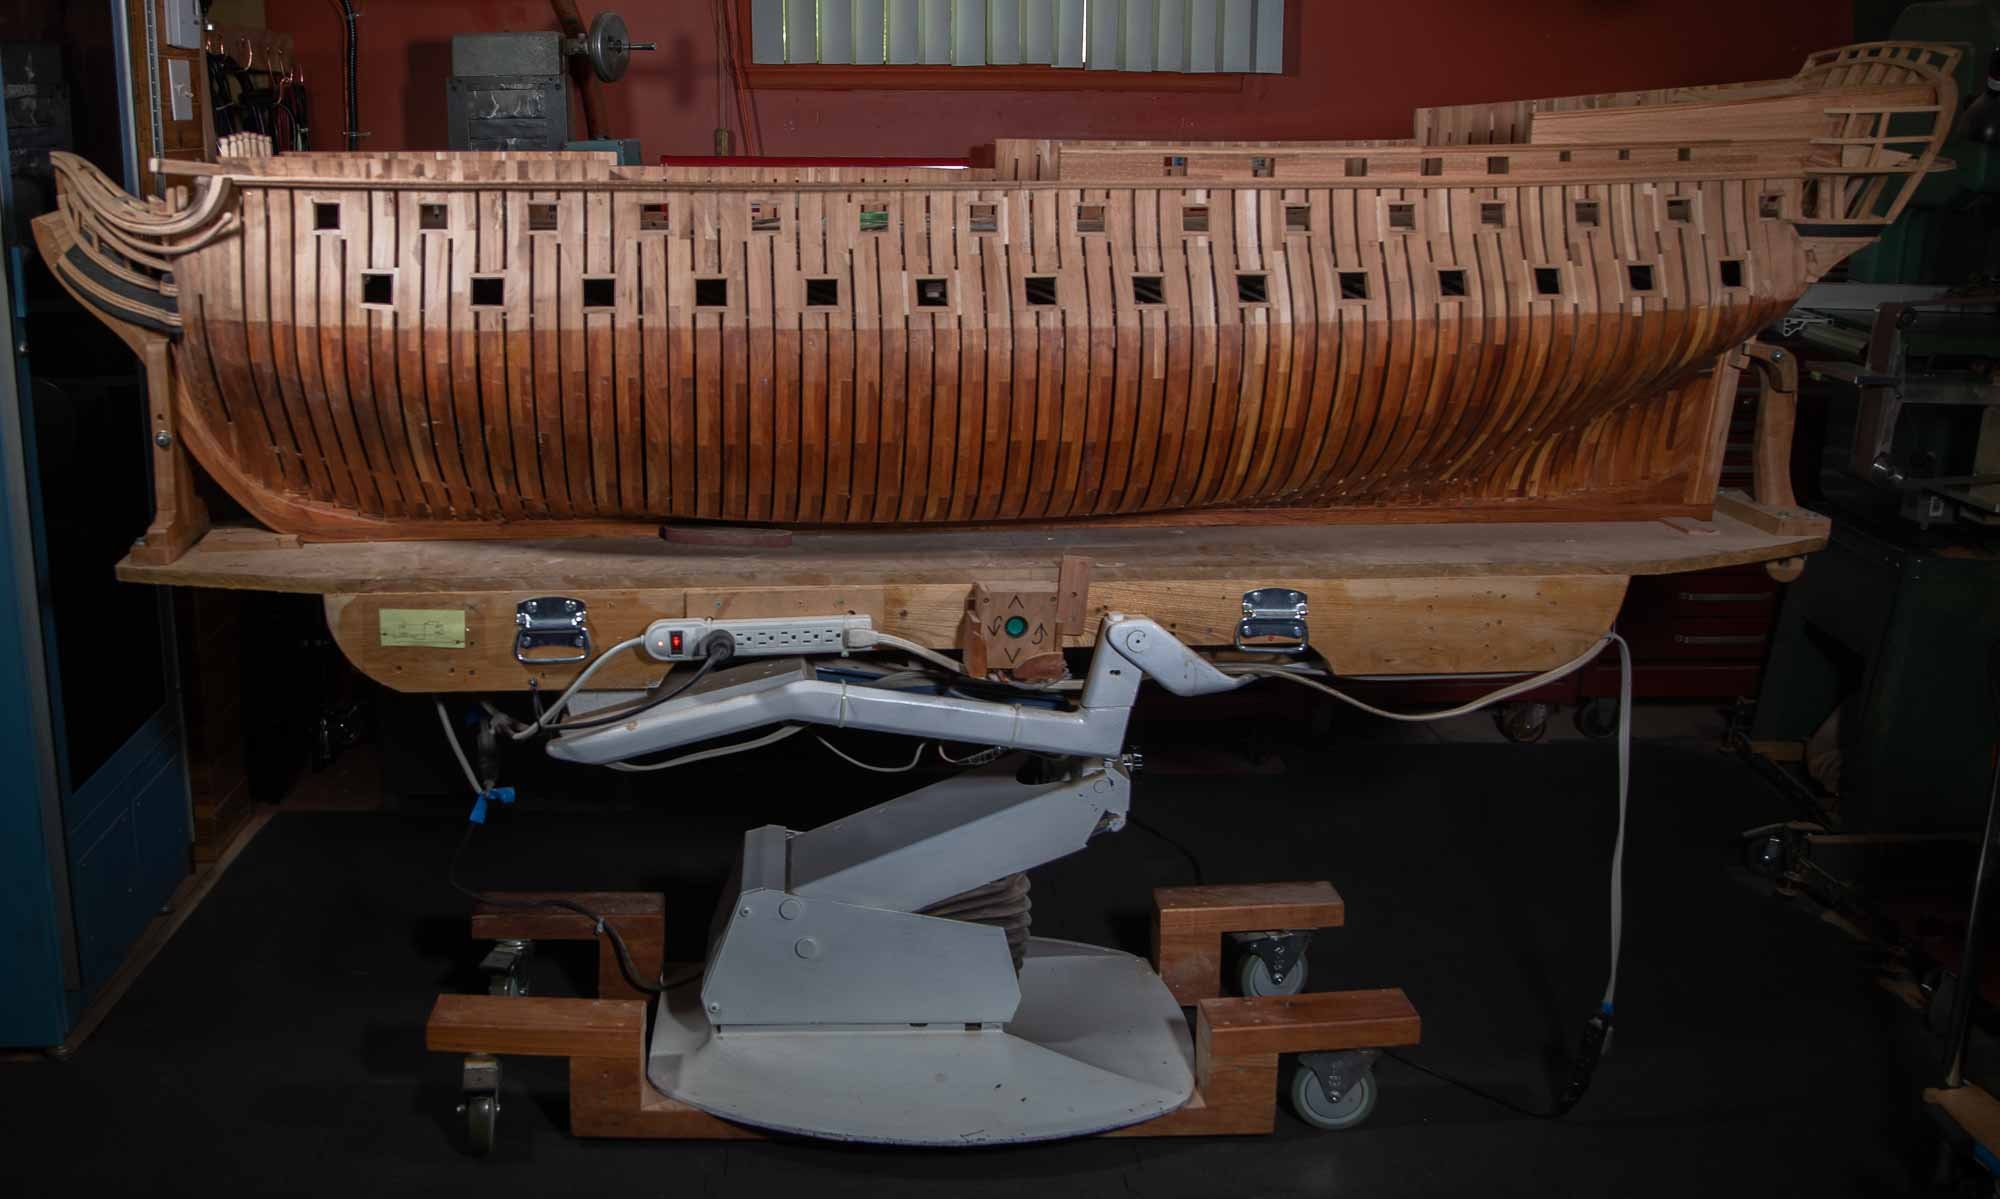
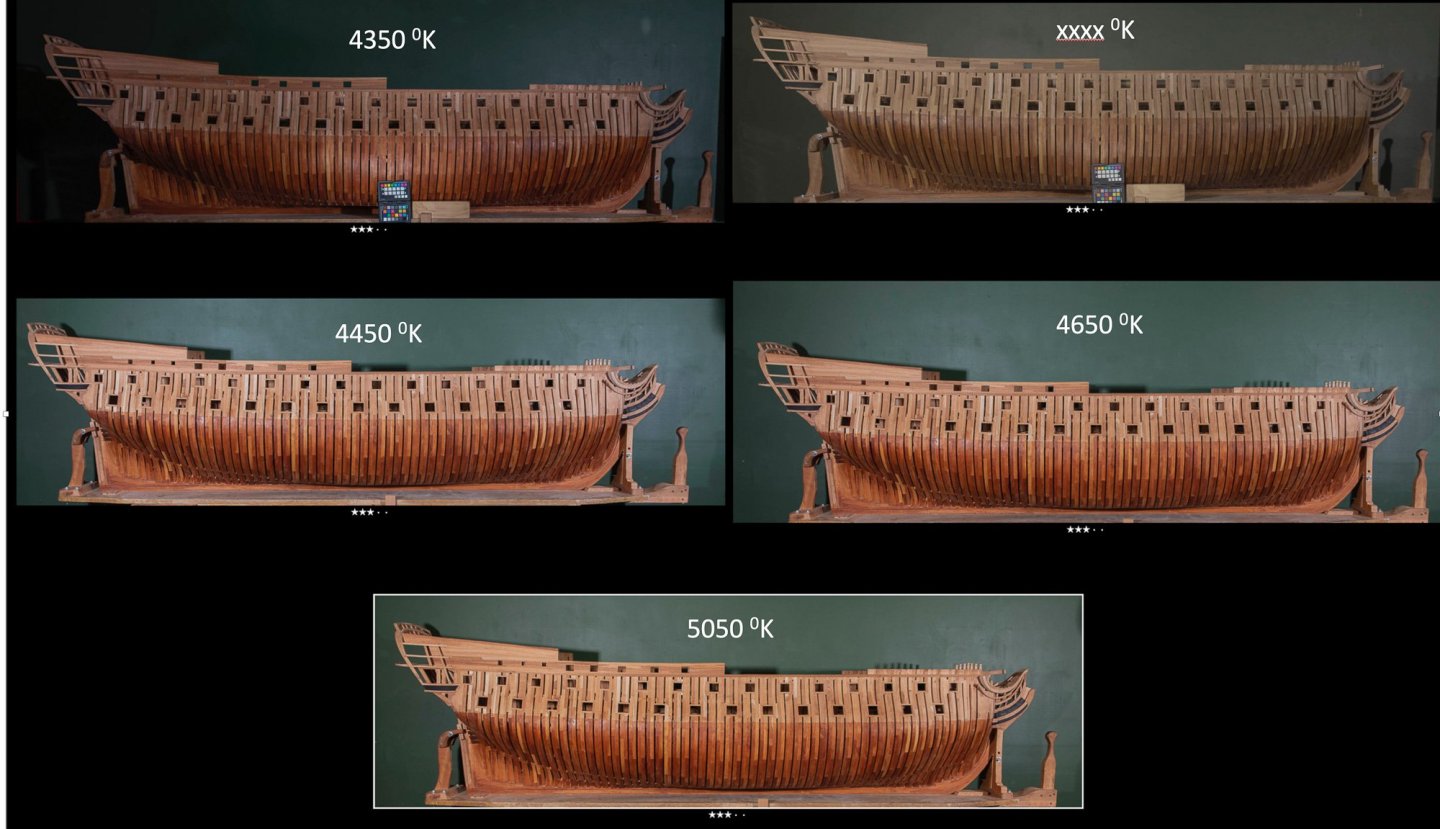
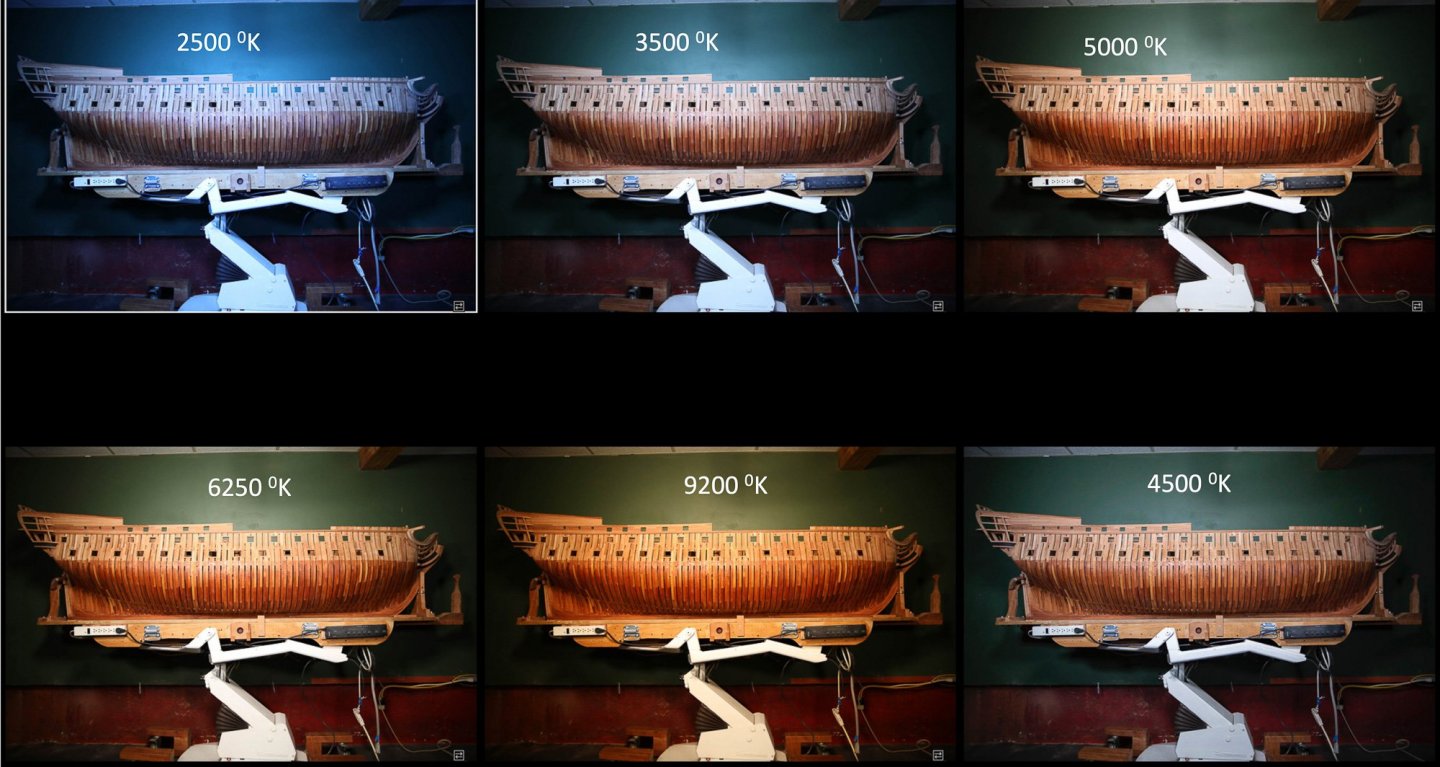
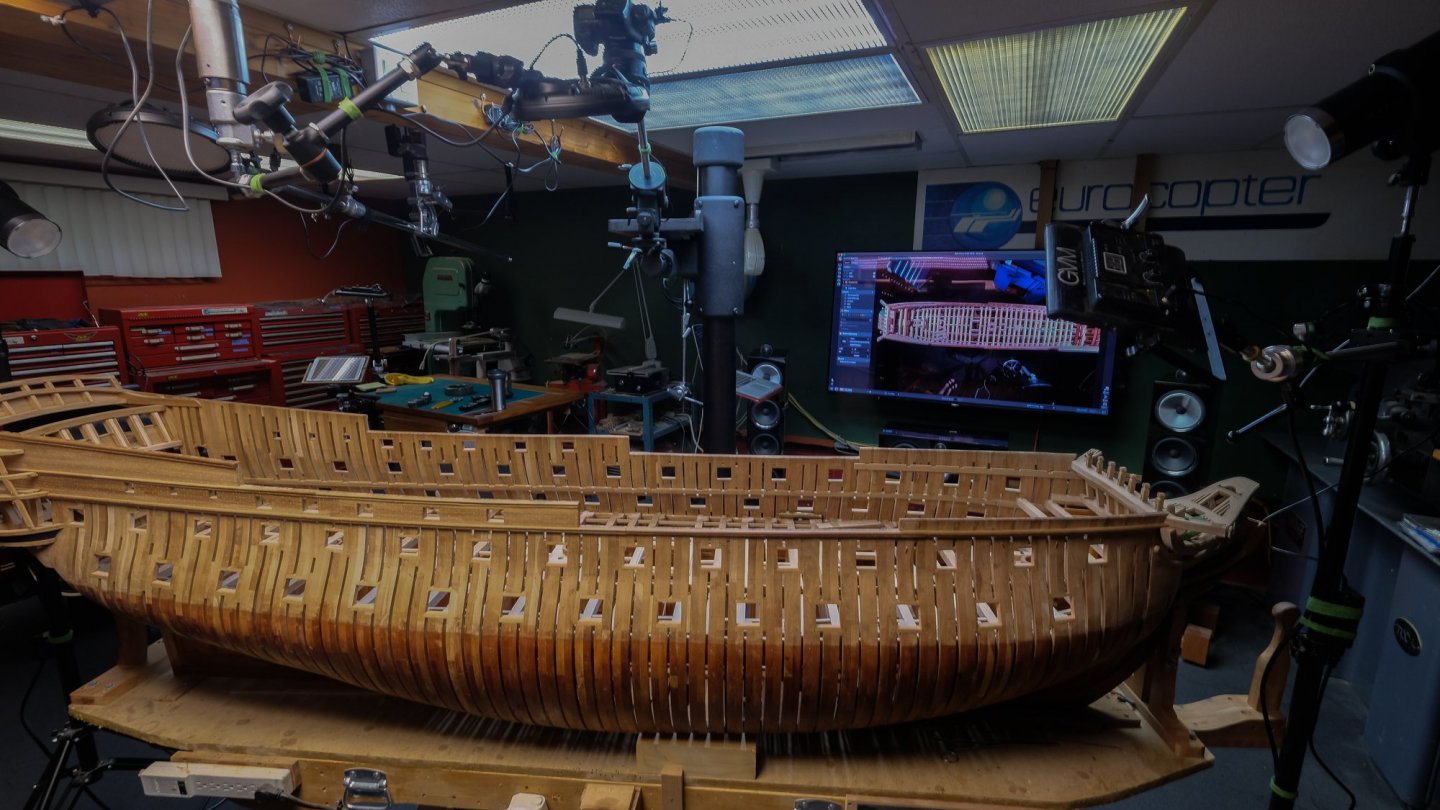
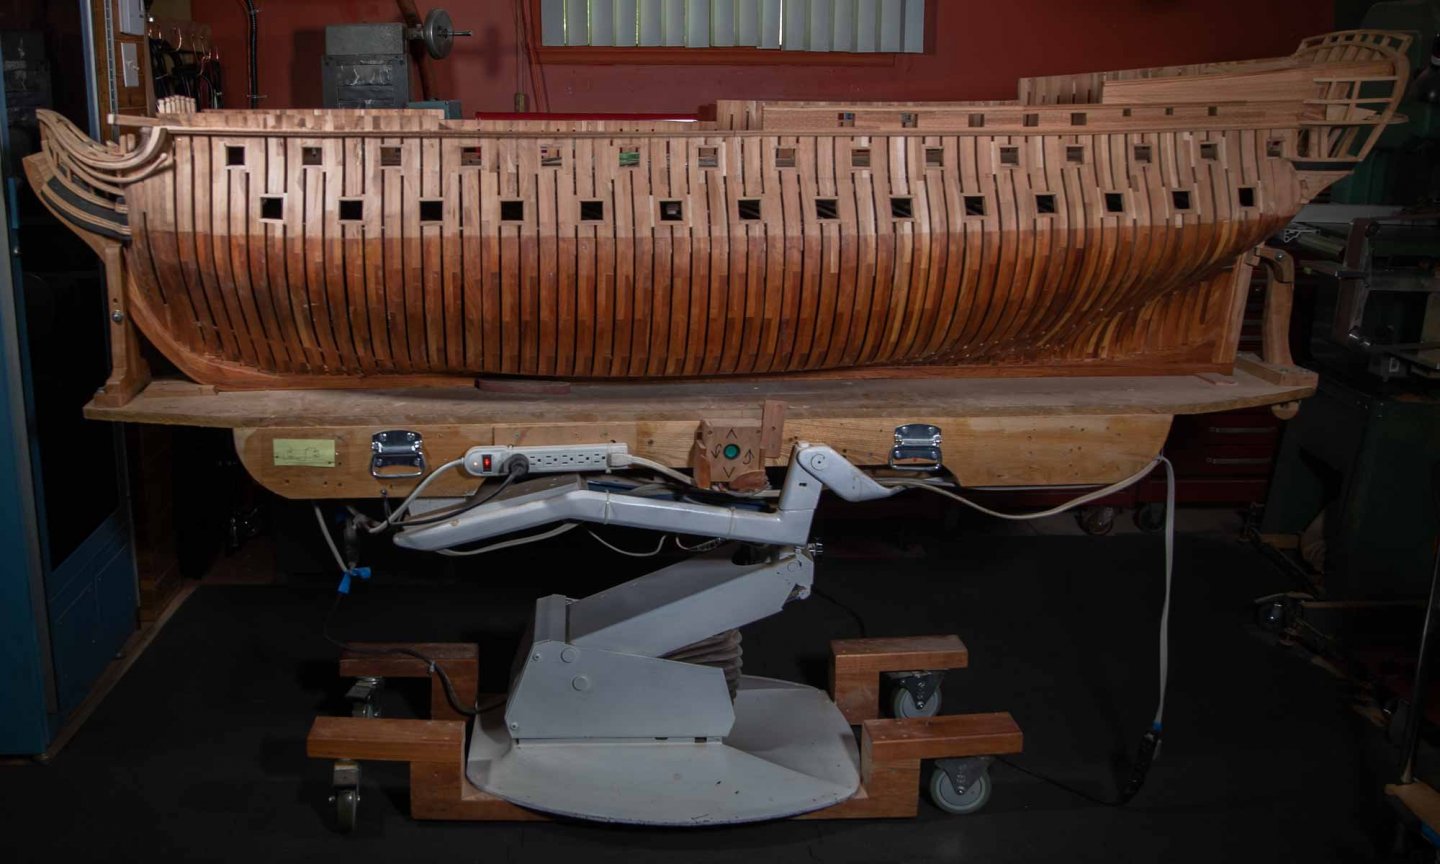
Ekis and Allan, thank you Allan, if I dare, This week was only to explore, again 1 aspect of photography: trying to match the color. To do this, I transform the workshop in a photo studio. Here is my easy way to transform a workshop into a photo studio: the big heavy are all around the walls so that the rest is in the middle. Everything being on wheels, it is easy to store when not needed. Also, I can make with this room a theater or a listening room where the sound does not sound too bad for 2 main reasons: concrete walls and a rubber mat. Over the years, I tried different floors and this one is my favorite. It acts as a anti fatigue mat and when I drop a tool especially those with a cutting edge, it does ruin the edge.


-
As sharp as it can be, very impressive Mark
-
For the last month, I turned and milled adaptors for photography. If I show my hands, you could not guess what I did for the last month. I do not have hands of somebody working with metals. For those who worked metals by turning and milling by example, you know that it is the best way to get dirty hands and sometime it is very difficult to clean. In fact, there is an easy way to keep clean hands. You need to wear gloves. In 2020, this the best solution. But not any gloves, you need gloves that fits... "like a glove". Nitrile gloves are a solution but not very durable. There is another kind:https://www.lequipeur.com/en/dakota-paquet-de-2-paires-de-gants-lite-enduits-de-pu-53768.html#53768=ASSORT This kind fits perfectly to the hand. These kinds of gloves have been on the market for the last 20 and are an industry standard used in many areas related to metal. To handle big peace of wood,I wear another kind of gloves: https://www.lequipeur.com/en/dakota-deerskin-gloves-32238.html?_br_psugg_q=gloves#32238=LEATHR I like these gloves because I can feel the wood grain. These gloves, in comparison with the other pair is more like a loose fit. This kind of glove would not be safe to use to work metal especially on the lathe. And again, some photos.


-
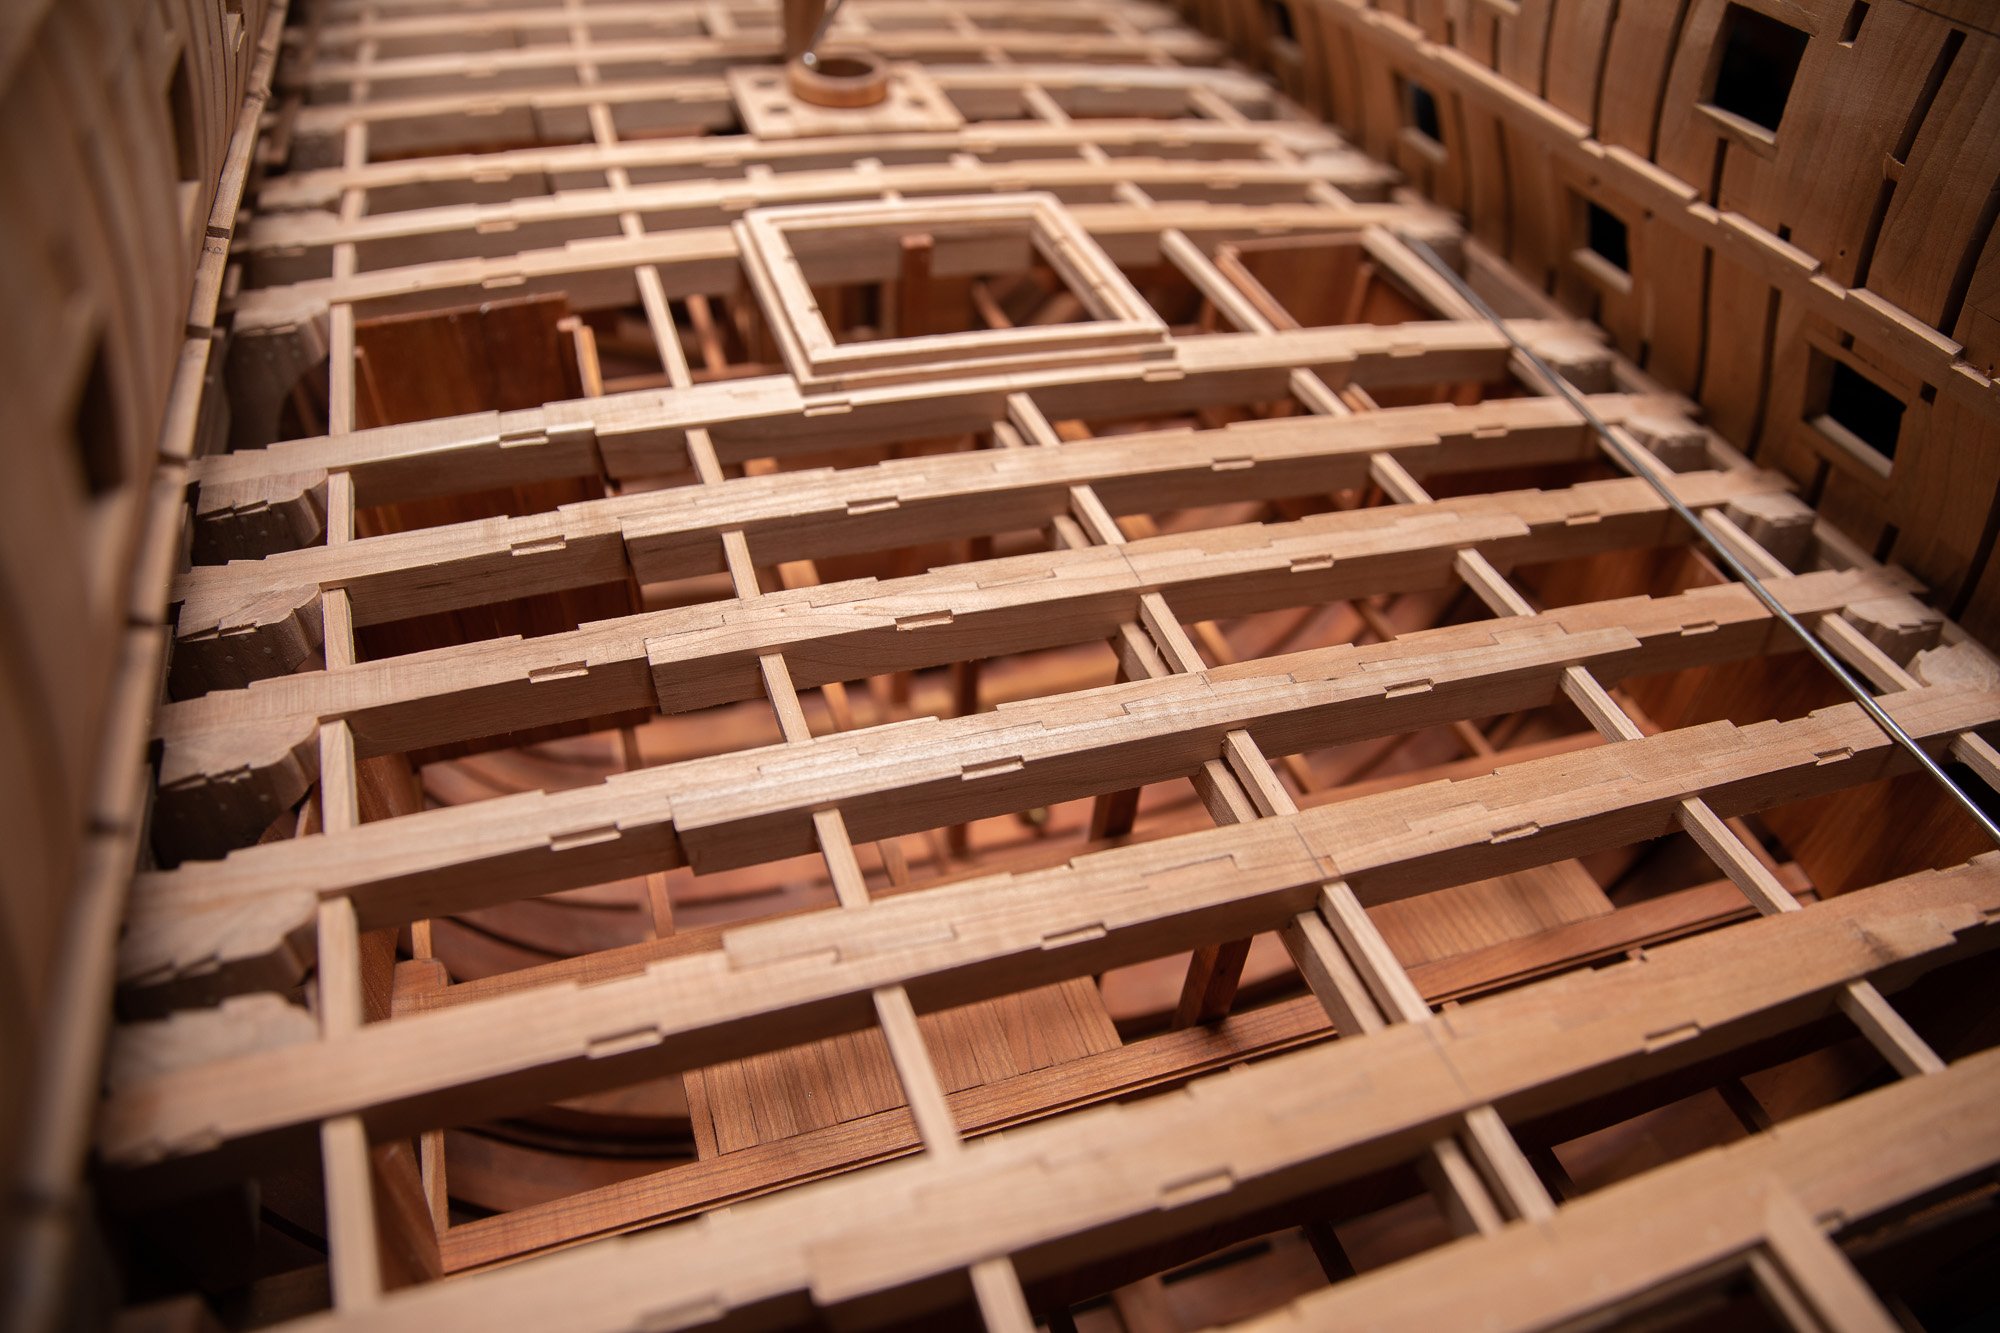
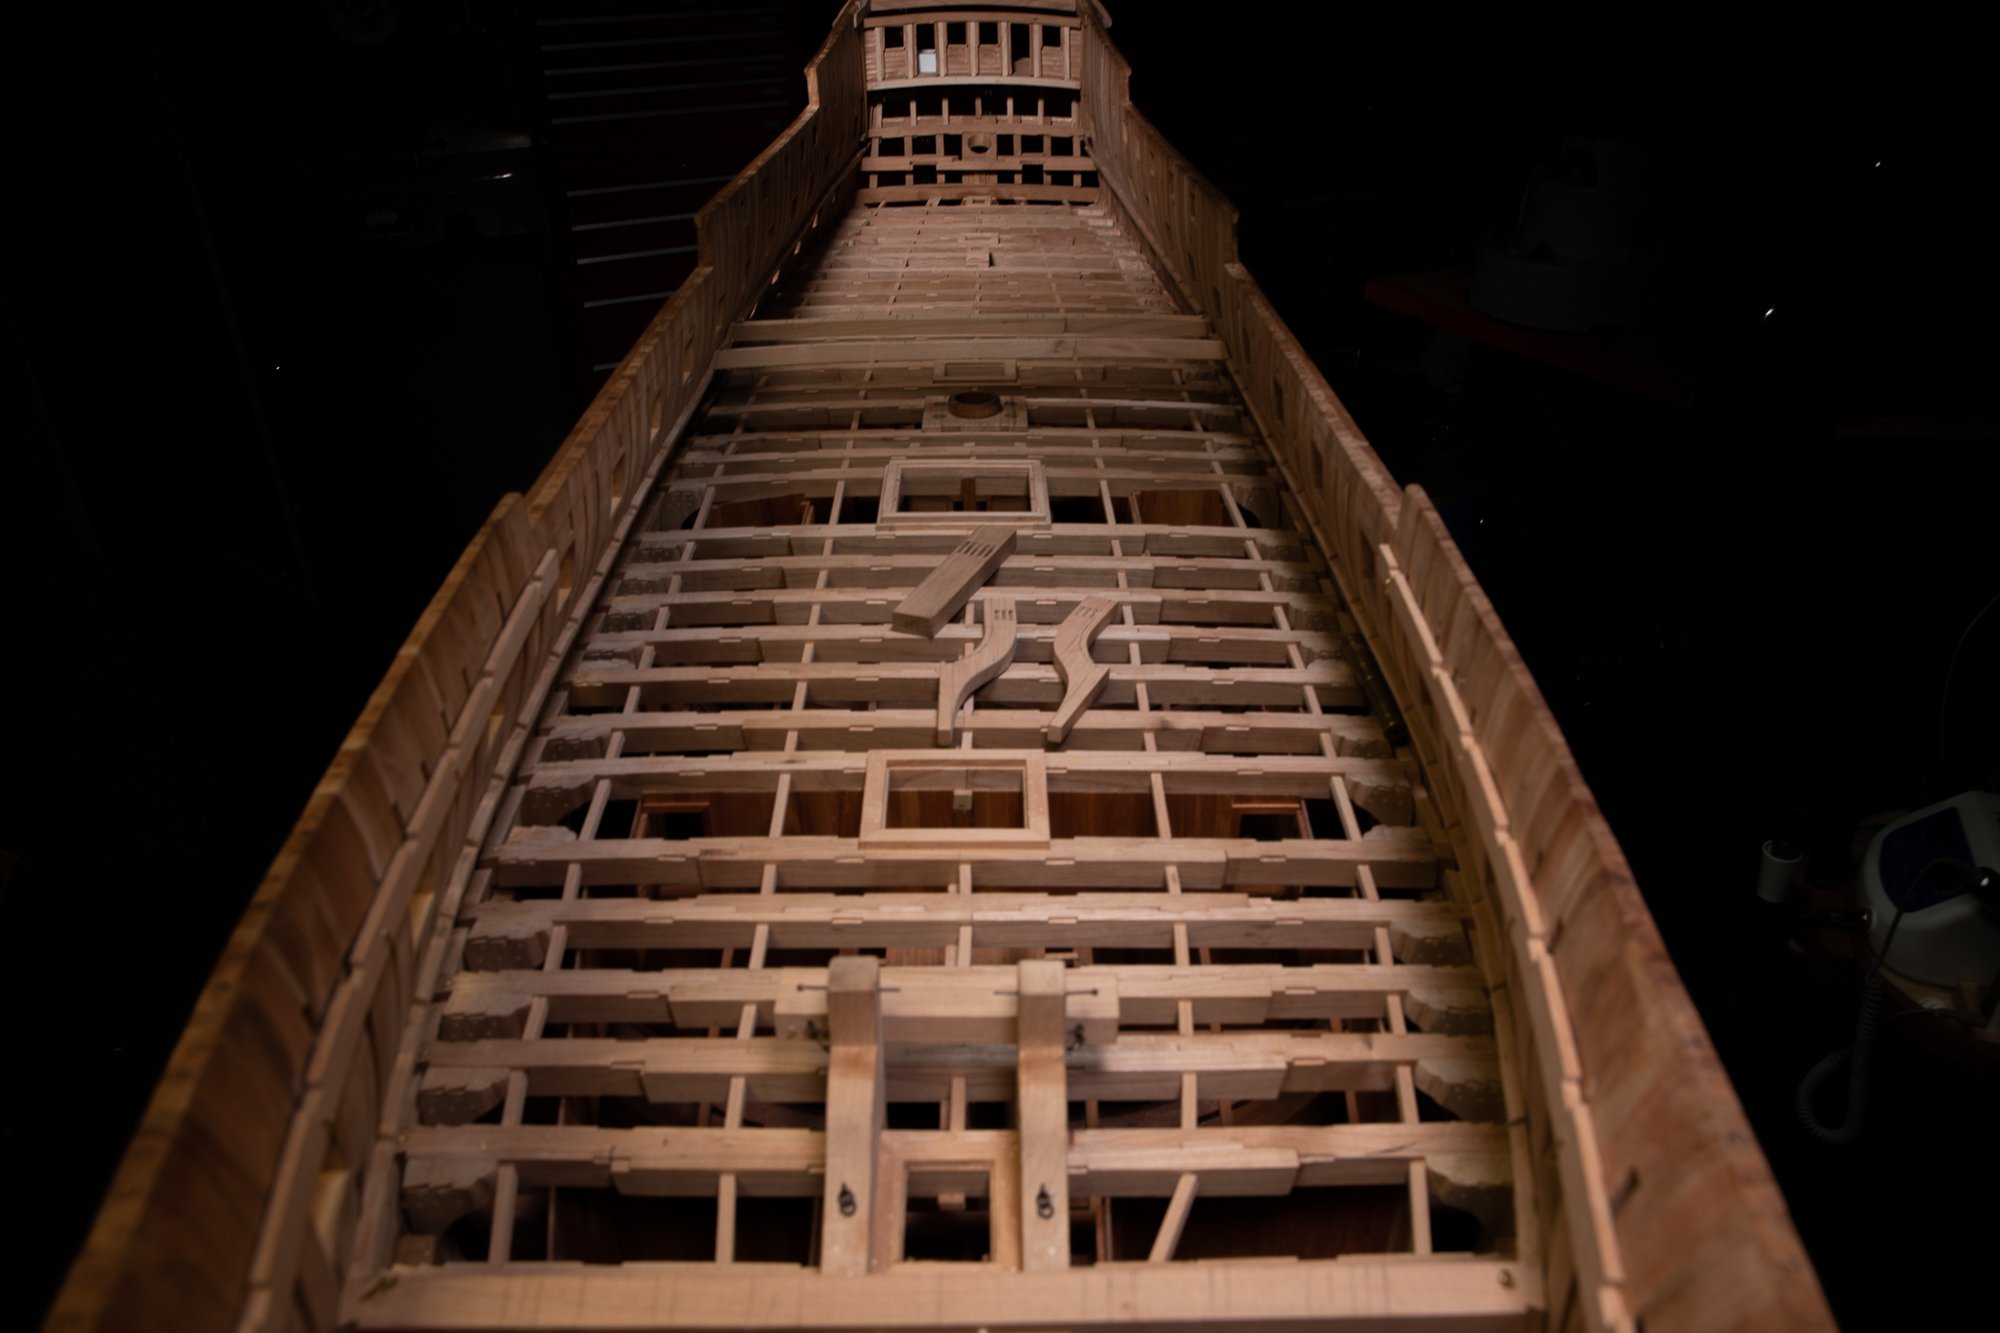
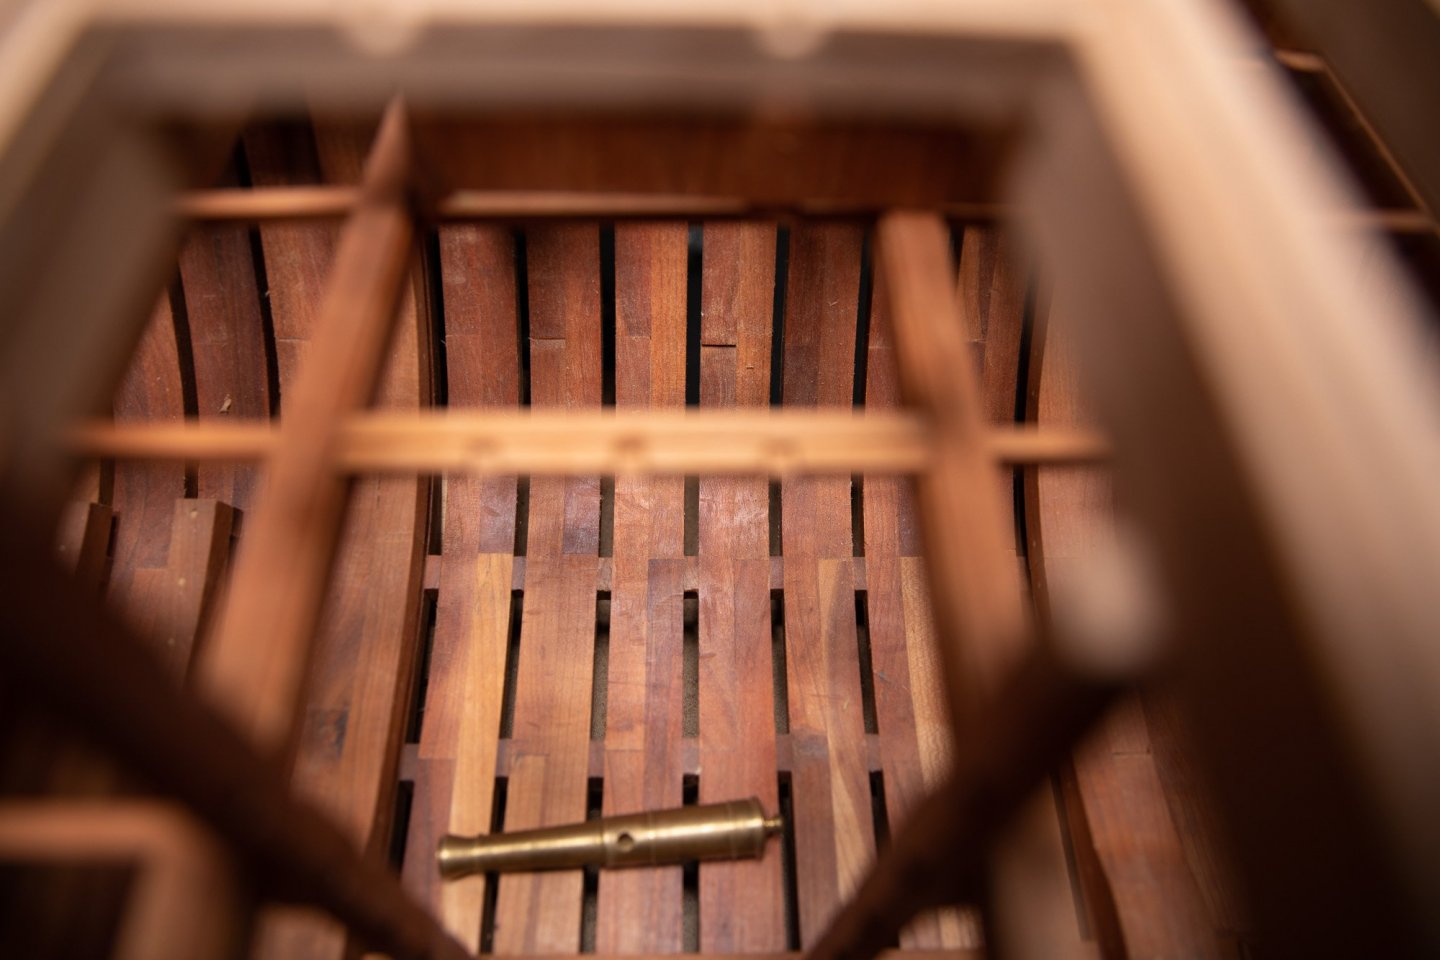
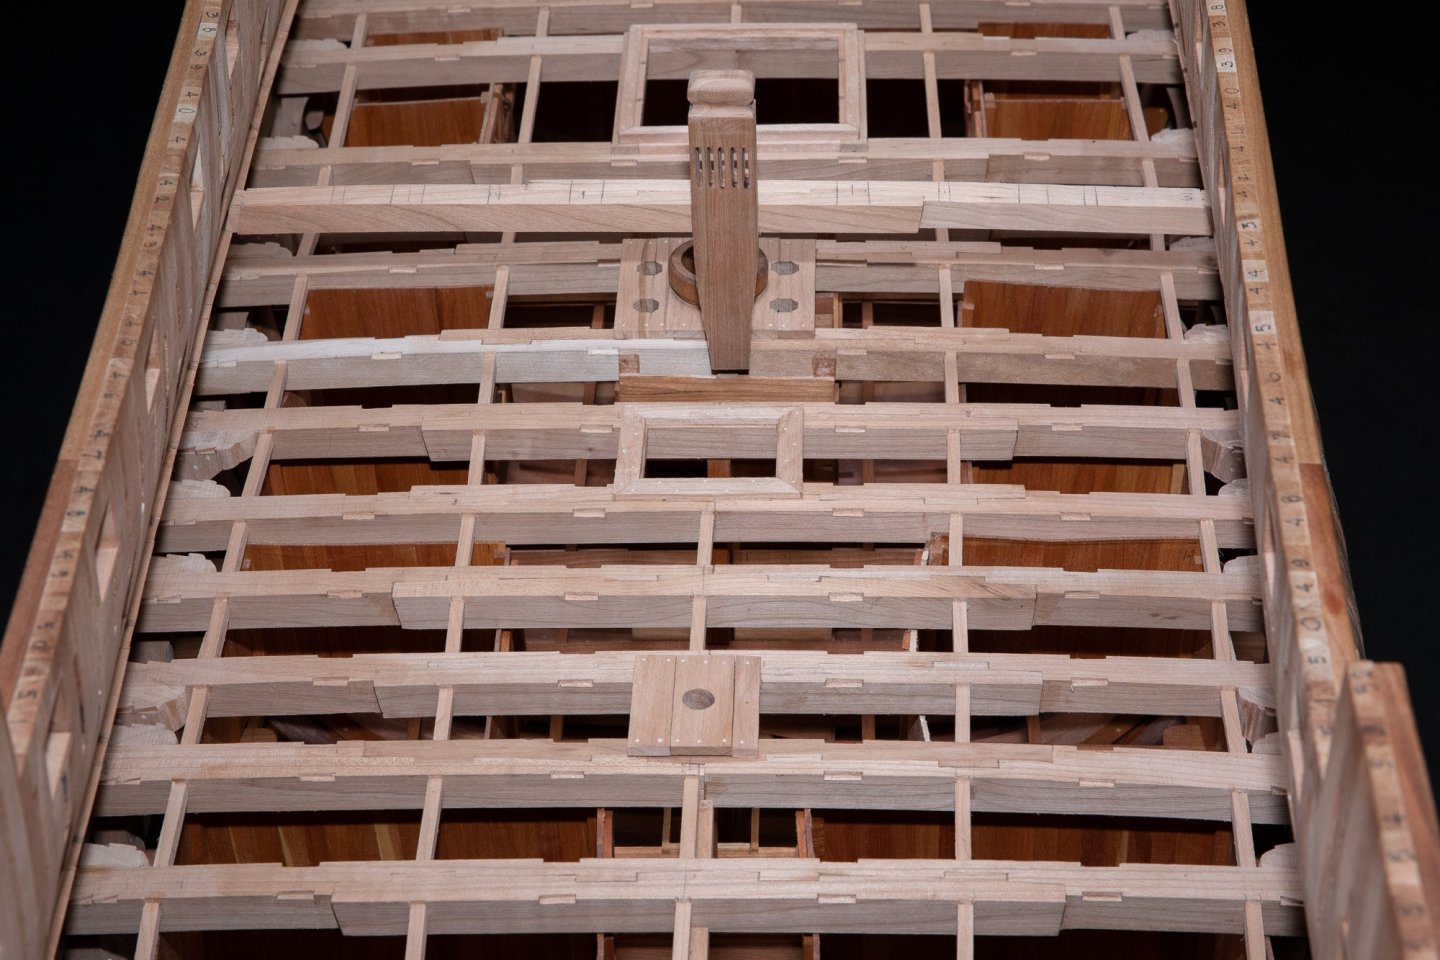
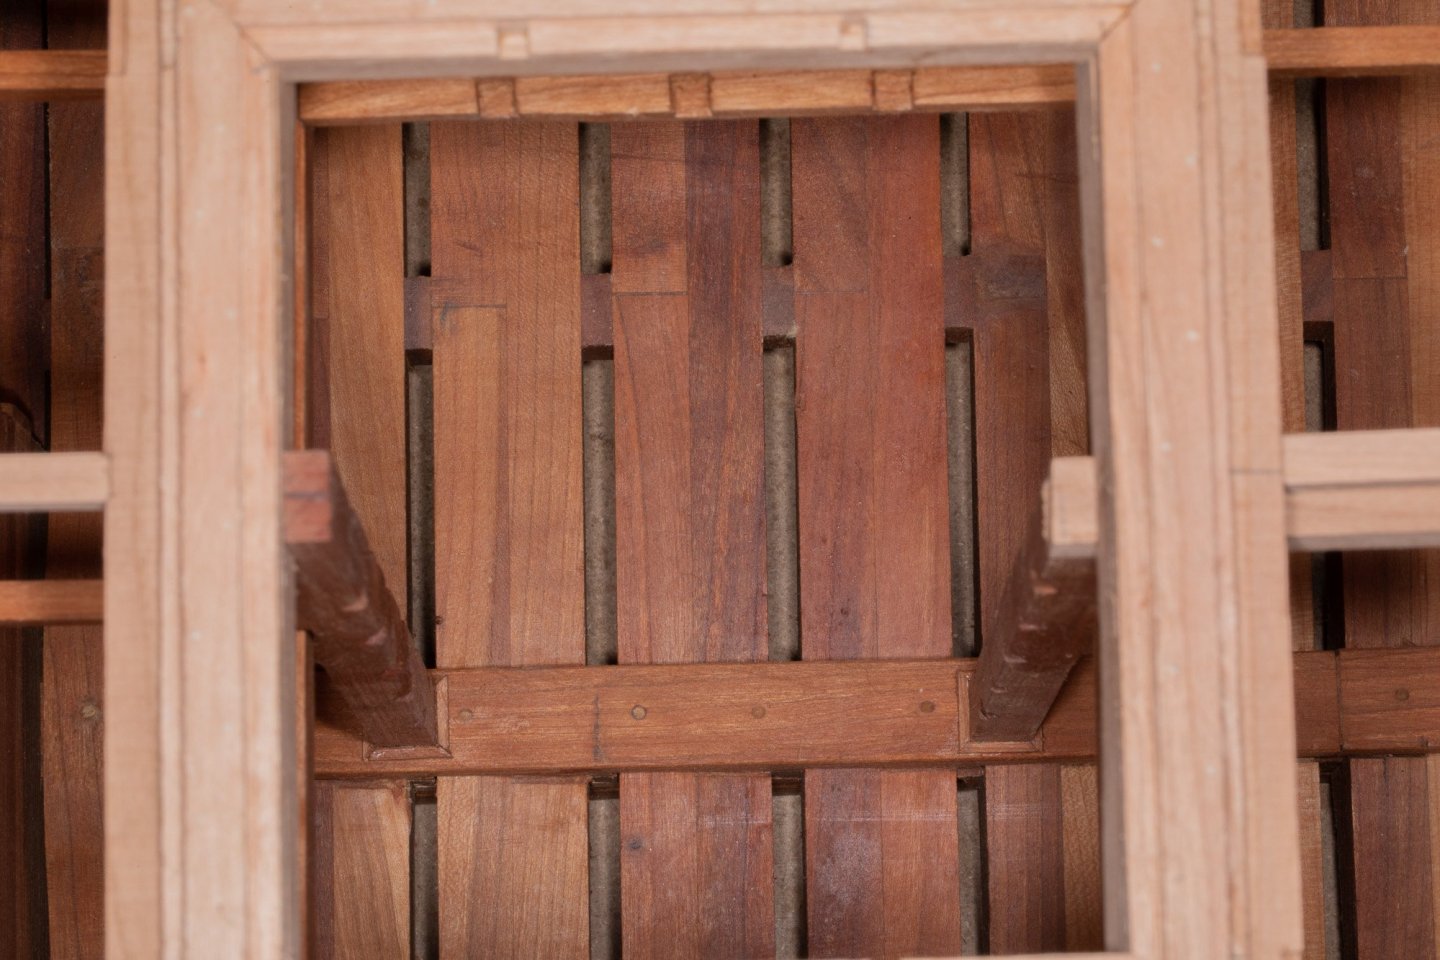
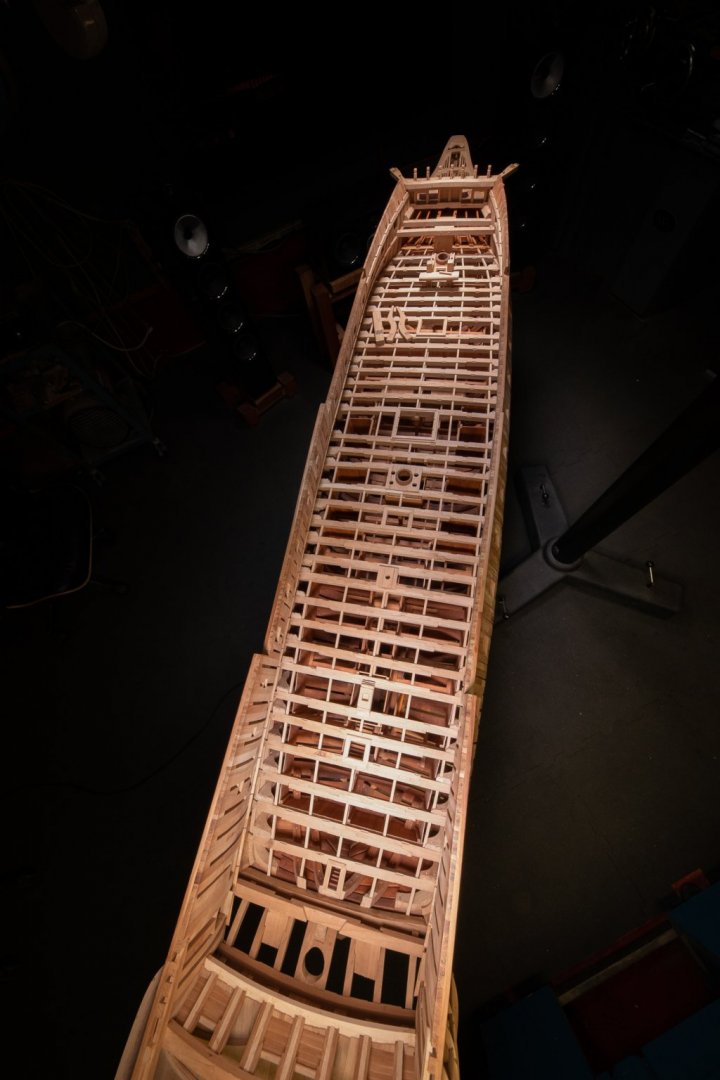
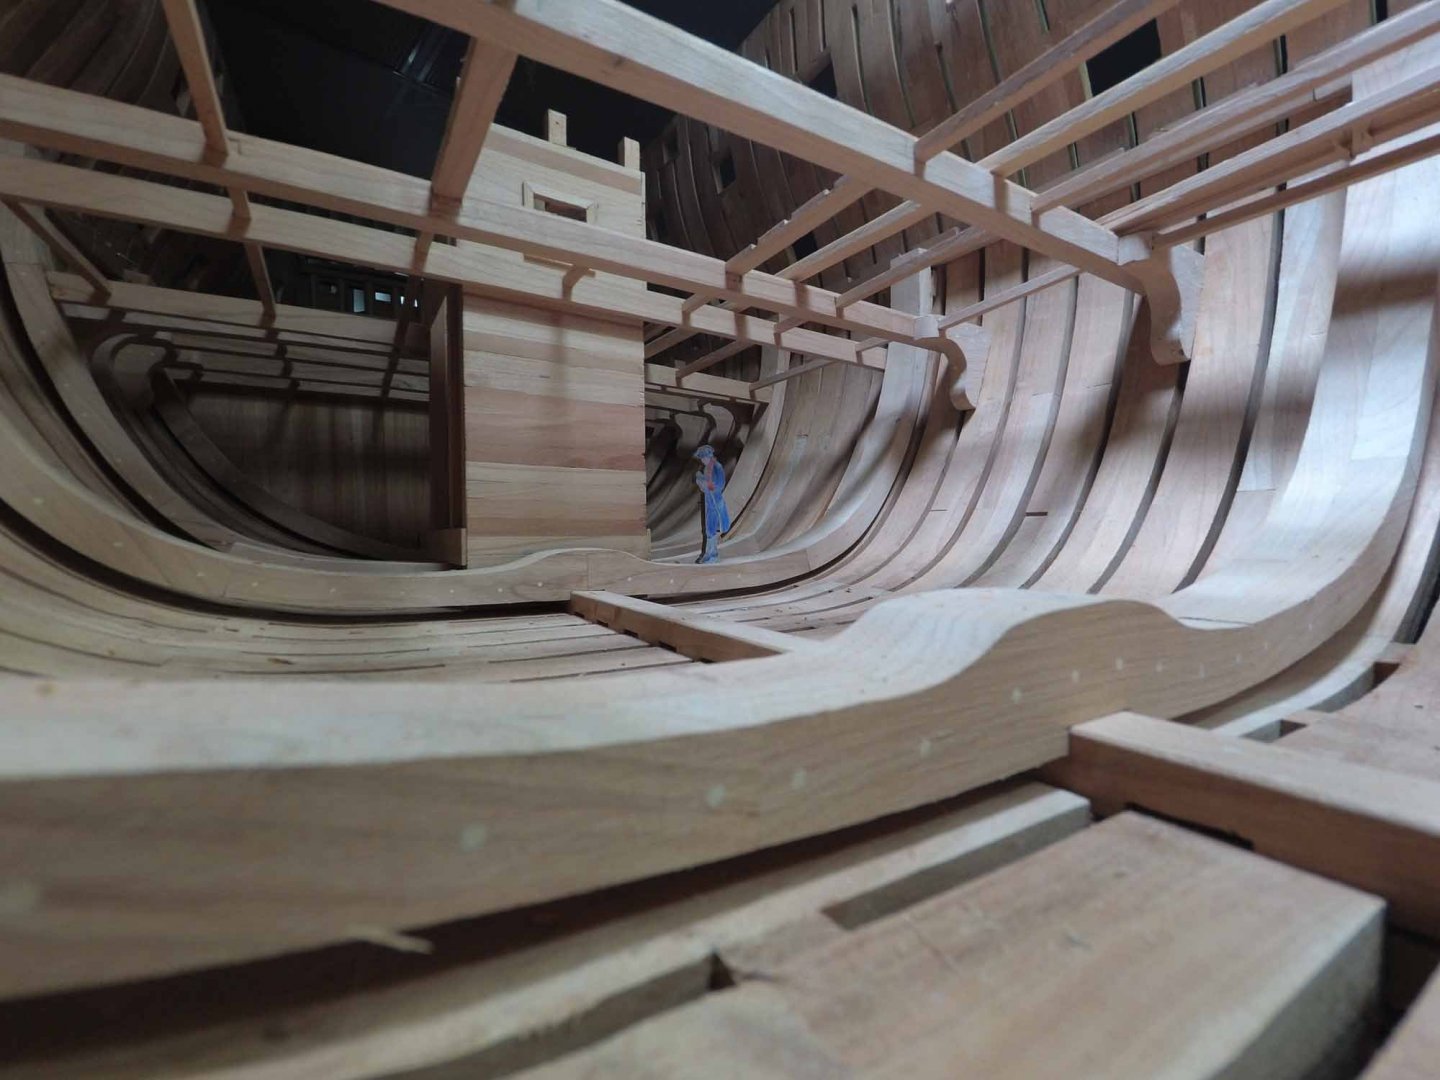
Actually,I am experimenting macro photography with a ring light around the lens.The 65mm and the 100 are useful for this. It is not every lens which are compatible. For the 74, the 100mm was used. By example, we can take photos of flowers outside. With the same set up, we can also take photos inside the 74. In a parallel project, I continue to explore ways to take photos inside the 74 in multiple levels at the same time. It is particularly difficult especially with the lighting. It is the kind of project which could be done easily with a 3D model, but this is not the road I want to travel.


-
It is sure worth to go to see this site: a very fine crafted model.
-
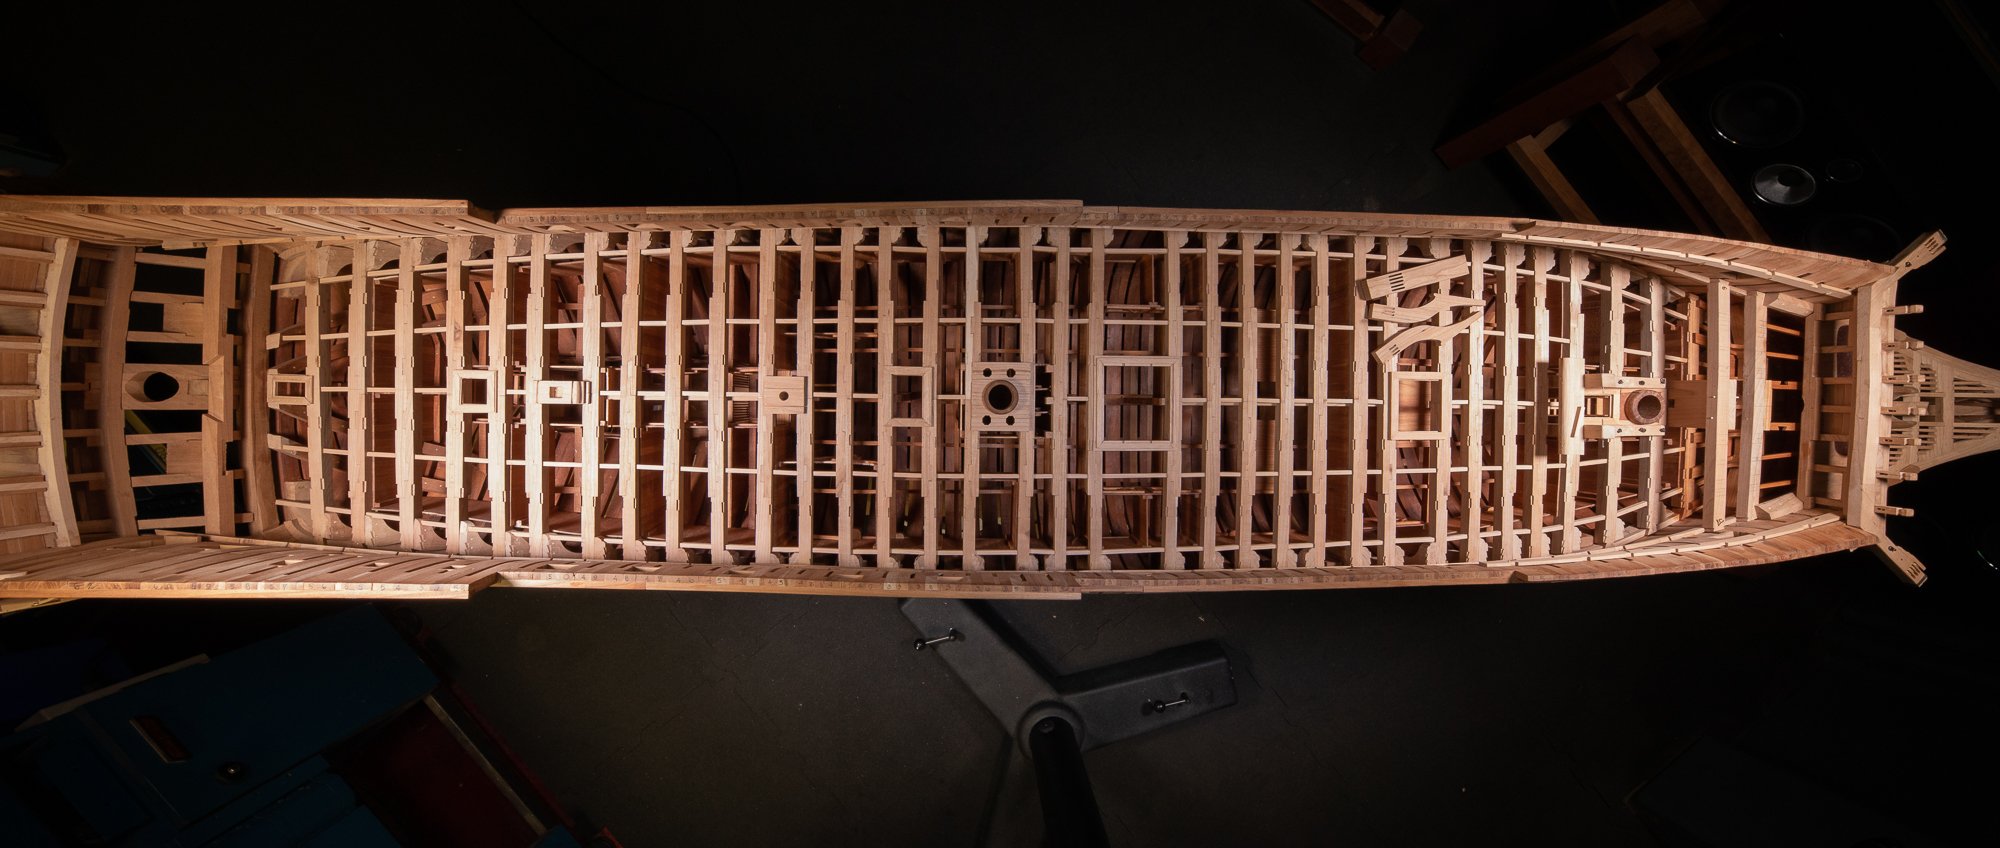
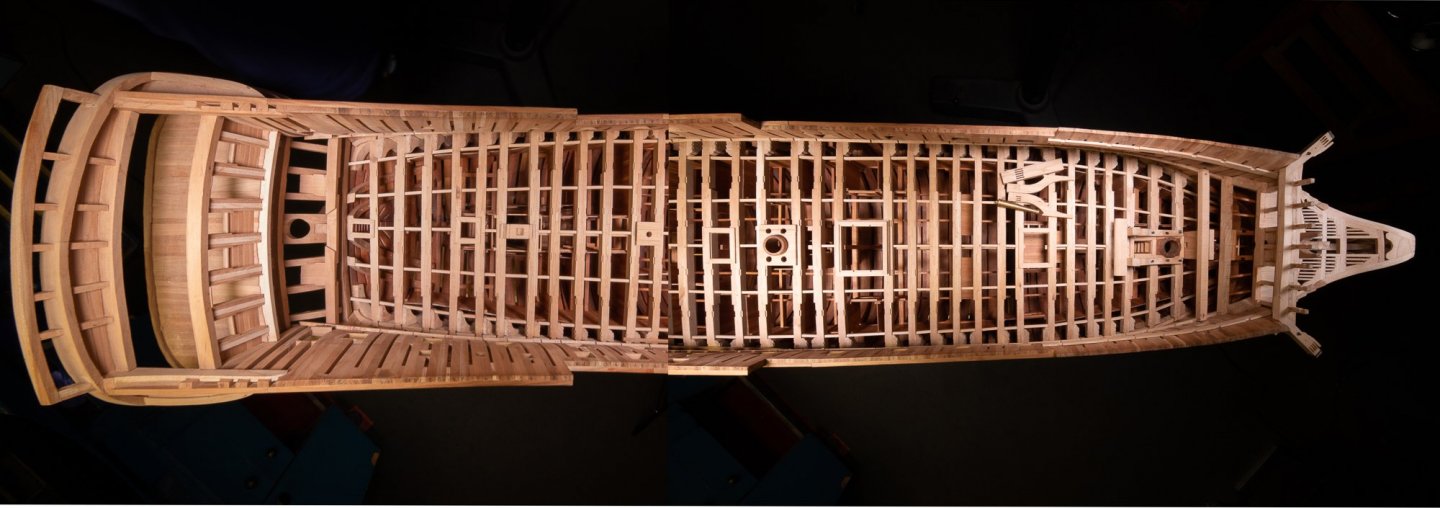
Finally, the solution was easy, I just needed 6 more inches between the camera and the model ship. I thought I was going to take the model to the ground which involved a lot of manipulation. Instead, I found an easier solution: remove 1 ceiling tile.


-
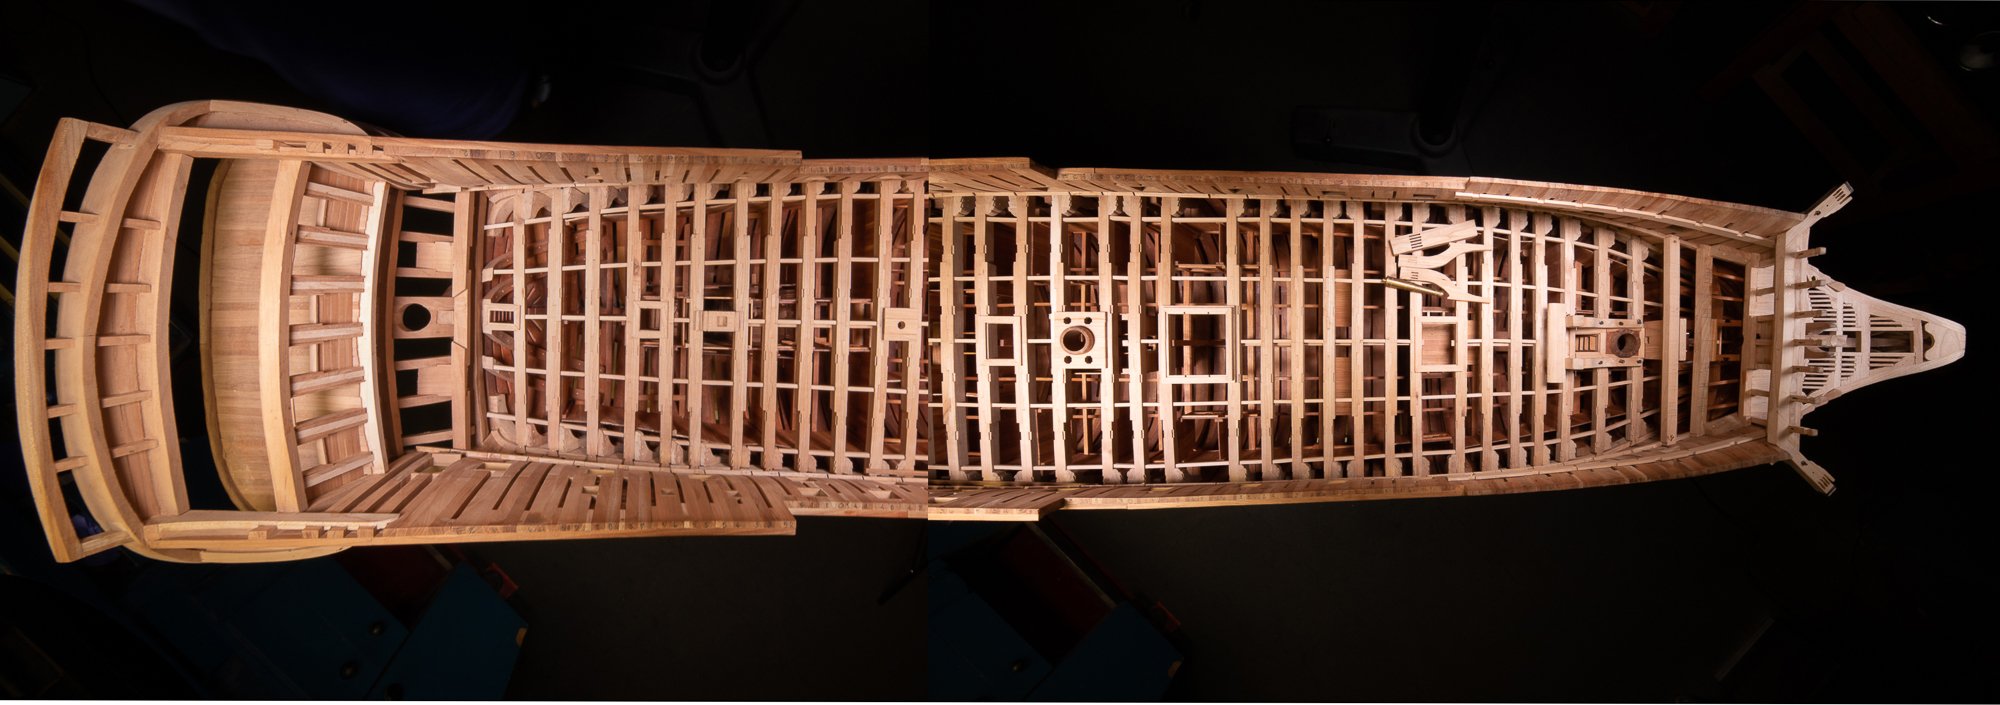
Photoshop calls it automatisation/ photomerge, but this is not the road I want to take. I will retry to do it in 1 shot.
-
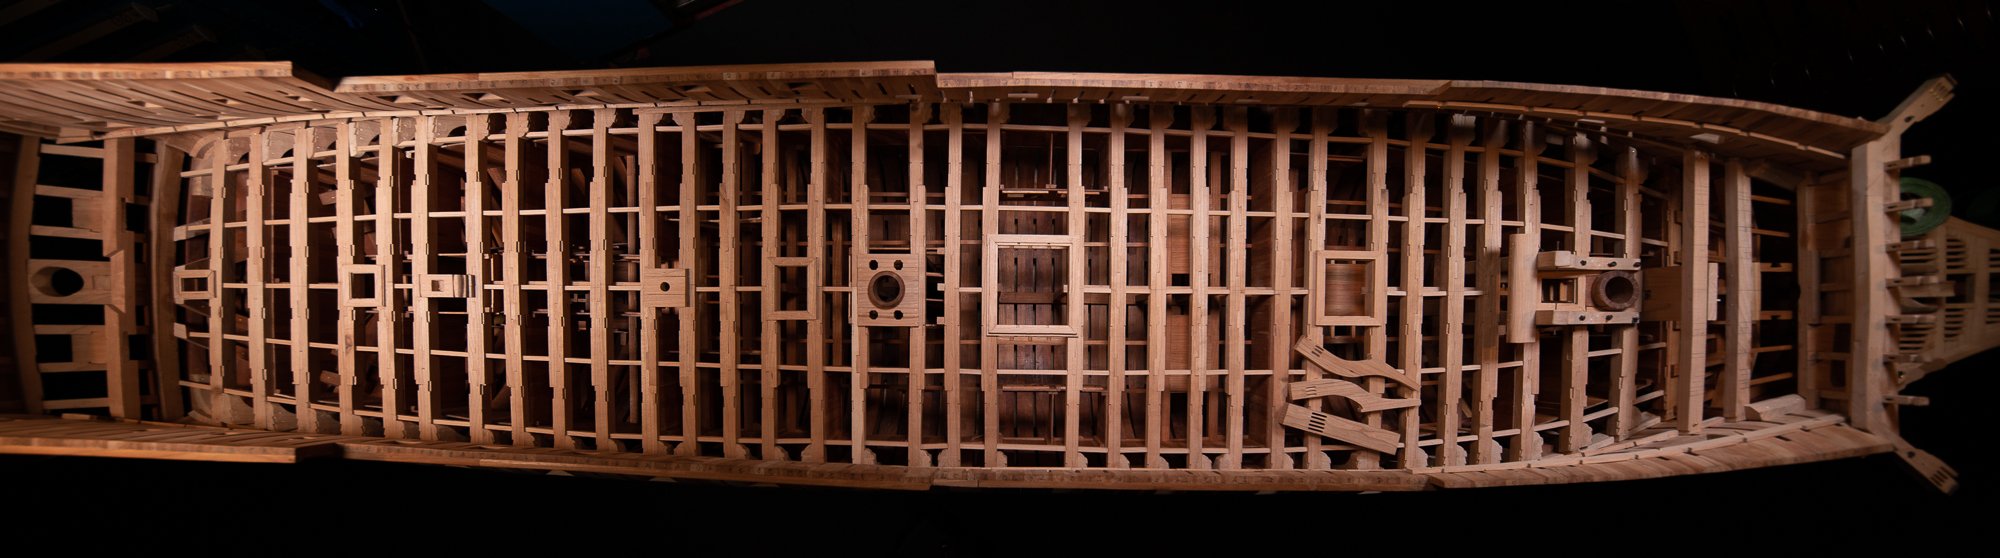
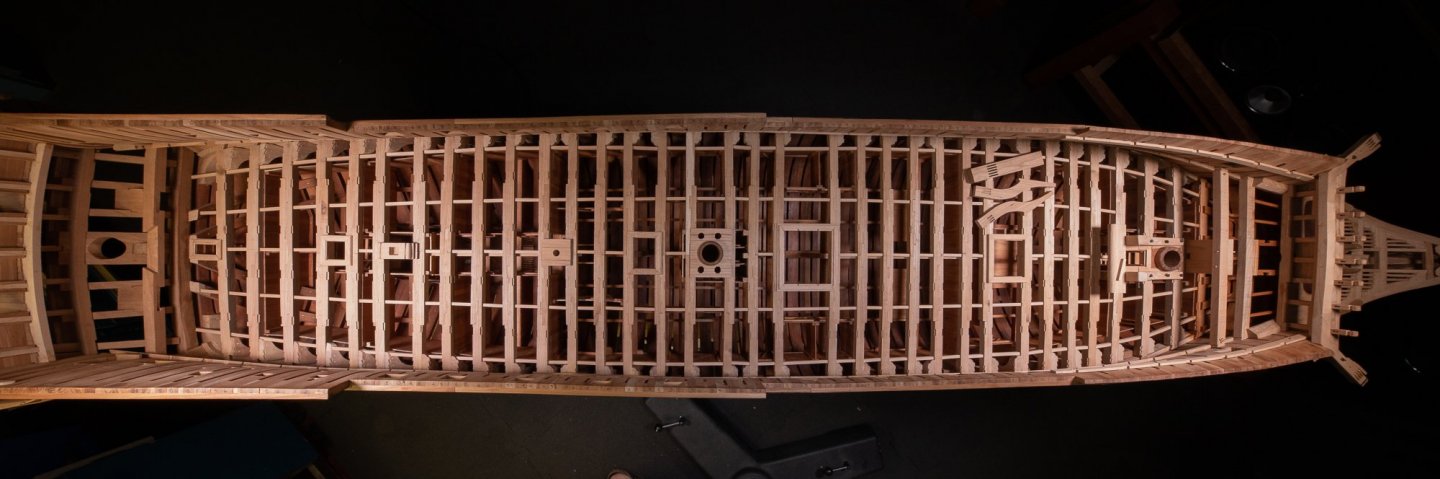
2 photos could be an option to get the model complete.I am not familiar with stitching images. I did not realize that I was missing the extremities, I was focused on the quality of the light. I did a fast try but to get a perfect match is difficult as you can see in the photo. I will do another try, focusing on taking the complete model. If the model is still too high, I will take it out of the dentist chair, this way I would get 3 more feet of distance and then it would be easy to get the full model.
-
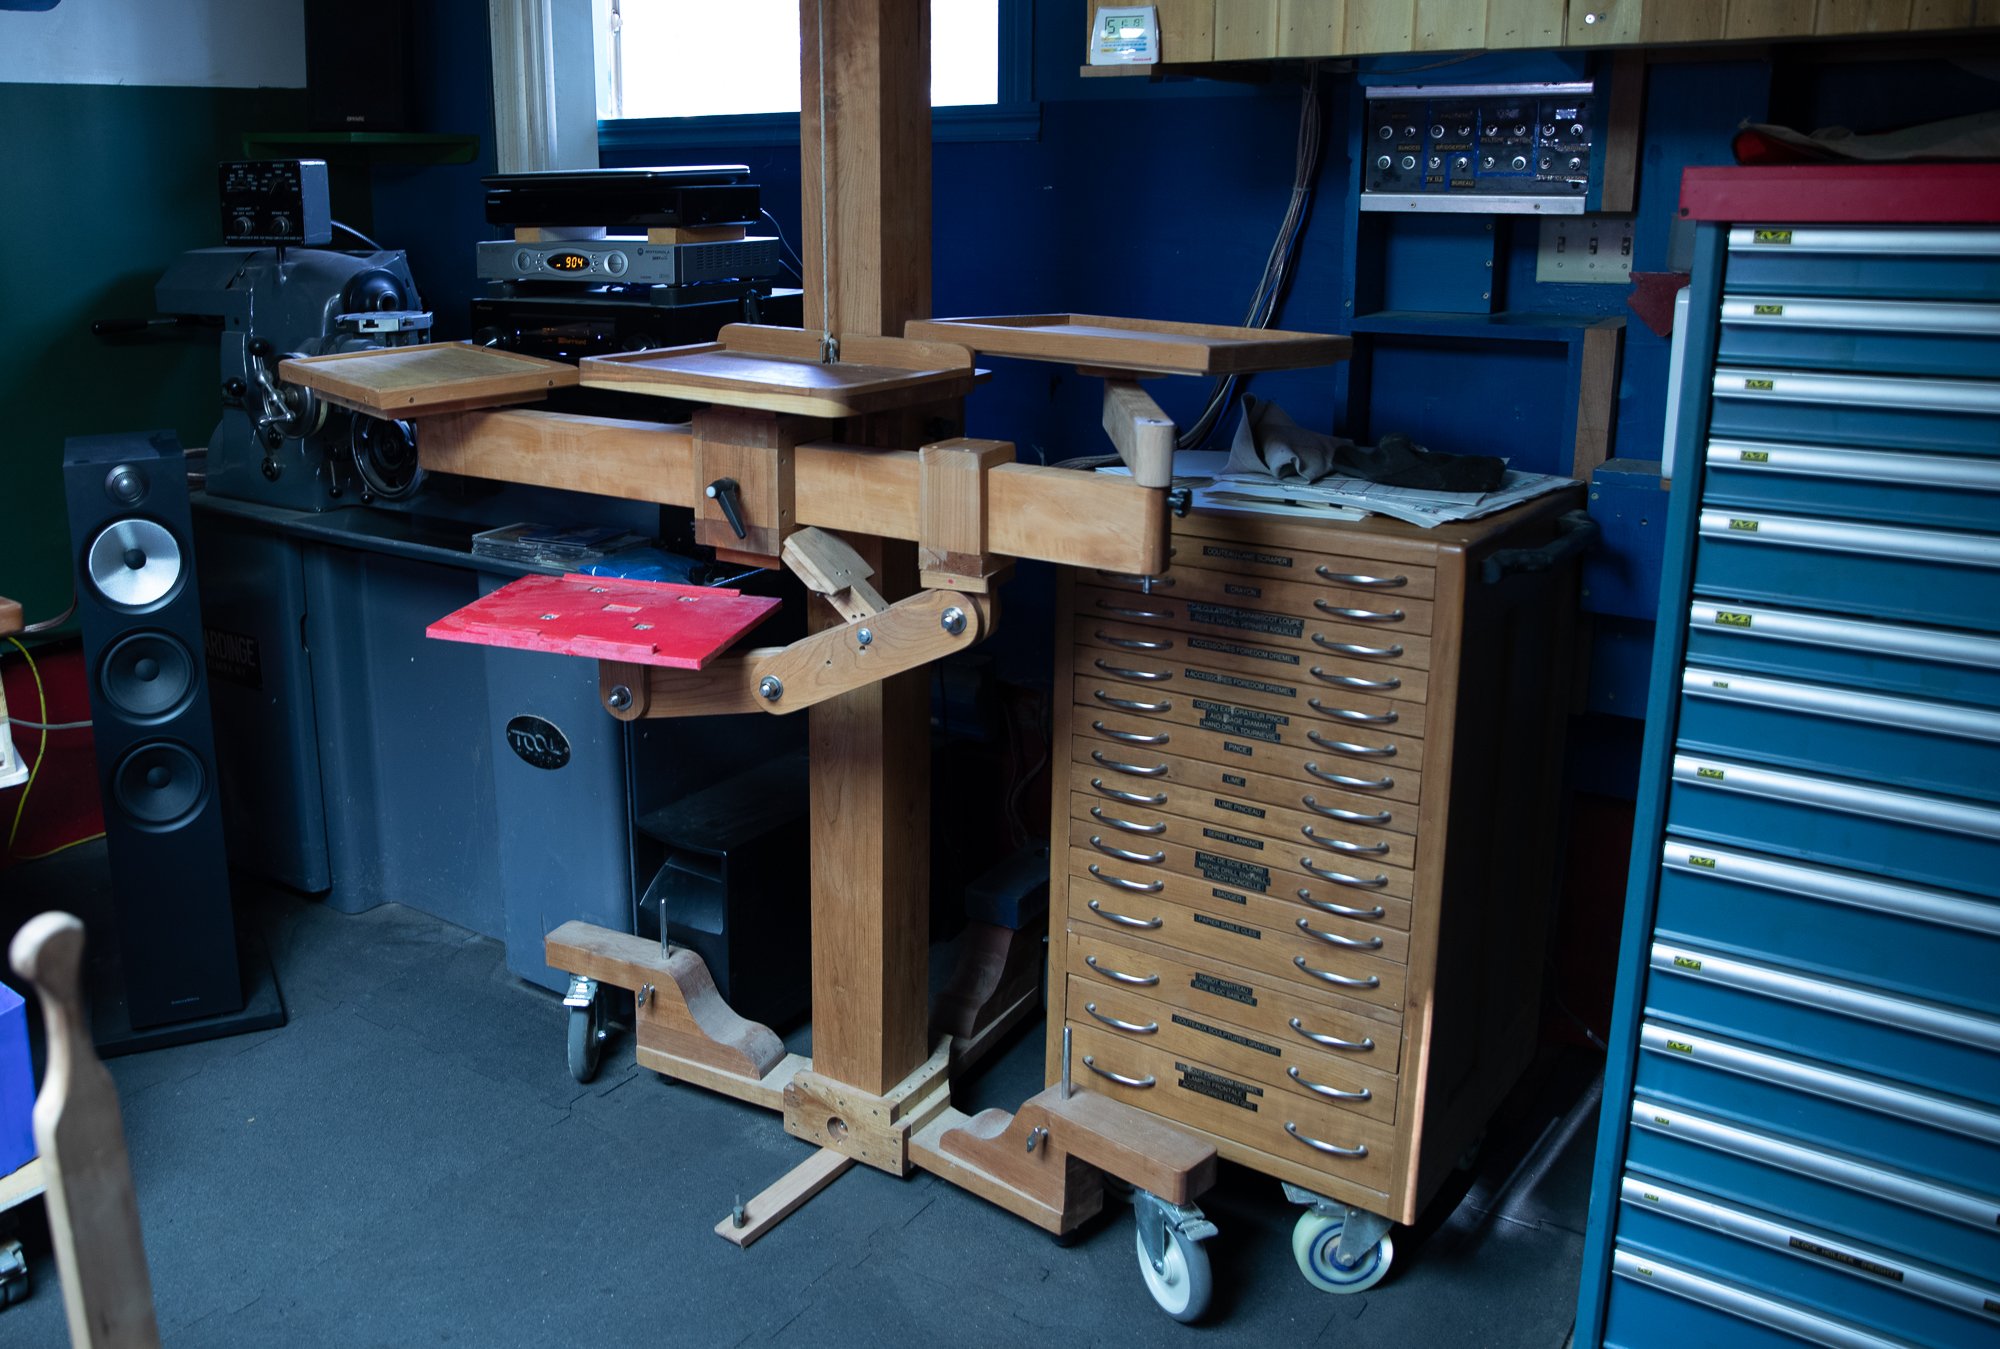
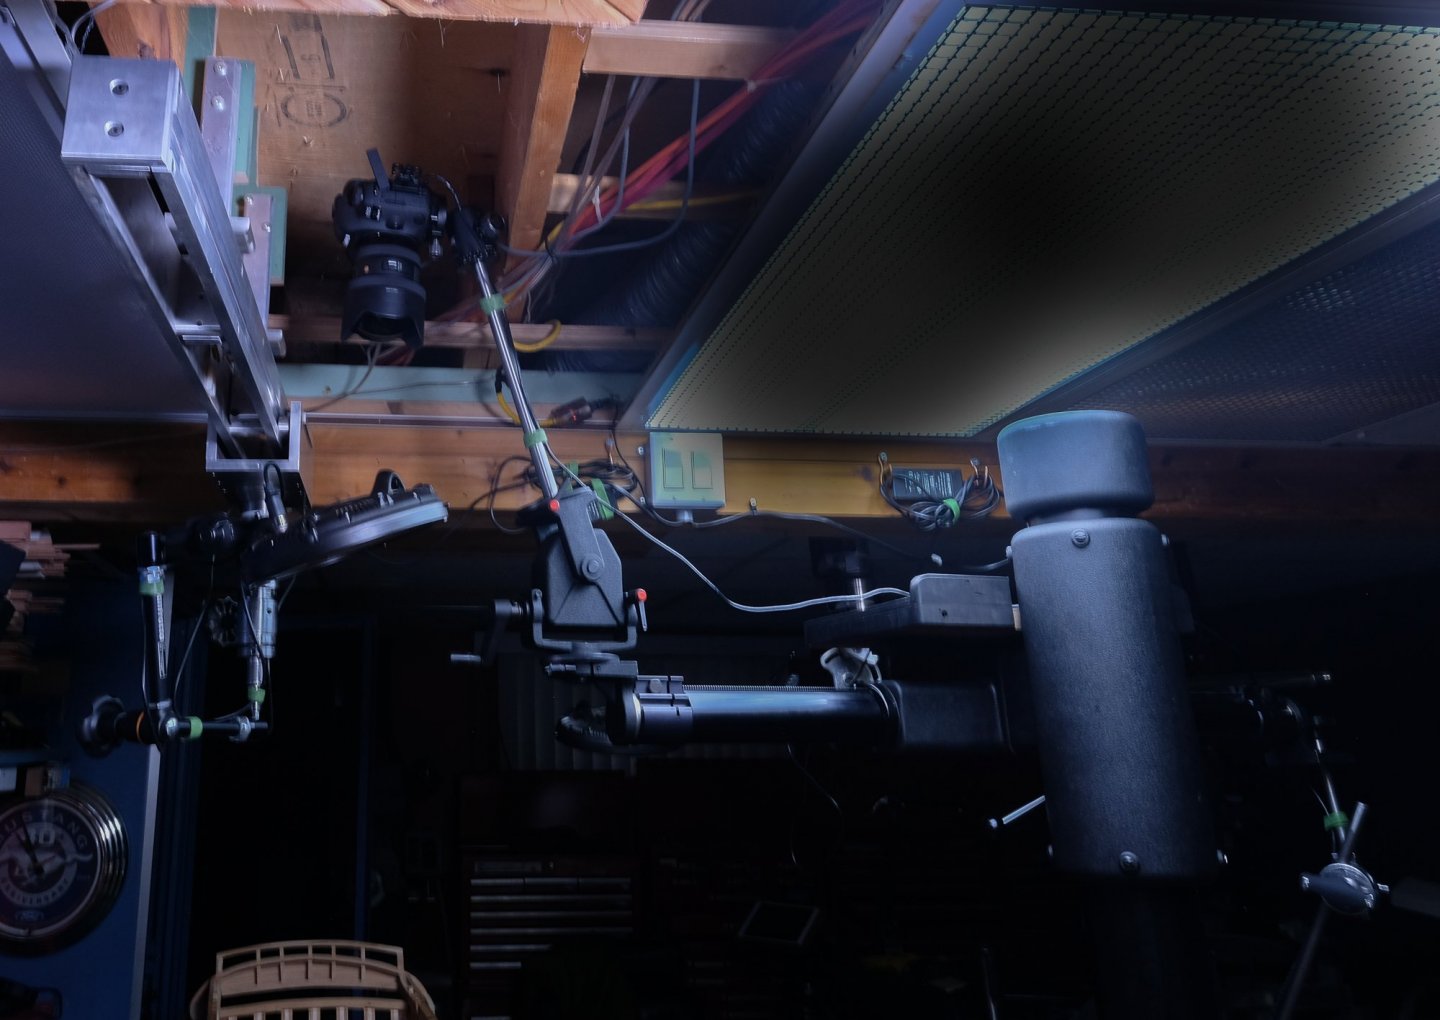
Thank you for your comments. The wood camera studio stand is replaced by a metal one. I machined few adaptors for the final goal: to take a photo from the top of the model ship boat. This is a difficult task because the camera has almost to touch the ceiling to be able to see the entire 8 feet long model at a distance of less than 3 feet. Of course, a wide angle lens is required. Here is how it works; the camera transfer a live view image to the lap top and then the photo transfers to the TV. This way, I can easily see behind the camera.


-
I had a Unimat and I sold it, I have a Myford and I would never sell it. It is the lathe I use the most. Myford lathes are perfect to make tools and I made a lot. Proxxon is much more smaller and is also for much smaller parts.
-
I know that we saw some models made of paper but in my head there is something like of impossible. I must admit by seeing your results, it is very convincing and also, a very fast technic.
-
The midlle third of the miling cutter was grinded with a wheel for carbide. This way, the cutter has a smaller diameter than the diameter of the cutters. Before the diameter on the top of the cutting part was larger. This meant that the cutter could not go deeper than the area which is sharpened as a cutter. This also means that I could not mill through the wood part completely. Now, the cutter can go through completely.


-
dull number drill bits
Gaetan Bordeleau replied to BETAQDAVE's topic in Modeling tools and Workshop Equipment
just like a knife that cannot cut; sharpening is possible or may be buy a better quality -
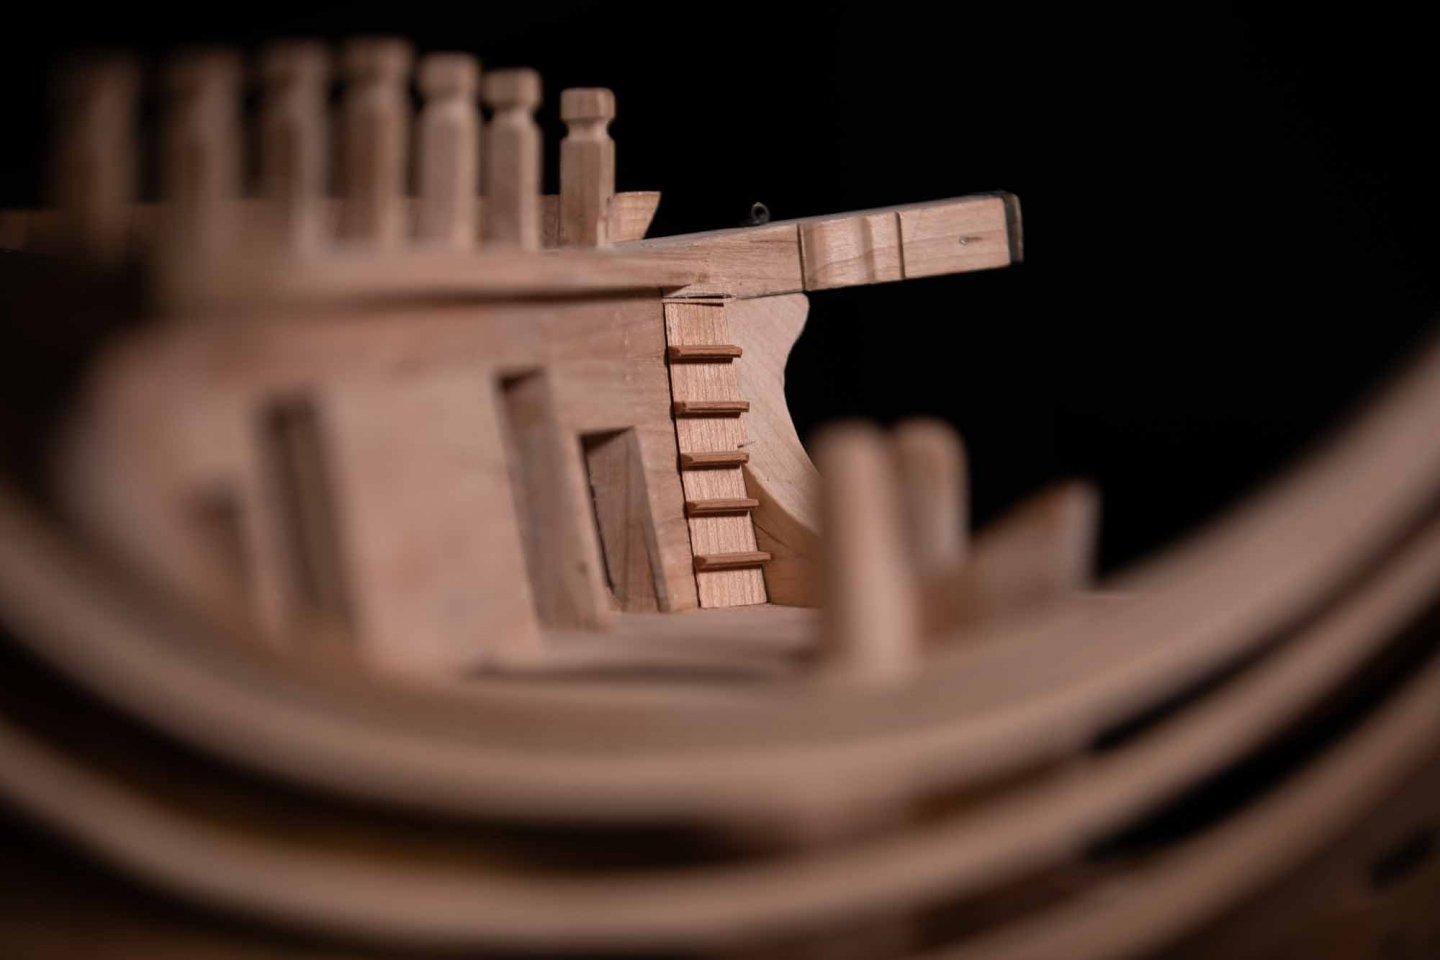
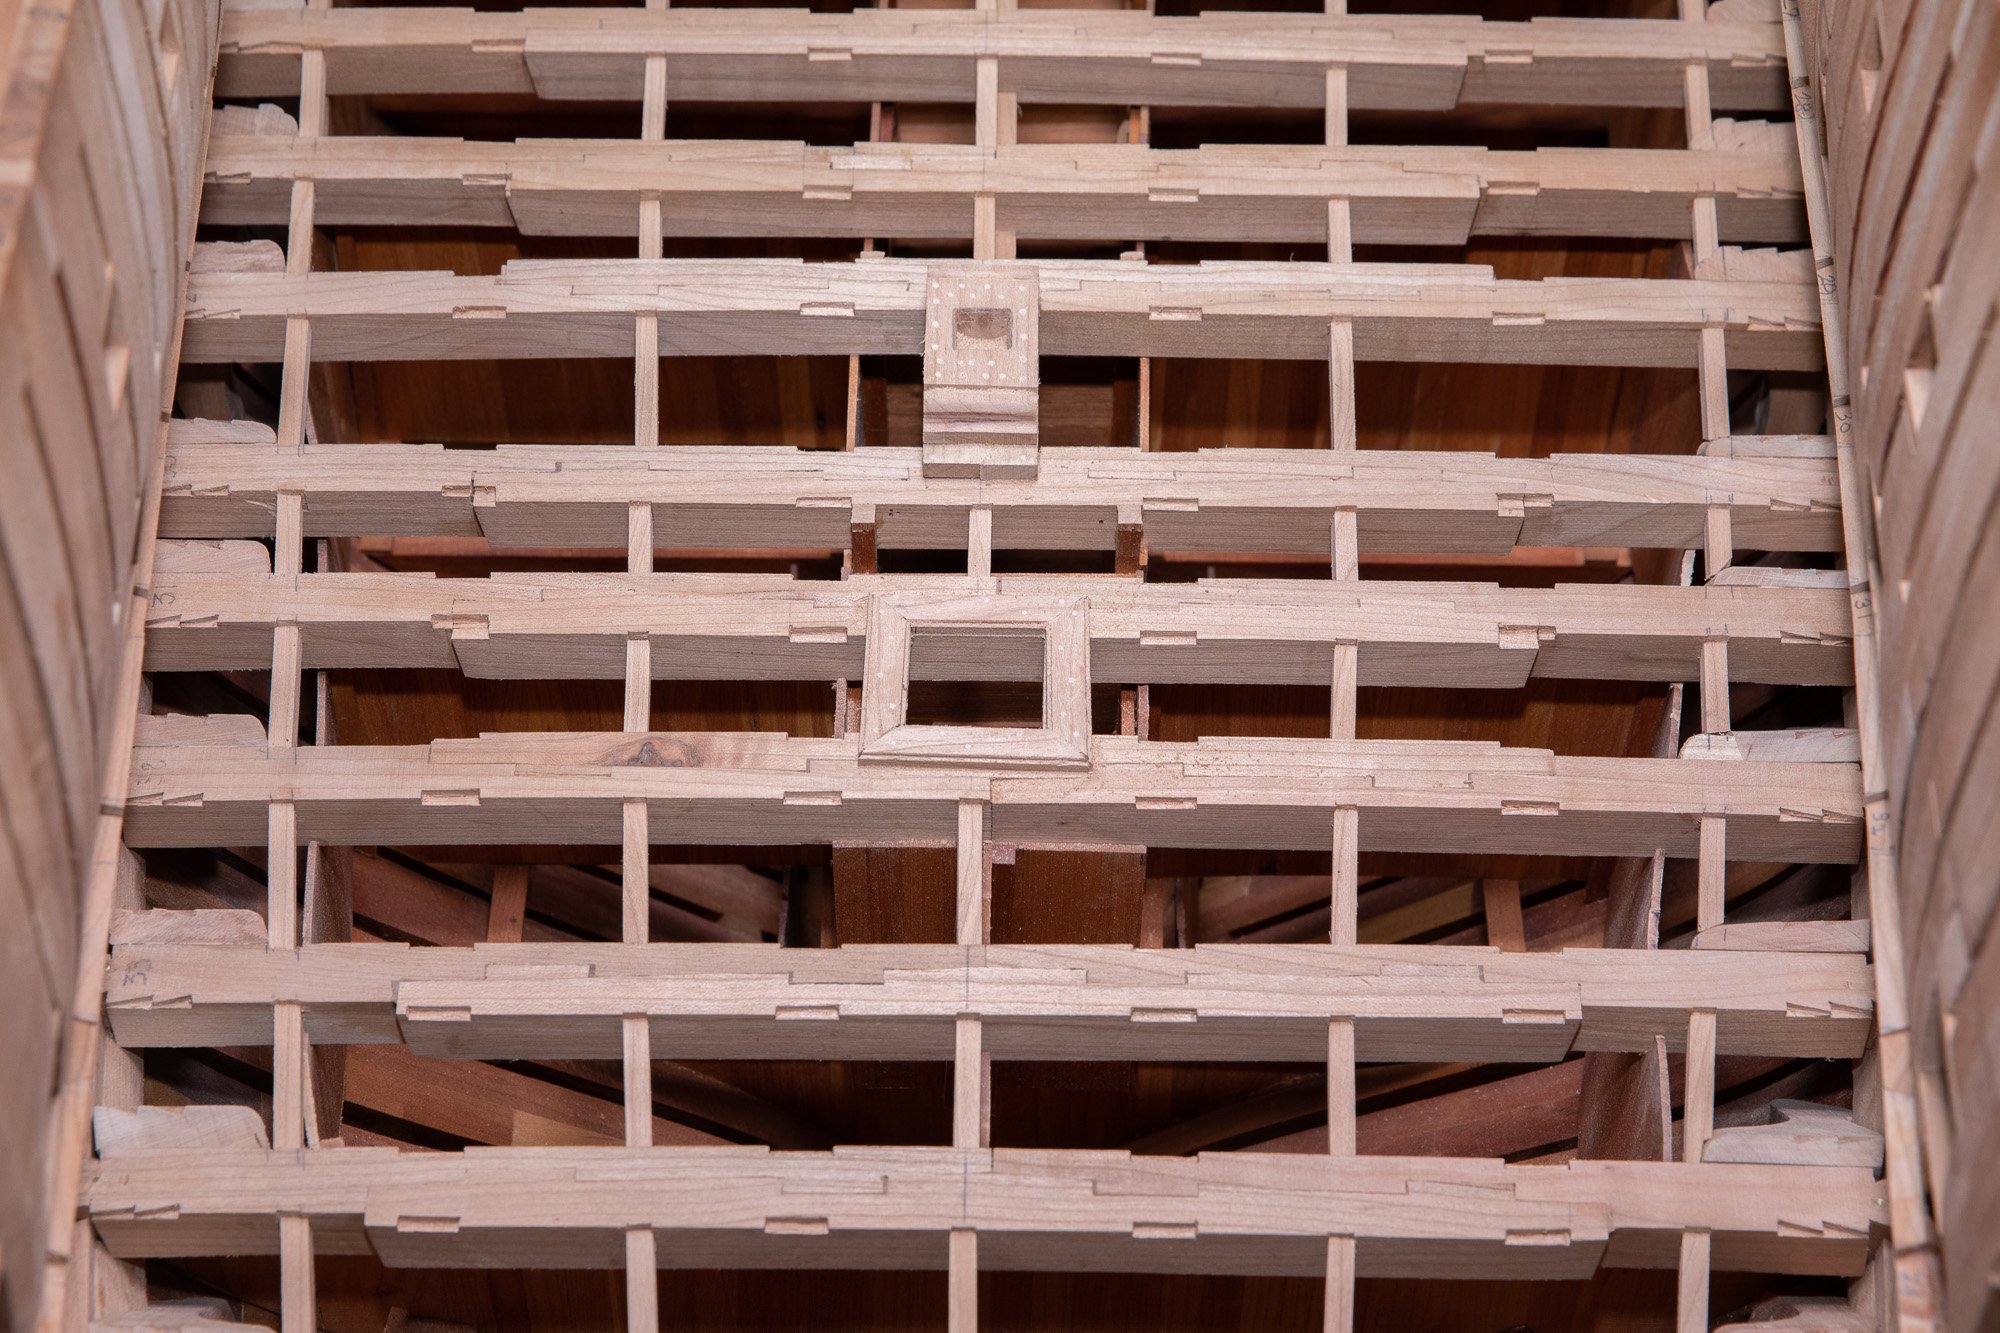
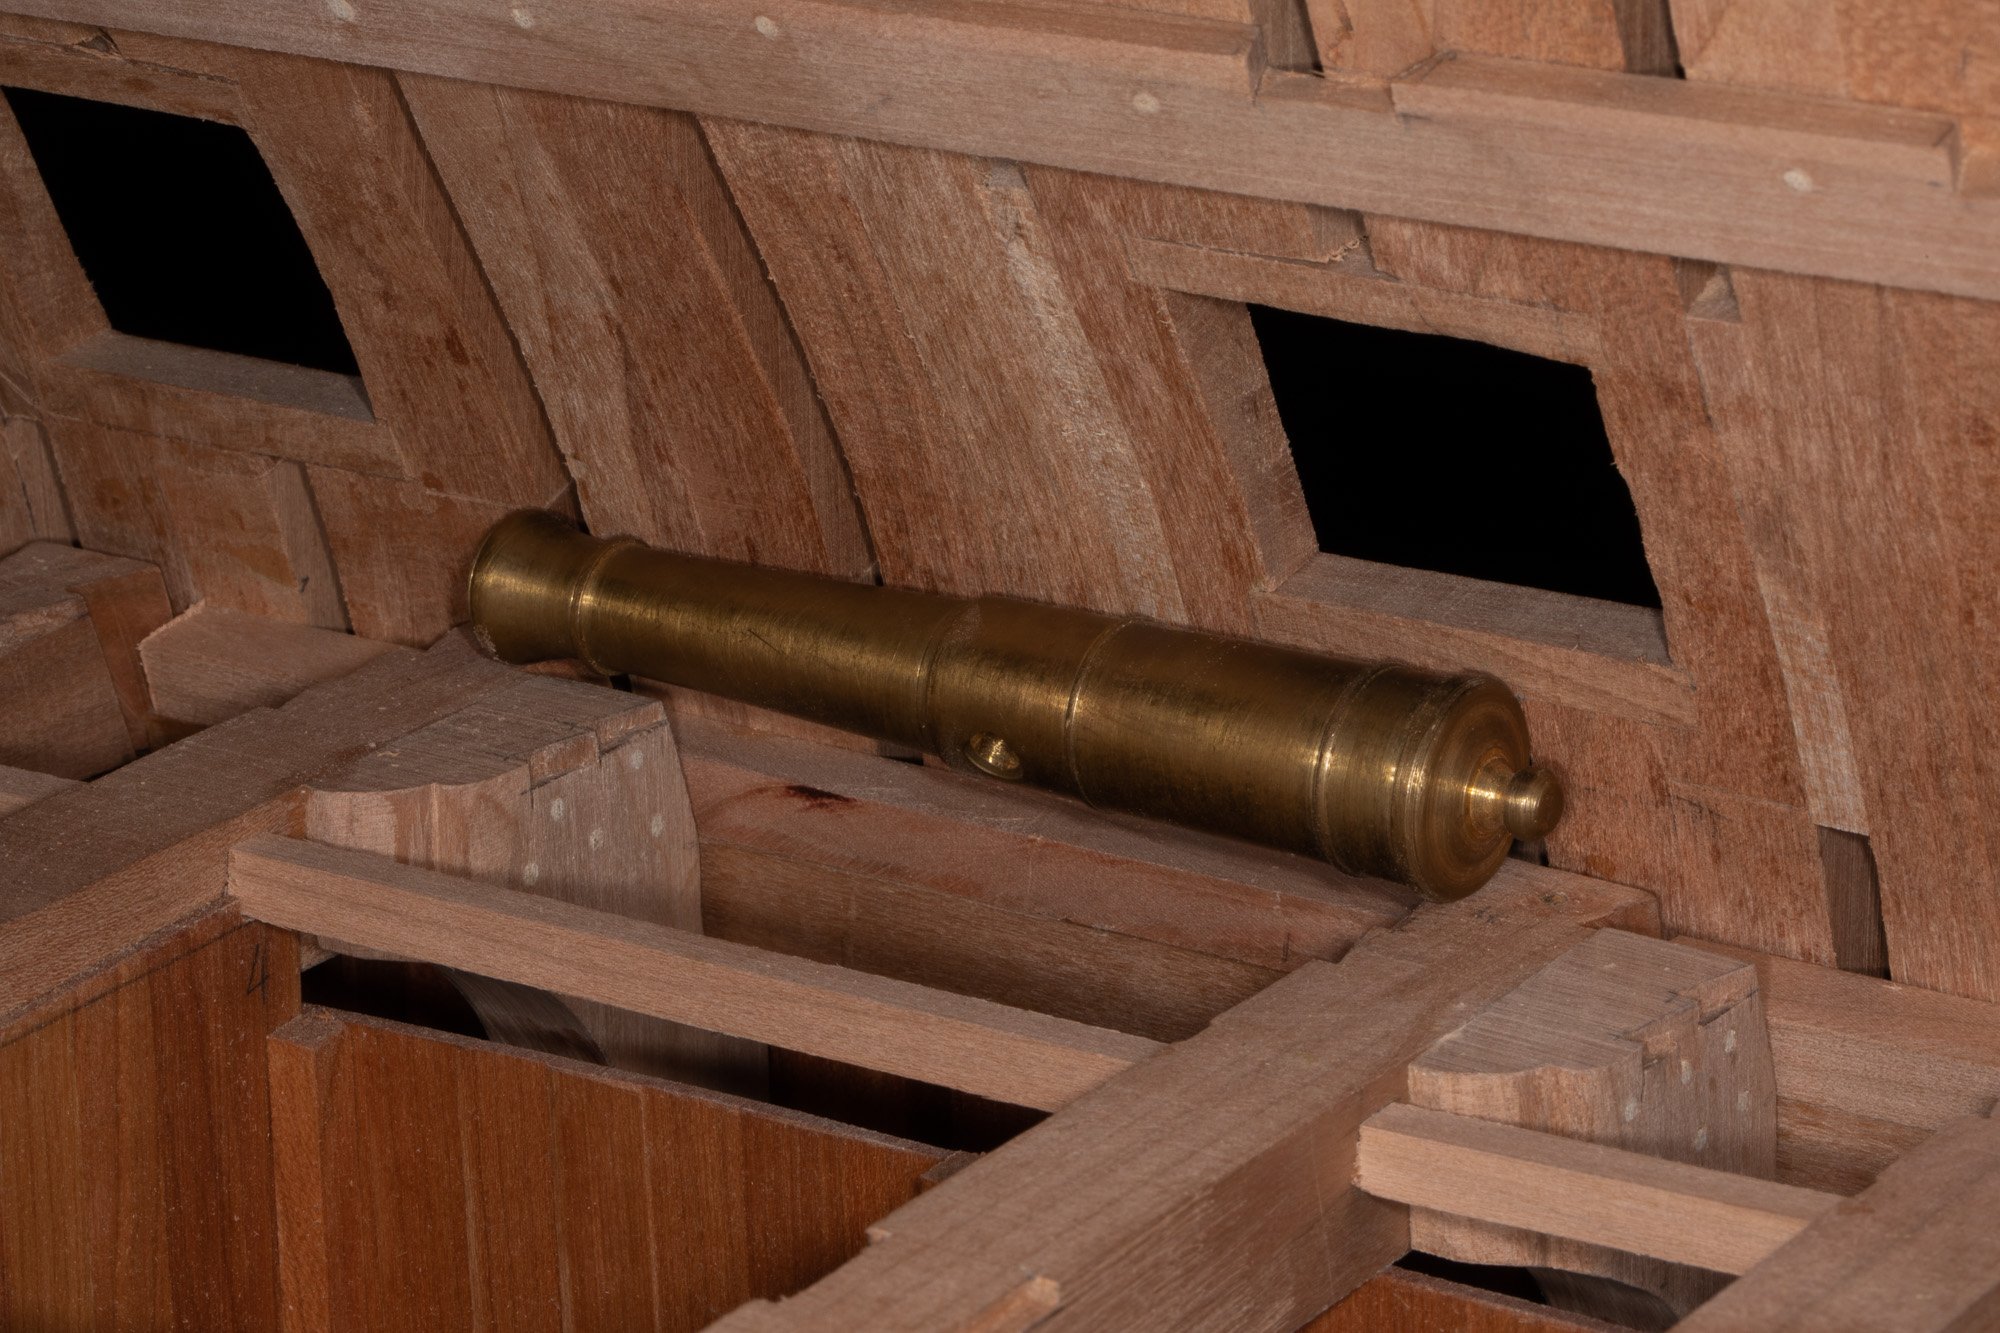
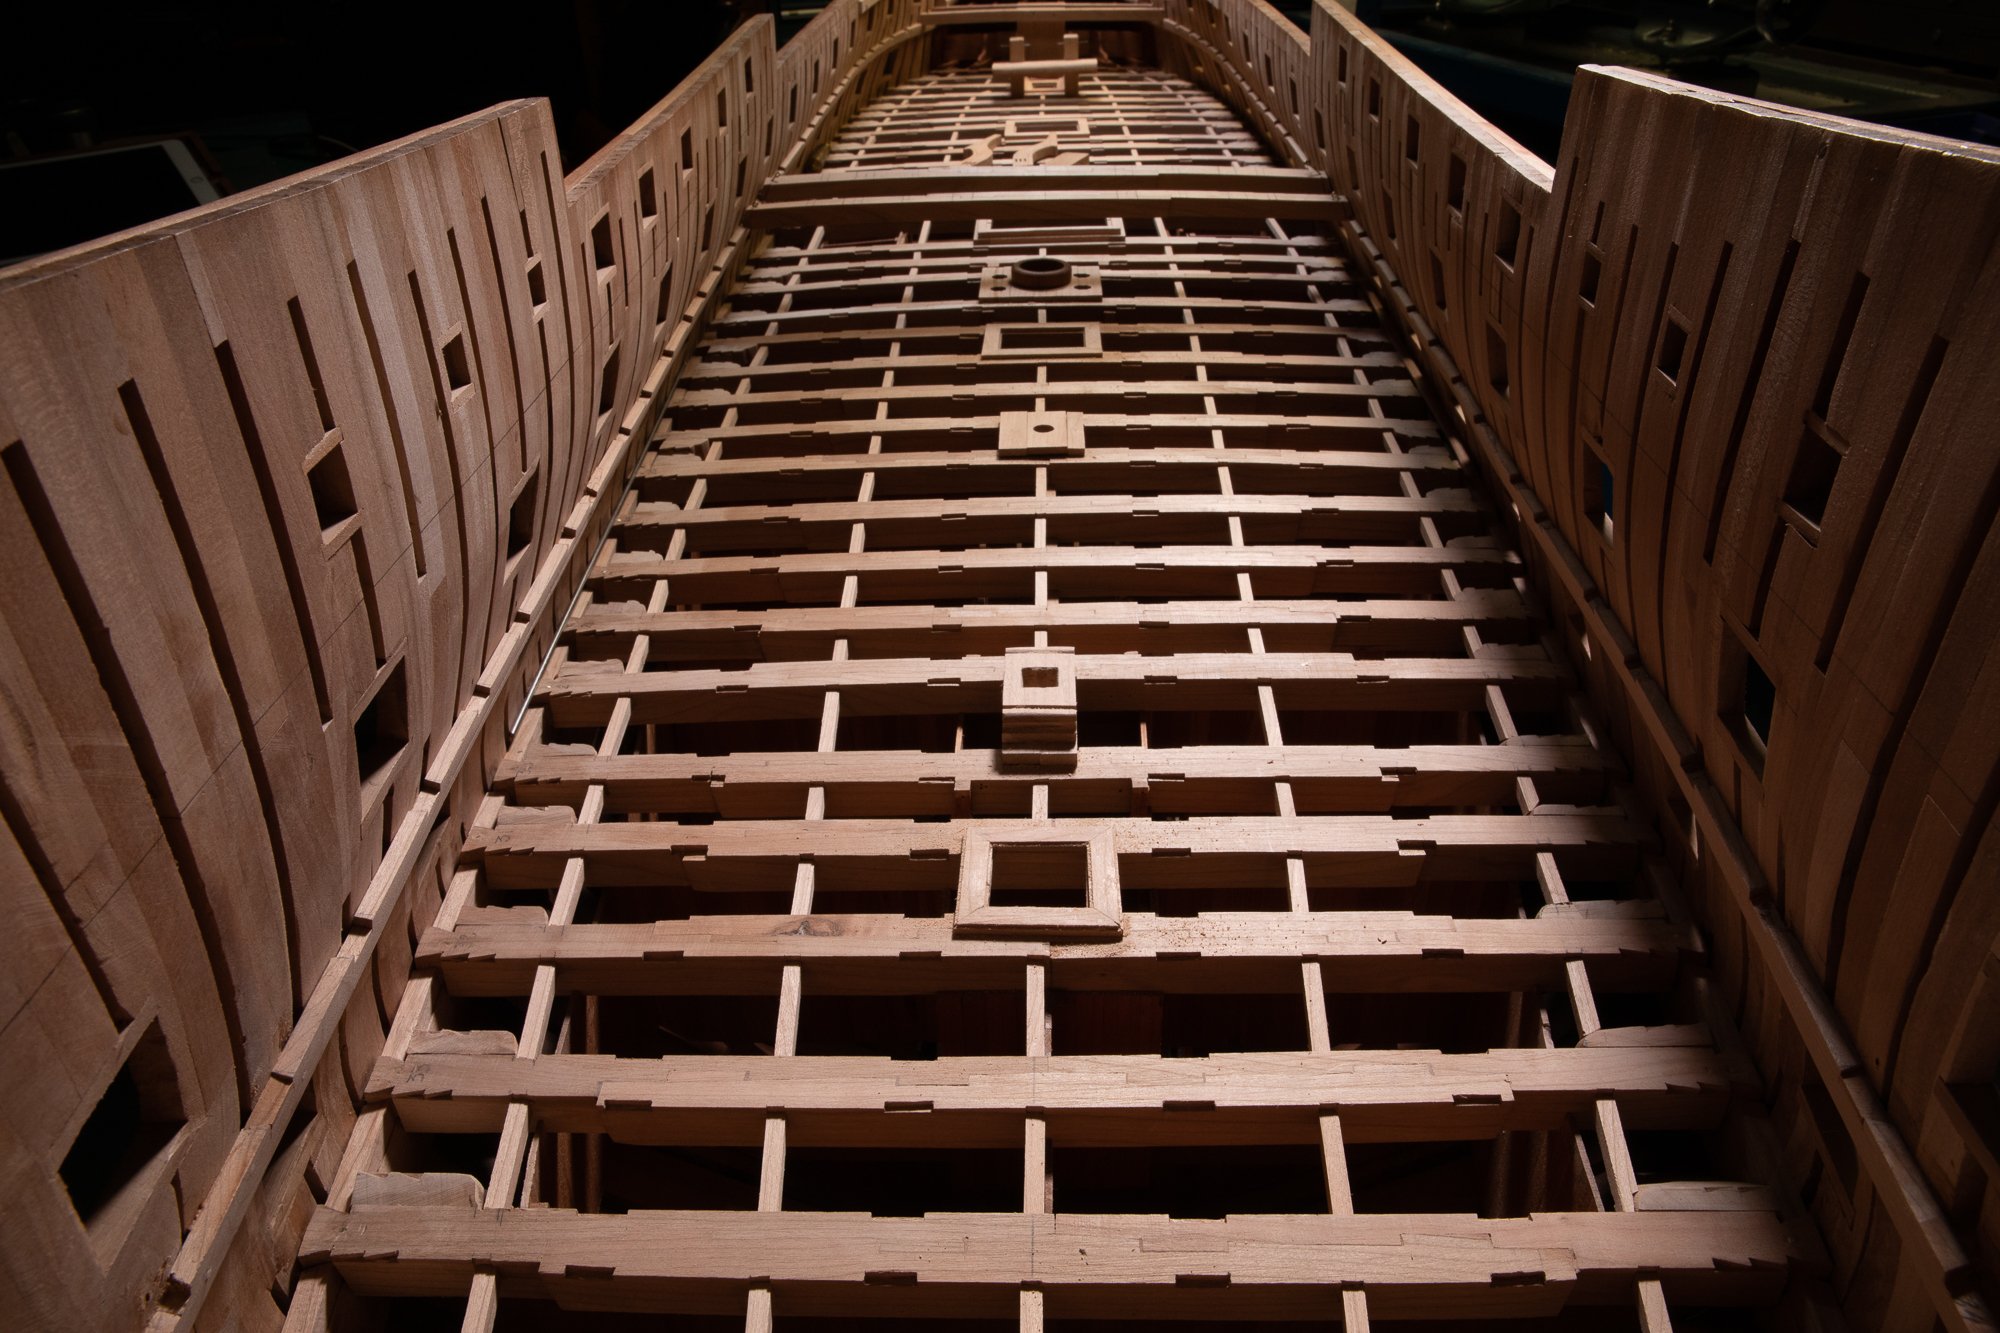
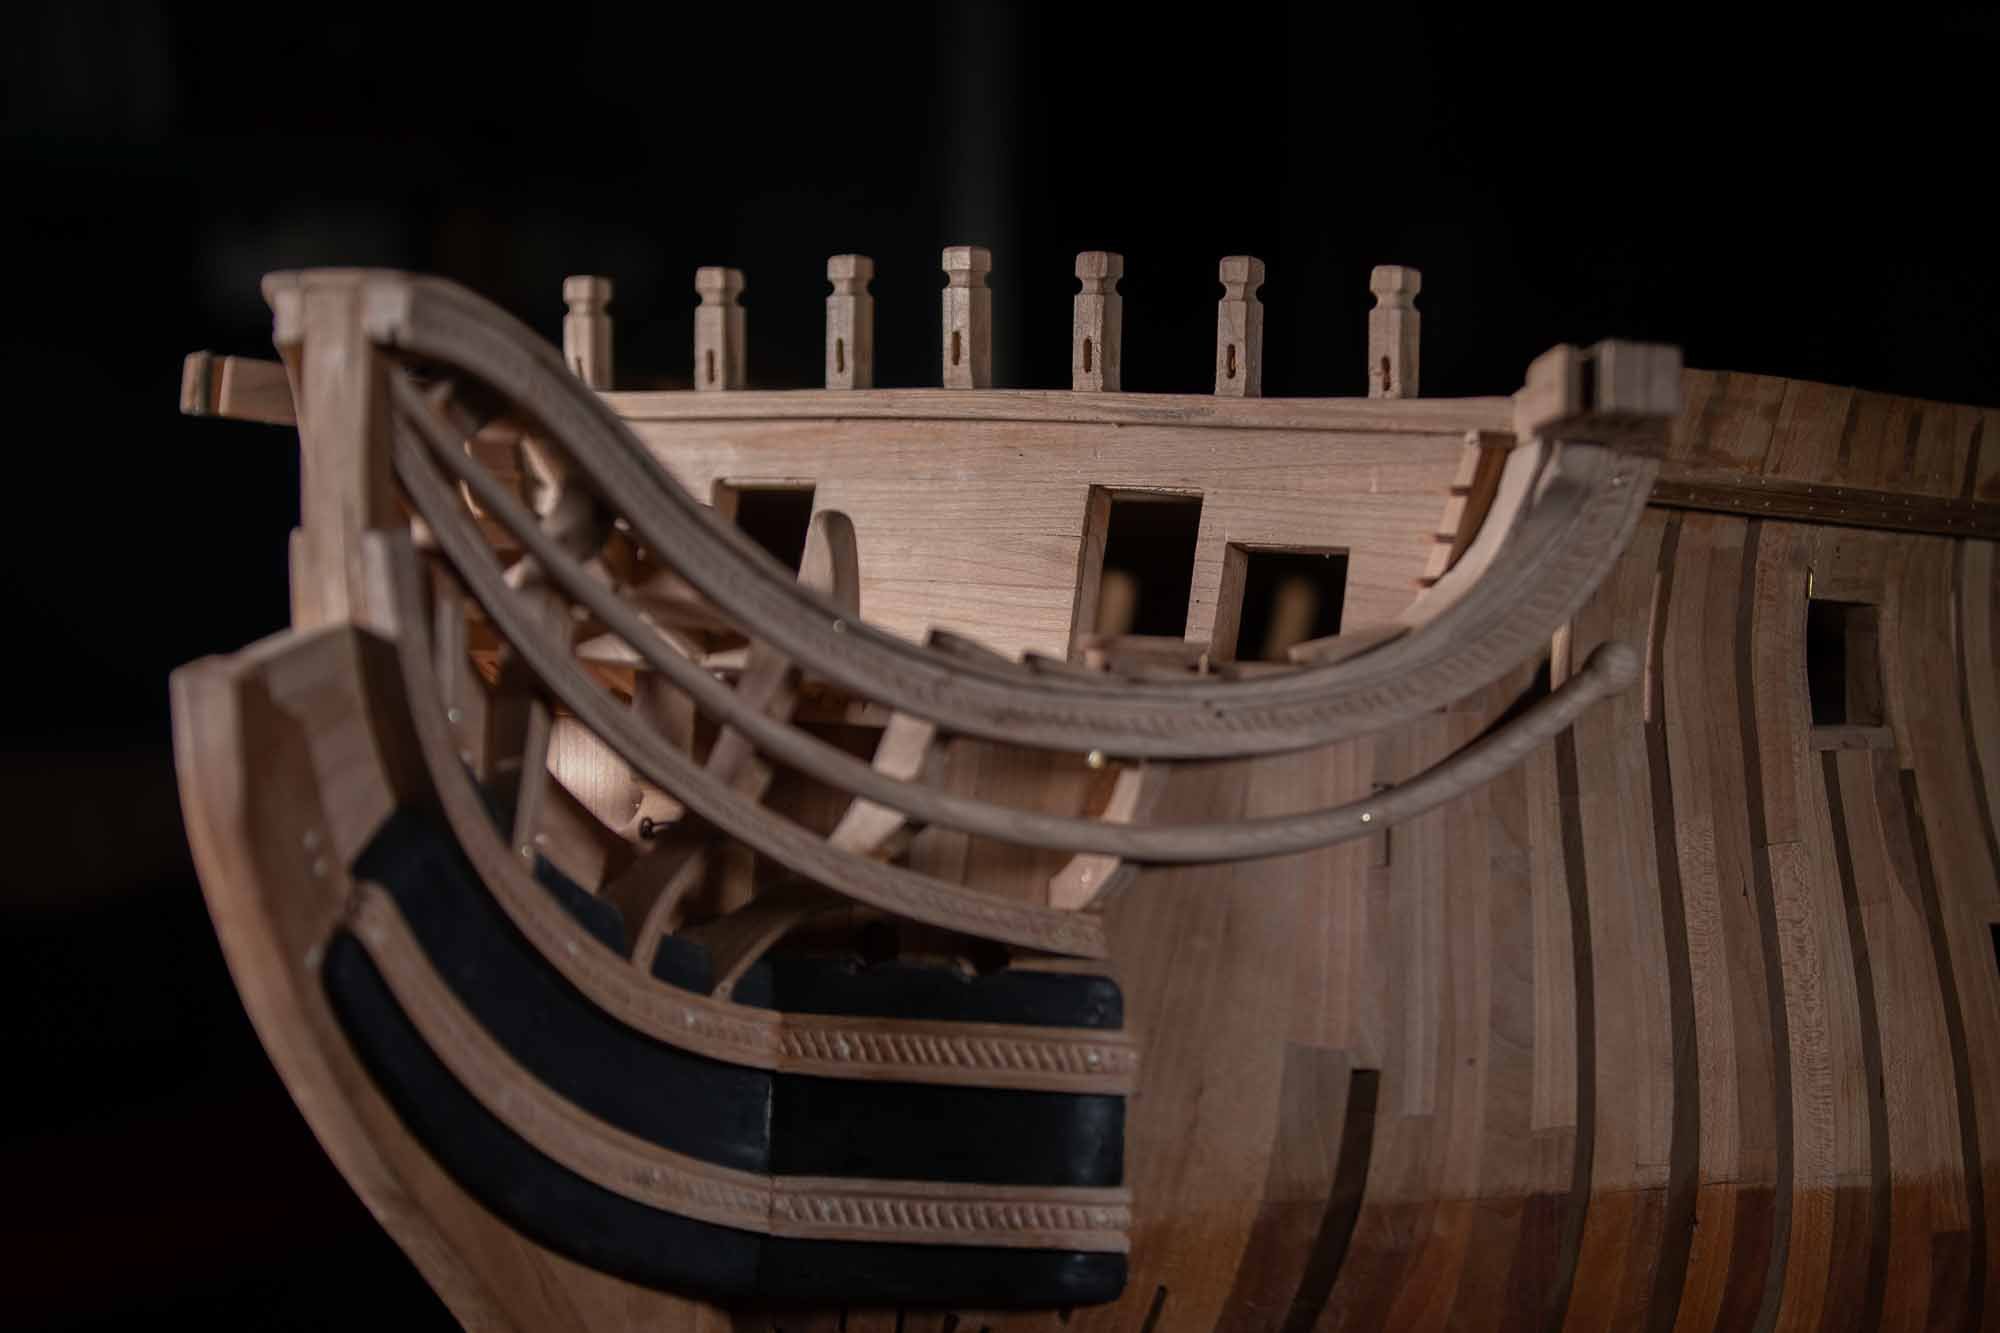
Thank you GranpaPhil Sorry to disappoint you Chuck, but my name is not Gerard and yes I use 100% cherry wood. I f you look the second before last photo; half down is coated with tung oil and the top is not covered with anything yet. I tried many finishes and to my eye, for cherry 1 coat of tung oil is enough, 3 is too much. I bought many batches of cherry wood and never had 2 identical batch, always different color. for this batch, here is an example inside the model:with and without tung oil. In a way we could say that the "real color" comes tung oil. It is like aging the wood 100 years in 1 hour only.
-
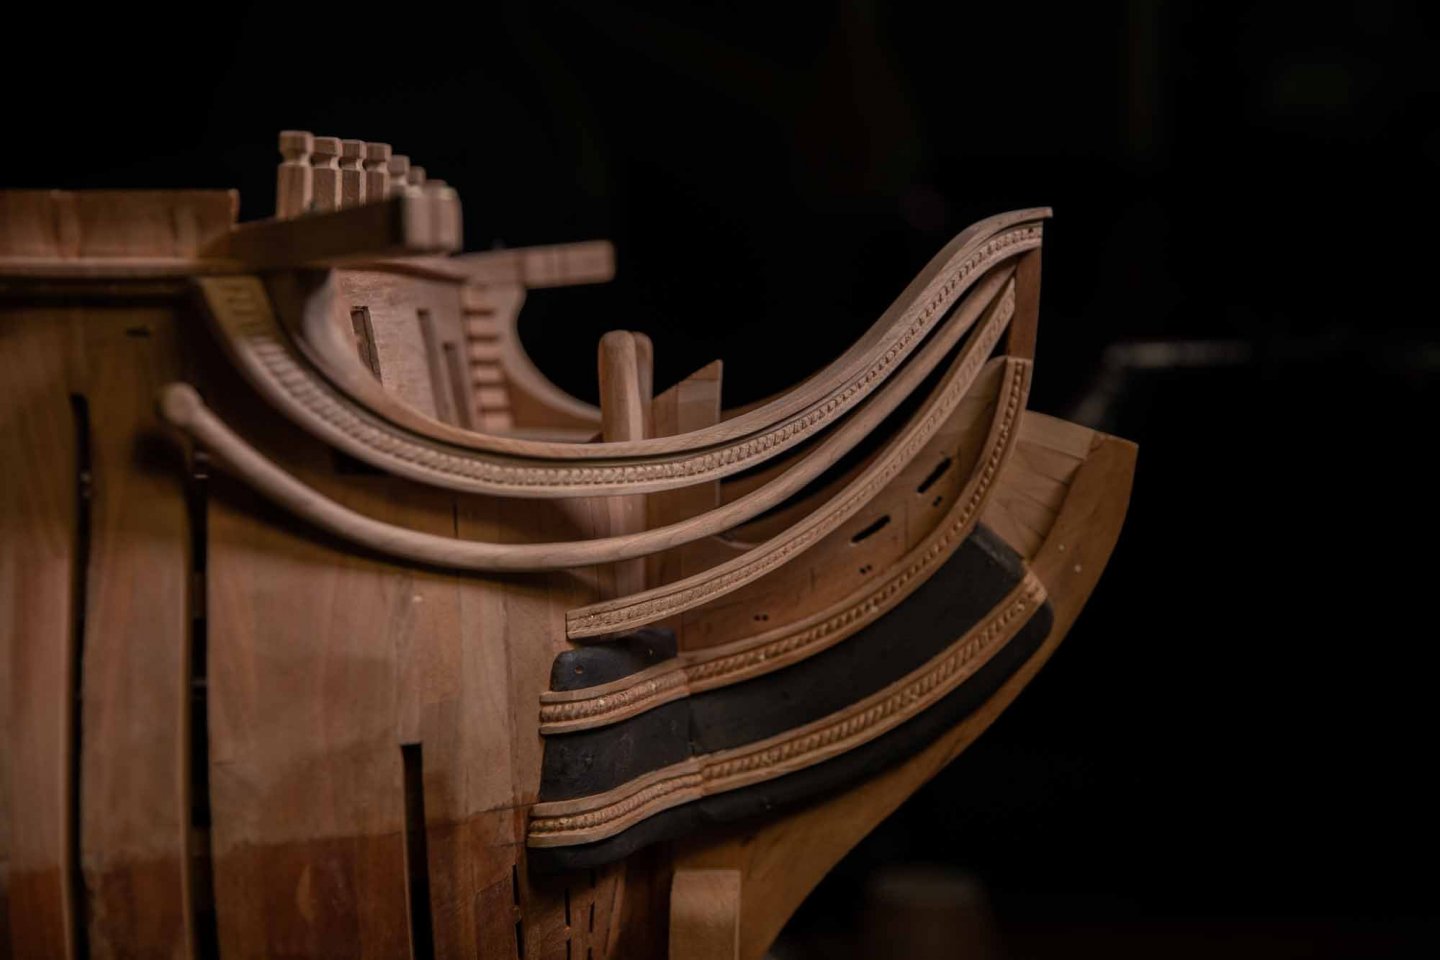
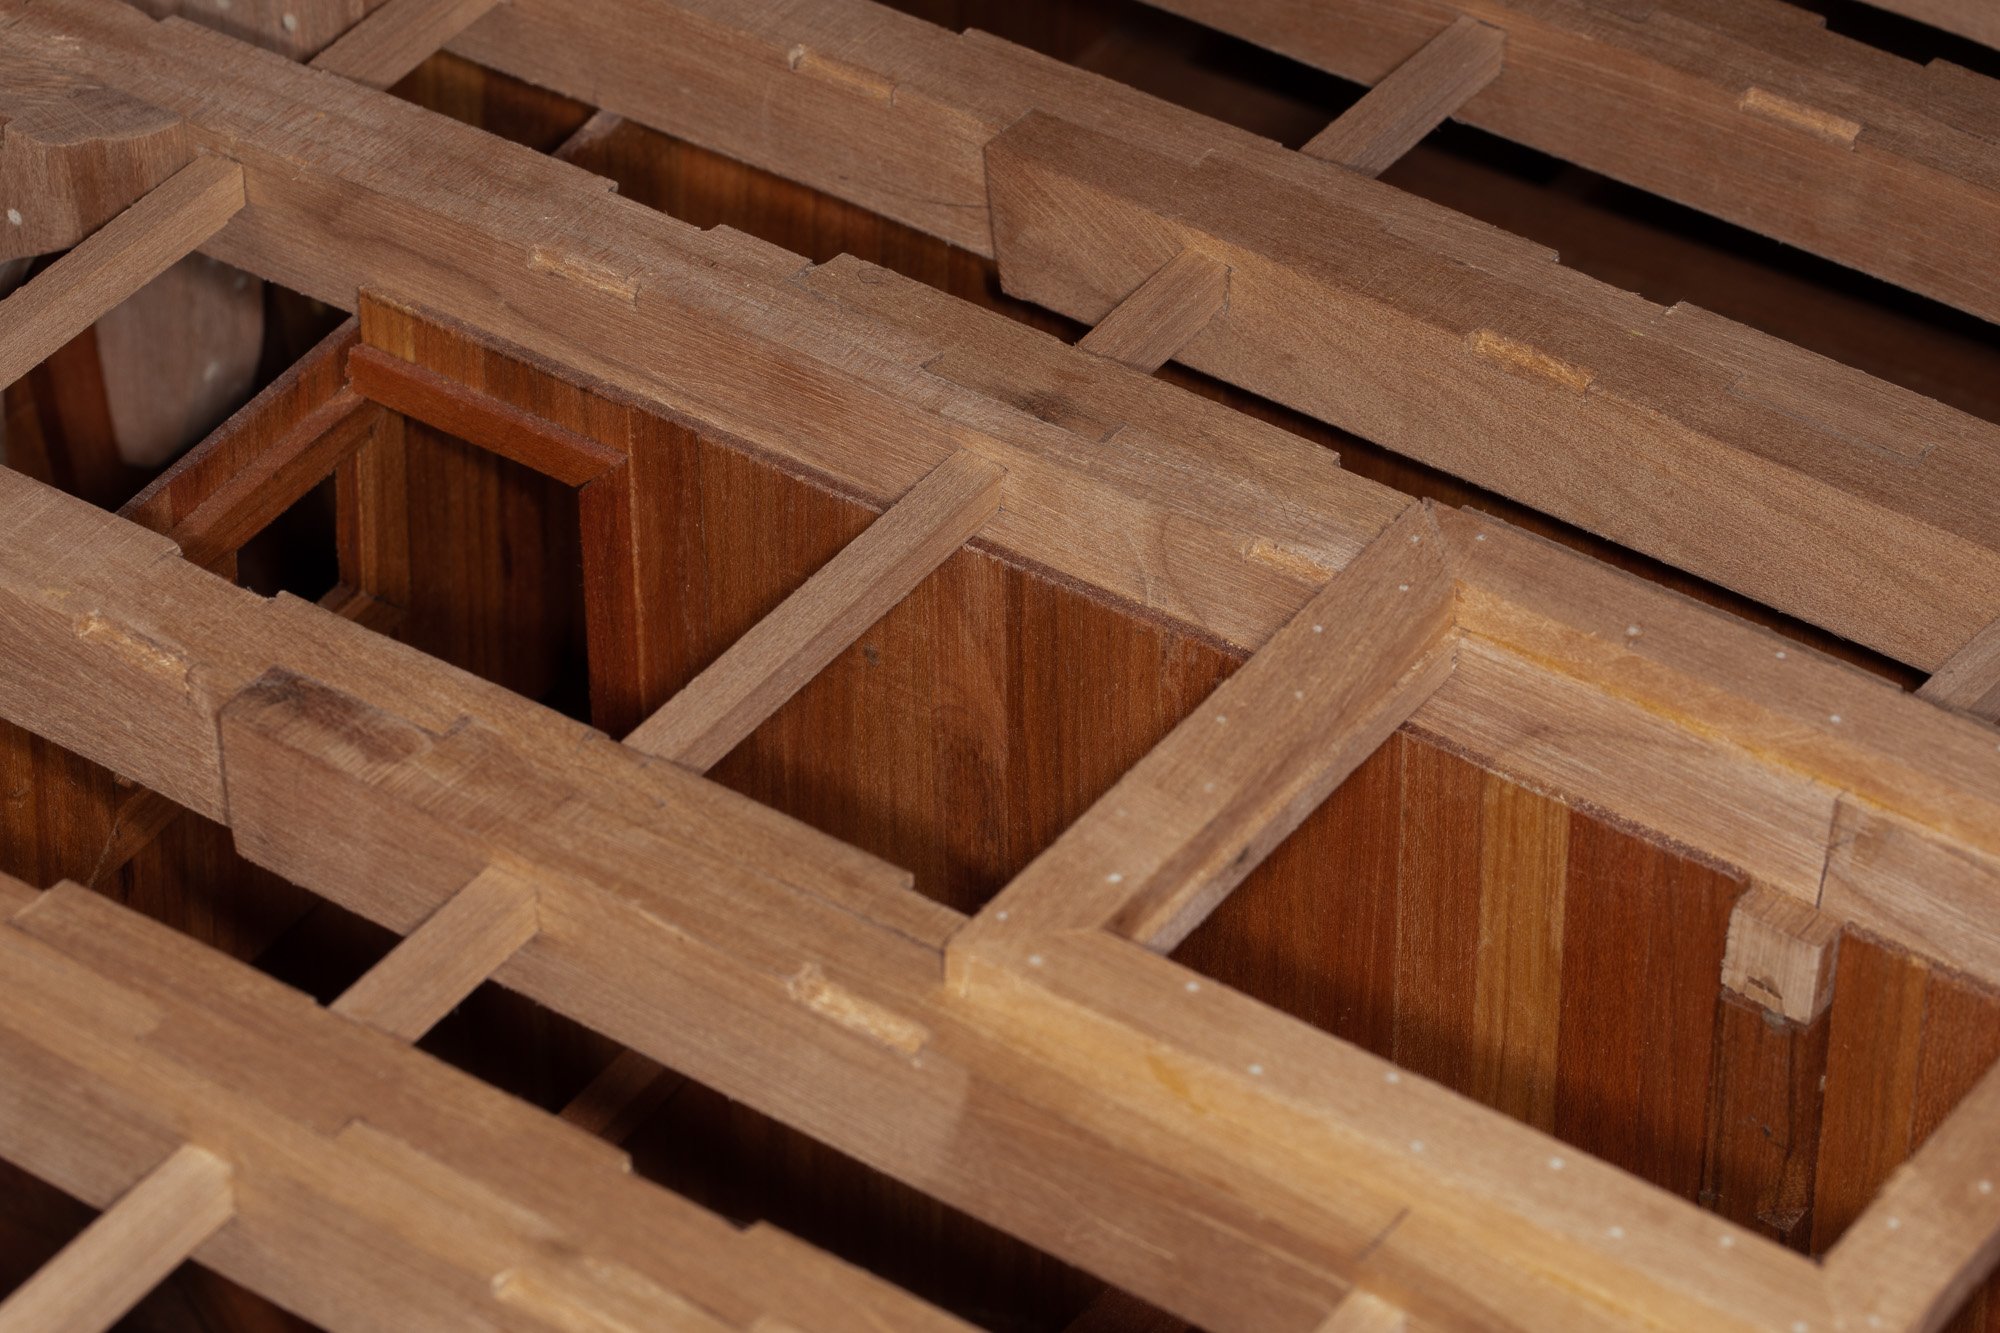
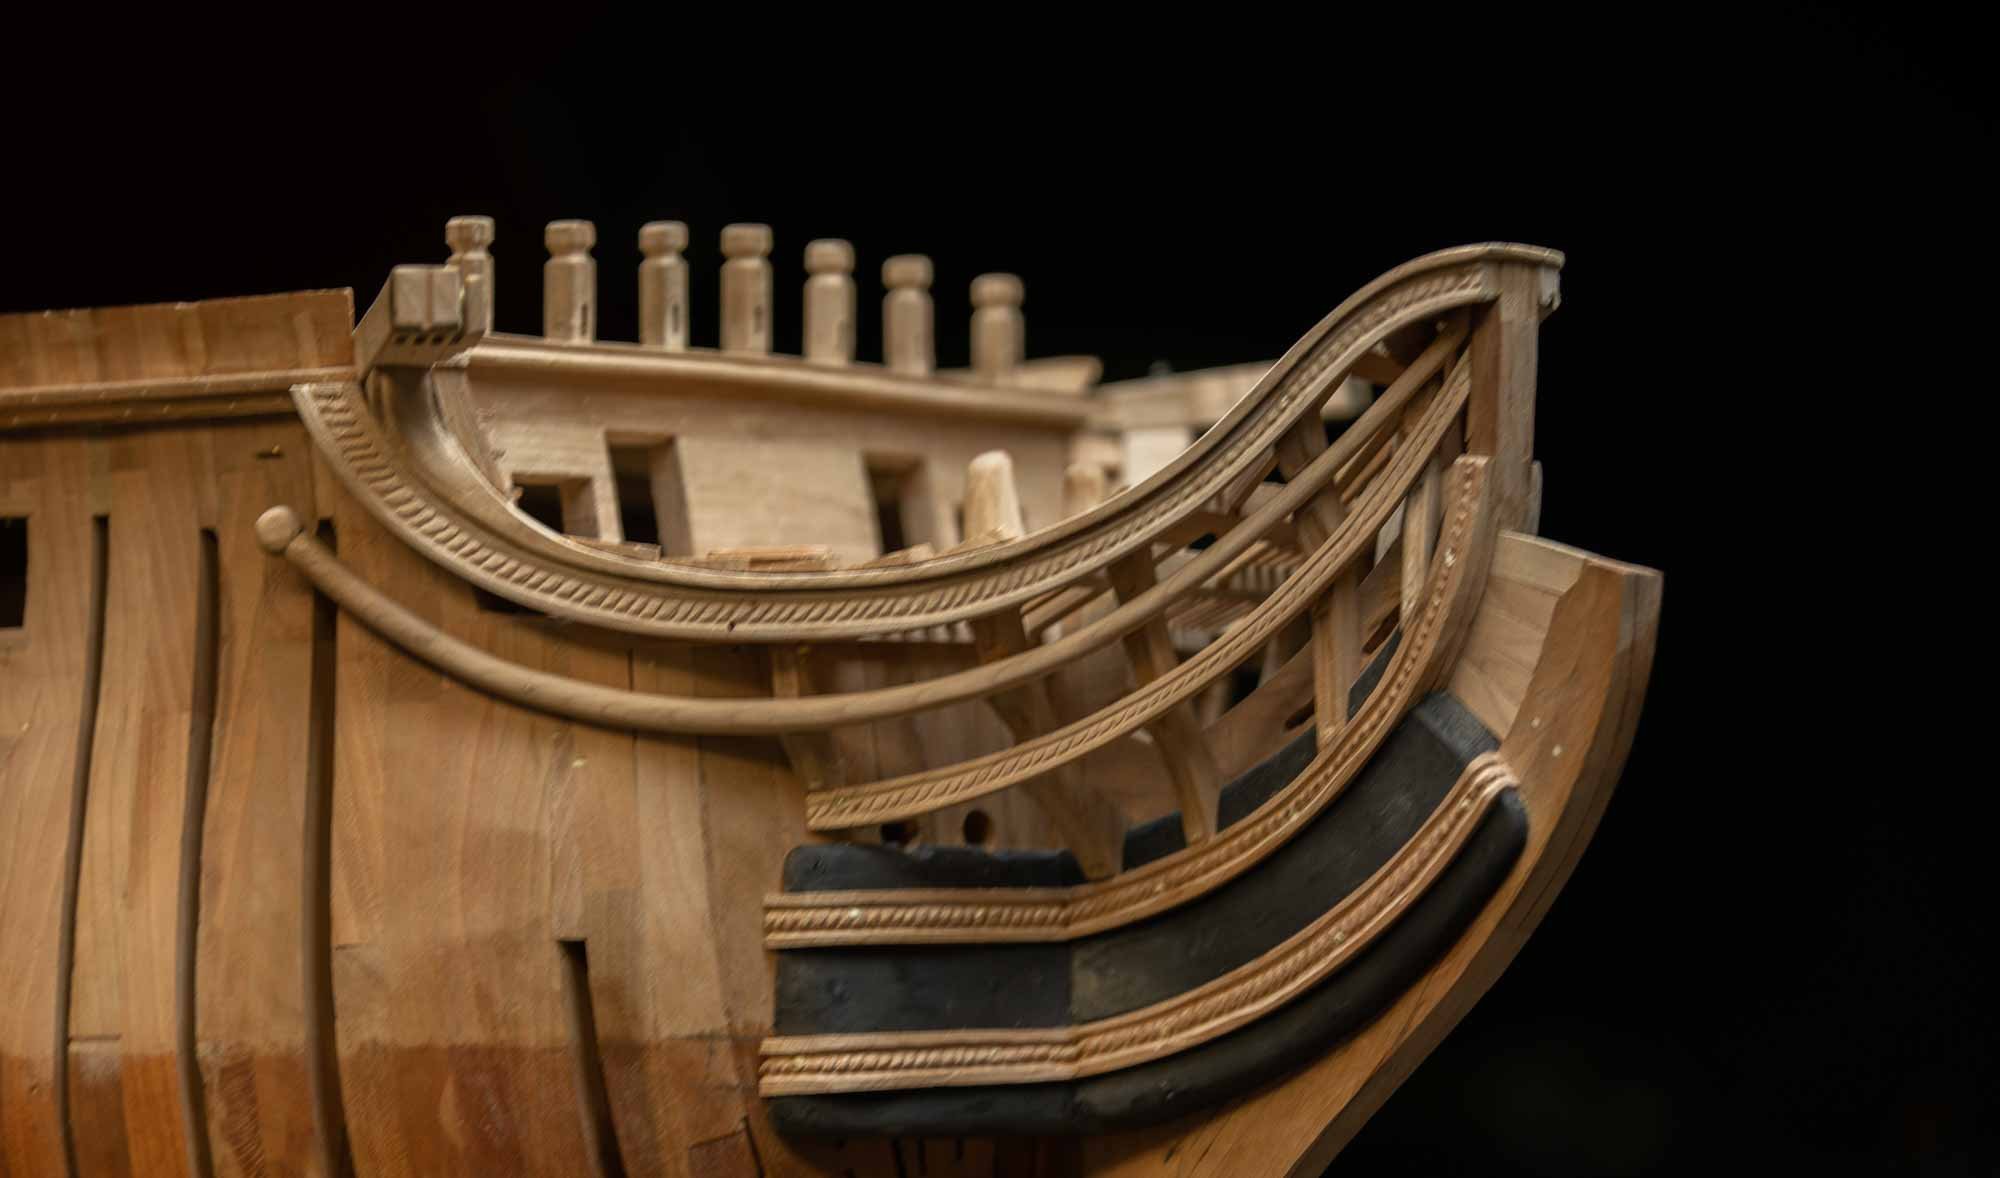
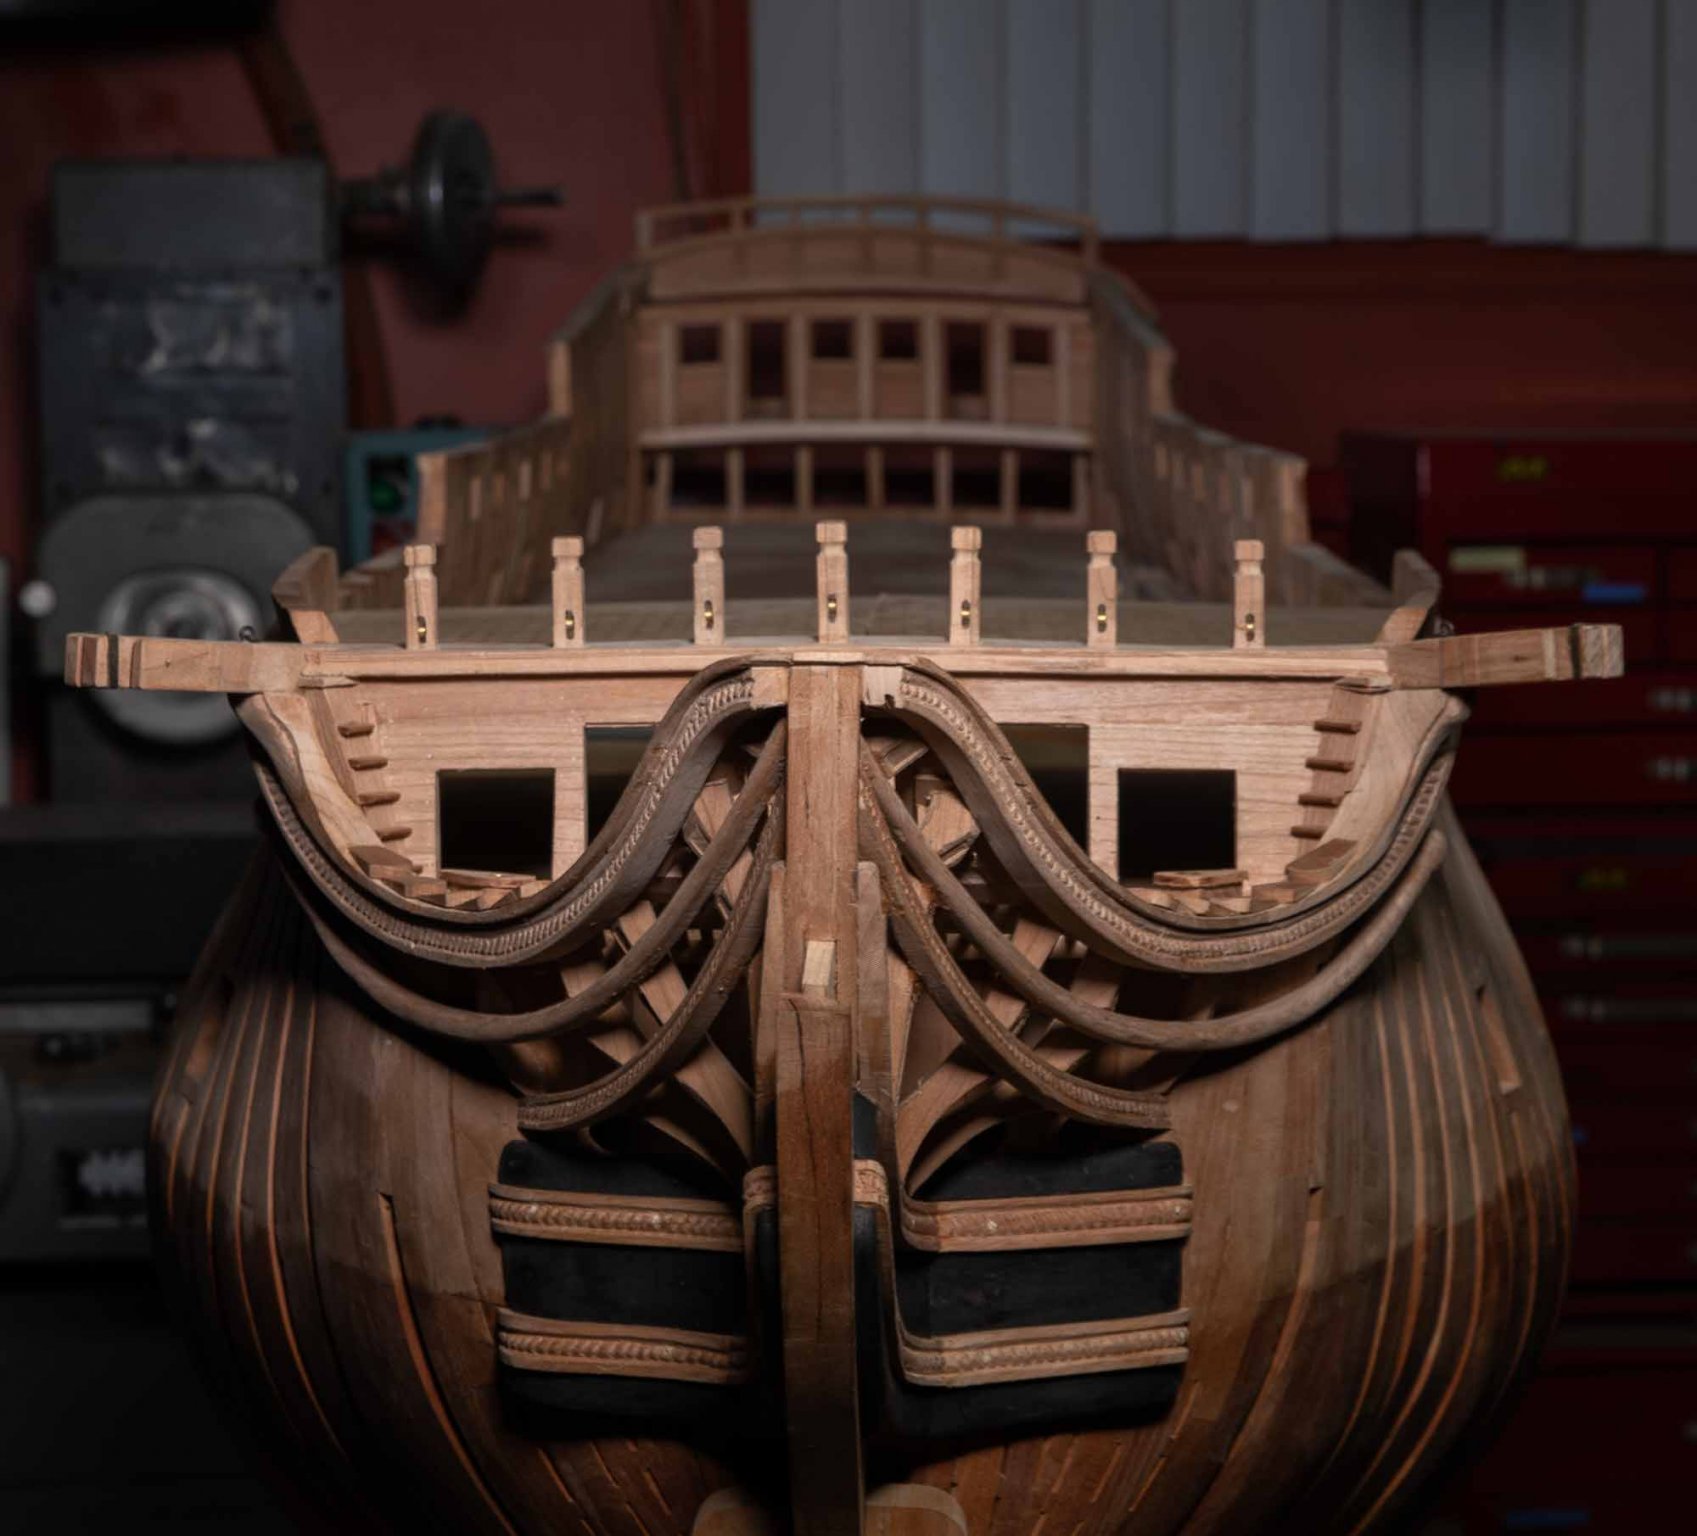
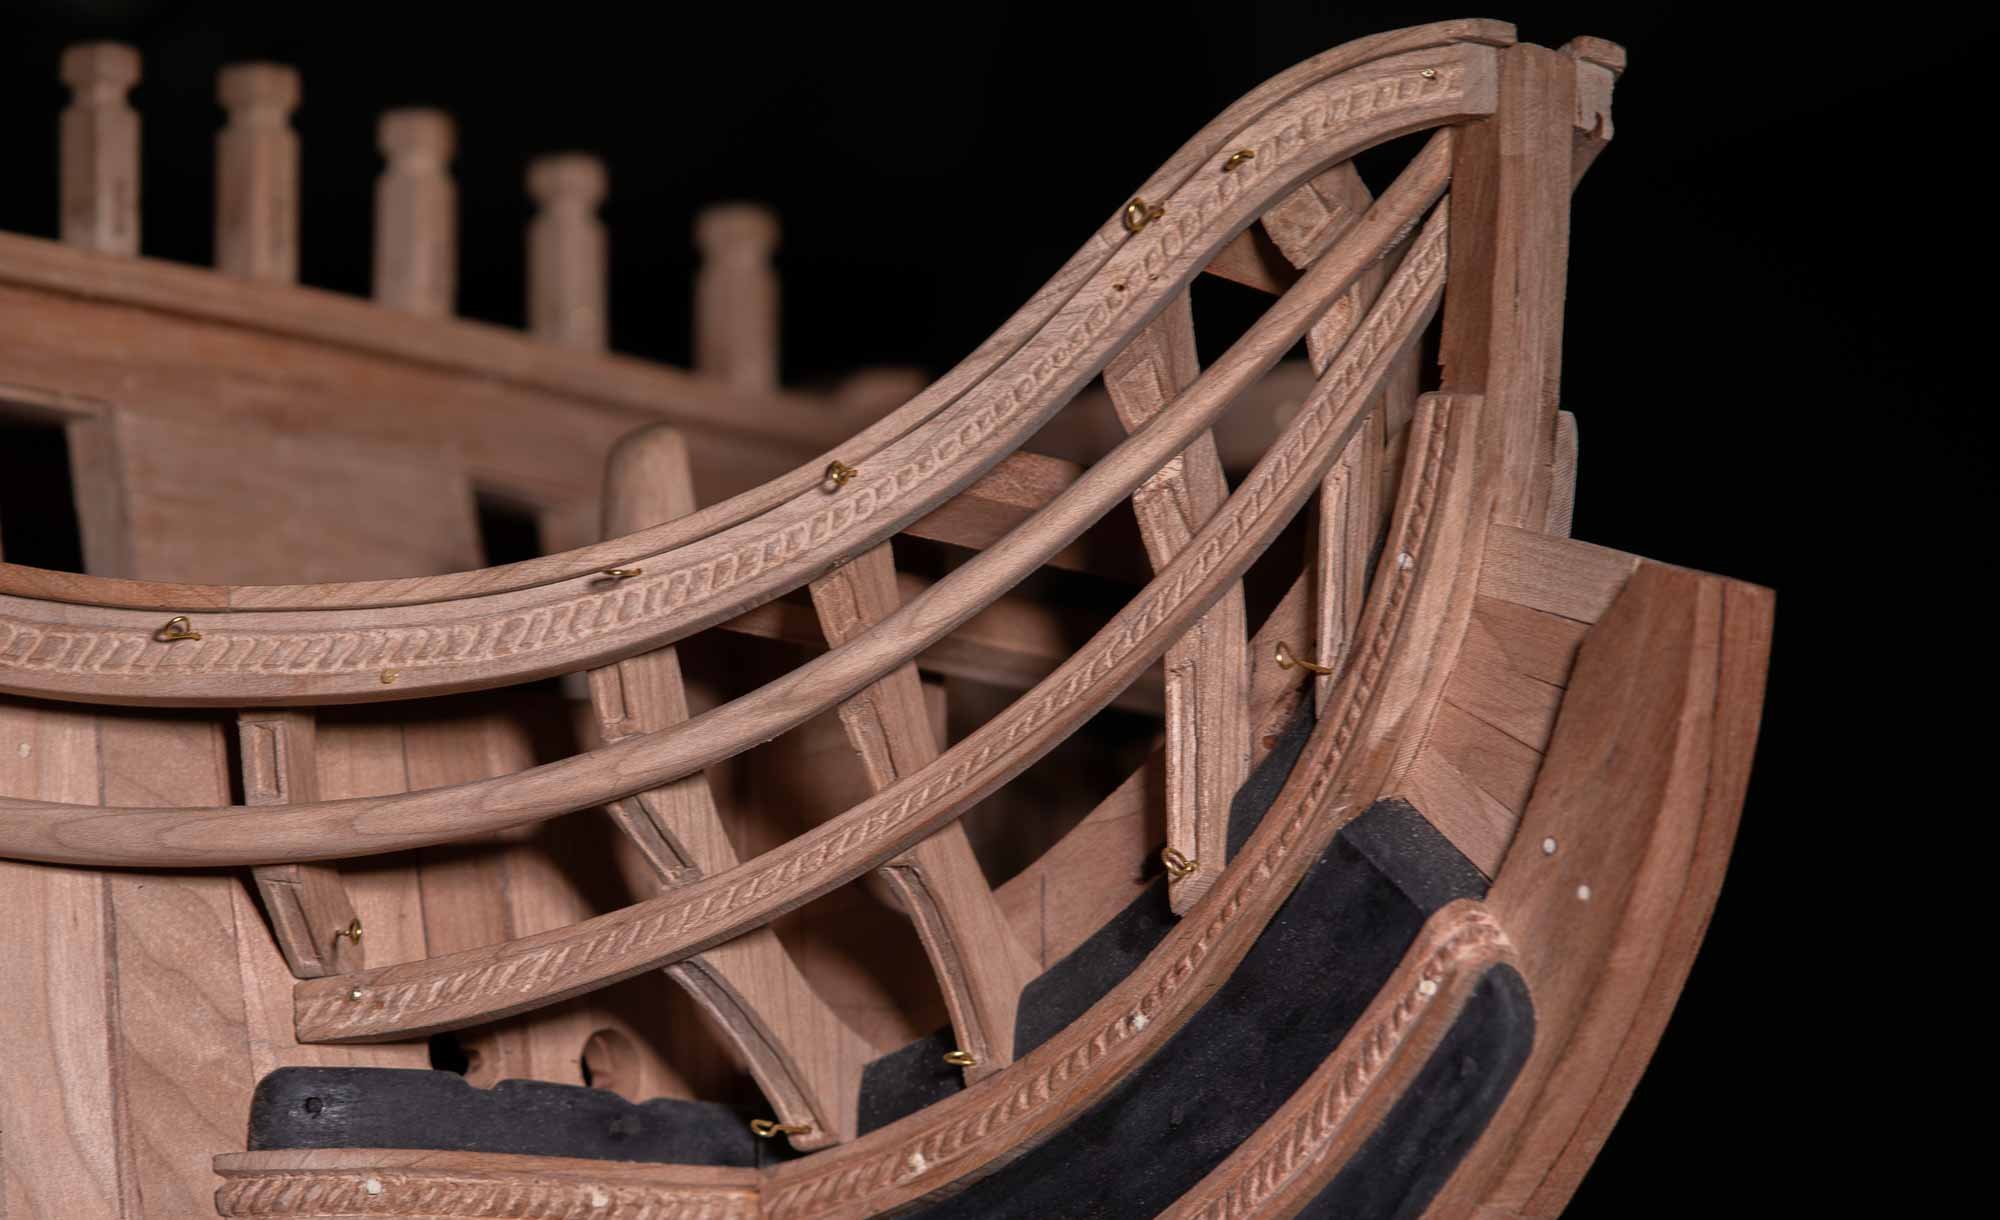
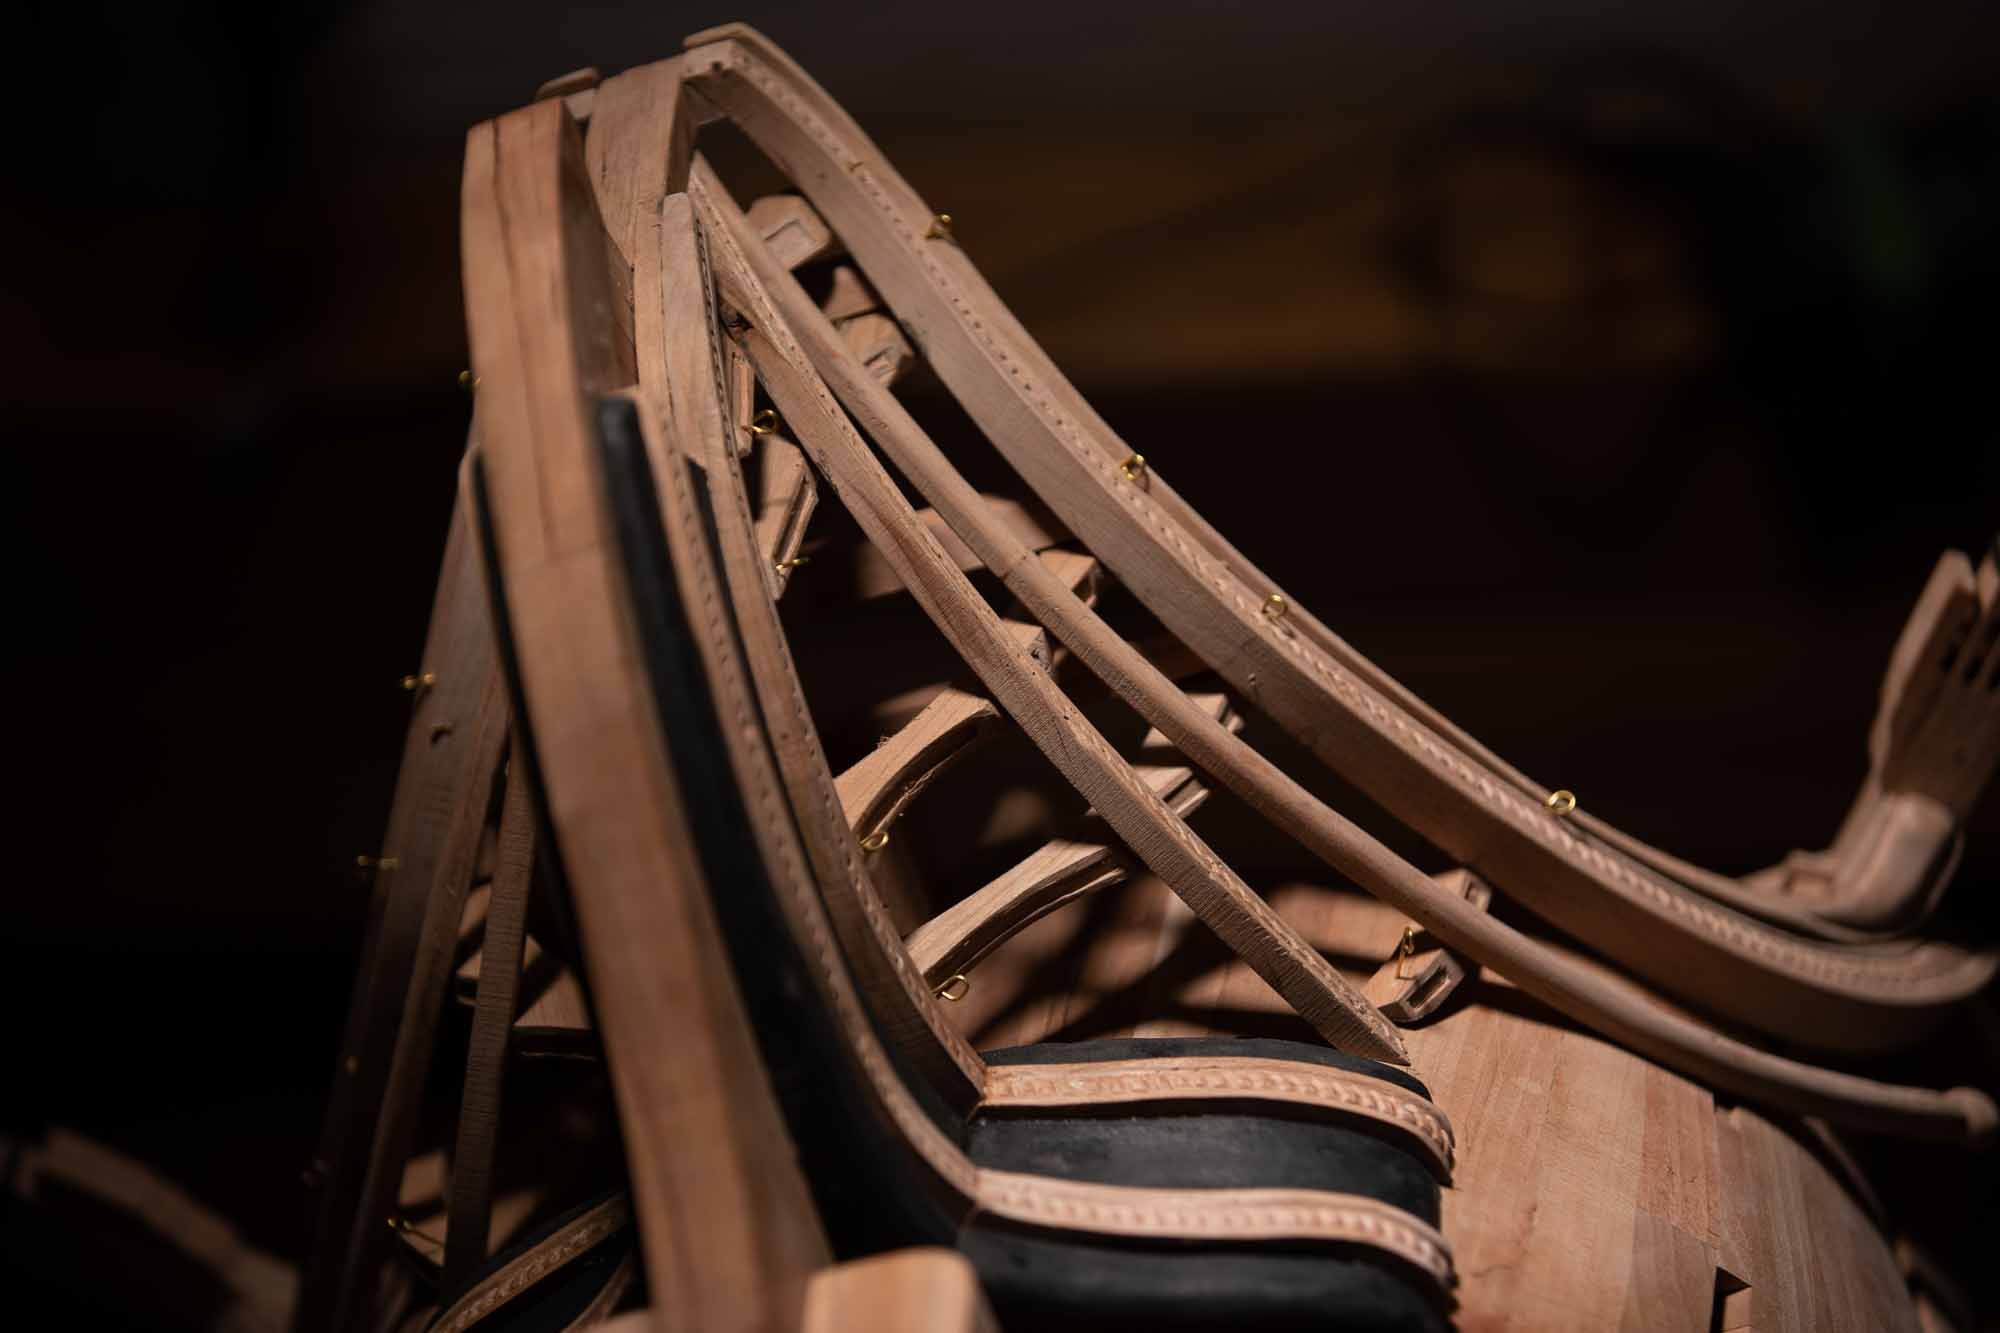
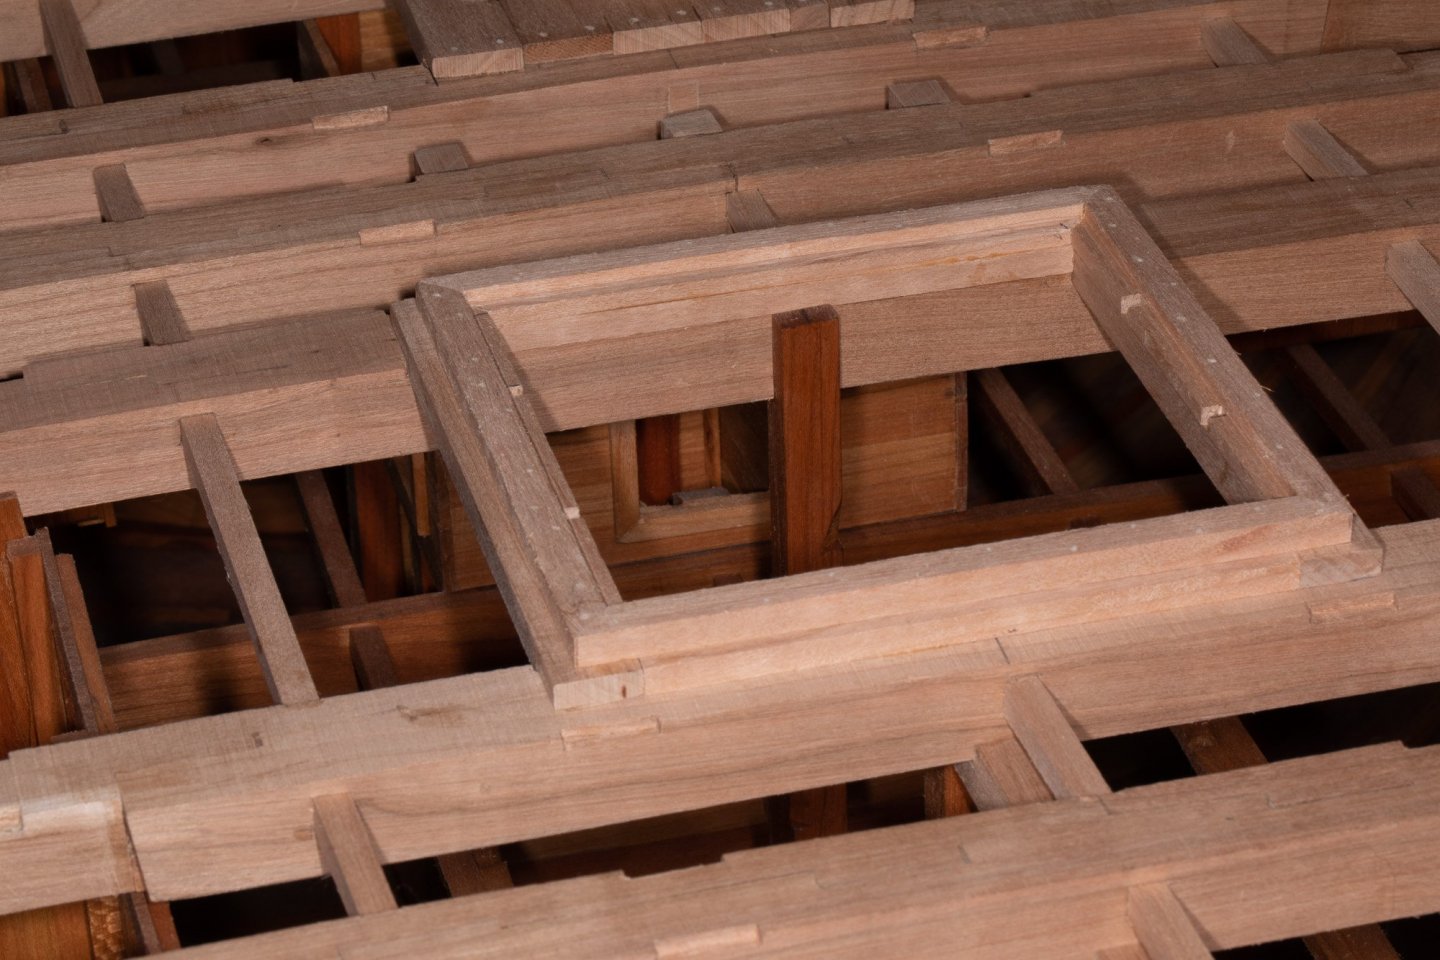
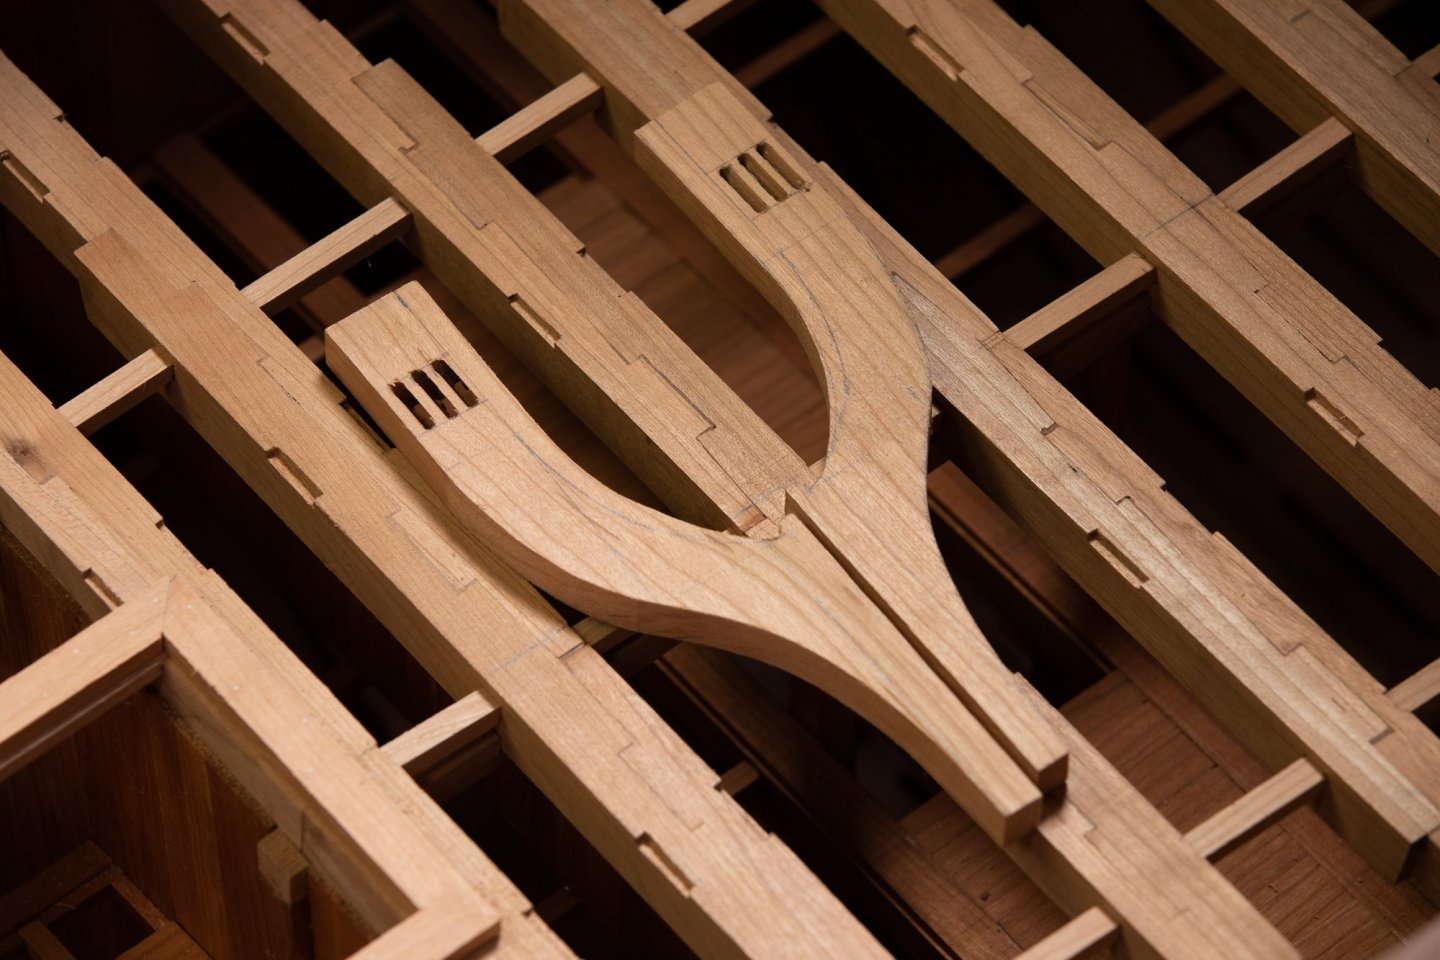
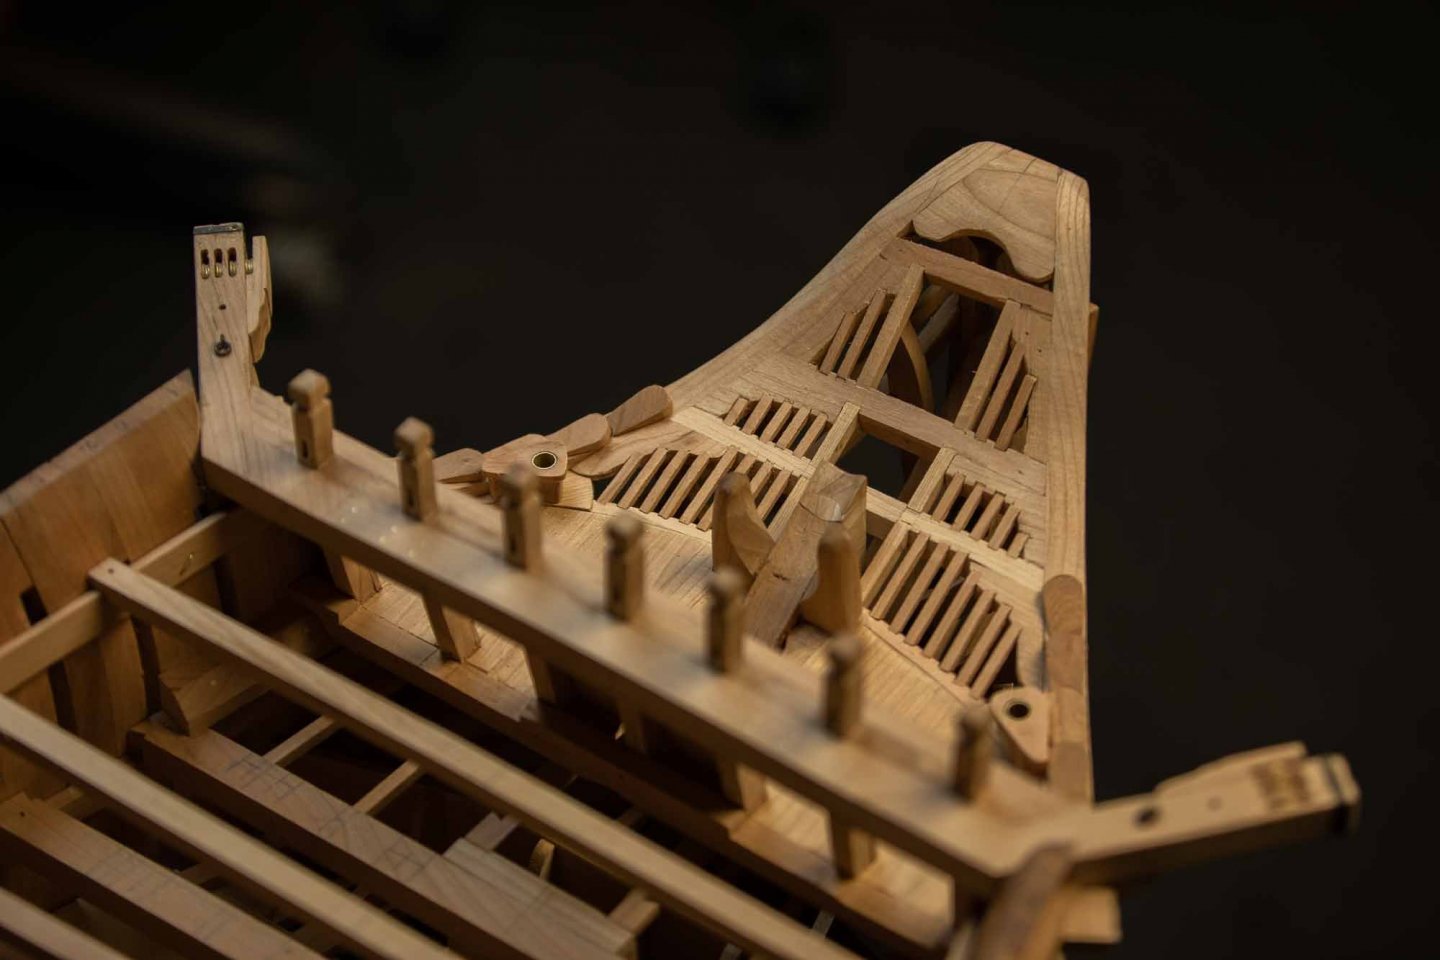
Thank you Richard Are these complicated curves, I do not know. I think that what is complicated is that you need to constantly refer to what is on the construction site. I also think that plans for this section are almost impossible to follow at exactly 100% because for every part that a slight variation it does affect many other parts. For now, it is enough with this part, I think I will come back on decks.


-
I would buy the Unimat because of the accessories: milling column and automatic feed. A lathe without automatic feed, it is not a lathe. The automatic feed allows you to have a nice finish that you cannot get without.
-
Byrnes thickness sander vs Micro Mark's
Gaetan Bordeleau replied to twintrow's topic in Modeling tools and Workshop Equipment
I use 2 by 72 belts and the best ones are blue, last for months. -
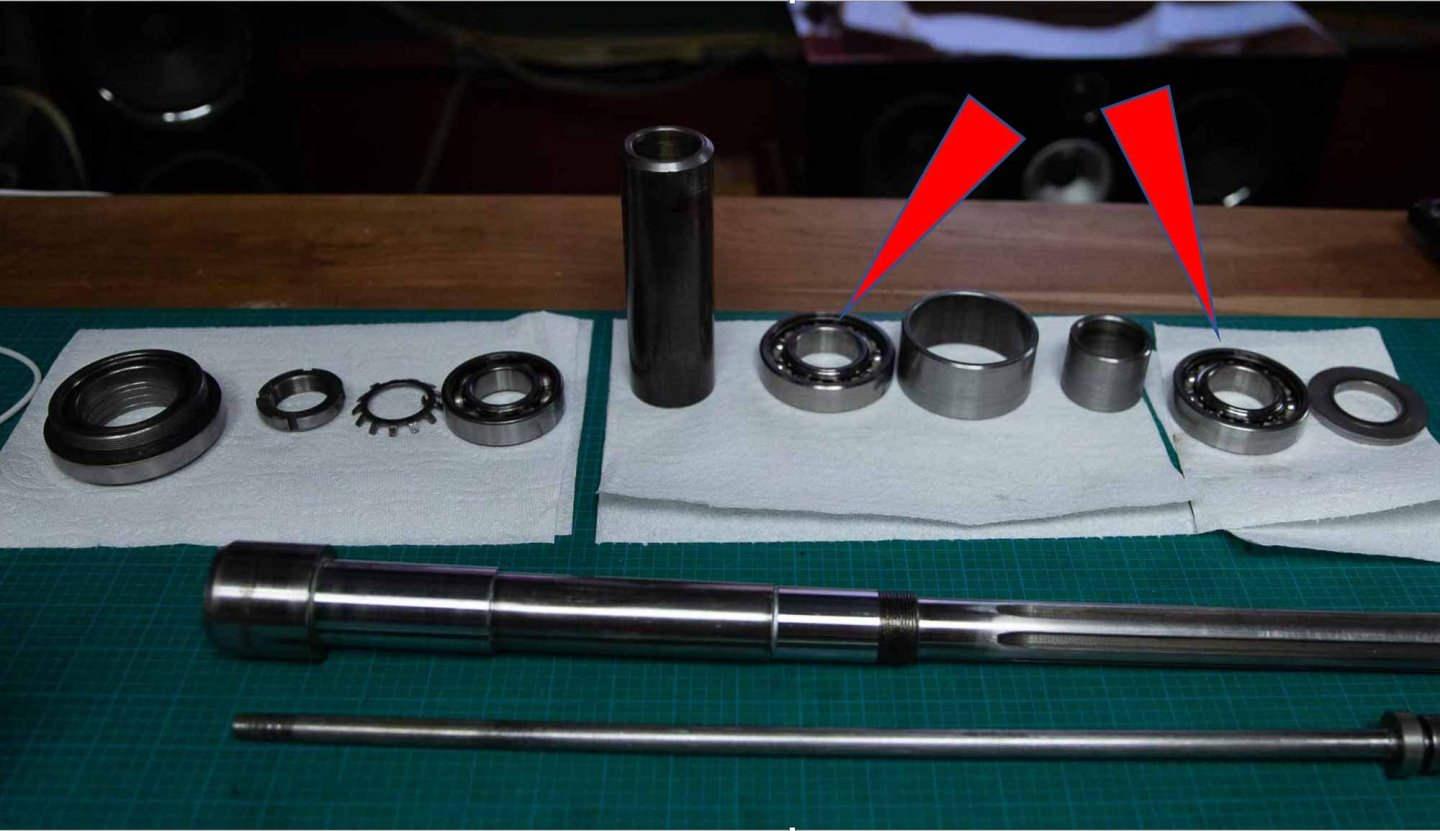
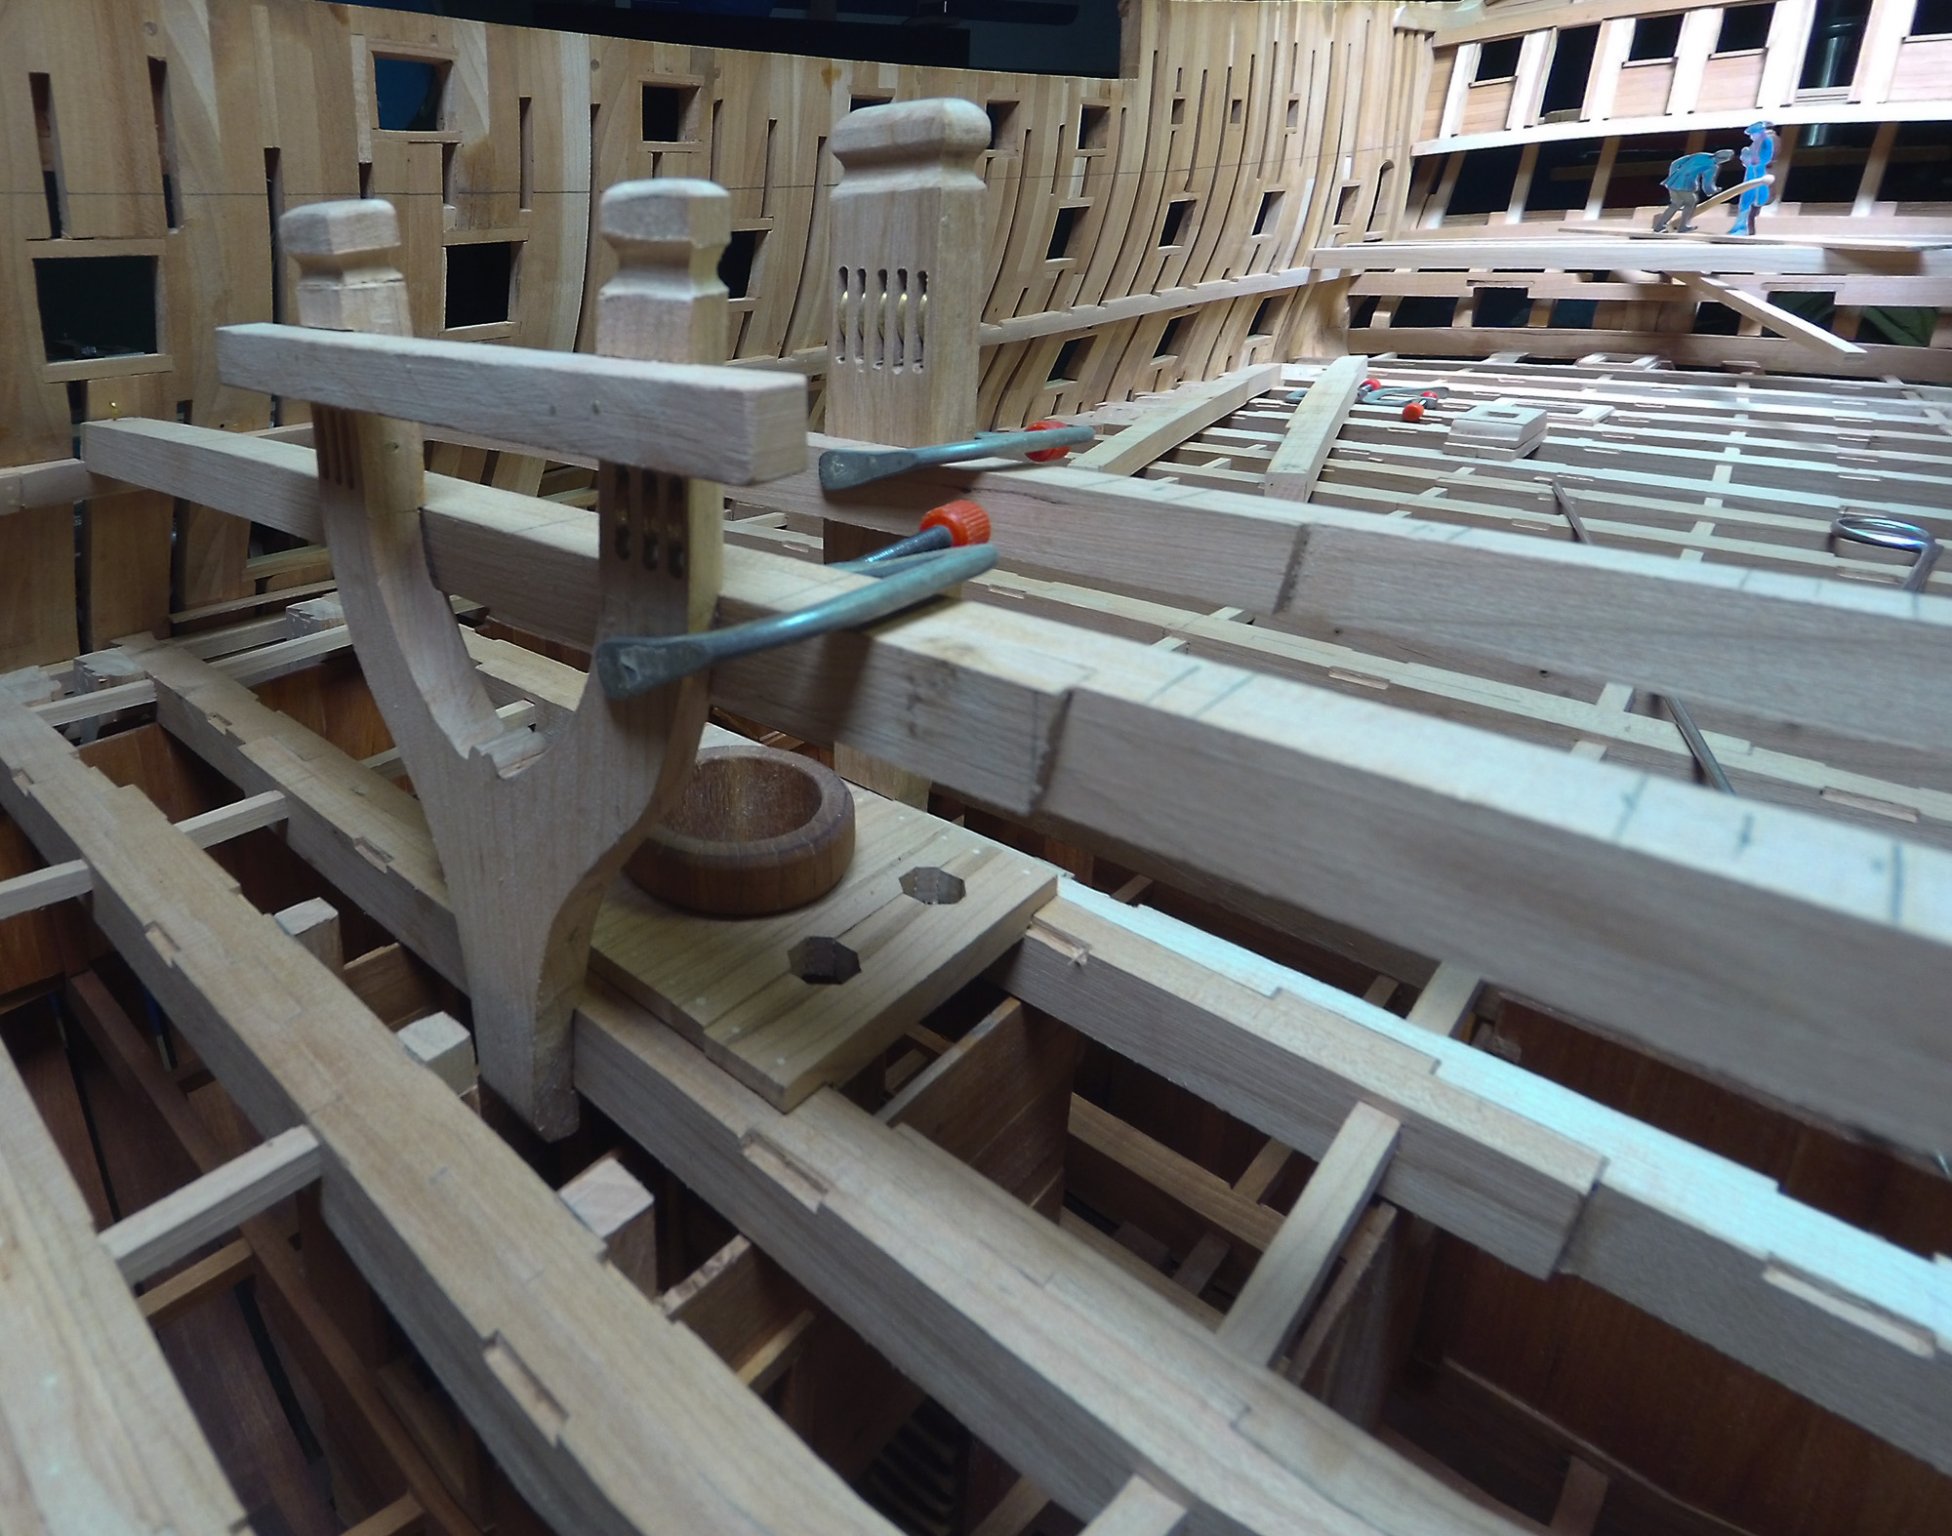
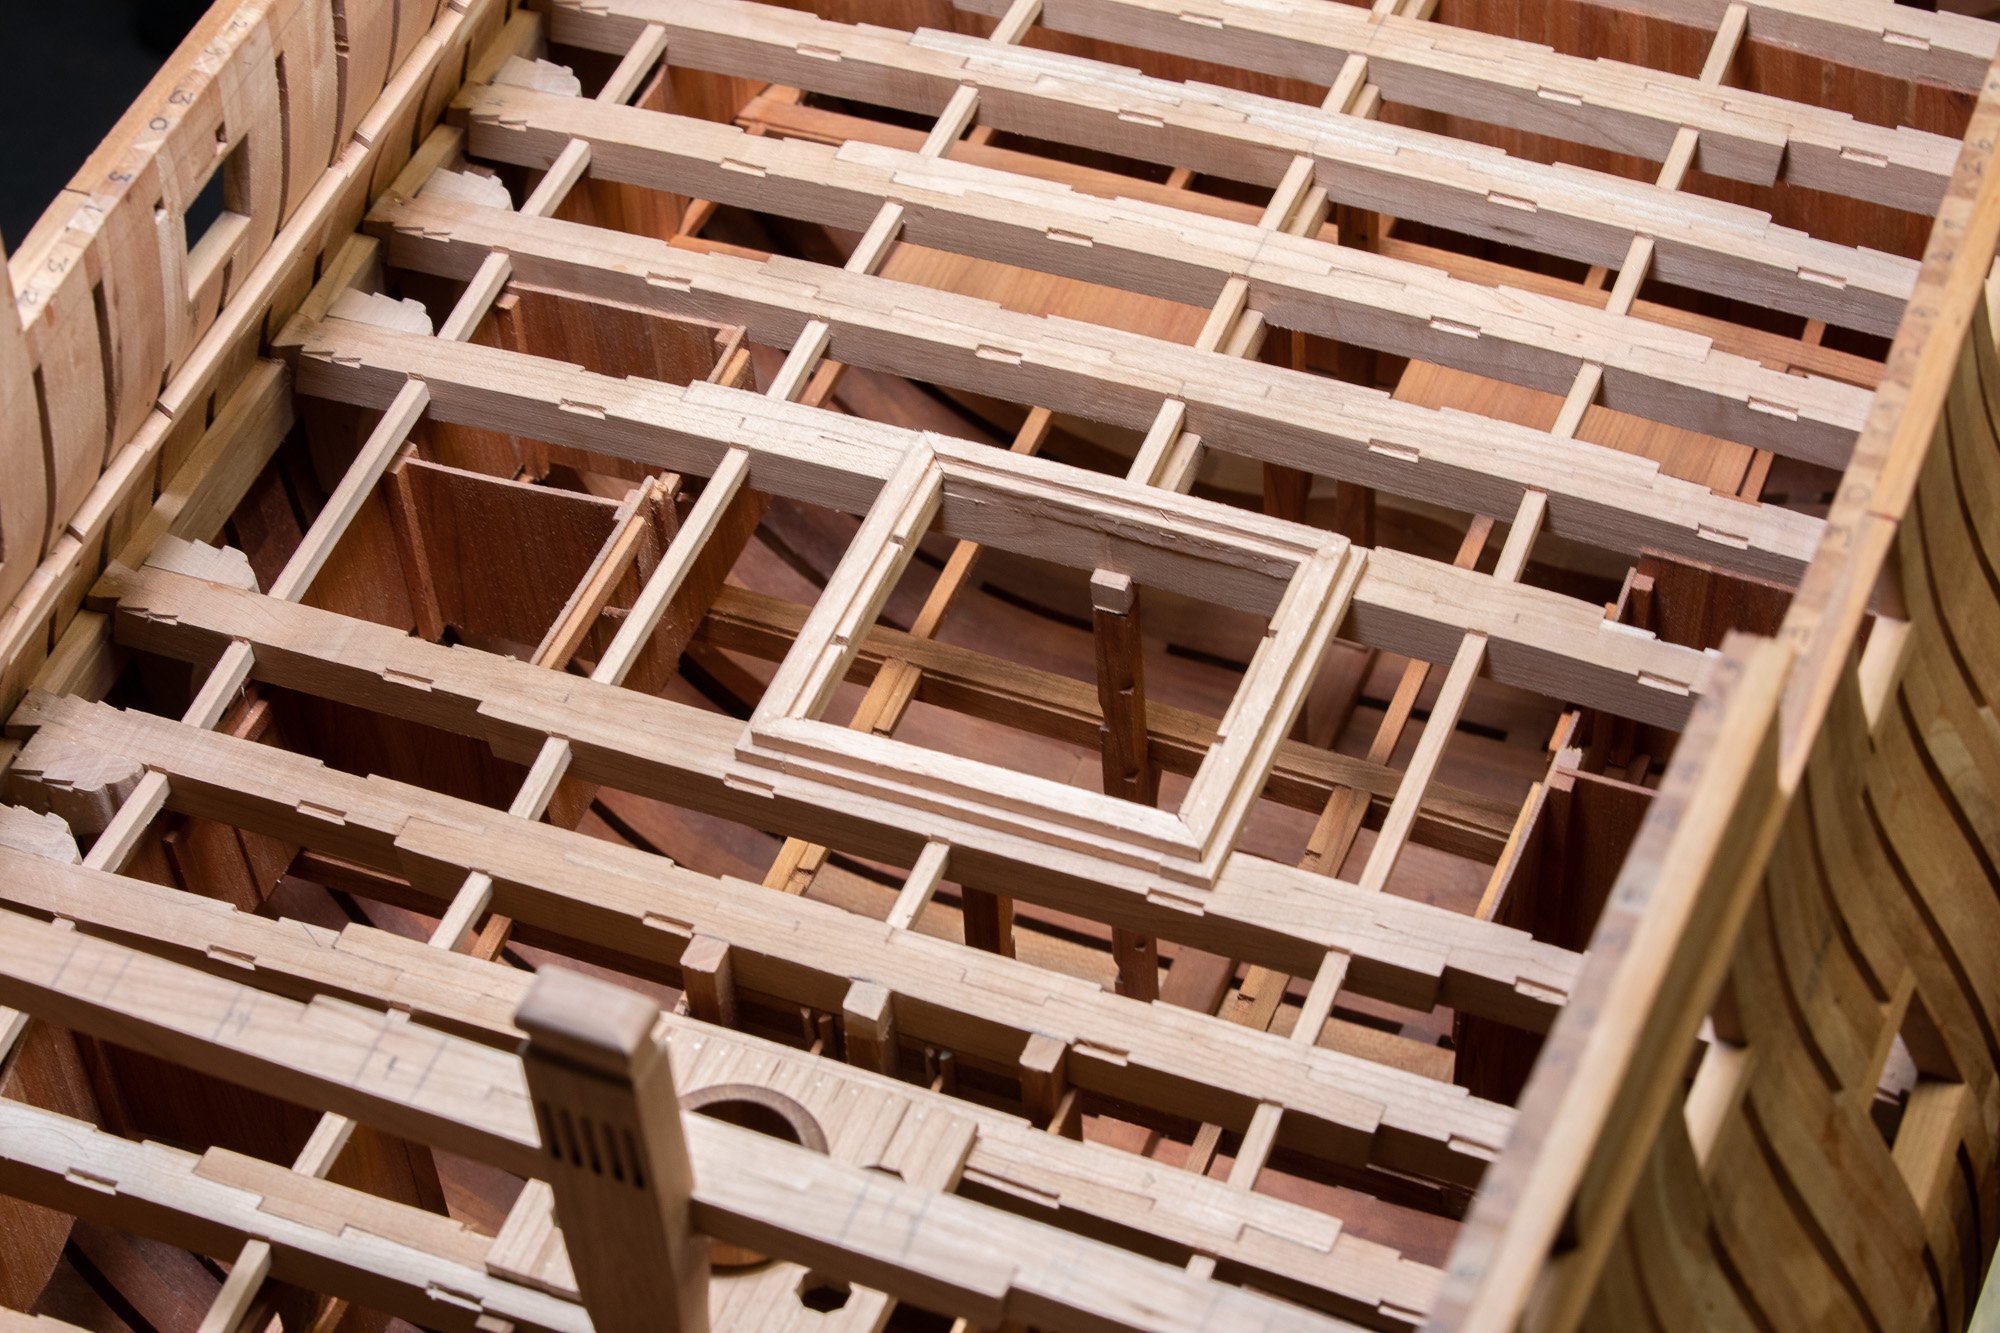
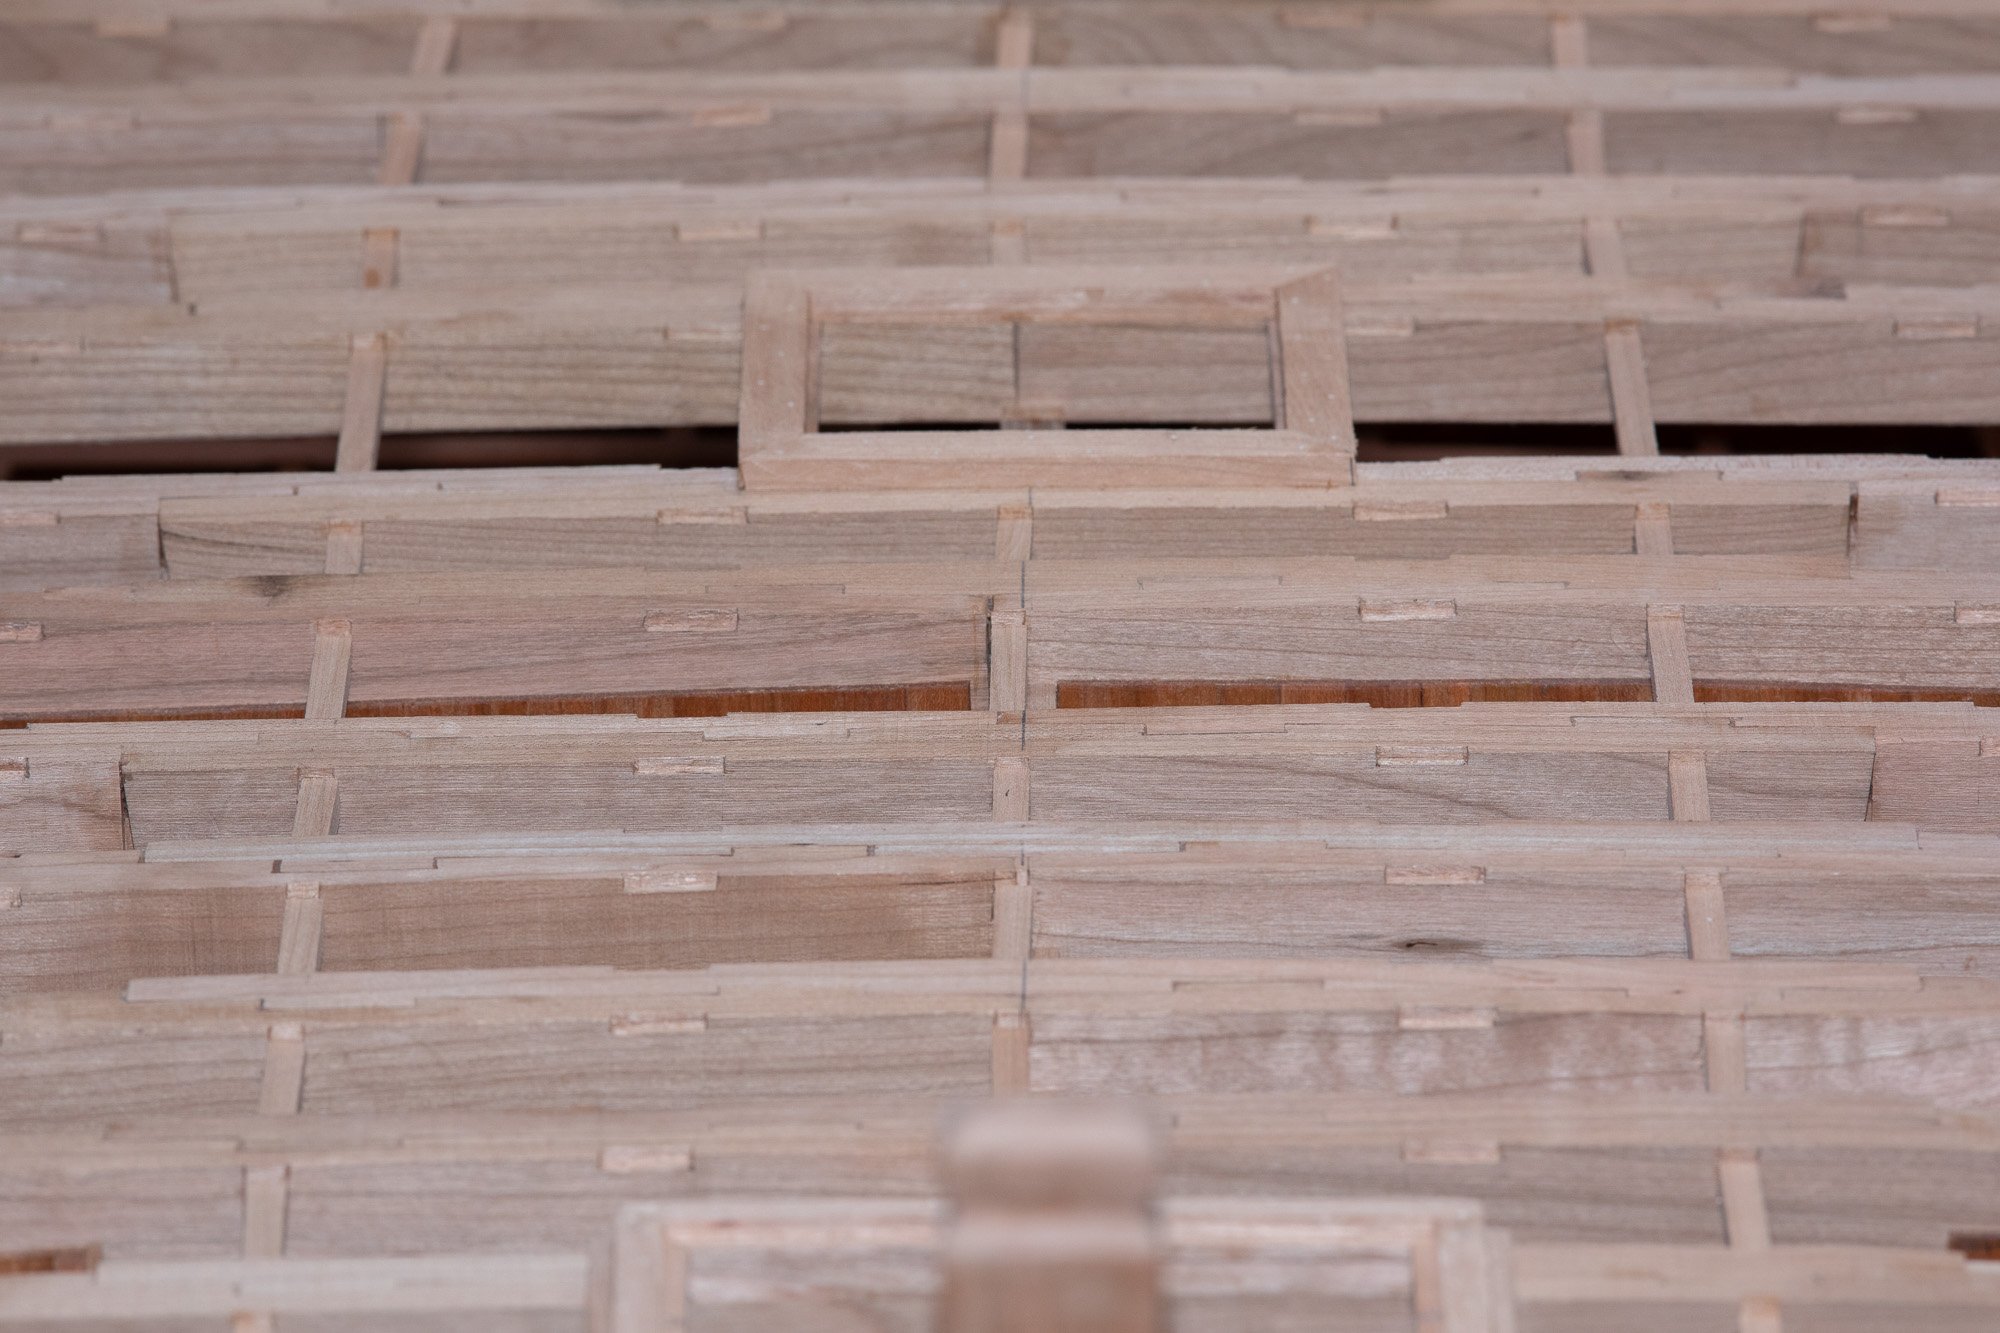
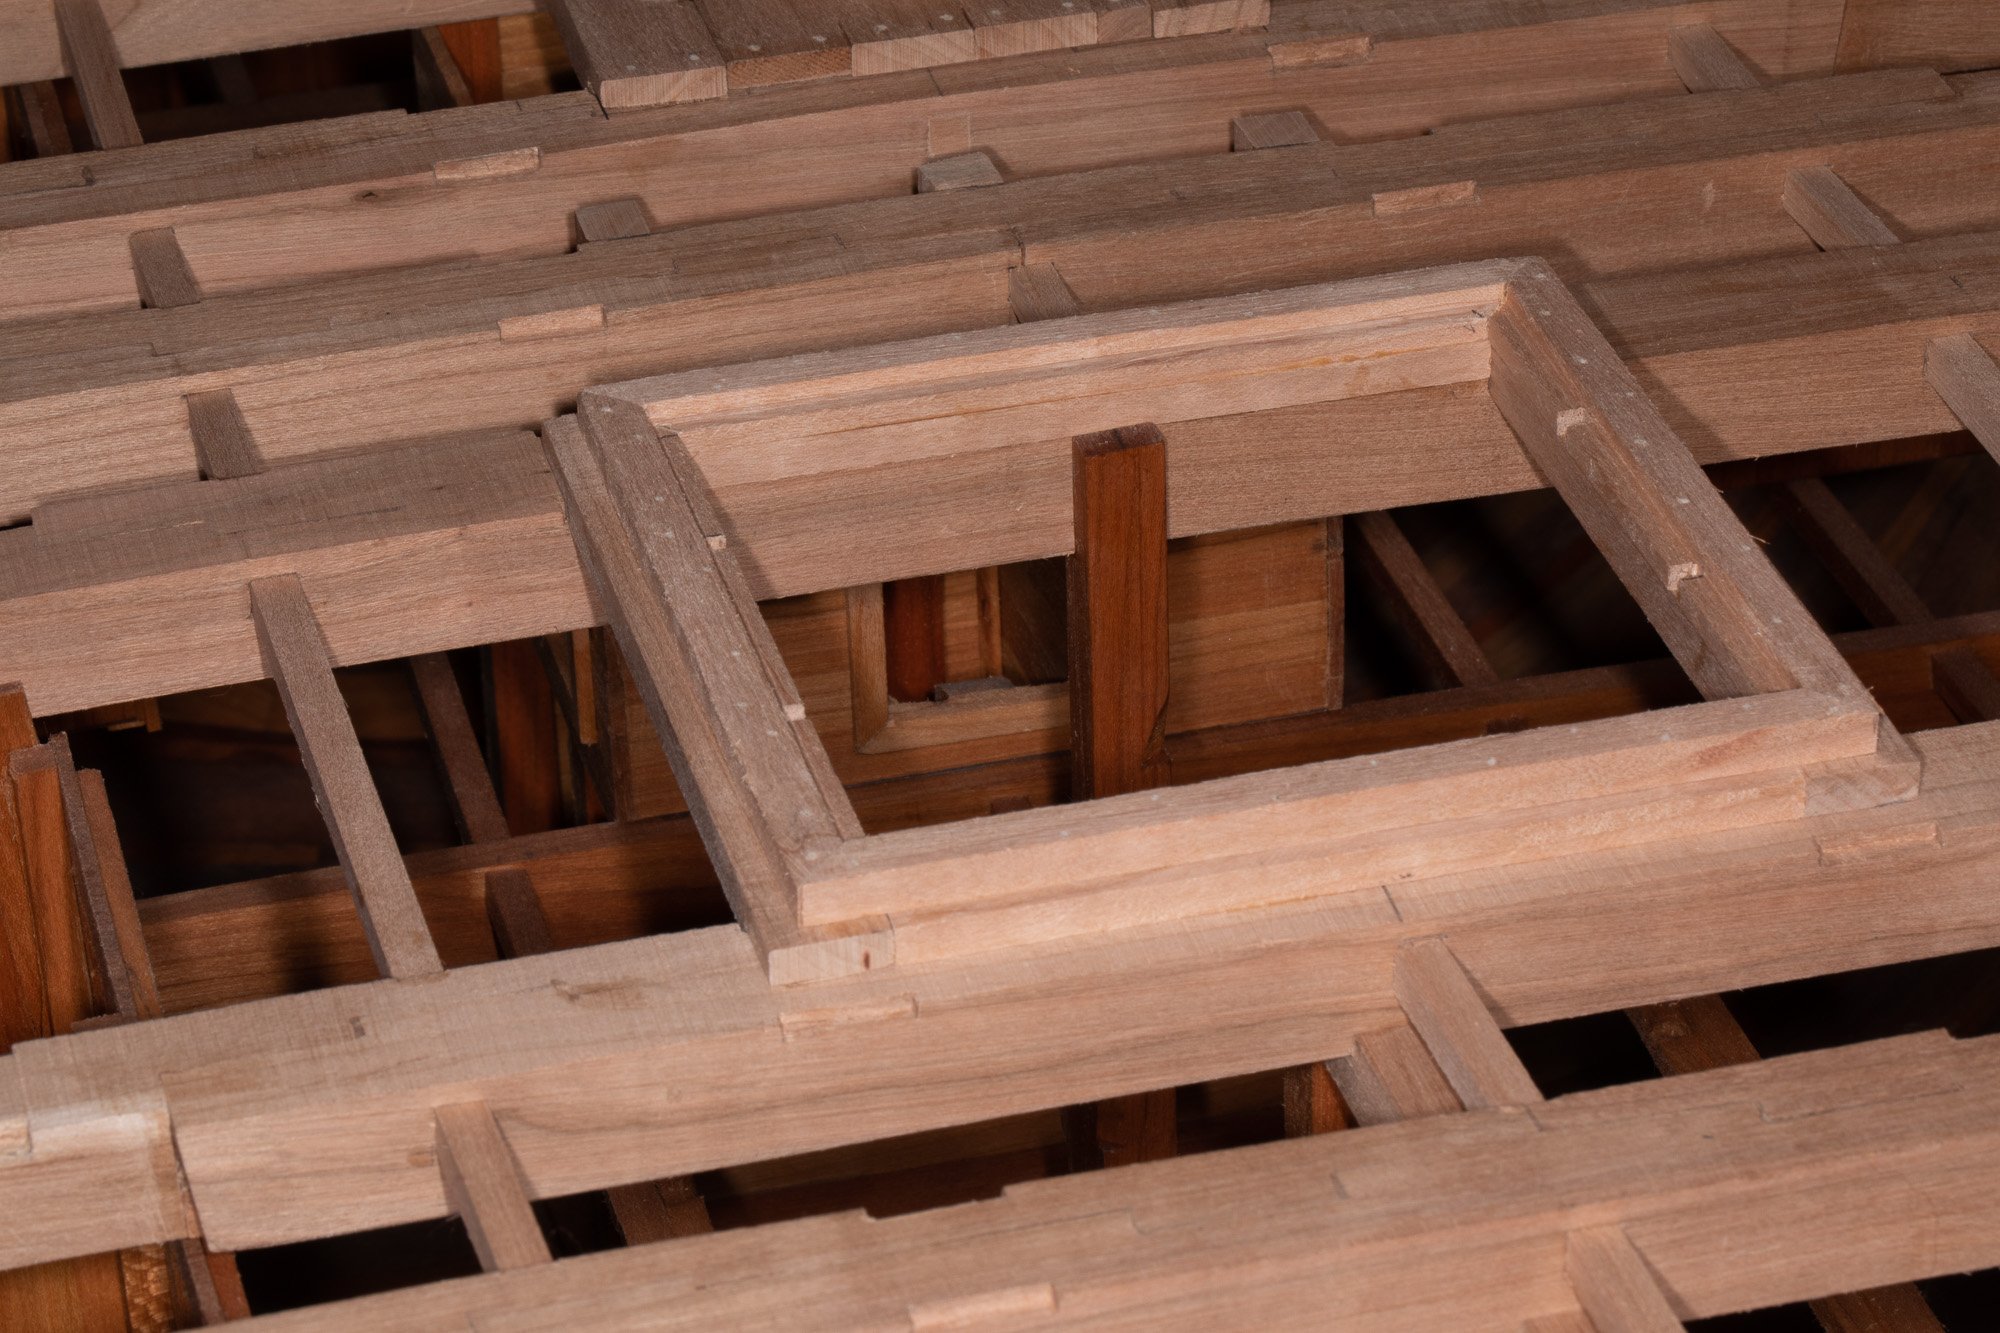
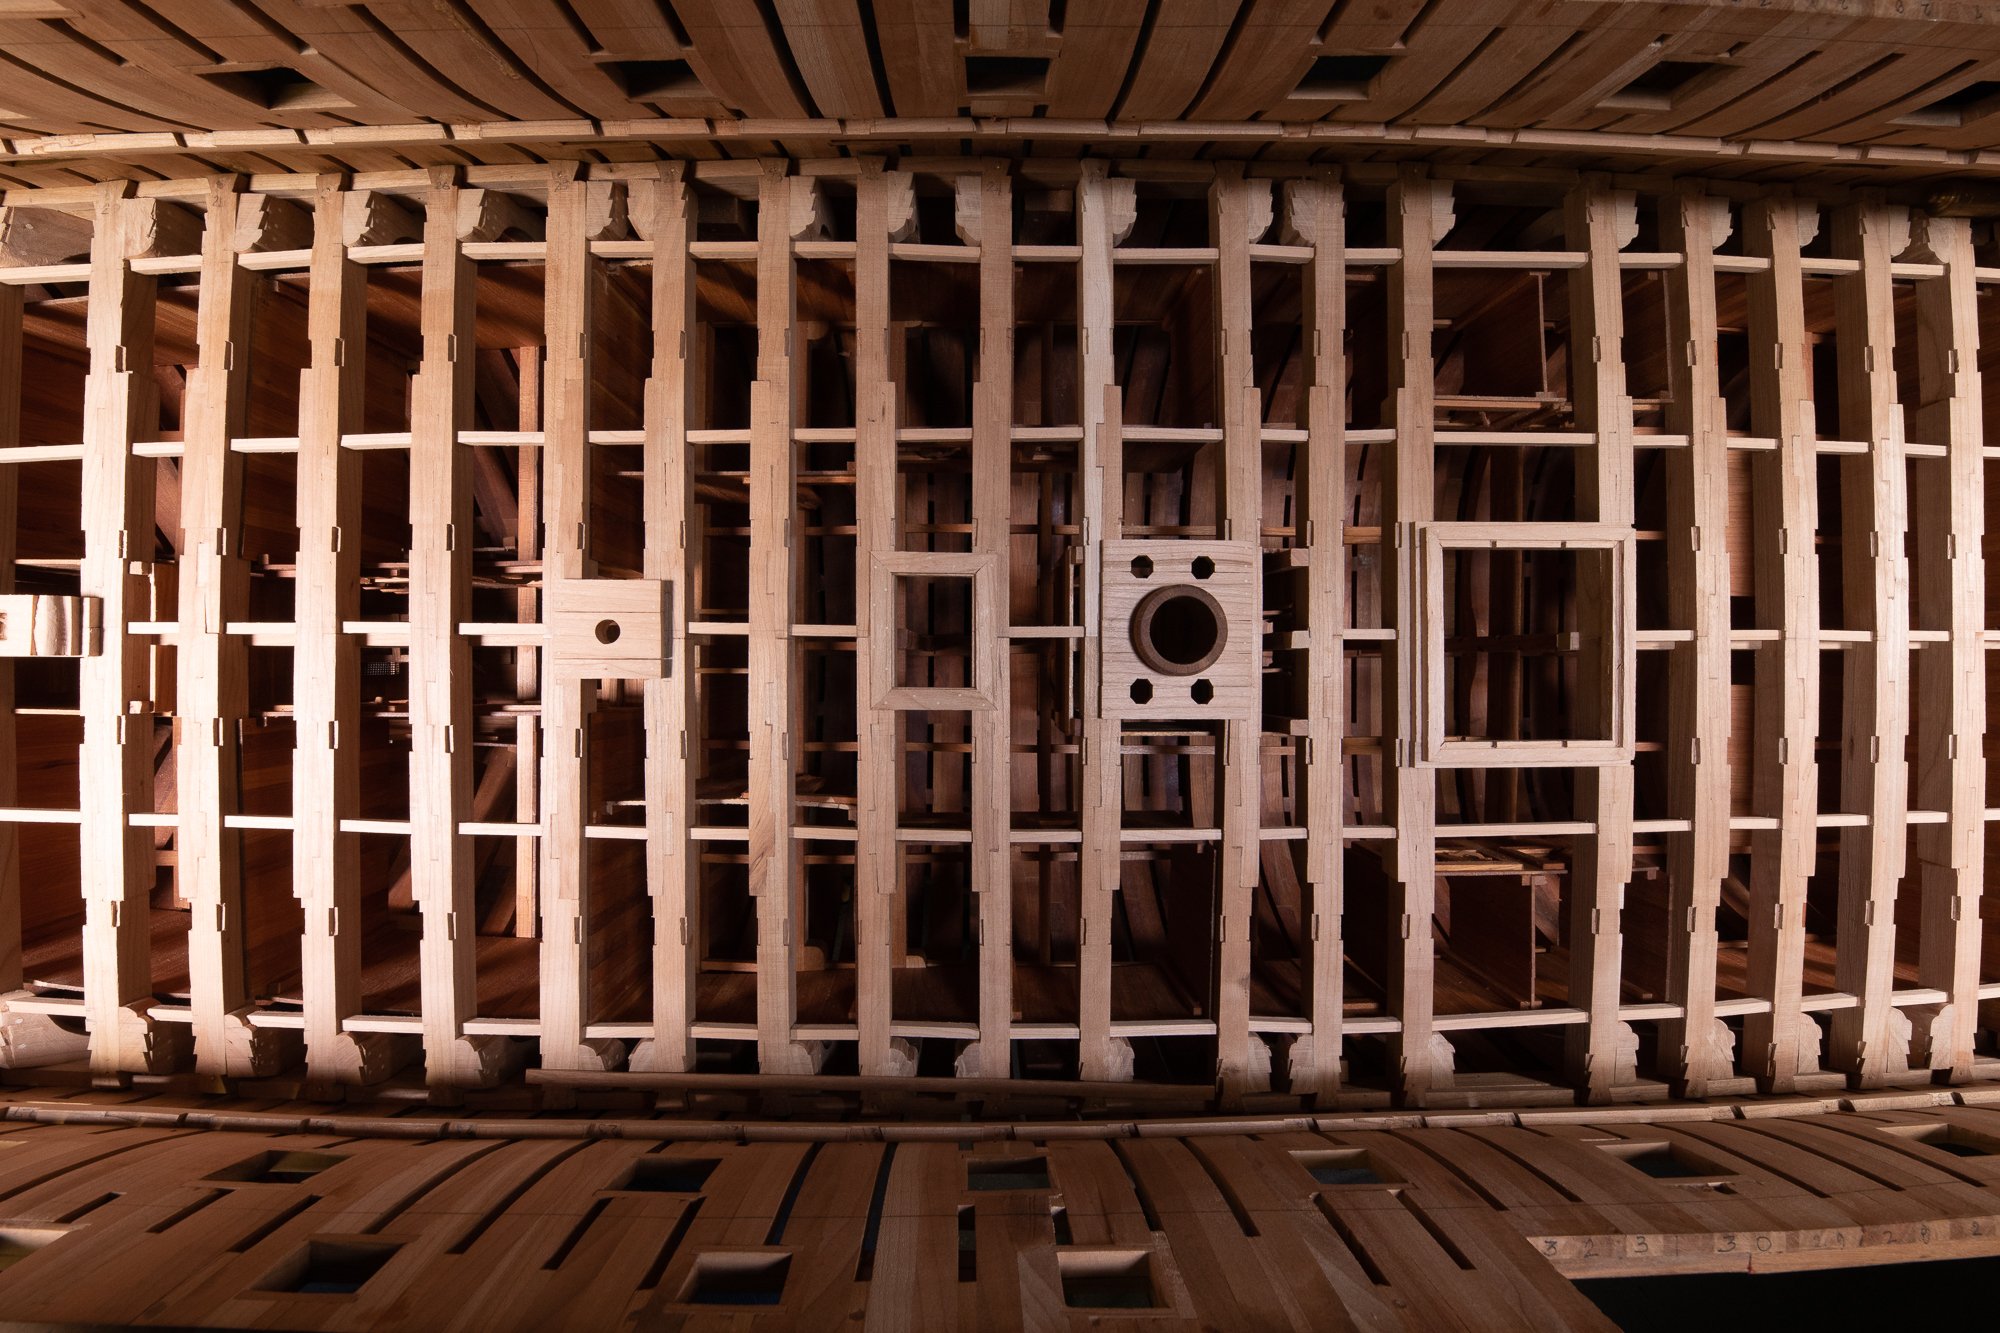
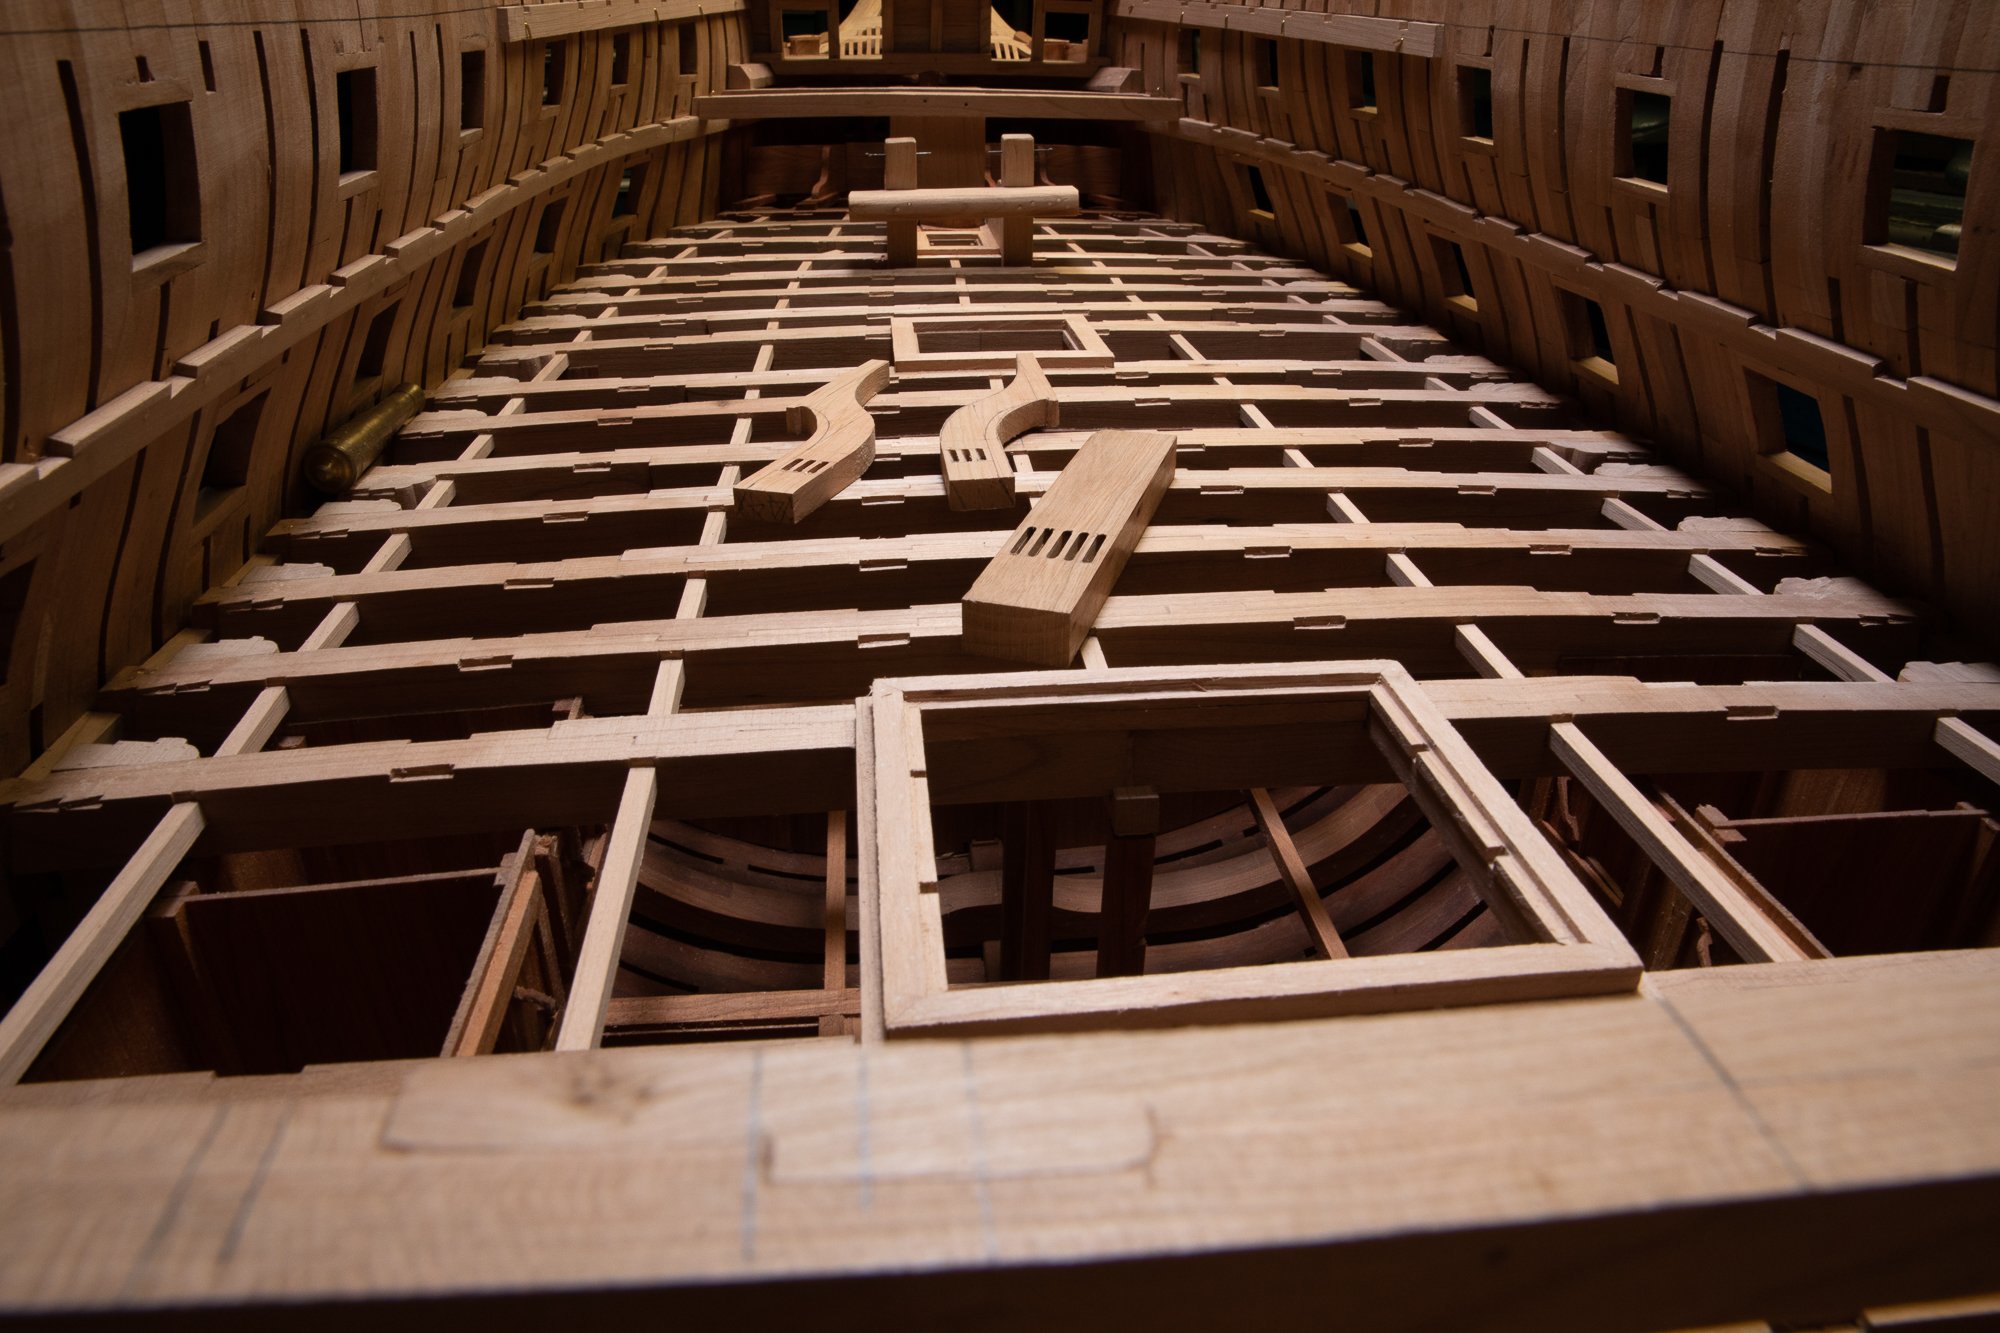
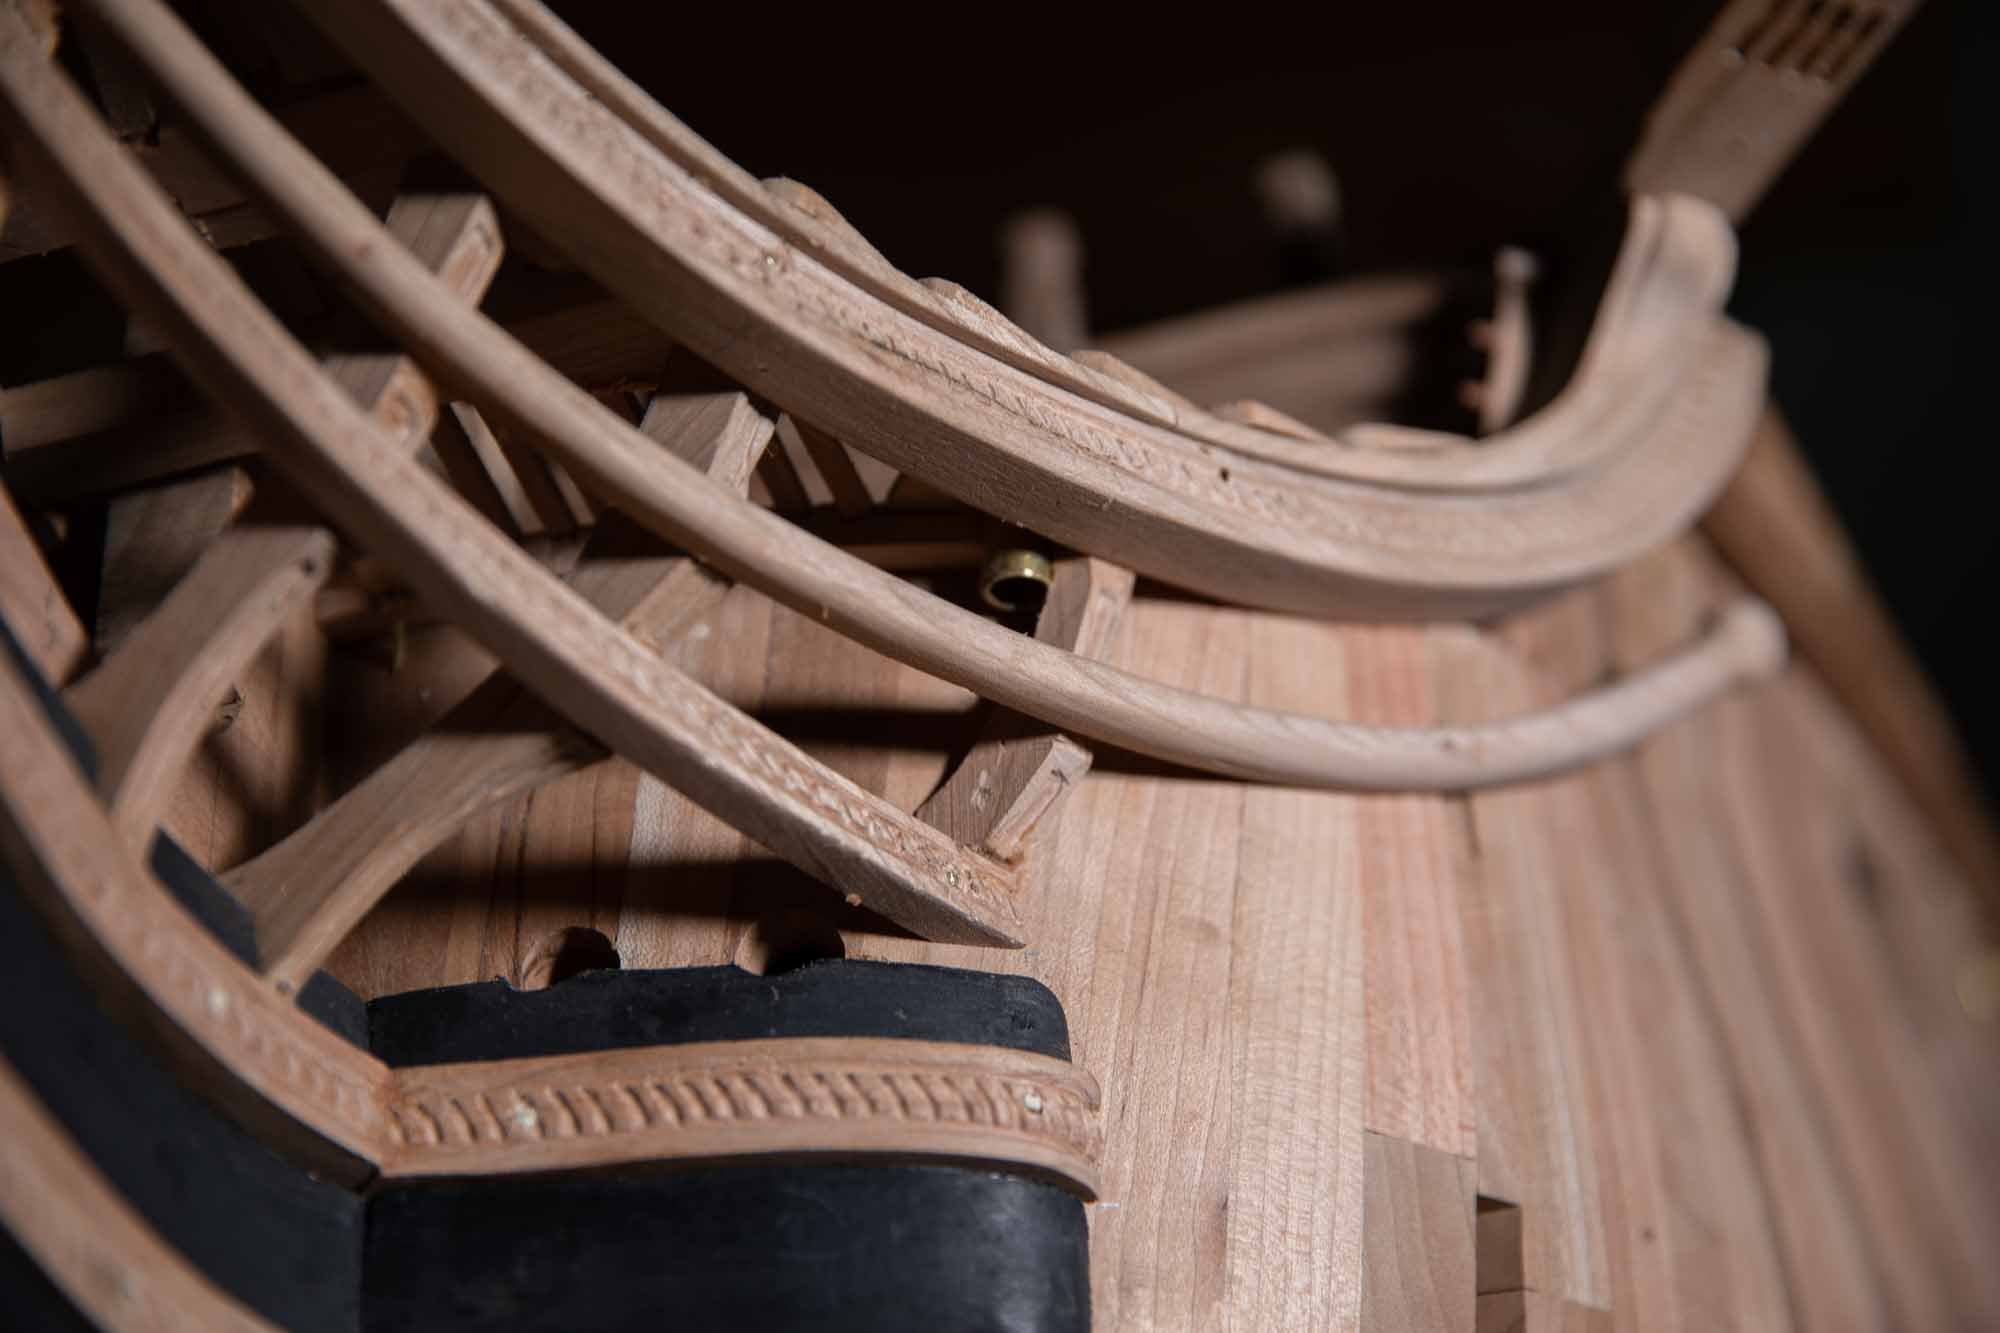
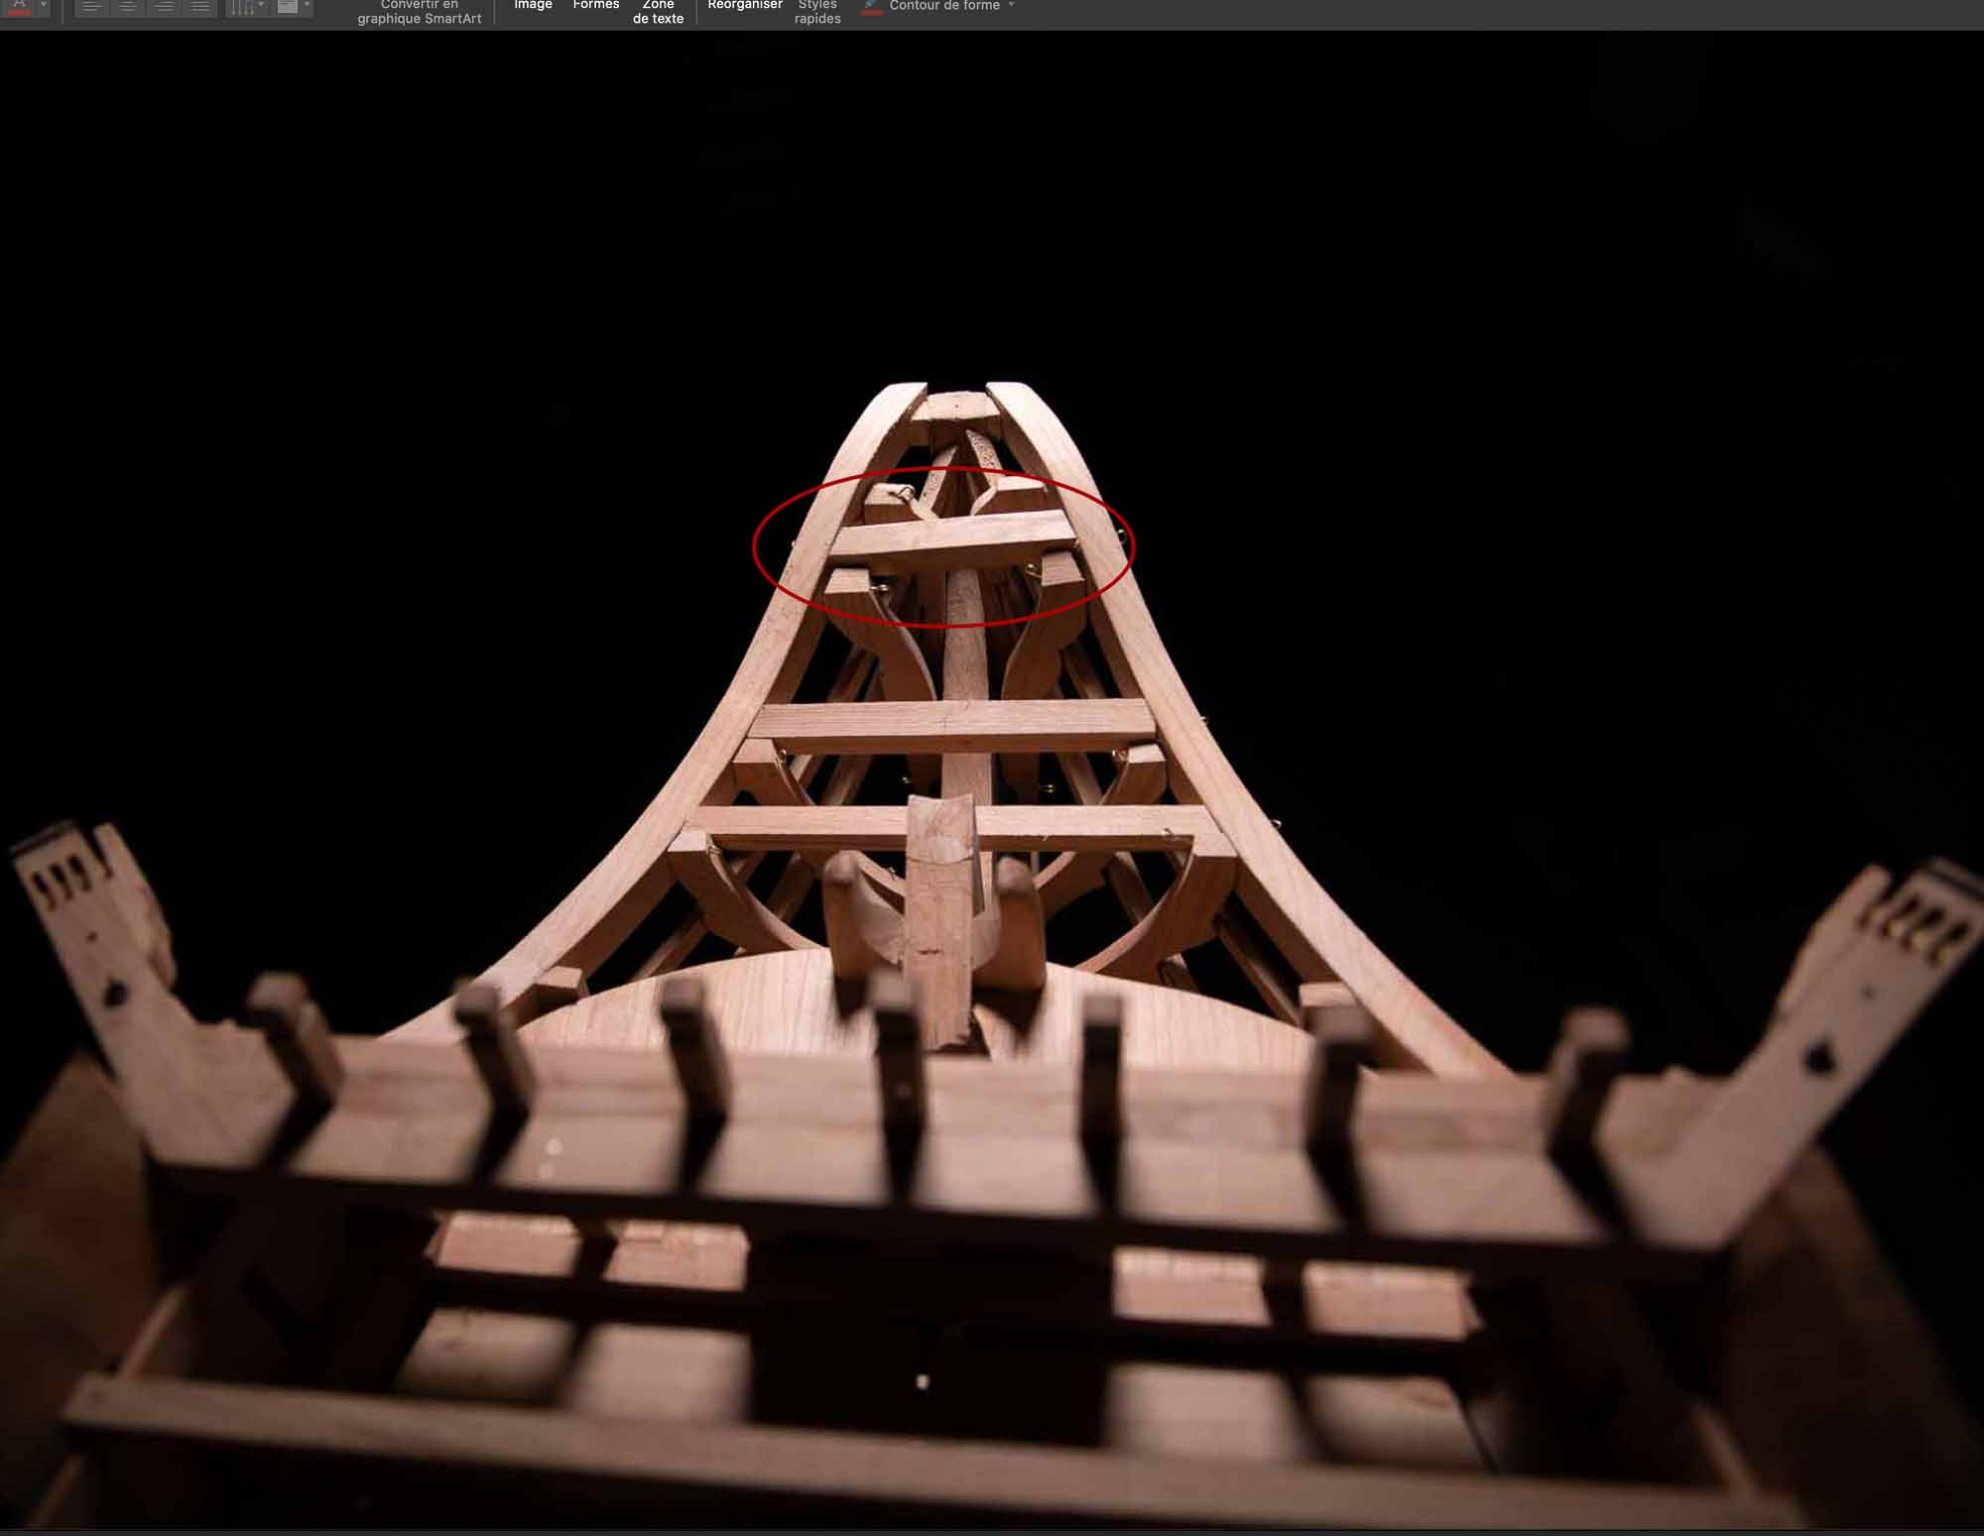
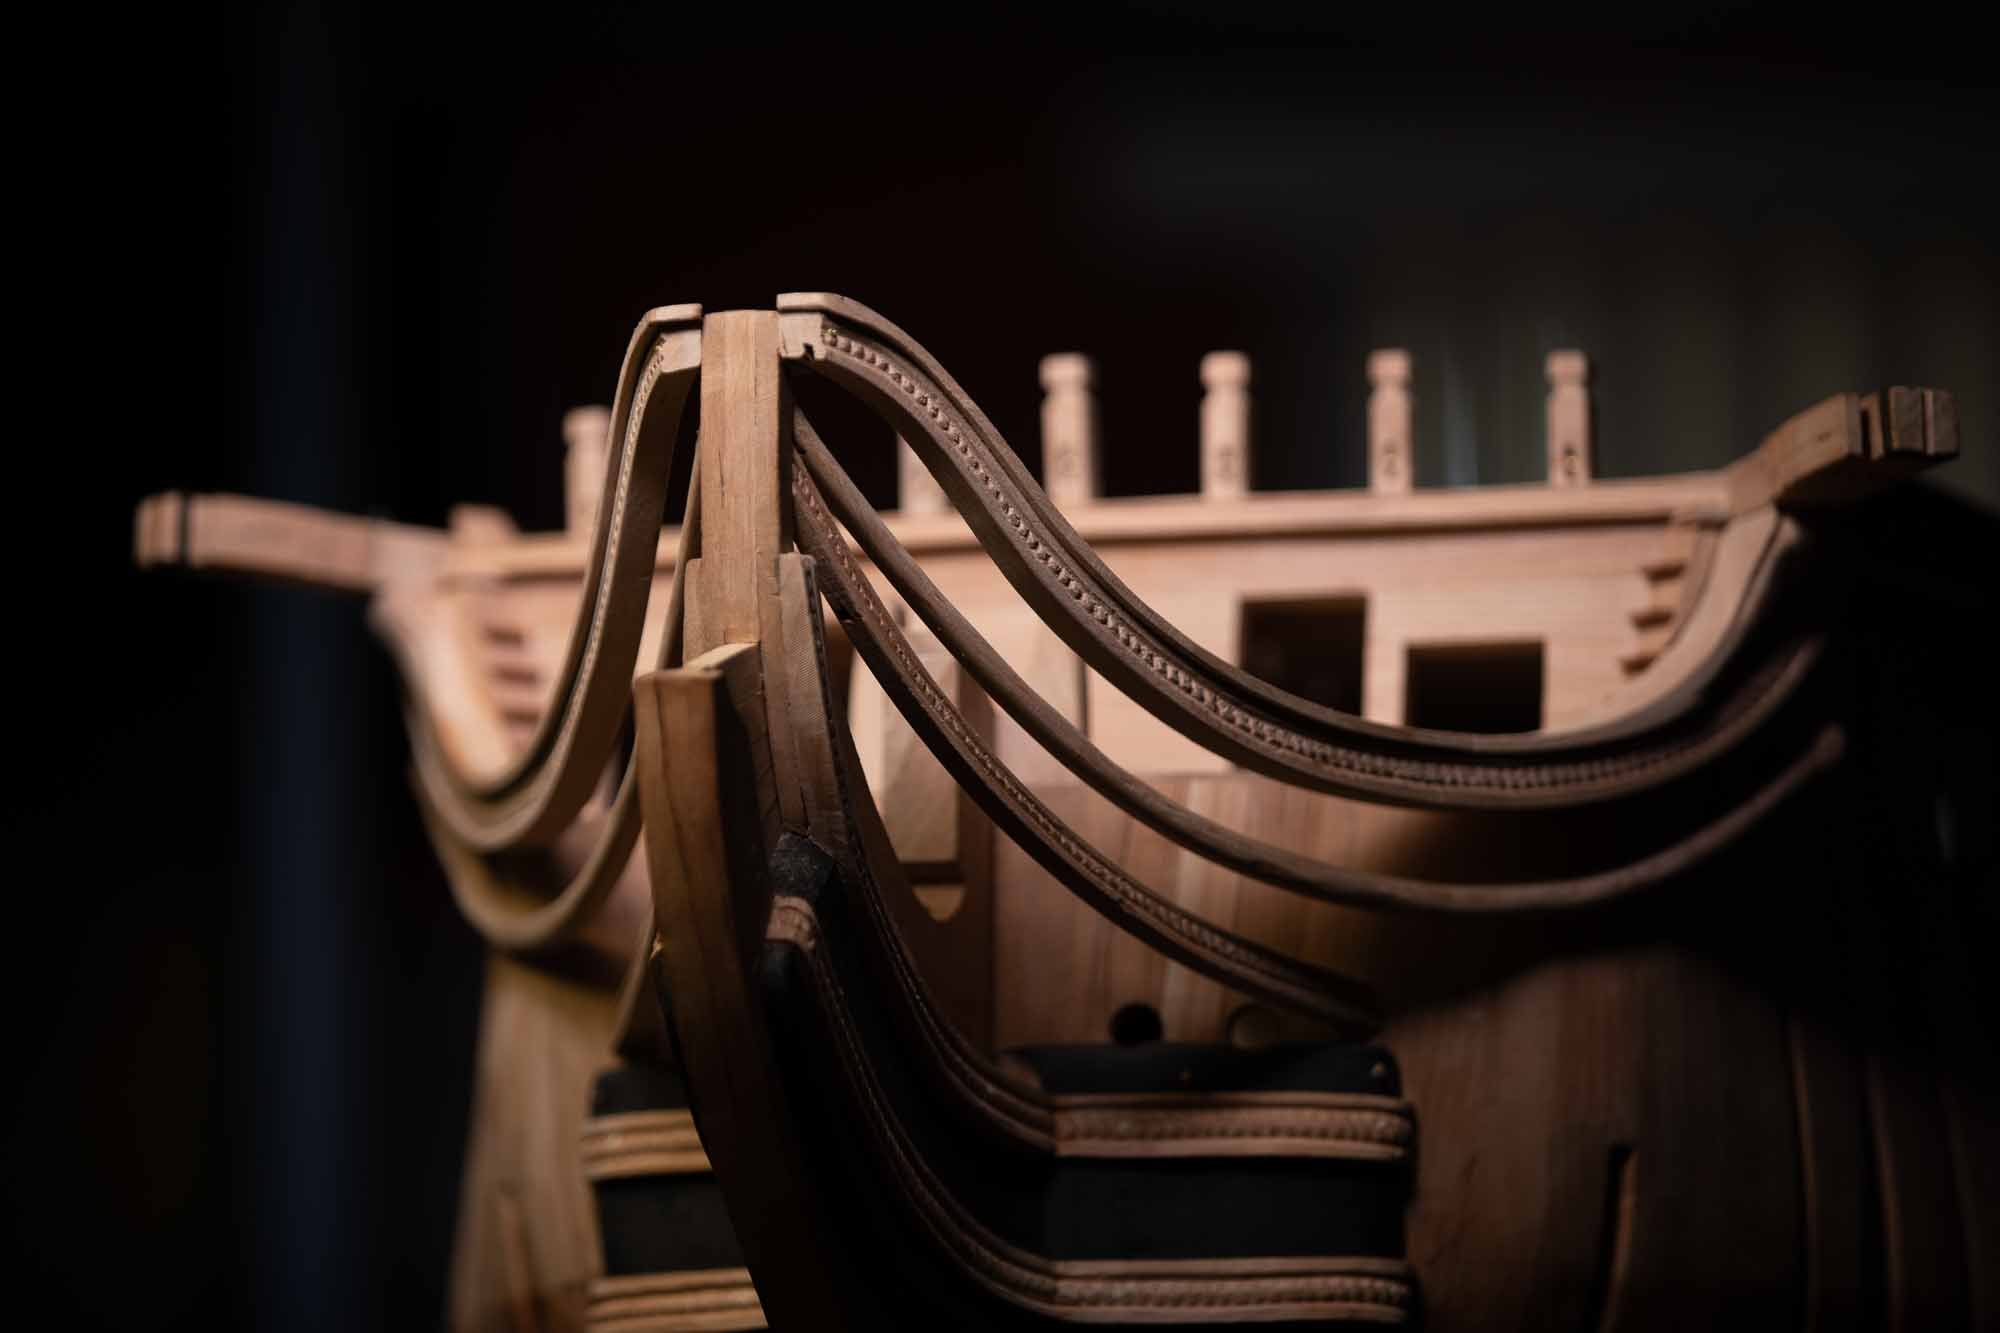
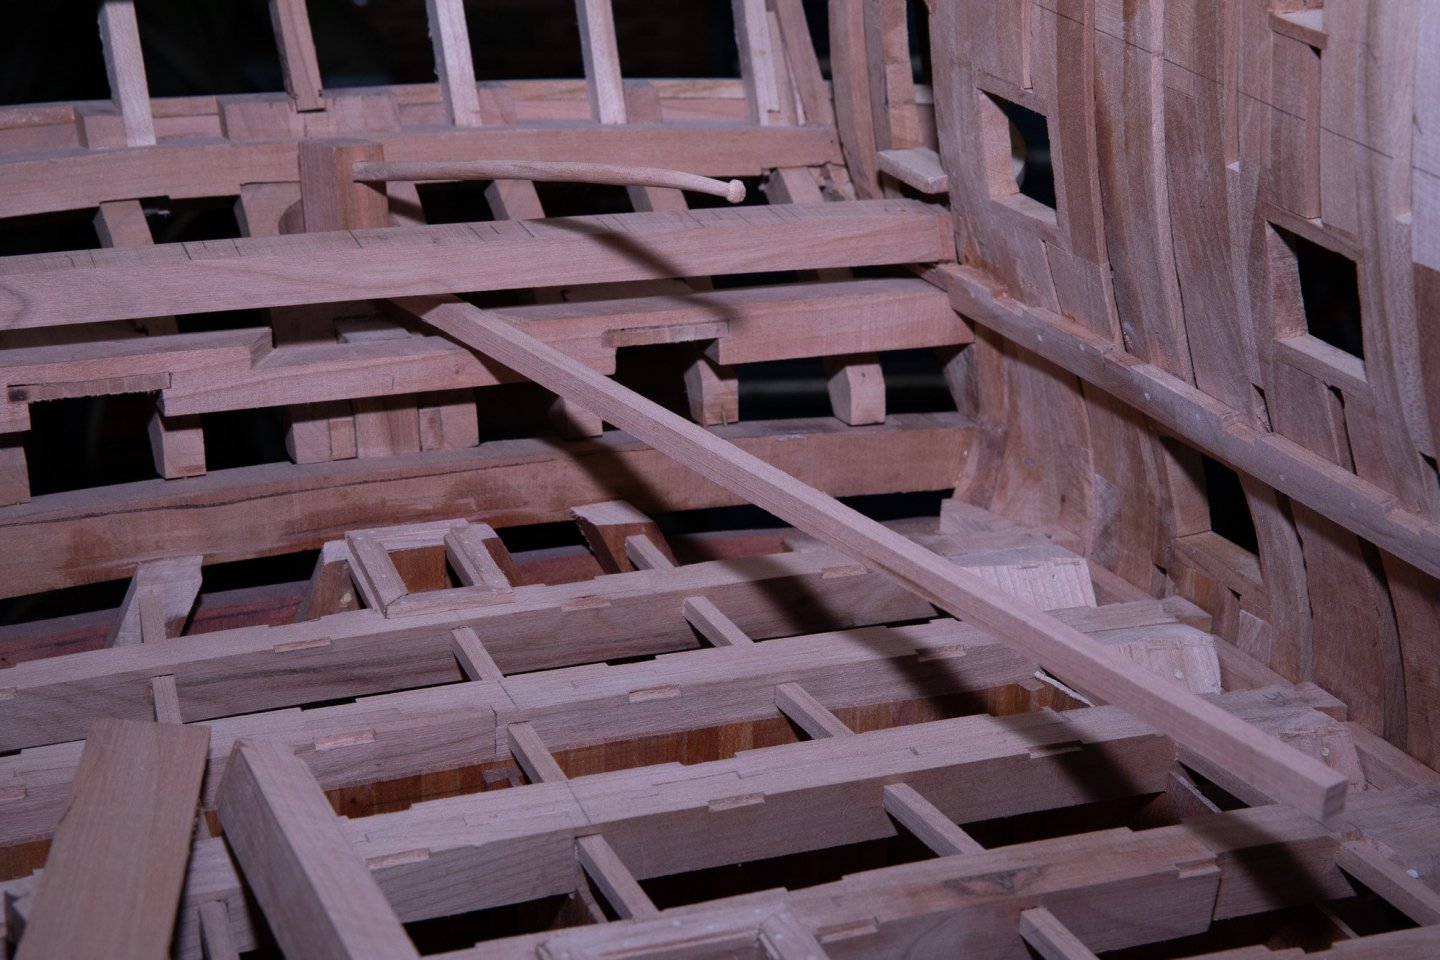
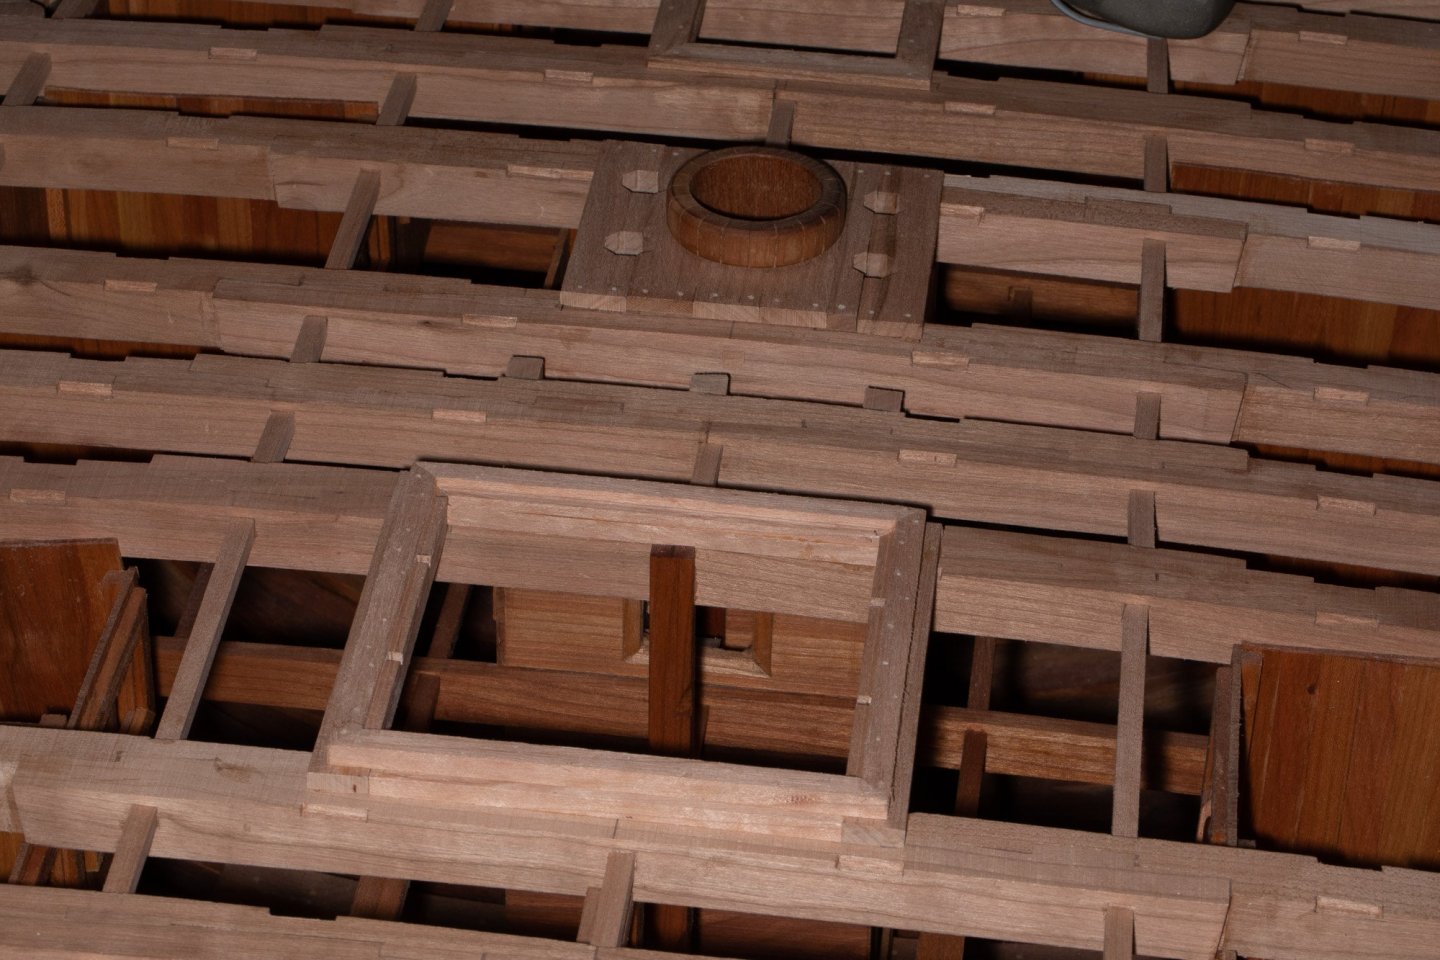
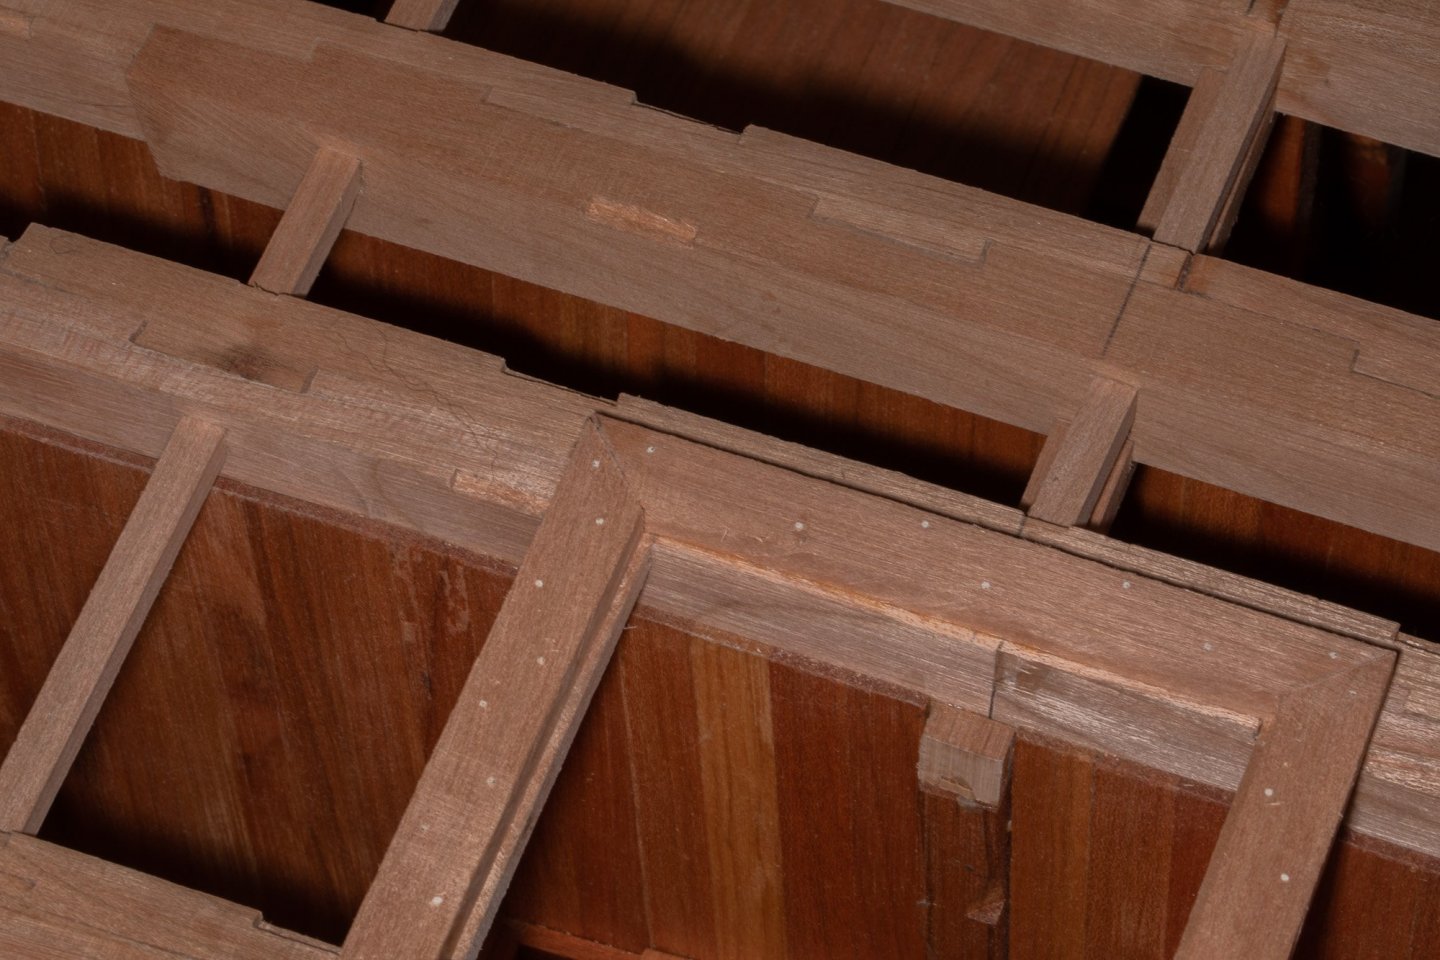
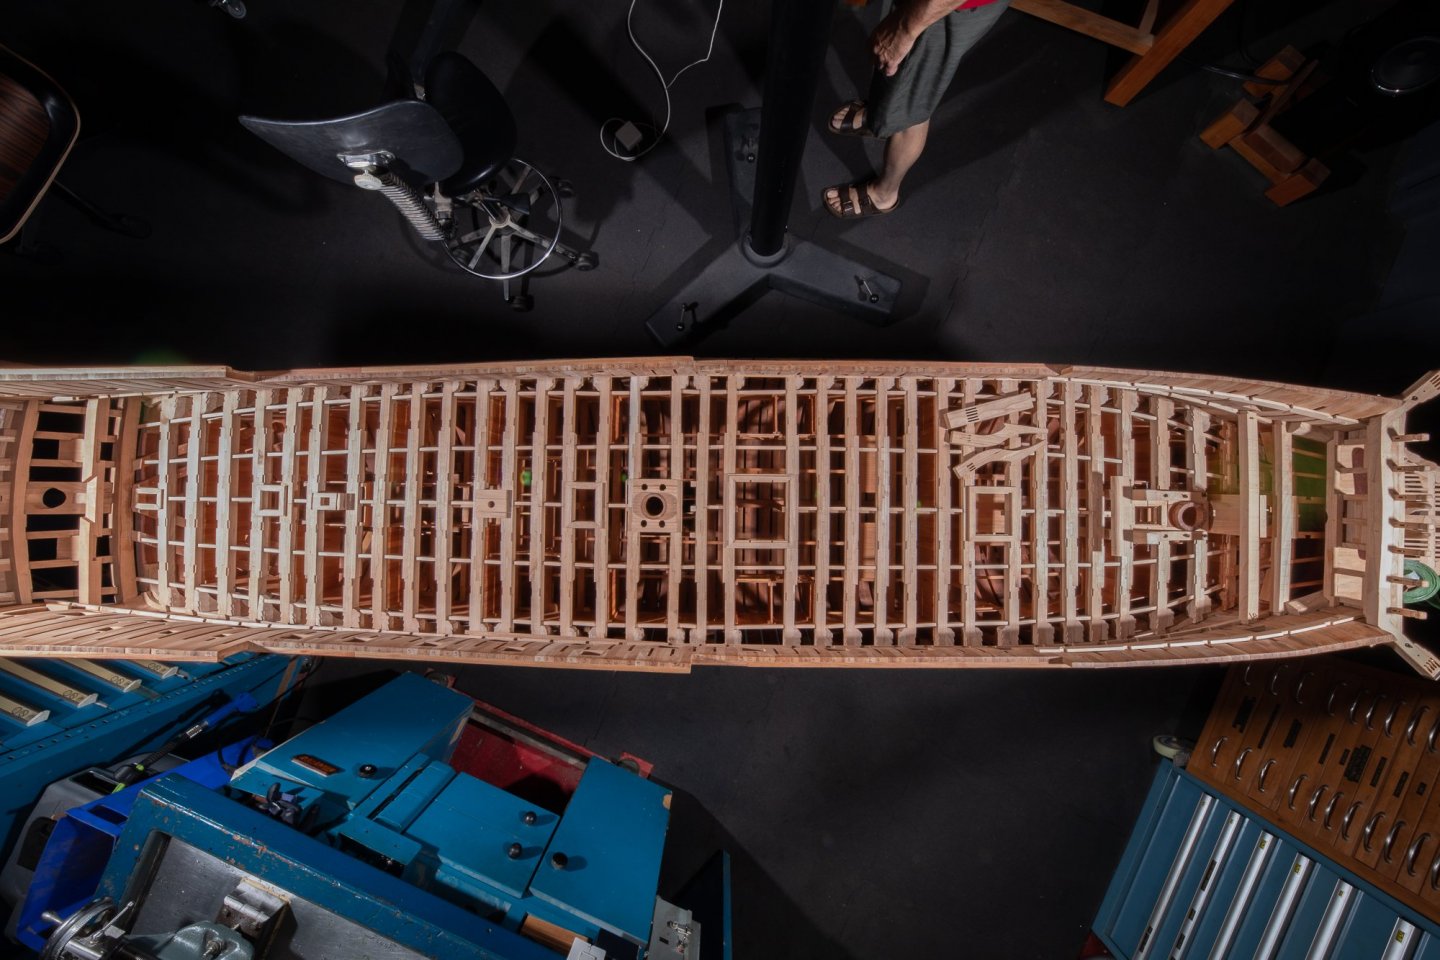
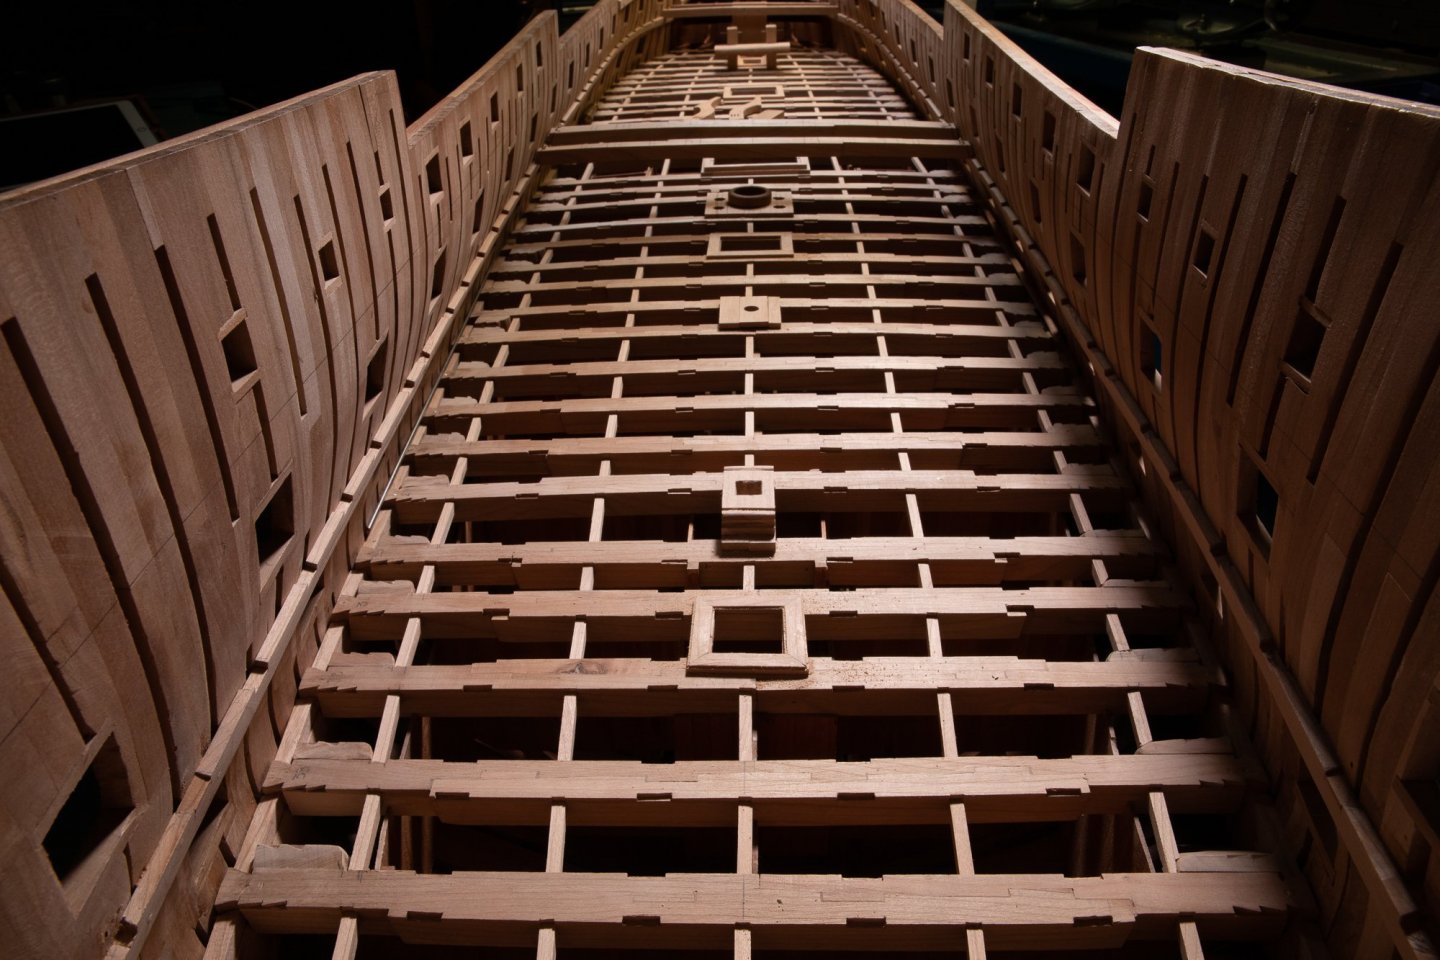
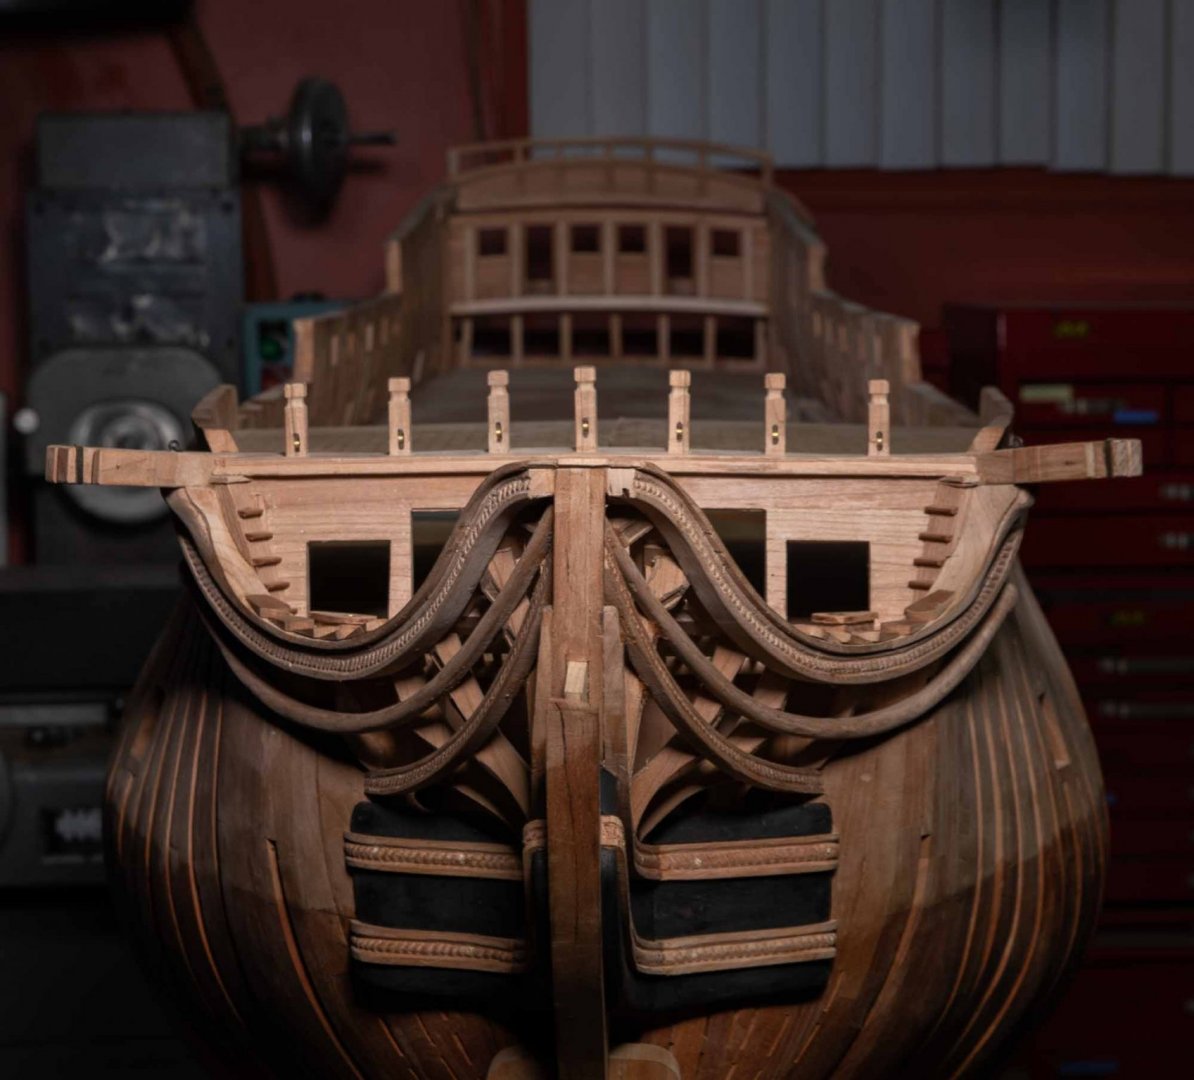
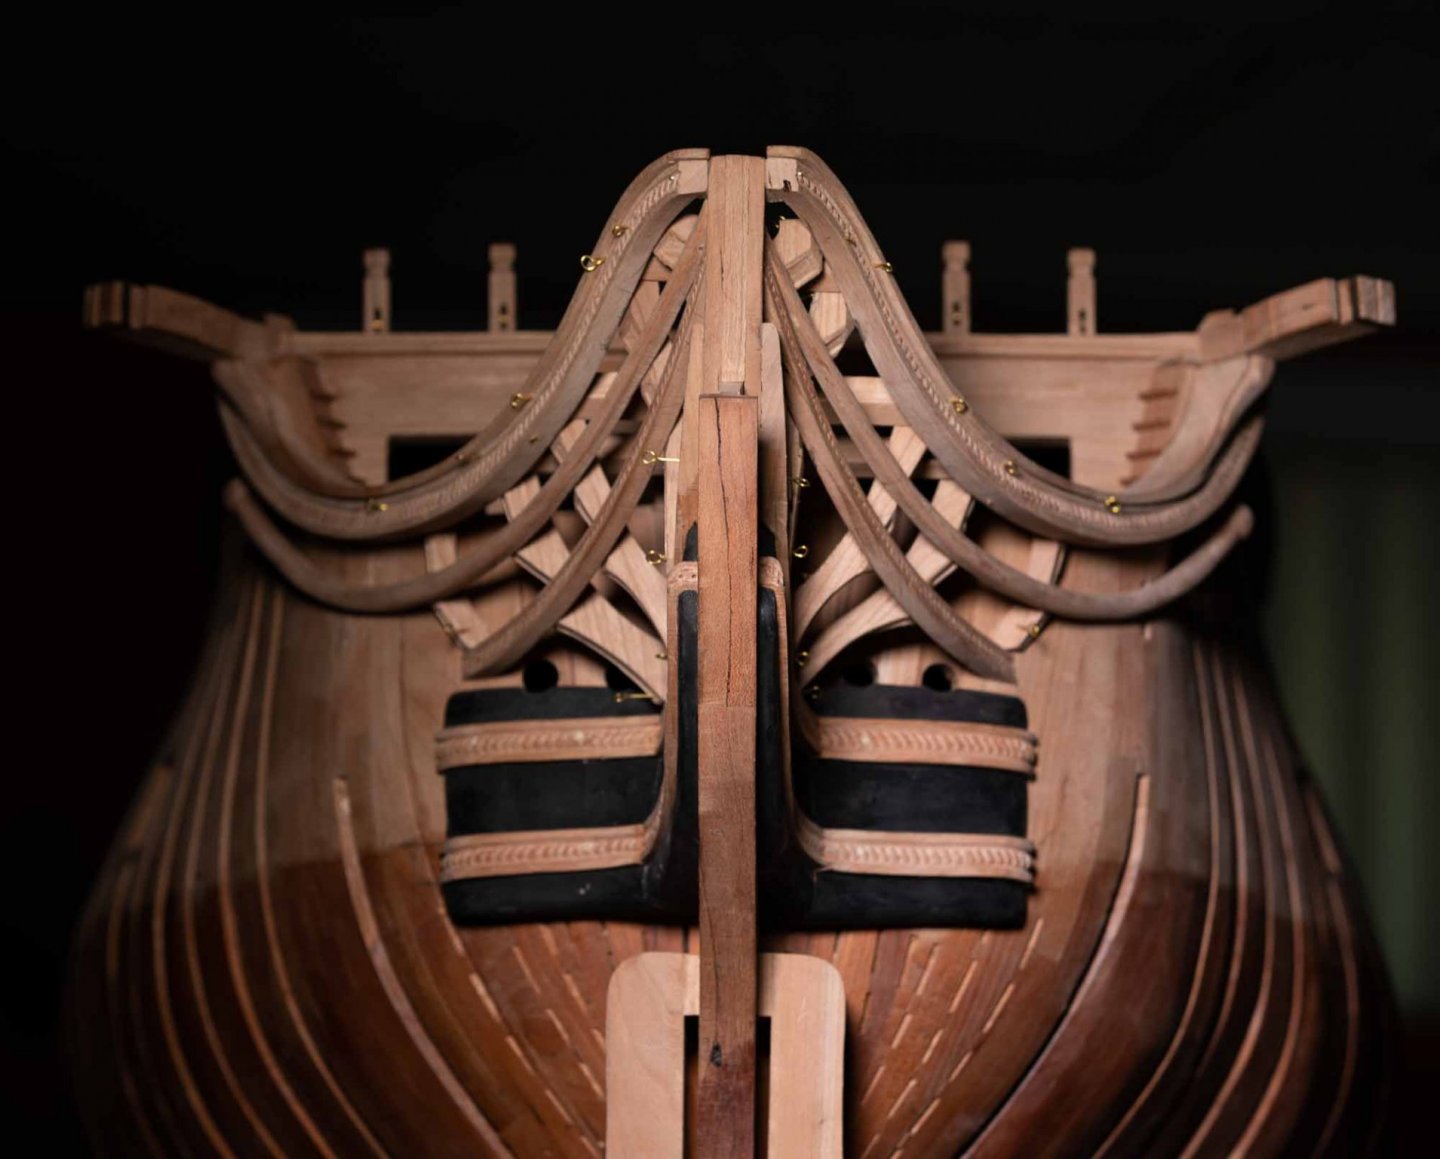
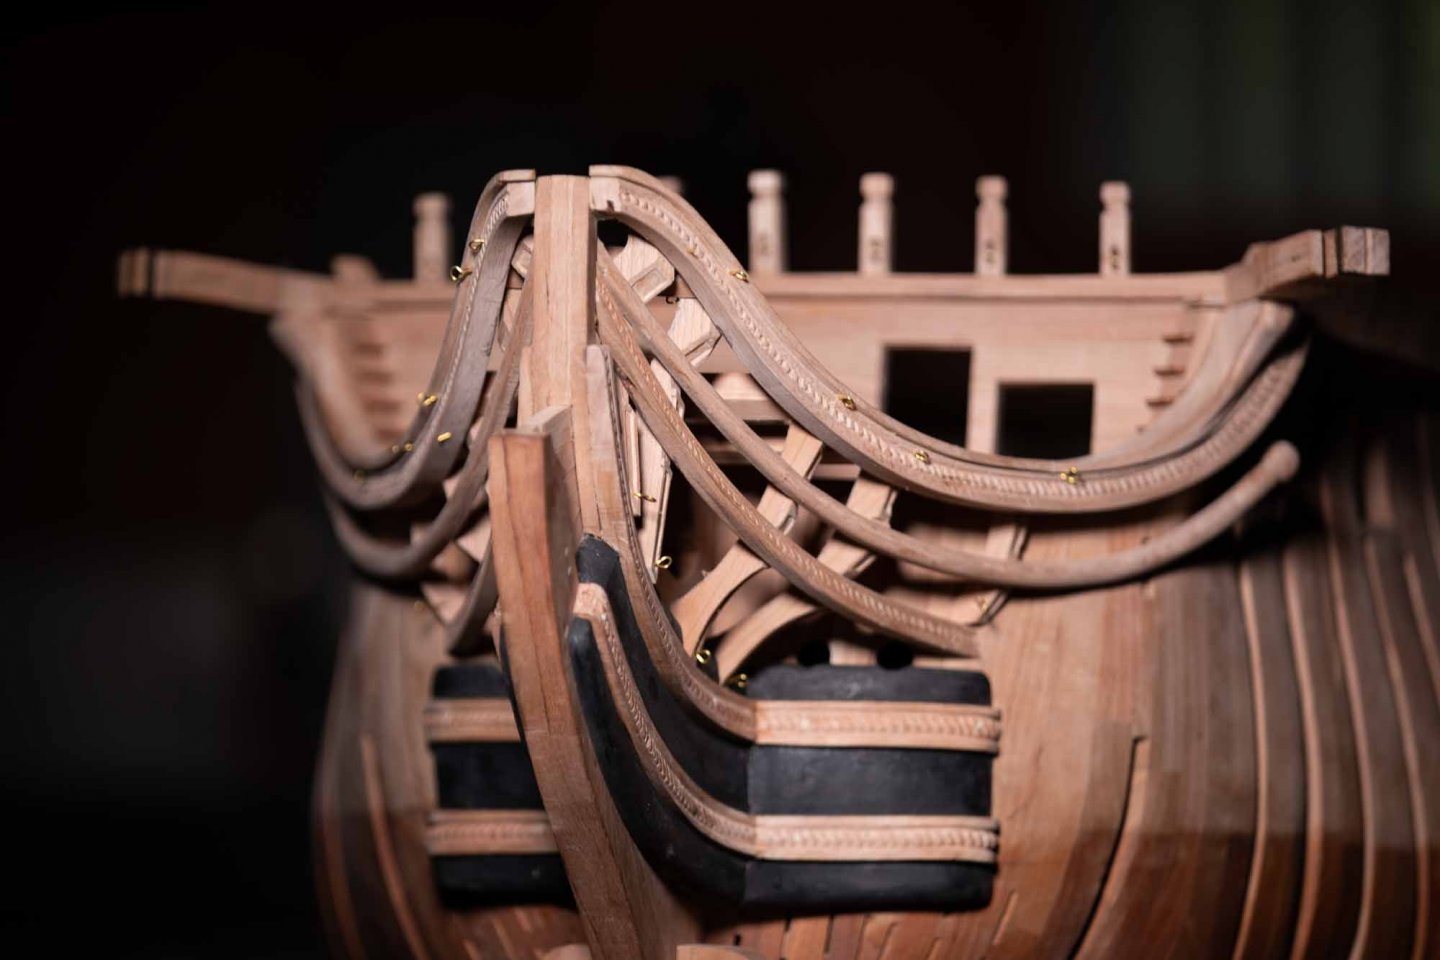
Taking photos is an easy way to exercise quality control. As an example, in the first photos, we can clearly see that one part, in red, is clearly not parallel to the other. Parts are not glued yet, it will be easy to rectify.


-
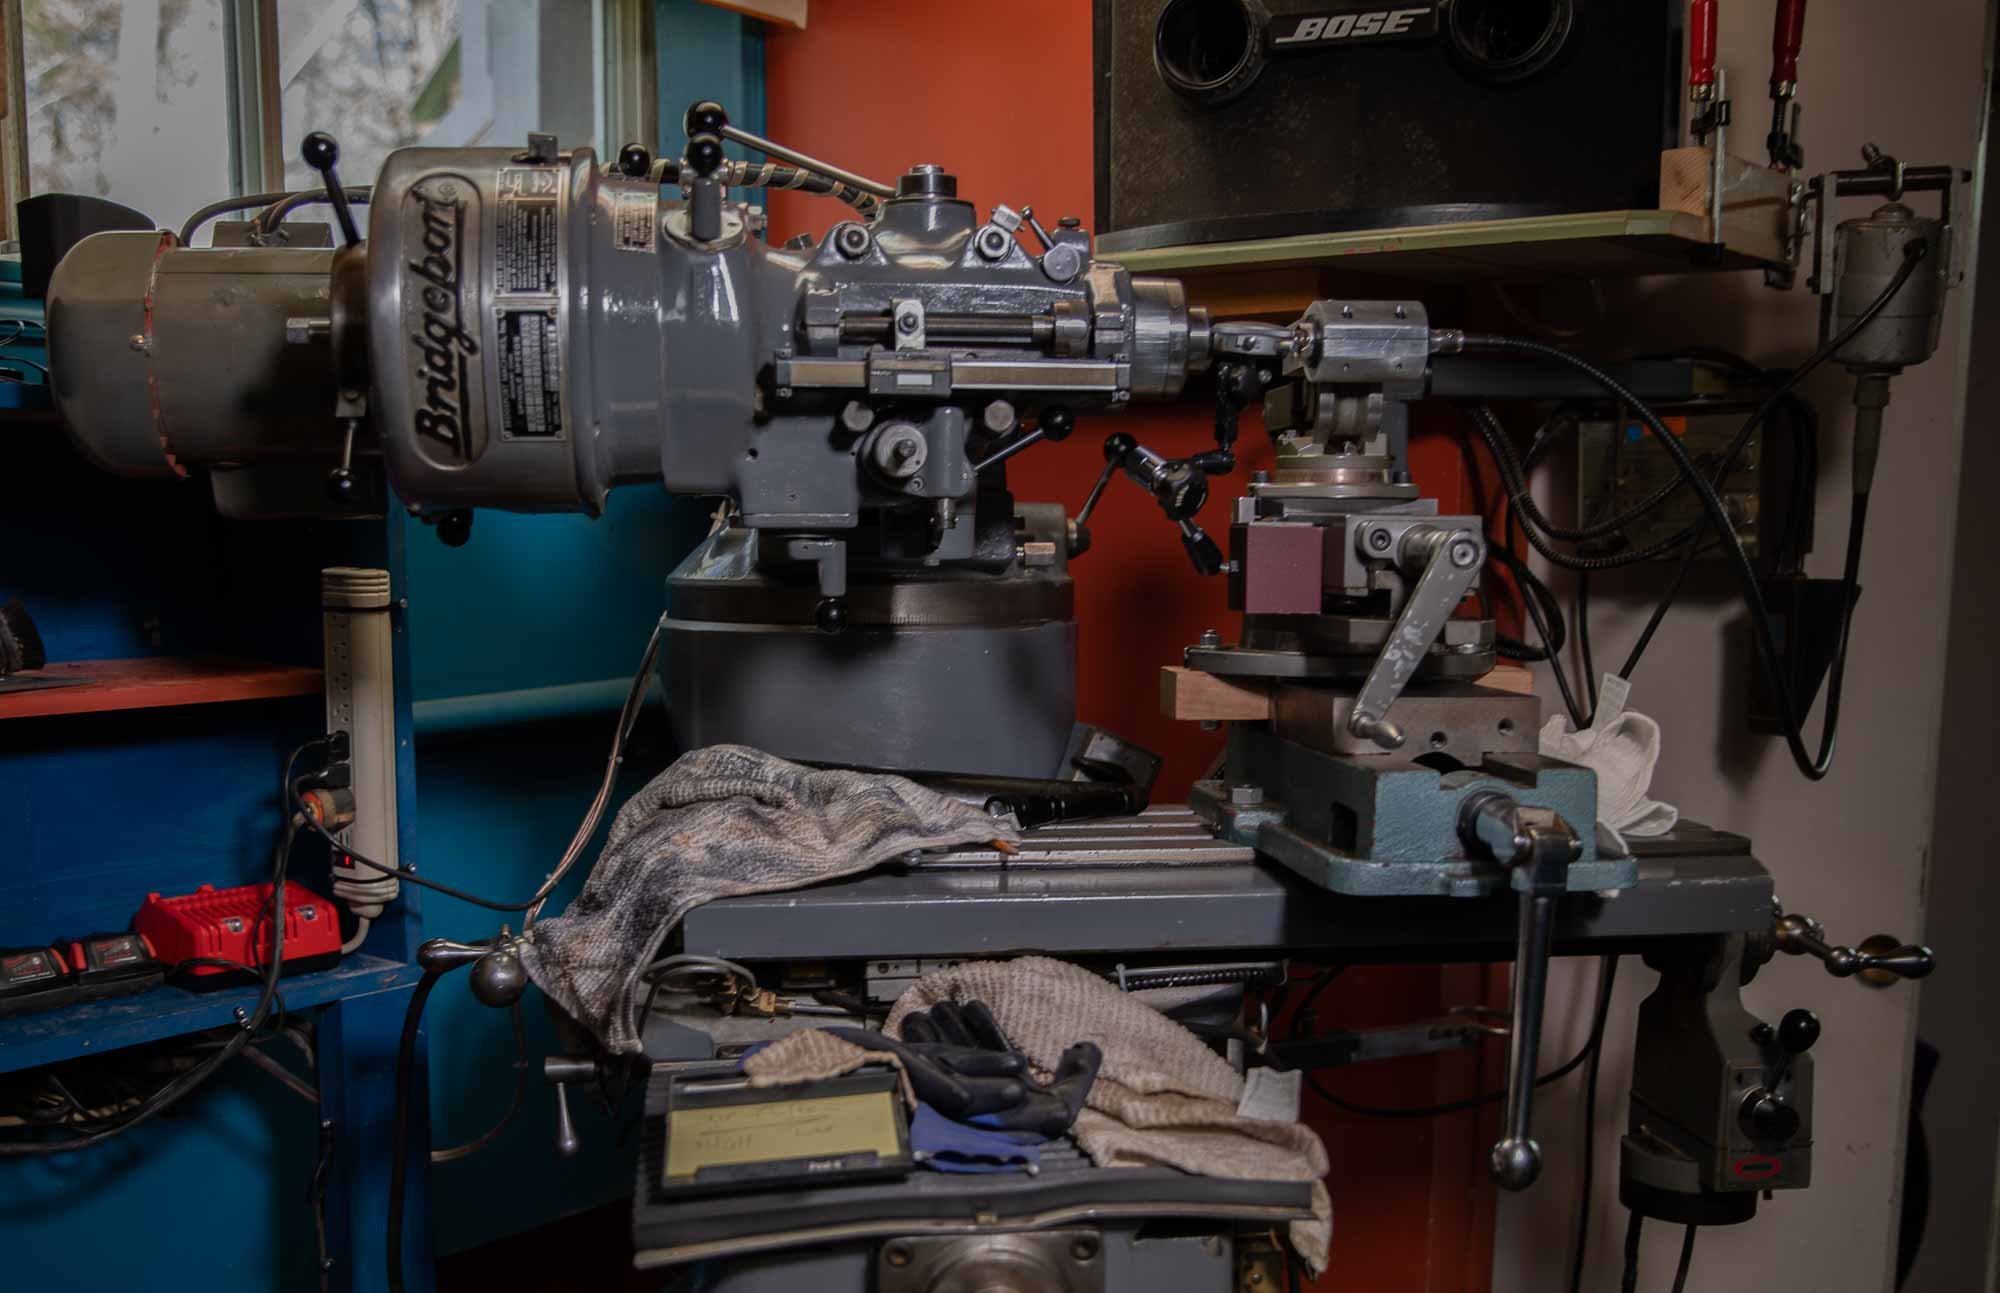
I did fix the last parts and we had the first real nice temperature this week... I did some maintenance on the milling to increase the spindle precision. One of the most interesting facts is the difference between a press drill and a milling machine. The spindle of a press drill has standard bearings. The Bridgeport has angular contact ball bearing with the main line at 40 degrees. This is why the spindle can work in more directions than the press drill.