Gaetan Bordeleau
-
Posts
1,307 -
Joined
-
Last visited
Content Type
Profiles
Forums
Gallery
Events
Everything posted by Gaetan Bordeleau
-
 I used ebony often and, nothing, beats the look and the touch of it. Wales is the first place where to use it. Did you know that ebony is heavier than water, if you throw it in the water, it sanks. Here in Canada, we can buy ebony but it is expensive. For 1'' X 4'' X 4'; $150 You have it, use it, and enjoy it! Of course boxwood because of it's fine grain will take the smallest details in carving. Although I have never tried but because of his high density, ebony could be interesting to carve!
 -
Tool storage
Gaetan Bordeleau replied to Q A's Revenge's topic in Modeling tools and Workshop Equipment
Joe Monday the carrier will pass... or 2 weeks of your time and you can have one, exactly like you want! -
Tool storage
Gaetan Bordeleau replied to Q A's Revenge's topic in Modeling tools and Workshop Equipment
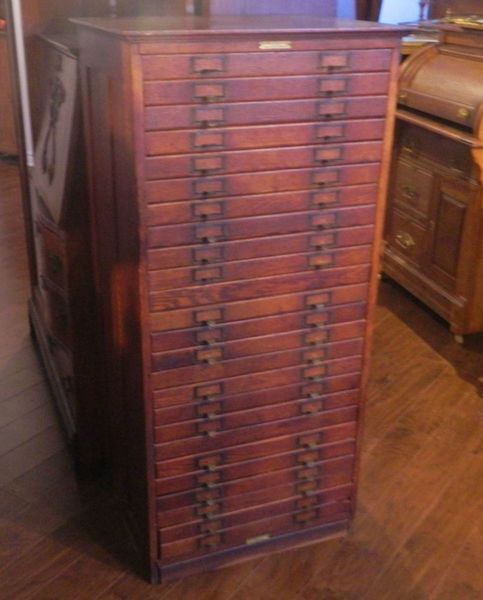
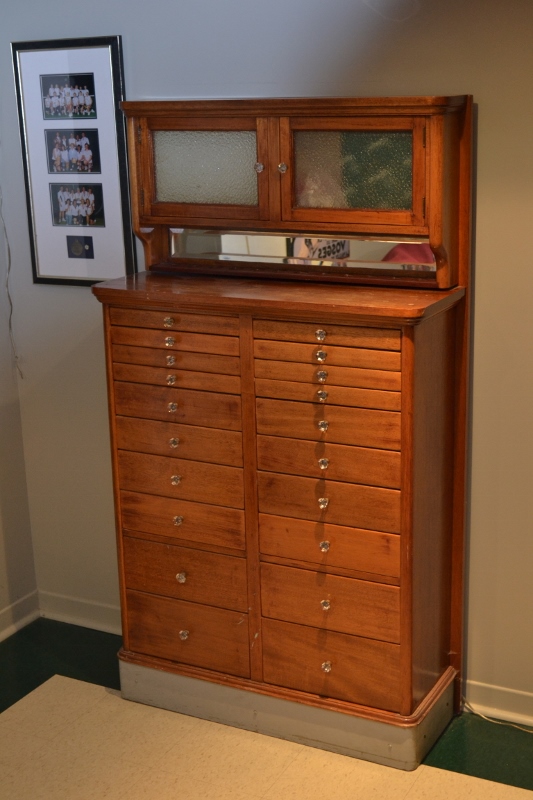
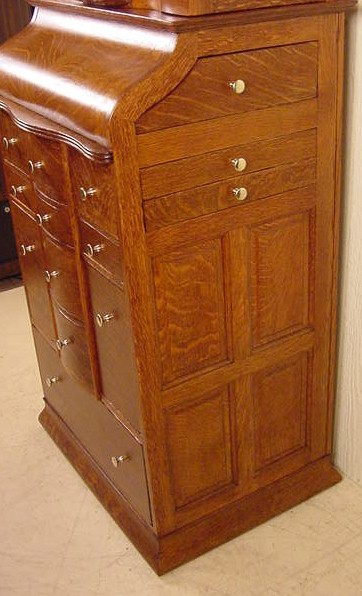
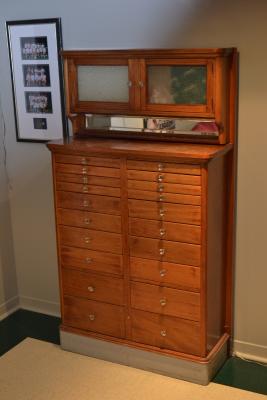
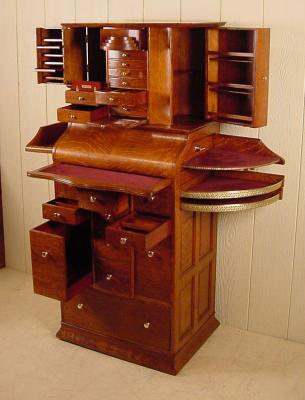
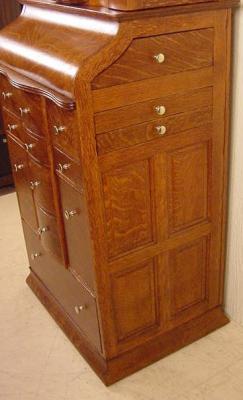
few others in that family some of the nicest I saw were dentist tool storage unit

-
Tool storage
Gaetan Bordeleau replied to Q A's Revenge's topic in Modeling tools and Workshop Equipment
Joe' I am not surre about the one you mean? Is it this one?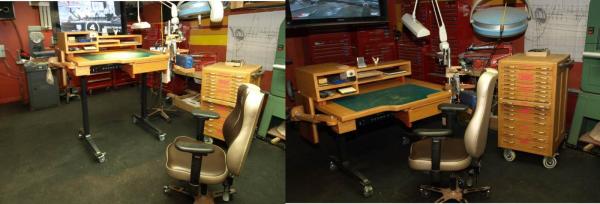
-
Tool storage
Gaetan Bordeleau replied to Q A's Revenge's topic in Modeling tools and Workshop Equipment
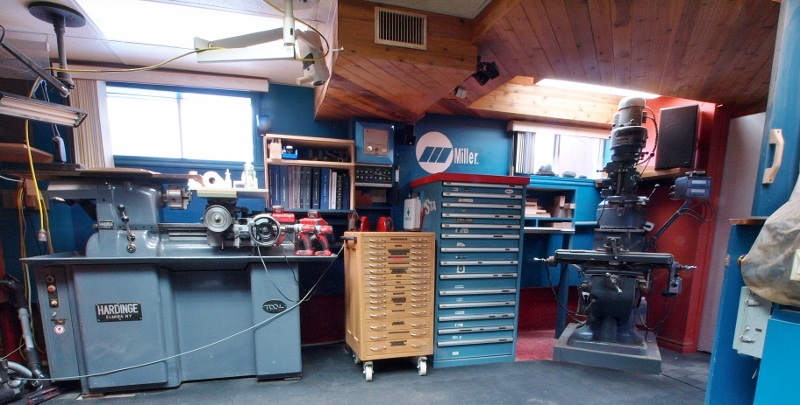
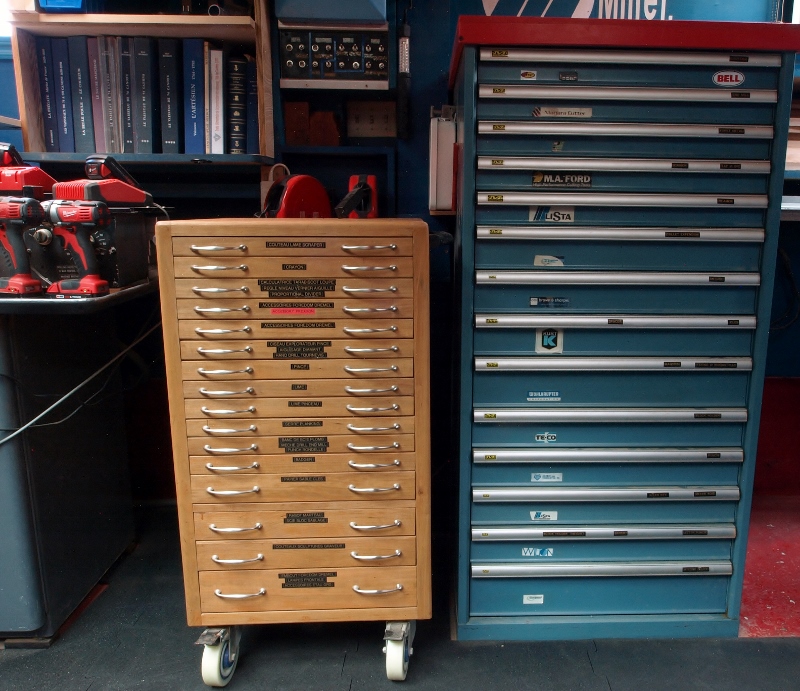
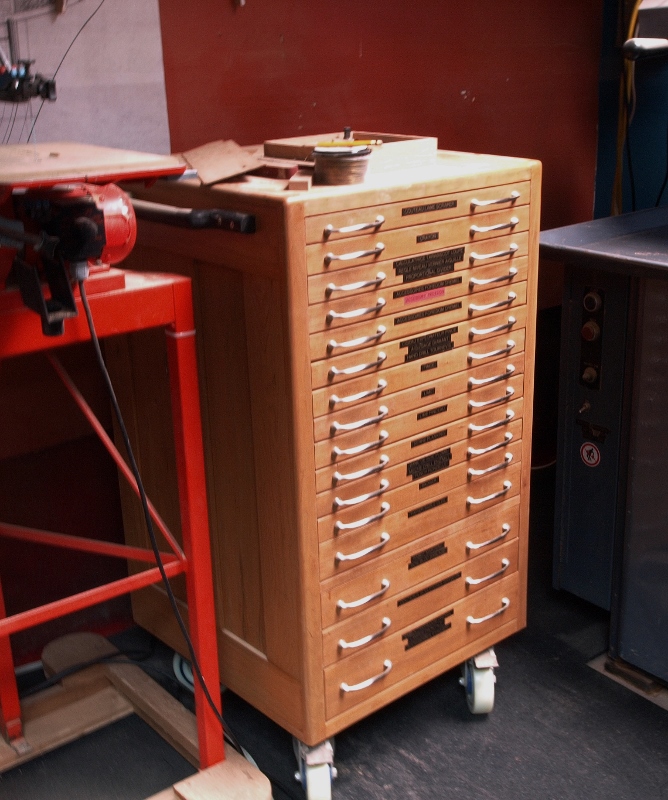
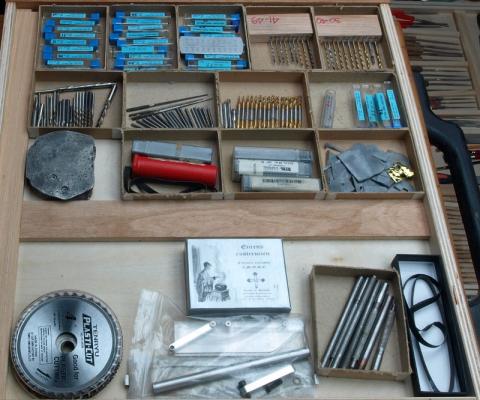
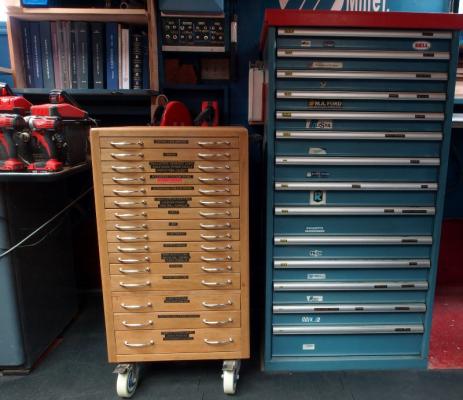
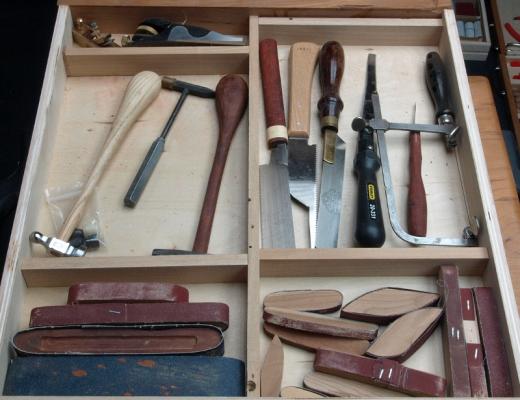
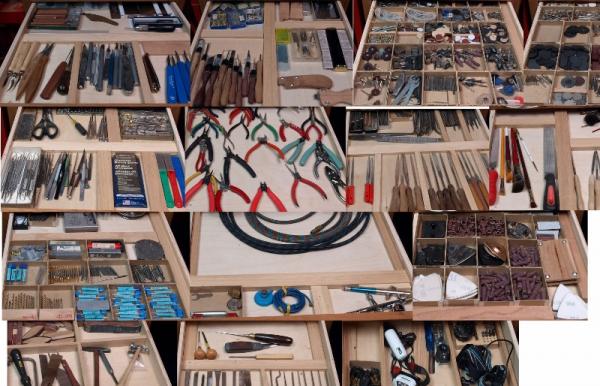
I think that what matters the most for a drawer is the area not the volume. For comparisons, this old school chest has 16 drawers 18 inches by 20 inches each. This would be an area of 41 square feet. The Lista chest has 14 drawers 2 feet by 2 feet for an area of 56 square feet. One is made of wood and the other of metal. One cost around $200, the other at least 10 times more. Joe, I hope there is enough! Gaetan

-
Tool storage
Gaetan Bordeleau replied to Q A's Revenge's topic in Modeling tools and Workshop Equipment
Of course Joe


-
Tool storage
Gaetan Bordeleau replied to Q A's Revenge's topic in Modeling tools and Workshop Equipment
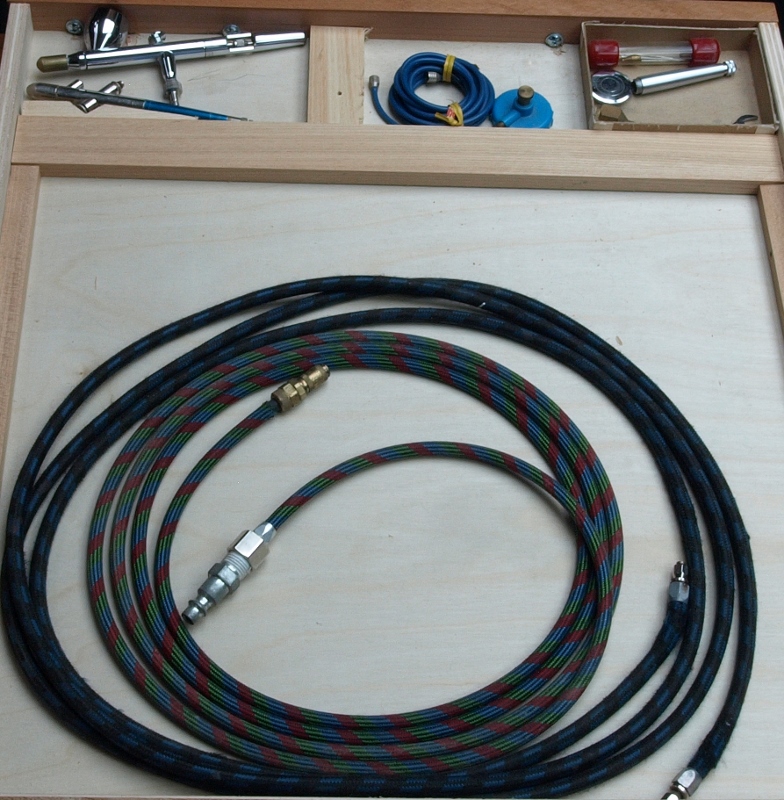
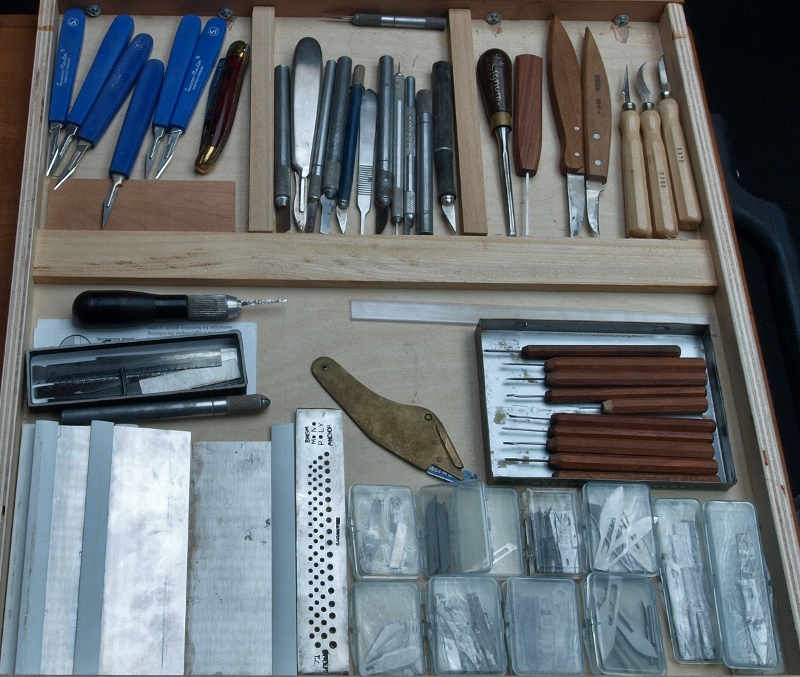
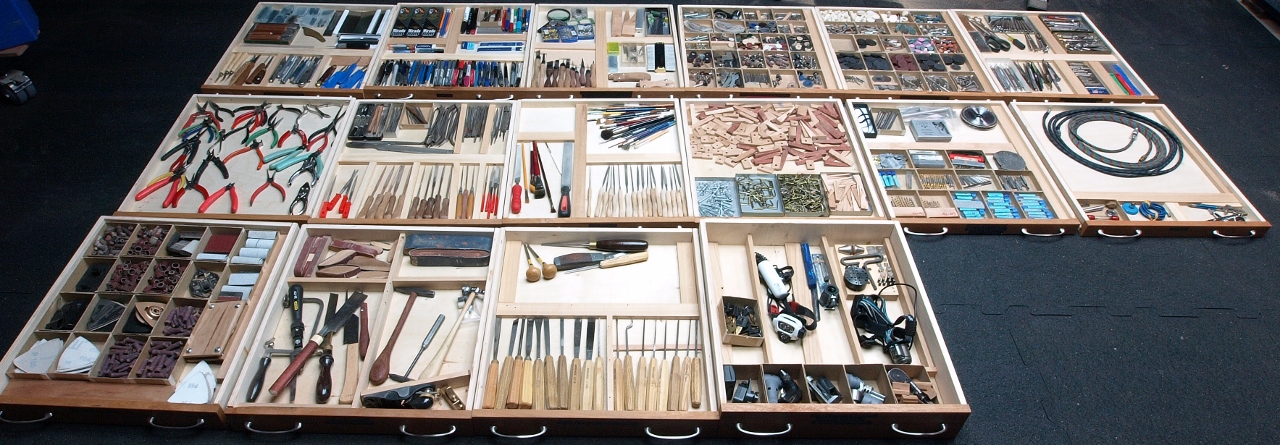
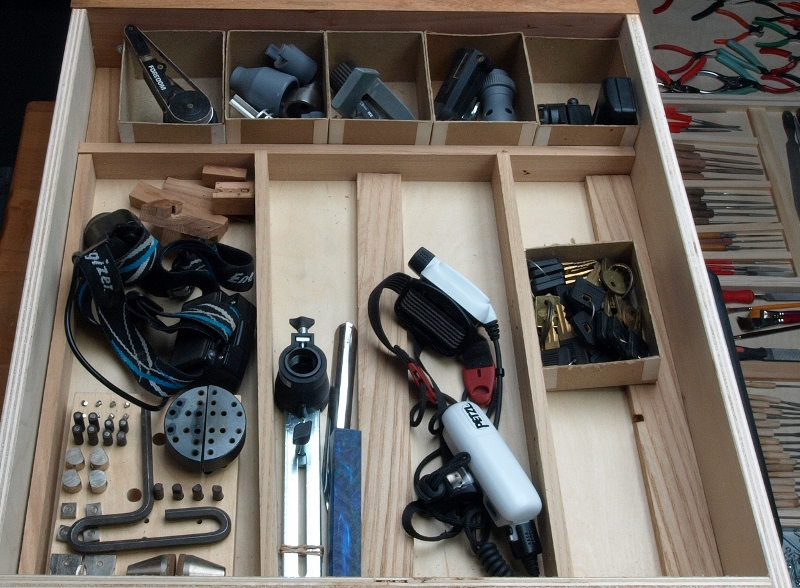
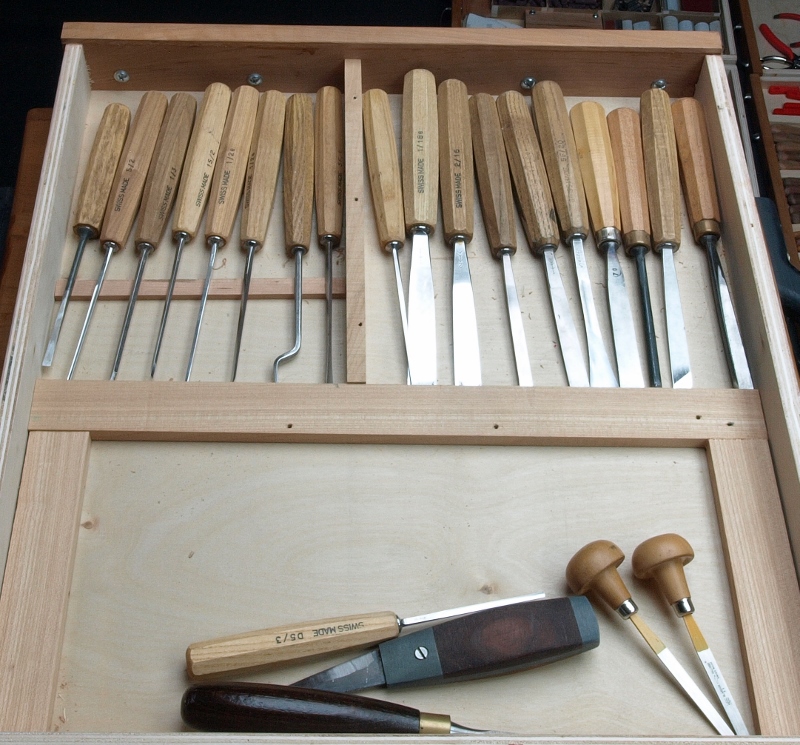
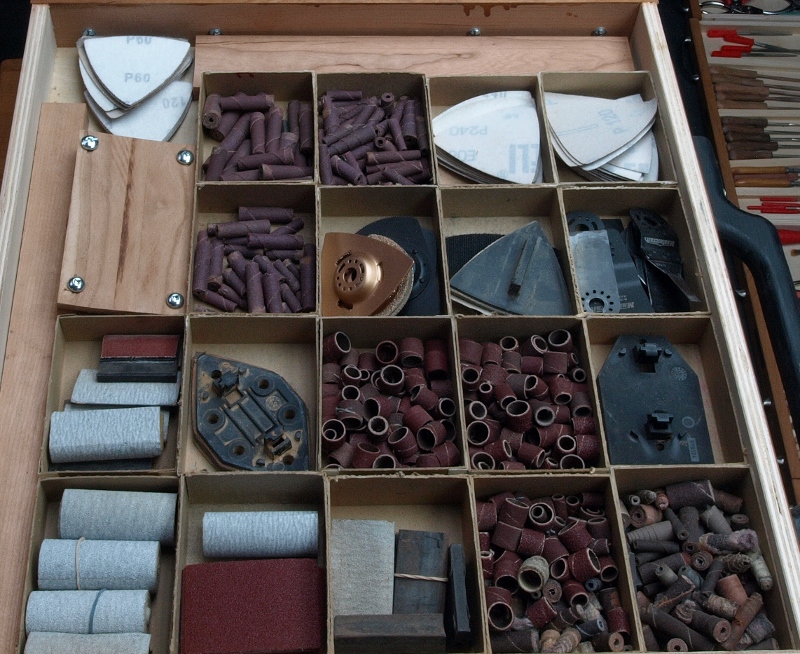
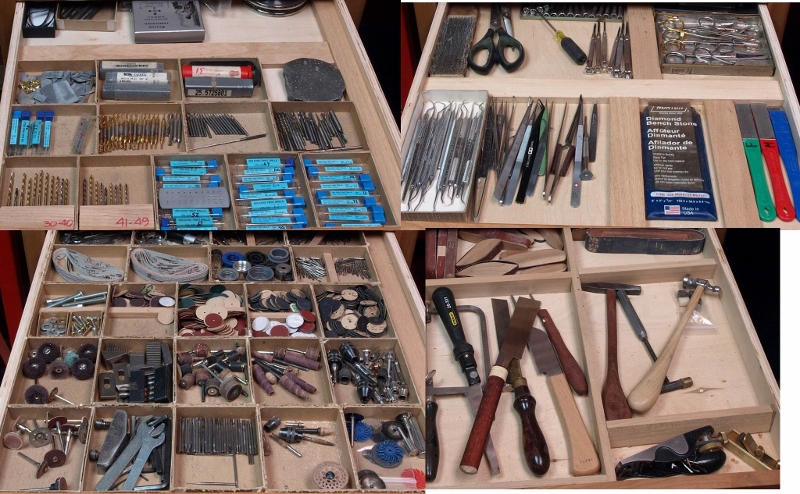
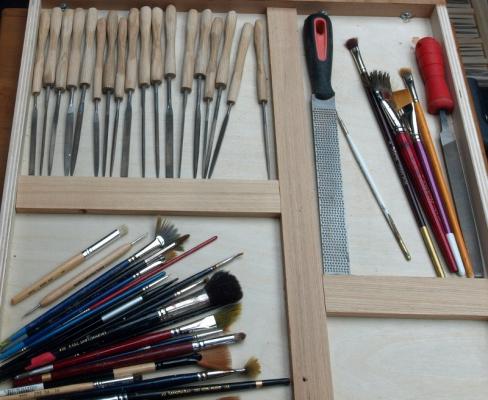
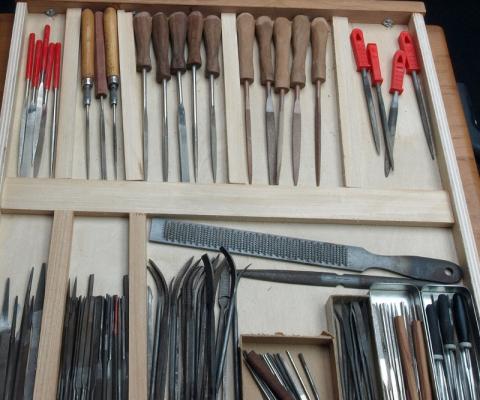
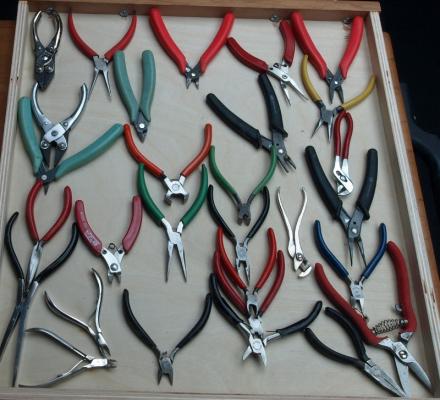
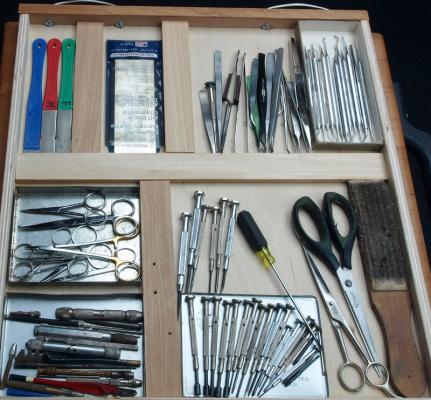
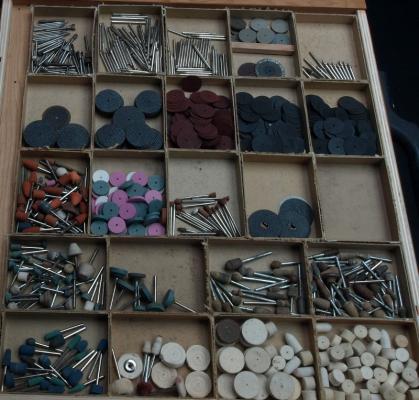
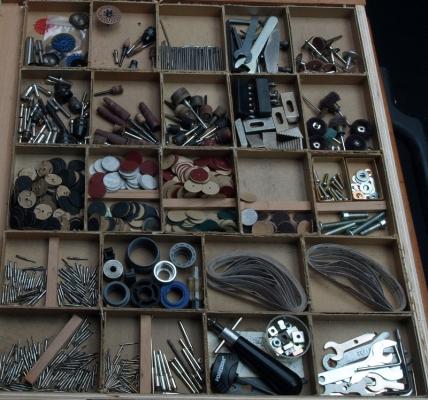
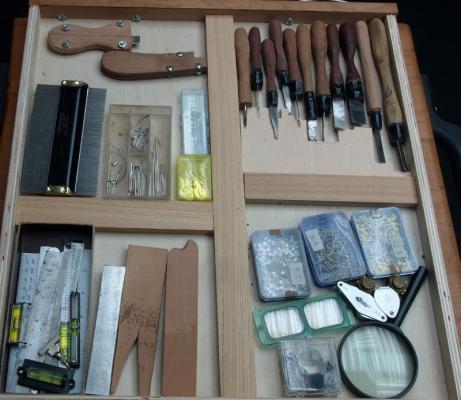
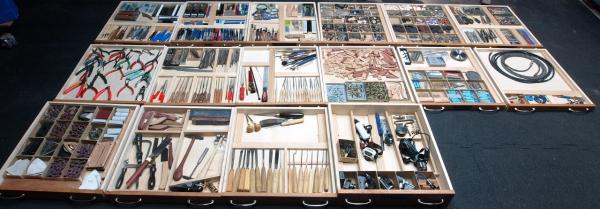
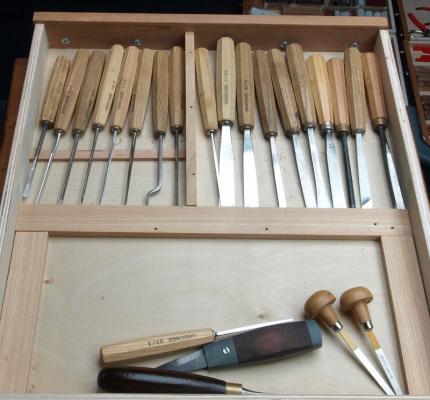
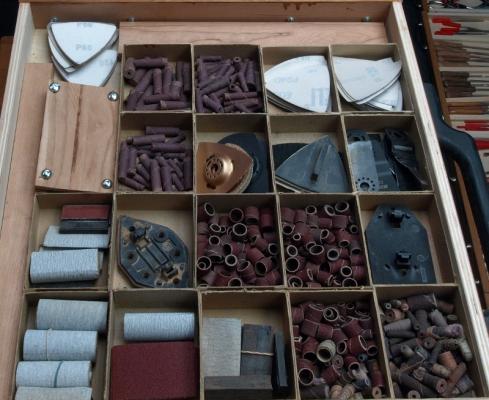
Along the years I built some tool boxes. Recently a major reorganisation to regroup the small tools in only 1 chest all at hand. I came close to buy Bisley cabinet (up to 15 drawers). Finally I opted to build one. Most of the drawers are only one inch high and most of the tools fit in and some drwaers could even be less high.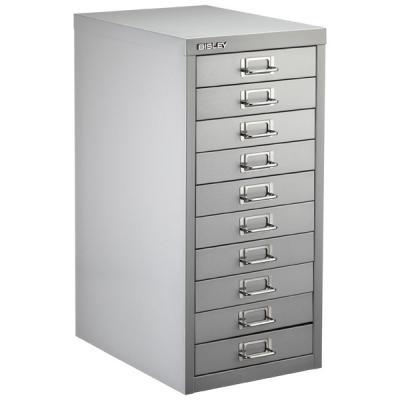


-
When we build a model ship, peaples say that we have to put our soul in the model to give it a life. Here is how to do it,
- 728 replies
-
- 8
-

-

-
- le fleuron
- 64 gun
- (and 1 more)
-
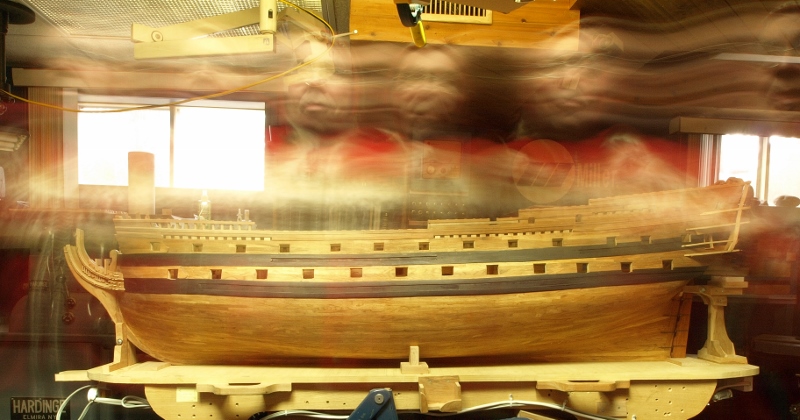
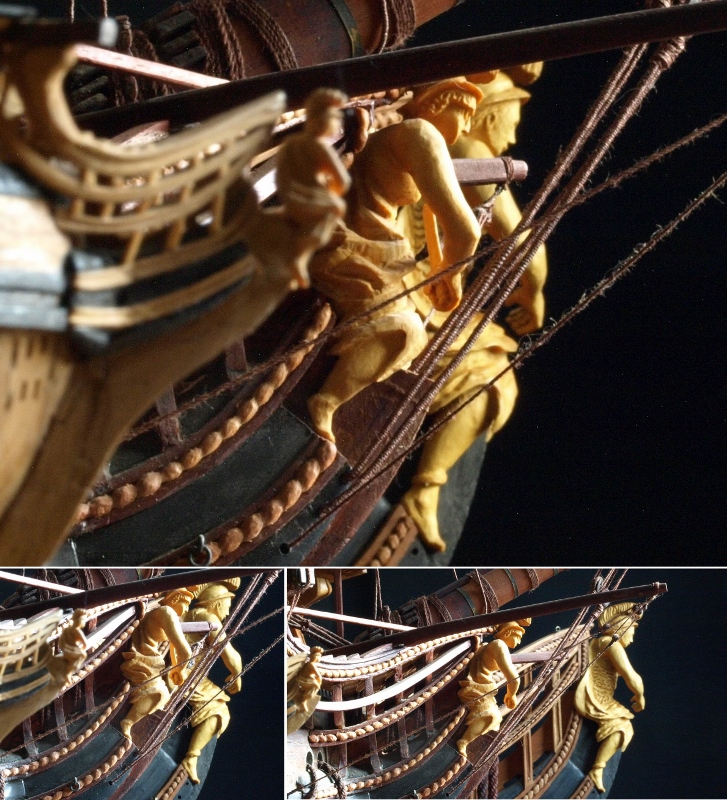
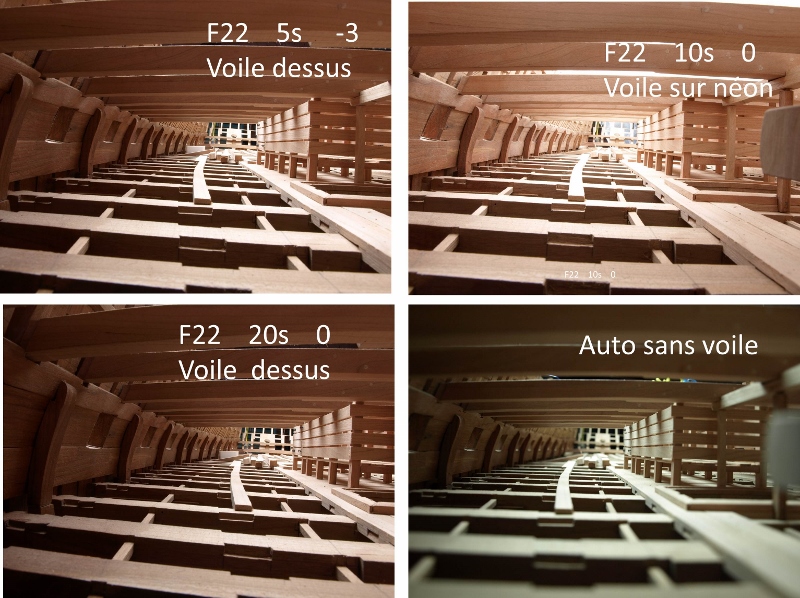
Thank you John, Up to now, all the pictures presented were in automatic mode. Circumstances made that next week will be the last part of Photography for the beginner. As for each week, we must try few pictures, so I develop a subject already tried but this time in manual mode! On the second picture, by changing the camera angle the distance between the figures changed. On the third picture, different tries by adding a white transparent curtain to soften the neon lighting coming from the ceiling.


- 728 replies
-
- 10
-
-
- le fleuron
- 64 gun
- (and 1 more)
-
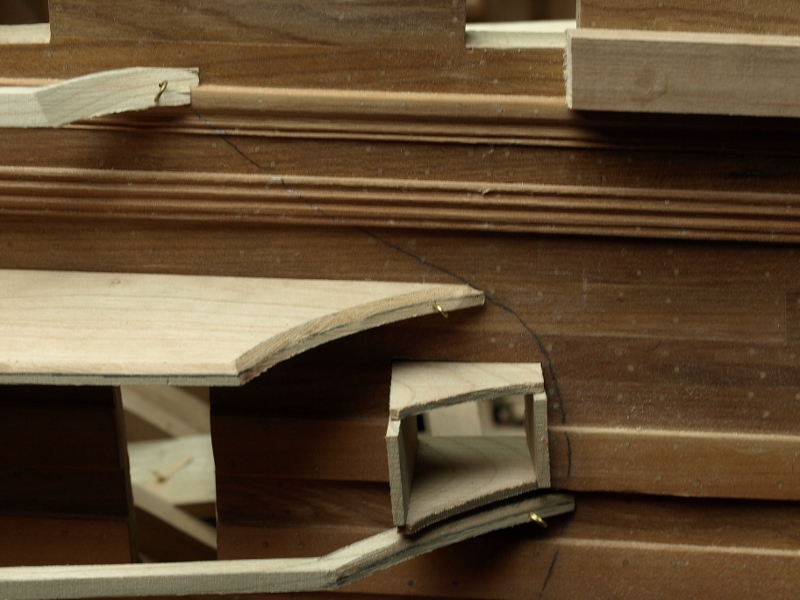
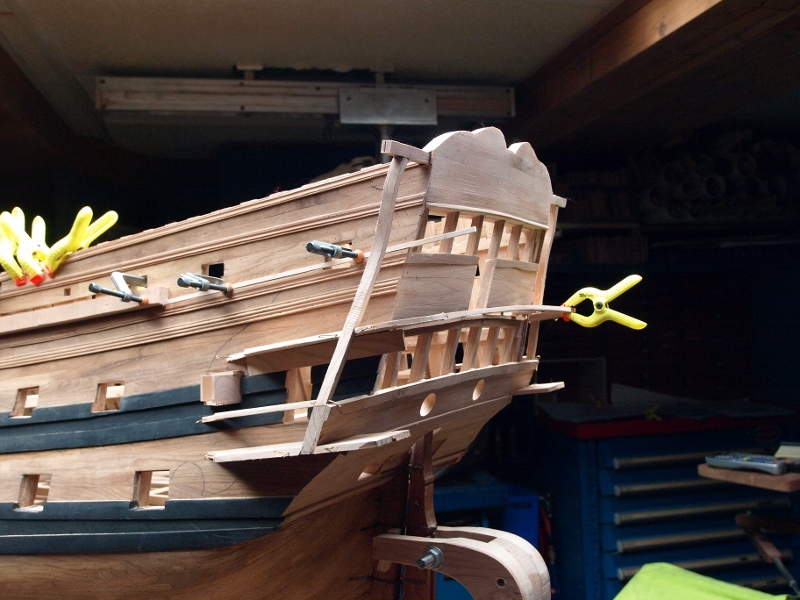
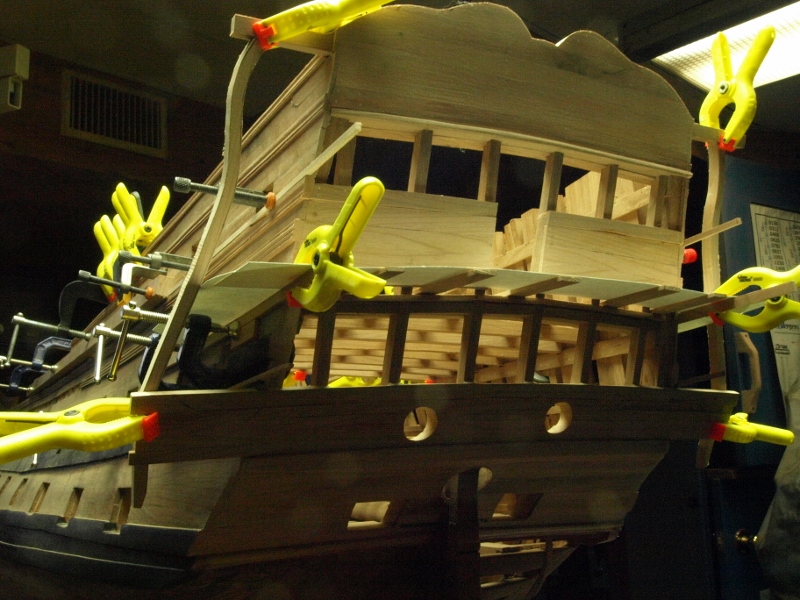
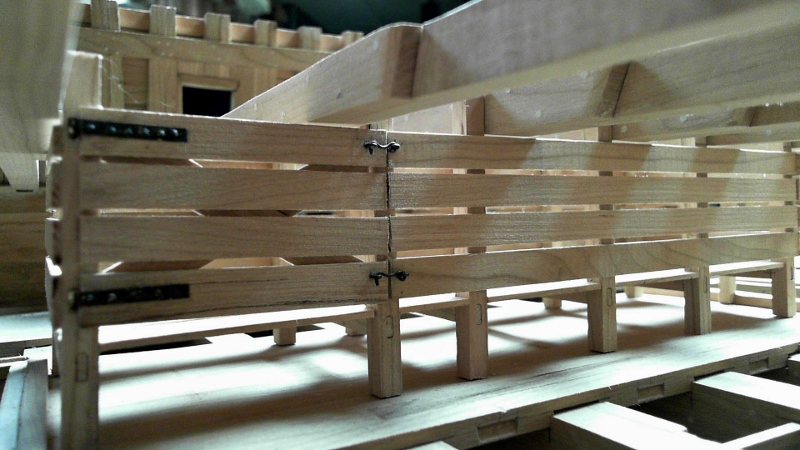
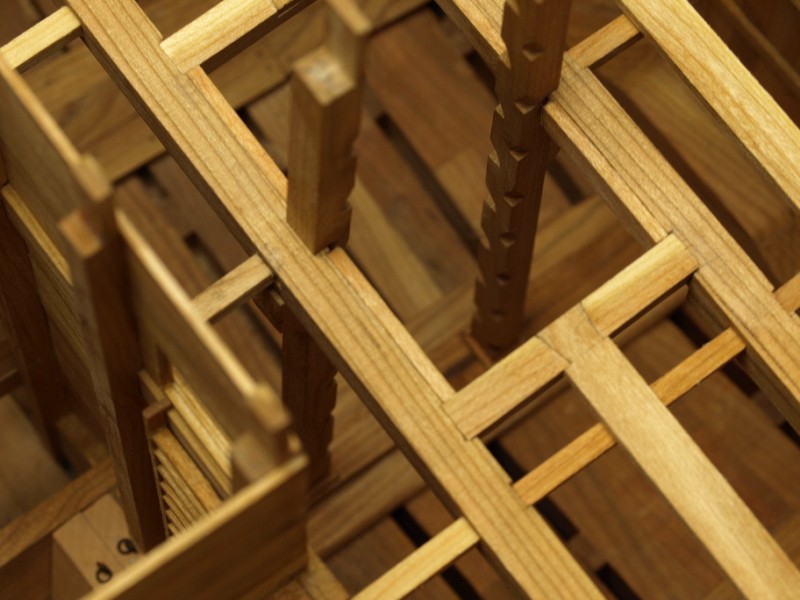
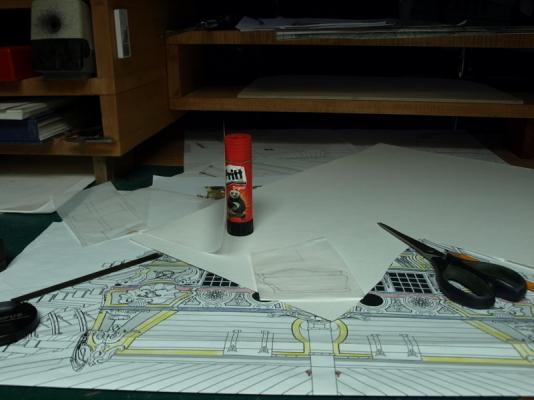
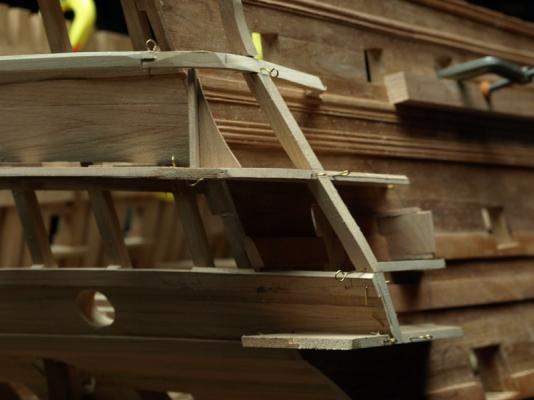
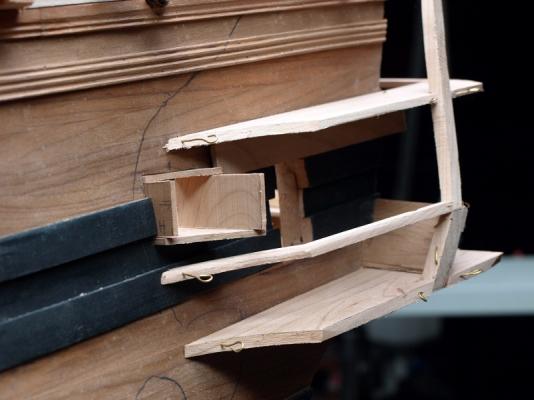
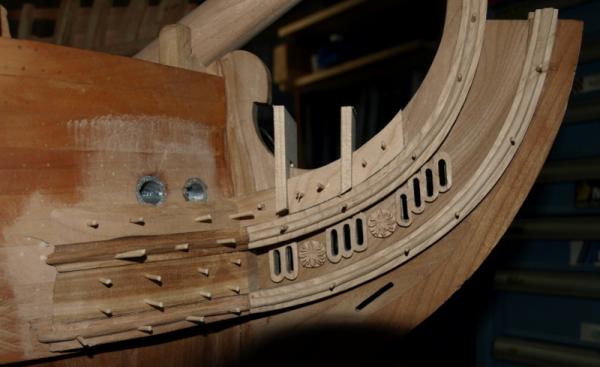
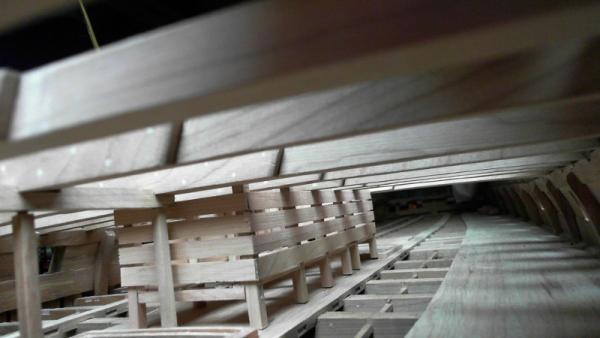
Image 1 parts are done with white cardboard which -Lines are copied on a transparent paper from plans then glued with Pritt paper glue on a white cardboard -Copied directly from the model Image 5 made from 2 planks with a groove for assembly Image 7 actually working on the balcony ramp made from 3 parts: 2 sides and 1 back same kind of assembly for the lower rail for the balcony. Alignment of sides is done with a plank resting on side planking thus giving exact parallelism between each one template made from 2 parts to give parallelism between the 2 rails the assembly of the side balcony ramp on the vertical post is done exactly as when assembling a cross


- 728 replies
-
- 8
-
-
- le fleuron
- 64 gun
- (and 1 more)
-
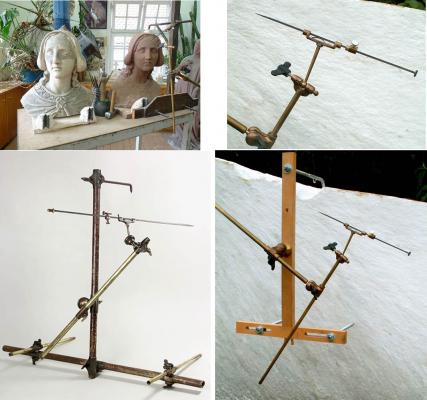
Yes Nils I will! Also here is an old tool but a new tool for me which could have some interest for our hobby. This tool is use to locate a point on a sculpture which is done on a new sculpture in work. May be I could use it when I want to build something on both sides of the ship?
- 728 replies
-
- 1
-
-
- le fleuron
- 64 gun
- (and 1 more)
-
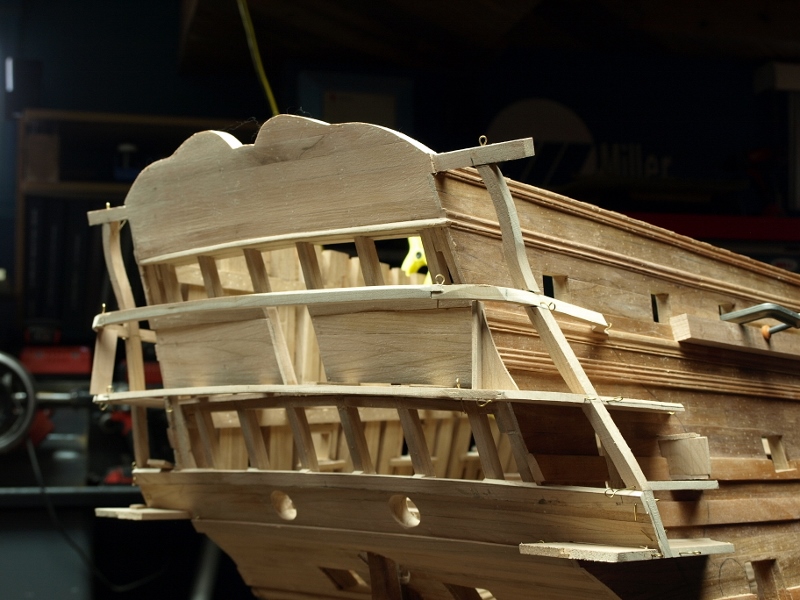
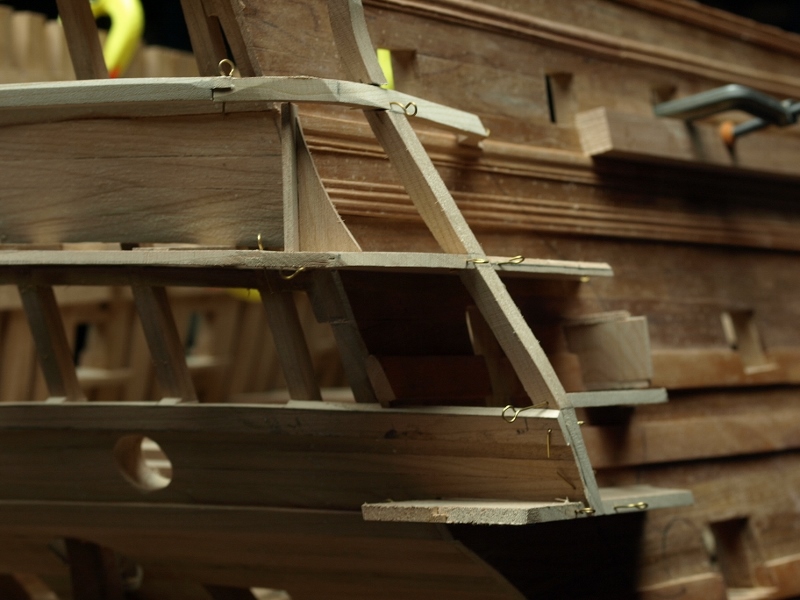
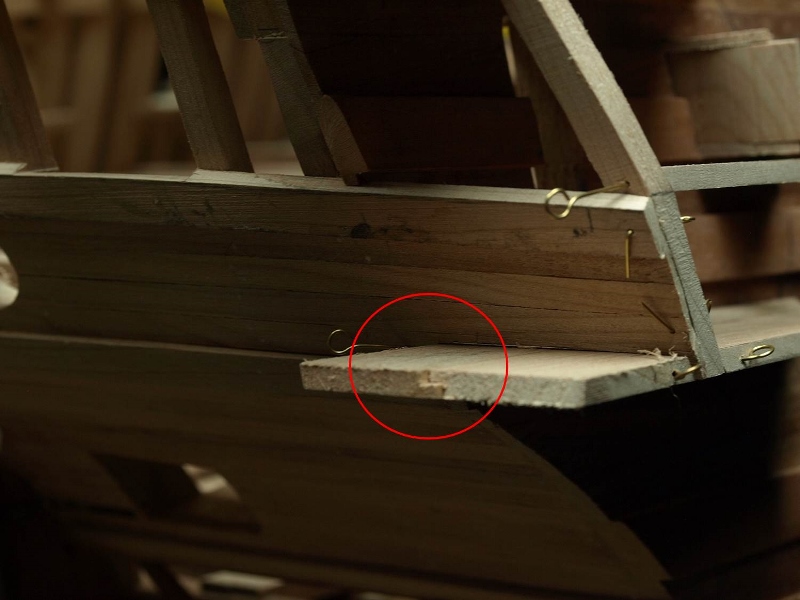
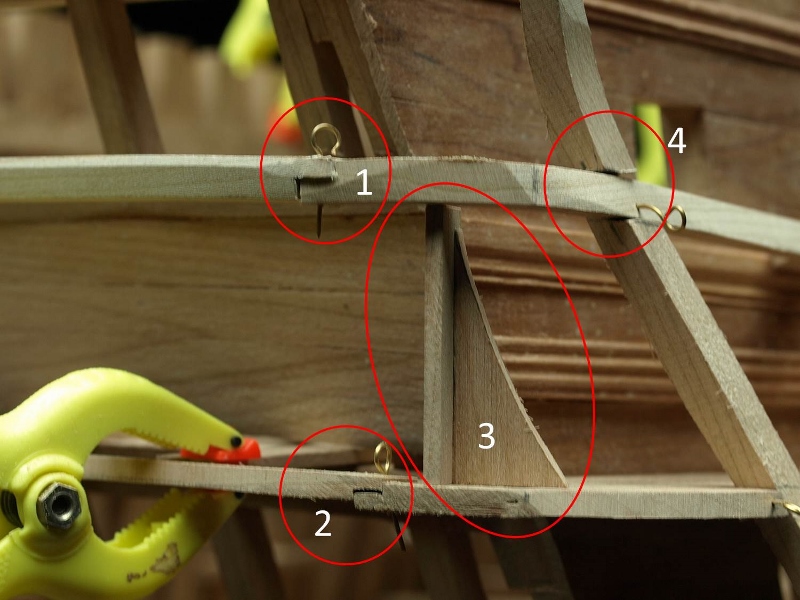
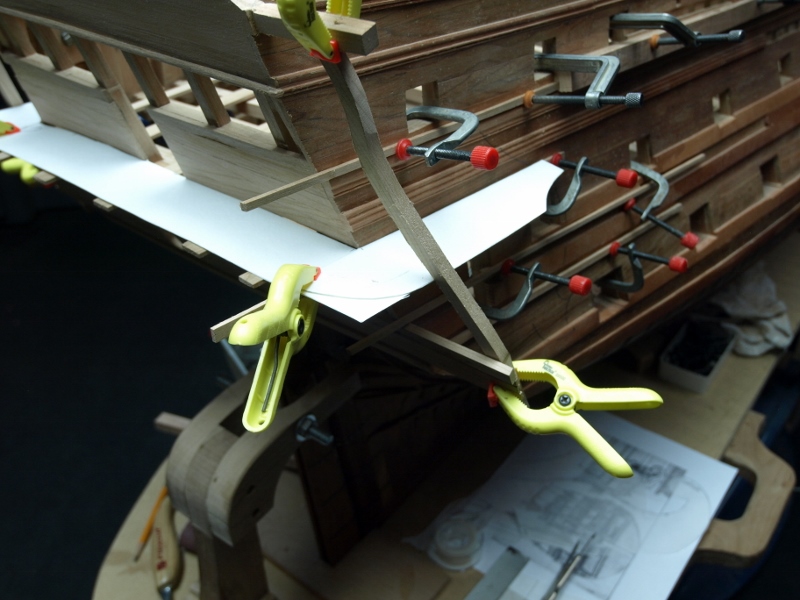
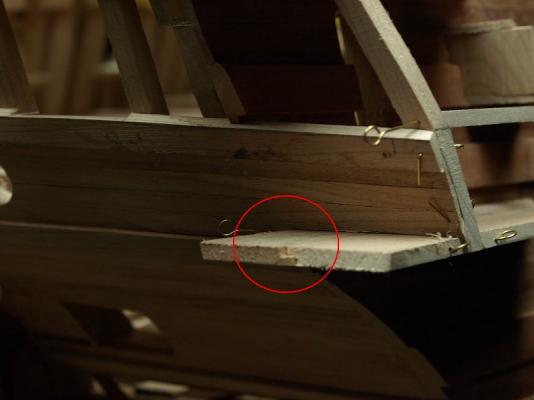
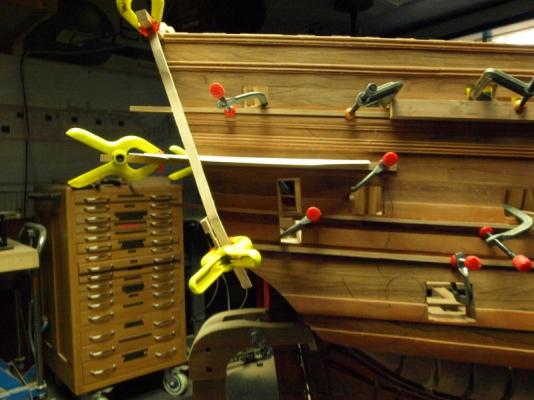
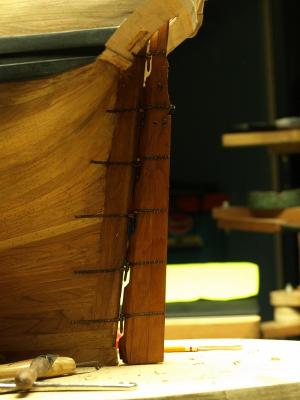
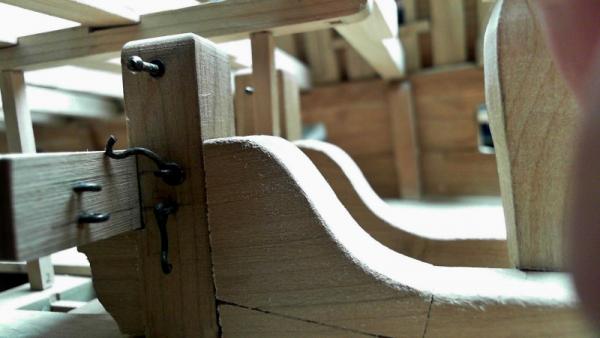
Merci Messieurs, I will continue in the same area; paper is replaced by wood and everything is dry fit with brass needles to hold everything until adjustments and alignments are completed. The last gunport will make part of the assmbly.

- 728 replies
-
- 7
-
-
- le fleuron
- 64 gun
- (and 1 more)
-
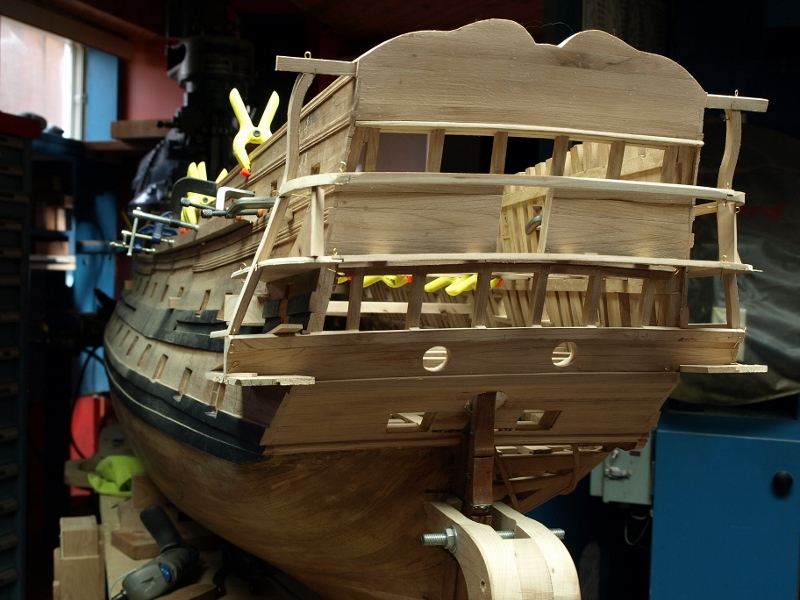
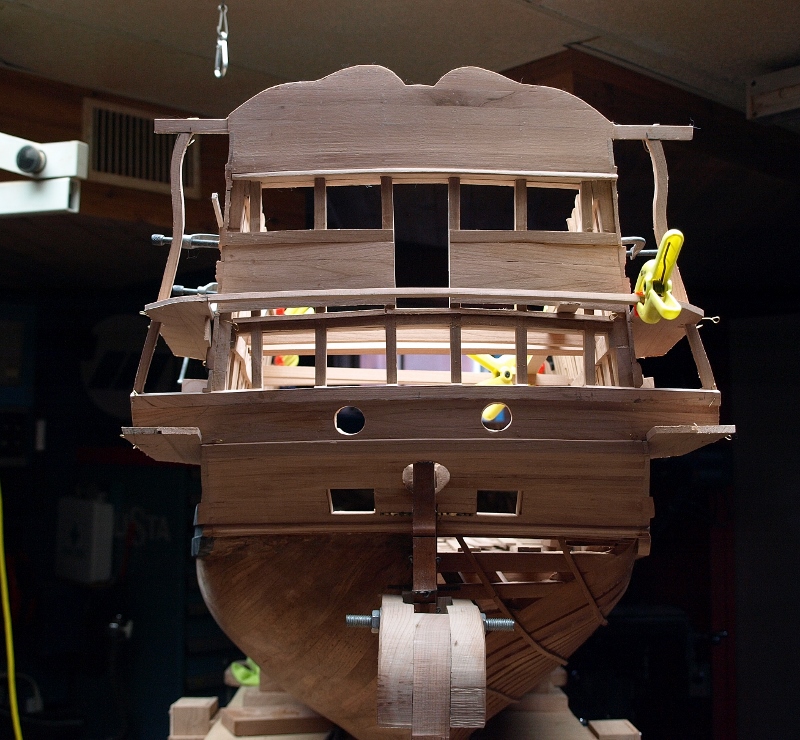
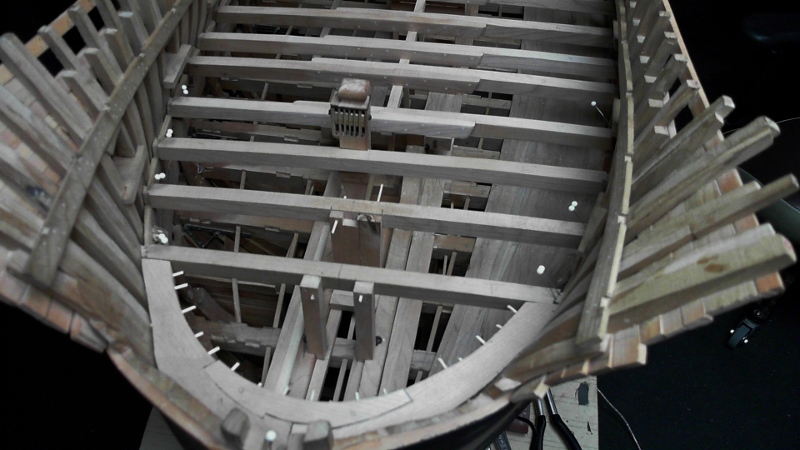
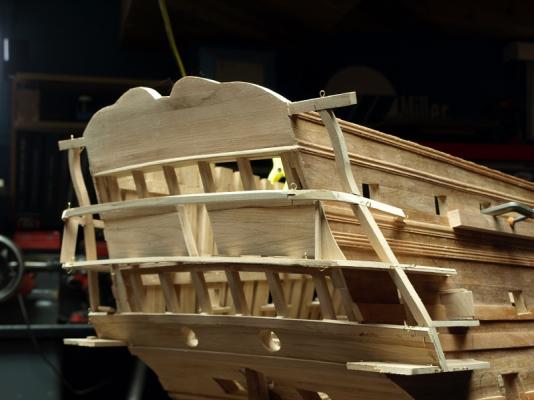
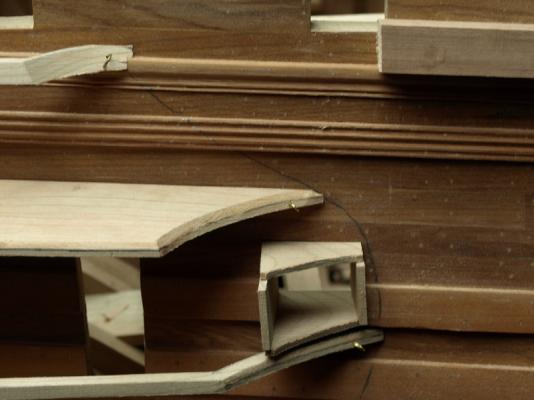
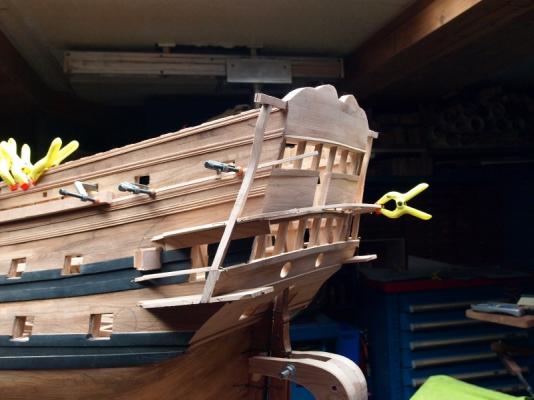
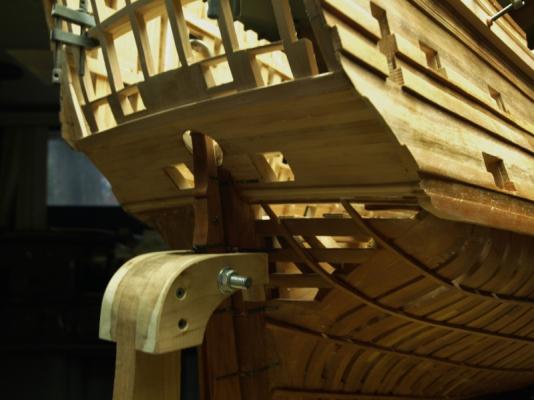
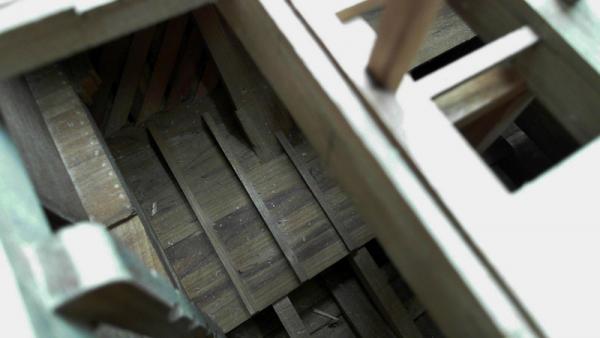
I want to be able to see the outside shape of the ship especially in the back.


- 728 replies
-
- 7
-
-
- le fleuron
- 64 gun
- (and 1 more)
-
I stopped working inside and did some work fore and plane the fore mast made from 7 parts. Actually, it is easier to plane round than what we could think. To be able to install the rudder upper metal fitting, it needed 1 layer of plank before.

- 728 replies
-
- 12
-
-
- le fleuron
- 64 gun
- (and 1 more)
-
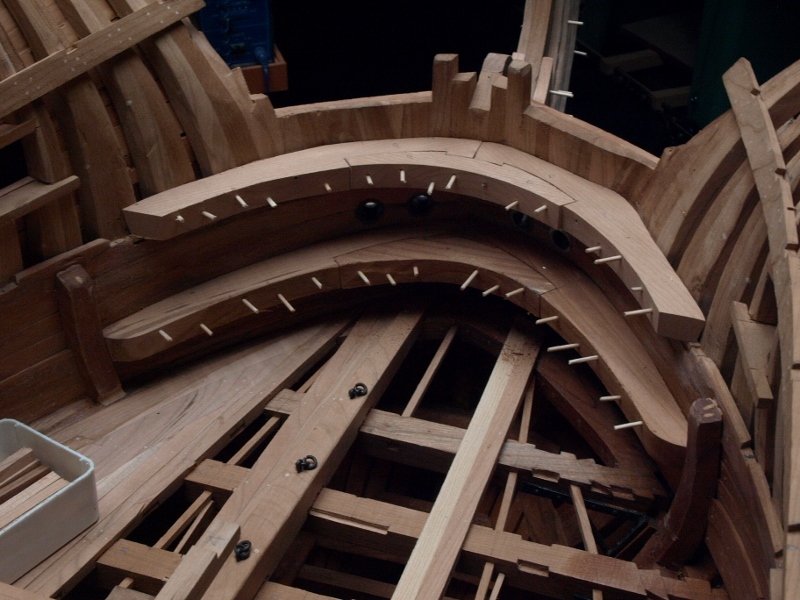
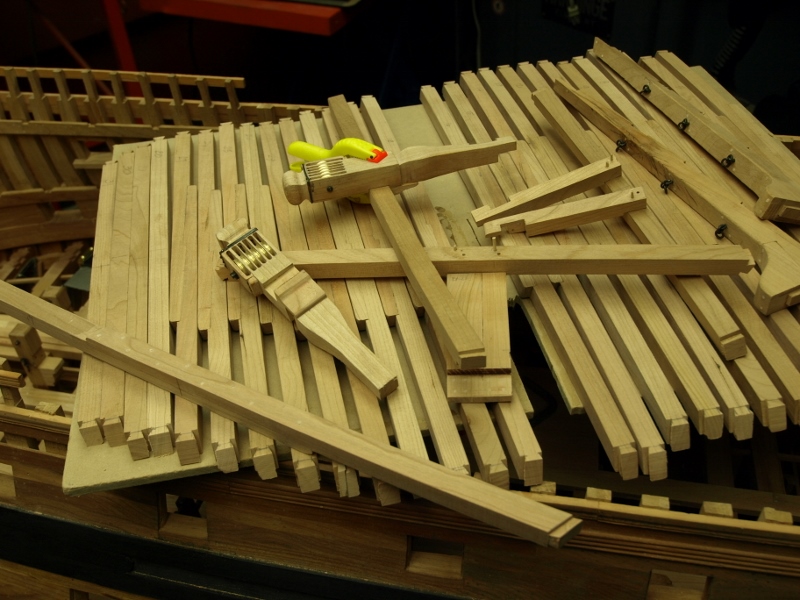
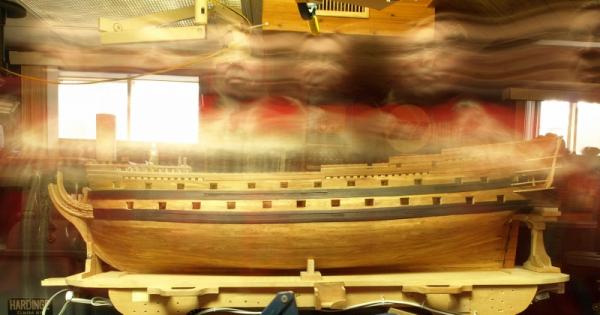
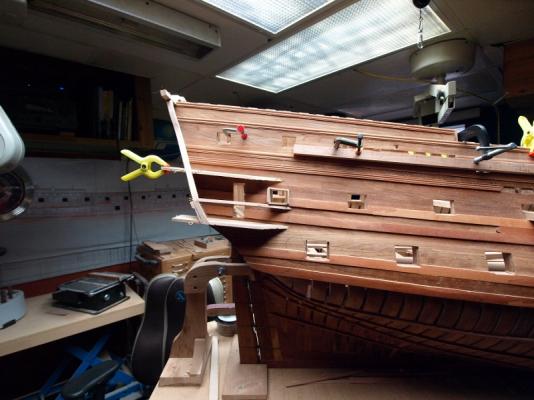
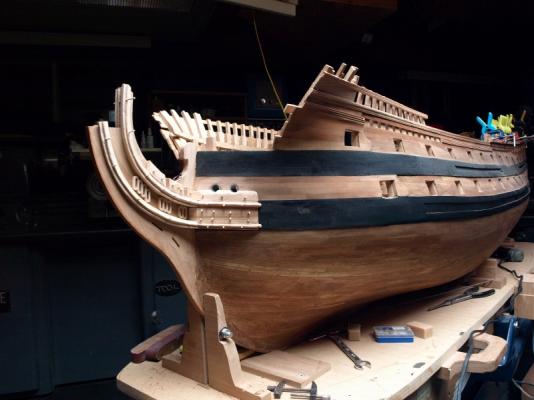
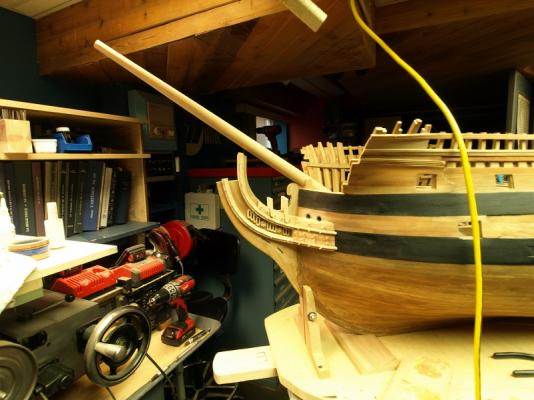
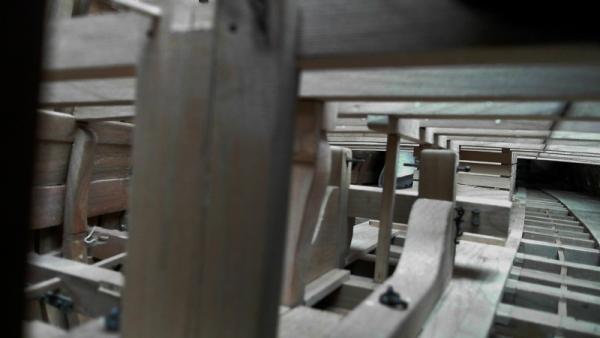
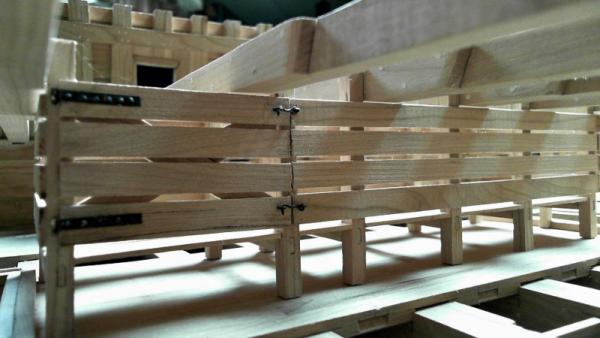
Here is an update on the first deck. Many parts are fixed in relation with the beams of the second deck, so they are also needed. Many parts are still not glued yet. Planking is mostly completed. 2 areas are needed, in the middle and on port side but just enough to supports guns. The idea is the more planking is done the less we can see inside and in fact it is just the opposite effect which is wanted. Animal park can be seen on the last 2 pictures.

- 728 replies
-
- 13
-
-
- le fleuron
- 64 gun
- (and 1 more)
-
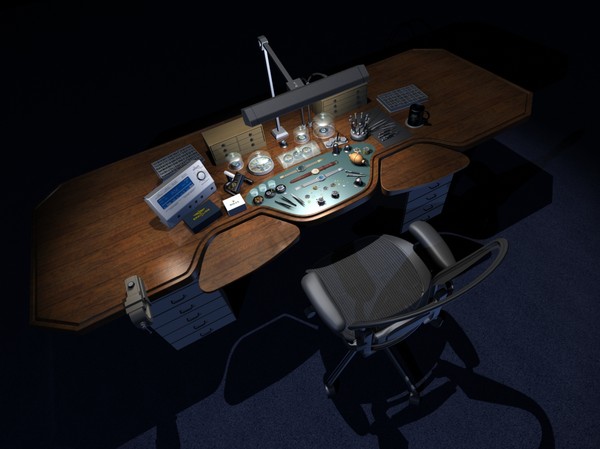
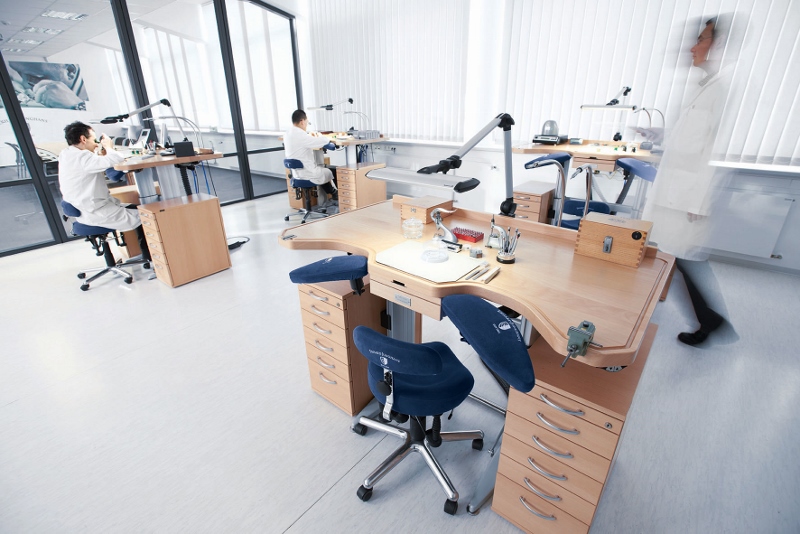
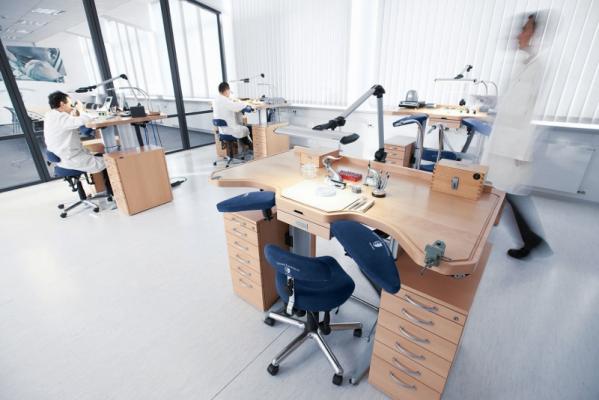
Here are few notes about the construction a part which is a very good example for the use of the milling of the holes for the sheaves which is done in 3 steps: The length of the milling cutter being about the half of the thickness, grooves are milled half way A drill bit is use to break through the part. These holes bored at one end only will serve as references to mill the other half of the thickness The part is then turned 180 degrees and the other half is milled Then the scroll saw which has to cut some angles which are about 1 inch thick needs the appropriate blade. Mainly I use 2 kinds of blades from Olson; one for thin and one for thick cuts. I am not sure about the name but it is about skip-tooth or reverse tooth . No sanding is required after the cut. The combination of the Hegner scroll saw and the blade allows to cut in straight line with precision and even to cut as thin as paper if required and with 0 vibrations. I tried to work at different heights on the table and I continue to believe that working at the ‘’good’’ height makes the difference at least it makes the job easier. As an example, here is a picture in Junghans German watch office. Another advantage for the Jewelers to work on a high table allows them to see their work closely.

- 728 replies
-
- 7
-
-
- le fleuron
- 64 gun
- (and 1 more)
-
compound table for Dremel work station
Gaetan Bordeleau replied to rtropp's topic in Modeling tools and Workshop Equipment
Dremel Workstation and precision milling were not made to be together. -
Belt/disc sander questions
Gaetan Bordeleau replied to md1400cs's topic in Modeling tools and Workshop Equipment
3 important things to look for: A big motor to resist the pressure so that the motor does not stop A 90 degrees angle even when applying strength while sanding meaning a strong table so that there is no distorsion A disk sander will leave ¼ round prints on the wood while a belt sander which is used in the same direction as the wood grain will leave no marks -
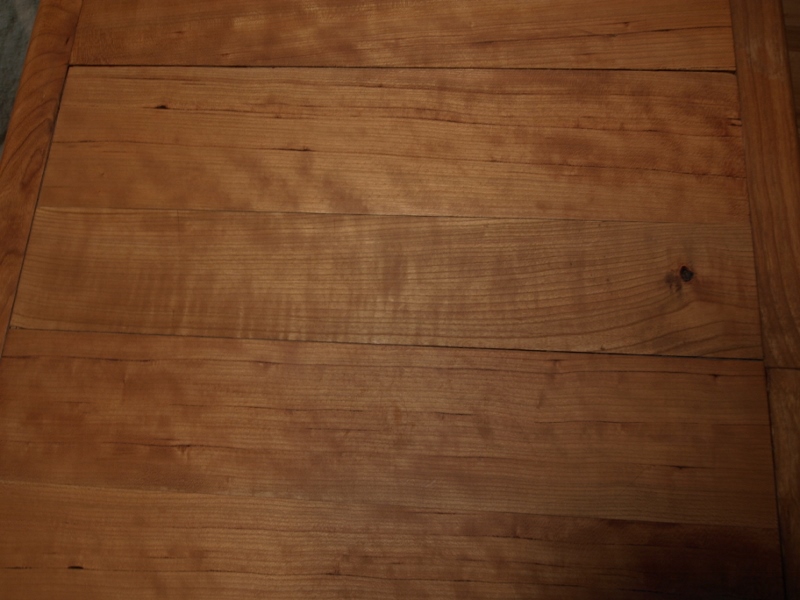
Having some cherry wood a second table is done to be use as a base for the 74 guns. Here is the kind of finish I used this time. I had an unfinished bottle of teak oil. In it I added about 1 table spoon of natural bitumen which is a black organic pigment used to age wood. On this forum, Russians showed good examples. 1 coat applied. For the low luster finish I like the effect of bee wax. I did a rolling top desk about 30 years ago and used bee wax as a finish and still today, it is as nice. Shavings of bee wax block are put in a jar with turpentine, again to accelerate the aging process some bitumen is added. Very easy to apply with a rag let dry and luster with and electric buffer. Sorry Karl I just saw your question. I use standard belt sander for fast removal and 1 orbital sander, 5 inch disk for finishing.

- 728 replies
-
- 3
-
-
- le fleuron
- 64 gun
- (and 1 more)
-
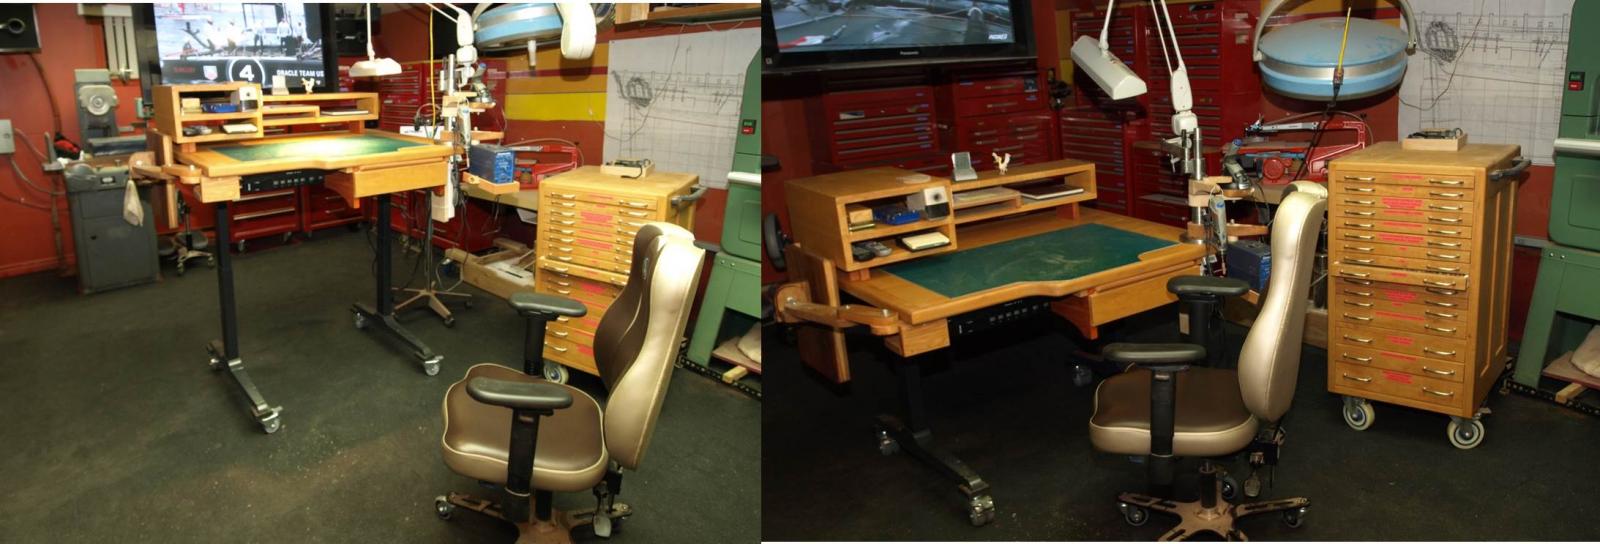
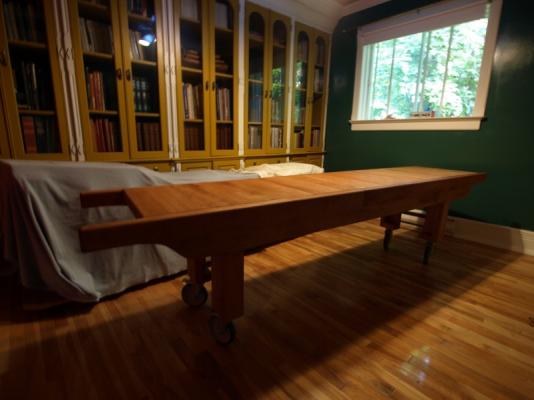
Here is what happened since the last update, Building a ship is fun, but building it in good conditions is even more fun. Building this size means that standing for long periods of time is a common thing. For this reason, I searched an ergonomic mat to work on and ended with some kind of rubber mat. Standard ergonomic mat are made to stand on. They are not made for compression meaning that a heavy trolley would sink in this kind of carpet. This is exactly what I saw with the version of the working desk 1.0 and also for a rubber mat a hard plastic caster wheels are needed. To correct this problem, the working desk will be cut in 2 parts a multidrawer unit to store all the small tools and a desk. The 16 drawers unit is made from cherry and as all the big tools, 4 caster wheels to move it easily. As I realised with the electric table that working at the good height makes working easier, we usually have a height adjustable chair with an oil chuck. If we look the problem from the other side a height adjustable working desk can make the life easier. I bought the electric mechanism, built the top of the table and kept some old parts from version 1.0 table and now here is version 2.0 of the working desk. To keep the table as low as possible in the lowest possible, double caster wheel are used.


- 728 replies
-
- 8
-
-
- le fleuron
- 64 gun
- (and 1 more)
-
What do you use your mill for ?
Gaetan Bordeleau replied to captainbob's topic in Modeling tools and Workshop Equipment
Tom it does not make sense, a milling cutter is more complex. -
carpenter square image
-
Which Sharpening System
Gaetan Bordeleau replied to Mau's topic in Modeling tools and Workshop Equipment
Diamond Wheel on a bench grinder is the fastest way to sharpen with a Mirror finish.