HOLIDAY DONATION DRIVE - SUPPORT MSW - DO YOUR PART TO KEEP THIS GREAT FORUM GOING! (Only 20 donations so far - C'mon guys!)
×

Gaetan Bordeleau
-
Posts
1,307 -
Joined
-
Last visited
Content Type
Profiles
Forums
Gallery
Events
Everything posted by Gaetan Bordeleau
-

what is the ideal modelling table?
Gaetan Bordeleau replied to AON's topic in Modeling tools and Workshop Equipment
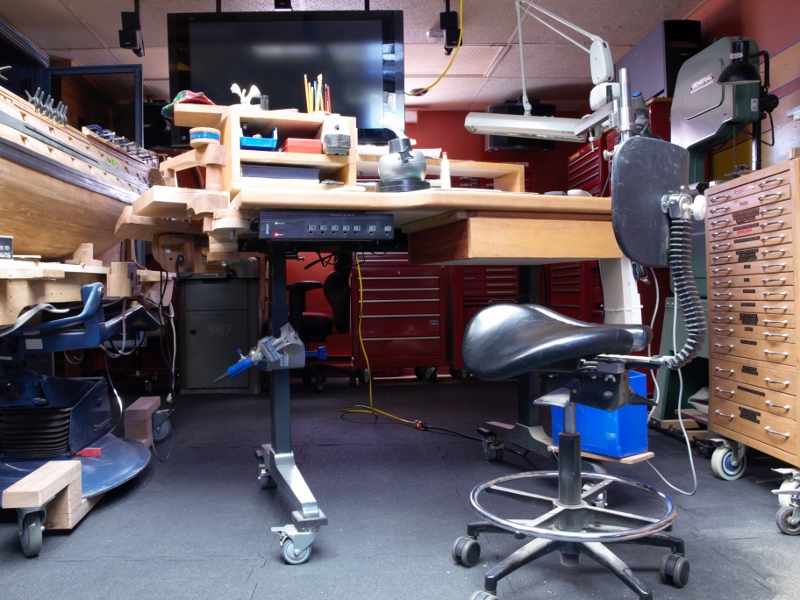
Alan, here is the internet site, but I ordered it through a local retailer, to save delivery. http://www.workriteergo.com/products/workcenters/proliftix-electric -
David, Le Fleuron is 1 feet shorter than the 74, so it is also lighter. The 74 was in the basement and is now 1 floor higher. It is encase behind the screen.
- 728 replies
-
- 4
-

-
- le fleuron
- 64 gun
- (and 1 more)
-
what is the ideal modelling table?
Gaetan Bordeleau replied to AON's topic in Modeling tools and Workshop Equipment
I like your idea, so I ordered one mechanism, did a cherry top and added caster wheels. The only questions I am asking myself: why did I wait so long!
-
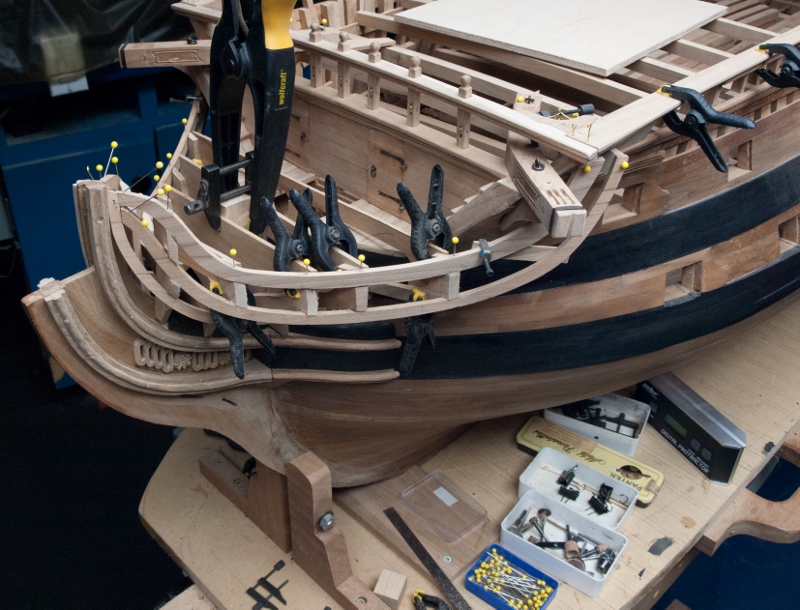
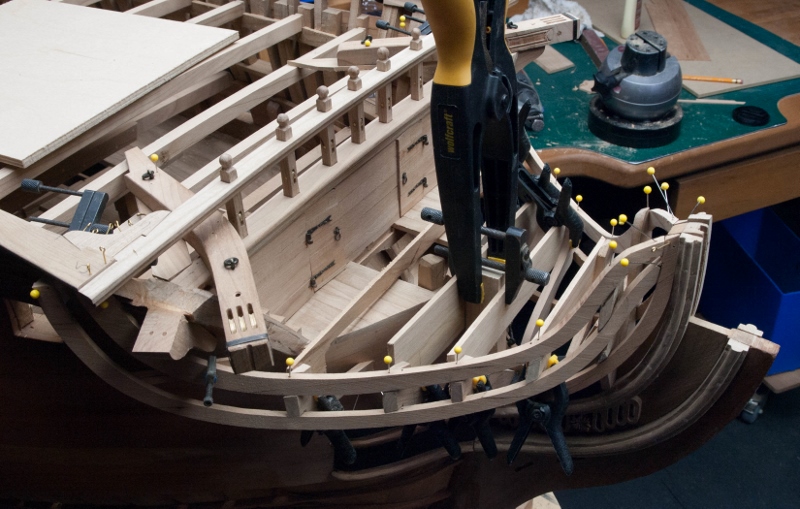
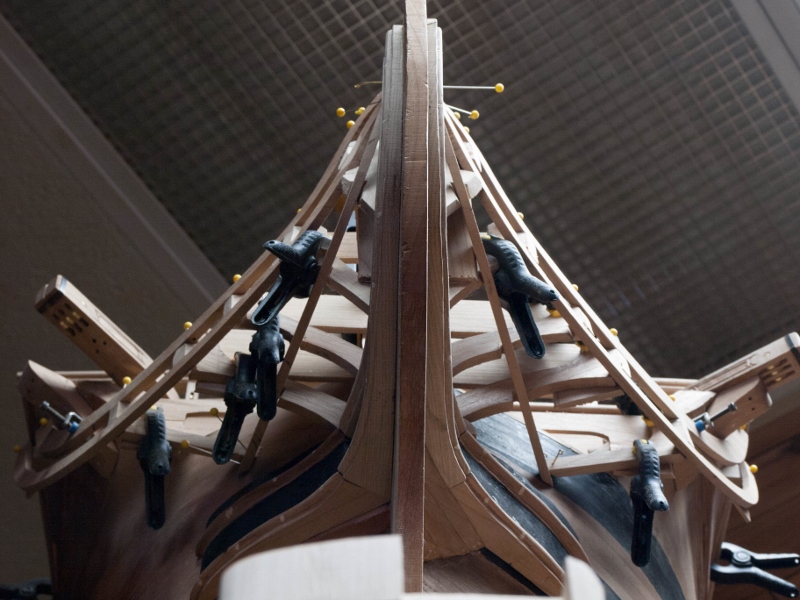
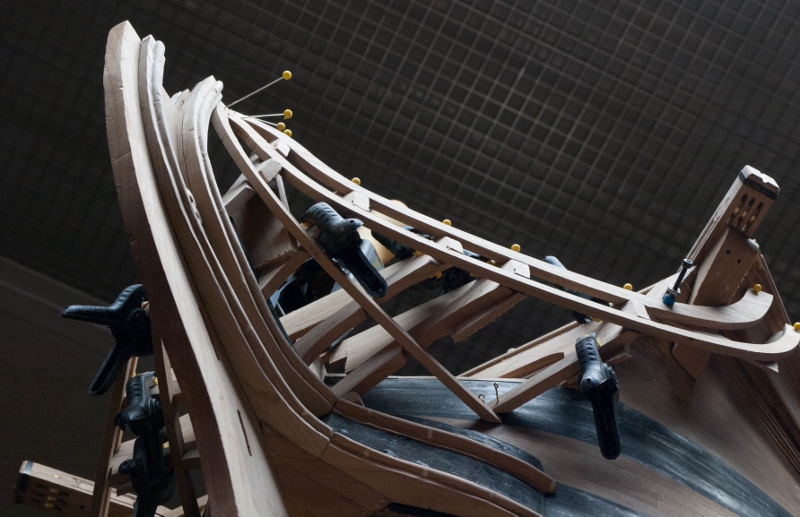
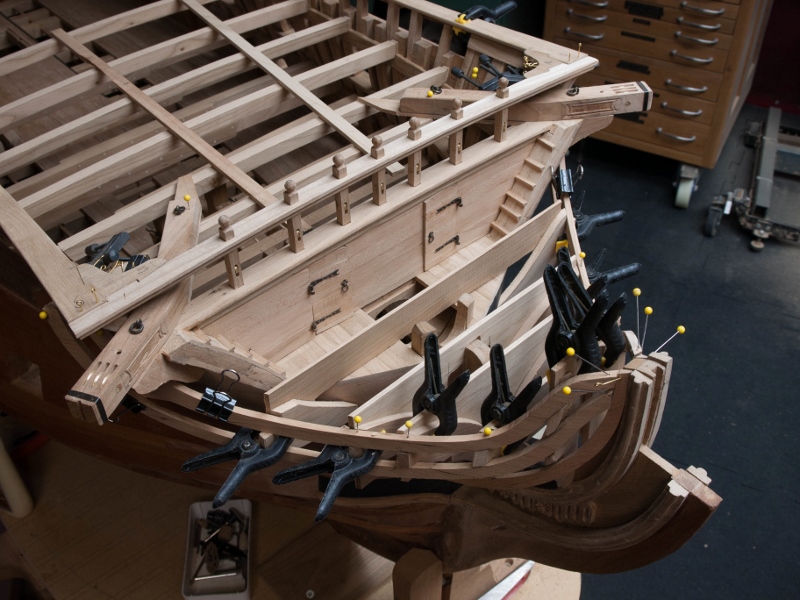
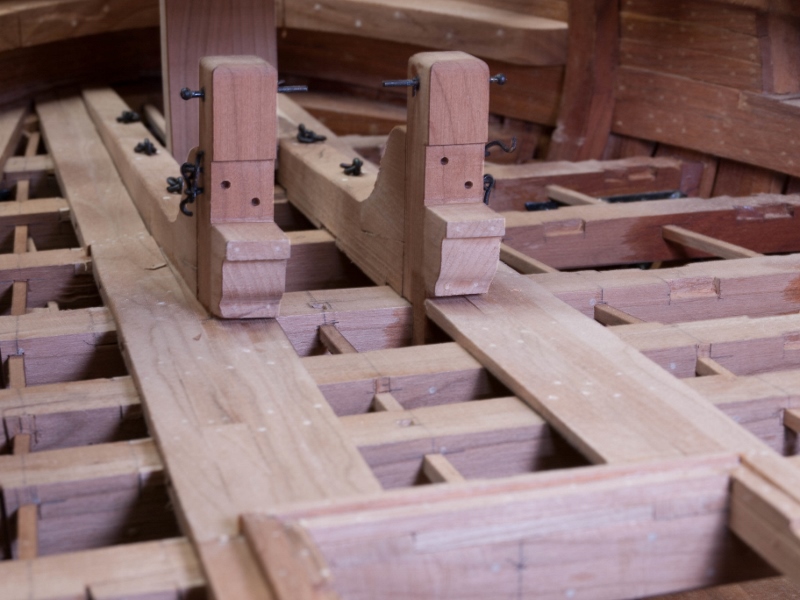
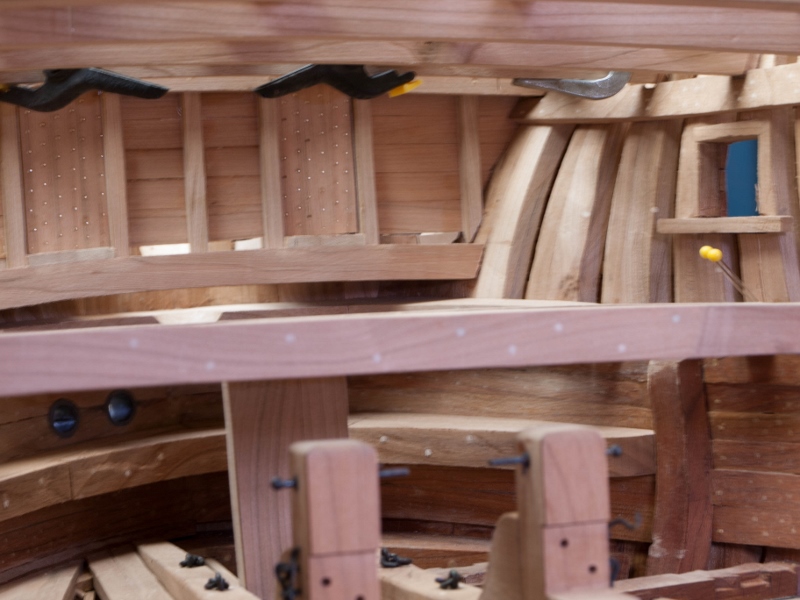
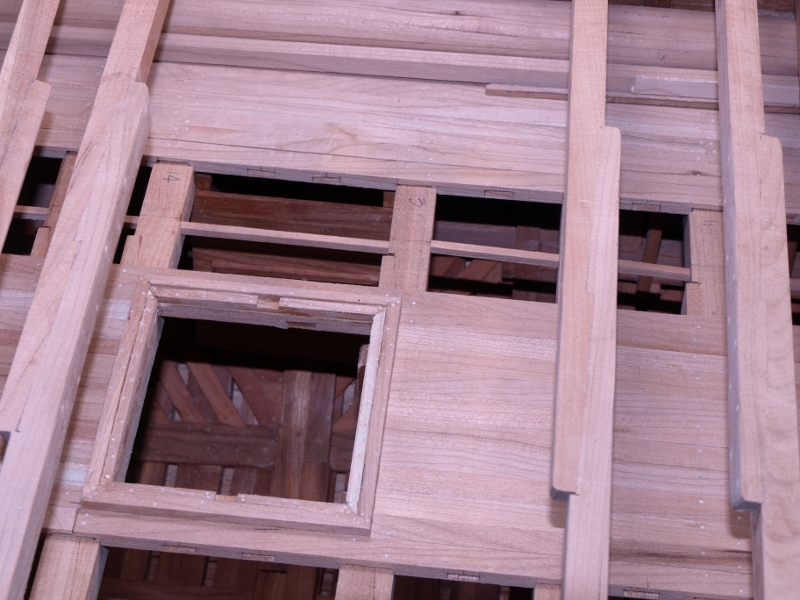
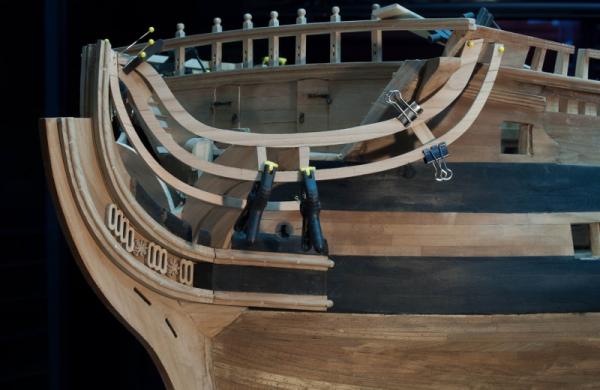
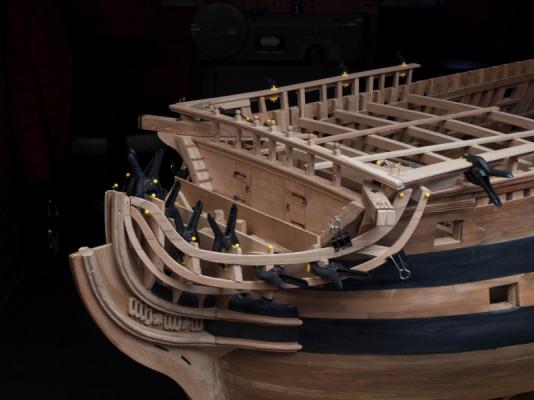
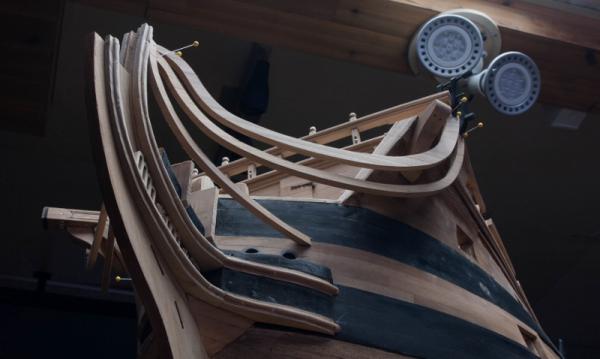
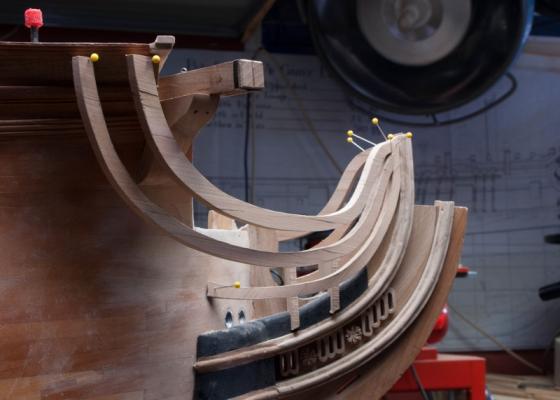
The long task is continuing. Nothing is glued yet. Only the part of the contour touching the rail is don the inner part is still to shape. It is a hard part to do because it is difficult to take efficient measures. I do not exactly what would be the best way to go. The only thing I know for sure is that for these 10 pieces, I did each one at least twice. This is 2 sets of 5 pieces. To align each set, I installed a sheet to make sure for the alignment.

- 728 replies
-
- 15
-
-
- le fleuron
- 64 gun
- (and 1 more)
-
Here are some other notes going the same direction about beewax. Beeswax is a component of the complex substances and contains almost 300 different substances. Beeswax becomes slightly corrosive when exposed to UV because it's a biological material and UV degrades the molecule releasing natural acids. I think that, the corrosive effects only really matter on a really long term scale and with fragile museum items. Microcrystalline and renaissance wax was invented because the V&A realised this fact after a century of applying beeswax to protect the nation's most precious and ancient artifacts that they had, unbeknownst to them, been applying slow acting acid.
- 3,618 replies
-
- 2
-
-
- young america
- clipper
- (and 1 more)
-
I saw a table, http://www.apimondiafoundation.org/foundation/files/1986/A.I.%20TIHONOV,%20S.V.%20IAVTUSENKO,%20I.%20ACILOV,%20T.G.%20IARNIH.pdf Beewax acidity would be at the beginnning of acidity on the ph scale , so very close to neutral. I did apply beewax on a roll top desk I built about 30 years ago. Still today the same wax is still there and looks very fine.

- 3,618 replies
-
- 3
-
-
- young america
- clipper
- (and 1 more)
-
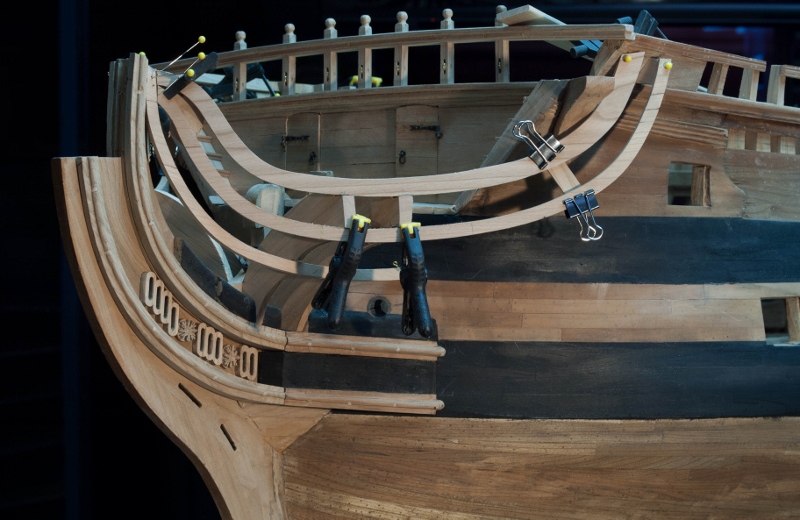
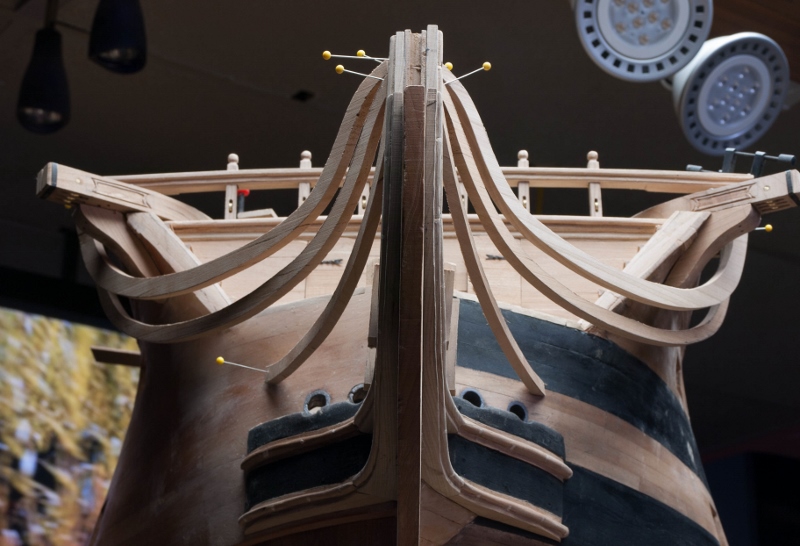
Thank you sirs but your comments are inflated. I tried another setup with led lights.
- 728 replies
-
- 21
-
-
- le fleuron
- 64 gun
- (and 1 more)
-
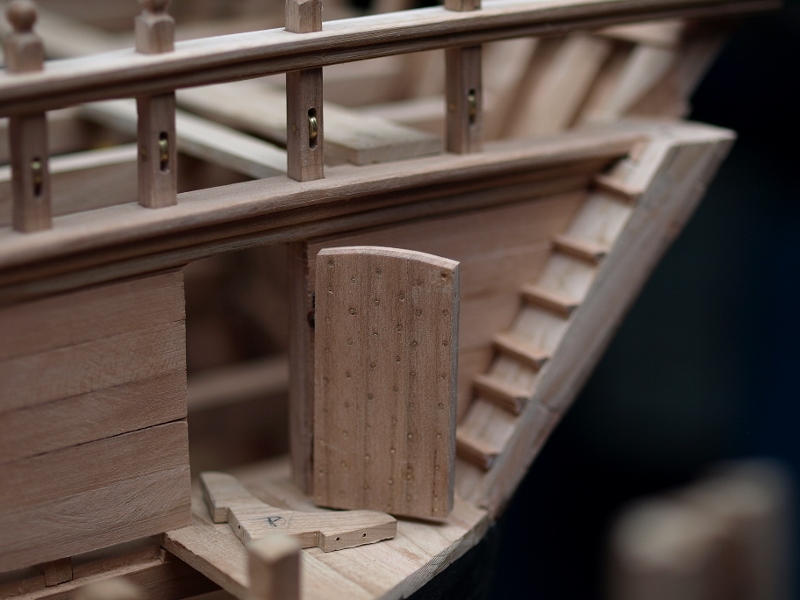
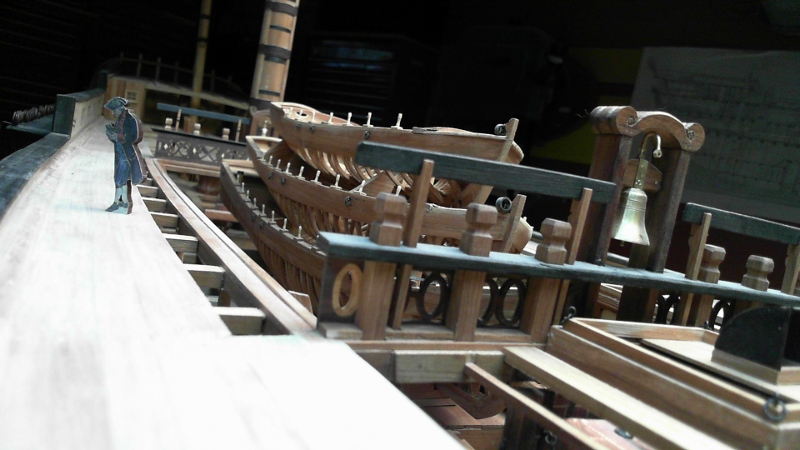
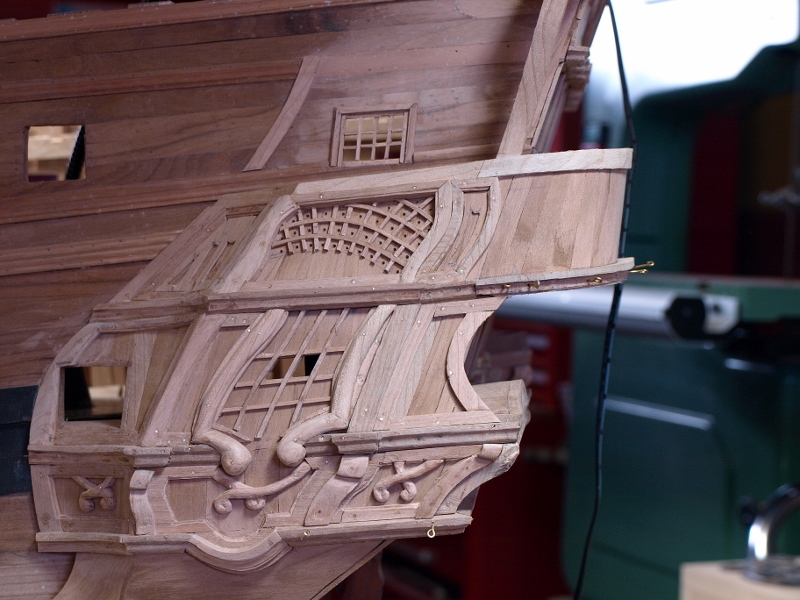
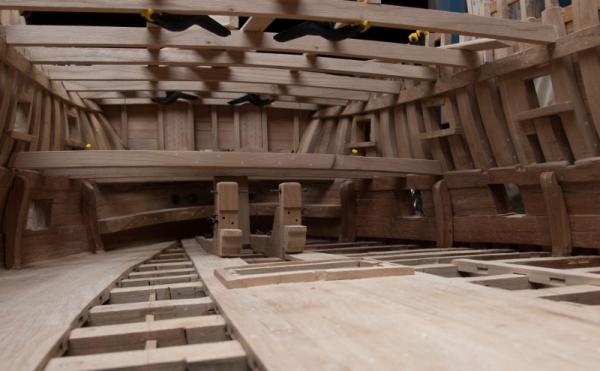
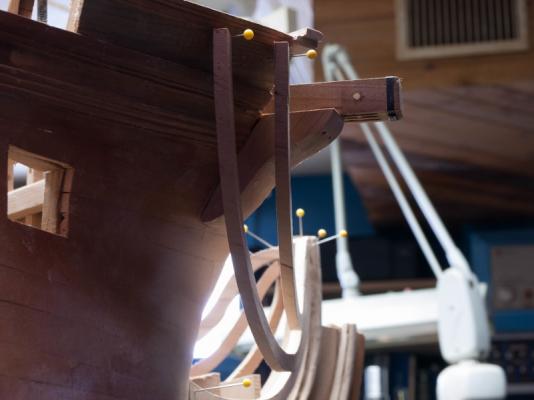
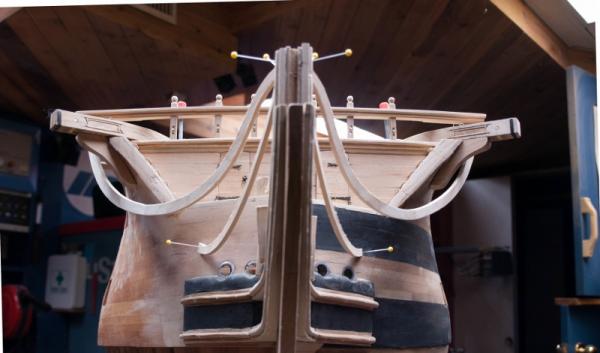
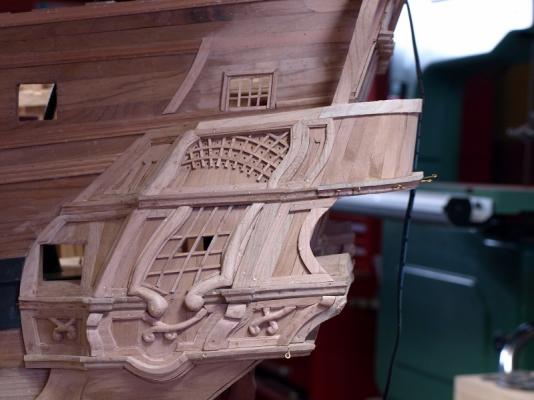
Thank you for your comments. I took some picture to visualize the alignment of these 6 parts.


- 728 replies
-
- 11
-
-
- le fleuron
- 64 gun
- (and 1 more)
-
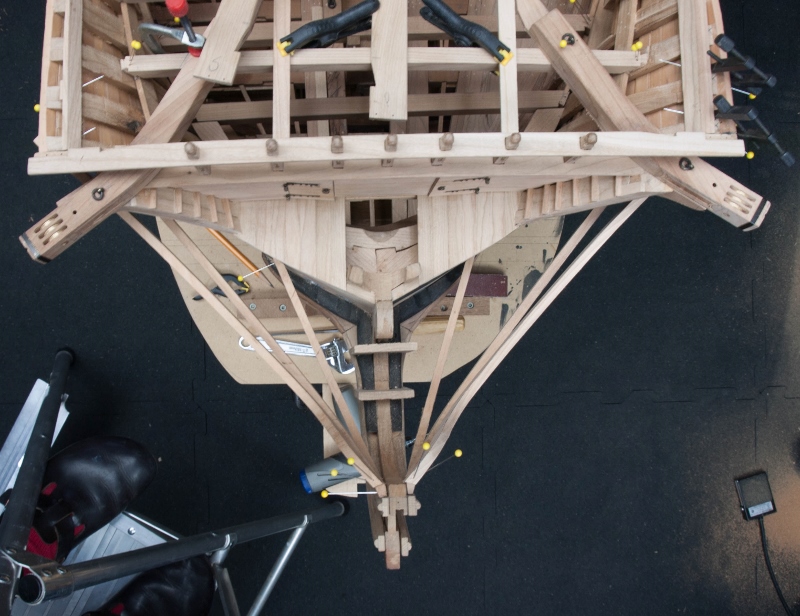
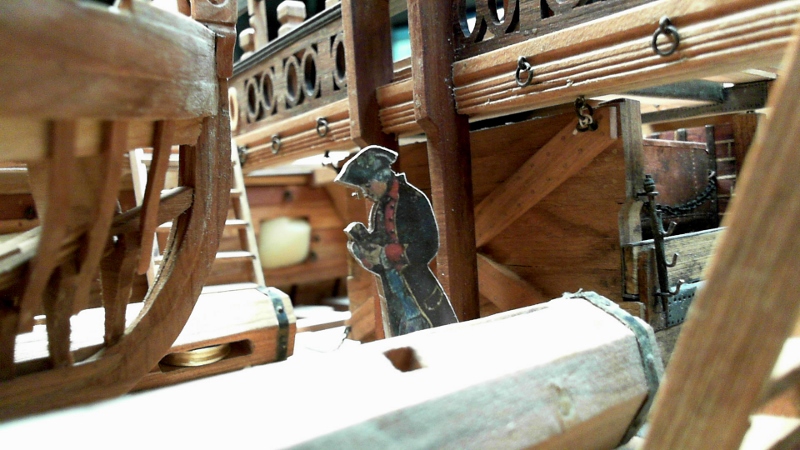
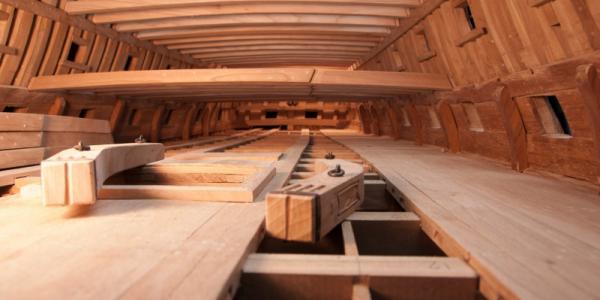
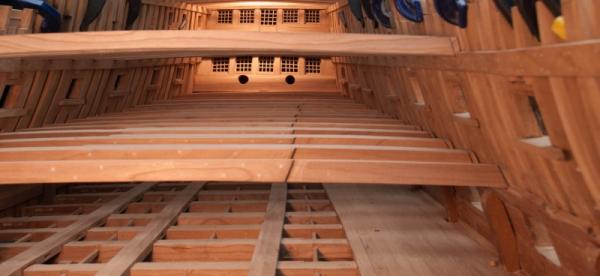
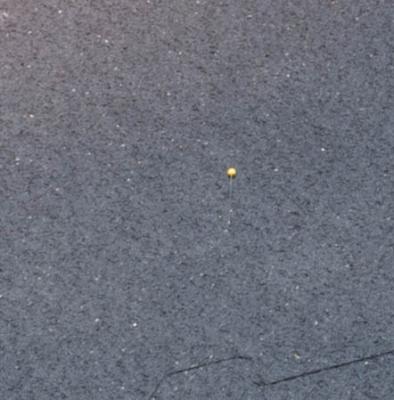
Black picture, find the needle! When I installed this black floor, I thought that finding a small part on the floor would be hard. In fact, it is the contrary, it is easier to find a small object. Since I installed it, I did not lose any parts on the floor.


- 728 replies
-
- 9
-
-
- le fleuron
- 64 gun
- (and 1 more)
-
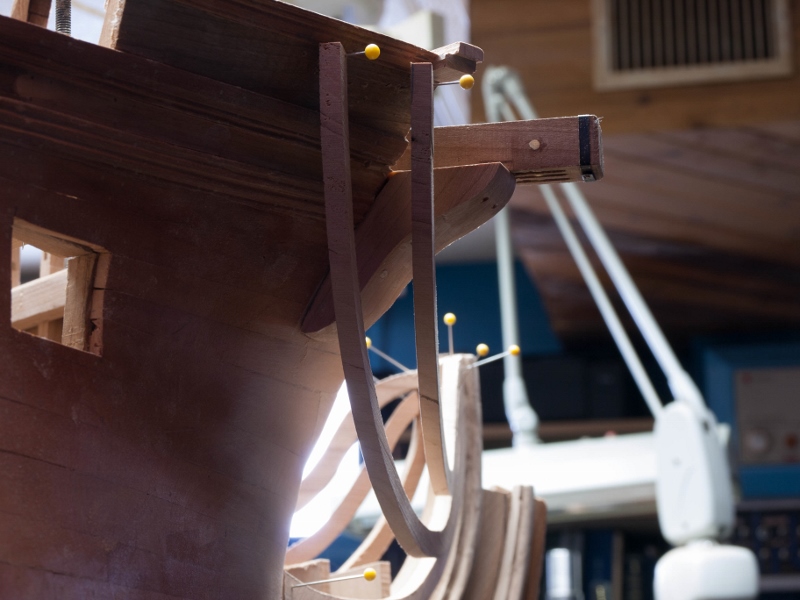
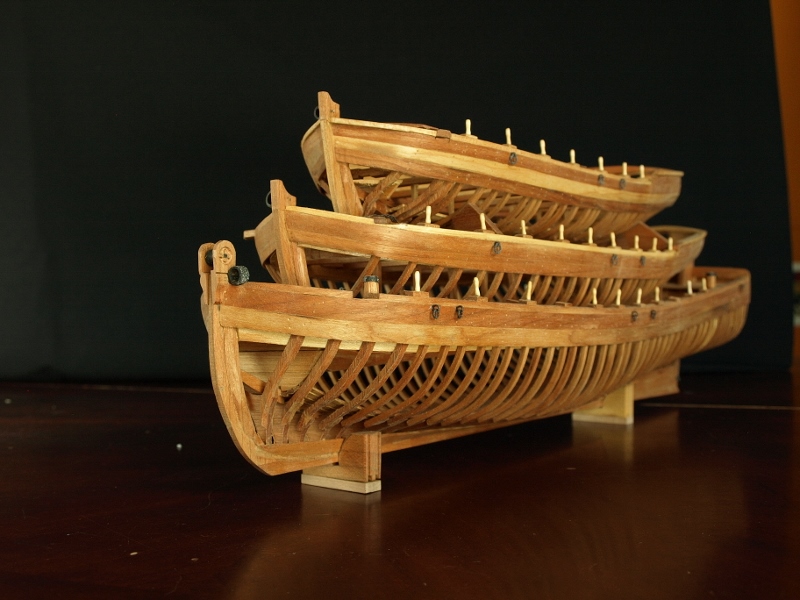
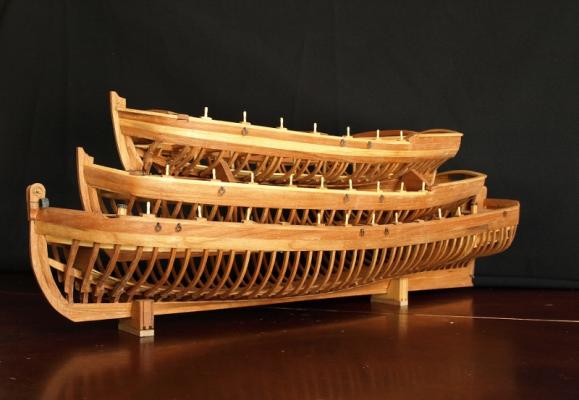
first picture how yo store one on to the other with ''wood spacer''


-
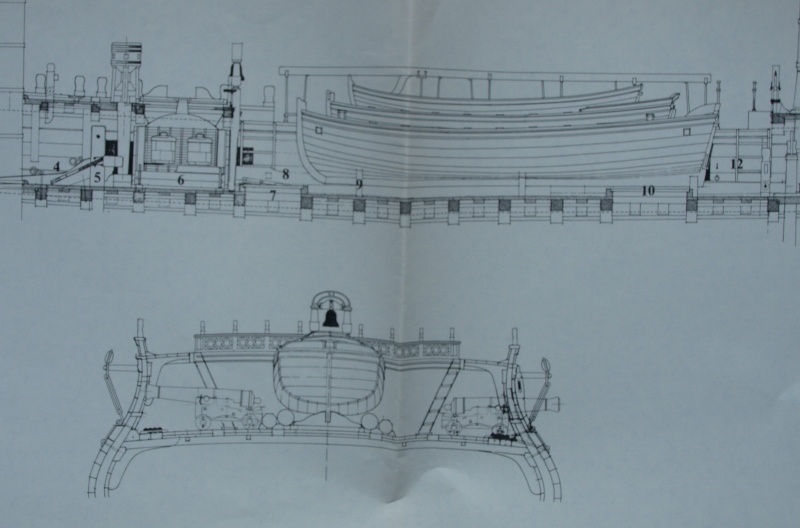
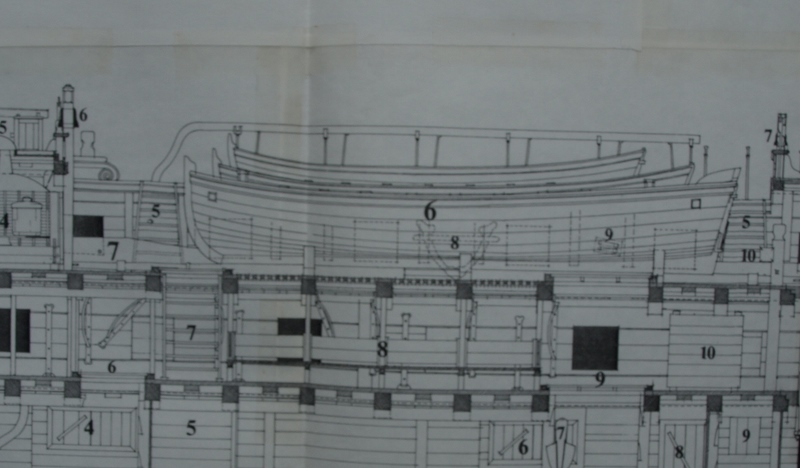
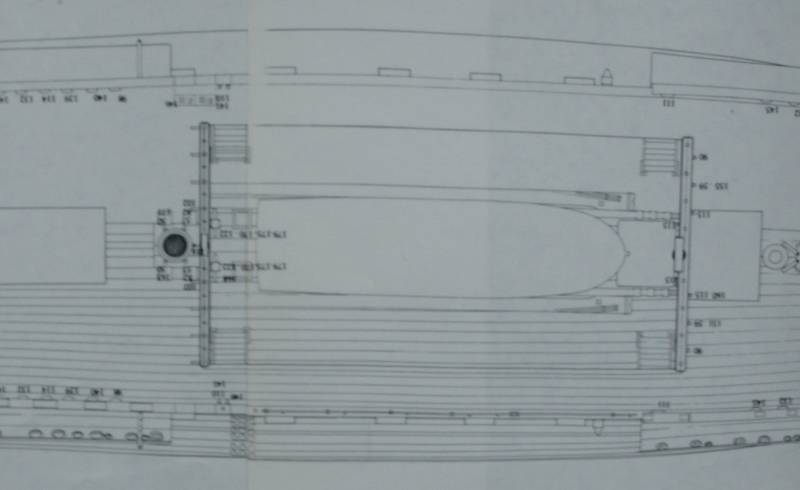
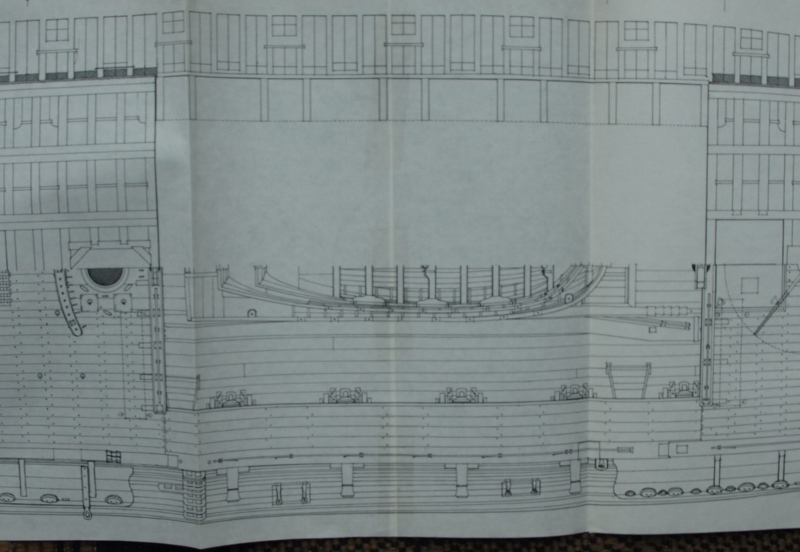
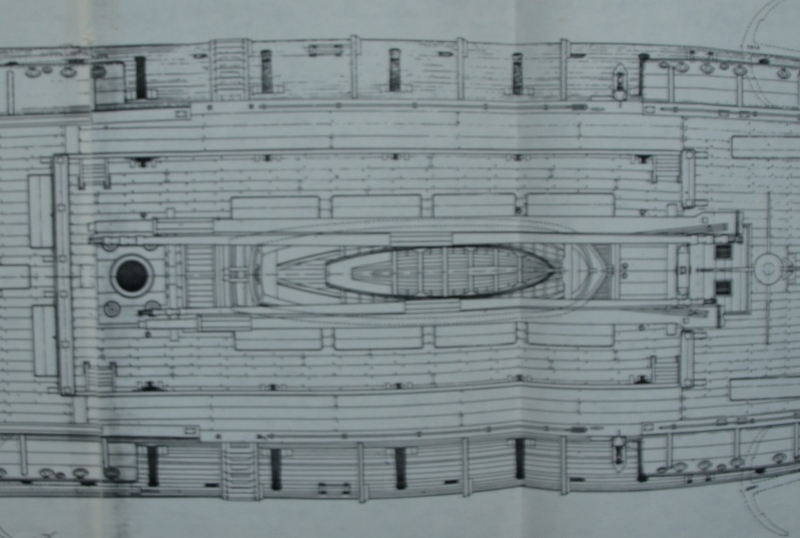
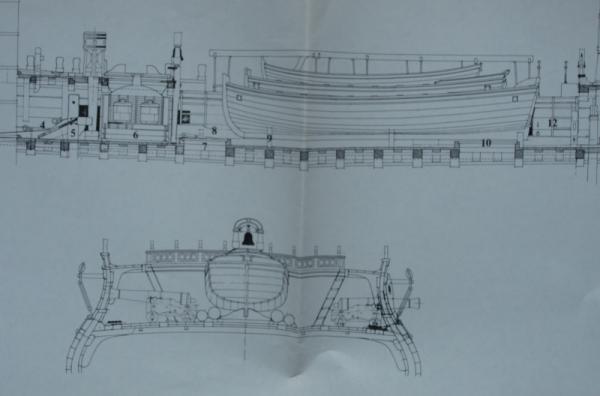
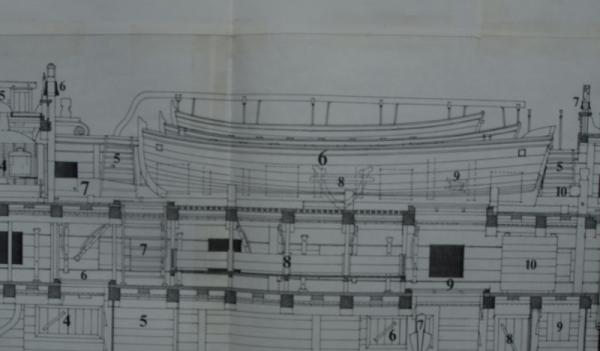
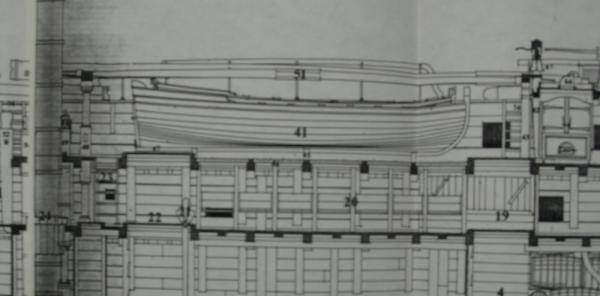
Mark, look at these drawings from La belle-Poule, Le Bonhomme Richard and Le Boullogne and take out details which are not suppose to be there.
-
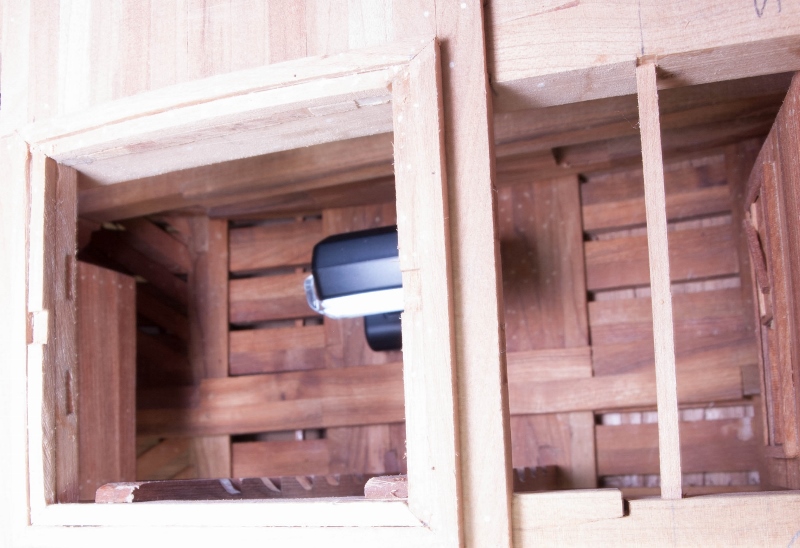
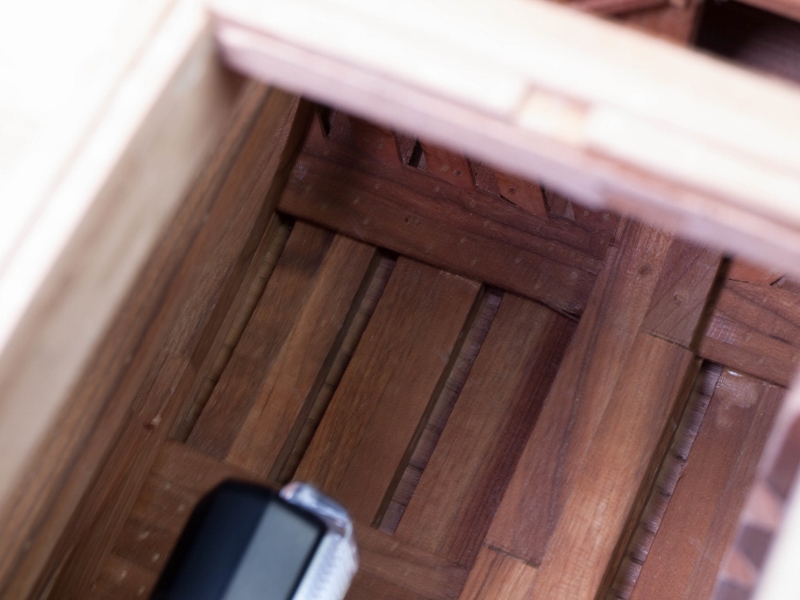
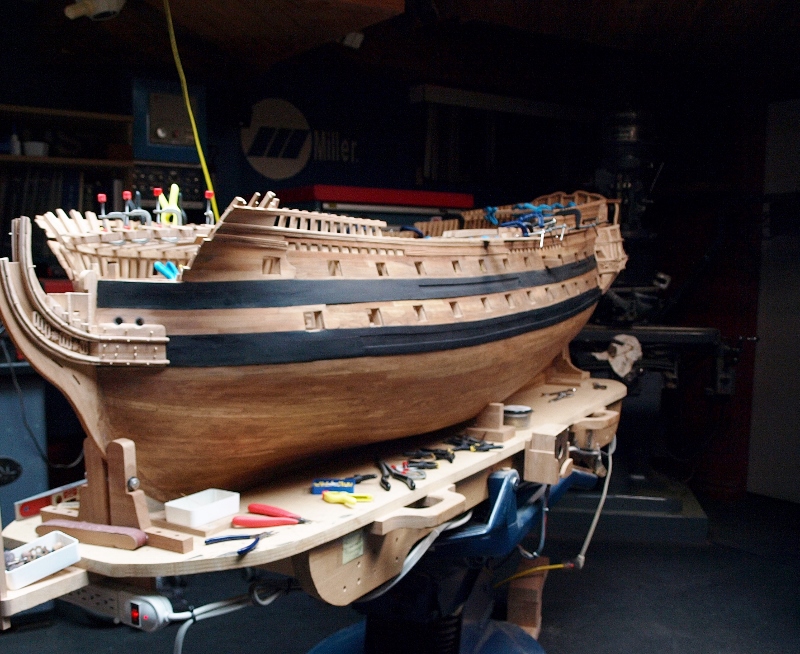
Flash or no Flash? We often hear that we should not use the flash for our modelships. Flash is a hardlight which produces hard shadows. One way to correct this is to diffuse that source of light. Photographs use umbrellas and softboxes. This week I tried http://www.garyfongestore.com/ lightsphere. It is like a white transparent plastic installed around the flash. It acts as a lamp shadow. Here are examples of pictures taken with the flash and the lightsphere. Except for the middle one, that I intentionally kept even if it is over exposed in part, results are interesting and color rendition is close to what we see with our eyes. We can see oiled and natural cherry. In the last picture, beams are cut so that we can see the cherry grain ‘’nice side’’.


- 728 replies
-
- 12
-
-
- le fleuron
- 64 gun
- (and 1 more)
-
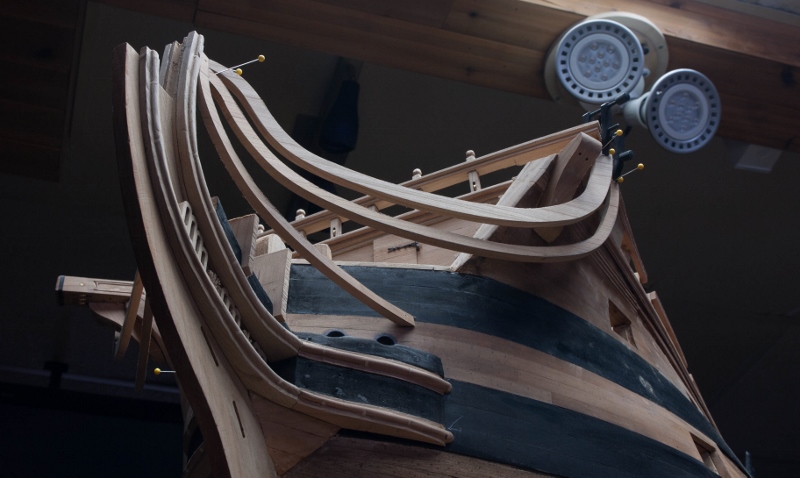
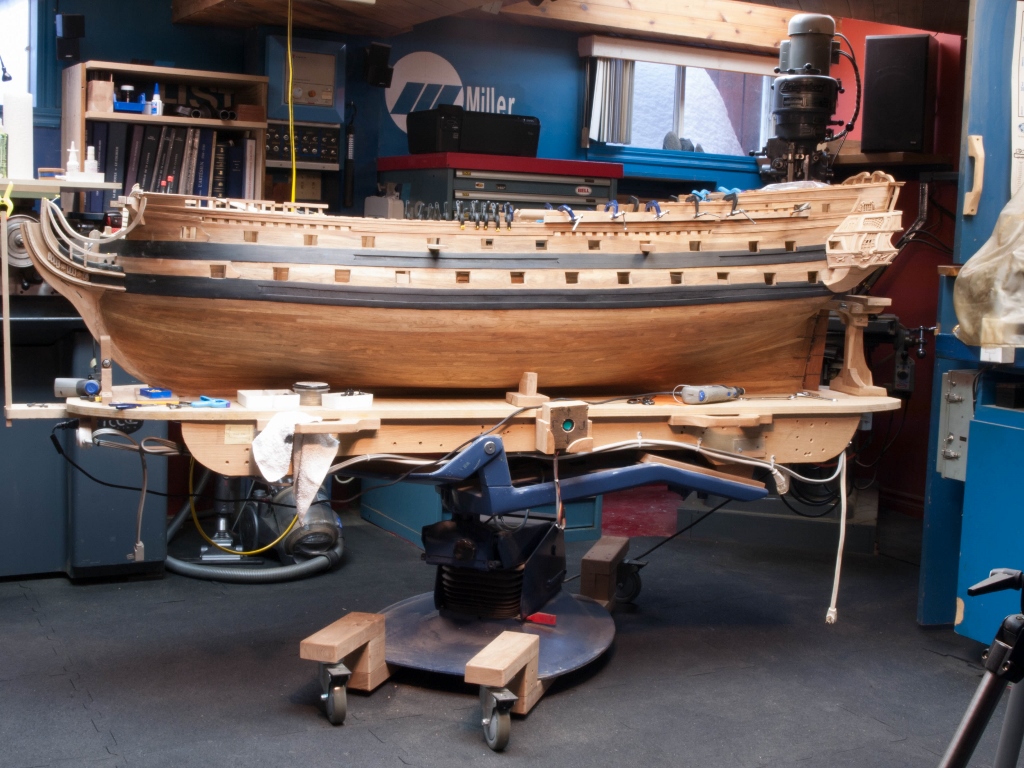
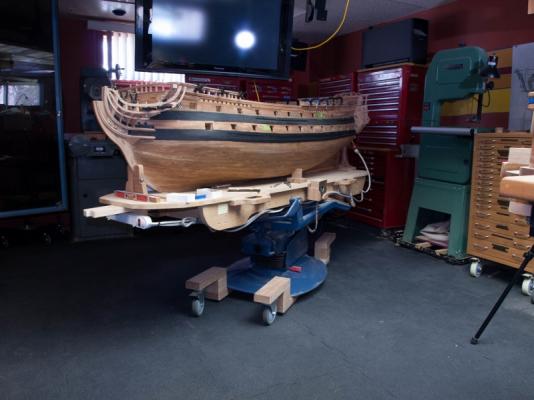
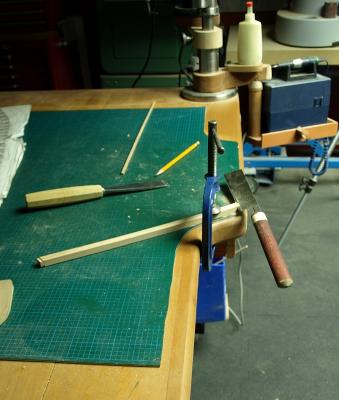
Experiences in photography. Working table, there is a 45 degres check on the left, because I use the saw with the left hand. This is very useful when clamping greatly improves workability angles. After 3 months on working aft, it is time to change and come to work fore, just to give a better idea of the model exterior shape, but before I needed all the beams.


- 728 replies
-
- 15
-
-
- le fleuron
- 64 gun
- (and 1 more)
-
cable laid vs rope (left vs right twist)
Gaetan Bordeleau replied to davec's topic in Masting, rigging and sails
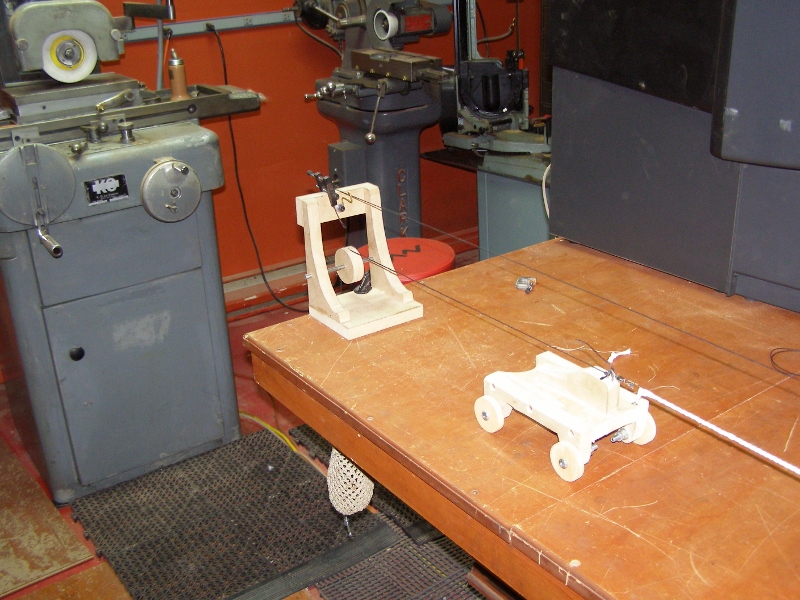
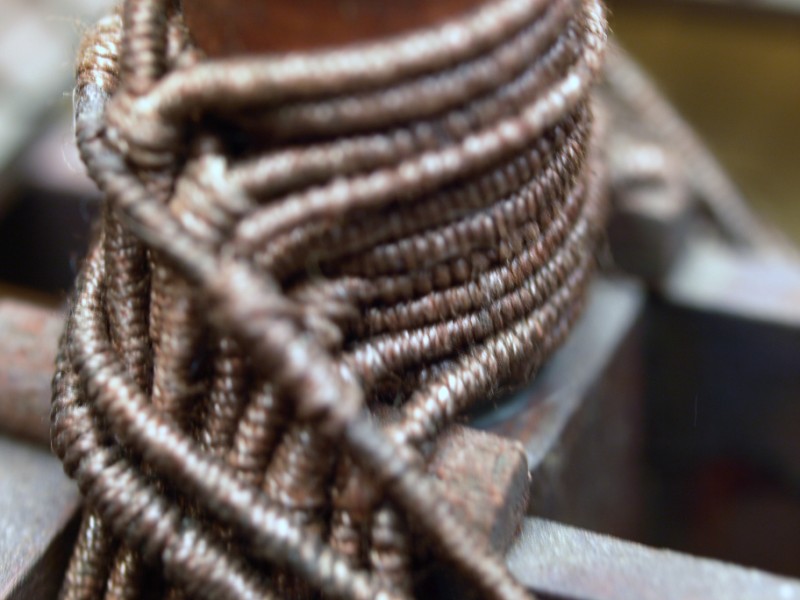
Chuck I cannot comment your method, I did not see your machine. You say you never twist lines individually first to create tension. The problem with Michael is that he turns all the lines together. The strength that makes ropes to form together is not the tension but more a torsion and the magic is in this torsion strength. This torsion must be built individually in each rope. Then the interlacing of the 3 ropes make a cable. When I said Standing while twisting is very awkward, I was commenting Michael picture where we see this friend holding a drill. As for tension, weights create a stable pressure and the 4 wheels buggy compensate for the diminution of the length. All these factors produce a very stable cable which does not need any corrections. -
cable laid vs rope (left vs right twist)
Gaetan Bordeleau replied to davec's topic in Masting, rigging and sails
Michael, your method to produce cable is 50% right, at one end the method is good but at the end with the drill, the method you use cannot produce good quality cable. The method to turn ropes is as in picture 2. The method you use is as in picture one. Your friend at the end with the drill keeps the tension but it is very difficult to keep a very steady tension, it would be better if it would be mechanical. In picture 3, tension is kept regular by weight. Also there is a swivel where the ropes end. This swivel acts as a tension regulator. The tension in the ropes decide when to join together, it is not you who is suppose to decide when to bjoin the 3 ropes together.


-
cable laid vs rope (left vs right twist)
Gaetan Bordeleau replied to davec's topic in Masting, rigging and sails
Michael, I do not see how you can make rope with the drill on the picture in front of the ML7? -
Here are some notes from internet; asphalt must be applied in thin layers . It is not recommended in thick application (dry to hard). Not recommended with linseed oil, the reaction with linseed oil induces at long term crack and separation.
- 728 replies
-
- 12
-
-
- le fleuron
- 64 gun
- (and 1 more)
-
Mauricio, the only difference between you and me is that it is the first time that you see the road of scratch building, I saw this road more than one time and occasionally I try different shortcuts to compare methods. In the last pictures, this is not brass nail I use but brass wire. I can choose by taste to add other brass wire or treenails. About tools, I want you to consider a new one. Would it surprise you if I tell you that I practically use no ruler to measure? I use a proportional divider. I find this tool more precise than a ruler, also it is very easy to use a repetitive length with this tool. Weems & Plath would be a good choice, remember this is a precision instrument. You should be able to find one below $200 US. http://www.nauticalmind.com/Proportional-Dividers-pr-64714.html http://www.nauticalcharts.biz/option,com_virtuemart/page,shop.browse/category_id,171/Itemid,55.html Gaetan
- 728 replies
-
- 1
-
-
- le fleuron
- 64 gun
- (and 1 more)
-
How to serve forward most shroud?
Gaetan Bordeleau replied to freewheelinguy's topic in Masting, rigging and sails
As for comparison, this is the same thing with french ship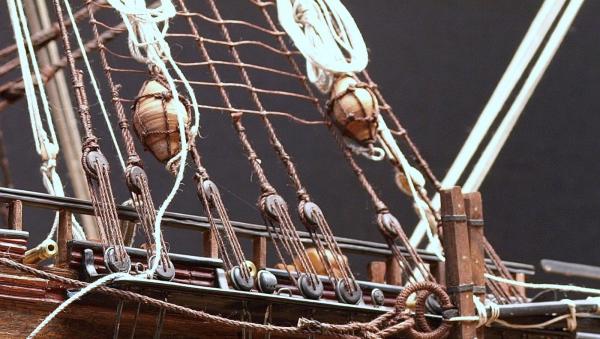


-
Meredith, I do not know which plans you talk about. Where and how to start? There are many peoples who are ready to help you if you just ask. There are mentor whos can guide you personnally through NRG. There are books written by David and Ed who show you all the main avenues. Answers do exist, and just like flowers are just waiting to be pick.
- 728 replies
-
- 1
-
-
- le fleuron
- 64 gun
- (and 1 more)
-
David, you are right research, can be very motivating. As you say a good set of detailed plans is the key. A detailed cannon is always nicer to look than a rough cannon shape!
- 728 replies
-
- 1
-
-
- le fleuron
- 64 gun
- (and 1 more)
-
Vivian, Skills only come with practice, but I am telling you, Plans are the key to open this treasure. If you want the most detailed plans available, Jean Boudriot is the man. Not only he will provide the good information, but he will do ALL the research for you. If you want plans with methods on how to do it David Antscherl is the man. With the coming of Internet, you have now Forums where many peoples to help you. With organism as Nautical Research Guild you can now have your own private mentor. For wood planking, Hobby millusa.com can provide all the precut wood you need, this means no big power tools to buy. For the tools, the main reason I use a lot of tools is just to go faster. Many tools make the work easier to do, but they are not absolutely essentials. You cannot buy all the tools you could dream the first year you begin to make model ship. To get tools is a long process, before to buy a tool you have to need it and you have to know that it exists then you need the money to buy it. At the end, you chose the way you prefer kit or scratch, but kit or scratch need time to learn the way, the first scratch will always be difficult, but the learning curve will be much faster. When you like to build with your hands, you find the time to do it and for a young person like you, there is still plenty of time in front of you.
- 728 replies
-
- 13
-
-
- le fleuron
- 64 gun
- (and 1 more)
-
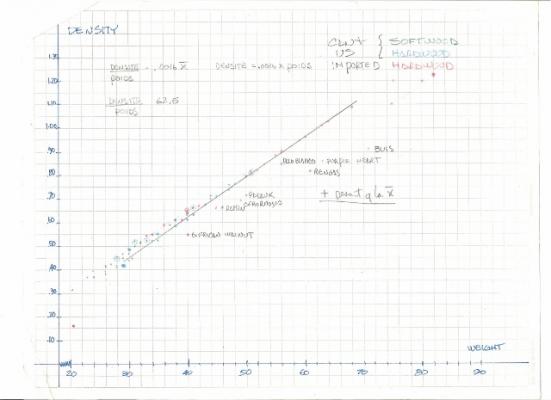
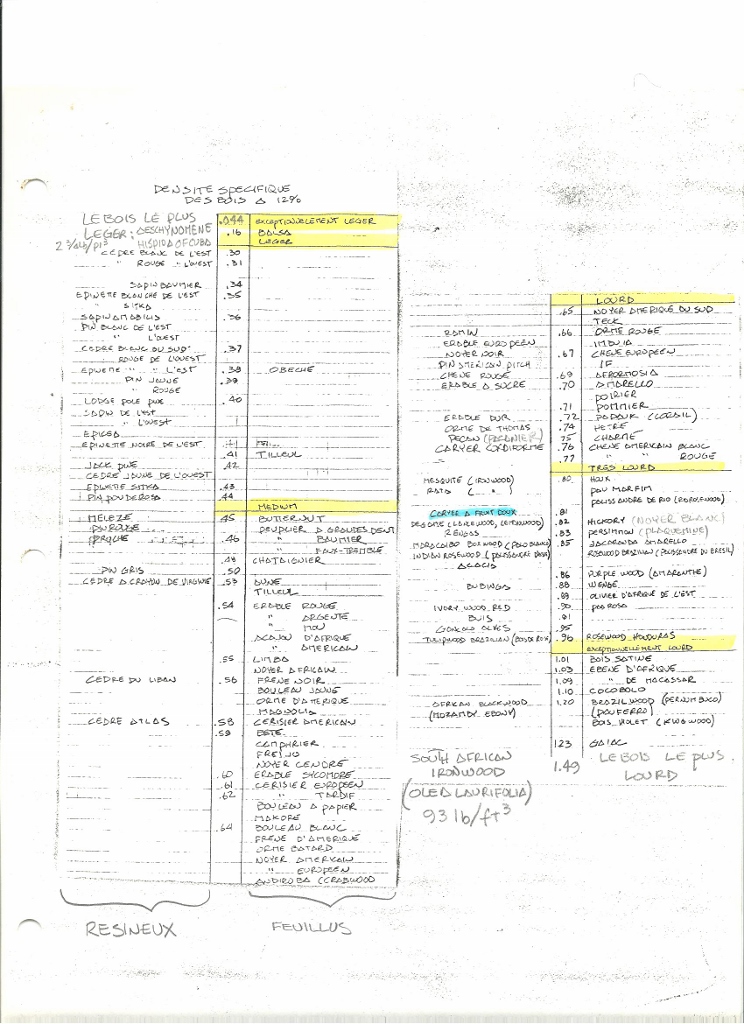
Density is a more helpful factor to help to choose wood species. I did this about 20 years ago: We all agree that boxwood is very good for detailed scluptures, but may be some other species from South America could produce crisp edges...