HOLIDAY DONATION DRIVE - SUPPORT MSW - DO YOUR PART TO KEEP THIS GREAT FORUM GOING! (Only 20 donations so far - C'mon guys!)
×

Gaetan Bordeleau
-
Posts
1,307 -
Joined
-
Last visited
Content Type
Profiles
Forums
Gallery
Events
Everything posted by Gaetan Bordeleau
-
 Vivian and David, Kit is not an oblige way to begin in this hobby. The first important points are the plans. Kits are not so far from scratch. Planking a kit or planking a scratch is the samething, the difference is just that one has more details than the other.
- 728 replies
-
- 8
-

-
- le fleuron
- 64 gun
- (and 1 more)
-
Druxey, another kind of unusual window will be install on the top of this on. Vivian, would you beleive me if I tell you that it is easier to build from scratch than from a kit!
- 728 replies
-
- 3
-
-
- le fleuron
- 64 gun
- (and 1 more)
-
Druxey, as usual you are right, though asphalt aging effect is also interesting. May be some day I will find a replacement. I will have a look at this place: http://www.kamapigment.com/store/index.asp?lang=0&catpage=2401 For now, another turn of the wheel.

- 728 replies
-
- 14
-
-
- le fleuron
- 64 gun
- (and 1 more)
-
Thank you Sirs, This afternnon, I did read some pages about varnish made from simples but efficient recipes, often gum (sometimes incenses) for characteristics and color + oil: varnish. I have interest for a black varnish made with asphalt and tung oil but tung oil does not dissolve well asphalt pigments. Turpentine helps this dissolution and acts as the binder. Hydrocarbon increases the acidity of the asphalt. Is this acidity high enough that it must be neutralize? I do not know. Apparently bee wax acts as a neutralizer, but I did not see any references on Internet. Here is what I saw. Bee wax is use as a binder, it has antibacterial properties and was one as the main ingredient for the mummification. Asphalt was also a ingredient. I did not see any references as neutralizing for acid, to the contray, bee wax contains certain acids. In 2009, a team had a look under the microscope to the varnish used by Antonio Stradivari. His varnish is composed of 2 fine layers. The first one, oil based and the second one, oil and pine resin (probably a form of turpentine) with pigments for the color (visual effect). If anone wants to help to make the recipe he is more than welcome.
- 728 replies
-
- 1
-
-
- le fleuron
- 64 gun
- (and 1 more)
-
Yes sir! Very clean job. I am sure you will like to have tools on hand. Gaetan
-
https://www.facebook.com/dekogge/photos_stream
- 188 replies
-
- 1
-
-
- latin caravel
- artesania latina
- (and 1 more)
-
MIchael http://www.leevalley.com/fr/Wood/page.aspx?p=68938&cat=1,43838,68966&ap=1
-
Mark, you are more clever than I am, your jig assures you the correct spacing which is a very difficult job to do ... without your jig. Gaetan
-
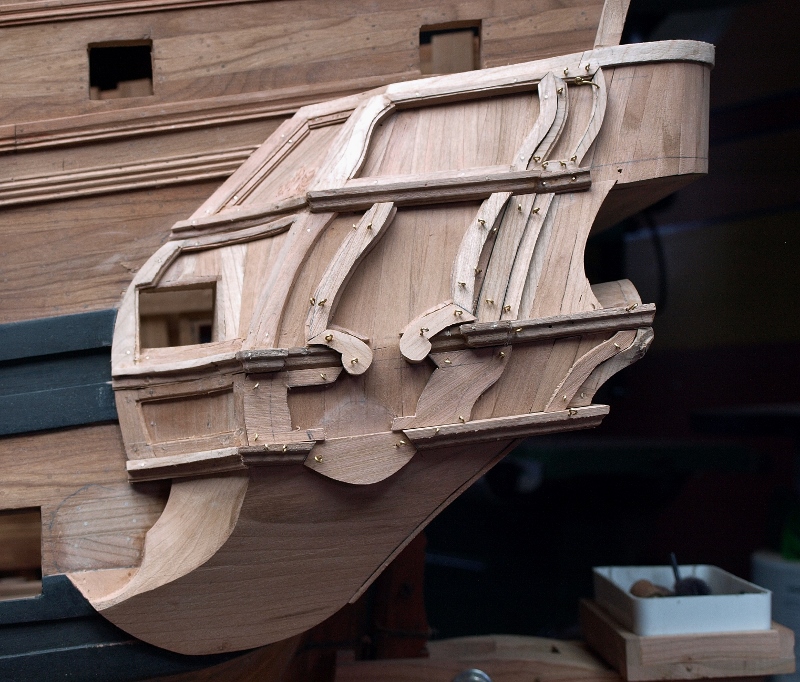
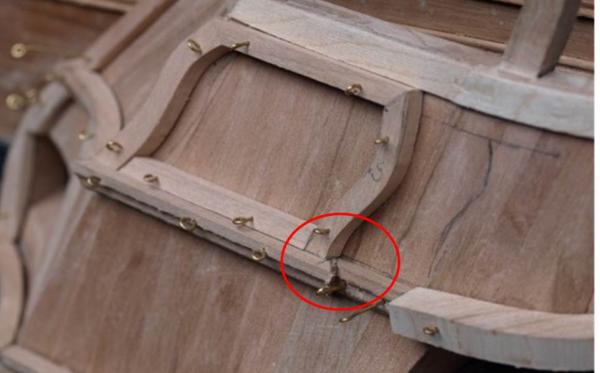
Thank you Mark, you understand exactly the idea. In a way the drawing is only a guide, the builder to succeed only needs flowing lines. I do not think that certain lines can be drawn on the first try. In this case horizontal curves are surely established before the vertical ones. Dry fit with the brass nails is a very forgiving way, but even with this, I do not succeed all the parts in the first try, sometimes it easily can go up to 4 or 5 try. Also in this case the thickness change, by example on the first picture, the thickness of the molding changes and in the second picture there are 4 layers to apply, you just have to guess which one you apply first. Finally to add some icing on the cake, there is a lot of discrepancies in the drawings Gaetan
- 728 replies
-
- 9
-
-
- le fleuron
- 64 gun
- (and 1 more)
-
Thank you Mauricio and you know that I will follow your posts also. Michael, lucky guy, I like those lines. It was a kit similar to this one: http://www.djhmodelloco.co.uk/prodpage.asp?productid=3047 Gaetan
-
http://warfrog.blogspot.ca/2011/10/white-metal-casting-tutorial.html complete kit $230 US
- 662 replies
-
- 2
-
-
- bonhomme richard
- frigate
- (and 1 more)
-
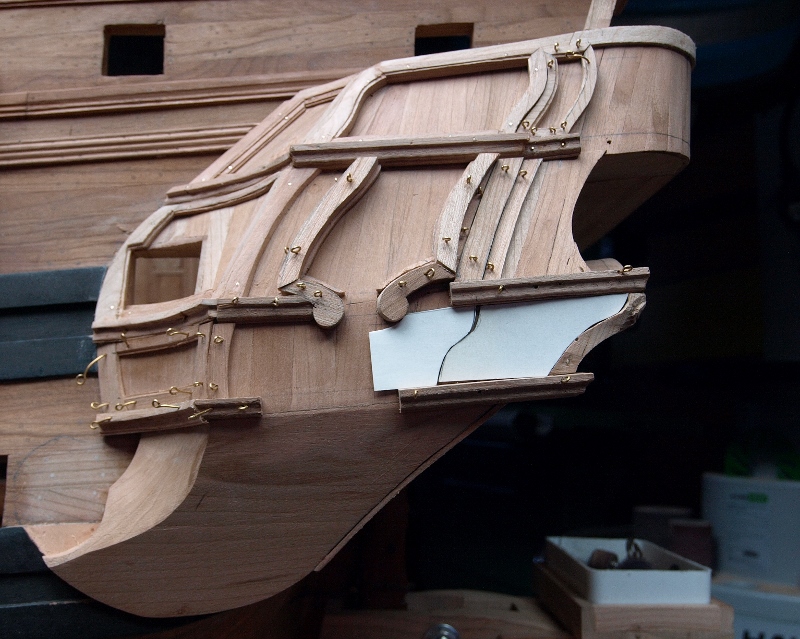
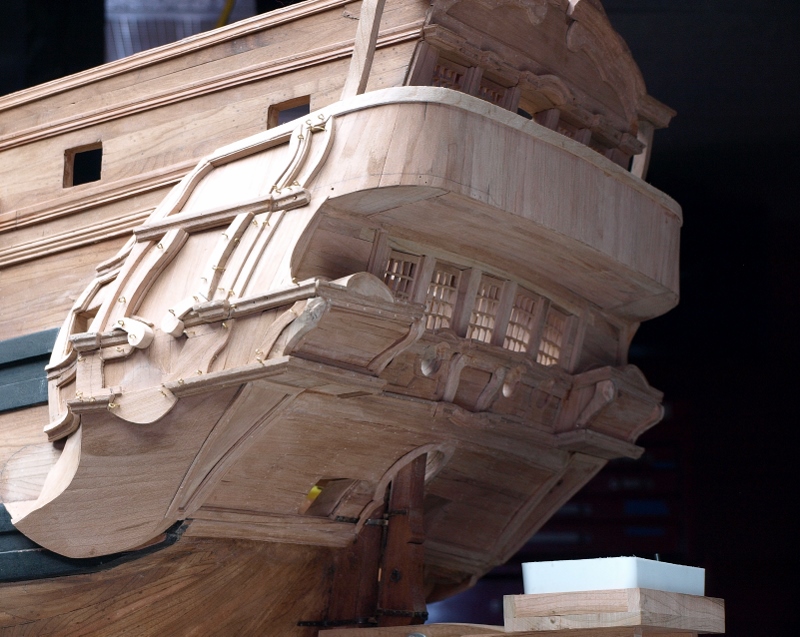
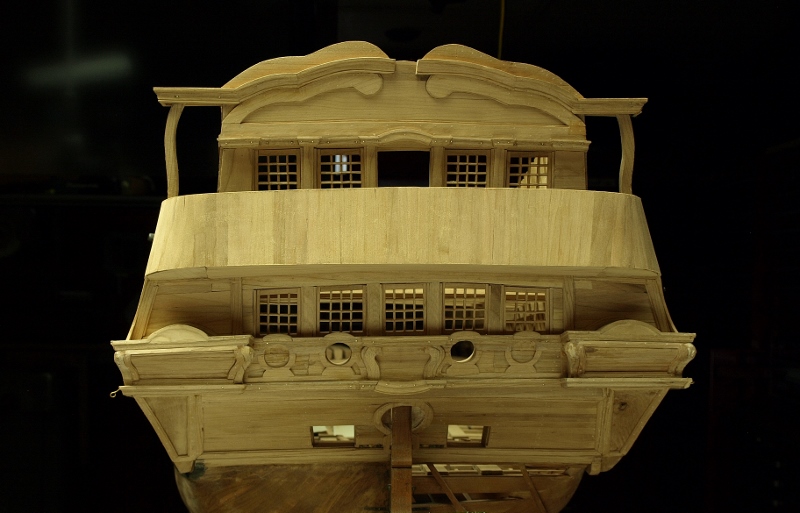
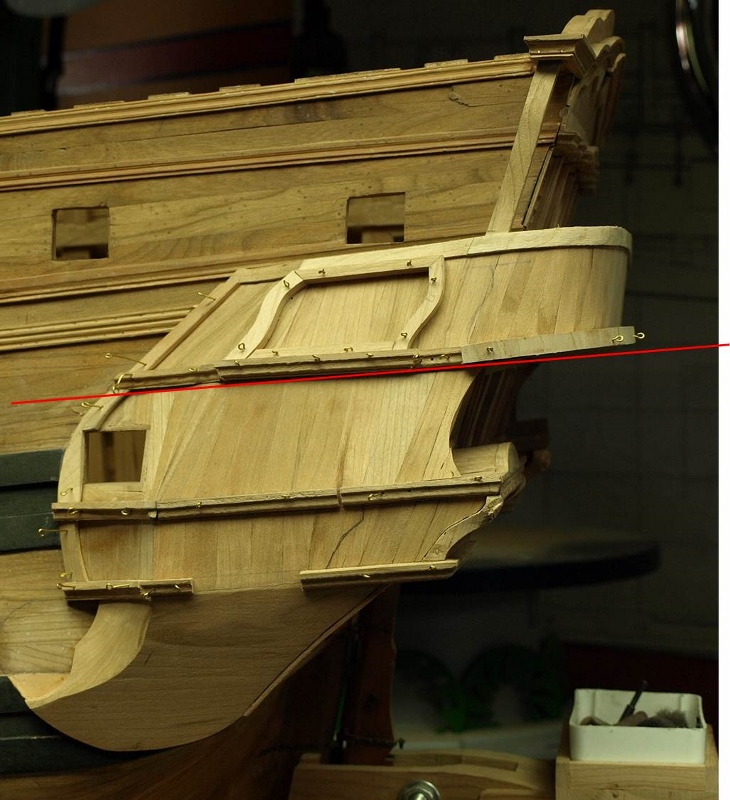
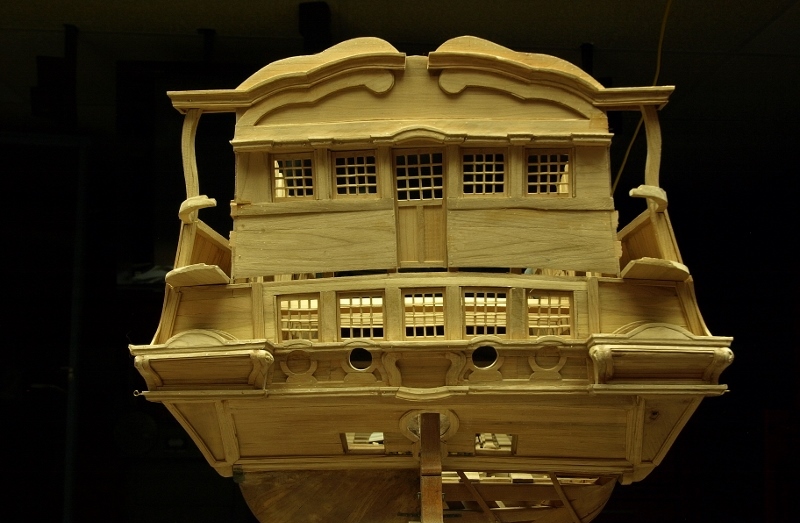
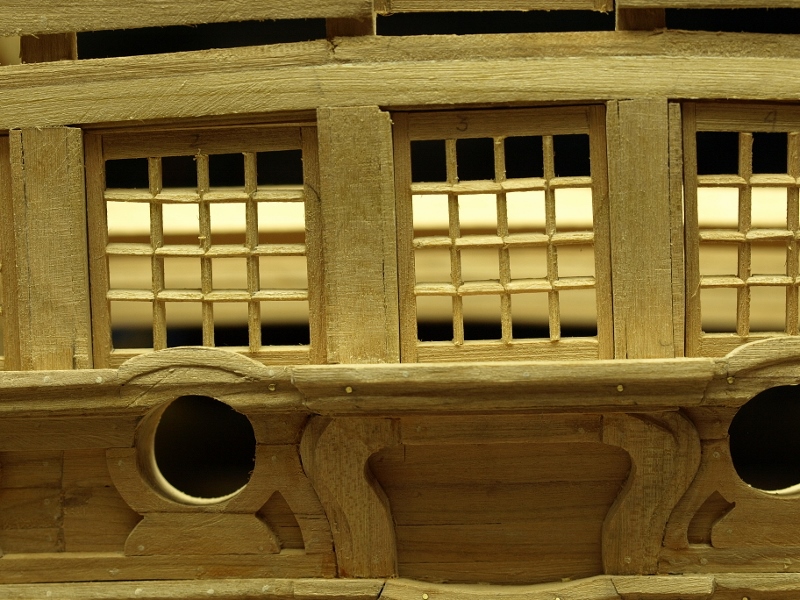
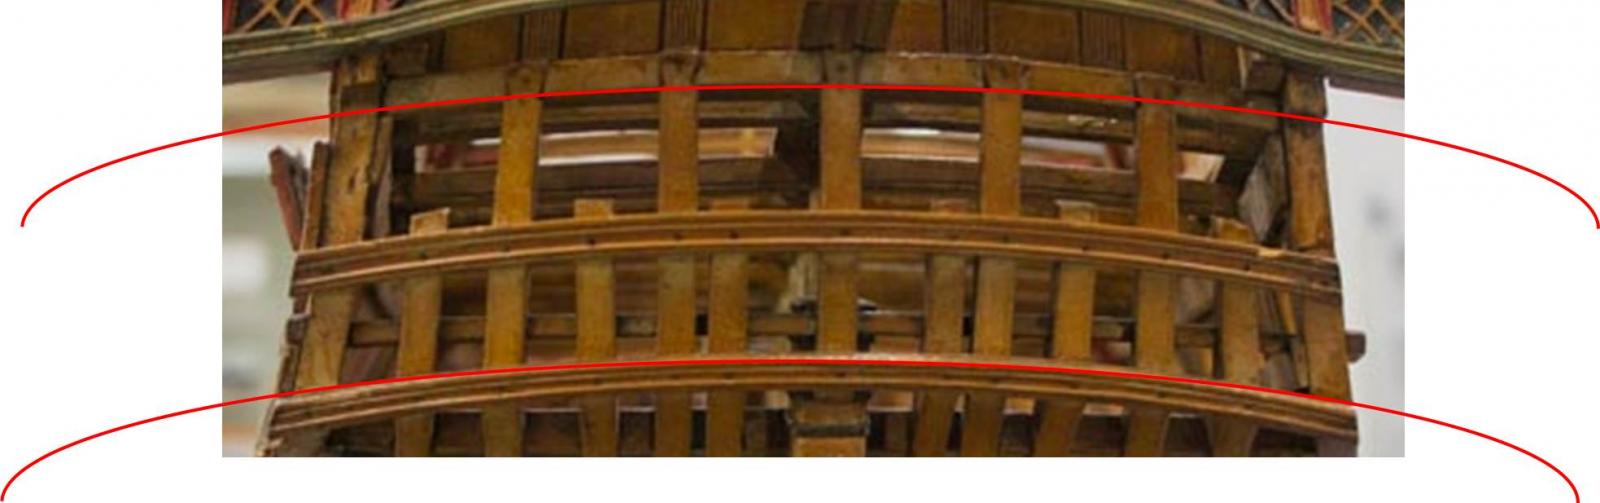
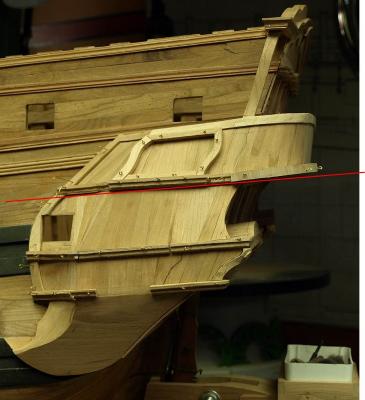
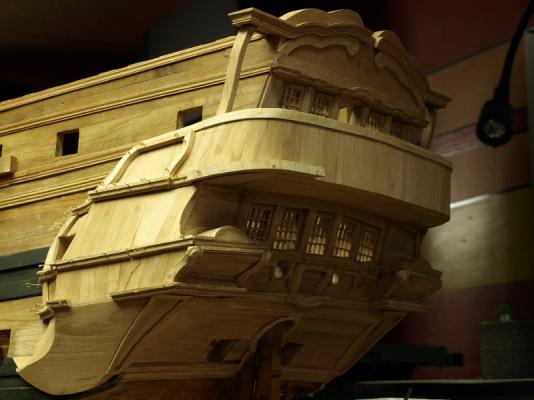
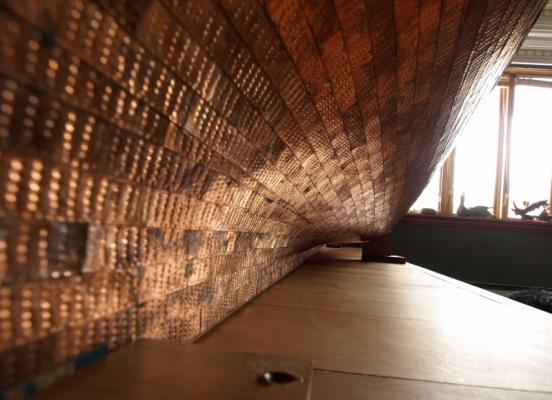
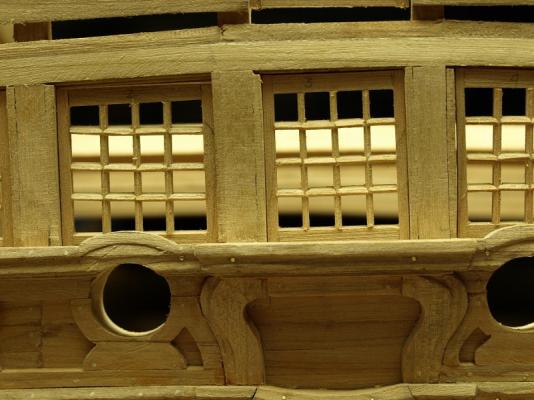
A little update for this Friday, I did retouch horizontal curving alignment of the tiles for the windows, I still will have to do some realignment. Now working on port and taking pictures give no mercy. On the second picture I draw a red line to show that some realignment will be needed. Nothing is glued yet, so that realignment can be done when necessary. It is easier to see on a picture of the model than on the model itself.

- 728 replies
-
- 12
-
-
- le fleuron
- 64 gun
- (and 1 more)
-
Hi Mark, If I would have to face this situation, I would also think that it is a difficult way to learn. But the desire to build and create is much more stronger. I tried ounce the the Hahn way with the frigate of 44 guns, I would not try it twice, the main reason being I do not like to work upside down. Did you know that some 20 or 25 years after Hahn, a little genius by the name of David created a method: - much more enjoyable to build - much more similar to the real method to build and - much more easy to build Mark, you will probably want to go in the Licorne V2.0. I am not trying to tell you not to go. I just wants to make sure that you are aware that there are easier ways to build and mainly that you will get plans in a much higher degre of accuracy and details with peoples like David and Ed, and that the better the plans are the better the results are going to be... it is simply mathematic.
-
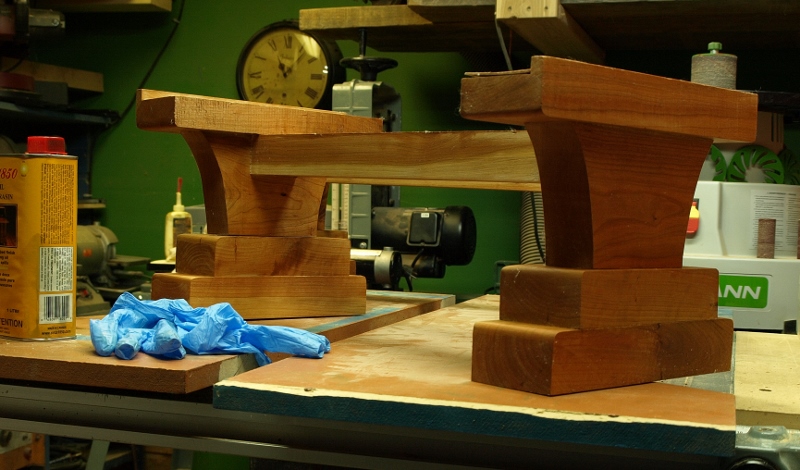
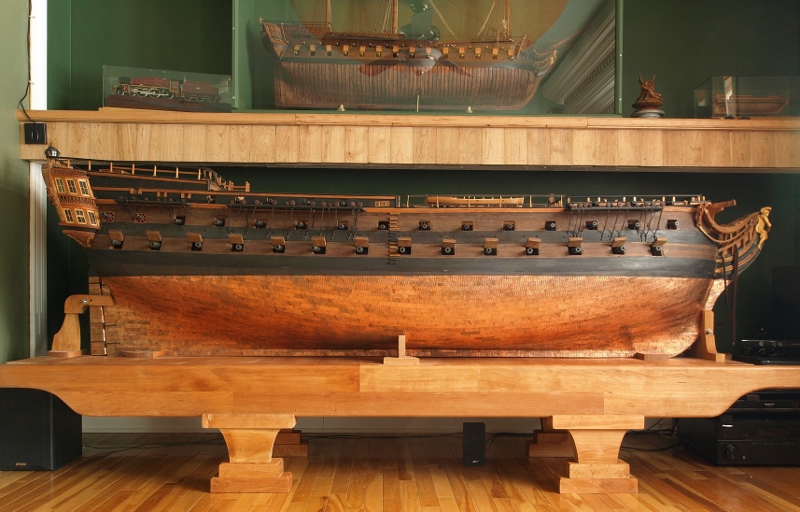
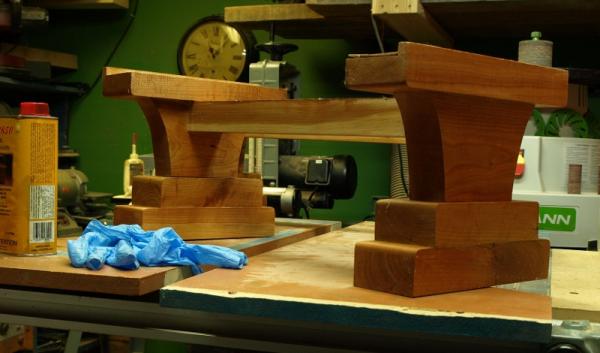
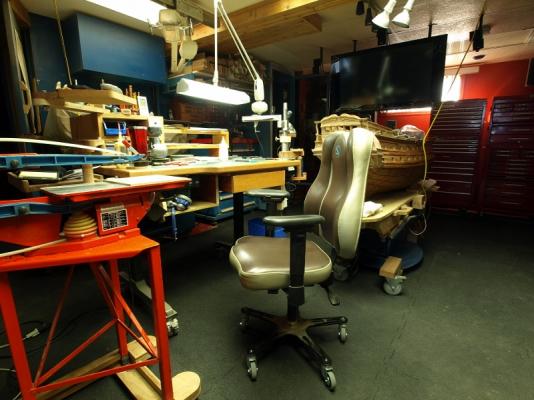
Finding a place for an 8 feet long model ship. When I finished the 74 guns 2 years ago, I did not know where to put it. A place was made in the basement stock room and I covered it well. Last summer the model was brought on the upper floor in an unoccupied room. A cherry table with wheels was made to transport it. Last week, my wife wanted a new hobby room in that same room and suggested to build a wall to wall shelf and put the big model under it. Legs table are replaced by 2 mount and the model finally finds a place.

- 728 replies
-
- 9
-
-
- le fleuron
- 64 gun
- (and 1 more)
-
Another expert in stove making. Great realism.
-
I see your point, it is just a matter of taste, not more not less.
-
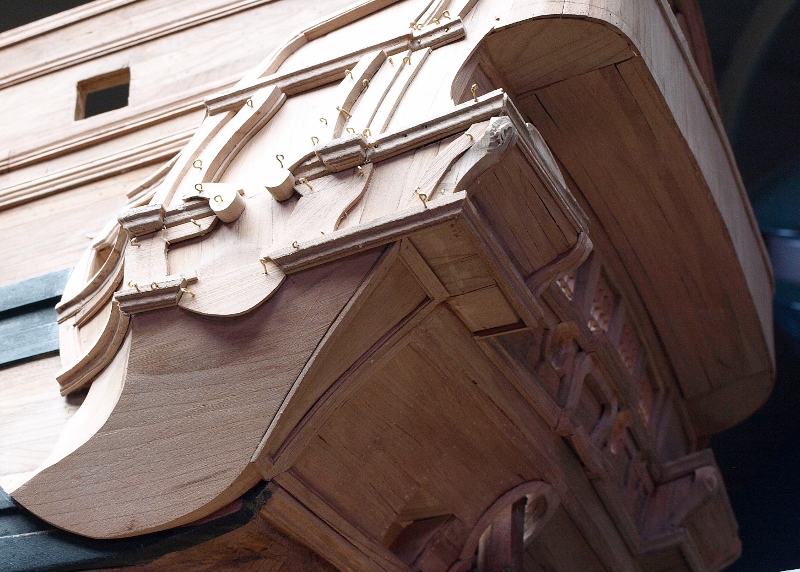
By comparison with a french 74, the curve of the gallery is exactly the same as the deck.


-
Hand Scraper
Gaetan Bordeleau replied to Stuntflyer's topic in Modeling tools and Workshop Equipment
made from scraper blades
-
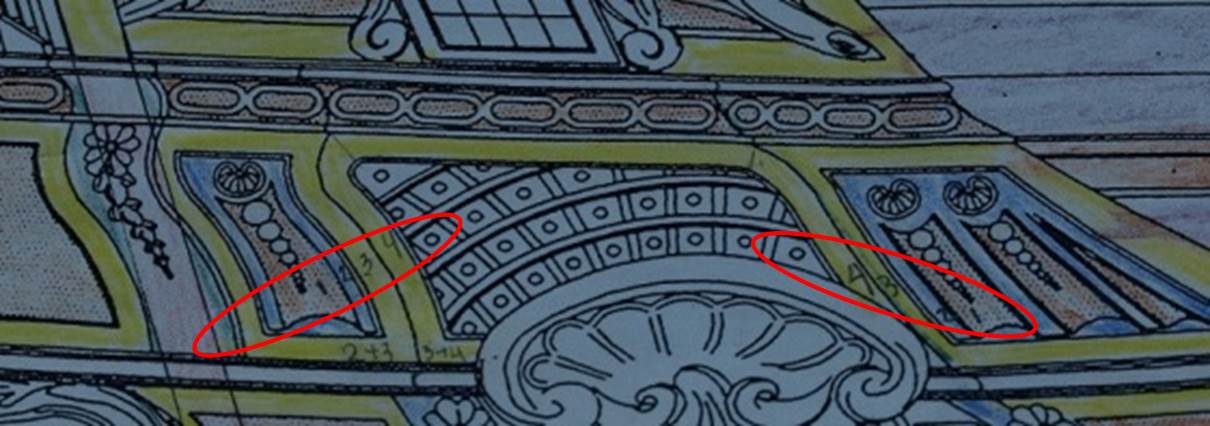
Same picture, 2 different place, but with a side angle Anatomy of the ship Bellona p 25 Ship of the line vol 2 p 117 There must be a better picture somewhere?

-
This is the nicest stove I have ever seen and it is not even finish yet.
-
Coppering... was done with copper Copper is much easier to bend than brass Why do you use brass?
-
Why the russians make coppering in brass?
-
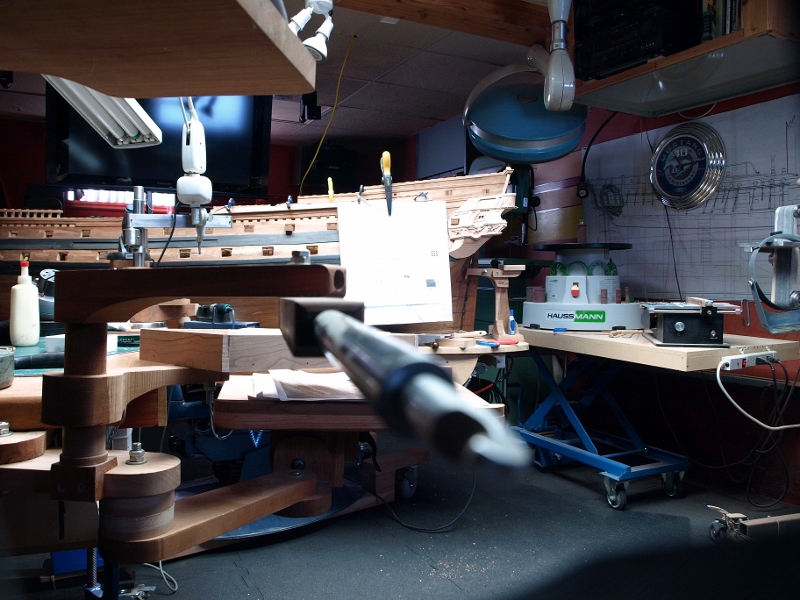
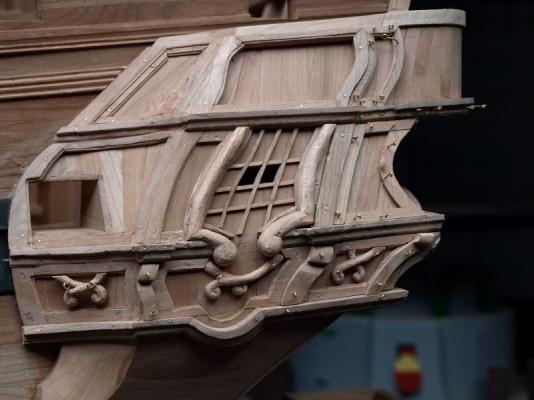
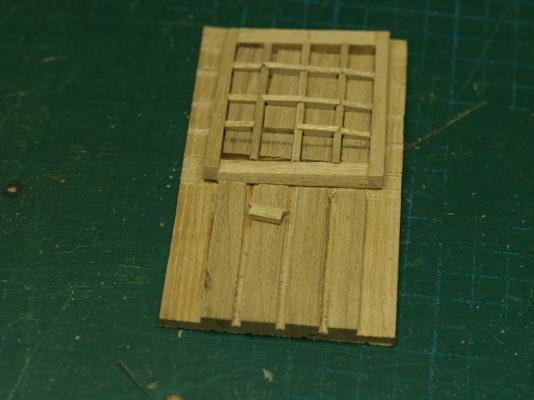
The most difficult part to do the windows was to decide to begin. 3 templates with grooves were made. Windows are dry fit for now. Next part will be easier to do, the gallery. I cut the legs of the scroll saw so I can use it while sitting and did a wood adaptor to use it while standing up.

- 728 replies
-
- 9
-
-
- le fleuron
- 64 gun
- (and 1 more)
-
Mark, you cannot take a decision only from drawing one, you need the drawing from behind with the same provenance as your drawing. Also, I am asking myself this question, are these 2 beams witness of the beam curvature of the decks?