HOLIDAY DONATION DRIVE - SUPPORT MSW - DO YOUR PART TO KEEP THIS GREAT FORUM GOING! (Only 27 donations so far out of 49,000 members - C'mon guys!)
×


Robert29
-
Posts
417 -
Joined
-
Last visited
Content Type
Profiles
Forums
Gallery
Events
Everything posted by Robert29
-
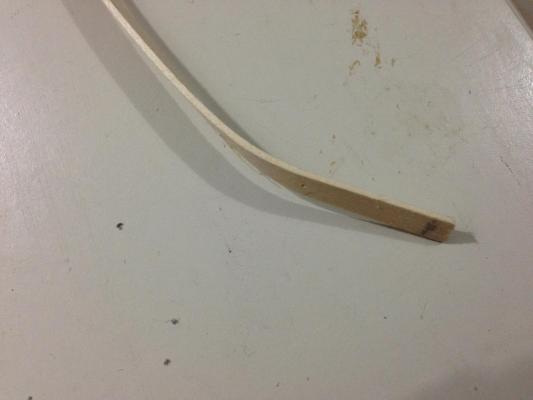
 Ian, thank you for your reply. The wood supplied with the kit does not have that kind of problem. It seems to be all at an even smooth thickness. The only thing I can see is the different shades. I think I will have a go with it. Your finished hull looks fabulous. It did not take me much to convince myself how great the hull looks finished in wood after I saw your work. For now I am still trying to finish the first planking. I will post some images when ready. Robert
- 527 replies
-
- 1
-

-
- caldercraft
- victory
- (and 1 more)
-
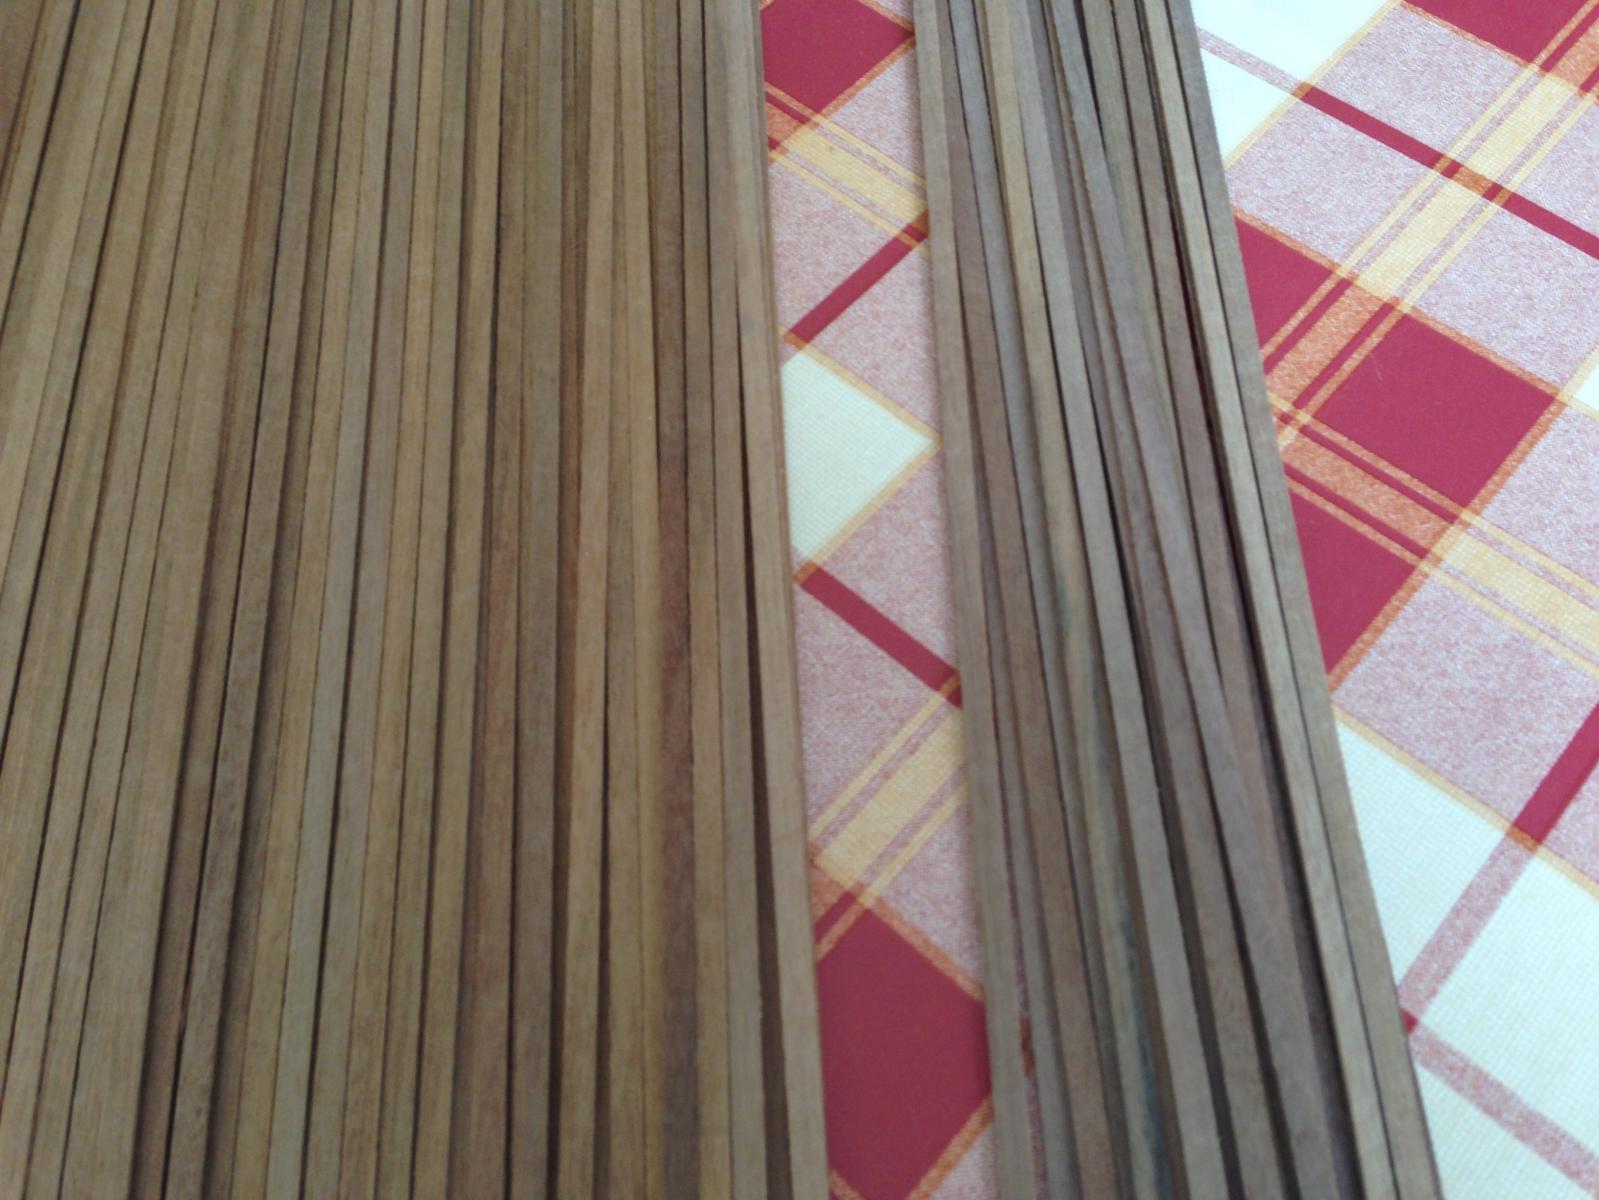
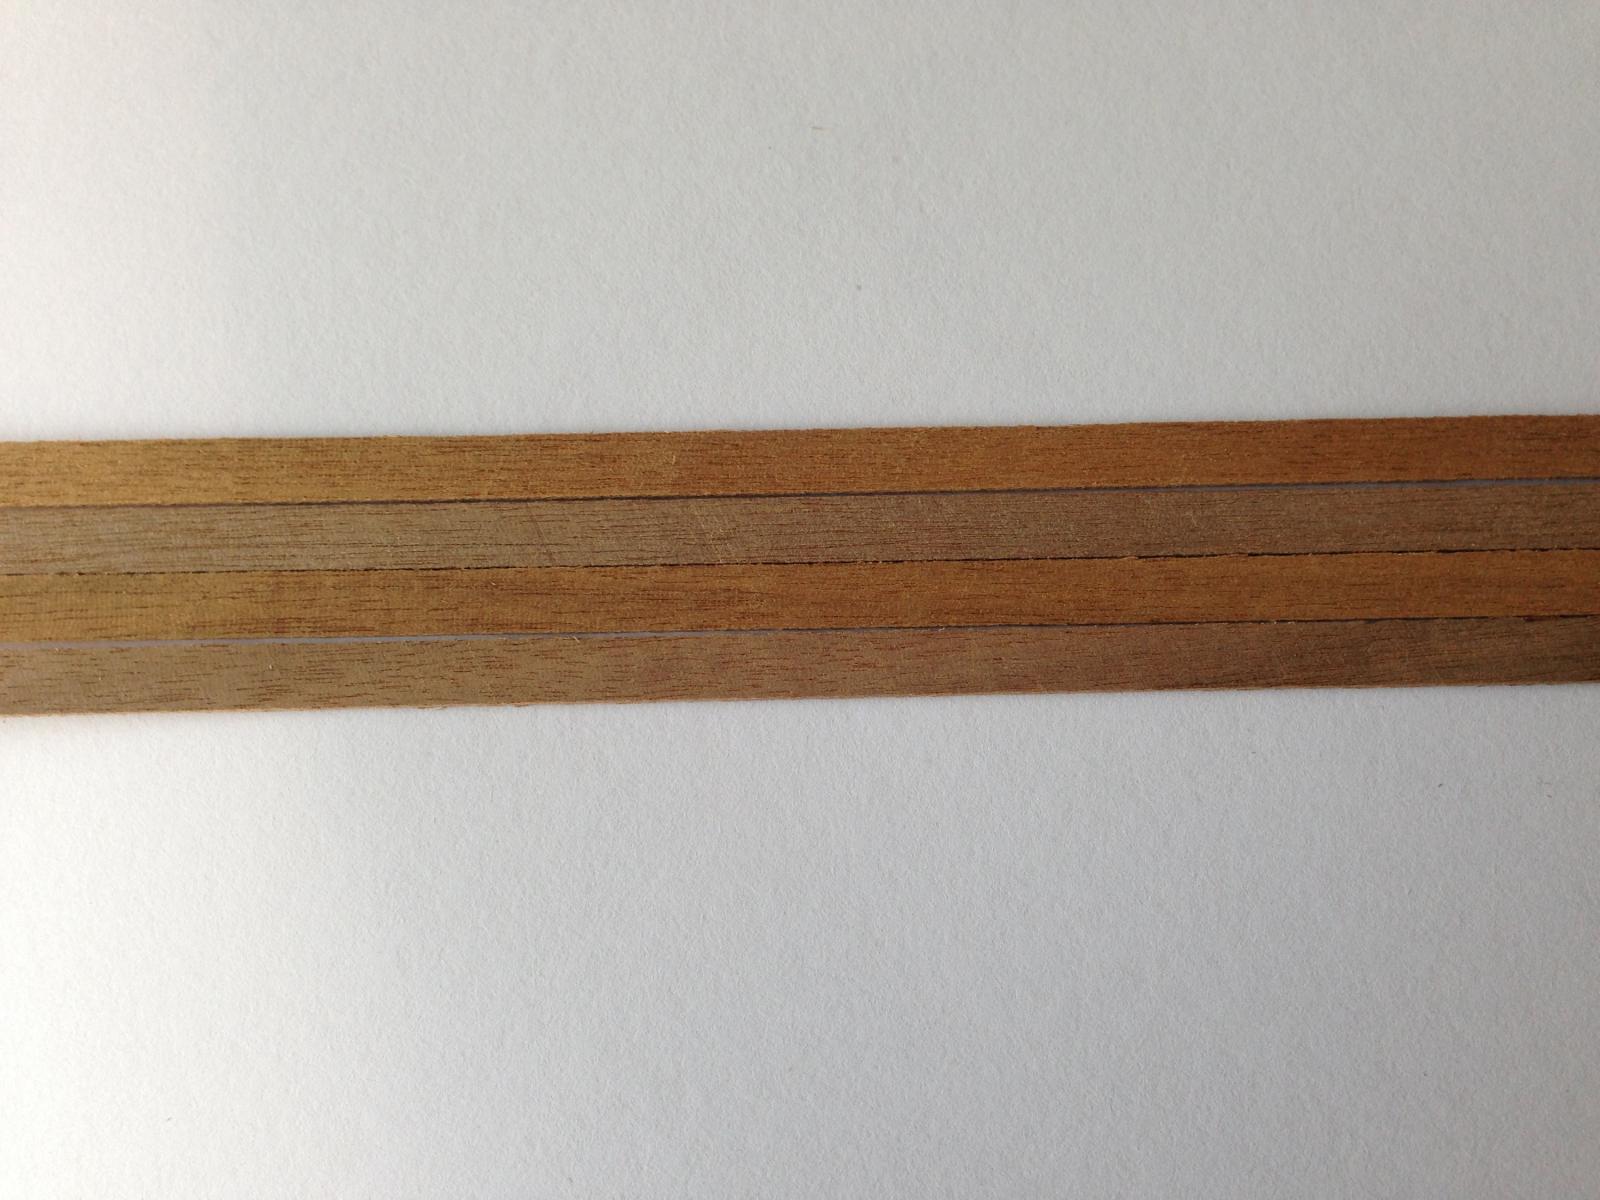
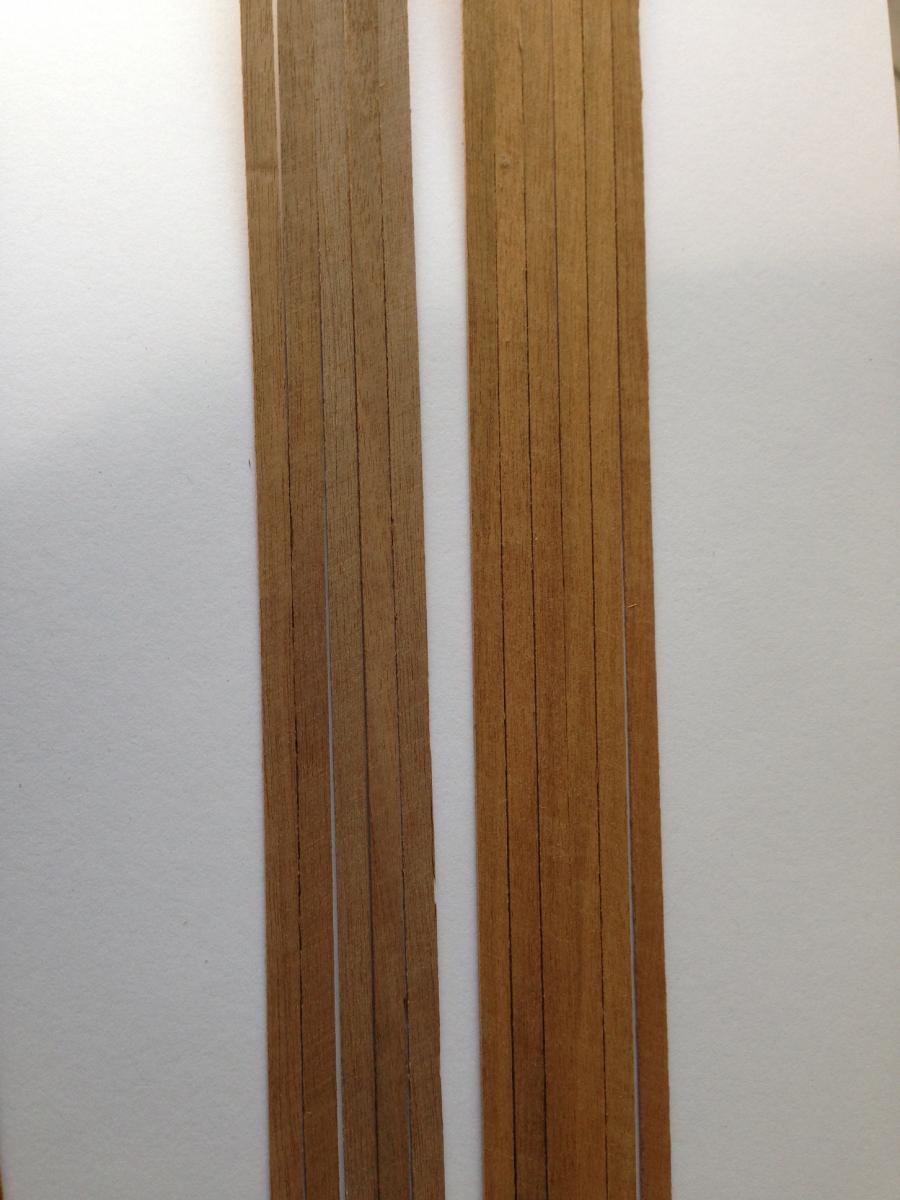
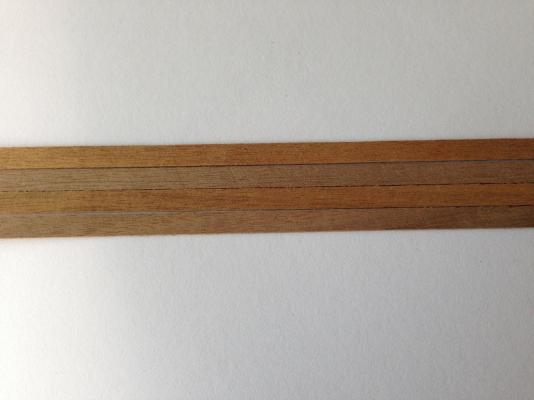
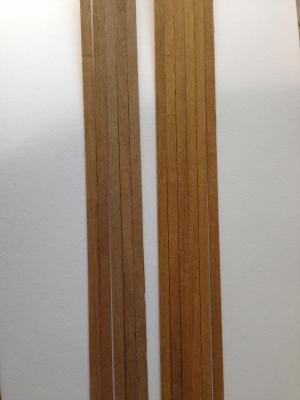
Nick , Kevin, Waspy, Joe, Bob, Ian Thank you for your comments. I think the second planking supplied with the kit is walnut (1mm x 5mm), and in the parts list it is listed as walnut. I was thinking it is mansonia as it has quite a few strips with a greyish shade. I am no expert in wood and probably walnut comes in a greyish shade as well. I separated the most extreme greyish once. I would still have enough strips for the hull and use the greyish once for the sides where it is going to be painted. This is how they look if they are fixed next to each other. The two shades separated, next to each other. I am still undecided what to do, that is, if to try the wood I have with the kit or try to find better quality. On the other hand, as you said Ian, I wouldn't mind some variation in shade as long as it is not an extreme. I wouldn't want the hull to look so perfect and shiny like it is the hull of a yacht. Robert

- 527 replies
-
- 3
-
-
- caldercraft
- victory
- (and 1 more)
-
Ian, Thank you for your nice comment and encouragement. To be honest with you whether to copper it or not has been brewing in my mind since the day I started building the kit. From the little experience I have I agree with you, I don't think the Mansonia supplied with the kit will do a proper job. I can see different shades in the planks supplied and I am sure they will stand out. Locally there is no way I can source a supplier to get the black walnut from. Do you know of a reliable supplier from where I can get it? I would prefer to finish it in timber than copper. Bob / Joe Thank you for the encouragement. It means a lot to me. Makes it easier for me to take the plunge for more challenging jobs like finishing the hull in timber. Depends if I can get hold of better planks then the once supplied with the kit. Any suggestions from where to get it will be appreciated. I would also like to thank all those for the Likes. Robert
- 527 replies
-
- 2
-
-
- caldercraft
- victory
- (and 1 more)
-
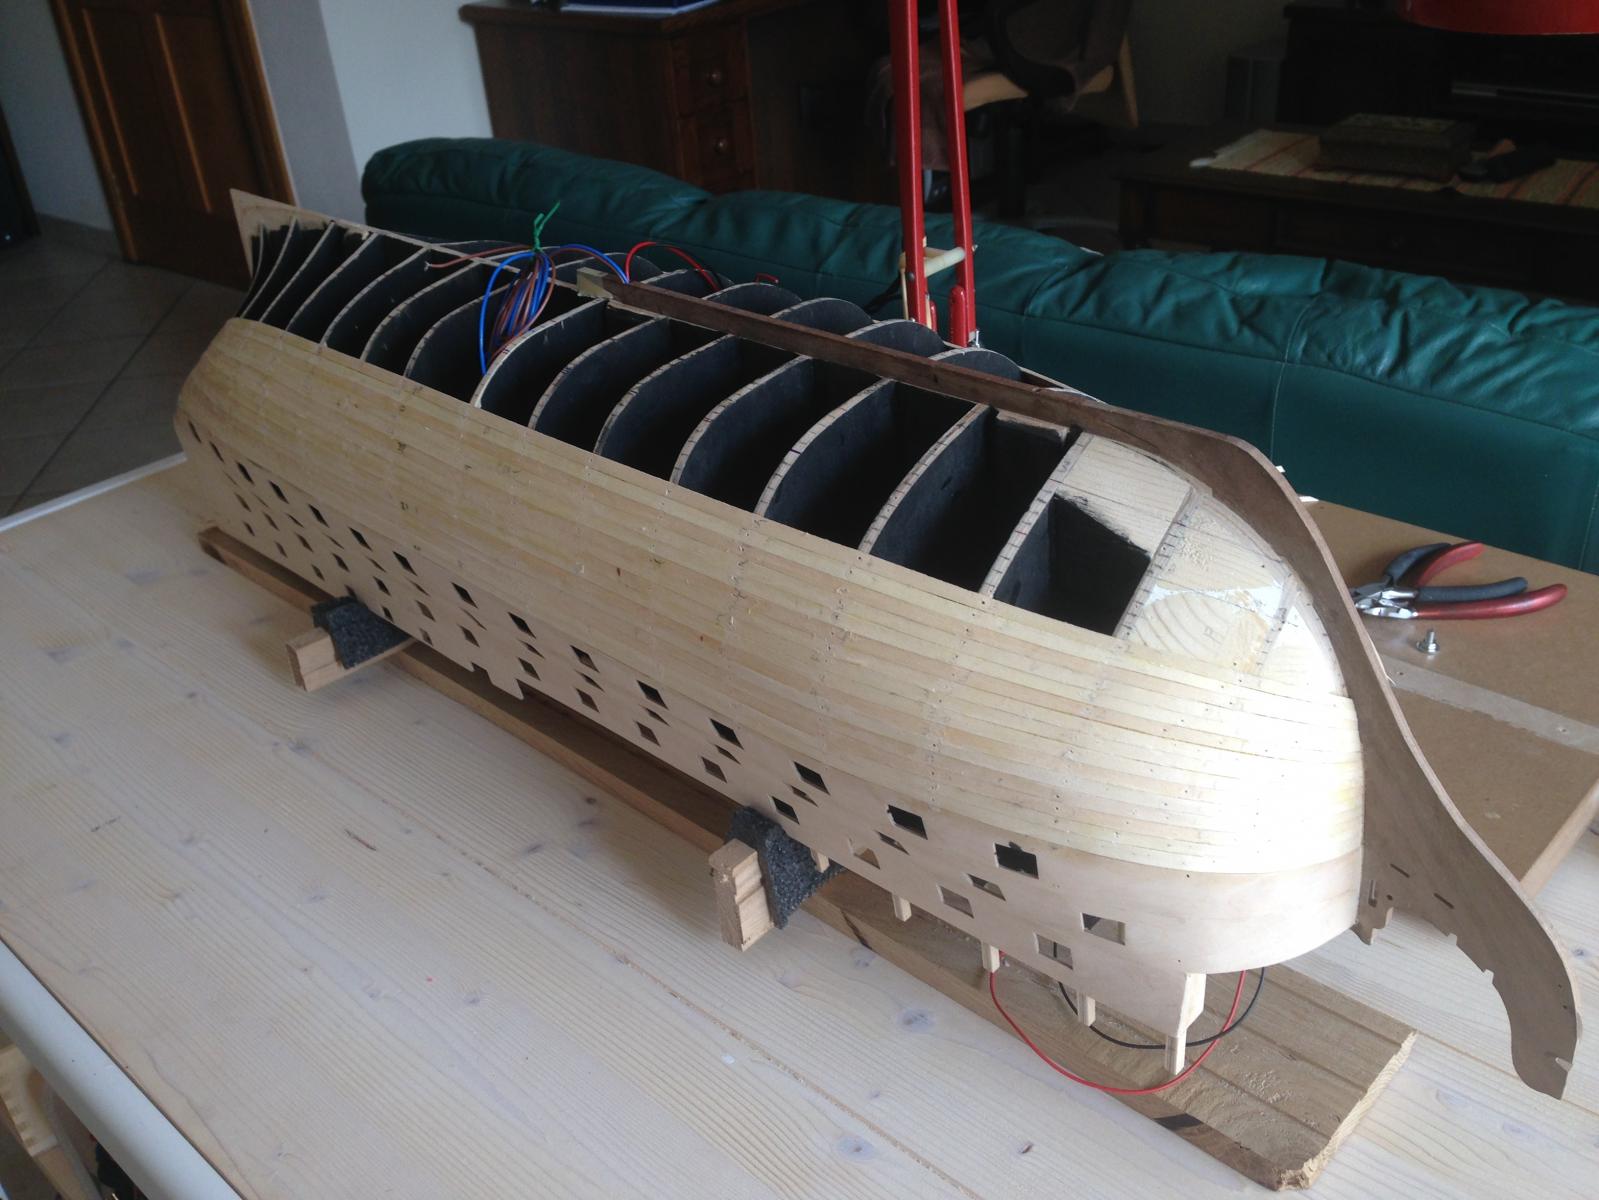
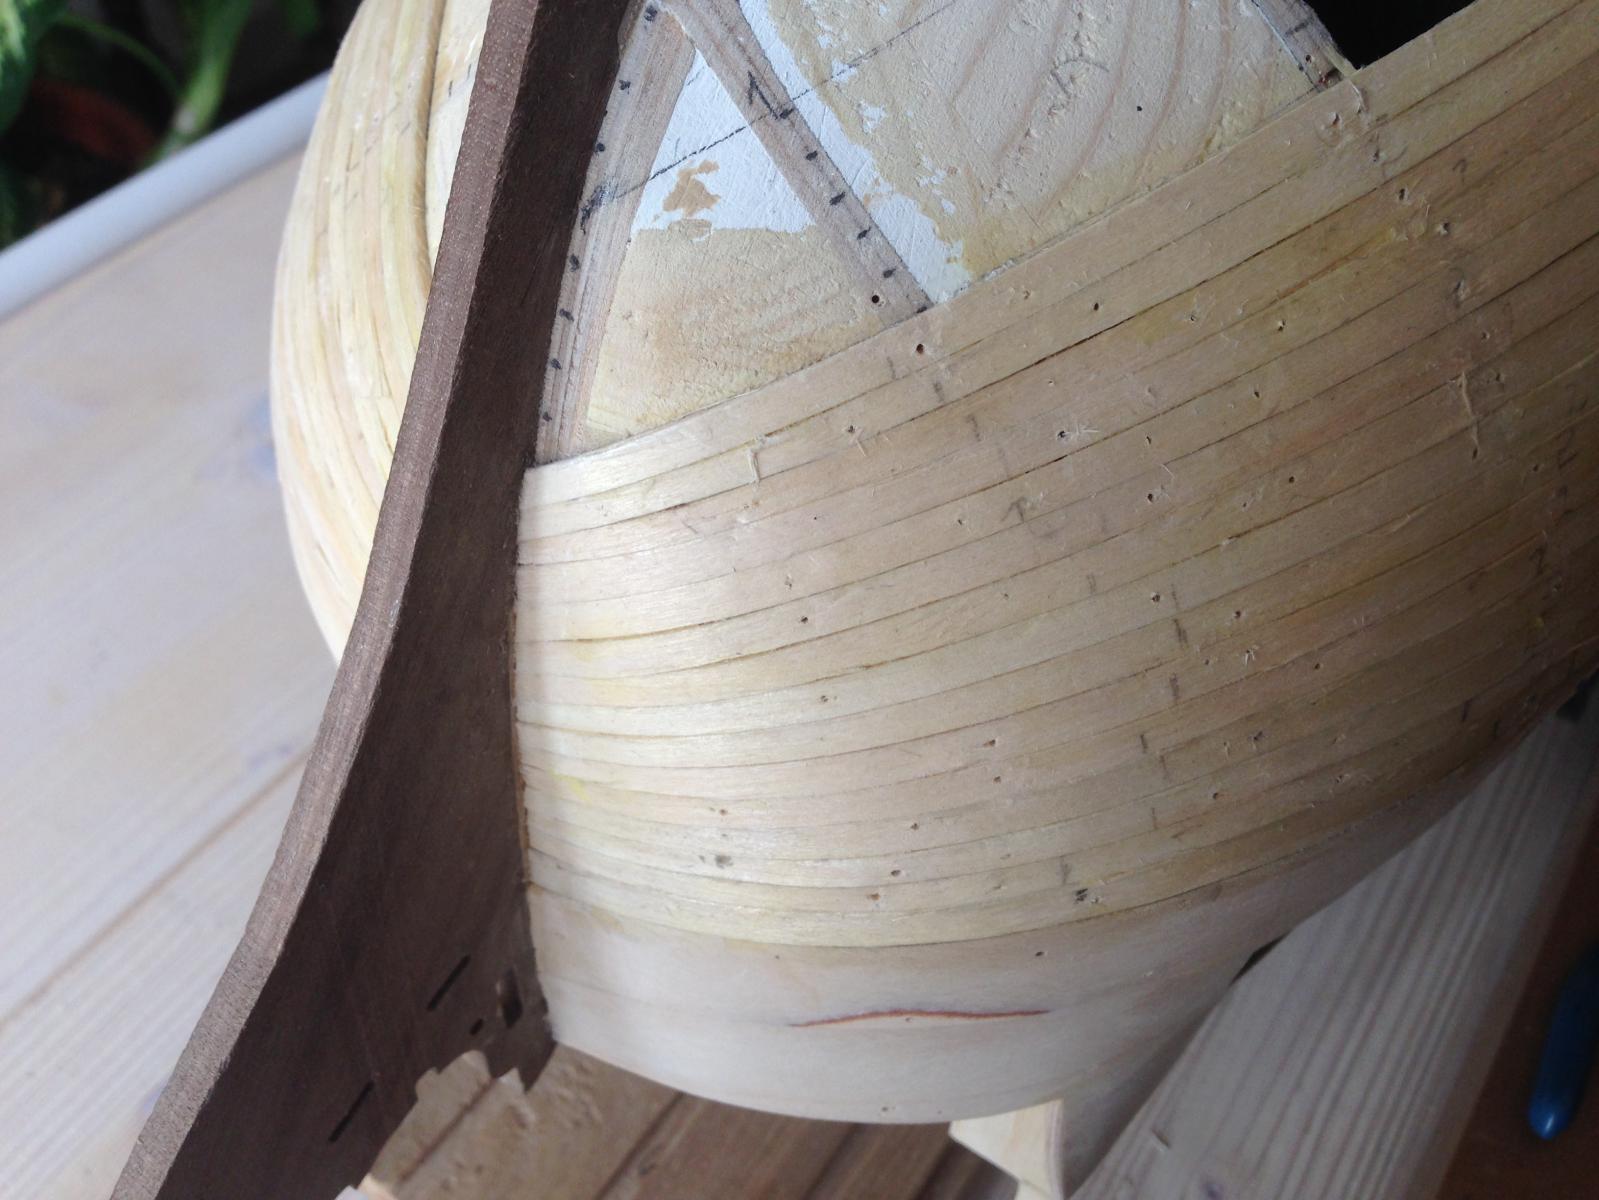
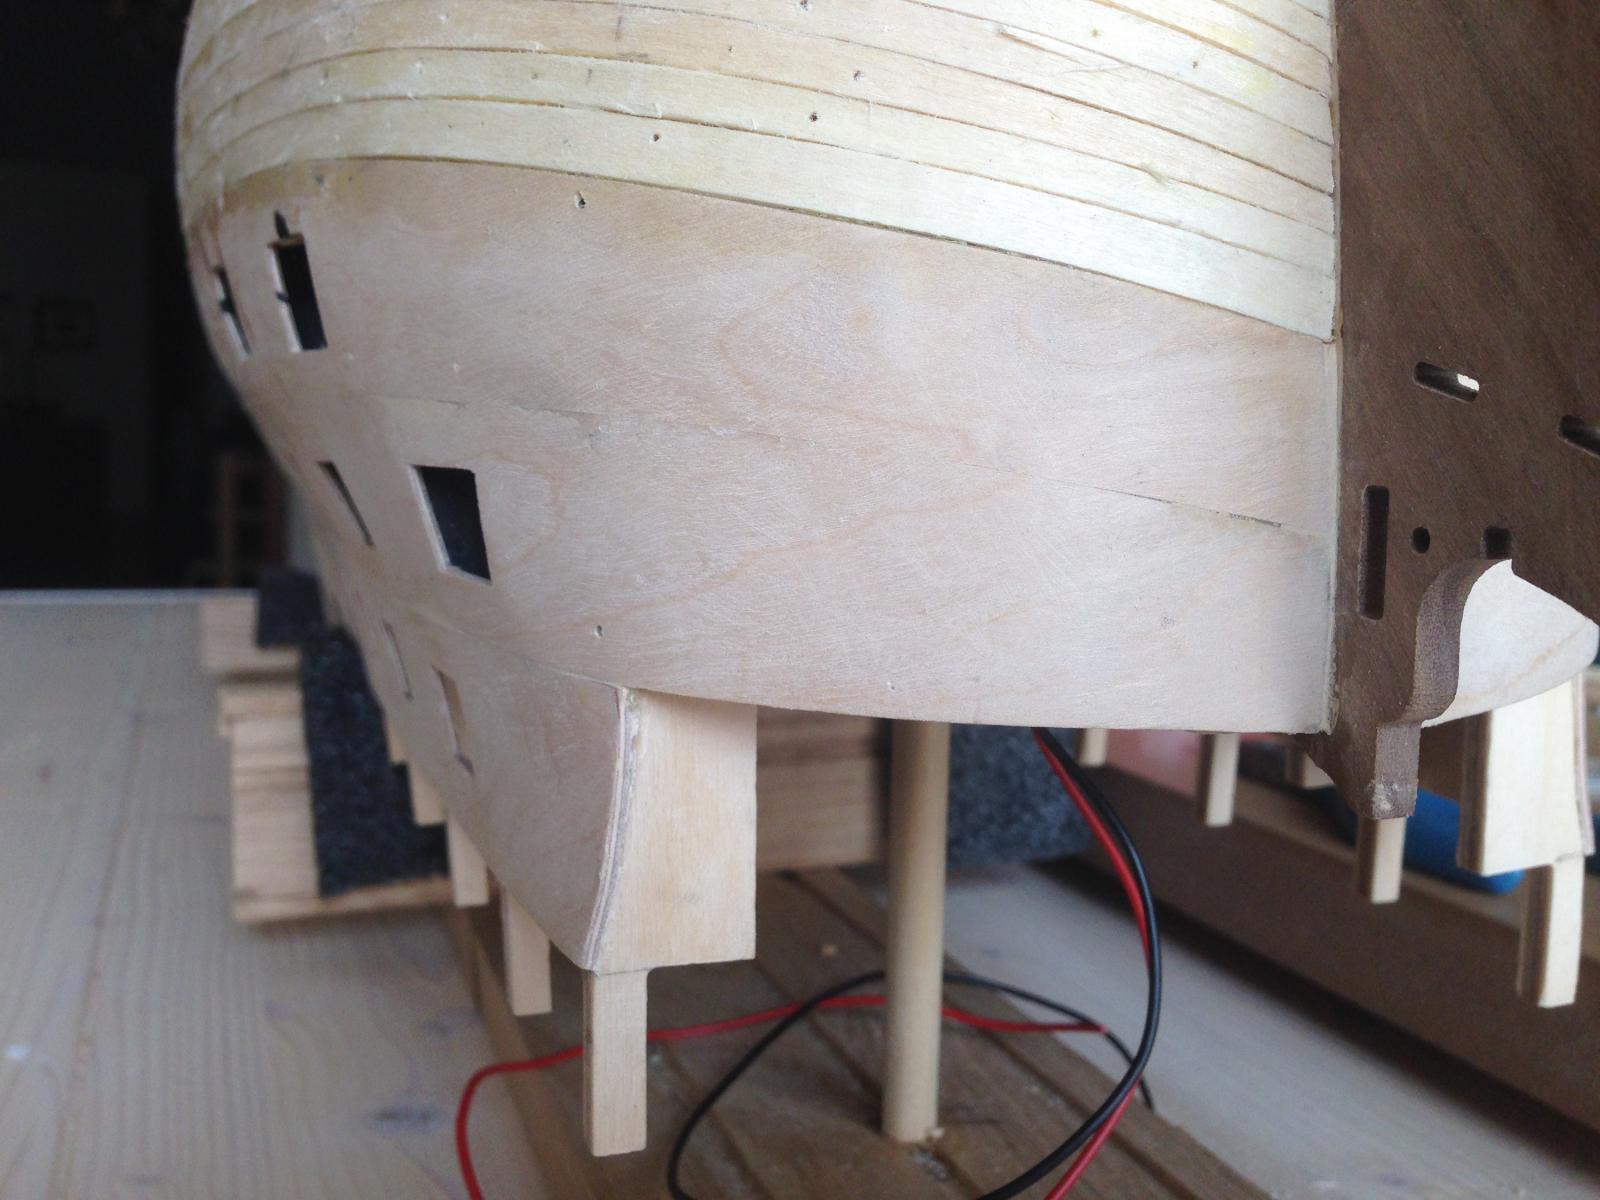
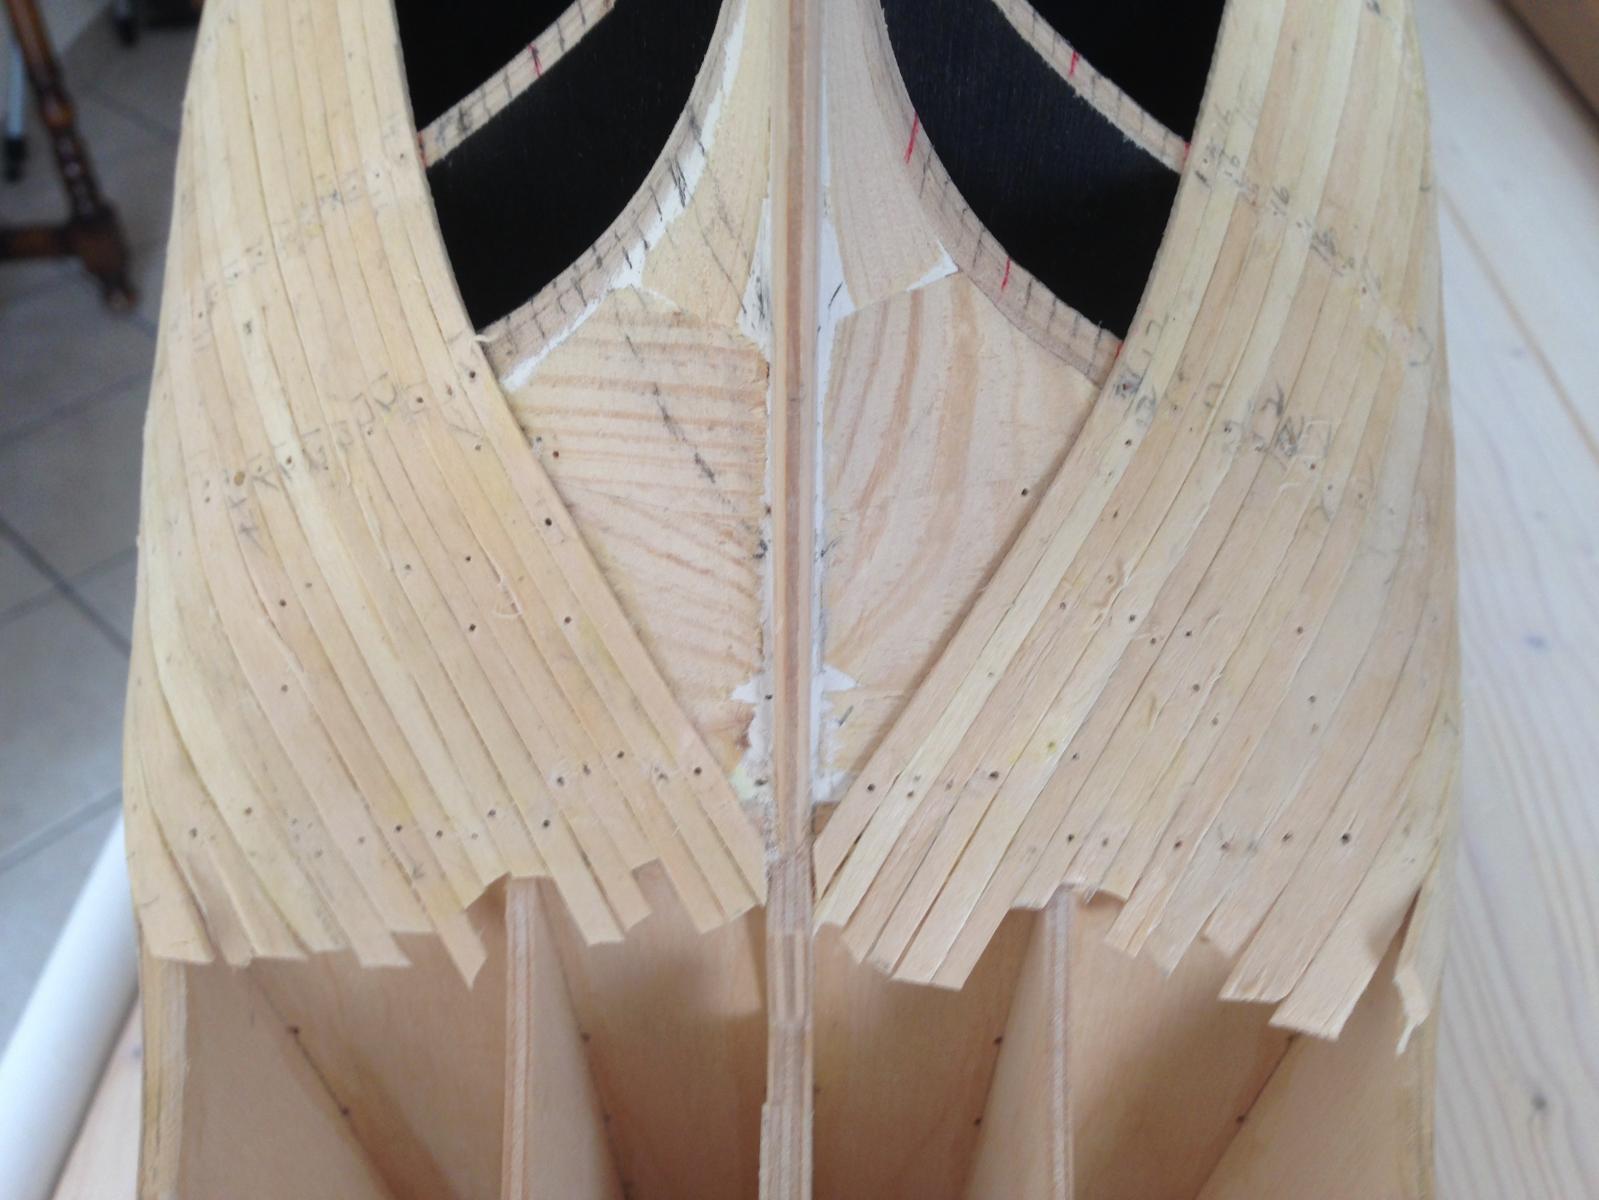
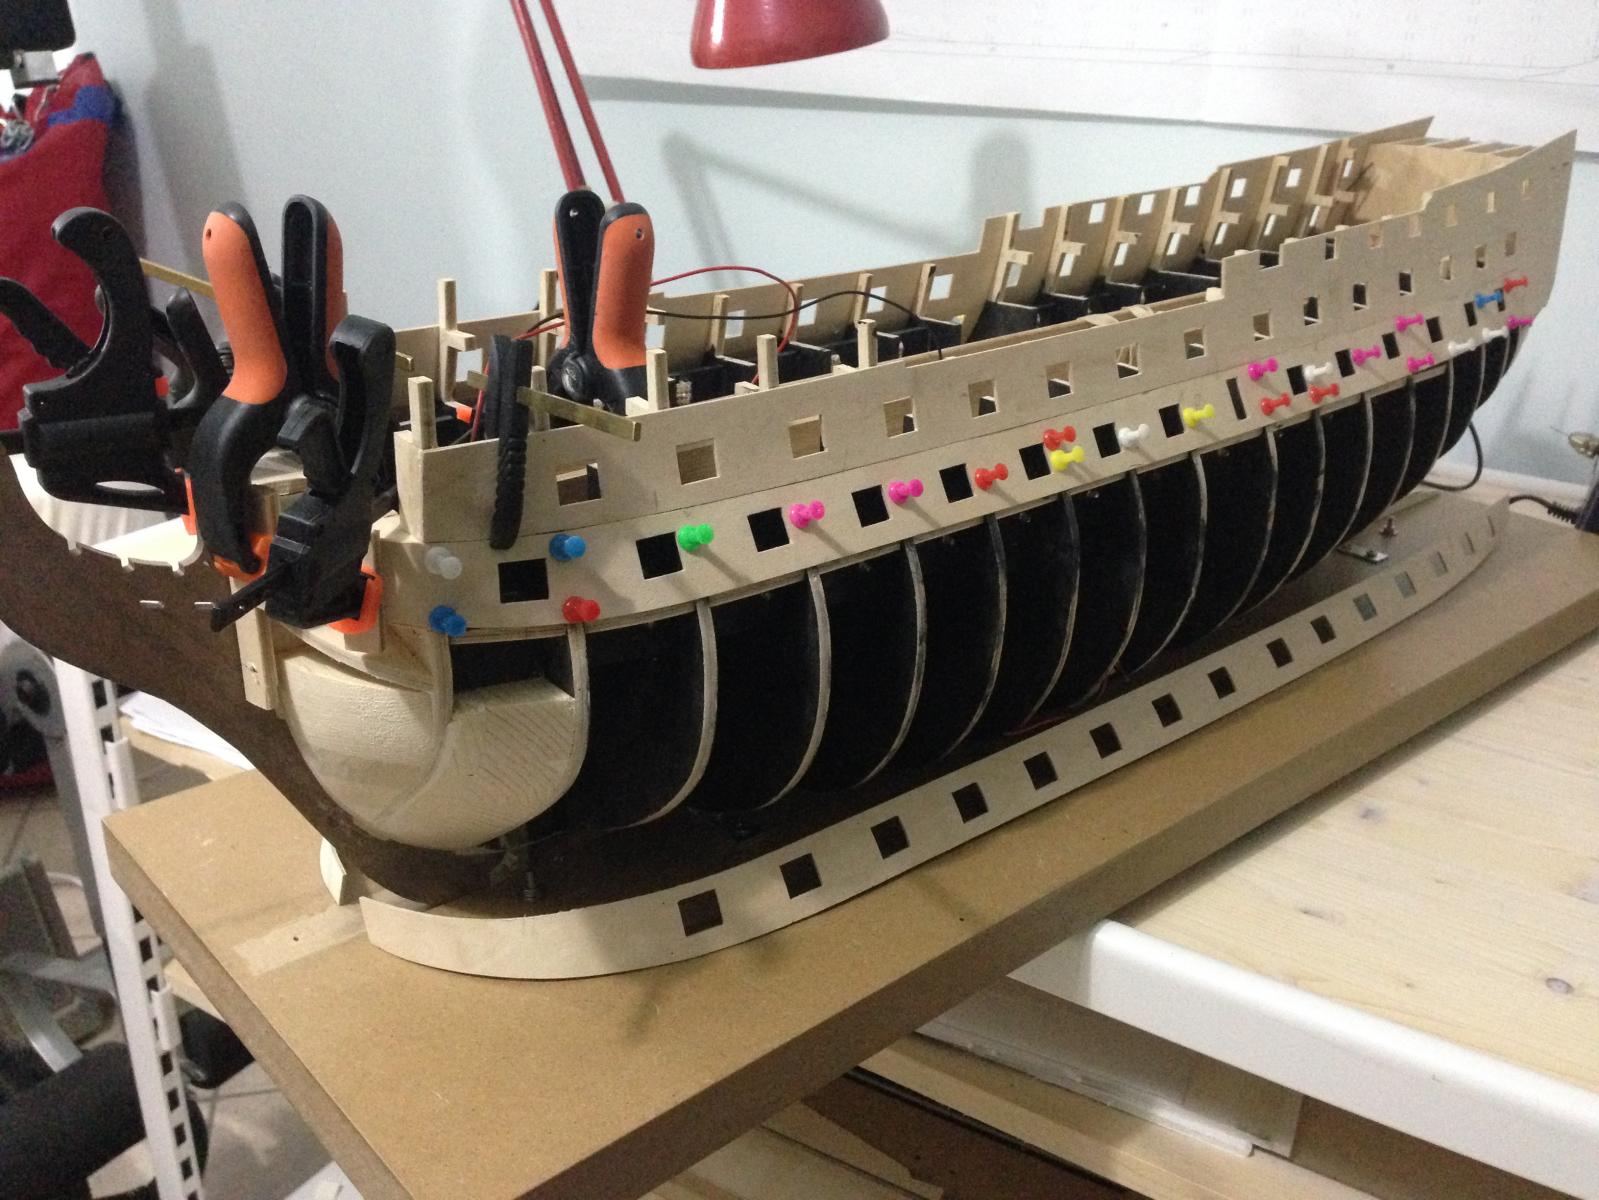
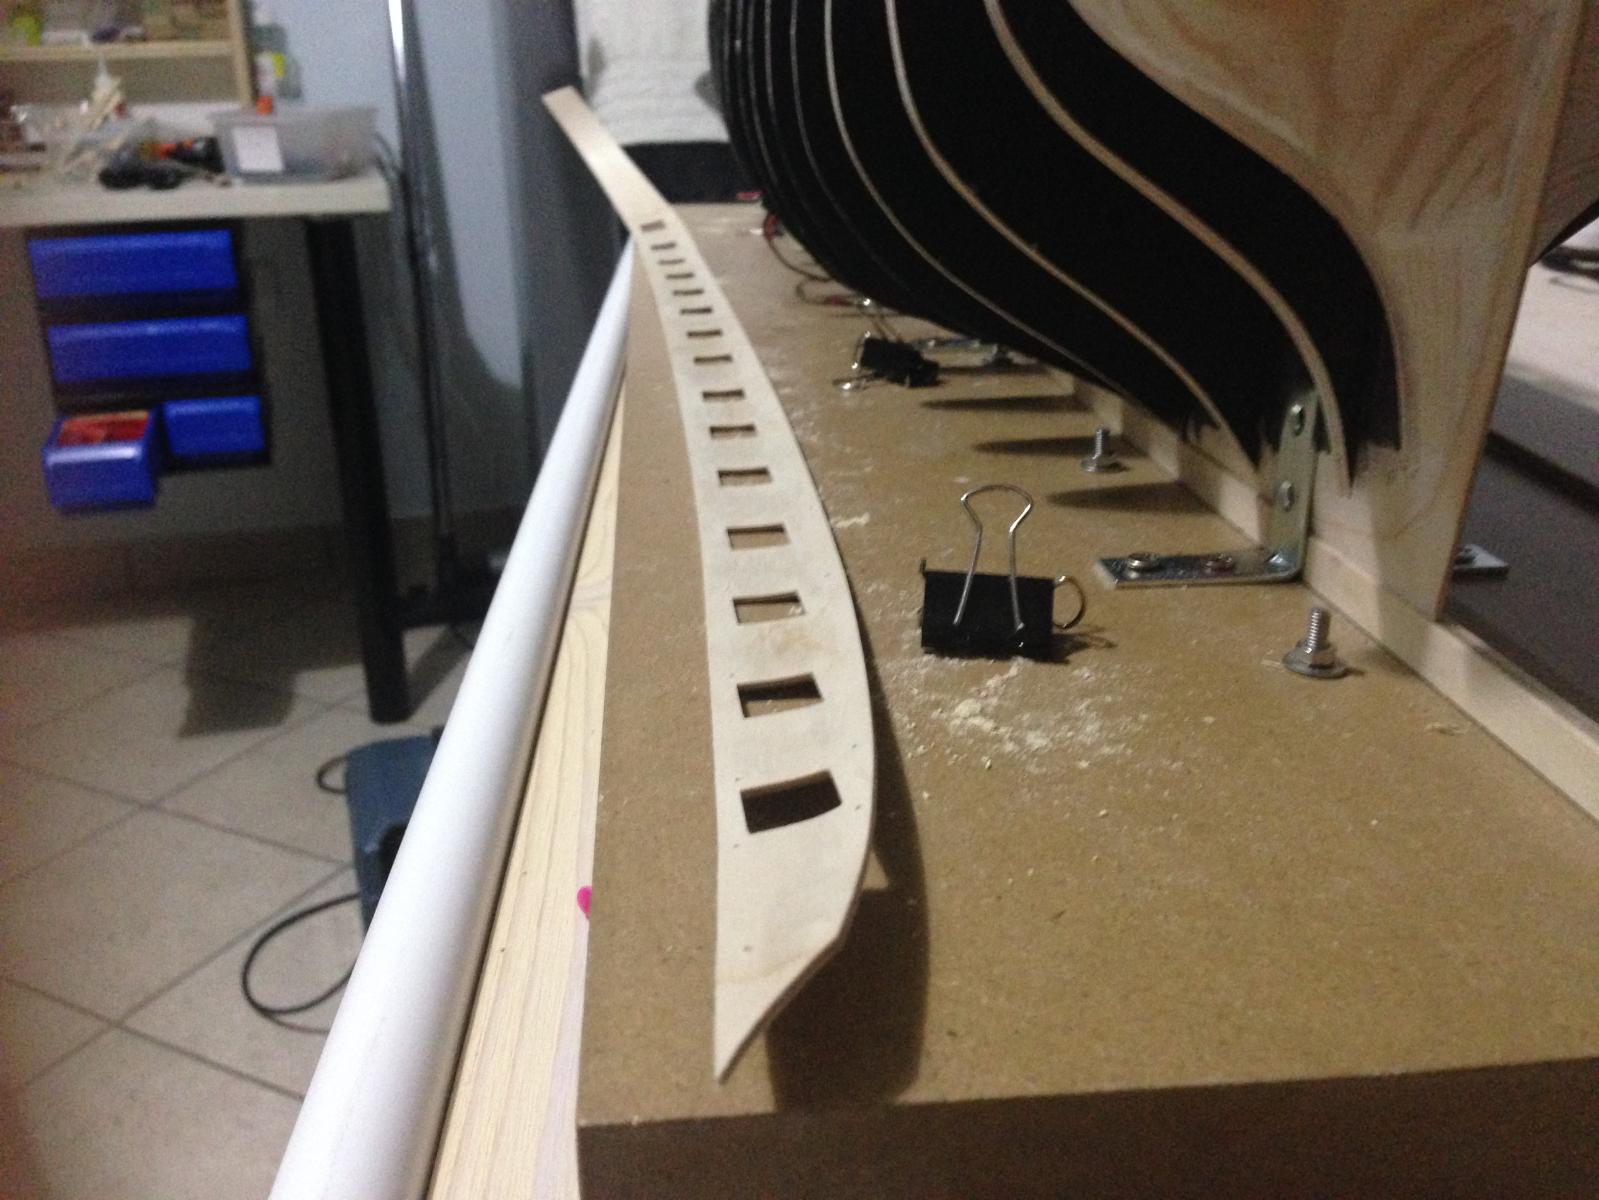
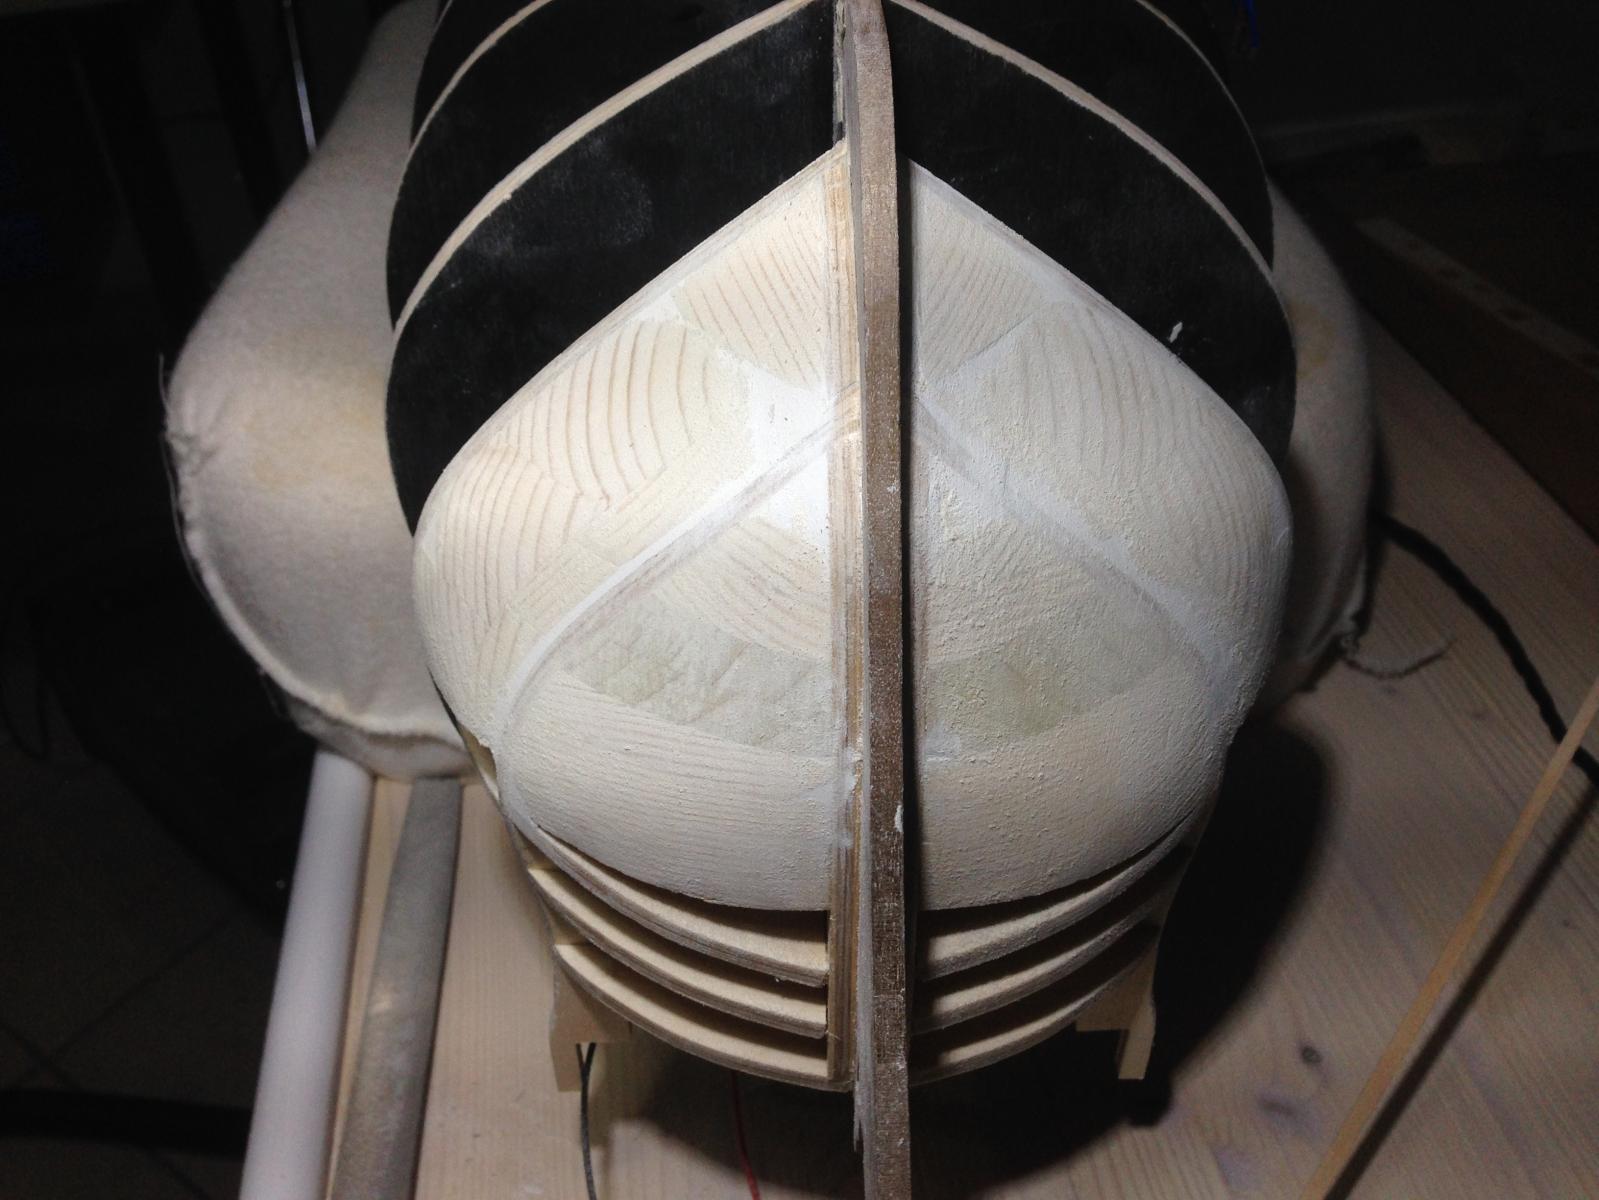
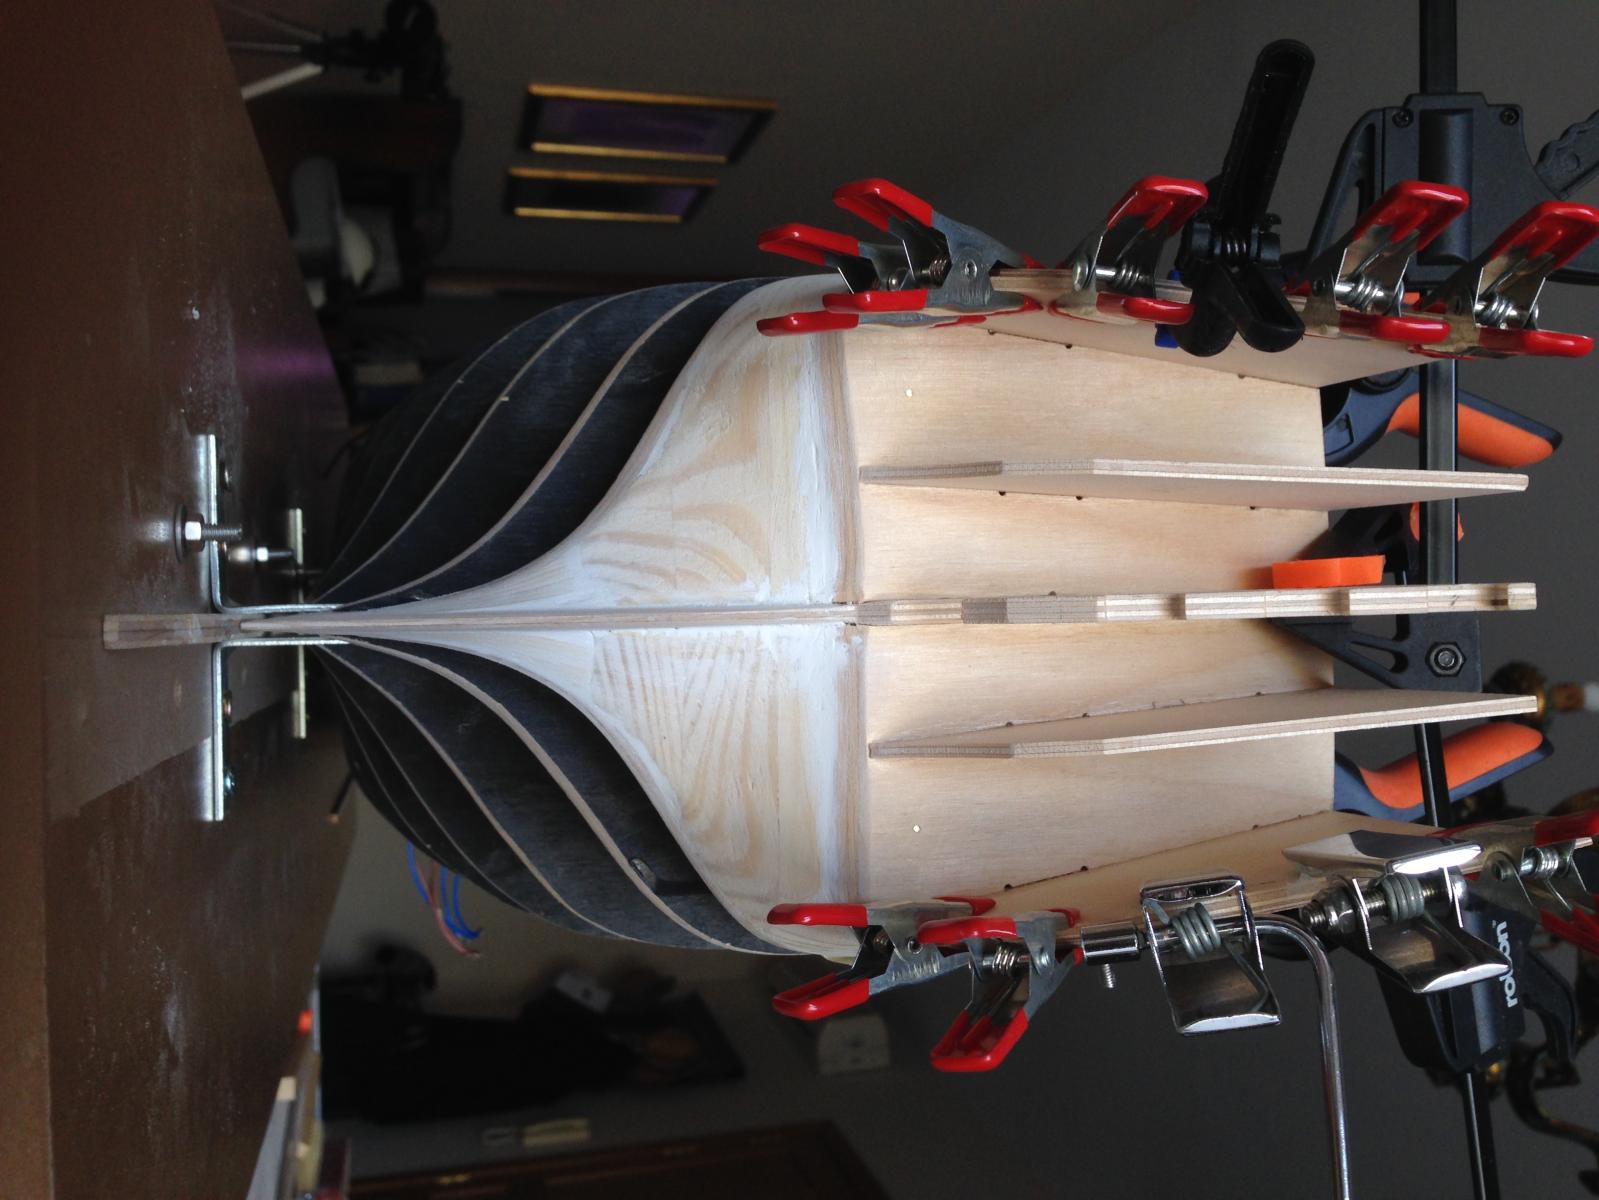
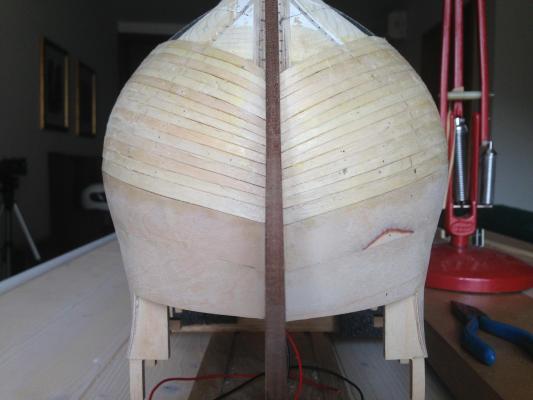
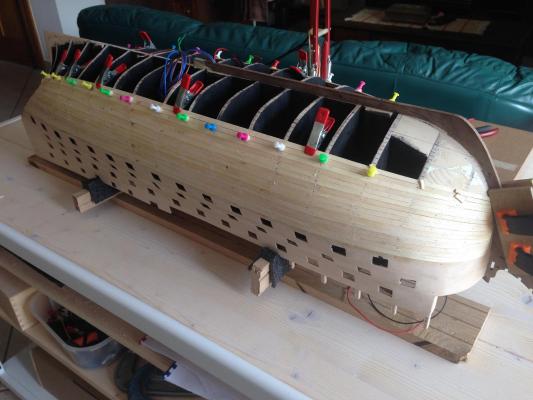
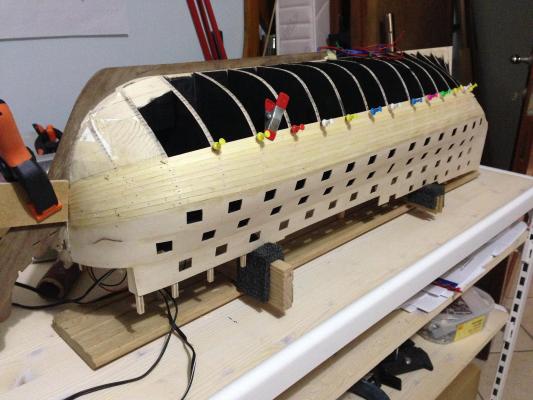
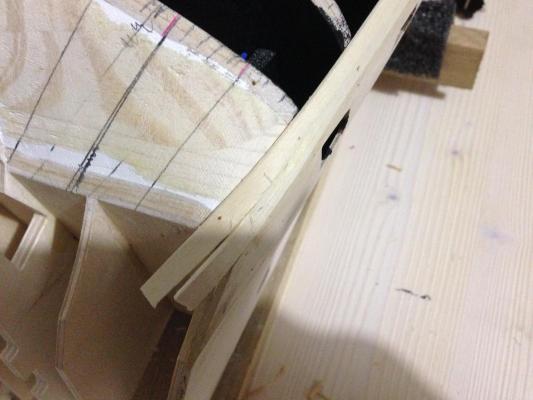
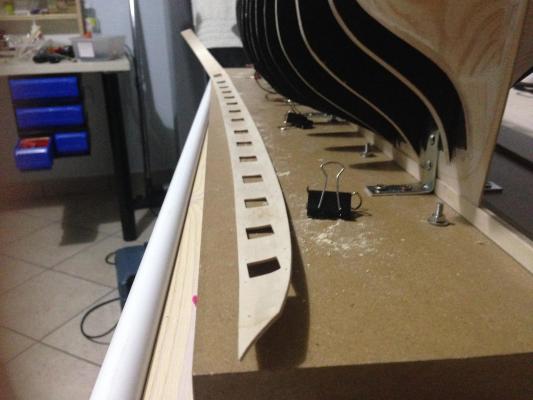
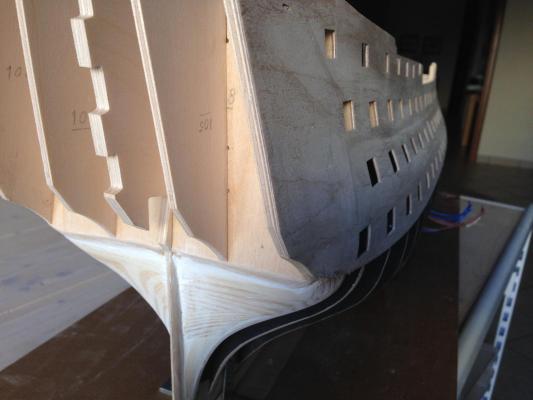
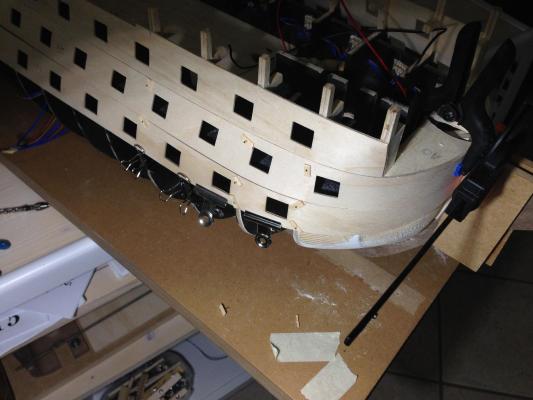
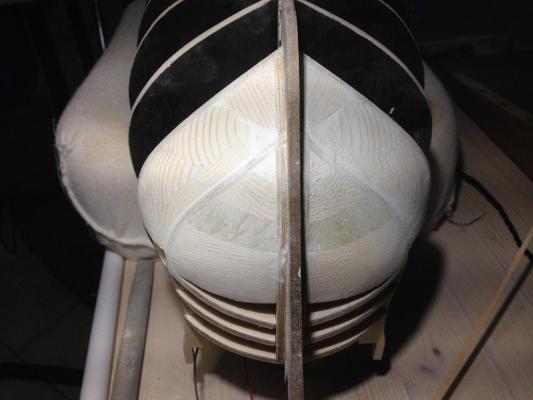
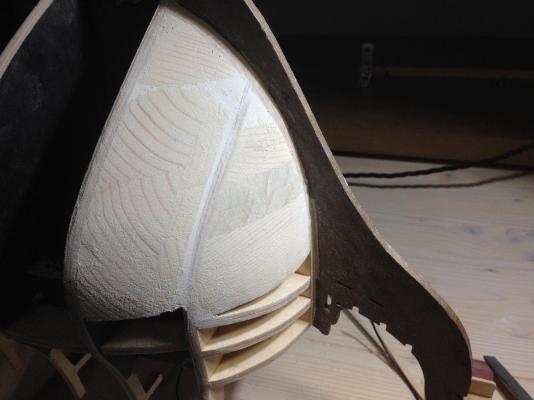
Halfway through the first planking. Taking me time as I can only do two planks, one on each side every day. On each side I am gluing one plank, then shape the next one by trimming, wetting and heating and dry fit it in place to dry. Next day I remove it, it keeps its shape perfectly, glue it in place and prepare the next one for the day after. I'm glad I took Ian's and Nick's advice to do the filler blocks.I'm sure I would have regretted it if I didn't do them. A few images Robert


- 527 replies
-
- 12
-
-
- caldercraft
- victory
- (and 1 more)
-
Great build Kevin, I will go through it again in more detail and steal some ideas if permission is granted. Robert
- 1,319 replies
-
- 4
-
-
- caldercraft
- Victory
- (and 1 more)
-
Kevin, Most welcome. Just had a look at your build, great build. Please let me know of any corrections you might see fit while I struggle along way behind you. Robert
-
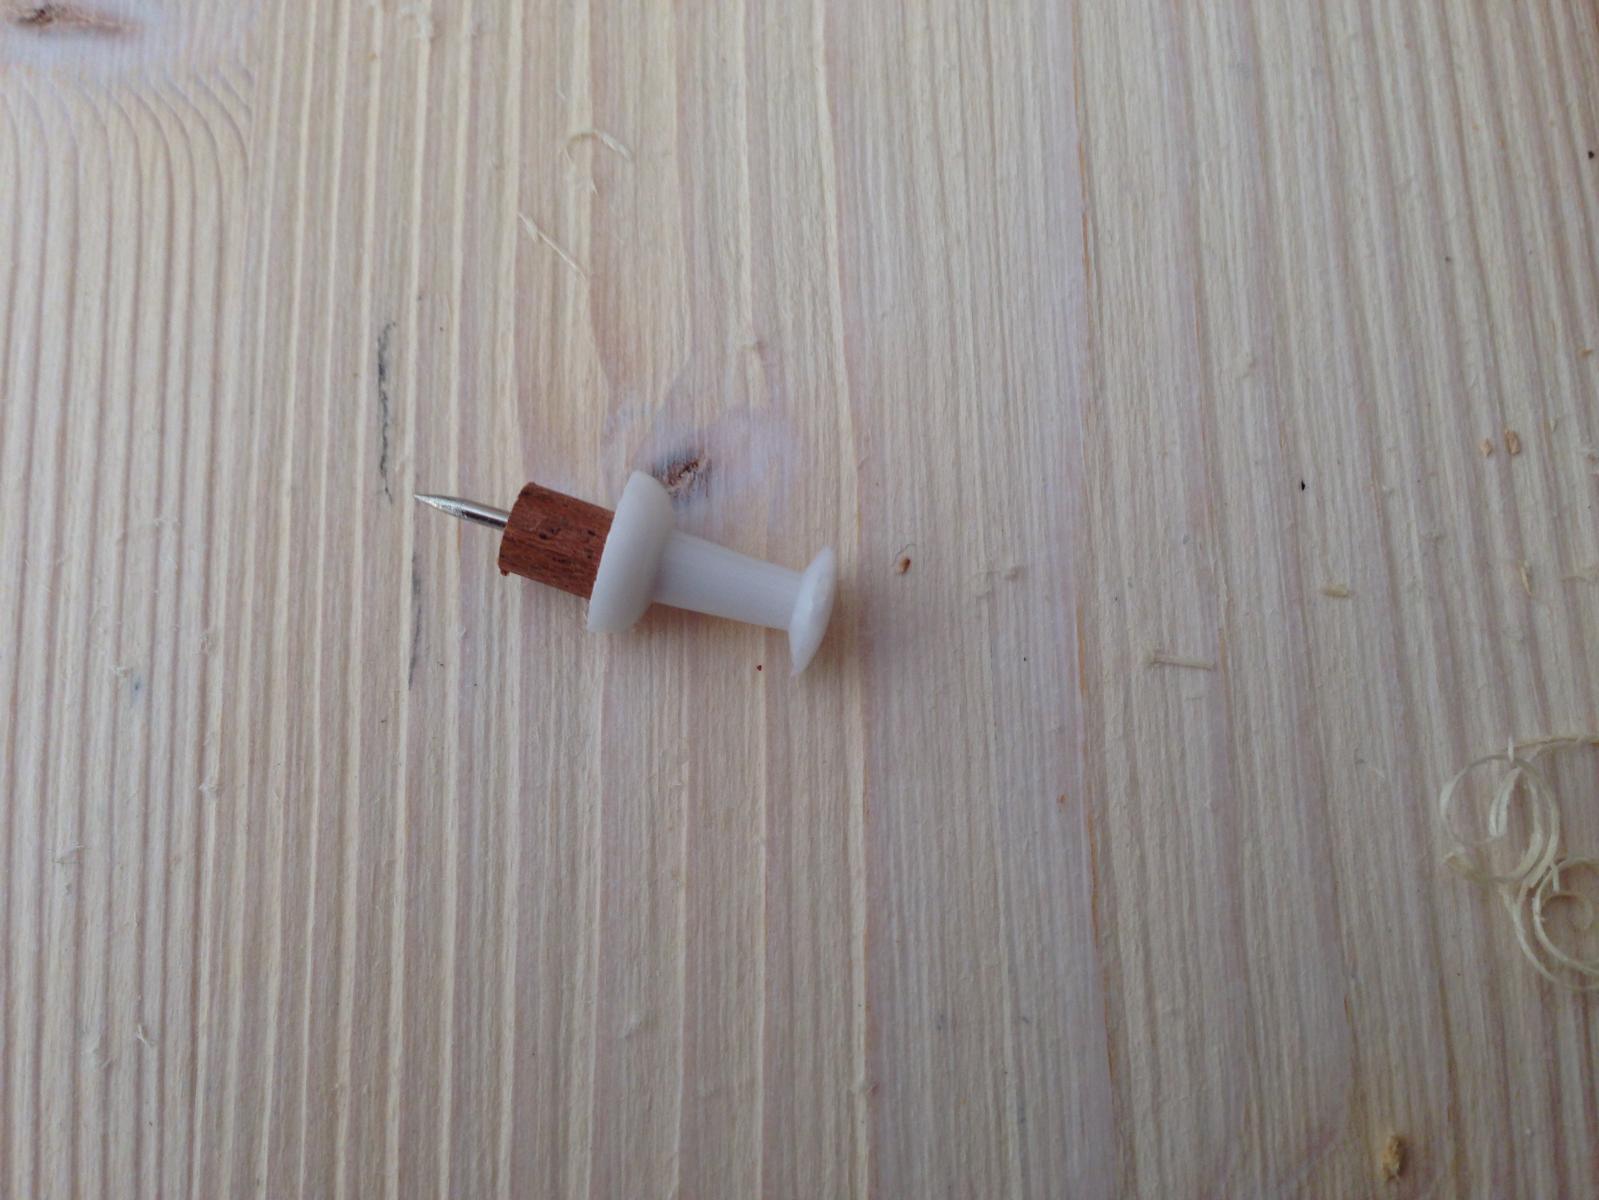
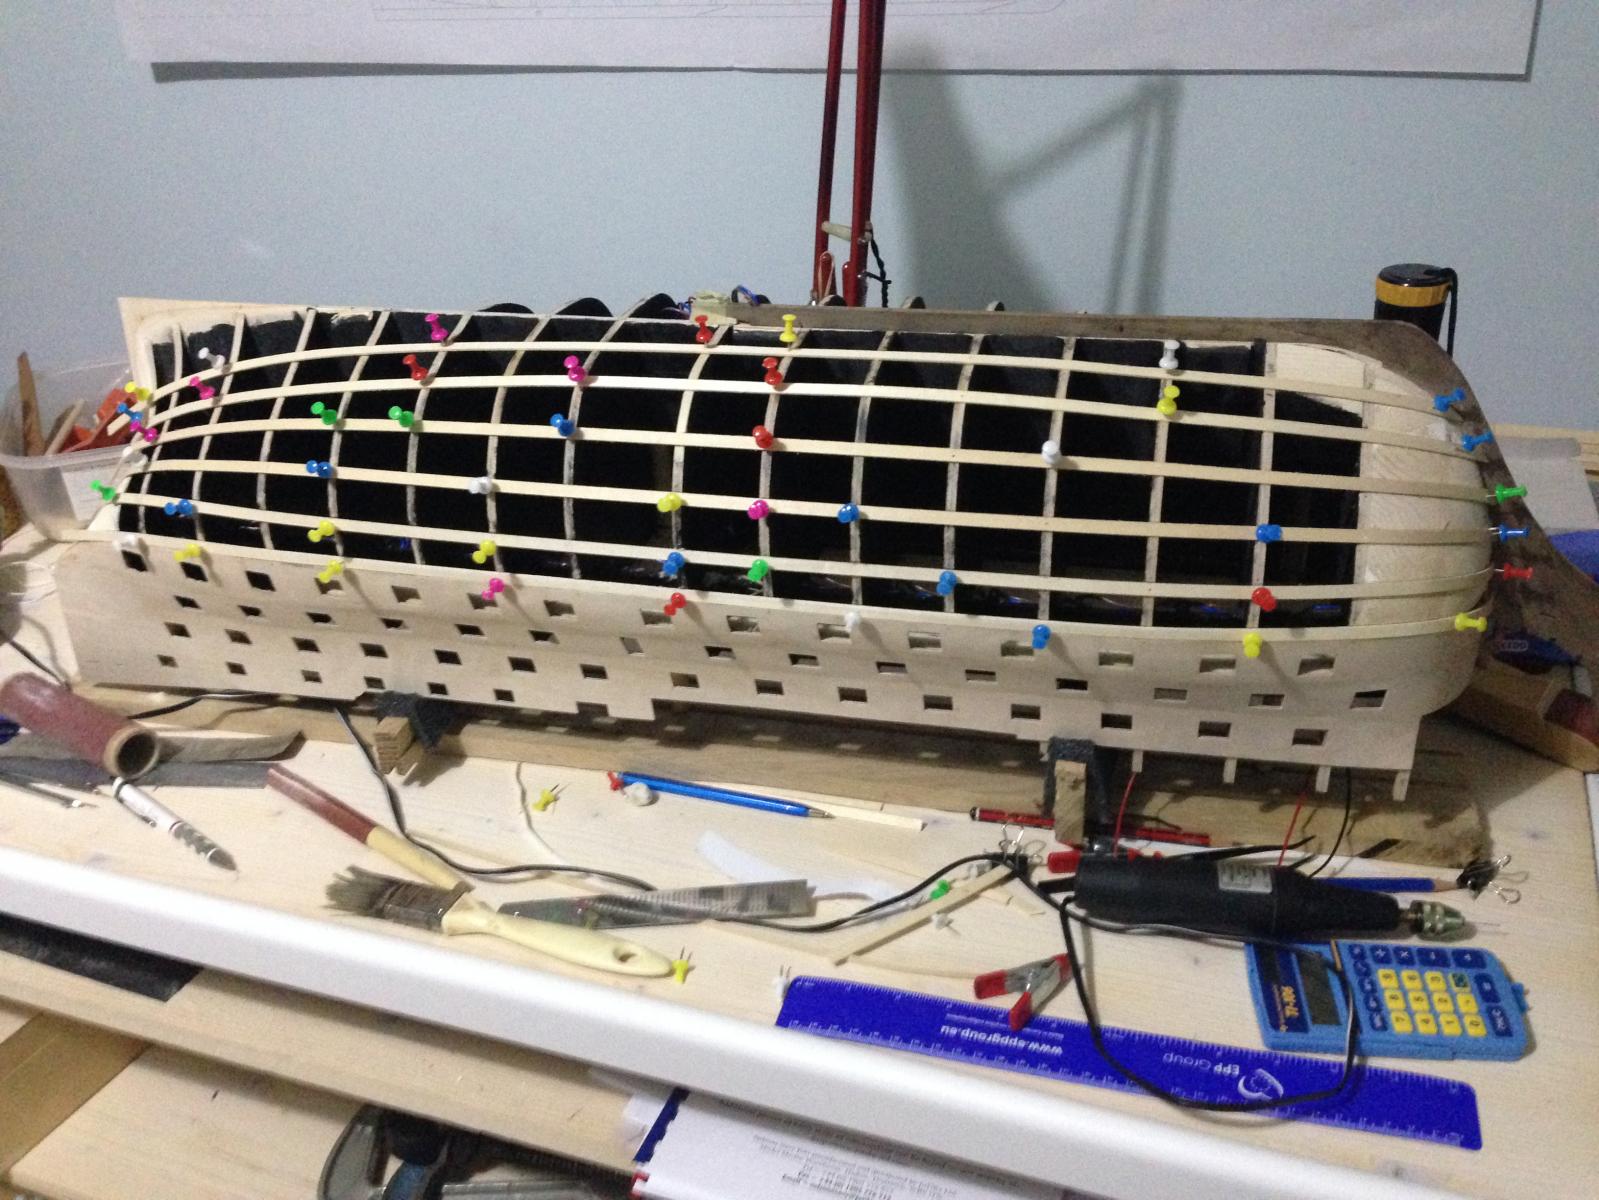
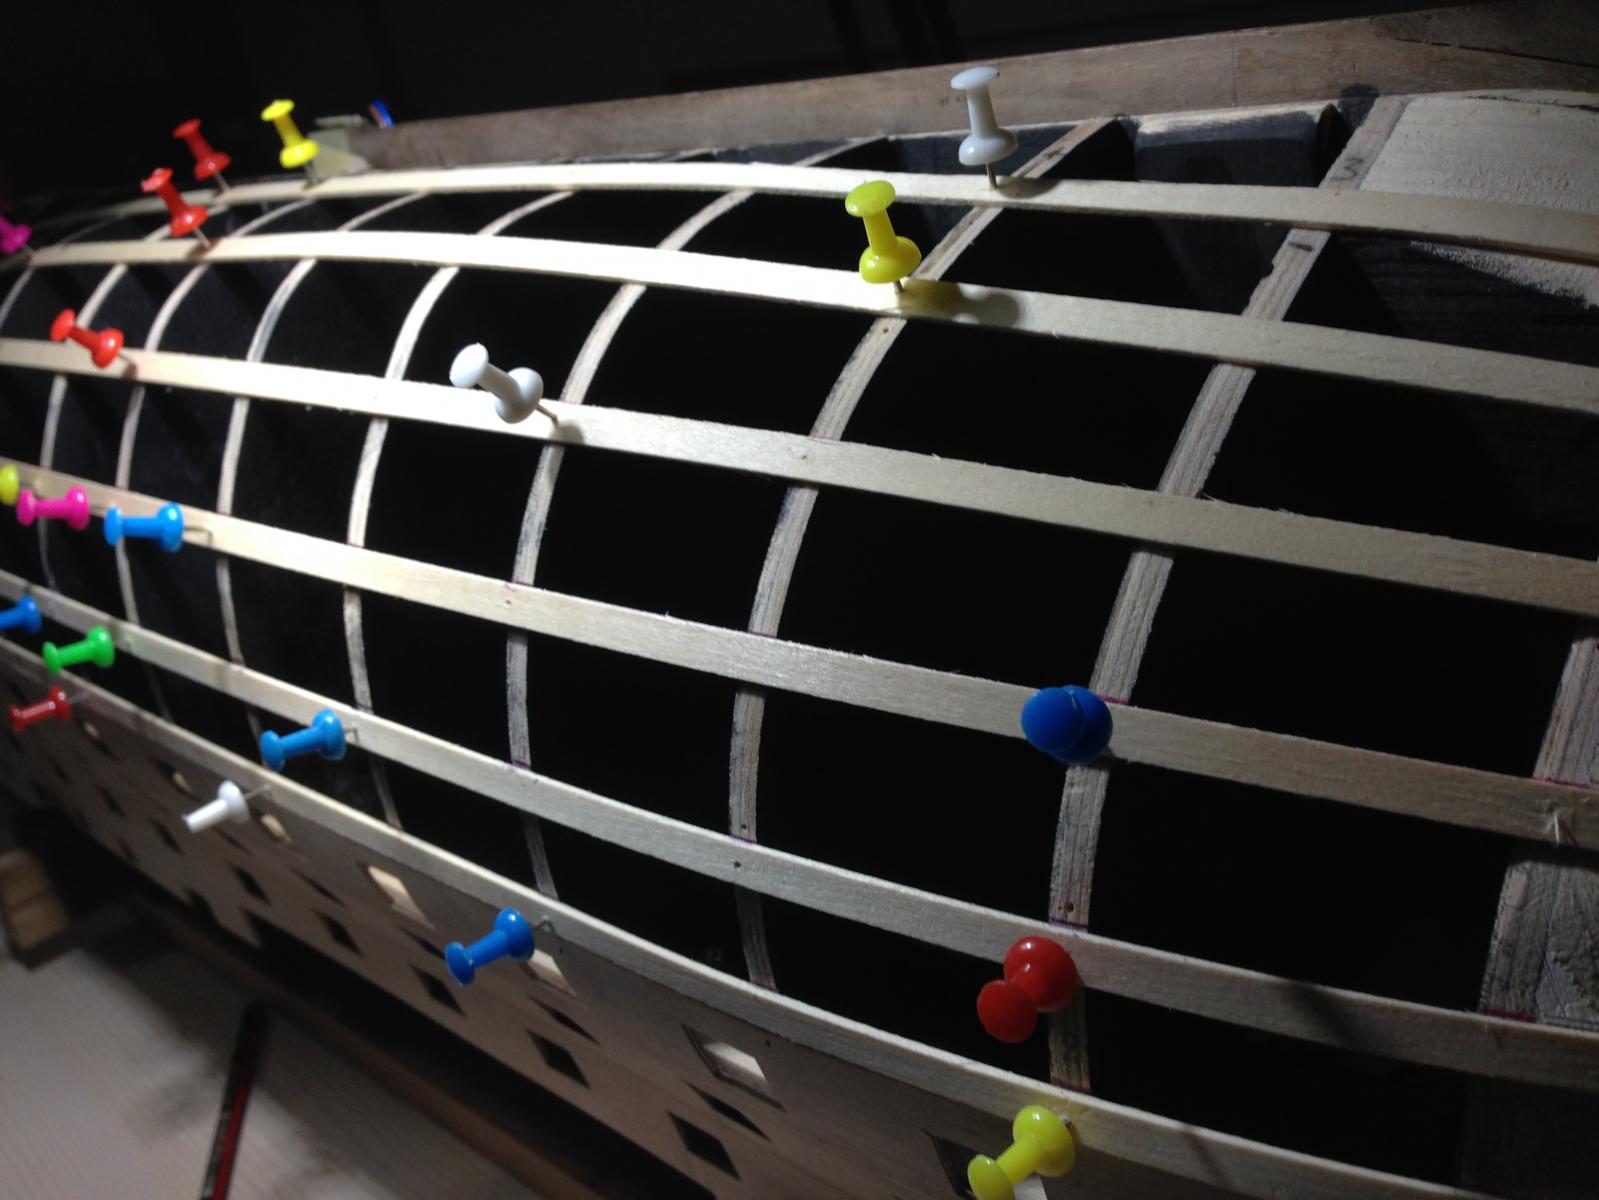
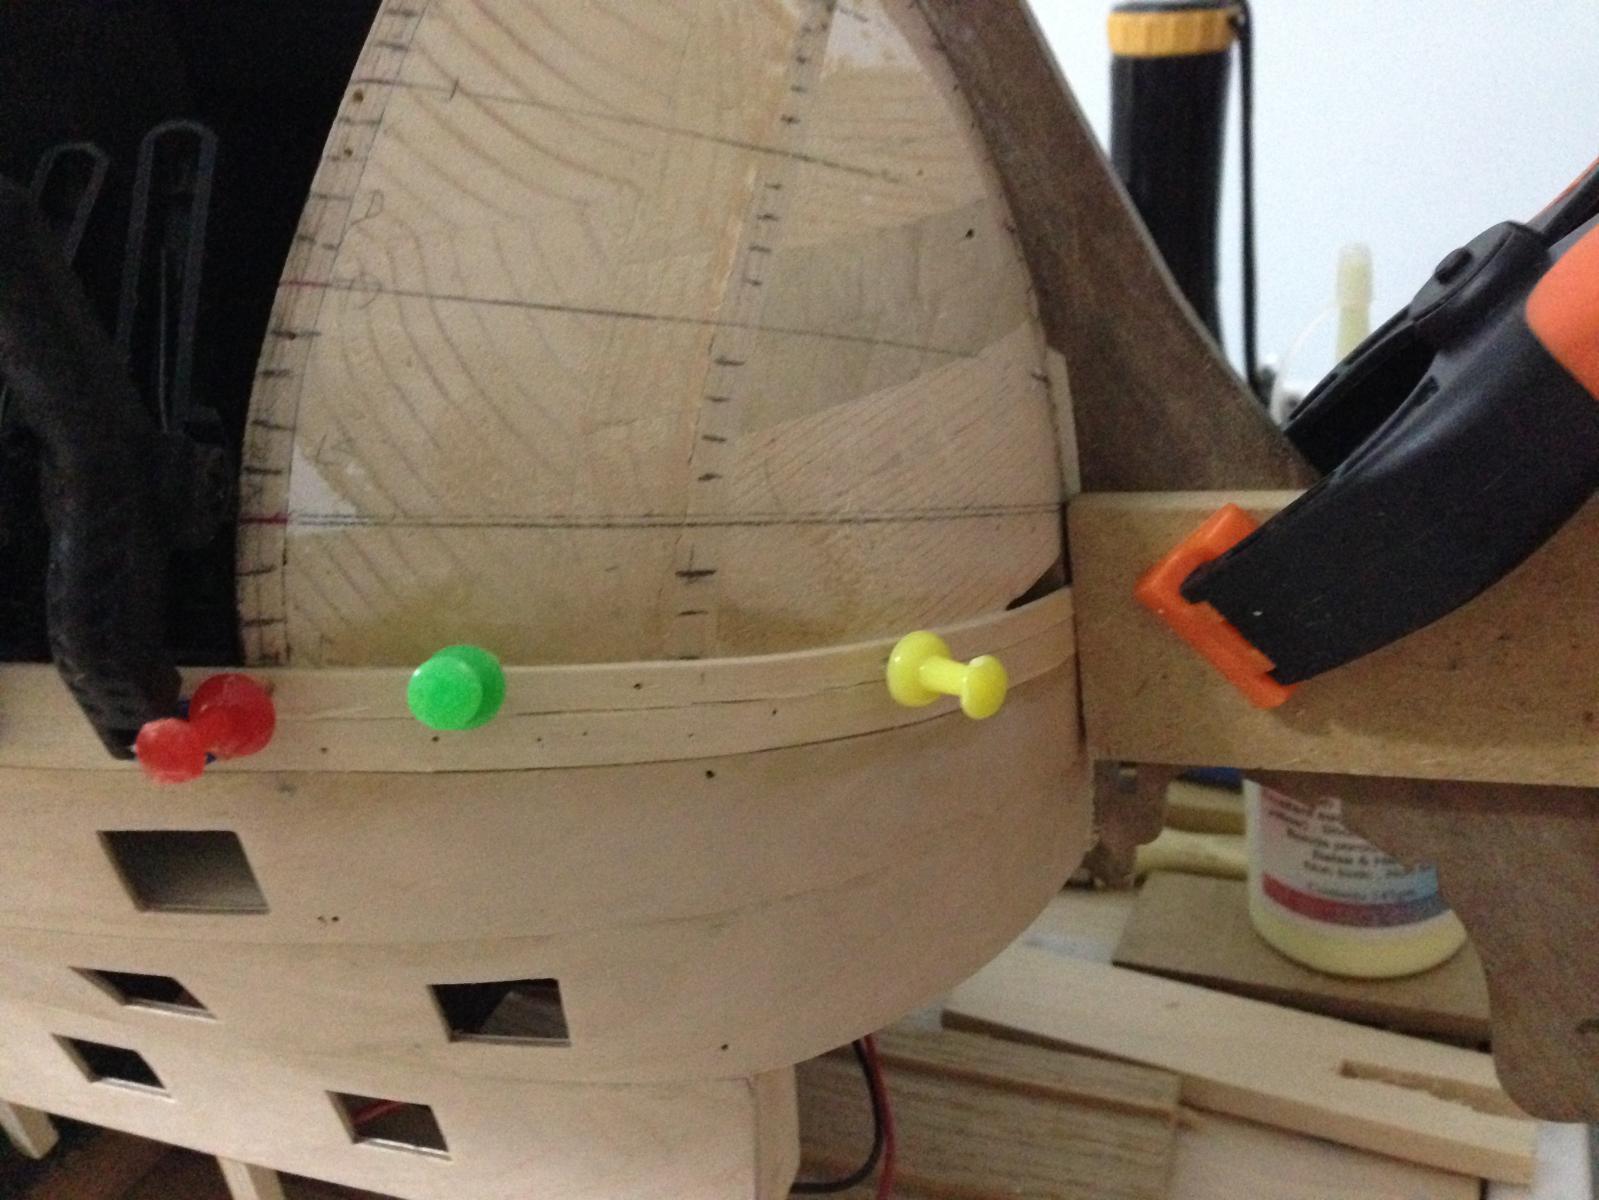
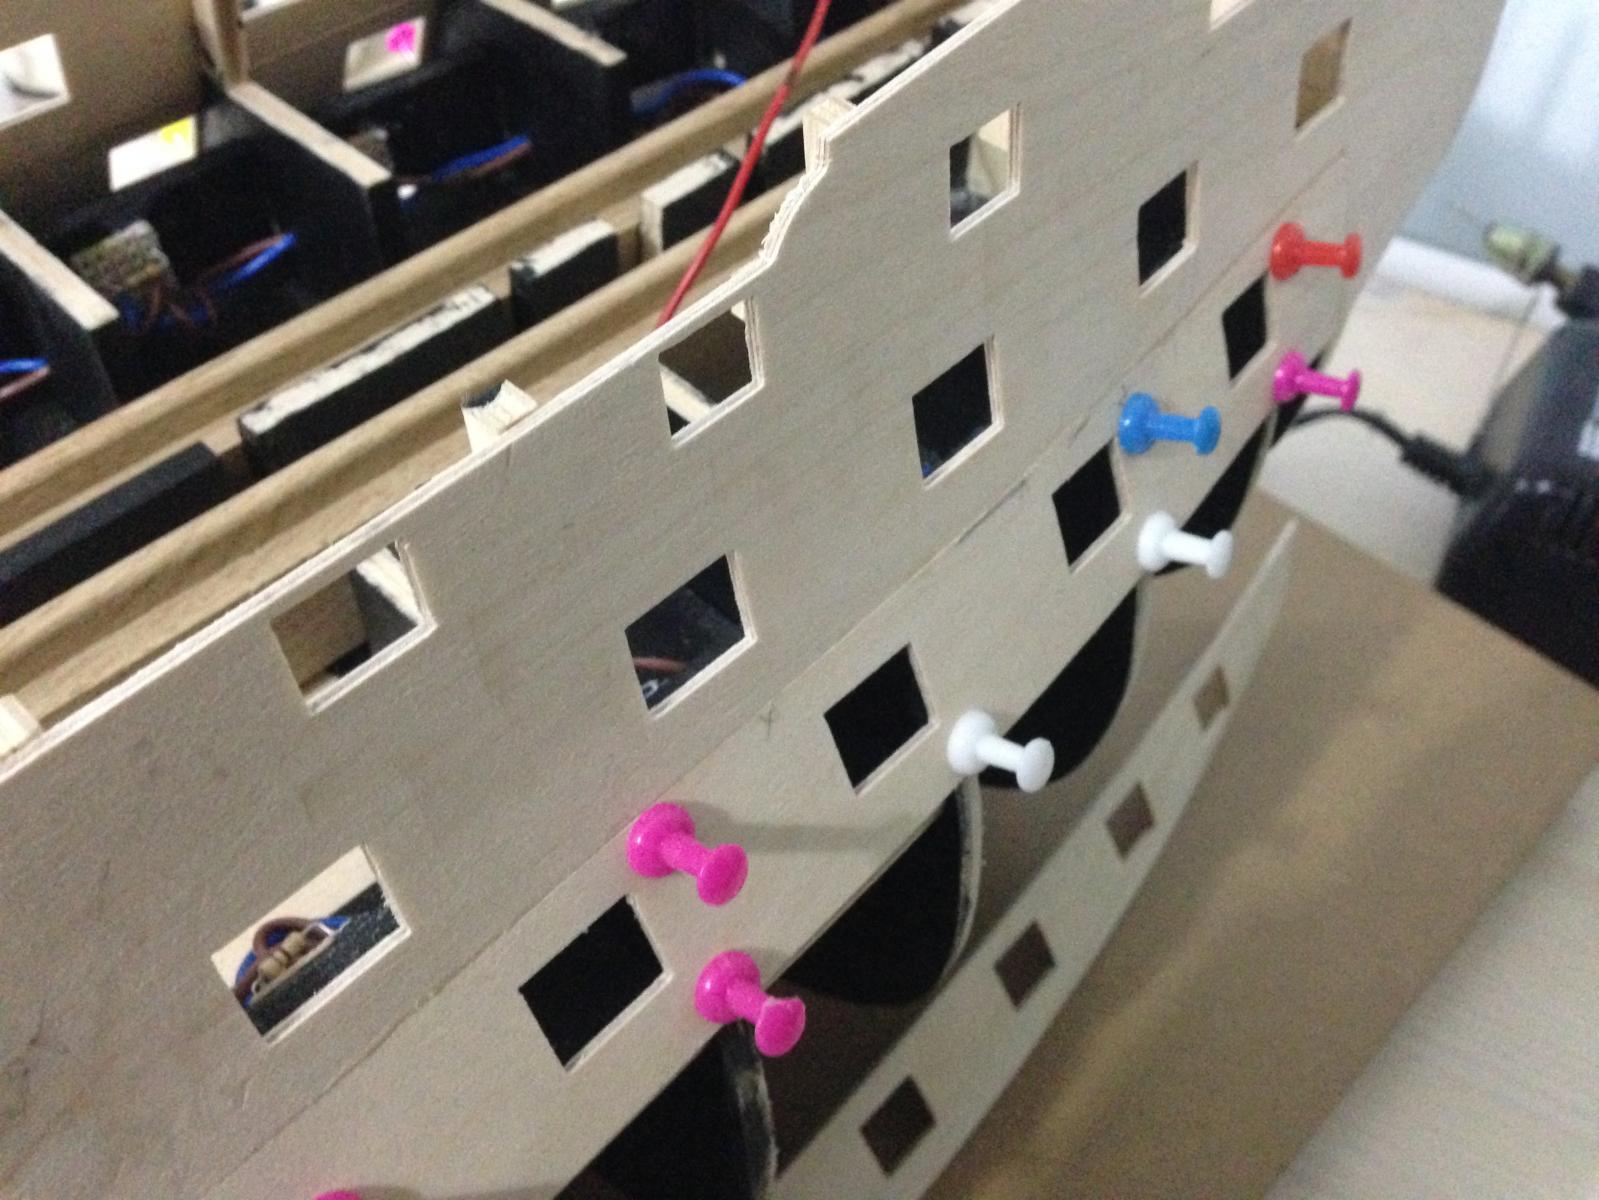
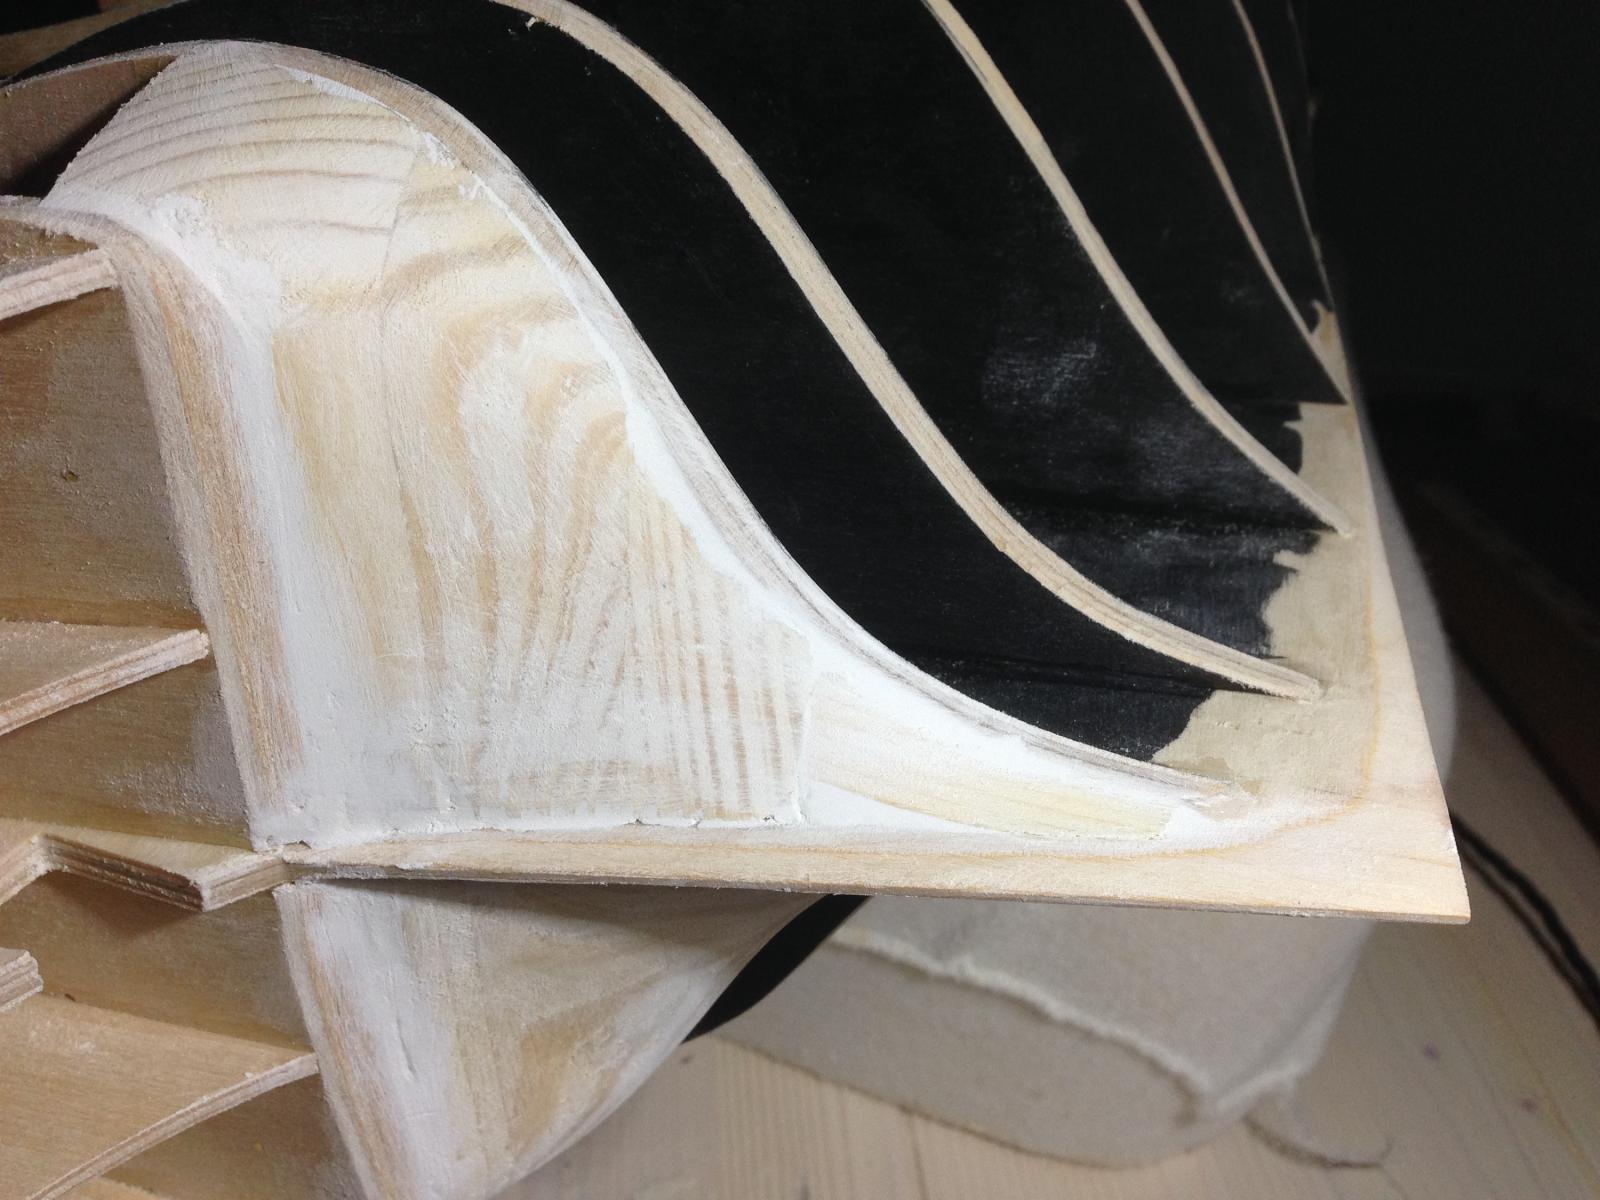
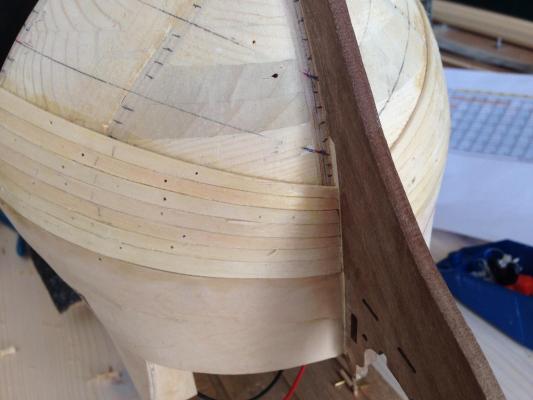
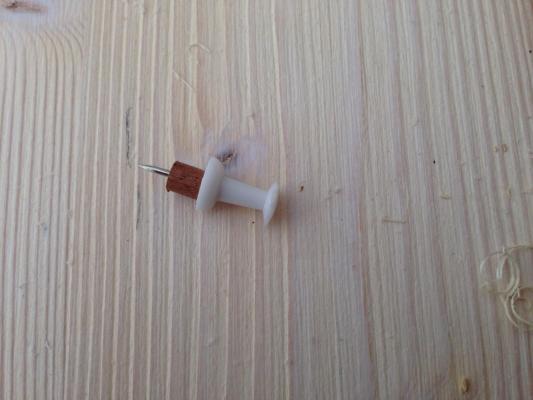
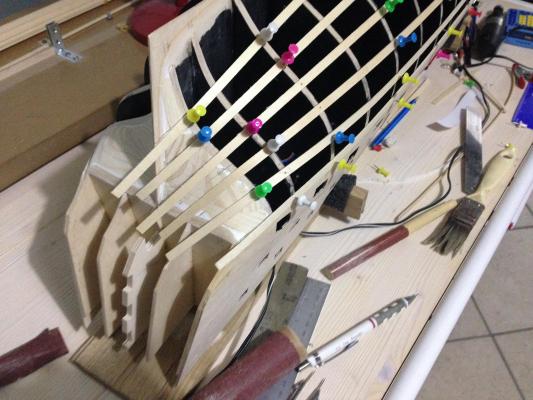
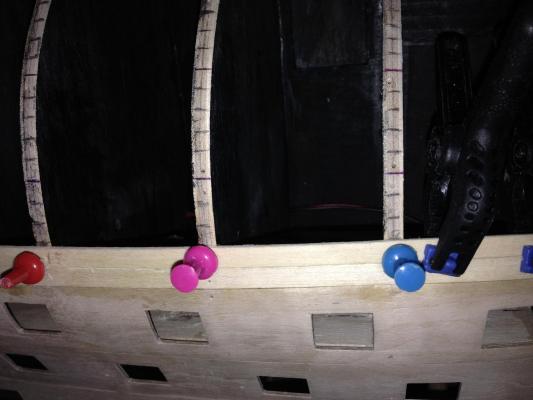
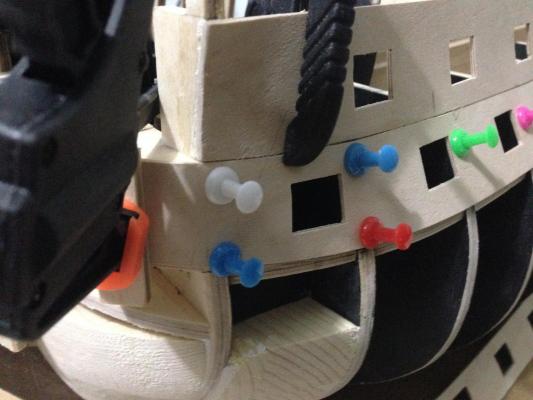
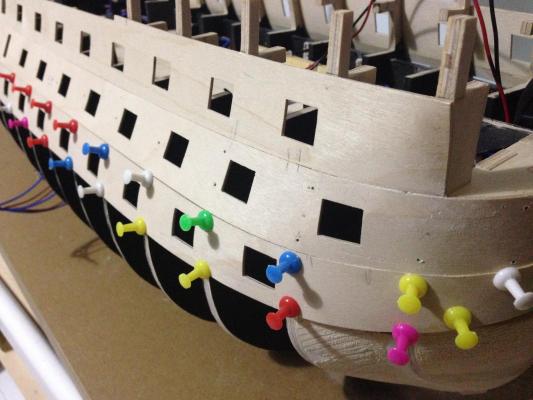
Bob, Thank you for your comment. The push pins I found were 10mm long and that's too much to just keep the plank in place. With the spacer they are much more convenient, Very easy to push in and to pull out. Ian, Thank you for your comment. The twist at the bow is not that bad. The lime planks supplied with the kit can be beautifully worked. Even edge bending is quite easy with them. The only drawback is that it is a bit time consuming. By wetting the strips I can practically edge bend them on my fingers little by little, I don't have to pin them to any jigs. I use a bit the hot electric bender too. When the plank is shaped I pin it lightly to the hull and leave it to dry in place. When it dries it fully keeps the twisting and the edge bending. I glue them when they are fully dry. From 6mm they taper to about 3.6 and some a bit more at the bow, so as you pointed out they are easier to edge bend. At the bow I won't be needing any drop planks, not that I see anything wrong with them. At the stern I will need a few stealers. Robert
- 527 replies
-
- 1
-
-
- caldercraft
- victory
- (and 1 more)
-
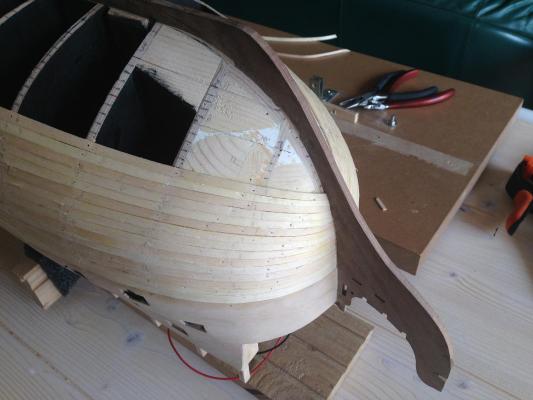
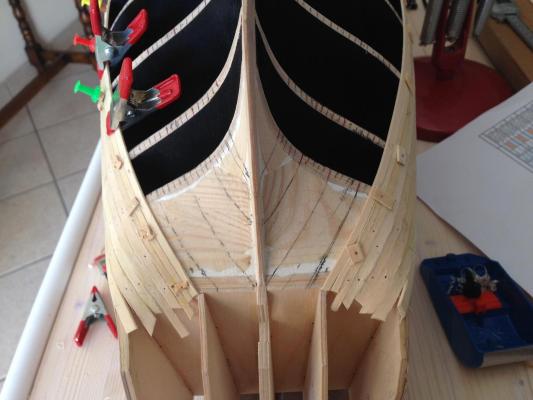
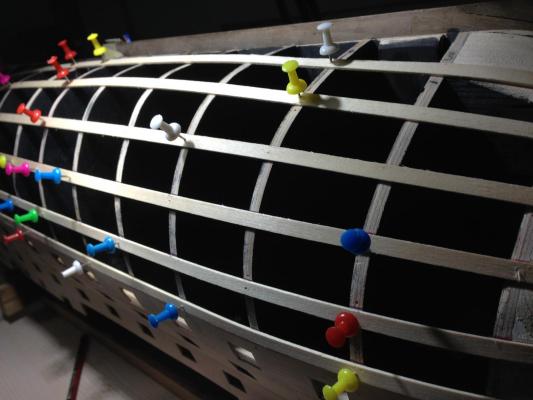
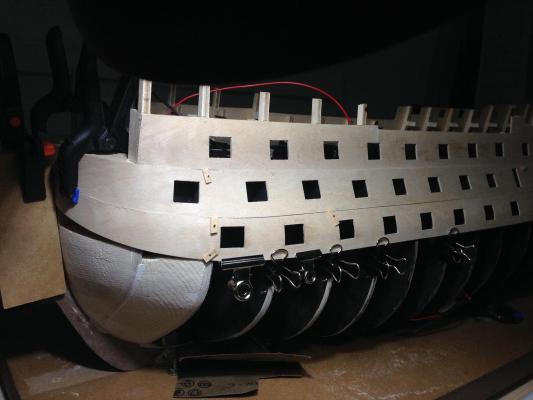
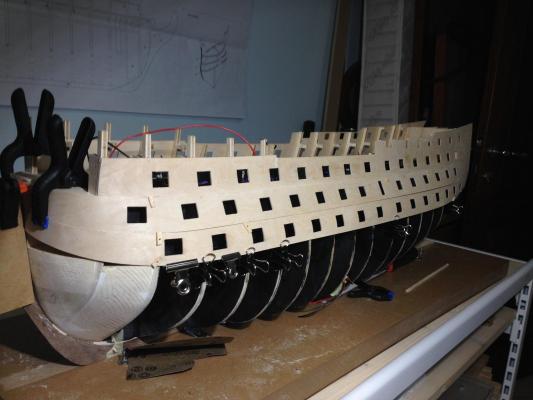
Ian / Nick, Thank you for your encouraging comments. Some progress on the hull planking. Robert
- 527 replies
-
- 3
-
-
- caldercraft
- victory
- (and 1 more)
-
Beautiful detail Bob.
-
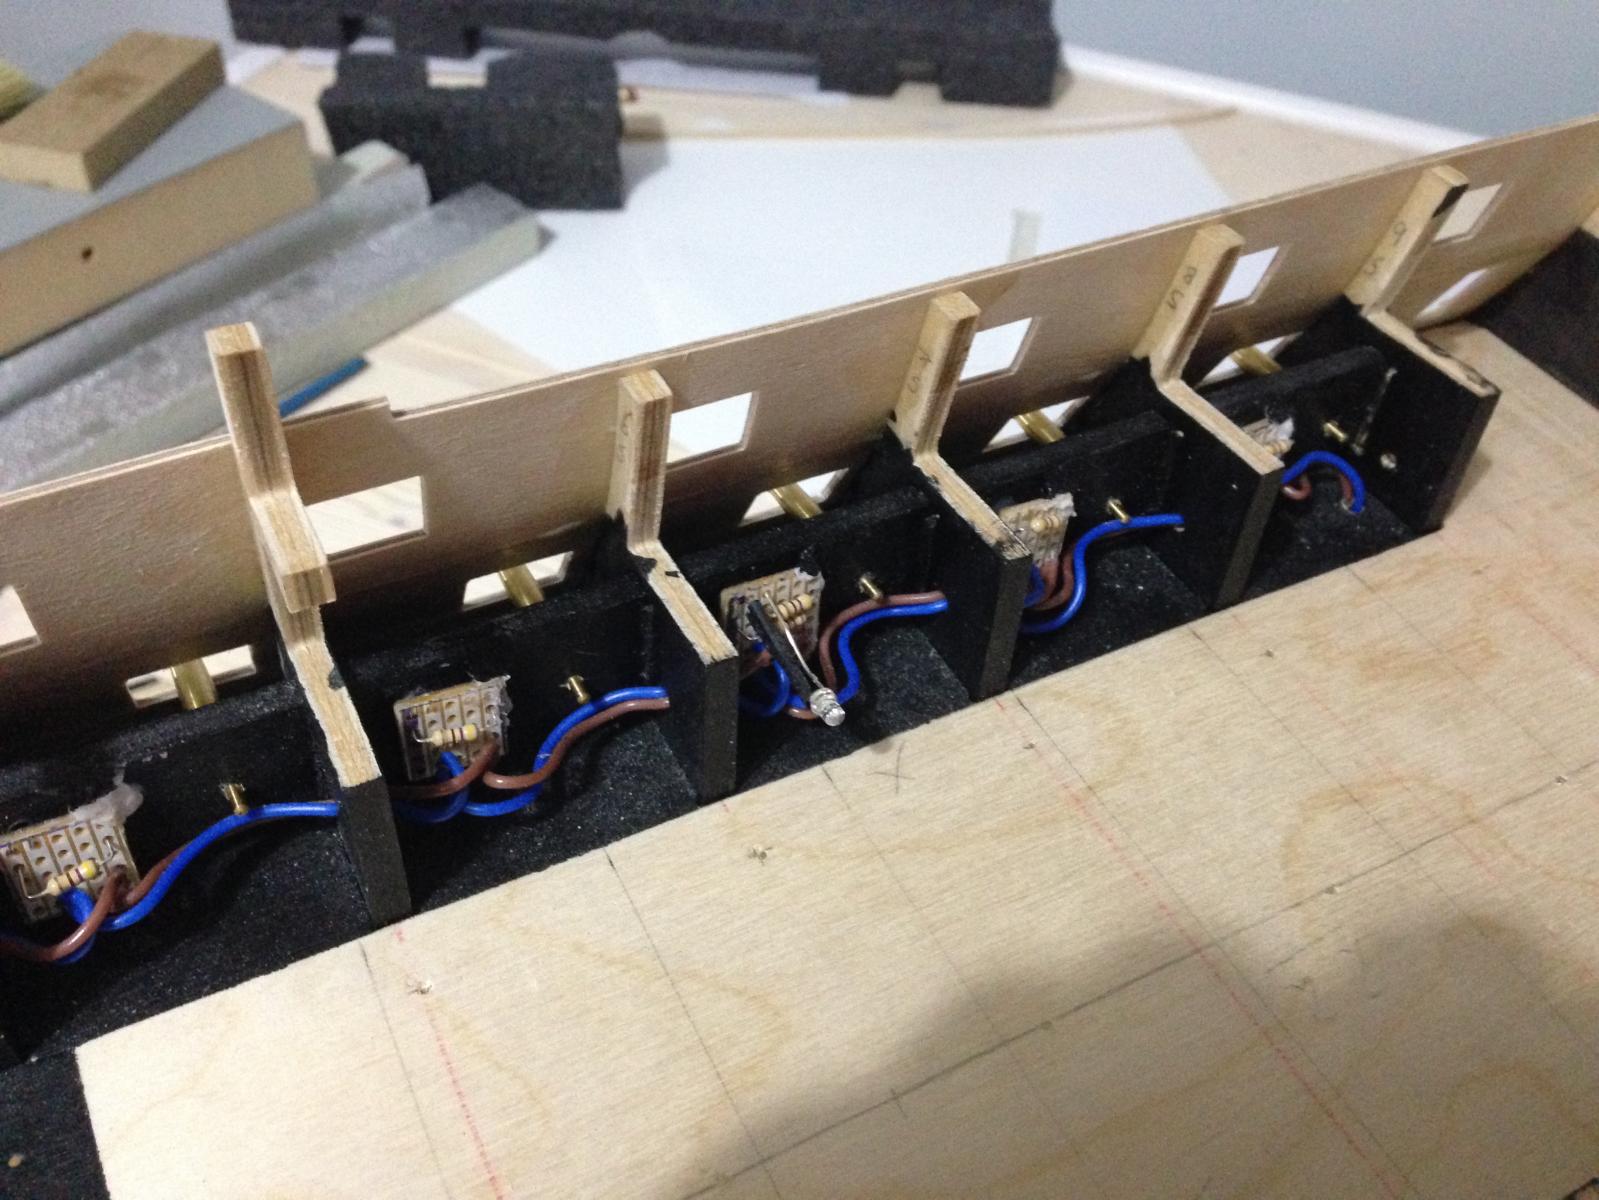
Nick, I like the way you wired the three stern lanterns. I intend to try and put LEDs in mine as well. Although I still have a long way to come to that, I have been thinking about it. The smallest copper tubing I sourced is 1/16 diam from CMB. Do you think the inside diam is enough to accommodate two tiny wires? Robert
- 84 replies
-
- 1
-
-
- finished
- caldercraft
- (and 1 more)
-
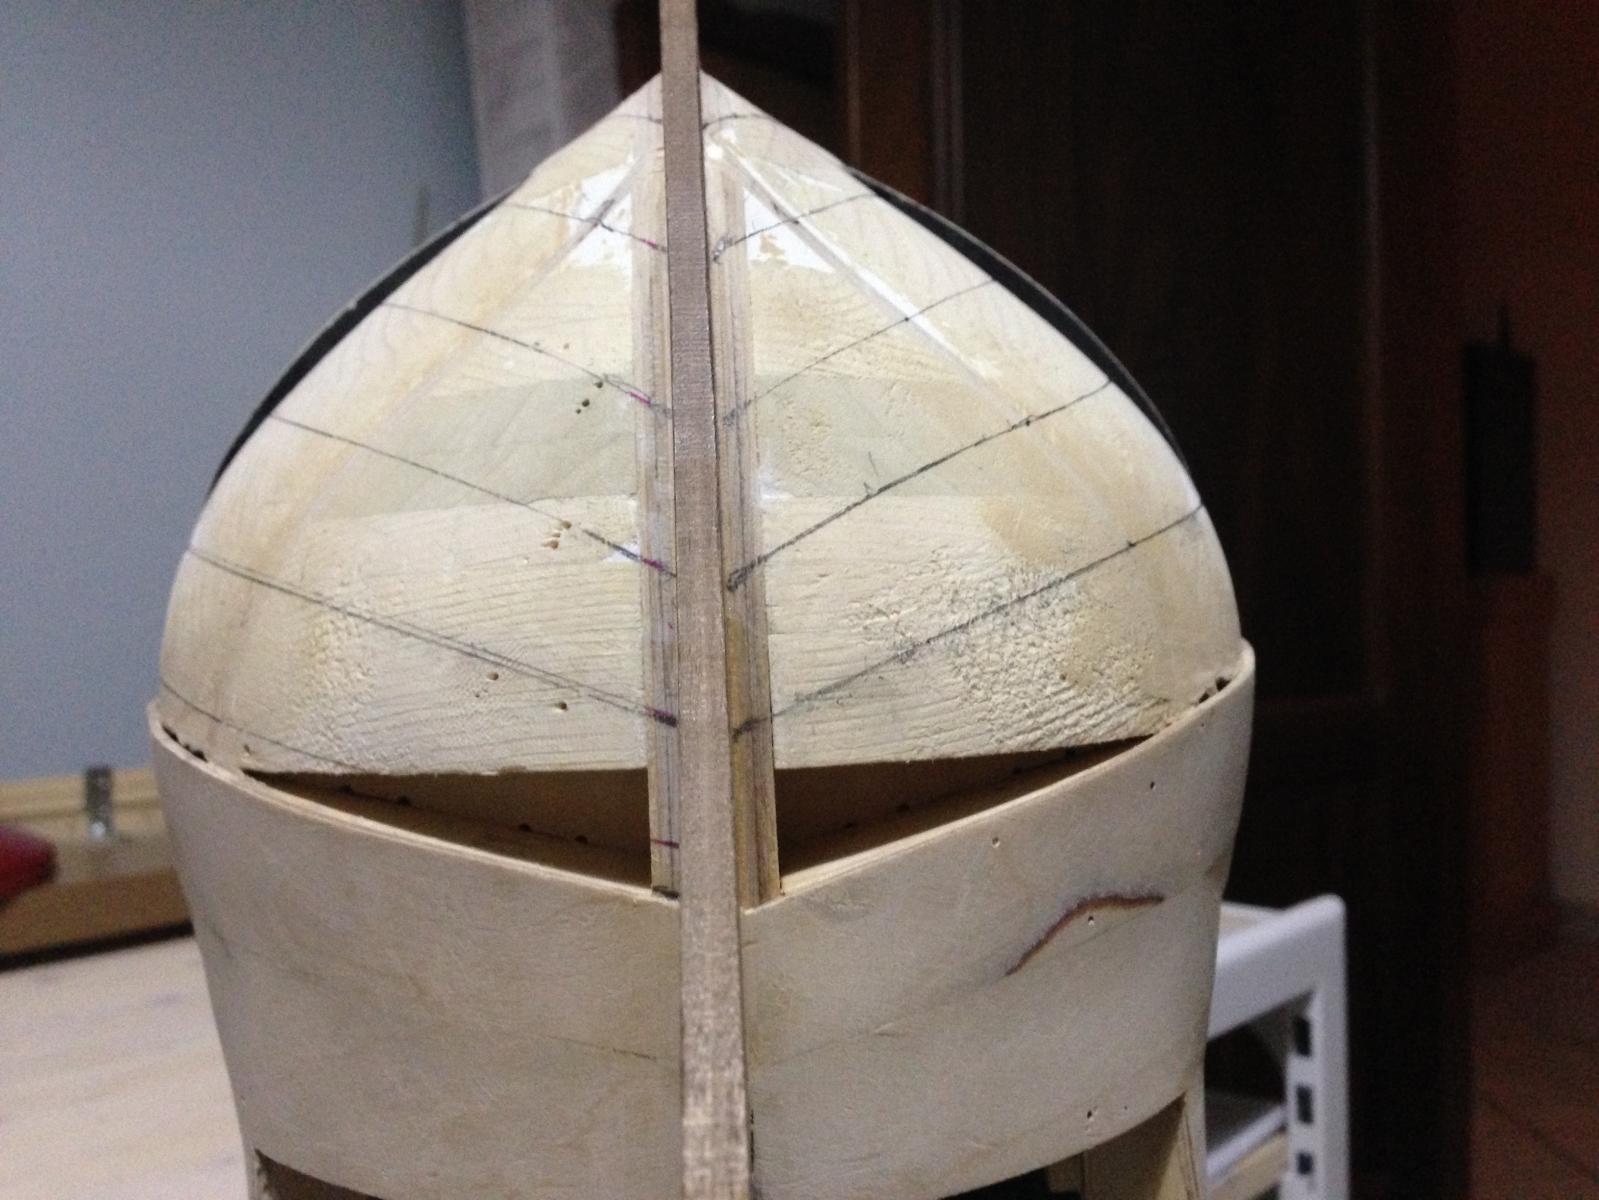
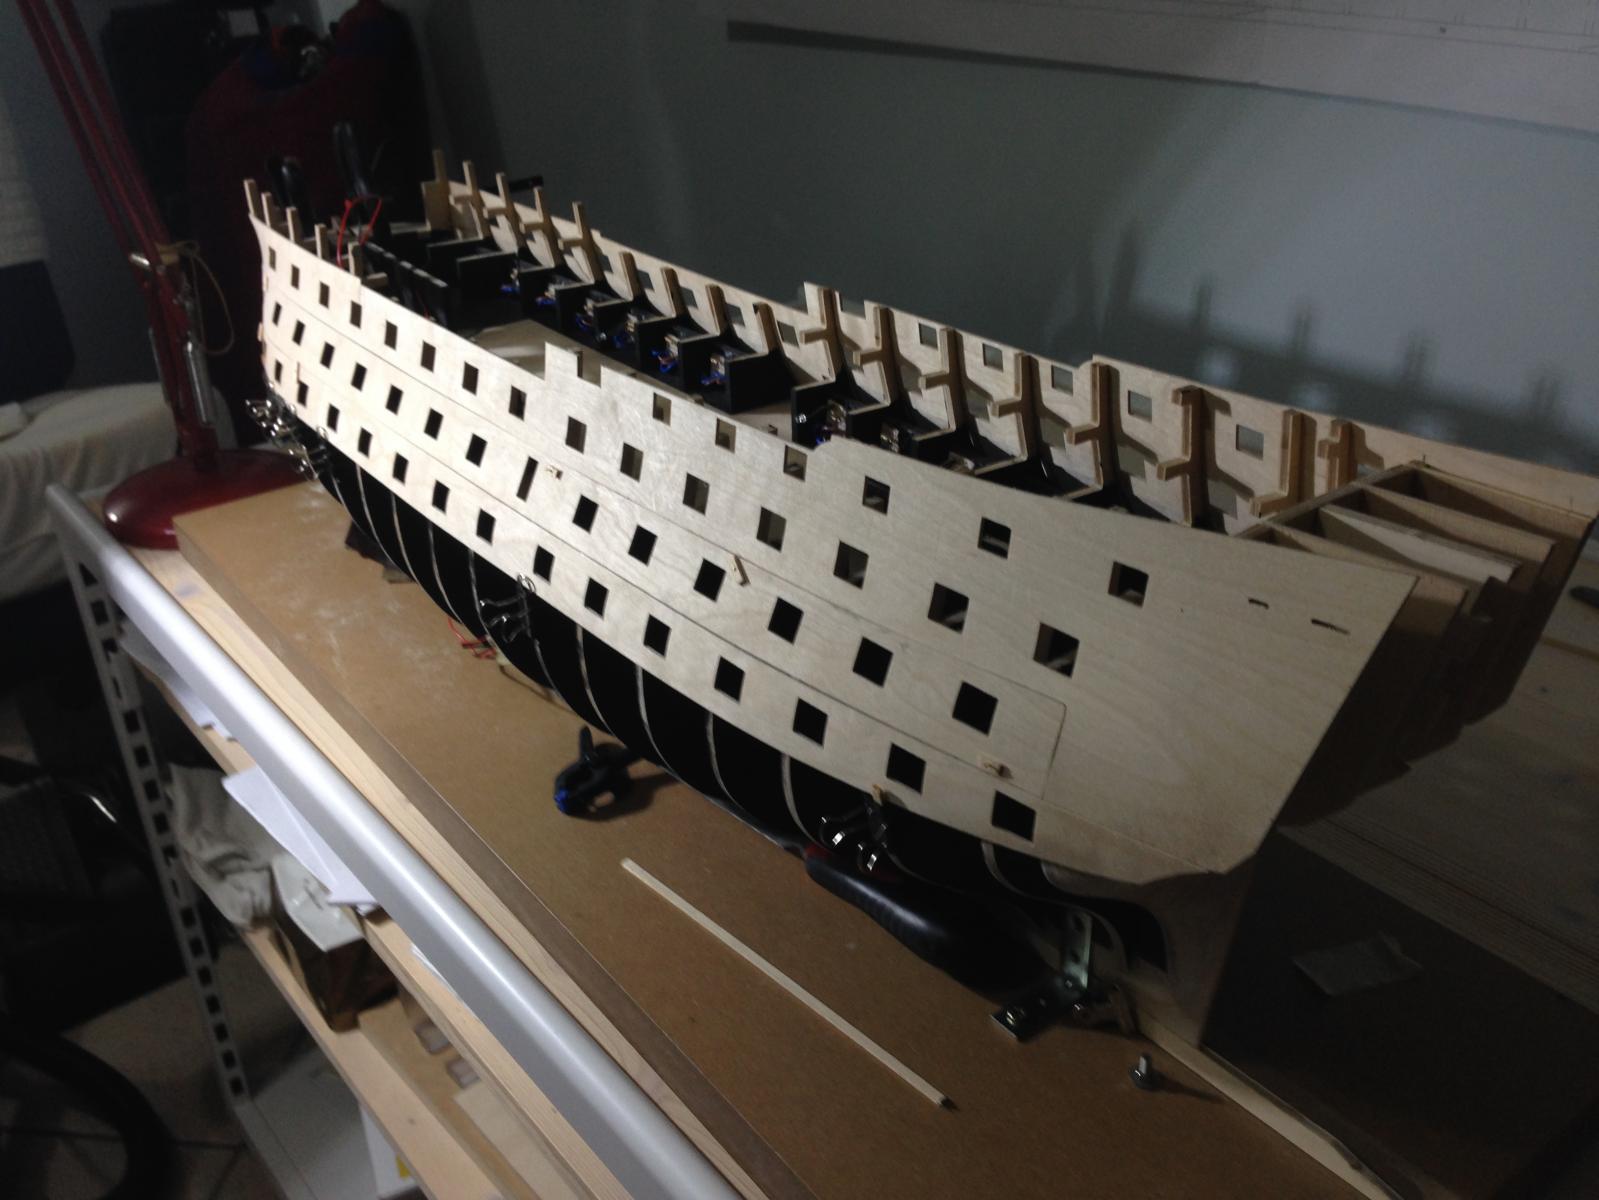
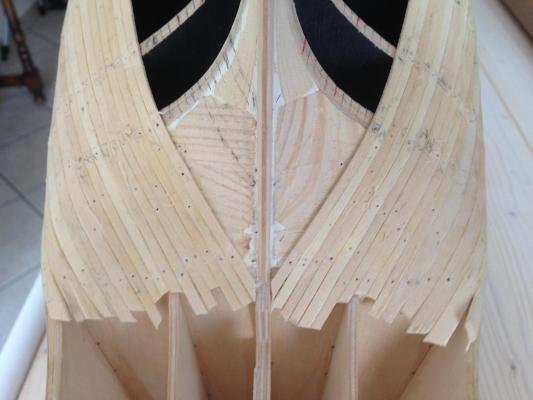
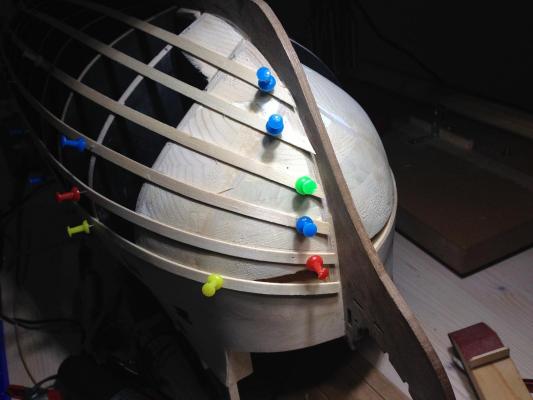
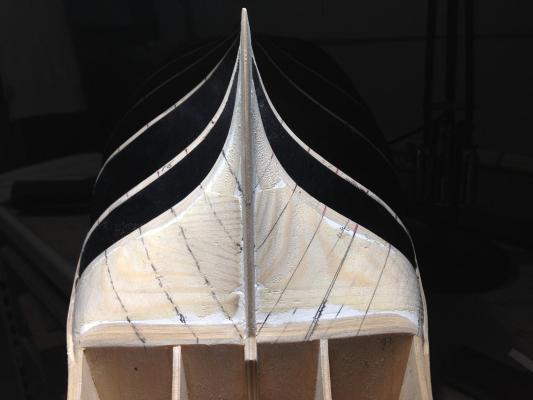
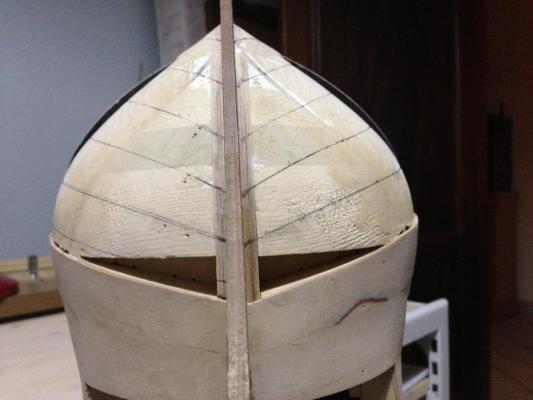
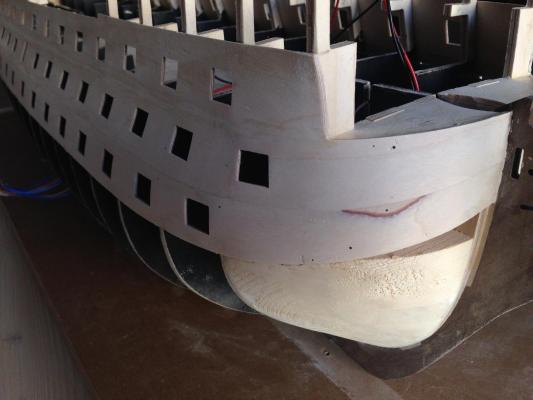
Hi chris, Thank you for your comment. I went through your build, it is fabulous. Finally I started the hull planking. I made six bands on each side. I did not like the way they met at the bow, so I decided to do some edge bending. I know the proper way is by spiling, but the lime strips provided with the kit are easily bent after soaking them, even edgewise. I pre shape them, let them dry, then glue them. After they are dry they keep their shape, they do not spring back, so did not need any forcing to fit them thus avoiding any clinker effect. I measured the distance between each band on each bulkhead and transferred them onto a chart from which I worked out the width for each plank at every bulkhead. I marked all the plank widths on the bulkheads so I have a good idea where I stand with every plank I fit. This is going to take me some time as I have to let the planks dry before I fit them. Robert


- 527 replies
-
- 7
-
-
- caldercraft
- victory
- (and 1 more)
-
Hi Rich, Just had a quick look at your build, looking great. Well ahead of me. I will go through your build in more detail to steal some ideas. Robert
-
I do get the notifications on email. Are you sure you got the settings accordingly, because you can opt to receive them by mail or not.
-
Bob, Thank you for your encouragement. Ian About the jig, that is what I thought as well, that I would not have to worry about the levelling but I had to do it as well. I cut the jig the exact size of the gunport but because of the curvatures of the hull the outside of the jig tends to point upwards, you have to file just a little the top and bottom of the gunport very edges to bring them horizontal so that the jig lays level. In fact I extended the jig a bit longer so I can check that it is level with the small spirit level showing in one of the pictures. There are smaller levels than the one I have which I think would be better for the job and I think it is a very good idea if you had to have it fixed to the jig, as you said. Mike Thankyou. I do not intend to give up this hobby, on the contrary, I am hoping I have more time for it in the future. I really enjoy it and while I am doing it my mind drifts away from other problems. Robert
- 527 replies
-
- 1
-
-
- caldercraft
- victory
- (and 1 more)
-
Beautiful rigging Nick. I also like very much the idea of hanging one of the boats from the quarter davits. Robert
- 84 replies
-
- 1
-
-
- finished
- caldercraft
- (and 1 more)
-
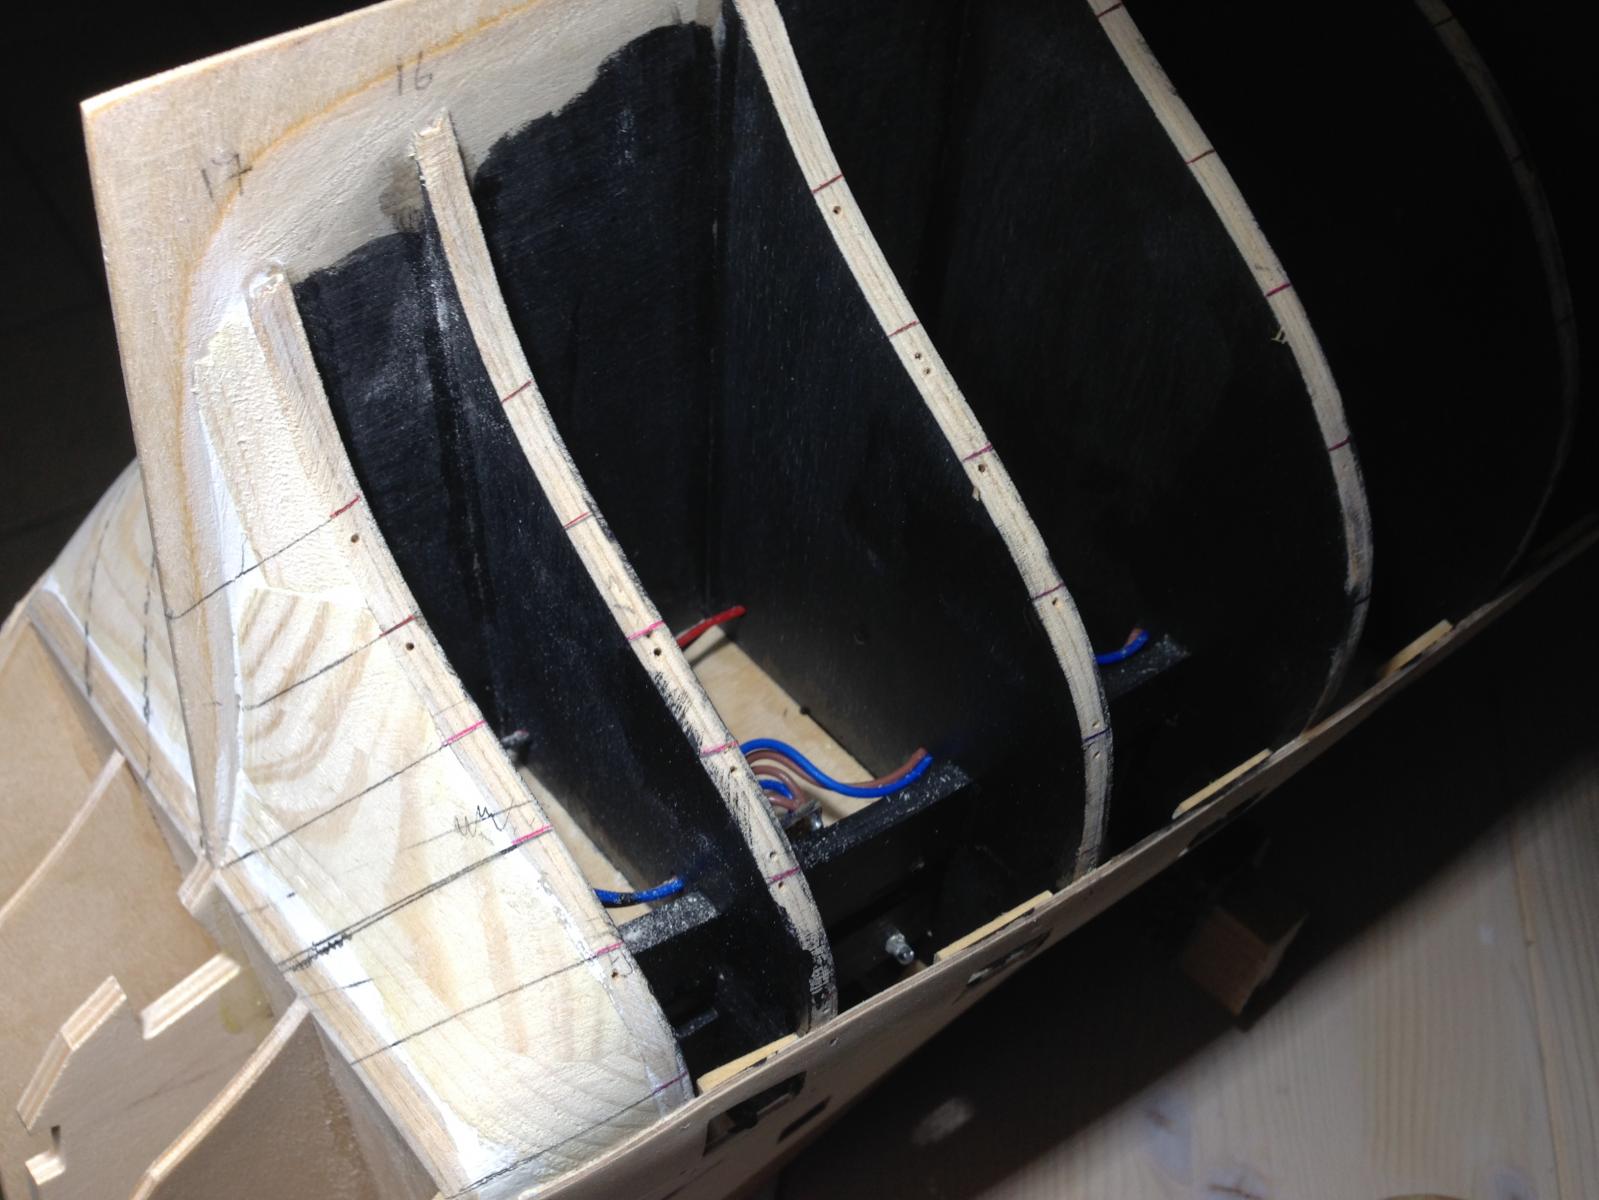
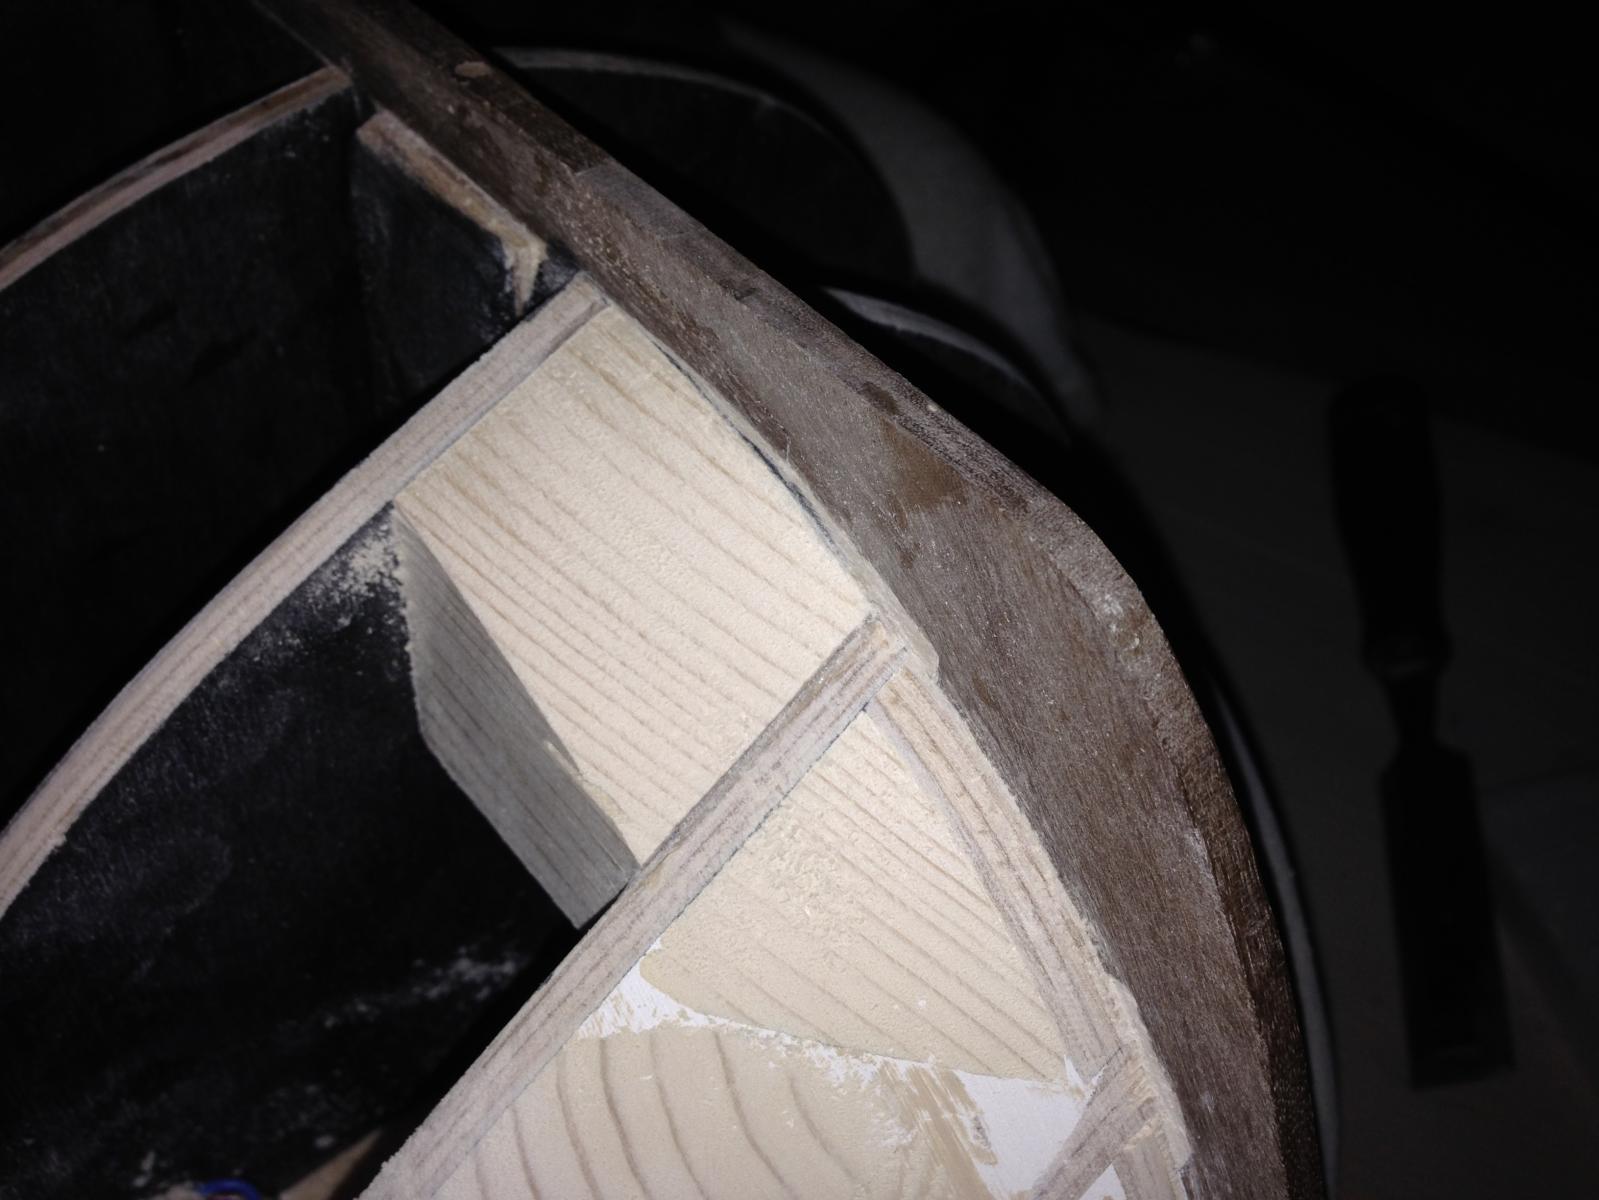
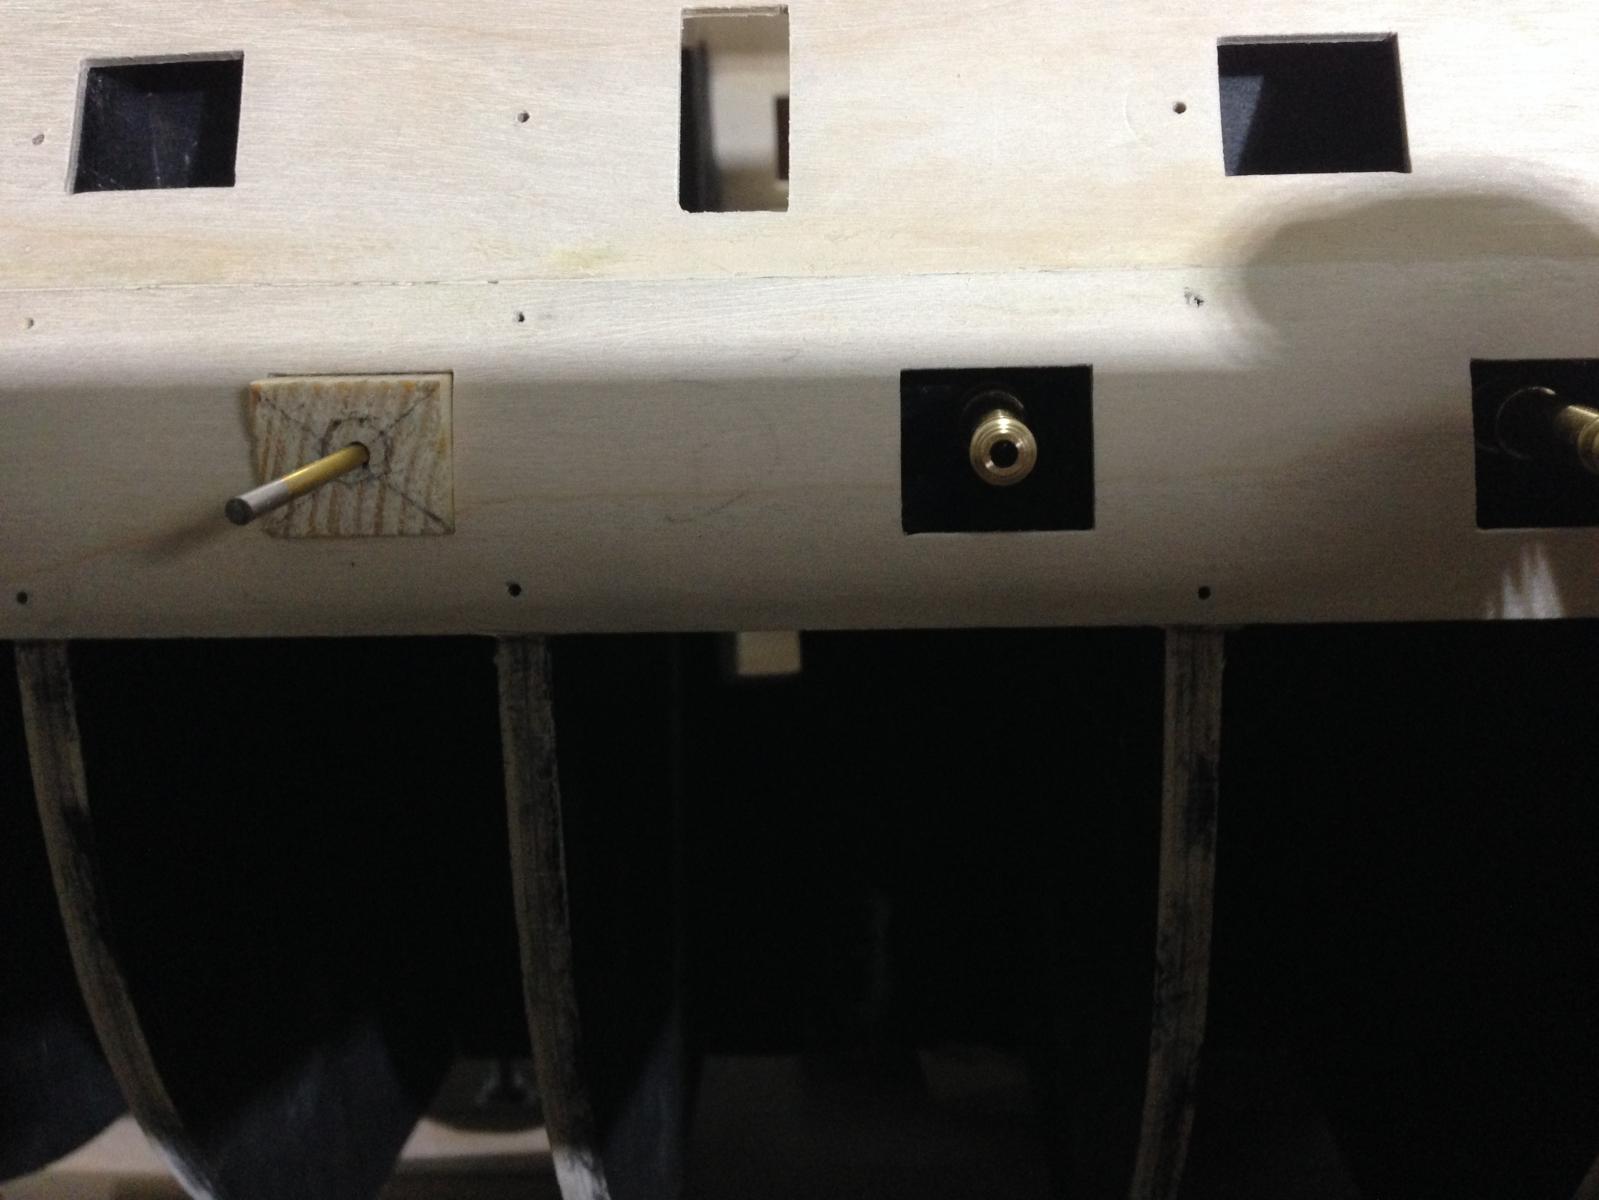
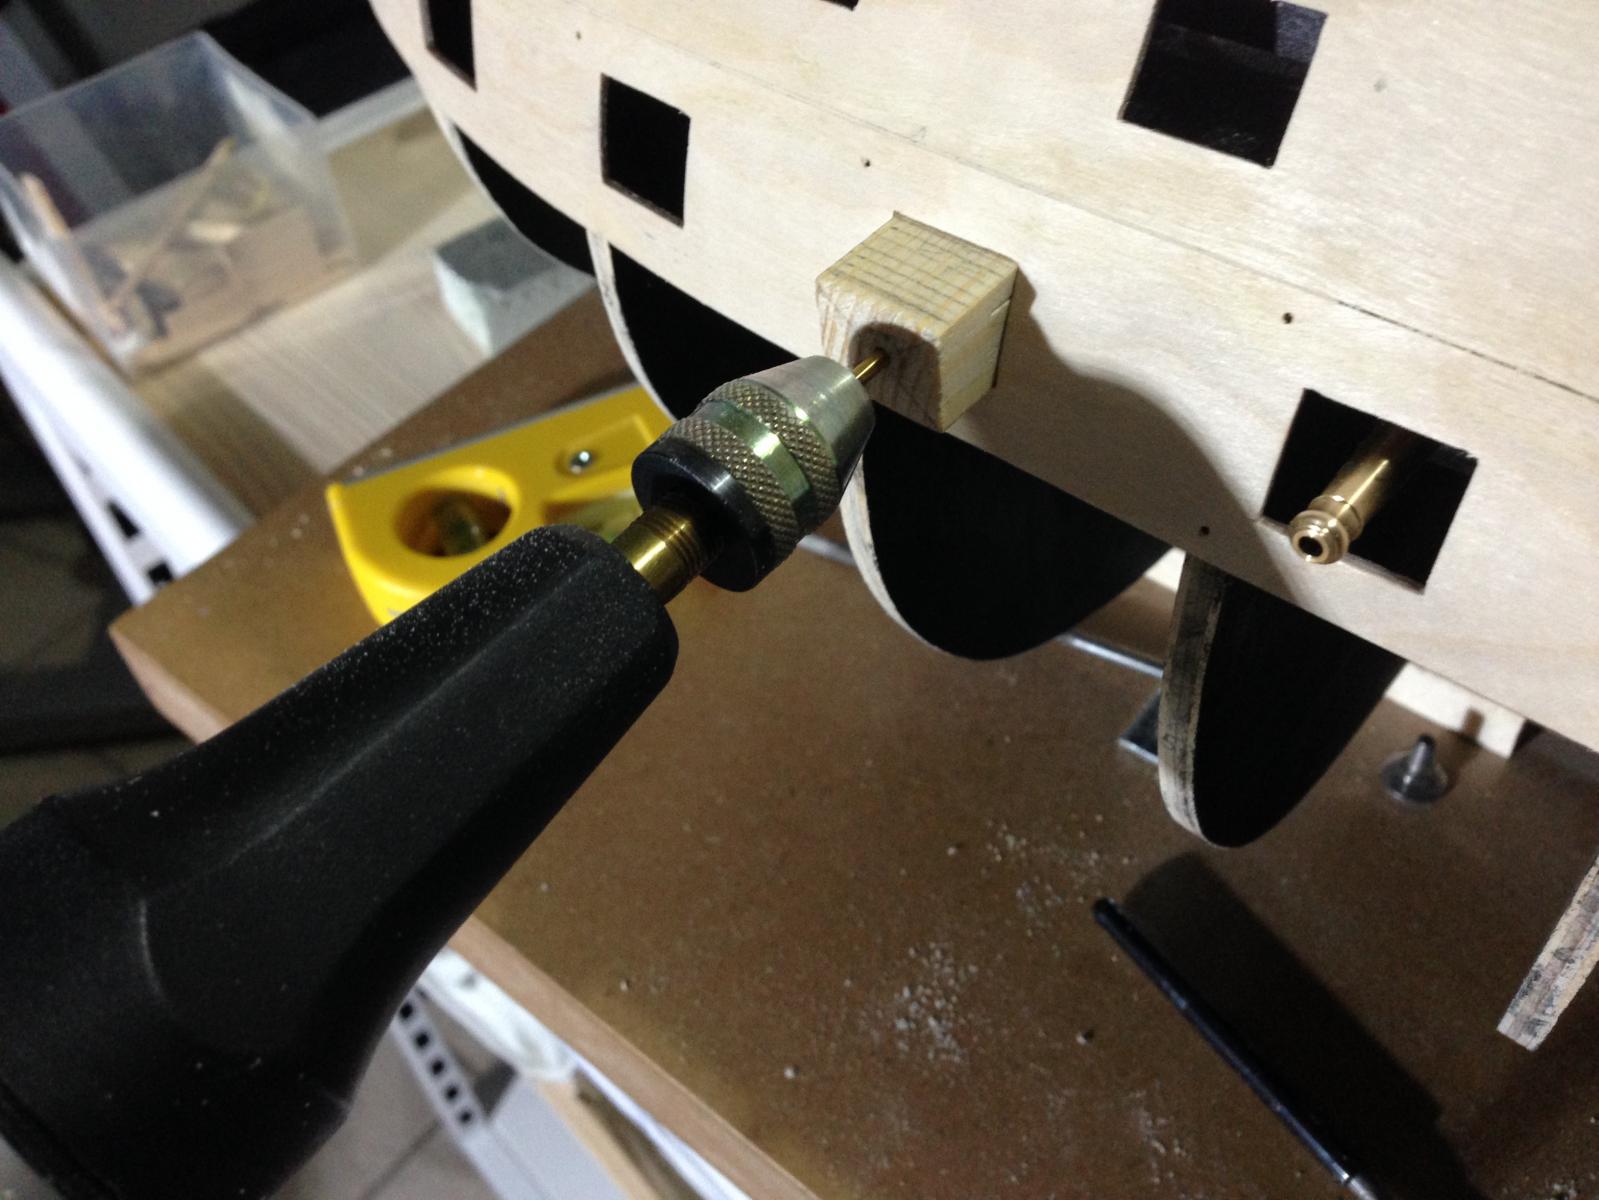
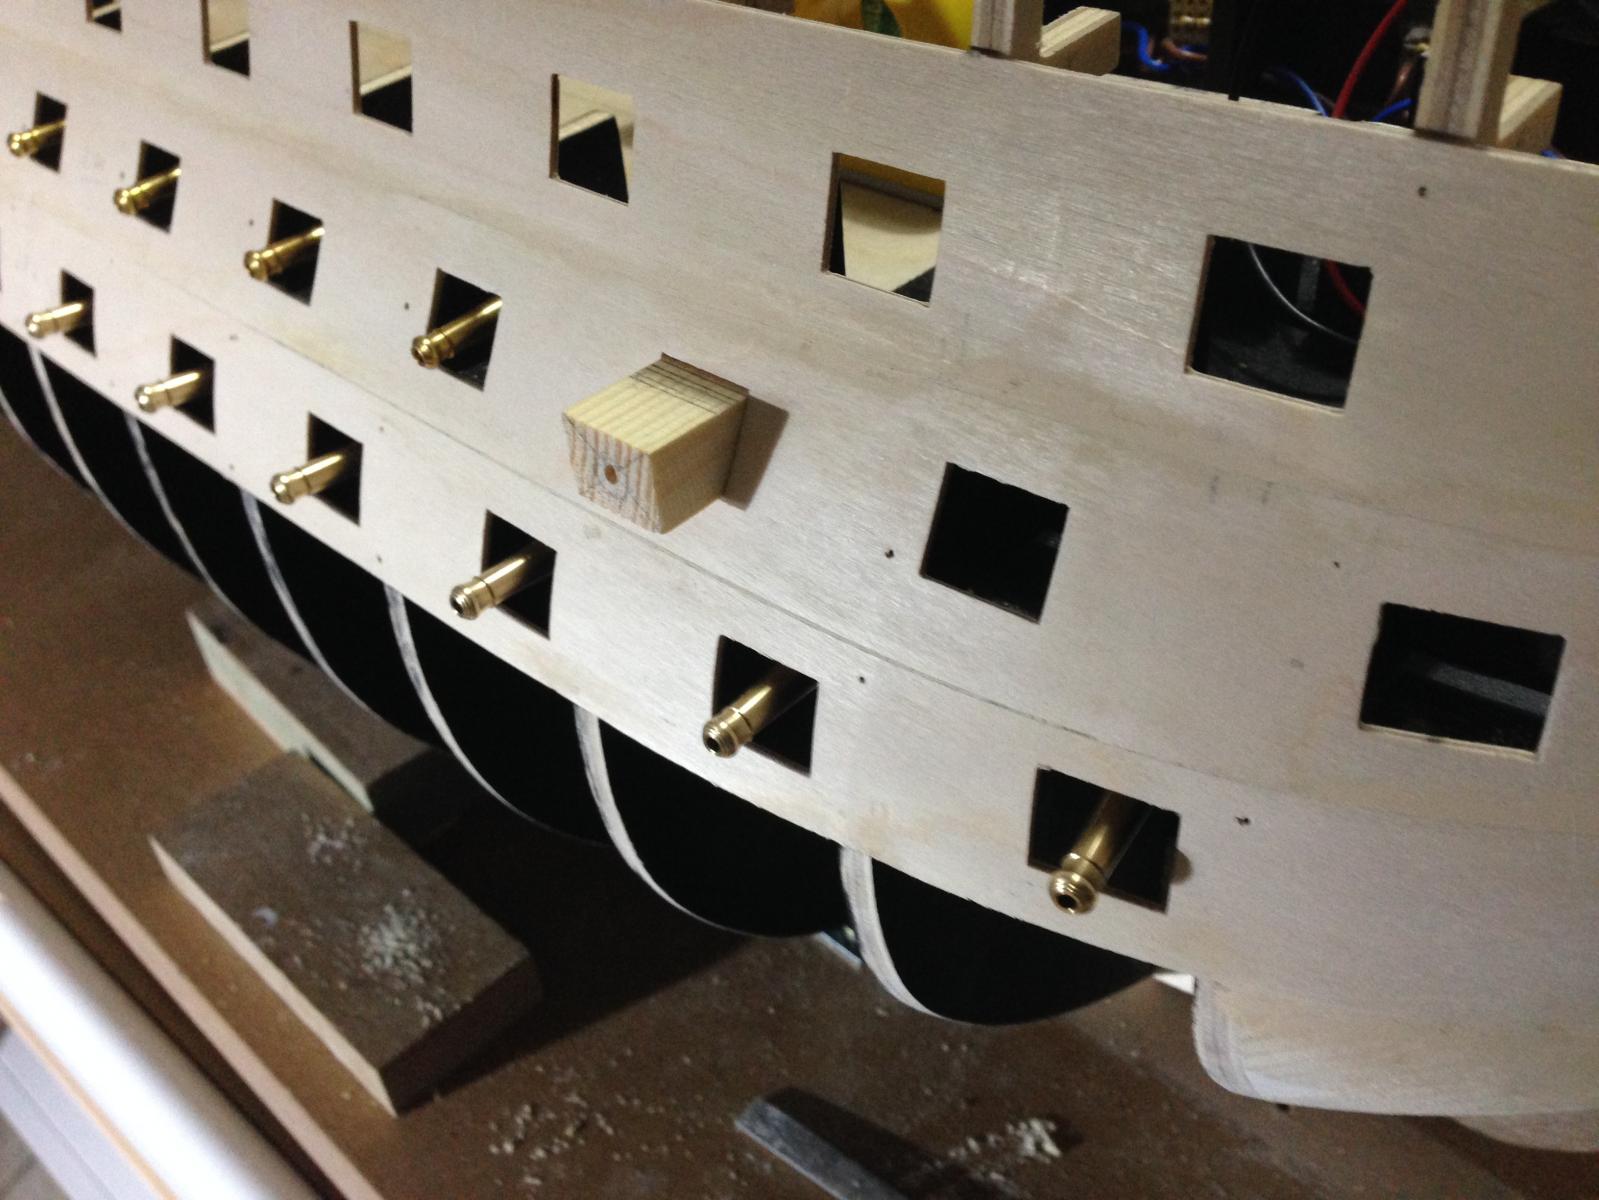
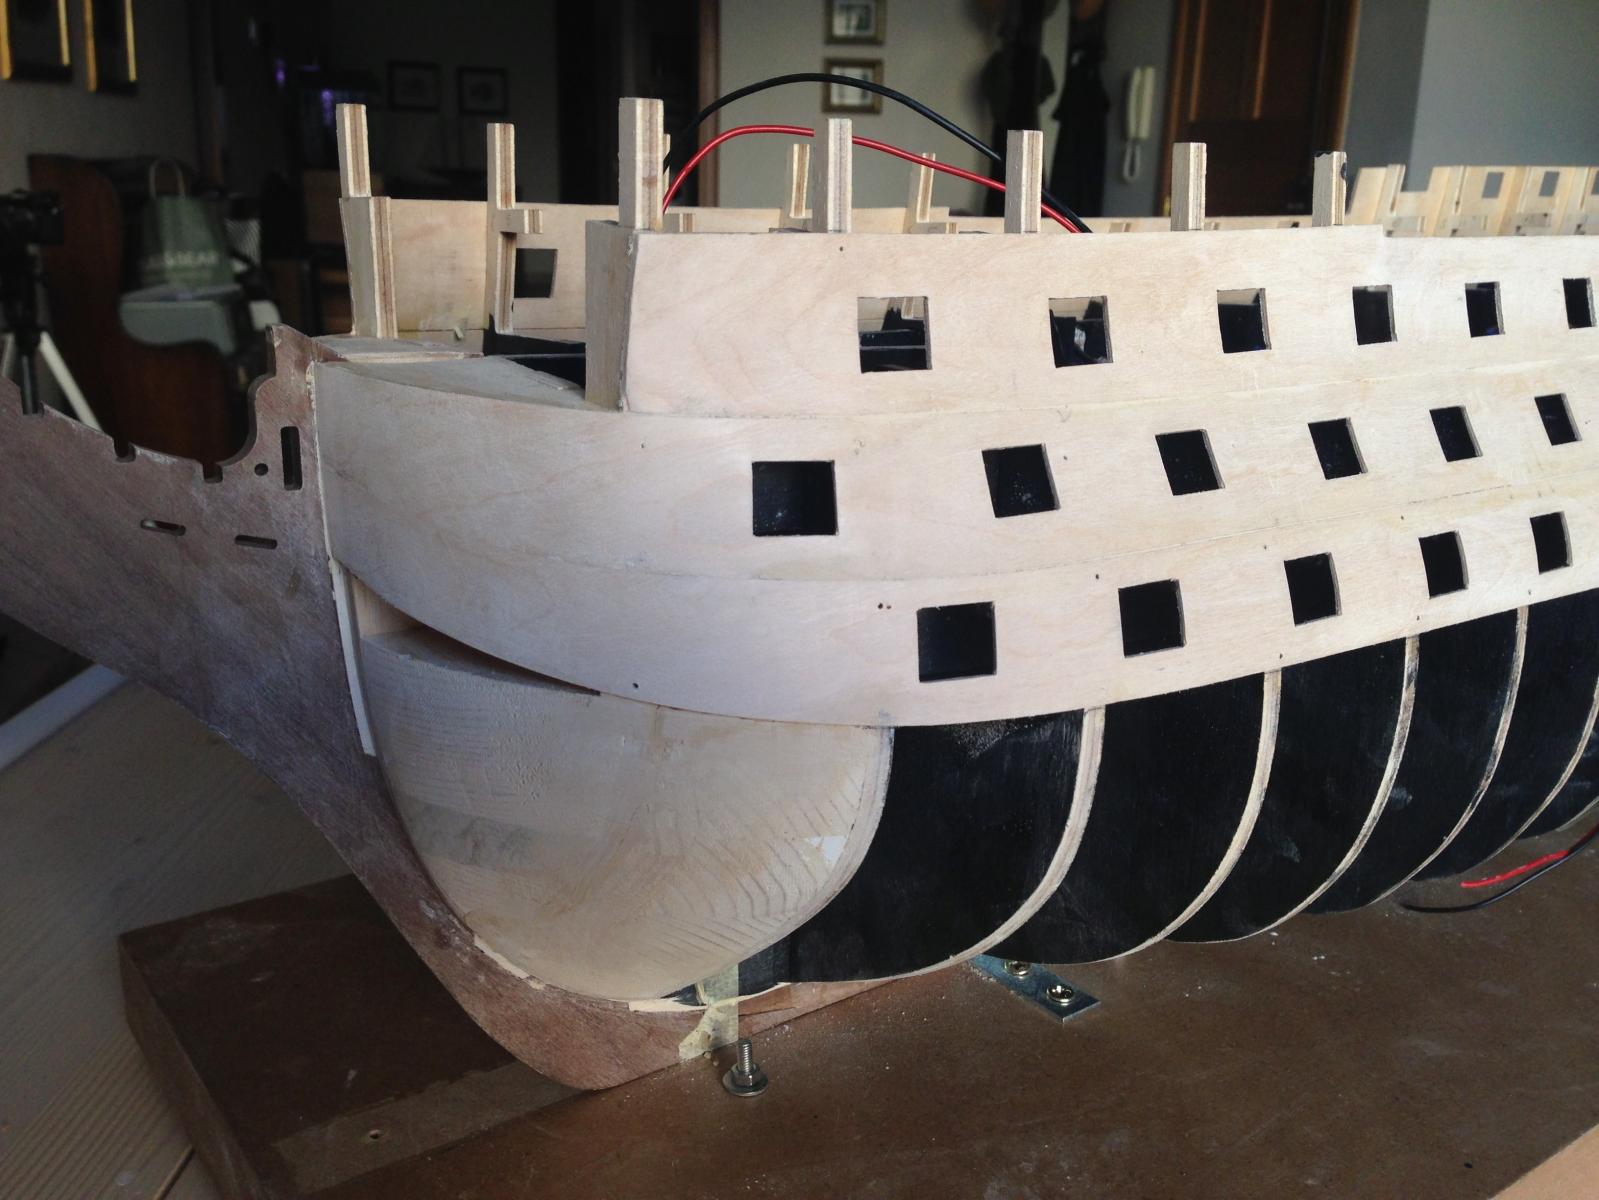
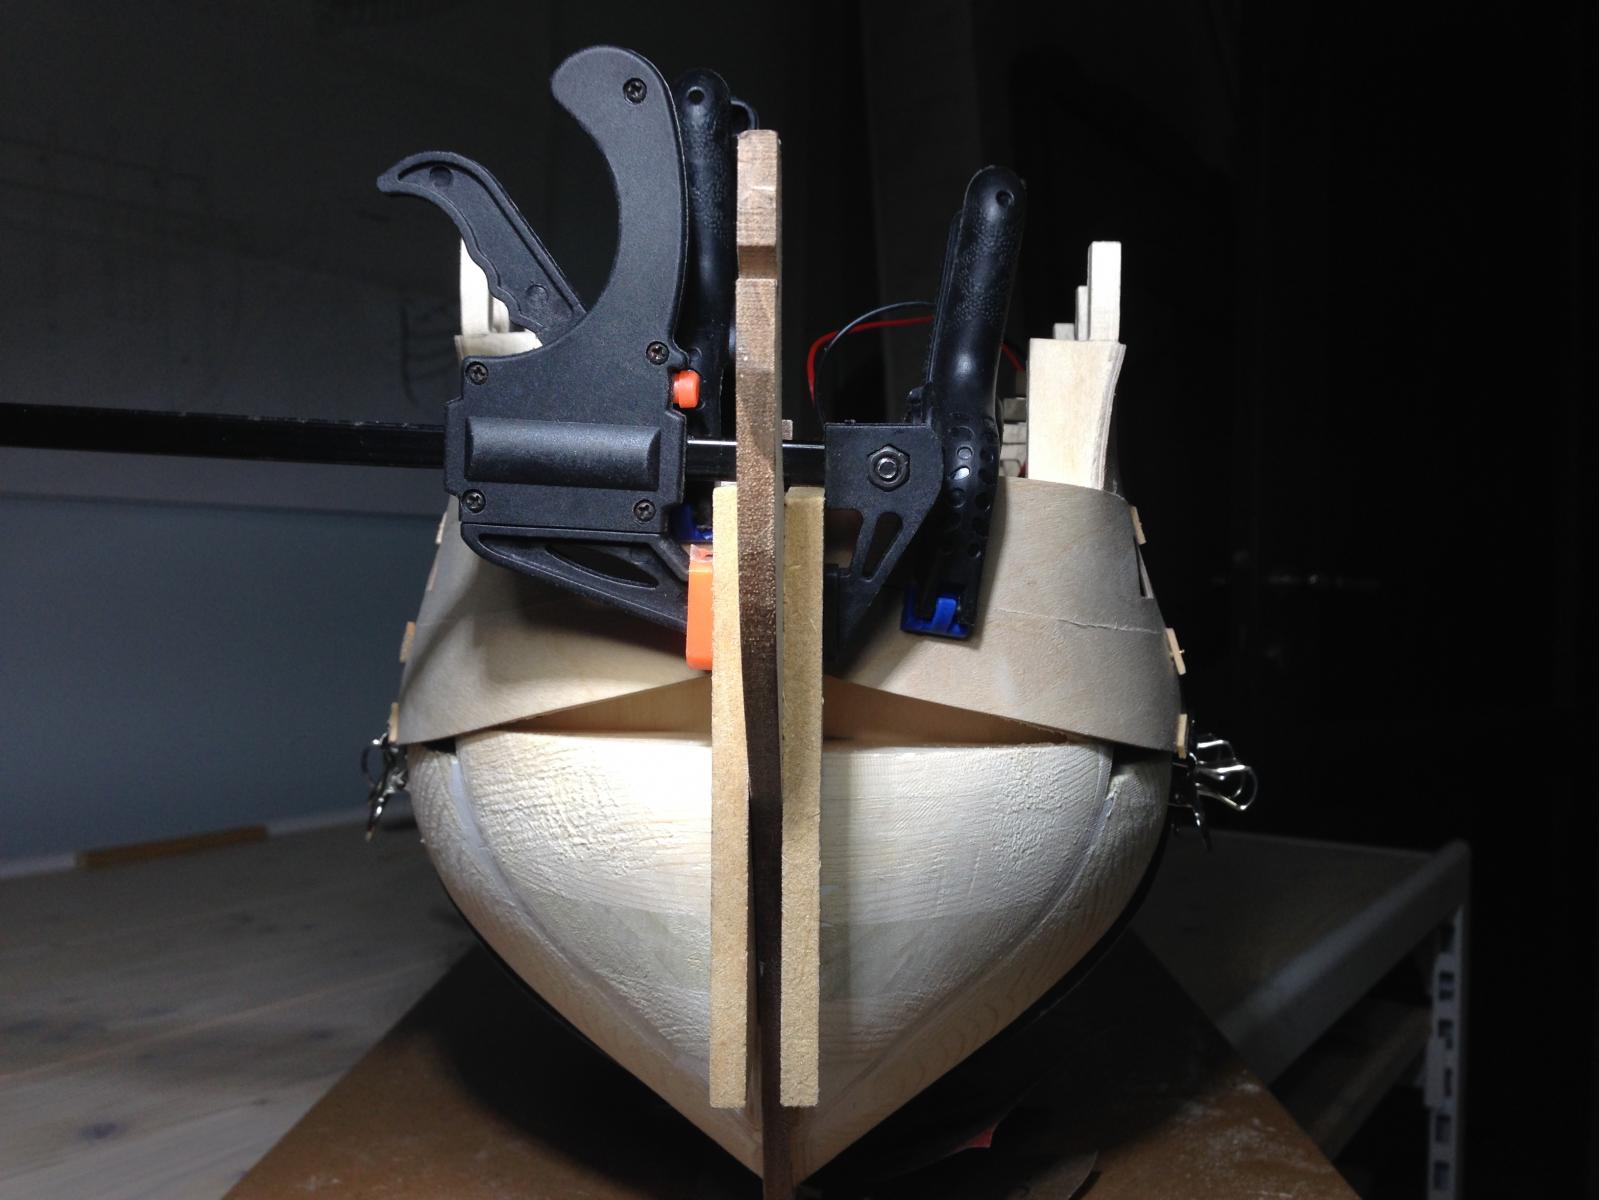
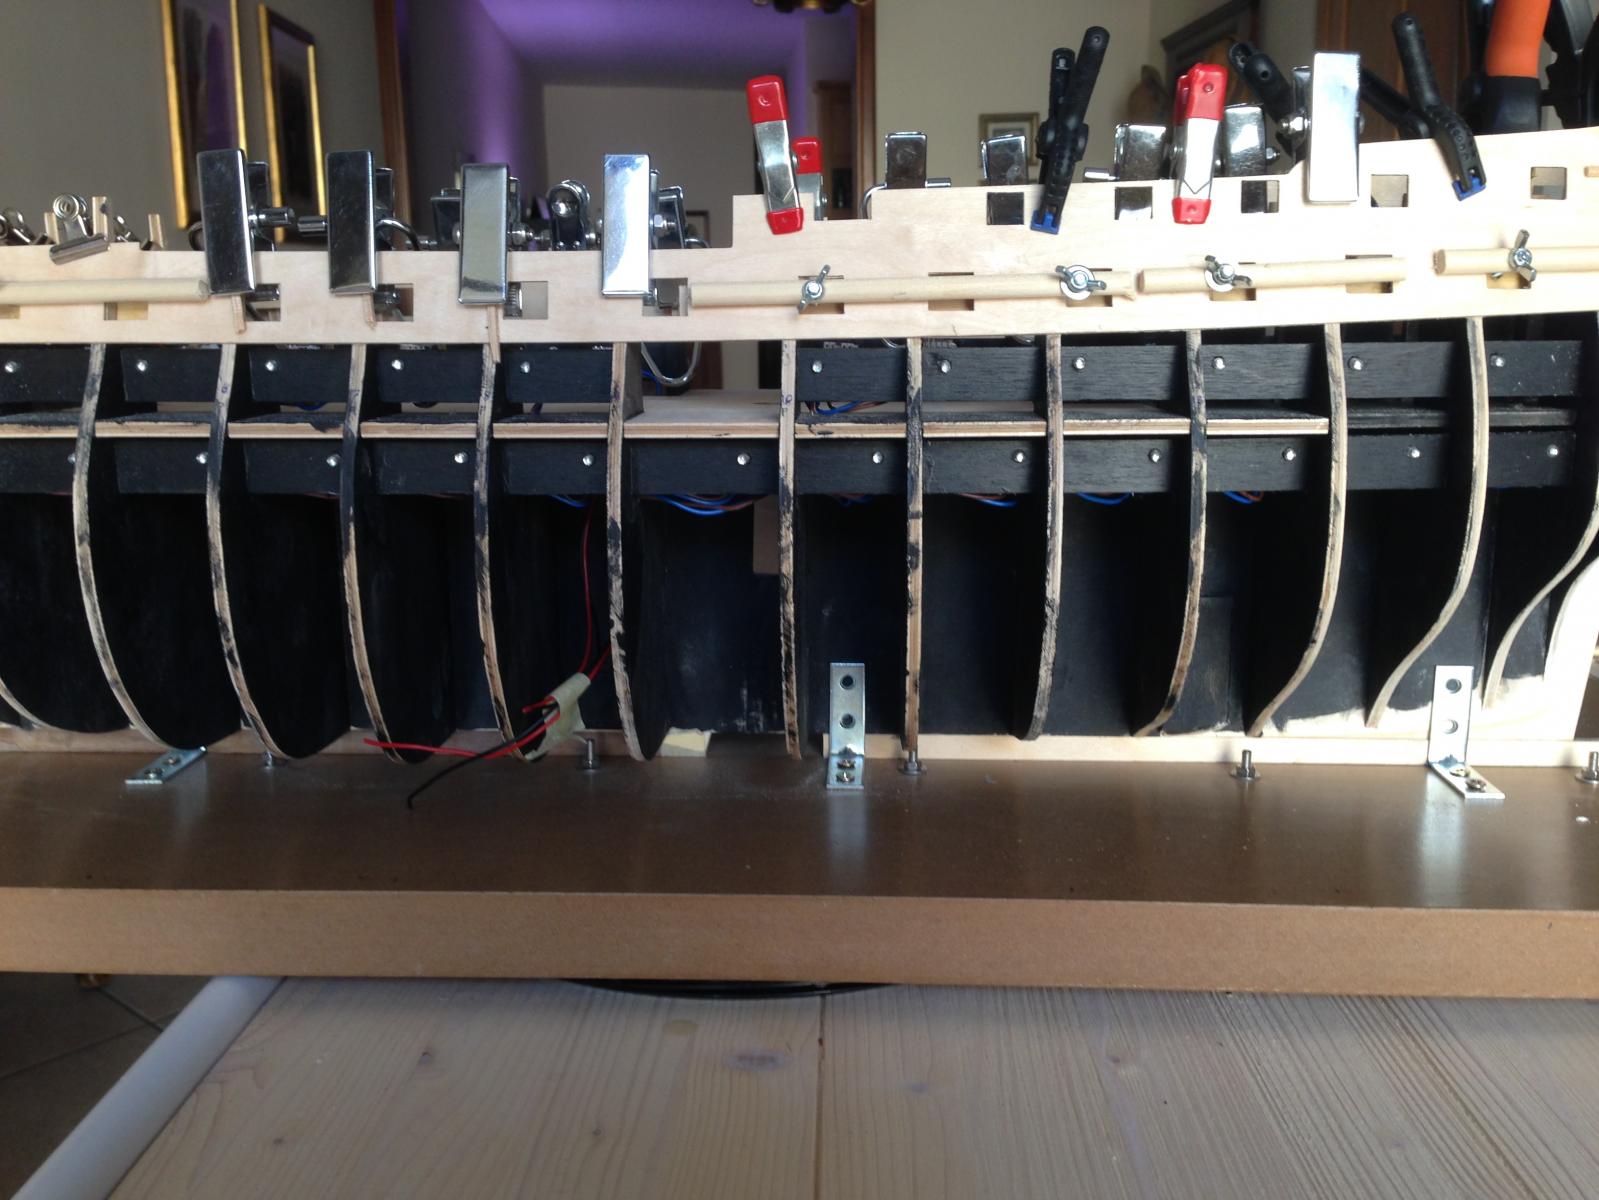
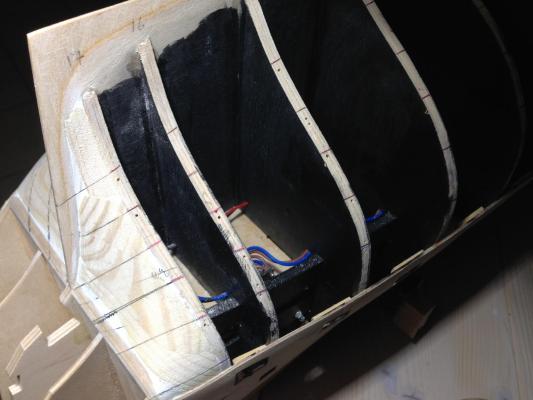
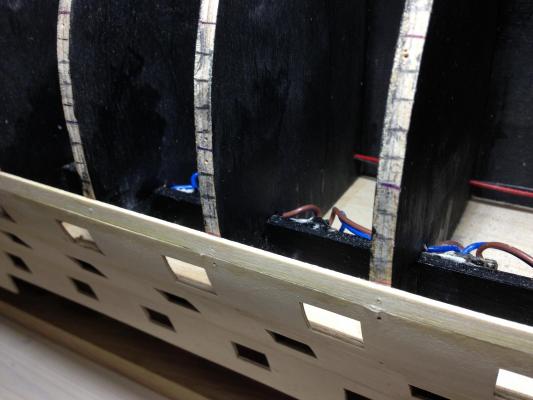
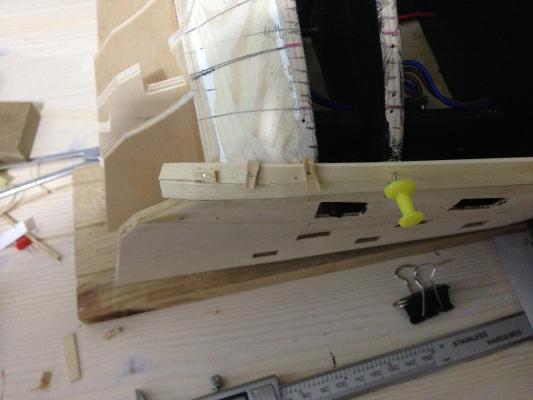
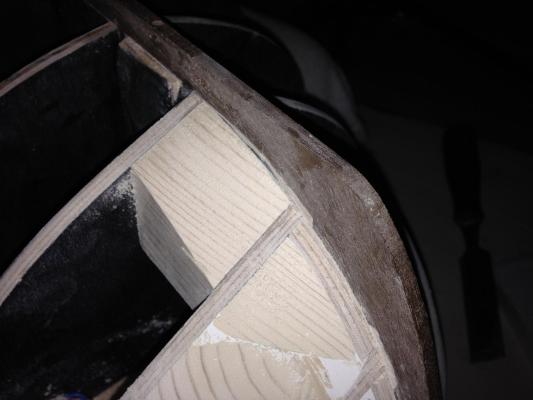
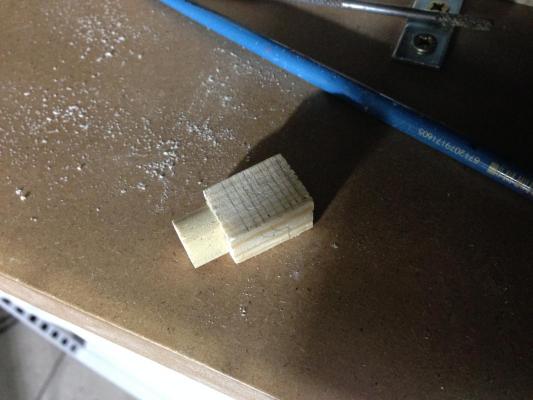
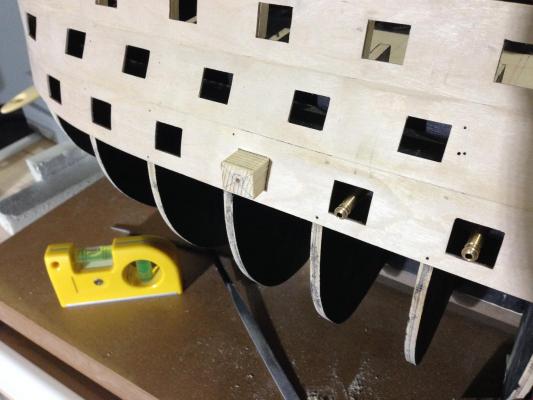
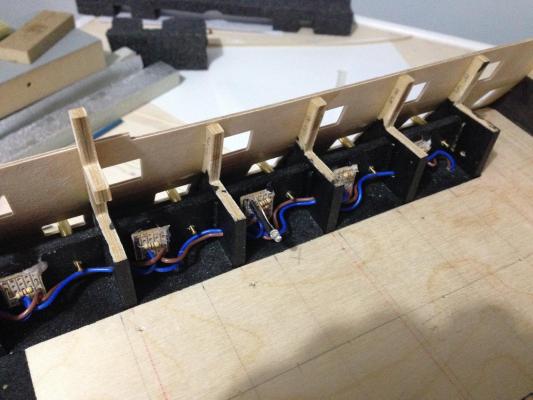
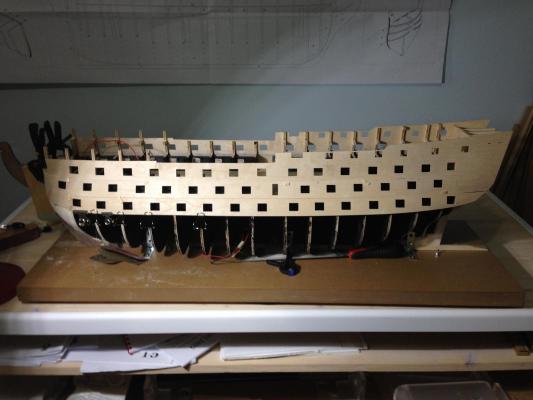
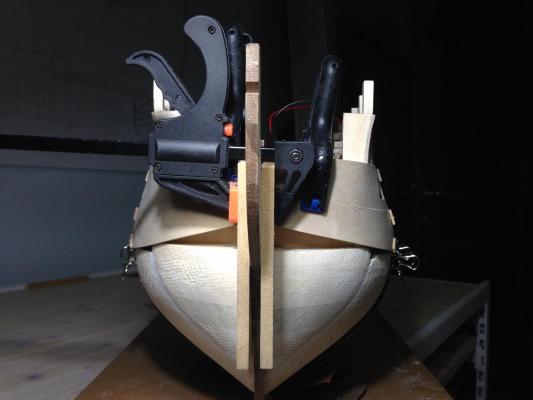
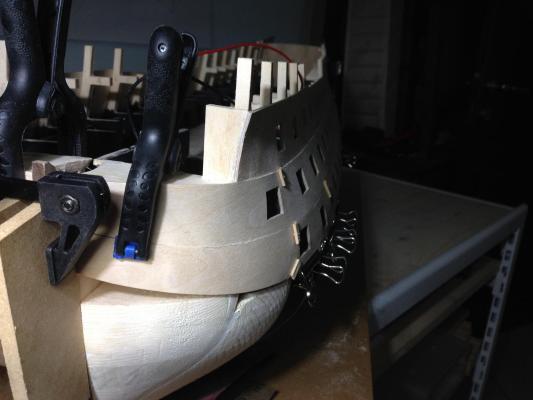
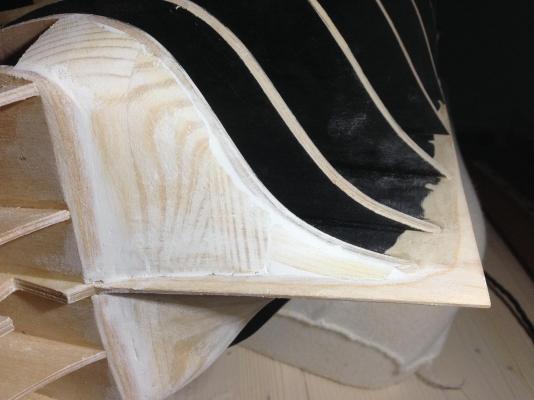
Today is a public holiday here and did some work on the Victory. I decided to prepare the holes for the cannons on the dummy barrel strips. One main reason is because at the back of the strips I have the wiring for the gunport leds and if I damage any of them when drilling there is no way I can get to them after I plank the hull. Ian I took your advice, I think this is the area you referred to. I added filler blocks just at the base. Thanks. I made a jig to centre the holes, but when I started drilling I was not very happy with the result. A couple of the cannons were coming out of the gun ports at an angle sideways. I realised the jig was too short. I extended the jig and drew some parallel lines on top to guideme keep it at right angle with the patterns. Worked fine. I blanked with a dowel the two I didn't like and drilled them again. Cannons dry fitted Robert


- 527 replies
-
- 8
-
-
- caldercraft
- victory
- (and 1 more)
-
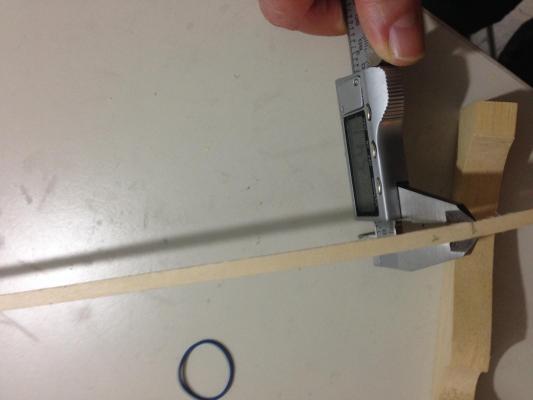
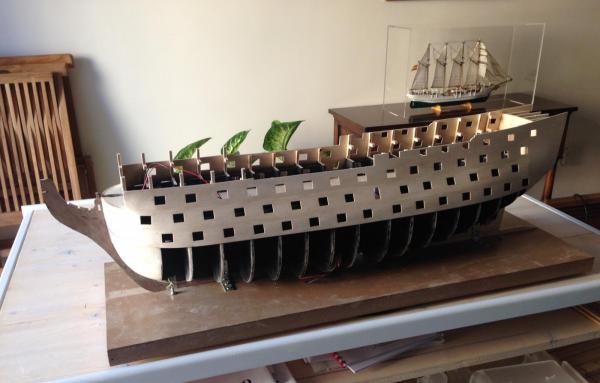
Bob, It was a special offer, the saw dust or the plant. I opted for the plant. Rob / Ian I have a vernier and find it very useful. I should think that the proportional dividers come very handy too. Ian I don't have green fingers, that is the only plant I have in my apartment, can't keep a plant alive in a pot, let alone on the Victory deck. It's the very top part of a plant sitting on the floor just behind the Victory when I took the photo. If I tried on purpose to make it look like it's on the Victory deck, I'm sure I wouldn't have succeeded as much!!! Yes next in line is the planking. But first I have to look at some planking posts to see how to go about it. The only boat I planked was the Bluenose II and was much smaller. The method was to start from just under the bulwarks to about half way down, then start again from the keel and meet at the middle of the hull. The other boat I built 'Juan Sebastian Elcano' had a solid hull. Robert
-
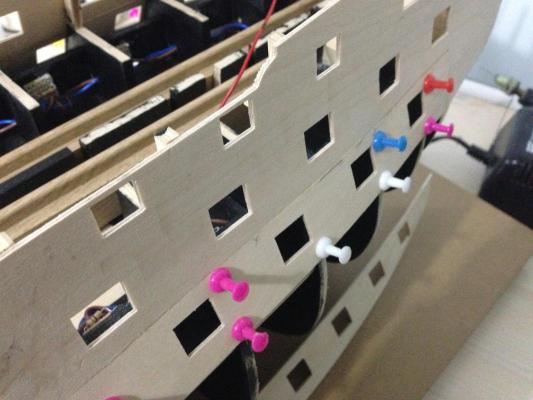
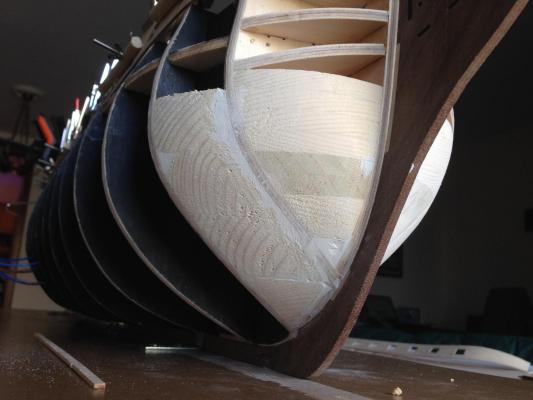
Gunport patterns ready. Ian, Thank you, quite happy with the fit. Bob / Nick Took your advice, thank you, did not hammer in any nails. I used the push pins. Very convenient to use instead of nails. Mike Wow, 25 builds!!! This is only my third build. I was really excited when I received the kit by UPS. Before, my hobby was carpentry, but when I changed residence due to lack of space I had to give it up. My brother had a kit 'Juan Sebastian Elcano' which he never got around to build and gave it to me. After I built it, which was quite a struggle as the manual with it was very poor, I got hooked to this beautiful hobby. Patterns pre shaped, glued, pinned in place and left to dry. First the middle pattern. Then the lower patterns. Pins removed and patterns sanded. Robert


- 527 replies
-
- 6
-
-
- caldercraft
- victory
- (and 1 more)
-
Really nice work Rob. The figurines really brings it alive. Robert
-
Bob Thank you for your nice comments. Ian Thank you for your nice comments. I think you are right about the lower area between bulkheads 2 and 3. I think I will insert a filler block just at the bottom. A few more images. The top gunport patterns are glued in place. They seem to be ok. The middle and the lower gunport patterns are just dry fitted. I pre shaped them as much as possible. Next I will glue the middle gunports, let them dry and then glue the lower gunport patterns, checking if they need any further shaping or trimming. My hesitation now is if I should temporarIly nail them leaving part of the nails out and remove them after glue is dry, or drive the nails all the way in and leave them there. ANY SUGGESTIONS? Robert

- 527 replies
-
- 3
-
-
- caldercraft
- victory
- (and 1 more)
-
I love the detail you go into Bob, very accurate. Robert
-
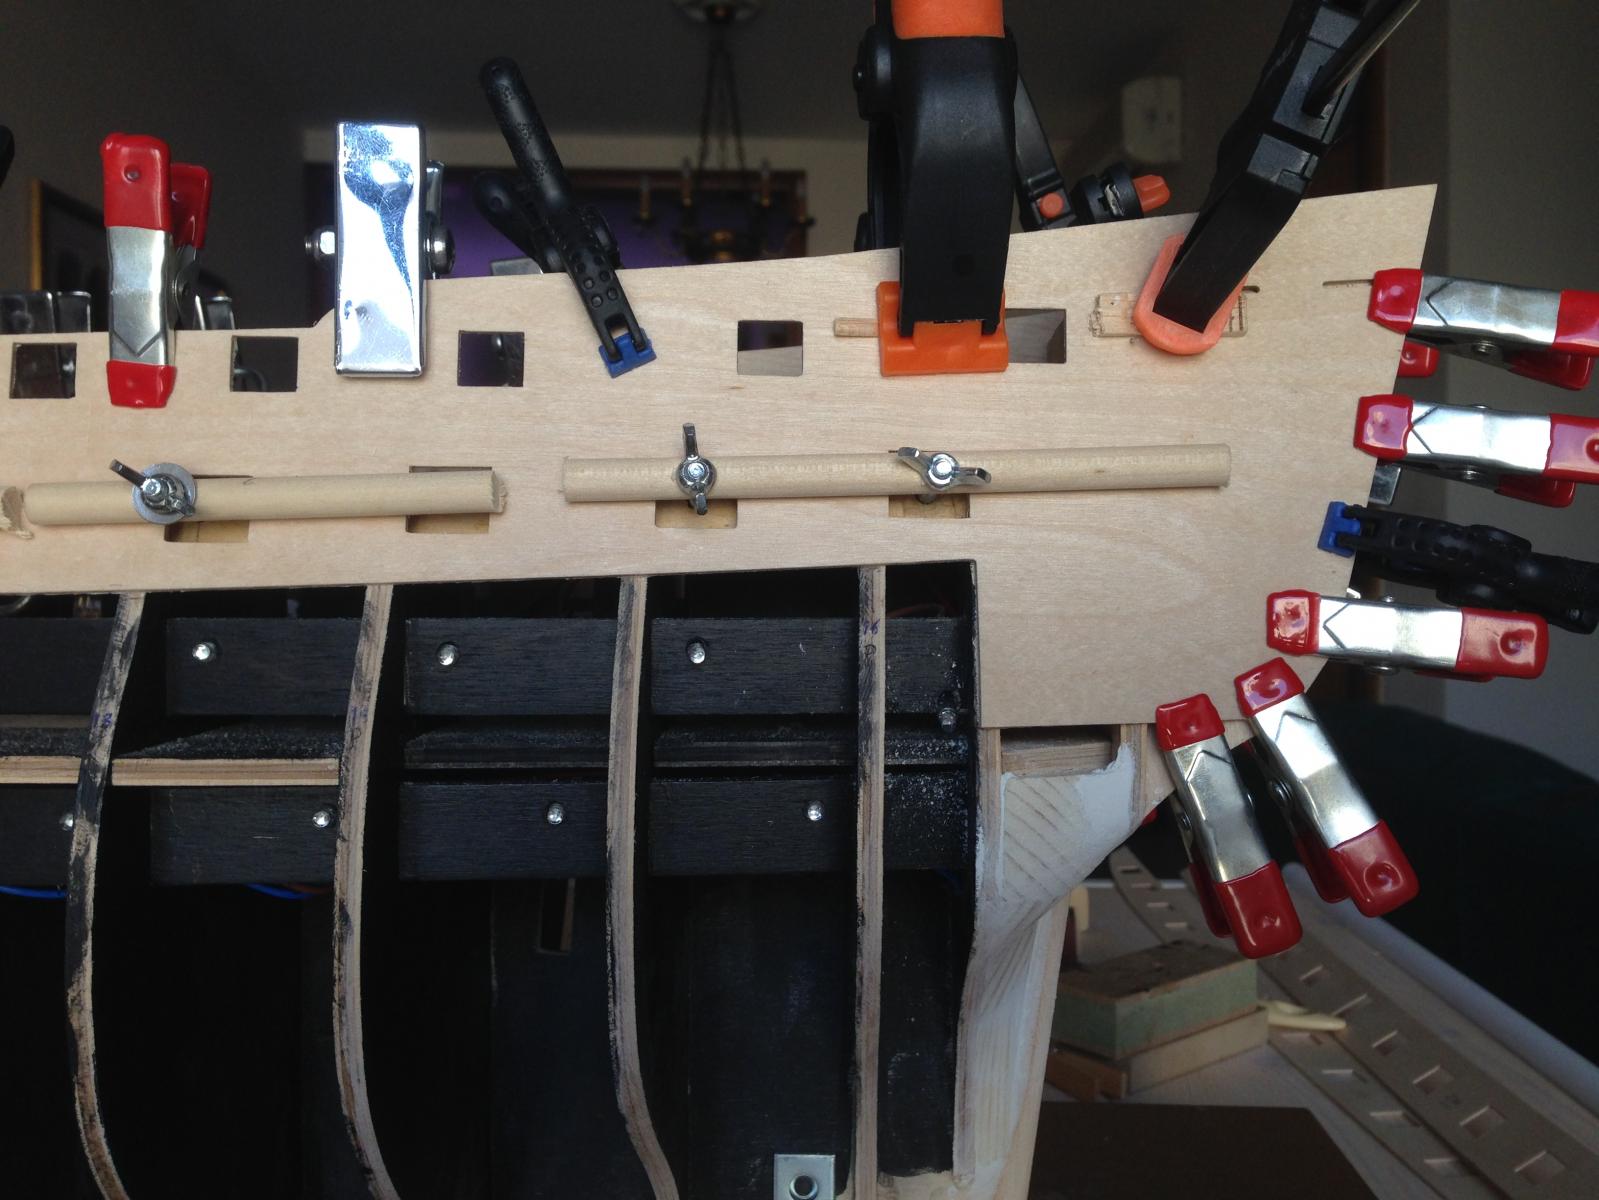
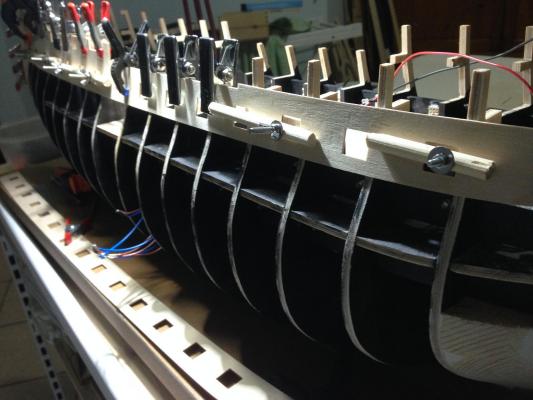
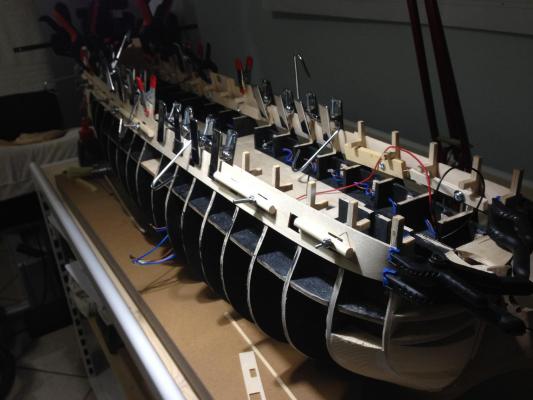
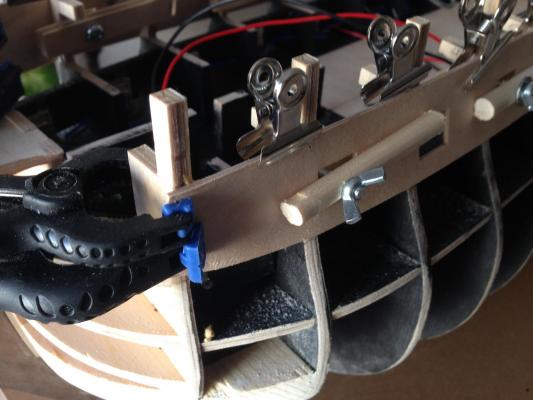
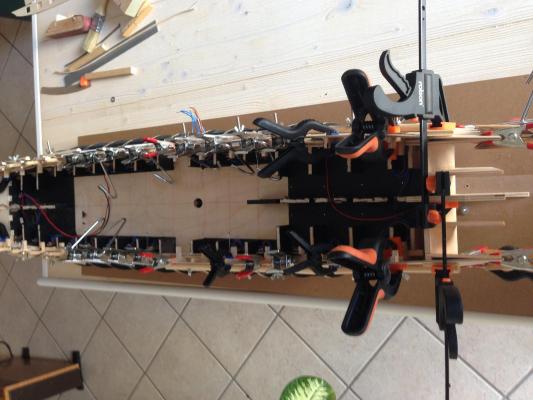
Finished filler blocks and started work on the gunport patterns. I shaped the front end of the top gunport patterns and after I don't know how many dry fits I glued them in place. To take the concave shape of the gunport patterns I used a flat piece of wood on the inside of the bulkheads and a piece of rod on the outside of the pattern and pulled together with bolts and nuts. Found it very effective. I will leave them to dry until tomorrow and start work on the middle gunport. Unfortunately I am not finding much time during the week, if any at all, so things are moving a bit slow. Robert


- 527 replies
-
- 4
-
-
- caldercraft
- victory
- (and 1 more)
-
What can I say!! Your level of detail and workmanship amazes me Nils. Robert
- 2,625 replies
-
- 4
-
-
- kaiser wilhelm der grosse
- passenger steamer
- (and 1 more)