HOLIDAY DONATION DRIVE - SUPPORT MSW - DO YOUR PART TO KEEP THIS GREAT FORUM GOING! (Only 27 donations so far out of 49,000 members - C'mon guys!)
×

Robert29
-
Posts
417 -
Joined
-
Last visited
Content Type
Profiles
Forums
Gallery
Events
Everything posted by Robert29
-
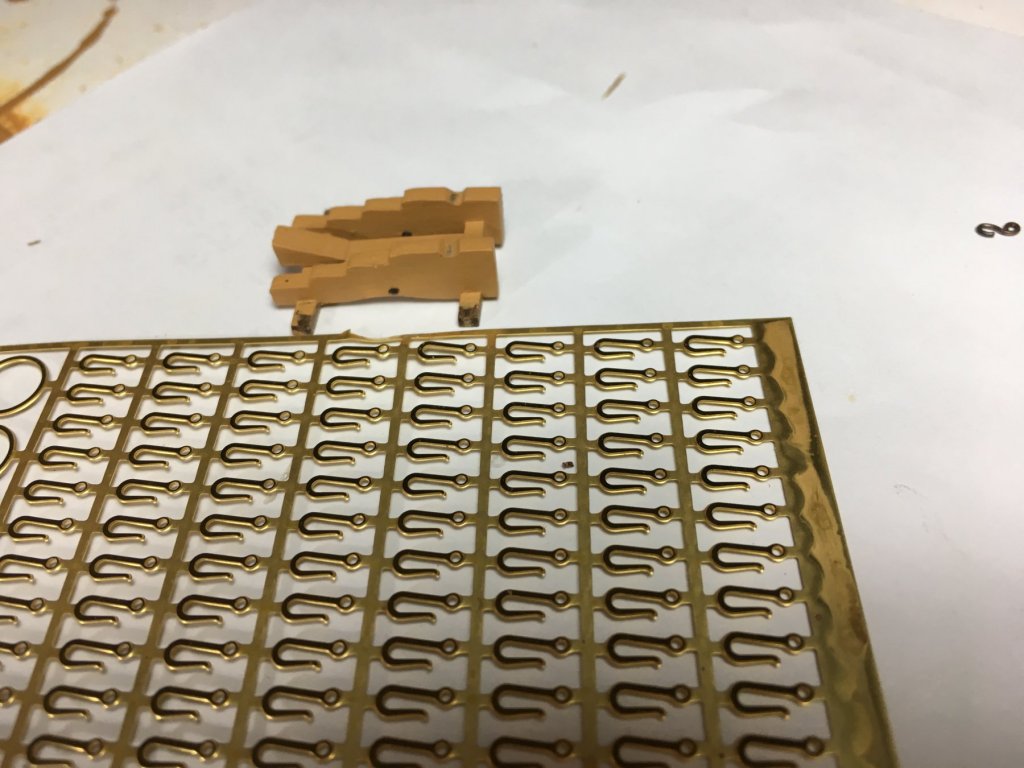
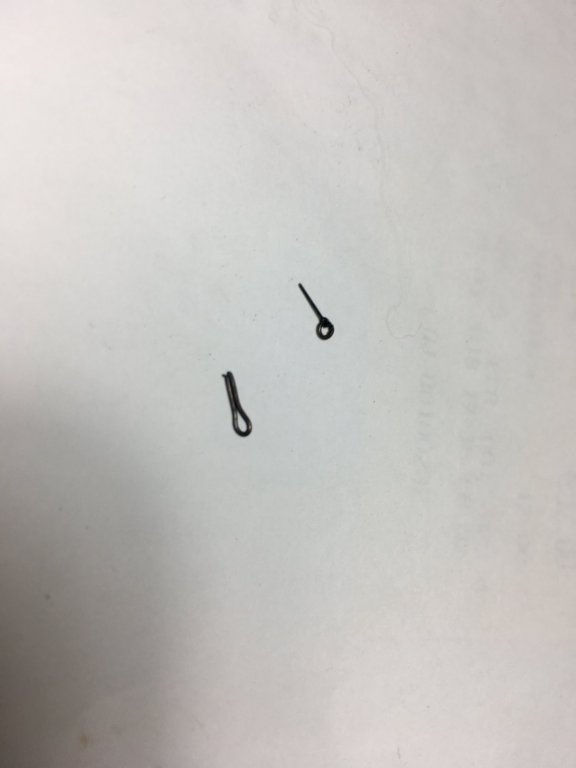
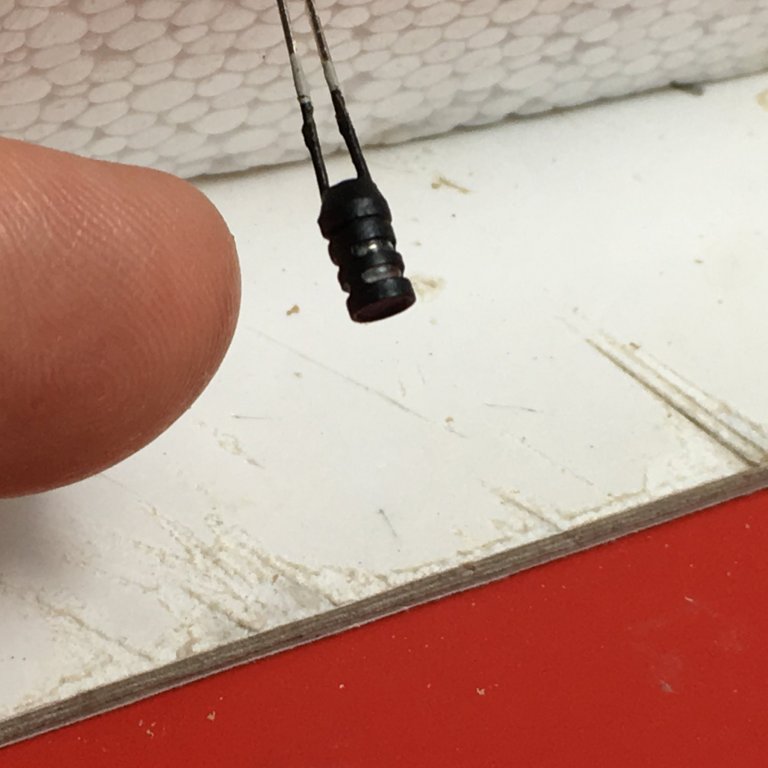
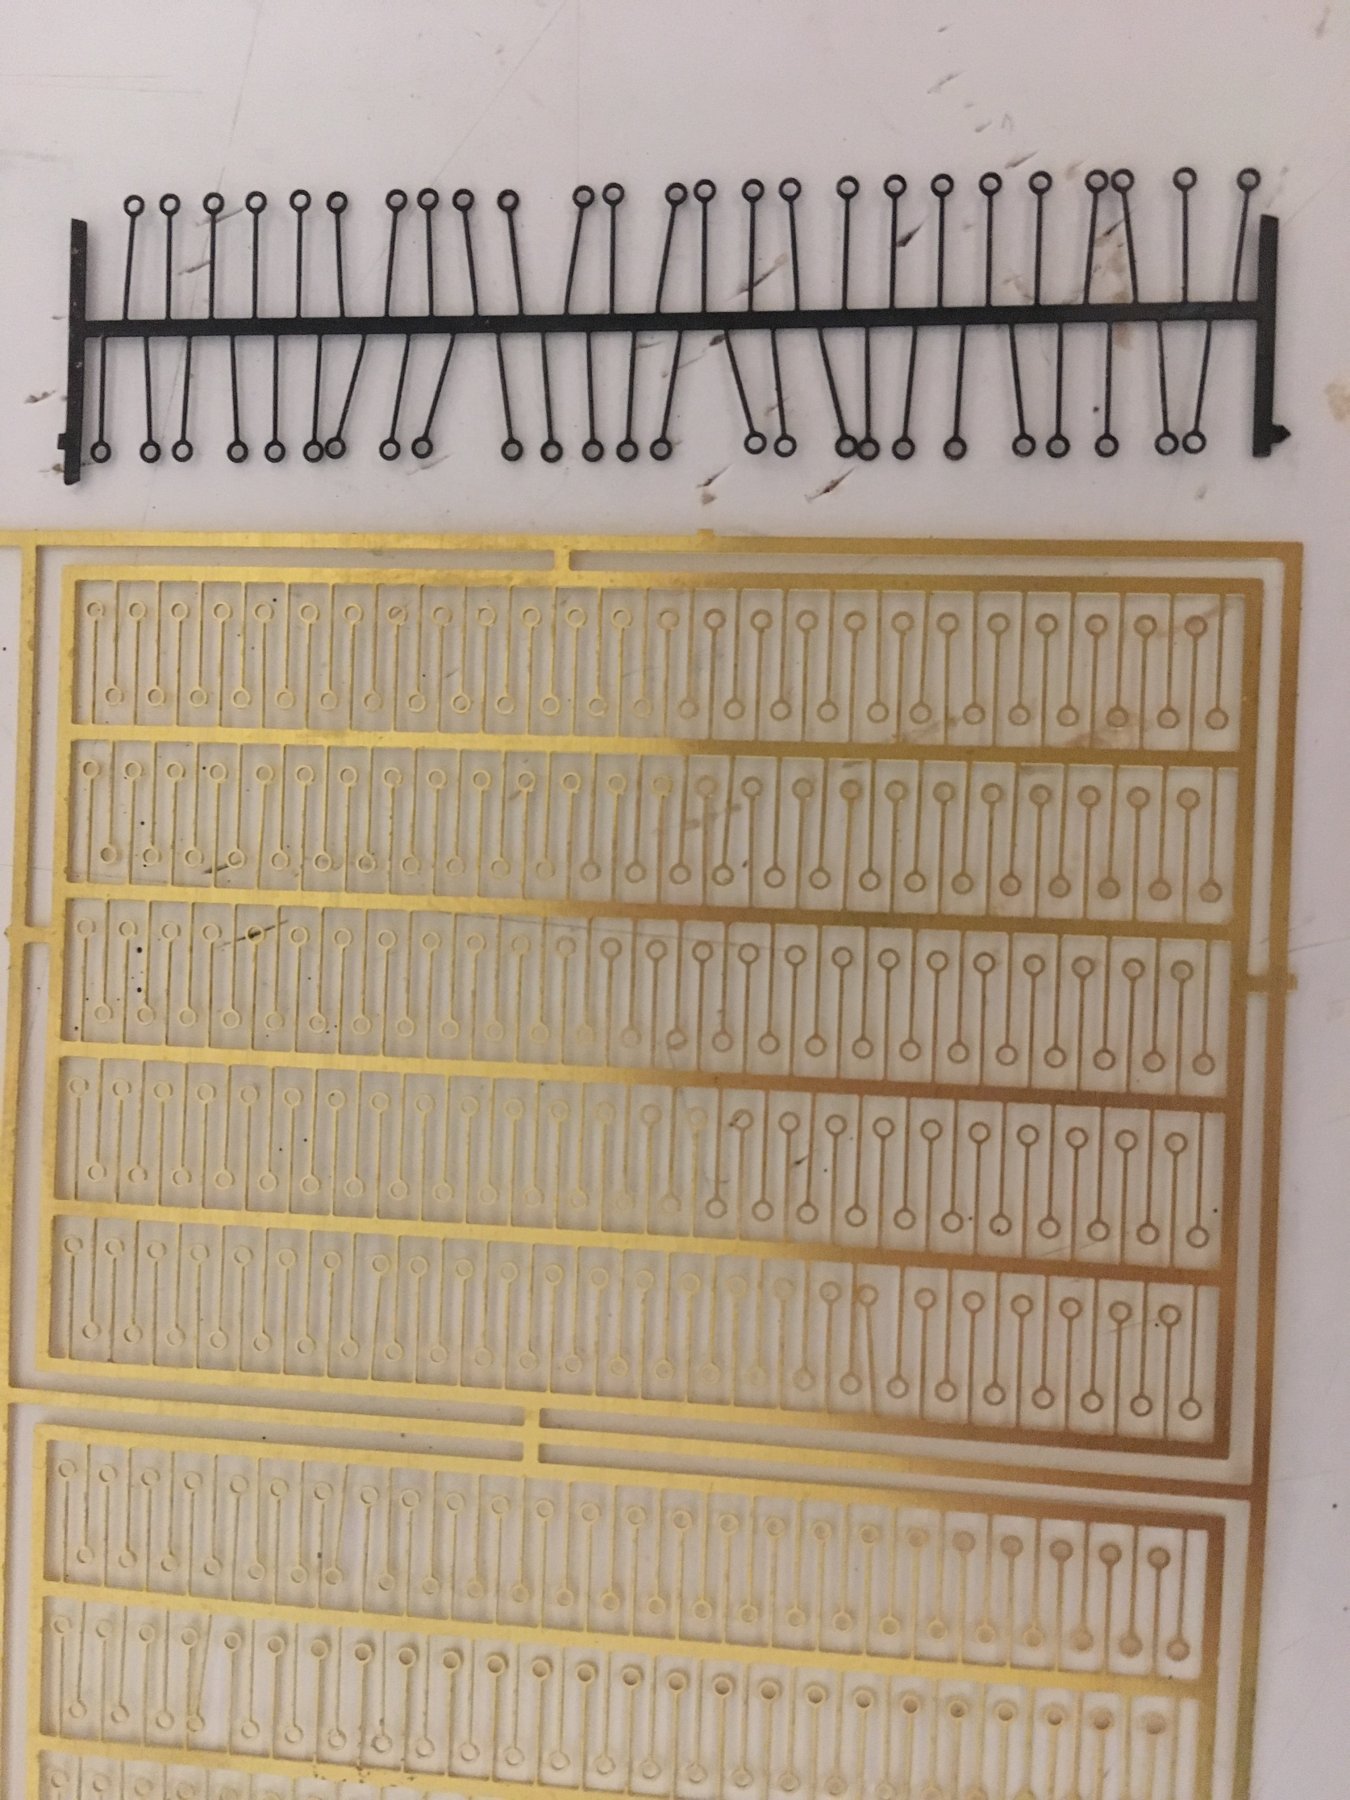
 Ian and Darrell thank you for your nice comments. Cannons, cannons, cannons ...... never ending. I had tried blackening some small pieces and nearly gave up as it did not go so well but after looking into Graham's build and seeing the result I decided to give it another go with a different solution 'Birchwood Brass Black', same Graham (Charter33) used. I tried it on the small brass items for the cannons, trunnion brackets, eyelets and pins, and it worked like a charm. I cleaned them in acetone , dipped them in the Birchwood Brass Black and in 30 seconds they were ready. Wanting to add the rings on the side of the carriages I ordered the rings from CBM, part no. 36750, which included the ring and the eyelet for the ring. The actual rings were ok but the eyelets for the ring (on the left) in my opinion were too bulky. I used just the ring and inserted them in the eyelets (480) supplied with the kit. Finished item on the right. The hooks supplied with the kit were too large for the cannon tackles, so I decided to make smaller hooks myself. To make the hooks I used the same eyelets which I got from CMB and did not use. Robert
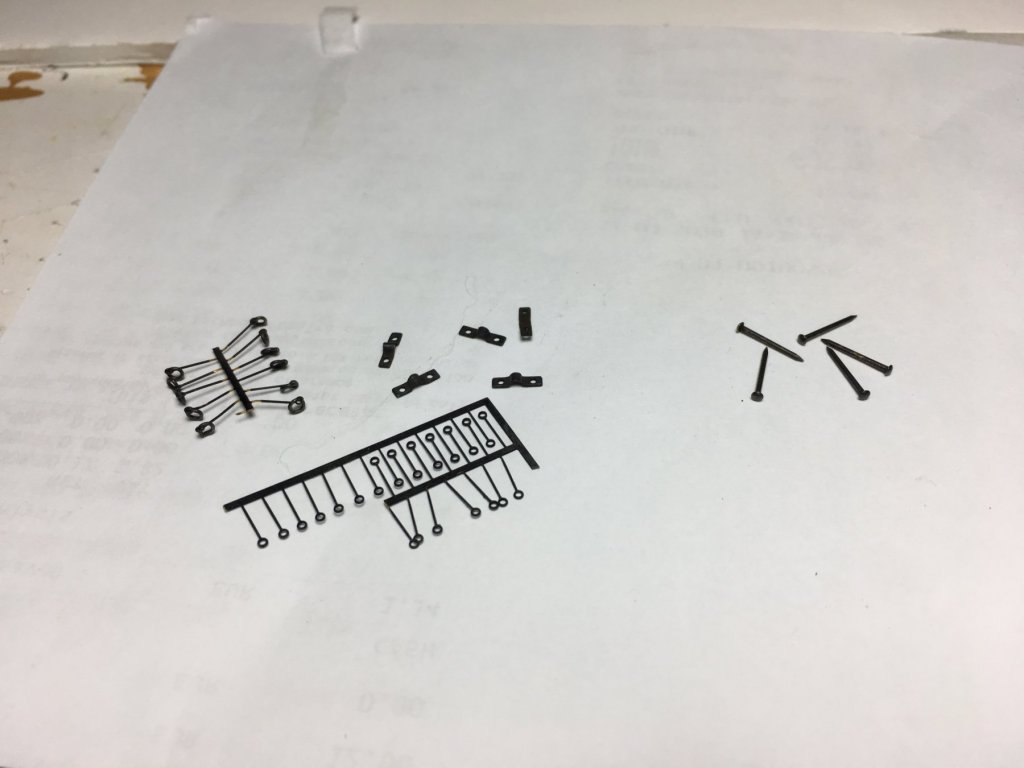

- 527 replies
-
- 6
-

-
- caldercraft
- victory
- (and 1 more)
-
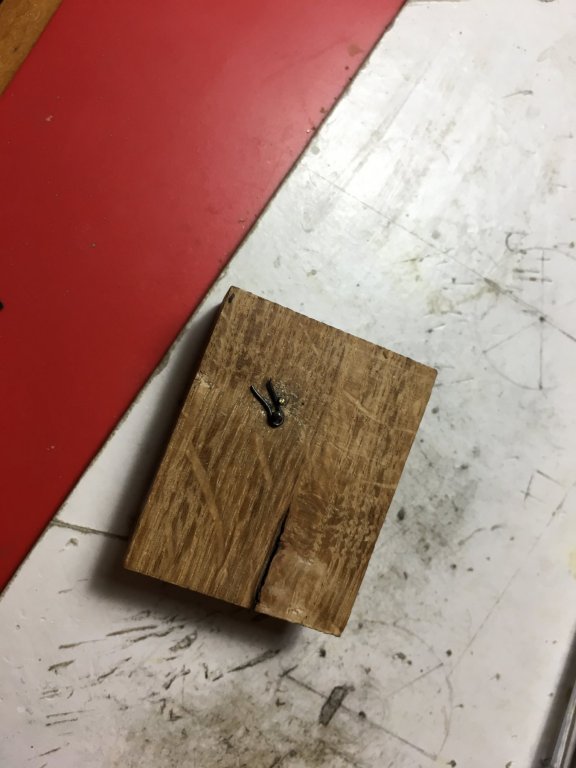
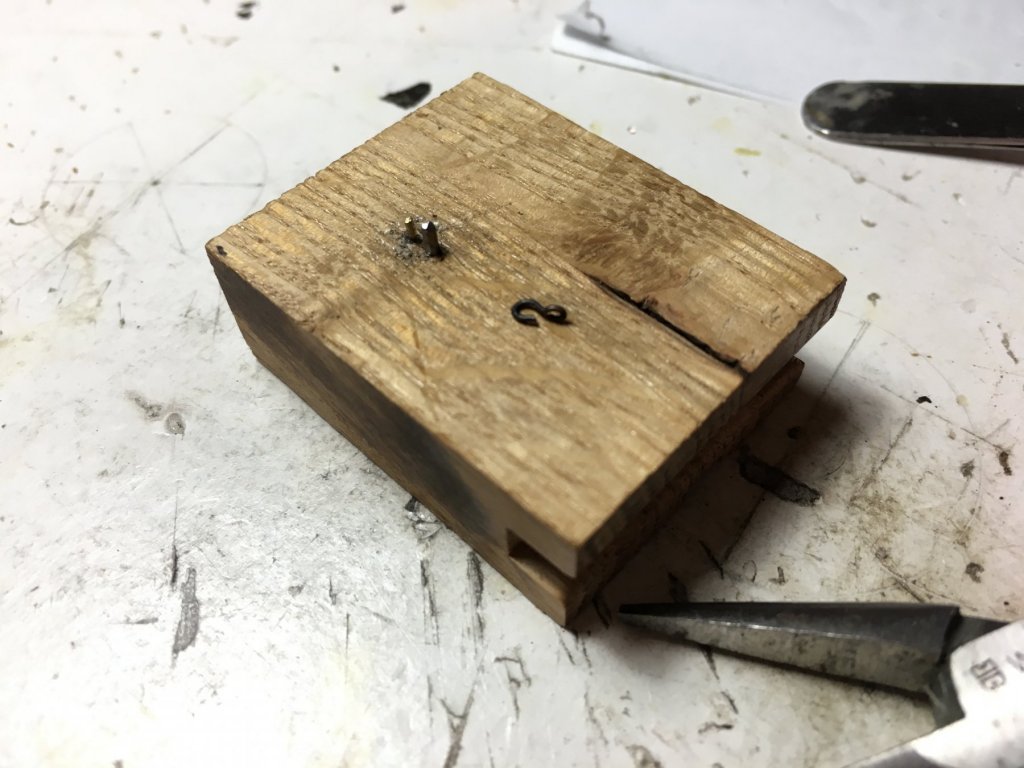
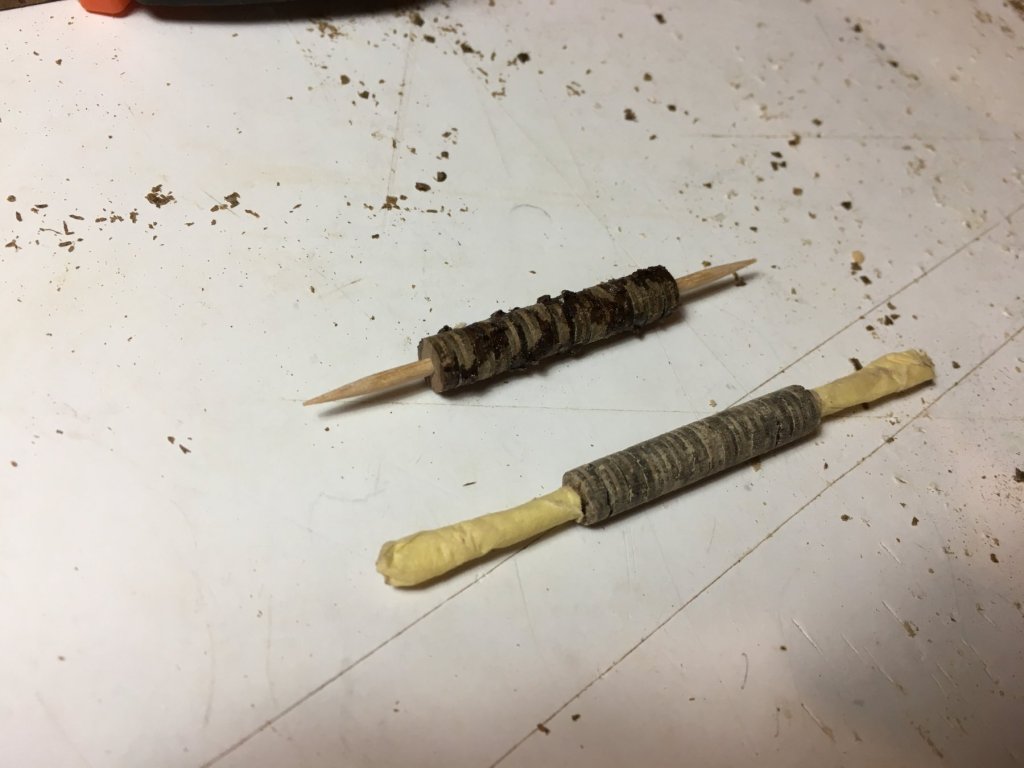
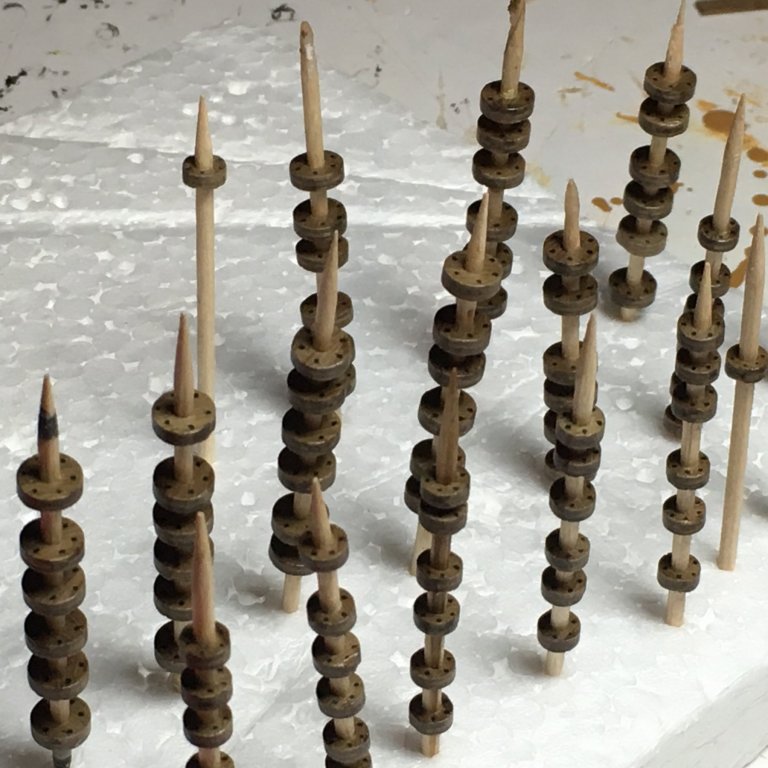
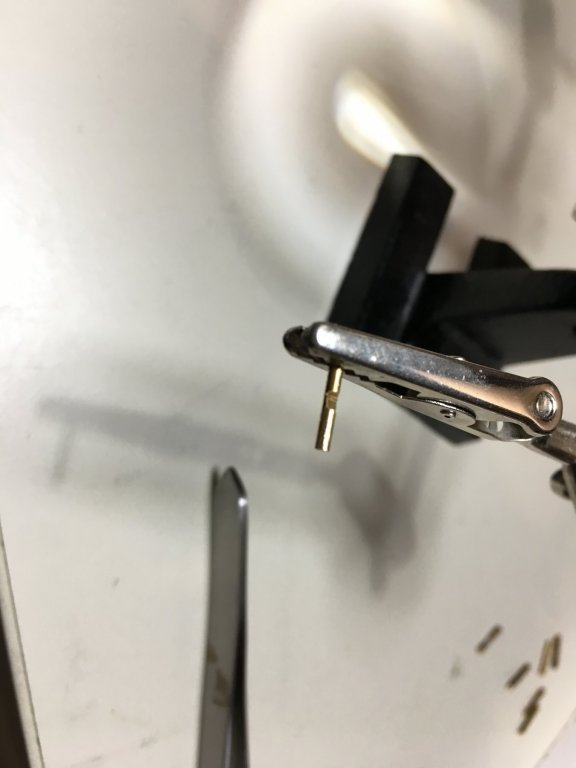
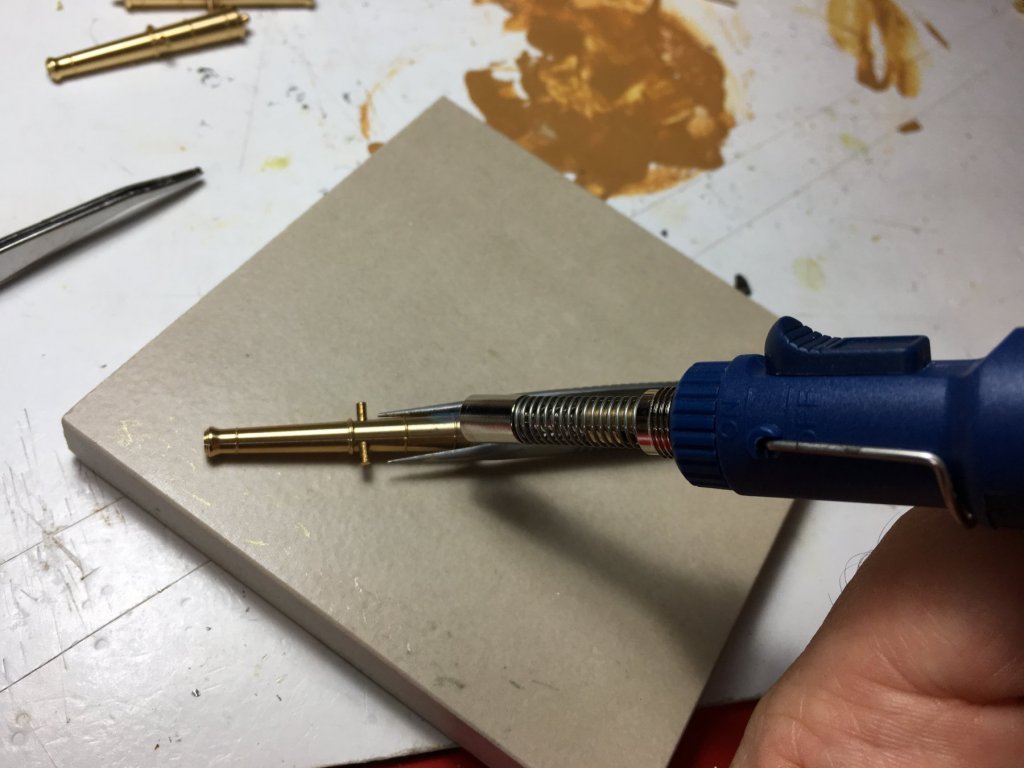
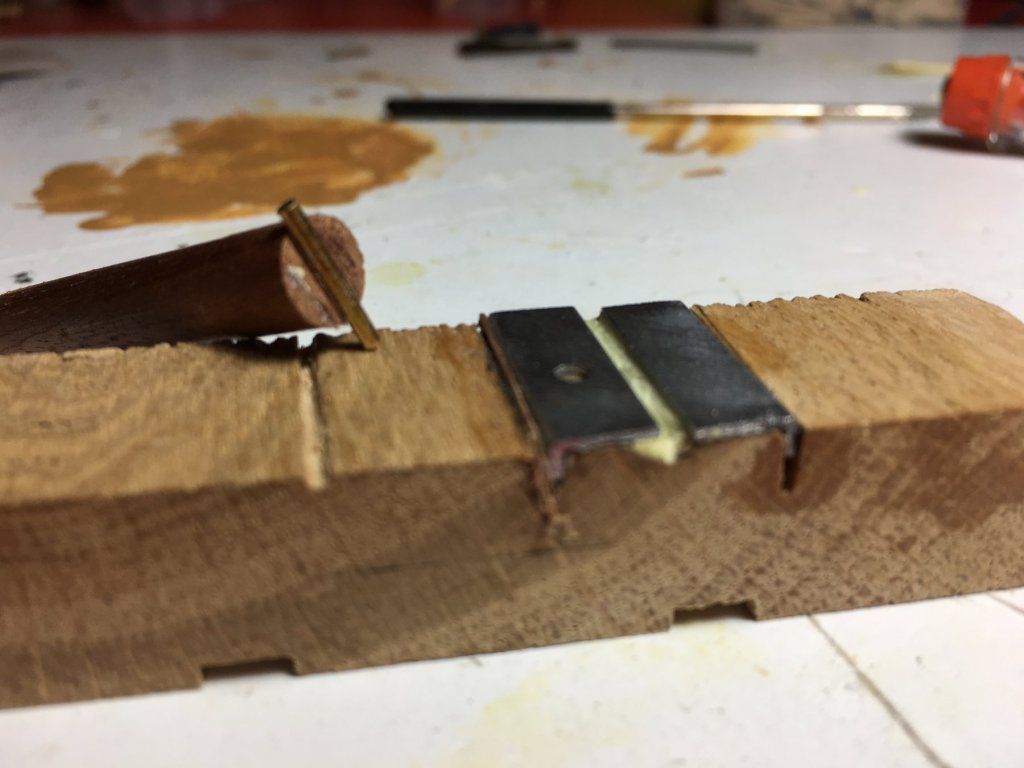
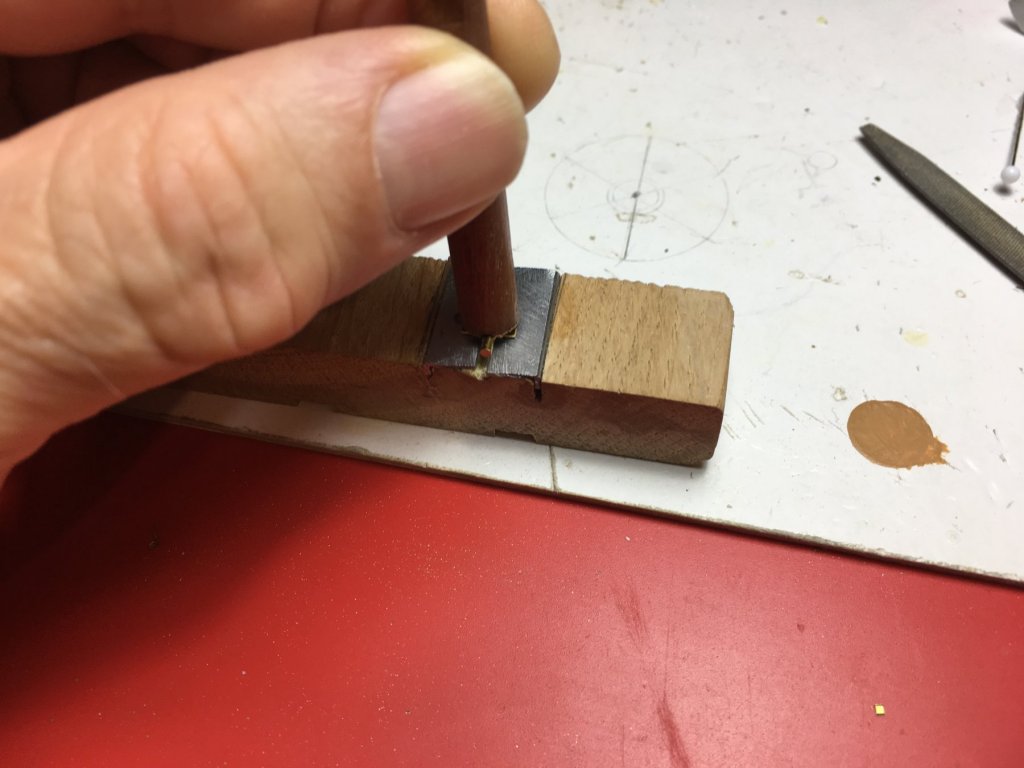
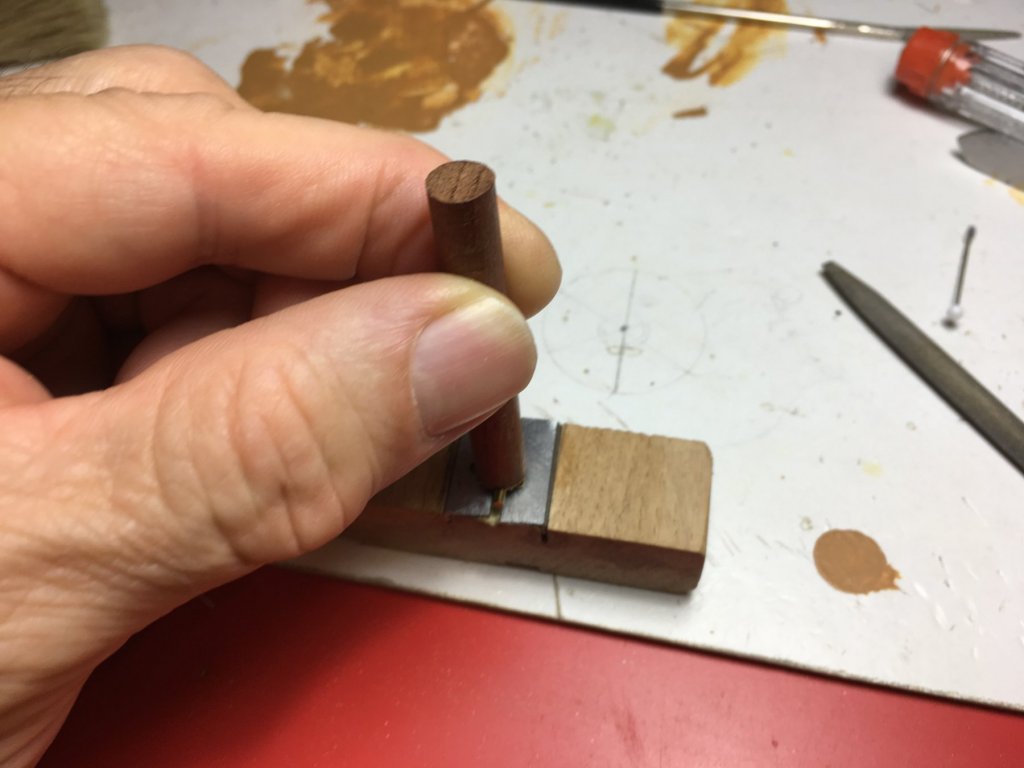
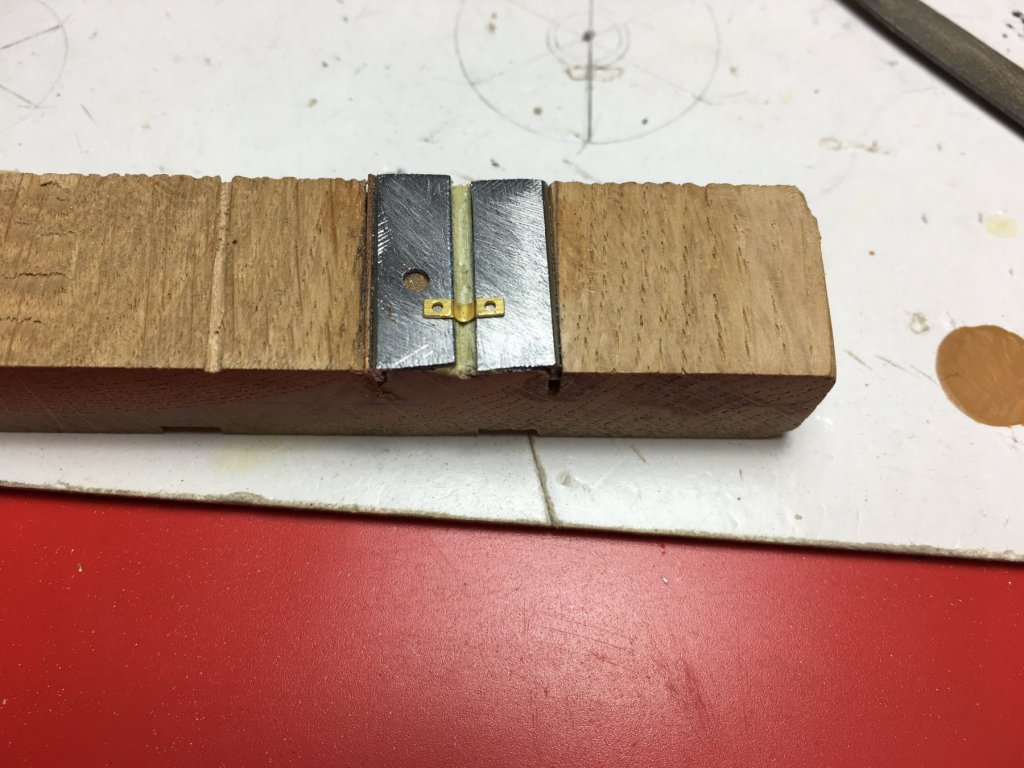
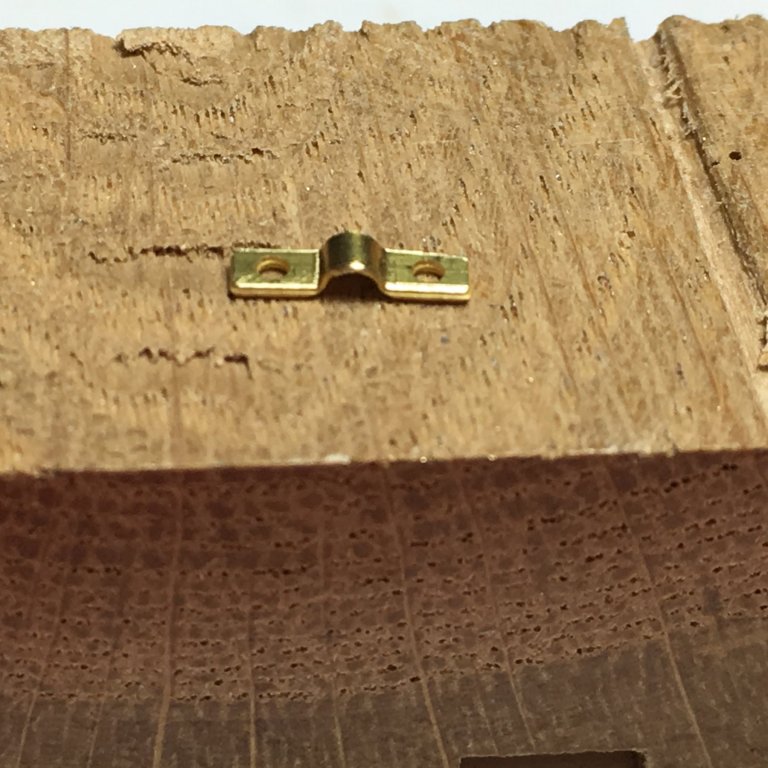
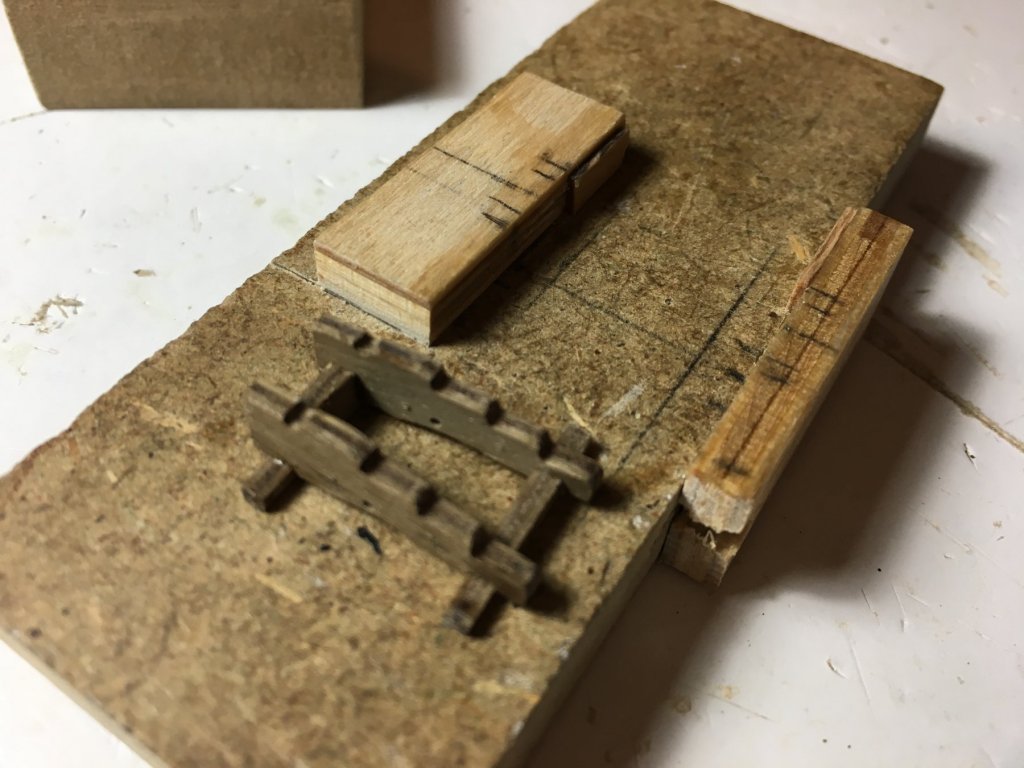
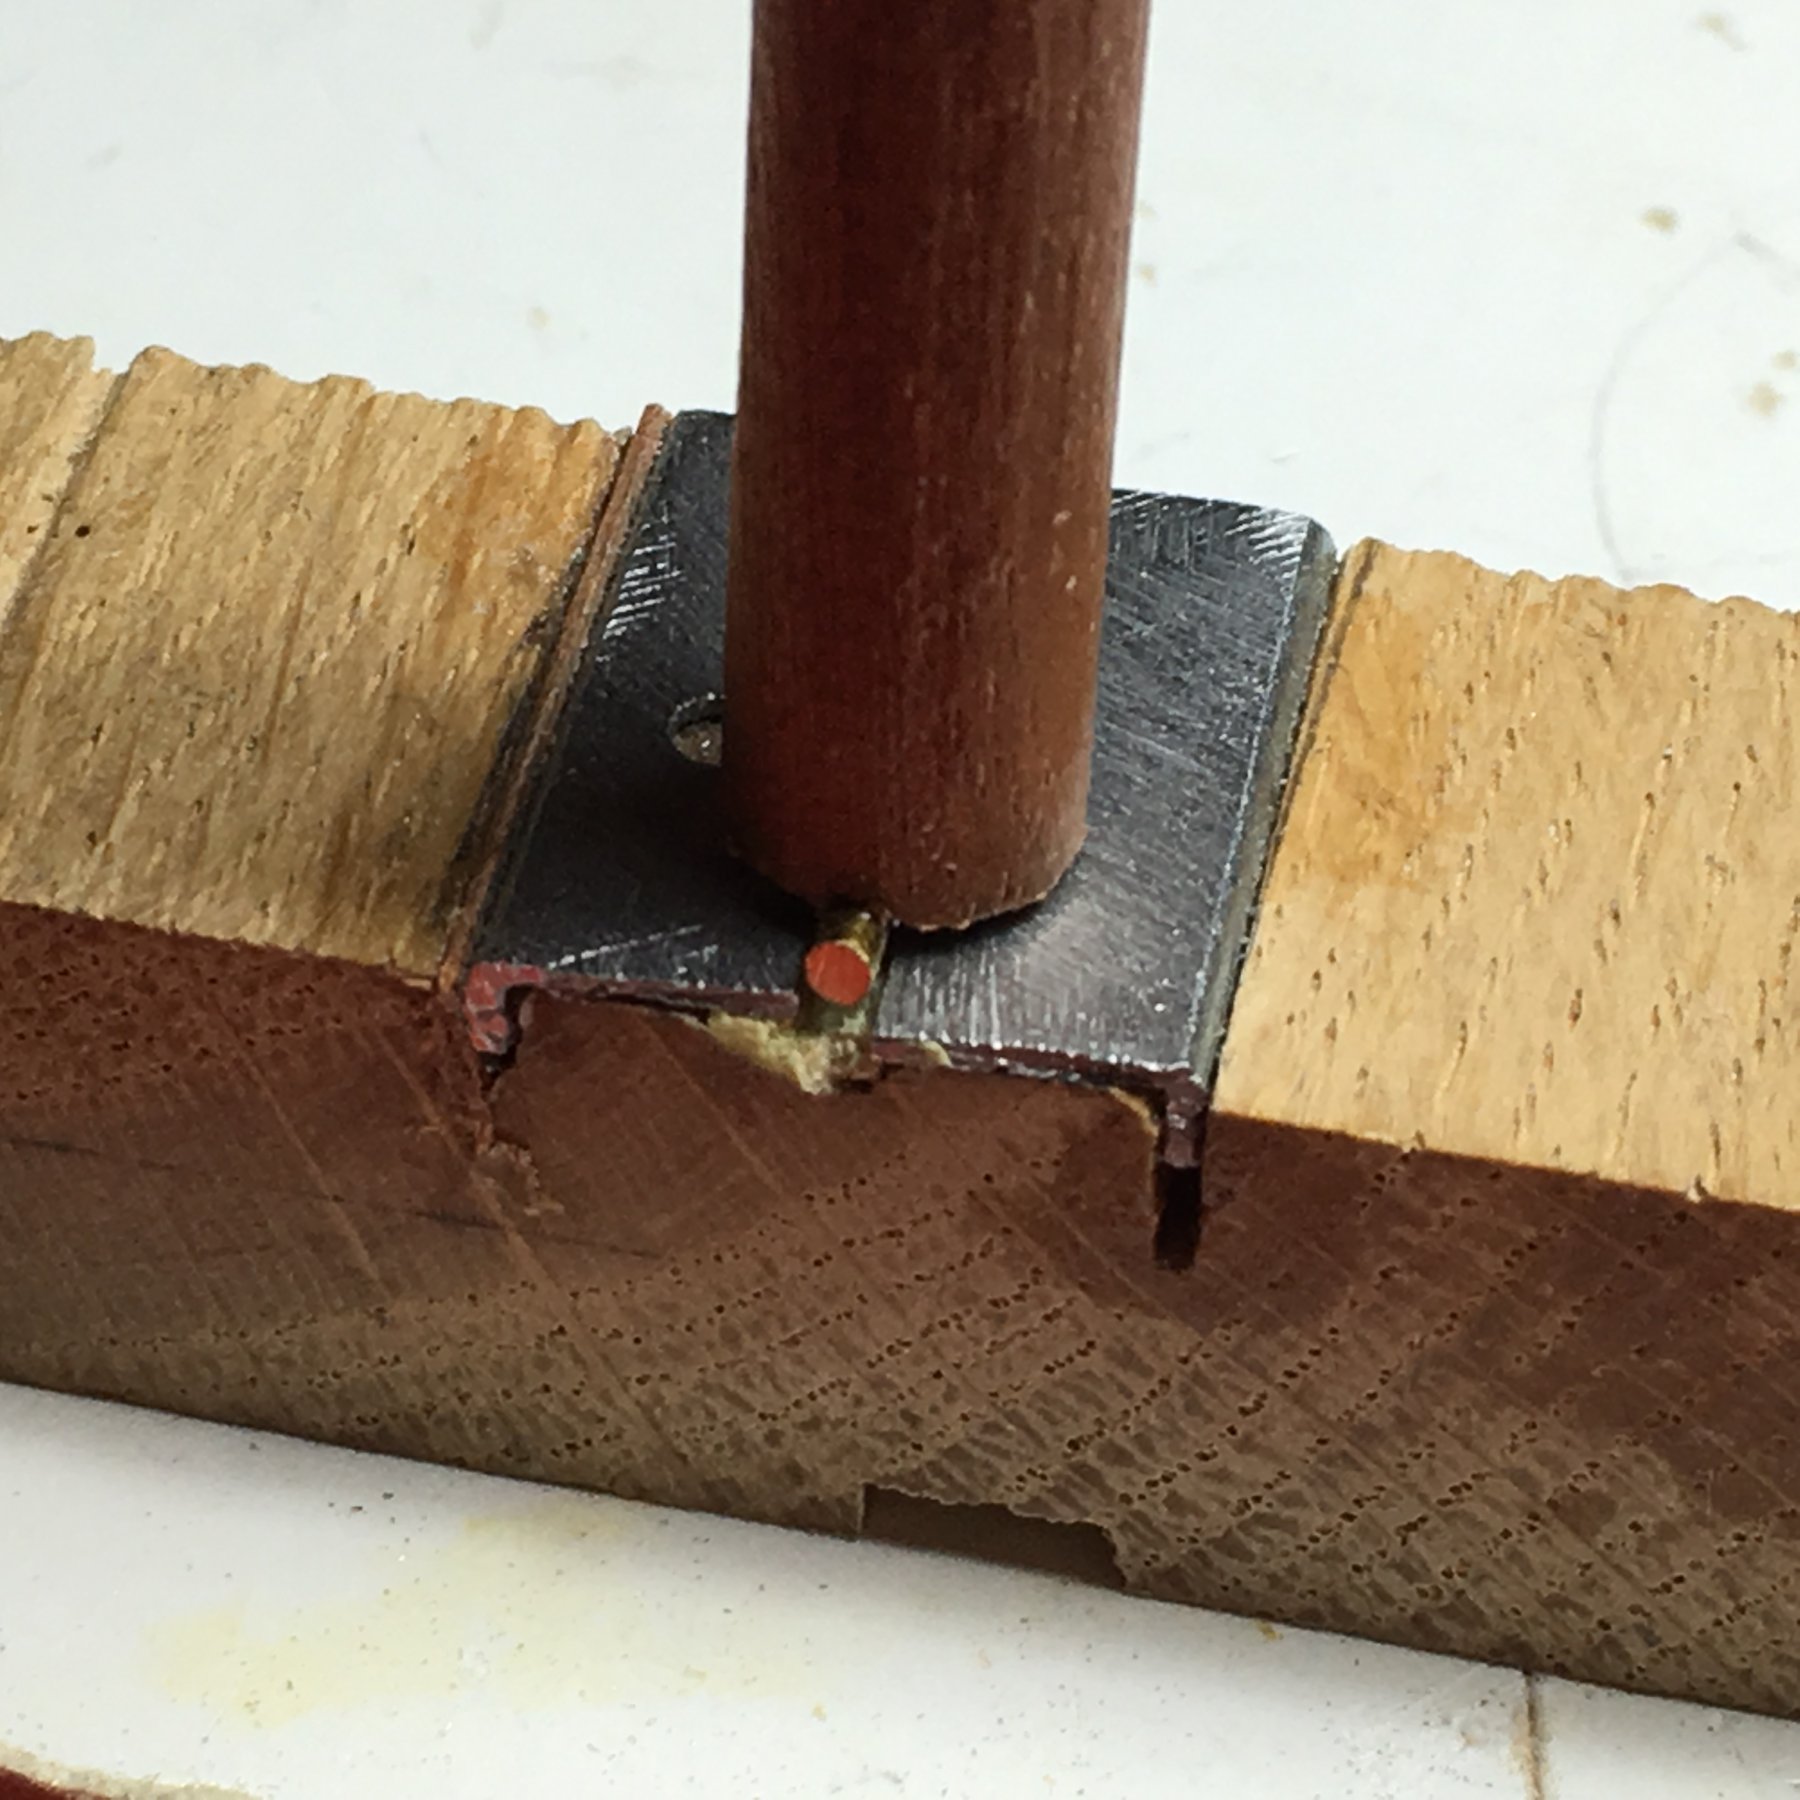
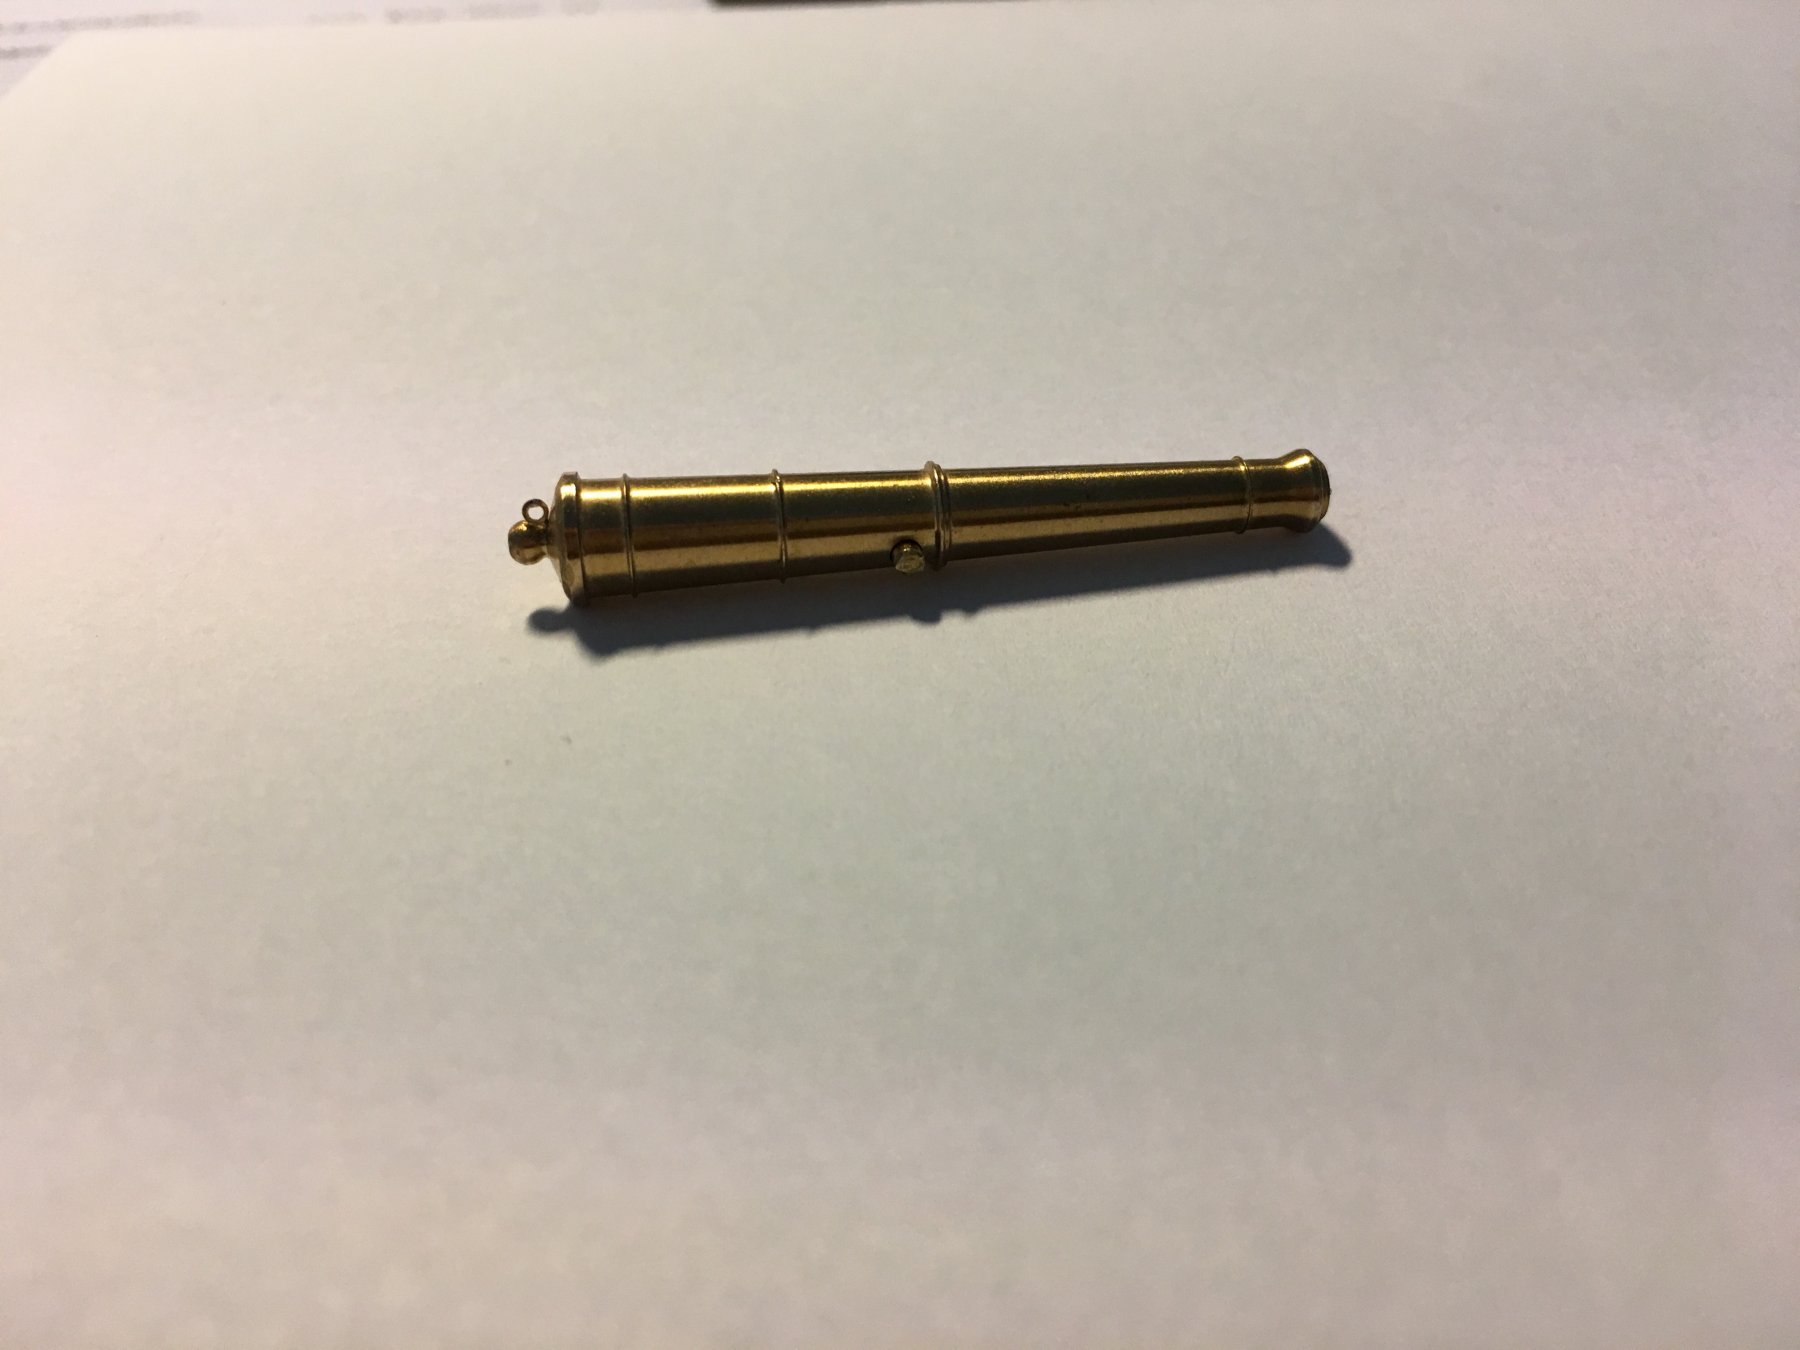
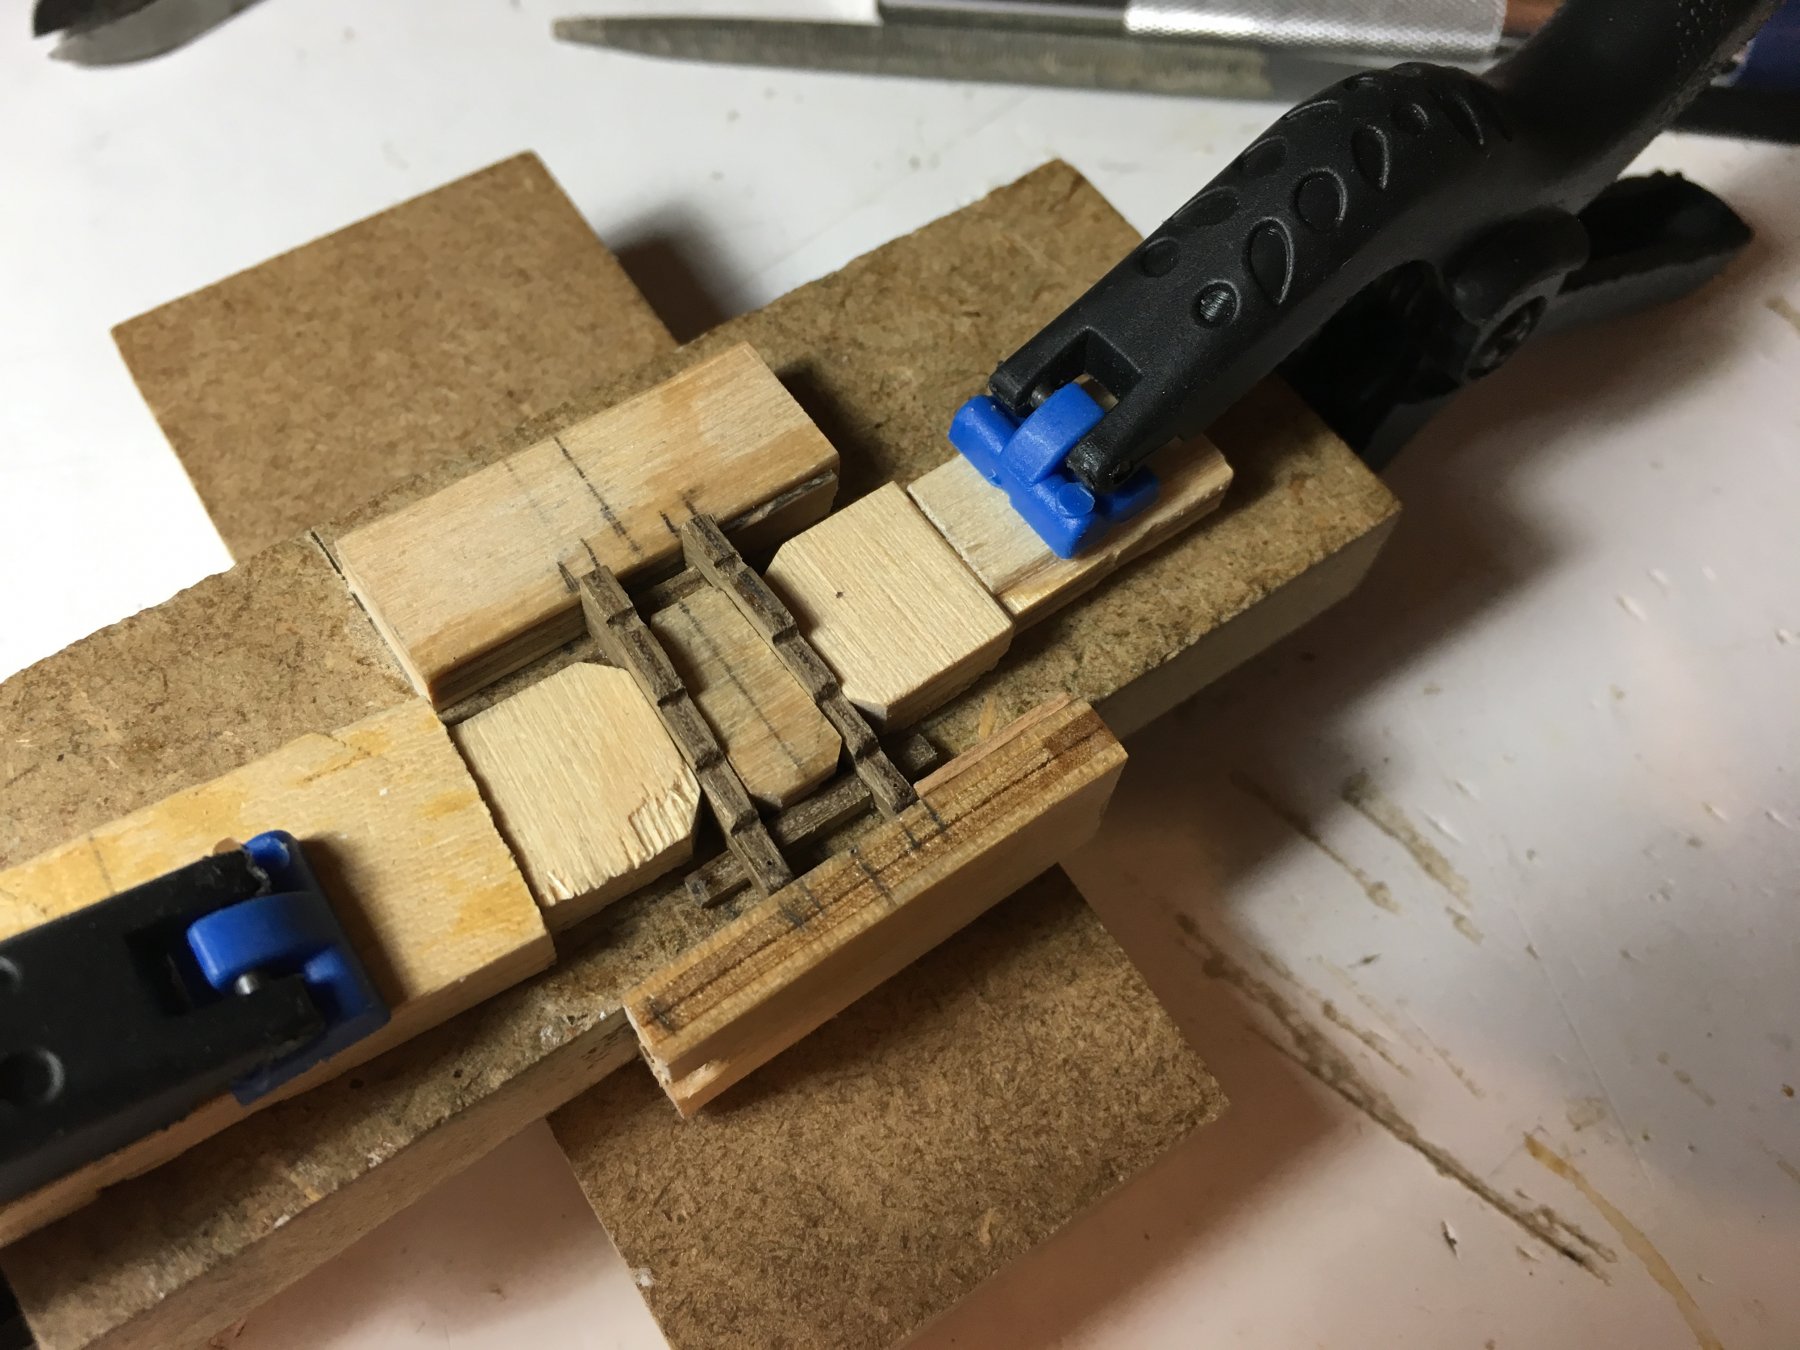
Still working on the cannons. After removing the wheels from the sheets I put some super glue on some of the wheel edges as some of them were easily splintered. Inserted them in a toothpick and sanded them together. Marked the wheel bolts and varnished them. I decided to solder the trunnions to the cannons. Since I intend to blacken the cannons I thought that any solder on the outside might give me problems when blackening so I used the following method. Grinded a small notch in the middle of the trunnion Filled it with solder, let it cool Inserted the trunnion in the cannon and heated the cannon with a gas soldering gun to melt the solder inside. Then I came to the trunnion brackets. To shape them by hand one by one was very difficult to keep them uniform and time consuming, so I thought of a jig. I found a piece of small metal angle and fitted two pieces next to each other in a piece of hard wood as shown, leaving a groove between them just a bit more then the diameter of the 1.5mm brass wire to be used for the trunnions. Took a piece of a dowel and at one end I made a small groove and glue in it a piece of the 1.5mm wire, leaving half of its diameter protruding out. Cut the trunnion bracket from the brass sheet, trim it and place it across the groove. Place the dowel with the brass rod facing down on the bracket along the groove and just give it a slight tape with a small hammer. The brackets are very thin and soft so a small tap is enough. This is the result. Quite neat and quite easy. Hopefully I will soon be putting the cannons, carriages, brackets, eyelets all together. Robert


- 527 replies
-
- 14
-
-
- caldercraft
- victory
- (and 1 more)
-
Don, Just gone through your build, beautiful work, very detailed and great skill. Robert
- 653 replies
-
- 3
-
-
- trabakul
- marisstella
- (and 1 more)
-
Hi Derek, Was wondering if you had finished the Victory!!! Robert
-
Hi Graham, Thank you very much for your suggestions, when I come to it In will let you know how it went. Robert
-
Hi Graham, cannons look great blackened. I blackened some eyelets using a a product called 'Krick', but didn't have much luck. The instructions with the bottle says that it should blacken after about 30 minutes. They do blacken but after over a day dipped in the solution. Now I managed to get a bottle of Birchwood Brass Black but I haven't tried it yet. After blackening do you varnish them or treat them with something else or just leave them as is? Robert
-
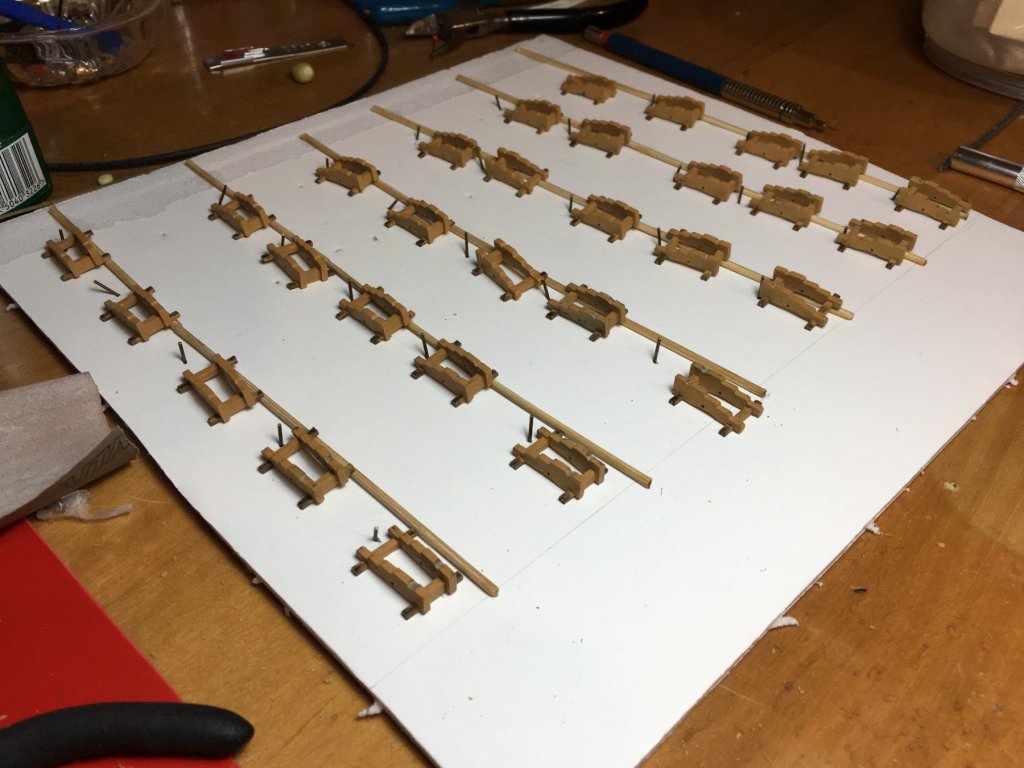
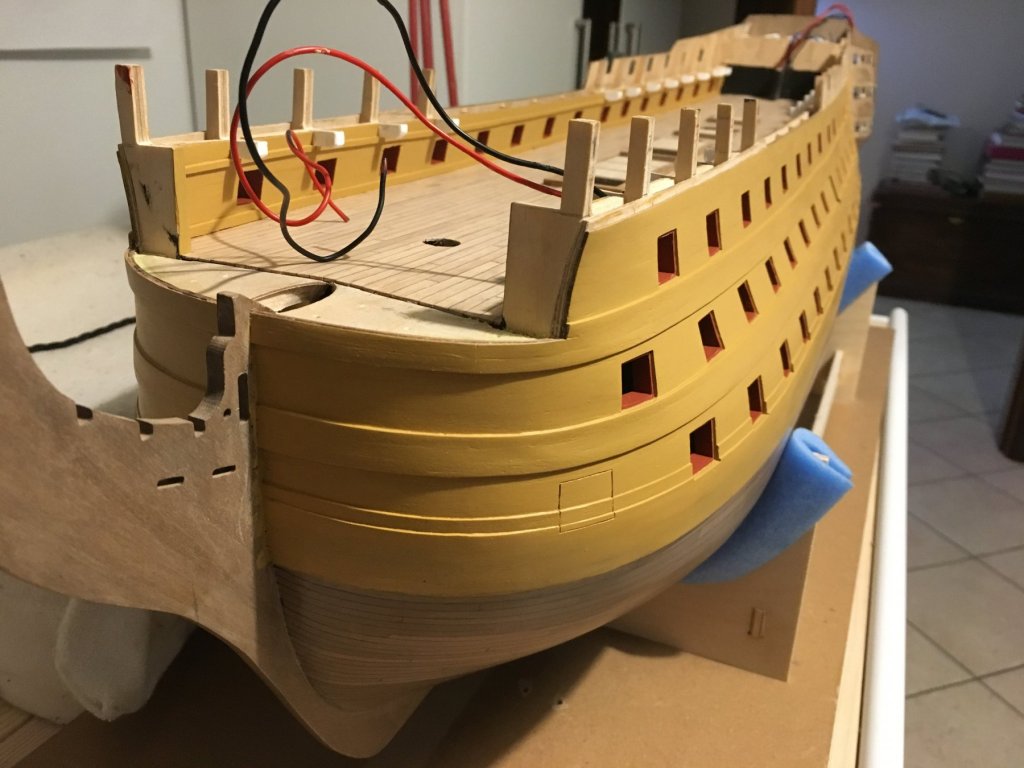
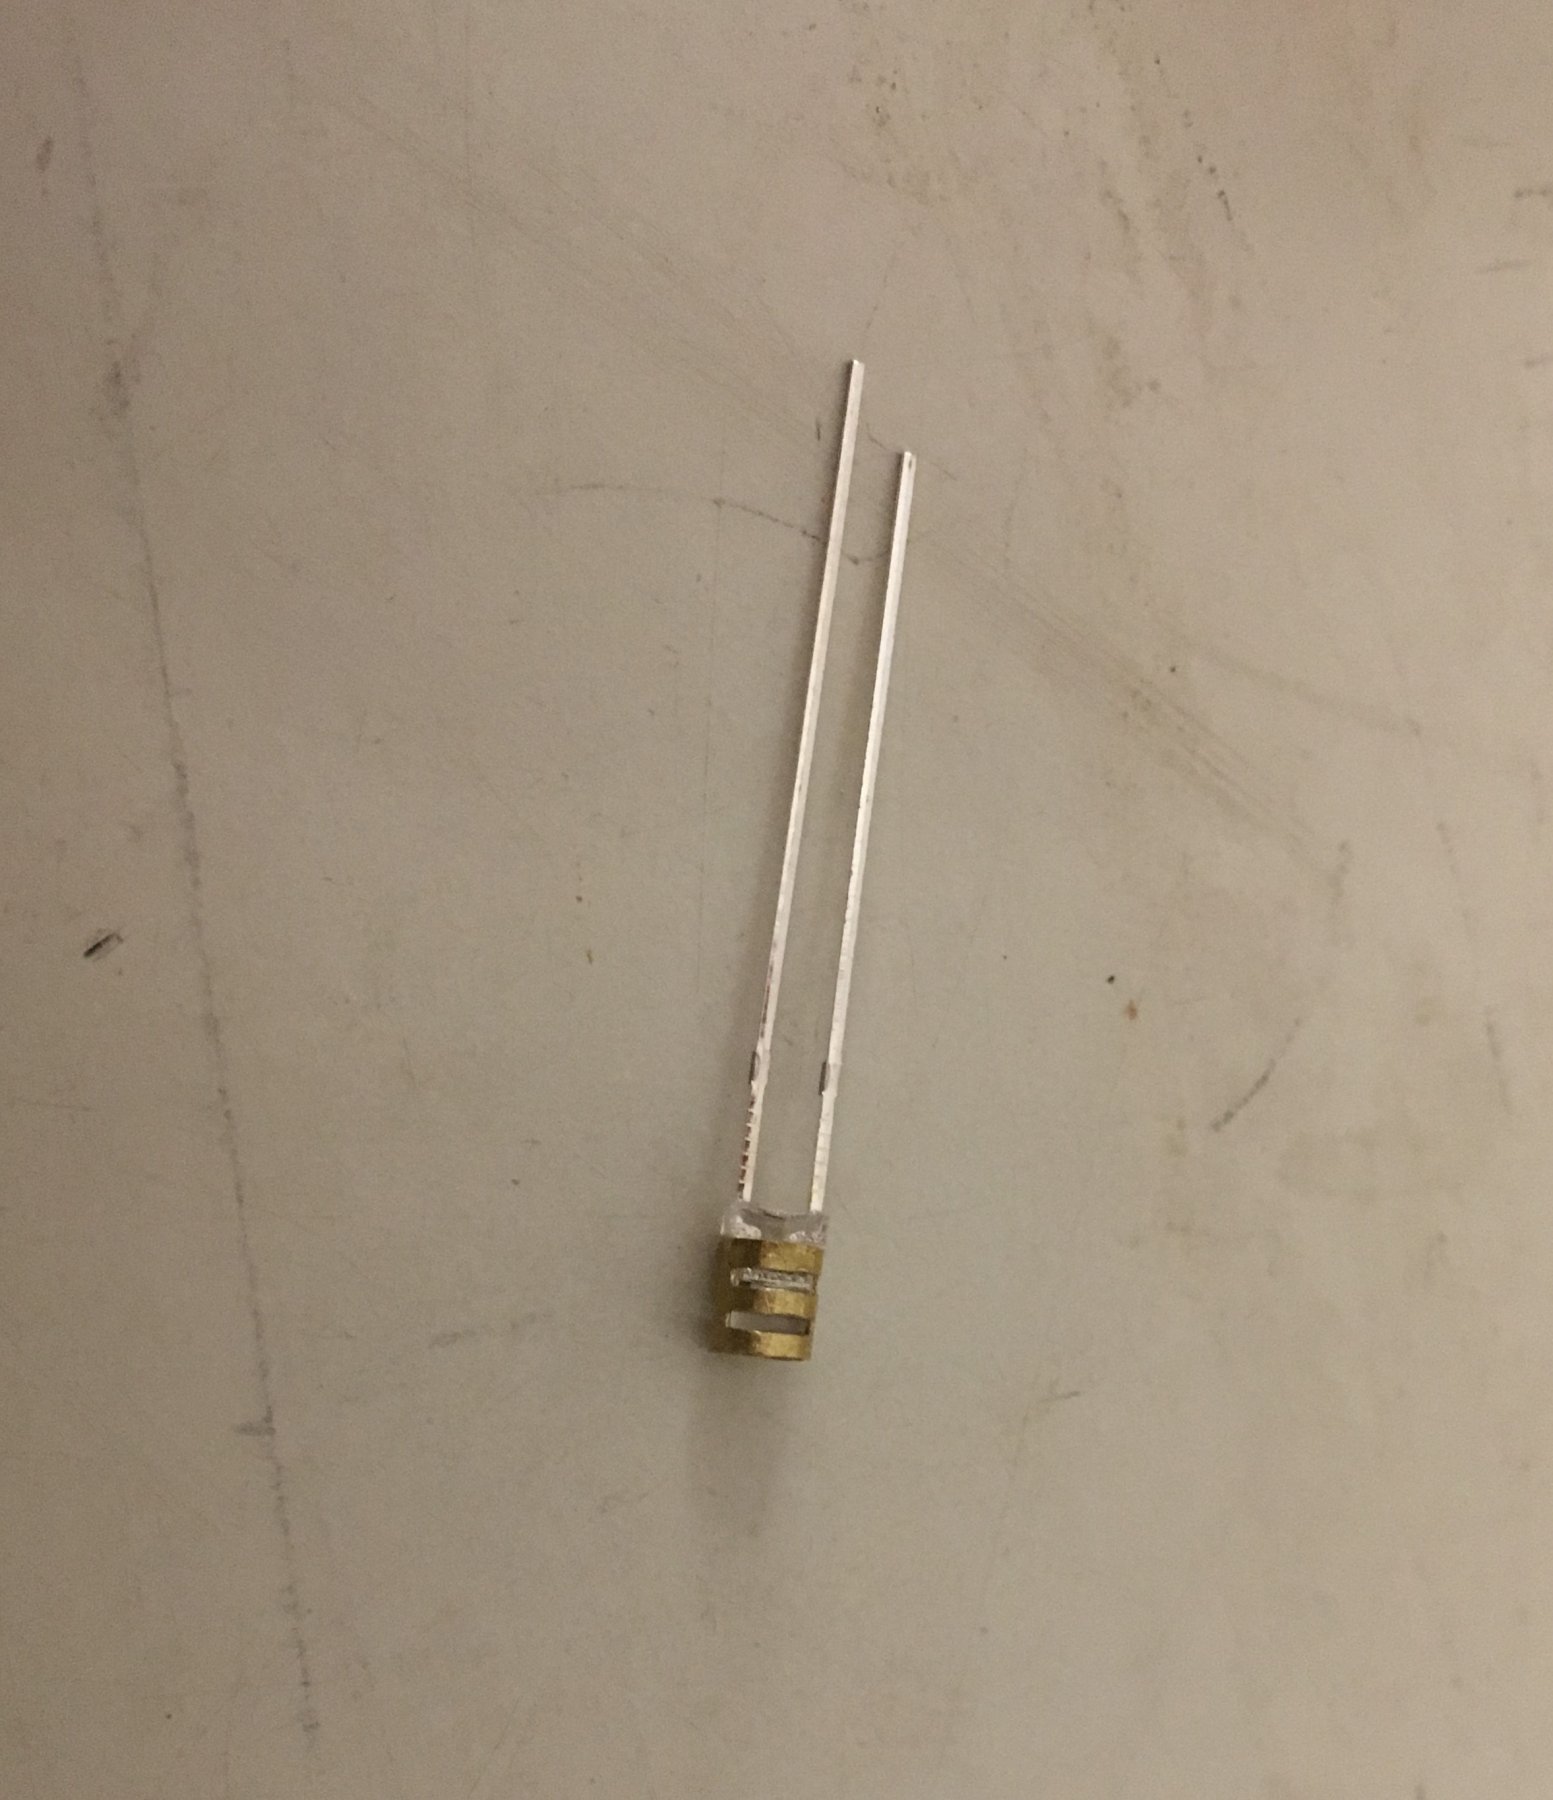
Thank you Michael for your nice comments, I took a lot of ideas from other builders in this forum, so I'm glad that sometimes I can be of a little help to others. I am preparing items that go on the upper gundeck. There is a lot of work on this deck that unfortunately will hardly show once the quarterdeck is fitted. My only consolation is that since I am fitting the lanterns they might show a bit more, hopefully!!! This is the finished lantern. I prepared a few of them which I will install and wire just before I fit the quarterdeck. I decided to add the breach rings on the cannons. I am using the eyelets (480) supplied with the kit. Drilling the holes on the cannons was quite straight forward, I thought it was going to be more awkward due to the very small size of the eyelets. All cannons are drill but I still need to fit the eyelets. Also started work on the carriages. Removed all upper gun deck carriage parts from sheet, cleaned and prepared the holes for the eyelets to go on them. I think it is much easier to drill them now then when the carriage is assembled. This is the jig I made to assemble them, quite crude but worked really well. Painting the carriages. Given them two coats, still another coat to go. I intend to blacken the cannons after I fit them with the breach rings. Hope all goes well with the blackening. Robert


- 527 replies
-
- 7
-
-
- caldercraft
- victory
- (and 1 more)
-
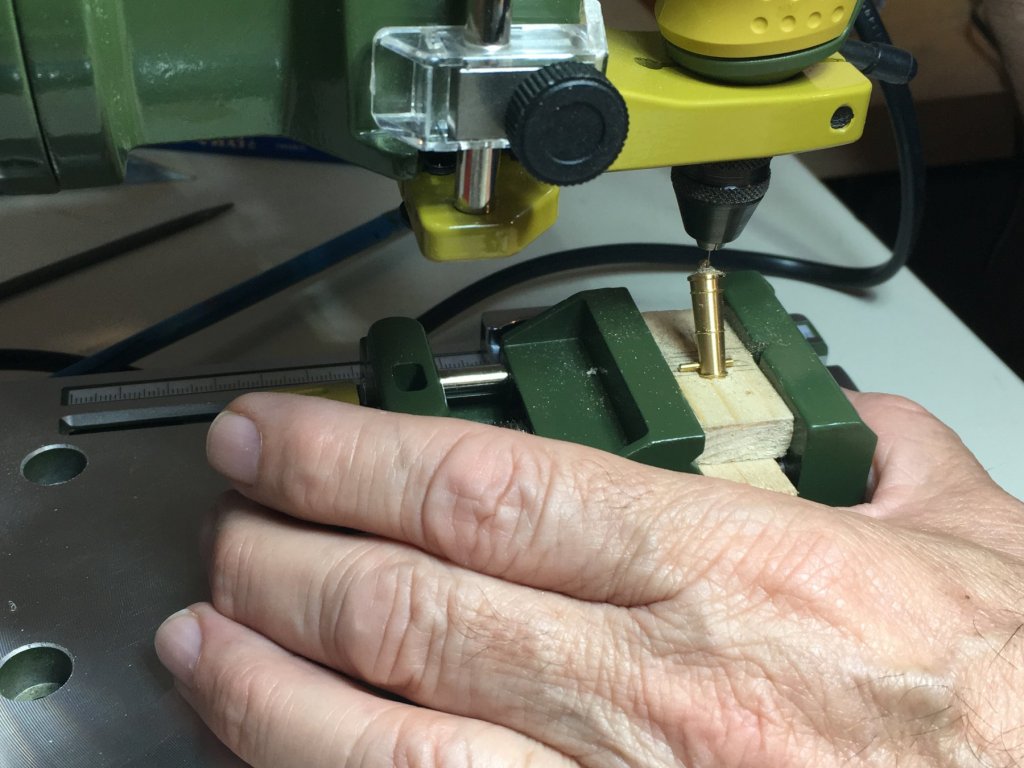
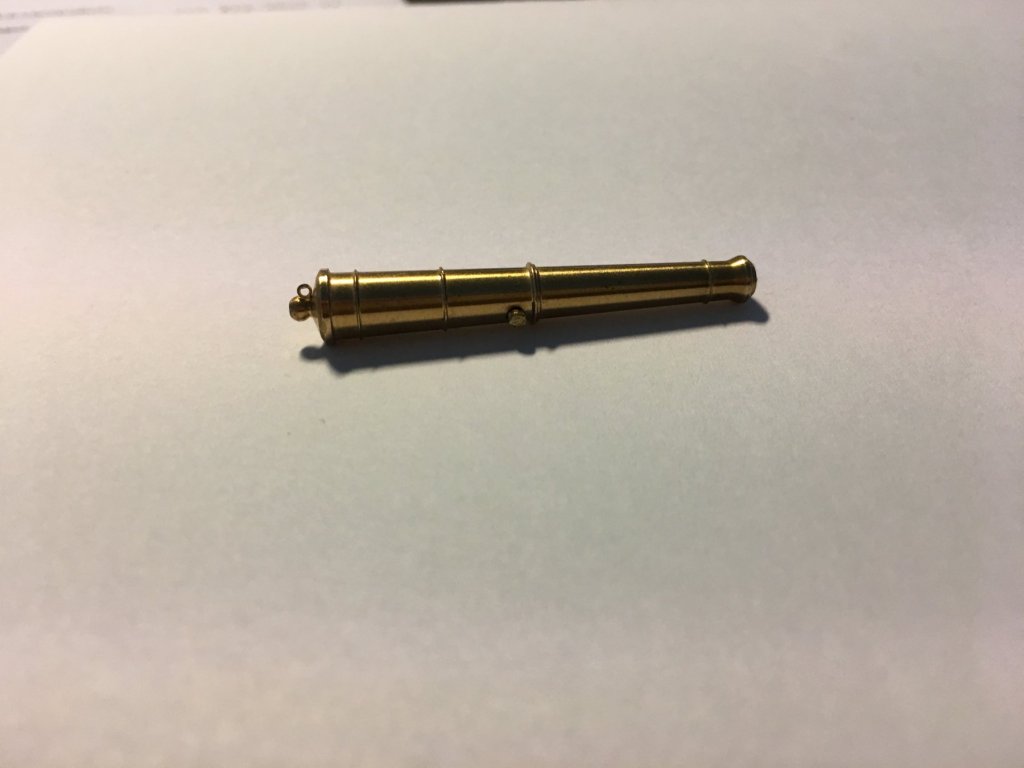
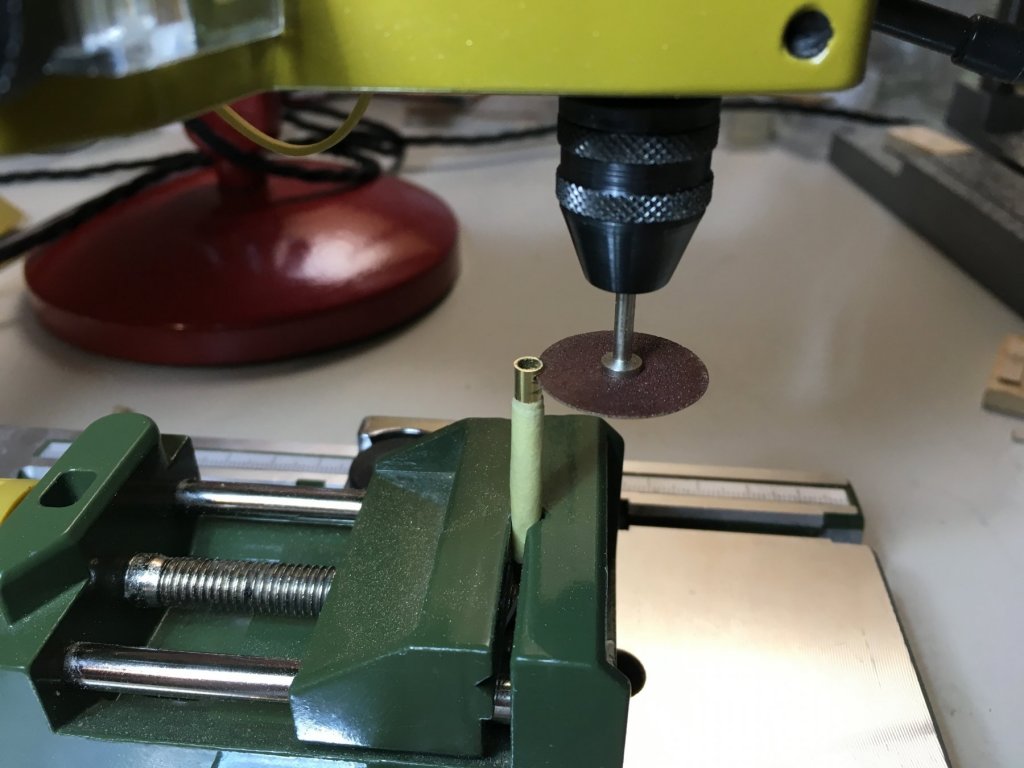
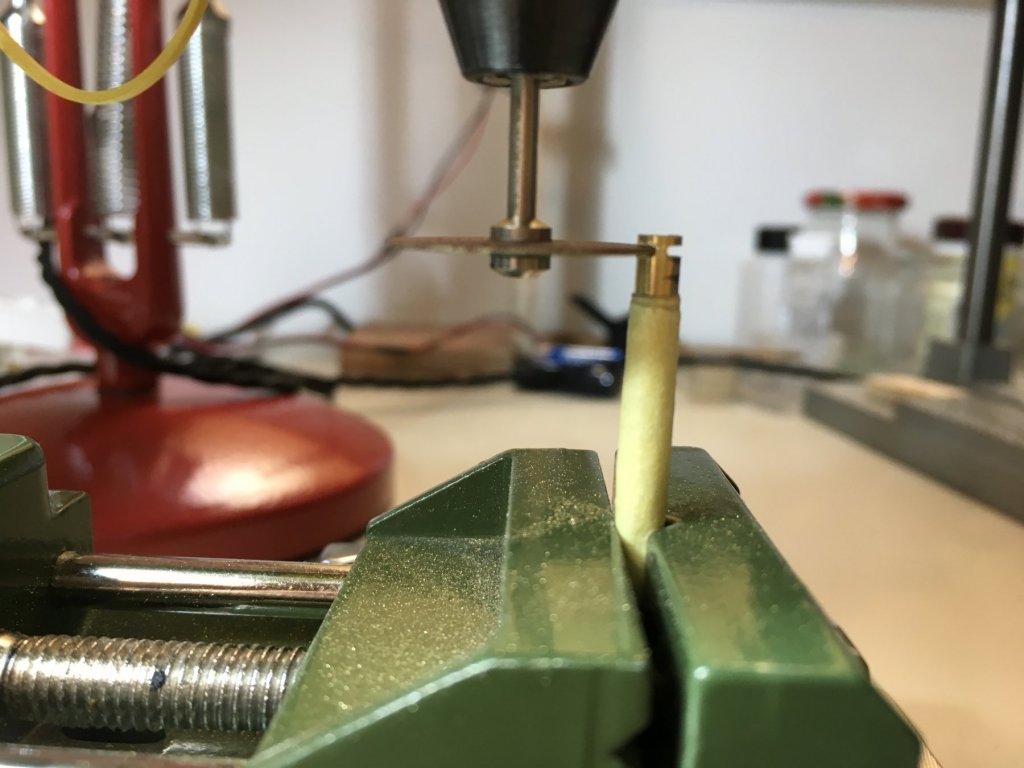
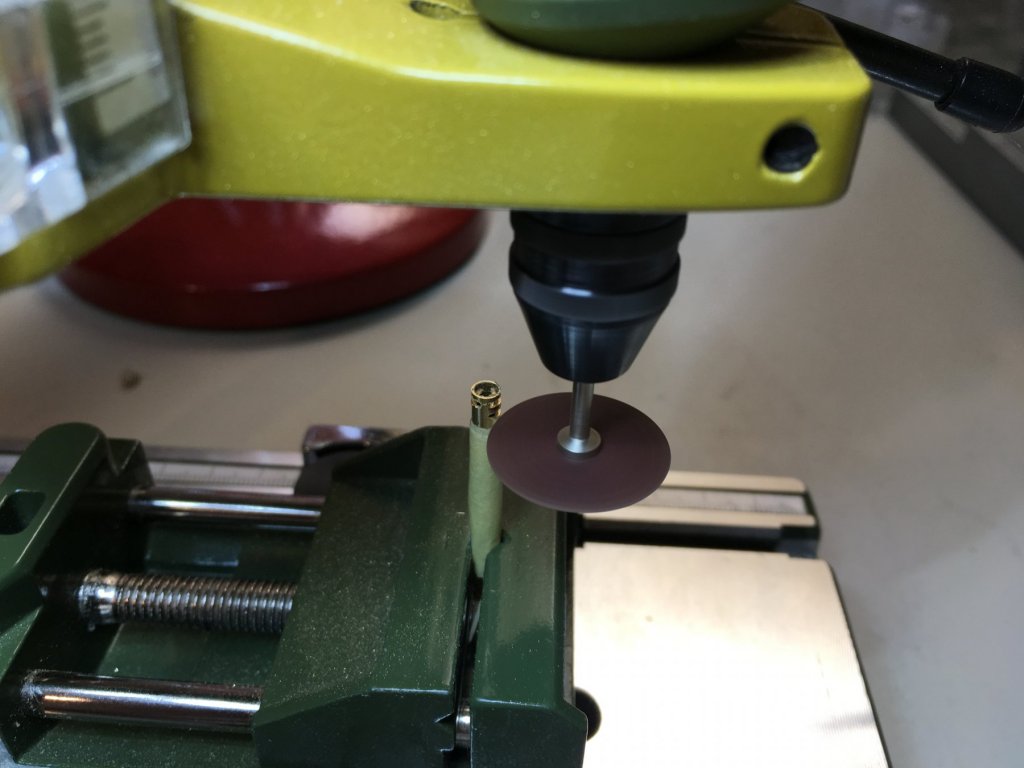
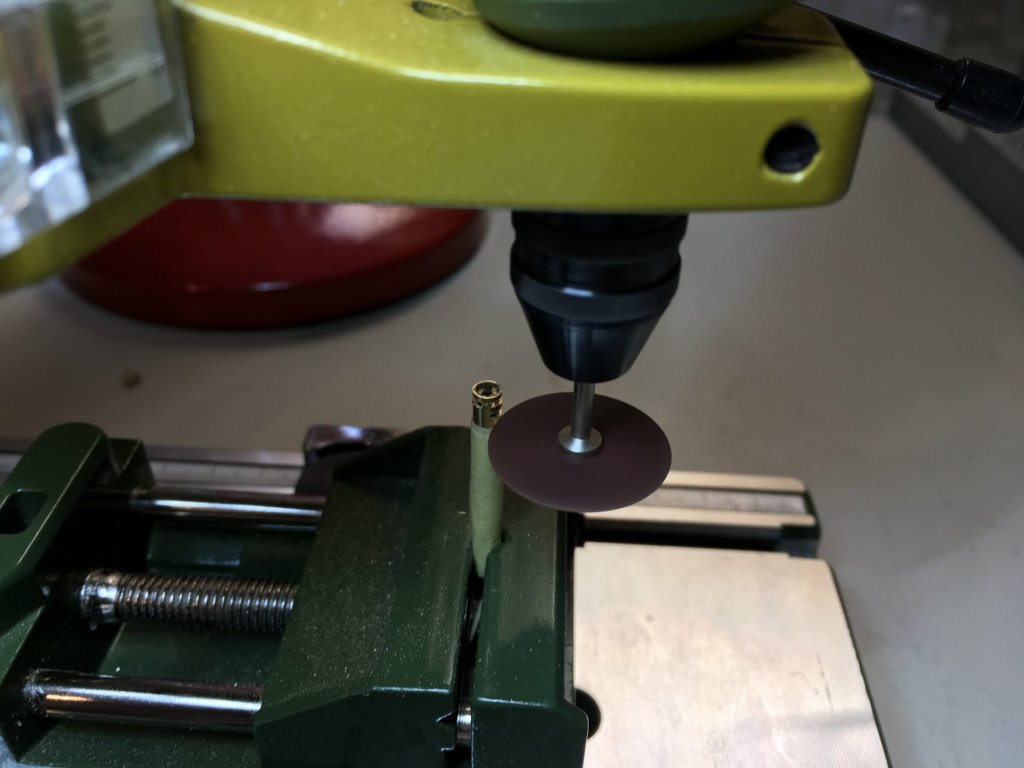
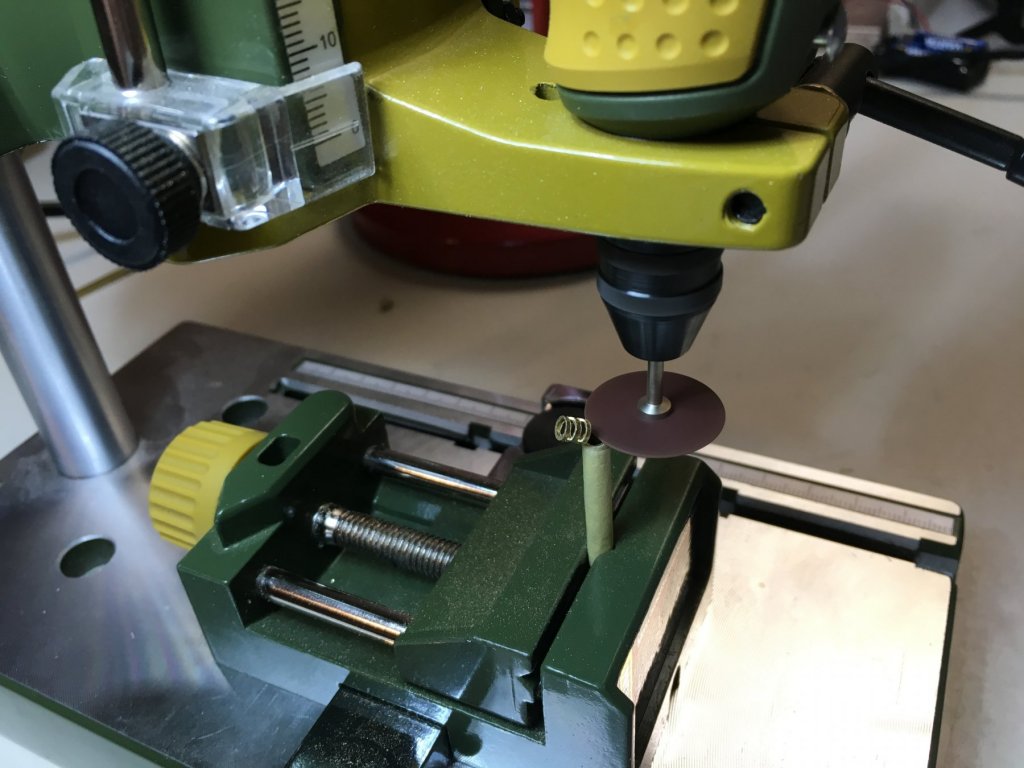
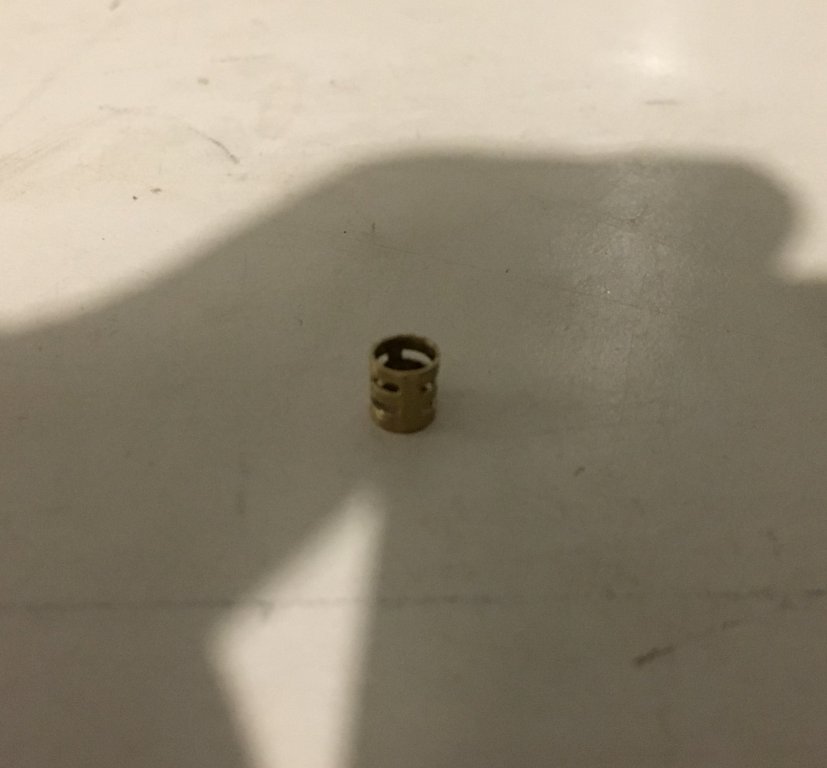
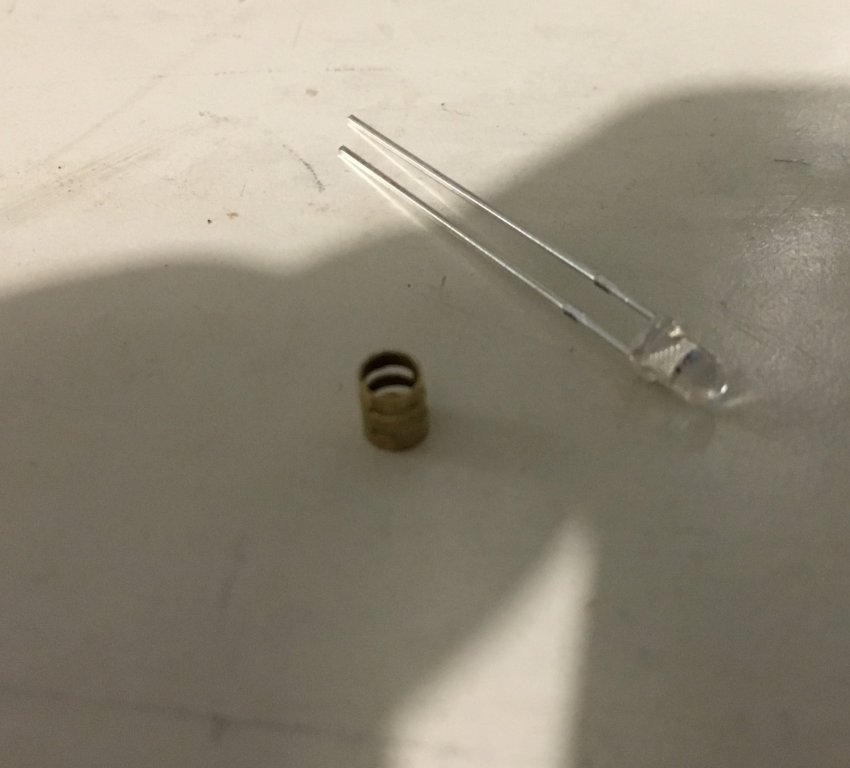
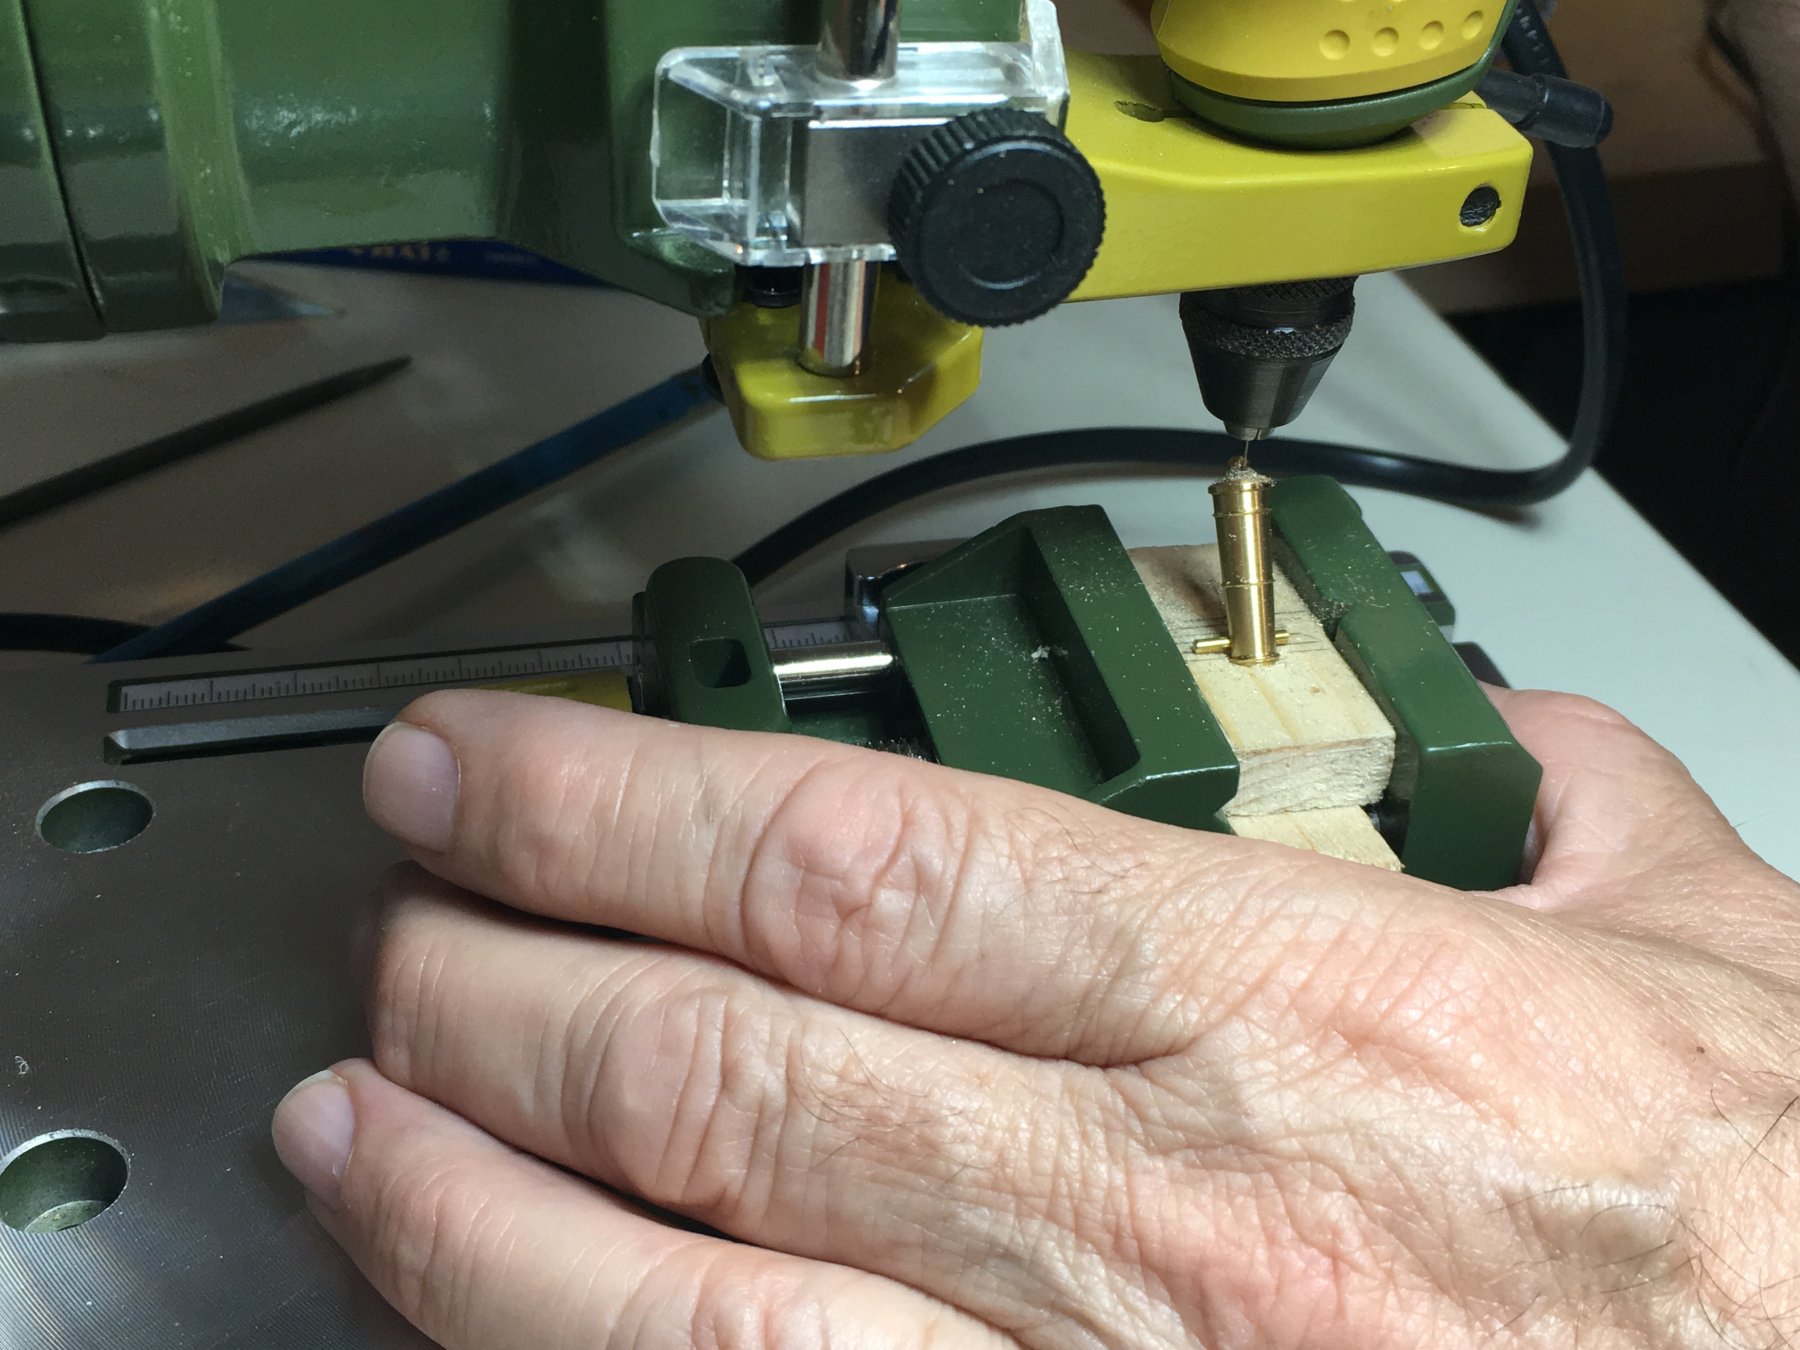
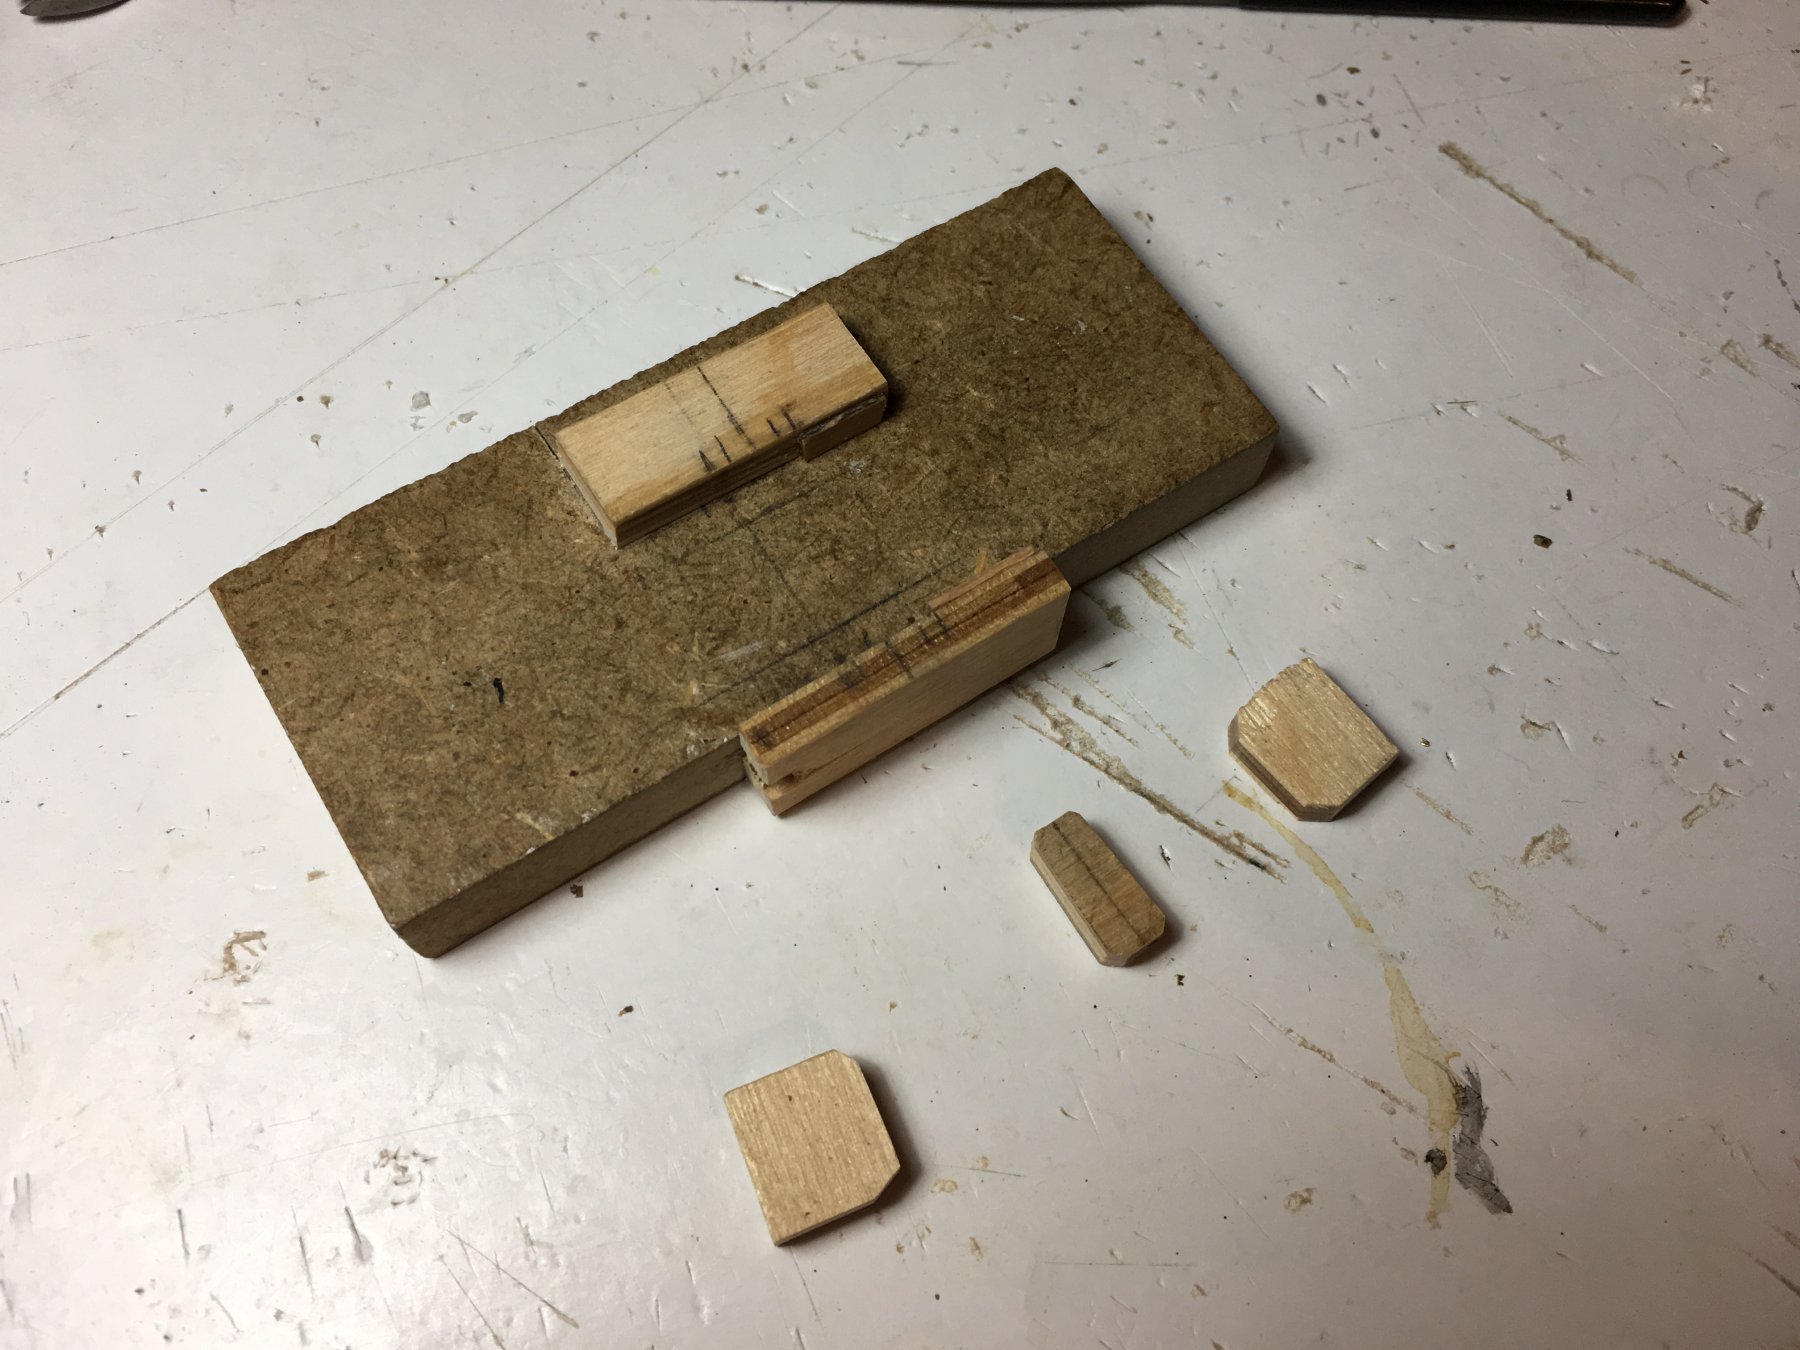
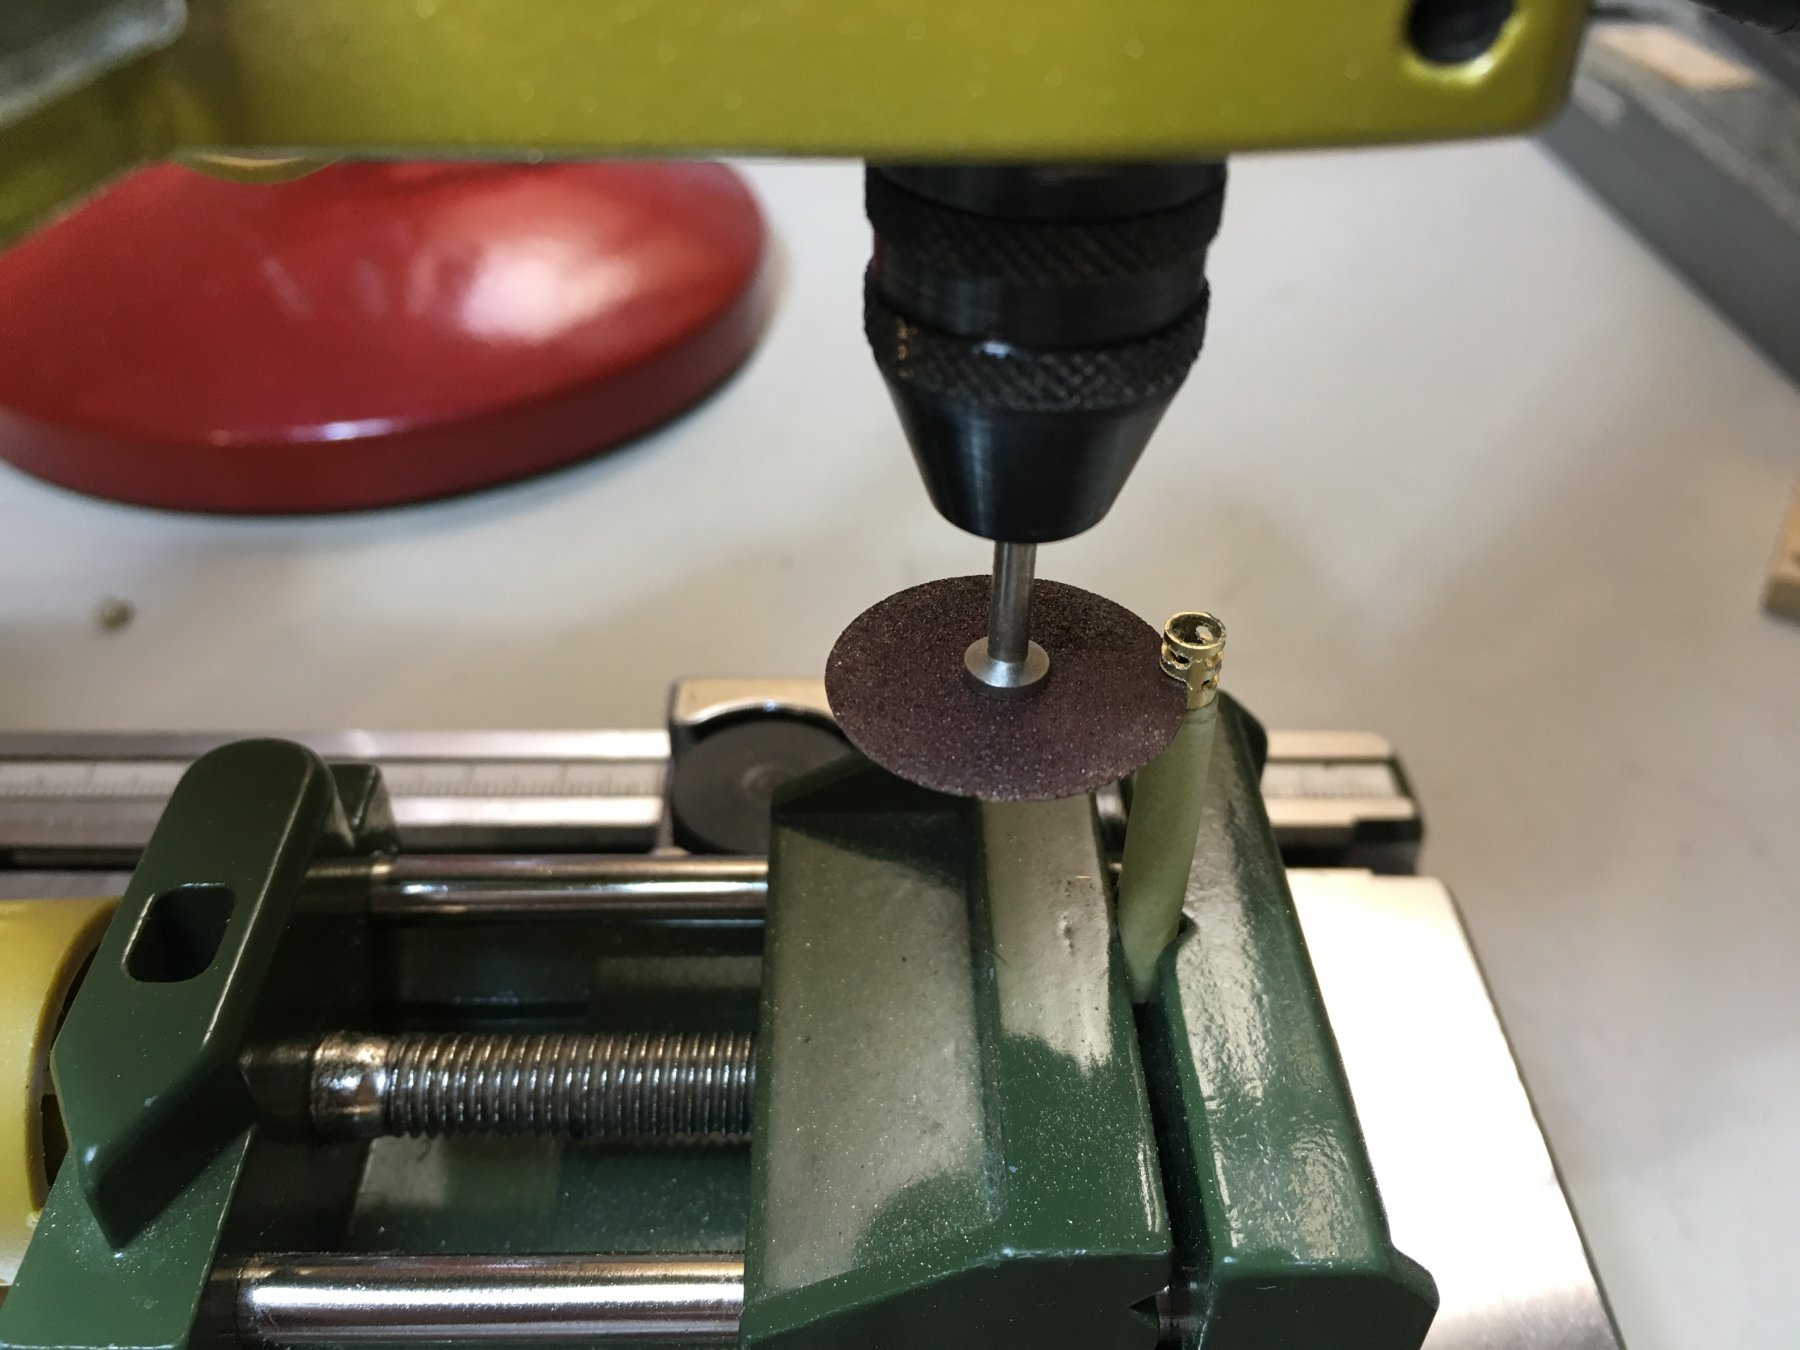
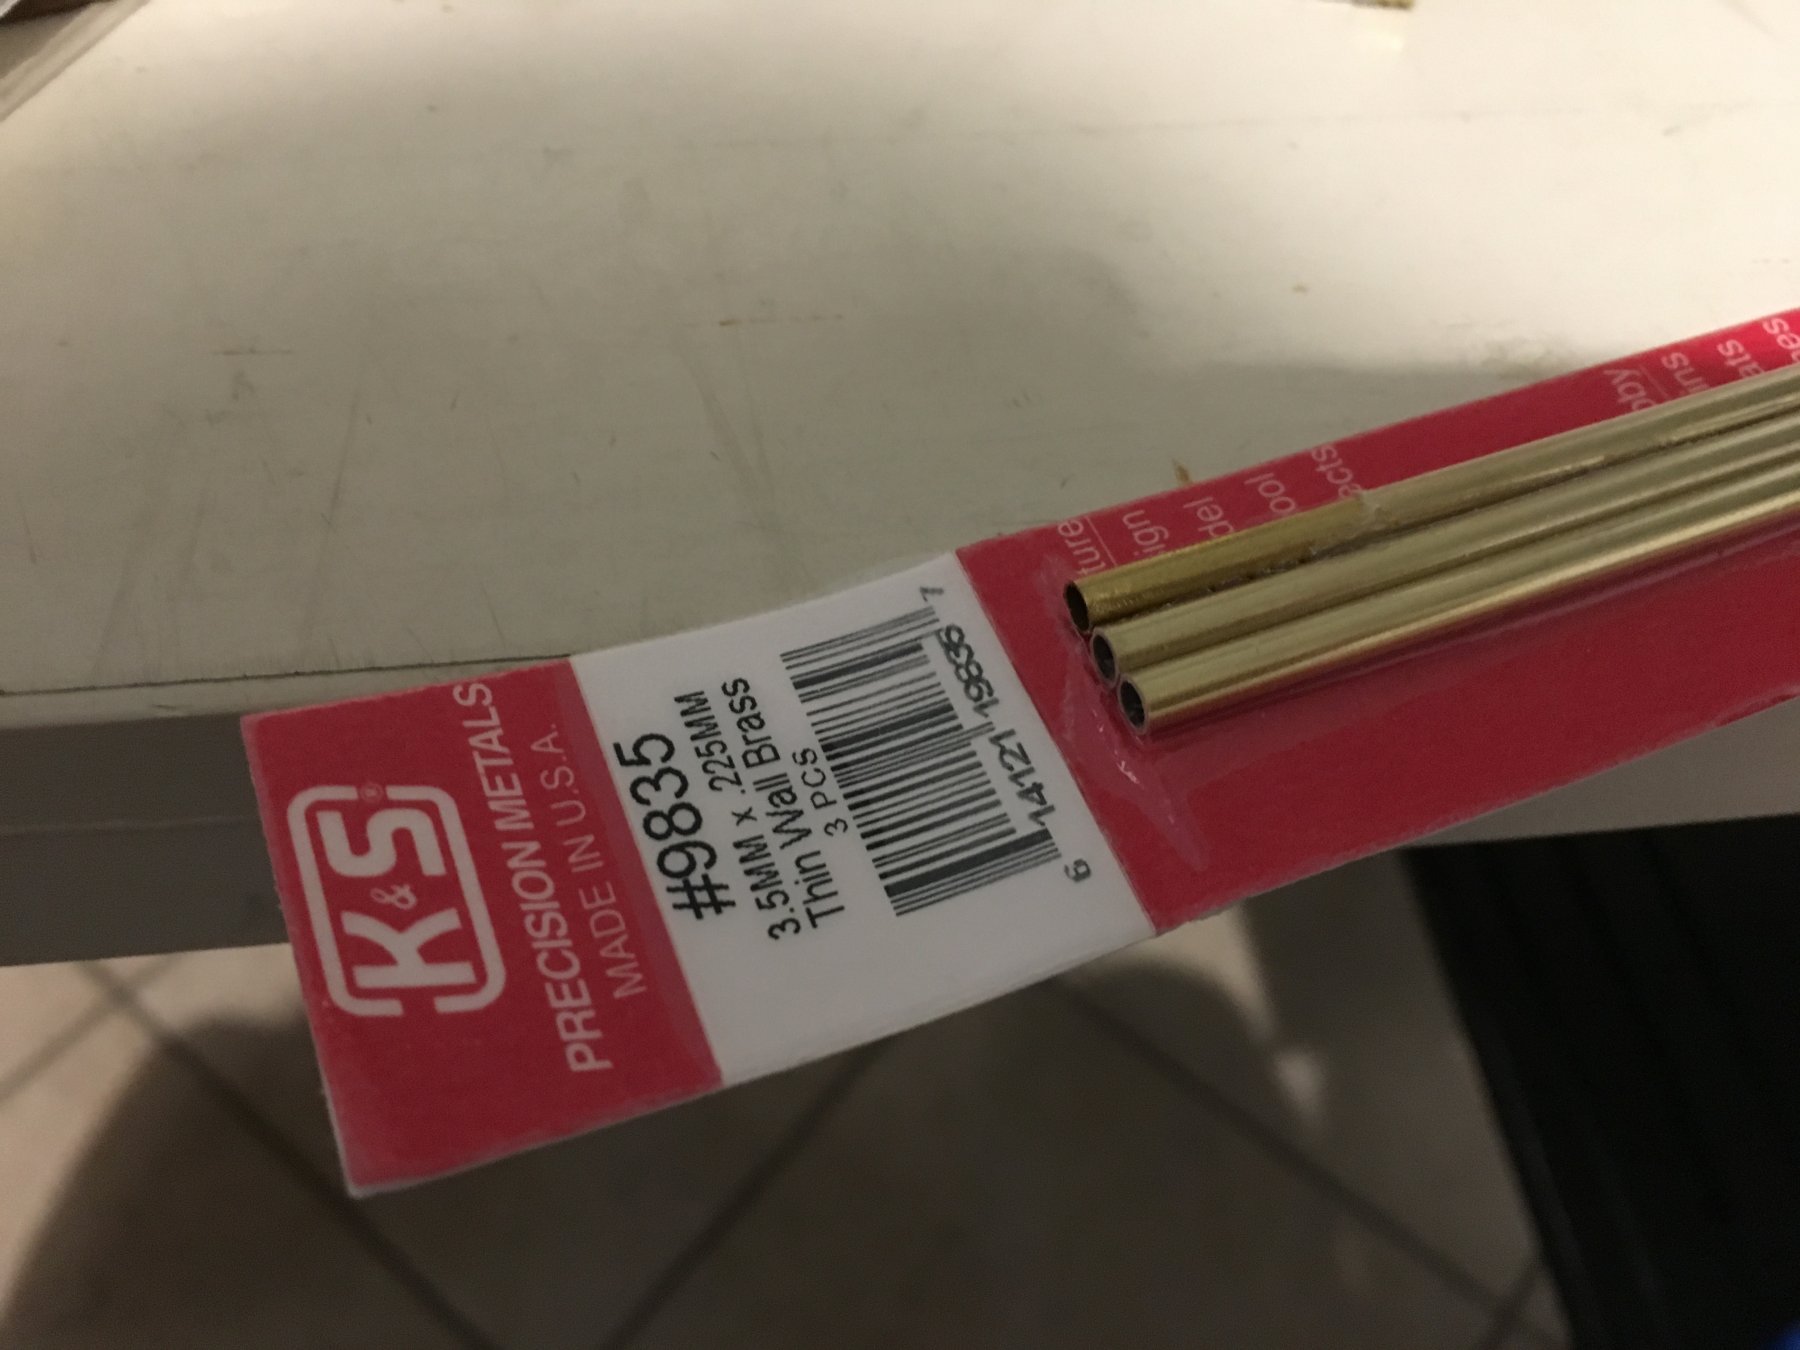
Thank you Michael, and thank you for the likes. Another small update. I started work on the canons for the Upper gundeck, but I decided to add the breach at the back of the canons, tried one of the eyelets supplied with the kit, but I think they are just a bit too small. I ordered some eyelets, just a bit larger to try them. I will put up photos when I receive them and fit them. Whilst waiting for the new eyelets to arrive I started some work on the lanterns I am putting on the same gundeck. This is the way I am making them. I am working them on my Proxxon drill and stand I bought lately, found it really good. I had put up a post about this lantern earlier, but at that time I did not have the Proxxon drill and stand, I had cut the slots with a saw blade. This way it is much quicker and more accurate. First 'cut' in the brass tube Second 'Cut' Third 'Cut' Fourth 'Cut' Cut Off Clean Try Fit I will make a few more of them, quite quick to make, then I will paint them black, seal the bottom and finish the top. Robert


- 527 replies
-
- 10
-
-
- caldercraft
- victory
- (and 1 more)
-
Great work Michael, very neat planking and precise. Robert
-
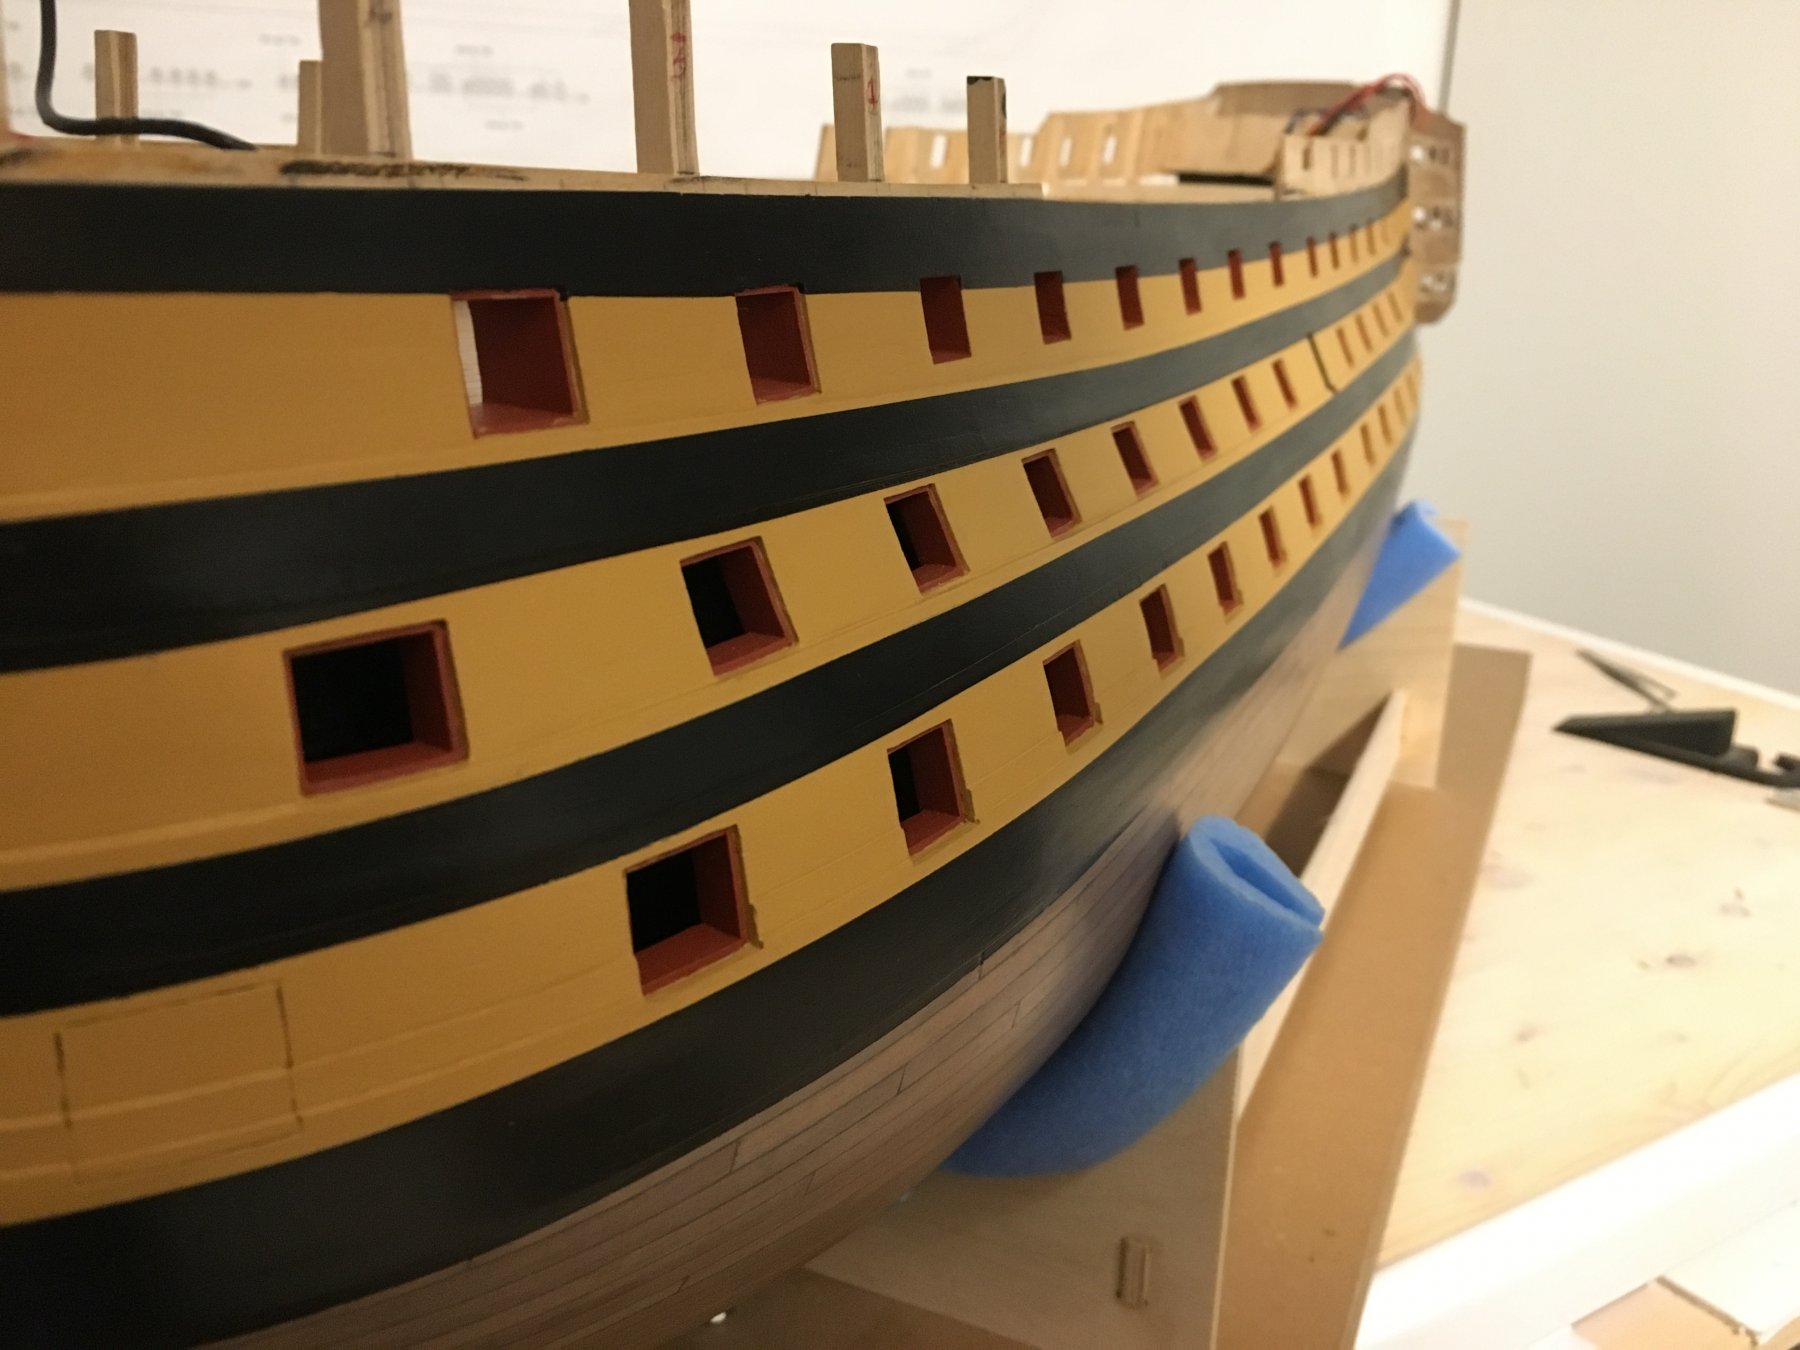
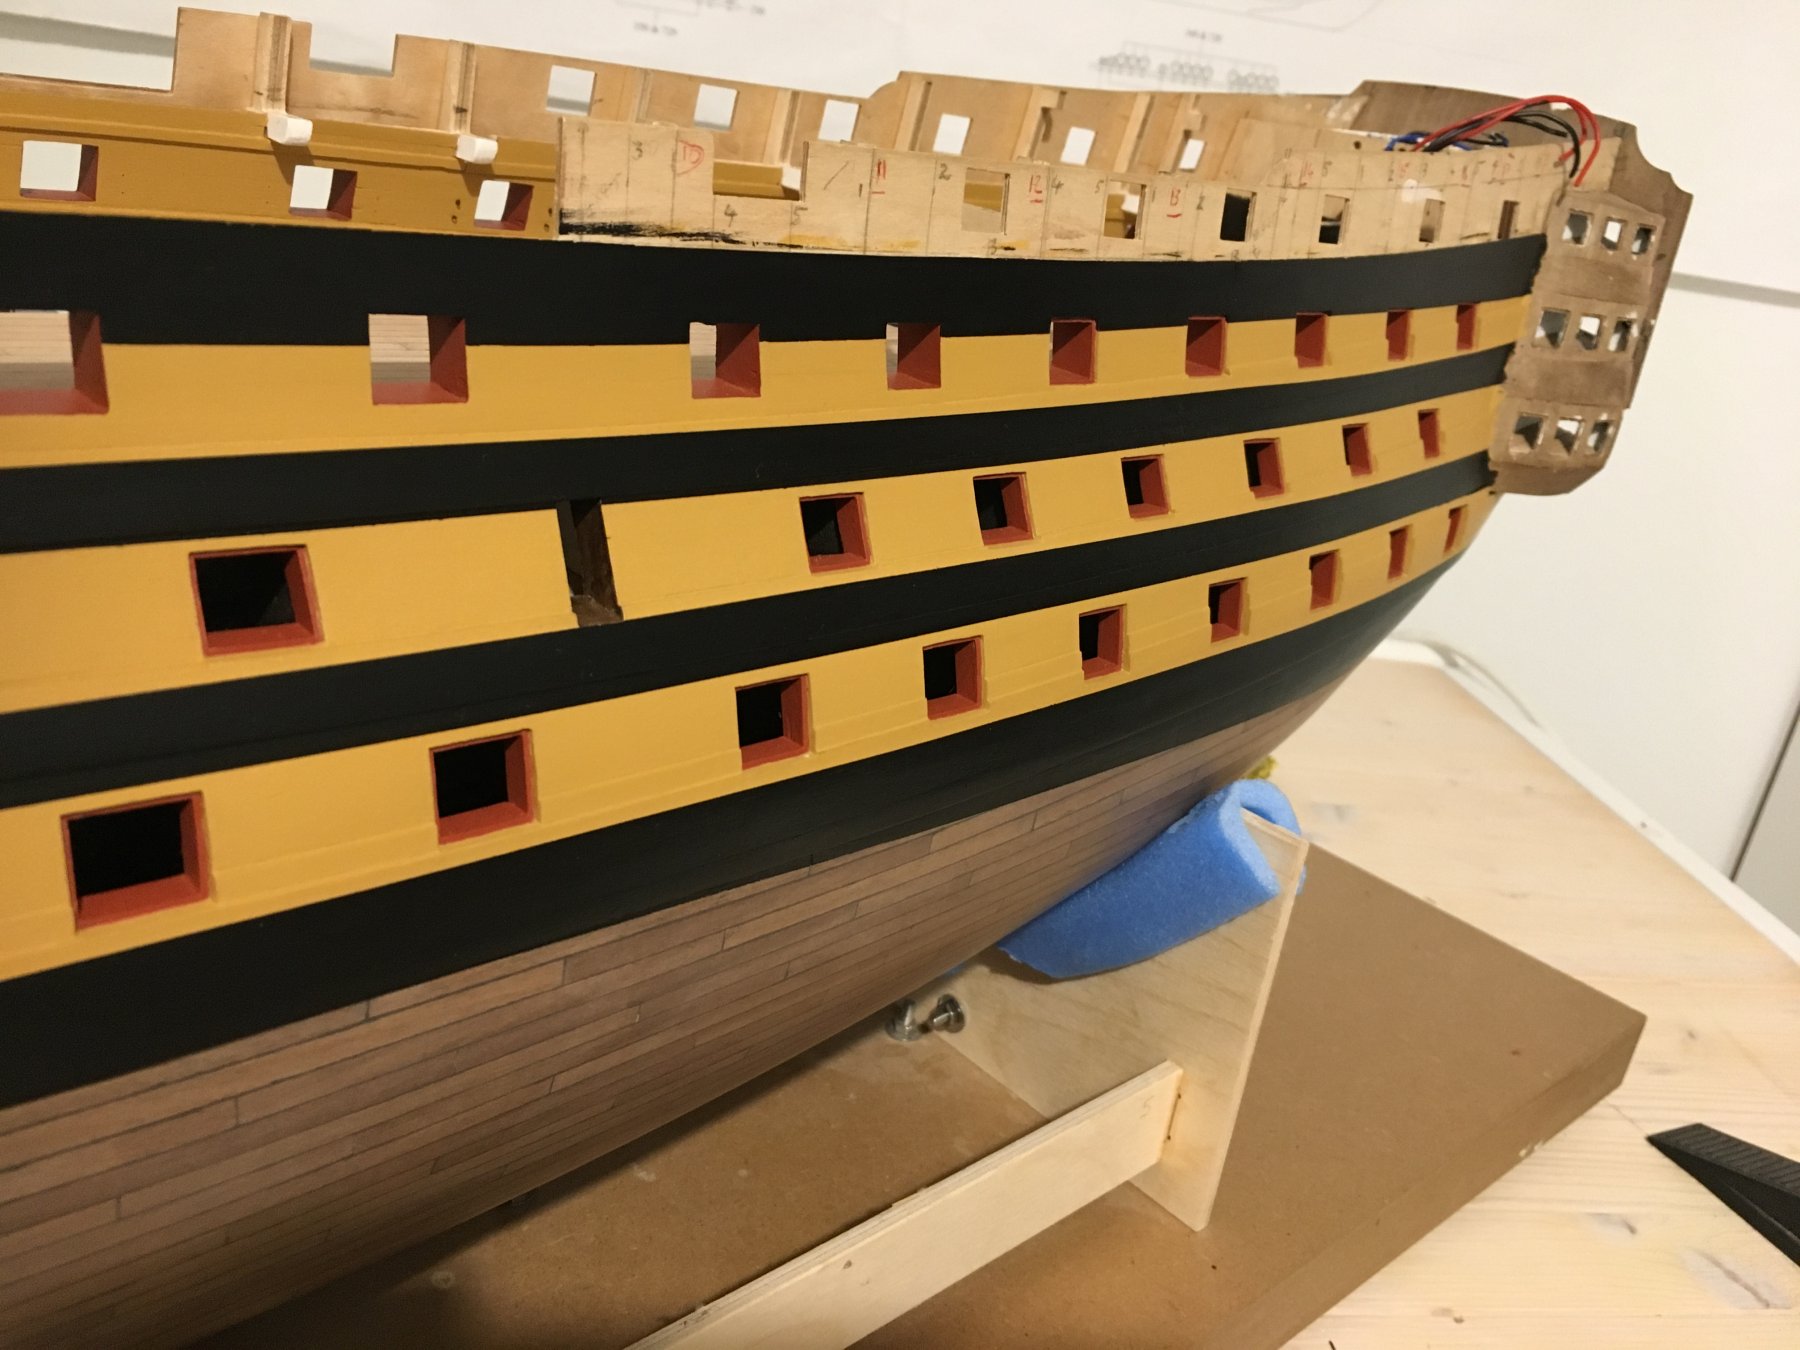
Thank you for your nice comment Michael. And thank you for the likes. I have another small update. Today I finished the black bands on the side of the hull. Robert


- 527 replies
-
- 11
-
-
- caldercraft
- victory
- (and 1 more)
-
Really nice work Michael, very detailed. I'd like to build a cross section kit but first I have to finish the Victory I am currently building. Your build inspires me even more to build one. Robert
-
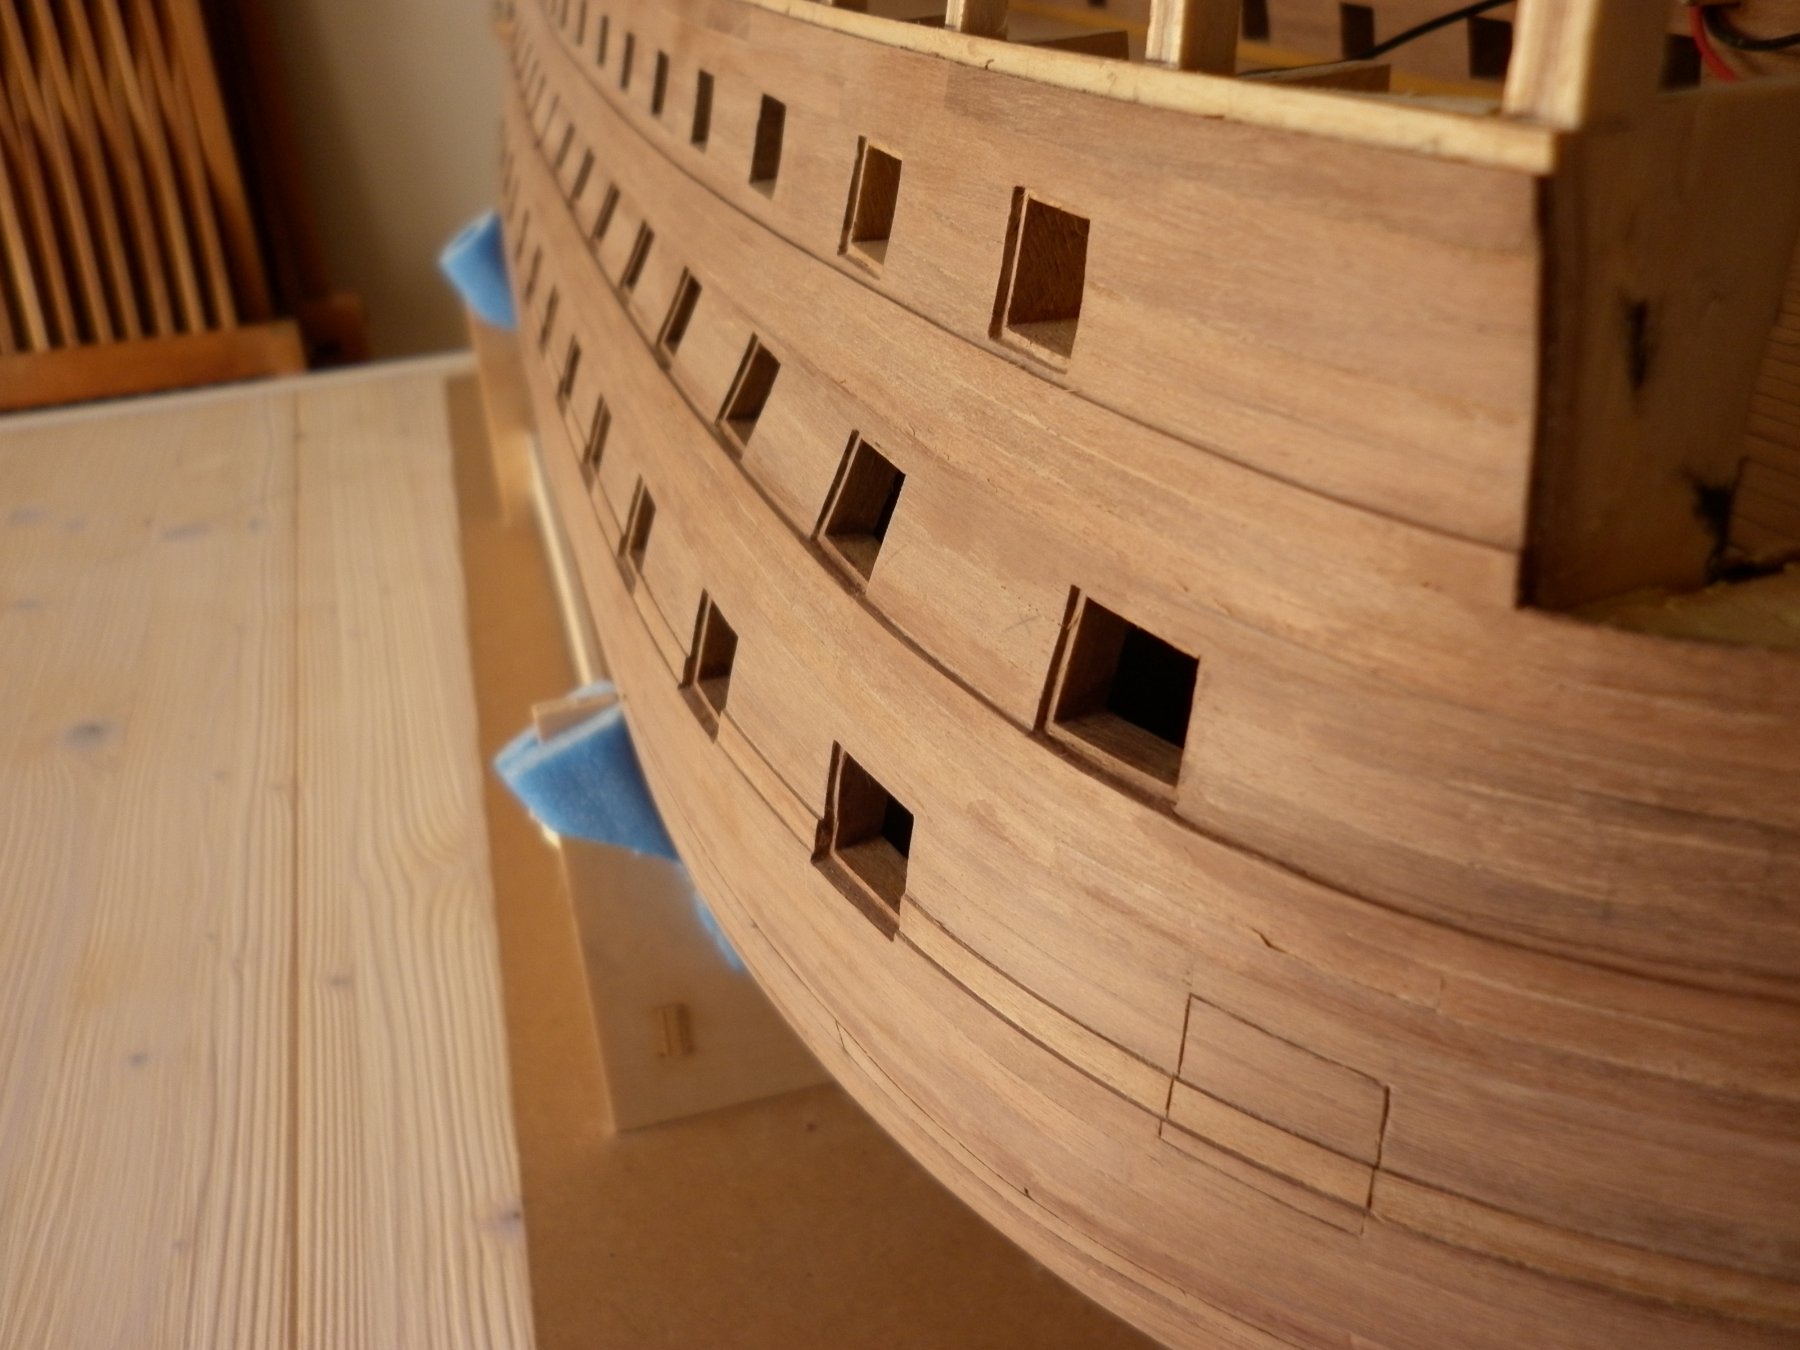
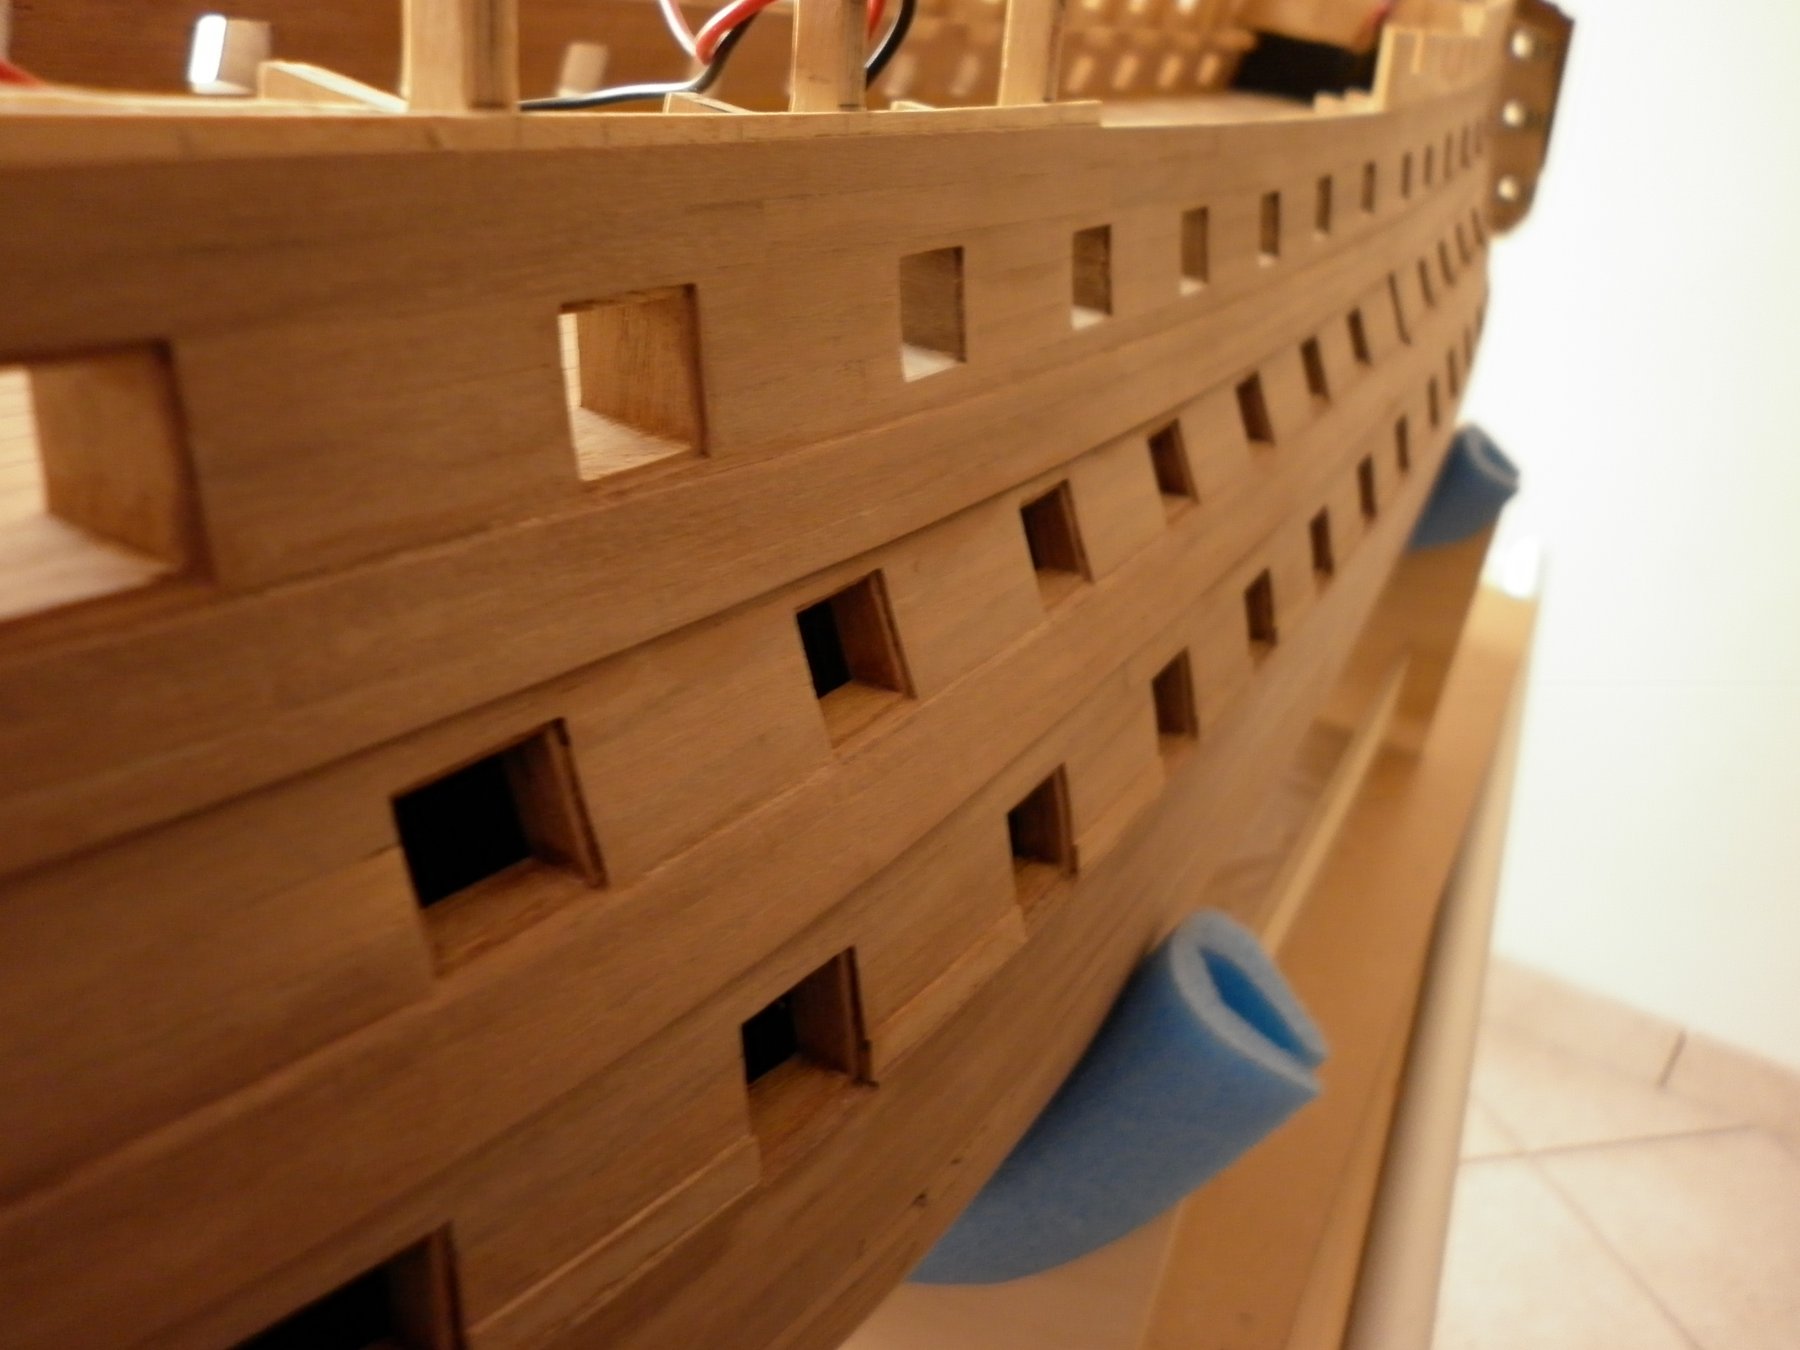
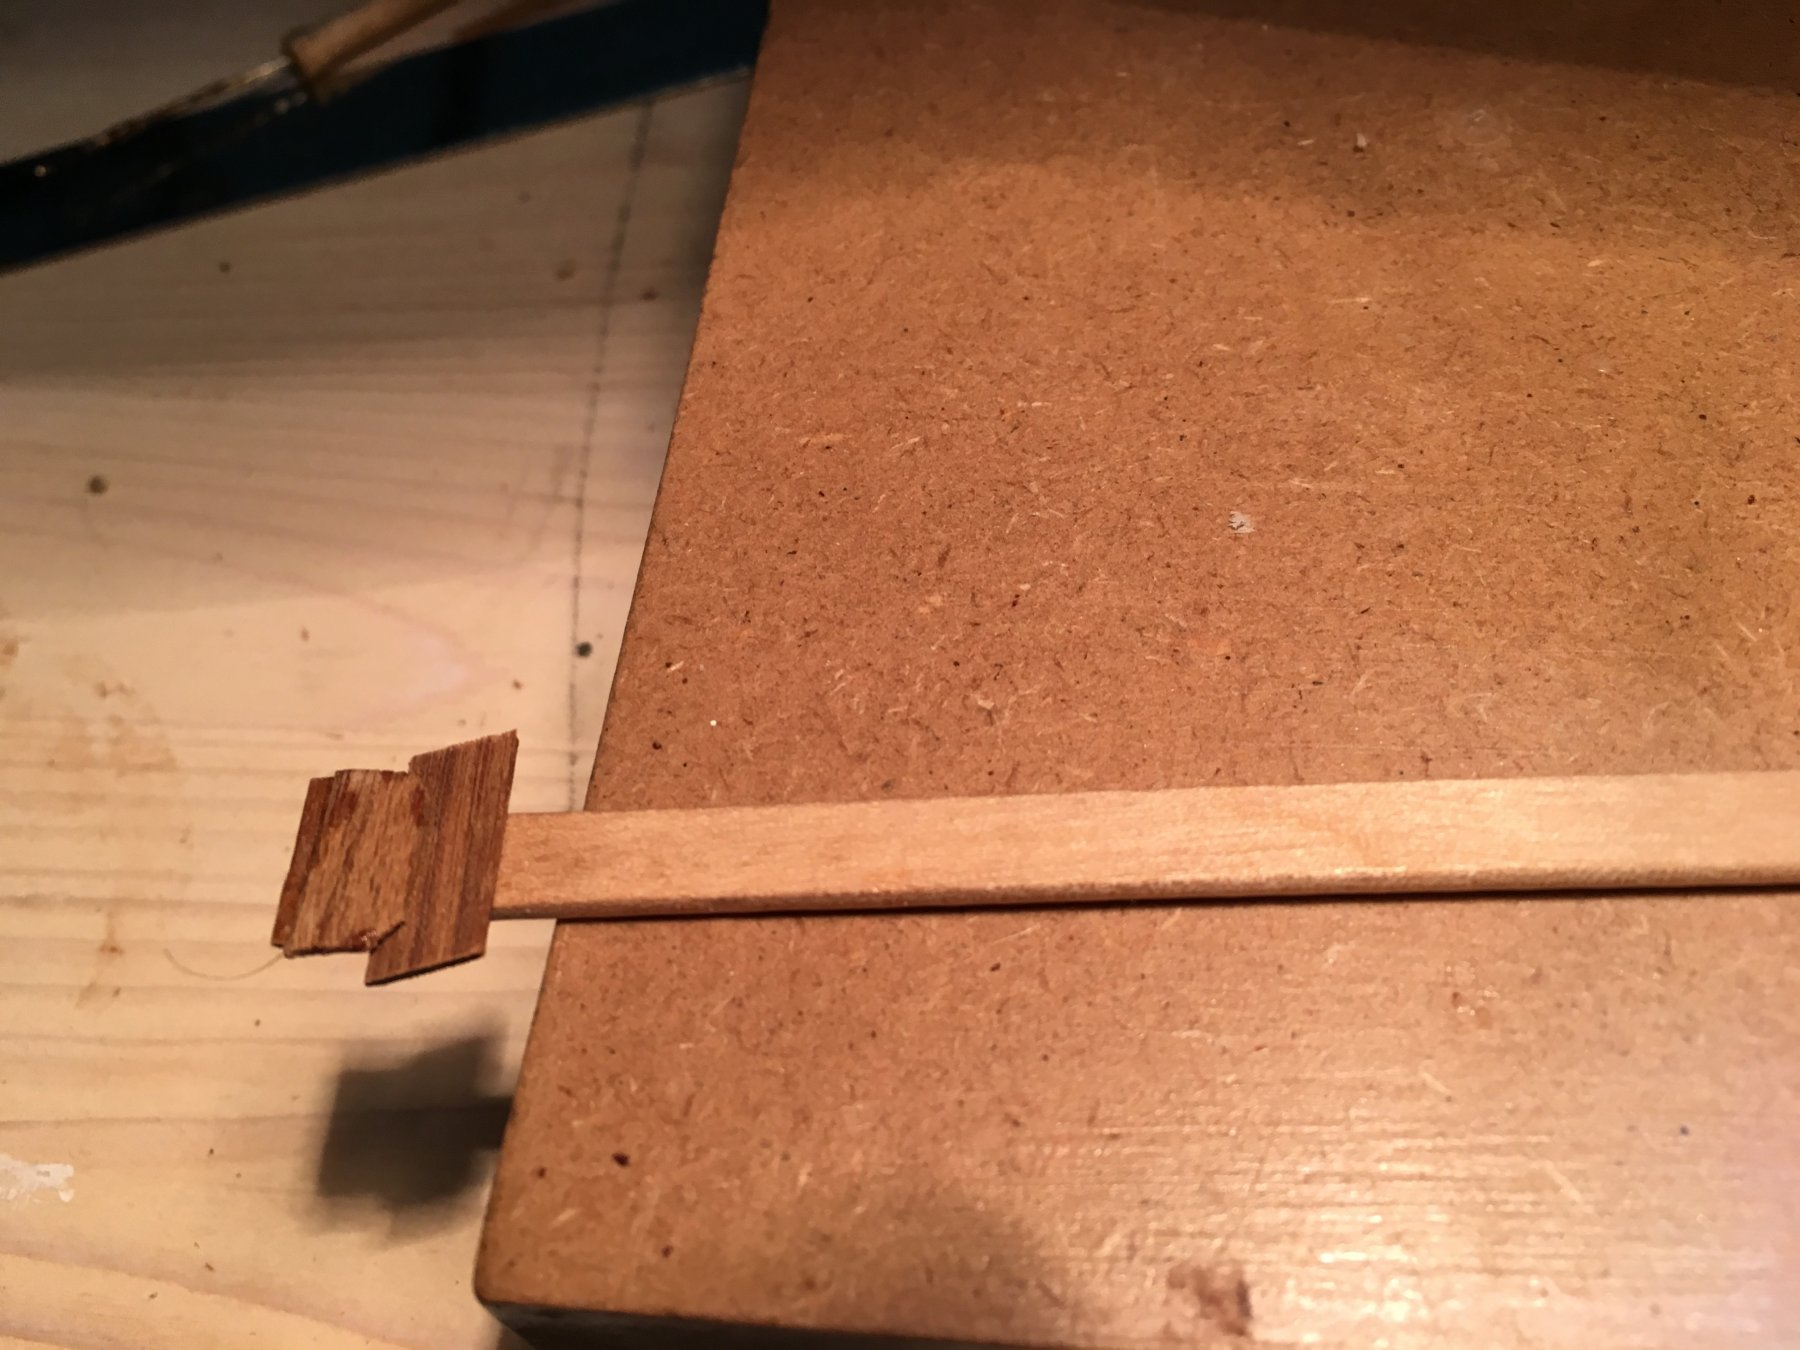
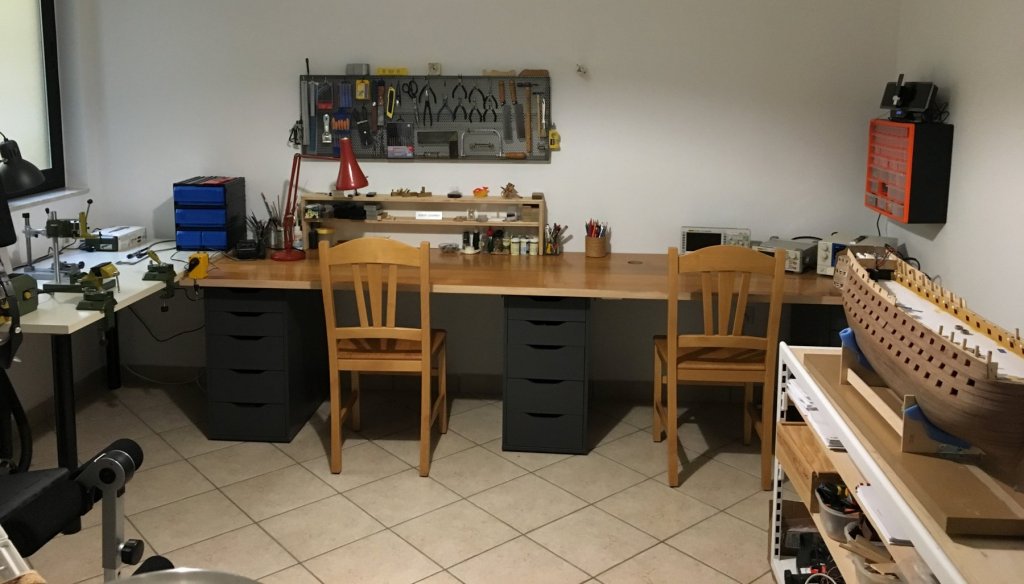
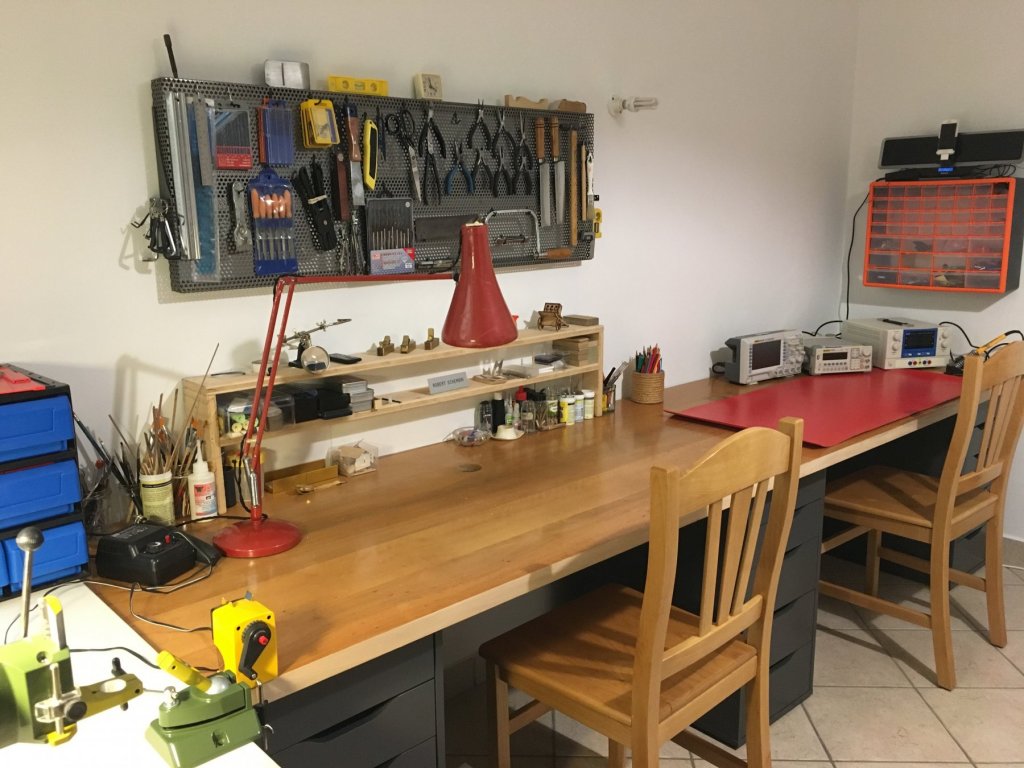
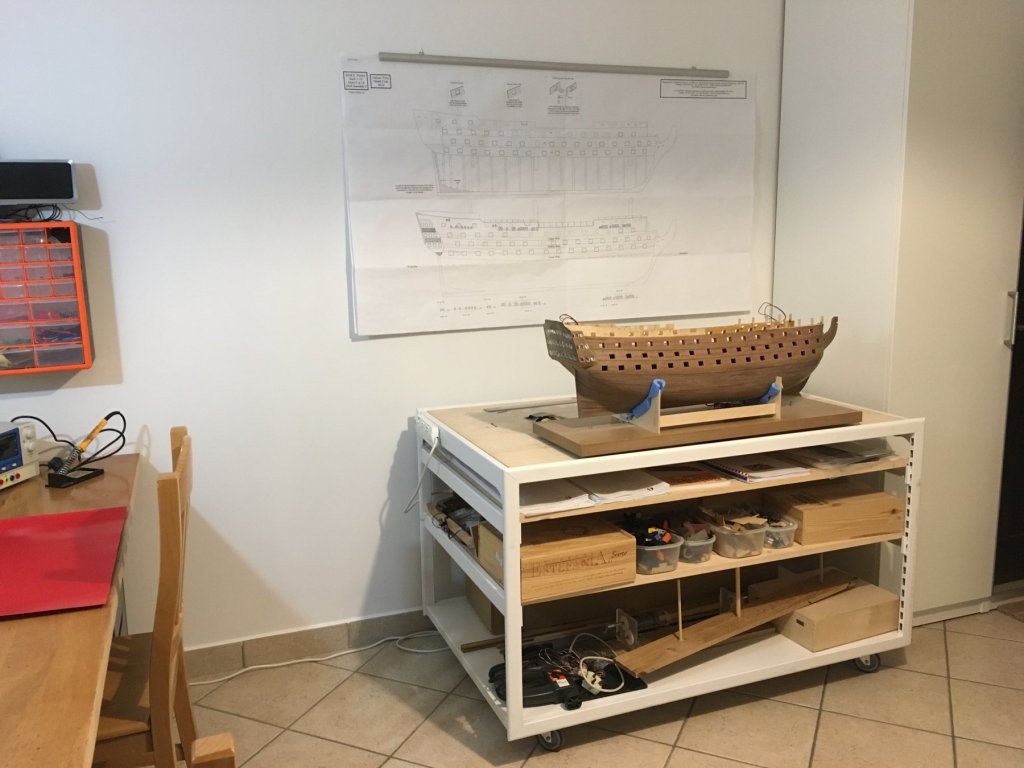
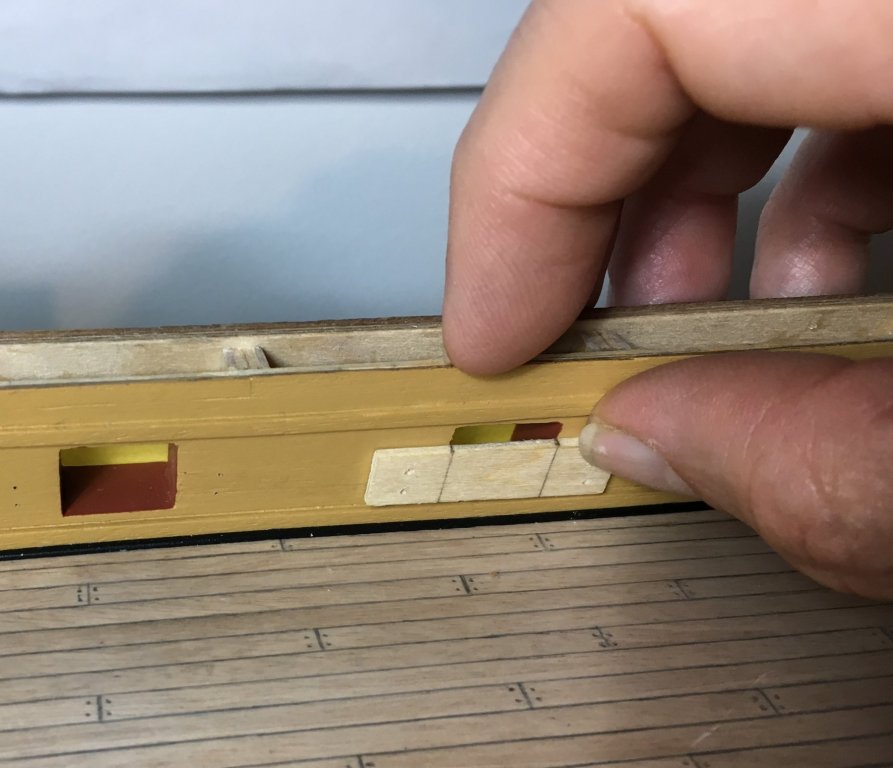
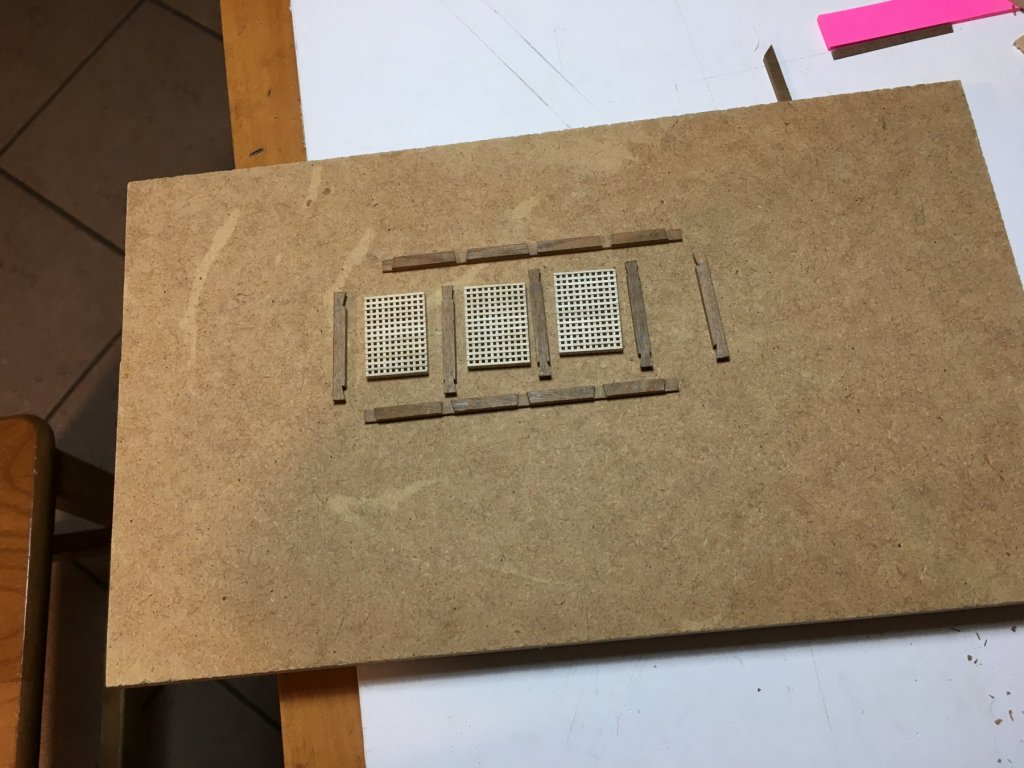
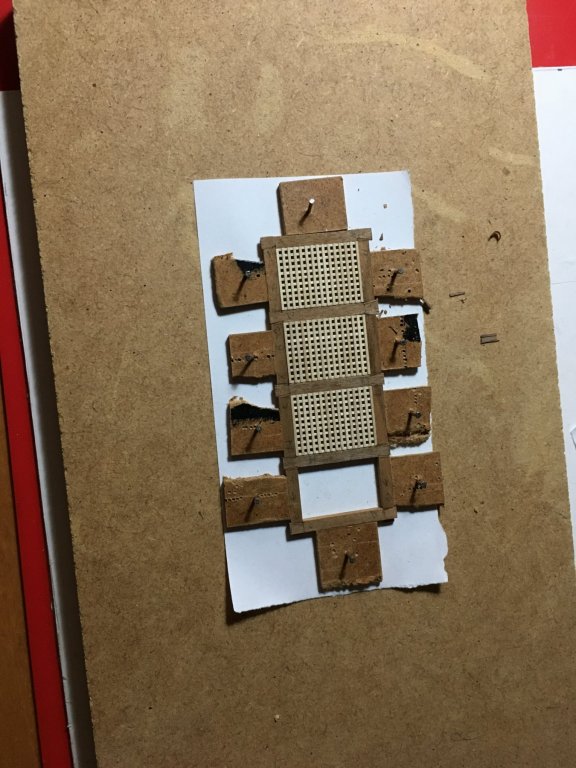
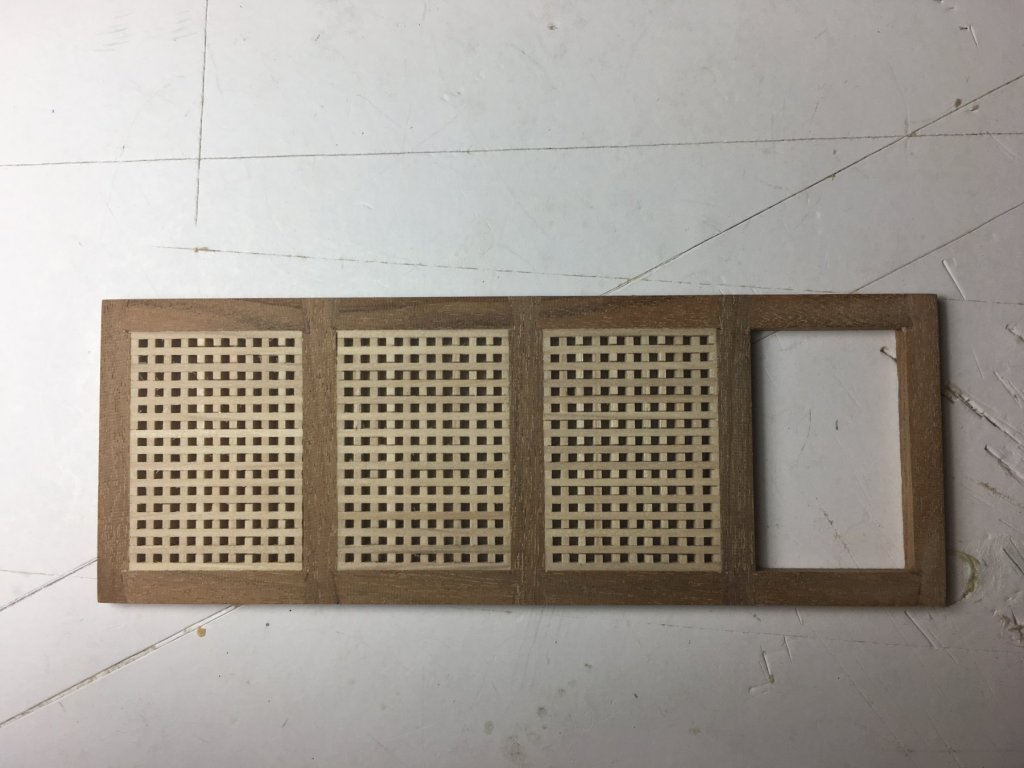
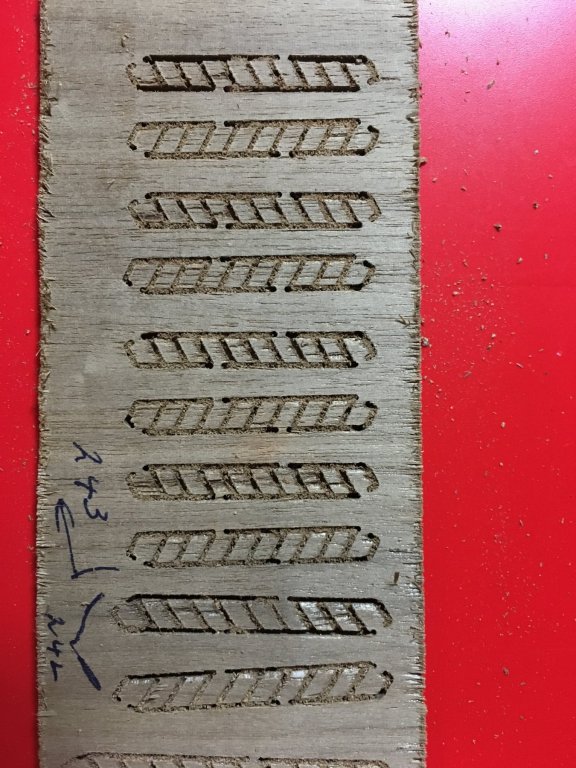
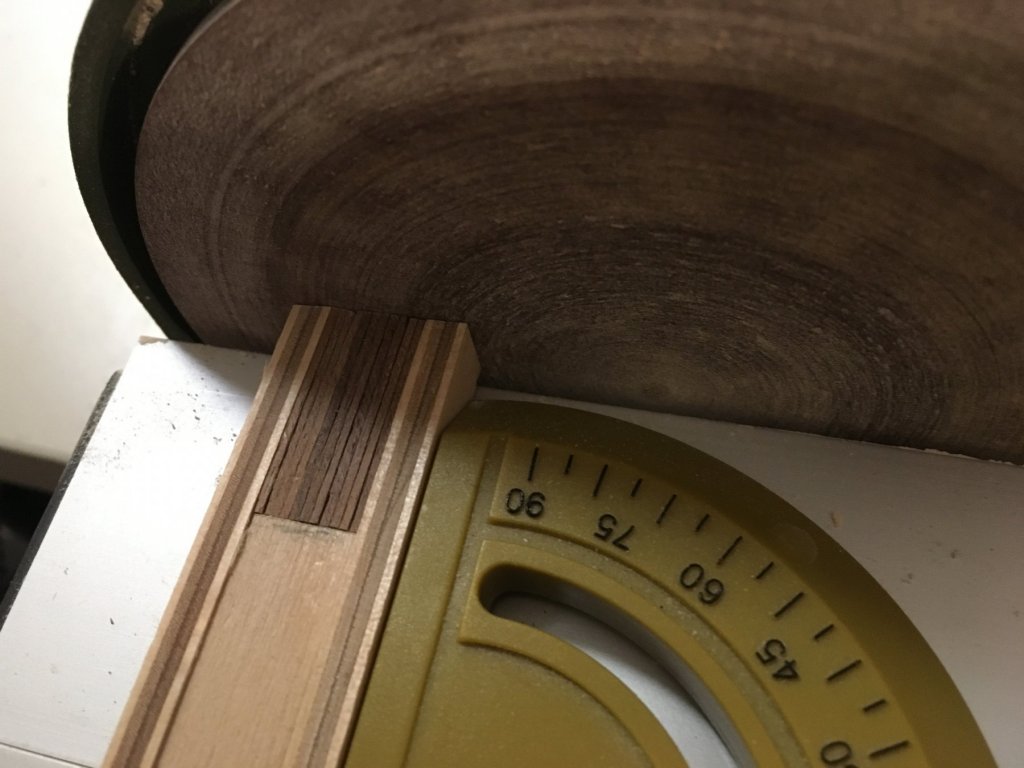
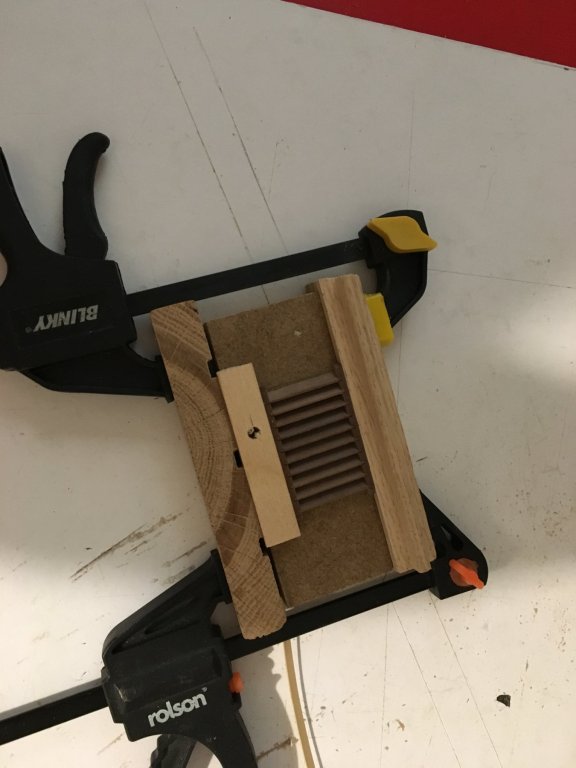
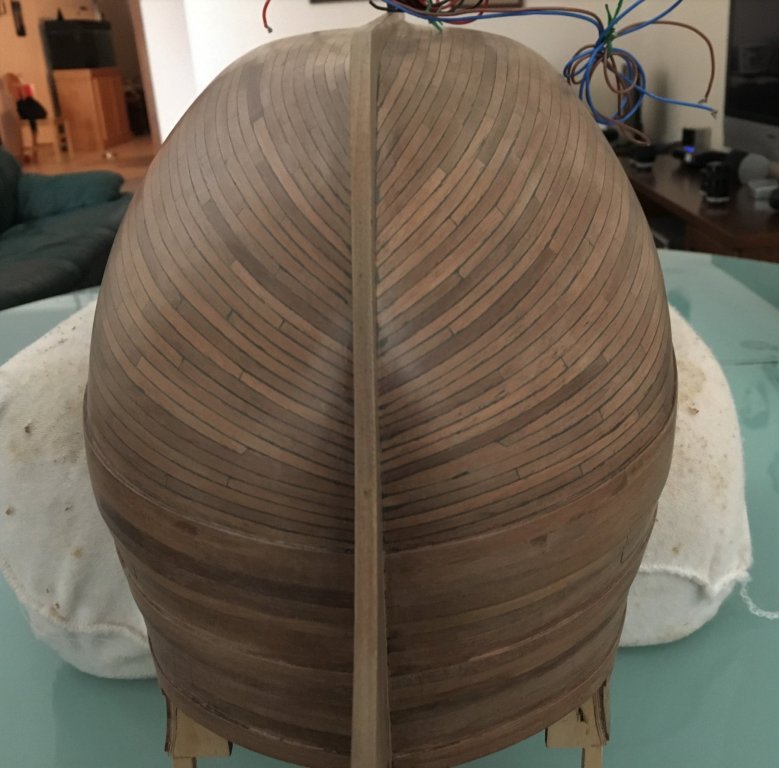
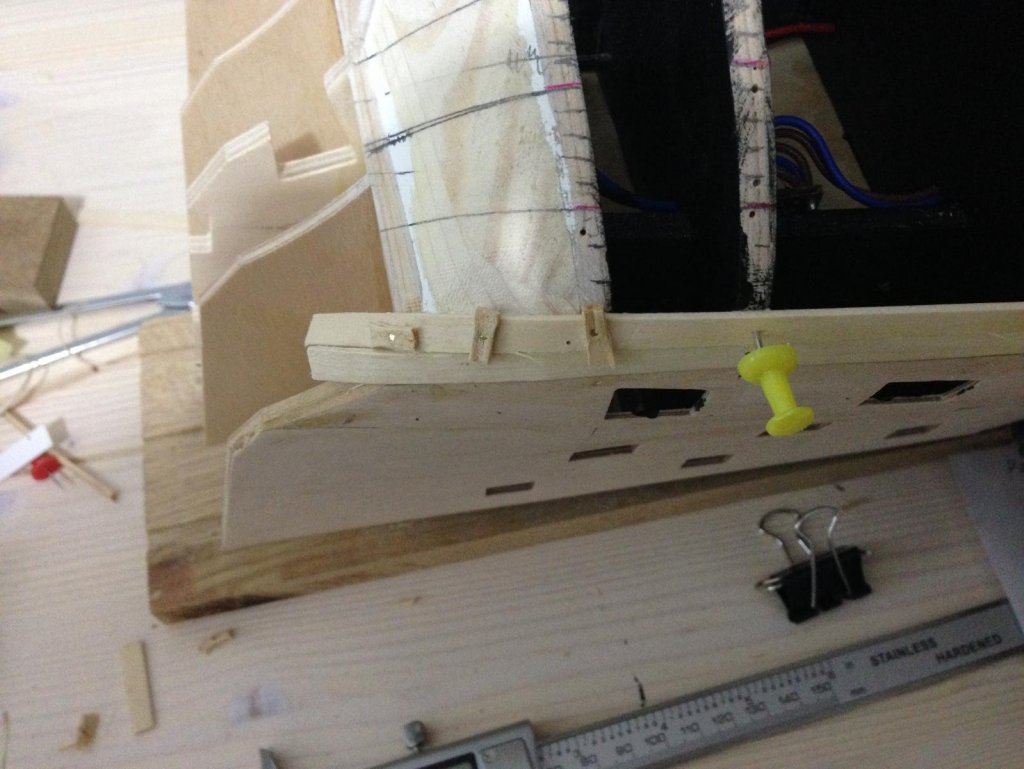
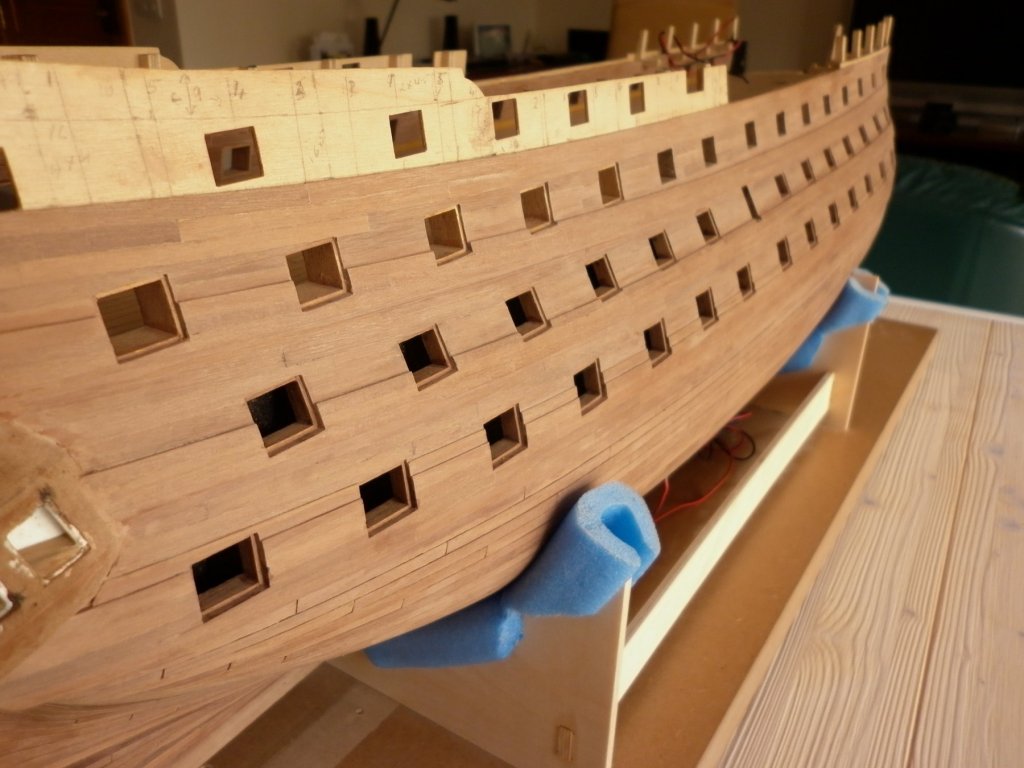
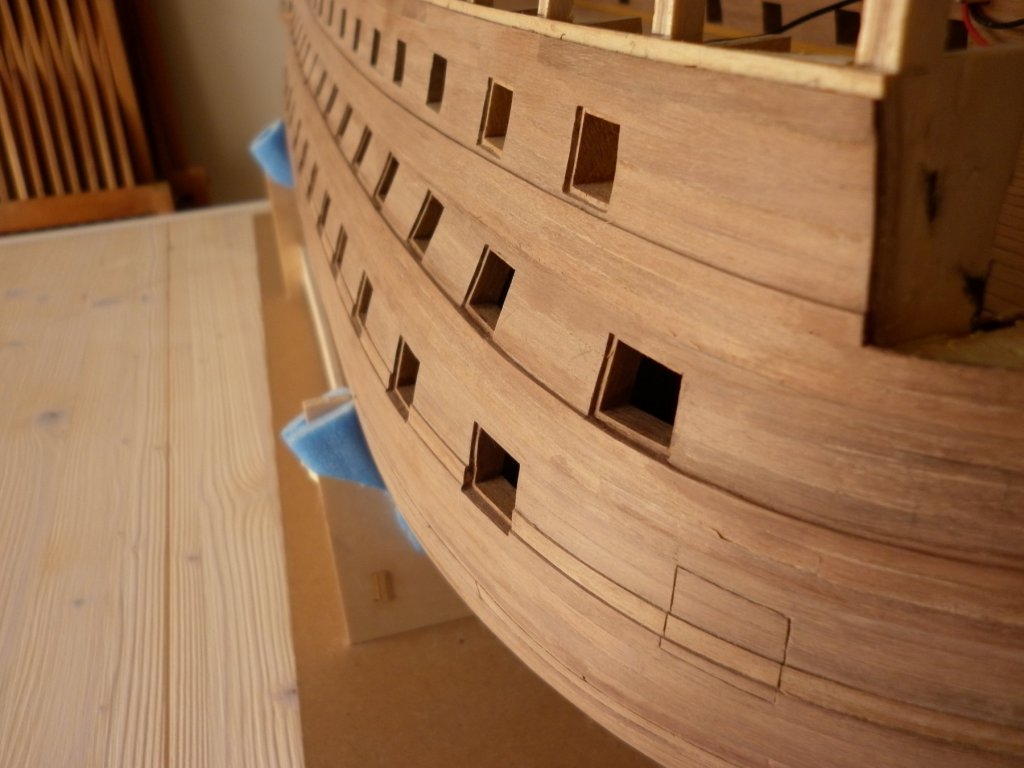
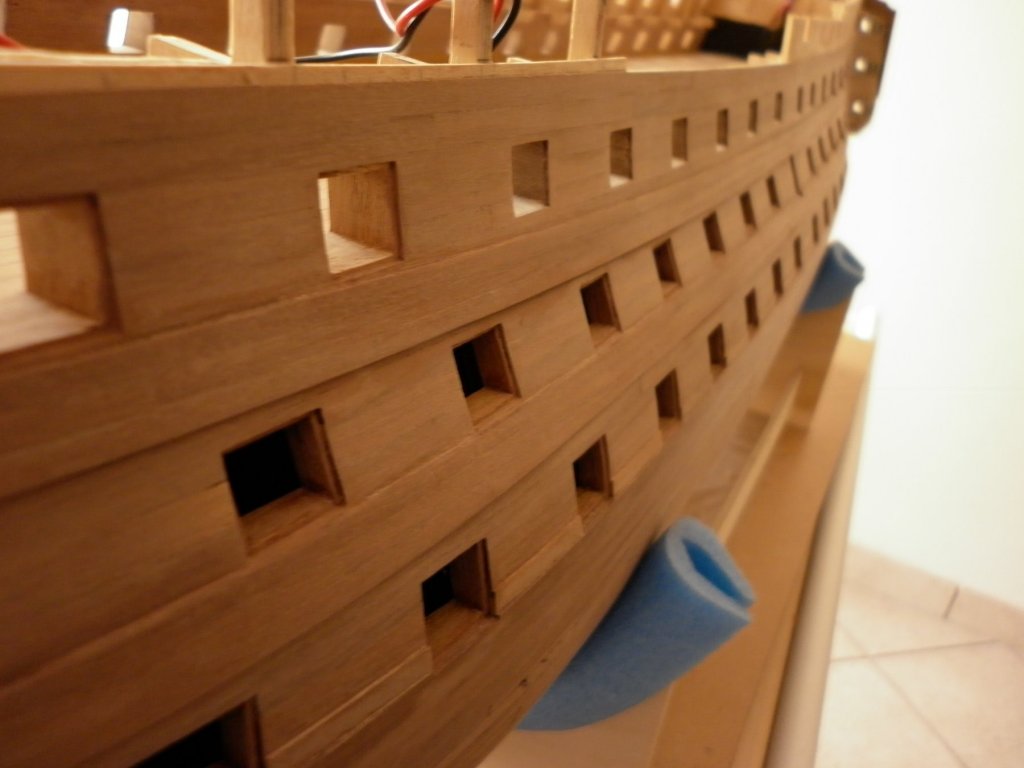
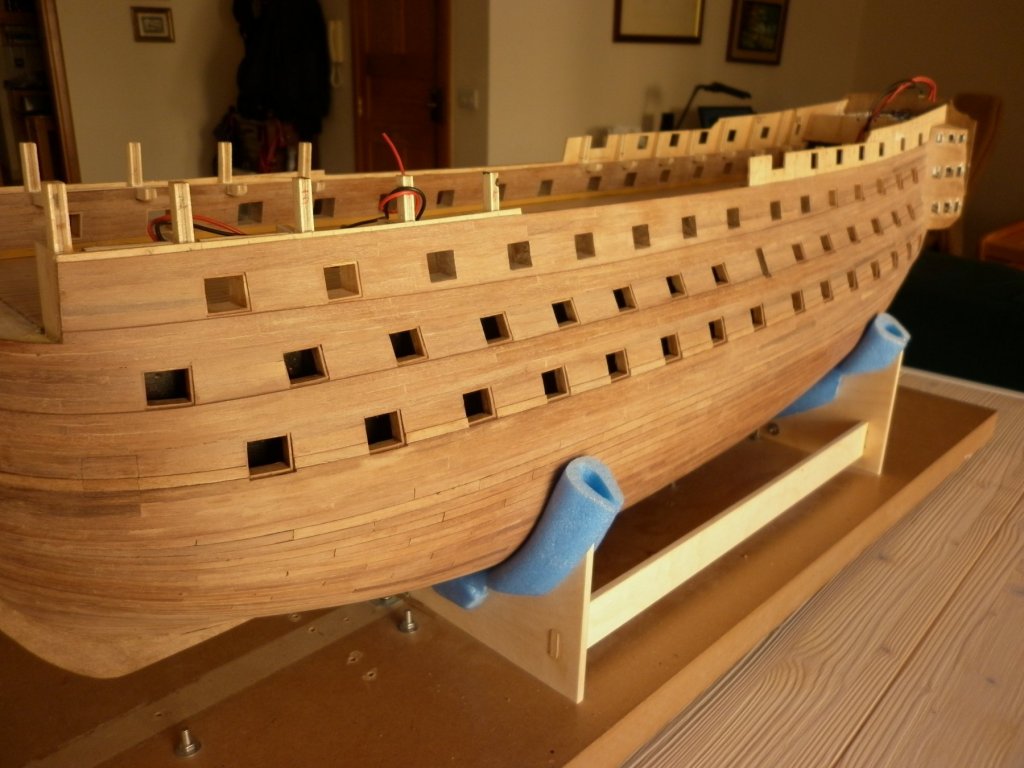
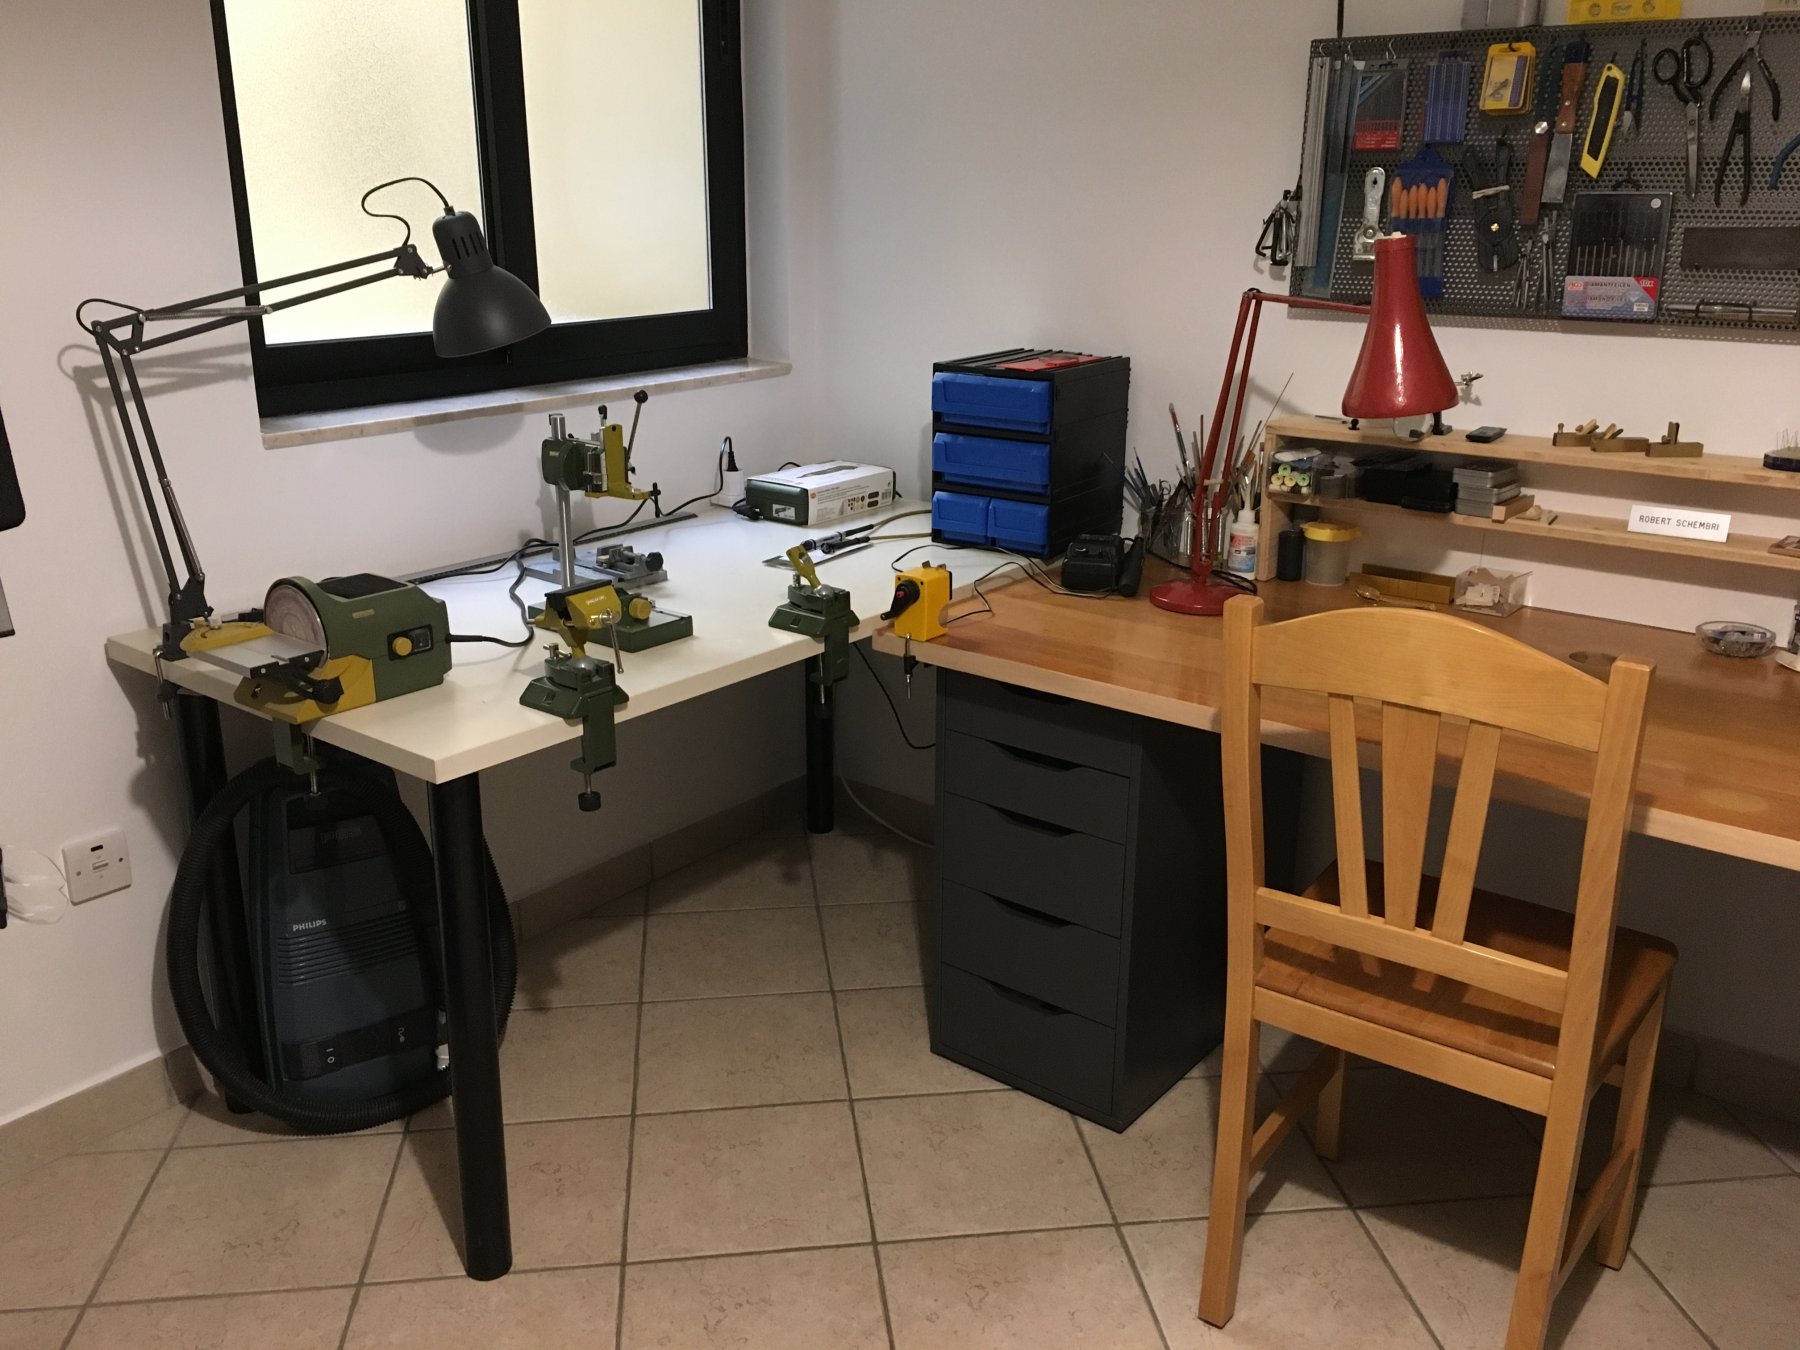
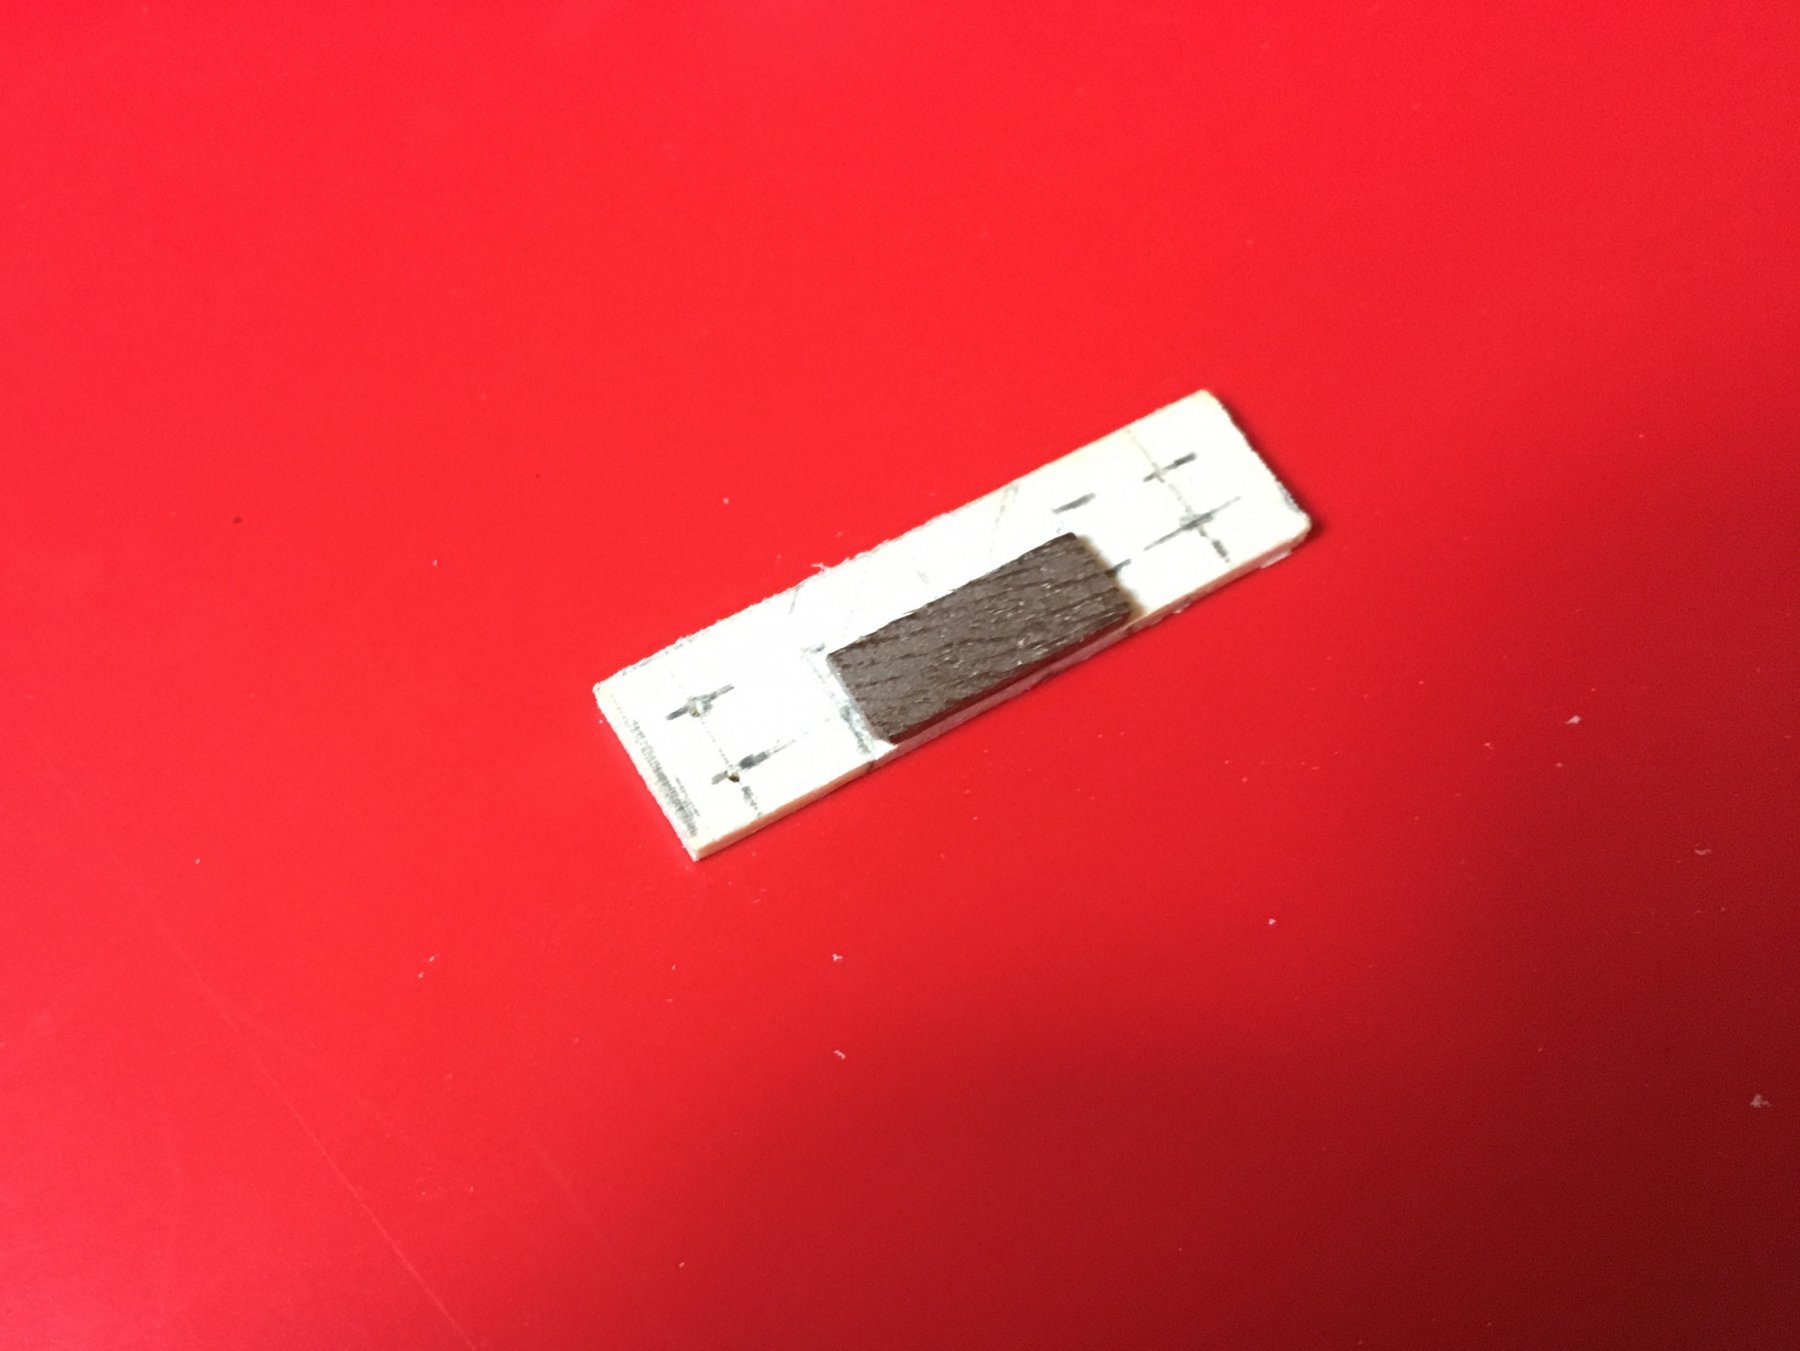
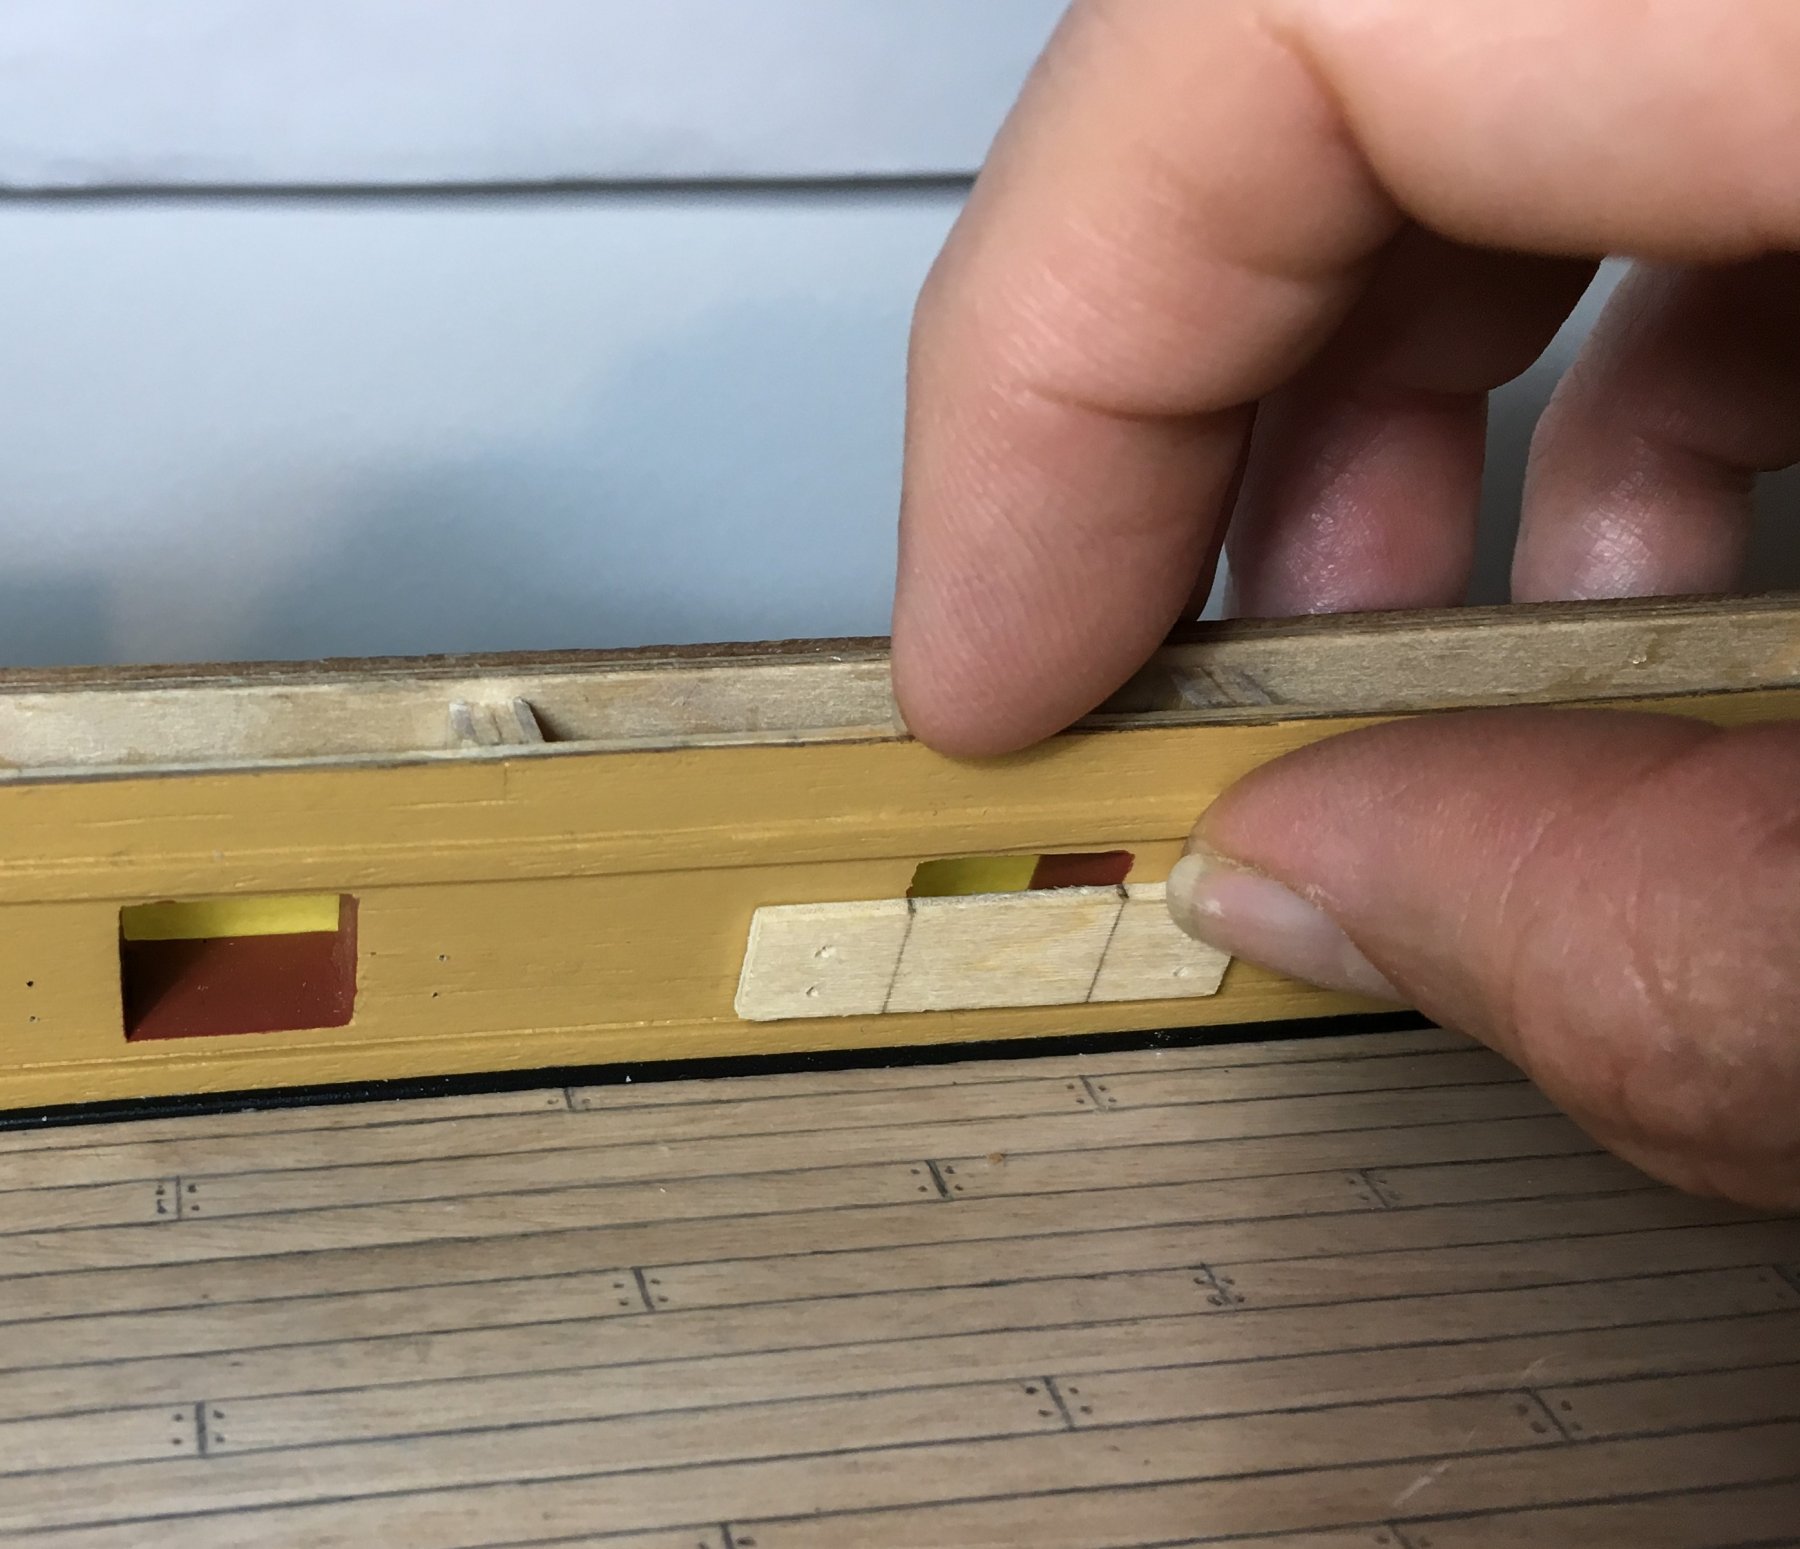
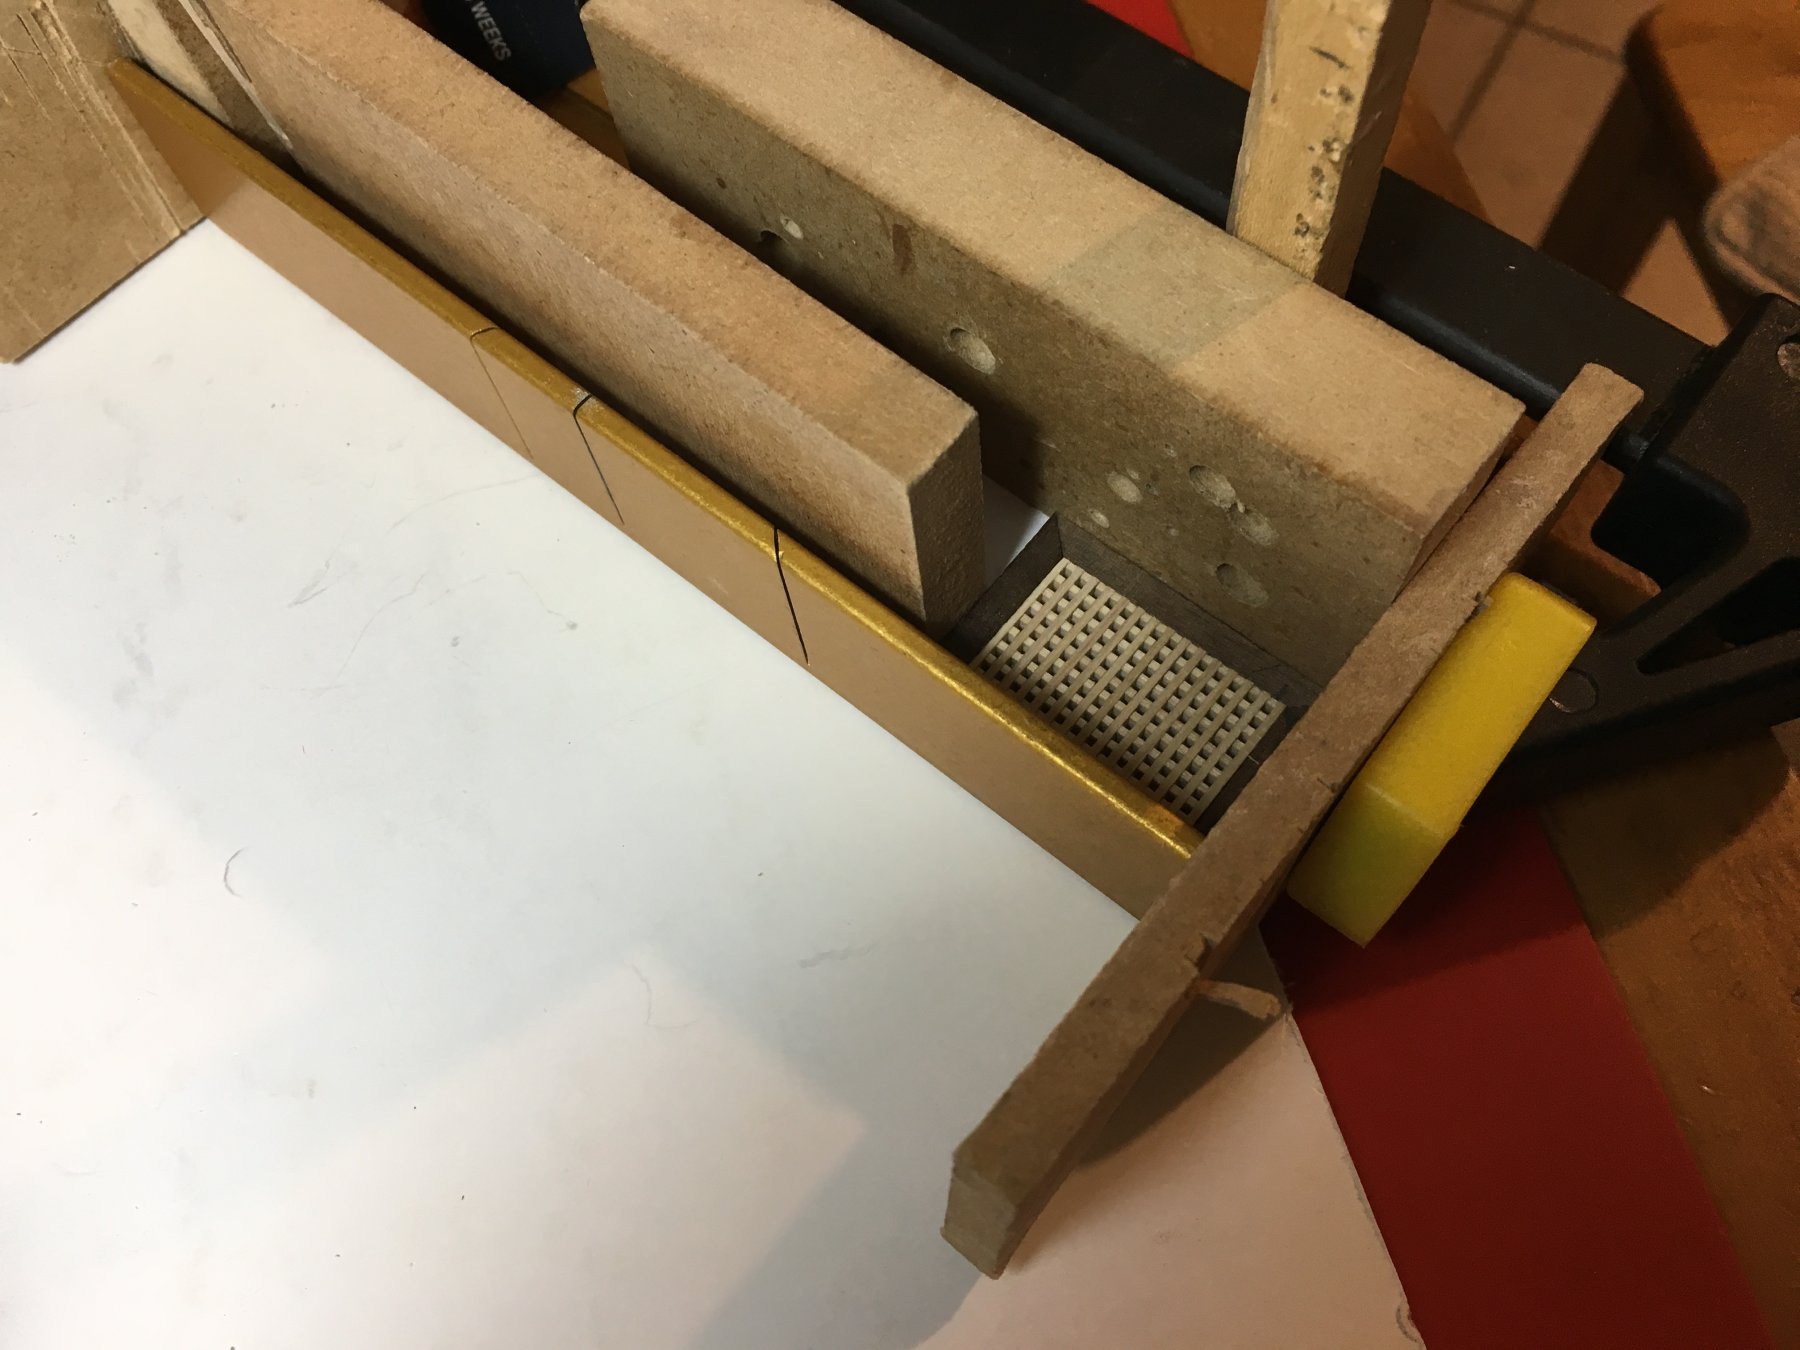
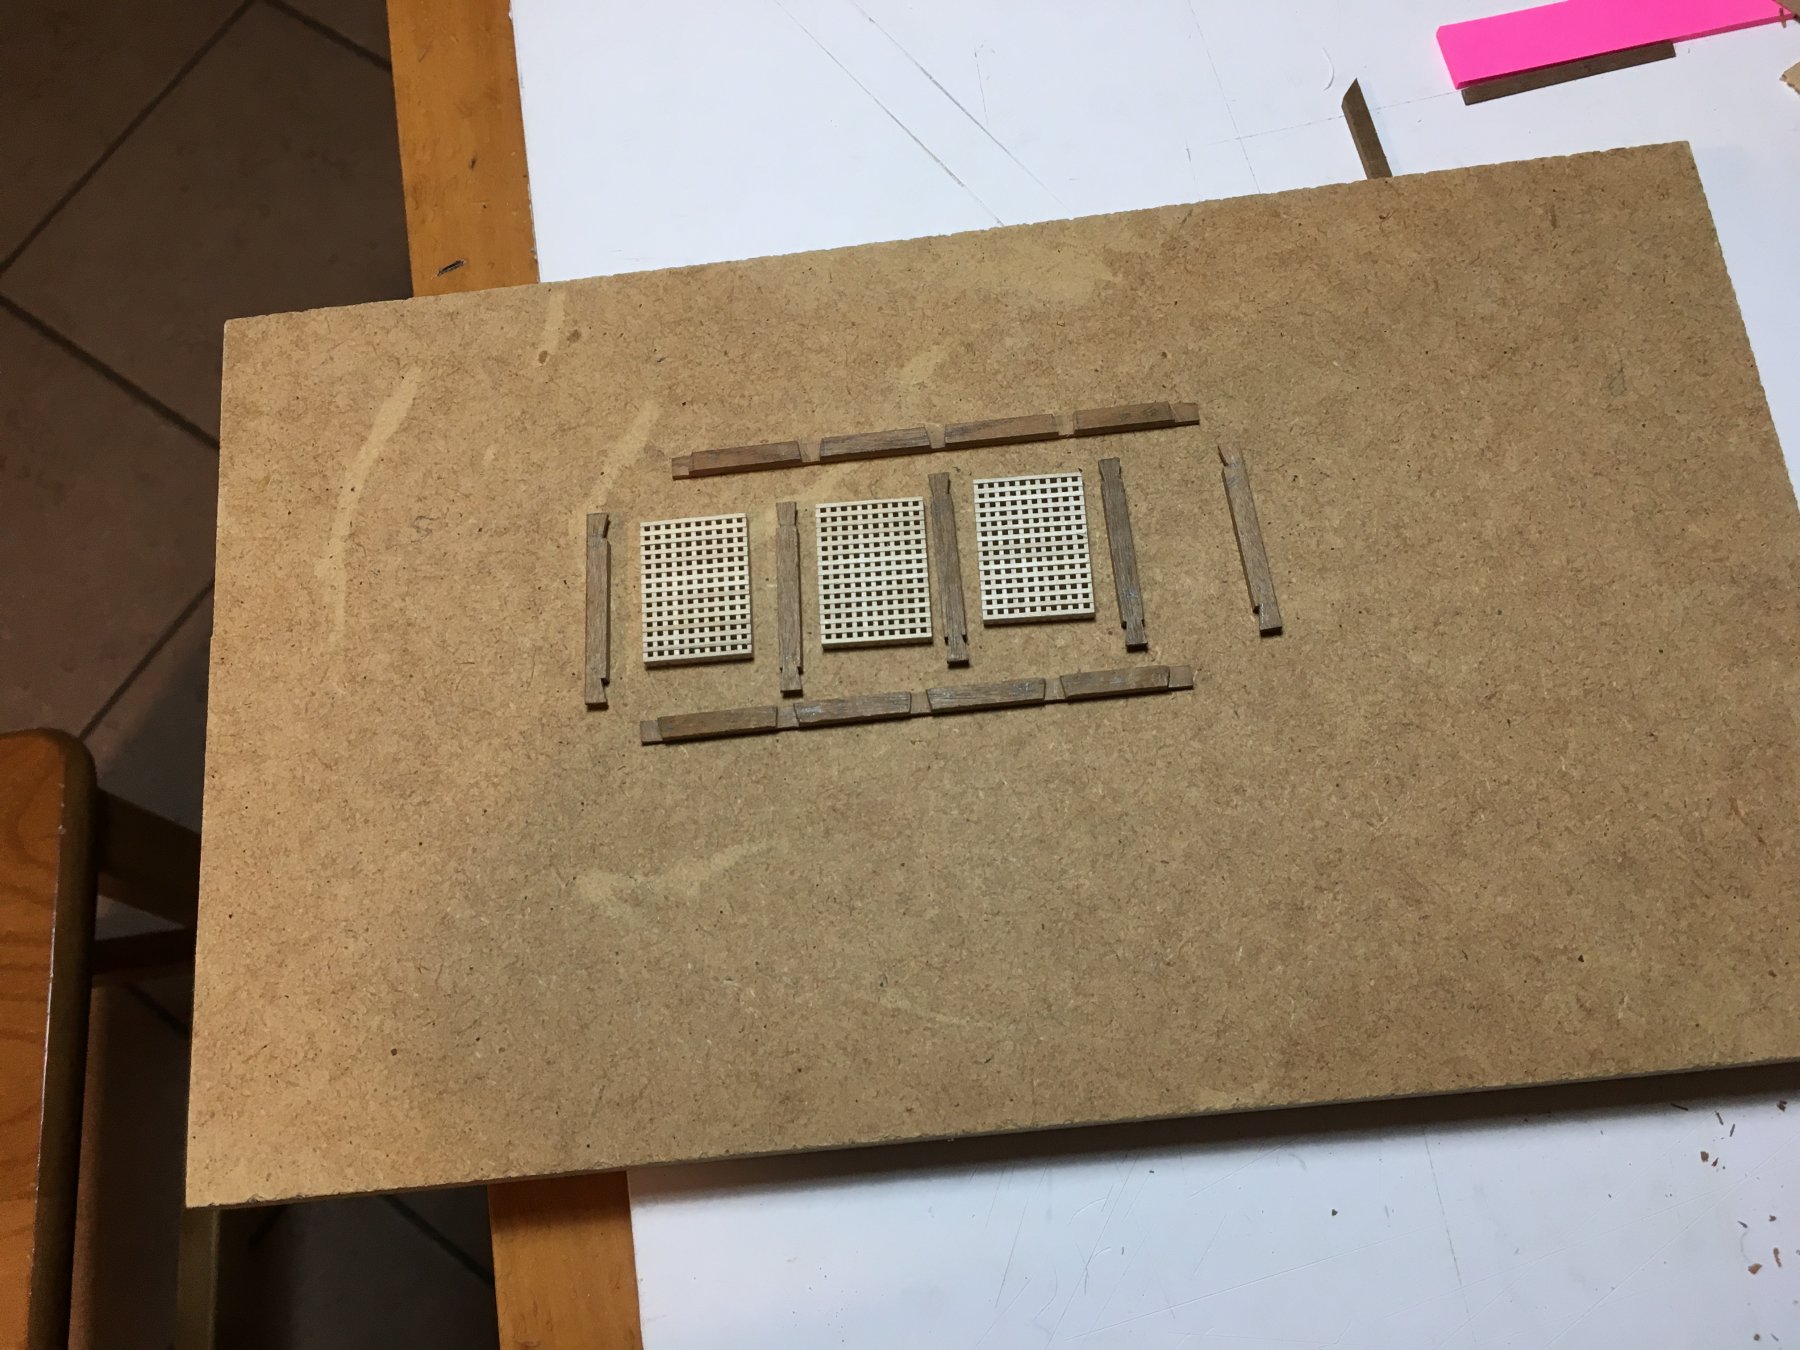
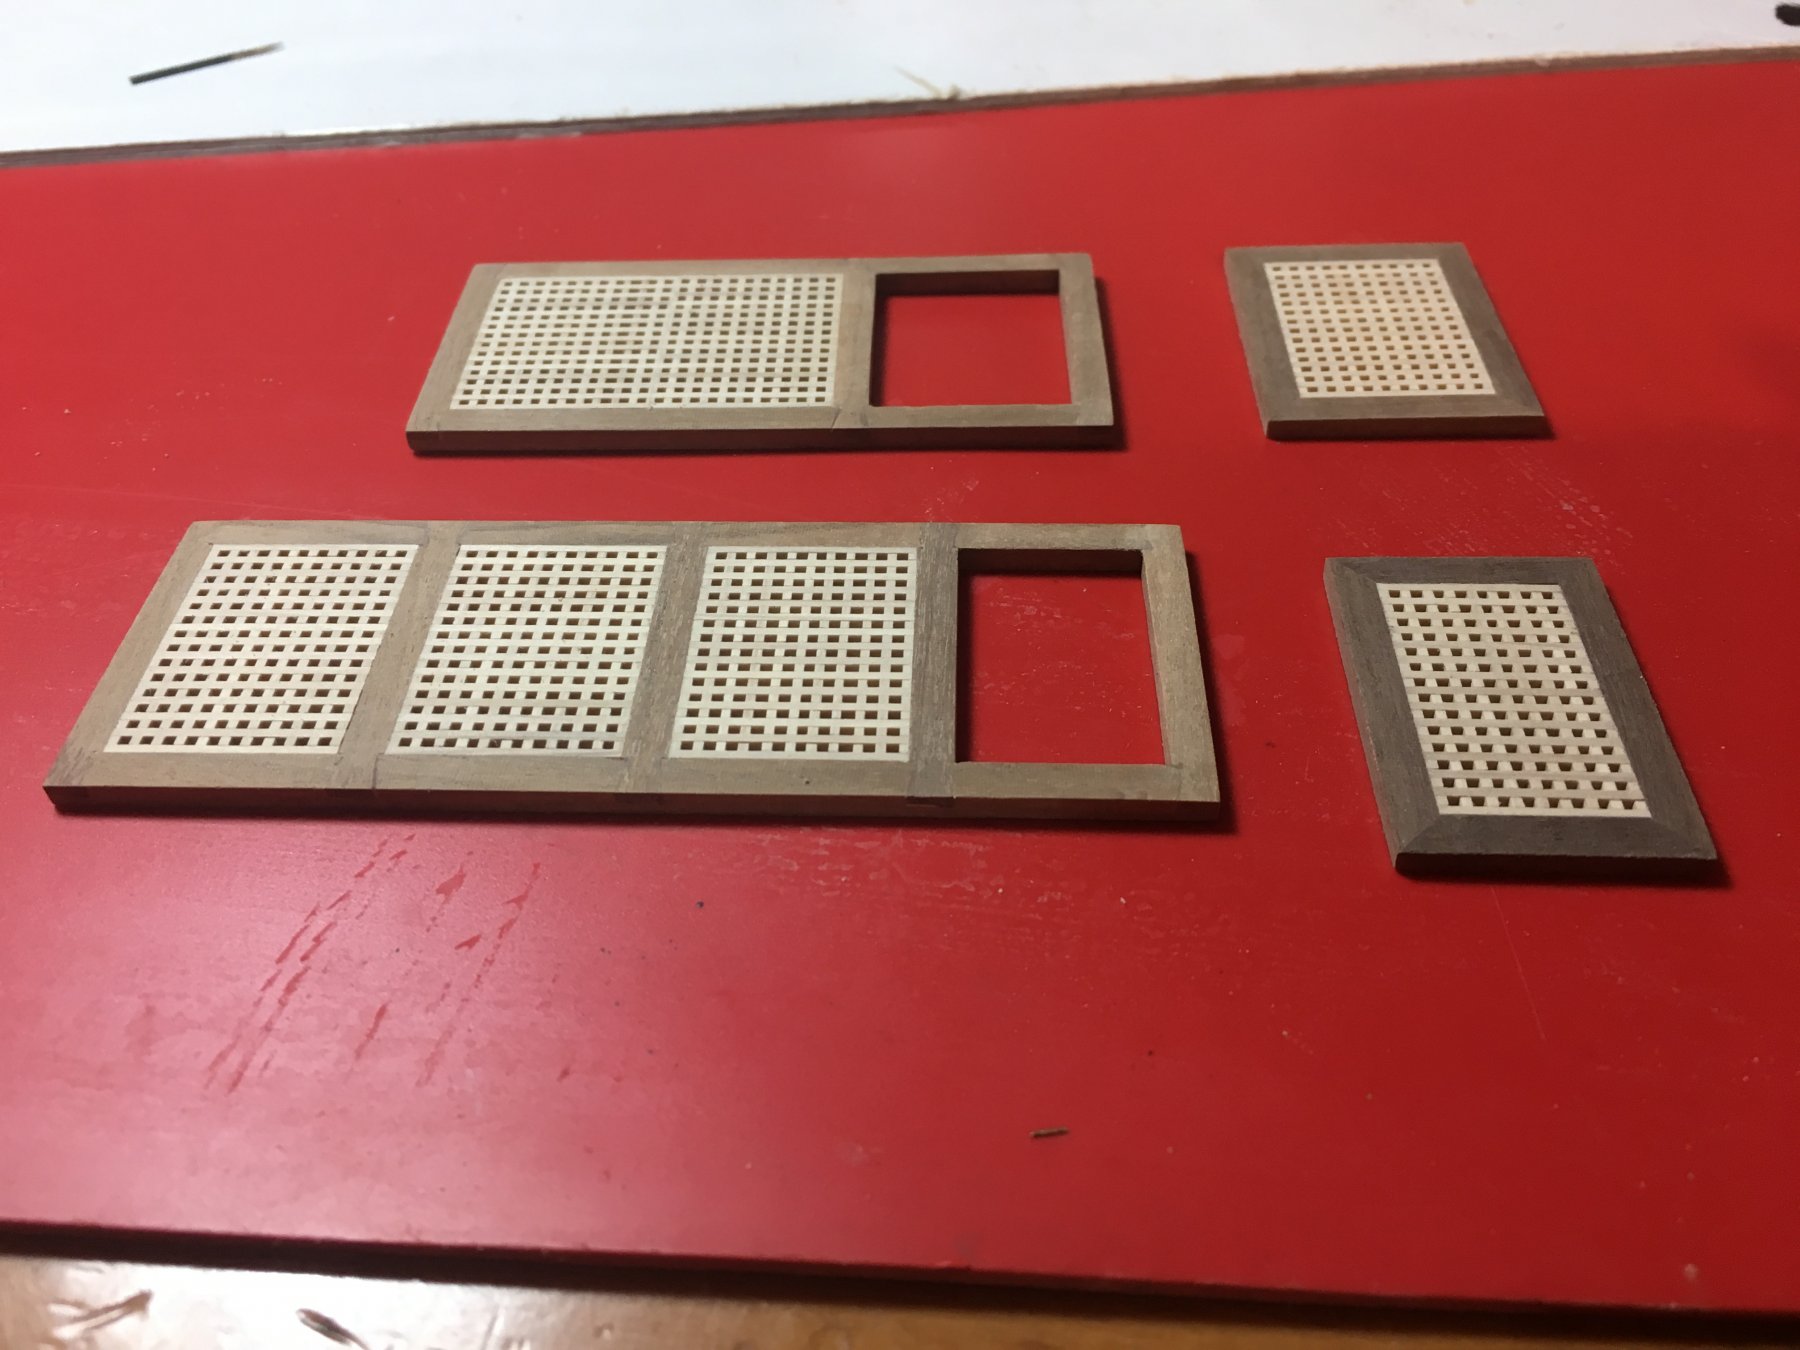
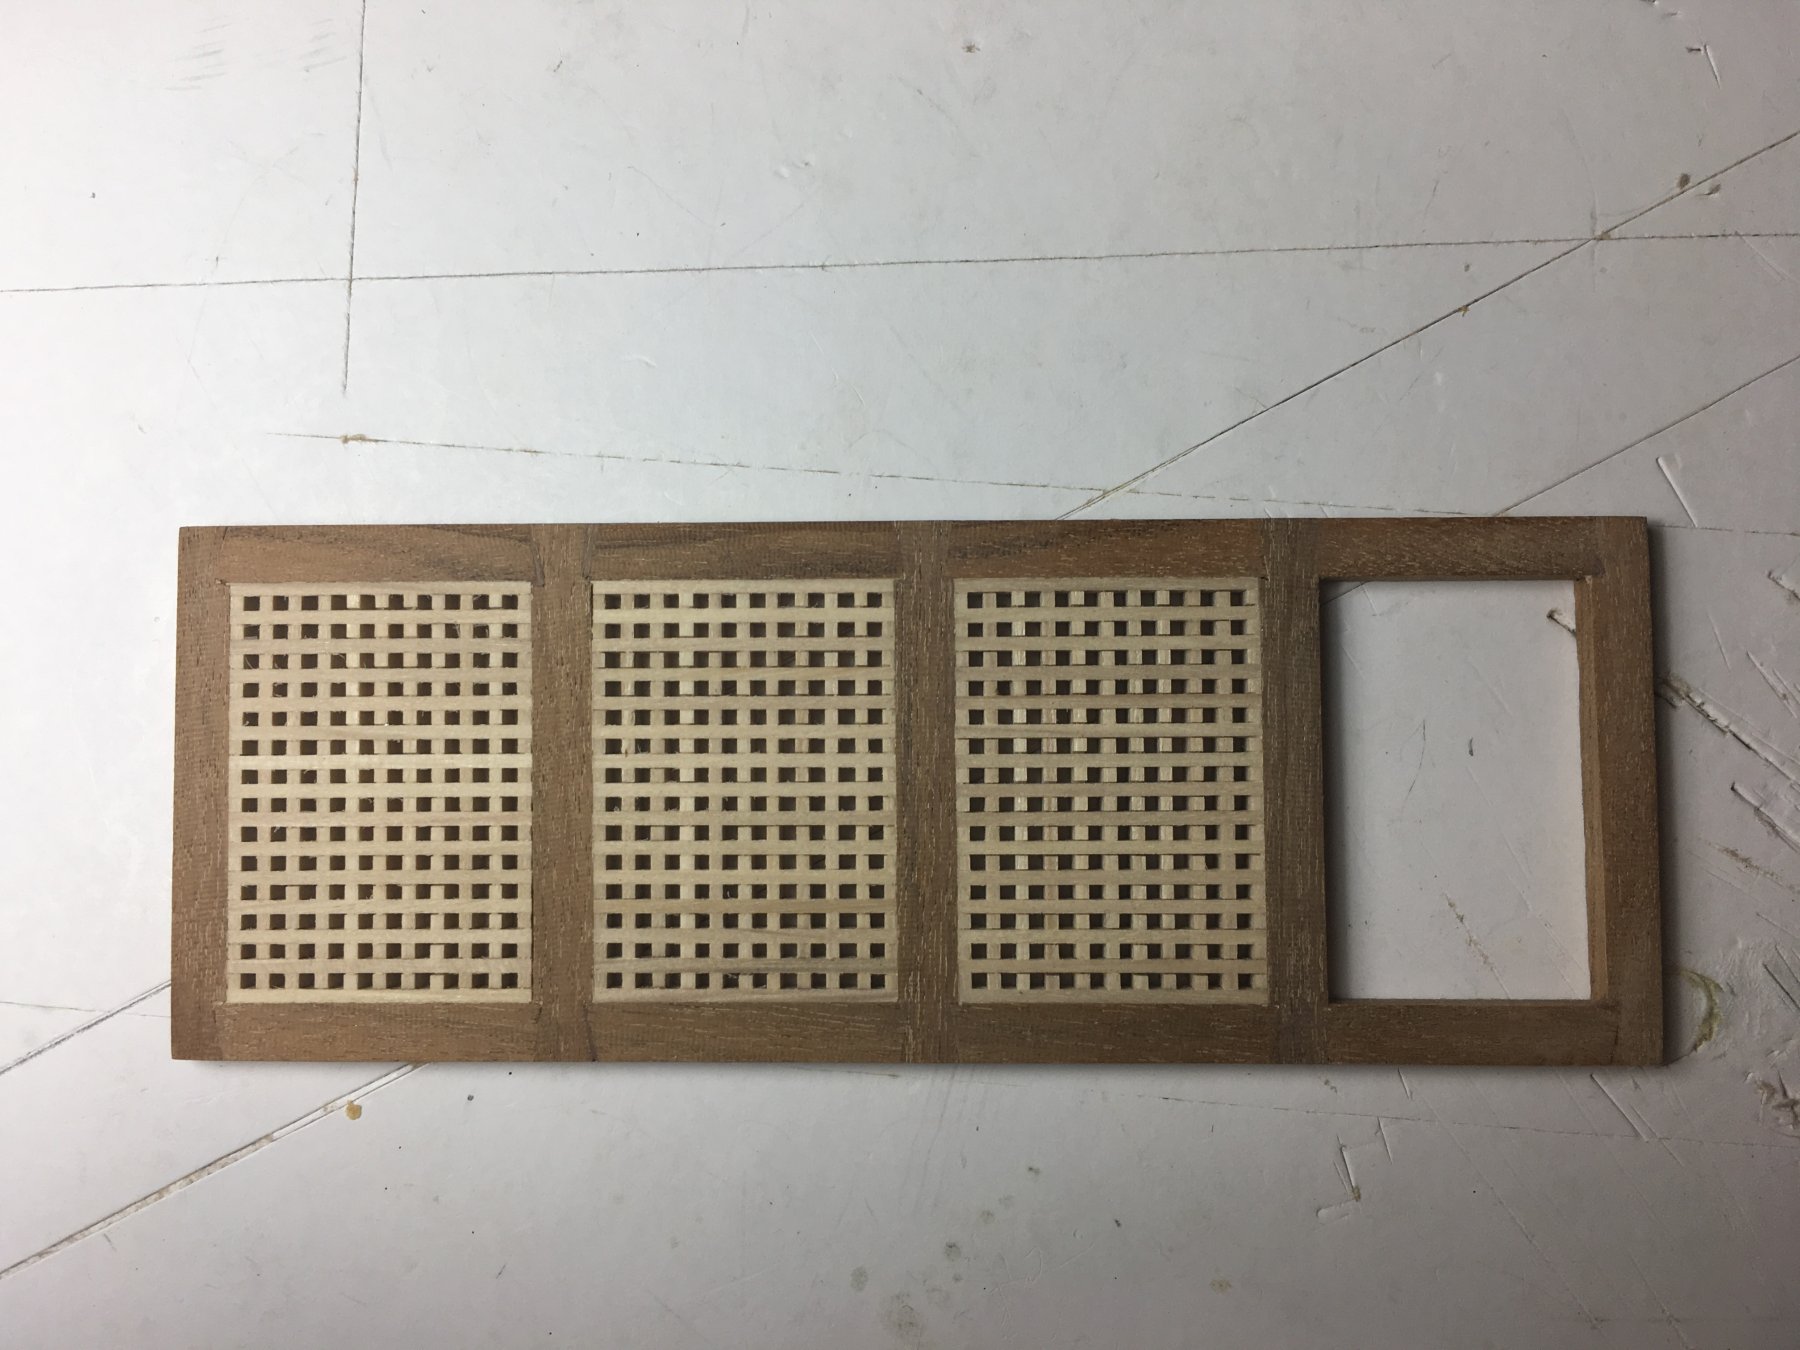
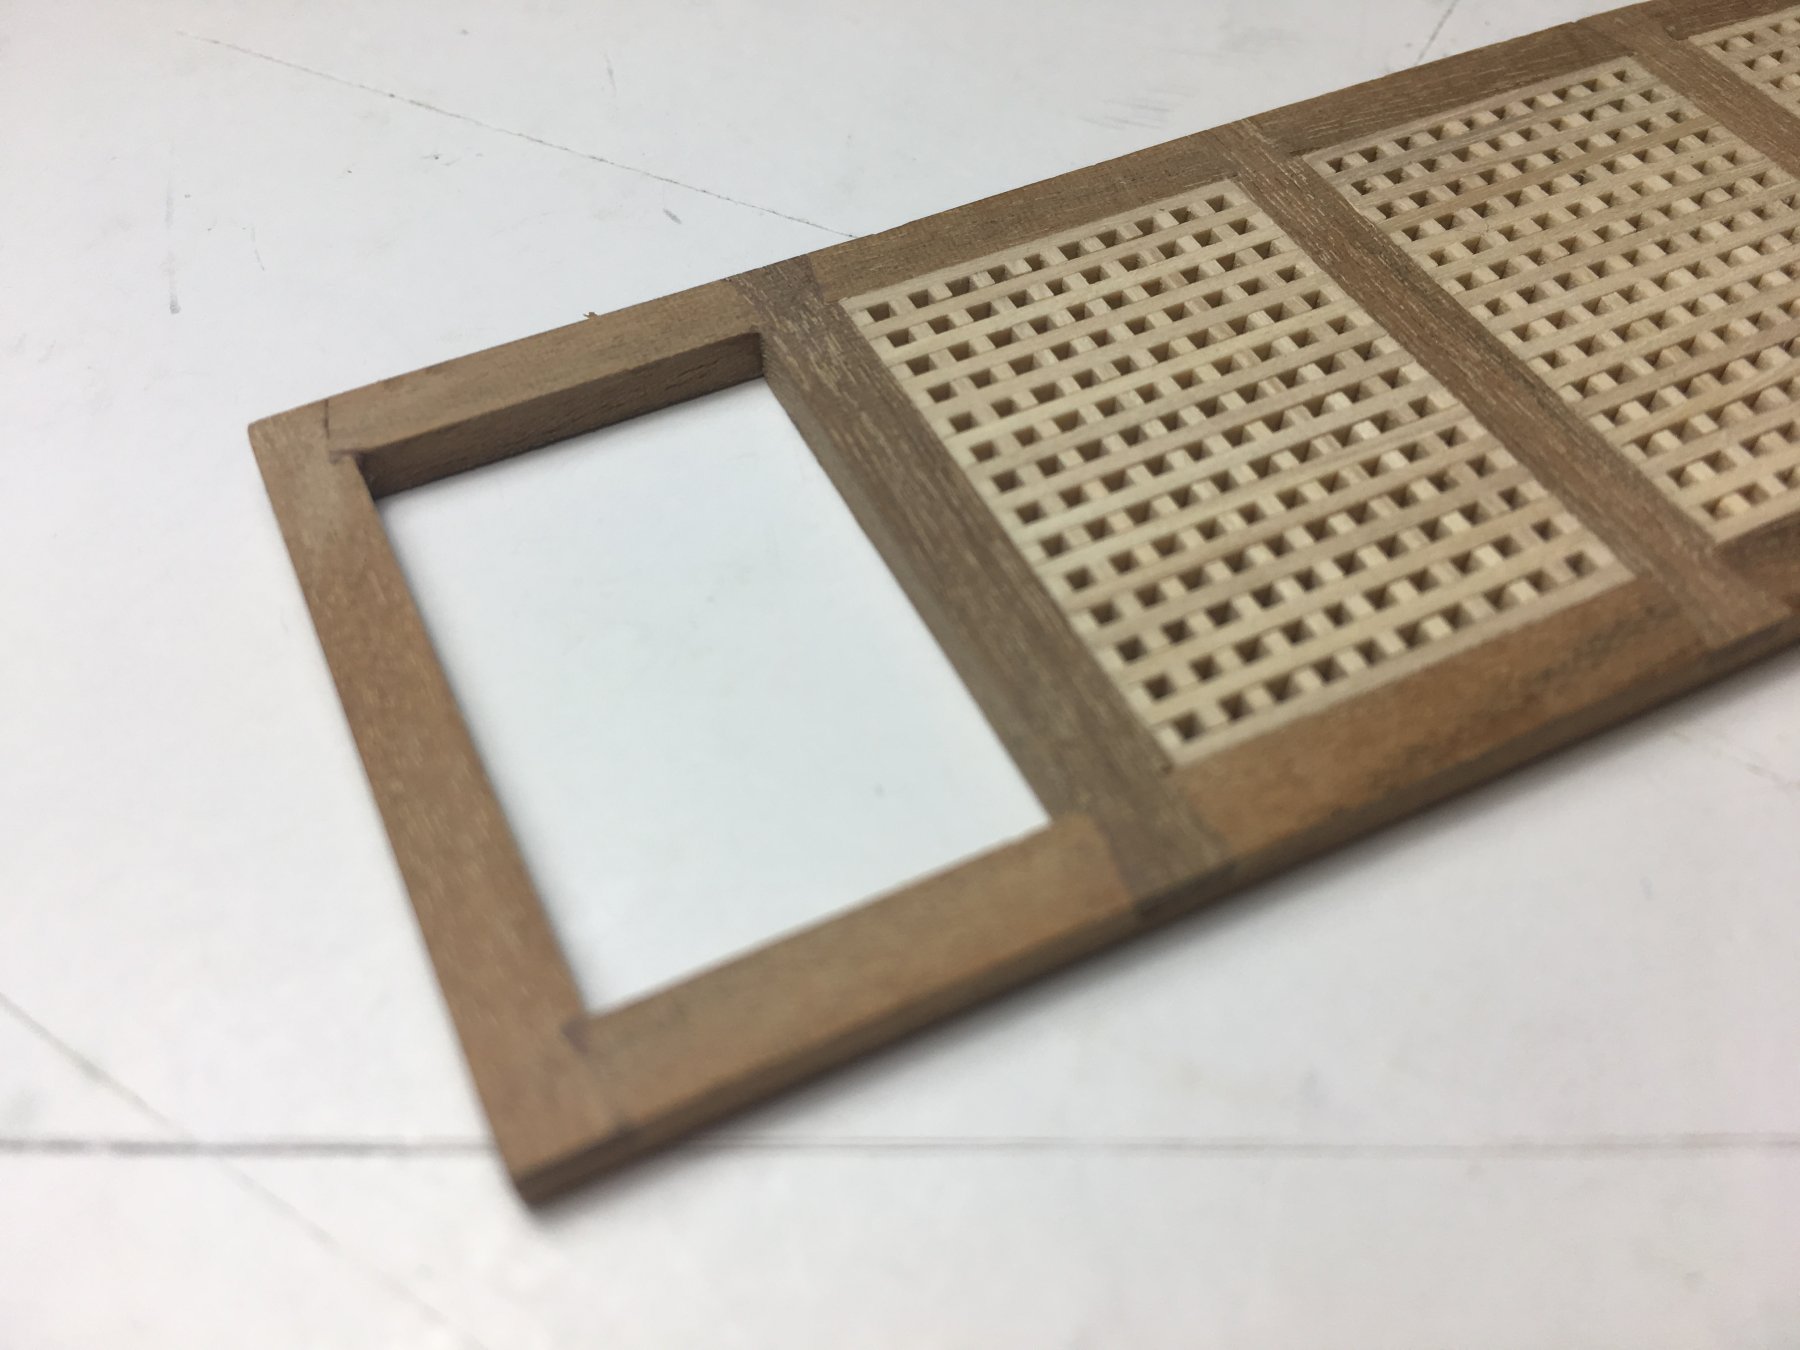
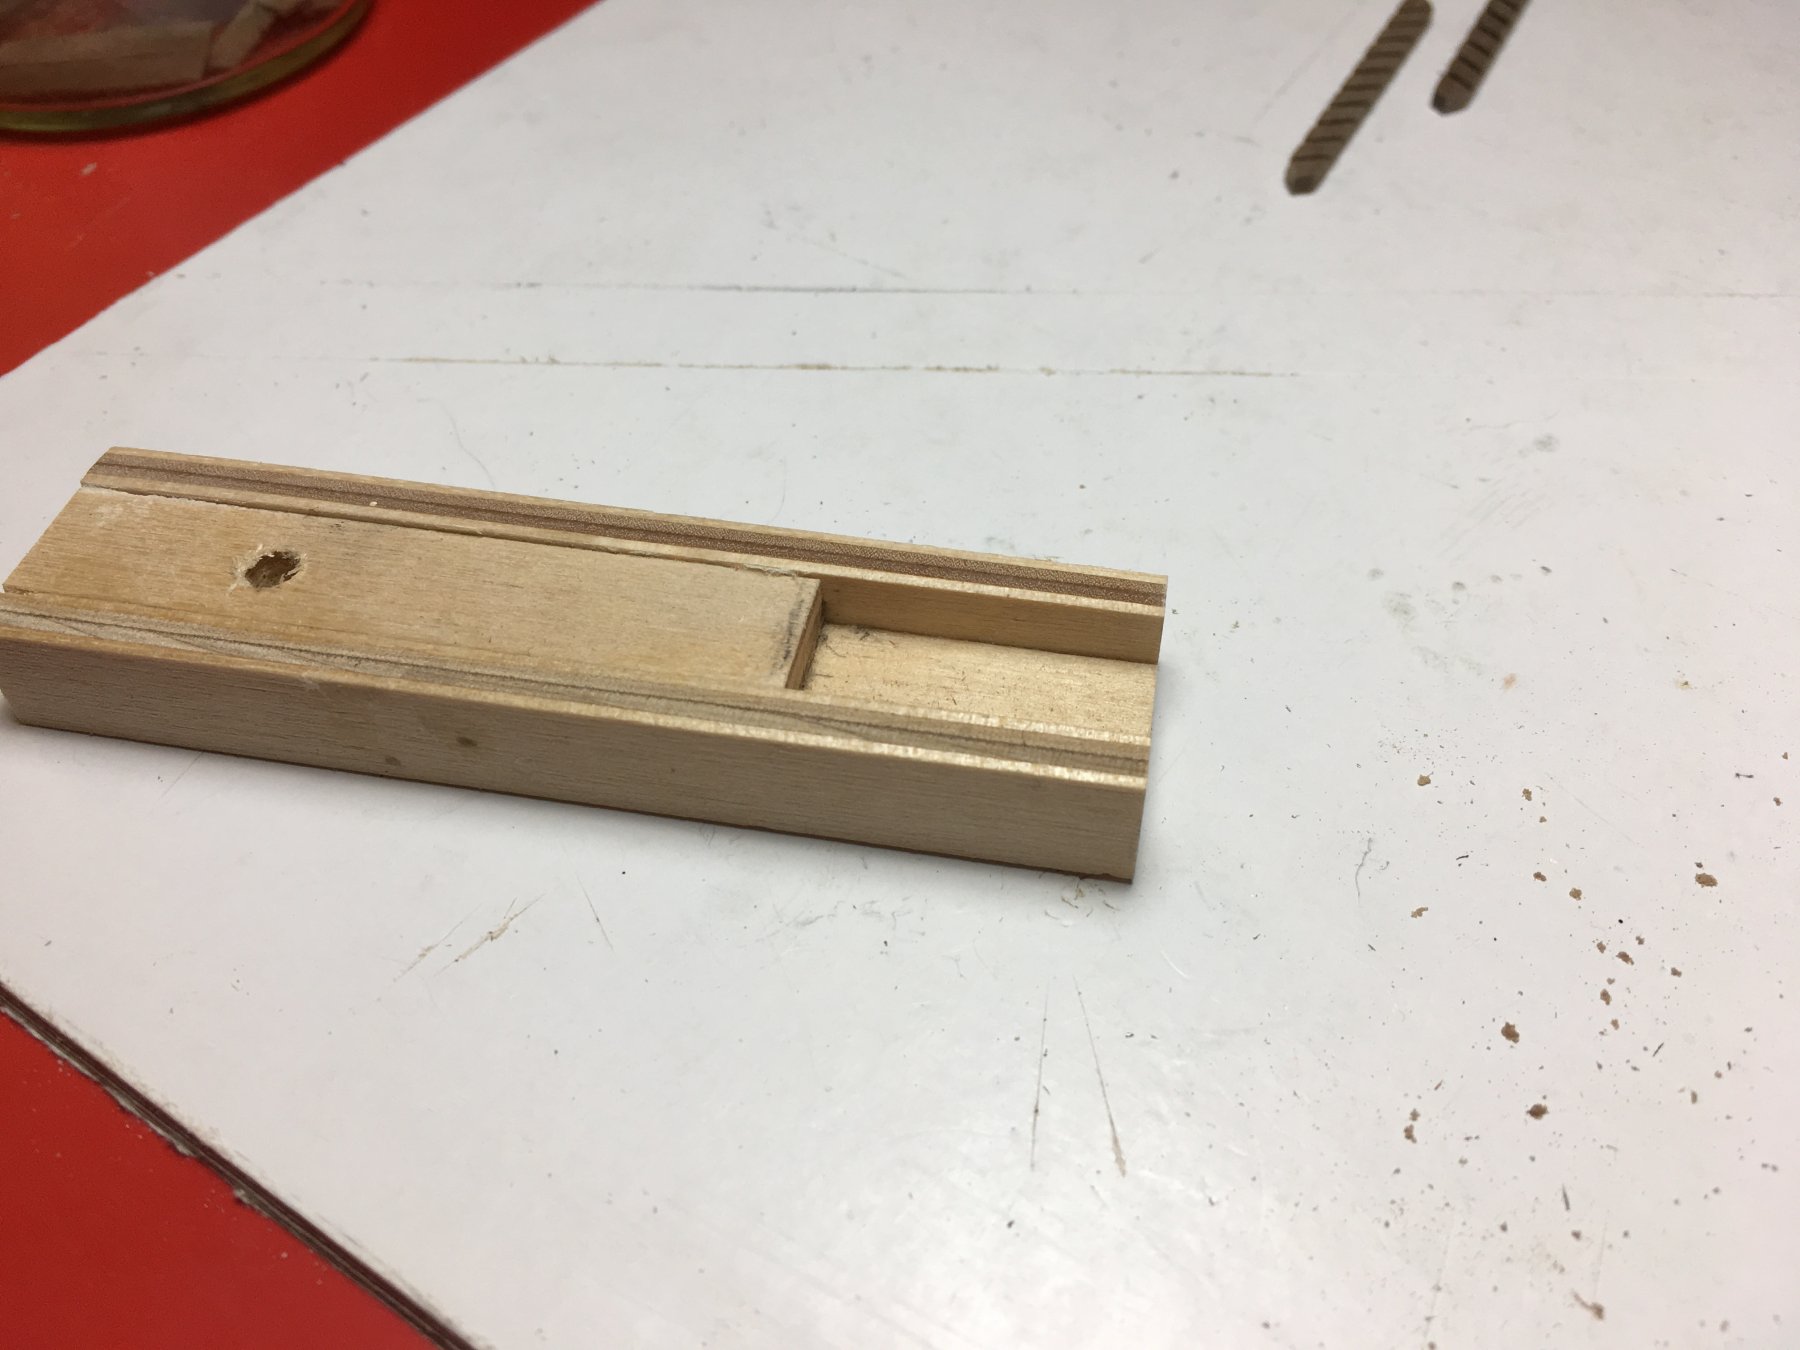
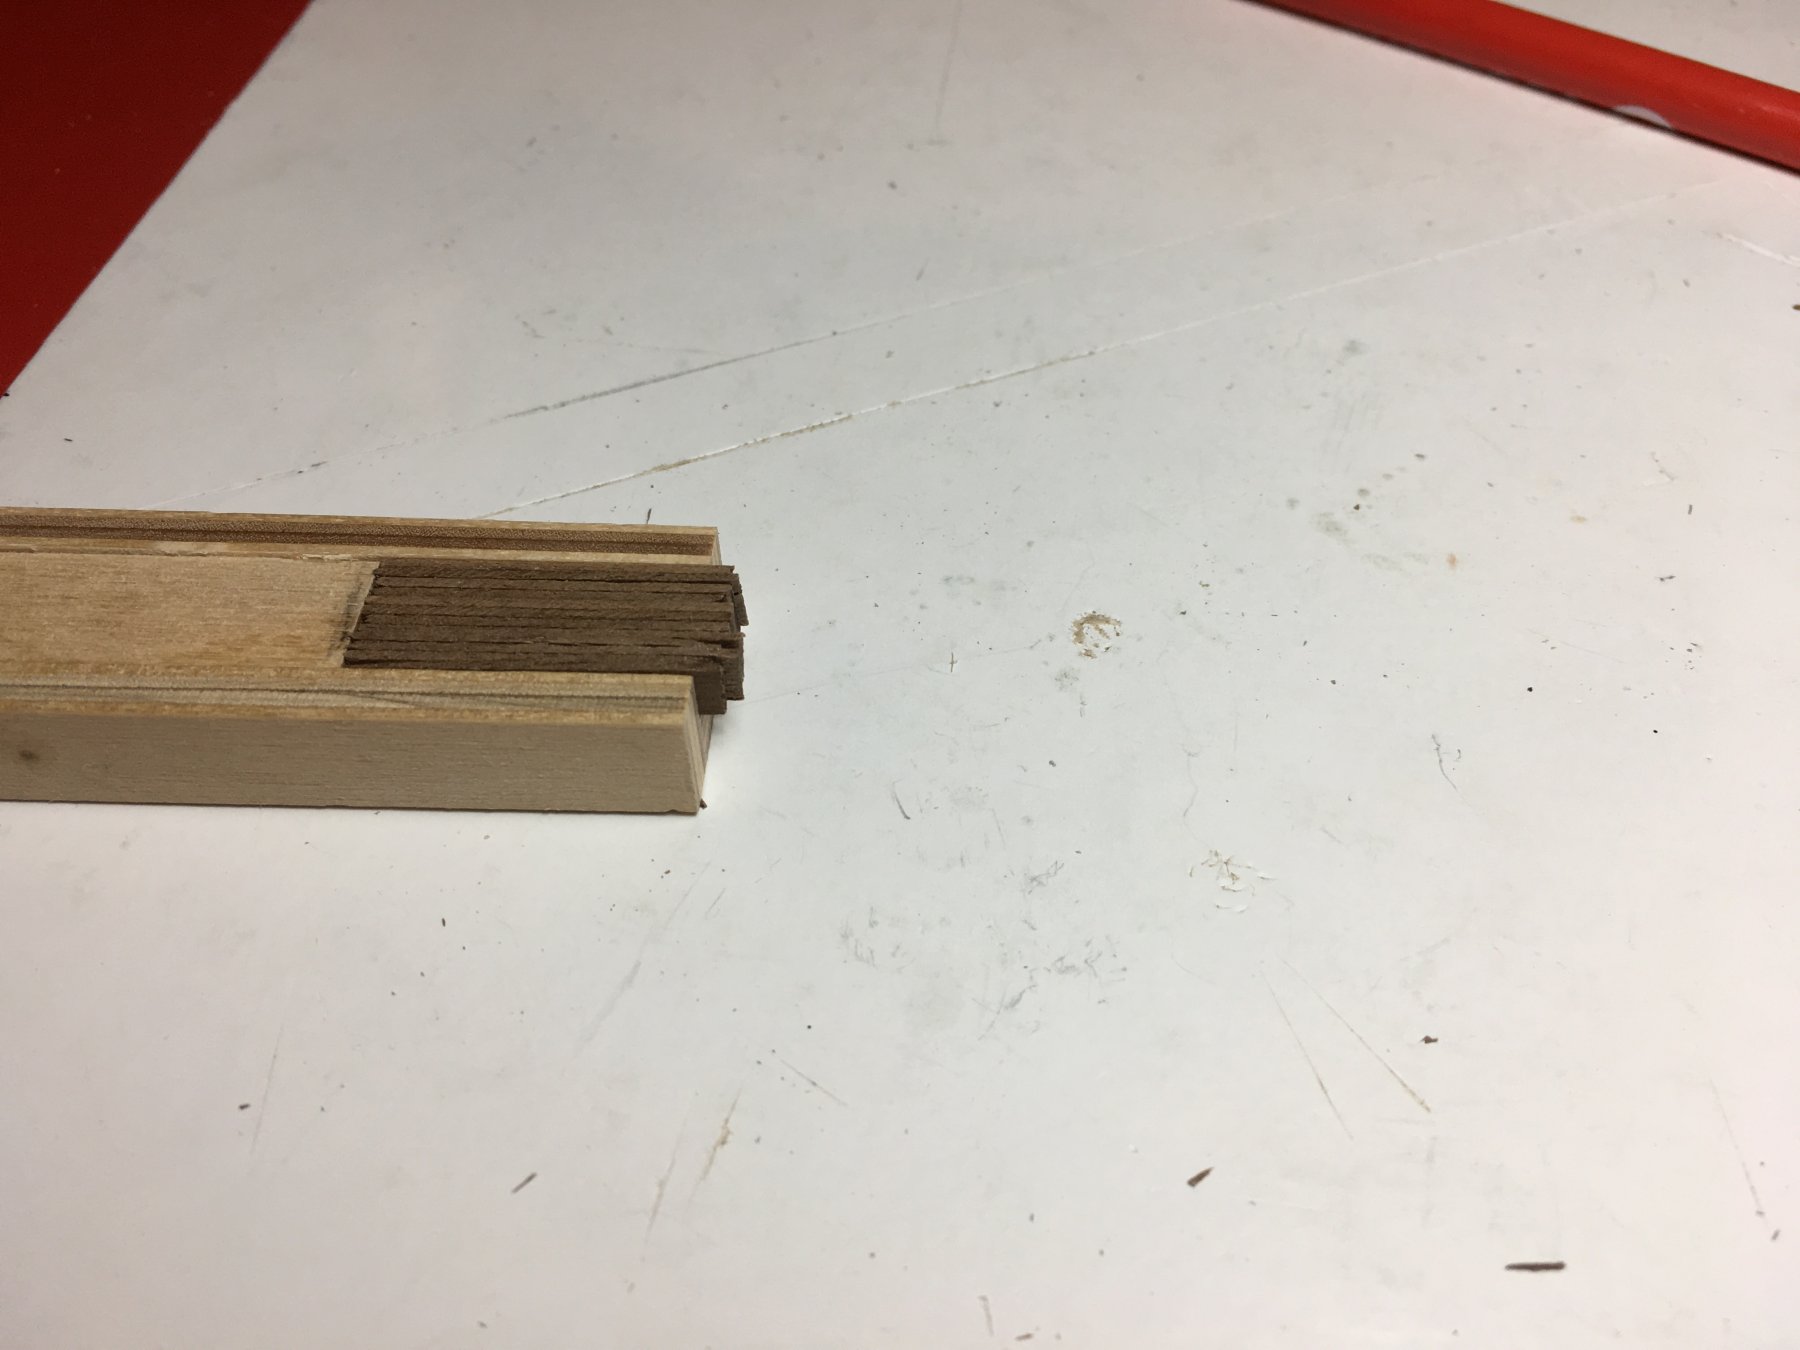
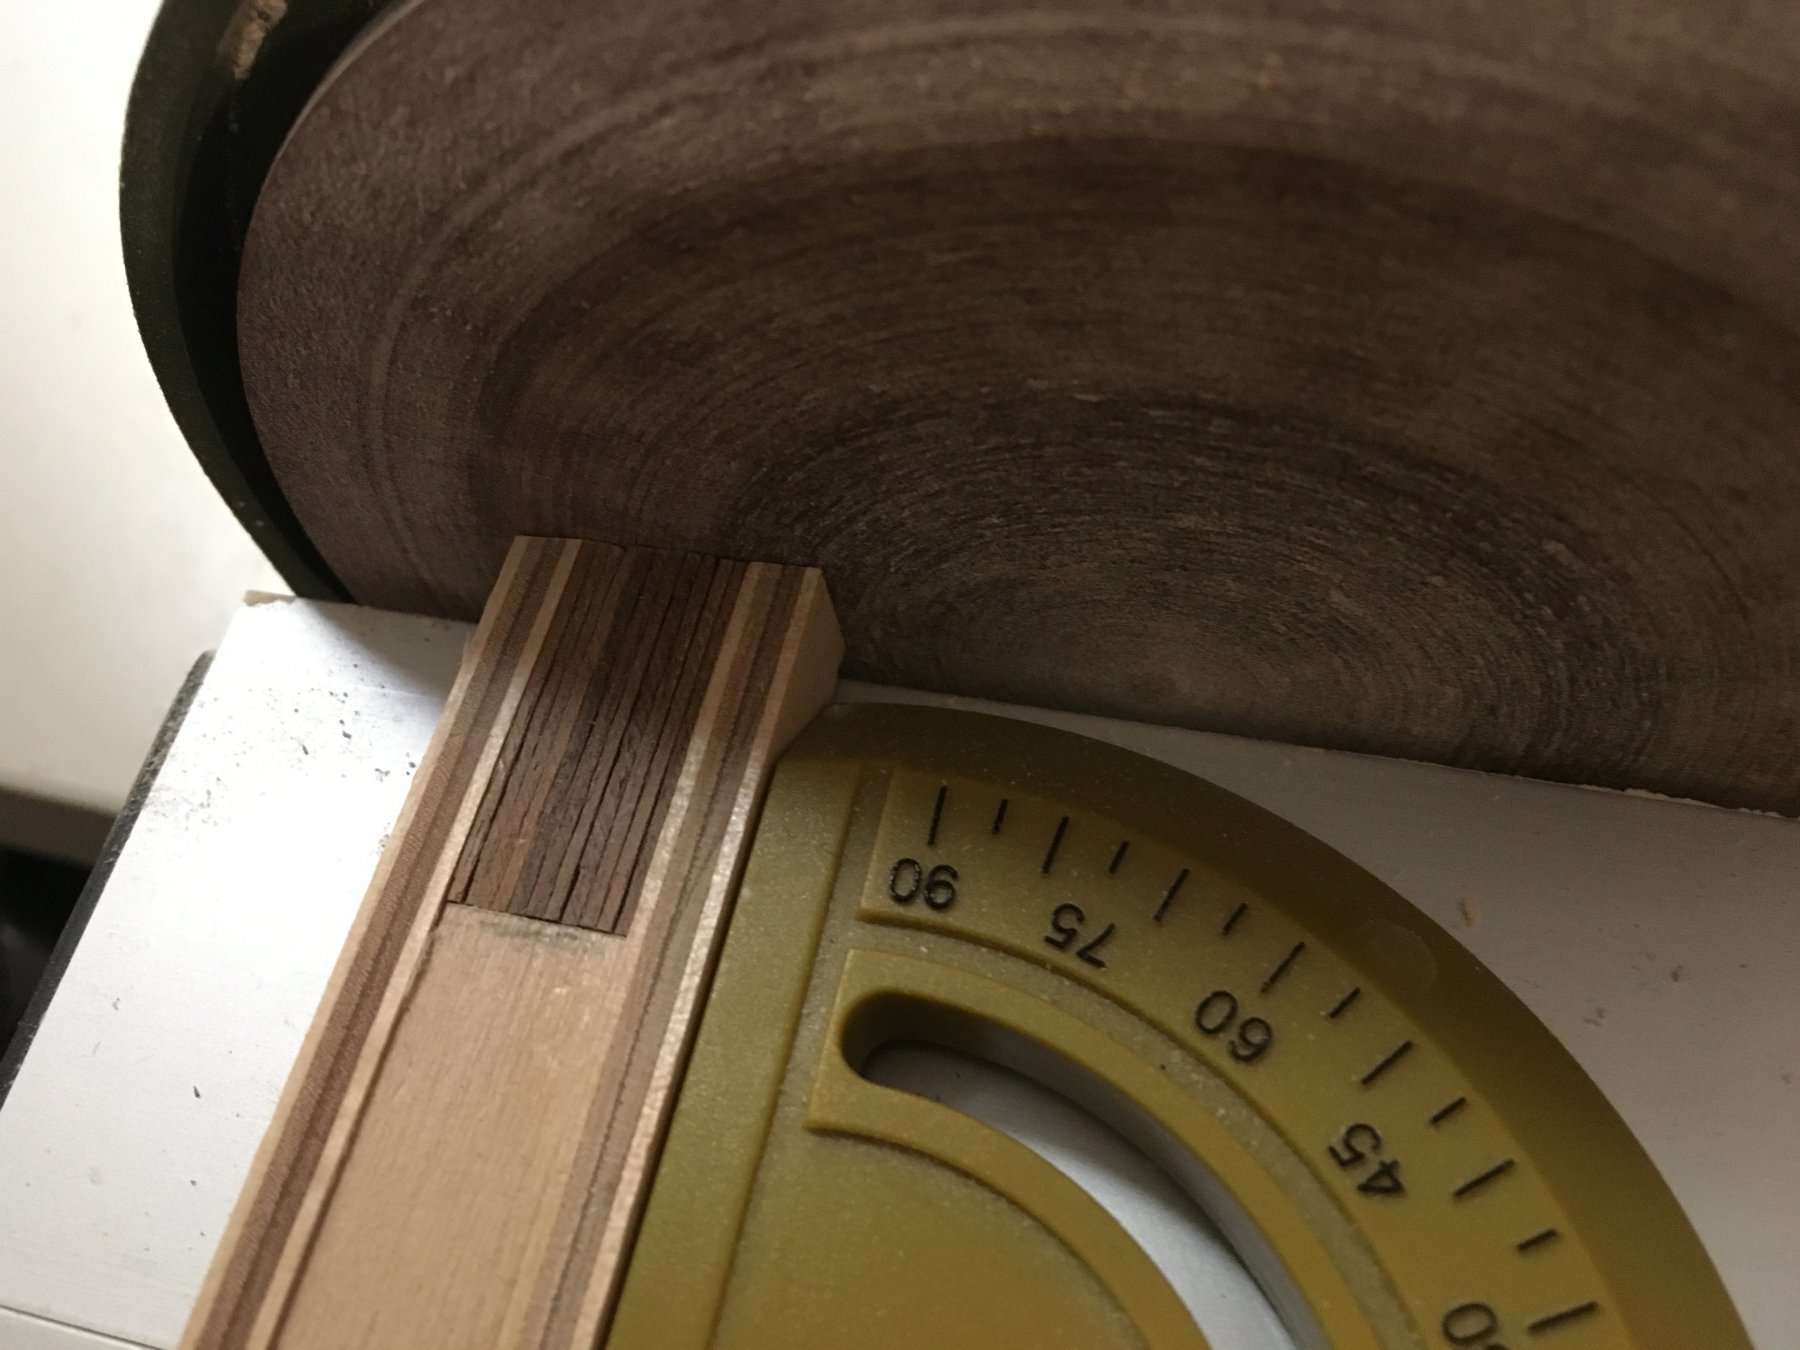
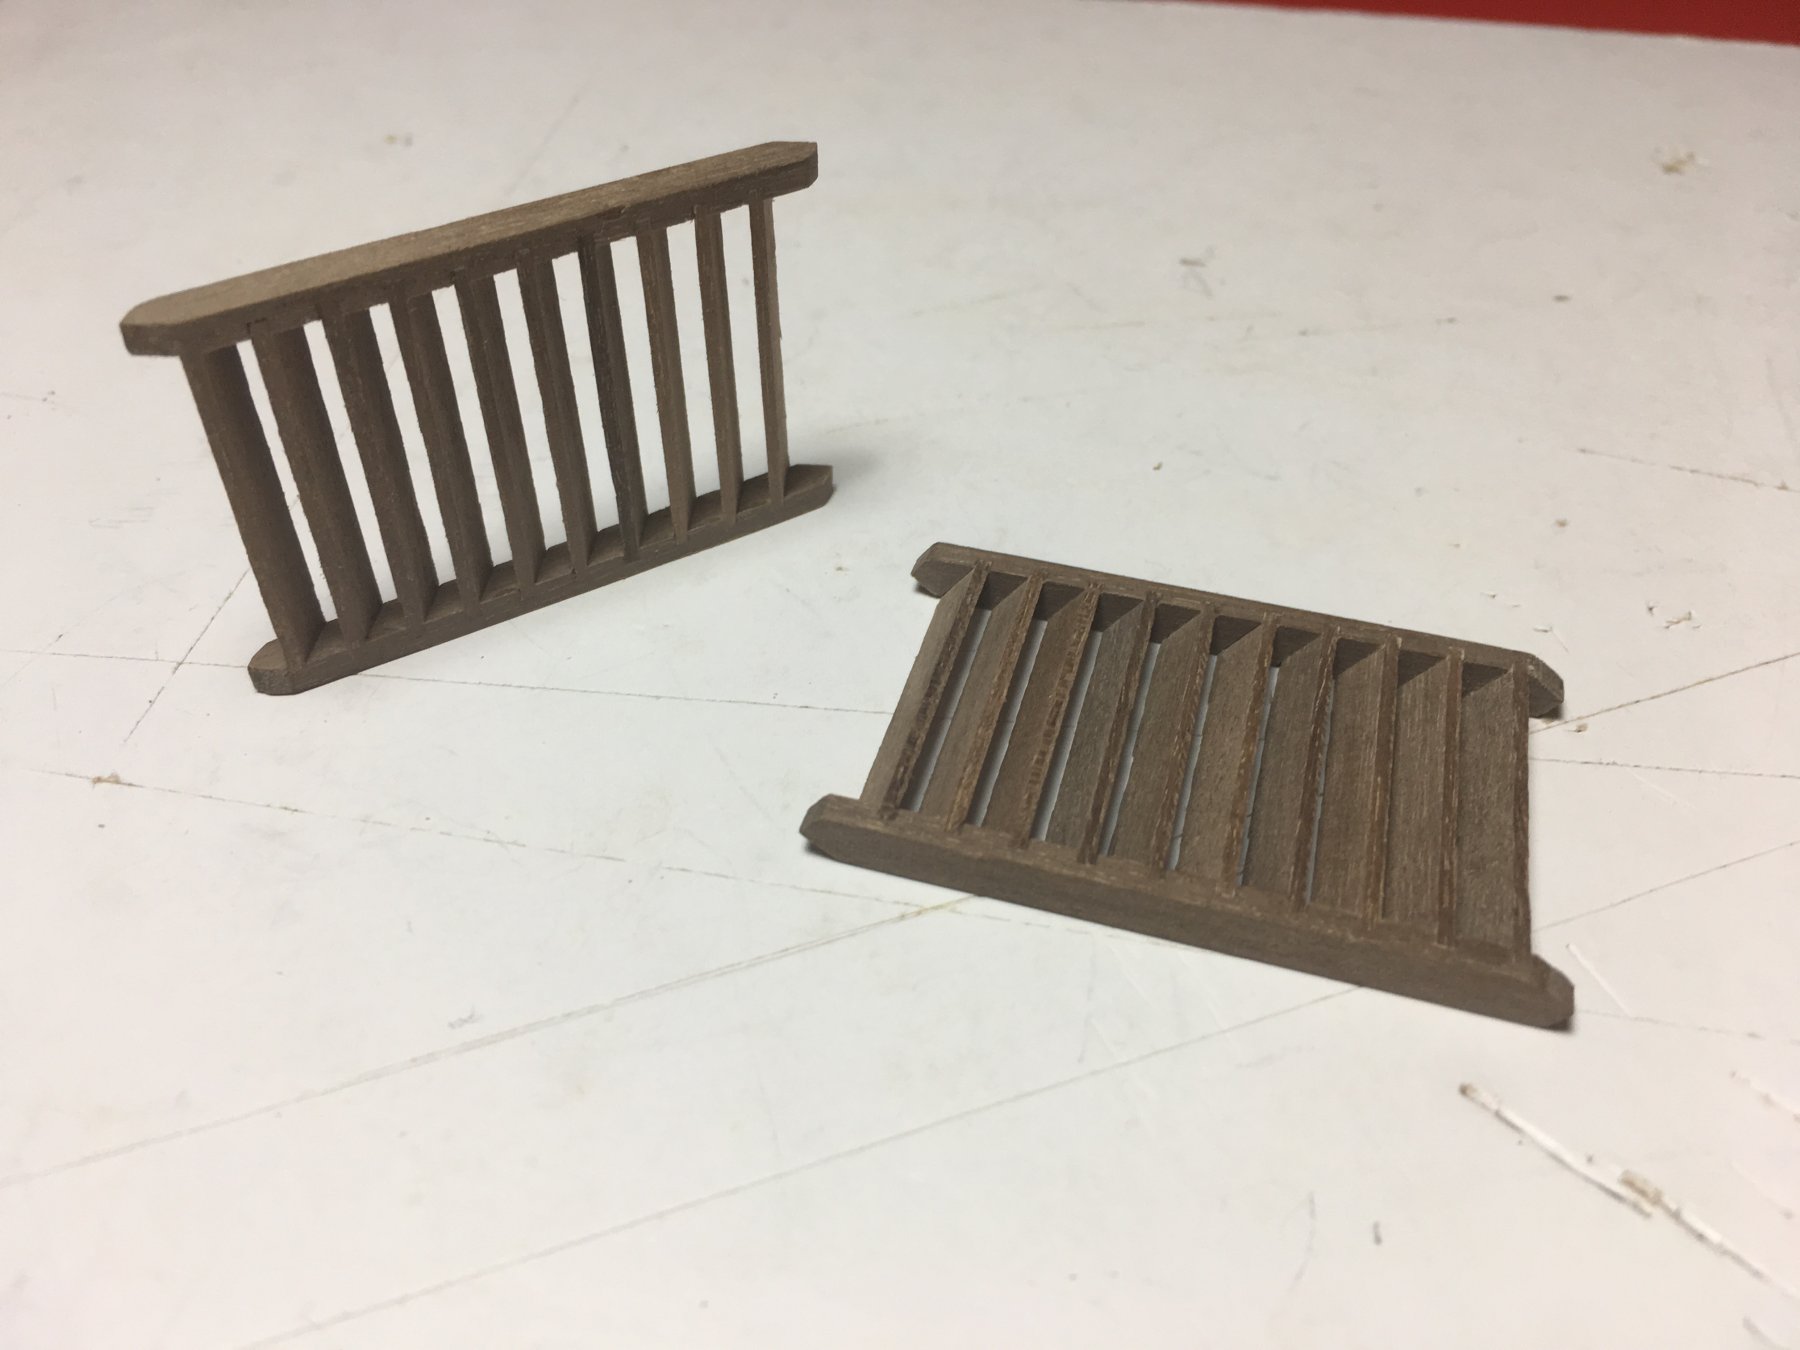
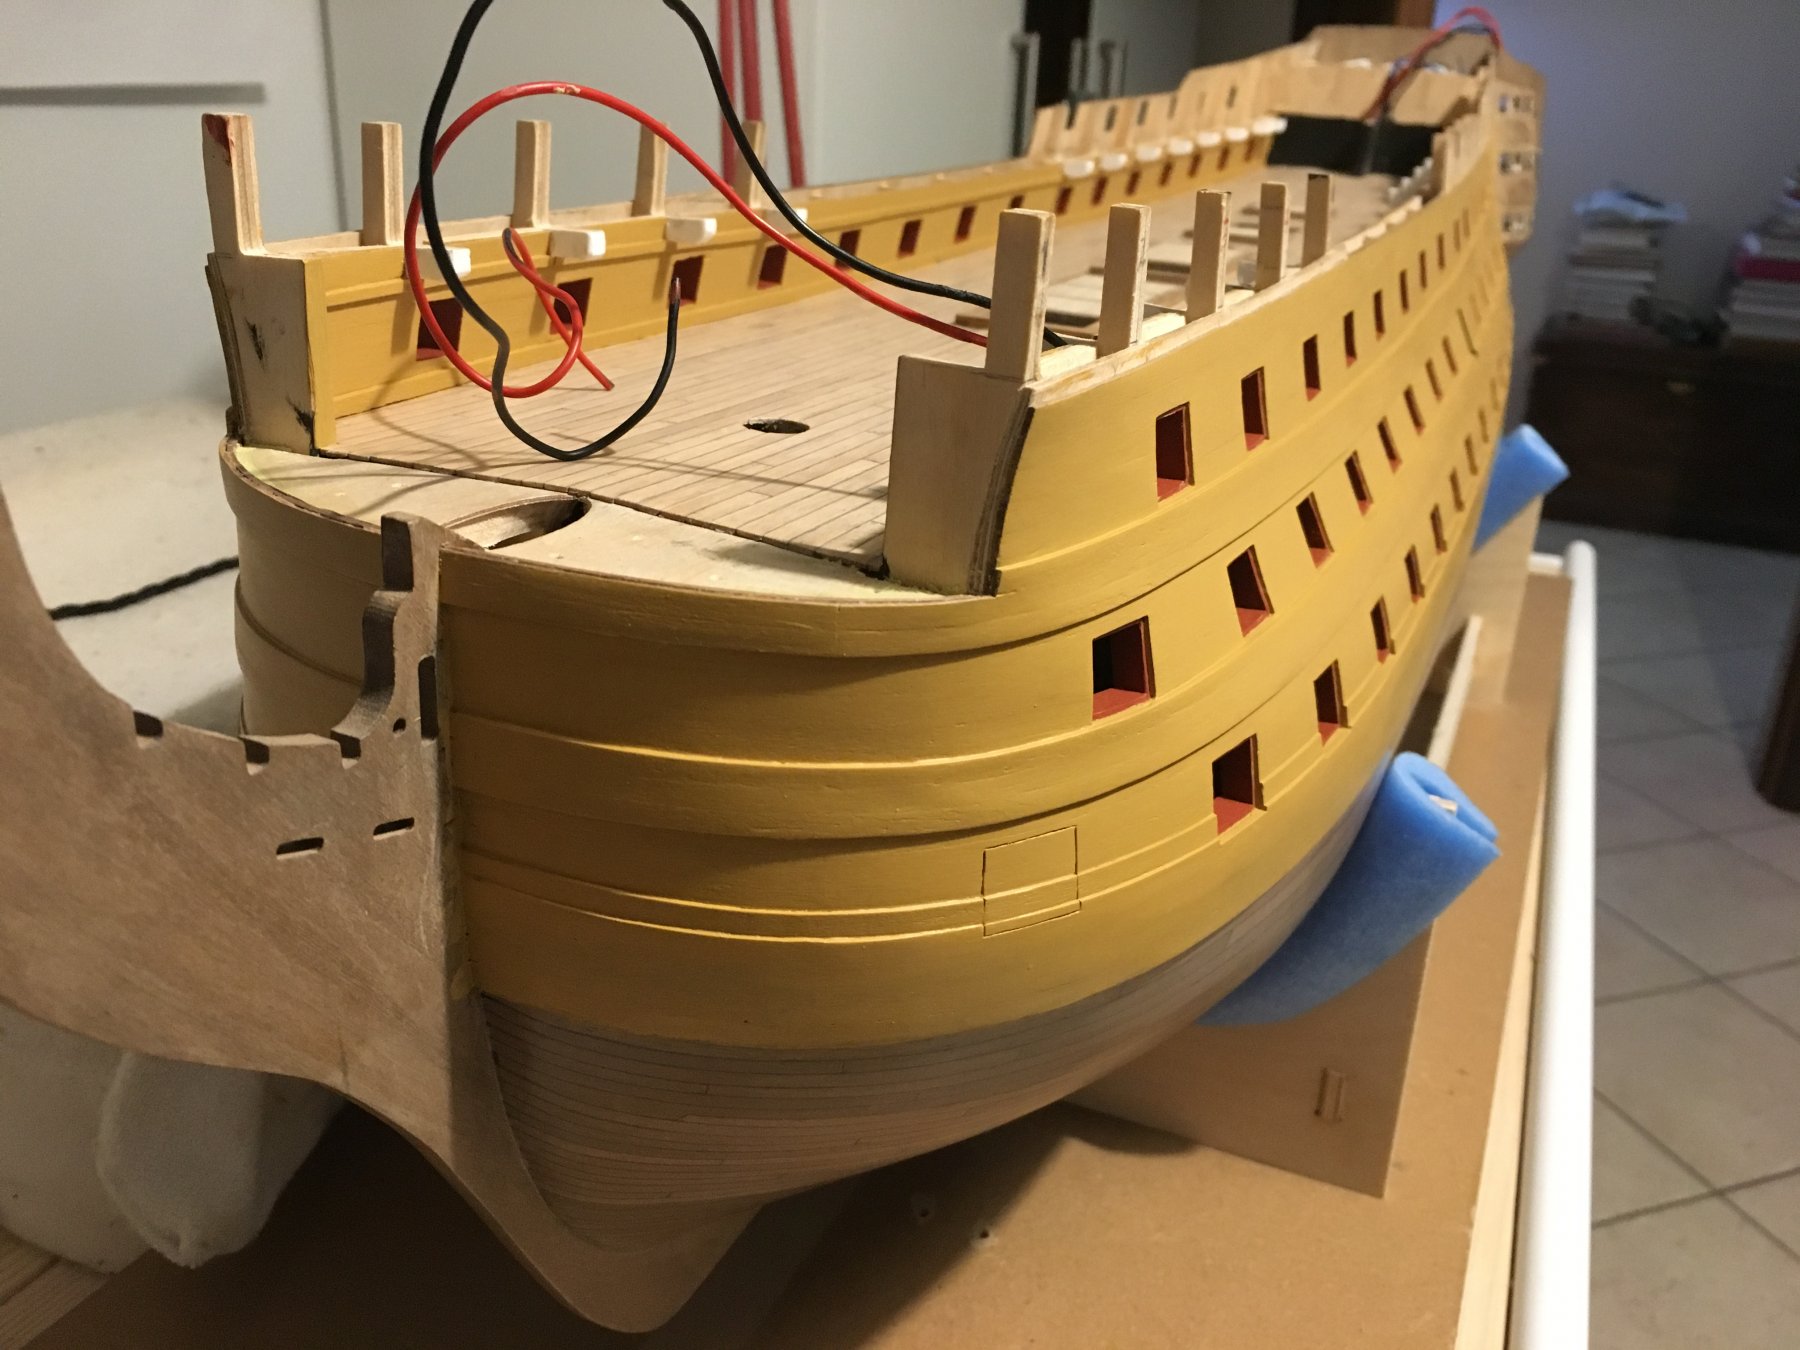
Hello Friends, It’s been a long time since my last post, some work had cropped up which took priority over my hobby. Here is an update of the work I managed since then. In the meantime I also did some changes to my hobby room. Hobby Room I made a new 3 meter work top with three drawer units for storage. I share half of the work top with my son who is presently studying electrical engineering. Now I must invest in a more comfortable chair. Inner Bulwark I added some more detail to the inner bulwark. Added the beam shelf and the stringer. Then I added the waterway which I made from 1mm x 1mm walnut strips, rounded one edge and painted black before fixing. I made a quick jig to mark the position on the bulwark for the eyelet arrangement for the canon tackle. I drilled all the holes ready to take the eyelets later on. I also experimented a bit with blackening the brass eyelets. I bought a bottle of blackening staff, mixed it with water as per instructions, cleaned the eyelets in white vinegar and according to the instructions after 30 min they should turn black. Nothing happened!!! I cleaned the eyelets in white spirit and after 30min still nothing happened. I left the eyelets in the blackening liquid for the night and next day they were black. Basically, to turn really black I had to leave them a couple of days. Why, I don’t know, maybe the material. Now I ordered the Birchwood Brass Black and will try that as I intend to do the canons as well. Gratings Prepared the gratings for the upper gun deck. The coamings for the gratings which are hardly going to show I mitred the corners. For those which are going to show more I dovetailed the corners. .. Ladders When I came to the ladders and took out the 2mm Walnut Sheet 3 for the ladder sides I was very disapointed the way they were splintered. There was no way I was going to use them. I sent an image to JoTiKa and asked for a replacement. I immediately received a reply from them confirming that thay posted a replacement and not only that, the new ones were made of solid walnut instead of plywood which were much better. I received it in just a few days. Very good service from JoTiKa, really helpfull. I made a jig to cut the treads for the ladders all equal lengths. Hull Painted all the gunport linings in red ochre and the hull sides in yellow ochre. Next step is to mark and paint the black bands. Hope not to take long for more updates. Regards Robert


- 527 replies
-
- 10
-
-
- caldercraft
- victory
- (and 1 more)
-
Great work Michael, very neat planking. Robert
-
Good to have you back Robert. Its always a pleasure to visit your log and watch your beautiful work. Robert
-
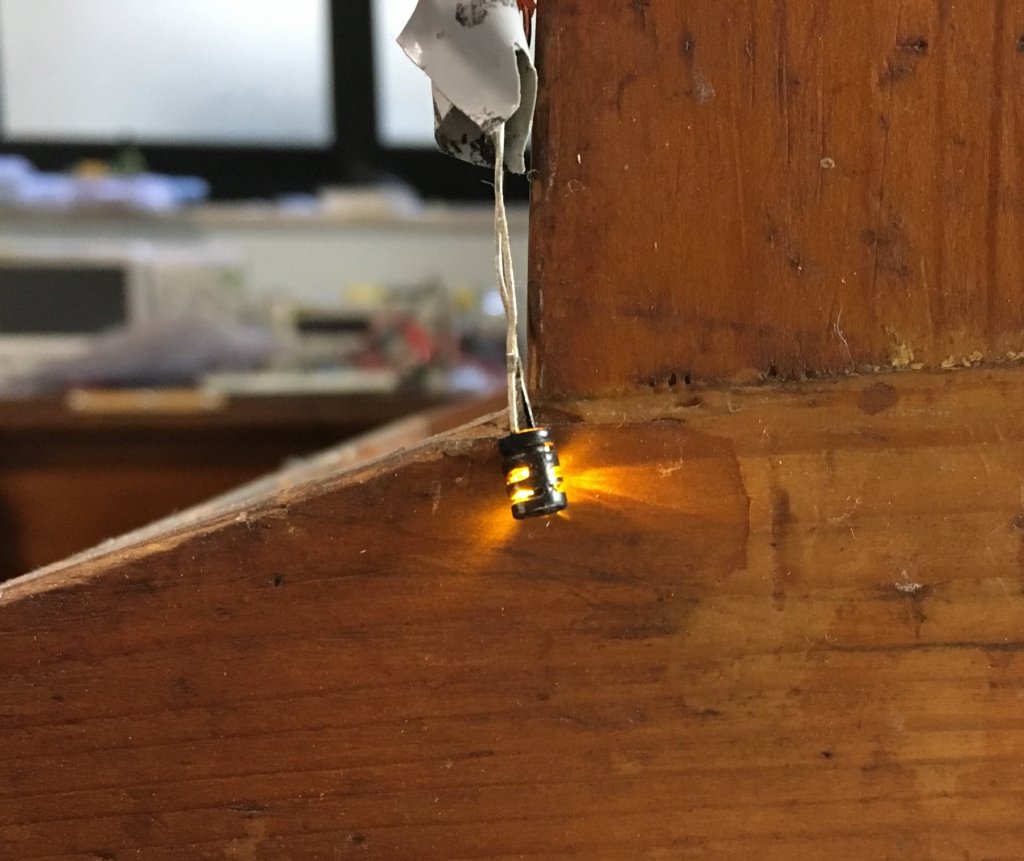
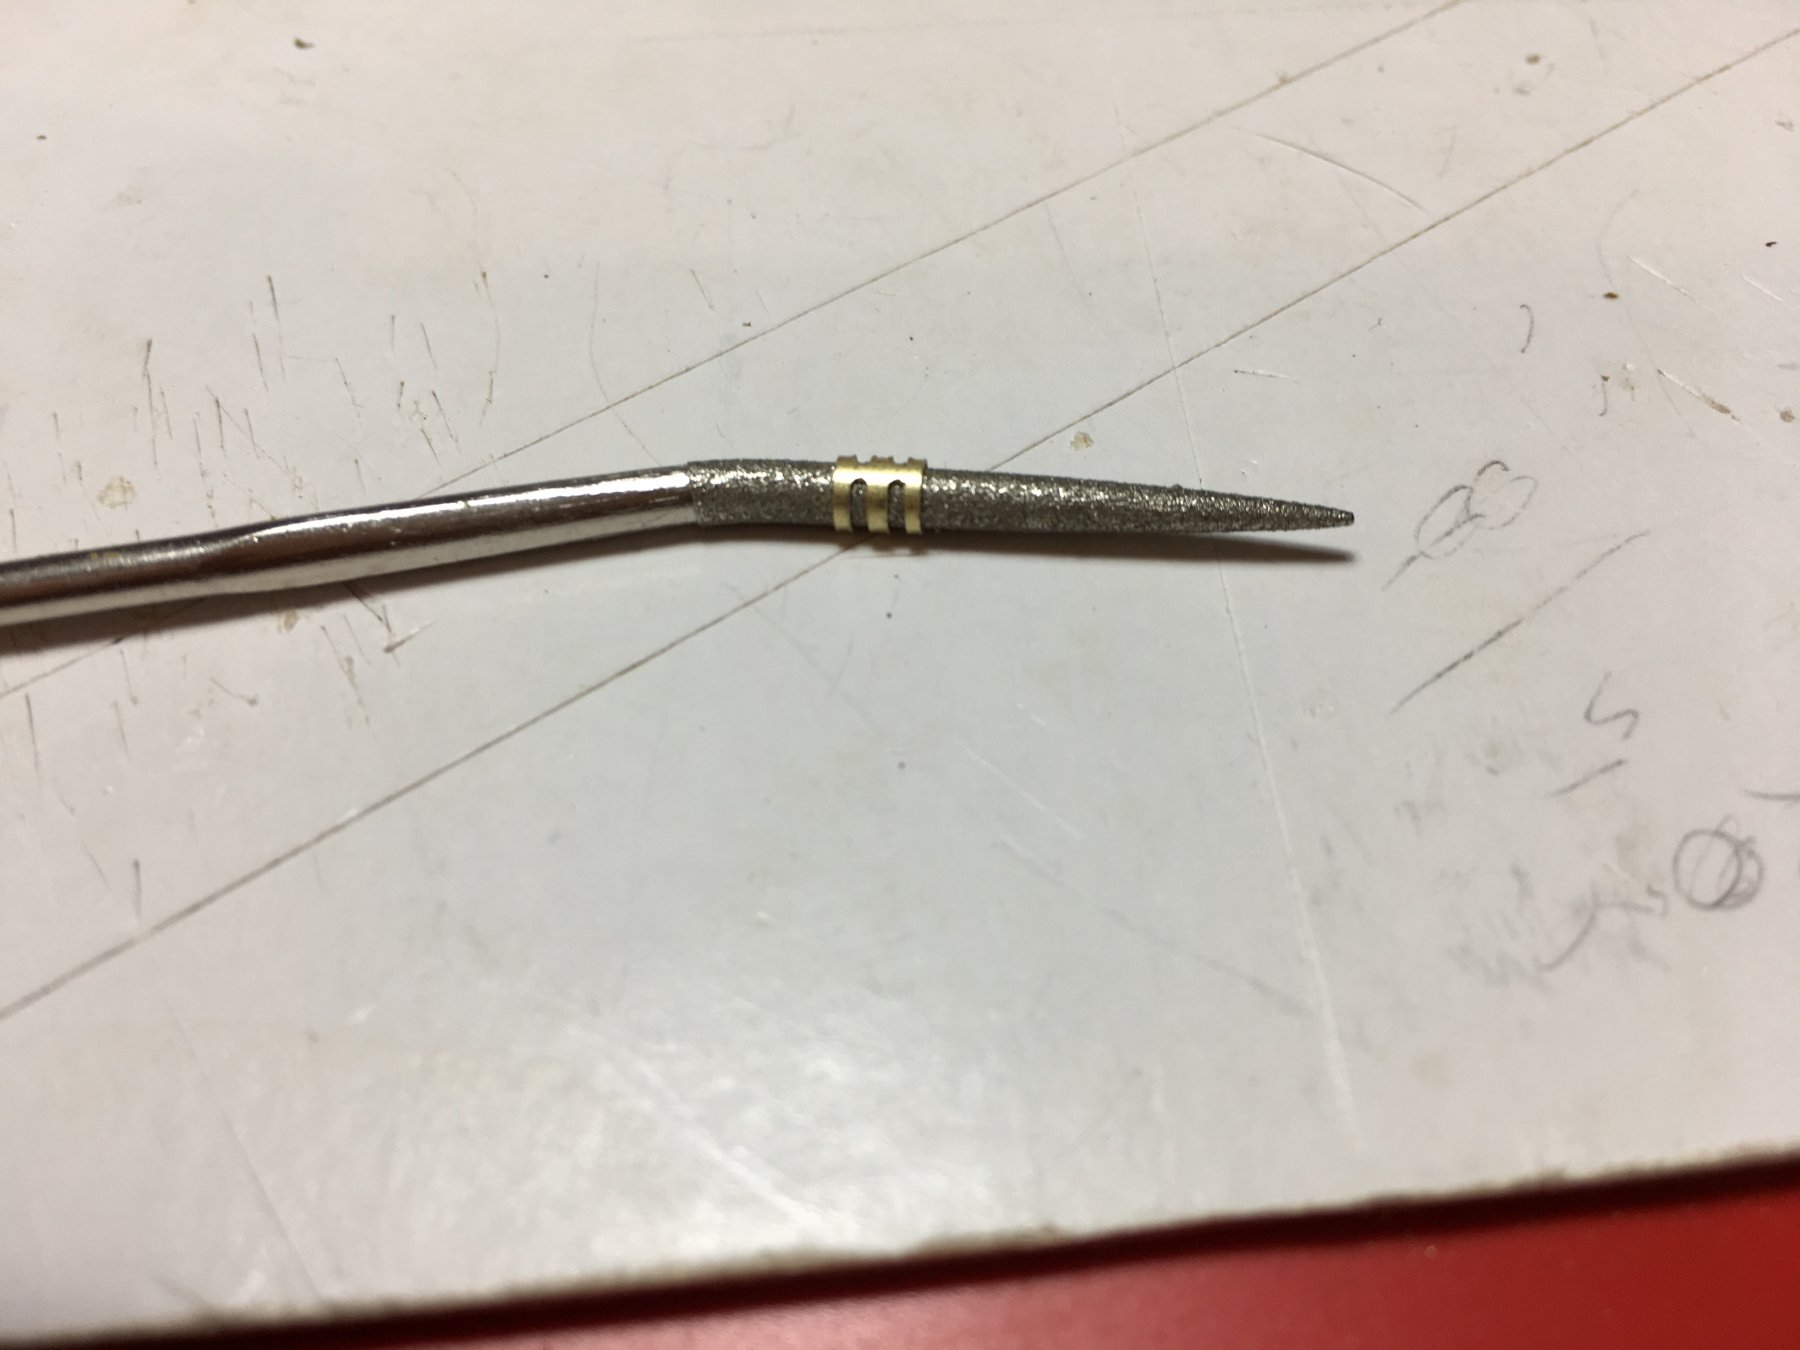
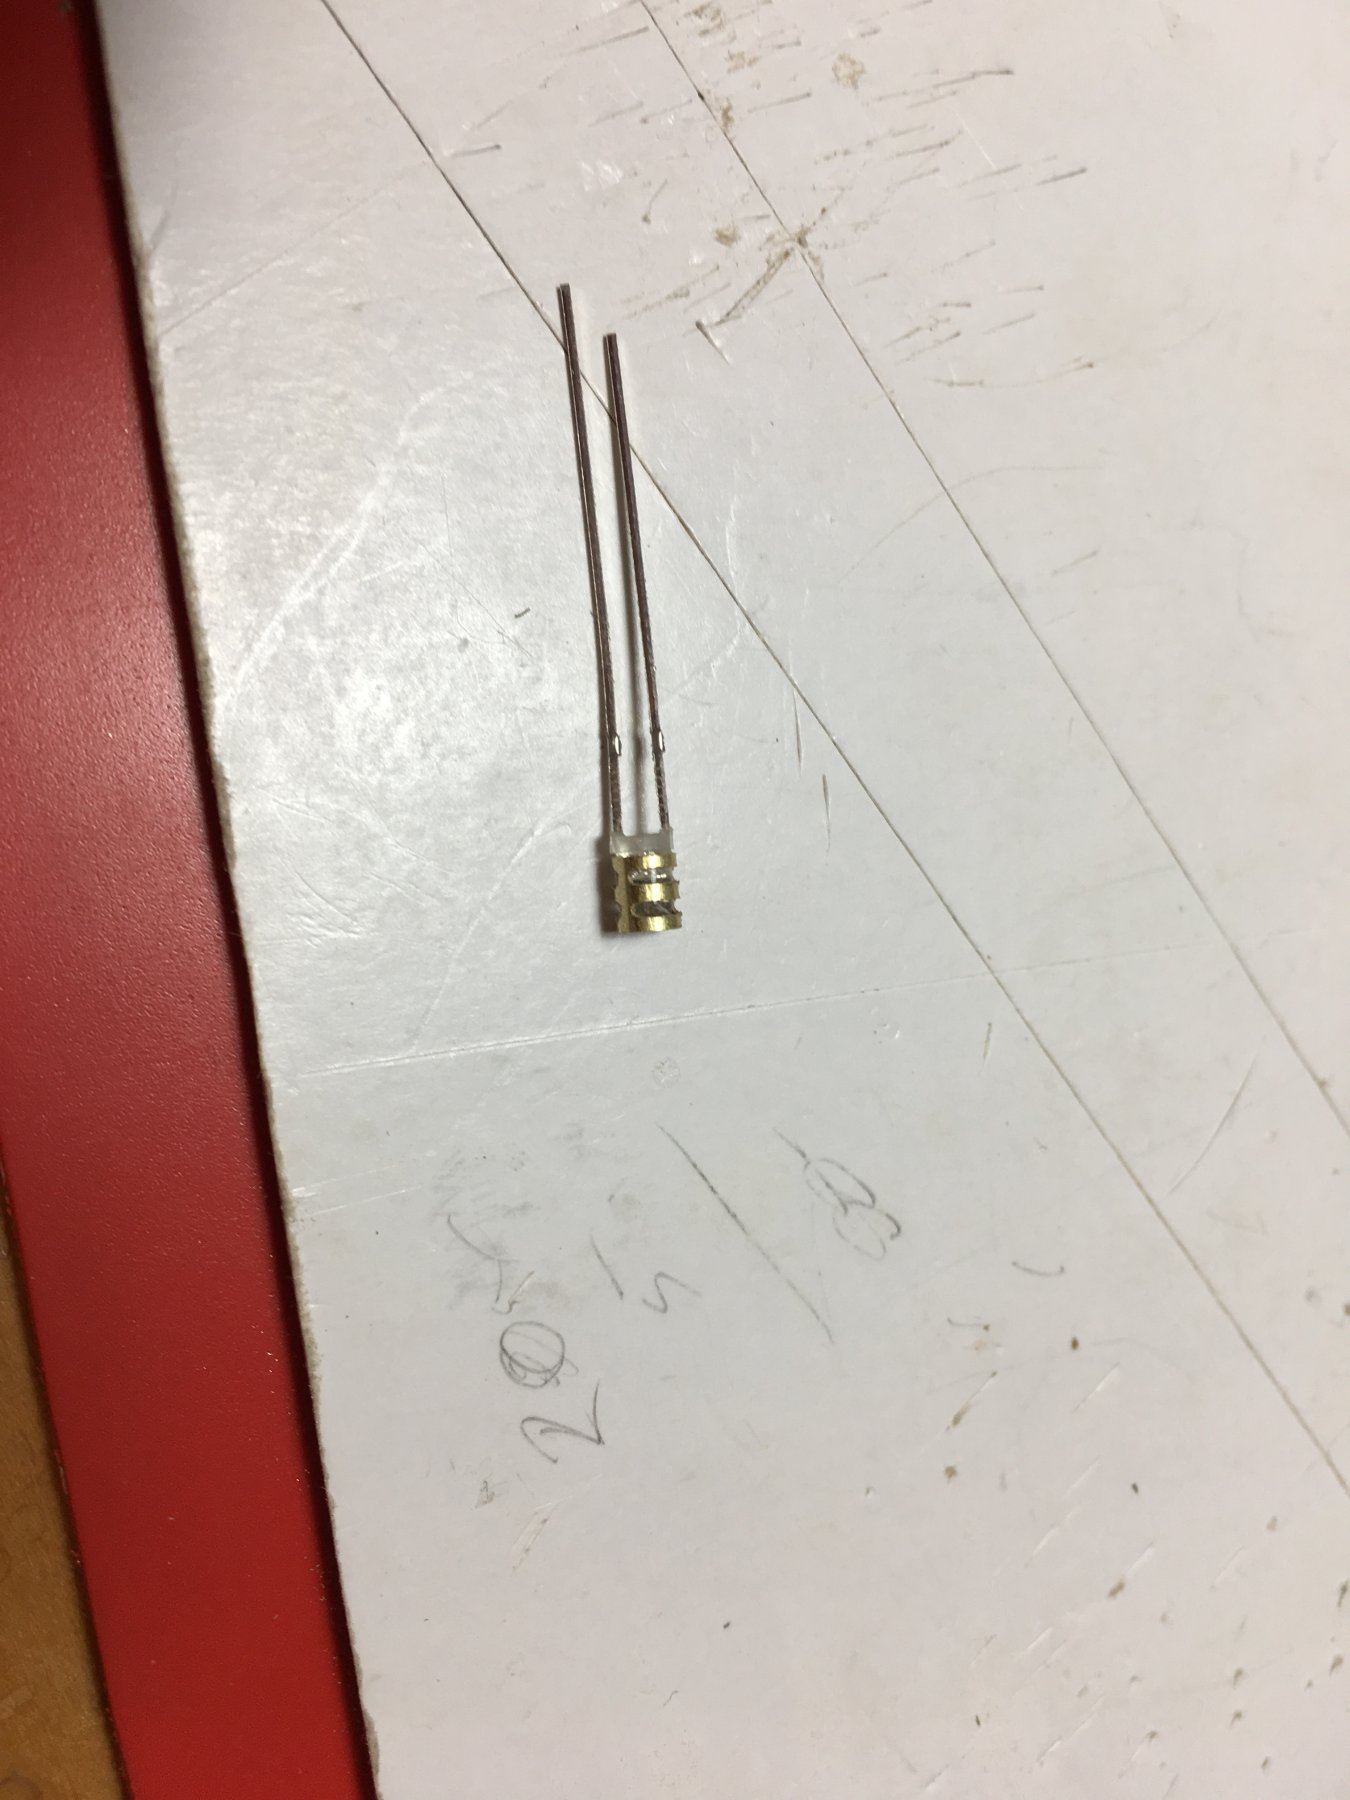
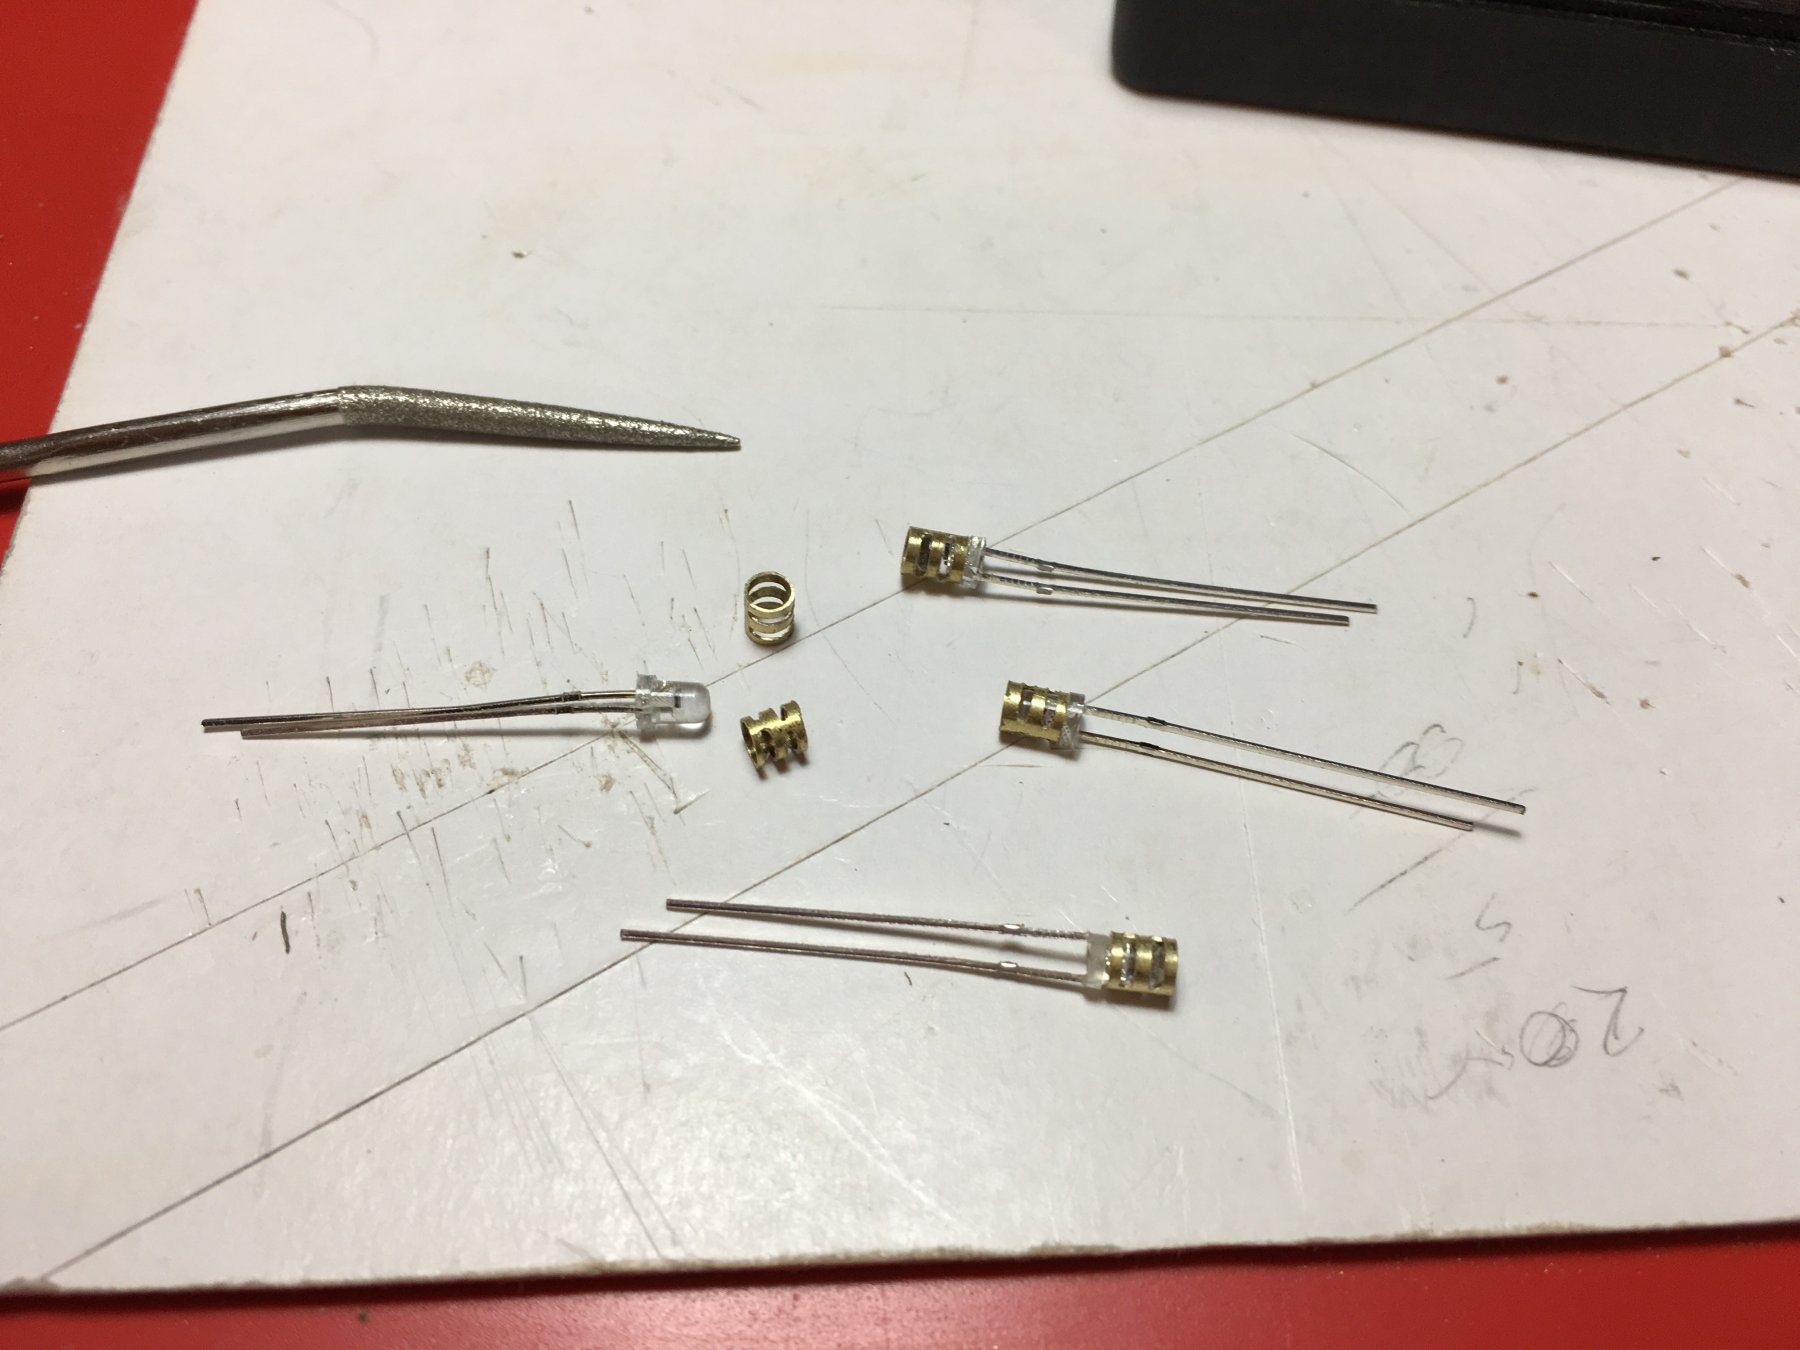
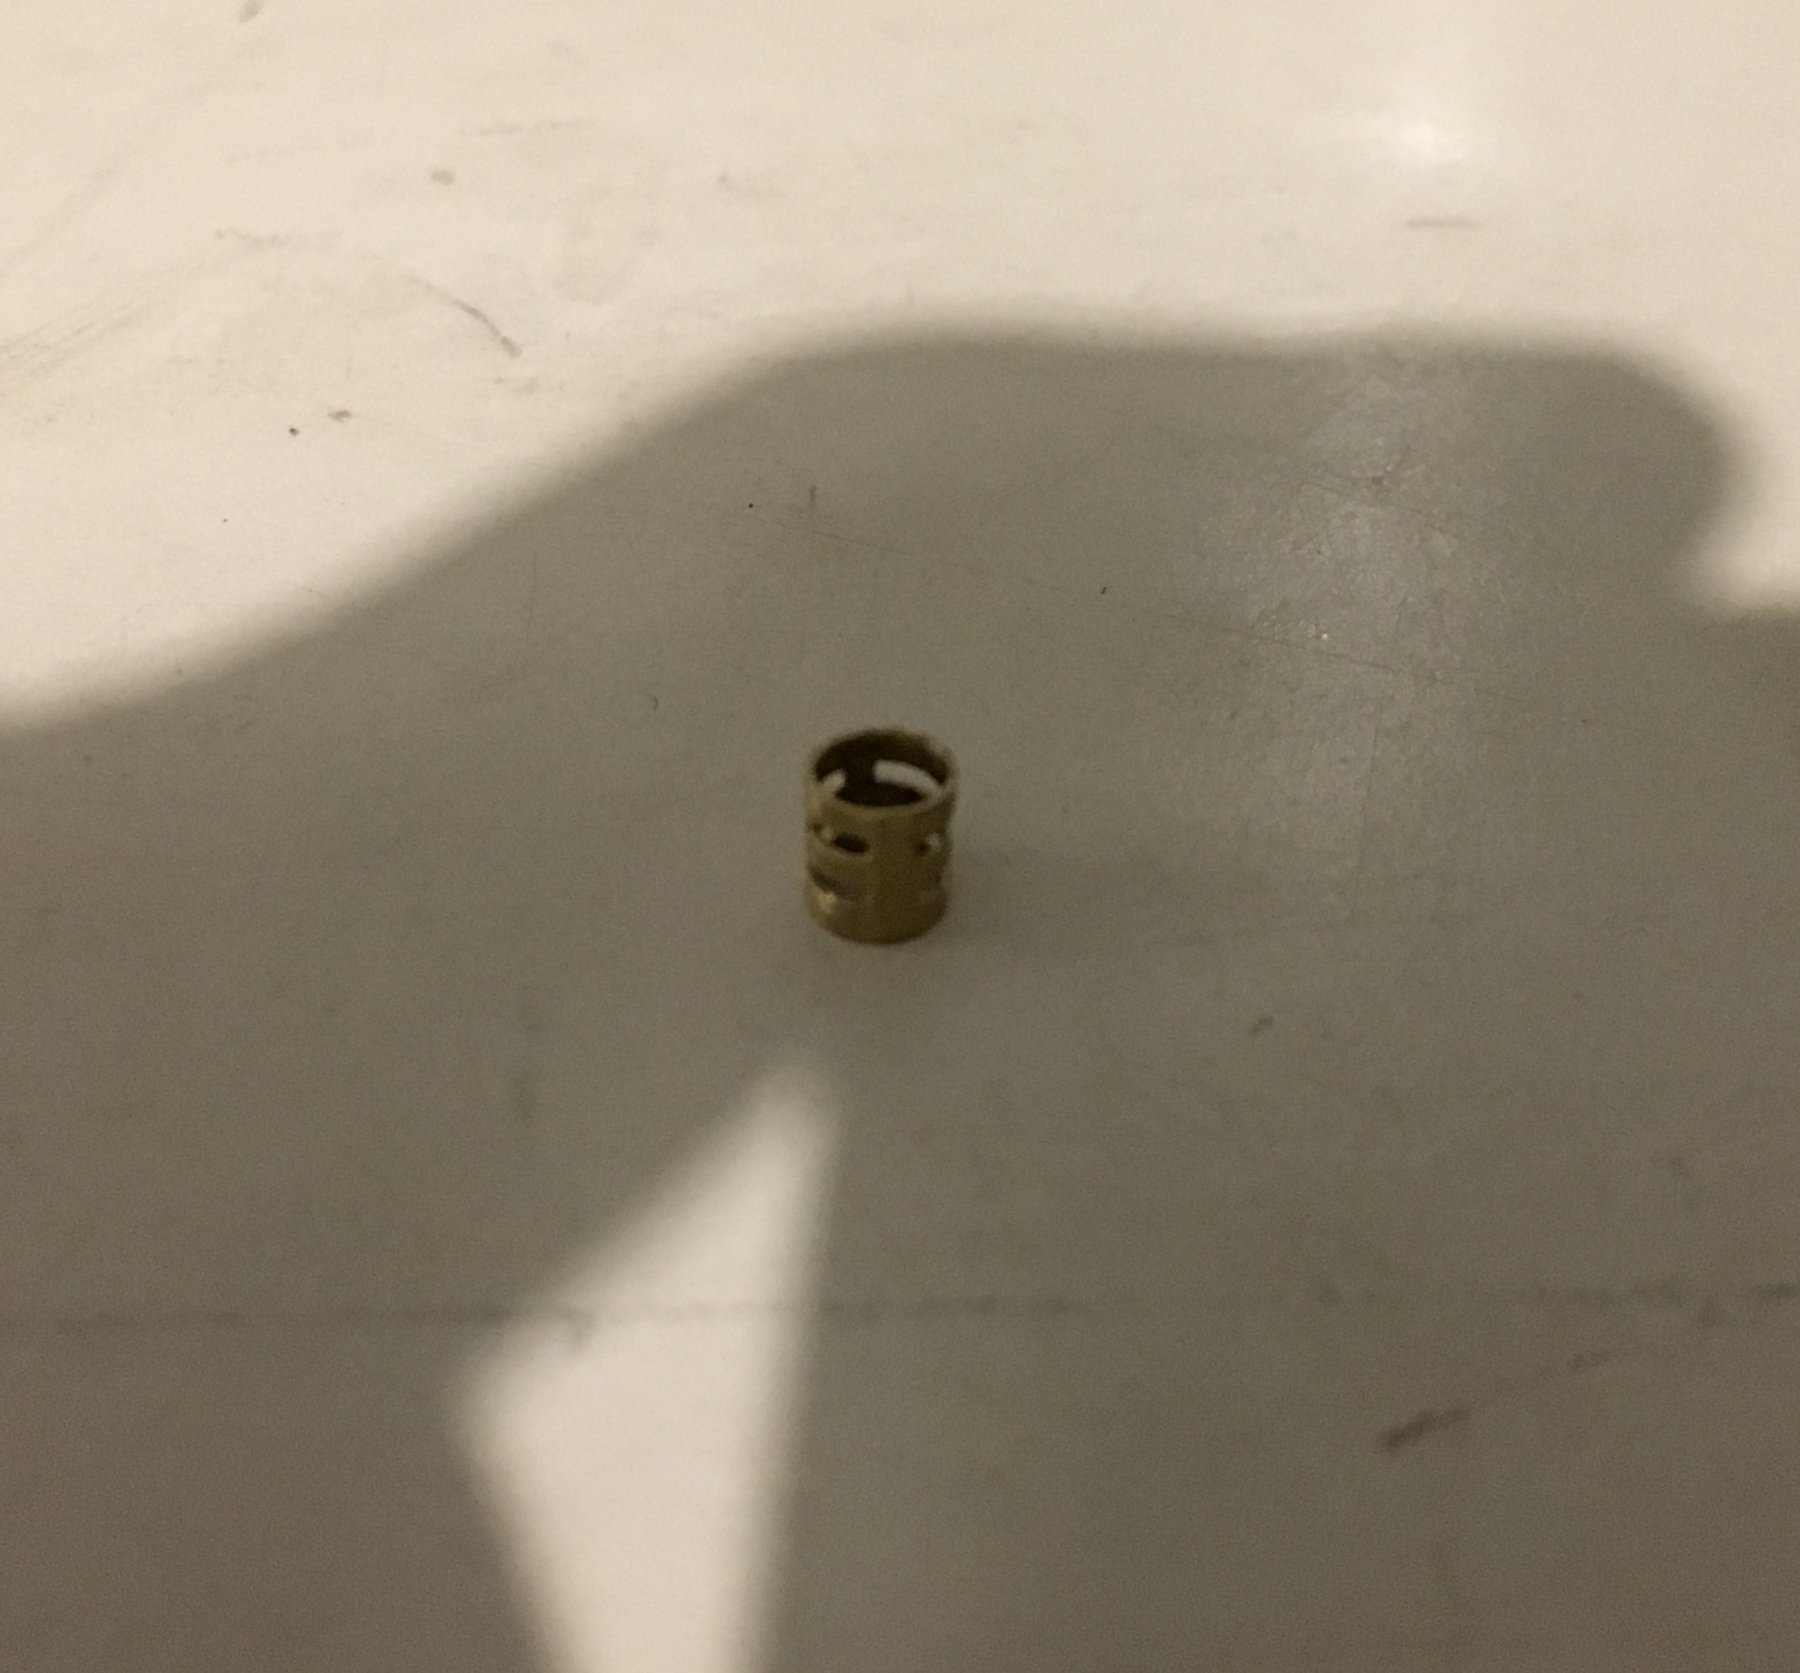
Paul, thank you for your comments, and for bringing to my attention that each row overlaps by 1/3 and not by 1/2. Yes true, I agree with you, the caldercraft copper plates are also not correct as they are laid one next to the other, no overlapping. I will probably leave the planking showing. Richard, thank you for your info, I will keep it in mind if I decide to copper. Christos, thank you, I am am definitely enjoying building this ship, moving slowly, because I work on it when I really feel like, I don't work on it to get a job over and done with. I like to keep it a hobby not a job to finish. Well, the lights on the upper deck have to be different as they will be showing not like the other decks below. I have already been thinking about it and have tried a prototype of a lantern. This is what I have come up with until now. I sourced copper tubes with an inside diameter same as the outside diameter of the LED's I am using. Cut a small piece and saw off a couple of slots on each side. Slide them in each other. And this is the result. Still needs some finishing touches. When it is to my satisfaction I will prepare a few of them. Robert

- 527 replies
-
- 11
-
-
- caldercraft
- victory
- (and 1 more)
-
The Jury has spoken, 'NO COPPER PLATES'. Don, Nils, Ian, Robert, Nigel, Joe, Heinz, Graham, Rich, Richard, thank you all for your comments and for your advise. Thank you all for the likes as well. Nils, coming from you is an honour. You have outstanding builds. Heinz, I was kind of expecting that kind of a reply from you. Ok no copper plates. Graham, still a lot more challenges along the way, we leave the celebrations for later on. Richard, thank you for the gun images. Very informative. Robert
- 527 replies
-
- 3
-
-
- caldercraft
- victory
- (and 1 more)
-
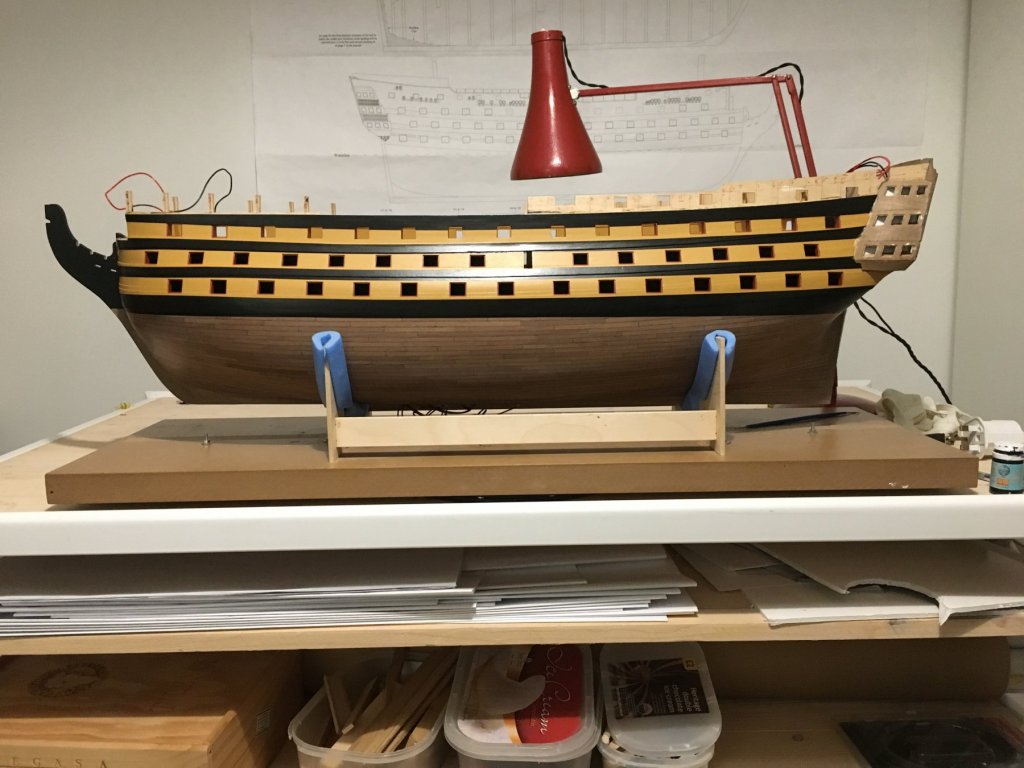
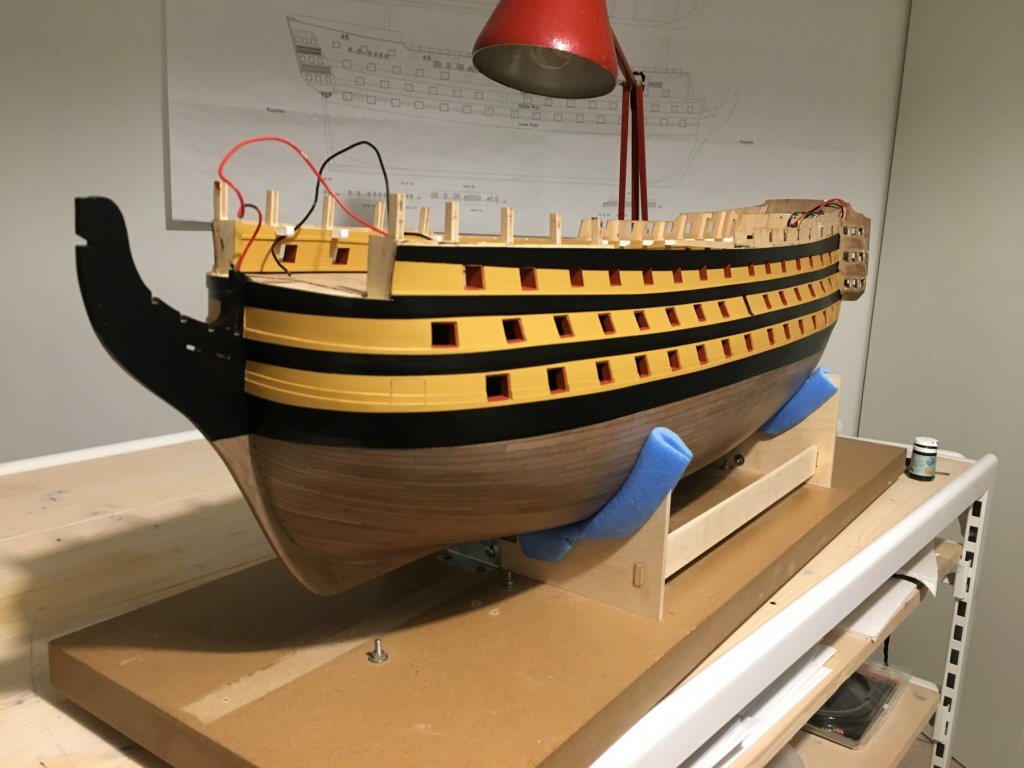
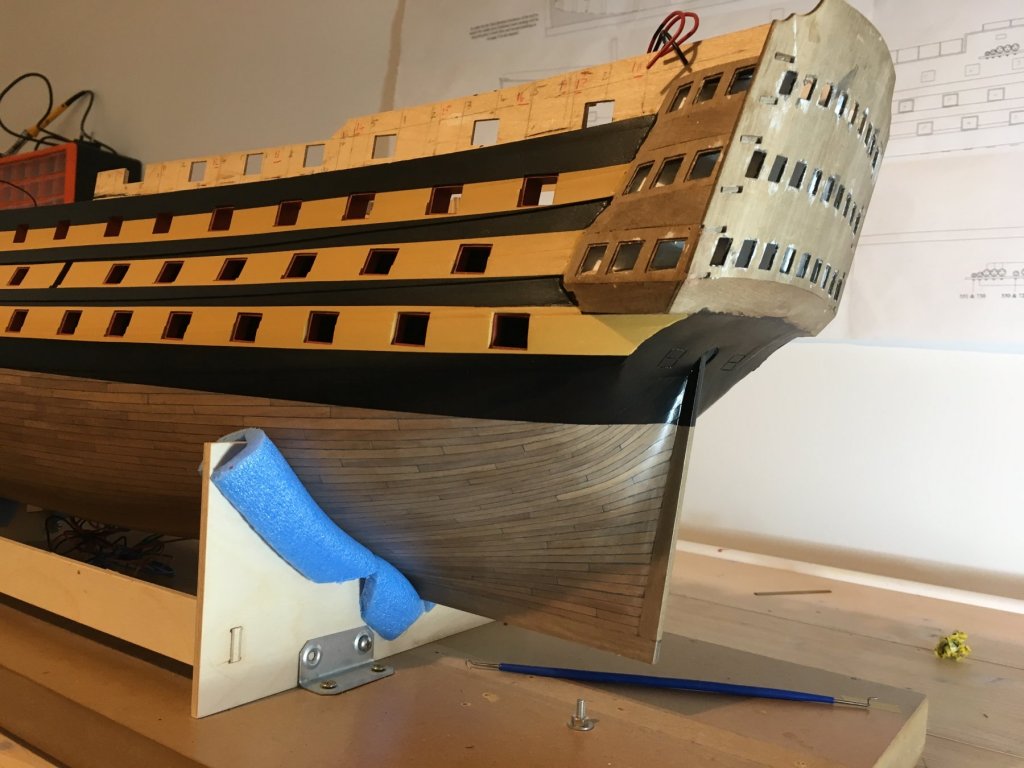
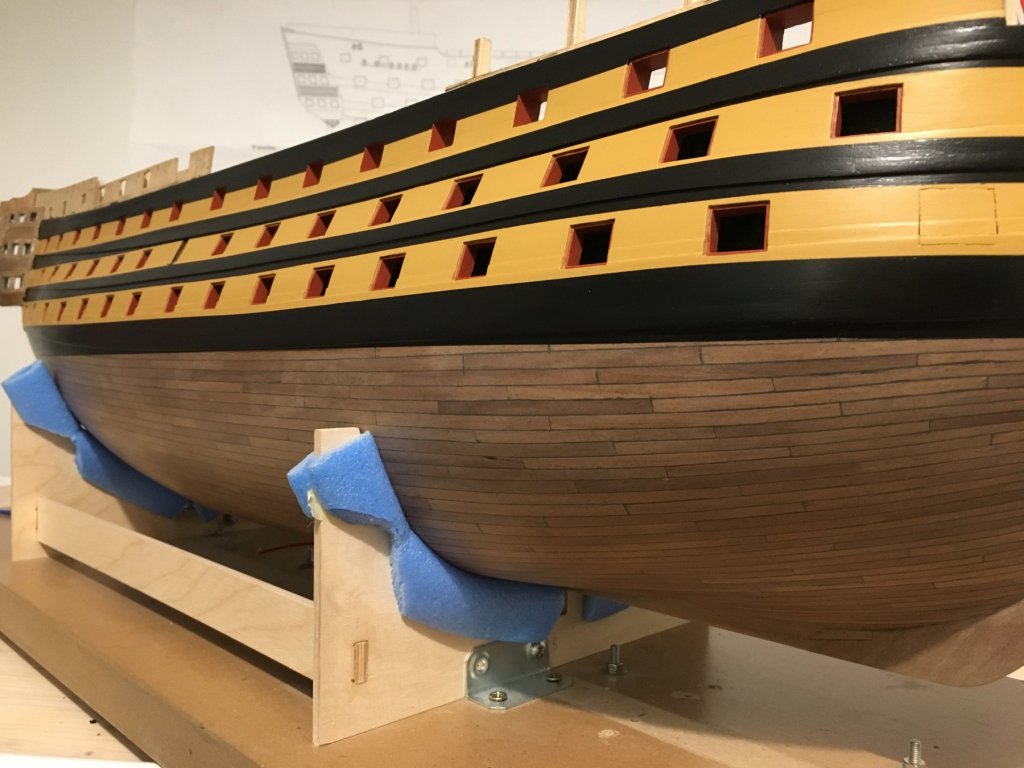
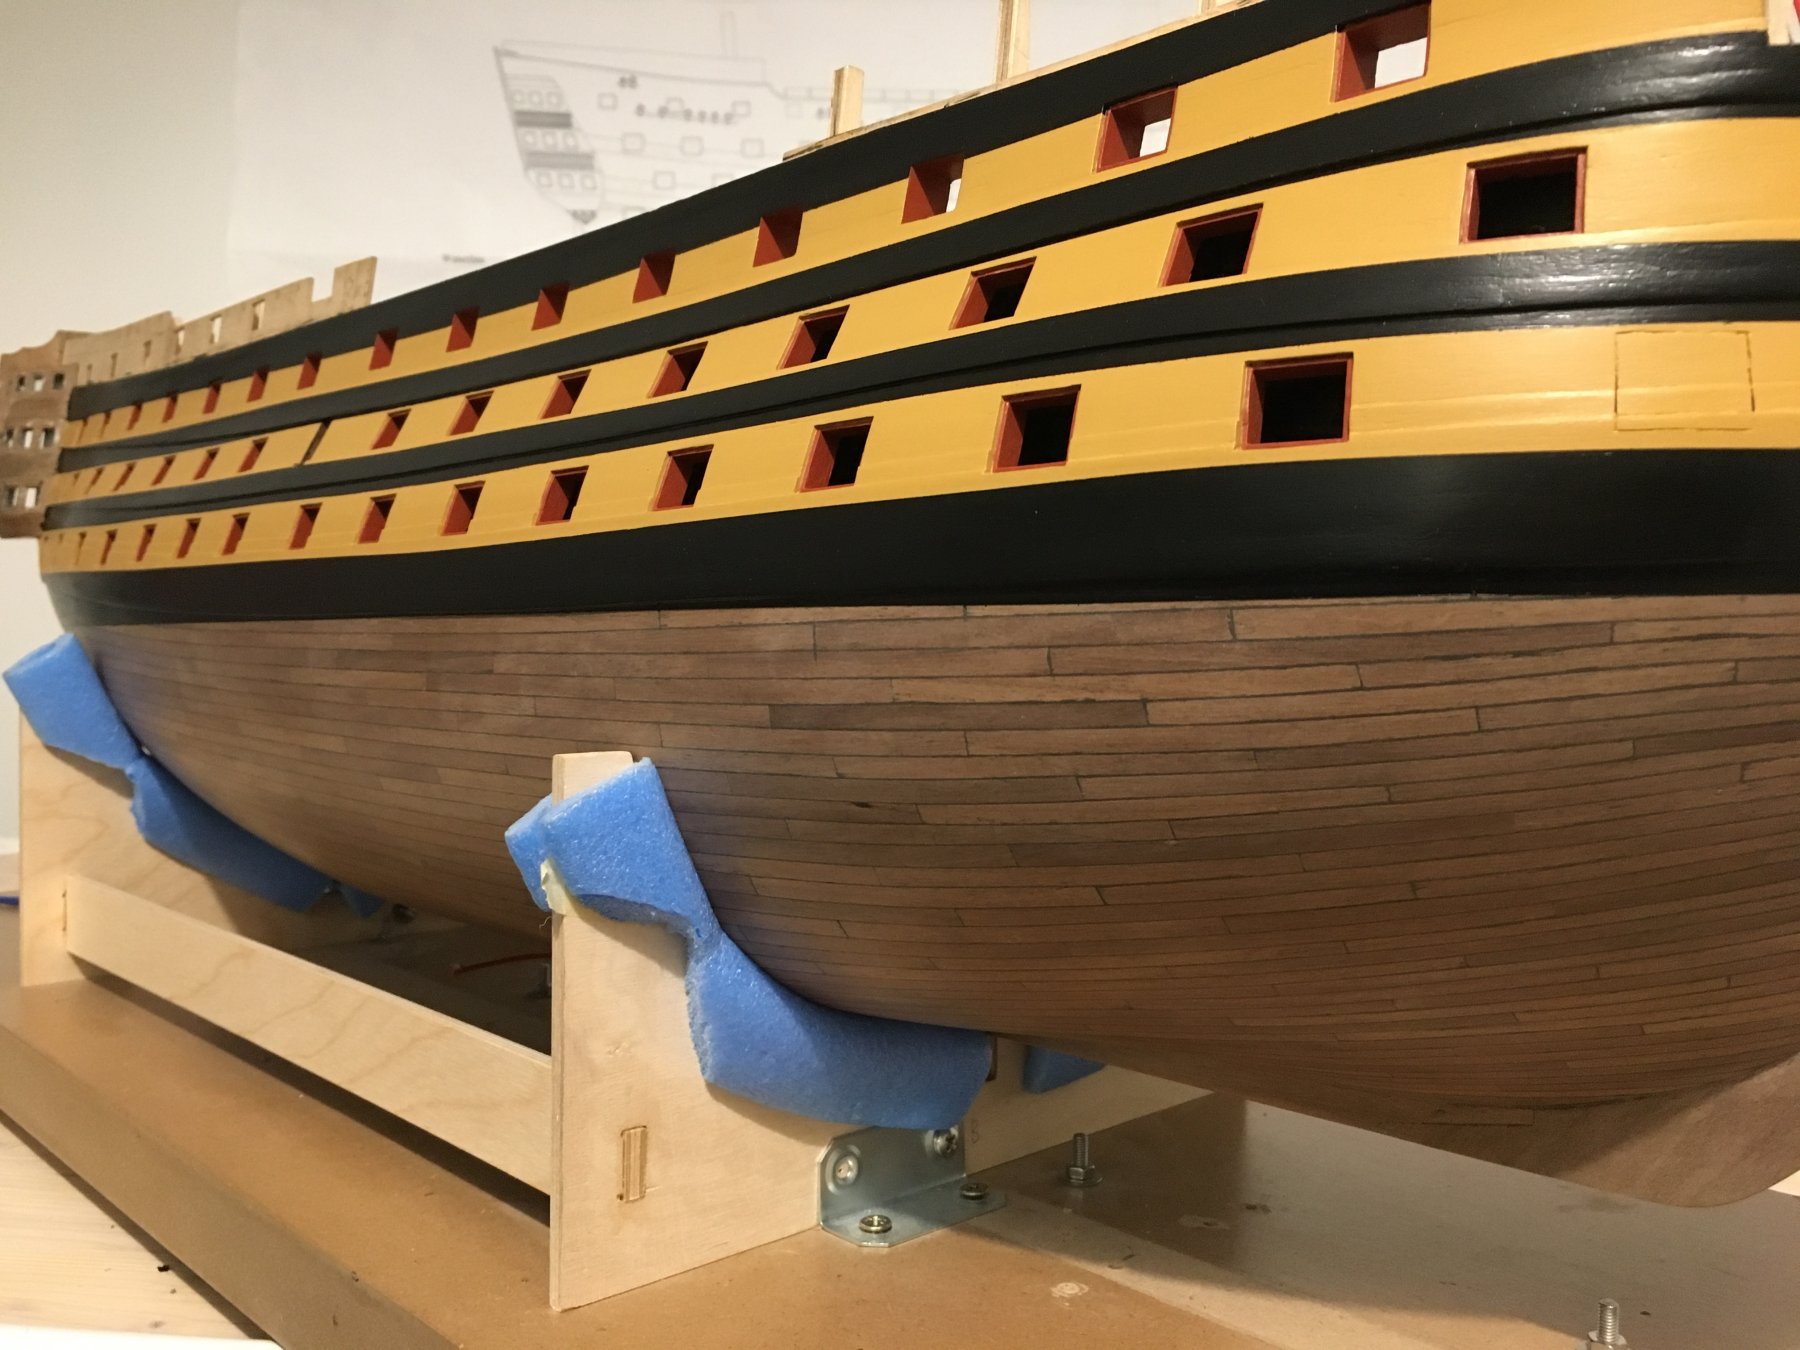
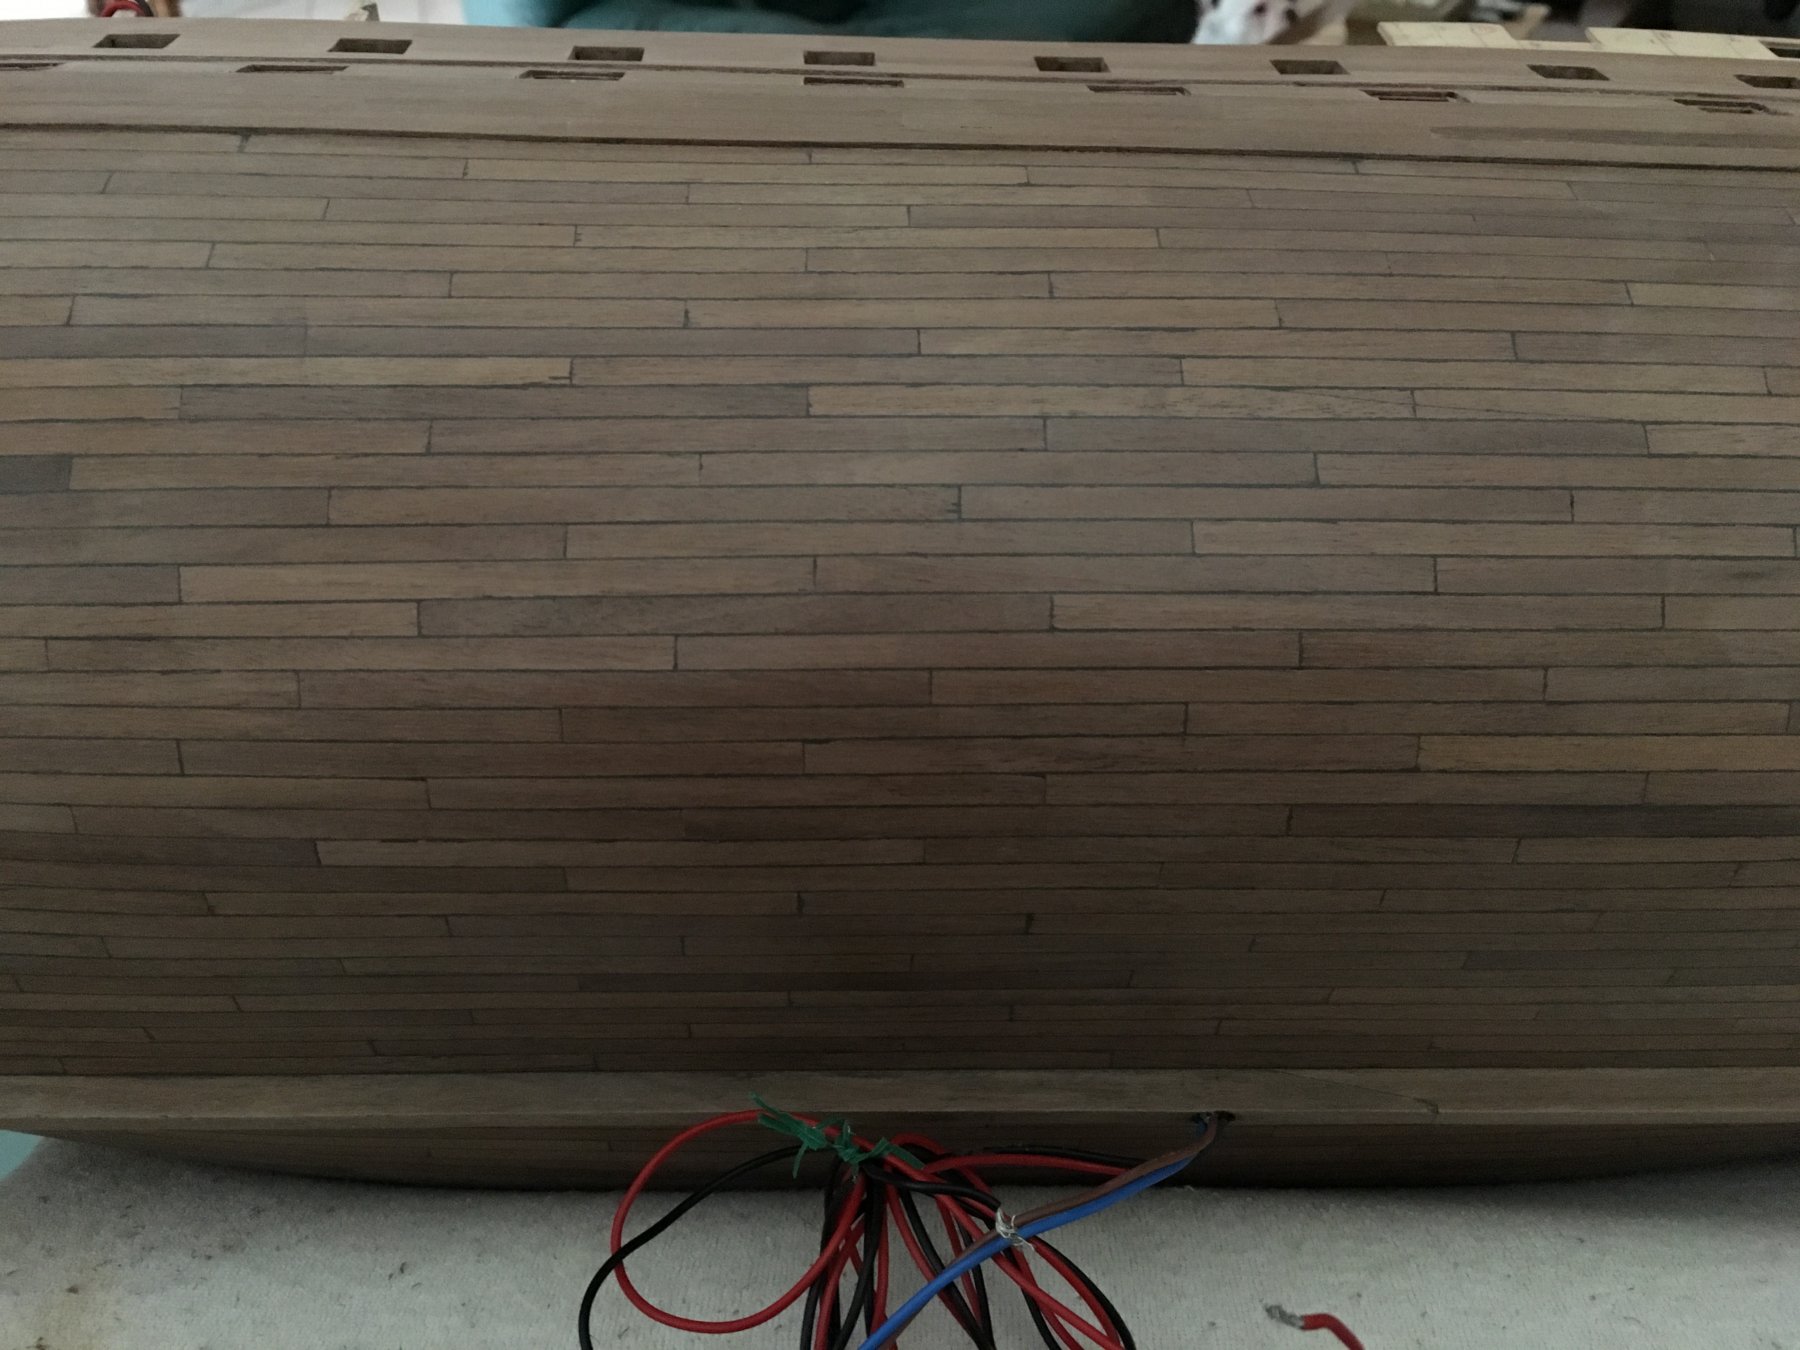
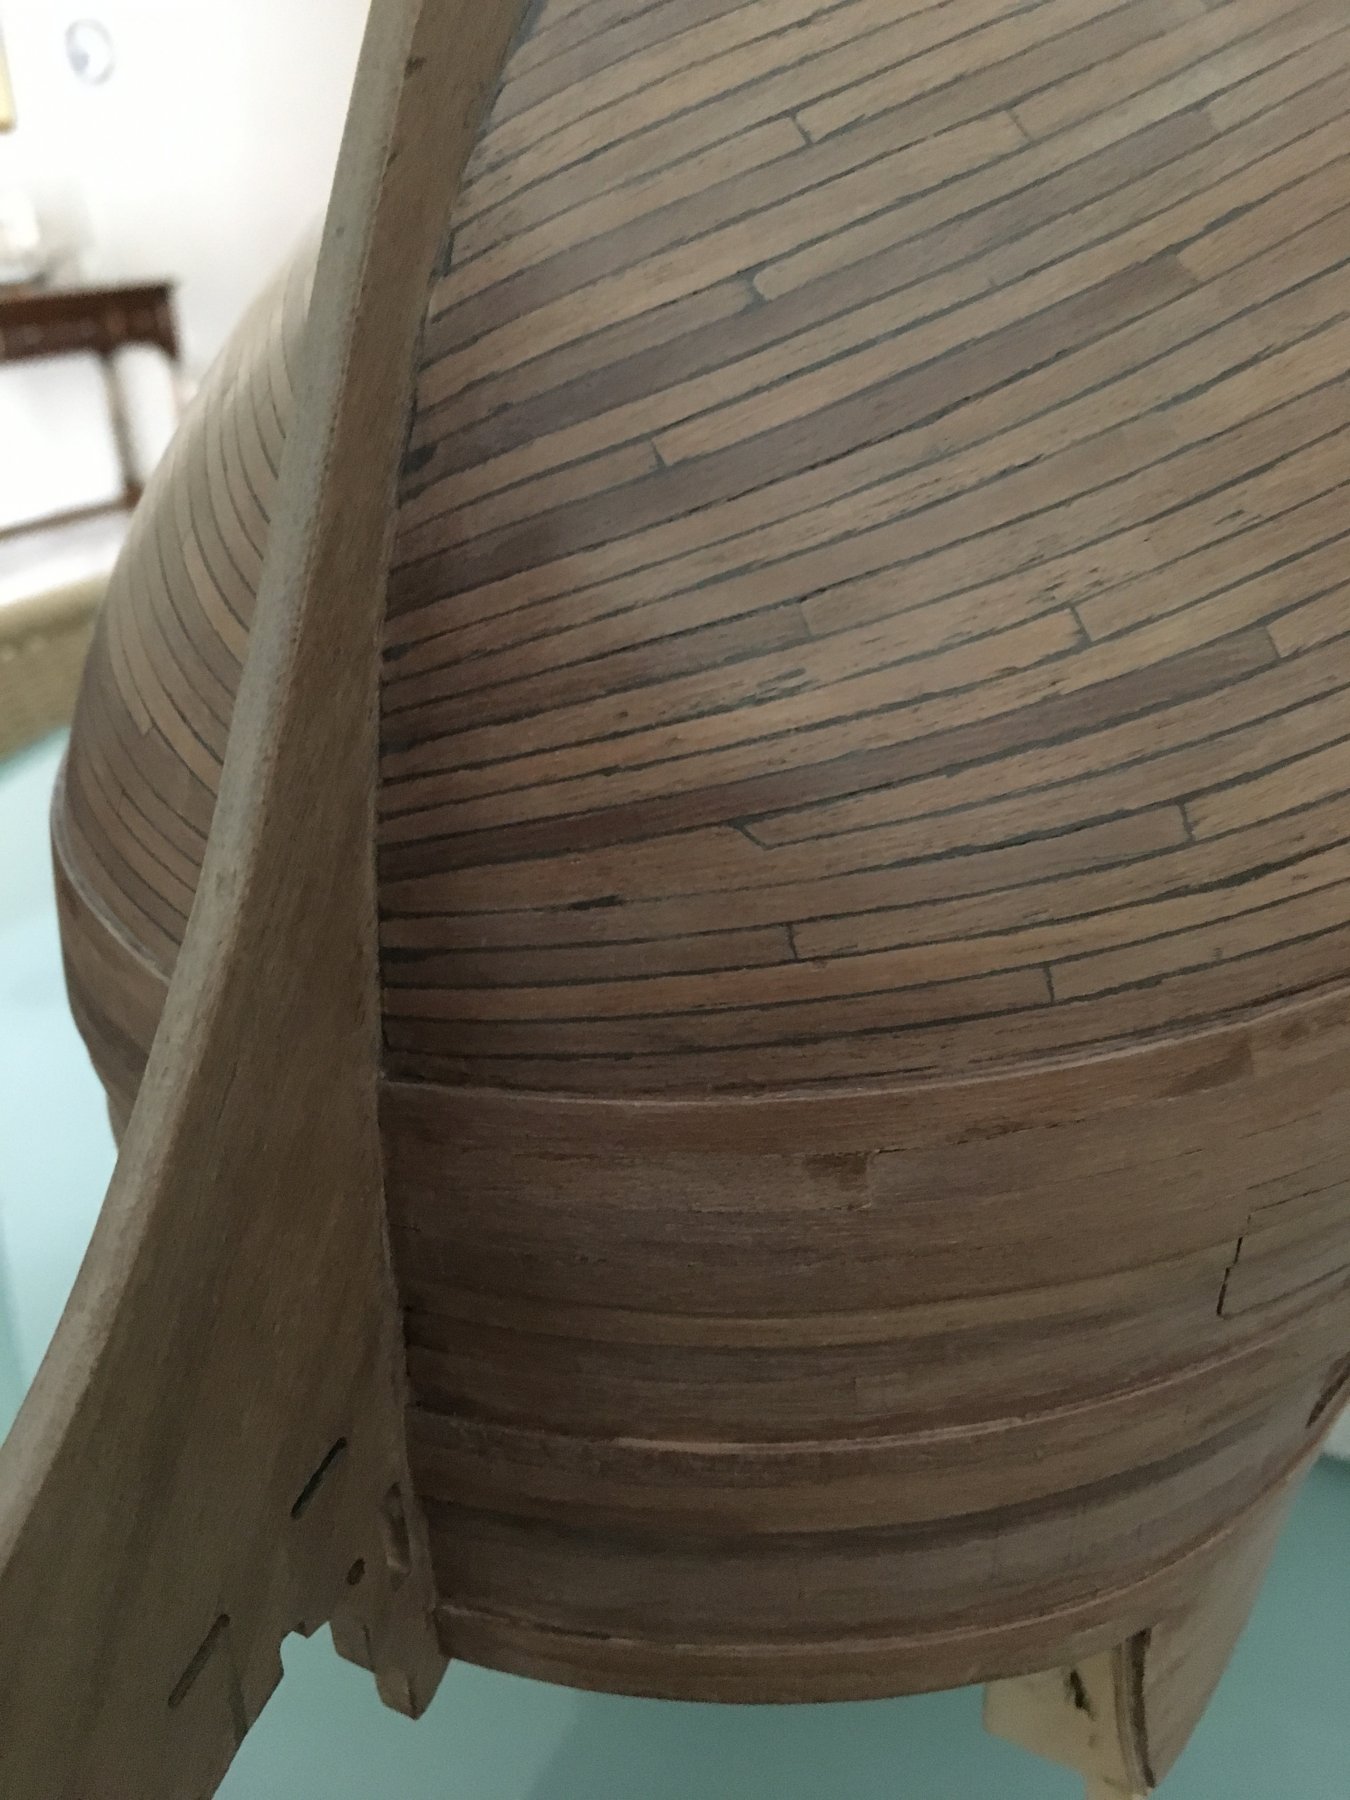
Finished the hull, from the lower wale to the keel, I finished it with mat varnish, wanted to try the Wipe-on-Poly but did not find it locally. I am still undecided if to leave the lower hull as is or to copper plate. This was a dilemma from the beginning, that is why I took the pain to lay and finish the planks as I did. To cover it all now is a pity. On the other hand I know that the real Victory had its hull copper plated!!!! Bounty, my son's dog couldn't be bothered what I was doing
.thumb.JPG.0d0d9d83eed0631ecc6eb33fb73a8069.JPG)

.thumb.JPG.659511f8257ba91b2974f2fe646c4780.JPG)

- 527 replies
-
- 19
-
-

-
- caldercraft
- victory
- (and 1 more)
-
Hello Michael, I looked into my photos and managed to find this from my model. Although the image is not very clear, if you look closely I had the same problem. As E.J. has already said you have to get down to shimming and sanding to fit it. As you go along the build, you will find other parts which will not fit perfectly and you have to adjust. The most important points to keep in position are the front, that is the height at bulkhead no.1, the middle, and for the gunport to be flash with the front of gunport 17. Keep those as accurate as possible. Also what you have to watch for is for the top of the pattern at the back where on you photo you have marked in a red box. Make sure that the distance from top edge of the gallery support to the top edge of the pattern is the same on both sides of the ship, that is, on the port side and the starboard side. The misalignment at the back of the pattern can be sanded later on when fitting the stern fascia inner skin n. 374. If the misalignment is not too big, that is more or less as shown in the images, it should not be a problem. I hope this is clear for you and you will find it of help. Robert
-
Paul, that's a great picture you you uploaded, good details for the gunports. Yes, you are right about the lower rabeted stop on the gunports. I started fixing the linings as per the manual supplied with the kit, after I had already done a few, from some images on the internet I realised that there is no stop on the lower edge as your photo clearly shows. Since I had already done a few I decided to continue with them. As for the blocks and rope I will keep that in mind when i come to them. I still have a bit of a long way to arrive to that part. Nigel / Michael, thank you for your comments, much appreciated and encouraging to go on. Rich, when I rigged Bluenose II I used the bee wax on the ropes. I agree it made it much easier to handle. As for the Quarter Galleries, I'm afraid yes the black rectangles have to be painted. The quarter Galleries are something I have to do some homework about as how I am going to finish it. There are a few things that probably I would finish differently from how it is shown on the manual. The Quarter Galleries have a lot of detail and if not well finished will ruin the ship. One of the headaches I have is how to pass the wires to the three lanterns which I intend to put lights in. Again, I will see to it when its turn arrives. Yes there are a few things in the kit which could have been better but on the whole I don't think it is a bad kit. That's what is nice about building wooden ships, there are no fast rules how to go about doing things. It is not just take out of the box and glue, even though it is a kit and not scratch building, you have to put to test your skill. Sometimes you are satisfied with the result, sometimes not and you try again until you achieve a result to your satisfaction. If you ruin a piece of wood it is not the end of the world, you get another piece and begin again. Robert
- 527 replies
-
- 1
-
-
- caldercraft
- victory
- (and 1 more)
-
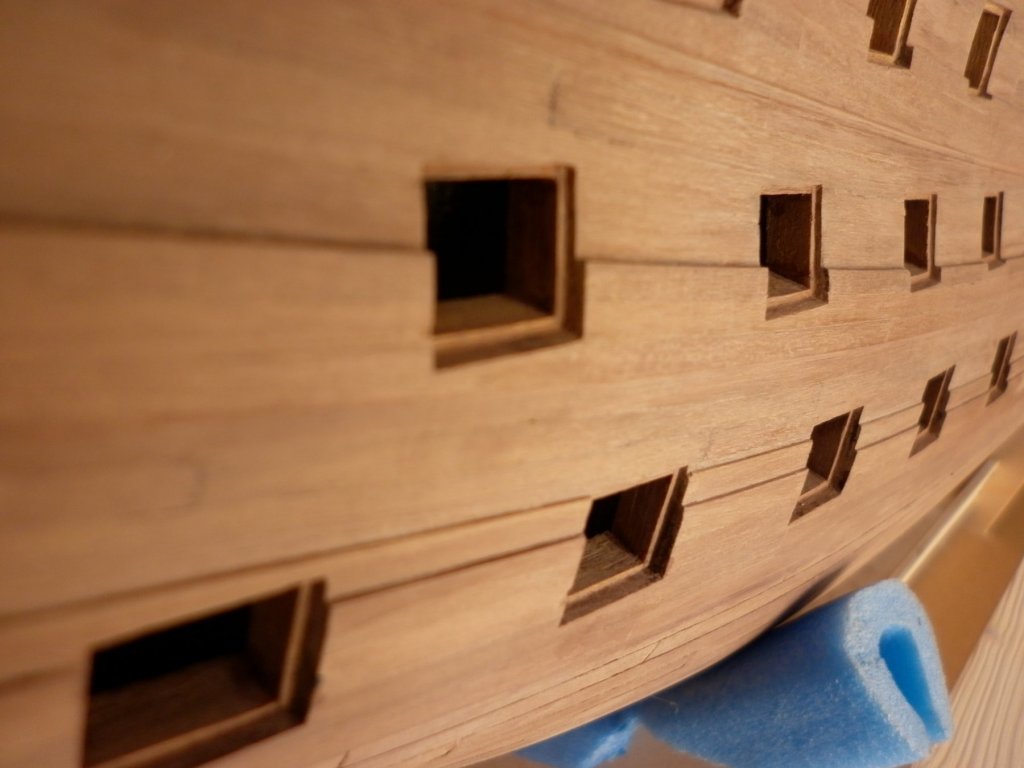
Rich, yes it is all caldercraft wood that came with the kit except for some linings for the top gunports. The strips which should have been 16mm wide x 1mm thick were in fact only about 0.7mm in thickness, quite brittle and were difficult to work with as they kept splitting in two when trying to trim them to size. Those are the only strips I replaced. The 1mm x 6mm strips for the rest gunport linings were ok. I can't really complain for the caldercraft wood supplied with the kit. The plywood, the lime for the first planking of the hull, the walnut for the second planking and the tanganyika for the decking were great to work with. The rest of the wood seems ok as well. To obtain a good result for the hull planking involves a lot of bending, checking, trimming and sanding. On mine I used a combination of spiling and edge bending. The walnut supplied with the kit for the second planking, was 5mm wide. Where the planks were to be narrowed to less than 5mm I took the advantage to spile the plank, where not I had to do some edge bending. Robert
-
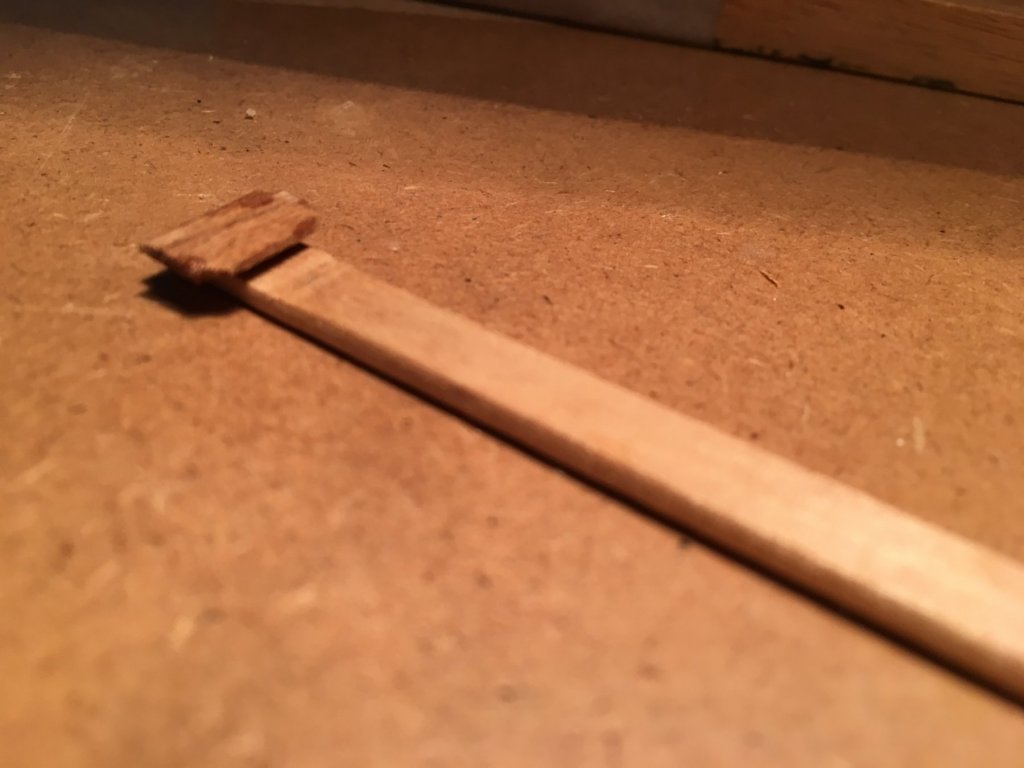
Nigel, Richard, thank you for your comments. Paul, thank you for the information on the treenails. I ignored the treenails in between as I was afraid the deck was going to look too crowded. It is a question that still lingers in my mind if I should have included them!!! Michael, thank you for your nice comment, I try my best. You are most welcome on my shipyard and if you have any suggestions for my build I would be more than glad to hear them. Mort, thank you for your information, much appreciated. The monograms look great. I guess the 3/32’’ should be ok for the 1:72 scale cannons. I will try them. It will be a nice detail. Now for another small update. Just finished the gunport linings. A lot of patience was needed. This is the jig I used to fit them. Very crude but very helpful. Got the idea from similar jigs on other builds. I must admit I got a lot of ideas and learned a lot from this great forum. Robert

- 527 replies
-
- 5
-
-
- caldercraft
- victory
- (and 1 more)
-
Beautiful work Don, very detailed. It's a pleasure going through your log. Robert
- 653 replies
-
- 6
-
-
- trabakul
- marisstella
- (and 1 more)
-
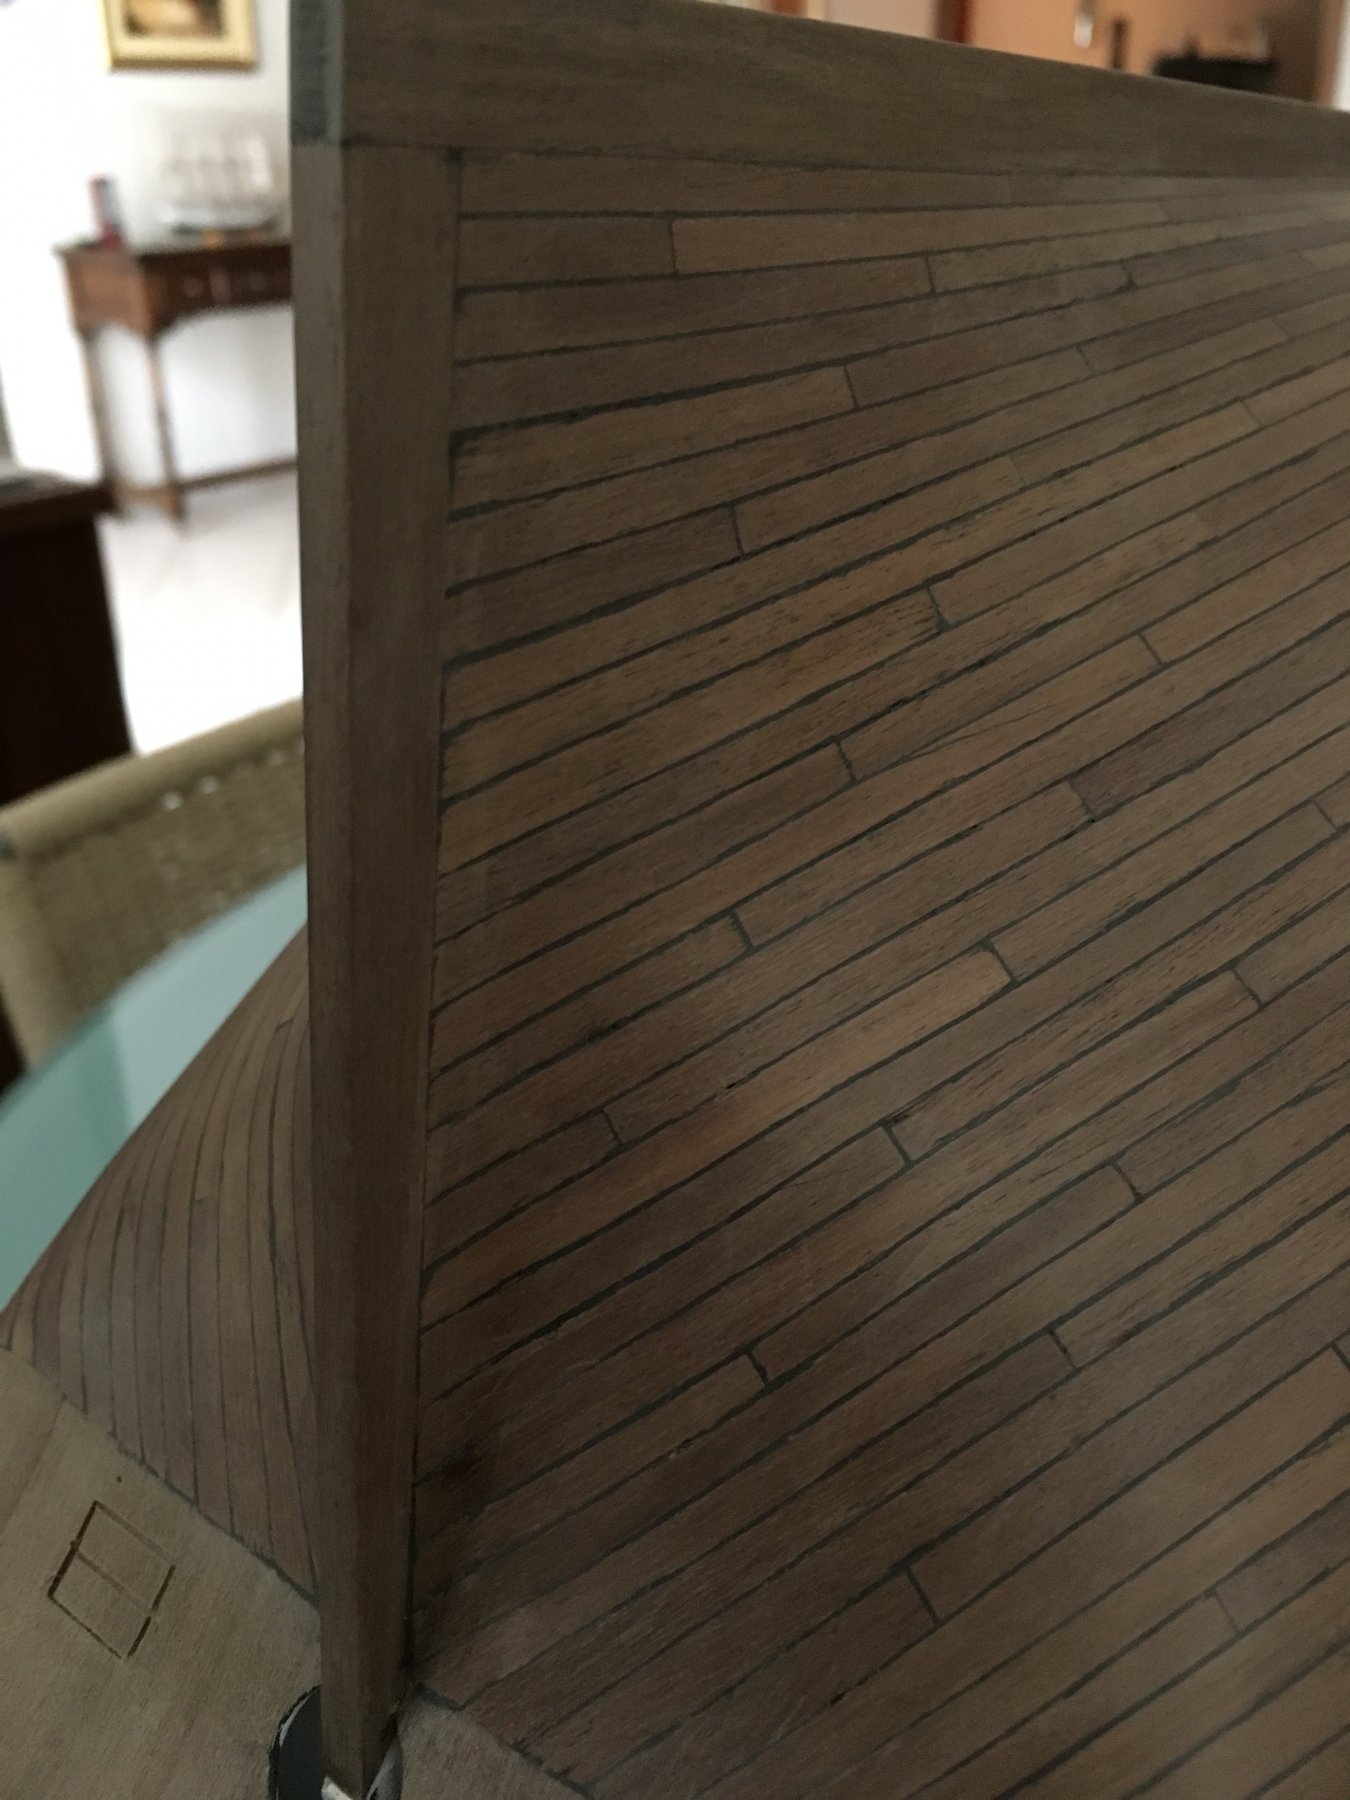
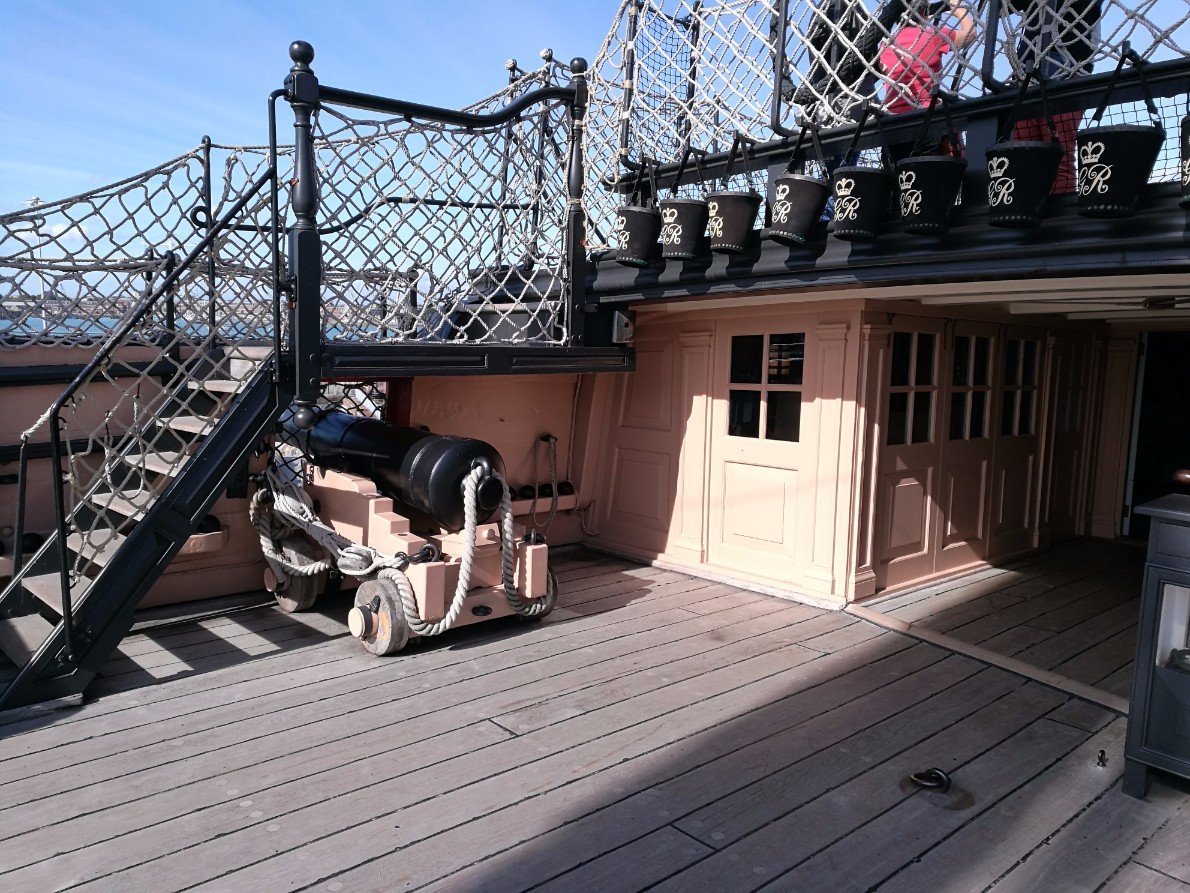
Richardjjs Thank you for your comments and thank you for your information, but to be honest I cannot understand what you mean when you are referring to the deck planking and say ‘BUT it should be joggled 4 apart NOT 2’. The planks on my model are laid in a four butt system, the end edge of each neighbouring plank is offset by 1/5 of twice the length of the planks. Four planks separate the plank ends where they meet edge to edge. Isn't that what you mean by ' 4 not 2'. Am I missing something? Also you stated ‘Again if you are going to mark the tree nails at least make sure each plank end is accompanied with the corresponding treenails next to each other’. What is the difference from what I did on my model to what you are saying? Again, am I missing something? Richardjjs, I would appreciate if you clarify this for me, or maybe another member of the forum who has more knowledge and know how than me on this subject enlighten me if the four butt system is the correct one for the HMS Victory, and if so, are my deck planks laid in the correct way? This is an image of the HMS Victory deck planking. On my model I only marked the treenails on the edge of each plank as I thought that if I mark the once in between as well it was going to be too much. Rich (Archicar), I hope you don’t mind, I borrowed this image from your great set of photos you took and placed in your log. If you do mind I will remove it. They are great pictures and found them very helpful. Thanks. Robert

- 527 replies
-
- 4
-
-
- caldercraft
- victory
- (and 1 more)


.JPG.52316797f085662d4a32e2b05e7c15aa.JPG)


.JPG.6861ff1c0348f3d430954b93c9a64dff.JPG)