HOLIDAY DONATION DRIVE - SUPPORT MSW - DO YOUR PART TO KEEP THIS GREAT FORUM GOING! (Only 27 donations so far out of 49,000 members - C'mon guys!)
×


Robert29
-
Posts
417 -
Joined
-
Last visited
Content Type
Profiles
Forums
Gallery
Events
Everything posted by Robert29
-
 Rob, yes in fact i have the caldercraft metal primer. As you said it is quite good on metal castings, but on brass, although it gives a good base for the finishing paint, adhesion wise it does not make much diference. Thank you for your comments, I try to keep it a hobby and not a job to get over and done with, that way it gives me more encouragement to redo things when they are not exacly to my liking. Mark, thank you, when I have the time I would like to take a few close ups inside the decks, through gunports or doors when it is lit. It is a bit tricky as you got to have the right lighting and the right exposure. CBM is for Cornwall Model Boats. They are very good suppliers in Cornwall, UK, and they are quite popular with model ship builders in UK. Basically they stock everything you need for modelling. In my country, Malta, we dont have good modelling suppliers, especially for timber, if any at all, so I dont even bother to source them locally I just go on their site and order from them. Postage is really reasonable and within a week they are in my hands. I suppose this is not a problem in USA, probably you have very good suppliers there. For me to order from USA is not feasable as postage from there to Malta is very high. Mort, Thank you Mort. Lately I have watched a move which had really taken me to the day while watching it. It's title is 'Master and Commander', worth watching. It's a nautical historical fictional novel. Here is a clip from it: https://www.youtube.com/watch?v=G95g0vzTAKI Old Collingwood, thank you, I will have a look into it, I'm sure it is interesting. Robert
- 527 replies
-
- 4
-

-
- caldercraft
- victory
- (and 1 more)
-
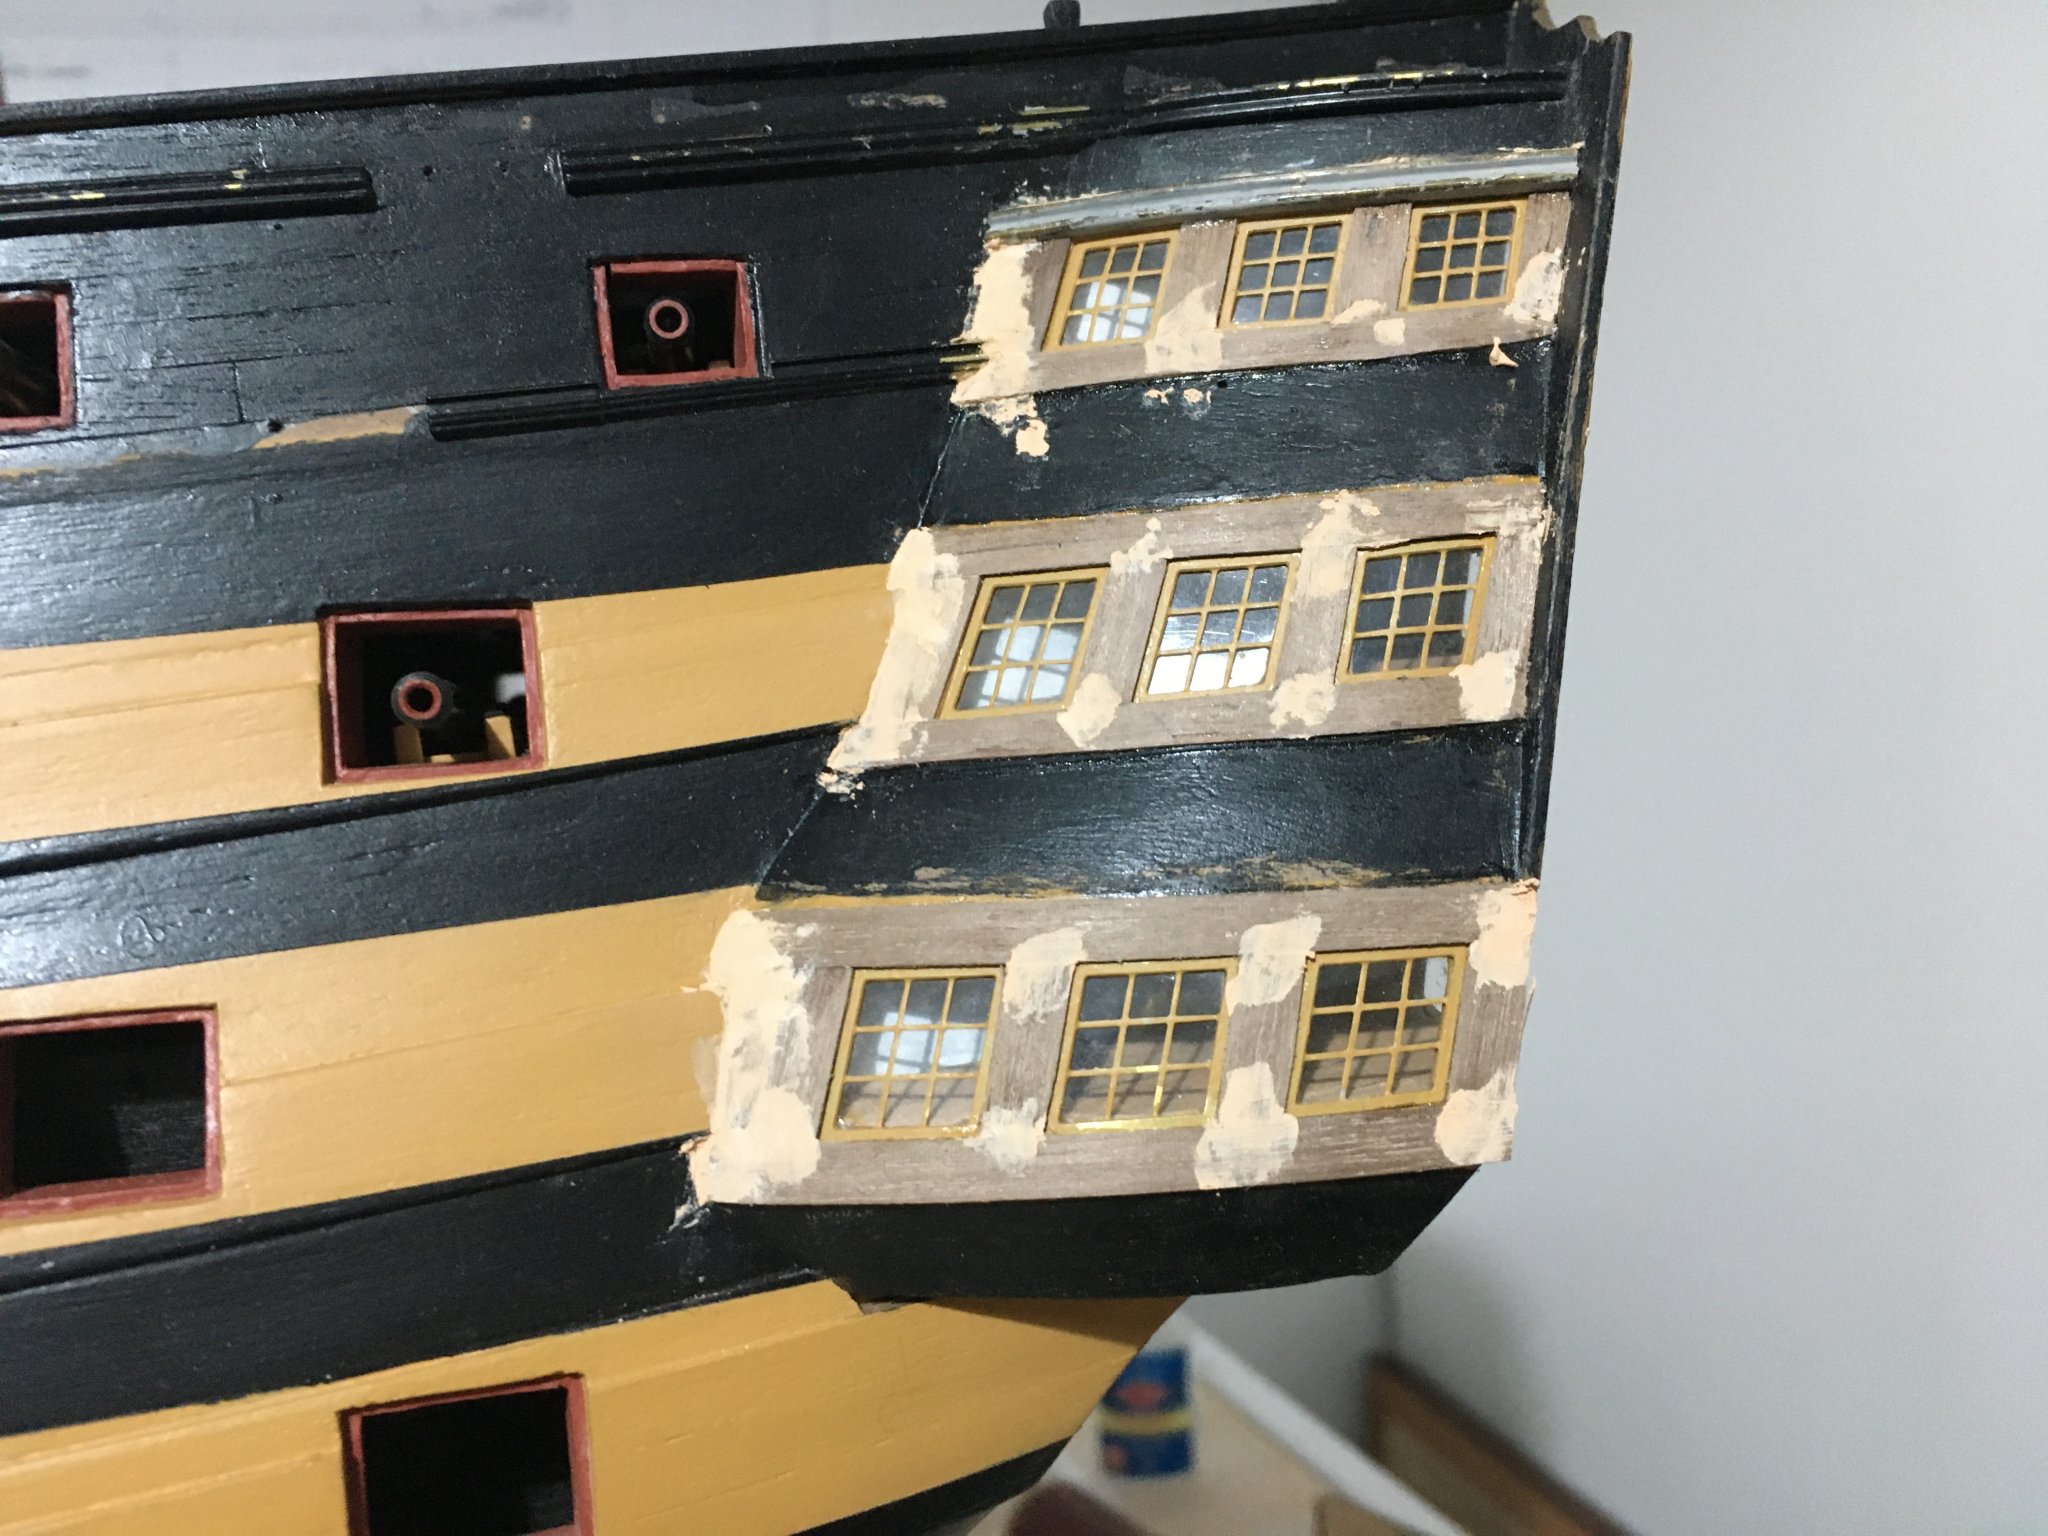
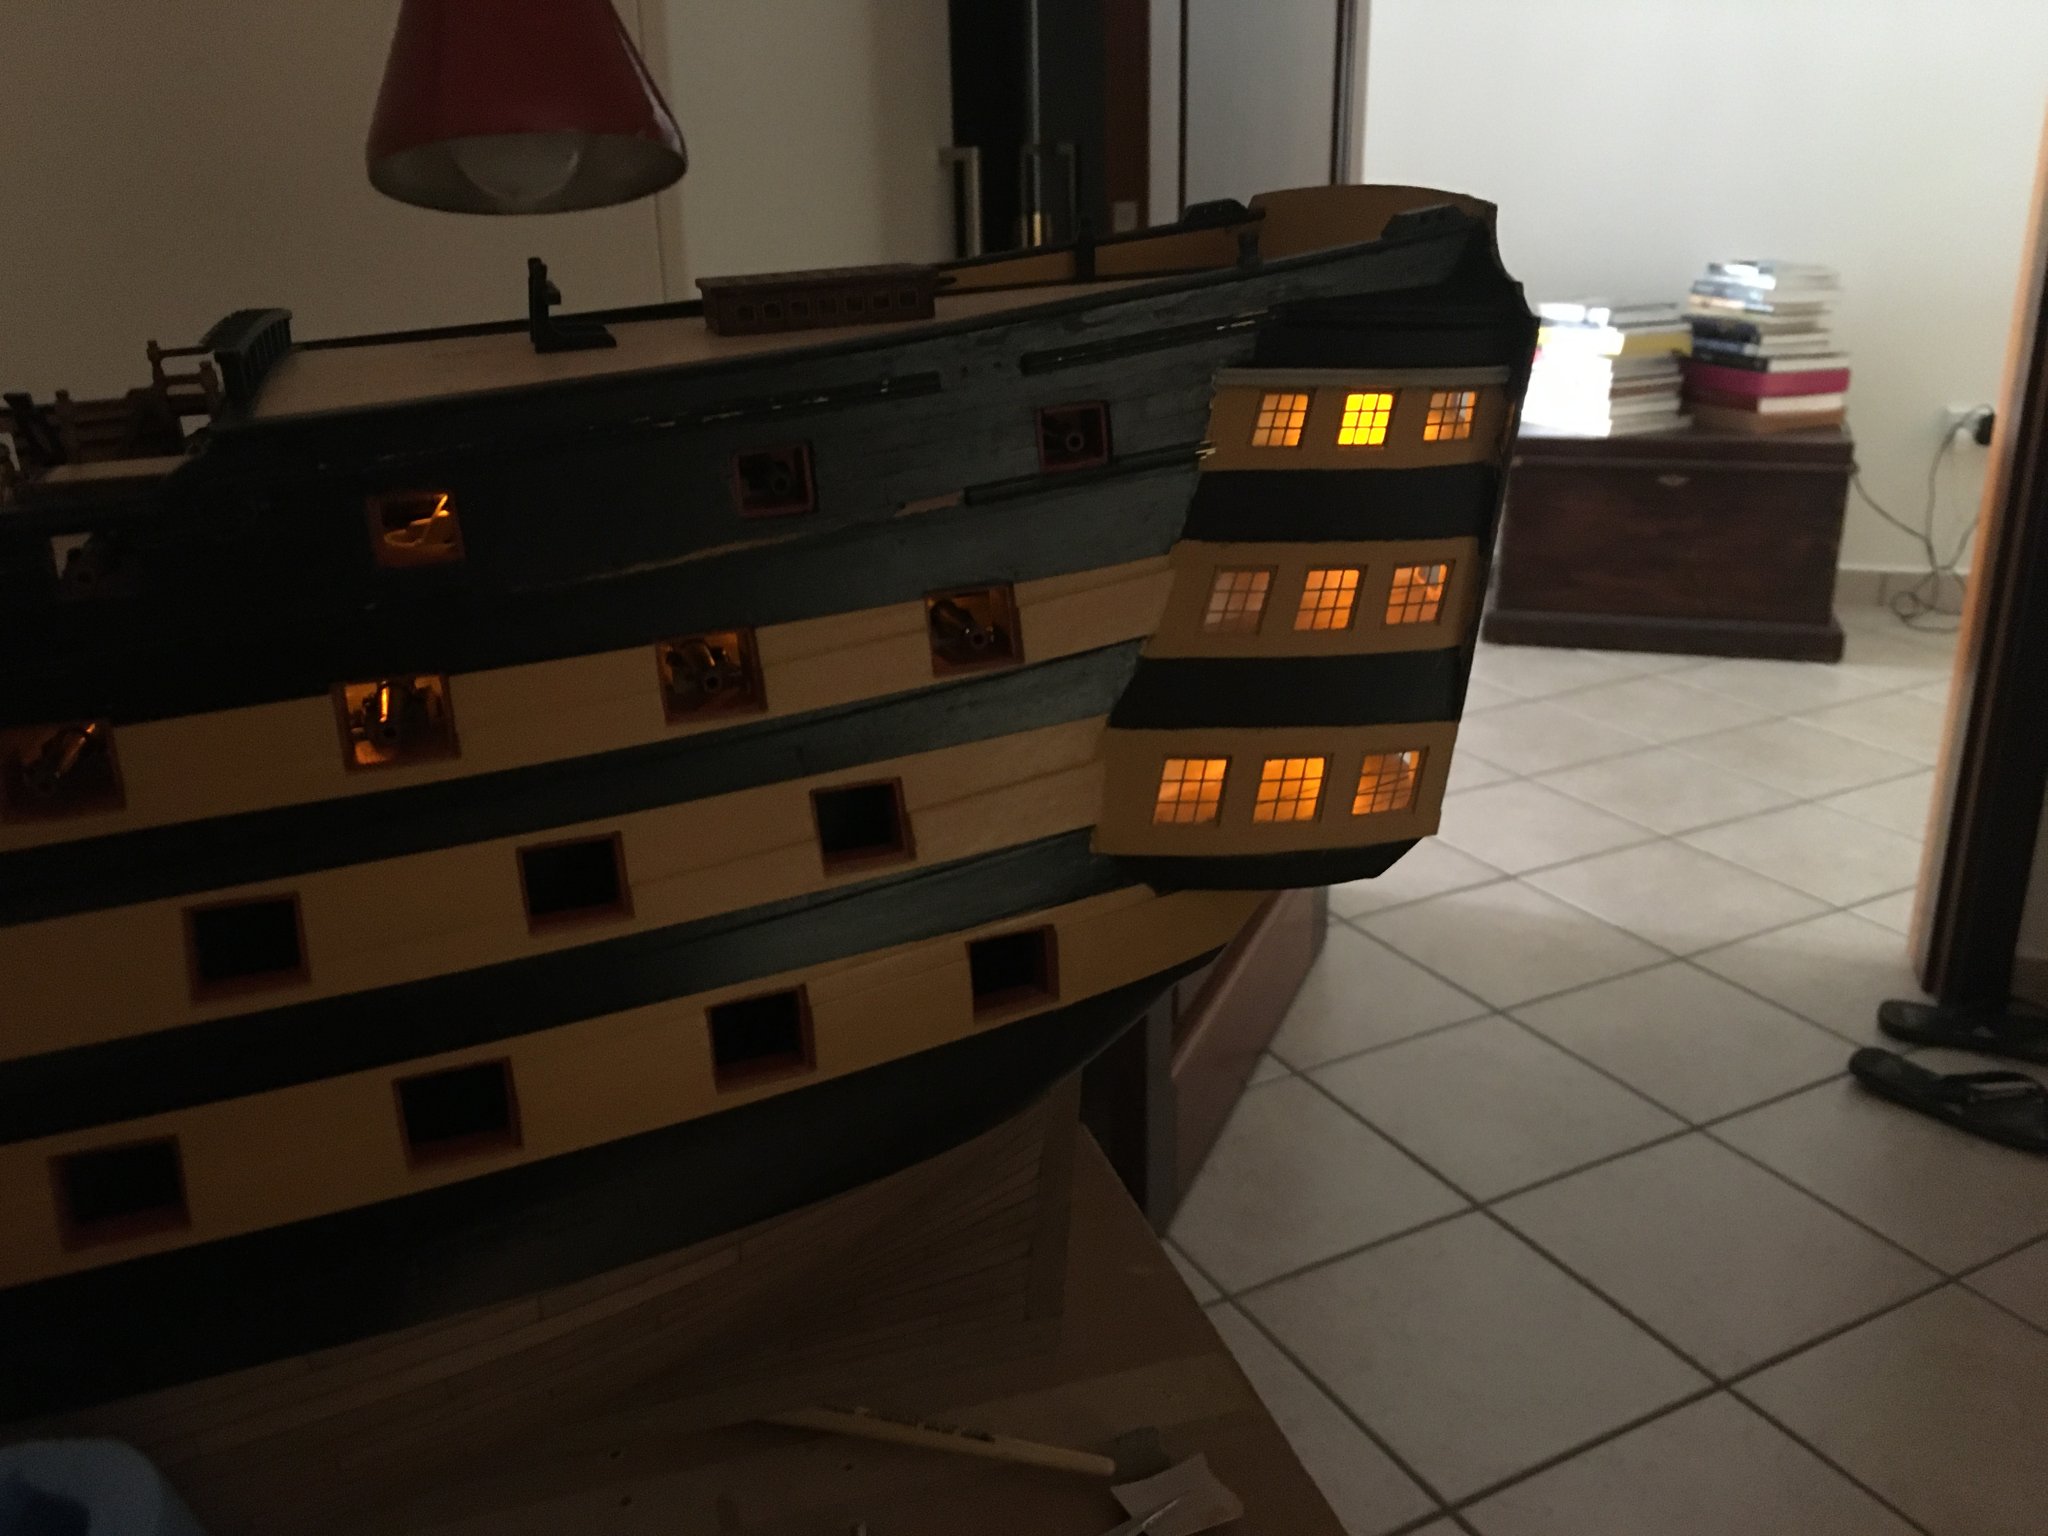
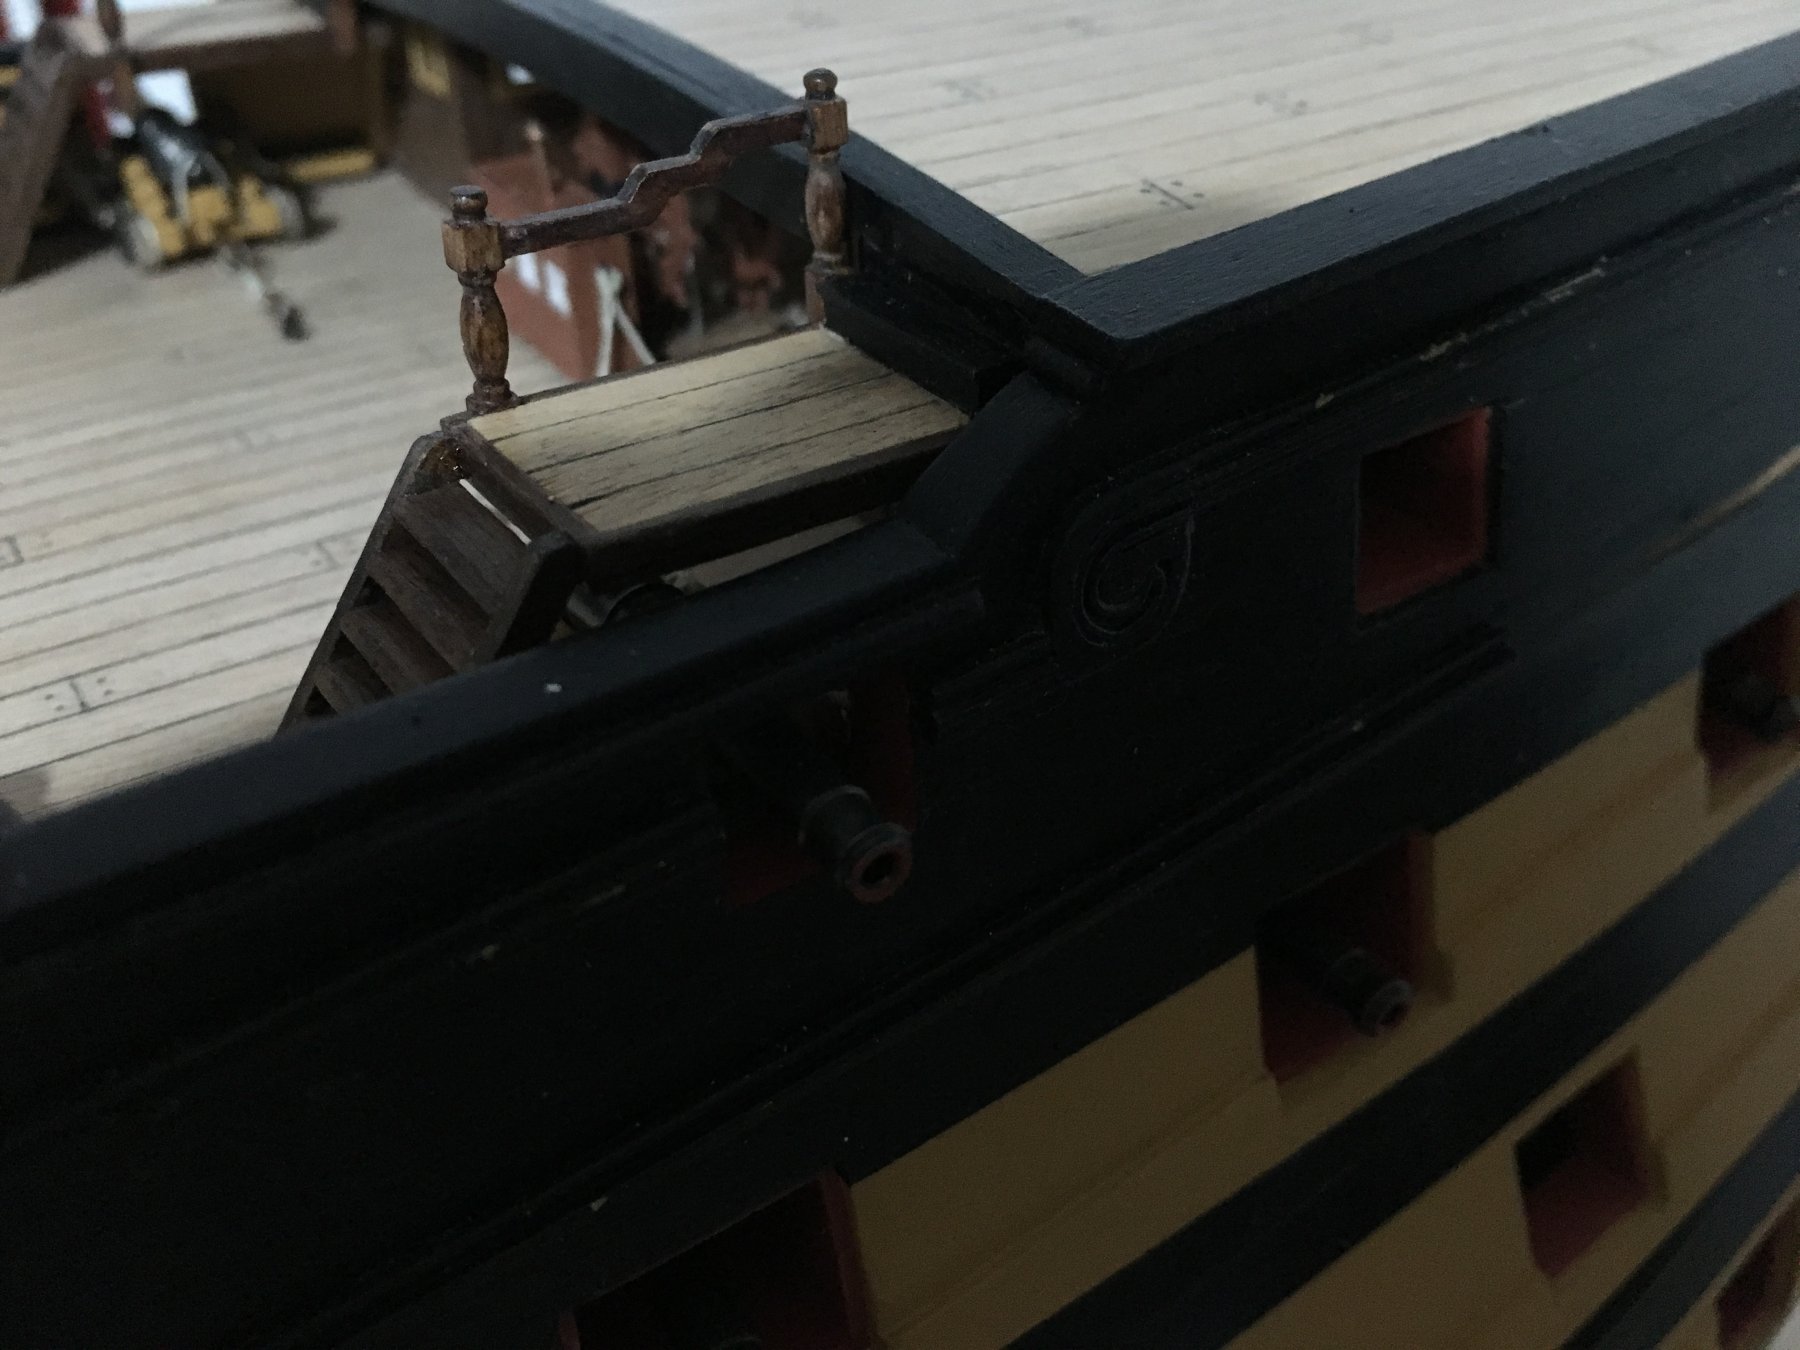
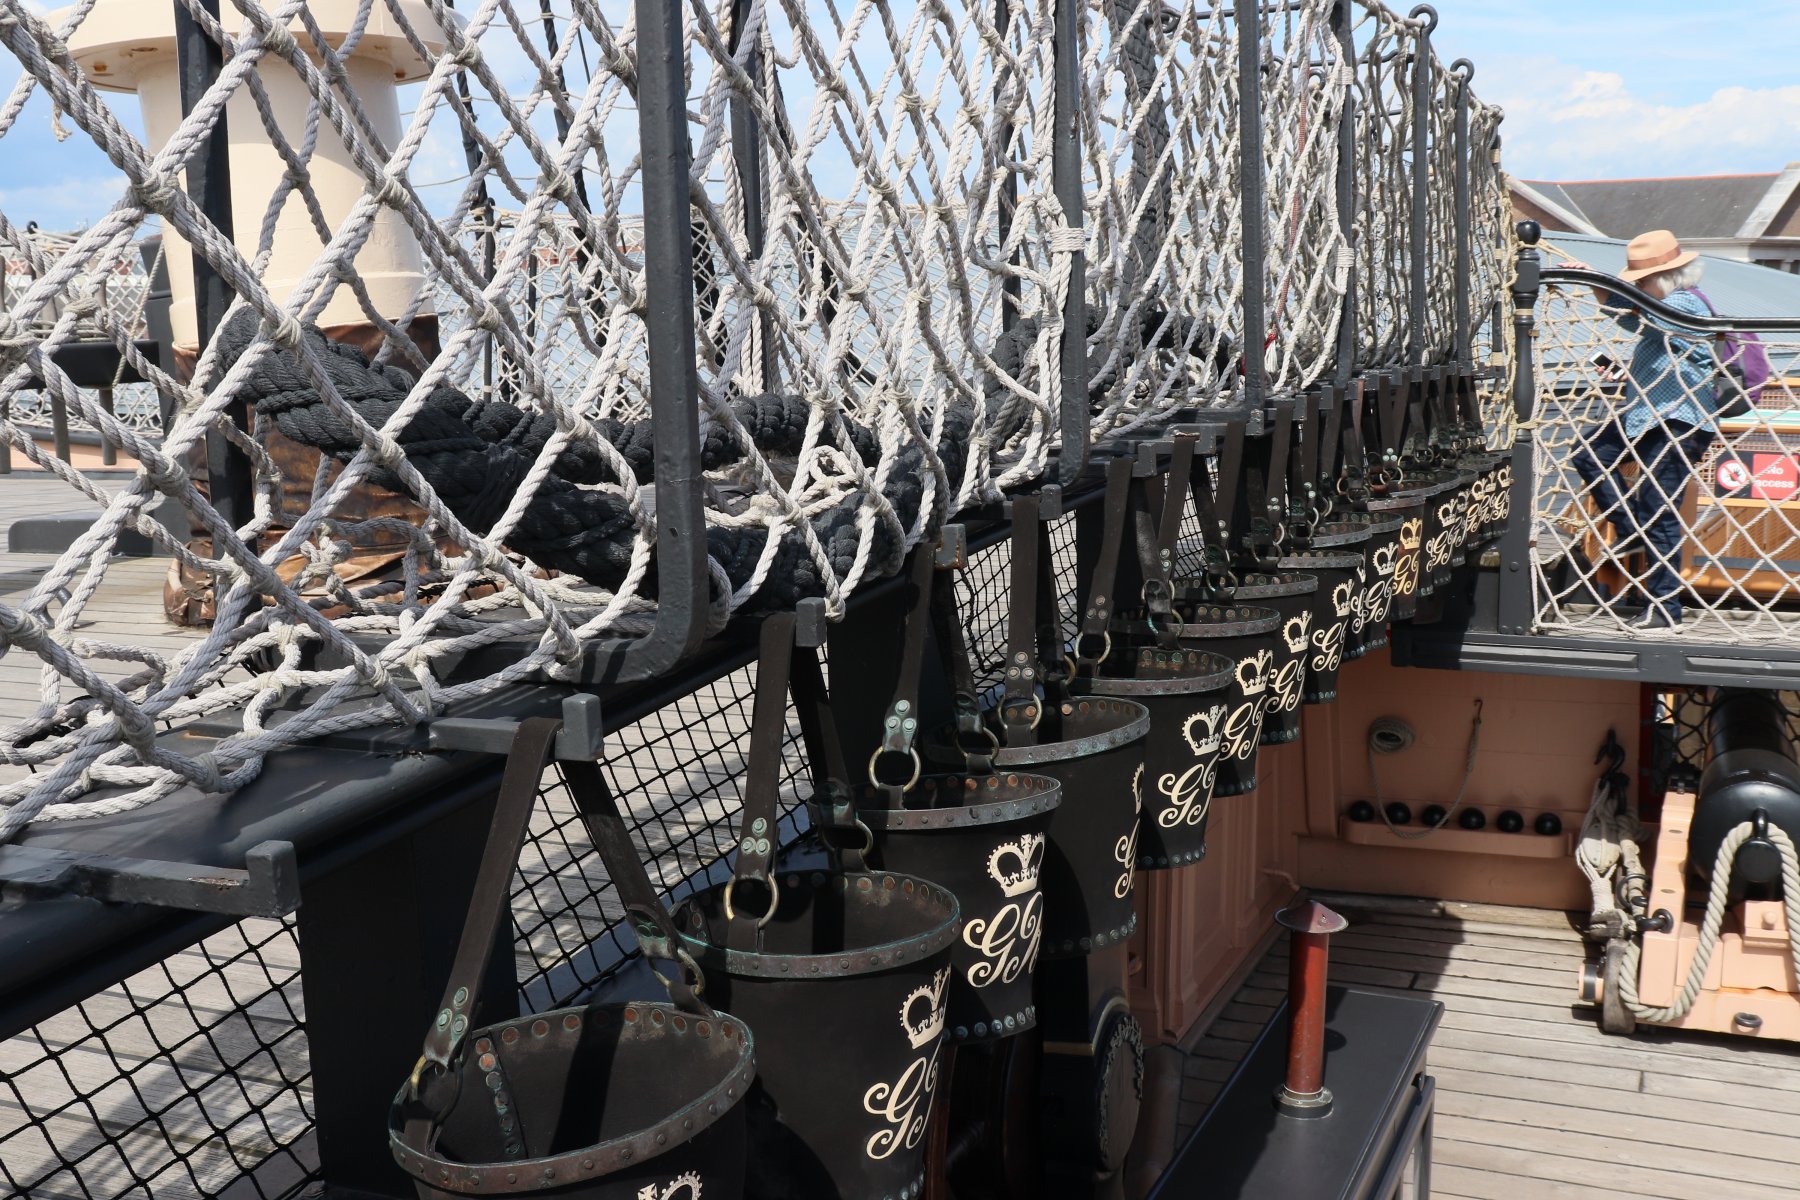
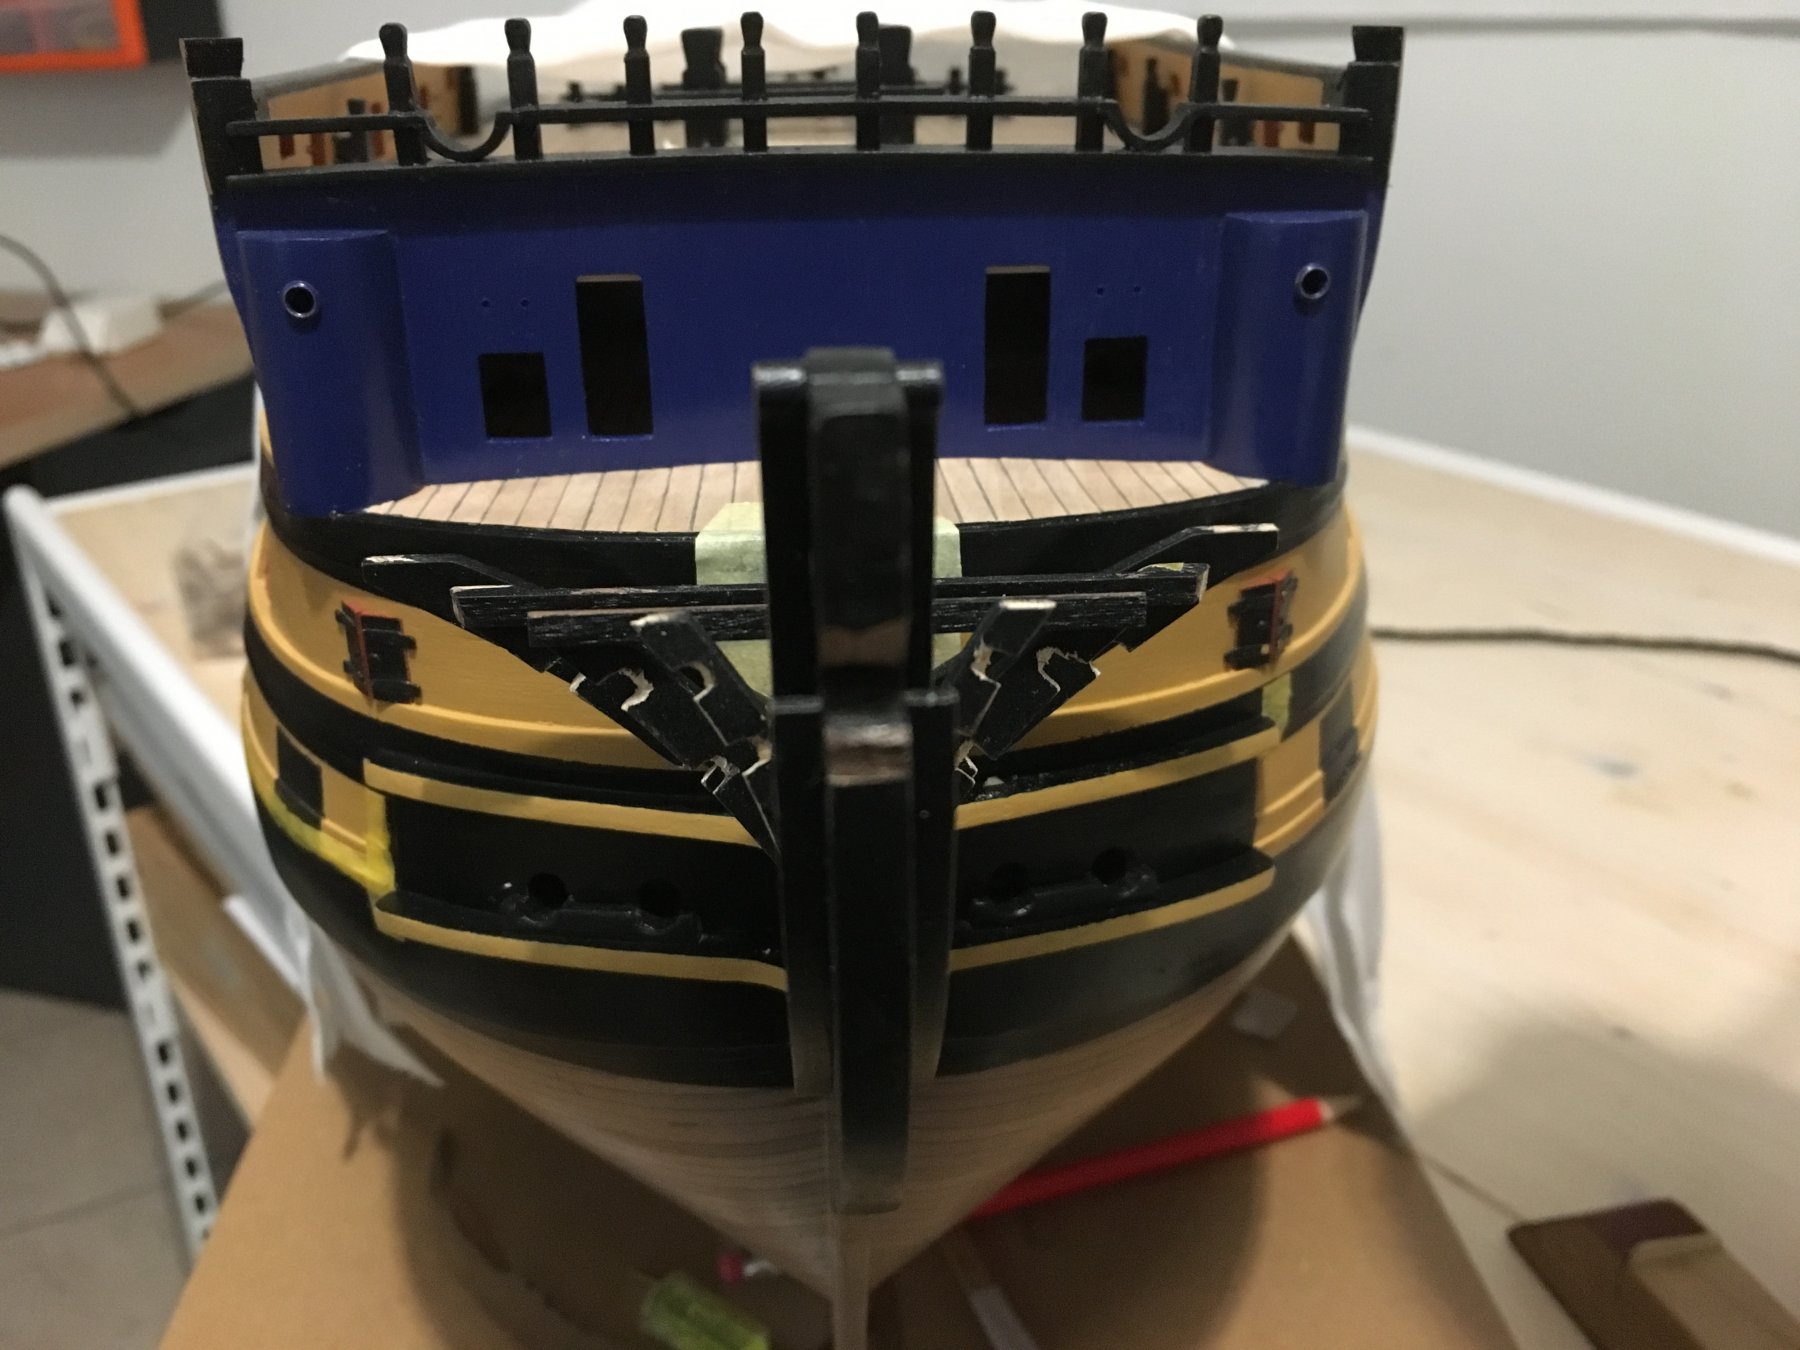
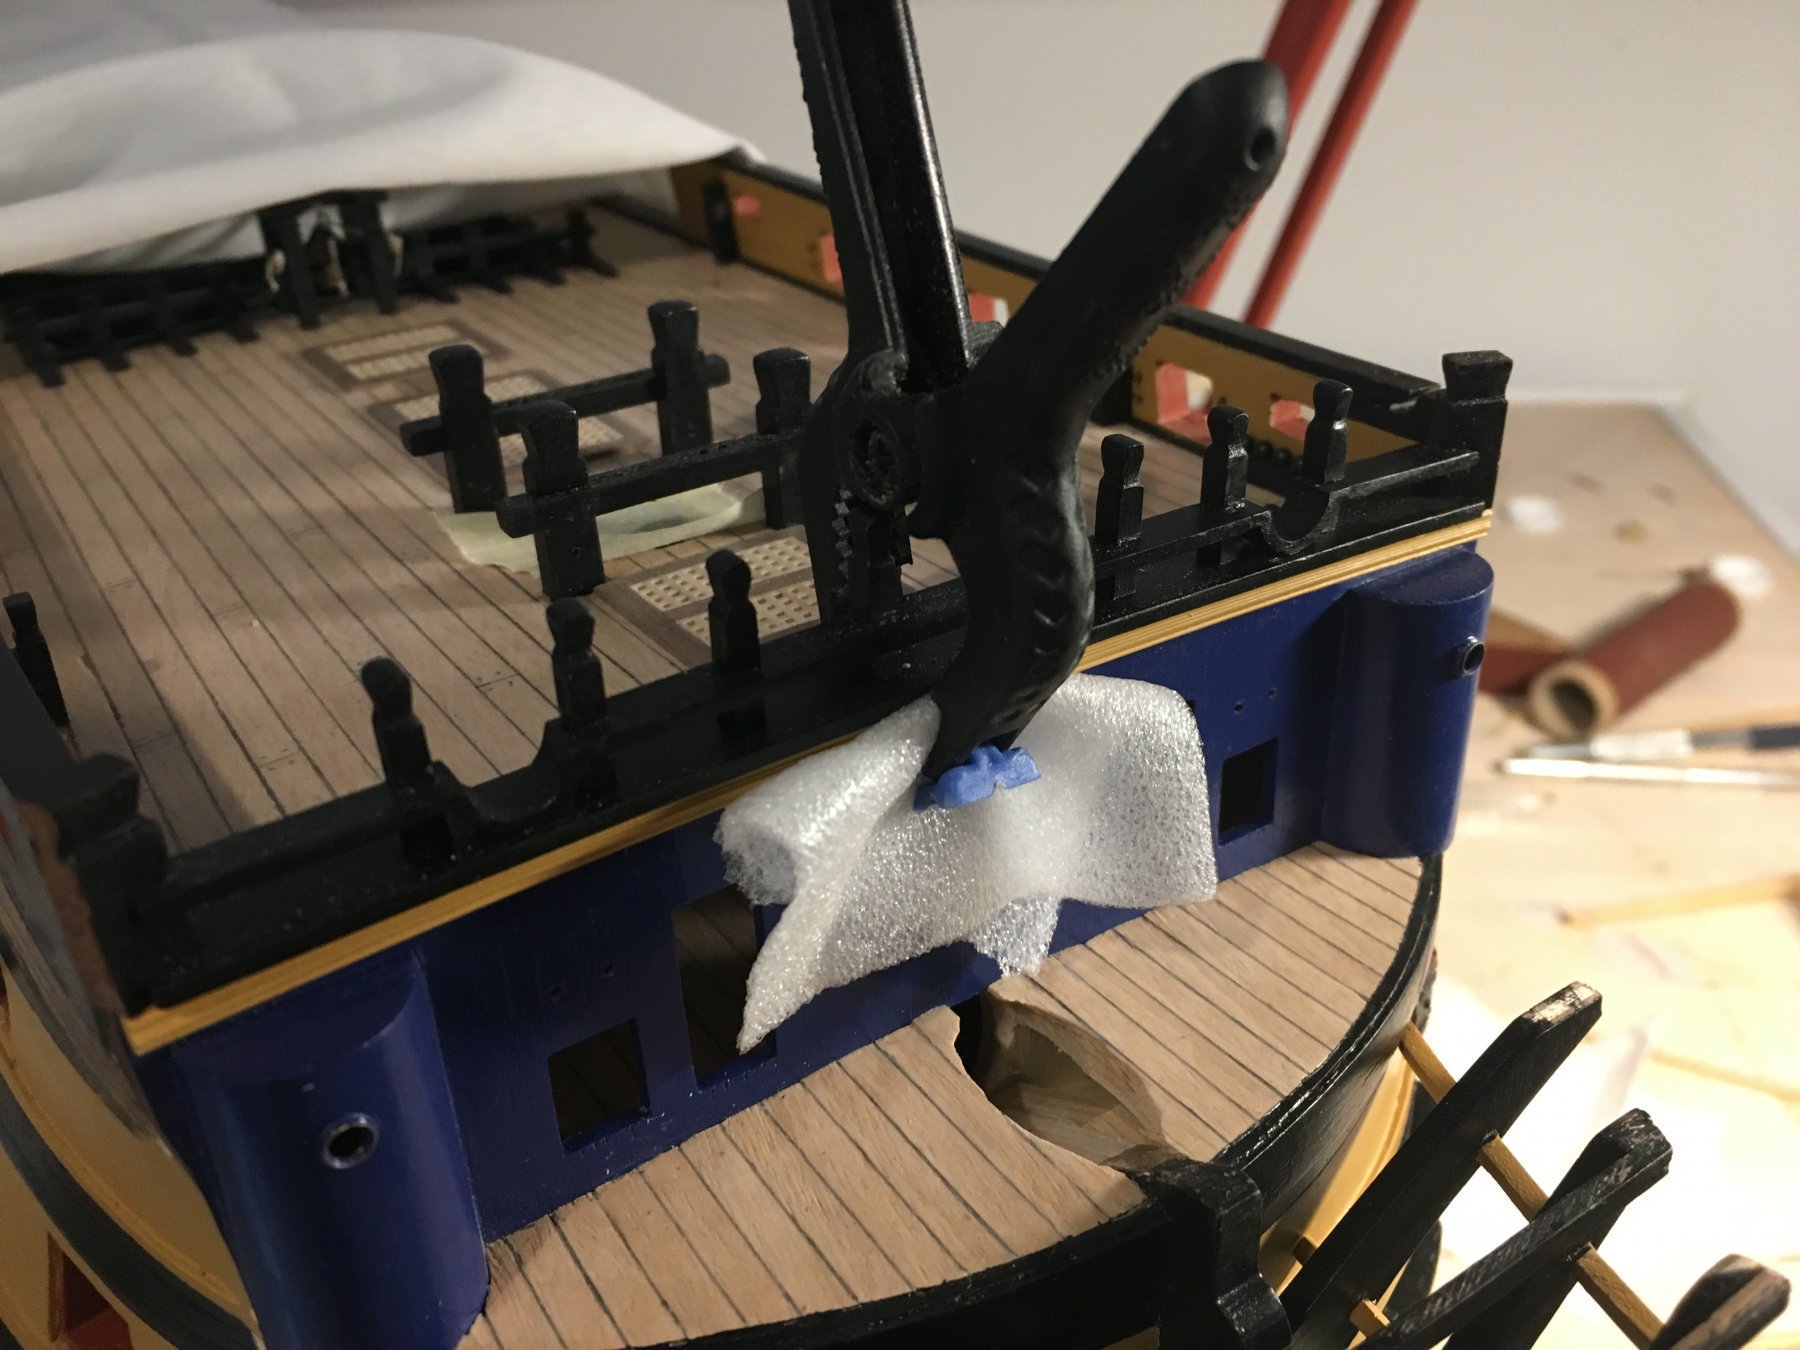
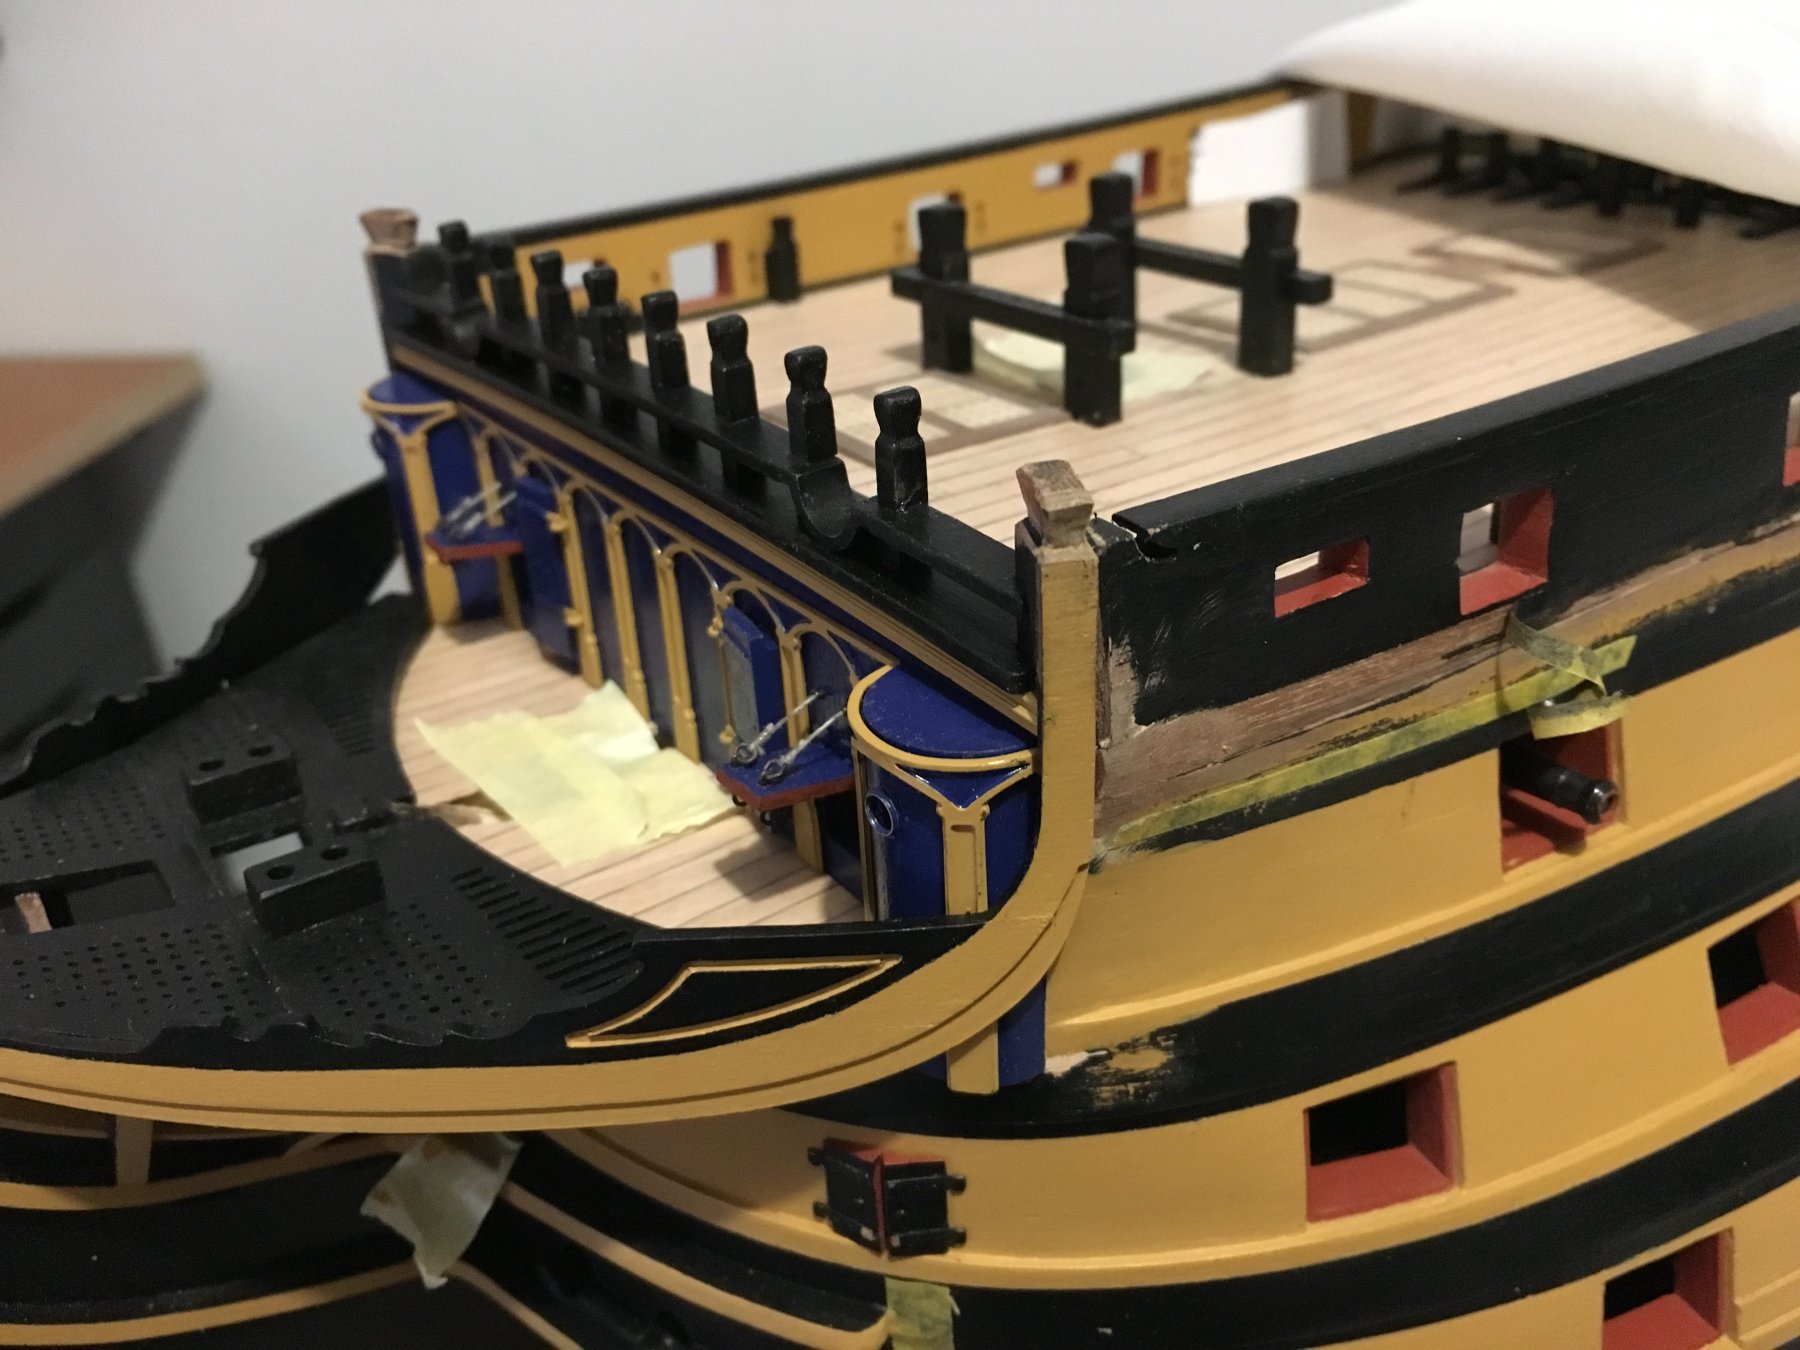
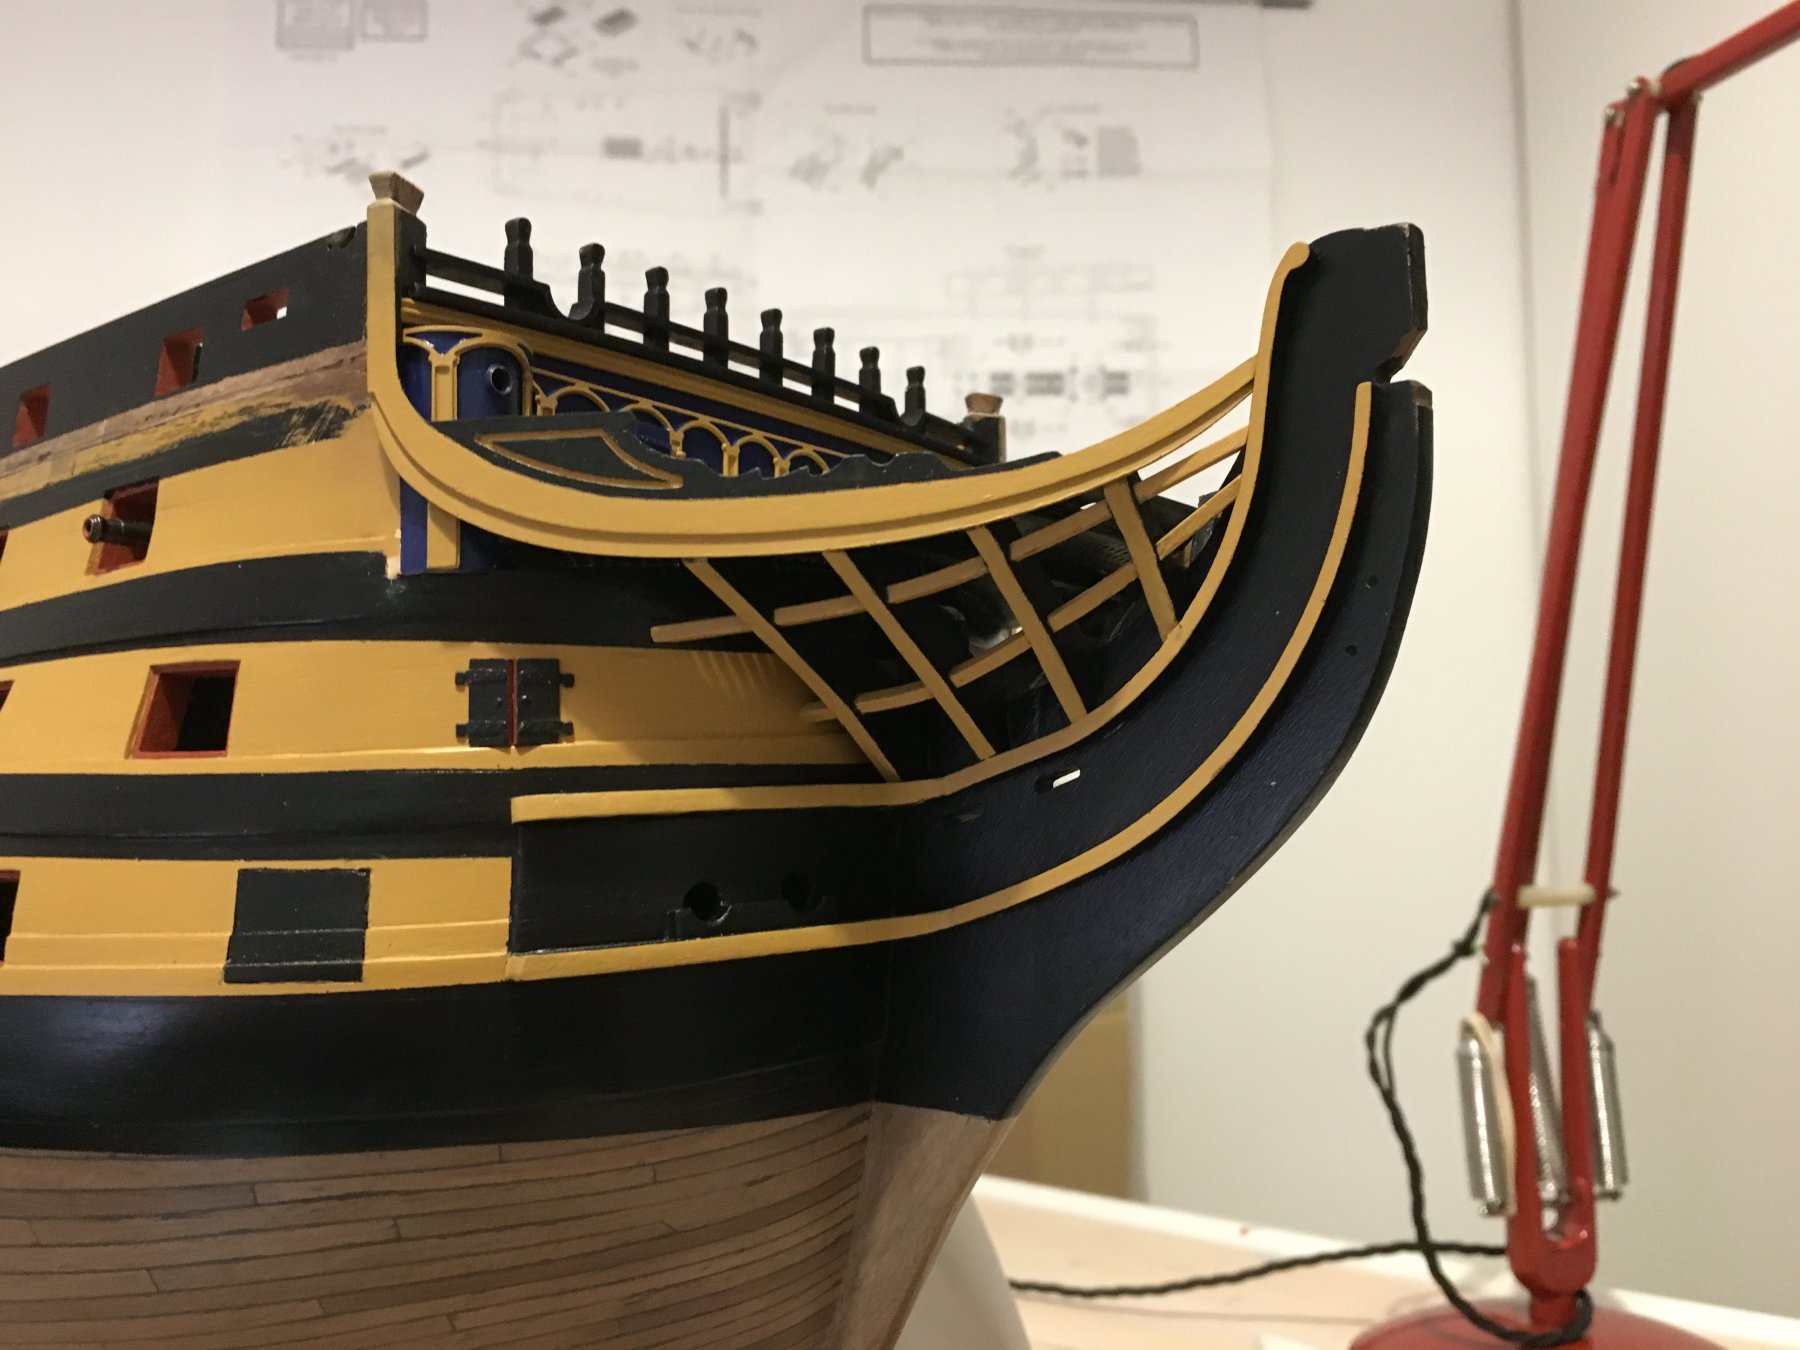
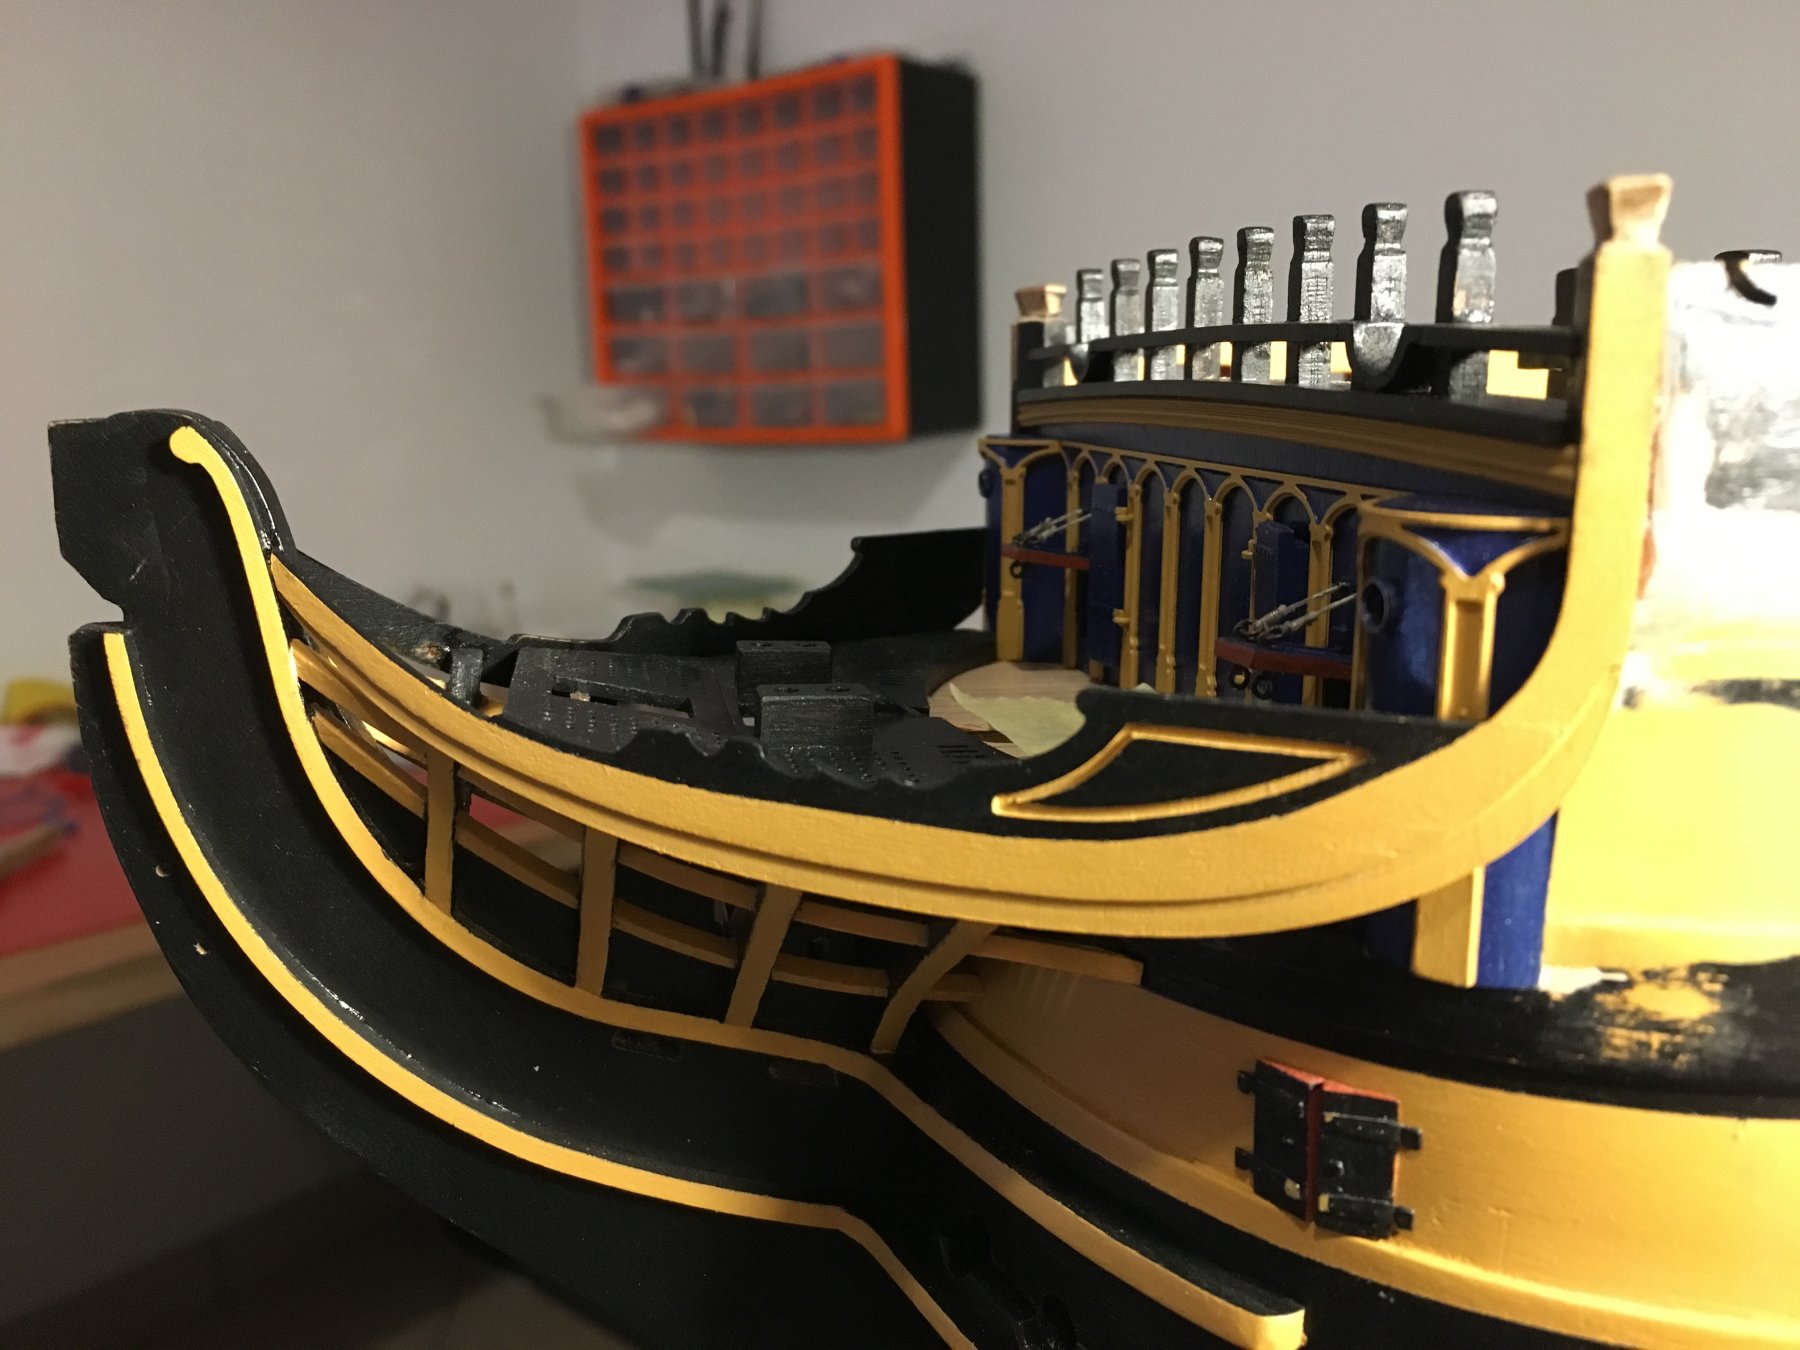
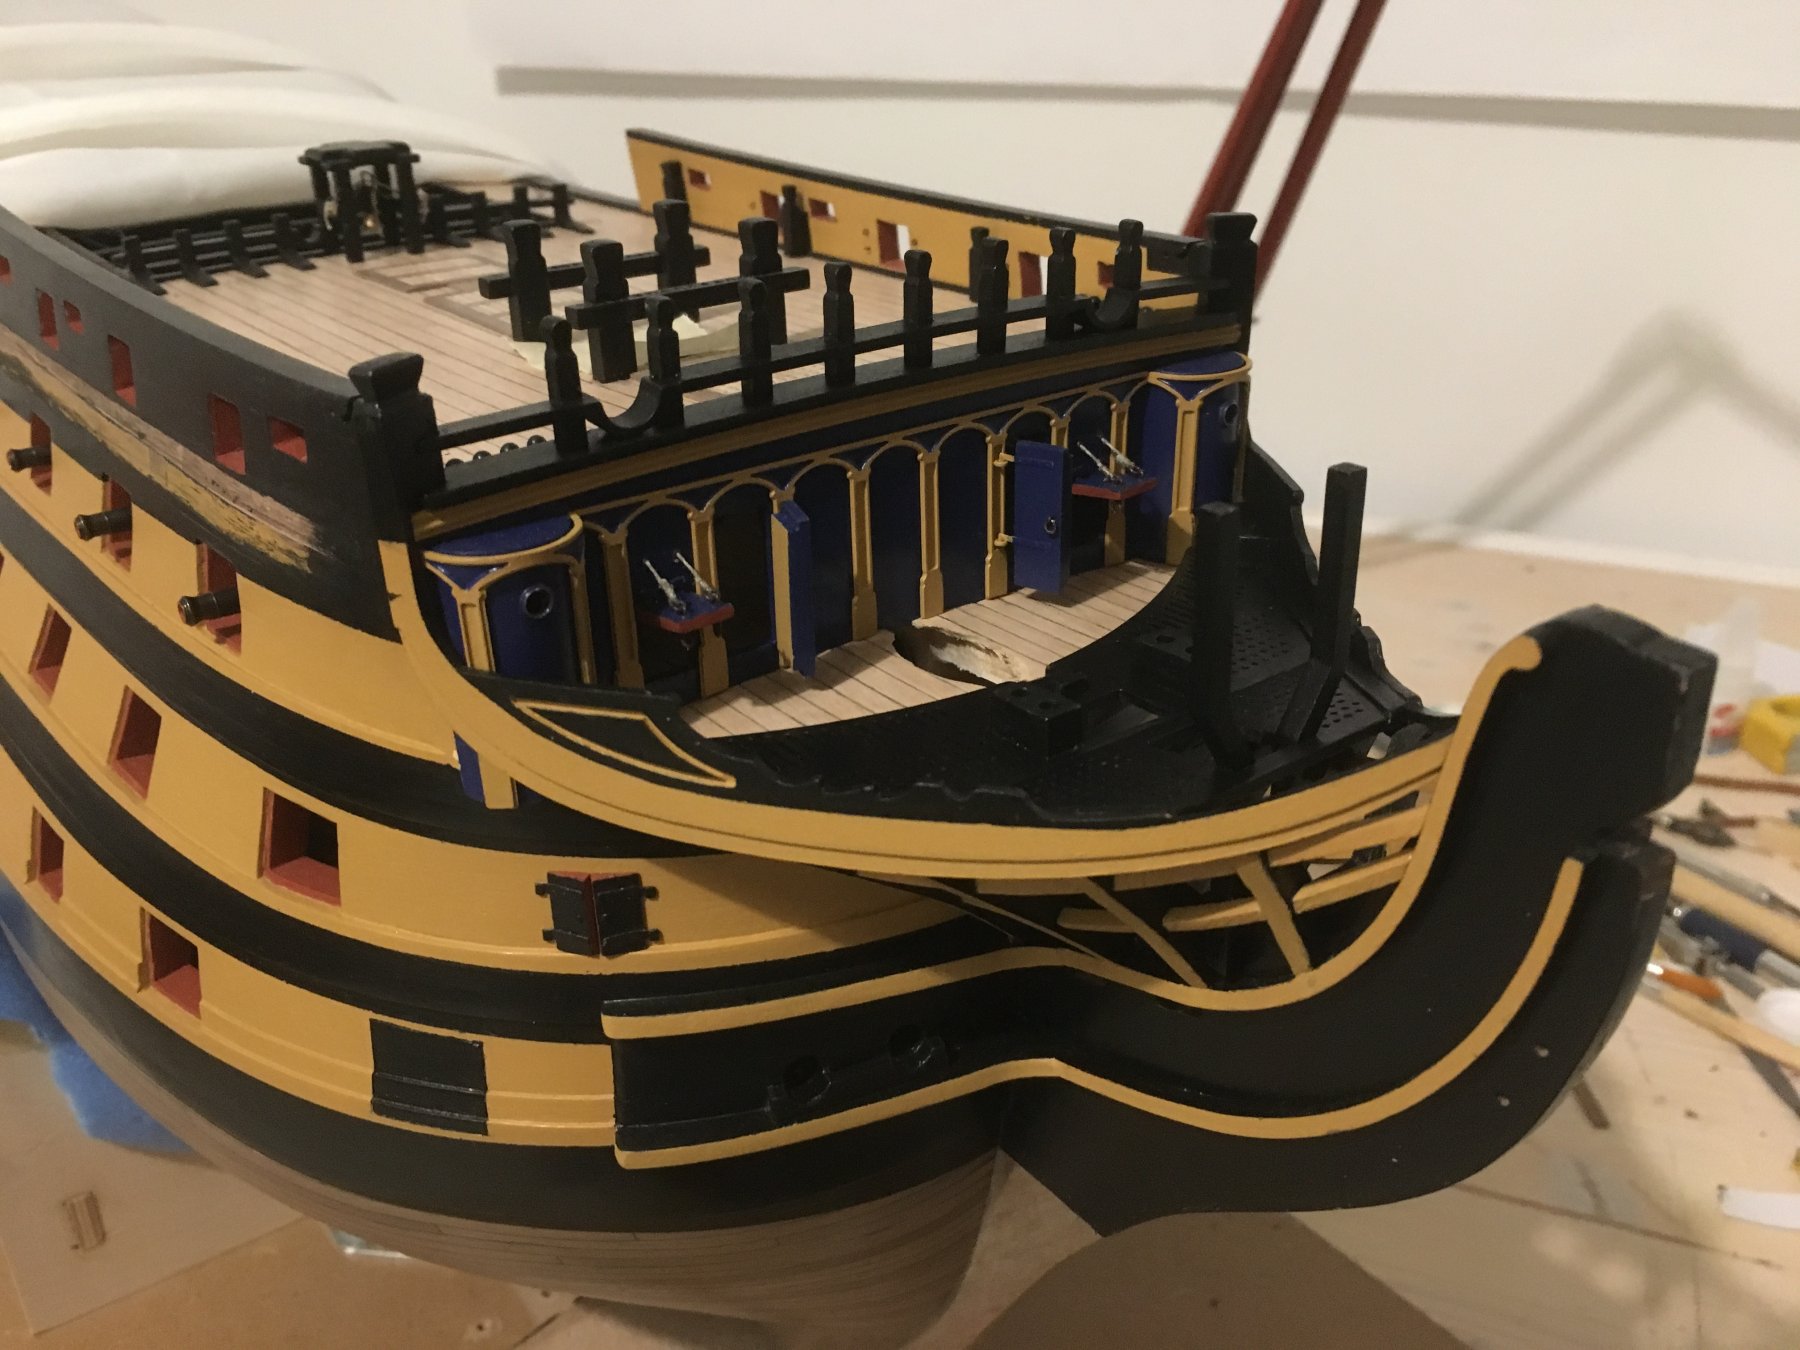
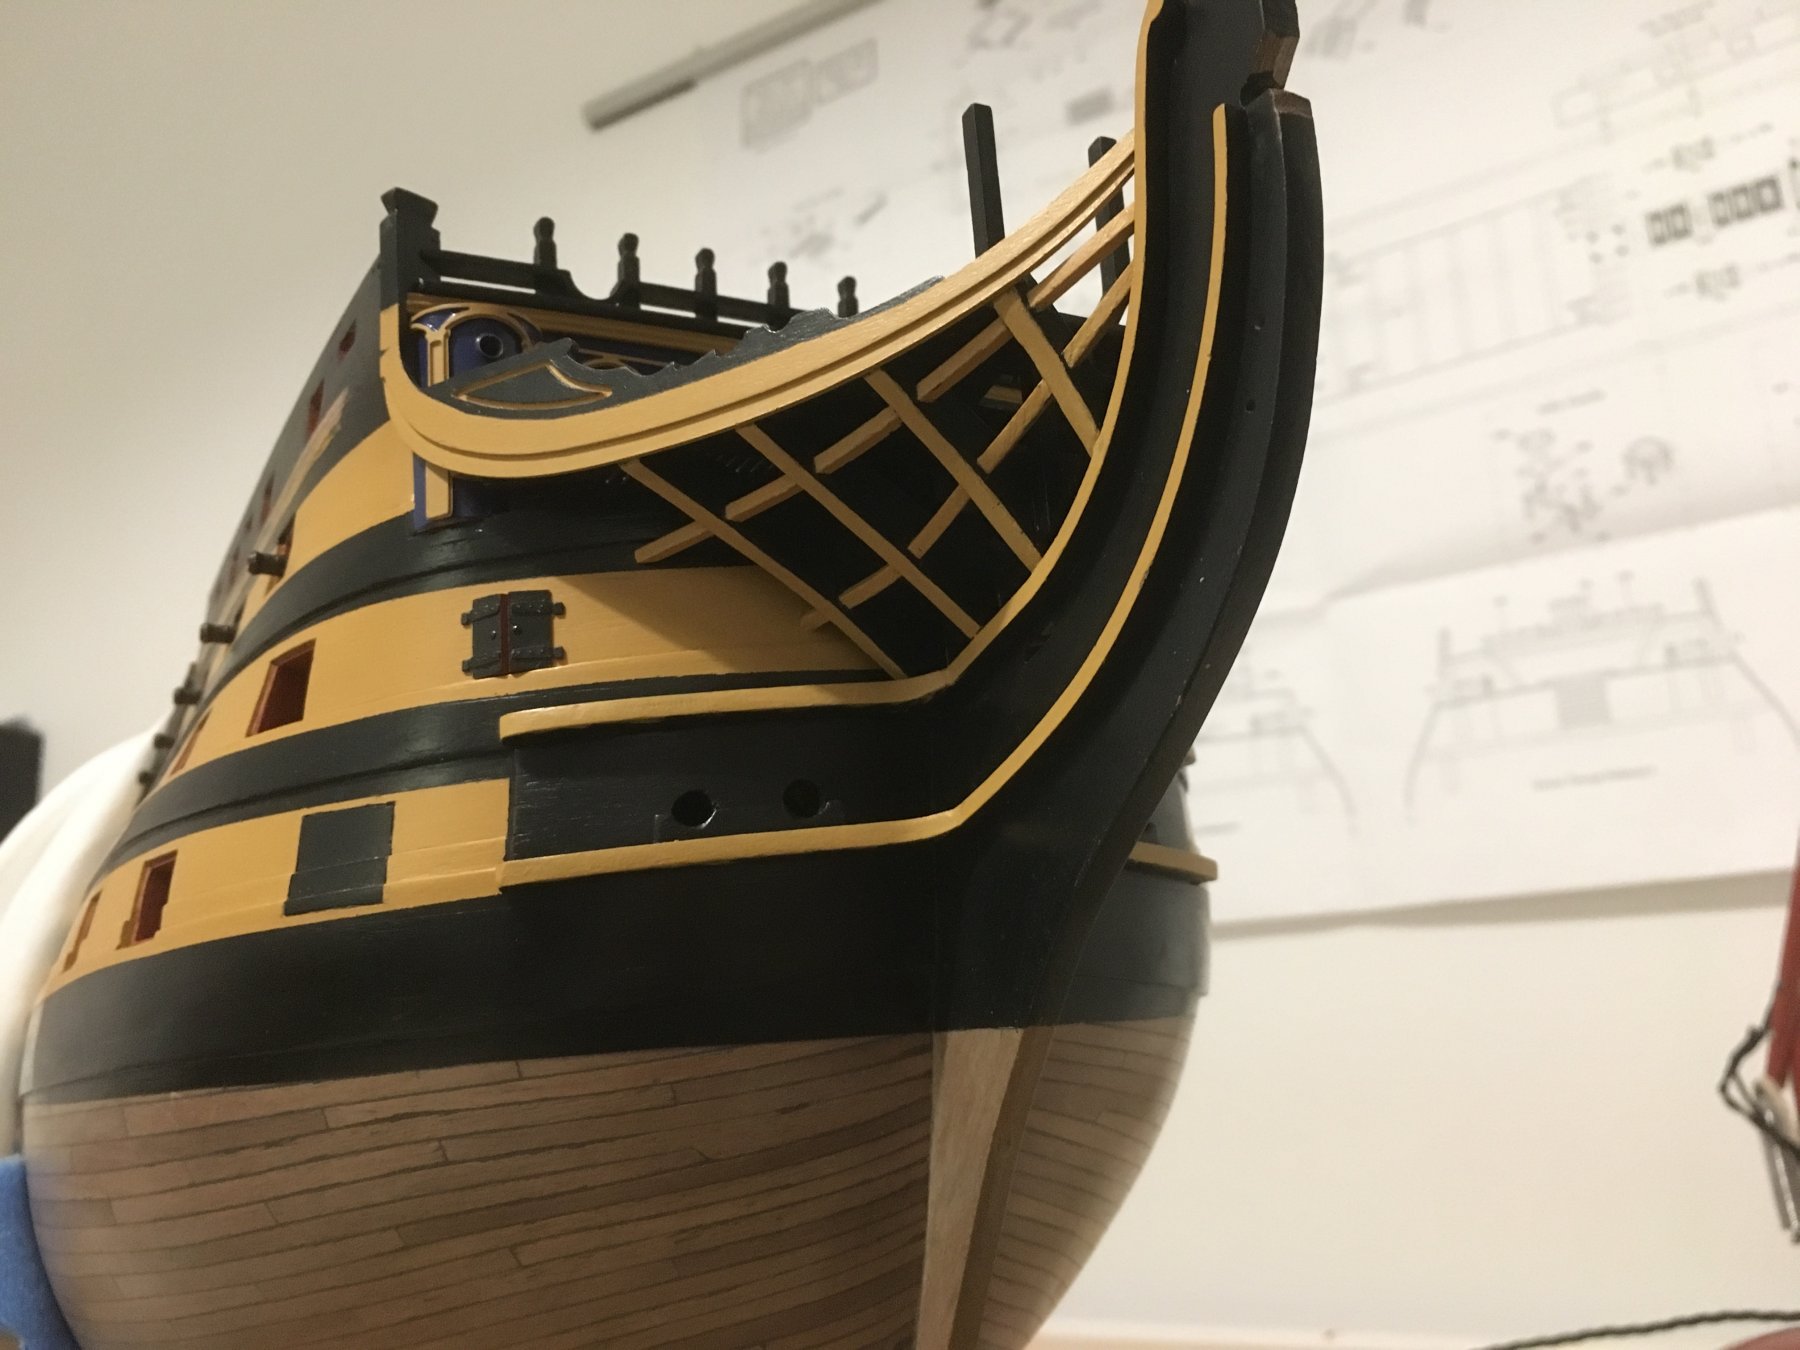
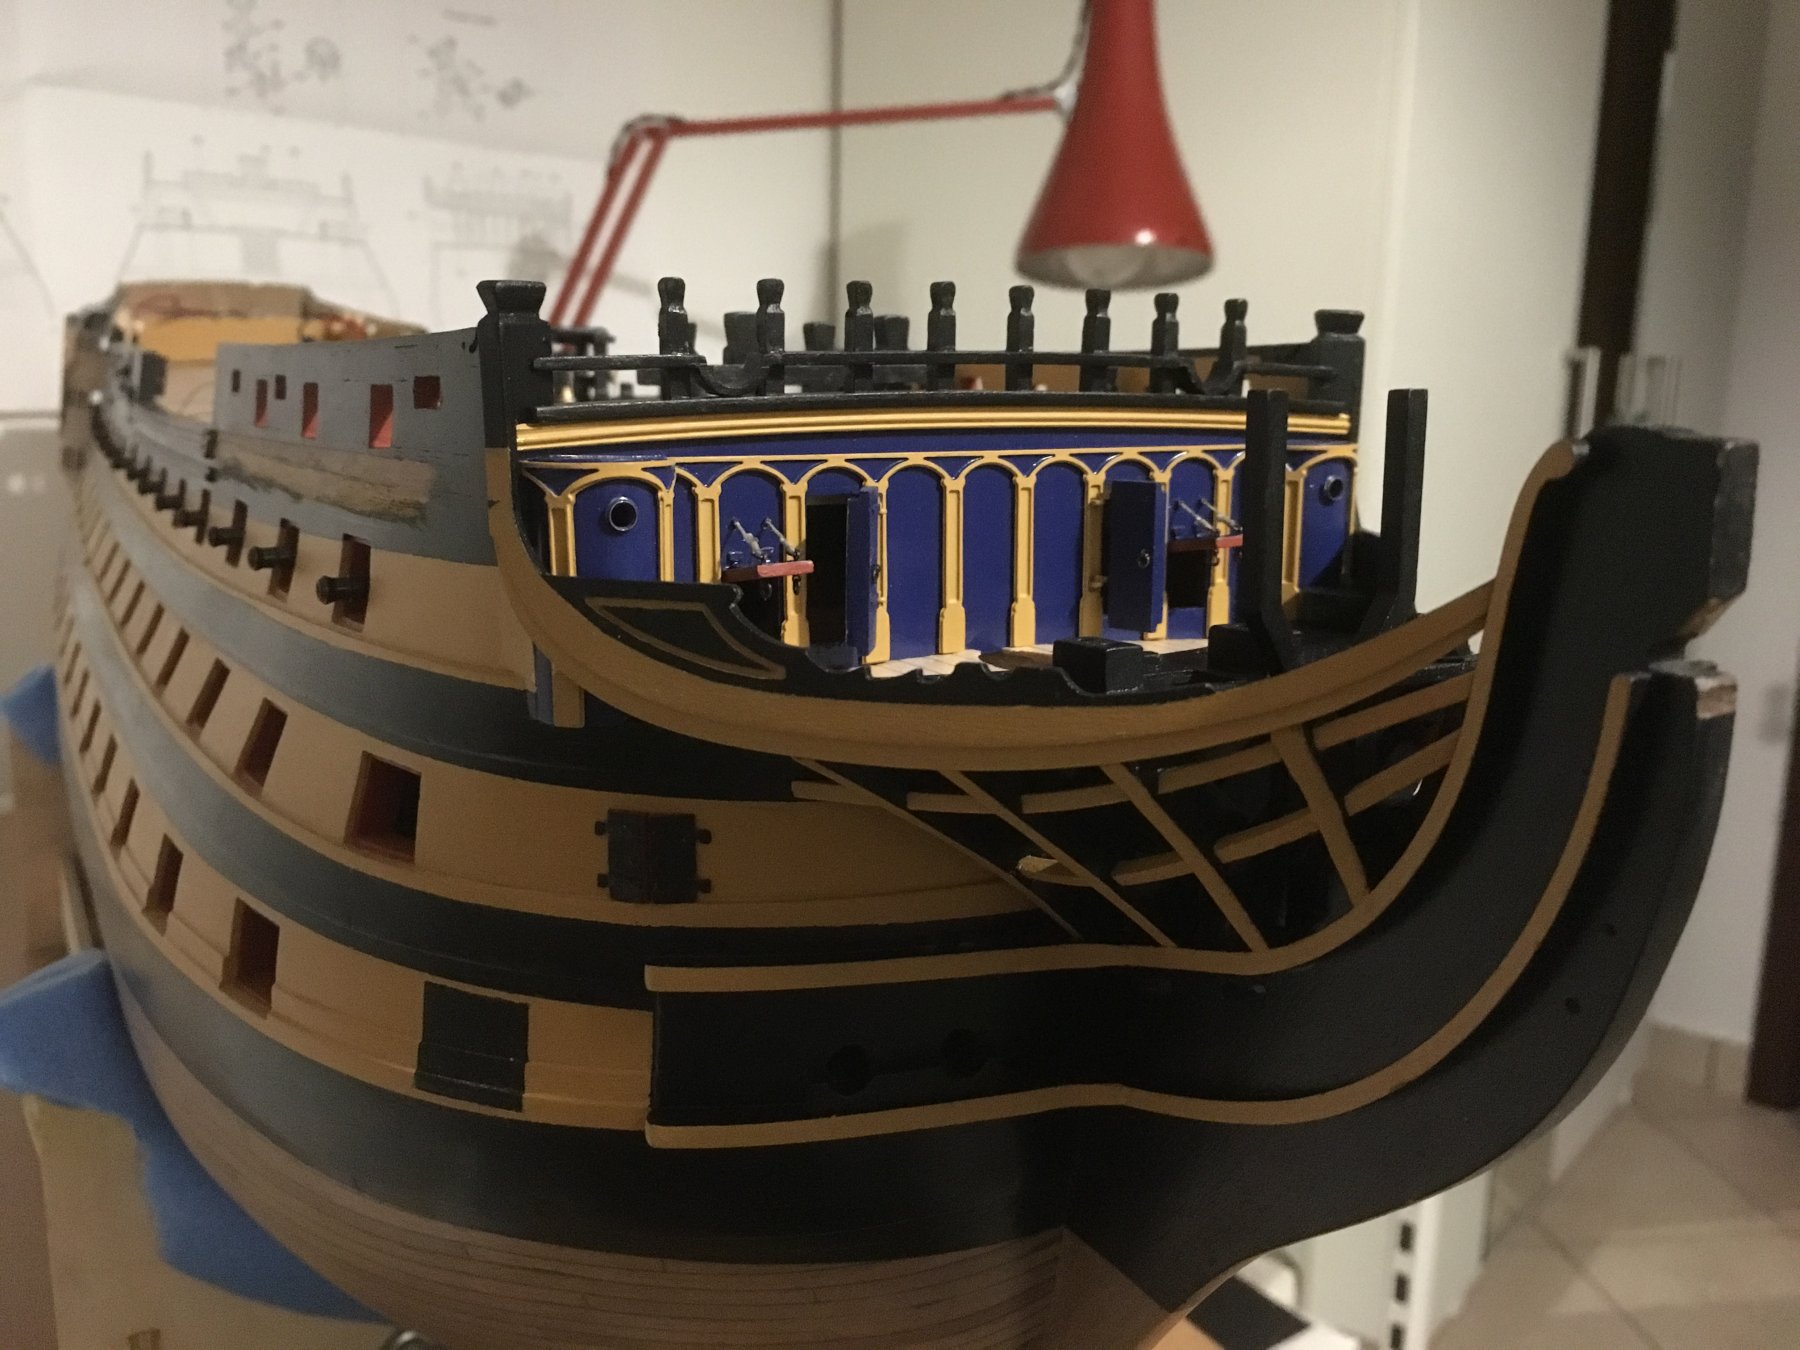
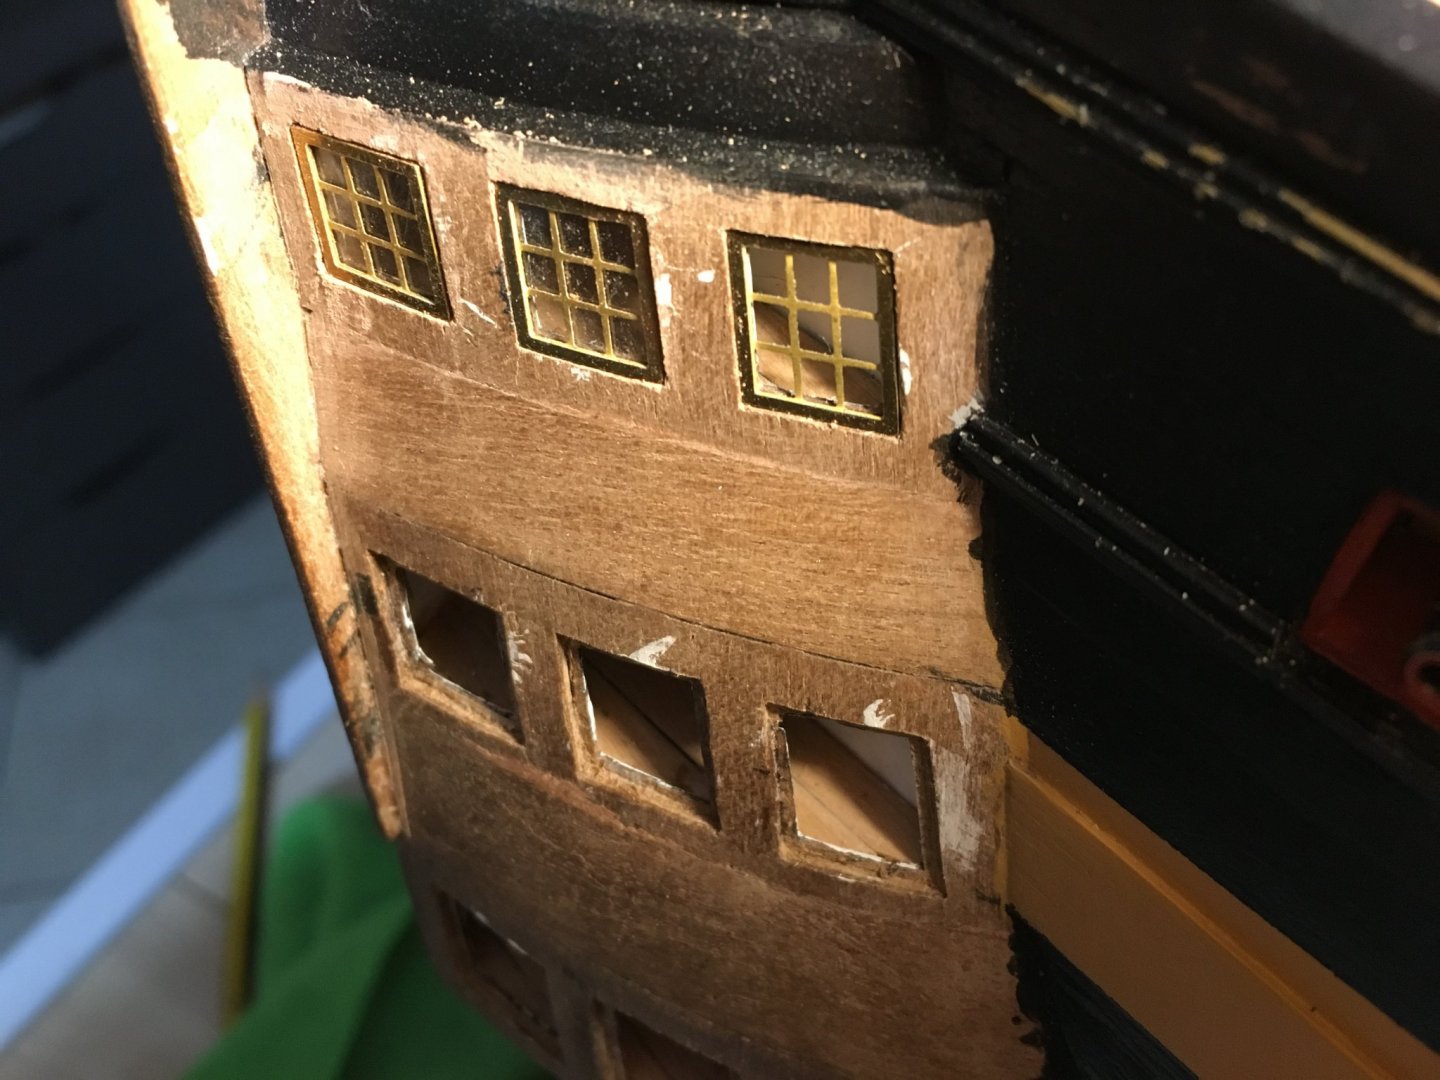
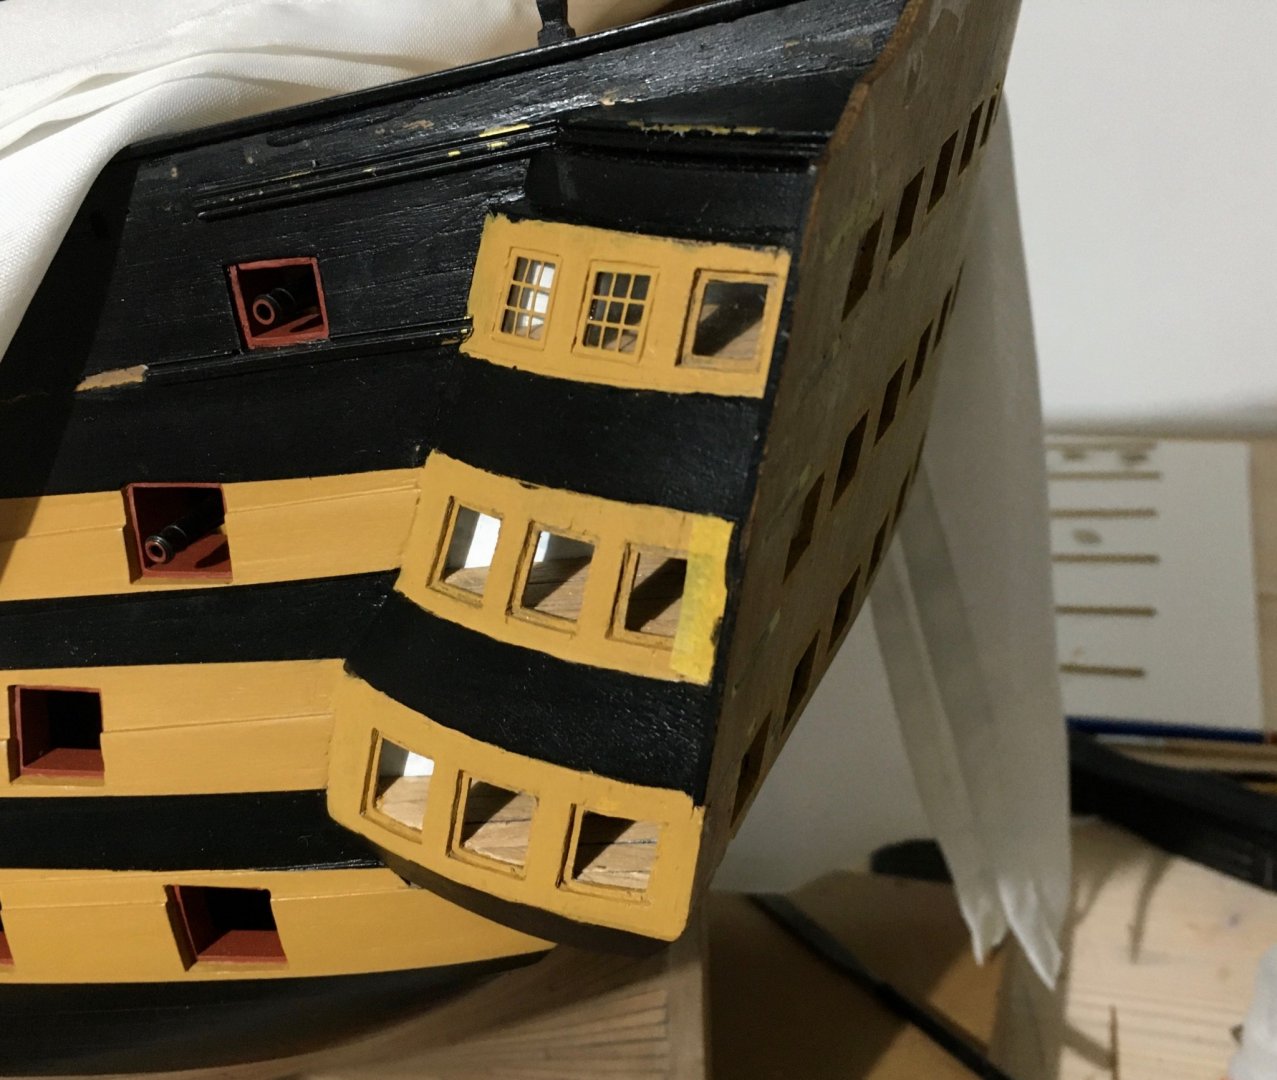
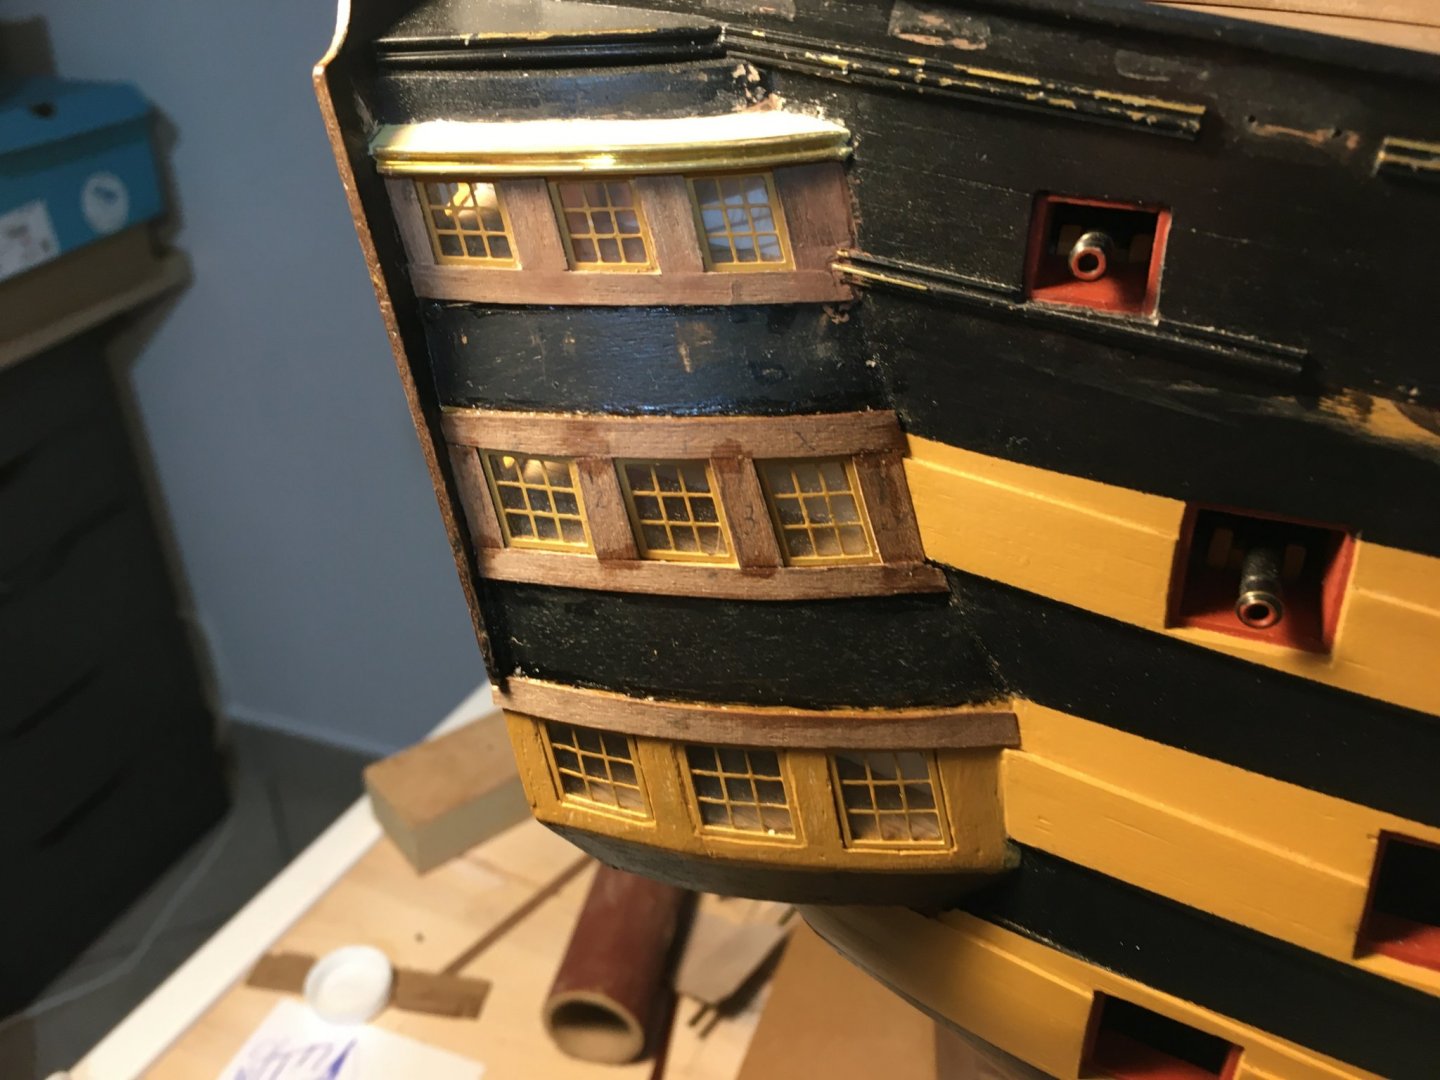
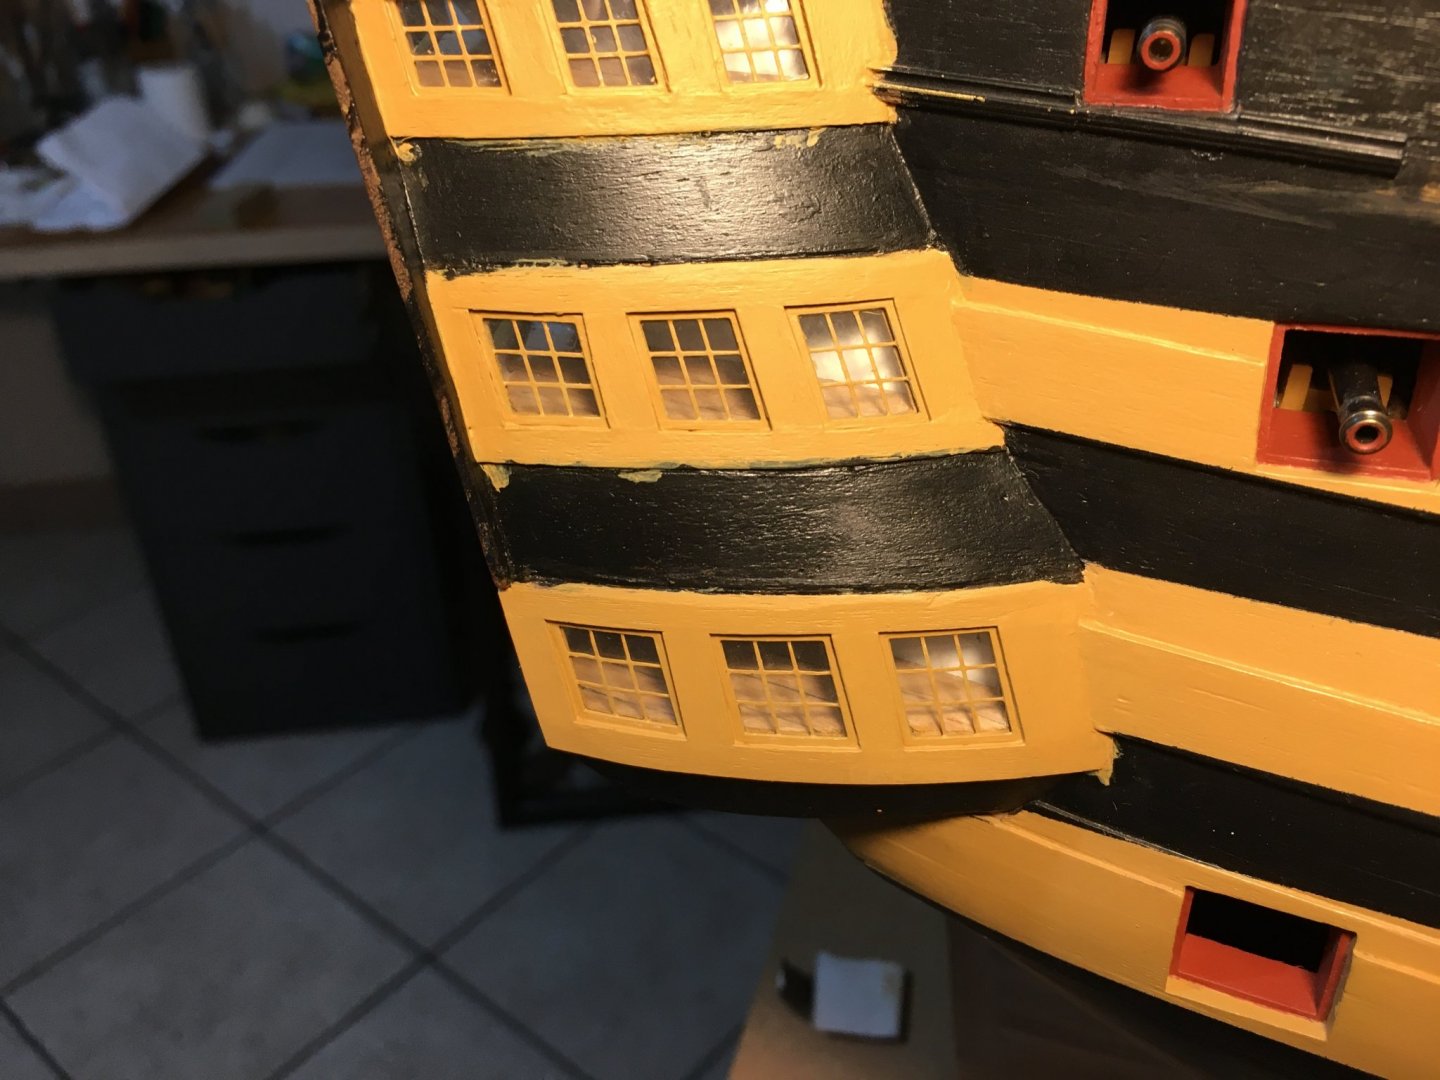
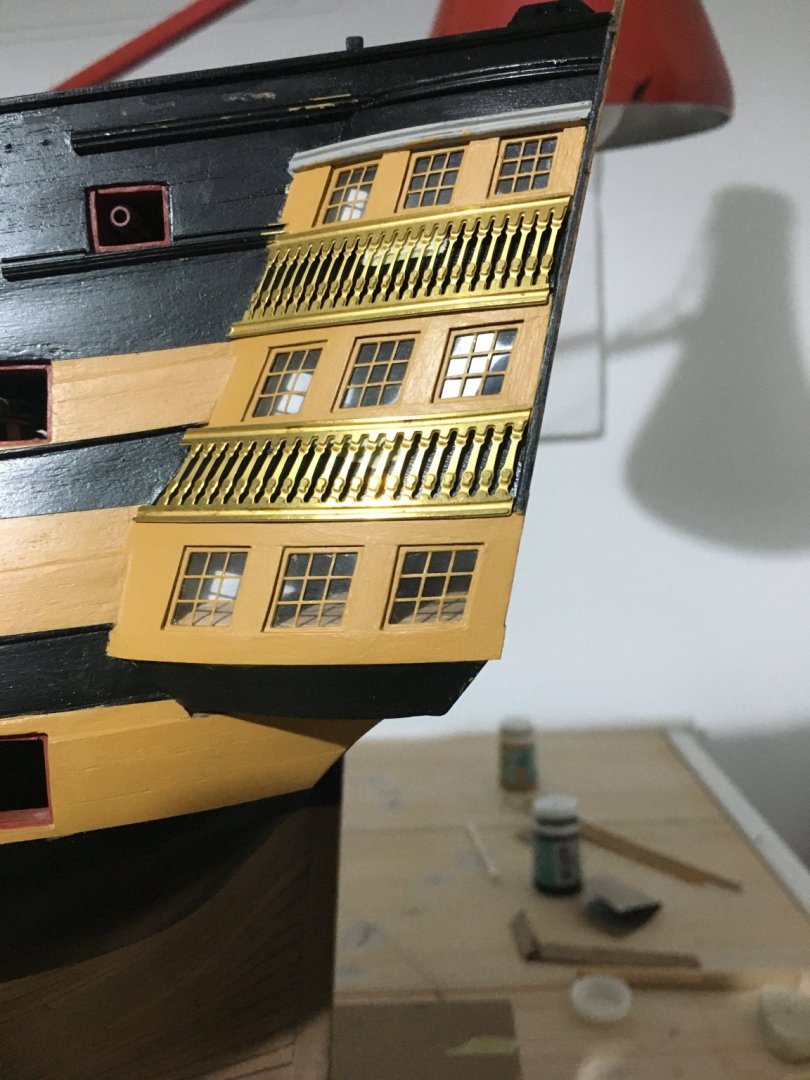
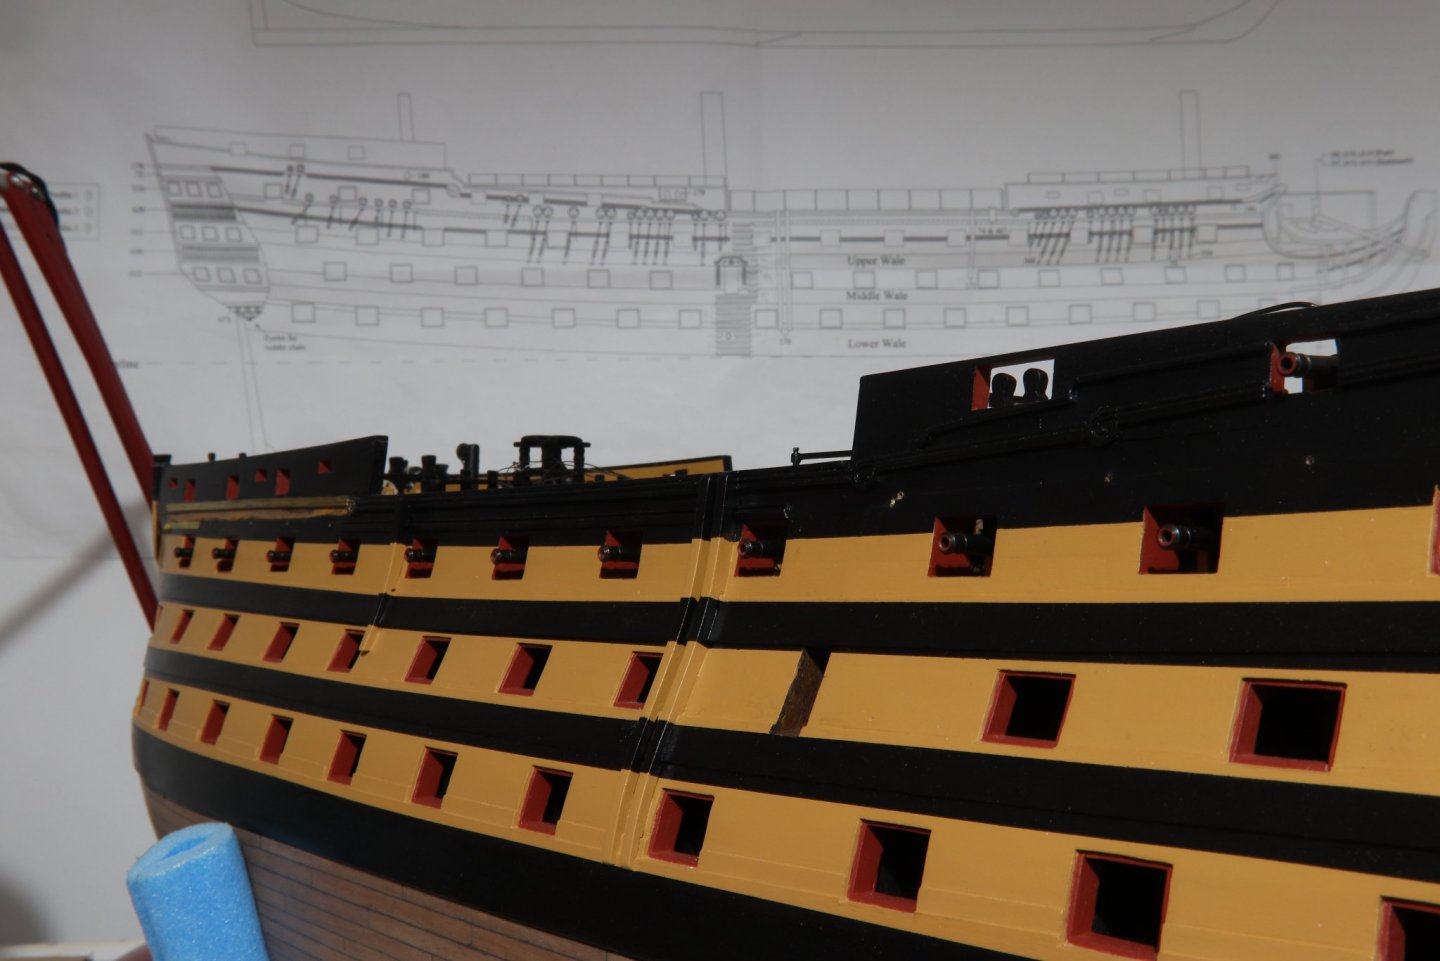
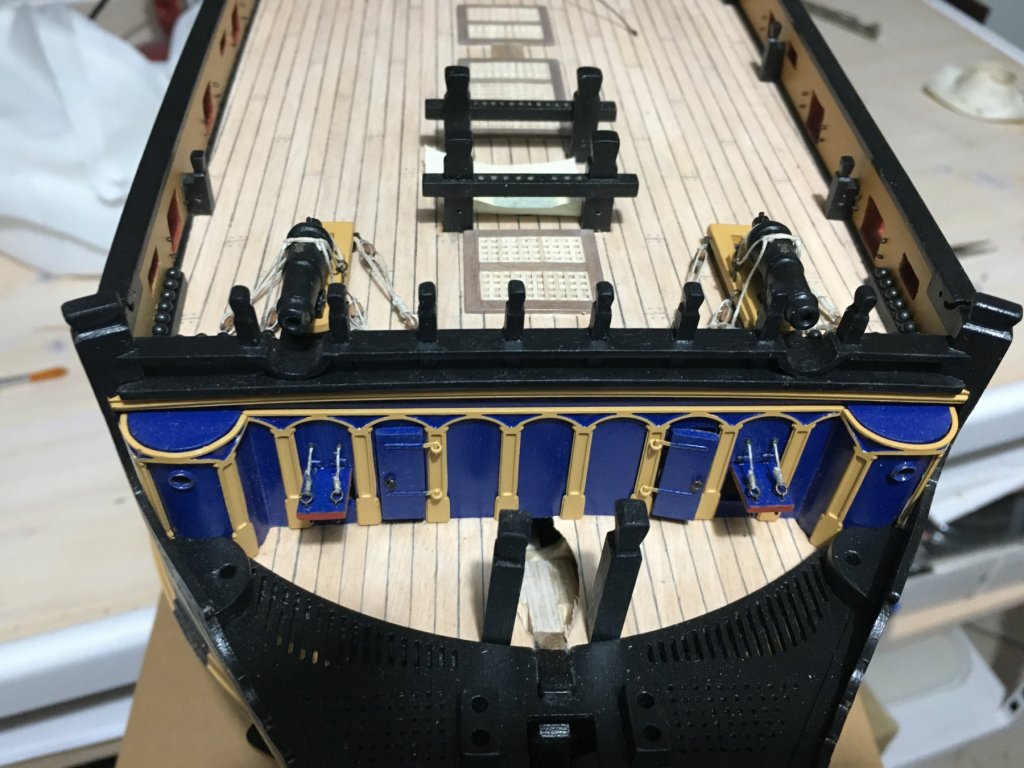
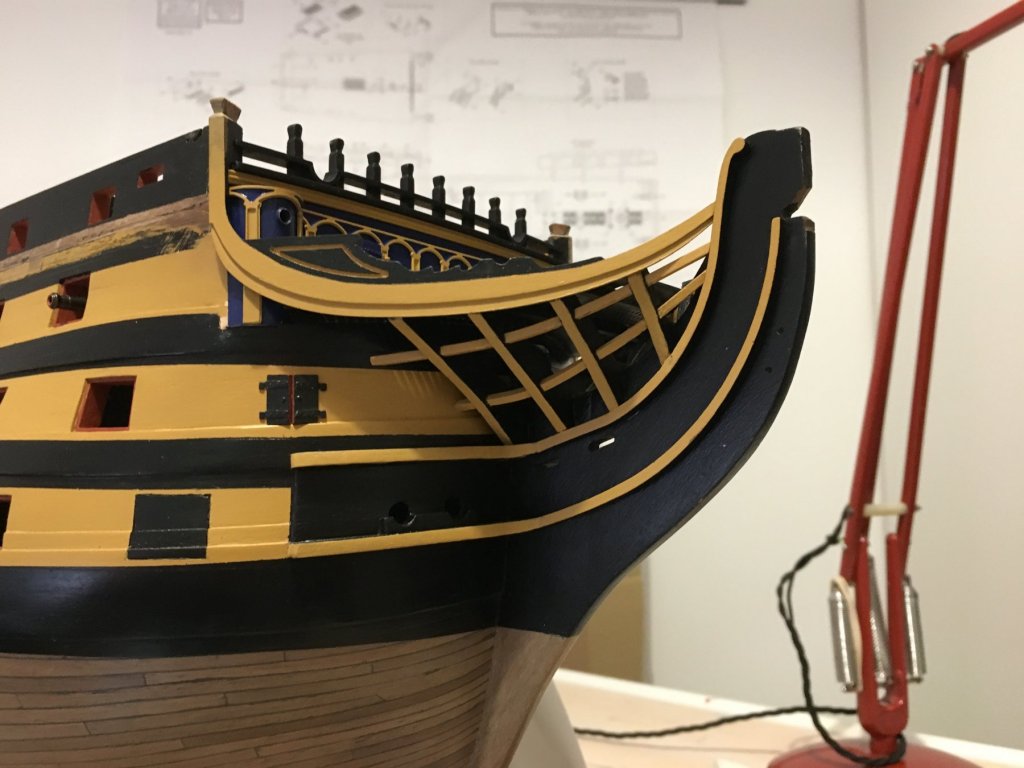
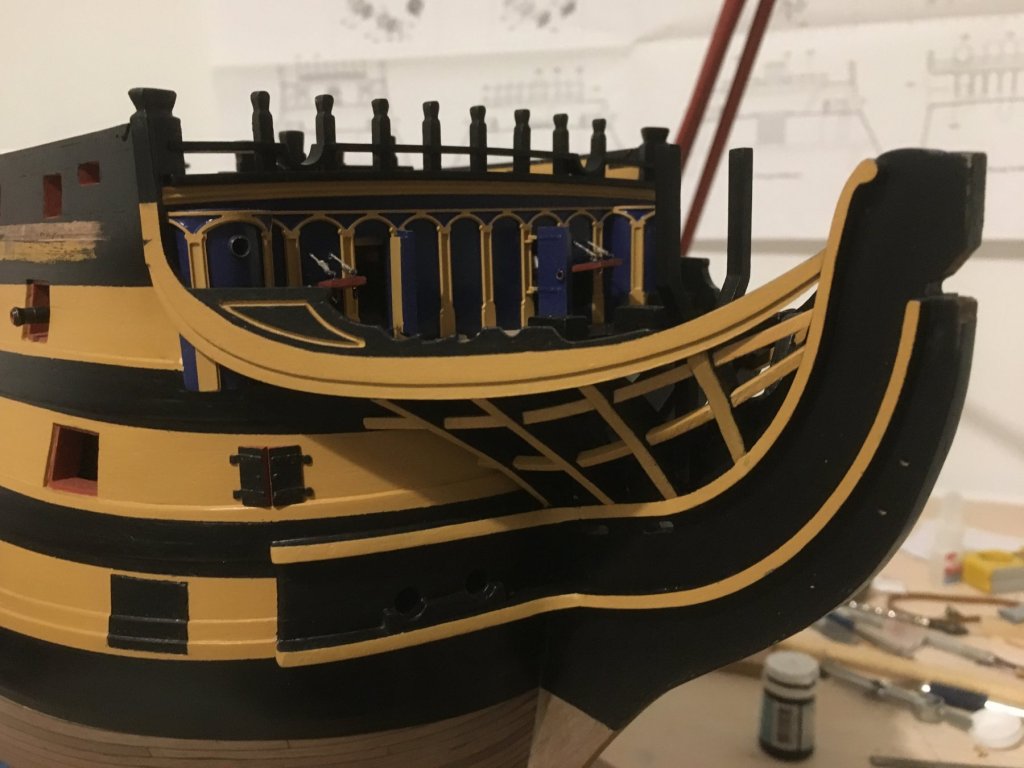
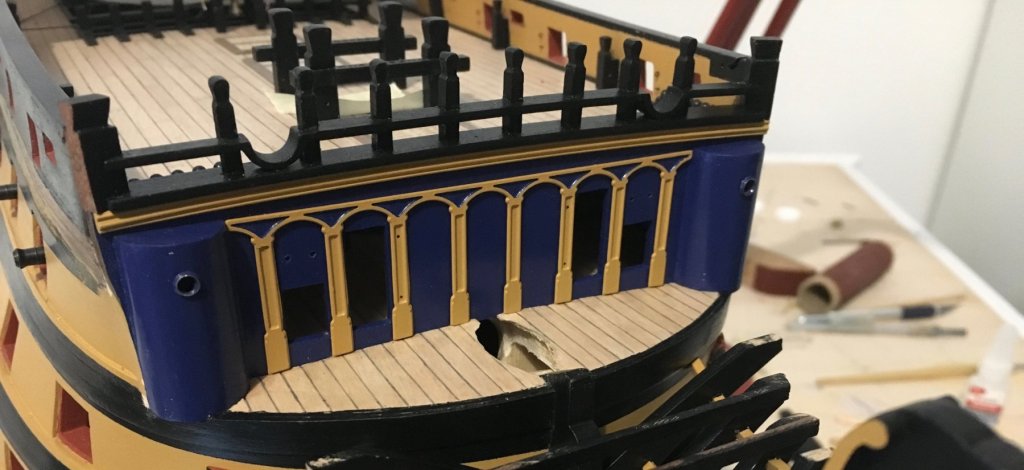
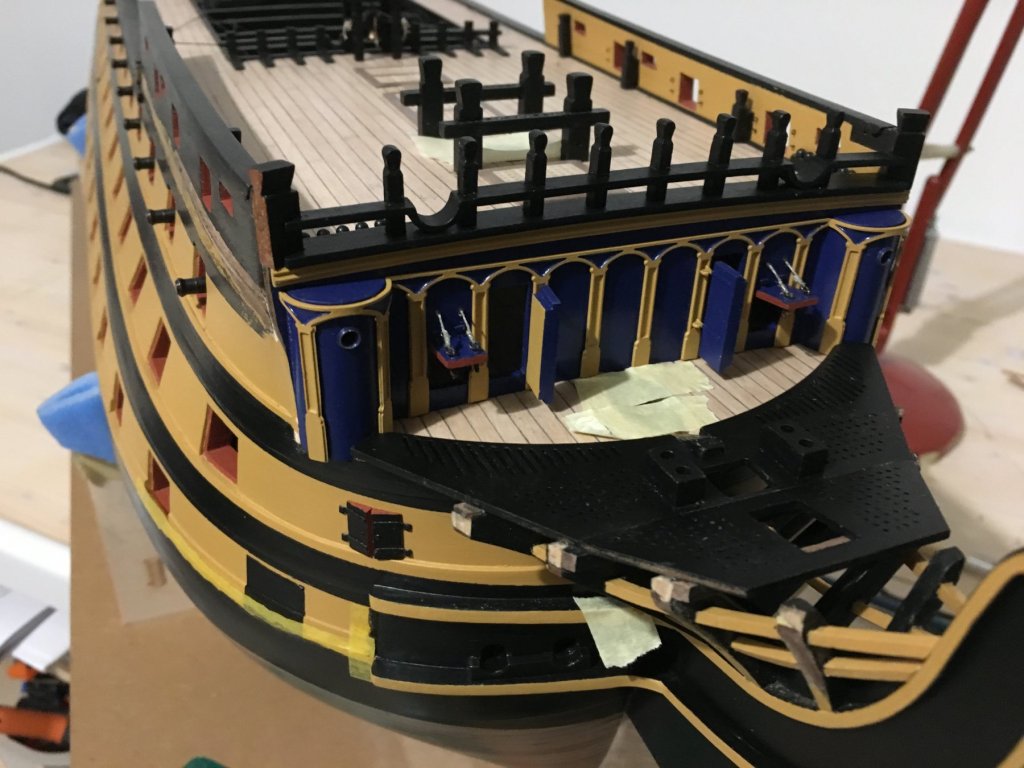
A long overdue update. Hi Swazza, I had bought the monograms from Syren and used the very small once on the cannons, they were great. I thought they are a bit bulky for the buckets, but I will have another go and see how they look. Thanks. I started work on the windows for the Quarter Galleries and I did not like the windows being flash with the quarter pattern skins. I wanted to create some depth so I made the recess for the windows on the pattern skin deeper. But when I painted them I did not like them either. The edges were they meet with the brass windows were not sharp and clean at all. I took a different approach and hoped for the best. I ordered some 0.5mm thick walnut strips from CMB to cover all the quarter pattern skins to create better window edges and even a deeper recess. I think they look much better now. Didn't worry about the line were the two colours meet as they will be covered by the railing. If you notice the brass profiles I had fitted and painted earlier on the hull, with handling, the paint is all coming off. The paint does not adhere at all to the brass. For now I stopped worrying about it and I will go all over them again when I finish all the work on the hull. On other parts of brass I tried dipping in white vinegar before painting, tried cleaning with acetone, nothing seems to work. Dry fitted the railings to see how it looks. I don't think I will paint and fit the railings for now for the same reason of paint being scratched off so easily on brass. Checked that the lights inside the quarter galleries still worked fine. Looking through one of the doors of the Beakhead on the Bow. Also fitted the fenders and the chesstrees on the side of the hull. Working on the Cat-Heads as well. Regards Robert


- 527 replies
-
- 9
-
-
- caldercraft
- victory
- (and 1 more)
-
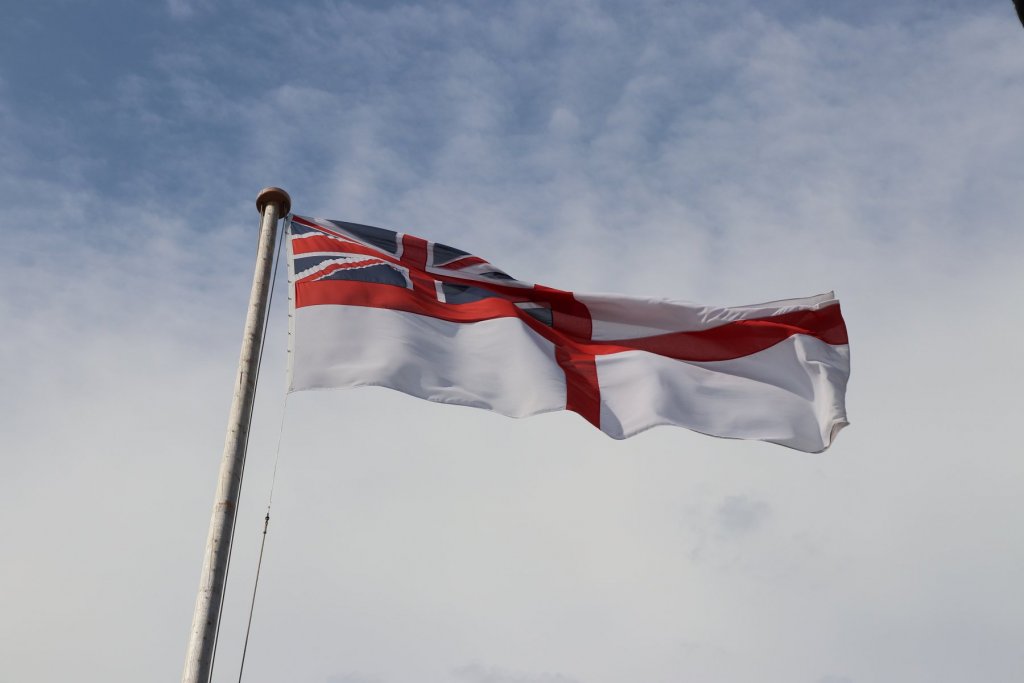
Wallace, thank you, I try my best. I learn a lot from this forum. Mort, coming to think of it I think I had seen it somewhere as well. I will try to find it. Reg, thank you for the web site. Looks very interesting, I think I will give it a go. I'll try to find an image of the ensign, check the size I need them and give it a go. The only downside of it I can see is that postage from USA to Malta tends to be quite expensive, but it's worth a try. Regards Robert
-
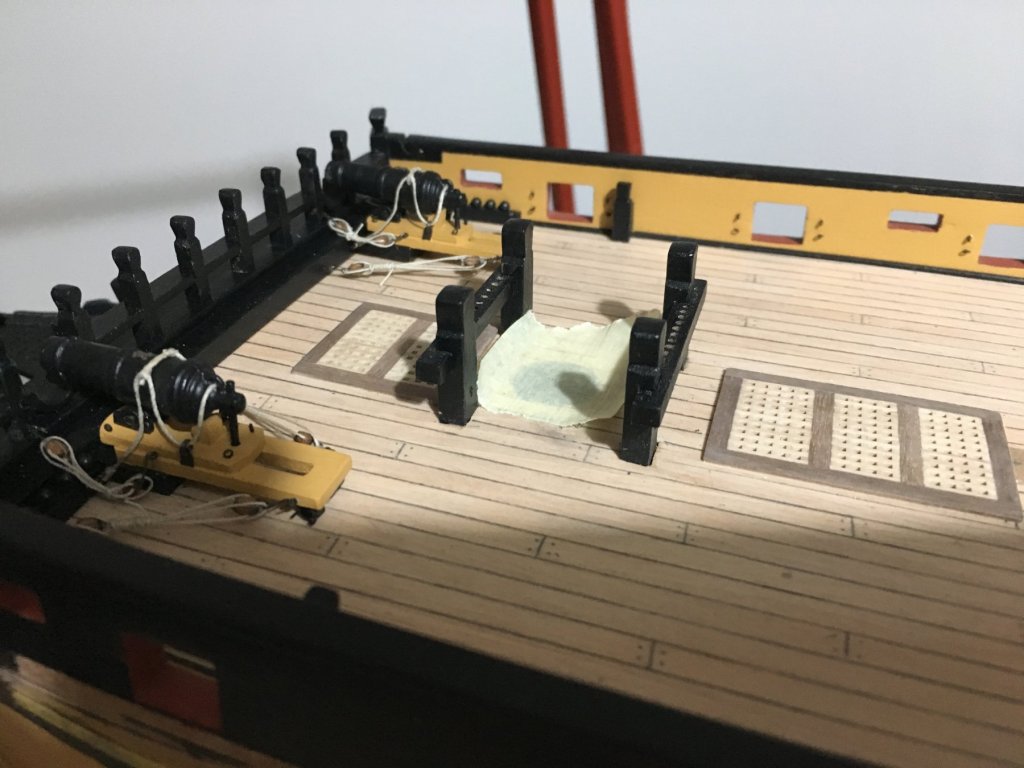
A small update. Added some more detail to the Galley Stove Chimney. I glued a metal washer to its base to create an edge and soldered two handles to its side. Nearly ruined the chimney, did not realise that the white metal had such a low melting point, started melting when I touched it with the soldering iron and had to fill it up. Skylight done as well. For the moment both skylight and Mizzen Topsail Sheet Bitts are dry fitted. I will fit them when I have the Flag Lockers ready as well. One thing that is on my mind for the moment are the buckets that hang on the Poop Deck Barricade Assembly. I like to print the ensign on them as well but I do not have the faintest idea how to go about it. Regards Robert


- 527 replies
-
- 5
-
-
- caldercraft
- victory
- (and 1 more)
-
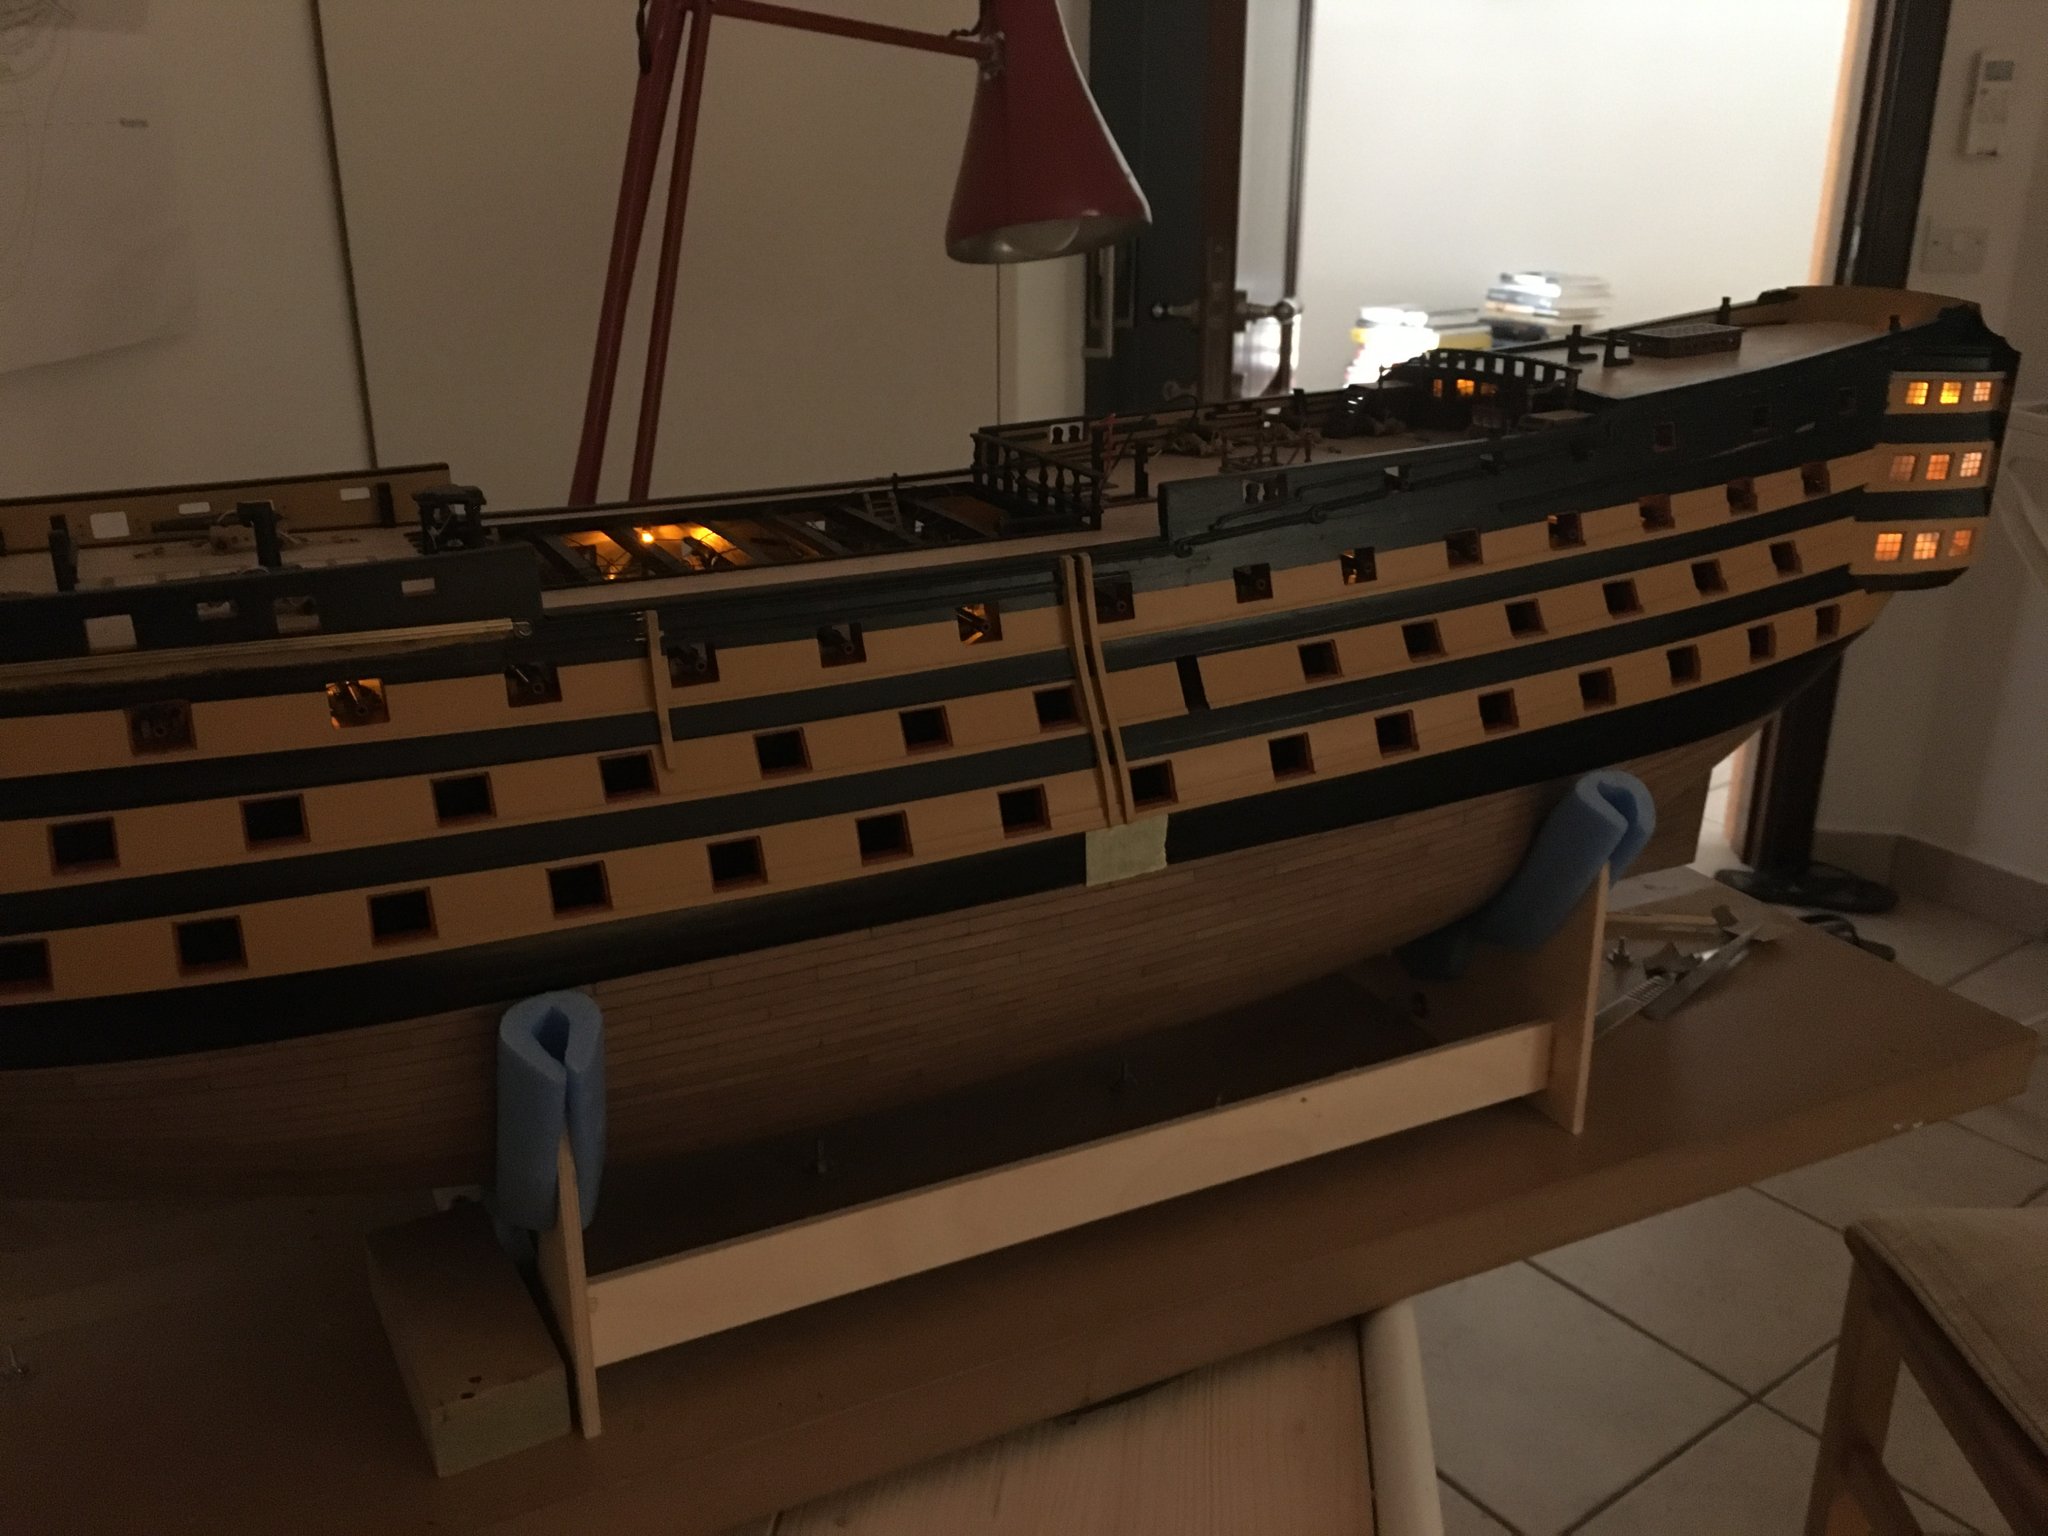
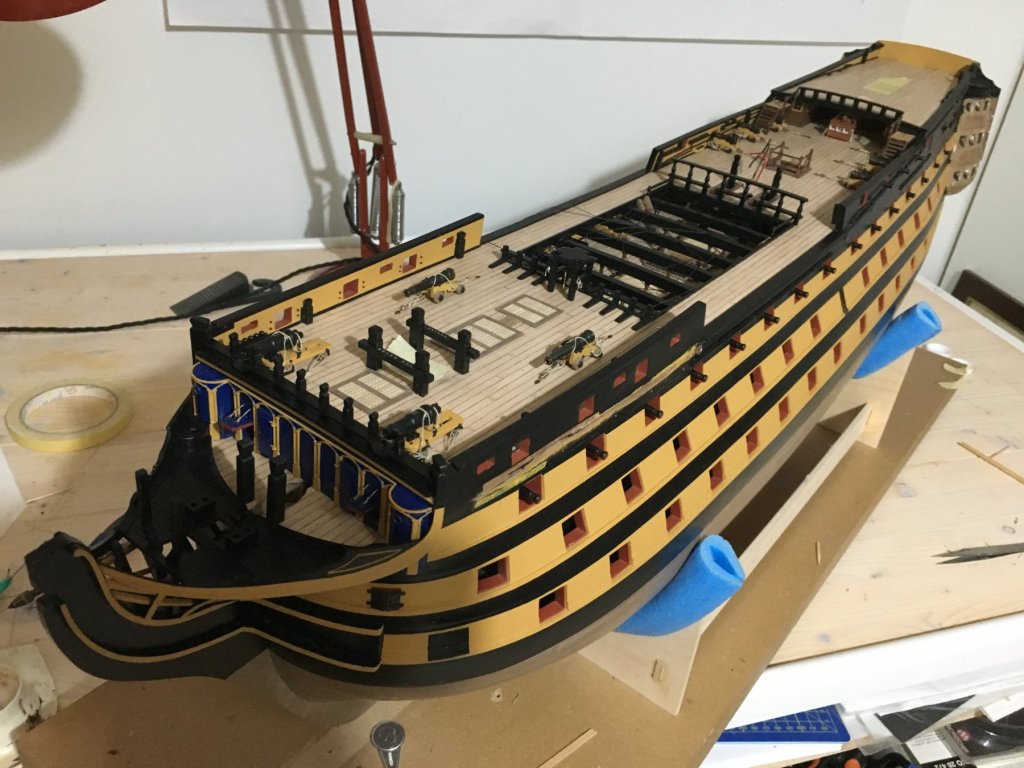
Alan, it is a hobby that needs quite a lot of patience. You have to make sure that you look at it as a hobby you enjoy doing and not a job you have to get over and done with as quickly as possible. I work on the Victory when I really have the mood. Sometimes I work on it nearly every day and sometimes I don't look at it for weeks. You have to enjoy building it, not just looking forward for the moment it is finished. Sometimes, when I am doing repetitive work it's true it gets a bit tedious, like when you are doing so many carriages for the cannons, but that is part of the hobby. When it comes to that I leave it for a few days to do other work around my apartment or start doing something different on the model itself. Nzreg, I have a three bedroomed apartment and now I don't really need the third bedroom so I turned it into a workshop for my hobby. It is quite a big model so basically you not only got to have space where to build it but also were to display it when finished. From figurehead to stern it is 950mm with a hull of 220mm in width, BUT complete with the bowsprit, masts and yards it is 1,385mm (length), 525mm(width), and 940mm(height). Regards Robert
- 527 replies
-
- 5
-
-
- caldercraft
- victory
- (and 1 more)
-
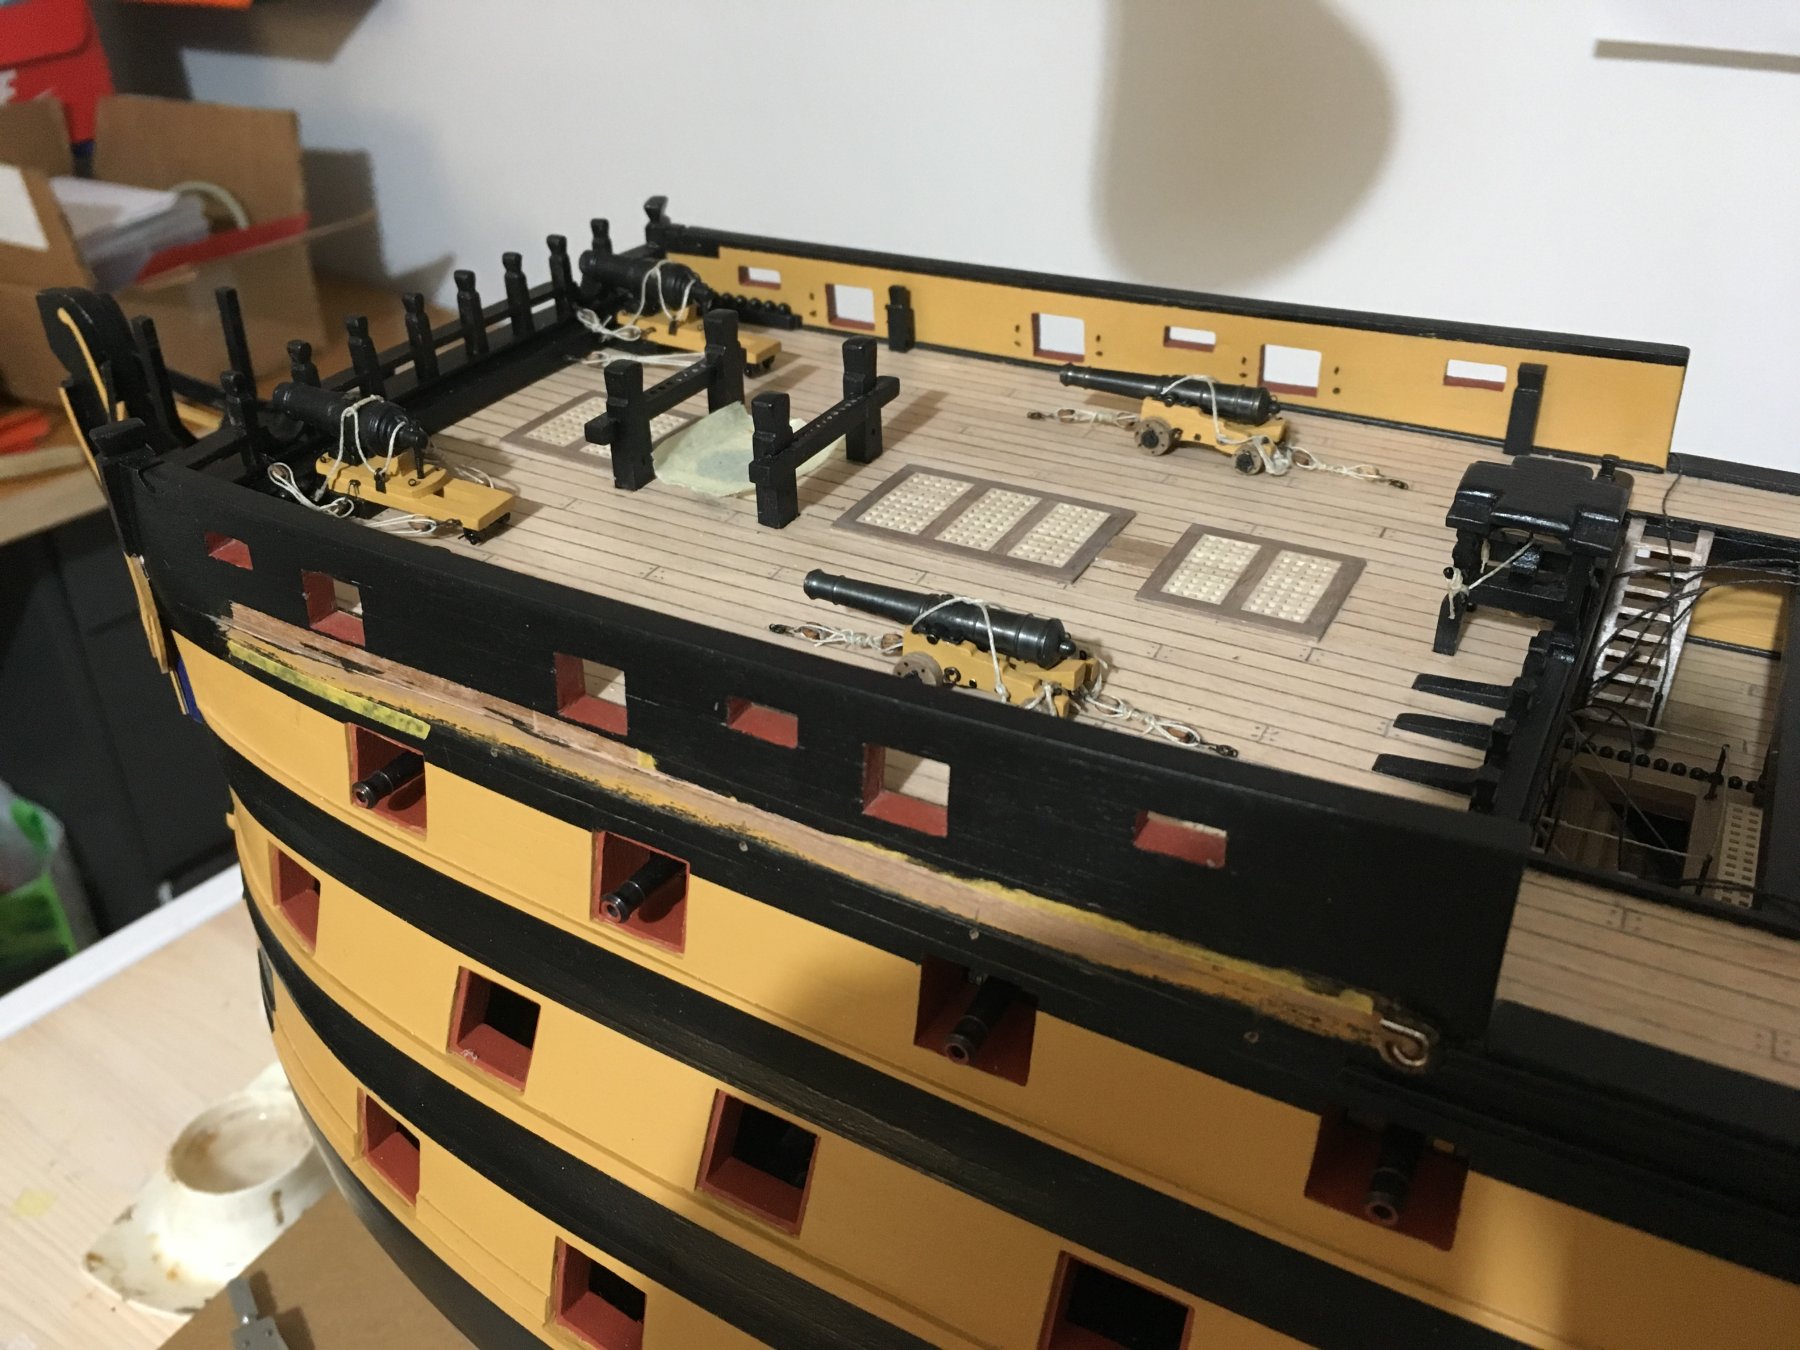
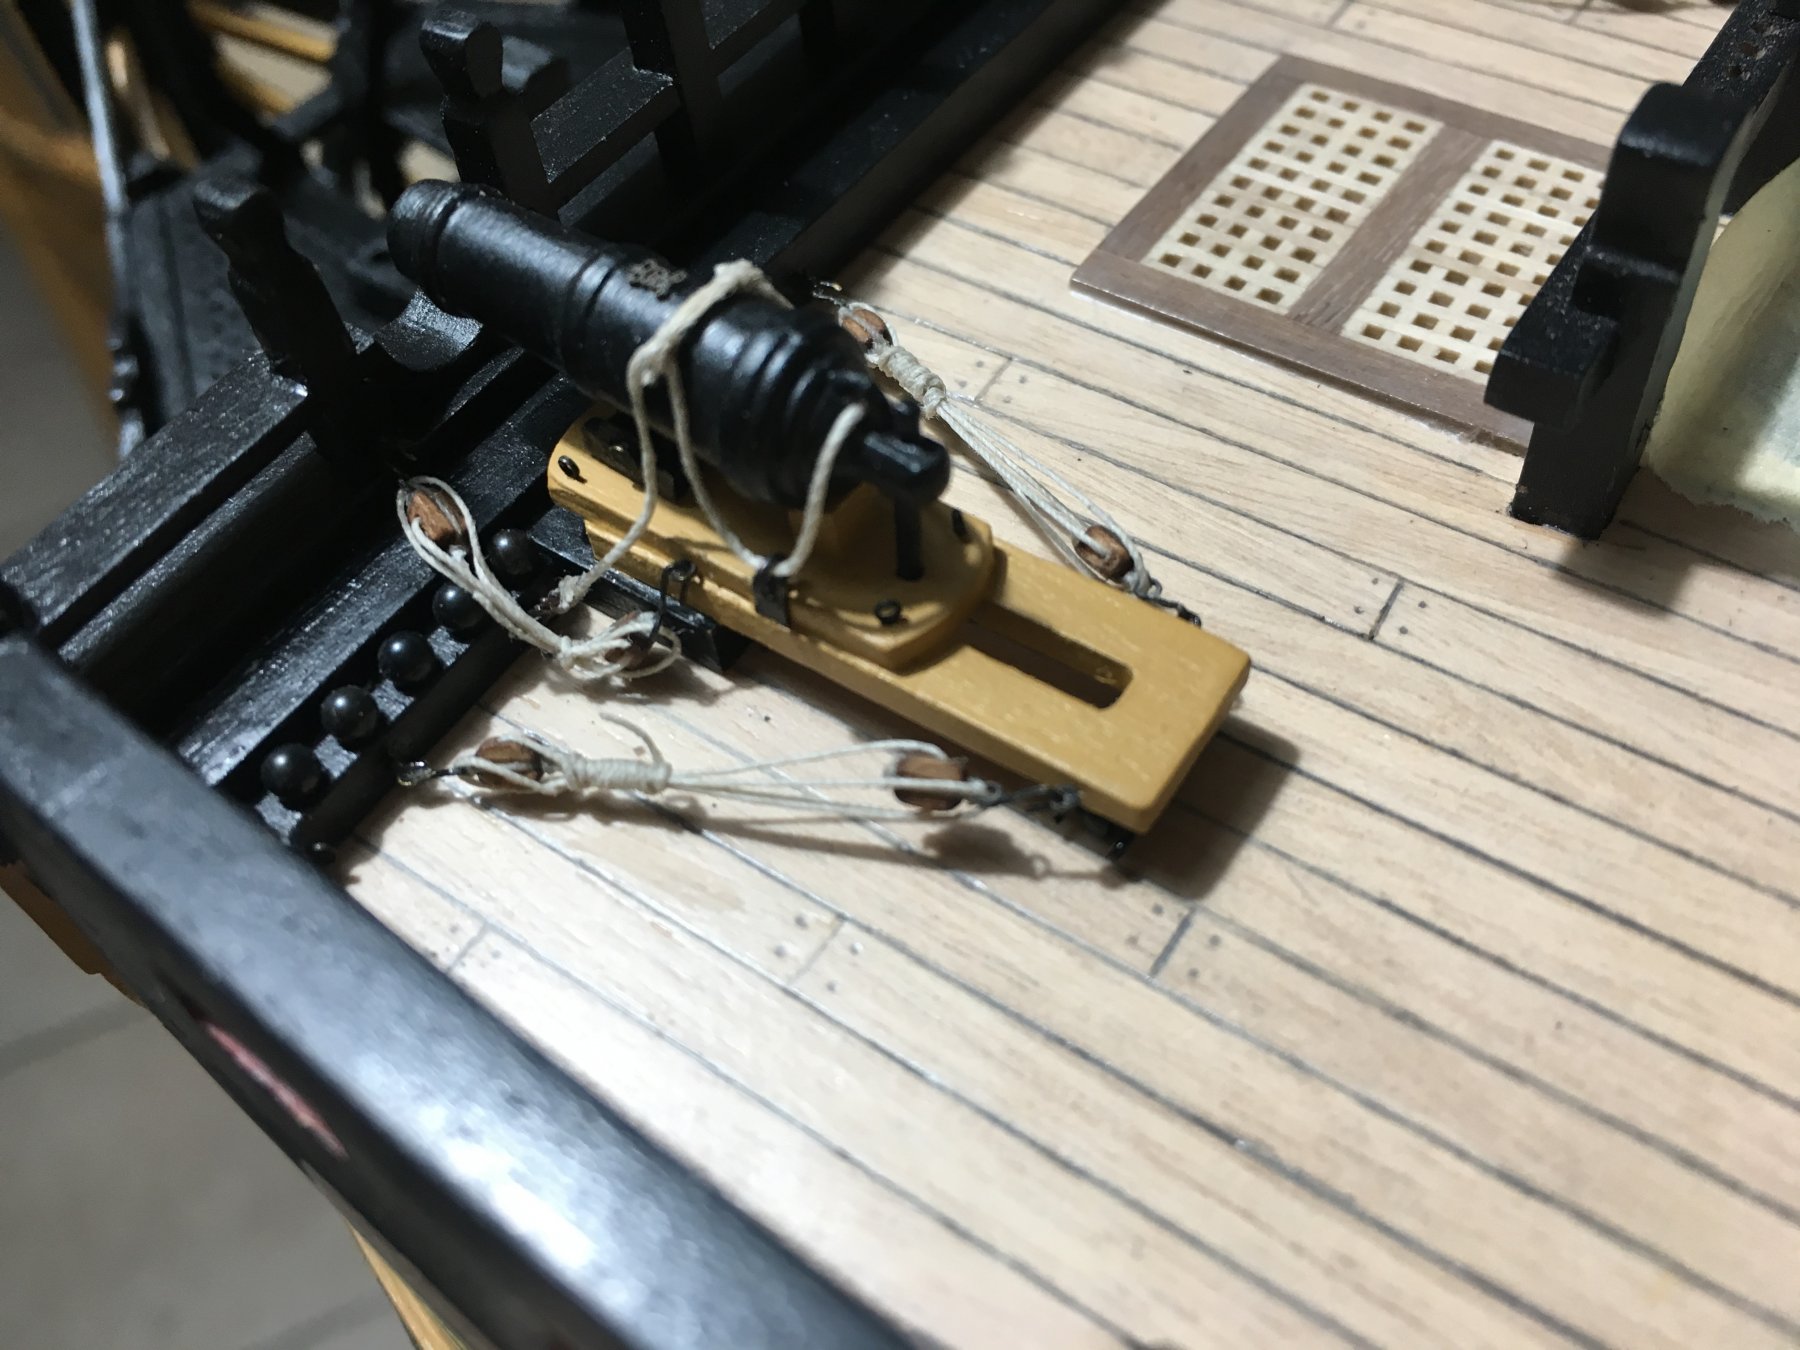
The two Forecastle medium 12pdr cannons are fitted snd rigged in place. Finally finished with all carriages and cannons. The dummy cannons will be fitted at a later stage. Robert
- 527 replies
-
- 4
-
-
- caldercraft
- victory
- (and 1 more)
-
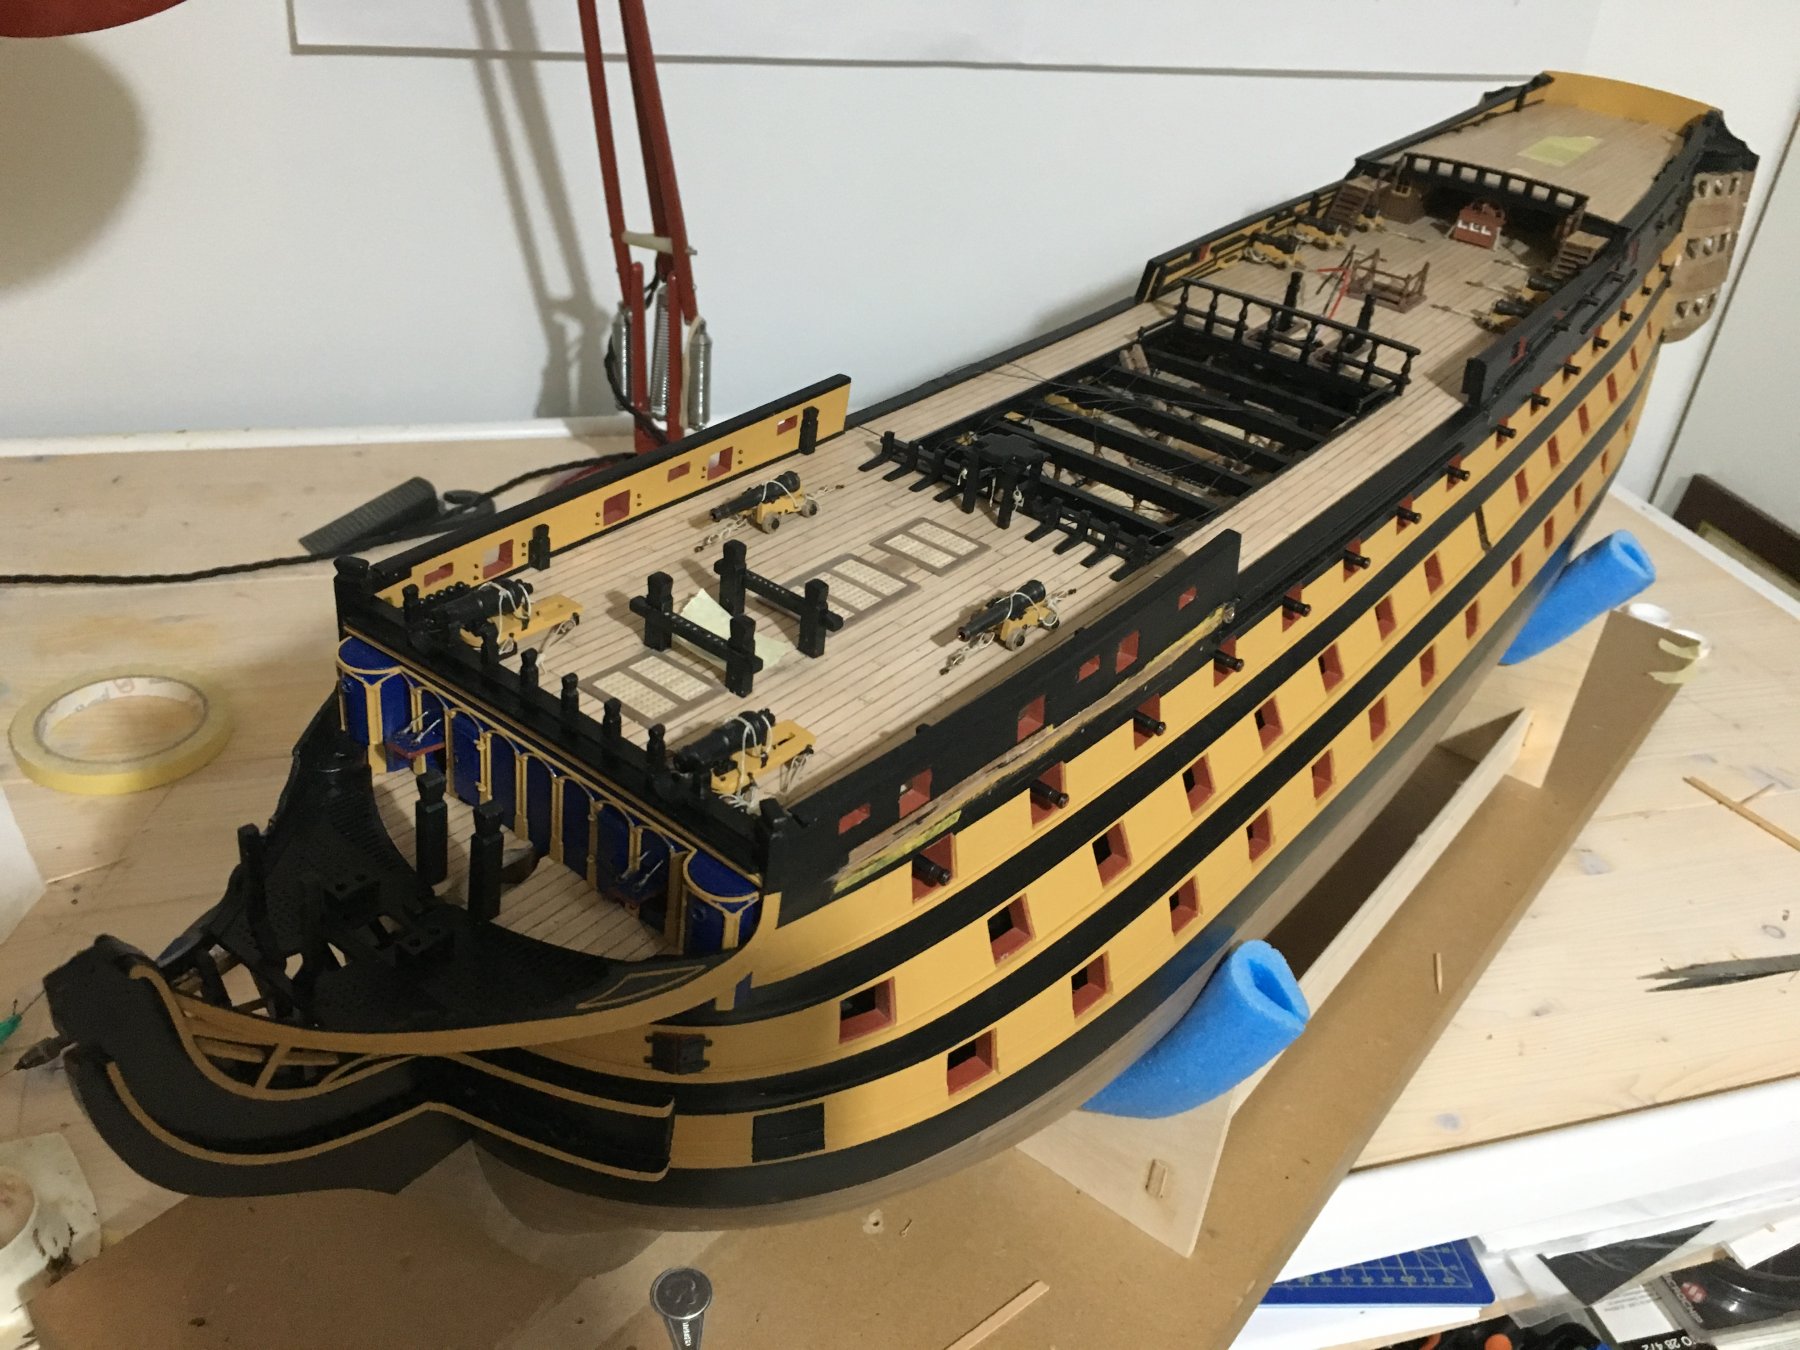
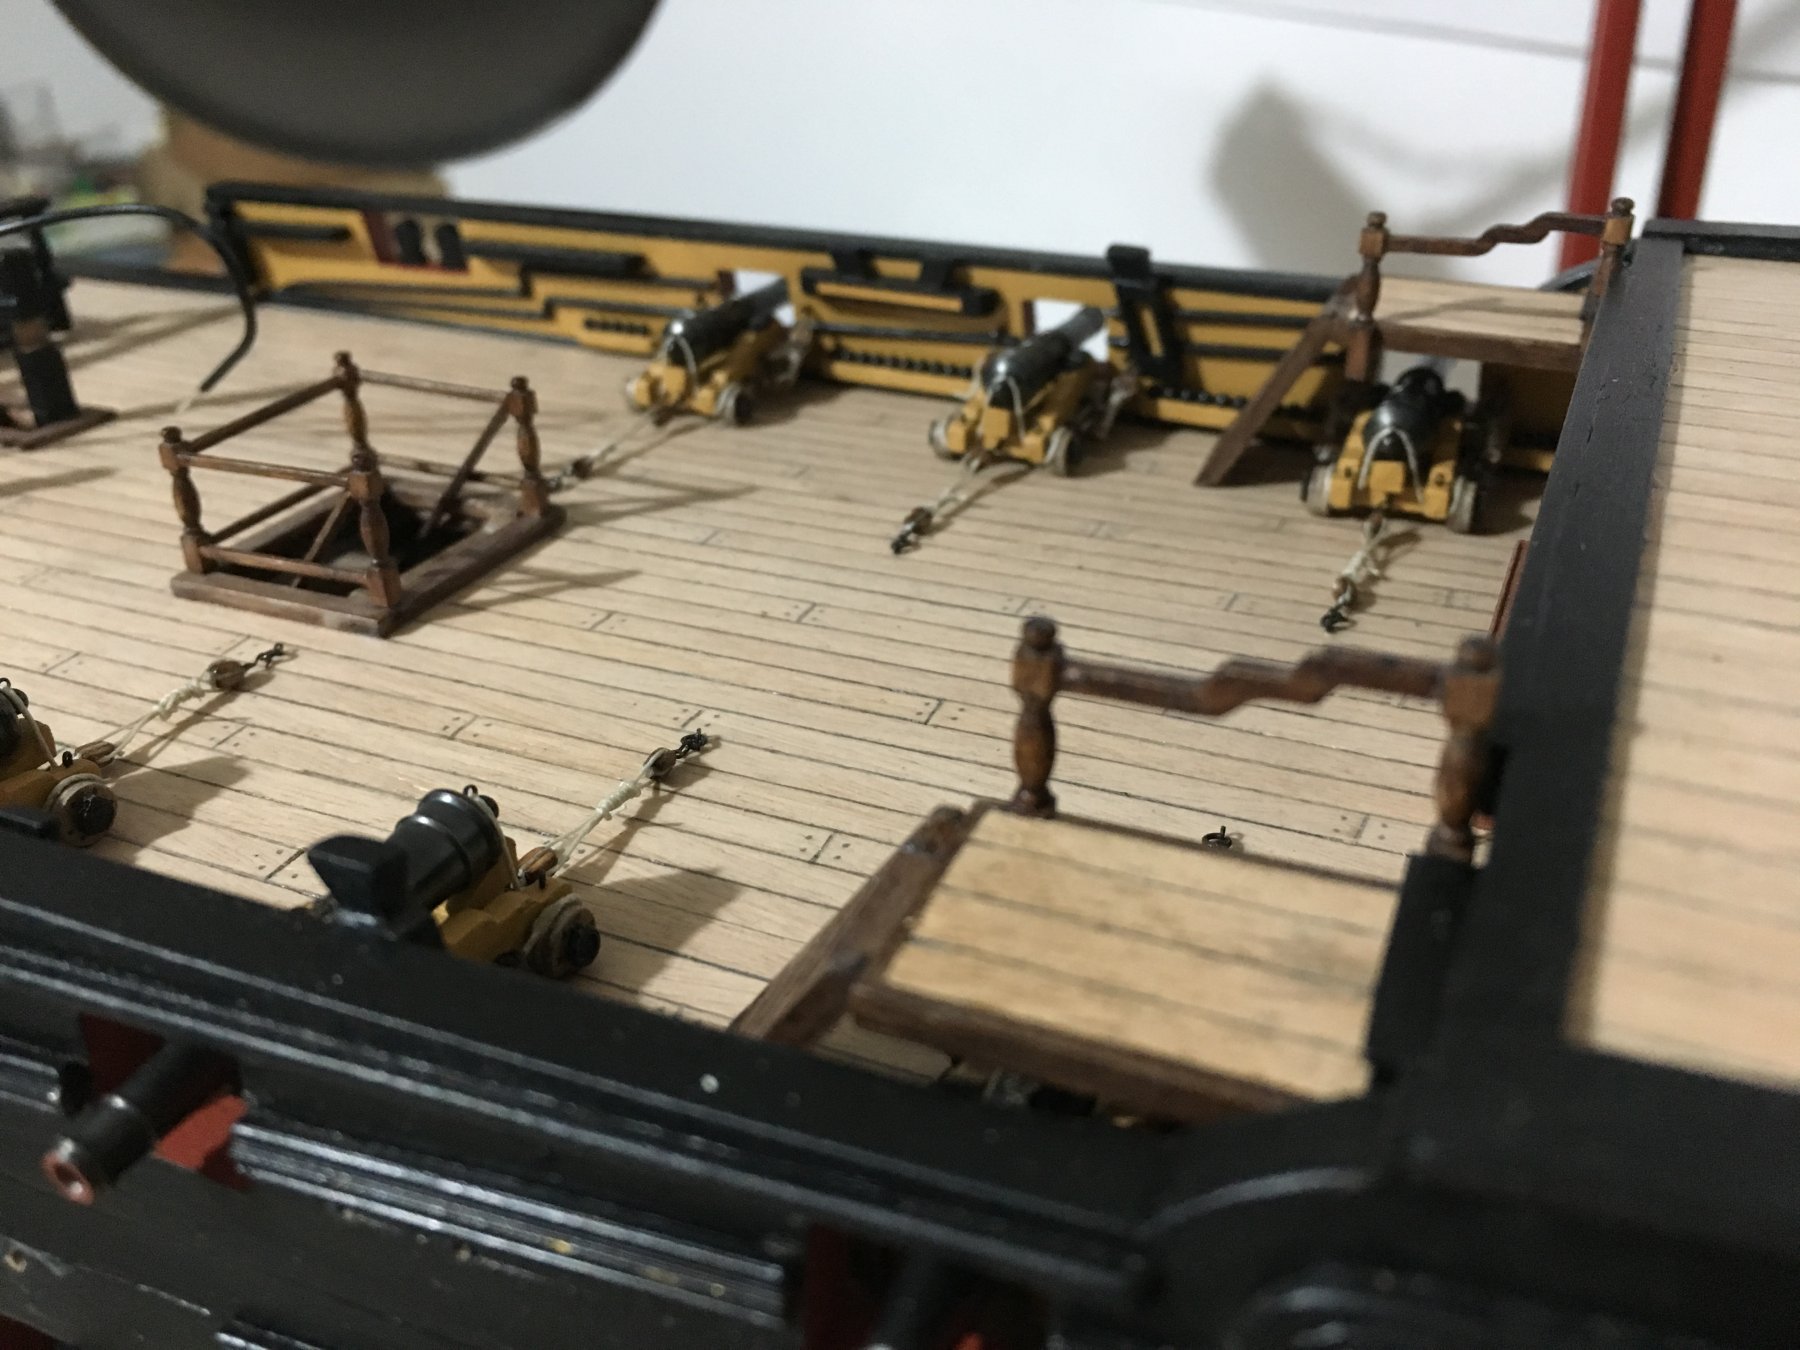
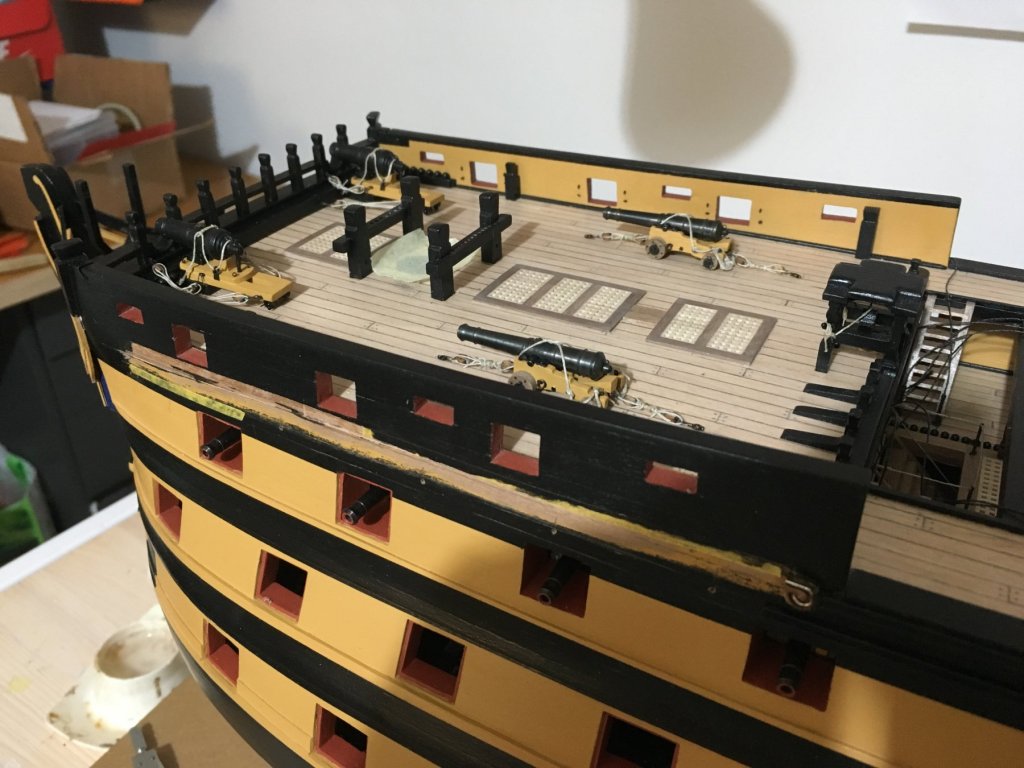
A small update, didn't do much as I was busy redecorating my apartment, finally finished. Fitted and rigged the two Forecastle Carronades. Fitted also the Poop Deck Barricade Assembly, buckets not yet. Robert


- 527 replies
-
- 4
-
-
- caldercraft
- victory
- (and 1 more)
-
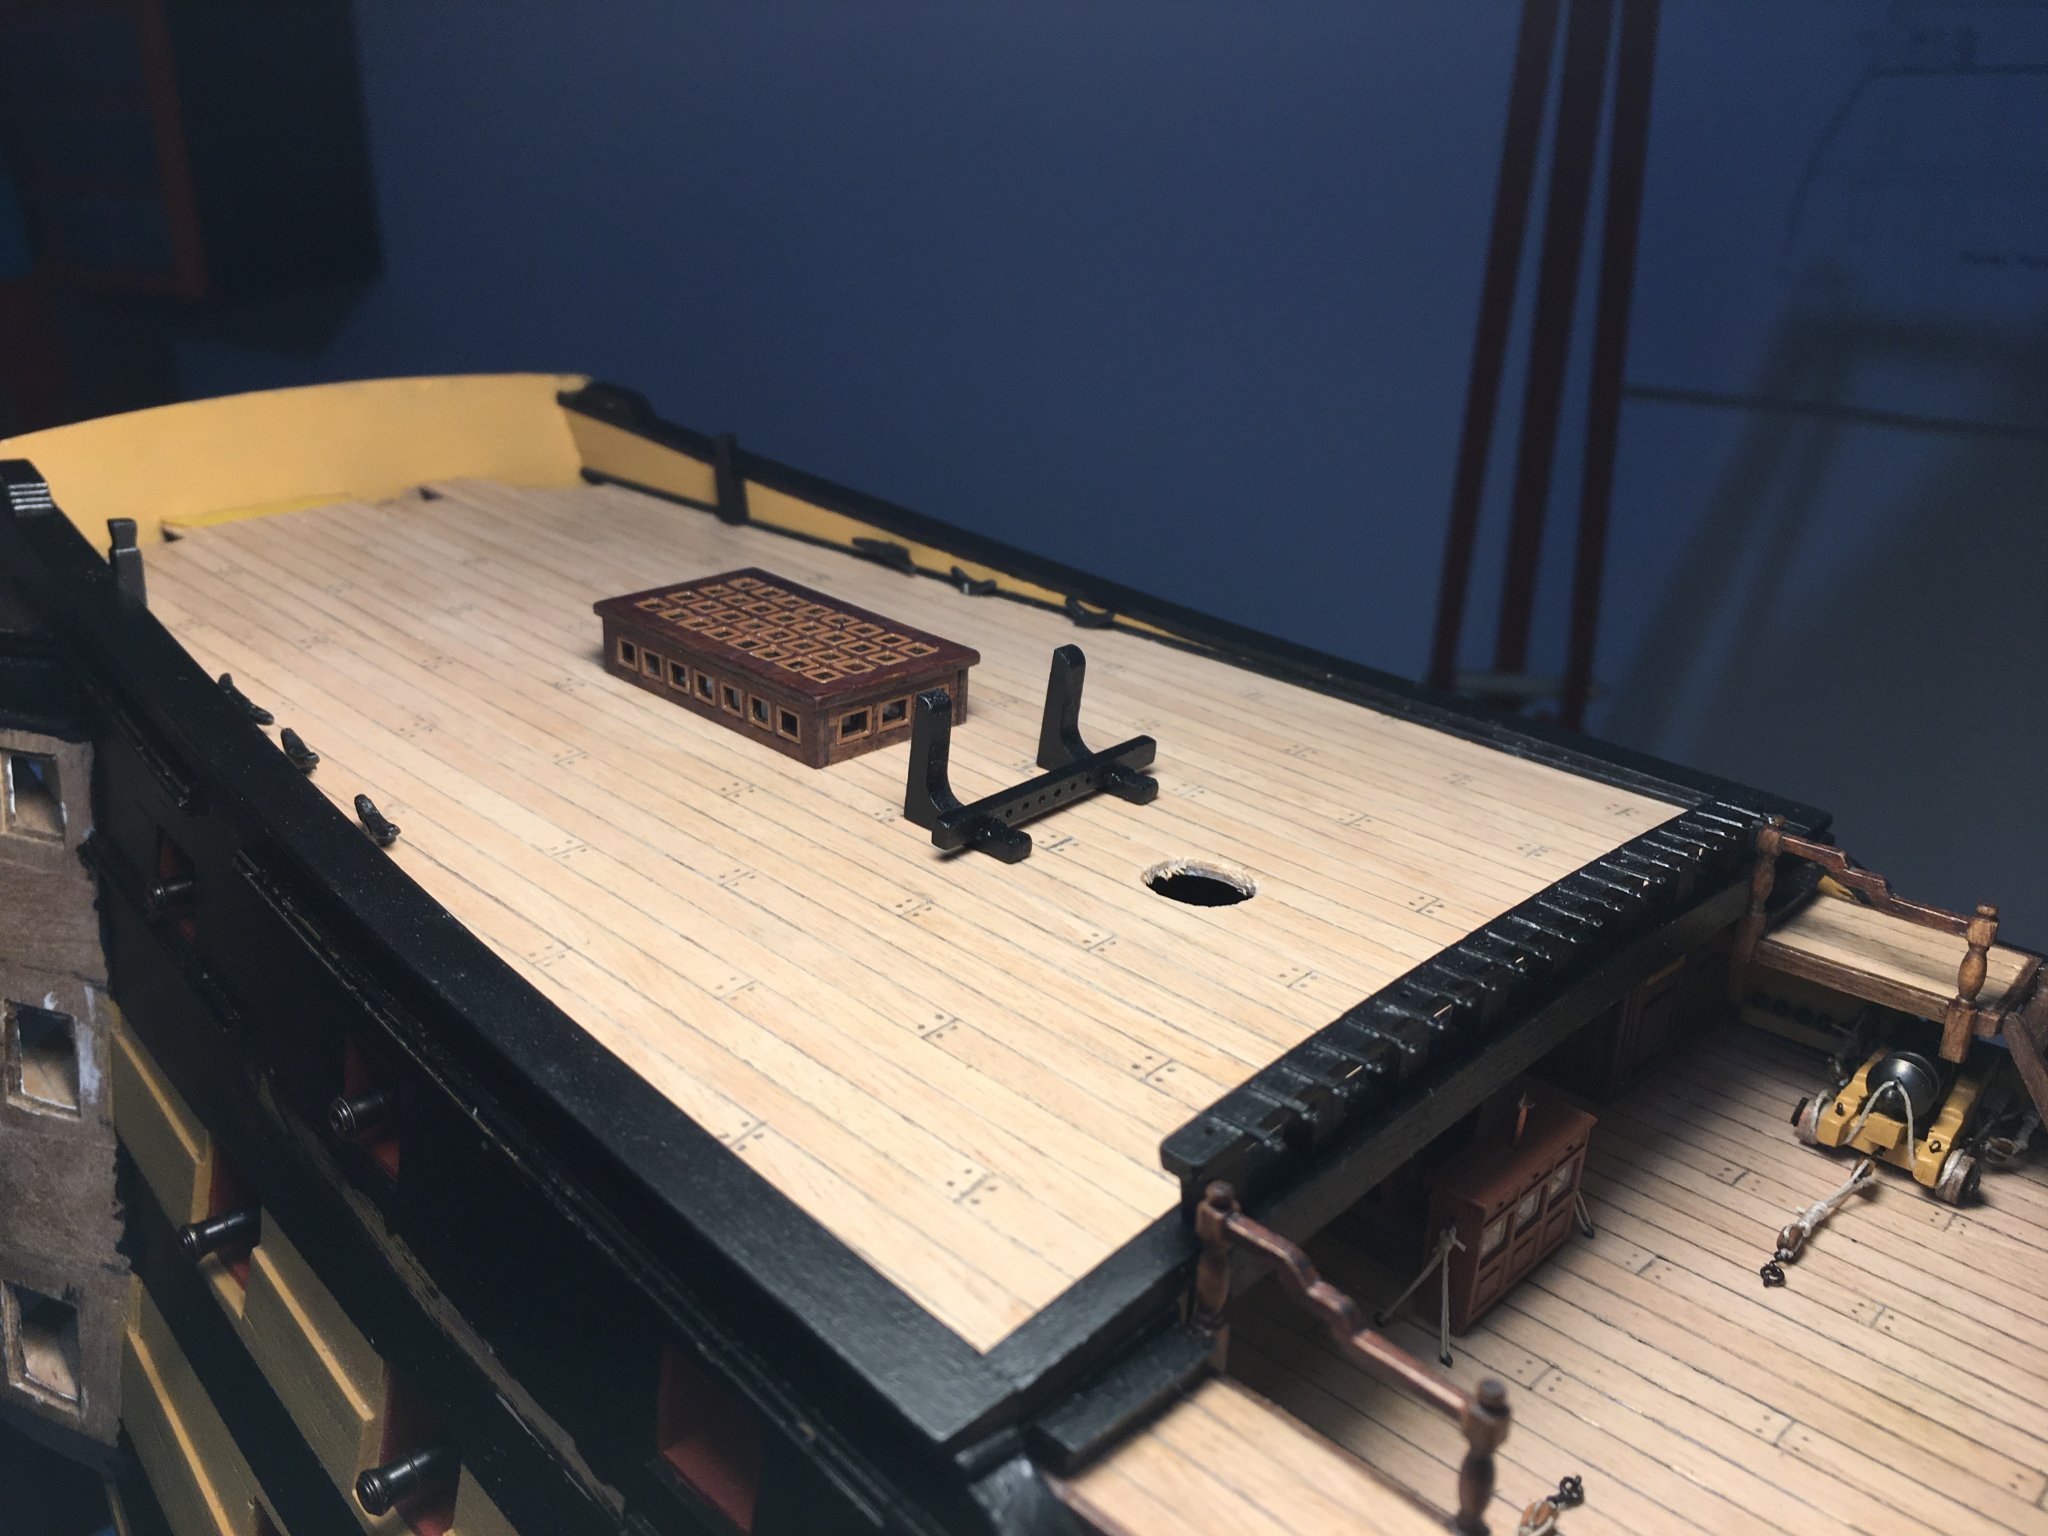
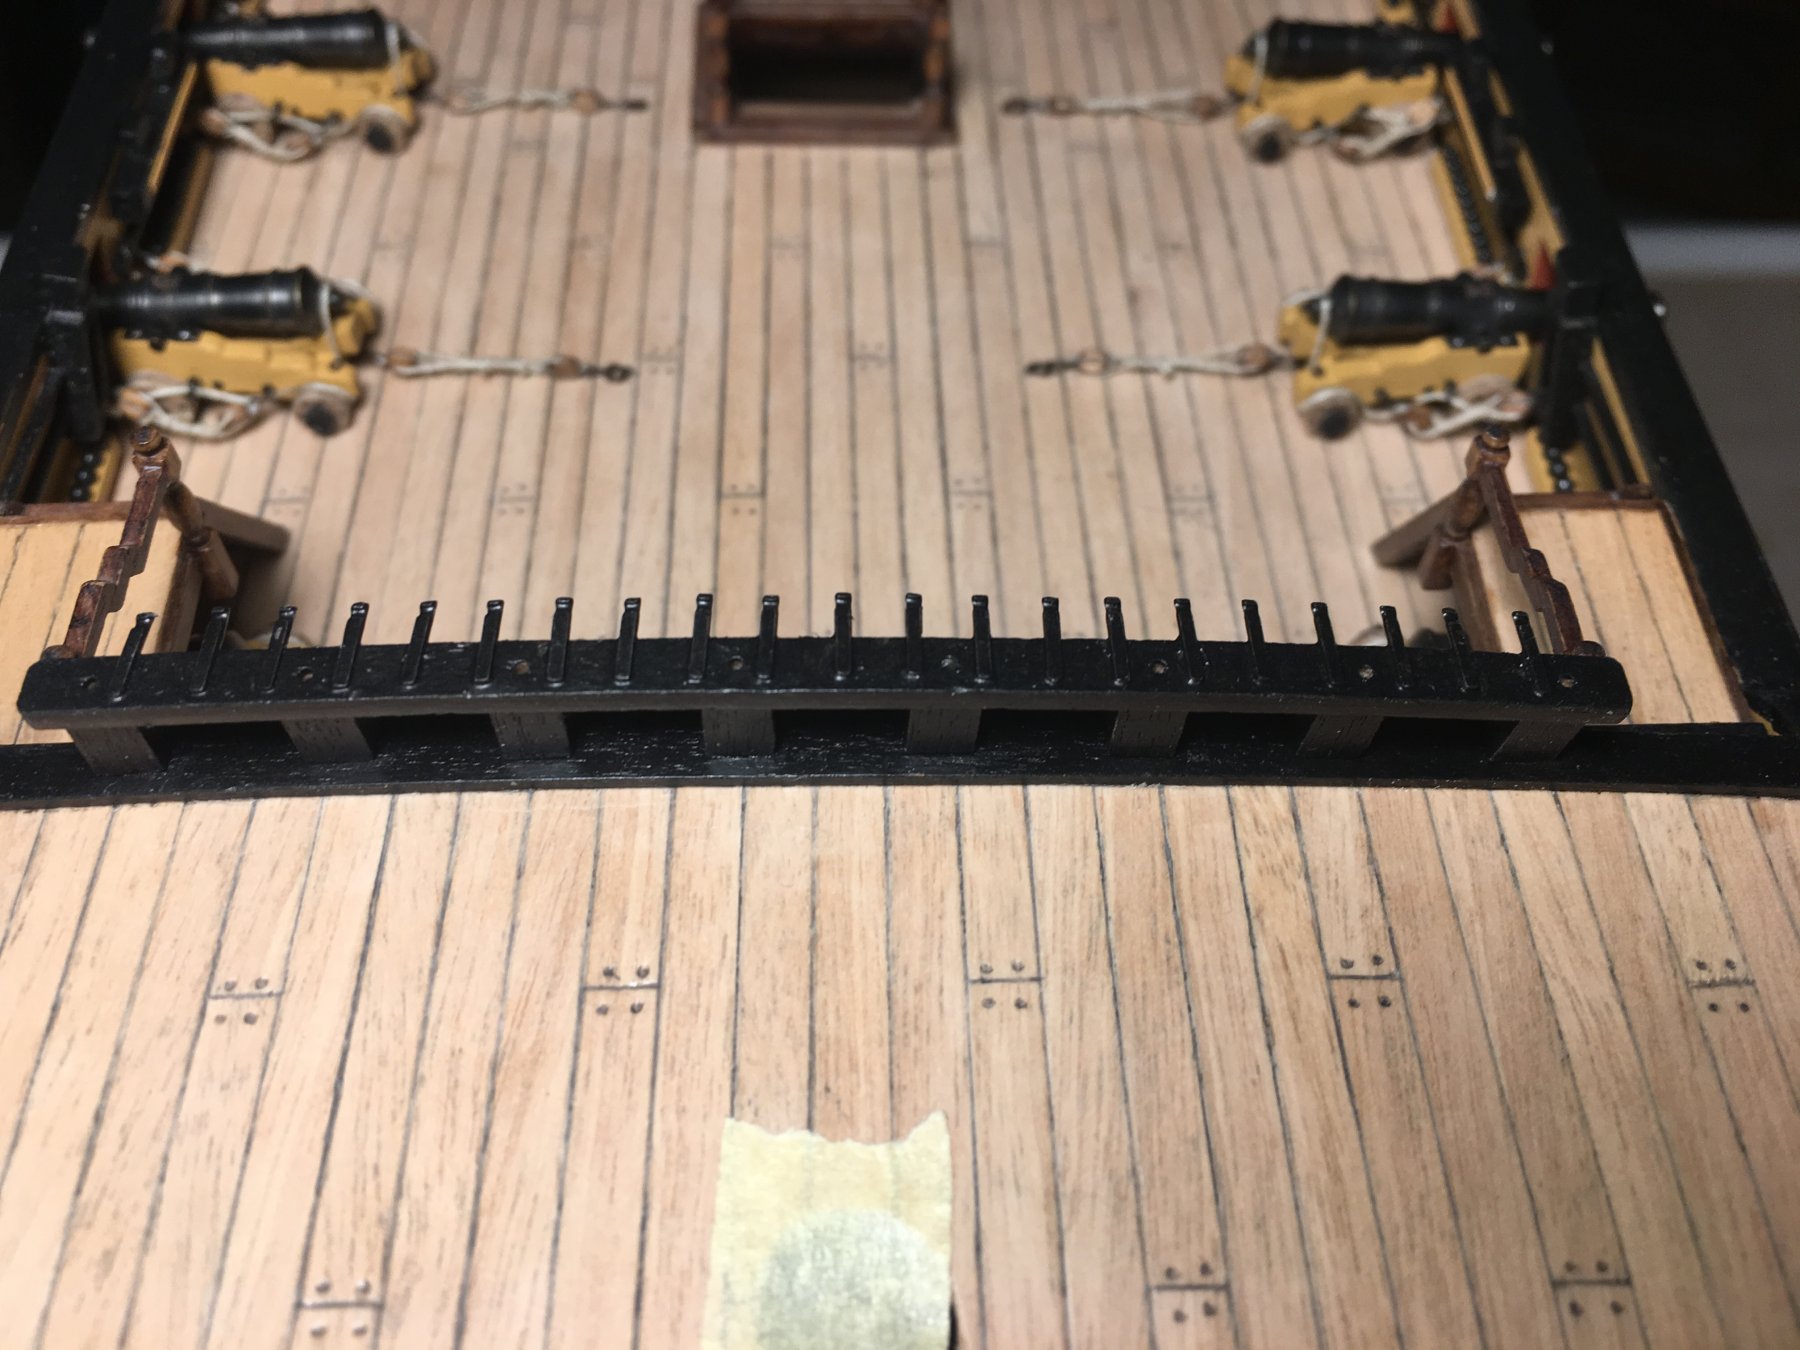
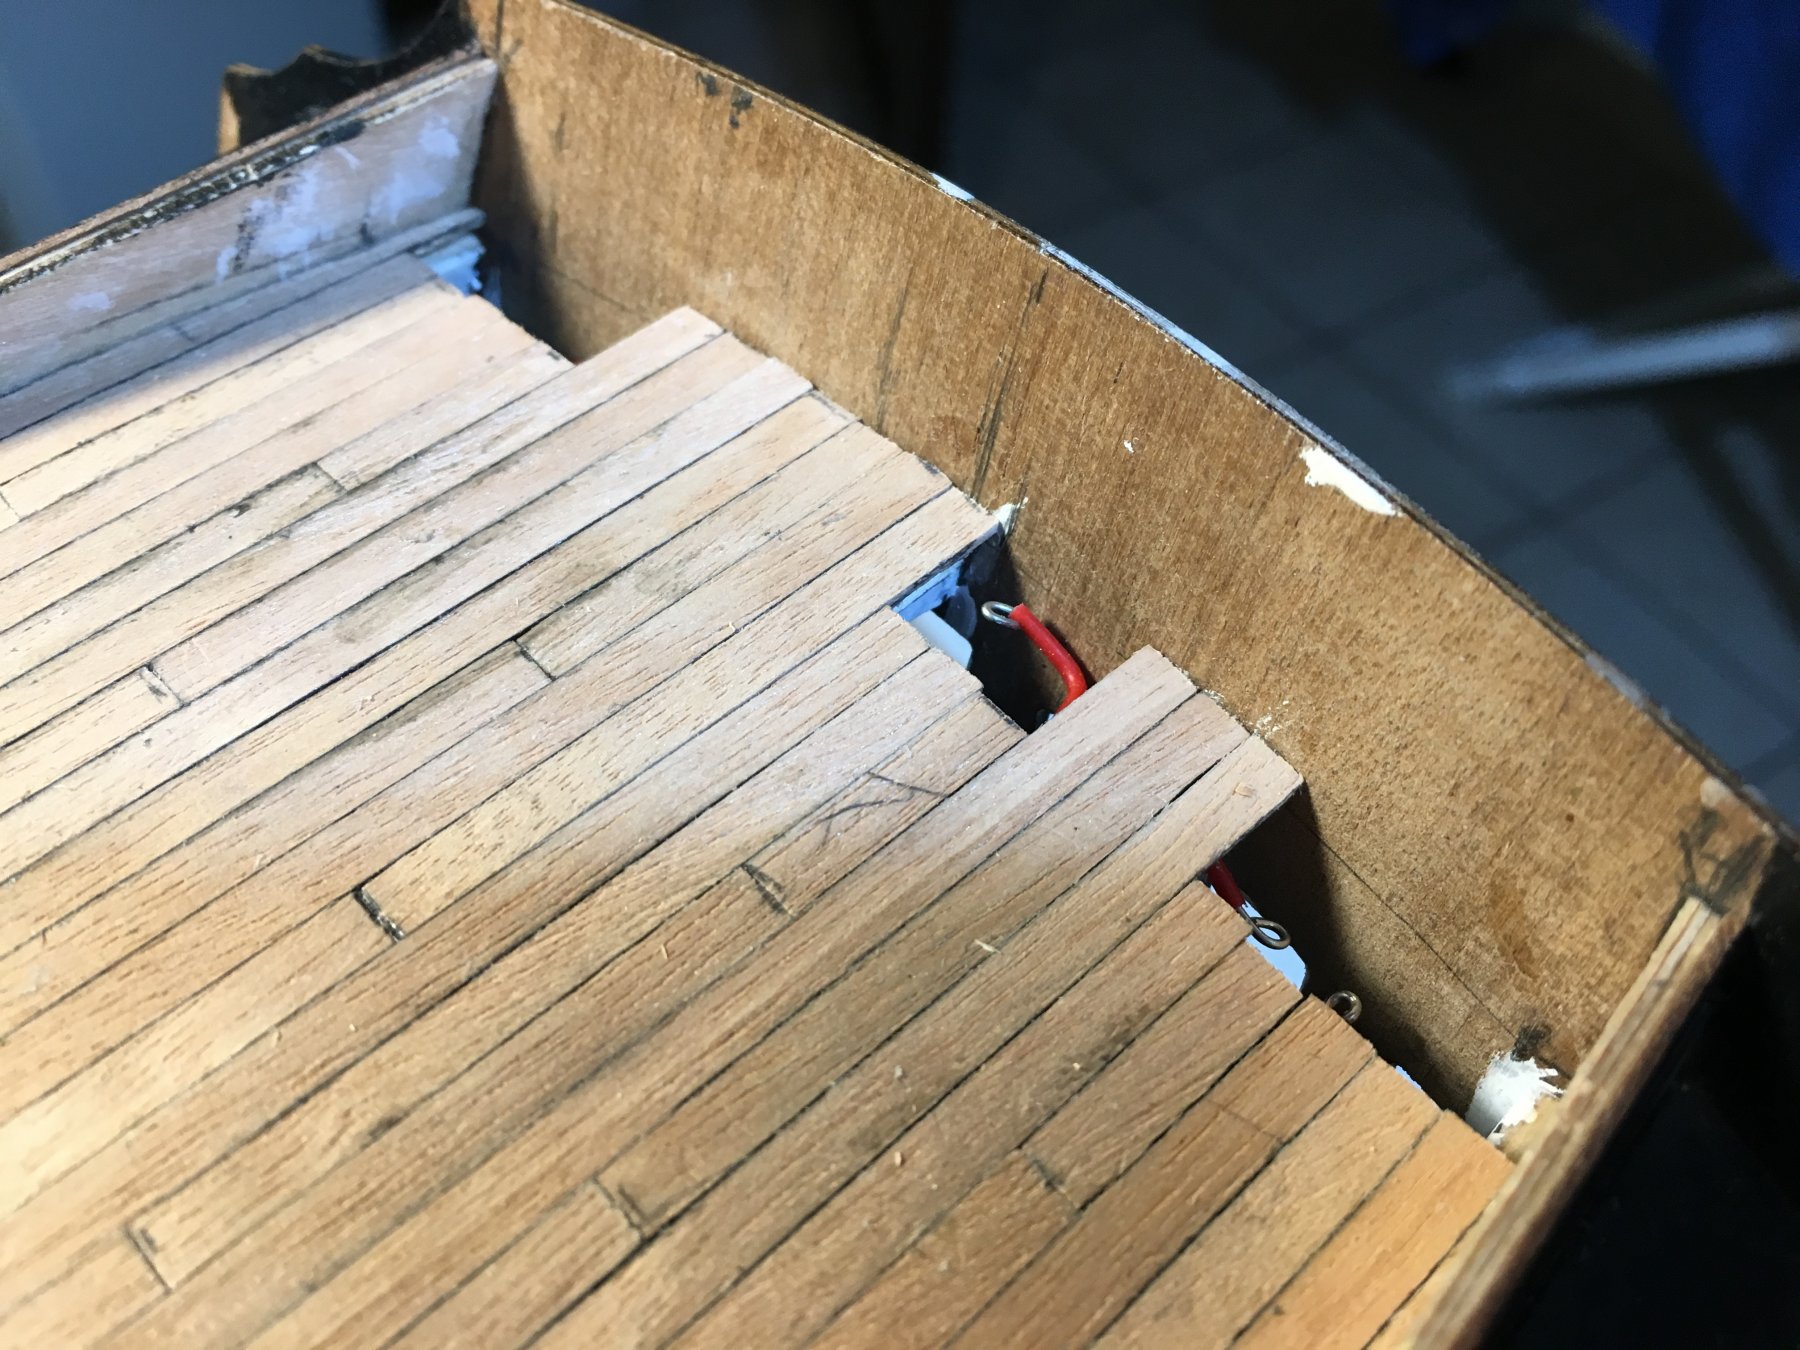
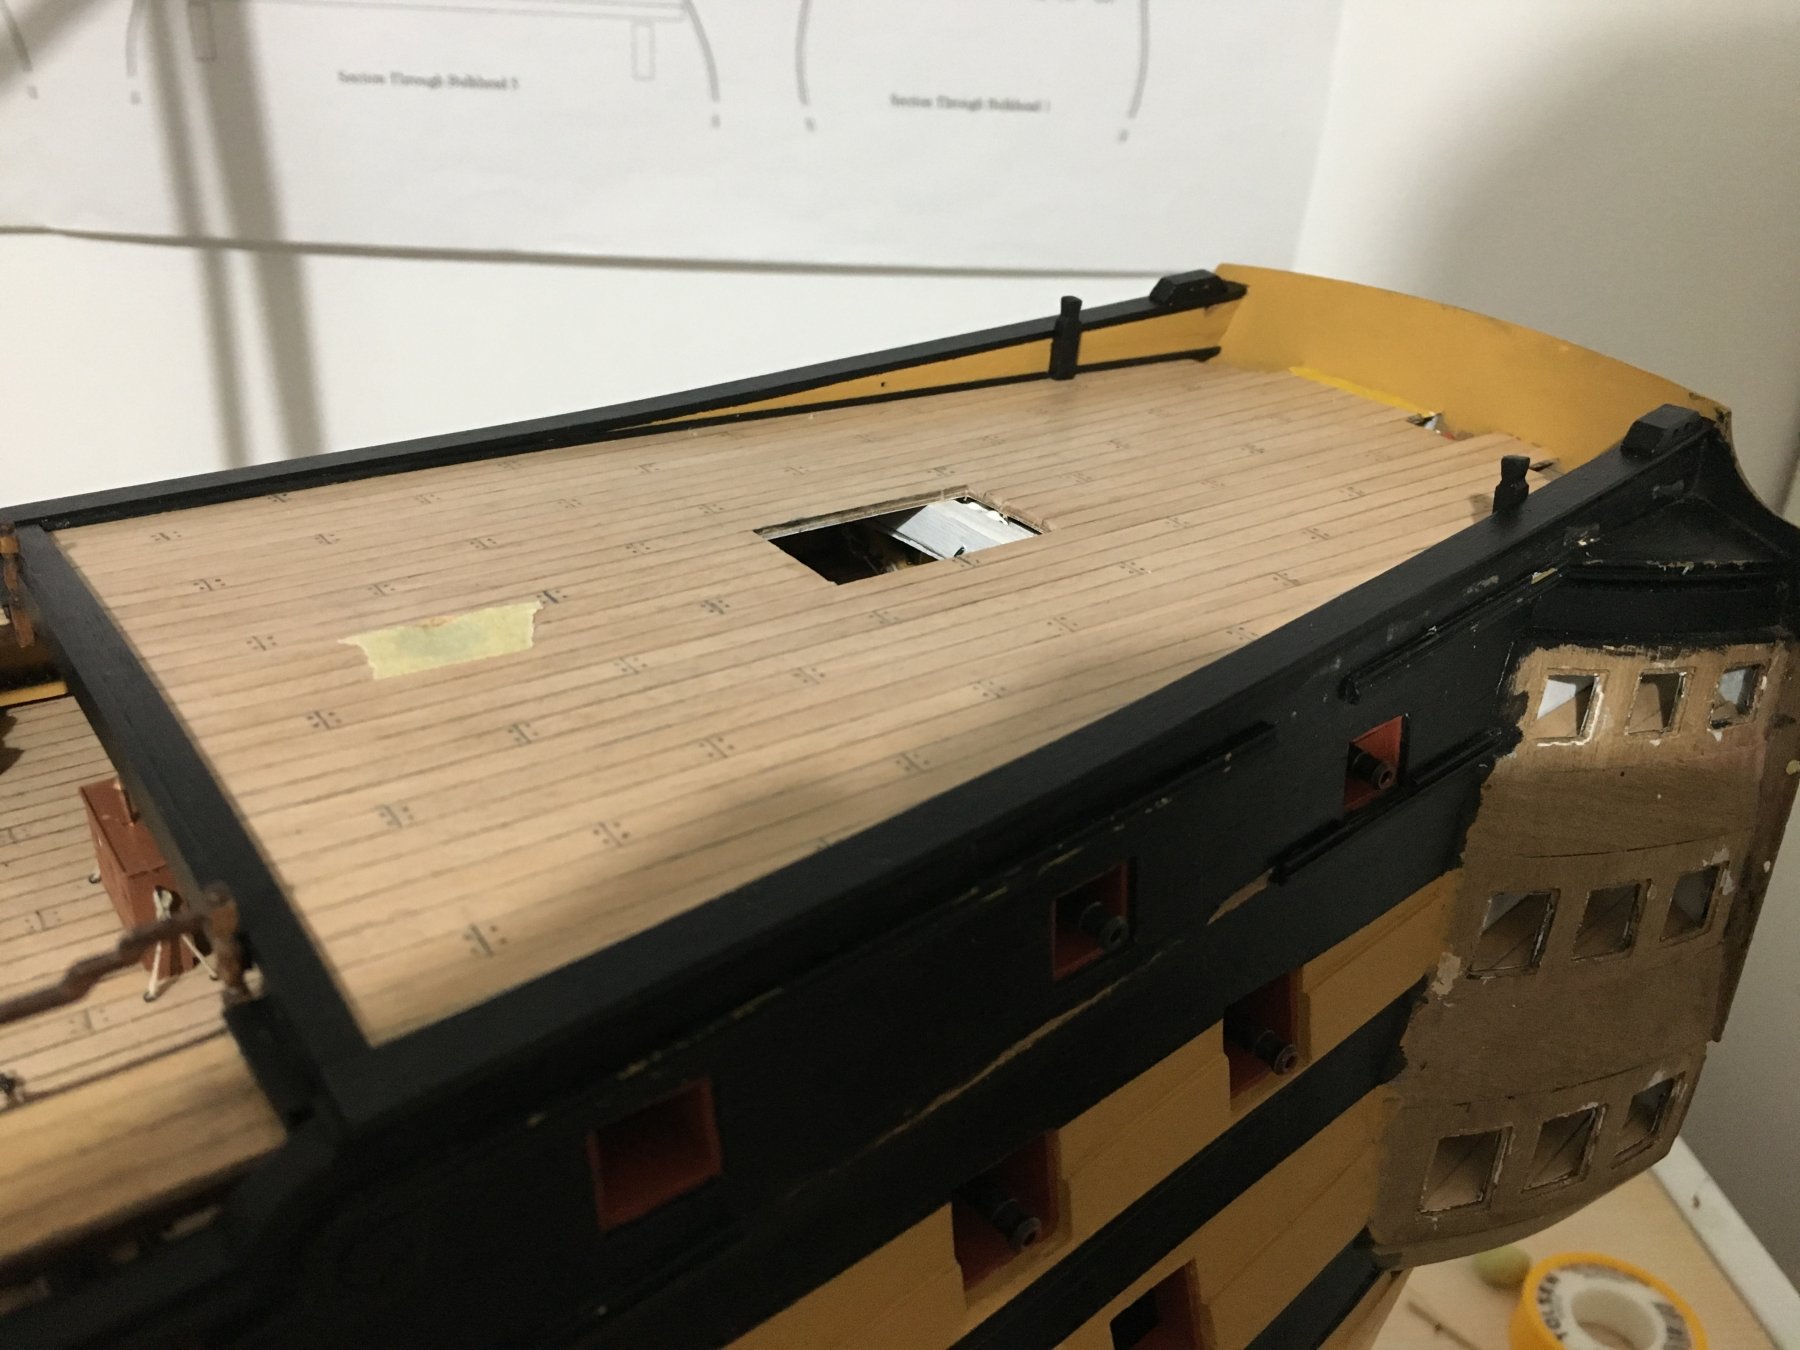
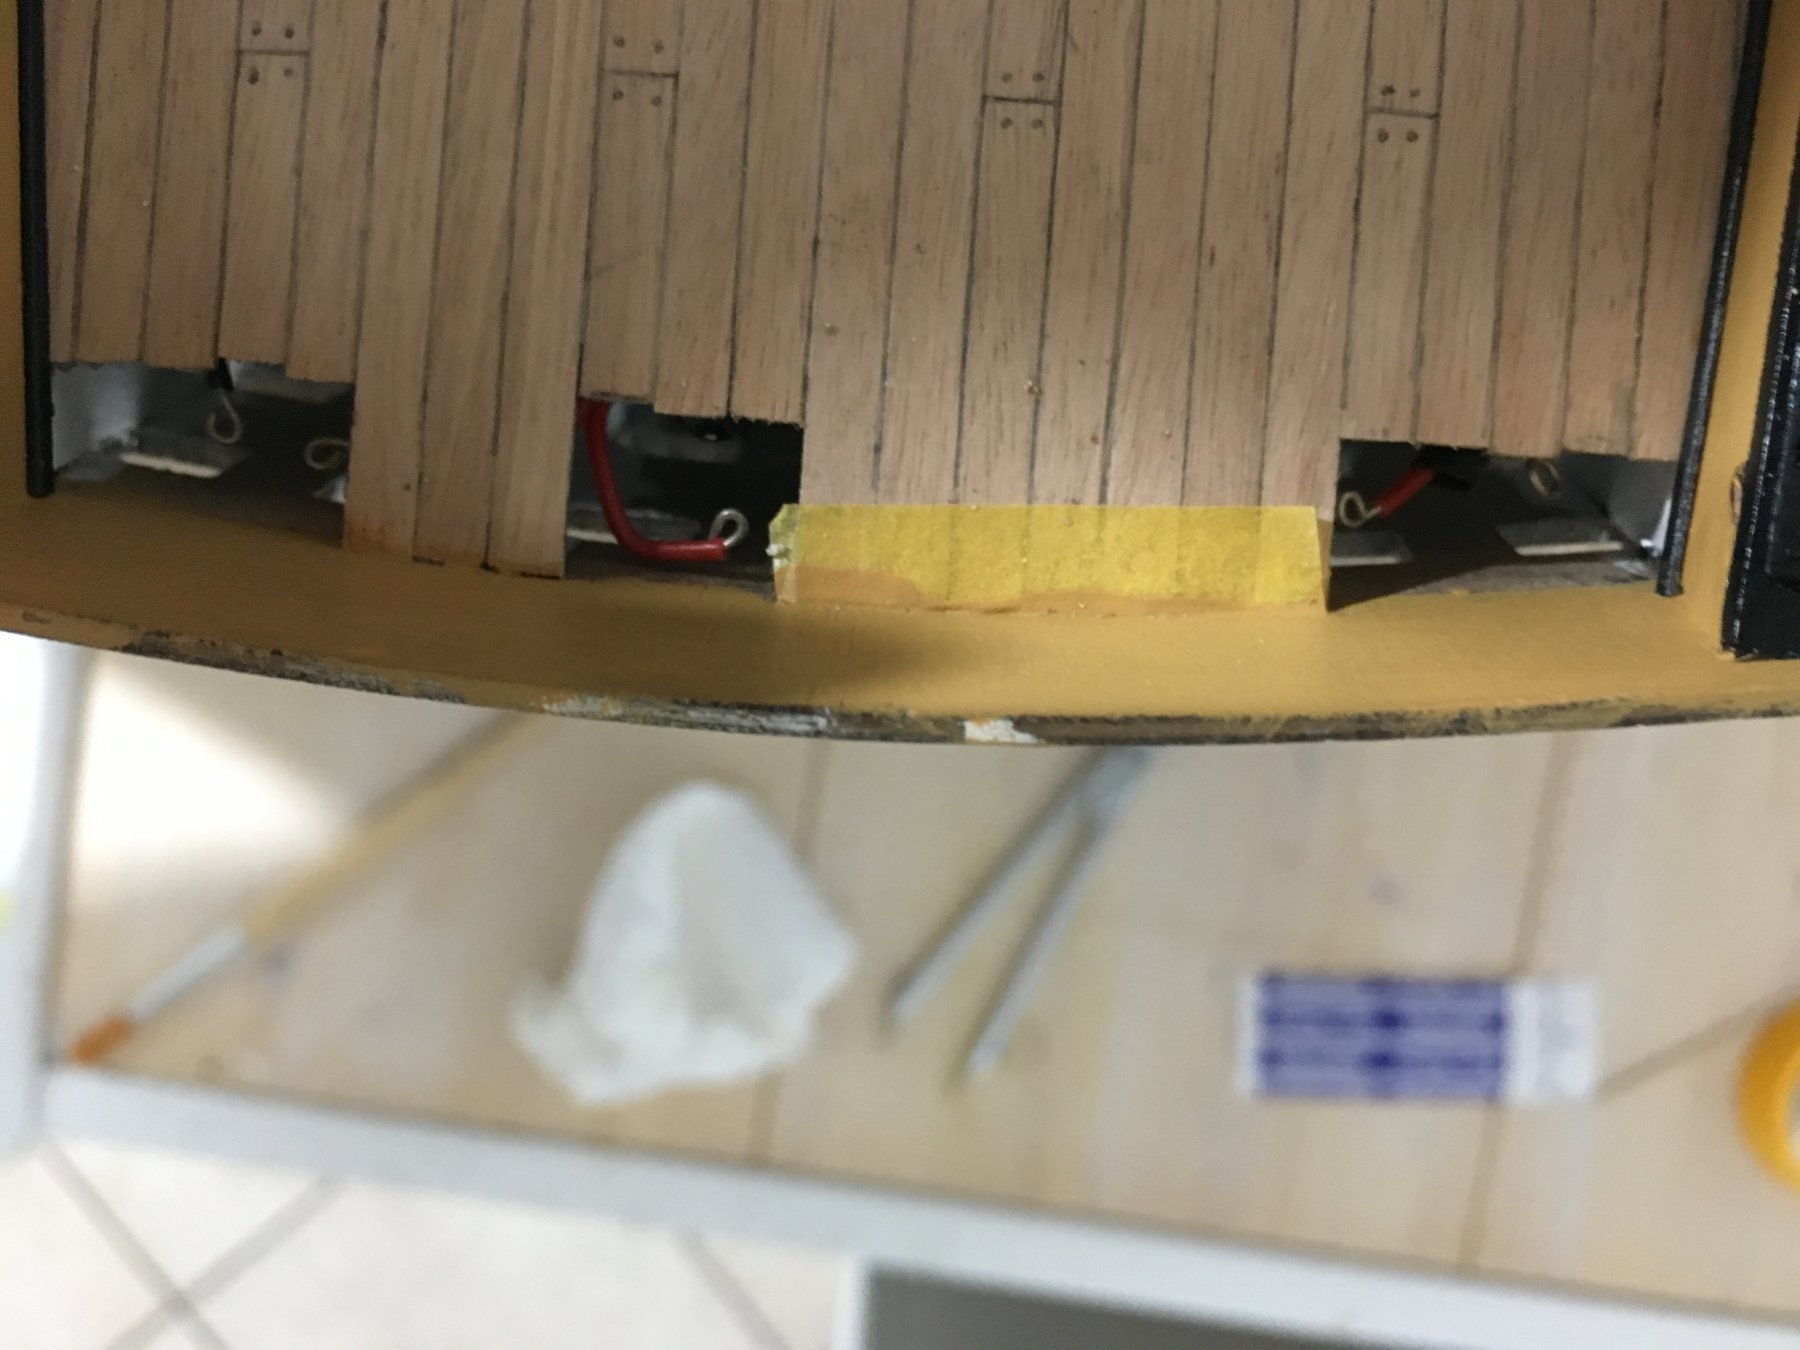
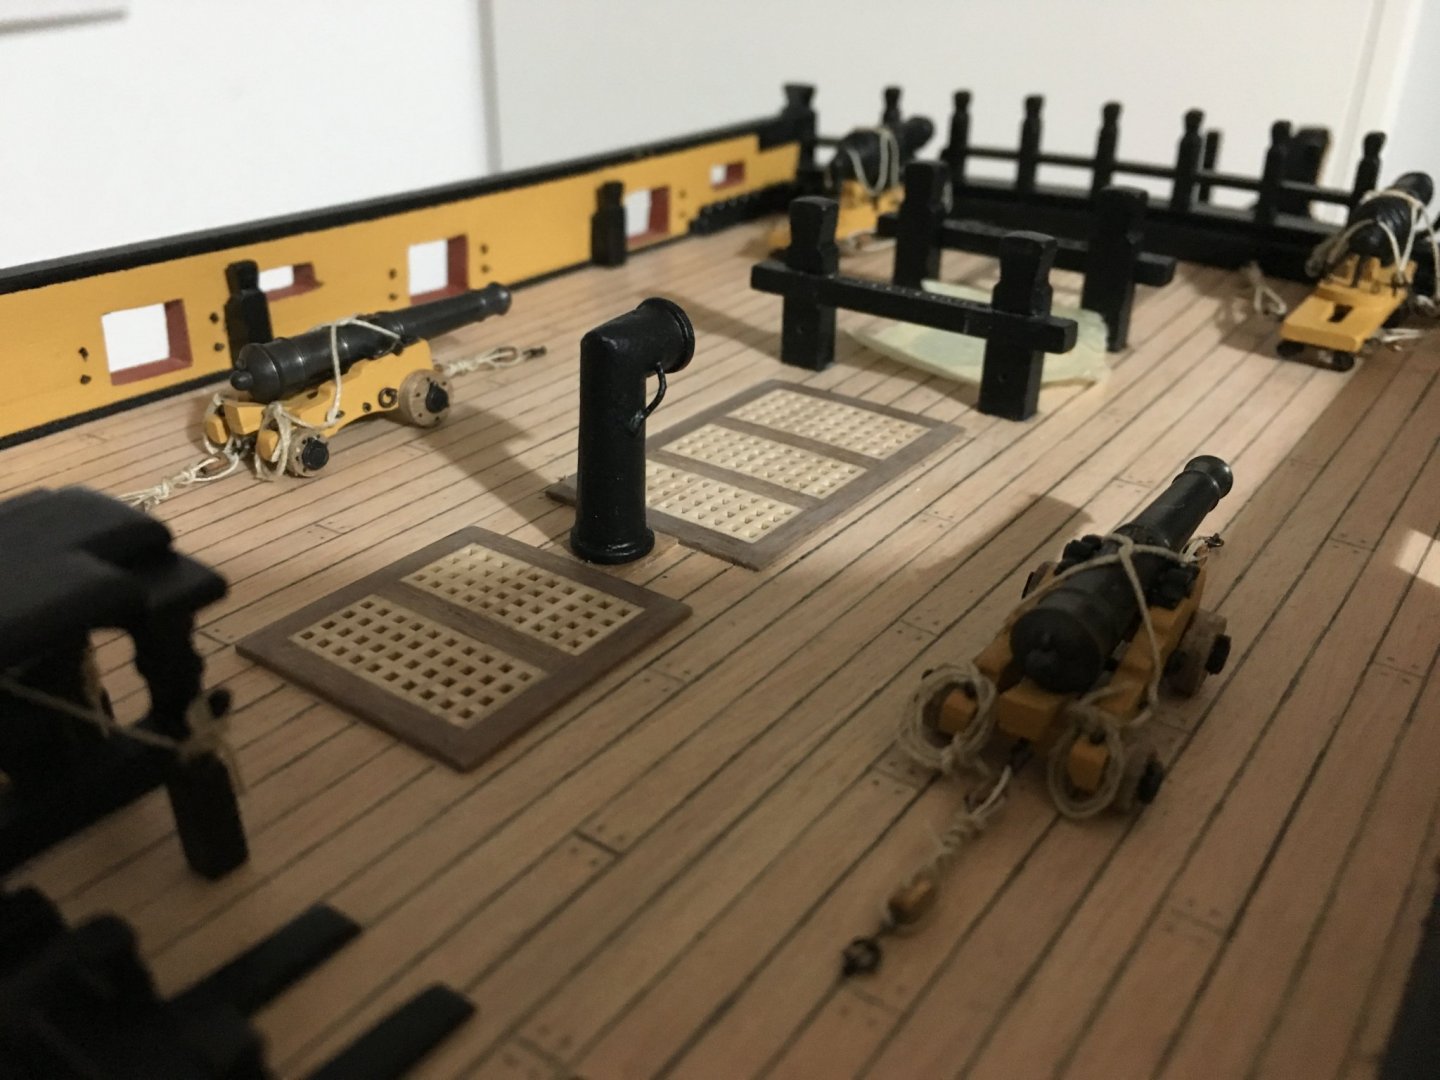
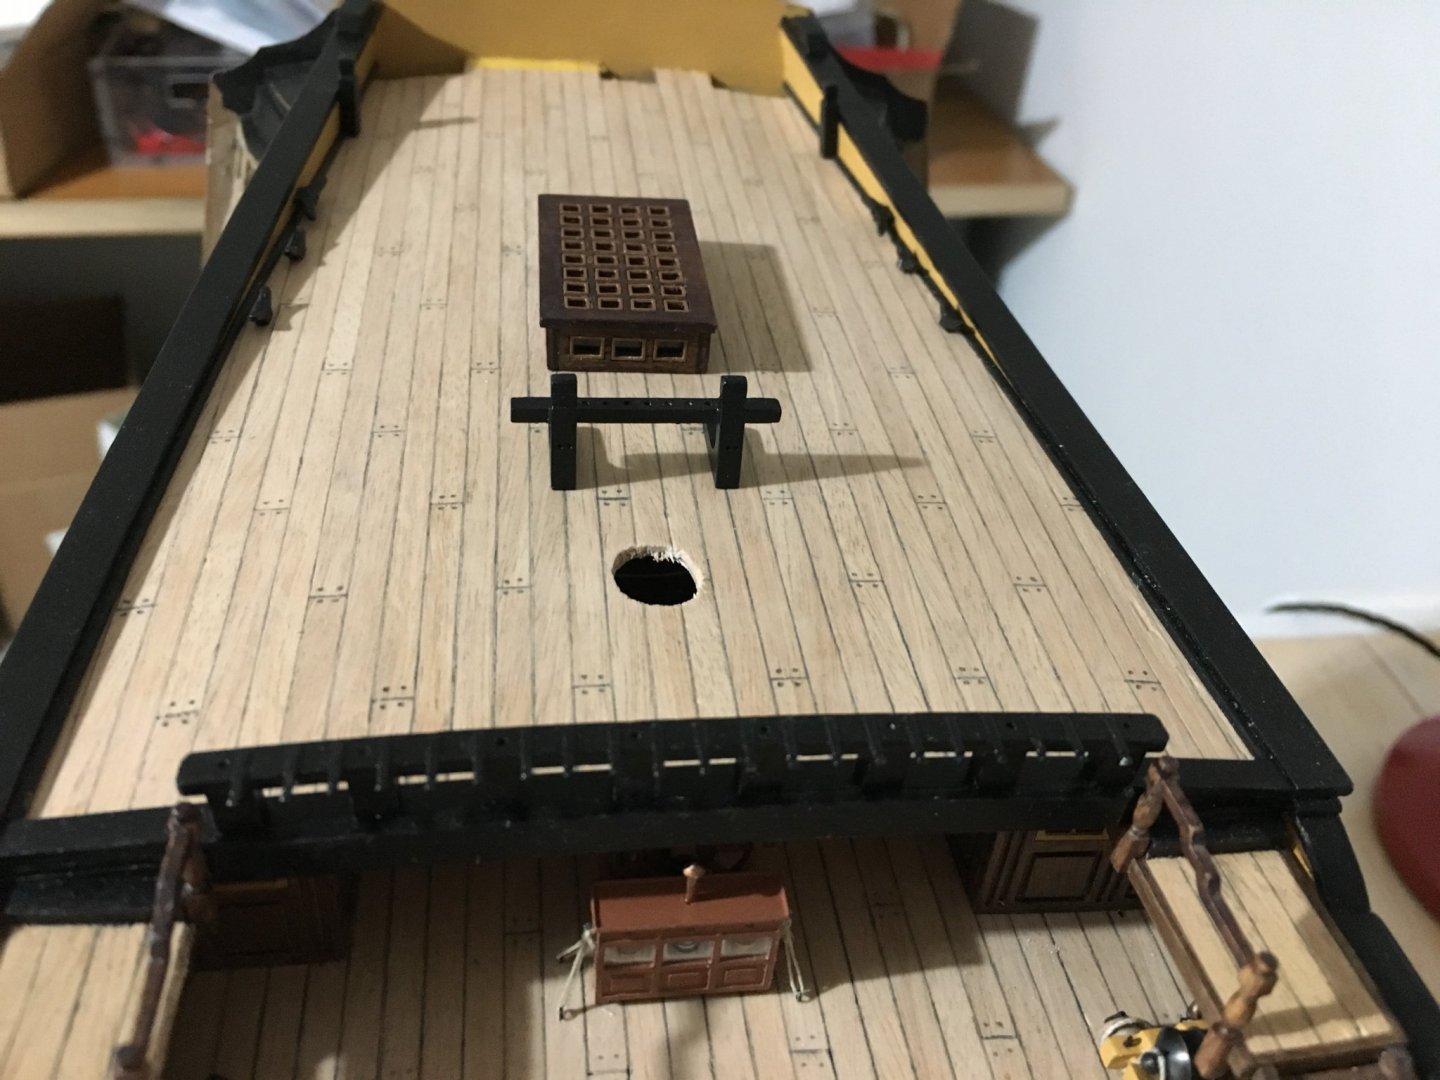
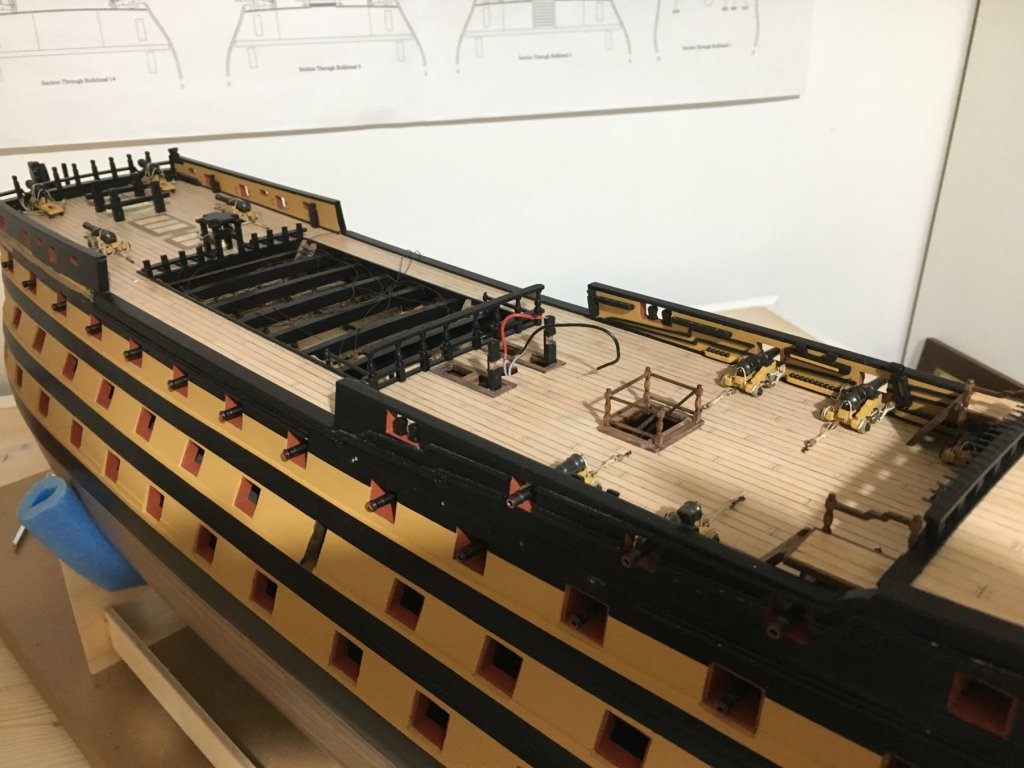
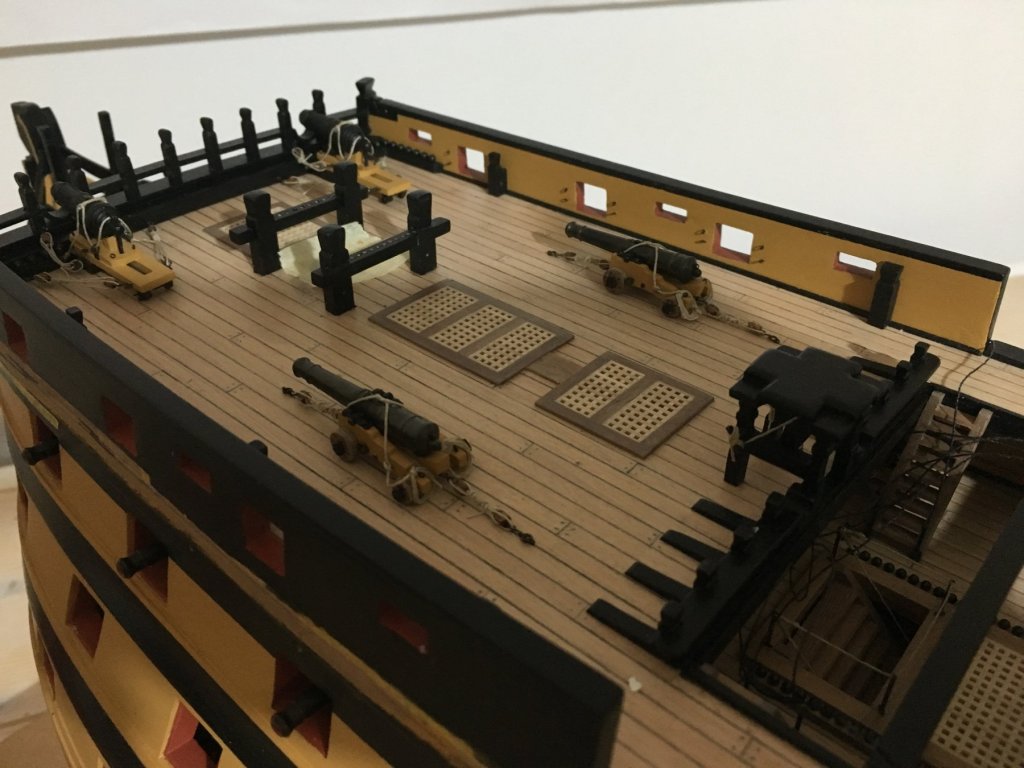
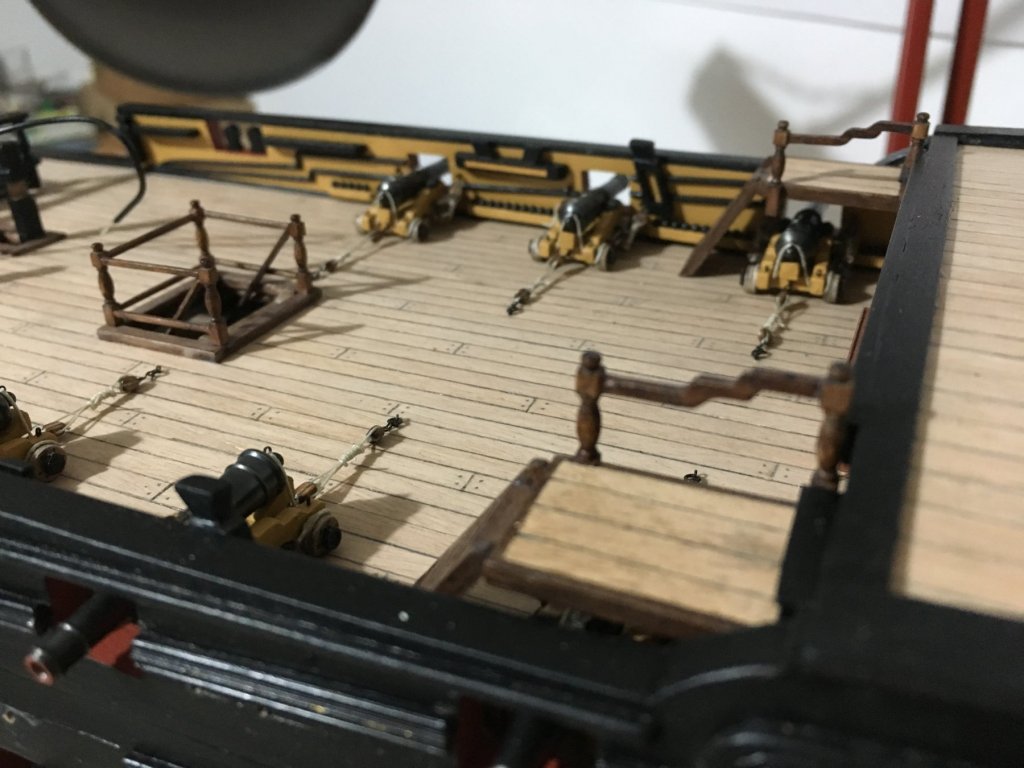
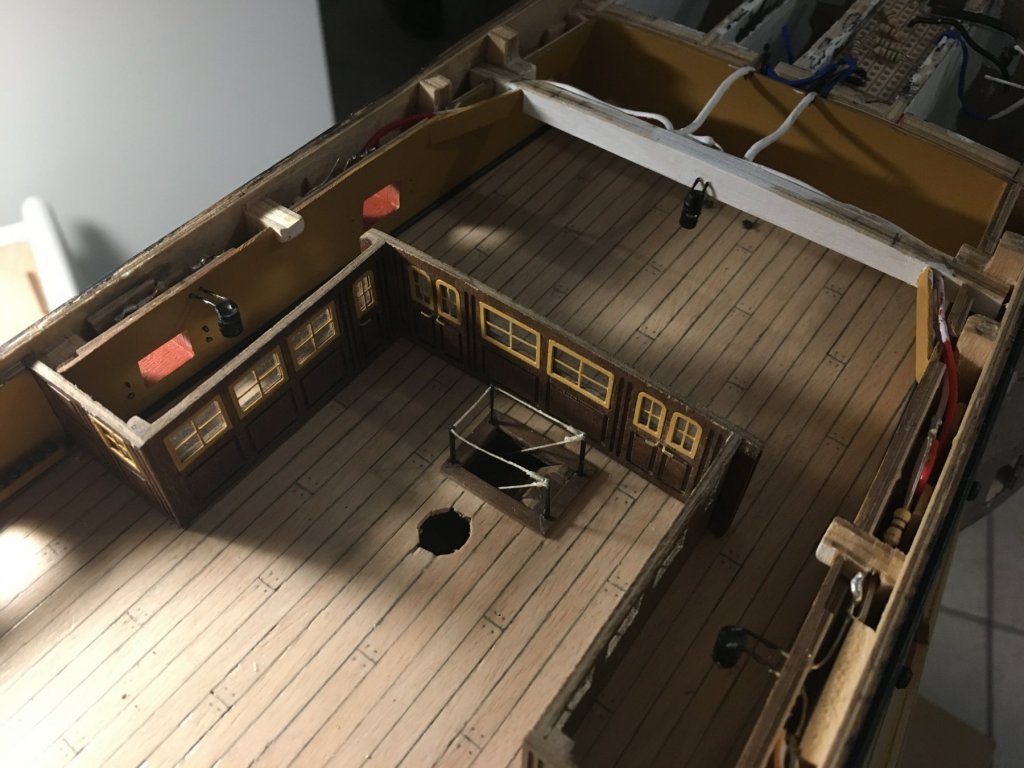
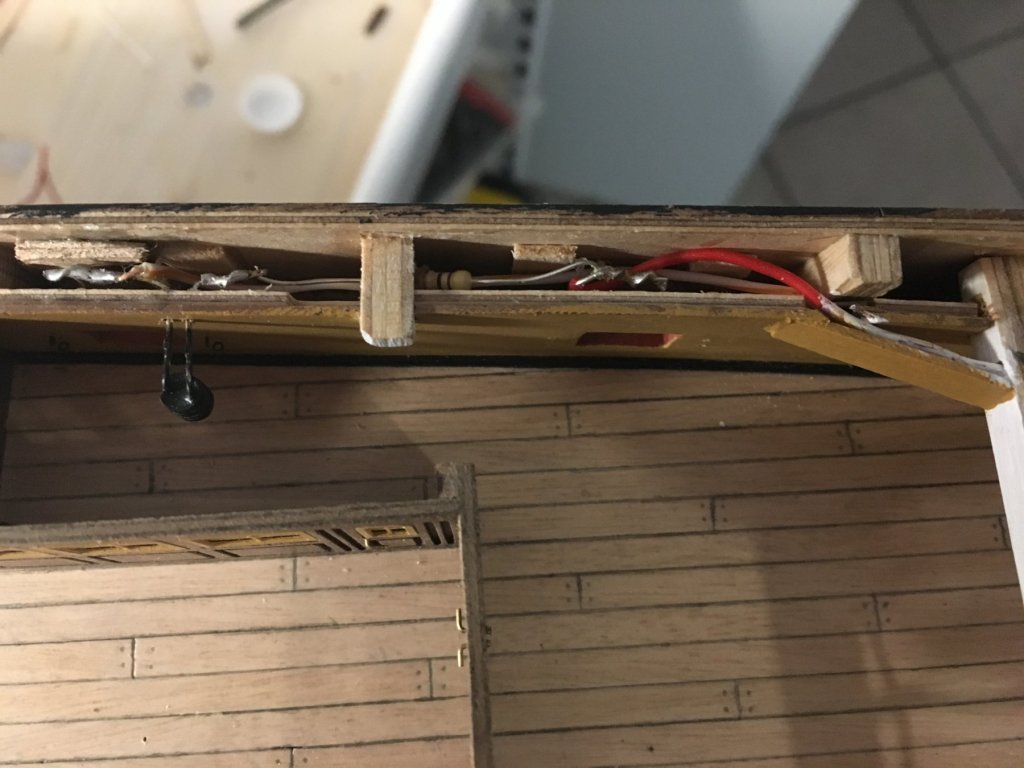
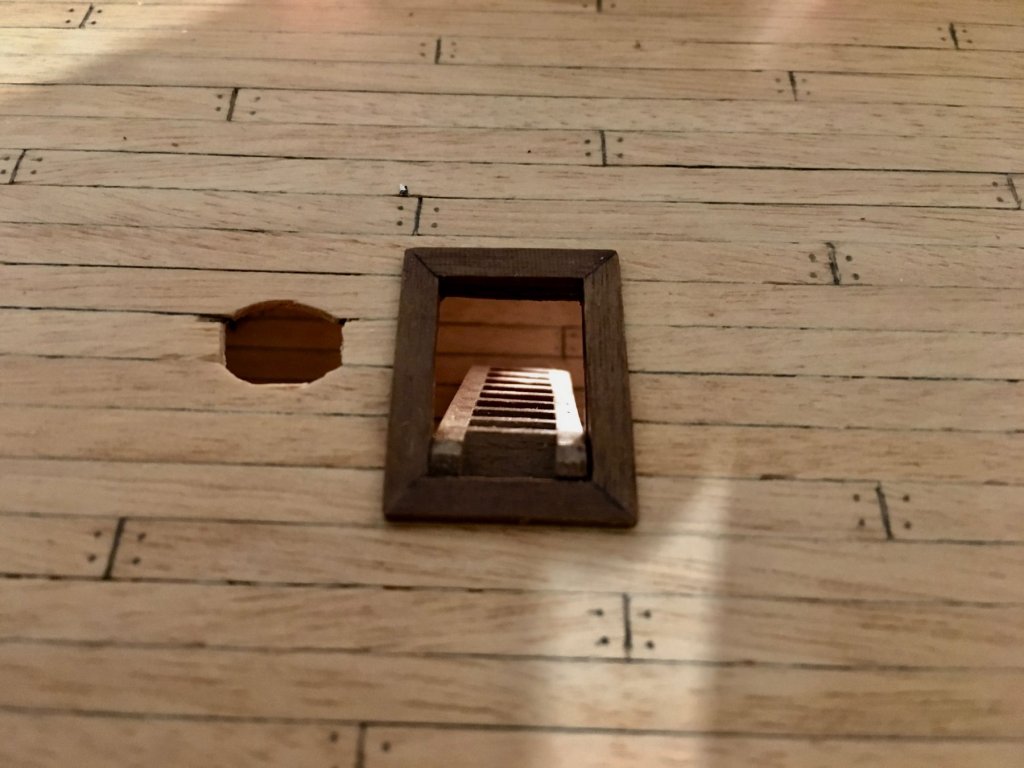
Poop deck in place. Had to finish all the wiring going to the gallery before I fitted the poop deck plywood. Checked that everything was working including the supply to the three lanterns which are to be fitted much later. Planking poop deck, all wiring hidden, leaving the holes at the back open so that I could reach the wire terminations for the lanterns. Poop deck ladders. Planking finished, capping fitted and painted, ladders fitted and carriages on the quarter deck fitted and rigged. Openings will be covered with the flag lockers and a small piece of planking at the very corners after soldering in the lanterns. There is a lot of work on the quarter deck and I want to finish it before I start work on the outside of the hulls. Still have to make the Skylight, the Flag Lockers, Barricade Assembly, fit the Forecastle Cannons..... Robert


- 527 replies
-
- 4
-
-
- caldercraft
- victory
- (and 1 more)
-
Beautiful work Michael, planking is fantastic. It's a pity that it will be covered with the second planking but I can assure you that it is not wasted. When I did mine I found it a very good base for the second planking and by then I had gained a great amount of know how which is so essential for the second planking. Keep on your beautiful work Michael. Robert
-
Beautiful work Dave. A piece of work that really deserves a prominent display spot in your entertainment room. Congratulations. Robert
-
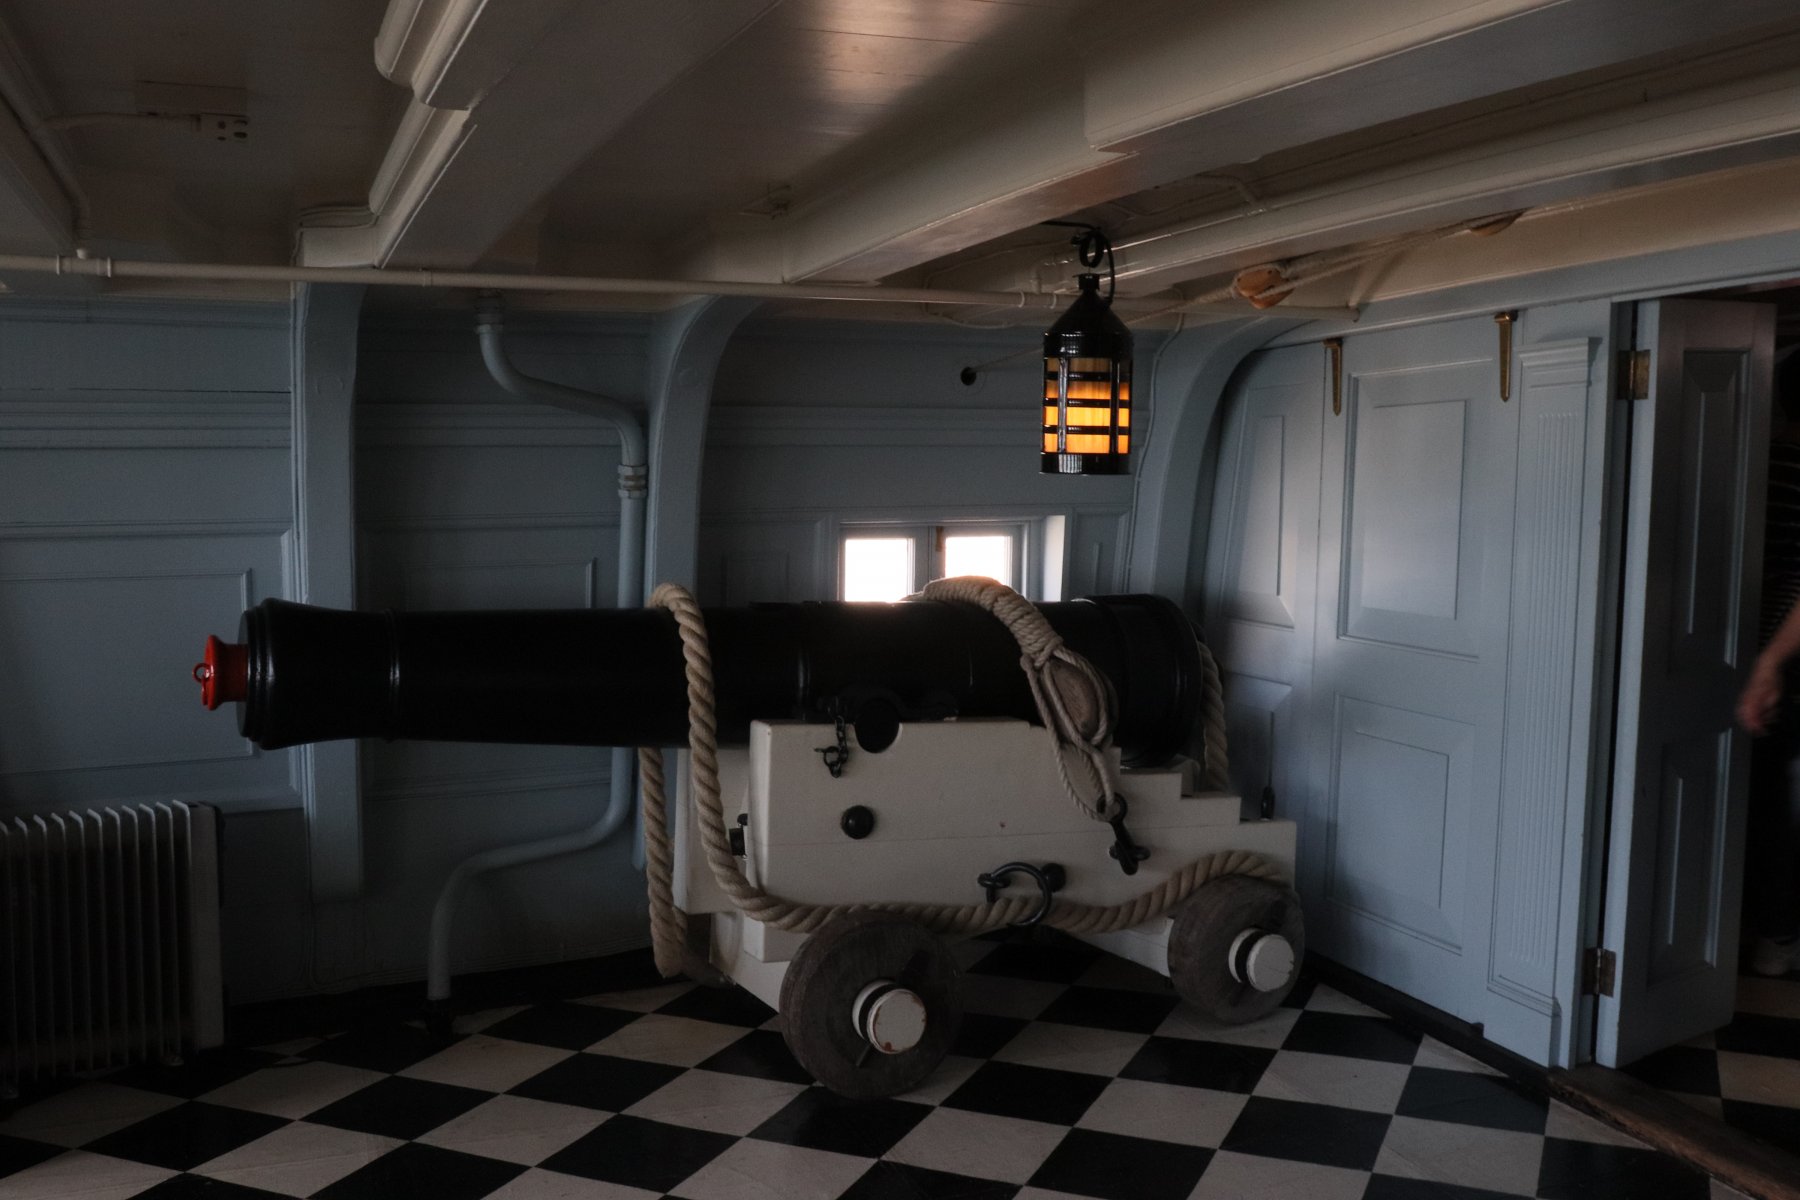
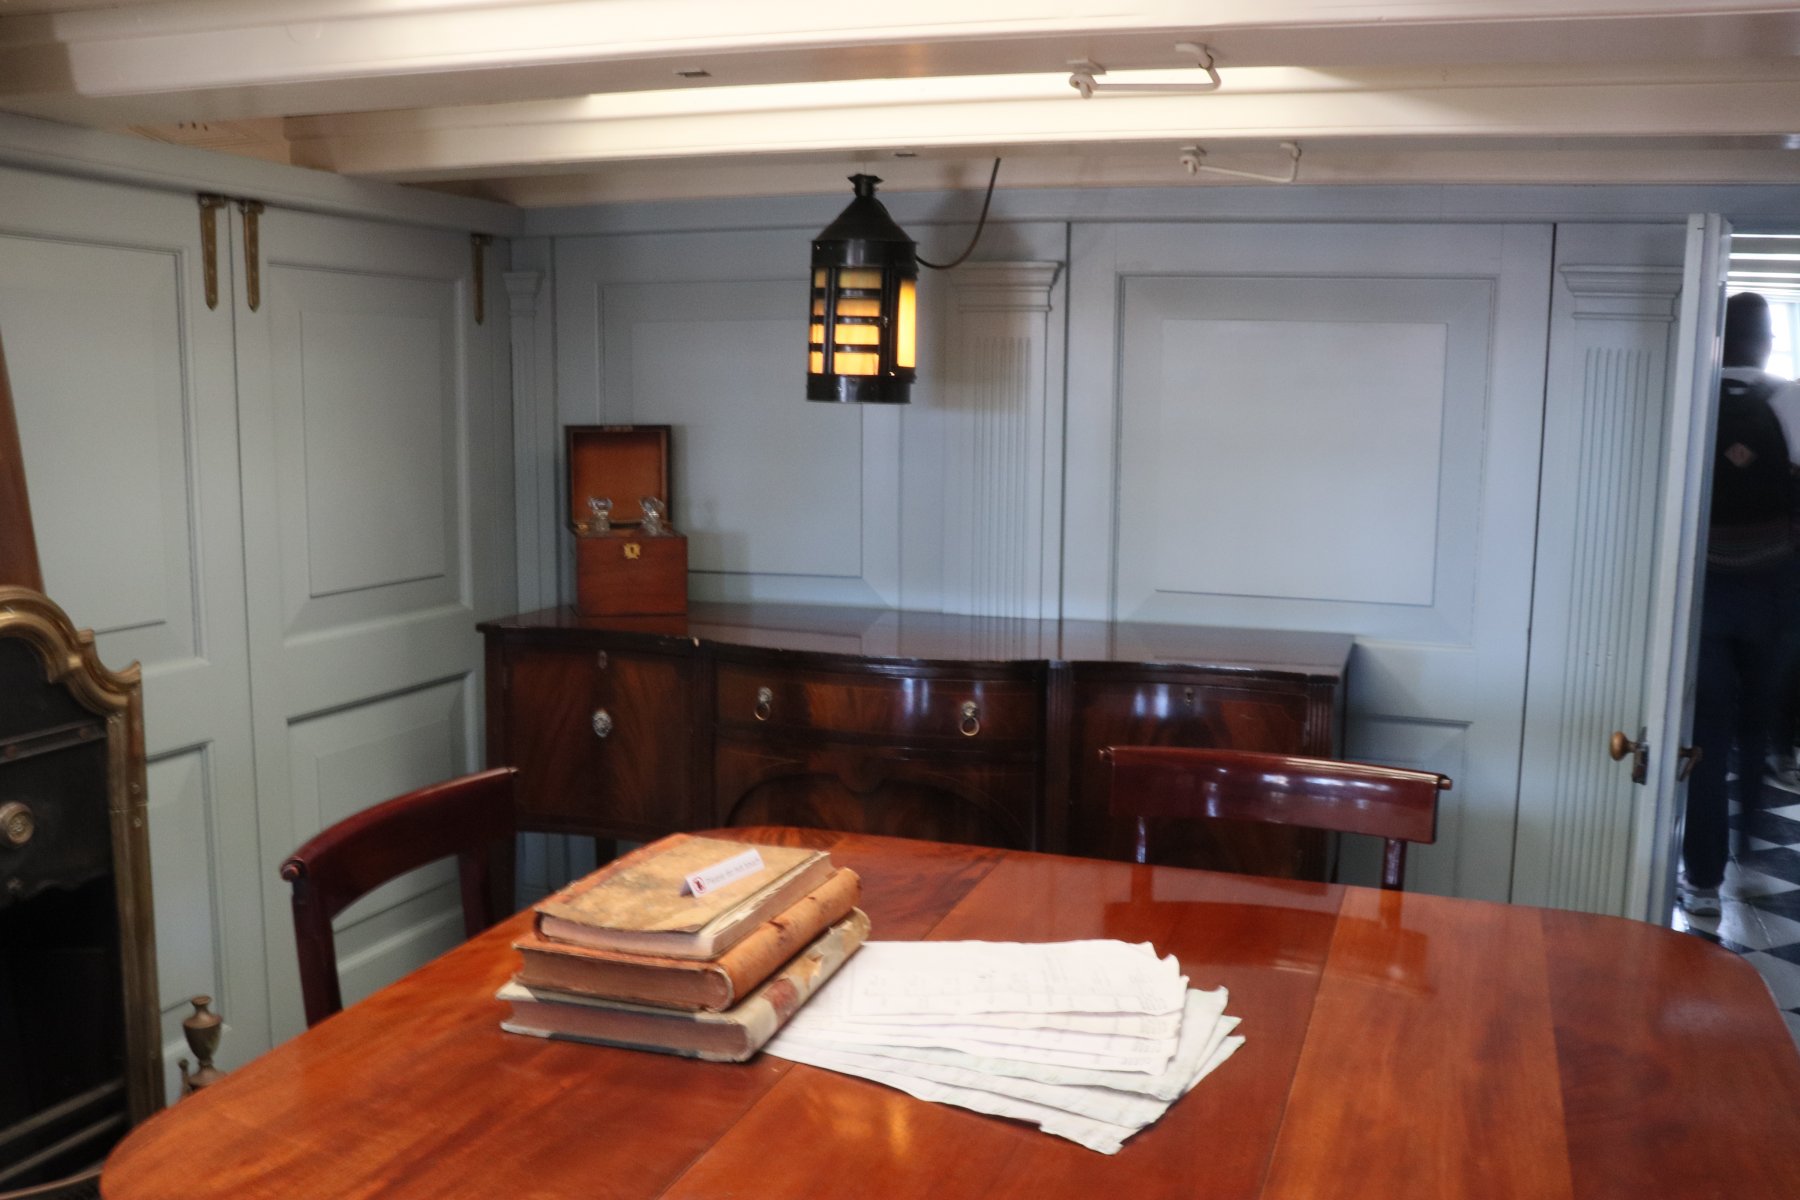
Thank you for the info Christos, on my next visit I'll make sure I take a tripod with me. Although images below the decks aren't really necessary for the build there is some really interesting details down the decks, which is nice to have and enriches your knowledge what it was like and what went inside those ships. Robert
- 527 replies
-
- 1
-
-
- caldercraft
- victory
- (and 1 more)
-
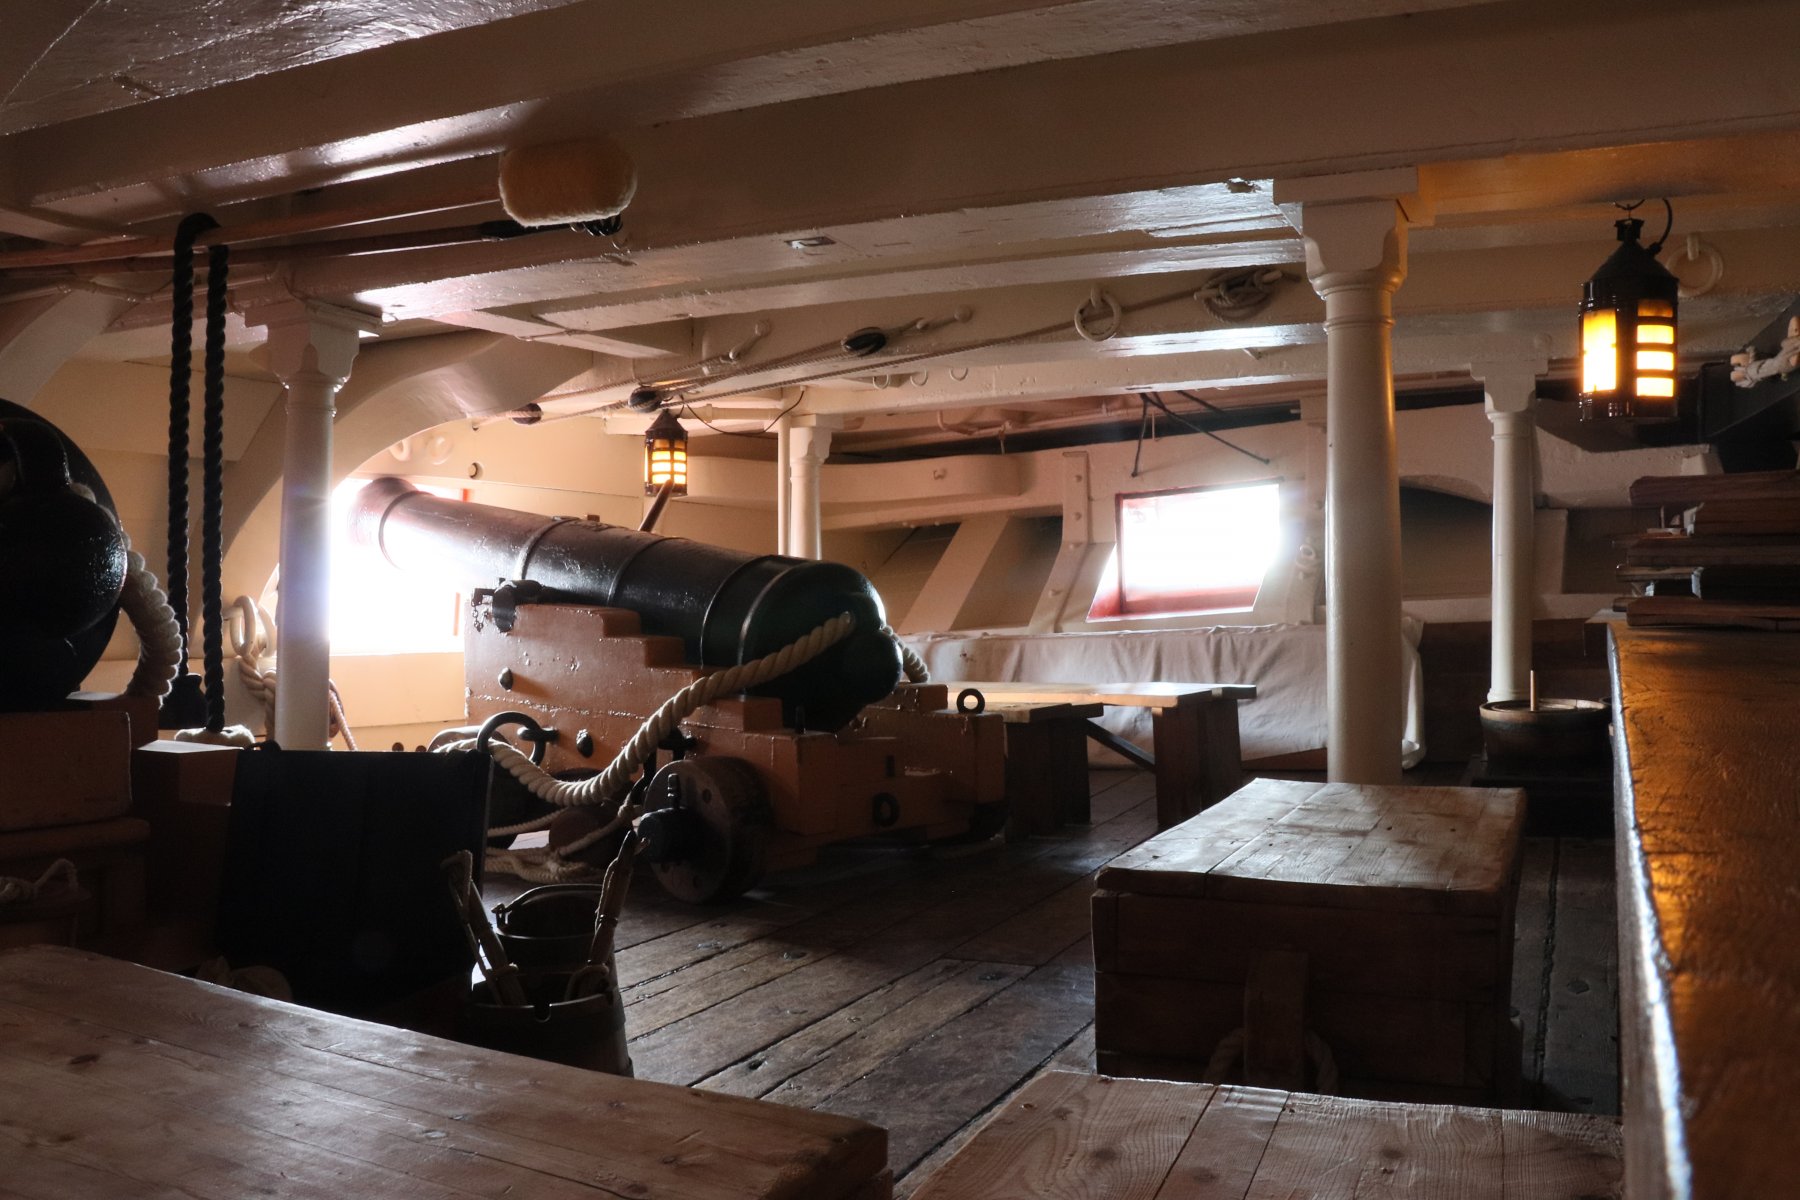
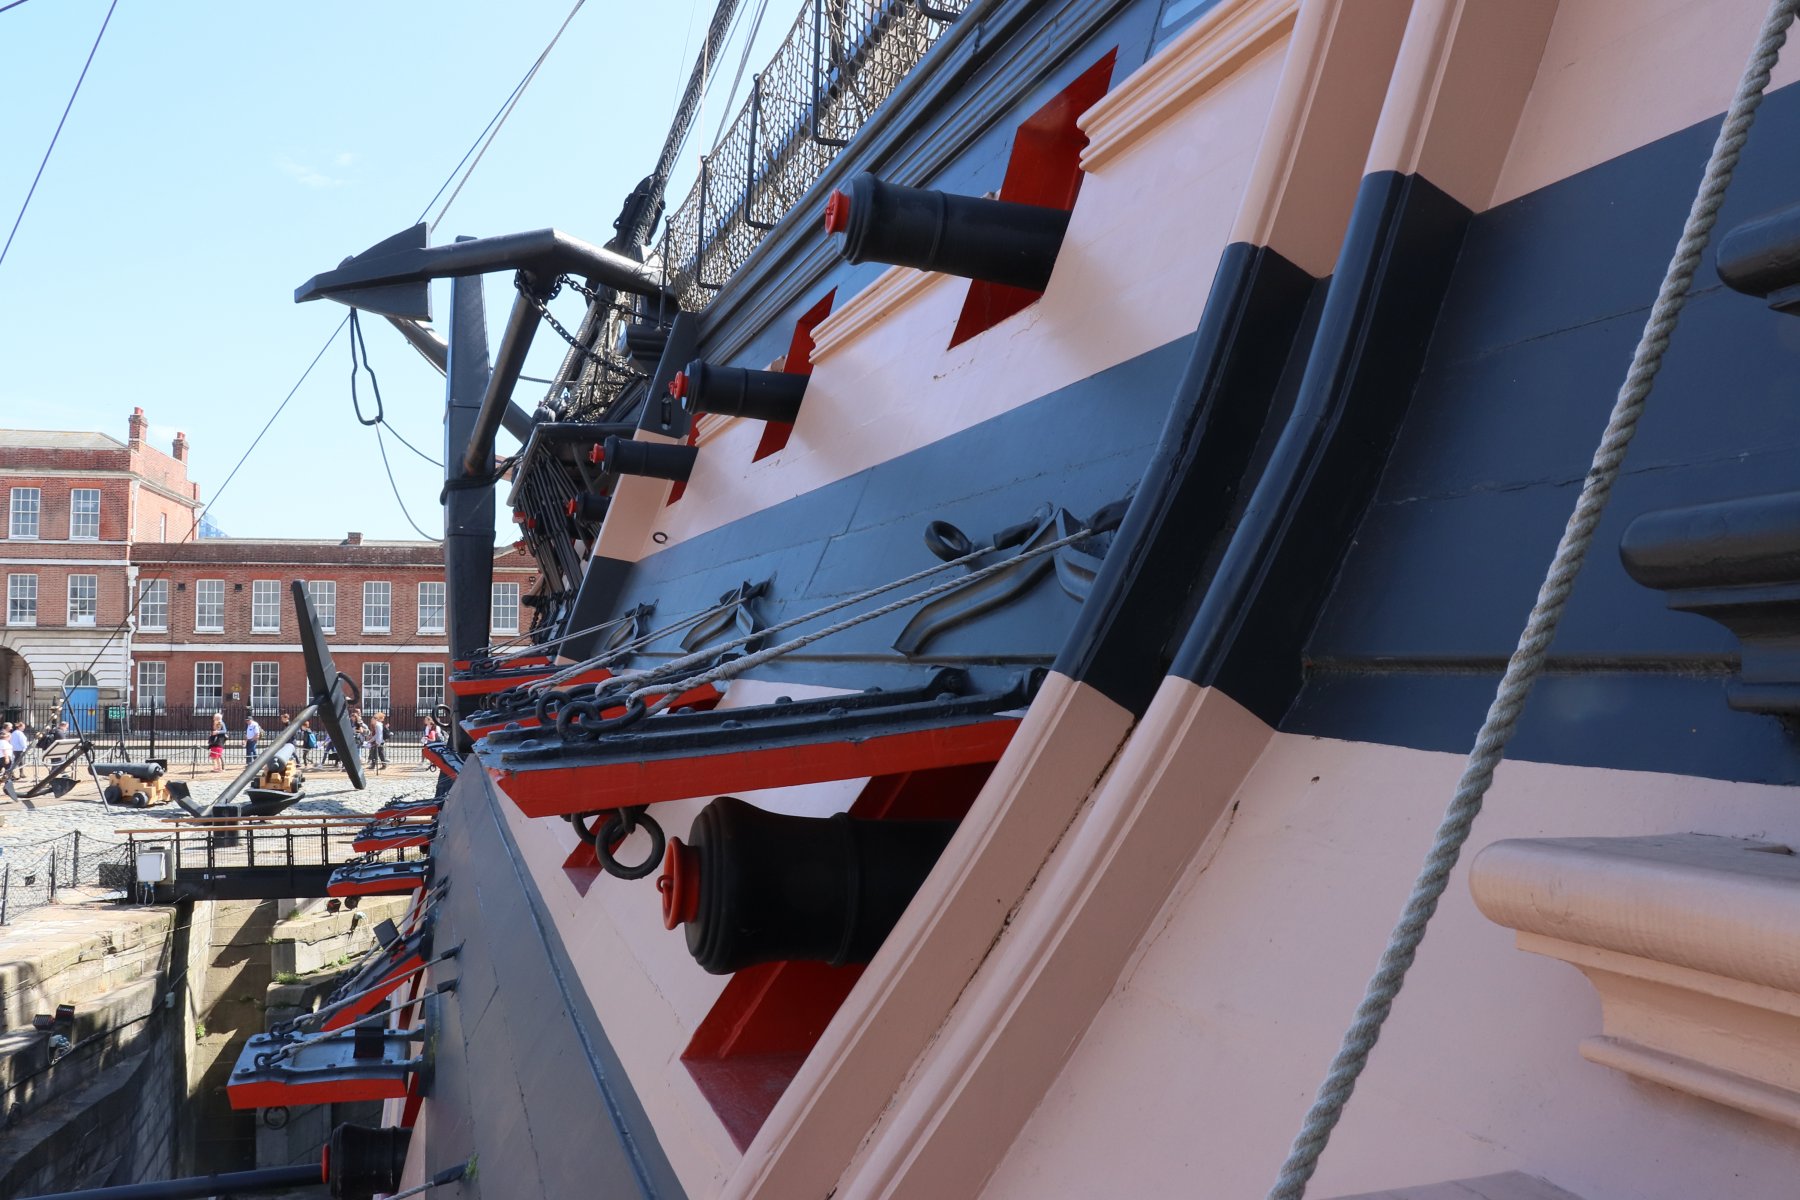
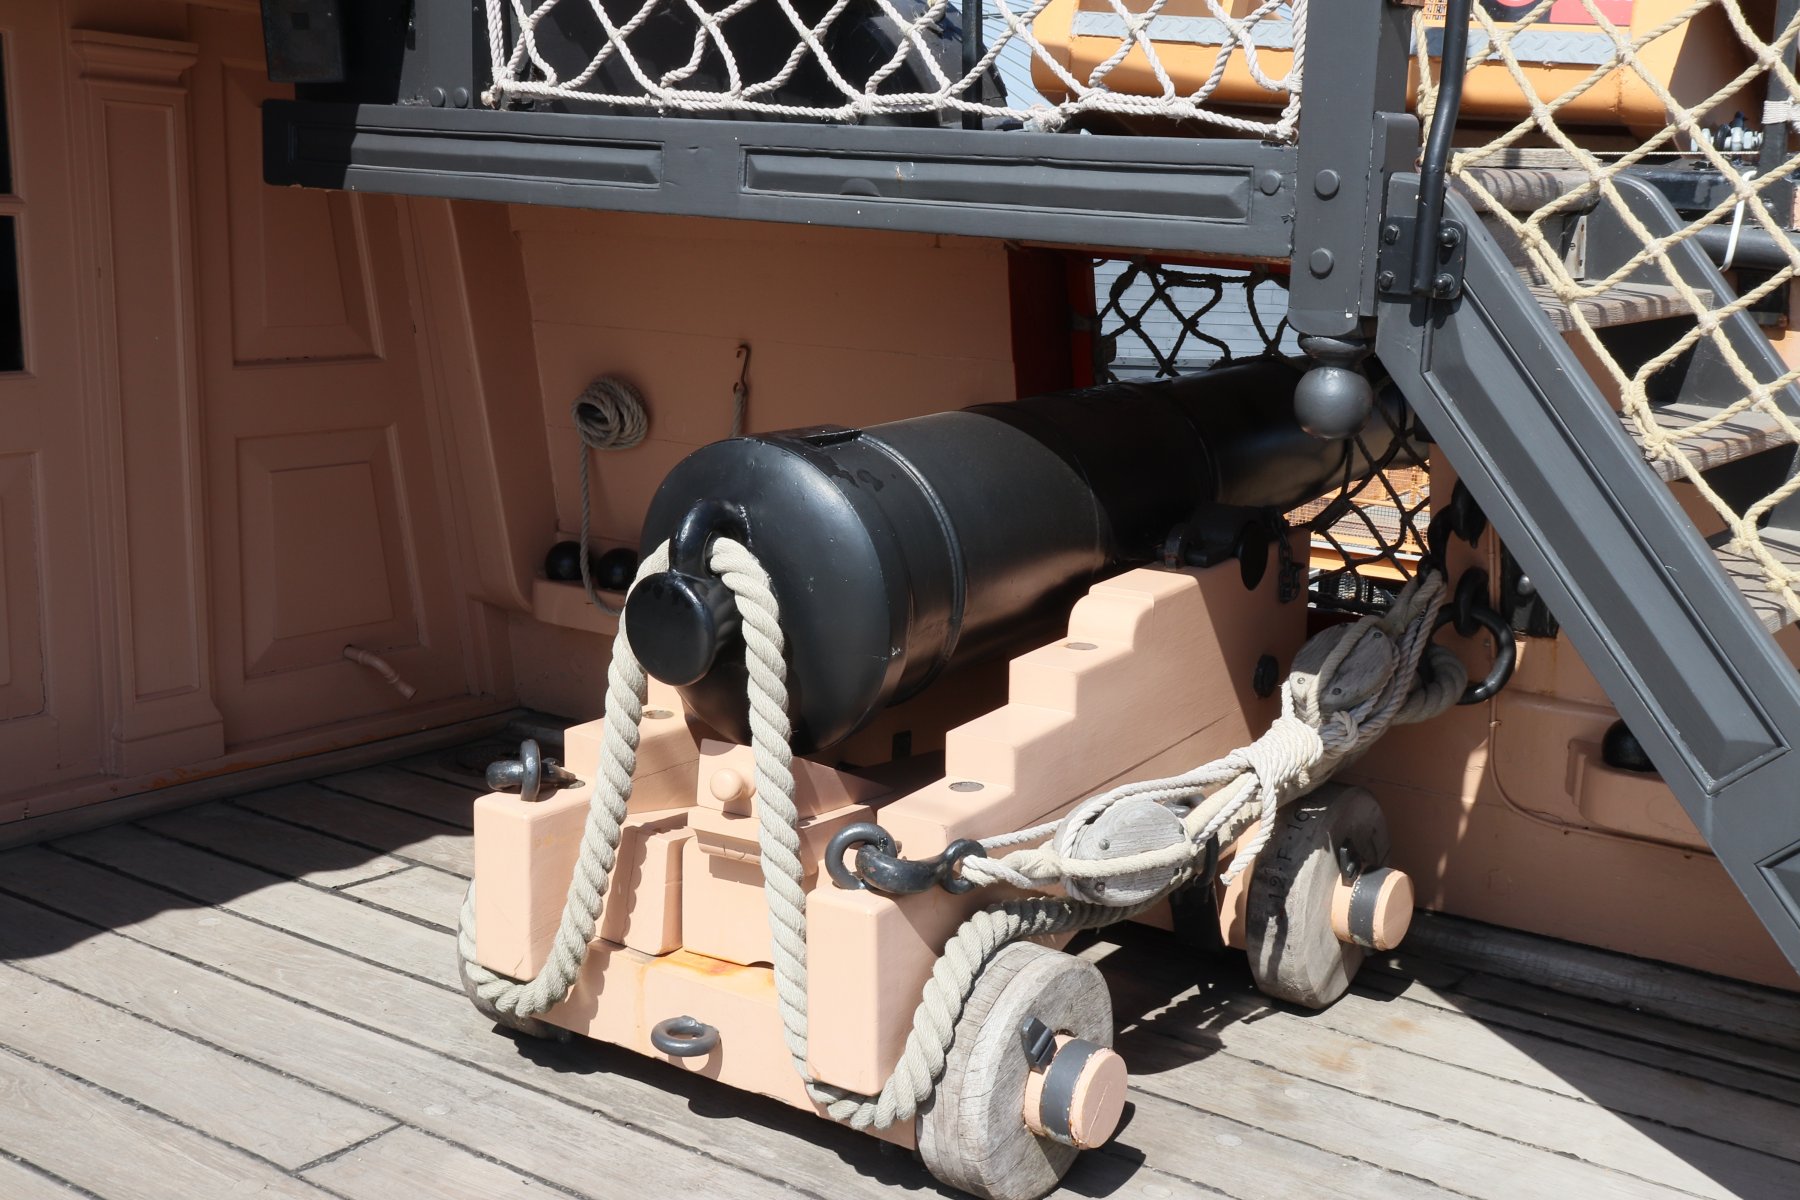
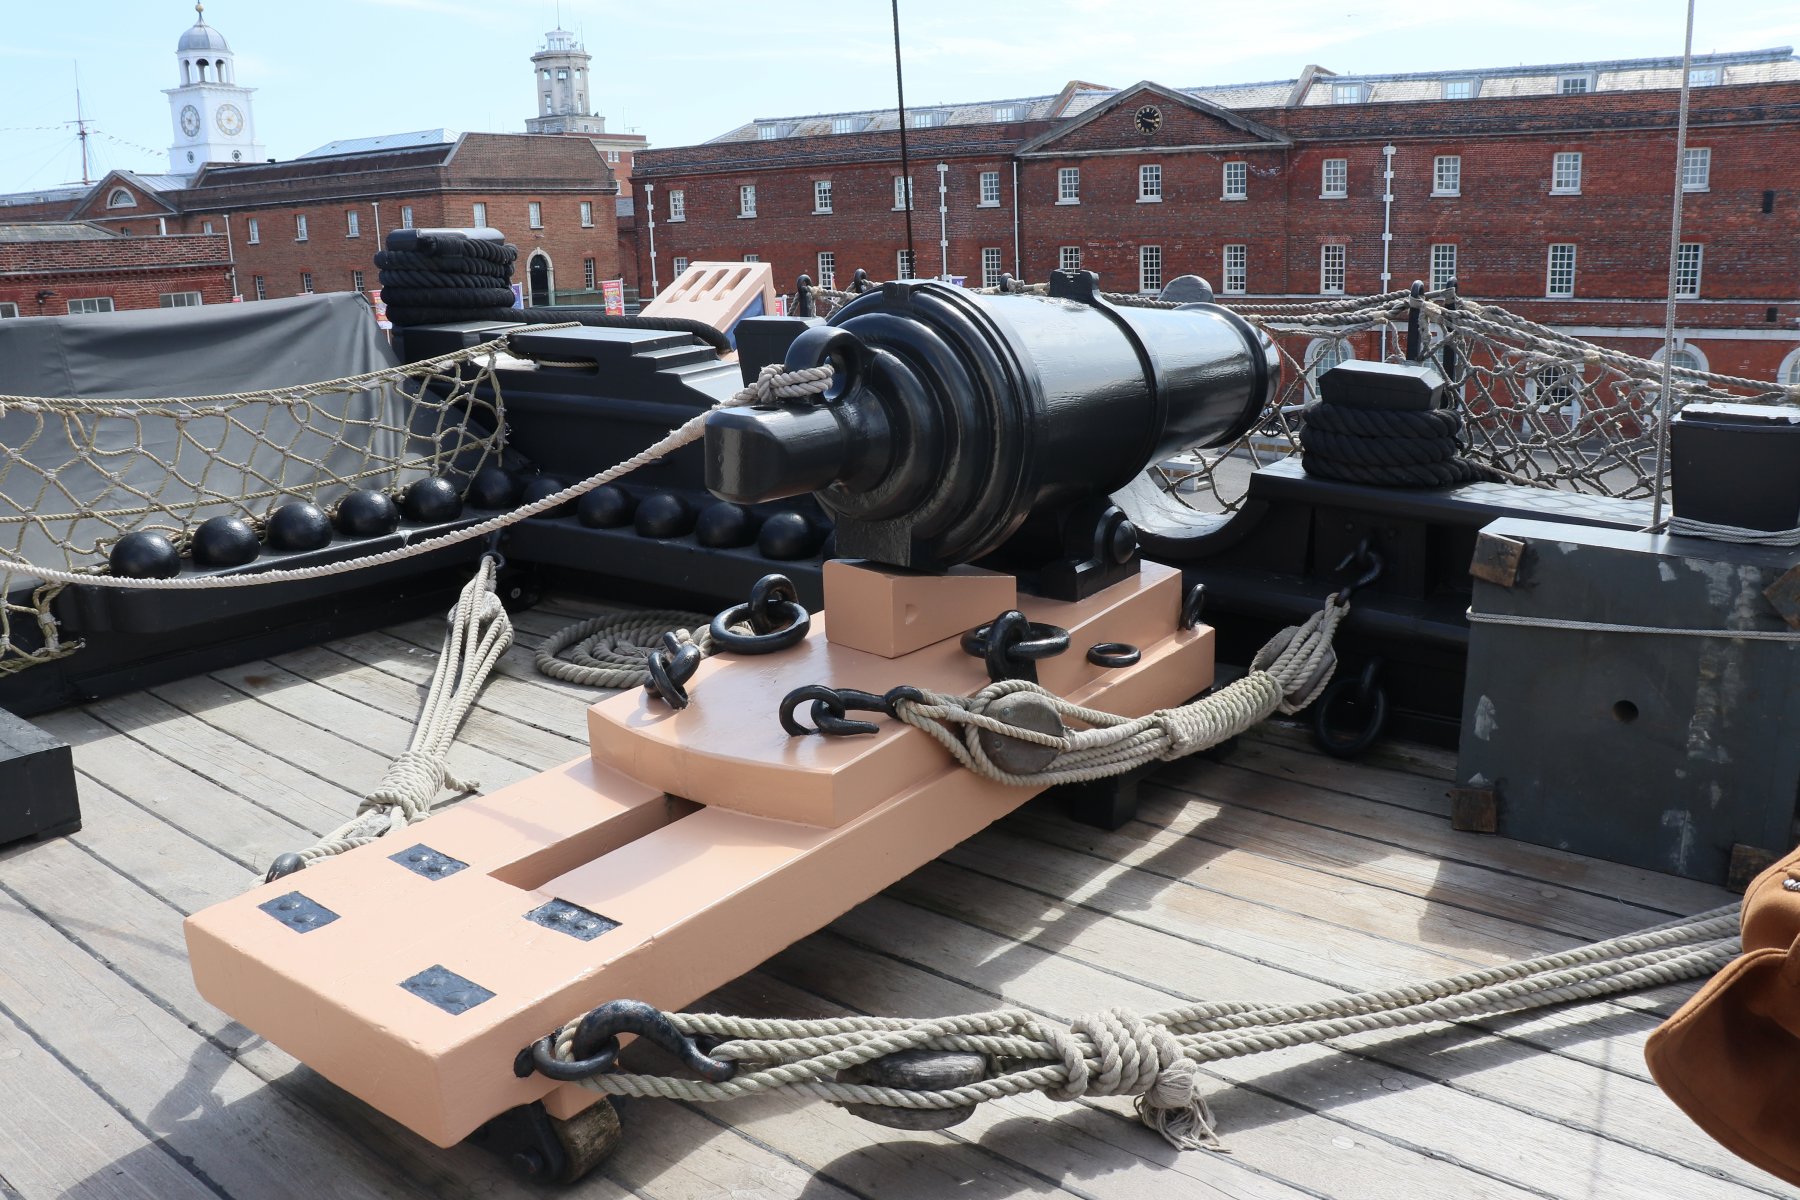
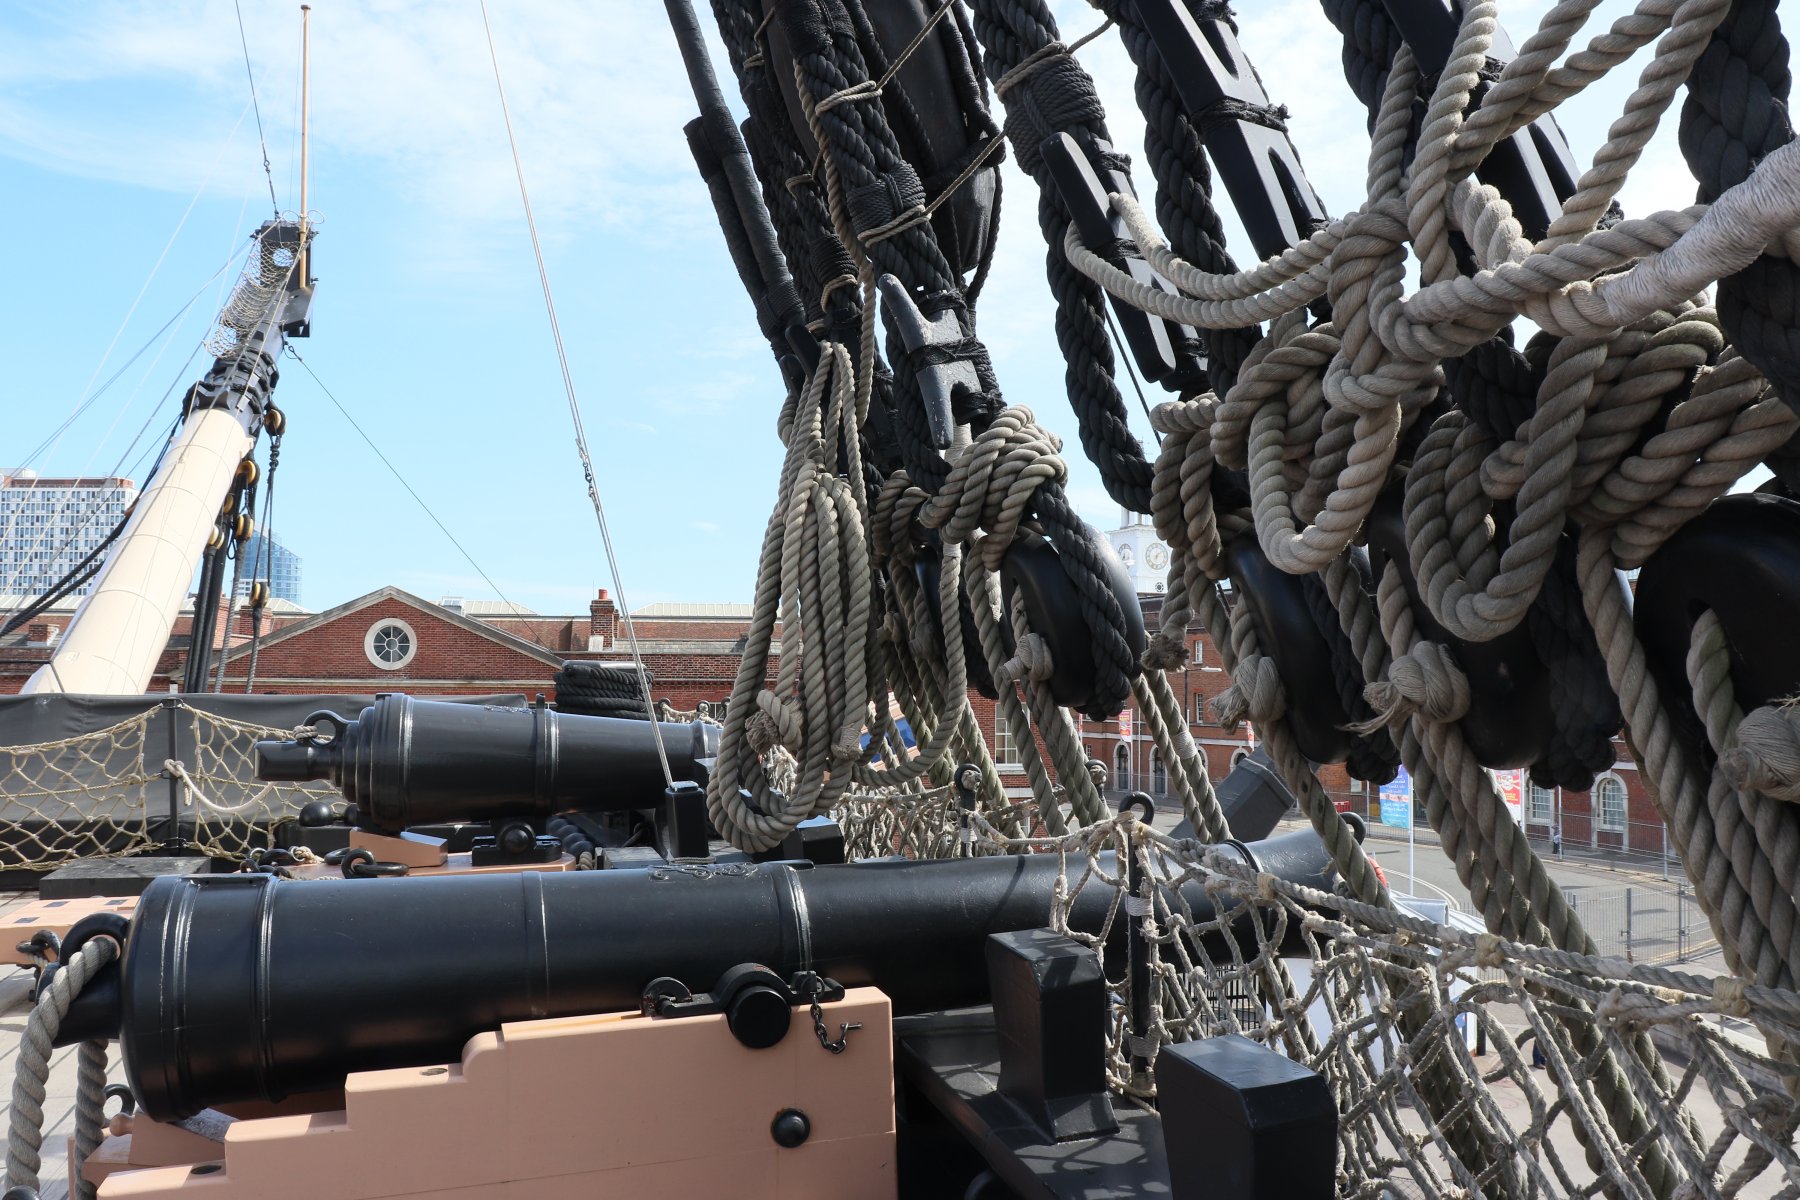
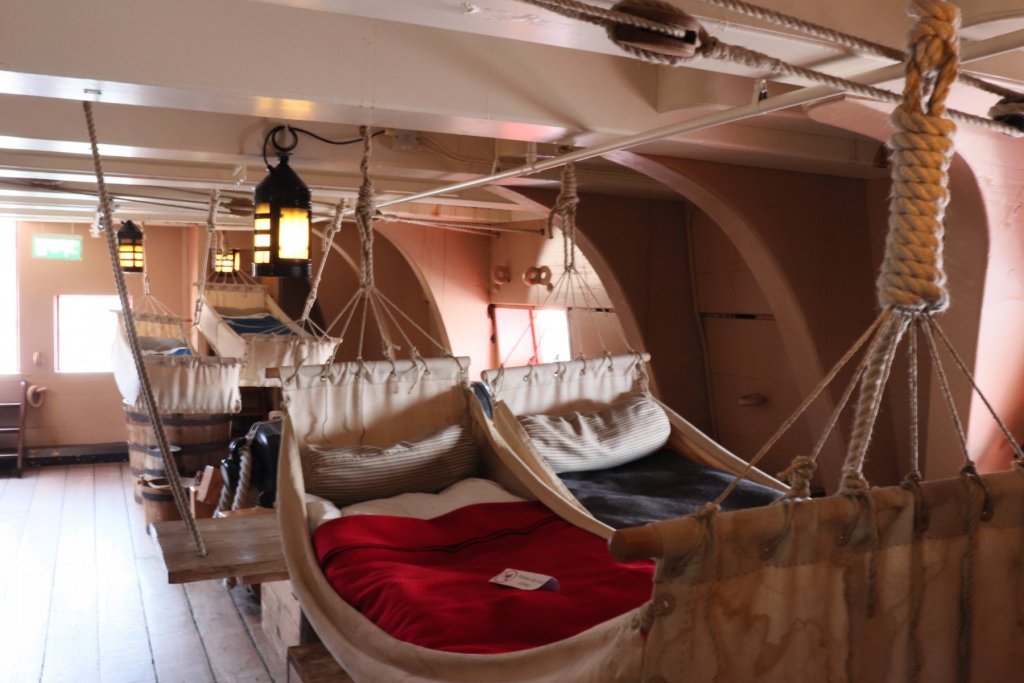
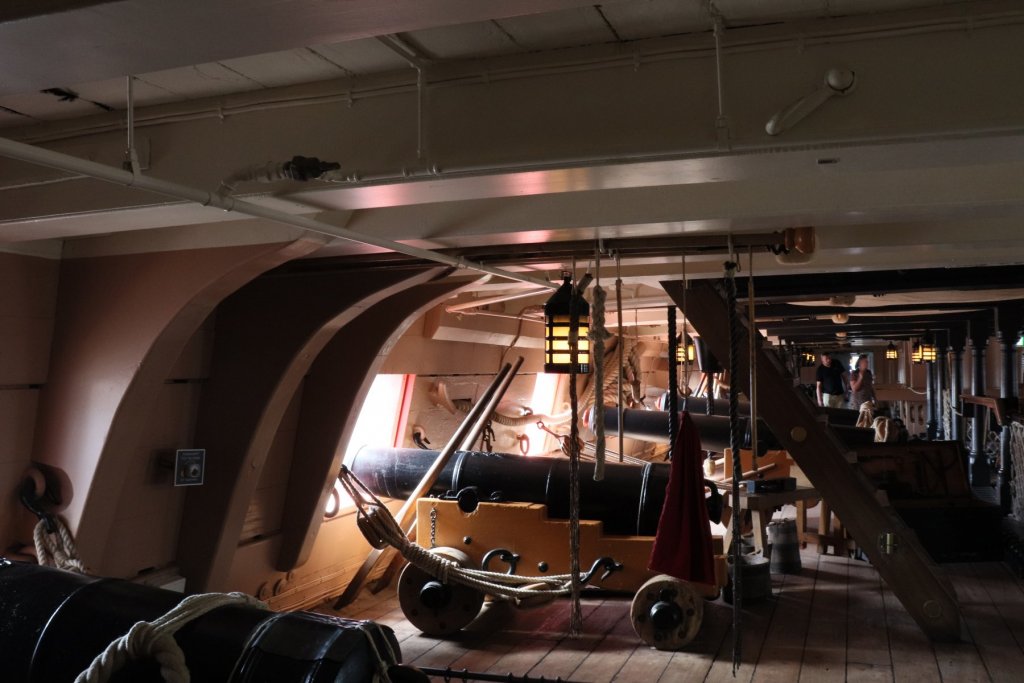
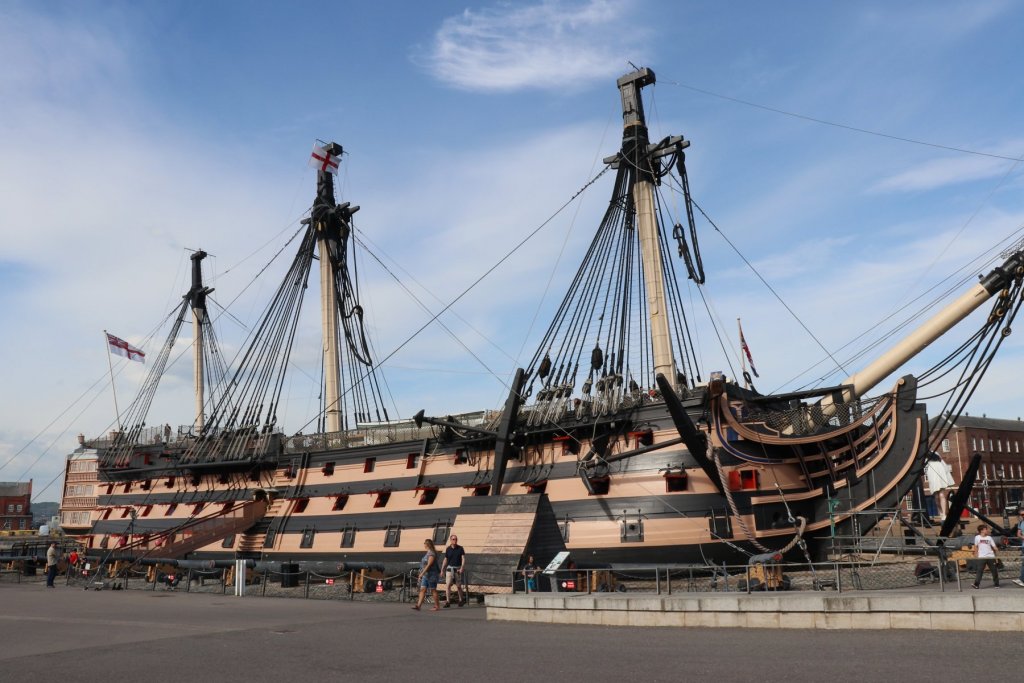
Thank you for the nice comments and likes. Mark / Kevin, Very true what you say about the colour scheme, a pinkish colour on a battle ship does seem a bit odd. In my model I stuck to the yellow ochre. Christos, wish I had a tripod for the camera with me. There were so many other things in the lower decks worth taking a photo off but could not because of the very low light. You are not allowed to use flash but to be honest I don't know if you are allowed to use a tripod. If I visit her again I will give it a try. Robert
- 527 replies
-
- 1
-
-
- caldercraft
- victory
- (and 1 more)
-
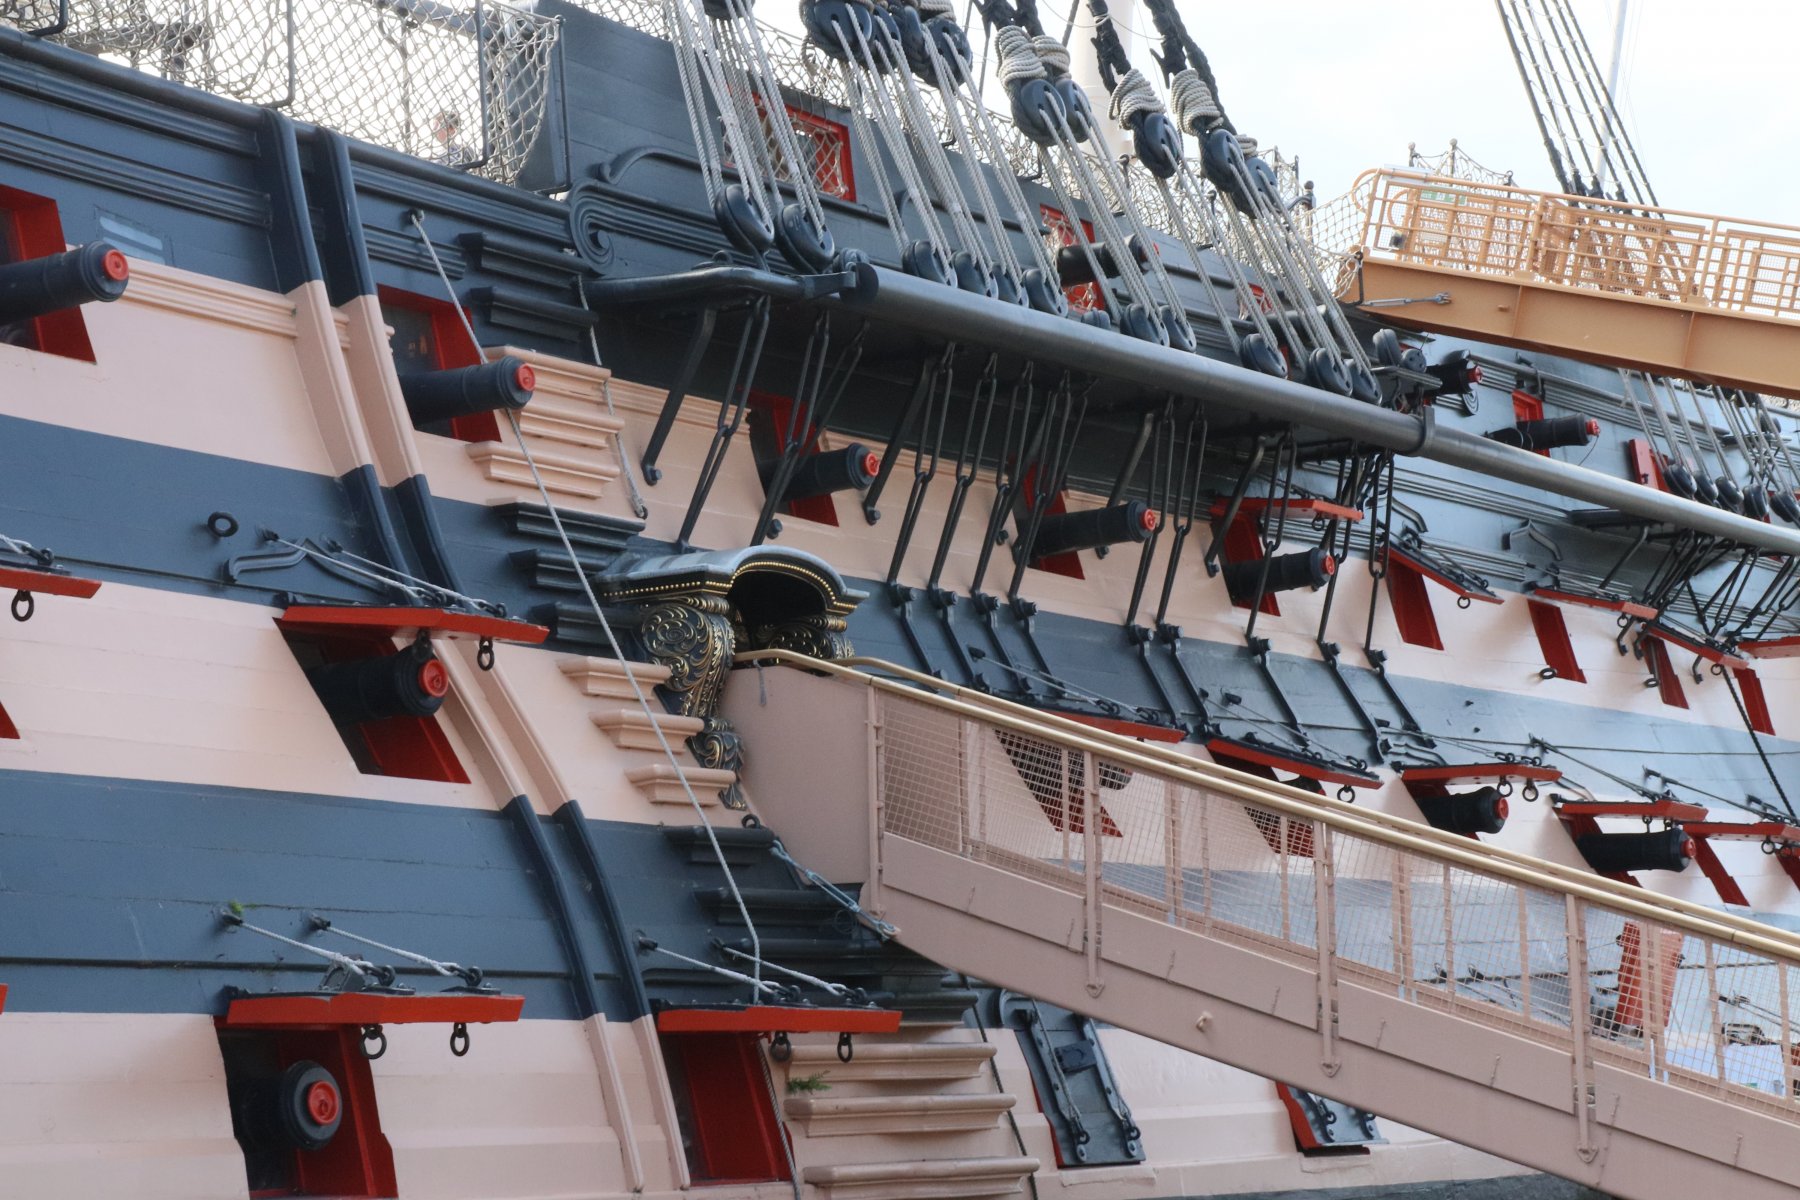
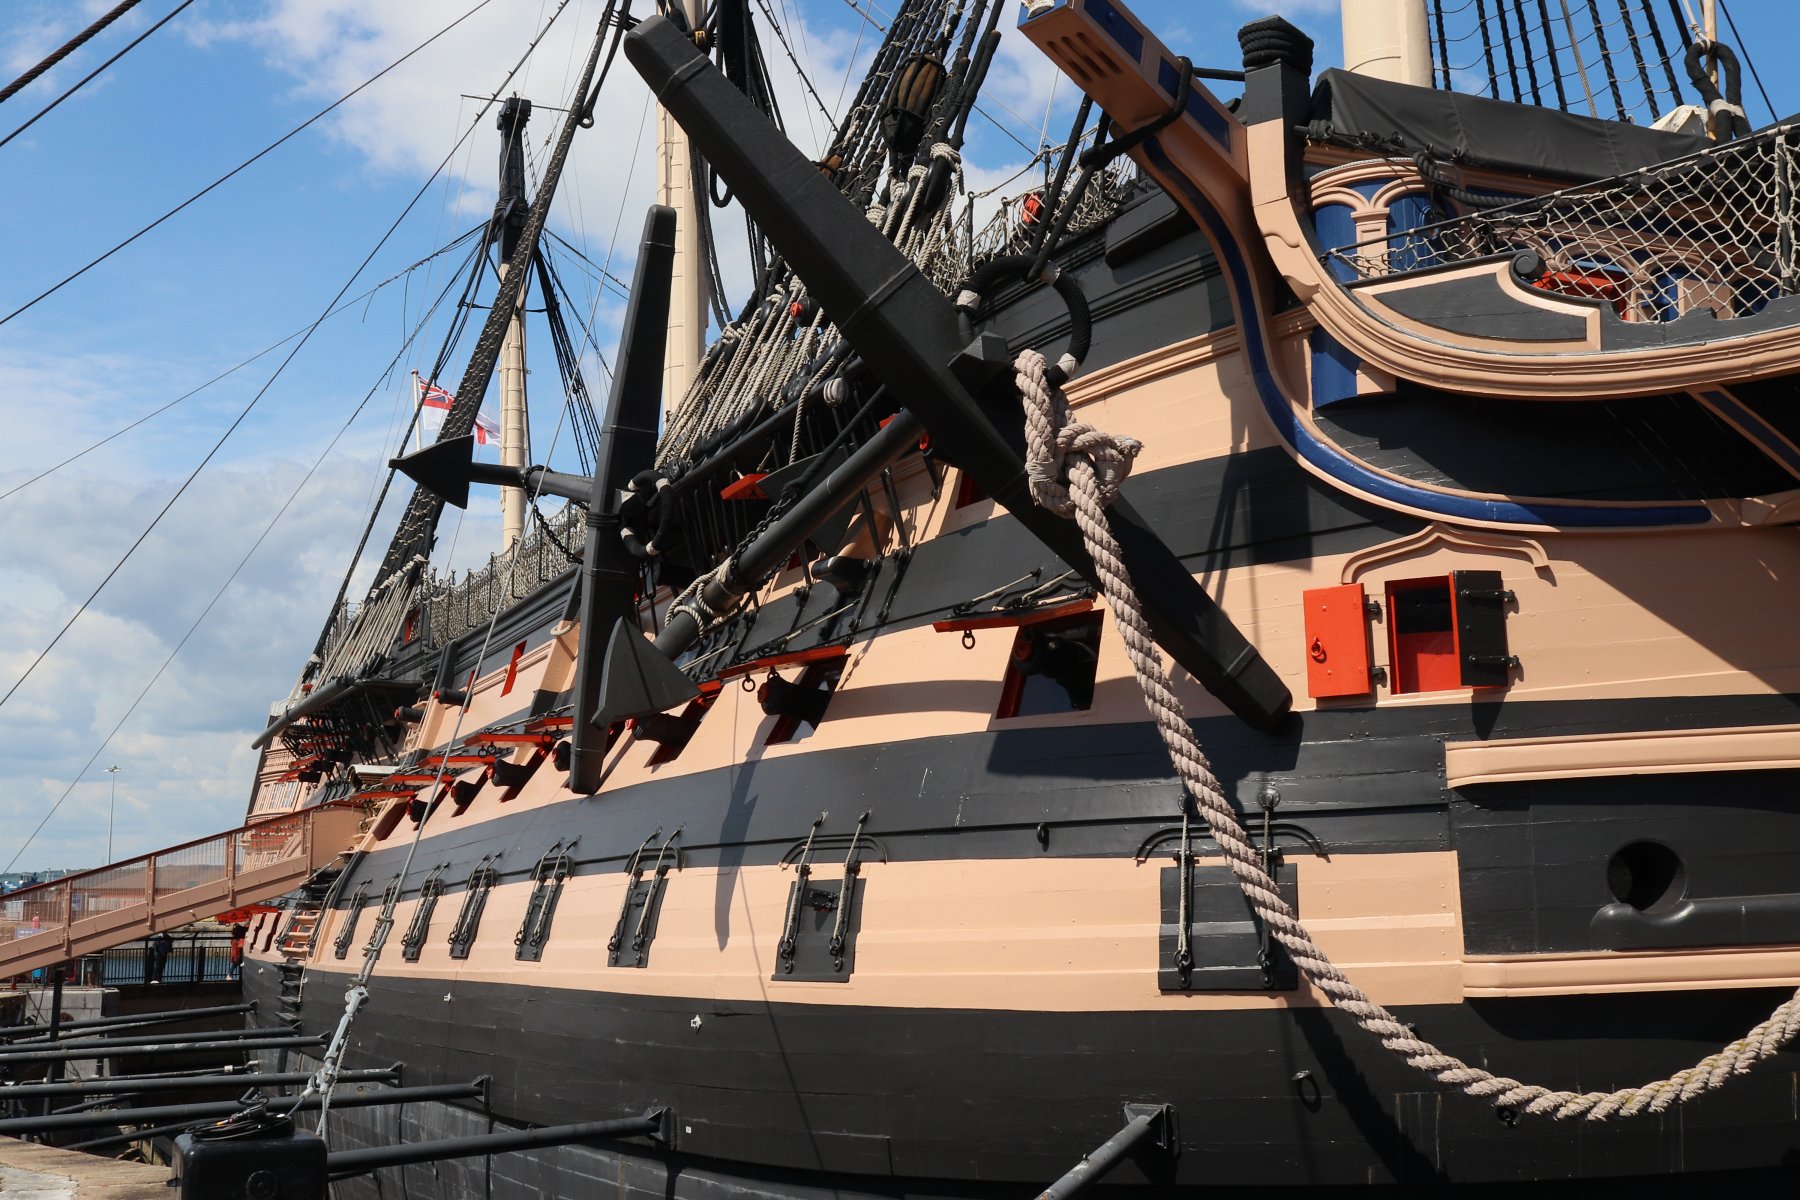
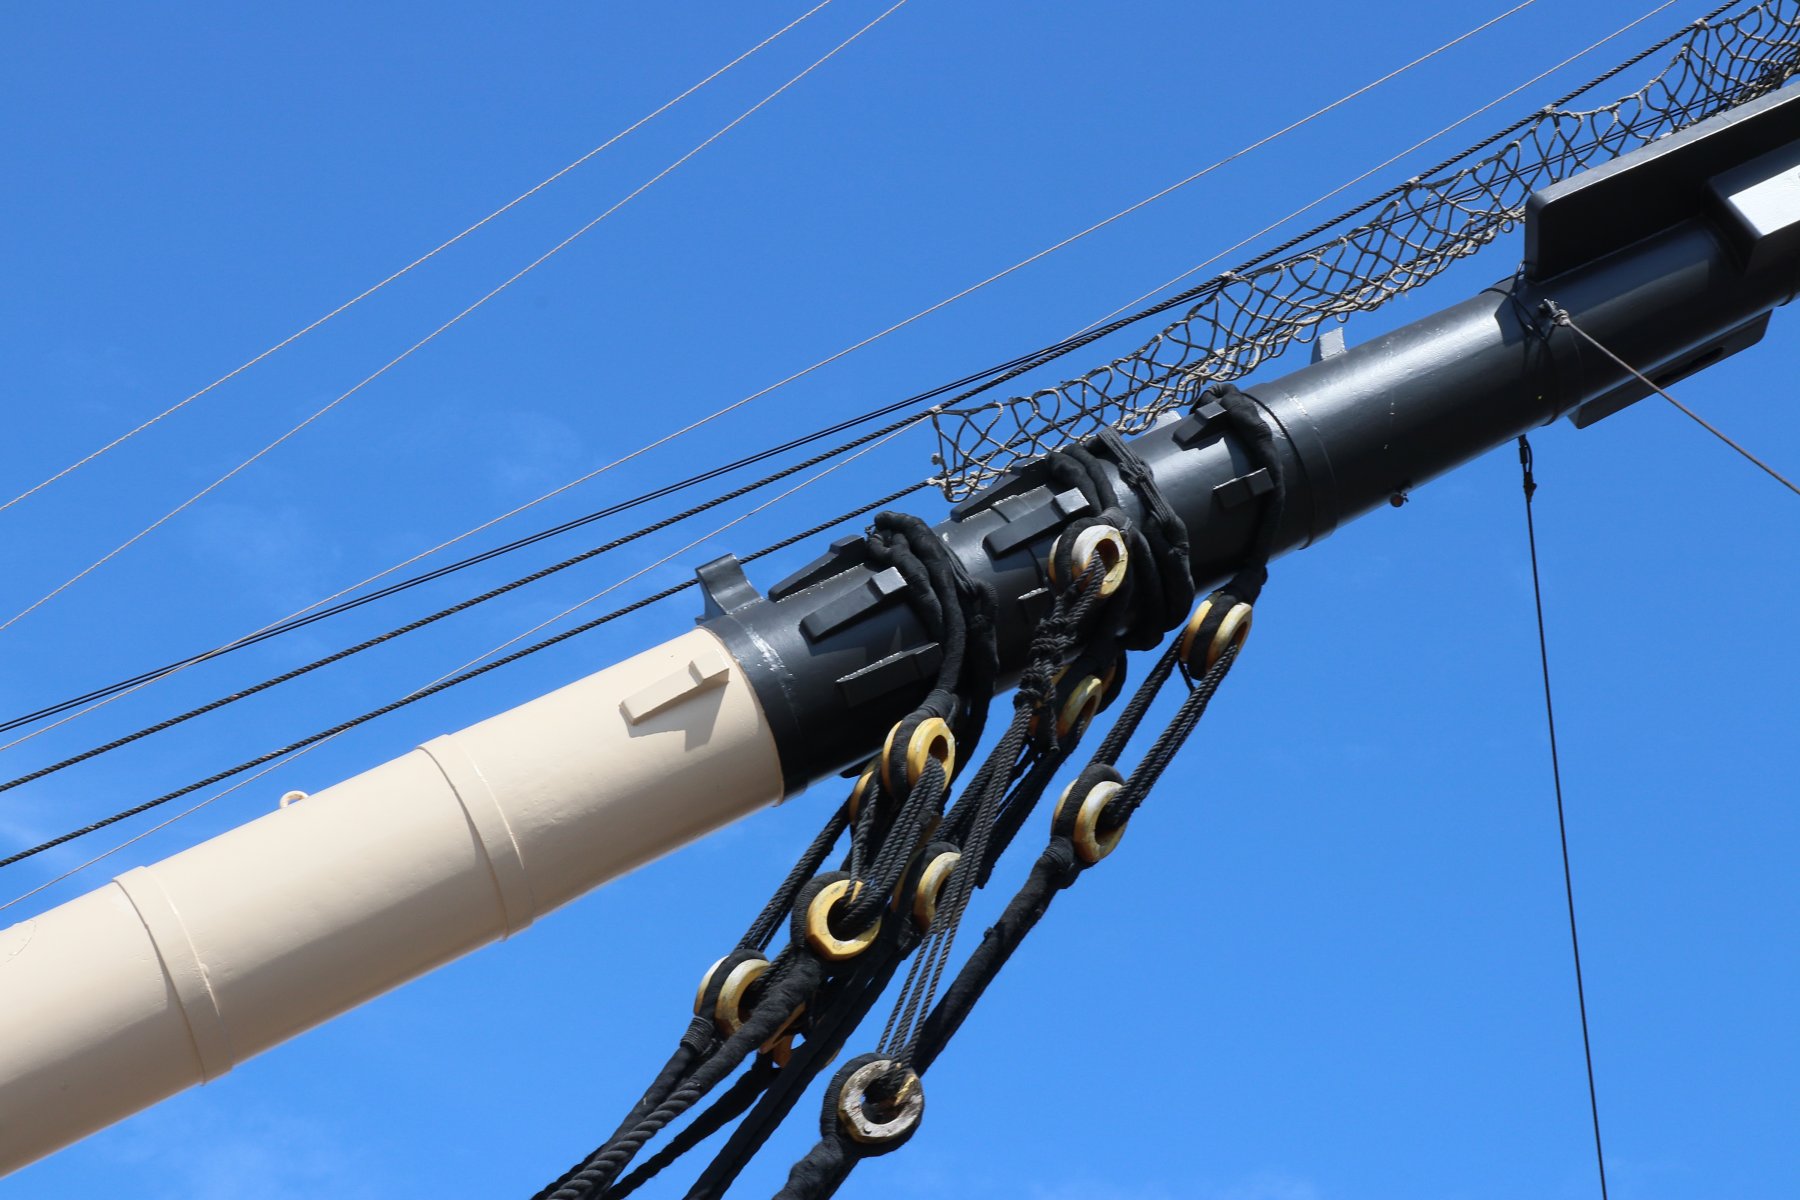
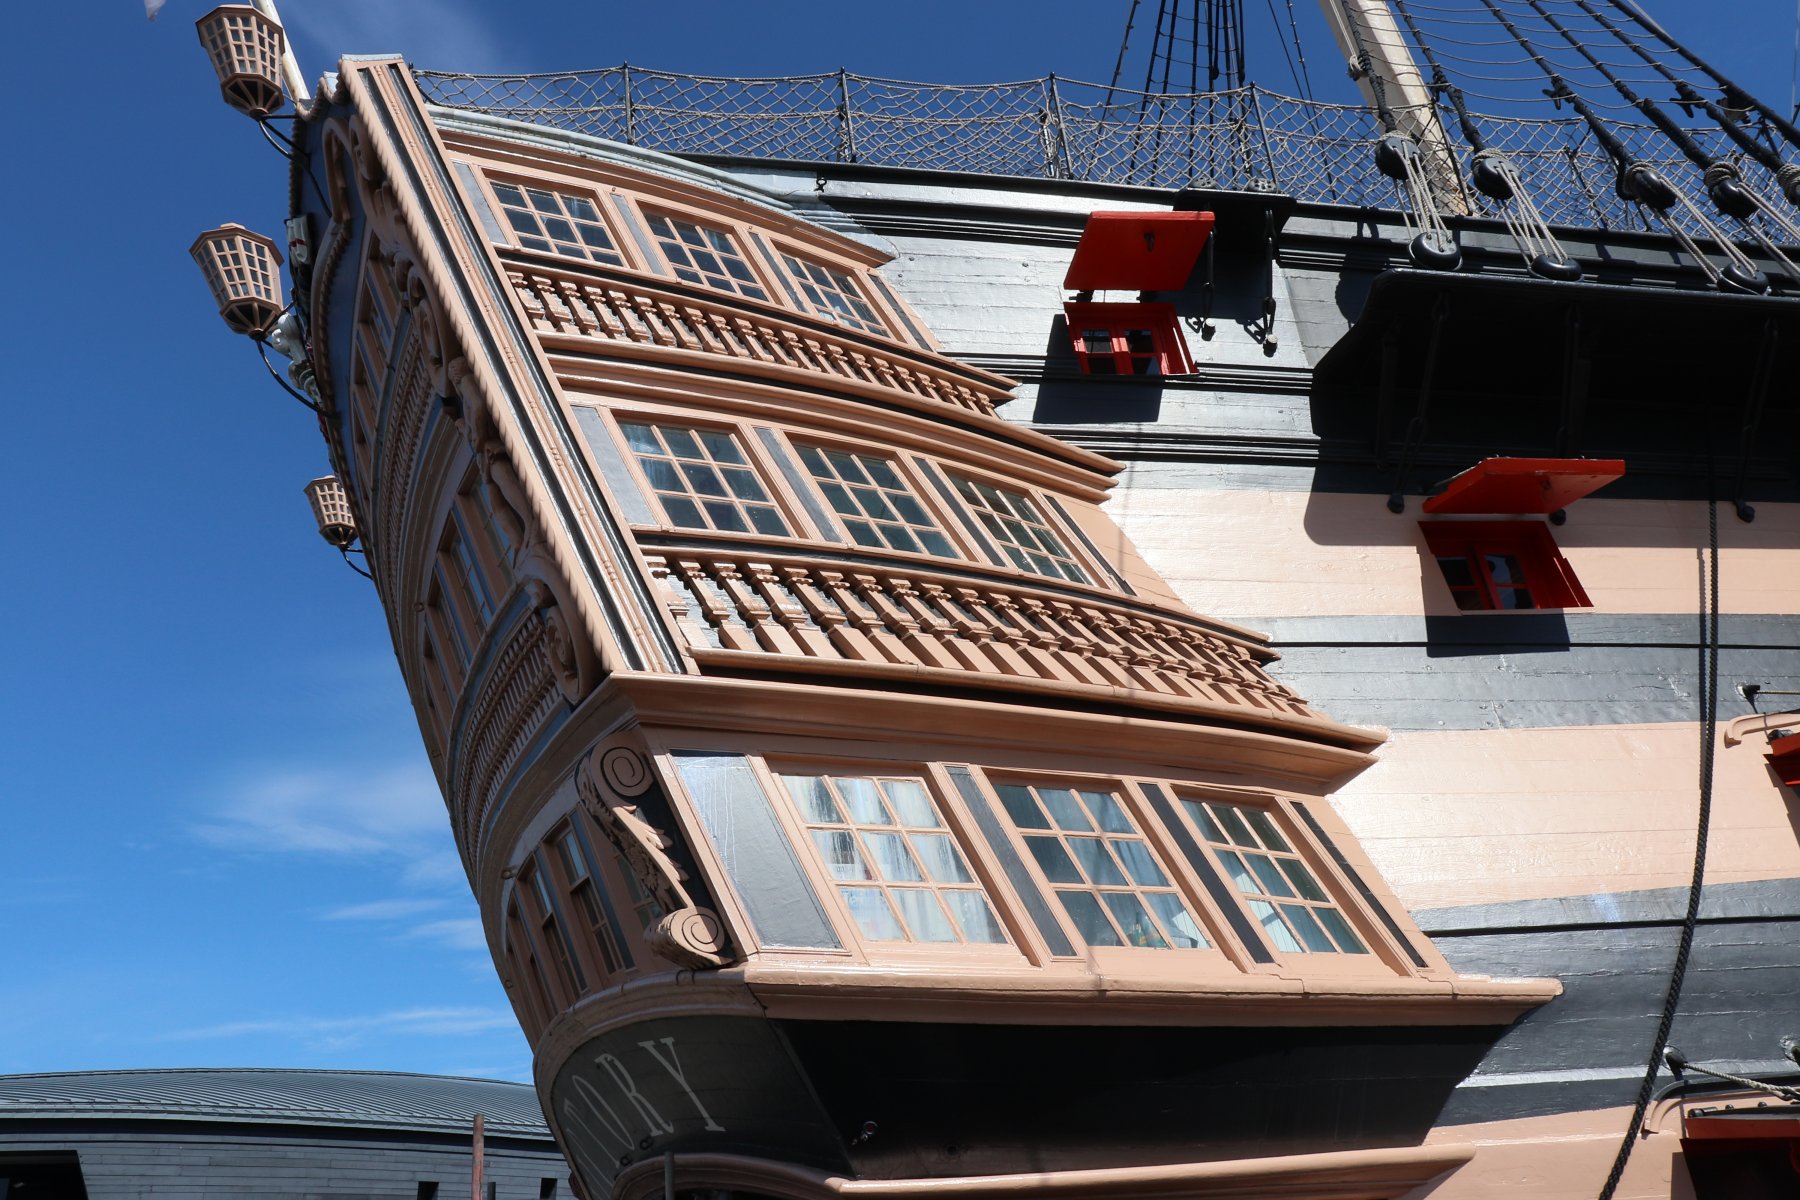
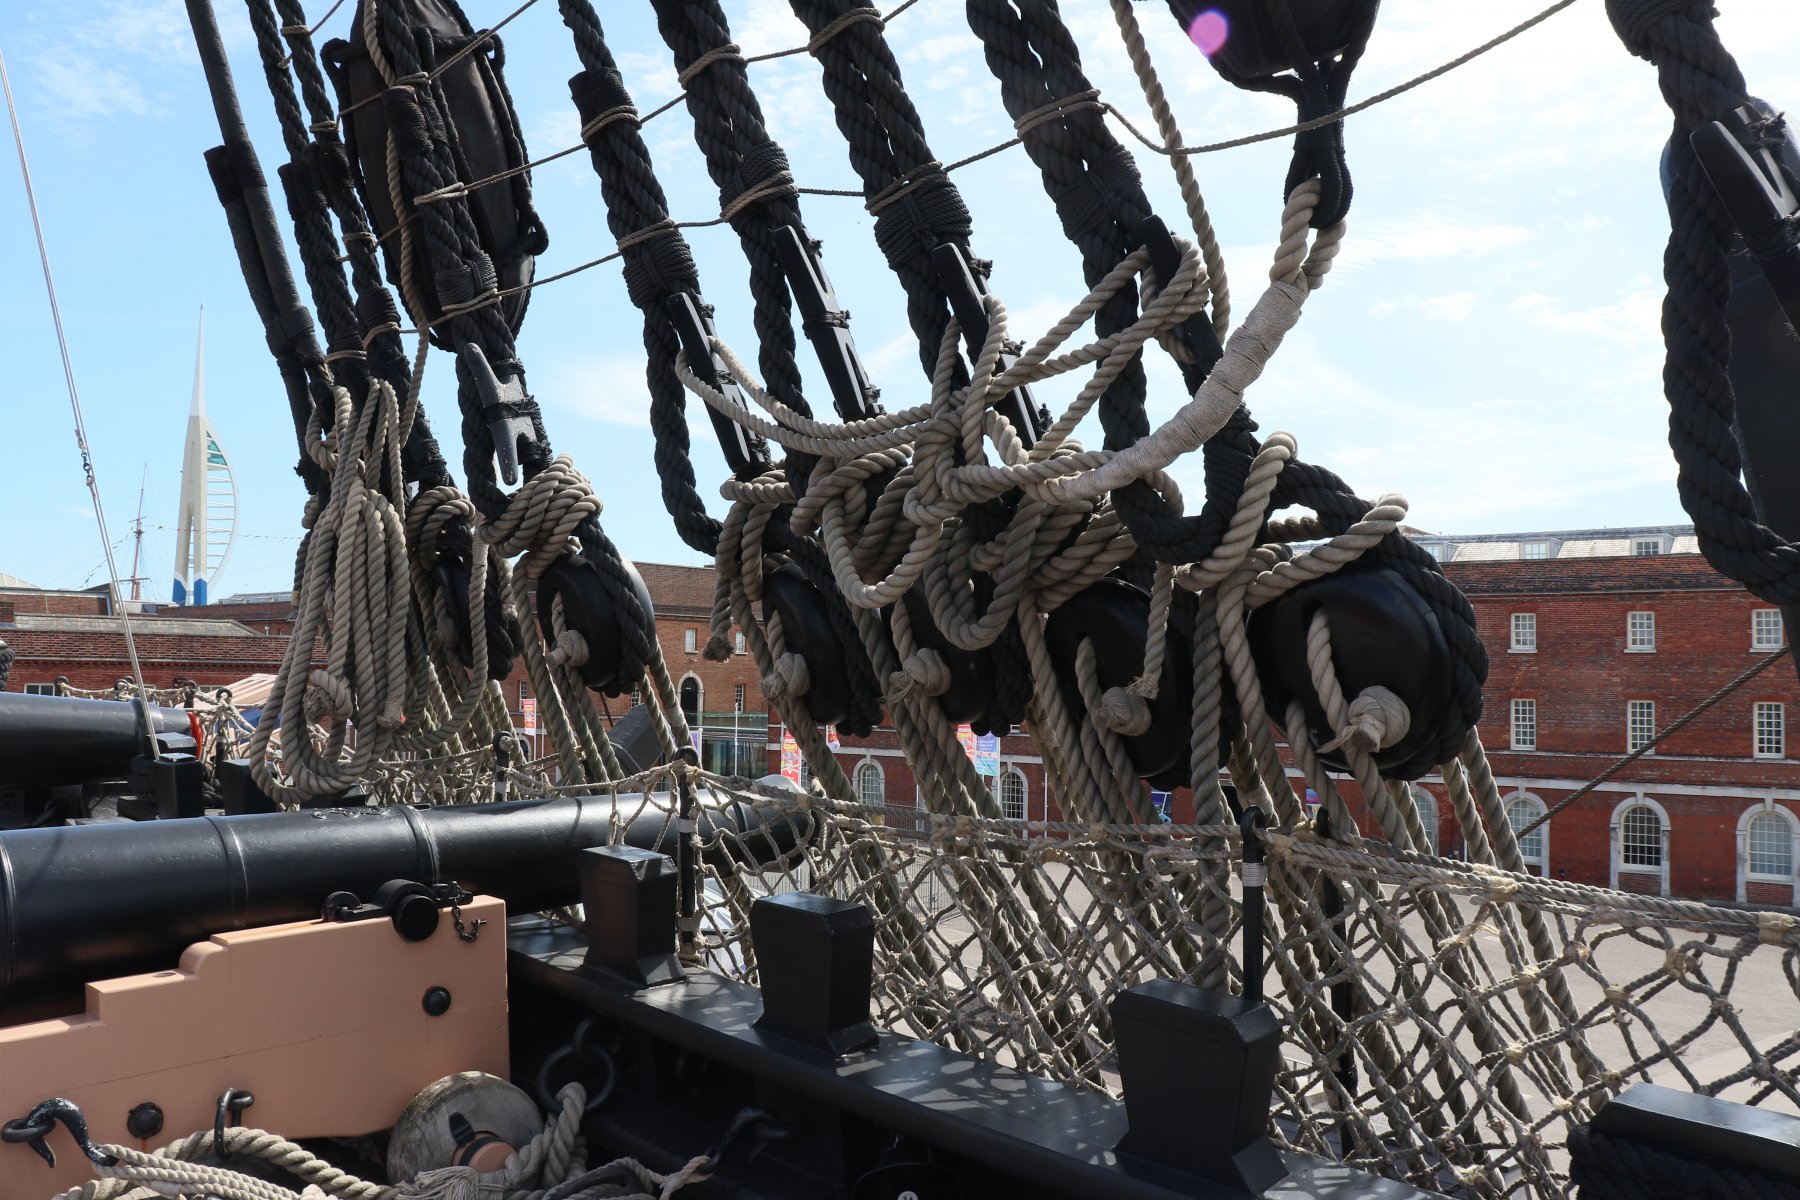
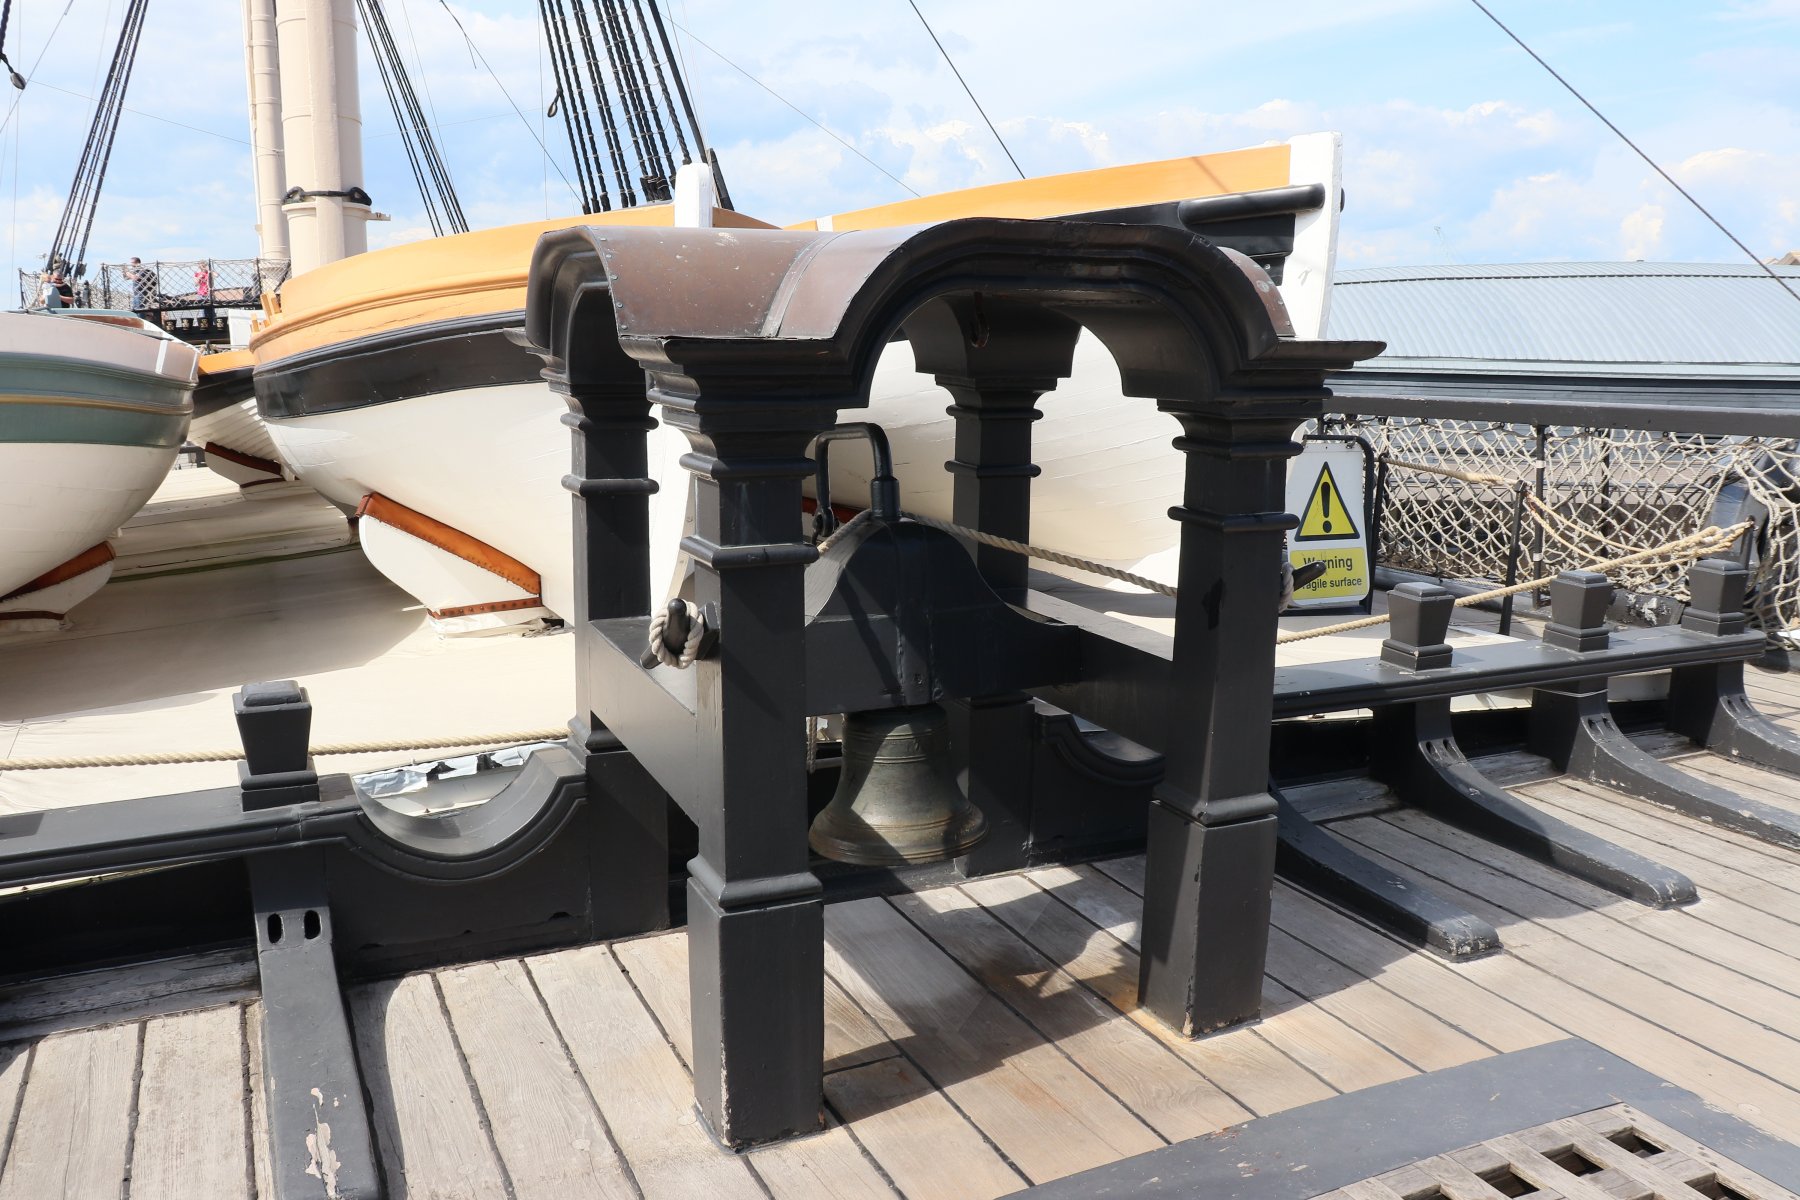
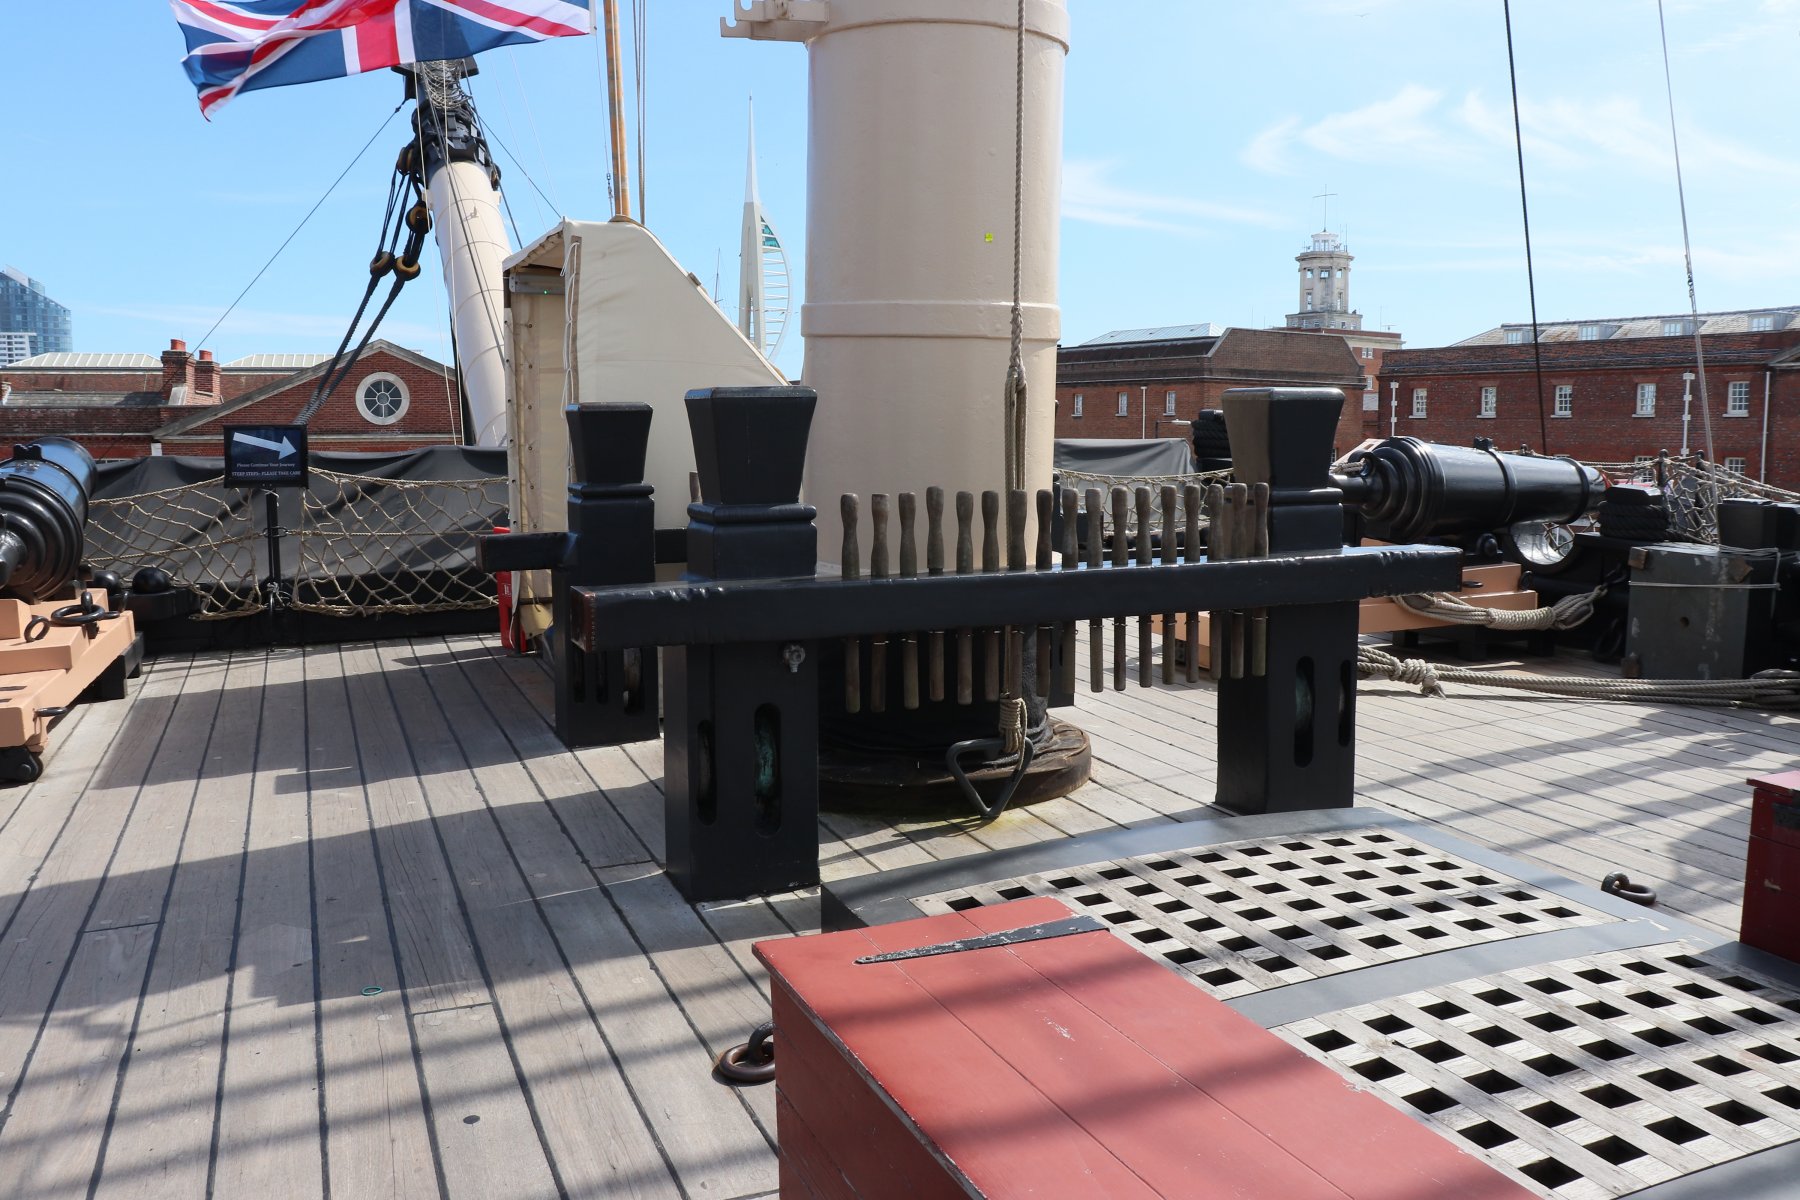
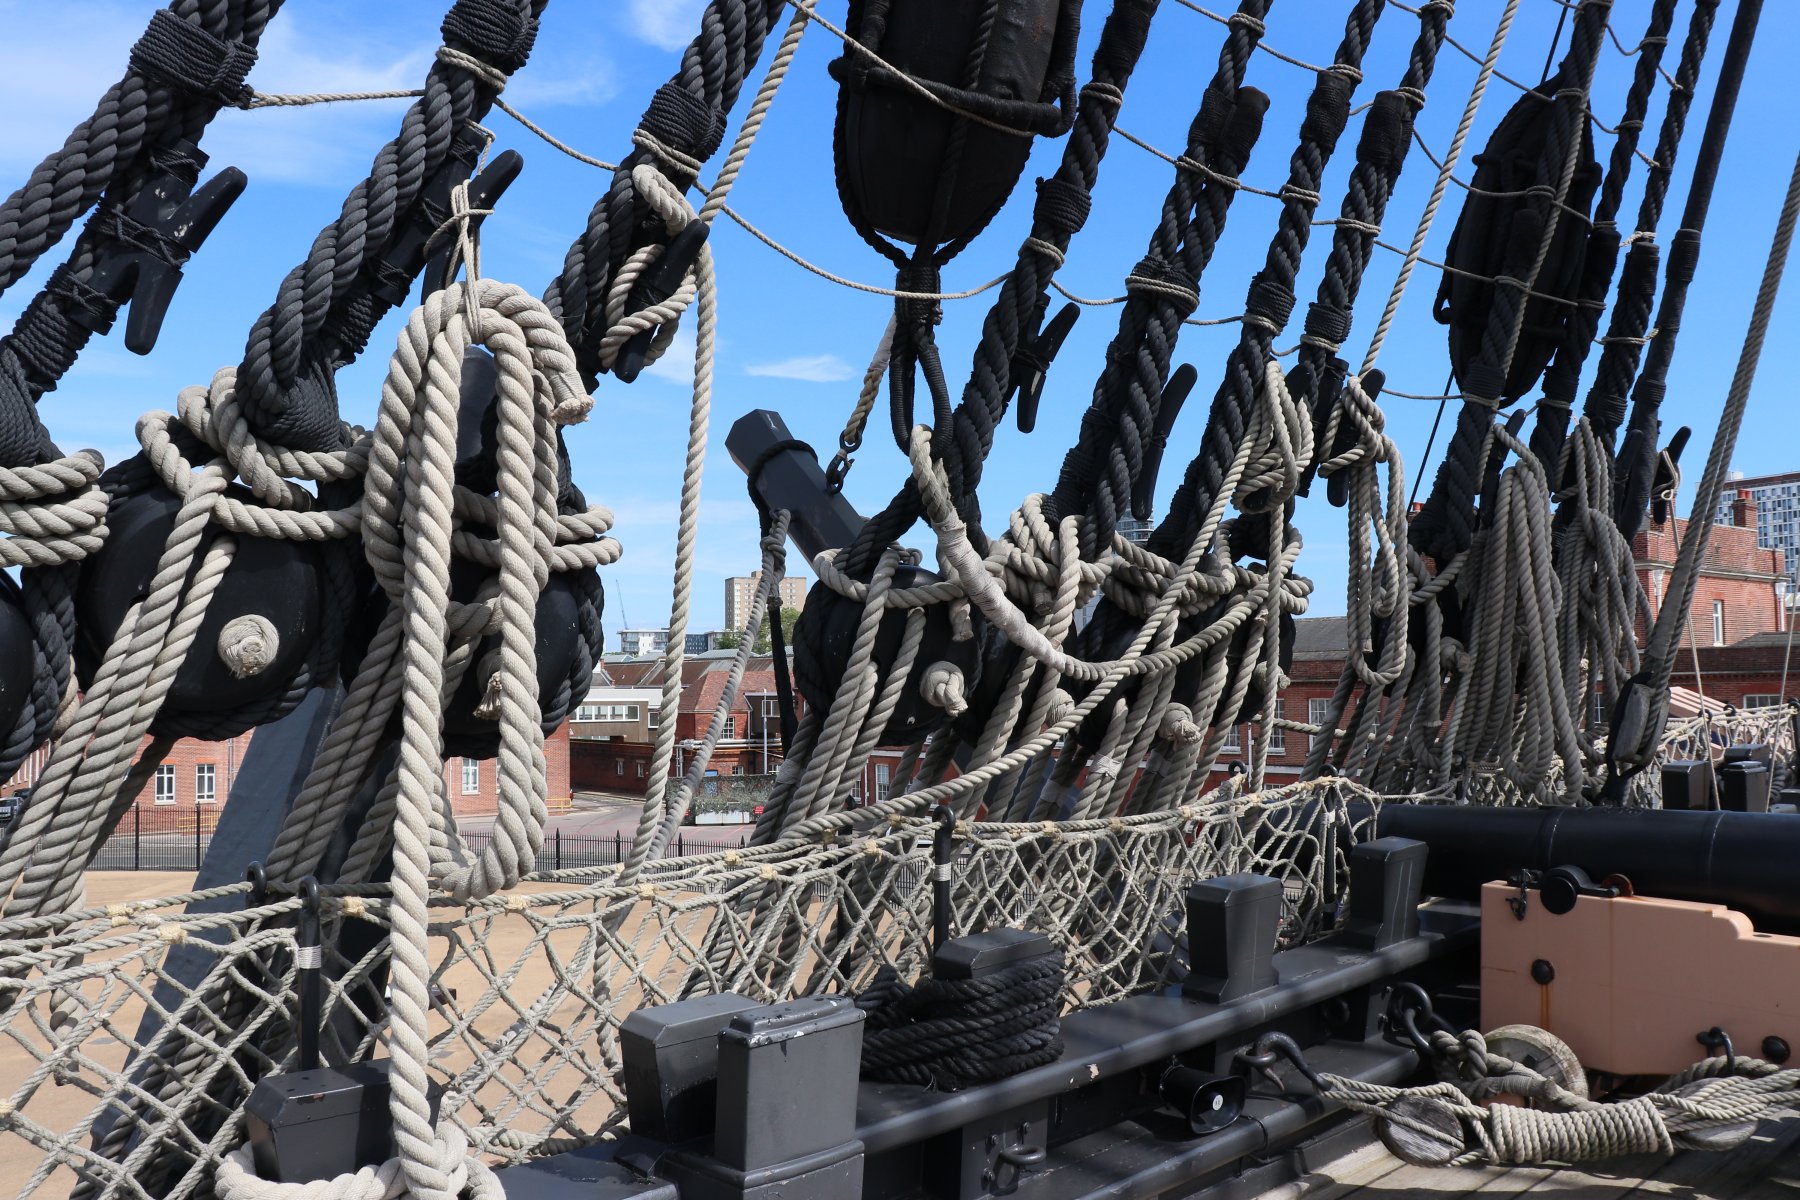
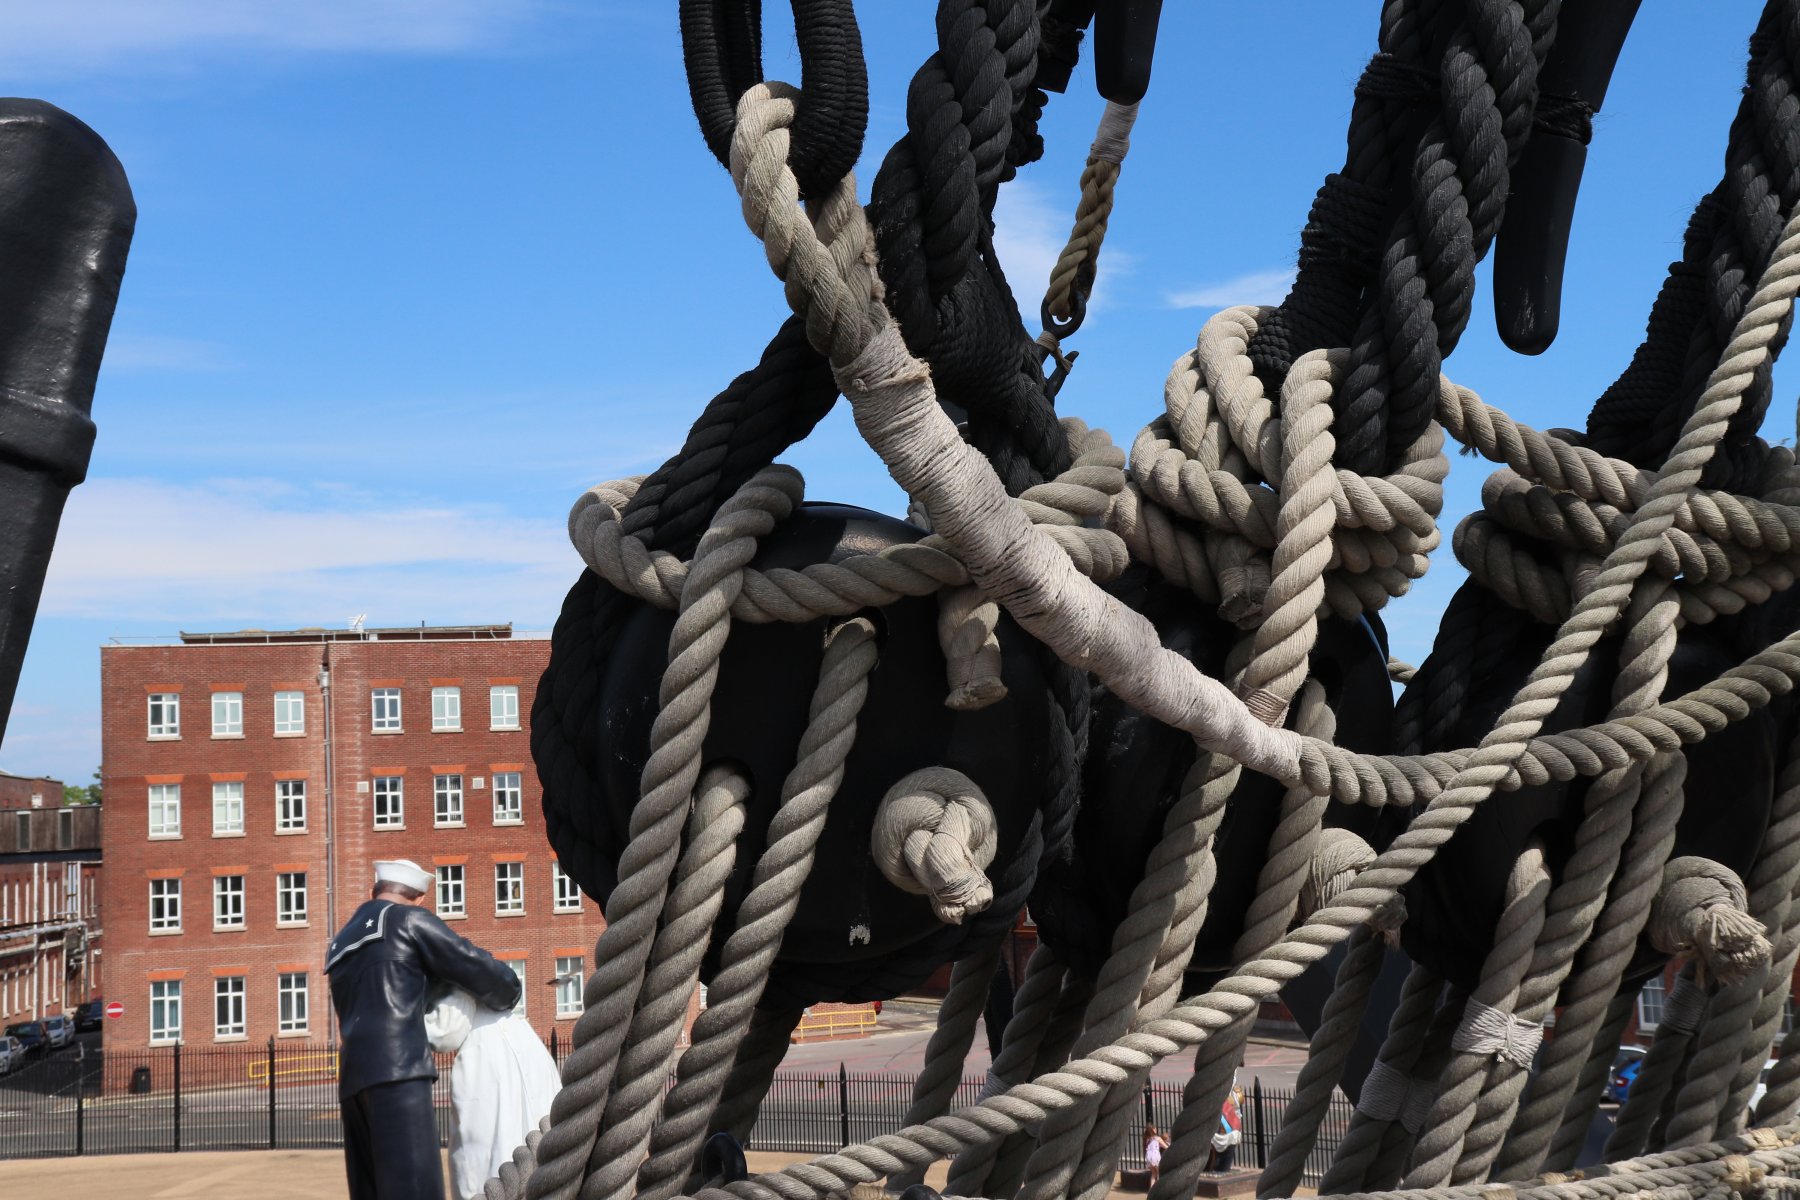
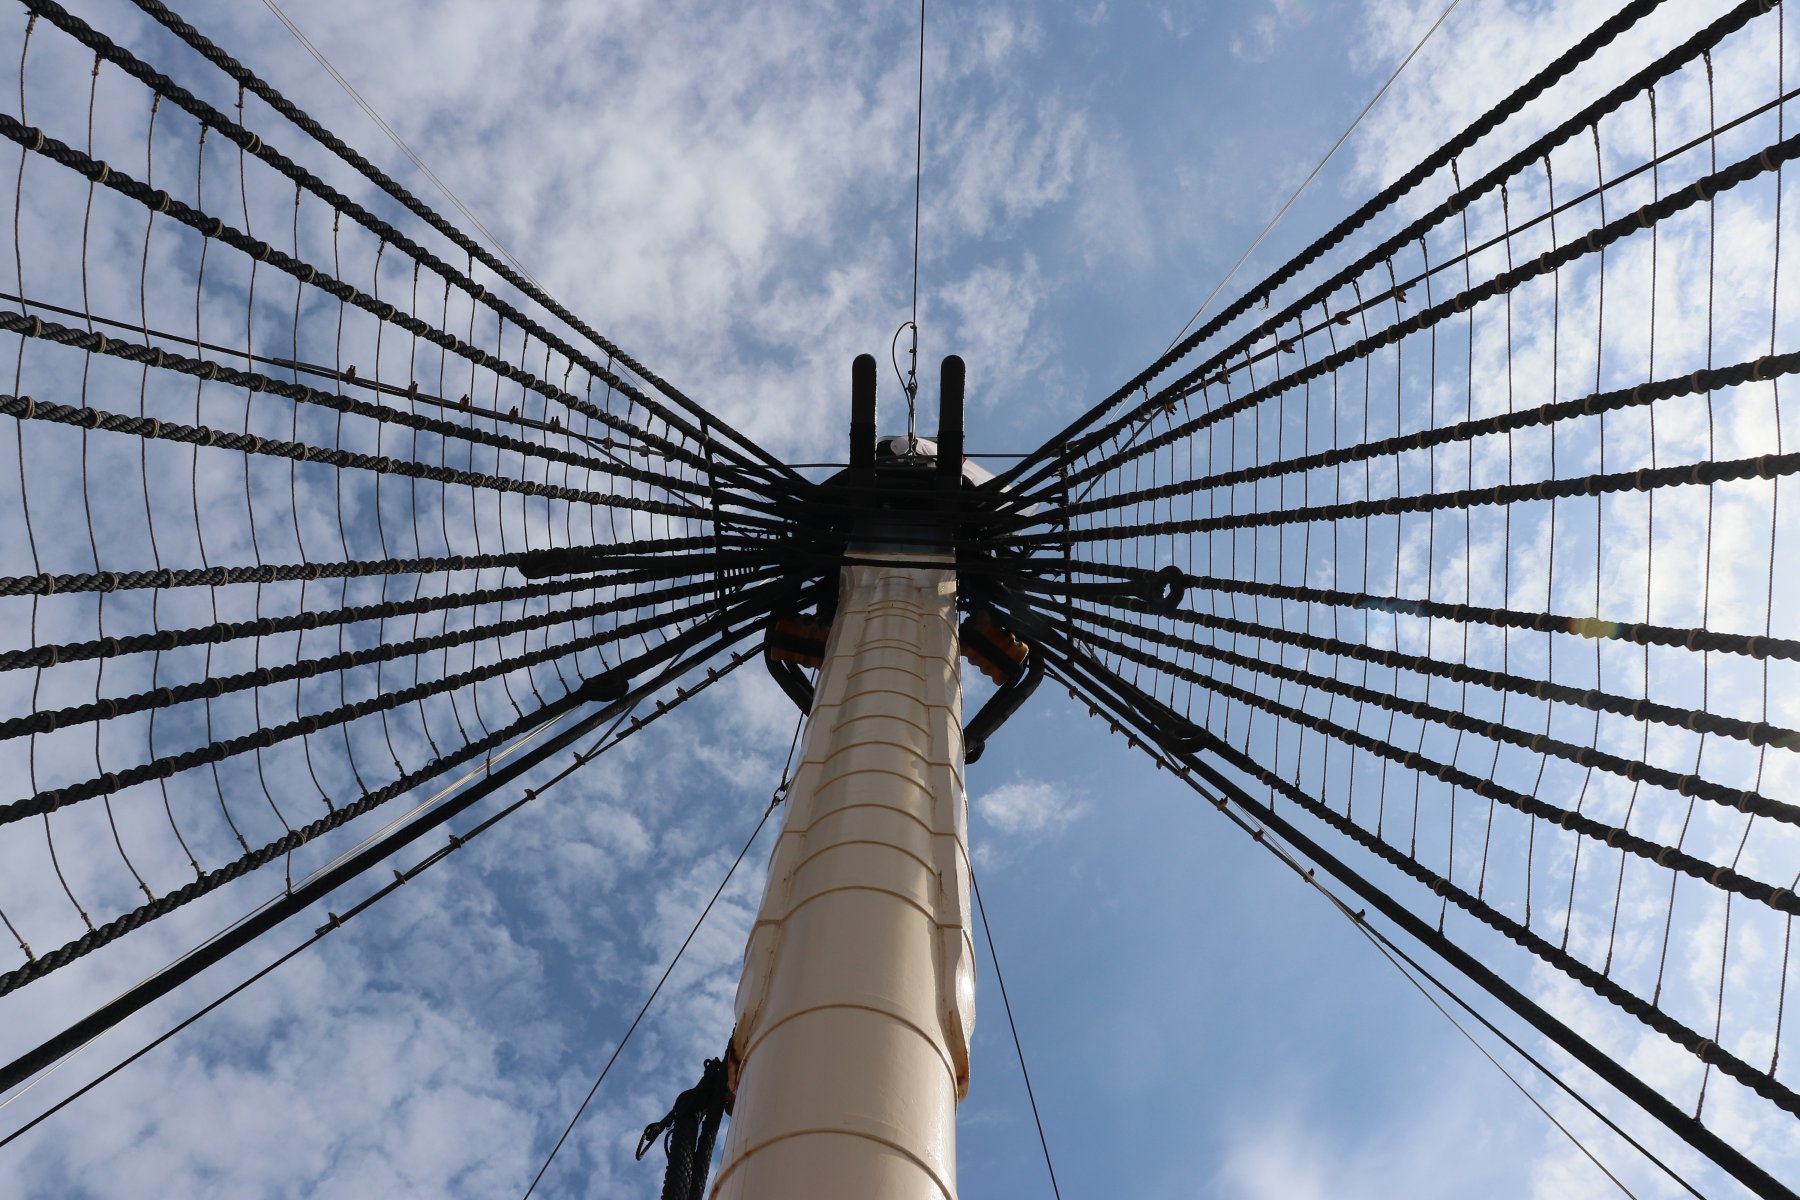
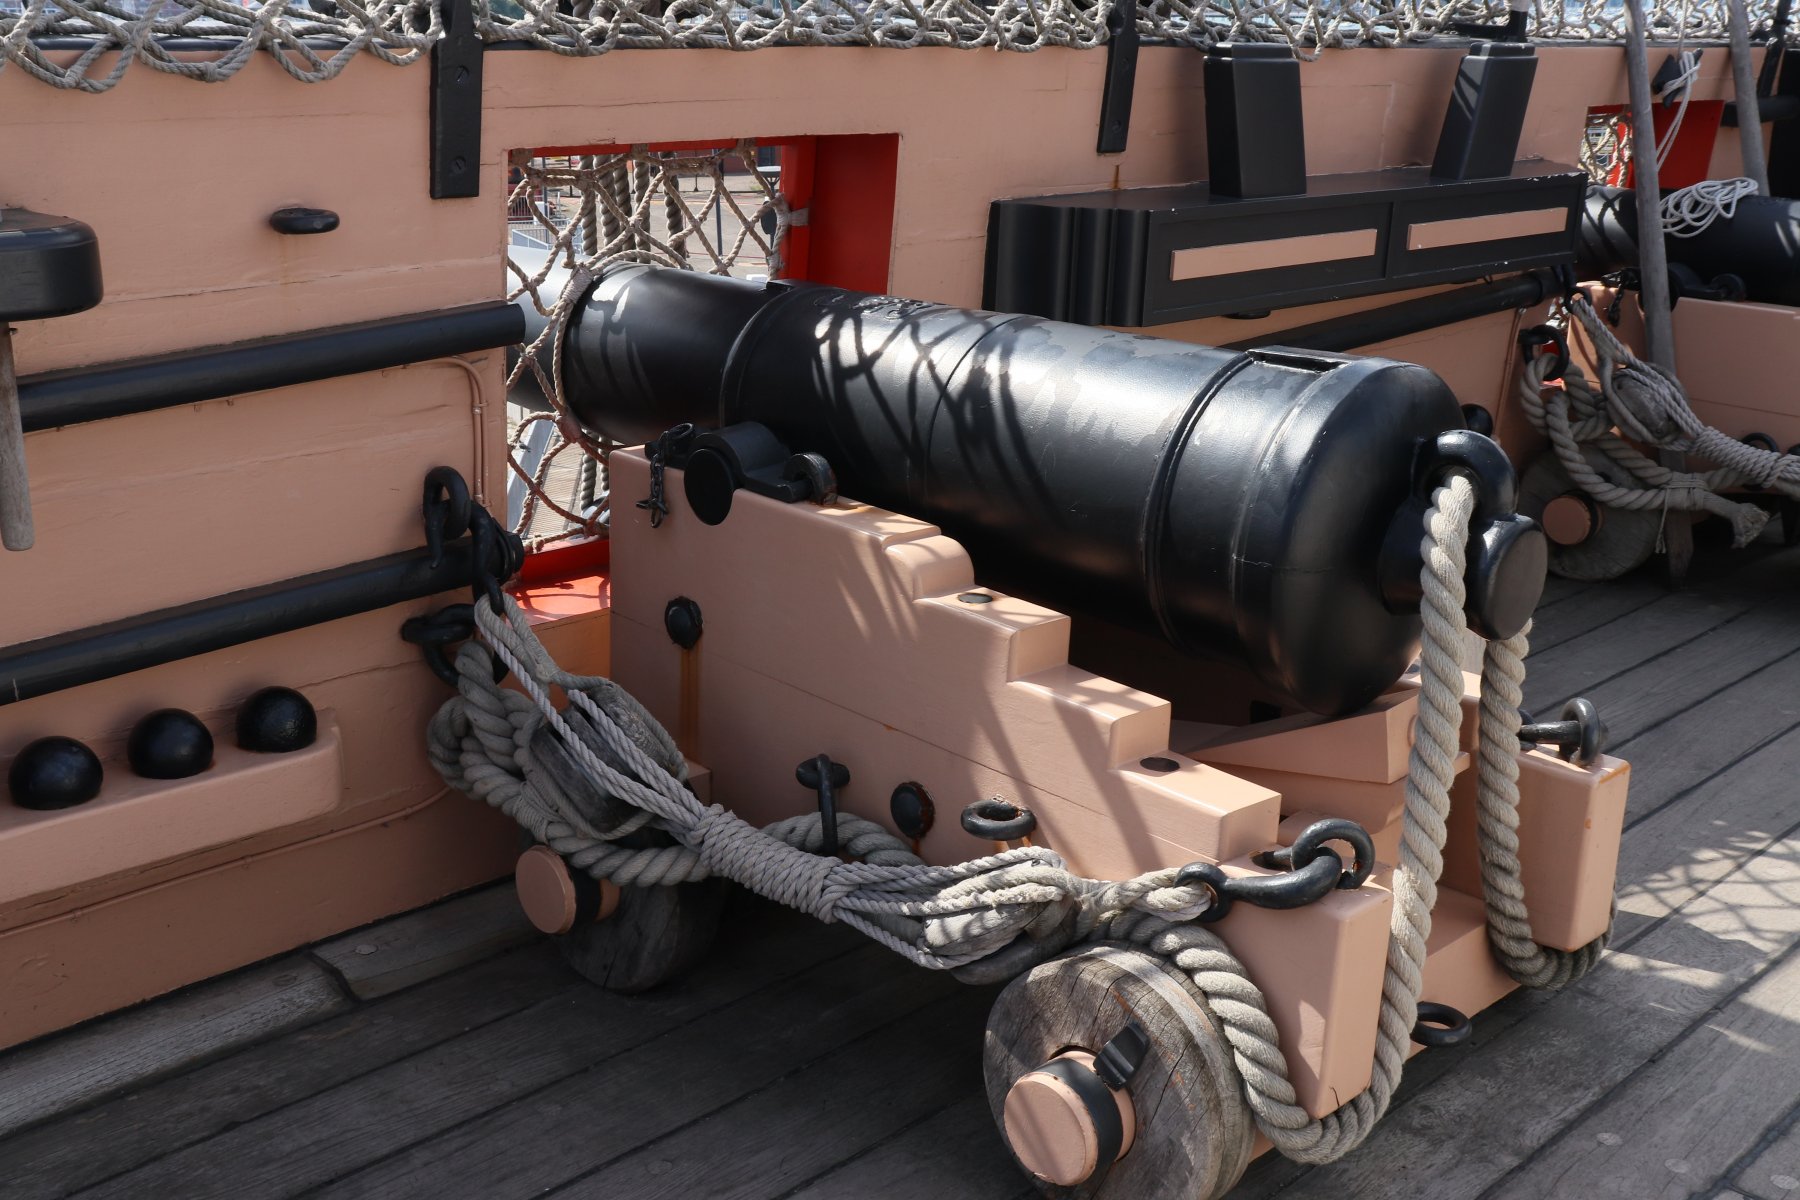
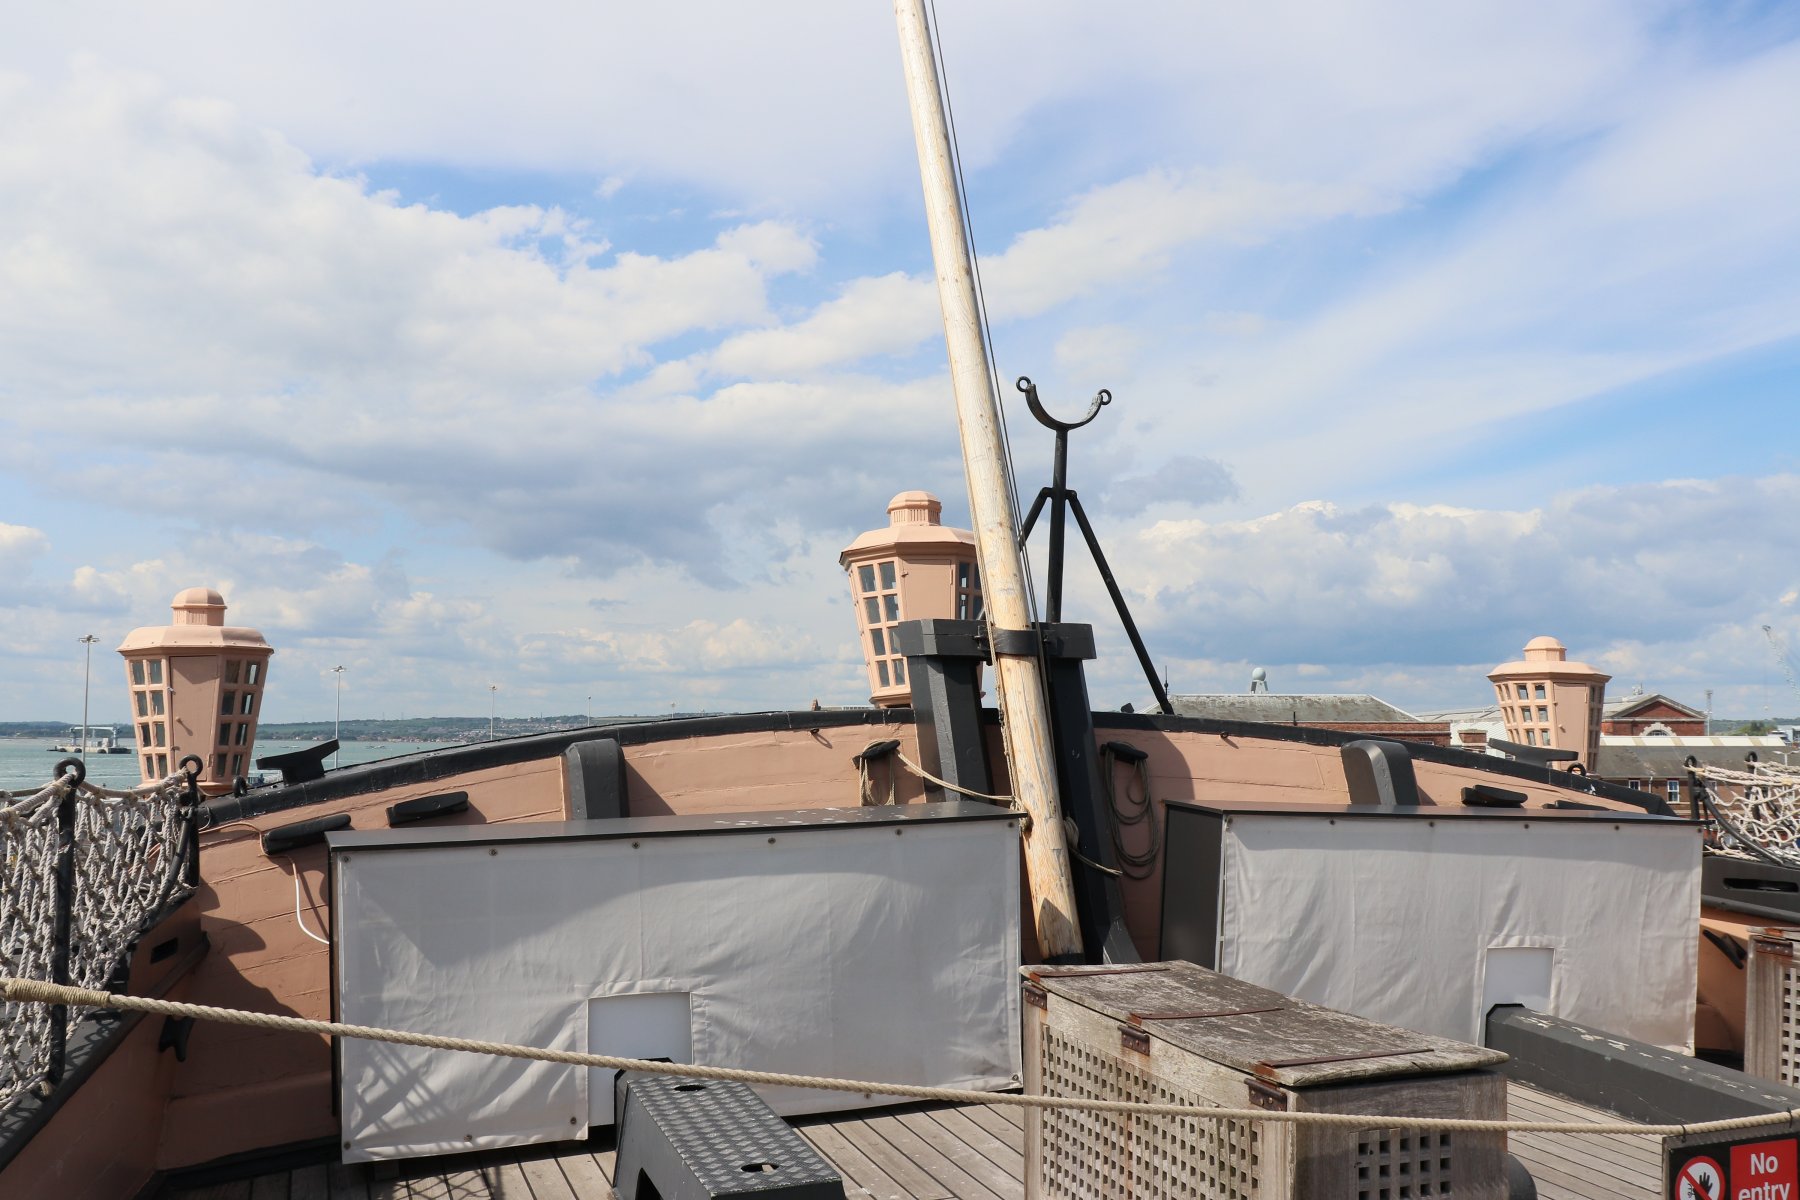
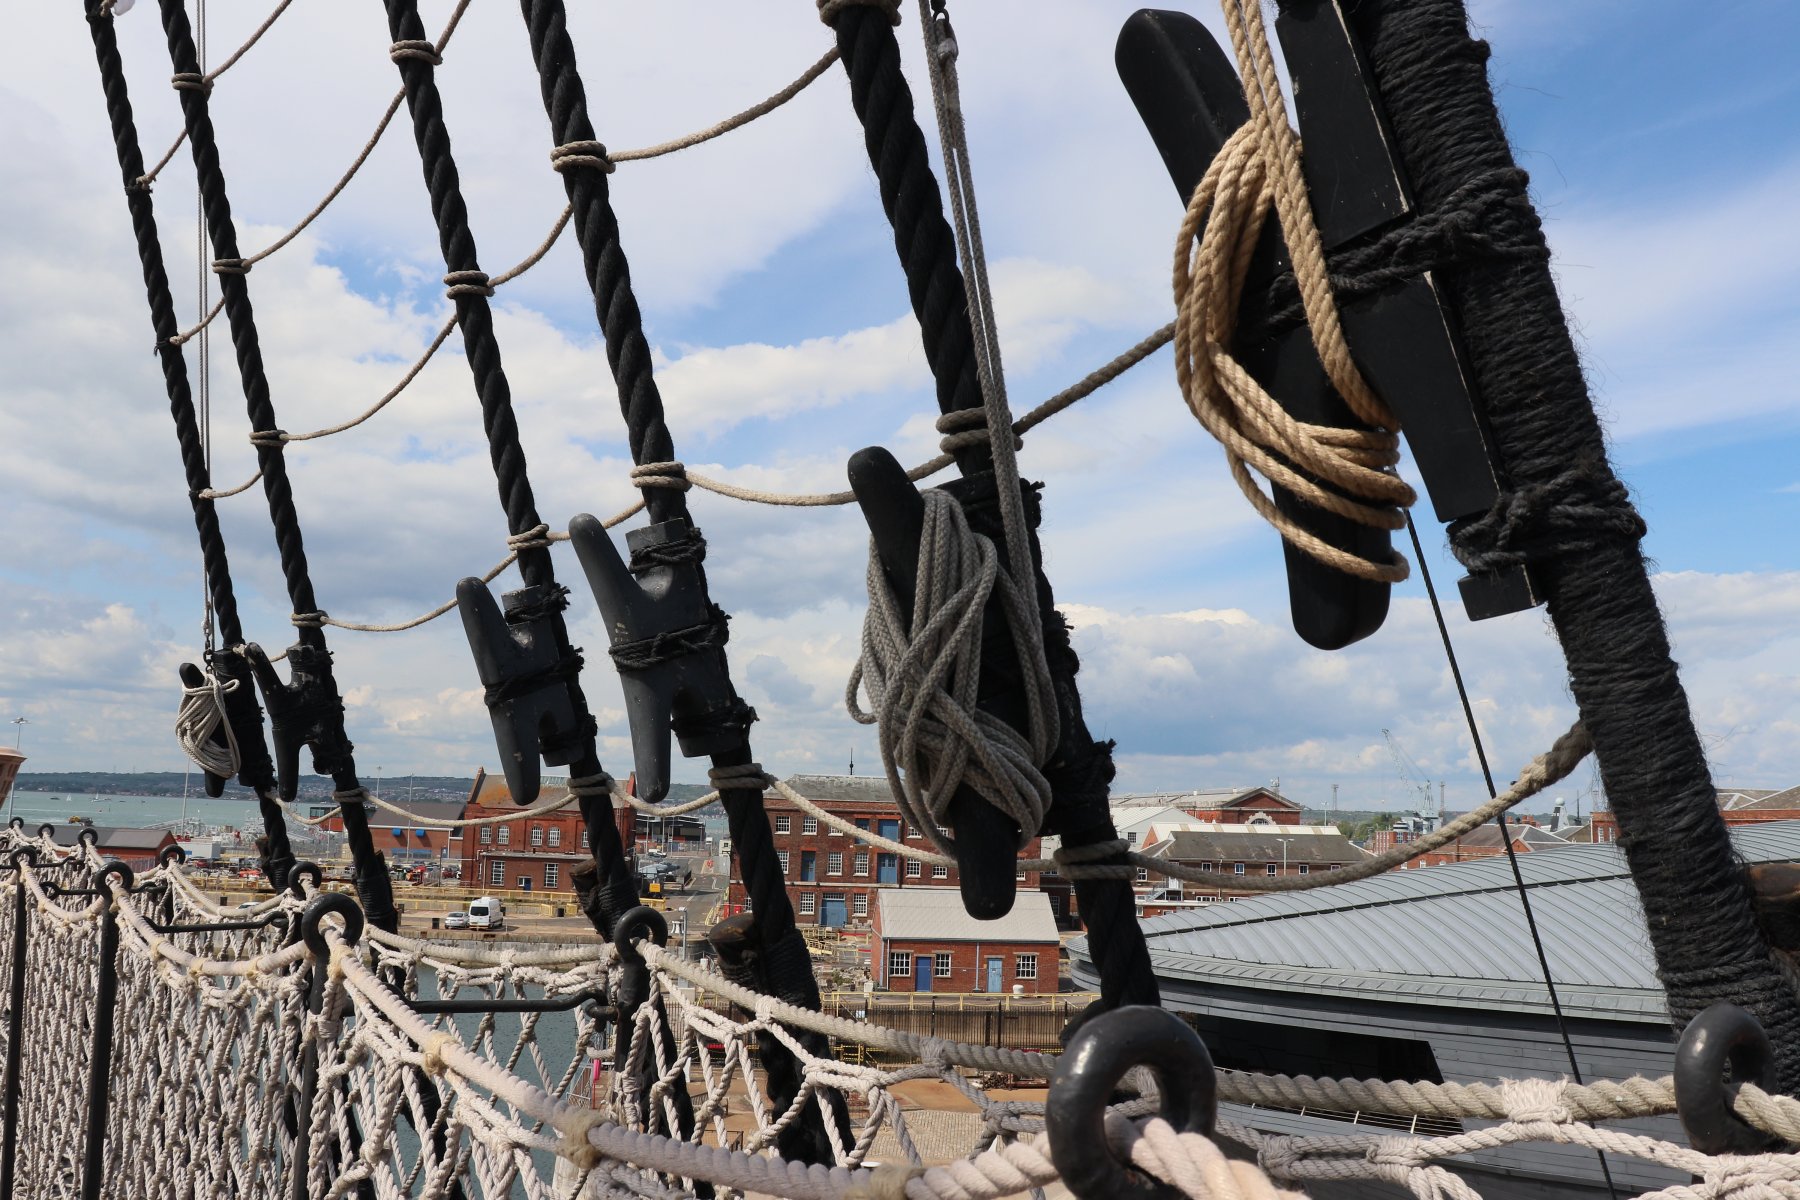
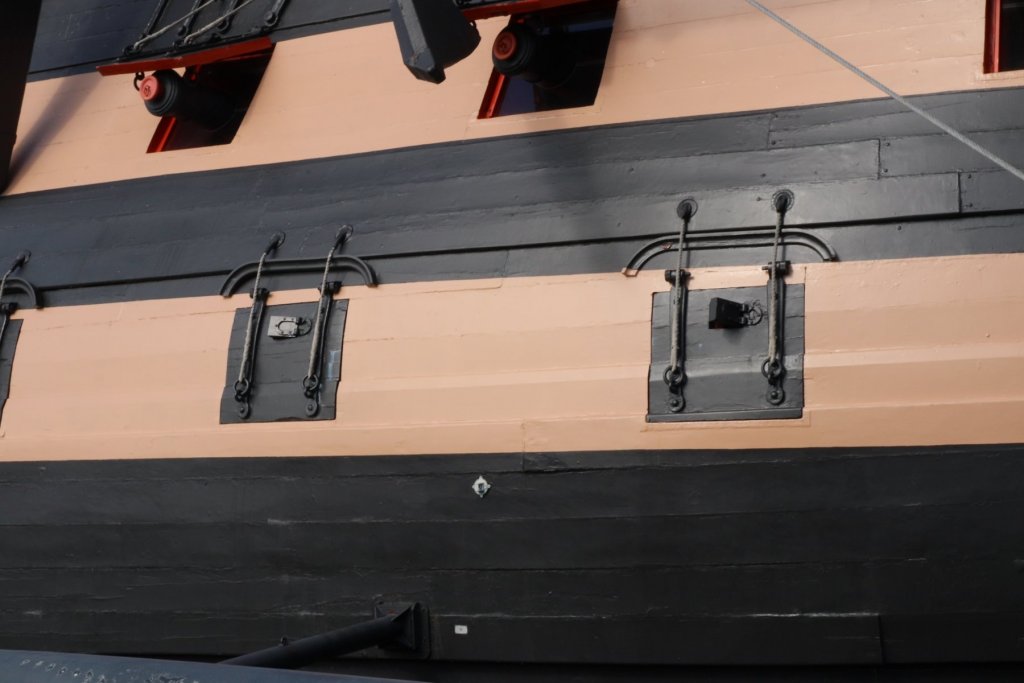
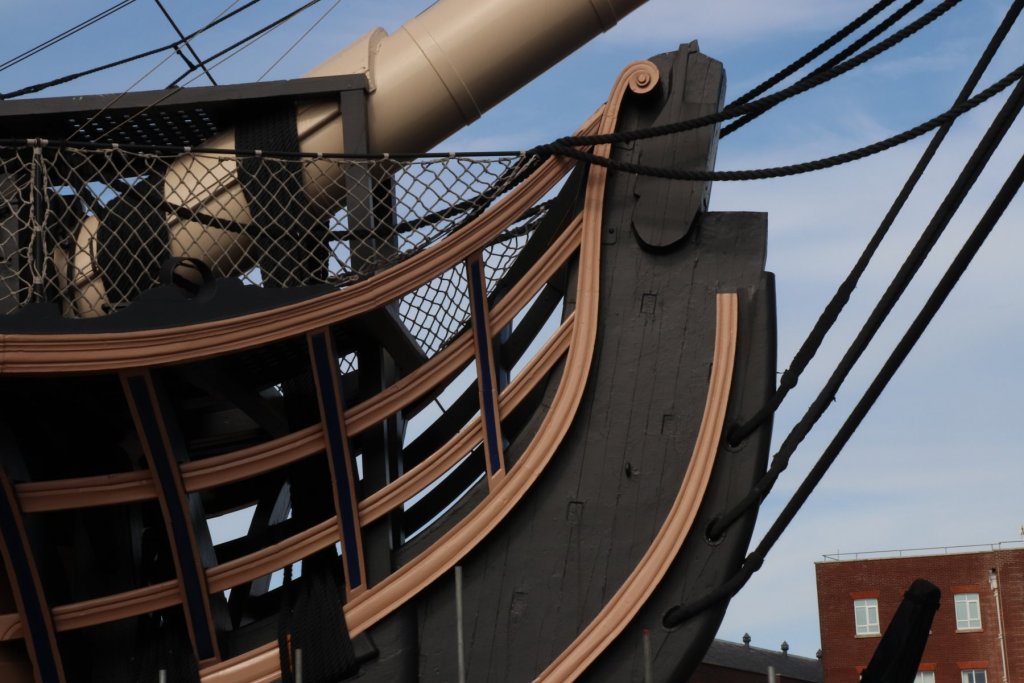
A few more photos. It's a pity I could not take more pictures of the lower decks as it was too dark. The light was very dim and it was impossible to take photos without a tripod, which I did not have with me. Robert


- 527 replies
-
- 7
-
-
- caldercraft
- victory
- (and 1 more)
-
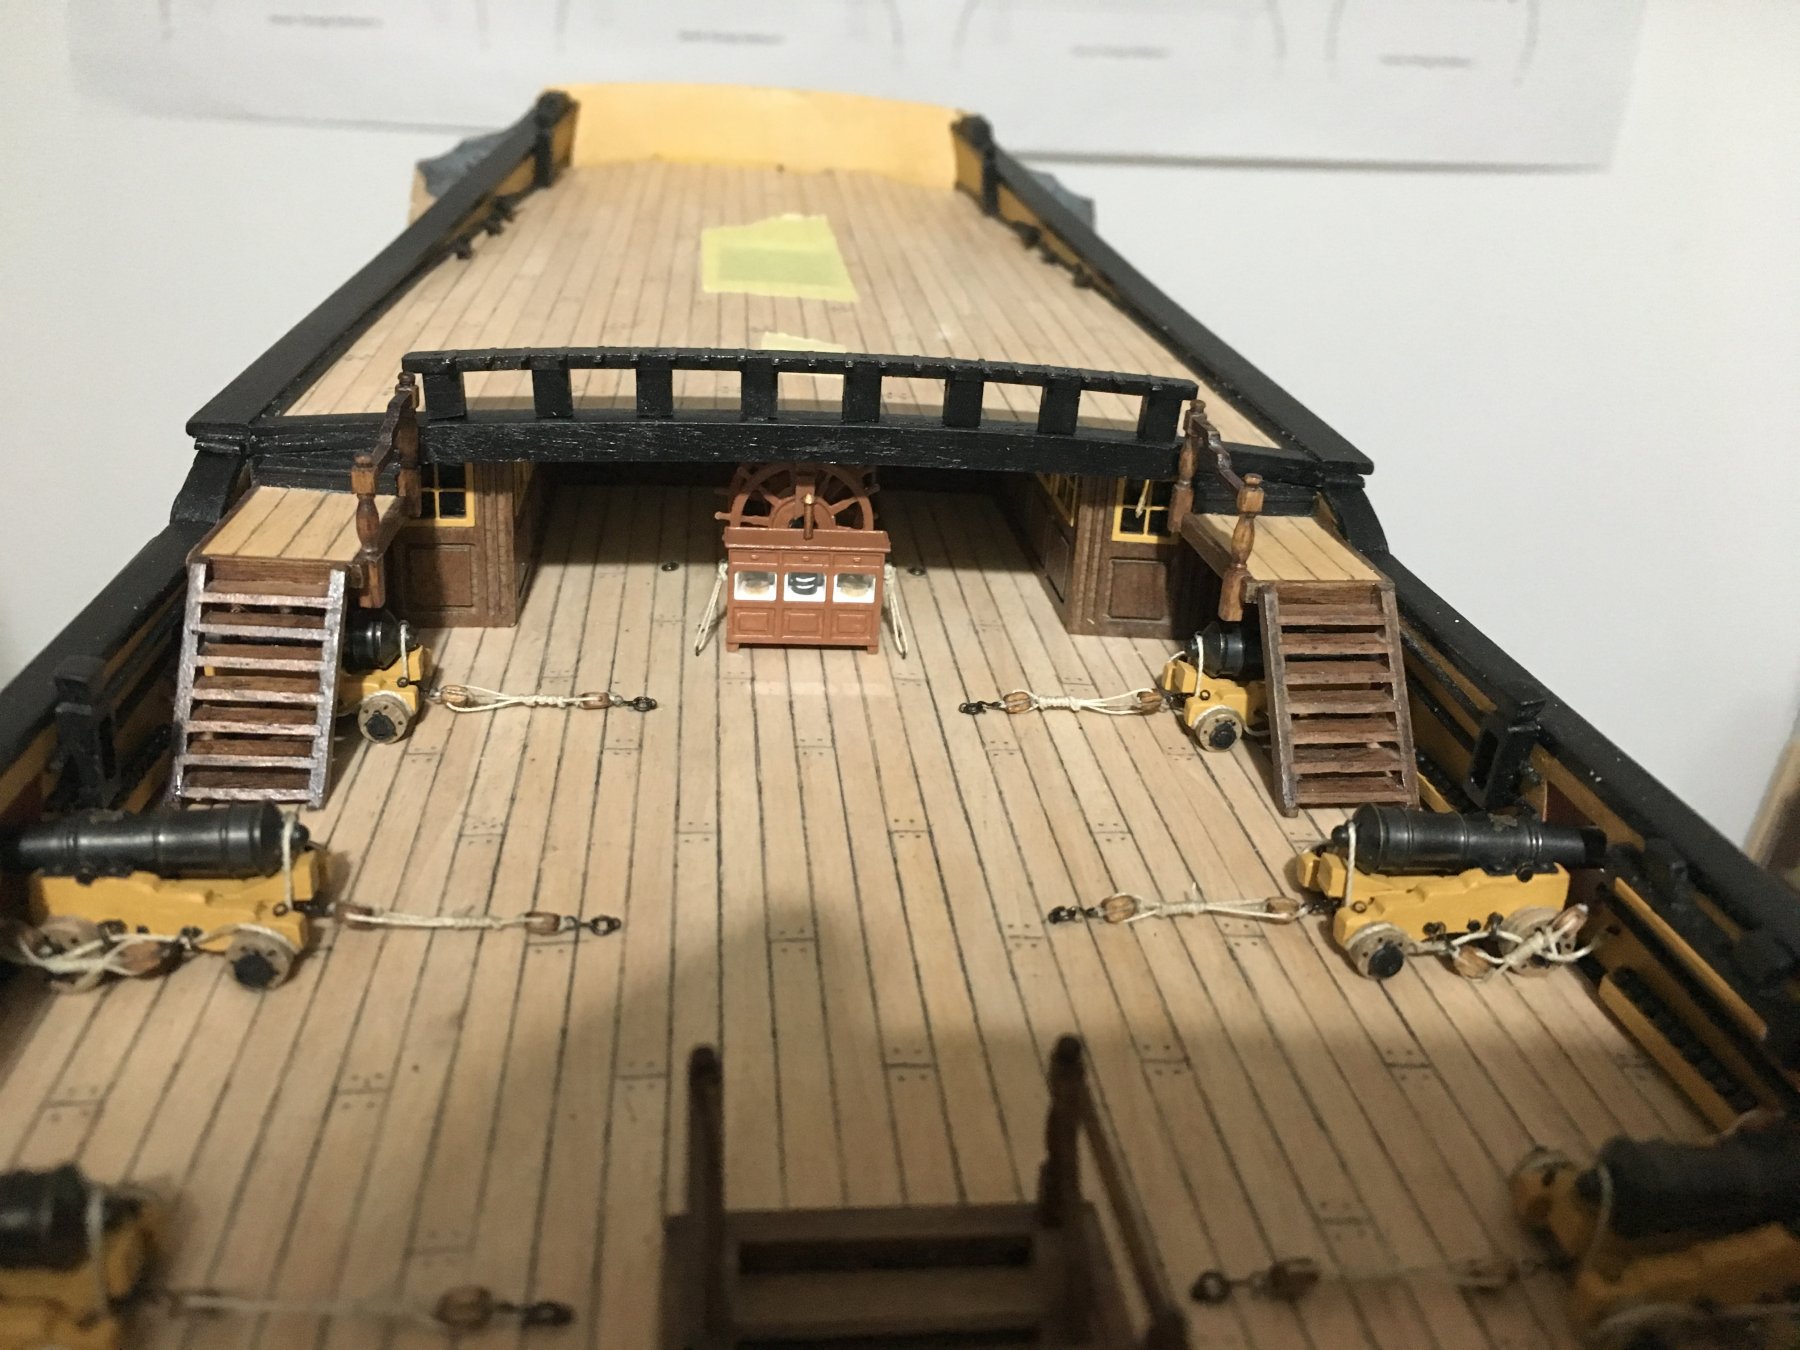
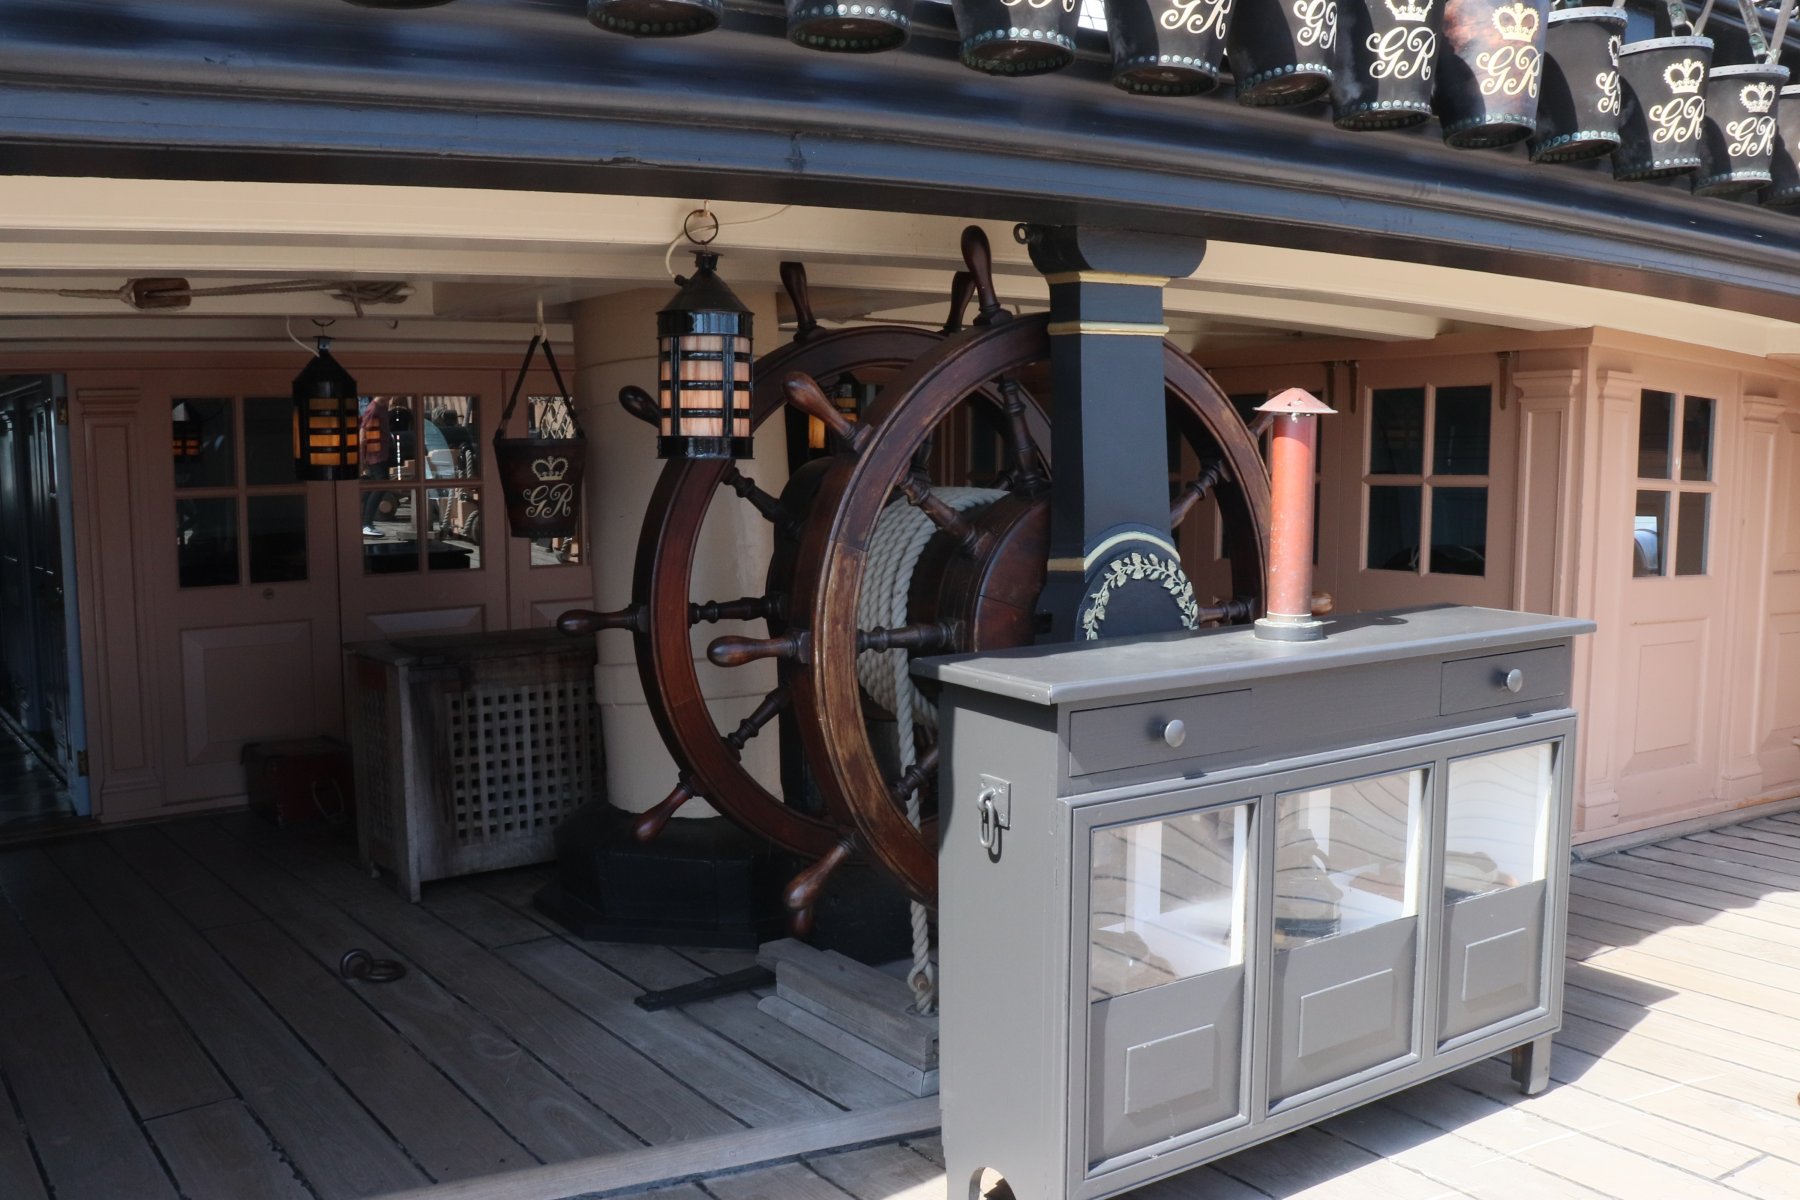
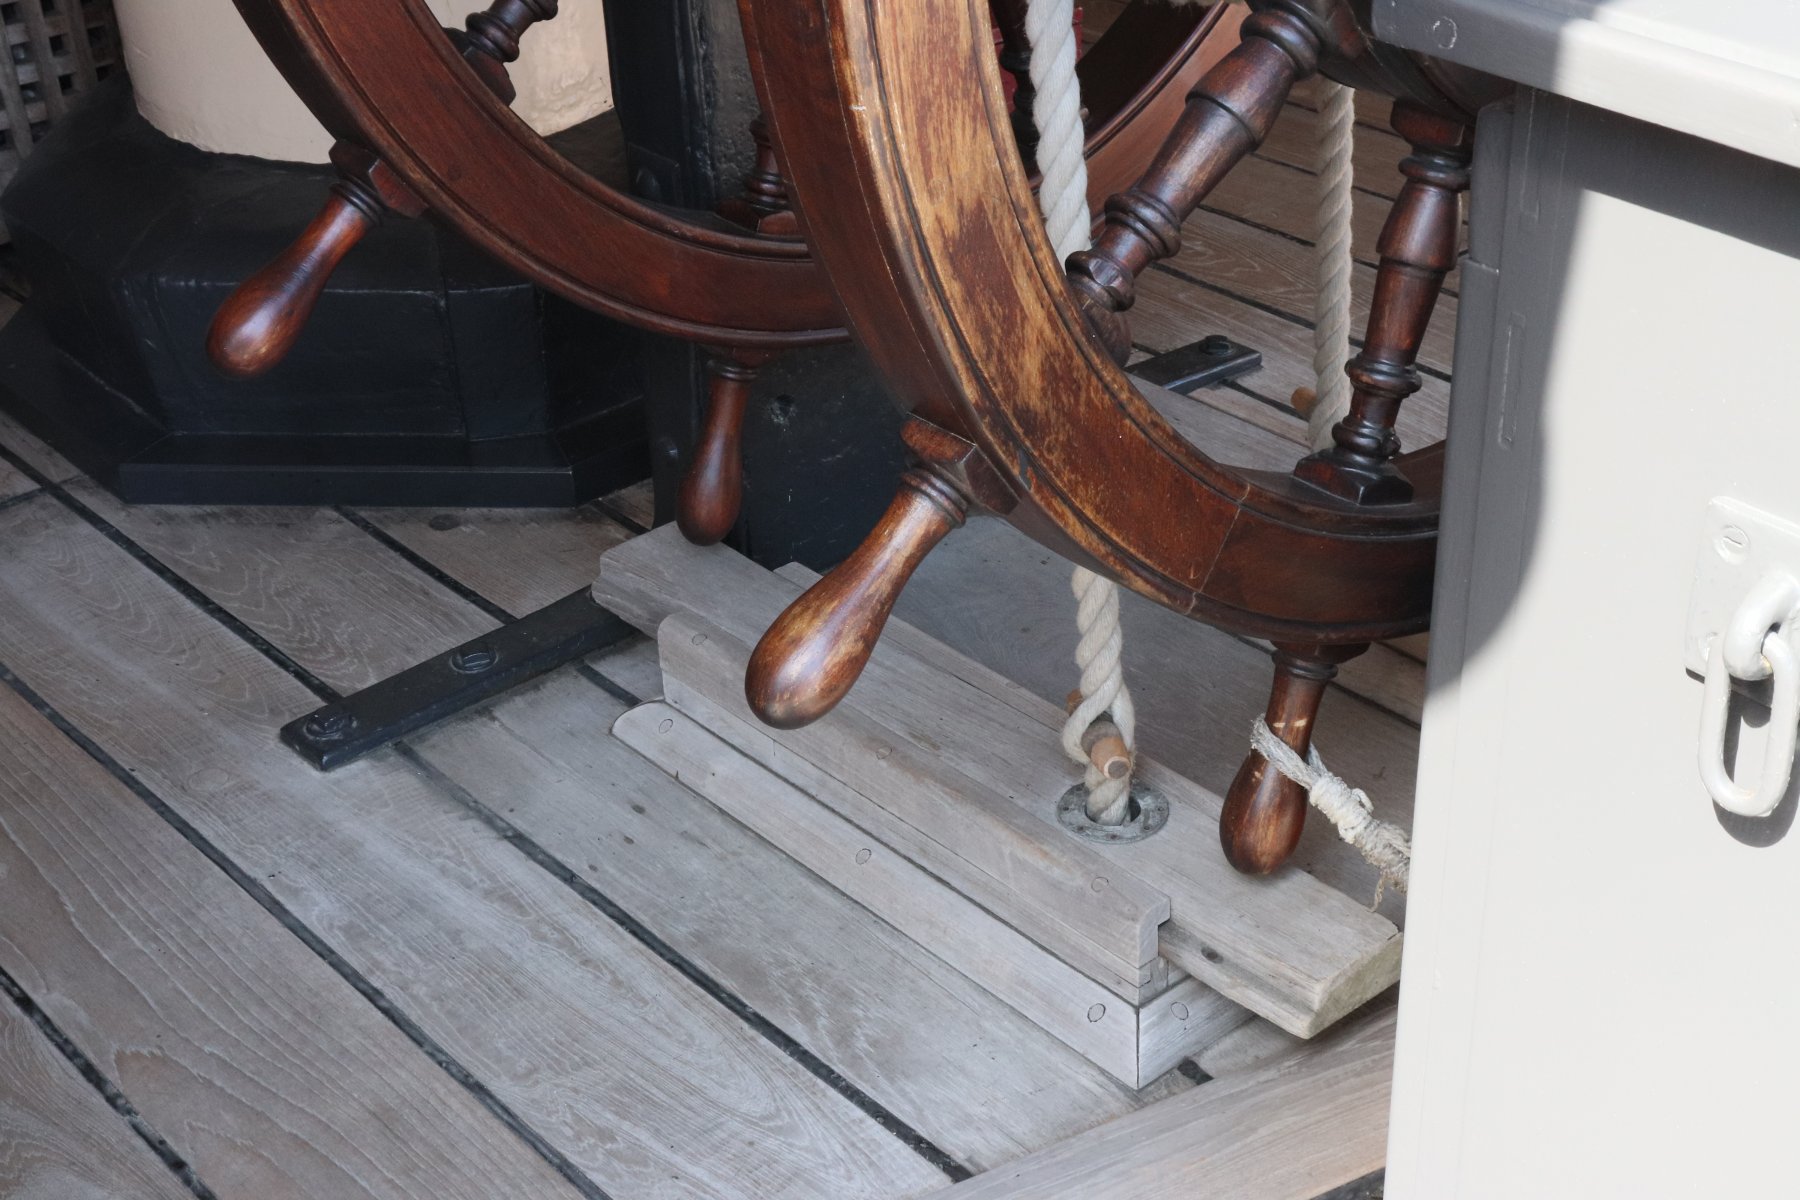
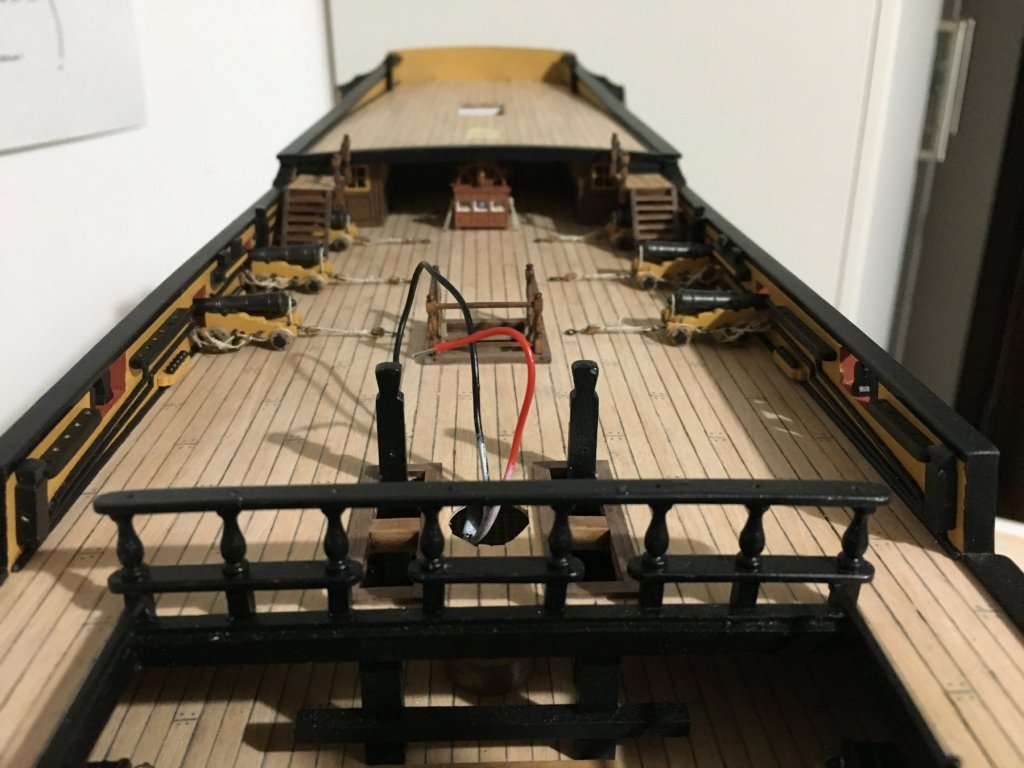
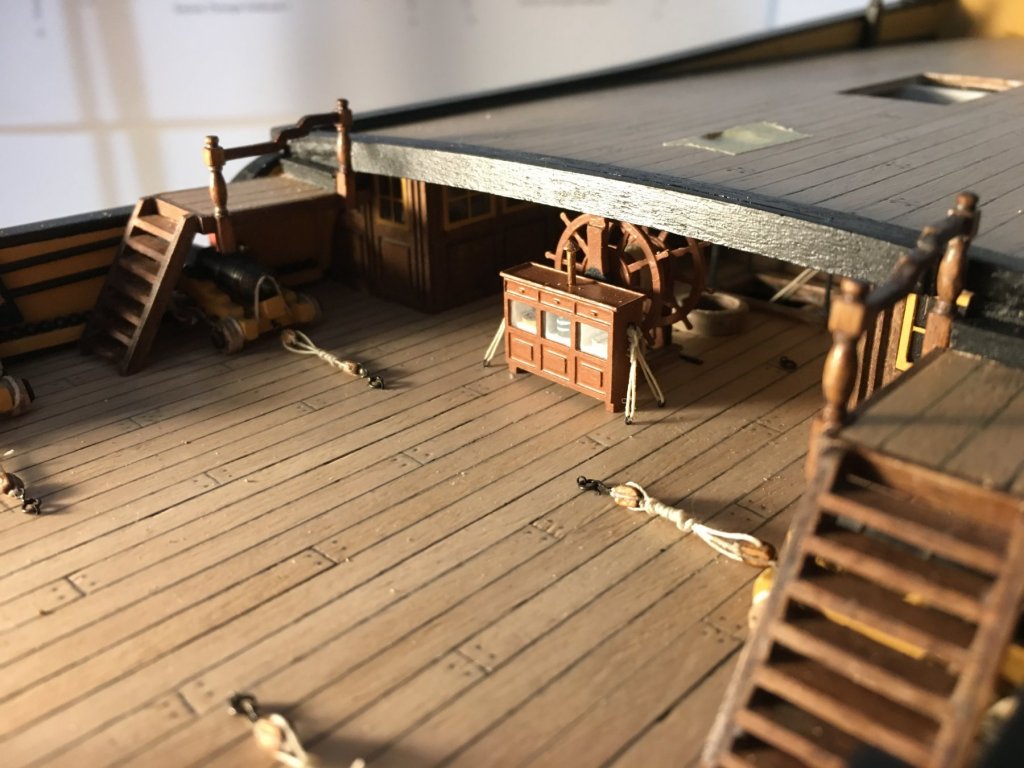
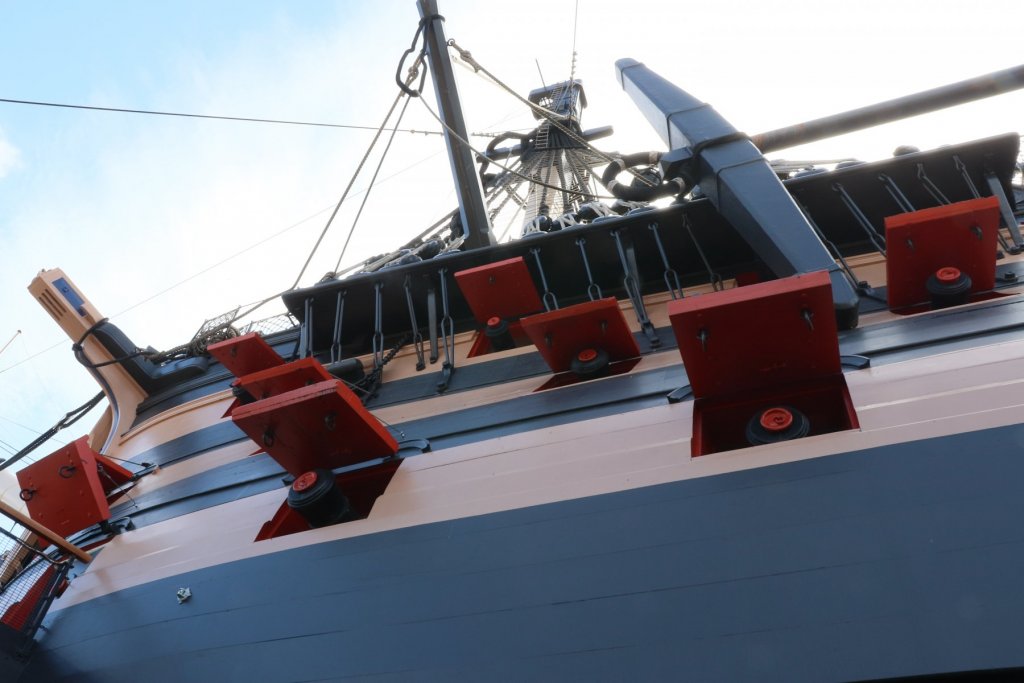
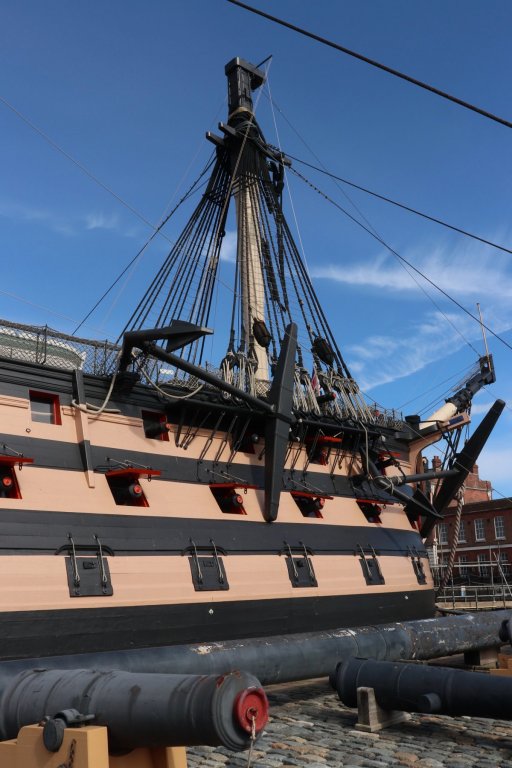
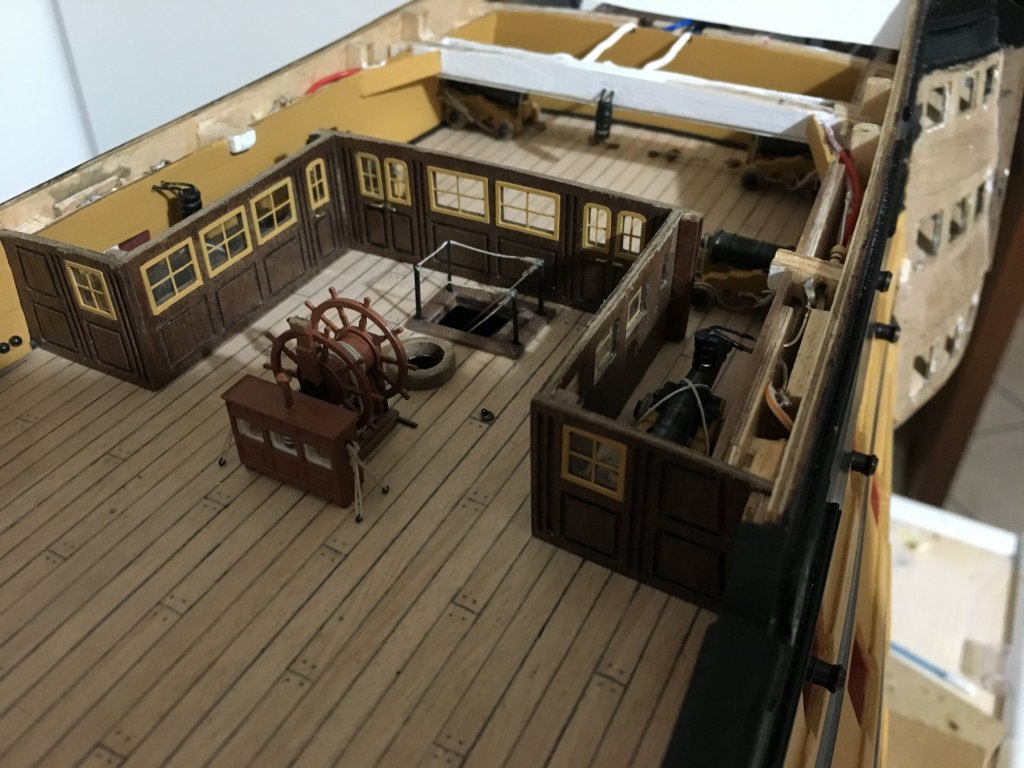
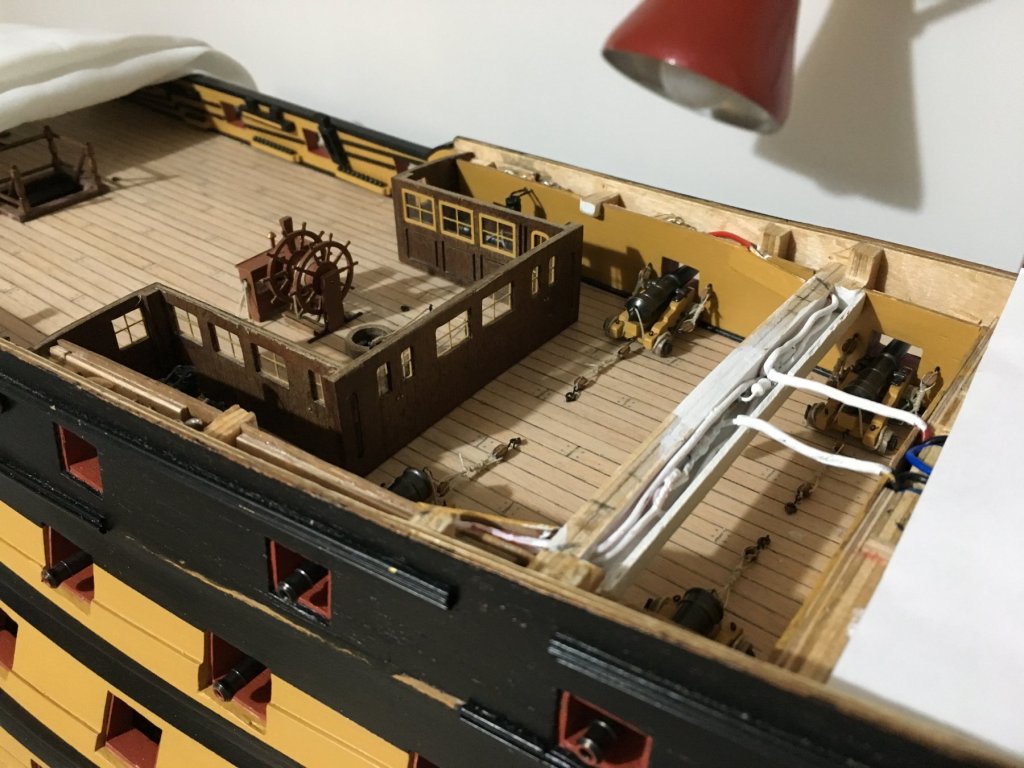
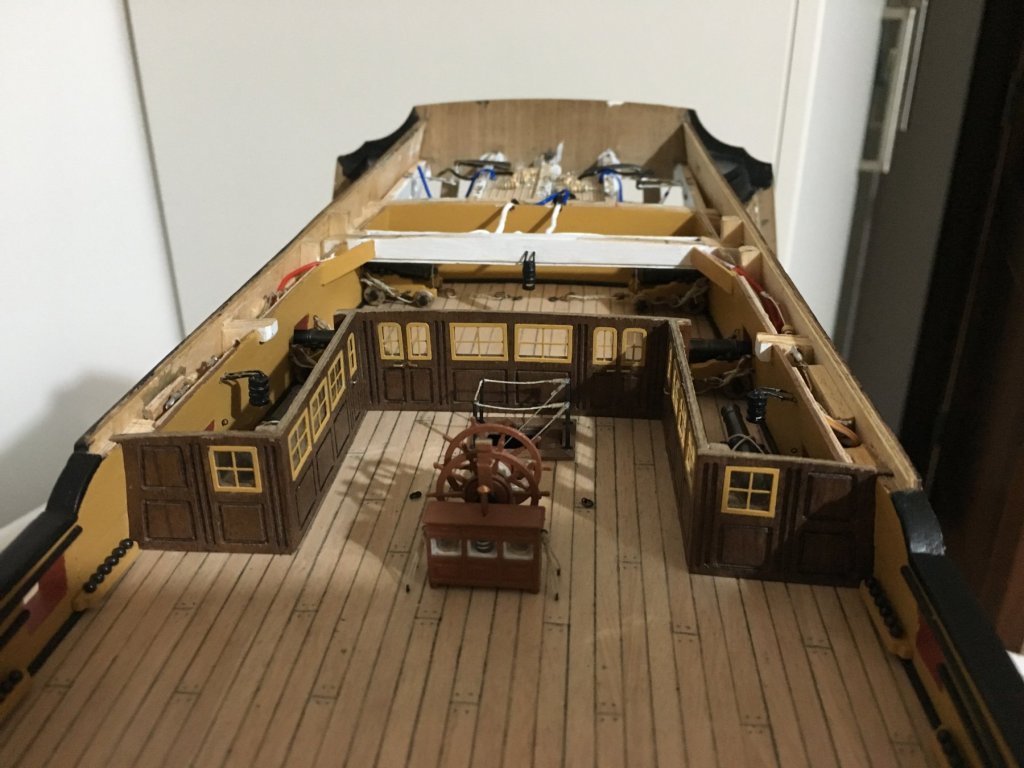
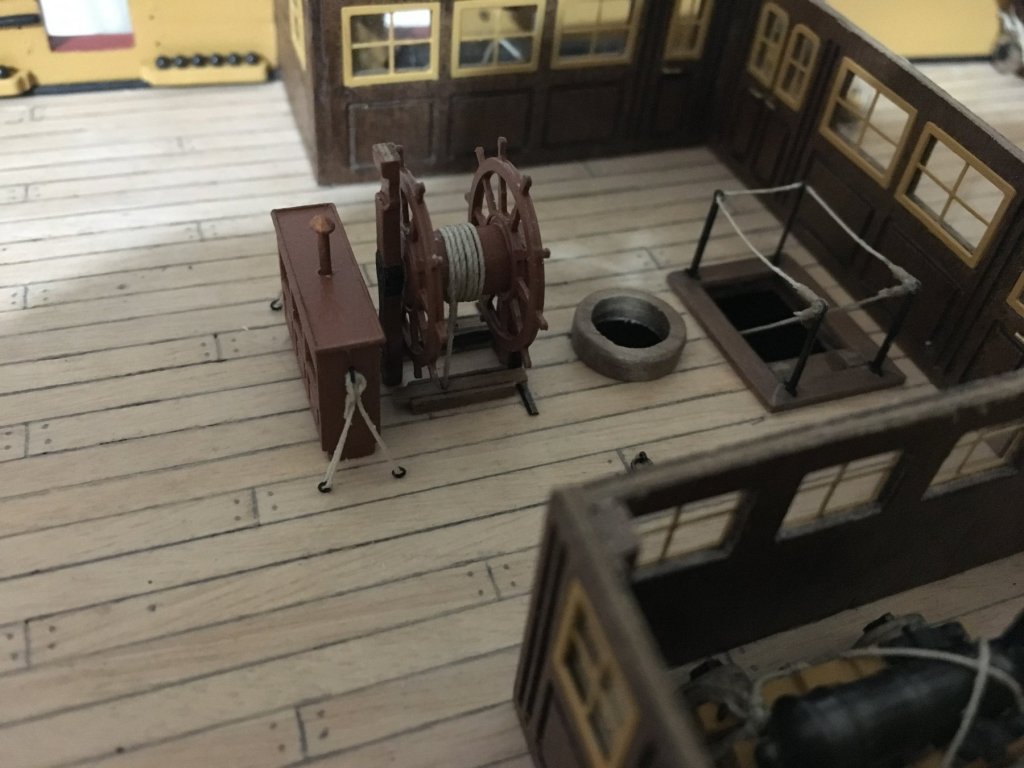
Mark, thank you for your nice comments. Patrick, thank you and good luck on your return to your Victory. Hope you enjoy building it as much as I am enjoying it. A fortnight ago I visited my daughter in Stratford-Upon-Avon where she lives and works, and she was nice enough, together with her partner, to drive me down to Portsmouth to visit the real Victory. We stayed there for the night where we had a great time. Weather was beautiful and I really enjoyed my visit to the Victory. When I sort the photos I took I will upload some of them. In the meantime I have an update for my build. I continued work on the rear of the quarterdeck so that I will be able to fit the poop deck. Fitted and wired three lanterns. Screens are only dry fitted for the moment, just to get a position were to place the lanterns and the cannons. Carriages in place and all rigged. Ships wheel assembled and fitted in place with thread lashed around the barrel and going down through the quarterdeck. Binnacle also fitted in place and lashed to the quarterdeck. Screen assembly glued in place I boxed the wiring passing along the beam to make sure they do not show through the gunport since the cabin is going to be lit by the lanterns. Robert

- 527 replies
-
- 10
-
-
- caldercraft
- victory
- (and 1 more)
-
Good luck Patrick, hope to see you back on your Victory build soon. Robert
-
Looking forward to see your work on the Victory Mort. Robert
- 60 replies
-
- 3
-
-
- victory
- caldercraft
- (and 1 more)
-
Yes Admiralty paints are Caldercraft. I had bought the set of paints for the Victory from CMB (part no. APS9014W). Here under is a list of the paints included in the set. The price is £29.36. If you notice, there is the Matt (Metal) Black which is very similar to the Dull Black. You can hardly see the difference. I used it for the two carronades which were made of white metal casting so couldn't blacken. HMS Victory Paint Set This paint set is for the Nelsons Navy kit HMS Victory and is made up of 14 jars as follows: Dull Black x 3 Matt (Metal) Black x 1 Matt White x 1 Yellow Ochre x 3 Red Ochre x 1 French Blue x 1 Olive Green x 1 Wood (Walnut) Brown x 1 Gold / Brass x 1 Copper x 1 Robert
-
Thank you Messis, the cannons were brass. I don't think it will work on cast metal as it will not have the same chemical reaction on it. On the Birchwood Brass Black container itself it states that it is for brass, copper or bronze. To be honest I don't know of any product that will work on cast metal. The cannon barrels in the kit, 104 of them, are all brass except for the two forecastle carronades which are made of white metal casting. Those two I had to paint. Robert
-
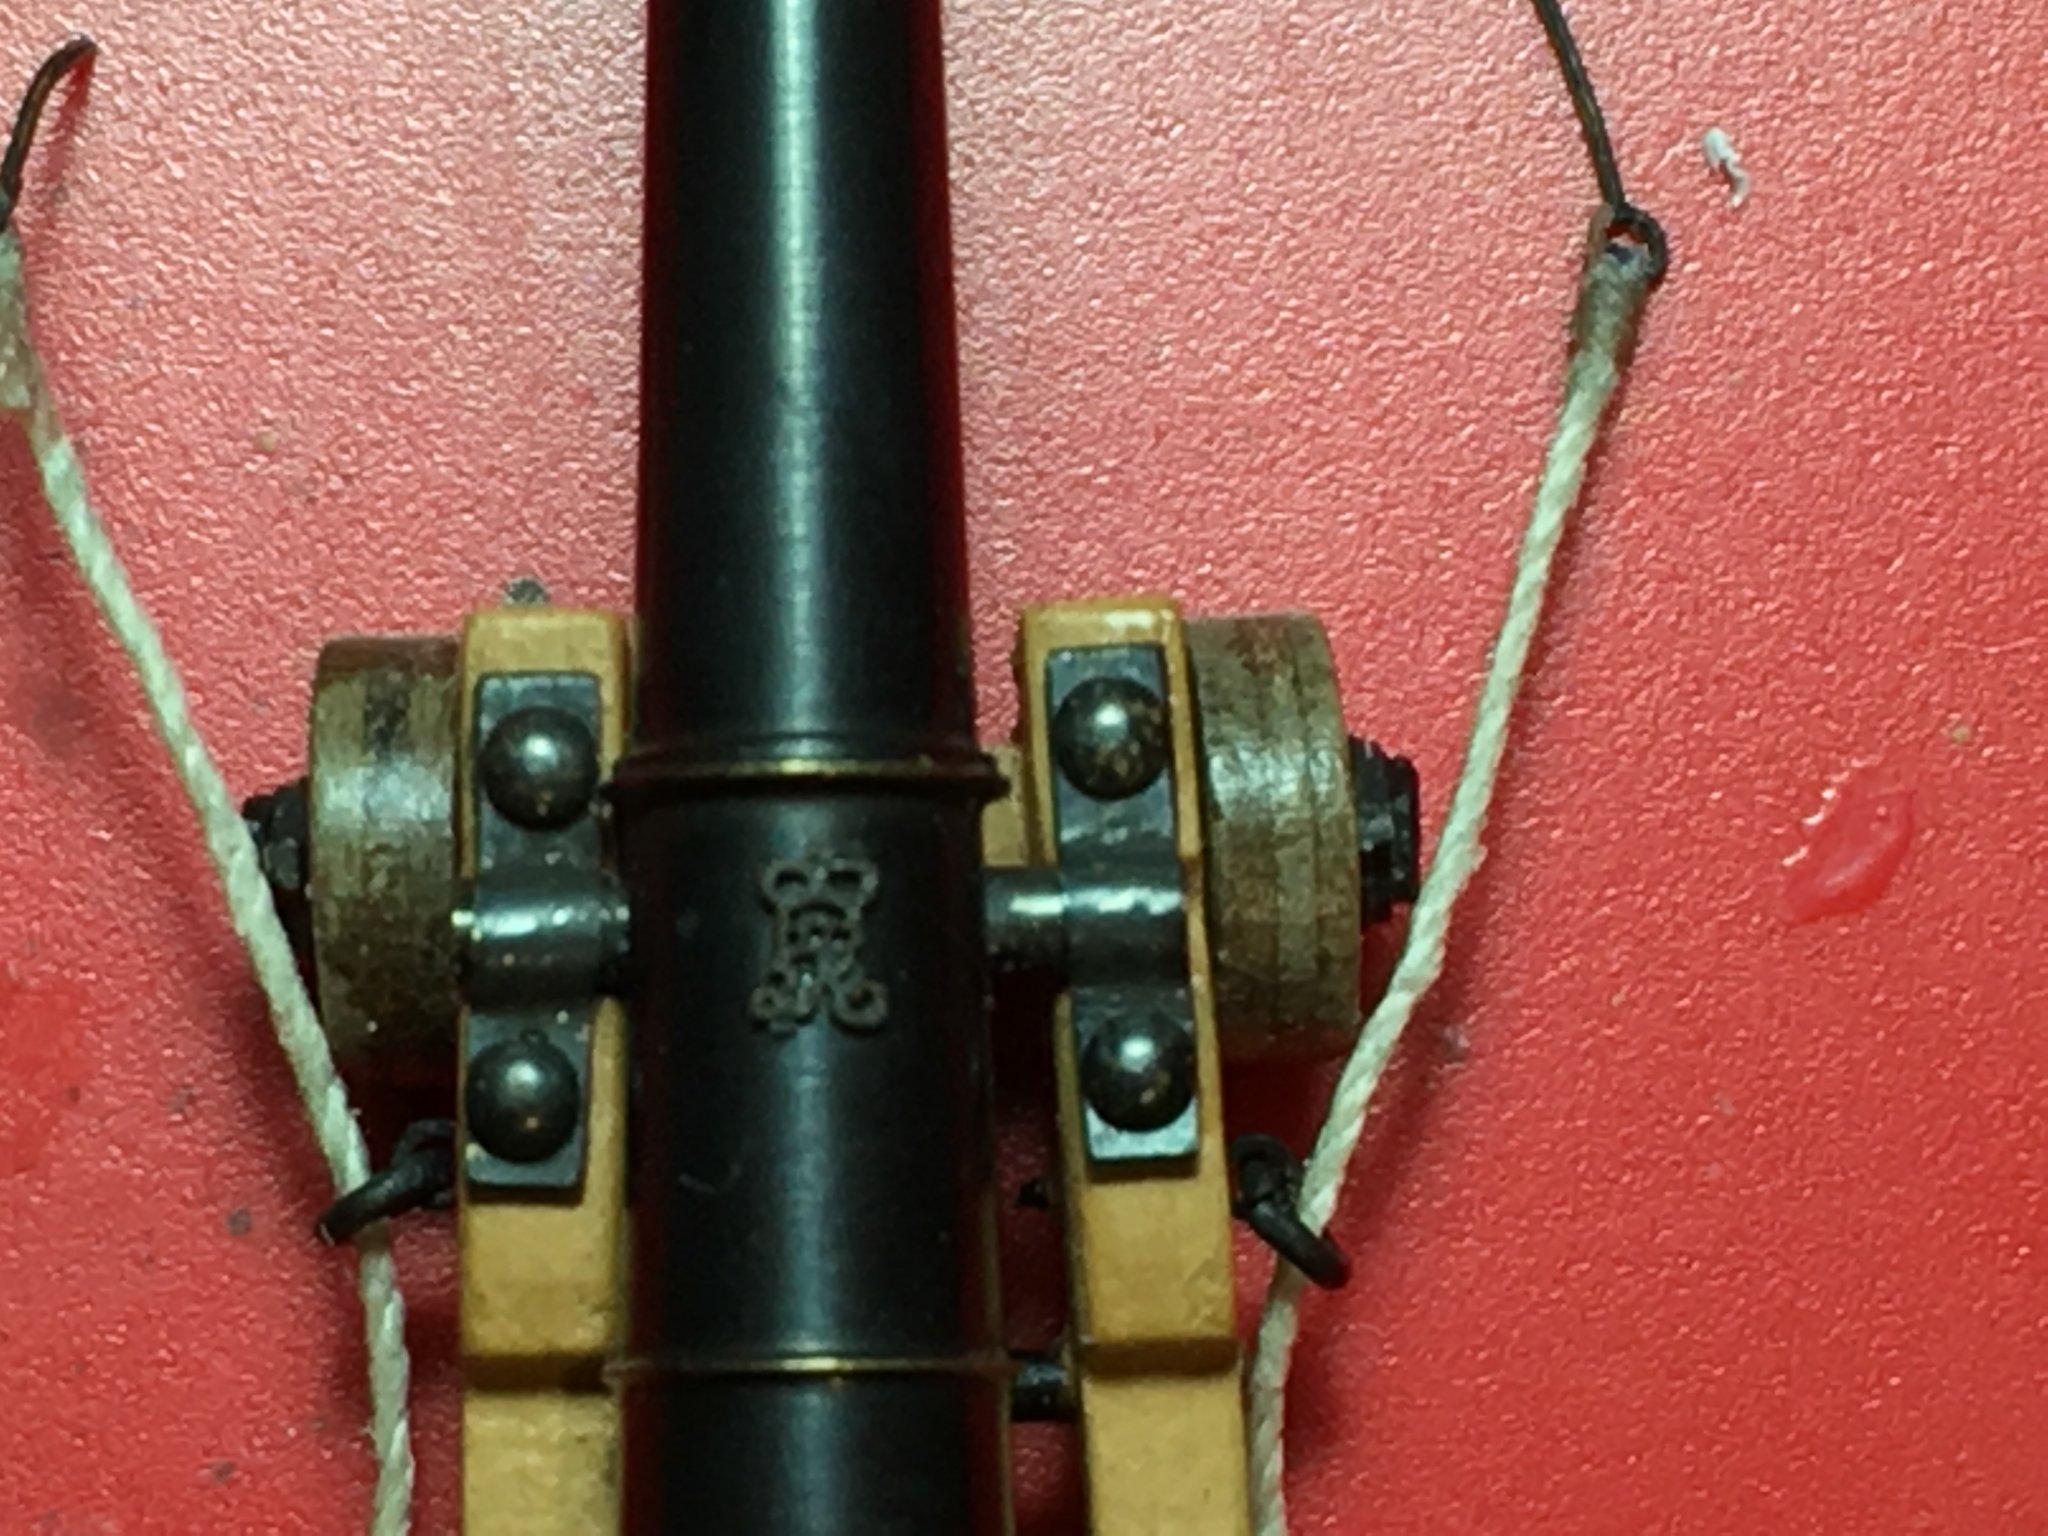
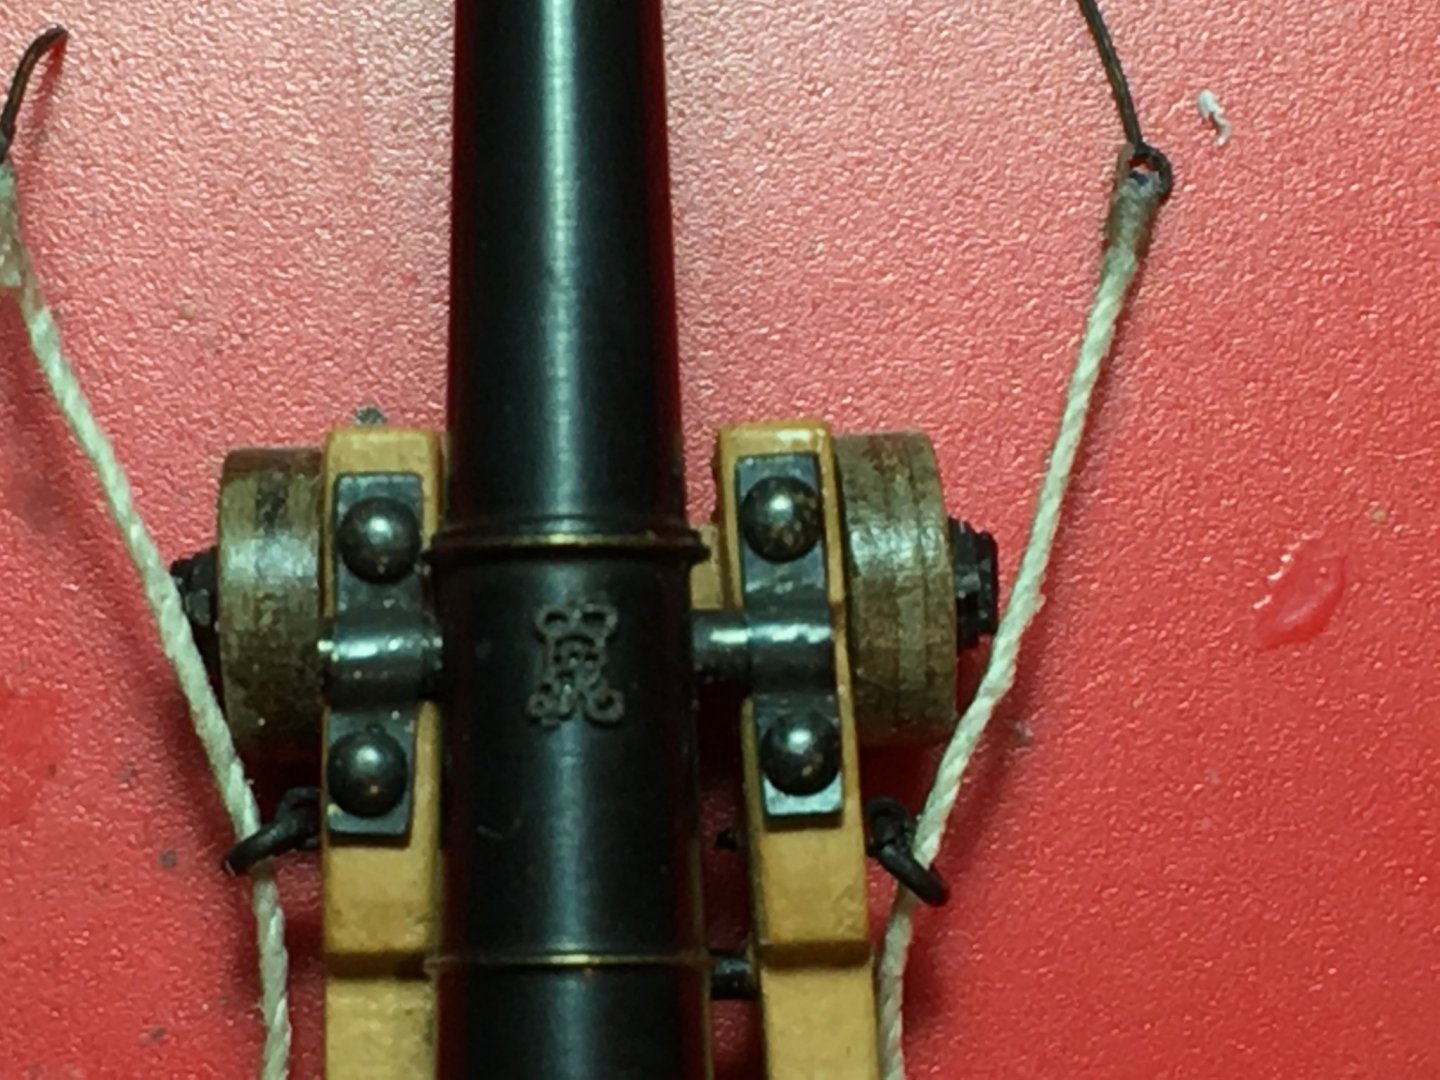
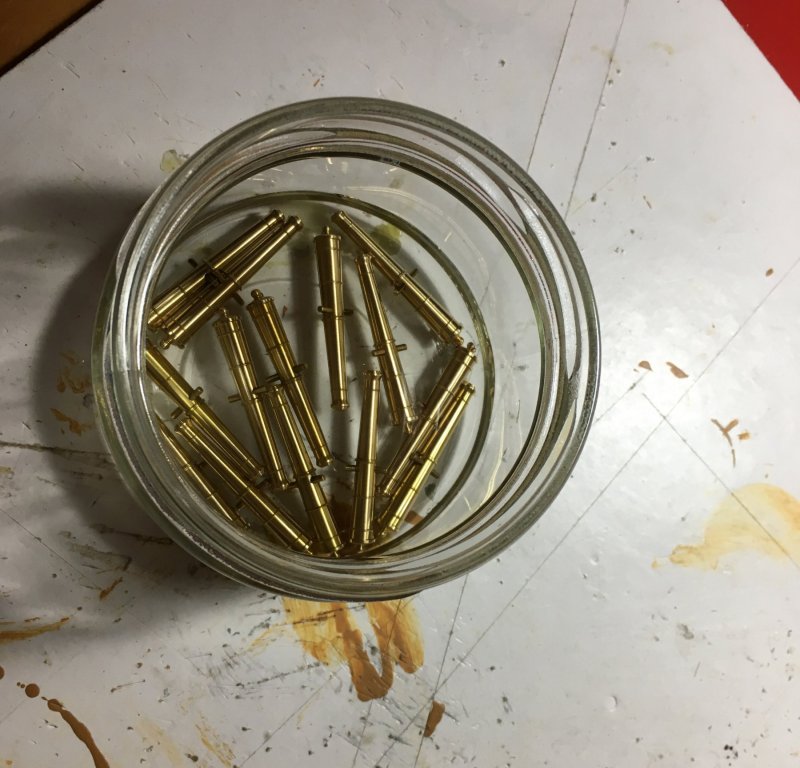
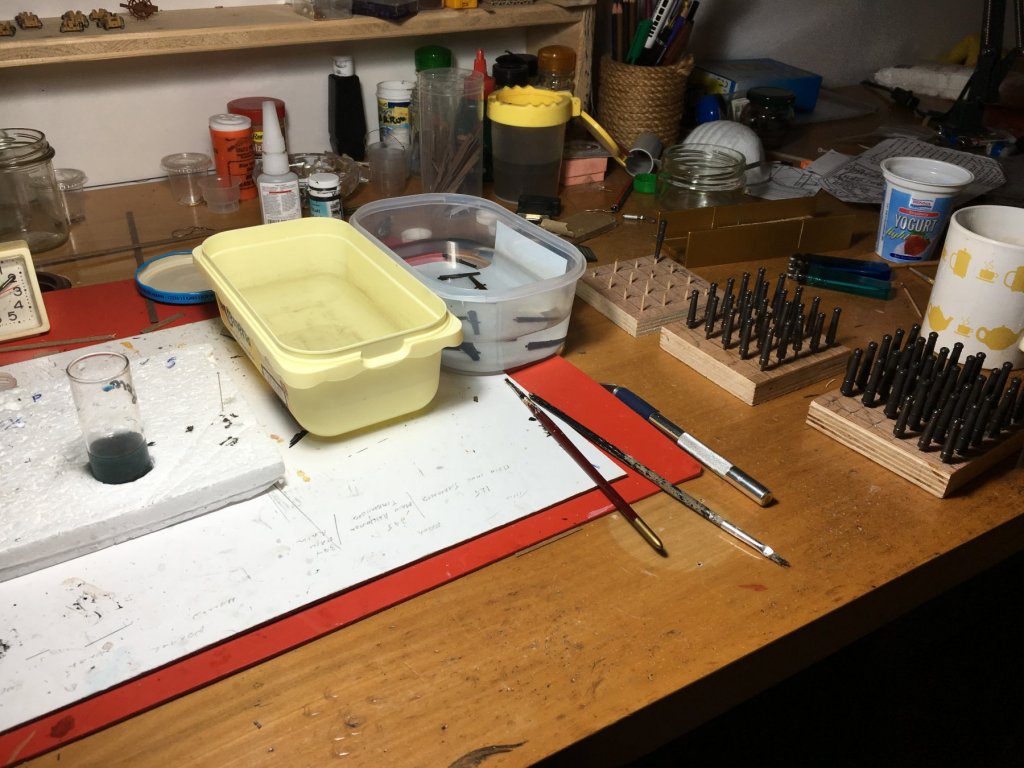
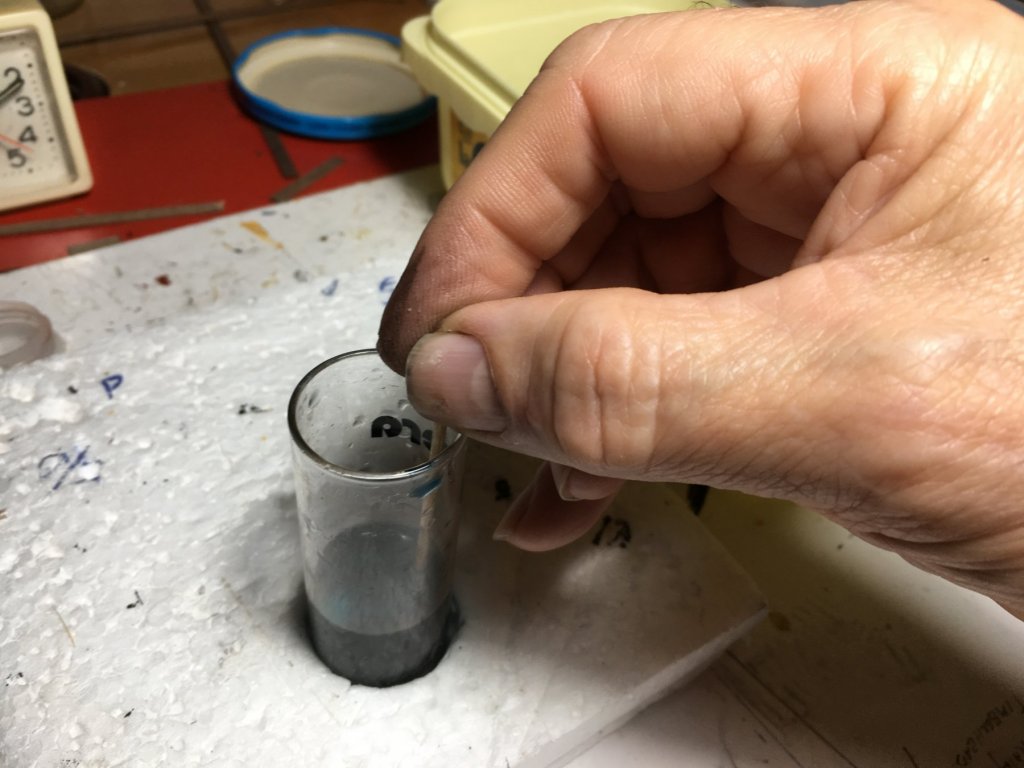
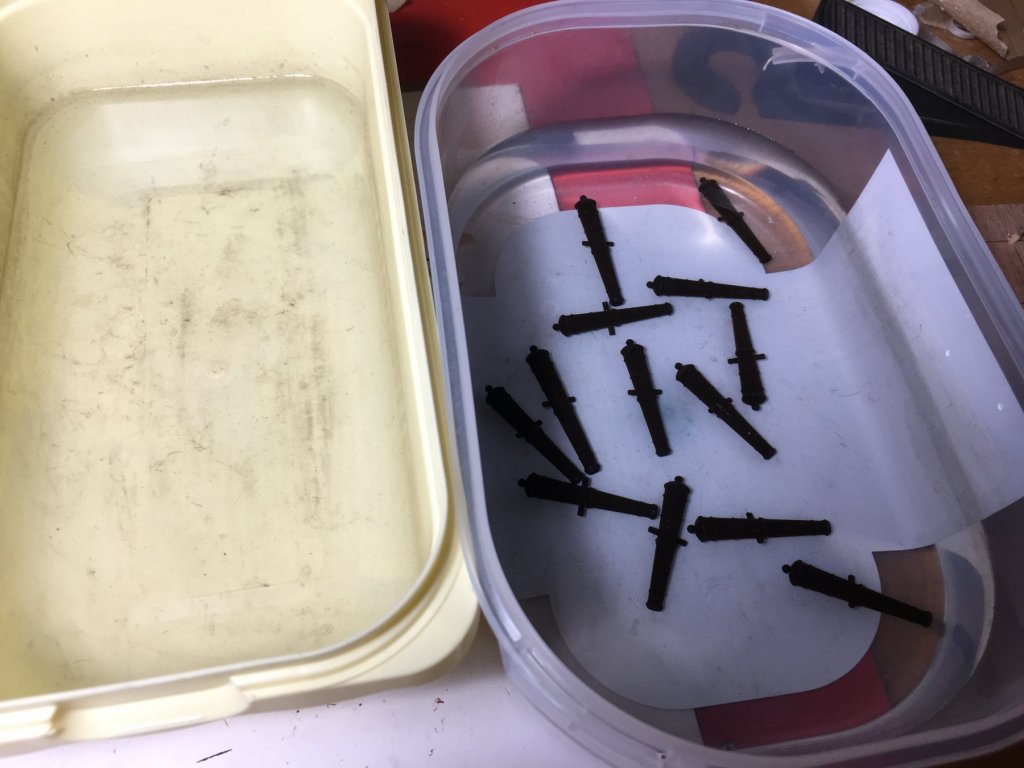
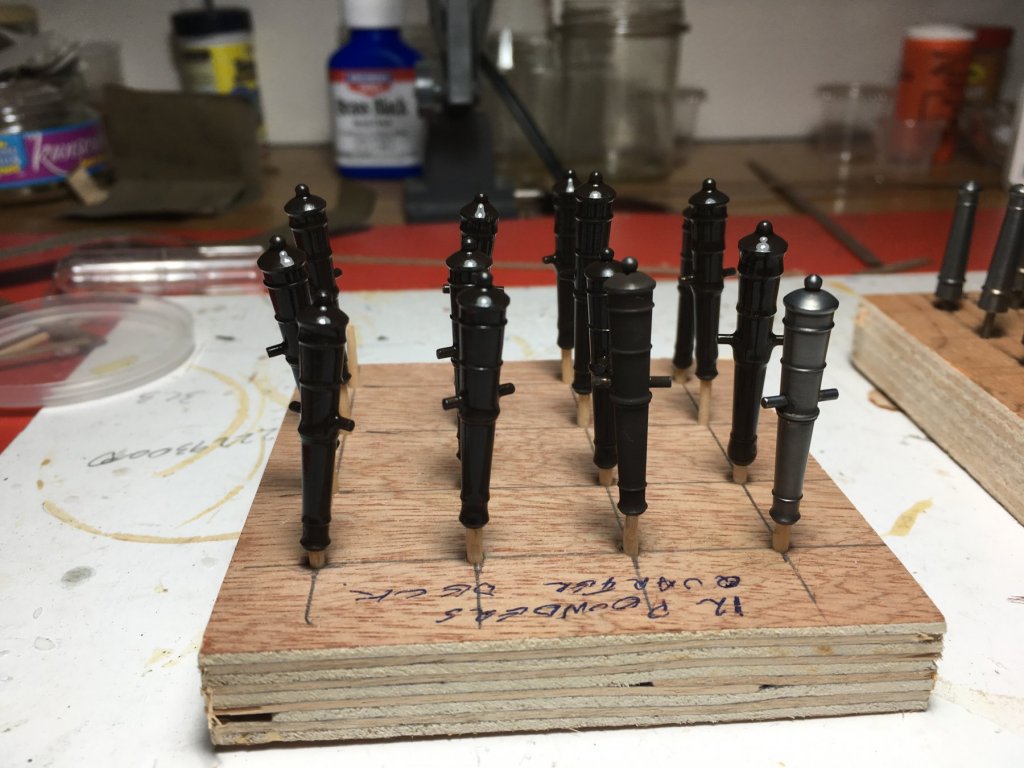
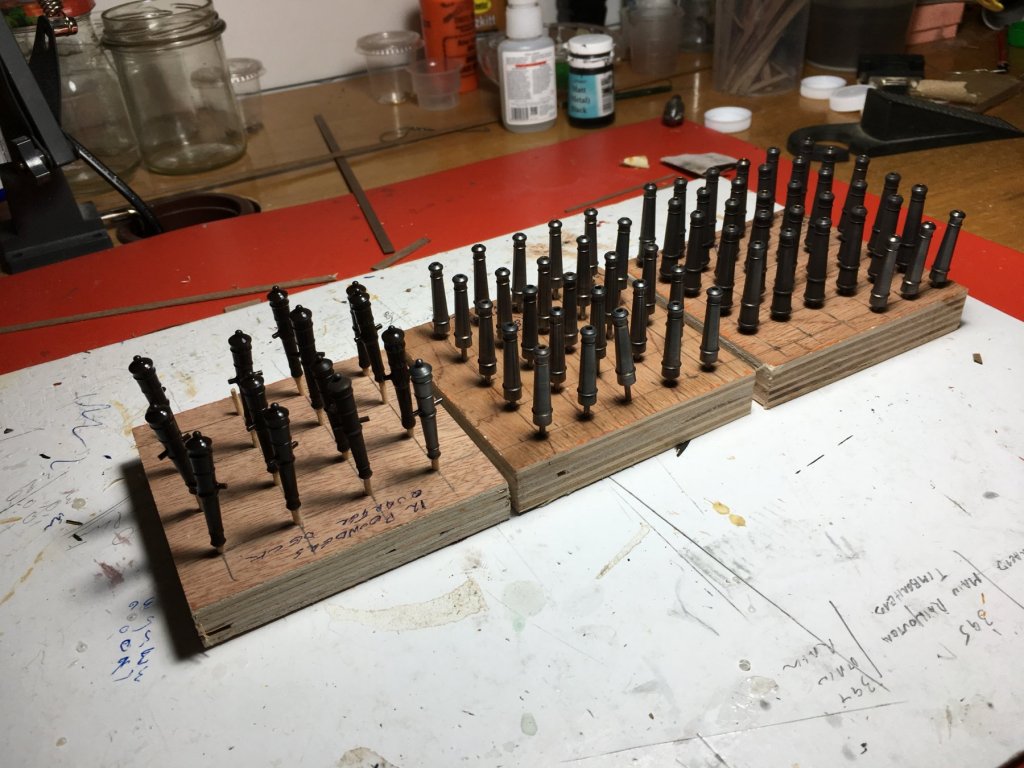
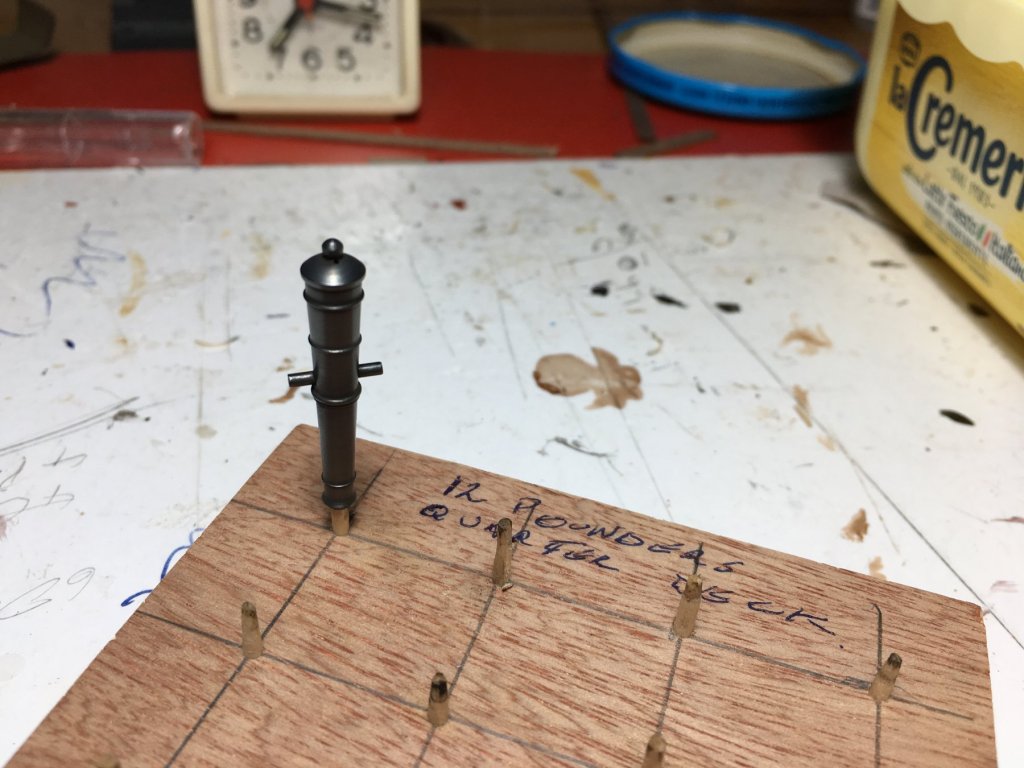
Thank you Heinz, from time to time I keep popping into your magnificent Victory build. My next job in mind is to fit the Poop Deck and to do that I have to fit the cannons inside the Cabin, so I have to concentrate on them for now. I have already prepared the carriages so I needed to blacken the barrels. Although for the moment I only need the cannons for the quarterdeck, once I am on the job I decided to blacken all the rest of the barrels, that is the dummy barrels for the lower and middle gun deck , at one go. As already posted before I had sourced the Birchwood Brass Black which I found very good. It was not available locally so I had to source it from abroad. The problem was that suppliers did not ship this product abroad until I finally found one that did. I found a small glass container for the Brass Black. It was ideal because I did not have to use much of the agent to cover all the length of the cannon. The only draw back was that I had to do them one by one which took more time but at the same time I had more control on the time dipping them for. The barrels had some kind of an oily residue on them so first I washed them thoroughly with water and a normal dish washing agent using an old tooth brush, then left them in acetone for half a day. This was the set up for the job, the glass container with the blackening agent, next to it two containers with water to rinse the cannons, first rinse in the first container to remove most of the blackening agent then leave them for some time in the other. The best method I found was to dip the barrel in the Brass Black agent for 15 seconds, take it out and leave it wet with the agent for another 45 seconds, then rinse them in water to stop the chemical reaction, first in one container than in the other. From previous blackening of small etched parts I experienced that if you leave them long in the blackening agent, the blackening layer will sort of peel off. With one process this was not enough, I had to repeat the same process another two times. After each process, when dry it leaves a powdery layer. Before each process it is very important to remove this layer by rubbing them with a cloth, otherwise the next process will not be effective. Barrel being dipped in agent by holding it with a toothpick plugged in the front hole of the cannon. Should have worn gloves because after so many dippings I also blackened my fingers and my nails, apart from the fact that after I read the label on container it stated that prolonged contact may damage your skin. After a good hand wash no harm done. Rinsed in water Left to dry on these stands I prepared beforehand. The quarterdeck barrels on the left side had the process repeated three times. They are still drying except for the one on the right in the front row which is already buffed and the powdery residue removed. The dummy barrels in the middle and right hand still have to go for their third dip. A closer look at the buffed one after three dips, which in my opinion the end result came out quite good. I am not saying this is the best way to be done but it is the best way that worked out for me after a few tests and some good advice I had received earlier on from Graham (Archer33) when doing the cannons for the upper gun deck. The Birchwood Brass Black is a fast acting agent. Before I managed to get this agent I had another brand with which I could not work, and could not understand what was going wrong for me, in fact I had nearly given up and was going to paint them before I decided to have another go with the Birchwood Brass Black. With the initial blackening agent it had taken two days dipped in the agent before any blackening took place. I definitely recommend the Birchwood Brass Black. Regards Robert
- 527 replies
-
- 4
-
-
- caldercraft
- victory
- (and 1 more)
-
Kevin, Ha, ha so that's why when I was doing the hull you had sent me this post. Thank you again Kevin, after that I made sure I don't forget them. Well, sometimes we all have a lapsus, after I had fitted the ladders in the Admirals Cabin that goes down to the upper gun deck, glued it to make sure it stays there I realised that I fitted it without the stanchions at the base of the ladders. There was no way I could take off the ladders again without doing any damage, and with the deck opening being so small it was no joke trying to fit them in place with a tweezer. I don't remember how many times I dropped the stanchions down the upper gun deck and fish them again for another try. If I remember well it took me nearly two hours until I succeeded. Robert
- 527 replies
-
- 1
-
-
- caldercraft
- victory
- (and 1 more)
-
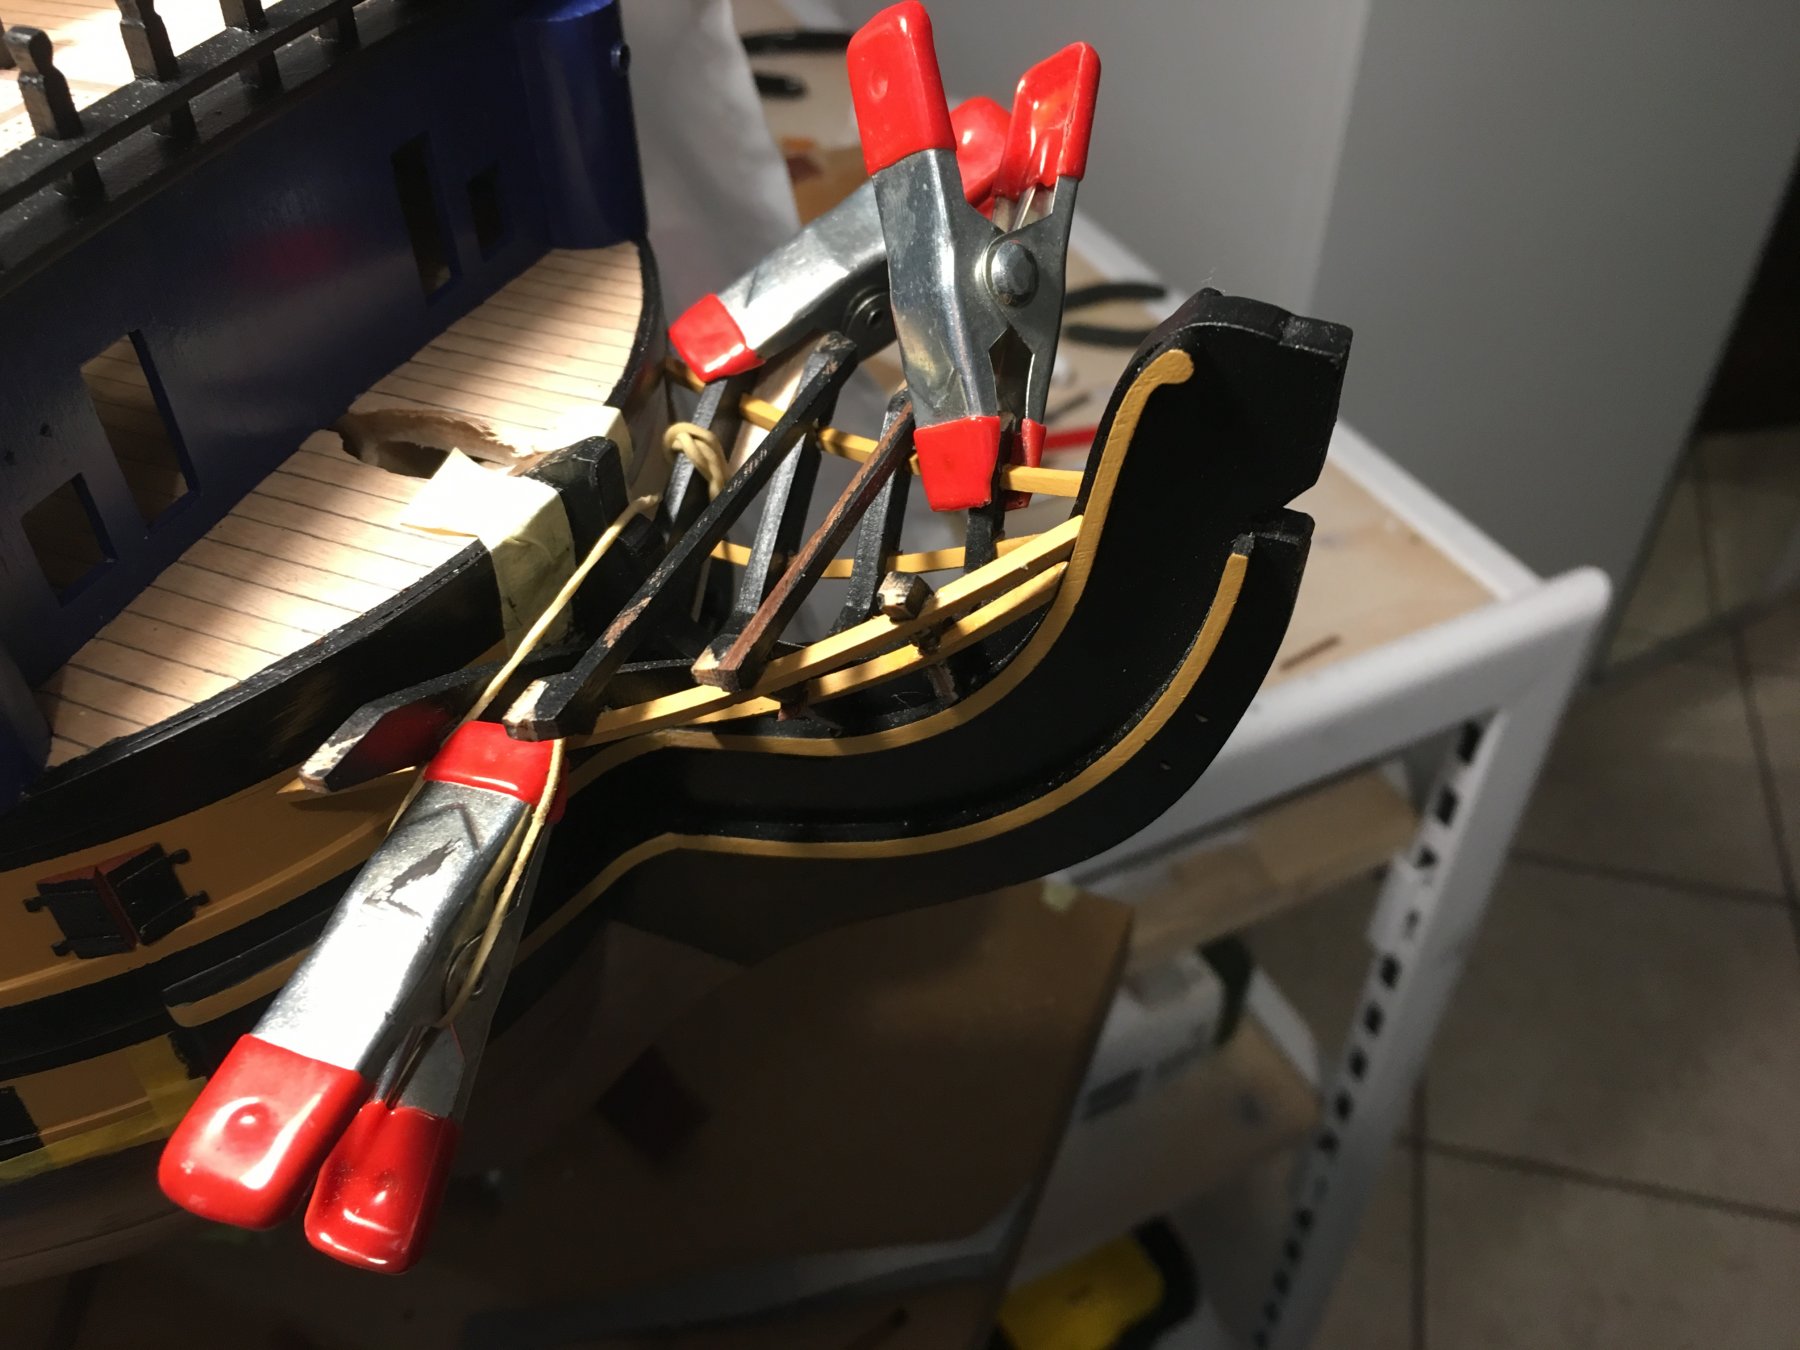
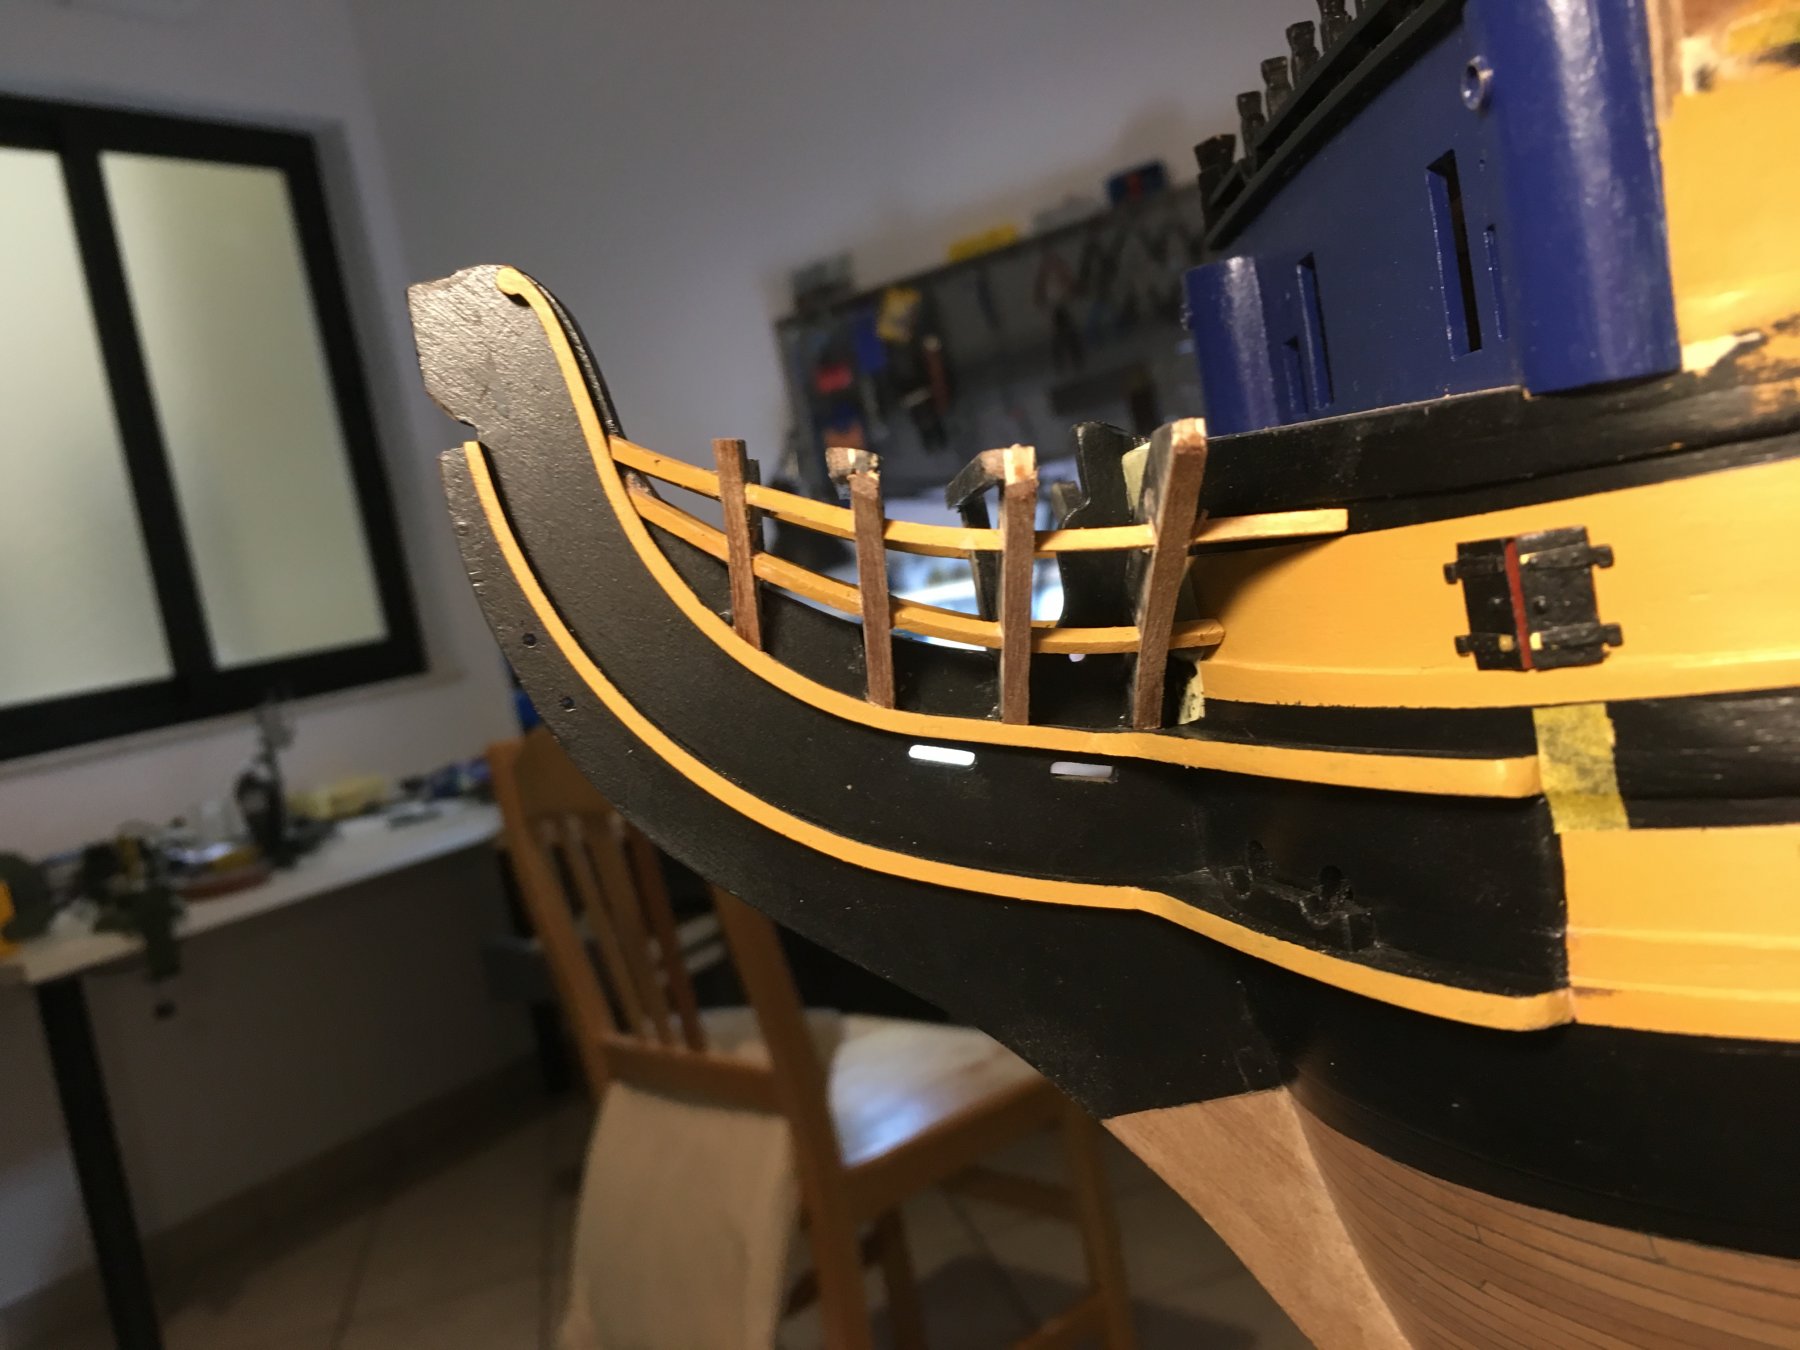
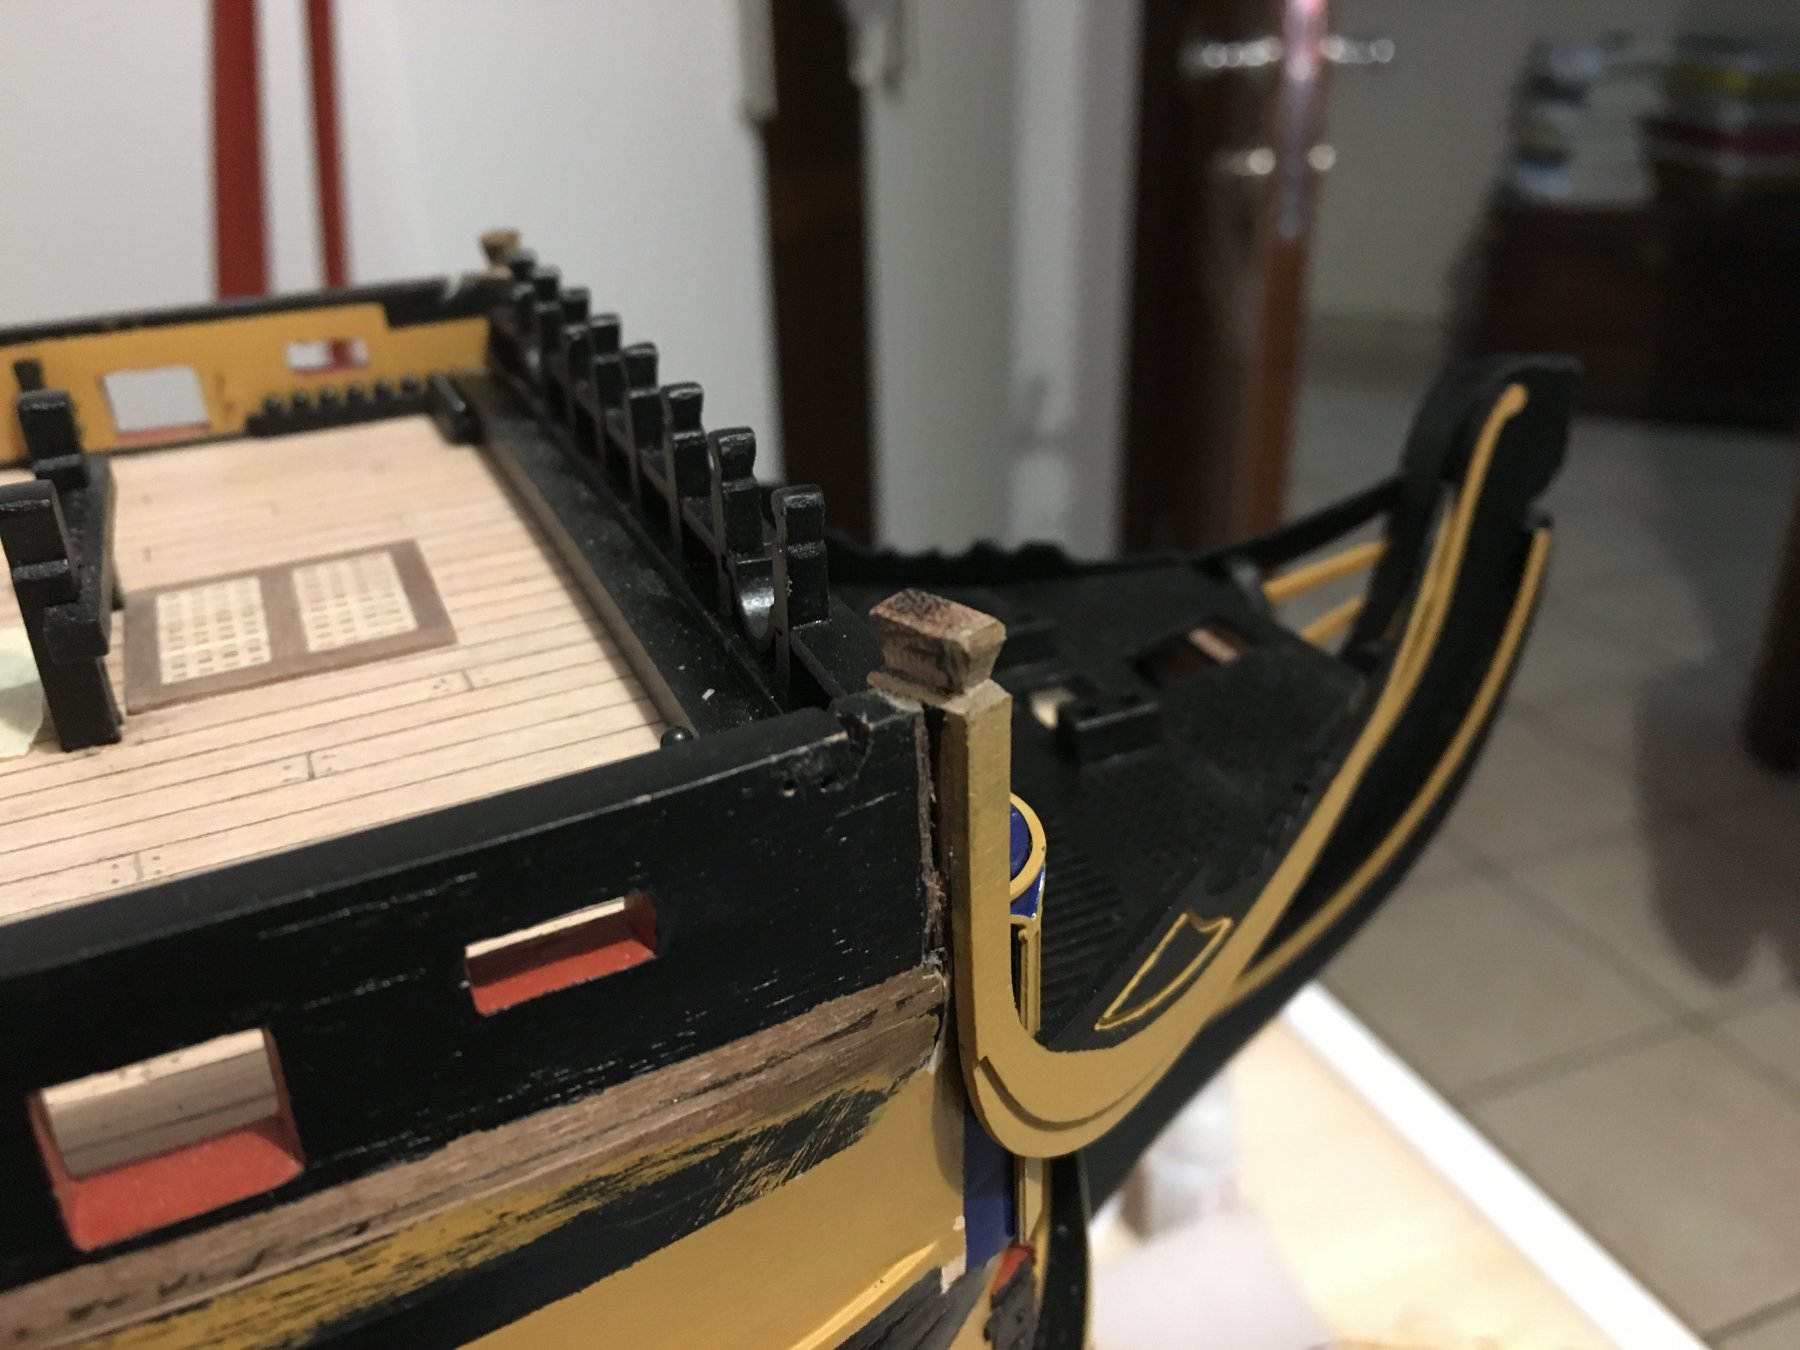
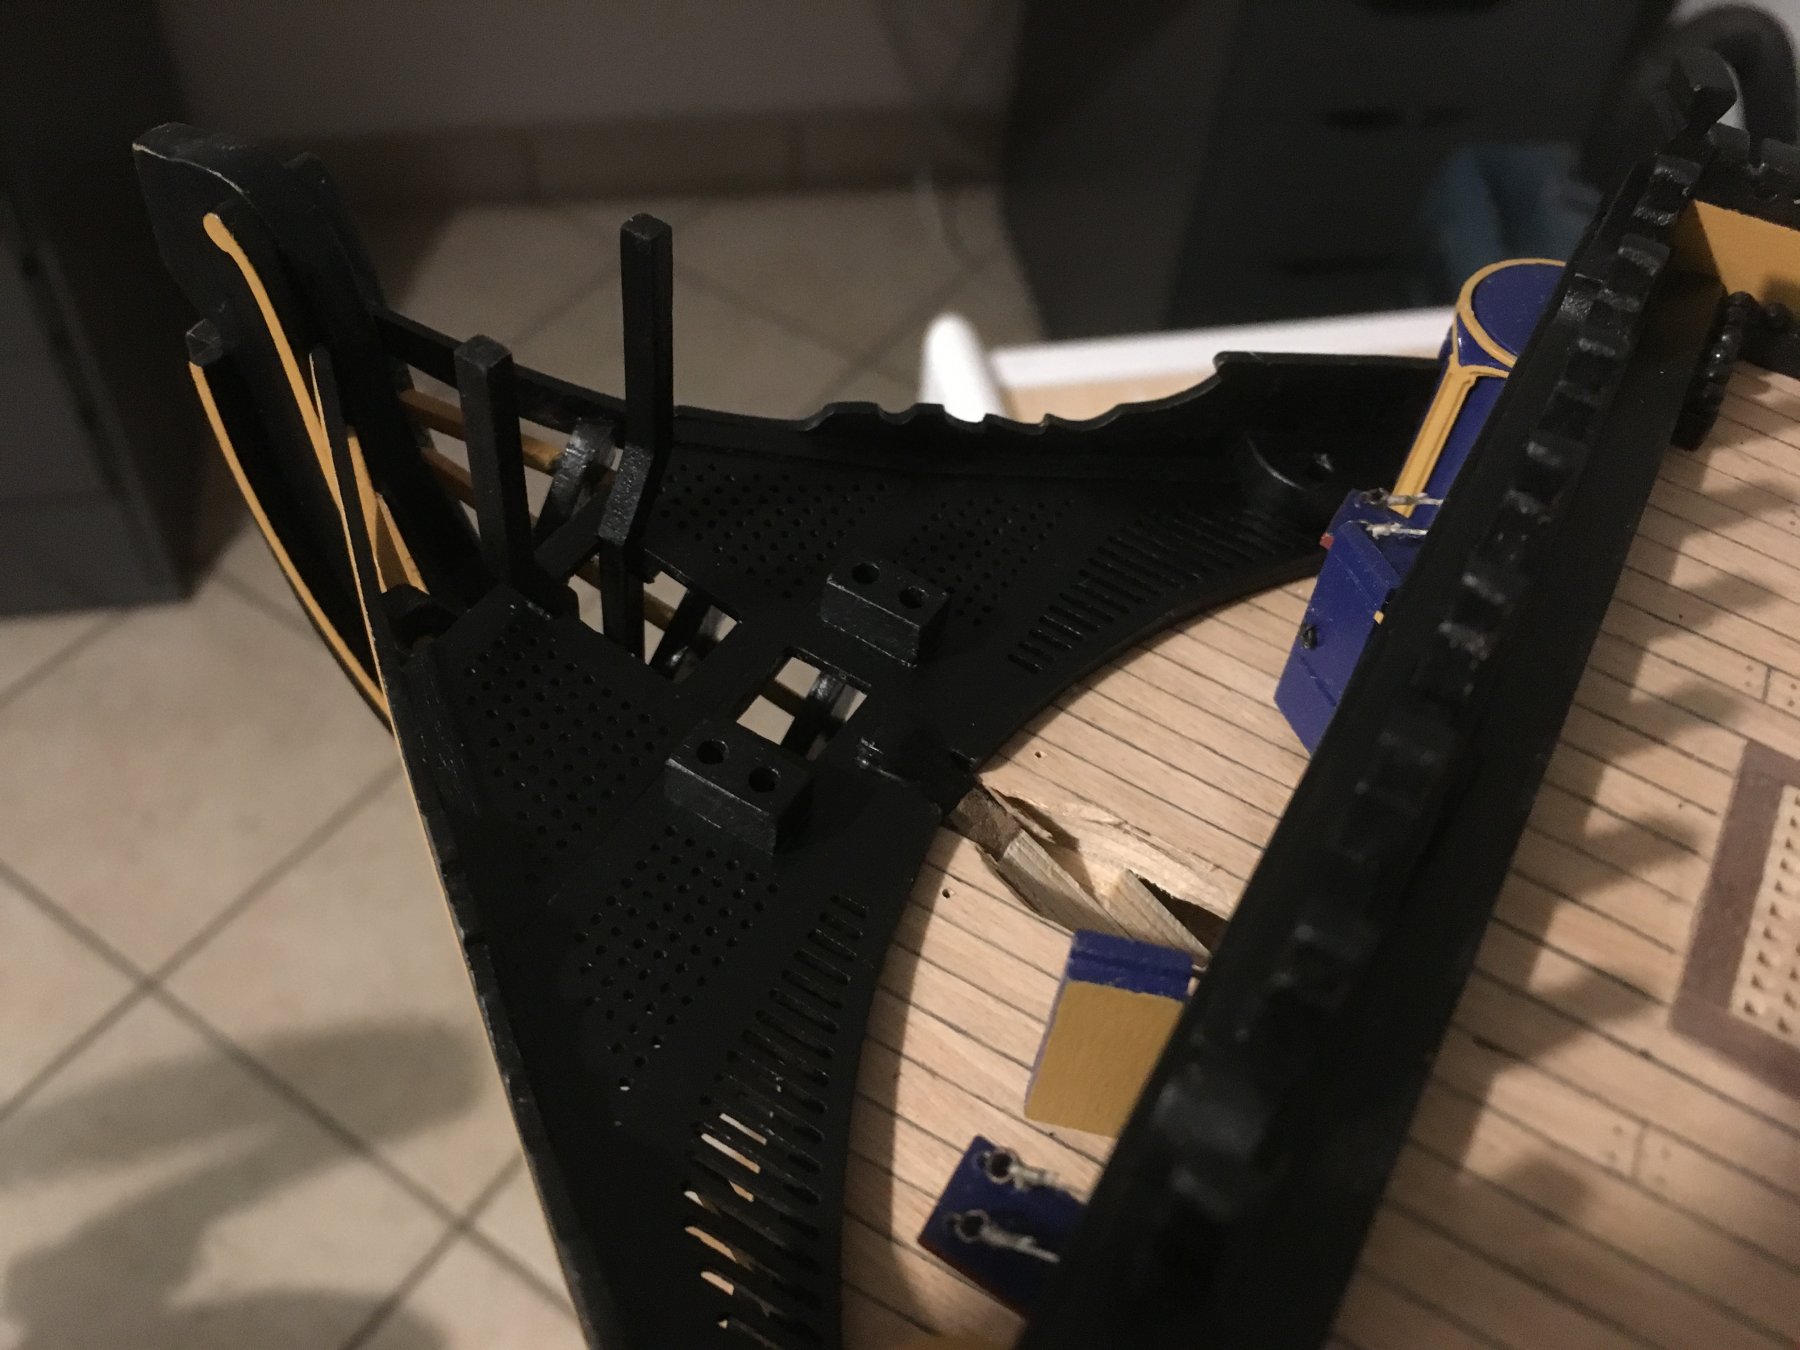
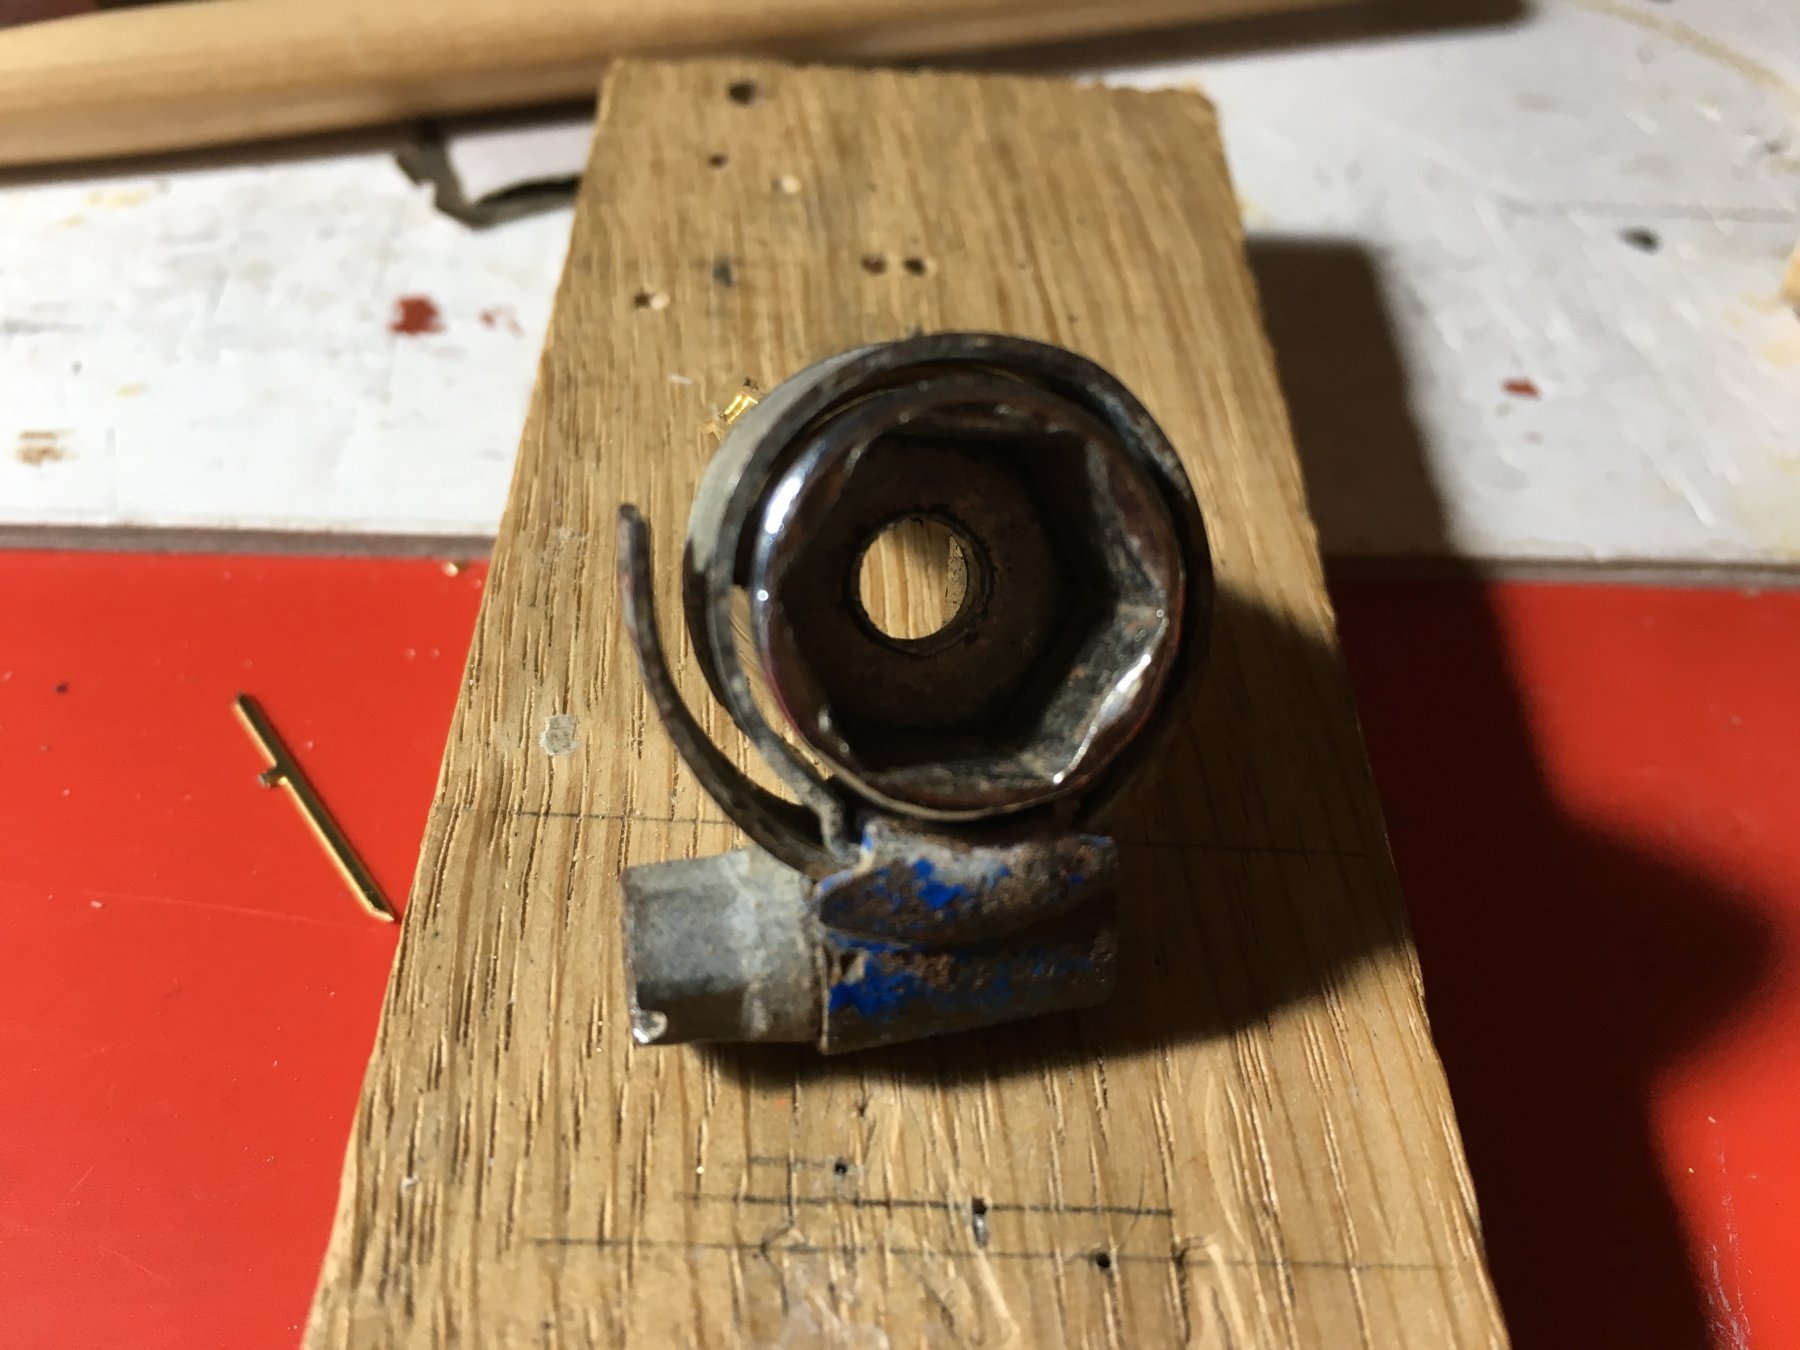
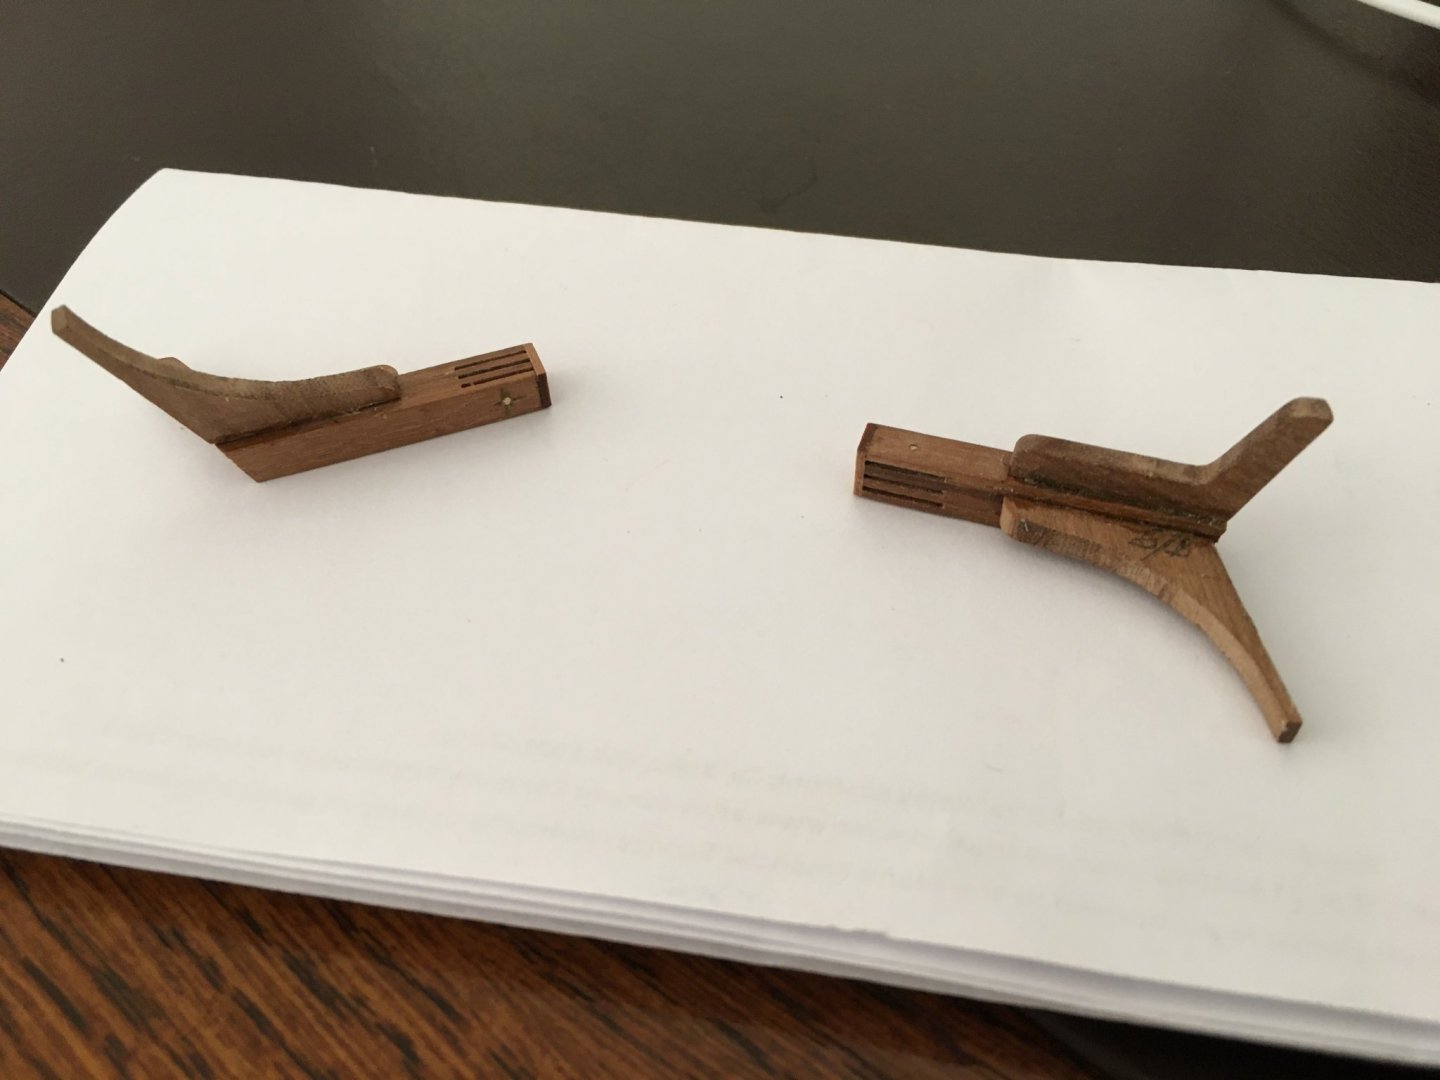
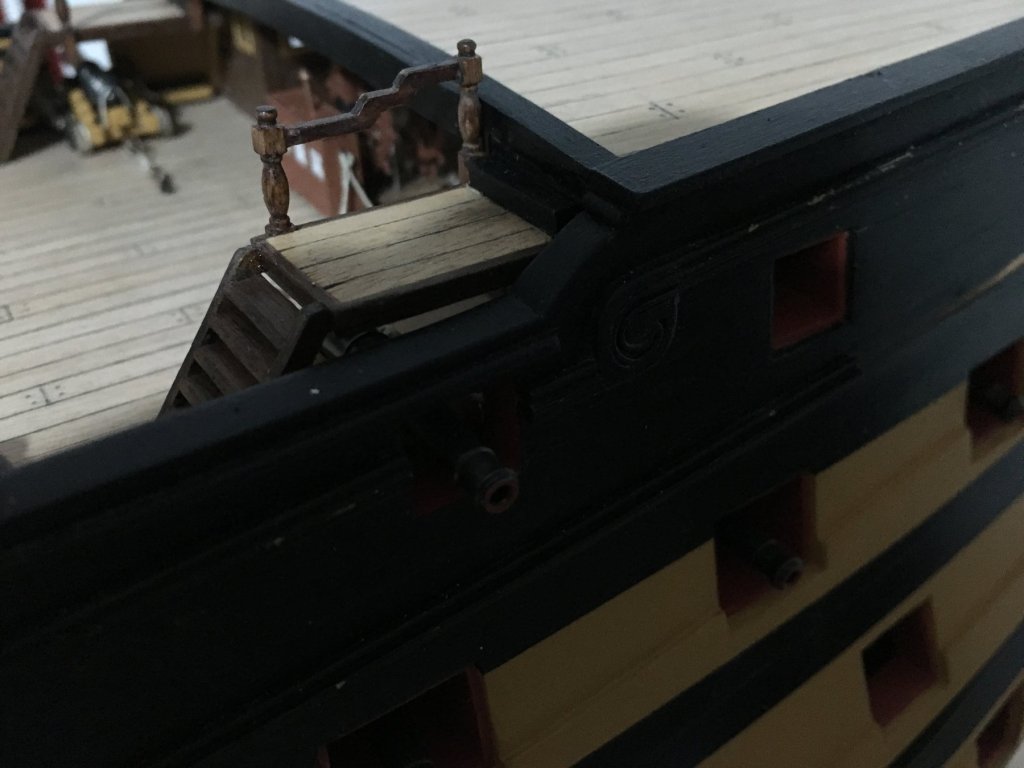
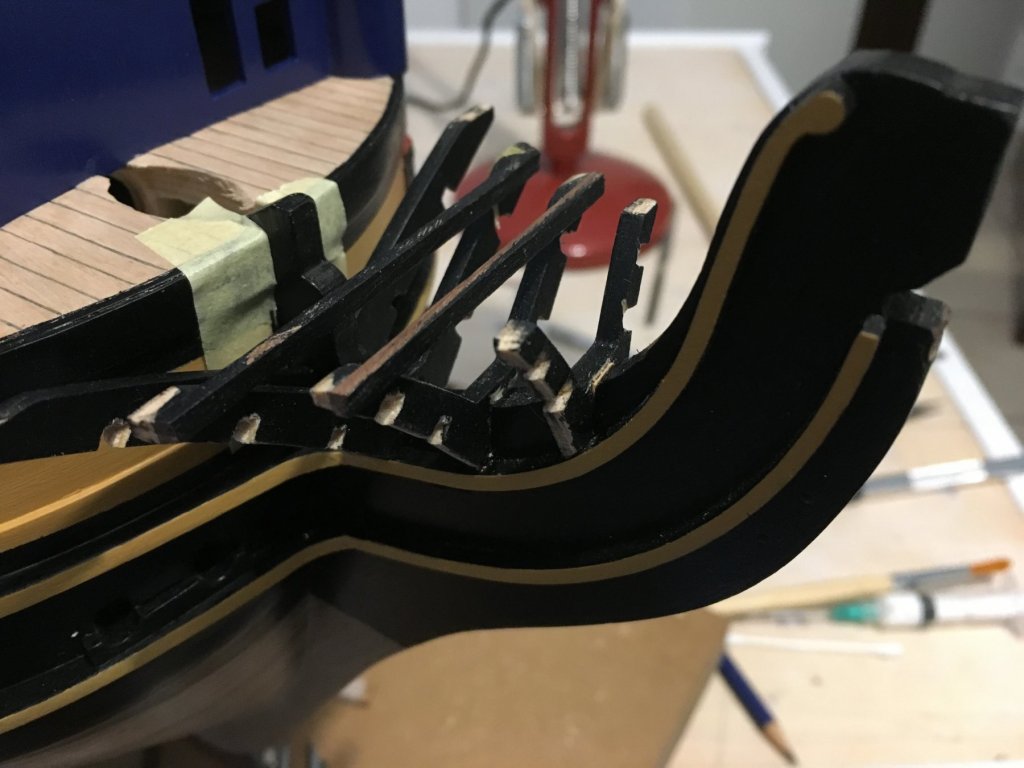
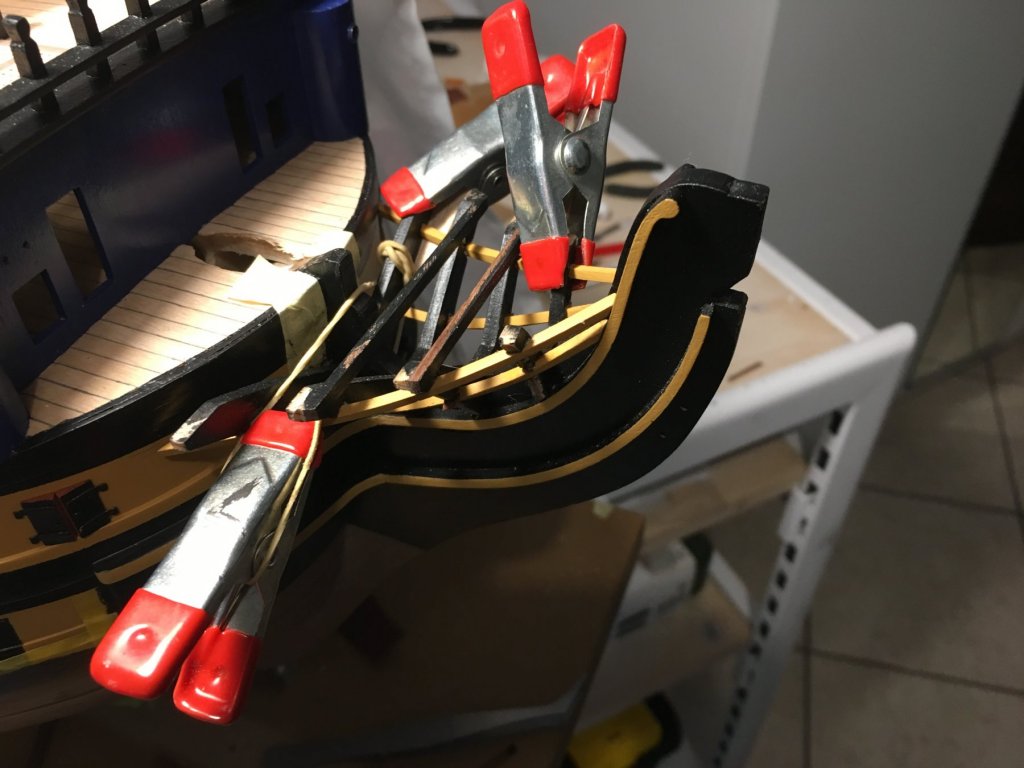
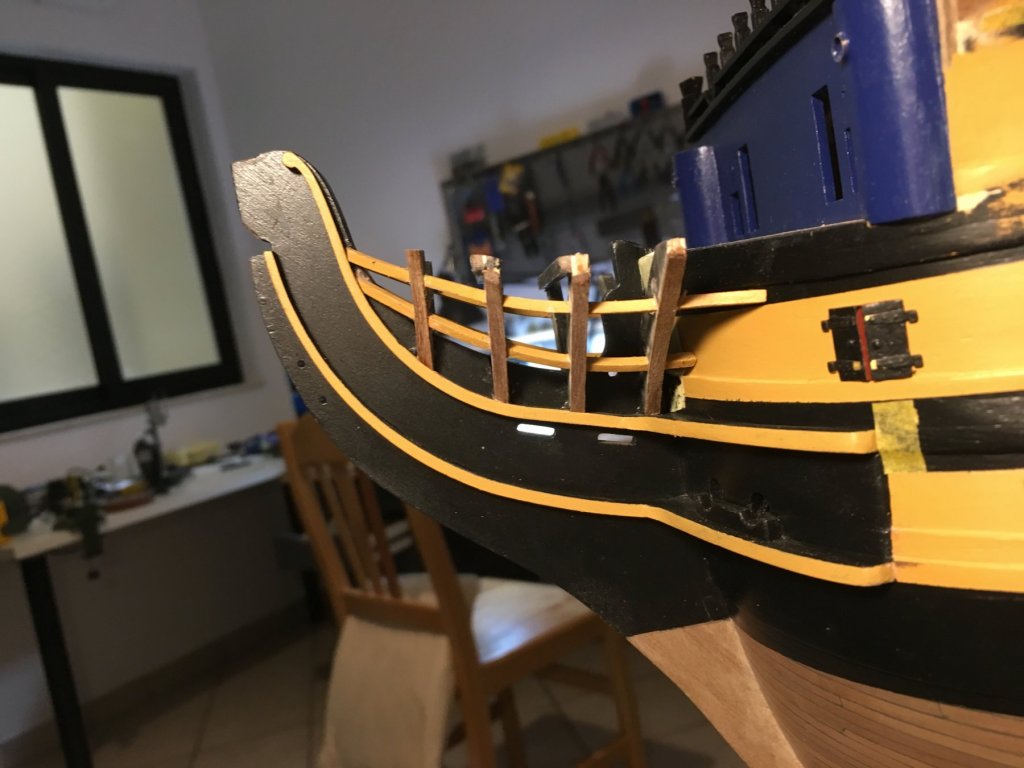
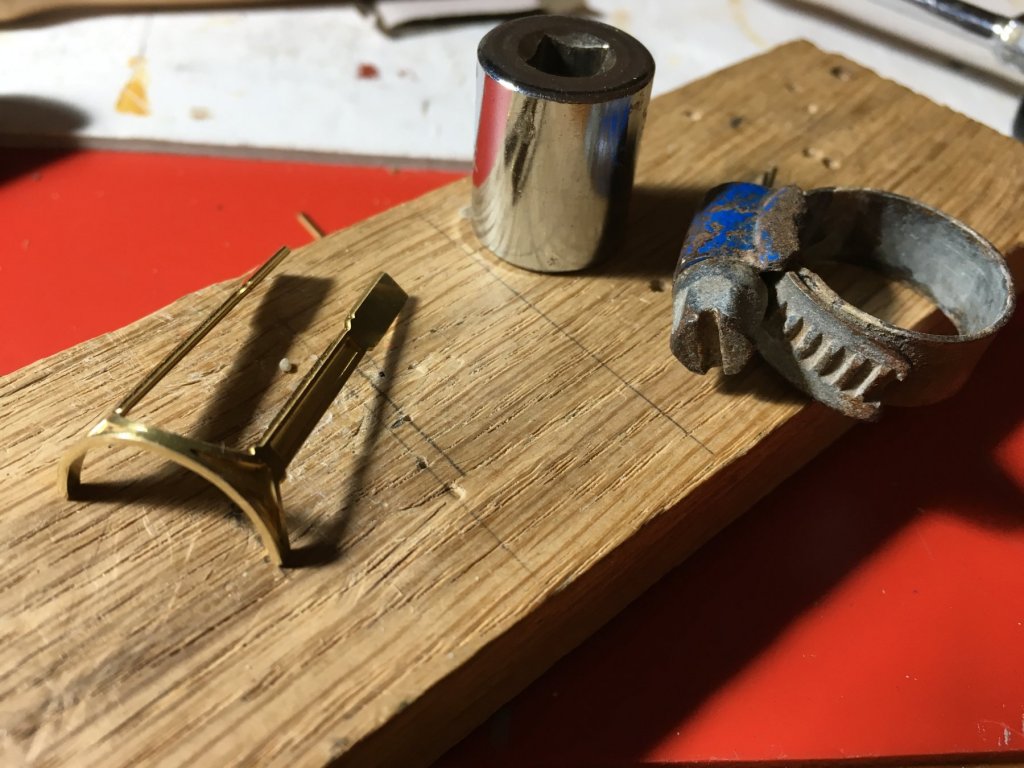
Thank you Wallace. I continued working on the bow section. The four head timbers glued in place . Rails shaped, painted and fitted in place. Decided to fit a strip of wood over the timber heads and rails. Brass profile shaped, painted and glued in position across the beakead bulkhead. Pilasters also painted and glued in place. This is how I rounded the pilasters for the round houses. I found a socket the exact diameter of the round house, got a water hose clip, first I shaped the pilasters to more or less the shape of the round house with my hands, placed it round the socket, placed the hose clip around it and tightened. It came out a perfect round shape. Fitted doors and gun ports and platform. Fitted main rail, which is also forms the outer part of the timberhead. Also. added a ring handle to the doors, That's all for today. Robert


- 527 replies
-
- 6
-
-
- caldercraft
- victory
- (and 1 more)
-
Hi Kevin, Really beautiful work, fantastic rigging. Whatever way you choose to display your Victory, she will always look magnificent. In my Victory build I am still miles away from finishing her but sometimes I also start thinking of two things, how I am going to display her, like you are doing, and due to its size WHERE. It's not easy to find a place for her. But one way or another she must be displayed in a prominent place where you can enjoy looking at it after all that work you've put into it. Congratulations again Kevin. Robert
- 1,319 replies
-
- 4
-
-
- caldercraft
- Victory
- (and 1 more)
-
Looking forward to follow your build Patrick. Beautiful work. Robert
-
Really nice work Paul, very clean and detailed. Robert