HOLIDAY DONATION DRIVE - SUPPORT MSW - DO YOUR PART TO KEEP THIS GREAT FORUM GOING! (Only 36 donations so far out of 49,000 members - C'mon guys!)
×

Robert29
-
Posts
417 -
Joined
-
Last visited
Content Type
Profiles
Forums
Gallery
Events
Everything posted by Robert29
-
 Nice work Michael. You work very precise.
 -
Hi Aydin, Sorry for my late reply. Thanks for your compliment. Bluenose was my first planking job. I first glued the waterways then trimmed them with a sharp blade as the planking progressed. When planking, every time I arrived to a nib I cut the plank to shape, mark it on the water way and carefully trim the waterway. What you have to be careful about is to make sure that you get identical nibs on bothe sides of the deck, otherwise they will not look good. I worked this by starting the deck planing from the middle and working sideways, all the time checking he distance from the last laid plank to the waterway. Thus if I notice any difference from one side to the other I just send a little from the edge of the next plank to be laid. Hope i have been clear. Robert
- 66 replies
-
- 1
-

-
- bluenose ii
- artesania latina
- (and 1 more)
-
It's a nice kit this was my second build. Really enjoyed building it and learnt a lot from it before I started the Victory. Apparently even though it is Bluenose II by AL as well the European version varies a little. Seems you are on a good start, have fun. Robert
-
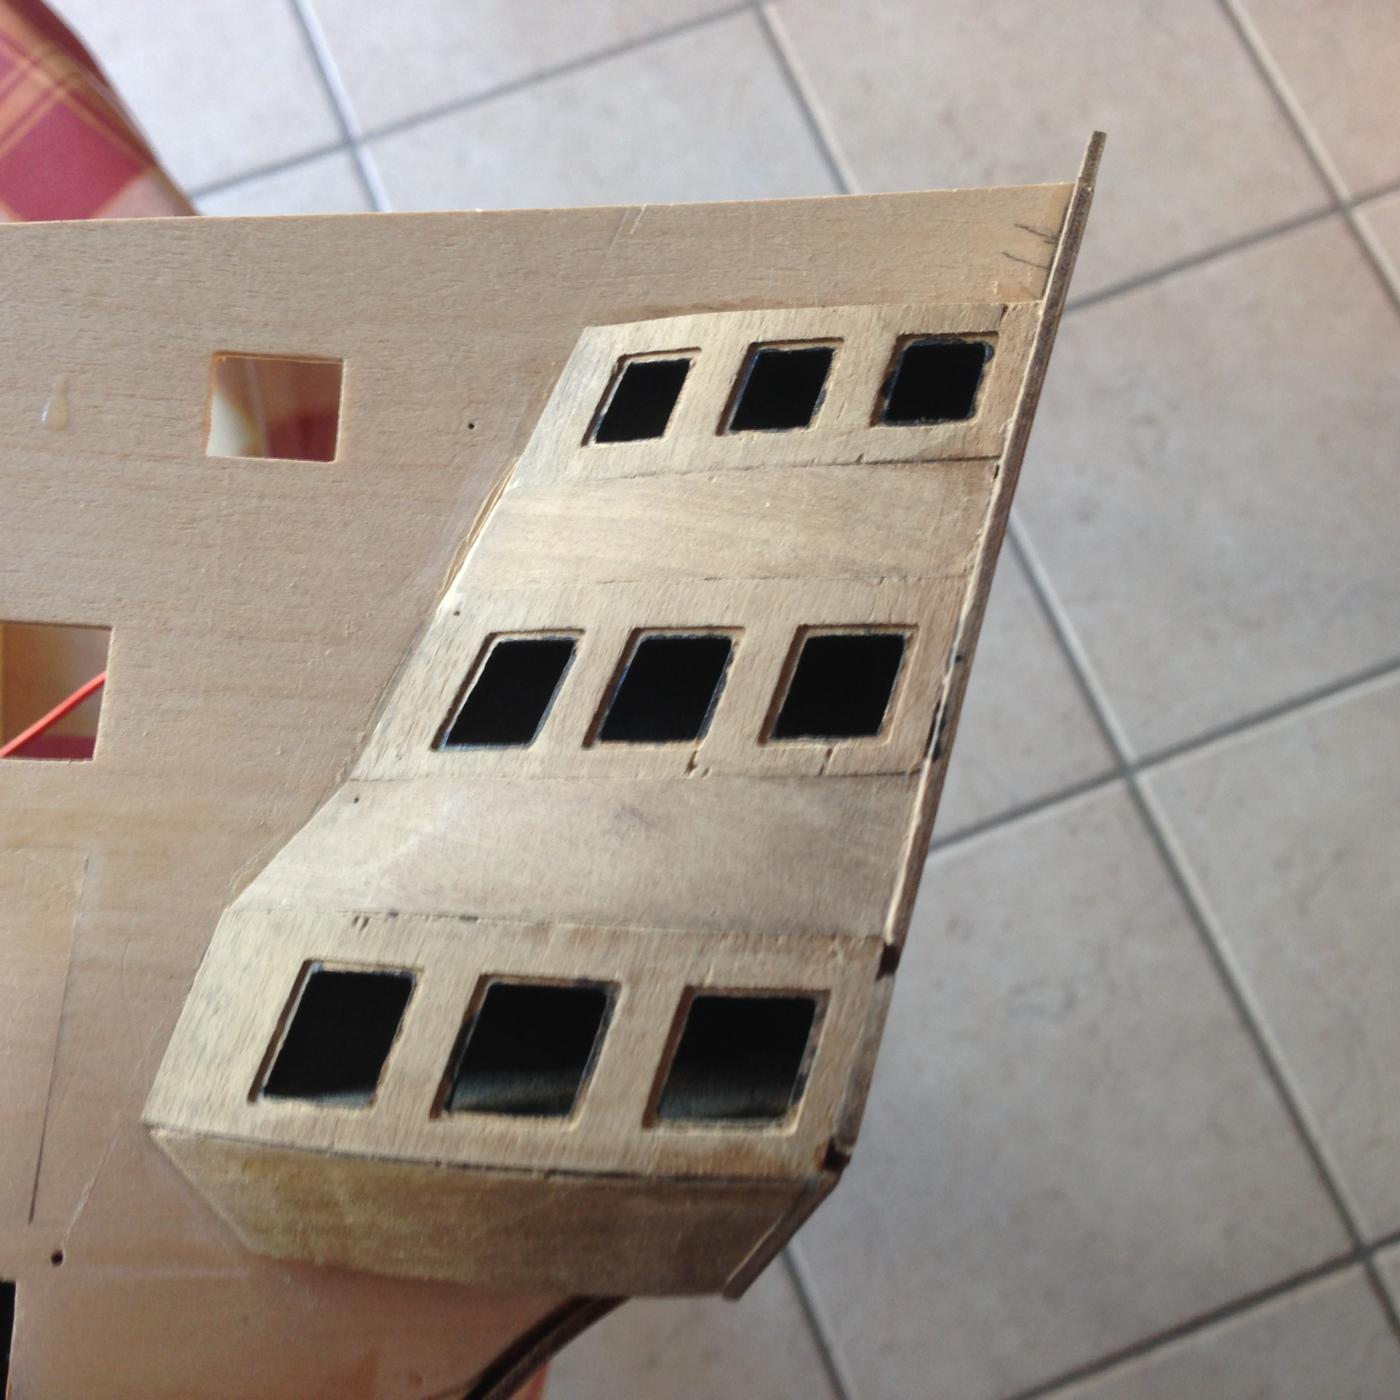
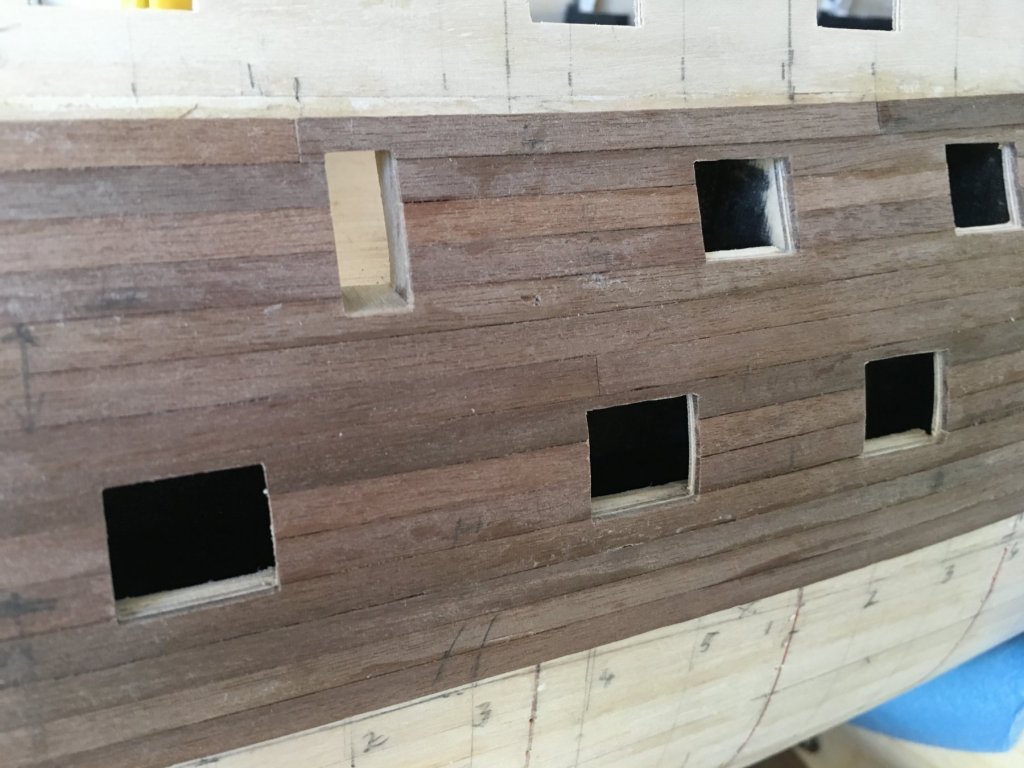
A small update Planked the lower and middle gun ports. Trimming the gun ports. Robert


- 527 replies
-
- 9
-
-
- caldercraft
- victory
- (and 1 more)
-
Hi Terry, If you are going to install LED’s you have to do some homework before. If you are going to install just a few LED’ say three lights is one thing but if you are going to install a substantial amount of LED’s, like I am doing about 75 LED’s is another story. If you use a 9V battery you are limited to just 4 LED’s connected in series. Another problem if you connect them in series is that if one LED fails all the others in the circuit will fail, and don’t forget that most probably the LED’s will be installed somewhere where you cannot reach to replace. With a parallel connection you can install as many LED’s as you like but you can never run them from a 9 volt battery as it only produces 400-500 milliampere-hour. Normally an LED has a forward voltage of 2.2volts with a rated current of 20 mA, 75 LED's x 20 = 1,500 milliamps (1.5 amps). So the supply has to be able to at least produce 1.5amps. In my case I am using a 12 volt, 4.2amp transformer which I already had. This is more than enough. A 12 volt, 2 amp transformer would have done the job as well. With a parallel circuit you are going to have twelve volts on each LED which will burn it out immediately as too much current will flow in it. So with every LED you have to connect in series a resistor to lower the voltage supply to the LED to 2.2volts and the current flowing through it to more or less 20 milliamps. Another advantage in connecting in parallel is that if one LED fails it will not affect the others at all, the rest will remain lit. I am not much of a teacher, there is a very good explanation in this forum itself and also explains how to calculate the value of the resistors required. Go to NRG Home Page/ Ship Modeling Resources/ Ship Modeling Database of articles/ Furniture and Fittings/ LED Lighting for Model Ships Steve, Thank you for your comment.
- 527 replies
-
- 2
-
-
- caldercraft
- victory
- (and 1 more)
-
Nice work Robert, coming out really nice. Robert
-
Very nice finish, I am well behind you in my Victory build. Will be visiting your progress. Robert
-
Your work is outstanding Heinz. I will go through it again in more details. Robert
-
Ian Thanks, I will be visiting your build to get more ideas. Heinz, Thanks, I'm eager to see the outcome of the hull as well. Bill Thanks, I try as much as I can to keep it a hobby to do at my leisure and at my pace, not a job that I have to do and to finish.
- 527 replies
-
- 1
-
-
- caldercraft
- victory
- (and 1 more)
-
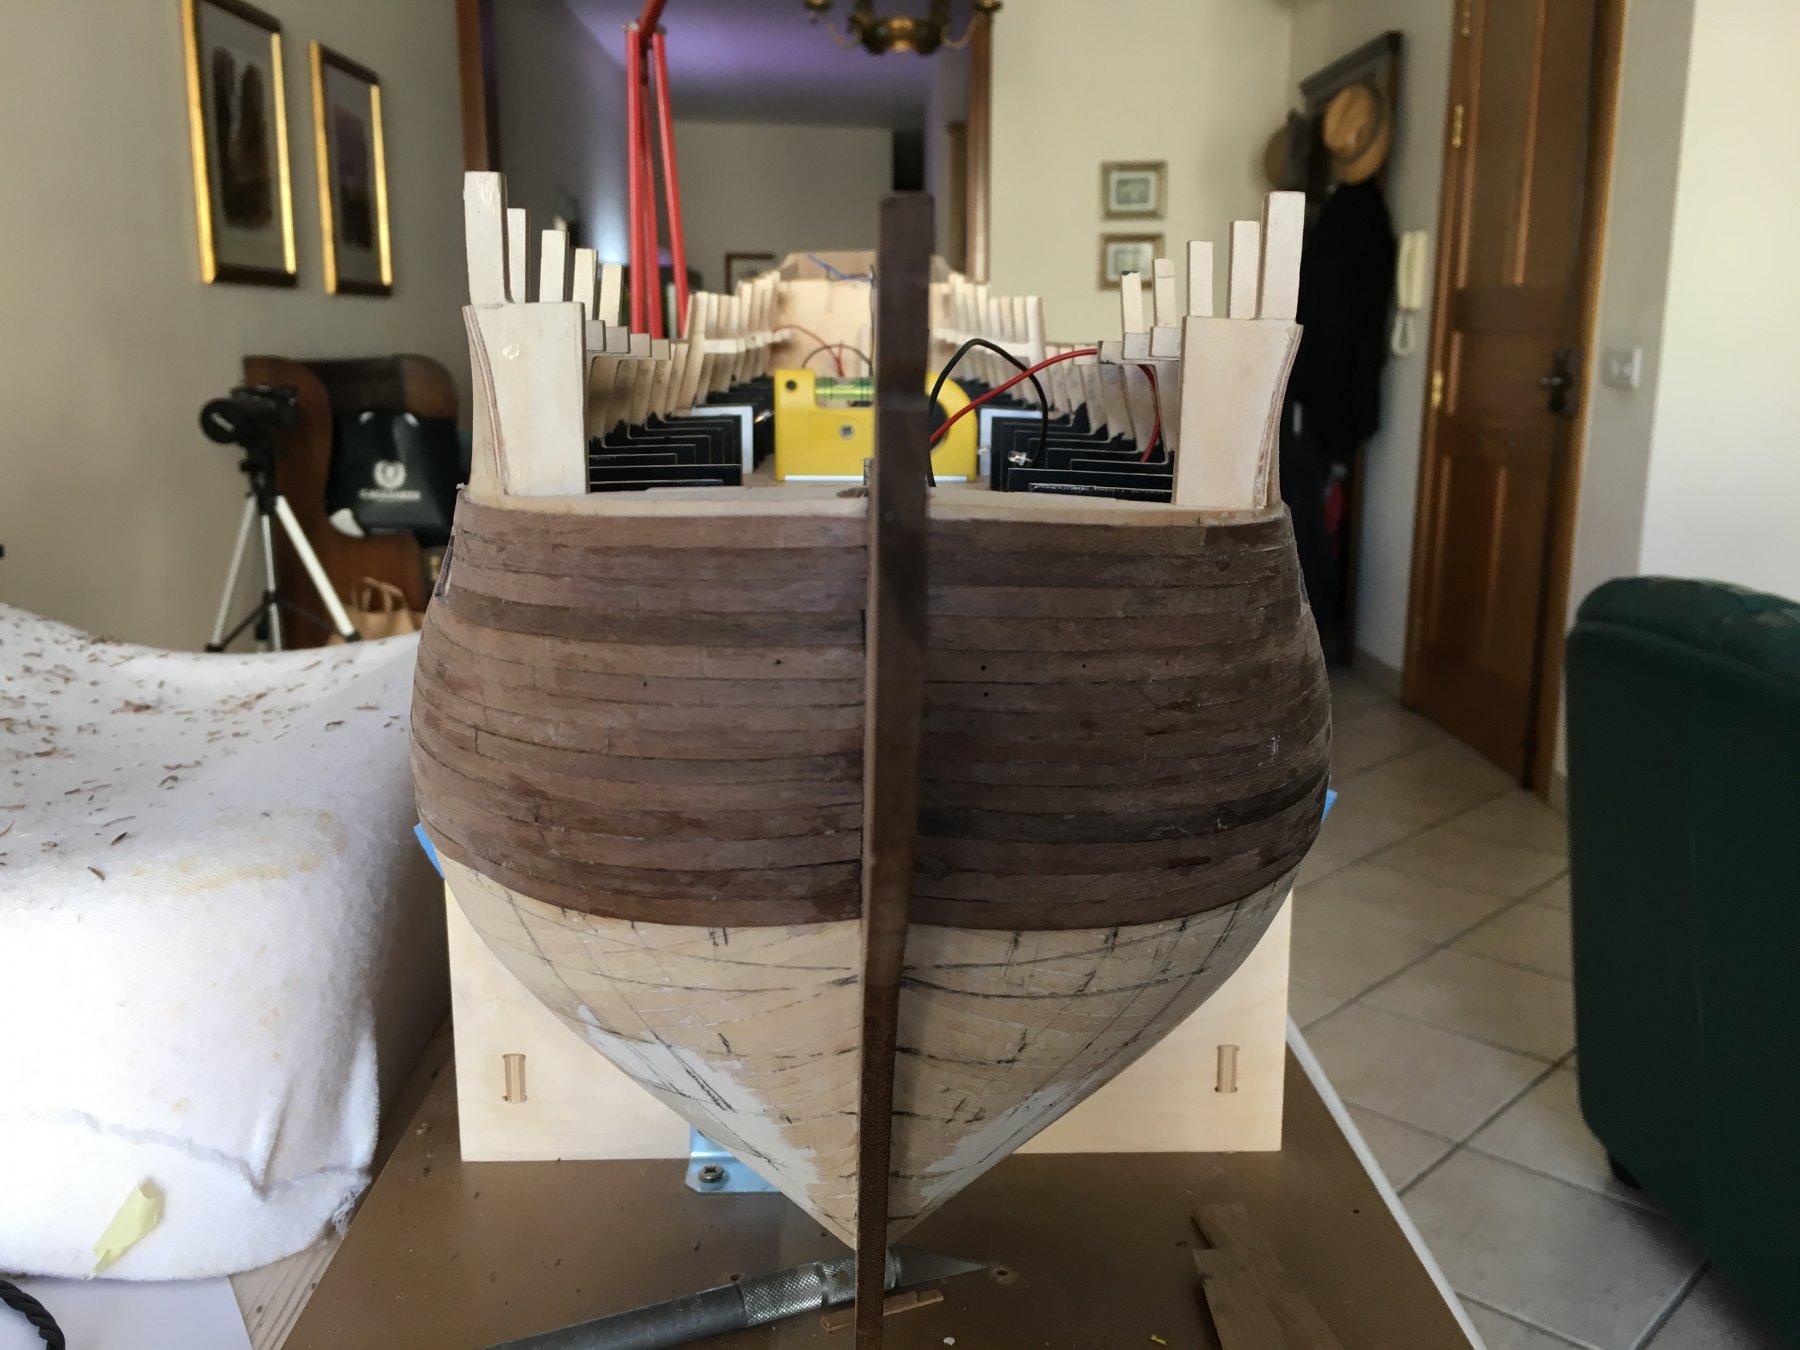
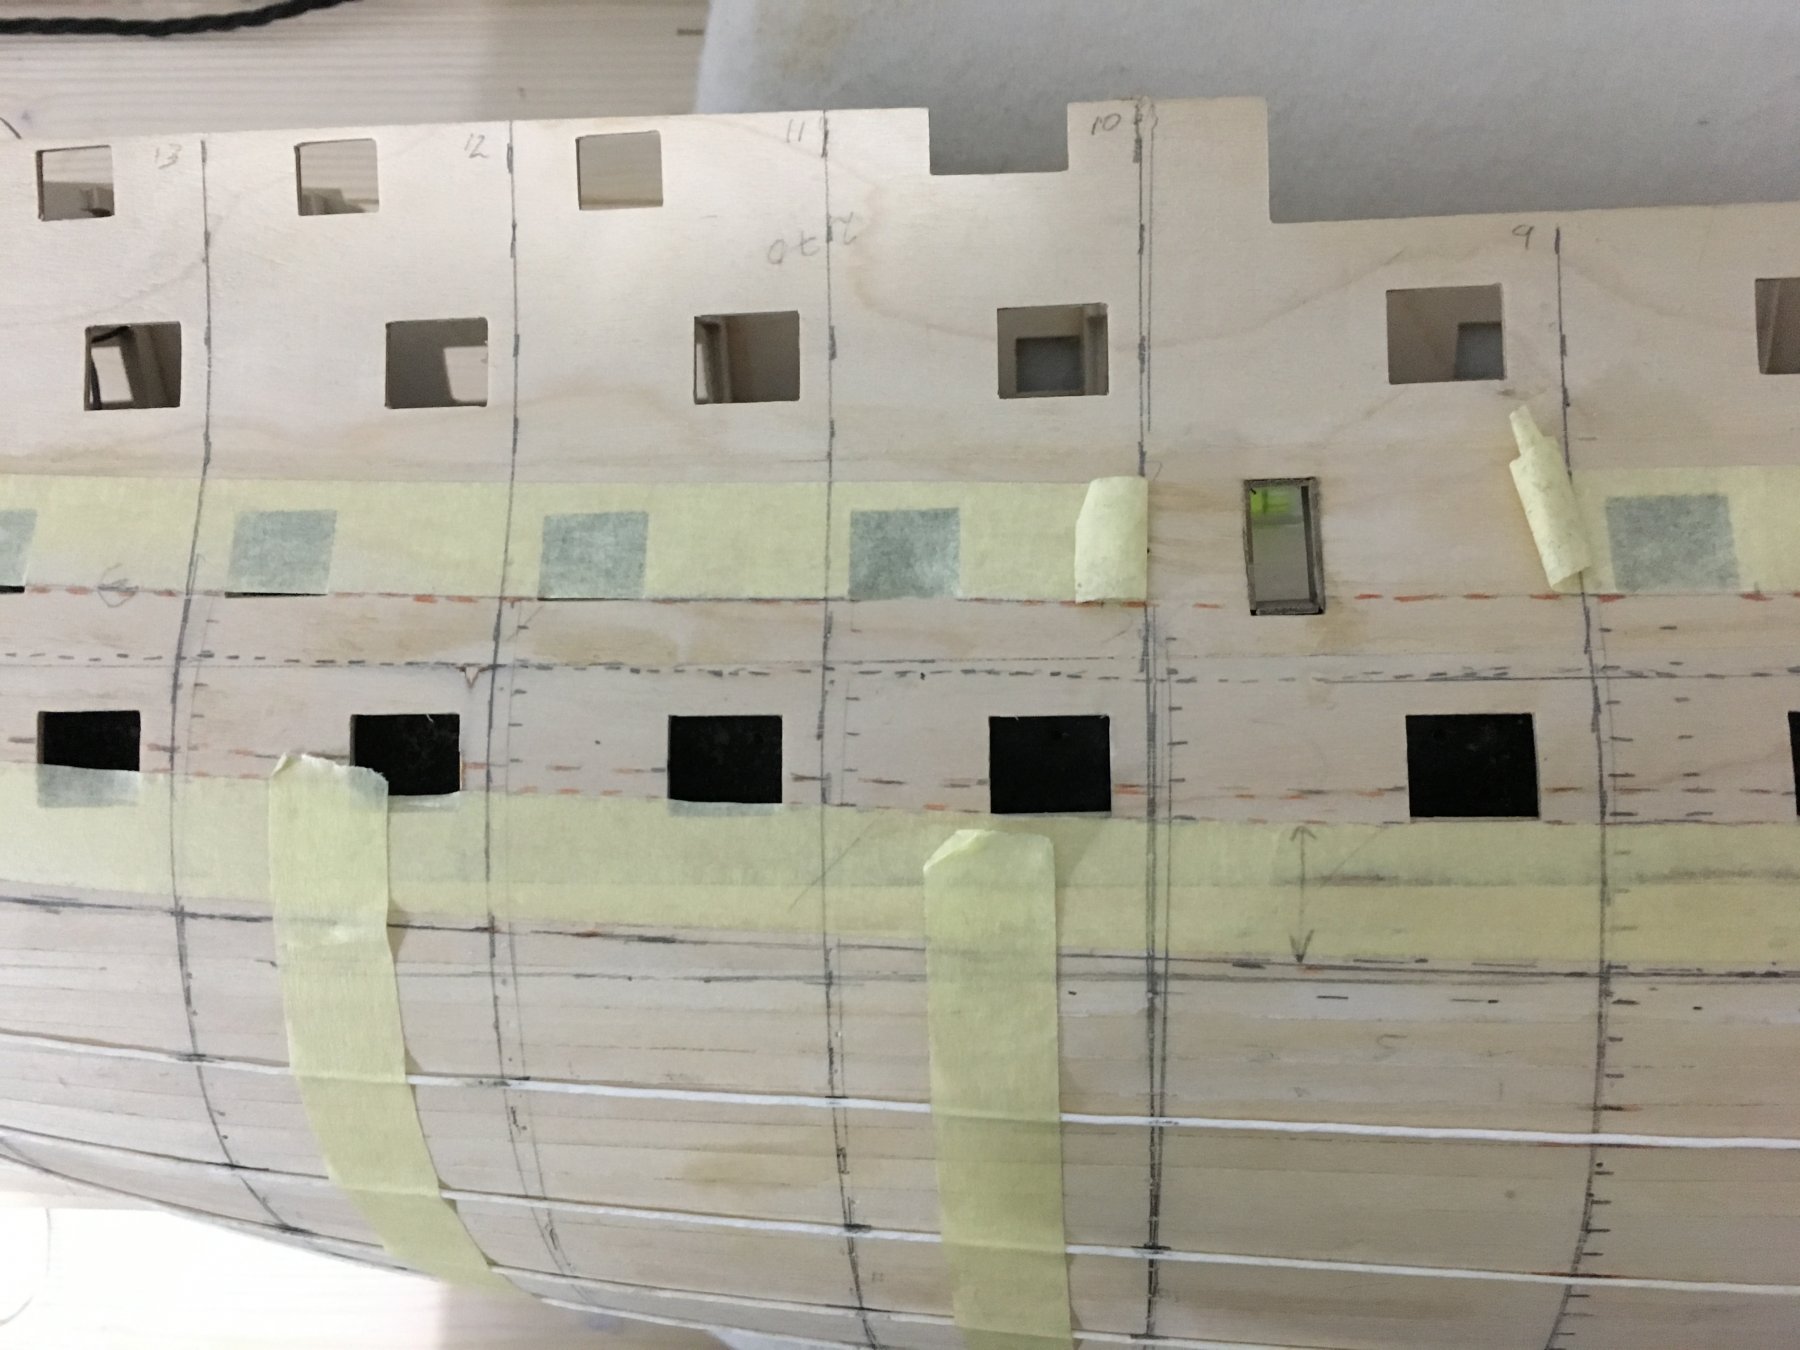
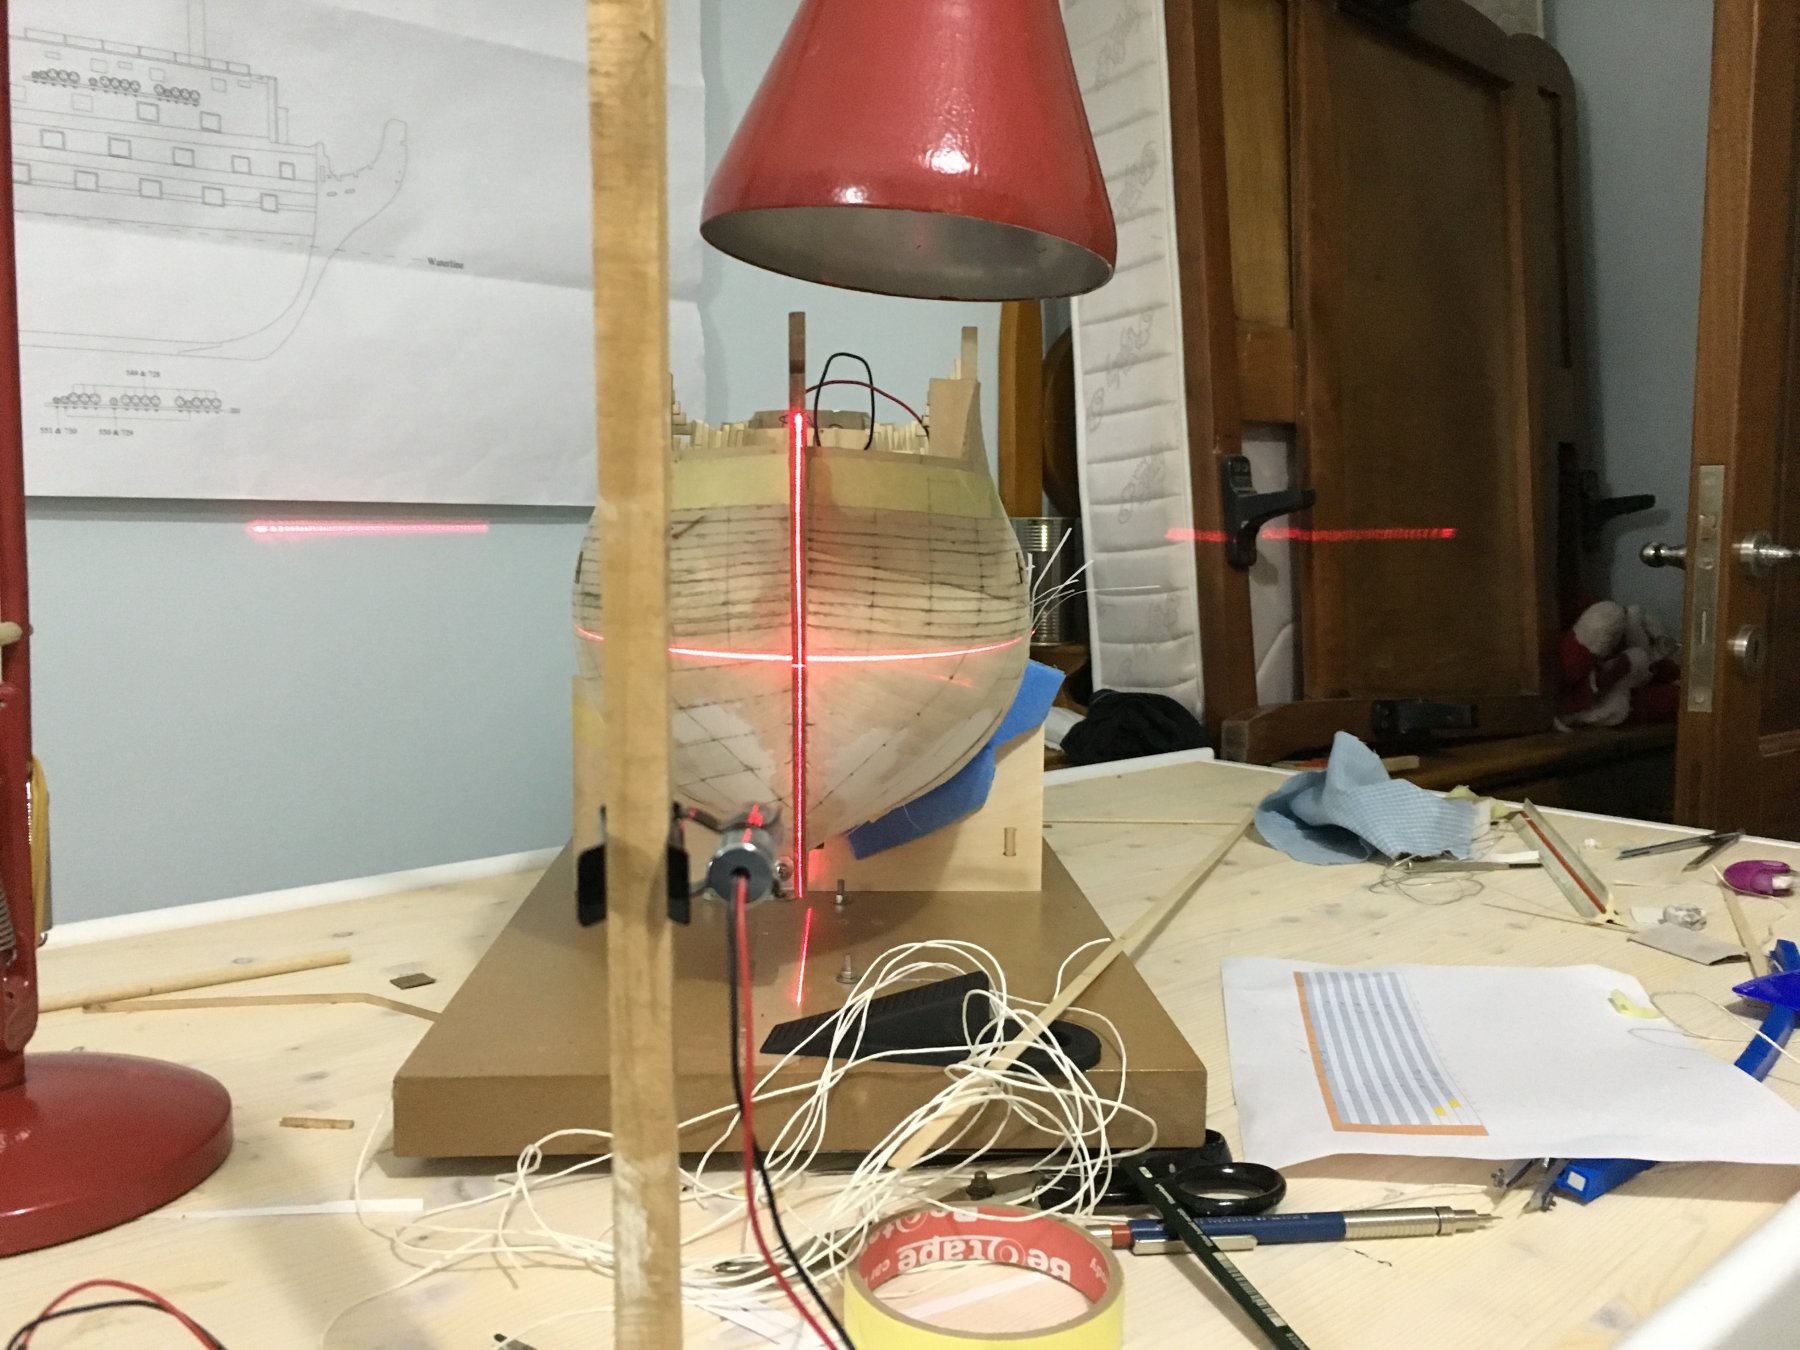
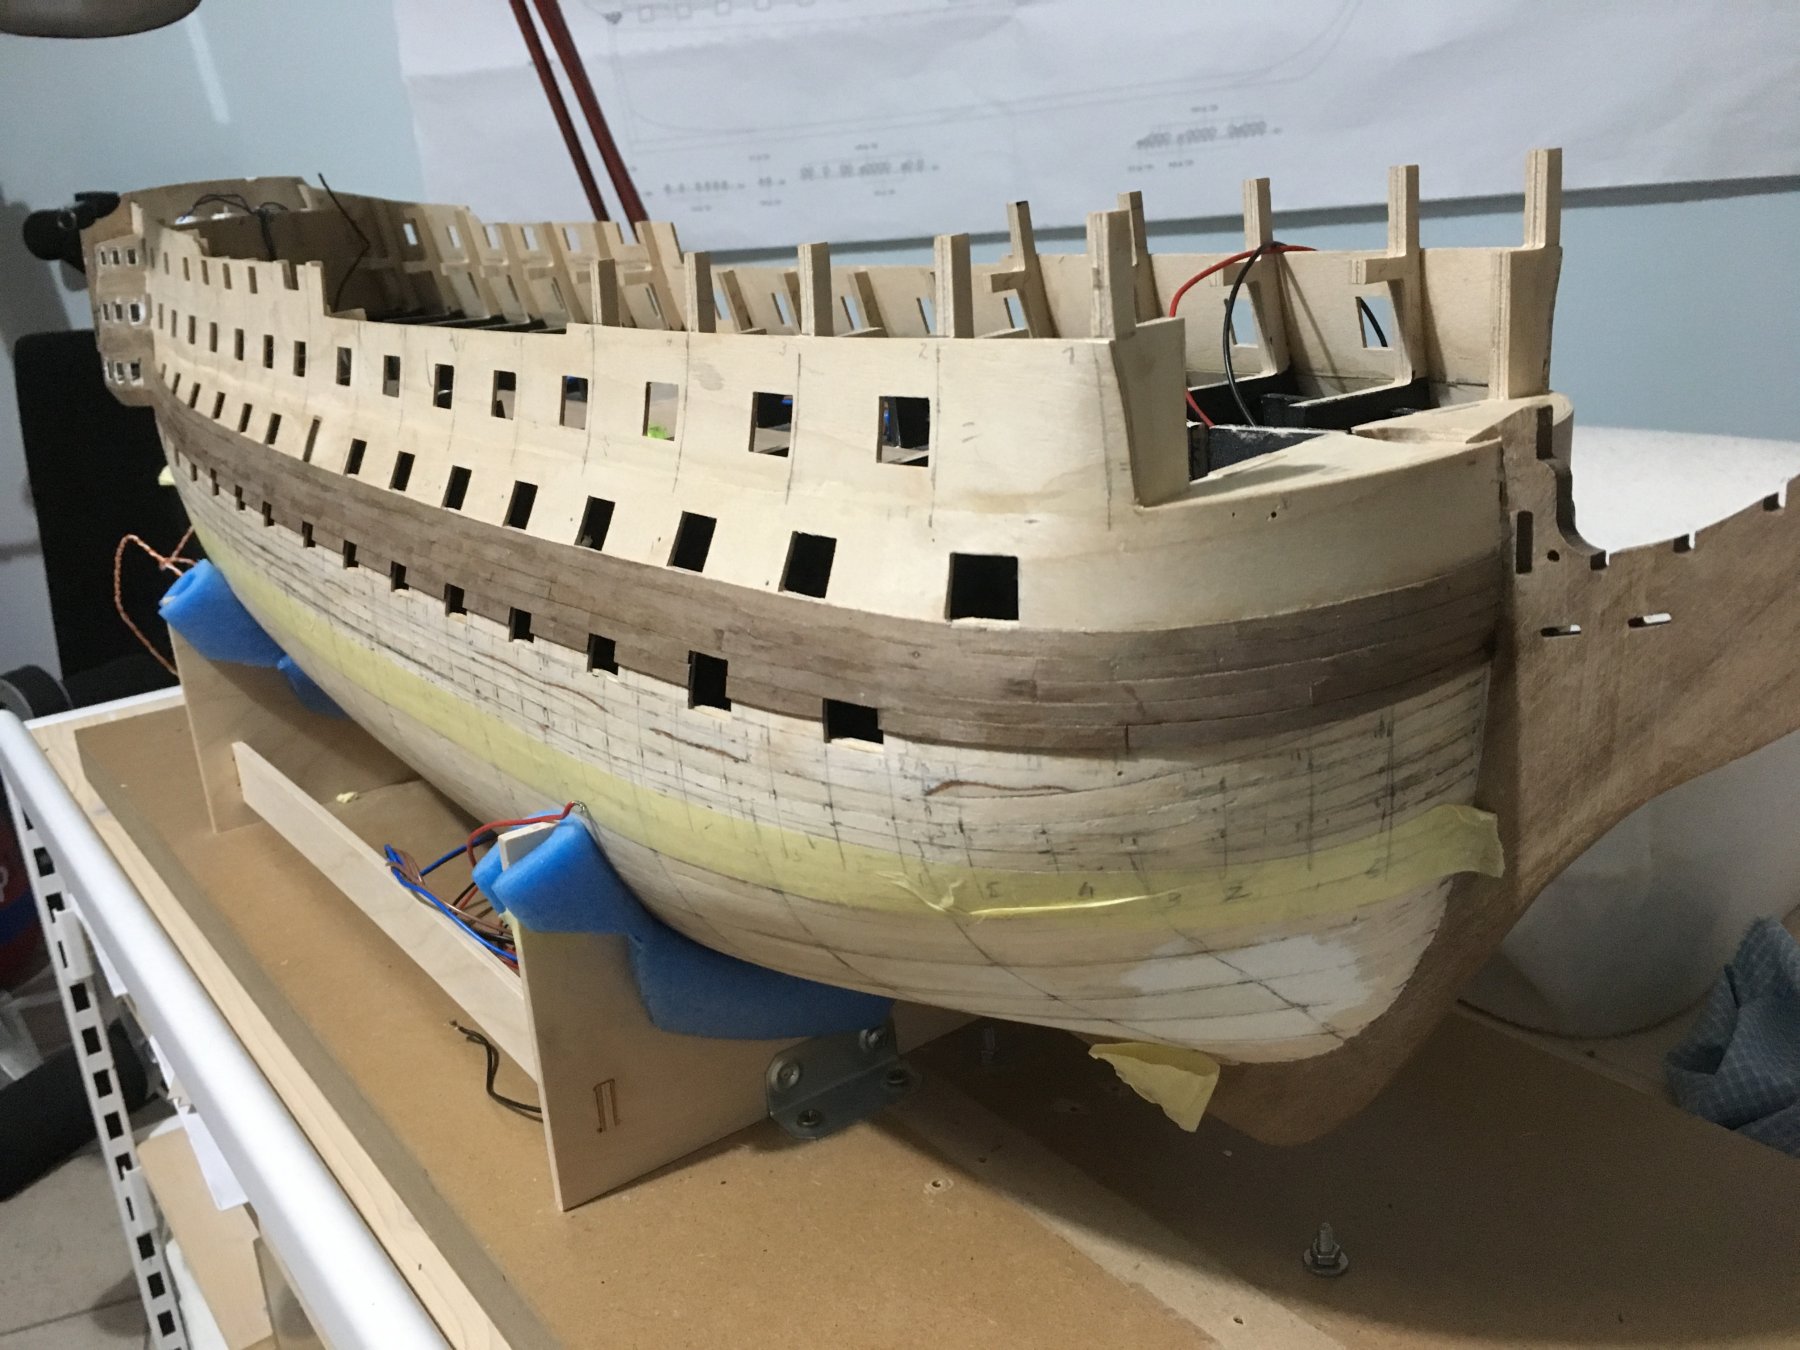
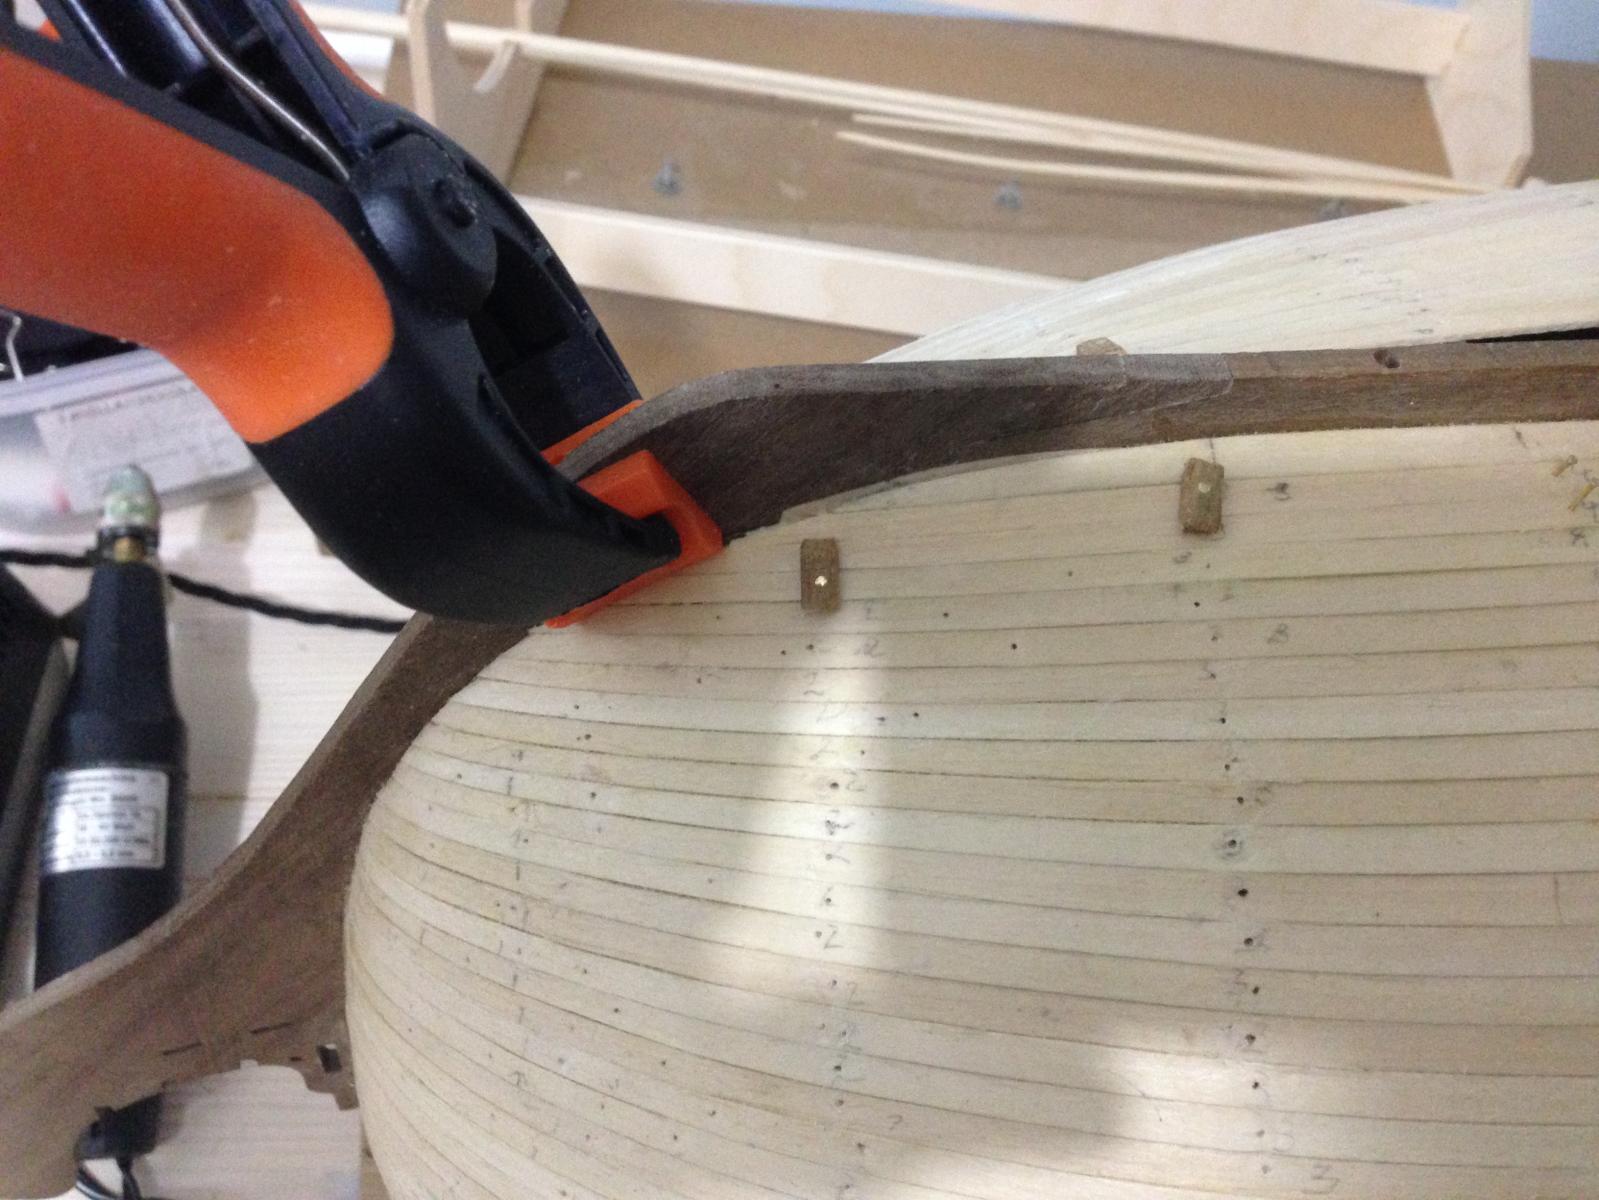
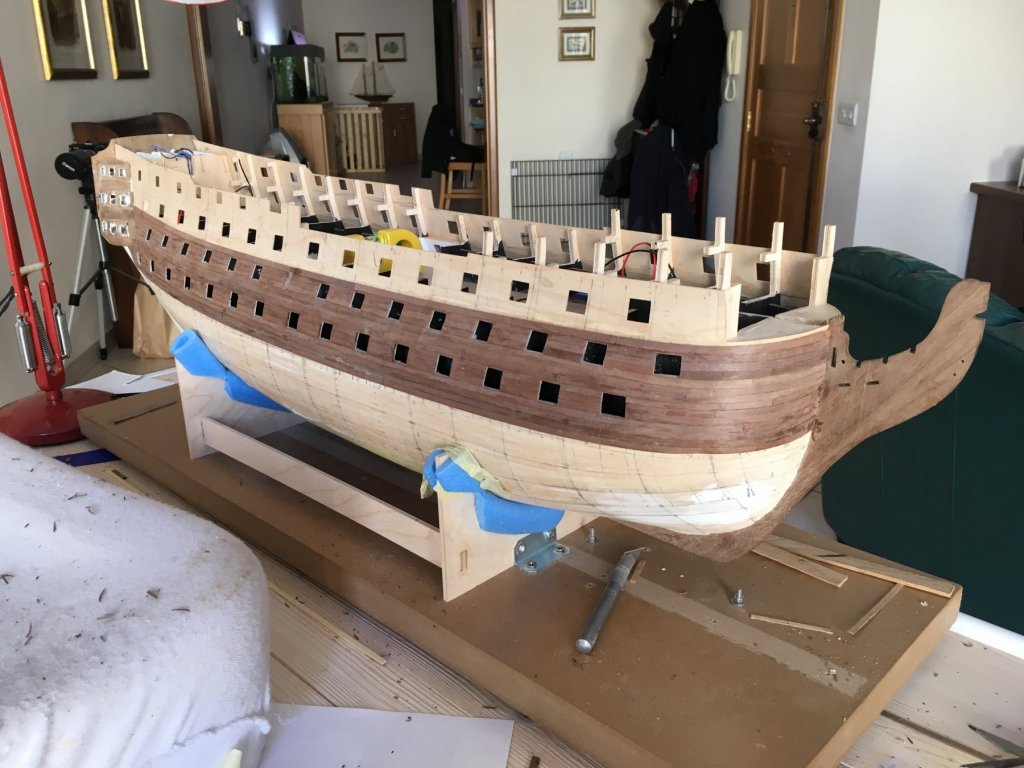
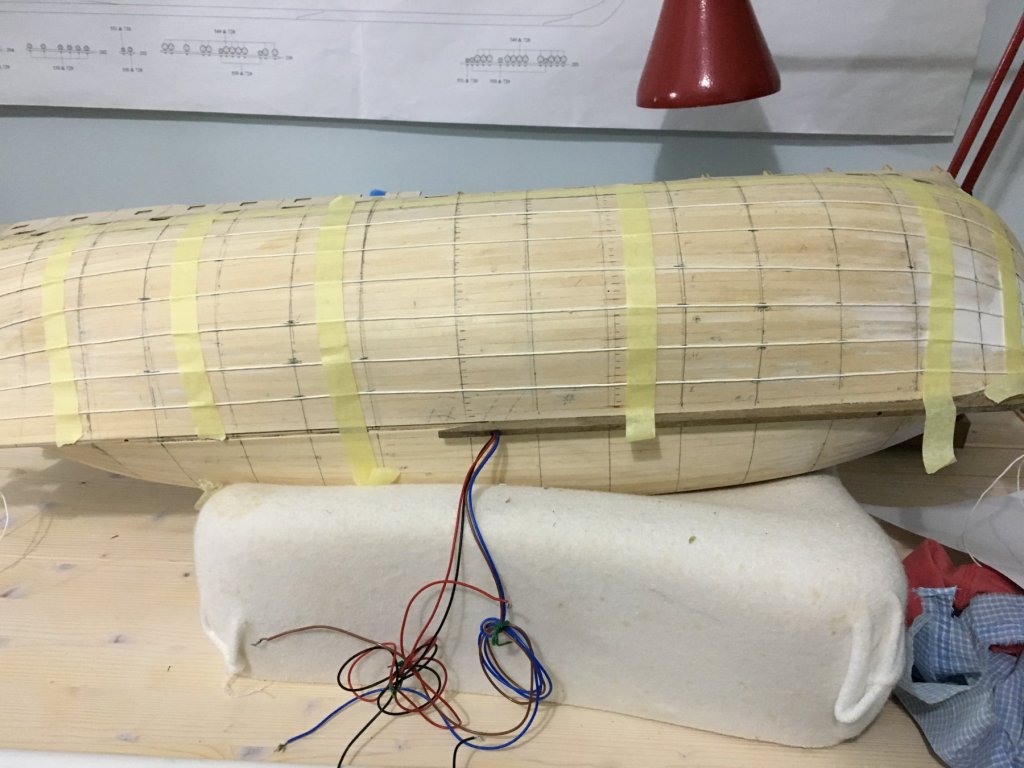
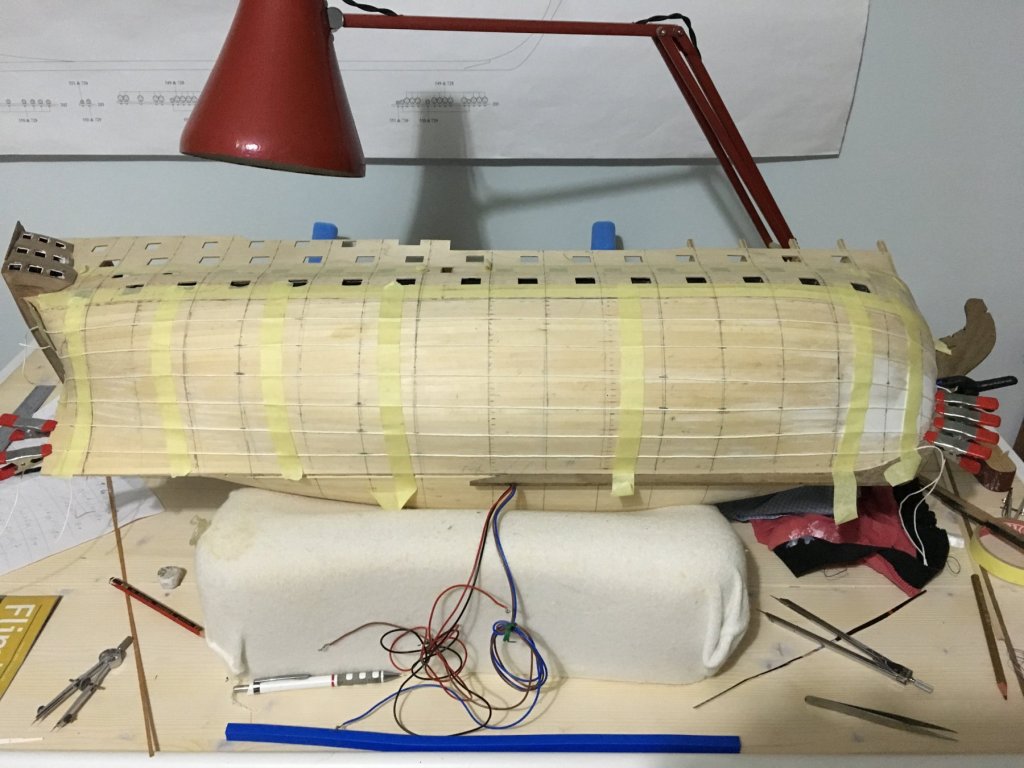
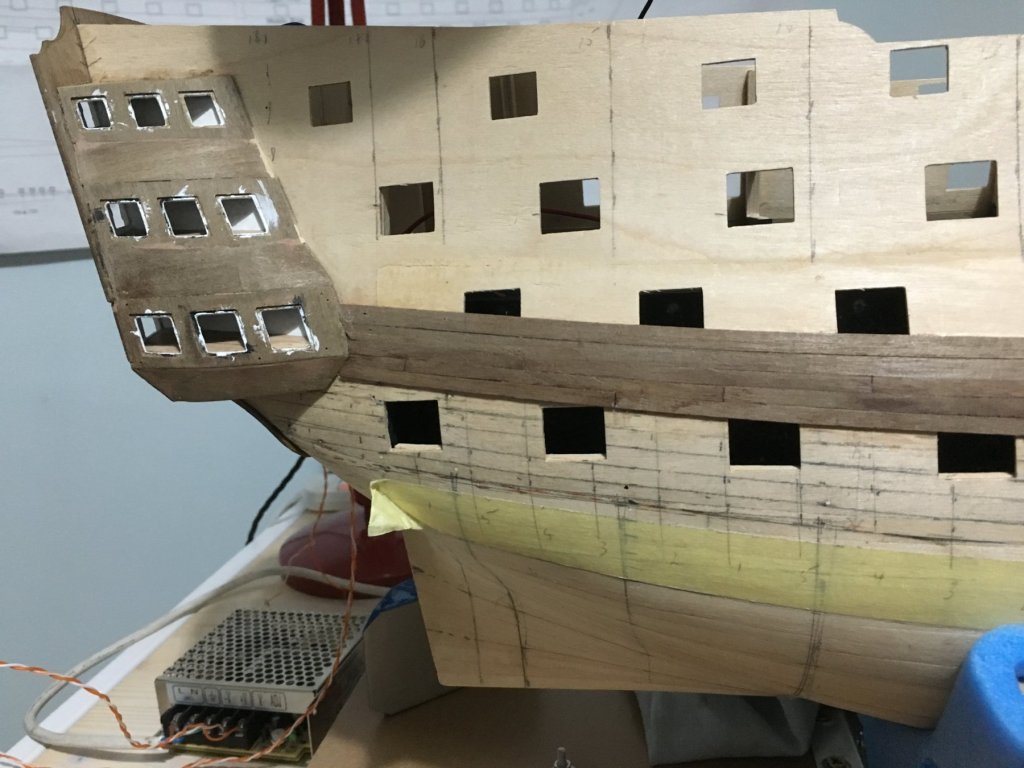
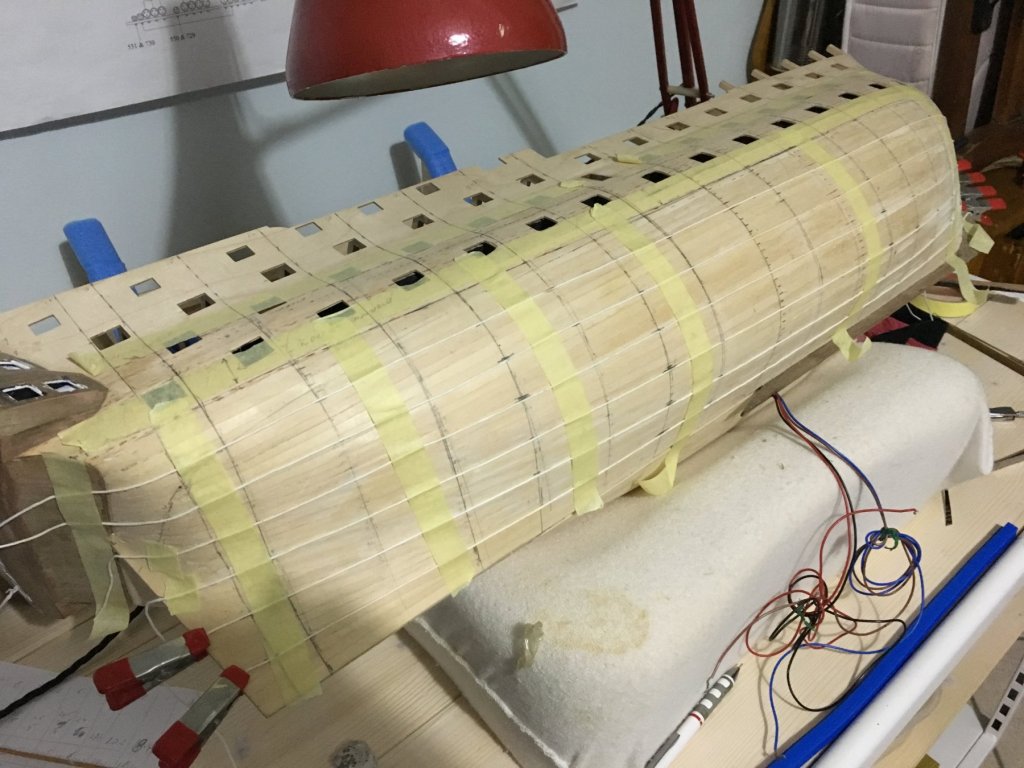
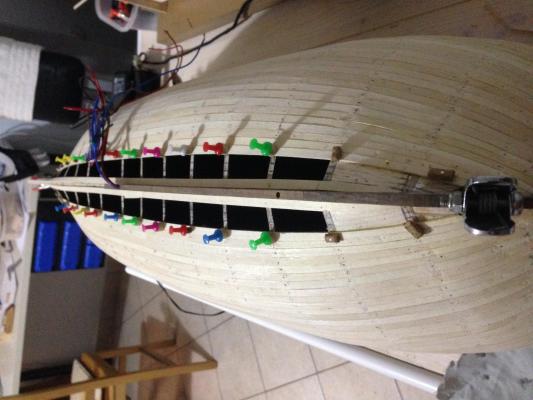
Hello there, my apologies for the long absence from this great forum. Unfortunately I had to shelve the project for some time due to my work. Last summer I was extremely busy and I was working very late in the evenings as well. Now I basically settled down and I started on the Victory build again. I have a lot of catching up to do, visiting your builds. Hopefully coming summer will be more relaxing and have time for the build which I enjoy doing. Going forward I decided on the following hull finish · Upper part of the hull to be paint finished as per the instructions manual. · Lower part of the hull not to be covered with copper plates but leave with the second planking timber finish. · Use the same walnut strips supplied with the kit cut into 85mm lengths to represent 20ft planks and use the four butt shift system. I will take Heinz’s idea of leaving a very small gap between the planks and use black filler. This will enhance the outline of each plank. So here goes my update for my last slow progress: Lined the side doors. Marked the positions of the lower and middle wales and planned the positions of the planks. From the lower edge of the lower wale to the keel I divided into bands. I made this with string by measuring the widest part of the hull and divided in 25mm bands (5 planks x 5mm), making sure nowhere else is wider then 25mm or narrower than 12.5mm (half the total of 5 planks). If everything goes according to plan there should be no stealers. Took me quite some time to plan the bands. Marked the individual runs of the planks from the upper edge of the middle wale down to the lower edge of the lower wale. First rows of second planking. You can see that some of the planks are not cut into 85mm lengths. That is because they are going to be covered again with the wales. Robert


- 527 replies
-
- 6
-
-
- caldercraft
- victory
- (and 1 more)
-
Paul / Bob, You are right, in fact after I finished it with a satin coat I sanded it lightly again with a piece of very fine steel wool and brought it back to matt. Jimz66, Thank you for your comment. Robert
- 527 replies
-
- 1
-
-
- caldercraft
- victory
- (and 1 more)
-
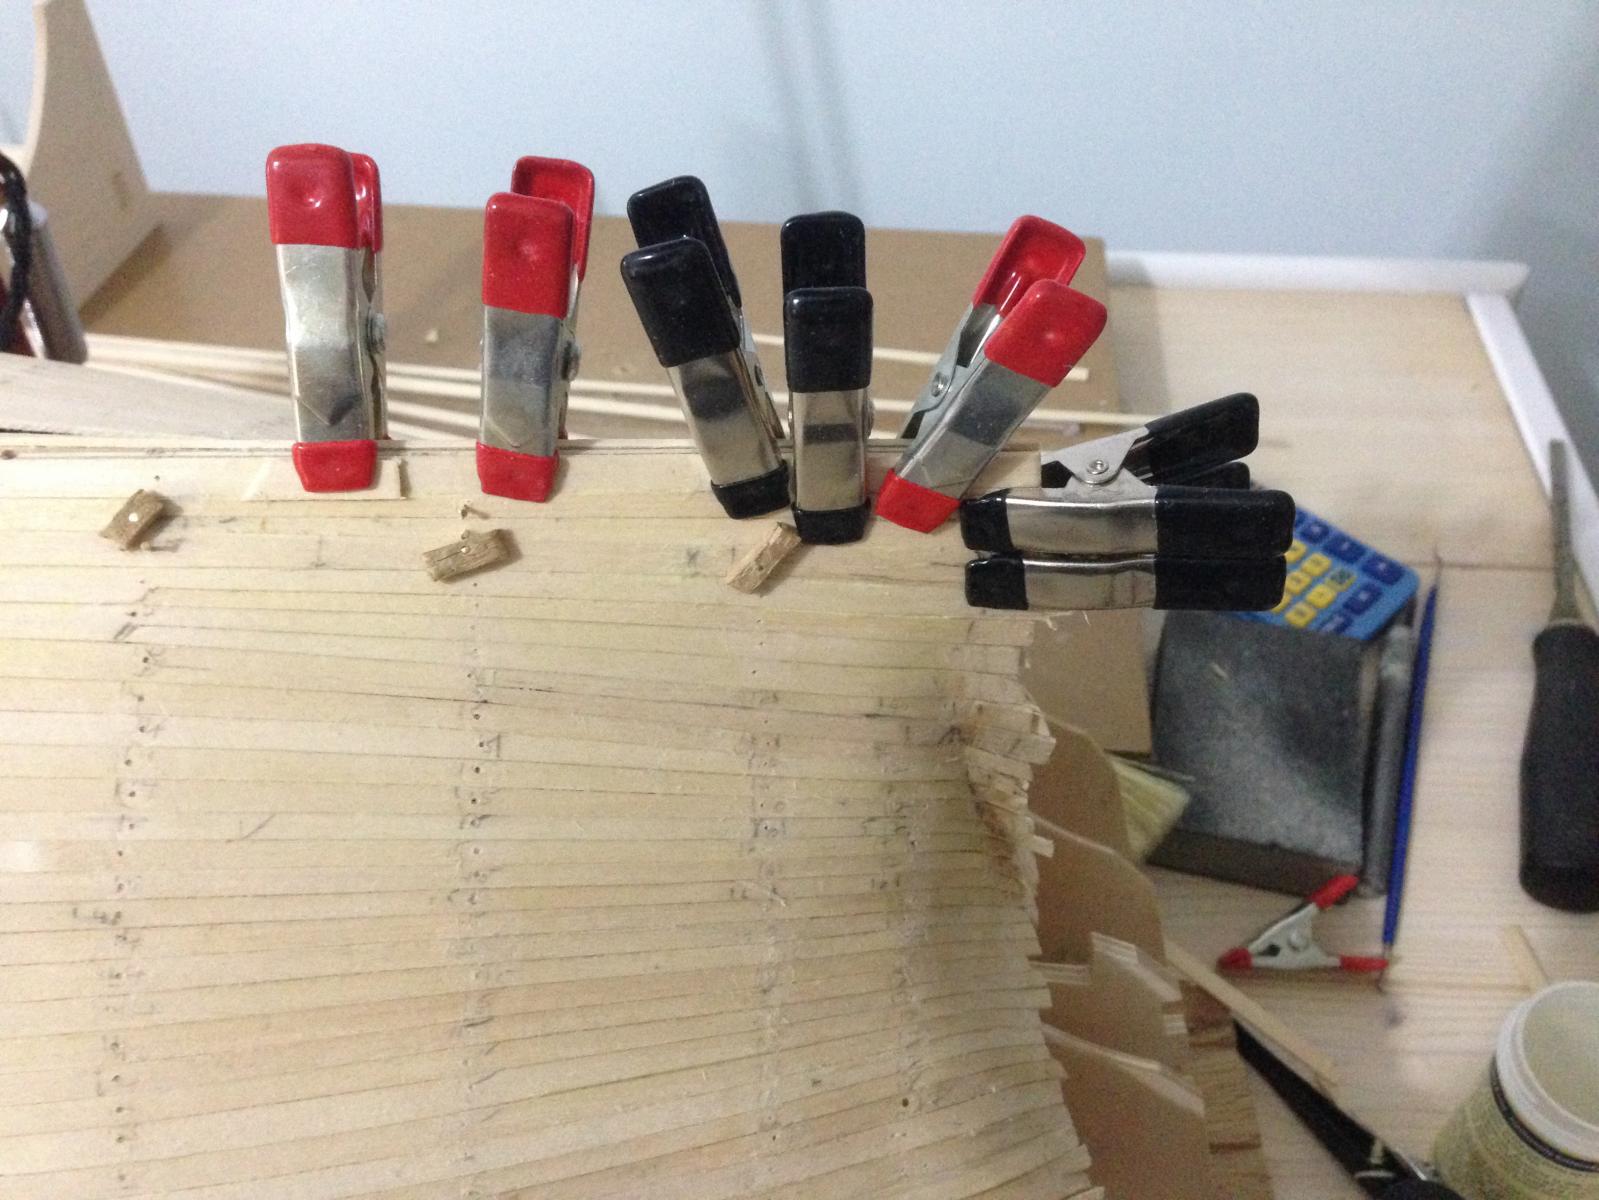
Thank you Bob. You are right about the counter pattern in fact while wetting and bending it ply sheets had already started to come apart . I had to insert glue at the edges and clamp it. Robert
-
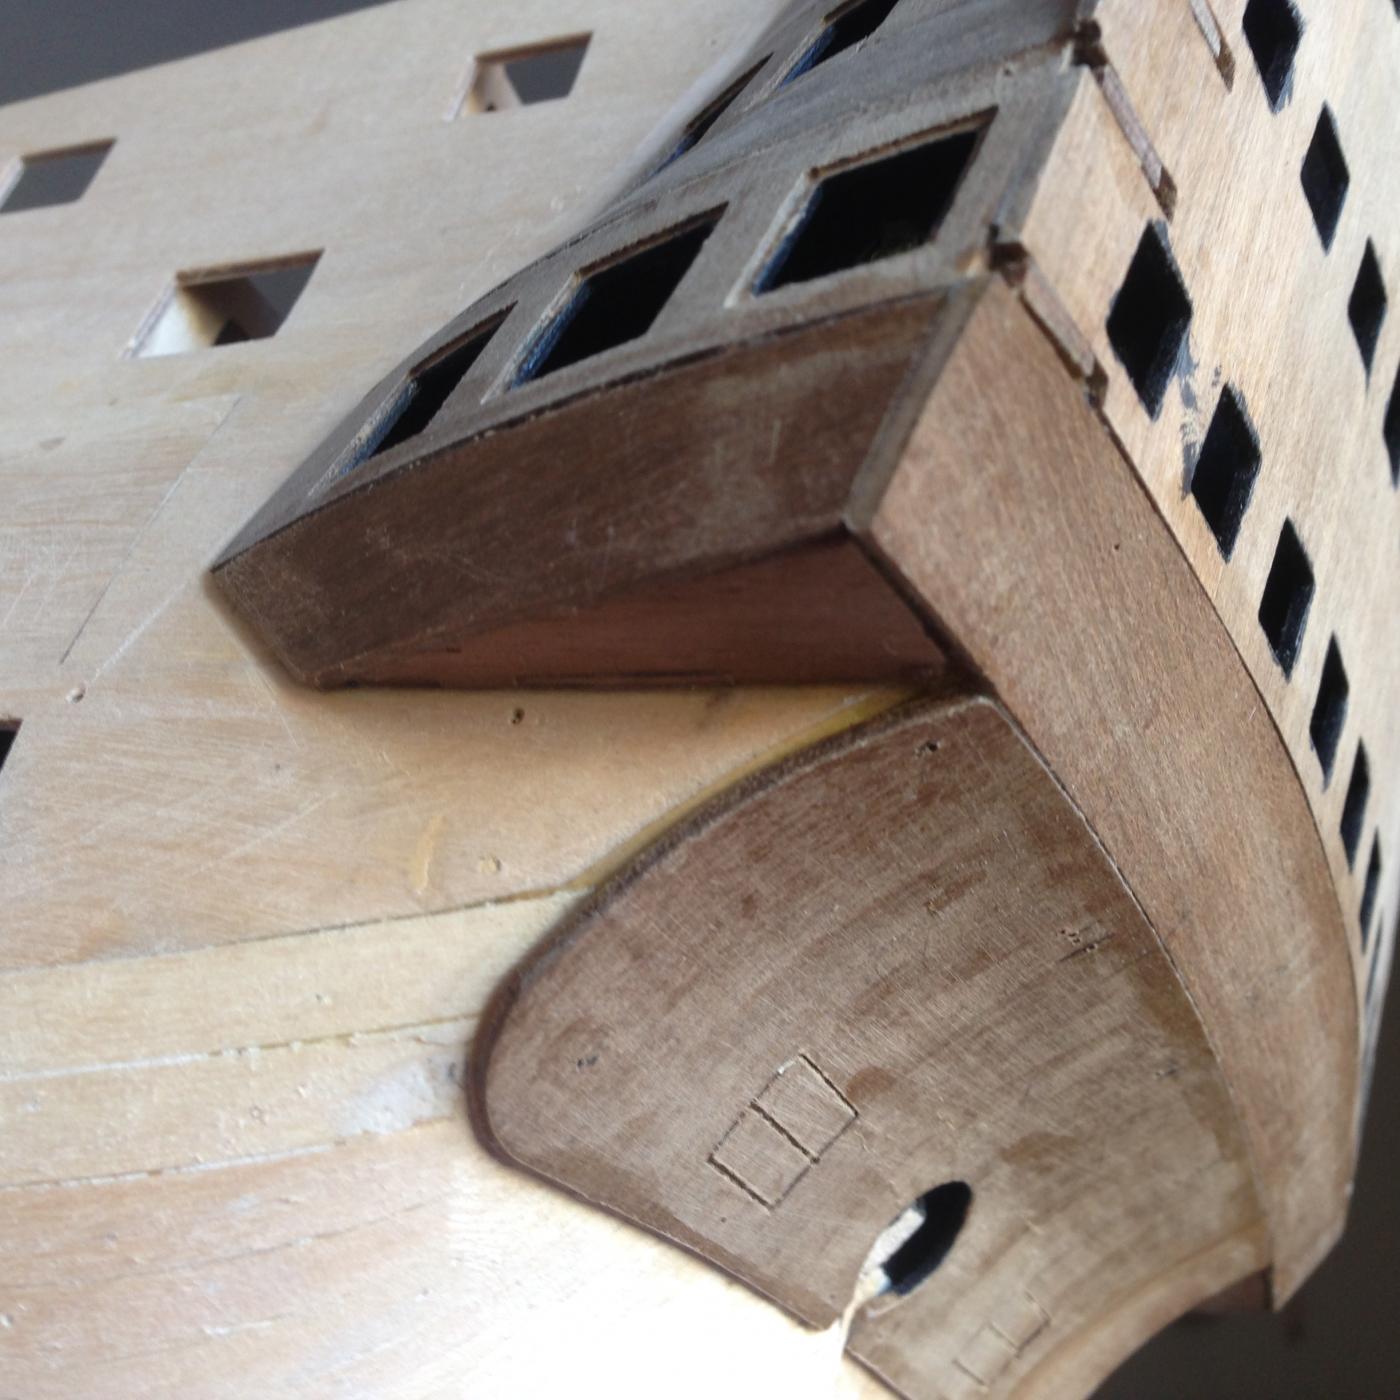
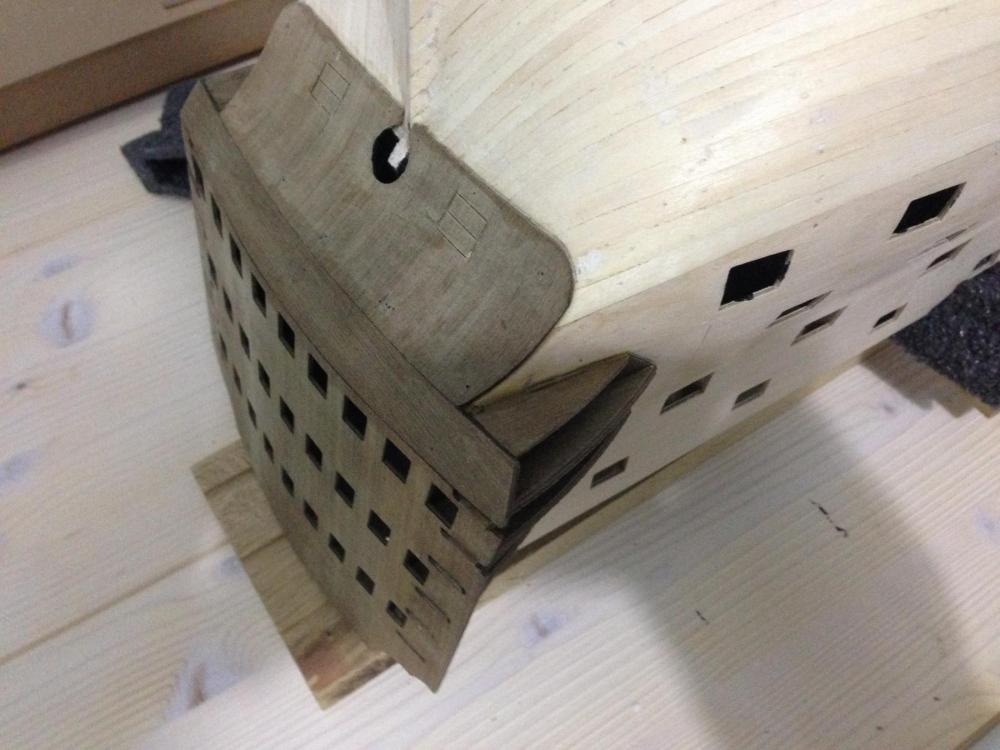
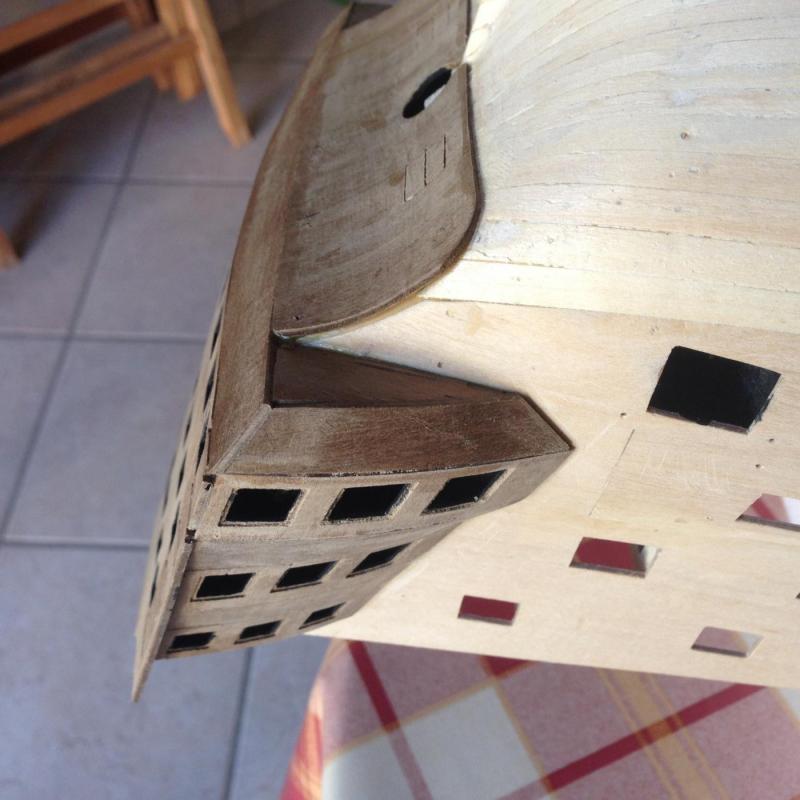
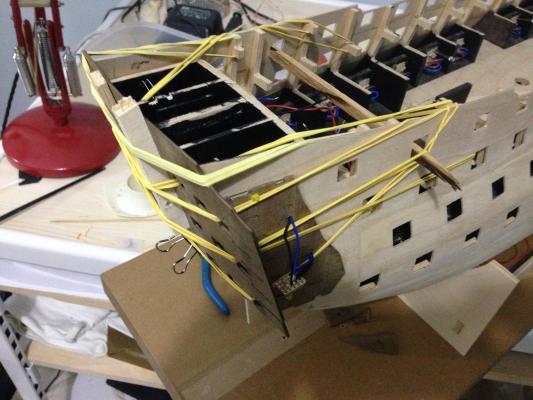
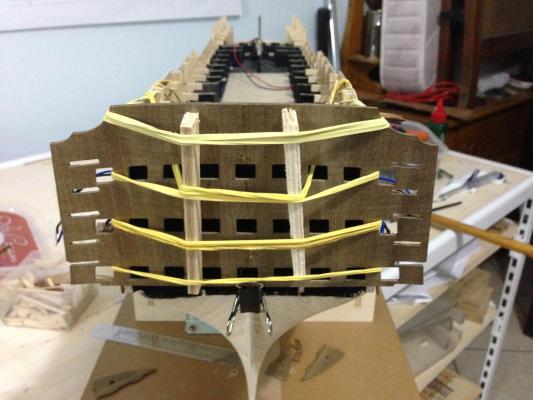
Thank you for your comments and likes, really appreciate them. They give me more determination for the next step. More work on the quarter galleries. Bent and fitted the upper and lower counter patterns. Fitted the skins. Robert


- 527 replies
-
- 6
-
-
- caldercraft
- victory
- (and 1 more)
-
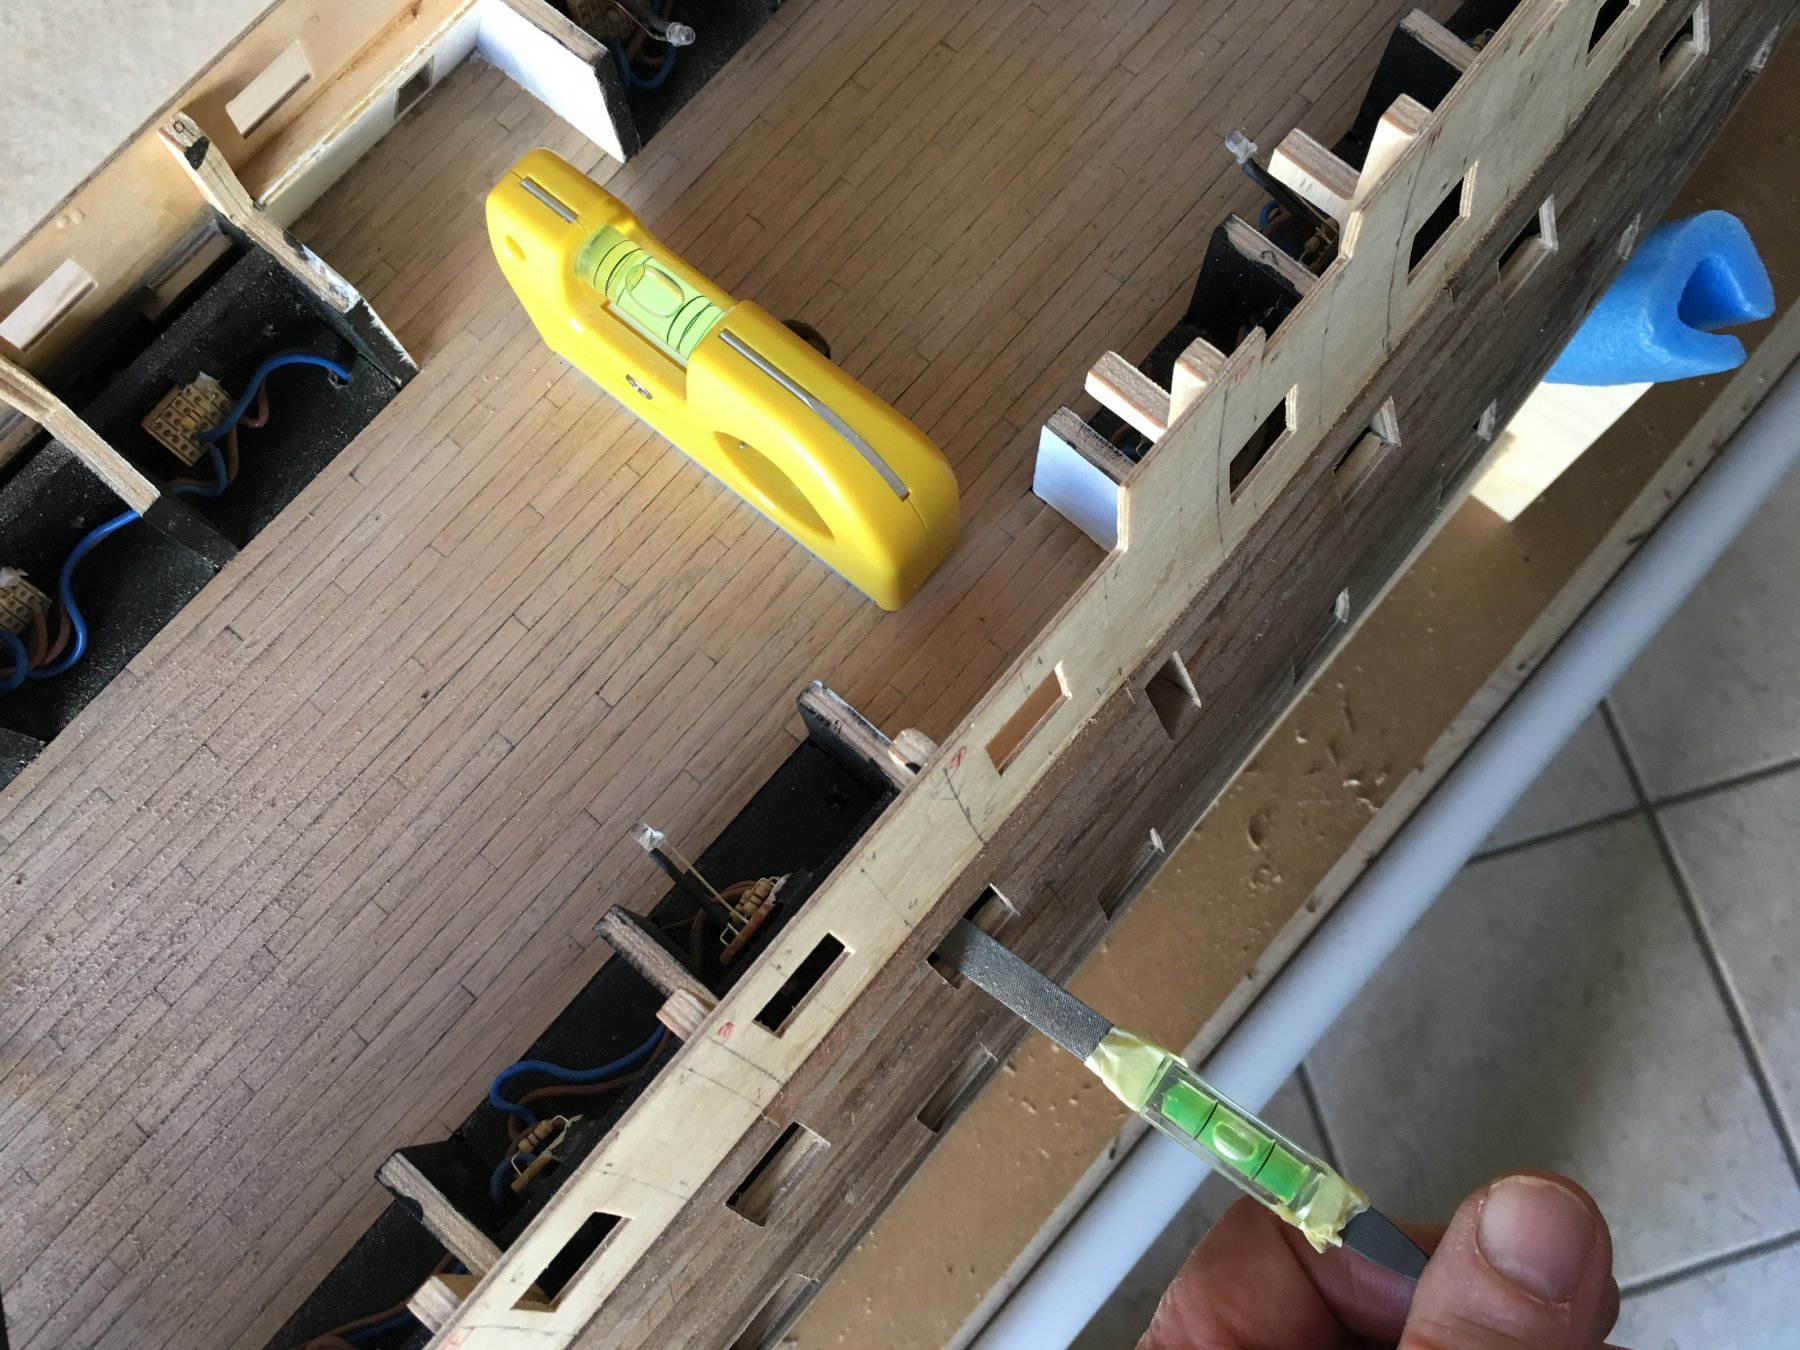
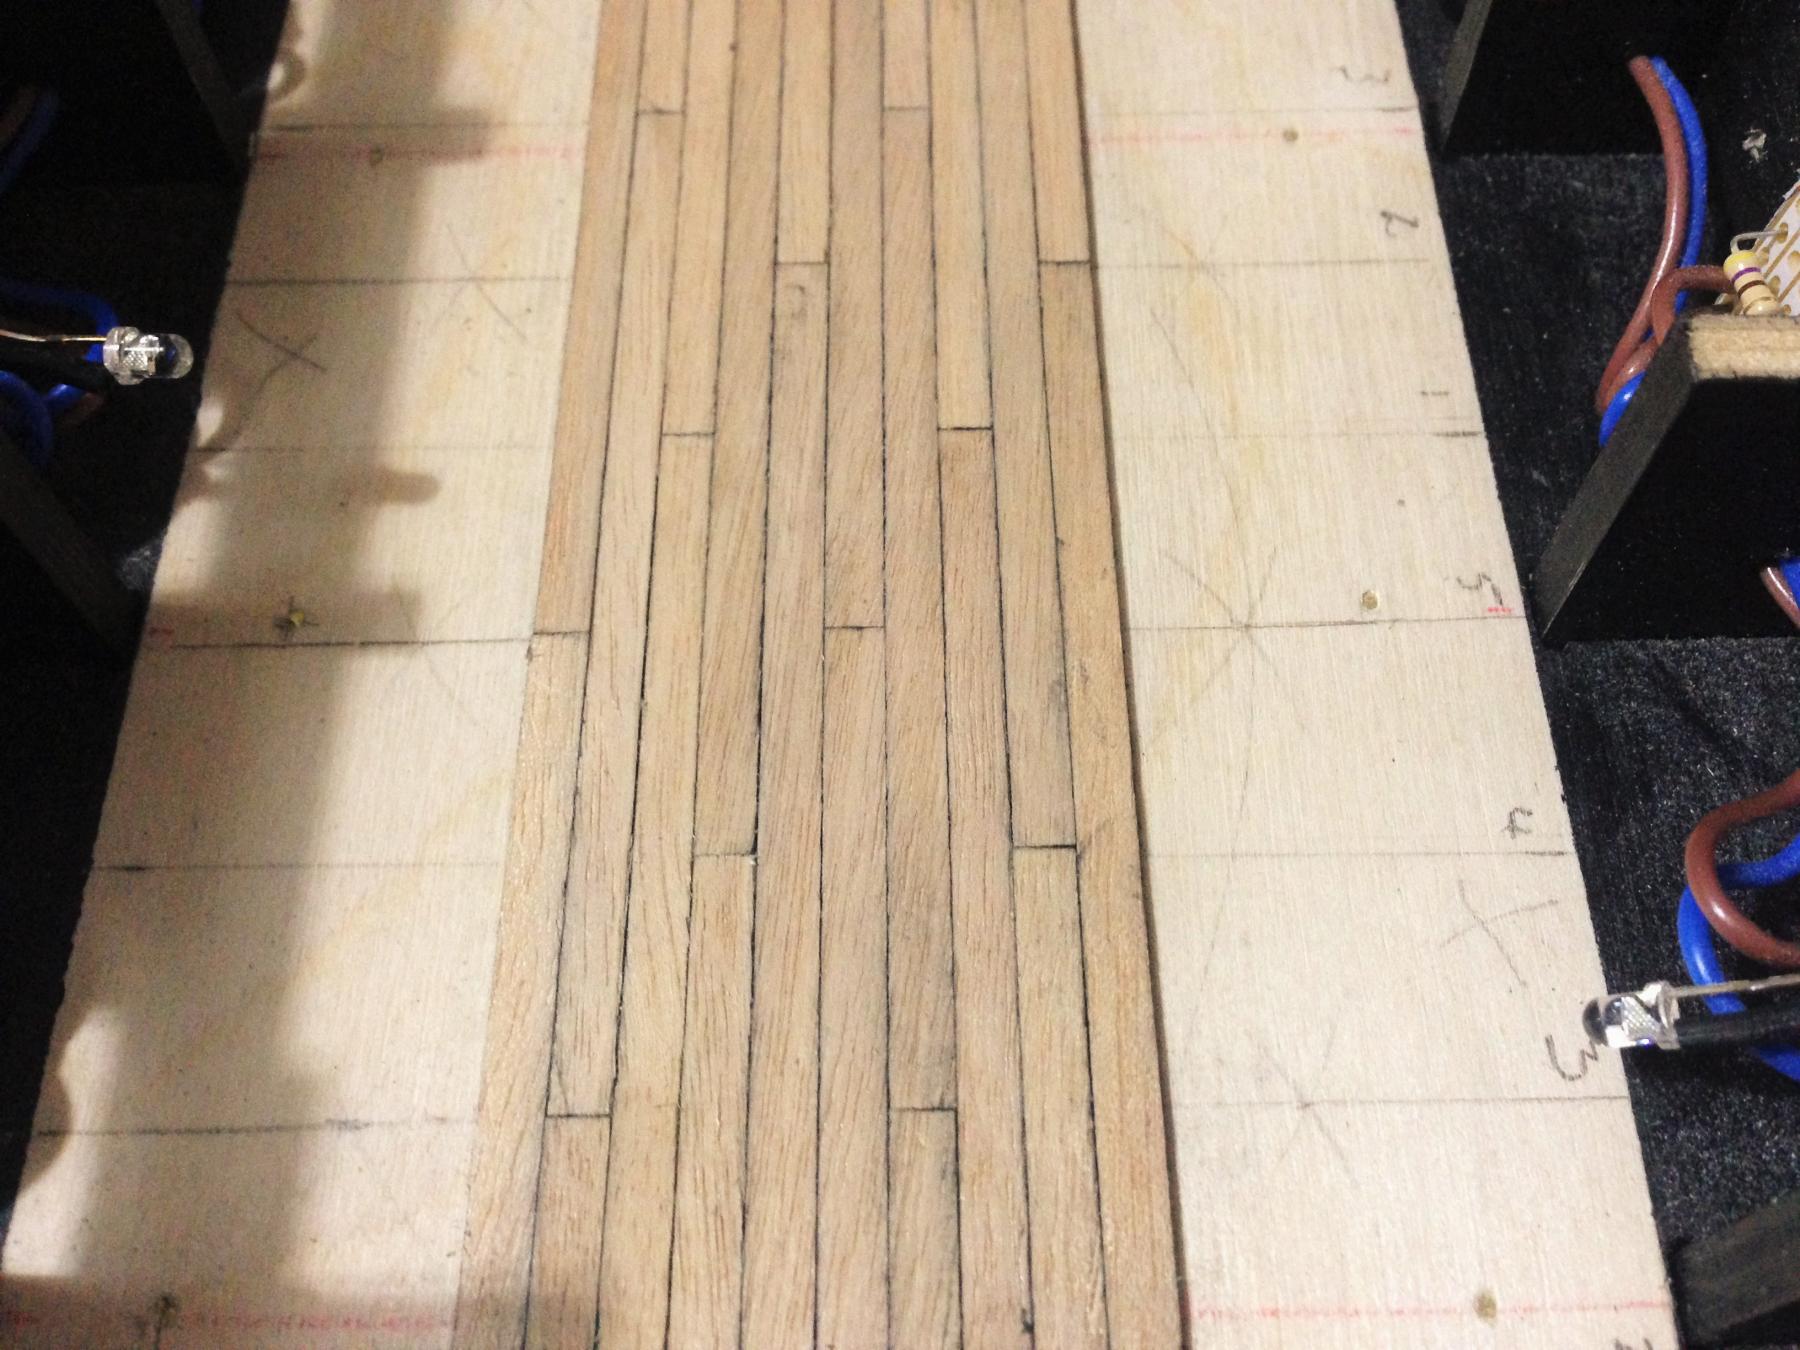
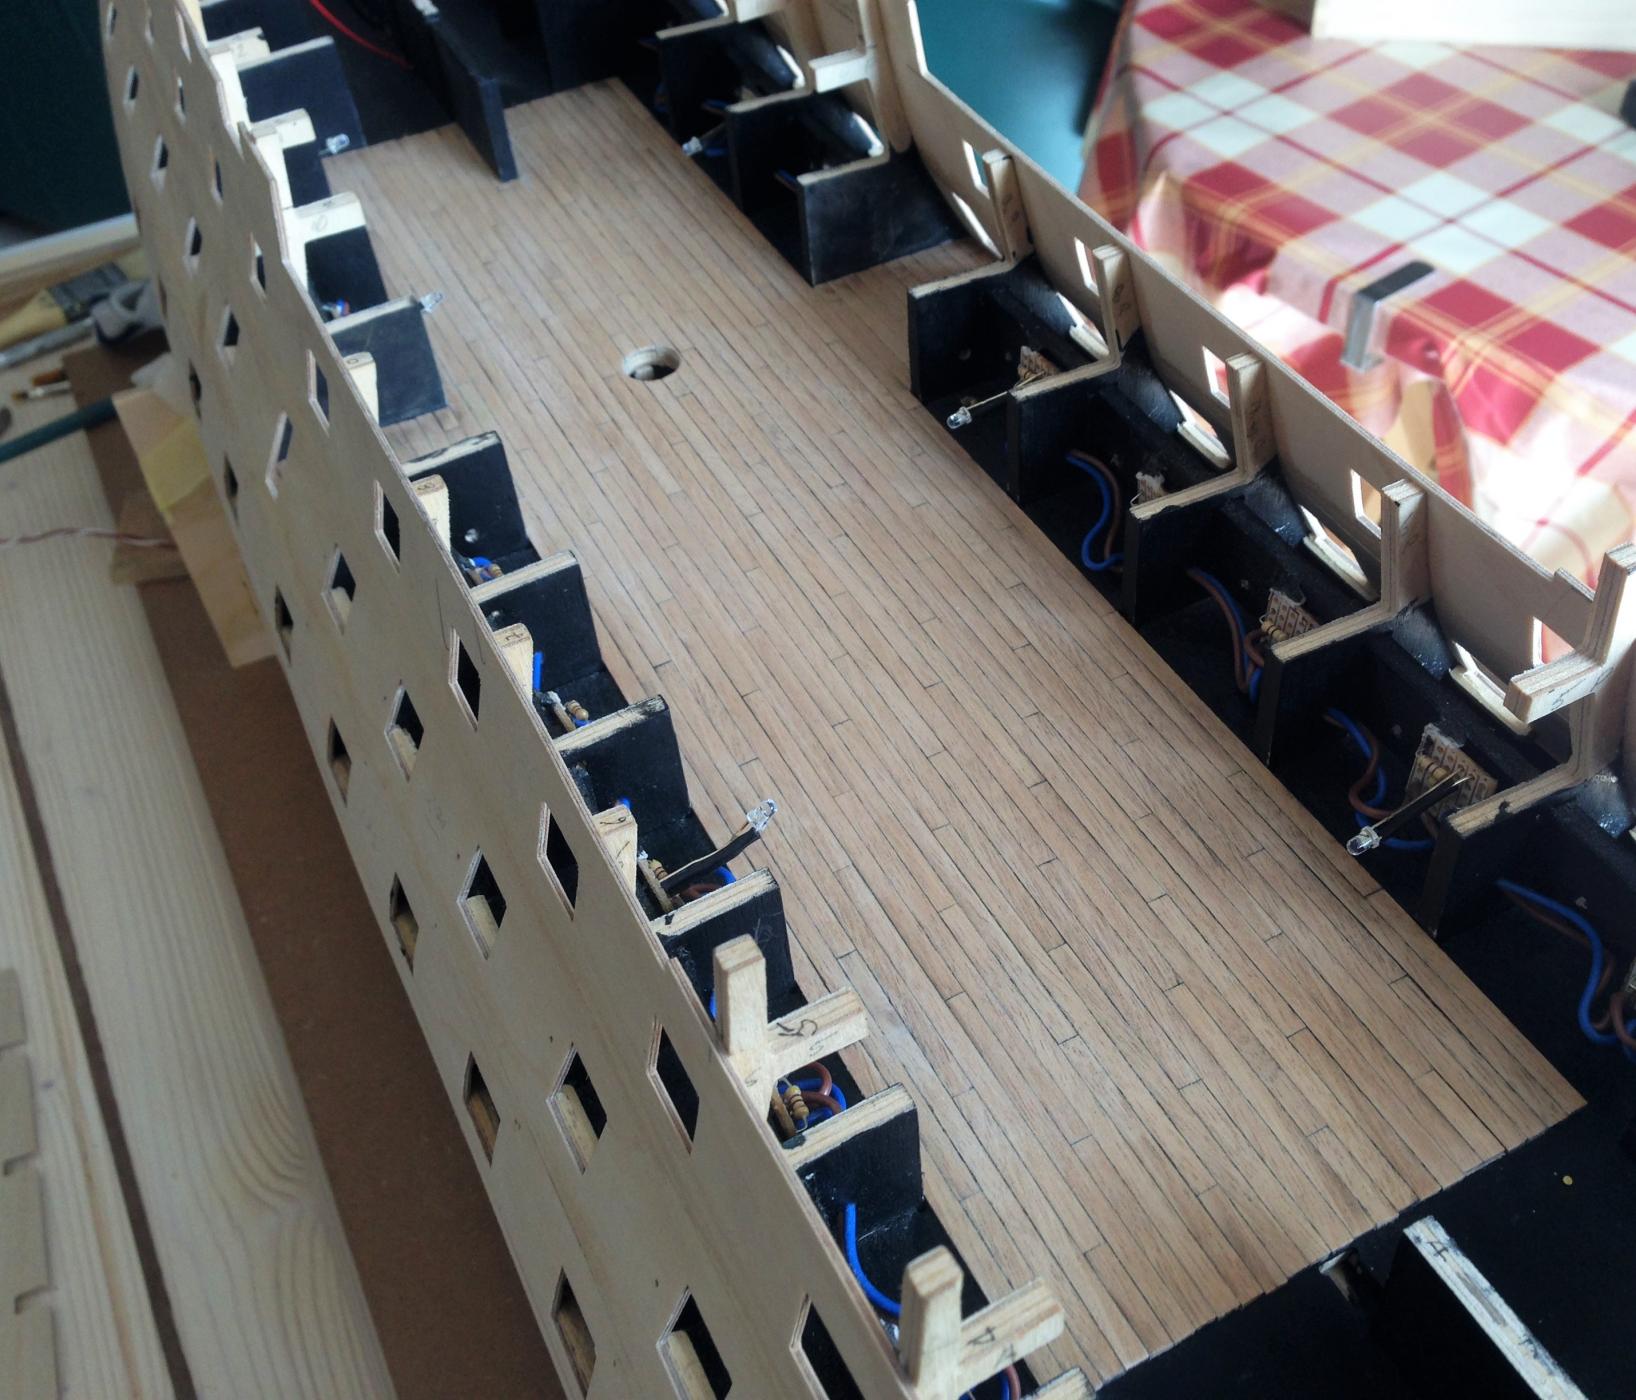
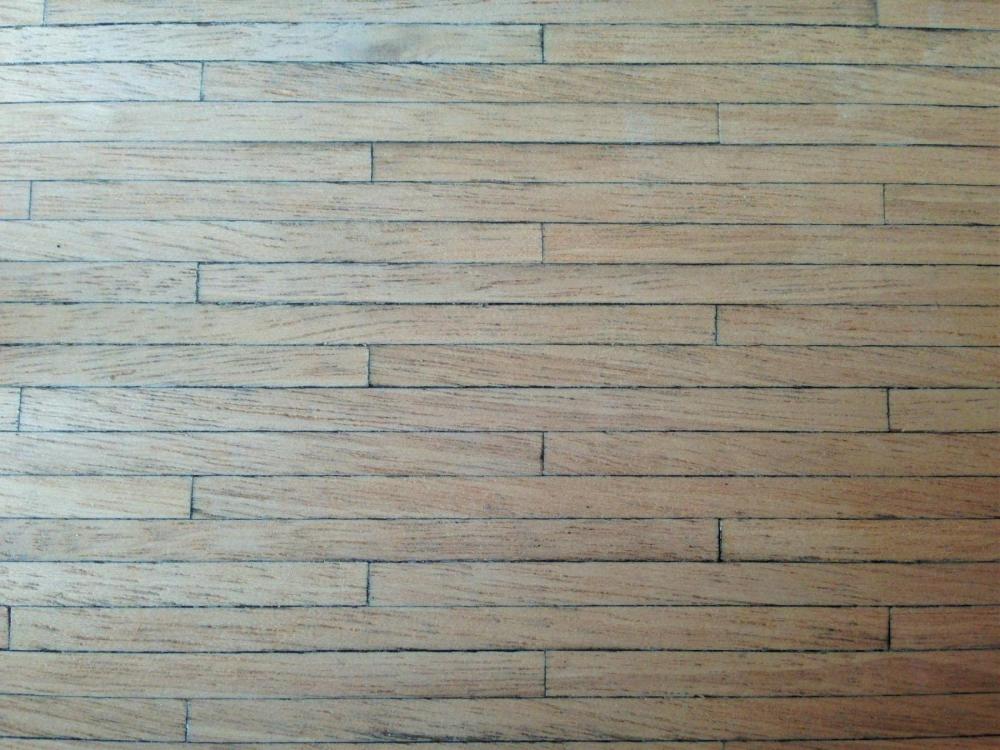
Not much to show. Unfortunately I am not finding enough time as much as I would have liked to. I finished planking the middle deck. I used the four butt shift system. There is a very good article in this forum's 'Ship Modelling Resources'. The title is Simple Butt-Shift Deck Planking by Ulises Victoria. For the plank edges I used a 6B pencil. I gave it two coats of matt varnish but was thinking of finishing it with a coat of satin matt varnish. Robert

- 527 replies
-
- 7
-
-
- caldercraft
- victory
- (and 1 more)
-
Great build Paul. I am way back behind you, will be sneaking into your build. Robert
-
Nice work Nick. I like the way you finished the glass panes with a rippled effect. I think I will try that on my build when I come to it. Robert
-
Congratulations Nick, great work. I will keep visiting you build as I go along with mine. Robert
- 84 replies
-
- 2
-
-
- finished
- caldercraft
- (and 1 more)
-
Ouch!!! Very sorry Bob.
-
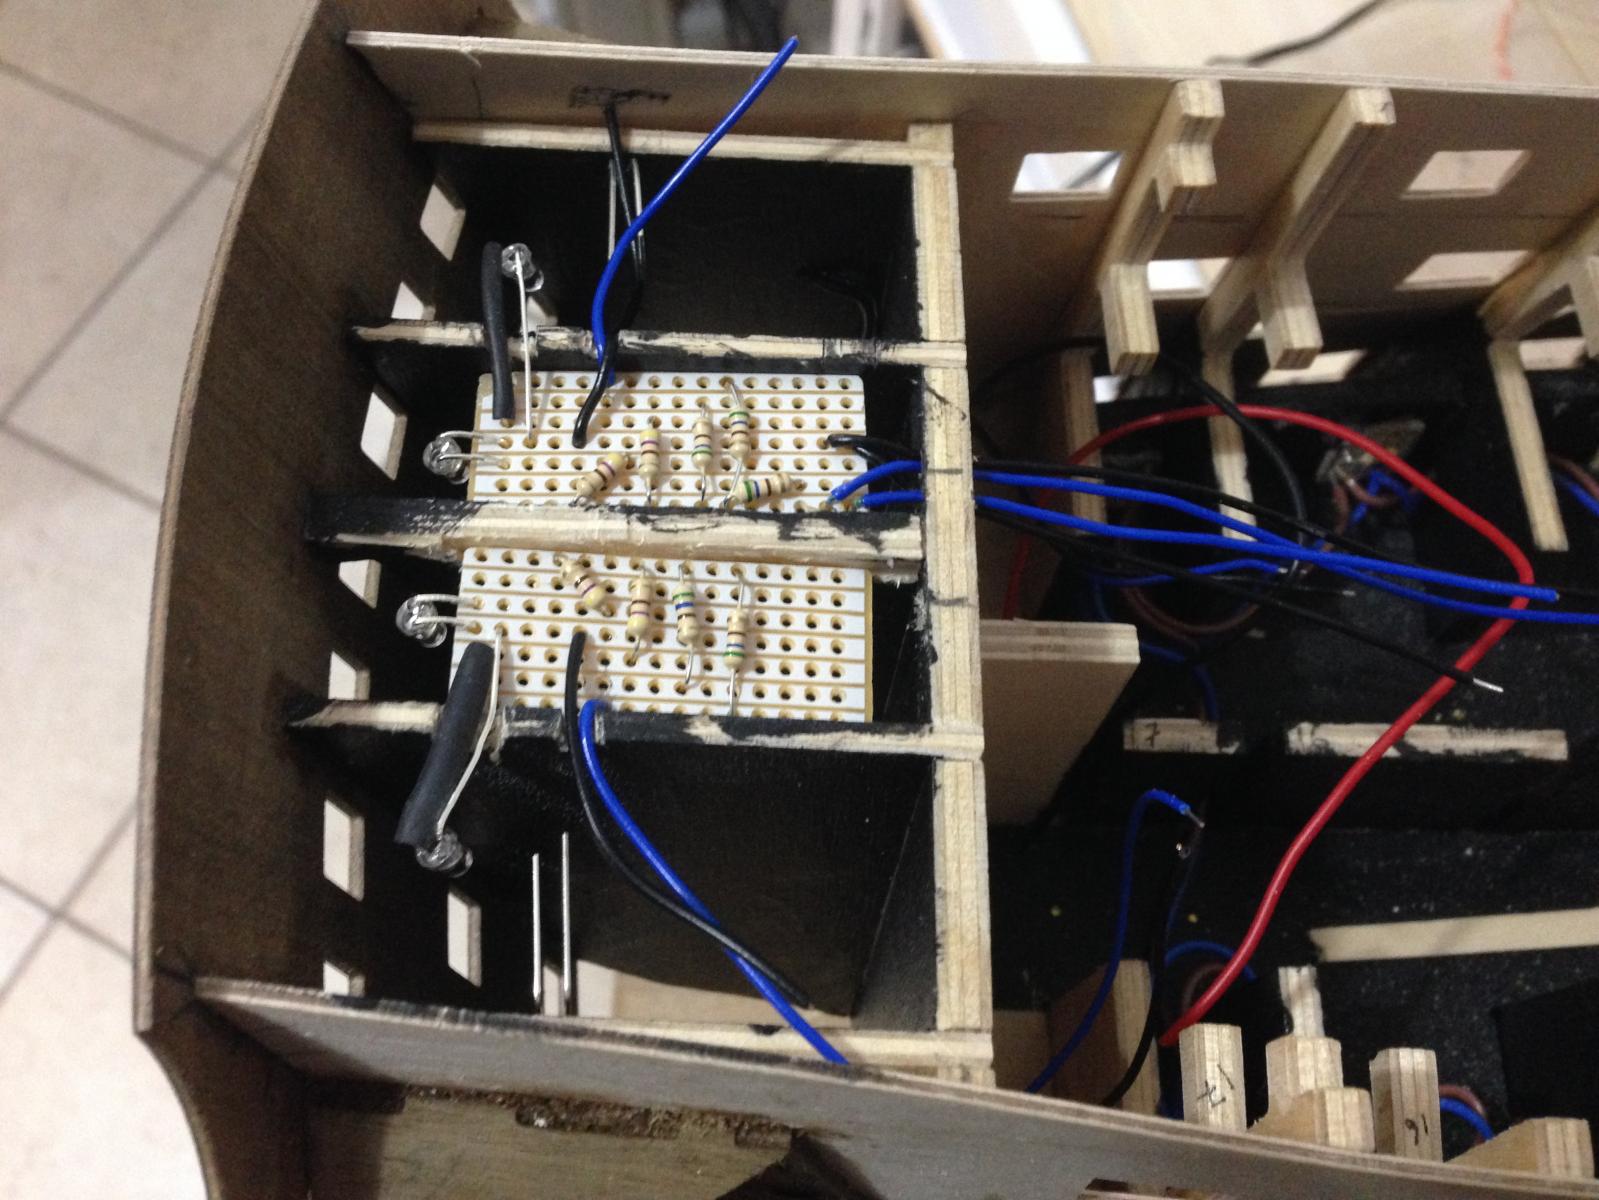
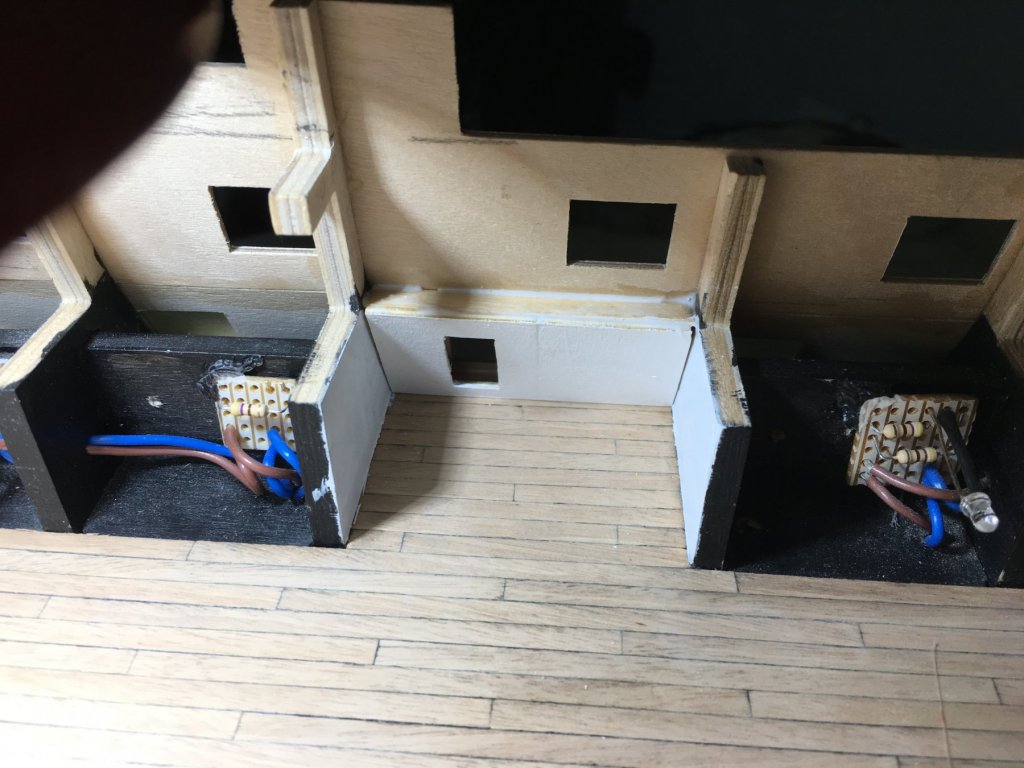
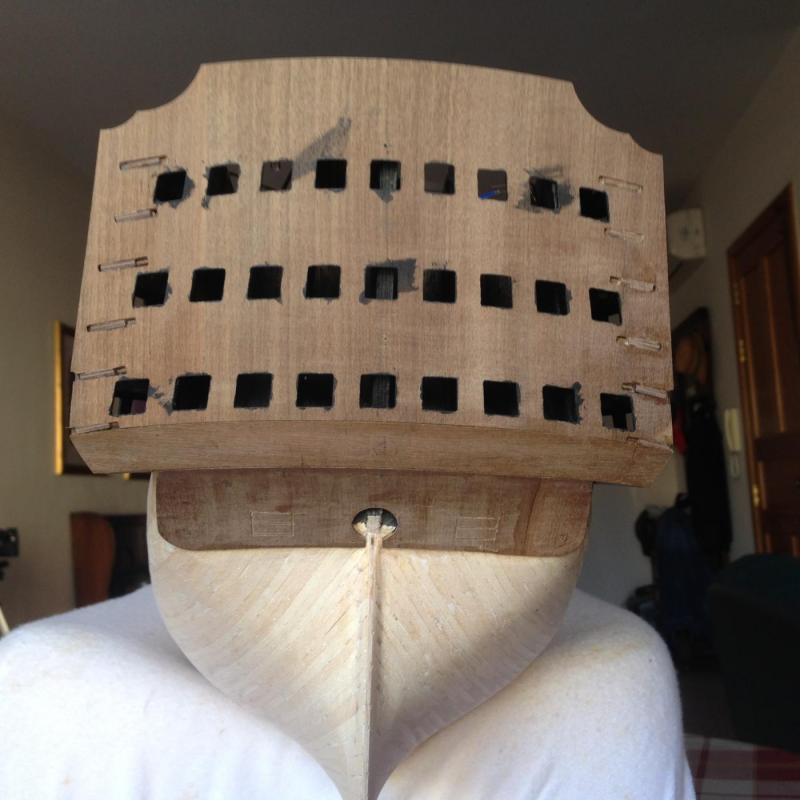
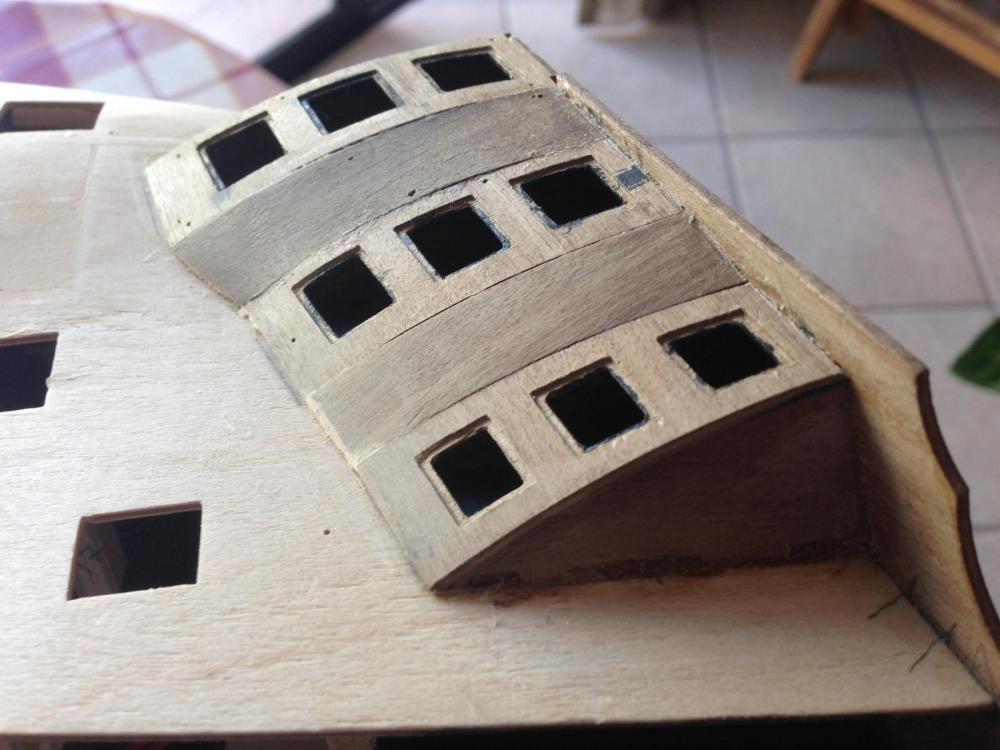
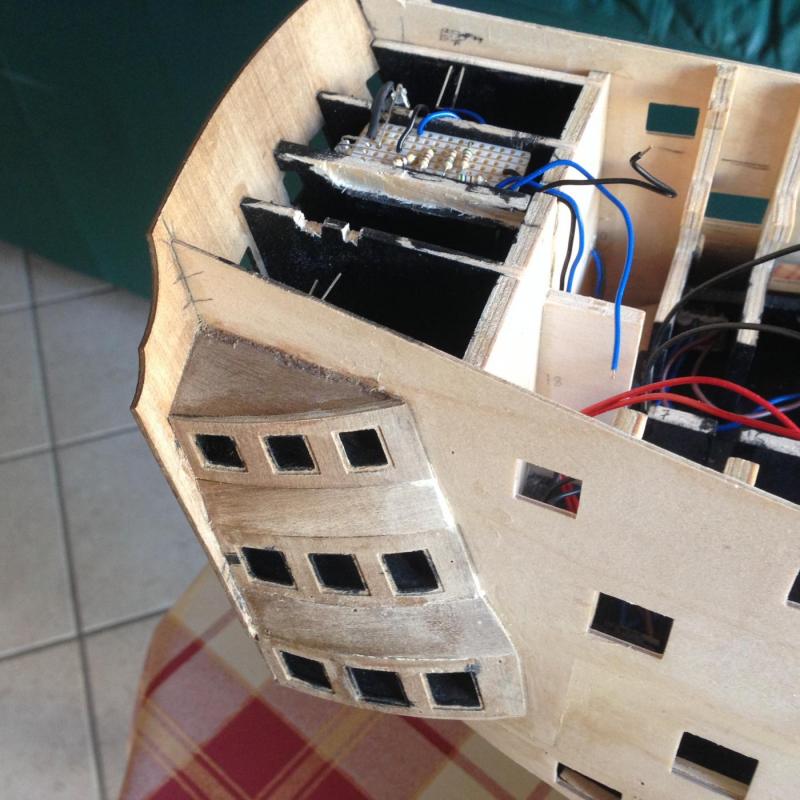
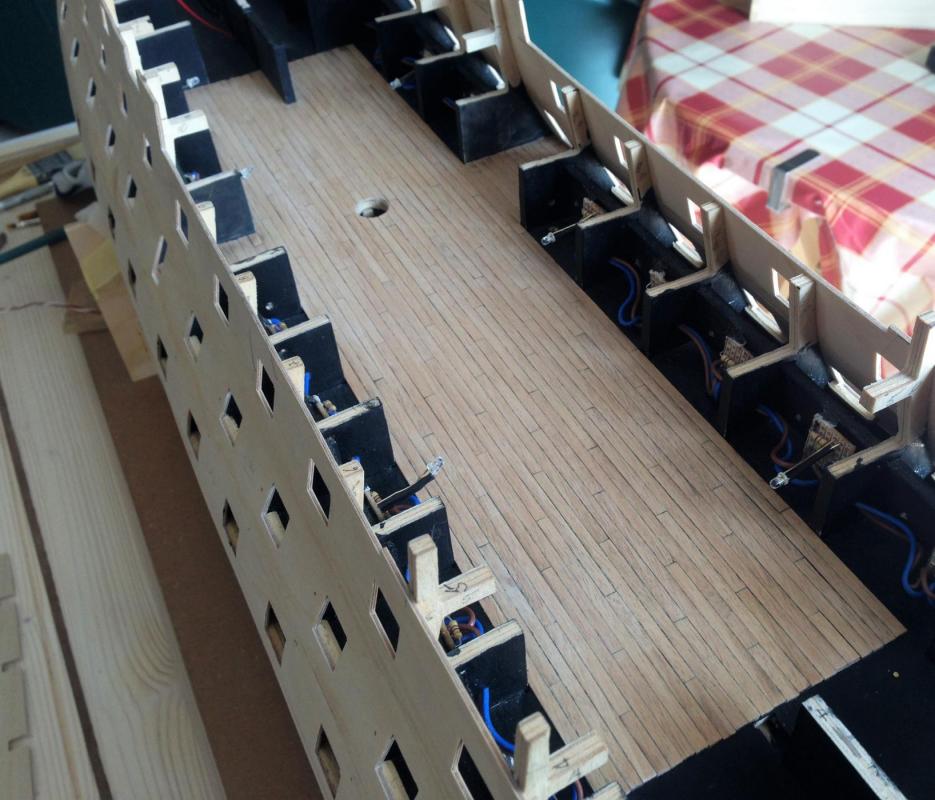
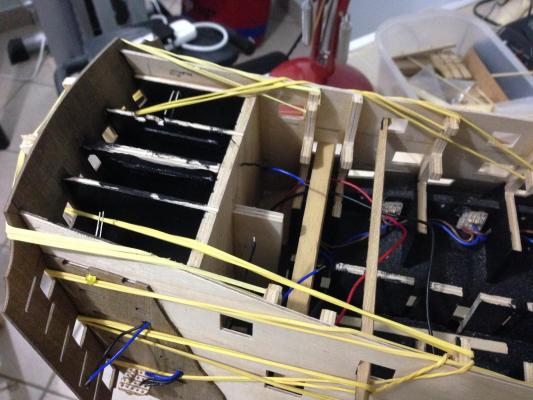
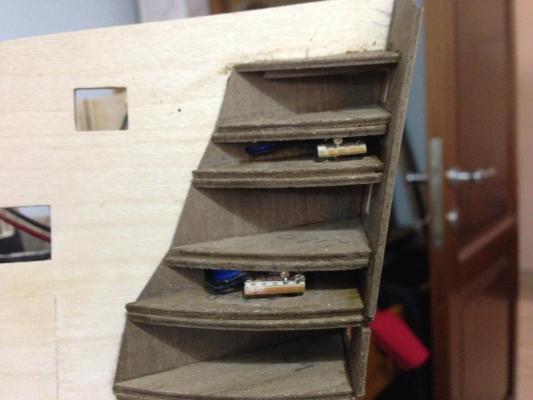
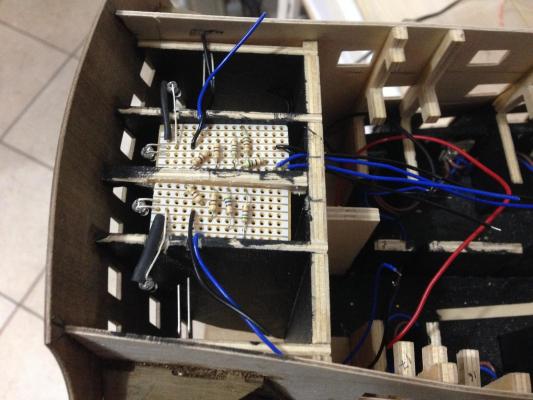
Fitted part of the quarter galleries and their lights. Lights well hidden in the space between the galleries. I try every light I fit to make sure the connections are ok. After I fit the skins there is no way I could get to them again. Lights for the stern galleries. Wiring still underway. I have also prepared the resistances for the three stern lanterns. Very thin wires will be soldered to the small circuit boards and passed through very thin copper pipes to supply the power to the lights in the lanterns, HOPEFULLY!!!! Robert .

- 527 replies
-
- 8
-
-
- caldercraft
- victory
- (and 1 more)
-
Great work Heinz. Don't worry about the rope. if you did not mention I would not have noticed it, had to look for it. That is because you know about it and your eyes go there. Robert
-
Heinz, Thank you for your reply, very much appreciated. I haven't started the second planking yet. Presently I am working on the quarter galleries and they are taking me more time than I thought as I am am fitting the lights in them and had to do quite a bit of thinking to avoid any wiring or lamps showing through the windows. Will post some pictures when I have made some more progress. Robert
- 527 replies
-
- 2
-
-
- caldercraft
- victory
- (and 1 more)
-
Thank you all for your comments. Sorry for not replying before but I have been very busy, in fact I don't really have anything new to post. Before I start the second planking I have to assemble the quarter galleries, including the lights for them, so I have to do a bit of thinking how to wire them. Ray, Don't be discouraged and you don't really need that much tools. There are some tools that although it is a help to have, but you can do without. I found the Bluenose II very helpful to learn on and gain some experience, mind you I still have a long way to go. Some builds I see on this forum are really a piece of art. Heinz, I am impressed with YOUR work. As I am thinking of not coppering the hull I have been having a close look at your great hull planking. Did you slightly bevel the edges of each individual plank to make them stand out more? Robert
- 527 replies
-
- 1
-
-
- caldercraft
- victory
- (and 1 more)
-
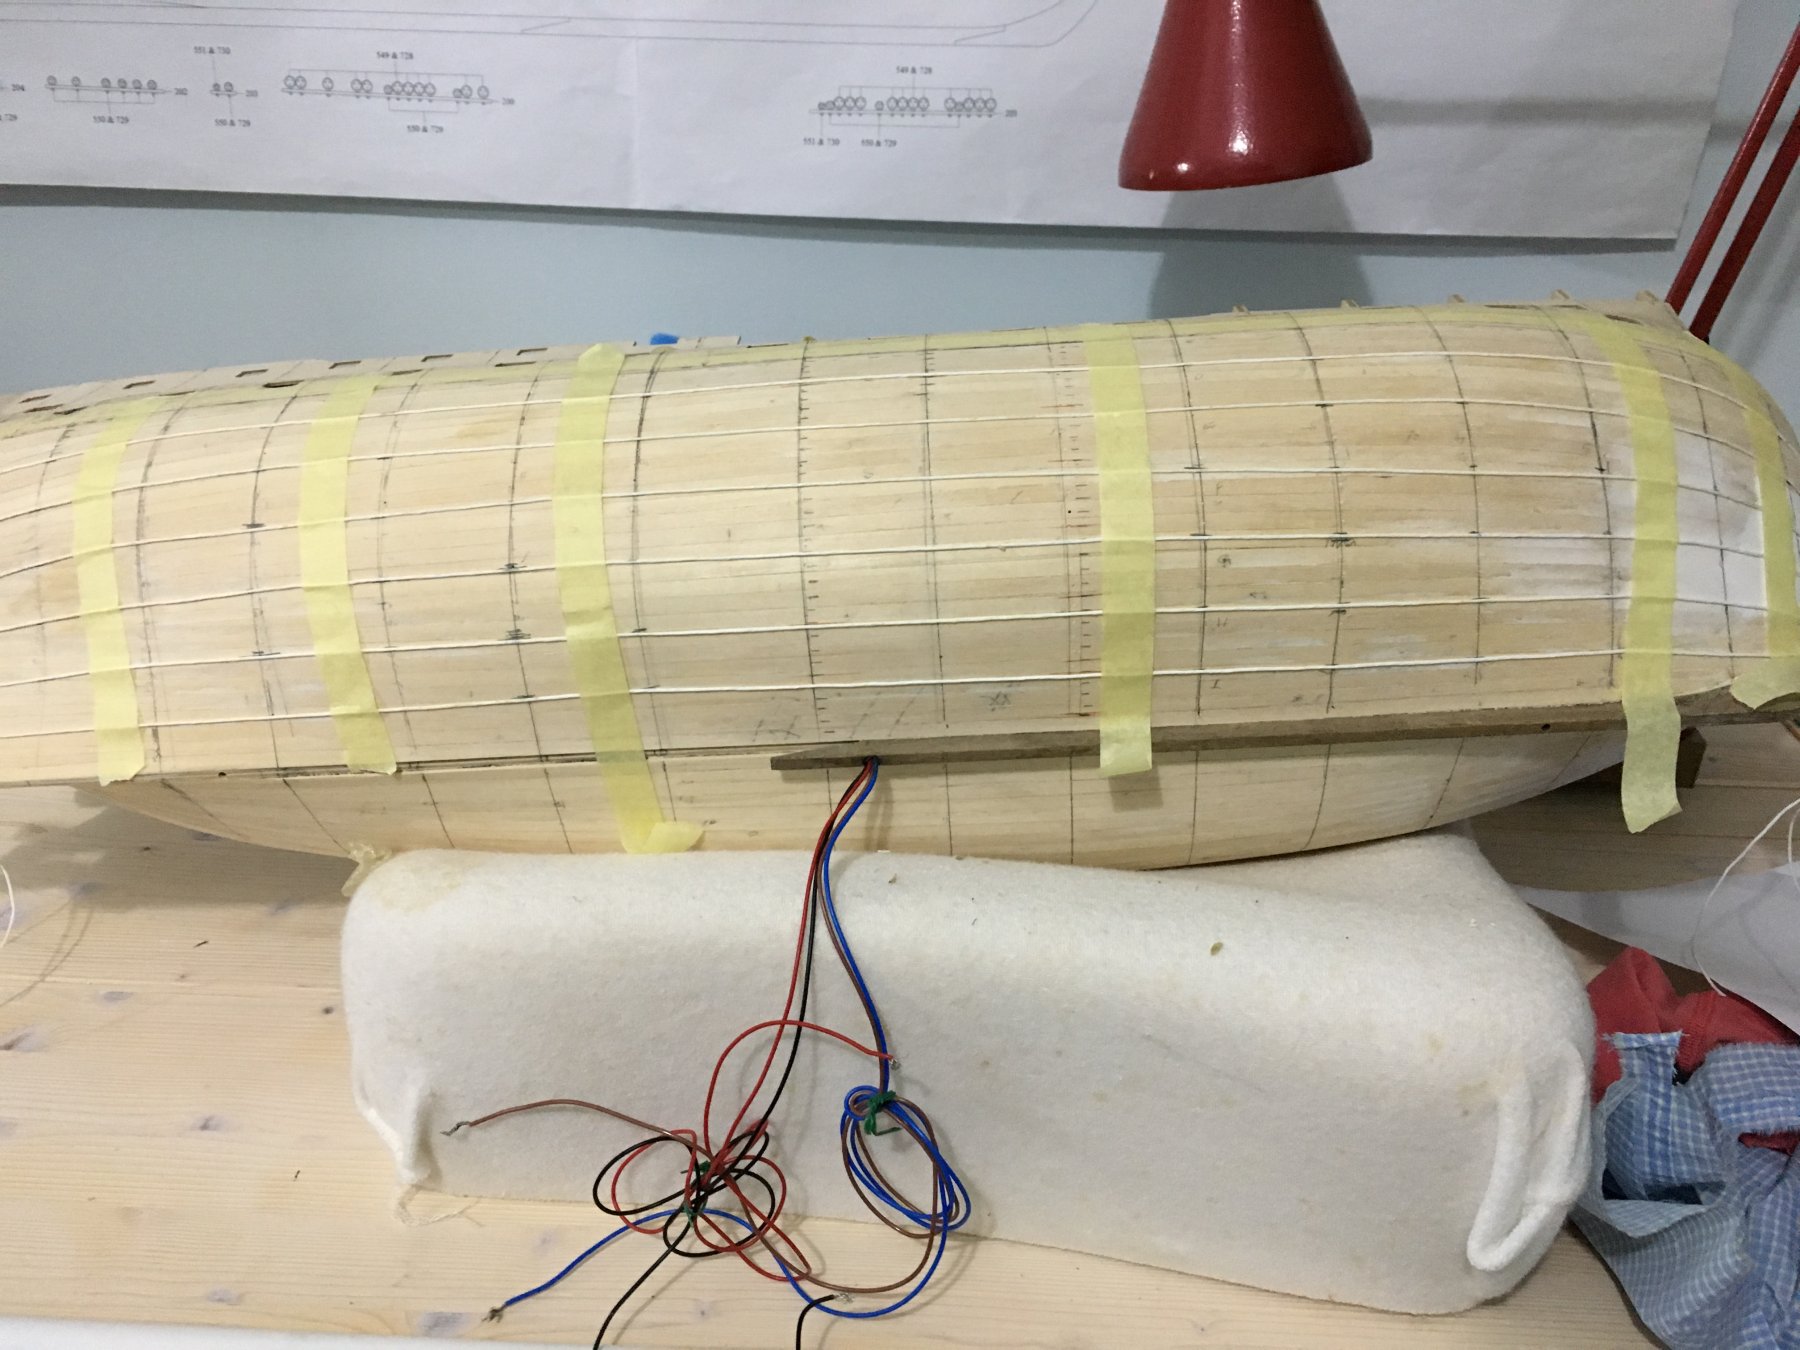
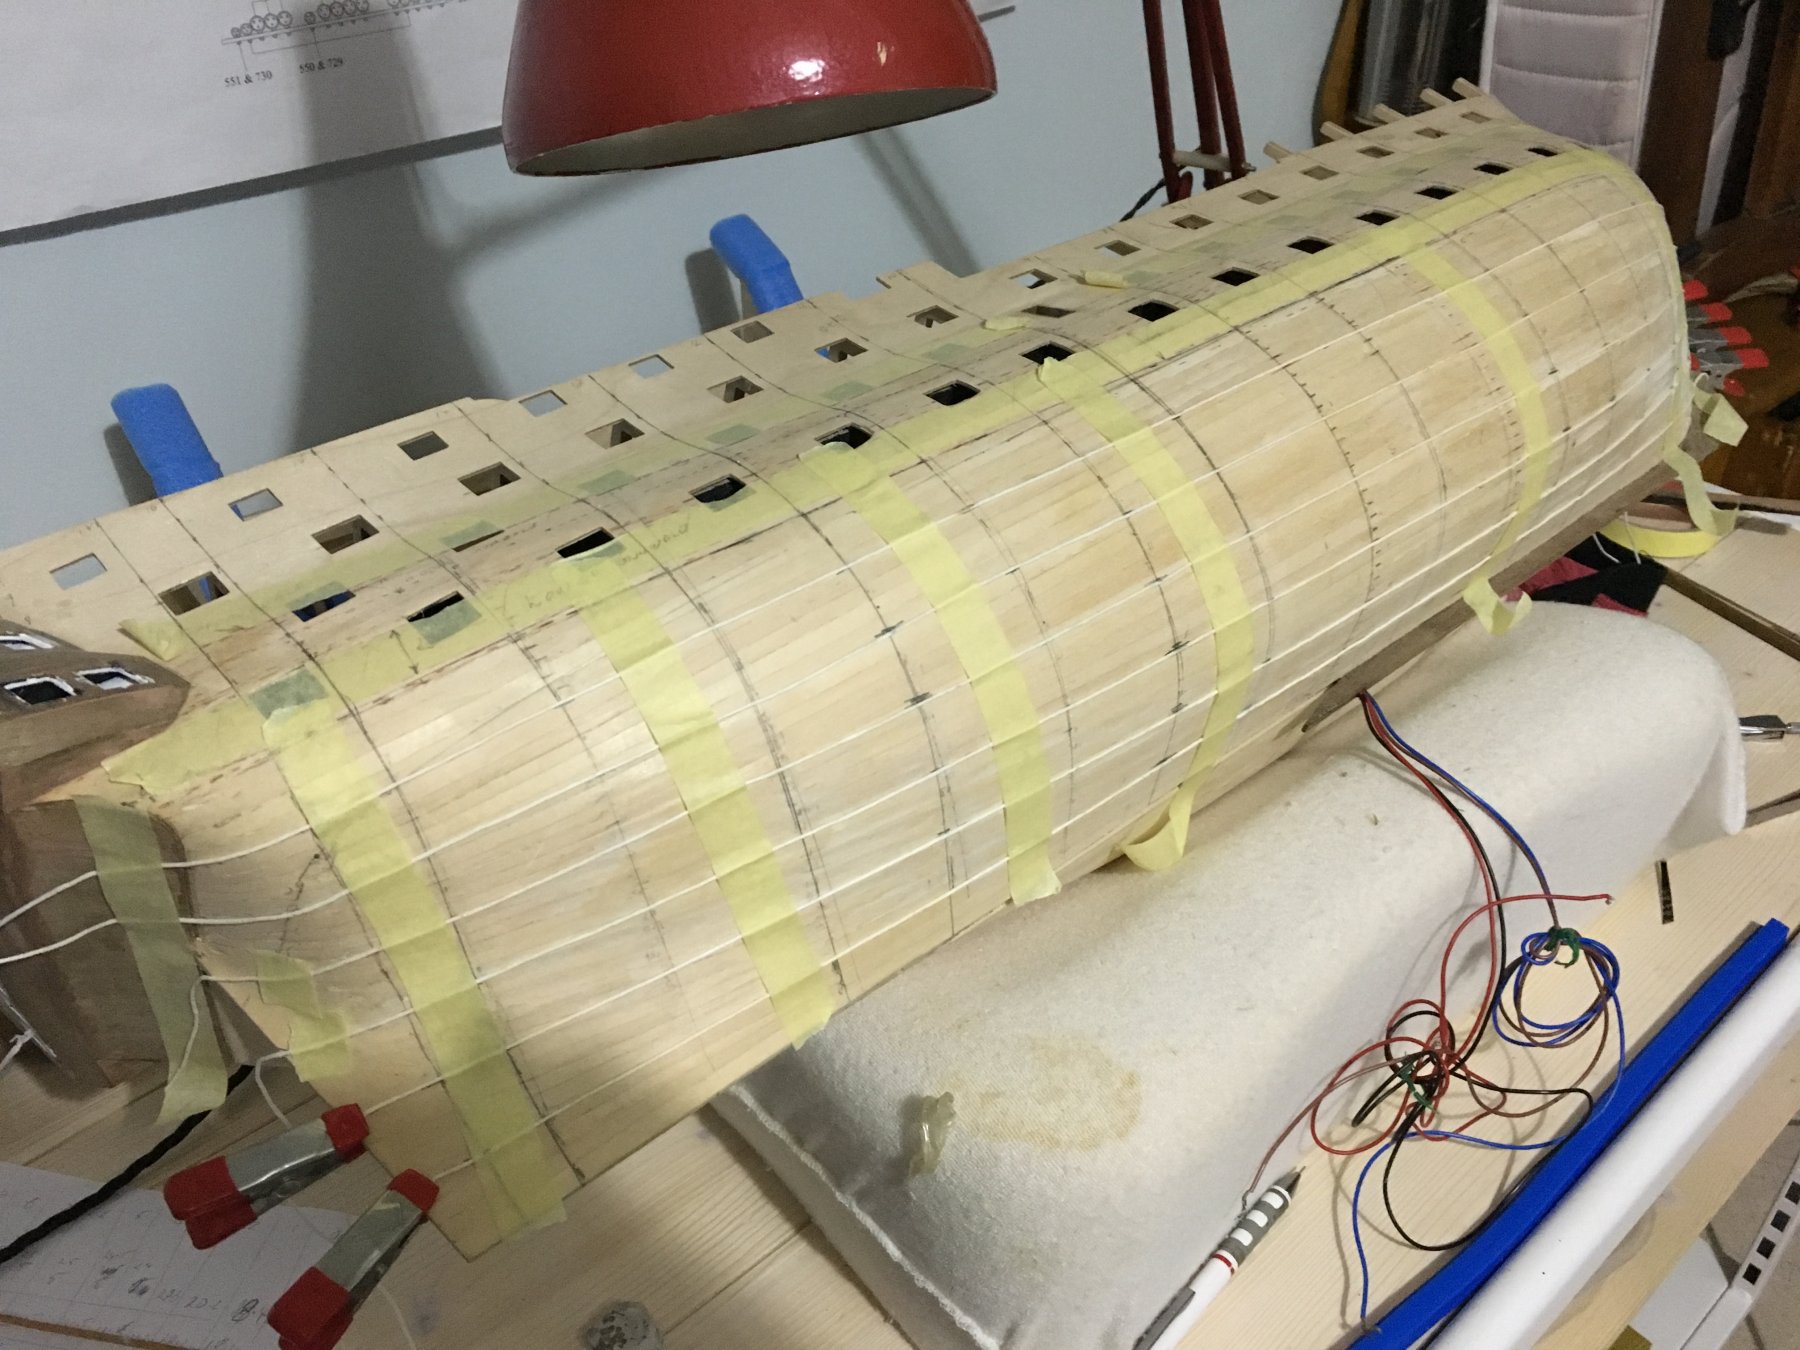
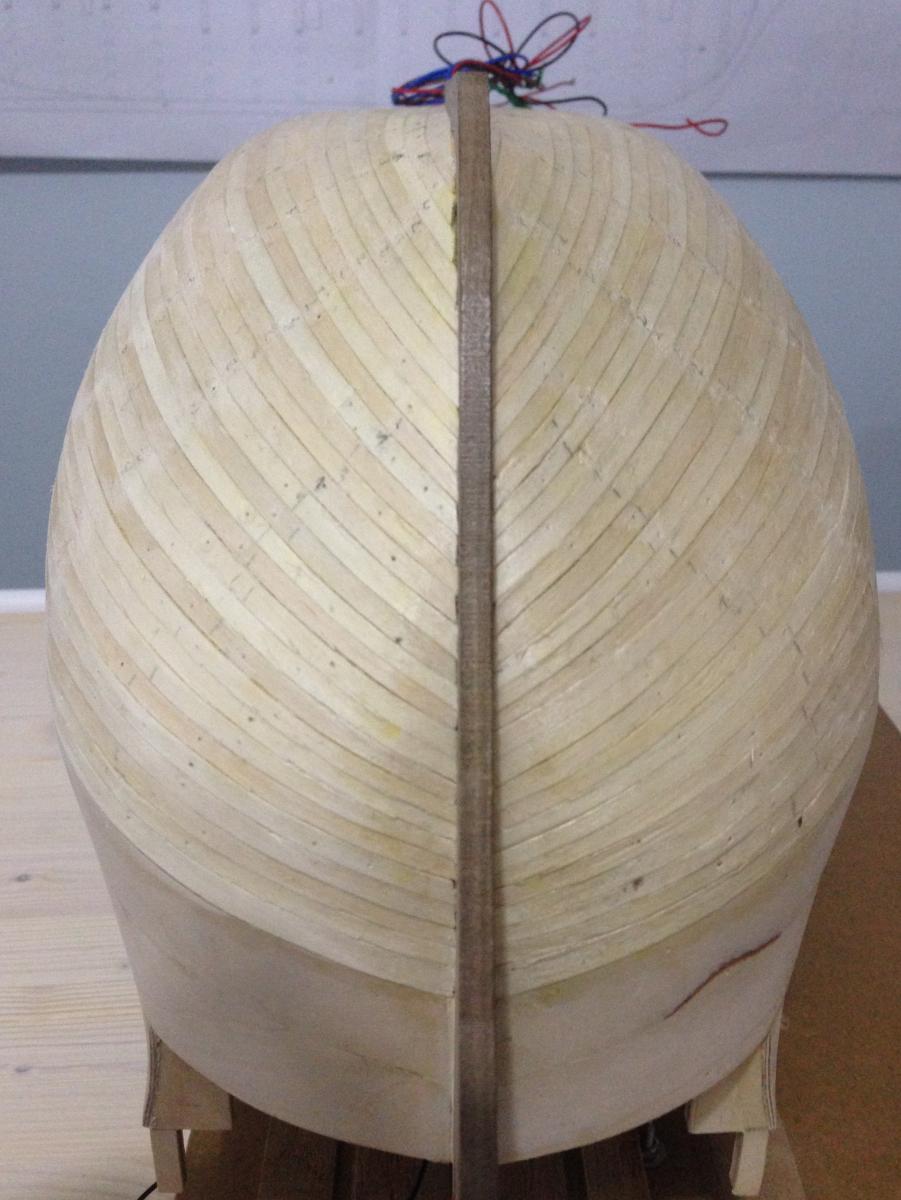
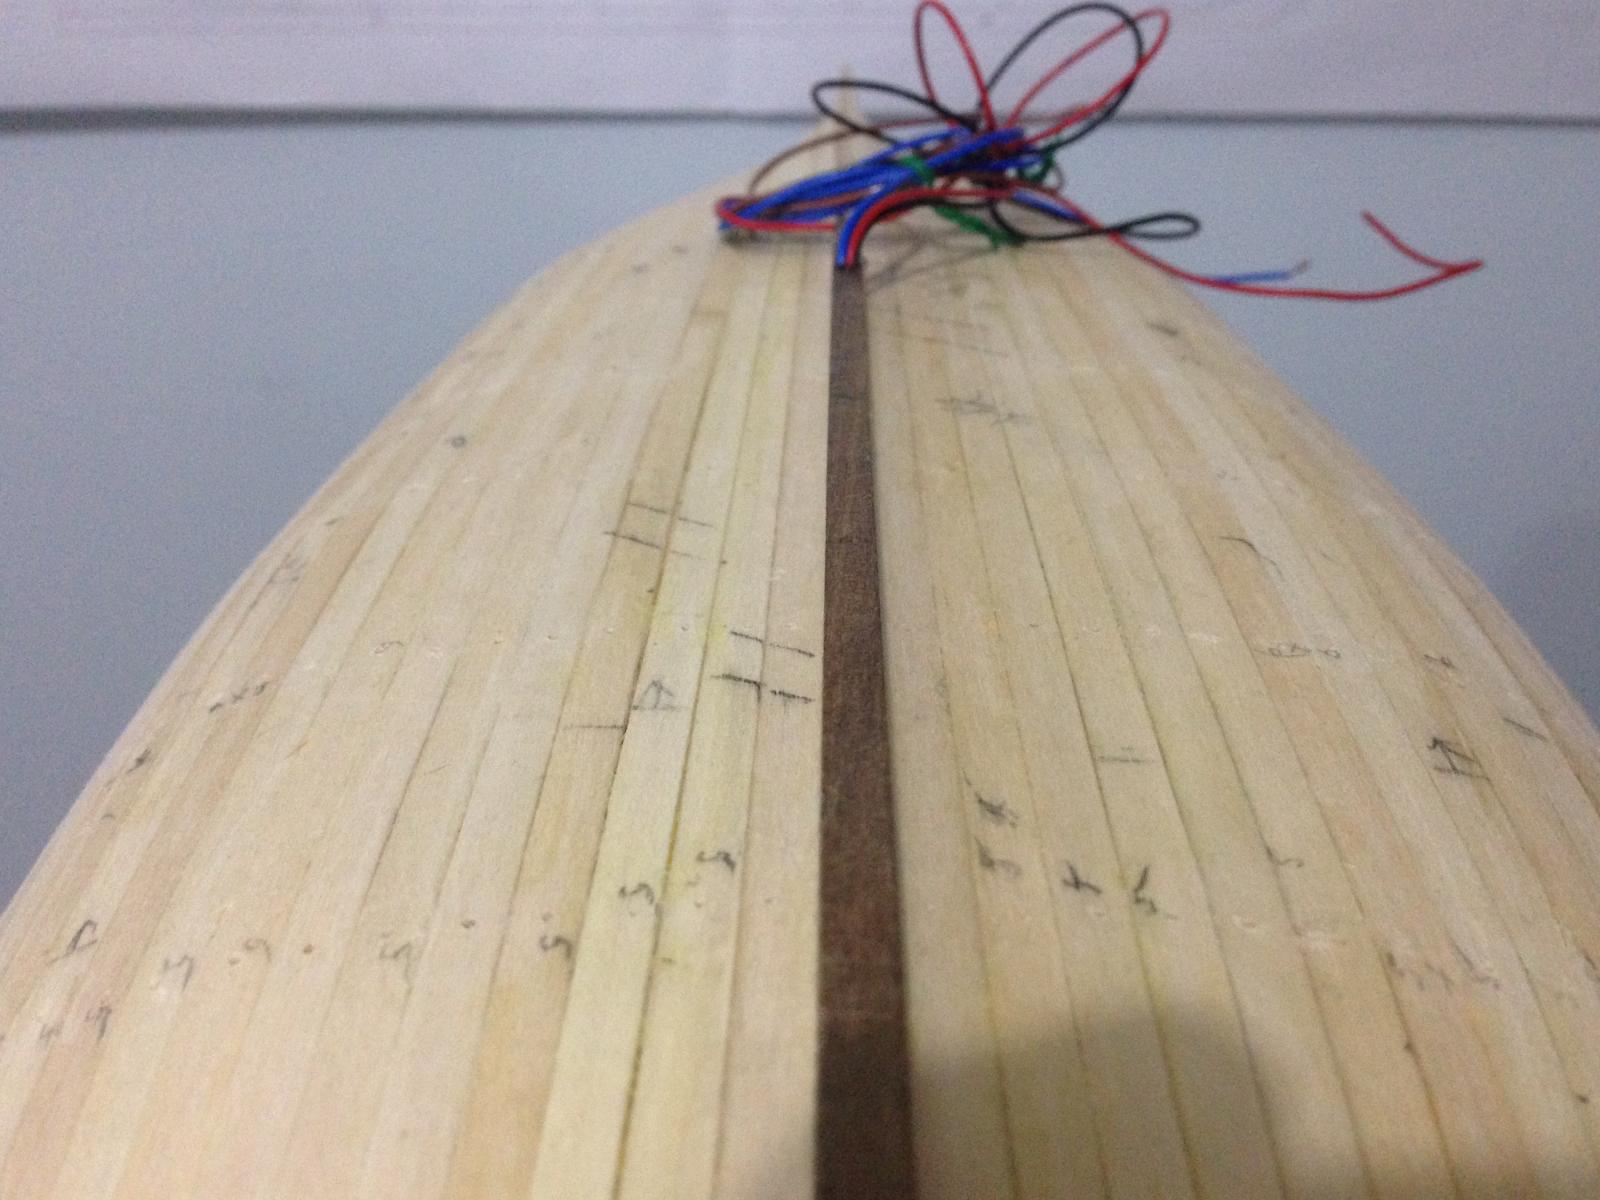
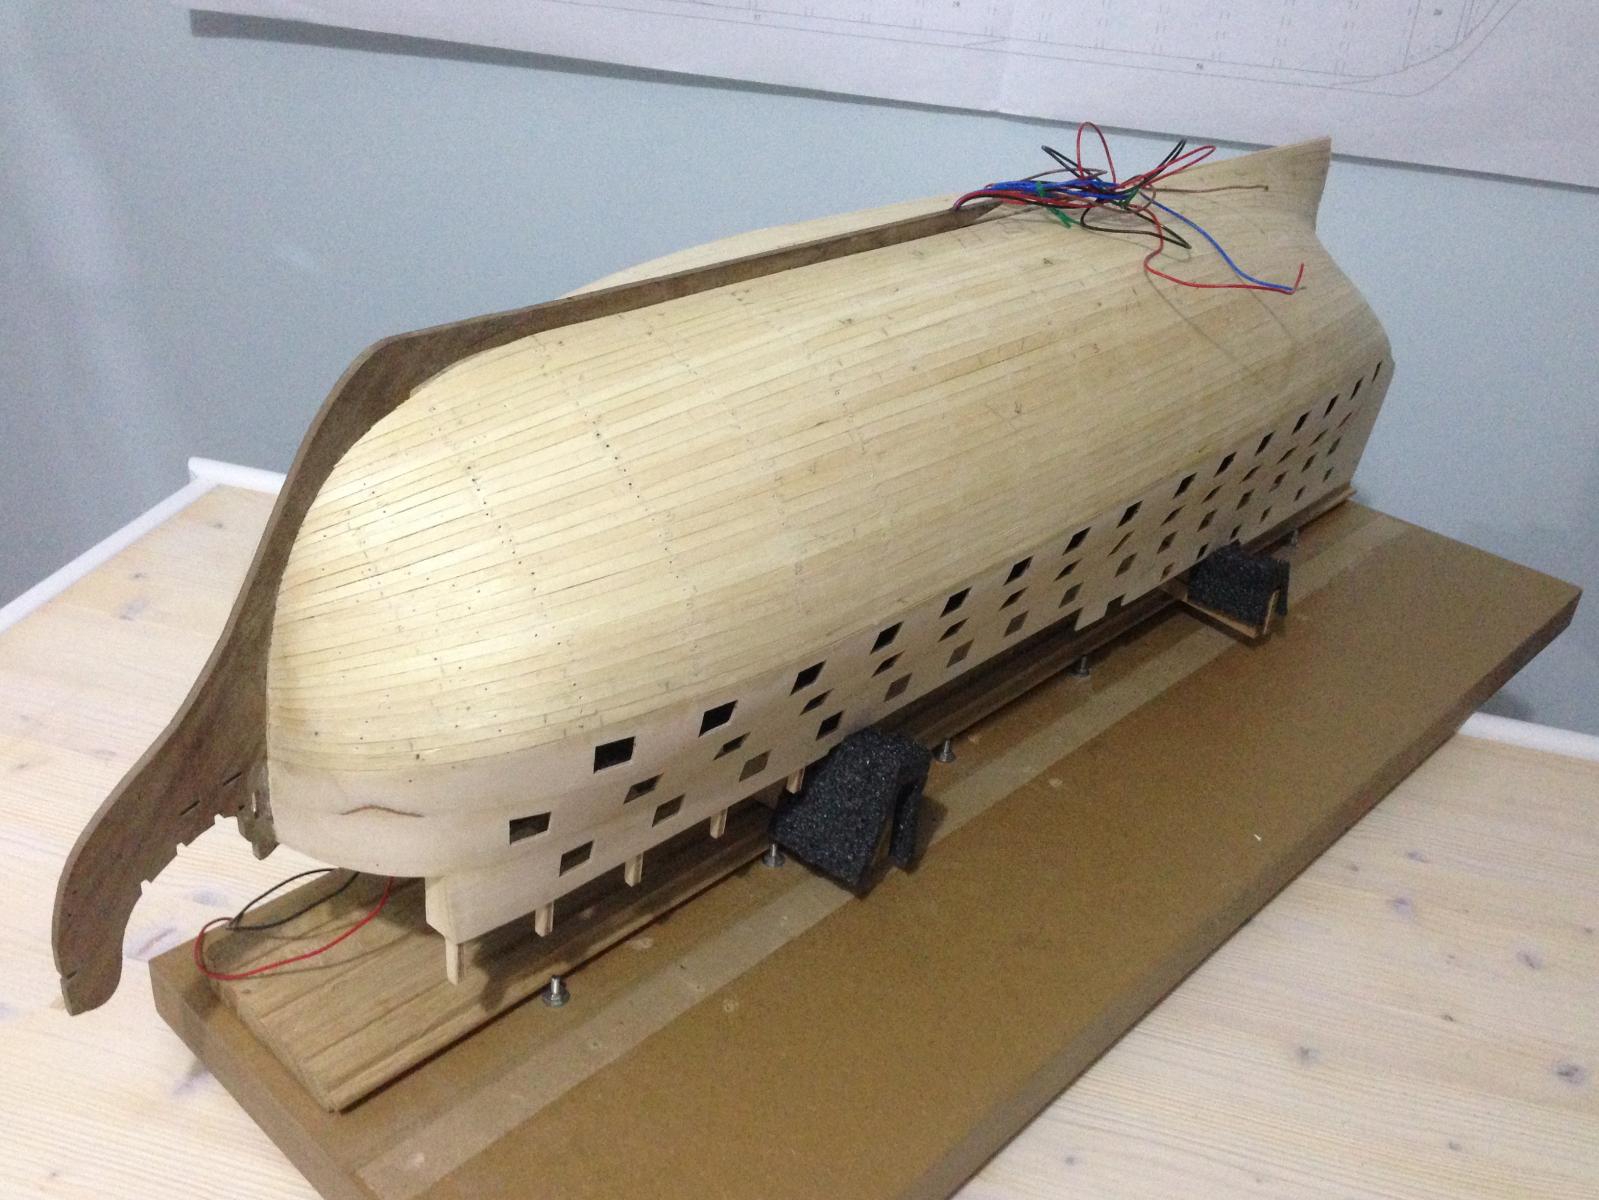
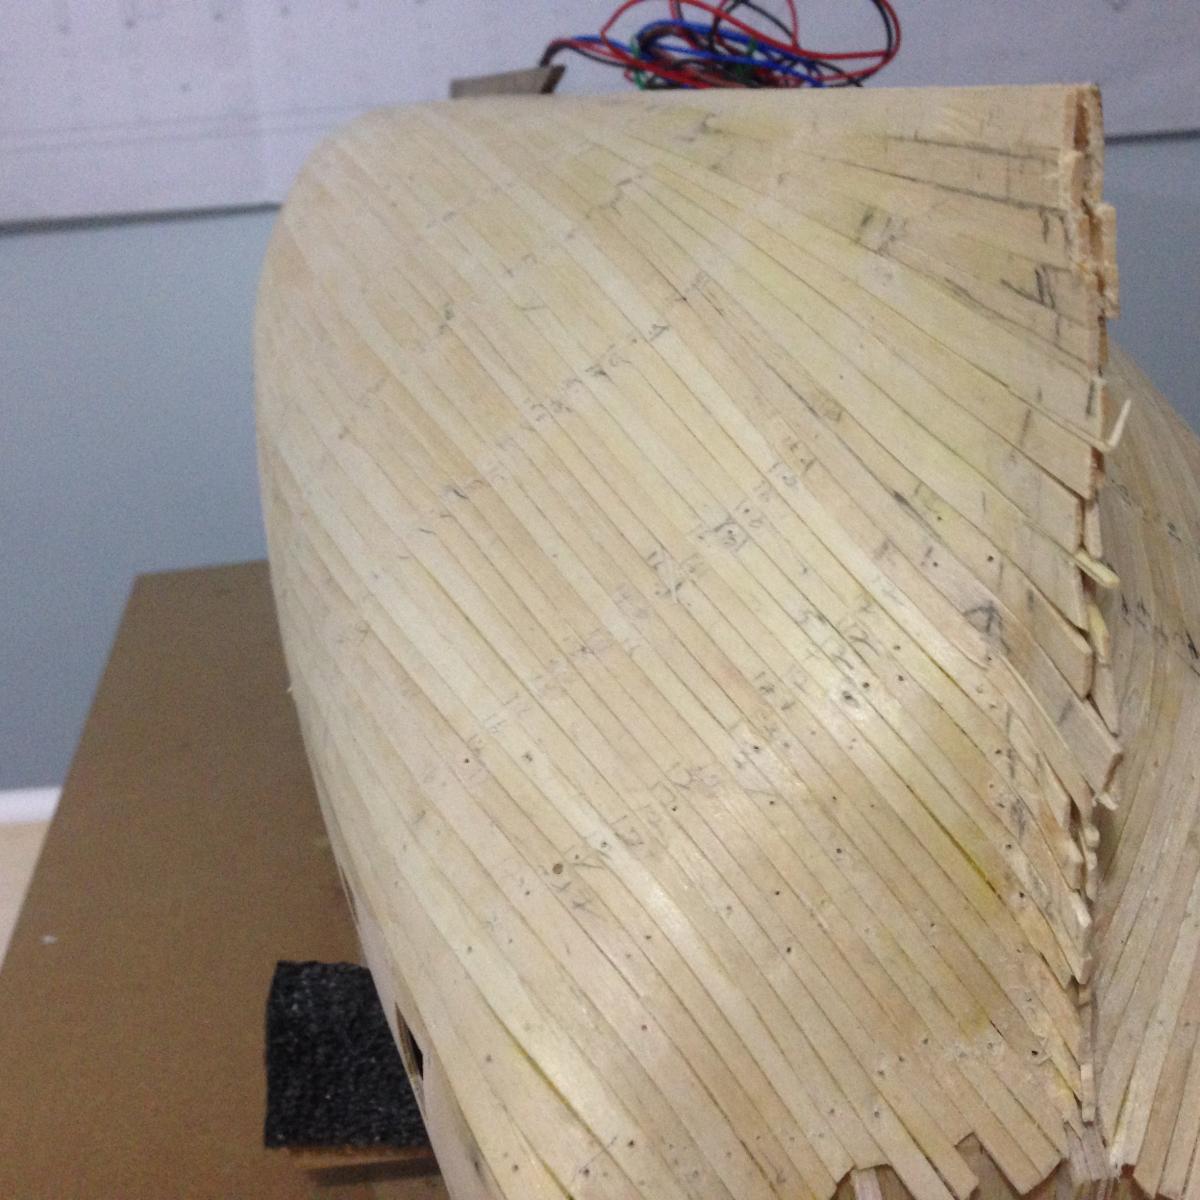
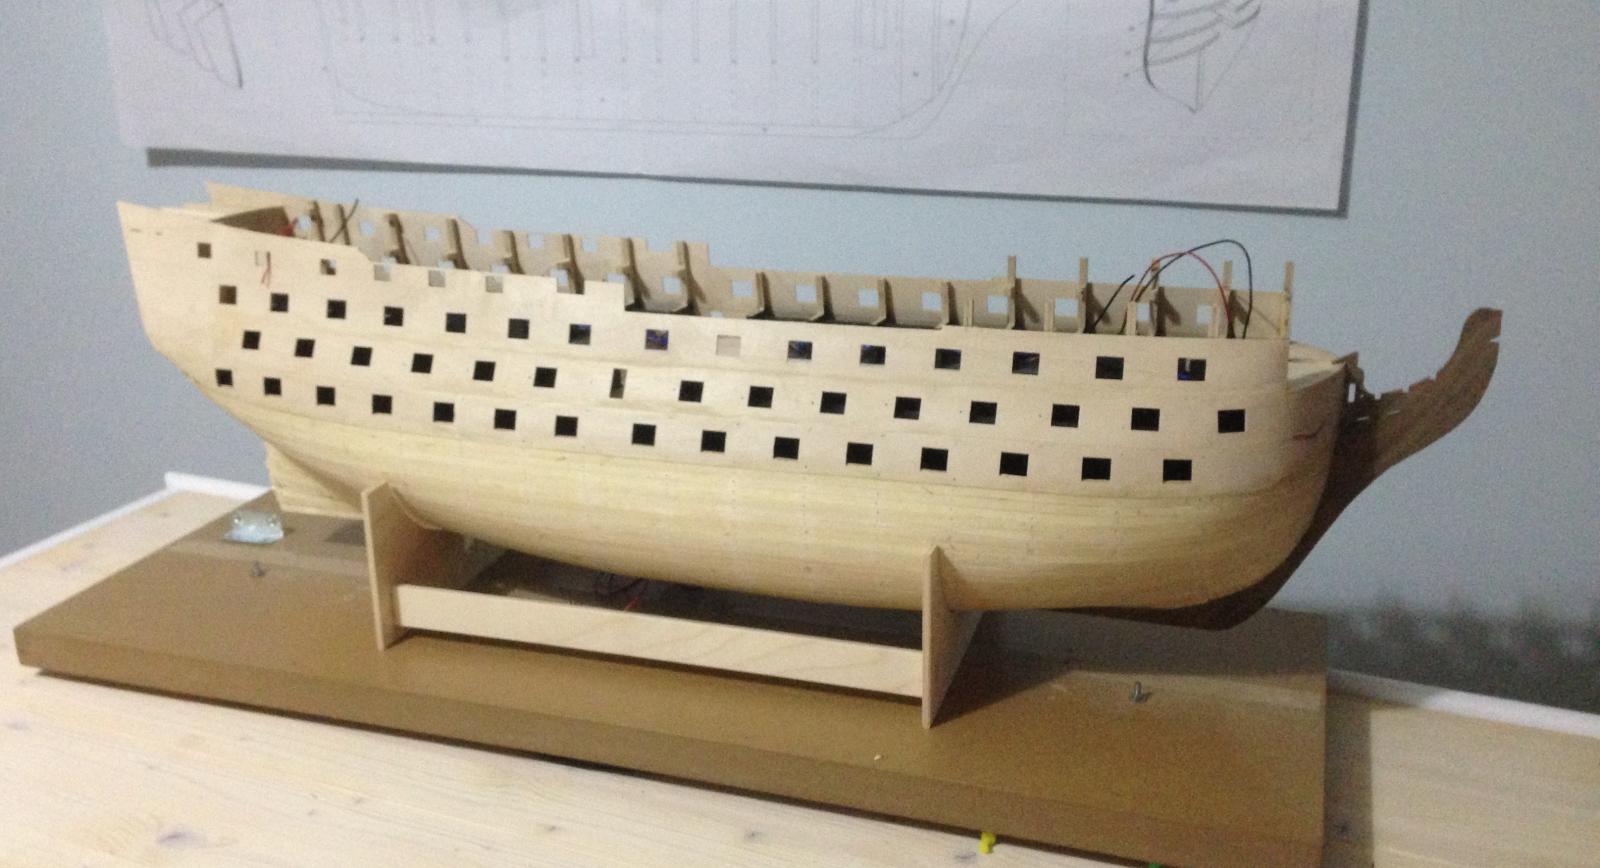
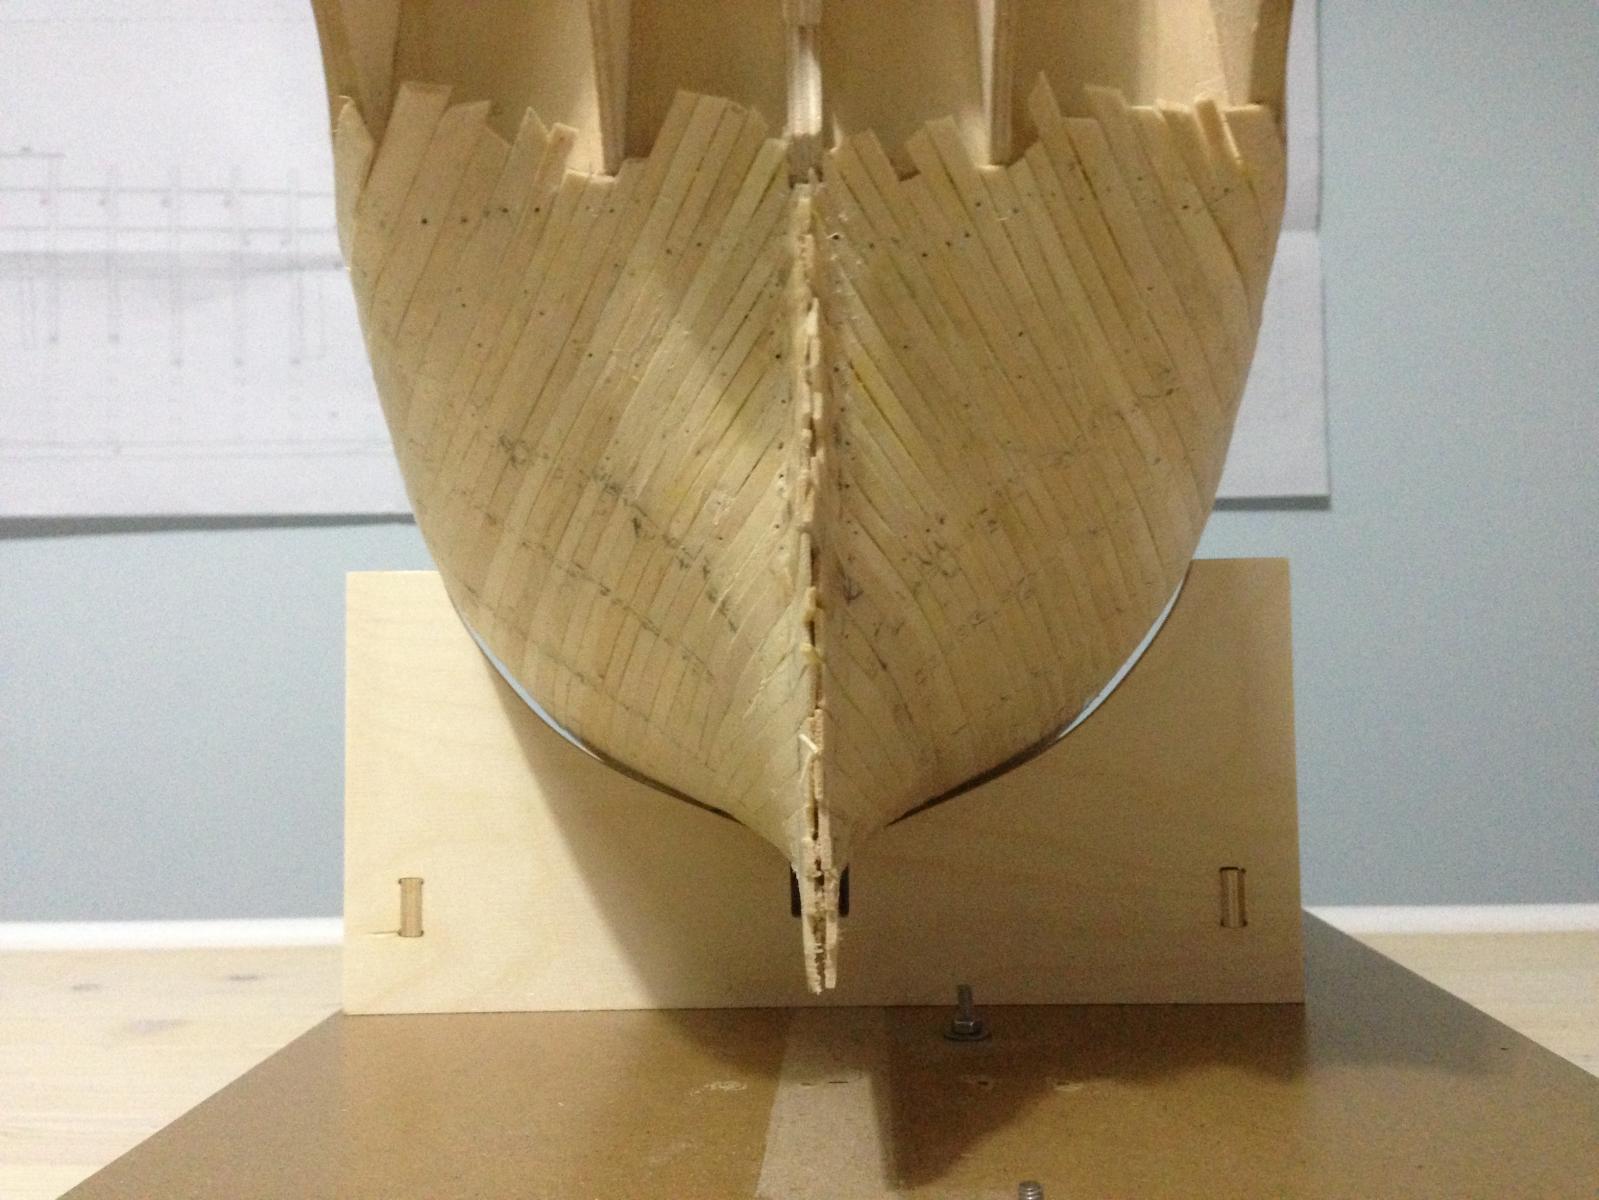
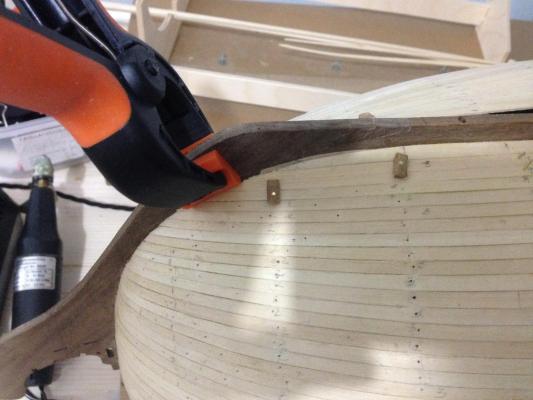
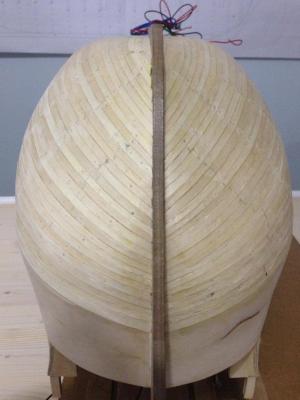
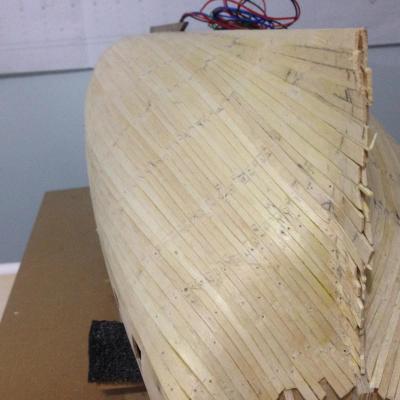
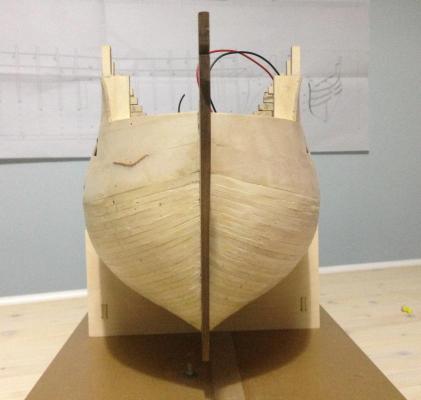
First planking ready. It wasn't easy, but I'm quite happy with the result. I think I learned a few things as I went along, what I should and what I shouldn't do next time. Now I have to decide if I am to copper or not. If not I have to be much more careful with the second planking. A few images of the first planking not yet sanded and finished. Robert


- 527 replies
-
- 13
-
-
- caldercraft
- victory
- (and 1 more)
-
Ian, Thank you, can't wait to start the second planking. This weekend I should finish the first planking and post some images. Mike, Thank you. I don't mind a little contest as long as it is not extreme and the wood has a good finish. Robert
- 527 replies
-
- 1
-
-
- caldercraft
- victory
- (and 1 more)
-
Outstanding finish Ian, thank you so much for sharing. Your build is of great help for me to follow for my build. Robert.
- 191 replies
-
- 3
-
-
- victory
- caldercraft
- (and 1 more)