HOLIDAY DONATION DRIVE - SUPPORT MSW - DO YOUR PART TO KEEP THIS GREAT FORUM GOING! (Only 27 donations so far out of 49,000 members - C'mon guys!)
×

Robert29
-
Posts
417 -
Joined
-
Last visited
Content Type
Profiles
Forums
Gallery
Events
Everything posted by Robert29
-
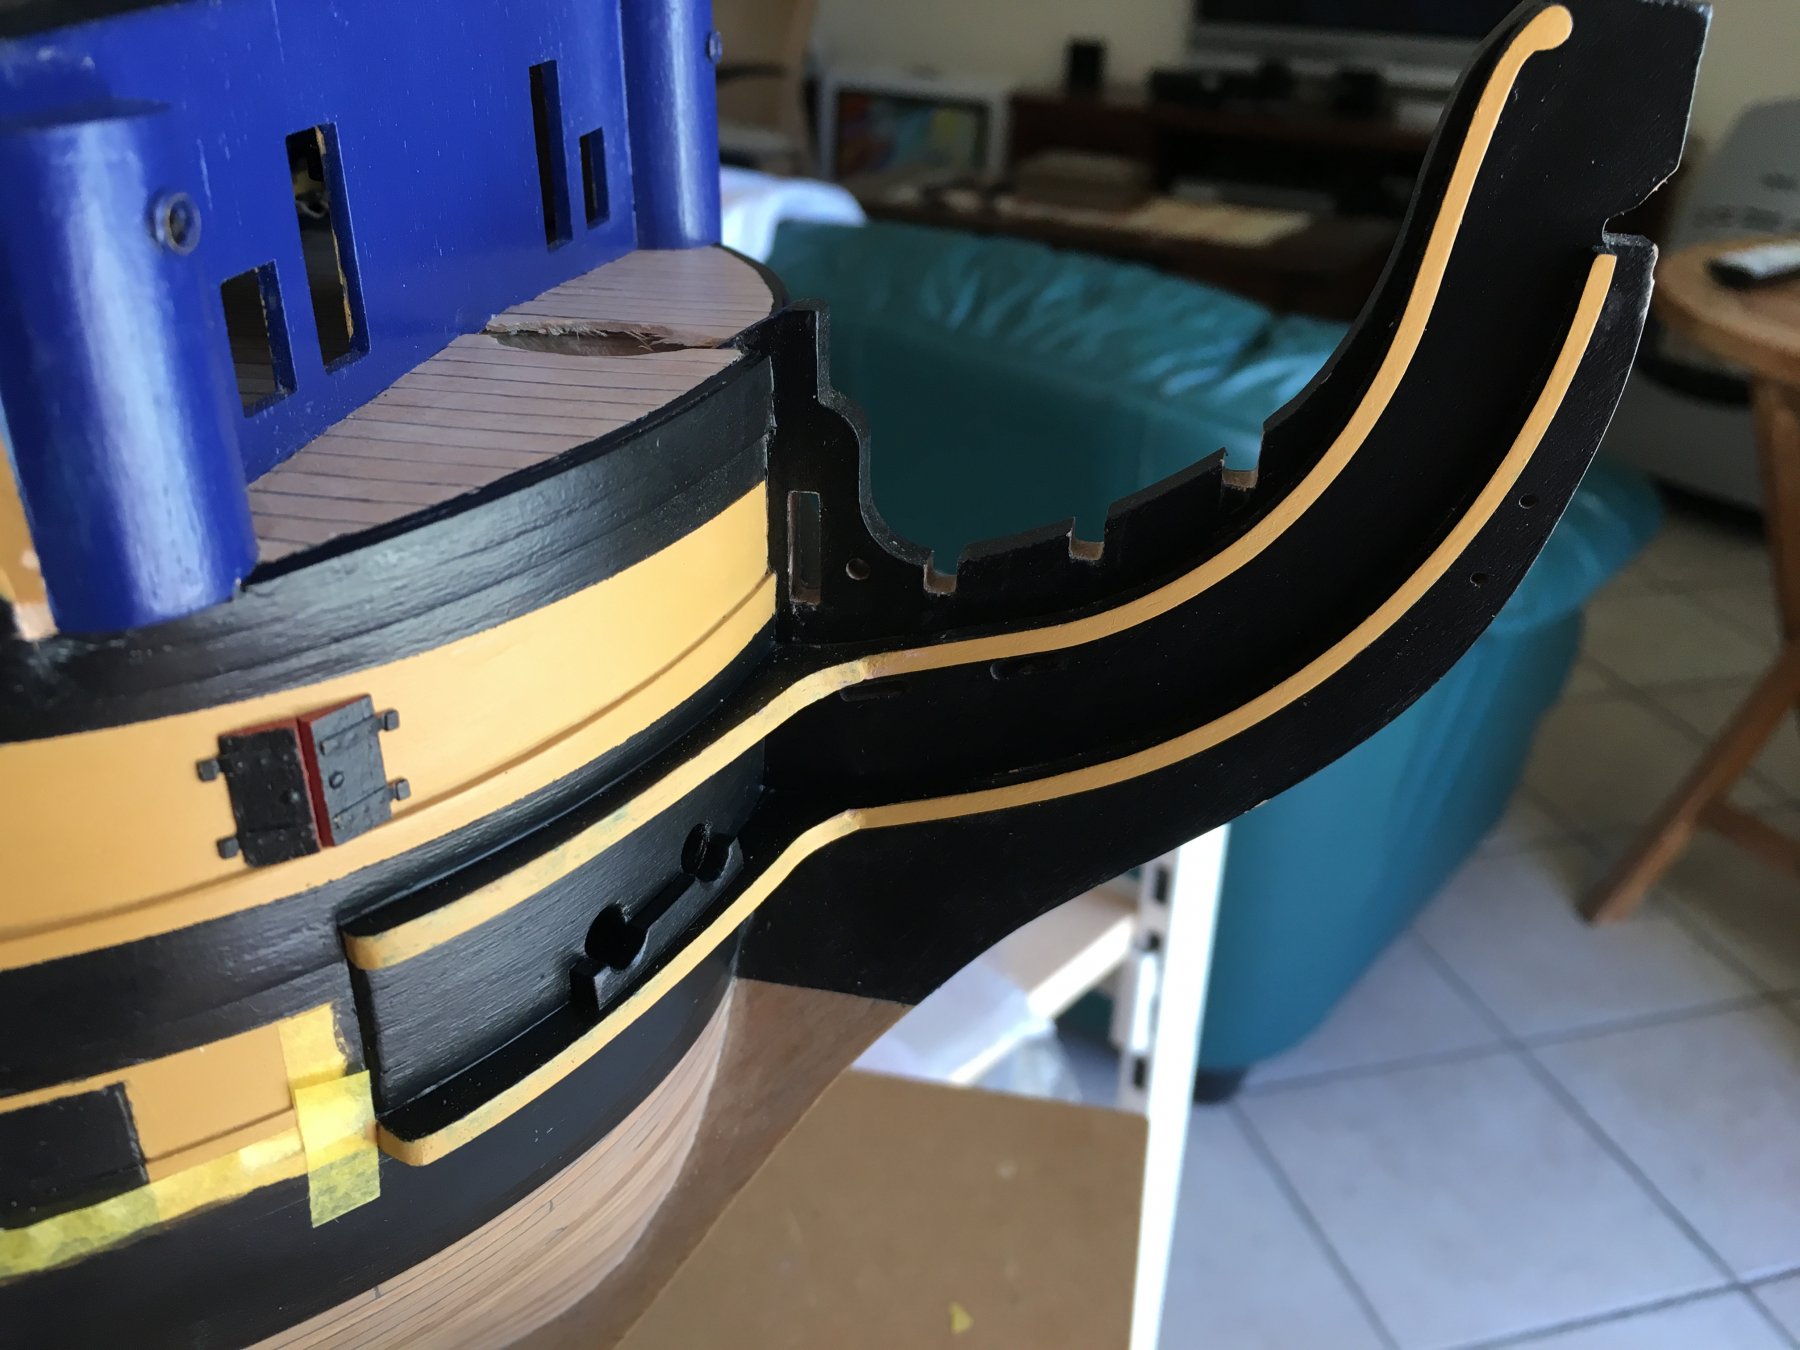
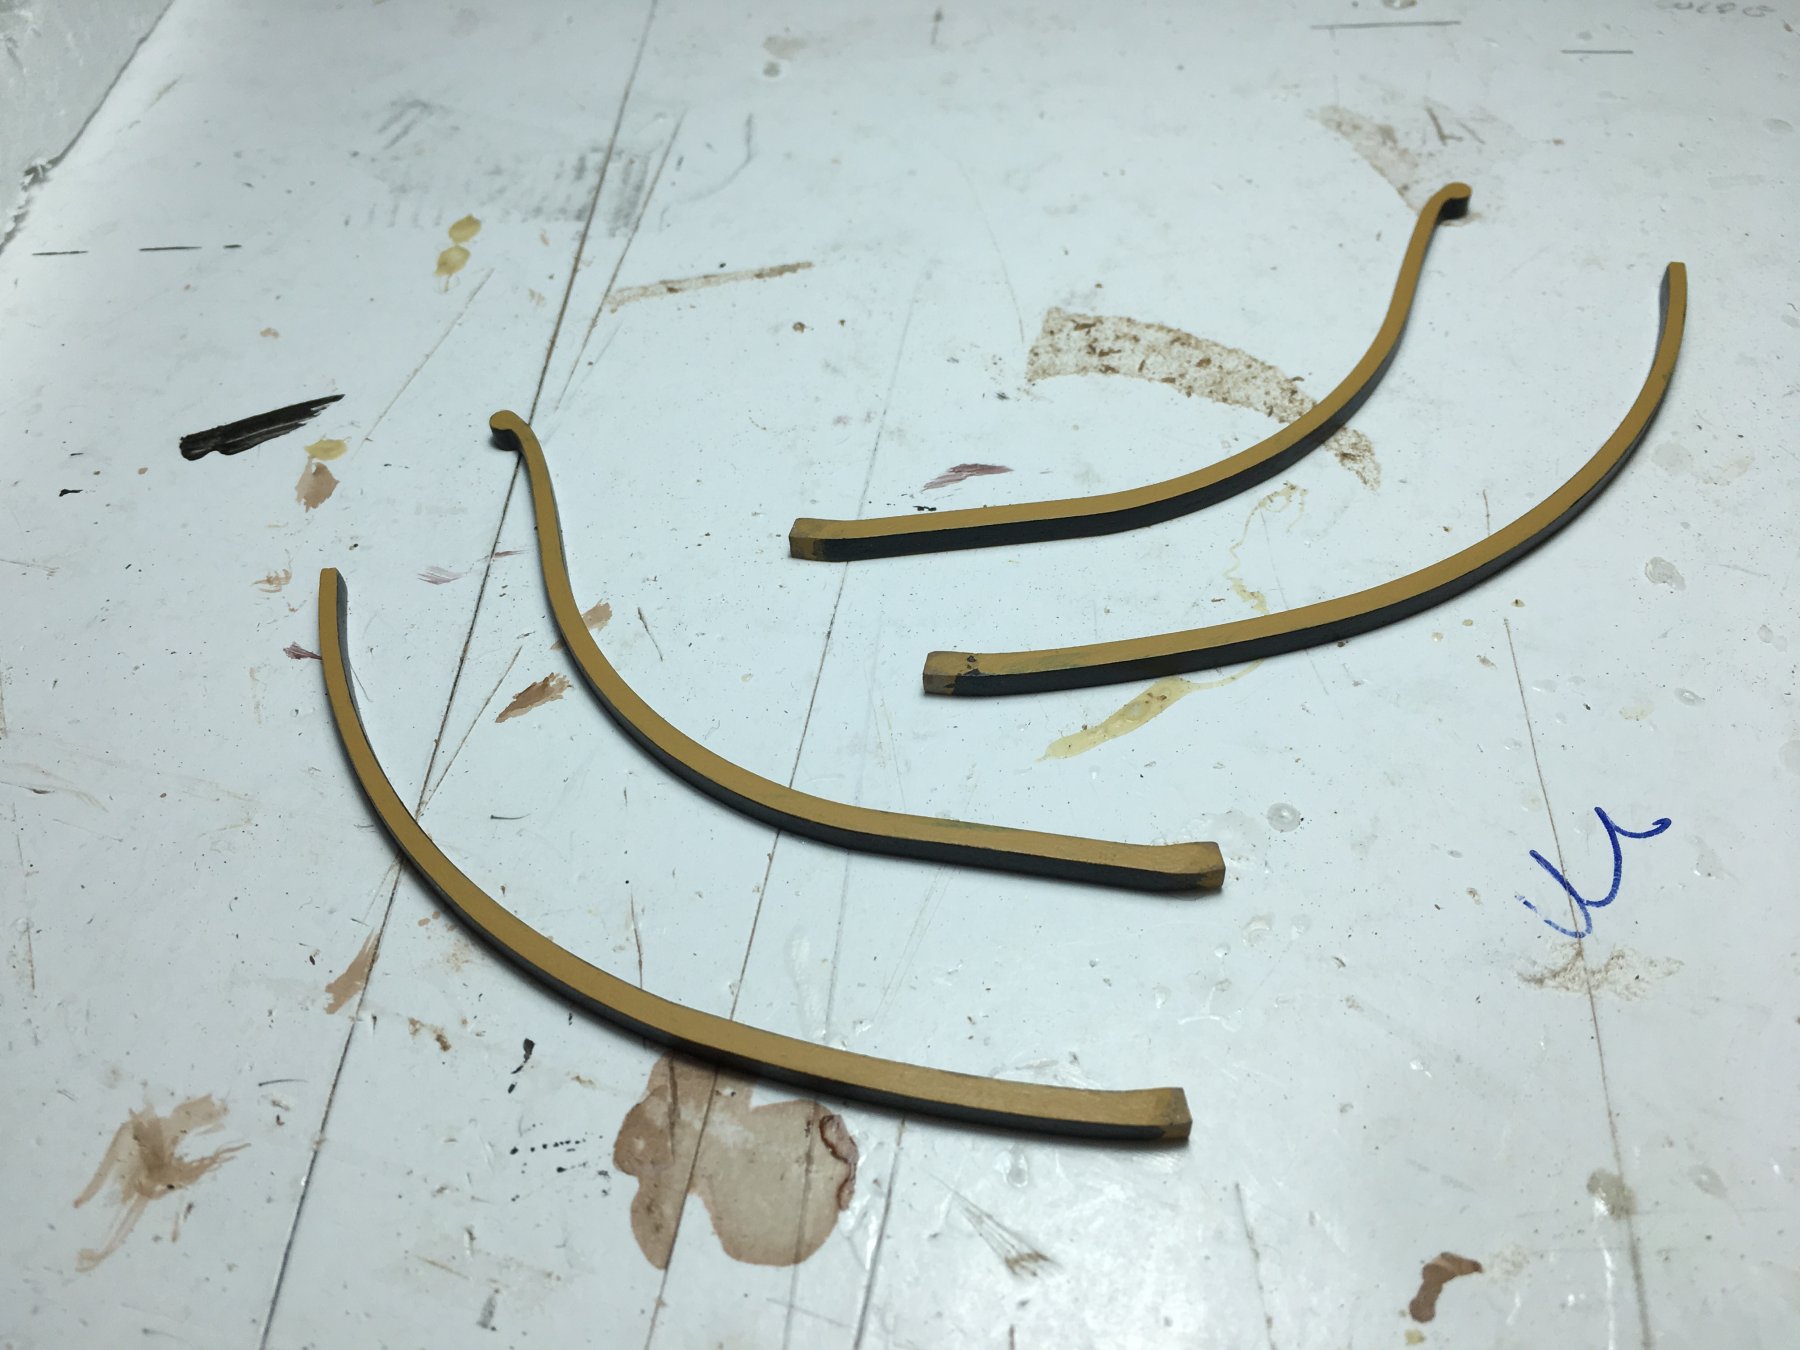
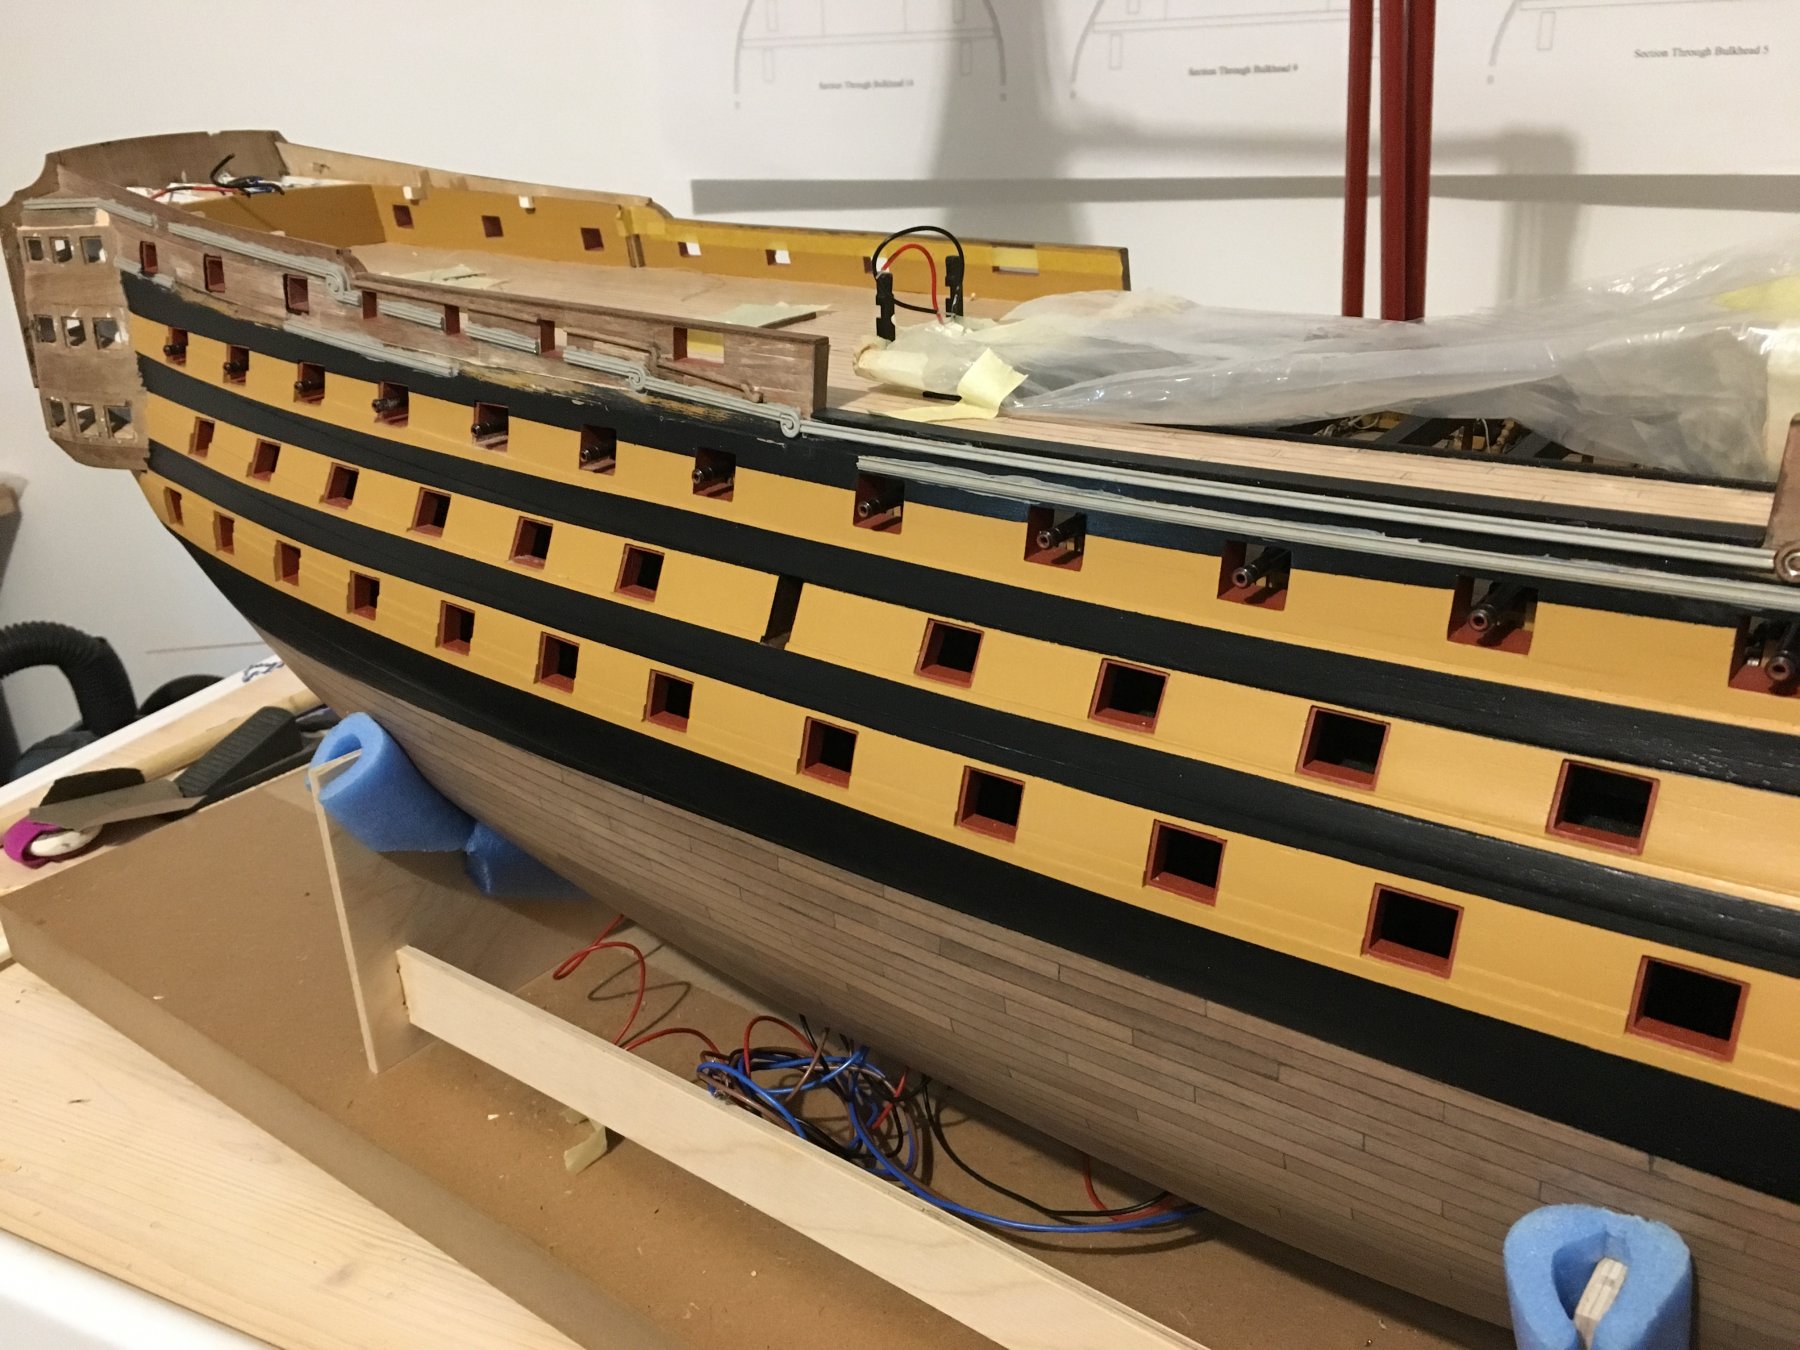
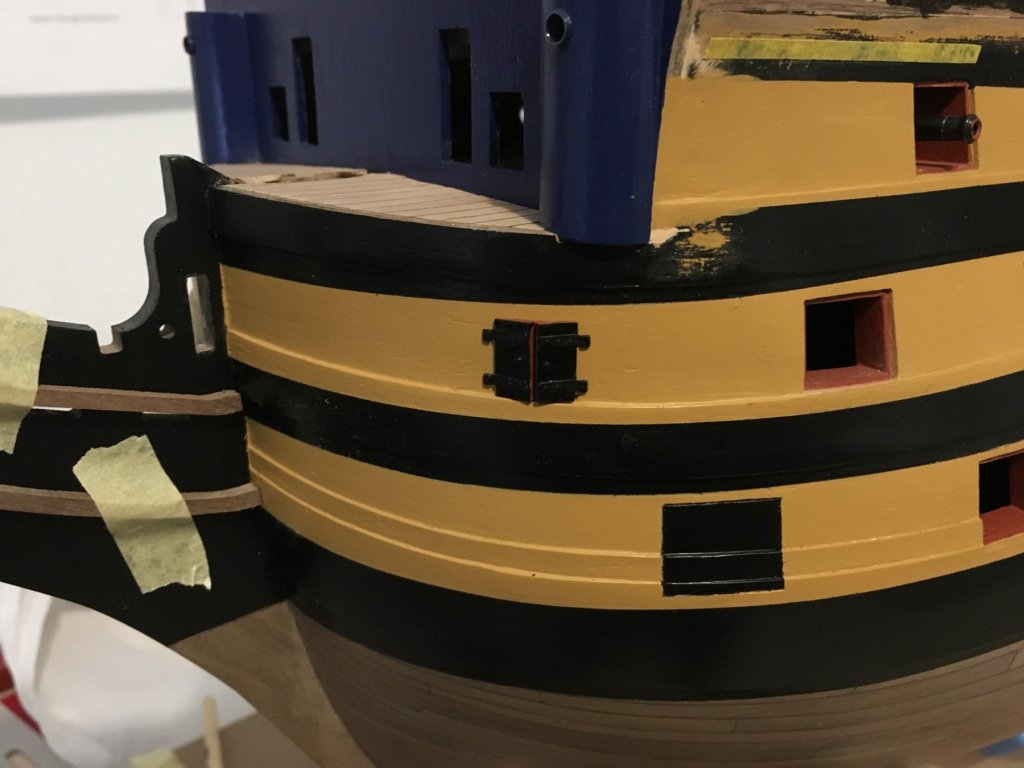
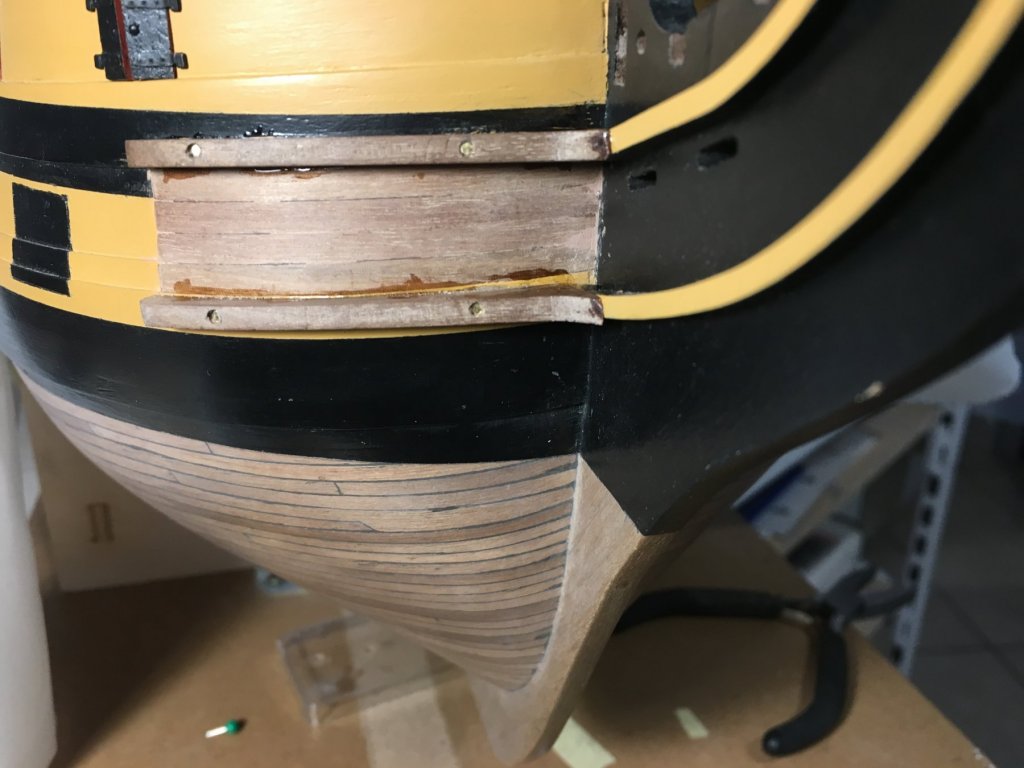
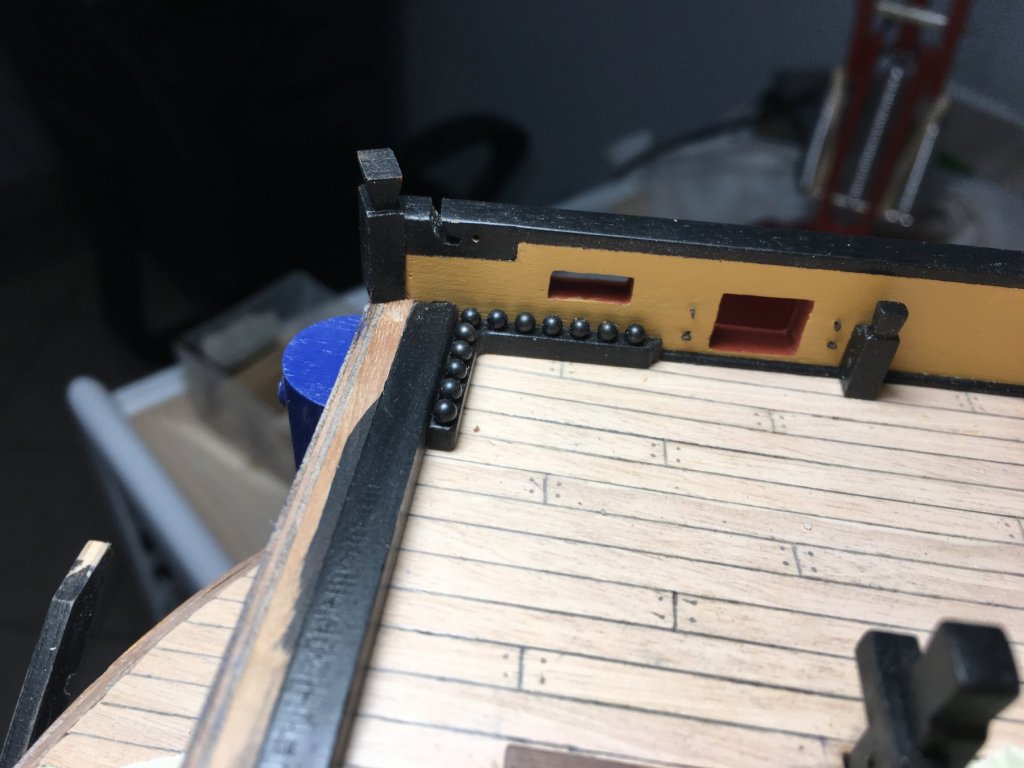
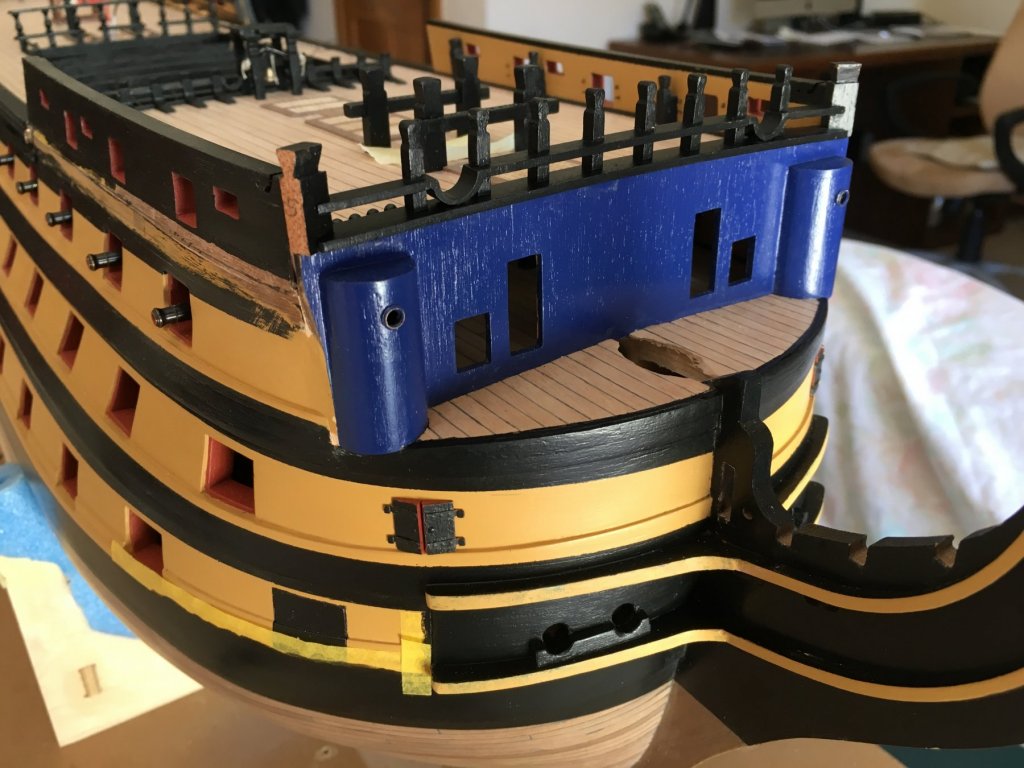
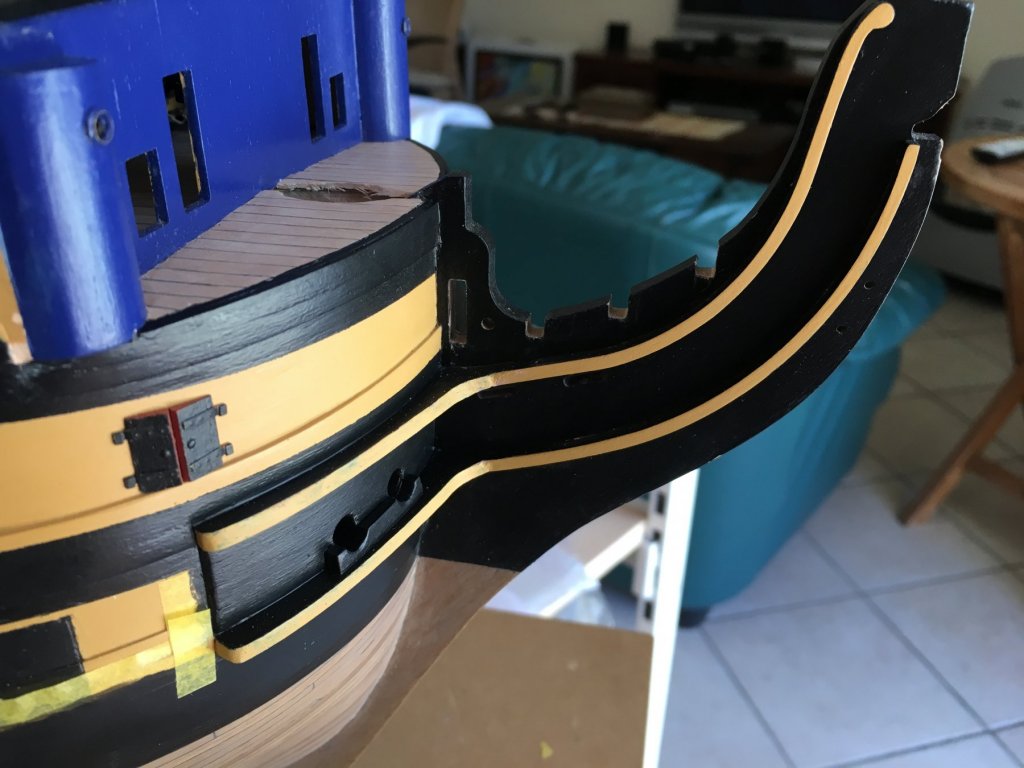
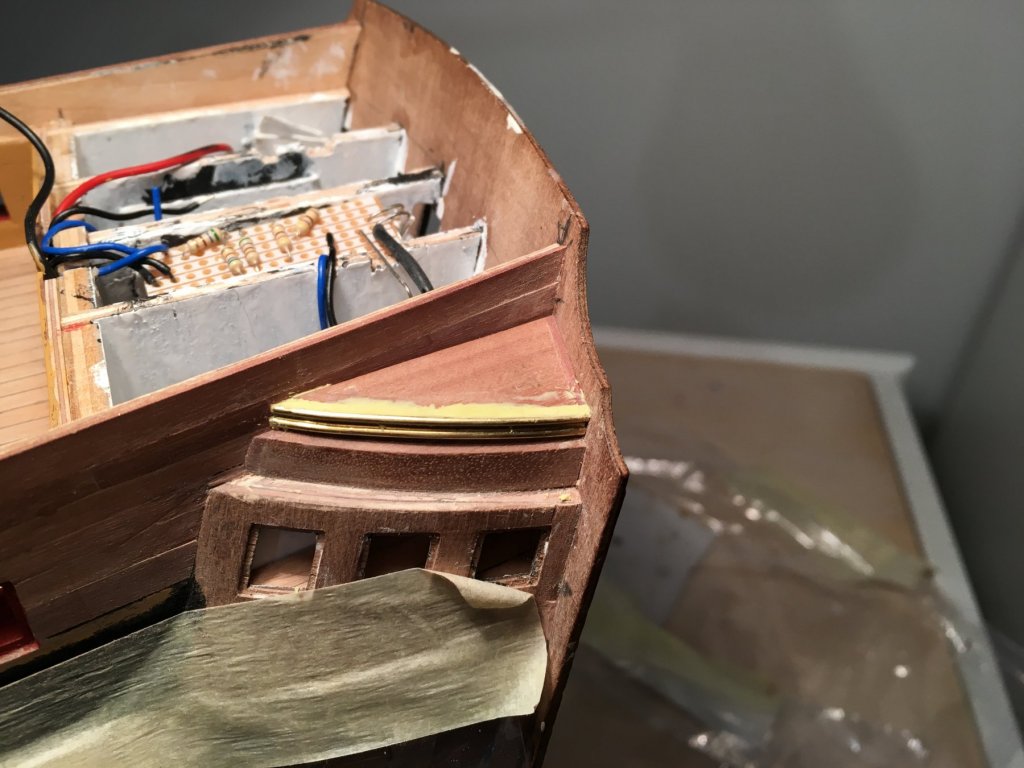
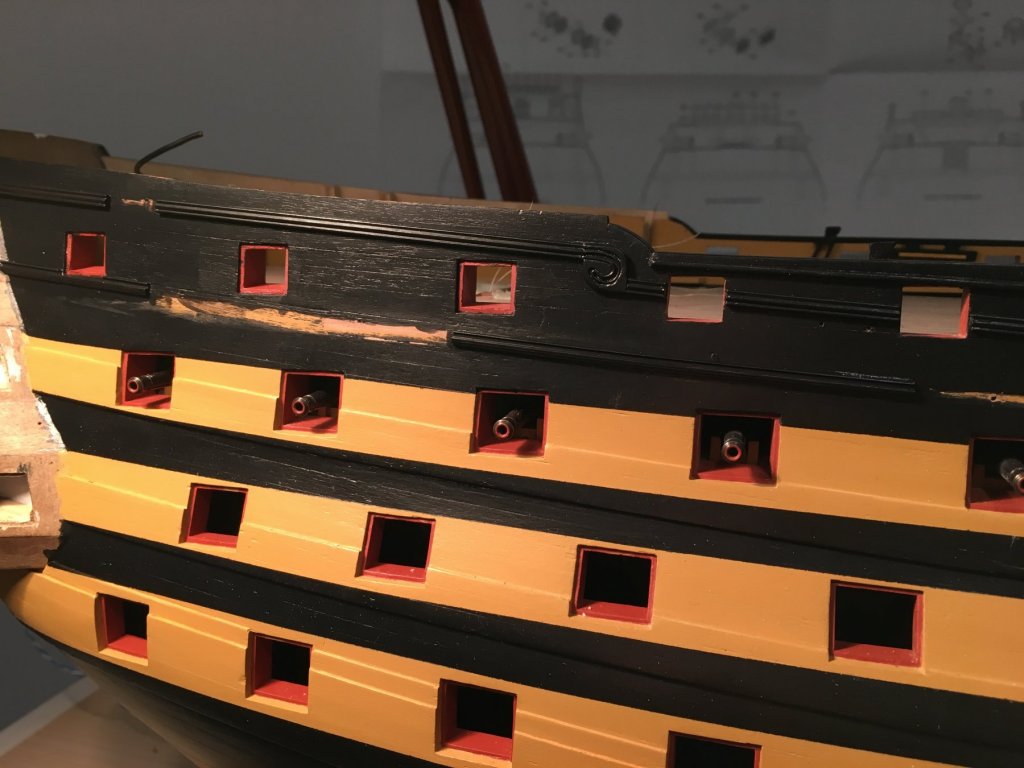
 Made some work on the forward most gunport on the lower and middle gun decks. I did the lower gun deck gunport as advised in the manual, but for the middle gun deck gunport a I went for a different approach. I cut two piece of walnut and sanded them at an angle to look like they are agar when fitted to the hull. The lower gunport is not entirely to my satisfaction, it still needs the hinges, etc... but I will still try to finish it better. When I came to the Beakhead Capping Assembly I was not sure how to finish the two beakheads (125) at the sides of this assembly. I found the instructions for this quite confusing and the unclear photo showing them in the manual was also quite different from the actual once. As the headrail (394) to be fitted at a later stage has one end attached to these beakheads and the other end to the stem against the curved rails I thought I better fit the curved rails to the stem at this stage. Prepared the curved rails which go o the stem. Fitted the rails to the stem and also fitted the hair bracket (120) and lower bow cheek (123). They needed quite some sanding to shape them to the bow curve. Planks in between fitted as well. For the side timberheads I decided not to use the once supplied with the kit and from photos I searched on the internet I shaped two new once which in my opinion are more near to the actual once and fitted them at an angle pointing to the front of the stem. Having the timberheads in place I was able to fit the Beakhead Capping Assembly. Plank sheer glued in place, with ends fitted to the beakheads. Beakhead bulkhead timberheads (121 and 122) glued in place. I used white glue to give me time to aligne them and keep them perfectly in position before glue dries. Assembly finished. Robert
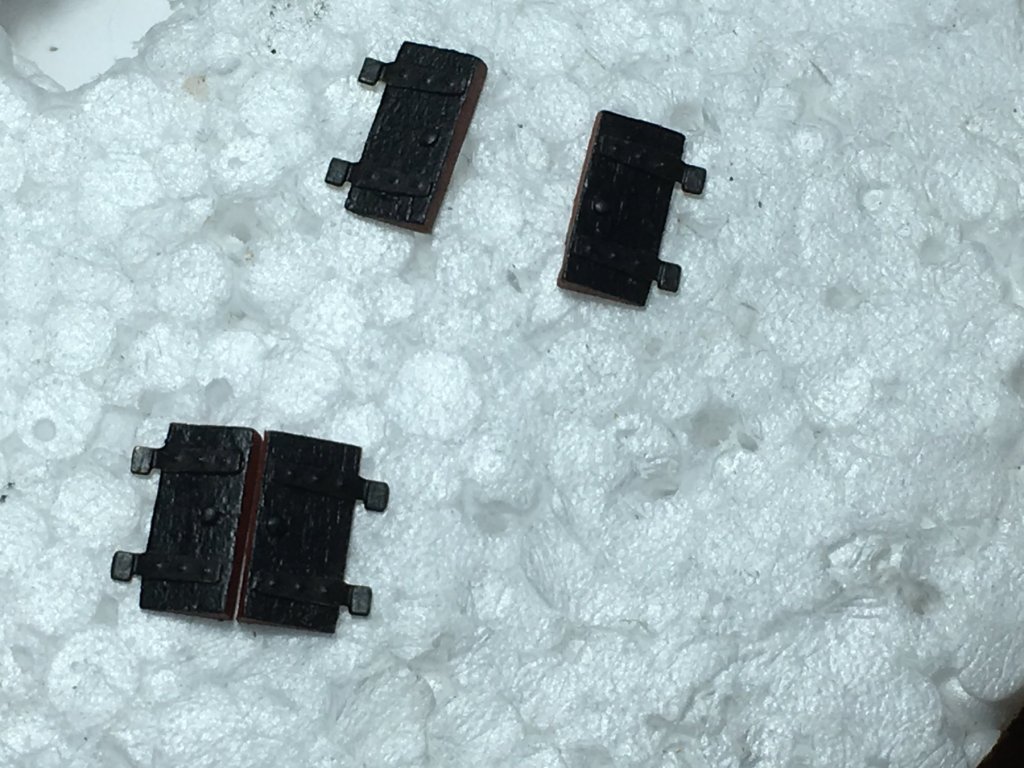


- 527 replies
-
- 5
-

-
- caldercraft
- victory
- (and 1 more)
-
Very nice rigging wok Dave. When I come to the rigging on my Victory I will surely be sneaking into your work in more detail. Robert
-
Congratulations Christos, beautiful work. Reminds me when I was doing my previous build, Bluenose II. Robert
-
Christos and Paul thank you for your nice comments and thank you for the likes. Christos about the railings, yes there should be a railing around the quarterdeck opening. Stanchions have to be fitted around the opening and the rope handrail which is already fitted to the ladders going down to the upper gun deck, keep going round these stanchions. I will fit them at a later stage as for the moment they will be a bit in the way to finish other work, and keep probably I will keep nocking them down. I don't always follow the sequence on the instructions manual, because if you always follow the instructions exactly step by step, sometimes you will find out that work described at a later stage would have been much easier if you would have done it before or in conjunction with work you are presently doing. I try to think ahead and see if the work doing now will temper with other work I still have to do. At the moment I am doing some work on the canons that go on the quarter deck and also started some work on the bow section although I still have work to do on the quarterdeck. Hopefully I will soon have some images to update. Robert
-
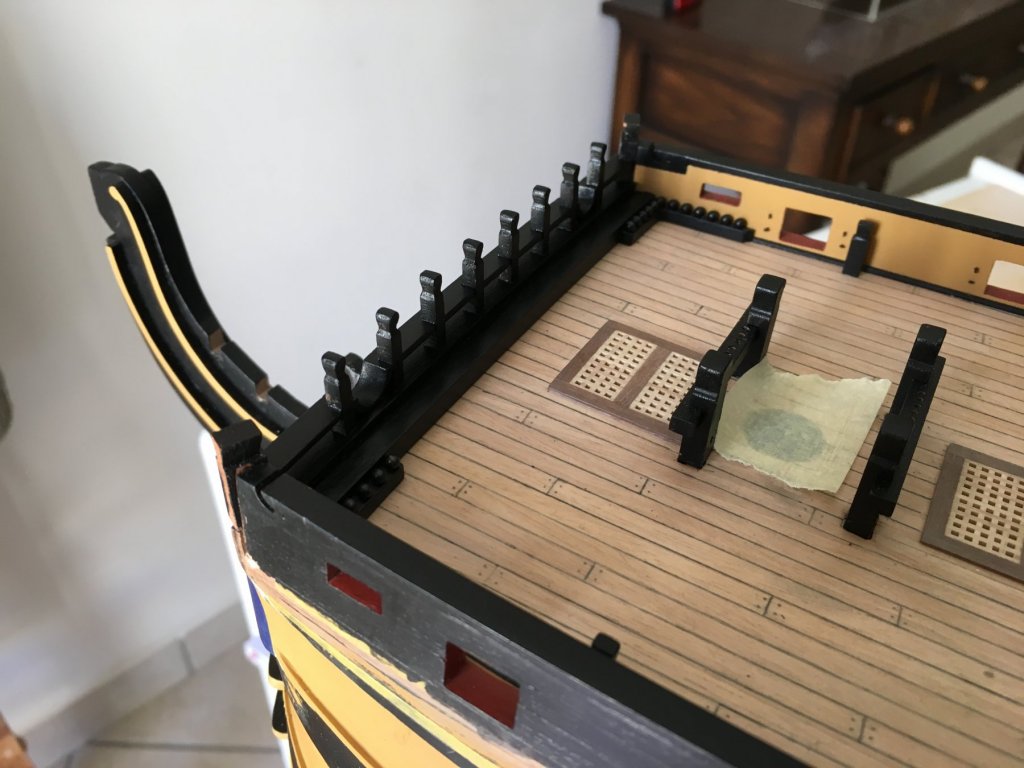
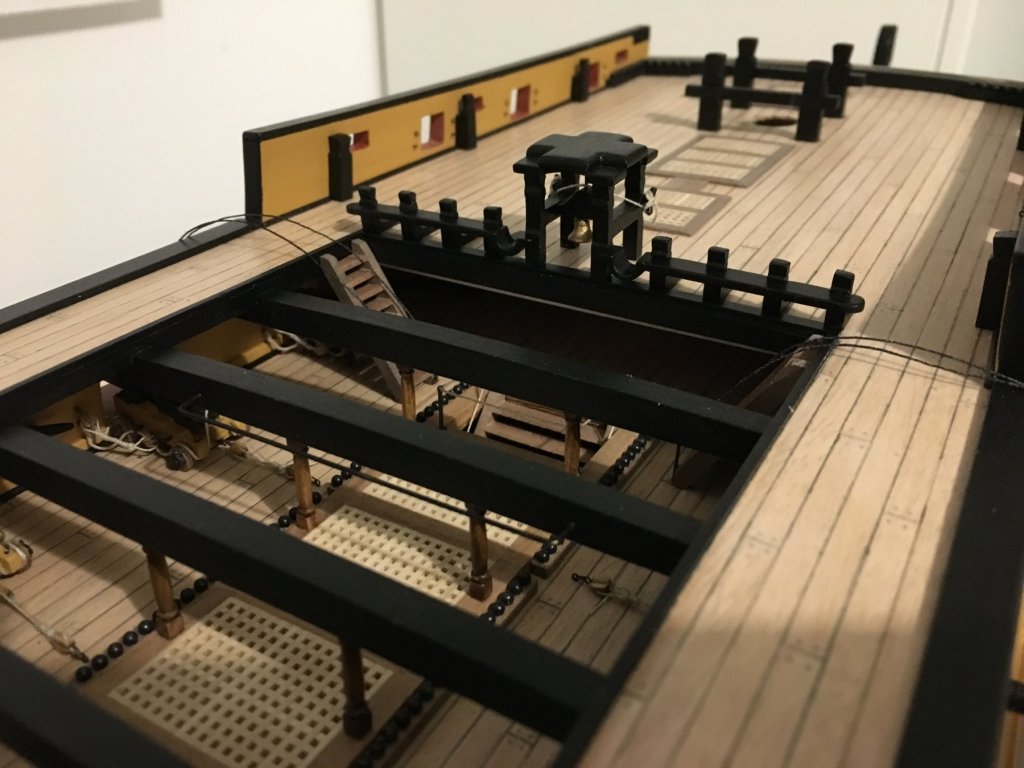
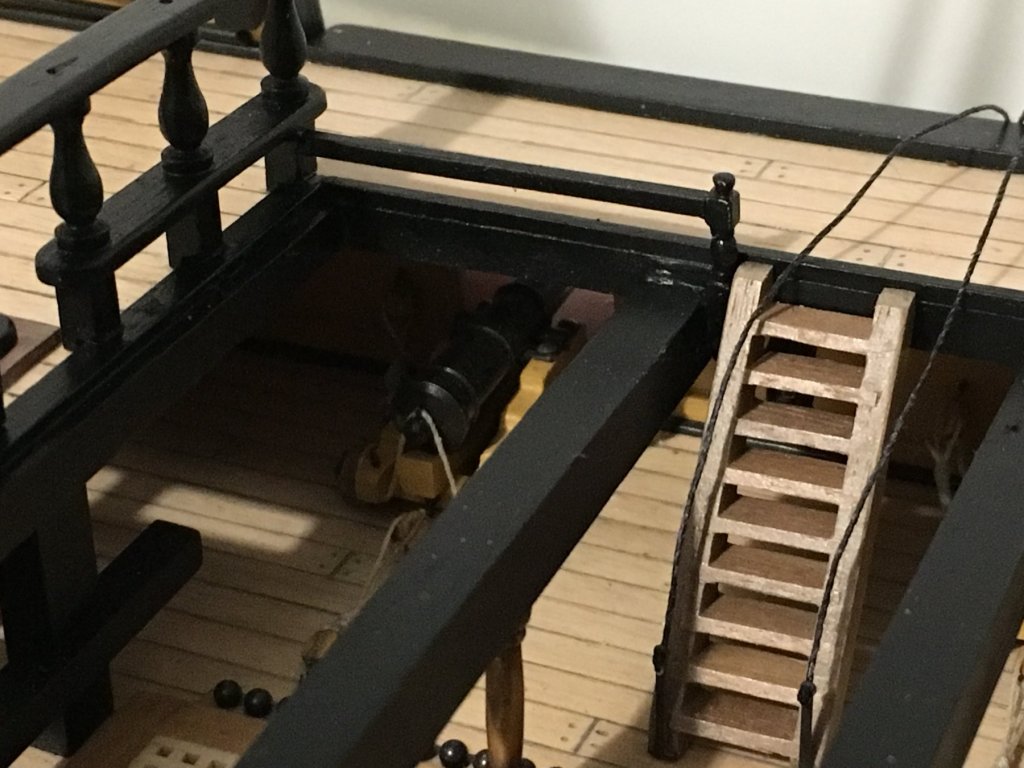
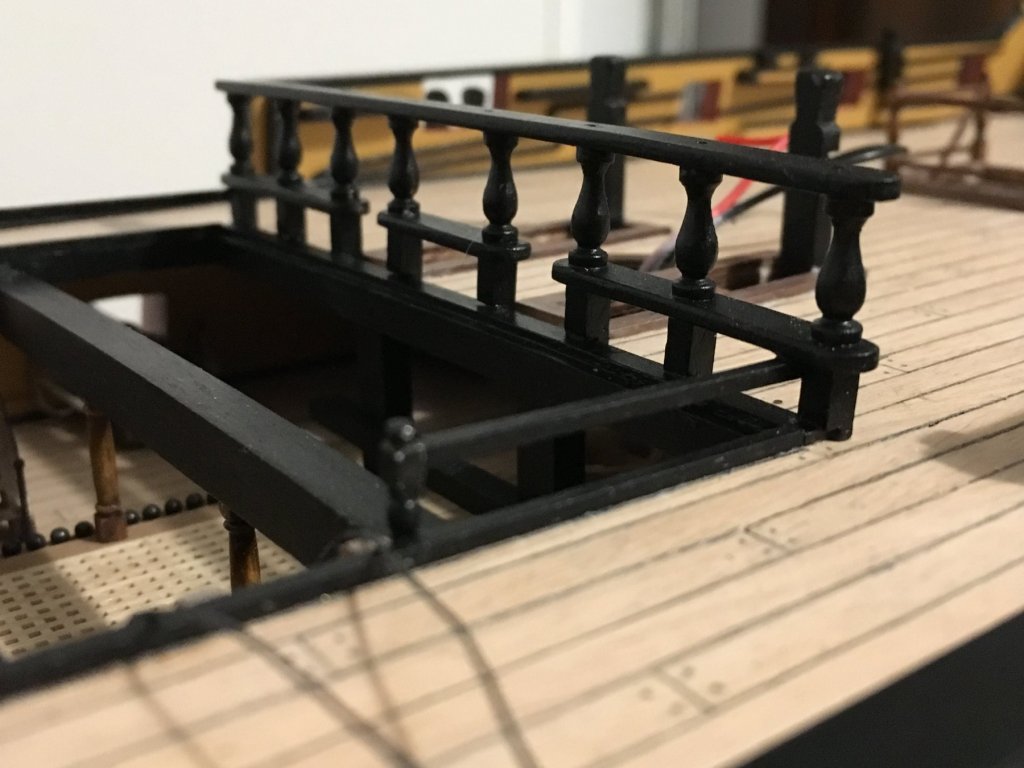
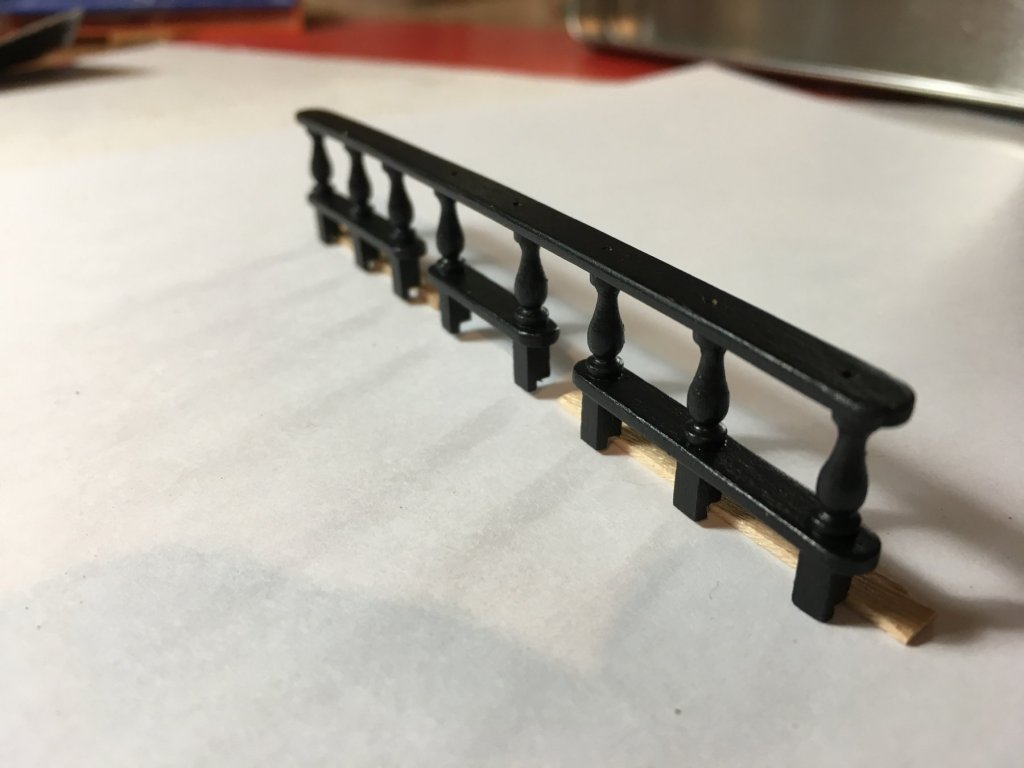
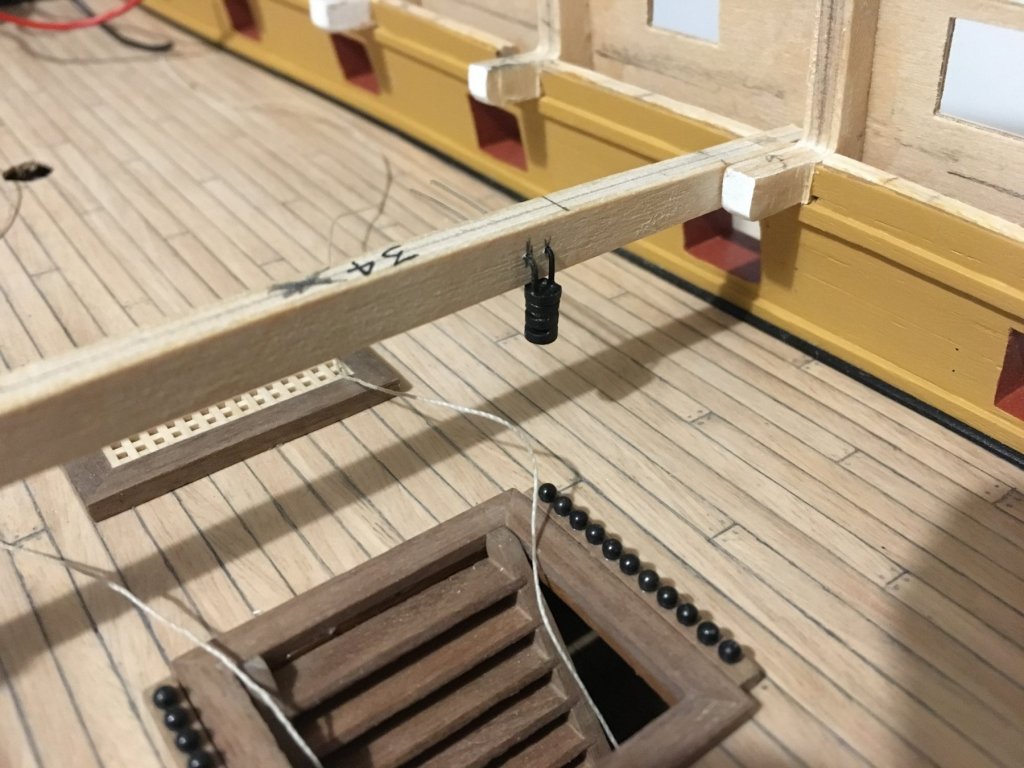
Thank you Heinz and Wallace. More work on the Quarterdeck. Belfry and forecastle breast beam in place. Quarterdeck Barricade and Main Companionway. Baluster and rail fitted as well. Companionway to Admirals Dining Cabin rigged. The Screen Assembly is only dry fitted for the moment. Robert


- 527 replies
-
- 6
-
-
- caldercraft
- victory
- (and 1 more)
-
Hello Heinz, very nice pictures. It is looking really beautiful. Robert
-
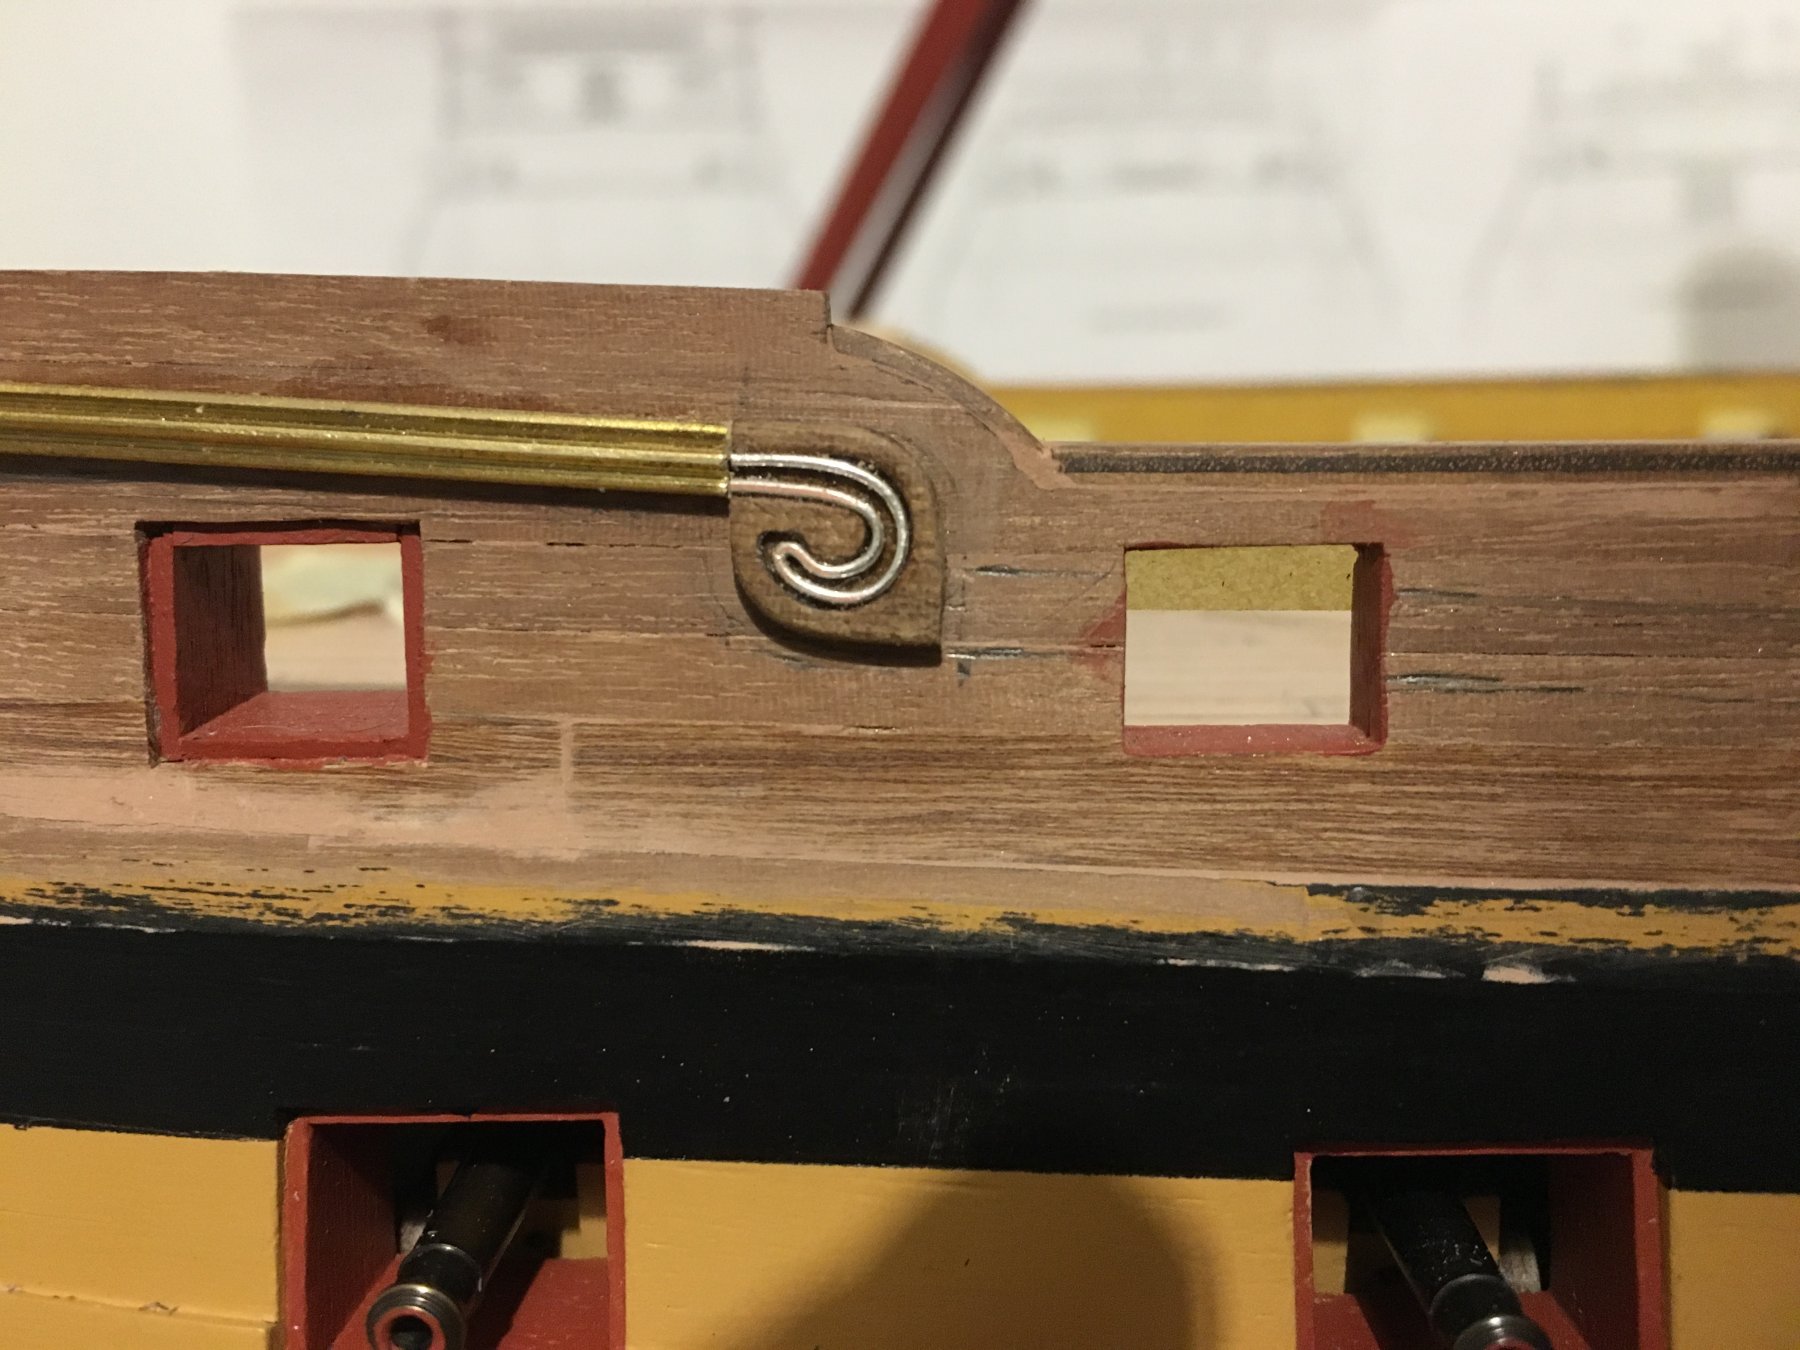
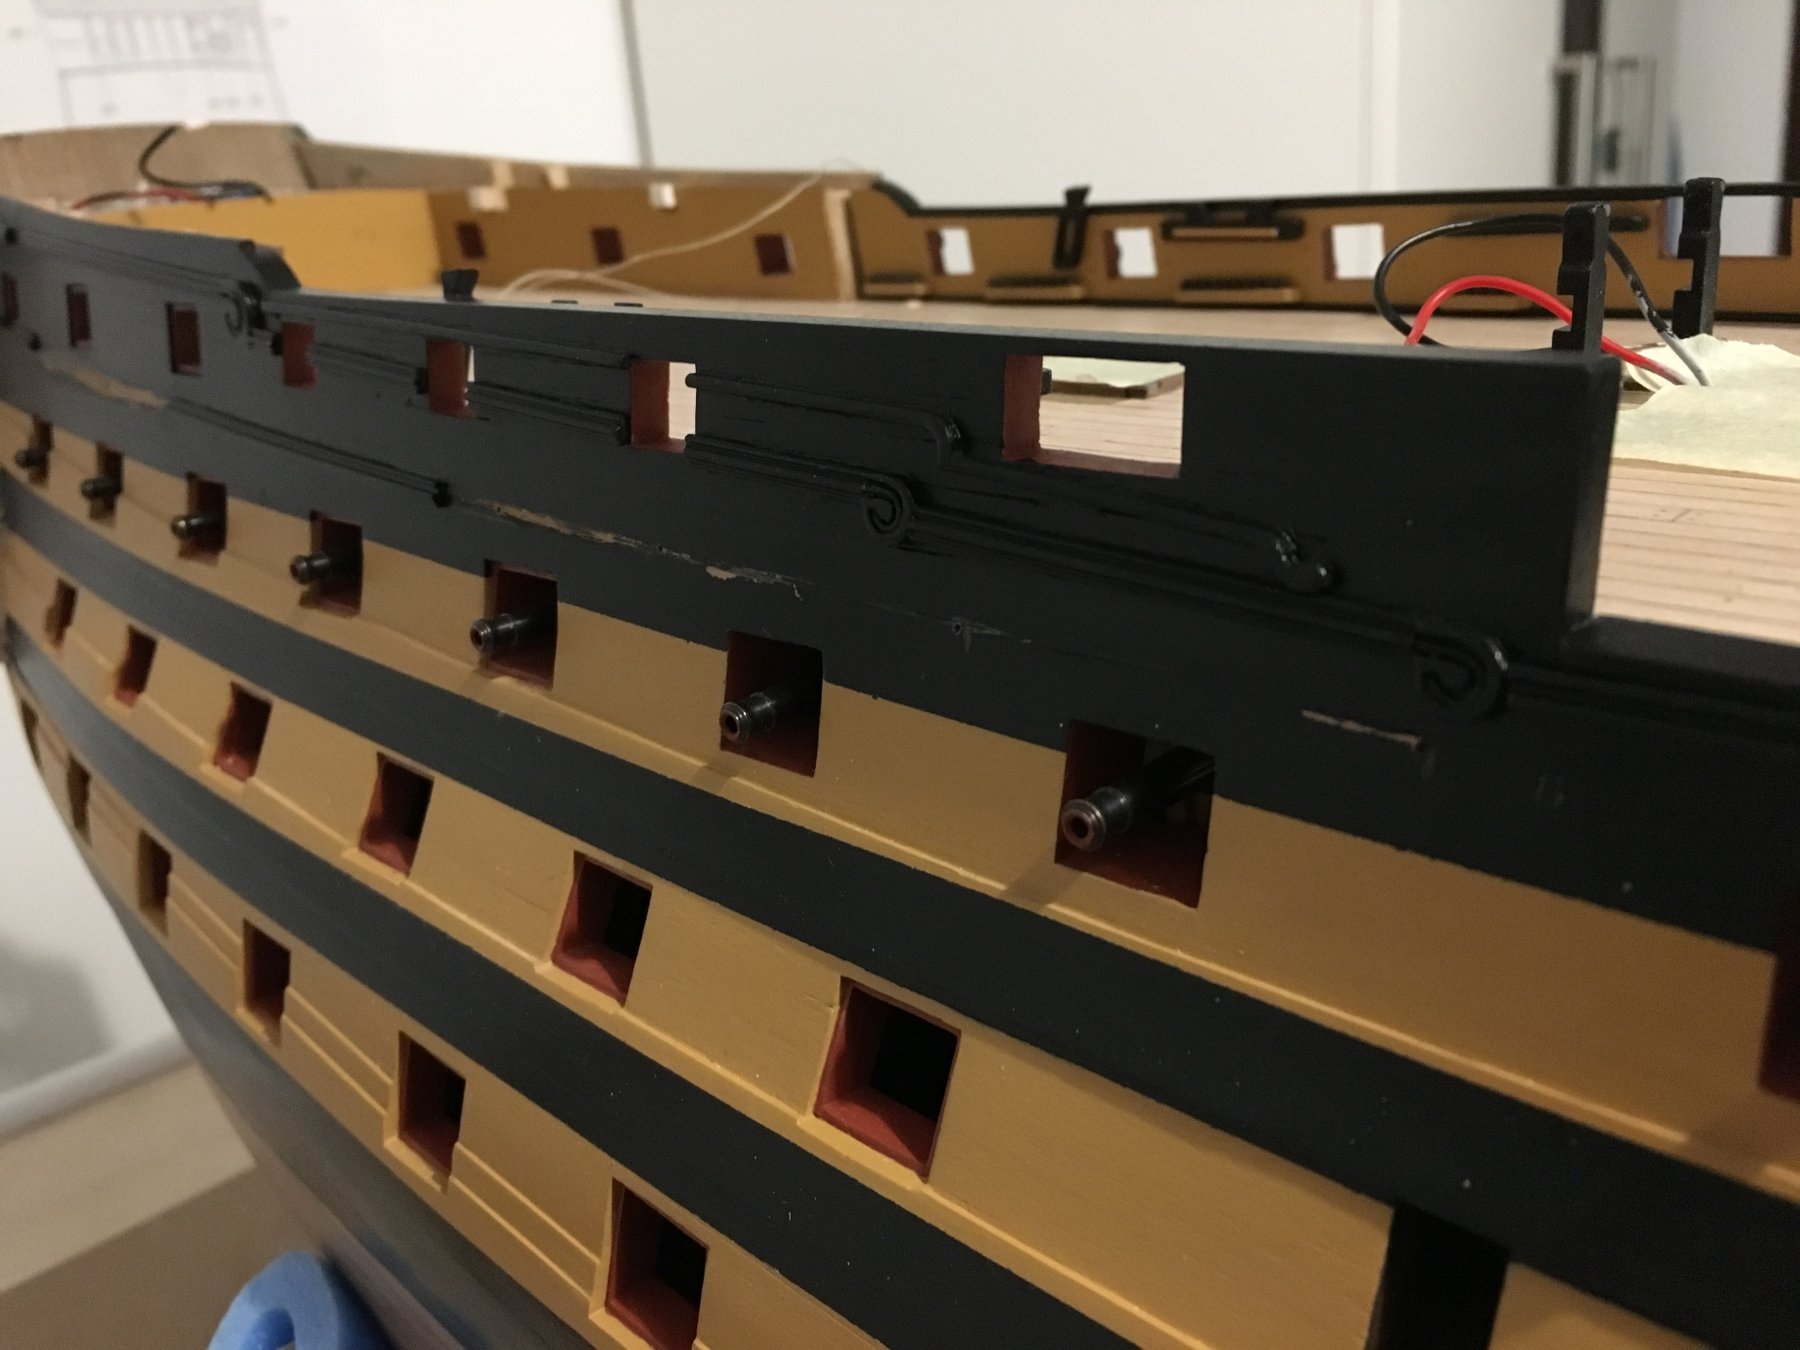
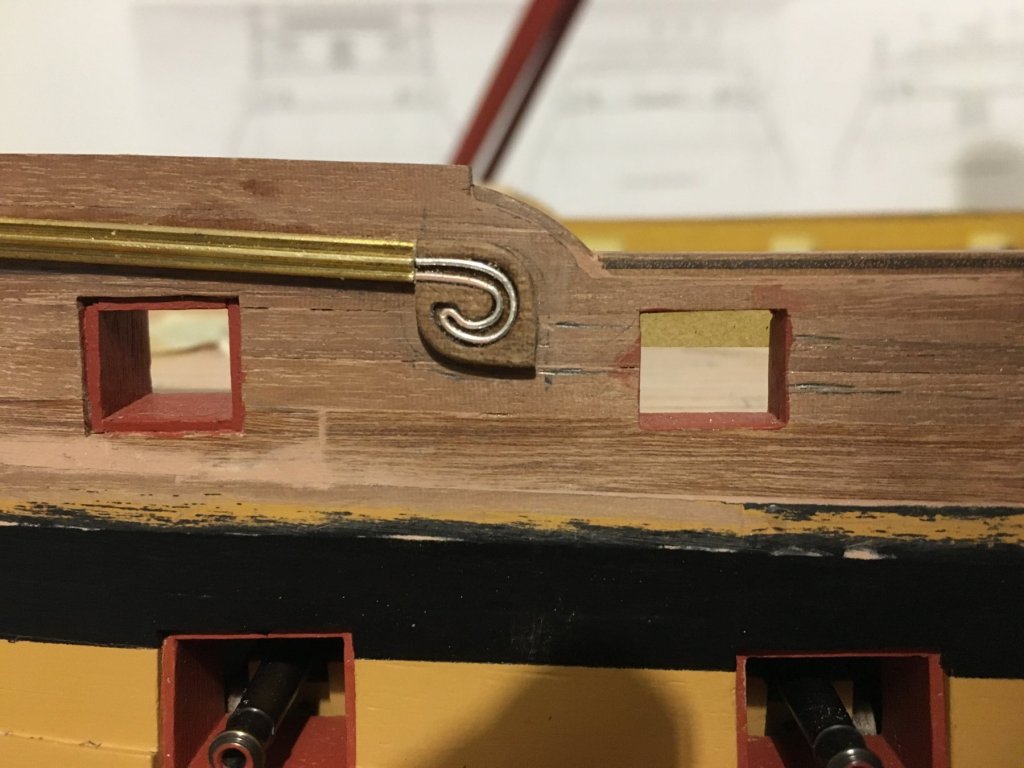
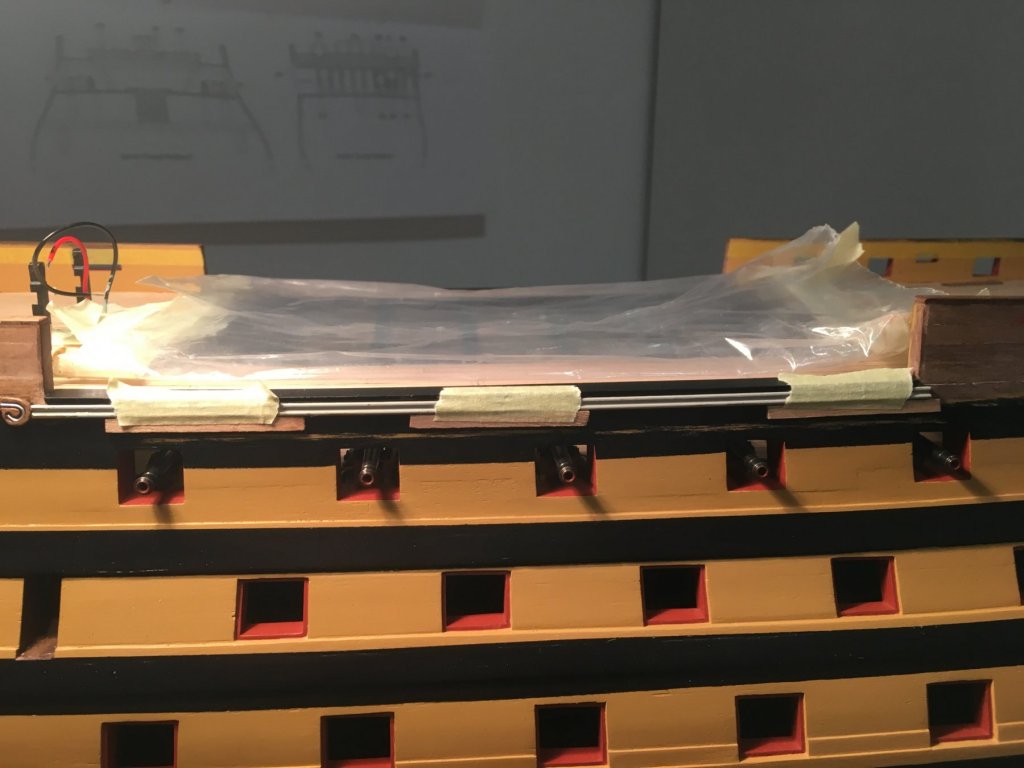
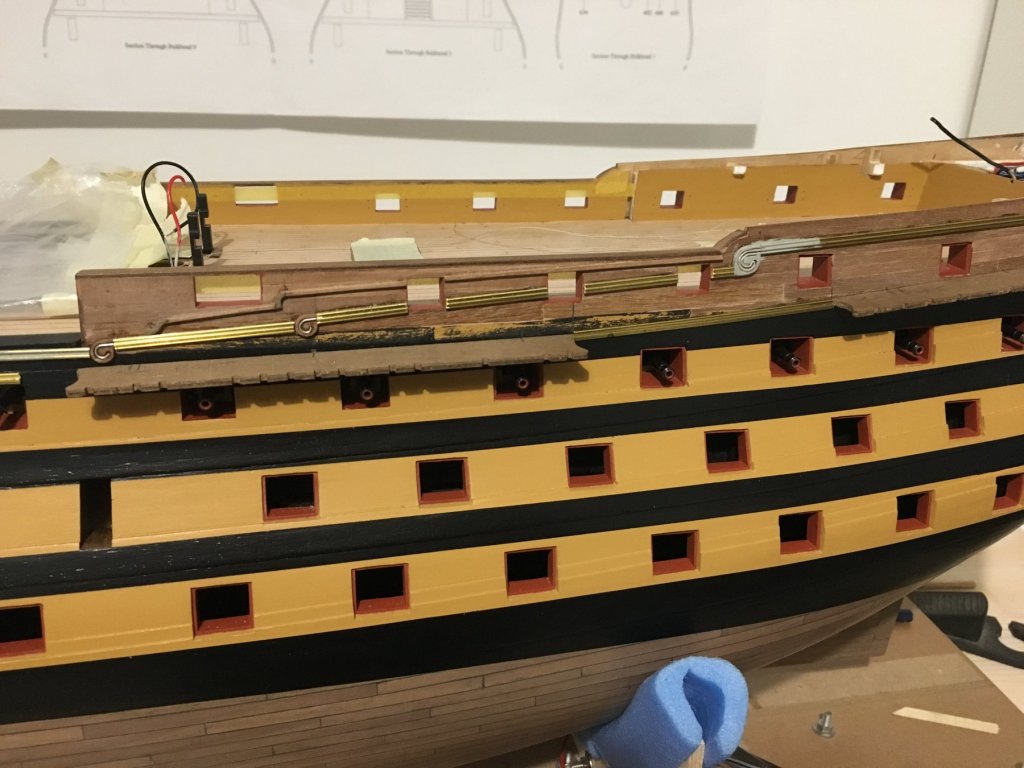
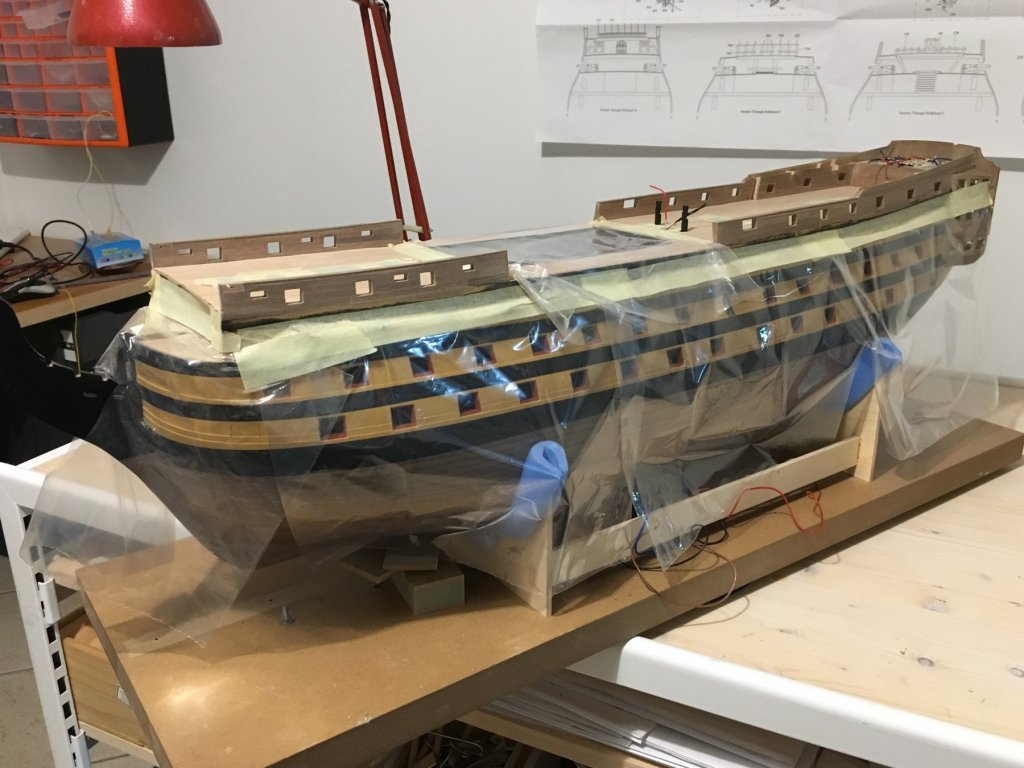
Hello, another update after a month from my last update. Before gluing the fittings on the inside of the bulwarks I thought it is a better idea to fit some of the brass profiles on the outside as I was sure they were going to need a lot of handling to find their position. The moulding swirls did not look so good so I added some detail to them. I think they look much better like this. I also prepared the place for the channels. I fitted pins on the inside edge of the channels and prepared their respective holes on the hull to be fitted and glued at a later stage. Painted bulwarks and fitted kevels , shot garlands, etc. on the inside of the bulwarks. I also added the mouldings on the inside of the bulwarks. These were not included with the kit but they make a nice detail. I made them from 1mm x 1mm strips. I left the place for the channels unpainted to get a better adhesion when glued. Will finish the paint when channels and rest of the brass profiles are fitted. Waist ladders also fitted in place. Beakhead bulkhead, complete with roundhouses fitted in place and painted. Should have another update pretty soon, with the Forecastle Breast Beam Assembly and the Quarterdeck Barricade Assembly in place. Robert


- 527 replies
-
- 8
-
-
- caldercraft
- victory
- (and 1 more)
-
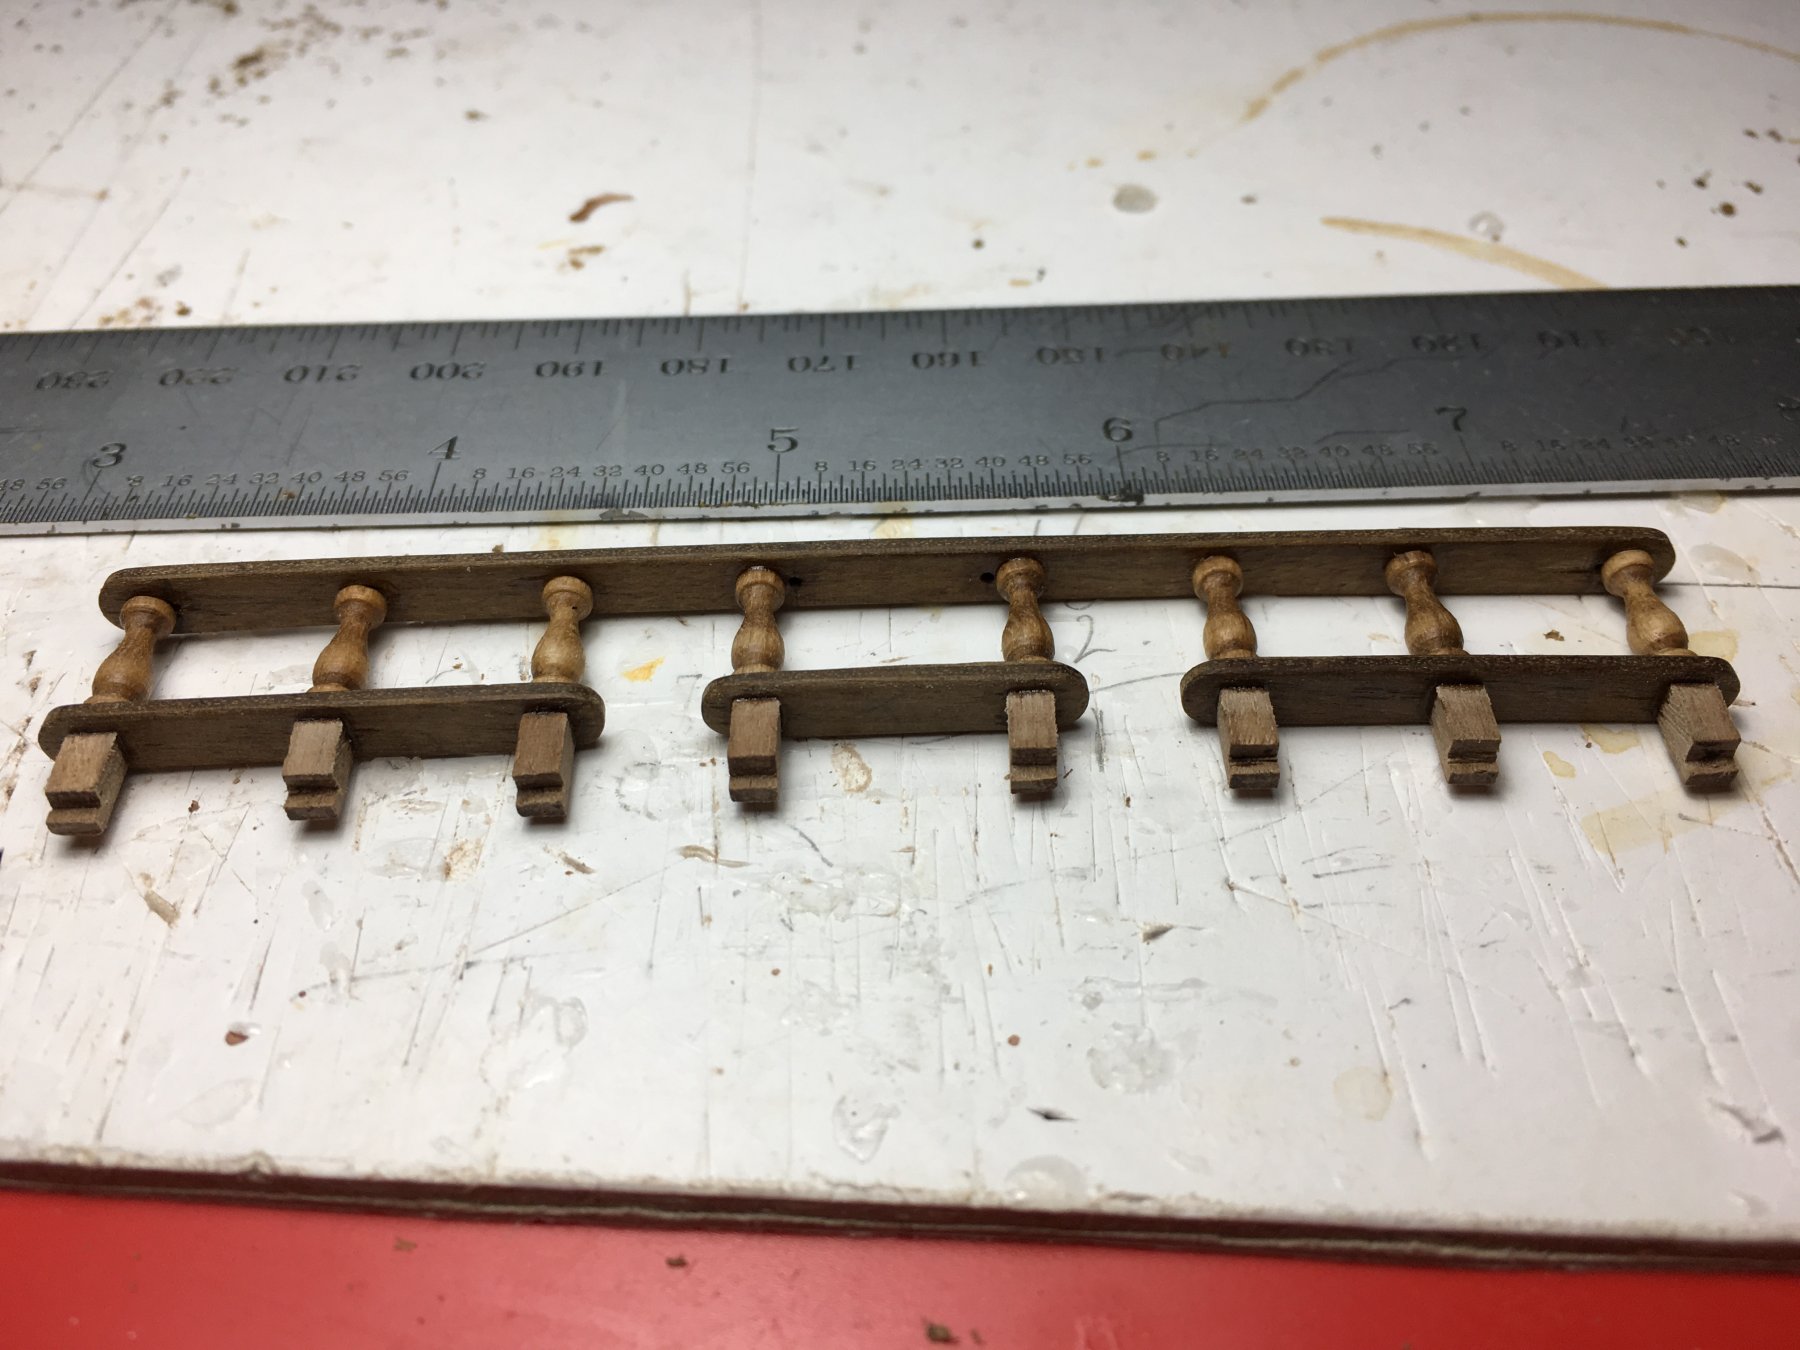
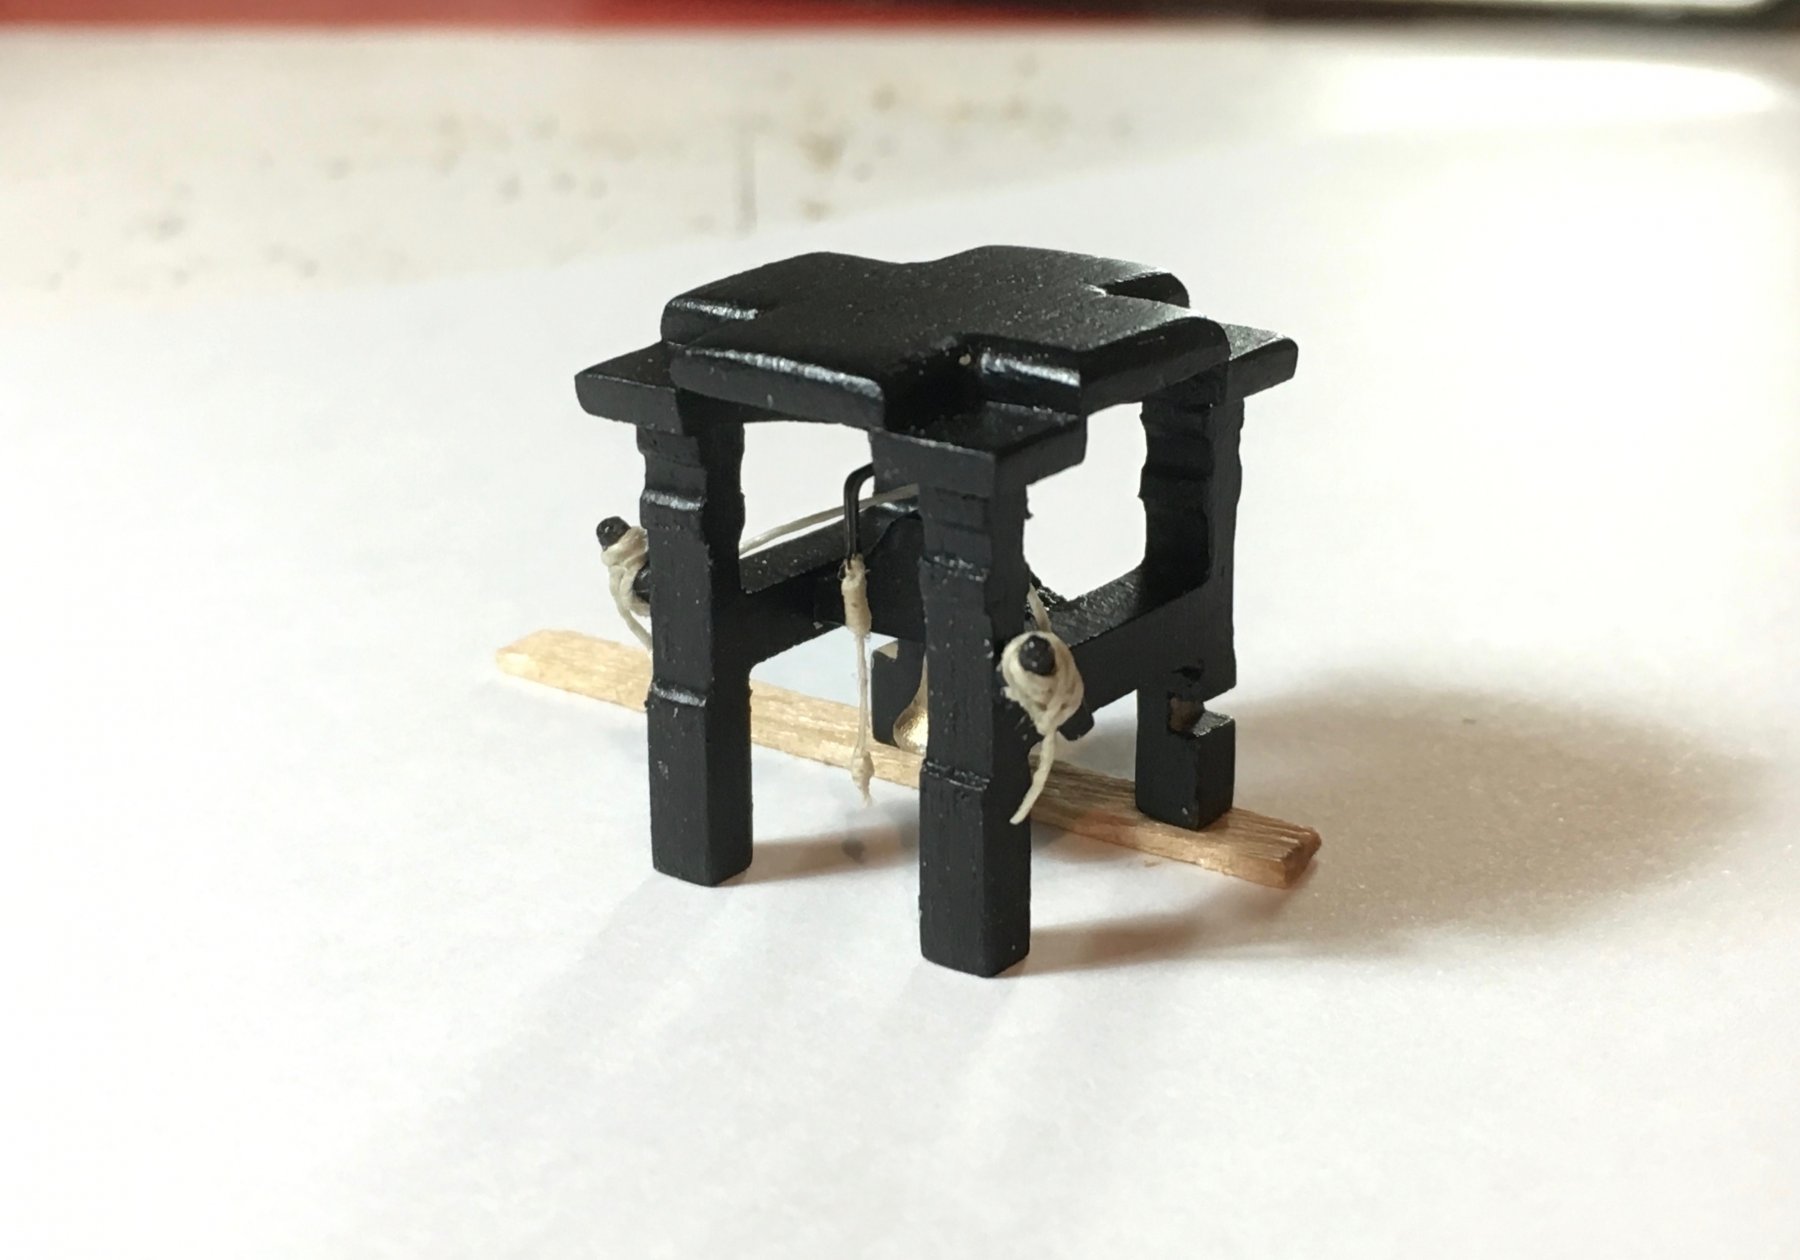
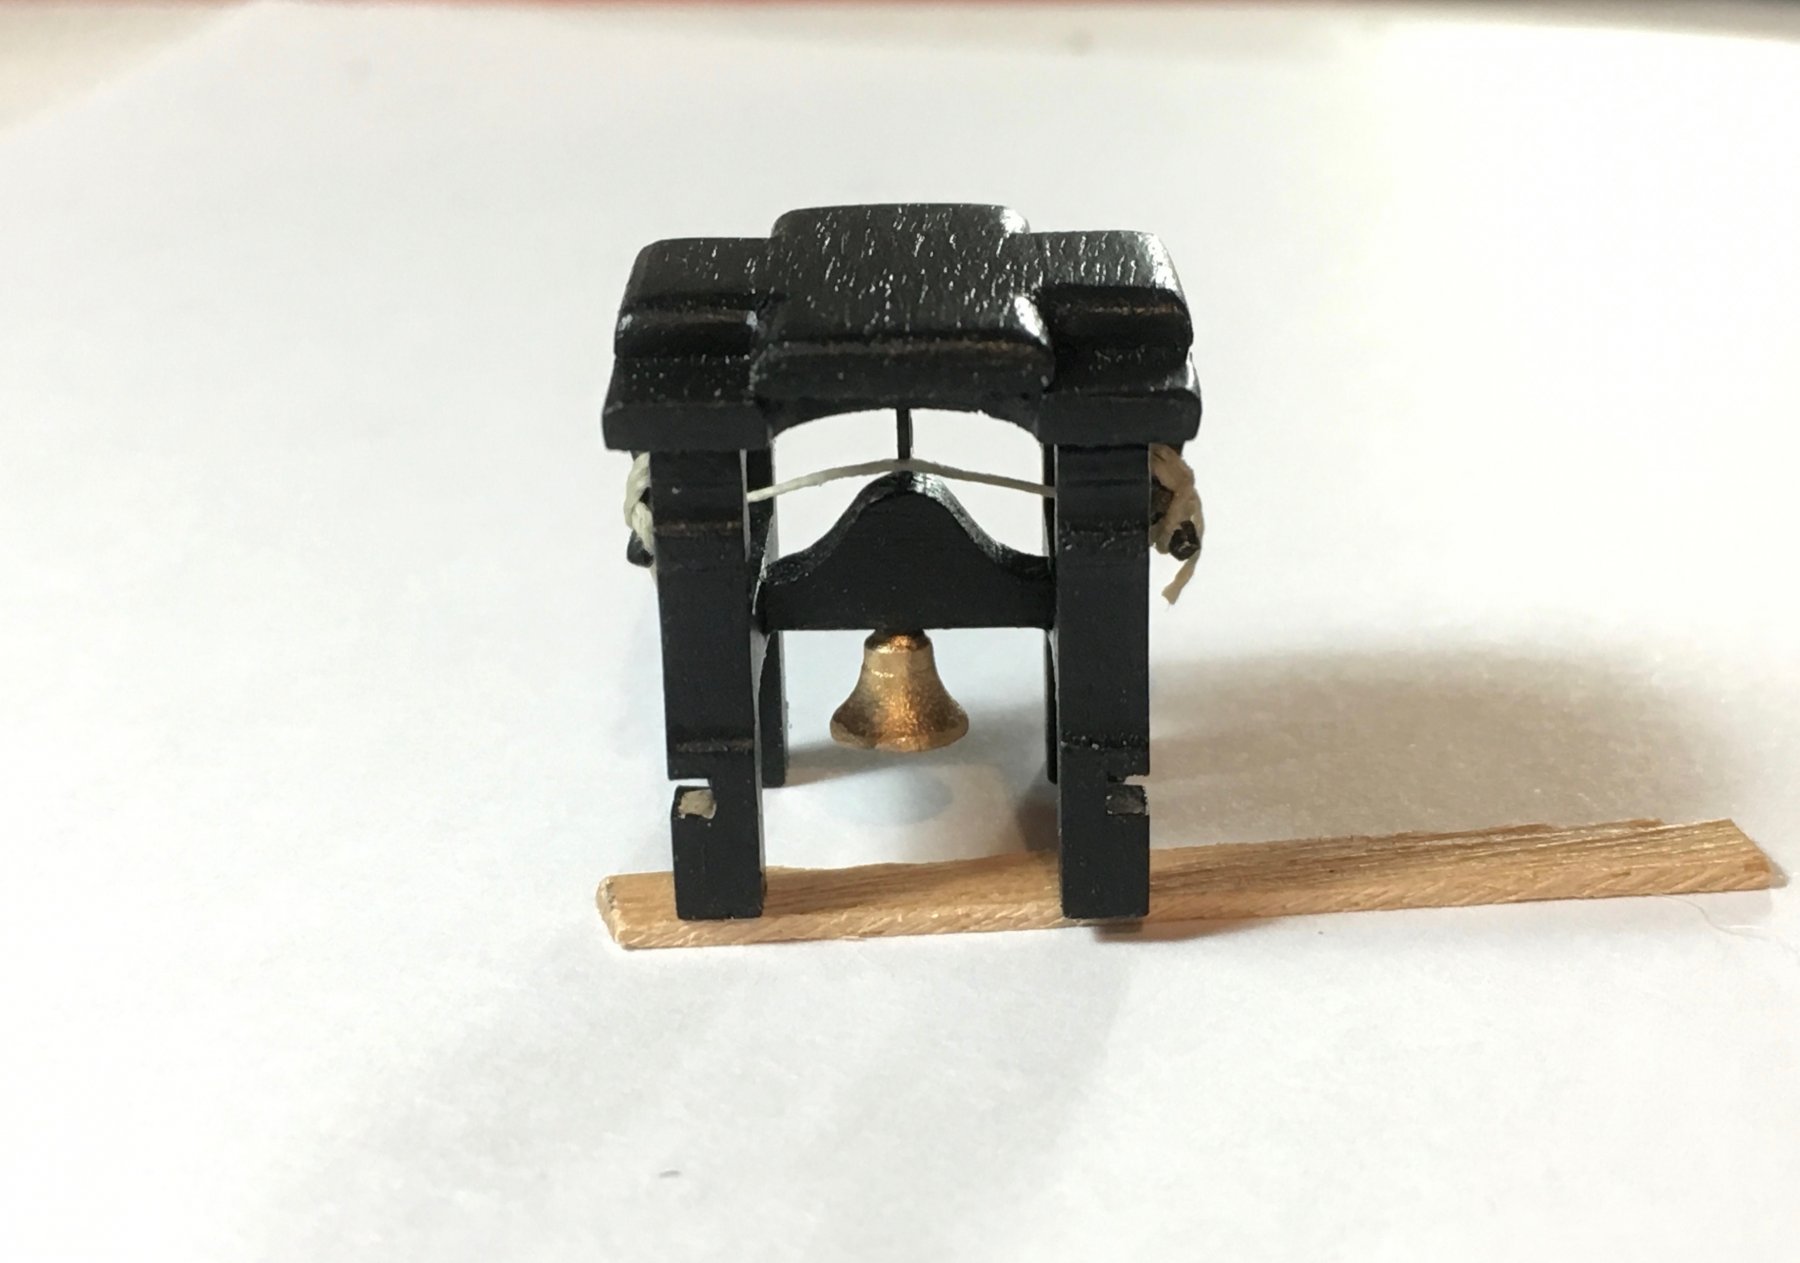
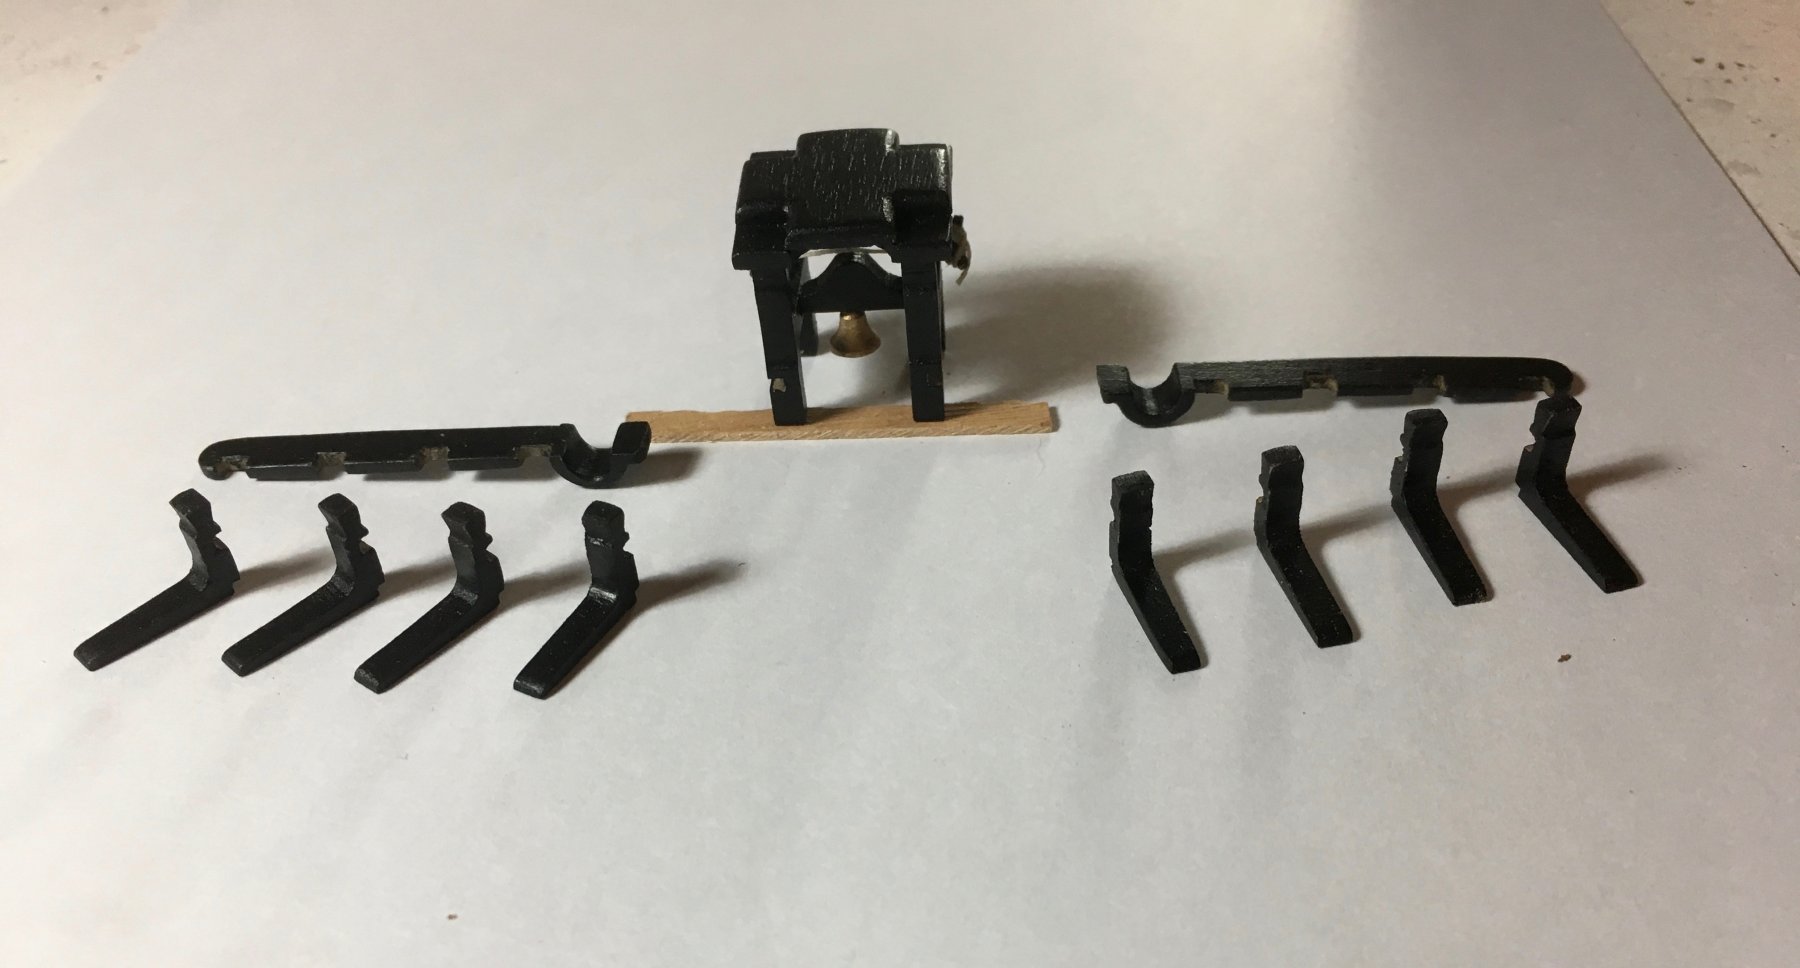
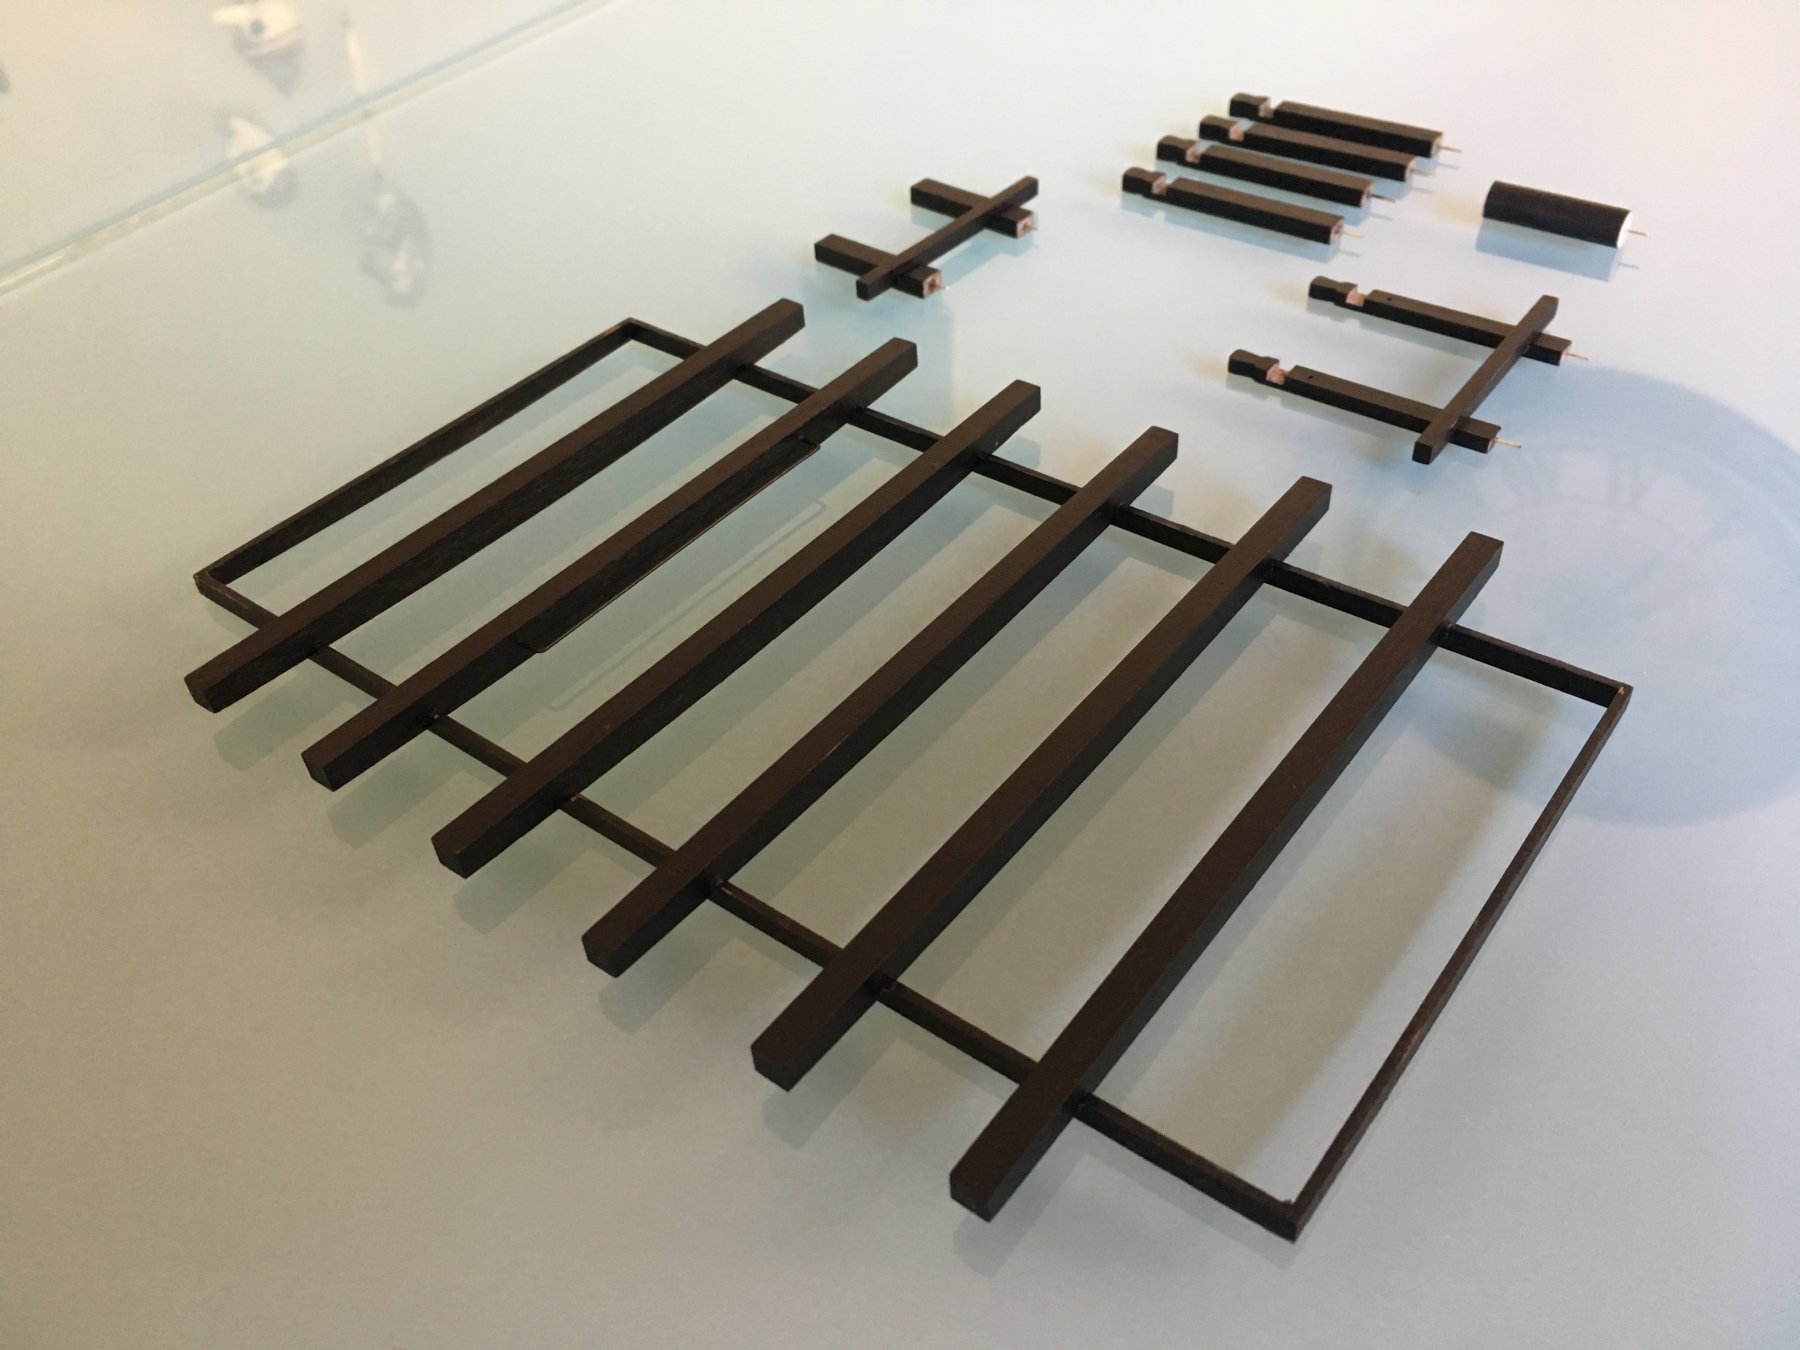
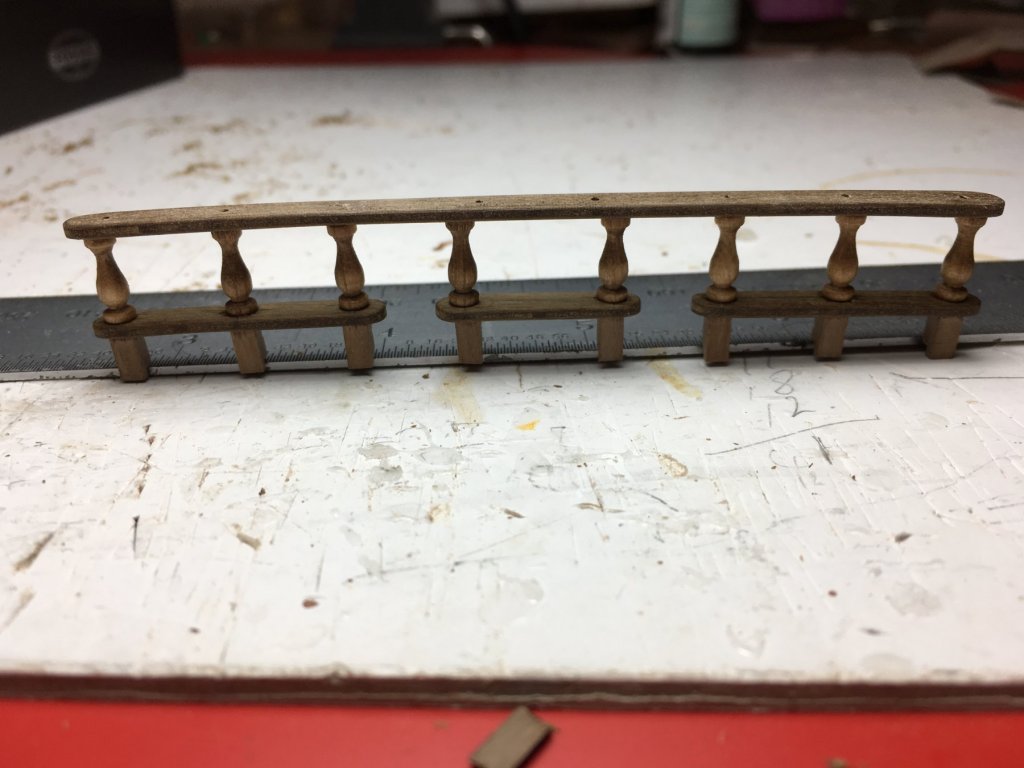
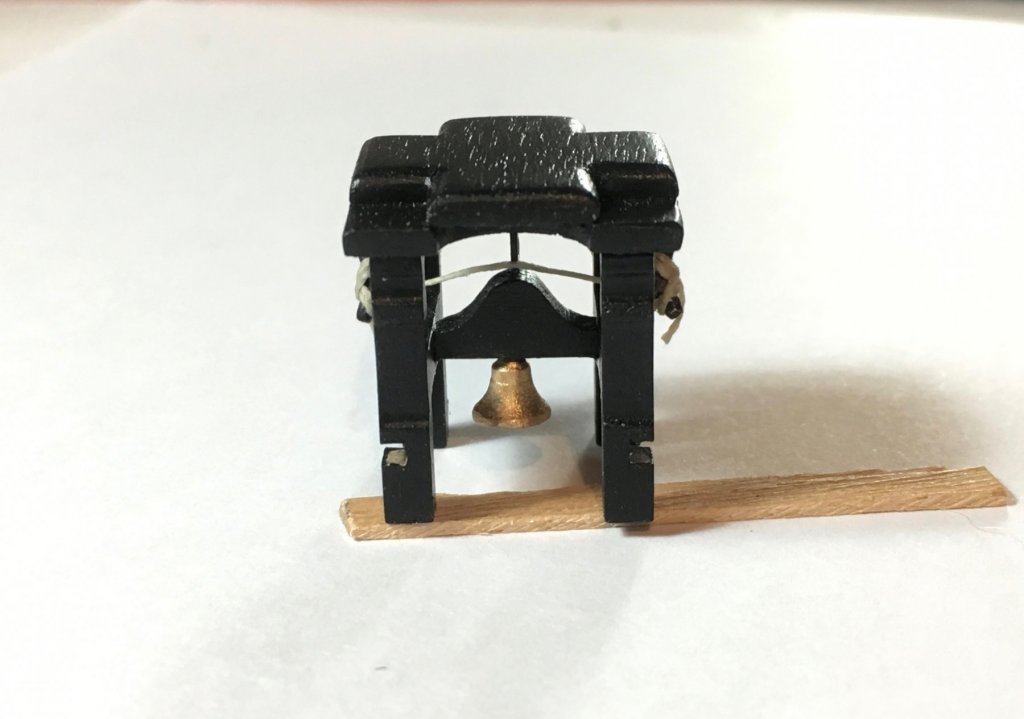
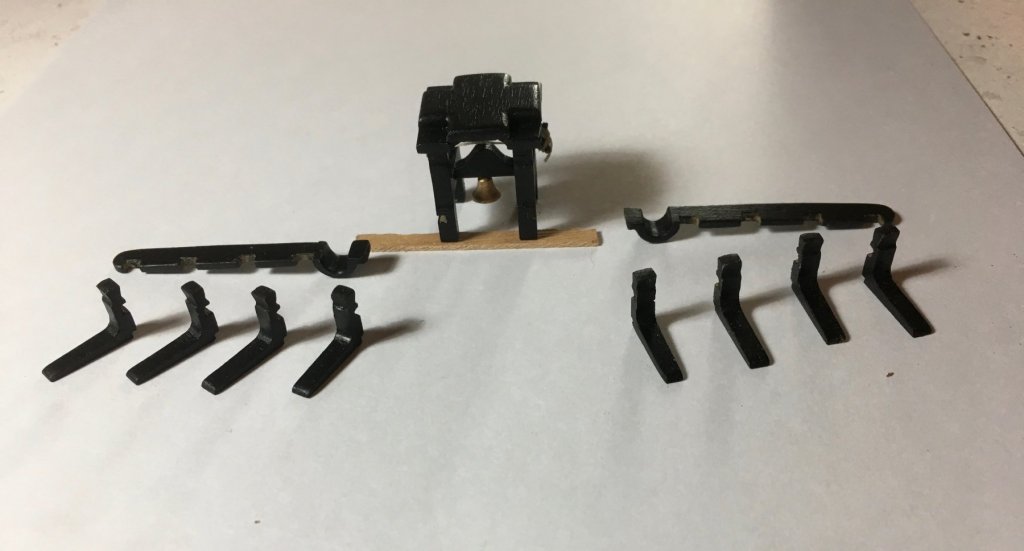
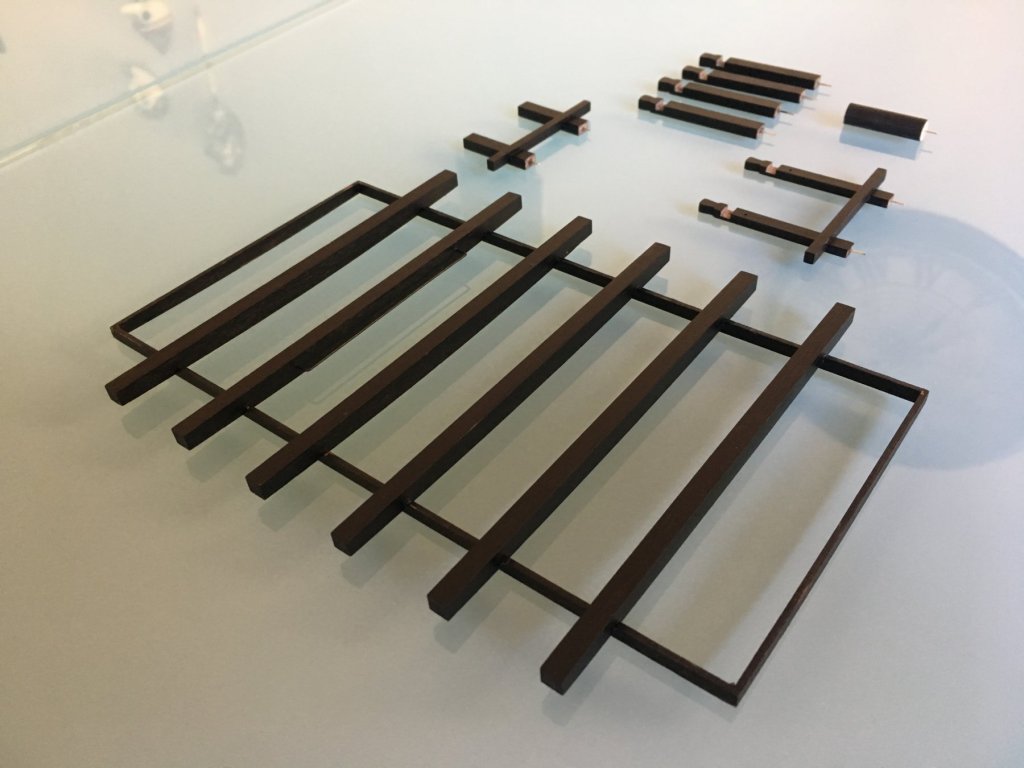
Preparing fittings to go on the quarter deck. Waist ladders ready with stanchions. Quarter Barricade Assembly also ready to be fitted. Instead of assembling it directly on deck as per instructions, I thought it would be easier to assemble it as a whole piece on workbench and fit it on deck as a complete assembly. The middle rails and the upper rail were bent with the same curvature of the deck before assembled so it will fit perfectly when fitted on deck. Belfry for the forecastle breast beam assembly ready as well. Supports and rails ready to be assembled on deck together with the belfry. Robert


- 527 replies
-
- 6
-
-
- caldercraft
- victory
- (and 1 more)
-
Wallace , thank you, I myself have taken a lot of ideas from other builders from this forum, it's a great forum and you learn a lot from it. Richard, when I had started the deck beneath, that was something I was asking myself. Do I show the tree nails or not? As you rightly so said, in reality they hardly show and you might as well not show them at all on the model, but I thought the tree nails added a bit more of a pleasant detail. But when I tried a sample with all the tree nails all across the planks, not just at the ends I thought it was an overkill, it was too much. So I decided to do just the ends. I know in reality they should be all across but in my opinion, on my model it was either just at the ends or nothing at all. I decided to do just the ends to have ecstatically a better looking deck. Robert
- 527 replies
-
- 1
-
-
- caldercraft
- victory
- (and 1 more)
-
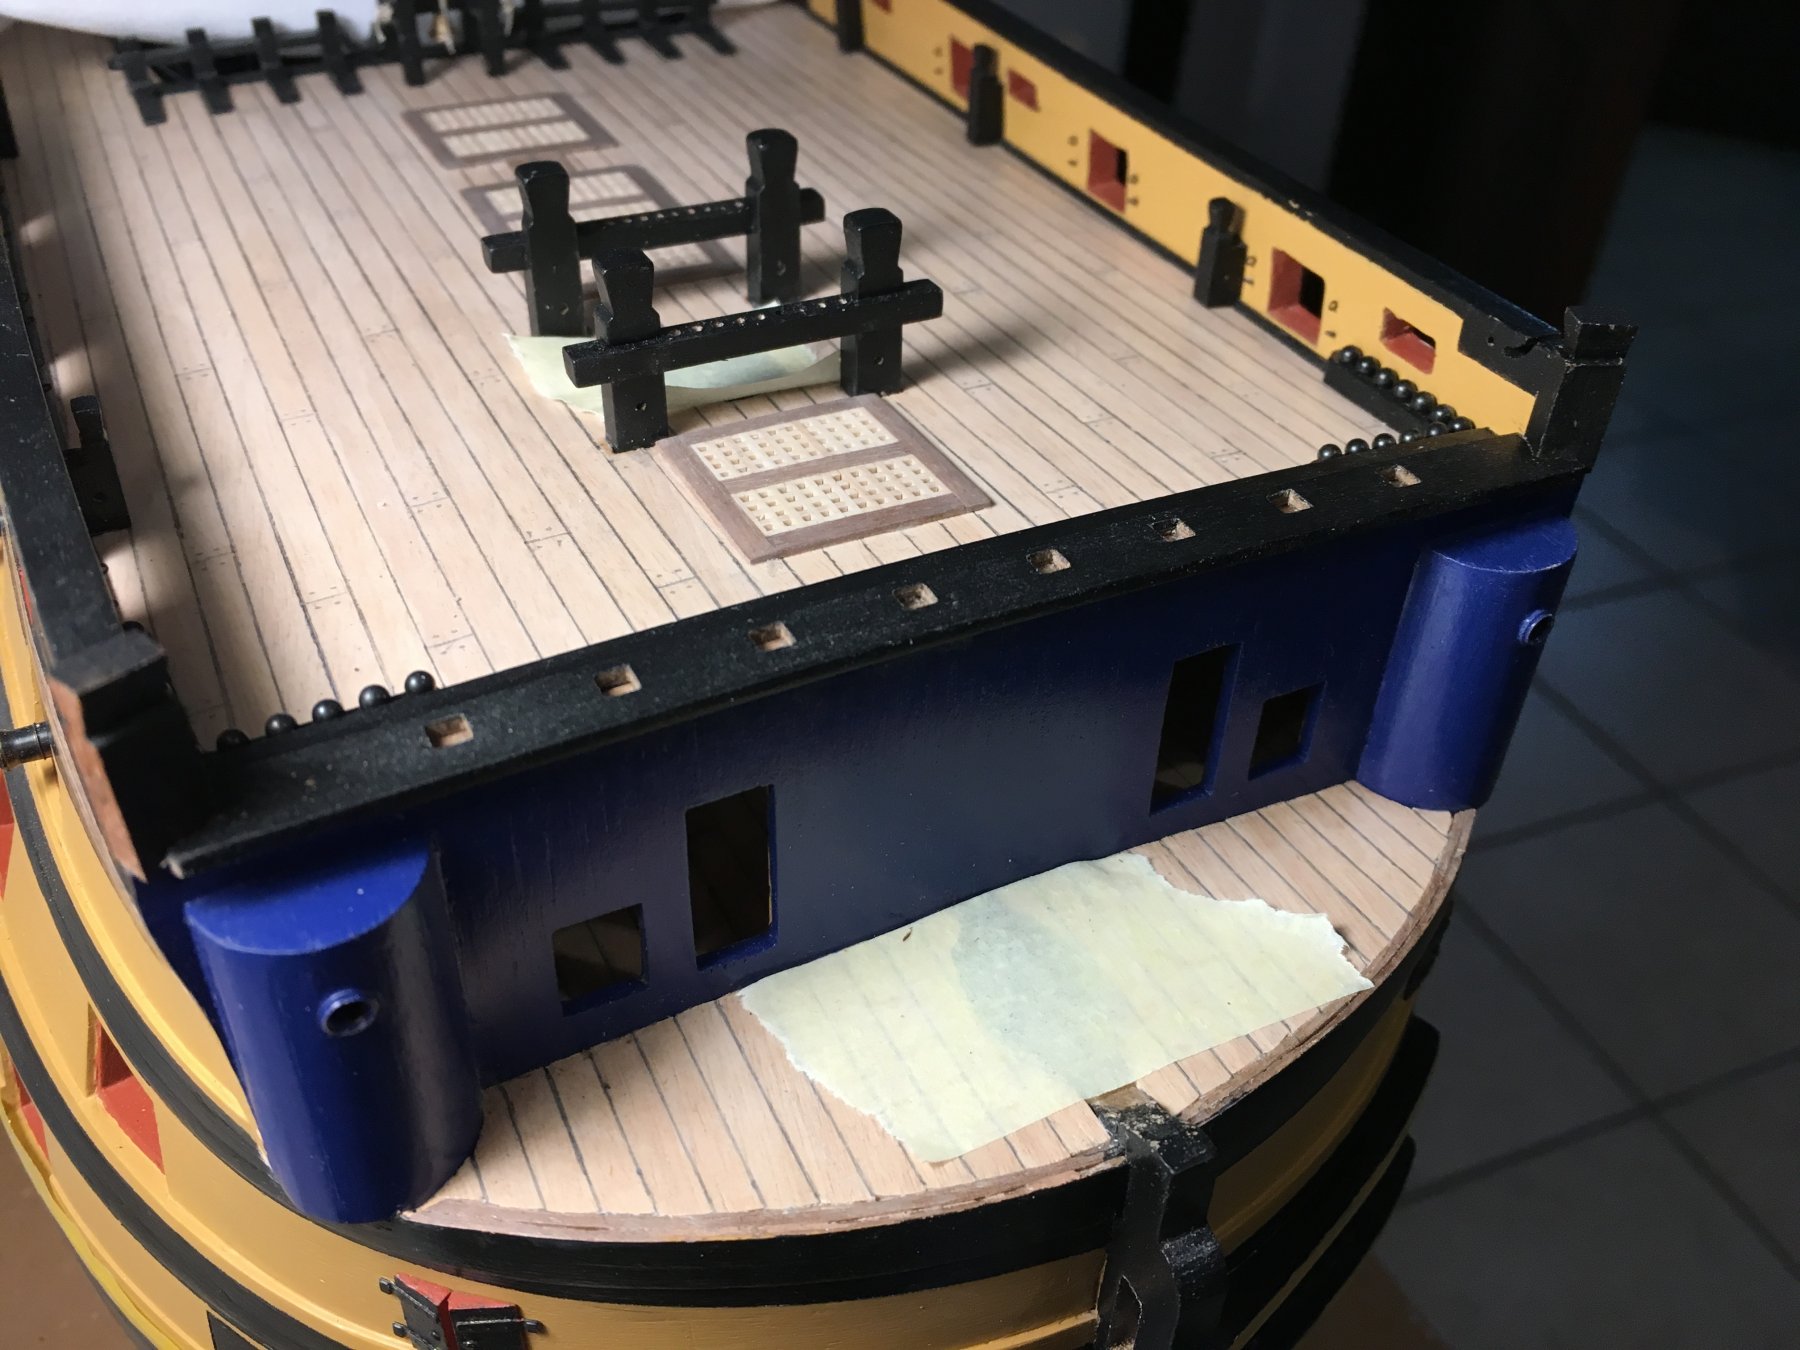
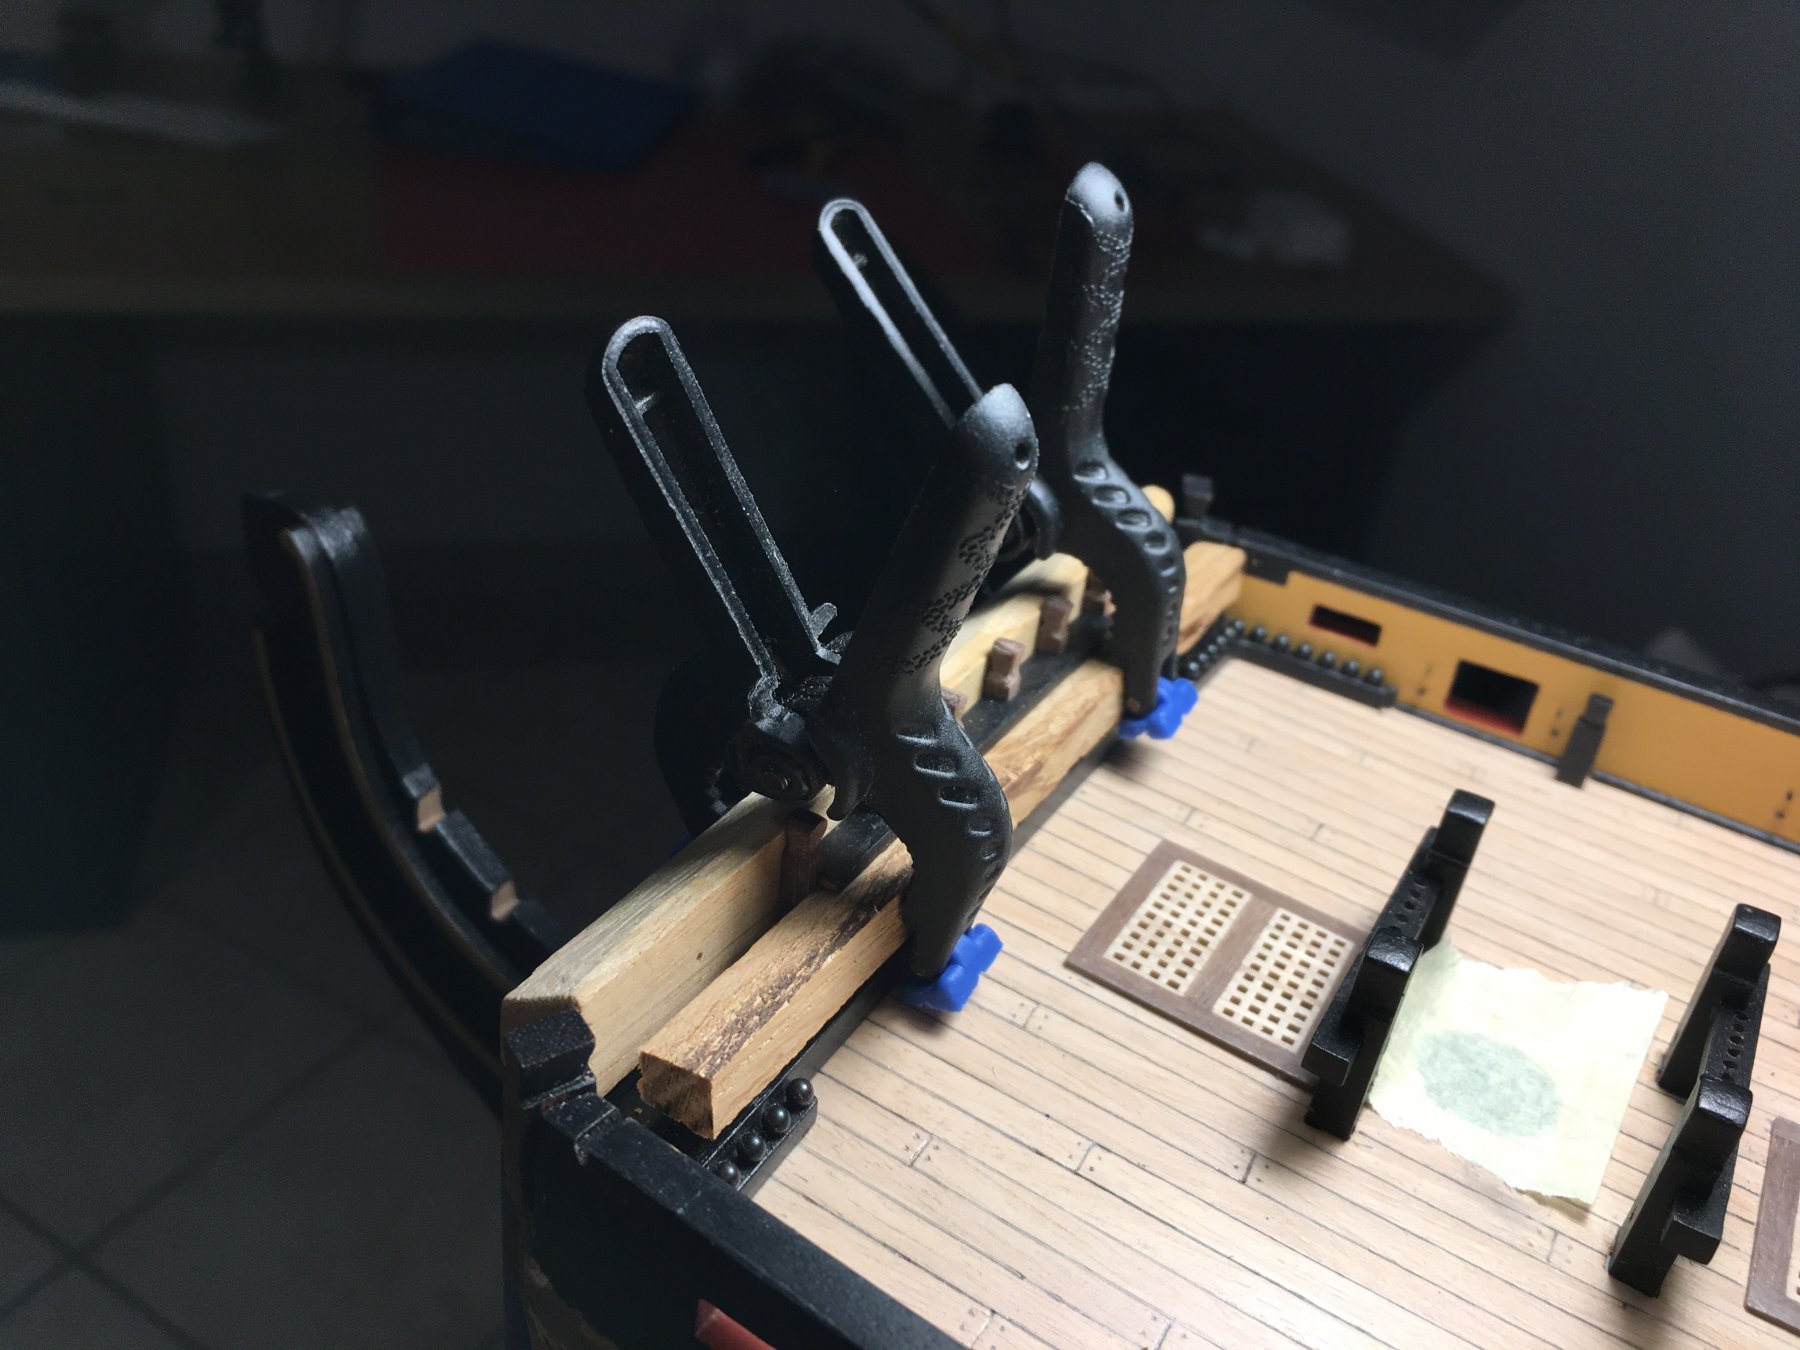
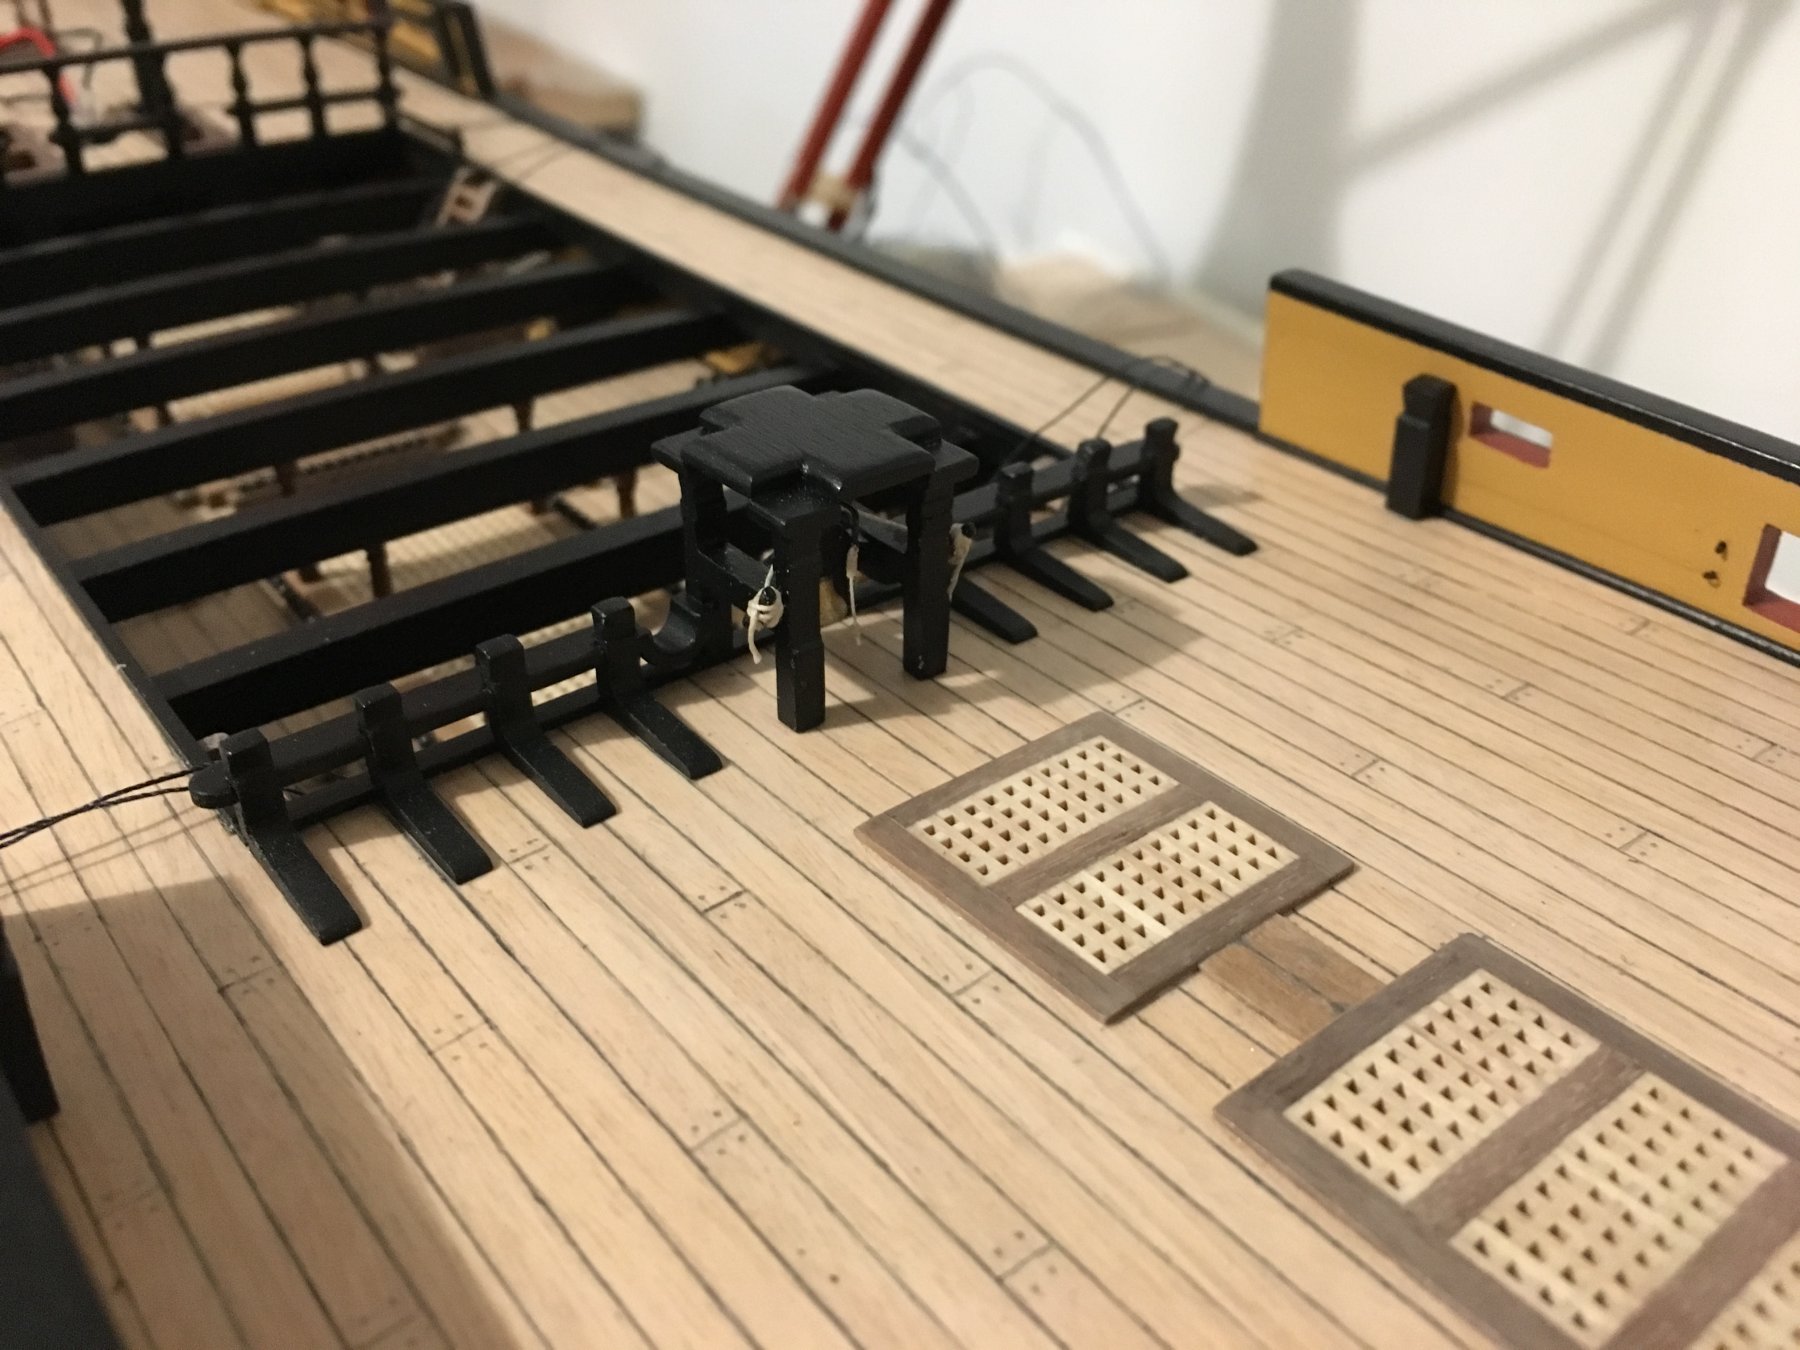
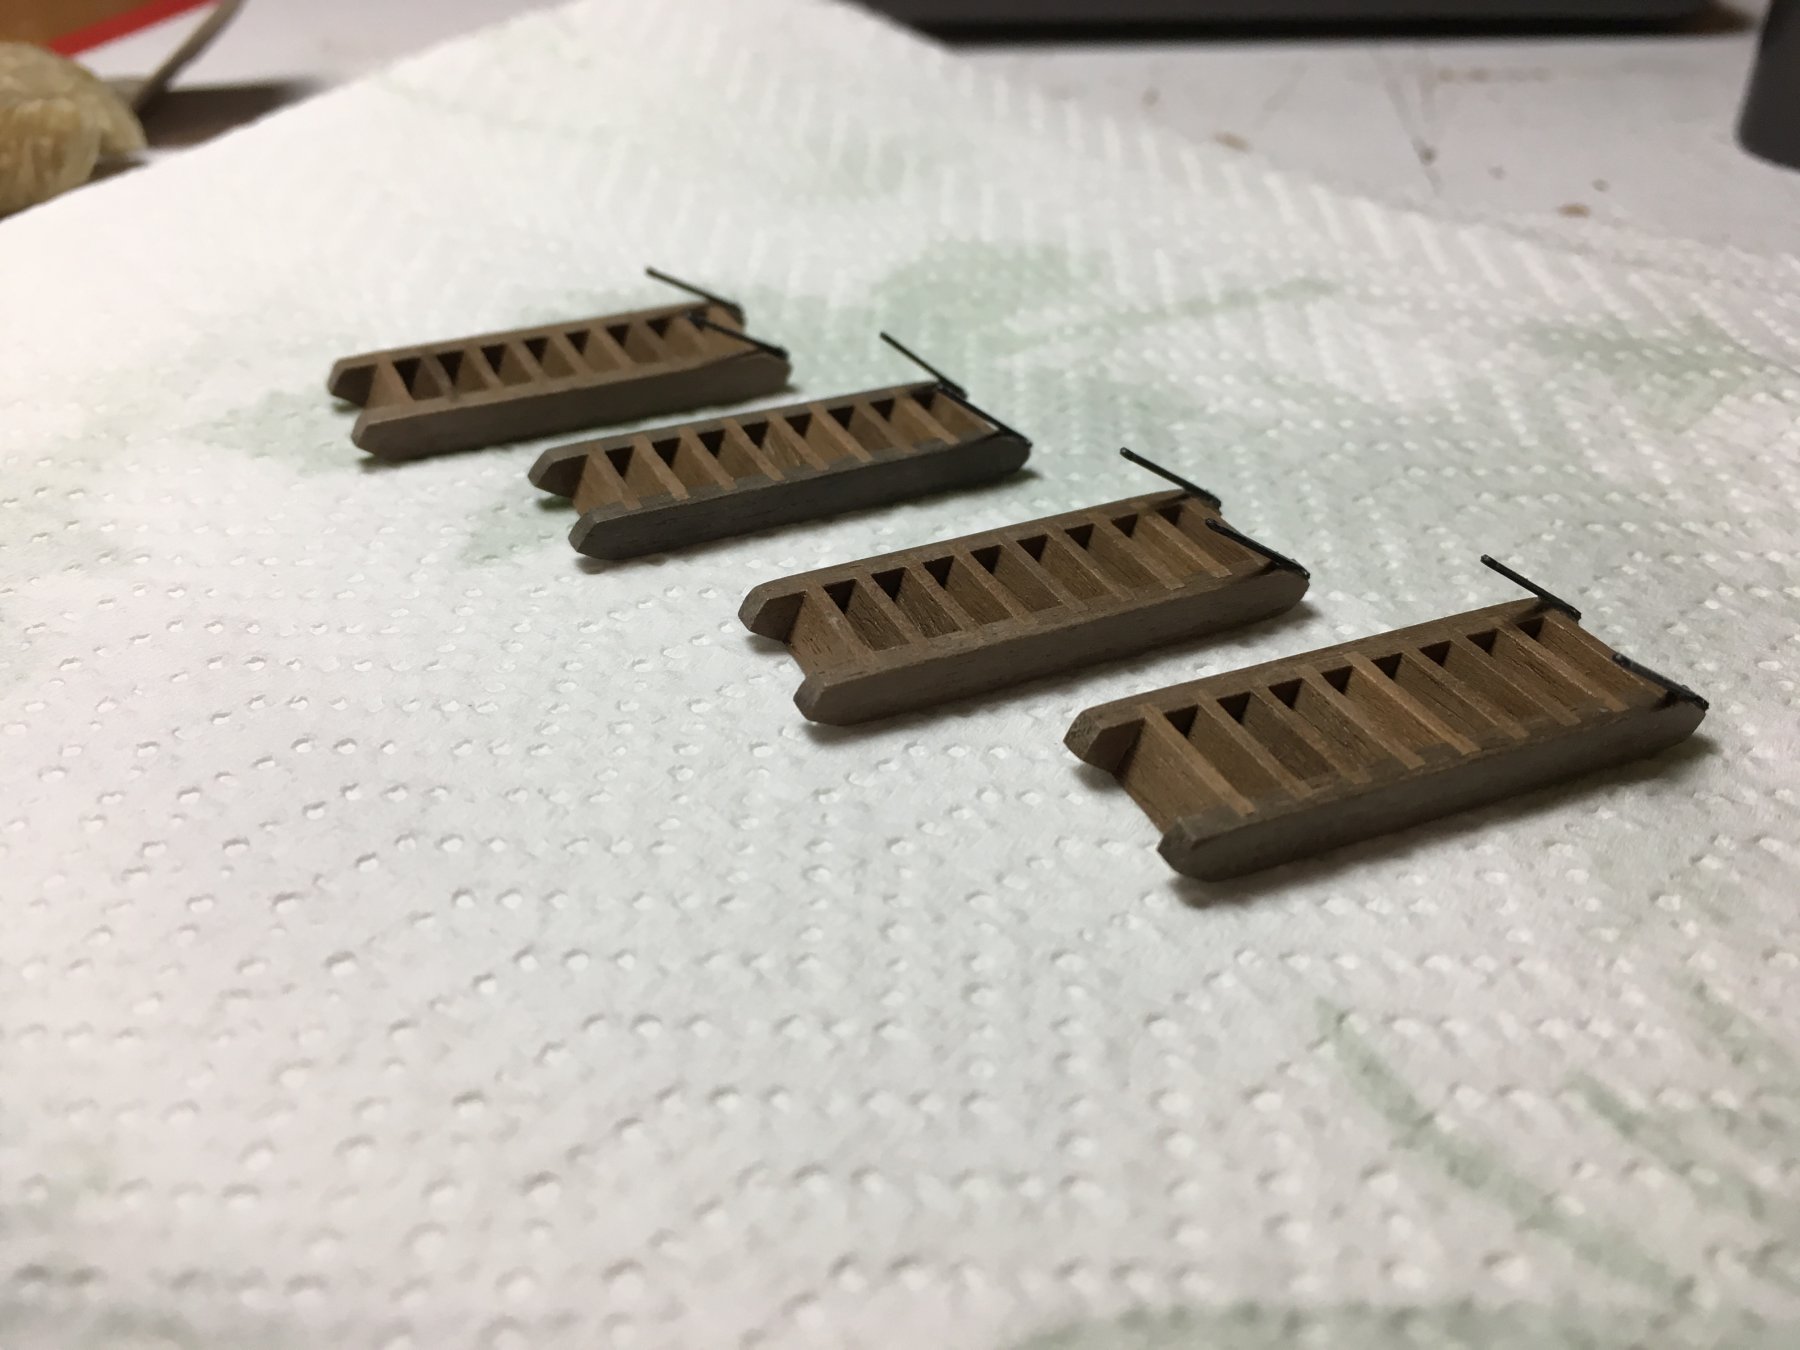
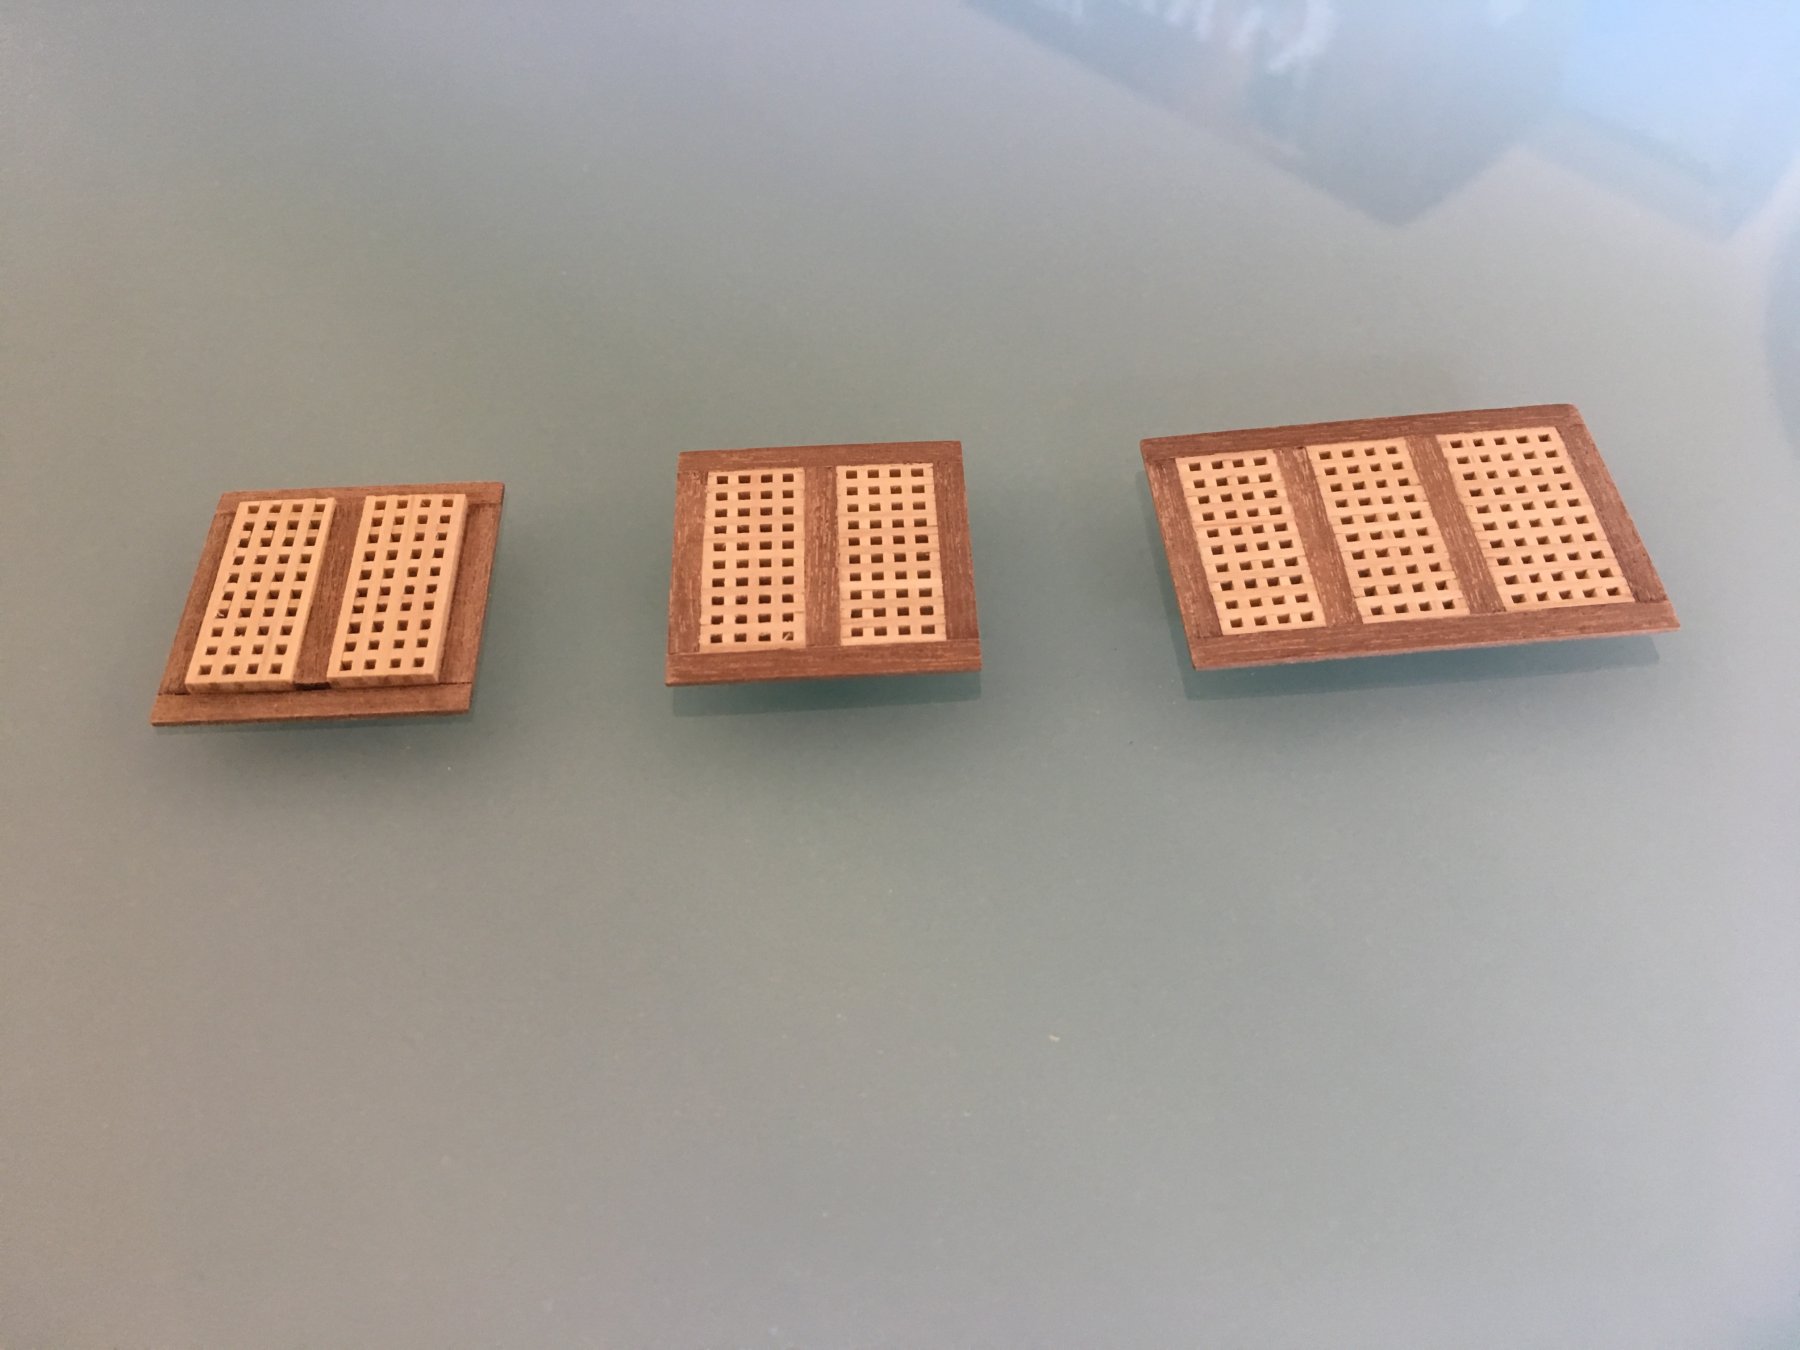
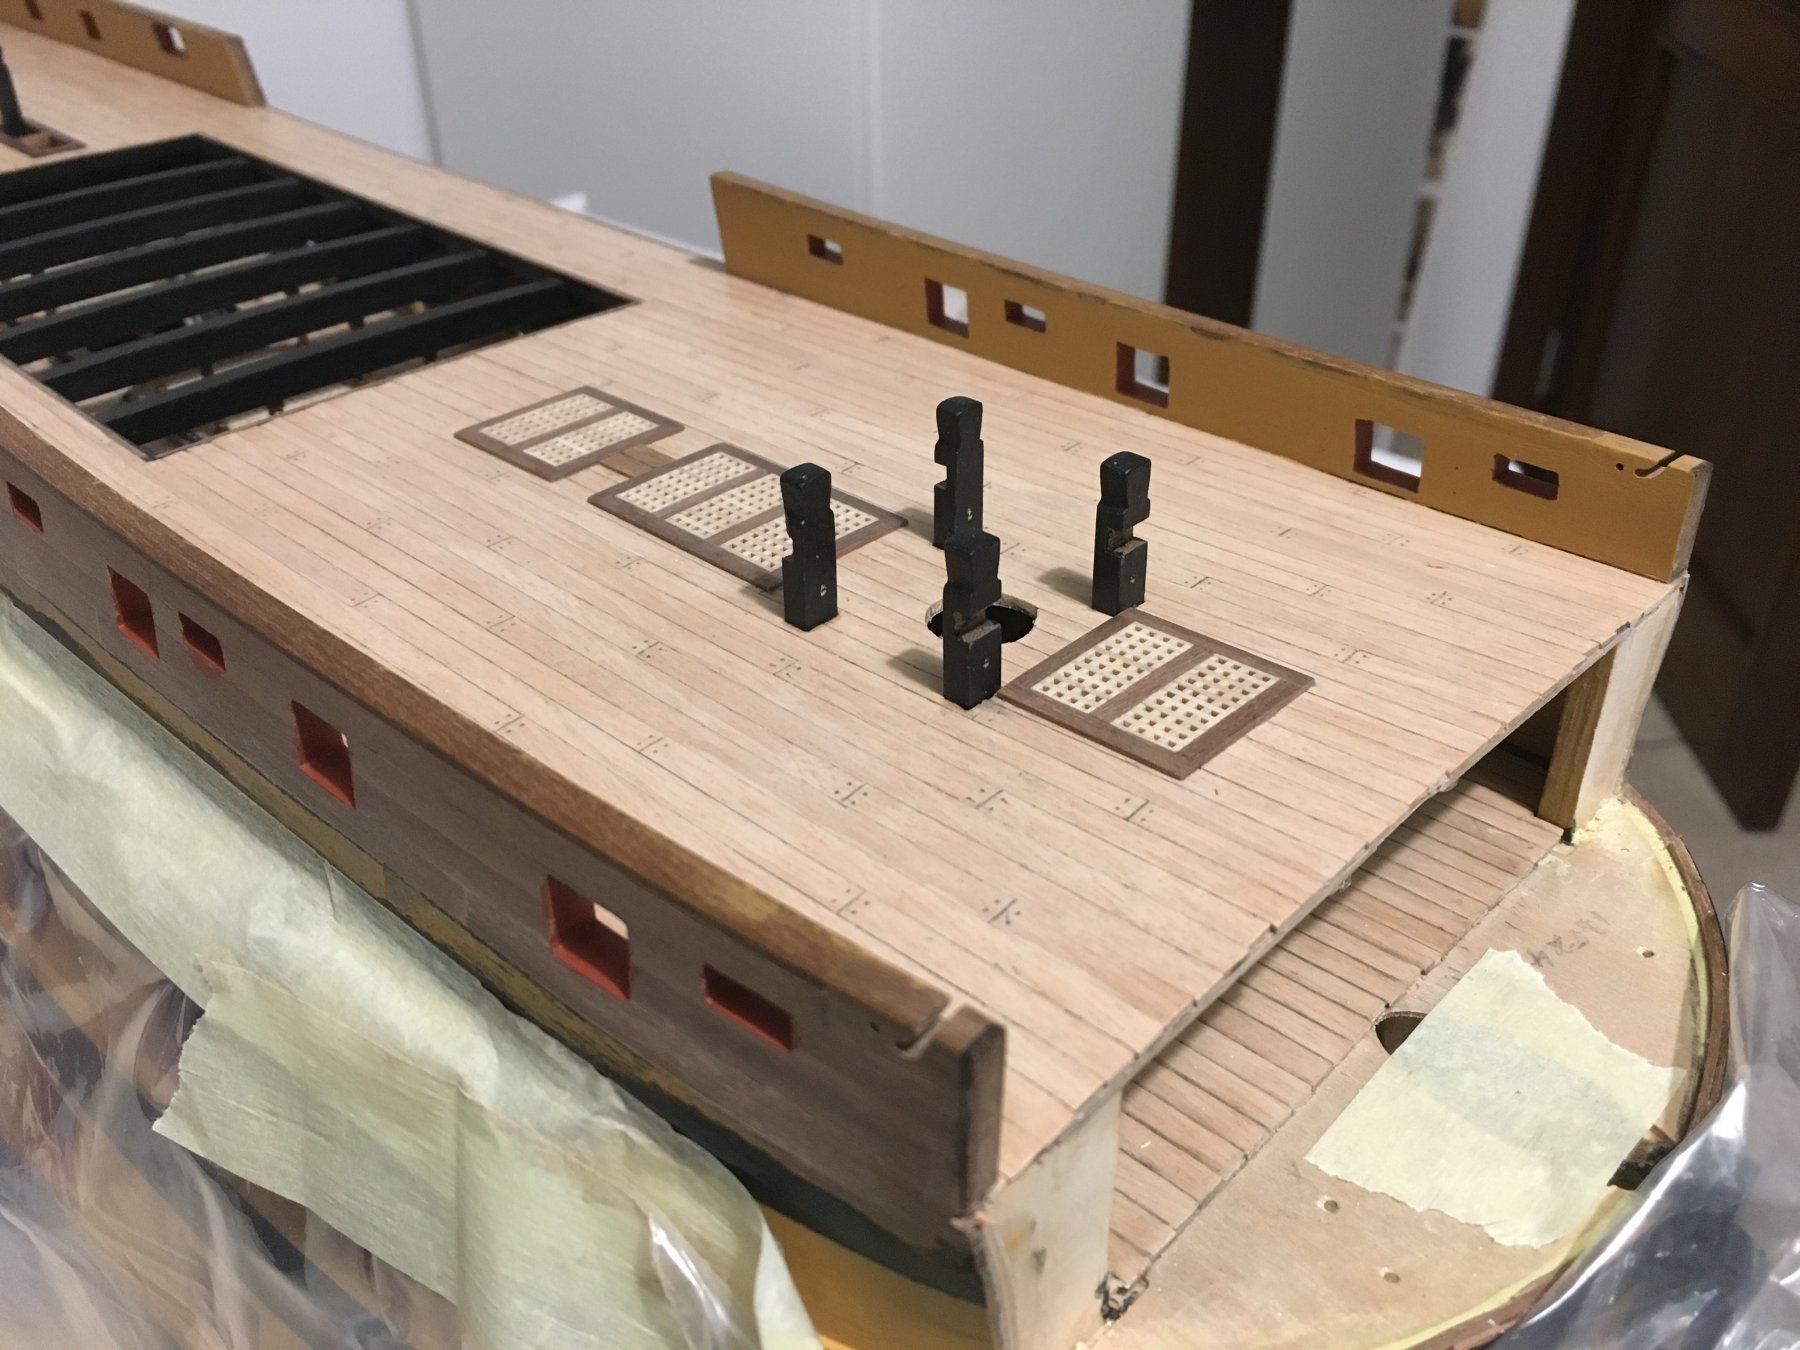
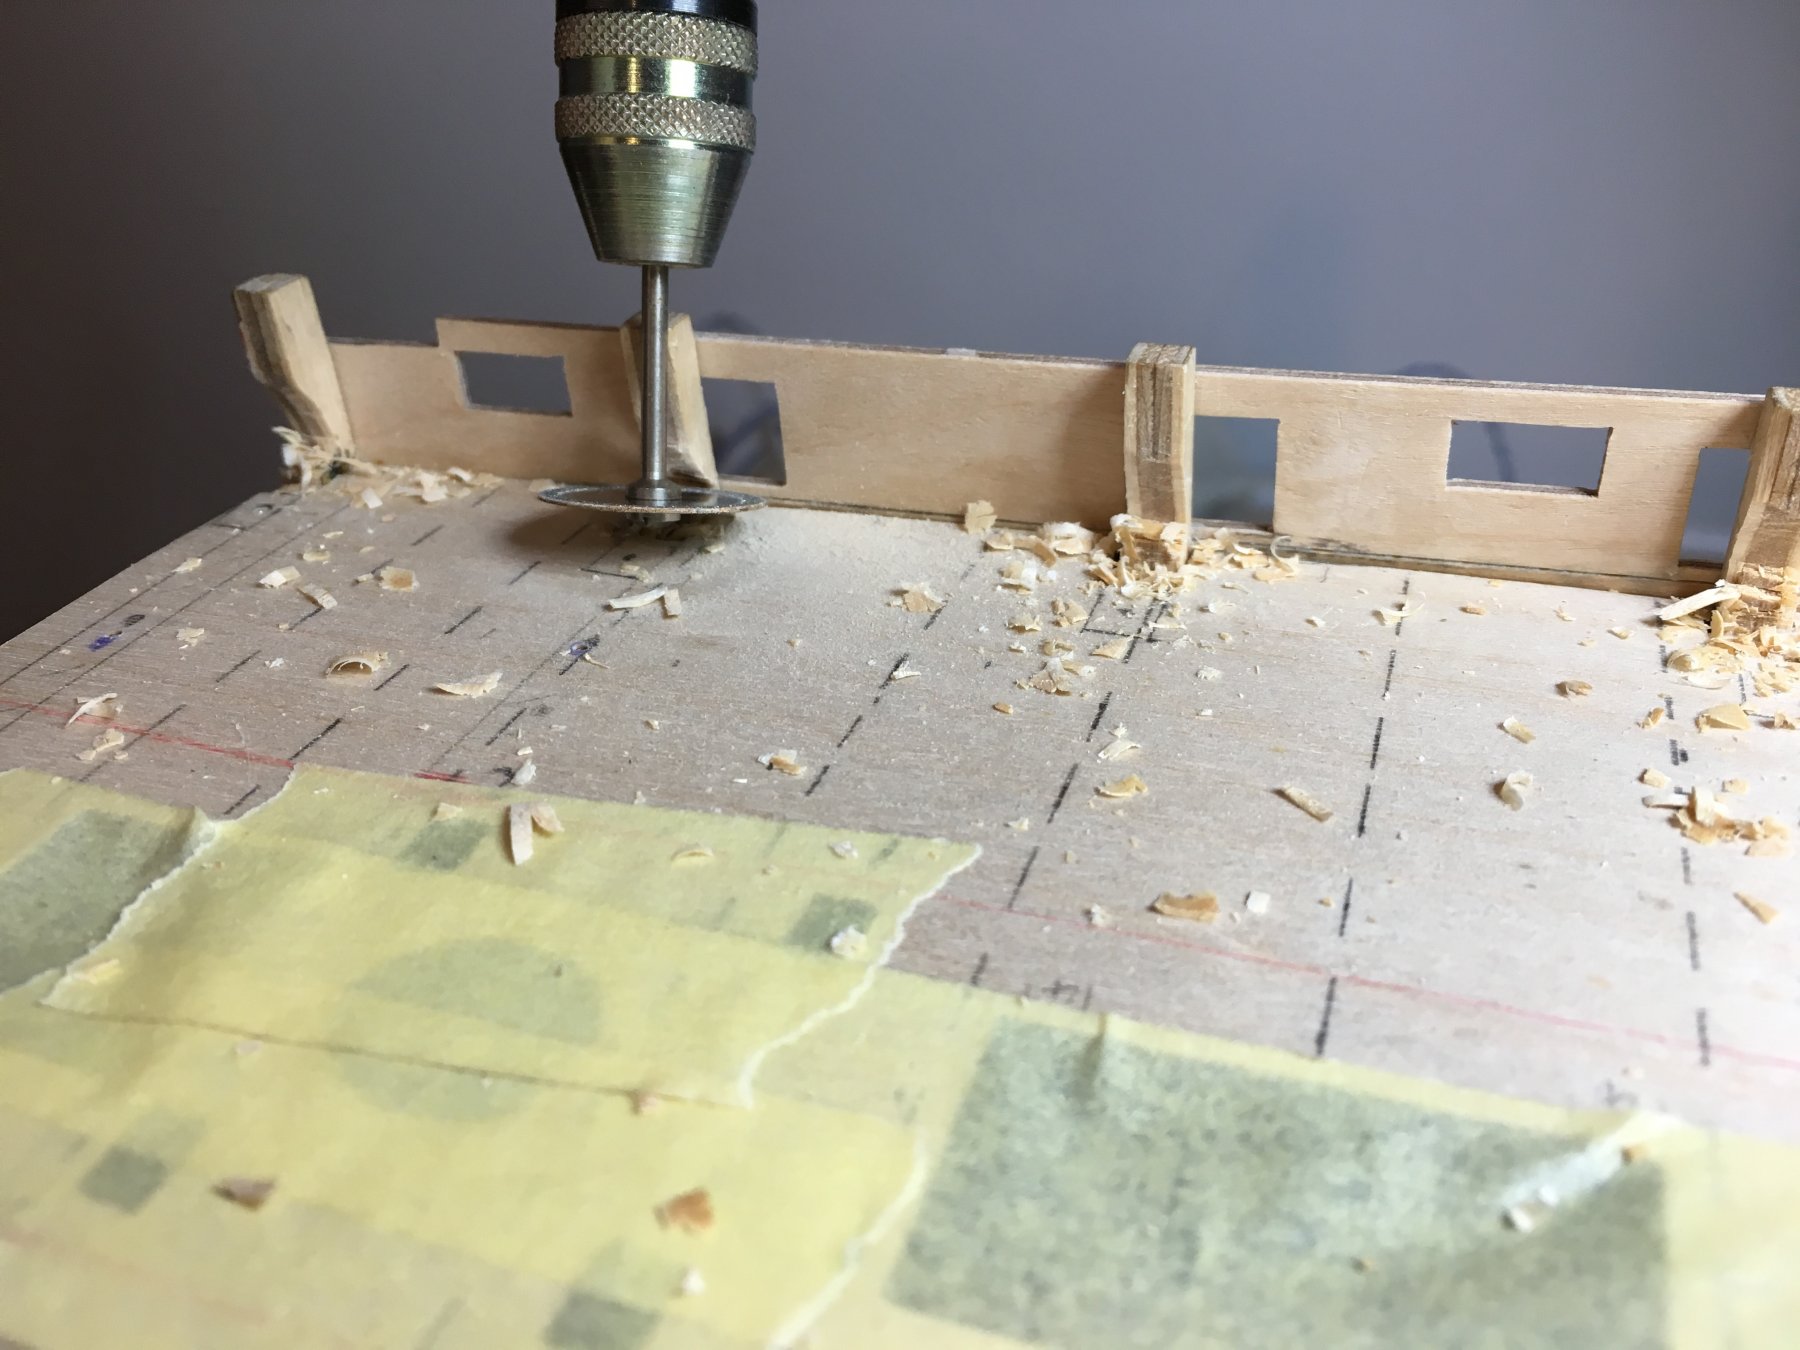
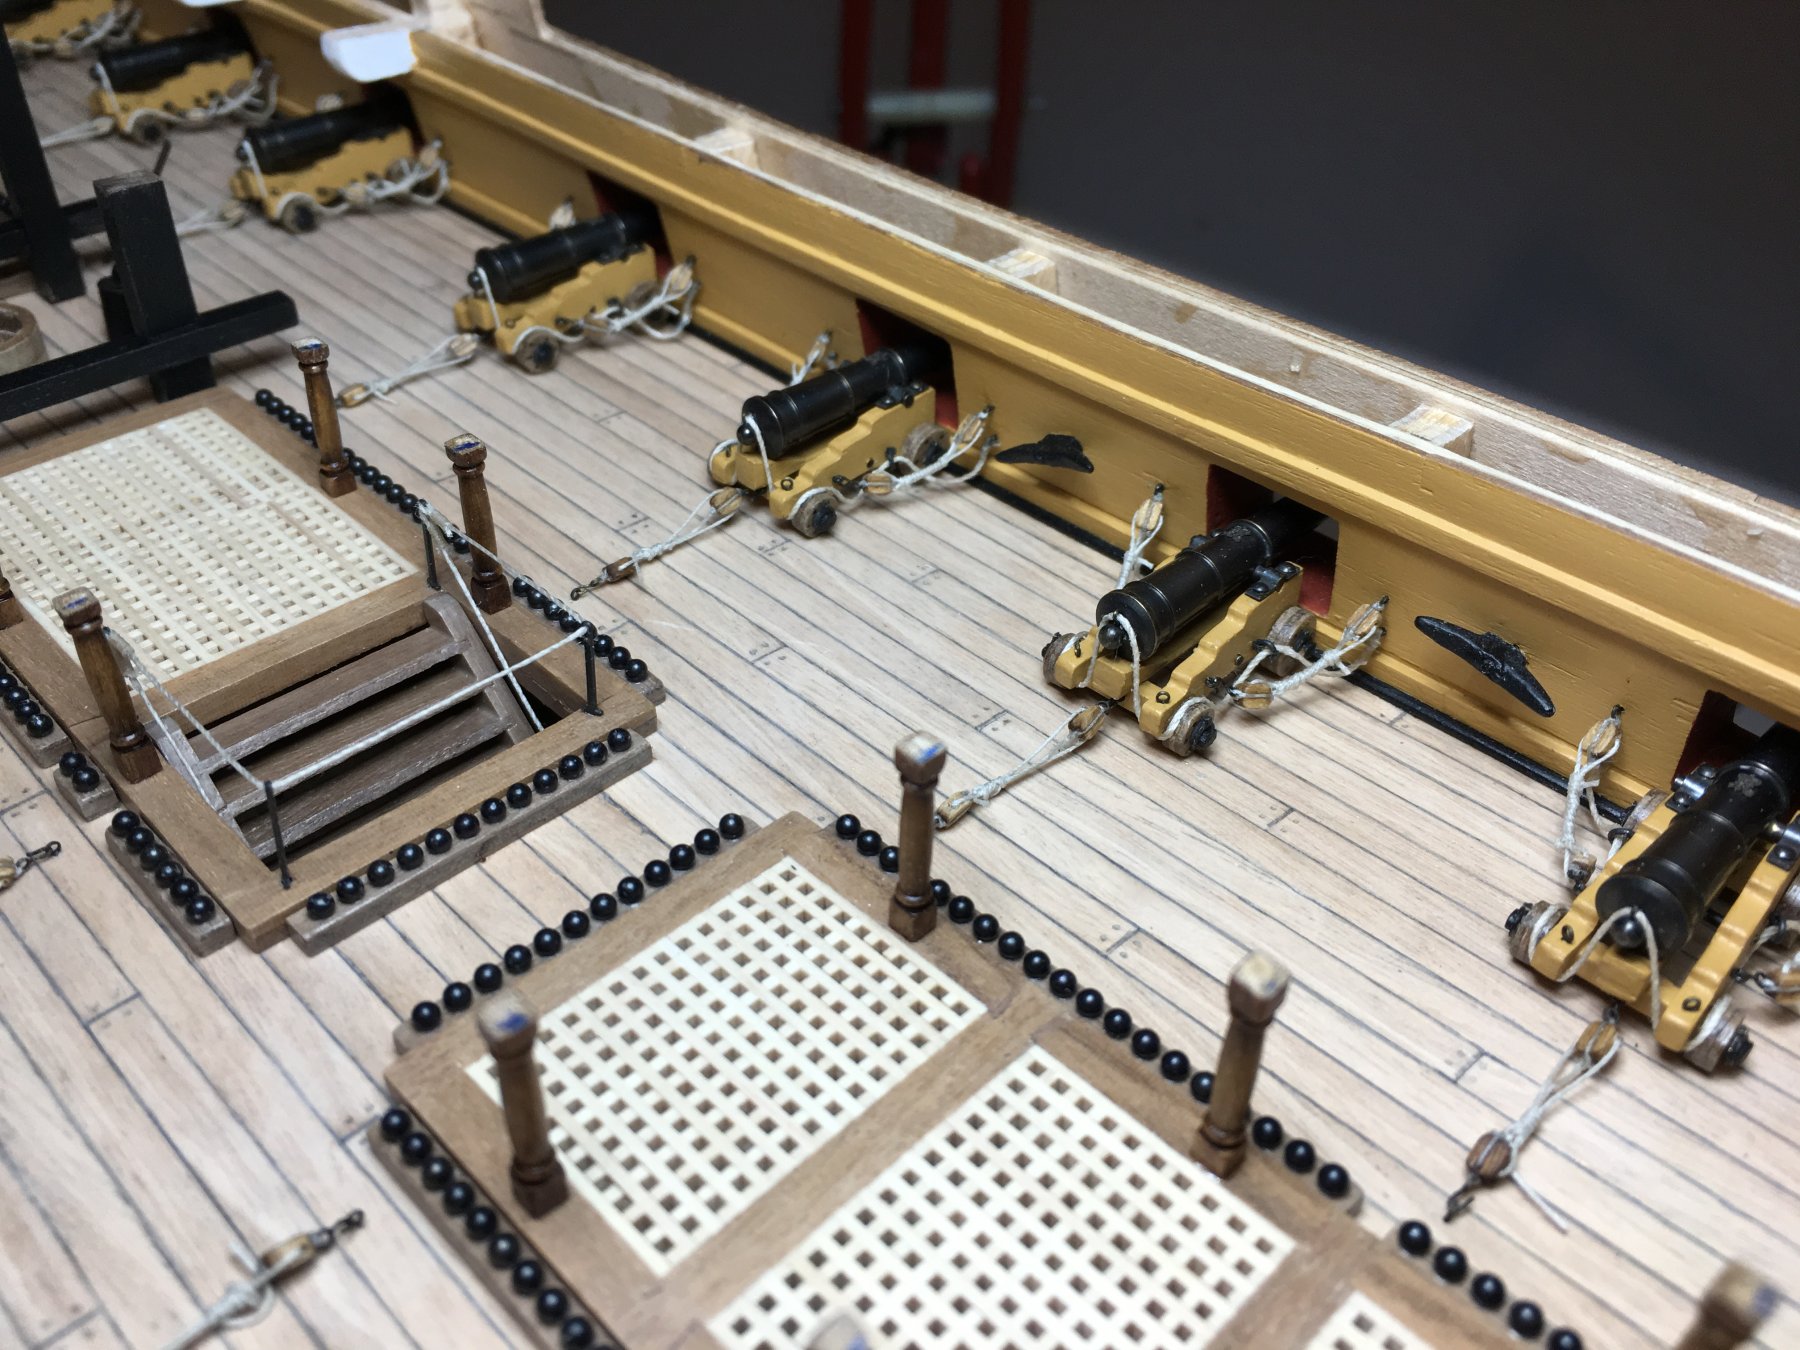
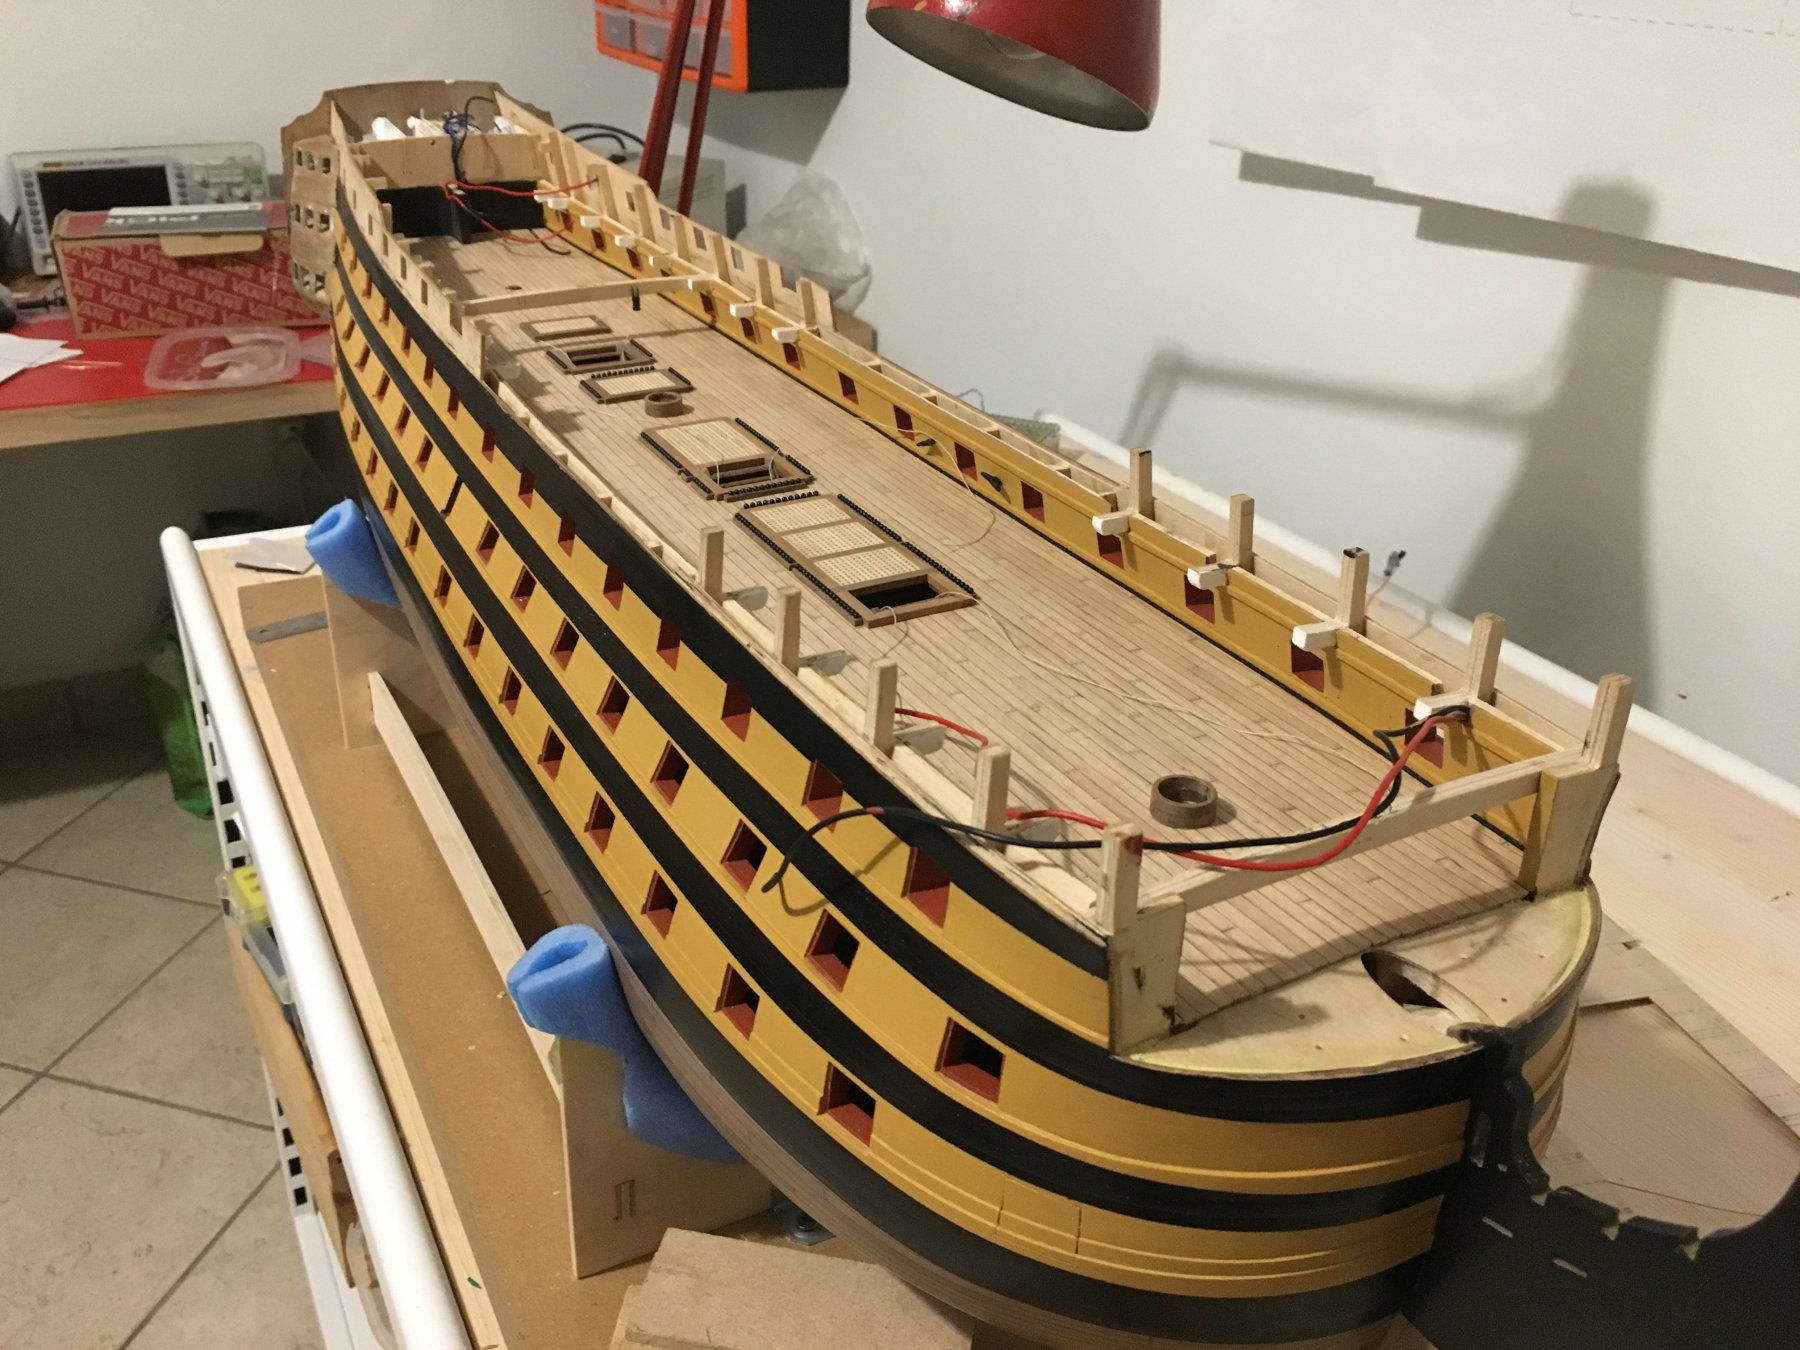
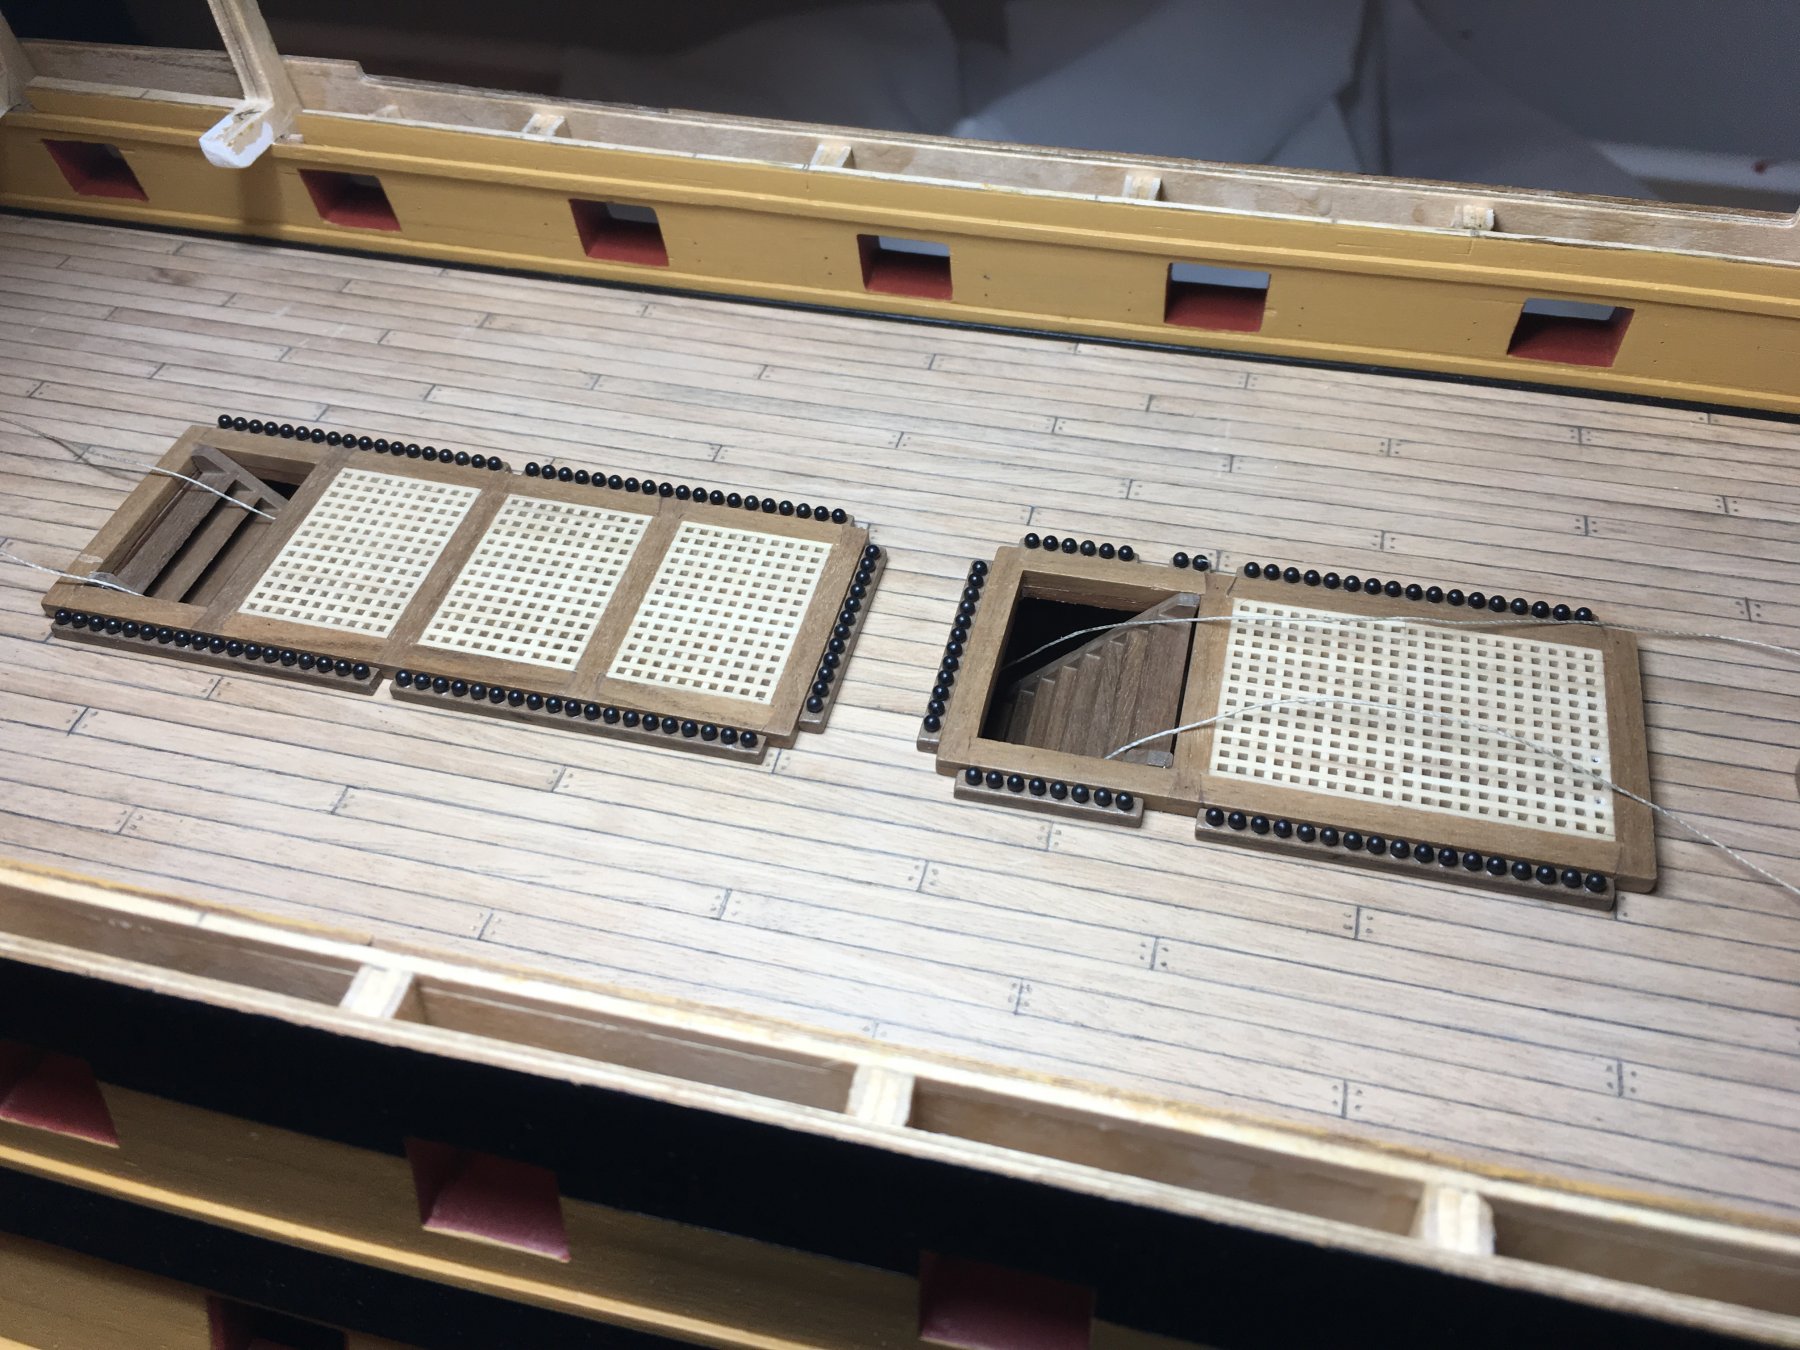
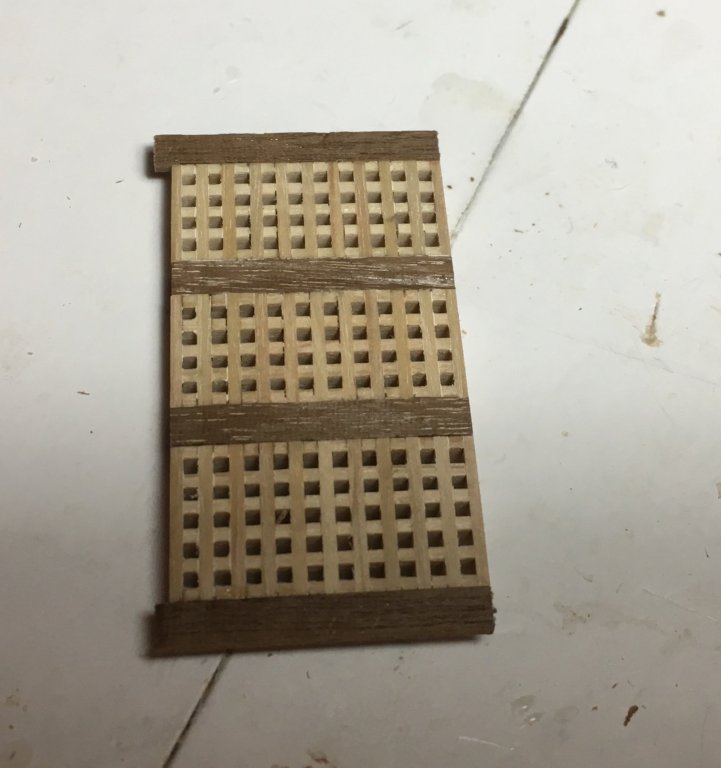
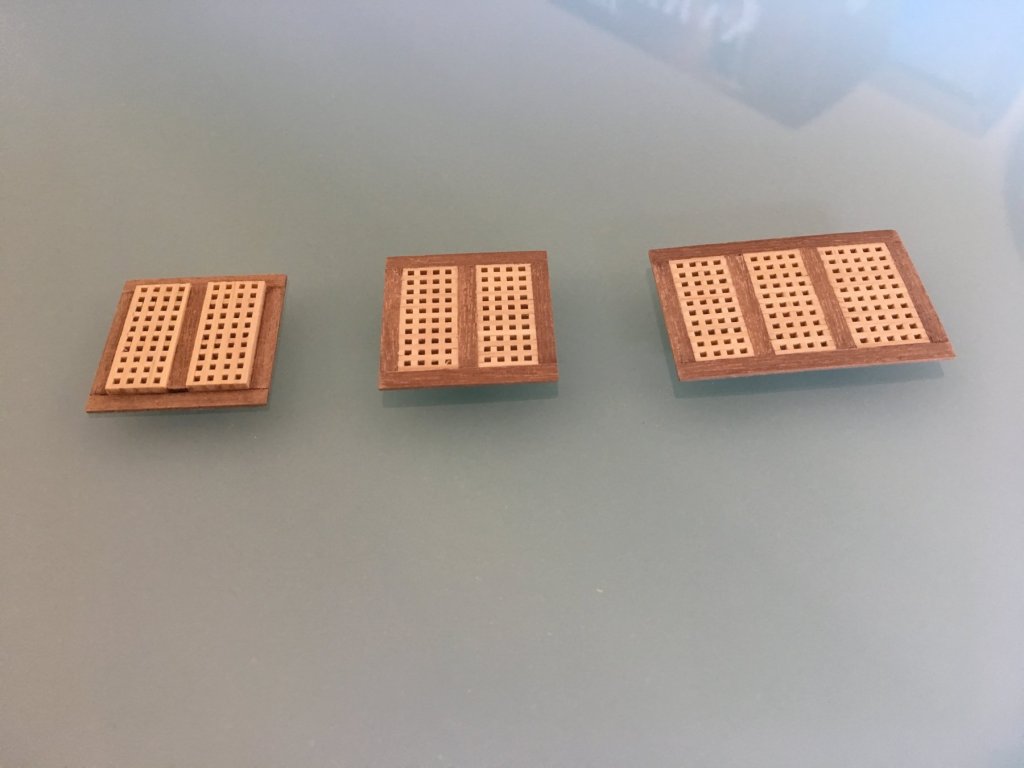
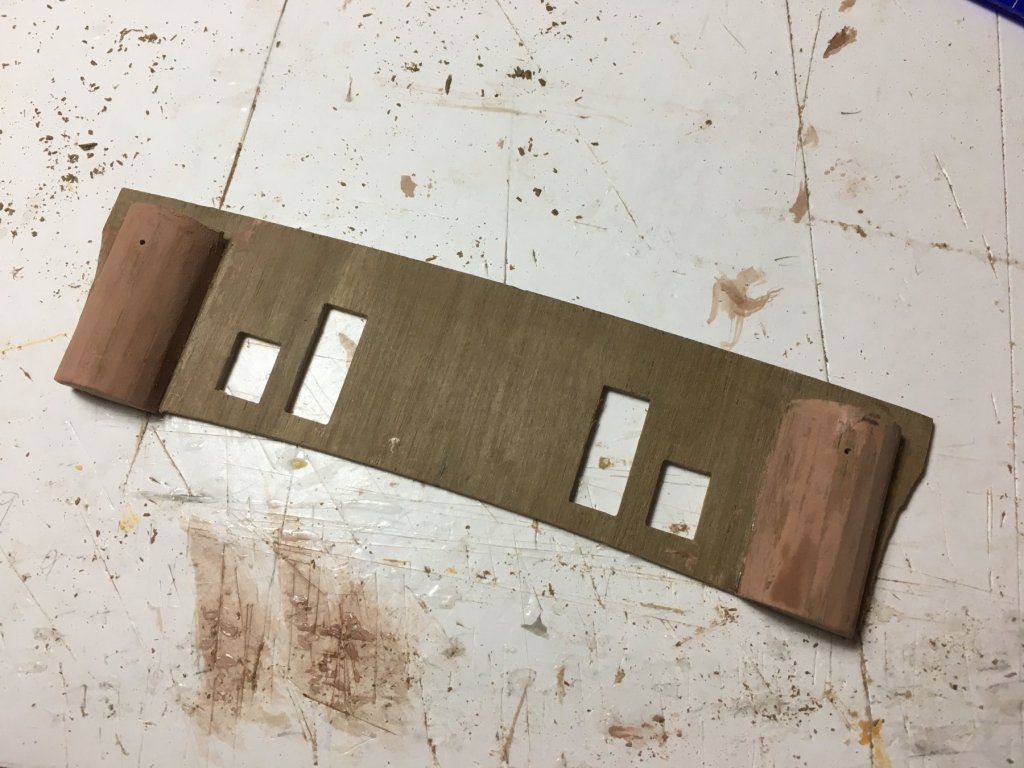
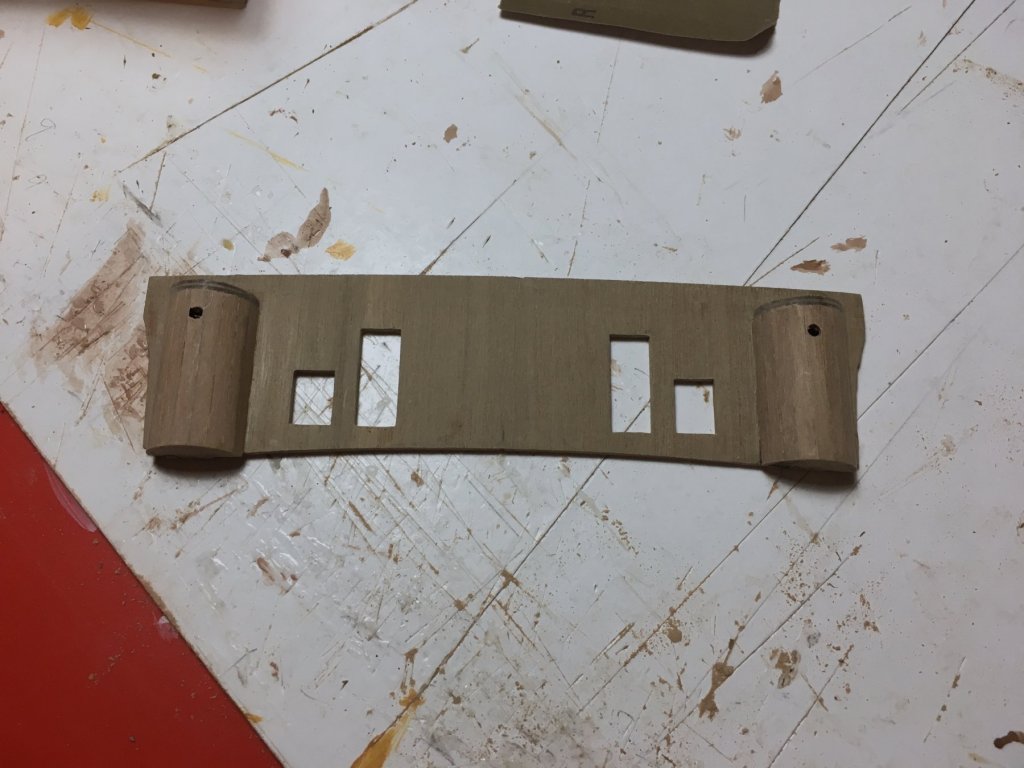
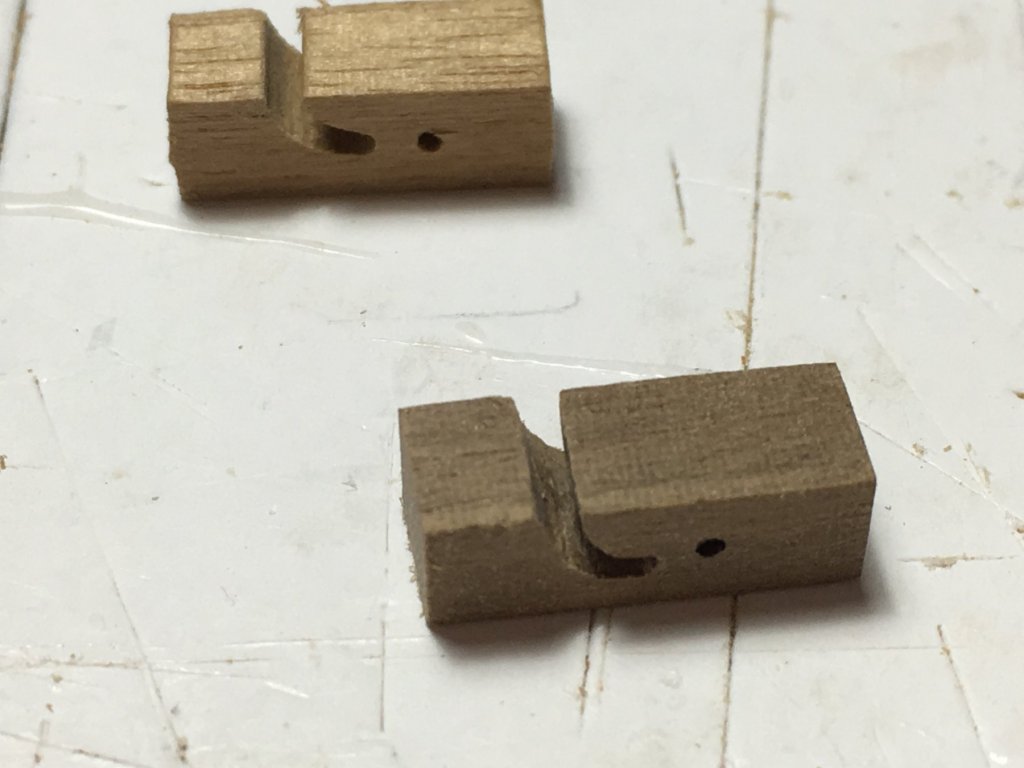
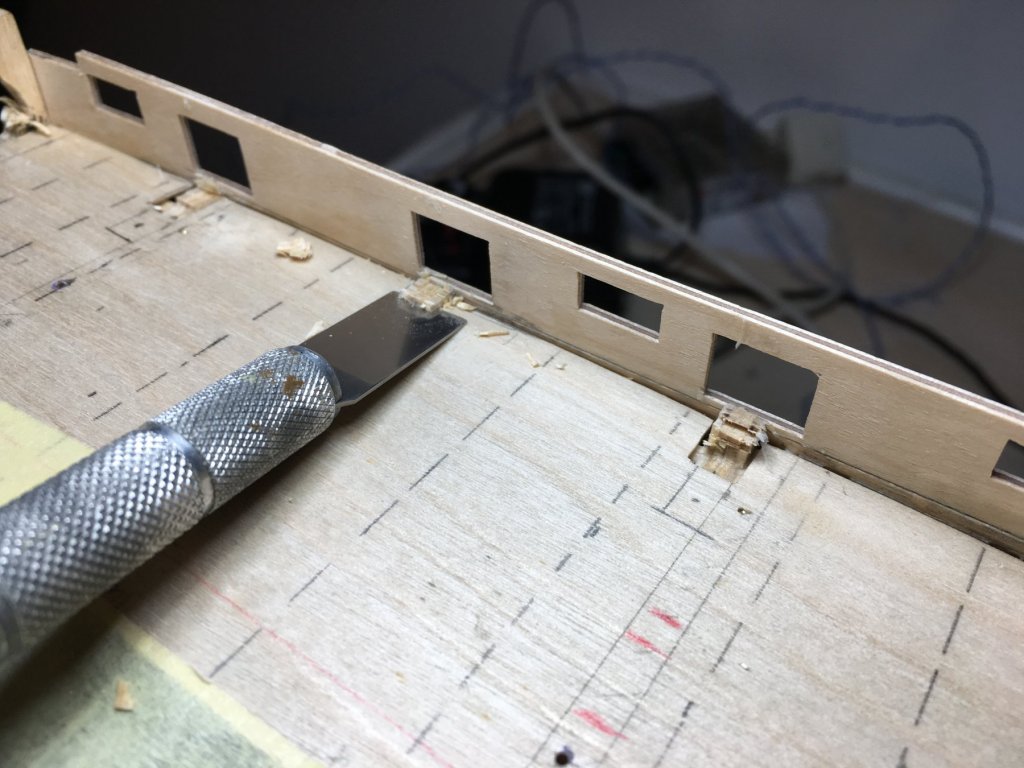
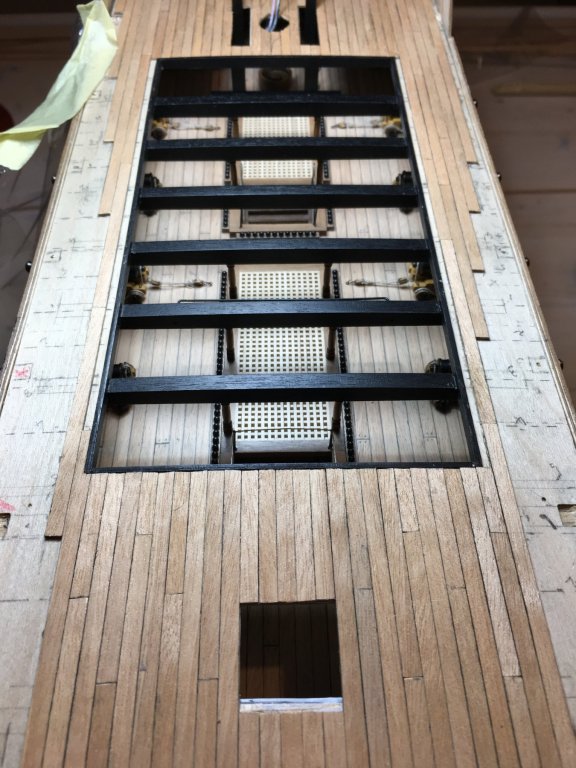
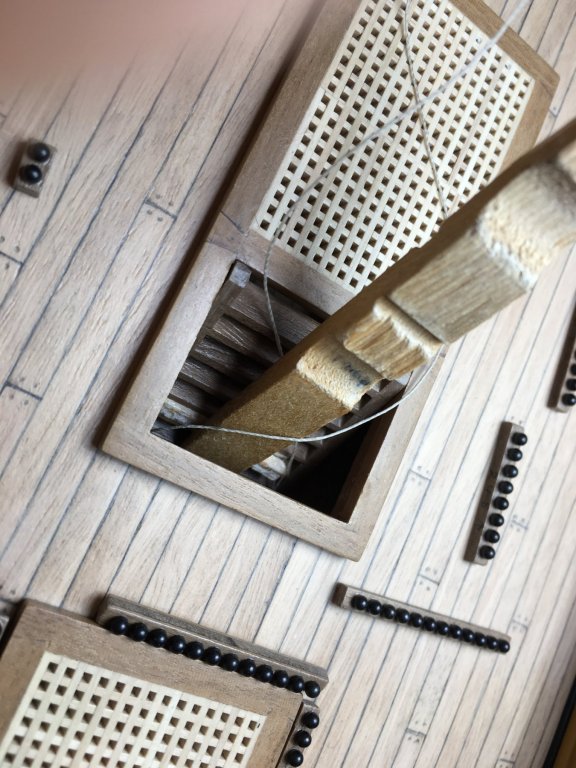
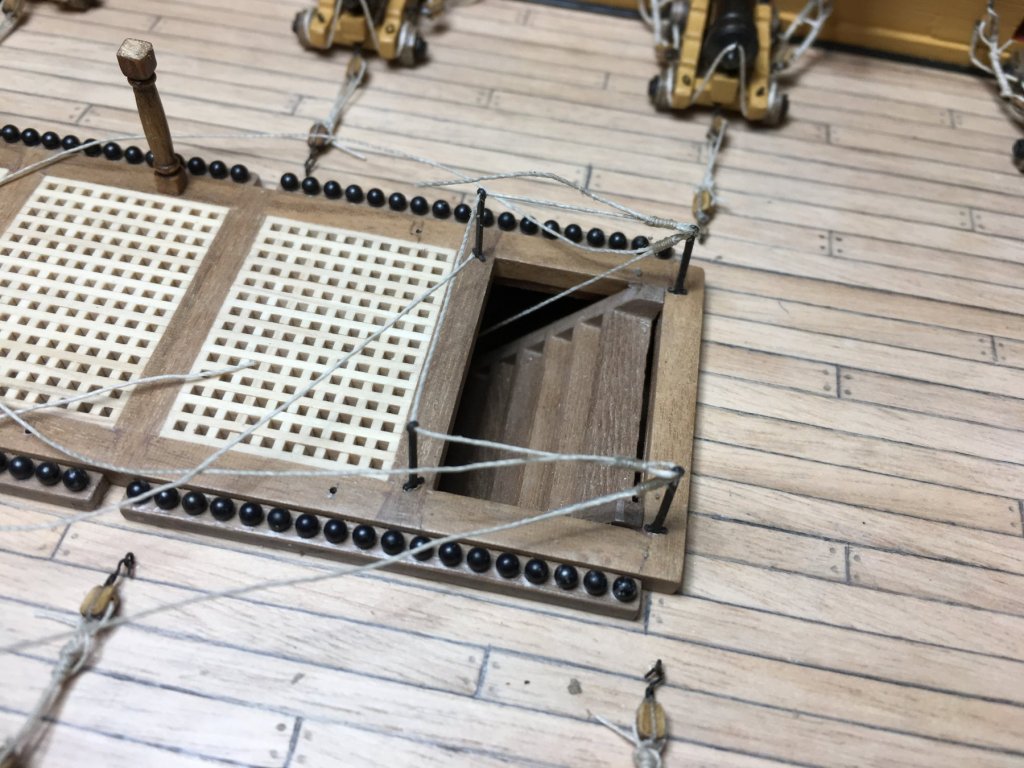
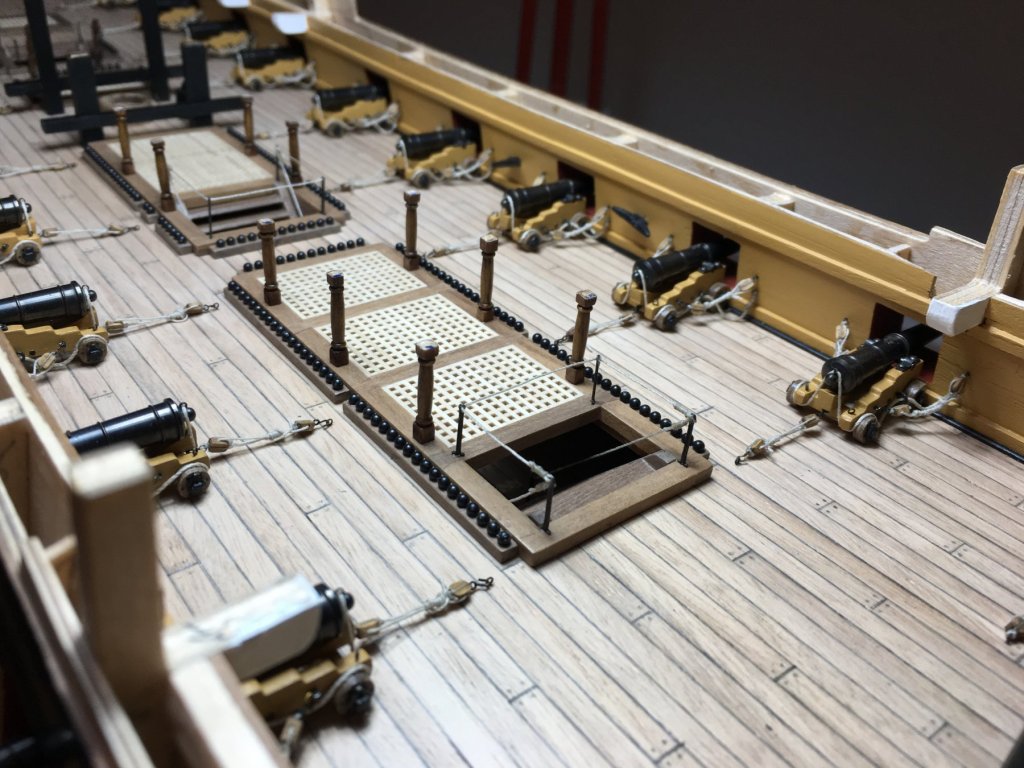
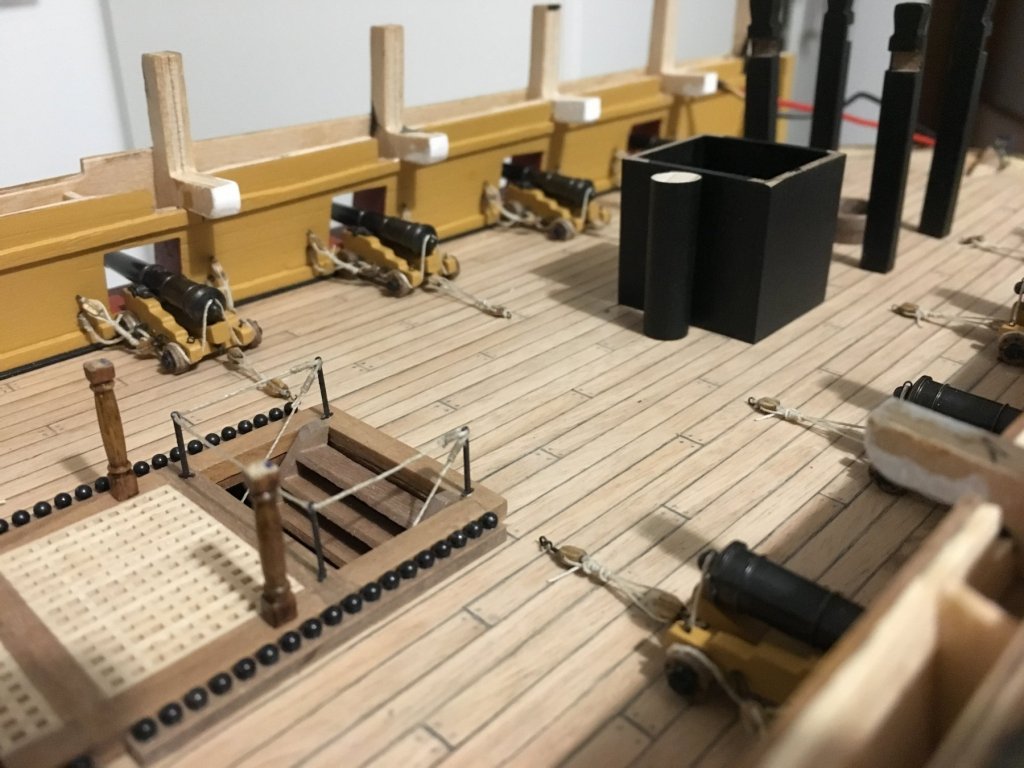
Thank you Wallace, to be honest I've seen it in other builds. It's a very good idea to avoid as much as possible damaging the hull whilst working on deck, also to avoid sanding dust going in the gunports. Another small update, Contrary to the instruction manual I did not build the gratings straight on the deck and sand them in place, I prepared the them beforehand and fitted them complete. I tried to avoid as much as possible saw dust and shavings going down on the gun deck underneath which is not easy to remove. First one is upside down to show how it is done. All sanded and ready. Also I did not want to fix the Beakhead Bulkhead before I had finished the quarterdeck planking. The front opening gave me more access to blow out any wood dust and shavings falling on the deck underneath. Apart from that I think it is much easier to prepare the round houses with the beakhead in hand then with it fixed in place. Gunport linings painted red and bulwarks painted yellow from the inside. Coamings fixed in place, gratings fitted in place and brace bitts secured in place as well. Deck varnished and ready to take more fittings. Robert


- 527 replies
-
- 4
-
-
- caldercraft
- victory
- (and 1 more)
-
Nice work Mike, very neat and accurate. It's good that you take the time to adjust inconsistencies in the kit that apperantly you find in most of the kits, the end result always pays for the time spent. Happy Holidays you too. Robert
-
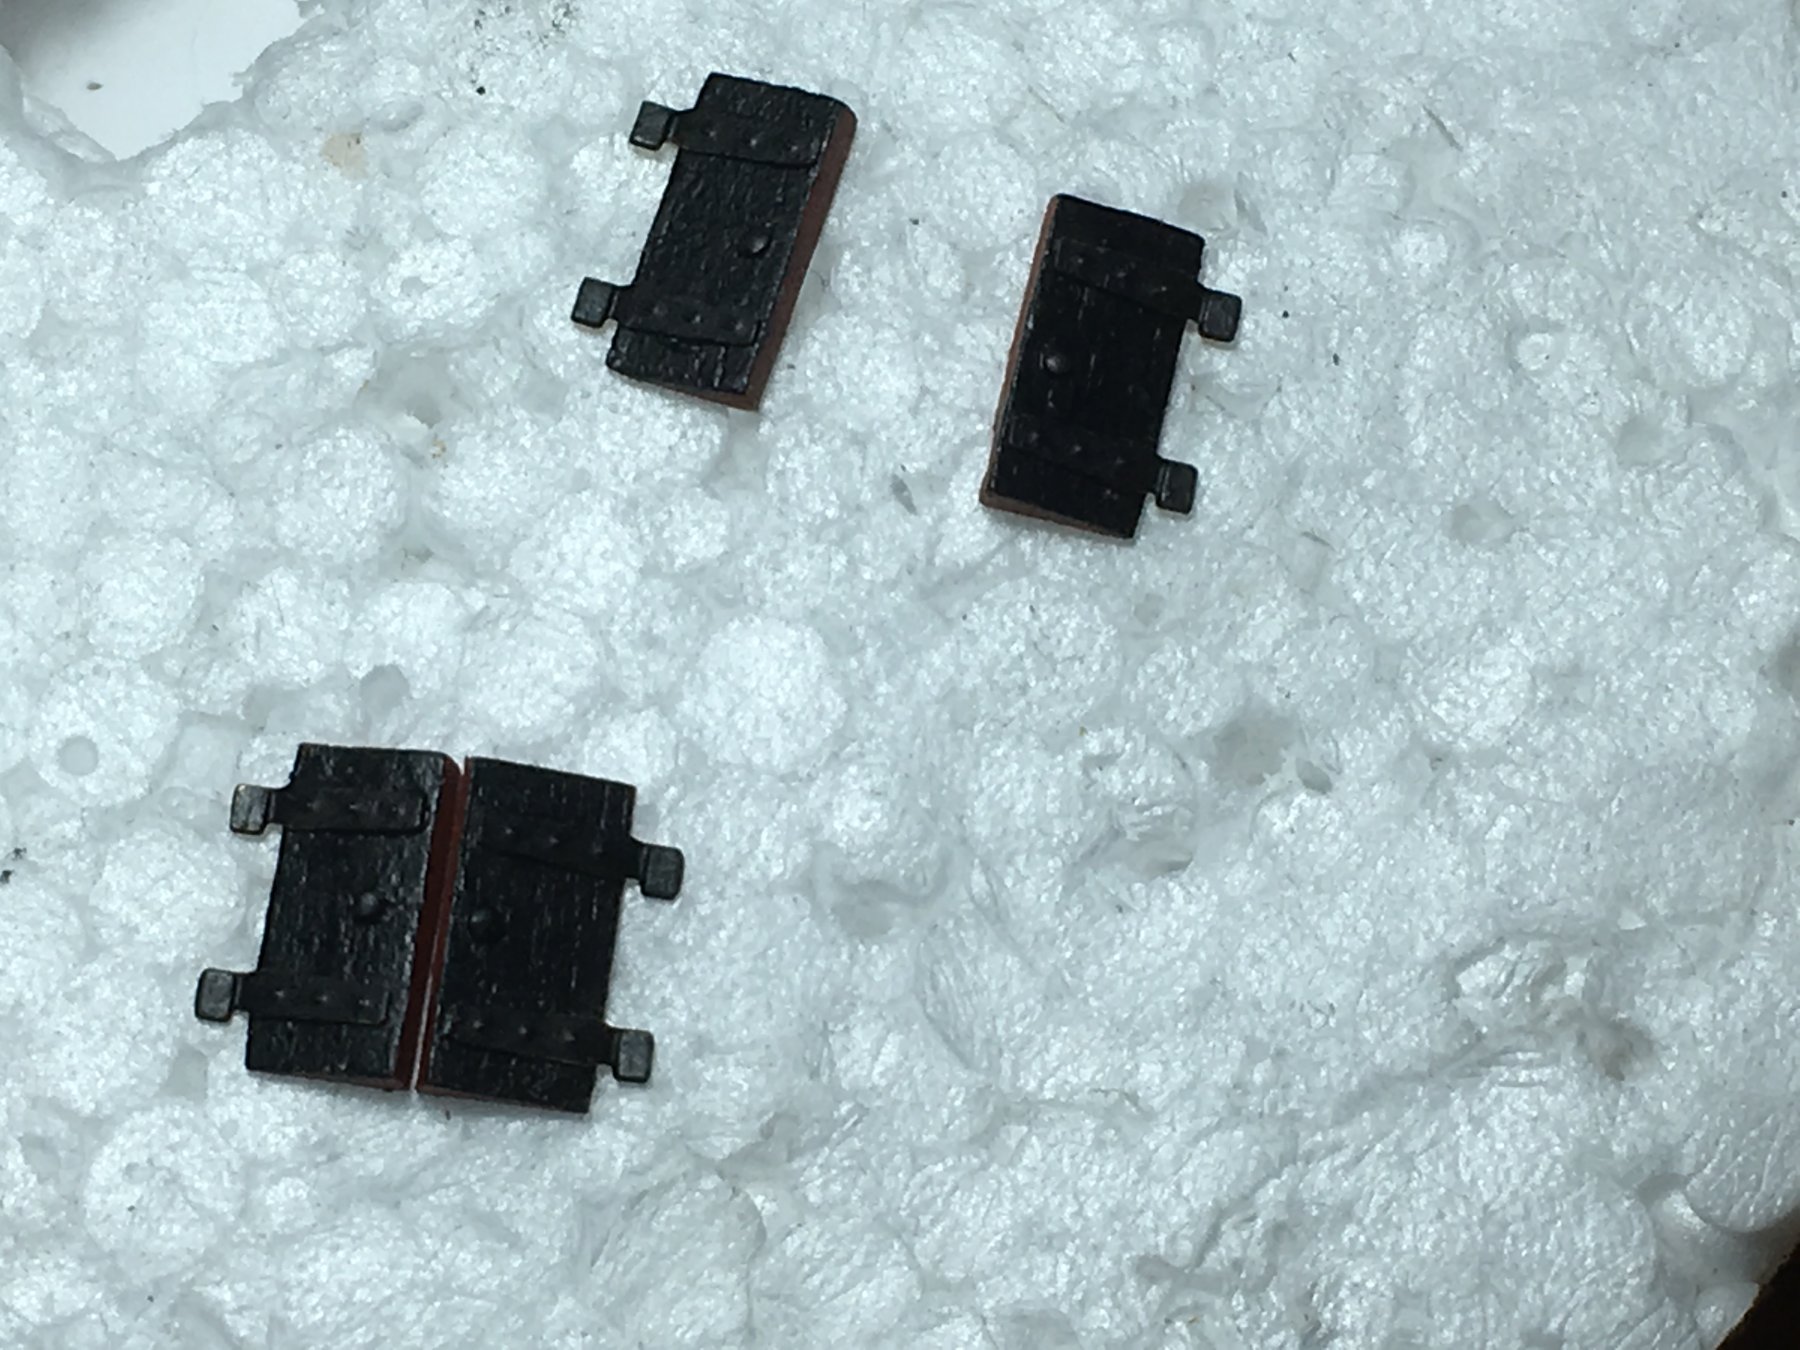
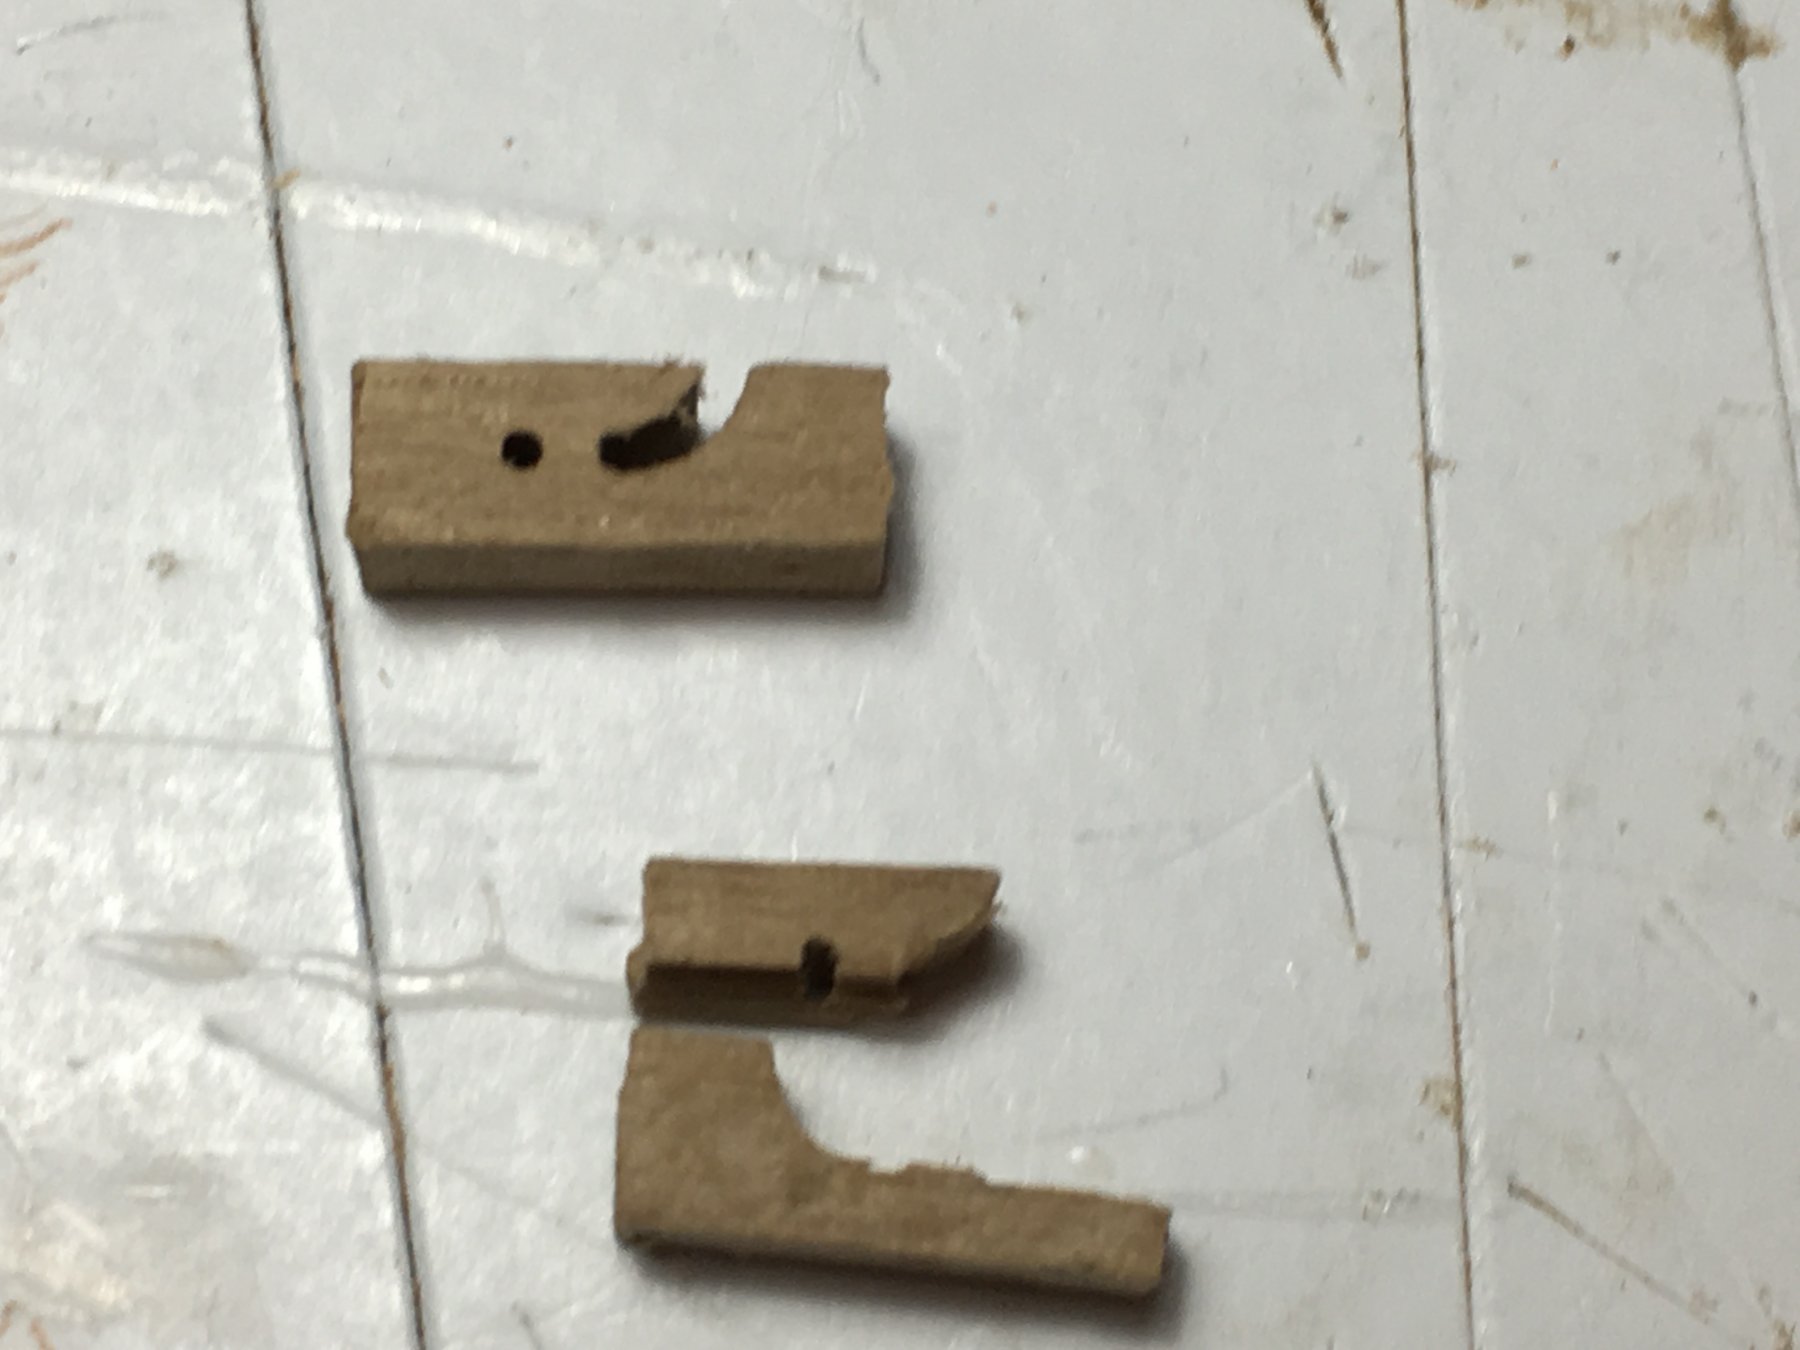
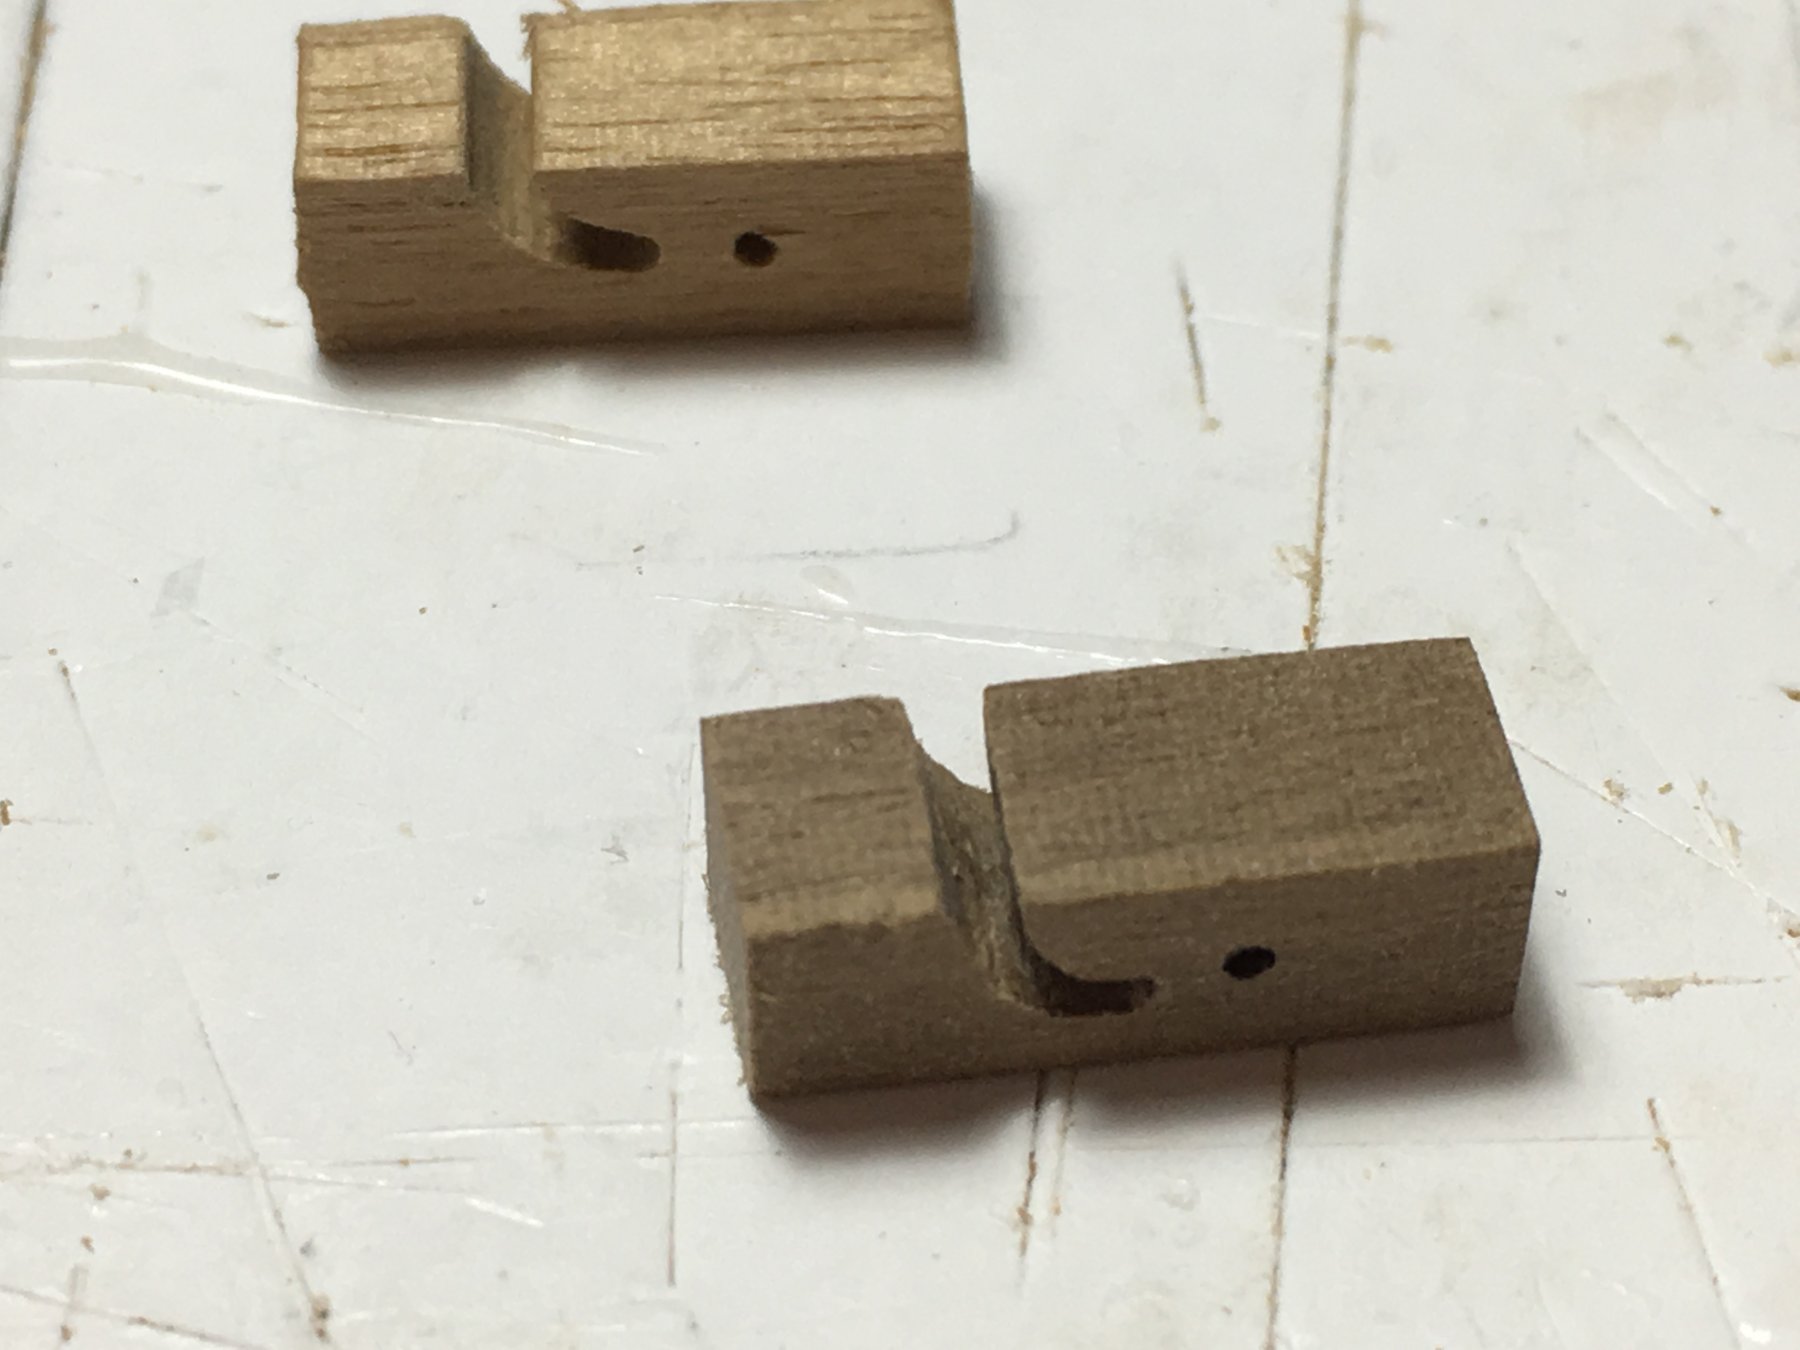
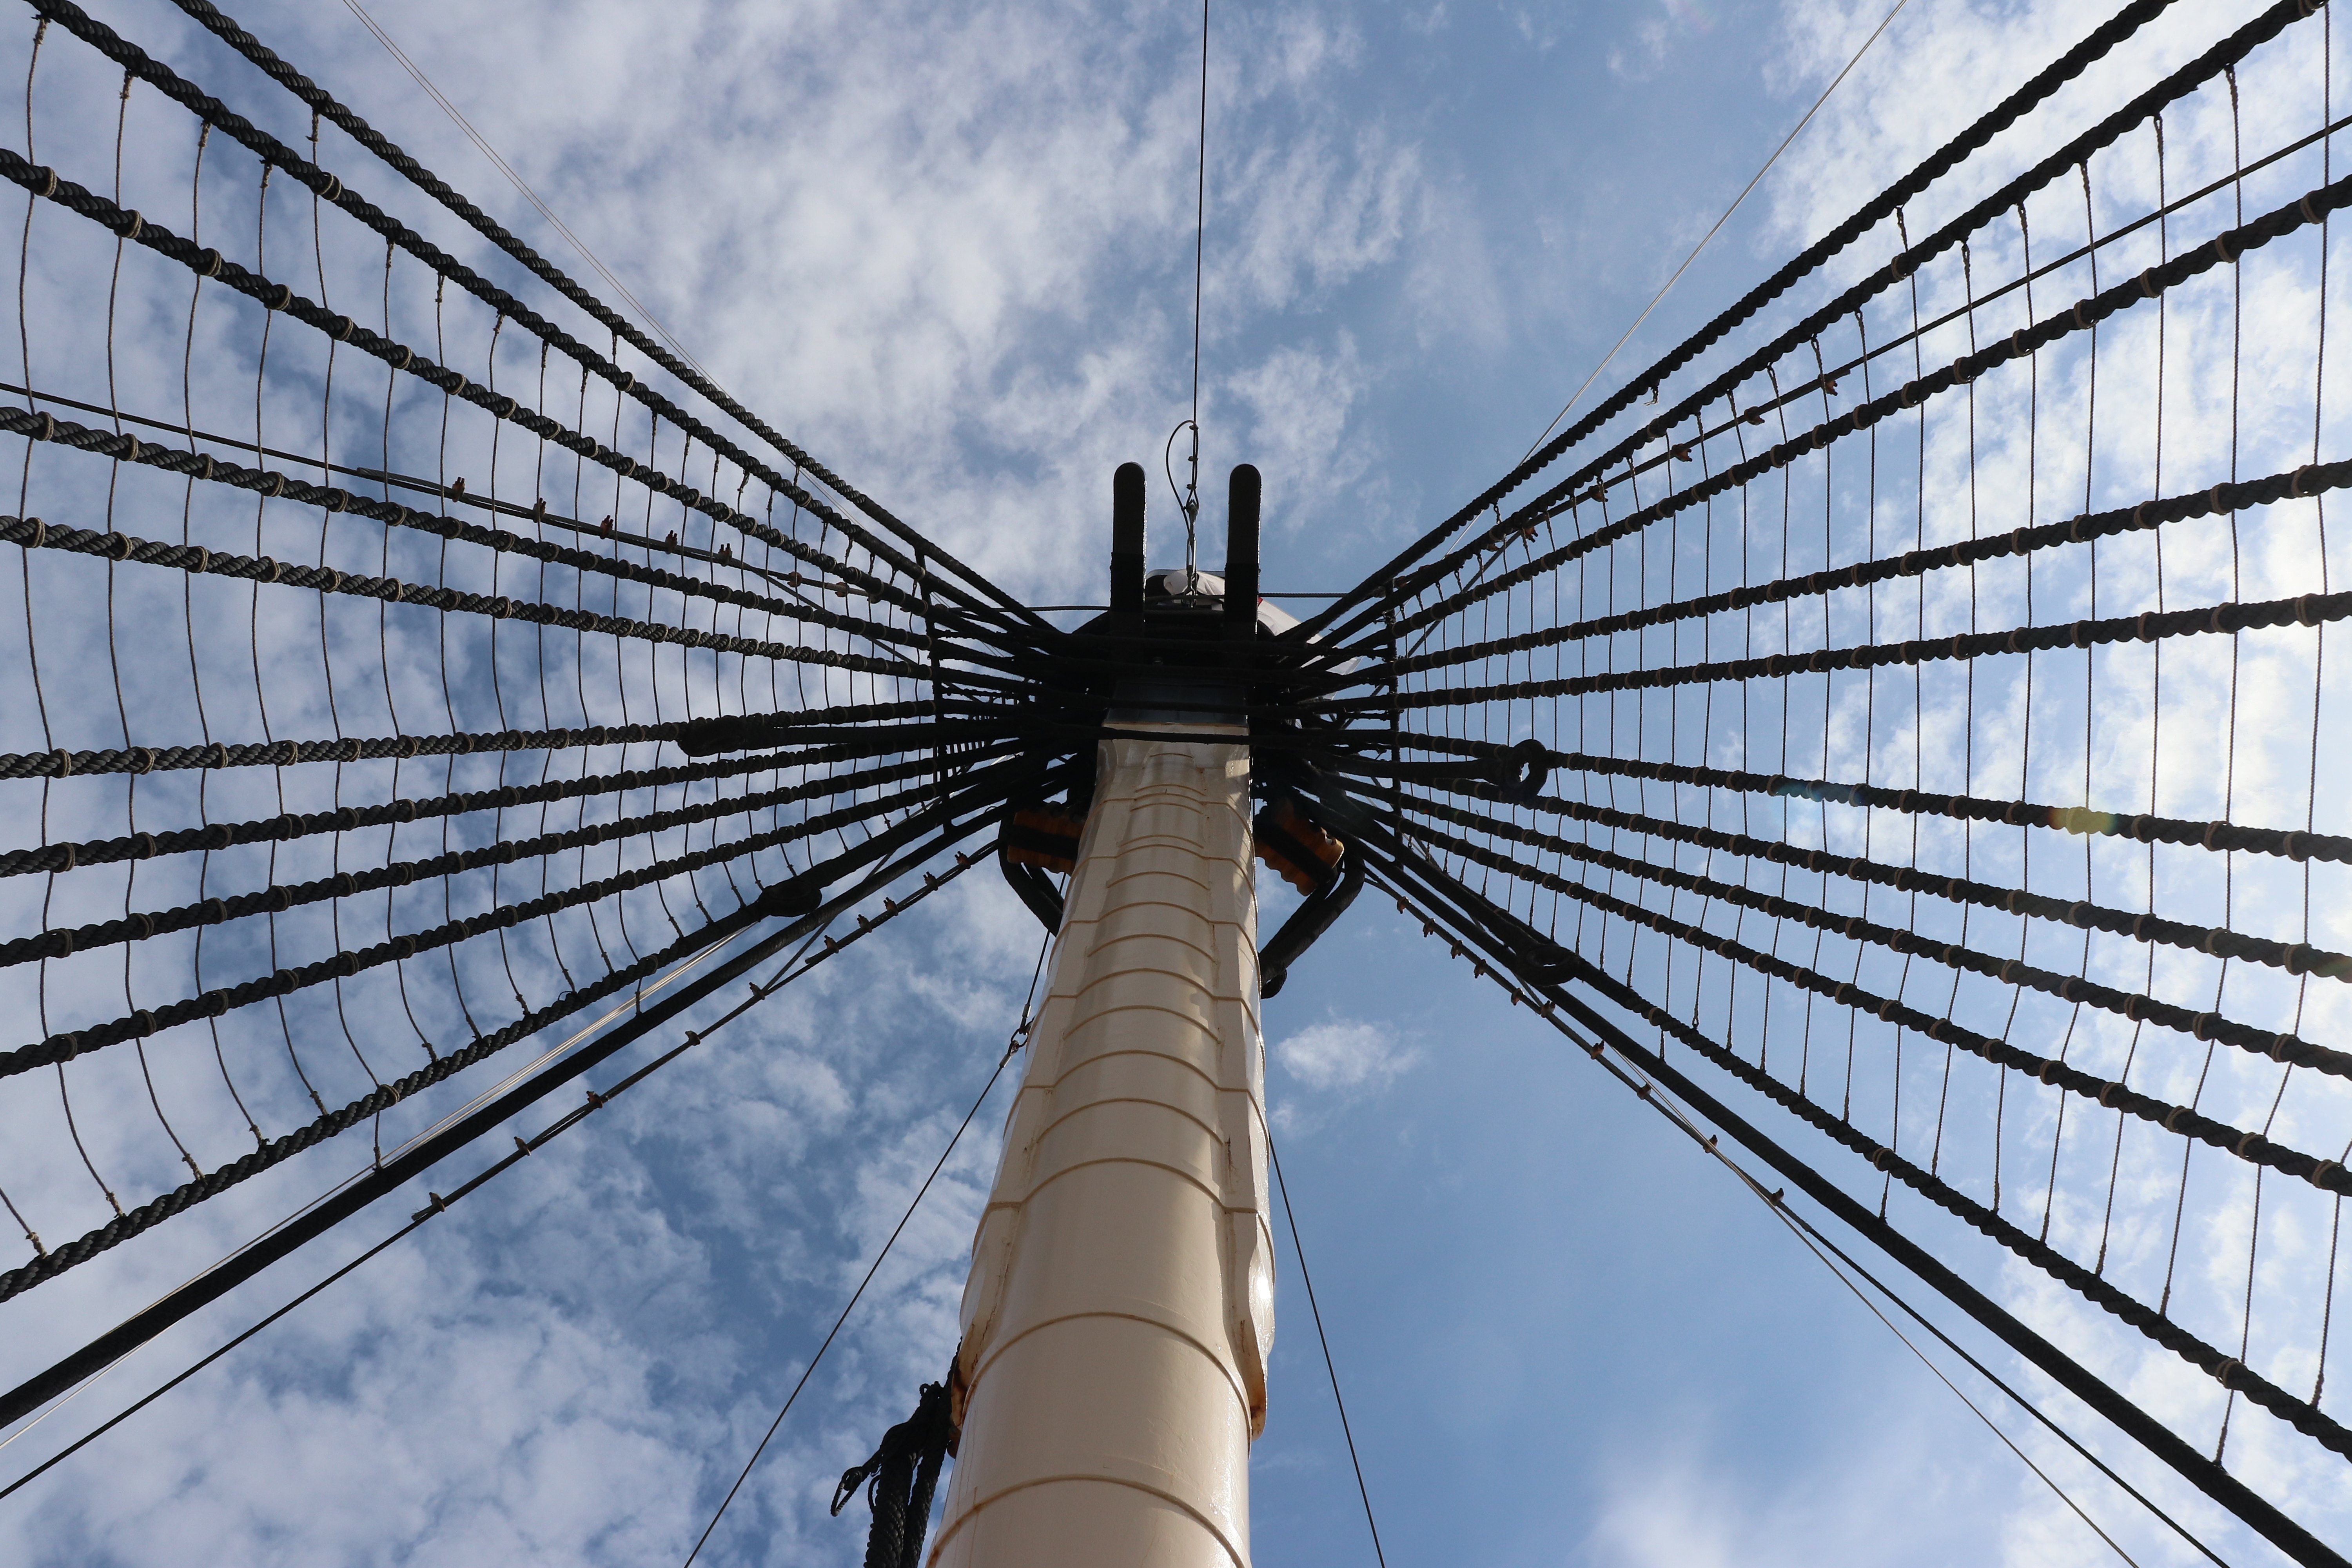
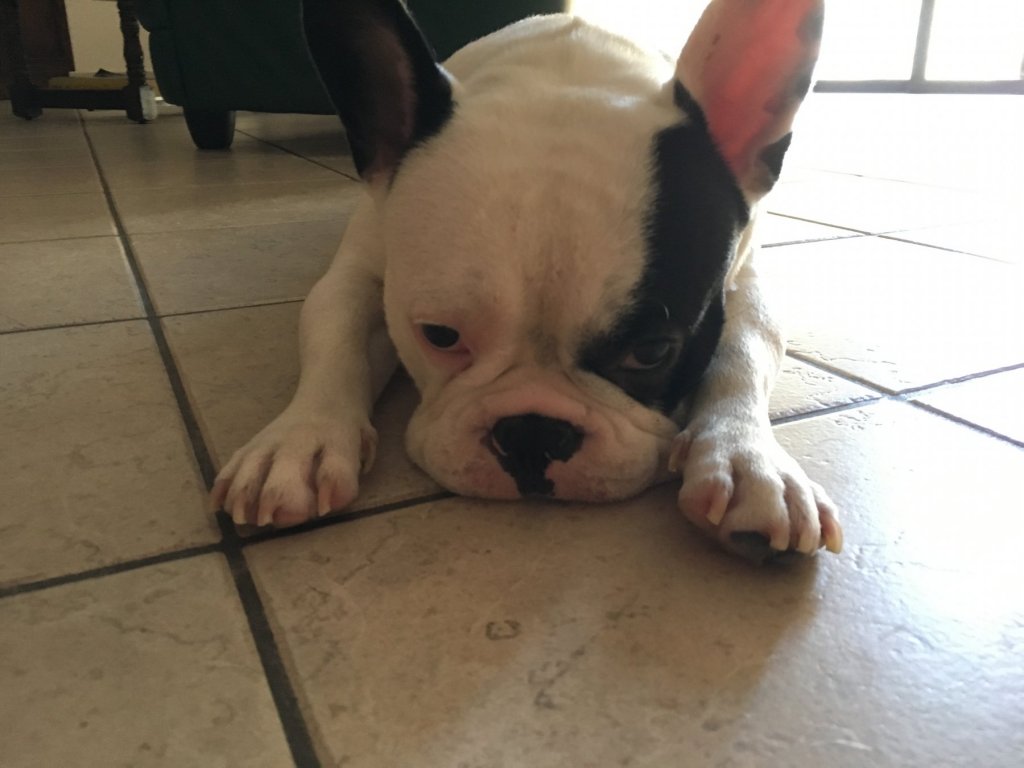
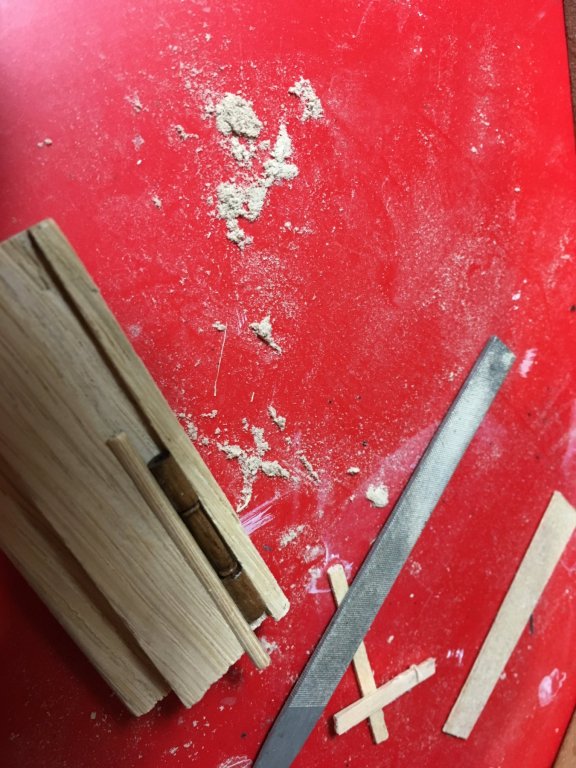
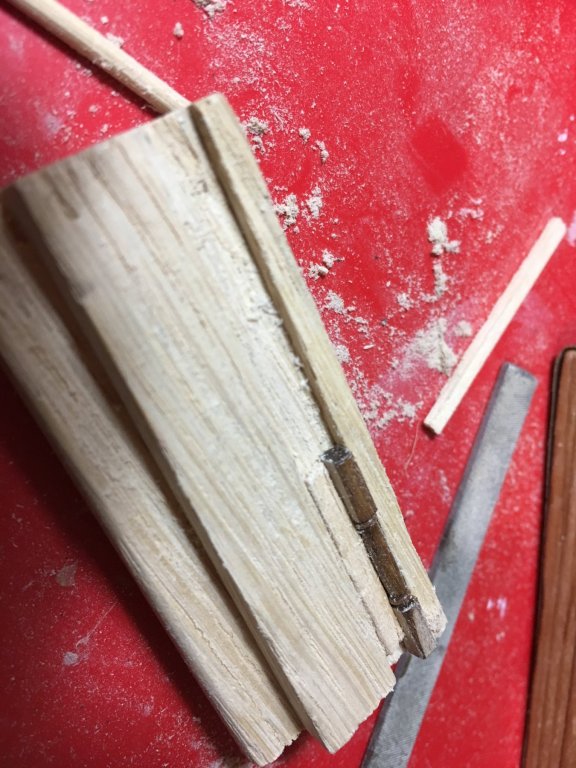
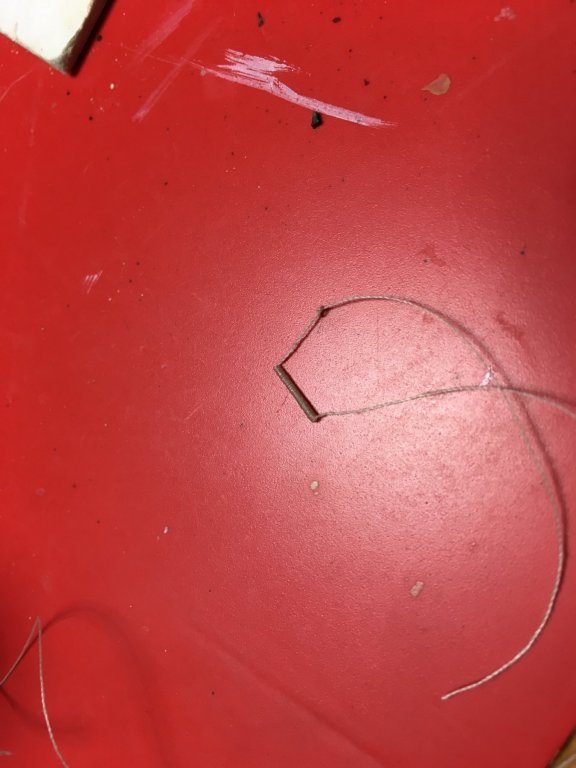
Graham, thank you for your comments, always appreciated and encourage me to do my best. Heinz, welcome back and thank you for your comments. Been through your updates and your work is stunning. Dropped one of the forecastle snatch blocks on the floor and my son's French bulldog was faster then me to pick it up and this is what I managed to retrieve back. Part of it went into his stomach. Worked another one (the dark one)from the 5mm walnut sheet. Lining the gunports. Bulwarks planked inside and outside. Snatch blocks and vertical edges glued to bulwarks. Capping rails glued in place. Complete bulwarks sanded and ready for painting. Deck is still not varnished. Wanted to finish the bulwarks before I finished the deck. The two wires coming out from the mast hole are in preparation for the supply for the lantern on the mast with a big IFF I manage to take the wires up the mast without showing!! Robert


- 527 replies
-
- 7
-
-
- caldercraft
- victory
- (and 1 more)
-
Hello Heinz, thank you for uploading these photos, your build is a masterpiece. The detail and precision of your work is fascinating. I could go through it times and times over to admire it. Congratulations. Robert
-
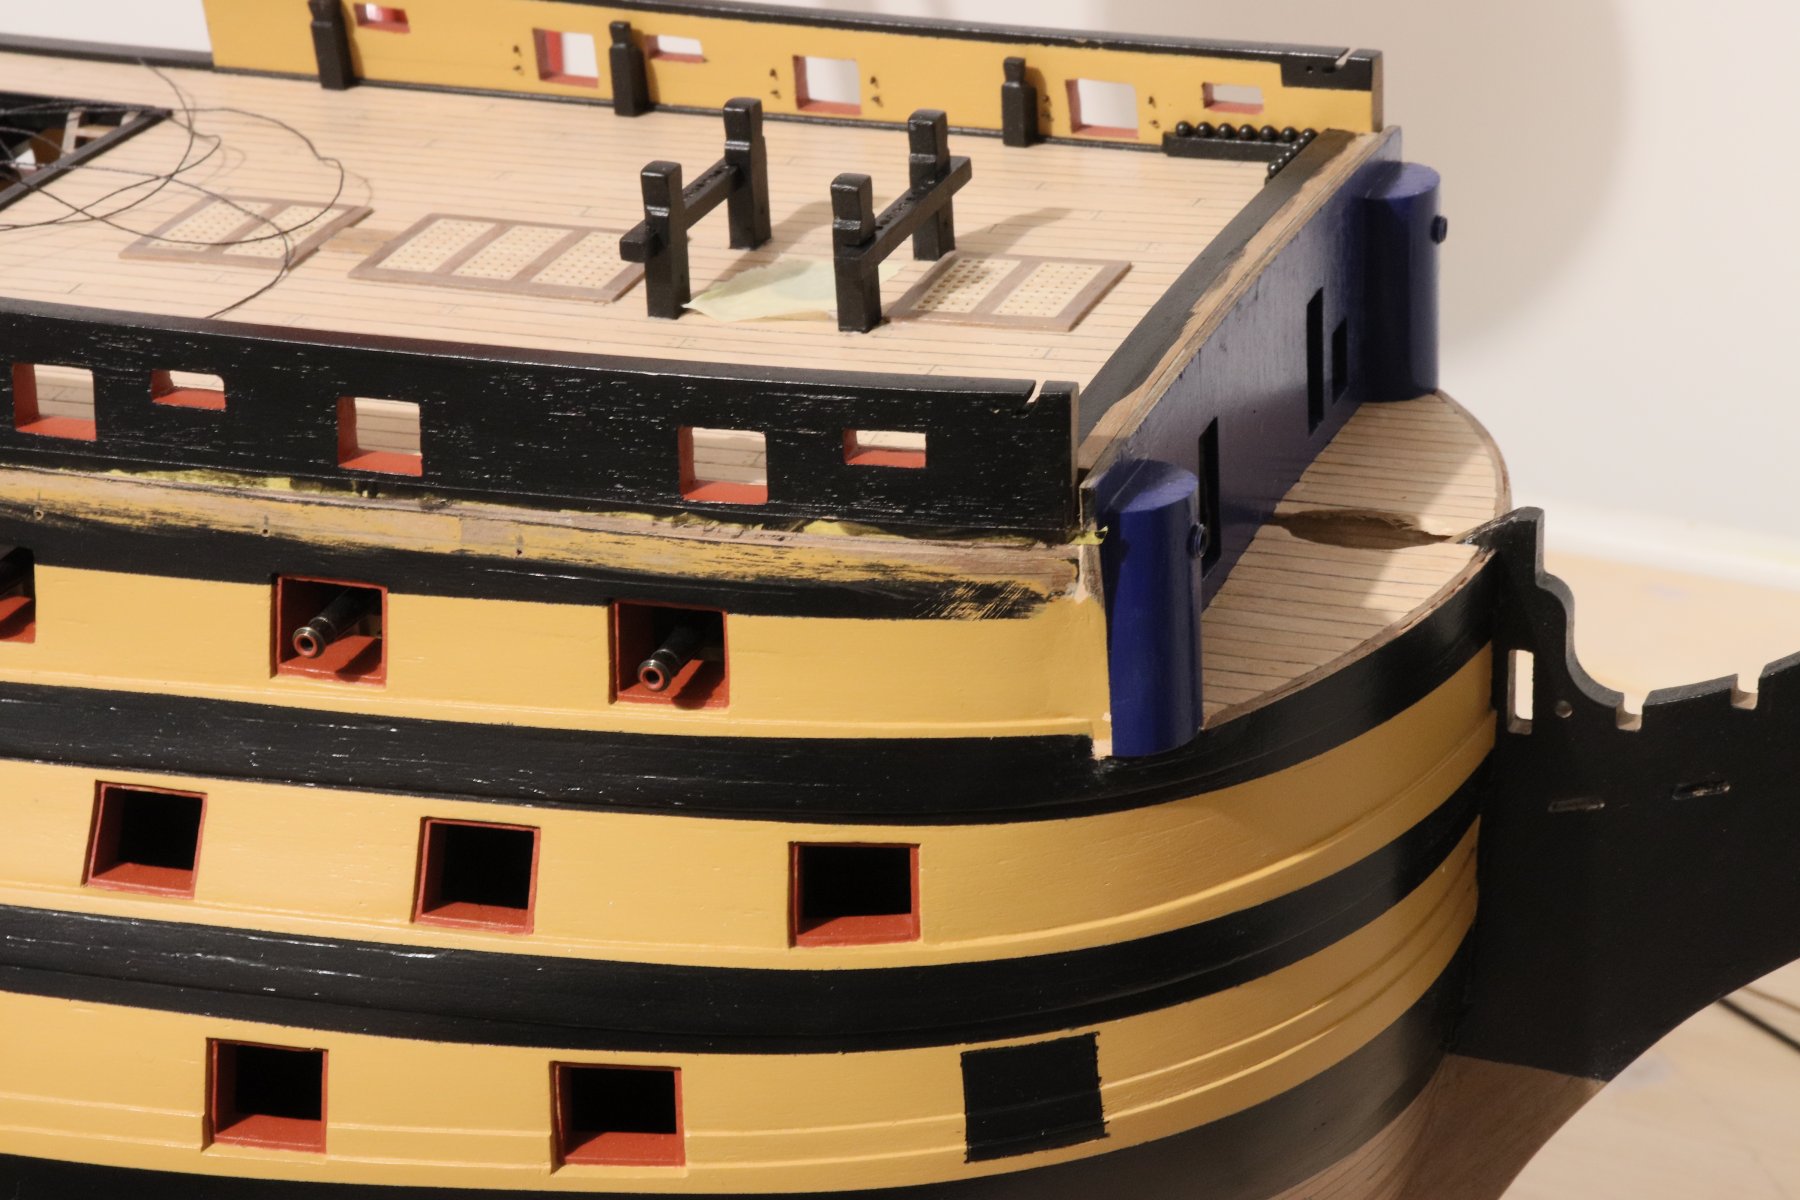
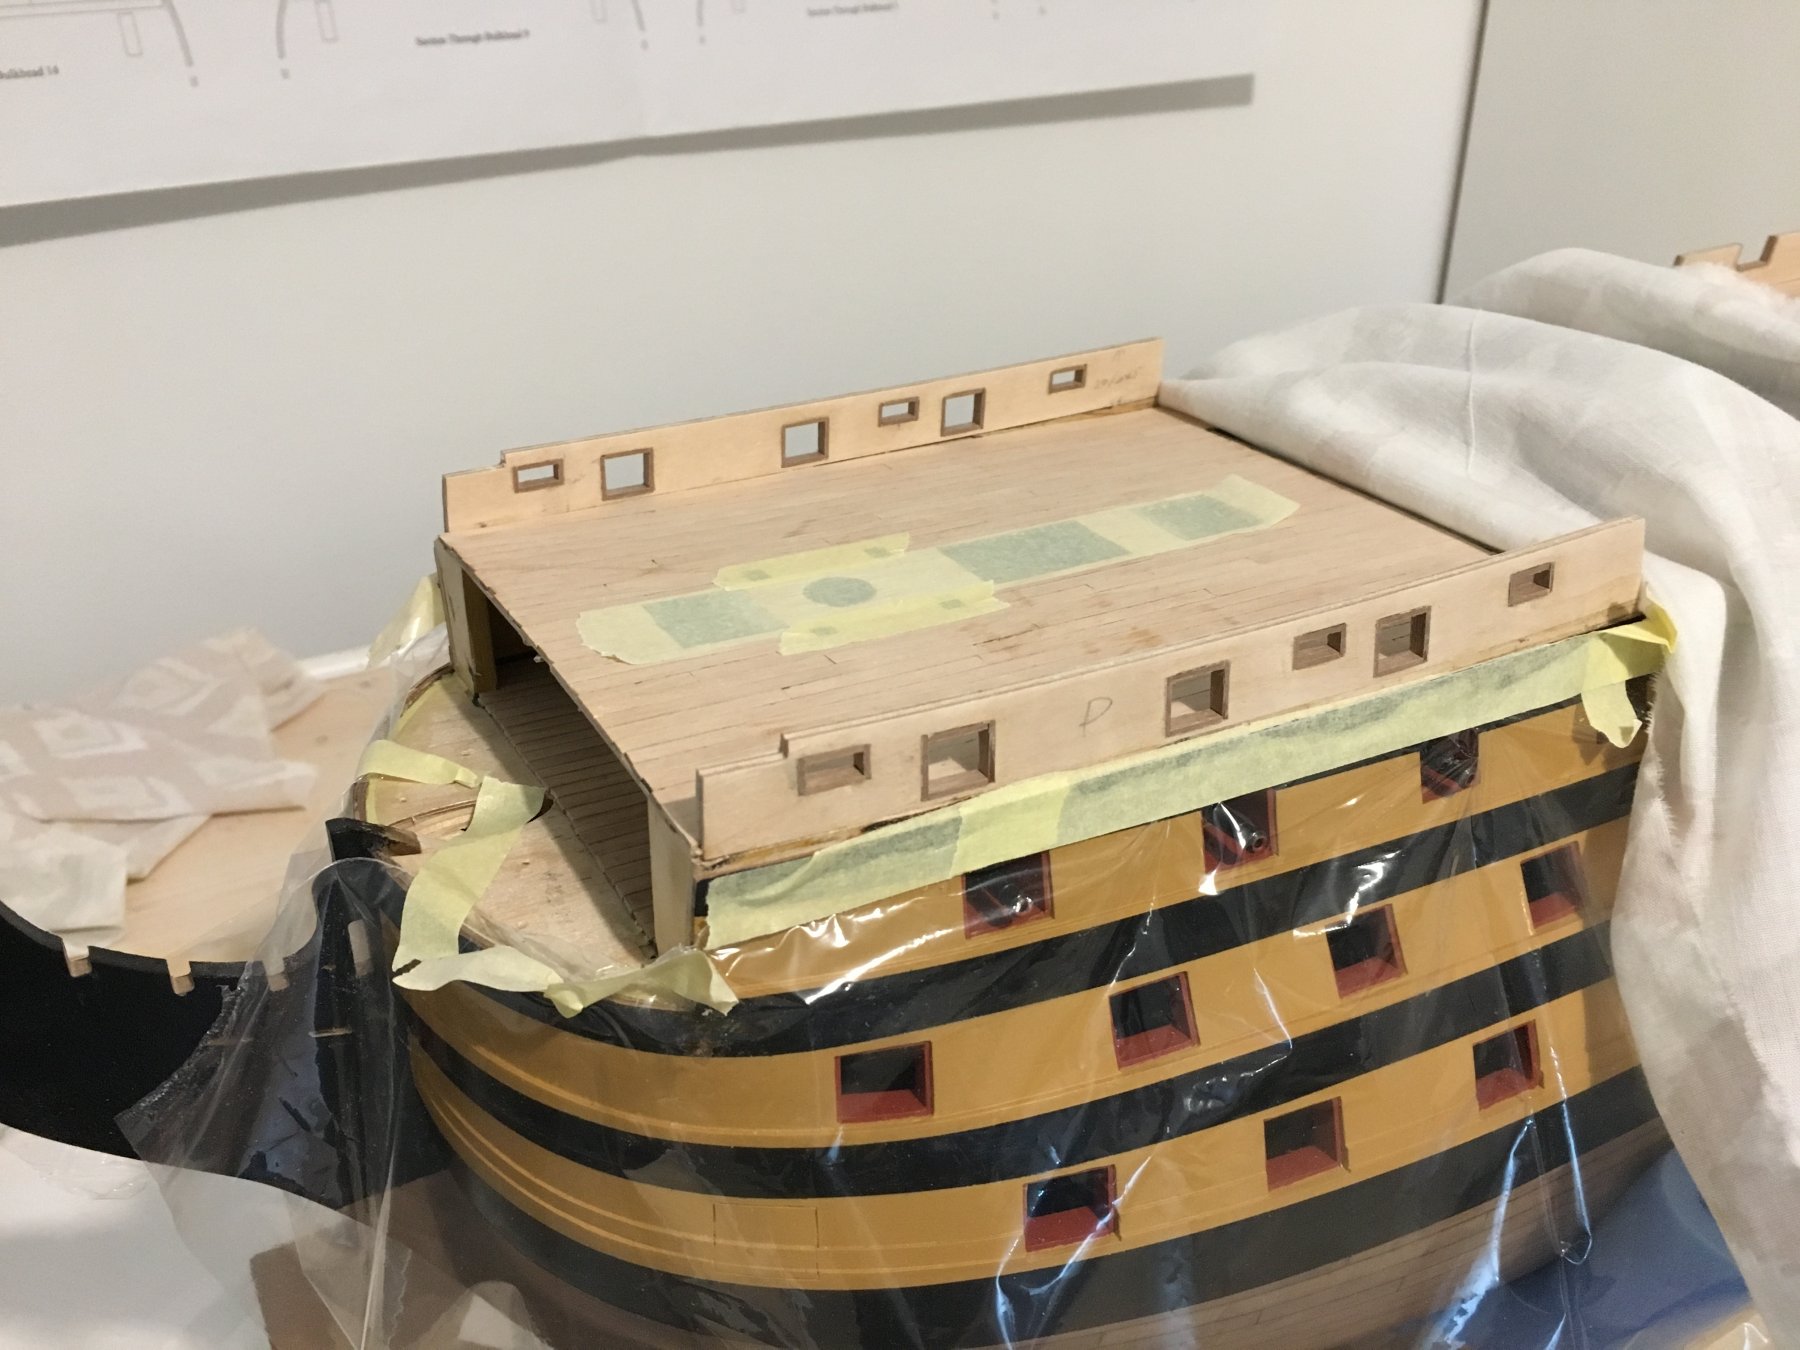
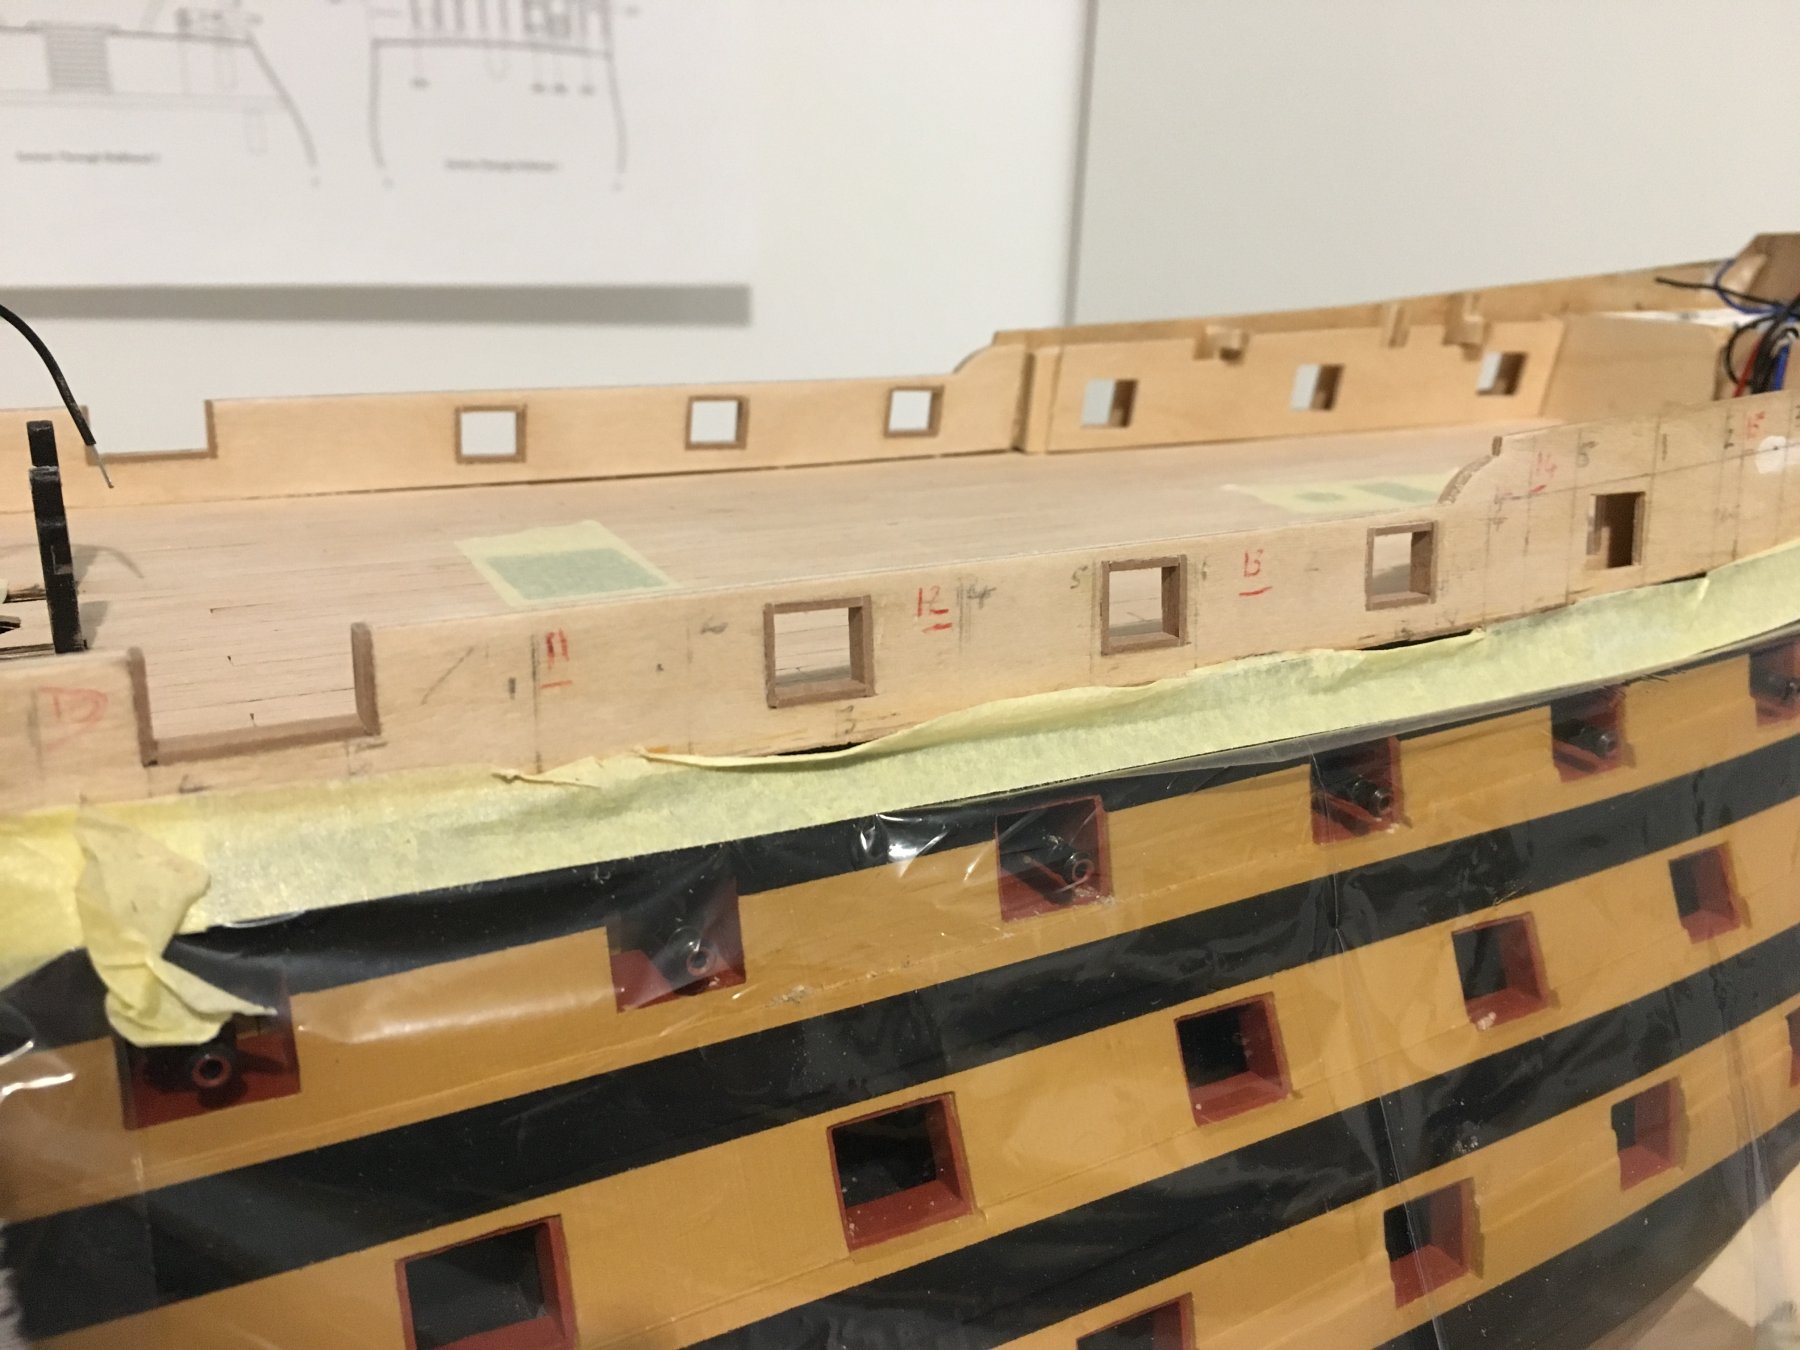
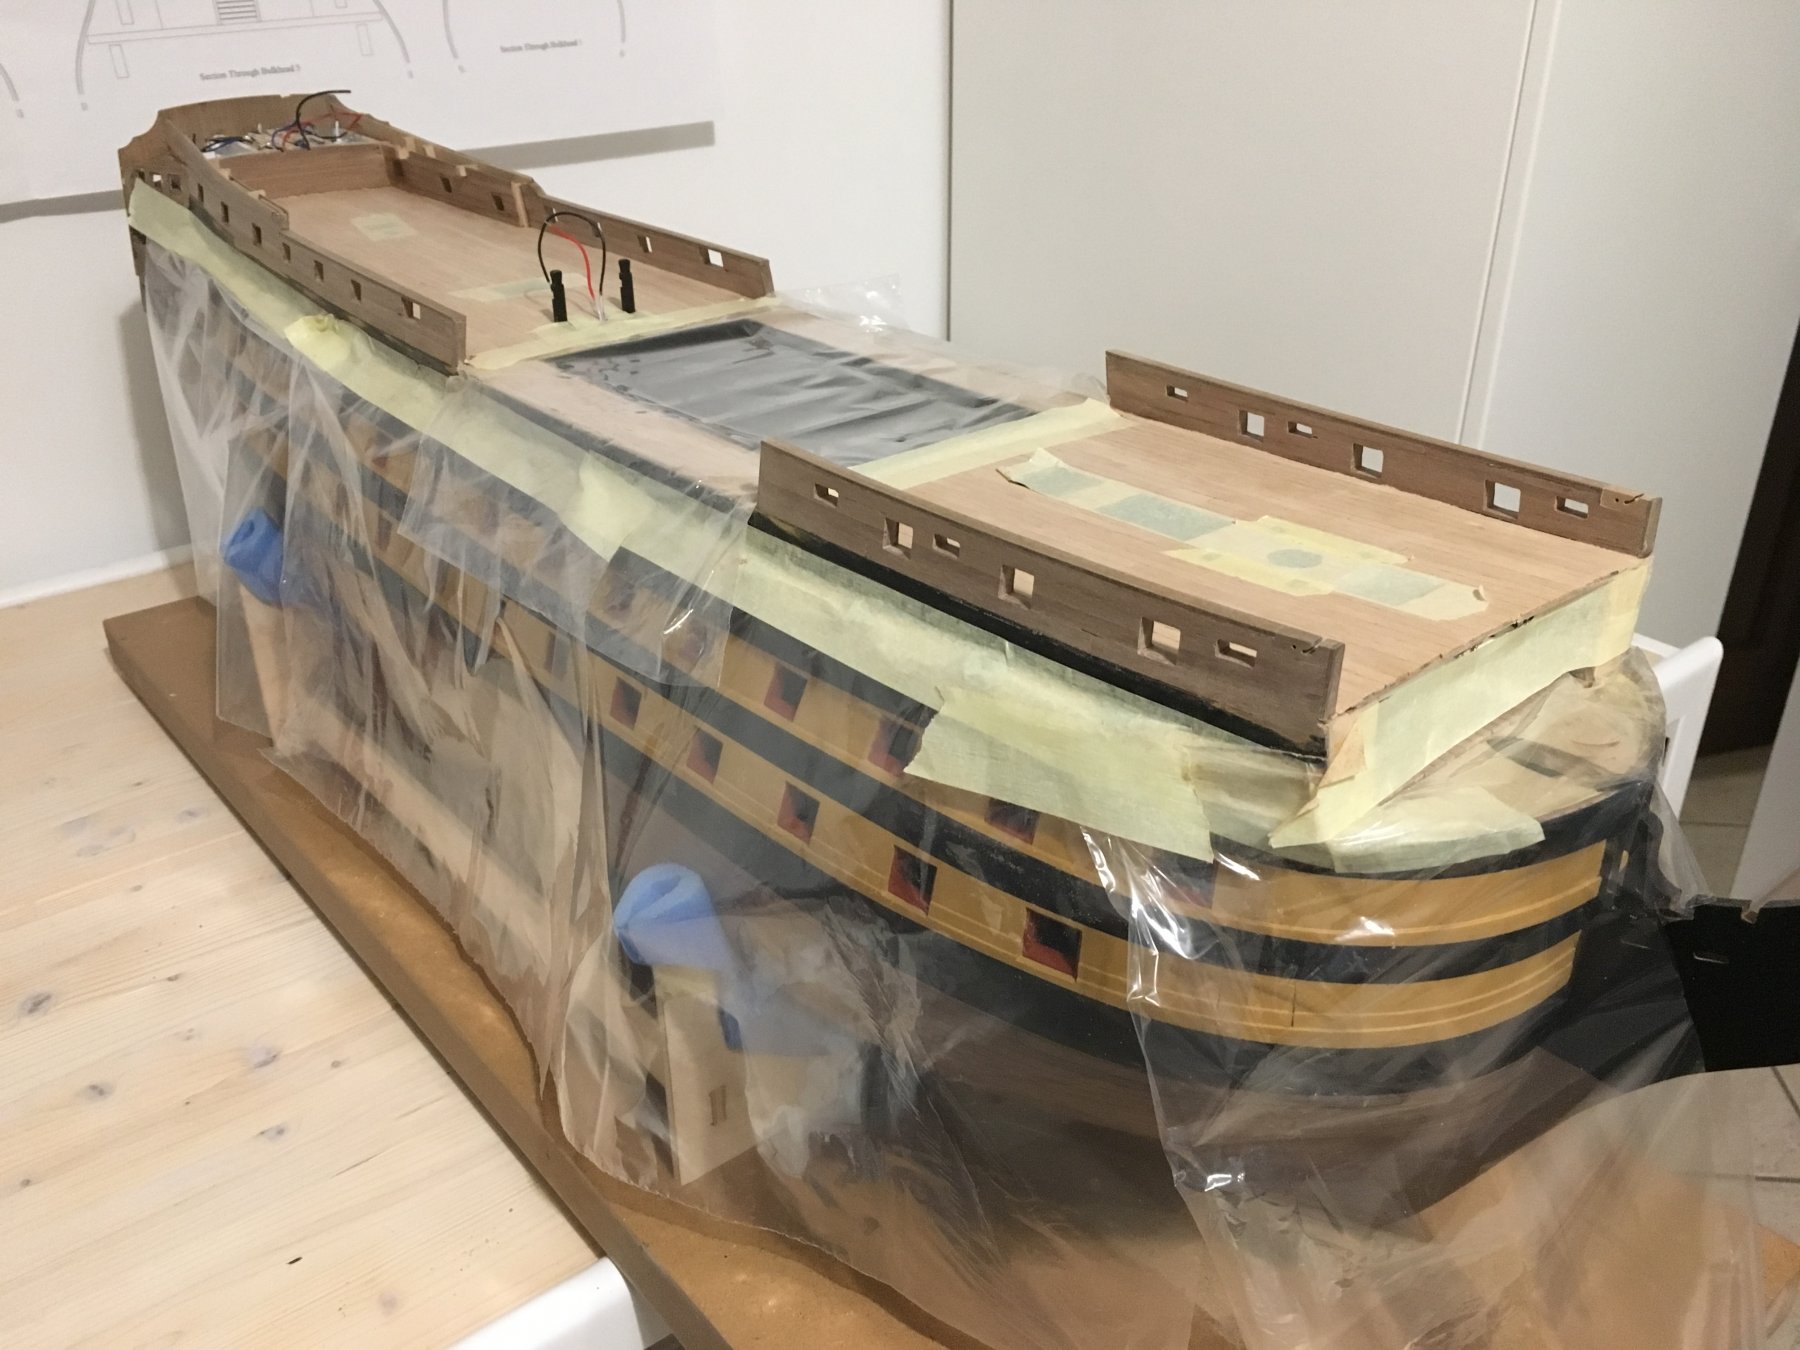
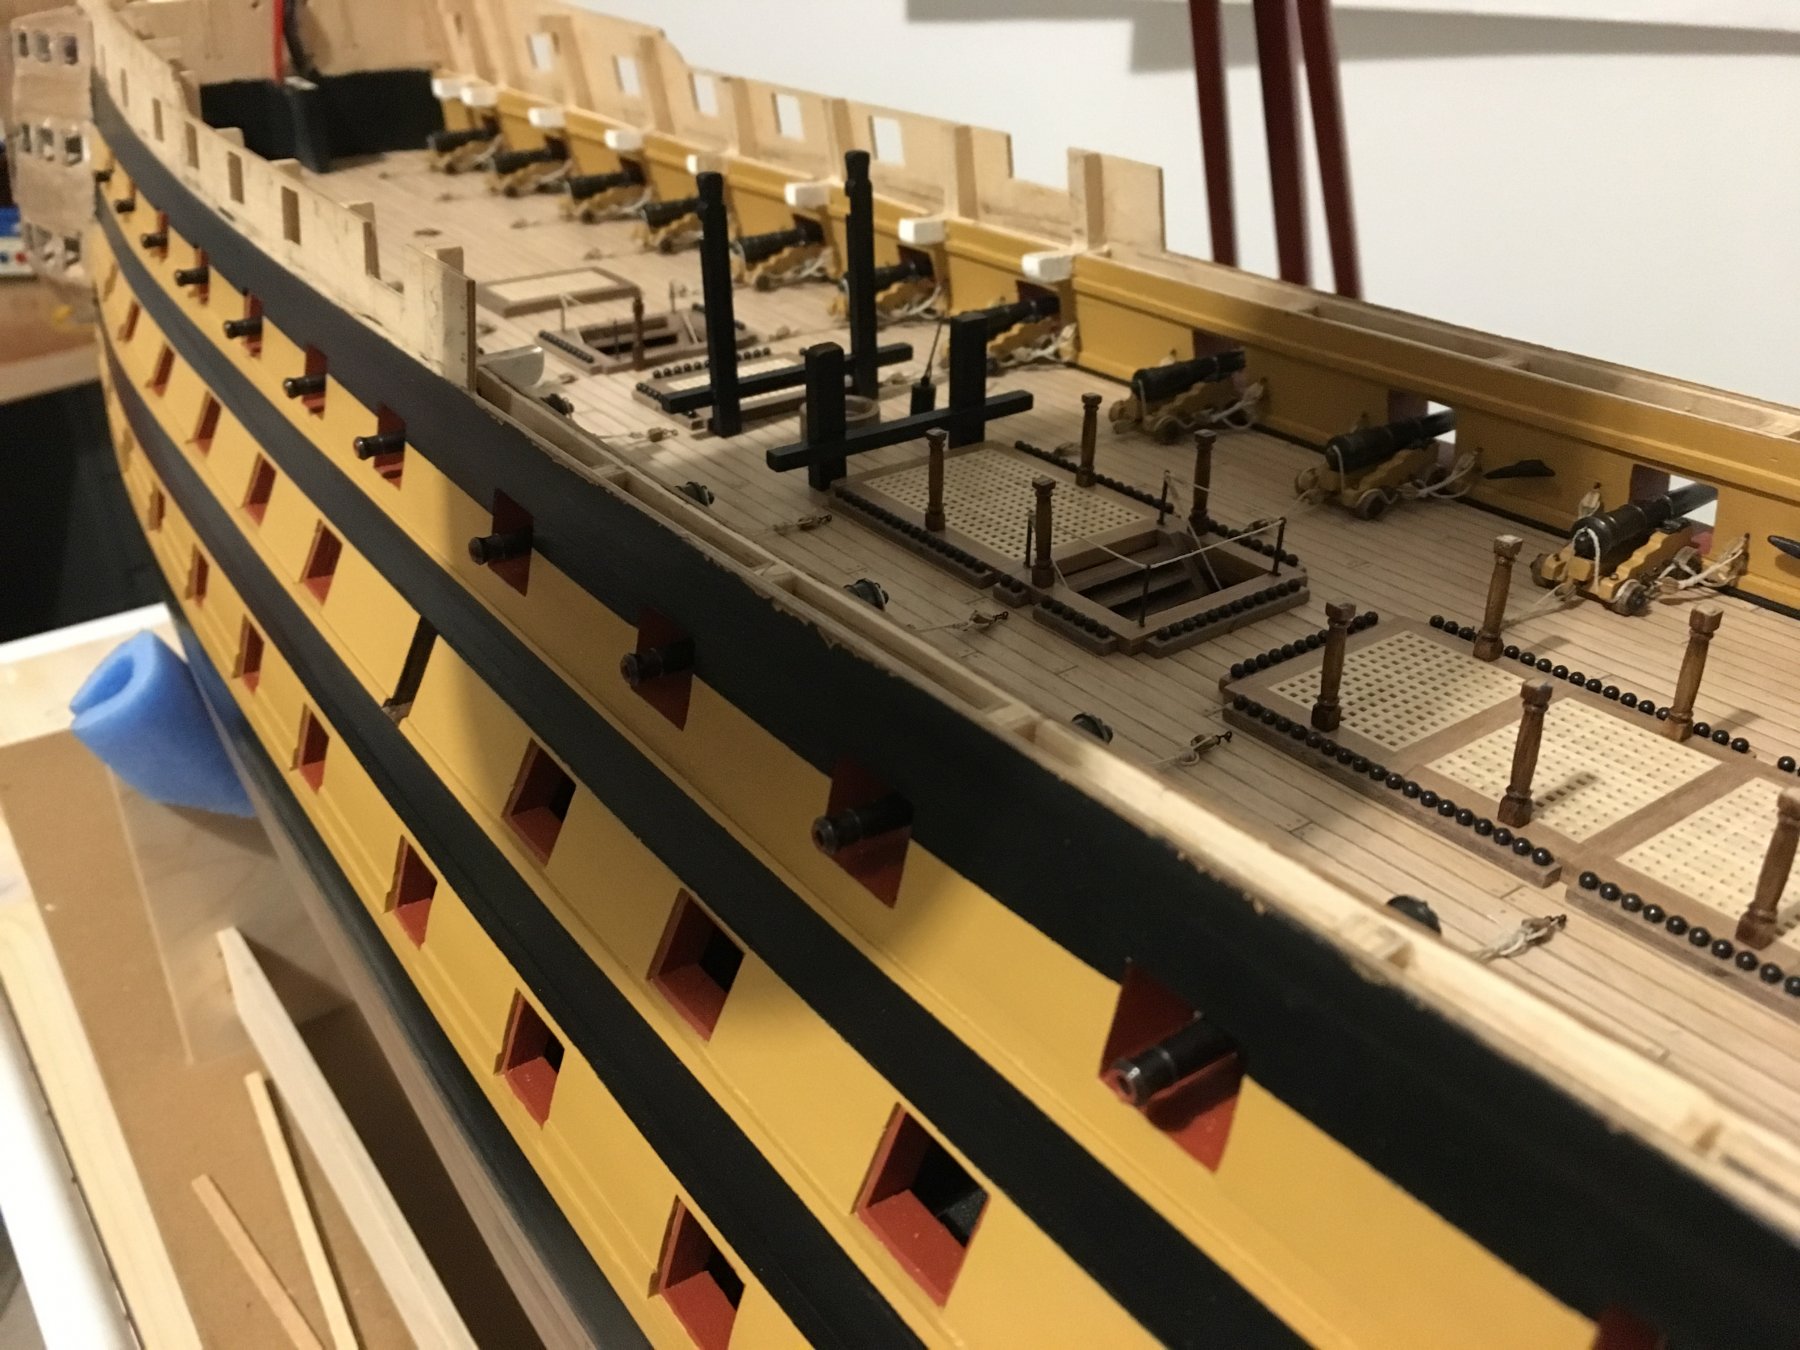
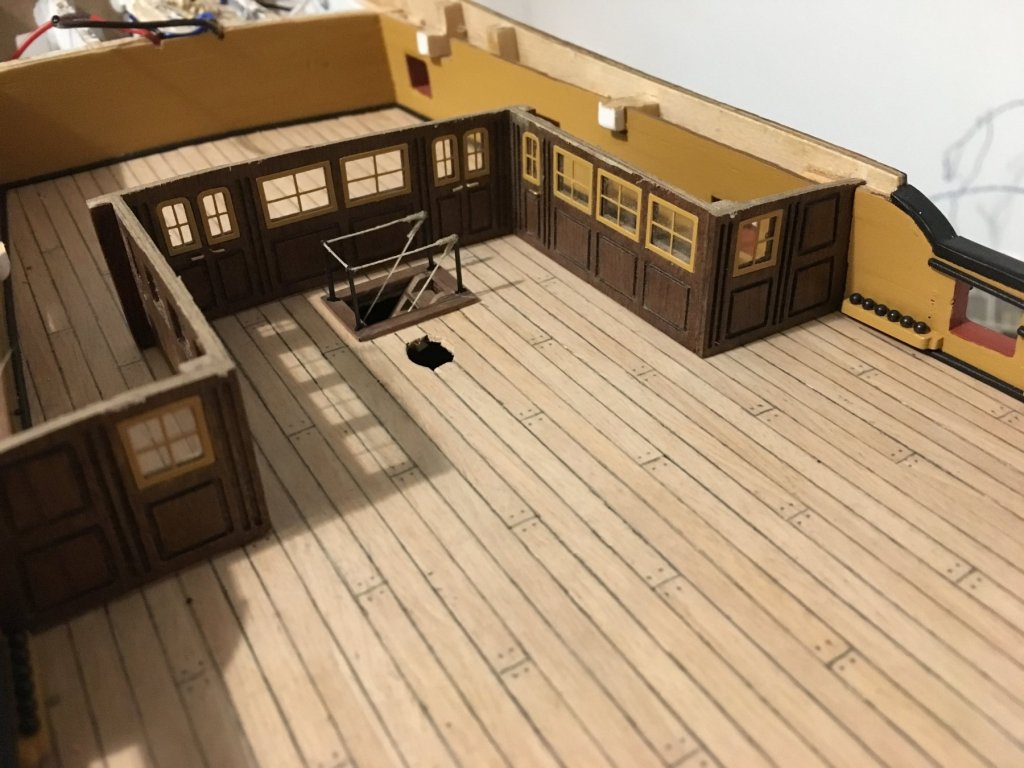
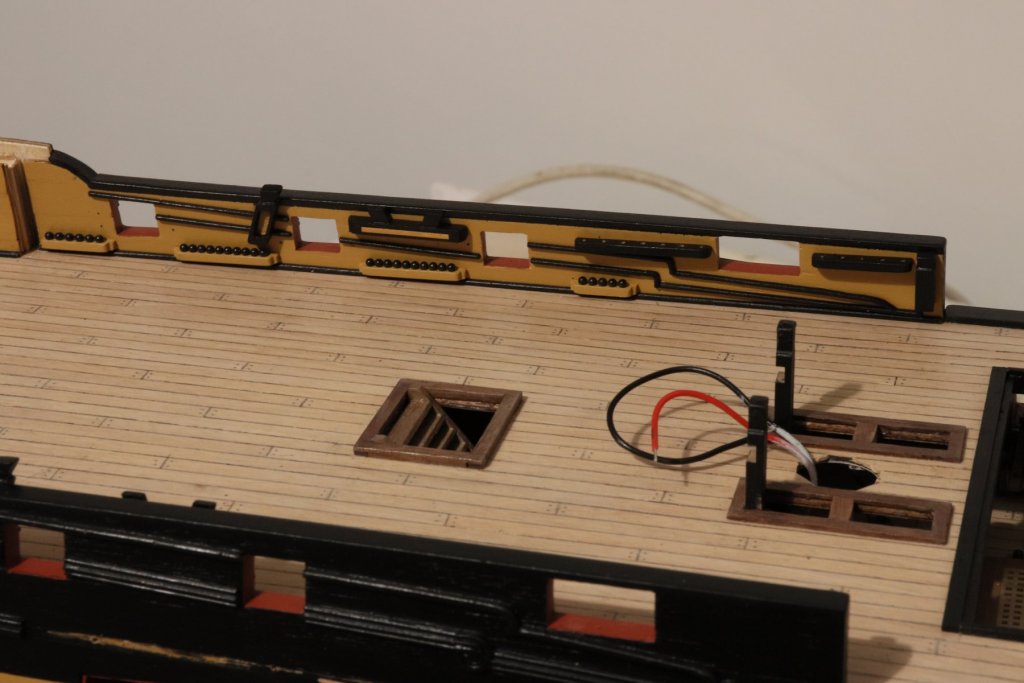
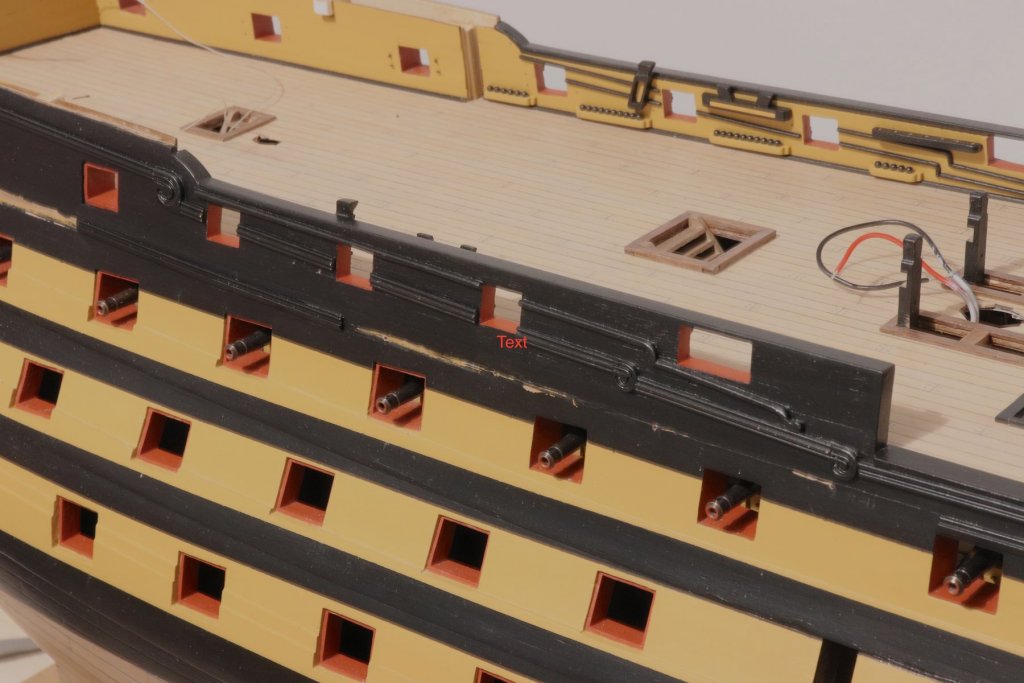
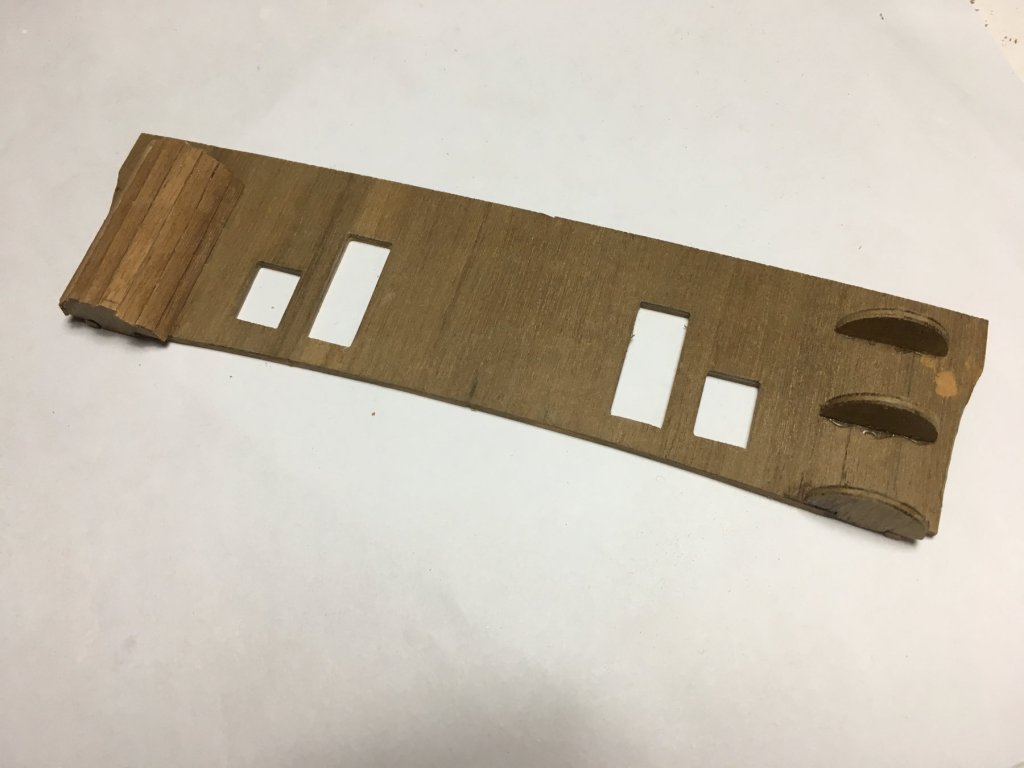
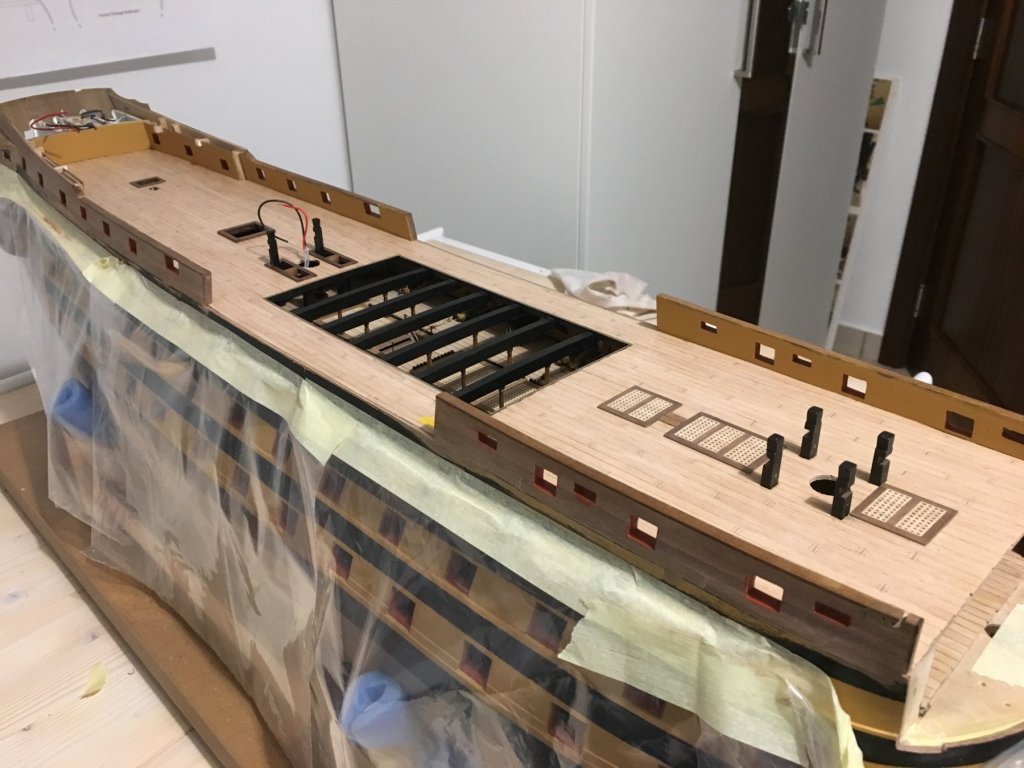
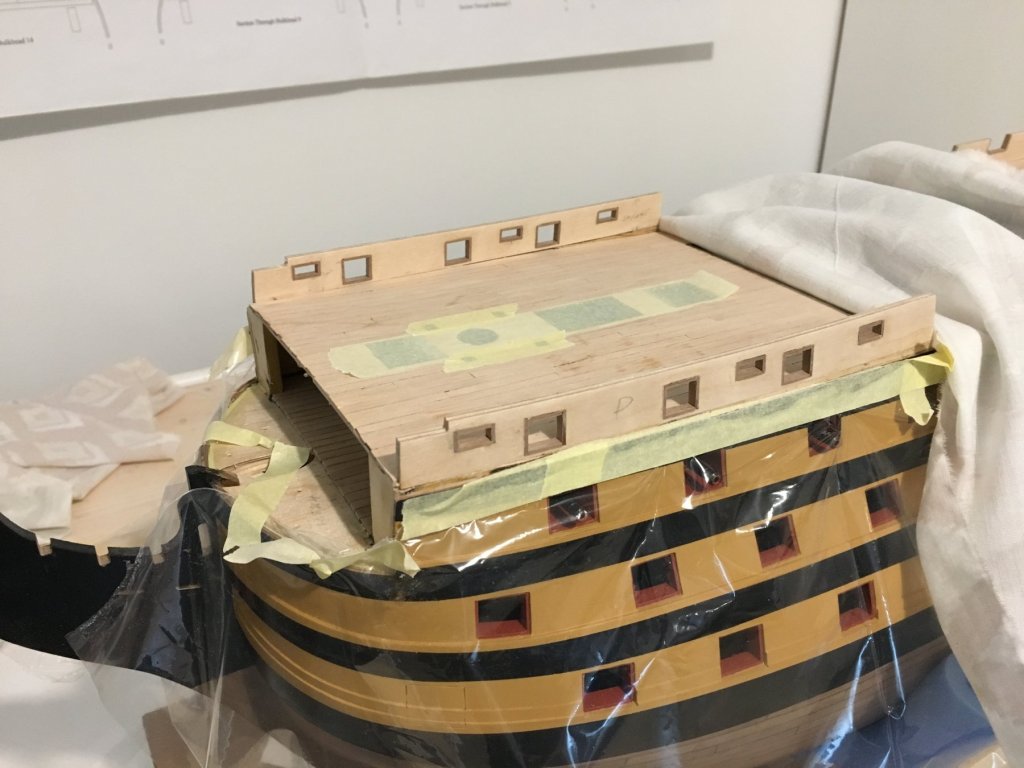
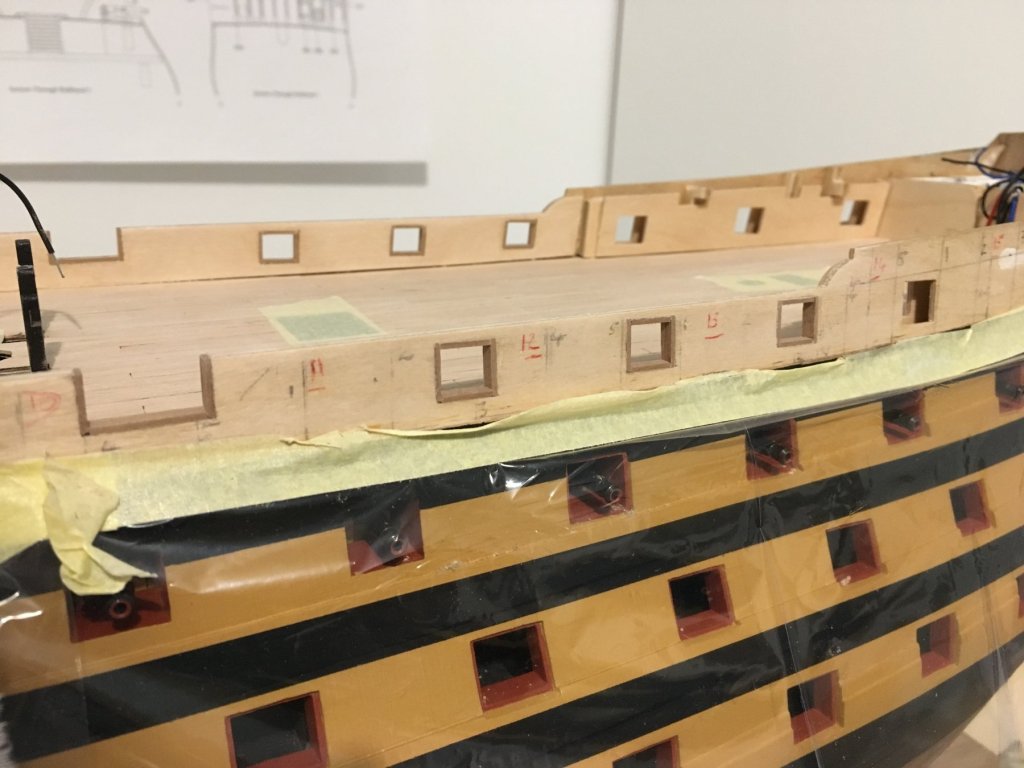
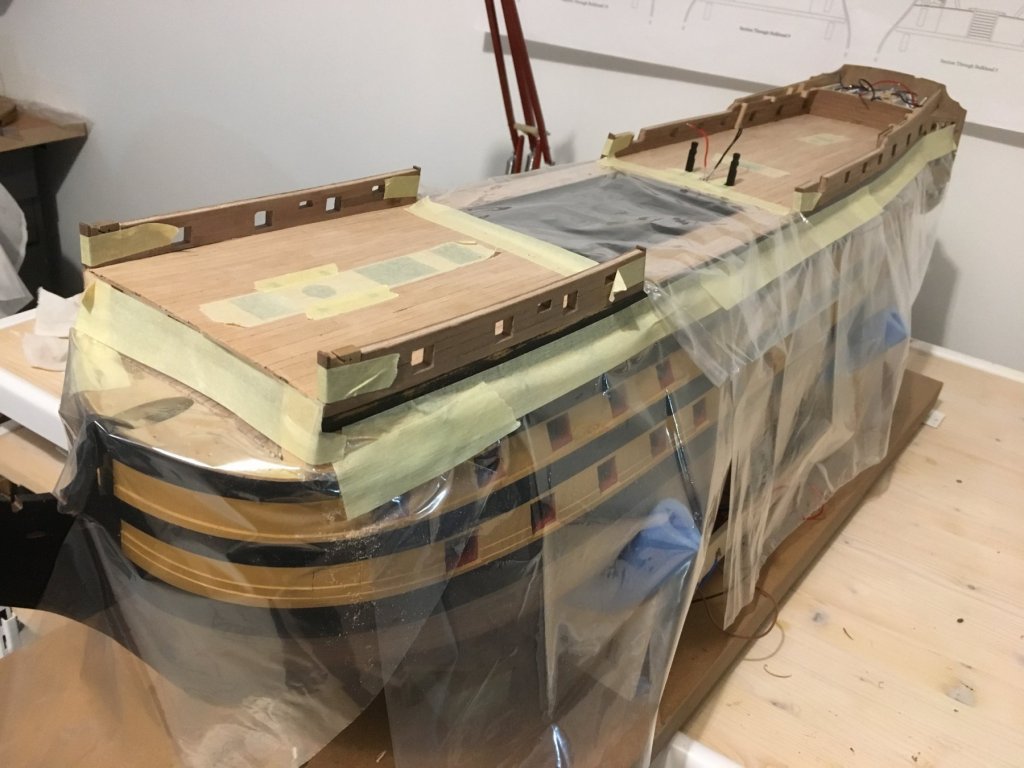
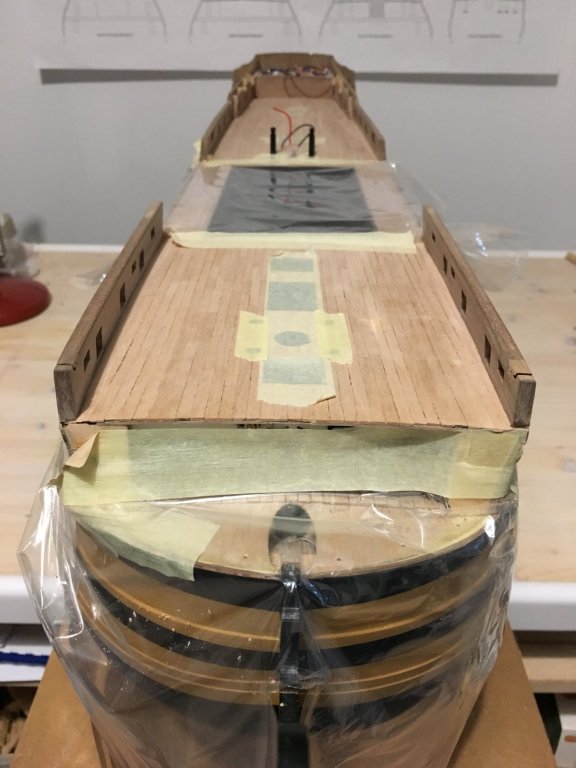
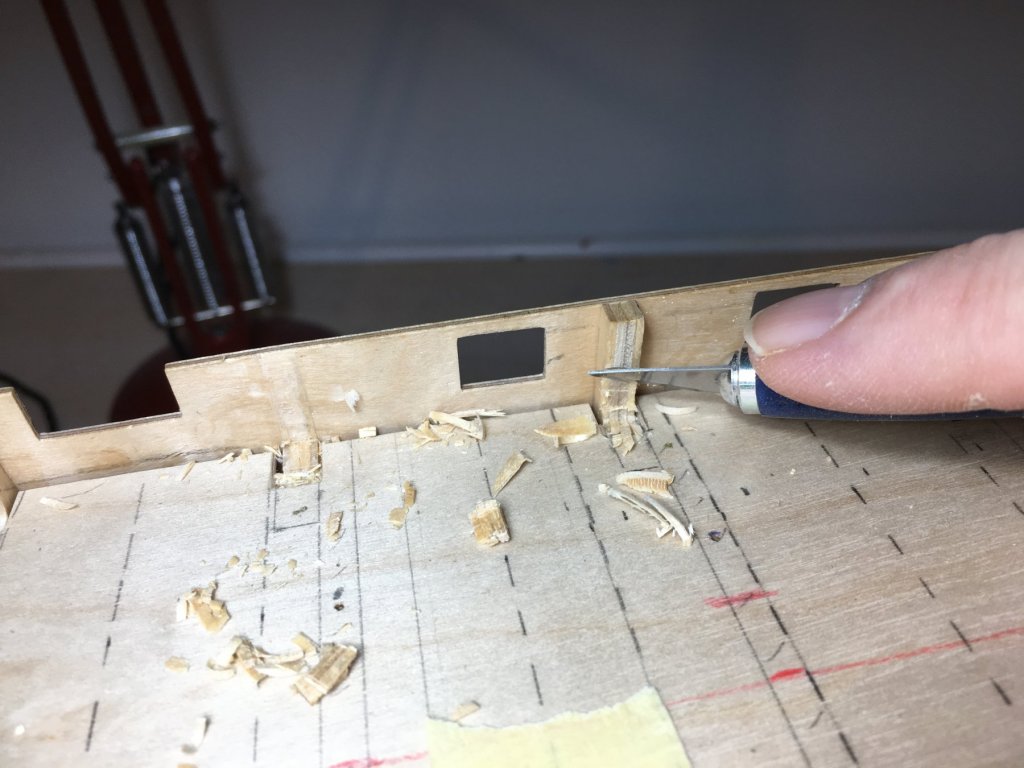
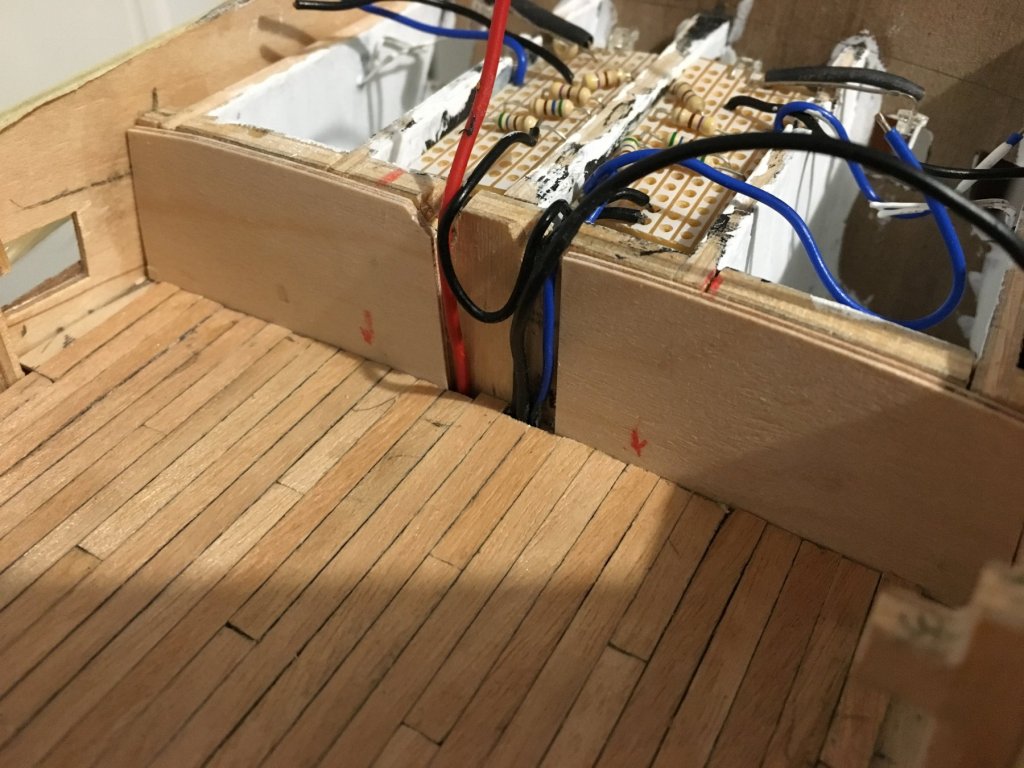
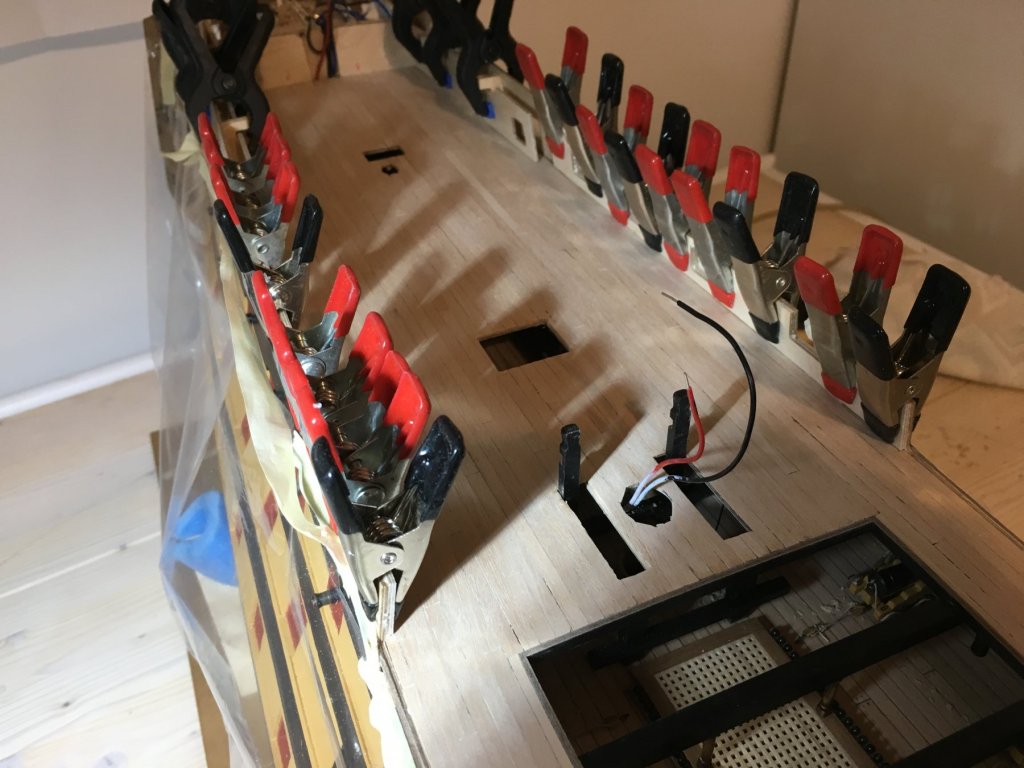
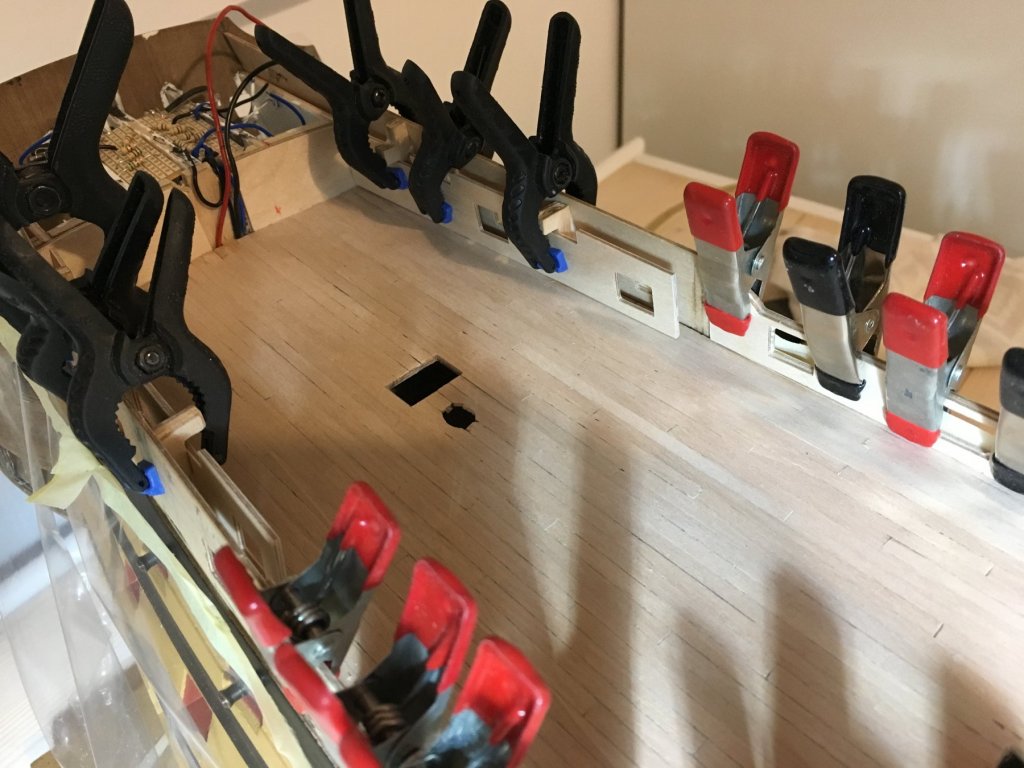
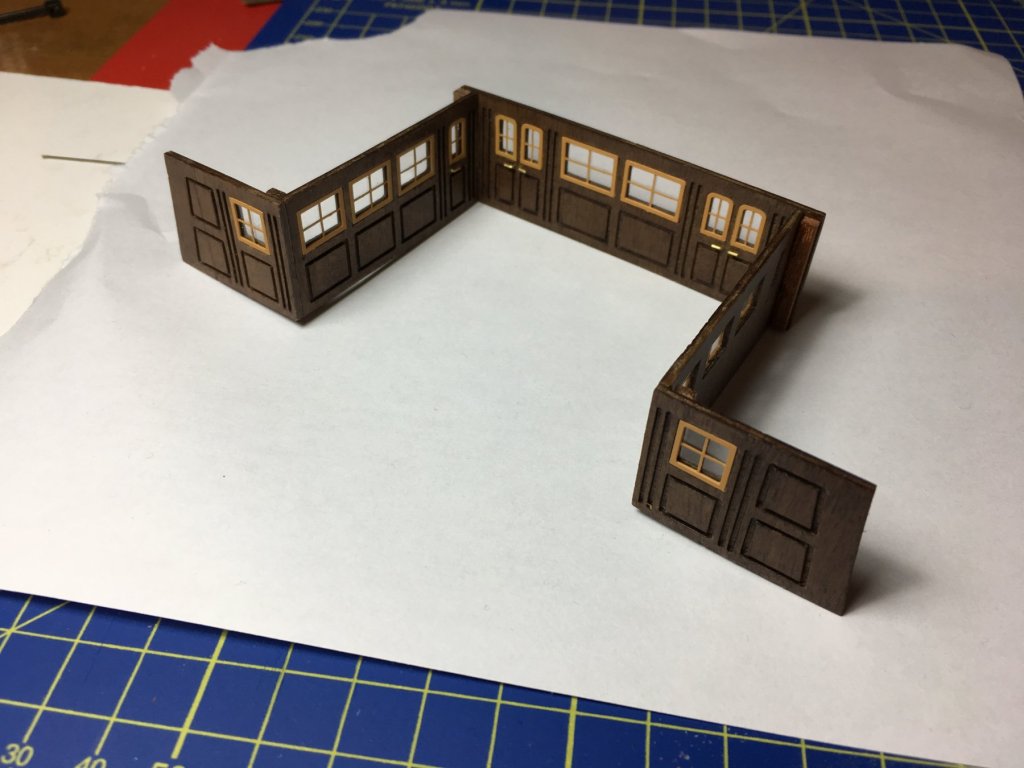
A small update, Fitted the quarterdeck. I did not fit the skid beam assembly as per instruction manual, that is first glue in place the back of the quarter deck, then glue the skid beam assembly in place from underneath, then continue gluing the front part of the deck. I realised that if you trim a bit from certain edges of the false deck you can fit the skid beam assembly beforehand and still be able to fit the deck in place. This was something I was dreading to do, the removal of the bulkhead uprights, but it went well until after everything was finished and was working on the deck planking I nocked down one of them. When you remove the uprights, the forecastle gunport pattern (276) is only holding in place by the glued lower edge with no side support. I will glue it back after I finish the decking and be ready to reinforce it with the inside pattern and the planking on both sides. Decking in progress. With the face of bulkhead 18 I have wires going up to supply the lights for the gallery and the screen assembly. To cover these I have glued a piece of plywood on to bring the surface flash with the wires which will be hidden after I plank the surface. The inner bulwark gunport patterns glued in. The deck is sanded but not yet varnished, that was why it looks so white and the chalking is not showing. The quarterdeck screen assembly also ready to be fitted in later on. I have added the handles for the doors. Robert


- 527 replies
-
- 7
-
-
- caldercraft
- victory
- (and 1 more)
-
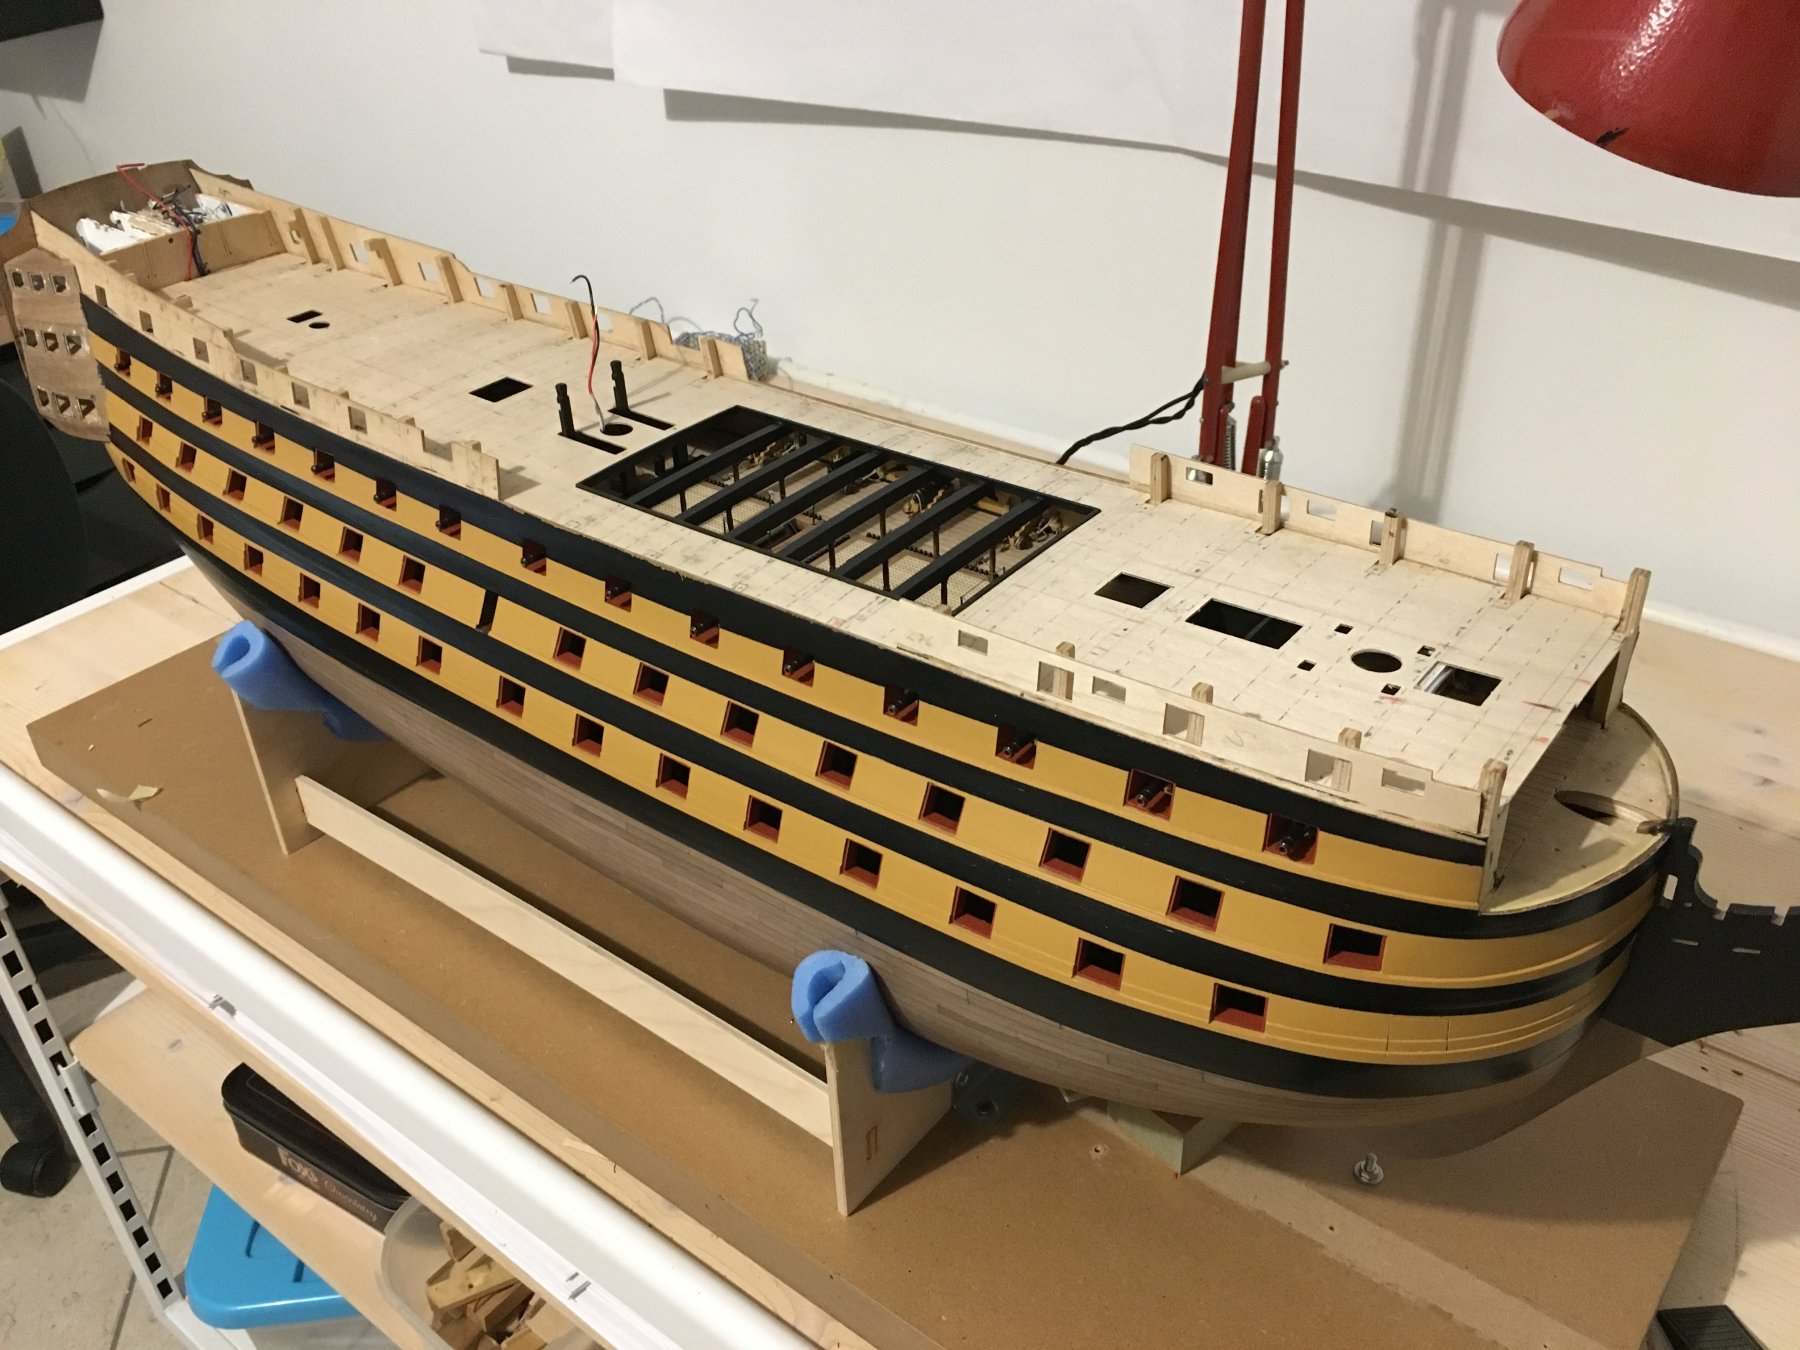
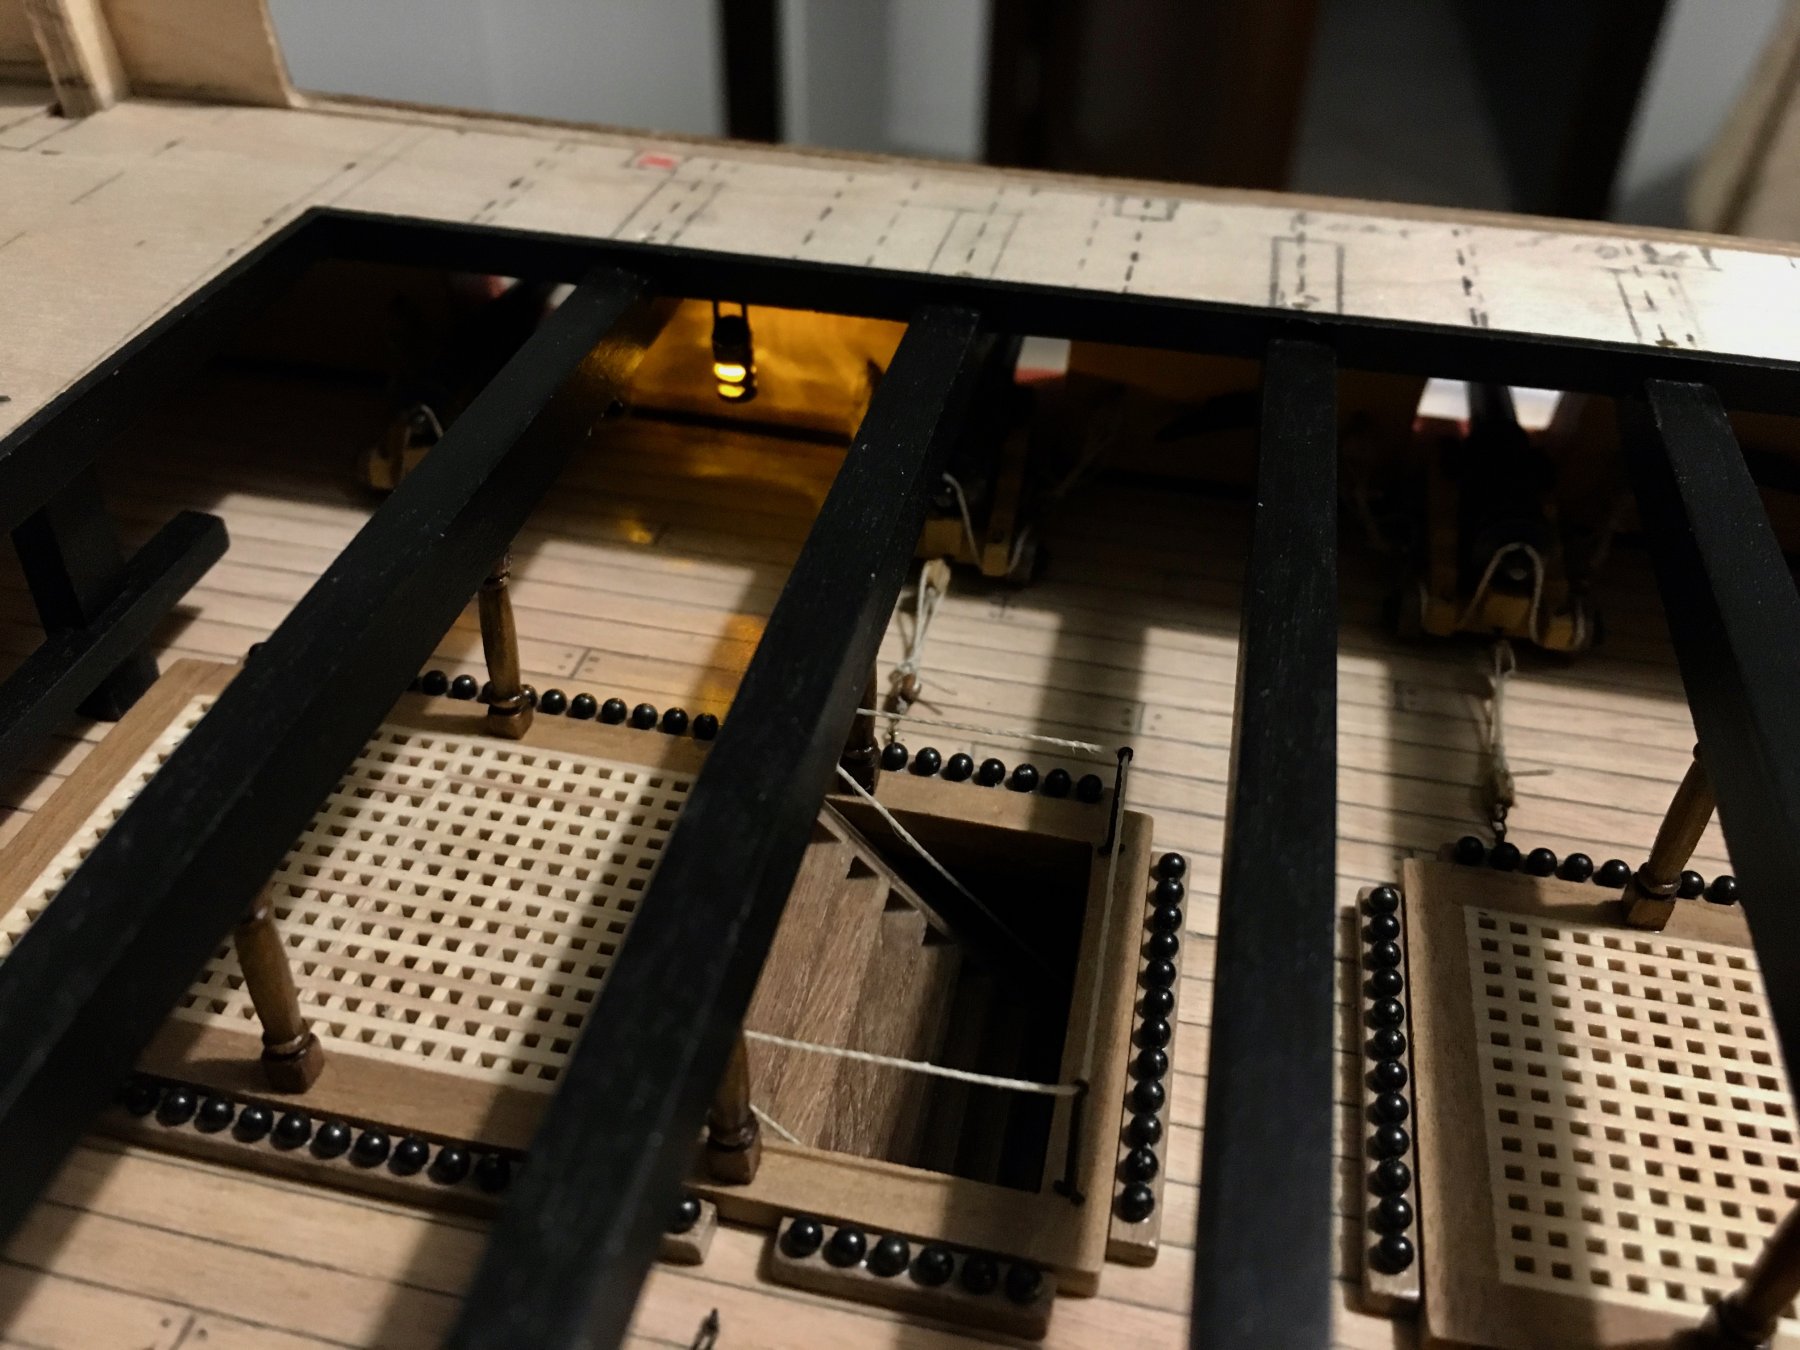
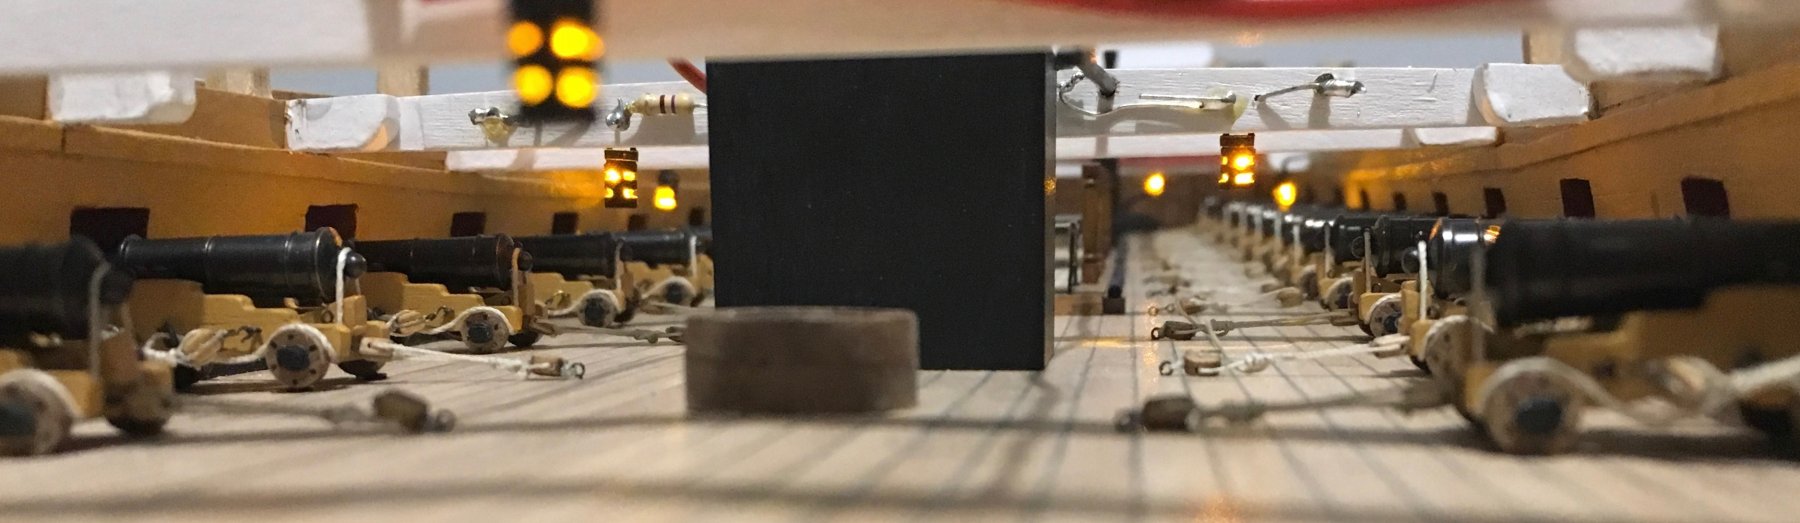
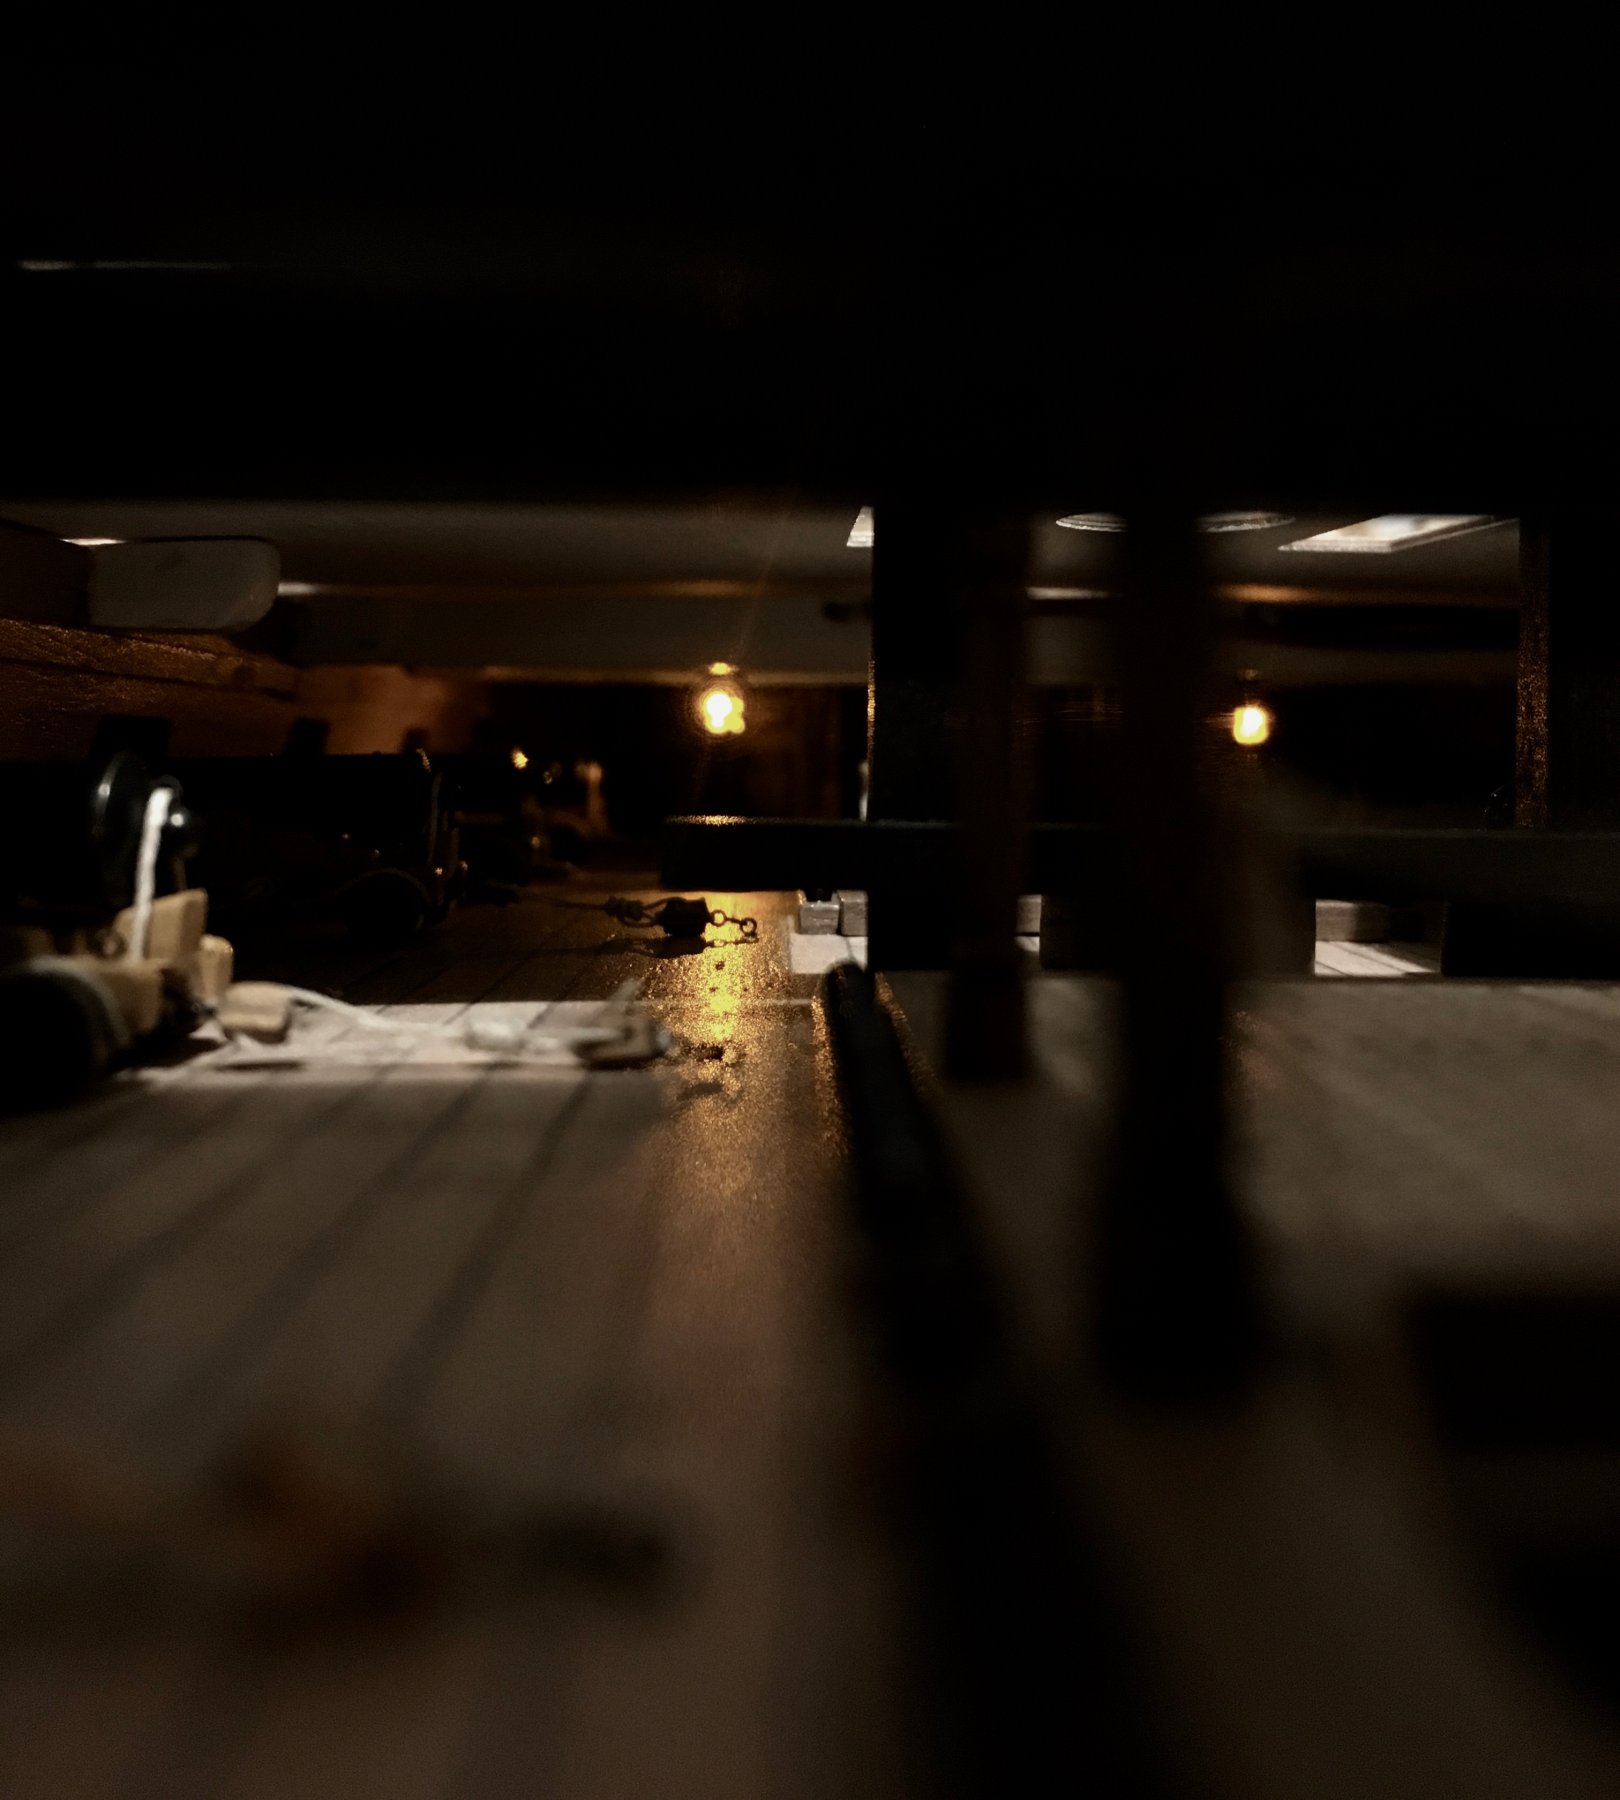
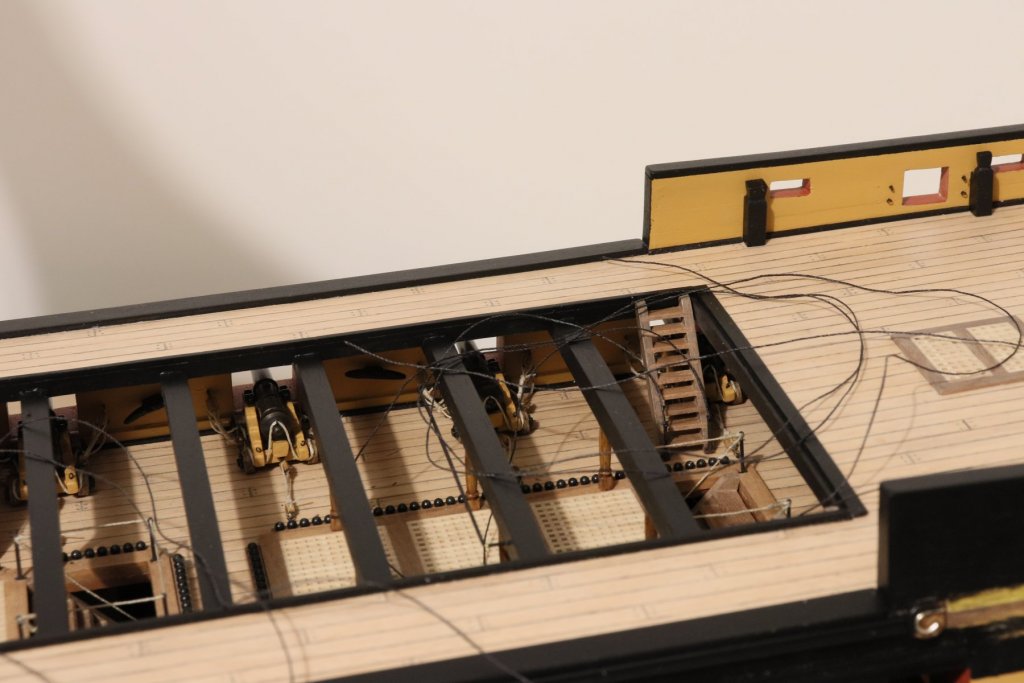
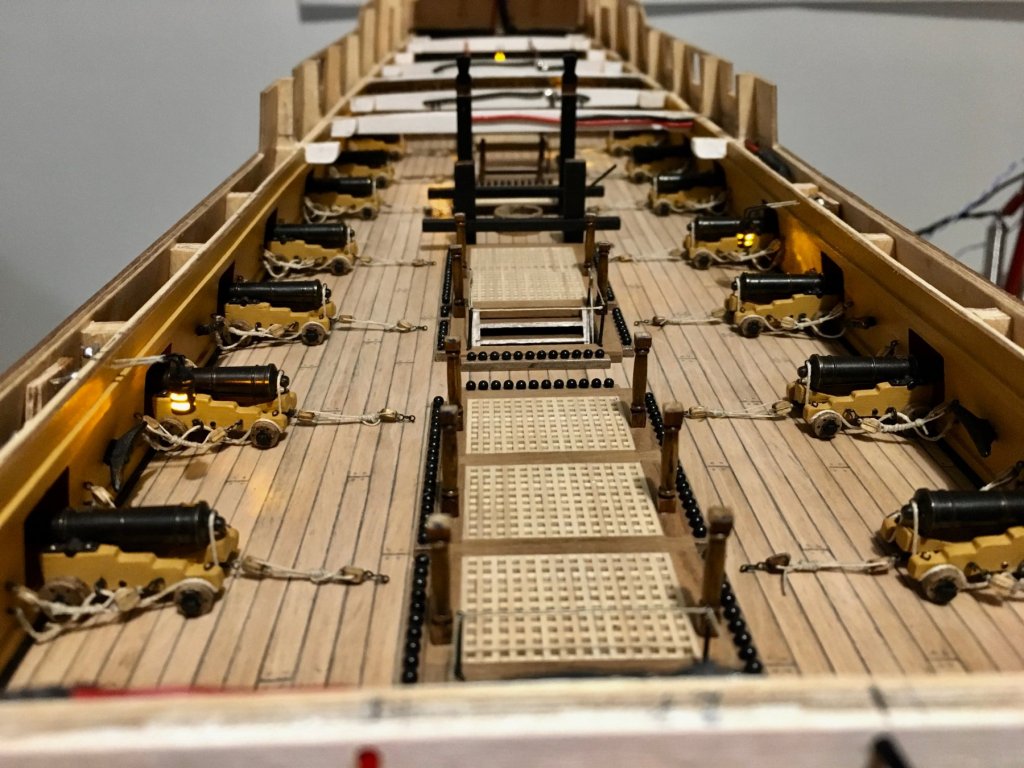
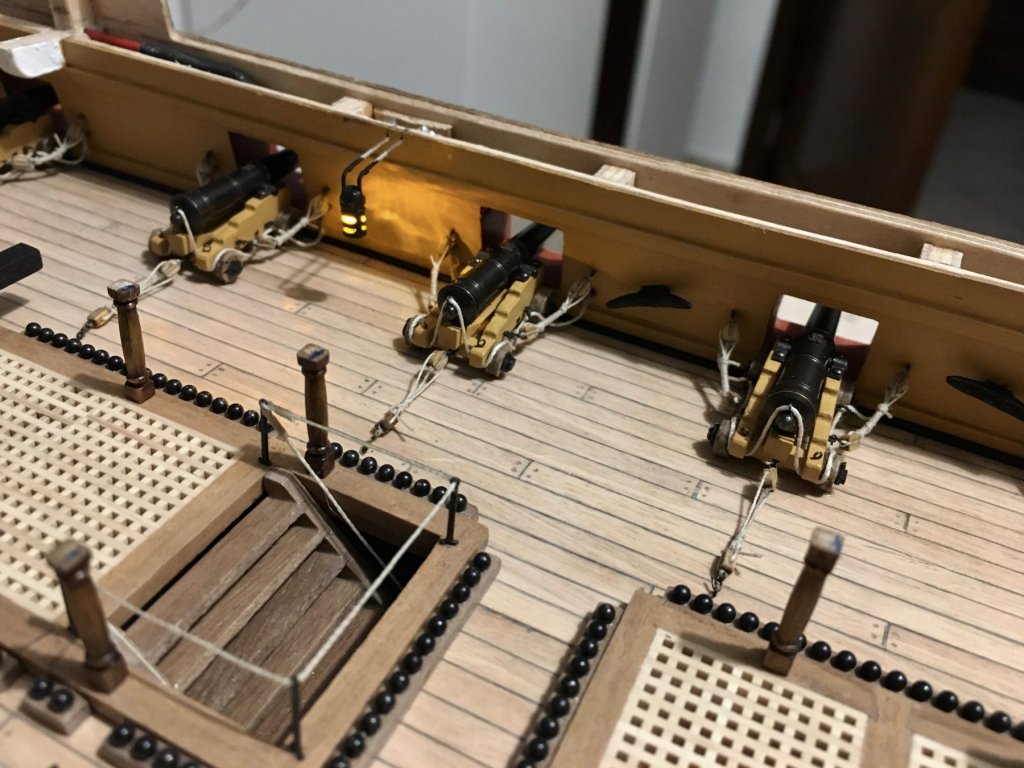
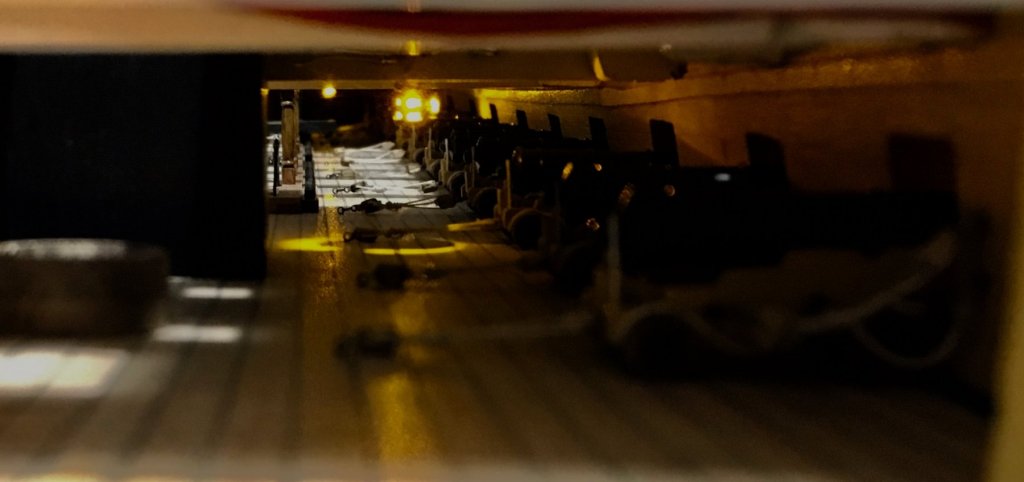
Greetings David and OC, thank you for your nice comments and thank you all for the likes. Finished the upper gun deck lighting and all fittings in place. Beams fitted and lanterns in place all wired up and tested. I will paint all wiring in white to make them less conspicuous. Lanterns fitted on the sides of the skid beams. Lanterns under skid beams with quarter deck dry fitted. Image with lanterns on without quarter deck. Images with quarterdeck dry fitted. It is a pity that a lot of the lighting effect is not easily seen with the quarter deck fitted. Robert


- 527 replies
-
- 13
-
-
- caldercraft
- victory
- (and 1 more)
-
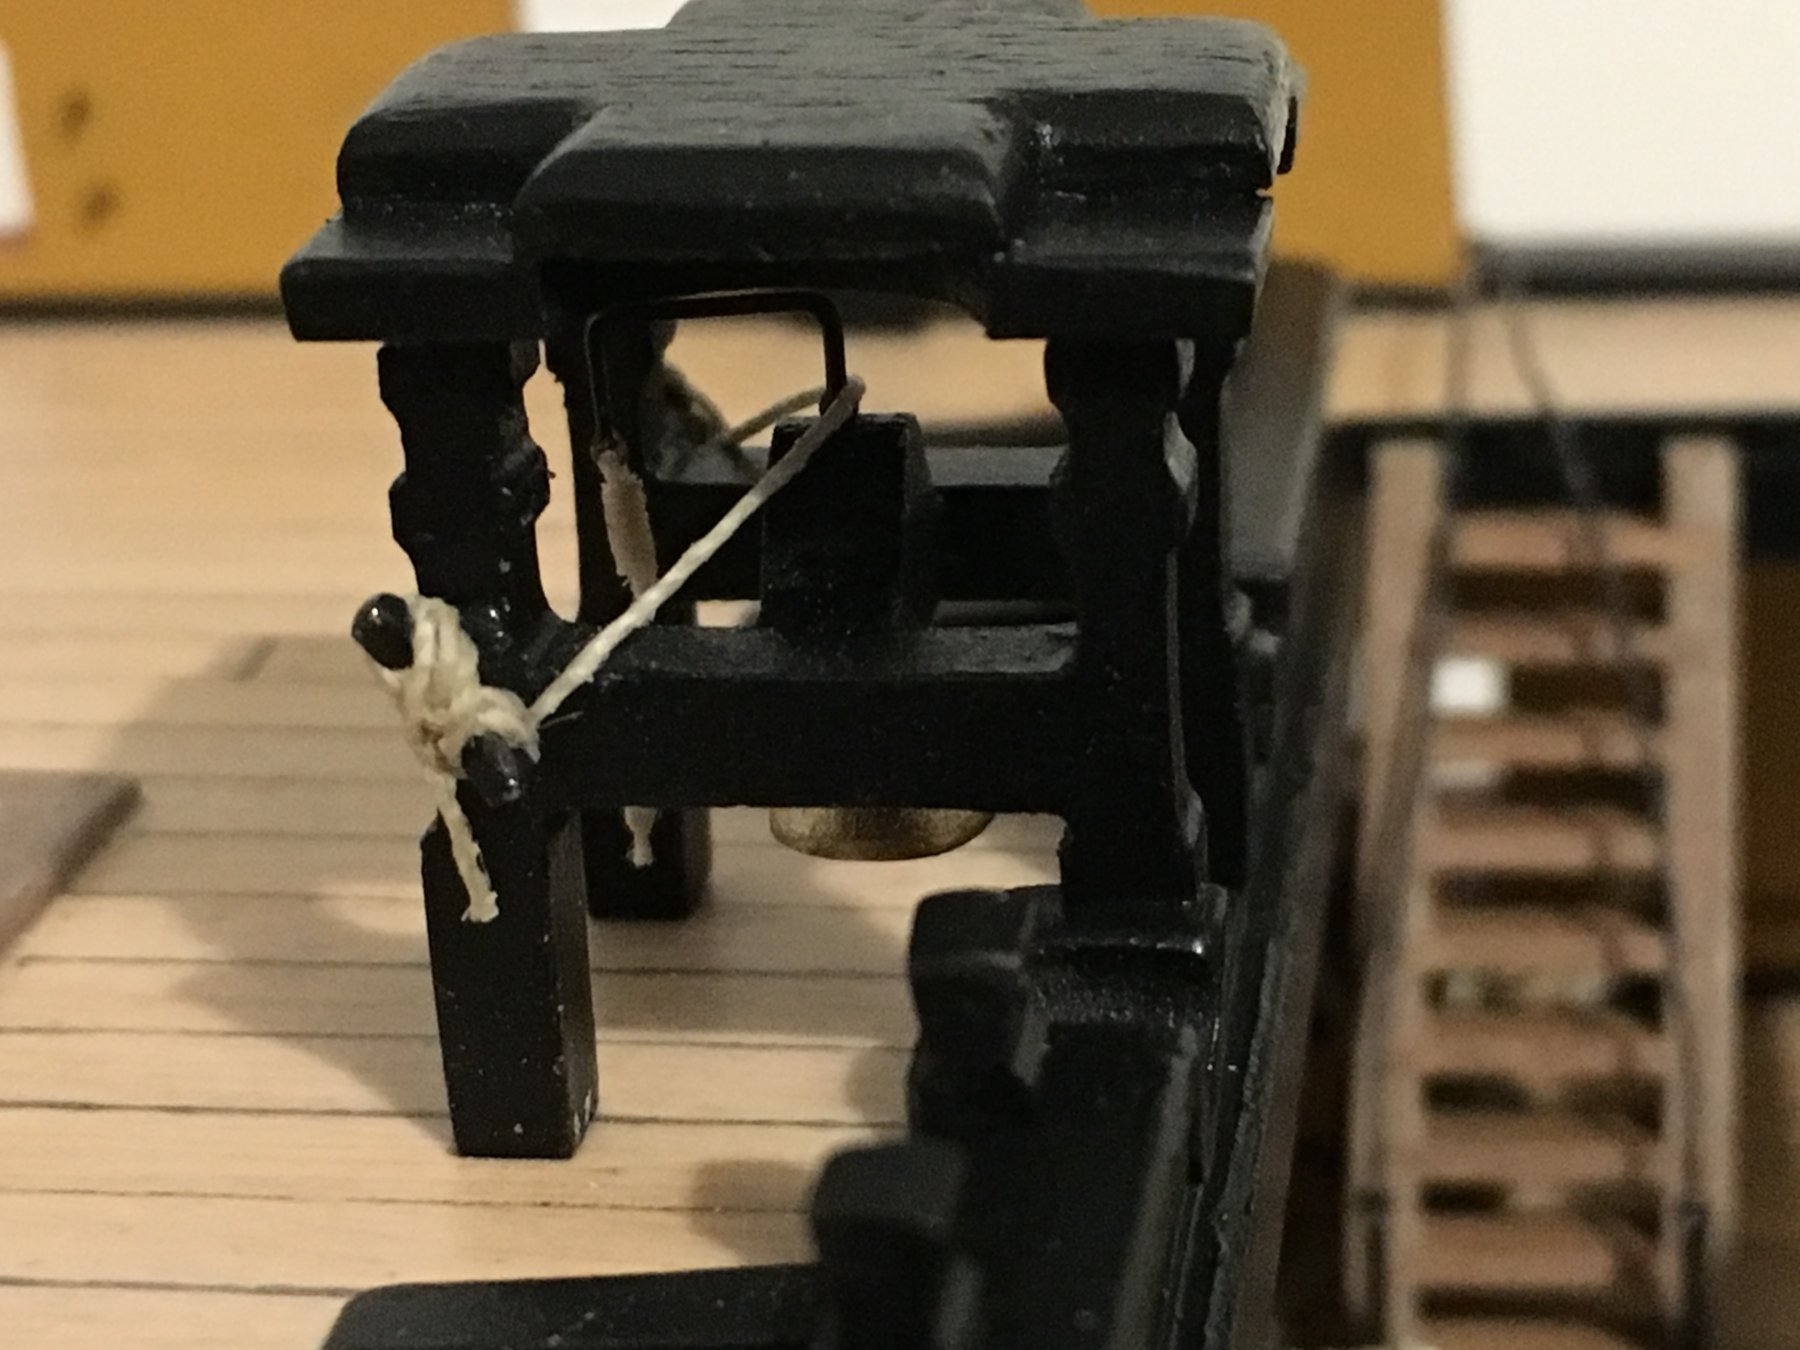
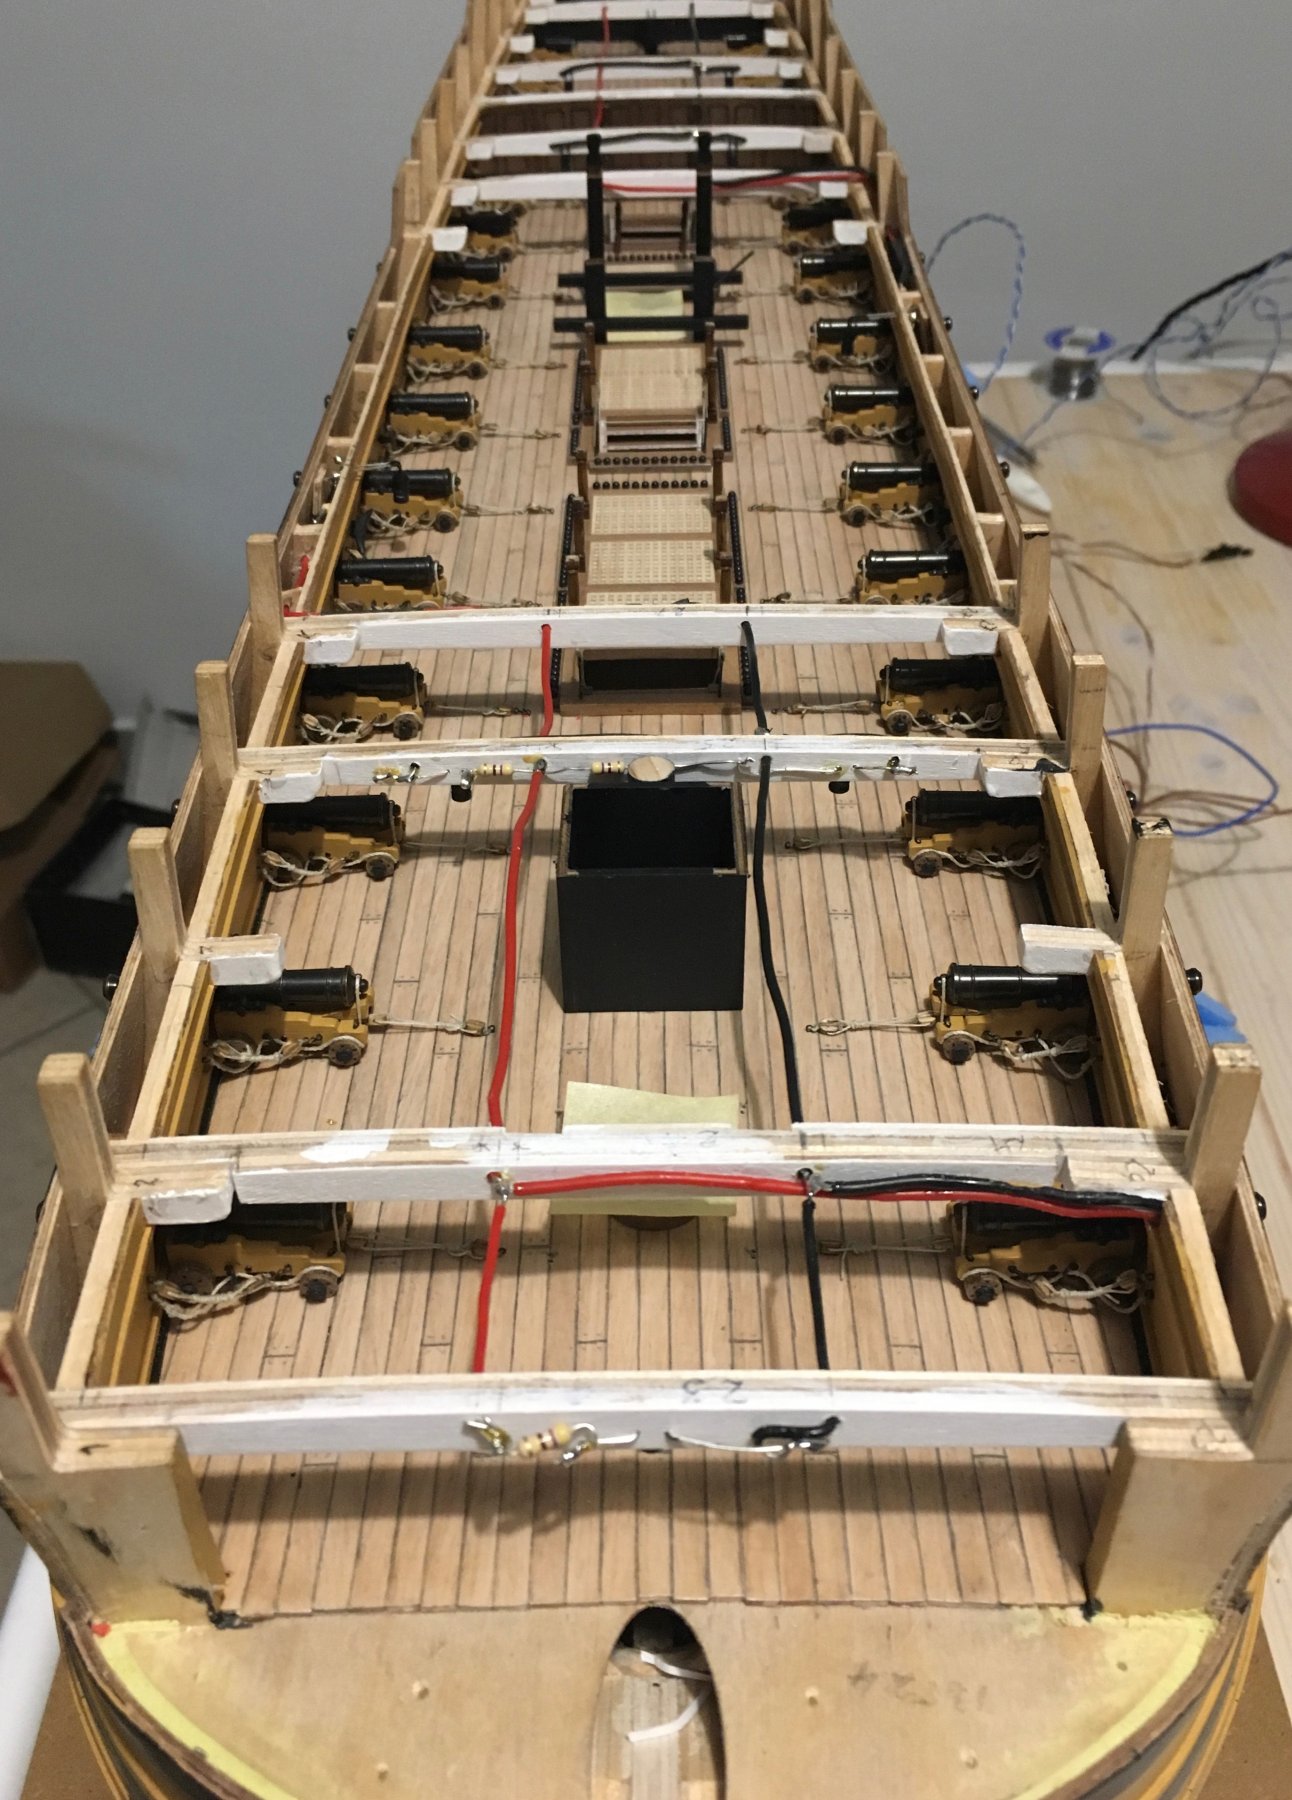
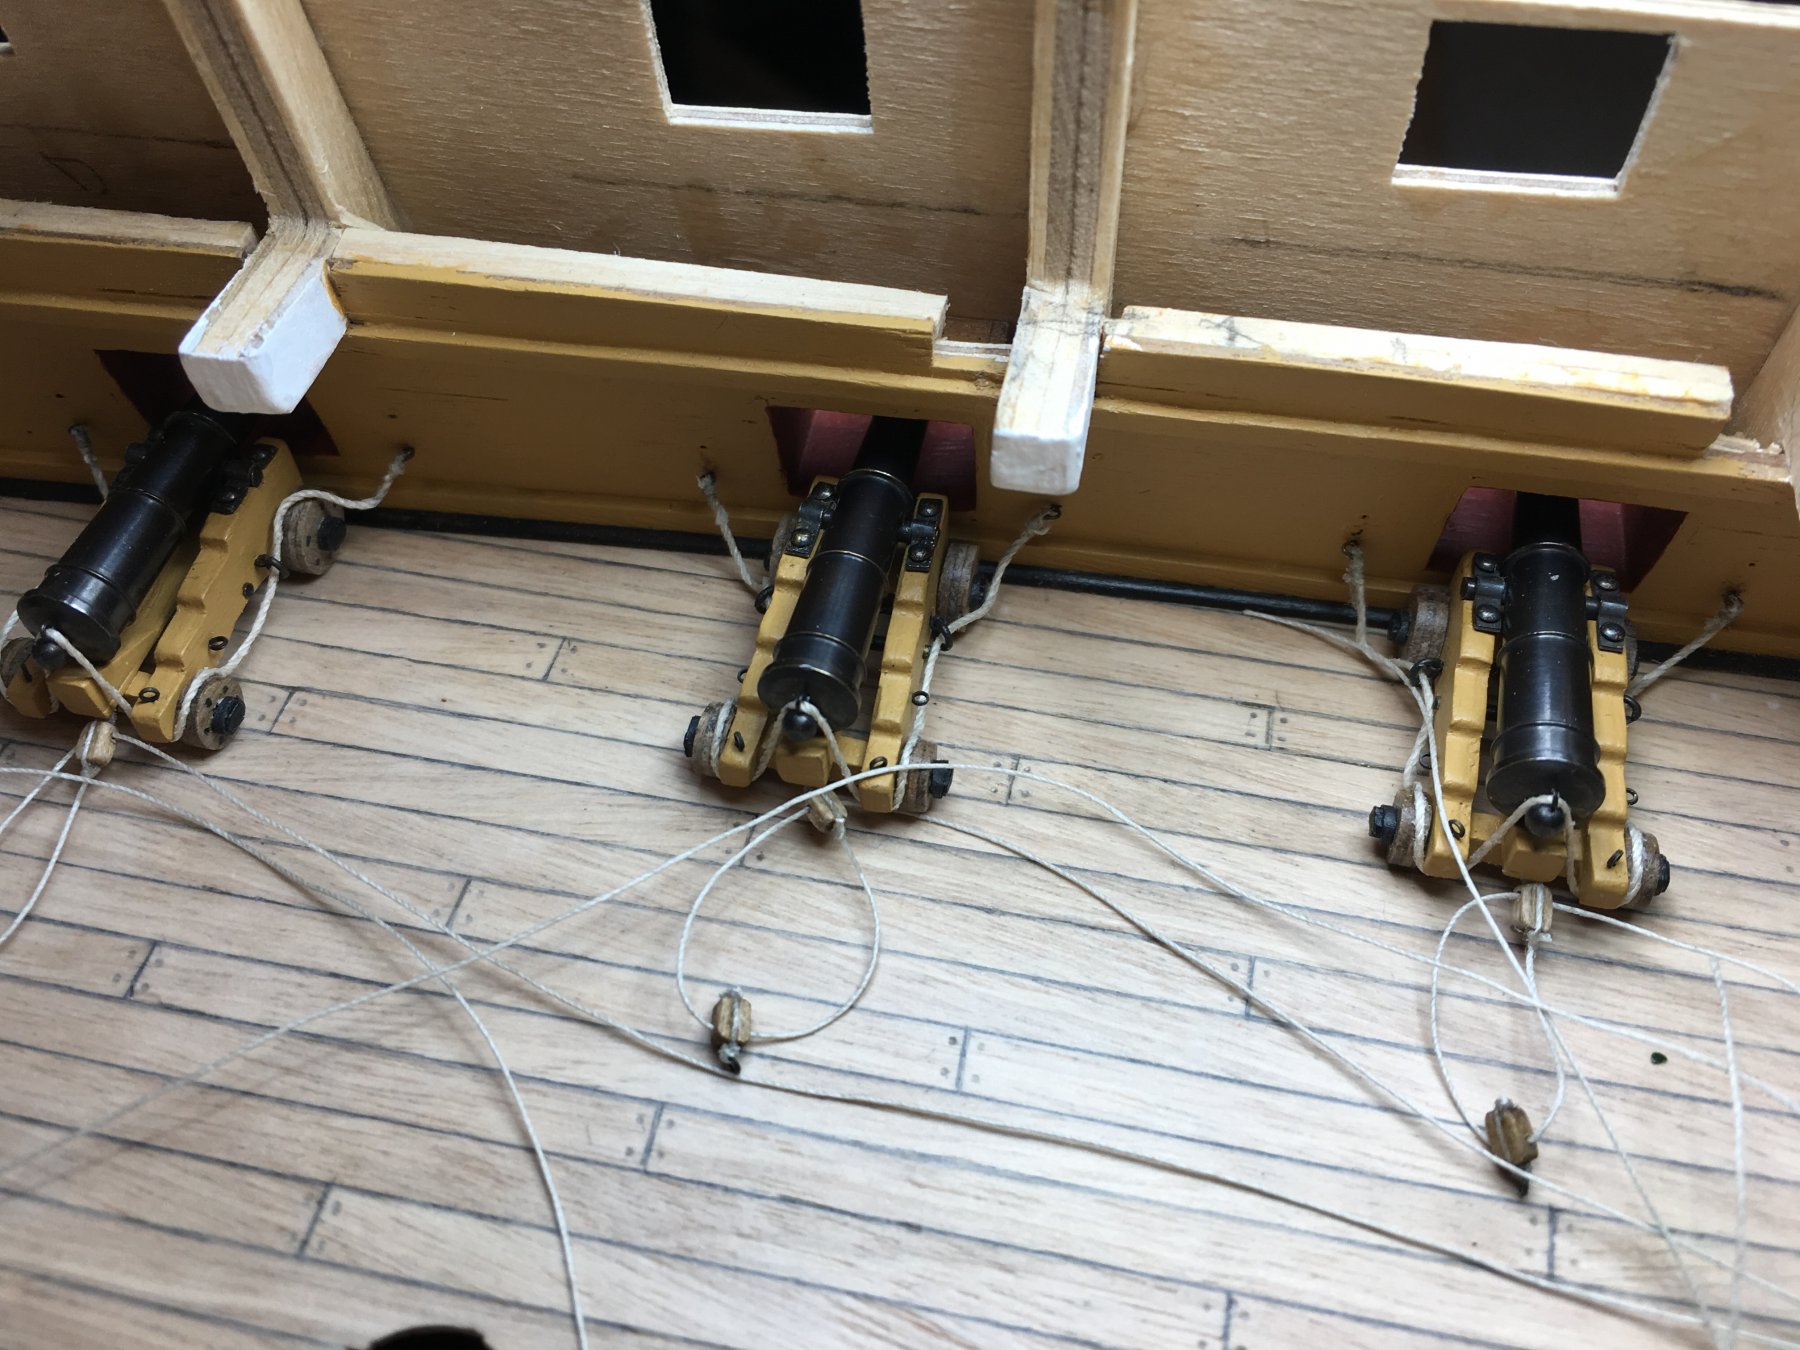
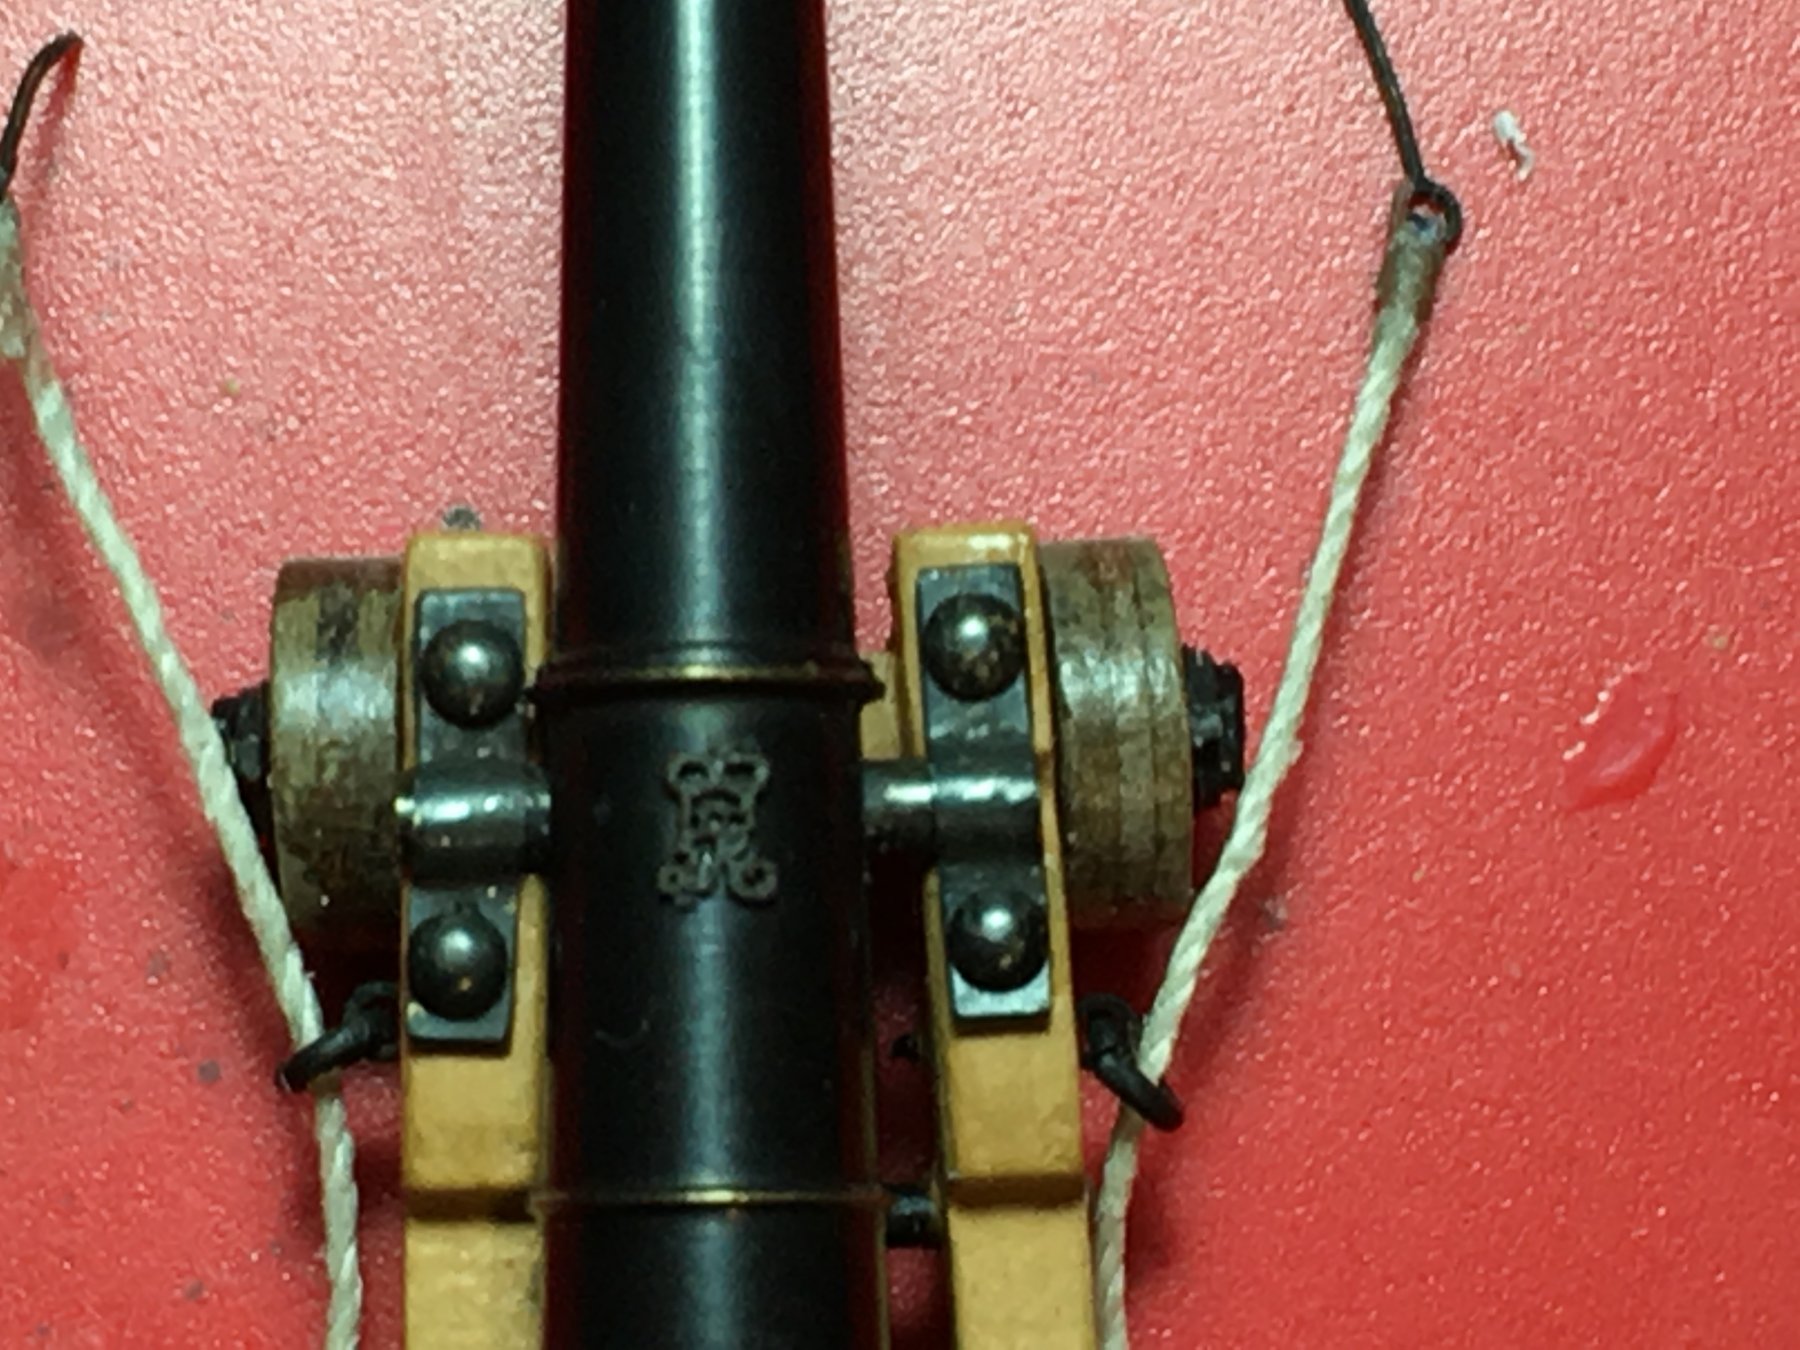
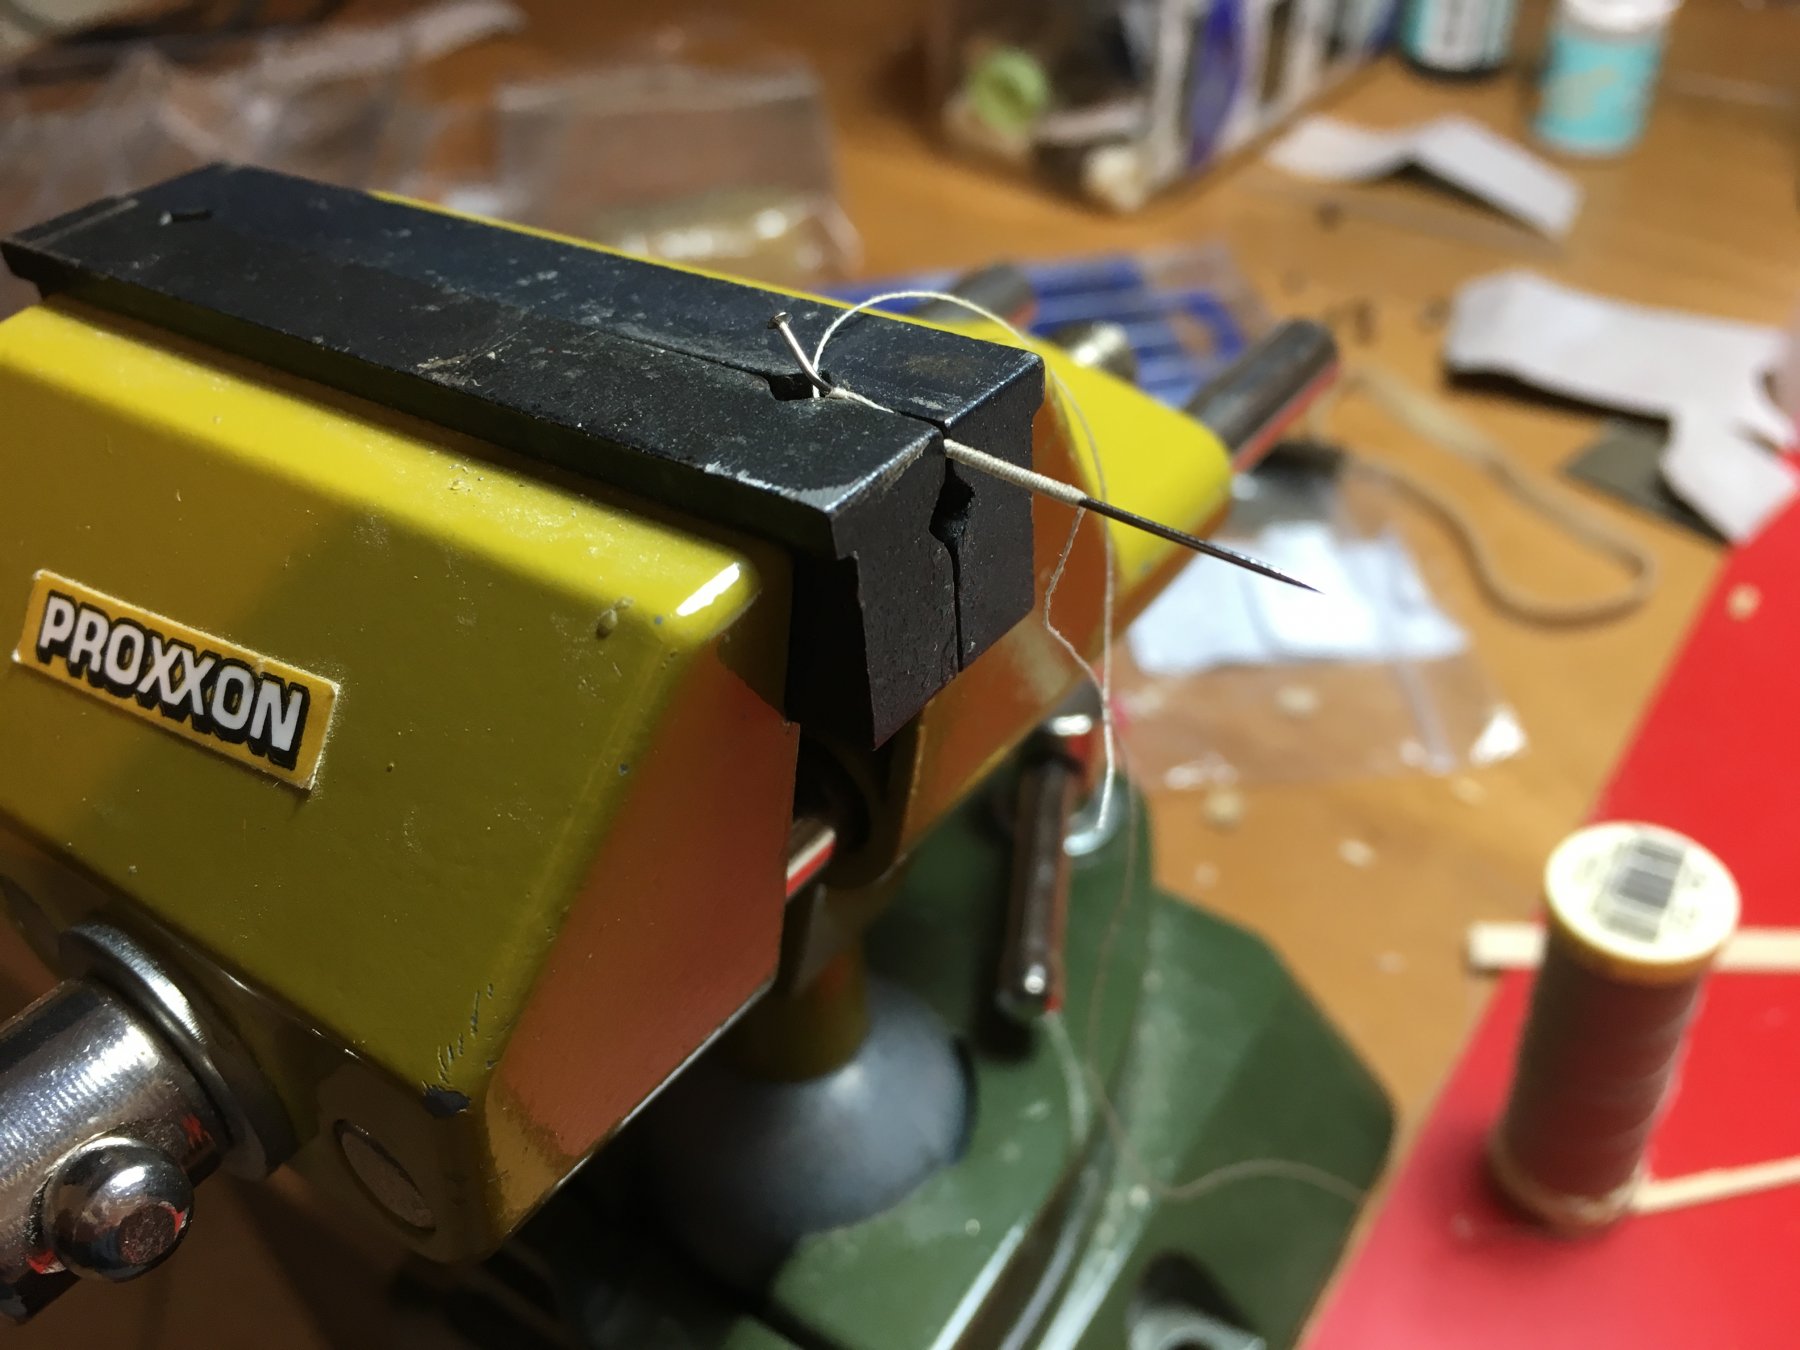
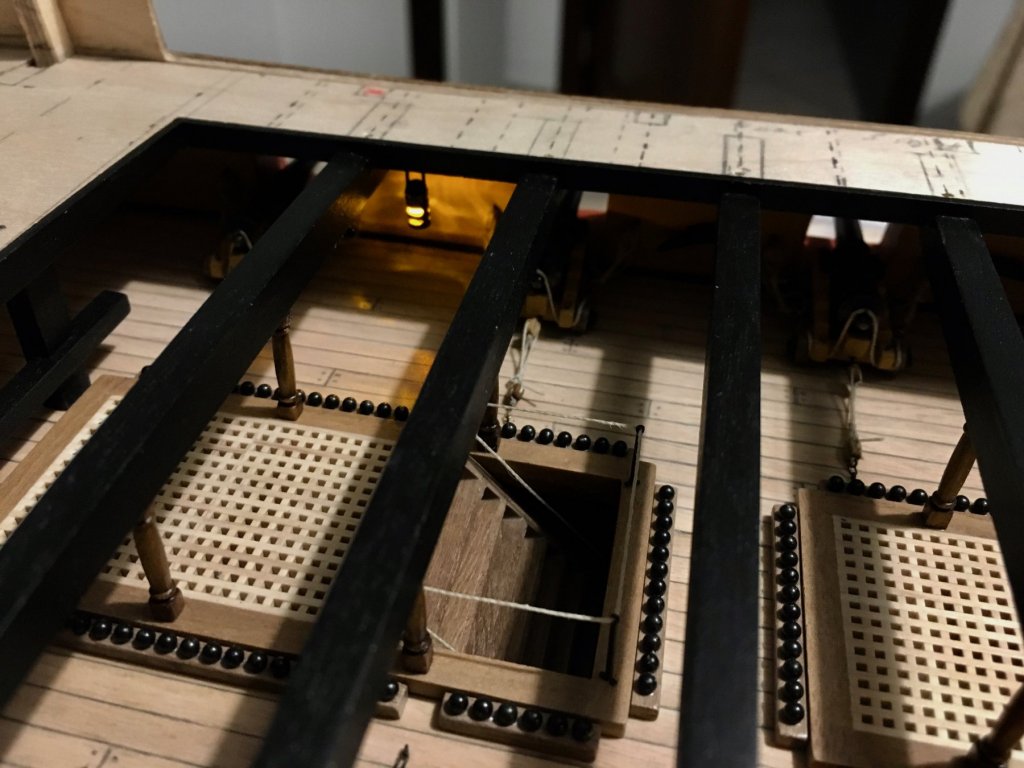
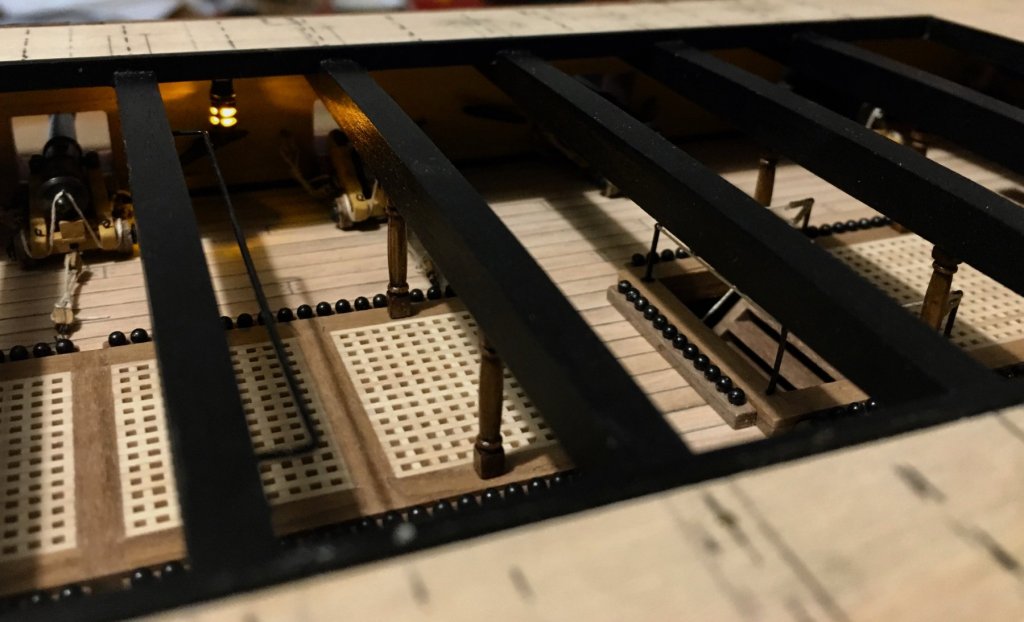
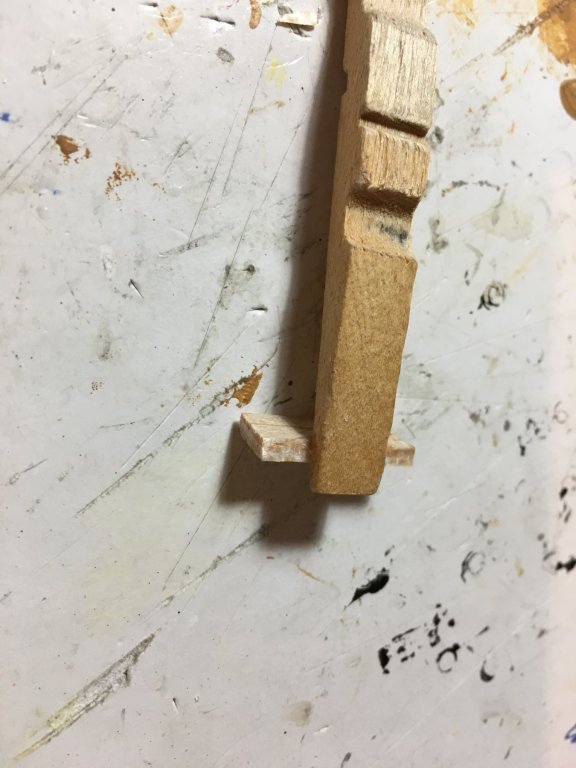
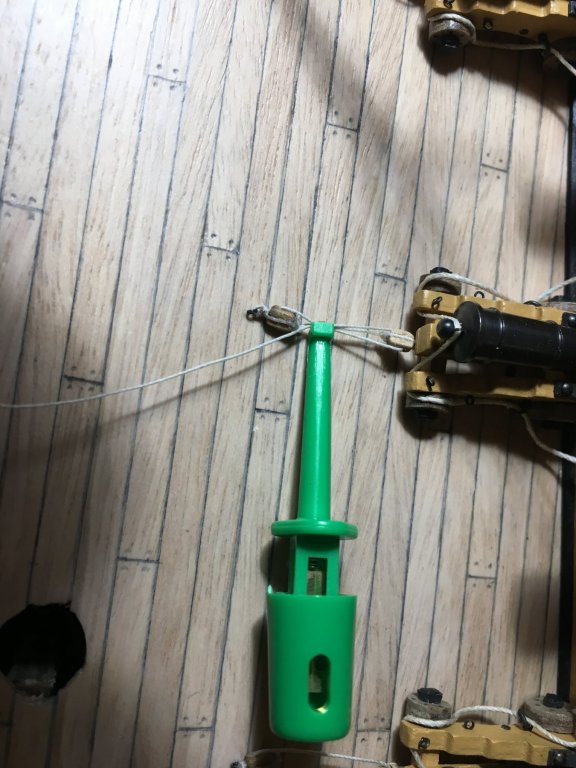
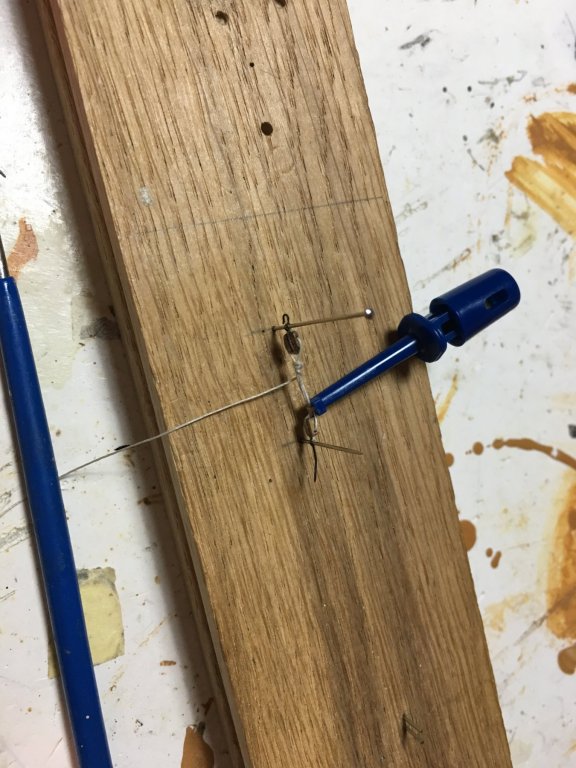
Thank you Wallace, Finally fixing the fittings I have been preparing for the upper gun deck A quick jig to glue the ladders in place Carriages glued in place with breaching rope eyelets fixed to the bulwark. Tackles at the back of the carriages finished with a hook I made from the eyelets (480) supplied with the kit. I added some detail to the cannons that will be showing through skid beam assembly. I bought these monograms from Syren Ship Model Company. Carriages all glued in place. Finishing the tackles at the back of the cannons. I found these wire holders really useful to hold the ropes in place while knotting them. Making the side tackles Squaring the ends of the pillars. A piece of grooved scrap wood became very handy. Companionway guard rails in place. I finished the ends of the rails to the truncheons by seizing imitation. Thread wound round a needlepoint, covered with CA glue, pulled out of needle and cut to small pieces. Rail end passed first through one of them, through truncheon and back through seizing imitation. Fittings on Upper gun deck in place. Pillars are already trimmed to the right height and glued in place, only the Bitt Pins are dry fitted. Next step is to fit the beams and wire in the lanterns I have already prepared for the upper gun deck before I glue in the quarter deck. Robert


- 527 replies
-
- 12
-
-
- caldercraft
- victory
- (and 1 more)
-
Beautiful work Messis, great detail, congratulations. The video is fantastic as well. Robert
-
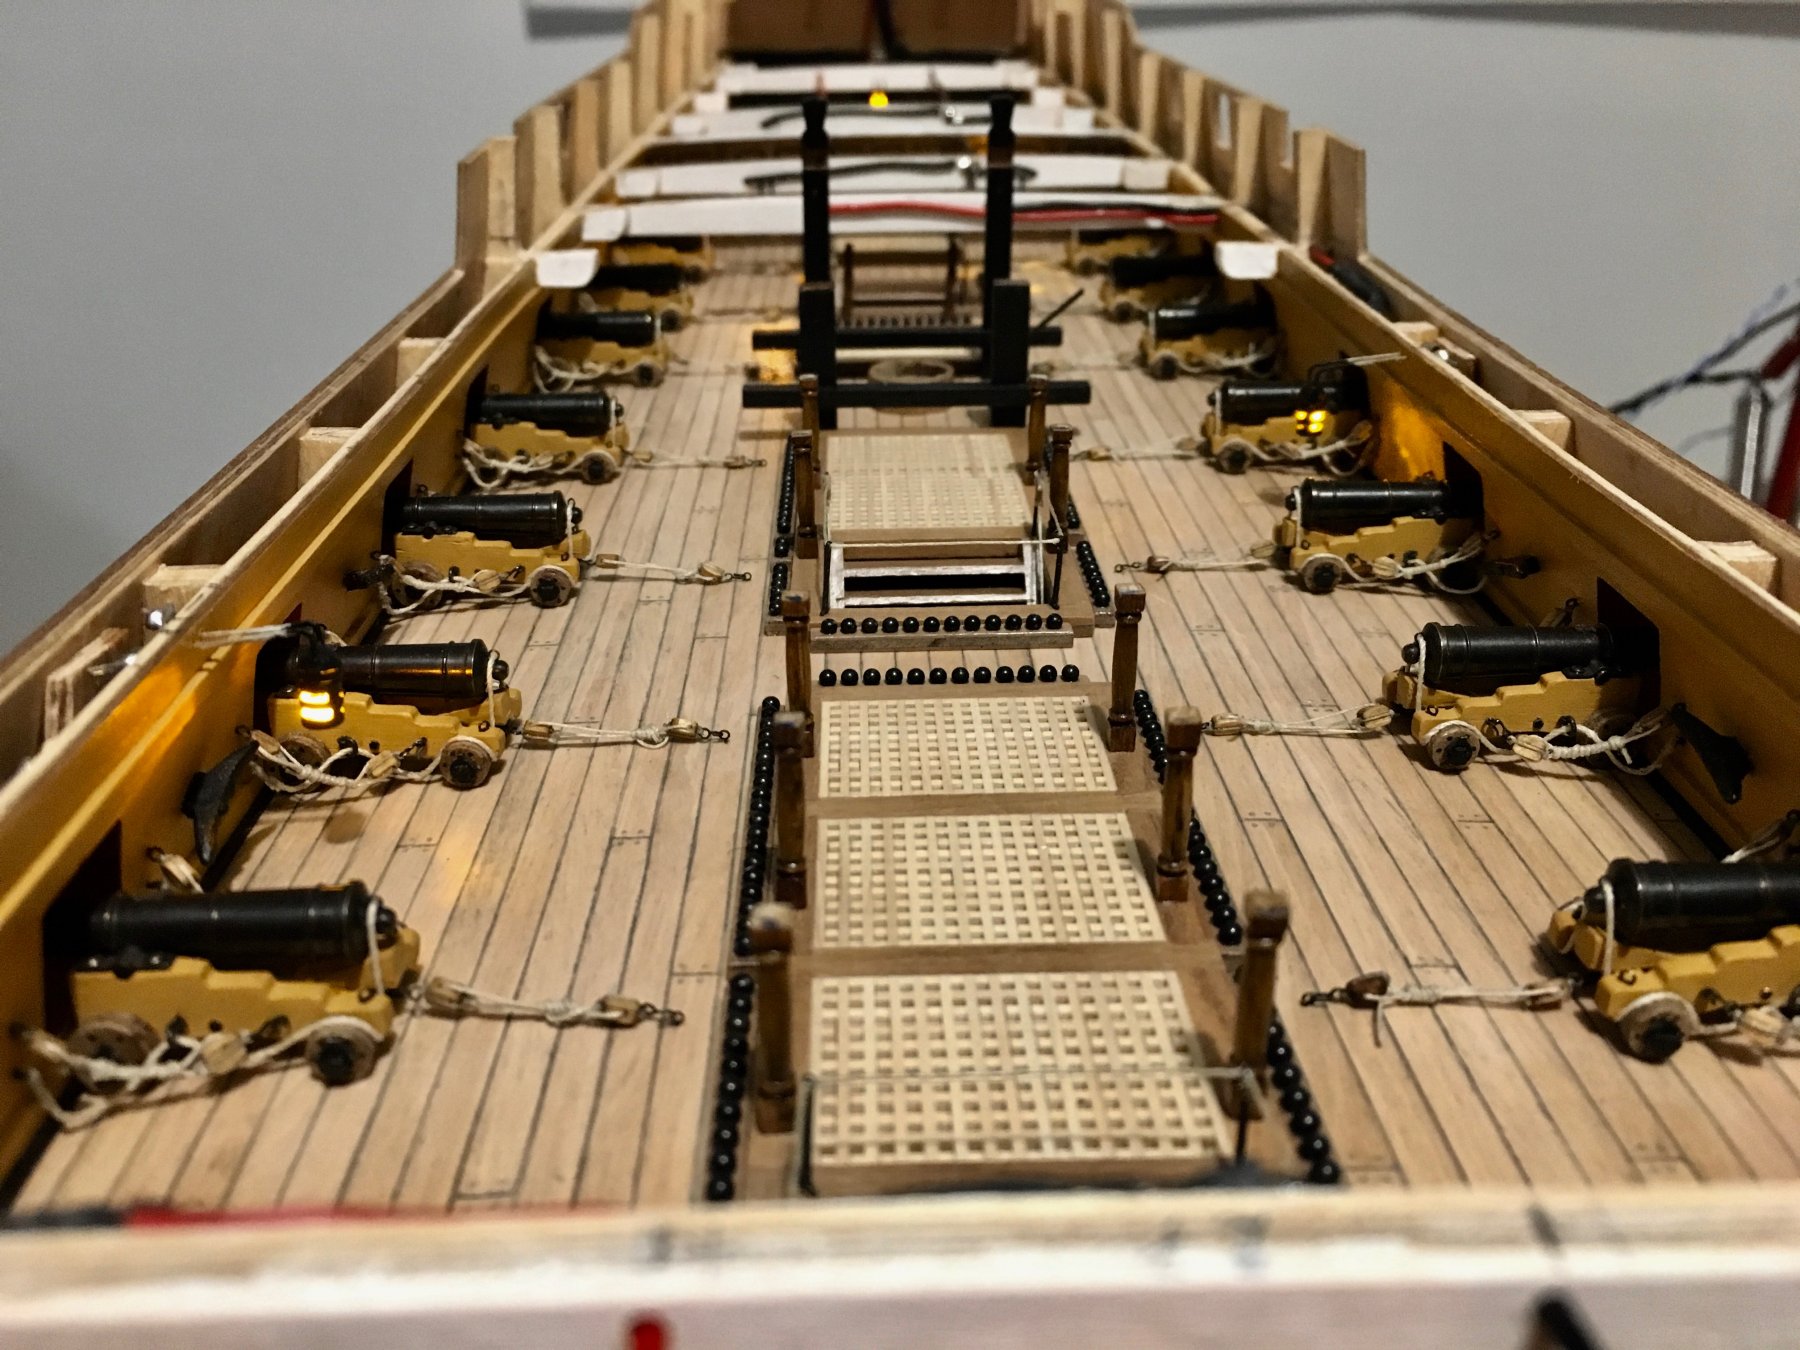
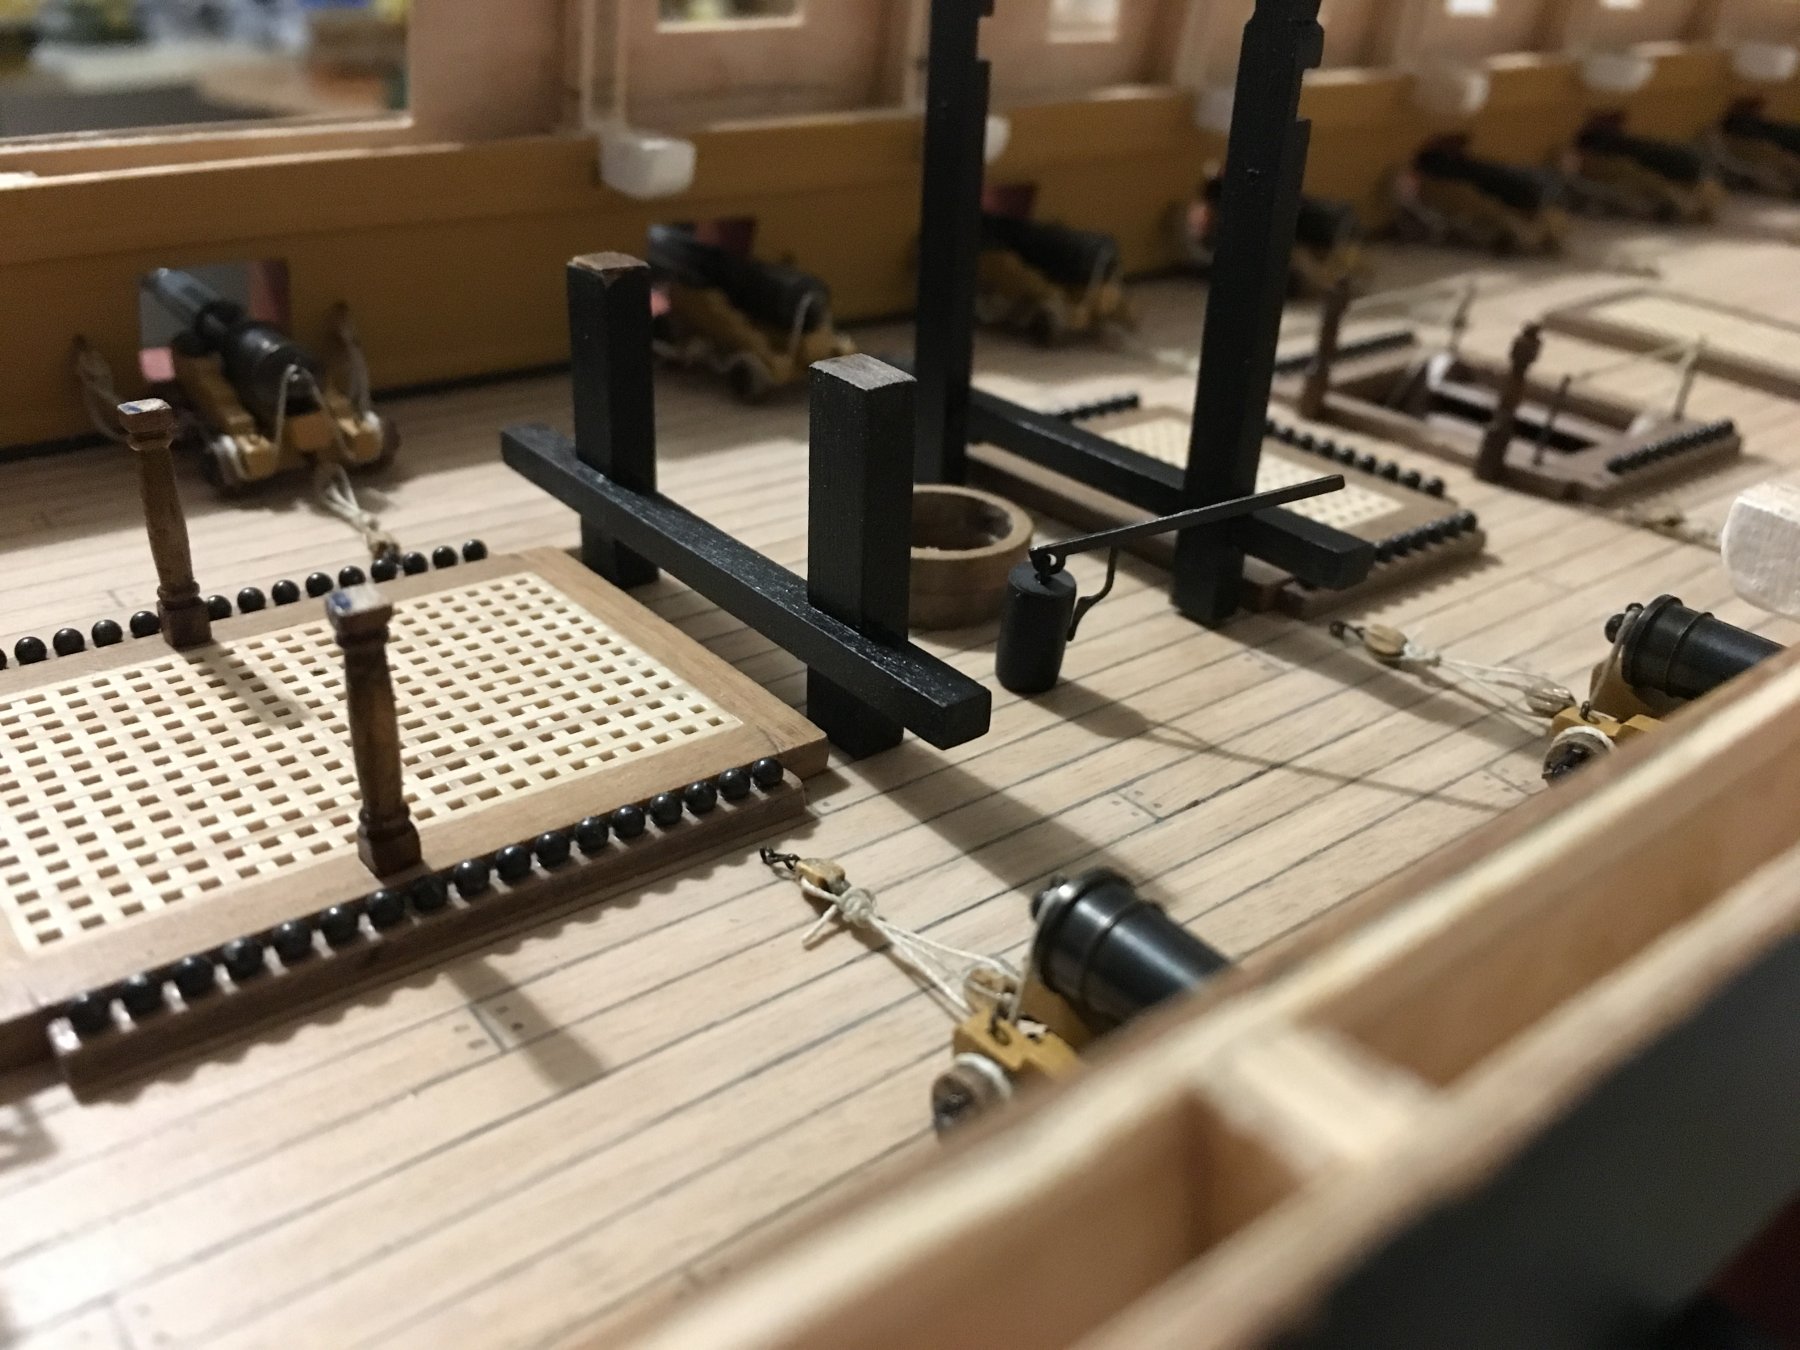
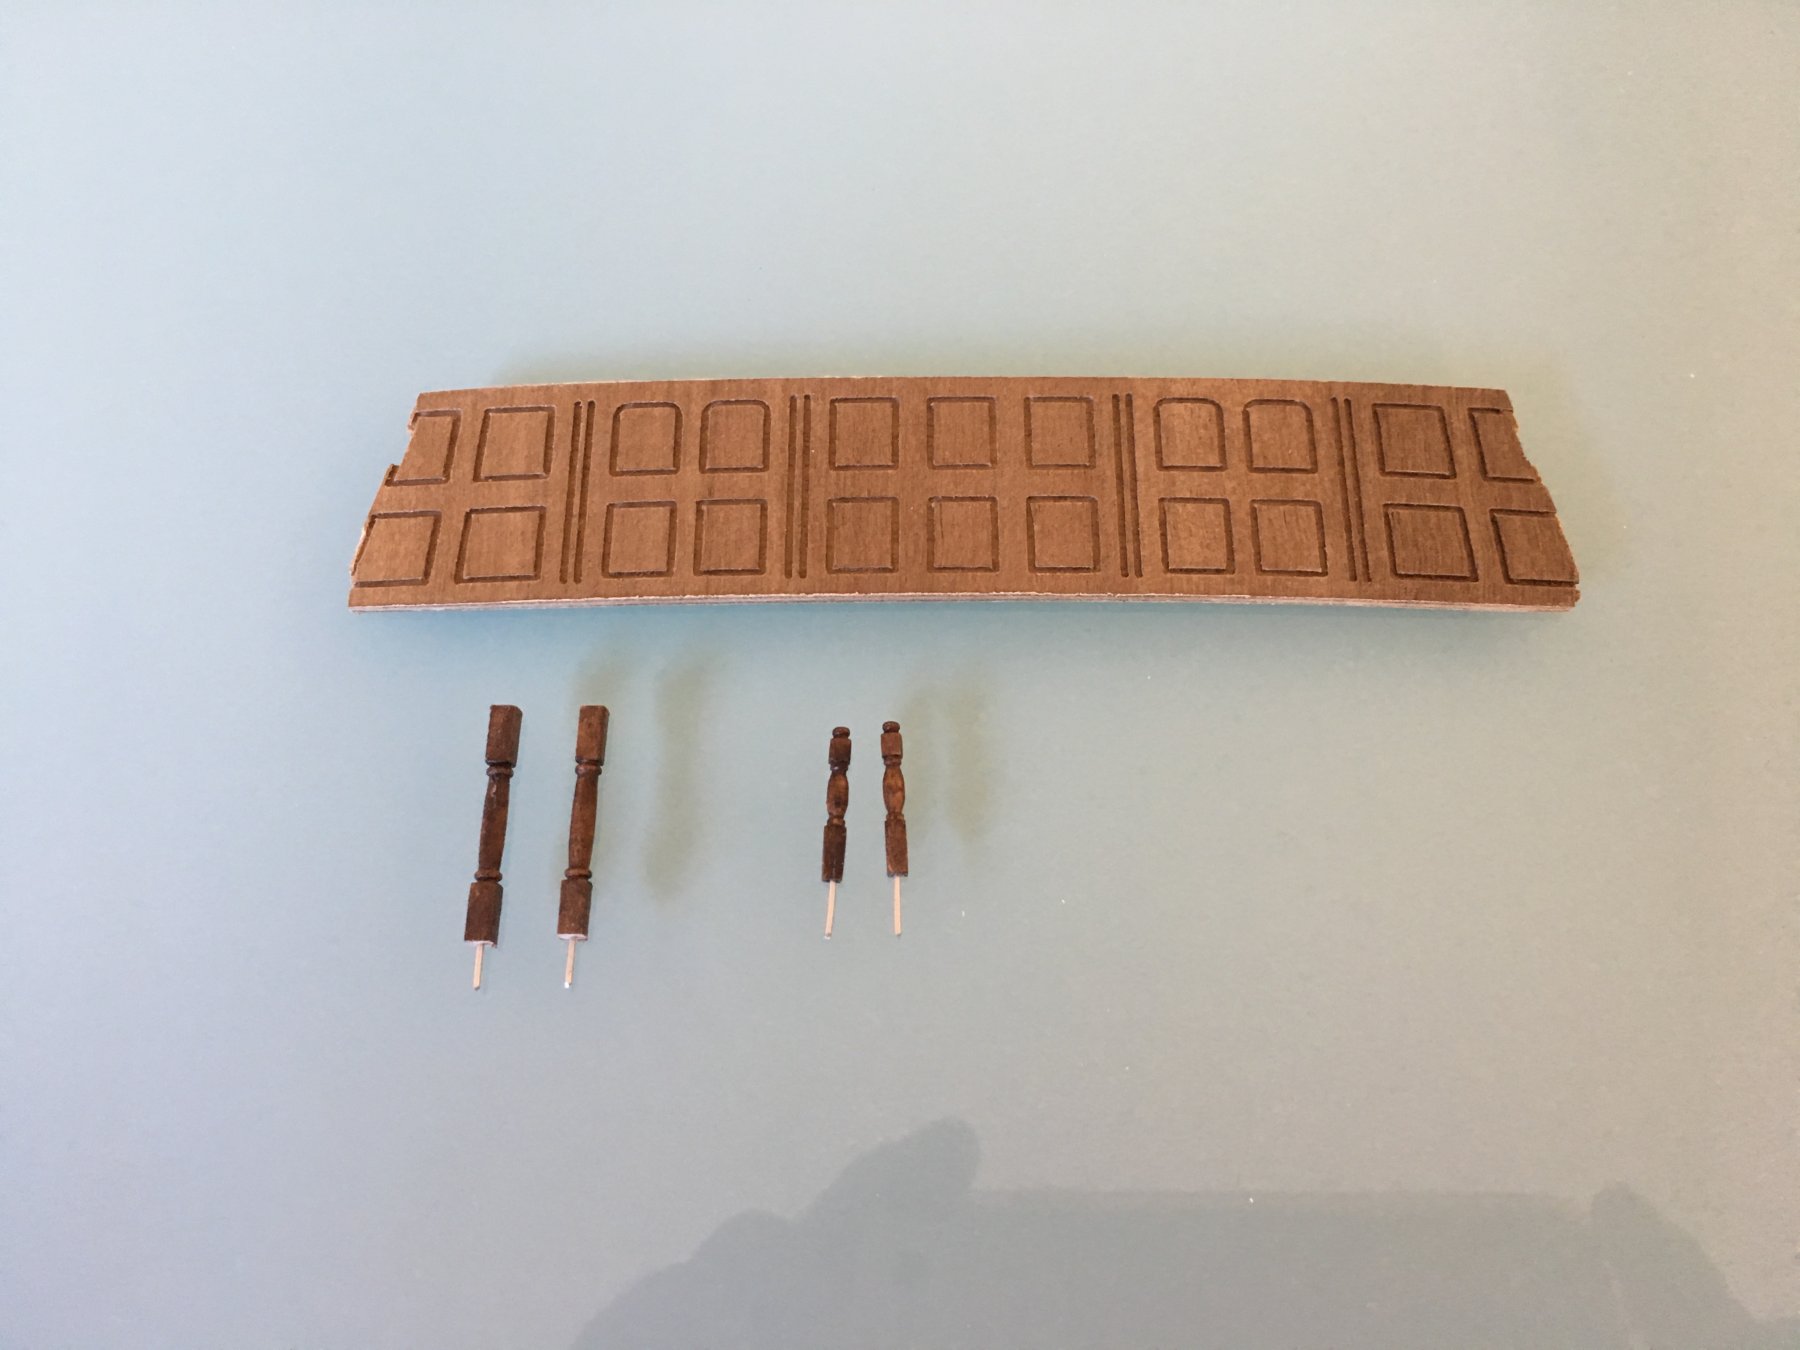
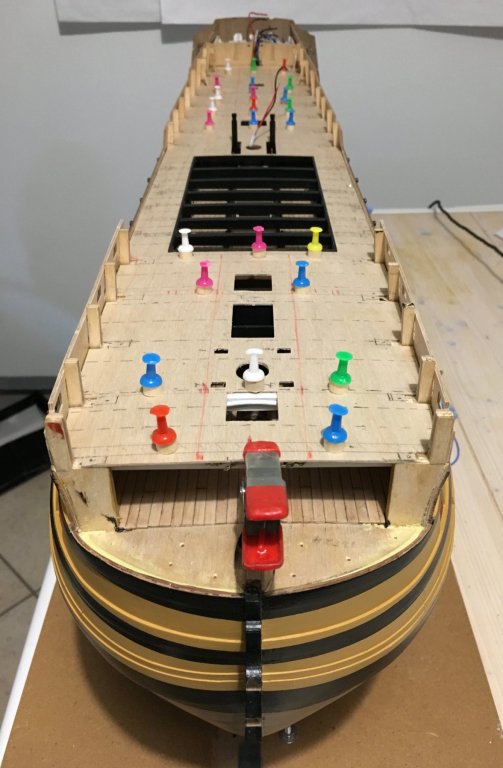
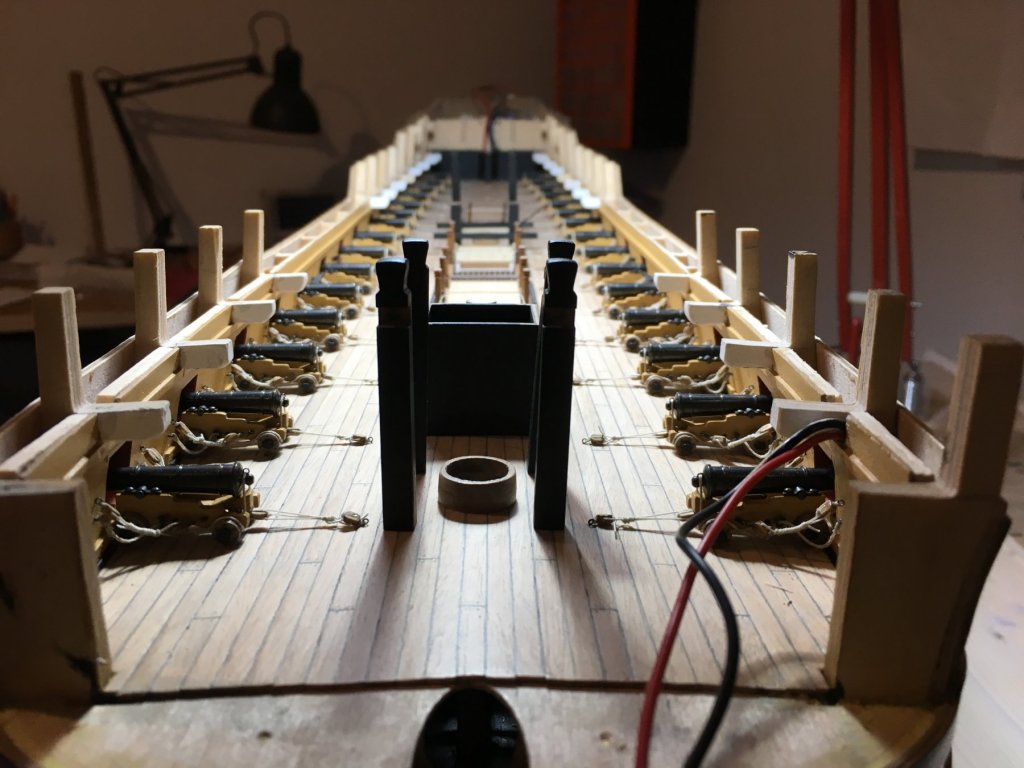
More work on the upper gun deck. Fitted gratings and ladders in place. My idea is to prepare as much as possible work that has to be done on the upper gun deck before I start installing the cannon carriages with their rigging in place to avoid as much as possible handling on deck after cannons are in place. At the same time I want to avoid installing the fixings on the upper deck to have more elbow space to fit the carriages and rig them in place. Skid Beam Assembly and Bitt Pins ready and checked they fit well on upper gun deck with quarter deck (446) in place. Upper gun deck screen bulkhead trimmed and ready to be fitted. Balusters for stairs and part of the pillars prepared as well. This is how the lanterns are to be fitted. Wiring will be done when everything is in place just before I install the quarterdeck. Robert


- 527 replies
-
- 5
-
-

-
- caldercraft
- victory
- (and 1 more)
-
Thank you all for the likes and comments. They are much appreciated as they encourage me to keep me going especially when I encounter certain problems on how to proceed. That is the beautiful thing of being in a forum, when you are stuck you can search on other builds, ask, and get new ideas from other builders. Its also nice to share your ideas with others. James - True having so much cannons sometimes it tends to get monotonous, but in the end you will be glad to take the time to finish them to your best abilities. When you take short cuts you are always disappointed later on. Thank you for your nice comments. Michael - Not always the best, but I try my best. You yourself are doing a very good job on your Victory build. Kevin - Thank you, I follow your build with interest. Very nice work. Ronald - When I started on the cannons I was quite confused on how to do the rigging. In the kit instruction manual there aren't much details on how to do them. It gives you the position of the eyelets on the bulwark and there is an image of a completed cannon which is not so clear, on other build you find different ways how they went about it. To be honest I did not take the details from just one source, I sourced images of the HMS Victory cannons on the internet, Richdsjjs had also posted some diagrams on my log, and sort of tried to do the best I could from what I gathered. I can point out some points how I went about it. The kit does not mention anything on the ring at the back of the cannon for the breaching rope. I decided to add this detail, and found some good ideas from other builders on this forum. I also added the side rings for the breaching rope which I noticed in actual images on the internet and also noticed that some builders added them as well. They are a nice detail. For the tackles the instruction manual tells you to use two single blocks. In reality it is one single block and one double block. Also there is a ring attached to the eyelet on the bulkhead and the tackle is hooked to this ring. I tried to make it likewise but the problem was that by using a double block, which is larger, the ring and a hook, the two blocks at each end of the tackle were going to be too much near each other, hardly any space between them. In my opinion it did not look good and most of the details against the bulwark will be lost anyway once the quarterdeck is installed. I decided to just add a hook on the side of the tackle that hooks to the eyelet on the side of the carriage. On a large scale it would not be a problem to add all this detail, but on a small scale it is a bit difficult and of course it also depends on the ability of the builder. Other builders might not find it a problem to add more details. As for the tackle behind the cannon I still have to decide as again it depends on what space I am going to remain with between the two block. In my opinion sometimes it is better to omit some details then try to cram them all in a very small space and don't look good at all. I have noticed that some builders omitted the tackles completely except for the once directly under the quarterdeck opening, which I understand as it is true that you are hardly going to see anything once the quarter deck is fitted, and it is quite a lot of work. But since I am having lights in there I thought I better make them to make sure that if anything shows through the cannon ports it will look better. I might have done them for nothing, only time will tell. Ronald, when you come to them if you want details that I can help you with feel free to ask. Wallace - Thank you for your nice comment. Unfortunately at the moment I do not have any updates as I had to slowdown on the build because of some work I have to finish, but hopefully I will soon have hands on deck again and be able to post an update. Robert
- 527 replies
-
- 1
-
-
- caldercraft
- victory
- (and 1 more)
-
Really nice detailed work Dave, just had a quick look into your log and I will definitely keep visiting again into more detail. Although I am building a different ship, the HMS Victory, I find your log very informative and can steal some of your ideas for my build. Thanks for sharing your impressive work with very good images. Robert
-
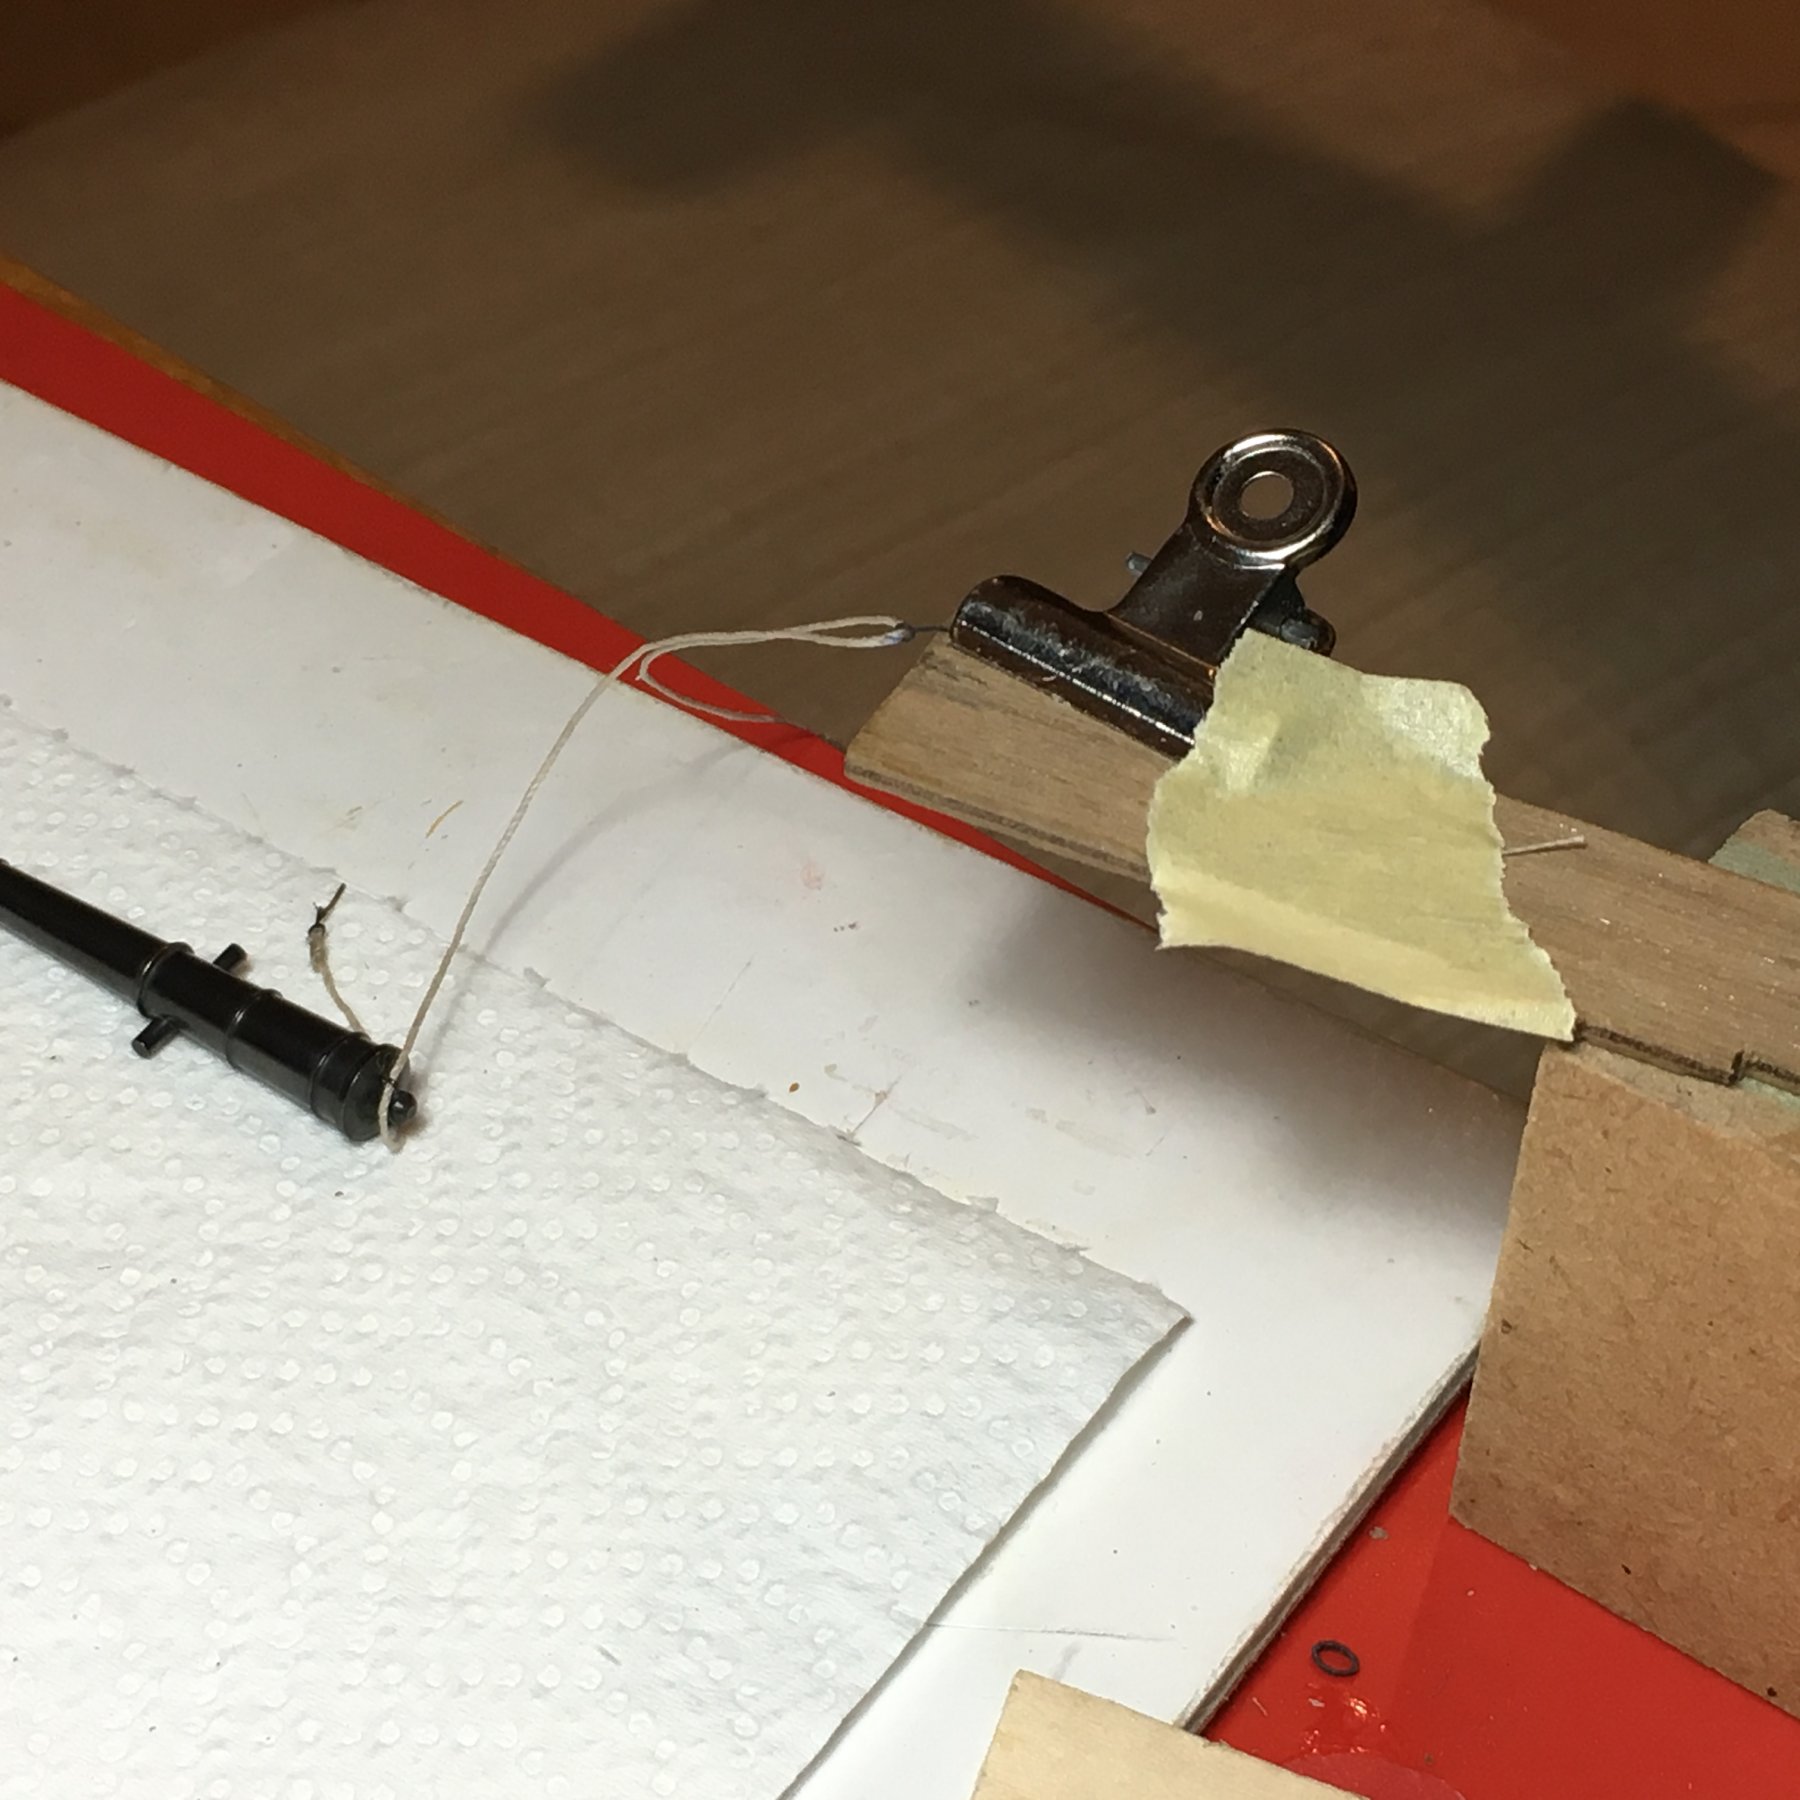
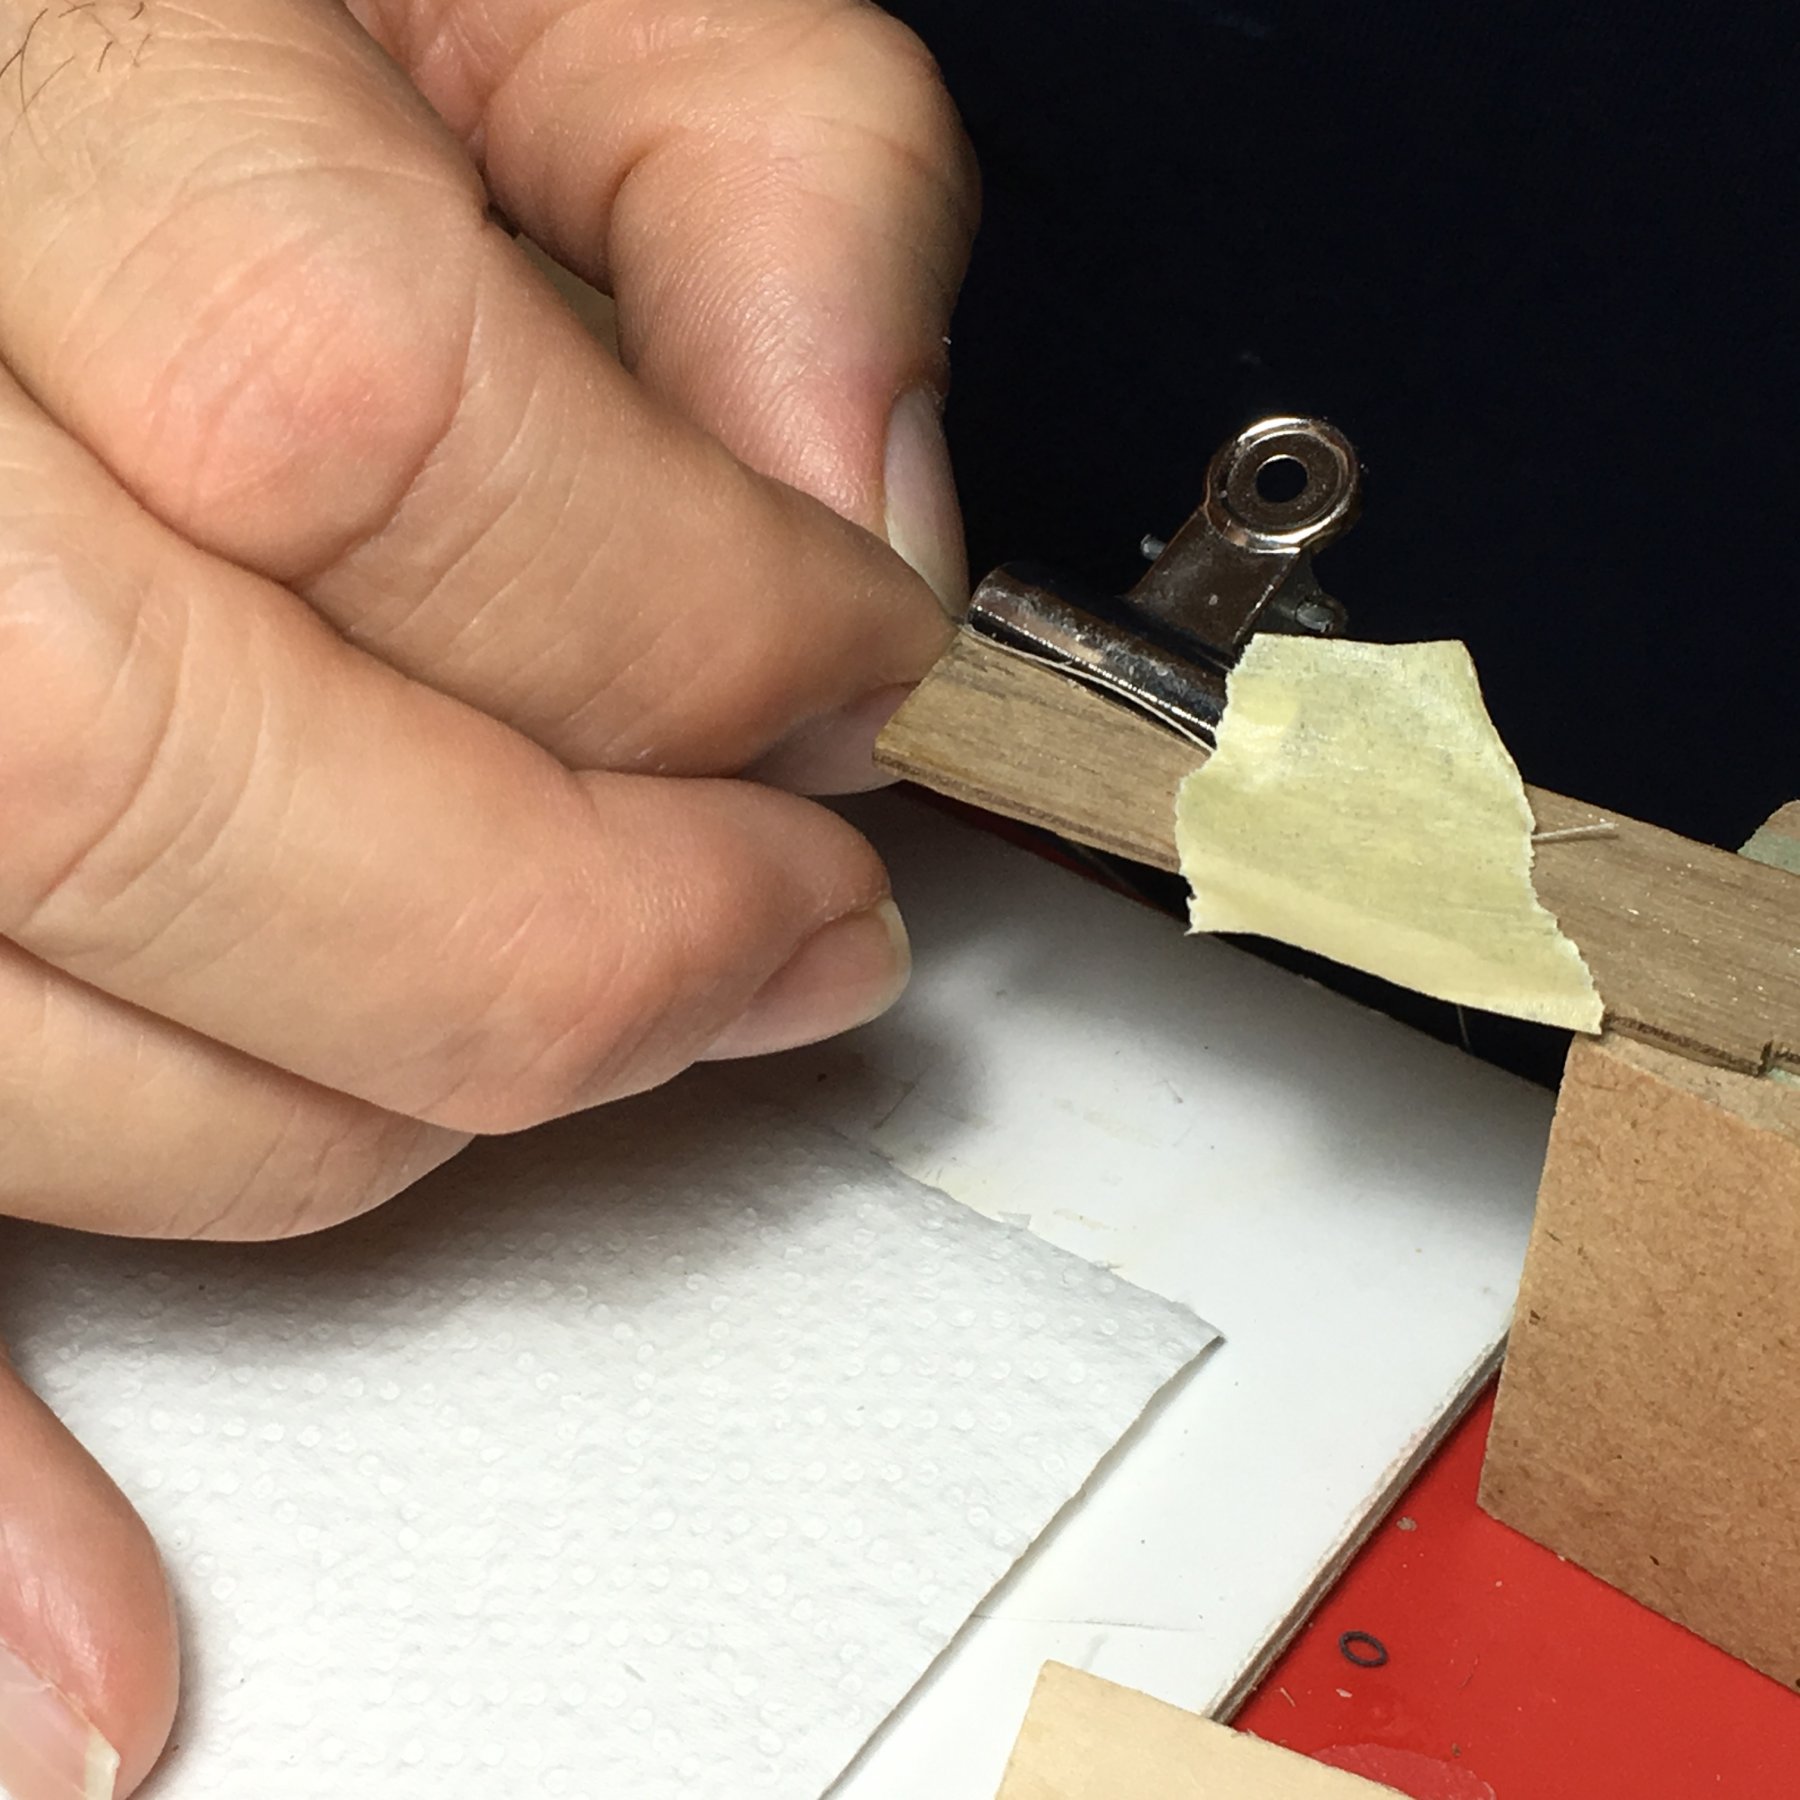
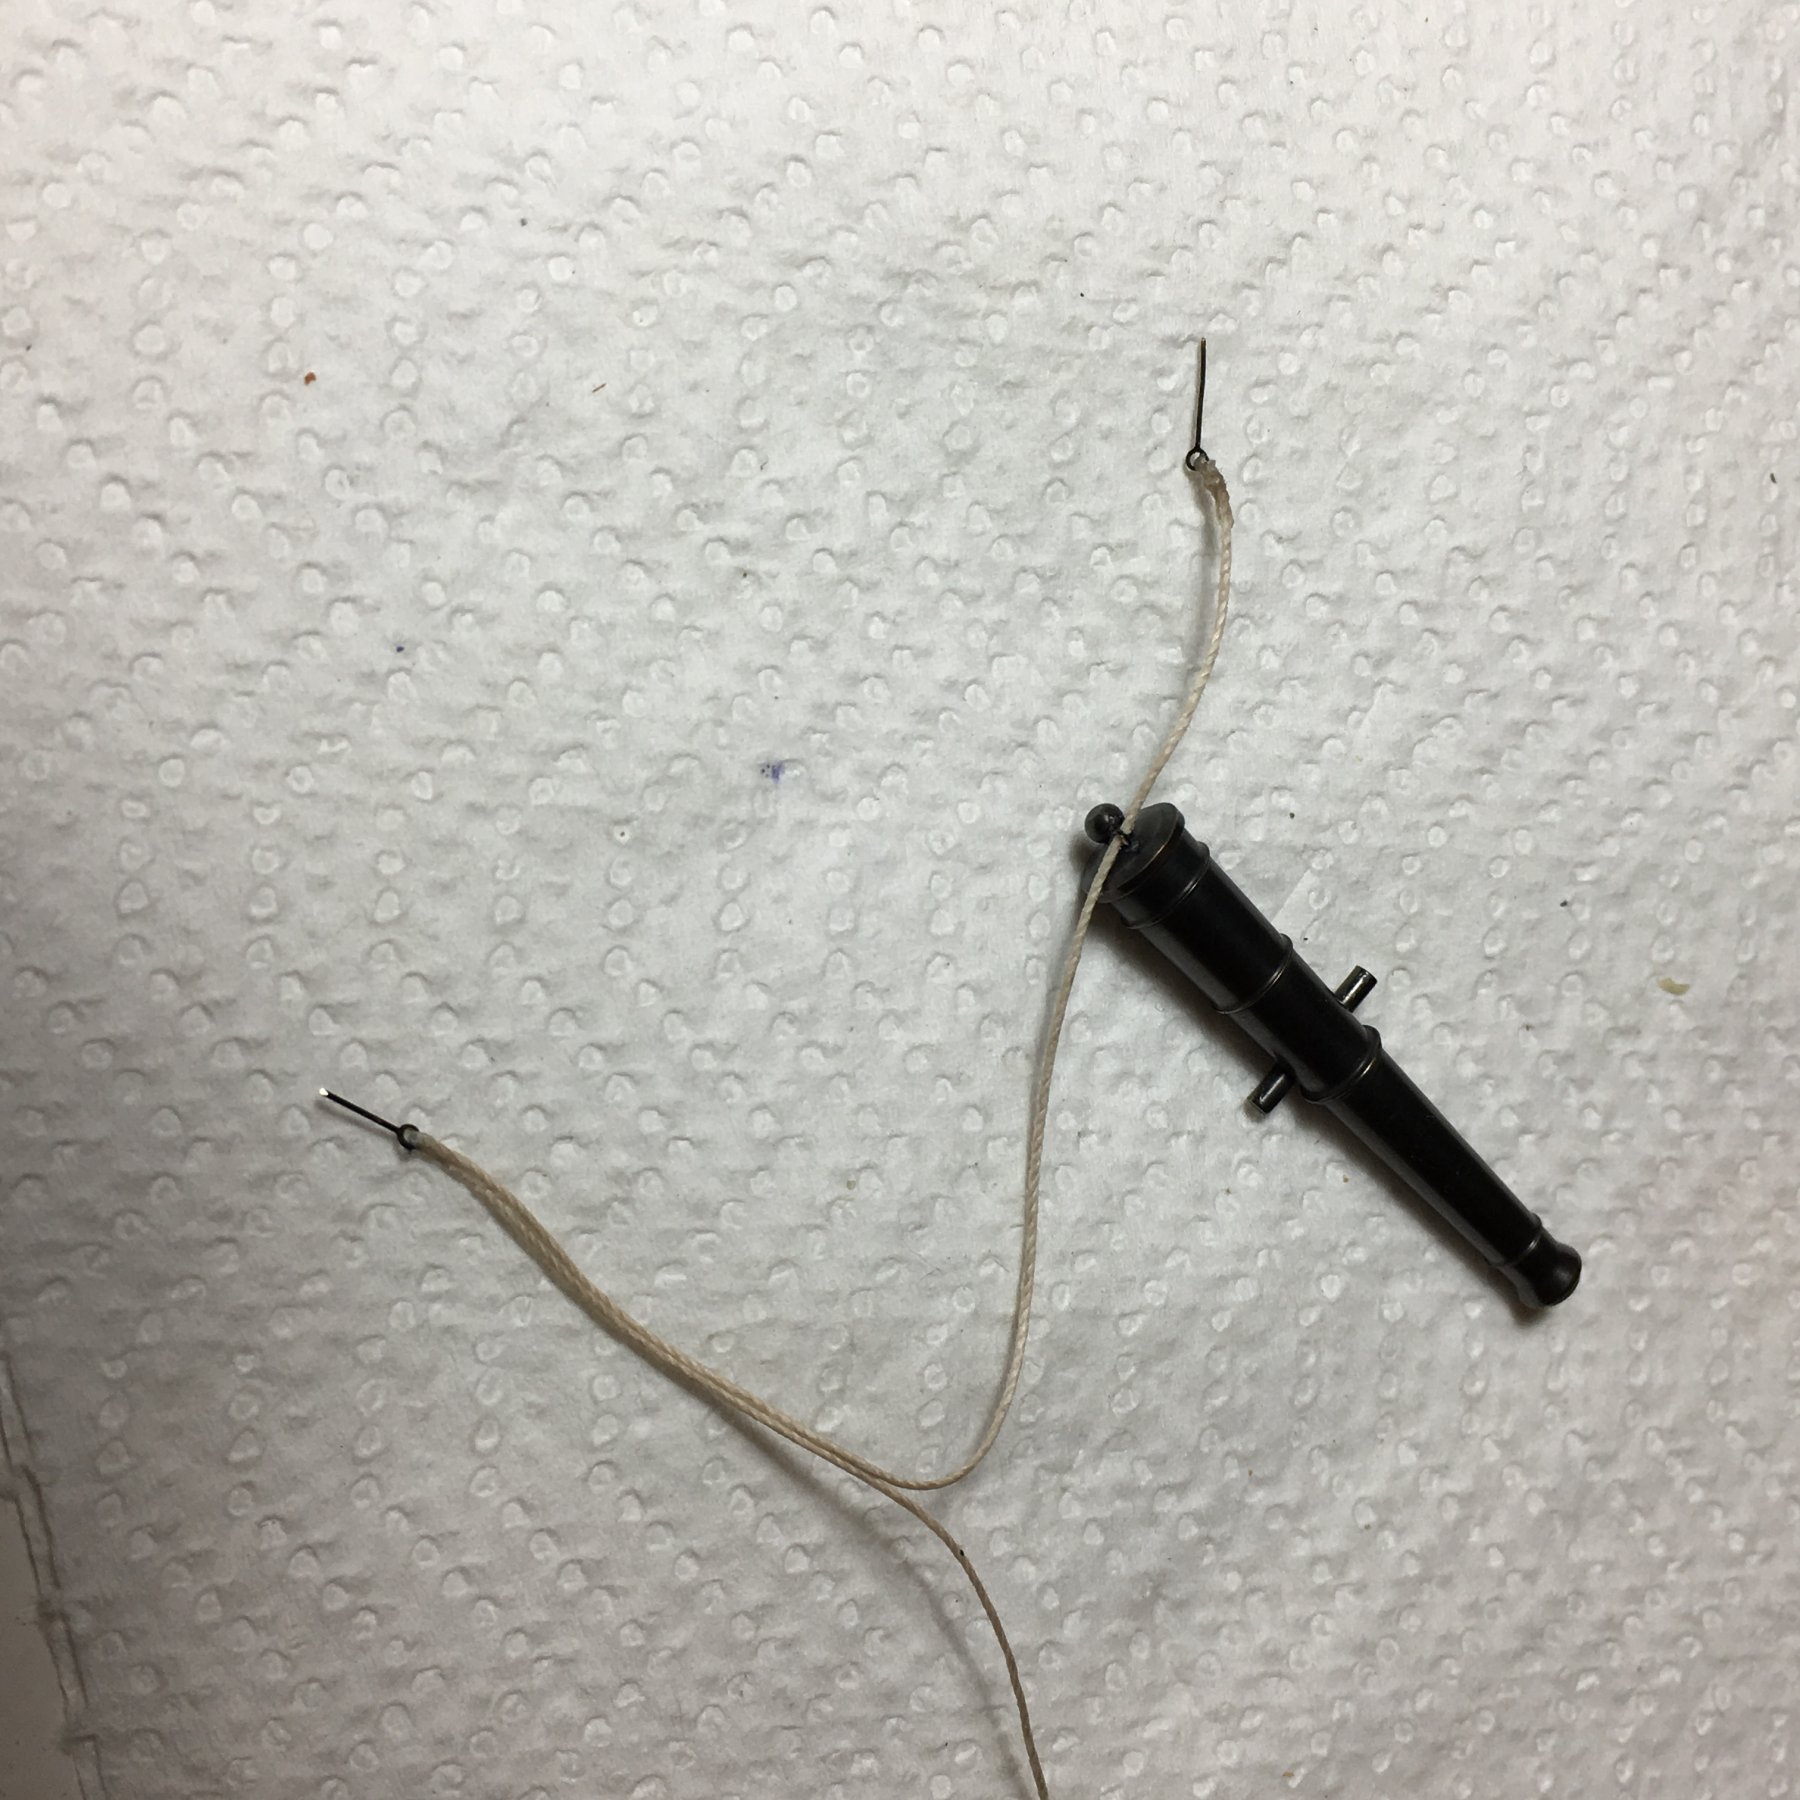
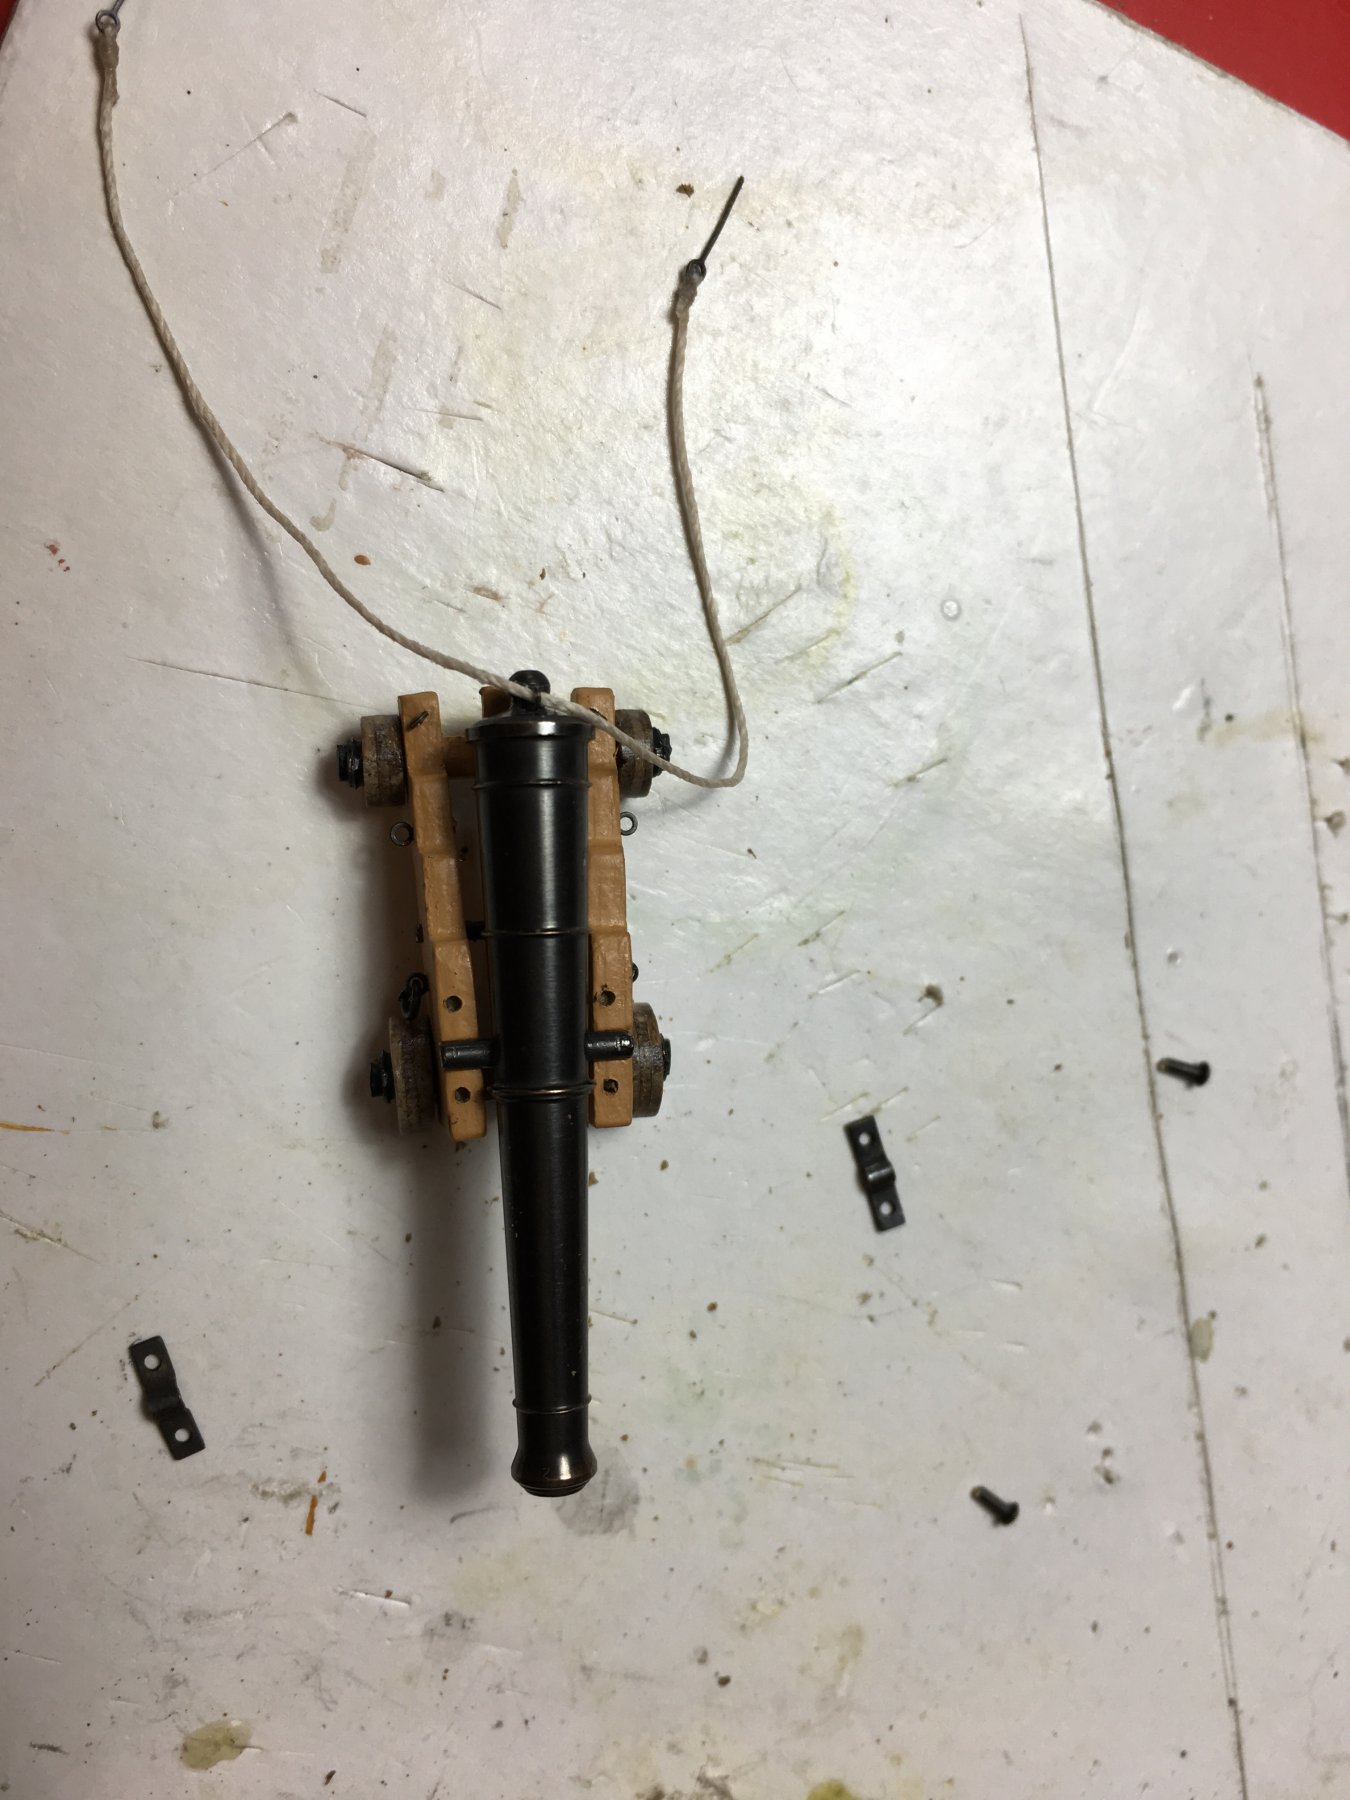
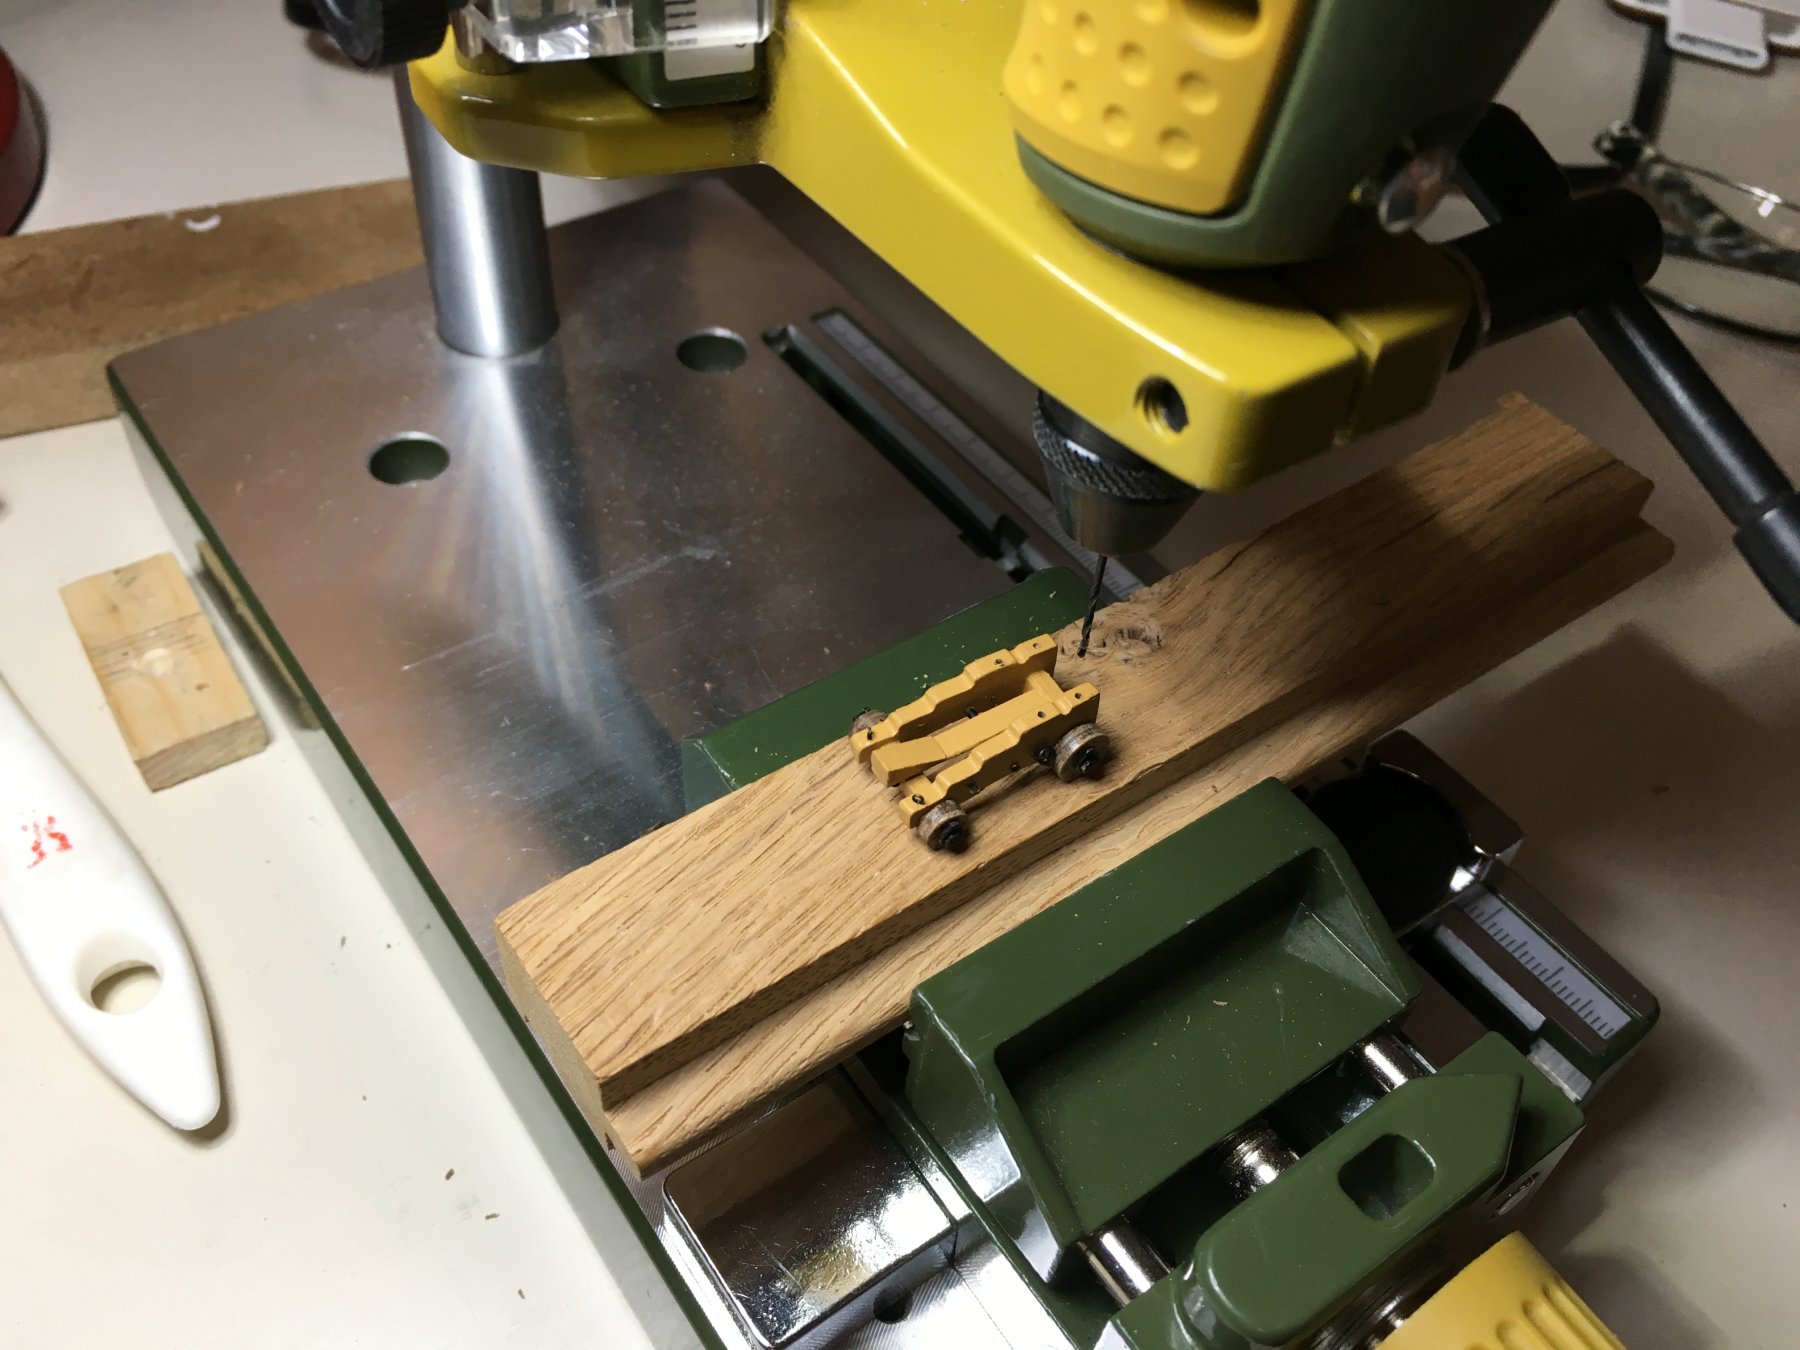
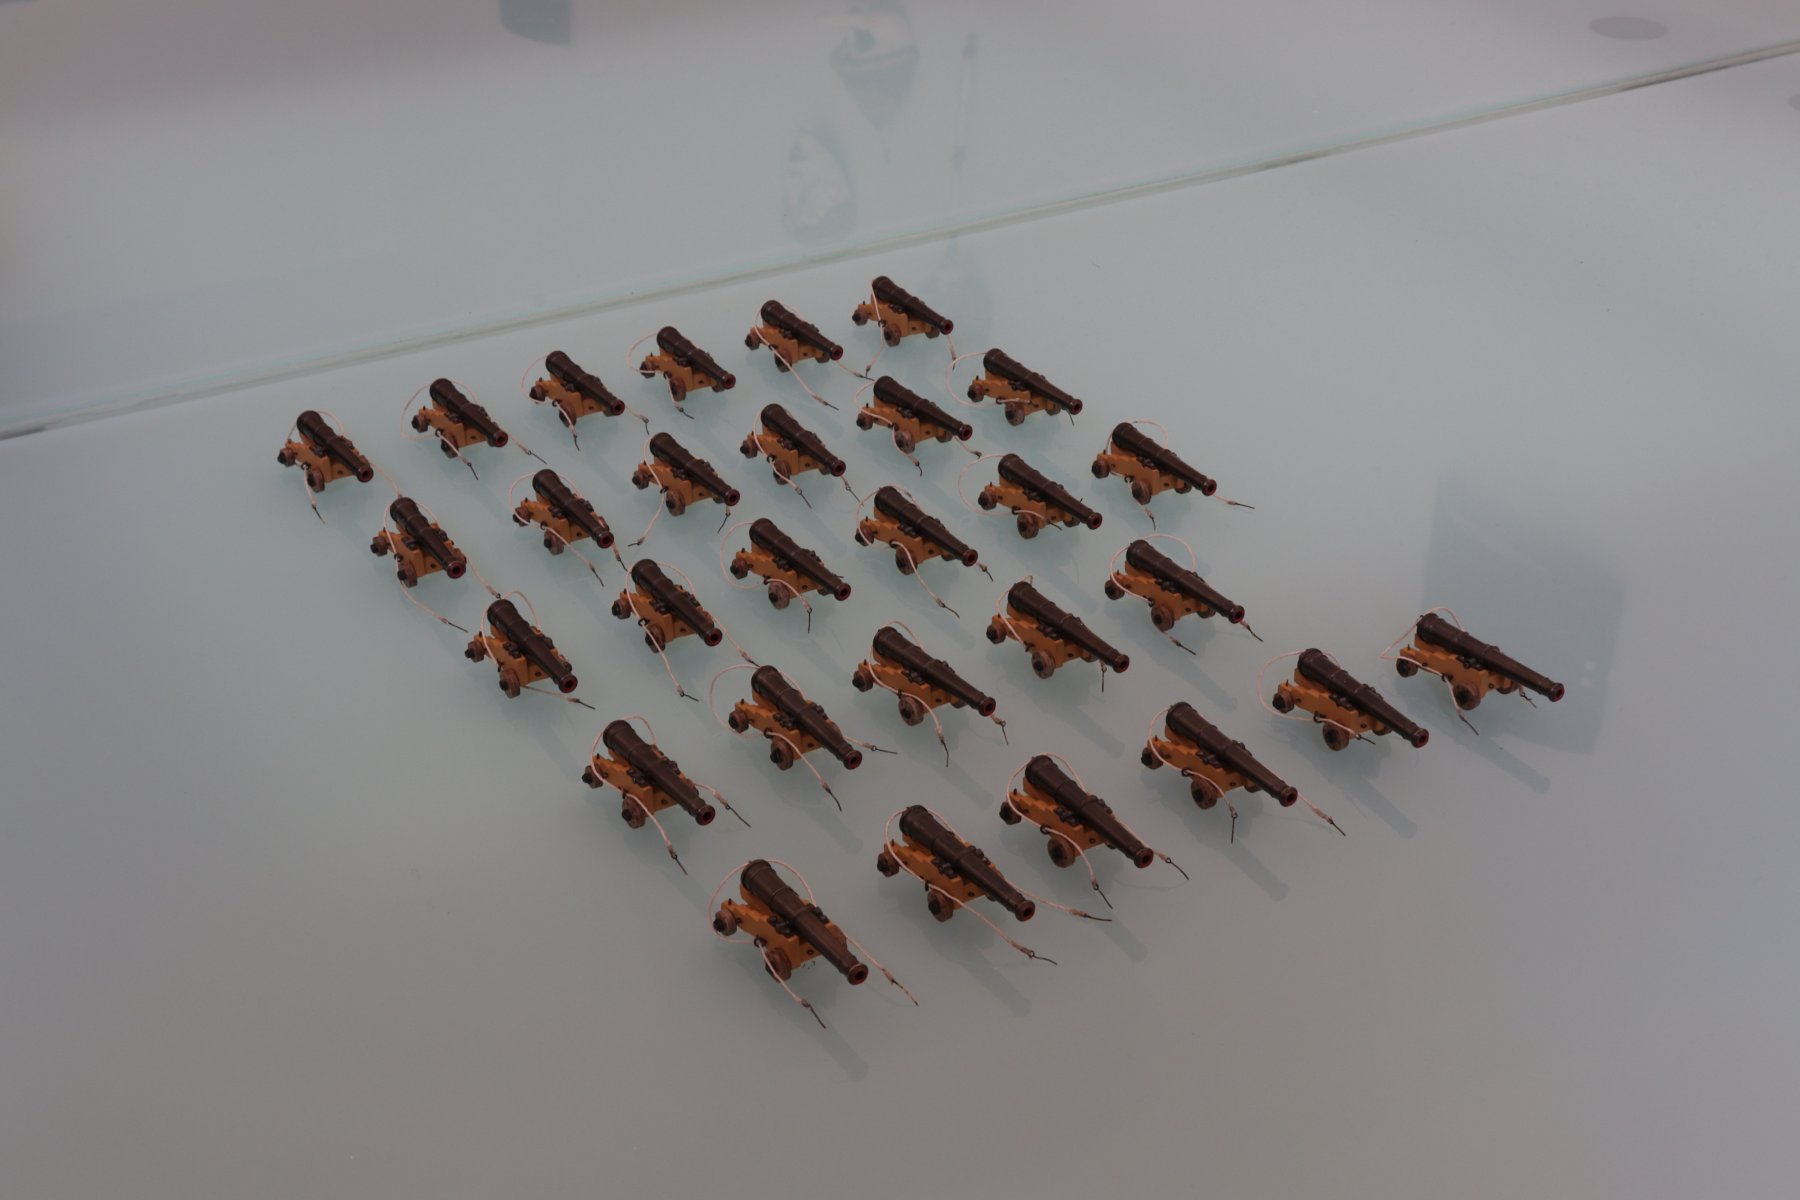
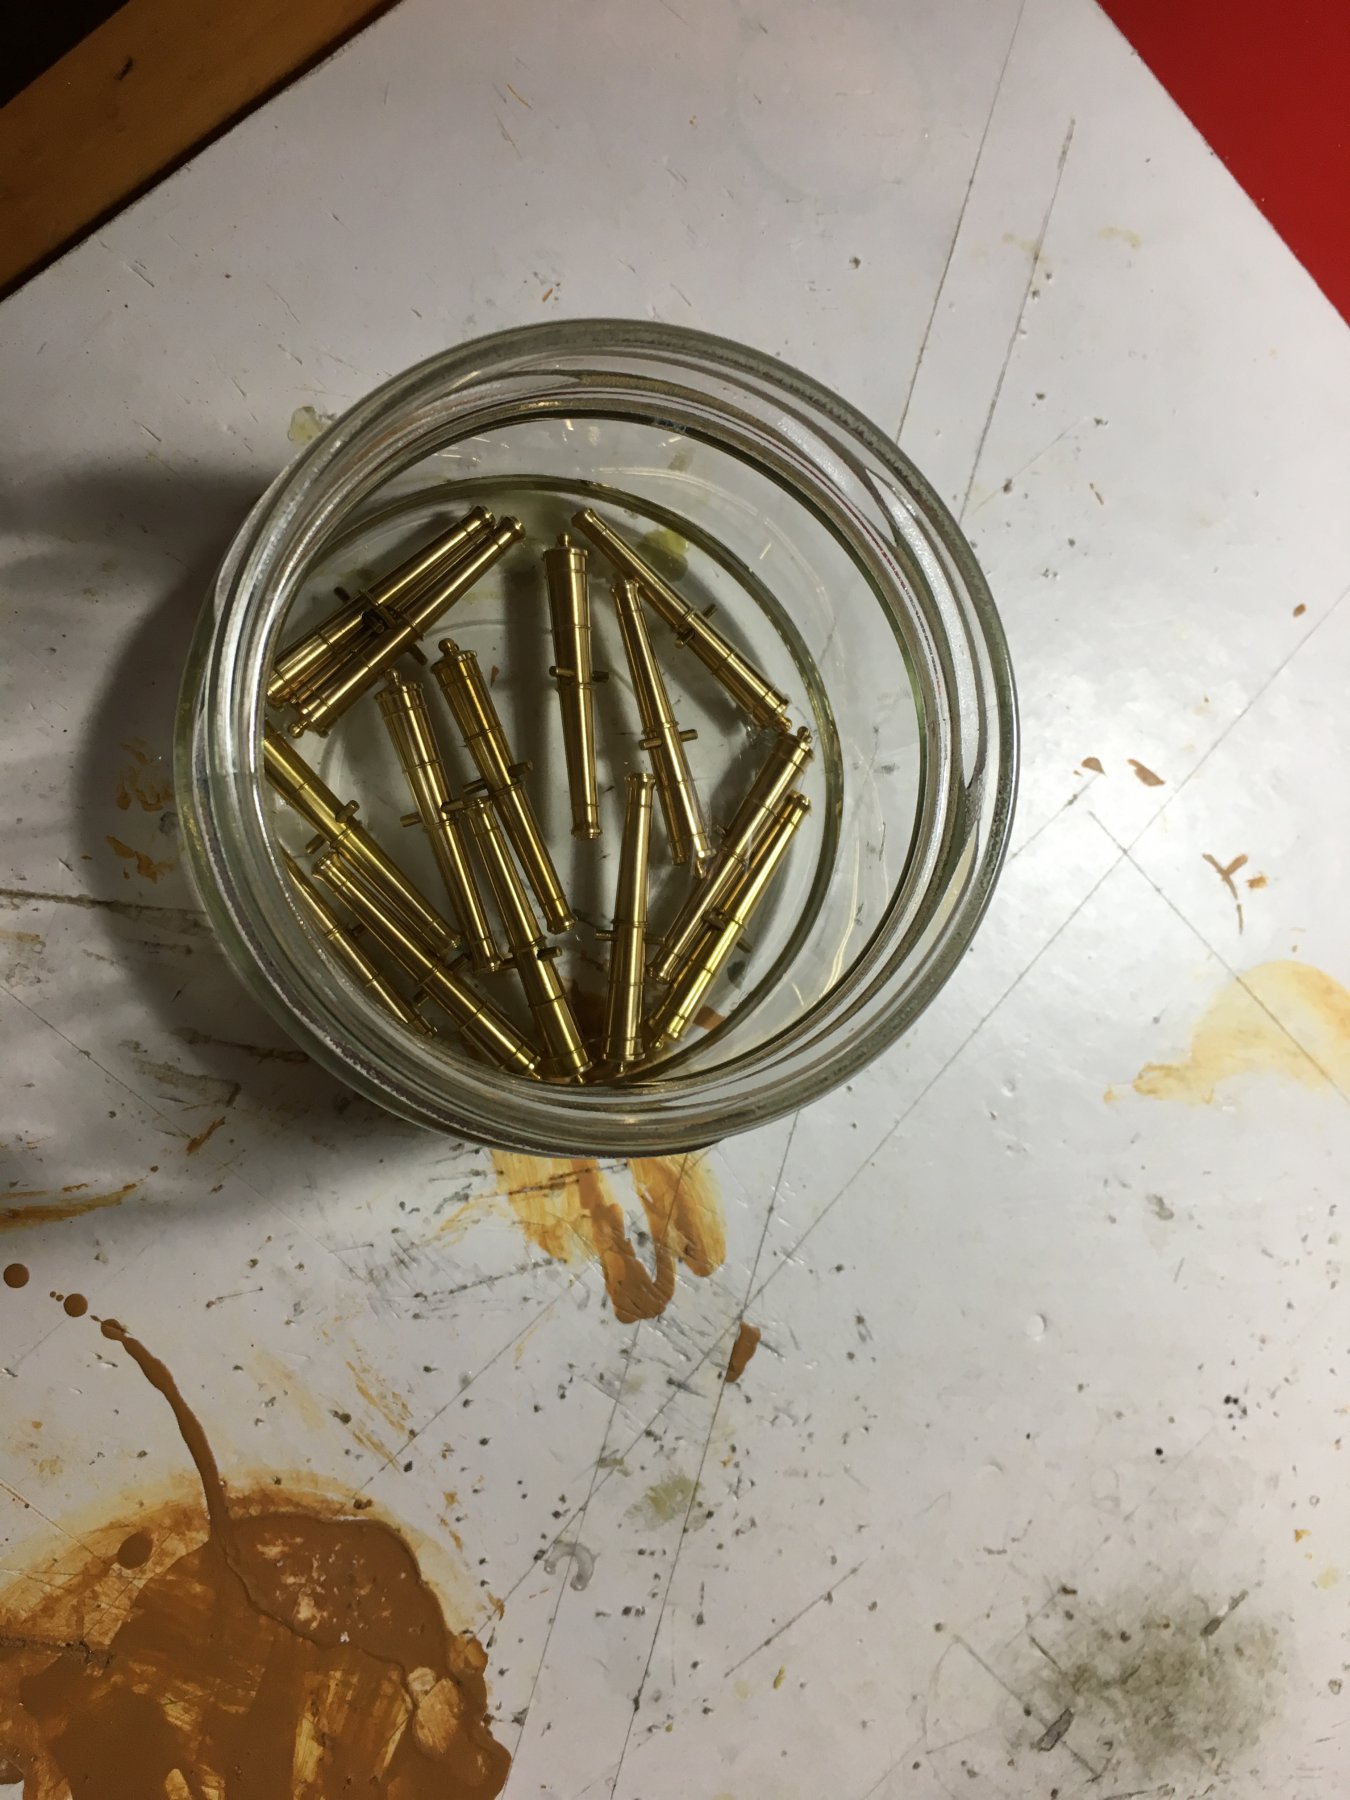
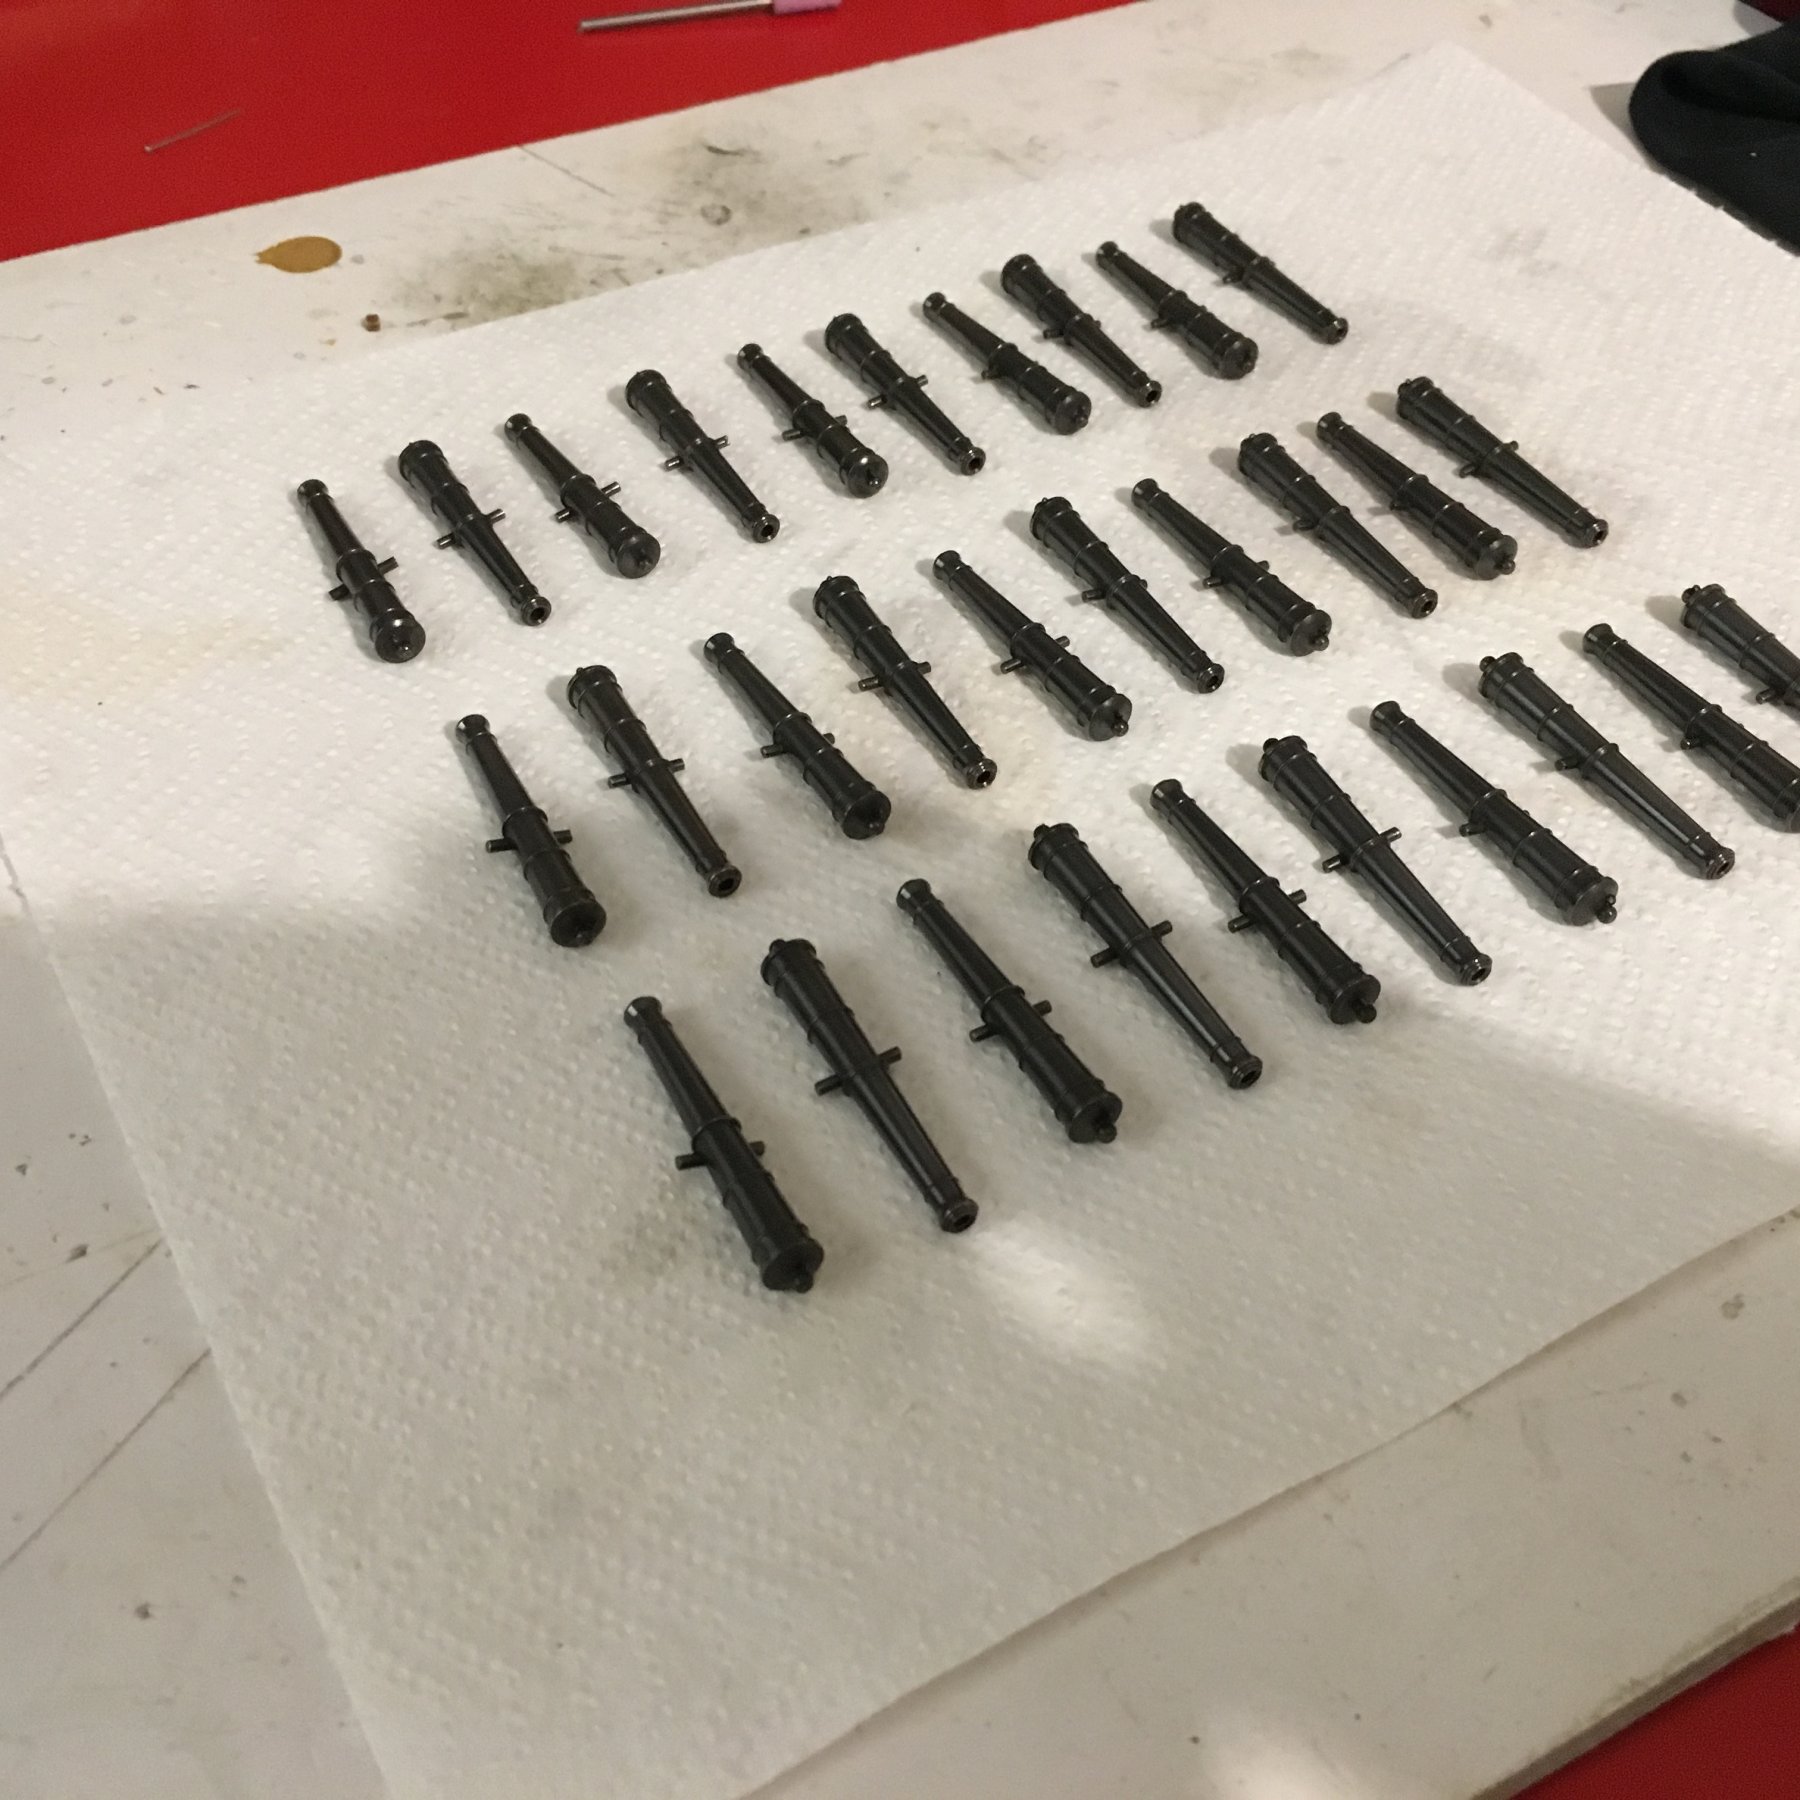
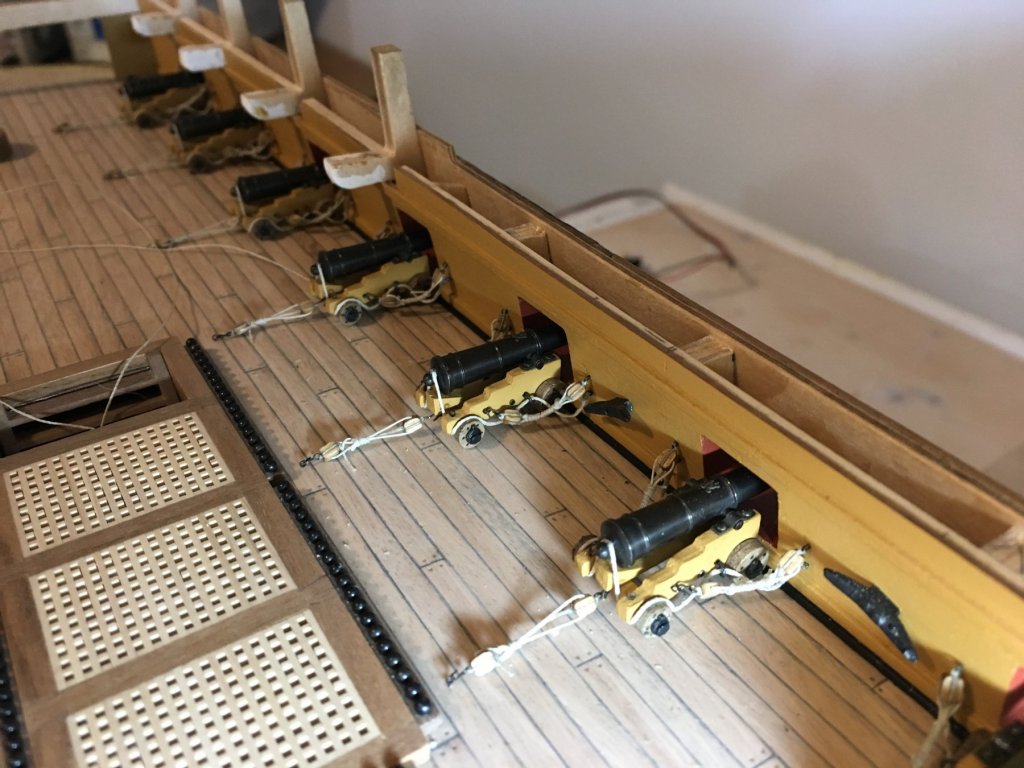
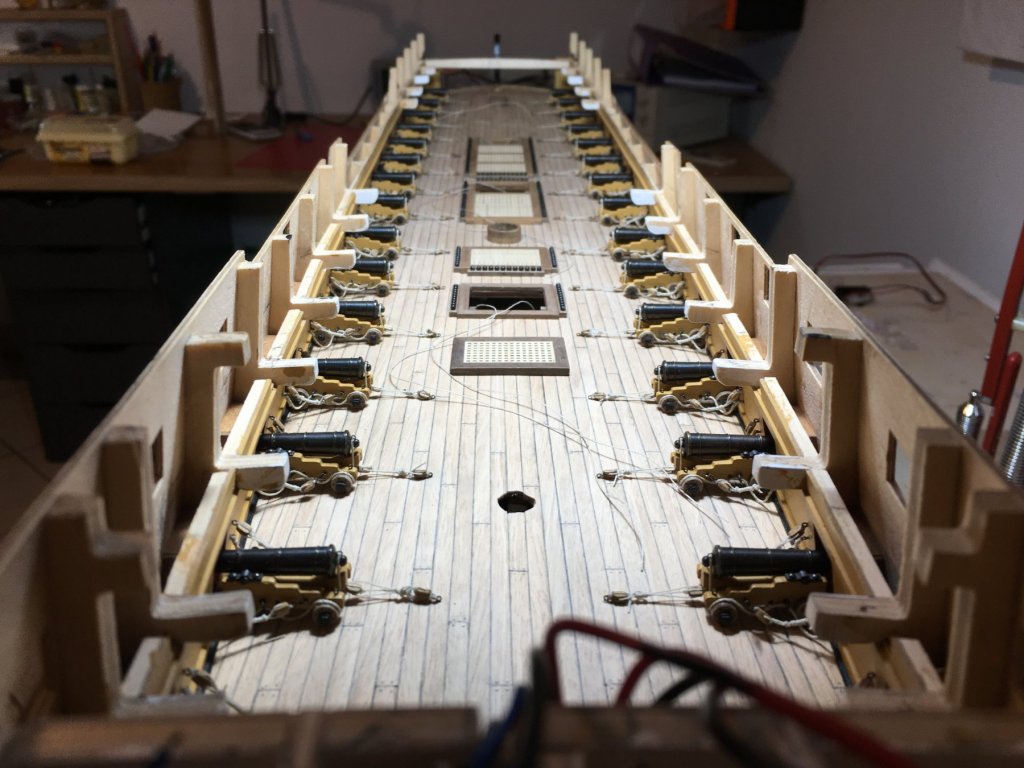
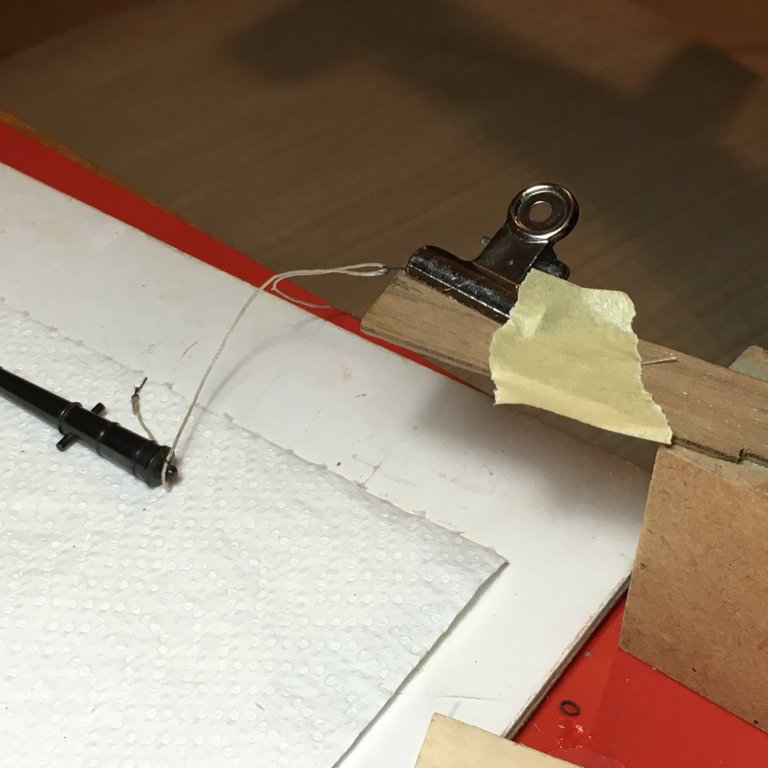
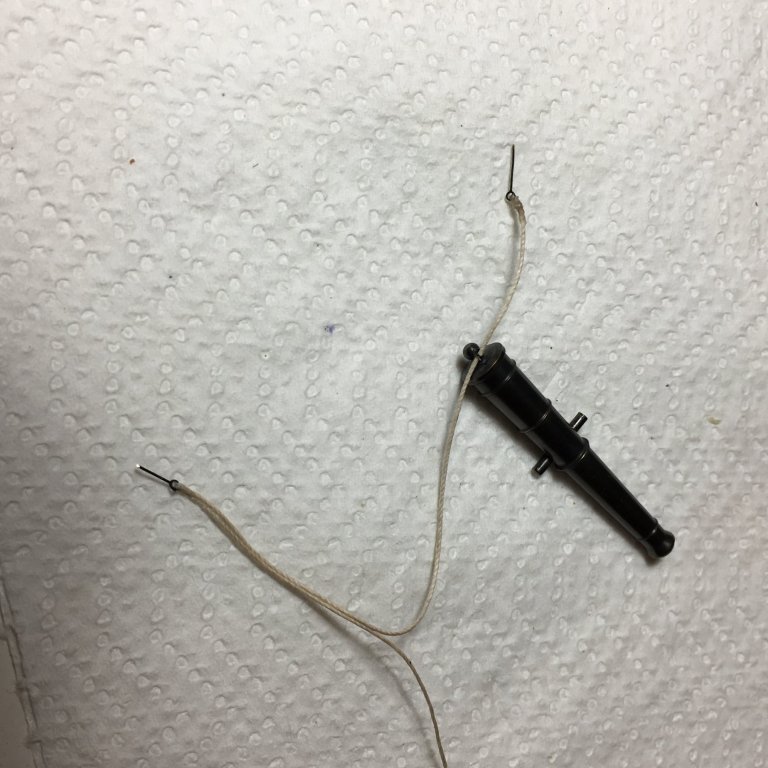
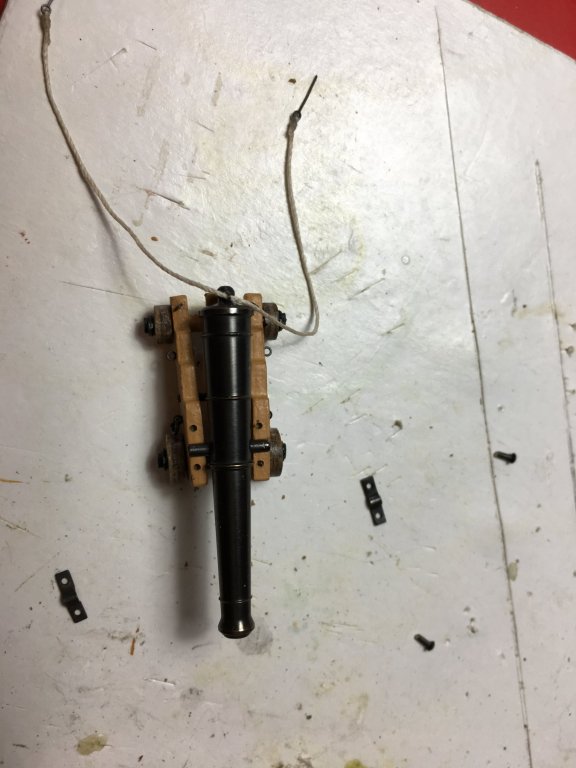
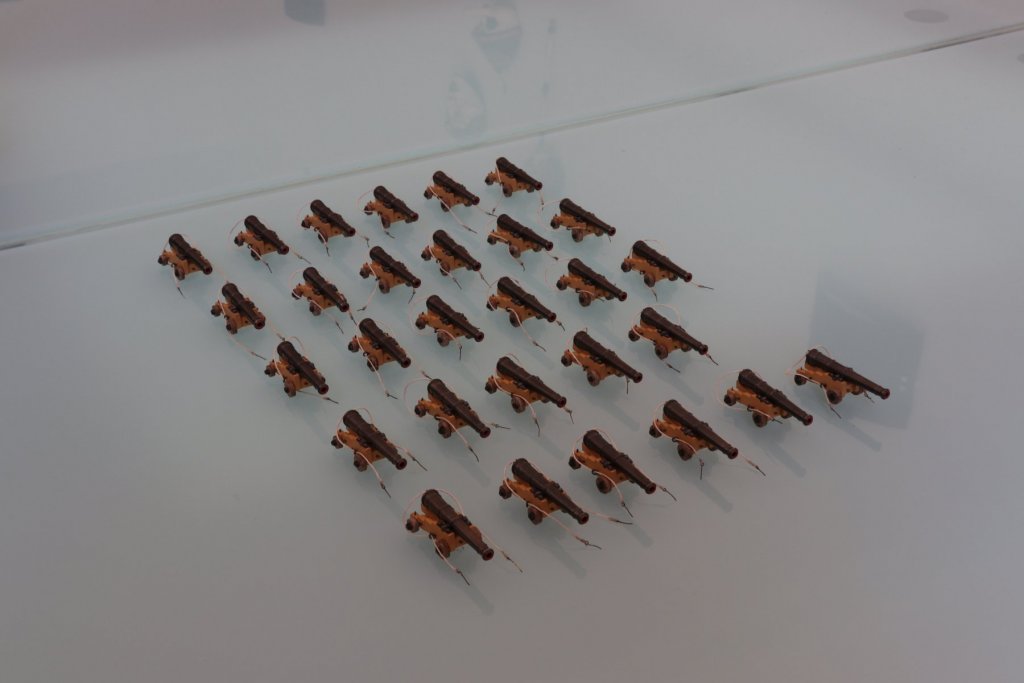
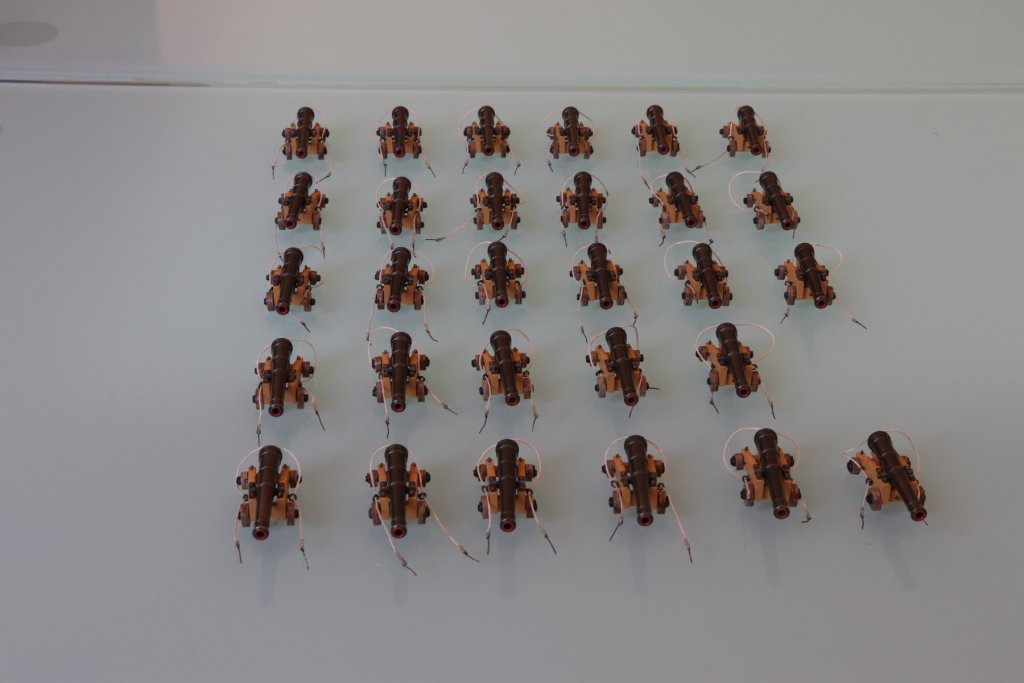
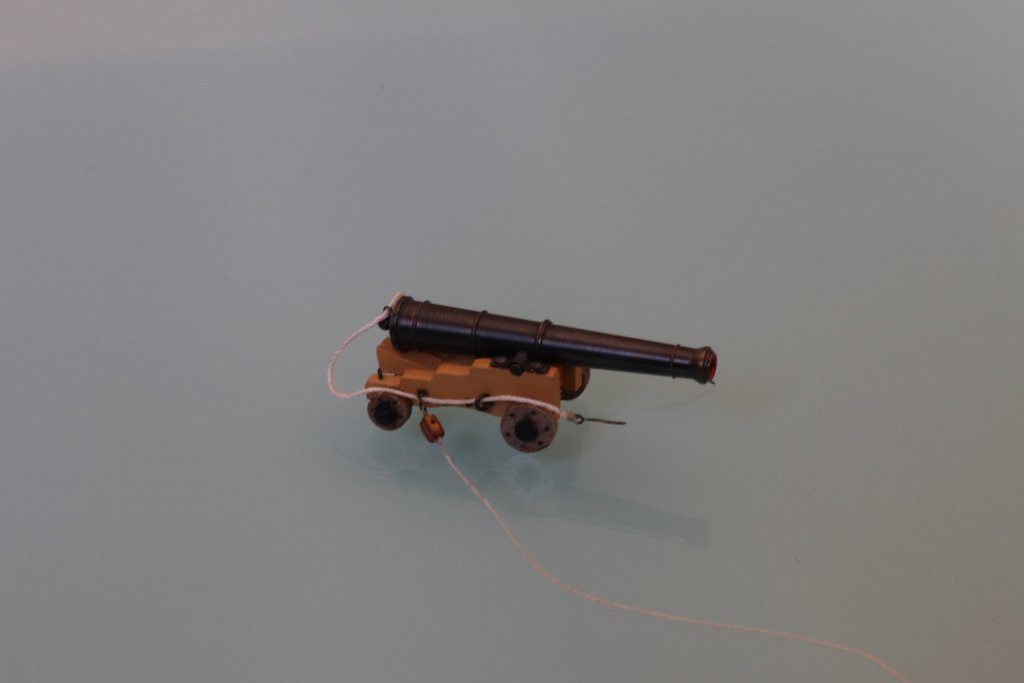
A quick update, more work on the cannons. No wonder Robert22564 in his build log once referred to them as the frigging carriages, there is so much work on them. Prepared the breaching ropes with an eyelet and passed through the eyelet at the back of the cannon. Fitted trunnion brackets to carriages. Marked pilot holes for each individual bracket. Drilled holes for pins on drill stand. Fitted brackets with pins. All 30 cannons (one missing , it is rigged on deck to check the lengths for the breaching ropes) ready with breaching ropes passed through rings of carriages. The eye pins were small enough to pass through the rings. You have to be careful when rigging the eyelets to the breaching rope to have a neat knot that passes through the ring as well. Next step are the tackles. Have to experiment a bit with the size of the hooks. Robert


- 527 replies
-
- 11
-
-
- caldercraft
- victory
- (and 1 more)
-
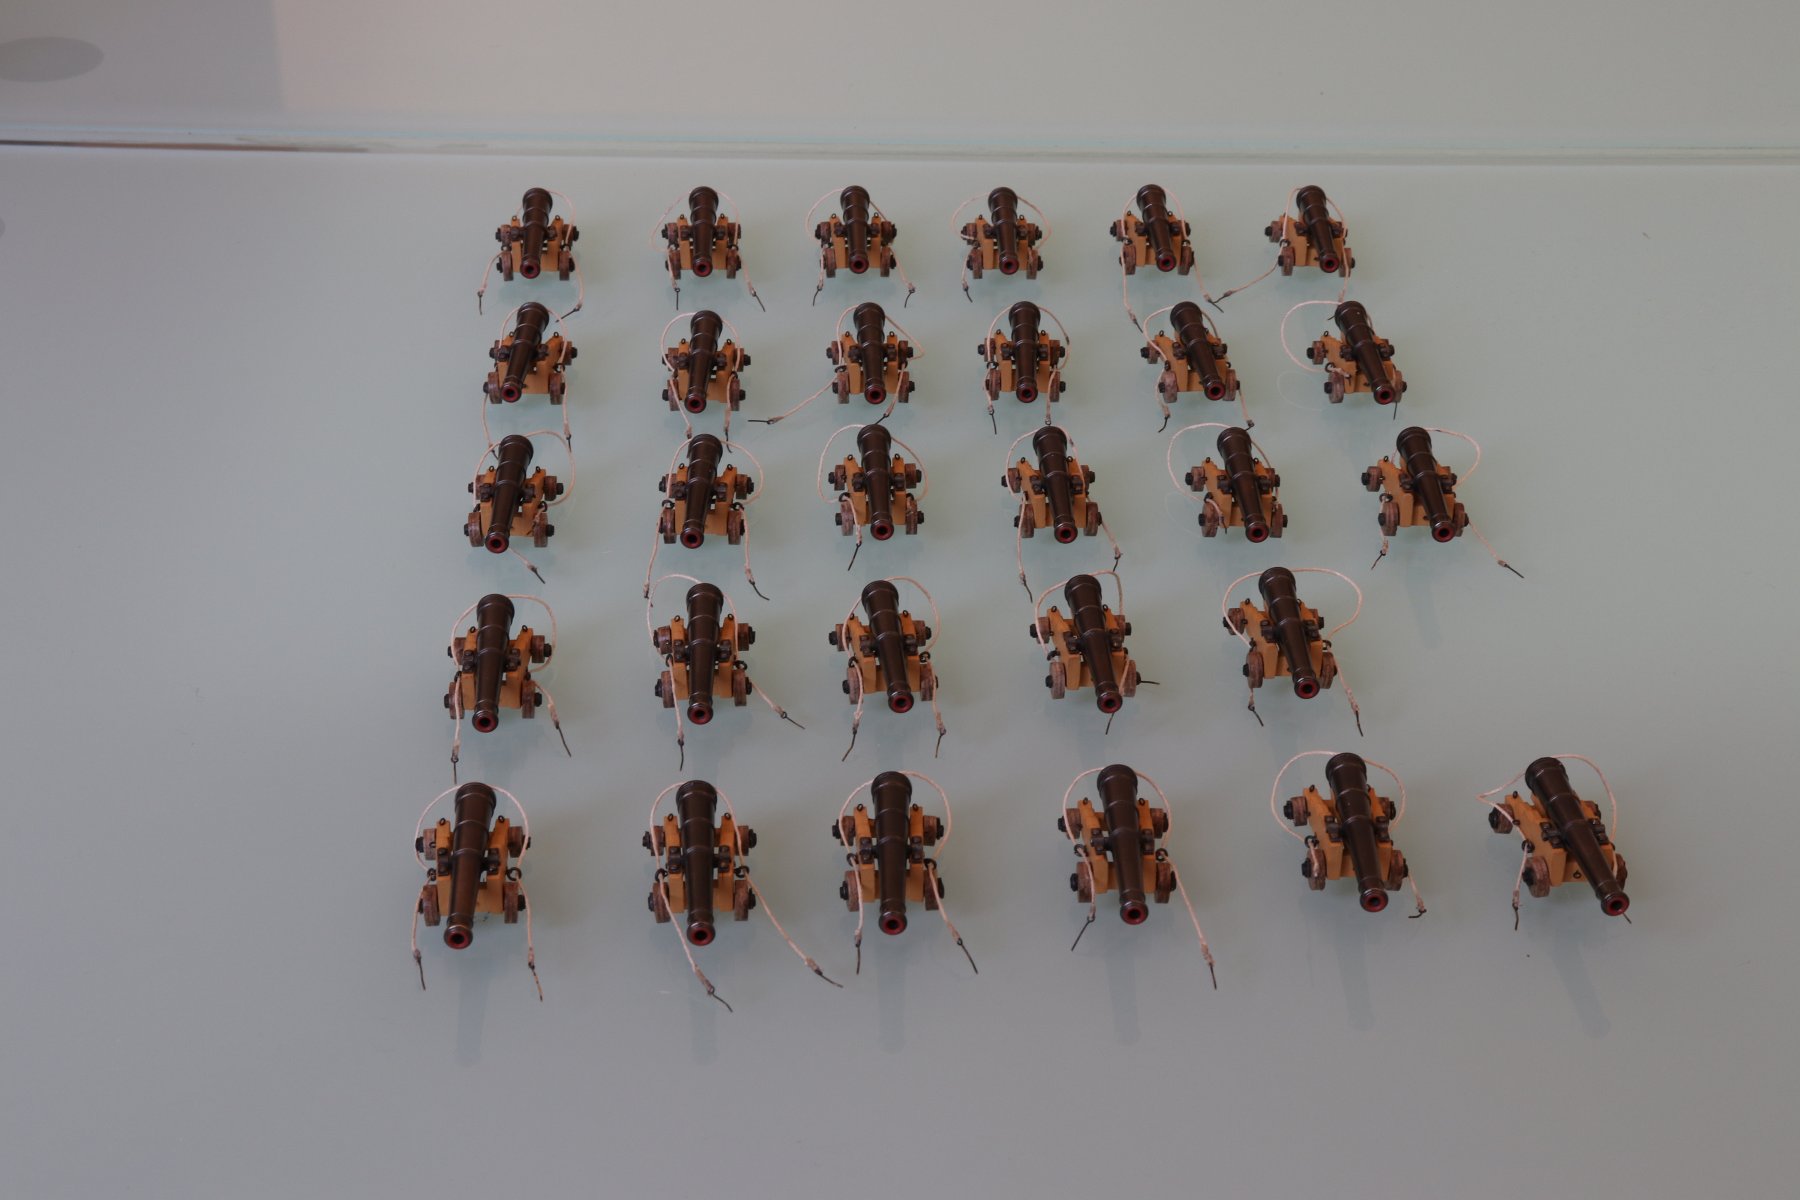
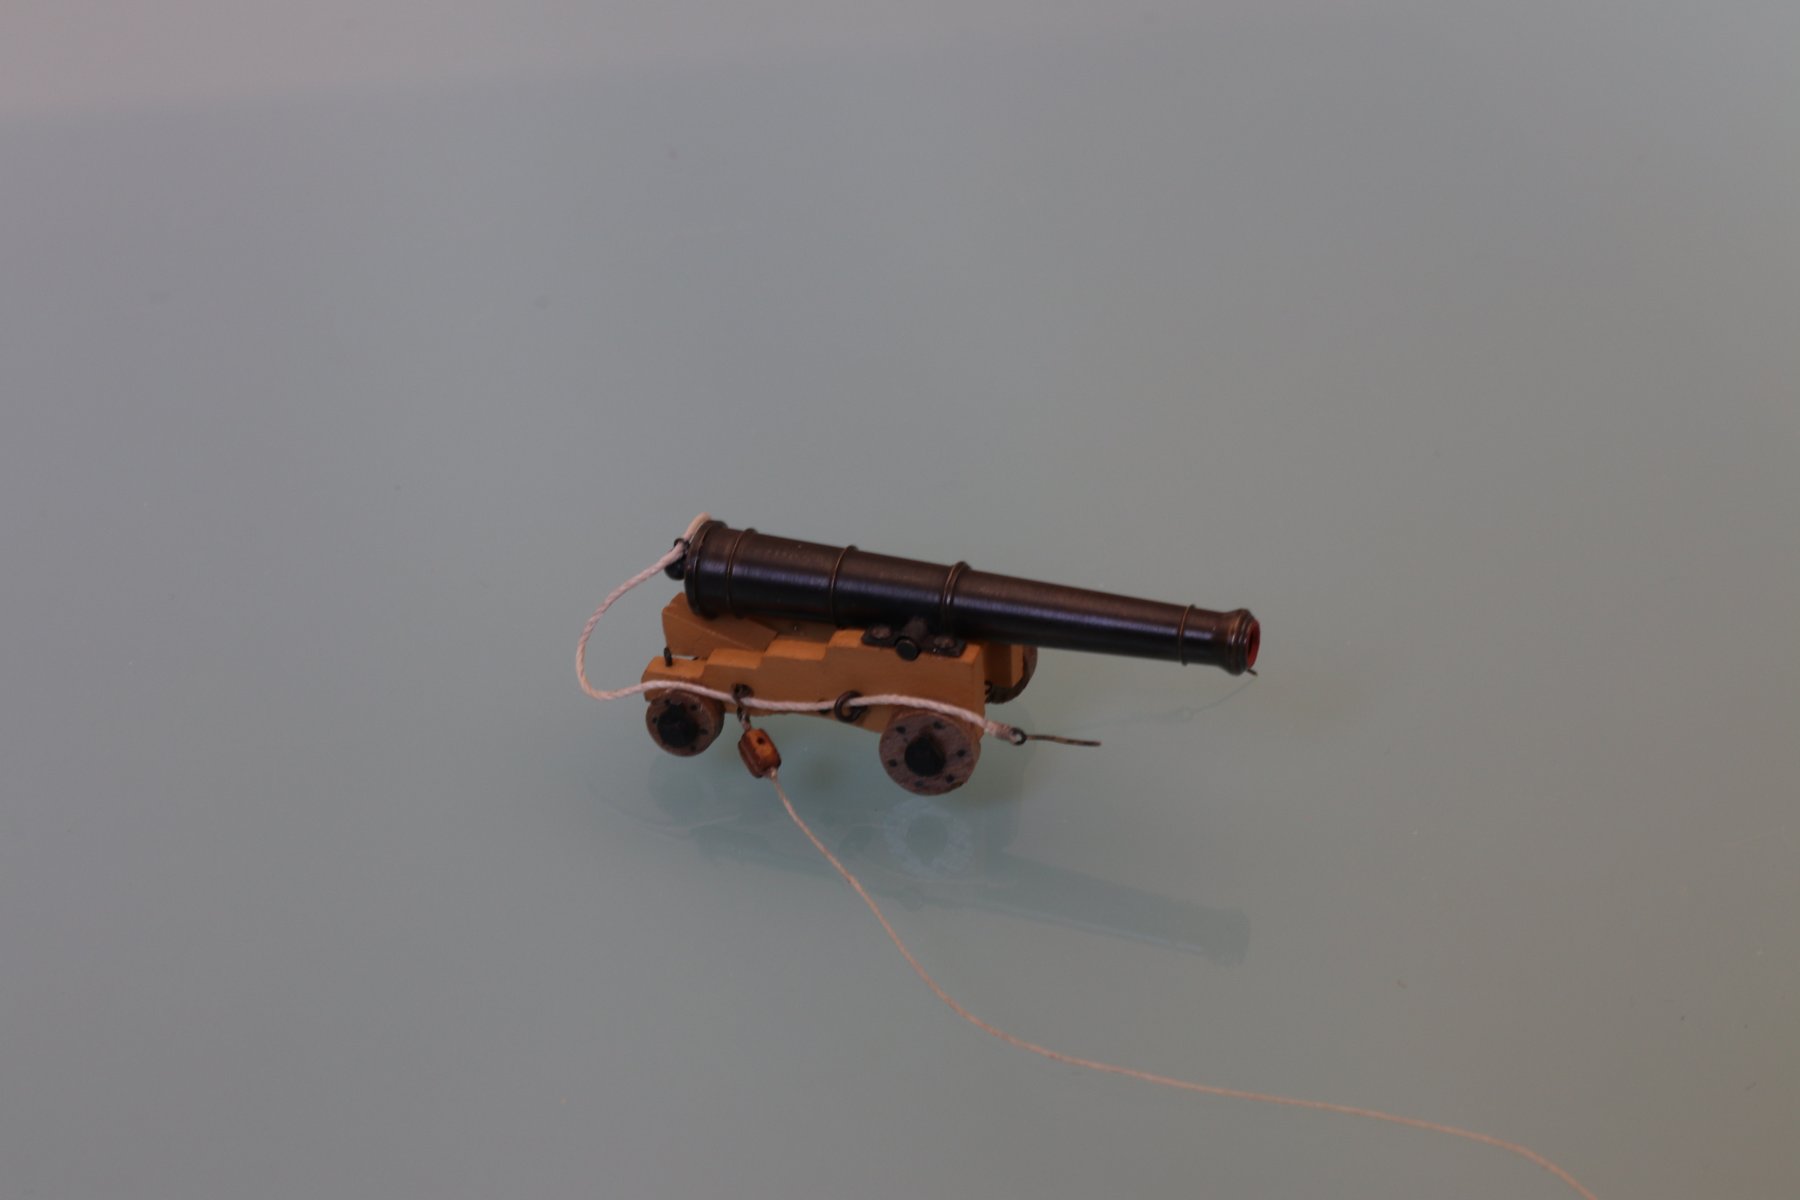
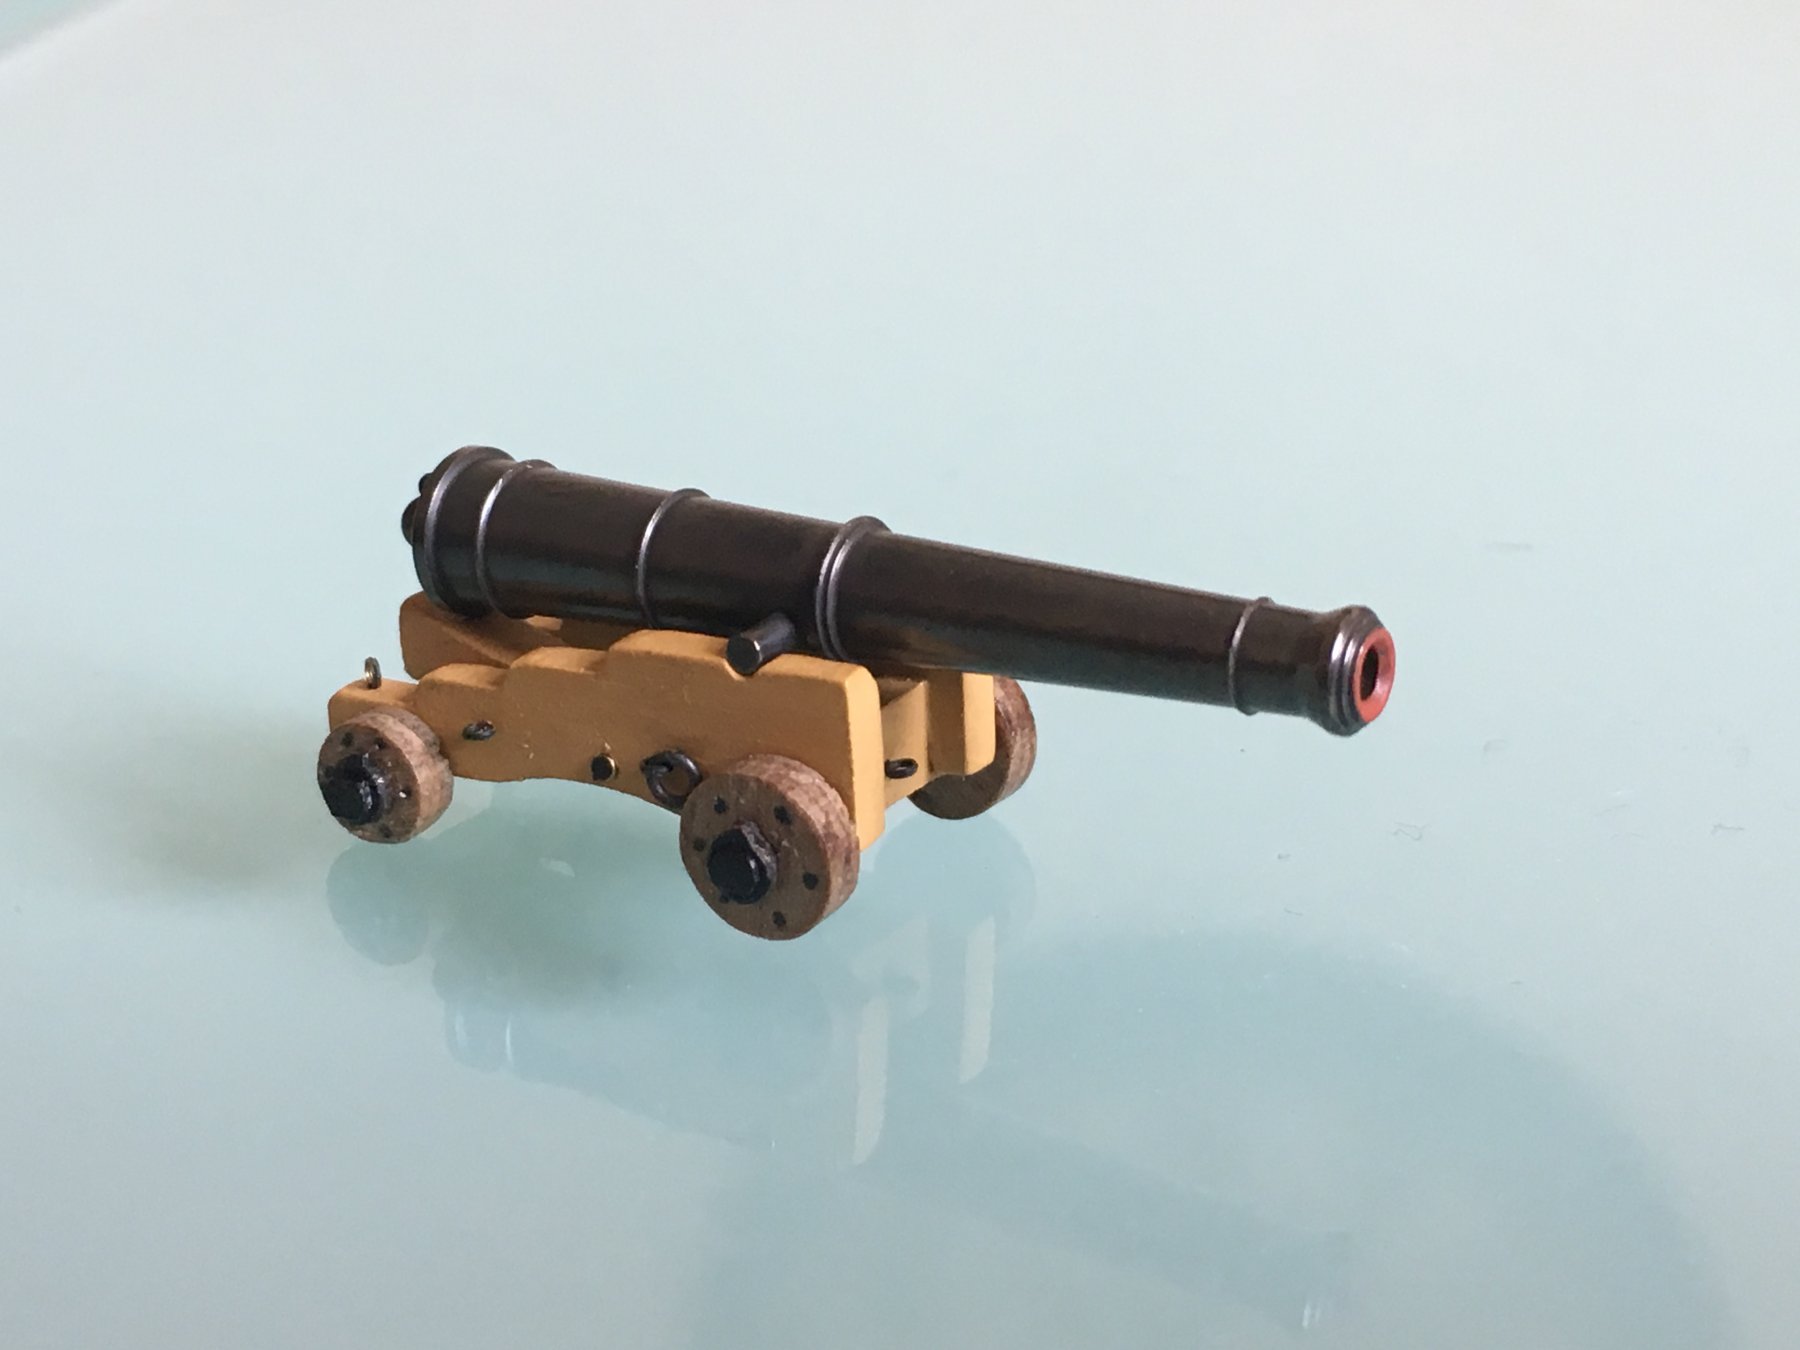
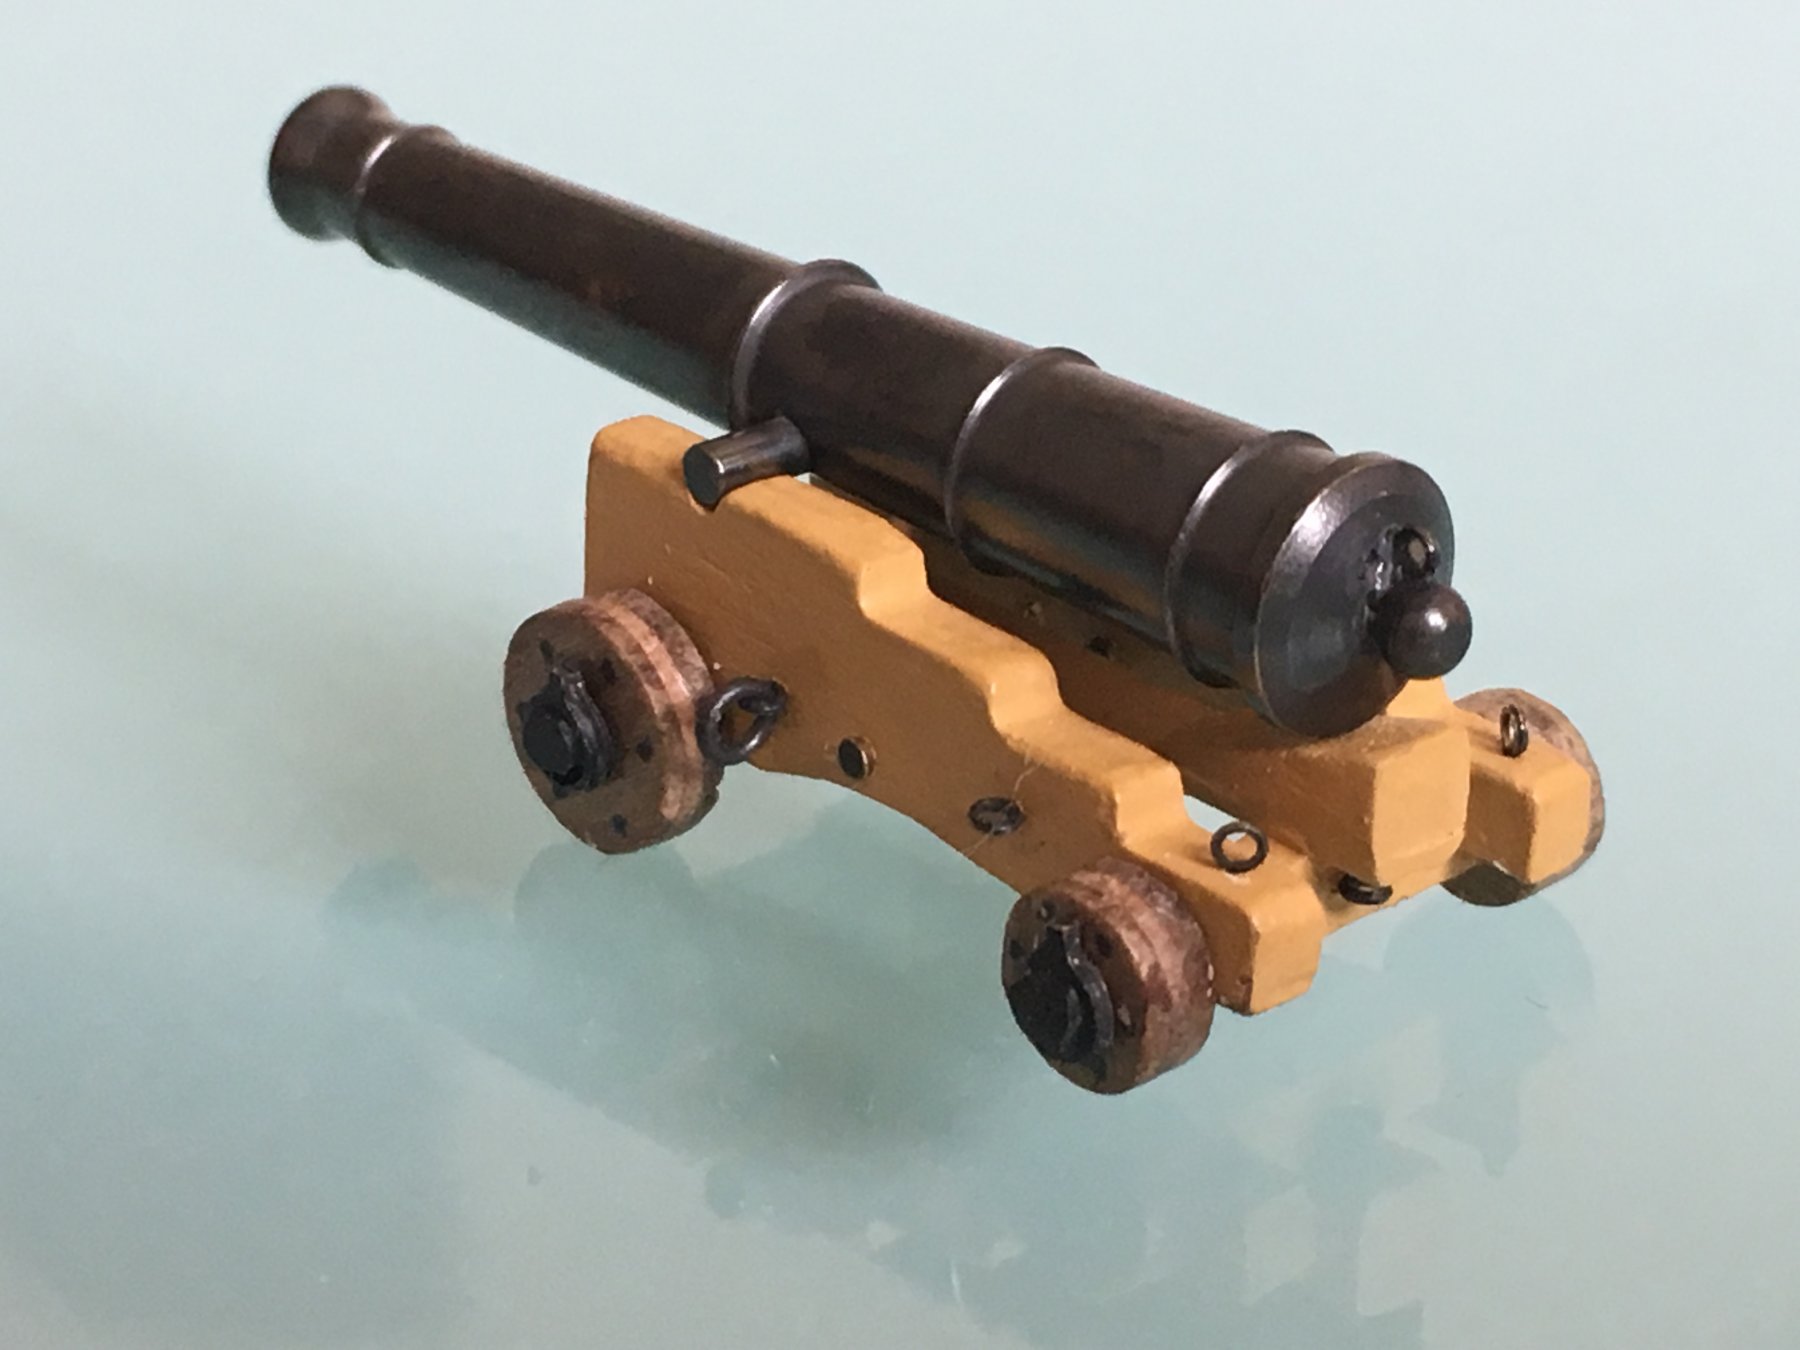
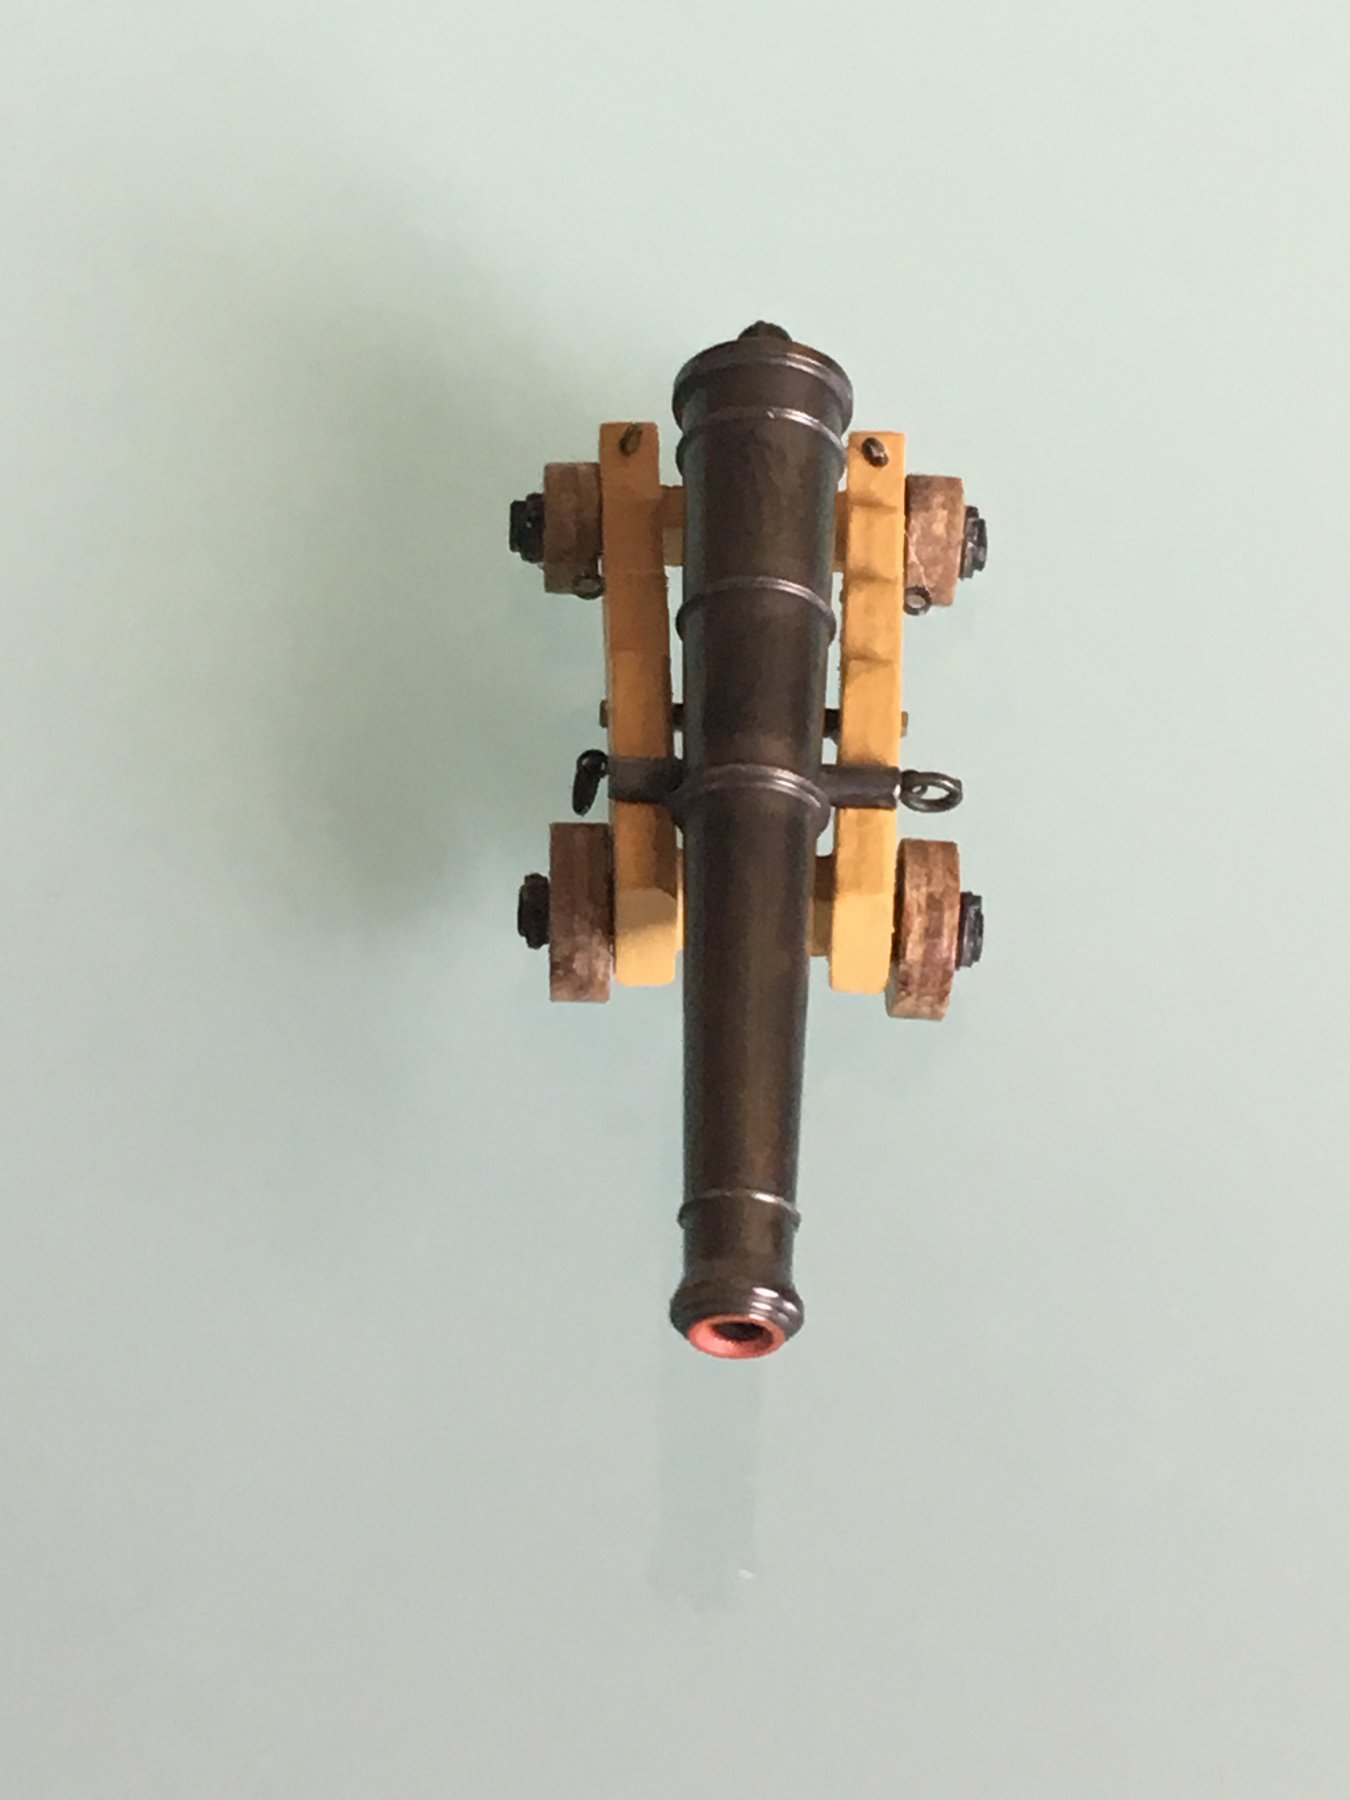
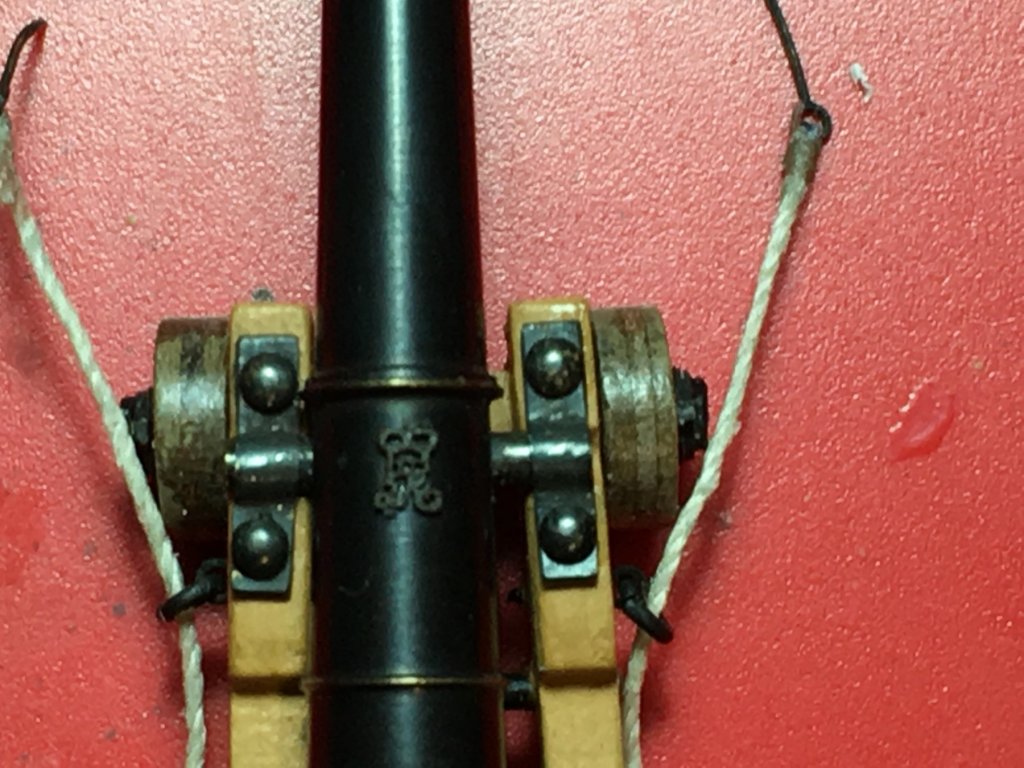
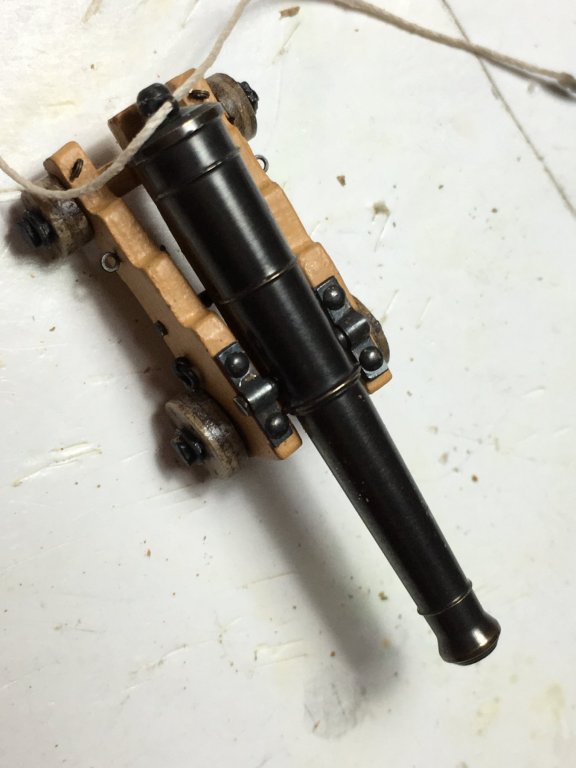
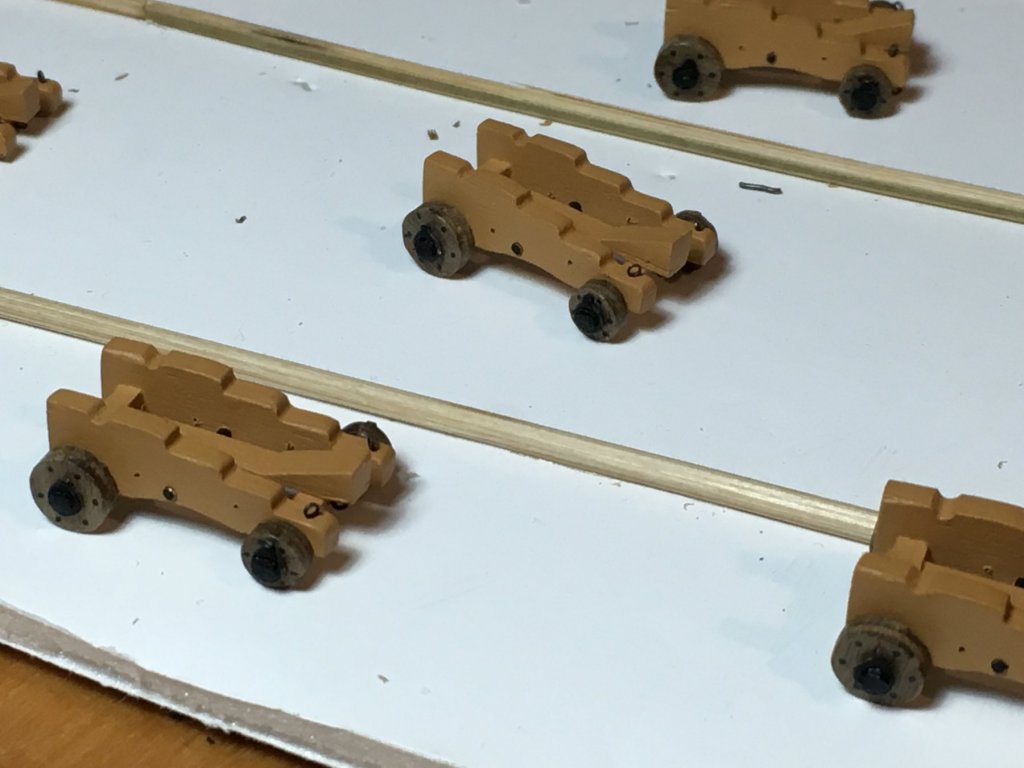
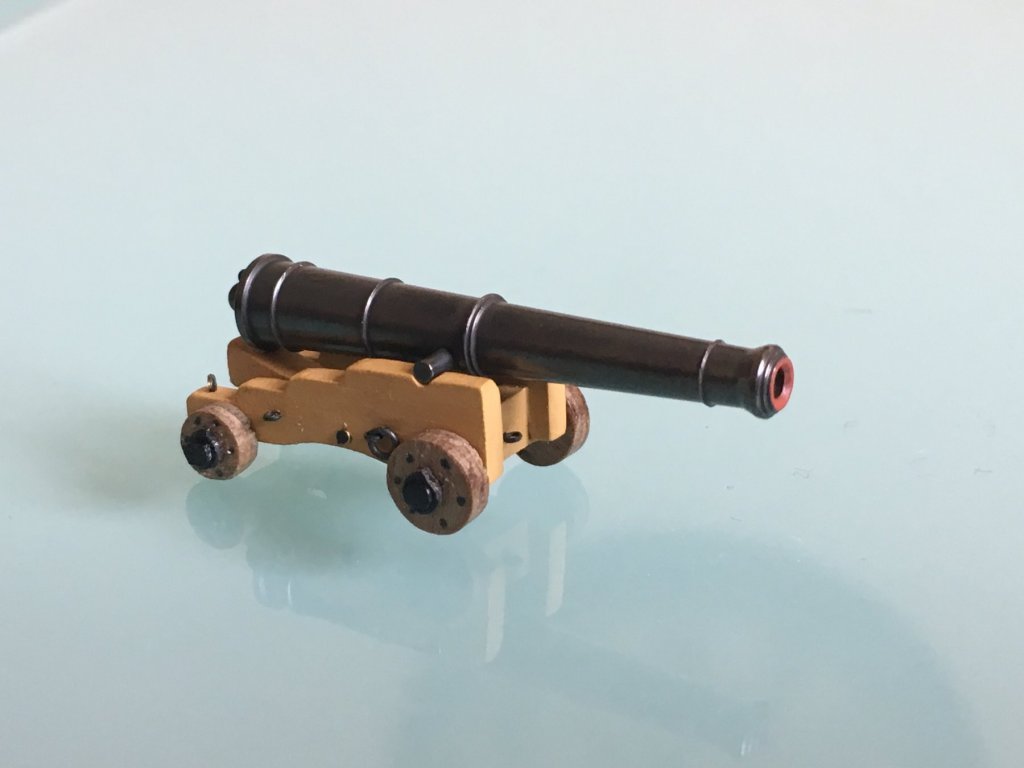
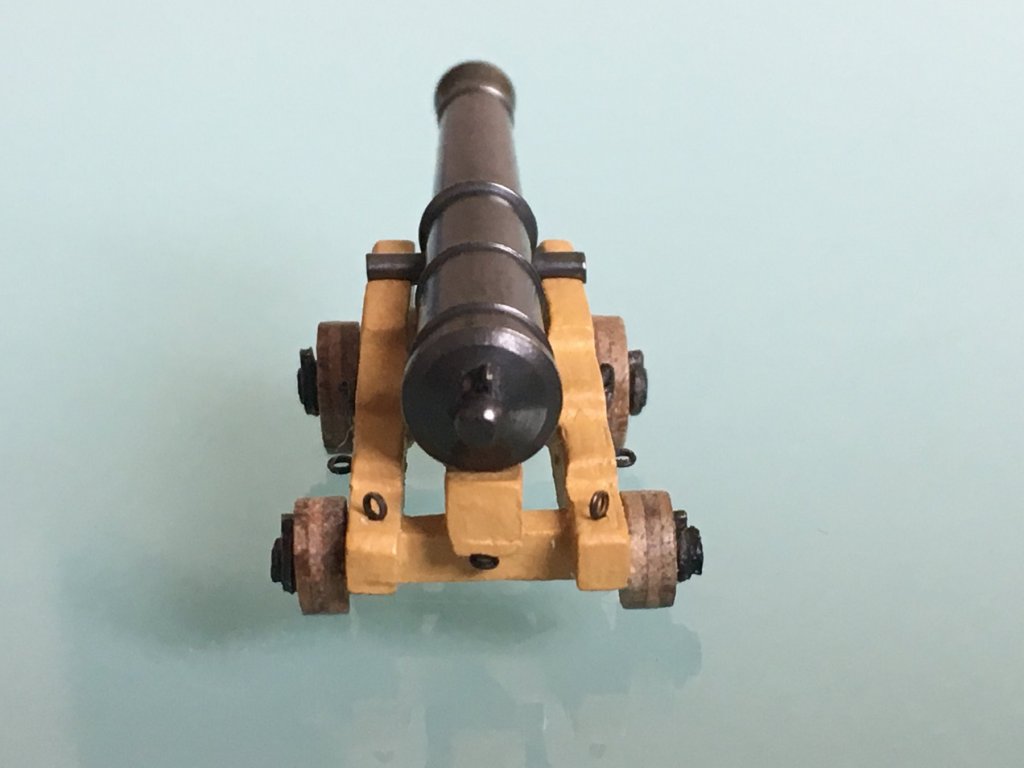
Blackened the upper gun deck 30 cannons with Birchwood Casey Black Brass. Found very good blackening hints on Graham's (Charter33) build log. Cannons cleaned in acetone Drying after blackened in Birchwood Casey Brass Black and rinsed in water. The three cannons on the left are already wiped with a cloth to remove the black dusty residue left on the cannons after drying. All 30 cannons wiped clean and polished with Carnauba Car Wax. For the carriages that are going to be under the skid beam assembly I added some more detail to carriage wheel shafts. I didn't like the squarish shaft protruding from the wheels. Bought some eyelets (C83506) from CMB, widened the hole to fit the shaft and cut off the eyelet leg leaving just a short piece. Blackened them, glued over the shaft and painted end of shaft black. Fitted eyelets to carriages, except for the once with the ring to take the breaching rope on the side of the carriages. In the image they are only dry fitted. These will be fitted later on when fitting the cannons to the carriages. Cannons will be fitted to carriage with the brackets, with the breaching rope already fitted with the eyelets and passed through the breaching ring at the back of the cannon. Robert


- 527 replies
-
- 9
-
-
- caldercraft
- victory
- (and 1 more)
-
Hi Graham, great idea for using eyelets 480 for the hooks. Tried one and they are the perfect size. Very kind of you to offer to send the jig, but don't worry I'll hammer a few pins in a piece of wood. If I run in any problem I'll let you know. I've already used quite a few of the eyelets for the rings to take the breech rope at the side of the carriage, but as you said if we run short of them we can always order from CBM. Robert
-
Very nice work Graham, I really like the rigging on the carriages. I am still trying to work out my way around the rigging on the carriages. Did you use the hooks supplied with the kit to to rig to the 2mm blocks? I made some hooks myself which came out quite good, but I am thinking they are a bit too big. Once again thank you for your hints on blackening. I blackened the cannons and I am quite pleased with the result. Robert
-
Graham, I used the Birchwood Casey Brass Black on some small items and it worked like a charm. I still have to do the cannons. Thanks for your help. Robert