rafine
-
Posts
2,932 -
Joined
-
Last visited
Content Type
Profiles
Forums
Gallery
Events
Everything posted by rafine
-
 Thanks so much to all for the good wishes. I greatly appreciate them. Bob
 -
An update on me, not on my Winnie..I just got out of the hospital in Florida and have flown to New York to enter the hospital here to undergo open heart valve surgery. it’s likely that I won’t be back in Florida for at least a month. Winnie will remain on hold for at least that amount of time. Bob P
-
Congratulations ,Chuck. A truly spectaular acheivement and the basis for the finest kit ever offered. . Bob .
- 1,784 replies
-
- 6
-

-
- winchelsea
- Syren Ship Model Company
- (and 1 more)
-
Wonderful work, Glenn.I wish my own looked as good. Bob
- 840 replies
-
- 3
-
-
- winchelsea
- Syren Ship Model Company
- (and 1 more)
-
Great work, Rusty. Your attention to detail is lesson to all of us. Bob
- 642 replies
-
- 3
-
-
- winchelsea
- Syren Ship Model Company
- (and 1 more)
-
Beautifully explained , and even more beautifully done. Bob
- 840 replies
-
- 5
-
-
- winchelsea
- Syren Ship Model Company
- (and 1 more)
-
Coming along really nicely. You’ve done the hard parts. It should be easy and fun from here. Bob
- 840 replies
-
- 3
-
-
- winchelsea
- Syren Ship Model Company
- (and 1 more)
-
Thanks so much Jim, Glenn, Ben, Grant, Bob, Thomas and JJ for the generous comments. Thanks also to the "likes". Jim, I' glad that someone will benefit from my exercise in clumsiness .Definitely a good idea to leave the swivels off til the end. Glenn, the final display will be a wooden base with a frameless acrylic top. The model will be mounted just as it is now on brass rods inserted into brass tubes .I have grown partial to that method over the years. Thomas, the fleet at home never grows. I am on a strict " one in ,one out" policy. Every time I finish a model to be kept at home, one of the existing home fleet has to go. Through the years, I have given many to family and friends and donated some to charitable auctions. Bob
-
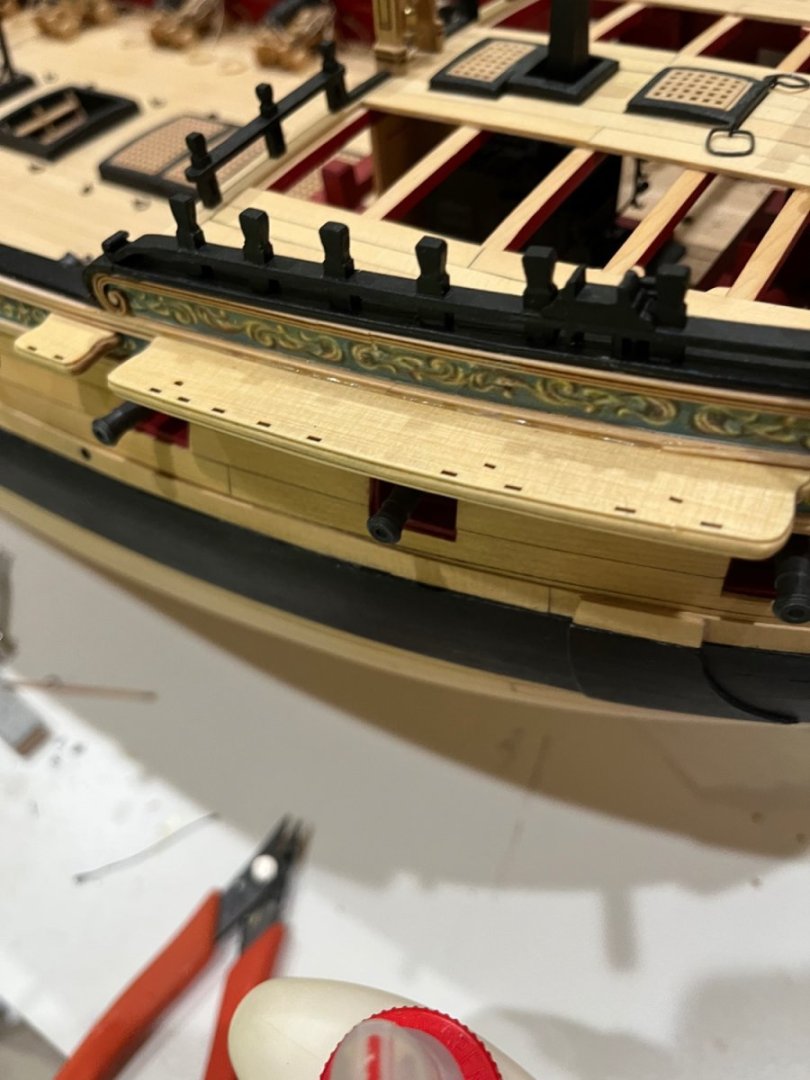
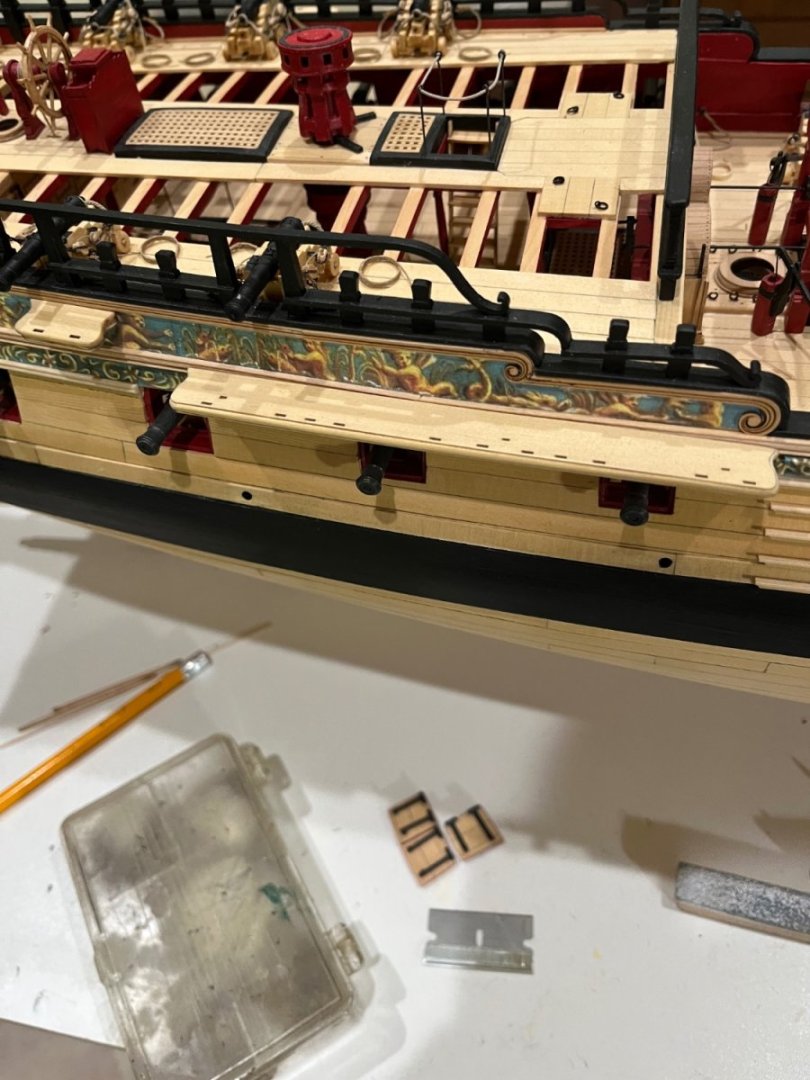
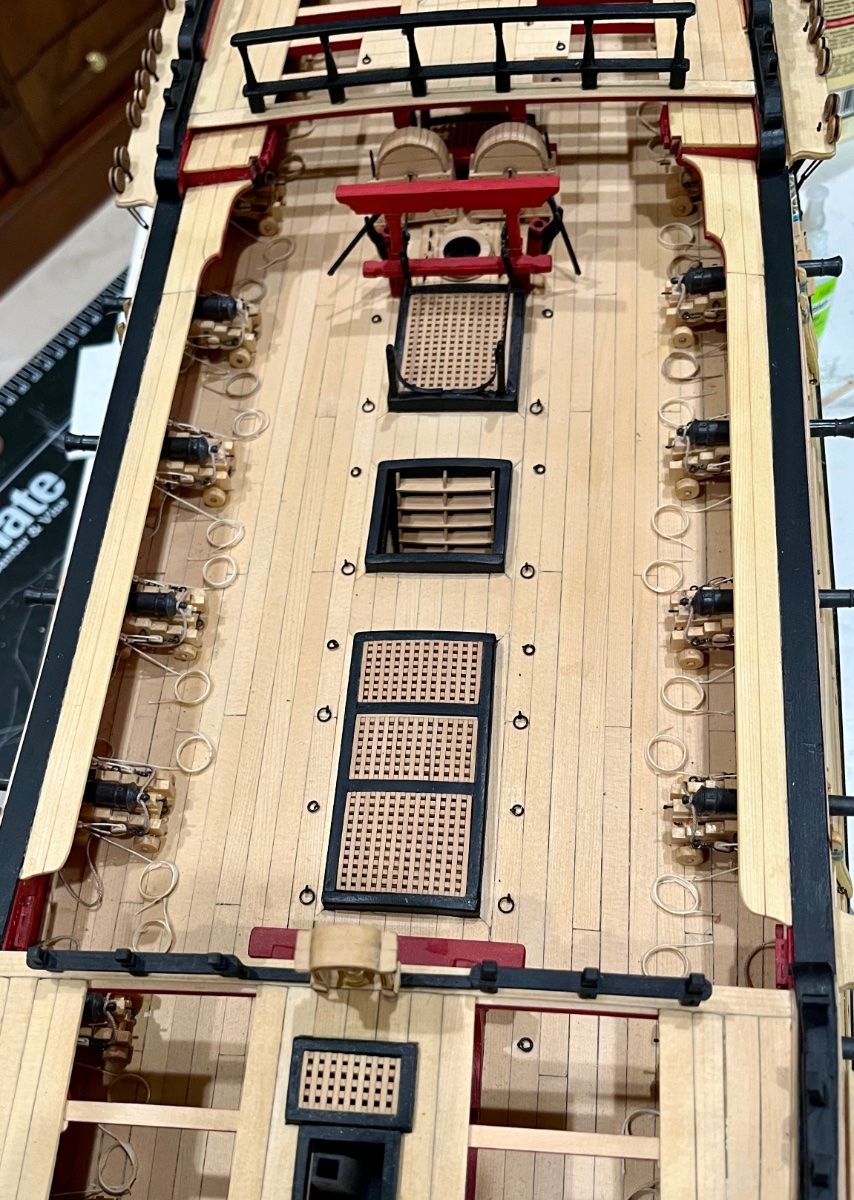
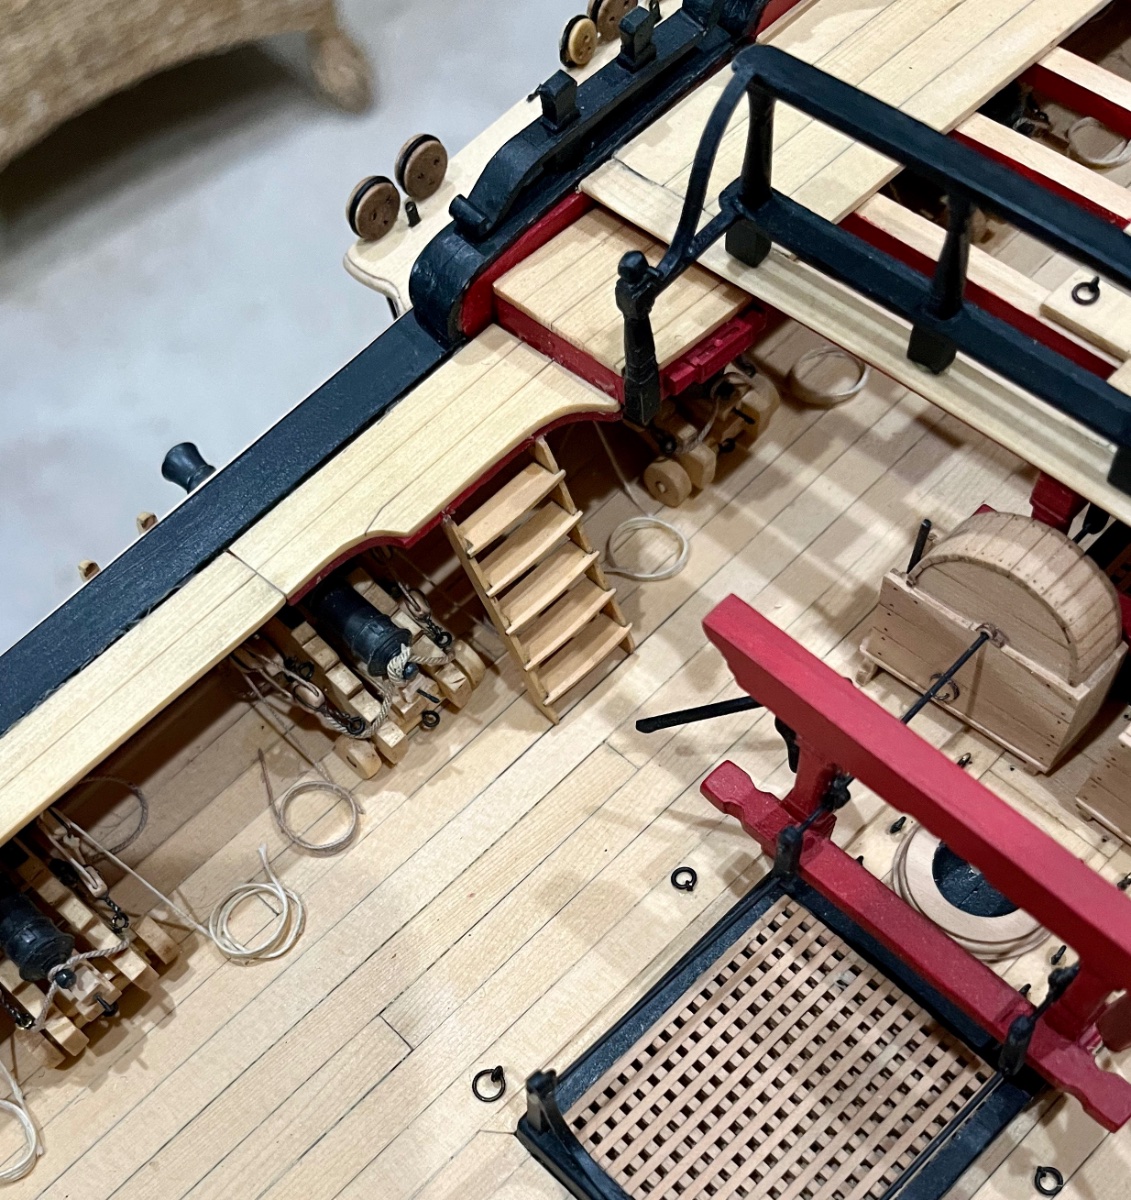
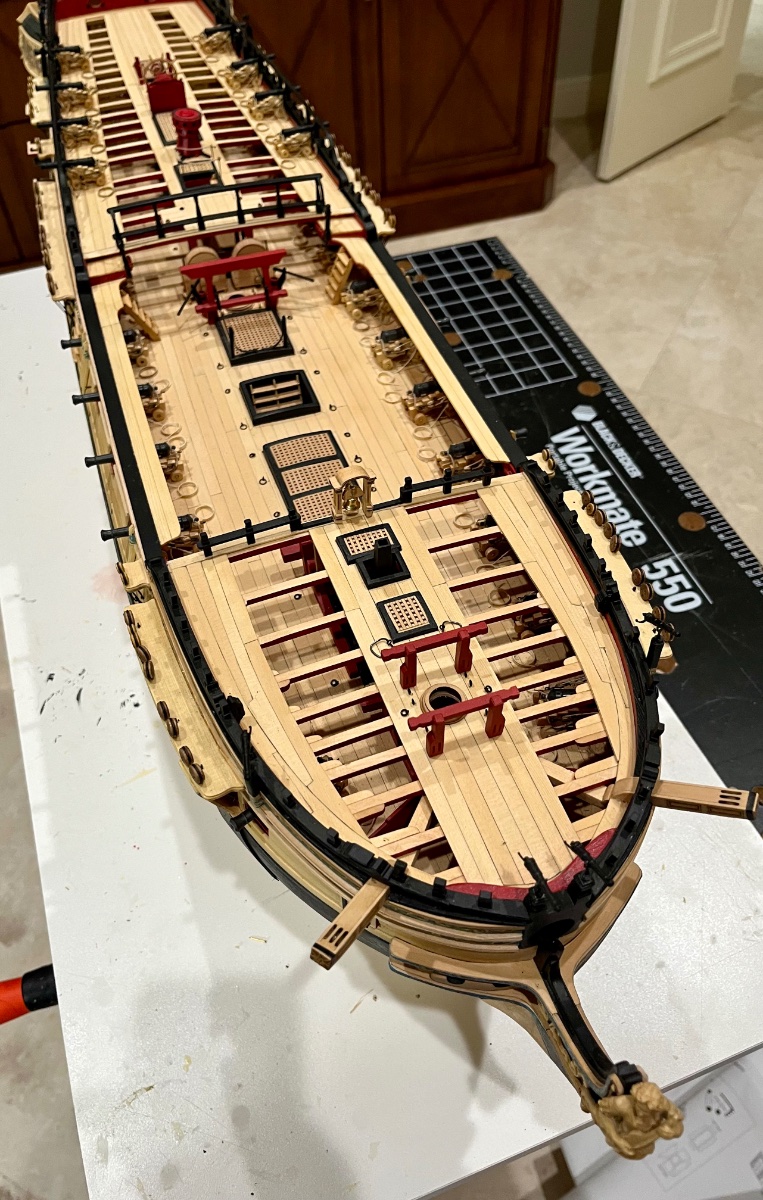
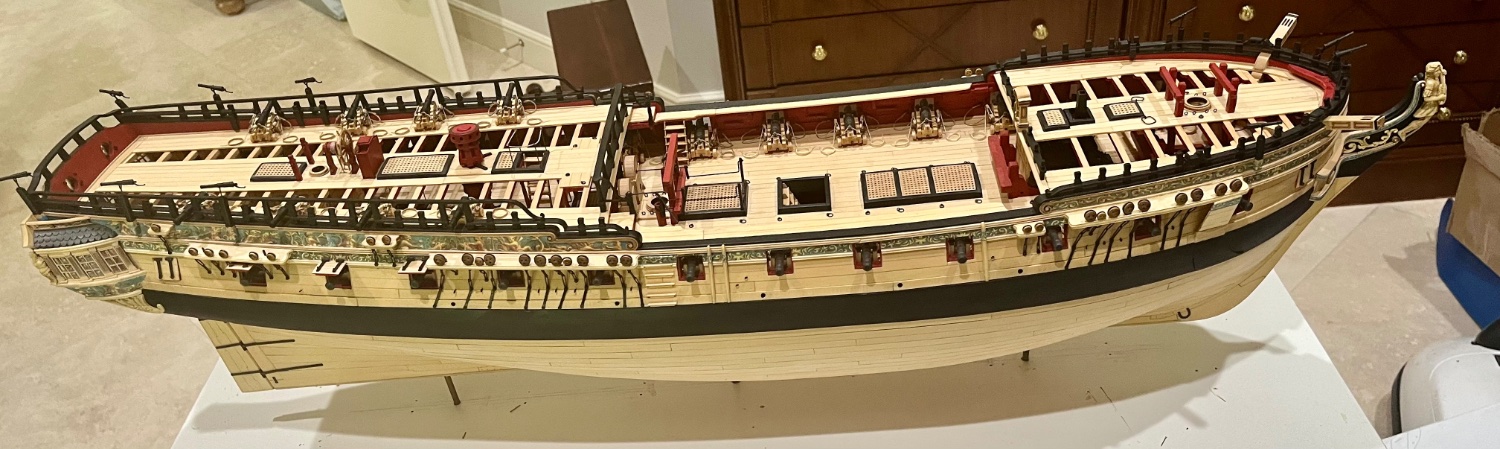
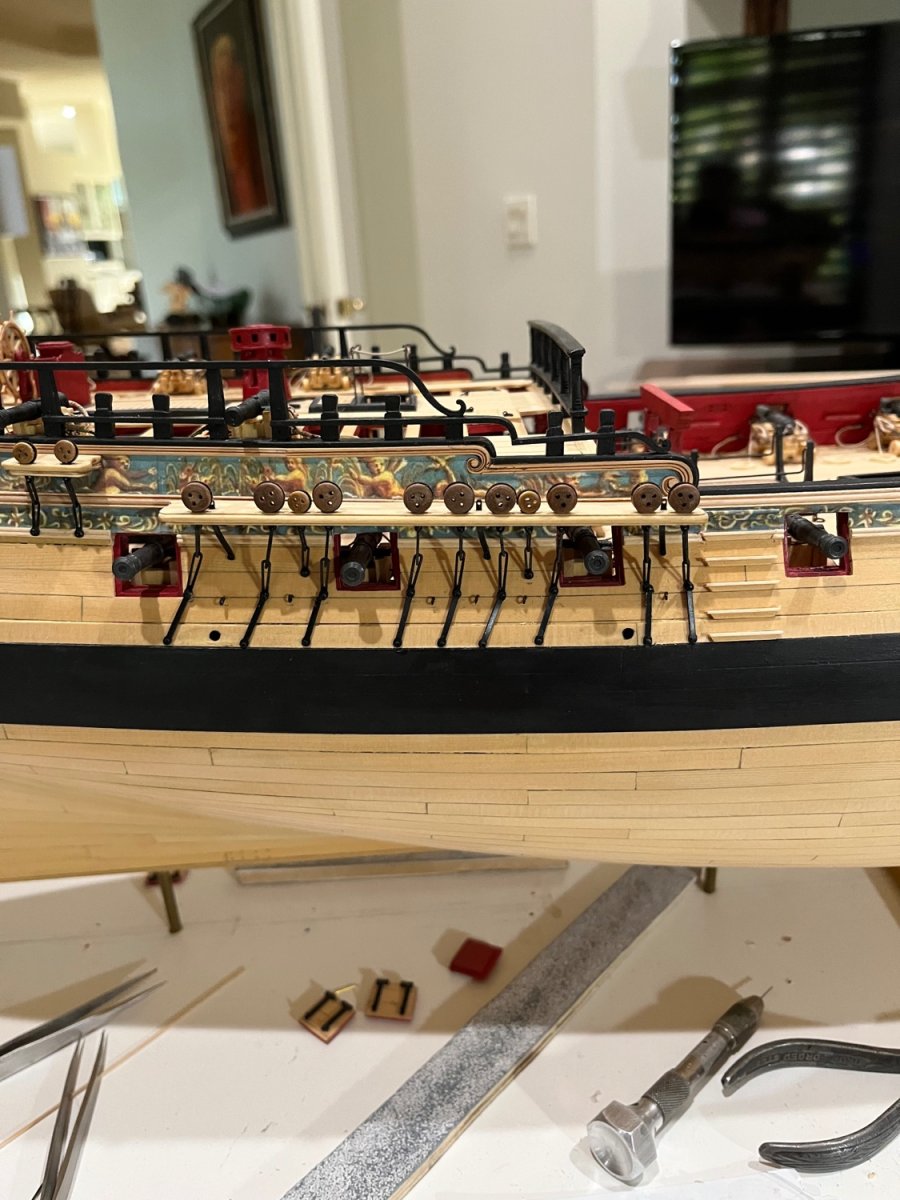
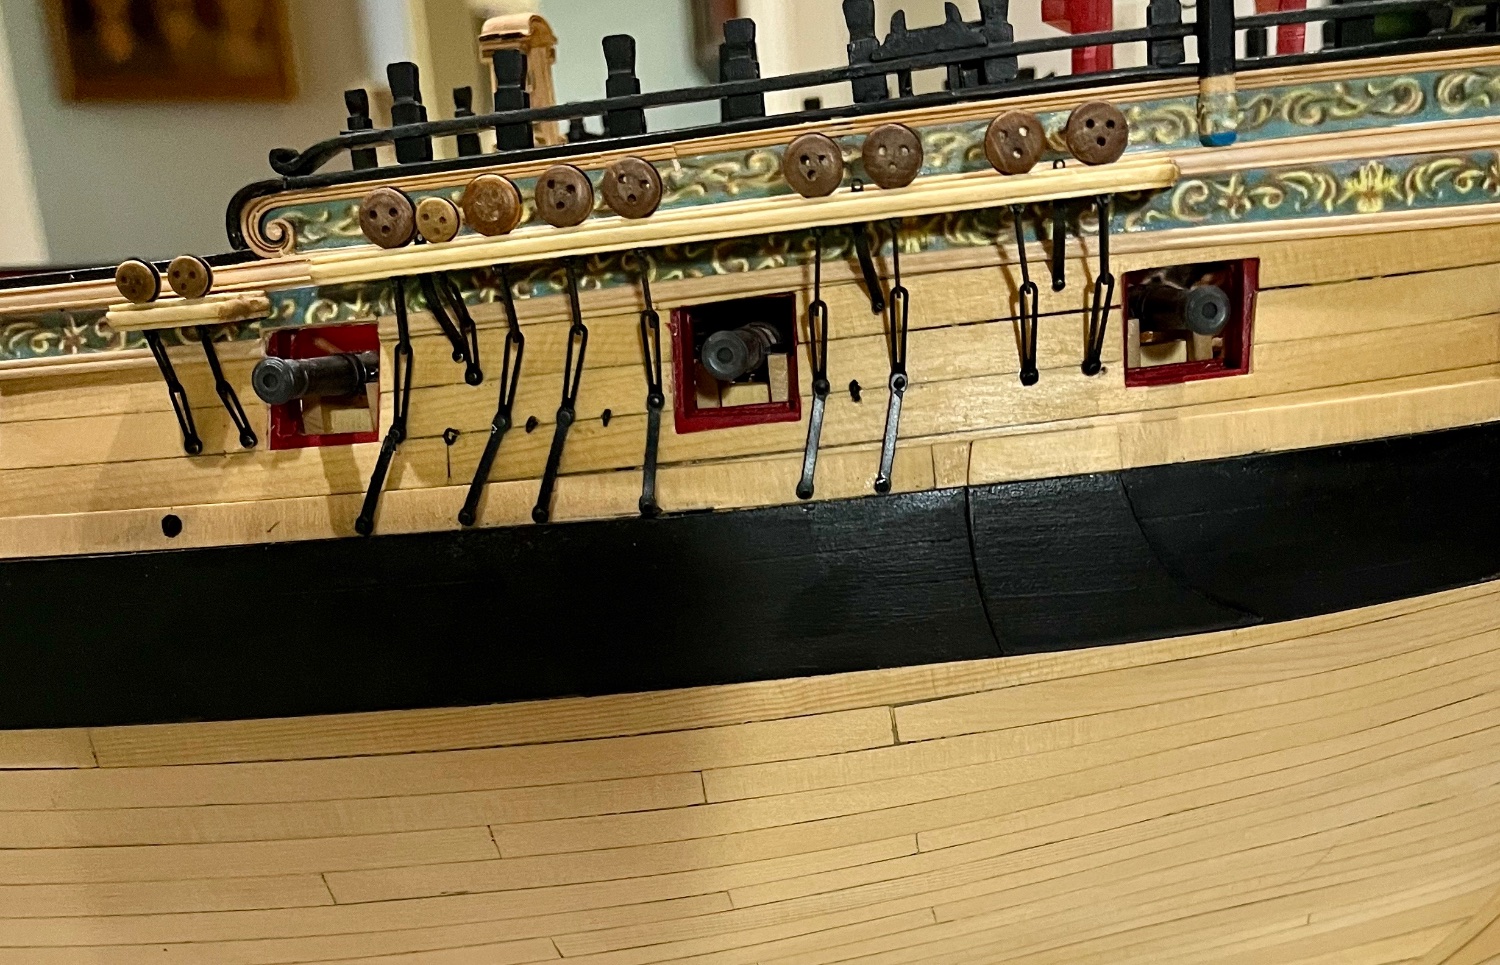
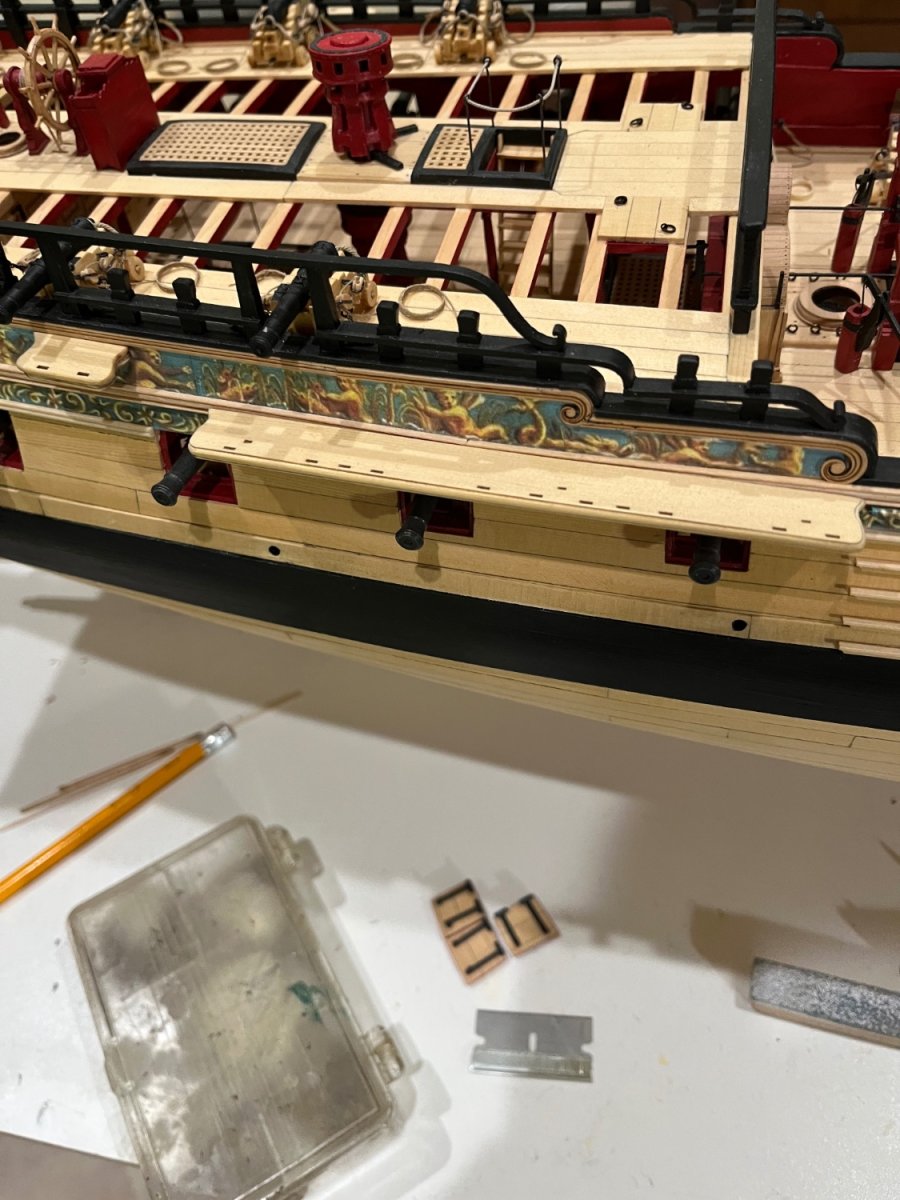
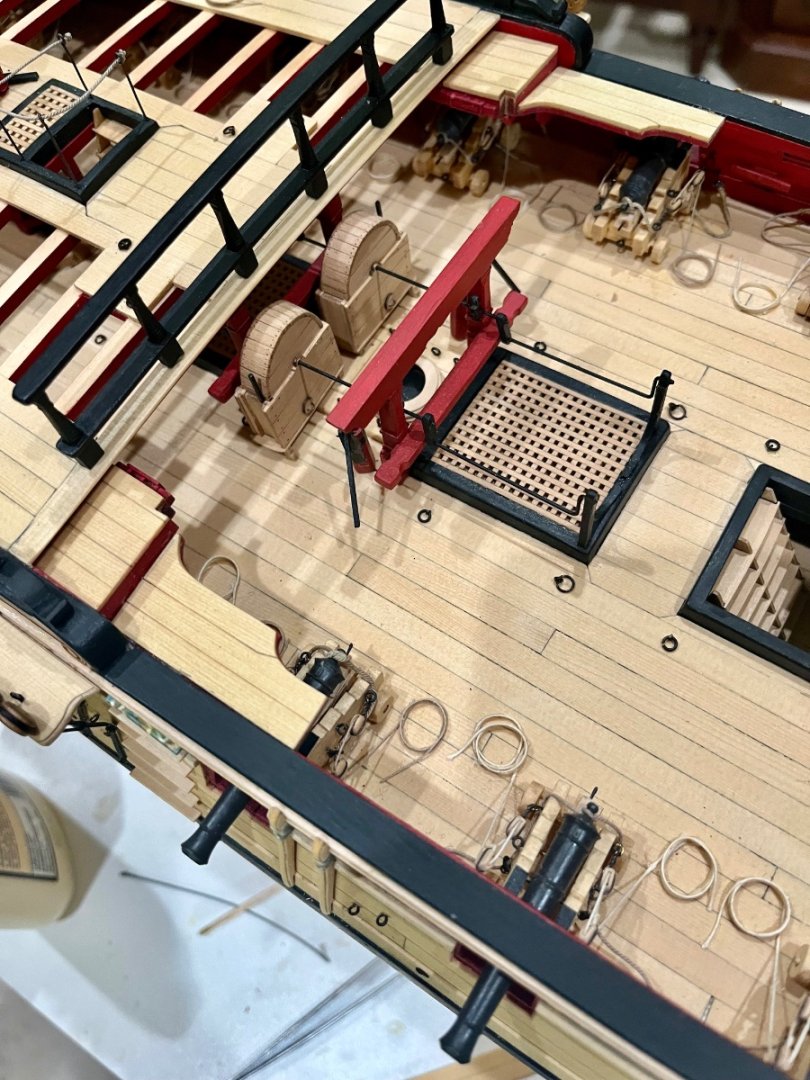
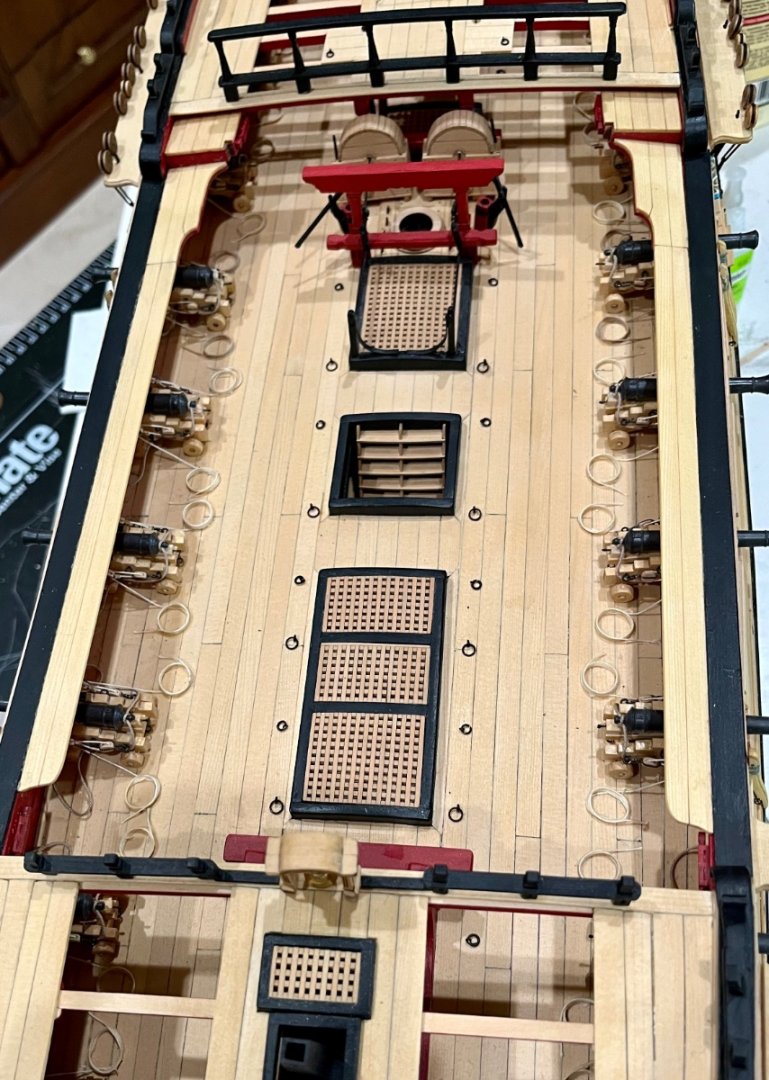
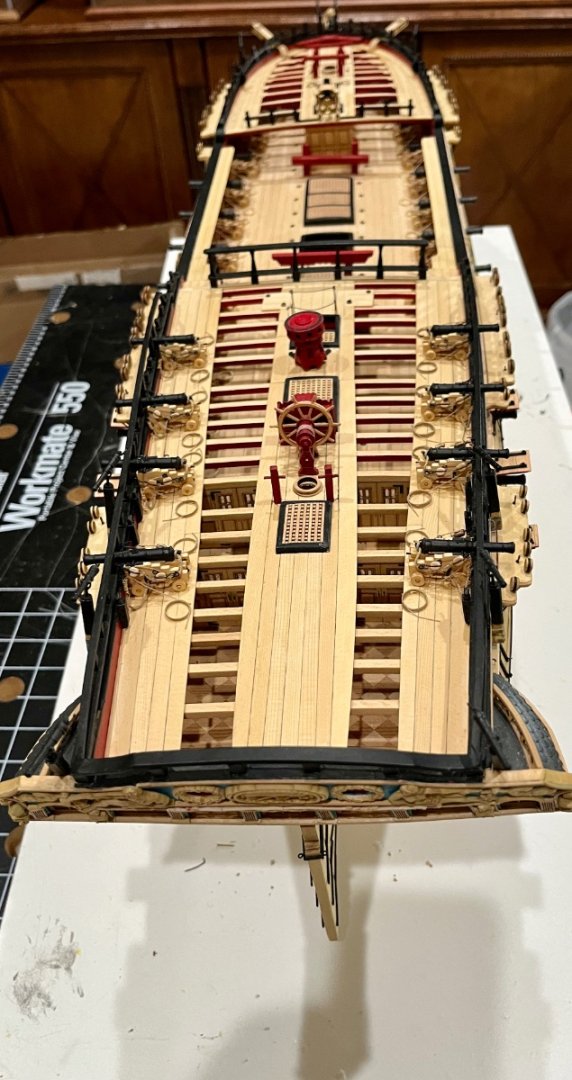
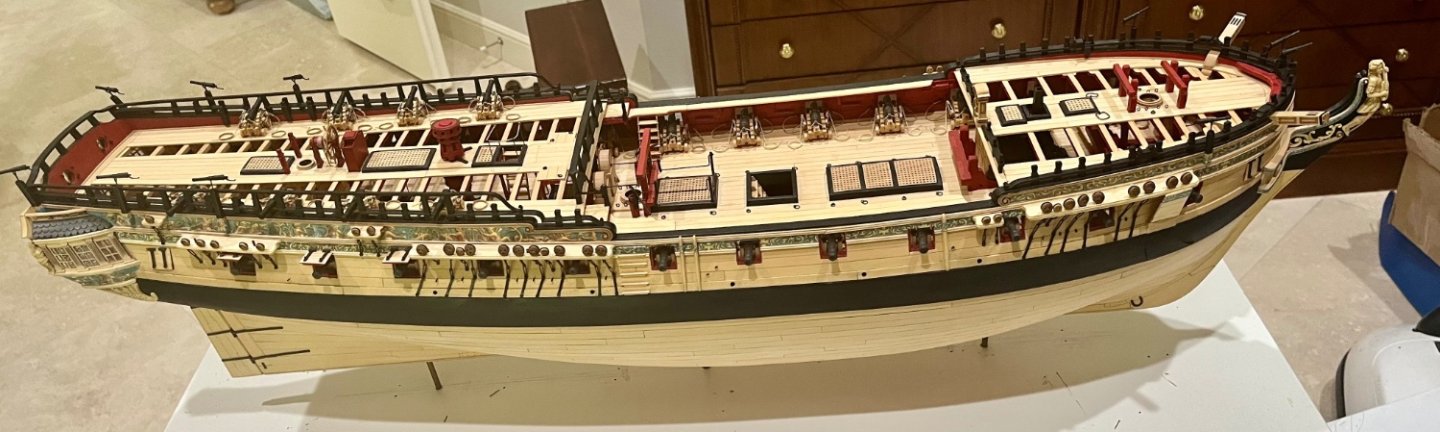
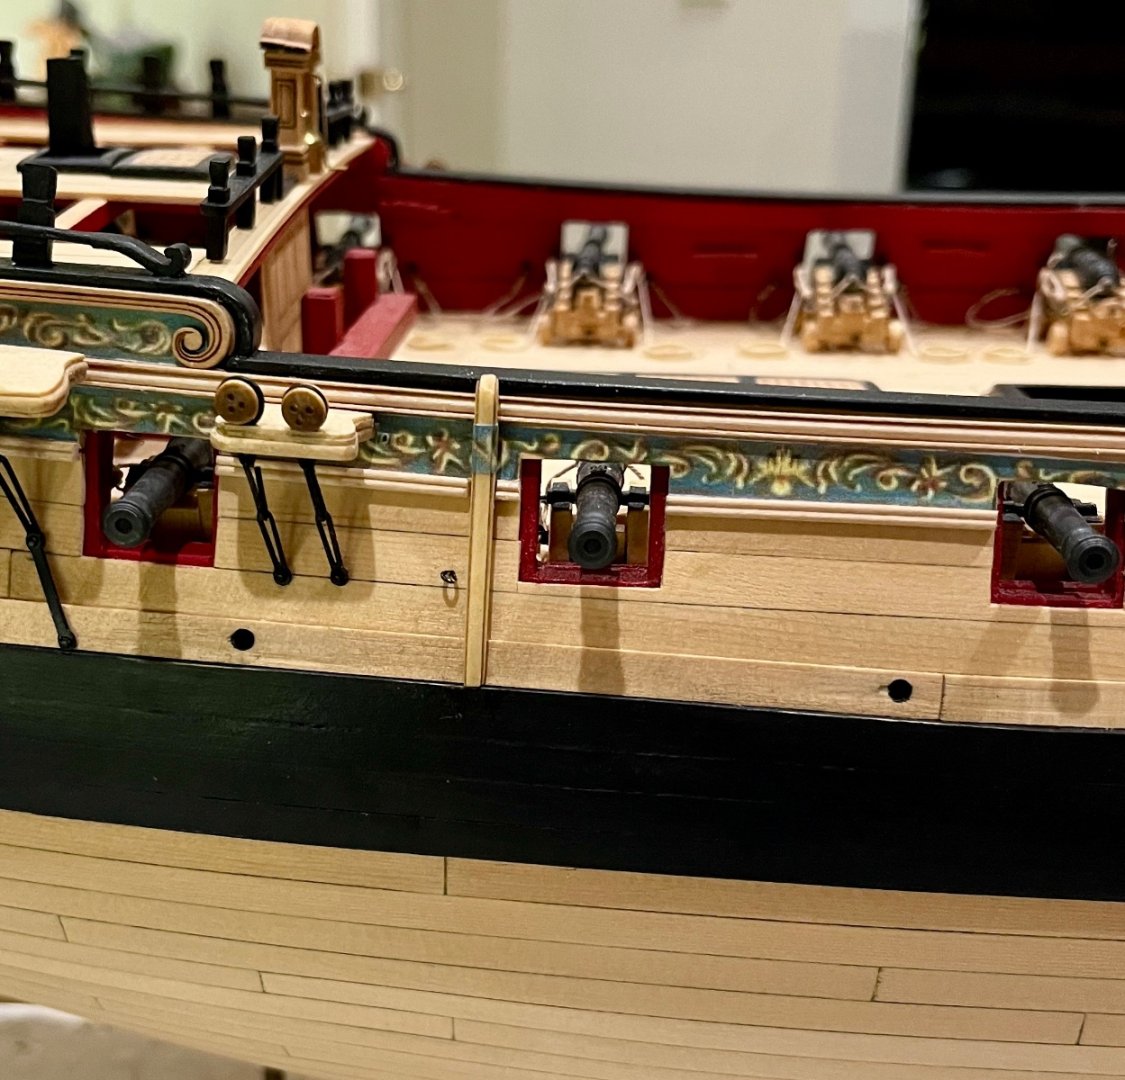
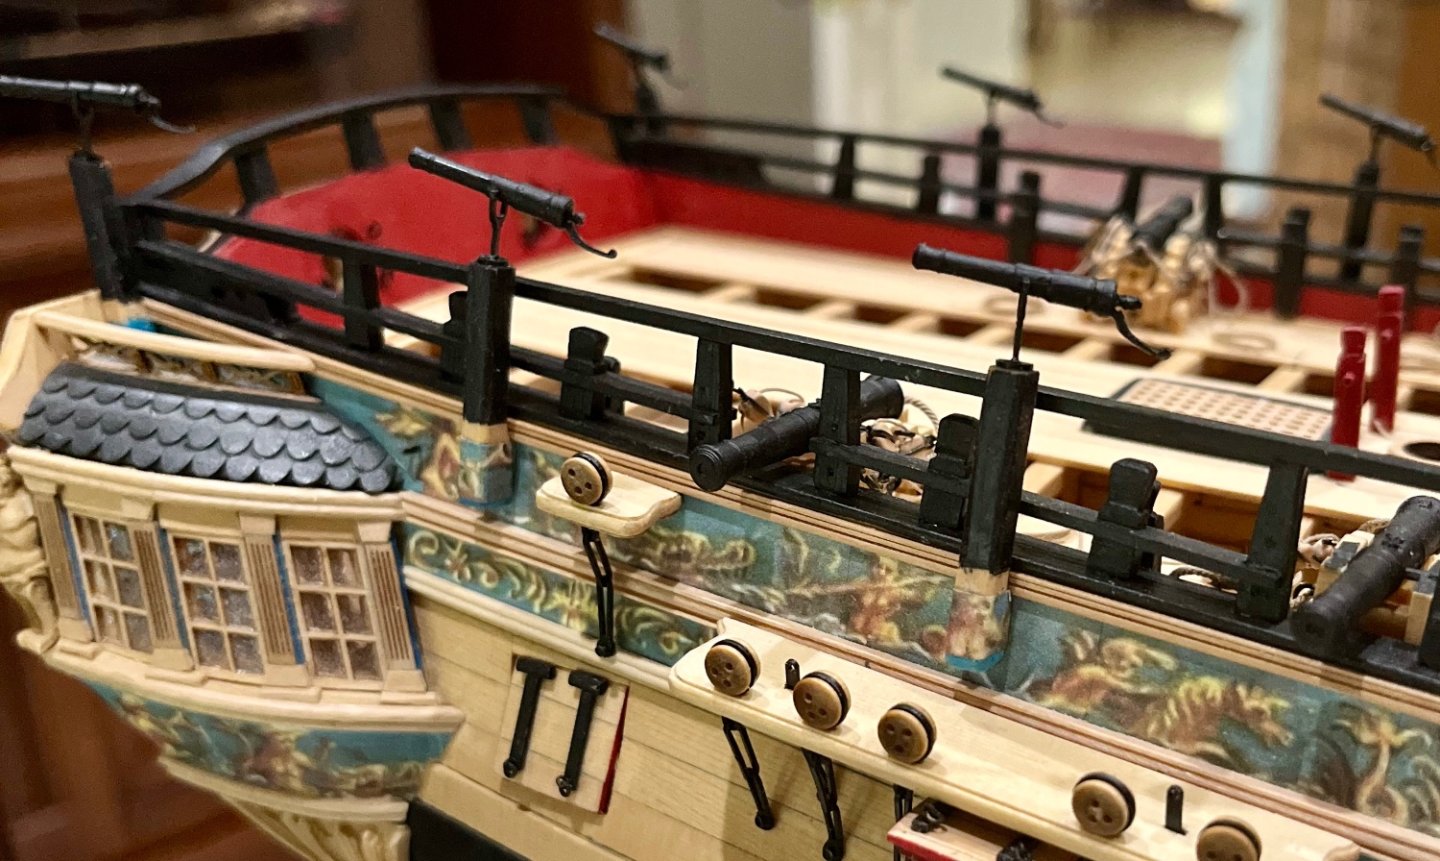
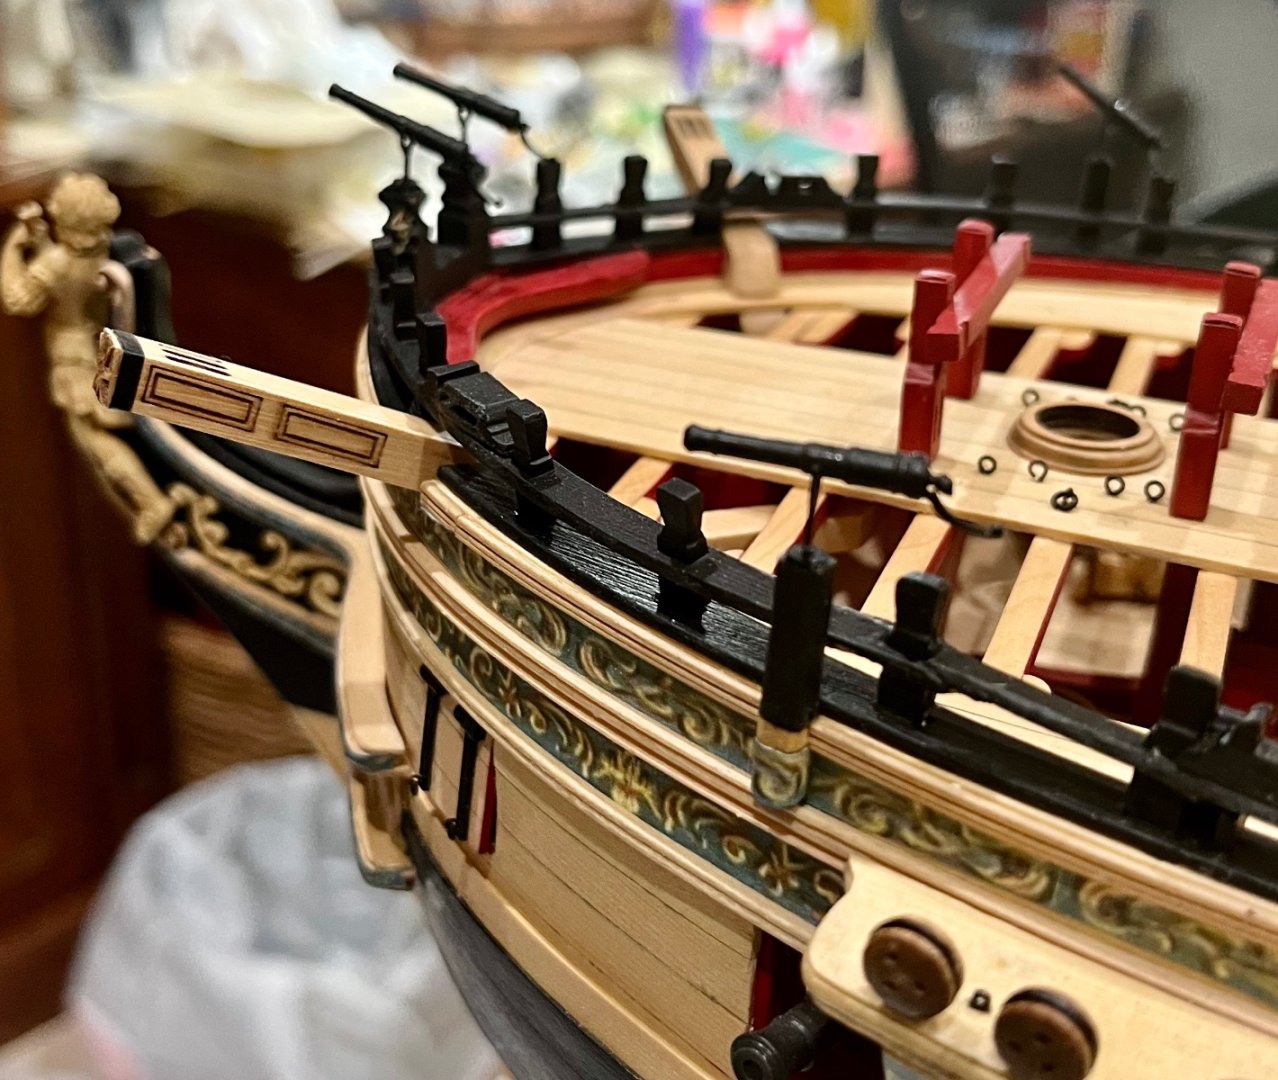
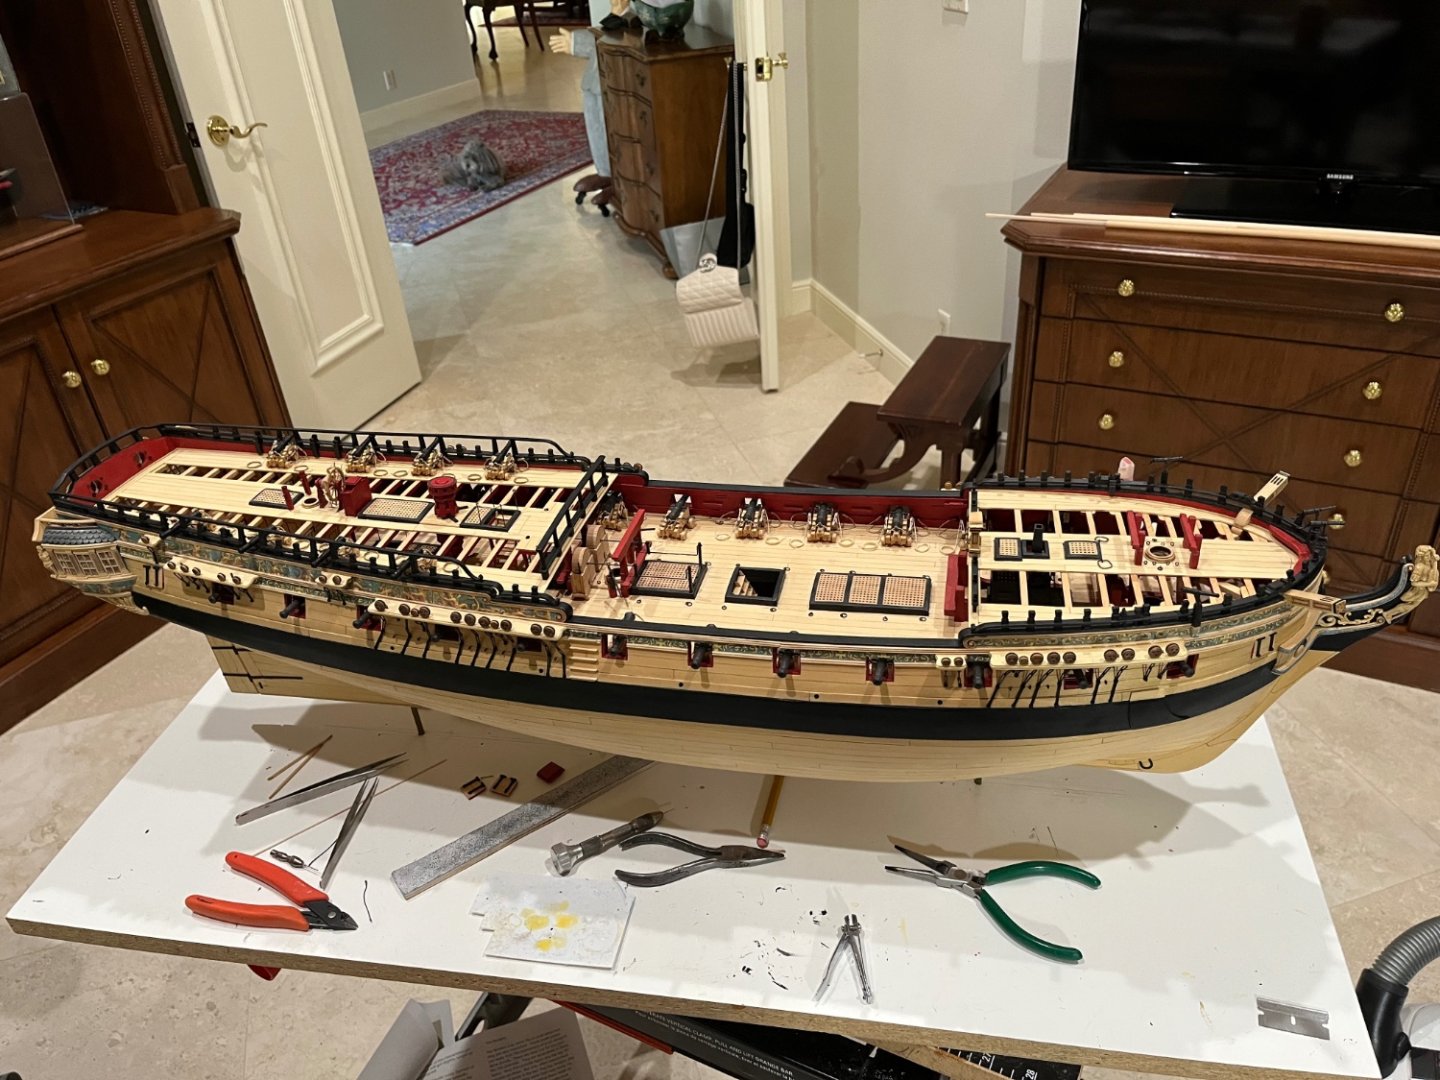
I have now completed the work in chapter 11. The final items were the gangways, gangboards and their supporting knees, the newel posts and fancy rails, and the gangway ladders. Although the work was relatively straightforward, it was done in tight crowded spaces and required an extra measure of care. Apparently, I didn’t do that because I damaged a number of previously installed items, including snapping off off three more swivel guns. This meant that my final work was damage repair and replacement and touch up painting. The attached photos show the work done with a few overall shots of the model as it sits now. Bob


-
Dave, you're off to a great start. Over the course of my 50+ years of model building, I've actually done Rattlesnake twice. Unfortunately, I don't have either model, no photos and very little memory of the building process to be able to offer much specific help. I do recall that I enjoyed building them, and hope that you will, as well. Bob
-
Beautiful work.The effect of the lighting is spectacular. Bob
-
Jim, there are 26 5mm and 34 6mm needed. If you are using Syren deadeye kits, you will need 1 pack of each size. Bob
-
Thanks so much thomas. Thanks also to the "likes". Always appreciated. Bob
-
Thanks so much Jim and Bob and the "likes". Bob
-
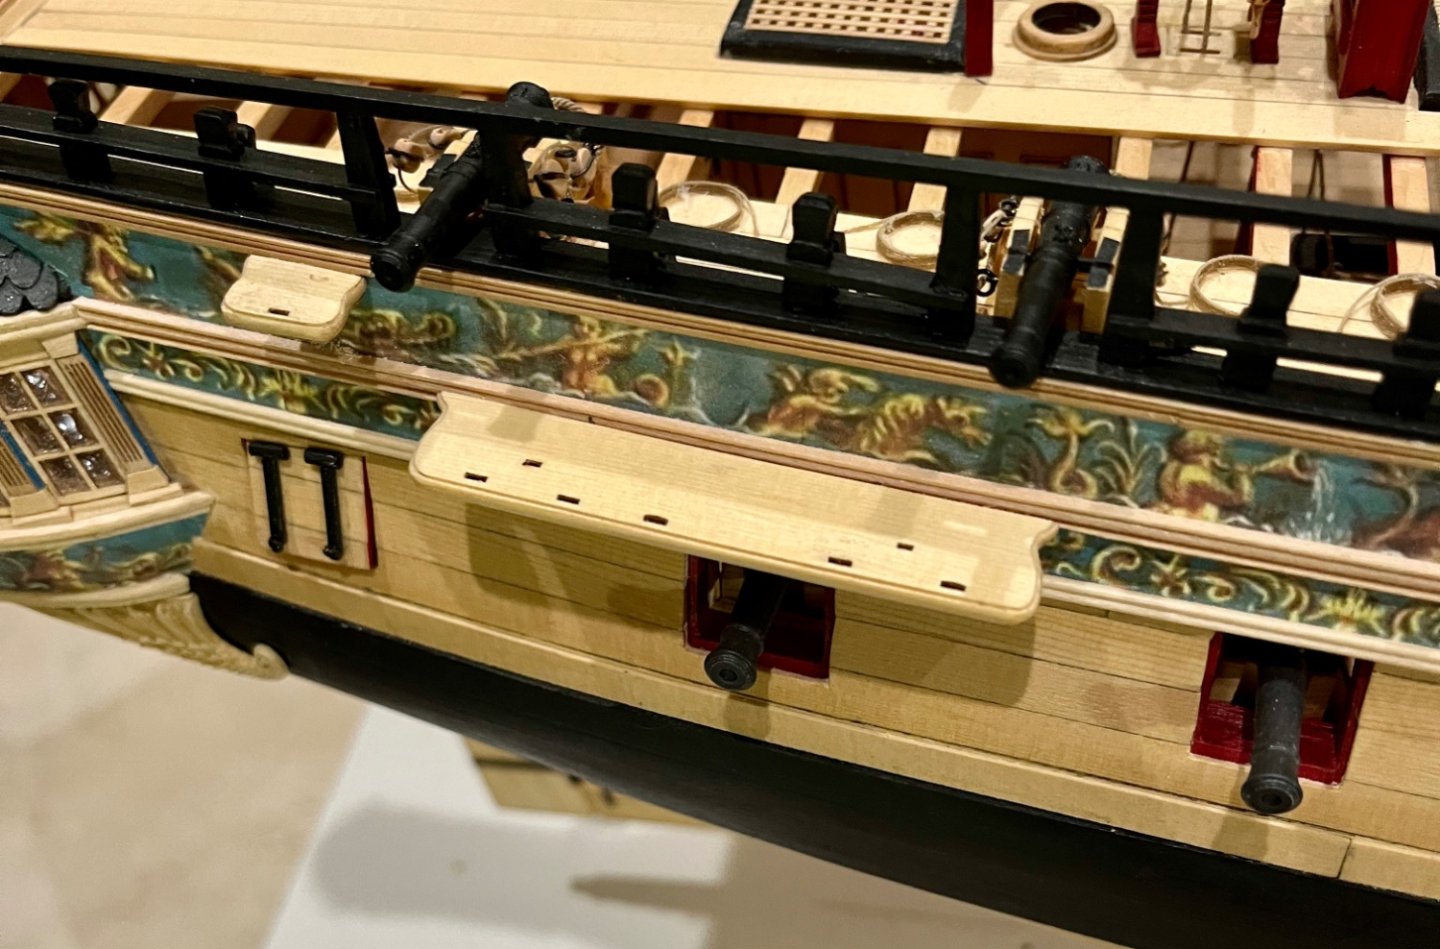
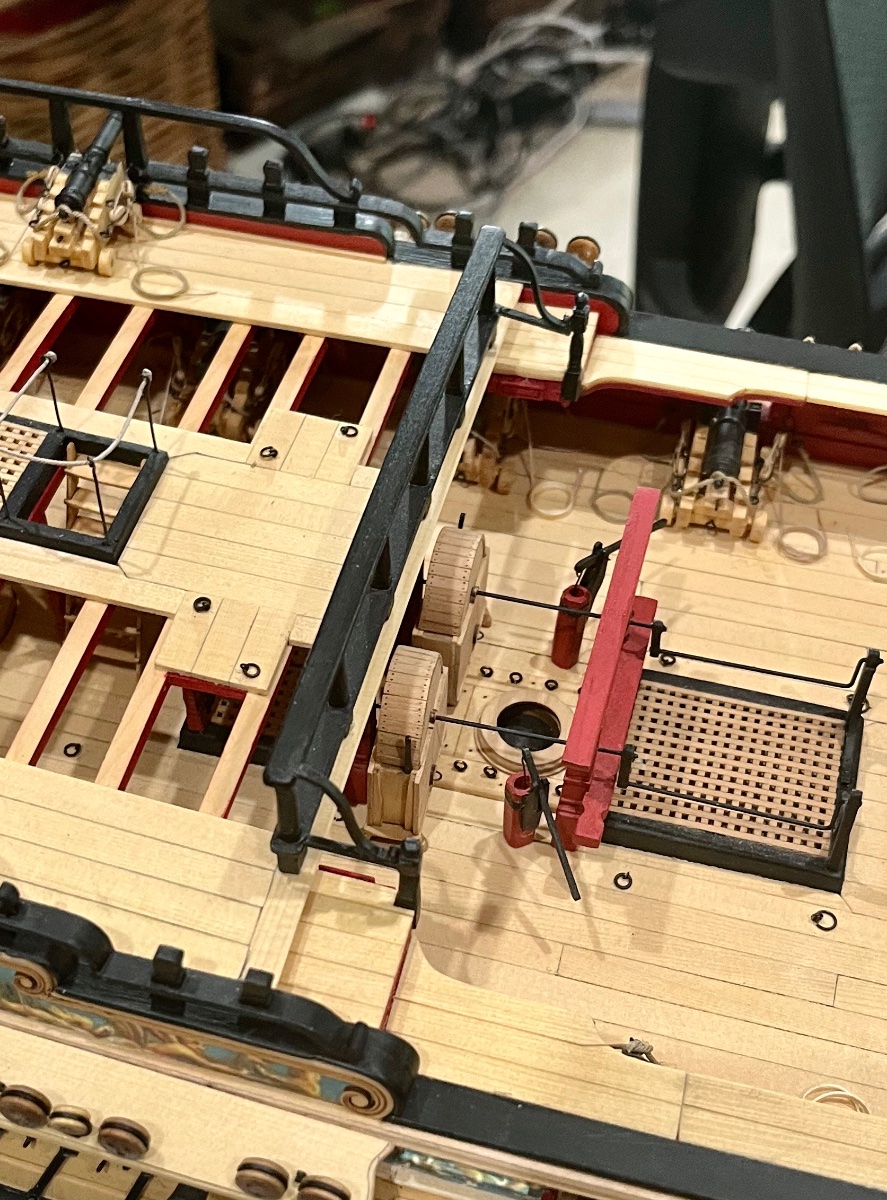
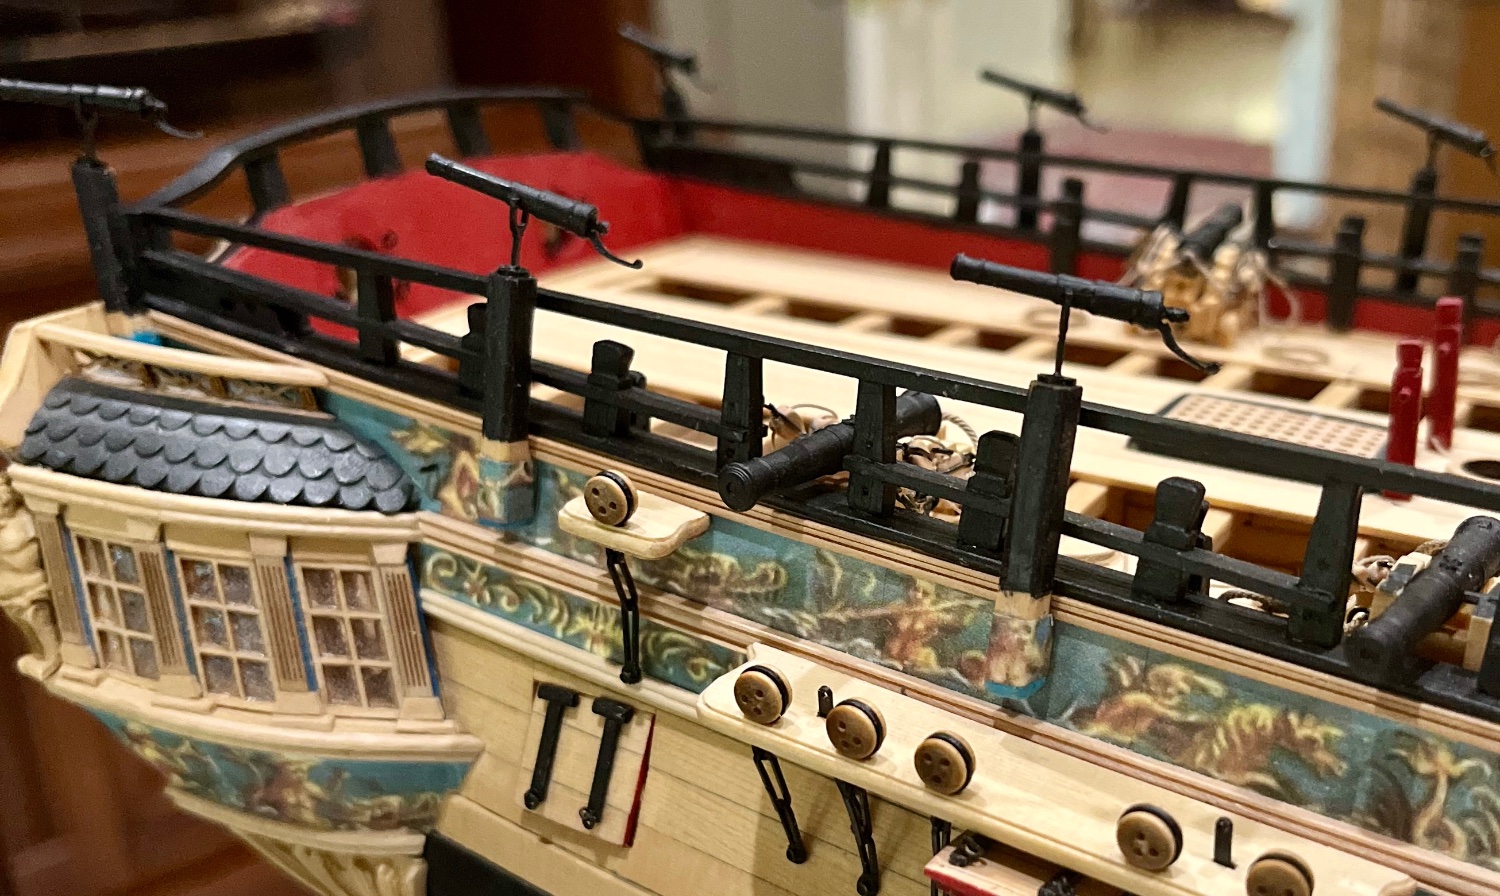
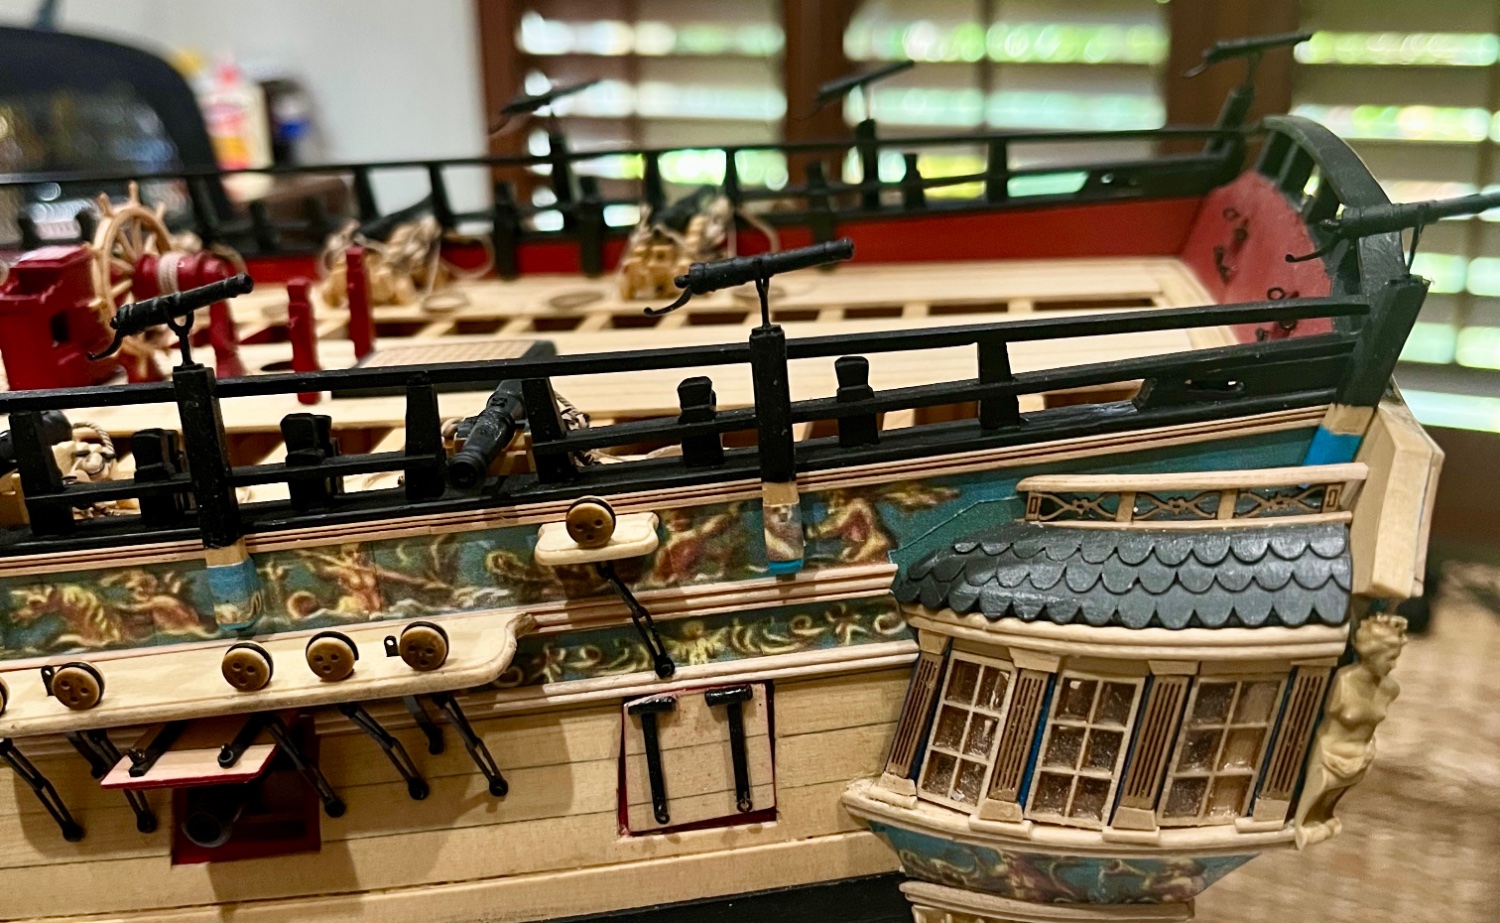
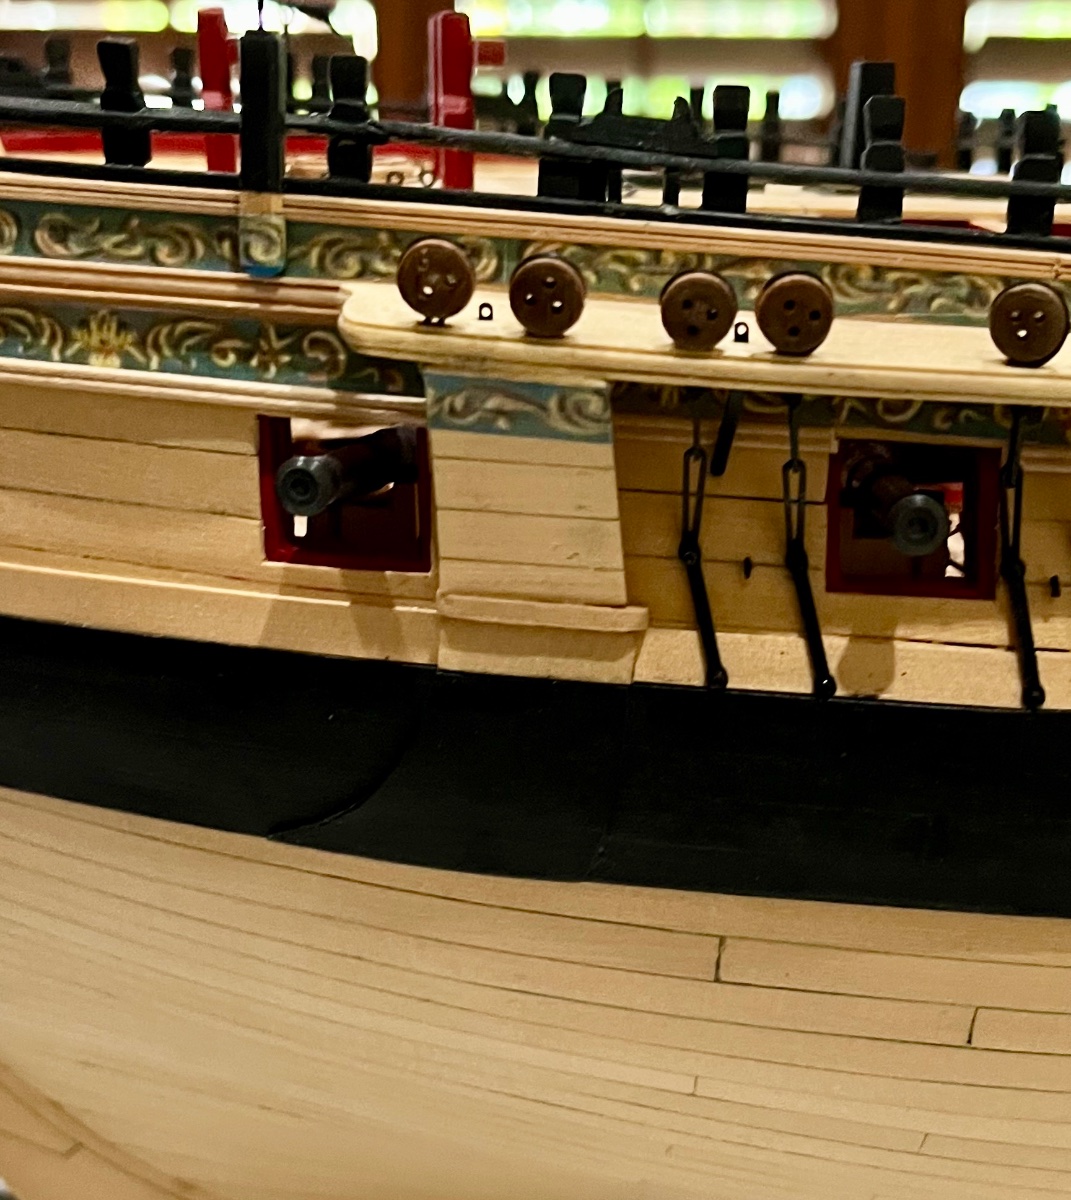
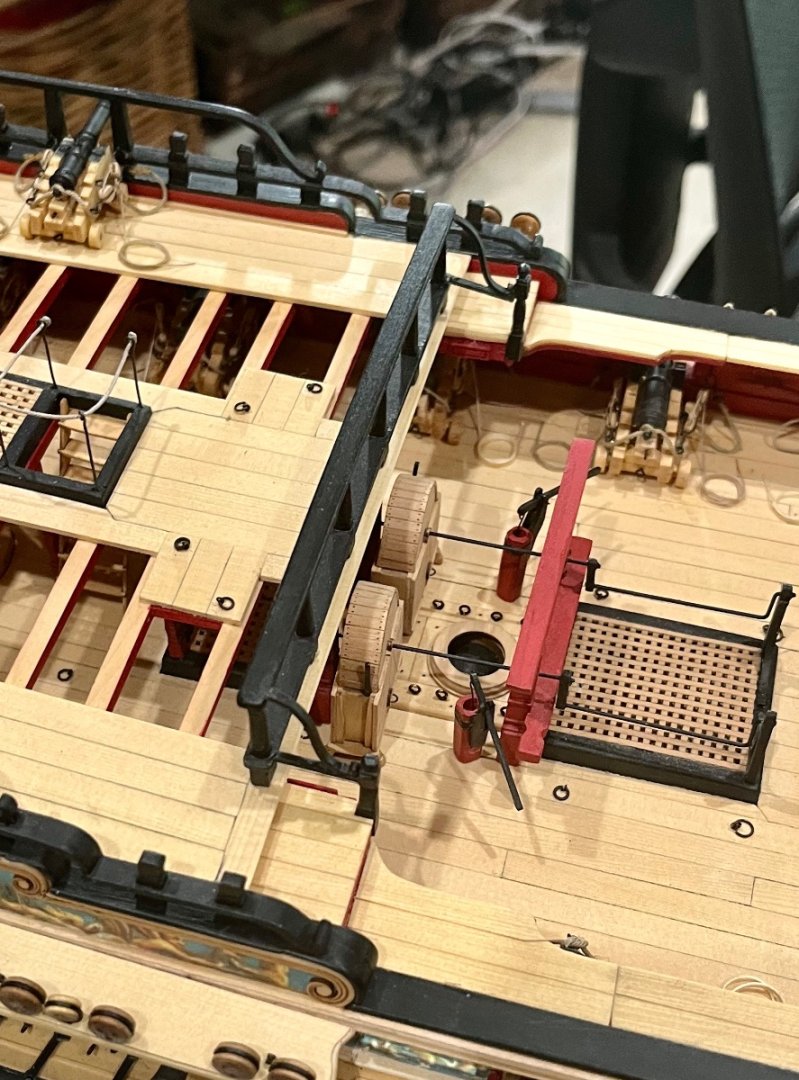
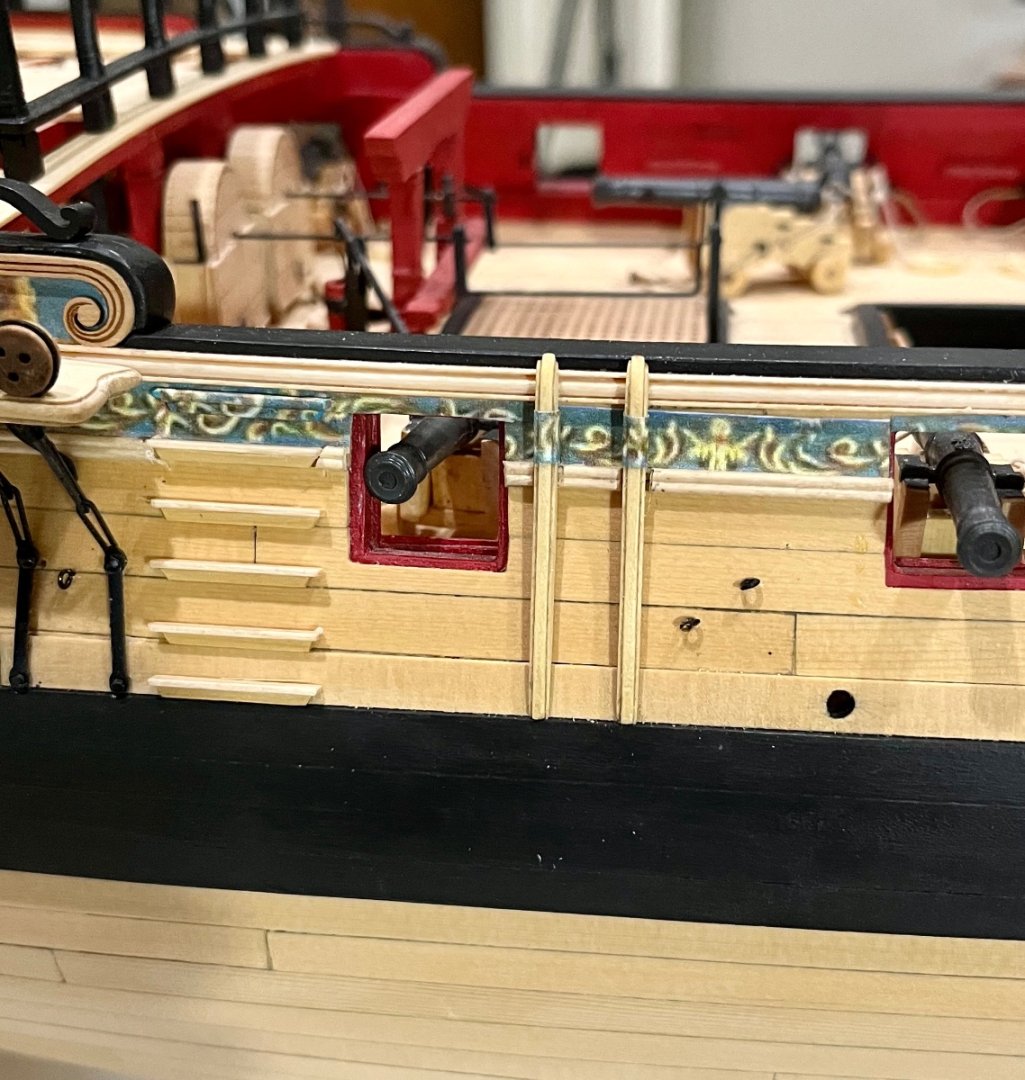
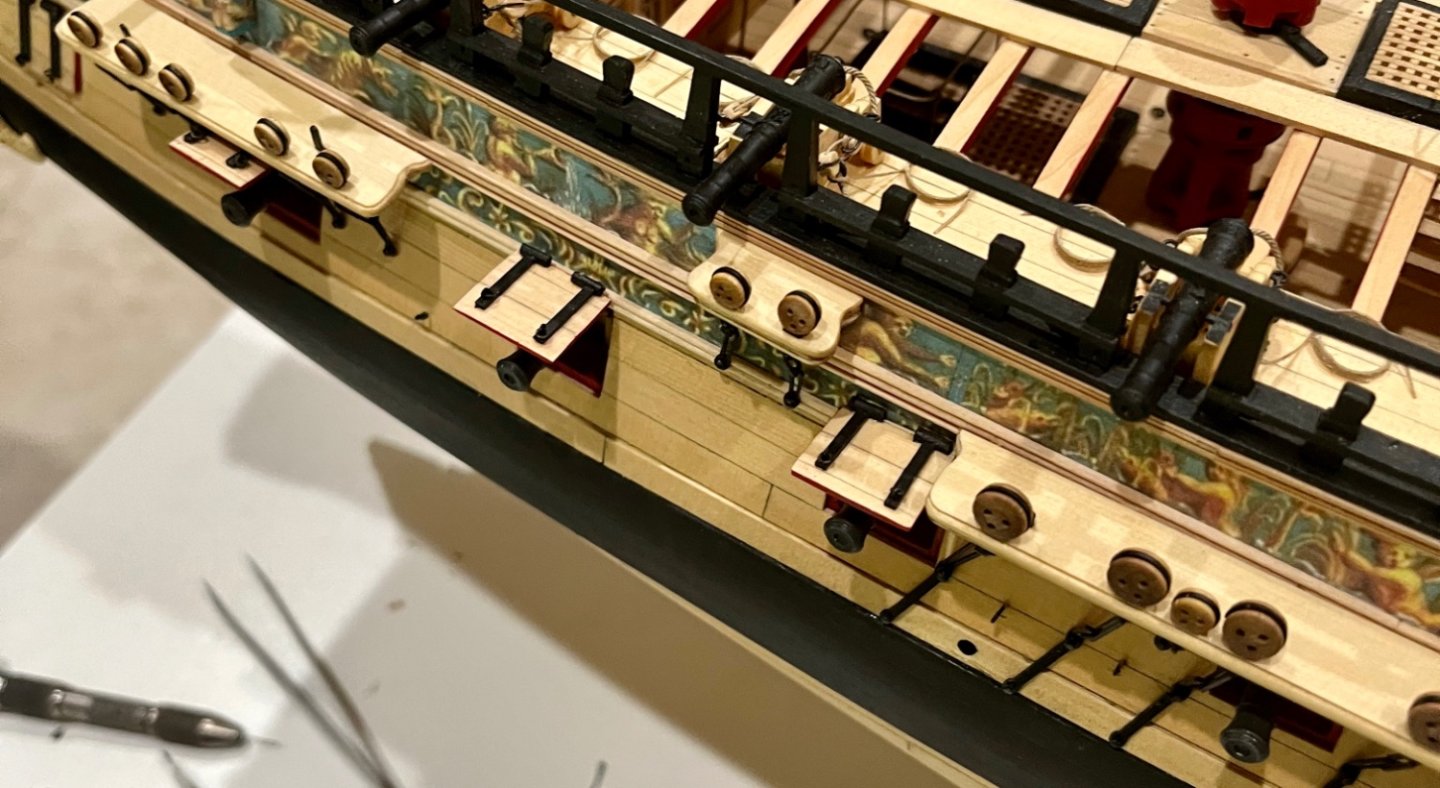
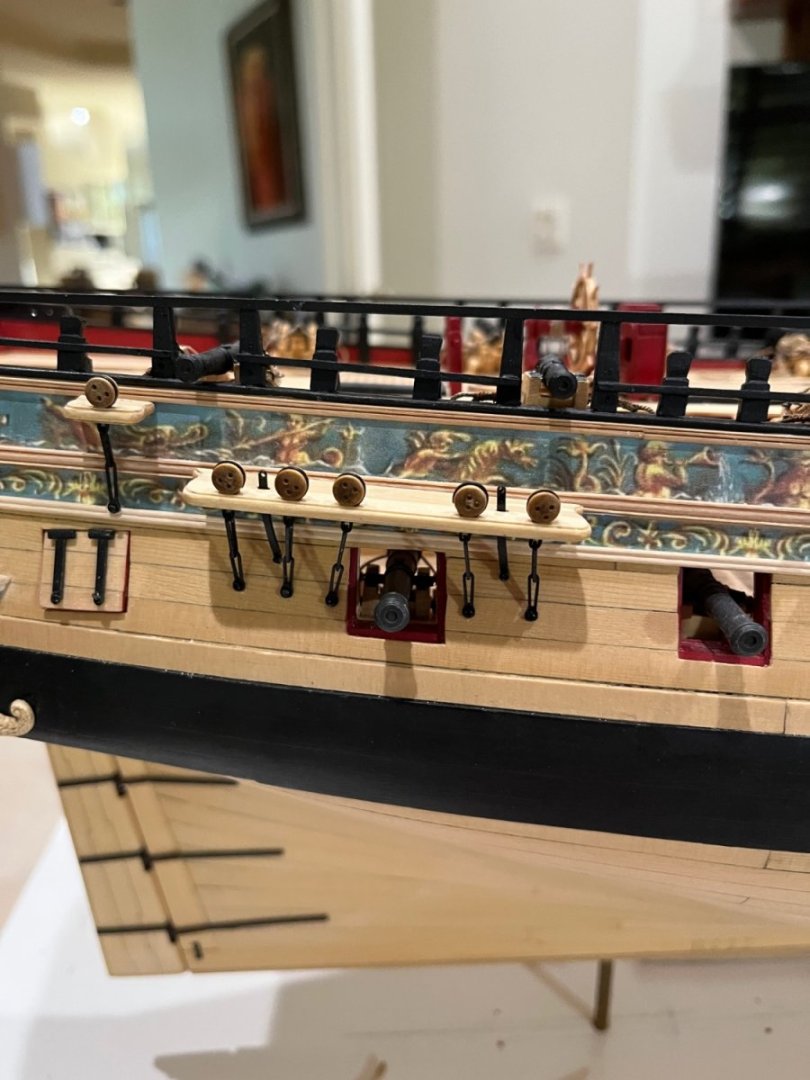
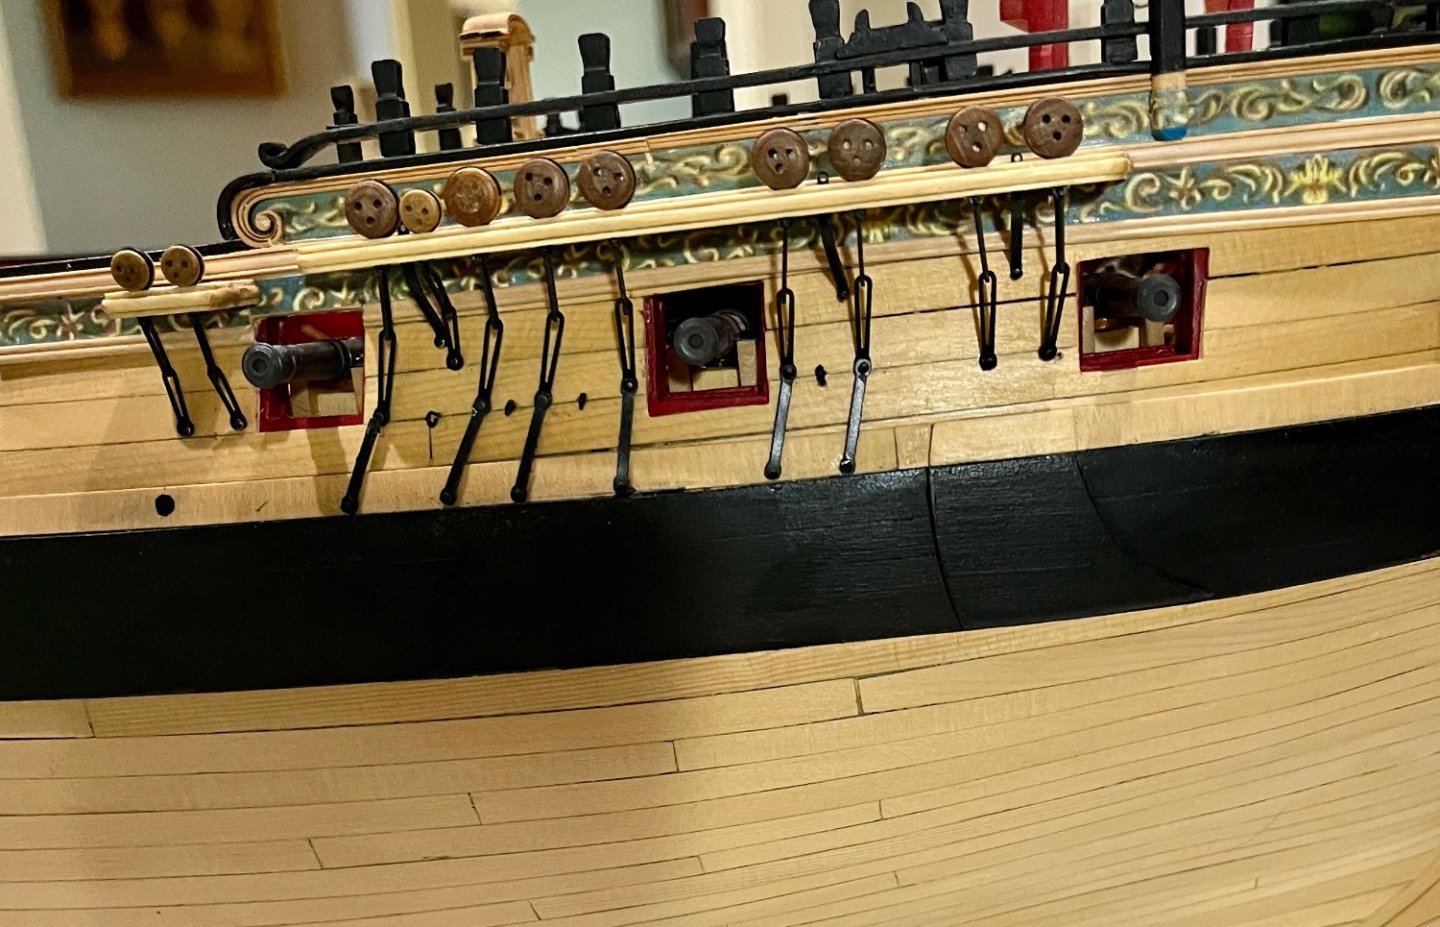
I have now completed the remaining external hull detailing in chapter 11. This included making up and installing the billboards, the fenders and chess trees and the swivel guns and their stanchions. When that work was completed, I mounted the gun port port lids which I had previously left off out of caution. Speaking of caution, the mounted swivel guns are extremely fragile, as I learned when I snapped off the two at the bow with an inadvertent hand movement . Replacing them required drilling through the broken off pieces glued in the knightheads, a tricky task. The last thing I did was to add the rigging eyebolts shown on the plans. All in all, it was enjoyable work and fun to see the outcome. I will now finish up chapter 11 with the gangboards et al. Bob


-
Thanks so much Rusty. I guess that I was wrong Jim. Bob
-
thanks so much Jim. Don and Kevin. Jim, I saw no reference in the chapter eleven monograph about cutting out the molding, and to my eye the photos show the channels attached to them, which was what I did. I had some Scotch adhesive on hand. That price sounds crazy. Bob
-
Thanks so much Bob. Greatly appreciated. Bob
-
Thanks so much for the generous comments and the "likes". Glenn: my "man cave". Part office, library and workshop .The good news is that it's a comfortable place right in the house; the bad news is no power tools, other than a Dremel. Greg: no rigging. I can't even imagine what I would do with a finished rigged model of this size. Giampiero: A great compliment from a builder as skilled as you. Thomas: I feel the same about yours. Bob '
-
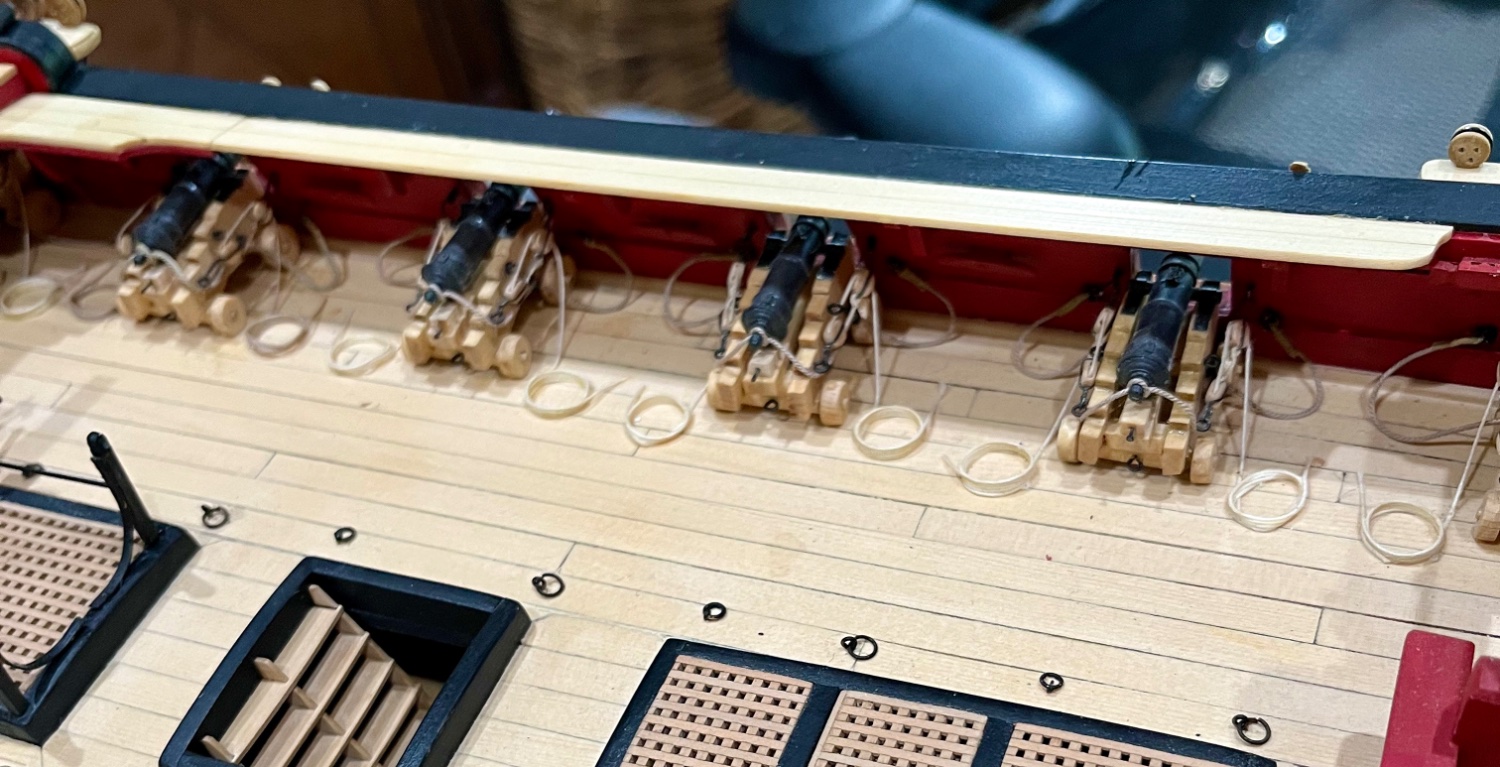
JThe deadeyes and chains were next up. At least for me, this was one of the more tedious tasks in the build . Due to stupidity on my part, things started of badly. I bought and assembled Chuck’s deadeye kits and also bought and assembled the Model Shipways block tumbler suggested in the deadeye instructions. I couldn’t get the thing to work at all. Rather than asking here what I was doing wrong, I chose to use commercial deadeyes that I had on hand. They were virtually identical in size to the kit deadeyes, but required some adjustment in the strops to fit. I then found that the chain links had to be fitted to each individual chain, using the various sizes provided. I lessened the pain by realizing that the links links (the lowest links) were the one constant and used them to mark where the other two links had to reach. I then added the eyebolts between the chains. I’m satisfied with the final result, but happy to move on to other things. Bob

-
Thanks so much Reg and Glenn. i'm happy to provide anything that might be useful. Thanks also to the "likes". Bob
-
My chapter 11 parts arrived and work is now well under way. I began by assembling and installing the channels. I found that applying the spray adhesive to both pieces created a much better bond than applying to only one piece. I also found it very helpful to slip a couple of deadeye strops into the channel slots while I was gluing and positioning the channel pieces to ensure proper alignment. After the channels were in place I moved on to the channel straps. Following the suggestion to use pliers heated over a candle to make the bends in the straps worked out great. Now it’s on to the deadeyes. Bob FullSizeRender.MOV