rafine
-
Posts
2,932 -
Joined
-
Last visited
Content Type
Profiles
Forums
Gallery
Events
Everything posted by rafine
-
 Thanks OC. It’s been an up and down kind of year. Last weeks post will be the last for about a month until we return to Florida. Bob
 -
Thanks so much Paul, Jean-Paul and the “likes”. Bob
-
Really well done Paul. Bob
-
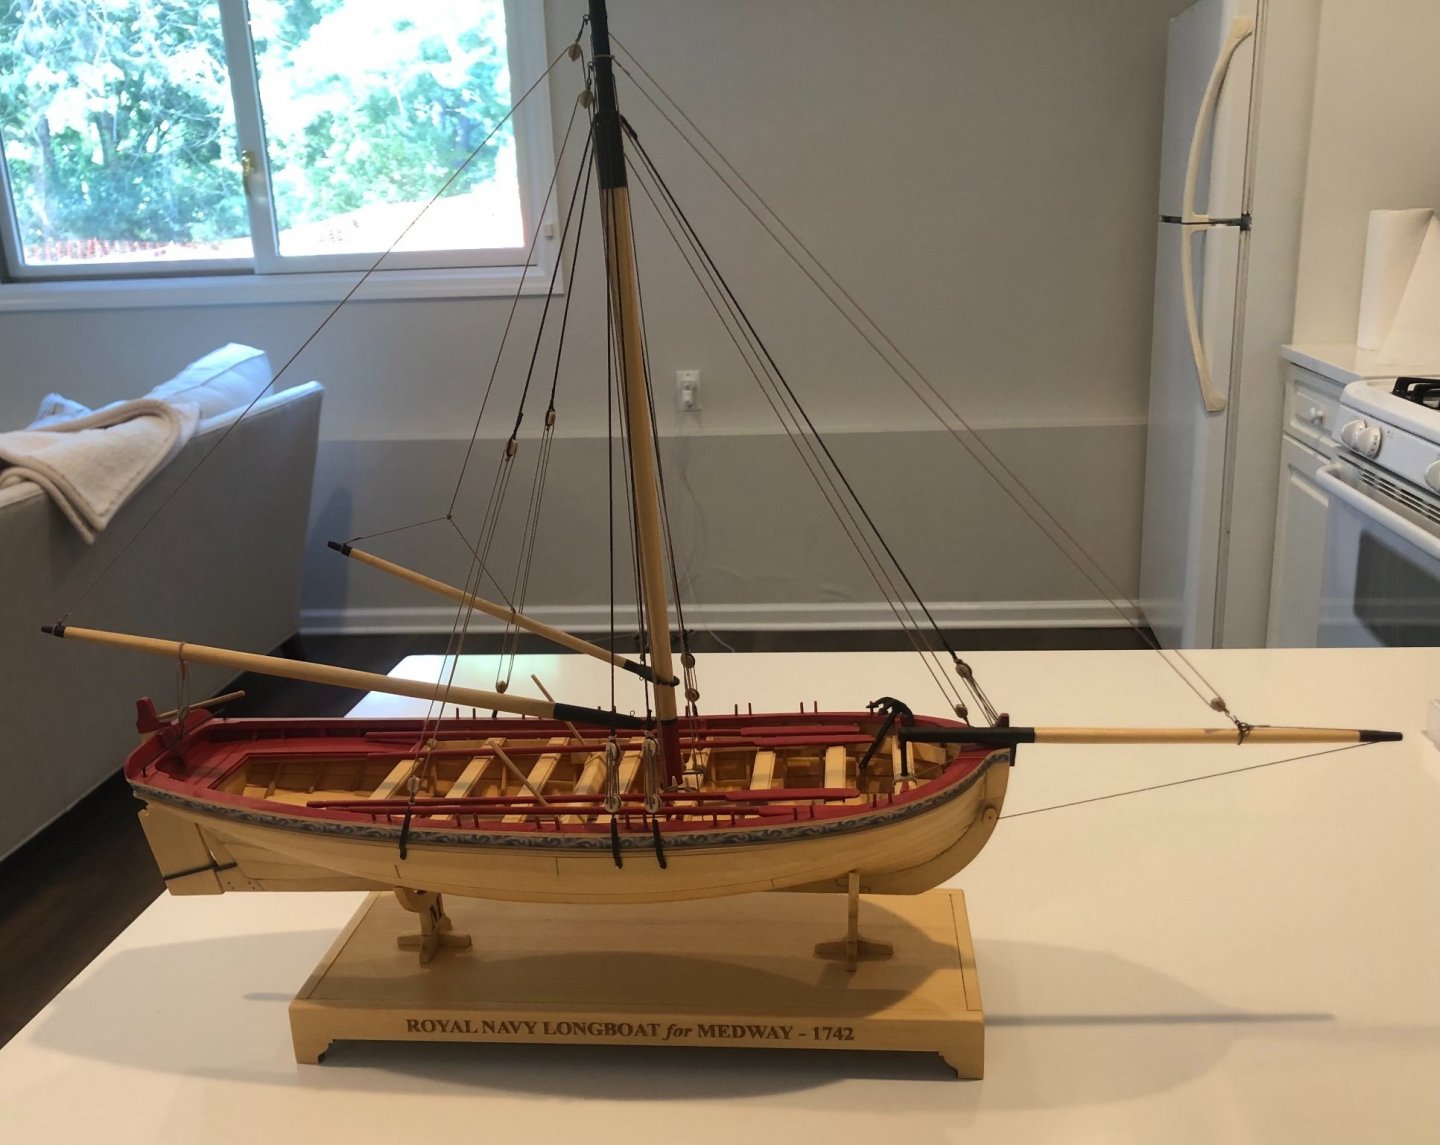
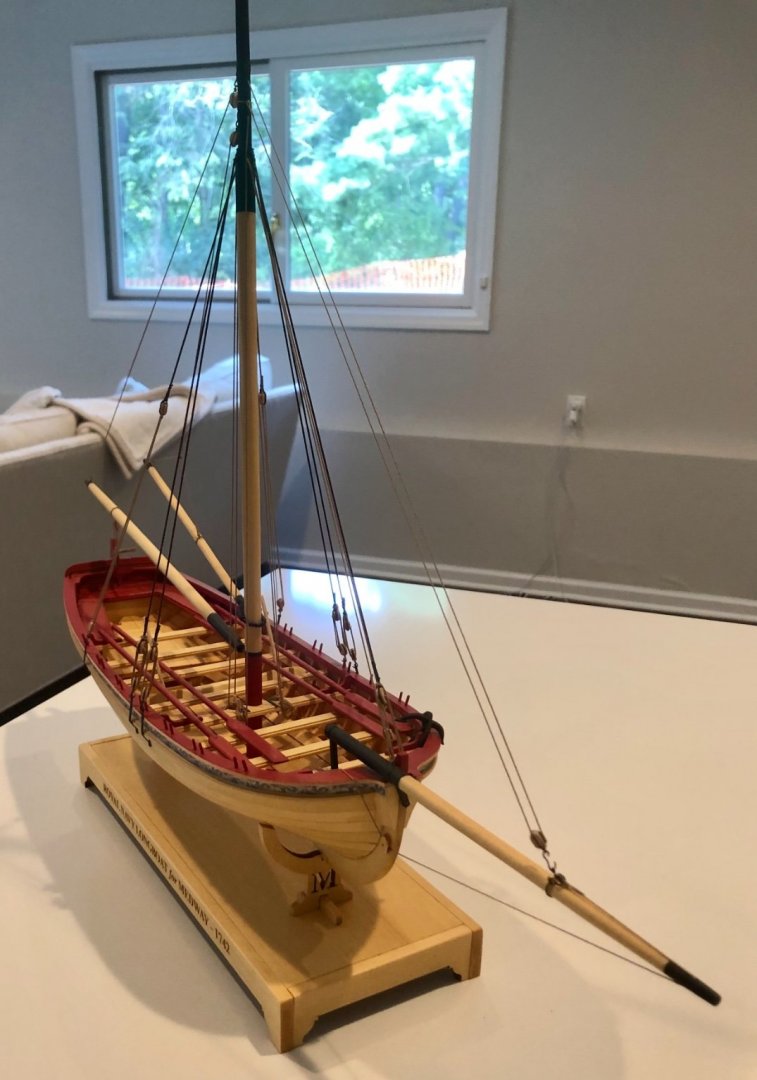
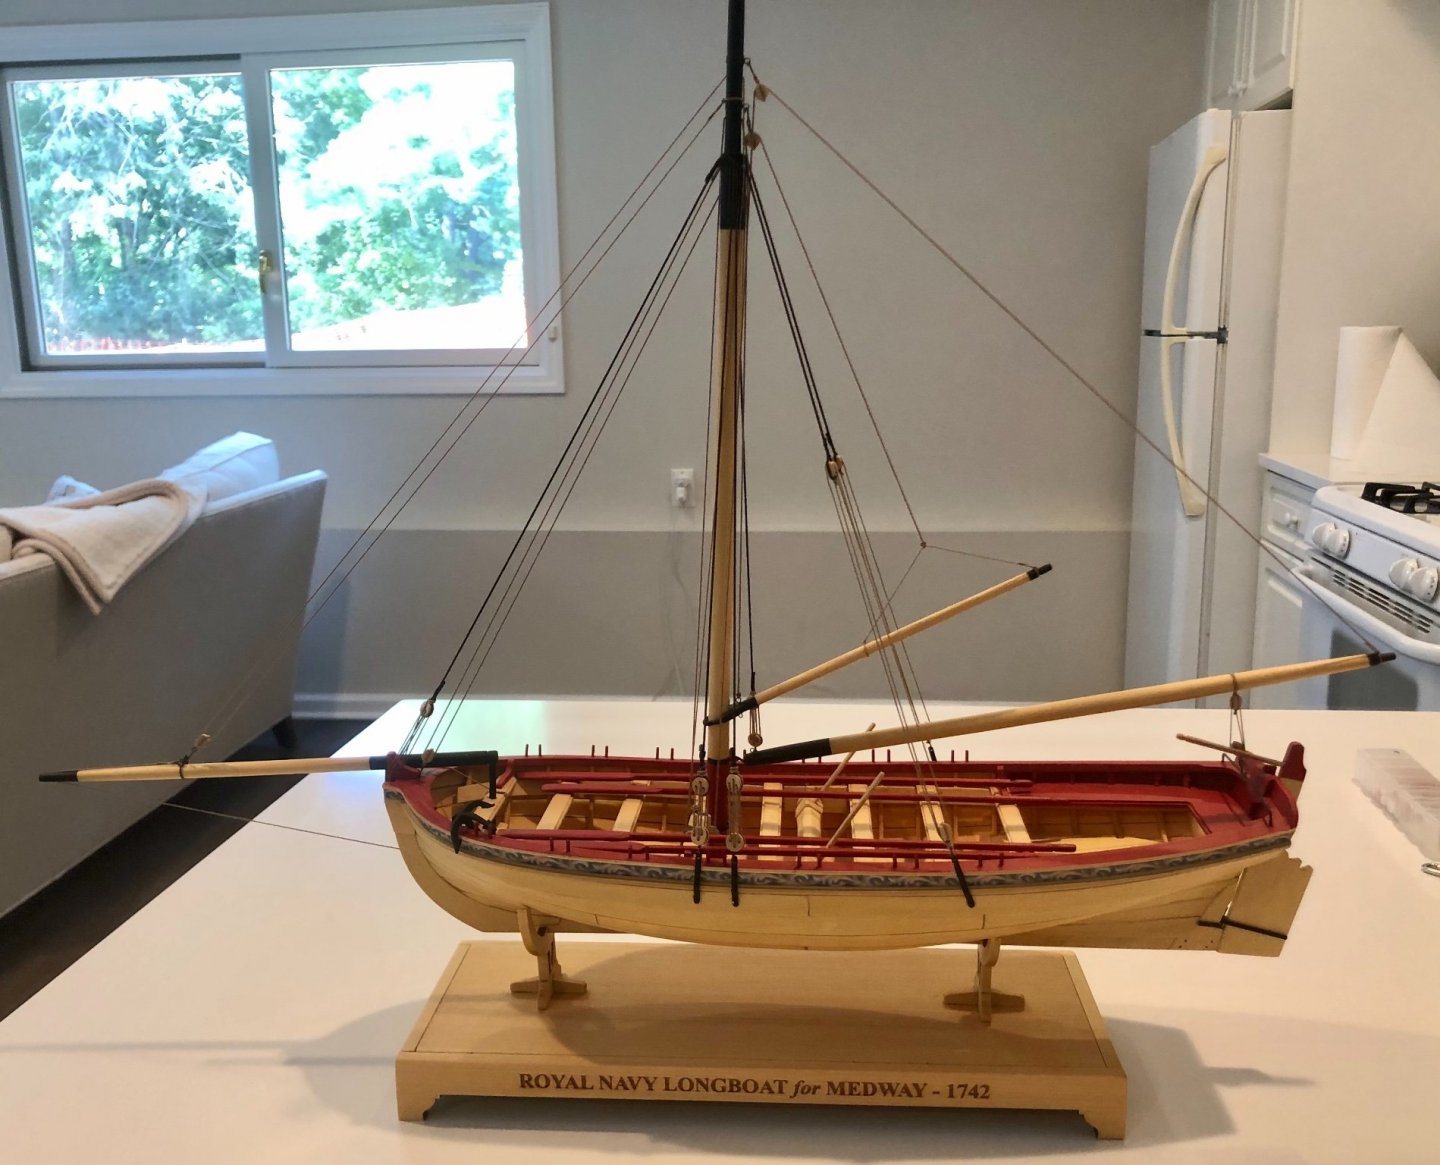
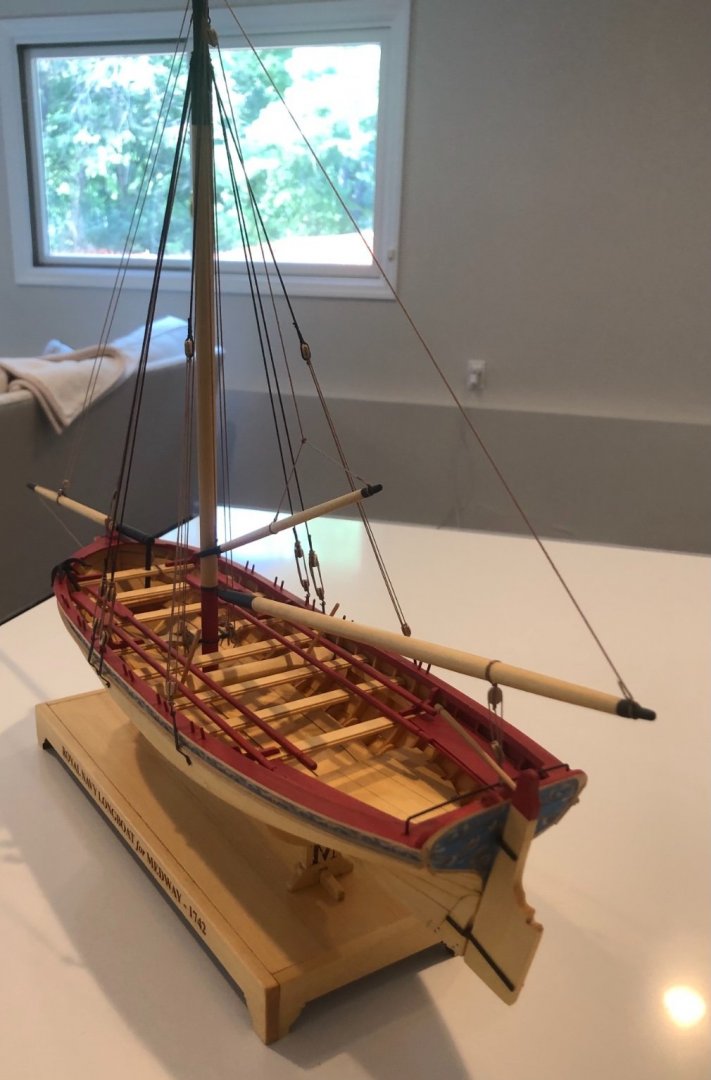
Finally, I’ve gotten to finish. This was my New Jersey summer project, but because of COVID we haven’t been here In two years. The last of the rigging has been done, lines have been tightened and coils added. The grapnel is in place. Whew!! Bob

- 78 replies
-
- 15
-

-

-
- medway longboat
- Syren Ship Model Company
- (and 1 more)
-
Thanks so much Thomas, Jean-Paul and the “likes”. Bob
-
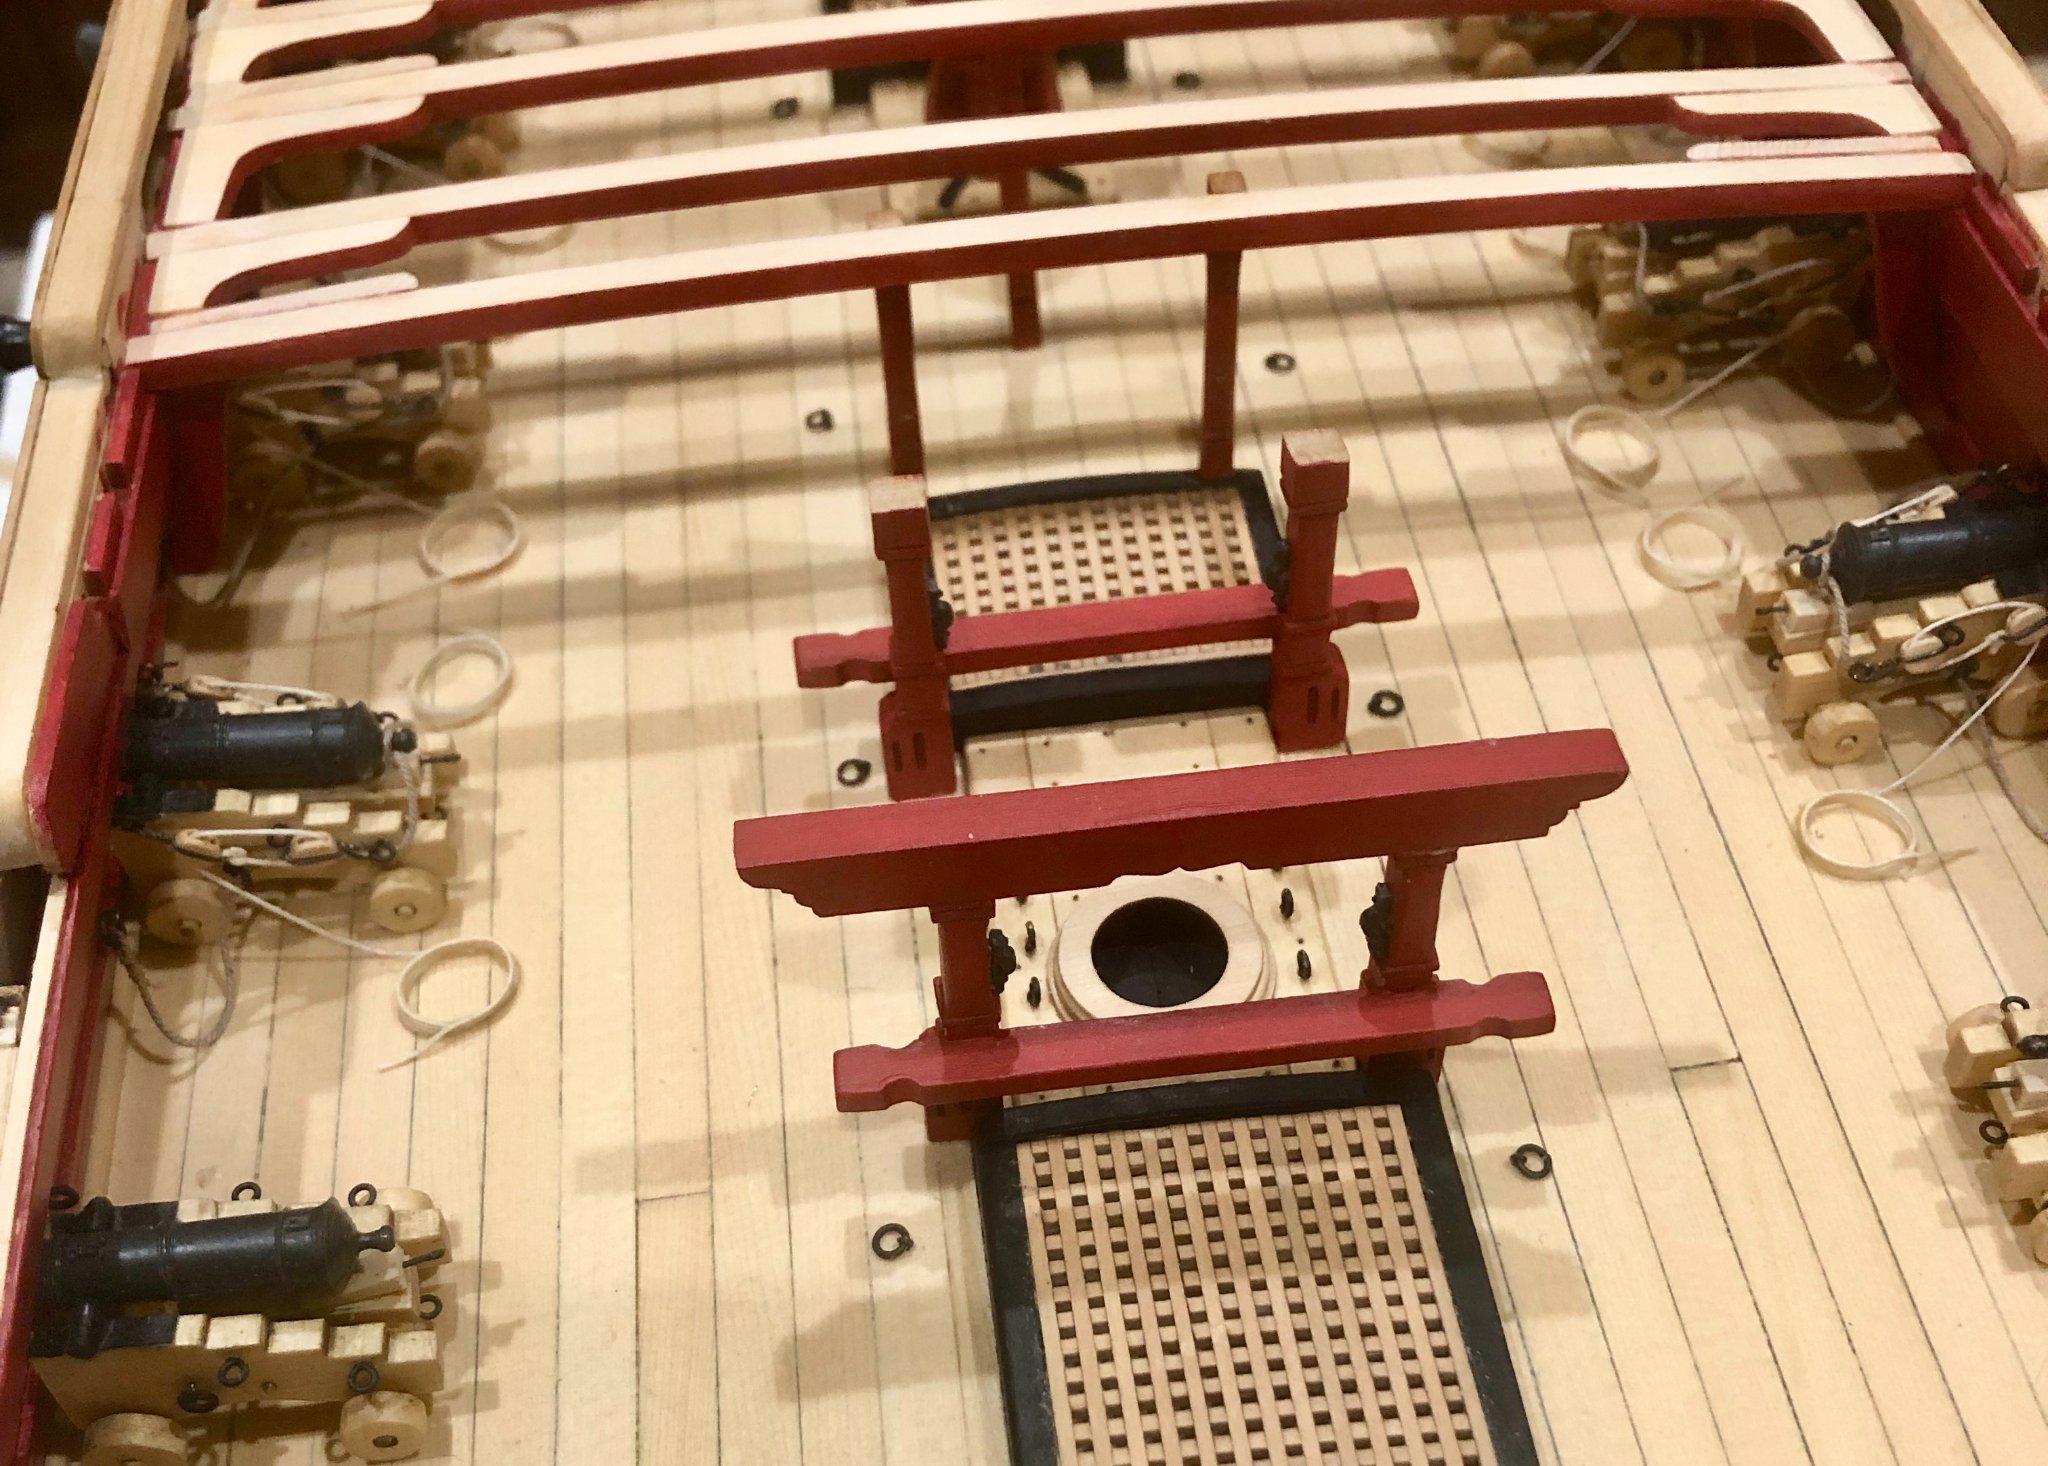
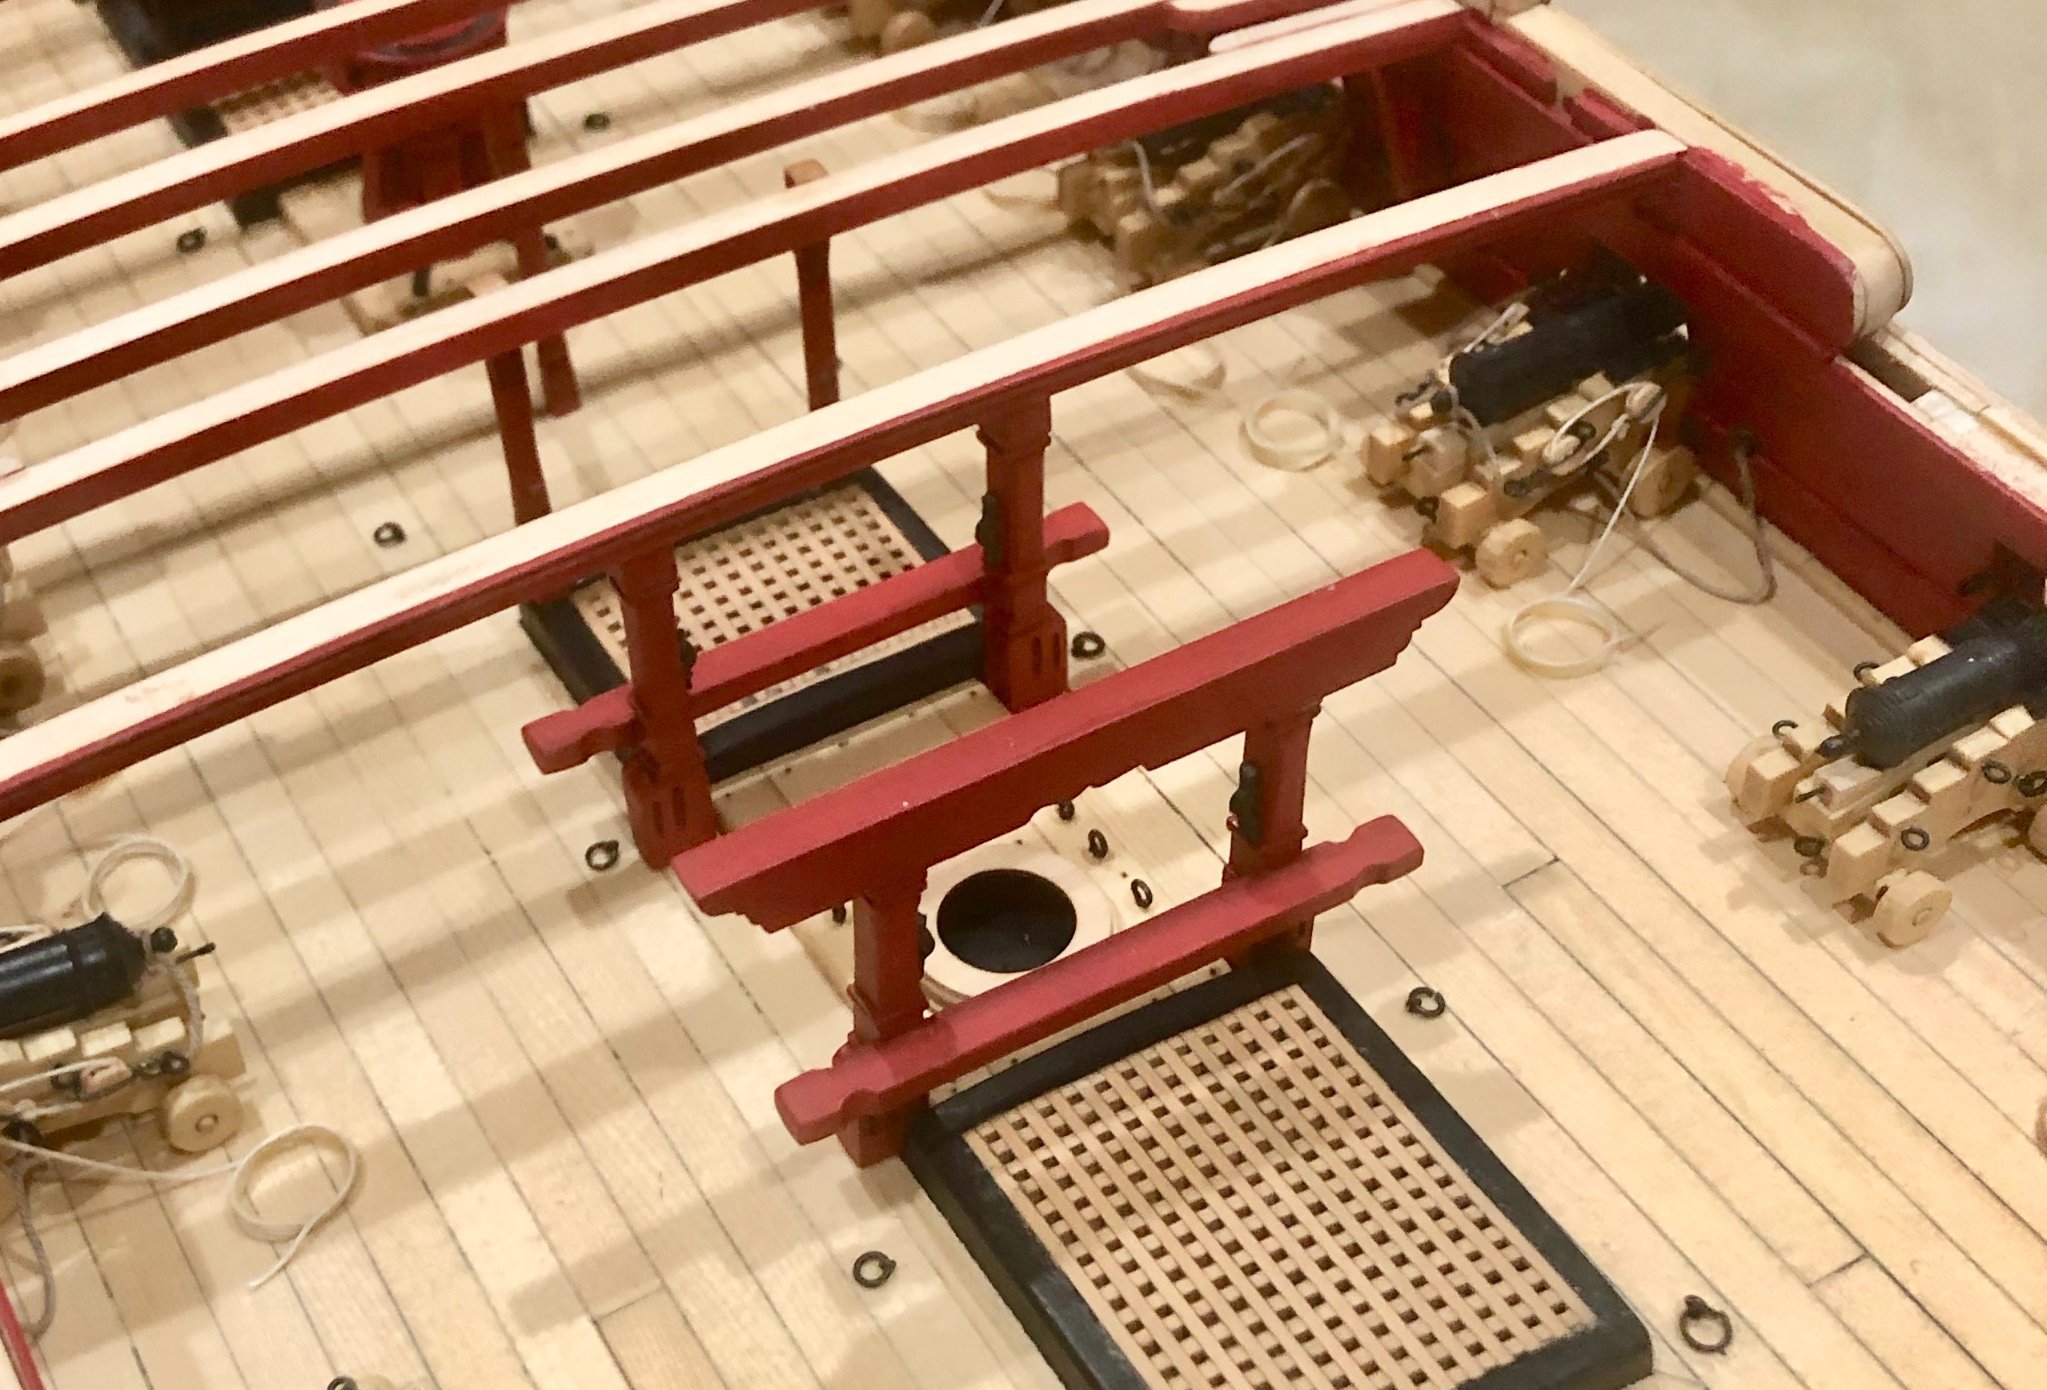
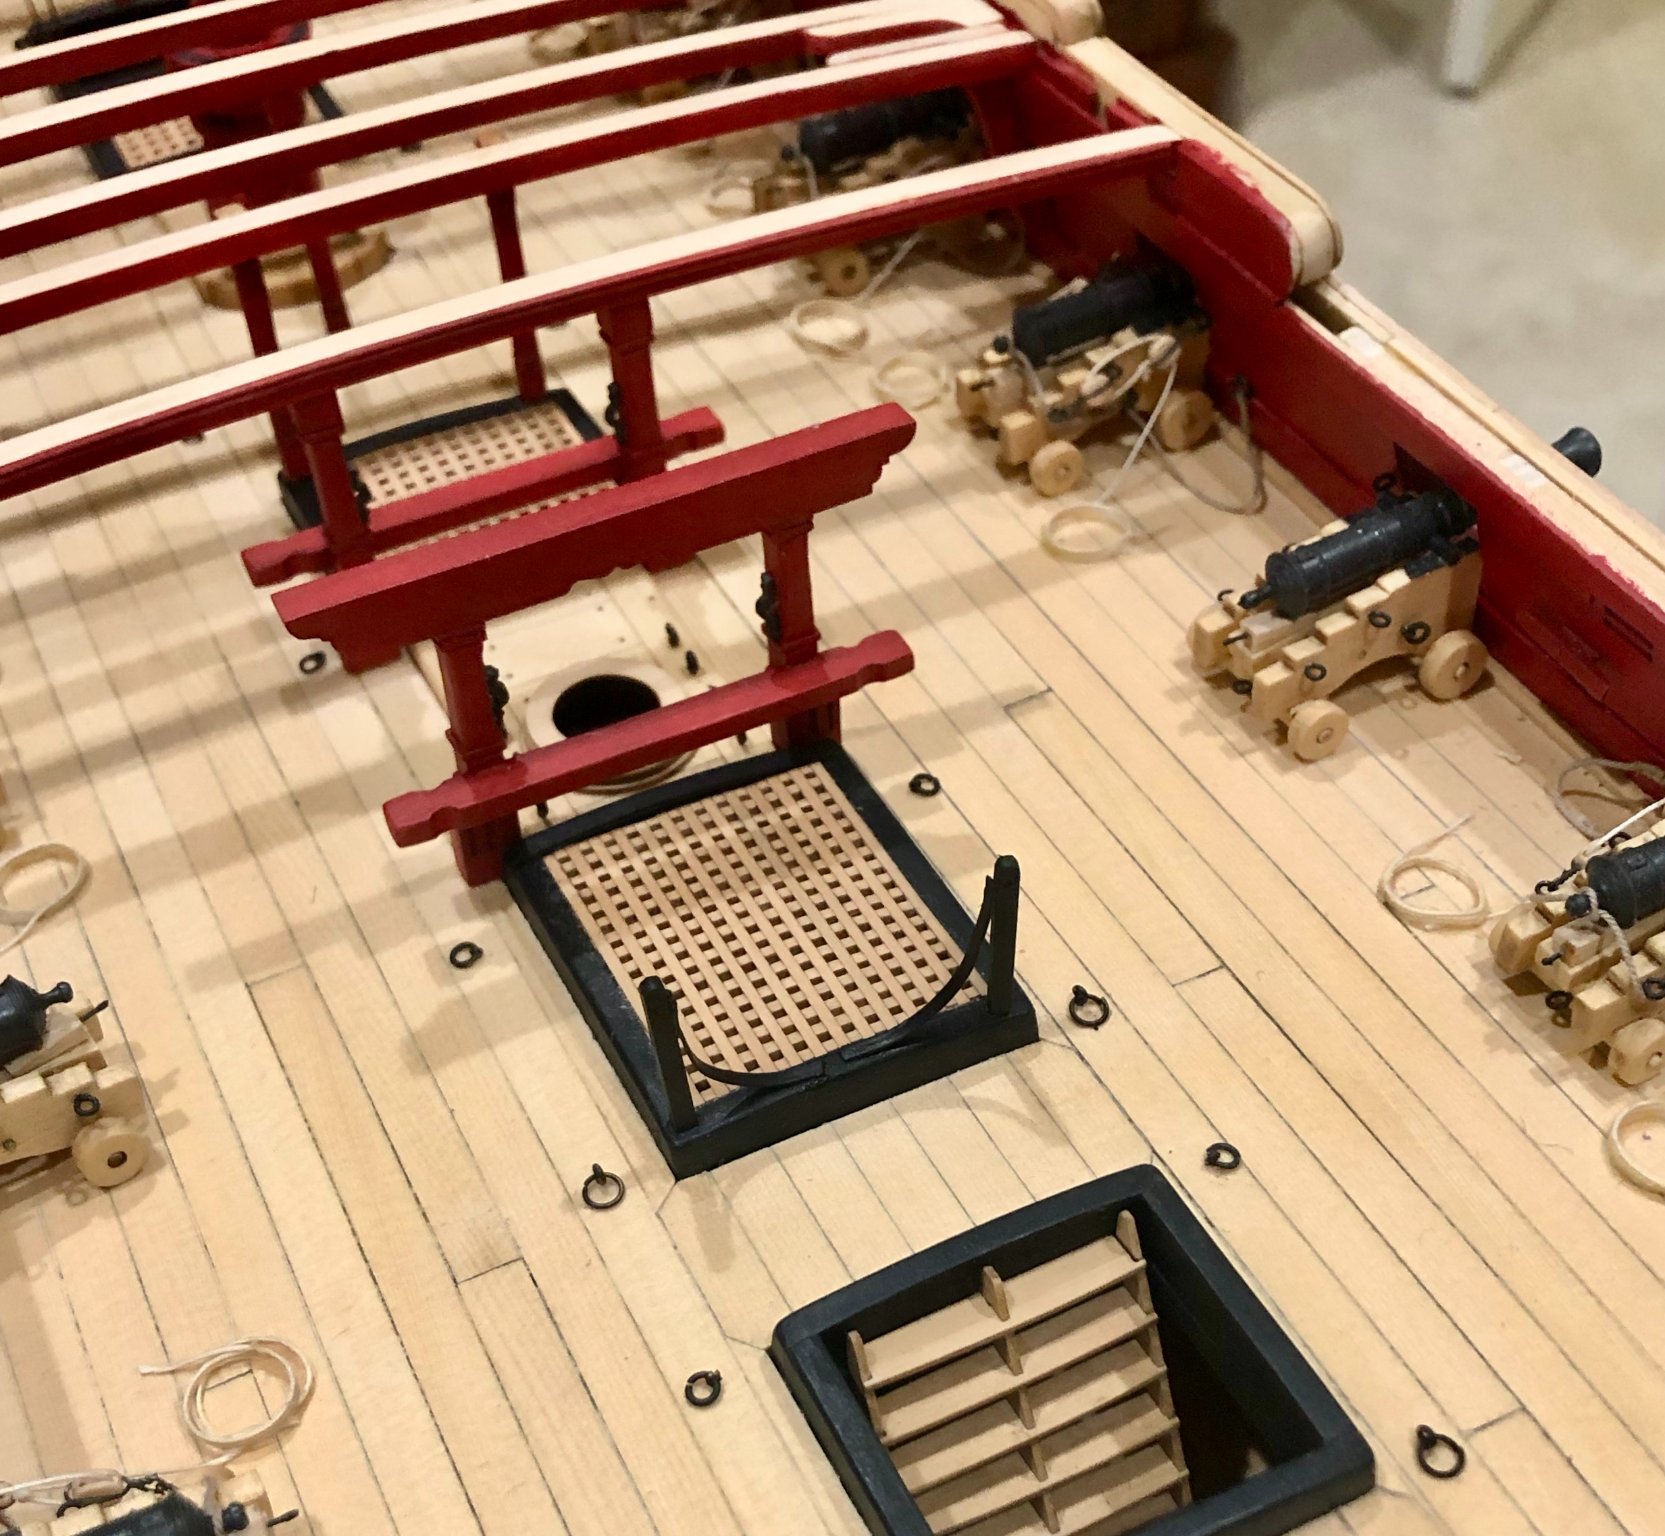
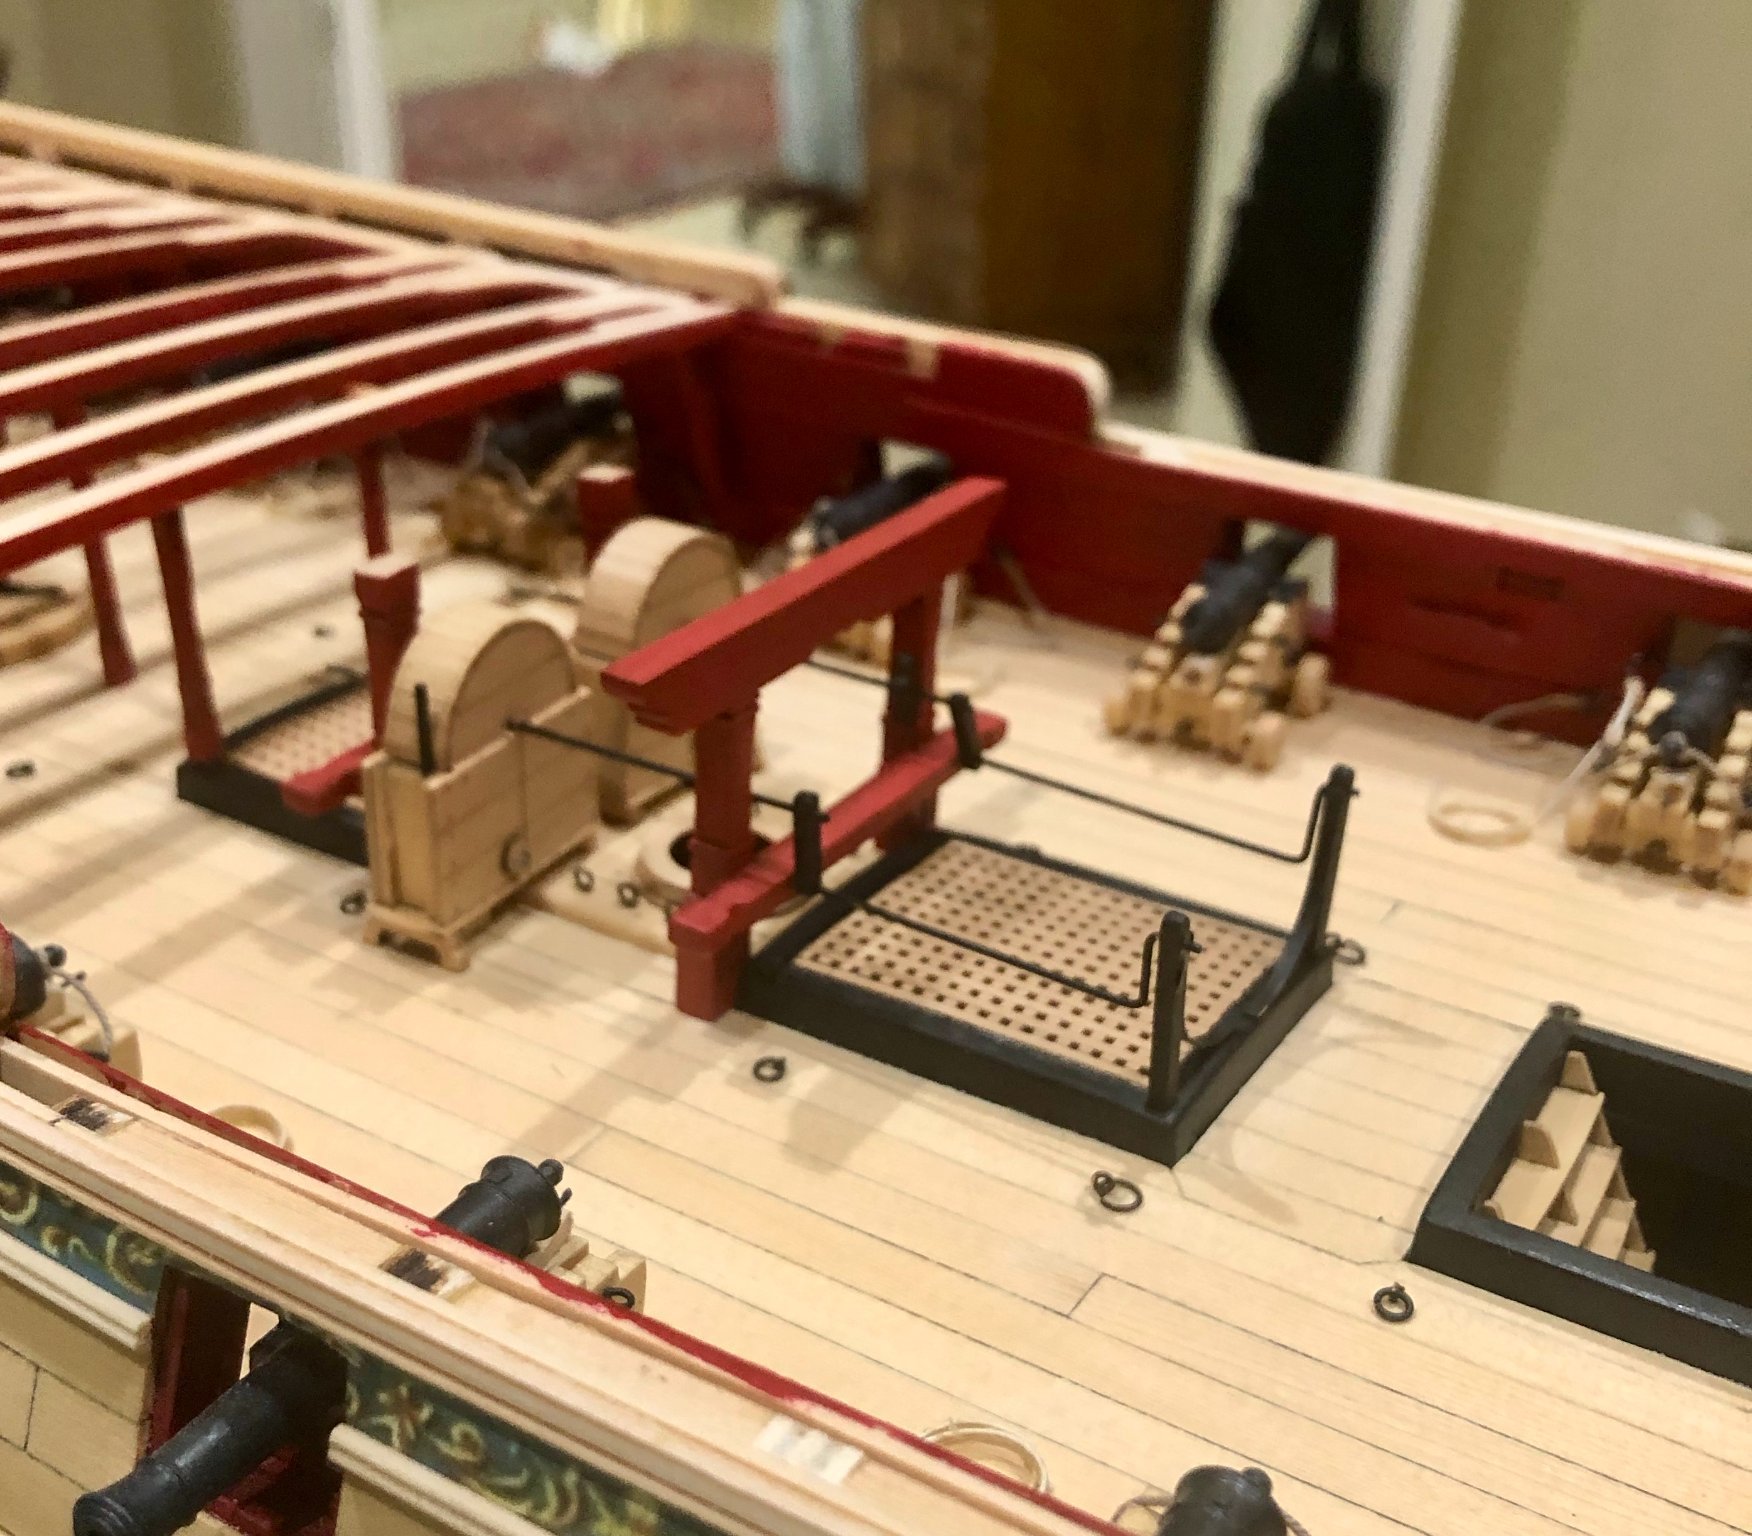
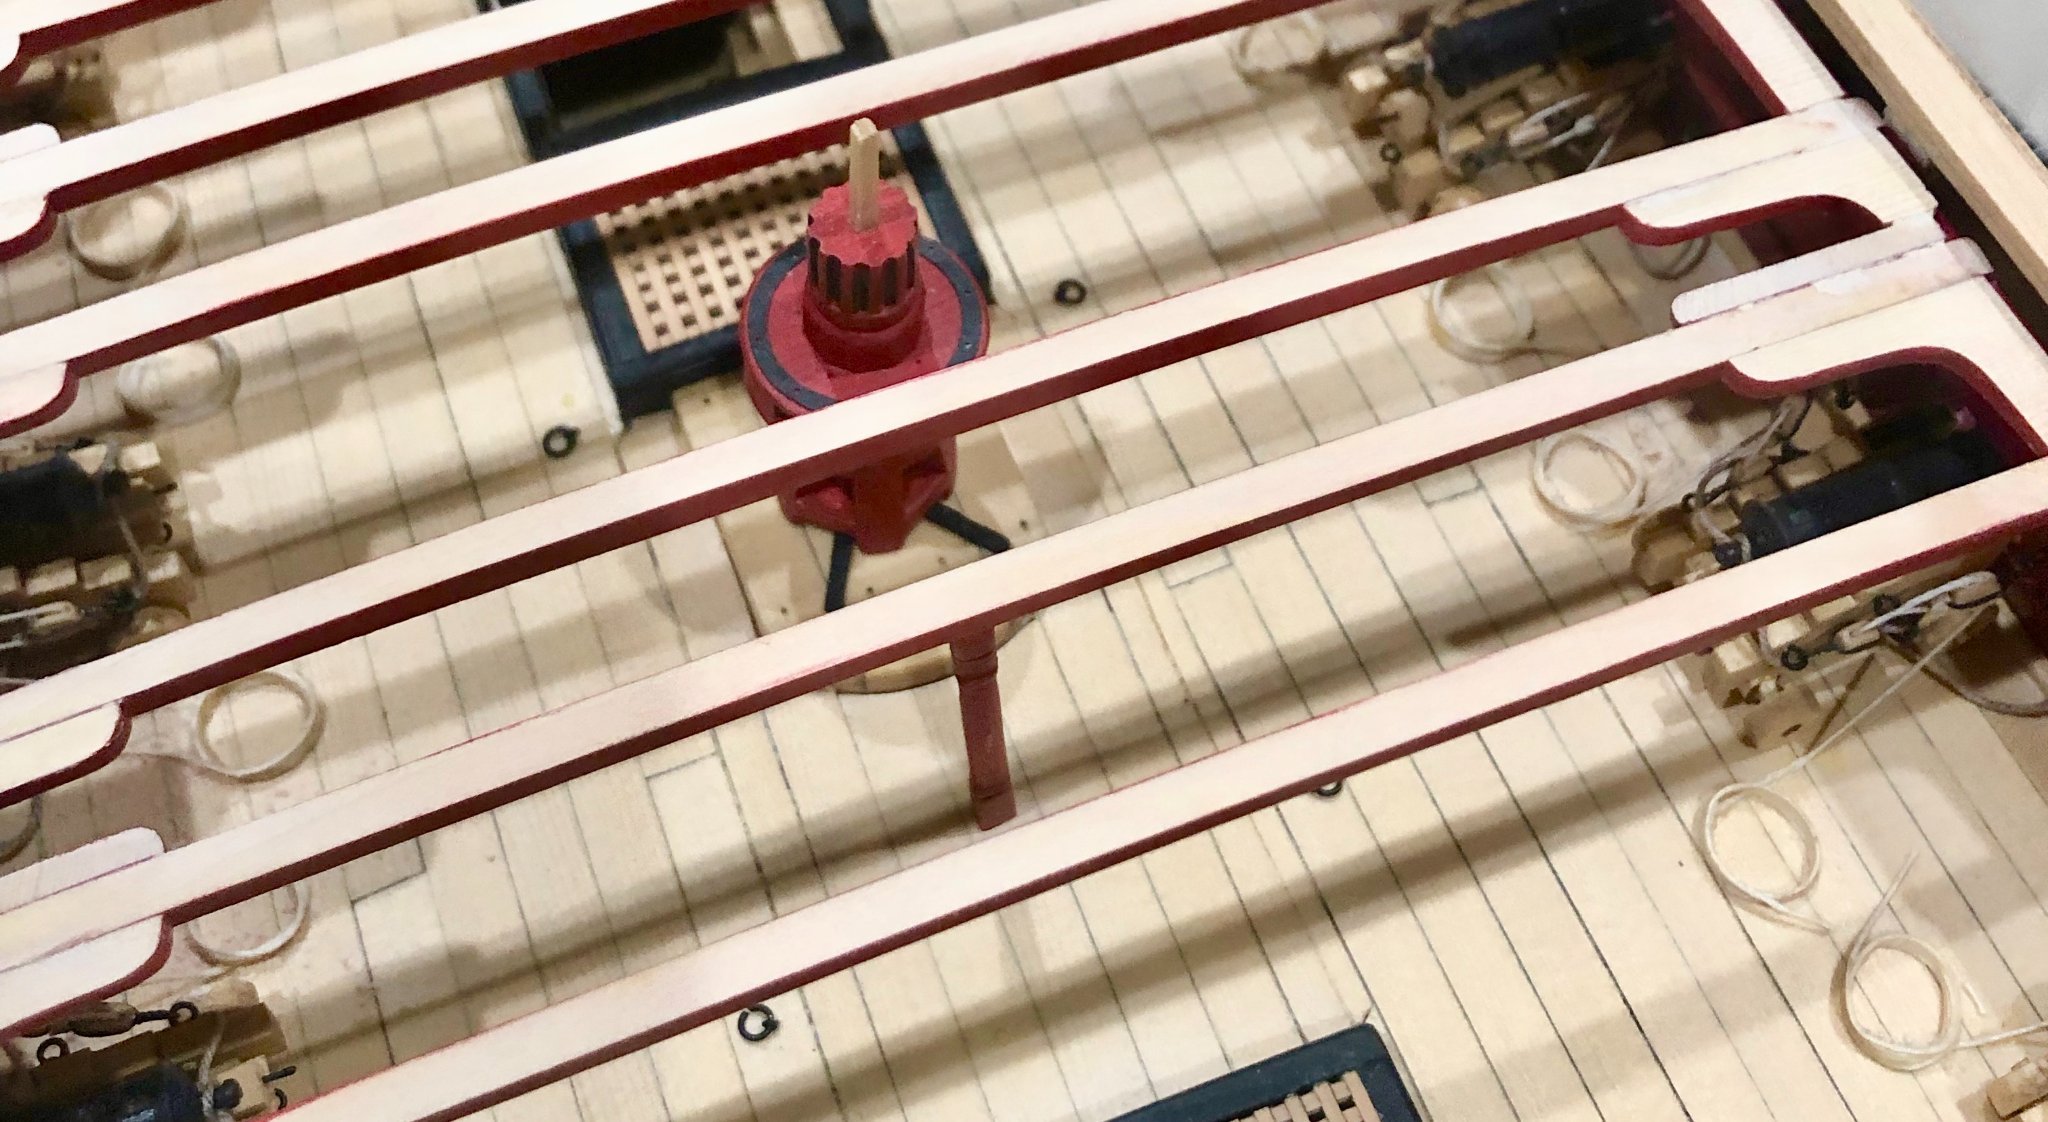
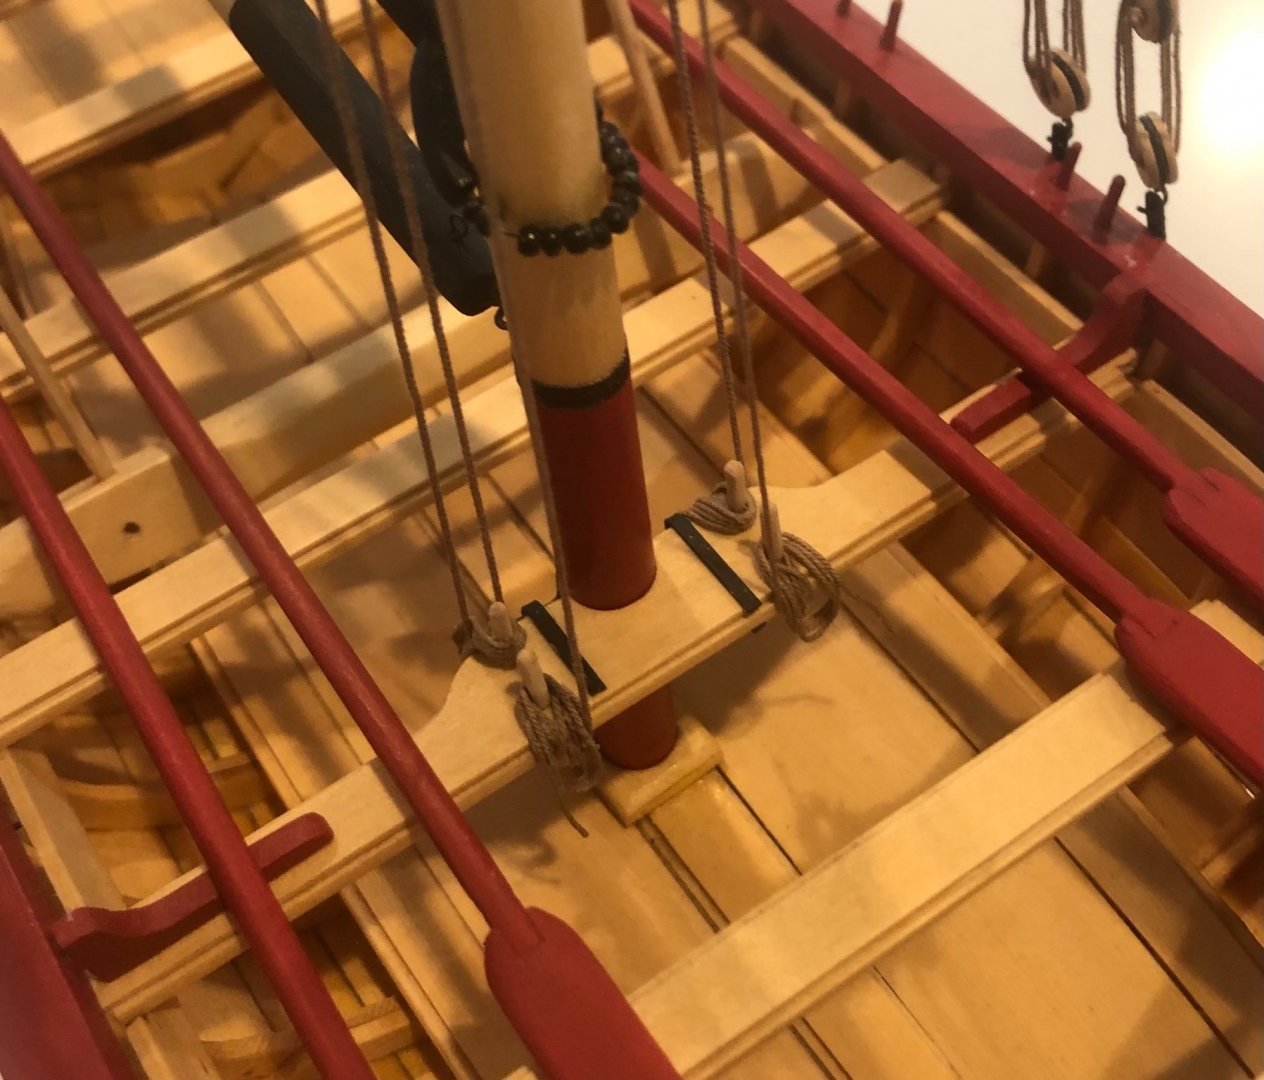
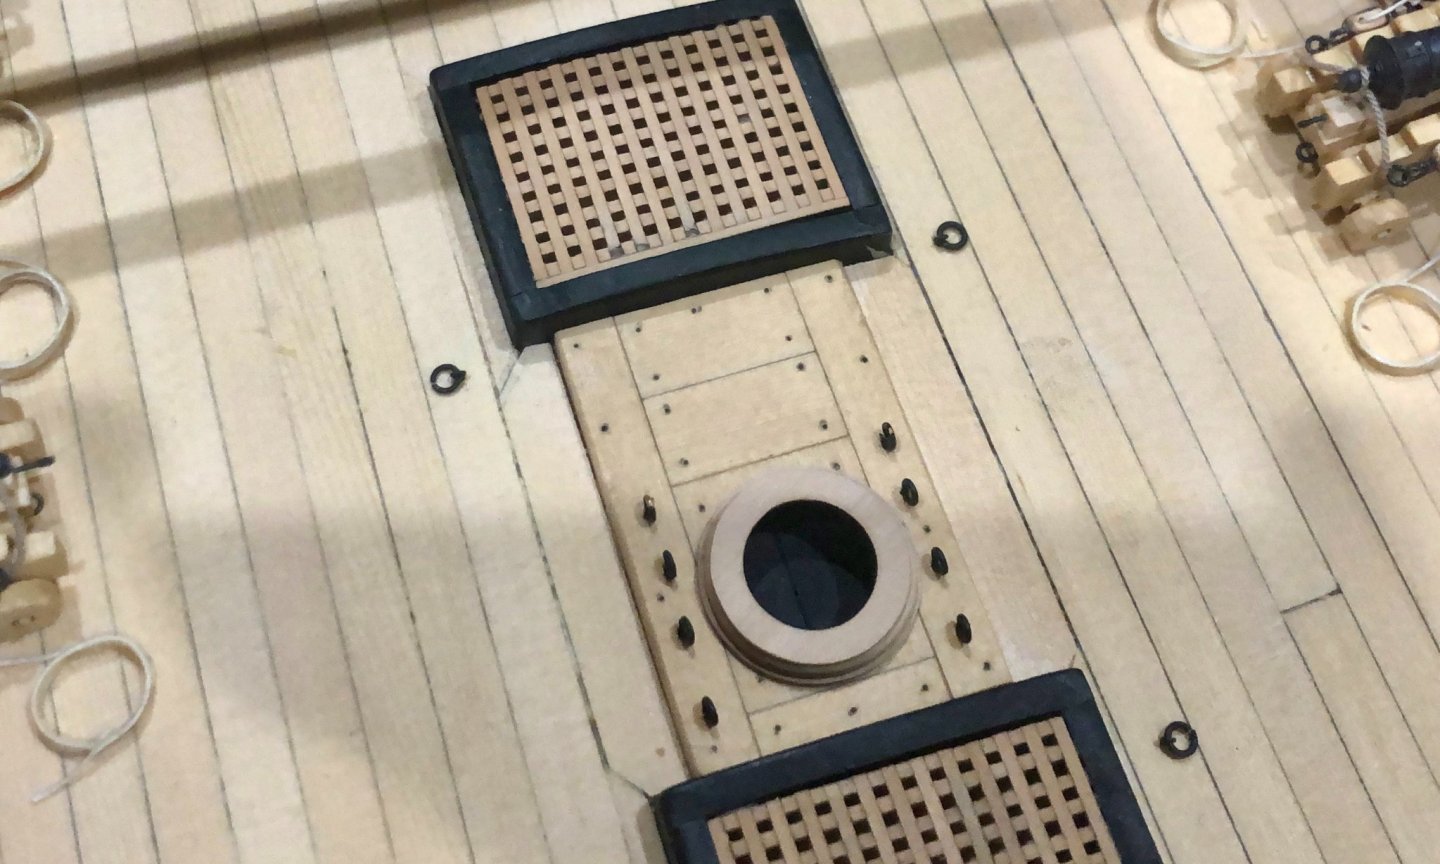
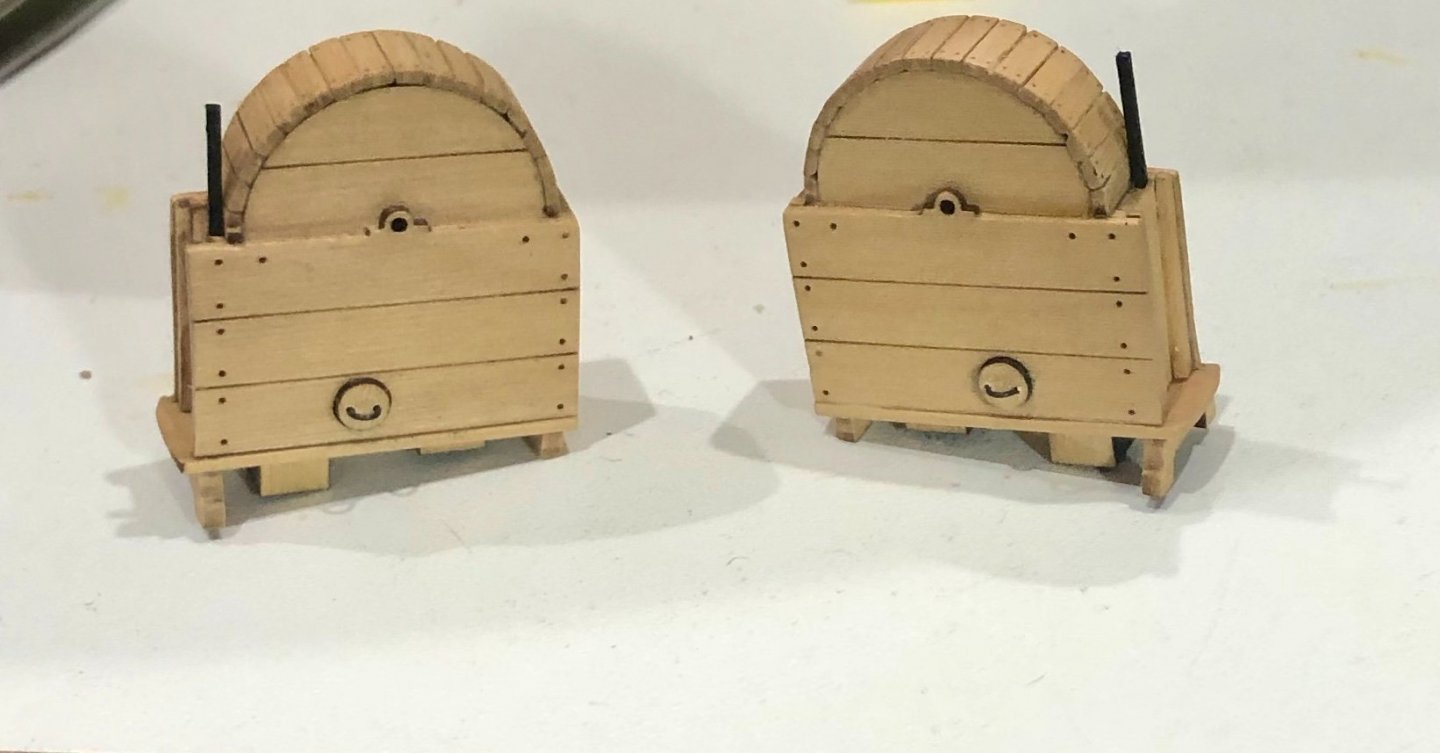
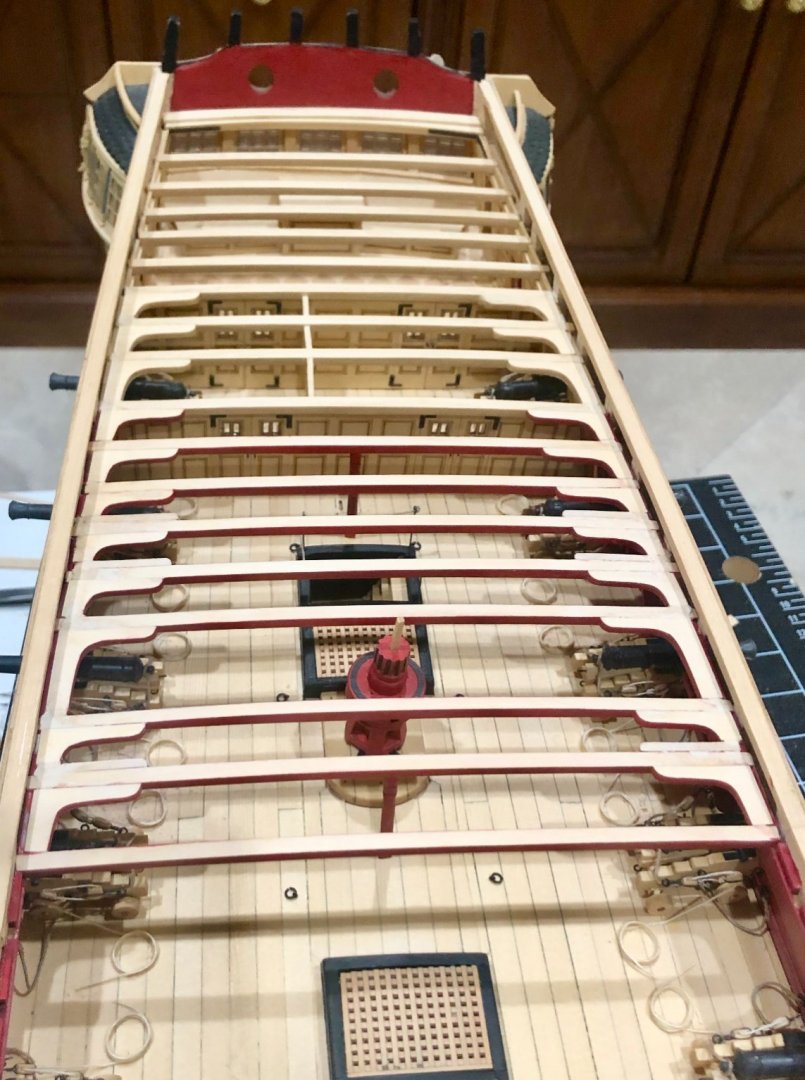
I've now made up and added the main mastcoat, jeer bitts and gallows, the two columns for the aft part of the chain pump crank handles and the stanchions for the forward part of the crank handles. The deck beams forward of the beam above the columns have not been permanently installed yet. I then made up the chain pump cisterns. The great laser cut parts for all of these items made the process relatively easy and fun. Getting everything lined up properly was less easy and less fun. Making up and installing the cranks was even less so. At this point, I have done only the center and forward portions, and I'm seriously considering redoing them. I will have just over a month to think about this, since we're leaving for New Jersey tomorrow and won't be back until early September. Bob


-
Thanks so much Reg, Paul, Don, JJ and Rusty for the generous comments, and thanks also for the "likes". Appreciated, as always. Bob
-
I too have just found your log, and you're on your way to a beautiful model. While I still miss your great products, as a long time retiree I certainly appreciate the the idea of " I 've worked long enough". Looking forward to seeing more of Connie. Bob
-
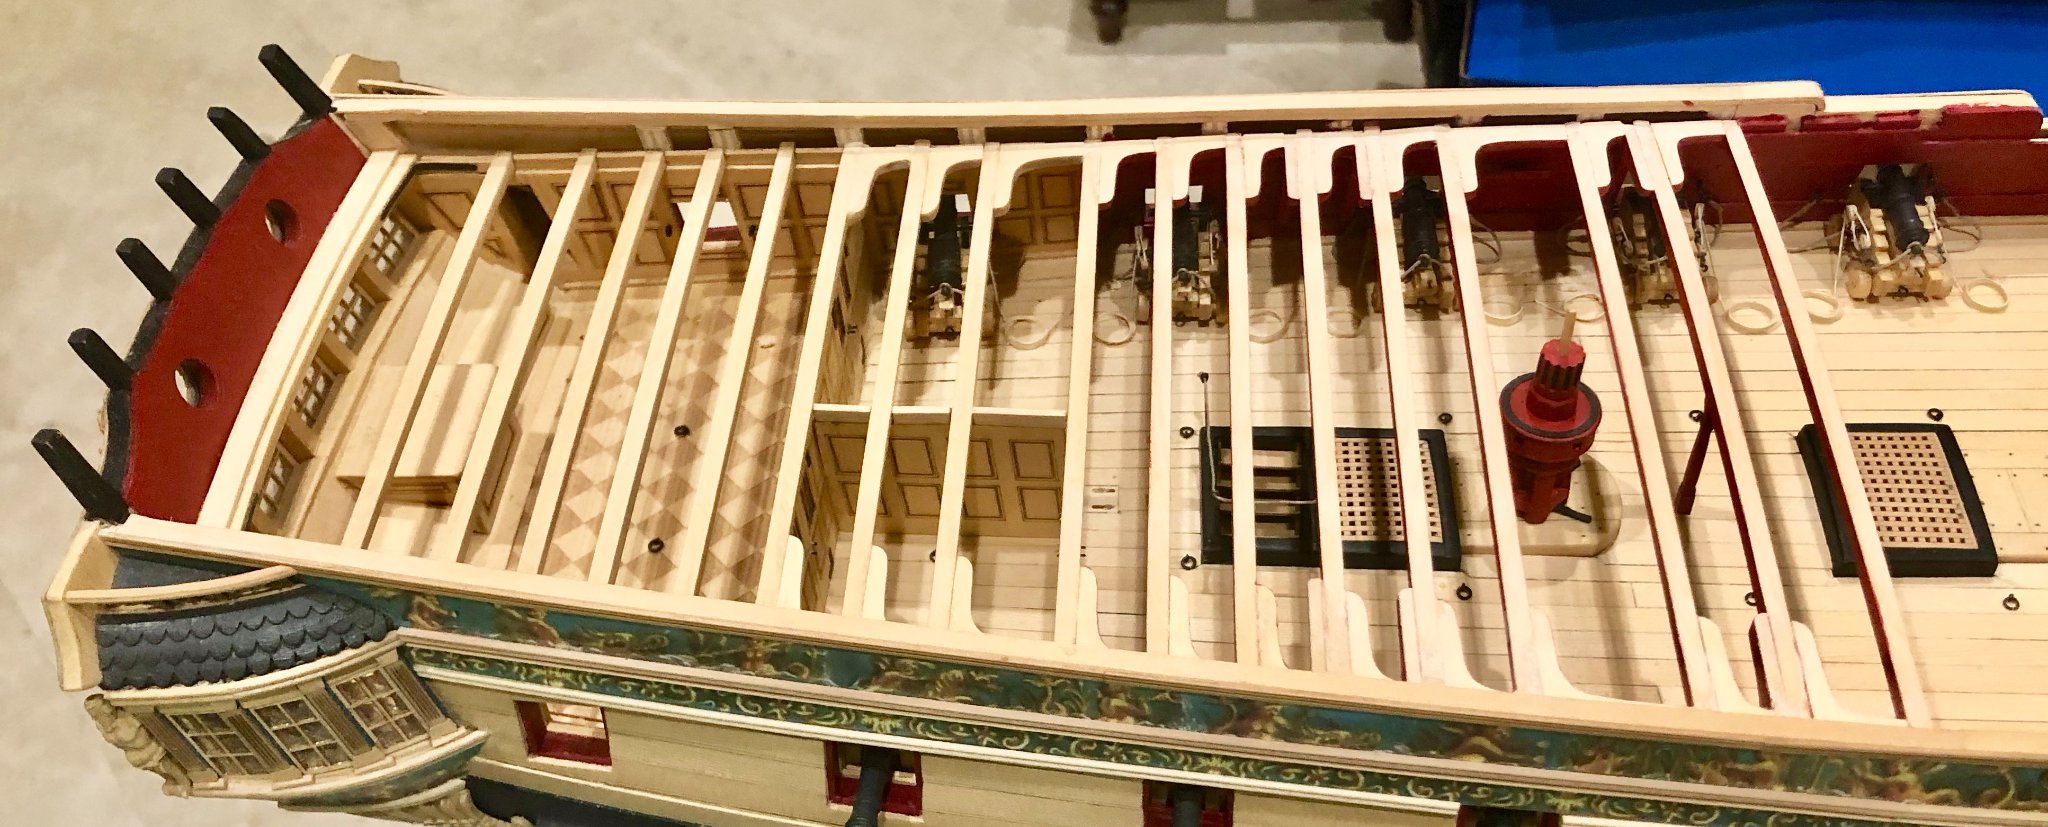
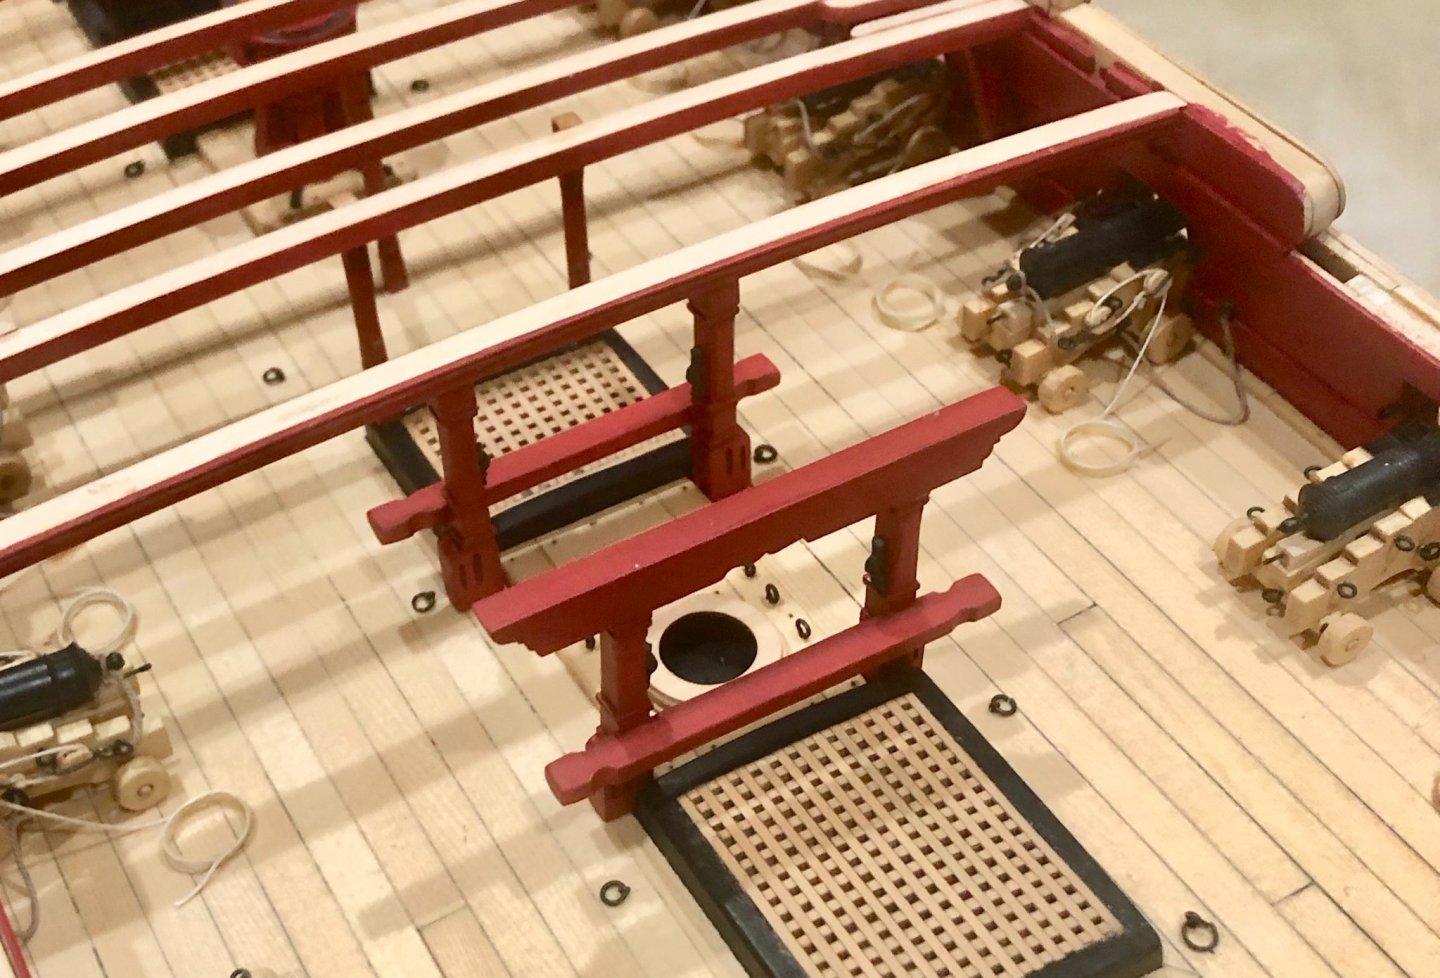
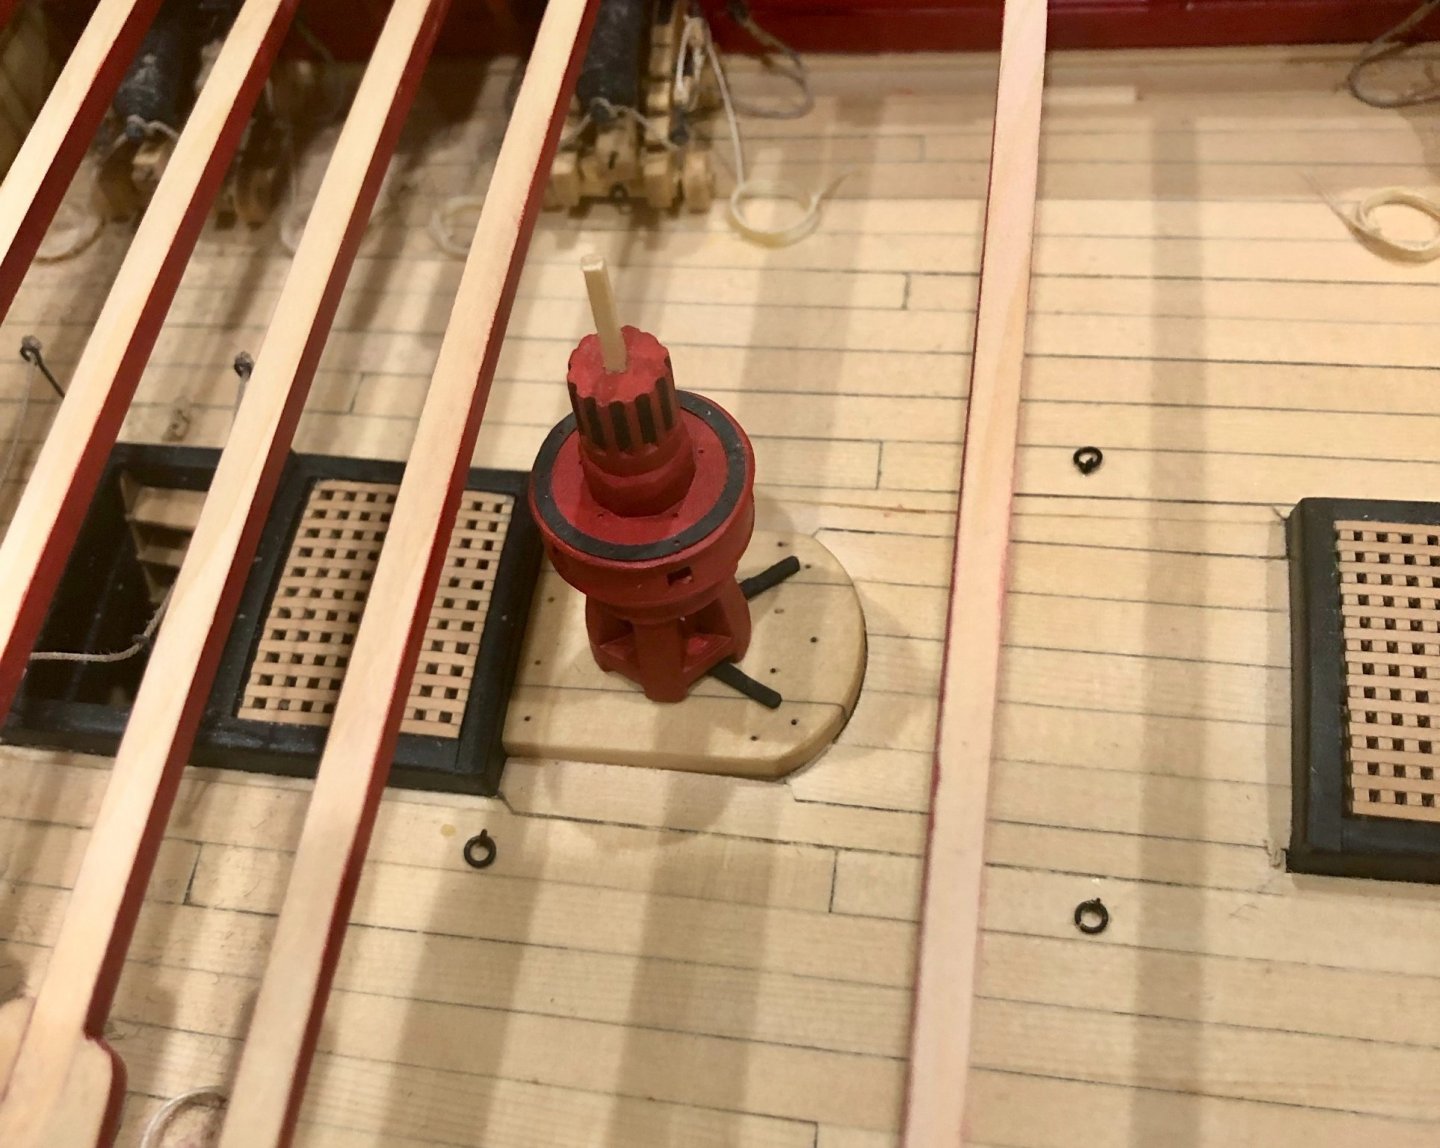
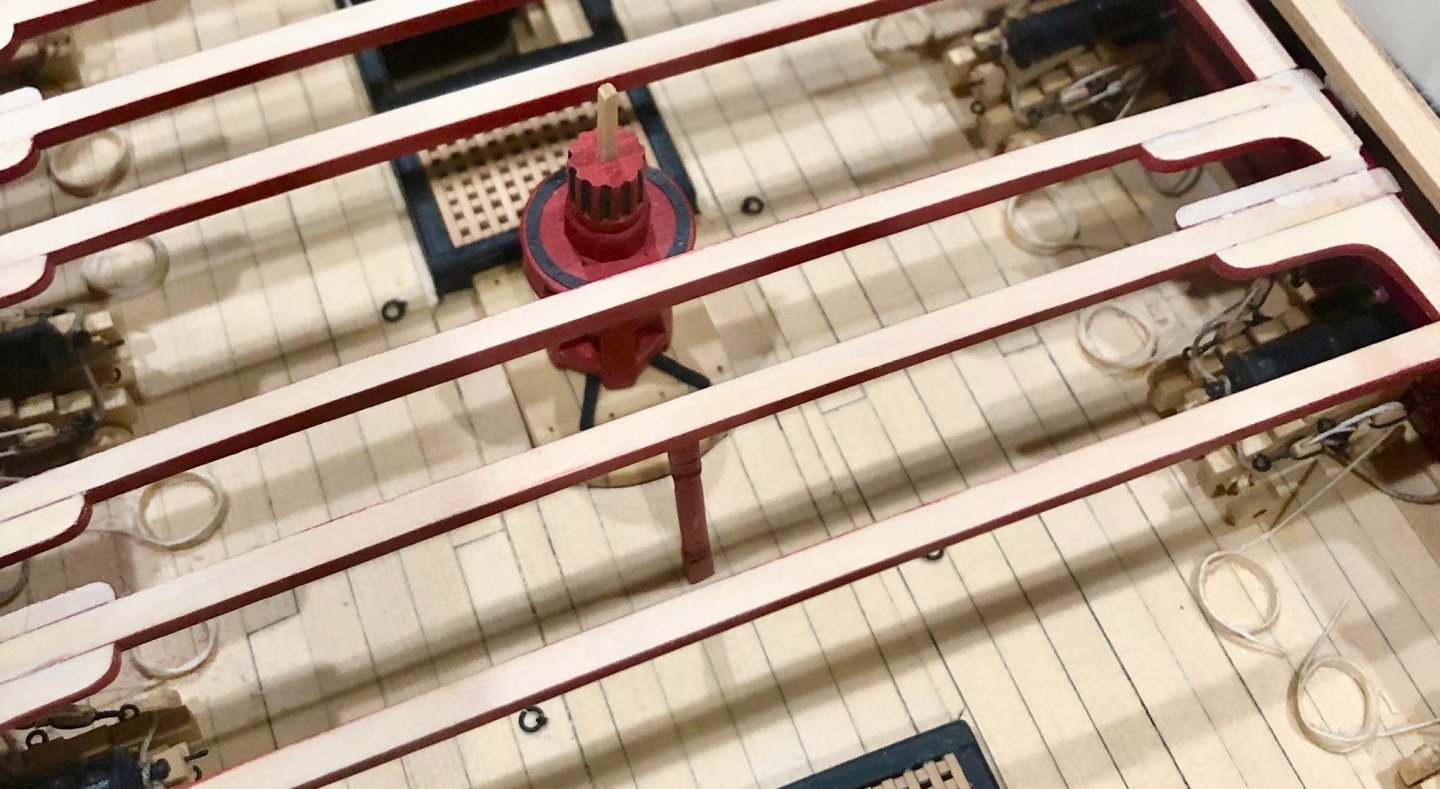
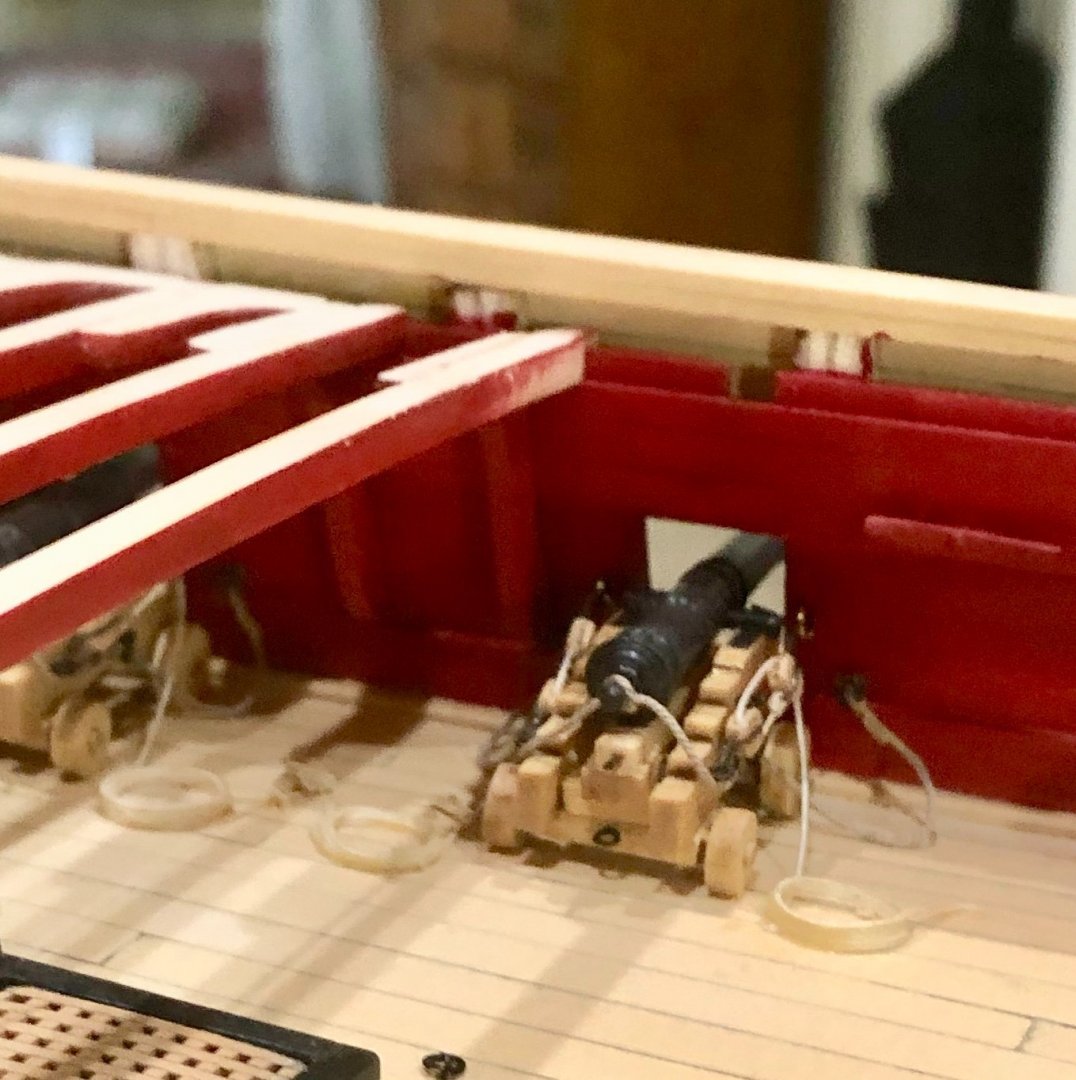
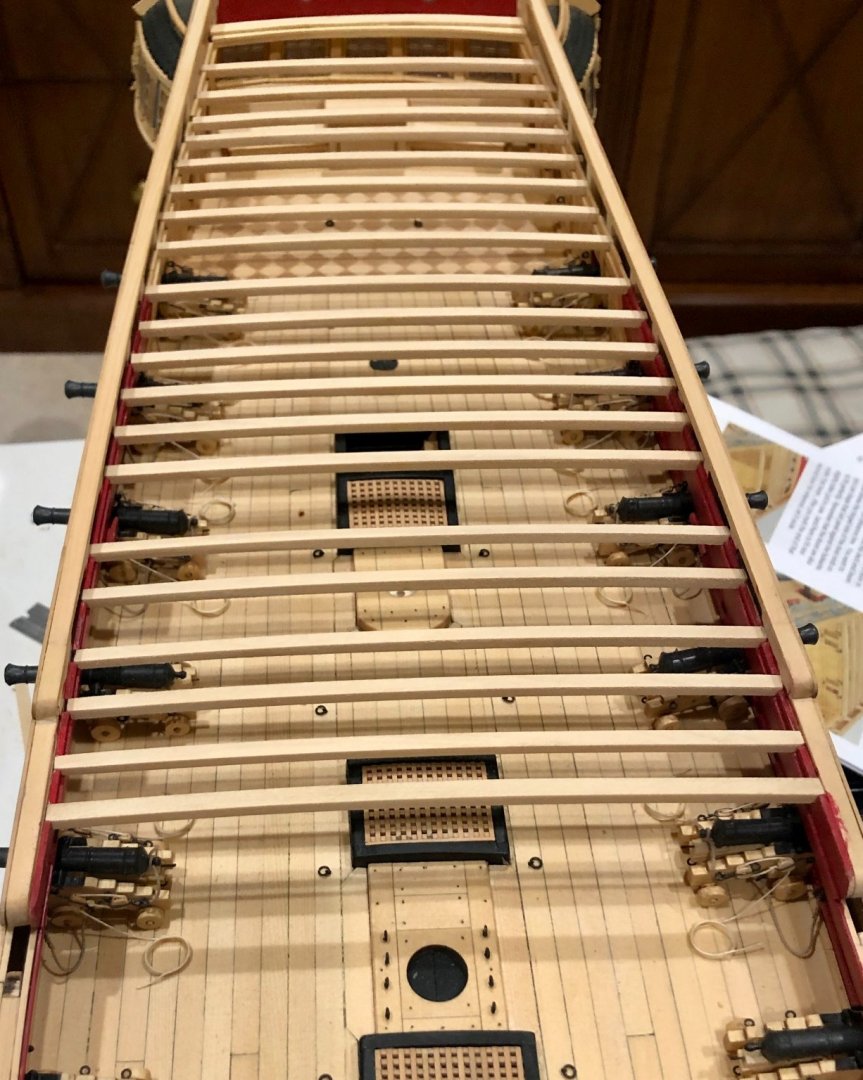
A small update. I have continued to move forward with beams, lodging knees and hanging knees. I also added the second column, glued in the capstan and added the pawls. With the addition of a hanging knee, I was able to mount and rig the remaining two guns under the quarterdeck. Now it's time to tackle the chain pumps. Bob

-
Thanks so much Mustafa and Jim for the generous comments. Jim, feel free to “steal” from me. The stanchions actually appear that way on the plans. Bob
-
Thanks so much Matt, Reg, Paul and Bob for the comments, and thanks also to the "likes". Paul, I use a small round nosed pliers, tweezers and a cutter and just kind of fiddle and tweak until the loop seems about the right shape and size. Not a very helpful description, I'm afraid. Bob
-
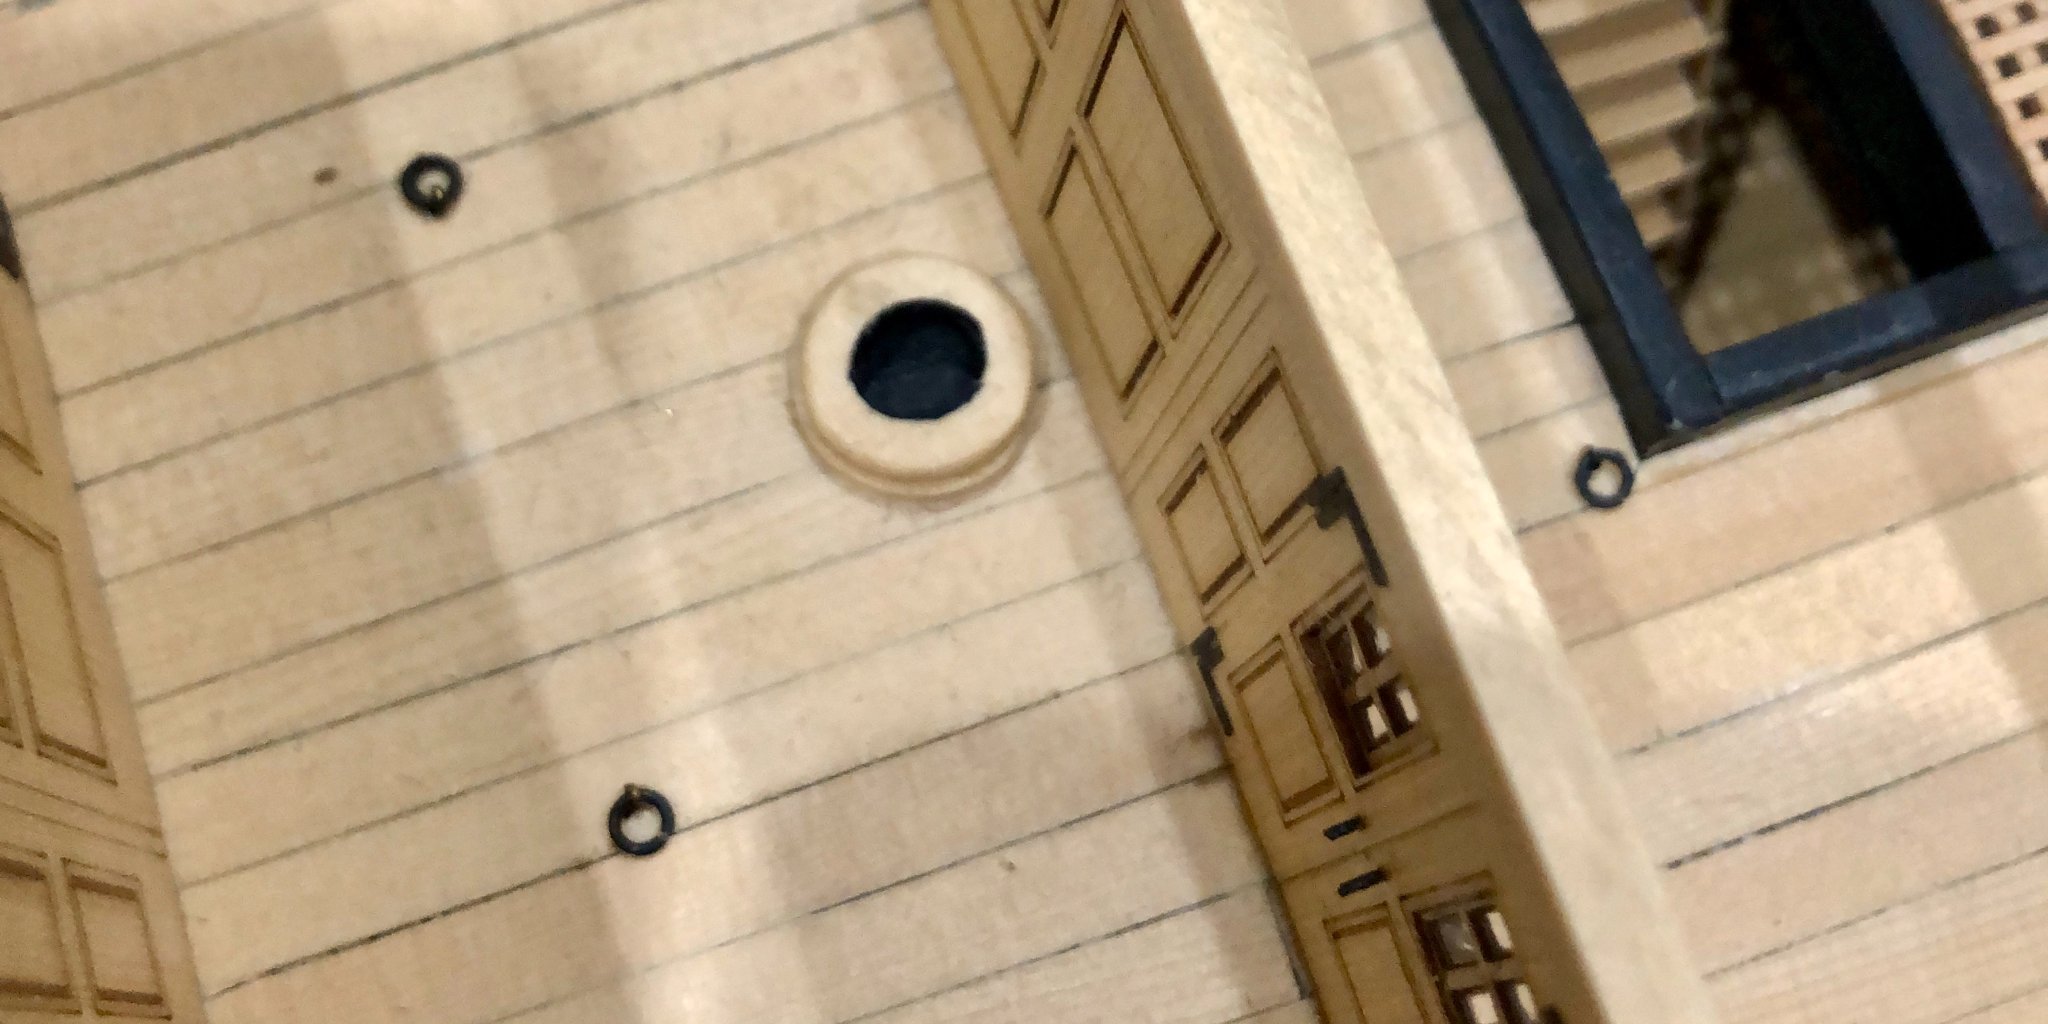
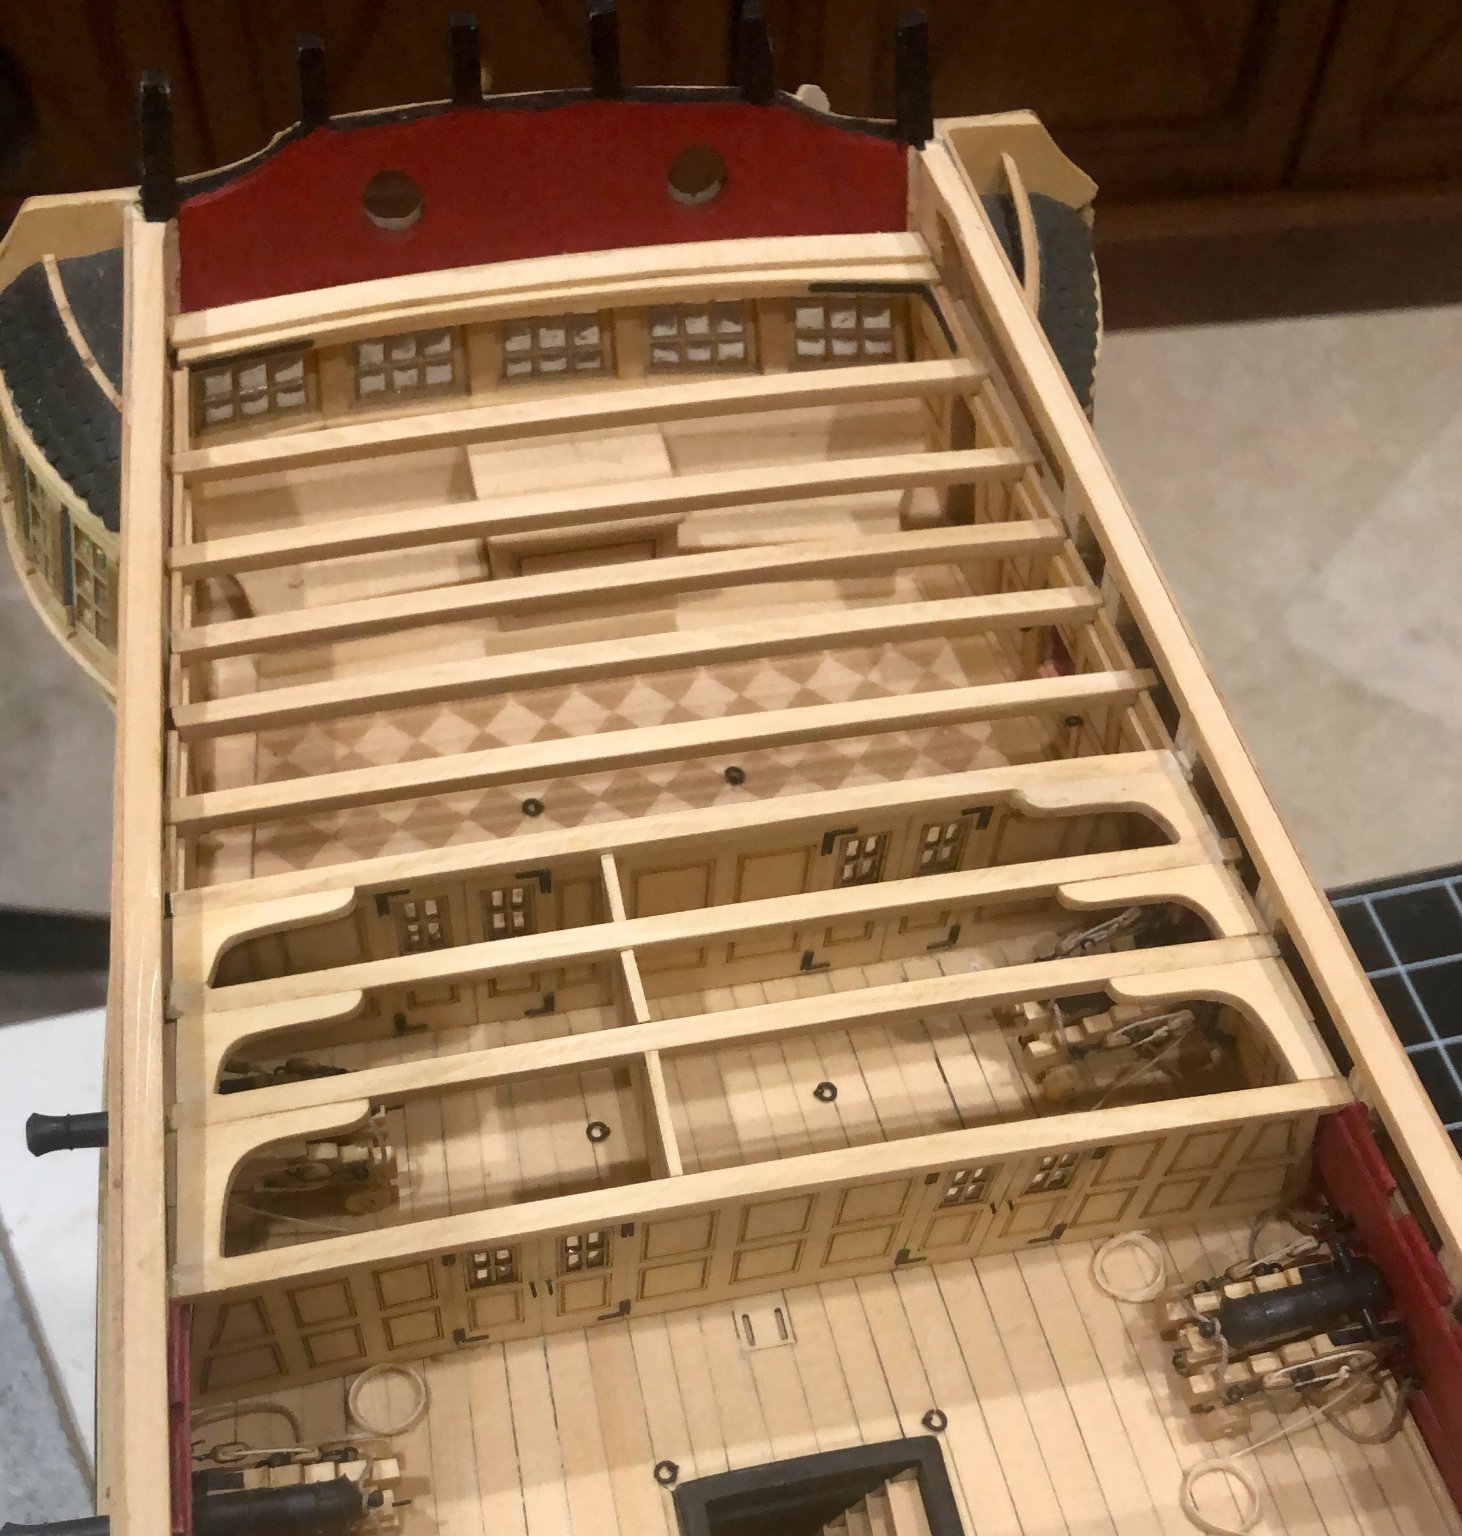
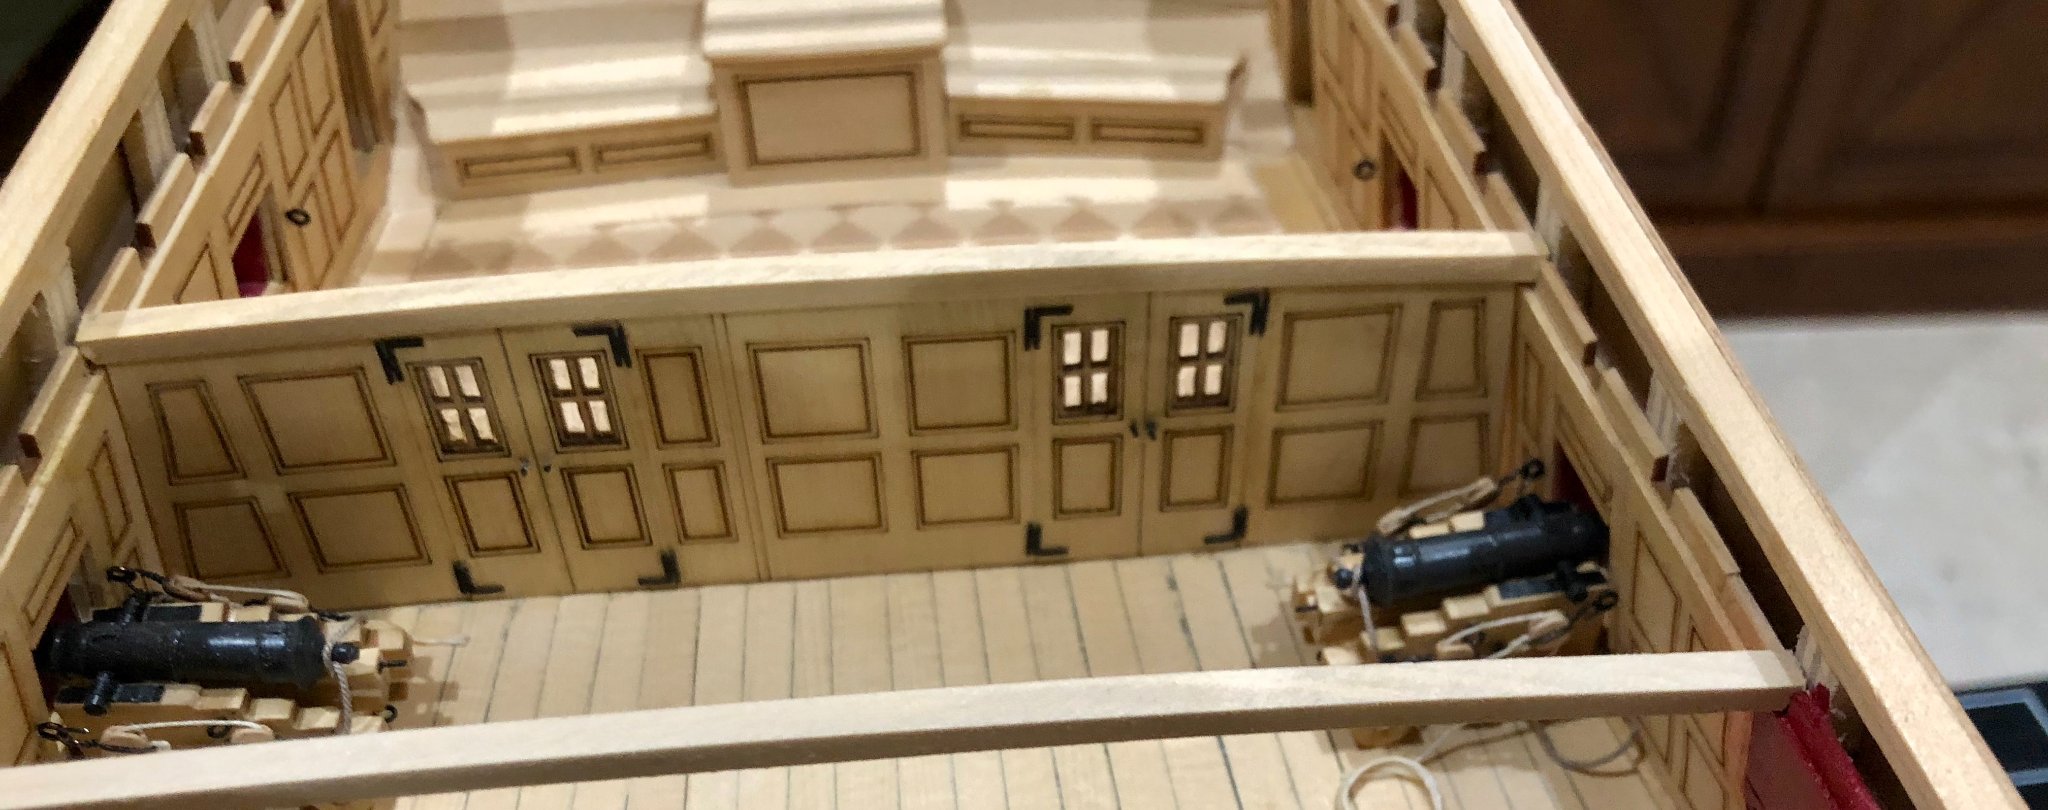
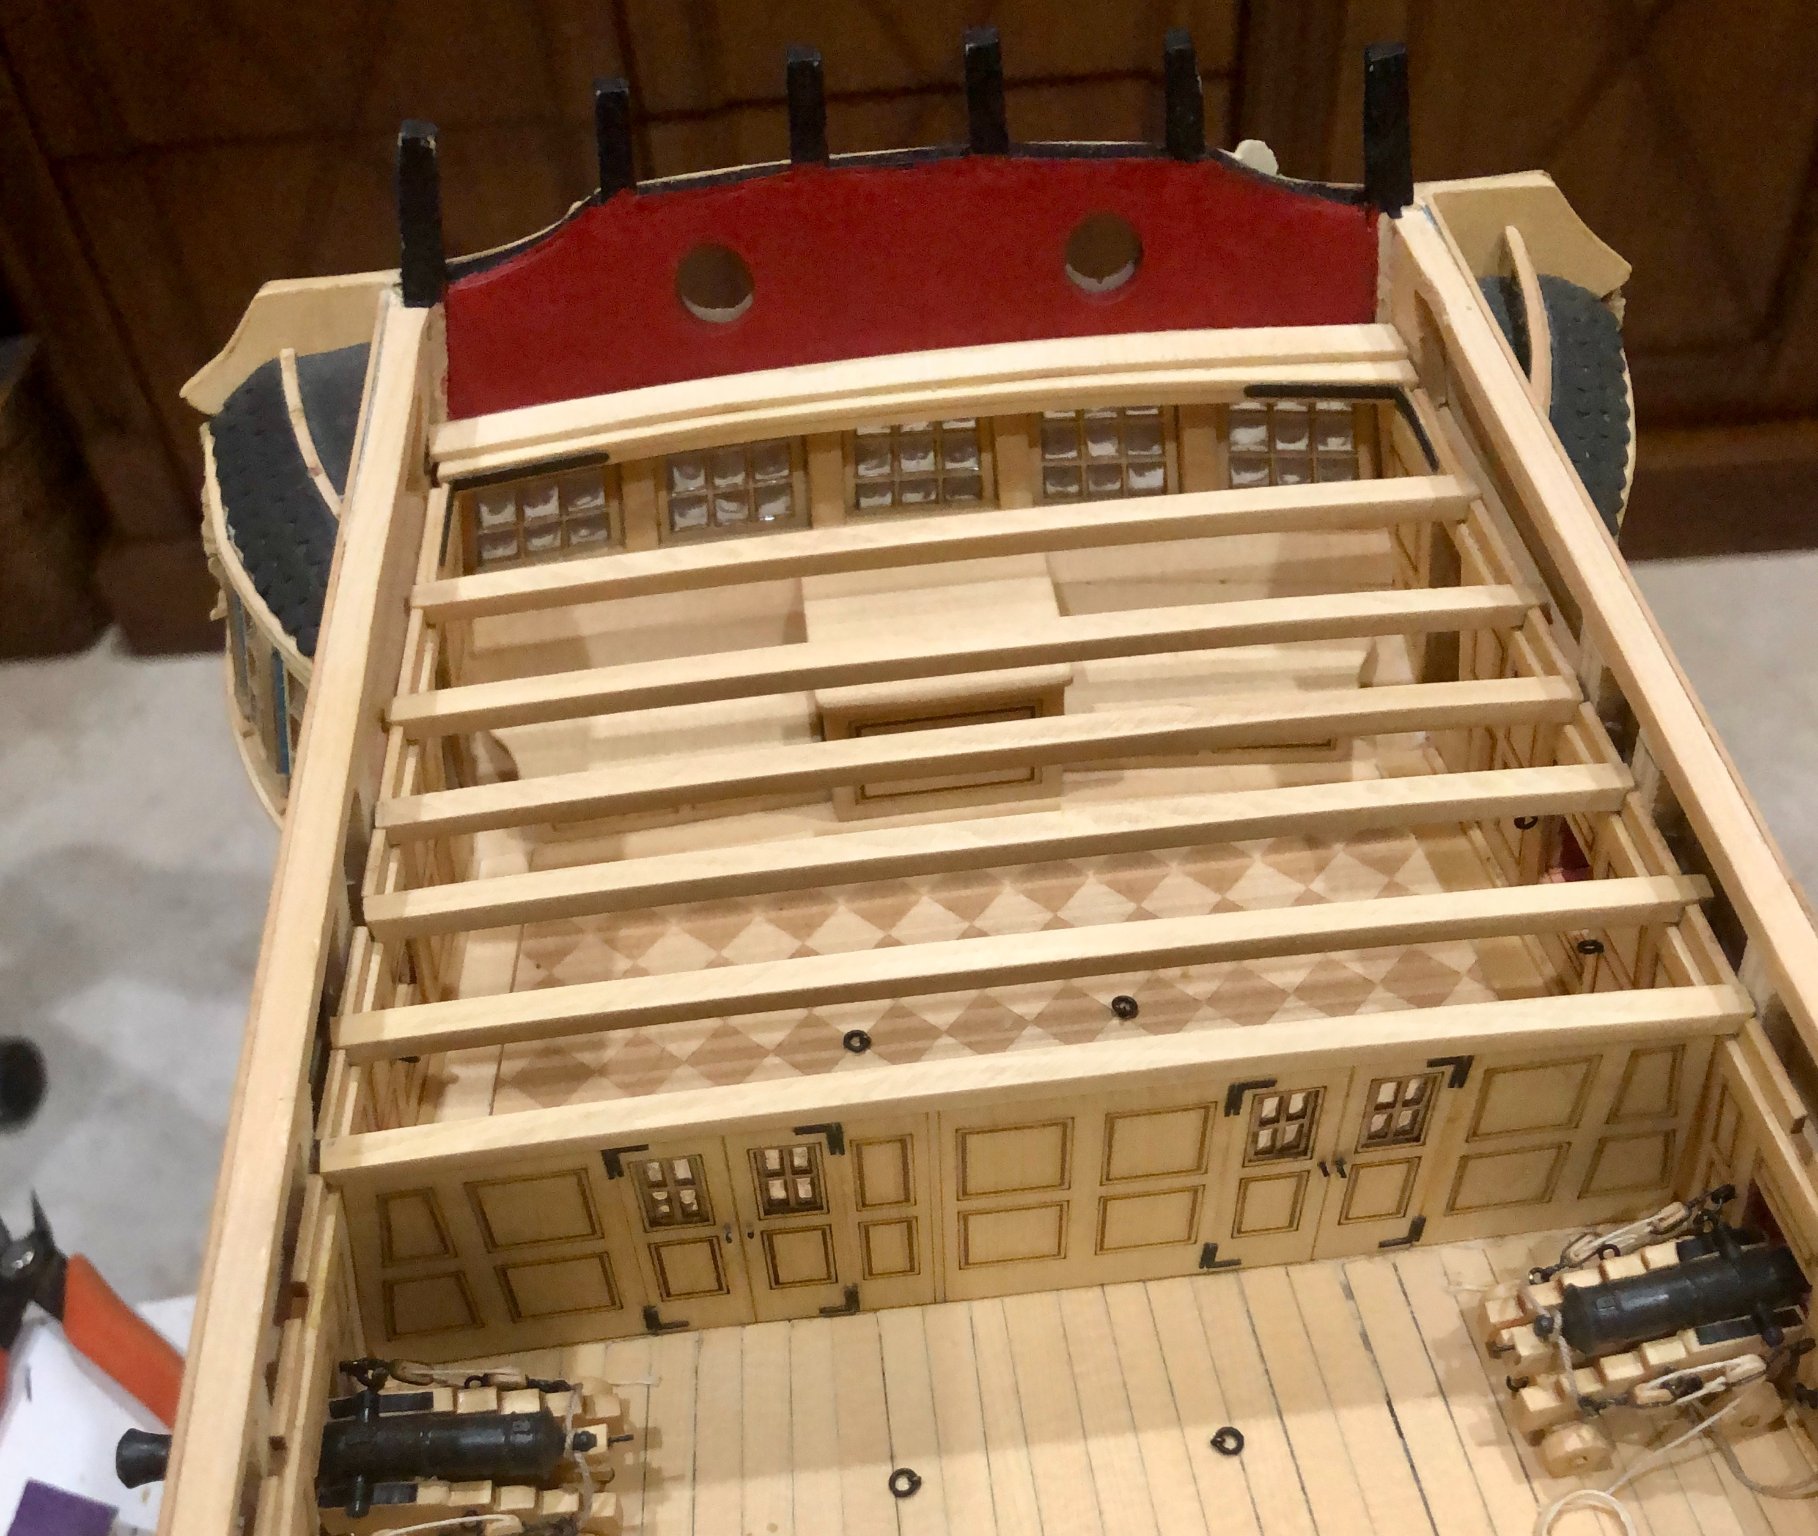
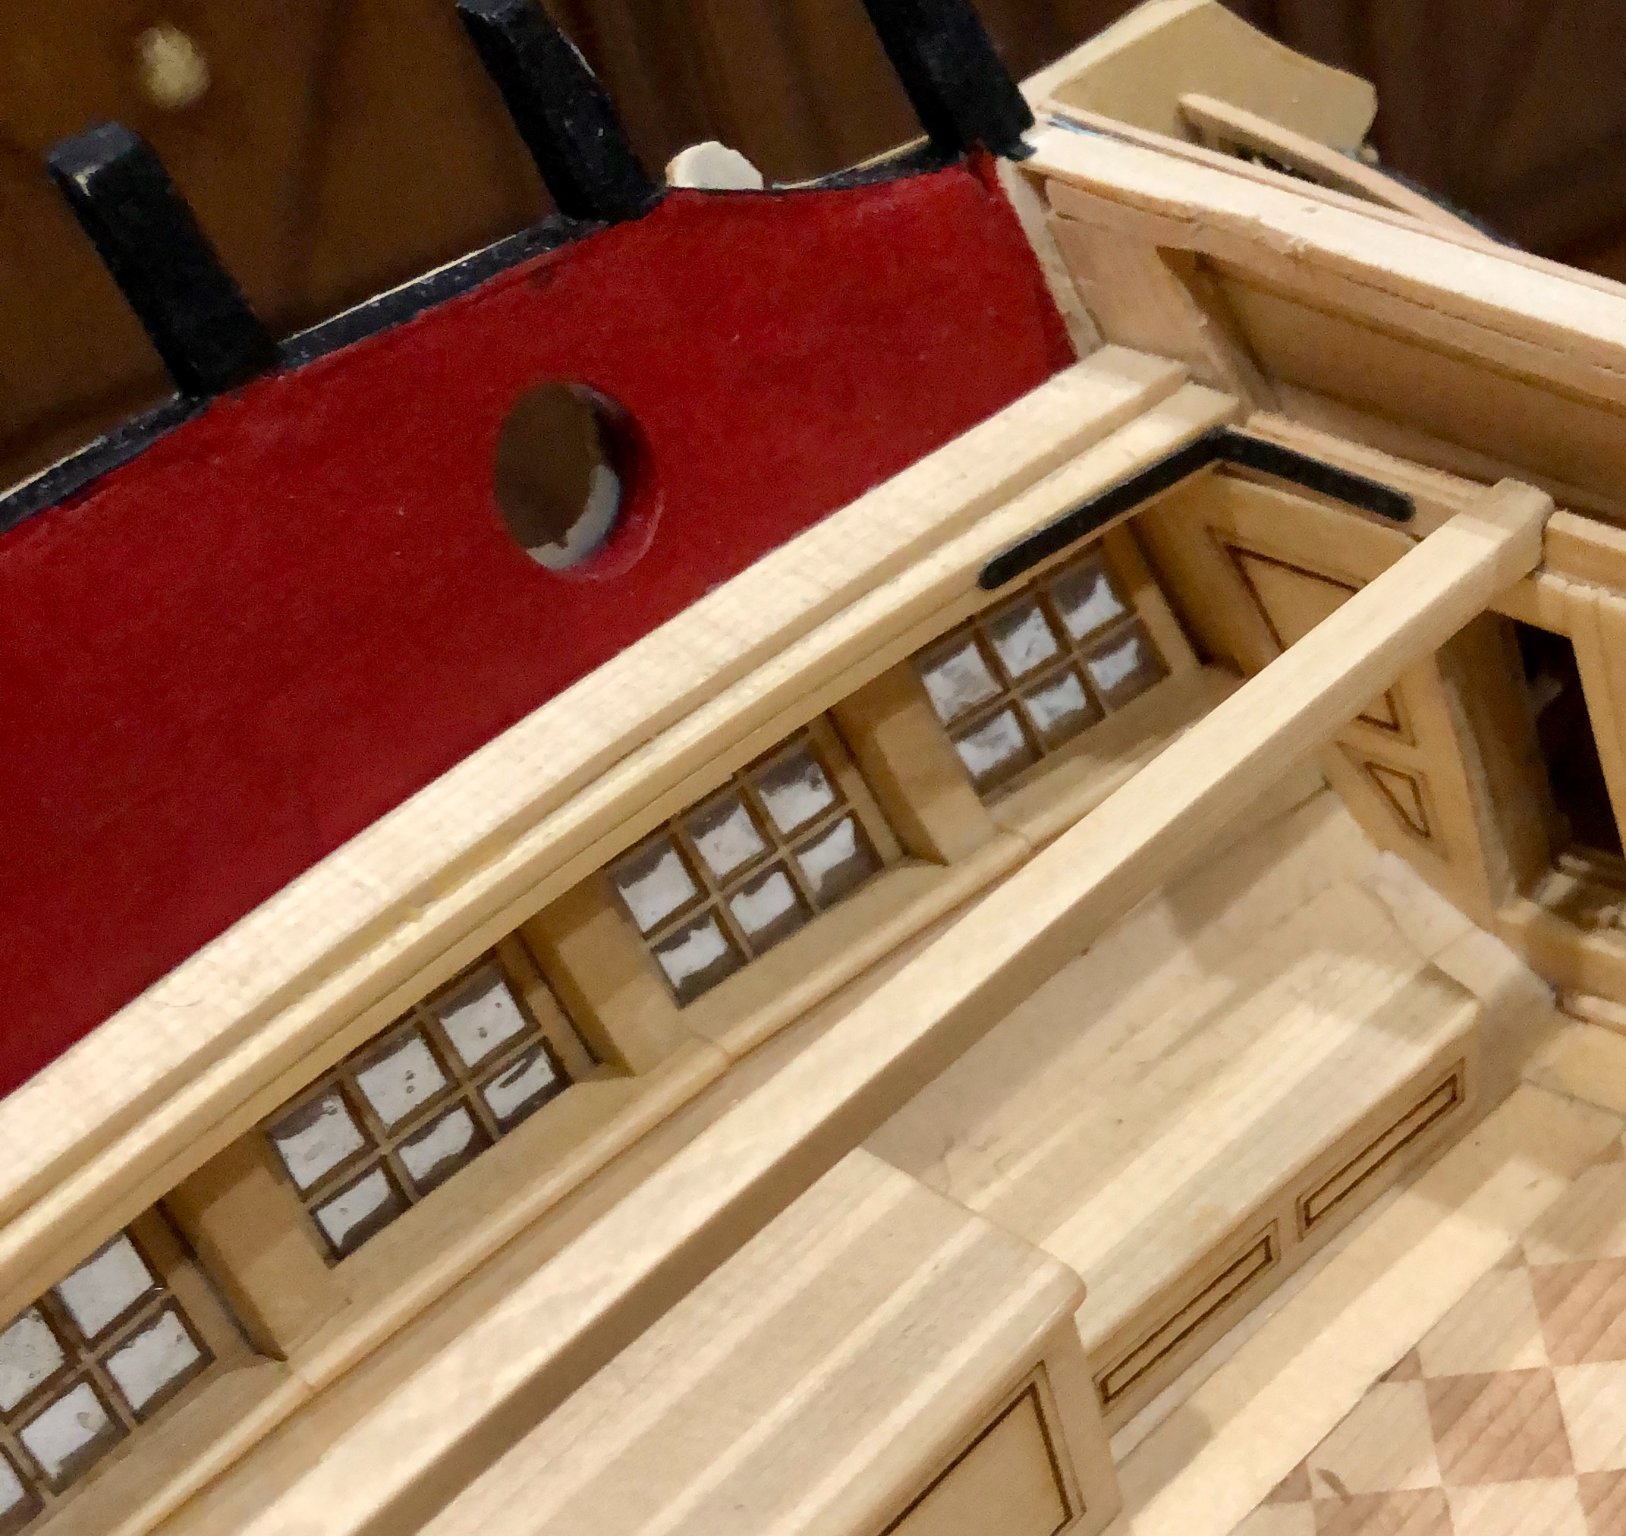
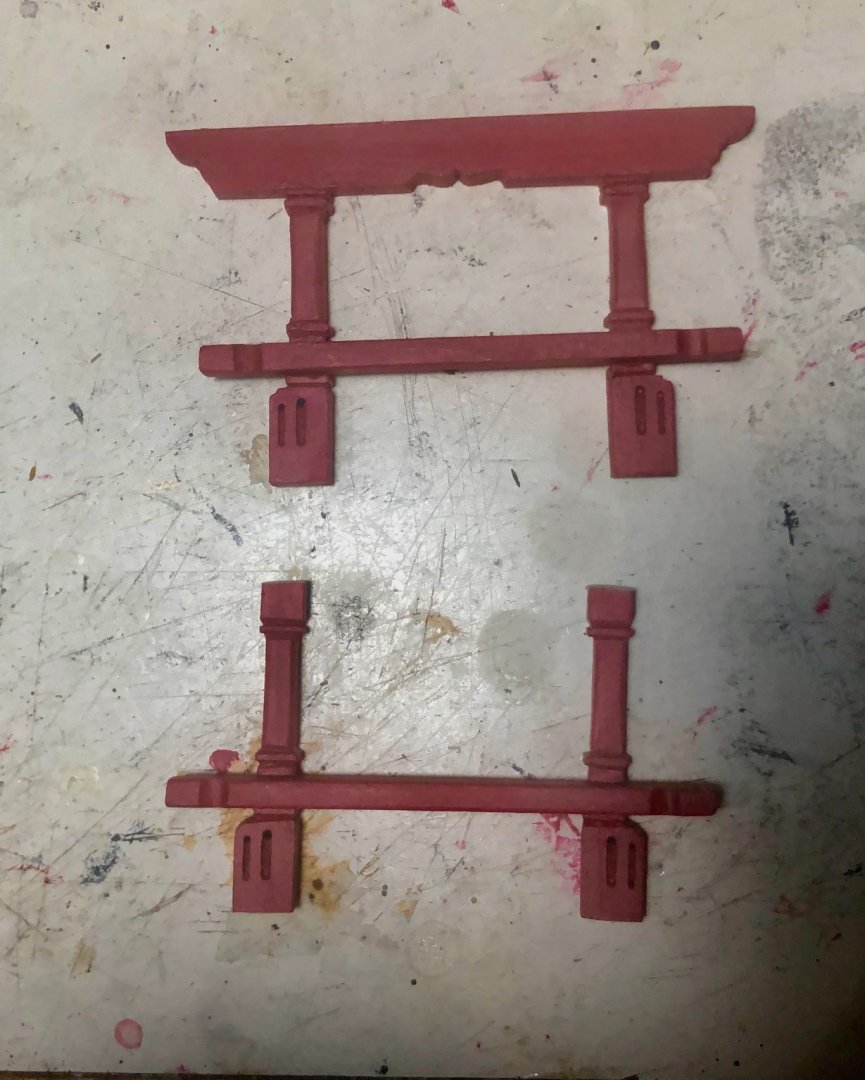
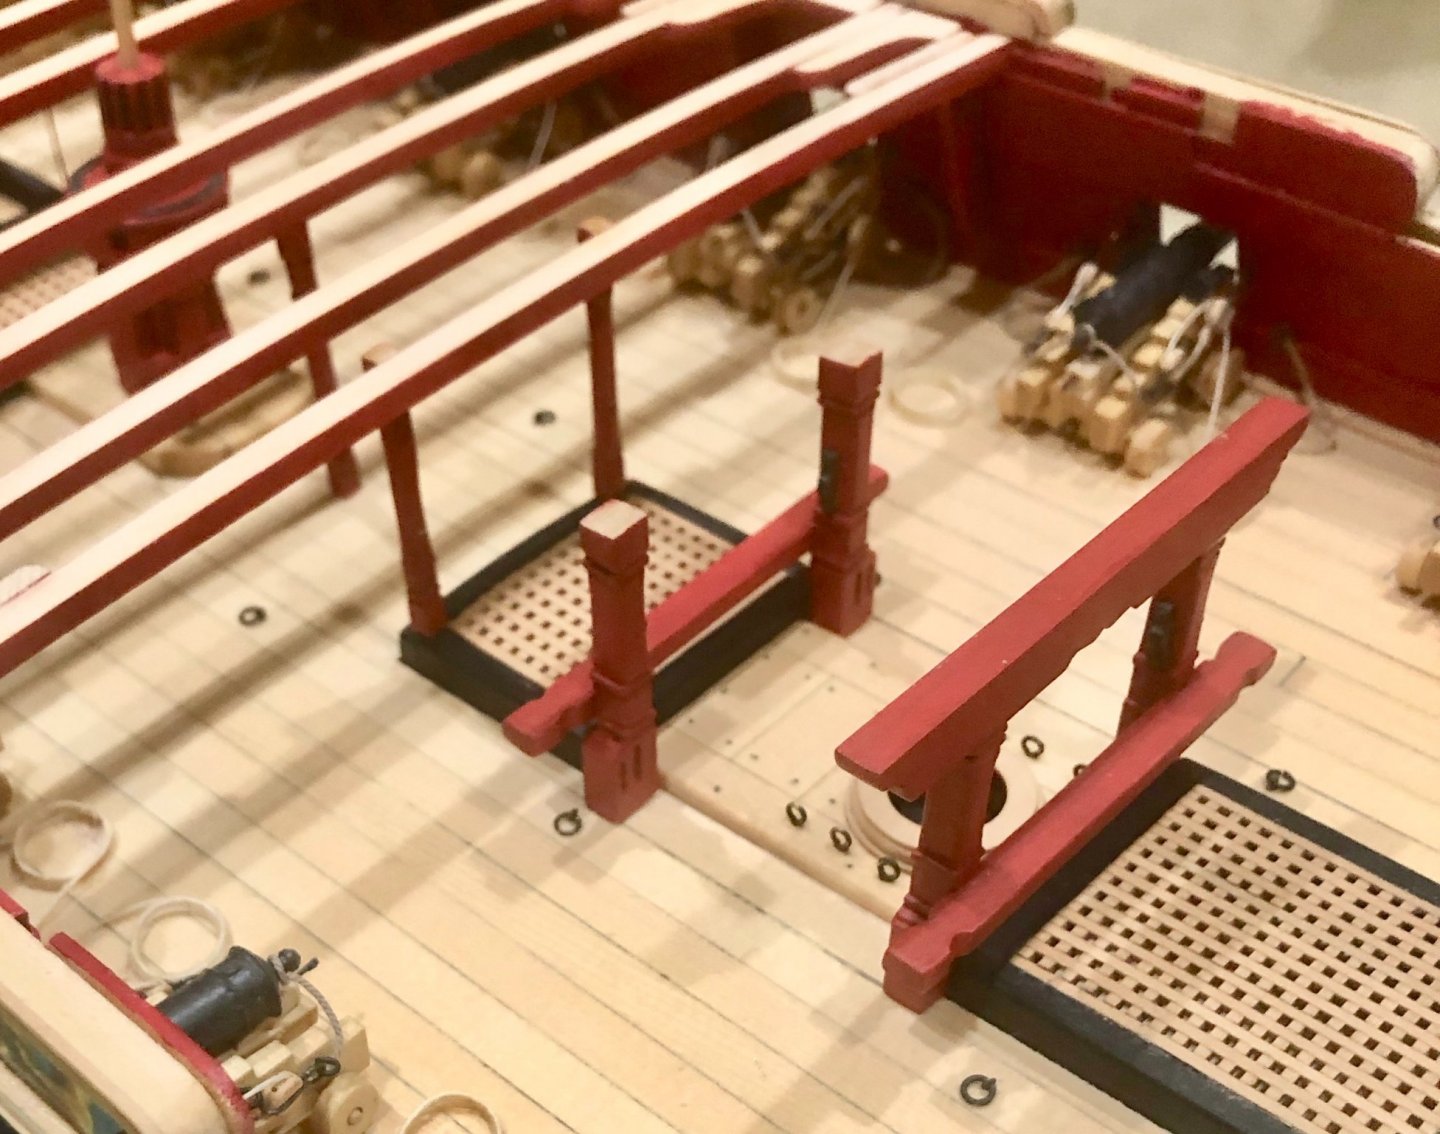
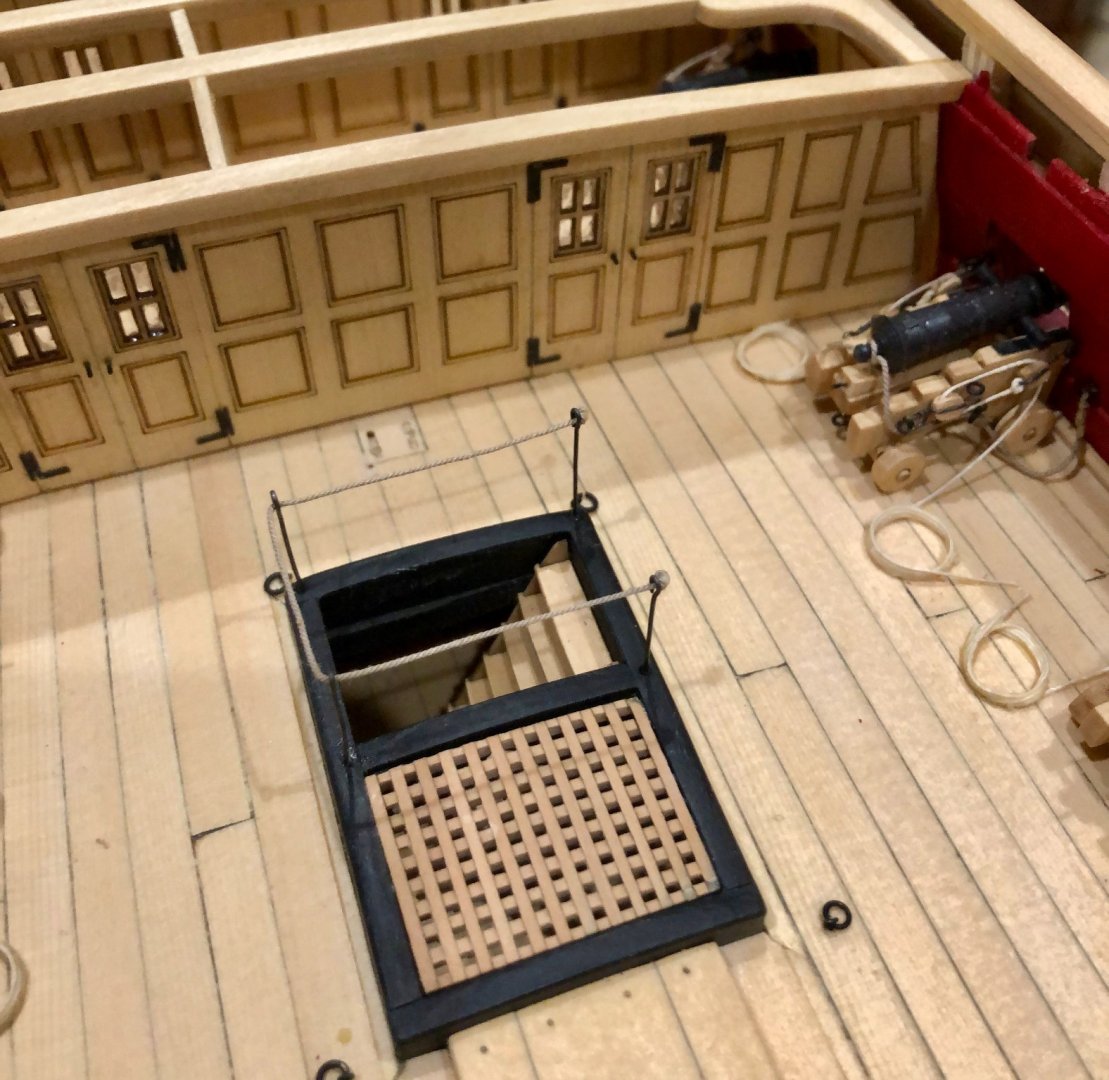
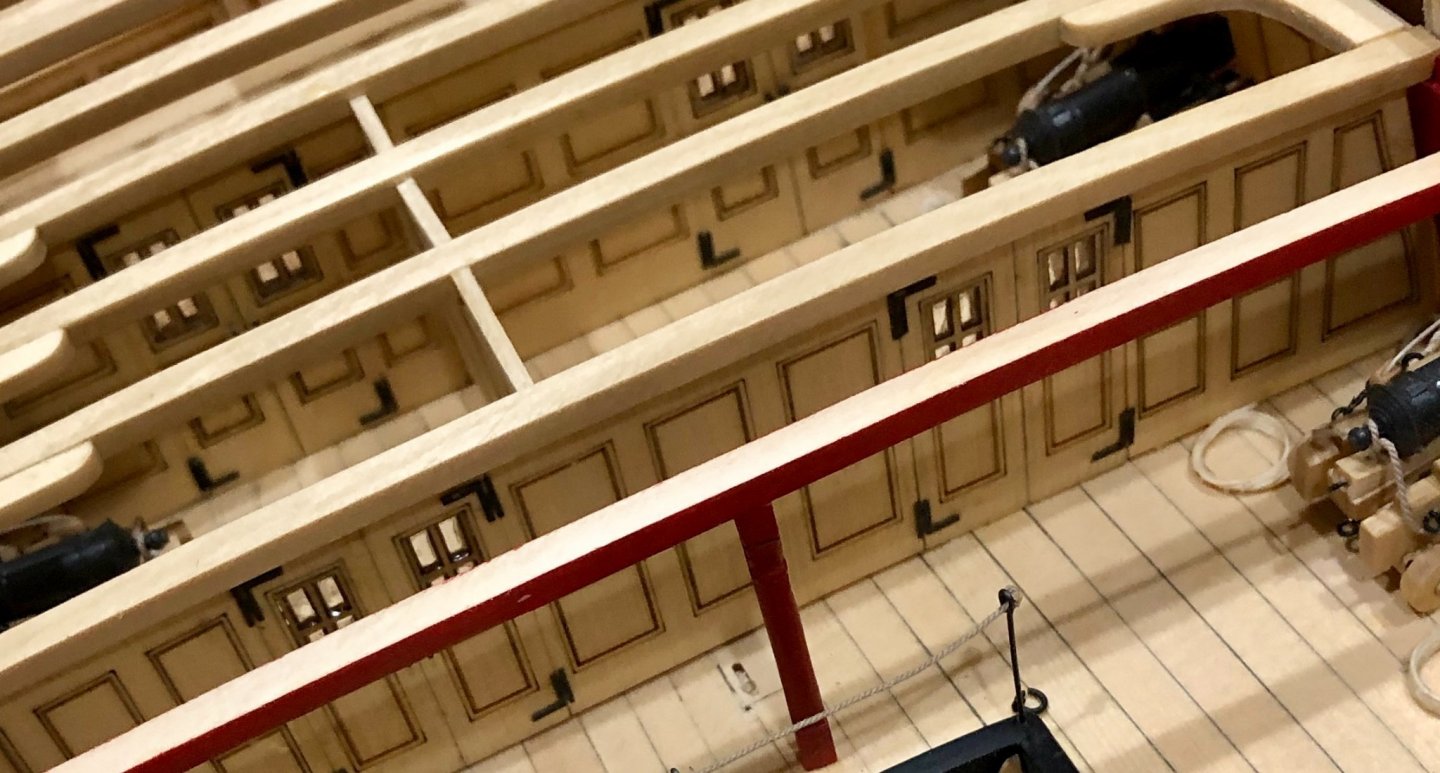
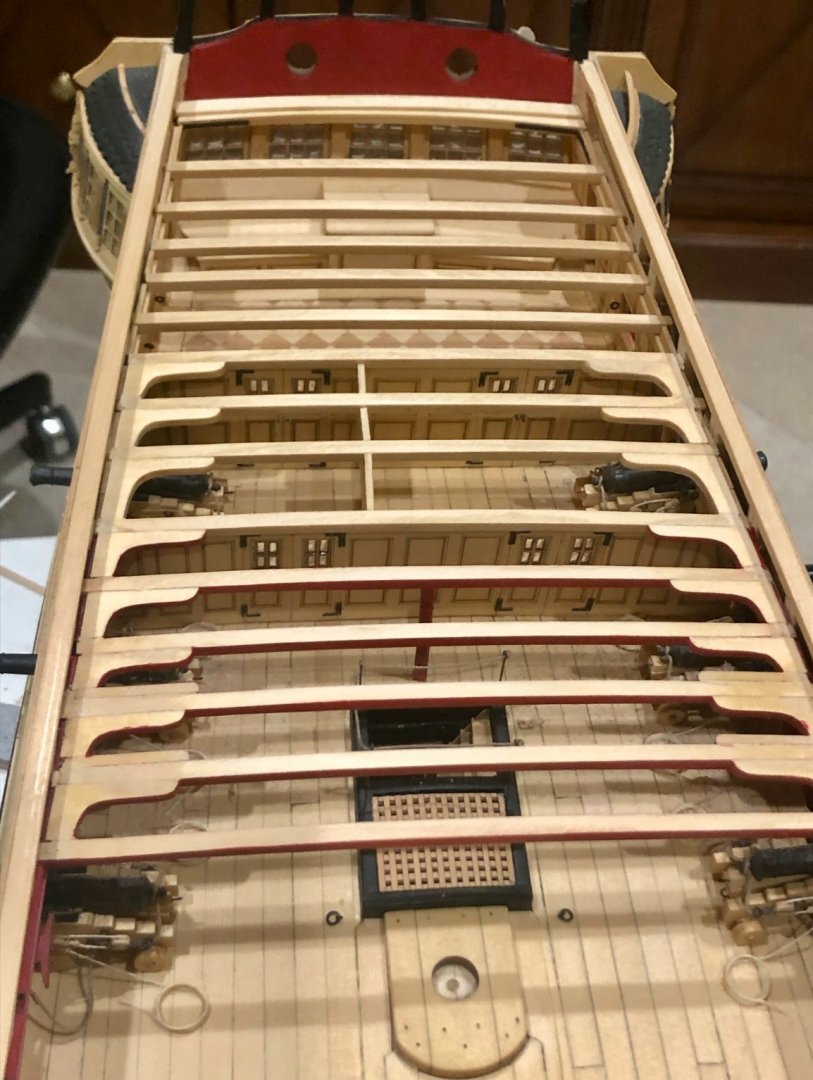
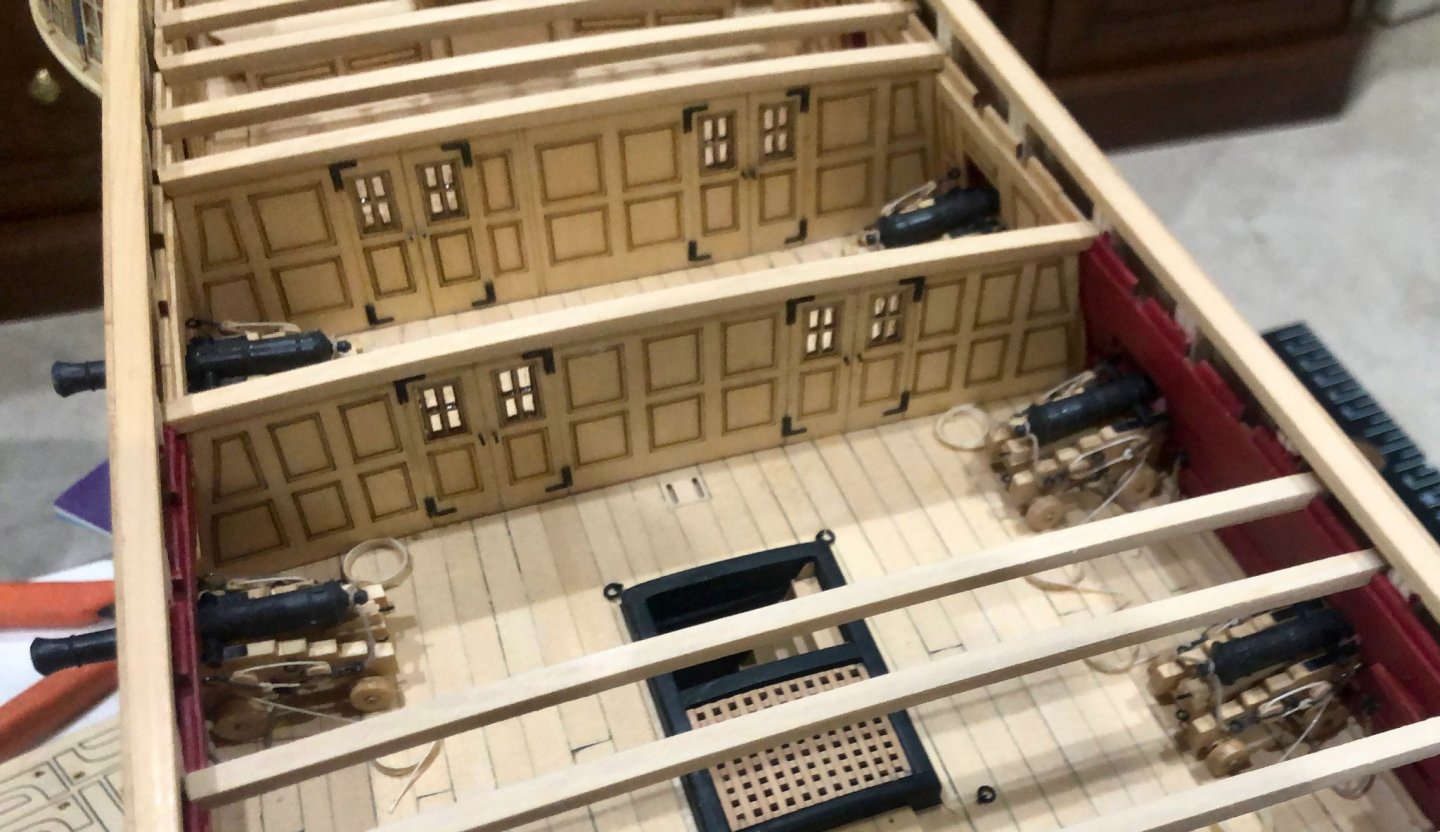
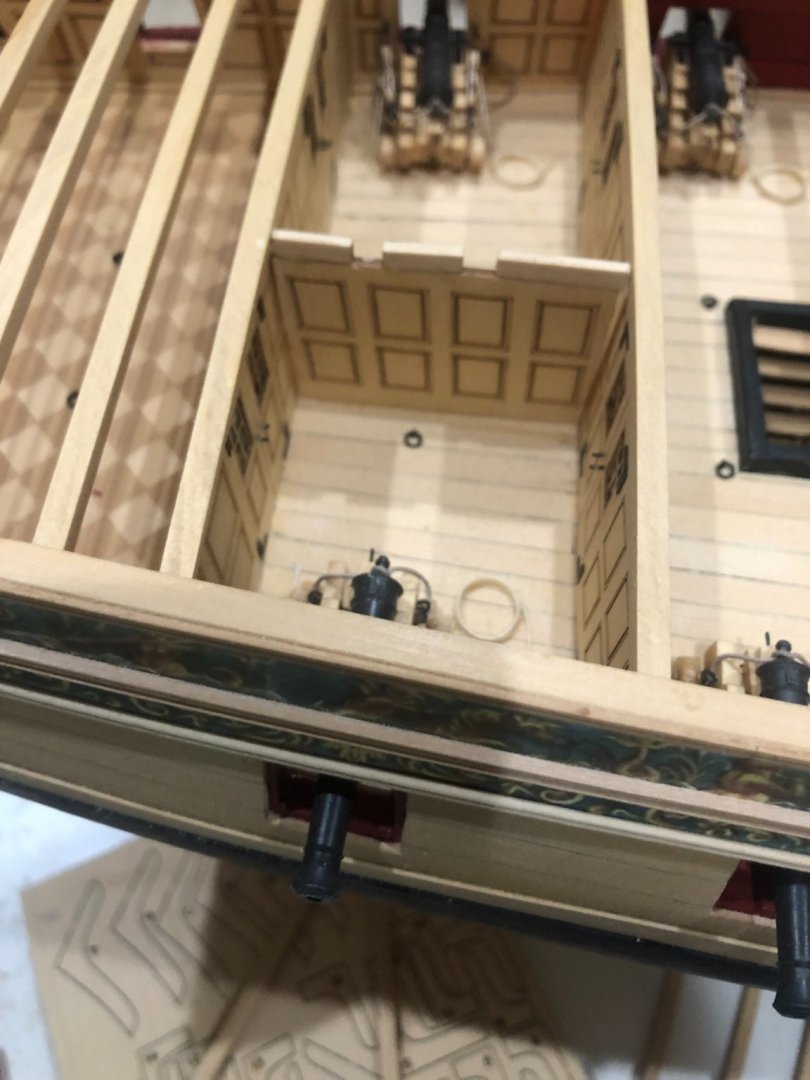
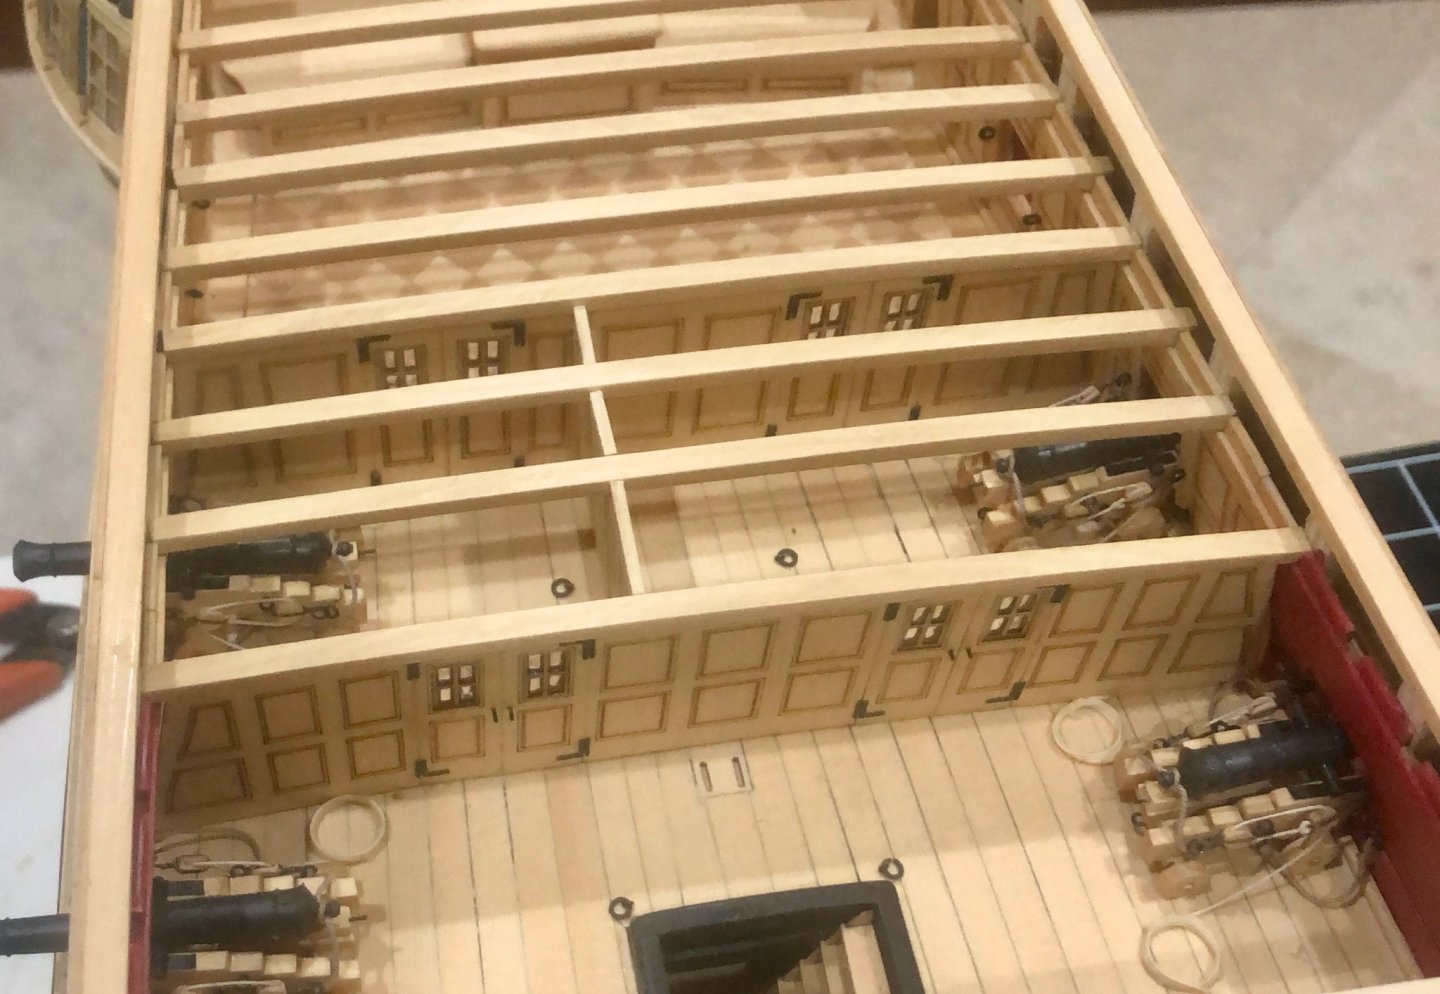
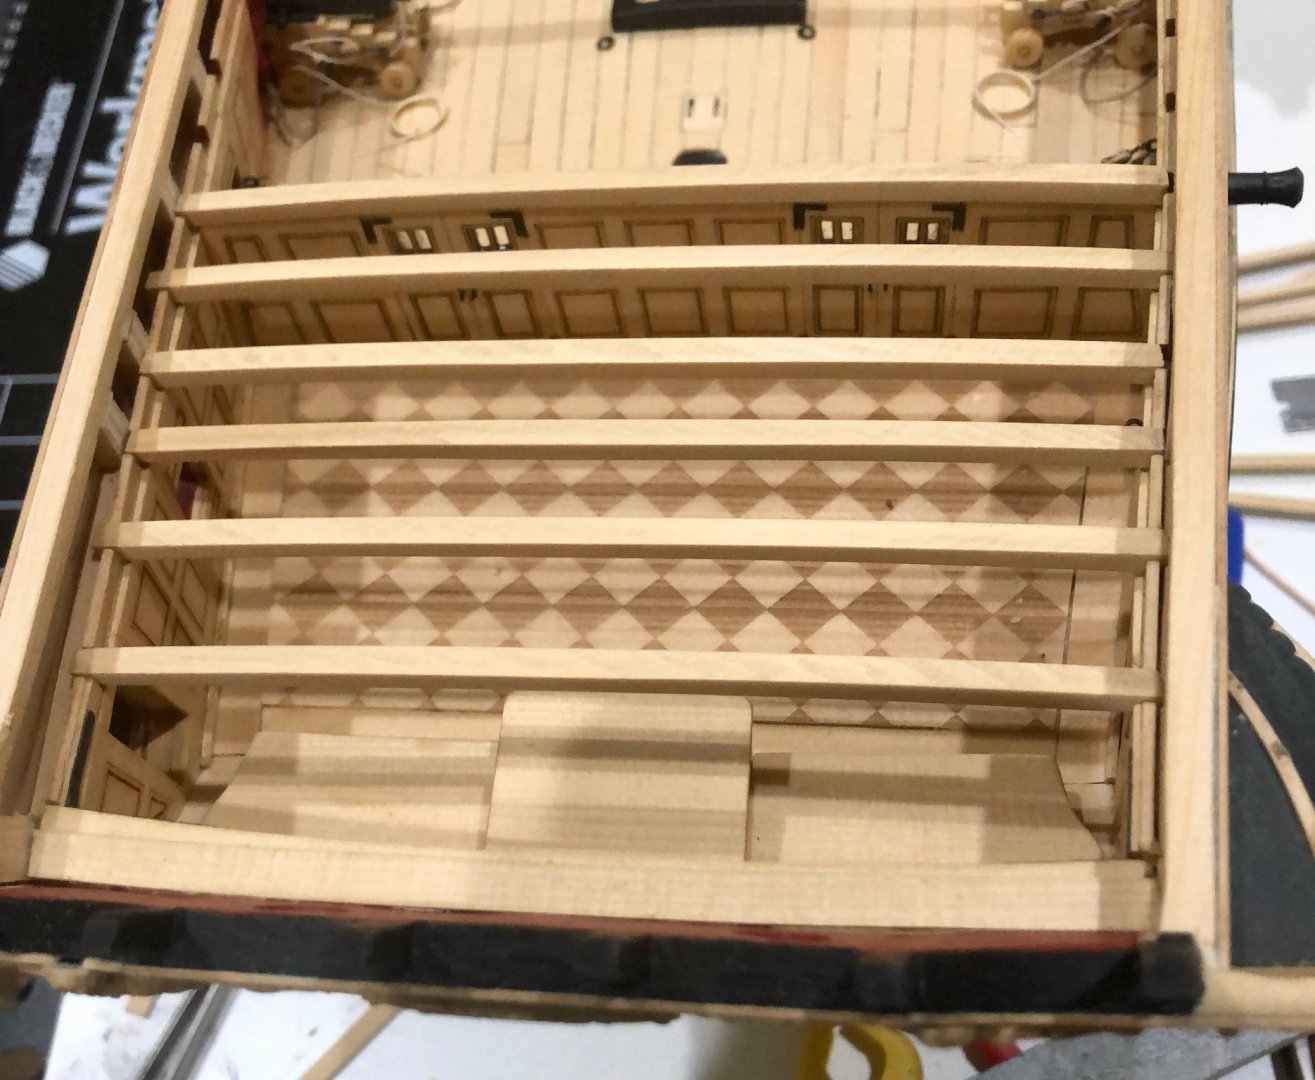
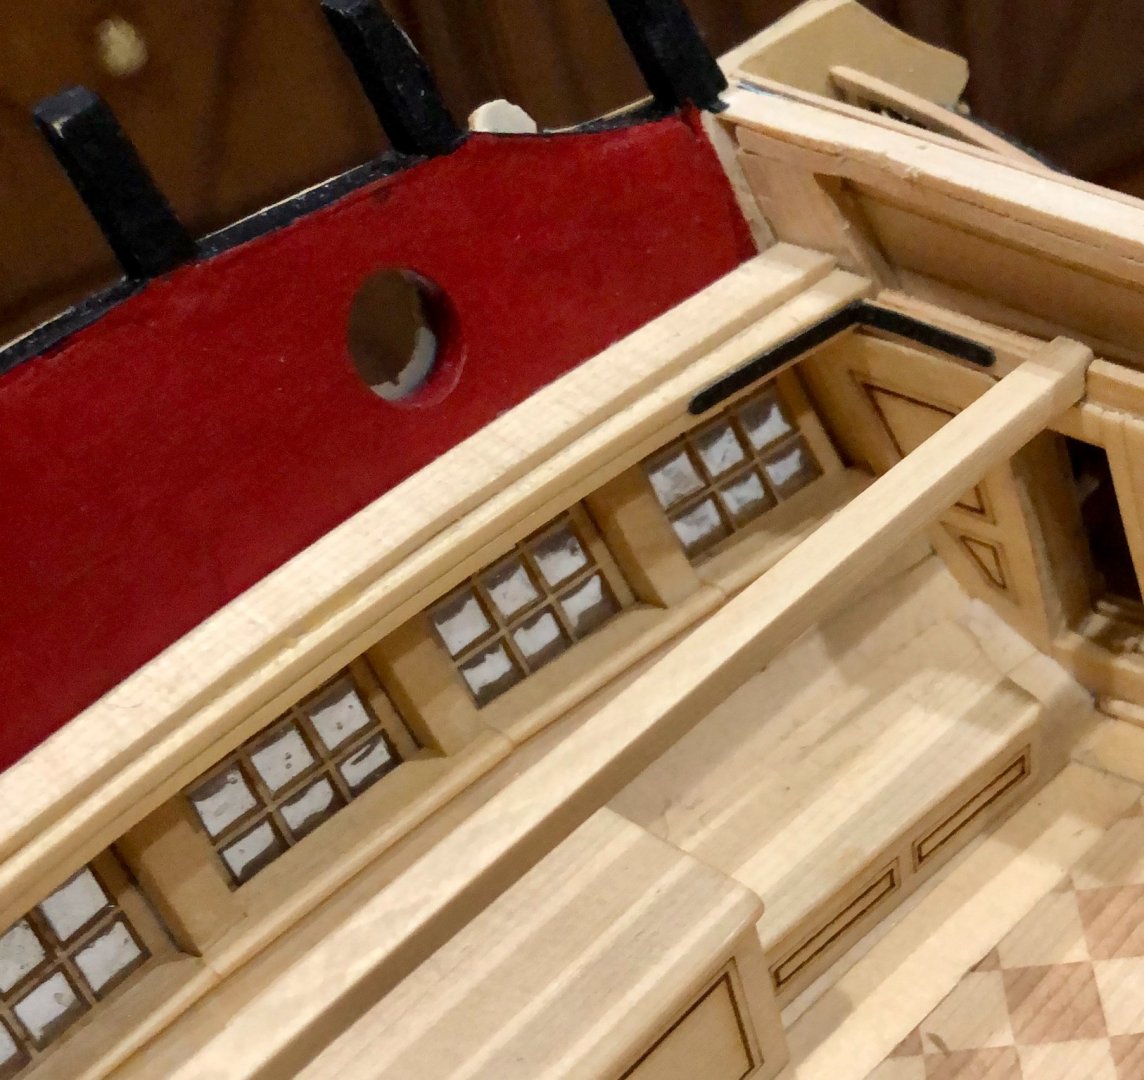
Continuing to move forward. I first dealt with the companionway. I chose to do metal stanchions with a rope rail, rather than the wooden posts and railing used by Chuck. I just liked the lighter look better. The stanchions are #24 wire with eyes bent at the top.The rope is .018". I then did the first column, shaping the laser cut part with files and painting it red. The remaining work was adding additional beams with their lodging and hanging knees. The laser cut lodging knees had to be adjusted slightly to fit, and the laser cut hanging knees were shaped to fit using files and sanding sticks. The sides of the beams, the edge of the lodging knees and the whole of the hanging knees were painted red. Bob


-
Thanks so much Fred and the "likes". Fred, I think that I will be happier winding the line around the drum and dropping the two ends through slots in the quarter deck, than taking two ends up through that deck and trying to make them appear as one line around the drum. Bob
-
Thanks so much Chuck and the "likes". Assuming that I will be rigging the wheel, I expect to run the lines down from the wheel through the quarter deck and not bother with the portion below the quarterdeck since they almost certainly will not be visible. Bob
-
The guns look great Reg. I know just how much work that took. Bob
- 137 replies
-
- 1
-
-
- winchelsea
- Syren Ship Model Company
- (and 1 more)
-
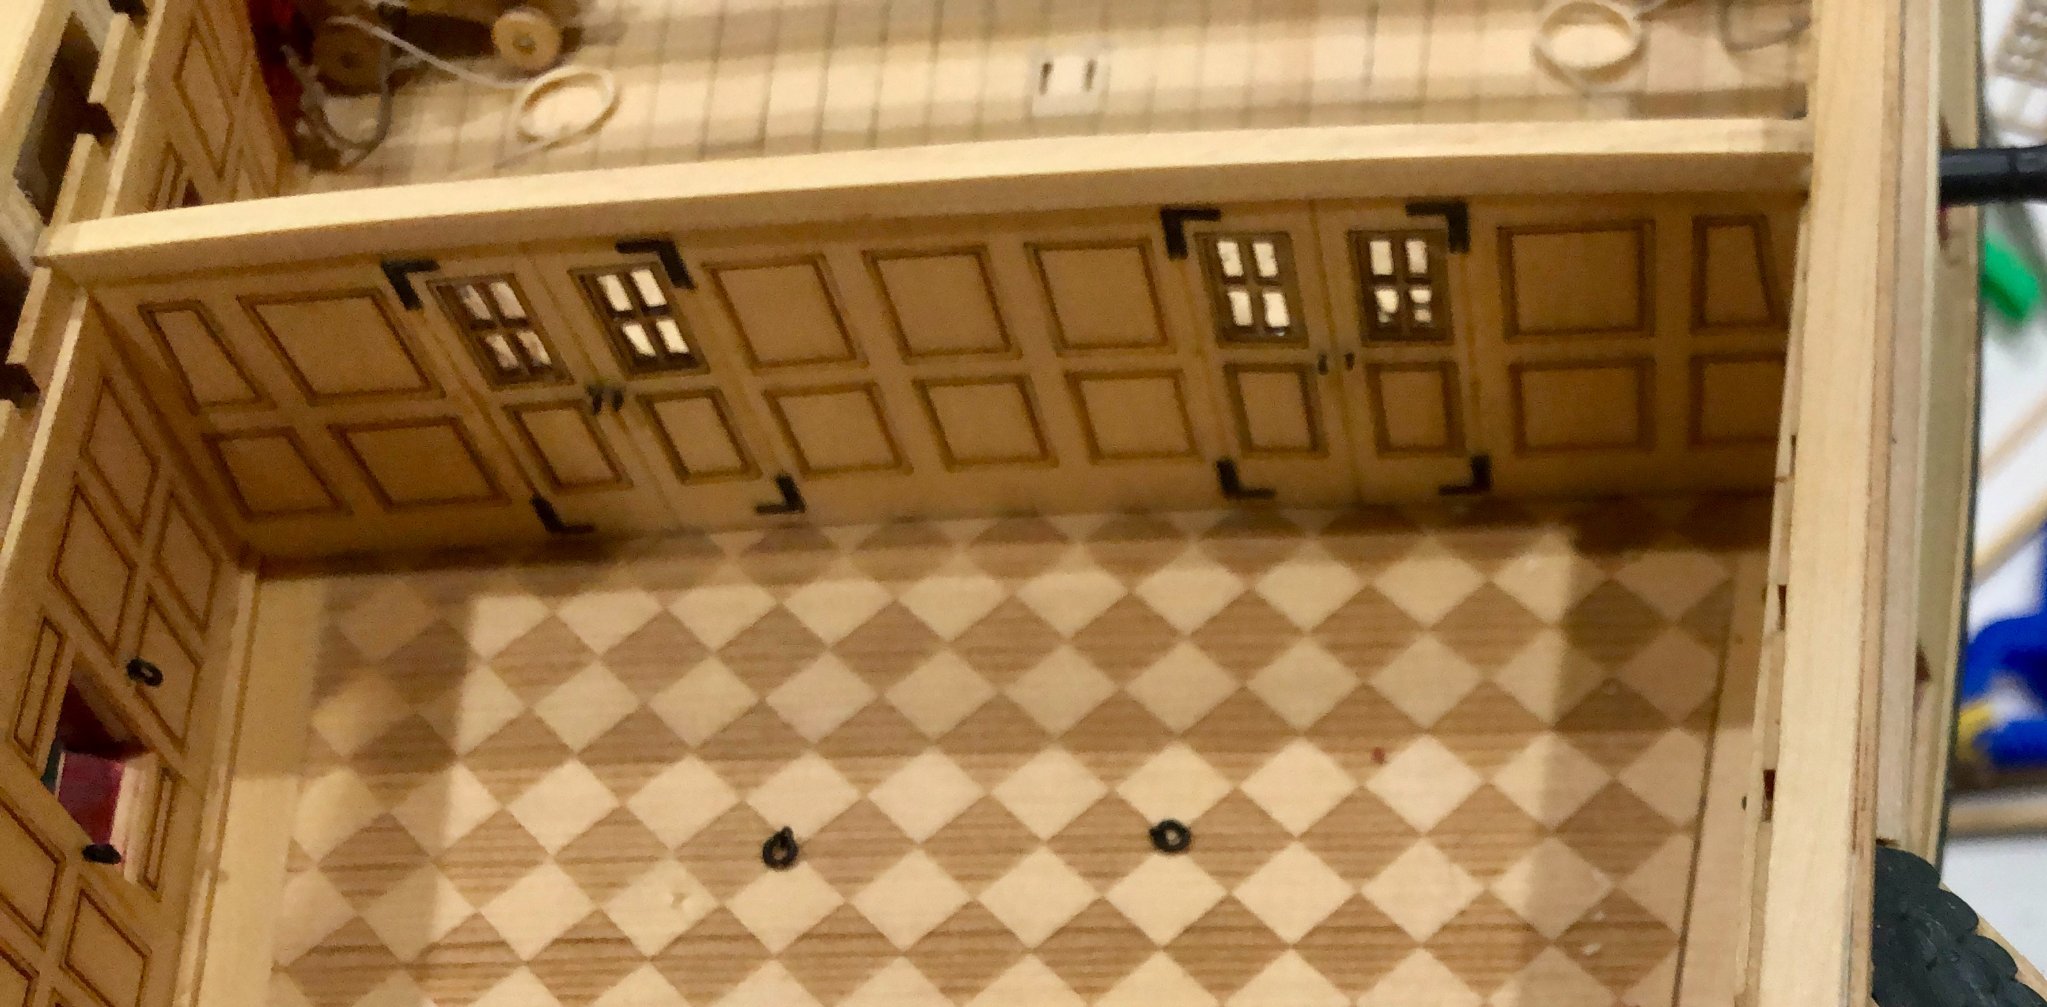
Moving forward, I made up and added the mizzen mast coat. I then made up and added the forward bulkhead and then the panel between the two bulkheads, adding the small pieces atop the panel to fit around the beams. After that work was completed, I permanently mounted the three beams between the bulkheads and then fitted and added the lodging knees between those beams. All of the exposed wood was given a coat of Wipe-on Poly. While adding the beams and knees, I continually checked with a planking strip to ensure that everything remained fair and level. Bob


-
Thanks so much Rusty, Thomas and the "likes". Greatly appreciated. Bob
-
Thanks so much Steve and the "likes". Bob
-
I've now added the aft bulkhead and glued in the beams aft of it. Having the rigged guns in place definitely created a bit of a challenge, but I still think it was worth it. Bob


-
I'm afraid that indefinitely still means indefinitely. I'm happily involved with Winchelsea and will continue with that until completion. Although I agree that builder effort can overcome bad kits, I have already built this Lexington once before and feel little compulsion to prove that I can do it again. Bob
-
Thanks Grant for the very generous comments, and thanks also to the "likes". Bob
-
A wonderful job Grant. A great looking Longboat. Bob
- 109 replies
-
- 1
-
-
- medway longboat
- Syren Ship Model Company
- (and 1 more)
-
Thanks so much Chuck, Don, Joe and the "likes". A good reminder Chuck. Only the last beam aft is glued in at this point. Bob
-
I received my Chapter 7 parts package and eagerly began work on it. I guess that I'm going to be the pioneer or guinea pig for this part, so here goes. I chose to paint the inboard transom first. The next task was to fit the quarter deck beams. These are laser cut, but must be cut to size. Although straightforward, care is required. I also found that the beams didn't quite fit into the deck clamp notches, so some sanding adjustment was necessary. When fitting the beams, I used a planking strip to continually check that everything is aligned properly. The last beam against the transom is a bit tricky, but worked out all right. The last item was to add the the laser cut straps to the last beam. These tested my aging dexterity. The beams are still only dry fitted to allow removal for doing the upcoming work. Bob


-
Thanks so much Joe. Time for some progress from you. Bob