rafine
-
Posts
2,932 -
Joined
-
Last visited
Content Type
Profiles
Forums
Gallery
Events
Everything posted by rafine
-
 Thanks so much Vlad and Glenn for the comments and thanks also. to the “likes”. Bob
 -
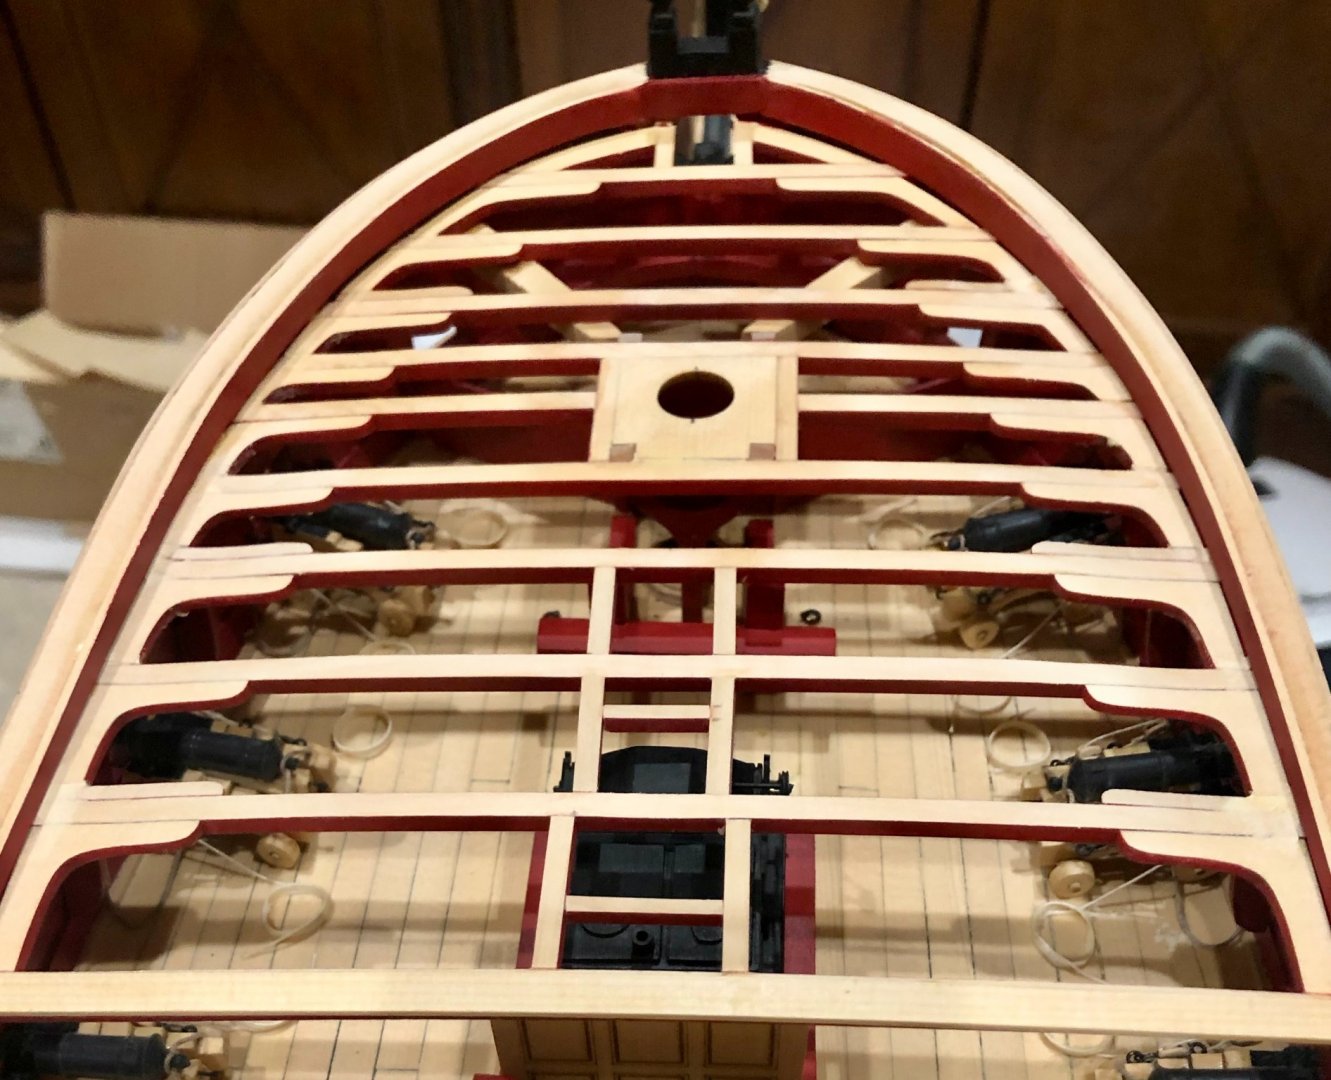
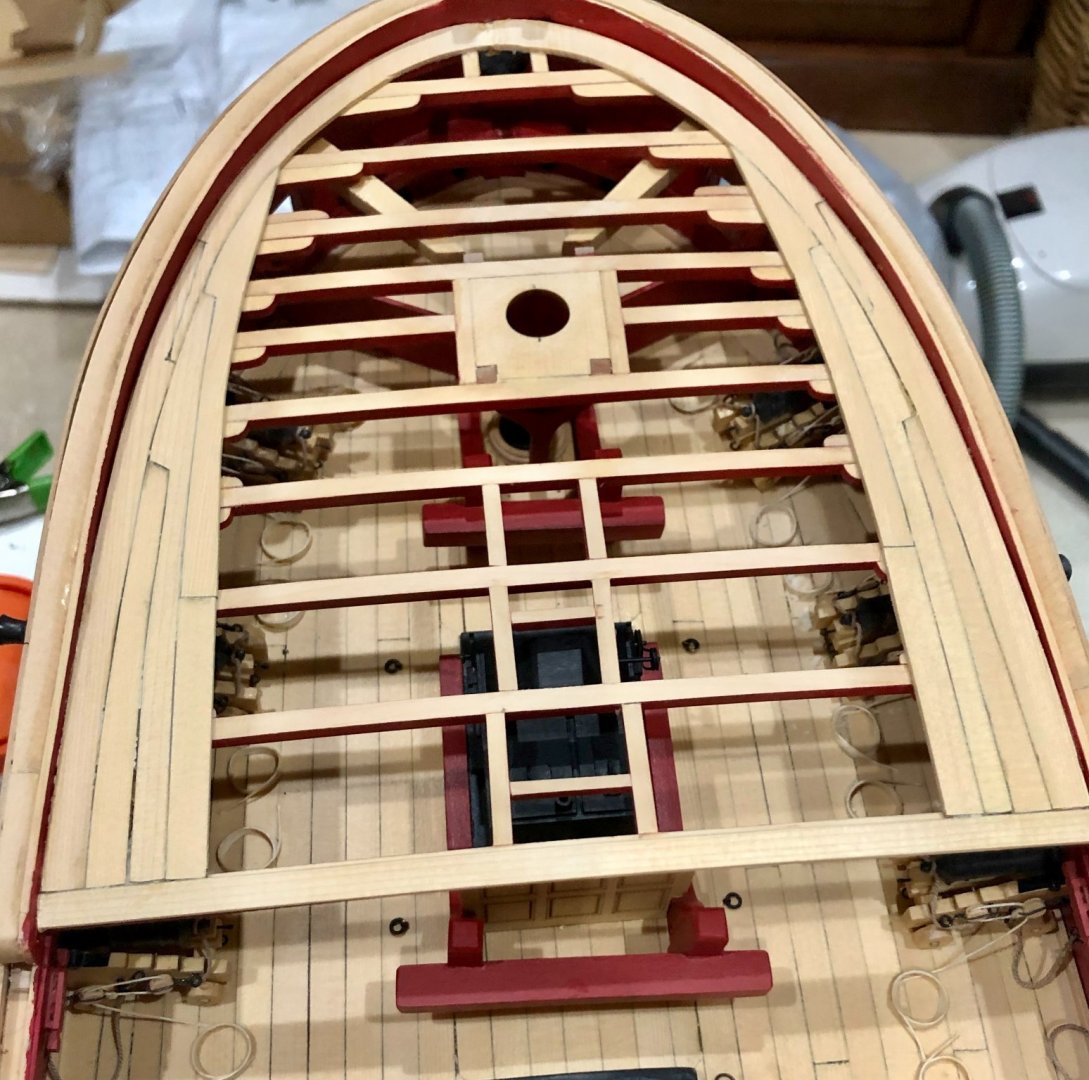
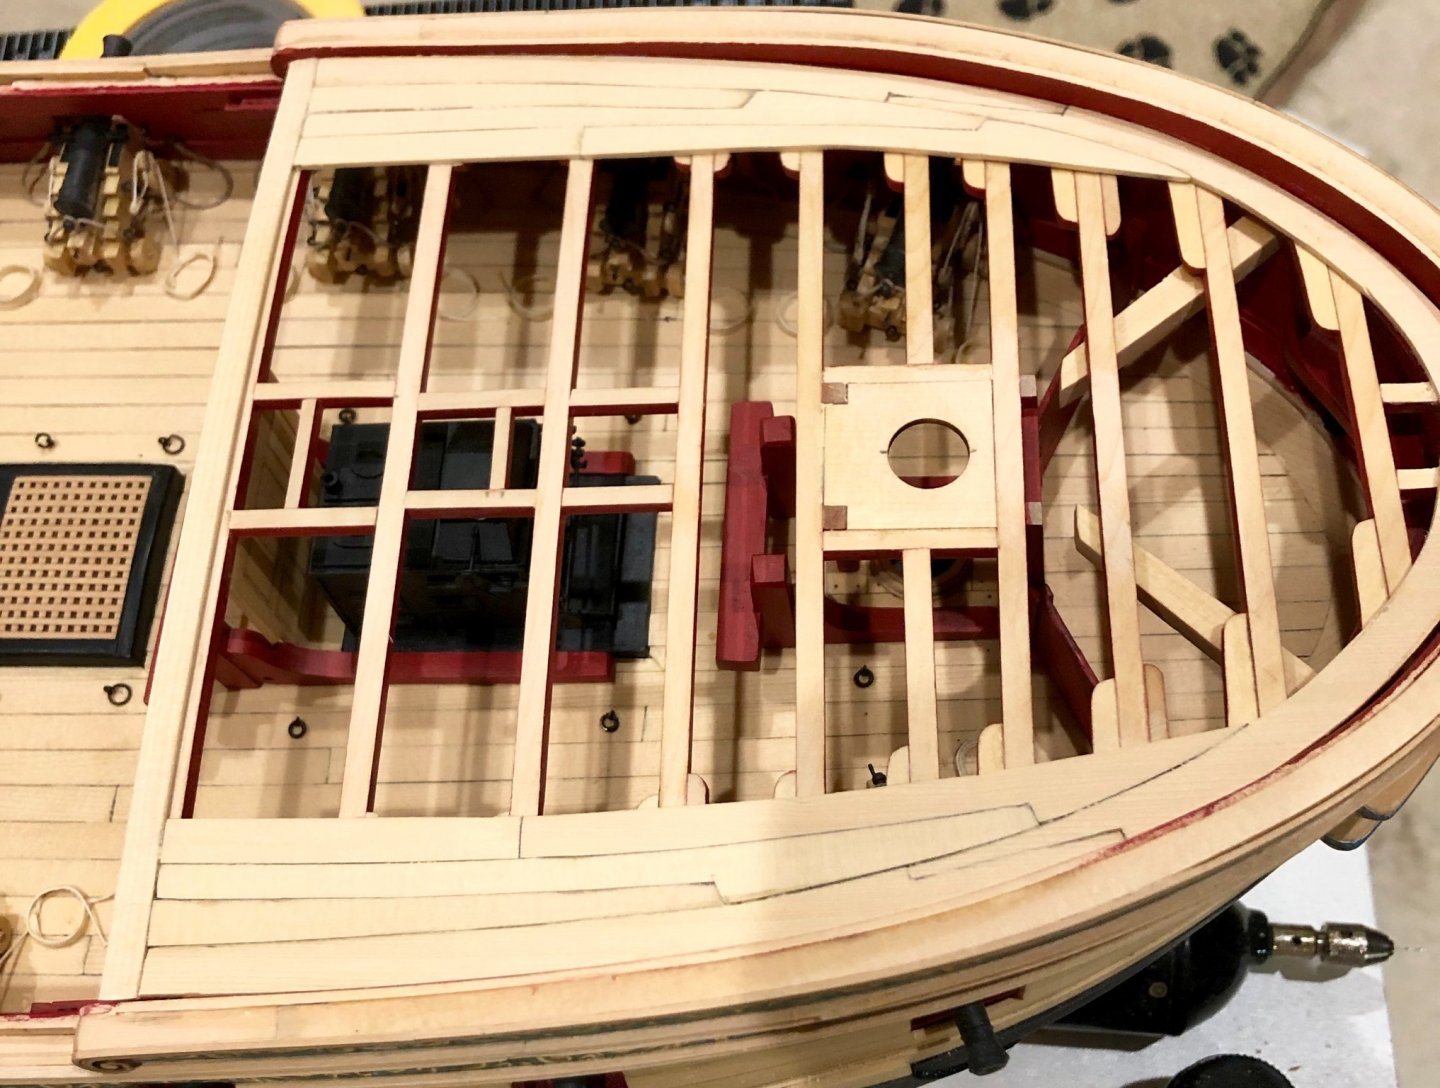
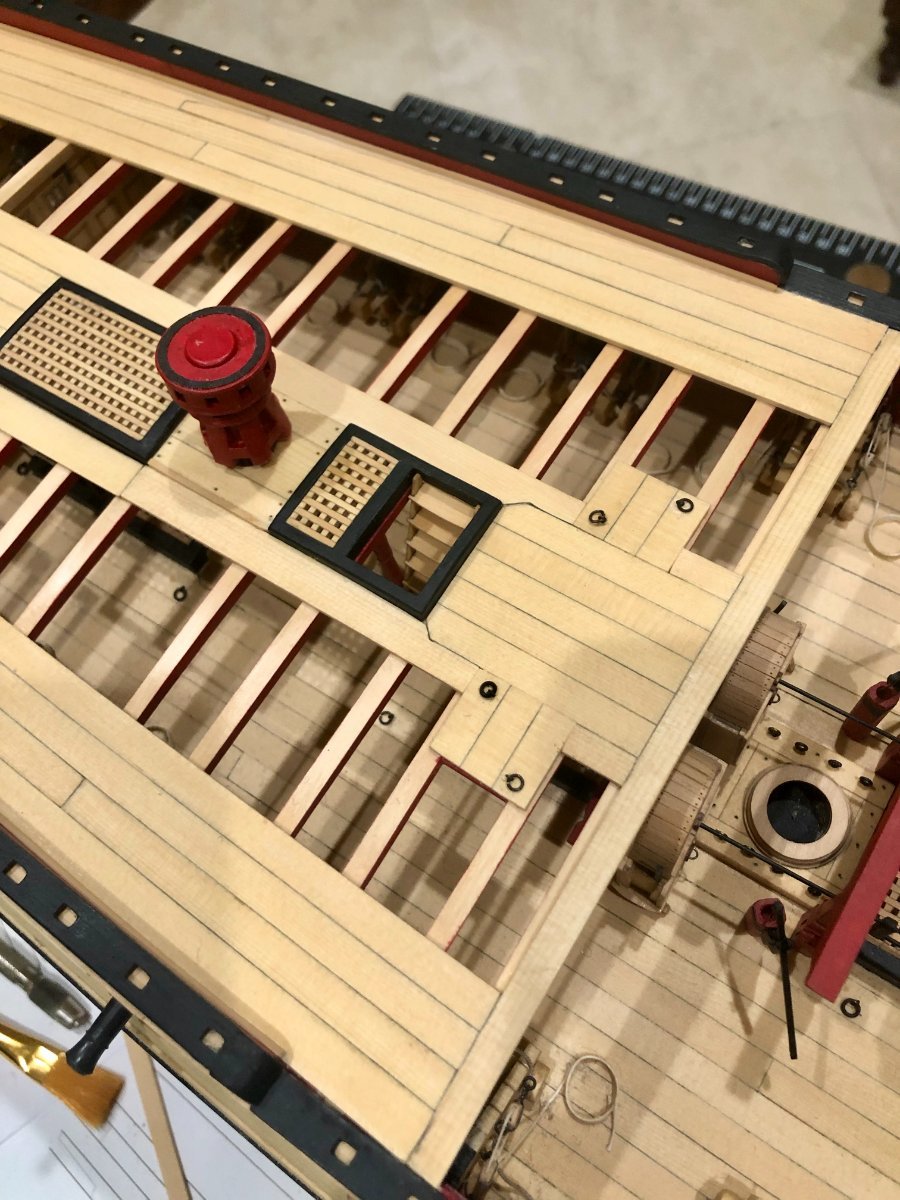
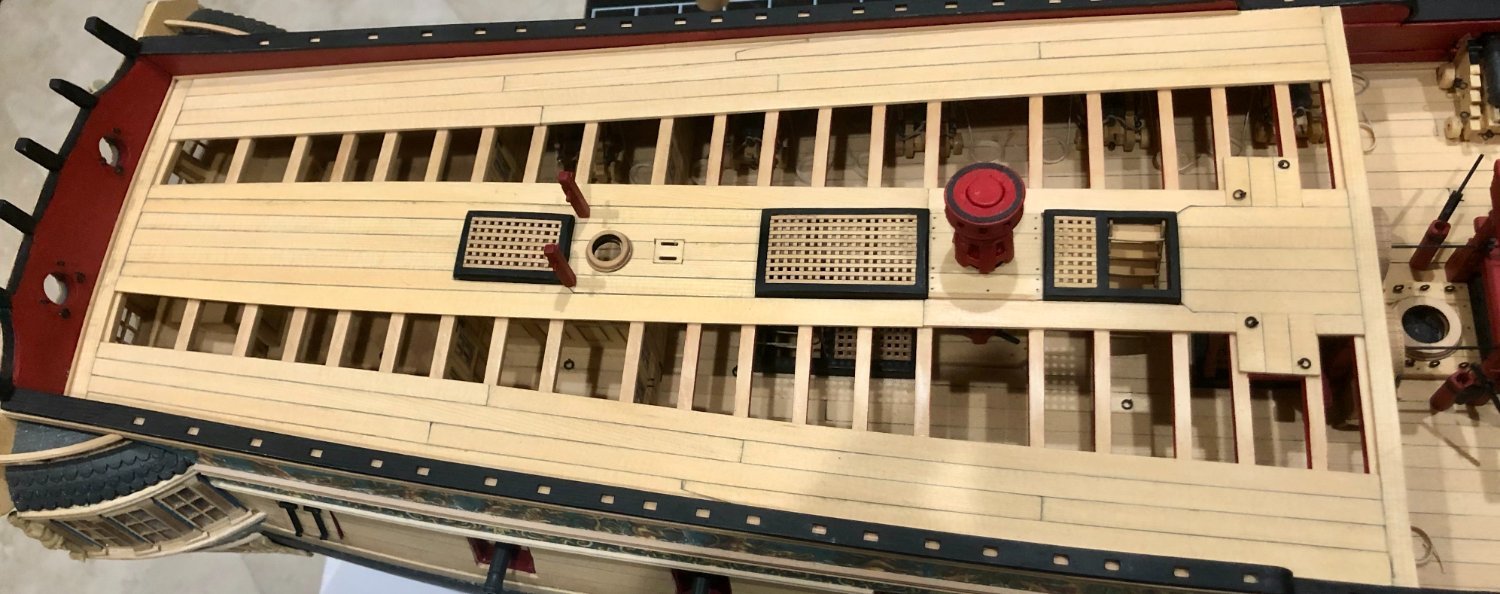
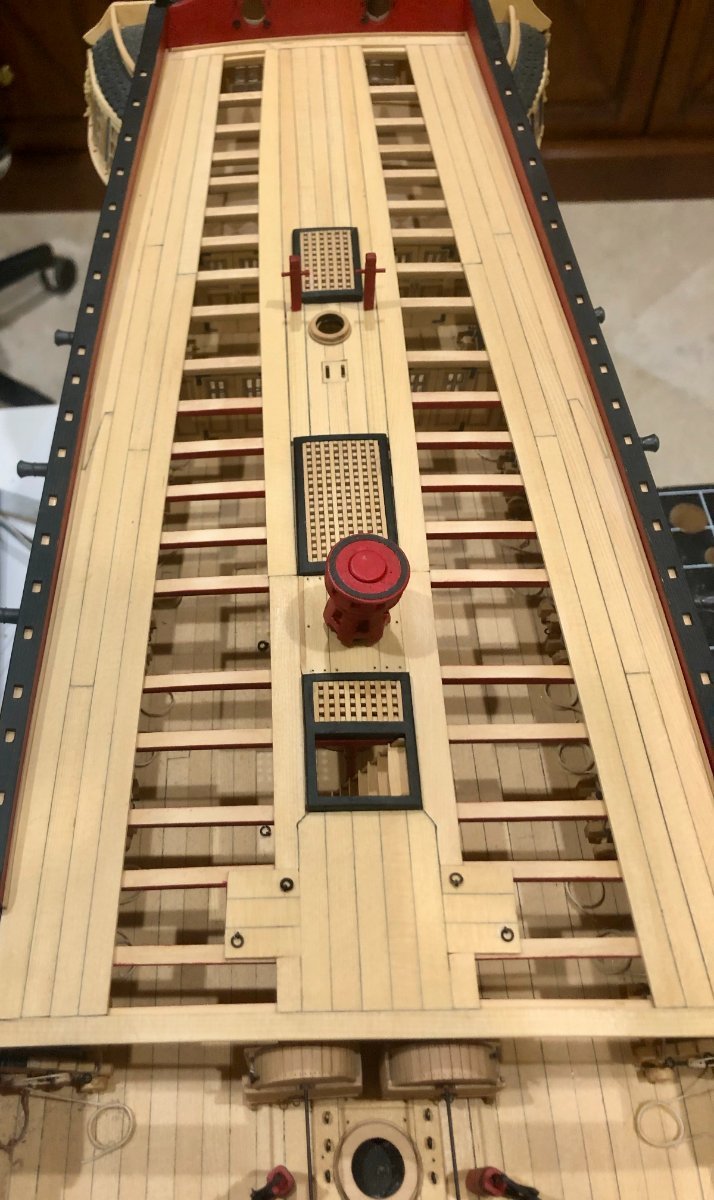
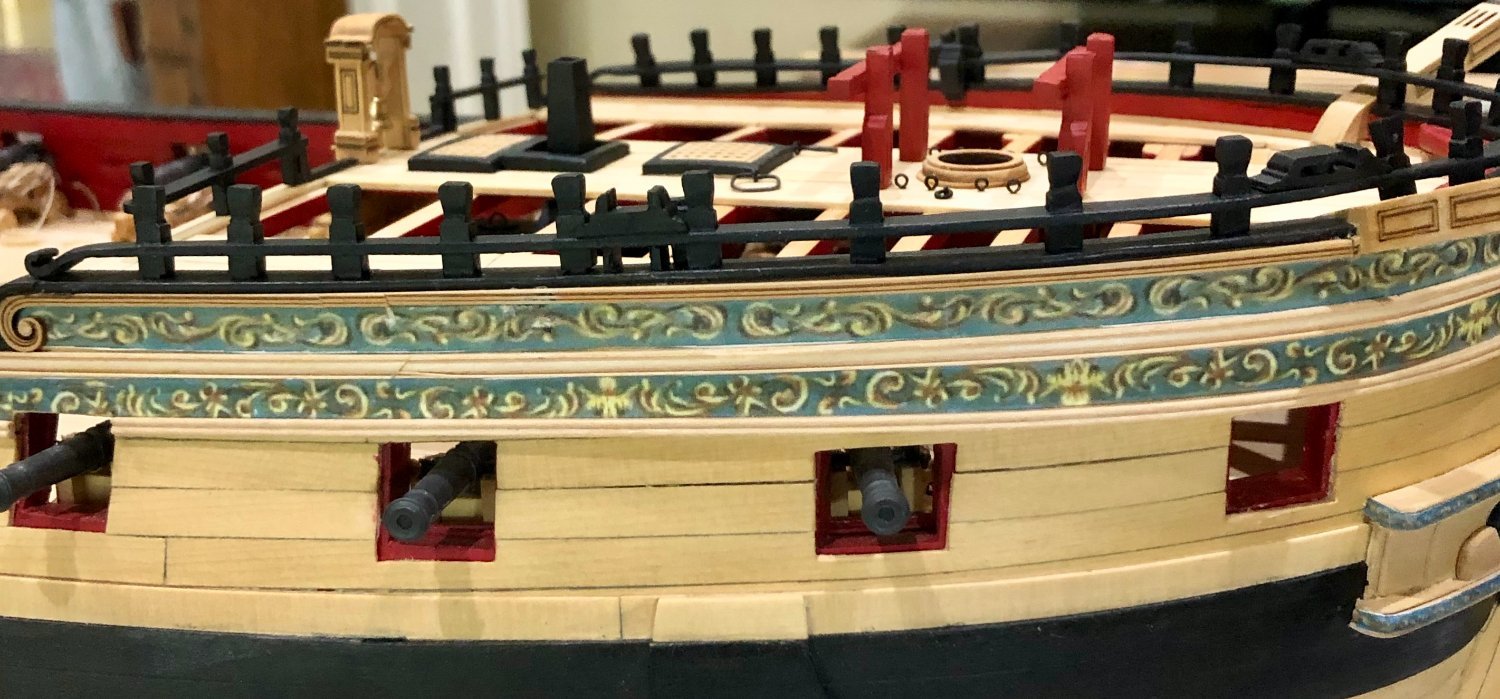
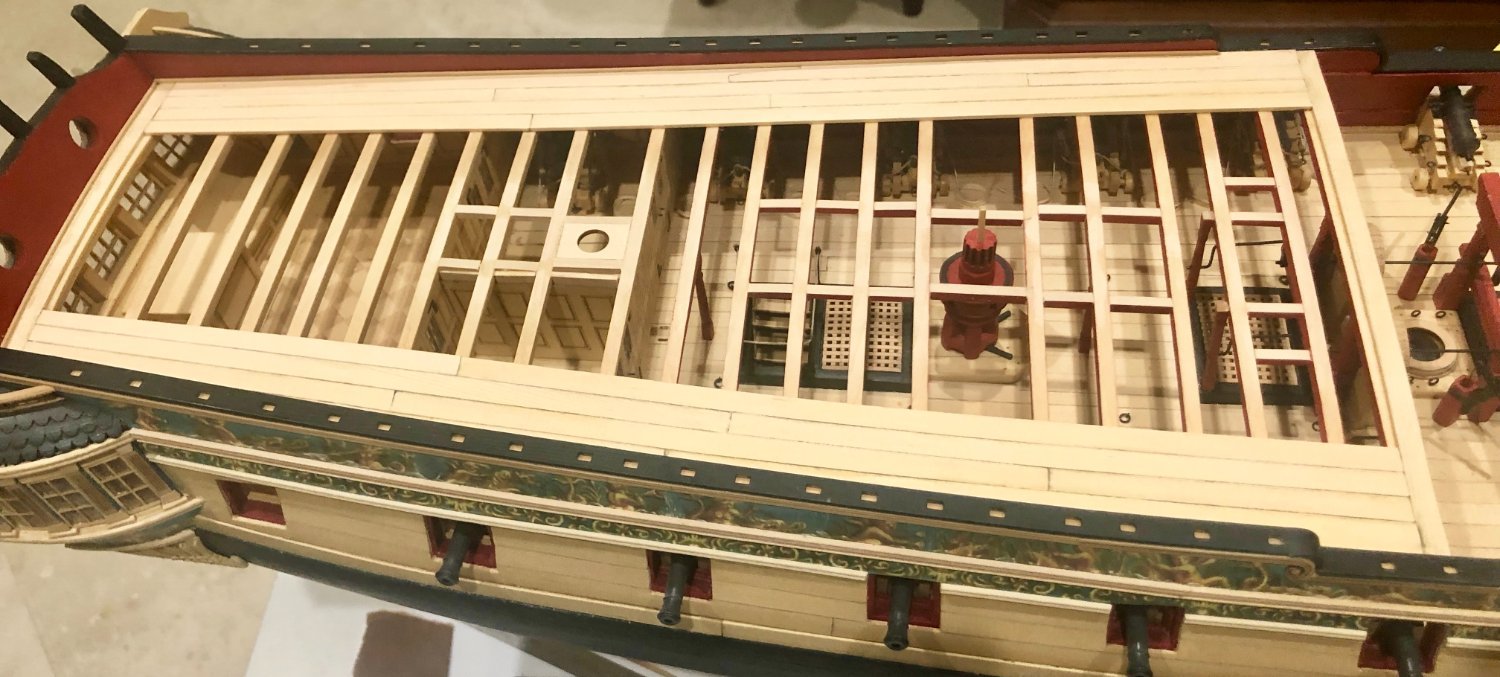
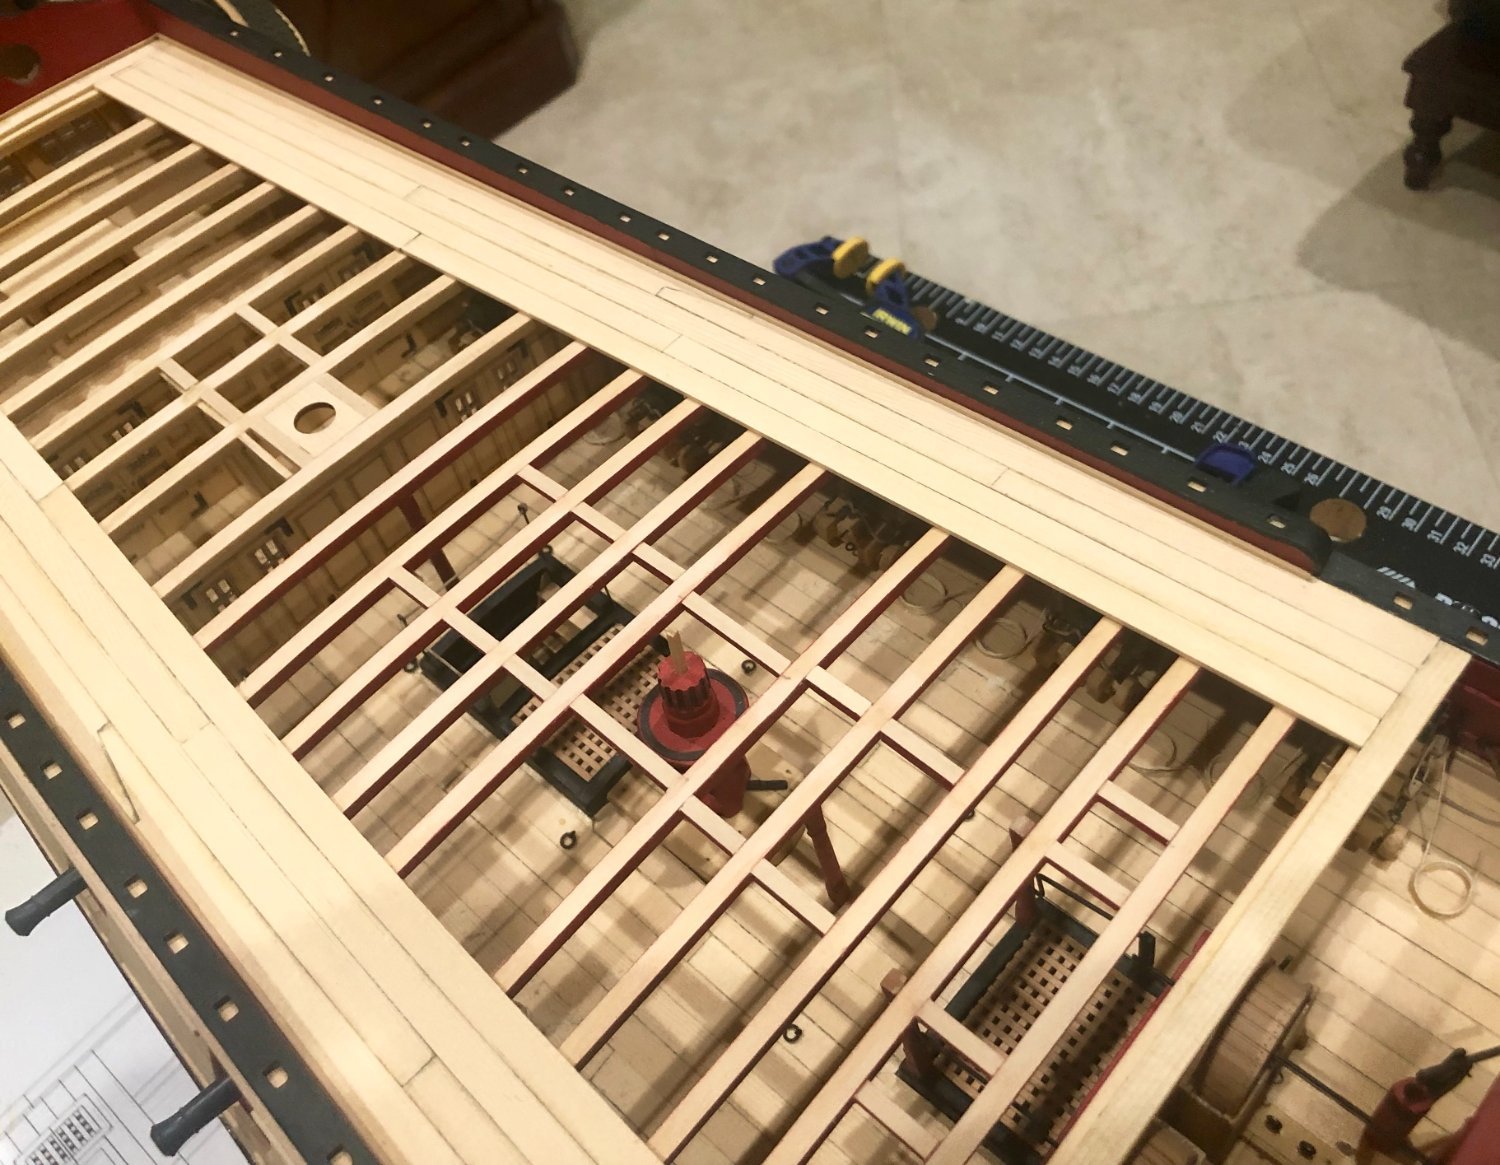
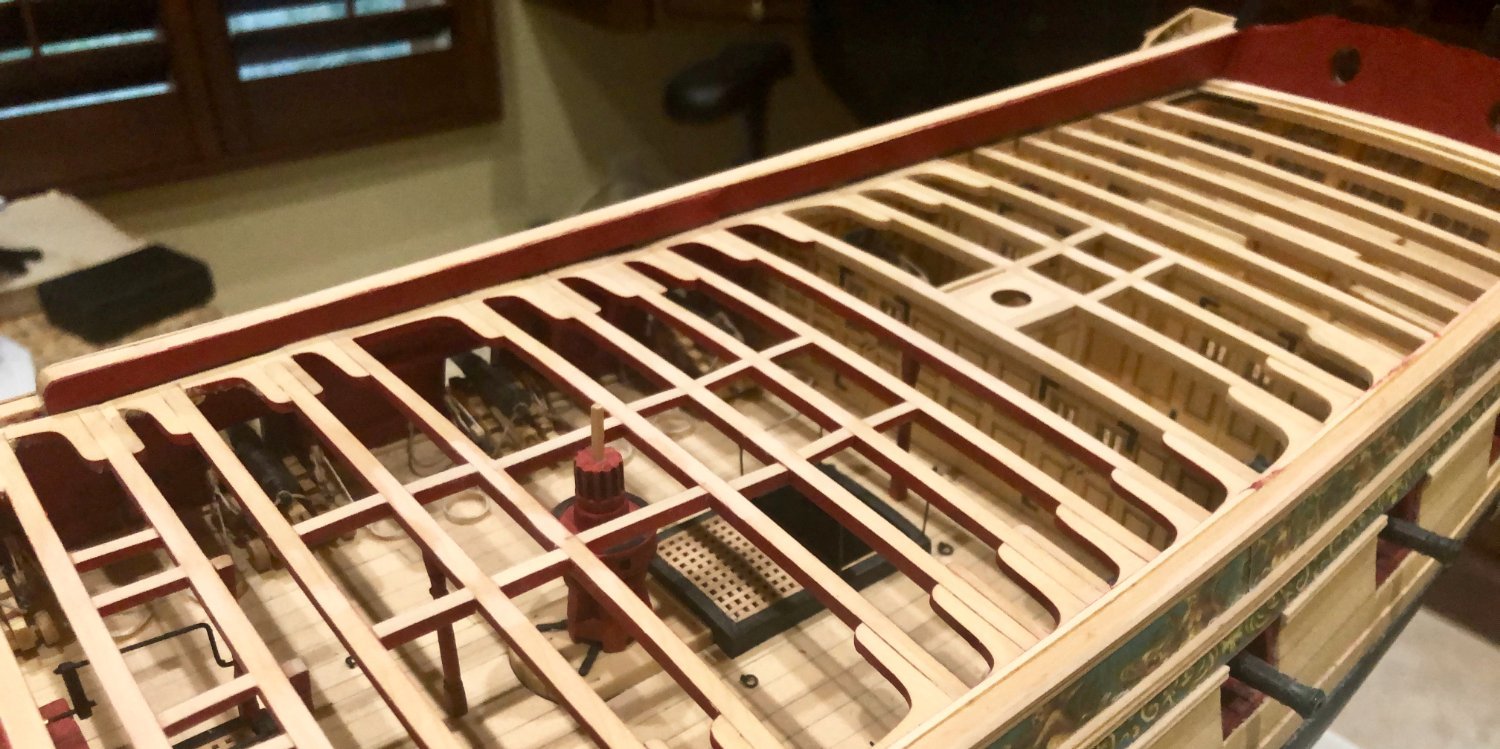
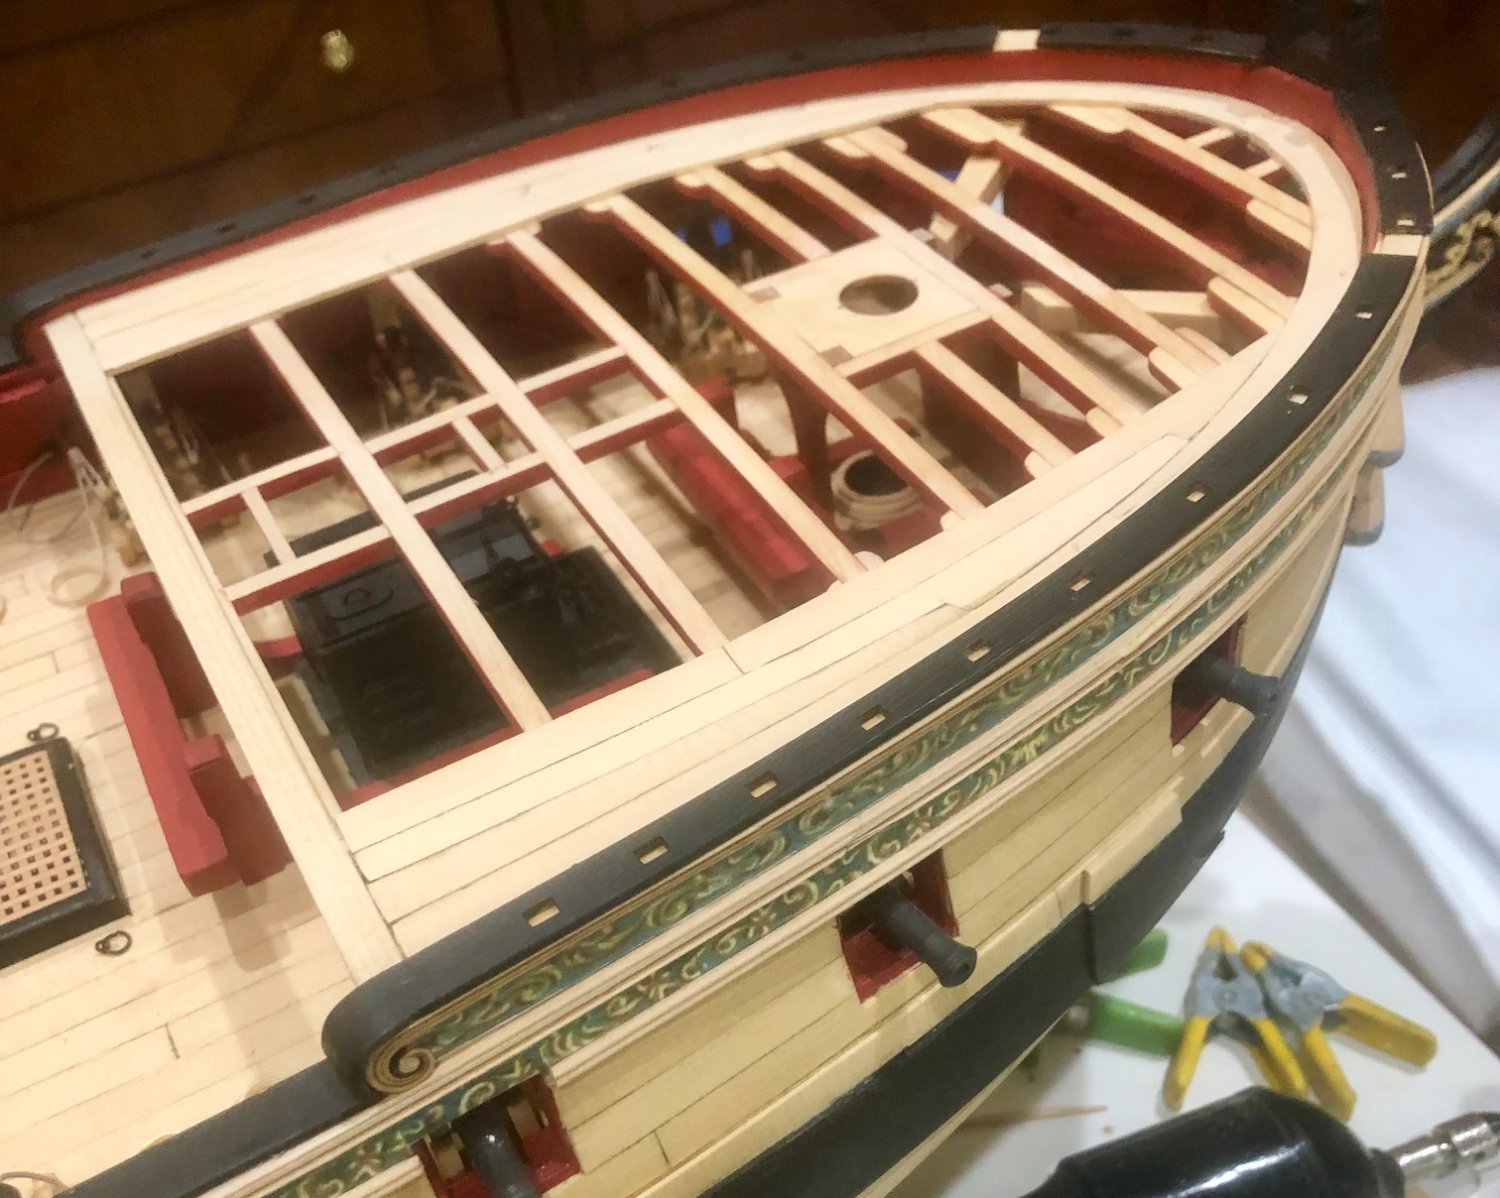
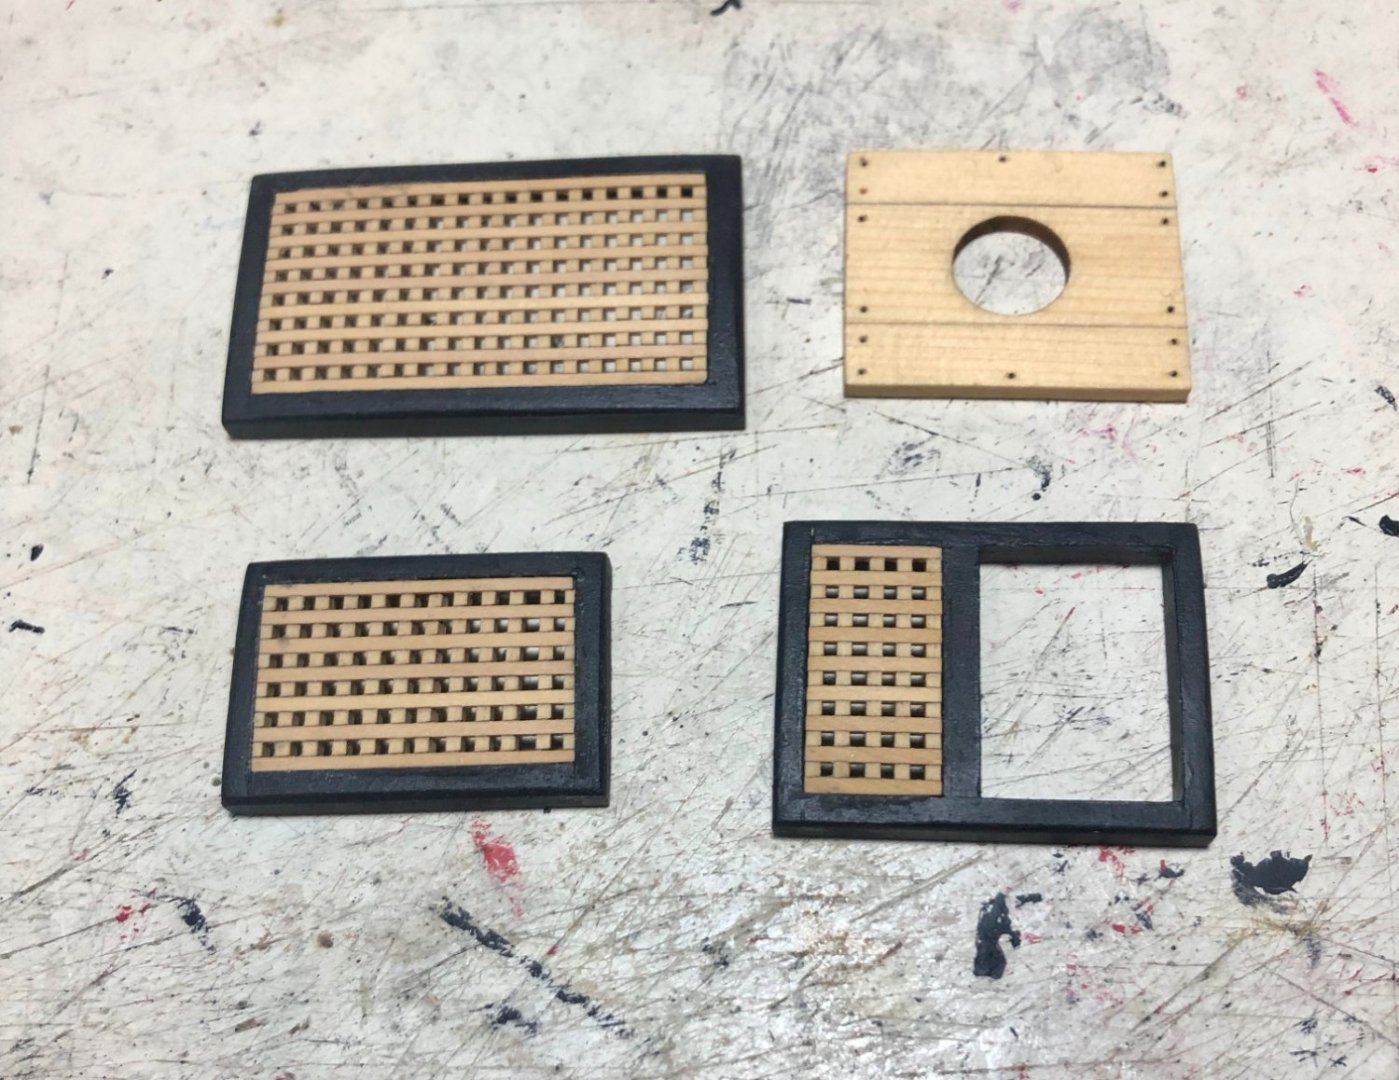
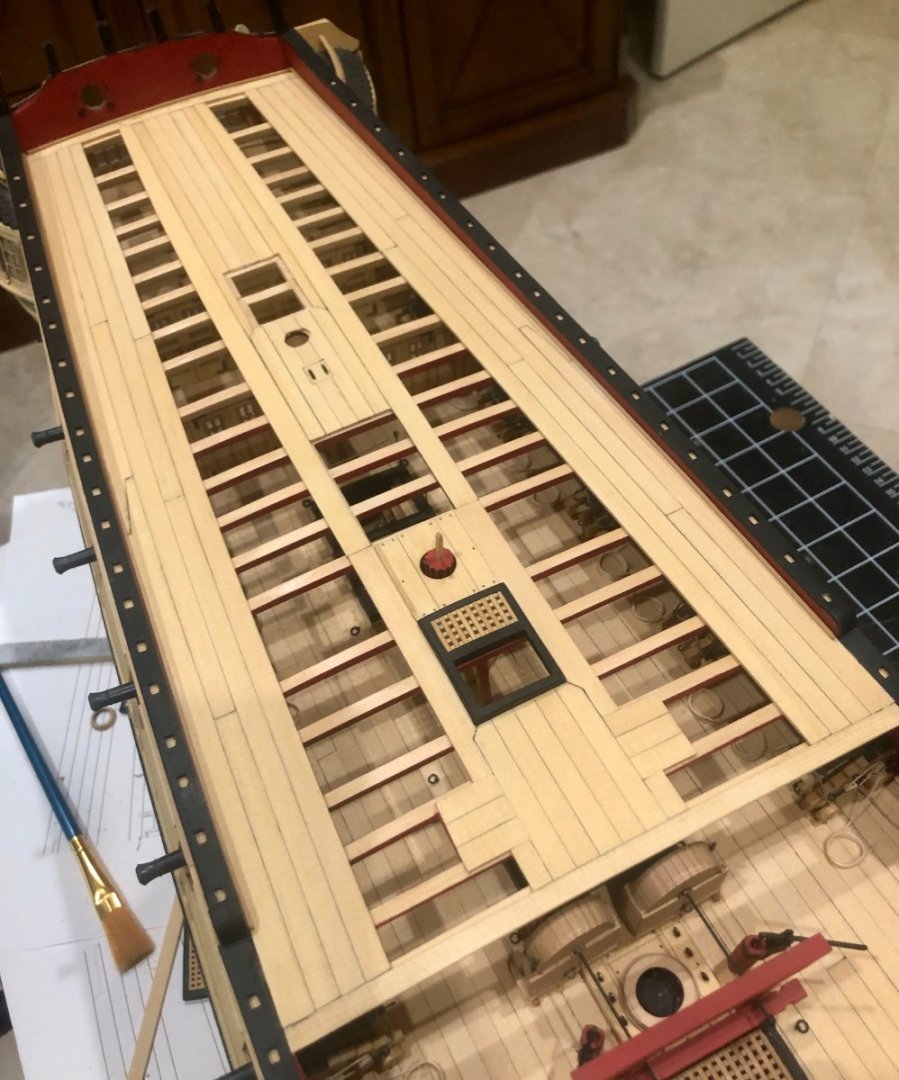
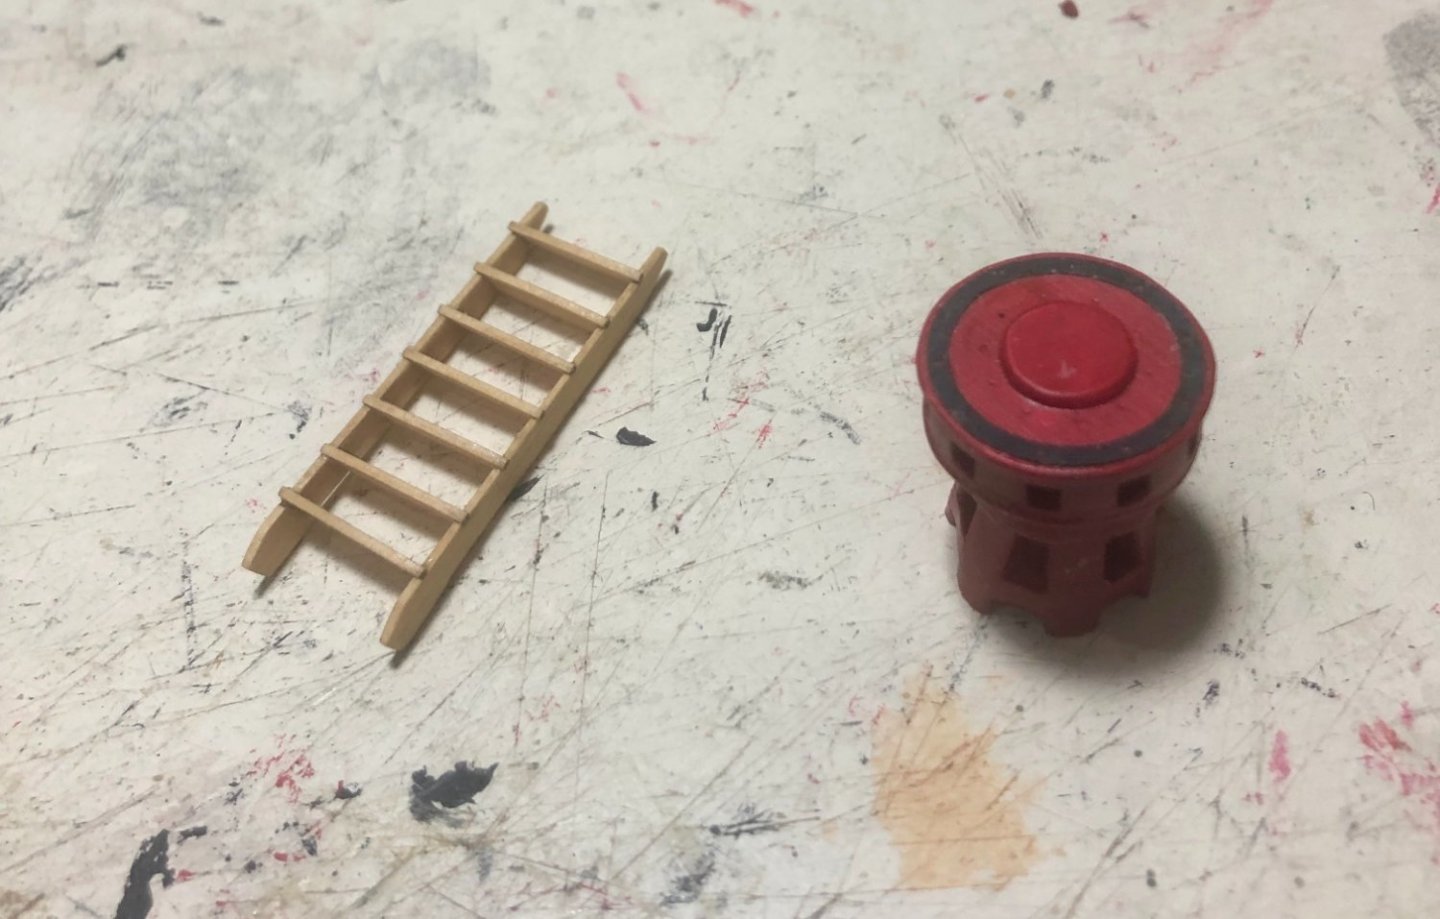
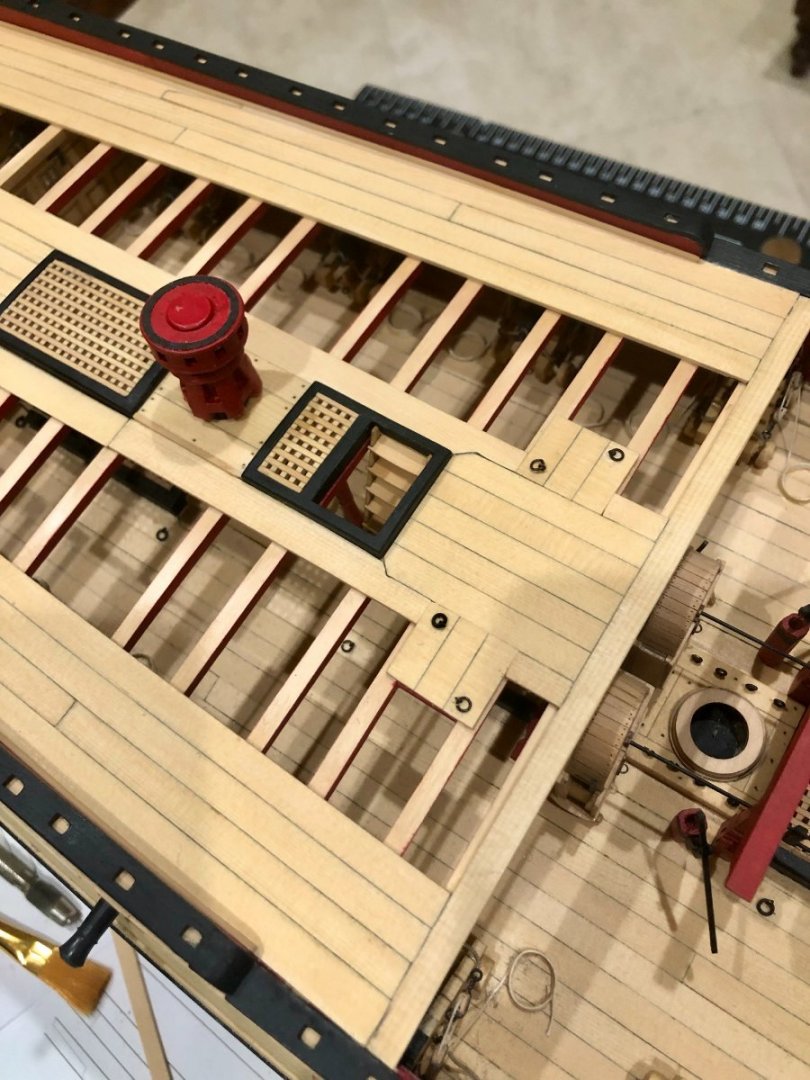
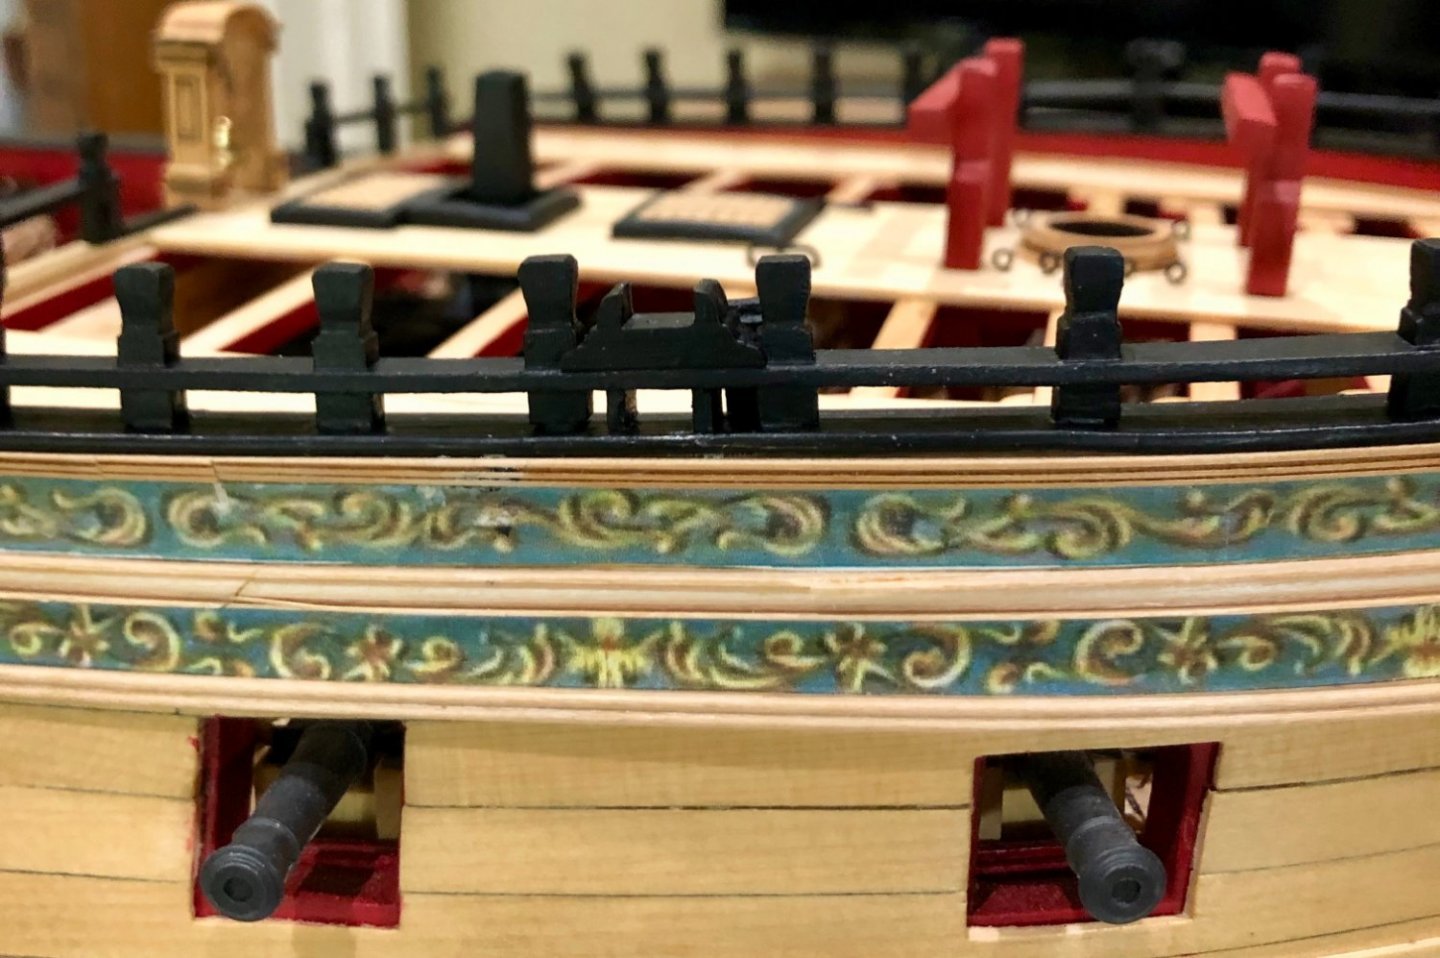
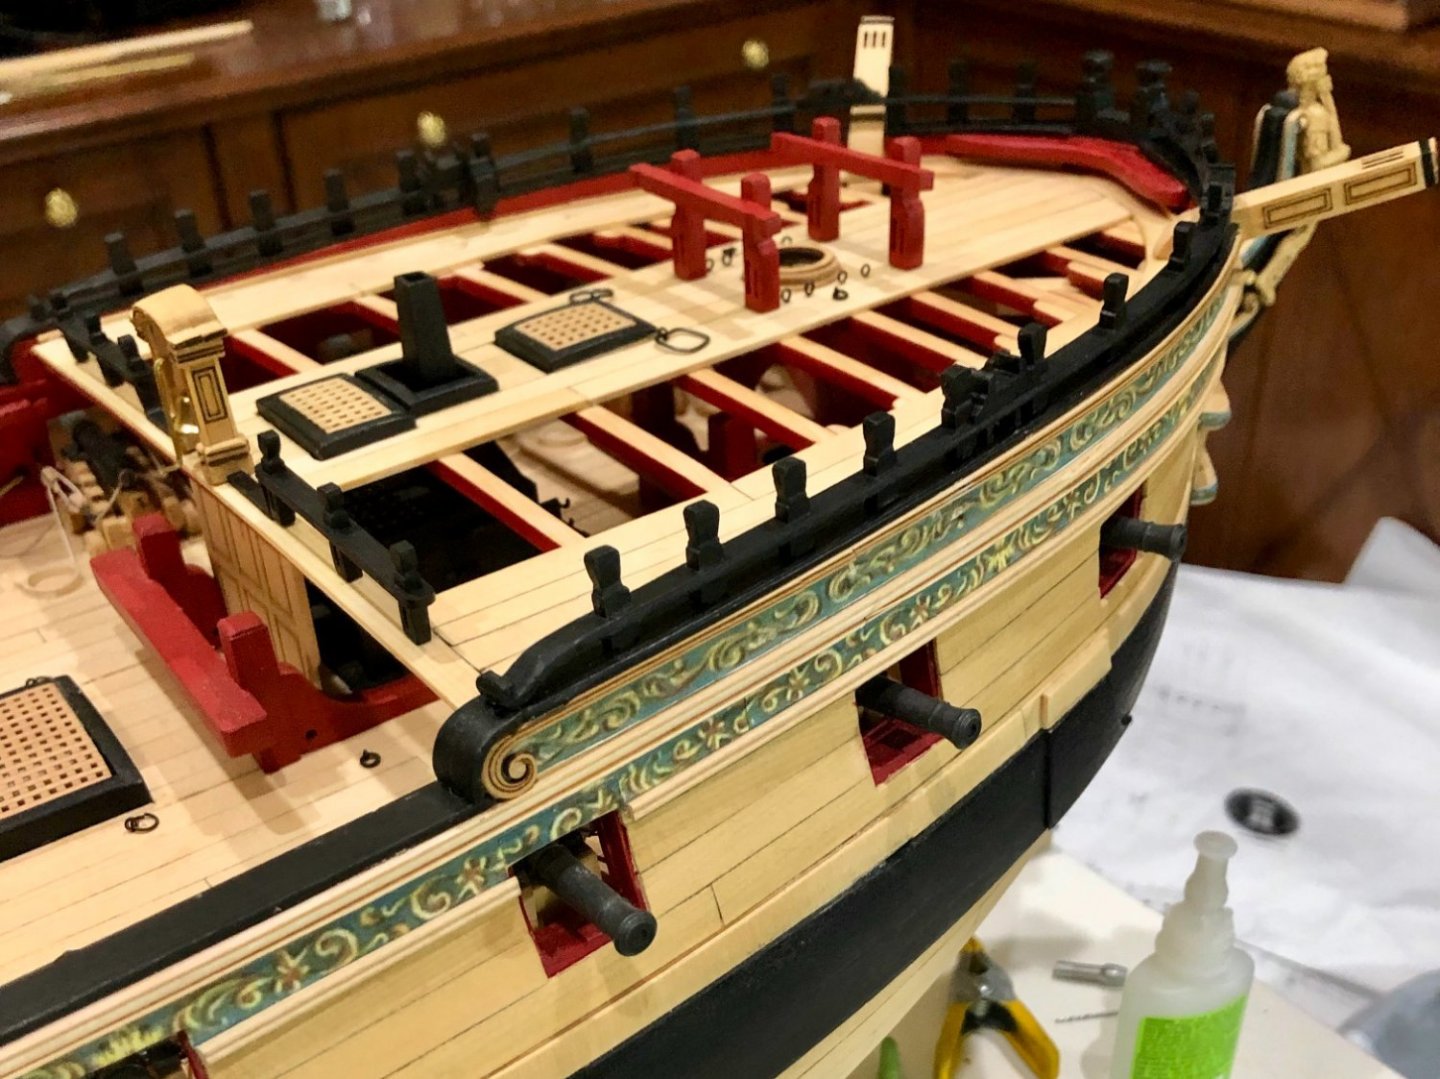
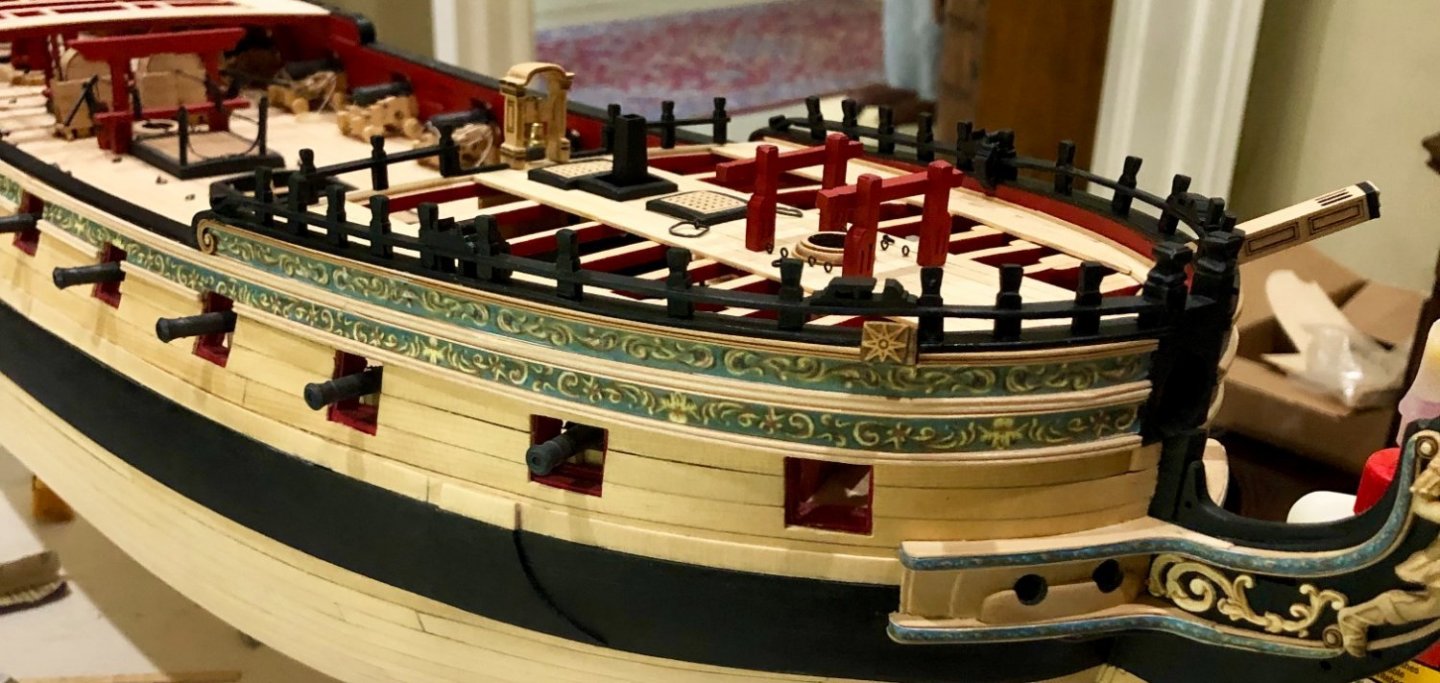
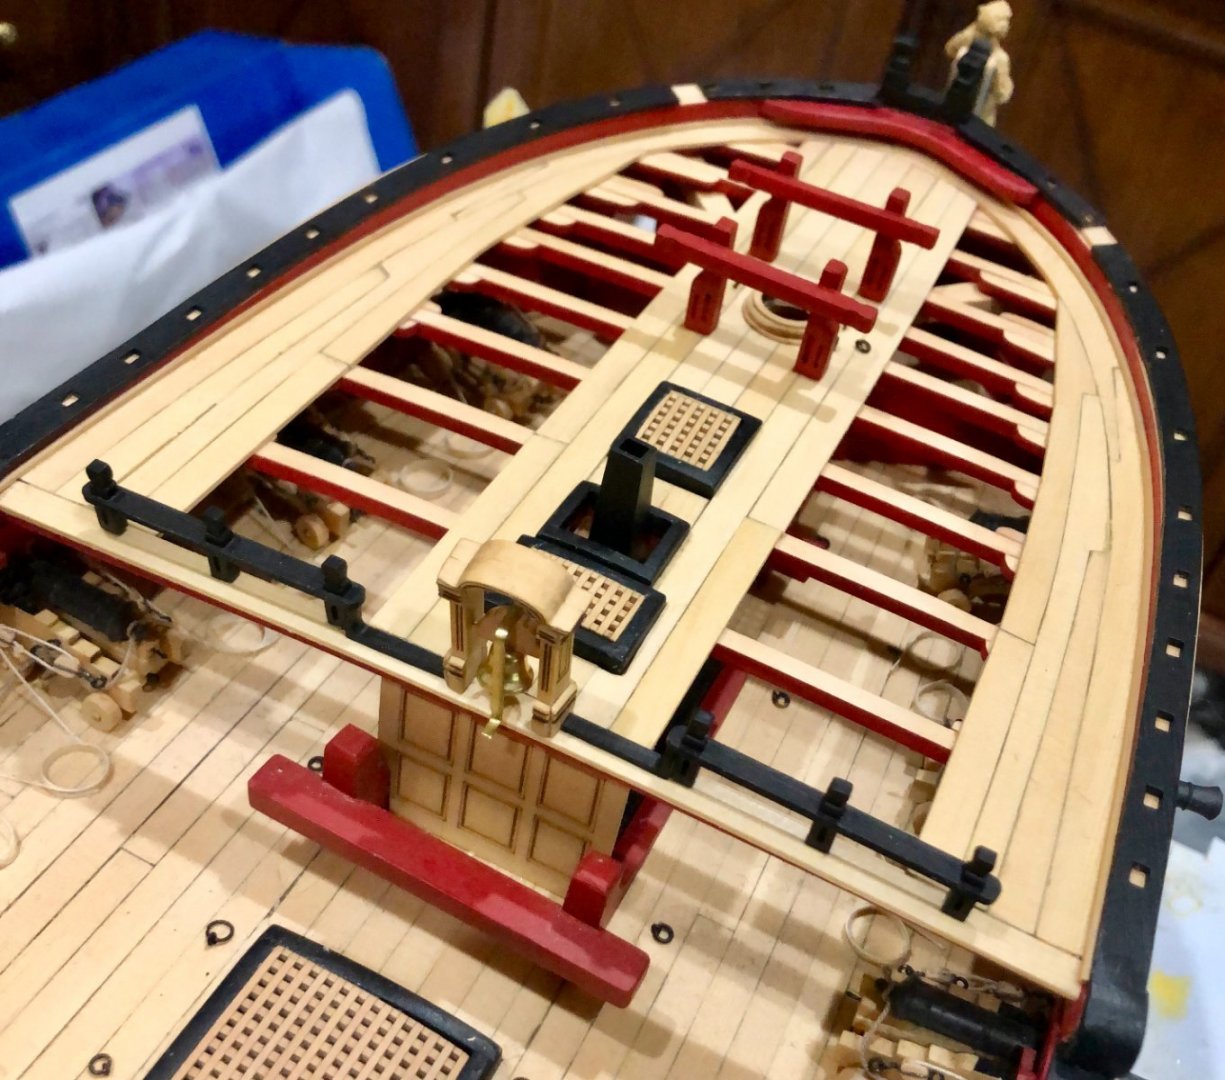
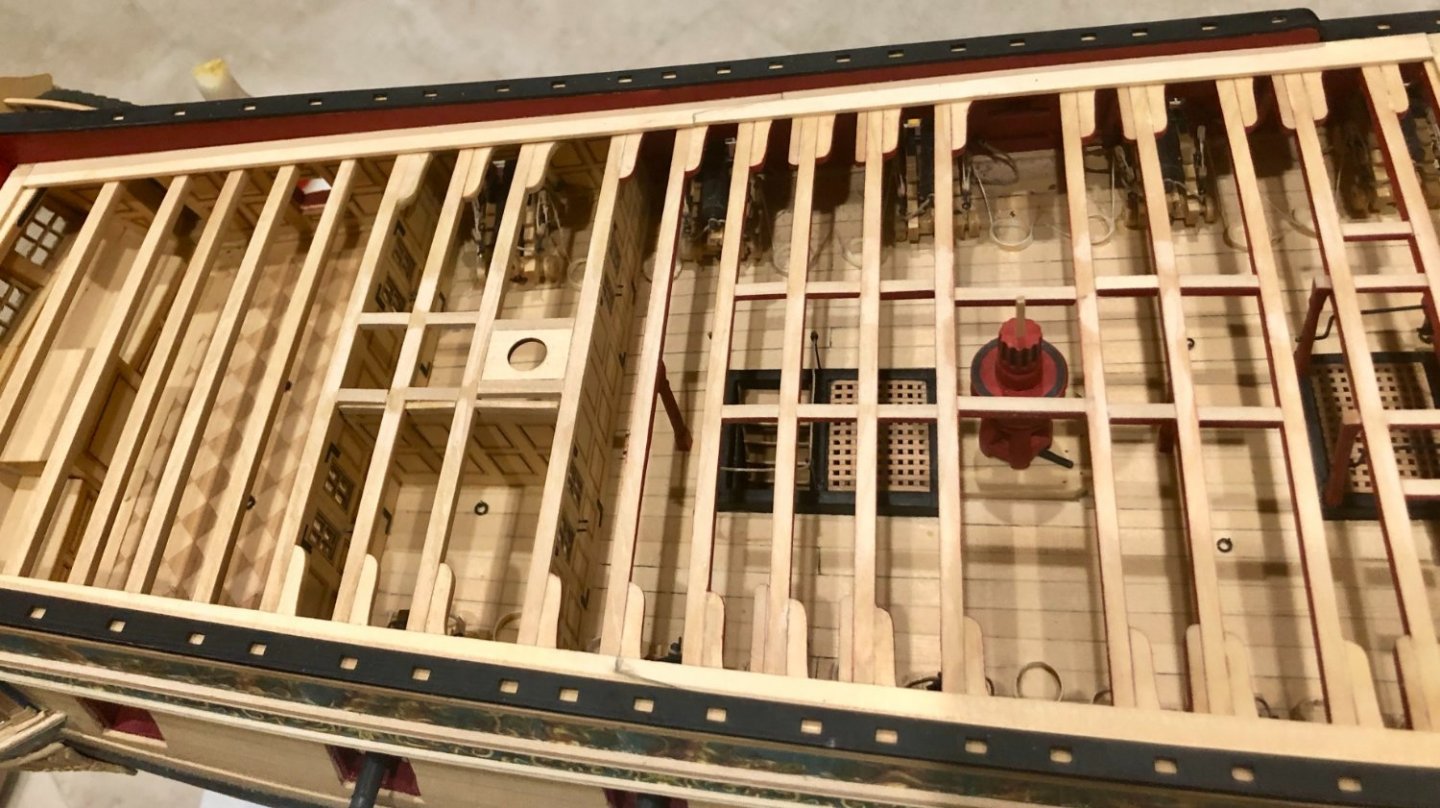
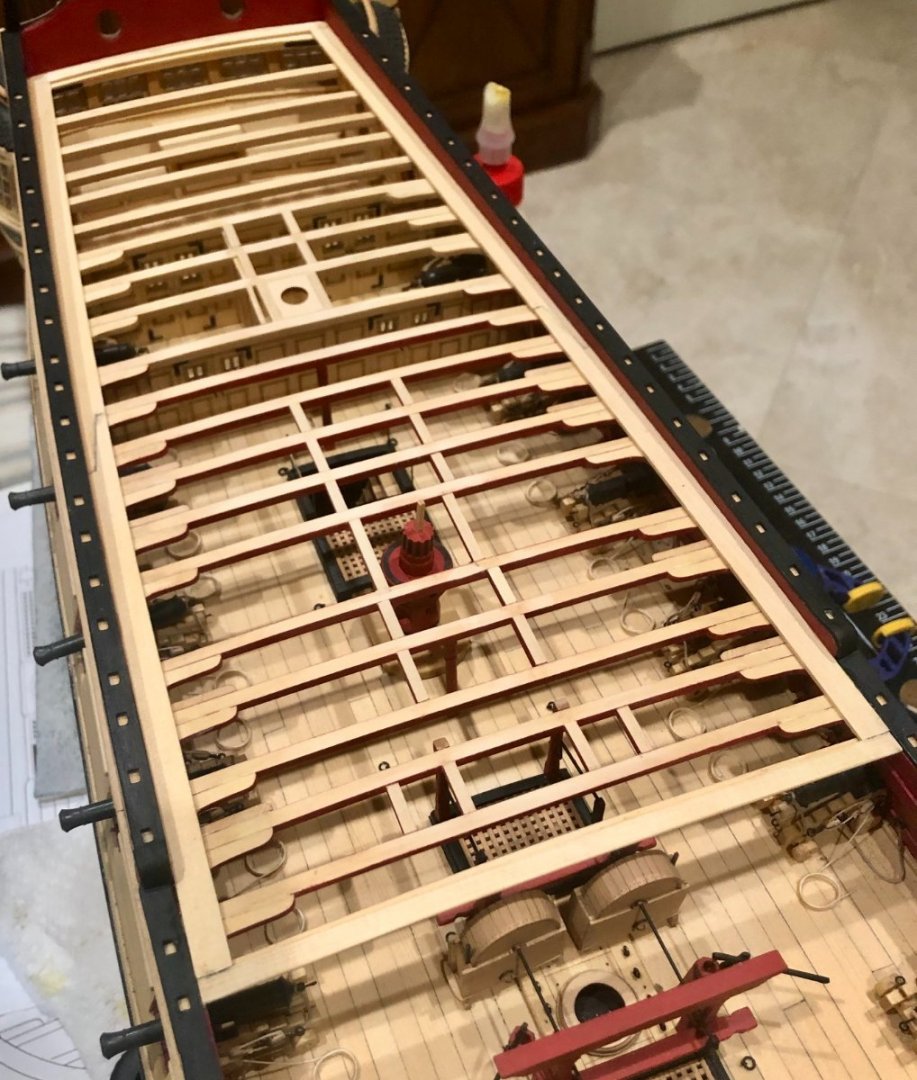
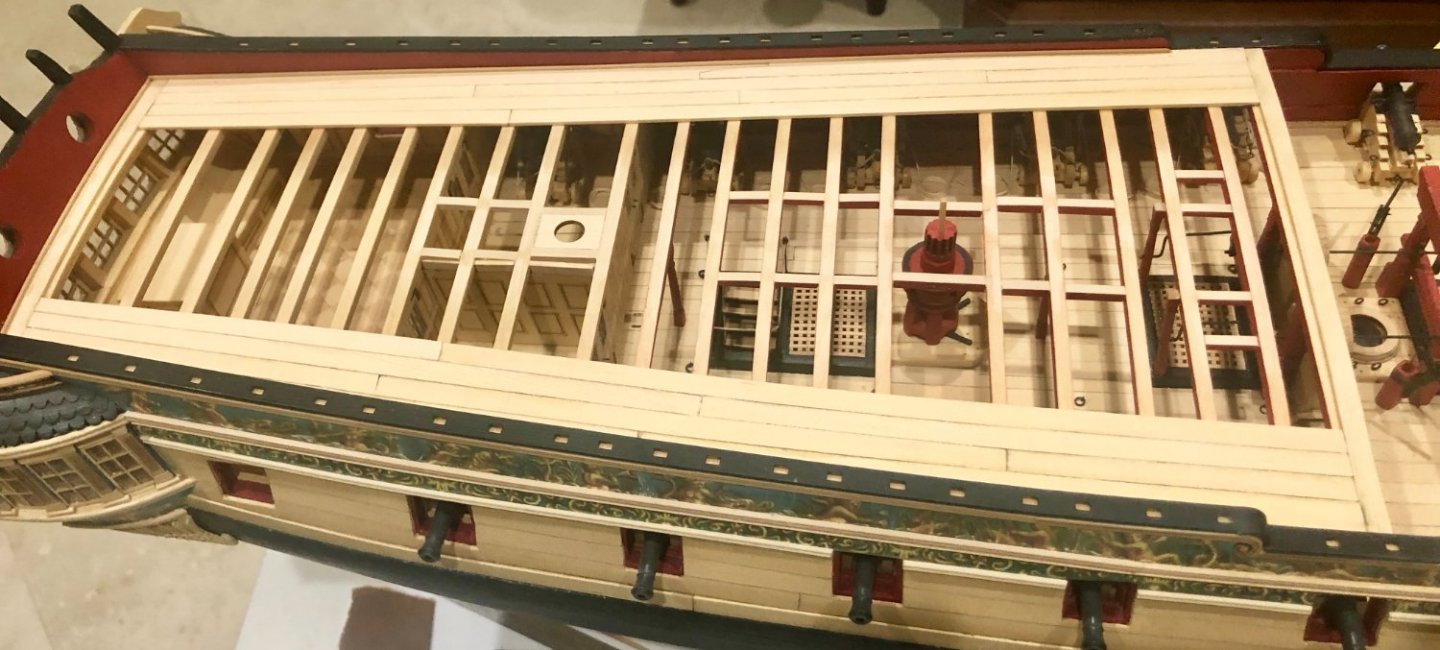
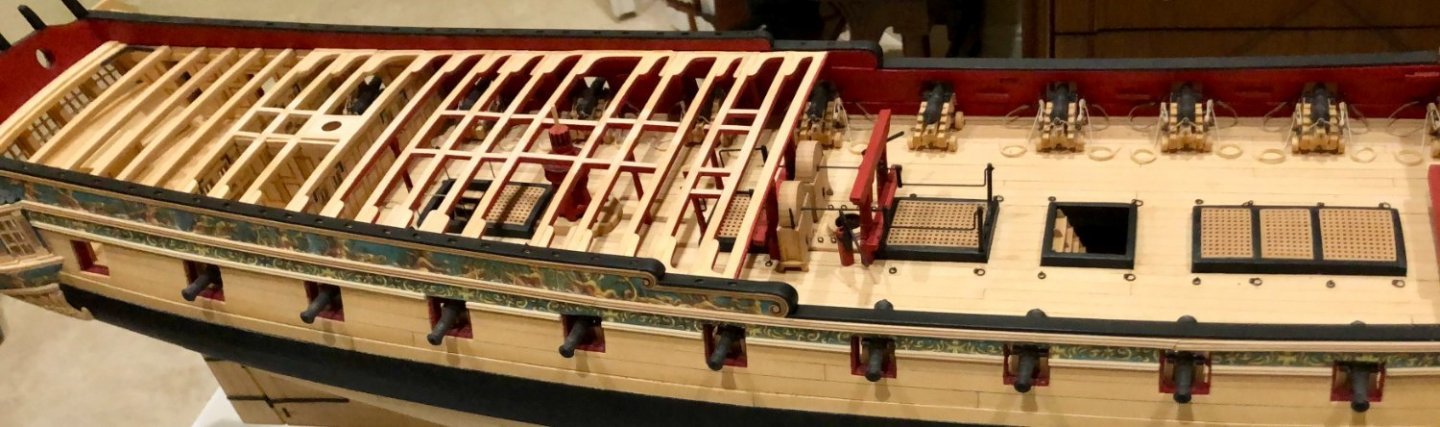
I have now begun work on chapter ten. The outboard deck planking had already been done, so it was time to do the center planking. This required that the hatch coamings and gratings be done first. I used the laser cut coamings and the boxwood grating kits. The planking was fitted around the coamings, using 3/16", 1/4",and 5/16" strips, which were shaped, tapered and bent to match the planking templates. After the planking was done and finished with Wipe-on poly, I added the coamings and gratings, the upper capstan, the ladder, the mizzen bitts, the mizzen mast coat and the ring bolts for the scuttles at the fore end of the quarter deck. Next up will be the wheel, the binnacle and the breast rail. Bob


-
USF Essex by mtbediz - FINISHED - 1:50
rafine replied to mtbediz's topic in - Build logs for subjects built 1801 - 1850
Absolutely fantastic work, Mustafa. I love it. Bob -
Since the guns will be sold separately, might you release the chapter ten parts before completing the guns? Bob
- 1,784 replies
-
- 2
-

-
- winchelsea
- Syren Ship Model Company
- (and 1 more)
-
Well done Glenn. You'll be glad that you took the time and care. Bob
- 840 replies
-
- 5
-
-
- winchelsea
- Syren Ship Model Company
- (and 1 more)
-
Thanks so much Don, Frank and the "likes". Don, I have no doubt that yours will be at least as good as mine. Frank, your comments are overly generous, but greatly appreciated. My disclaimer was merely an acknowledgement and recognition of the effects of aging and my intention to not allow that to prevent my enjoyment of a great hobby. Thanks again. Bob
-
Thanks so much Glenn, Bob and the 'likes". Glenn, I missed the shape of the bow by a little bit, but it was enough to cause a lot of grief in fitting the rails. Perhaps, having the templates back then would have helped. Bob, it was made a lot more challenging by my prior small errors. Bob
-
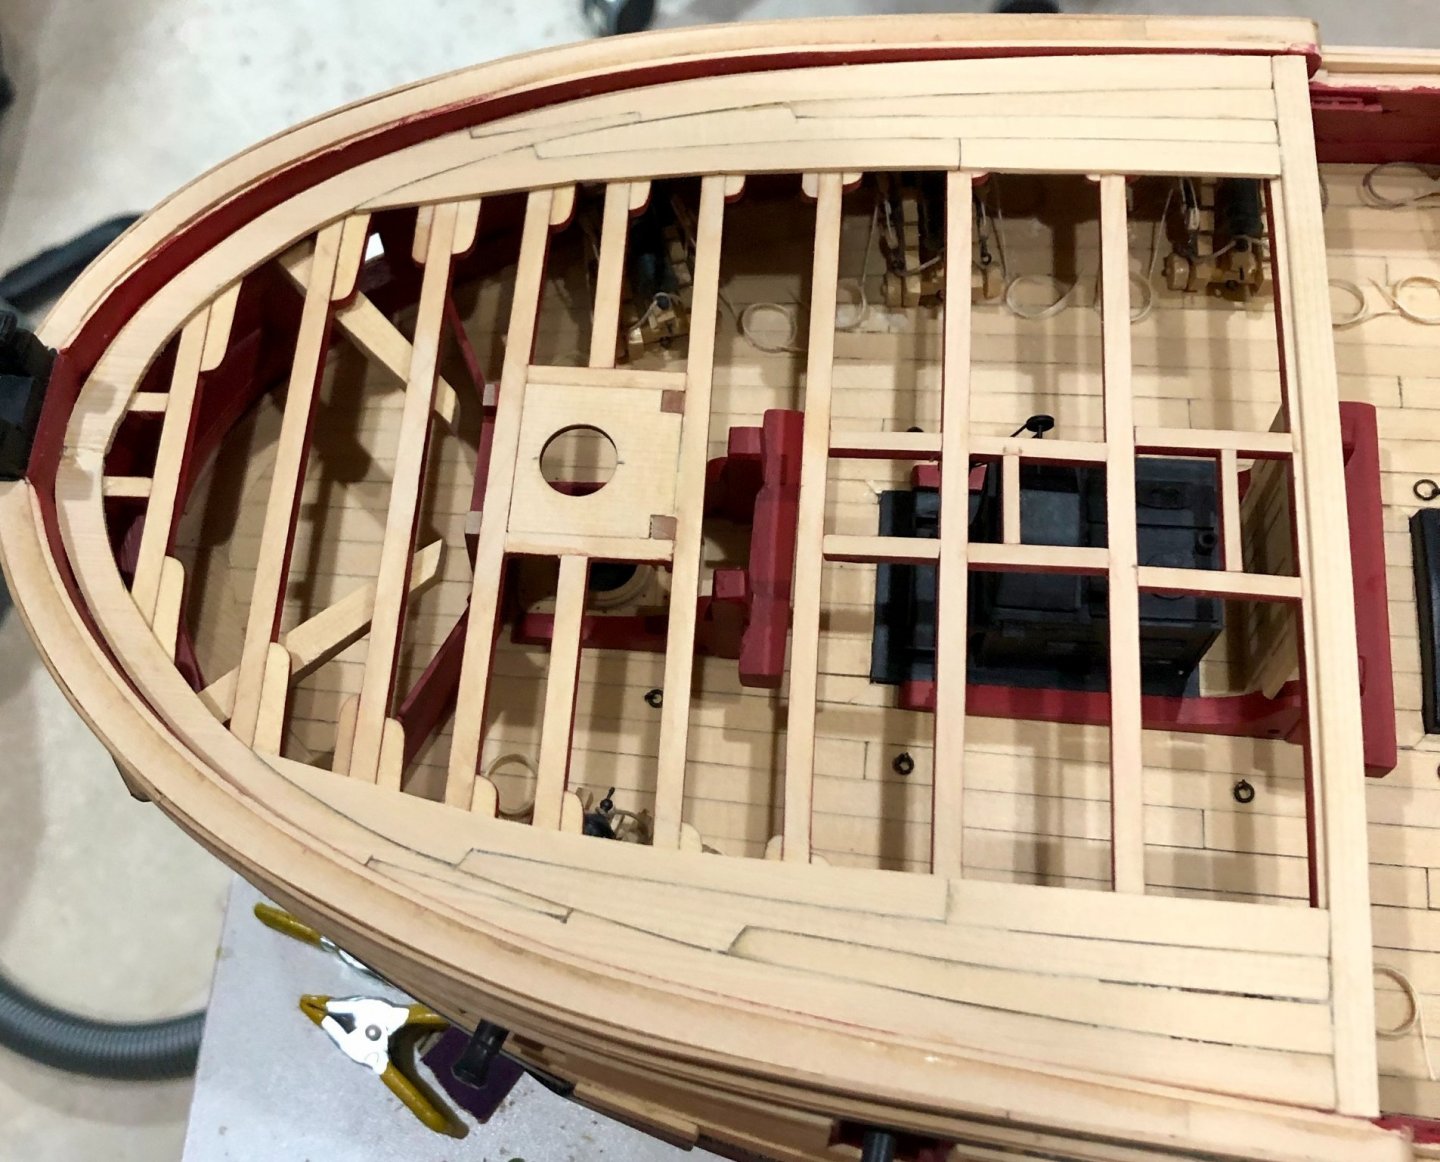
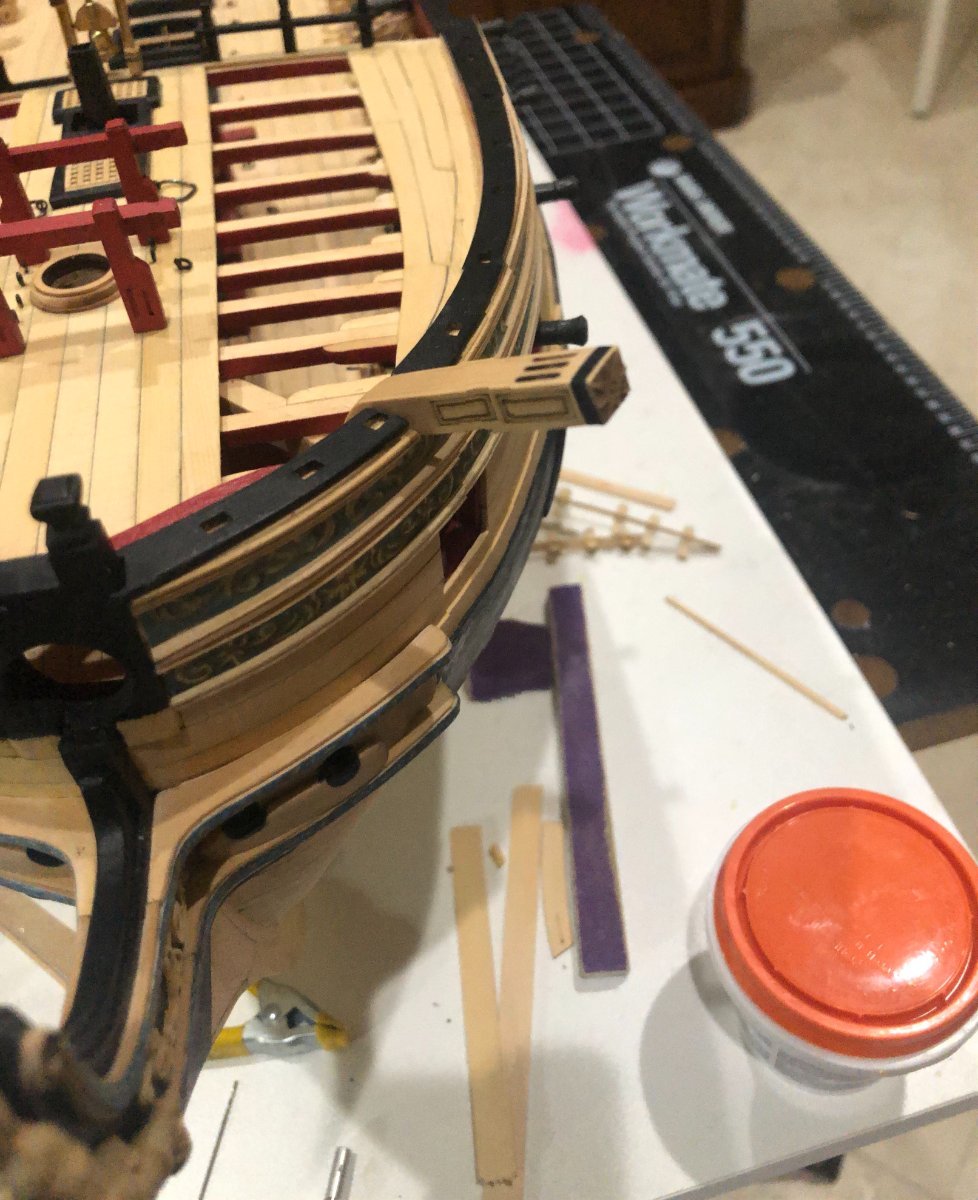
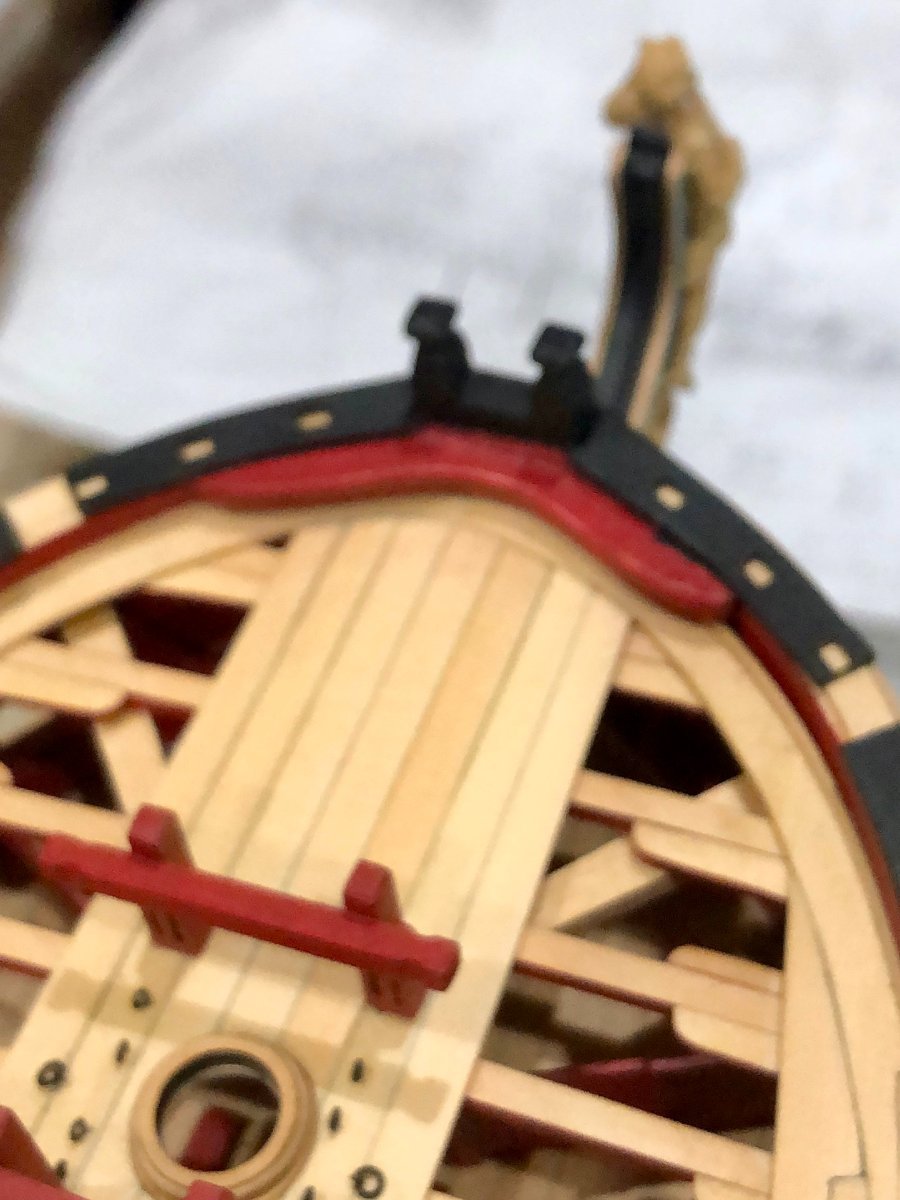
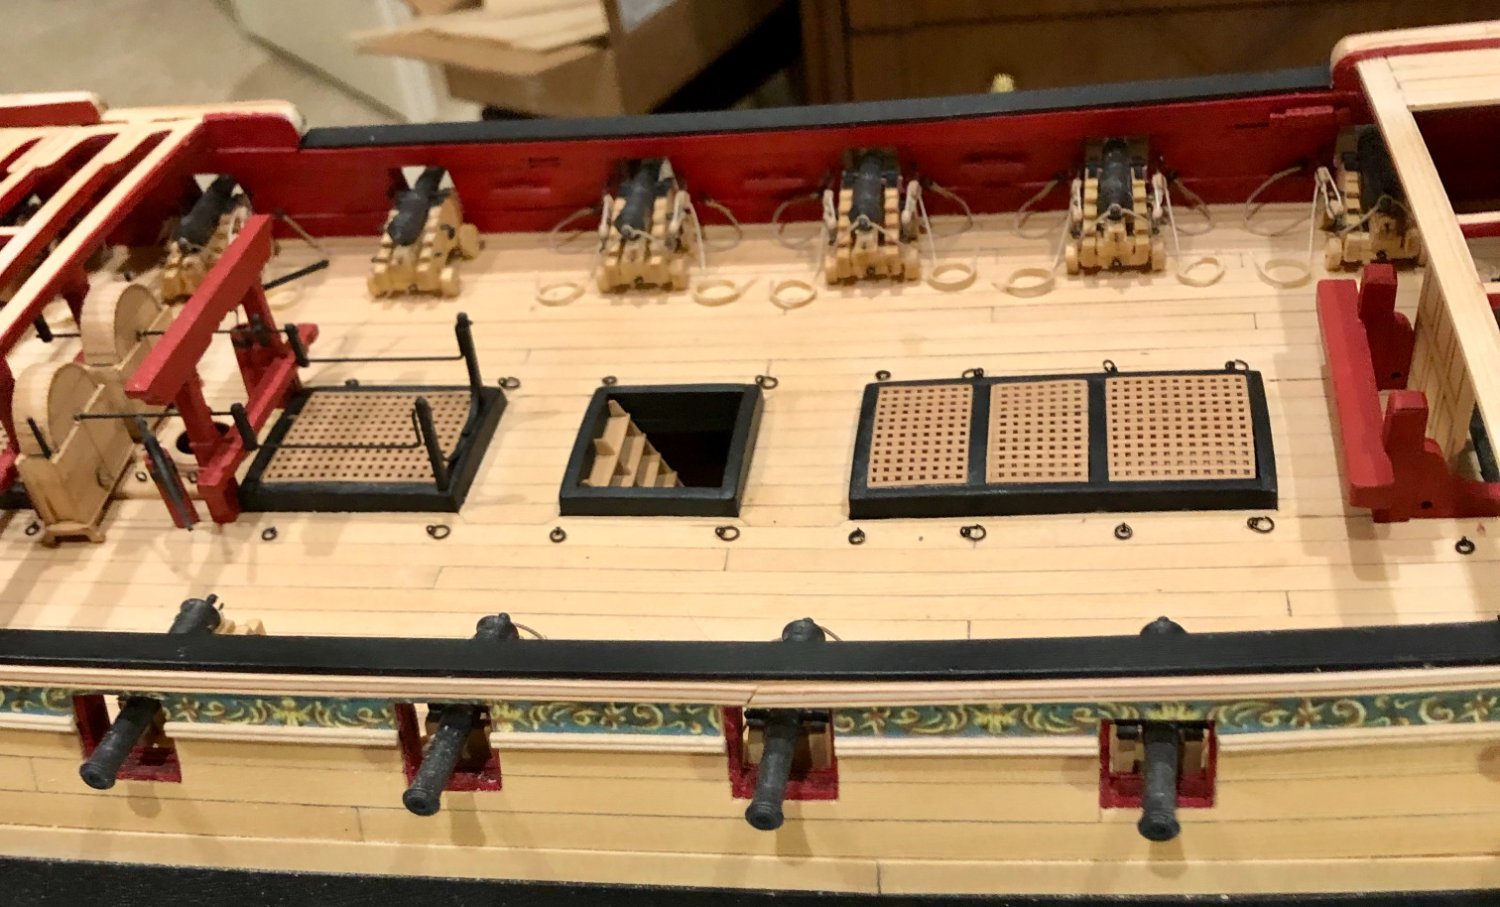
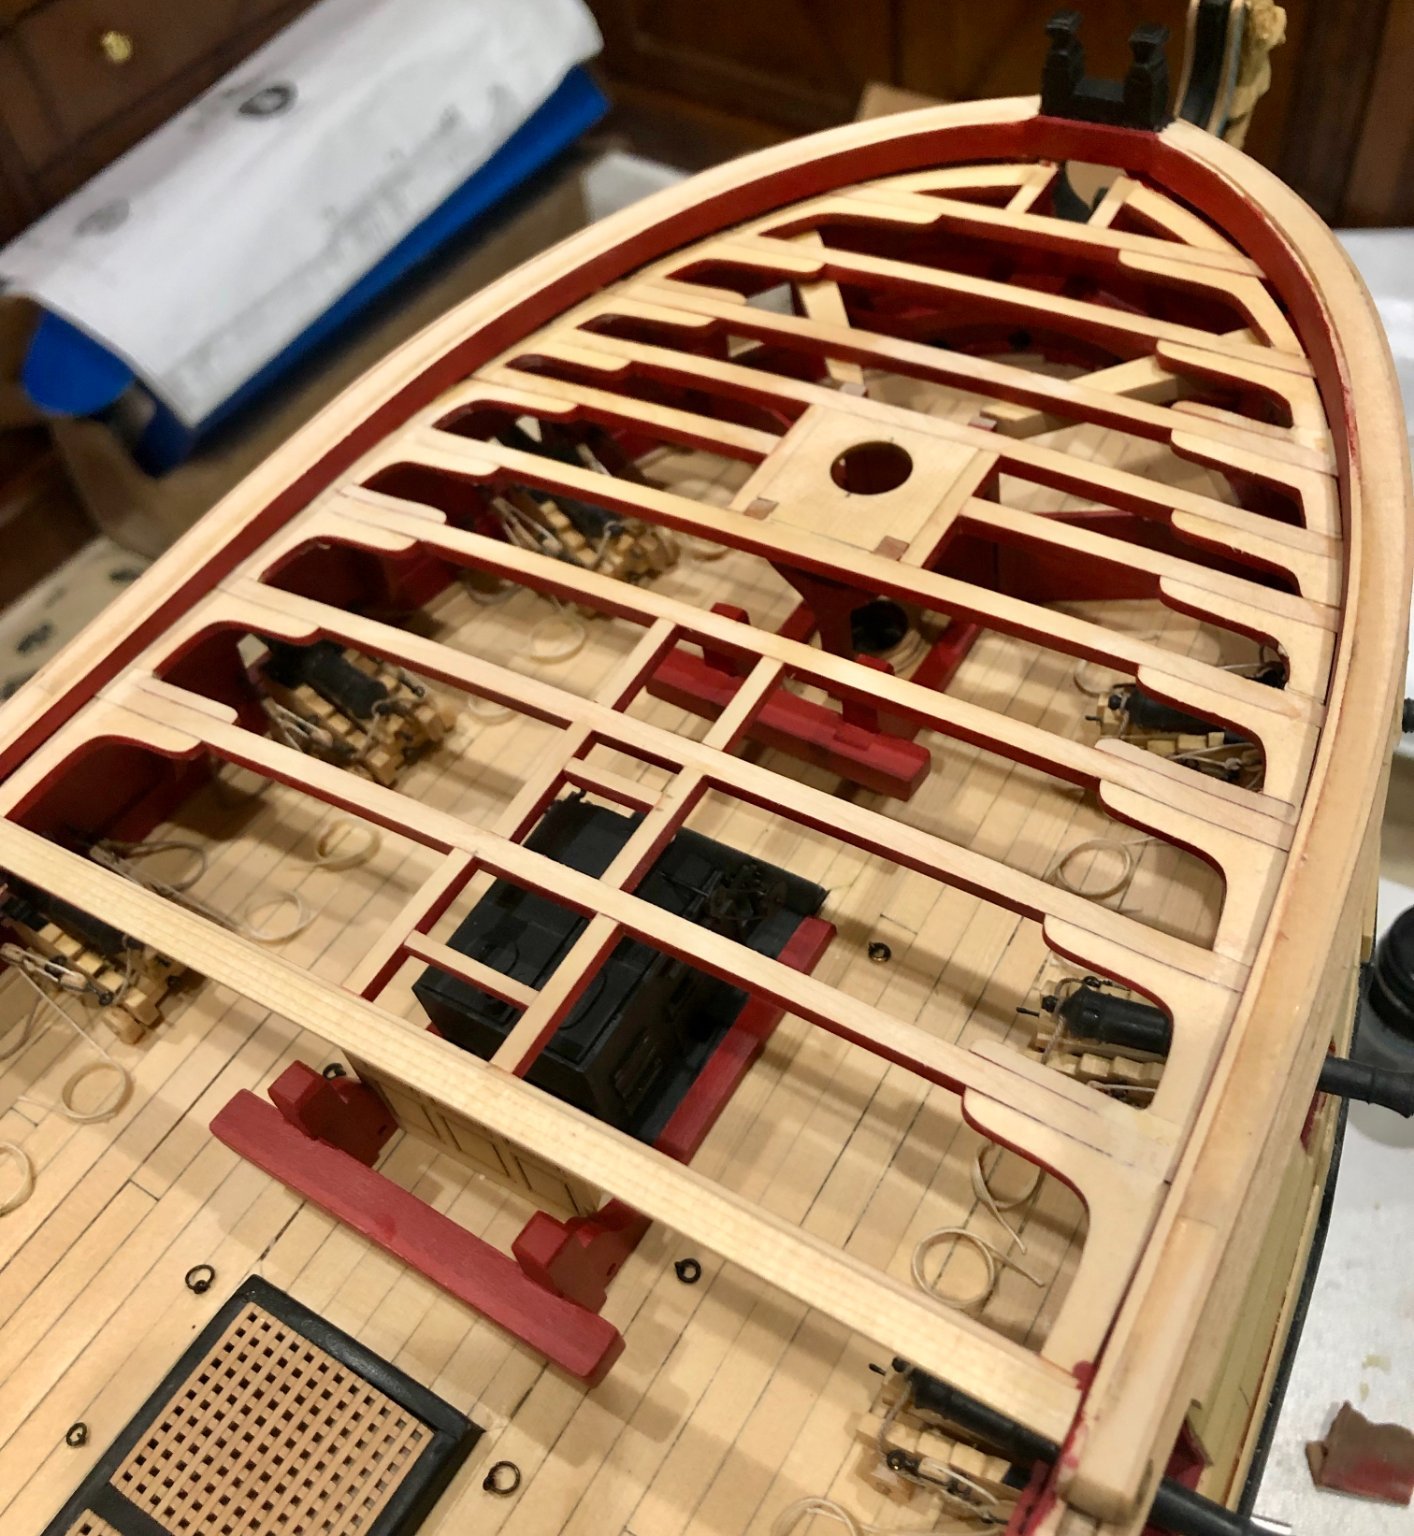
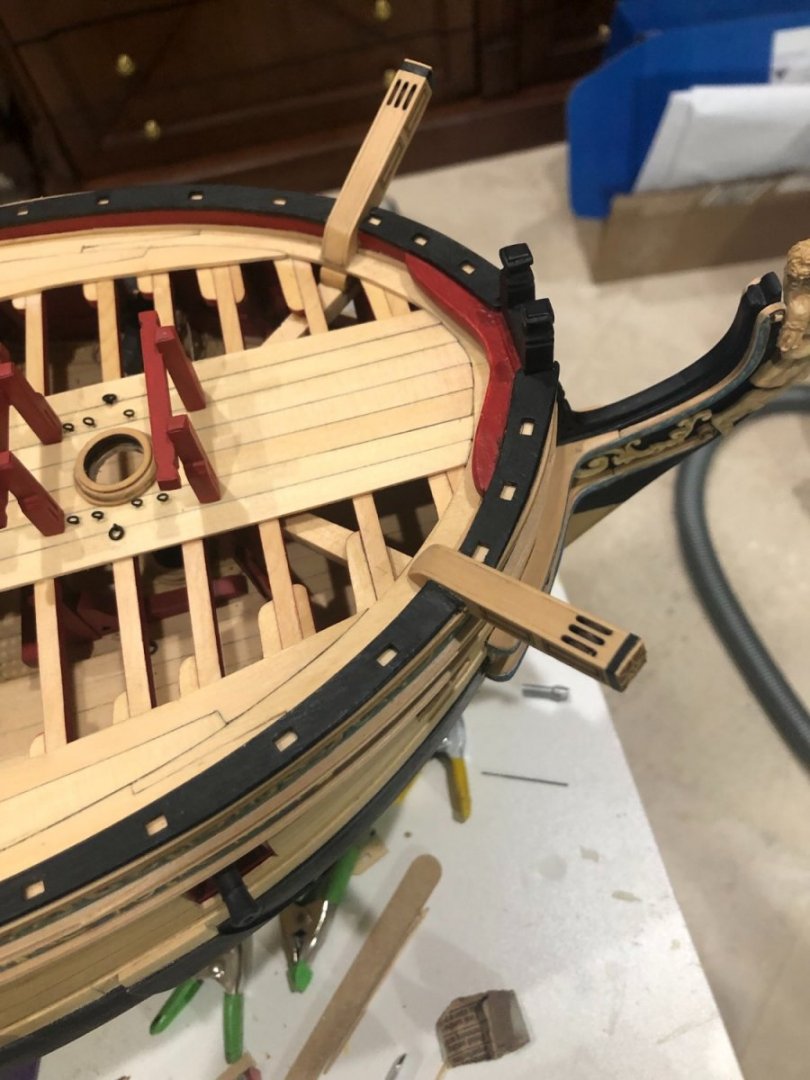
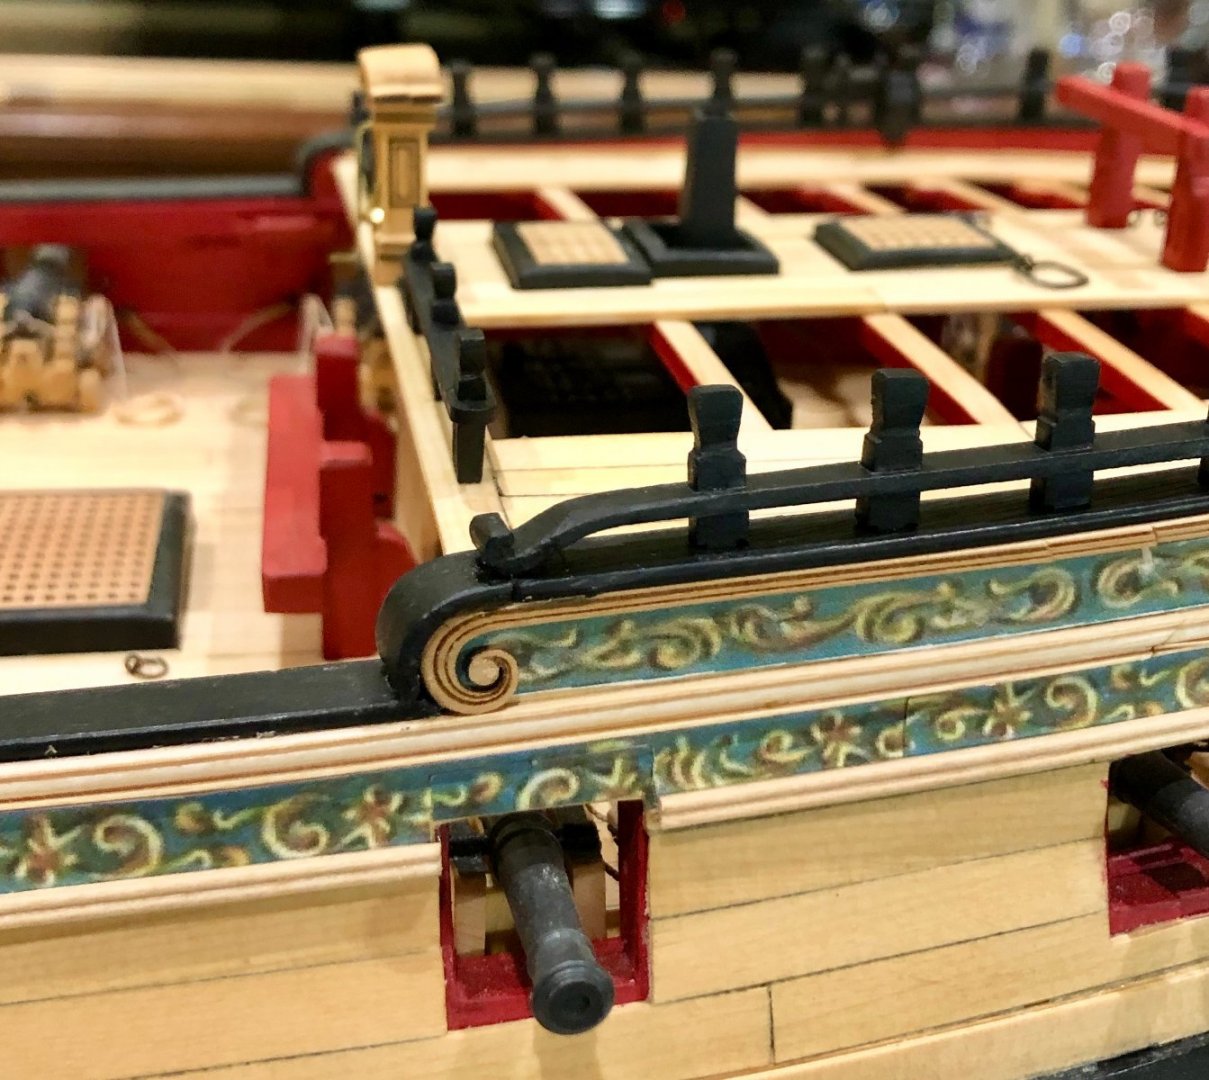
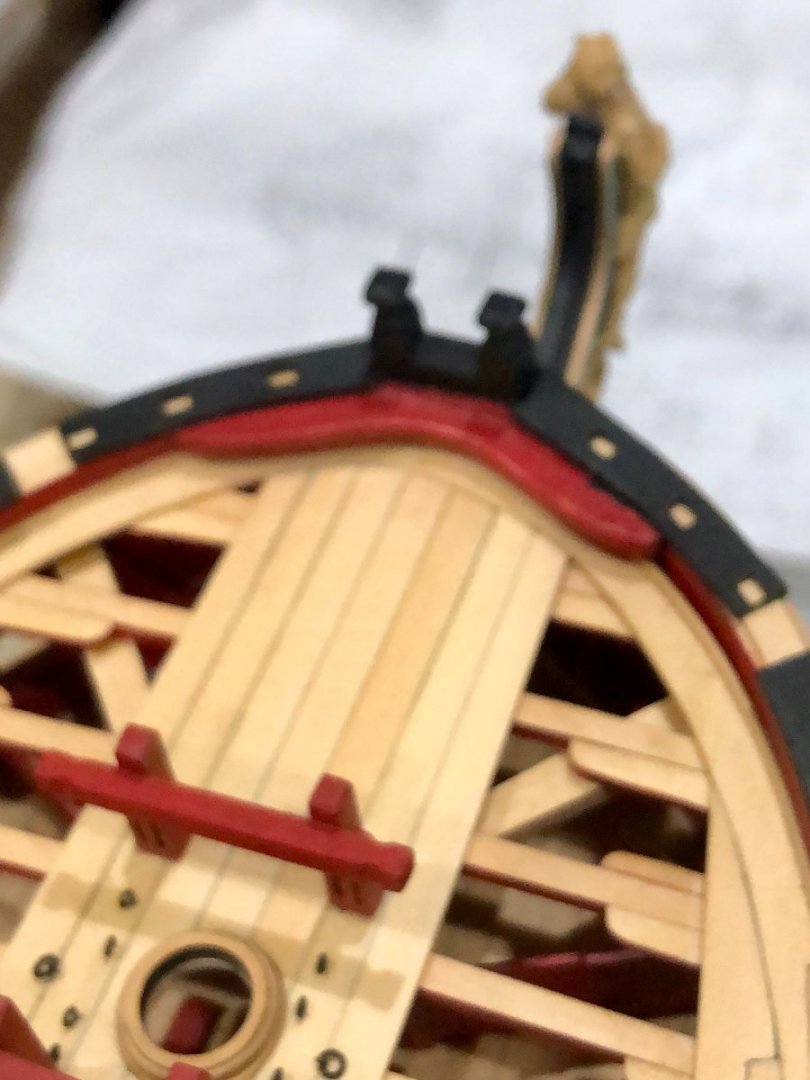
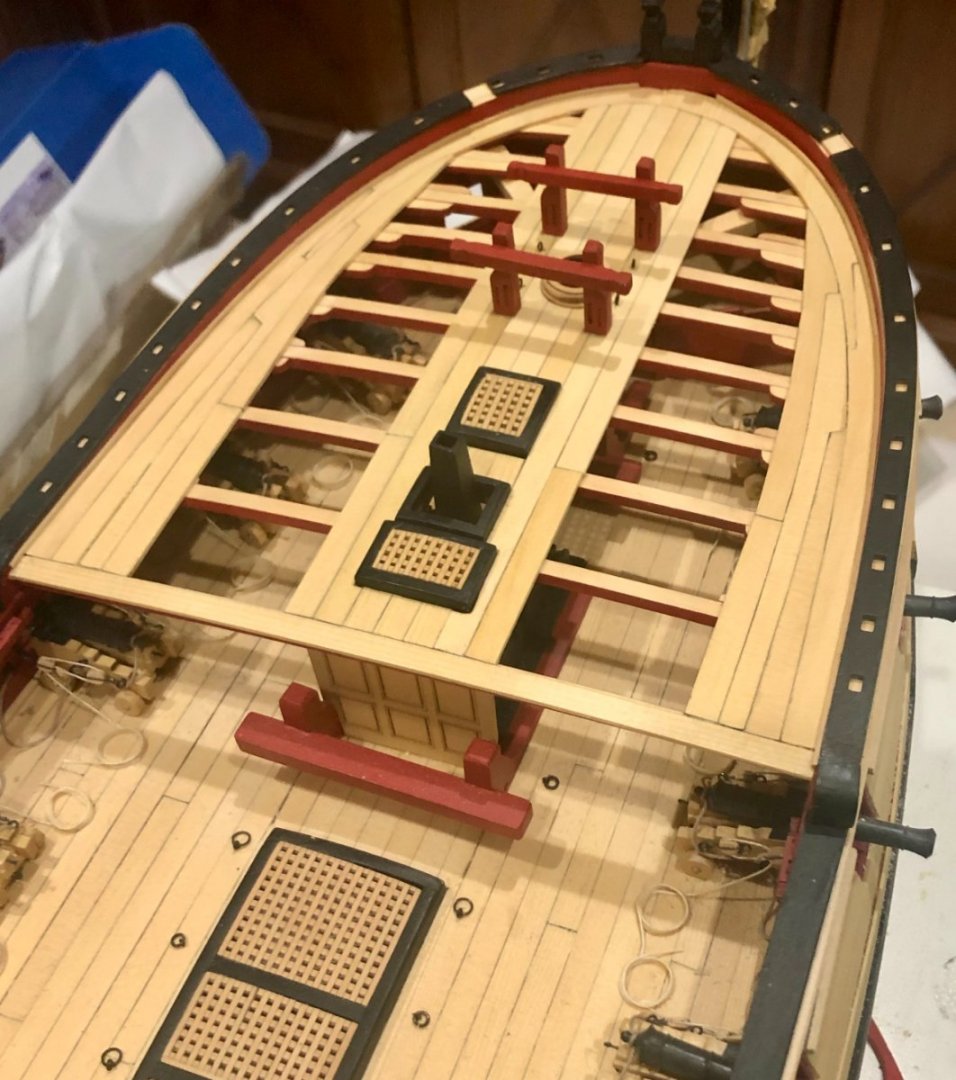
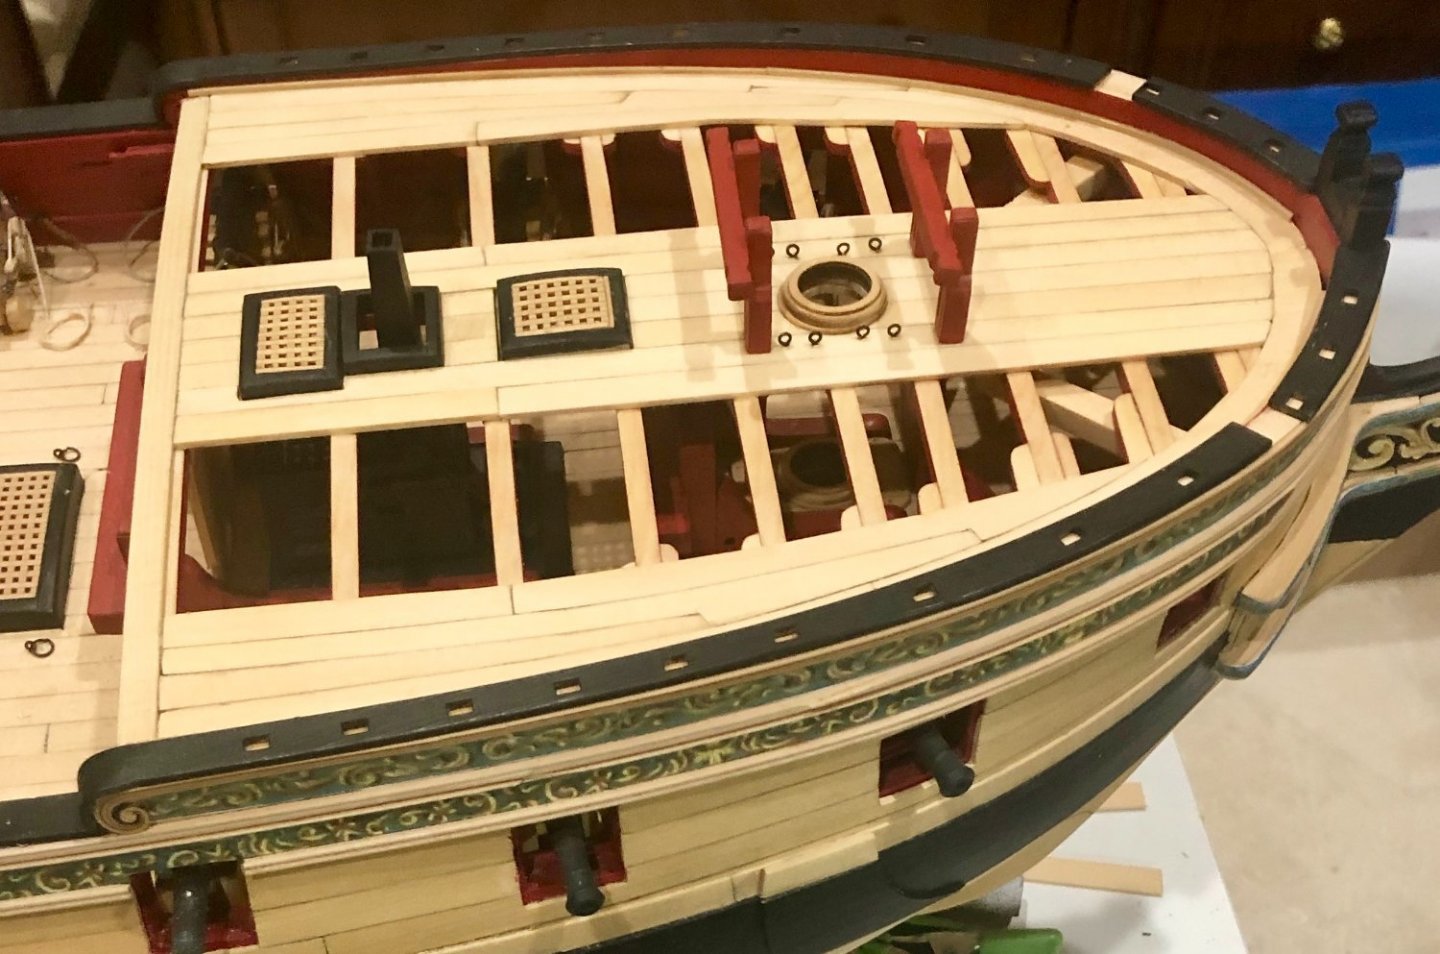
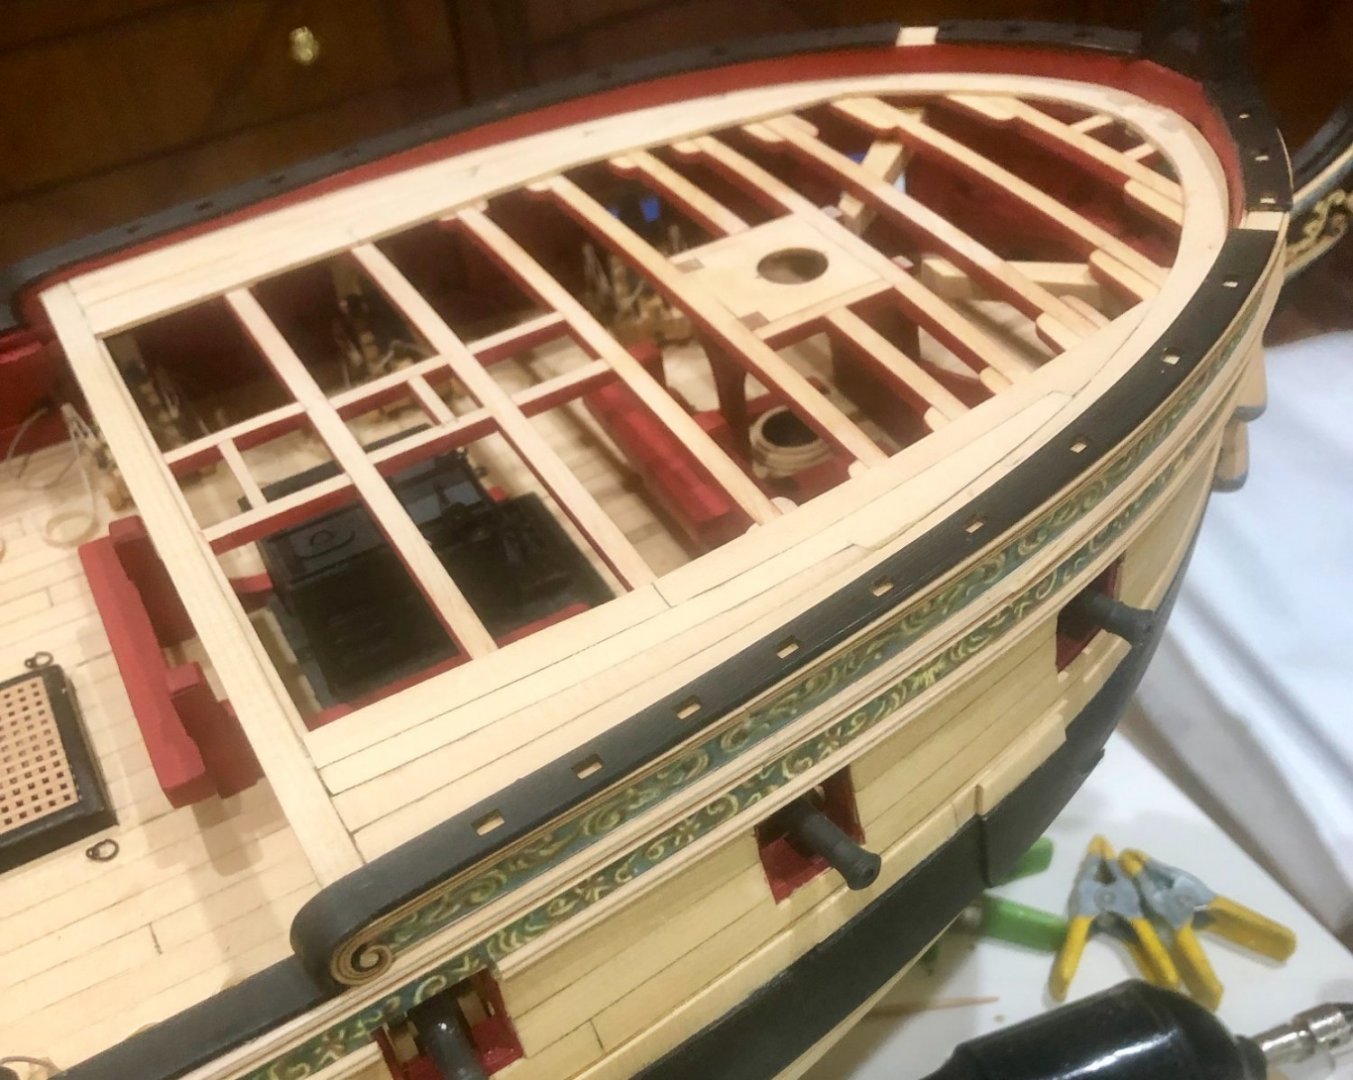
First, a disclaimer: all shortcomings in the work are the result of my failings, not the kit parts. Aging and the deterioration of my hands (a small tremor in one and arthritis in the other) have taken a toll. Handling and manipulation of small parts is getting progressively more difficult and redoing is less and less successful, because the third try isn't likely to be any better than the first. Having said all of that, a word of caution, particularly to those still in early stages of the build. As Chuck has warned, the parts in this chapter have very little wiggle room, meaning that even small deviations in shape and position in early stages can make life difficult later on (no need to ask how I know). Notwithstanding all of the foregoing, I still greatly enjoy building generally, and this build in particular. With that overlong introduction, I have now completed chapter nine. This last work includes the catheads and the forecastle rail, with it's cat blocks, spanshackle cleats and inboard cleats. While most of the items should be relatively straightforward, for the reasons set out above, I found many of the tasks got fussy and difficult. Cutting the slots for the catheads and getting the rail to align properly were the most problematic. Bob


-
Thanks so much Tom, Greg and the "likes". I only wish that it were still true Tom. I seriously considered it Greg, but it did seem a shame to hide the detail, and Chuck had left it natural so I foiiowed suit. Bob
-
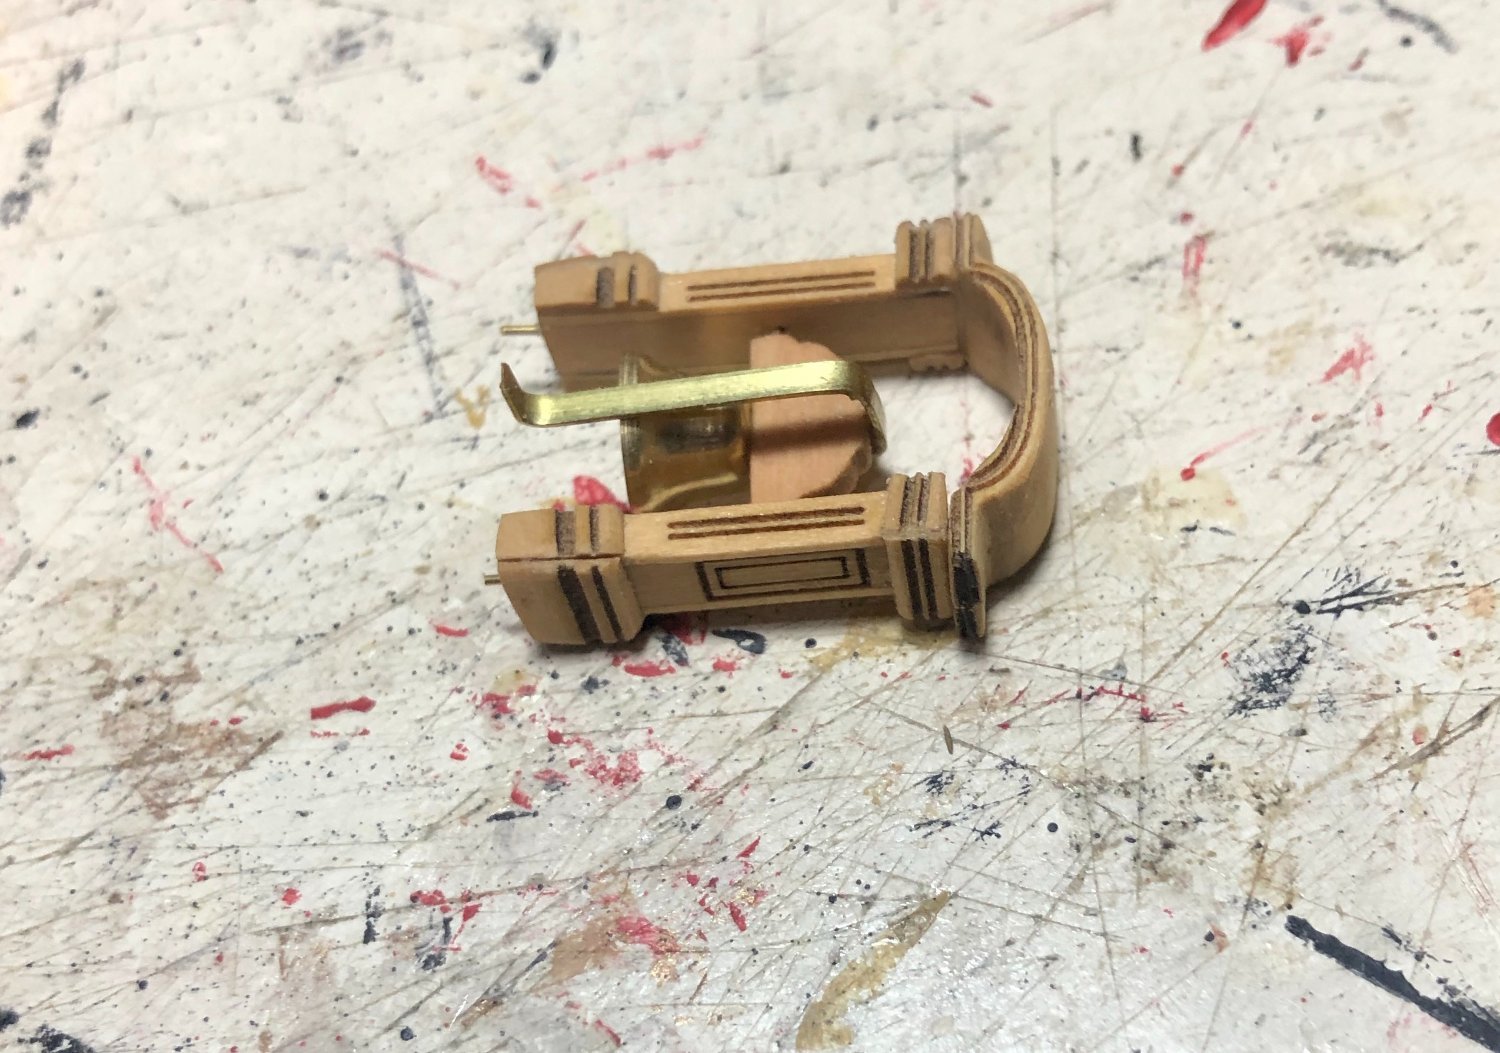
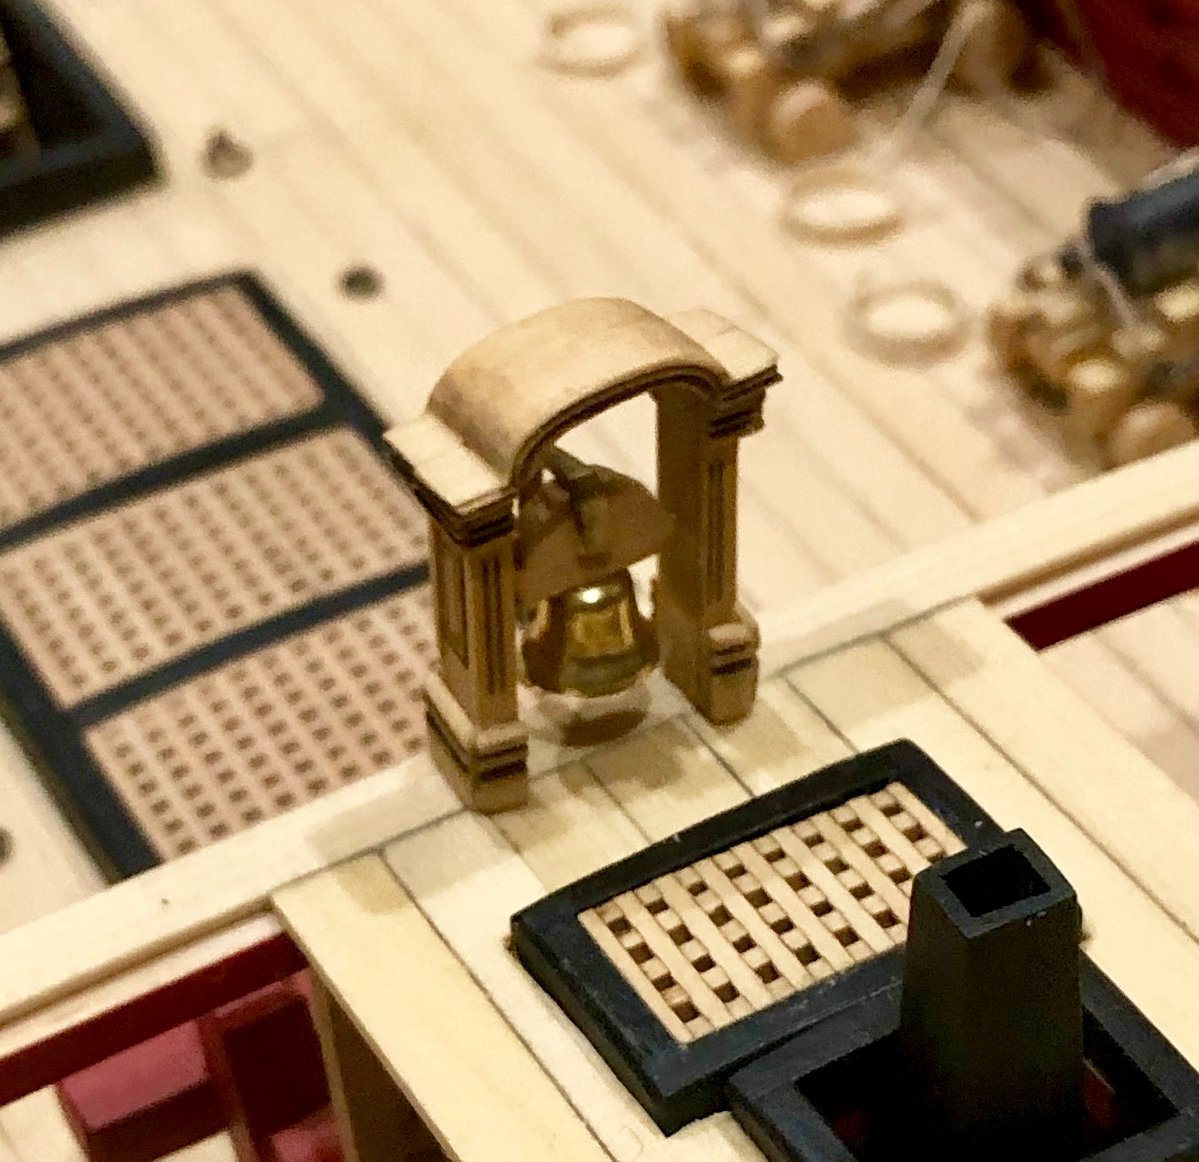
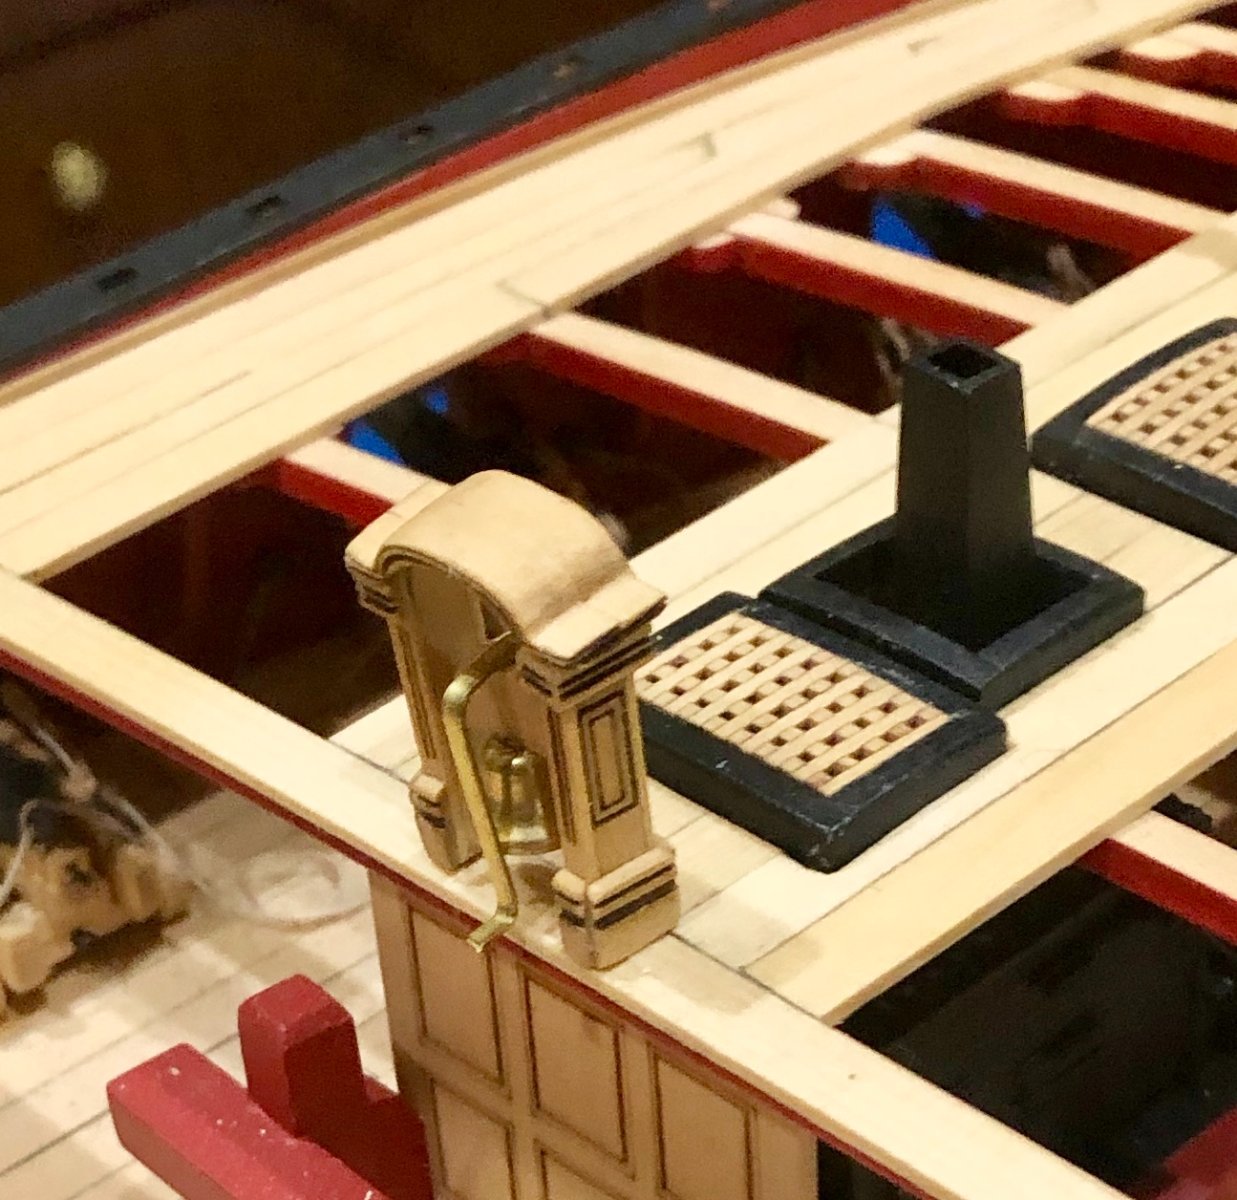
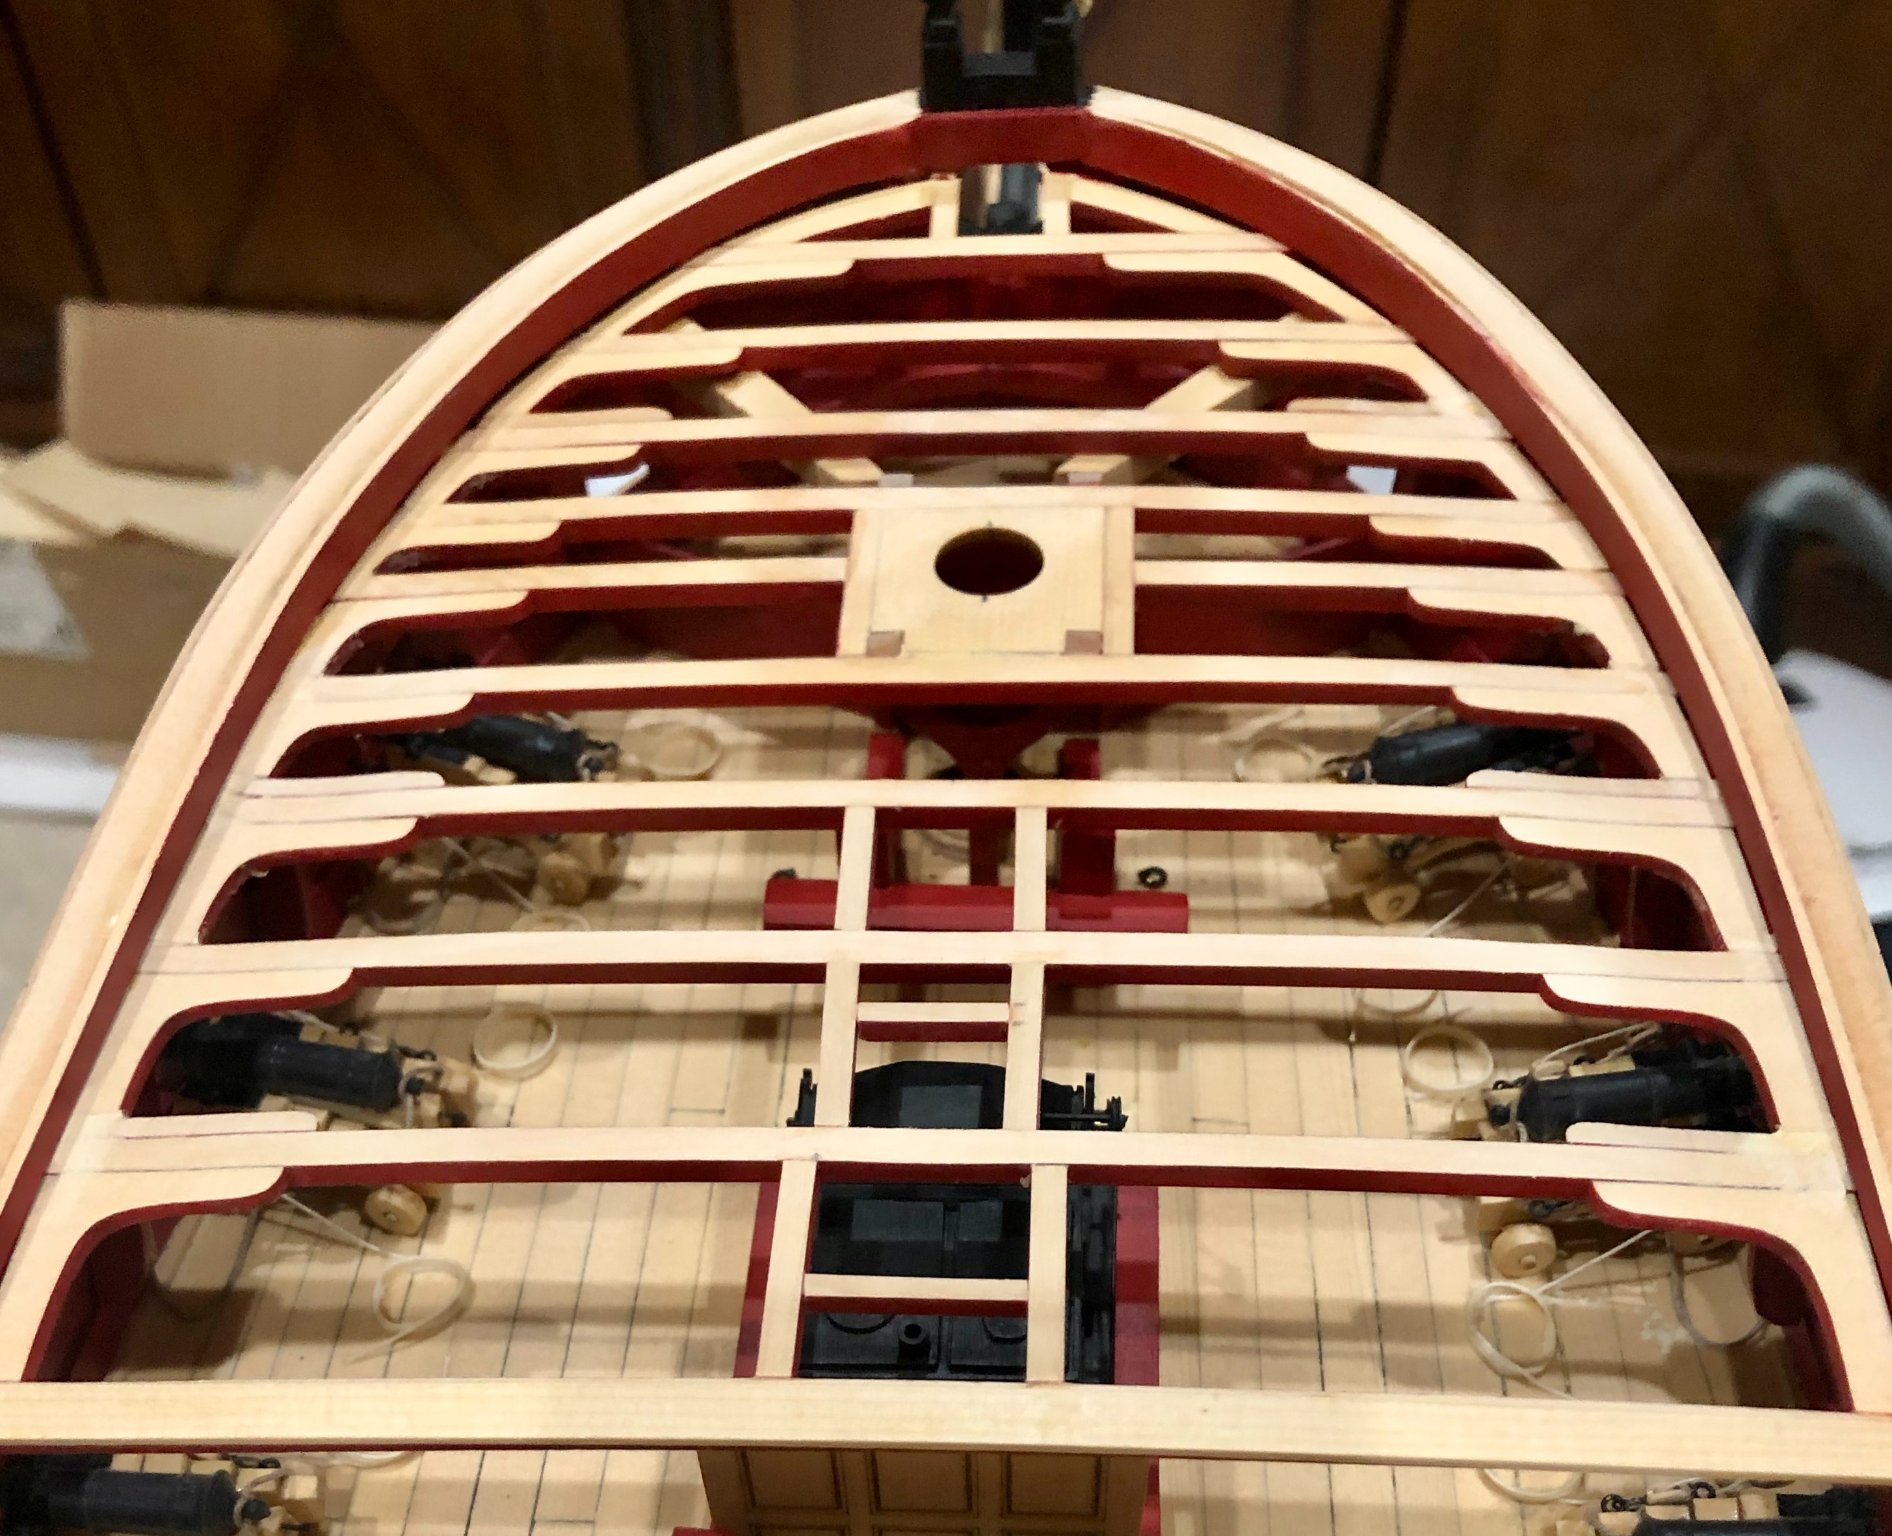
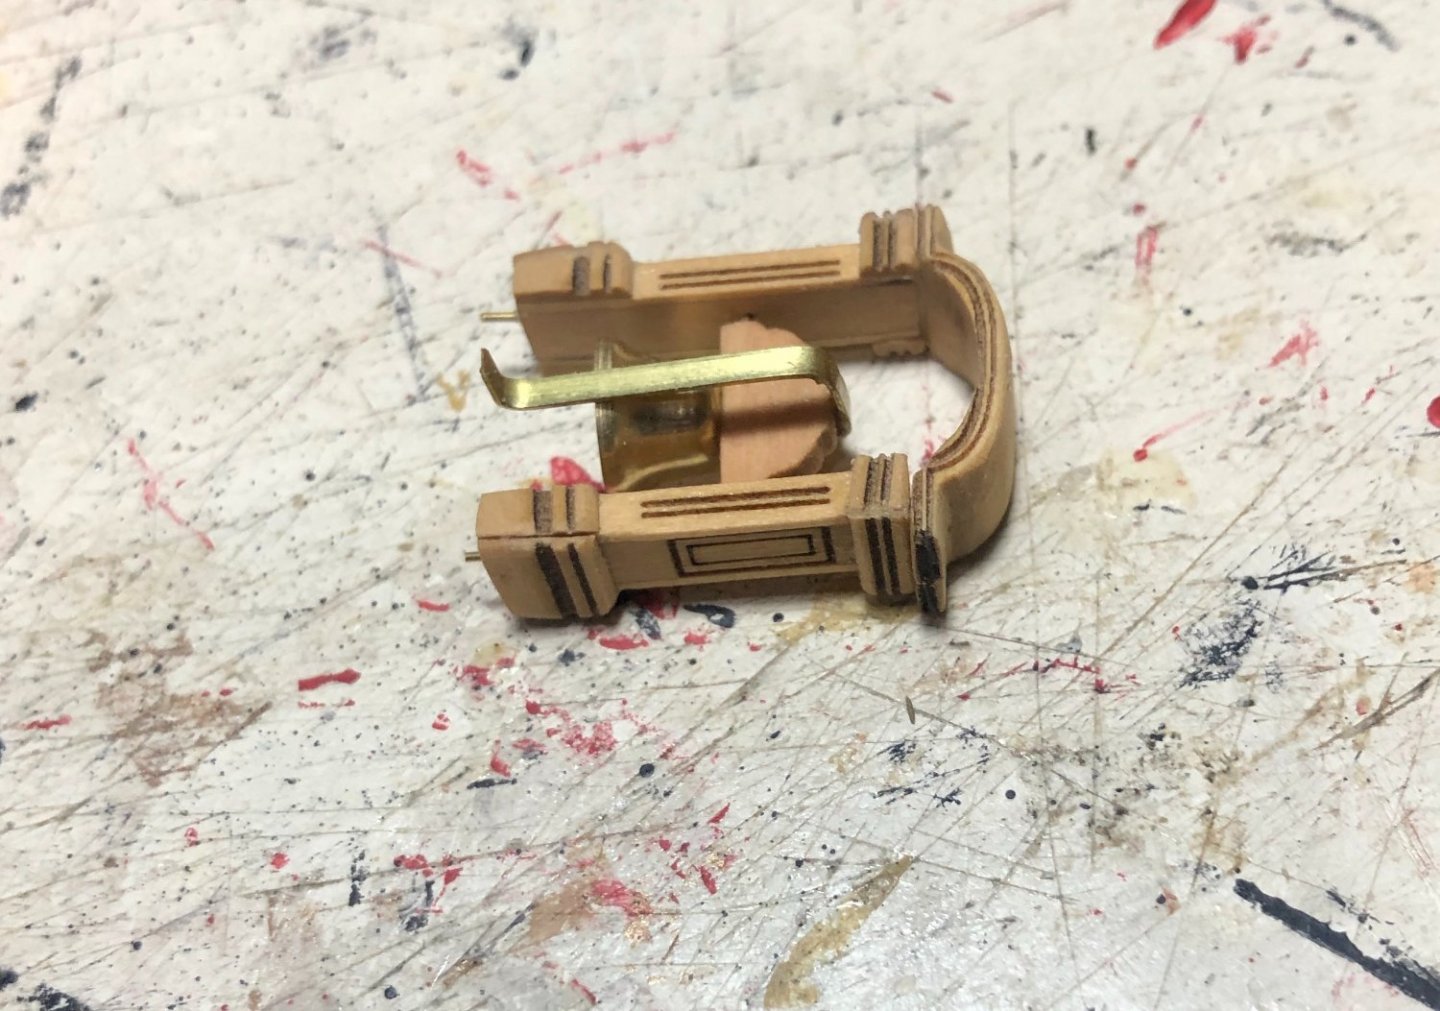
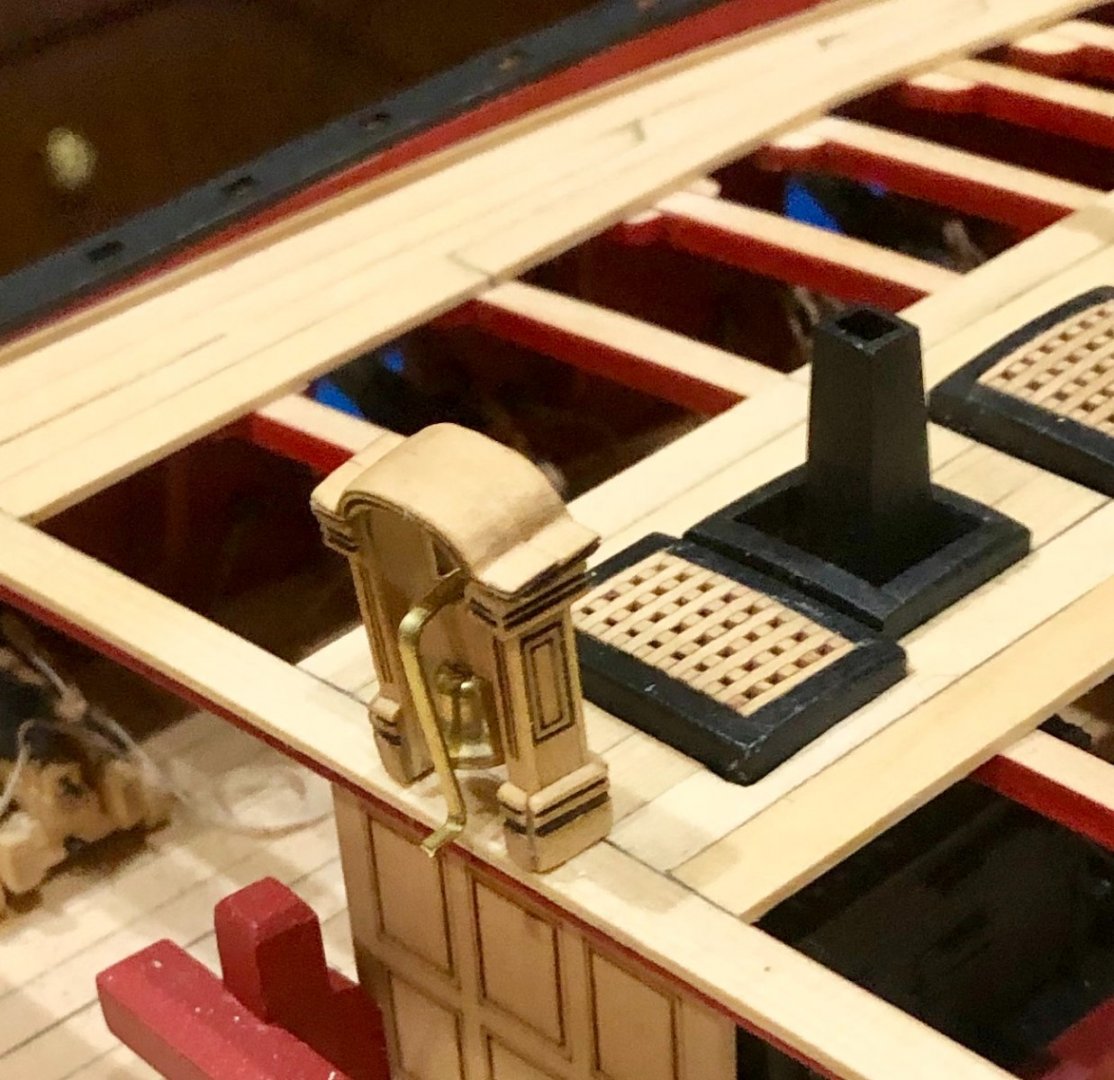
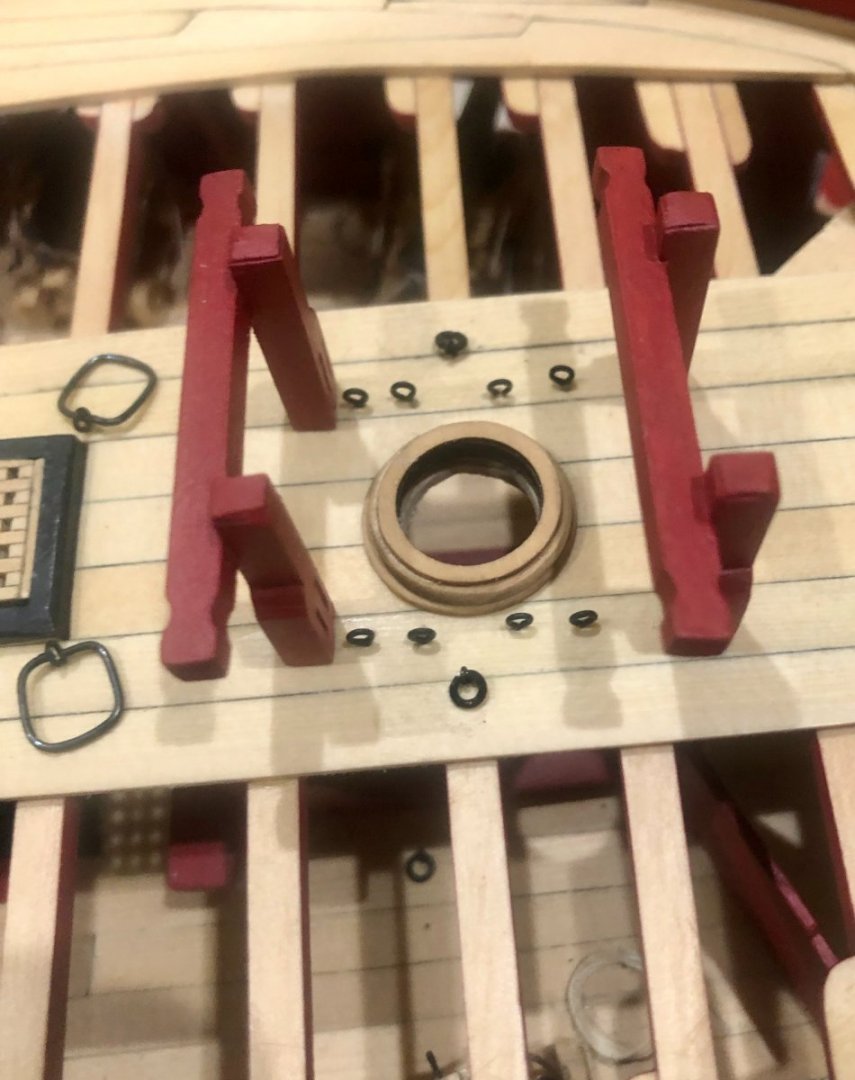
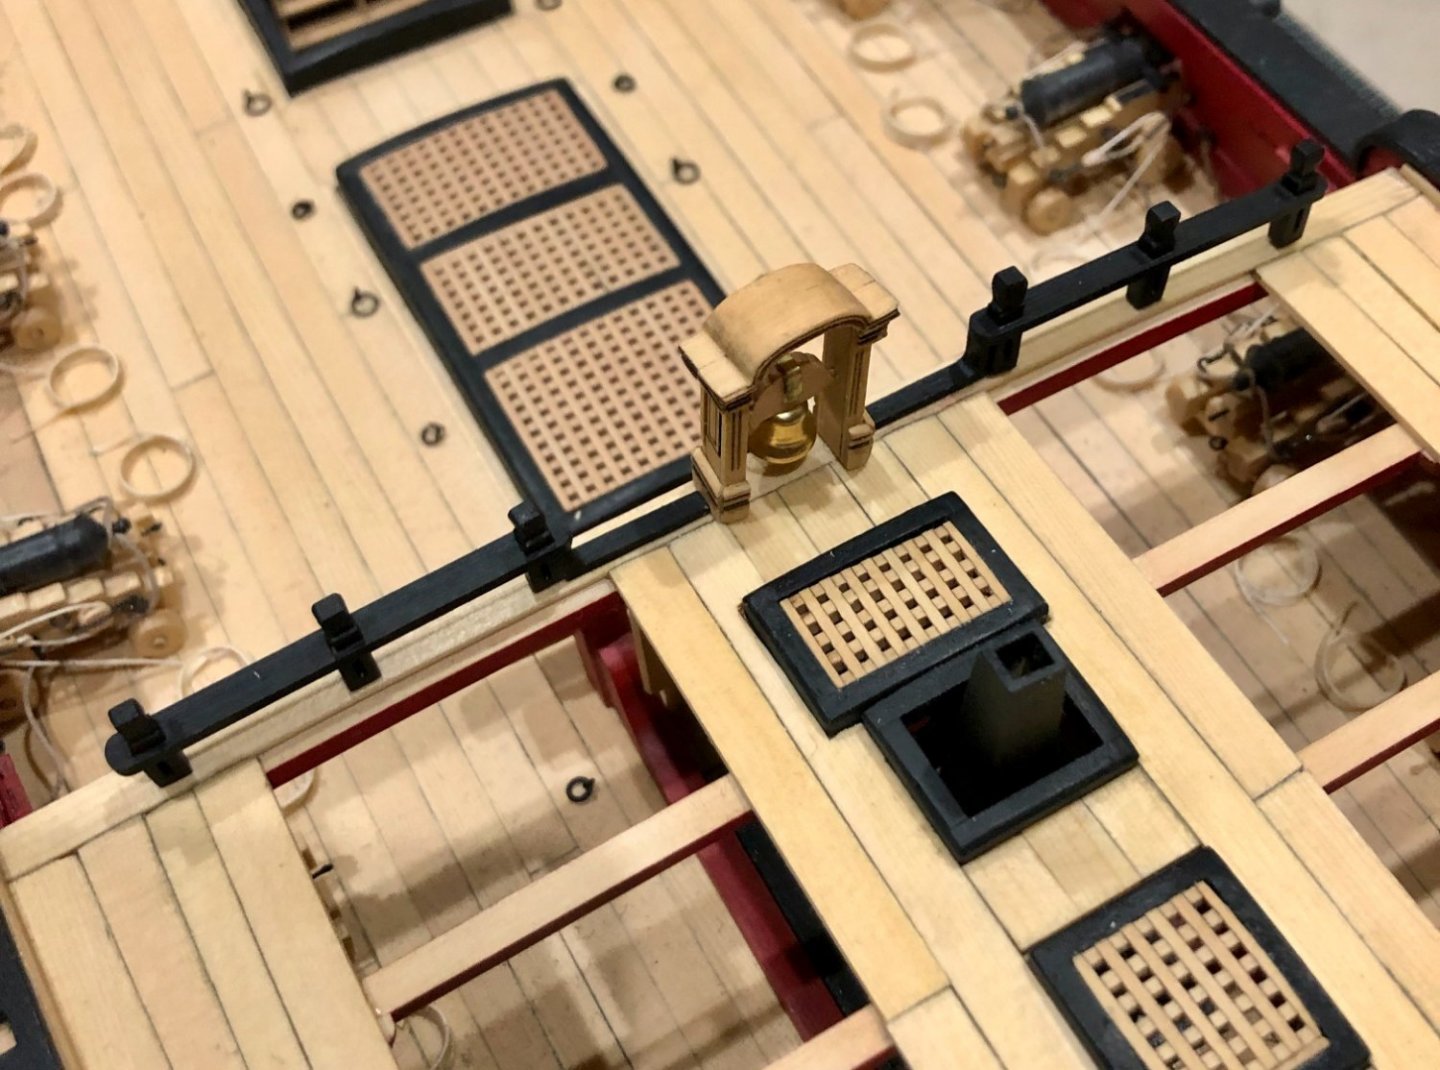
Working my way through chapter nine. First, I made up the belfry from the laser cut parts. This involved some very fussy work, particularly with the really tiny bits of molding. I finished it with a coat of Wipe-on poly and added the bell and brass handle. The belfry was then pinned and glued in place. Next, I added the breasthook. It required some shaping to fit the contour of my bow and was painted red and glued in place. I also added the two ringbolts and two spanshackles to the deck. The spanshackles were bent around a piece of 1/4" stipwood as a former to get uniform size and shape. Lastly, I made up the belfry rail, using the laser cut rails and timber heads. The timberheads were filed to shape. The assembly was painted black and glue in place. This leaves the catheads and forecastle rail to be done. Bob

-
Thanks so much Nils. Always good to have you look in. Bob
-
Thanks so much Glenn, Ben, Rusty and Thomas for the comments, and thanks also to the "likes". Always greatly appreciated. Bob
-
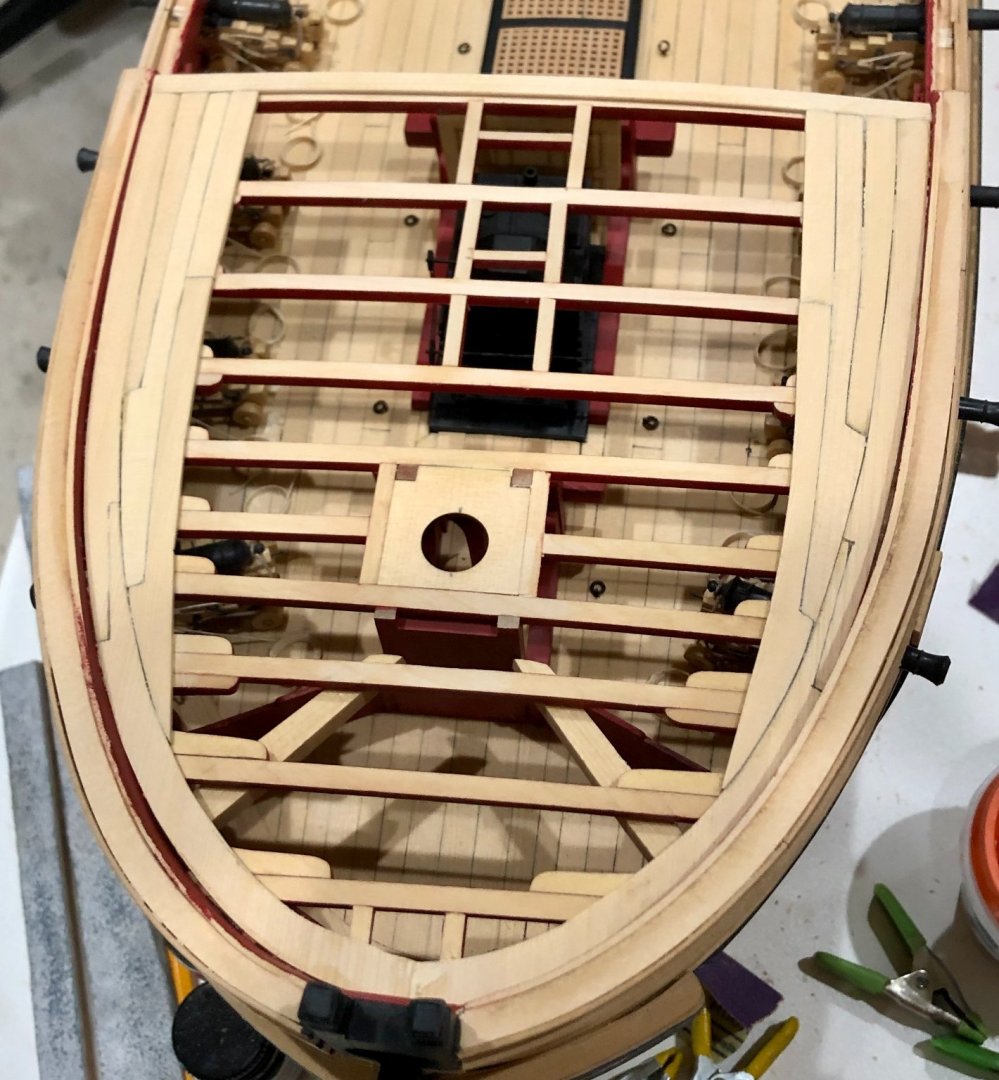
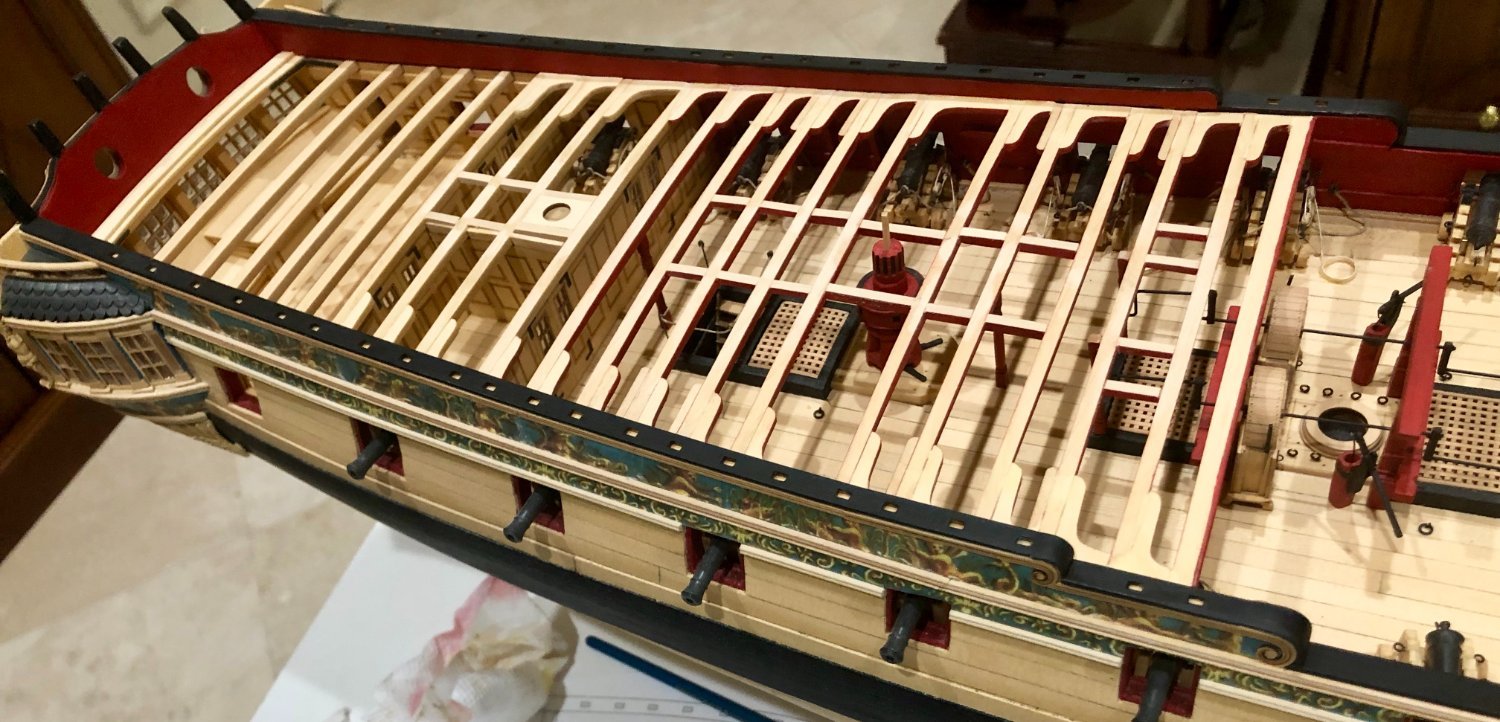
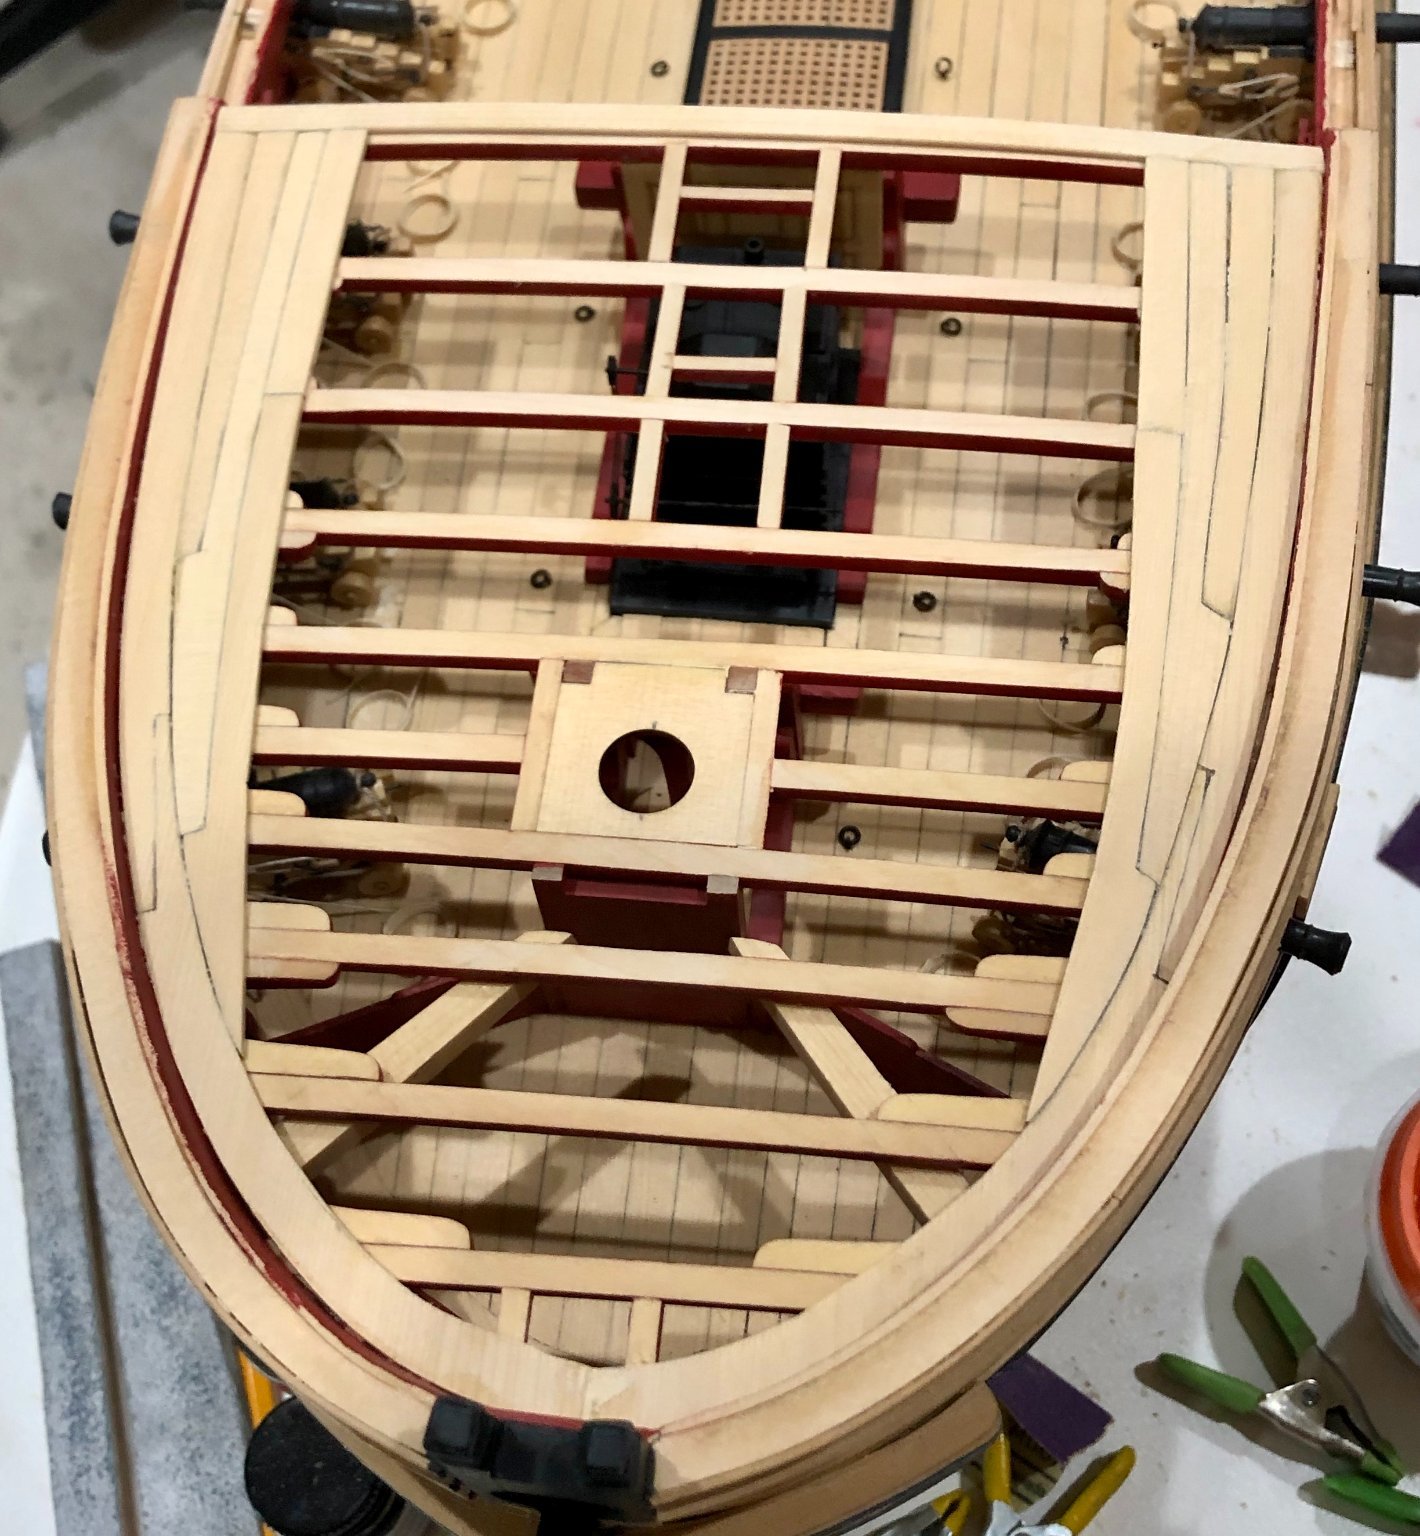
Continuing on with chapter nine.. I did the quarterdeck margin planks, the waterways and then the outer quarterdeck planking, which was bent and tapered in accordance with the templates. Moving to the forecastle, I made up the coamings and gratings, using the laser cut parts, and laid the middle planking around them.The planks were tapered in accordance with the template. The decking was finished with a coat of Wipe-on Poly. I also added the foremast bitts, which had been previously made, and were pinned and glued in place and glued the stove stack in place. Lastly, I added the fore mastcoat, and the eyebolts alongside. Bob

-
I'm afraid Floyd that I can't answer your question. I have no memory of the contents of the various laser cut sheets or of the specific part you're asking about. I'm sure that Chuck would be in a better position to give you an answer. Sorry. Bob
-
Thanks so much Frank. Still along way to go before finished, but I am looking forward to Speedwell already. Bob
-
Thanks so much Glenn, JJ ,Don and Thomas for the very generous comments. Thanks also to the "likes". I'm so glad to be back at it that I have to force myself to stop. Bob
-
Thanks so much Rusty and Bob for the nice comments, and thanks also to the "likes". Bob
-
I received my chapter nine parts, downloaded the monograph chapter, and finally got back to work after a long break. I added the quarterdeck inner planking, prepainted red. I then added the various cap rail parts after painting them black. The laser cut parts are great and make the work very straightforward. I sanded, filled and resanded the various joints and then repainted those areas. Bob


-
Thanks so much Rick. Have fun with your build and post build log. Bob
-
US Brig Syren by Gahm - Model Shipways
rafine replied to Gahm's topic in - Kit build logs for subjects built from 1801 - 1850
Beautiful work, as always. Bob -
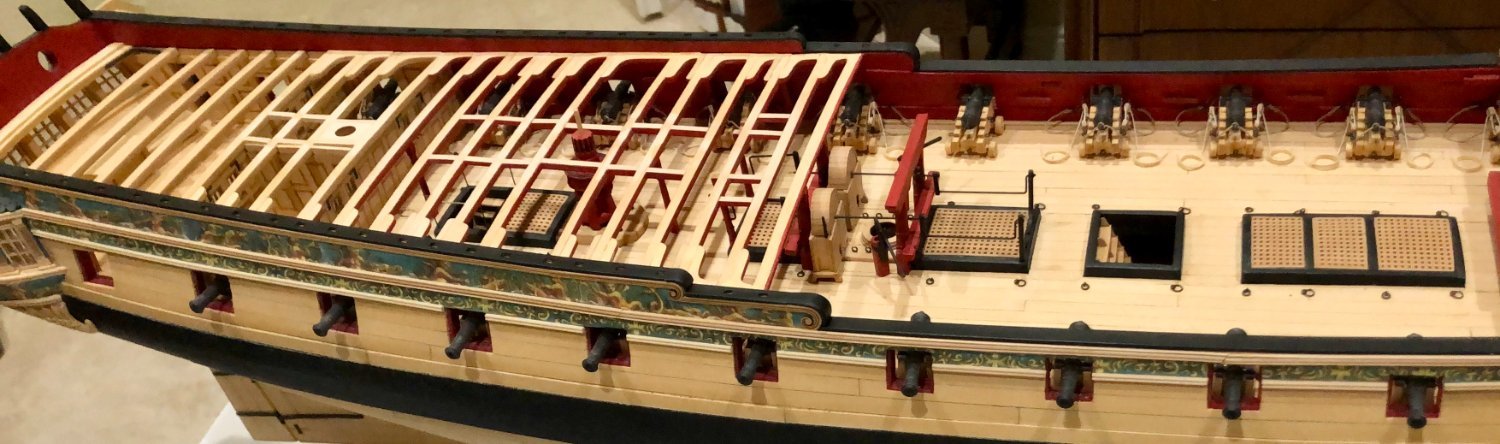
Well, I just couldn't resist any longer. I have added the f'castle bulwark planking, the f'castle margin planks and the outer f'castle deck planking. Hopefully, this won't cause me any future problems. Now, it's back to waiting again. Bob