rafine
-
Posts
2,932 -
Joined
-
Last visited
Content Type
Profiles
Forums
Gallery
Events
Everything posted by rafine
-
 Thanks so much Reg, Elijah, Jean-Paul and the "likes". Reg, I do't know if it's a tip , but maintaining a healthy level of fear that you will screw up generally works for me. Bob
 -
Thanks so much Don and the "likes". There were times, Don, when I wished that I had gone the way that you intend to. My patience came very near it's limit, but I was glad that I had done it when it was finished. Bob
-
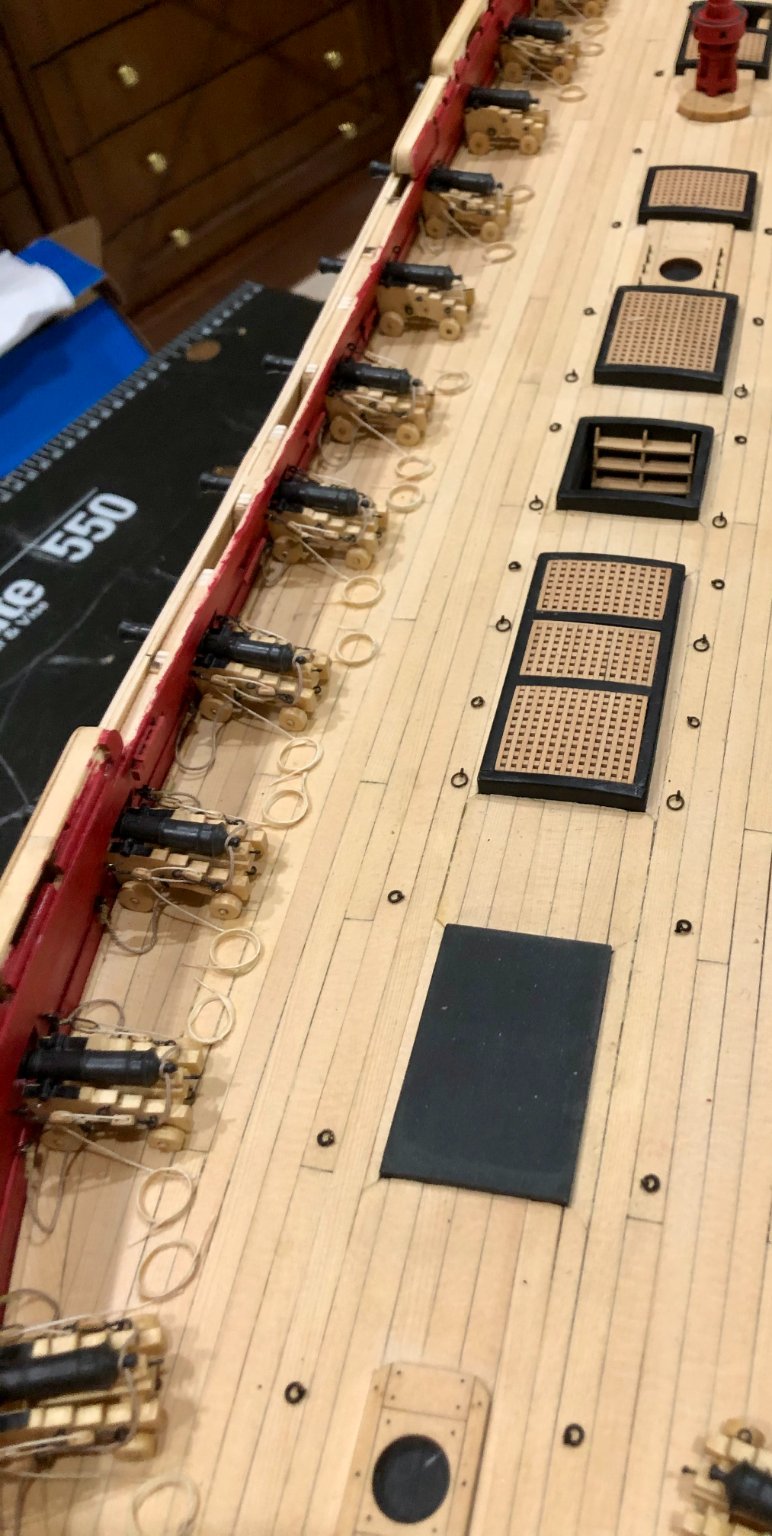
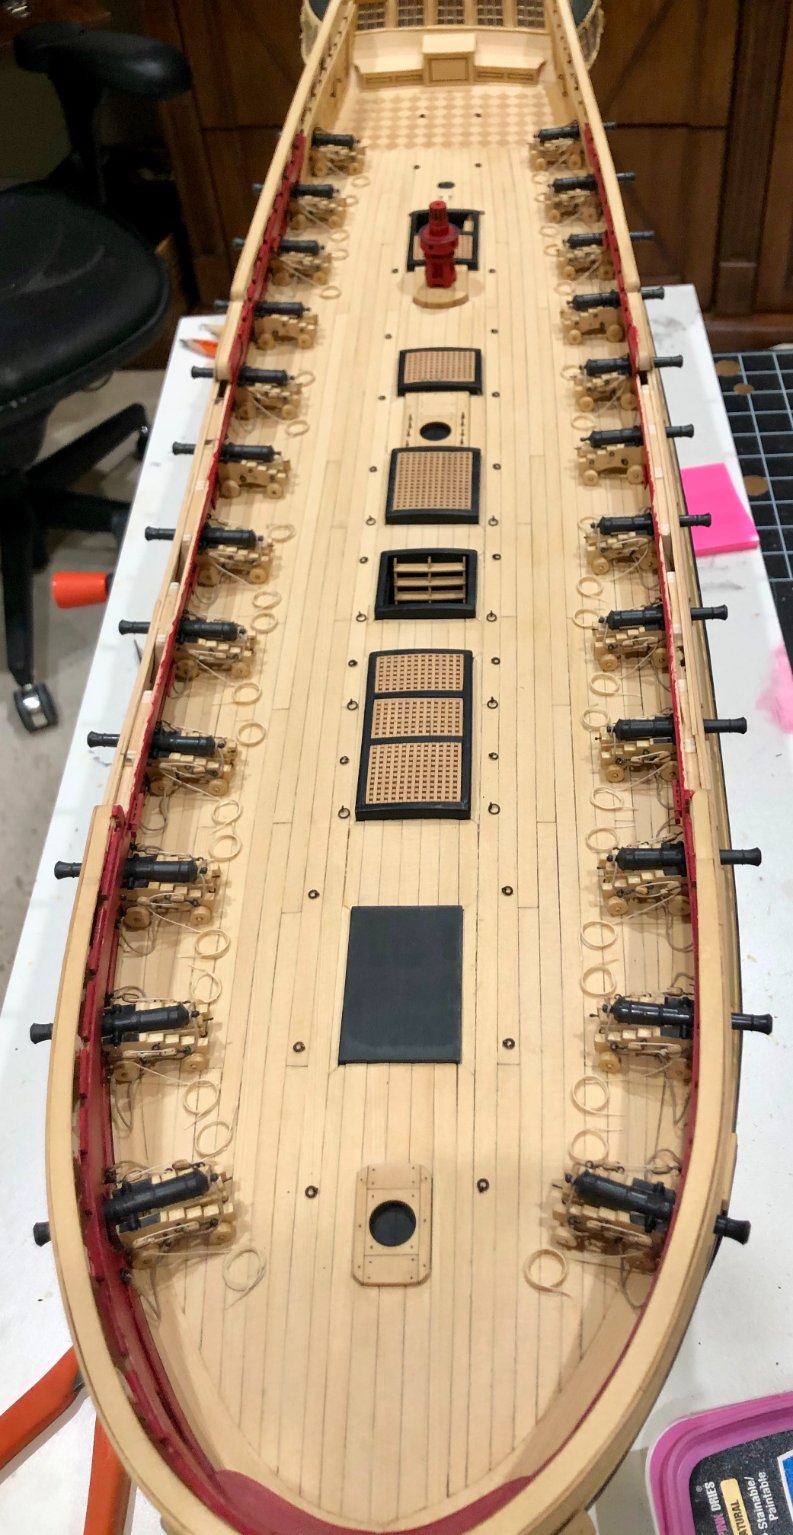
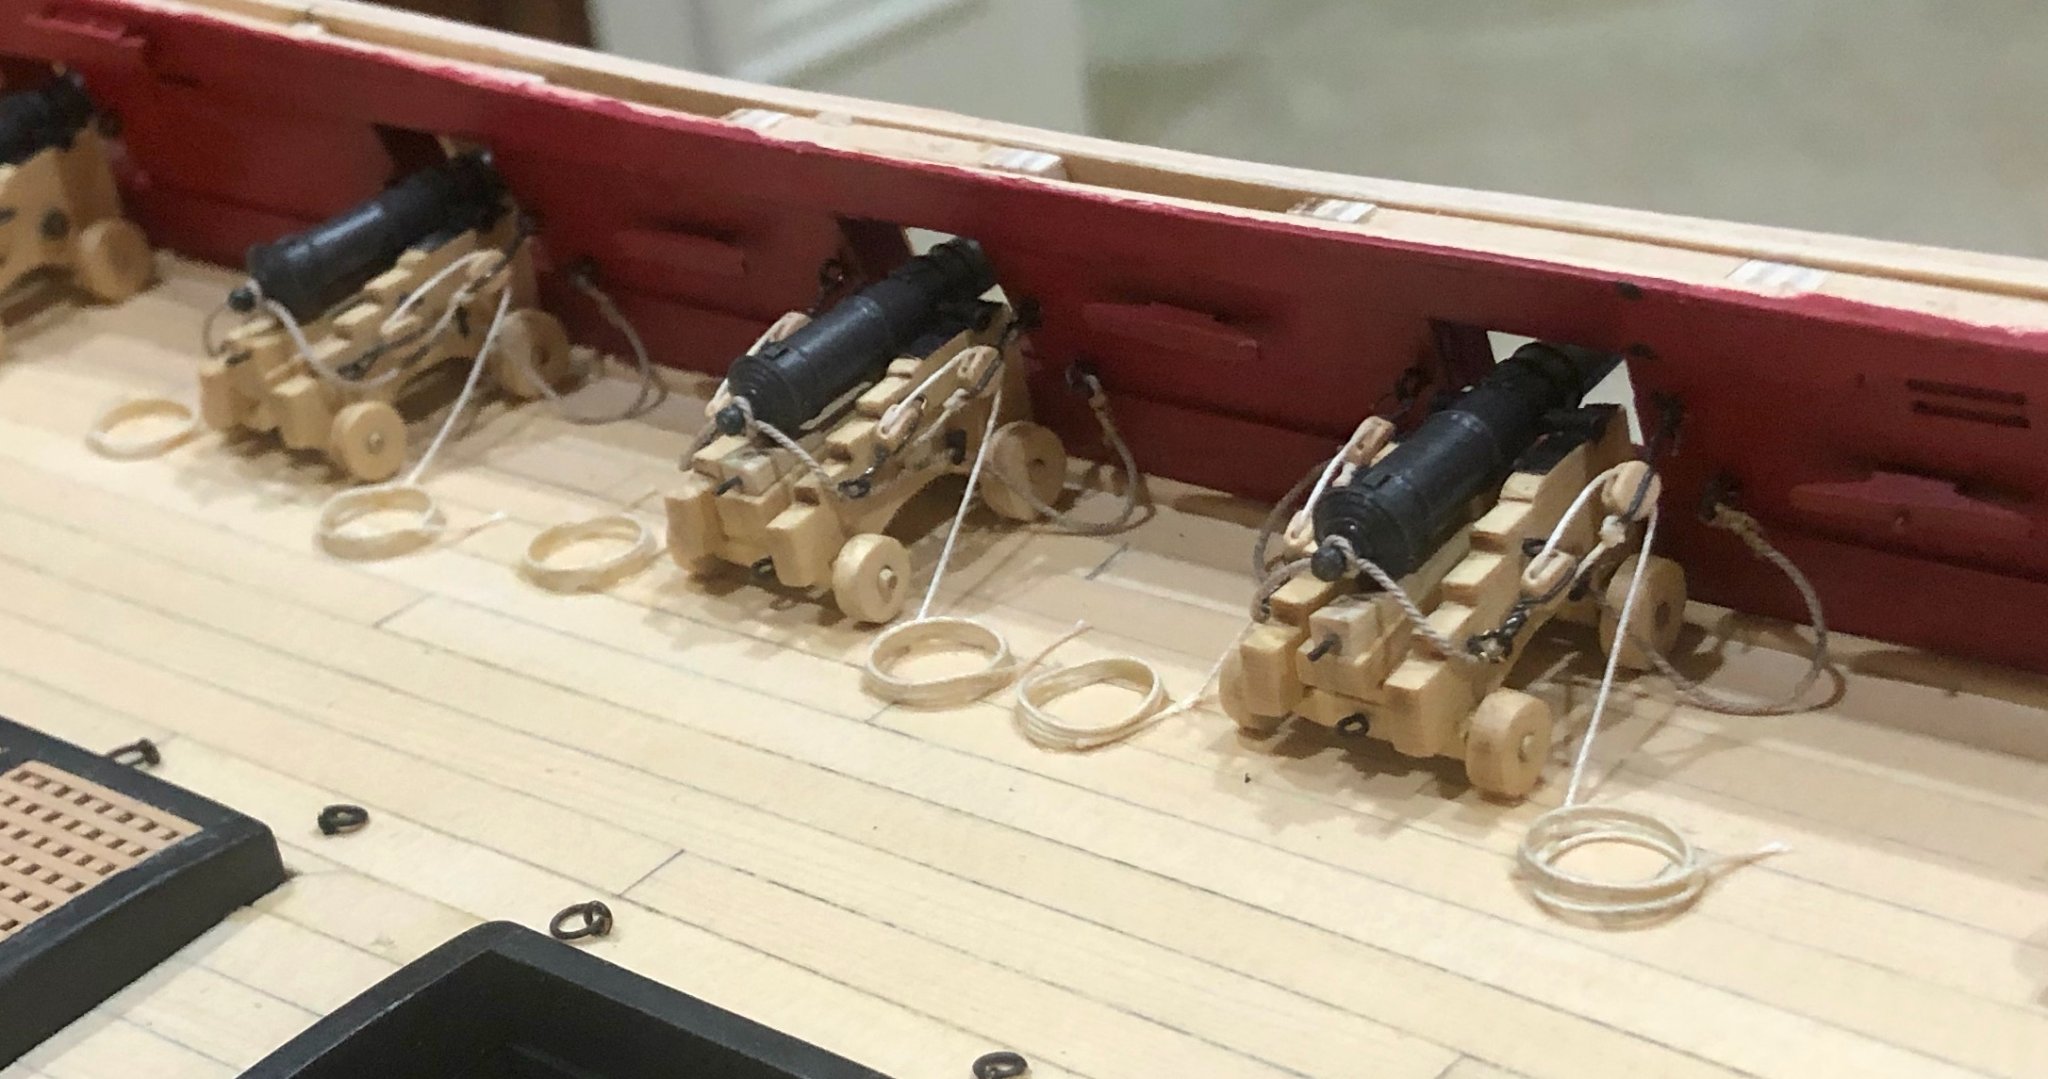
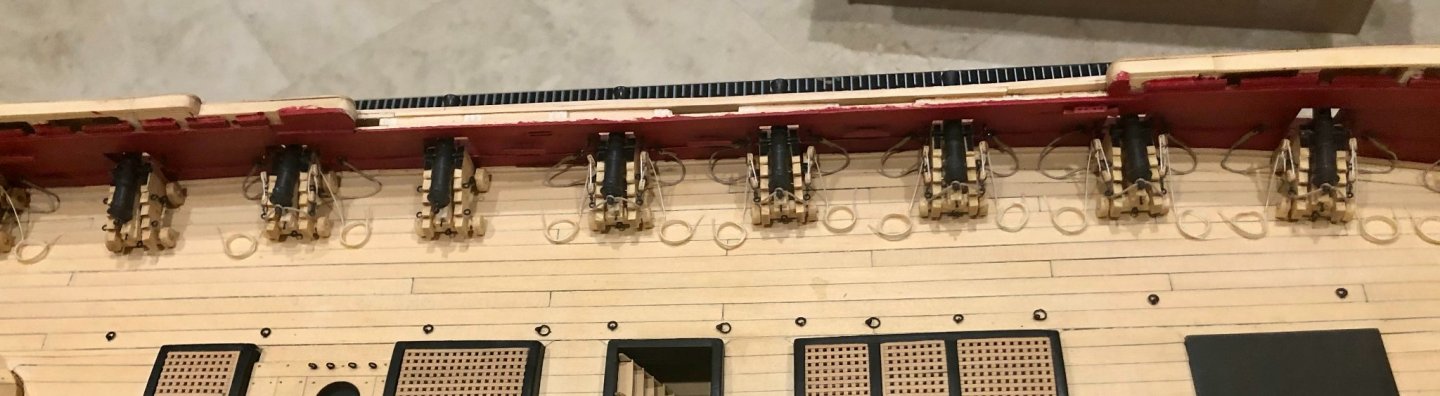
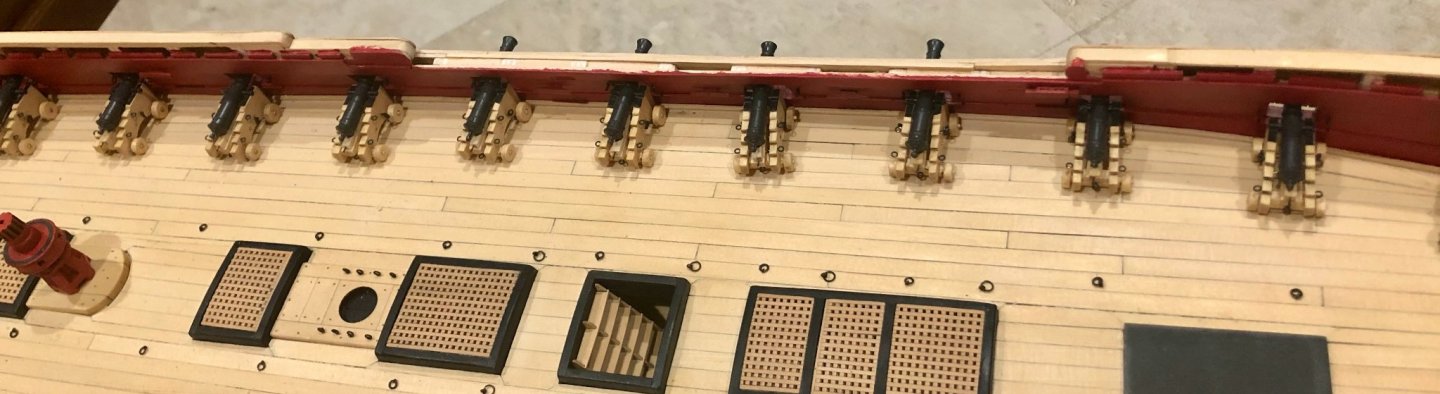
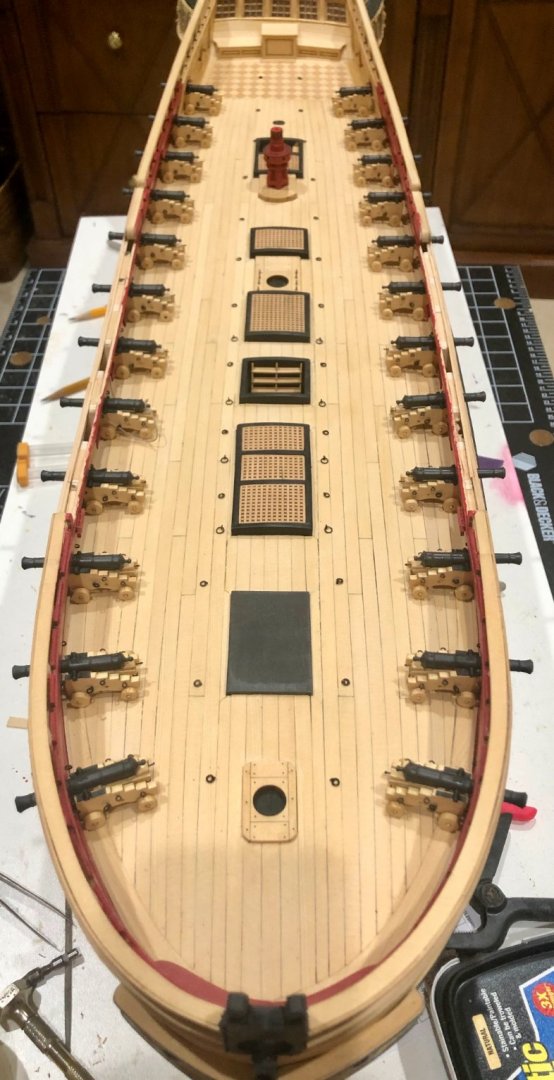
I have finished rigging the guns (with the exception of a couple that have to wait on installing the hanging knees). I now have to wait on the availability of the Chapter seven parts to proceed any further. Bob

-
I used Lees to figure sizes and I came up with 5/32" singles for the blocks, .015 for the tackles and .028 for the breach ropes. I make no claim of accuracy for my calculations, but you can see the results on my log. Bob
- 144 replies
-
- 1
-

-
- winchelsea
- Syren Ship Model Company
- (and 1 more)
-
Thanks so much Rusty, Frank and the "likes". I greatly appreciate both the comments on the modeling and the concern for my health. Bob
-
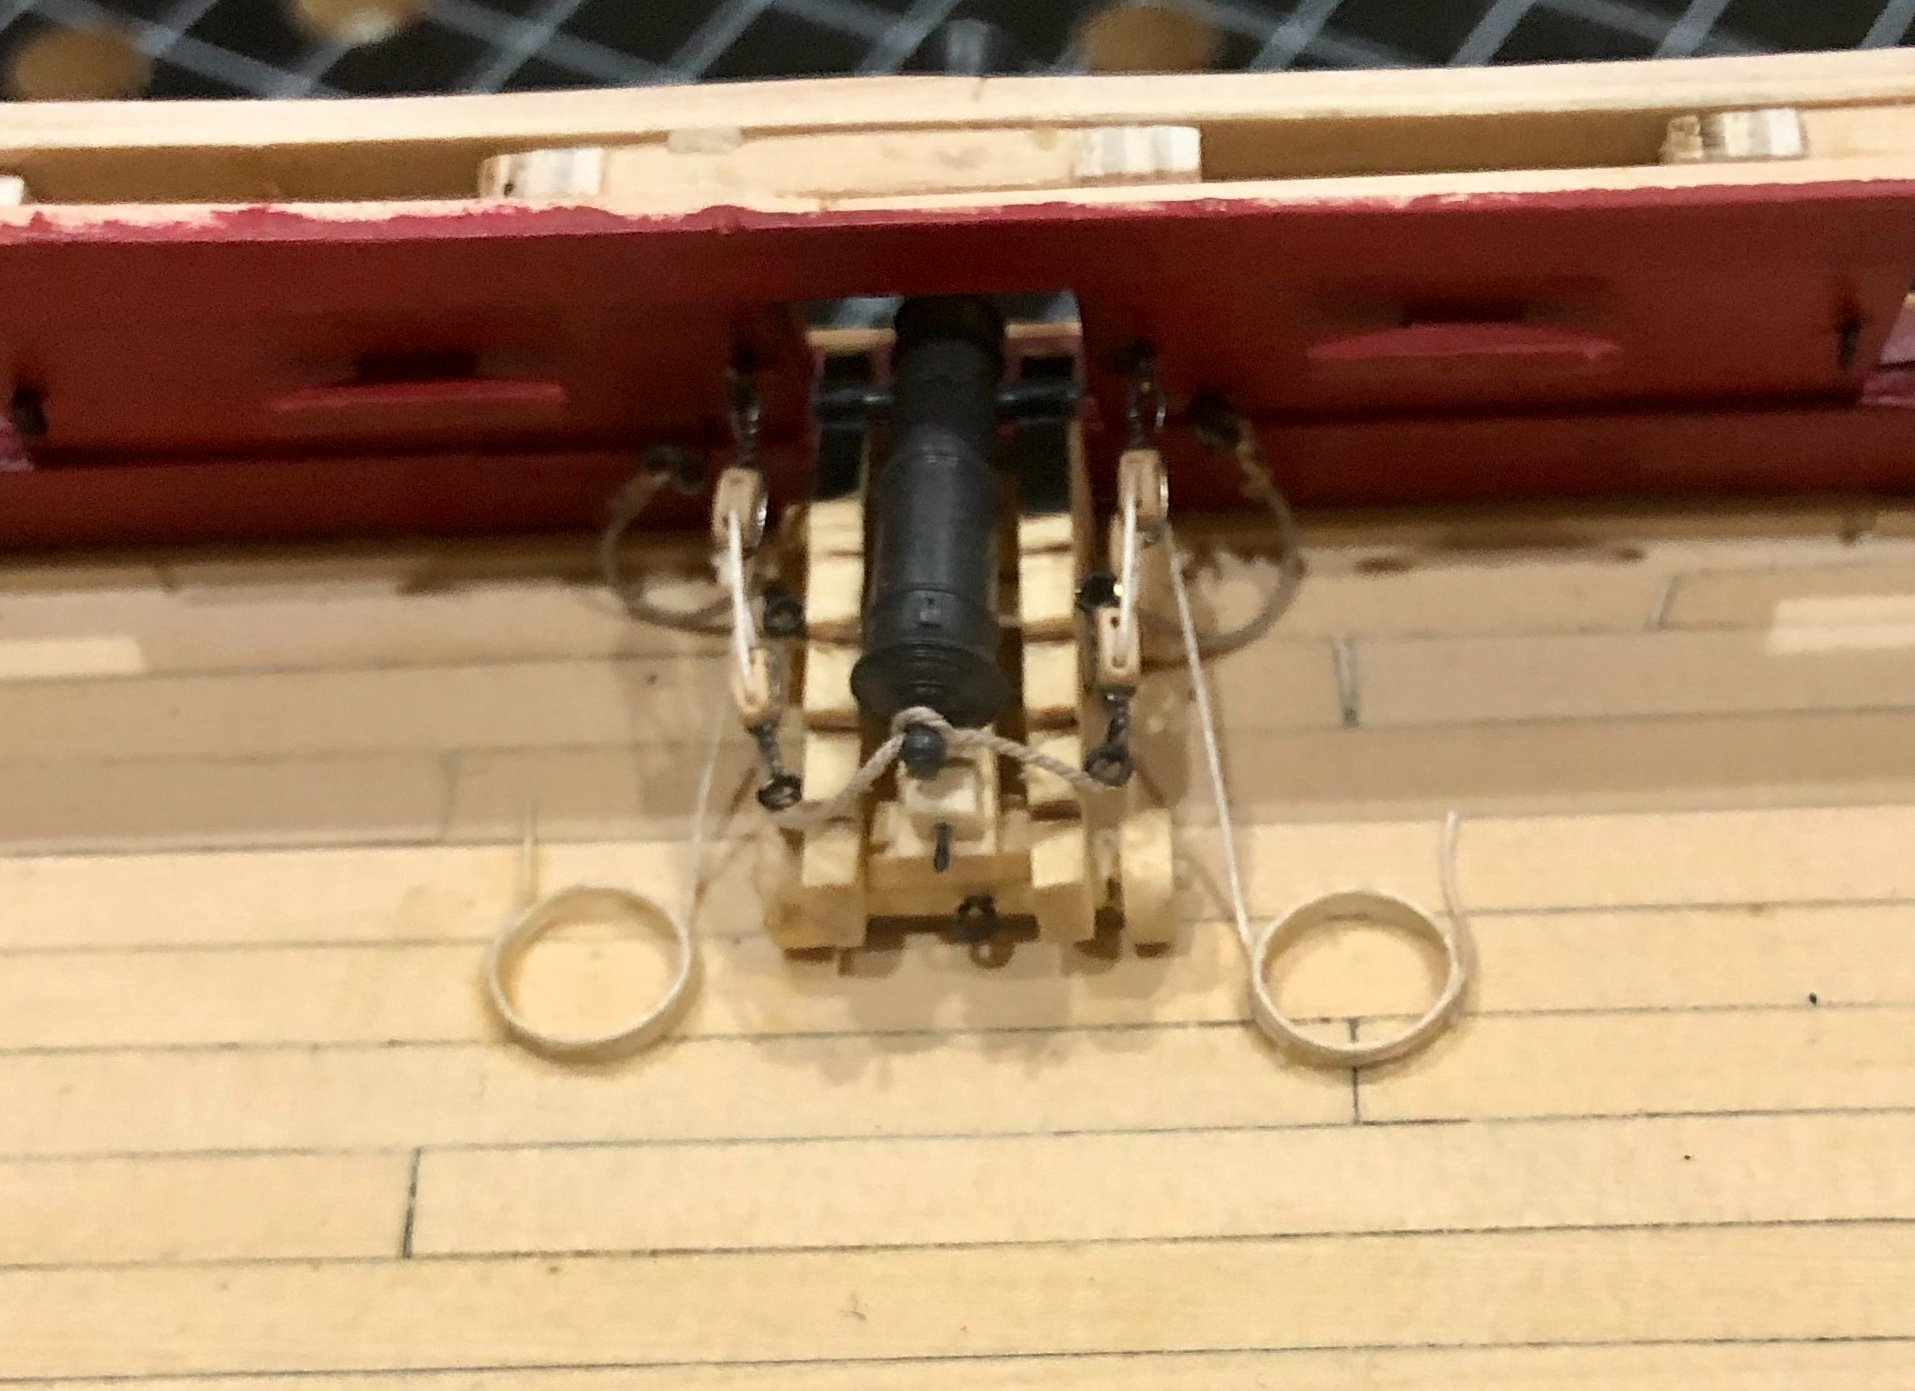
Thanks so much Matt, Vlad, Tom, jj and the "likes". Hardly a master, Matt. I've recently had a couple of heart valve procedures, and things seem to be improving. Tom, the fingers seem to be less nimble every day. The sequence I use is almost easier to do than to explain, but here goes: 1) make up side tackles; 2) attach breech rope to gun barrel and run through ringbolts on carriage; 3) seize breech rope to bulwark ringbolts (not yet attached to bulwarks); 4) Glue gun assembly to deck; 5) insert and glue ringbolts into predrilled holes in bulwark; 6) hook side tackles into eyebolts on carriage and bulwark; 7) tighten tackle and glue end to deck; 8) make up separate rope coil and glue to end of tackle. I have no idea whether this is the best way to do it, and it involves some faking, but it has worked for me. Bob
-
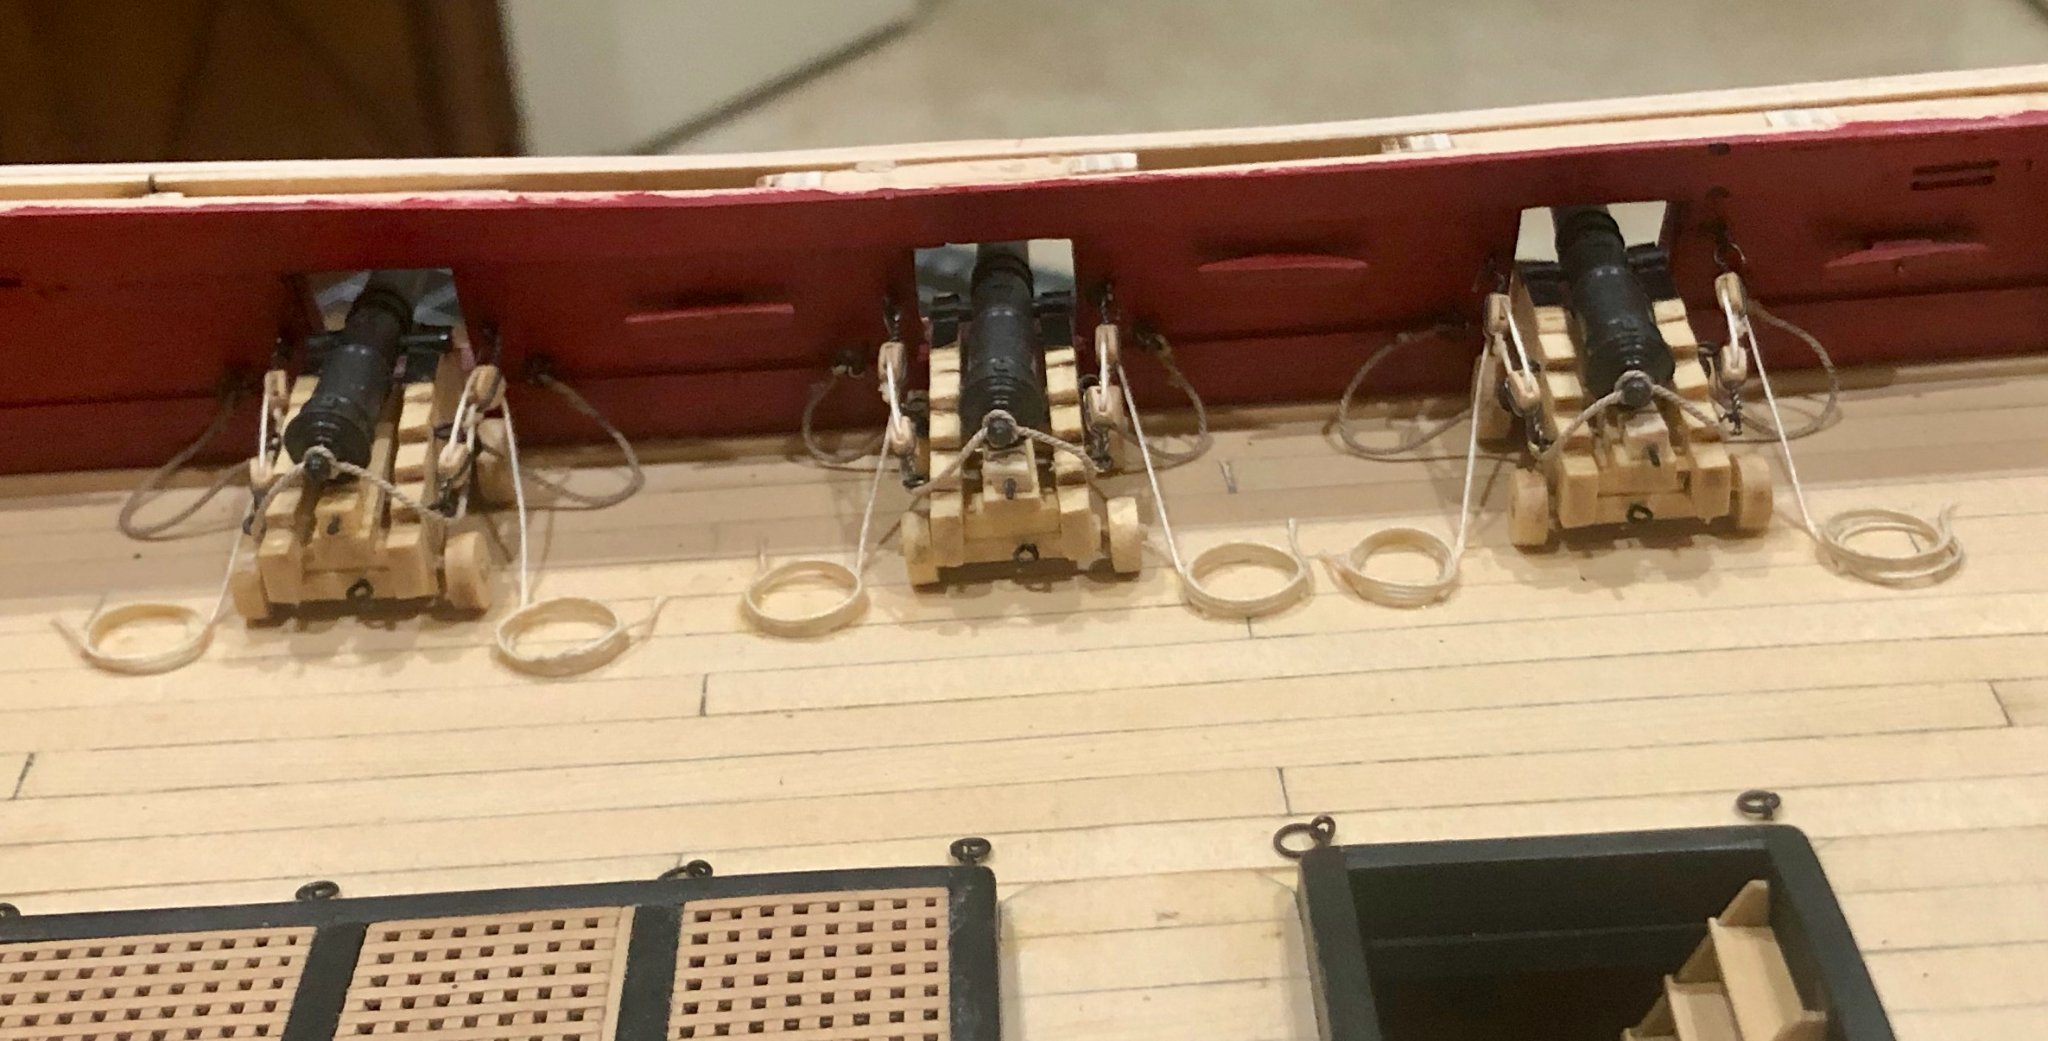
Finally, I've gotten into doing some gun rigging. Between some hospital time, and a reluctance to do the work, it's been awhile. In any event, I've done three guns with breech ropes and side tackles. I came up with the line and block sizes using the tables in Lees (The Masting and Rigging Of English Ships Of War). I will continue to do the remaining guns, with the exception of those that have their eyebolts or ring bolts set in knees. Those will have to wait until deck beams and knees are in place. Bob


-
Thanks so much Jean-Paul, Rusty and the "likes". Appreciated, as always. Bob
-
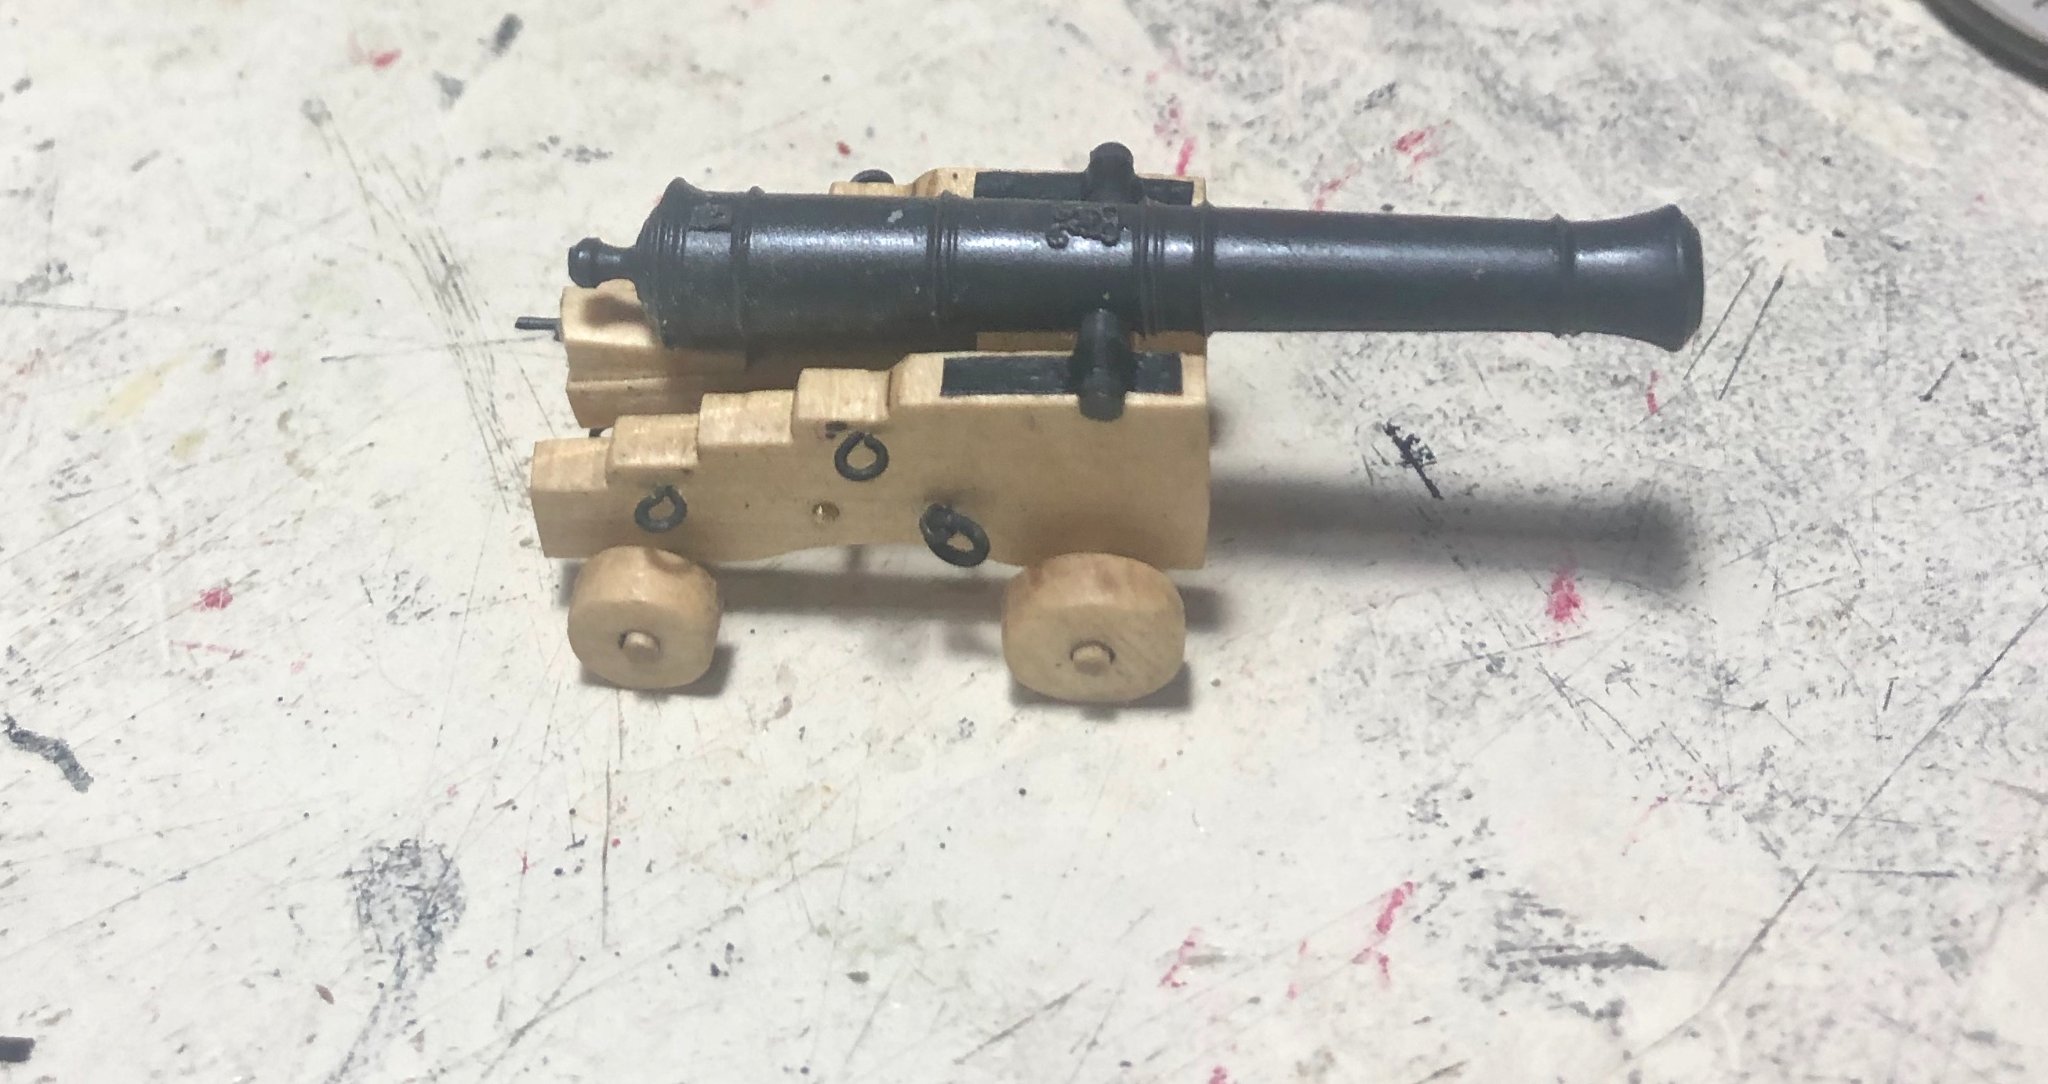
After what seems like forever, I've finally finished making up the guns. I'm seeing eyebolts and ringbolts in my dreams. Now it's on to the gun rigging. Bob
-
Congrats on a beautiful model. A high bar for all the rest of us. Bob
-
Beautiful planking. Bob
-
USF Essex by mtbediz - FINISHED - 1:50
rafine replied to mtbediz's topic in - Build logs for subjects built 1801 - 1850
Wow, Mustafa, what fantastic work. I had lost track for a while, but I'm really glad to have caught up. Bob -
Very nicely done. Bob
-
Thanks so much Thomas, Rusty and the "likes". Appreciated, as always. Rusty, I'm less eager about doing the tackles, and i'm hoping that Chuck still rigs one gun so that i can get a look and also get the rope and block sizes. Bob
-
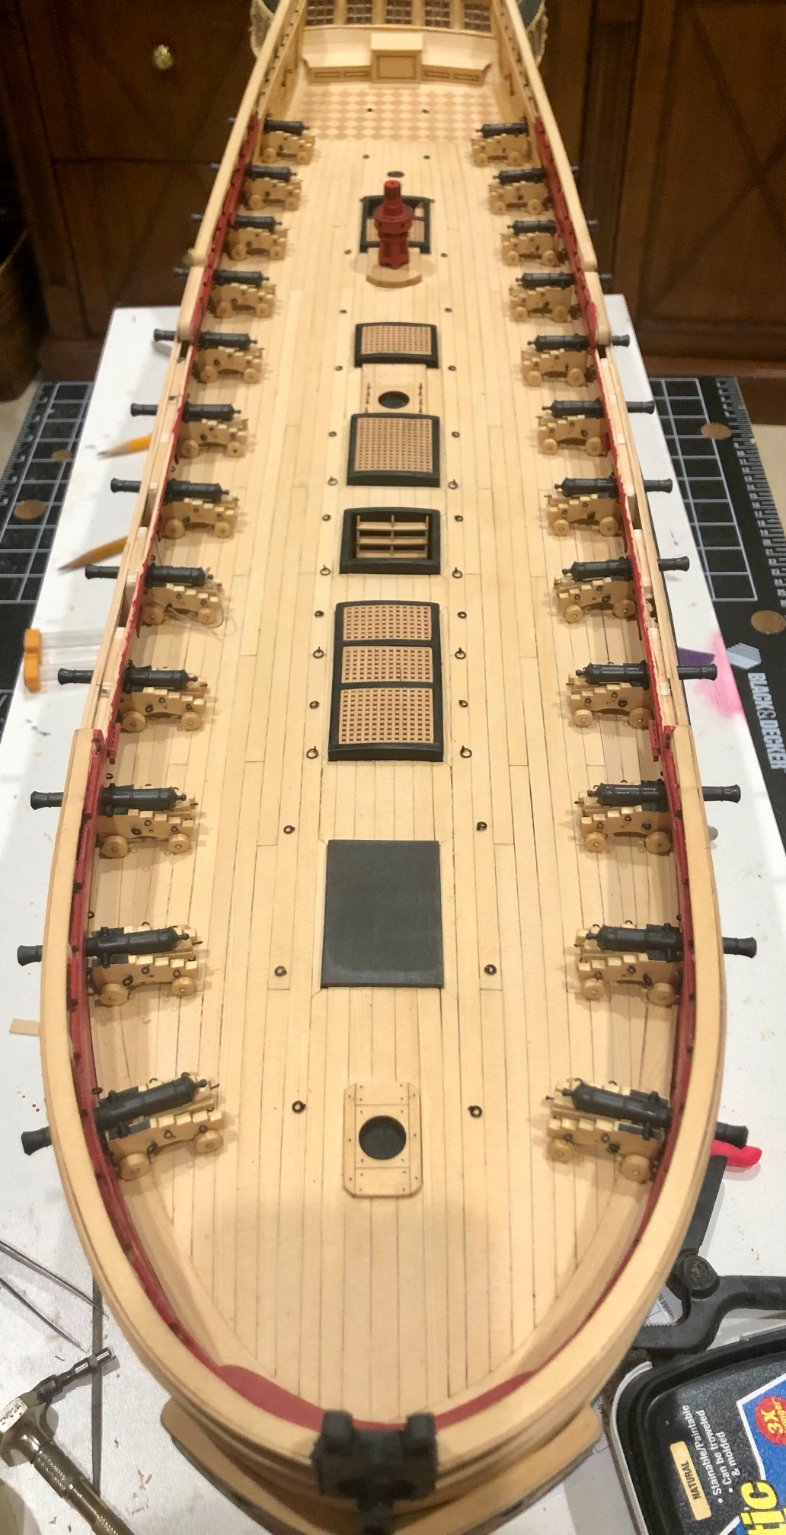
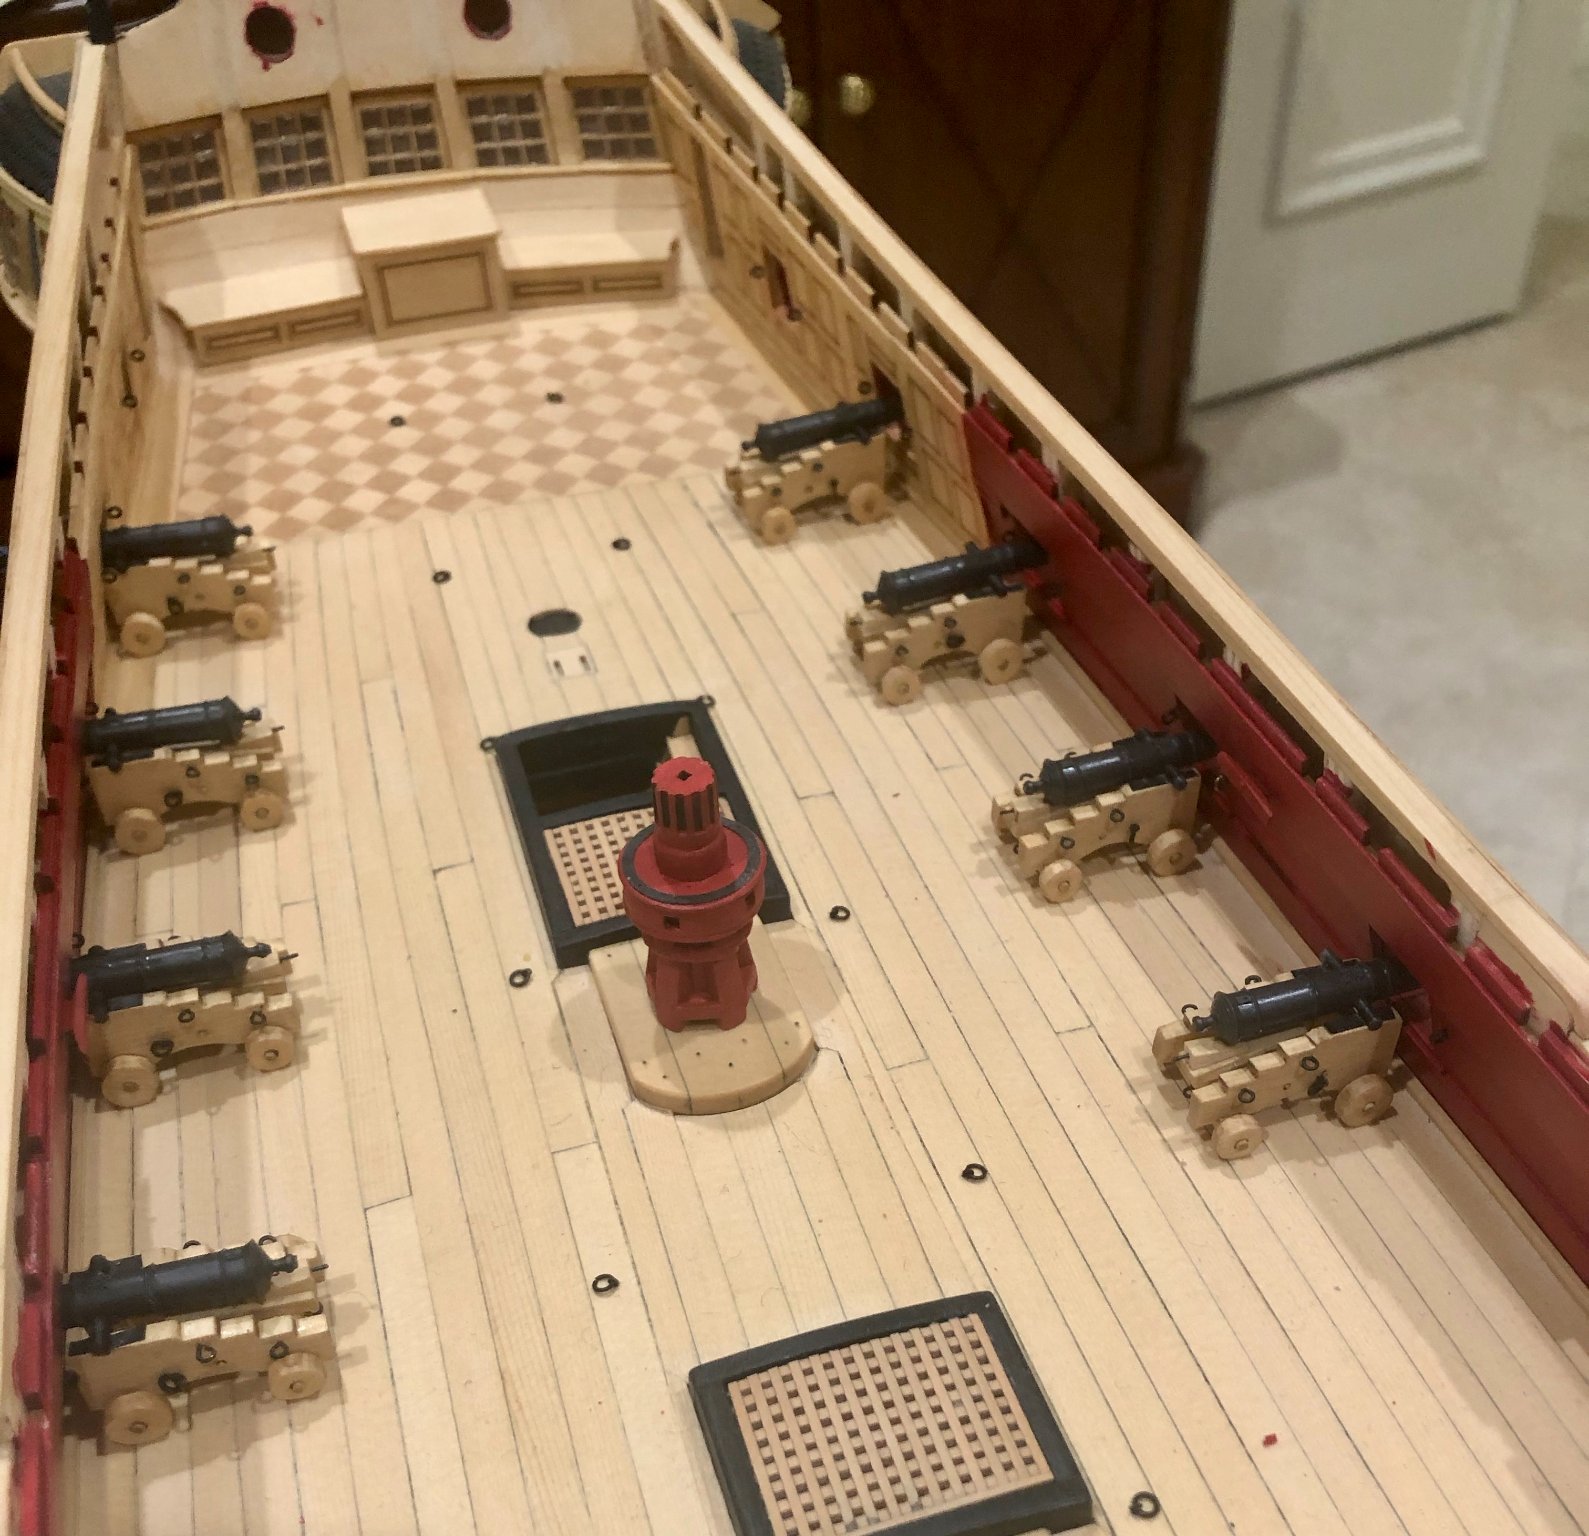
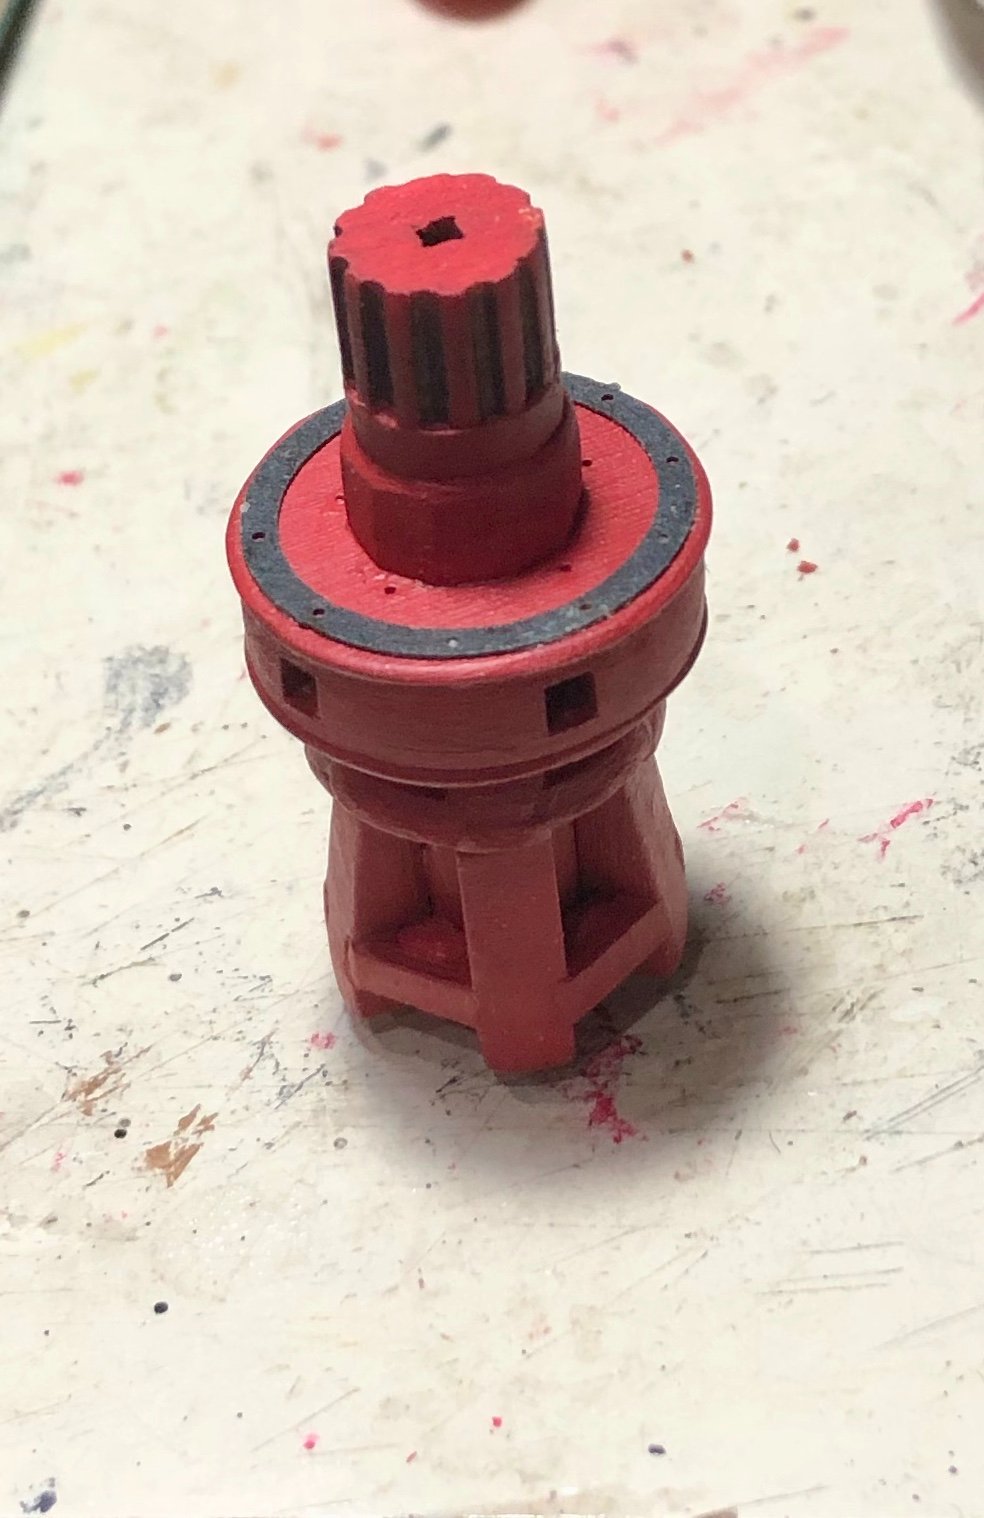
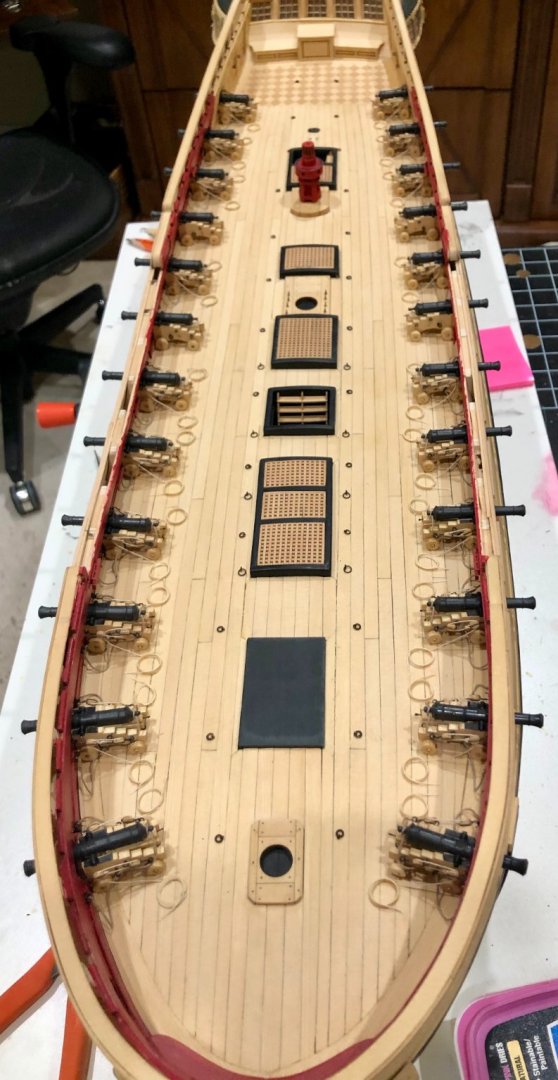
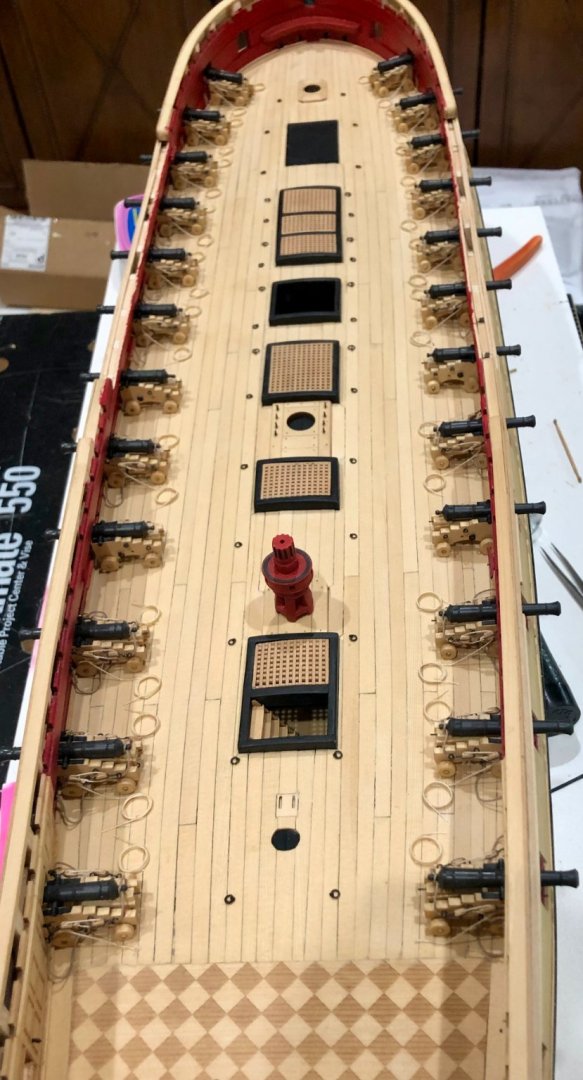
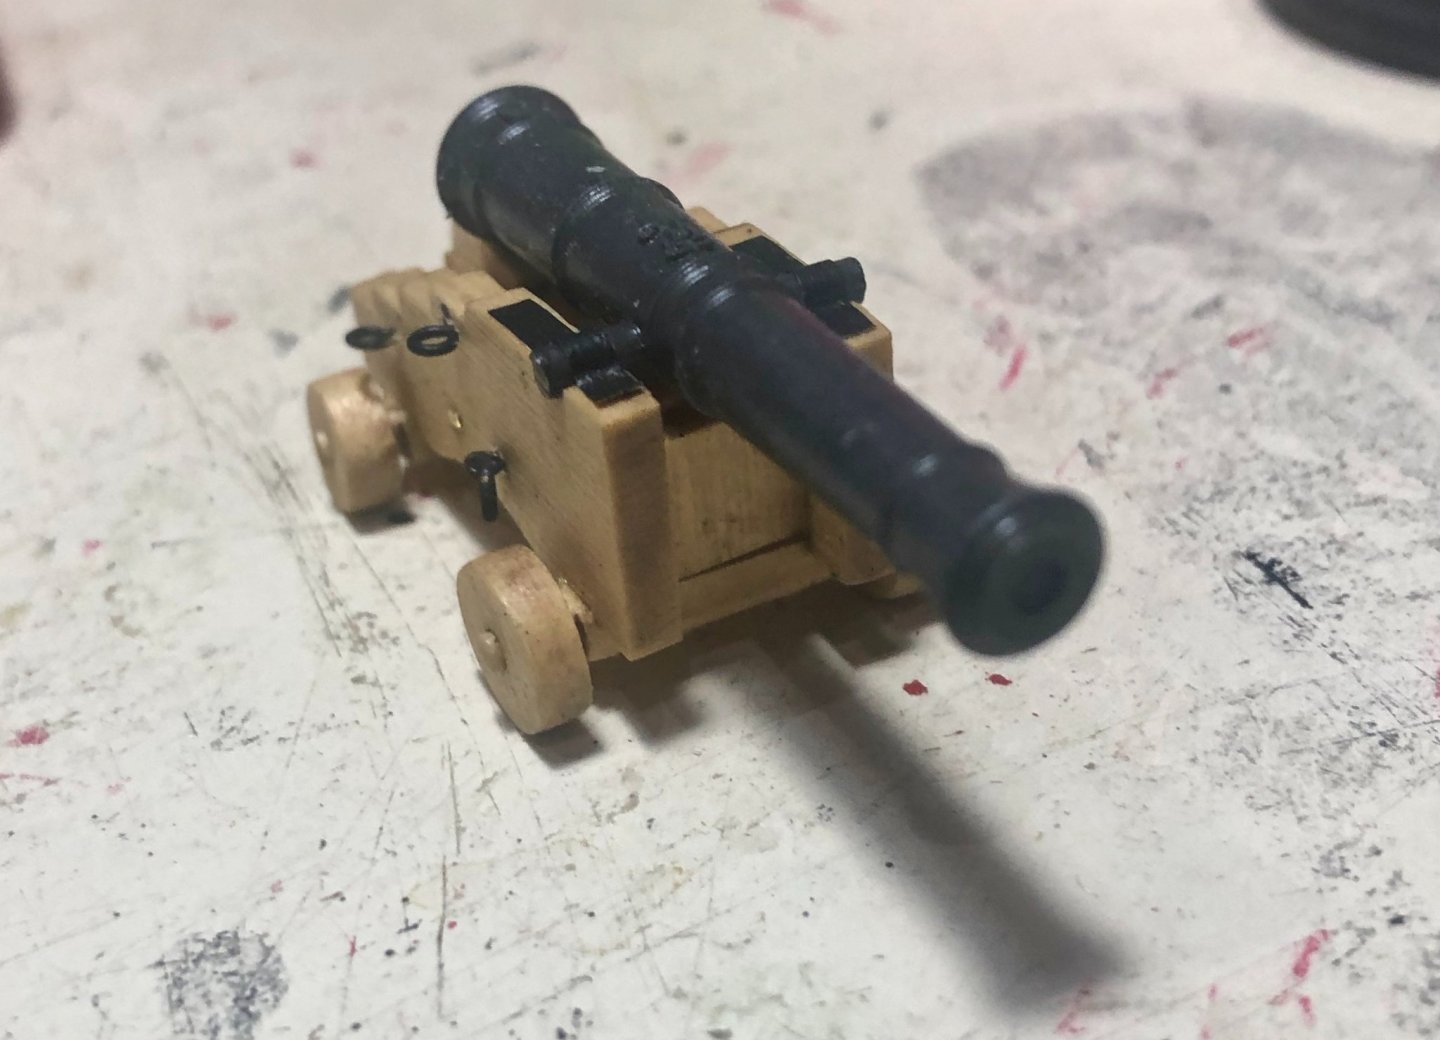
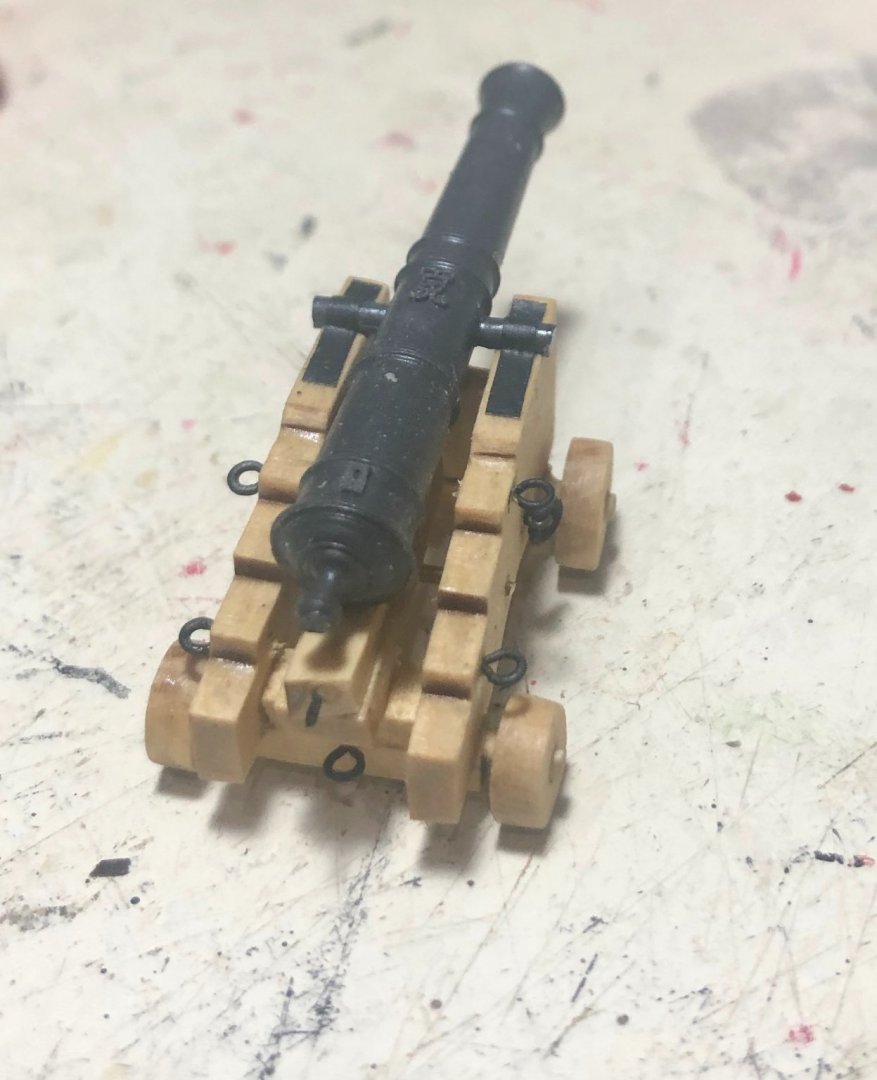
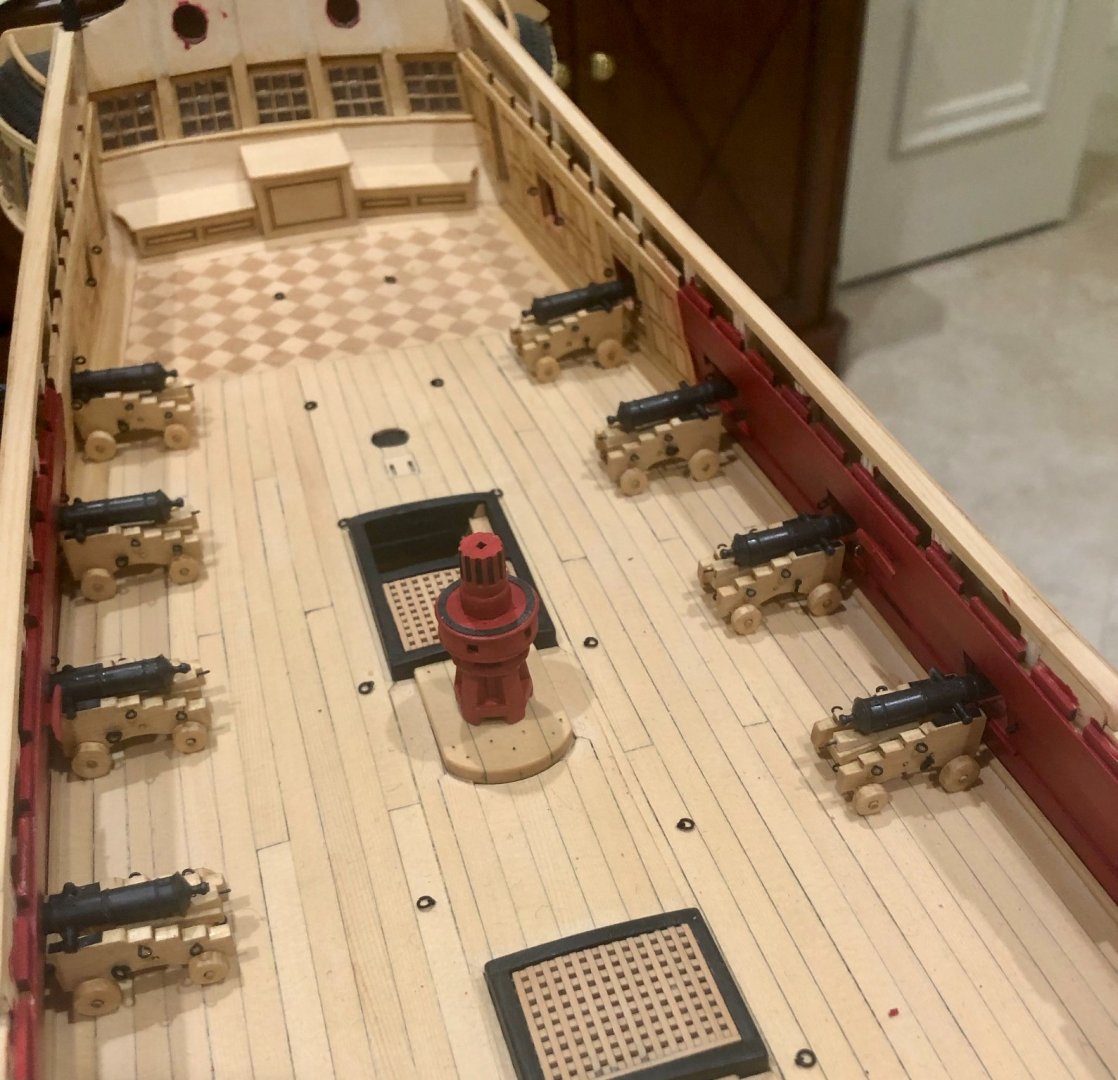
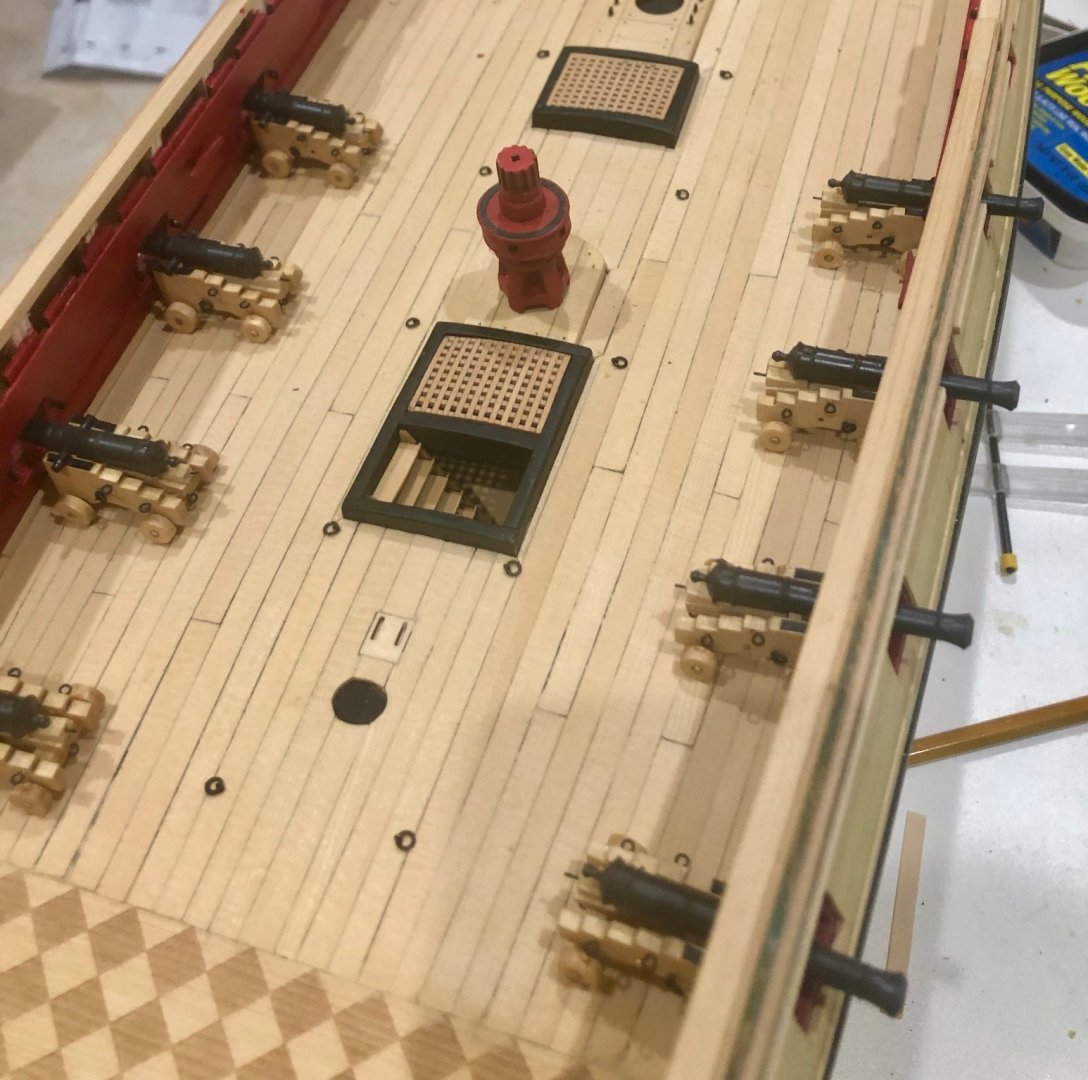
Having gotten the guns, carriages and jig from Chuck, I started work on them. Chuck had mentioned how tedious this repetitive work can be. How true that is. I did the first eight and then decided that I had to do something else or go crazy. I chose to do the lower capstan. I will probably do the upper capstan after doing the next eight guns. As you can see, I went with natural gun carriages, but a red capstan. It just seemed "right " to me. It is my intention to rig the guns with breach ropes and side tackles after I finish making them all. I also added the knee above the hawse holes on the interior bulwarks.


-
Thanks so much Greg, Fred and the "likes". Like every modeler, I mostly see the faults in what I do. More importantly, Winnie is a truly fun build that I look forward to working on every day. Bob
-
Thanks so much Frank and Ryland for the kind comments and also to the "likes". Bob
-
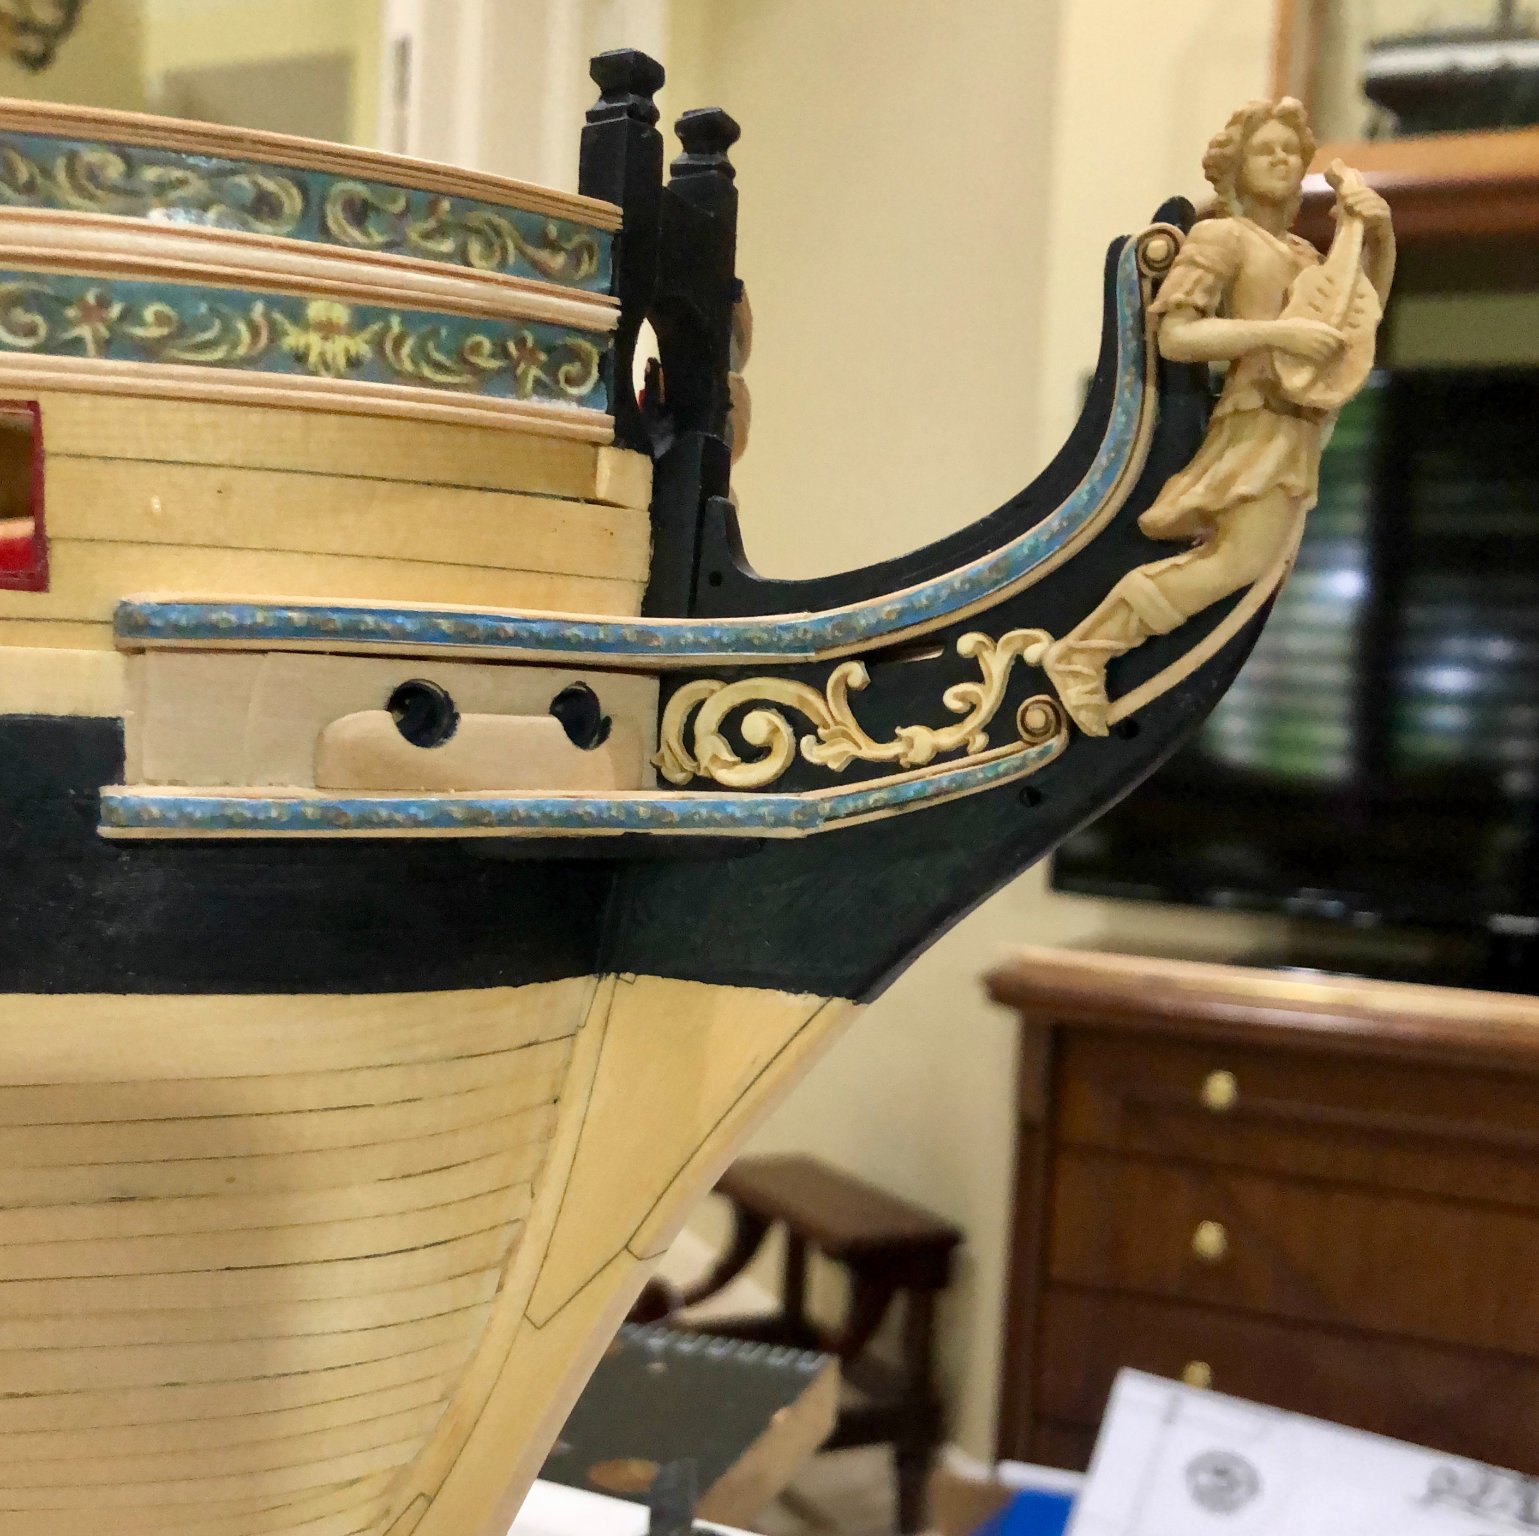
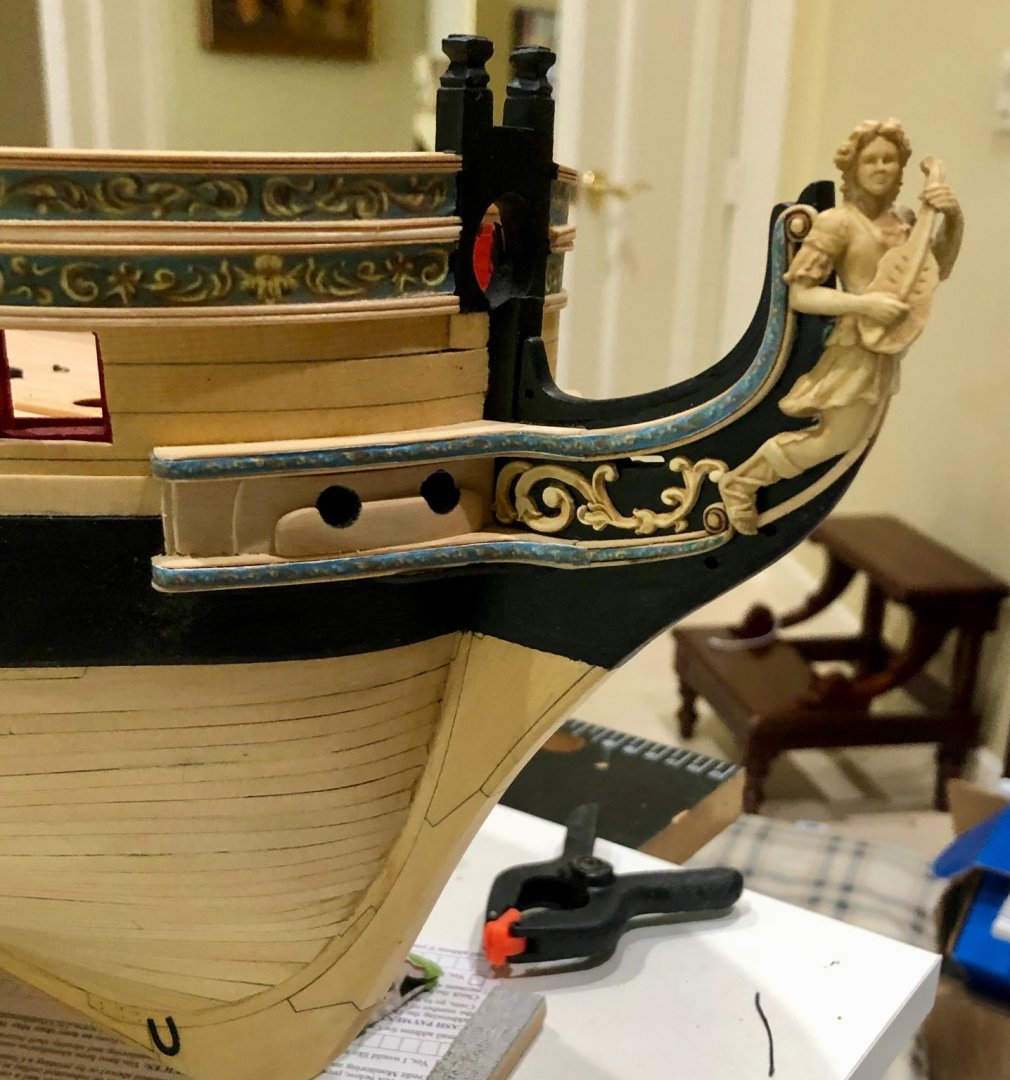
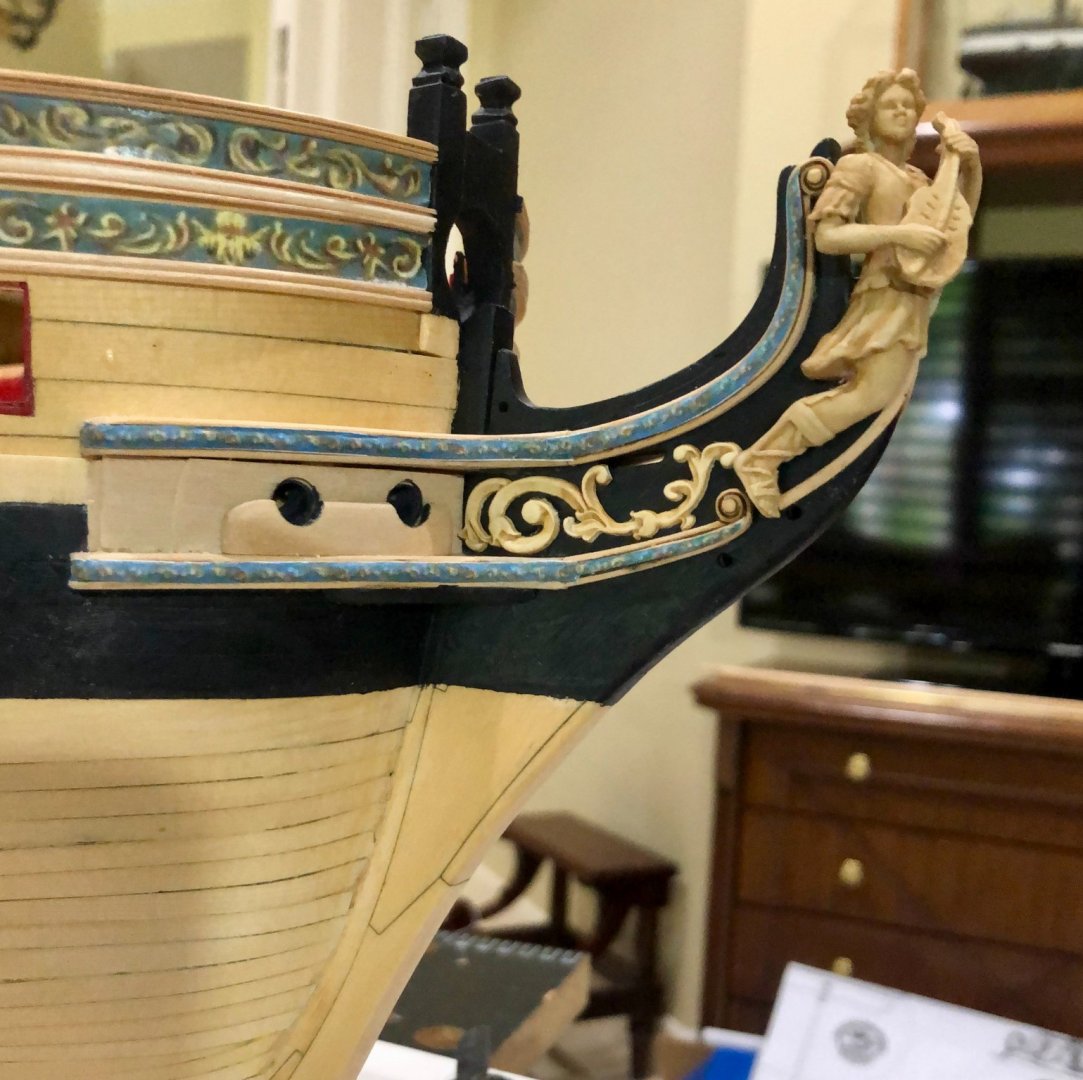
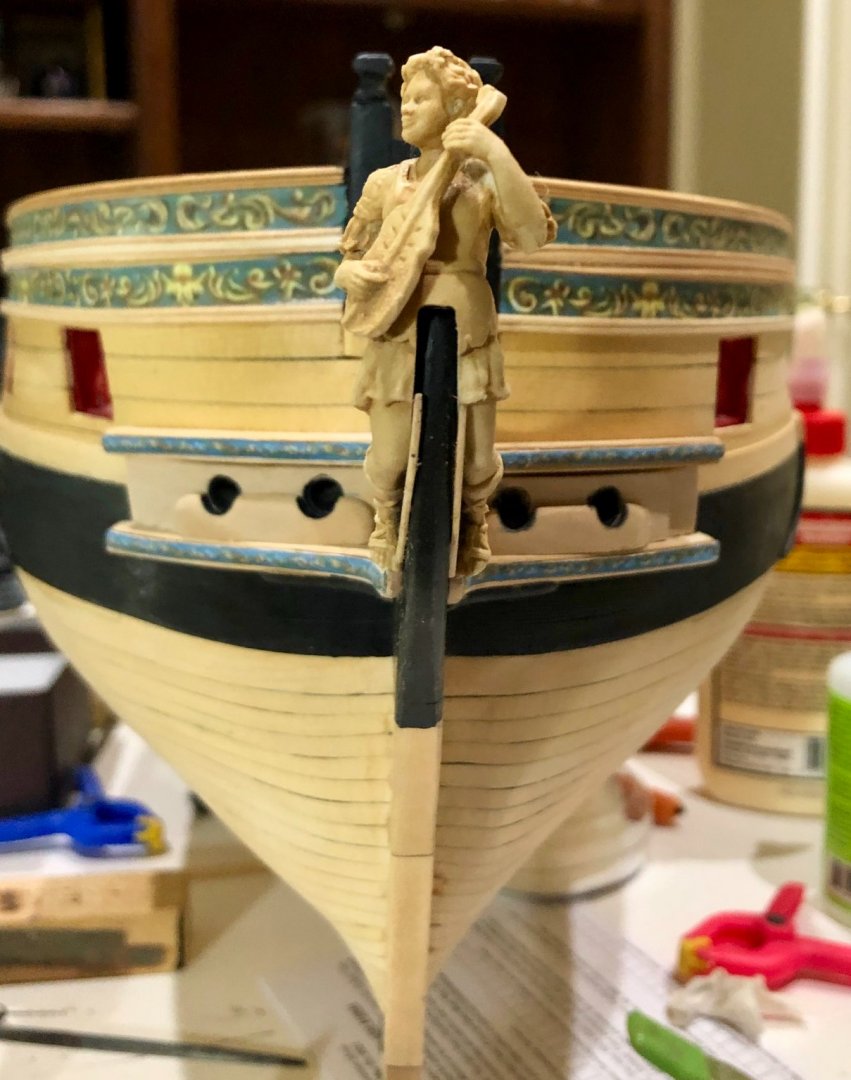
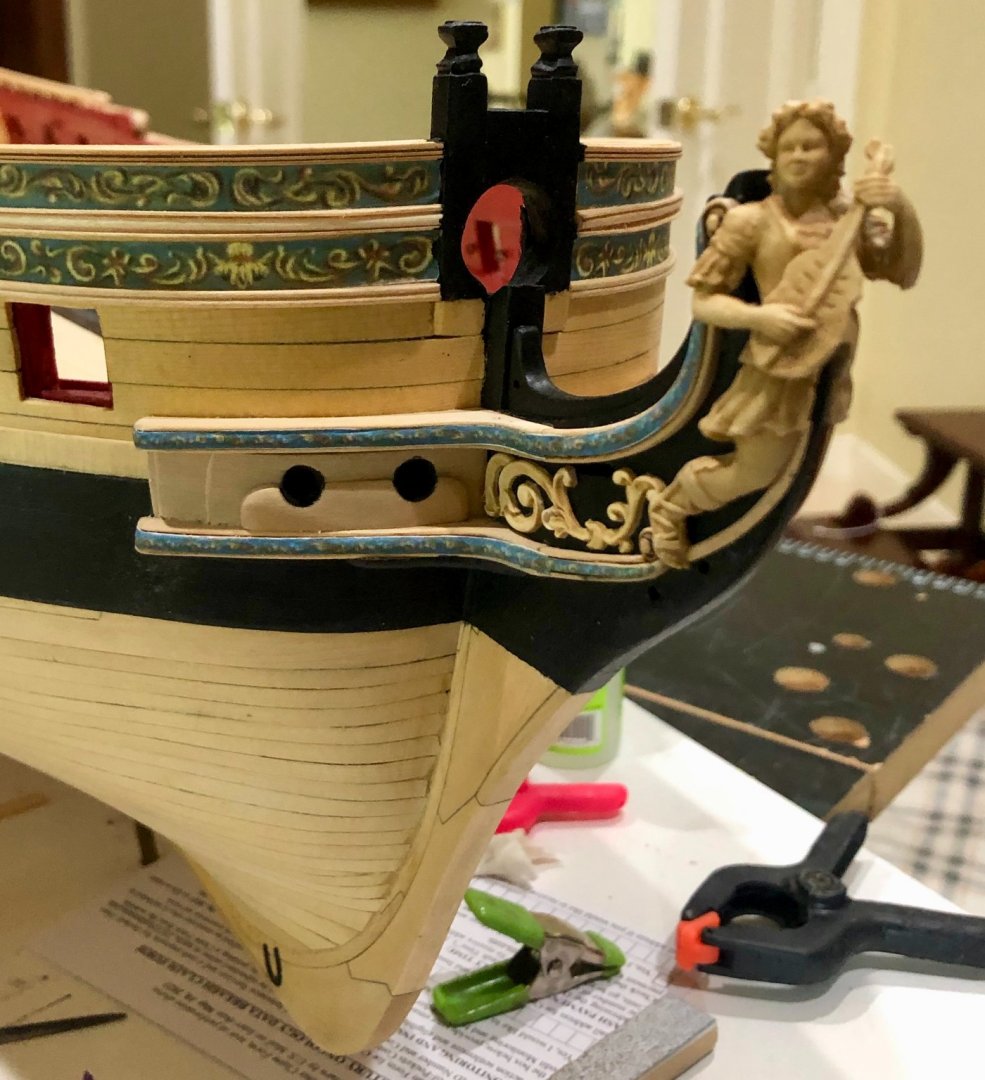
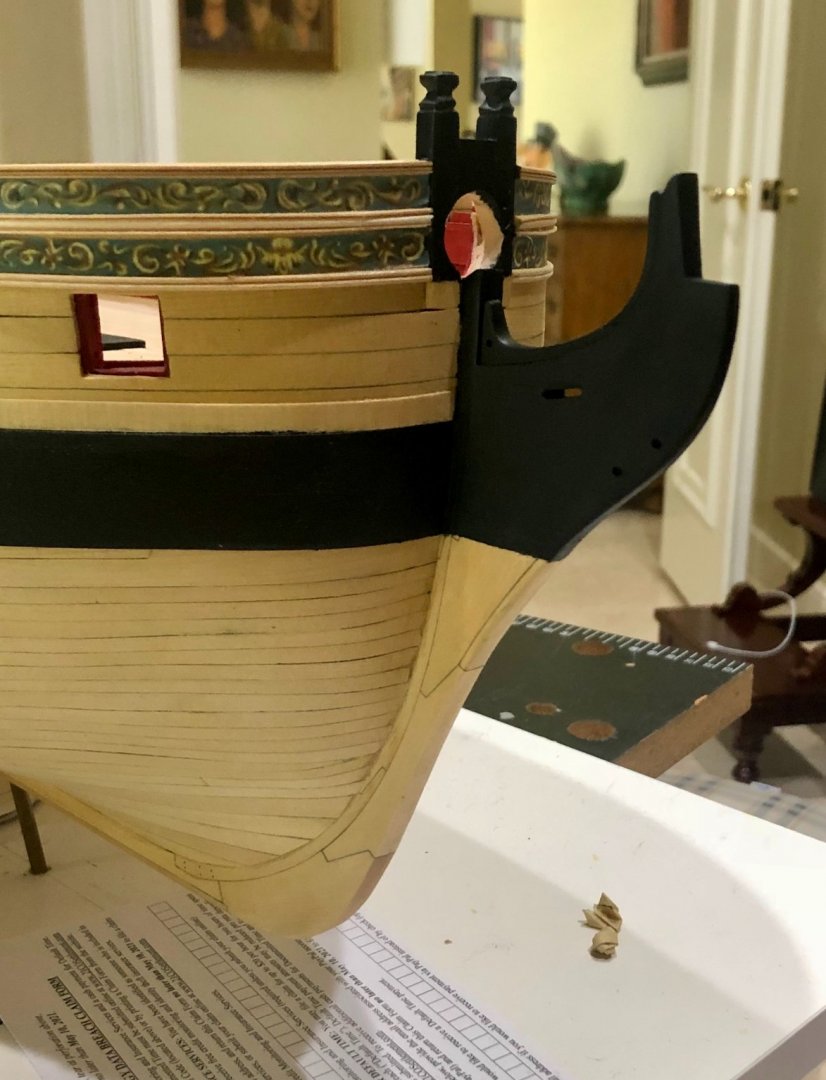
I have now done the work on the head, using the laser cut parts, the printed friezes and the molded resin parts. Even with the laser cut parts, this is no walk in the park. Truthfully, it was very difficult. It is one of those tasks that you're just happy to be done with. Among the most troublesome areas for me were the hawse holes and getting the friezes to sit well. In any event, I'm now going to do the guns. Bob
-
Thanks so much Thomas and Frank and the "likes". Bob
-
Thanks guys for the generous comments and the "likes". Always appreciated. As to the eyebolts: I must admit that the smallest (used for the ringbolts) are commercial. There is no way that I could make them. The larger ones are time -consuming , but can be done. Bob
-
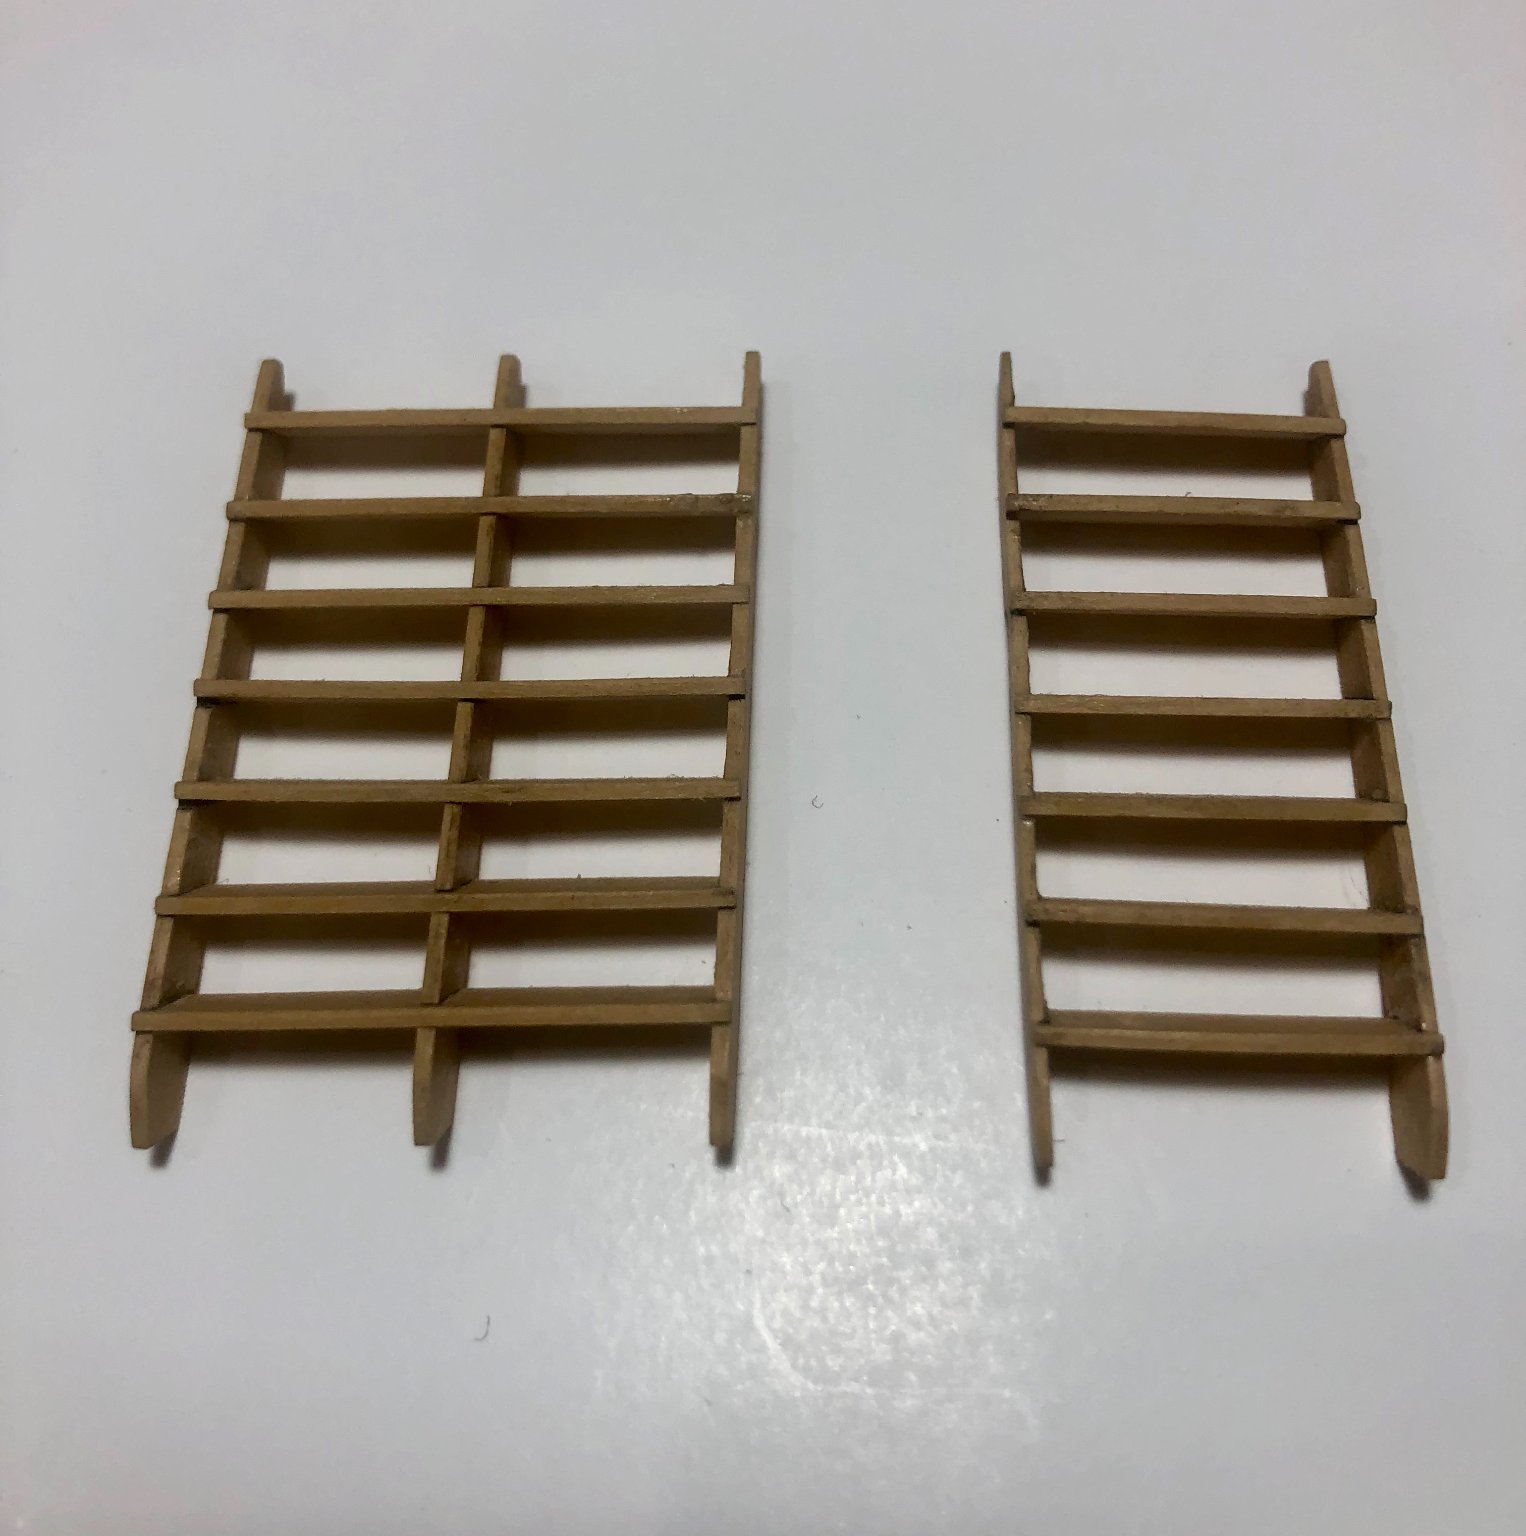
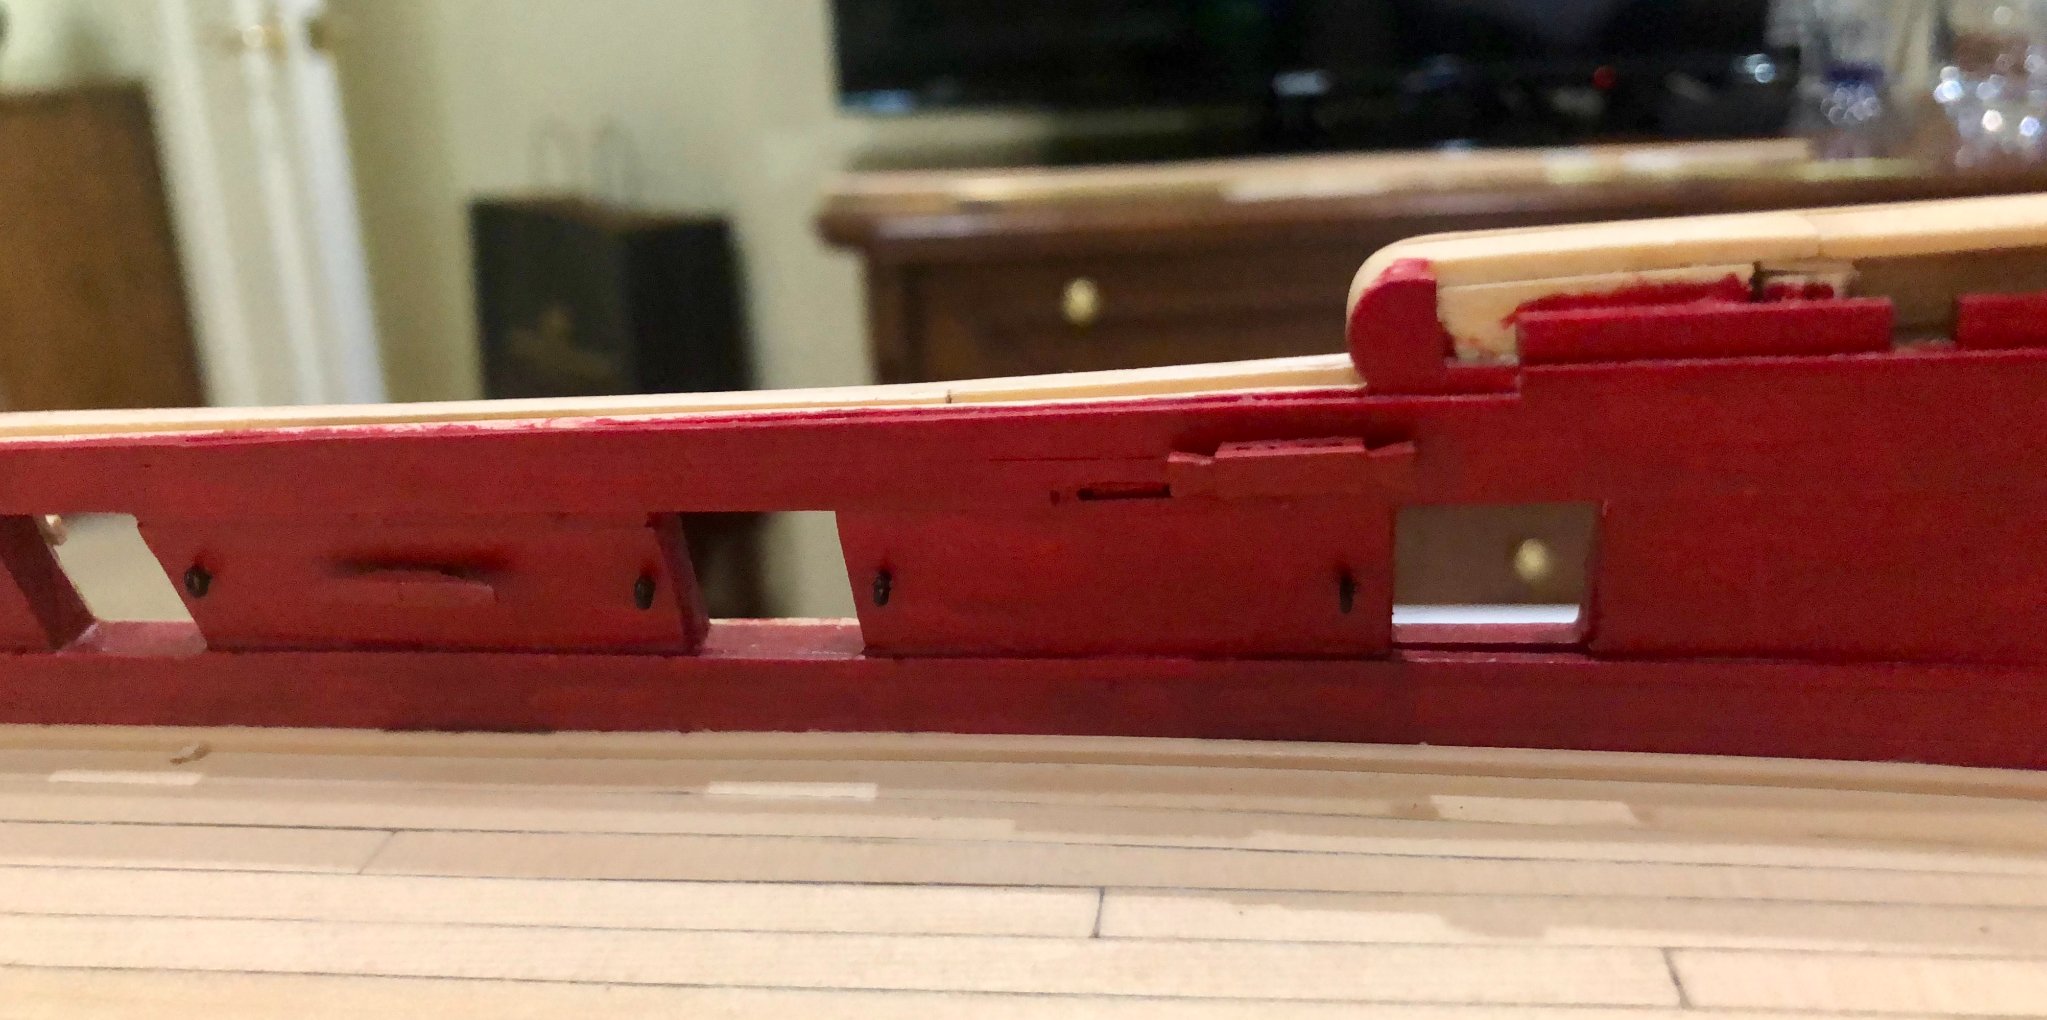
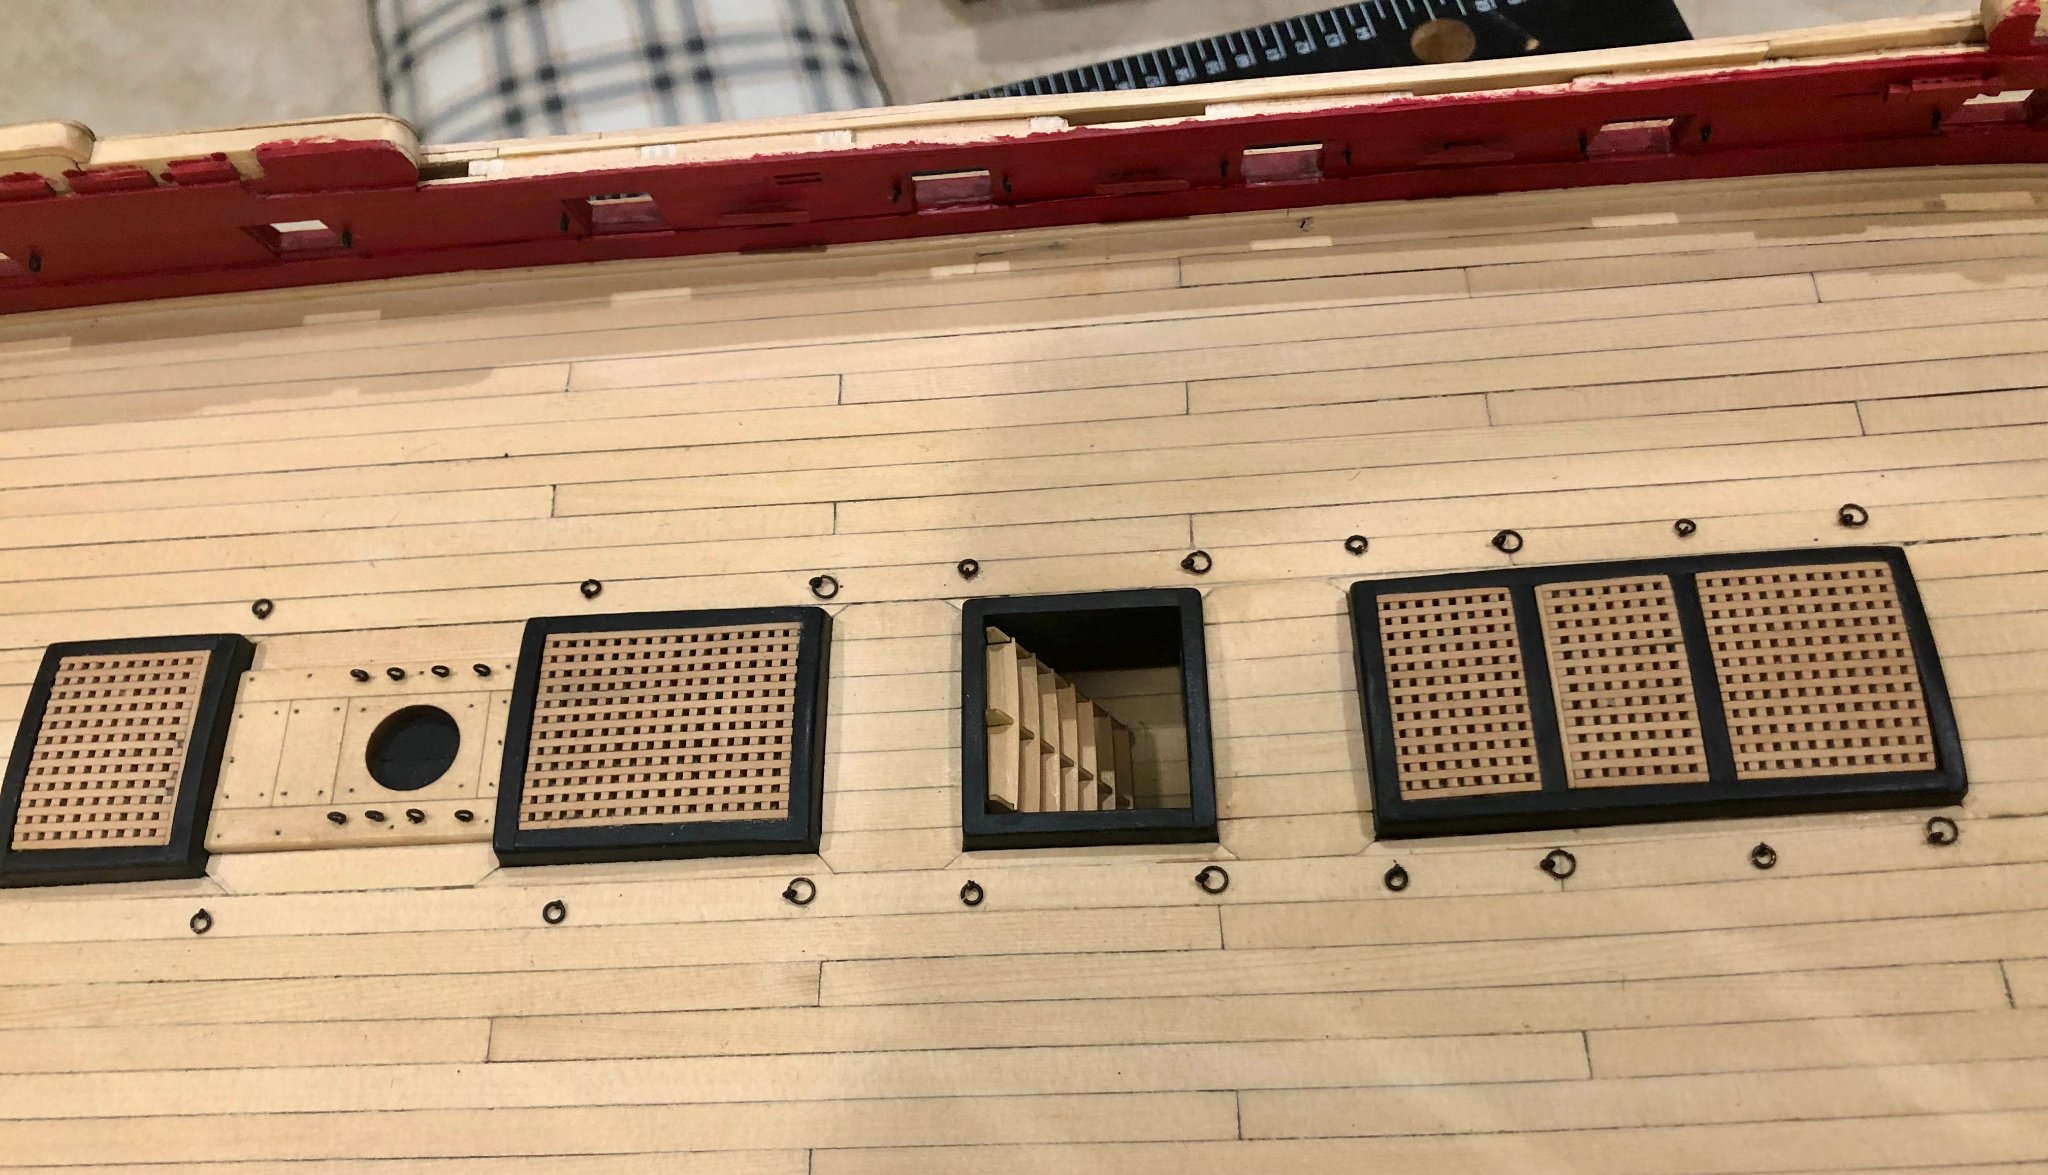
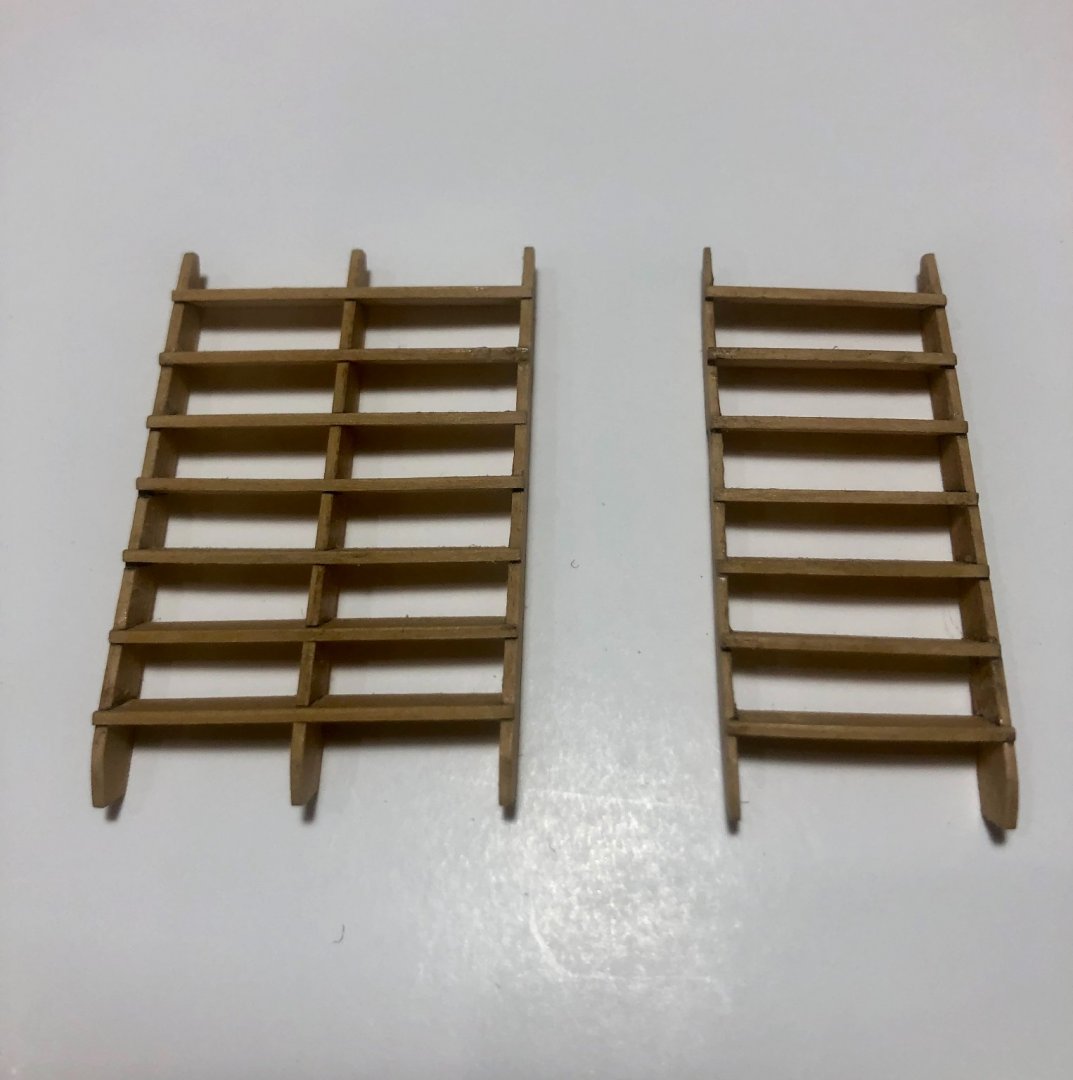
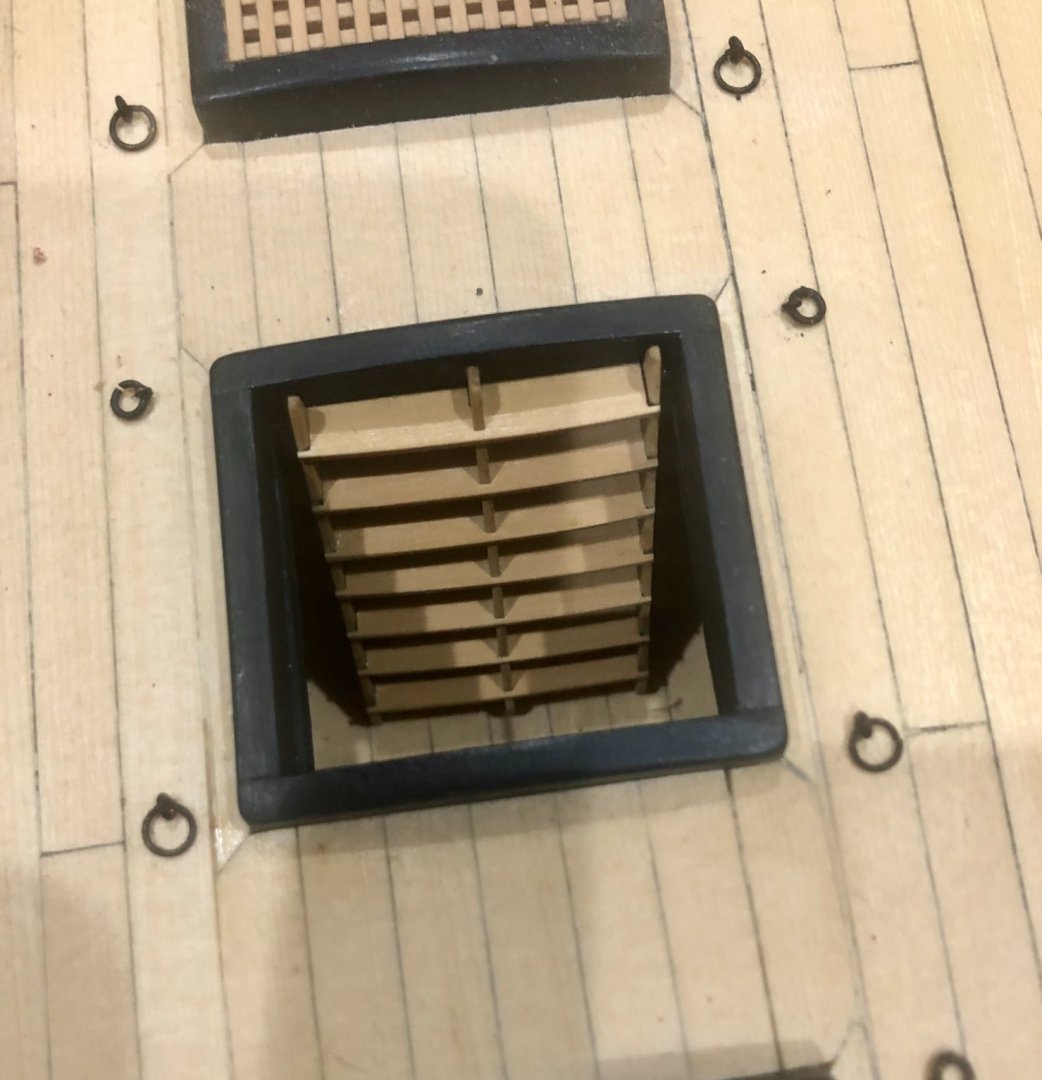
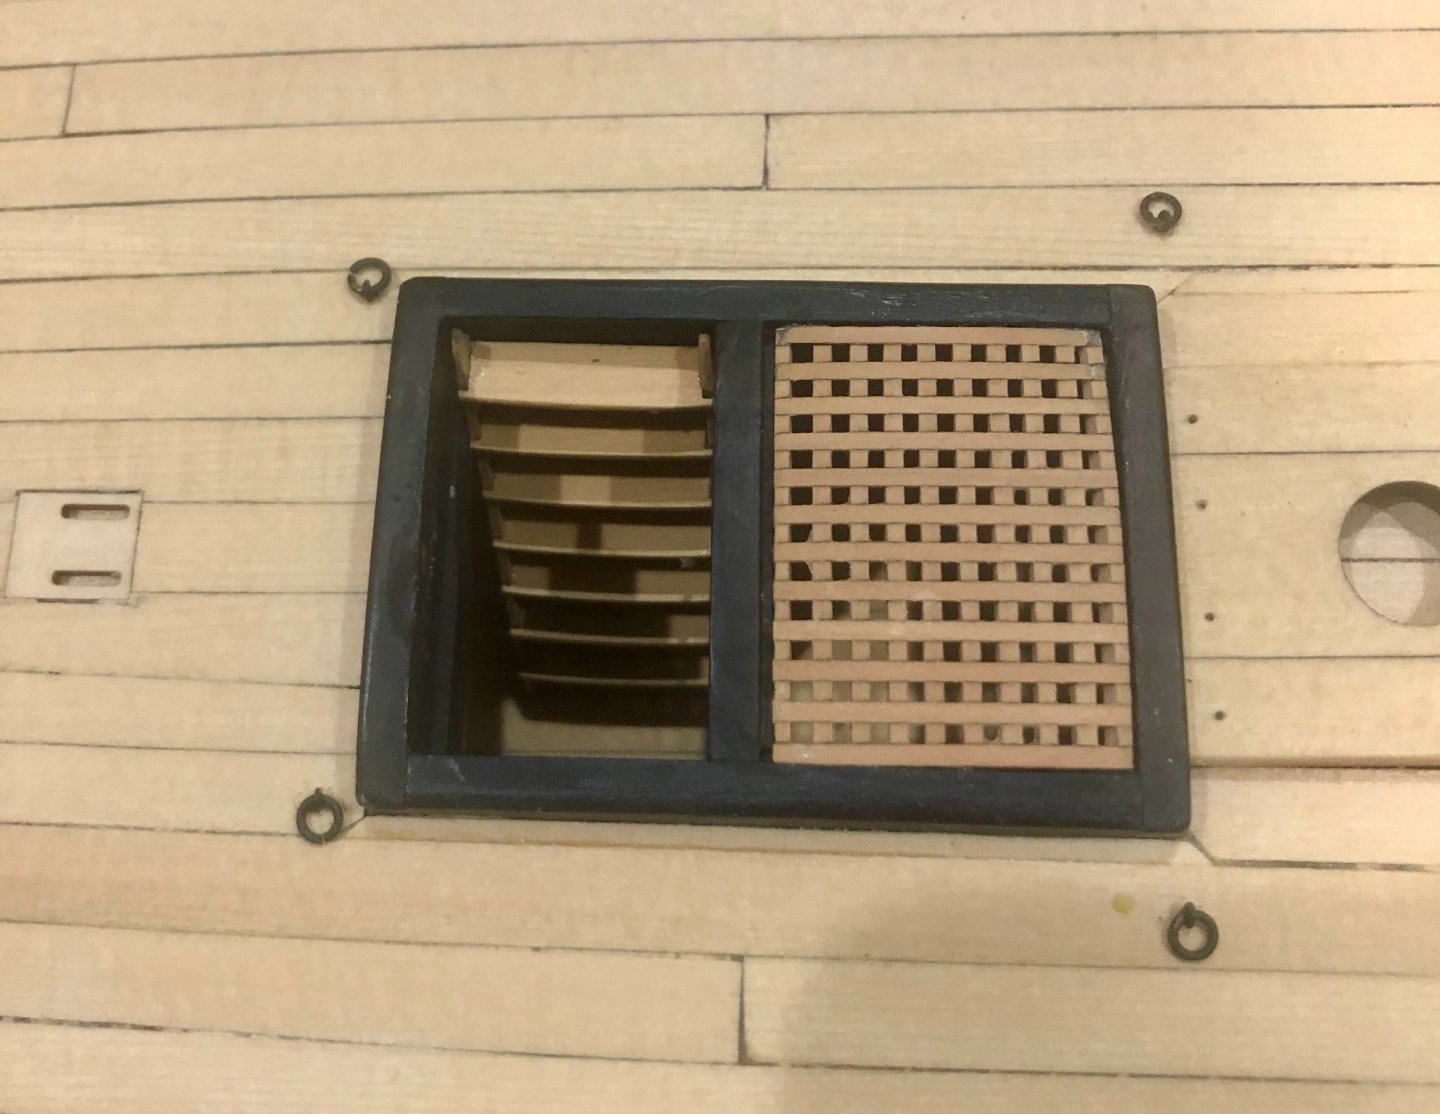
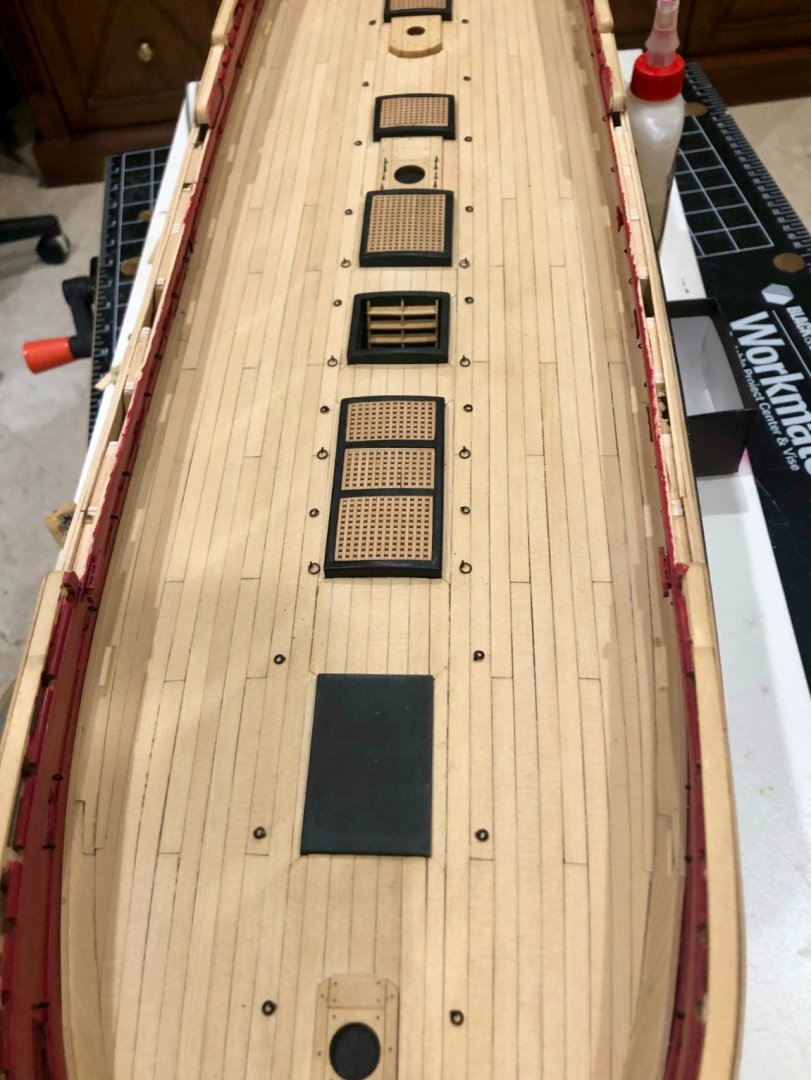
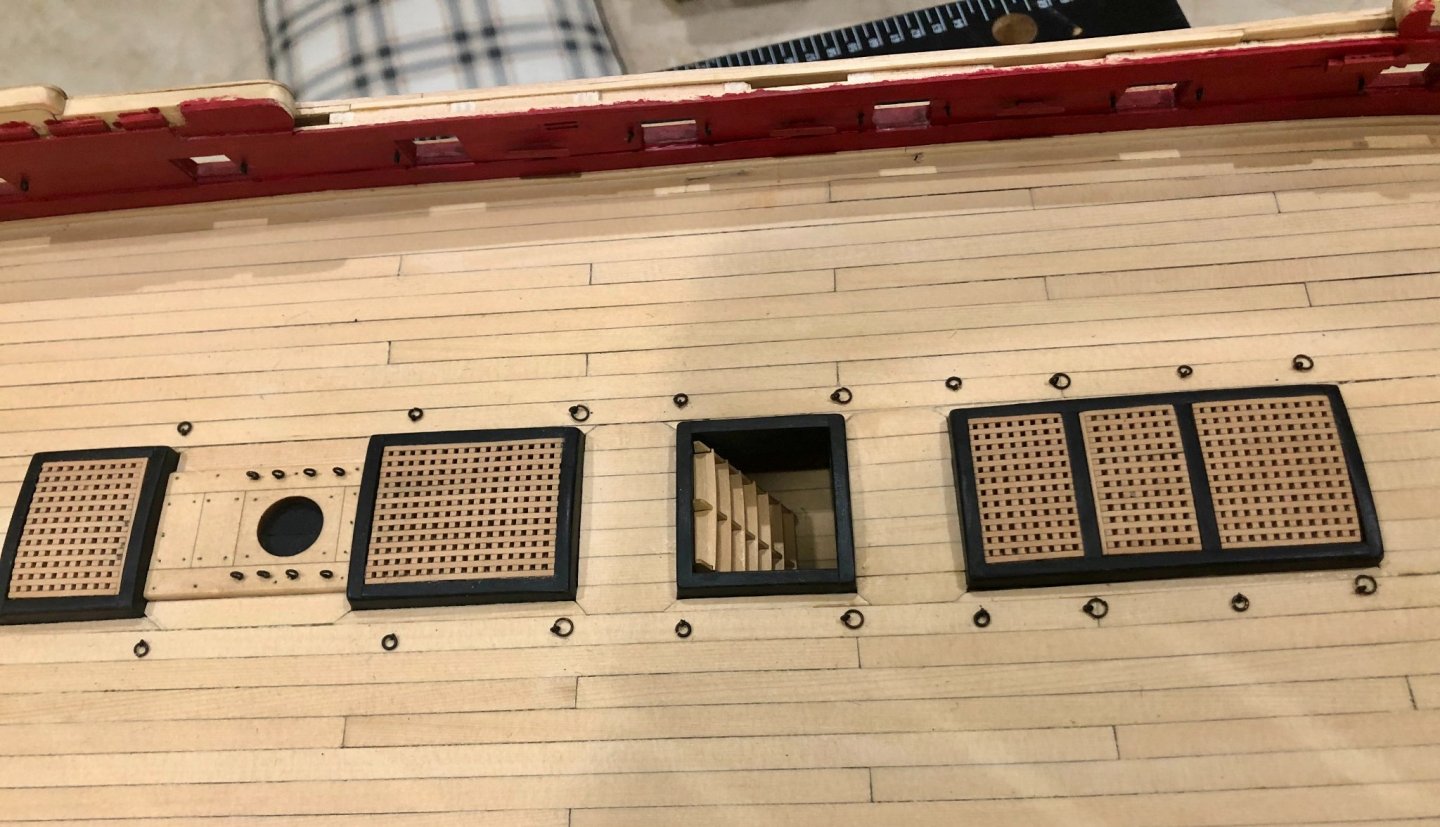
Thanks so much Tom. I have progress to report, but not what I said it would be. I didn't like how I was doing the port lids, so I switched to the ladders and then some other things. The ladder kits are great and make up nicely. After mounting them, I did the bulwark cleats and staghorns. Having done those, I decided to do the bulwark eyebolts for the cannon tackle. I left out those that will be drilled and mounted through the knees. Having done those eyebolts, I then decided to make up and add the deck ringbolts, which the plans show in two different sizes, as well as the eyebolts at the main mast partners. After completing that work, I began work on the head by painting the black areas in preparation for doing the actual head work. Sooner or later, I will get back to the lids. Bob

-
Thanks so much OC, Rusty, Chuck and Jean-Paul for the nice comments and thanks also to the "likes". I'm now starting to work on the port lids. Bob
-
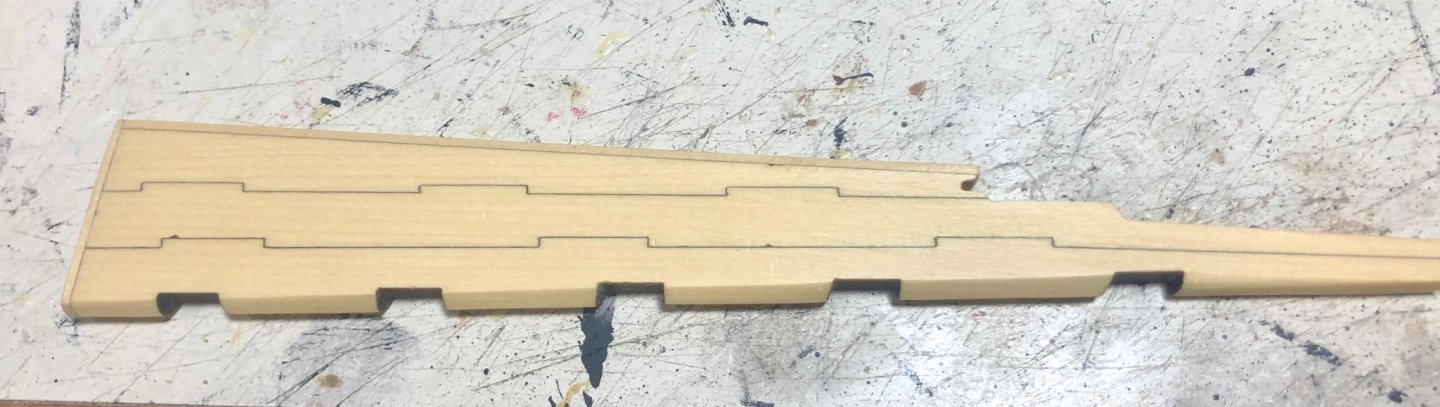
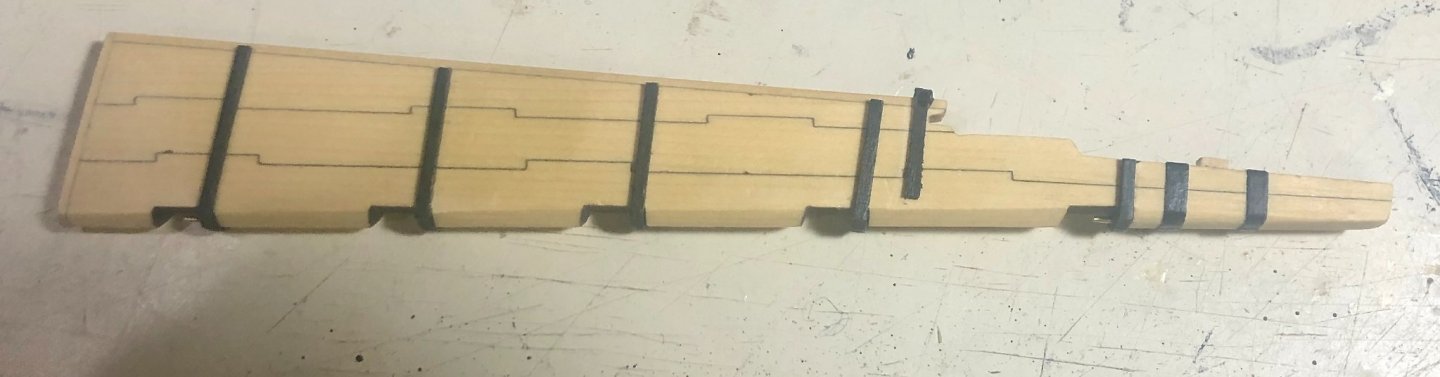
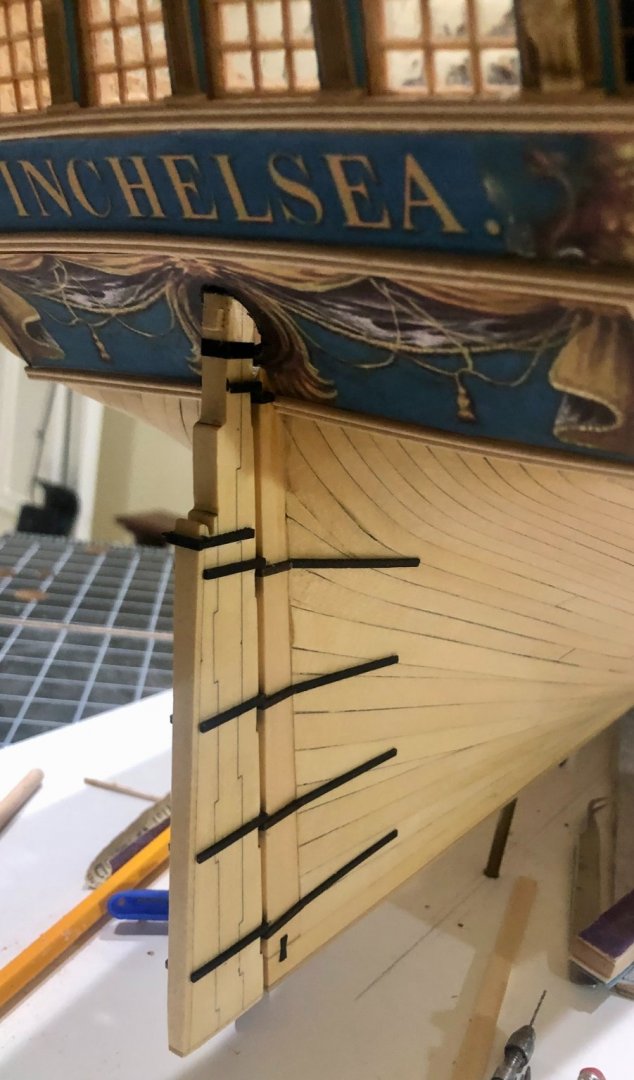
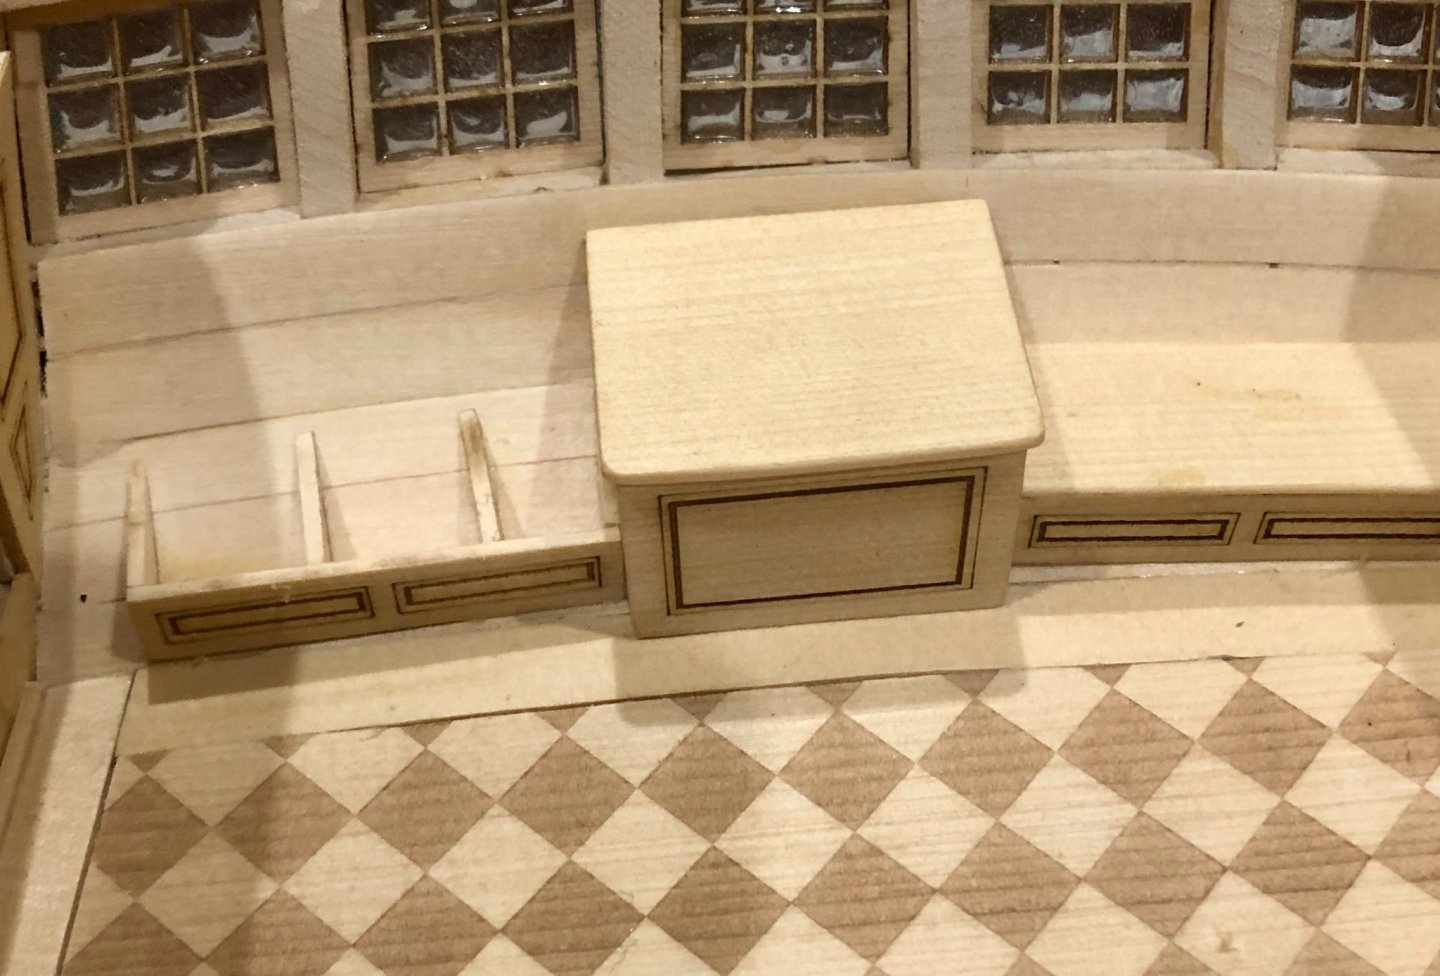
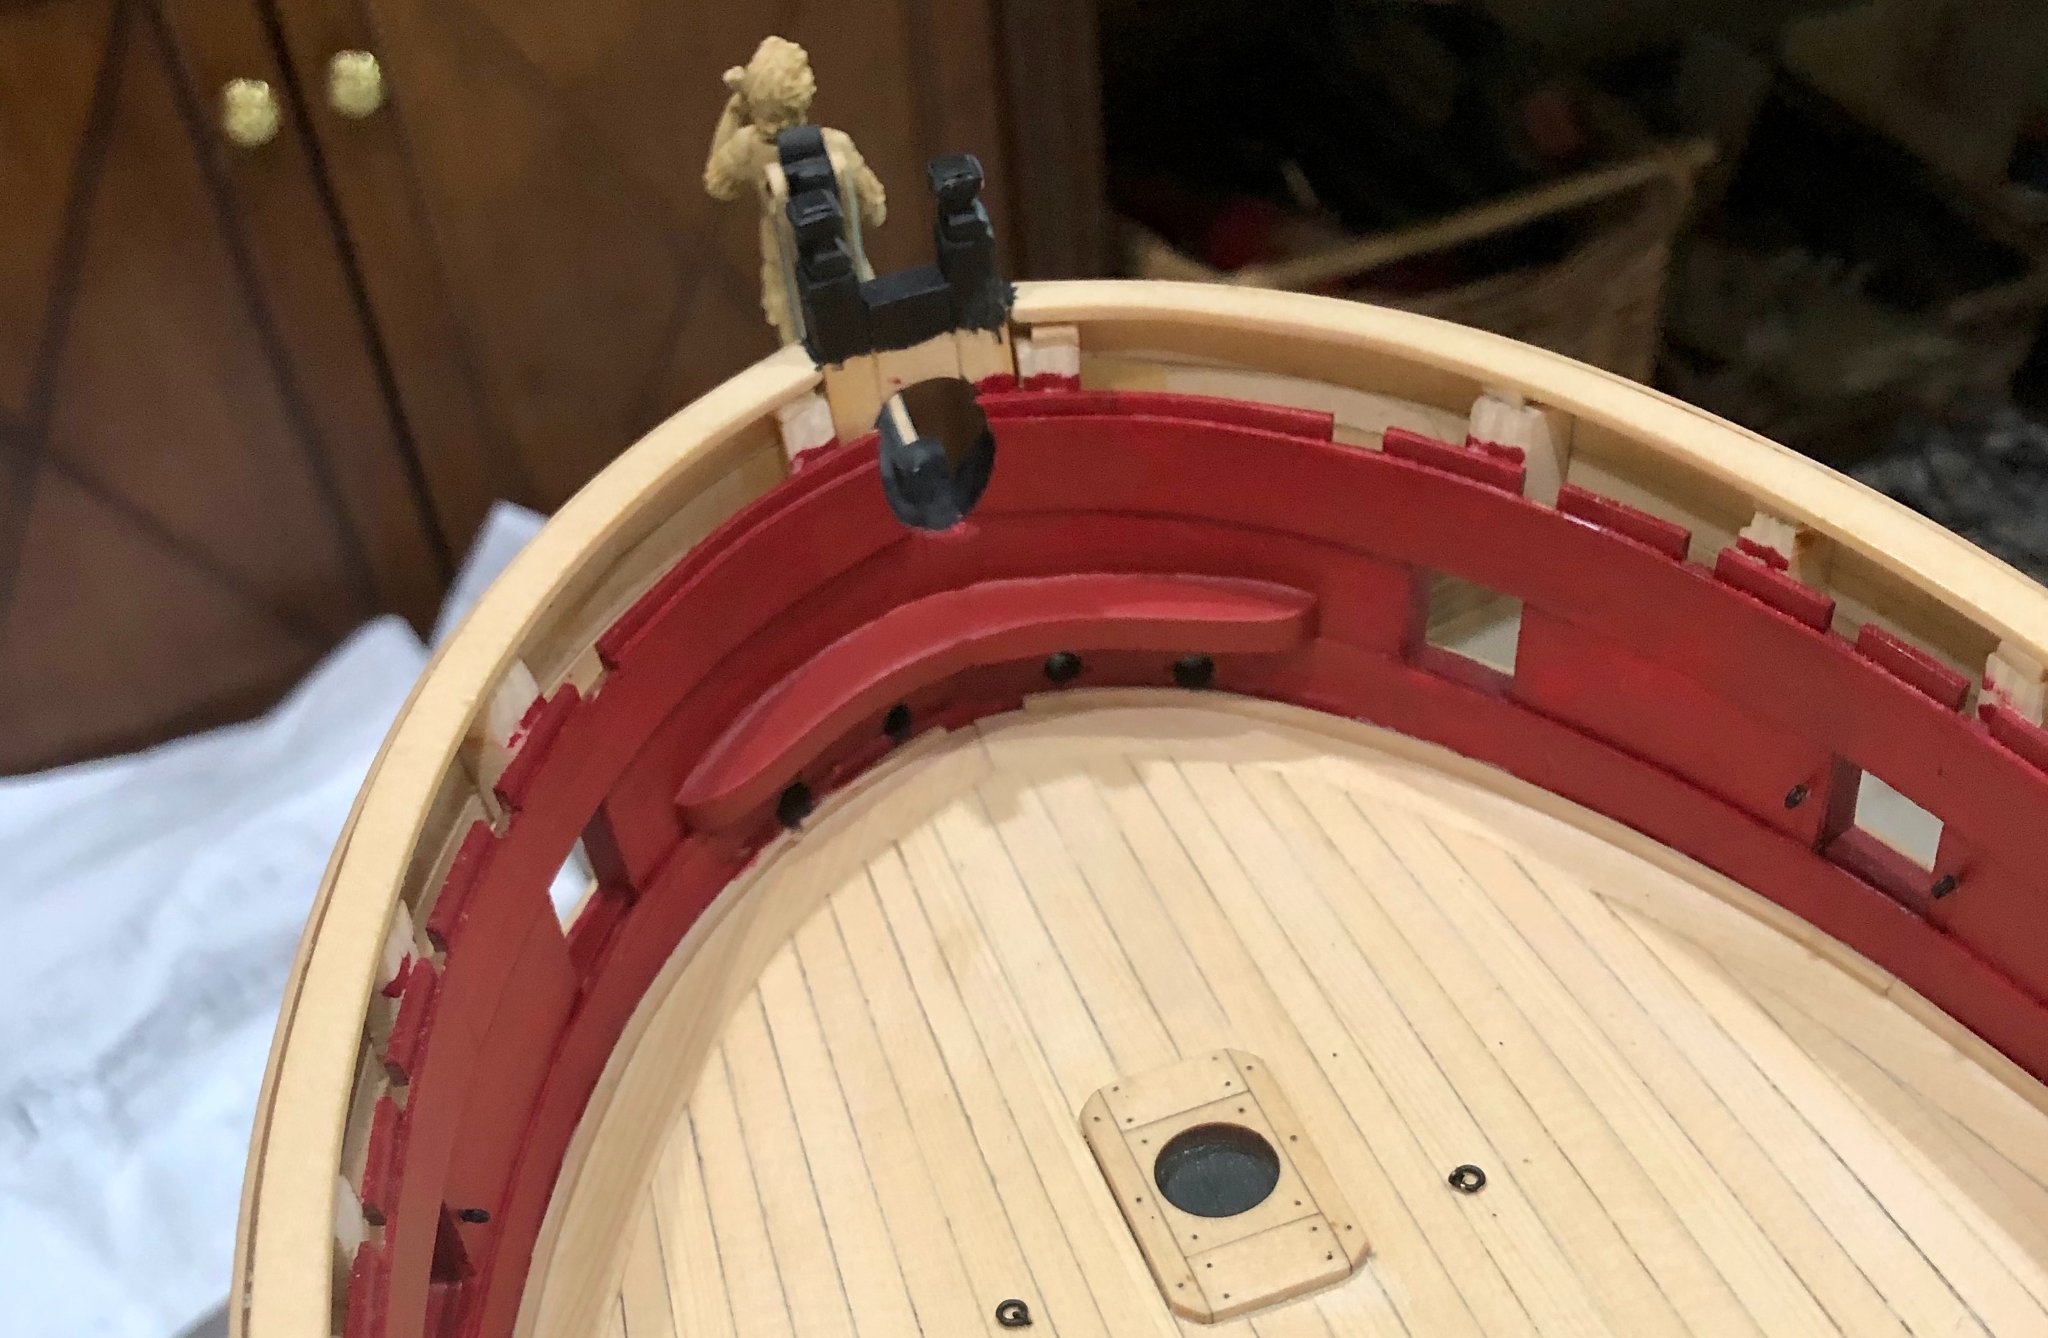
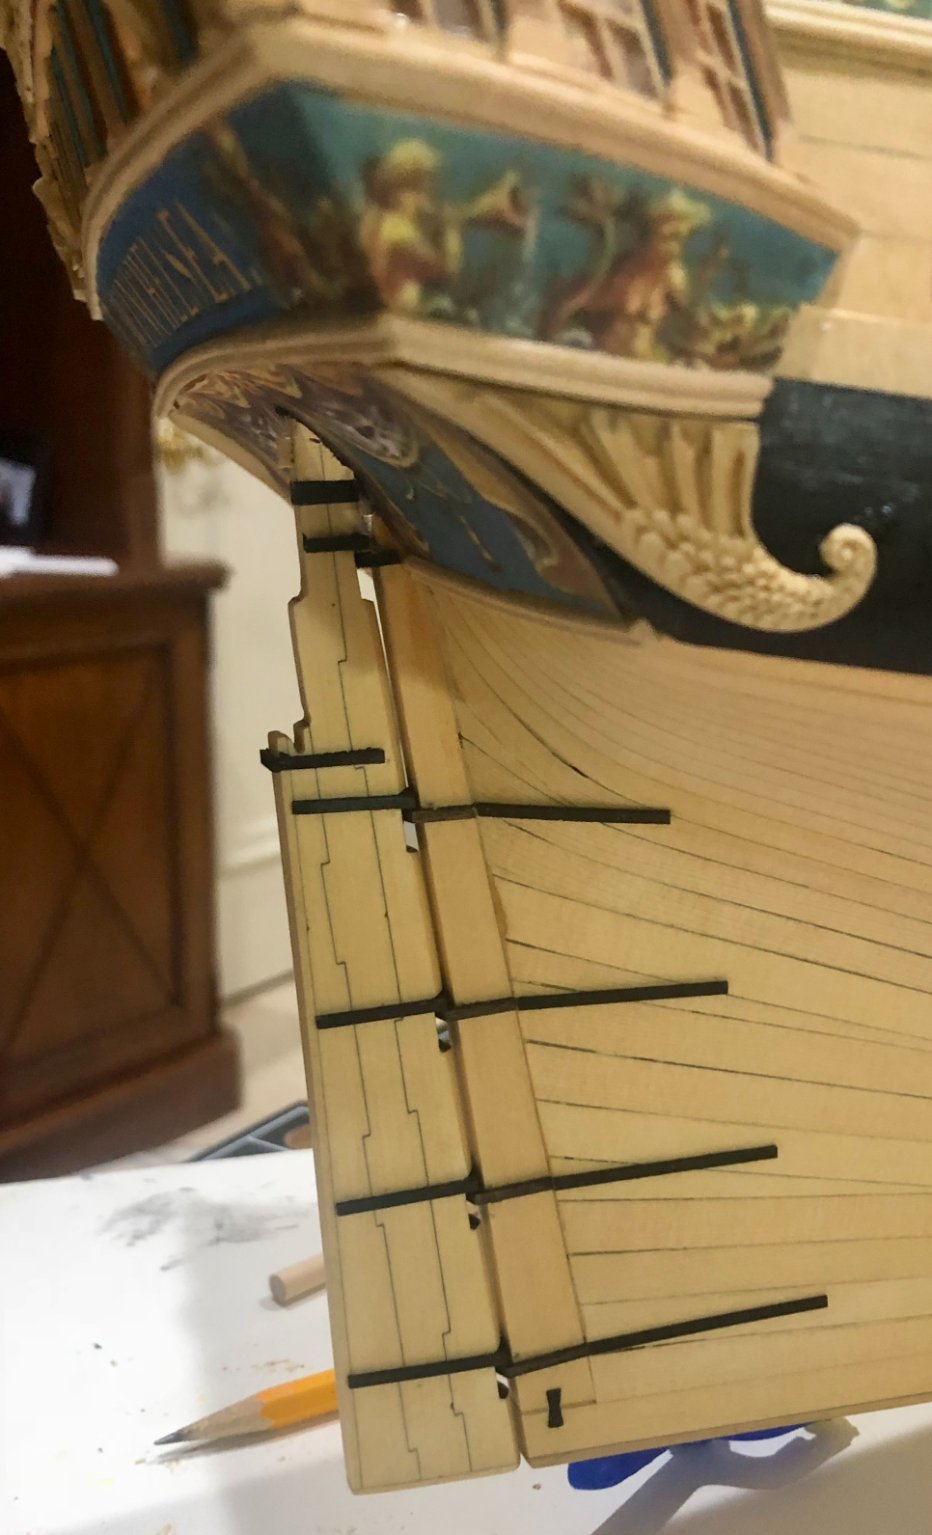
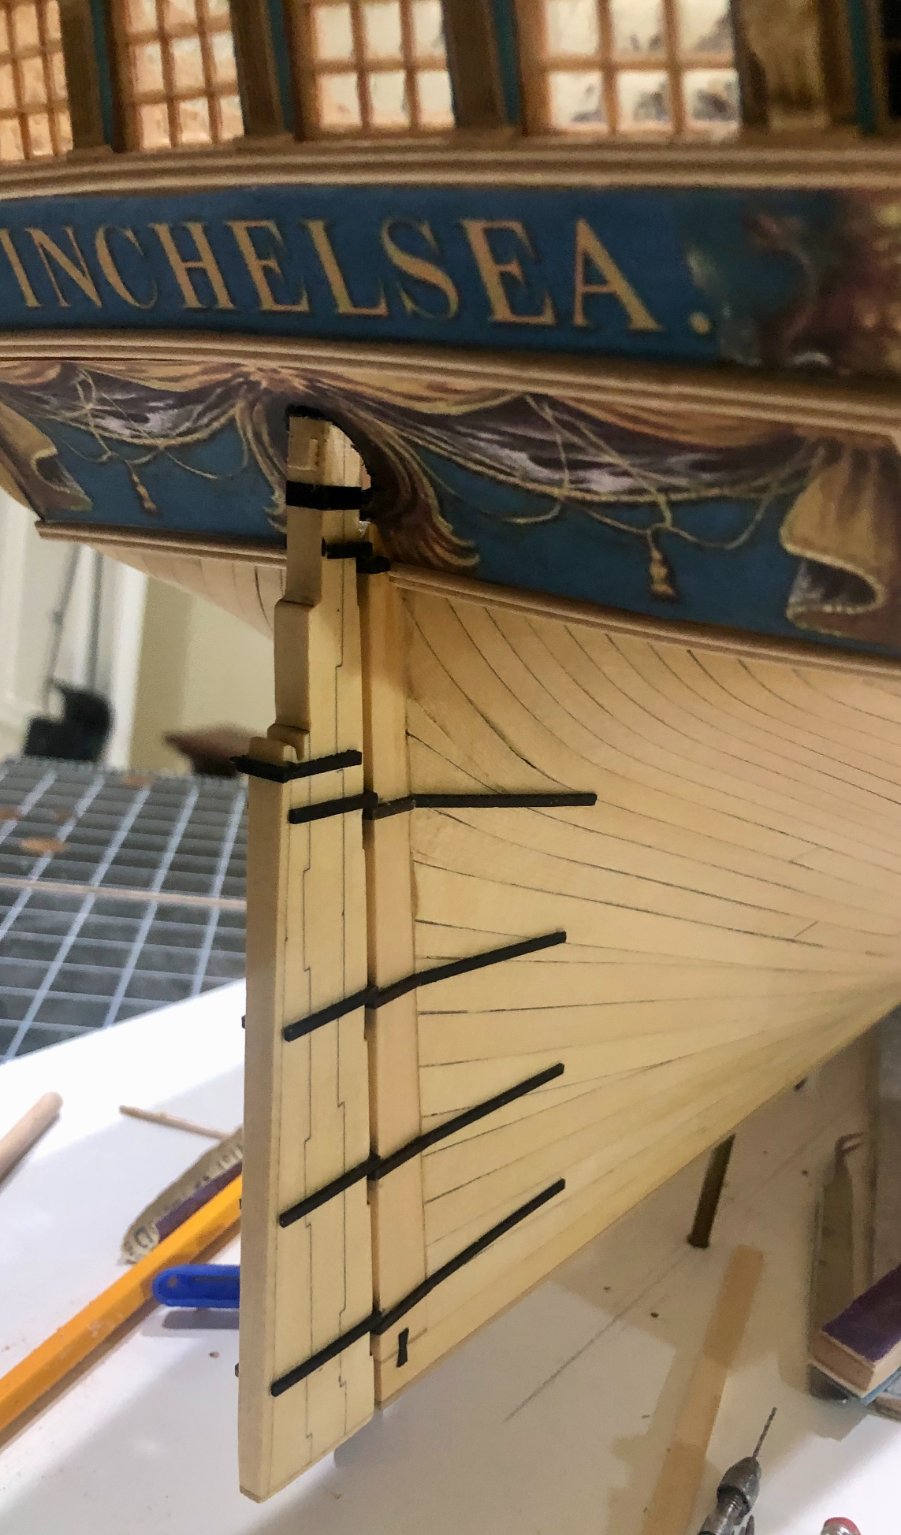
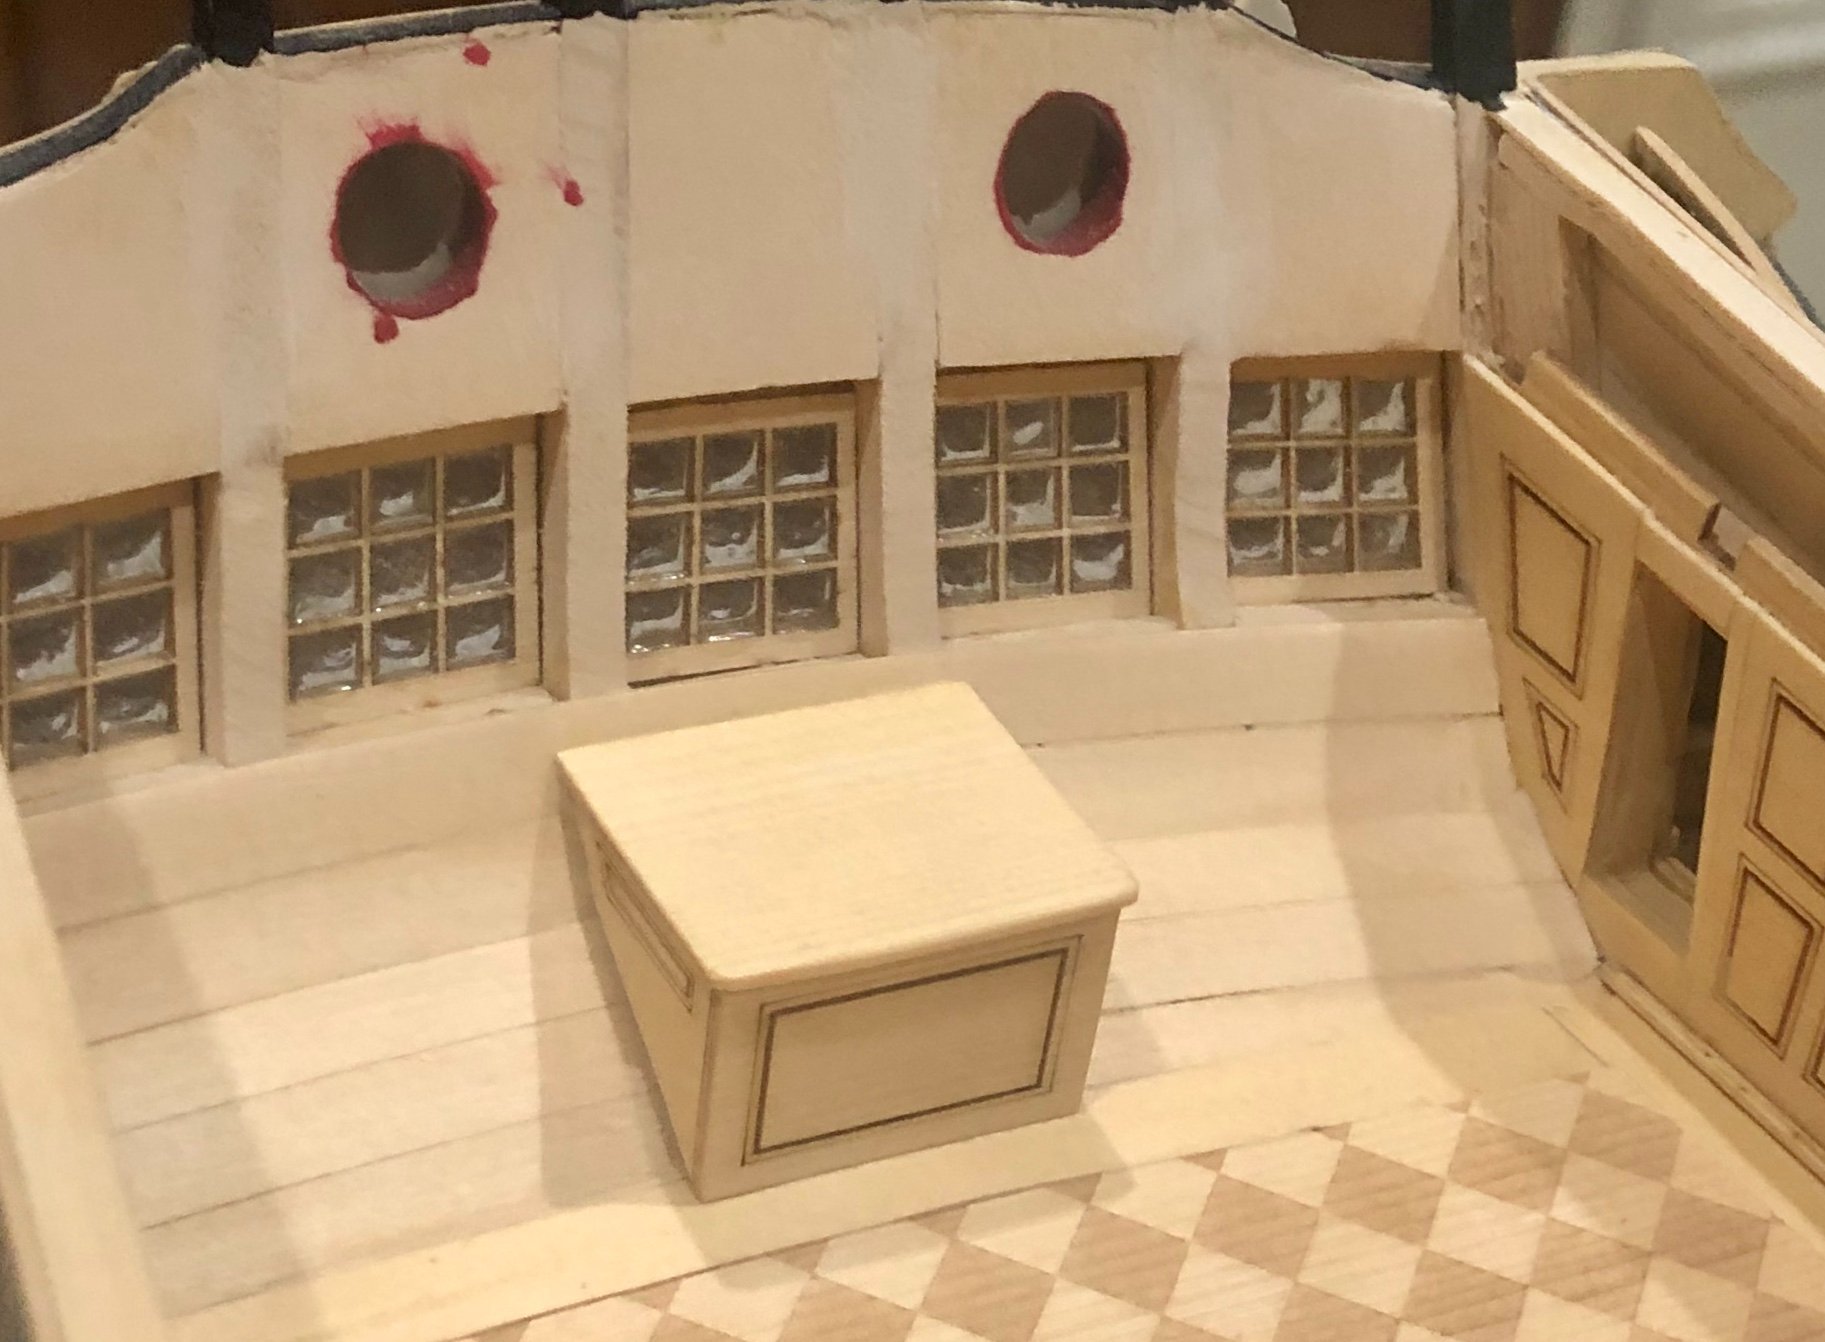
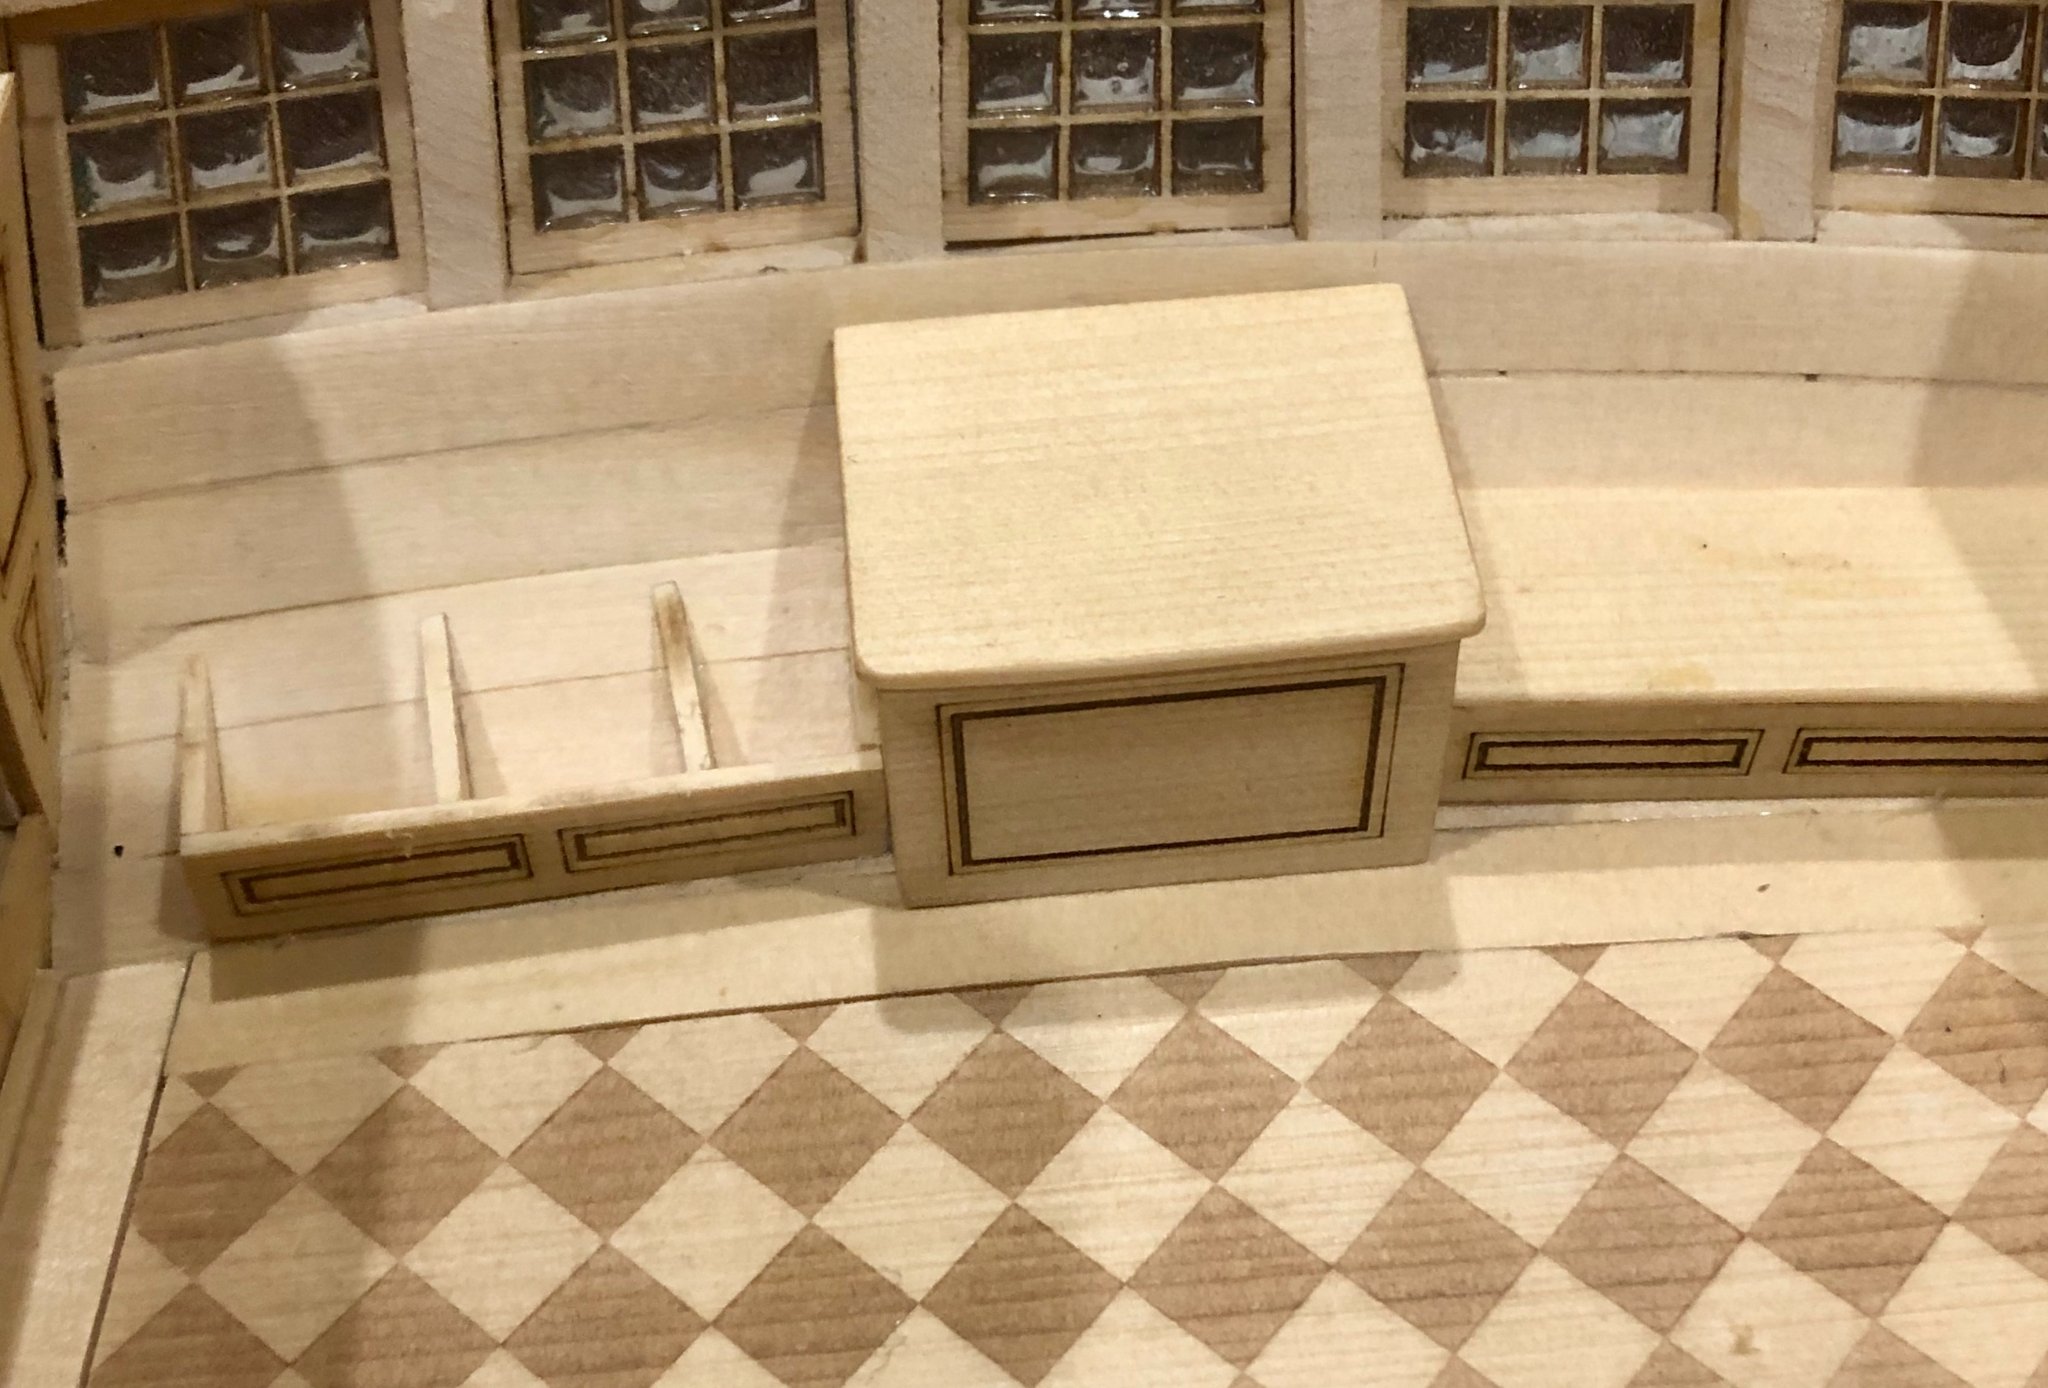
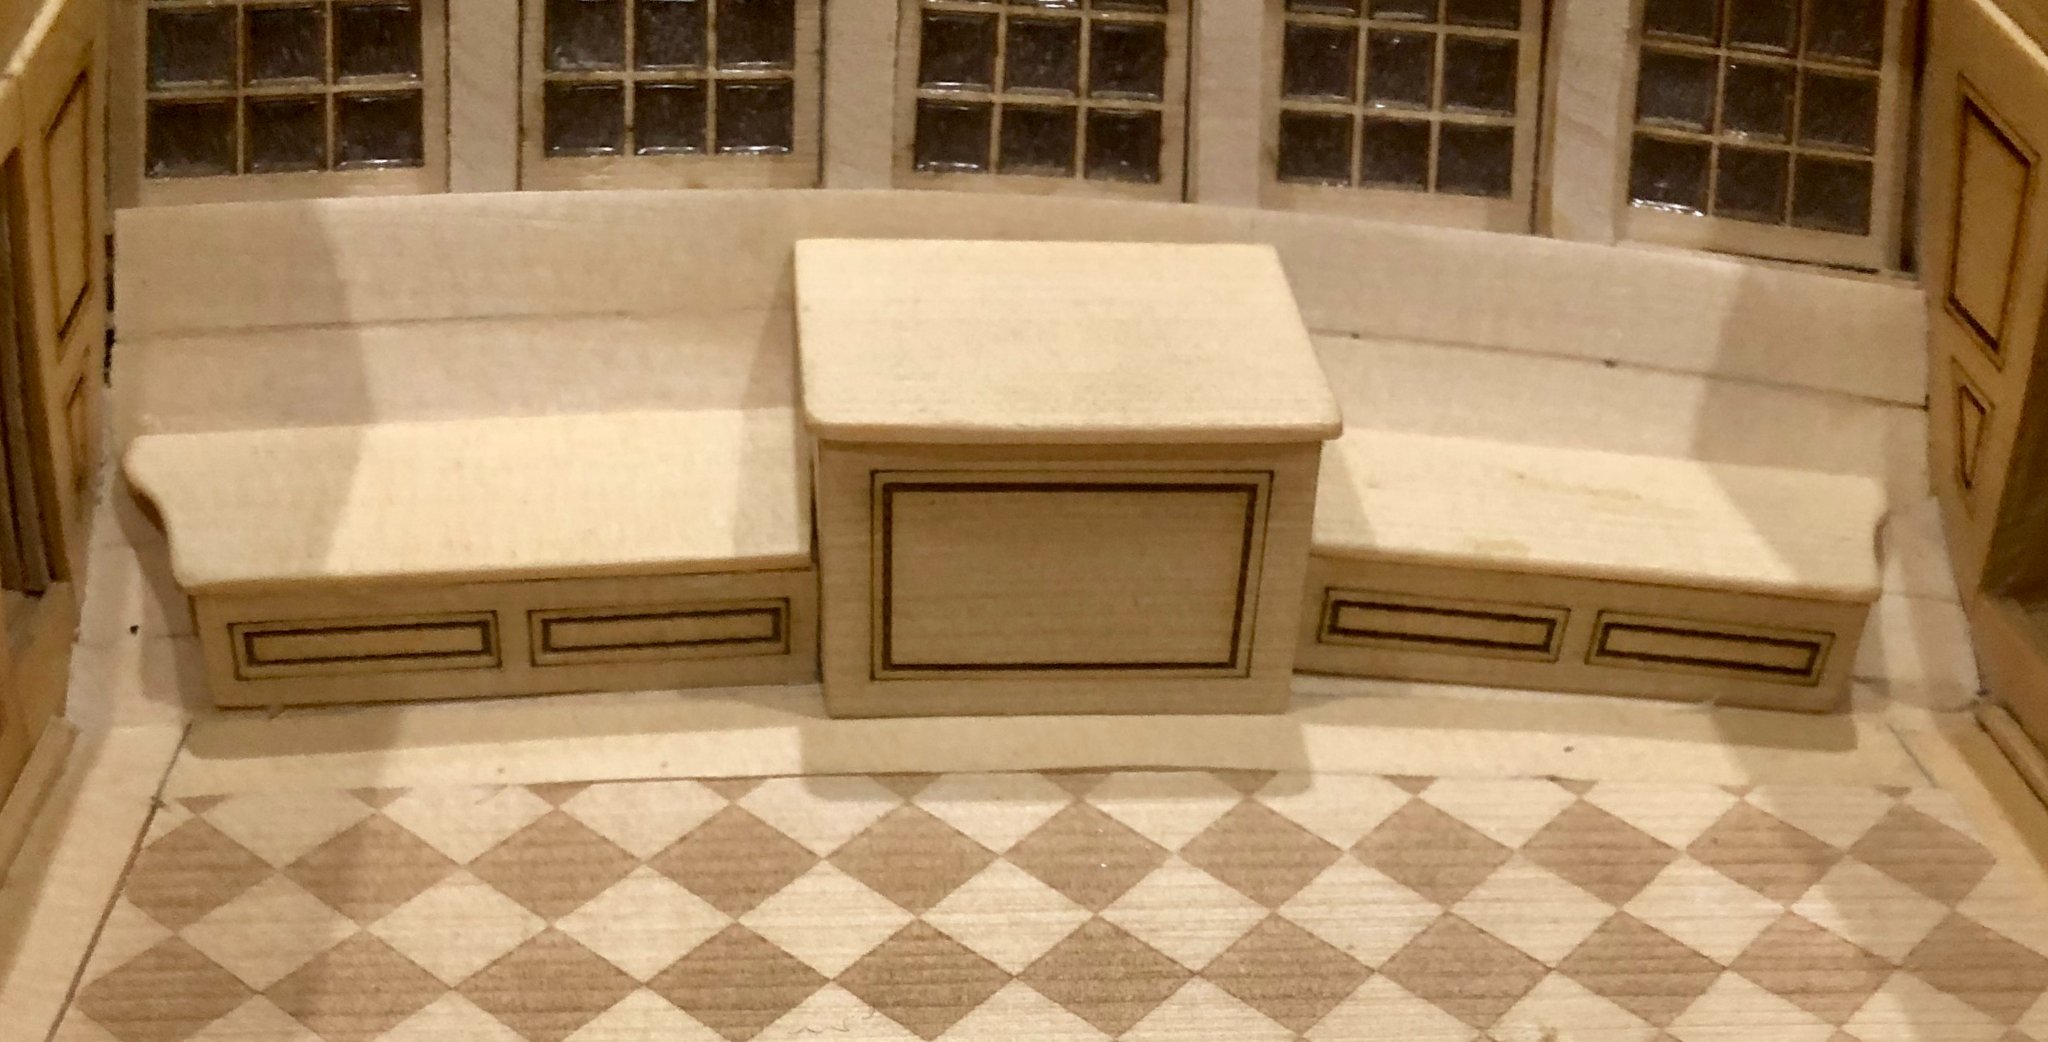
I'm happily back at work on Winnie. Duchess of Kingston will now go on pause until I complete Chapter five. The first thing done was was to make, shape and fit out the rudder, using the laser cut parts. I drilled and filed the rudder opening and painted the edge black. I followed Chuck's suggestion to use only two pins to mount the rudder.Much easier than trying to fit five of them. Next, I added the rudder trunk and benches, again using the laser cut parts. You can see from the photos that I added the extra triangular bench top supports to protect against warping. Lastly, I made up and added the sill from strip cedar. All of the work was given a coat of Wipe-0n Poly. Bob