rafine
-
Posts
2,932 -
Joined
-
Last visited
Content Type
Profiles
Forums
Gallery
Events
Everything posted by rafine
-
 Thanks so much Rusty. You're right-- it's a fun build. Bob
 -
Thanks so much OC and the "likes". Always appreciated. Bob
-
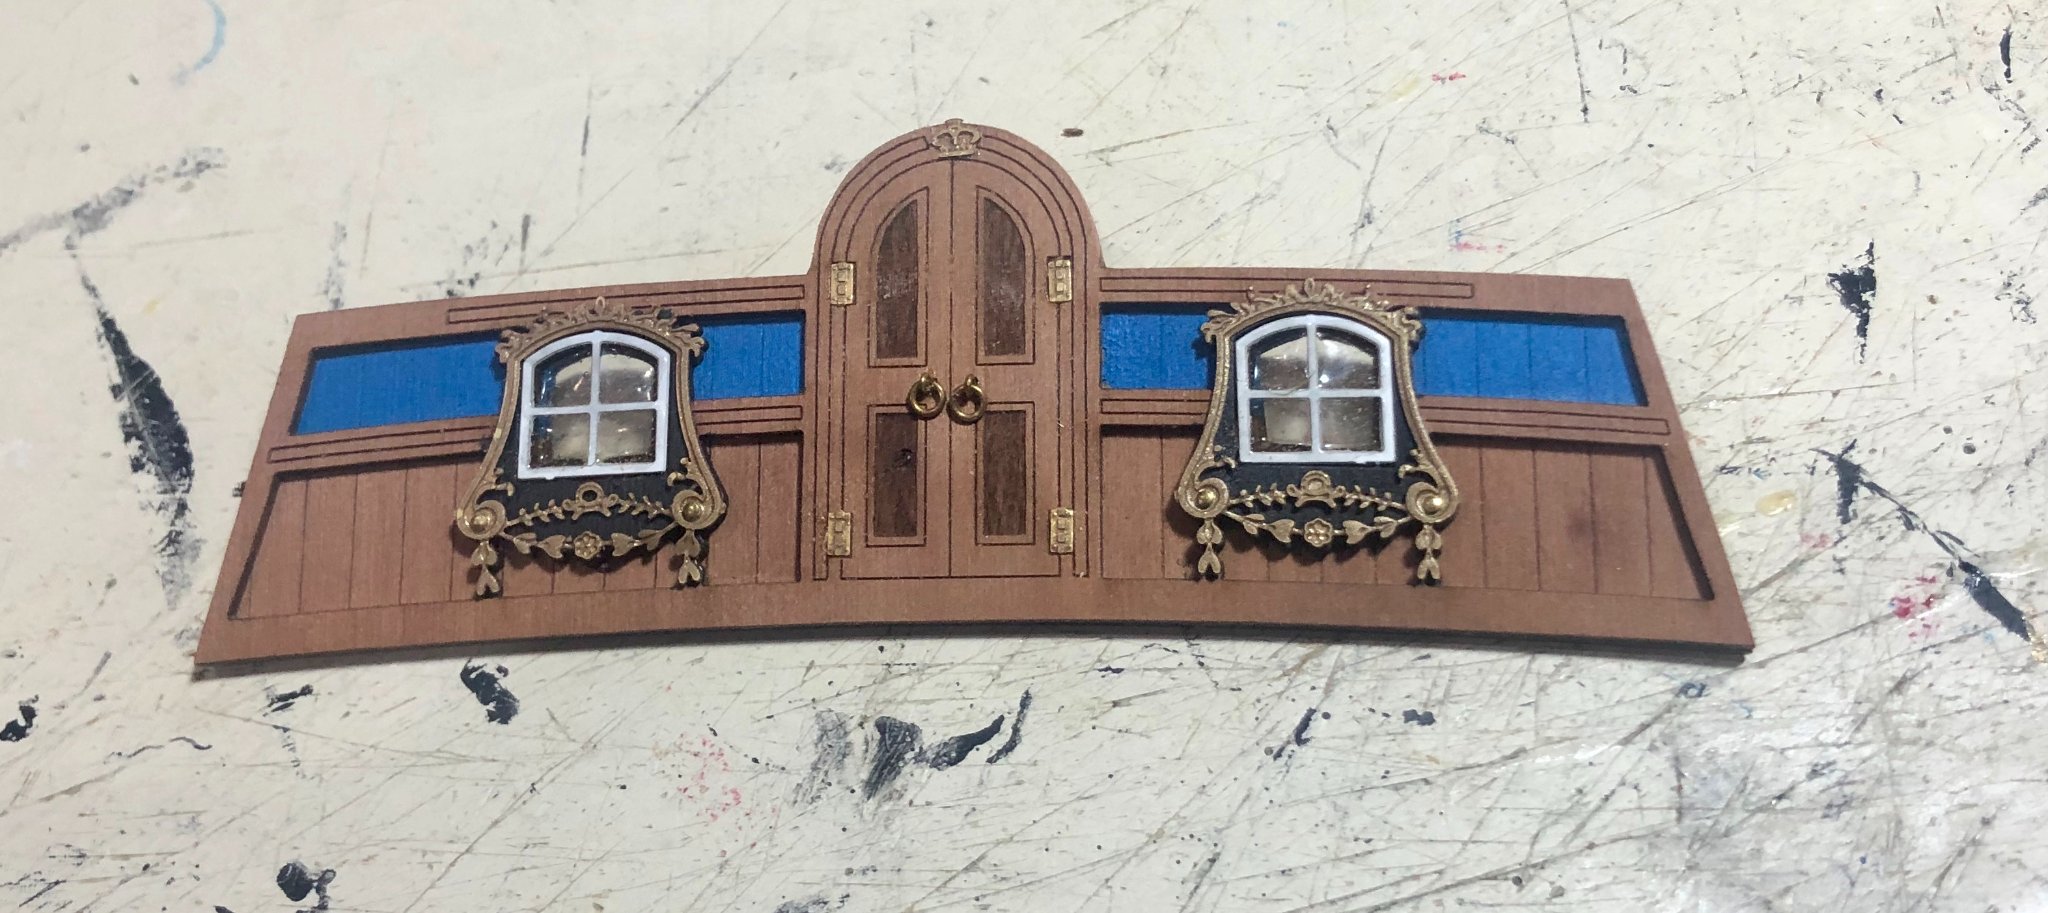
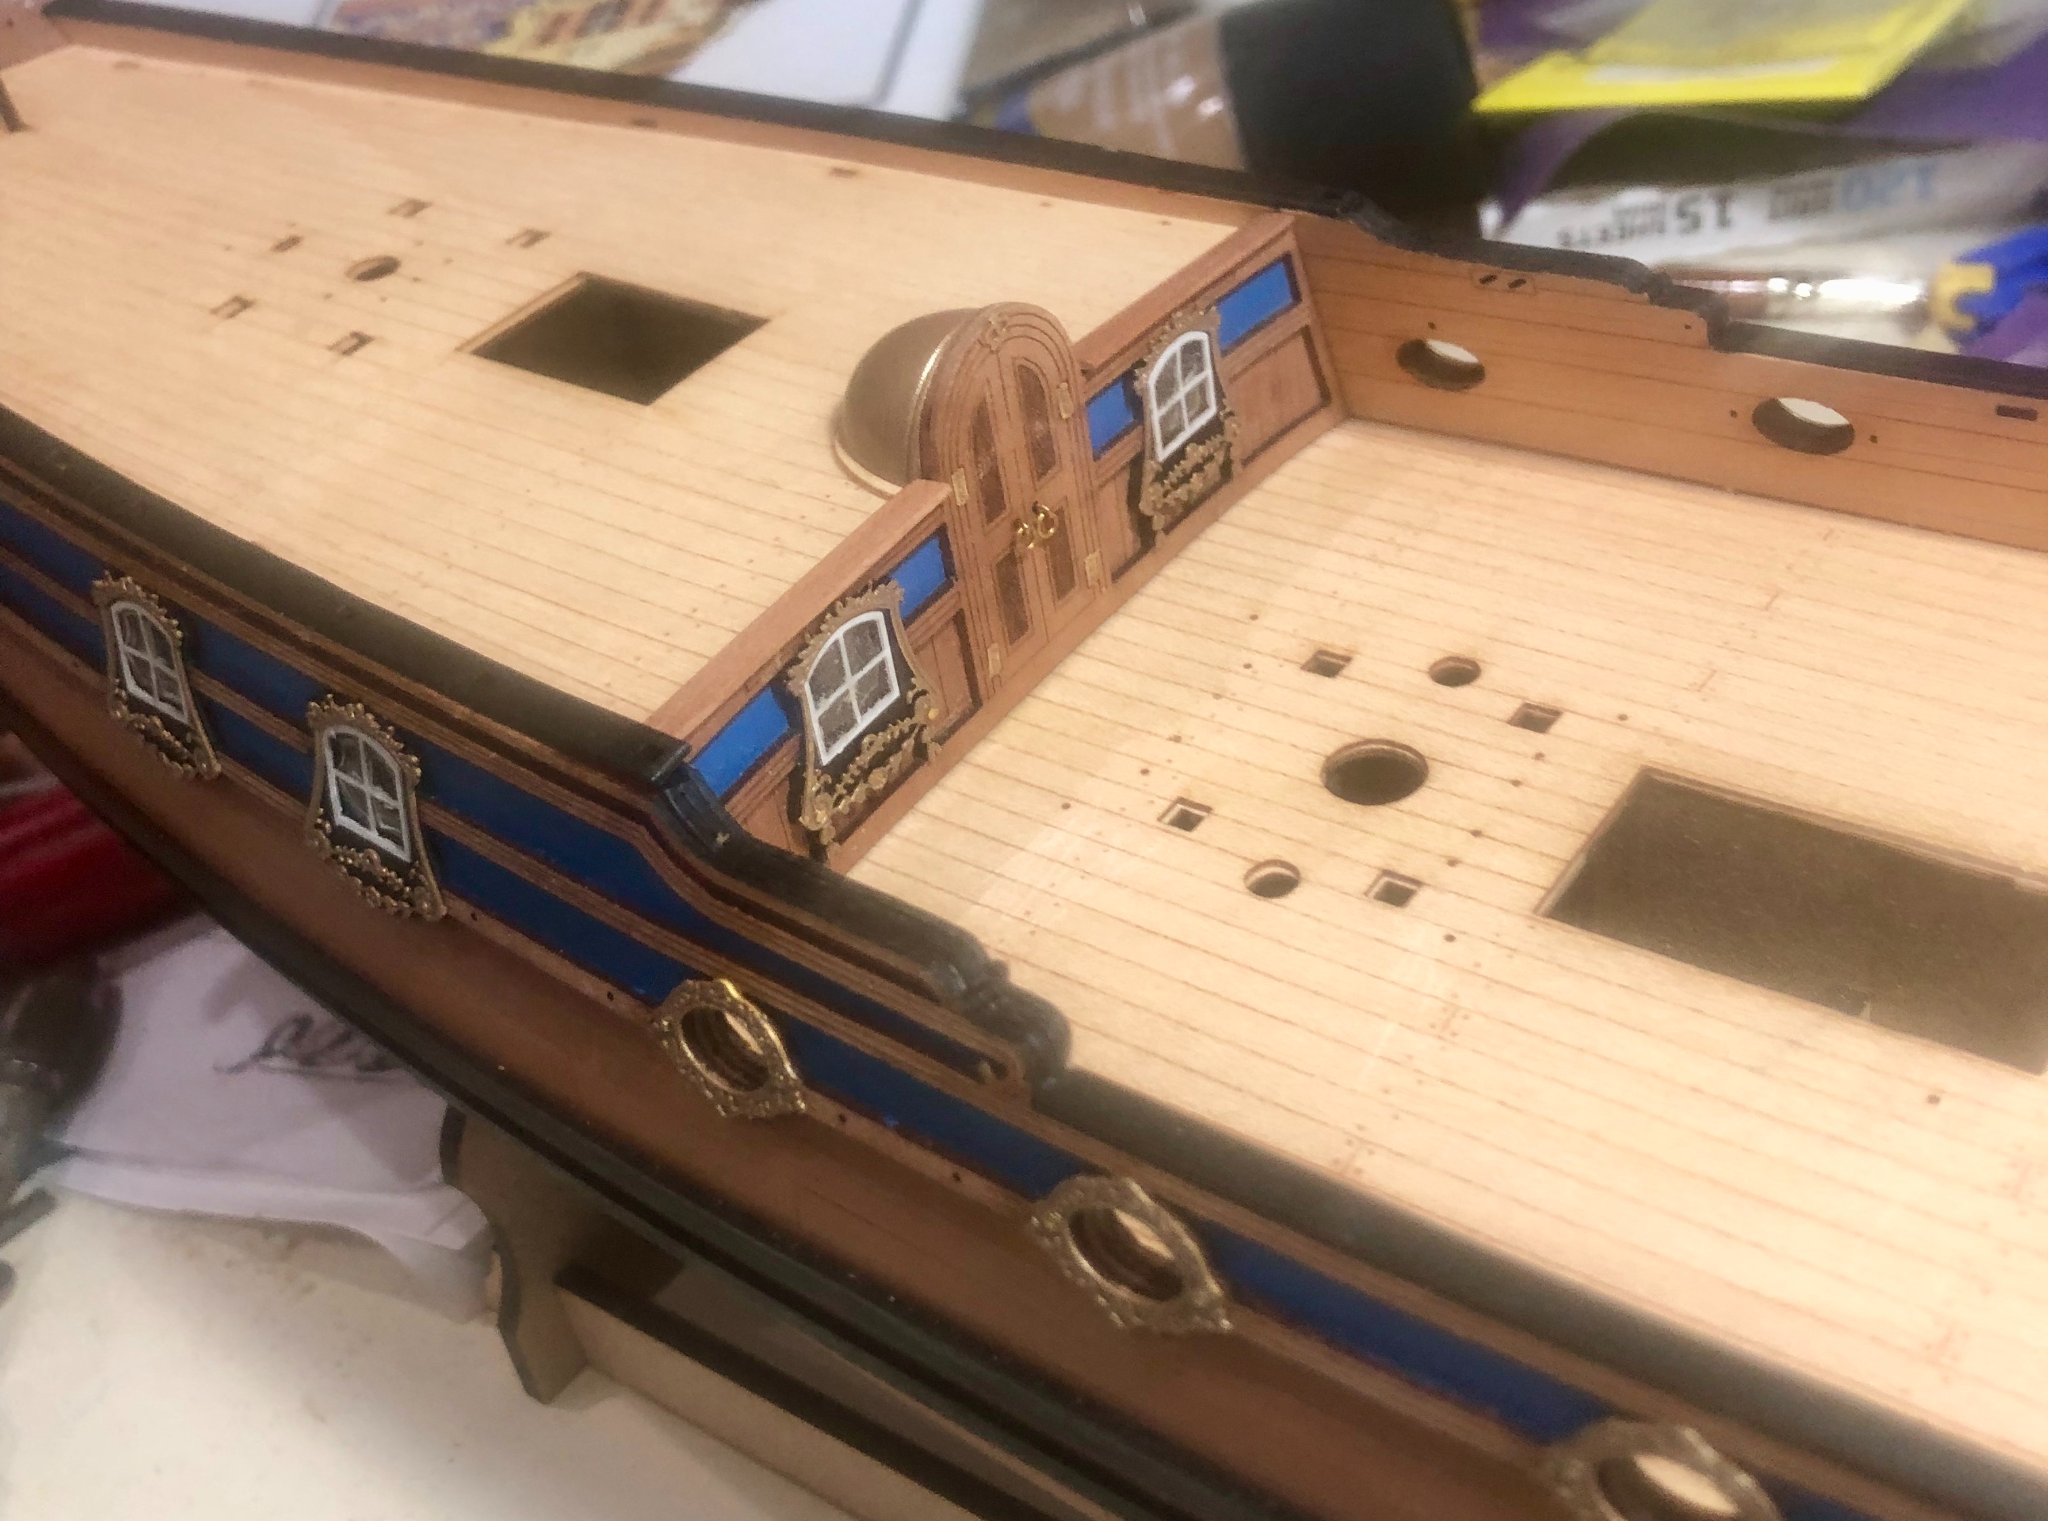
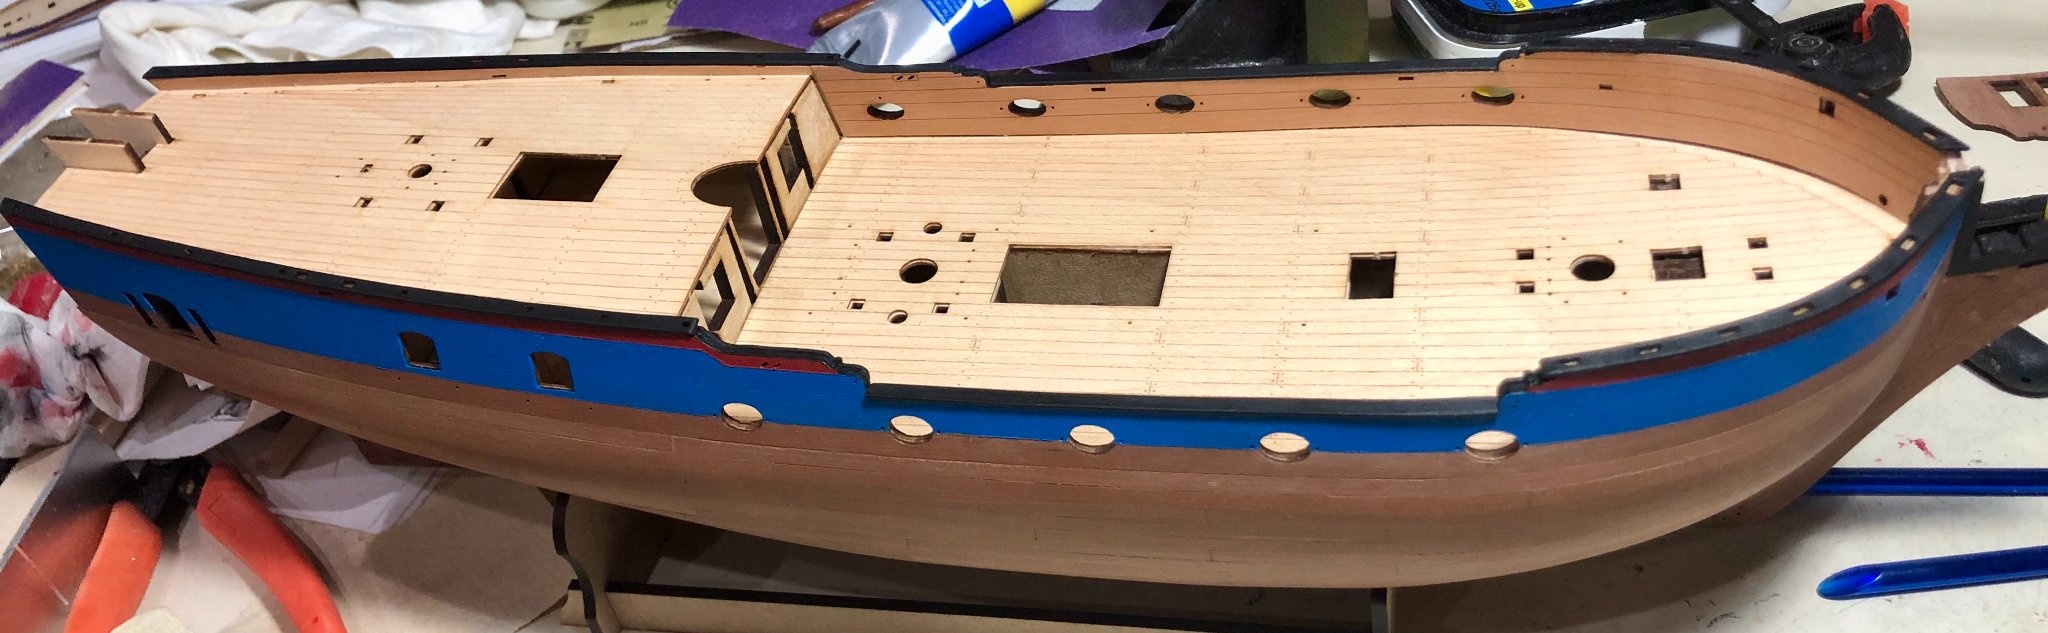
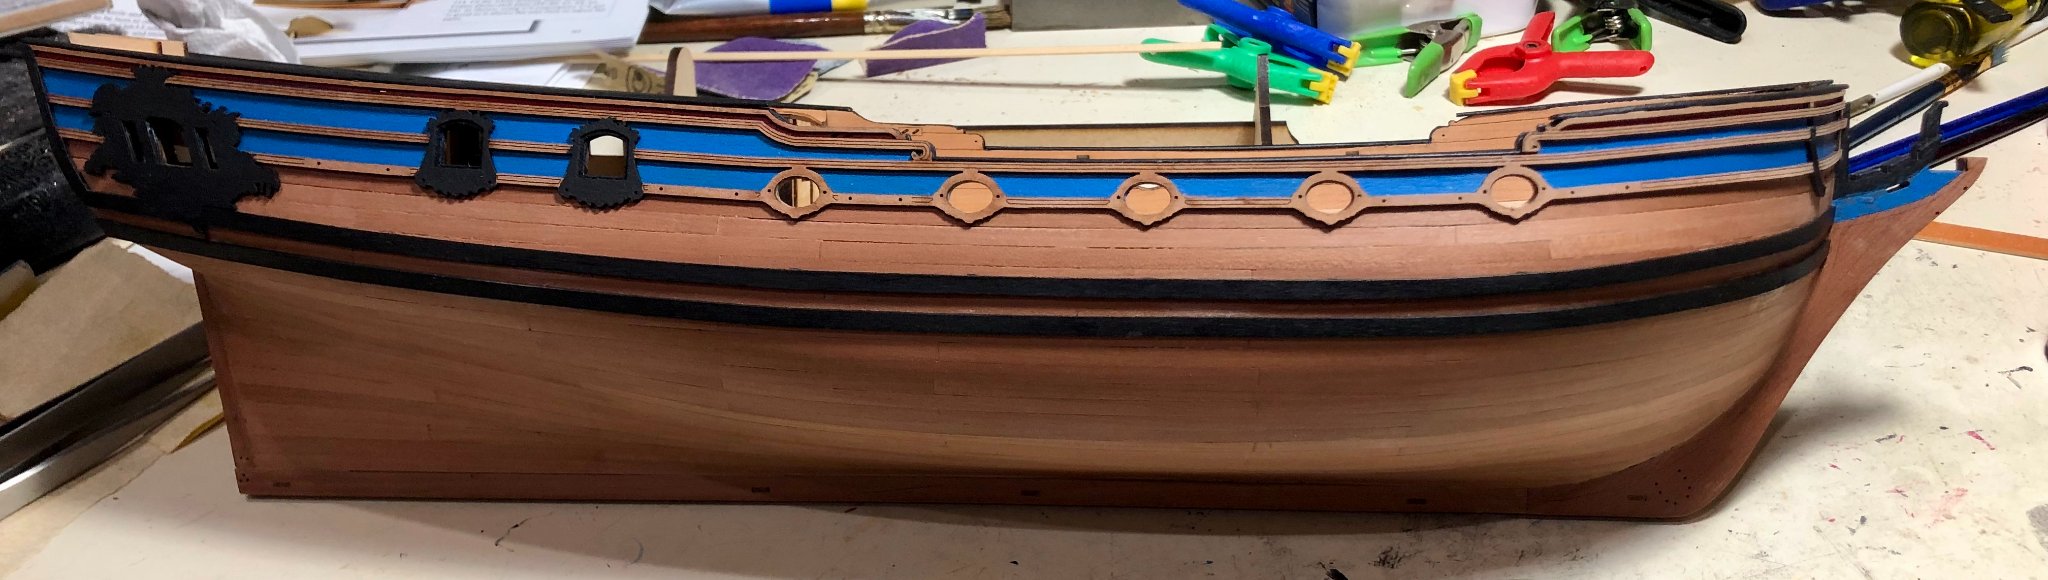
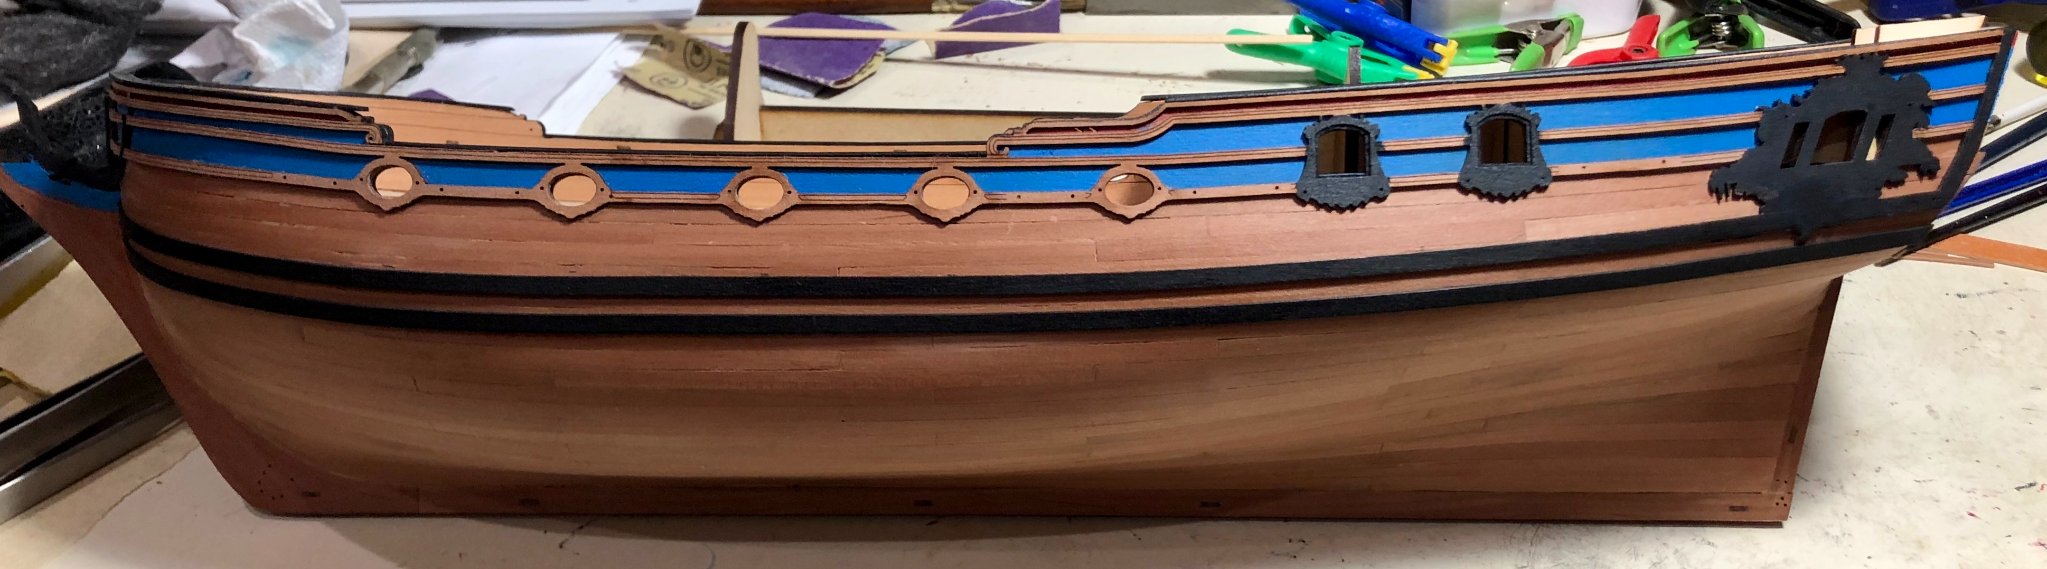
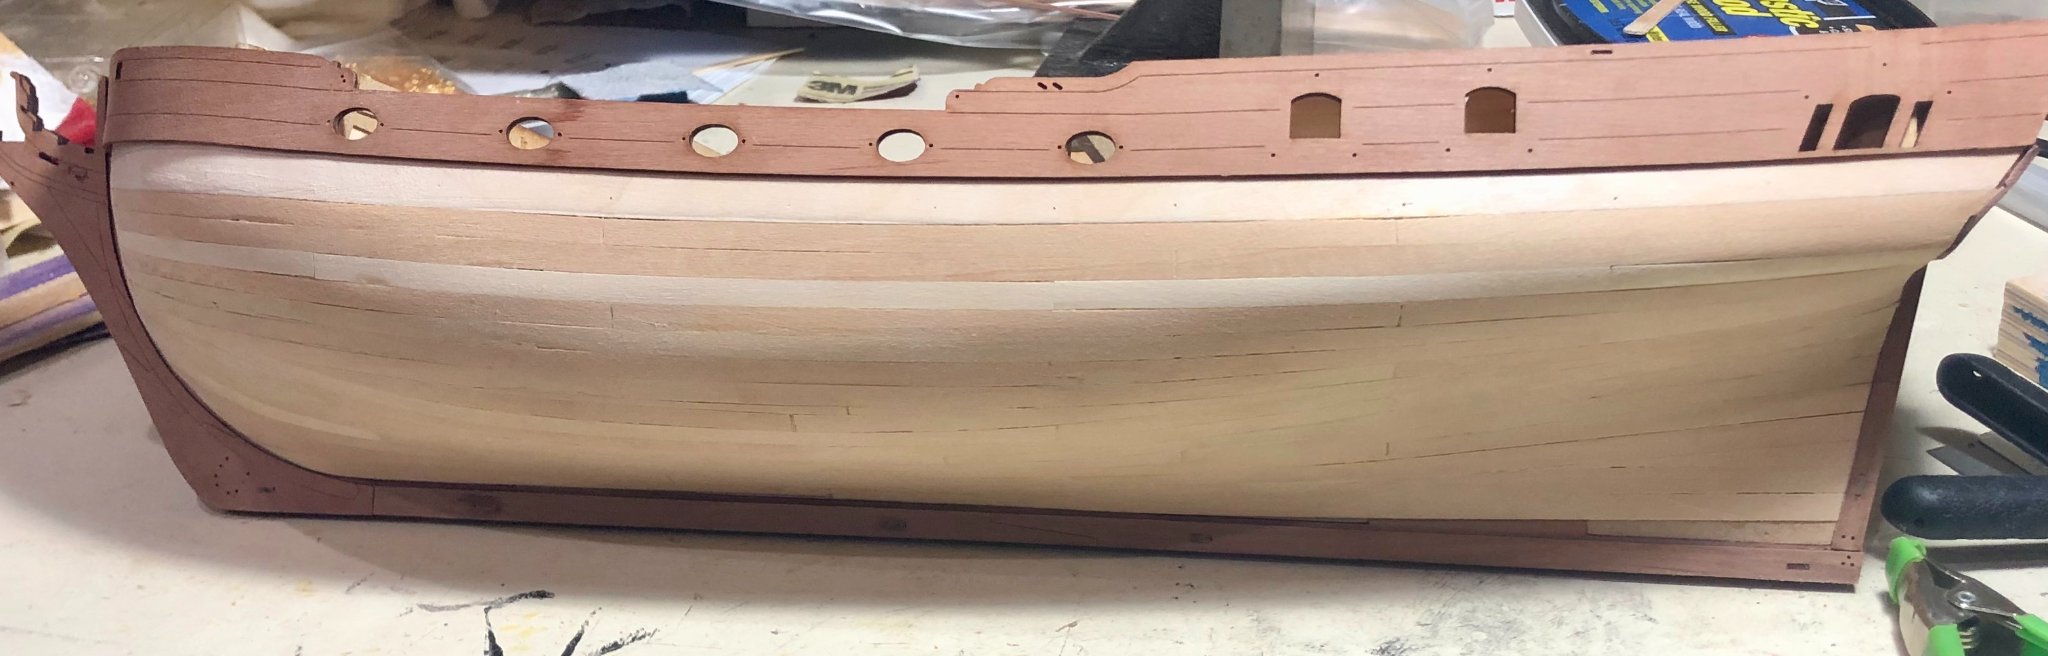
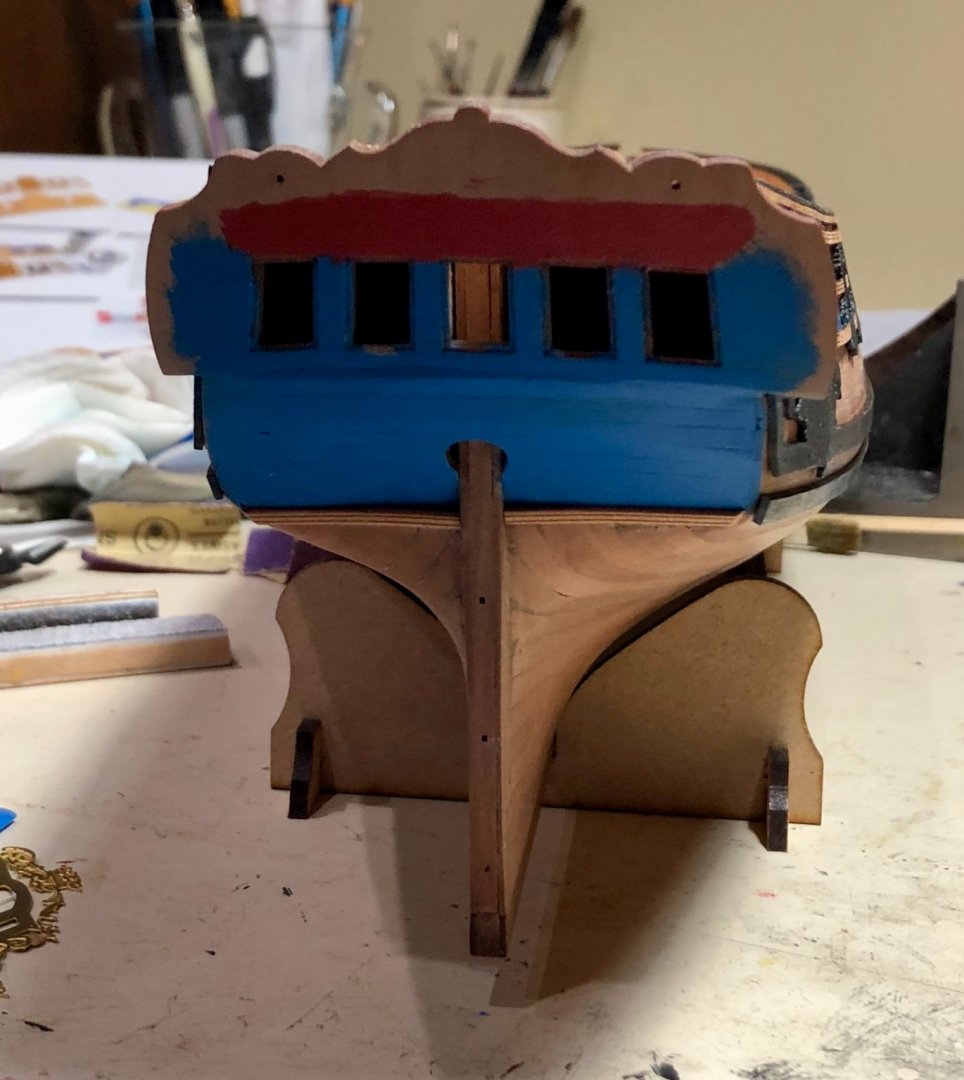
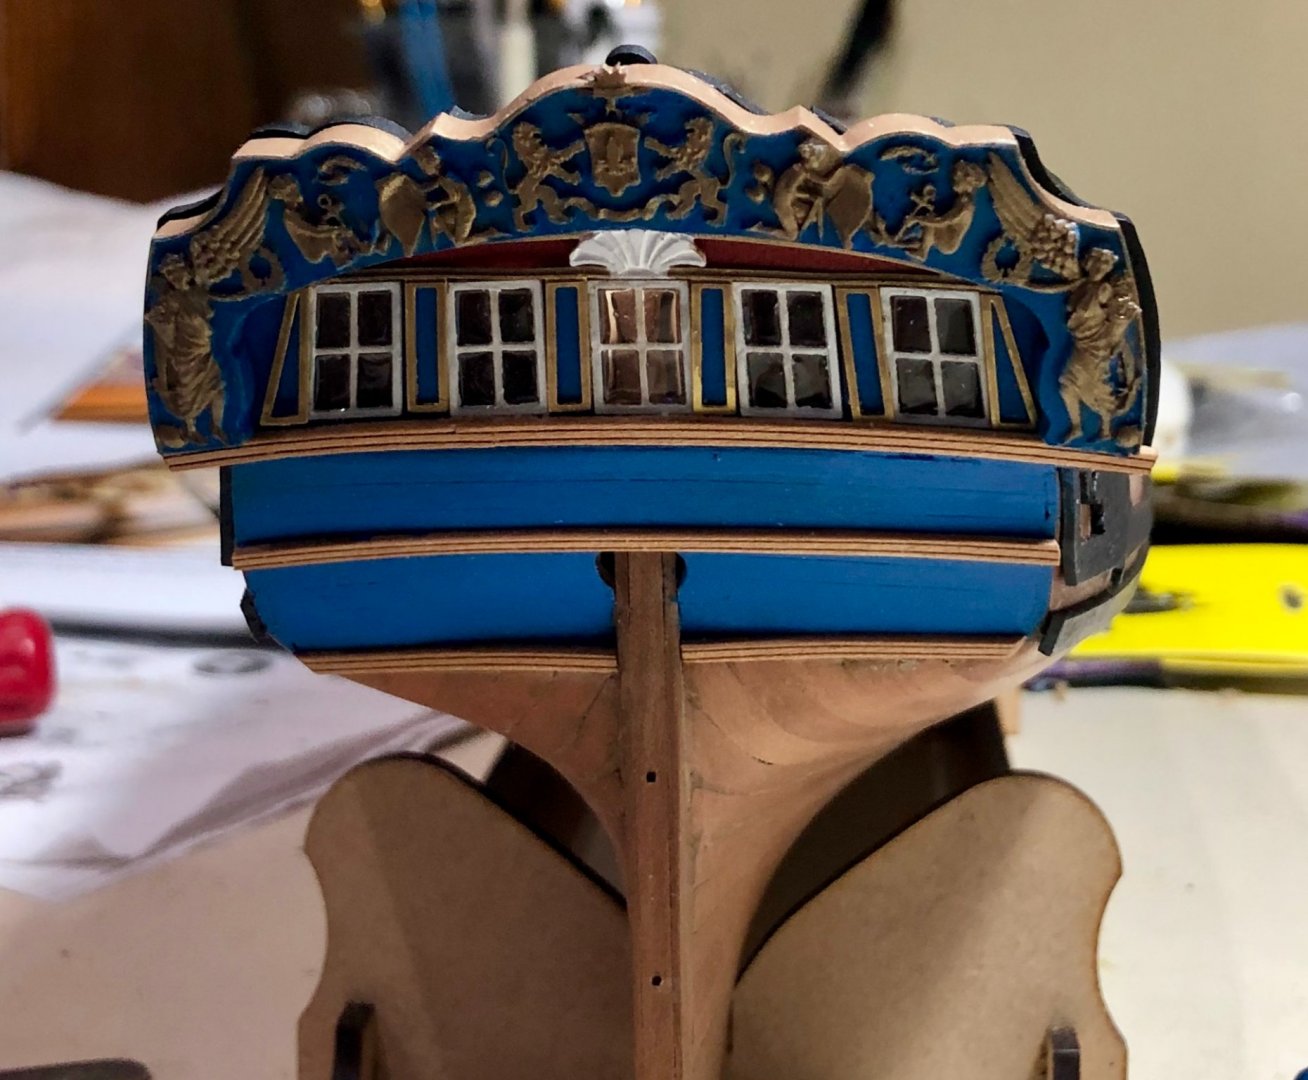
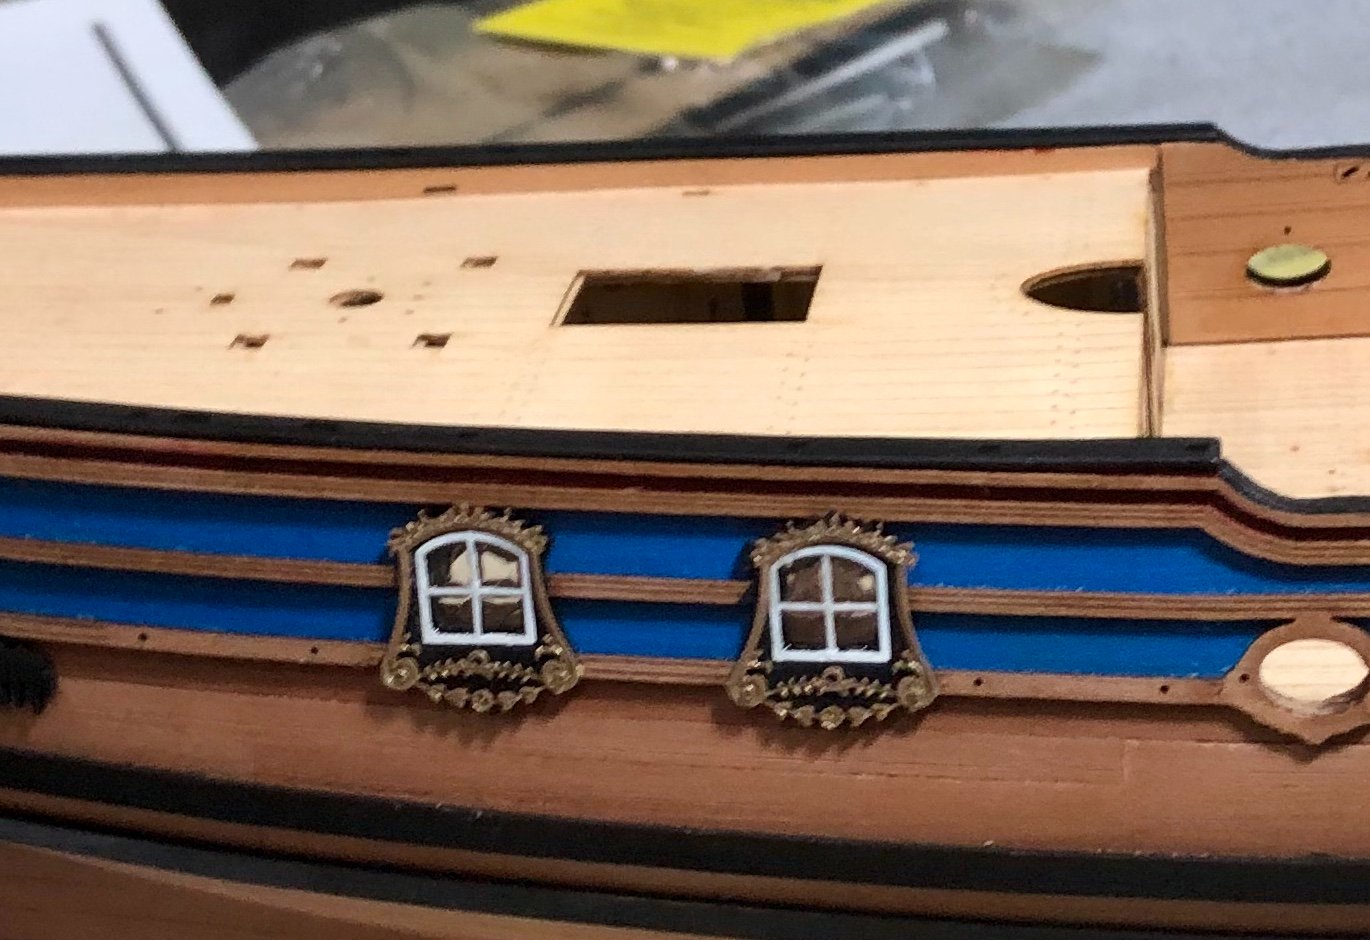
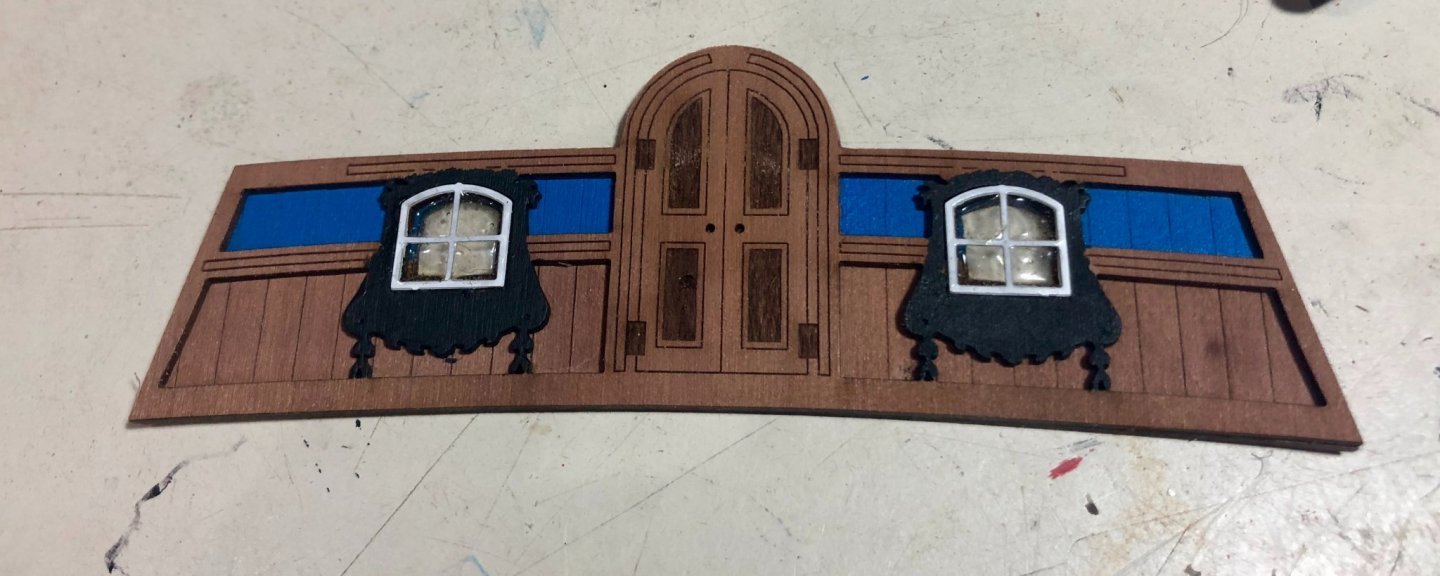
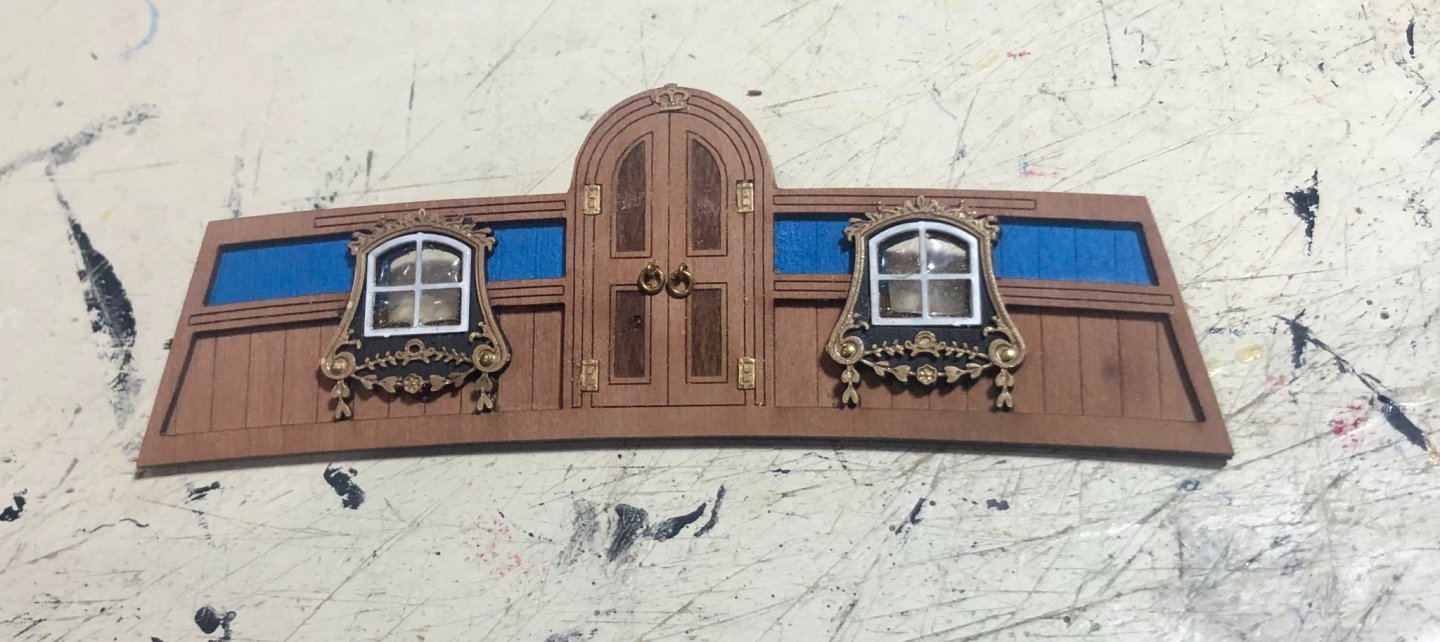
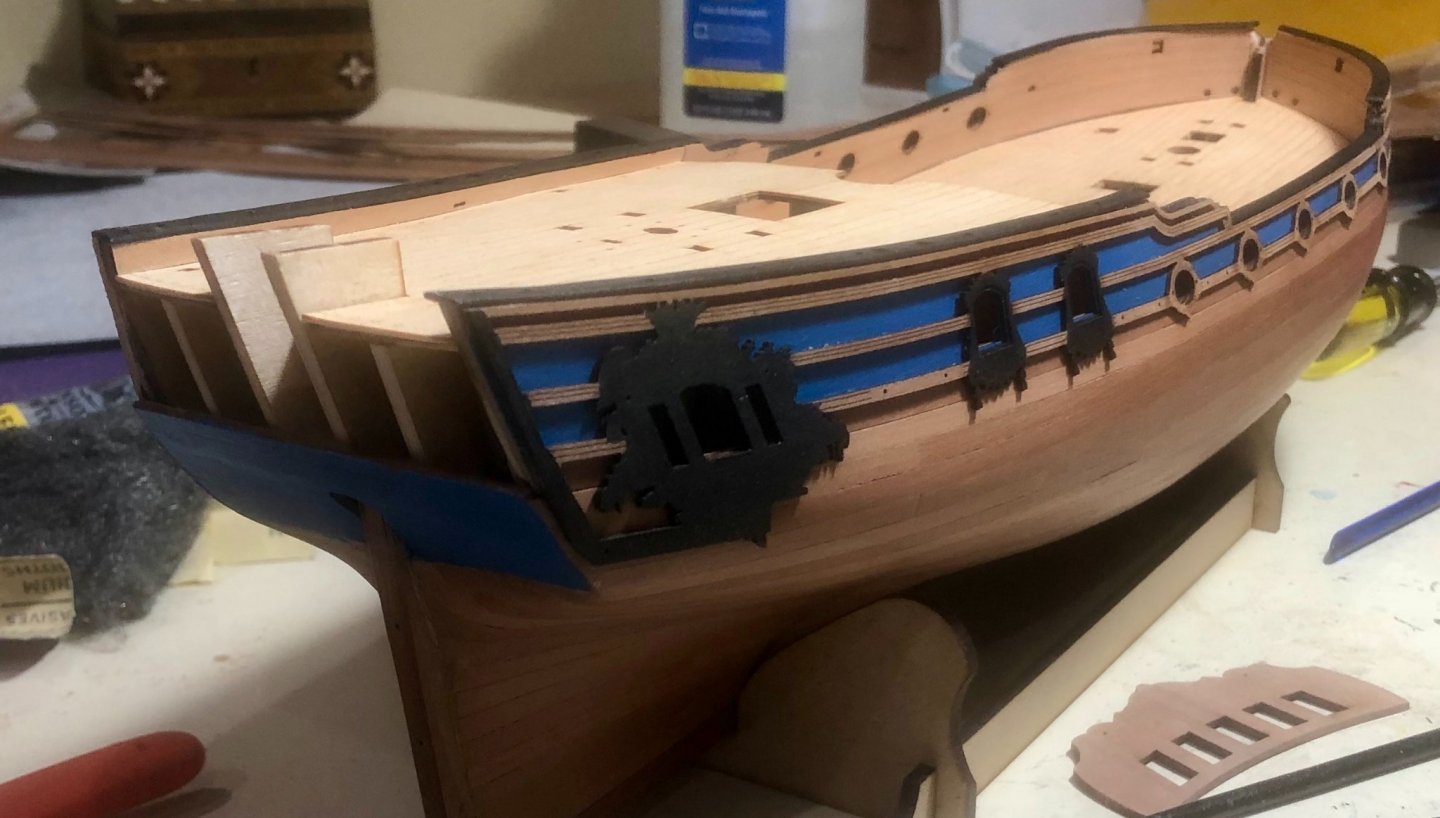
Lately, I've been moving along in no particular order or sequence, but just kind of "doing things. These have included doing the transom and stern moldings, the port wreathes, the side windows with their decoration, and the quarter deck bulkhead. Some thoughts about choices or changes I've made: 1) all of the windows are glazed with Micro Krystal Klear, which is clear and translucent and a longtime preference of mine; 2) the transom is painted blue, with red above the windows, rather than all red. This matches the transom on Winchelsea, which I am building concurrently; the stern moldings were left natural, rather than painted gold. Again, a personal preference; finally, not withstanding the near unanimous opinion of those who responded to my question, and my own response to those opinions, I have decided not to paint the hull white below the waterline. I just like the way it looks natural.


-
Jeff, cutting it out from sheet wood is the easiest and best way to do it. Bob
-
You're setting a high bar for the rest of us, Glenn. Great work. Bob
- 382 replies
-
- 1
-

-
- Vanguard Models
- Duchess of Kingston
- (and 1 more)
-
Thanks so much guys for the comments and "likes". Bob
-
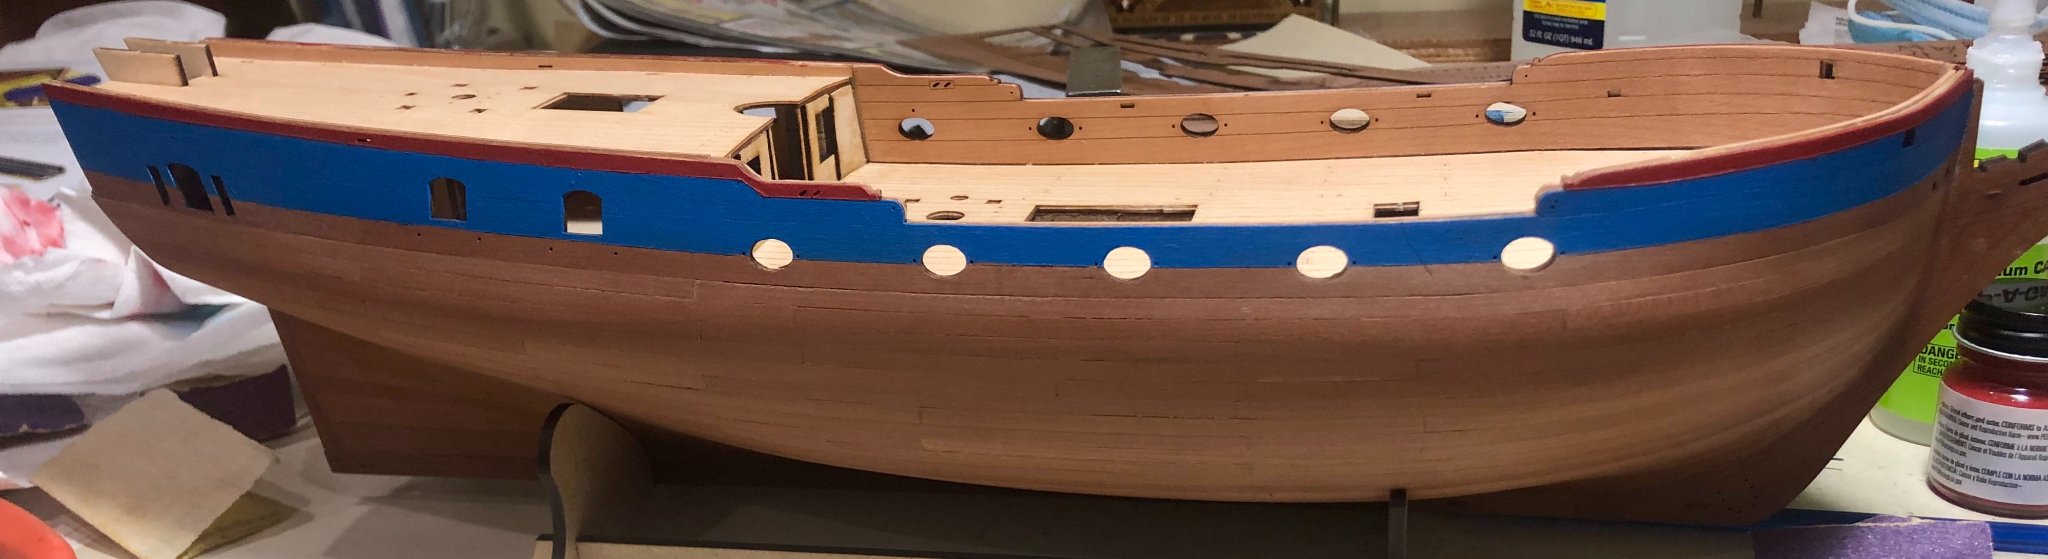
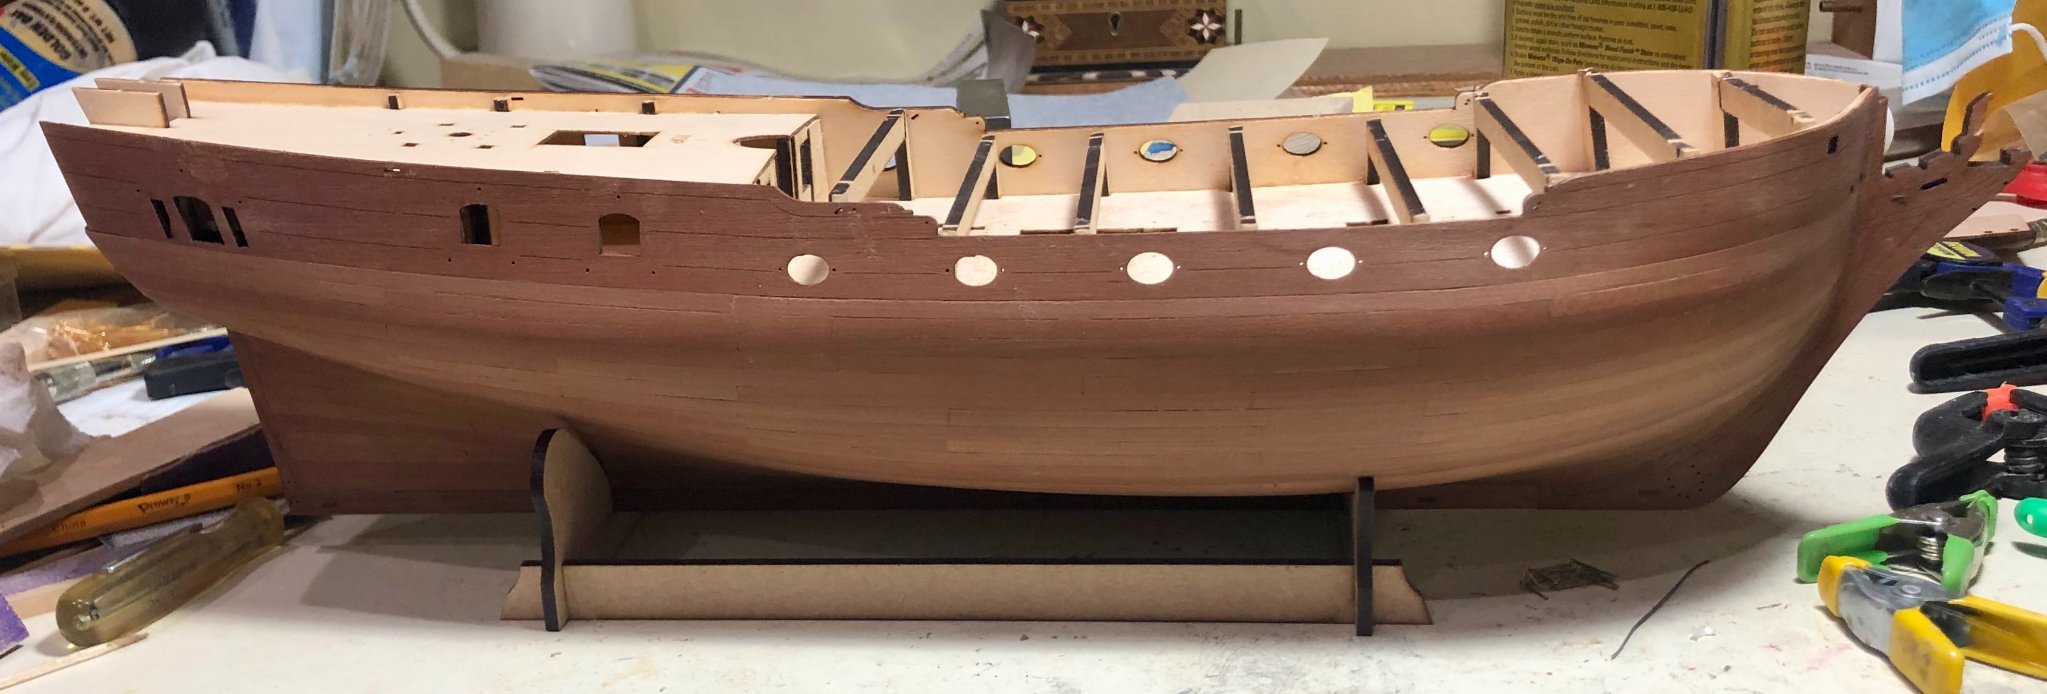
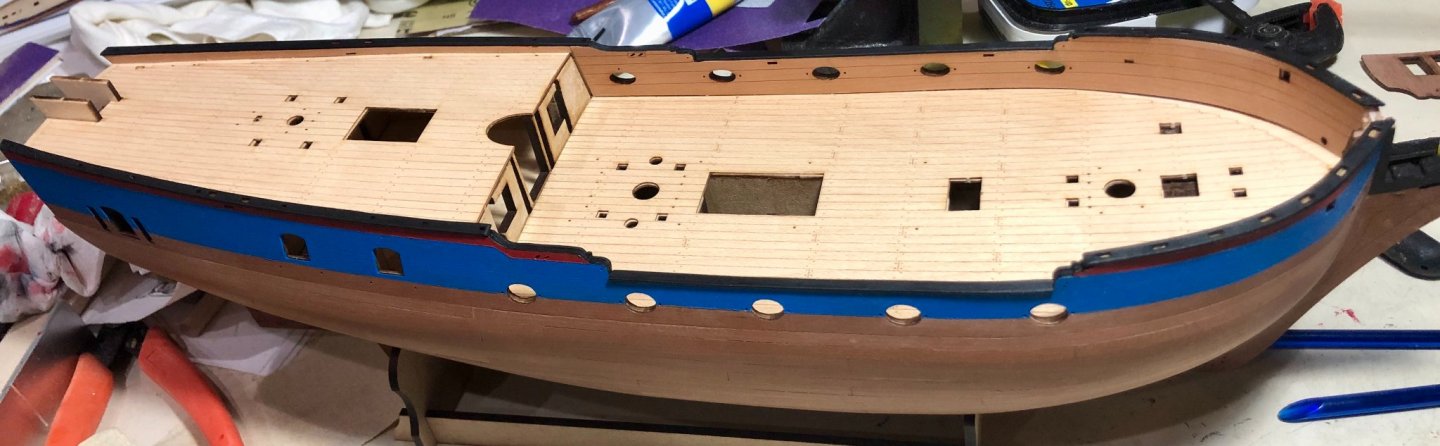
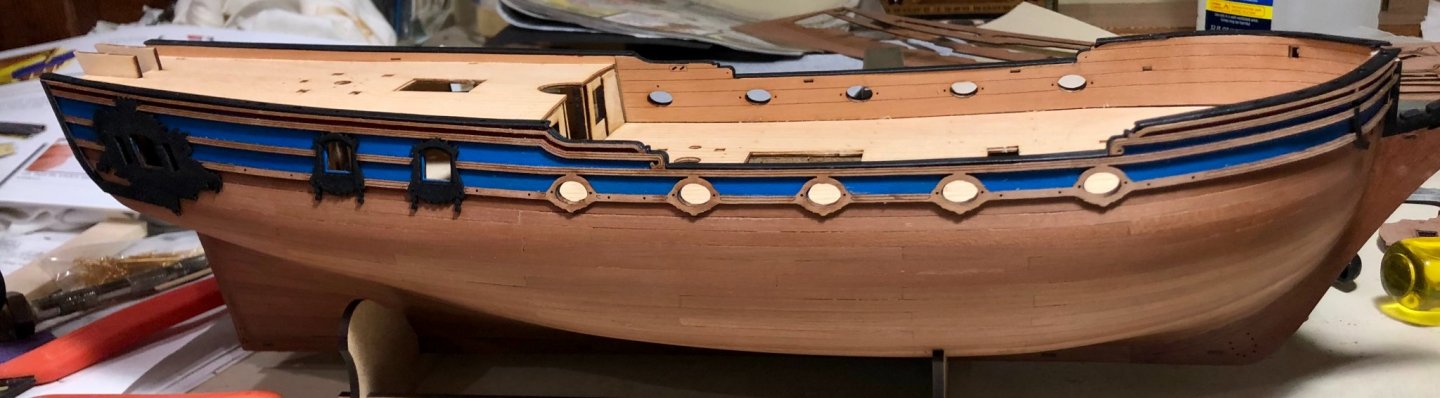
A number of things have been accomplished. Firstly, I masked and painted the appropriate areas of the upper hull blue and red. Next, I added the cap rails, after painting them black. After that, I added the upper rail patterns, after painting the appropriate areas black. Finally, I painted the wales black and glued them in place. Before moving on to the transom, I have a question for Chris and Jim. The plans show the transom painted blue, while the prototype and the instructions show it painted red. Which is correct? I have the same question about the quarter galleries, although the plans make no reference to color. Bob


-
Thanks so much Rusty. I really liked the look of your decks, but I 've decided to do this one pretty much straight from the box. Bob
-
Thanks so much Glenn, Bob, Erik and the "likes". Always appreciated. Bob
-
Wonderful work Jean-Paul. You can be very proud of what you've done. What's next? Bob
- 164 replies
-
- 2
-

-
- first build
- model shipways
- (and 2 more)
-
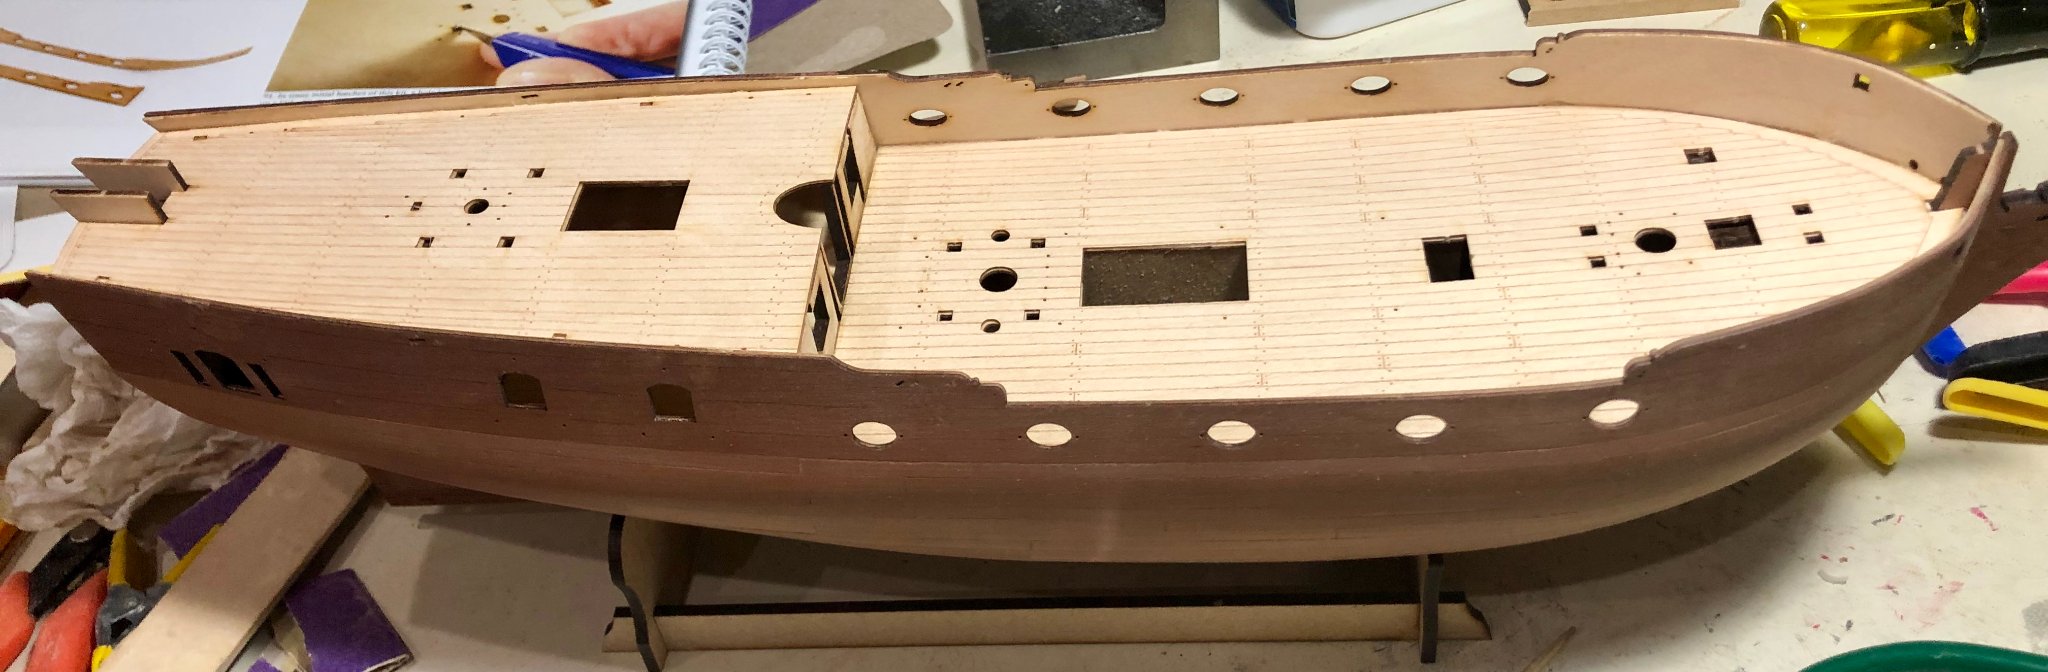
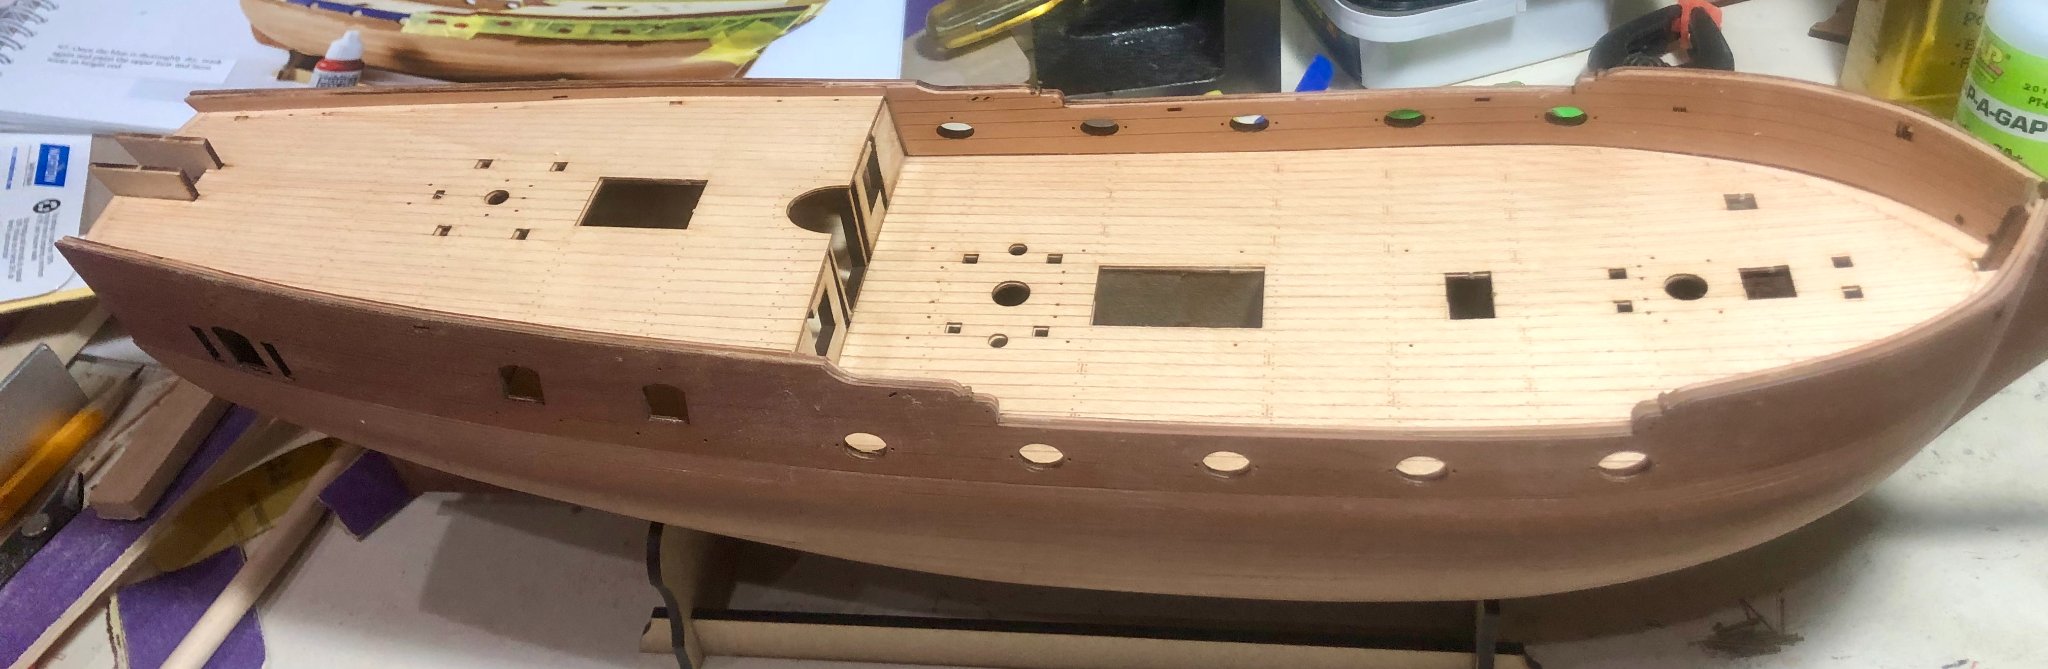
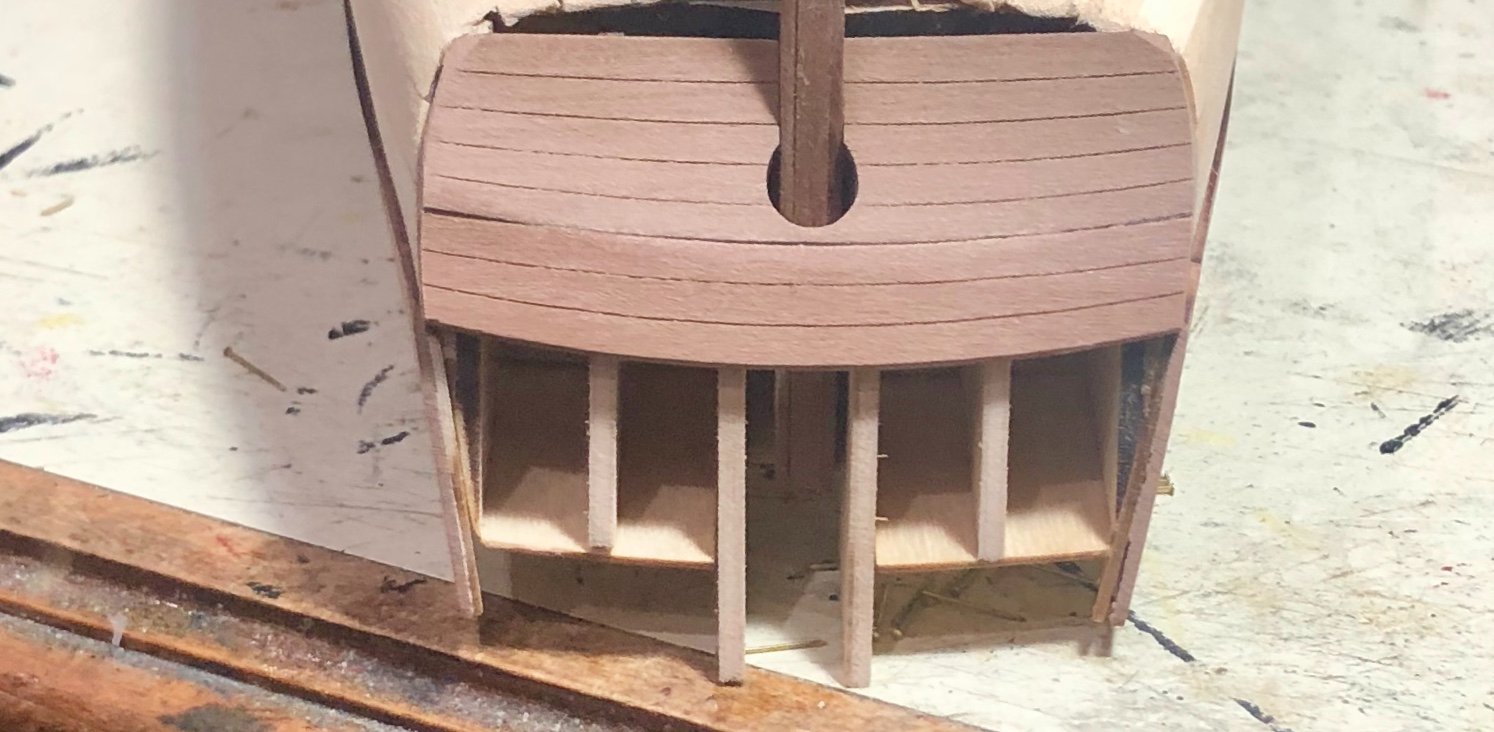
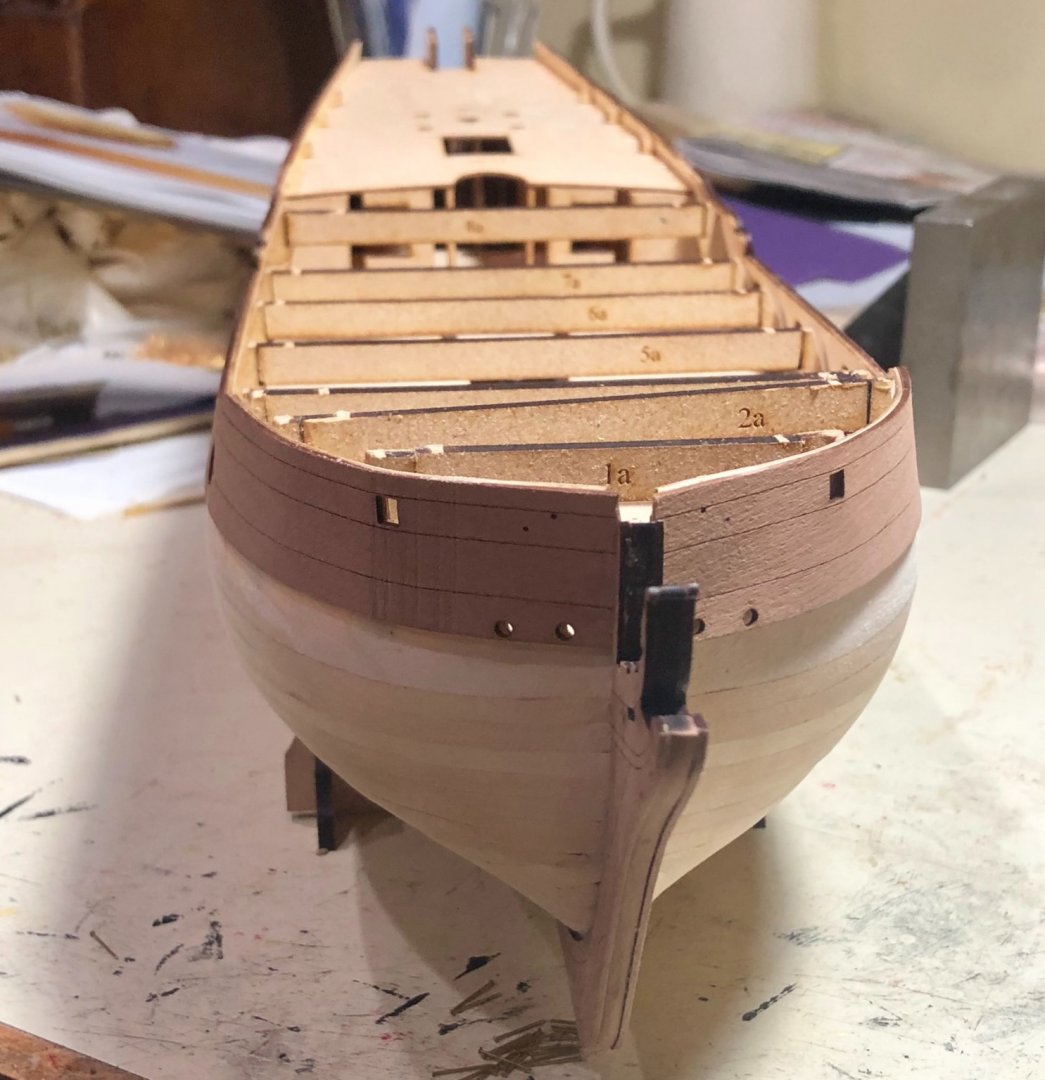
Thanks OC and happy New Year to you, as well. A small update. I removed the temporary beams and then the bulkhead tabs, using a chisel and finger pressure. Anything remaining was sanded flush. Next, I added the two deck pieces. These required a small amount of sanding for a snug fit. Although I was tempted, after seeing Rusty's planked decks, I chose to go with the kit decks. Next, I added the inner bulwark pieces. These required a bit more sanding and tweaking than I had expected, but turned out just fine. Lastly, I put a coat of Wipe-on Poly on the decks and the inner bulwarks. Bob


-
Beautifully done Rusty. Did you paint the blue background first and then paint the gold sculptures? Bob
- 201 replies
-
- 2
-
-
- Duchess of Kingston
- Vanguard Models
- (and 1 more)
-
Mike is spot on. Looks great Chuck. Bob
- 1,784 replies
-
- 2
-
-
- winchelsea
- Syren Ship Model Company
- (and 1 more)
-
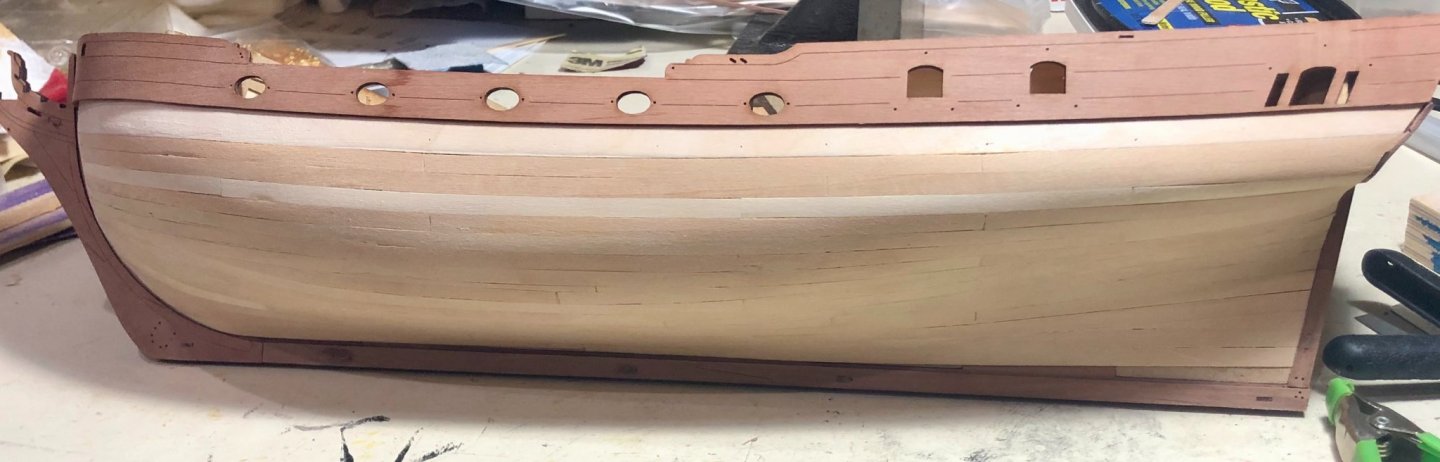
Thanks to all for the nice comments, opinions on lower hull painting, and "likes". It would appear that there is general agreement to paint, and I think that you've convinced me. Bob
-
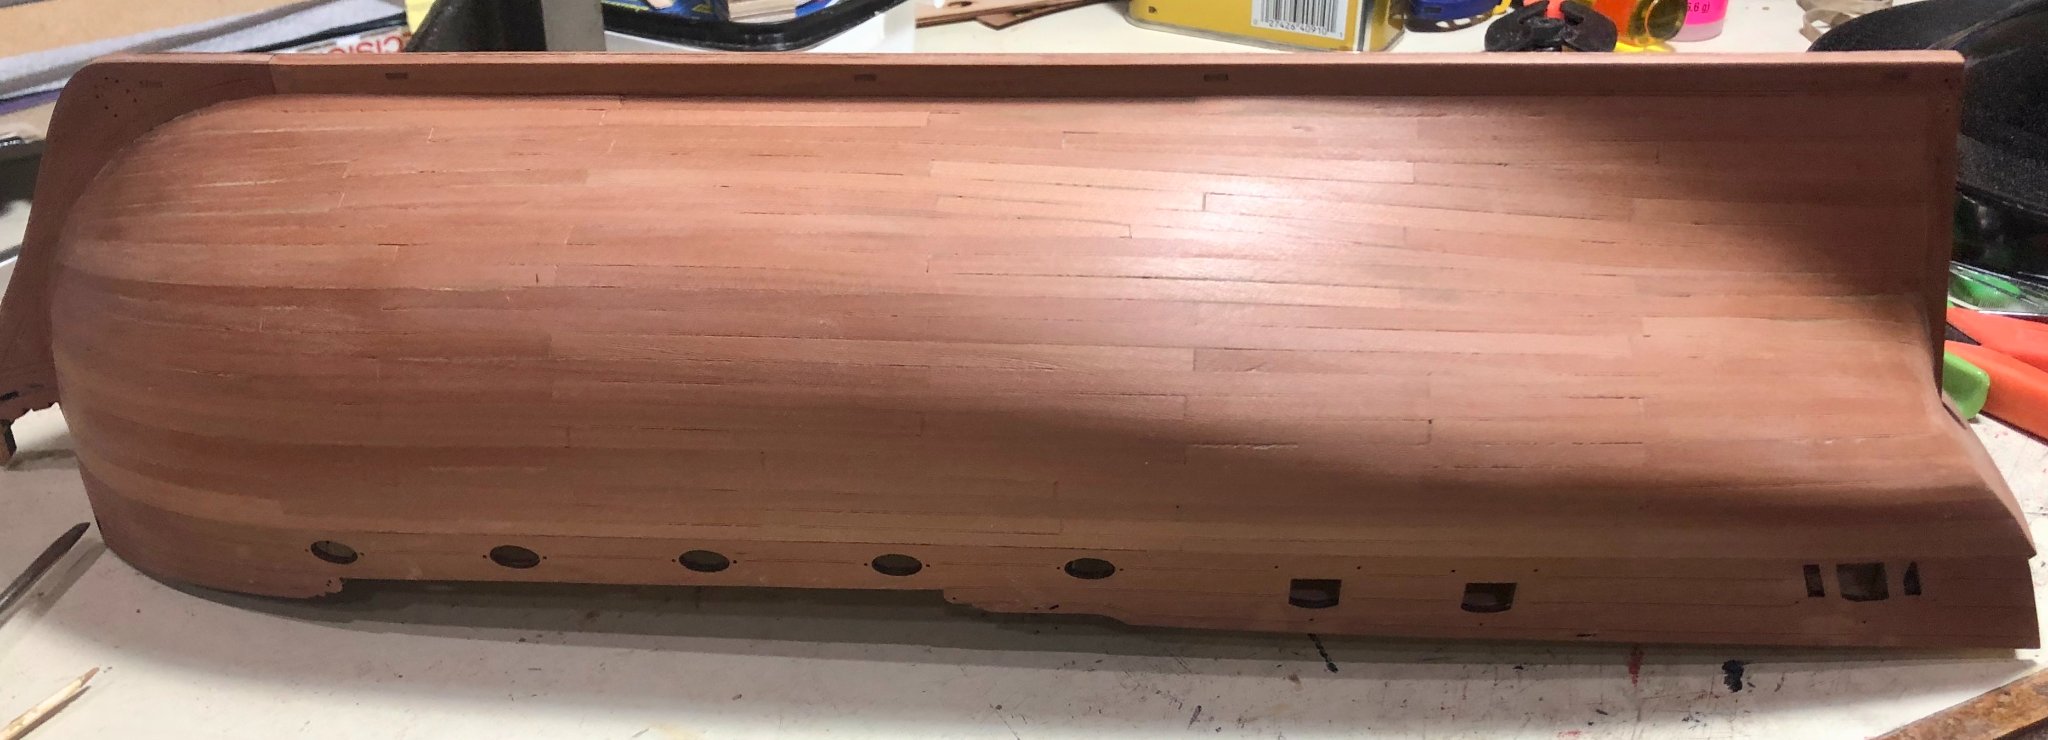
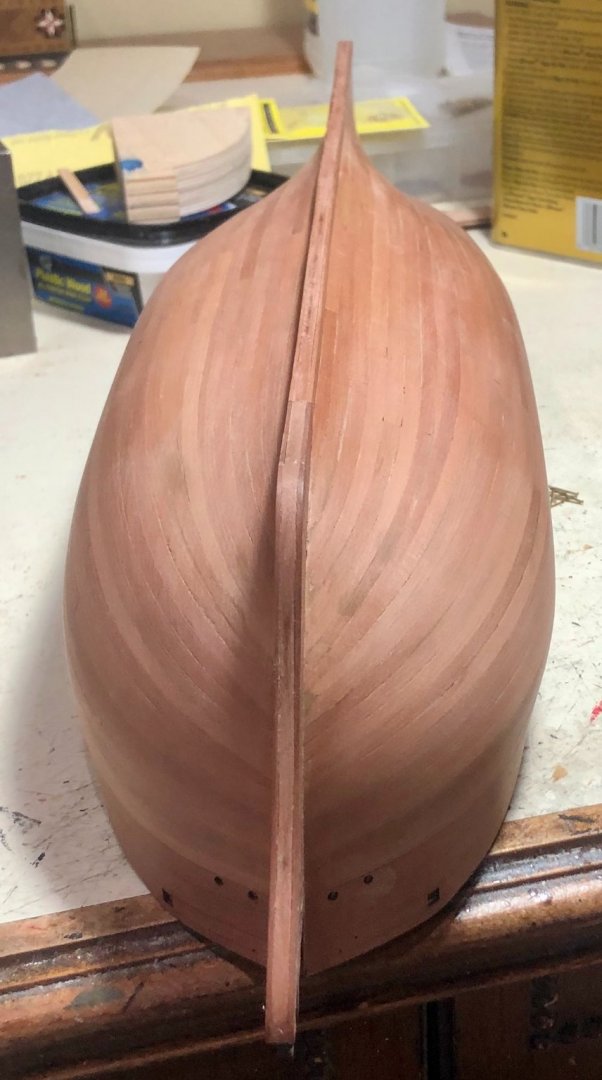
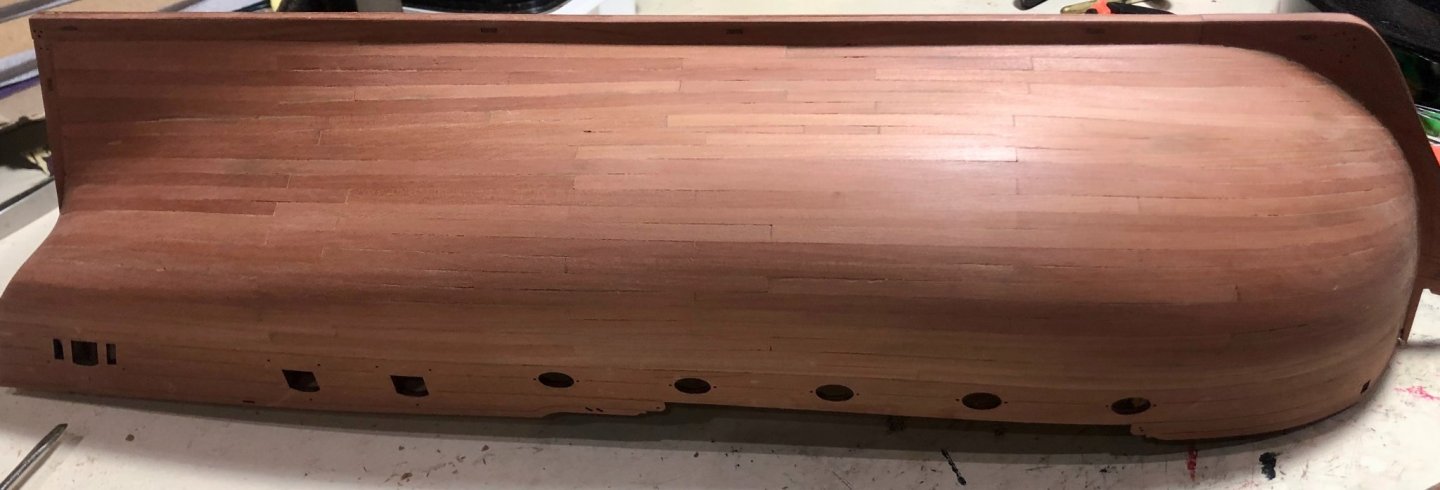
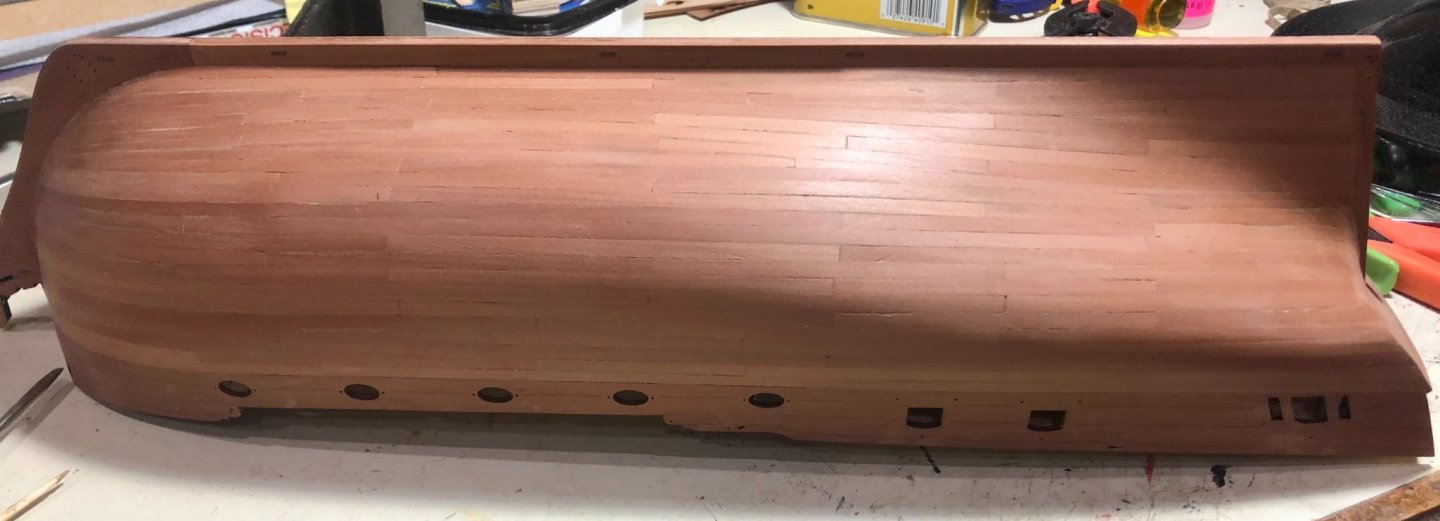
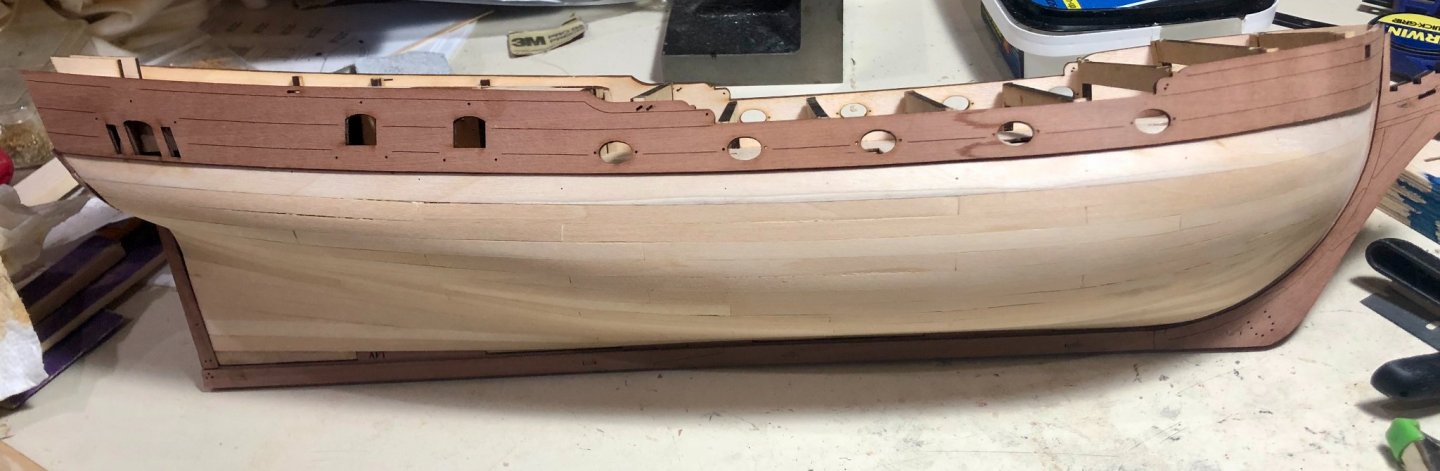
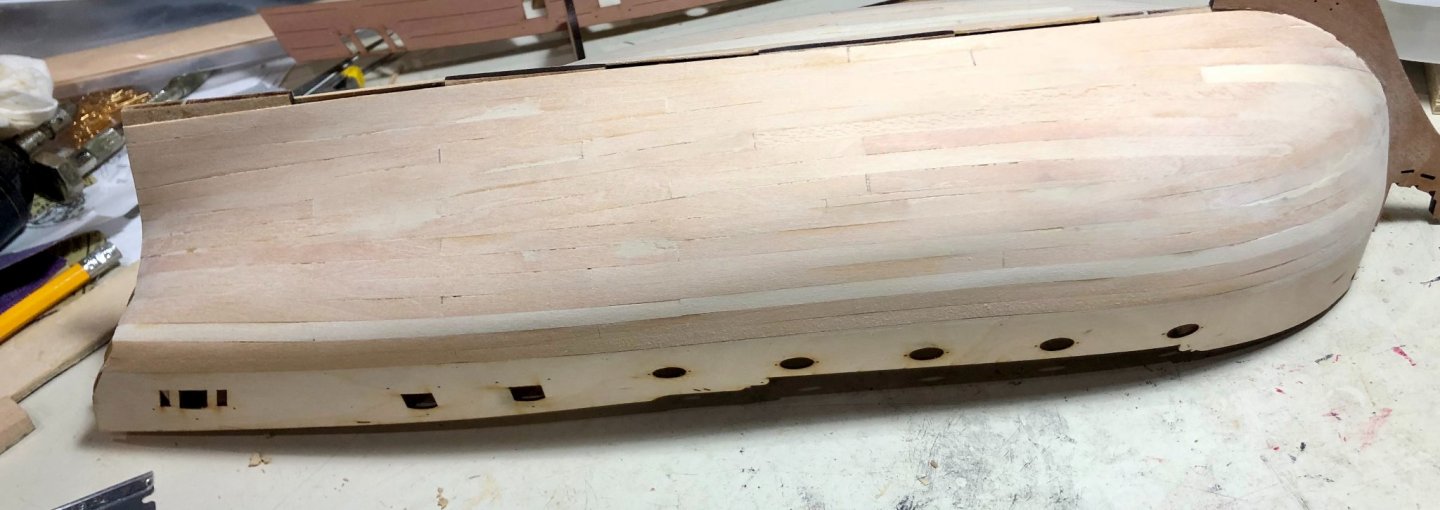
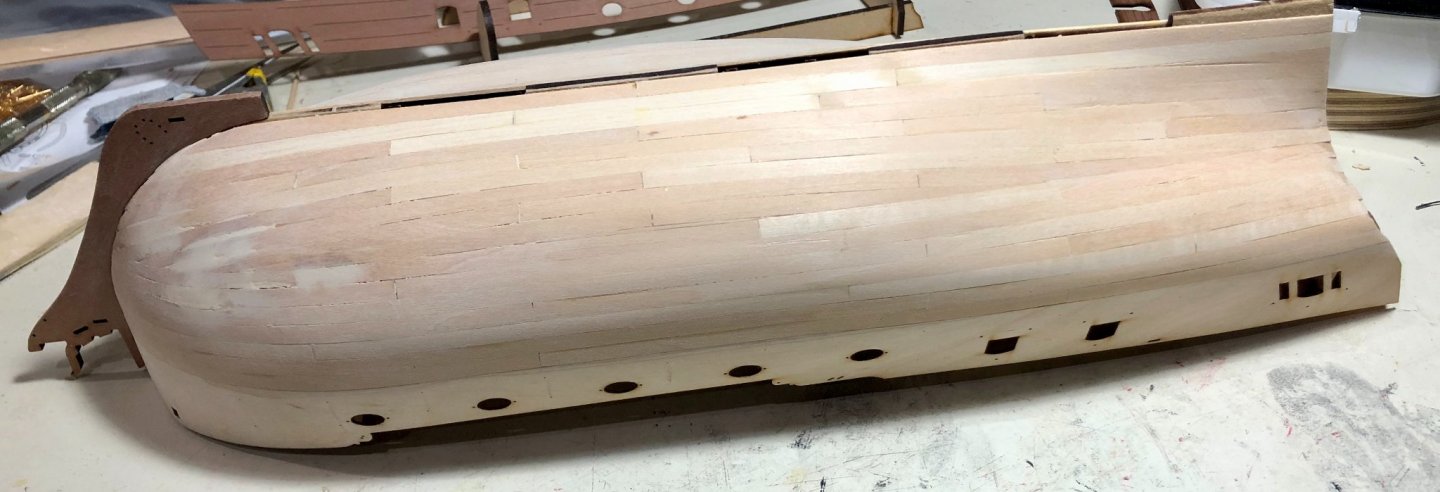
Thanks to all for the comments and "likes". I've now completed the second planking (it took a while). The planking has been sanded and given one coat of Wipe-on Poly. I like the look of the pear. In fact, I like it enough to consider not painting below the water line. I'd appreciate any thoughts on that. Bob


-
She's looking great Rusty, and you're moving with the speed of an Amazon one day delivery.😊 Bob
- 201 replies
-
- 3
-
-
- Duchess of Kingston
- Vanguard Models
- (and 1 more)
-
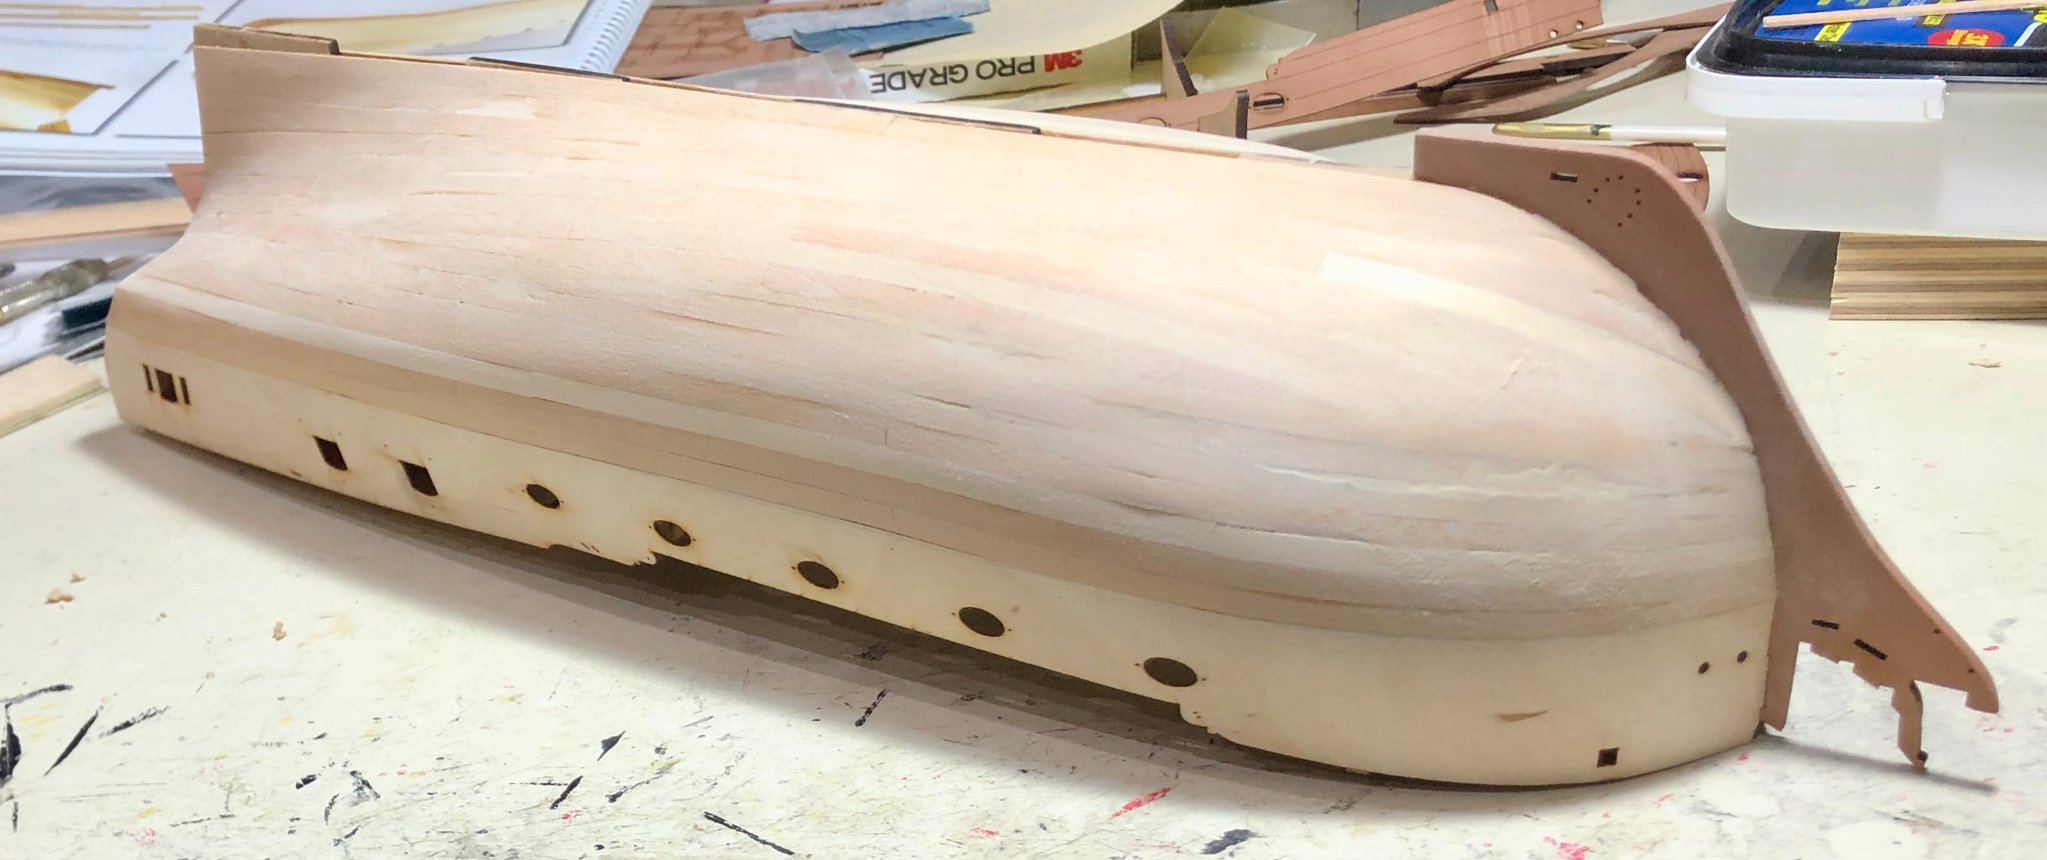
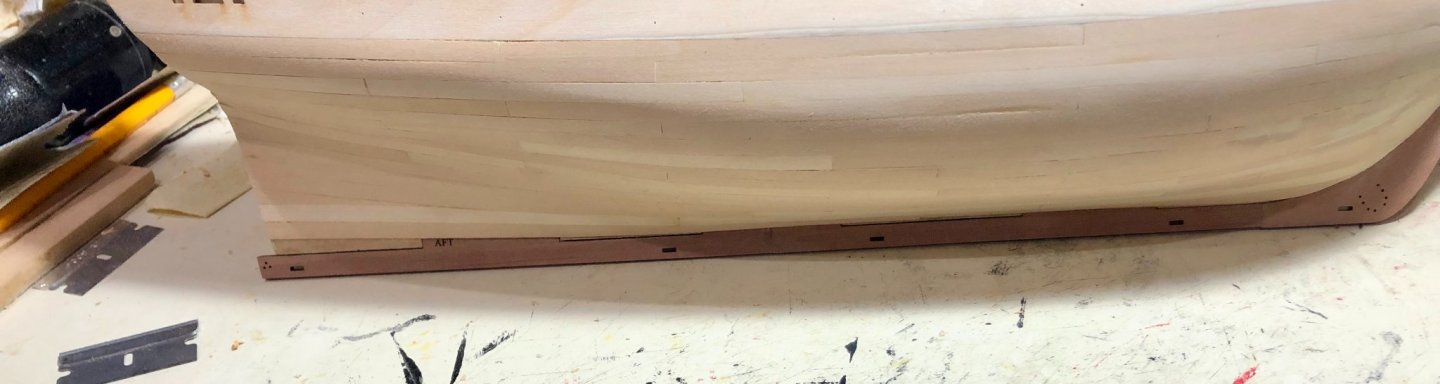
I have now added the outer bulwark facing pieces, as well as the facing pieces for the stem and keel. I have also added the stern post assembly. The precision with which these parts have been manufactured is truly impressive The use of the pre-drilled pin holes to key the parts together leaves virtually no room for error. Finally, I added the two counter pieces.On reflection, I would add them before doing the first planking to avoid leaving the gap (my mistake) below the counter that I will have to deal with when doing the second planking. Now, it's on to the second hull planking. Bob

-
Thanks so much OC and the "likes". Bob
-
It took me a bit, but I've finished the first planking. I used scale length planks, rather than full length, because I've done it that way for years and find it much easier. I didn't worry about a prototypical planking pattern, however, since it will all be covered over by the second planking, which I will do properly. The goal was merely to get a smooth, even surface, which was achieved with a little filler and a lot of sanding. After the planking, I added the keel pieces. Bob

-
USF Essex by mtbediz - FINISHED - 1:50
rafine replied to mtbediz's topic in - Build logs for subjects built 1801 - 1850
She looks great Mustafa. I can't believe how quickly you are going. Bob -
Thanks so much Glenn, Rusty and the "likes". Bob