rafine
-
Posts
2,932 -
Joined
-
Last visited
Content Type
Profiles
Forums
Gallery
Events
Everything posted by rafine
-
 Thanks so much Tom for the comments and the "likes". I appreciate your appreciation. Fred, I cut my bow margin planks from sheet. I tried edge bending, but got lumps and bumps. At least with the cedar, grain was not an issue from an appearance standpoint. In addition. after the focs'l framing and decking is in place, it will hardly be noticeable. BTW, I'm now working on Chapter five and will be posting soon. Bob
 -
Looks great Mark. I can only imagine the fun you had fully rigging those carronades at 1:72. Bob
-
She’s looking great Matt. Bob
-
Thanks so much Glenn, Matt, Derek and the "likes". My methods and sequence are what I have come to be comfortable with over a long period of time. I don't claim them to be the best or only way to do things and I know from discussions on this site and elsewhere that there are others who disagree, particularly about rigging from the mizzen forward. My only concern is with the best methods for me. If they work for others, all the better. Like you, I learned the hard way that it is easier for me to rig shrouds and stays before upper mast sections are in place. Bob
-
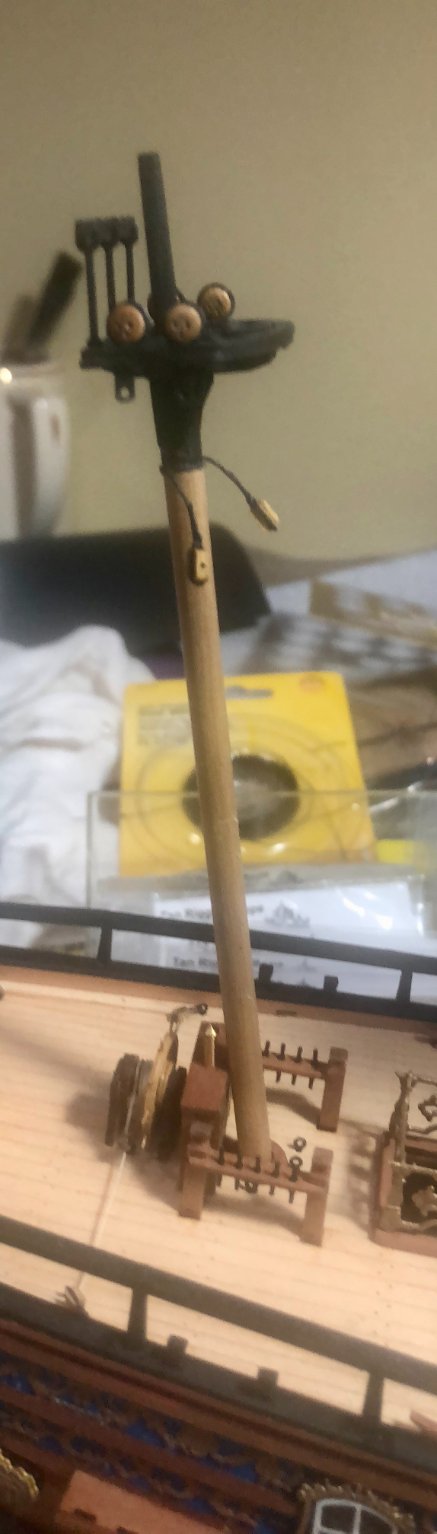
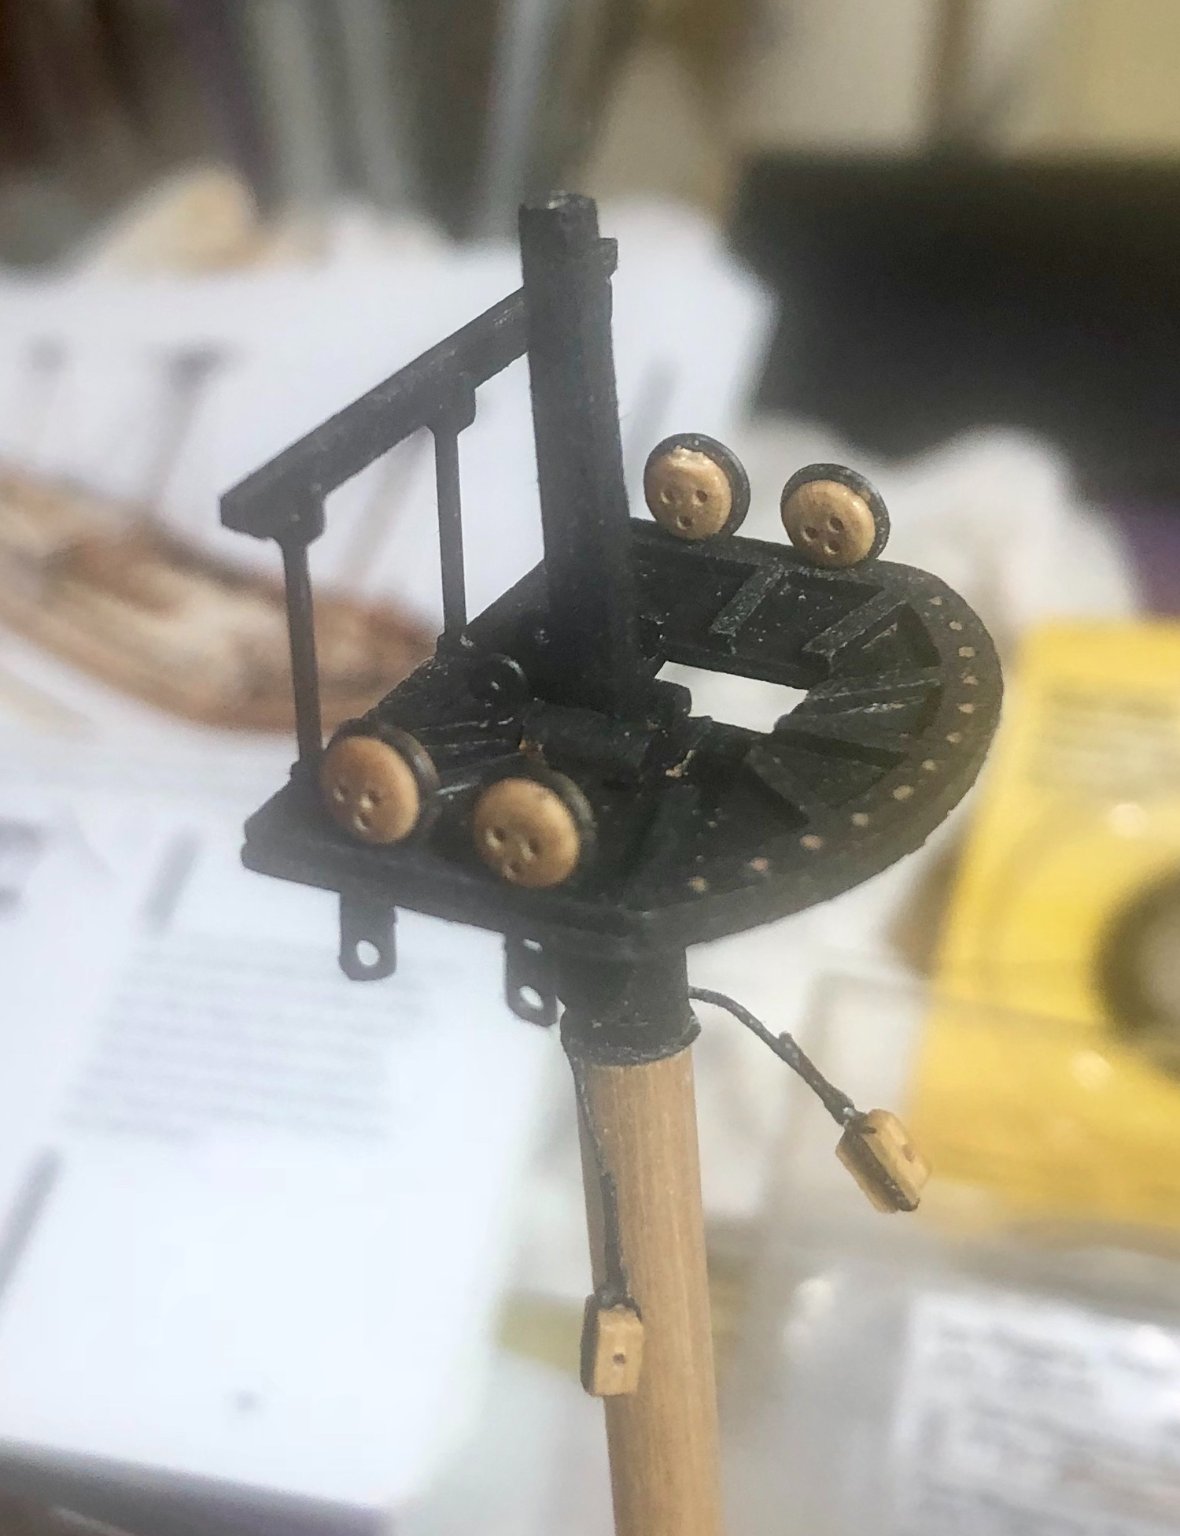
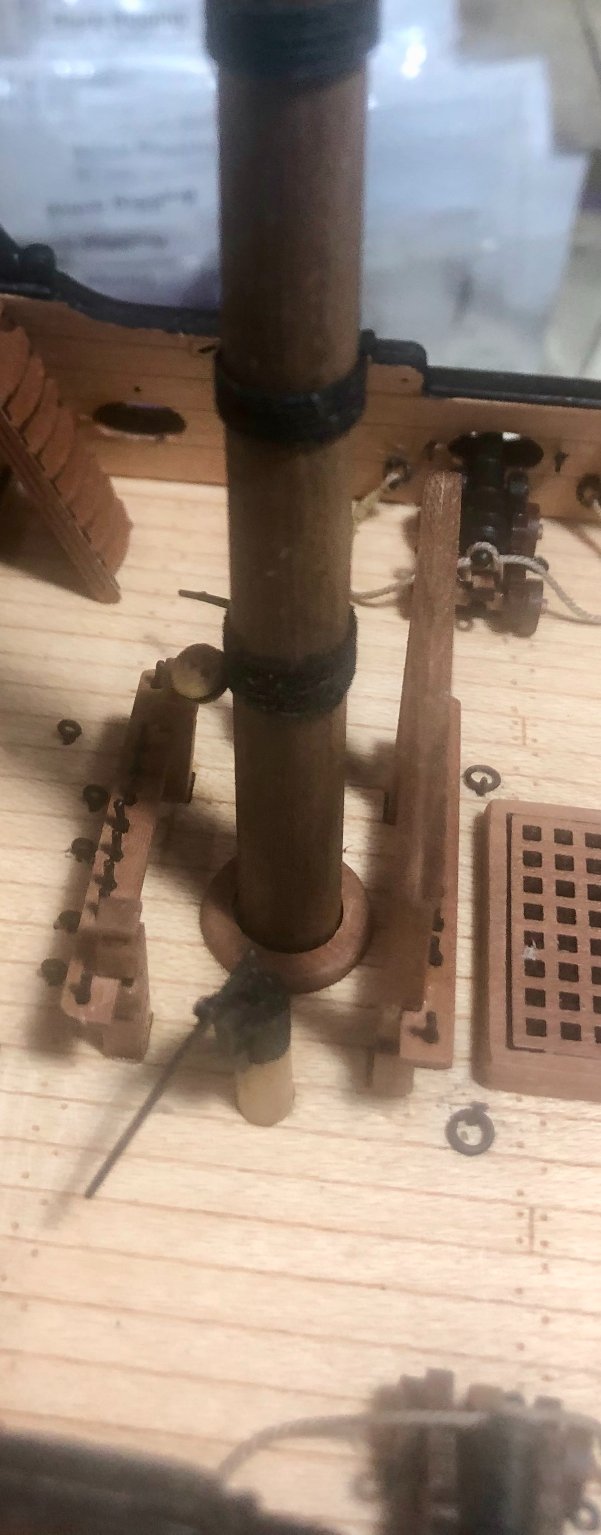
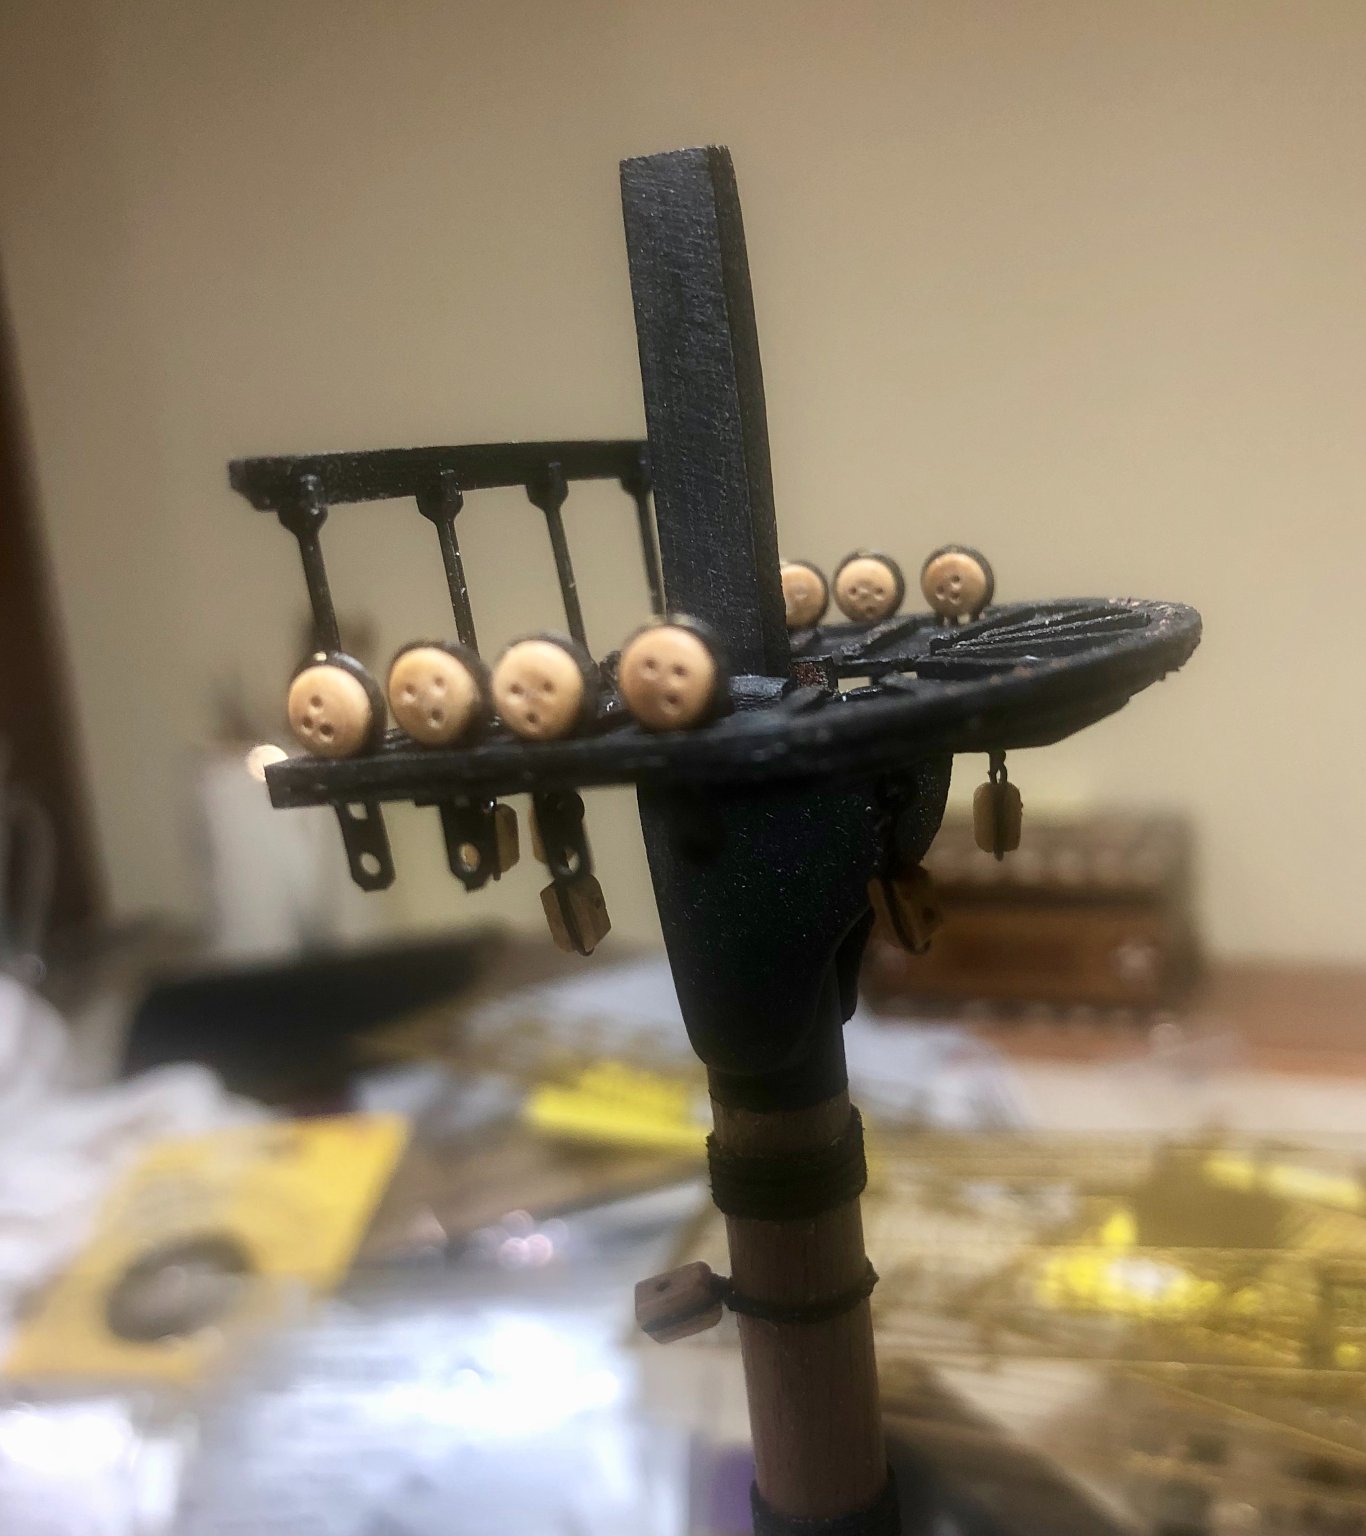
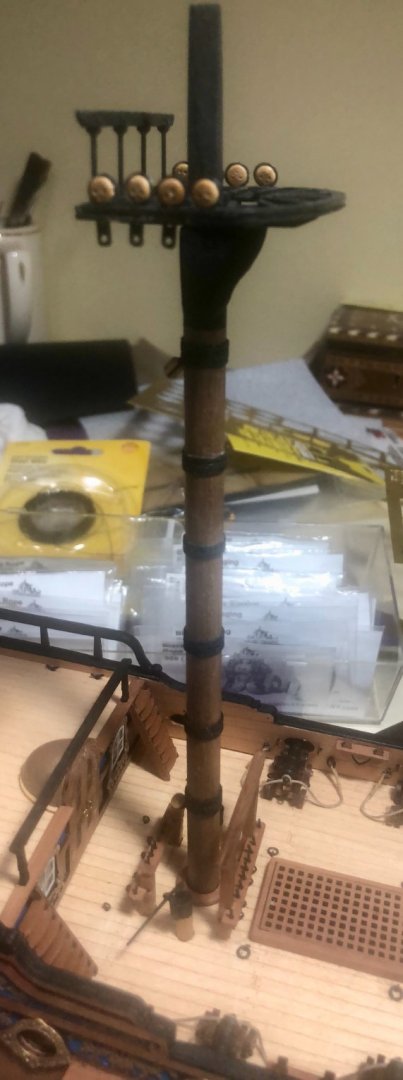
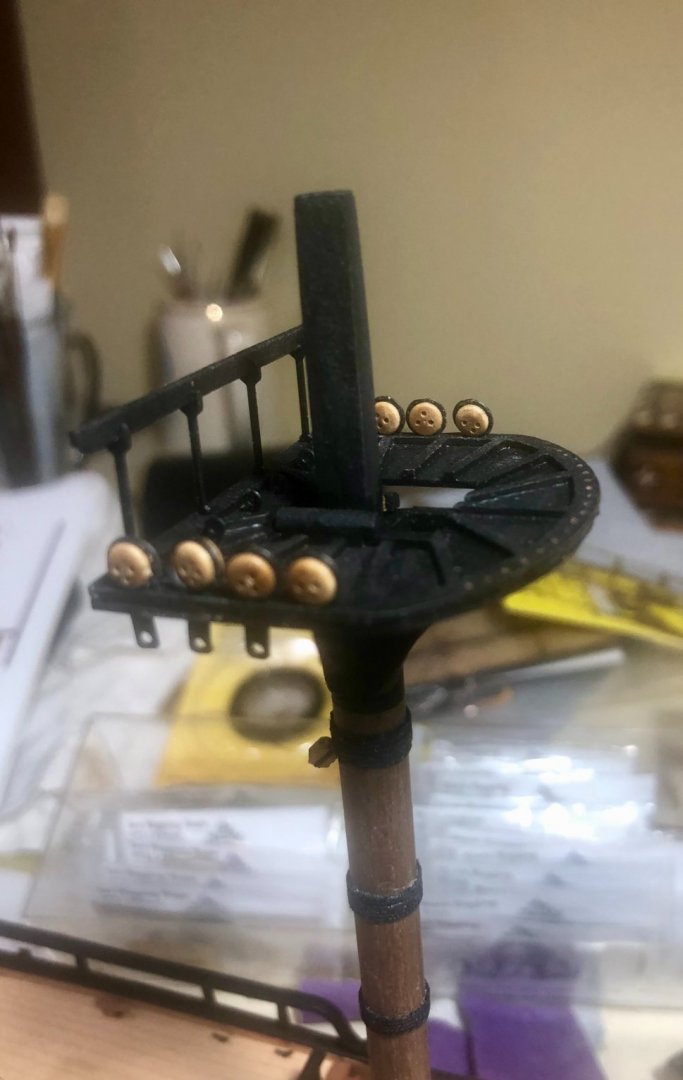
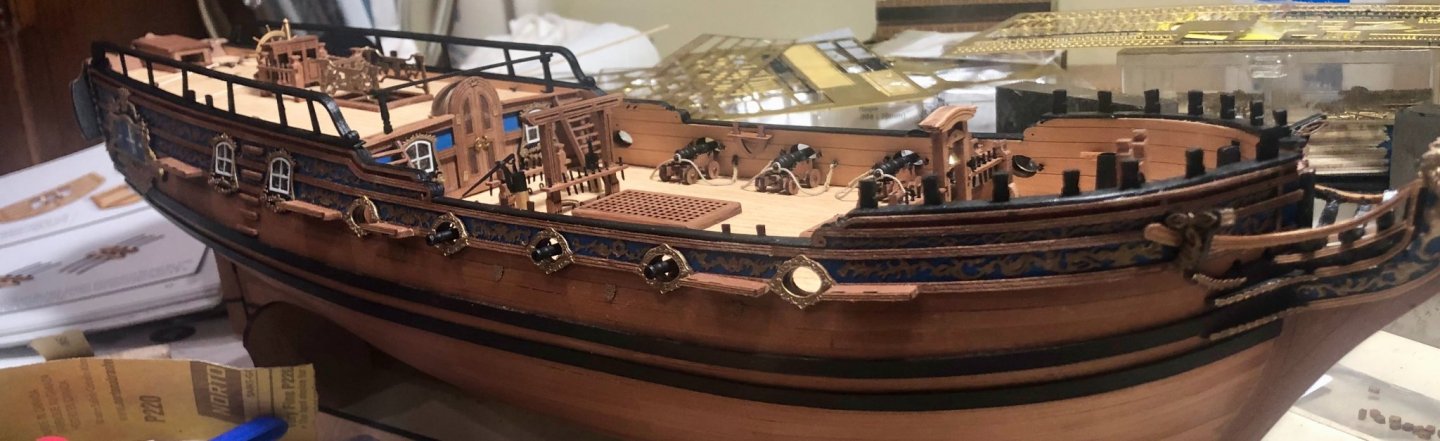
I have now begun work on the masting and rigging. The first work was to construct and mount the lower masts. This involved shaping the mast heads, adding the cheeks, making up and mounting the platform assemblies, doing the wooldings, adding deadeyes and blocks, and mounting the completed assemblies. Blocks attached to the head will not be done until after the lower shrouds and stays are in place. Over the years, I have settled on my own sequence of steps in the rigging process. I will proceed by doing the lower shrouds and stays before constructing and mounting the upper mast sections. The rigging will go from the mizzen forward to maximize access. Bob


-
Thanks so much Erik. Jim, I used a combination of medium CA on certain parts and Micro Krystal Klear, not technically a glue, on the thin decorative pieces attached to the sides of the hull and the head. Bob
-
Thanks Rusty. I'm glad to see that I wasn't the only one with a problem. Bob
-
Thanks so much Glenn and the “likes”. Bob
-
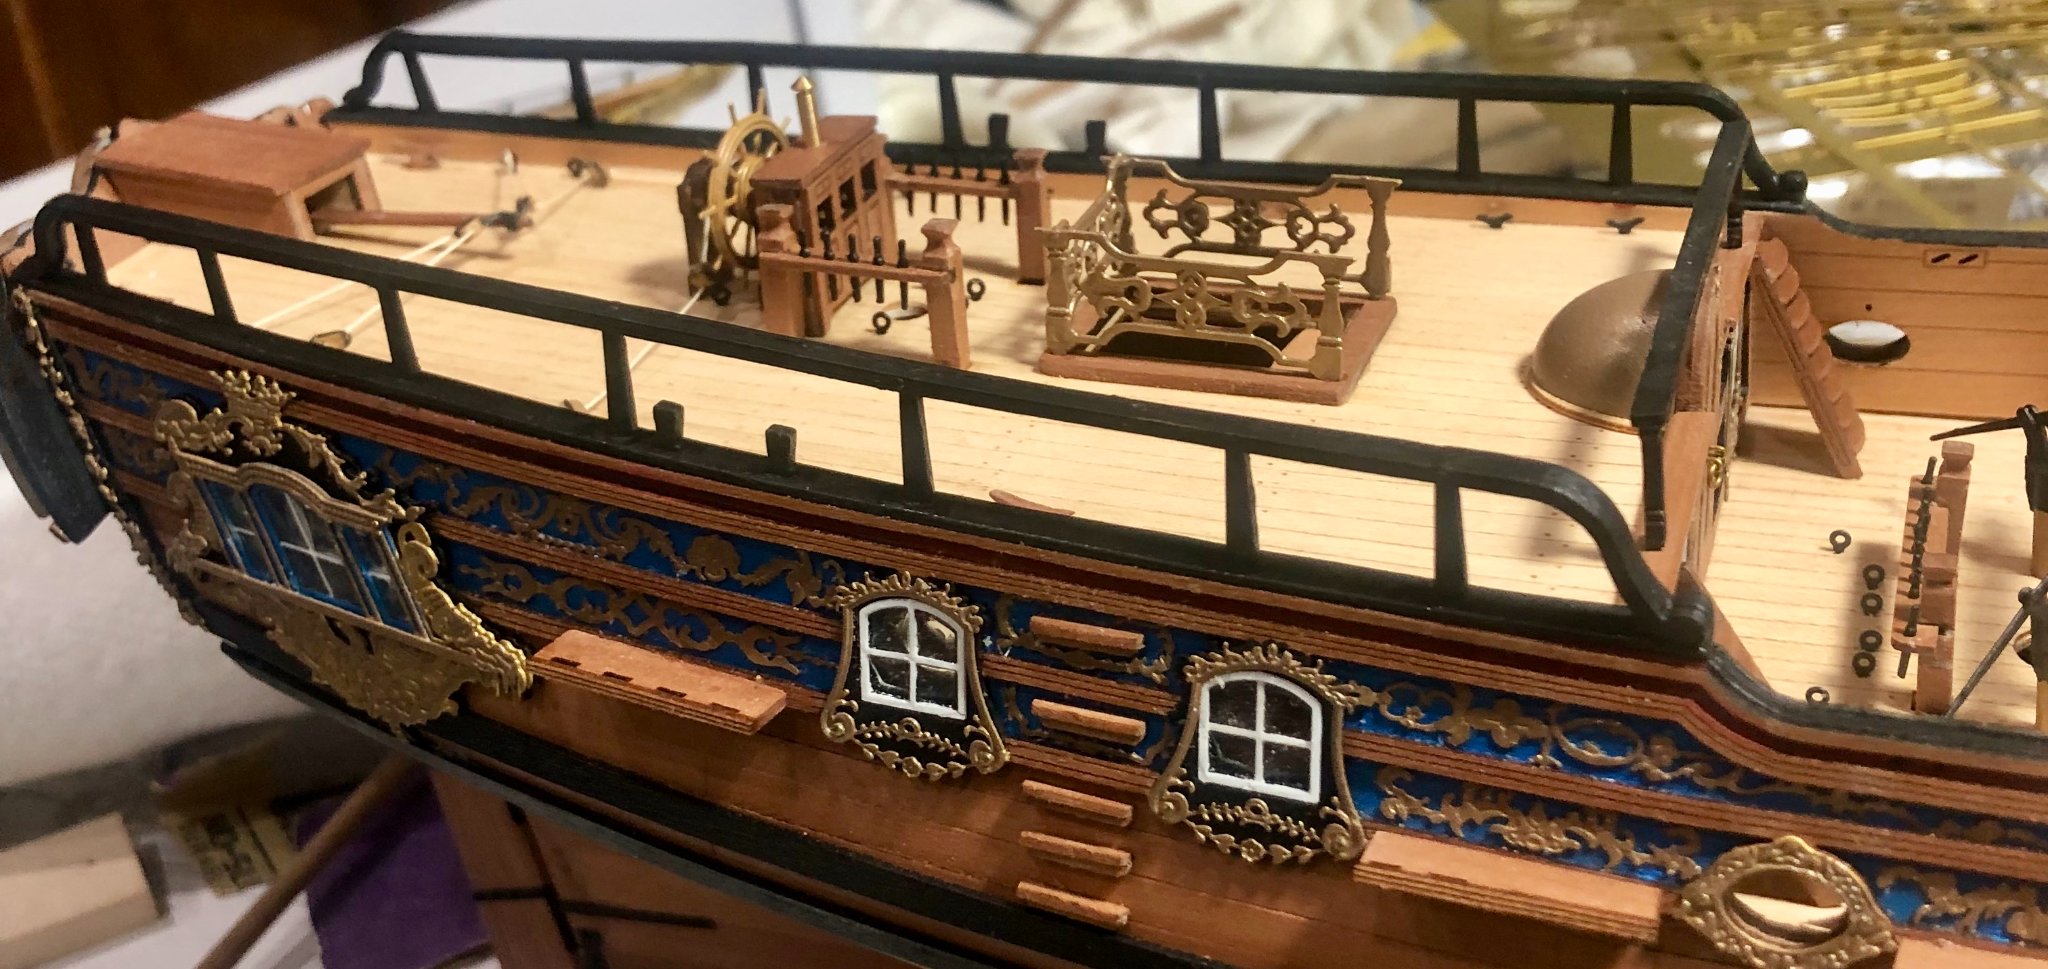
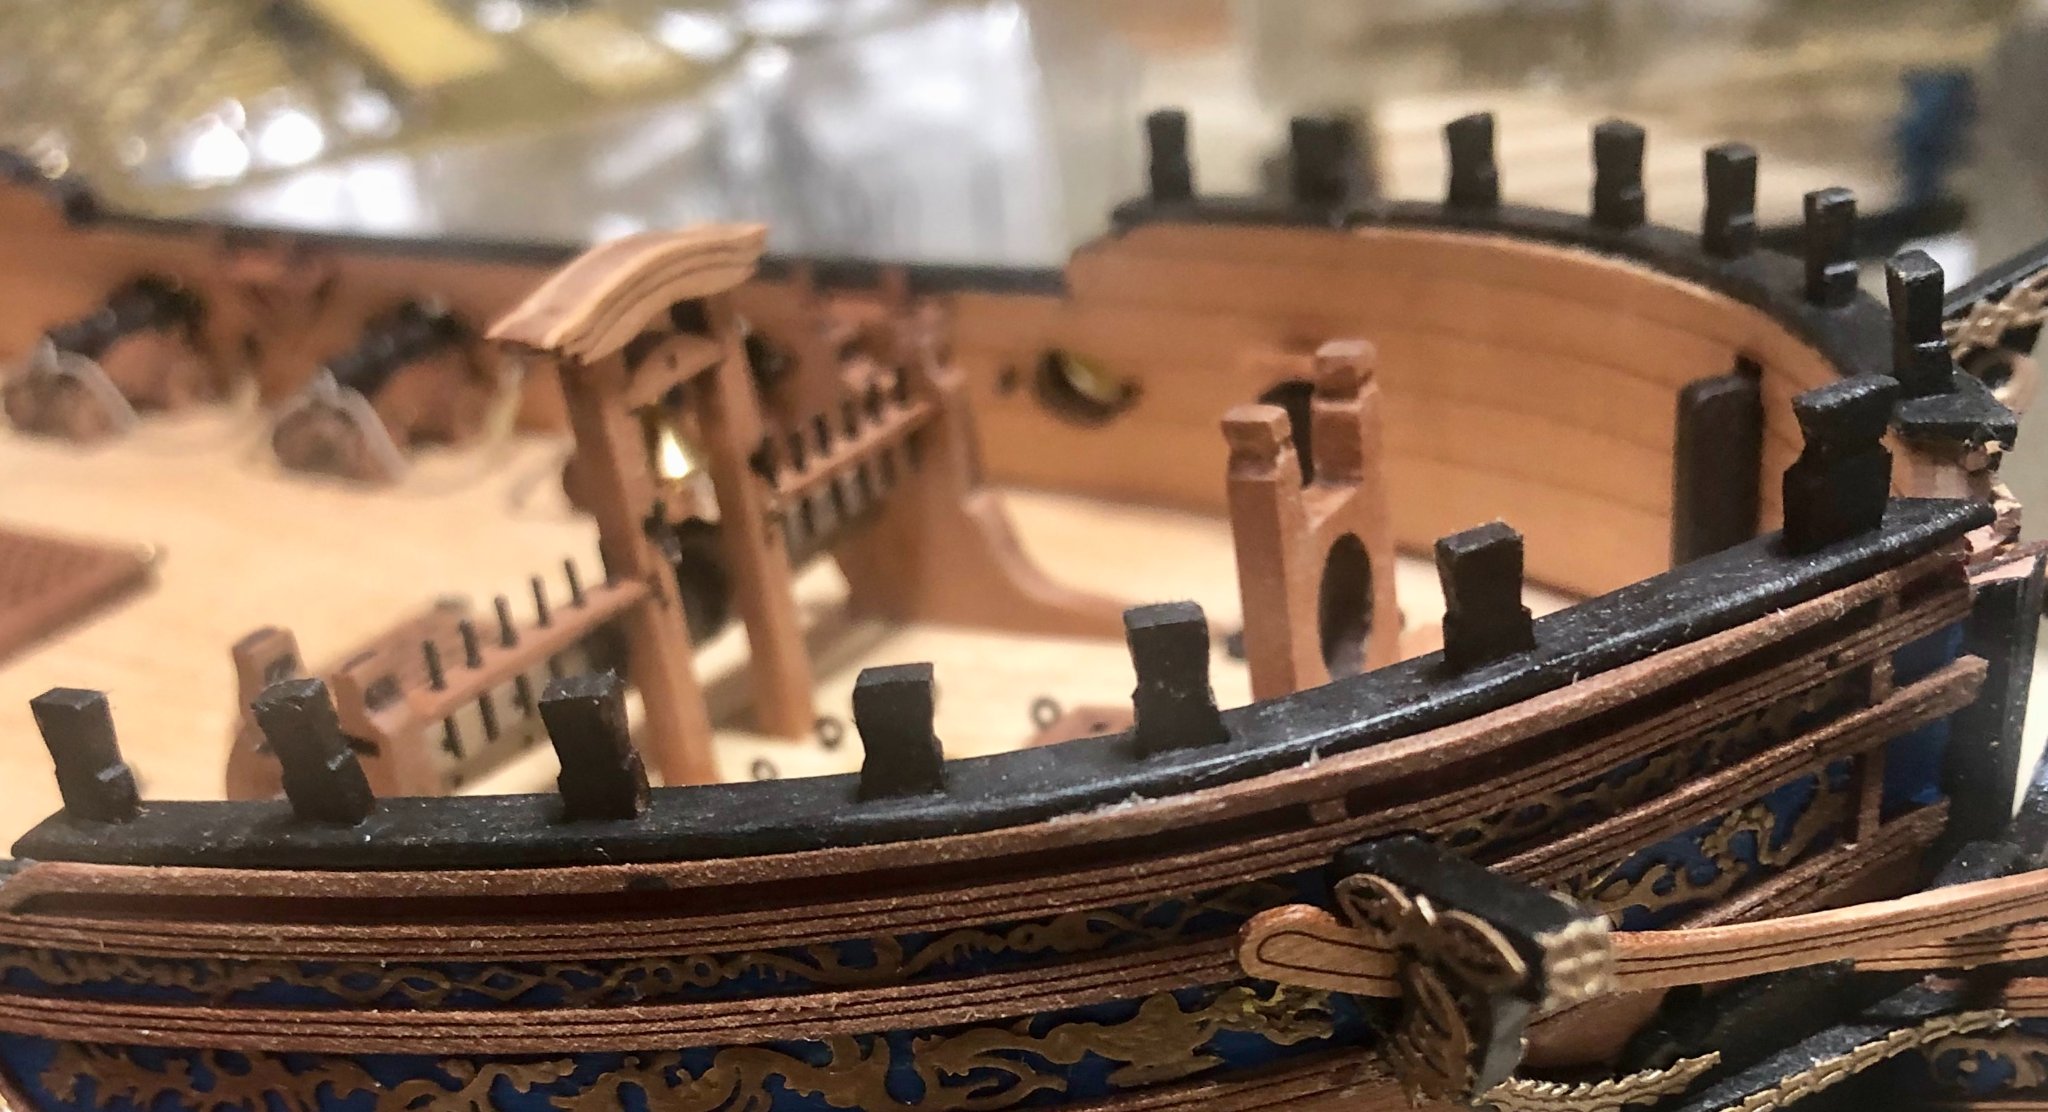
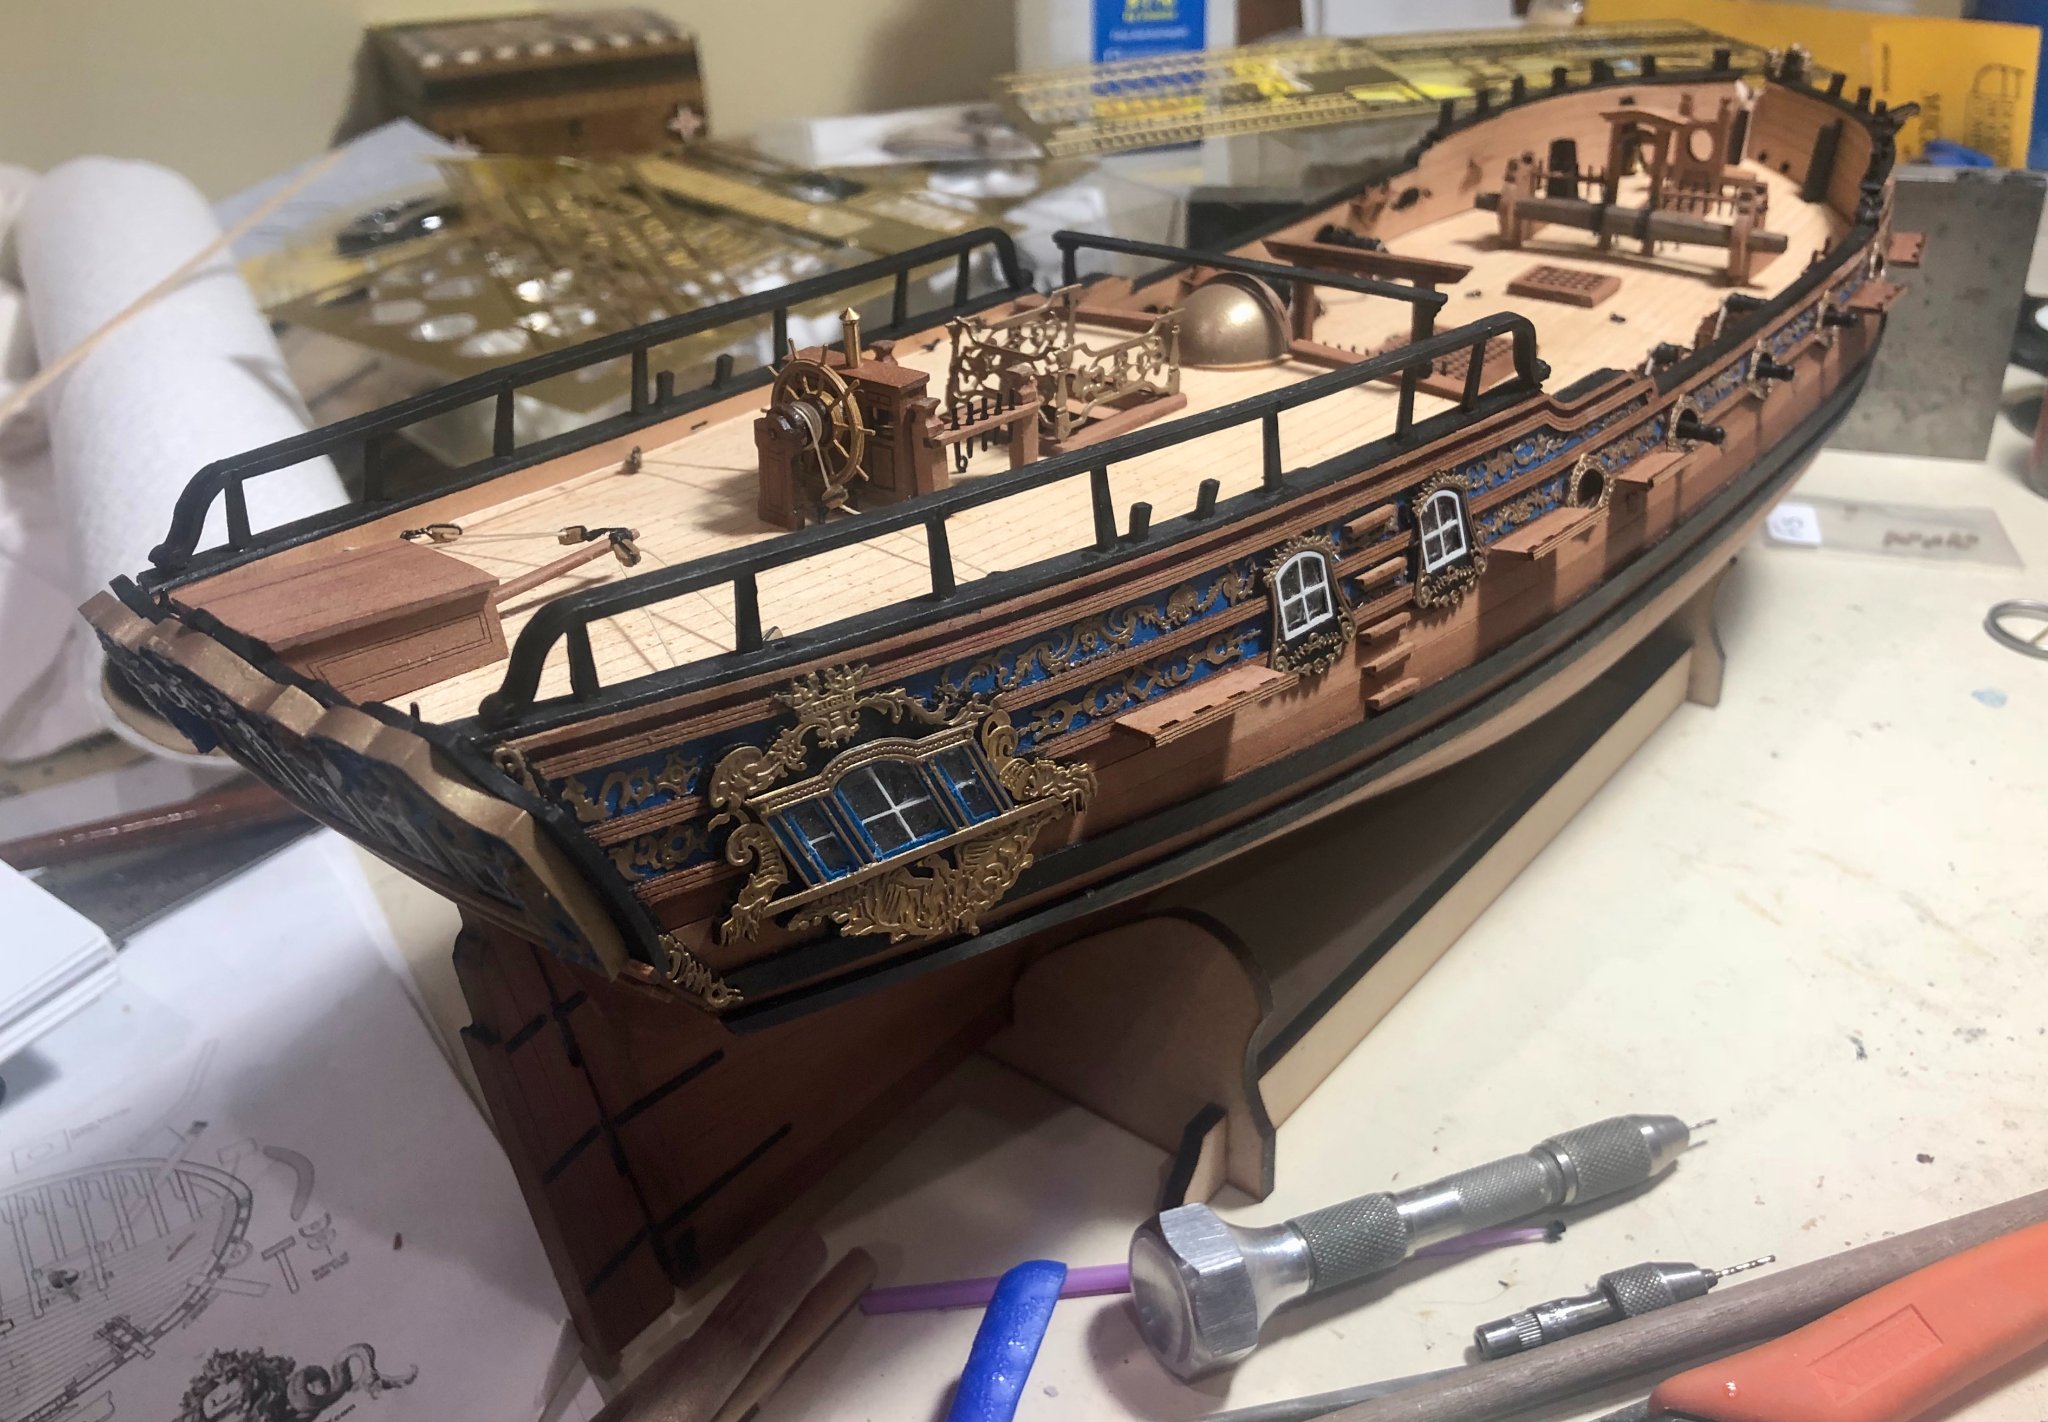
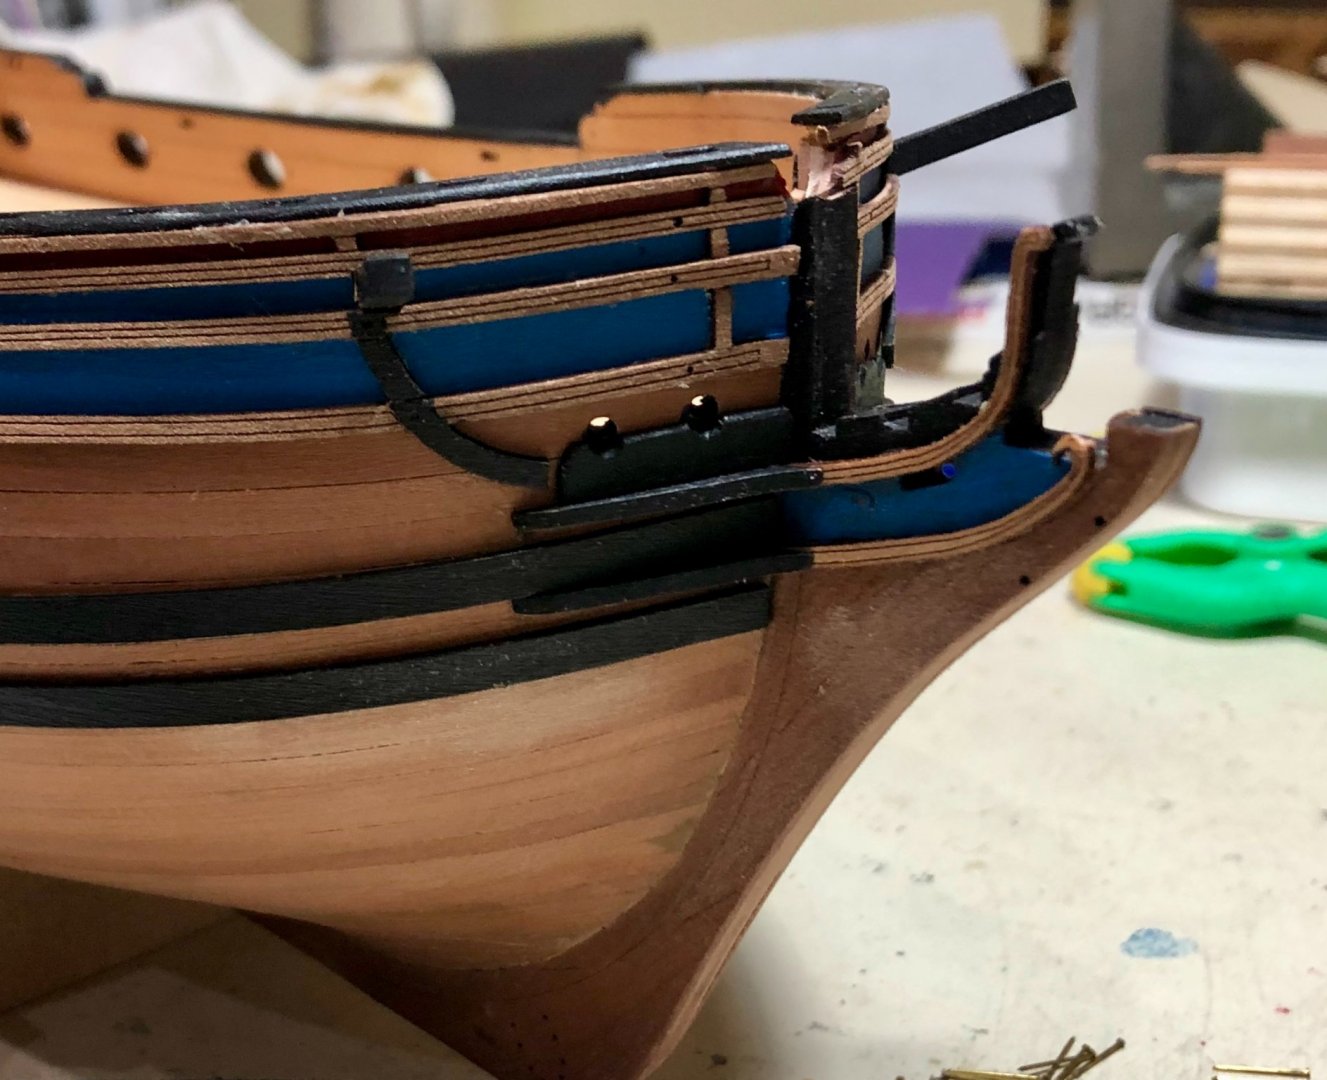
I've now completed work on the hull. This include the quarter deck and aft rails, the quarterdeck ladders, the bow timberheads and completion of work on the head. The head is always fussy work, even if the parts are well designed and made, and I found this one no exception. The surprise to me was the difficulty that I encountered with the aft rails Perhaps due to my own clumsiness, they proved to be quite fragile and hard to fit into the mortises. My other problem was entirely of my own making. When I had done the quarterdeck bulkhead, I had added finishing pieces at the end of the deck, without looking ahead and realizing that there were pieces that formed the base of the quarterdeck rail. Without the mortises in the laser cut pieces, I had to pin the rail supports in place. Now it's on to masting and rigging. Bob


-
Thanks so much Rusty and the "likes". Bob
-
Thanks so much Jean-Paul, Matt and the "likes". Always greatly appreciated. Bob
-
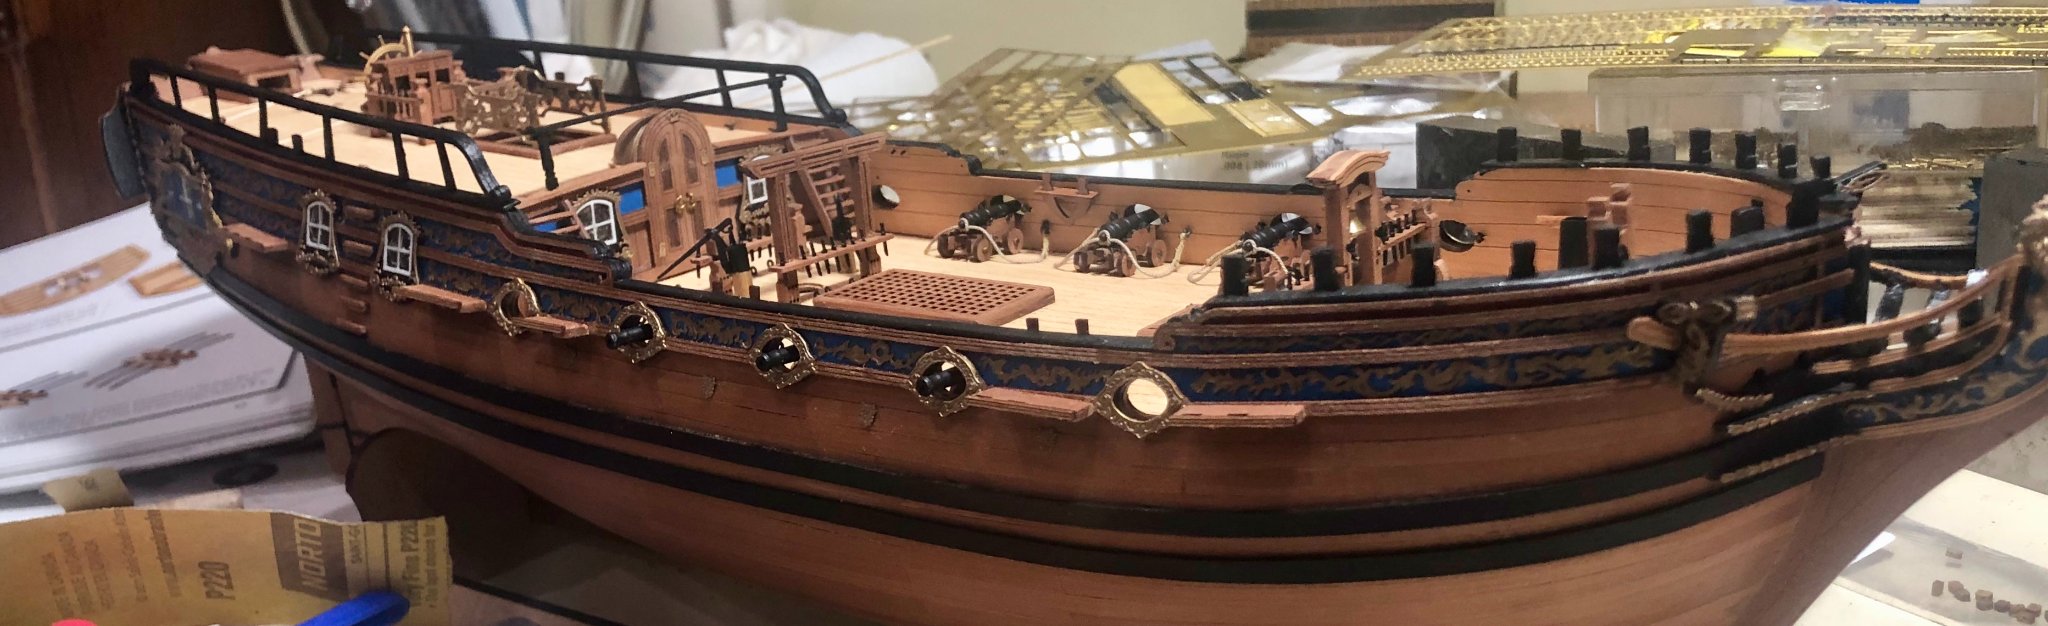
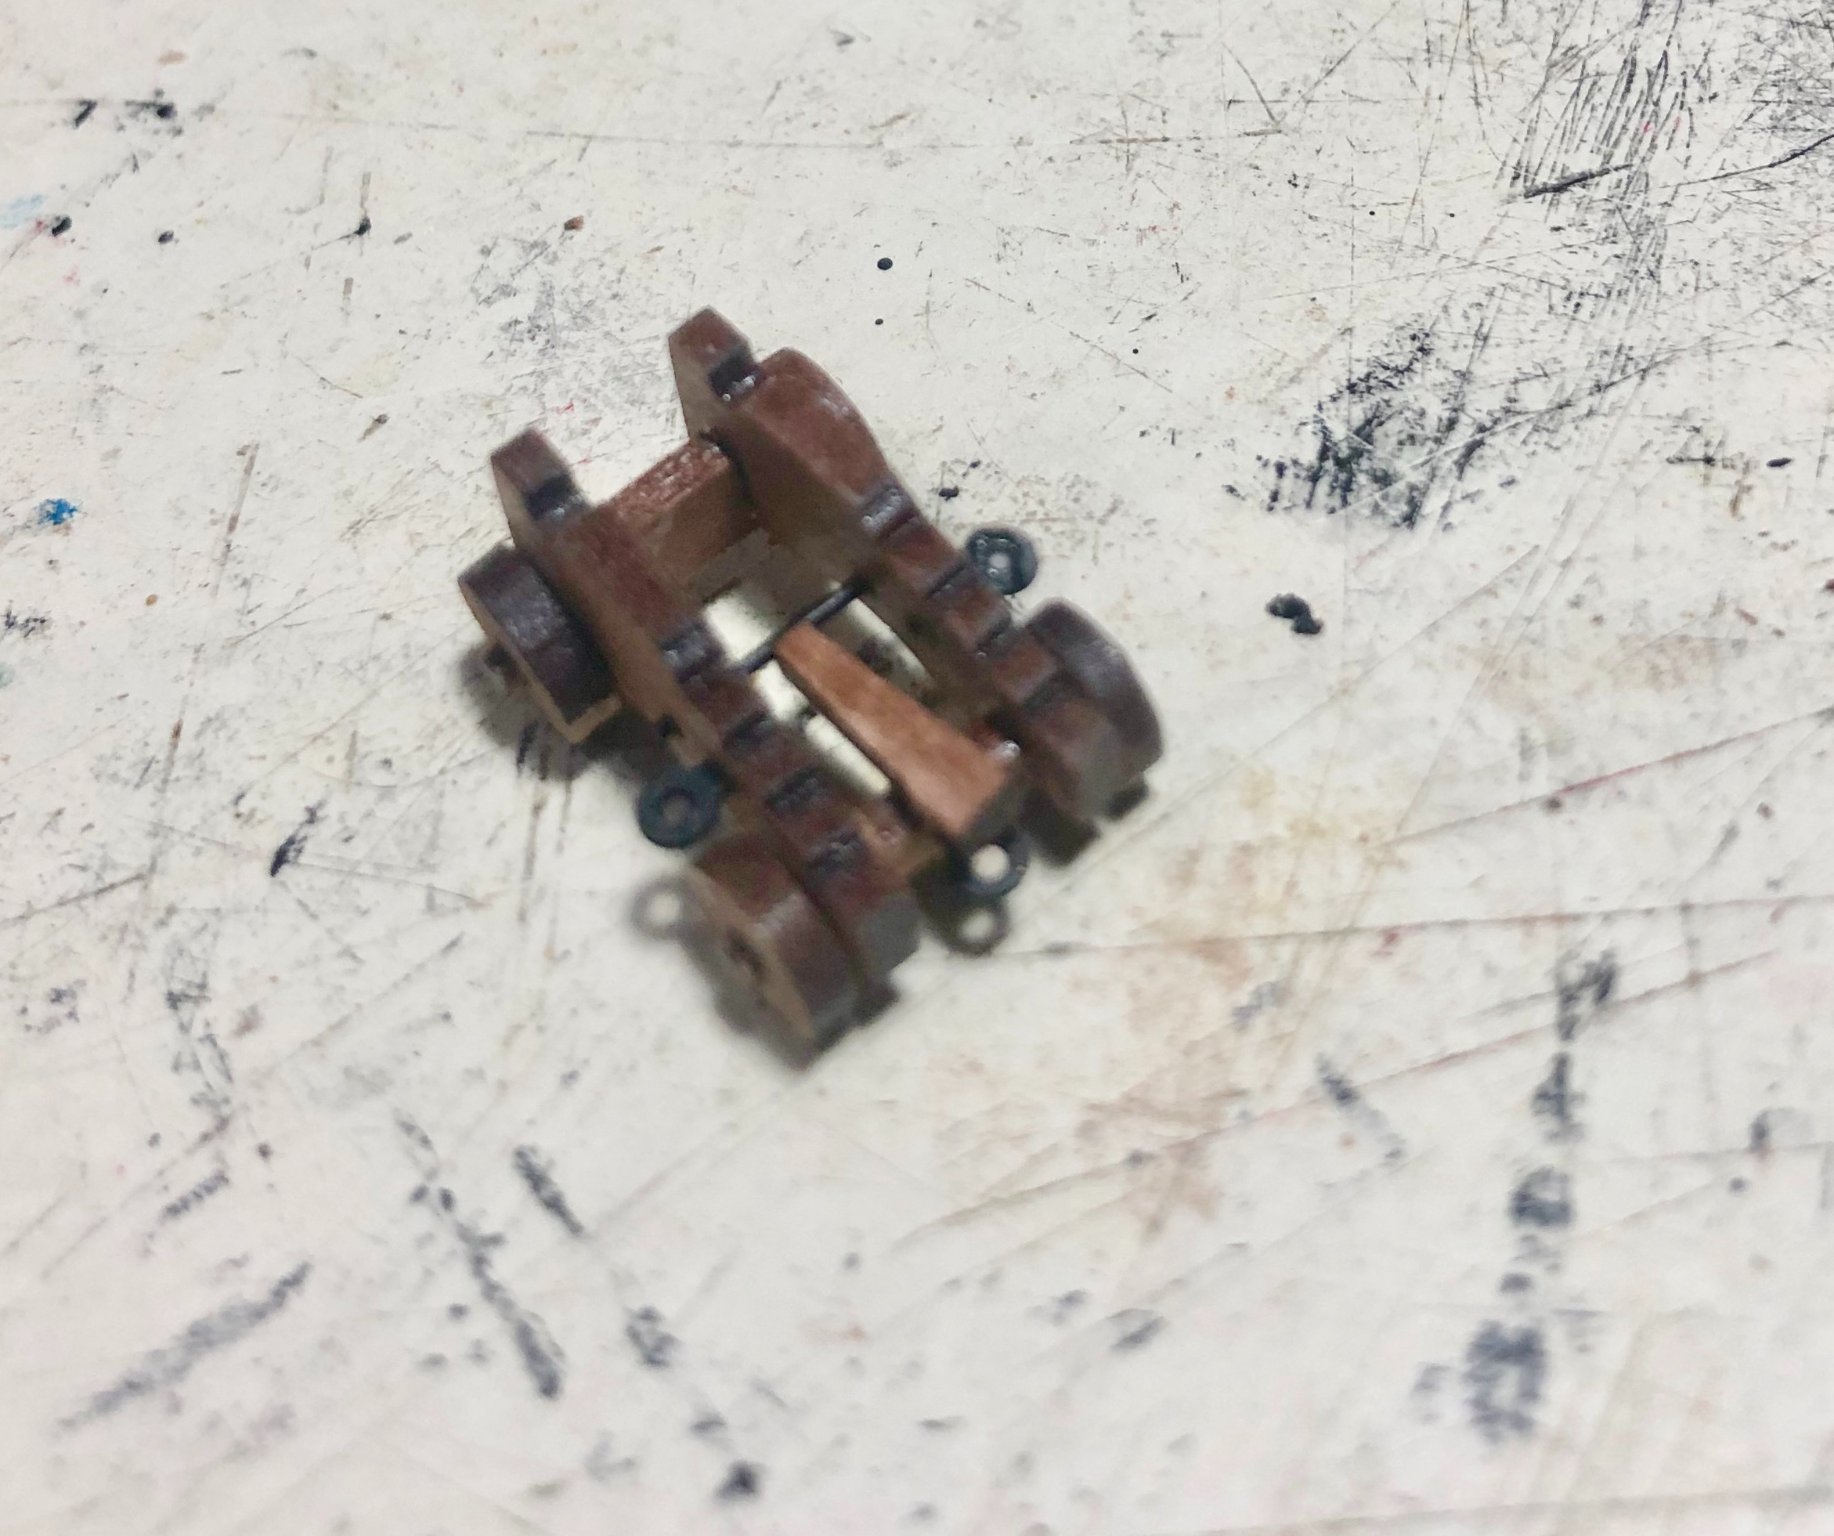
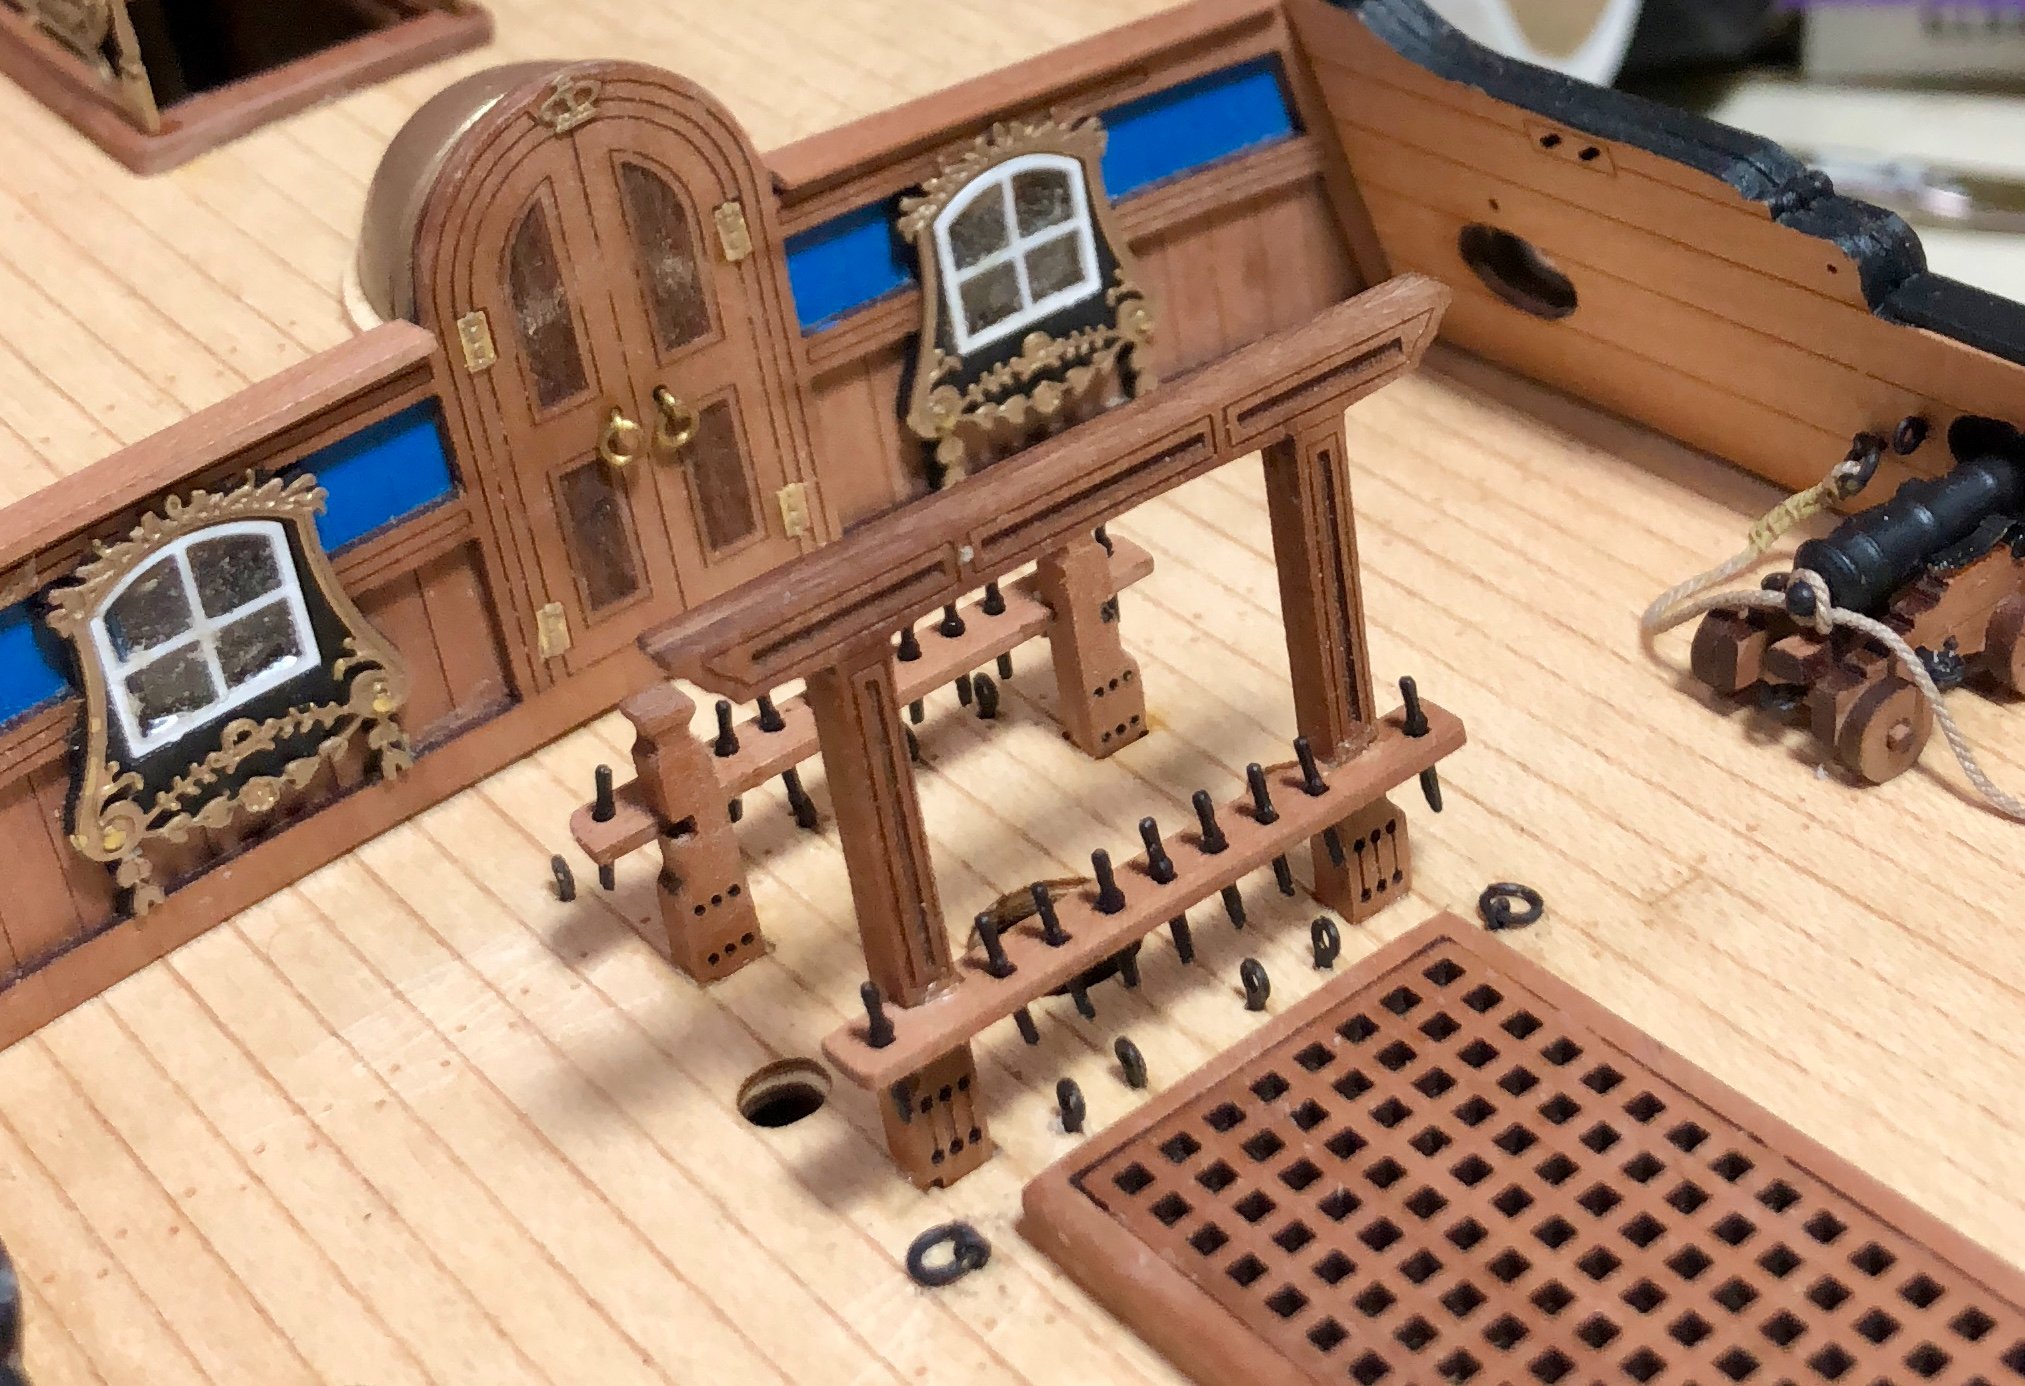
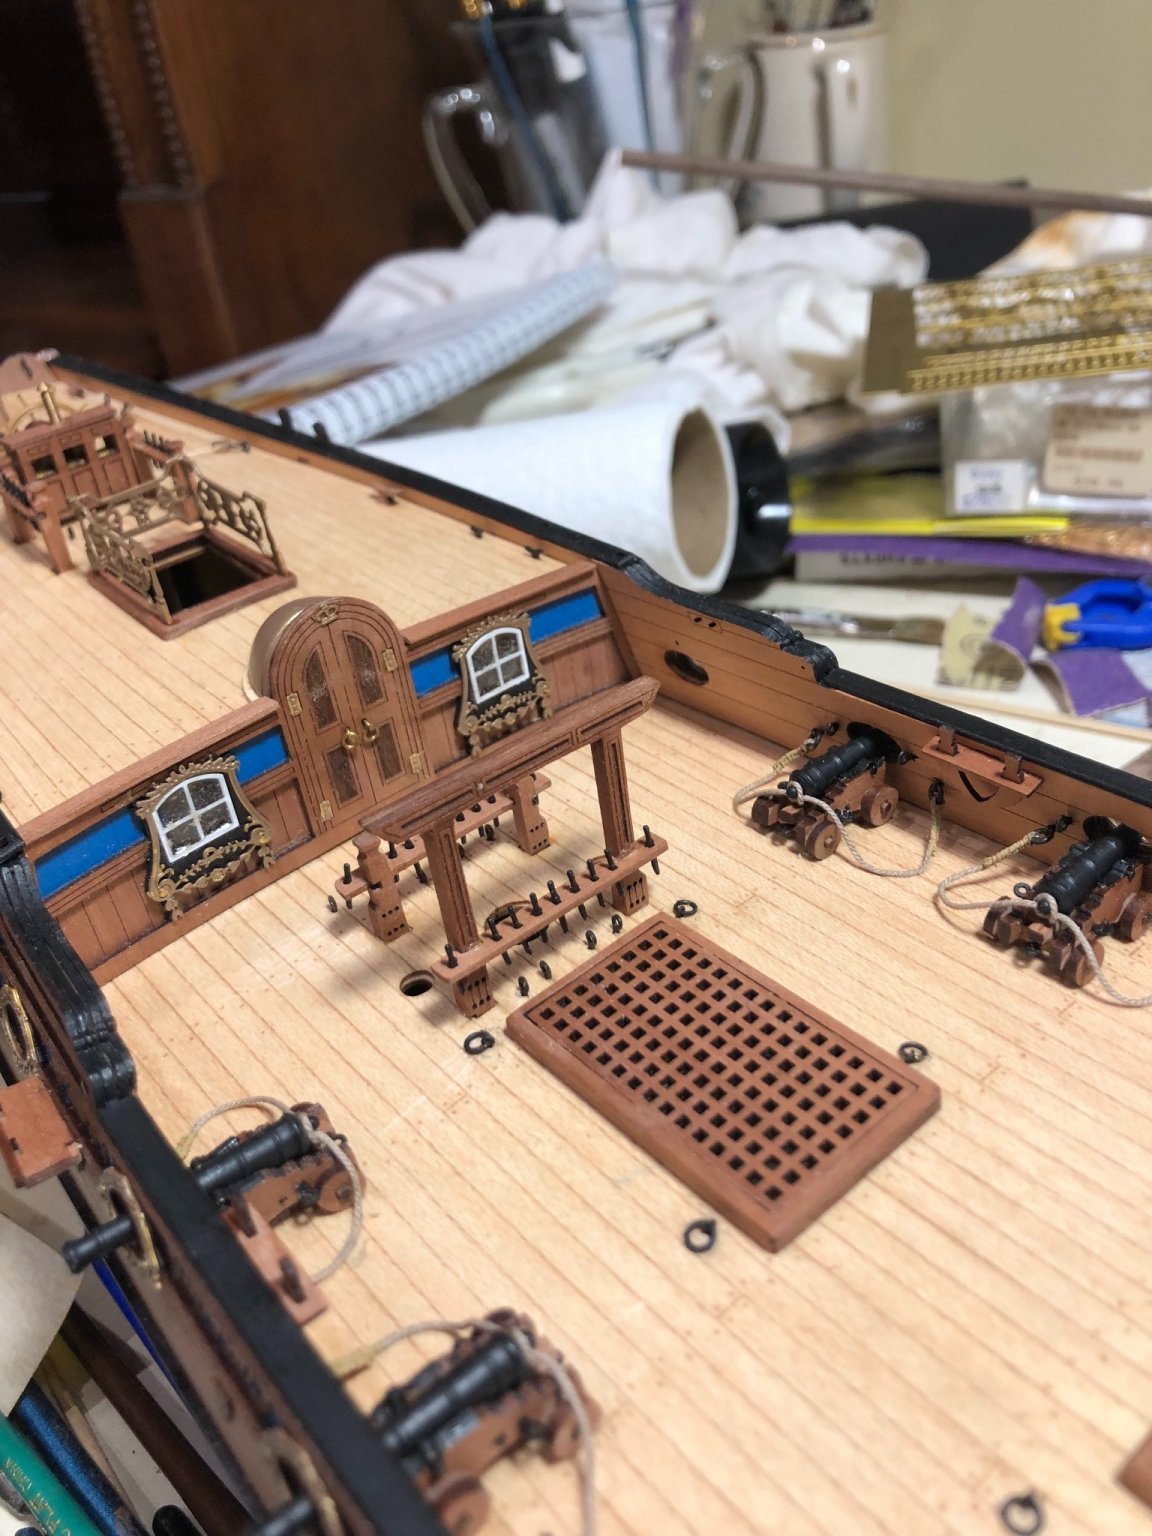
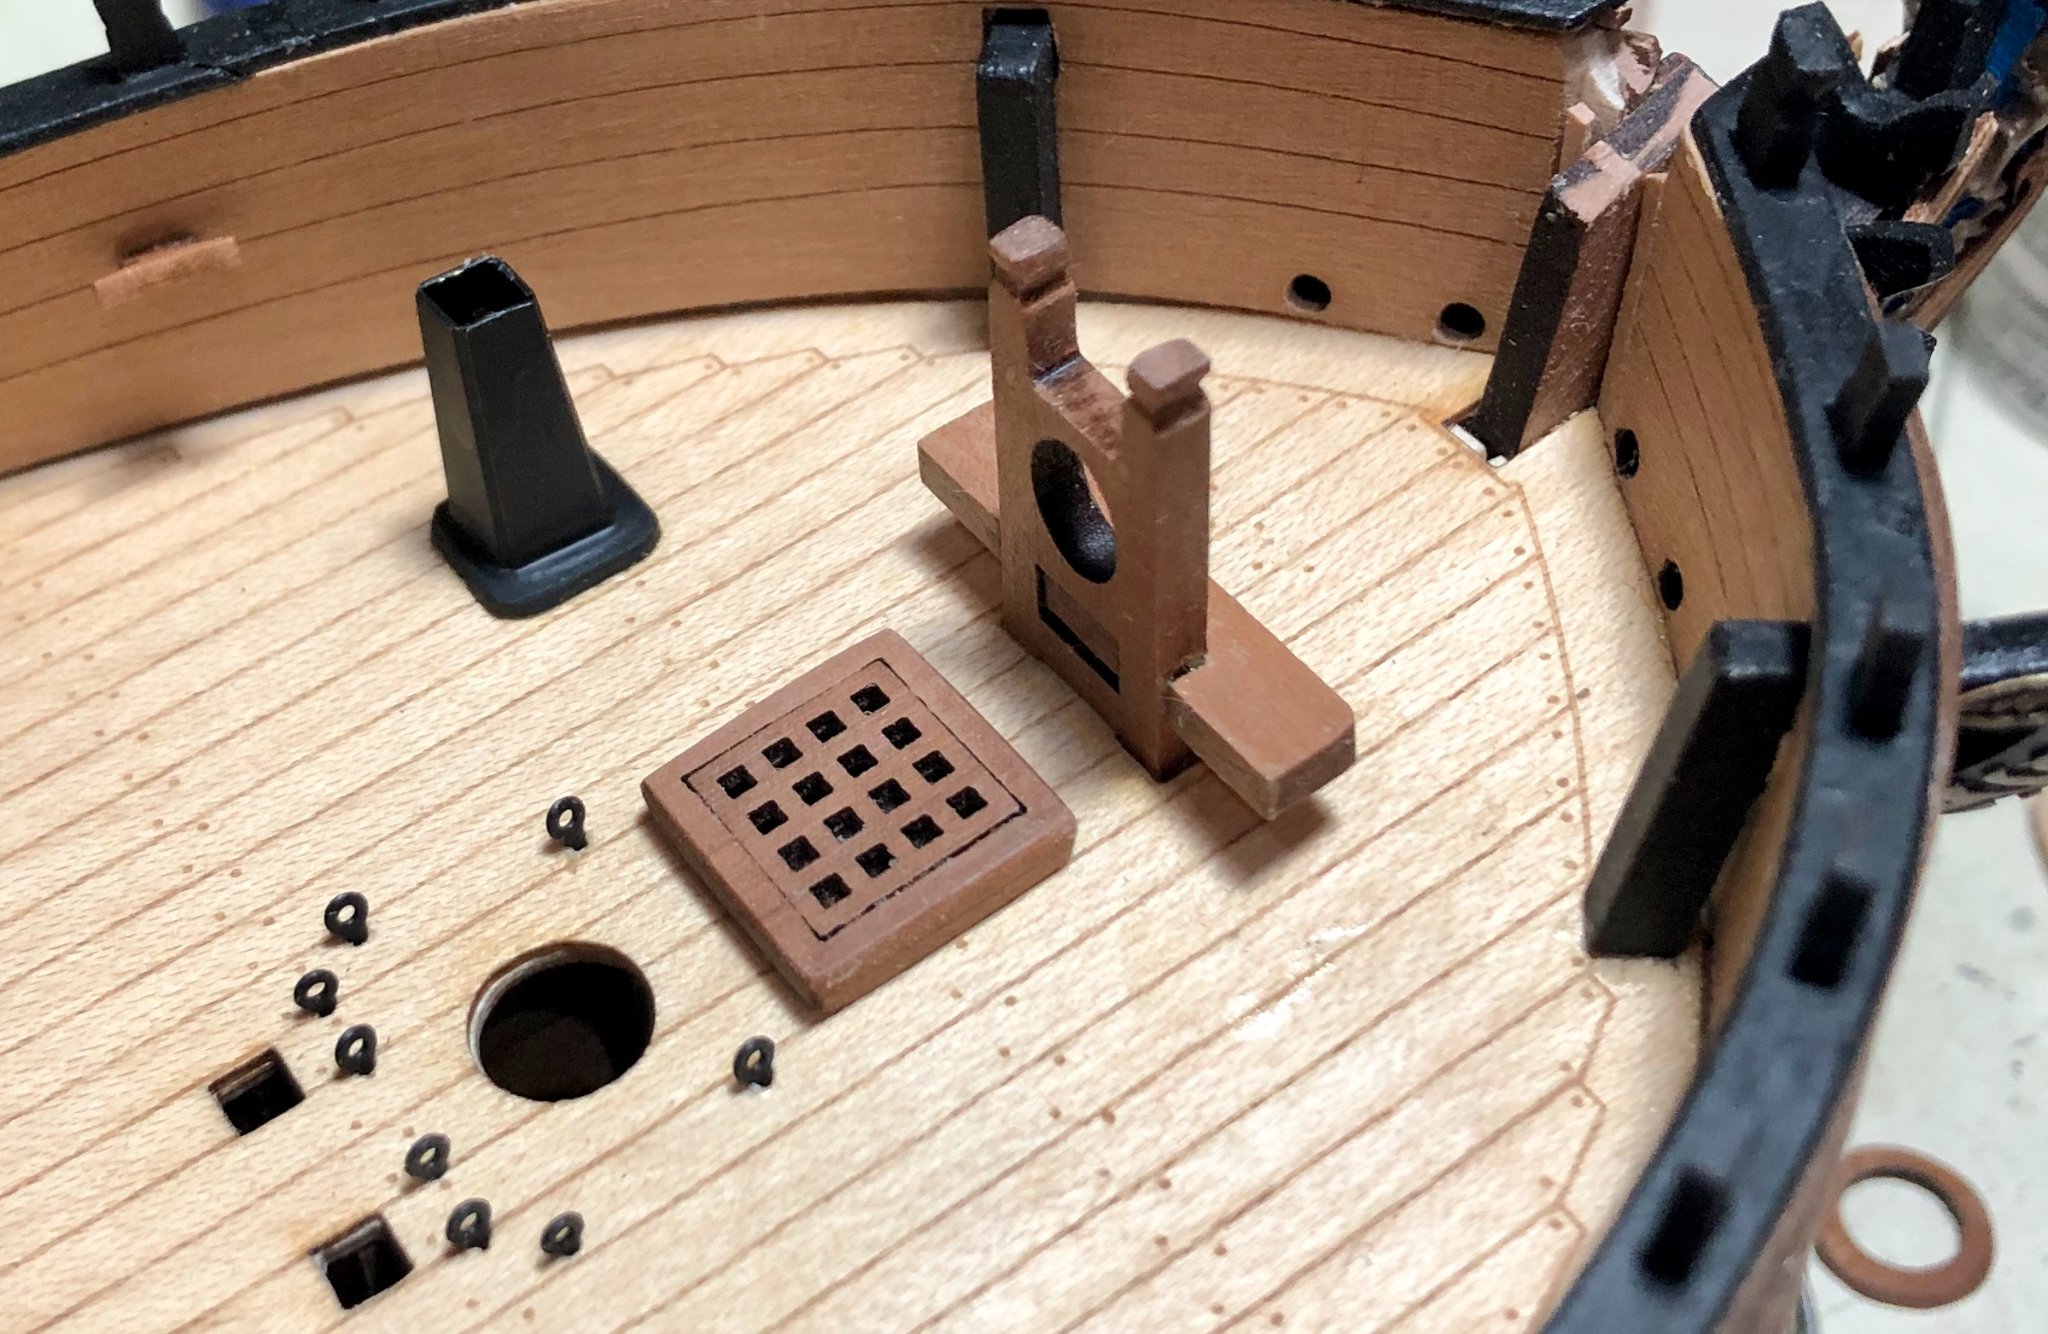
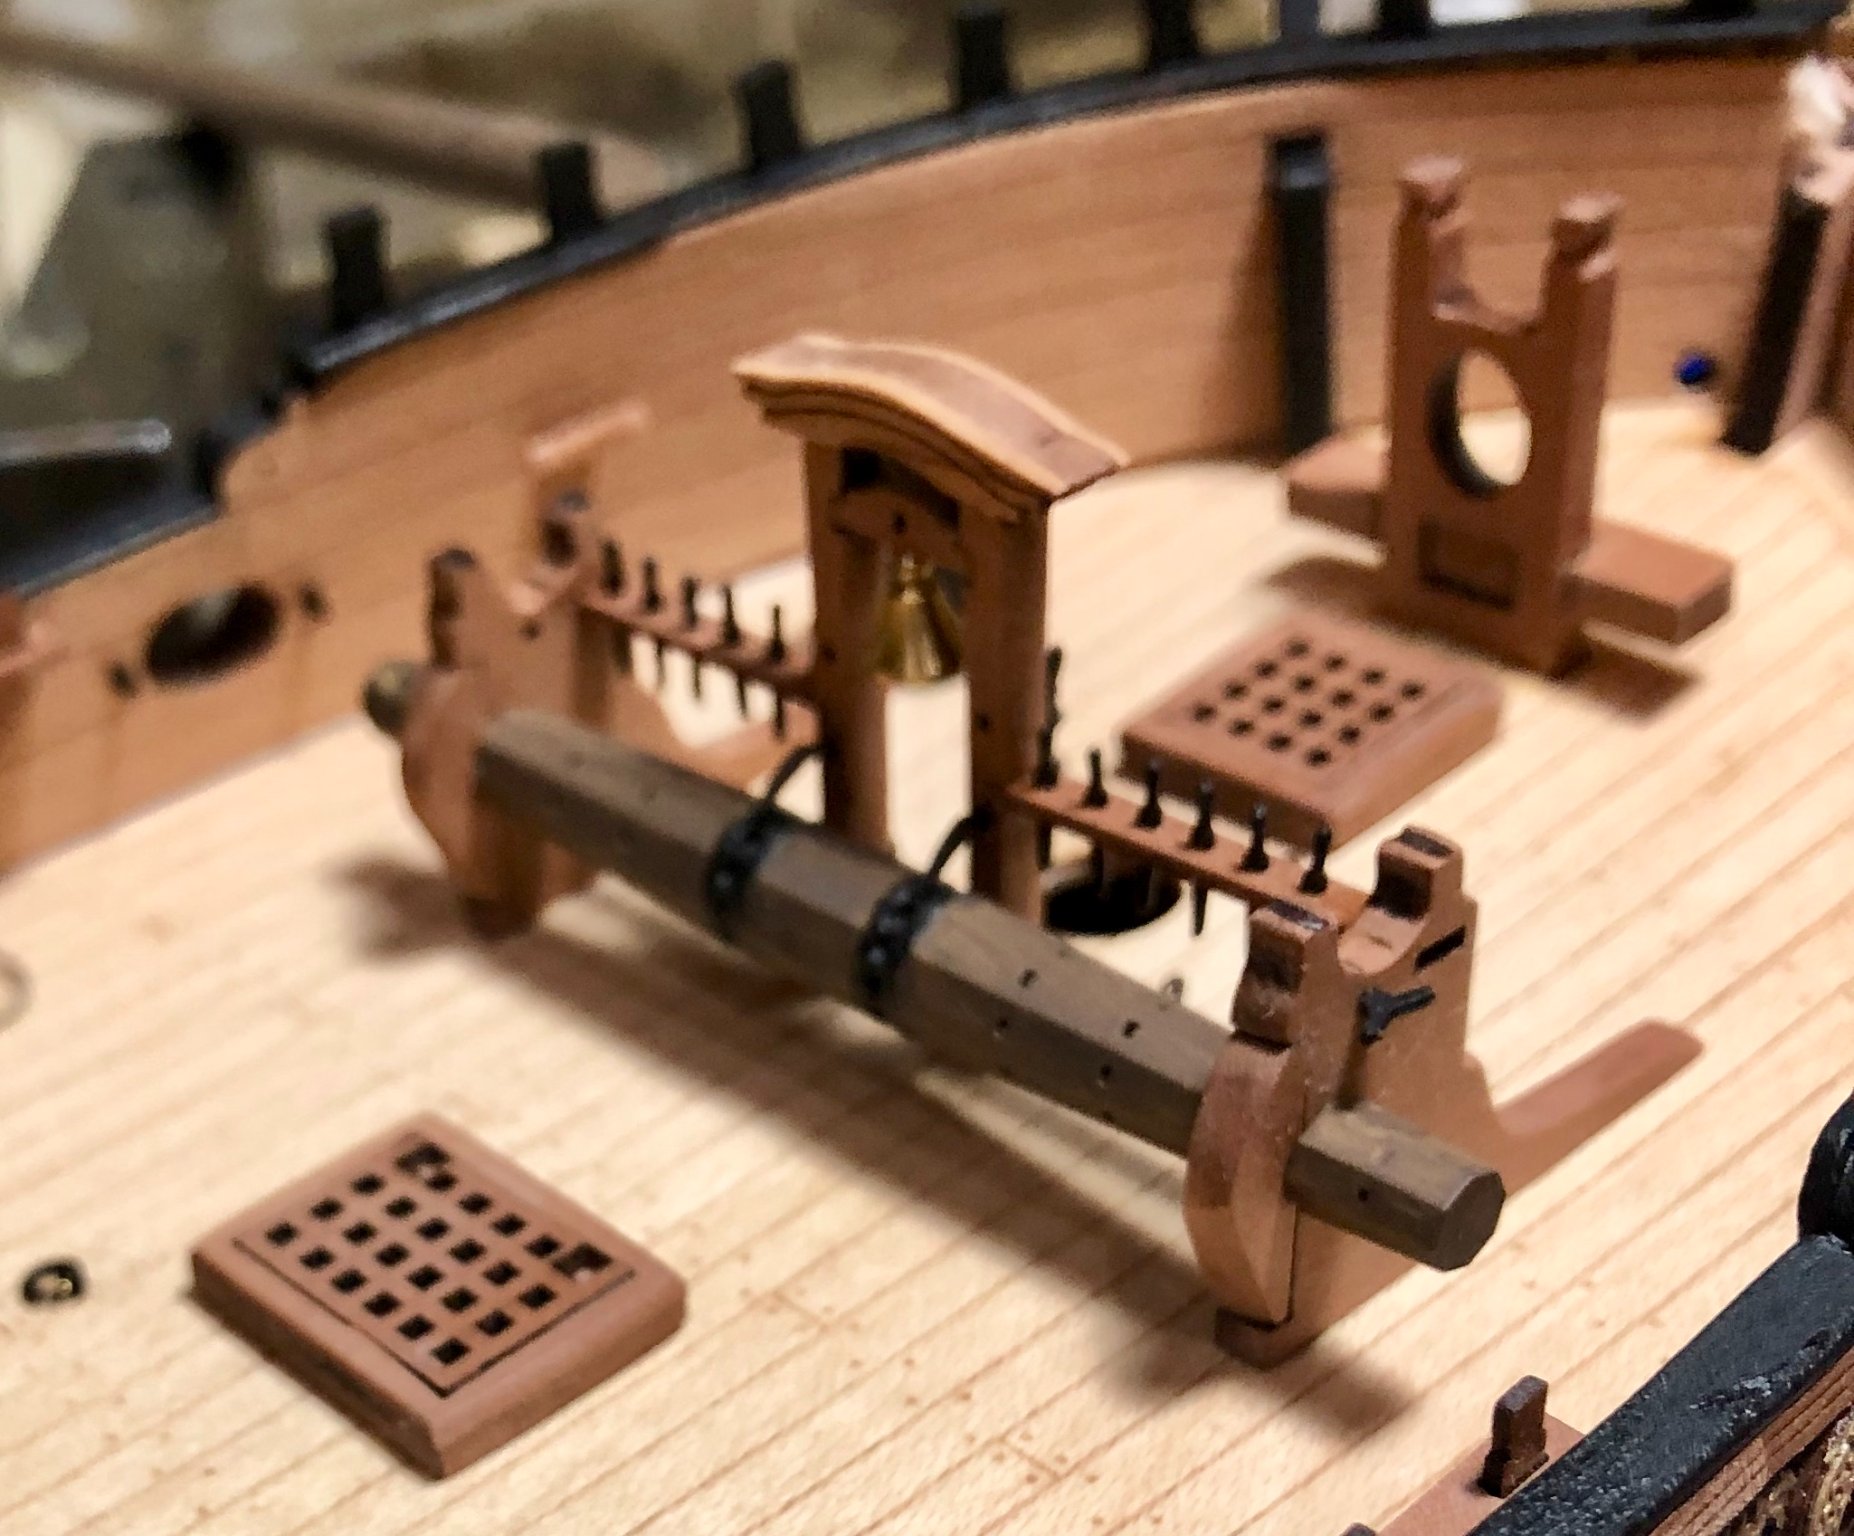
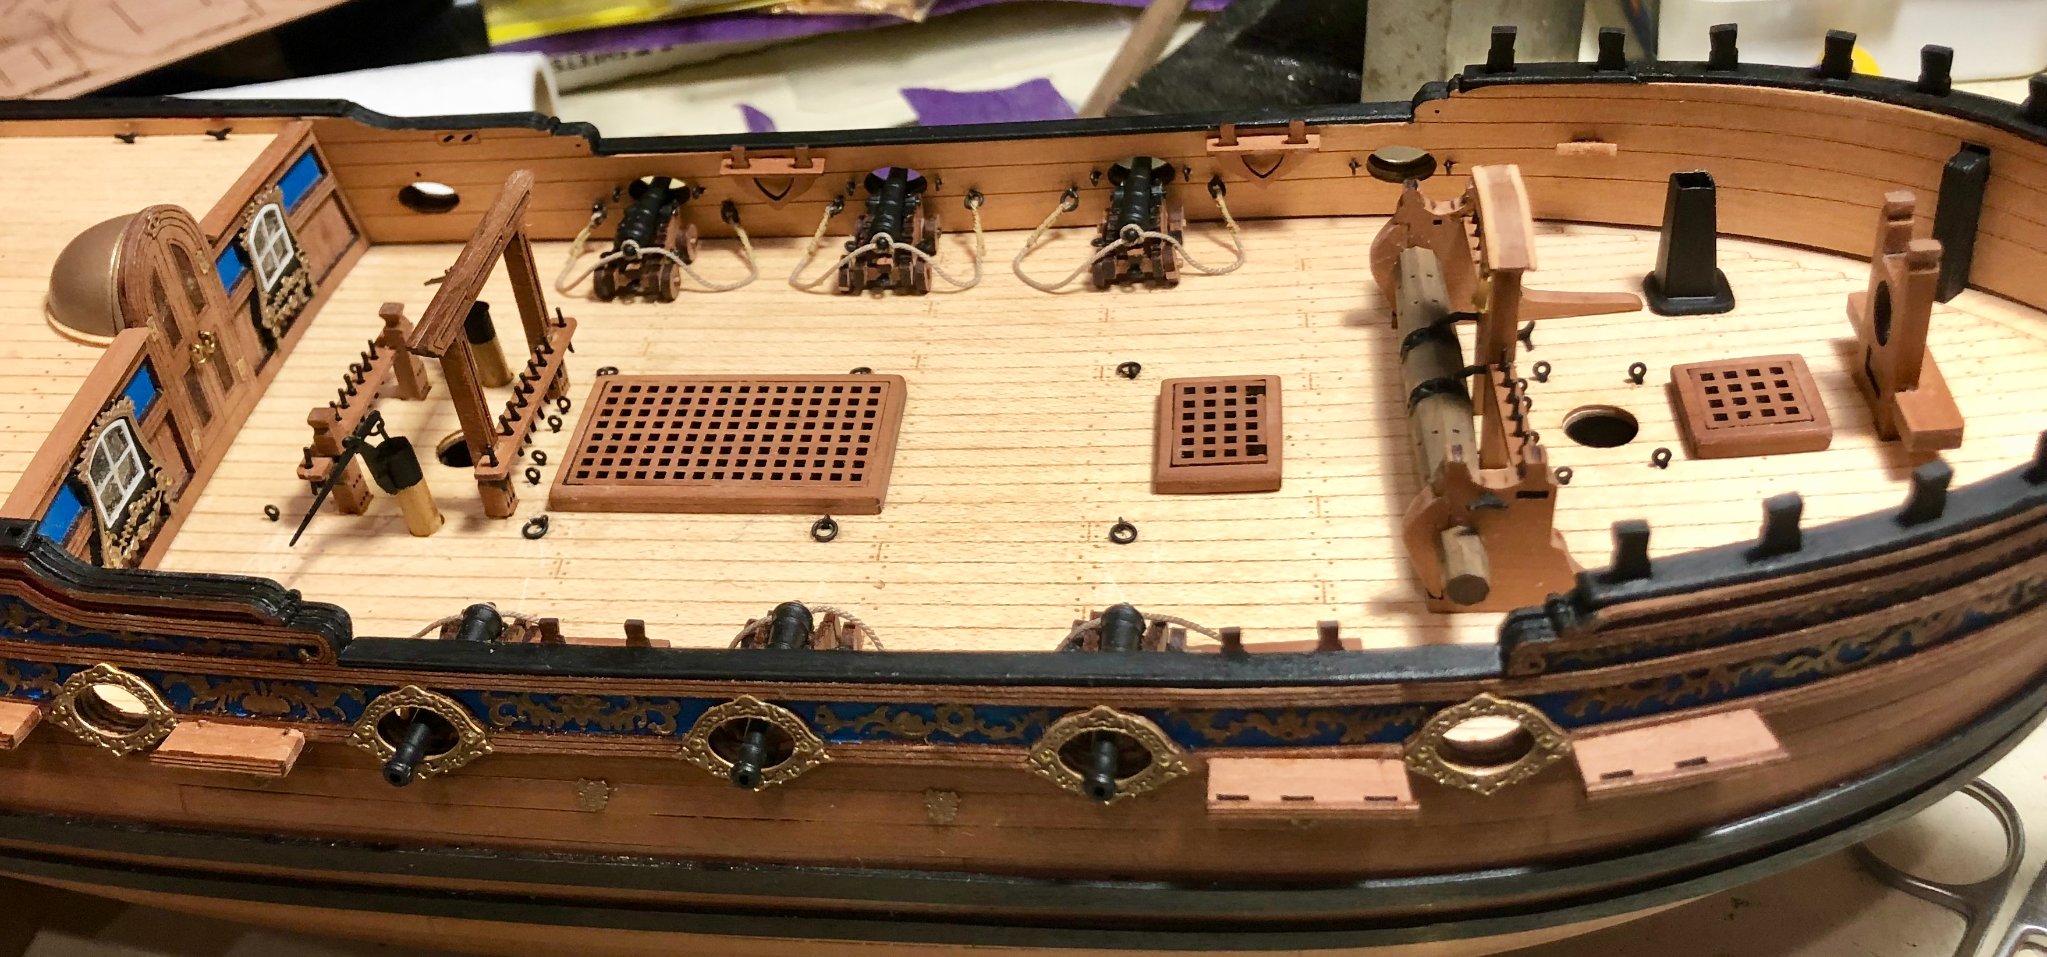
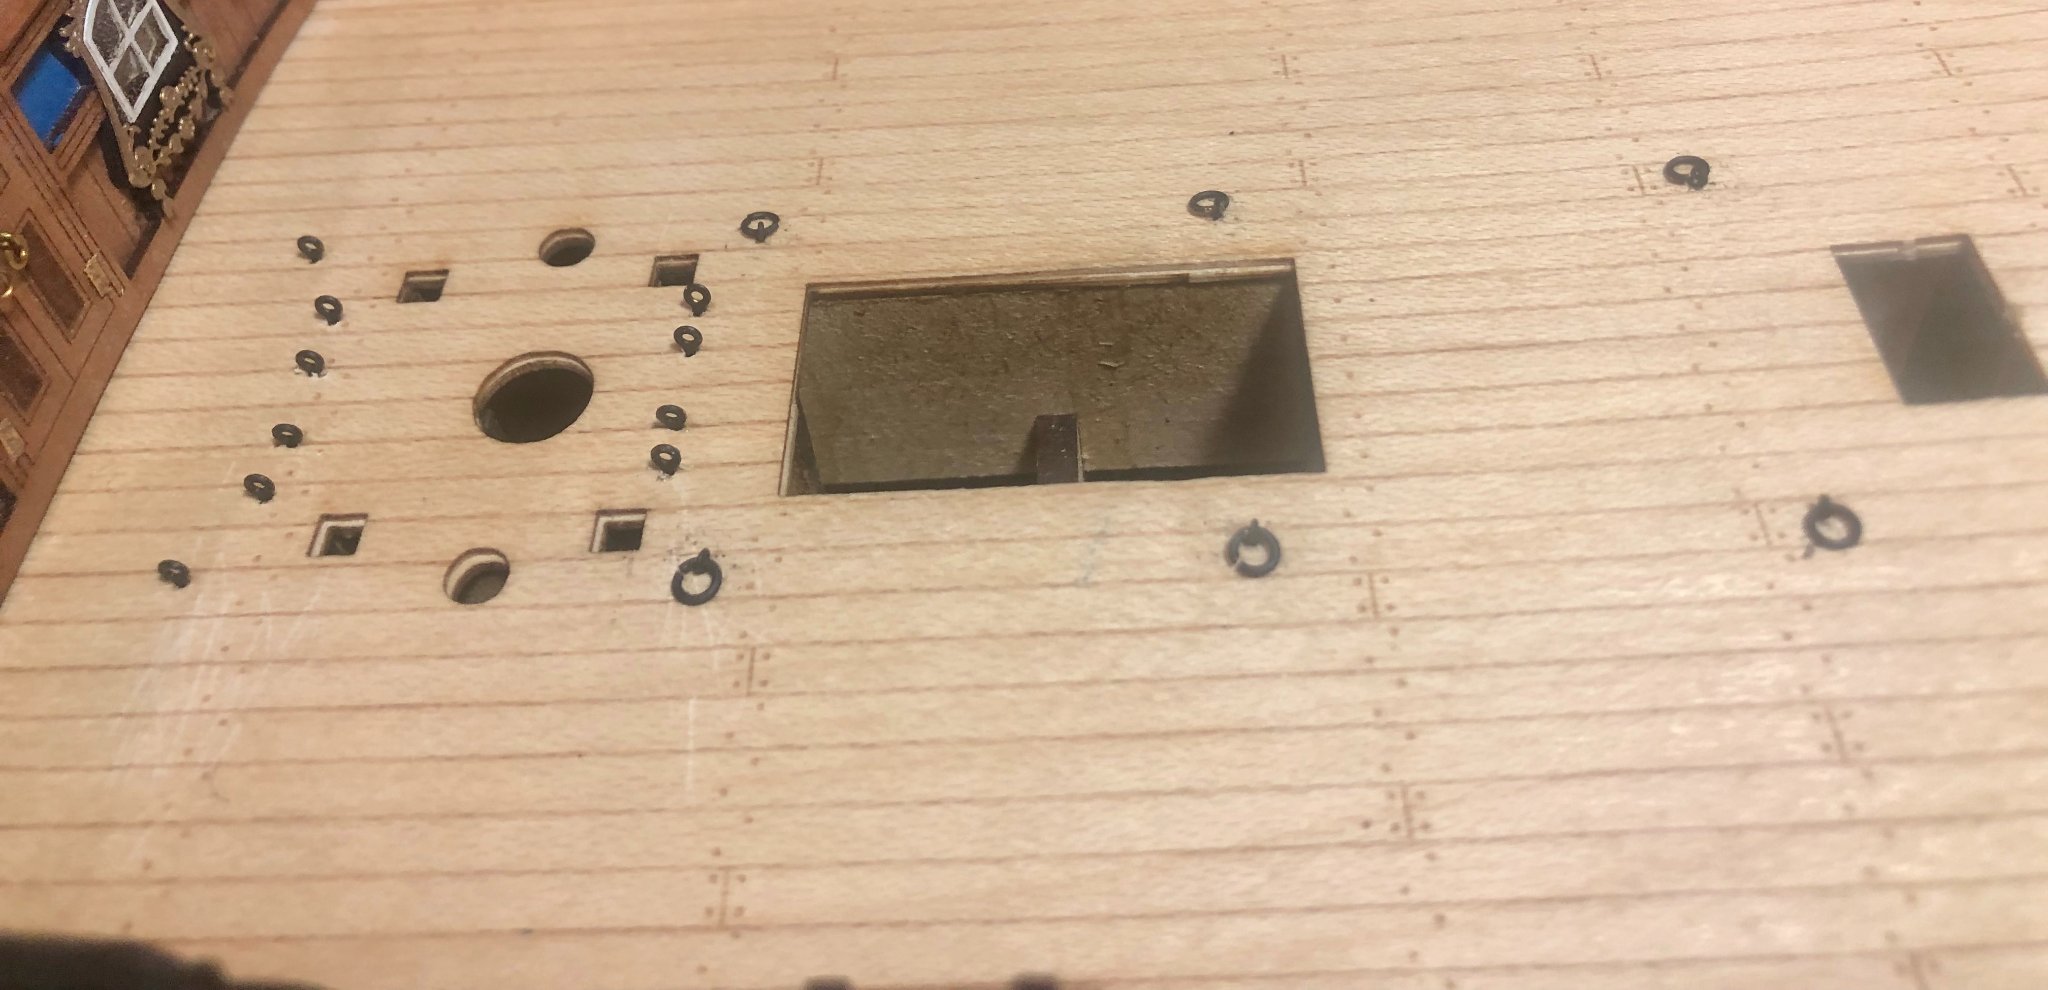
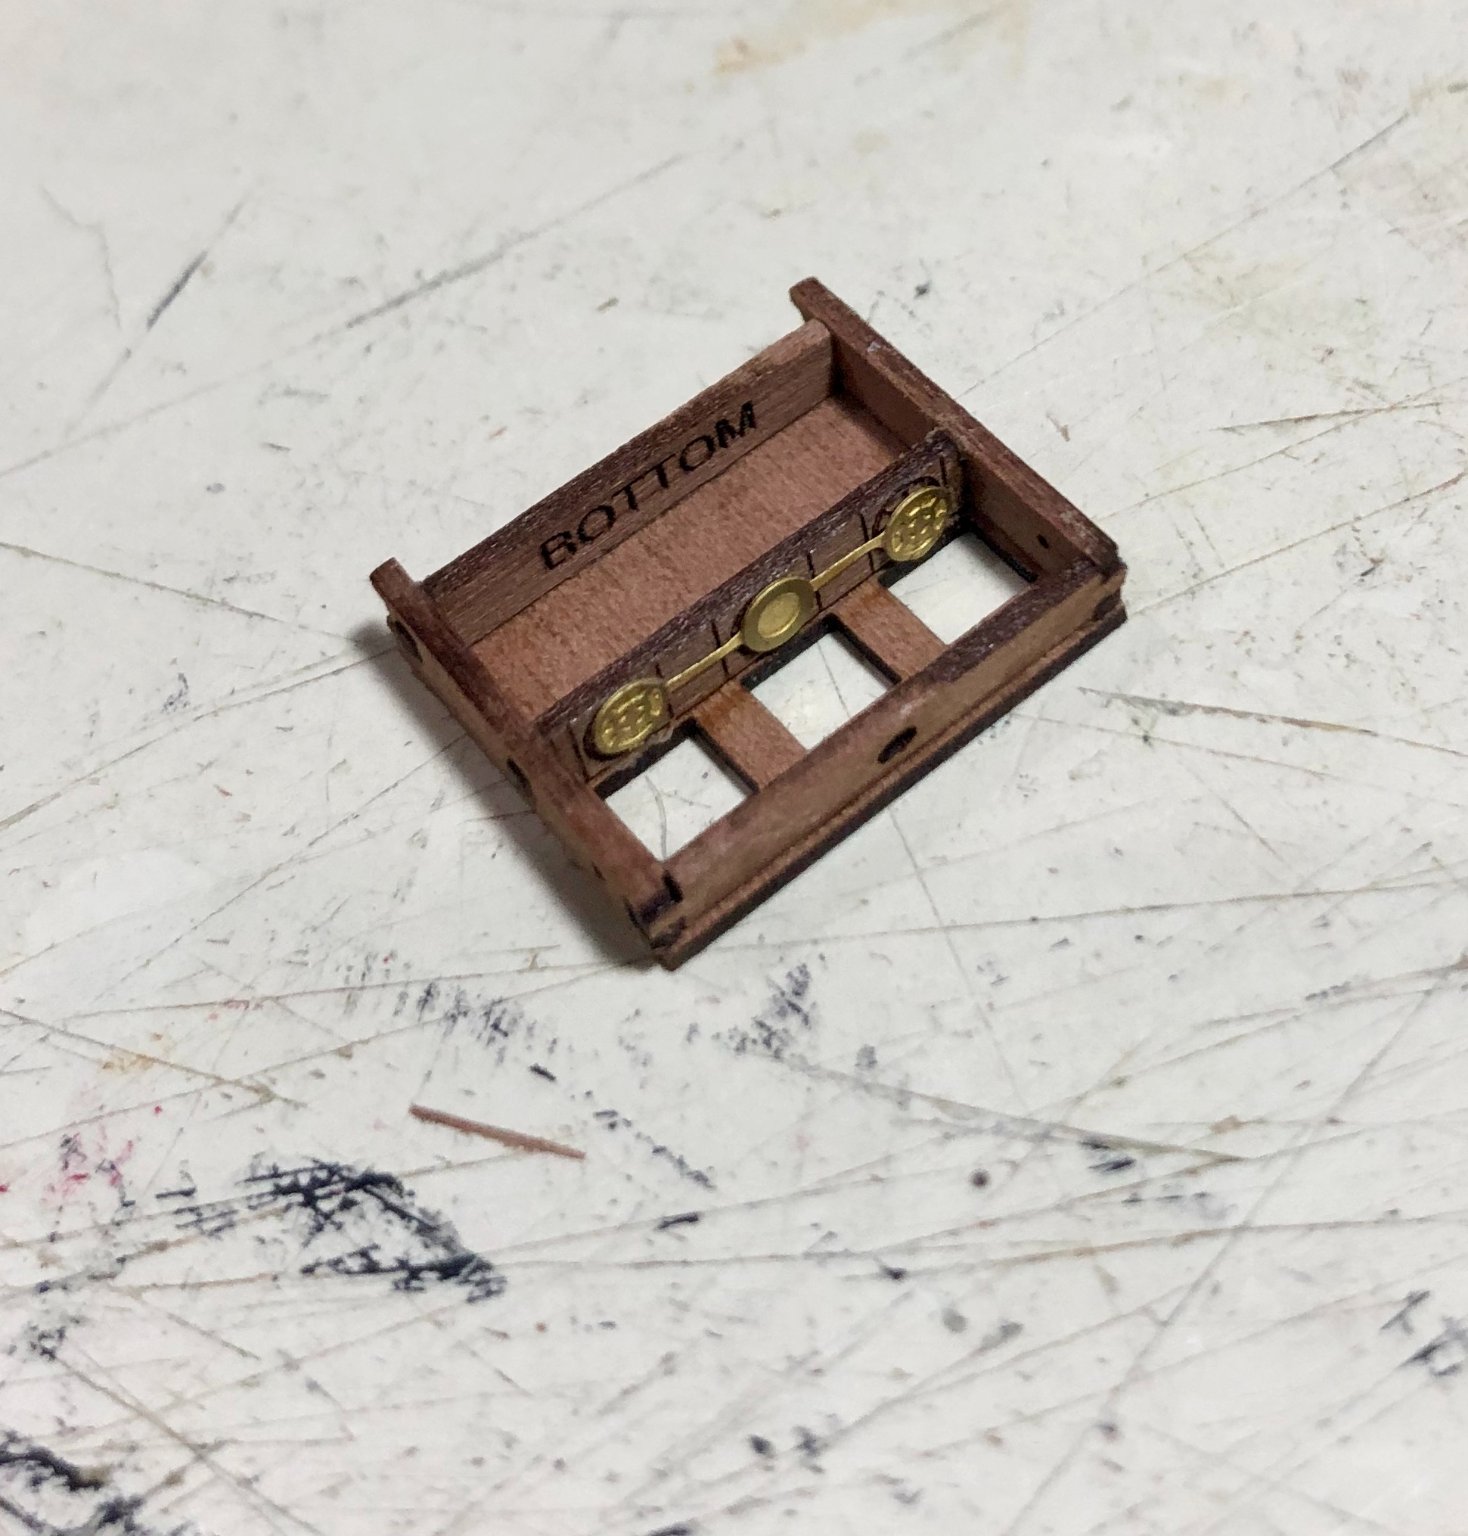
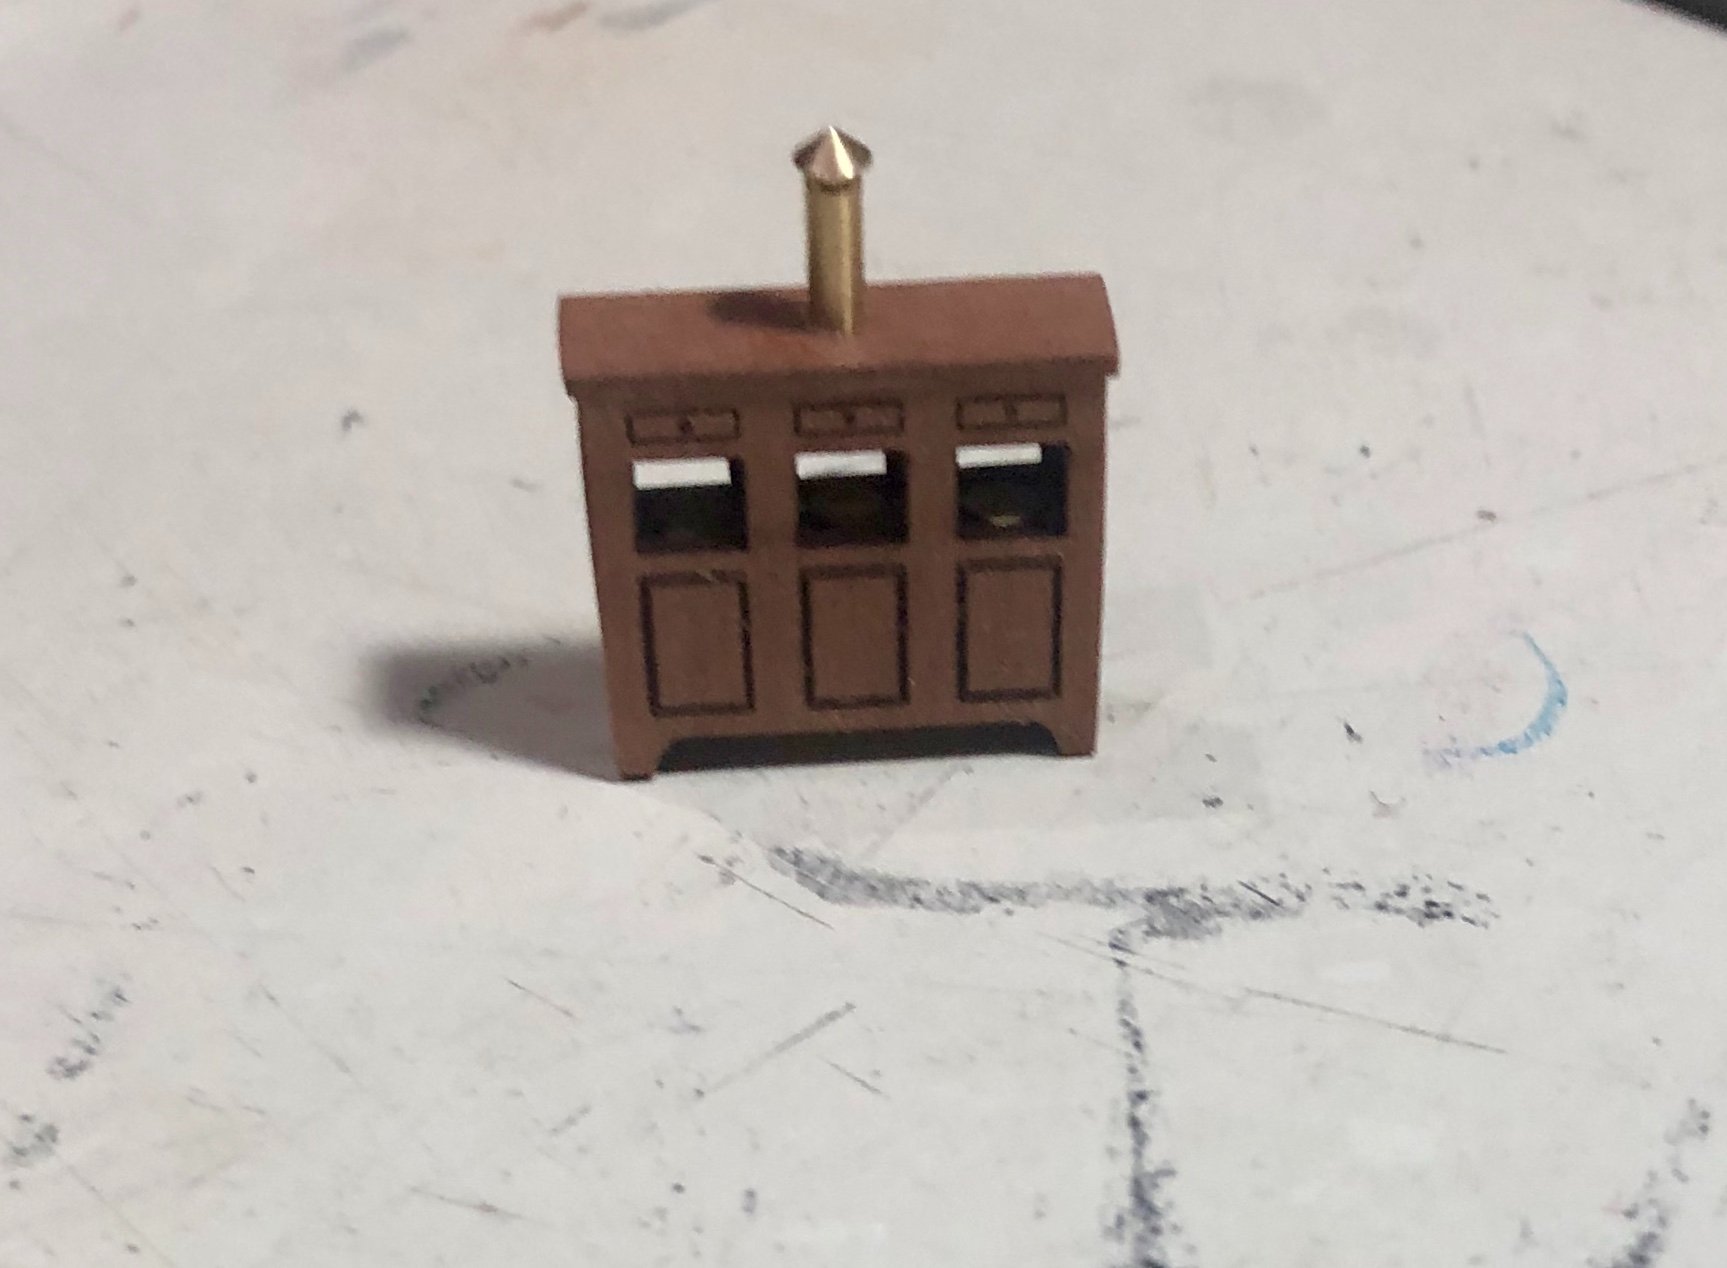
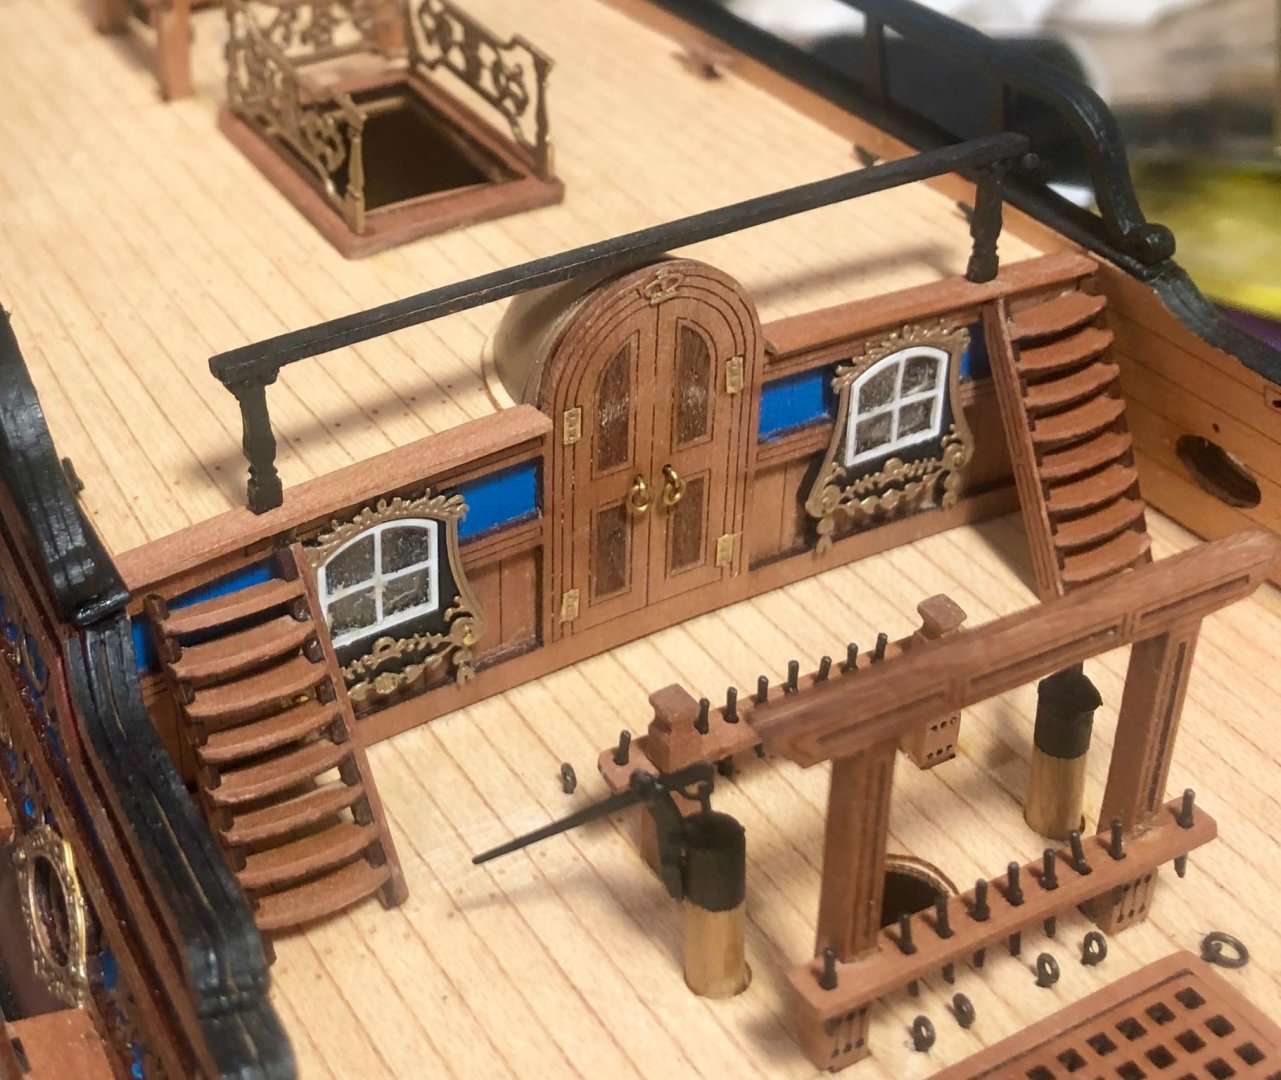
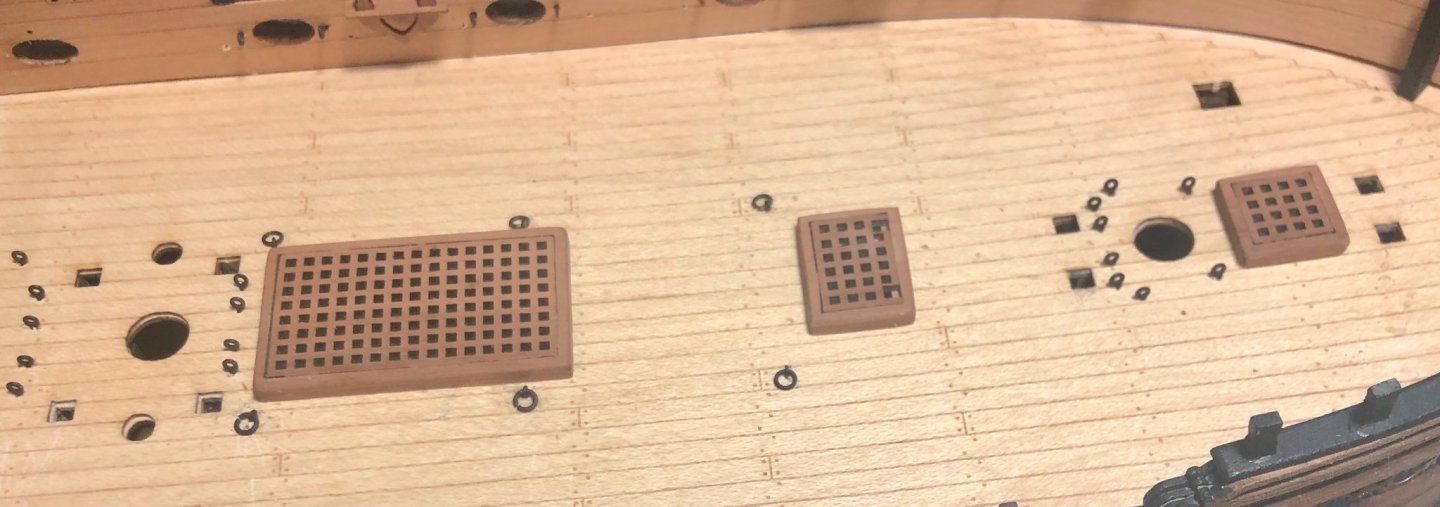
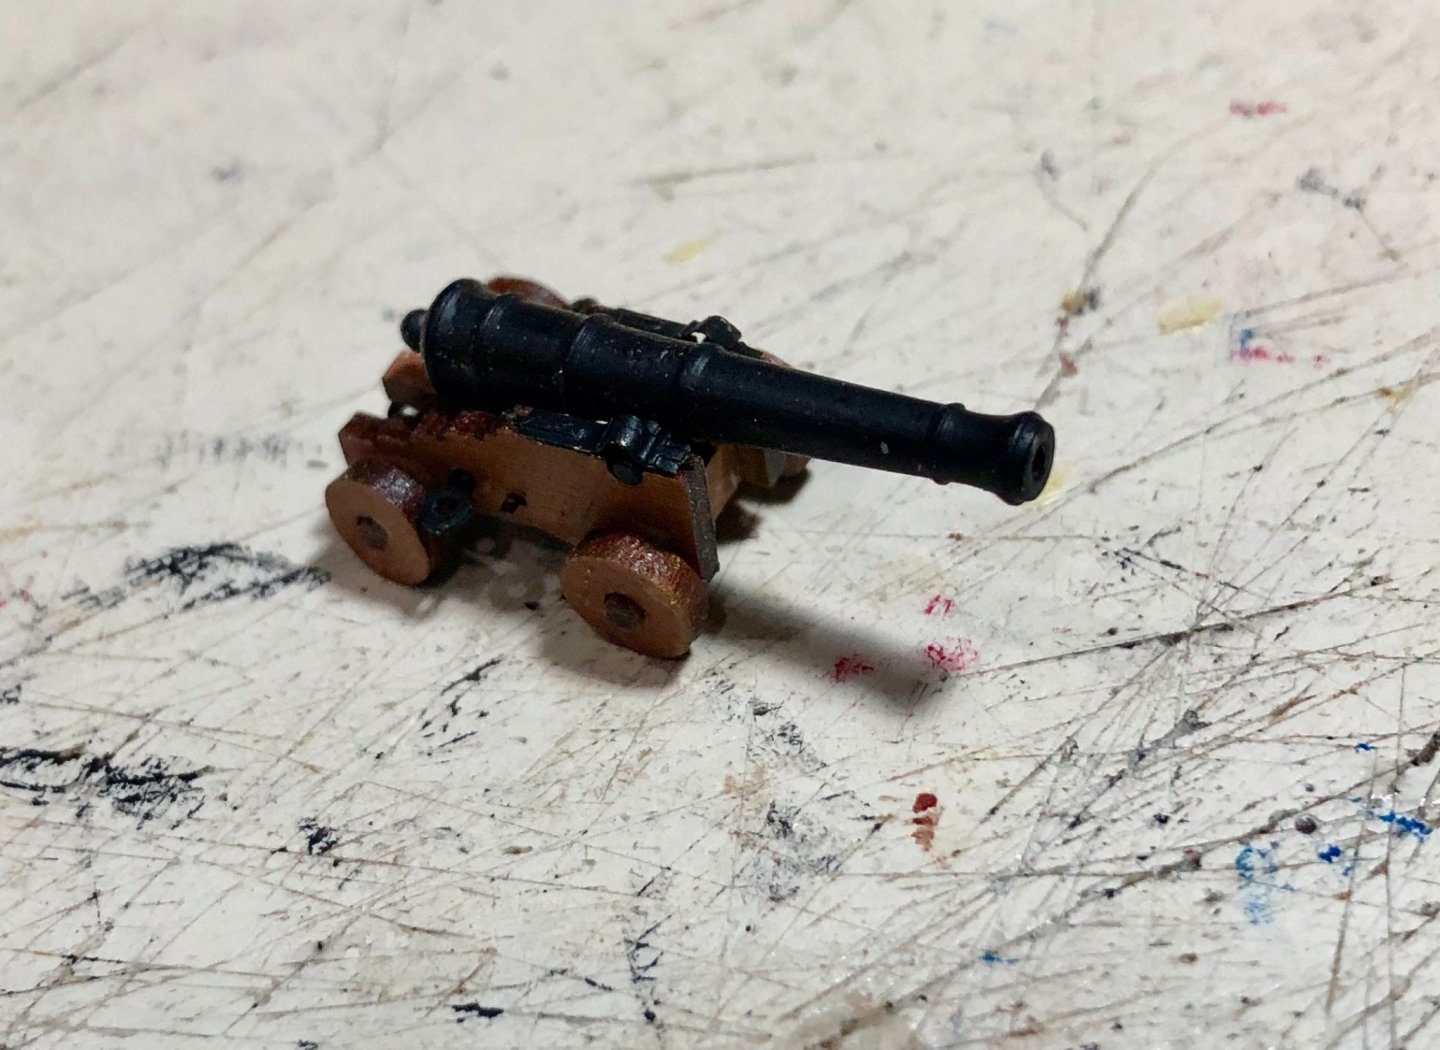
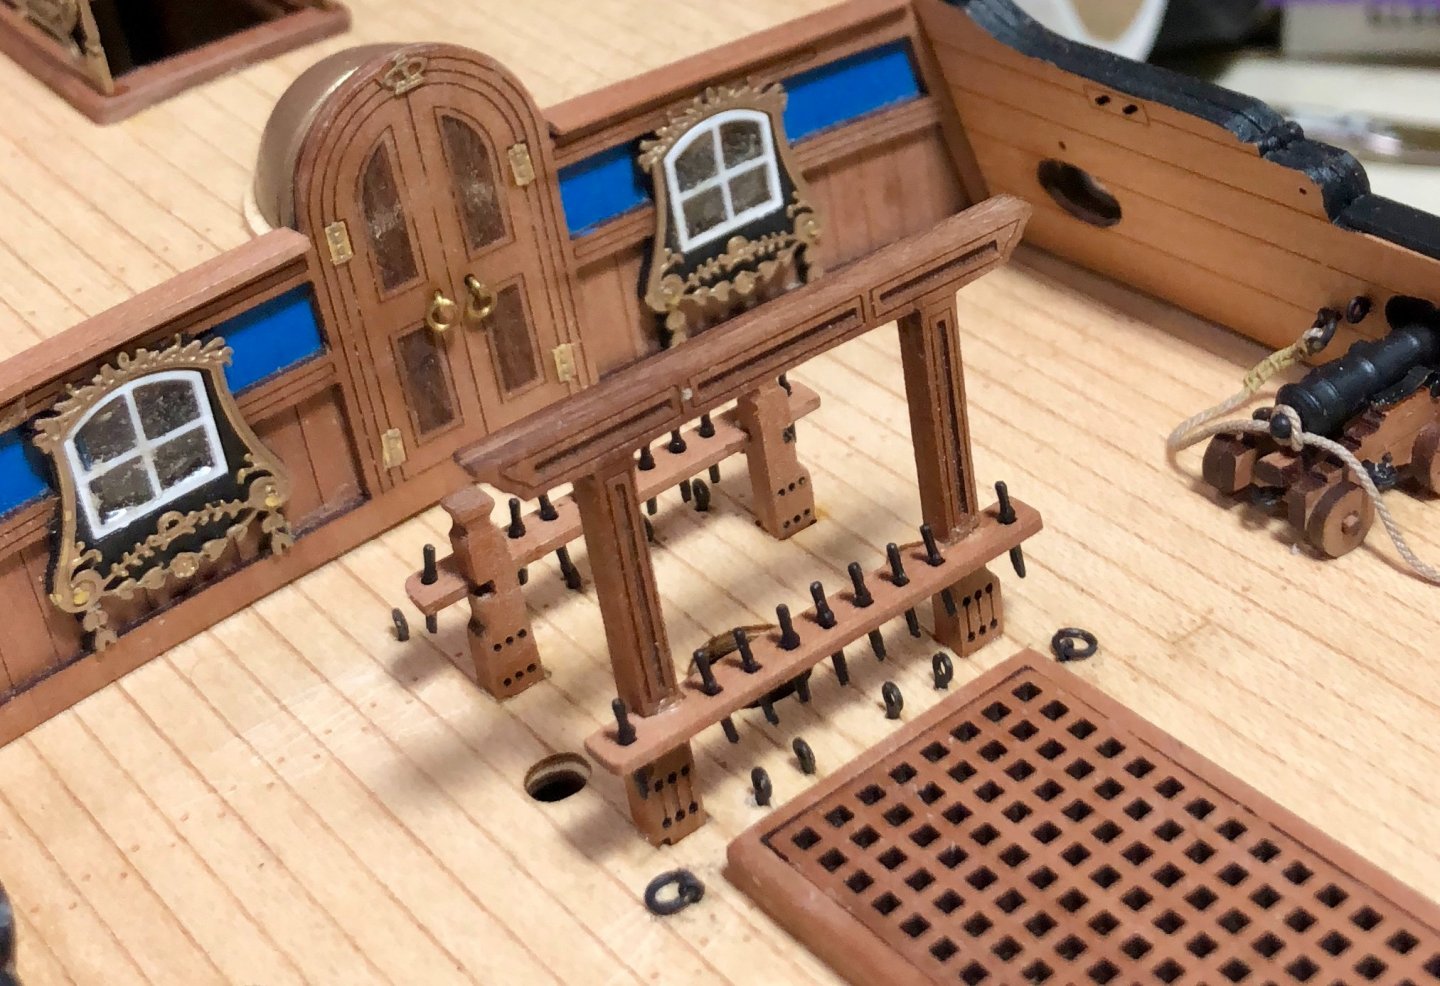
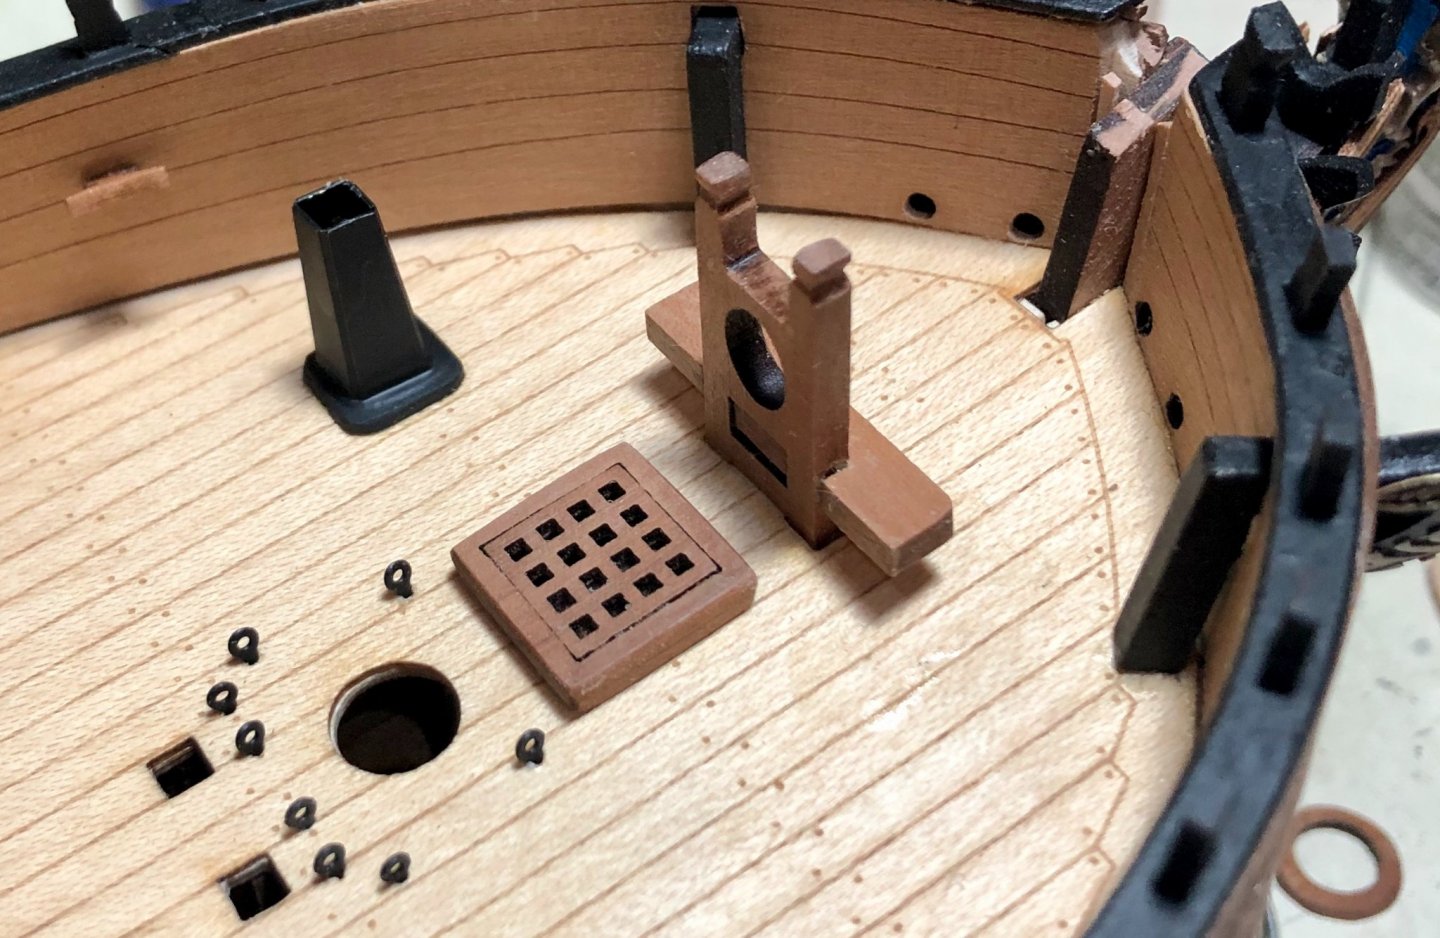
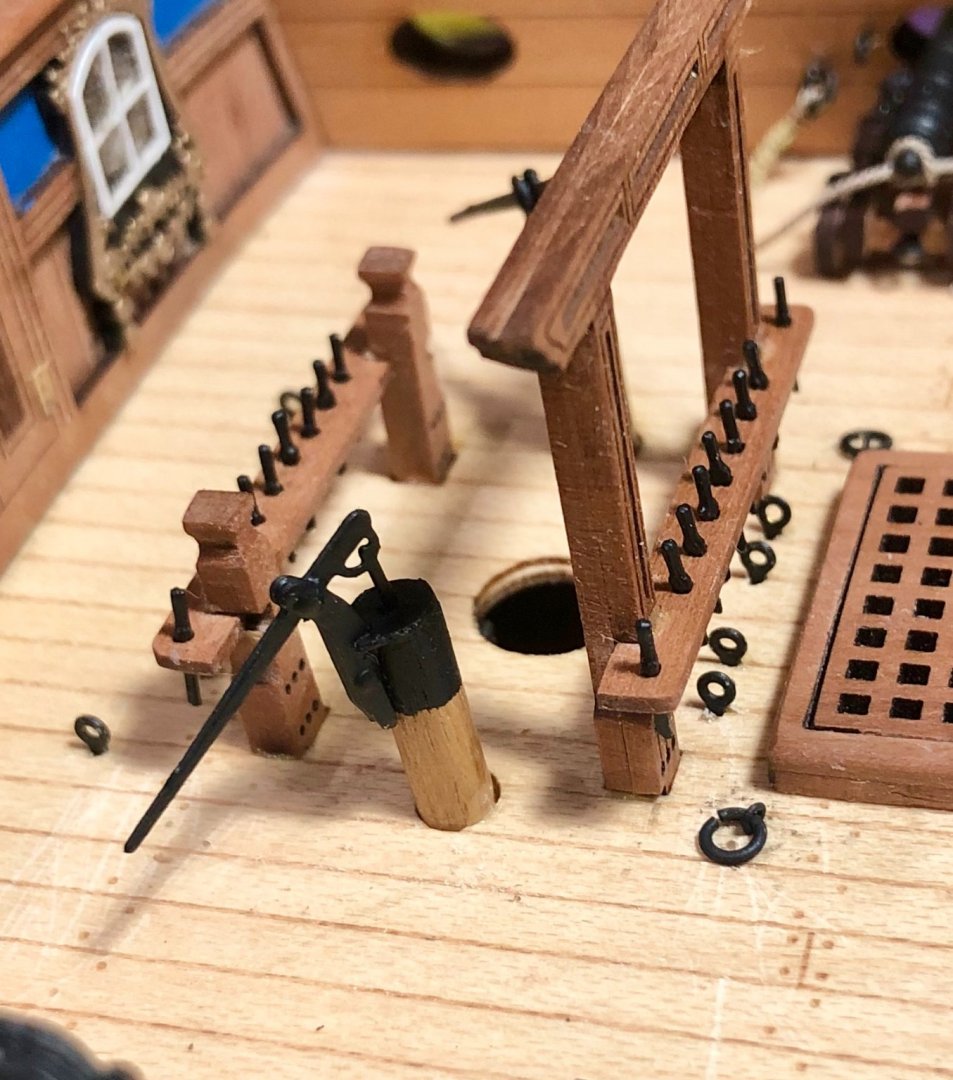
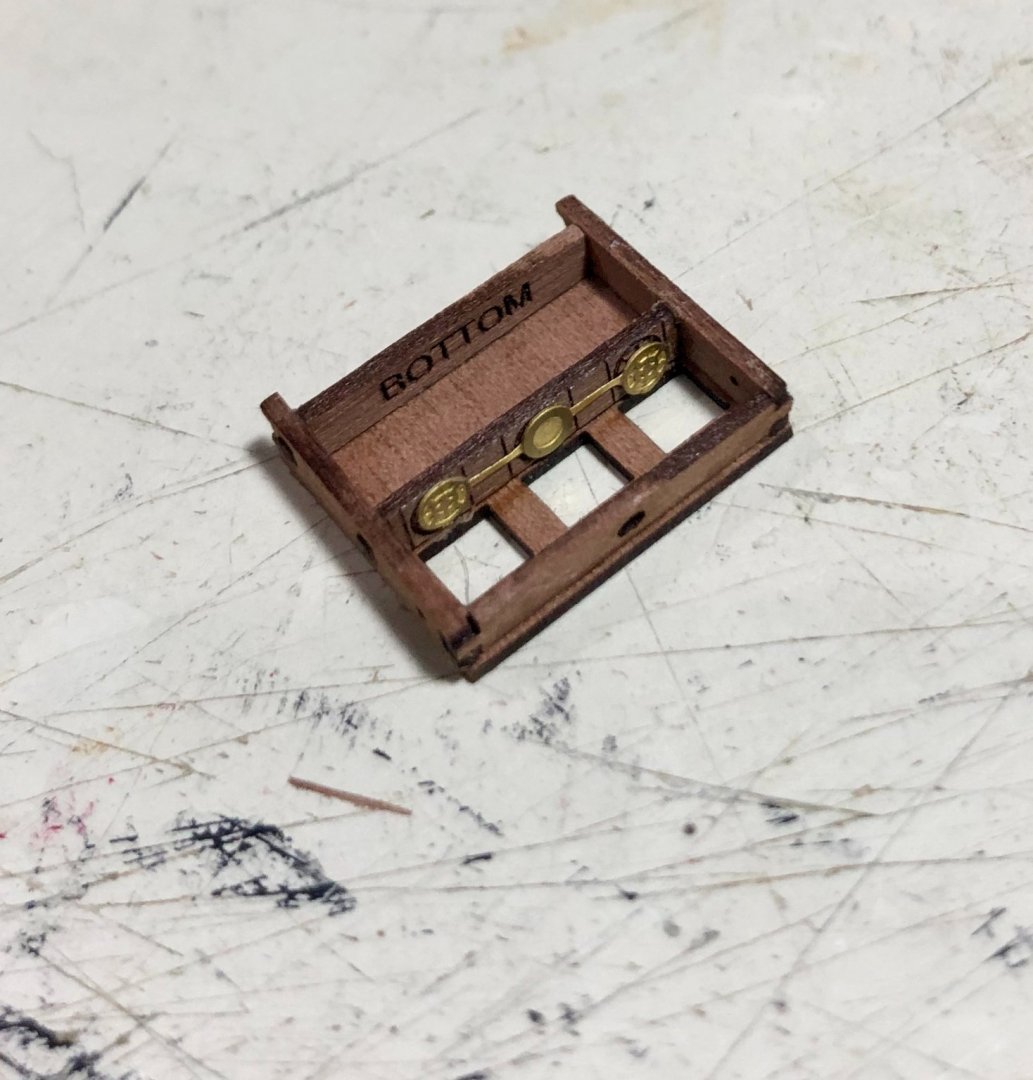
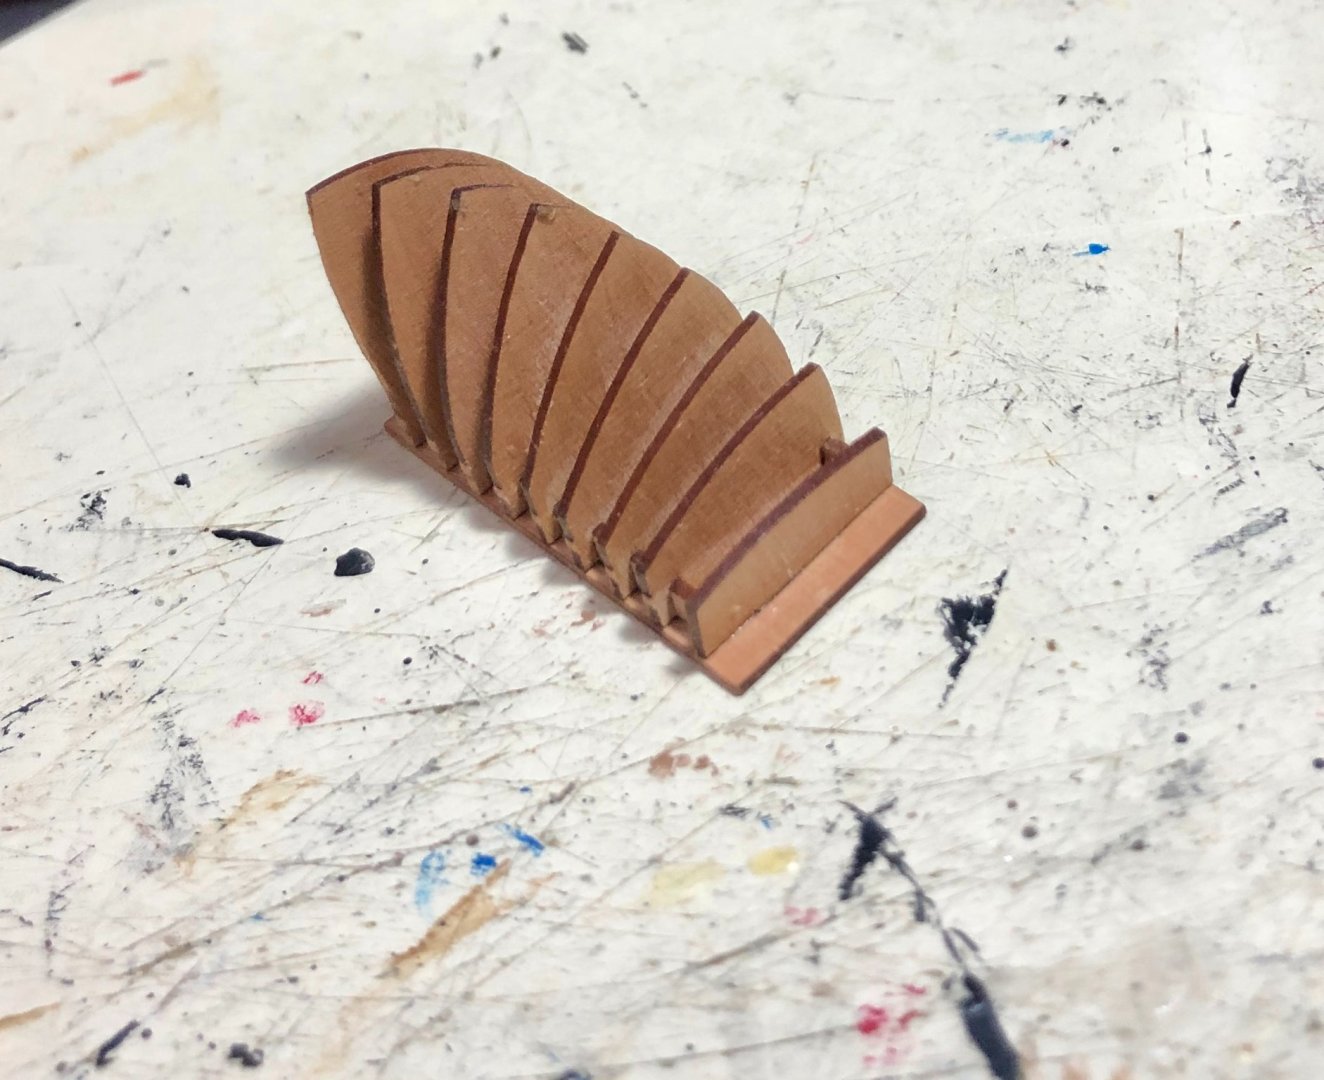
Thanks so much Derek, Bob and the "likes". I've now completed the main deck furniture and fittings. These included the hatch coamings and gratings; the galley chimney; the main bitts; the gallows; the windlass and belfry; the pumps; the bowsprit bitts and the guns. This work was quite straight forward, using the excellent laser cut and PE parts. The guns presented the only issue-- whether or not to rig them . After experimenting with the tackle, I chose to go with breech ropes only. Now it's on to finish the remaining hull items, including the head, which I continue to put off. Bob


-
Really nice work John. It brings back a lot of very old memories. I built the kit about fifty years ago. Your's looks much better than what I remember of mine. Bob
- 204 replies
-
- 1
-

-
- marine model company
- charles w morgan
- (and 1 more)
-
Looks great Rusty. I too tried to rig the gun tackles and didn't like the result. I'm going with the breach rope only. Bob
- 201 replies
-
- 2
-

-
- Duchess of Kingston
- Vanguard Models
- (and 1 more)
-
Thanks so much Rusty, OC, Glenn, Ron and Matt for the generous comments and thanks also to the "likes. Rusty, I'm going to do the breach ropes for sure. The tackle are now a 50-50 proposition. Ron, trust me that when you get old, some things just get harder to do. I'm just very grateful that I can still do them. Matt, i'm still pleasantly surprised each time I get to a new part, to see just how well done this kit is. Bob ".
-
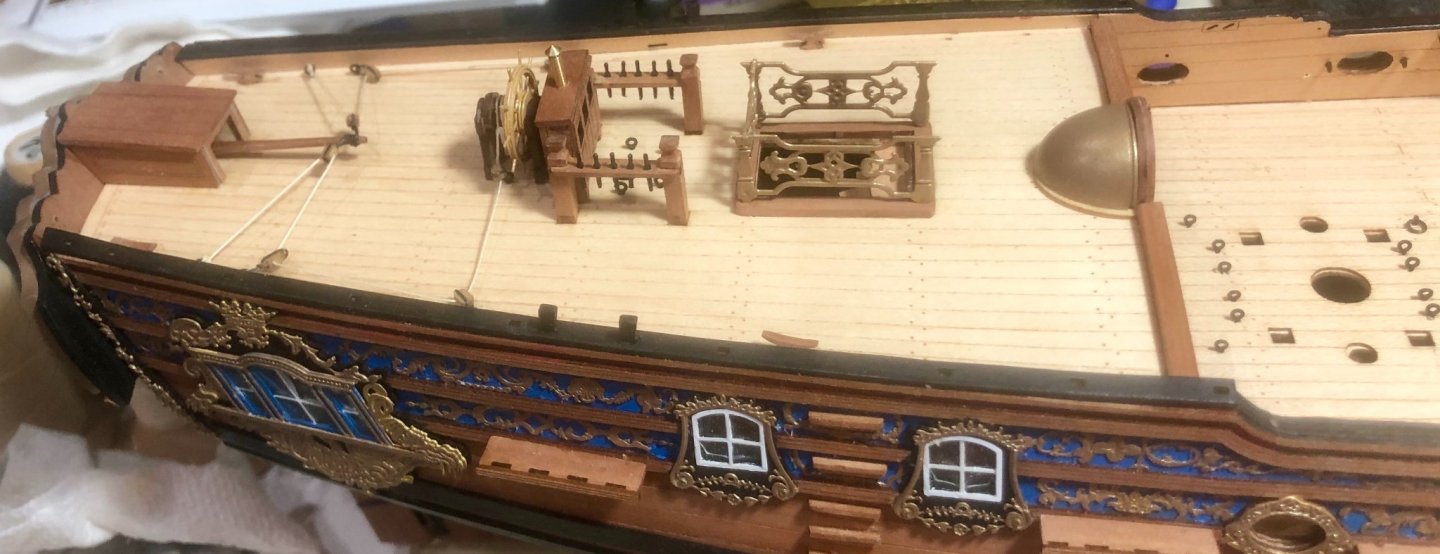
Looks great Rusty. One very small item.The eyebolts you have on the forward end of the quarterdeck should be PE cleats. Bob
- 201 replies
-
- 2
-
-
- Duchess of Kingston
- Vanguard Models
- (and 1 more)
-
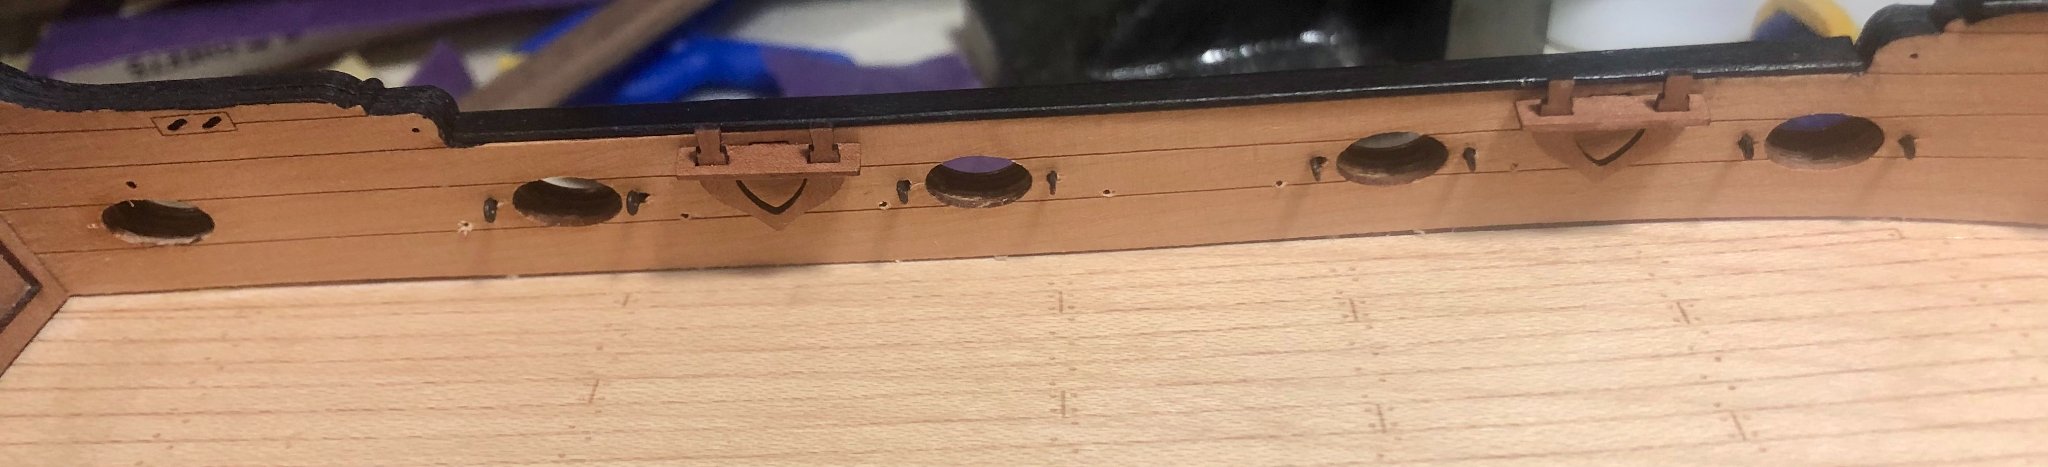
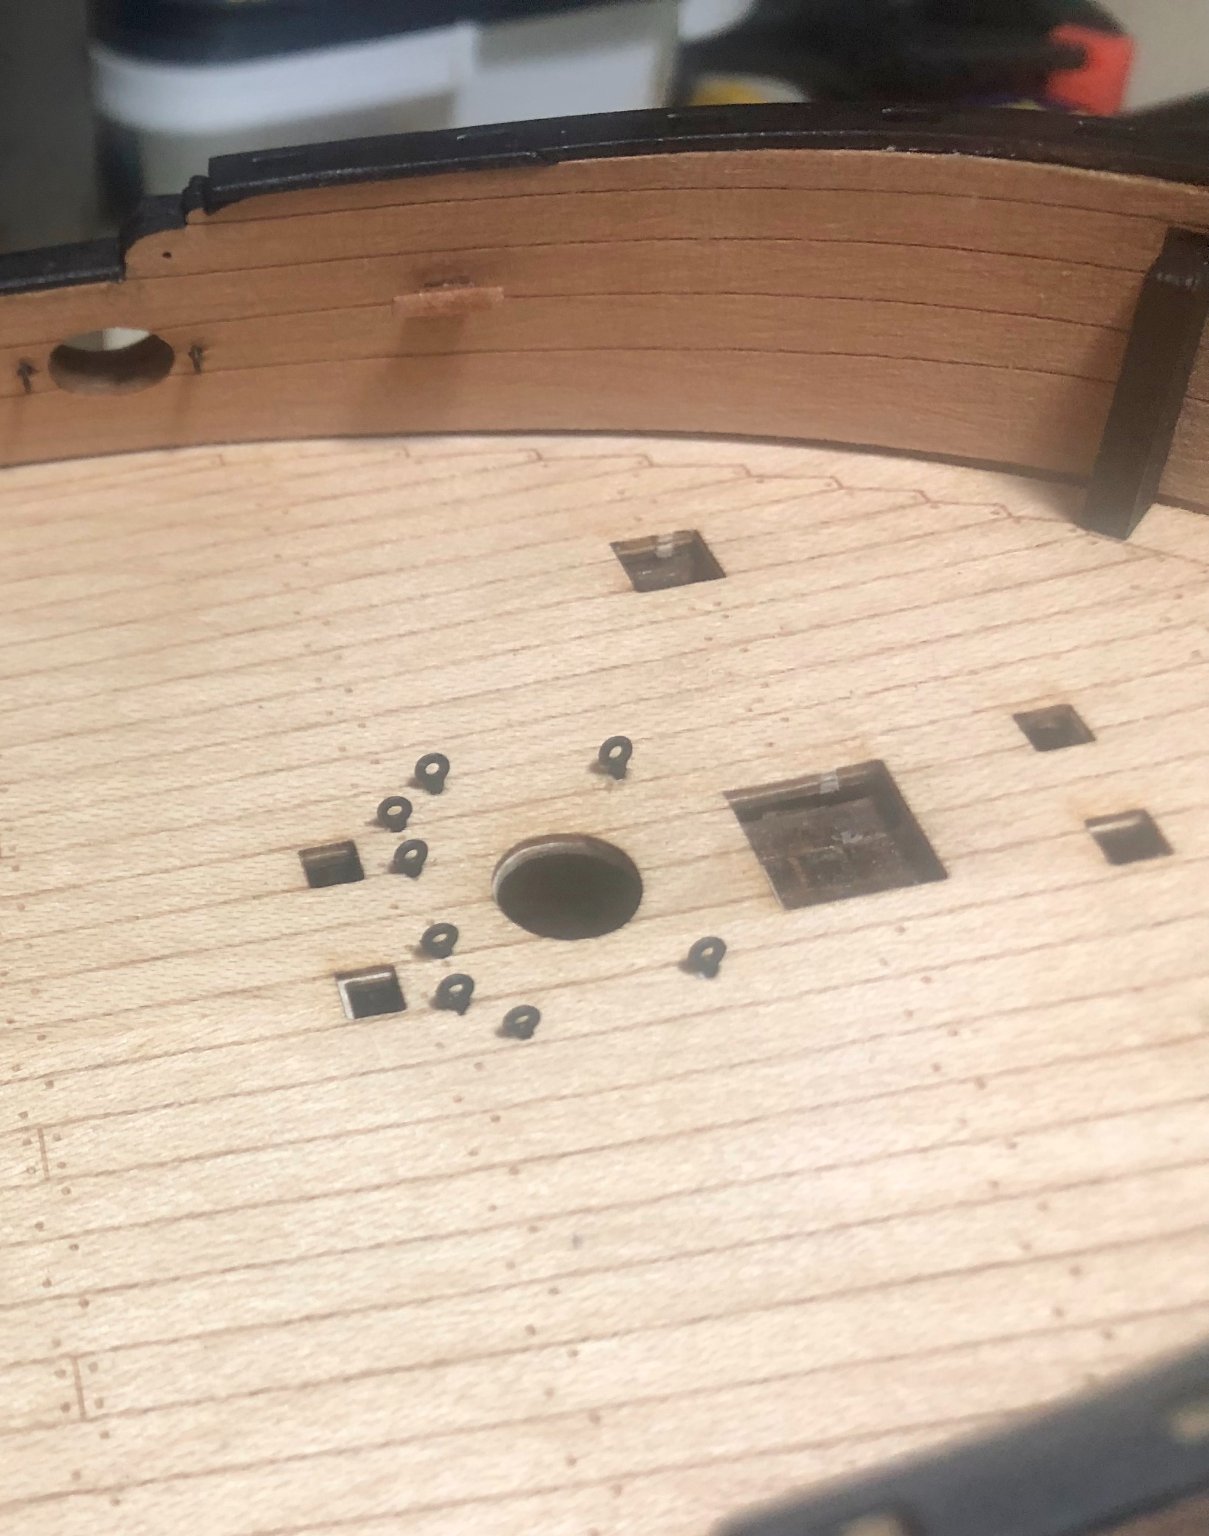
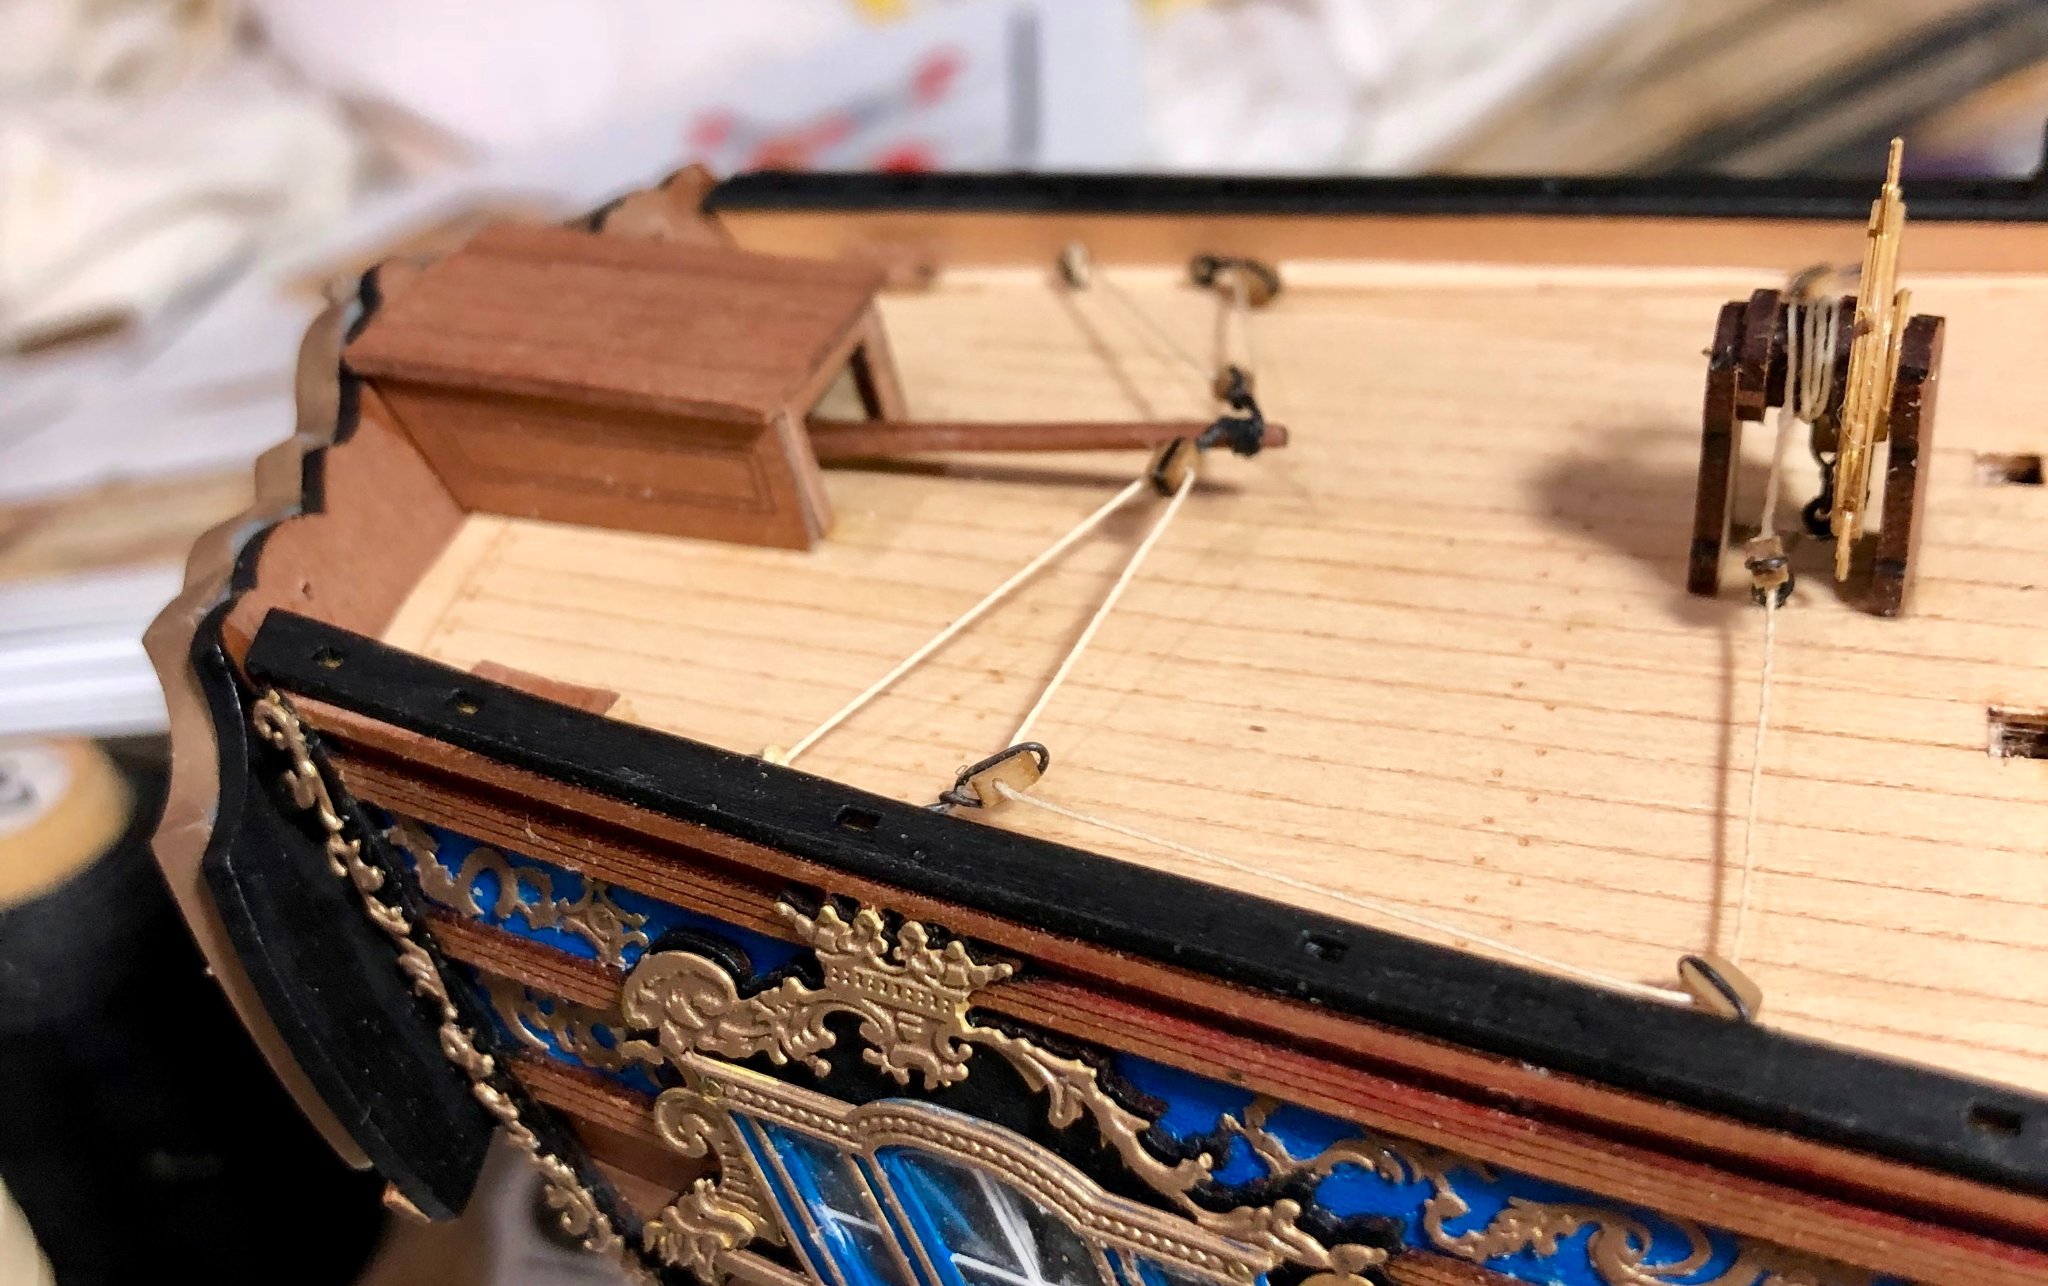
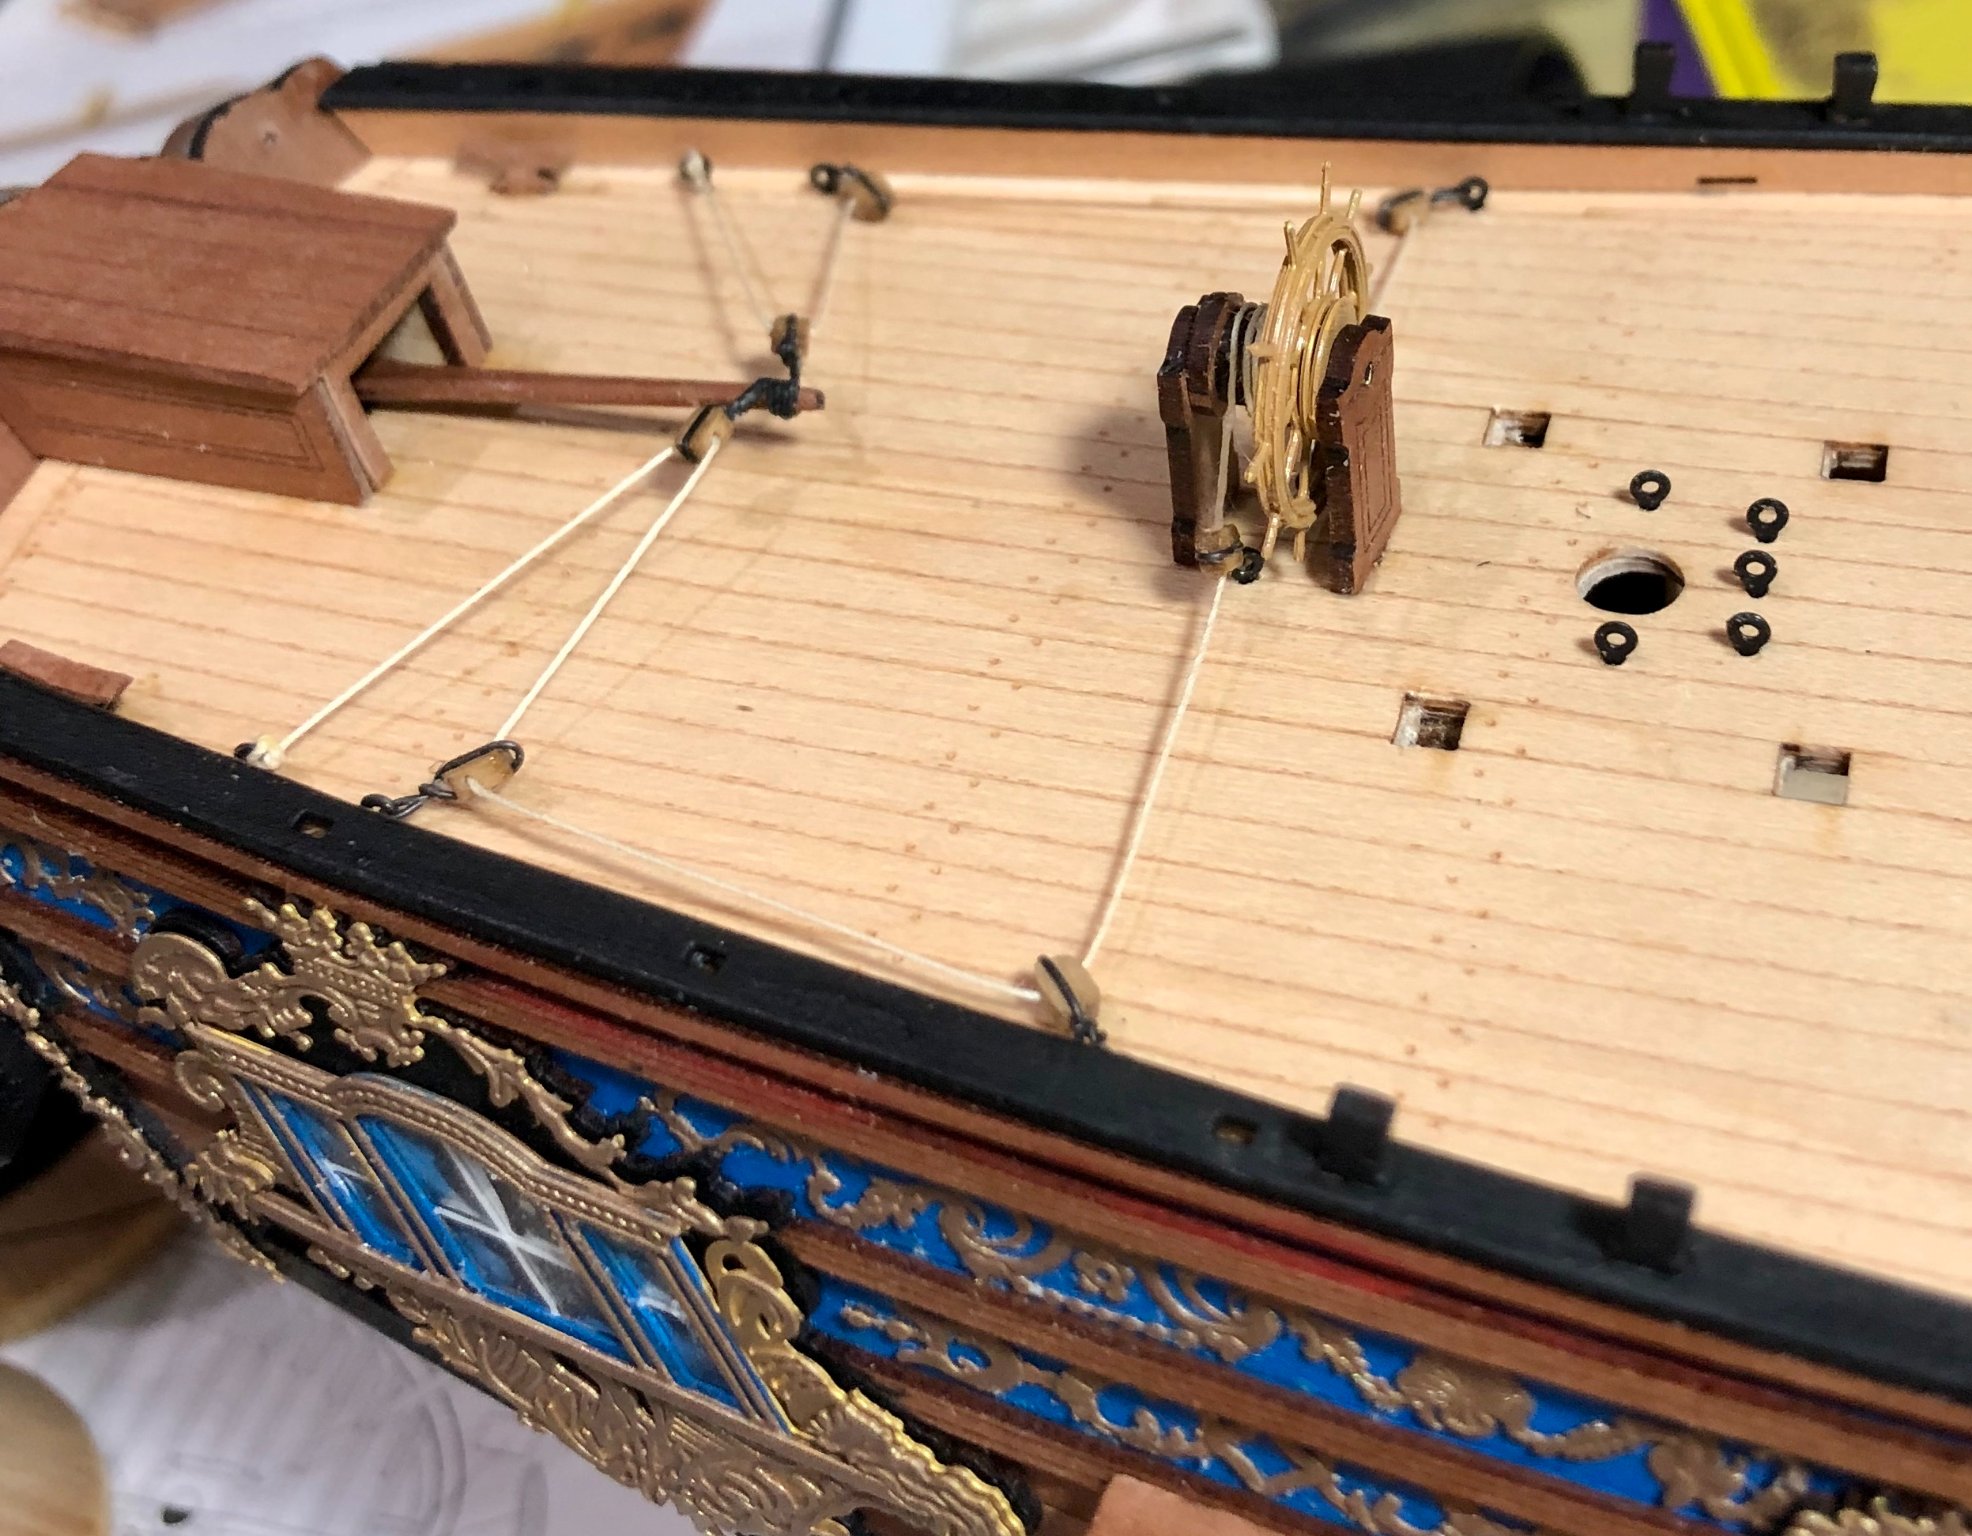
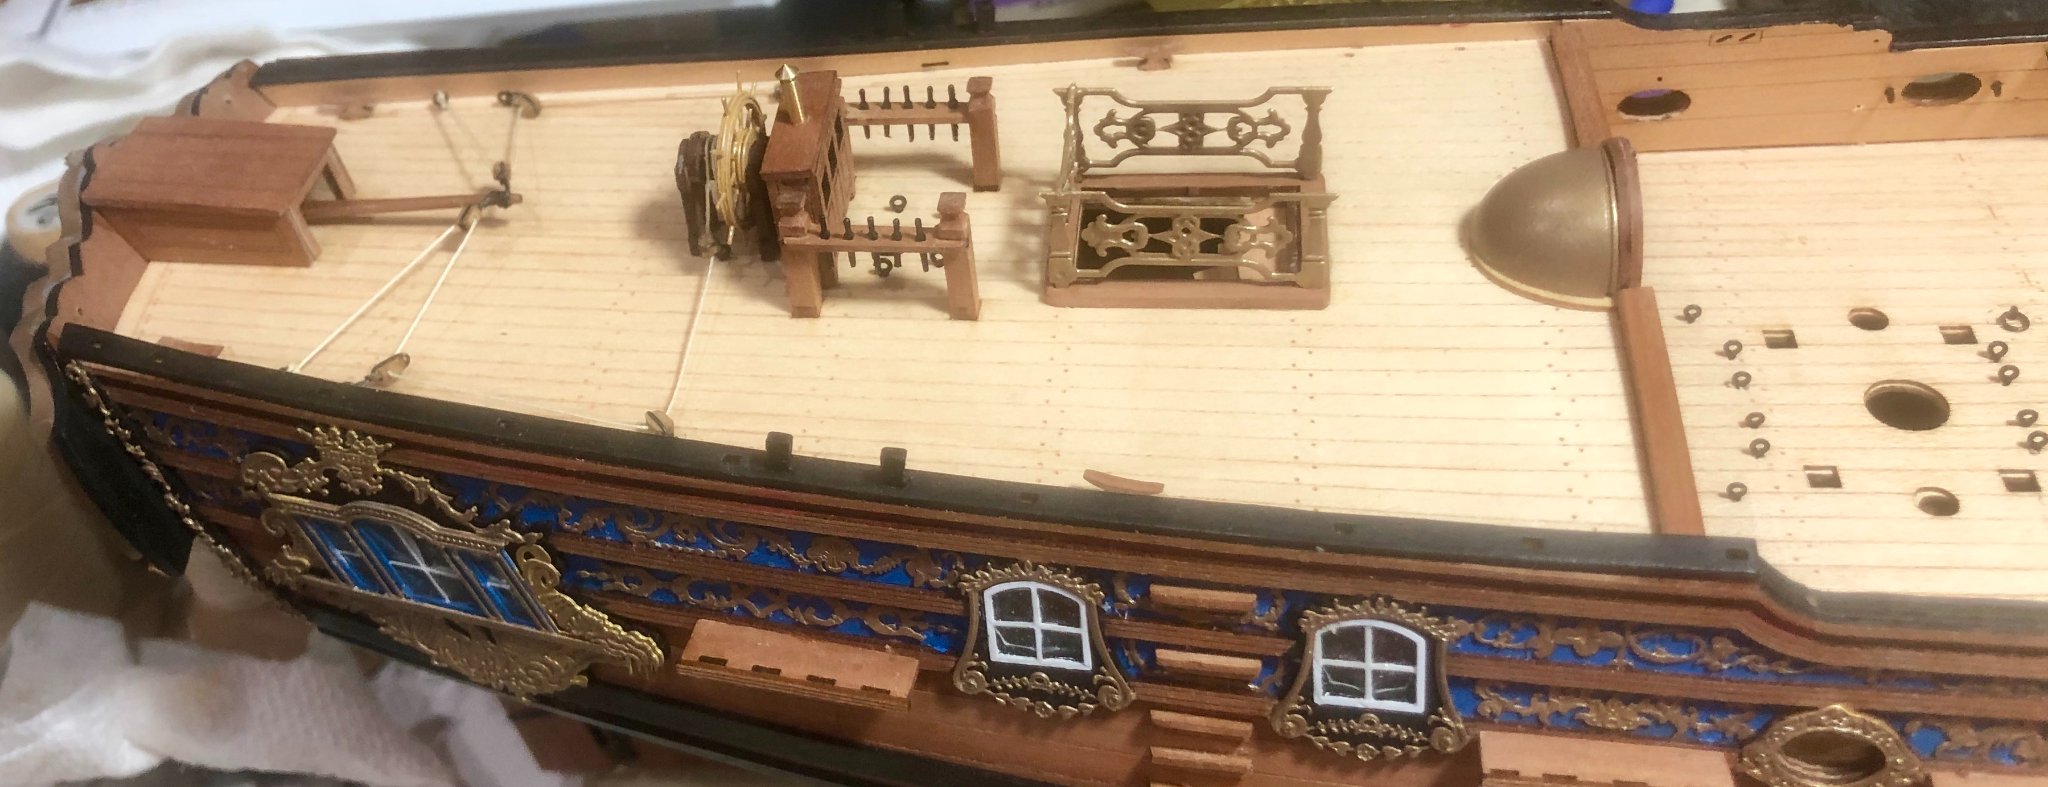
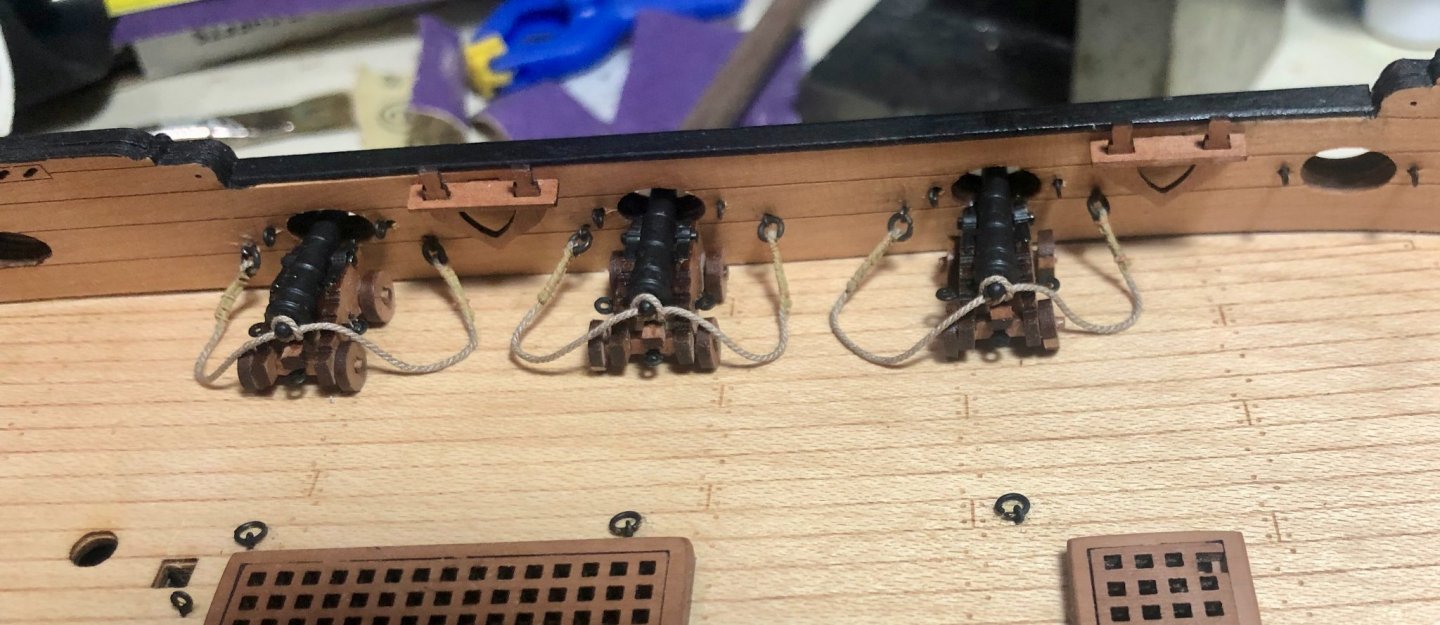
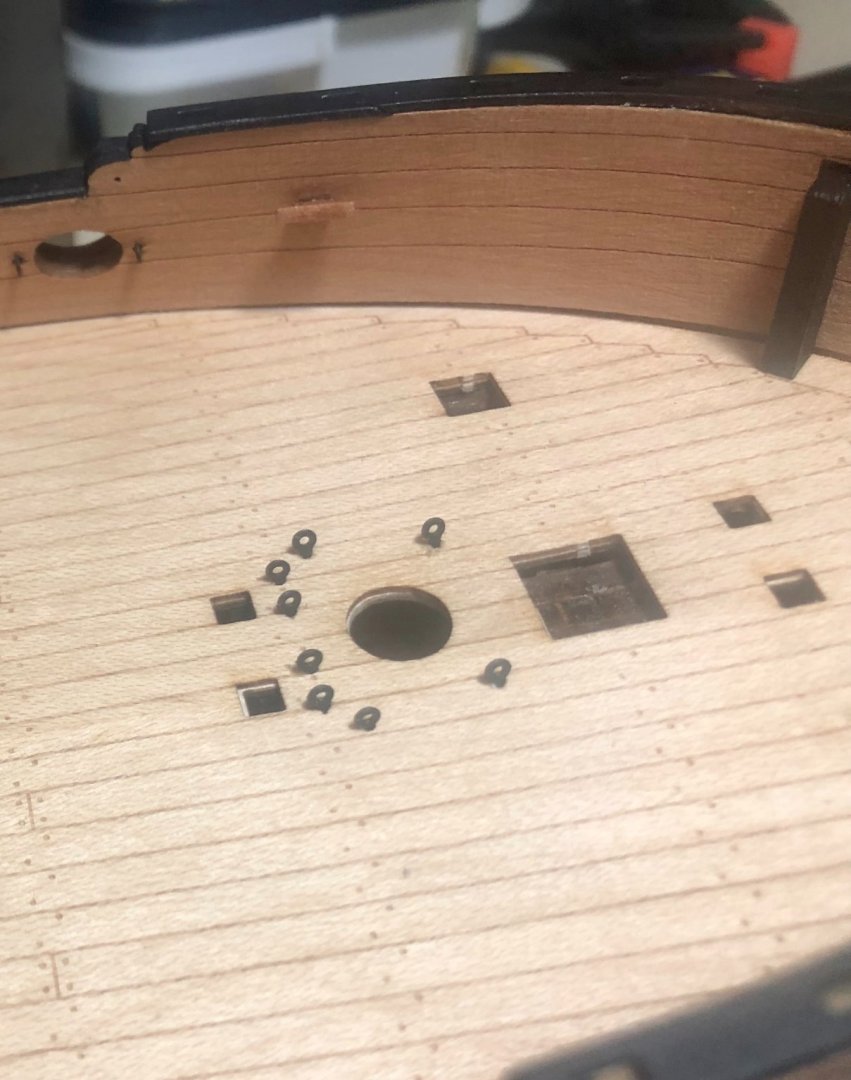
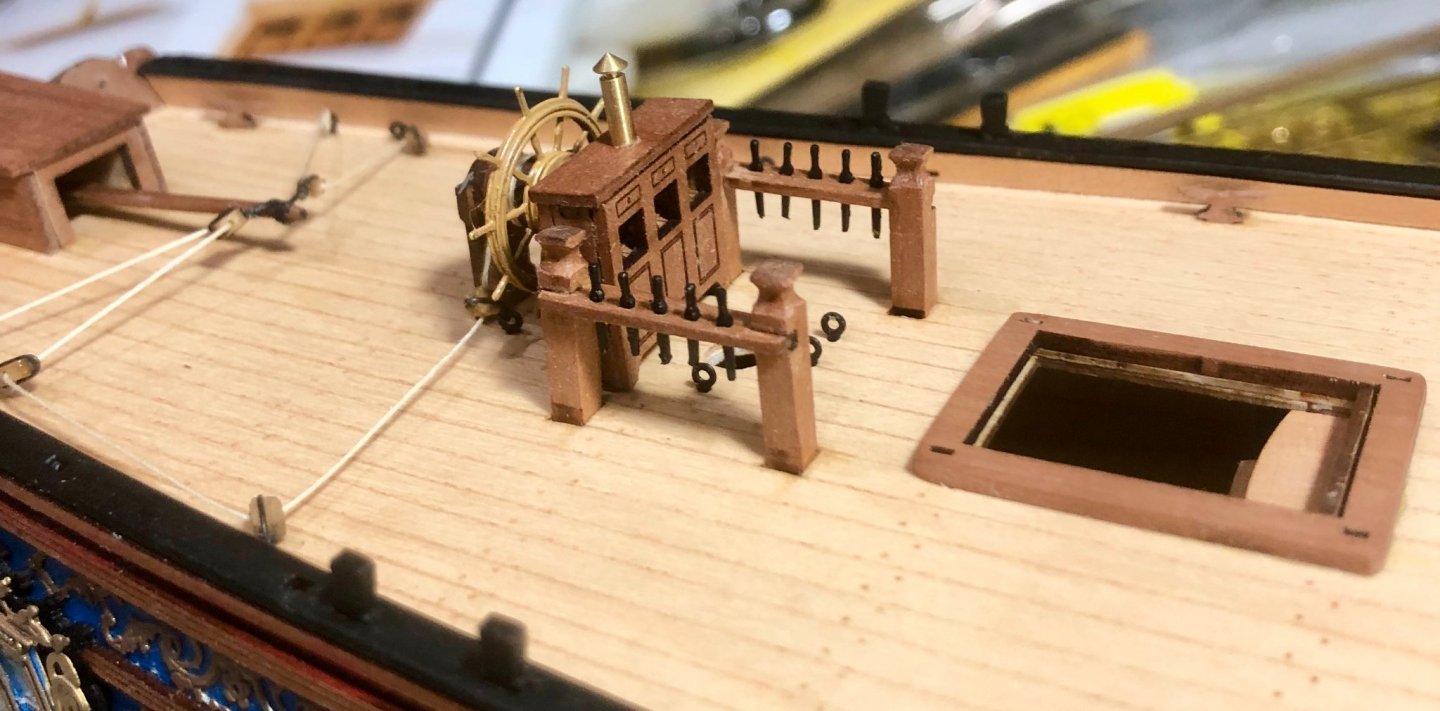
Thanks so much OC and the "likes". A lot of different items have now been done. They include: the rudder, tiller and tiller housing; the wheel and the rigging for the wheel and tiller; the binnacle; the curved stairway and the railing and coaming for it; deck eyebolts and ringbolts on quarter deck and main deck; the mizzen bitts and belaying pins; quarterdeck timberheads; bulwark eyebolts, staghorns and cleats and drilled holes for the bulwark ringbolts for the breach ropes. A few comments on this work: The blocks for the tiller and wheel rigging are really small. I wasn't sure how my aged hands and eyes would do with them, but it turned out well enough to get me thinking about gun tackle rigging again. I pinned the binnacle to the deck because it just seemed so fragile. The ringbolts for the breach ropes won't be fitted until the cannon are in place. Bob


-
Thanks so much Glenn, Rusty and the "likes". Bob
-
She's looking great Glenn. Bob
-
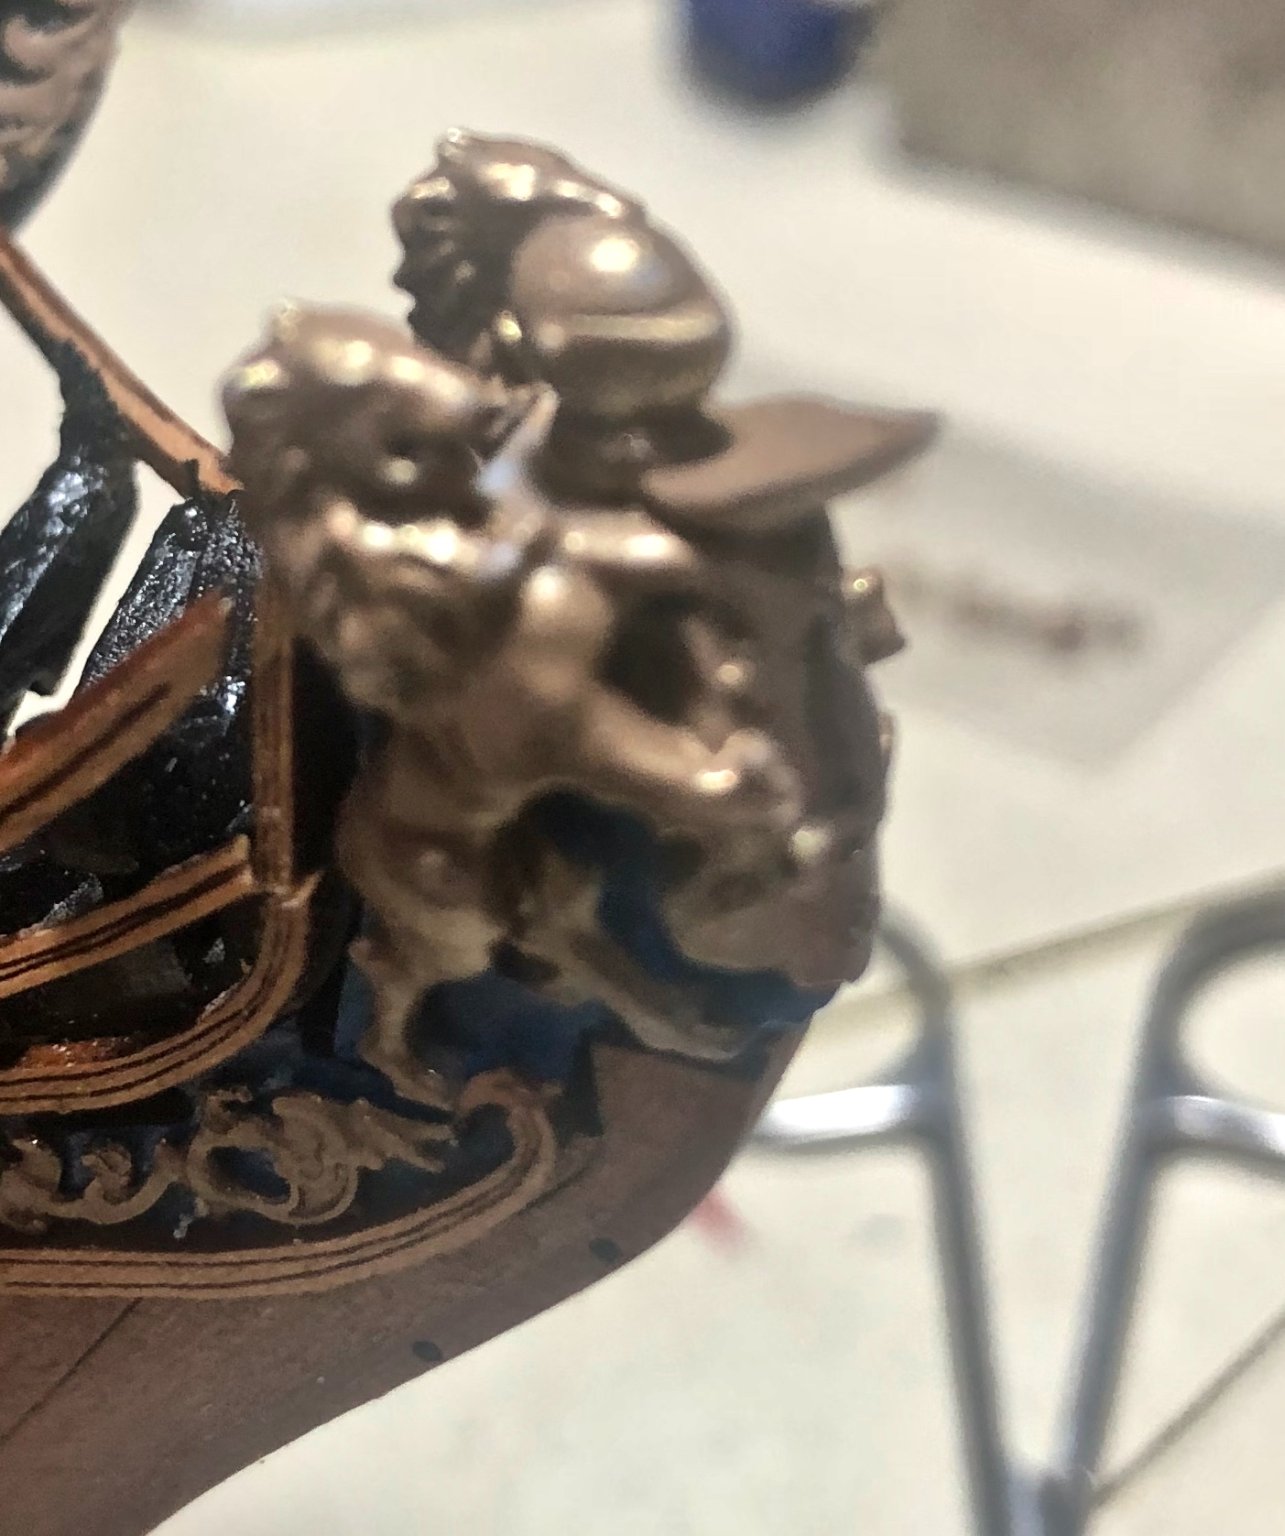
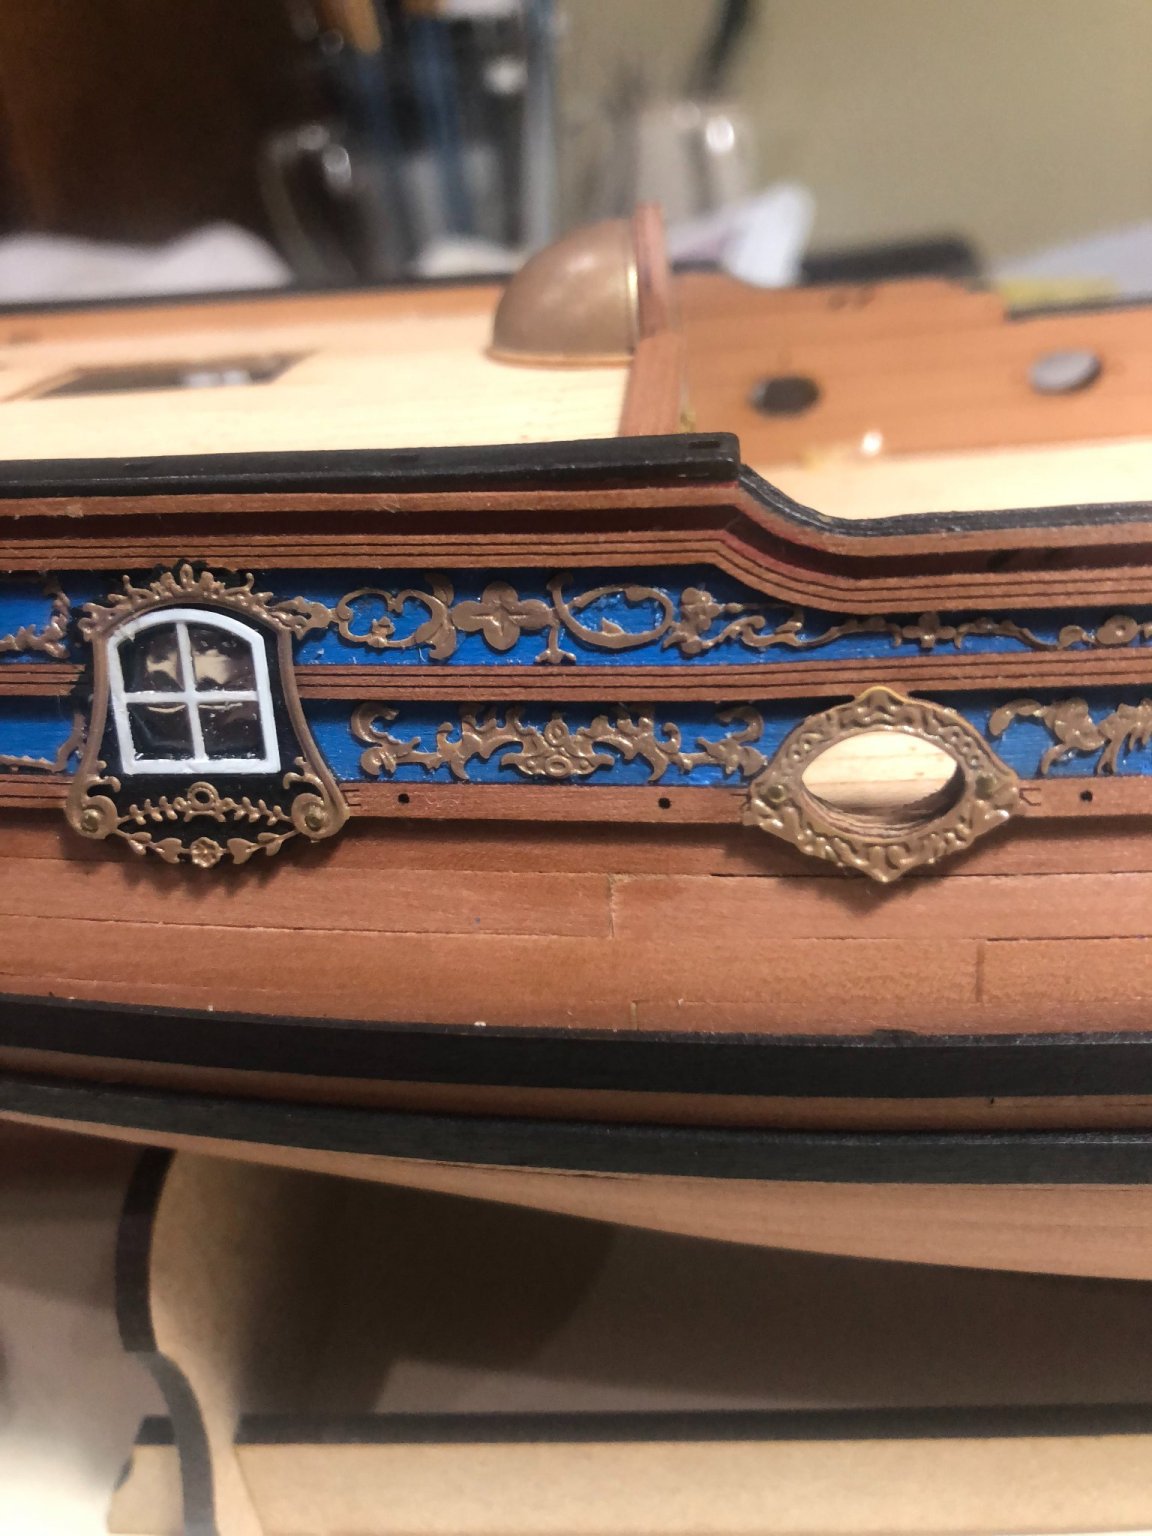
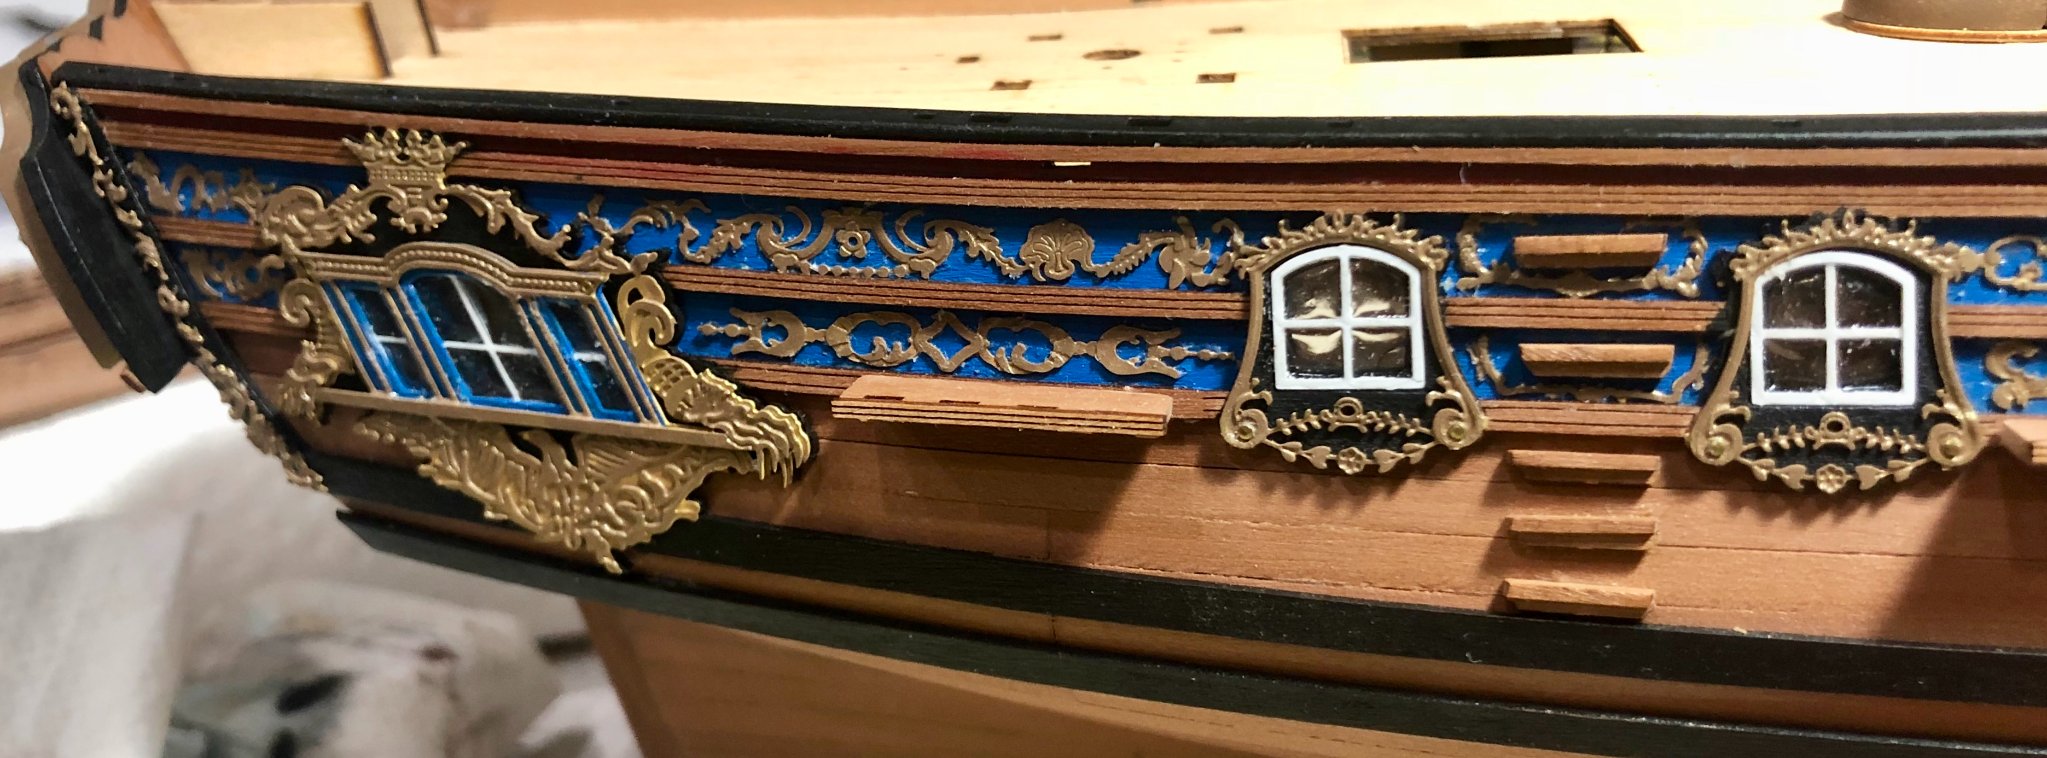
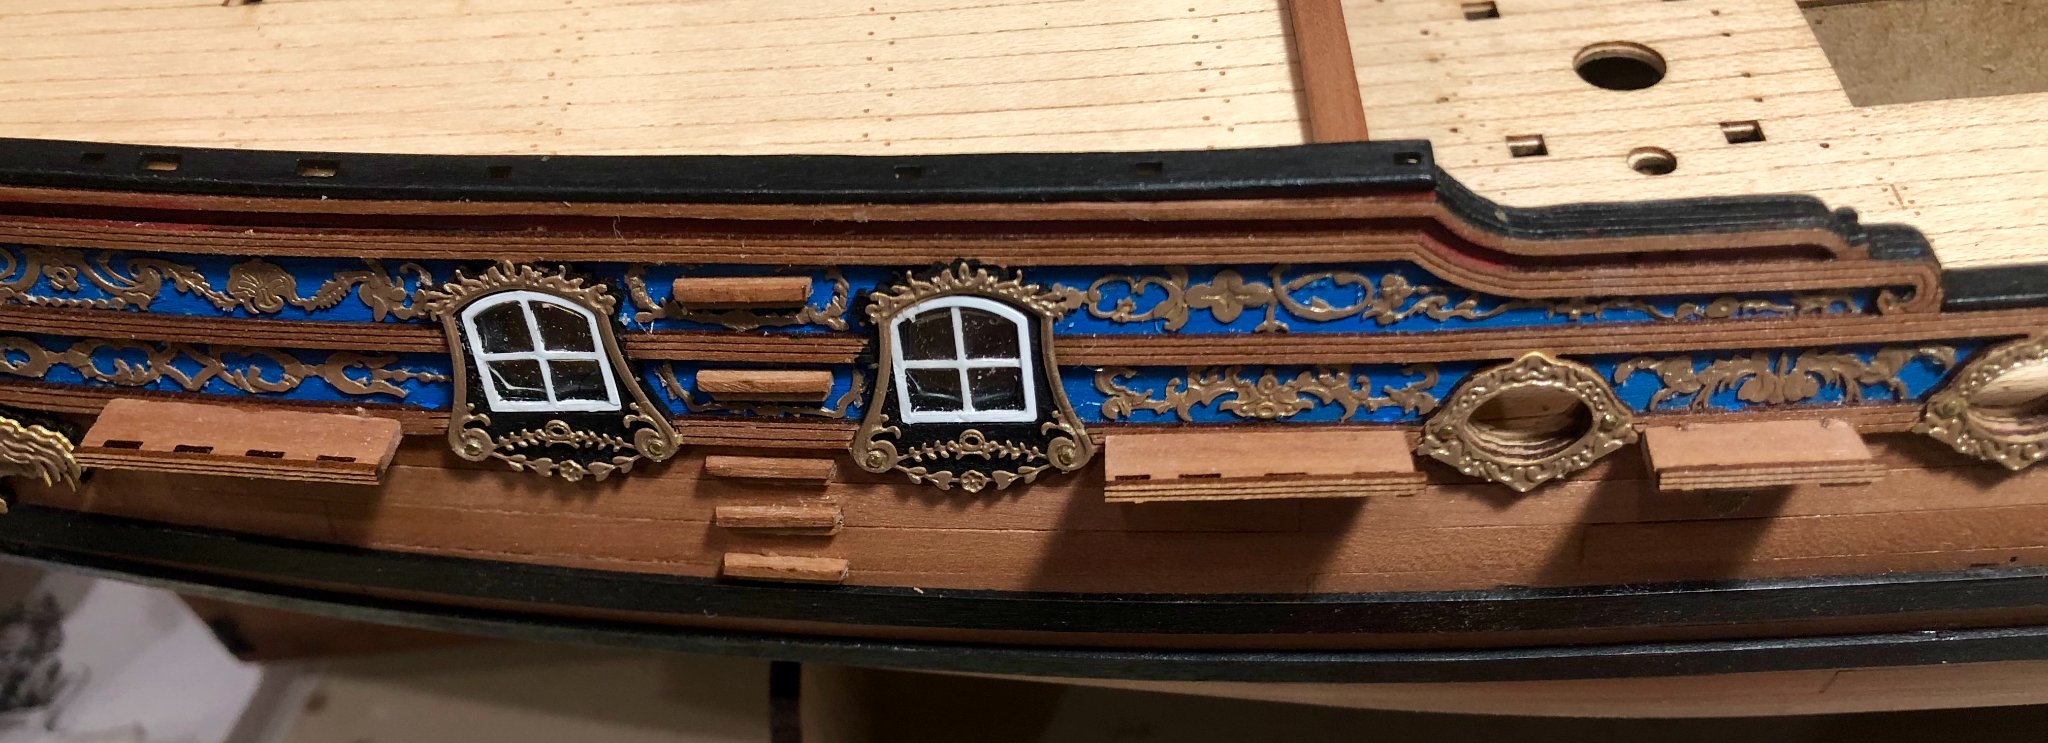
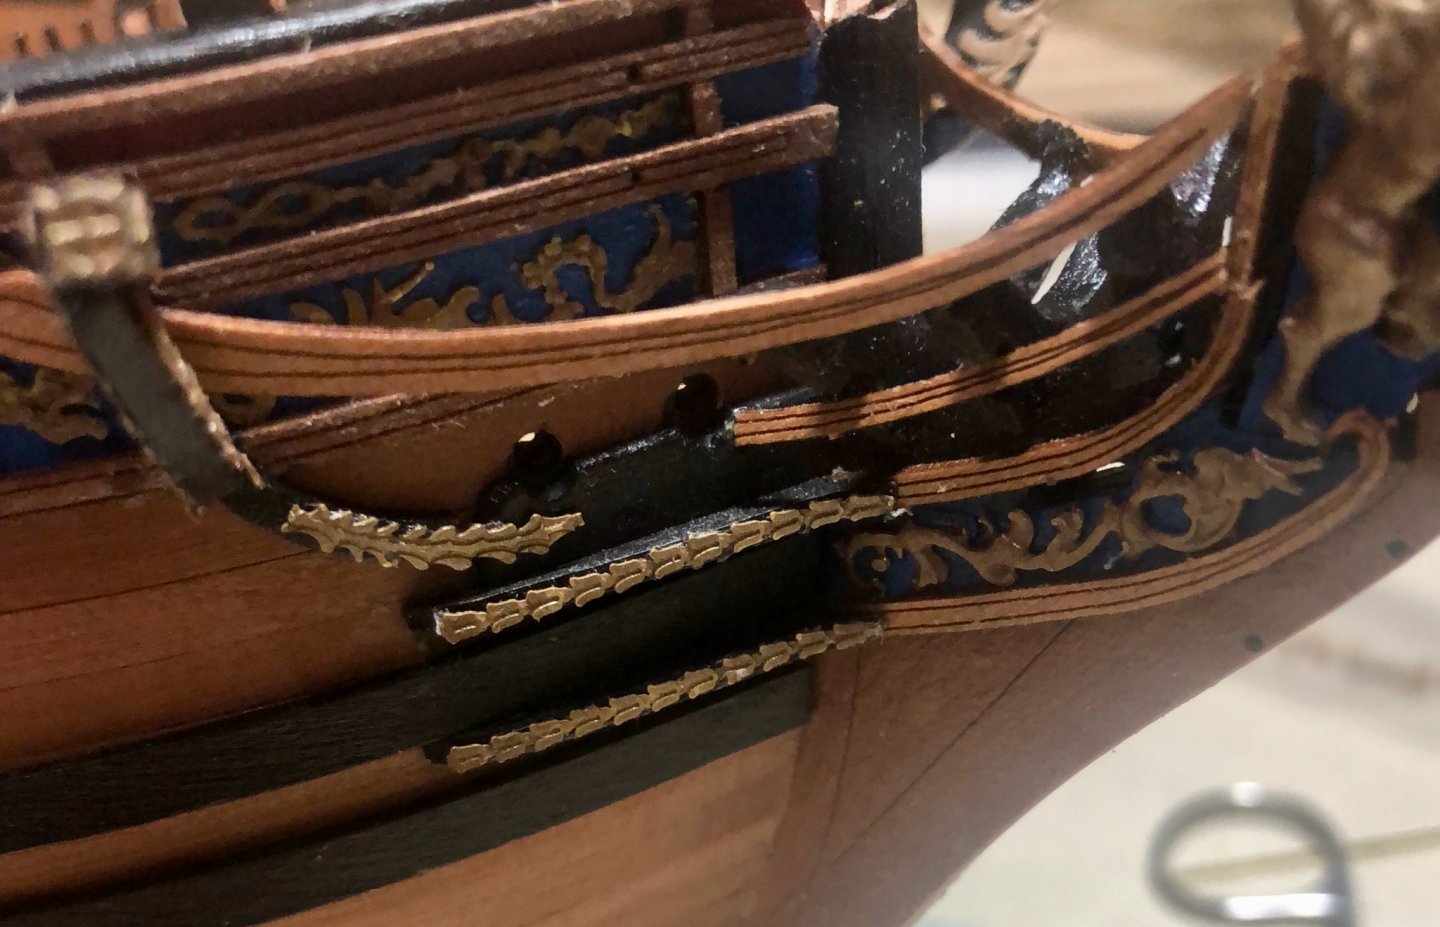
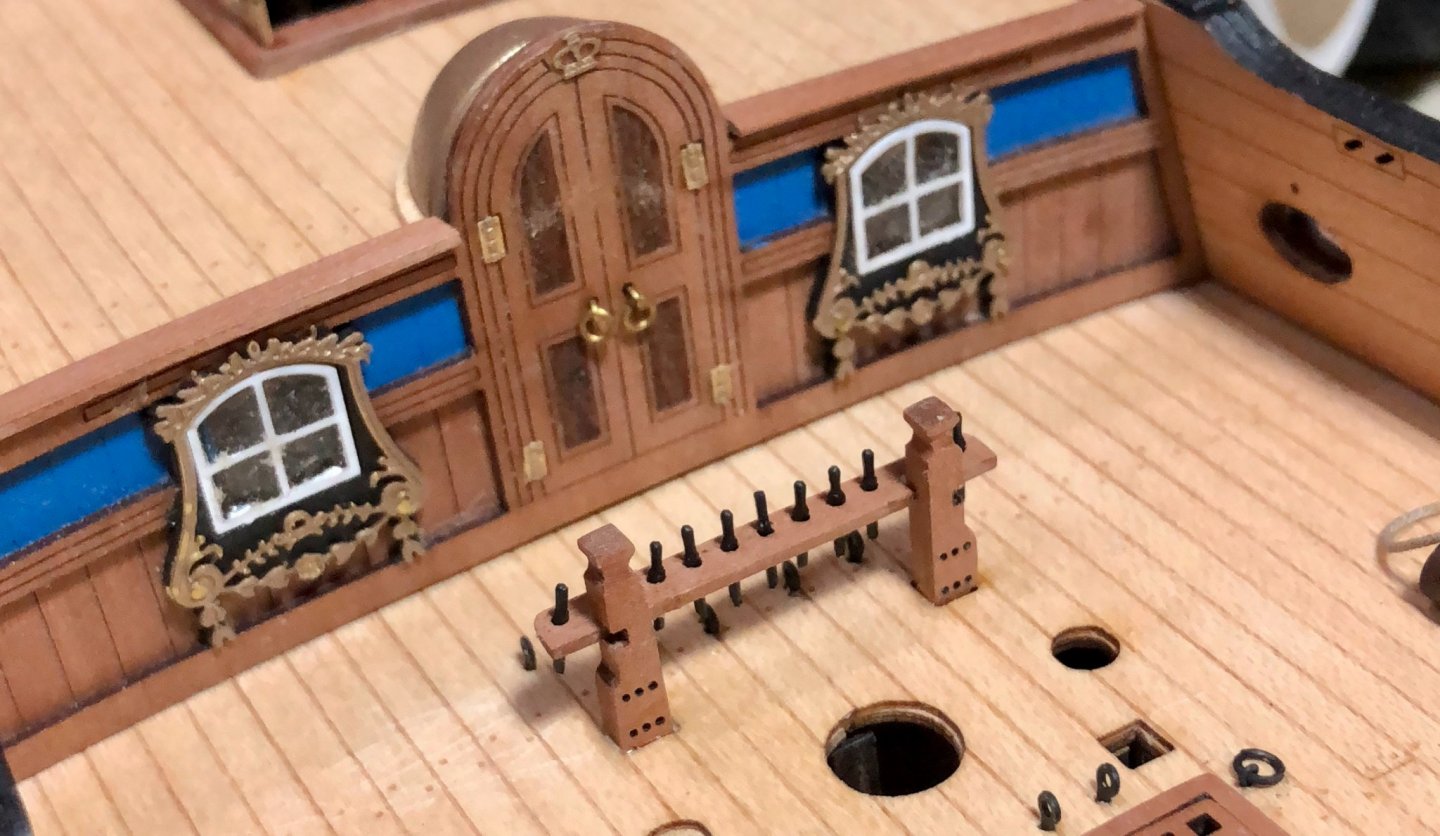
The following have now been completed: 1) painting and installation of the PE decoration on the hull; 2) painting, glazing and installation of the quarter galleries; 3) installation of the channels; 4) installation of the hull steps. The gold paint that I have used is an antique or old gold and is not as bright as others have used. I prefer a subdued look, but I can understand how others prefer the "pop" of a brighter gold. Although I am intrigued by use of floor polish to attach the PE, I chose to use a method that I have used before. I used the same Micro Krystal Klear that I use for glazing as an adhesive to attach the PE. It is very easy to use and leaves no visible residue. I completed the process by applying a coat of Wipe-on Poly over the entire area. On the quarter galleries, I again used blue, rather than red, as the background color. I have also begun work on the head, but will leave that for the next update. Bob


-
Glenn, my current plan is to do the beach ropes, but probably not the tackles. Bob
- 382 replies
-
- 1
-
-
- Vanguard Models
- Duchess of Kingston
- (and 1 more)
-
Really well done Glenn. She looks great. Bob
- 382 replies
-
- 1
-
-
- Vanguard Models
- Duchess of Kingston
- (and 1 more)
-
Rusty, you are a step ahead of me and setting a very high bar. Great work. Bob
- 201 replies
-
- 3
-
-
- Duchess of Kingston
- Vanguard Models
- (and 1 more)