Roger Pellett
-
Posts
4,519 -
Joined
-
Last visited
Content Type
Profiles
Forums
Gallery
Events
Everything posted by Roger Pellett
-
Making lifeboat small mast for 1:200 Yamato
Roger Pellett replied to Olaf's topic in Metal Work, Soldering and Metal Fittings
Since you have posted this under metalworking it would seem that you are considering metal. Metal, particularly brass can be an excellent choice for very small parts as grain is not a factor. A piece of hard brass wire should work. -
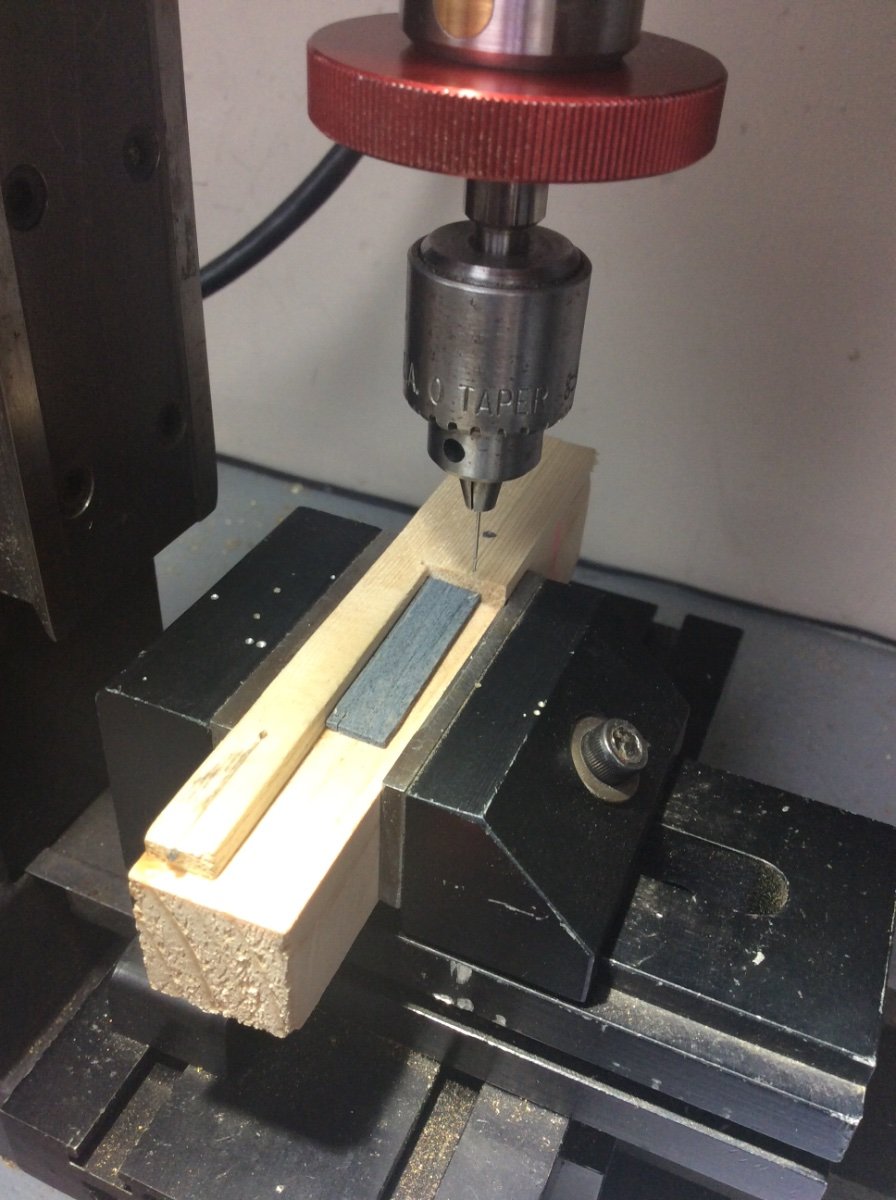
Mini Bench Drill Press
Roger Pellett replied to Gregory's topic in Modeling tools and Workshop Equipment
The company that I worked for had a metallurgy lab for testing the effect of different hot bend temperatures and subsequent heat treat cycles on pipeline steels. A key requirement was impact strength. Charpy impact specimens make good lathe parallels as they were surface ground to close tolerances. There was always a bucket of unbroken specimens left over from testing a particular heat that were scrap. Roger -
Mini Bench Drill Press
Roger Pellett replied to Gregory's topic in Modeling tools and Workshop Equipment
Here’s a photo of the Sherline vise. Note, The socket headed cap screw that tightens the vice pulls down as well as in.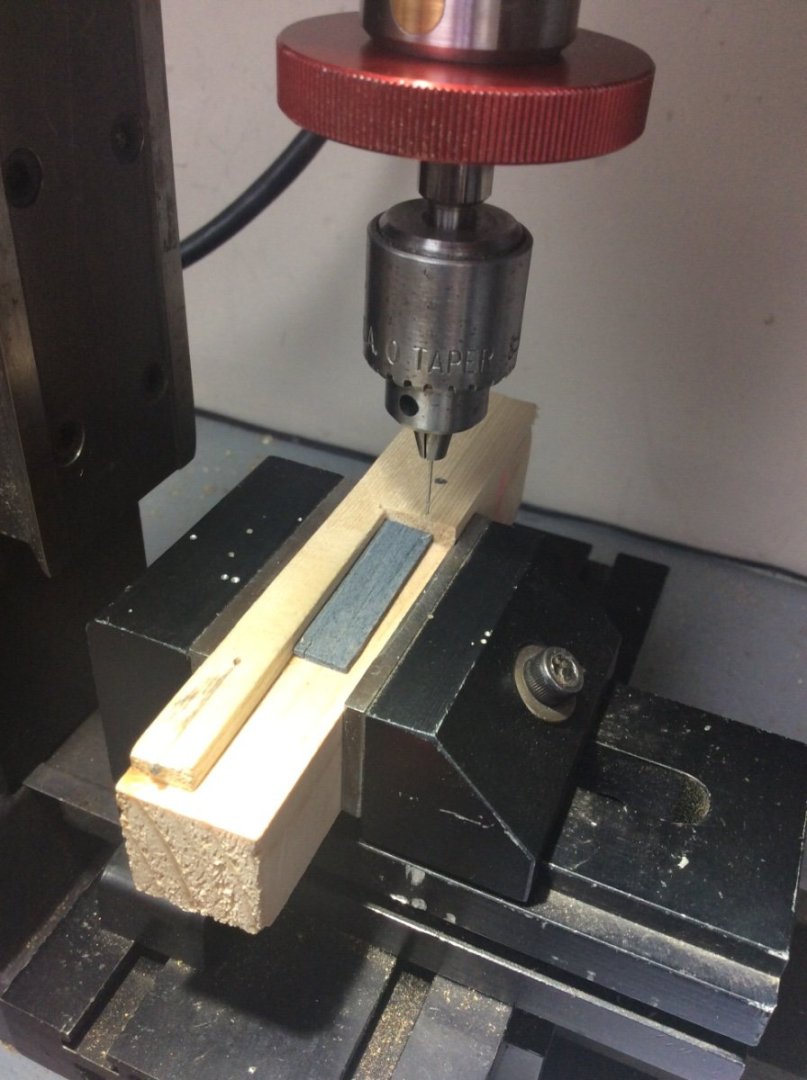
-
Hello from Seattle - looking to buy a built ship
Roger Pellett replied to wyapa's topic in New member Introductions
When it comes to ship models I am a traditionalist in that the basis for any worthwhile model is its hull lines. In other words, does the shape of the model’s hull match that of the real ship being modeled? That is the first thing that you should check out. High quality decorations on a misshapen hull is putting lipstick on a pig. -
Steven. I just used ordinary hardware store masking tape and taped it all around. I keep a stock of cheap construction grade softwood lumber in my shop for knocking up things like the frame. Roger
-
Just stumbled onto this. Very nice work! A characteristic of these c 1850-1900 East Coast Pilot and Fishing type Schooners is their lovely counter sterns. You have captured this defining feature nicely. Roger
-
Brian, you’re doing great! Overall you are capturing the look of this regional American watercraft. I’d like to weigh in on your soldering problem: Wire- A while ago someone on MSW mentioned square wire. It’s great stuff! It is available as both copper and brass in a variety of sizes; the smallest that I’ve found is 1/32.” Lots of applications. Uprights for your railings? Solder Flux combination- Some highly recommended solder flux combinations , particularly the pastes just don’t work for me. I don’t know why. I use Bakers Fluid for flux. It’s a very low viscosity liquid that draws solder into tight joints. I use this with solders of different diameters, particularly 1/32” dia and .010”dia Heat Source- My hat’s off to Kurt and others who can solder with a torch; it’s a real art, not easily learned. A while ago, I would have recommended a Weller cordless iron but mine just died after what I consider to be an unreasonably short life. I use two plug in irons, a 15 watt with a very narrow tip and 40 watt. I like the electric irons as they can concentrate heat over a small area. To summarize, soldering seems to involve a degree of witchcraft despite attempts to rationalize it. If something doesn’t work try something else until you find a combination that does. Roger
-
Interesting project! I’m curious. Where are the ballast tanks? Submarines that I am familiar with (U S Navy) carried ballast in saddle tanks outside of the pressure hull, or in tanks wrapped around necked down areas of the pressure hull. This meant that they were Soft Tanks; not designed to withstand sea pressure. They also have Hard Tanks within the hull. These were used to adjust weight to maintain required trim. Roger
-
Mini Bench Drill Press
Roger Pellett replied to Gregory's topic in Modeling tools and Workshop Equipment
I drill small holes using a sensitive drilling attachment in my Sherline milling column. For reasons not understood, I don’t have the touch for using the carbide drills with the larger 1/8” diameter shafts that can be chucked in a Jacobs Chuck or a collet. I, therefore, drill with HSS wire size drills. My drilling attachment does not accept collets so I use the provided Jacobs Chuck. I have noticed that the drills bits themselves are not necessarily straight. While the chuck runs true, there is often a slight wobble of the drill bit itself. On the other hand, these tiny wire sized drills will “find” any slight center punched depression nearby. It appears to me that the key to accurate drilling is marking out and center punching holes in the first place followed by correct lining up of the center punch mark beneath the drill bit. While this might not be good enough for true miniature machining it will produce results good enough for our purposes. Roger -
I’m personally not a CA glue user but have read, here an the forum and elsewhere, that the hardening reaction depends on moisture. Blowing on it gently can speed the reaction. An alternative to CA glue is nitrocellulose based clear nail polish; a close relation to the model airplane cement that we used as kids. I prefer it to CA. Roger
-
That tongue and groove floor should be really nice!
-
Climate control is not as much for you as it is for your tools and equipment. High humidity and condensation can rust tools overnight. It is, therefore, wise to provide some means of controlling humidity even when you are not present in your shop. It is also a good idea to put down a plastic film vapor barrier on the concrete before laying down the wooden floor. Roger
-
That wood does not resemble any cherry that I have ever used for projects or that remains in my lumber pile. It appears to be some sort of walnut. Roger
-
IMHO, an interesting and attractive feature of Bluejacket’s lineup is its line of vessels built in its “backyard,” the northeastern USA. Regional vessels do have unique characteristics many due to the environment in which they operate and you guys do a great job of understanding this. Roger
-
Steven, The consensus on available material for sails is that no matter what you choose, it will still be over scale. It would therefore seem that the problem with your Silkspan is not that it’s too thin but that it’s translucent. So instead of laminating two thin sheets together, why not just paint what you have? I have found that it’s easy to paint Silkspan with diluted acrylic paints. If you first attach it to a frame, mist it with water, and let it dry you should have a drum tight surface to paint. Roger
-
Help with understanding the rigging diagram
Roger Pellett replied to Linda DOBLE's topic in Masting, rigging and sails
There is also book on seamanship for the USCG Barque Eagle. It is published by the US Naval Institute Press. I believe that Eagle was built in Germany in the 193O’s. There is also Allan Villers’ The Way of a Ship. This is devoted to the steel hulled vessels still sailing in the 1930’s. The book includes several excellent illustrations of rigging drawn by Harold Underhill. Roger -
Help with understanding the rigging diagram
Roger Pellett replied to Linda DOBLE's topic in Masting, rigging and sails
Linda, the line in question that you have marked in green is the sheet for the Royal Sail. It’s job is to pull the clew (corner) of the Royal Sail down against the TopGallant Yard, the yard immediately below. The line passes through a sheave in the outboard end of the TopGallant Yard. It then runs inboard along the yard where it is turned again by a block close to the yard’s centerline. From here it passes down to a belaying pin on the deck. If you are modeling with set sails, it is attached to the clue of the Royal Sail as shown in the picture. If the Royal Sail is furled it will lead up to furled the Royal Sail, still attached to its clew. If you are modeling the vessel without sails, this line can be omitted. Roger -
There IS evidence of wooden hatch covers much wider than those shown on the B. Noble drawing being used on Great Lakes vessels. Accounts of the Benjamin Noble’s sinking report that her hatch covers were found along the beach at Park Point. Park Point is an inhabited sandbar that stretches along the Western tip of Lake Superior. Being directly down wind from Noble’s sinking wreckage would have washed up there. There is a photo easily found on the internet that is supposed to be one of these hatch covers. The cover stands on one edge with two young ladies standing behind it. It is prominently stenciled with the ship’s name and is considerably wider in proportion than those shown on the builders drawing. To me, the photo looks too posed and I’m not sure that someone on board would have spent time stenciling the vessel’s name on humble hatch covers. I used the dimensions from the drawings. A better example is a photo in the book Steamboats & Sailors of the Great Lakes by Mark Thompson. This photo shows two deckhands lifting one edge of a wooden hatch cover. I would estimate it to be about 5ft wide; twice that of Benjamin Noble’s covers. I would just eyeball the covers in your photo. That’s the best that you can do. Roger
-
If you are going to plank it the “correct” way, every plank will be unique and will get wider and/or narrower from fore and aft. Shaping of these planks is called spiling. If you plan to do this, cutting standardized planks at this point is just going to waste wood. Since you are going to glass it easer methods such as strip planking might work. If you have not already done so, I suggest that you Google “Building a Strip Planked Canoe.” Druxy’s advice is worth following, he’s an expert! Use thread to plan out your planking. Roger
-
I believe that the dimensions listed in your last post; 8’x8’, 8’x10’, etc. are the sizes of the hatch openings. The individual hatch covers would of course be sized to fit these openings. The covers had to be small enough to be handled by the deckhands in the absence of power equipment. Benjamin Noble’s hatch covers per her builders drawings were made from 2”x 6” white pine planks laid edge to edge and fastened together with metal strapping on the underside. My calculation is that each 9’x 2’-6” cover would have weighed about 150#, possible for two hefty men to handle. You MAY have photo evidence that two narrow panels were fastened together to make a larger one, OR, maybe the “black stripe” is just the edge between two adjacent covers stacked against the bulwark. Of course, you can always punt and show them tarped. Roger
-
I used shellac impregnated paper for the shell plating on the Steamship model that I am building. It worked great! I just sprayed it with zinser shellac from a spray can. It did not react with the PVA glue that I used to cement the paper plating to the wood hull. Roger
-
Smart choice! At 1:700 scale skip the plating and simulate with paint. Roger
-
Thanks Andy. I wonder if the black line on the hatch is a steel or wrought iron strap fastened to the wooden cover that serves to secure it. Roger