


michael mott
-
Posts
5,198 -
Joined
-
Last visited
Content Type
Profiles
Forums
Gallery
Events
Everything posted by michael mott
-
 Hello Keith, a bit of catching up, very nice work on all the rigging details, nice choice of color for the "whippings" on the ends. Michael
 -
Metal bashing
michael mott replied to michael mott's topic in Metal Work, Soldering and Metal Fittings
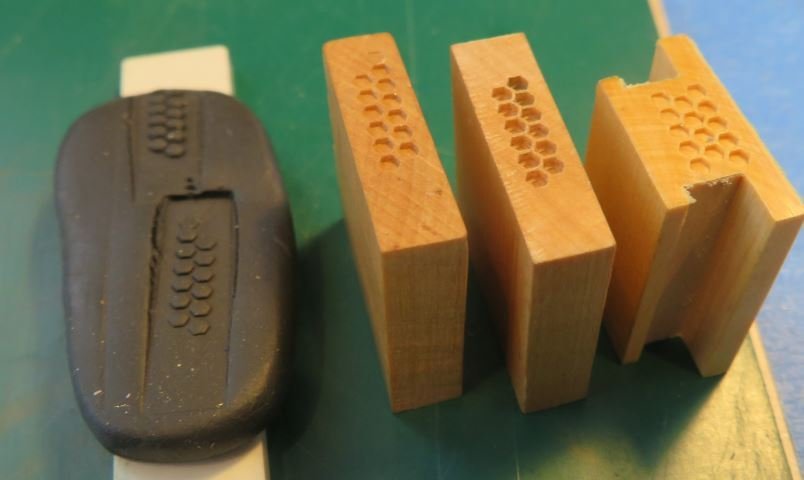
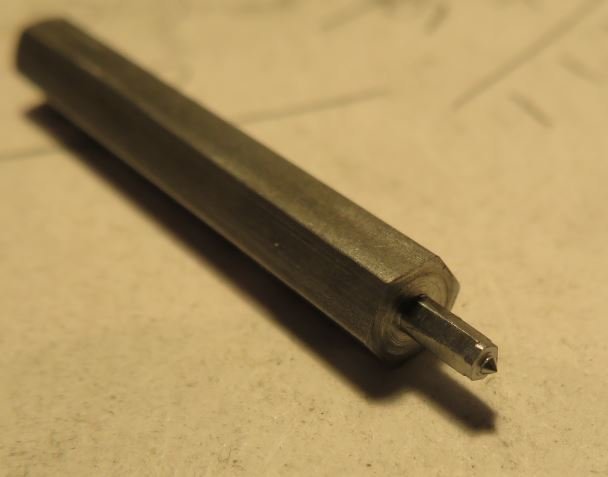
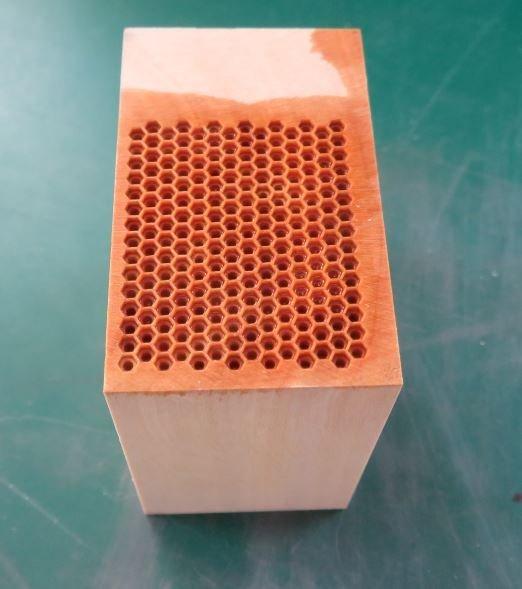
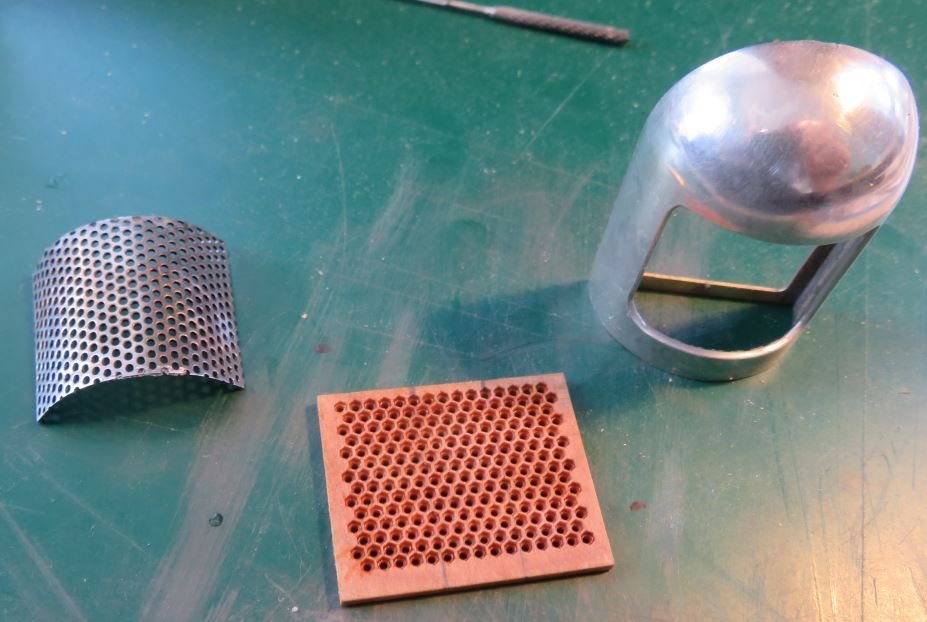
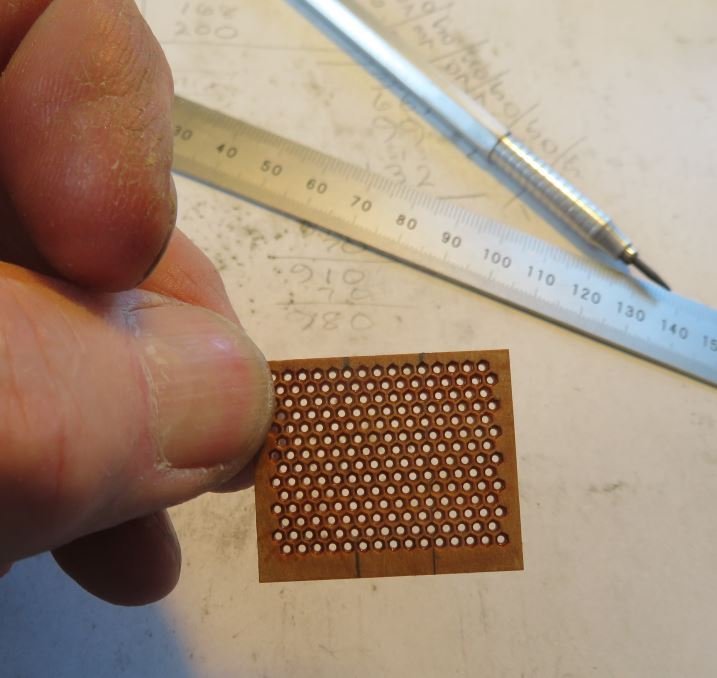
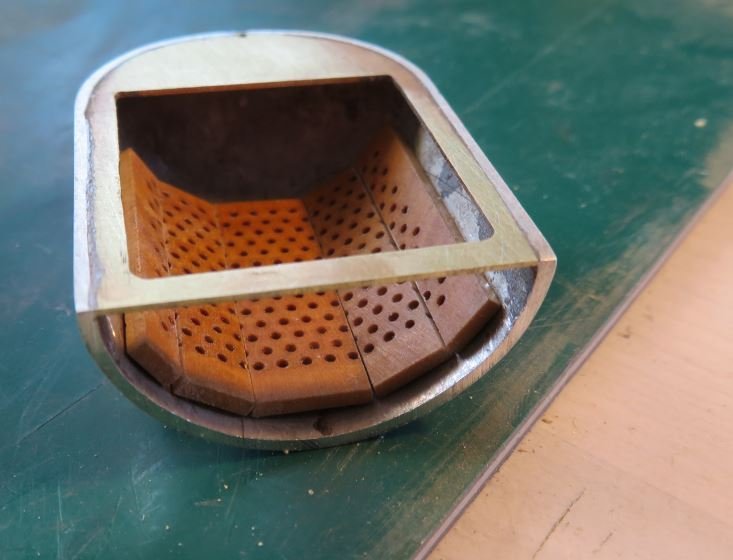
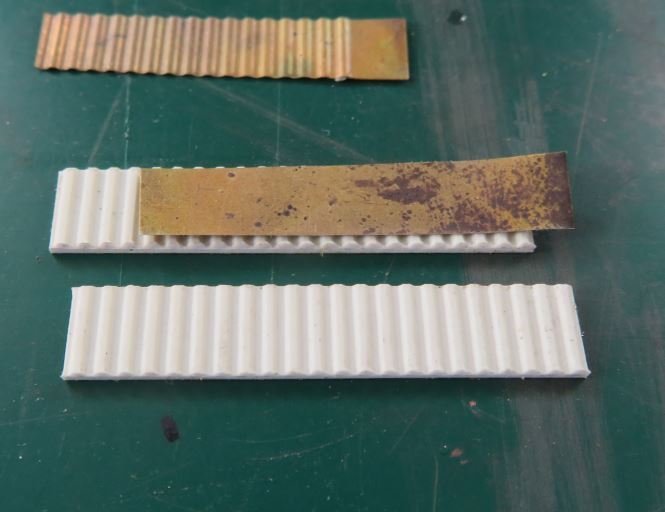
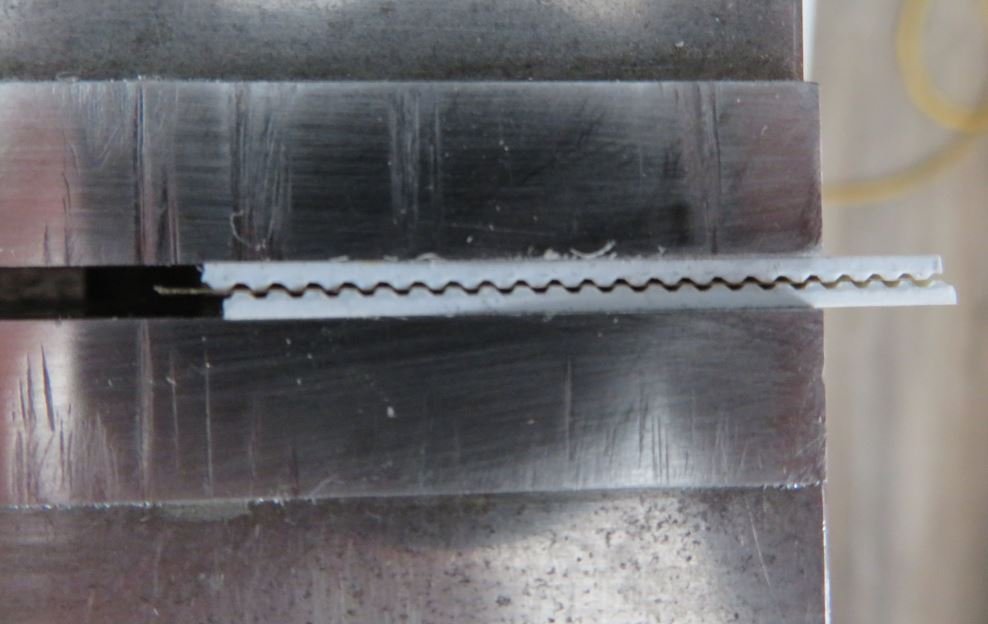
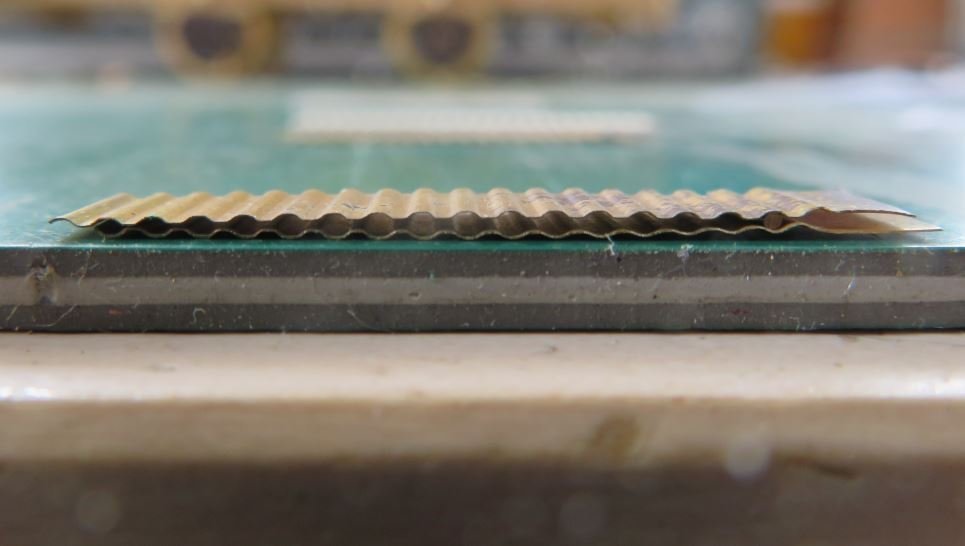
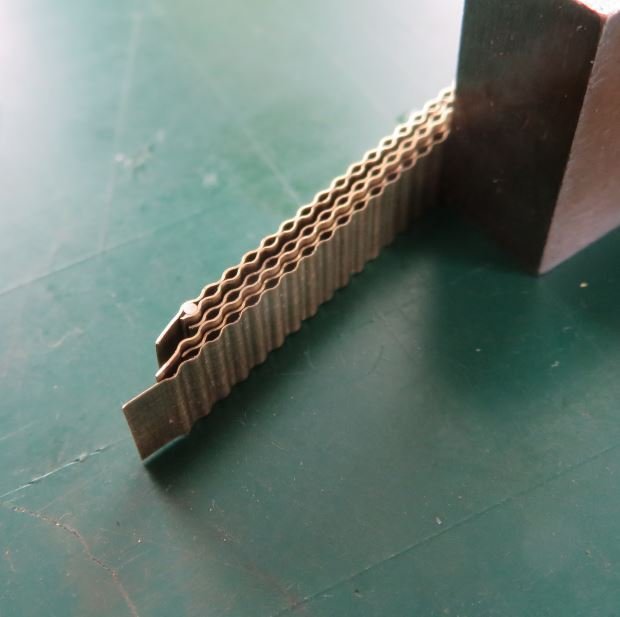
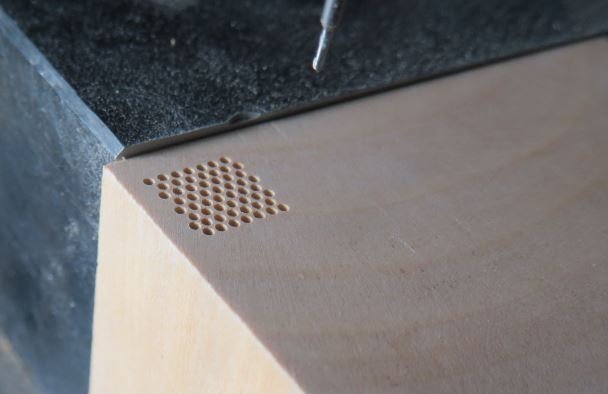
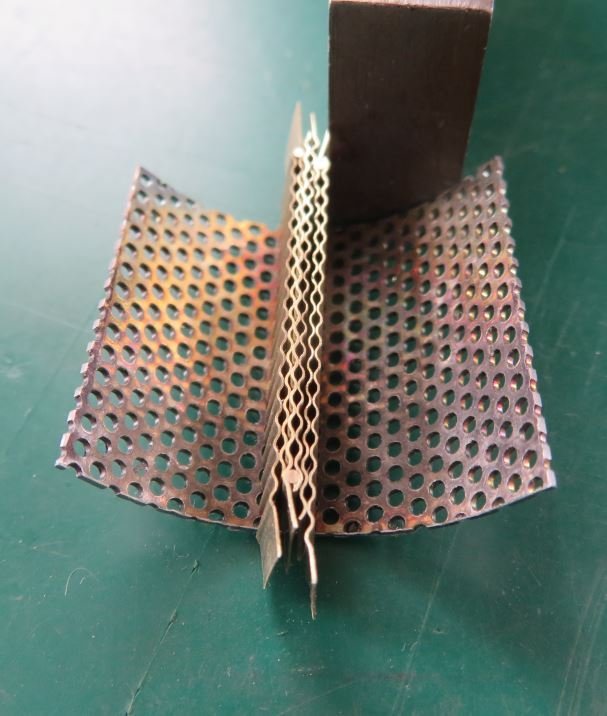
Thank you all for you kind words. I have been working away at this little project trying to solve some issues related to the radiator, I tried a model shipbuilding technique for making the grill but in the end decided on the proper way to build the core, Oh yes and have been making more piano type hinges using the same methods that I have outlined in other threads. The first idea was multiple layers of woven screen. Its Ok but the wrong look and it is the proper look that I am after. so then a lot of time was invested in a wooden grill after a few quit experiments by pushing punches into the end of some off cuts of Castello and the English boxwood (a little side experiment by pushing one of these into some fimo modeling clay an Idea for using the wood block for molding bolts comes to mind)I set up block of salvaged boxwood that was a central American Ash tray in its former life. And spend a couple of long hours over two days punching the hex indent .030 deep following a chart of offsets, then back to 0,0 and repeated the same by drilling a further .030 with a .038" drill The punch filed up Tests Block punched and drilled then painted with ACC sliced off and sanded on the back untill the holes were exposed. All old hat for all you folk who make all those wonderful gratings in such small scales. Then it was sectioned with the jewelers saw beveled and fitted into the radiator shell and held in place with a snapped in sheet of clear acetate, I did not want to glue it yet. I look reasonable but not quite right and a bit over scale . So a new block was begun with a smaller grid on a .030 x .025 set of offsets using a .022" watchmakers spade drill bit But after an hoer I decided it was time for a rethink of this whole exercise. I slept on it. Woke up and had one of those aha moments when I remembered just how old radiator cores are made with sheet metal. So some little strips of annealed .003" brass pressed between a couple of strips of plastic model corrugated roofing. Then the two strips placed back to back with a dowel of .028" brass rod as a register produced this. And as "Monty Python's Dinsdale brothers" would say this operation was the changing point. All I need now is a stack of 30 of these side by side inside the curve of the shell laid up just like the frames of a ship Here they are laying inside an earlier experiment using a perforated sheet. I am happy to climb out of this rabbit hole for now, A bit of crimping in order today. Michael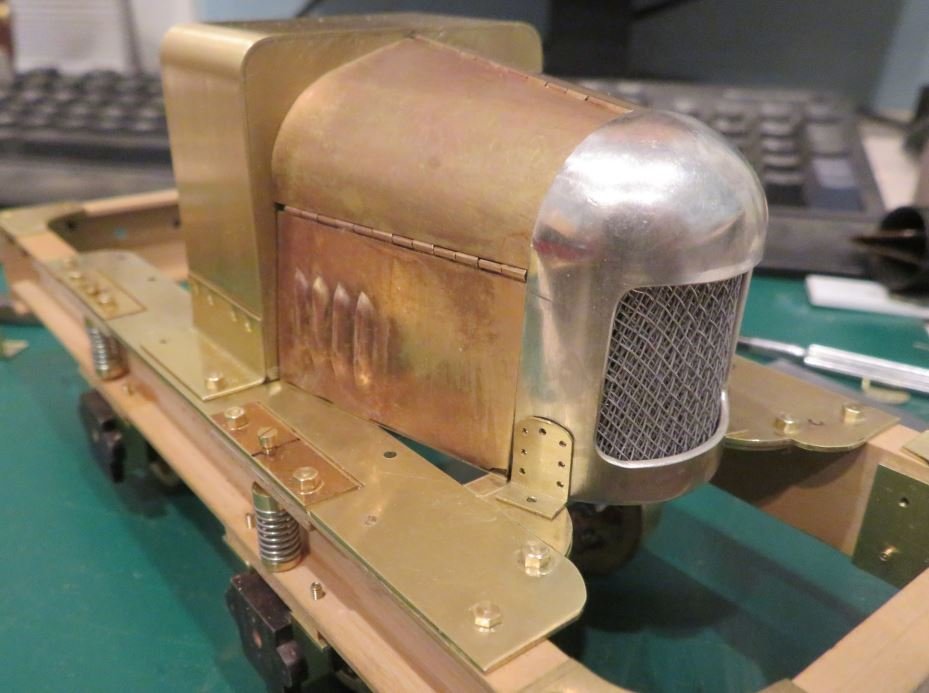

- 49 replies
-
- 13
-

-

-
Metal bashing
michael mott replied to michael mott's topic in Metal Work, Soldering and Metal Fittings
Late afternoon brass-work replacements. Sorting out the springs comes next. Michael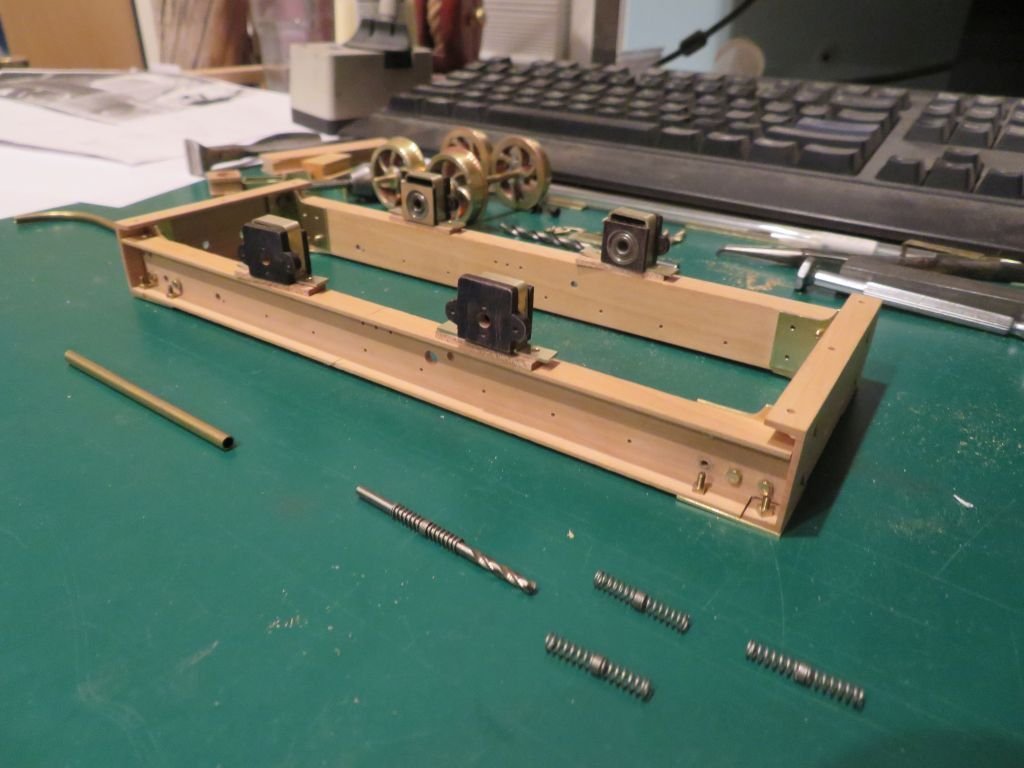
-
NAIAD 1797 by Bitao - 1:60
michael mott replied to Bitao's topic in - Build logs for subjects built 1751 - 1800
So True, it is the most one of the most valuable lessons we can learn, but at the same time not hold us back. I feel that these challenges are presented for us so that we can progress in our journey, which is after all the most important consideration. Overall the model does look amazing. Michael -
Metal bashing
michael mott replied to michael mott's topic in Metal Work, Soldering and Metal Fittings
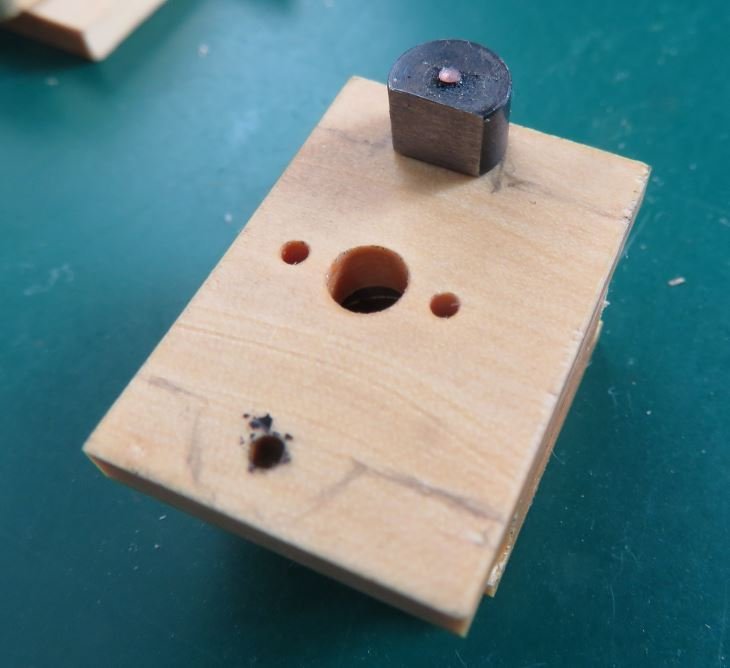
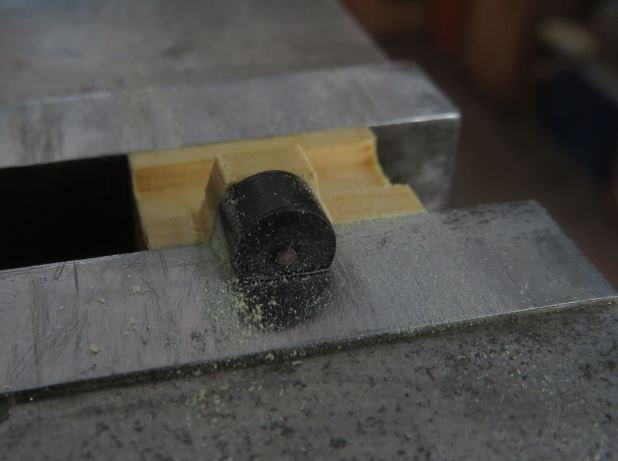
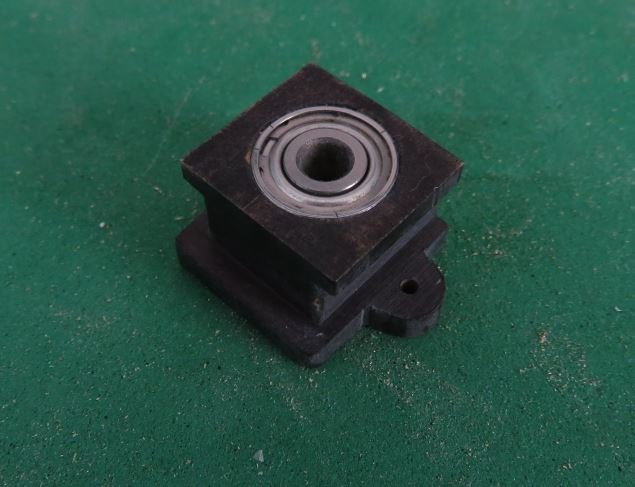
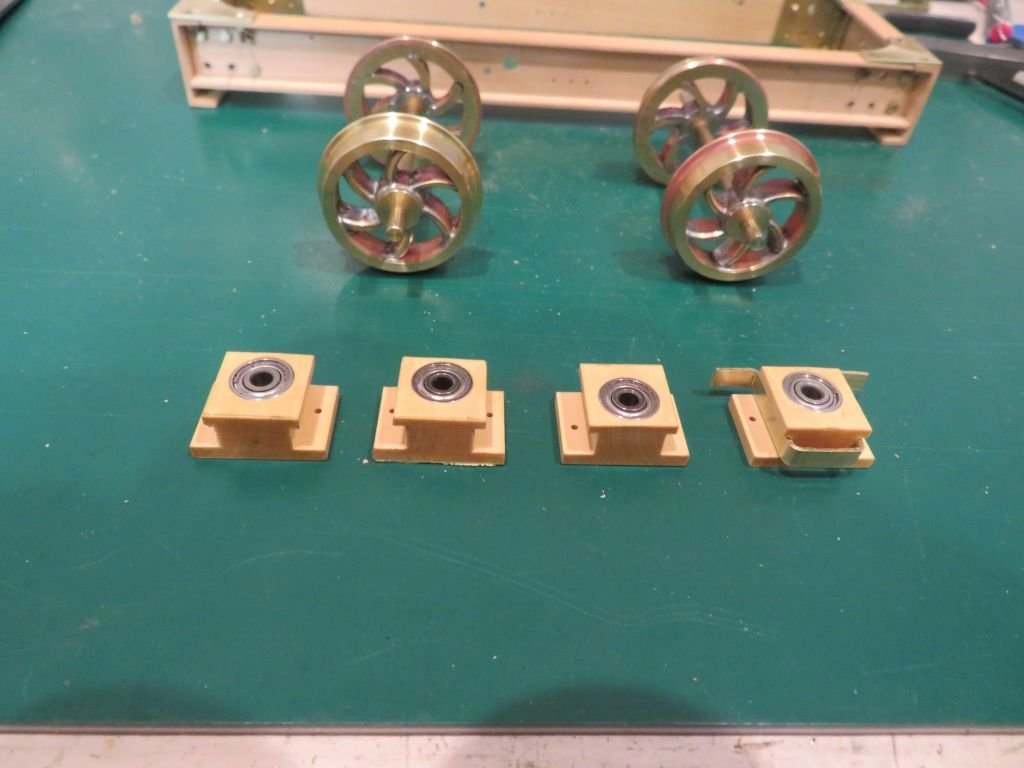
I used some English boxwood for the hornblocks with ball races for the bearings. As my supply is now very limited I will be putting all the offcuts into the boxwood cuttings box for future considerations. The rectangular section is the prize this time. After squaring the peice up on the shooting board I milled out the sides. Then turned the section on its face to bore the recess for the 3/8 x 5/32 ball race. and drill the holes for the stabilising rods and the cover plate. As each one was drilled it was sliced off with the exacto saw and reset for the next set of holes. The surface looked like glass.... such an amazing wood. Next I turned up a small button for filing the tabs for the stabilizing rods then hardened and ground it so as to act as a depth gauge as well. After removing the bulk of the material either side of the tab the offcuts went into the boxwood scrap box. ready for the finishing filing The completed hornblock after a little bit of filing to round off some of the edges and blackened with a sharpie pen. The hornblocks were dry placed to check the fit and appearance. The hornblock guides had to be remade today because I made them too long, but the method i used was a good practice for the final ones which I have not photographed yet. Michael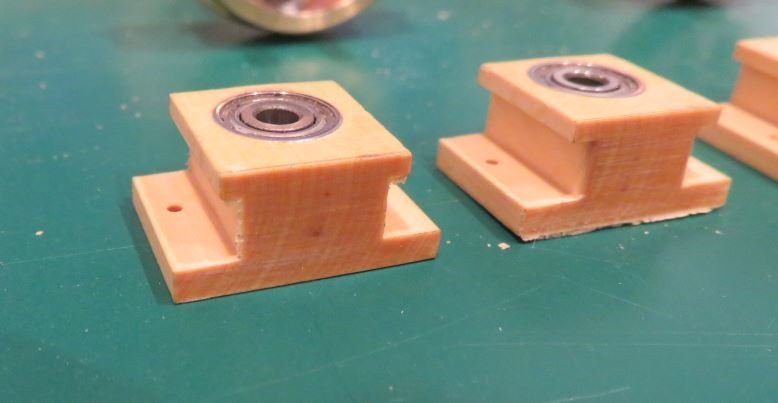

-
Metal bashing
michael mott replied to michael mott's topic in Metal Work, Soldering and Metal Fittings
Thank you Phil for the links. Michael -
All your hard work is paying off Well done. Michael
-
Metal bashing
michael mott replied to michael mott's topic in Metal Work, Soldering and Metal Fittings
Thanks for all the comments and likes, Kevin there is a member here who has done a absolutely outstanding job making ventilators like the one you have shown. If my memory serves me correctly it is on a Russian steam yacht, he used a method of electroplating that built up the layers of metal over time. Michael -
Hi Ron, your model of the Oneida has come along really nicely. The thing that always amazes me is how long these models take, and at the same time it is one of their joys, there is no rush, in my mind because it is all out the journey. Michael
-
Metal bashing
michael mott replied to michael mott's topic in Metal Work, Soldering and Metal Fittings
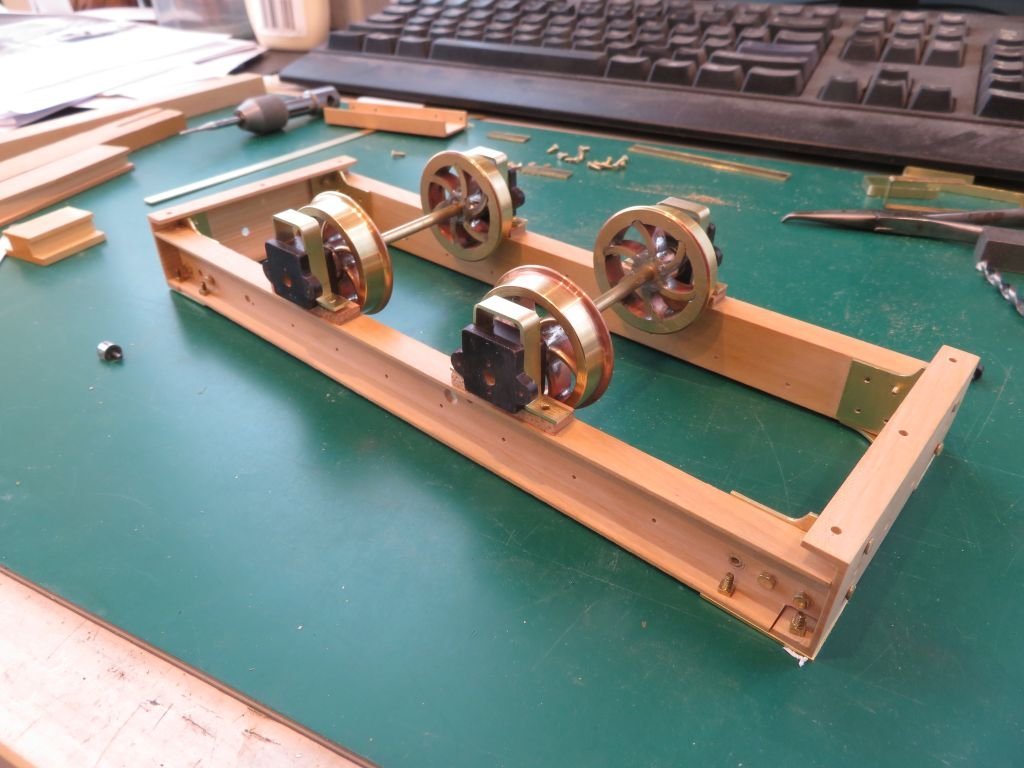
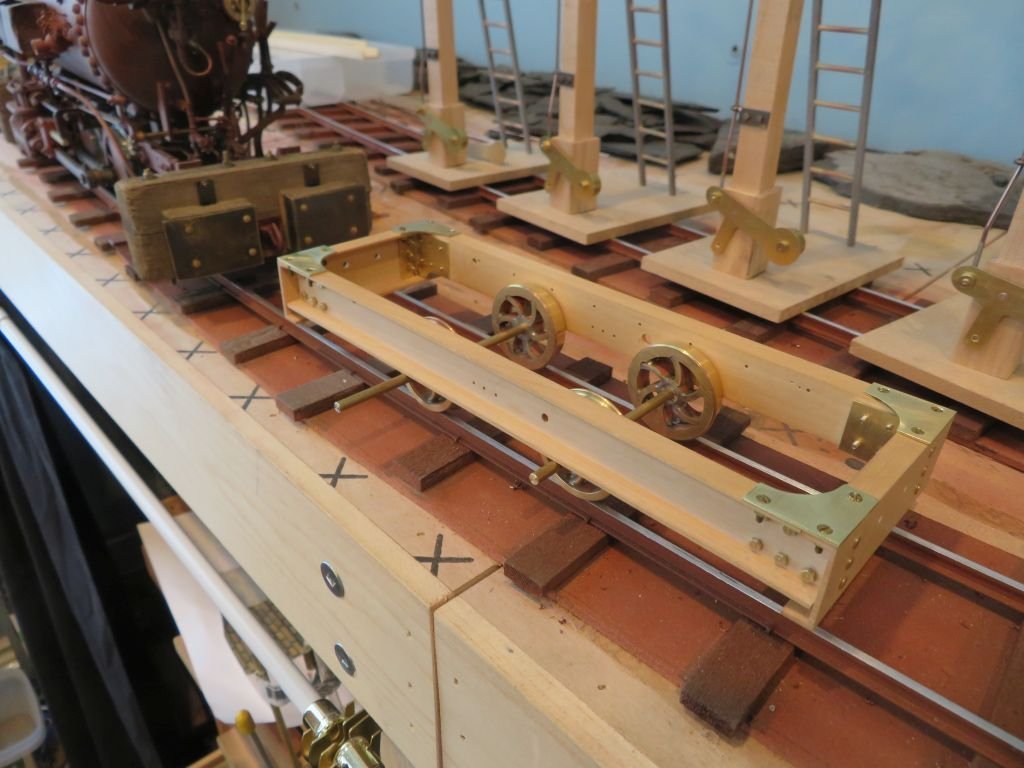
Eberhard, yes I did do the tapping on the lathe. It is robust and I was careful to tap gently and many annealings to keep the silver soft, Plus I only used a leather head on the small mallet. The Castello frames worked out well. Then a lot of small parts made (0x80 hex and square nuts and bolts) and now the frame is all bolted together. and a cameo appearance of the cutter which is sitting patiently for my muse to change. Now to make the axle boxes for the wheels The Penrhyn Quarry used a number of car parts from the Bullnose Morris Cowley, here is another modelmakers interpretation of this loco I am using a collection of photographs that appeared in a special publication of the Penrhyn Quarry details for modelmakers. and preparing my own drawings based on those and some overall measurements of the loco. They basically chopped off the front end of the car chassis and bilted it inside the structural steel frame. Michael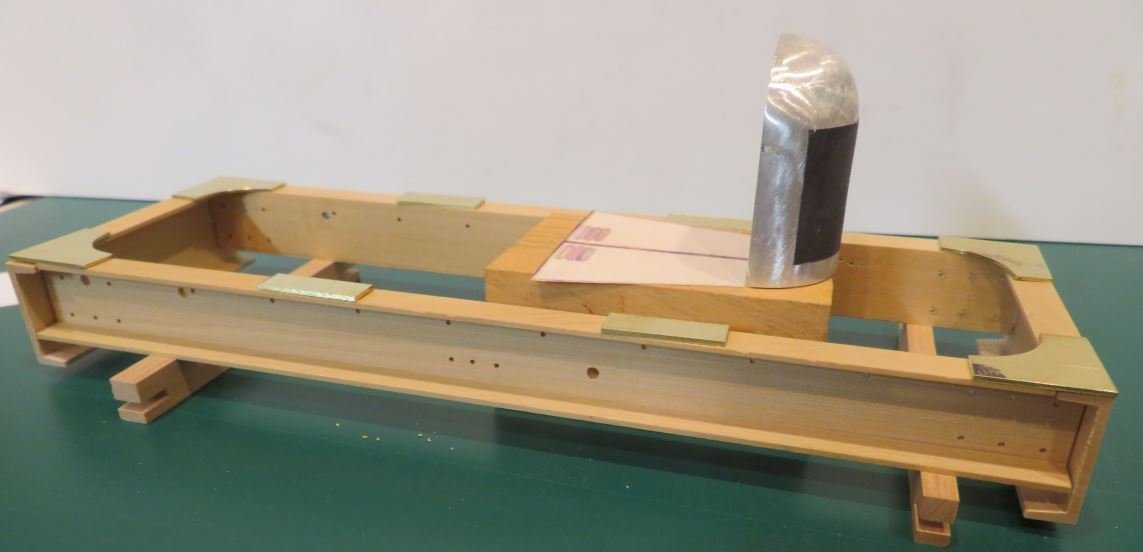
-
A huge improvement over the first one, I do agree with Steve about some of the spacing. The eye does like to see good order. I admire your willingness to accept council and then work at doing the work again. When you are old and grey and you pass on this knowledge to younger folk you will often have forgotten how you came by these things. Michael
-
If you can find a piece of ladies leather skirt clothing at a thrift store, it is really nice fine leather very thin and flexible. it is what I used on my bowsprit traveler You can always tell the clerk that it is a gift for your daughter😉 Michael
-
Metal bashing
michael mott replied to michael mott's topic in Metal Work, Soldering and Metal Fittings
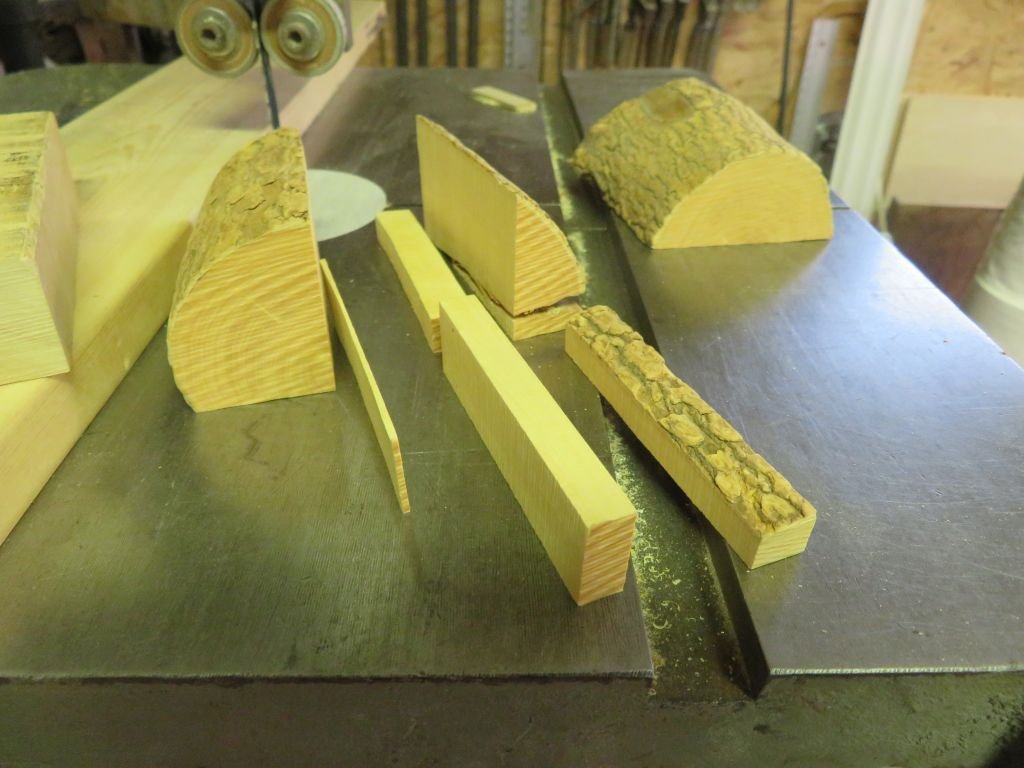
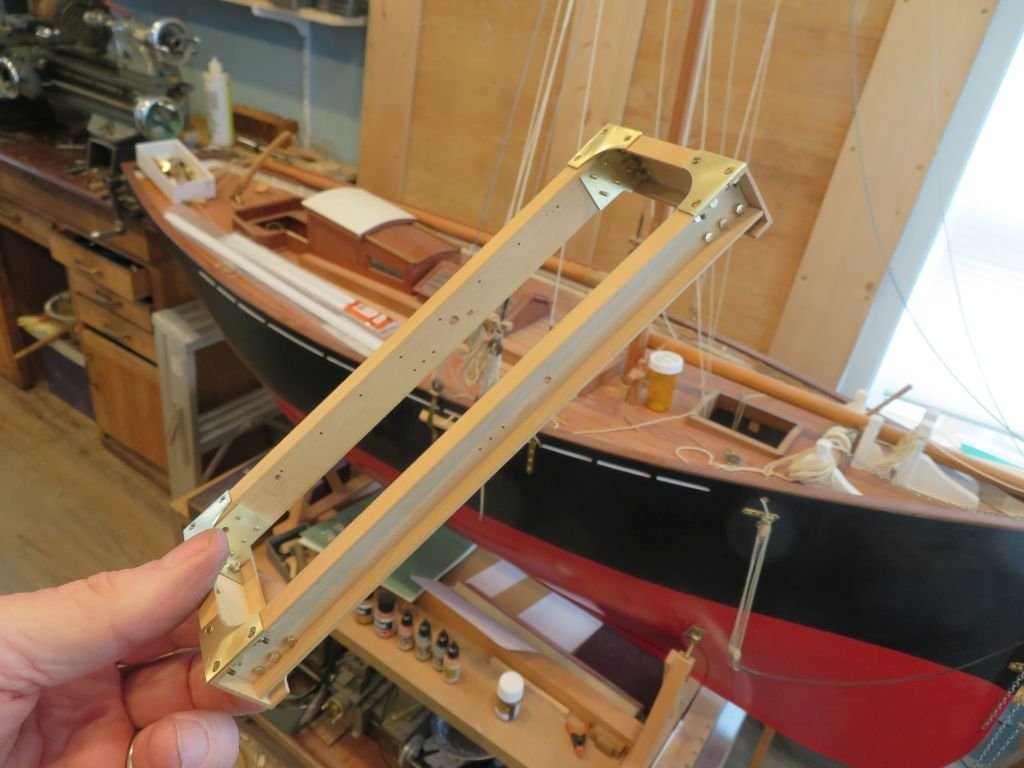
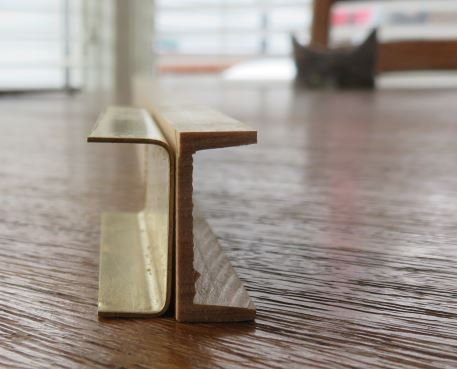
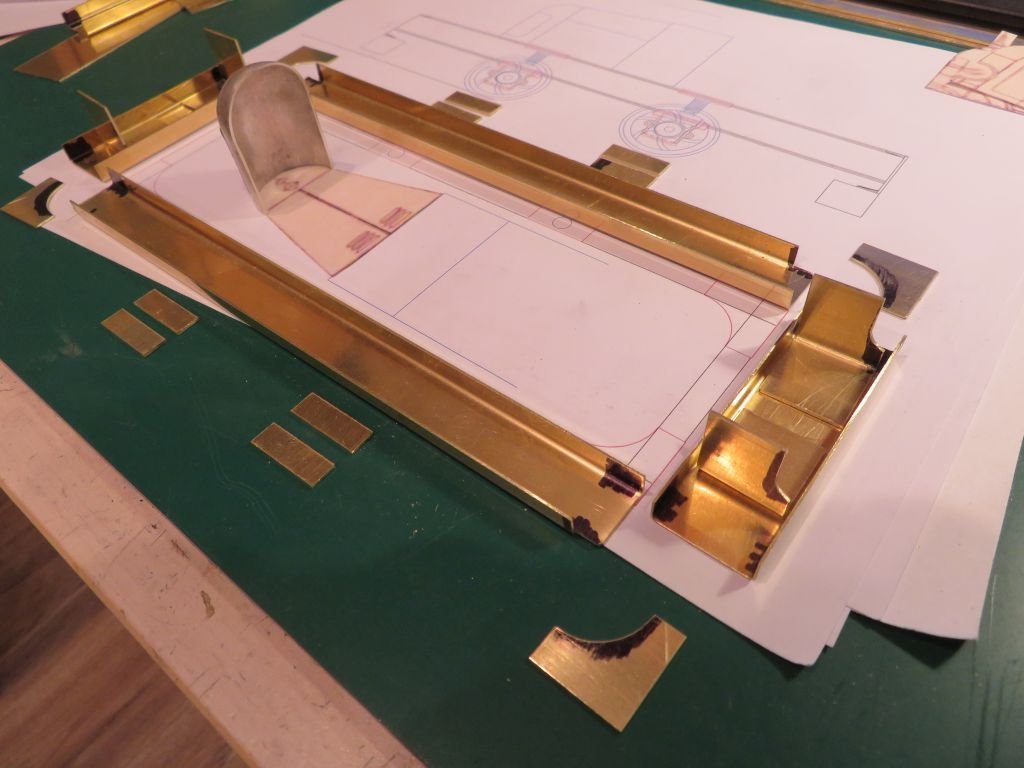
Well yesterday I folded a bunch of brass to form some structural channels for the frames for the bashed silver But it kept nagging at me that the folded channels looked a bit toy like so I spend a bit of time on the table saw and did a proof of concept bit of dadoing on some yellow cedar and maple. Armed with a set of operations that i knew would work I carefully selected a bit of castello and produced an acceptable section. A bit of sanding on the back face and all is well. And so it goes. Michael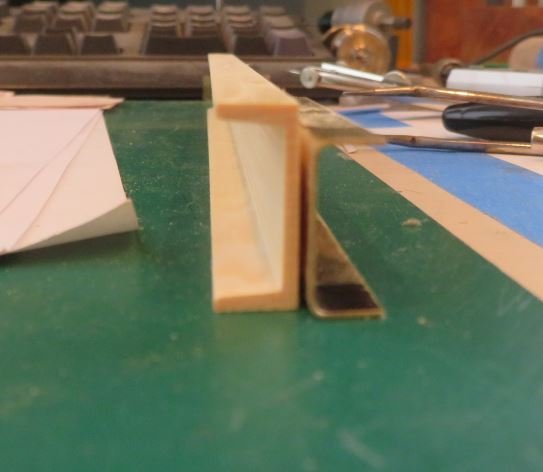
- 49 replies
-
- 13
-
-
Absolutely lovely, do the saddles have leather on them or are they just metal? Michael
-
By putting the letters on a thin strip you can simply cut between them. Do a quick test with some printed letter from your printer to get a feel for what I am describing. Cheers I'm off to bed. Michael
-
To be perfectly honest I think you are capable of doing a better one. (you did ask) Might I suggest something that might be thought of as completely bonkers. If you were to paint the letters in a straight line on a thin material of the background colour and just paint each letter several times. Then you could transfer all of the best ones to a curved line so that you can adjust the letters so that the (kouerning) Sp? can be tweaked. Sort of like setting out waterslide transfers. Remember how we practiced our cursive writing in school. Michael
-
That is a really great bit of advice, I wish I had though of it Bob. There you go one learns something new every day. Michael
-
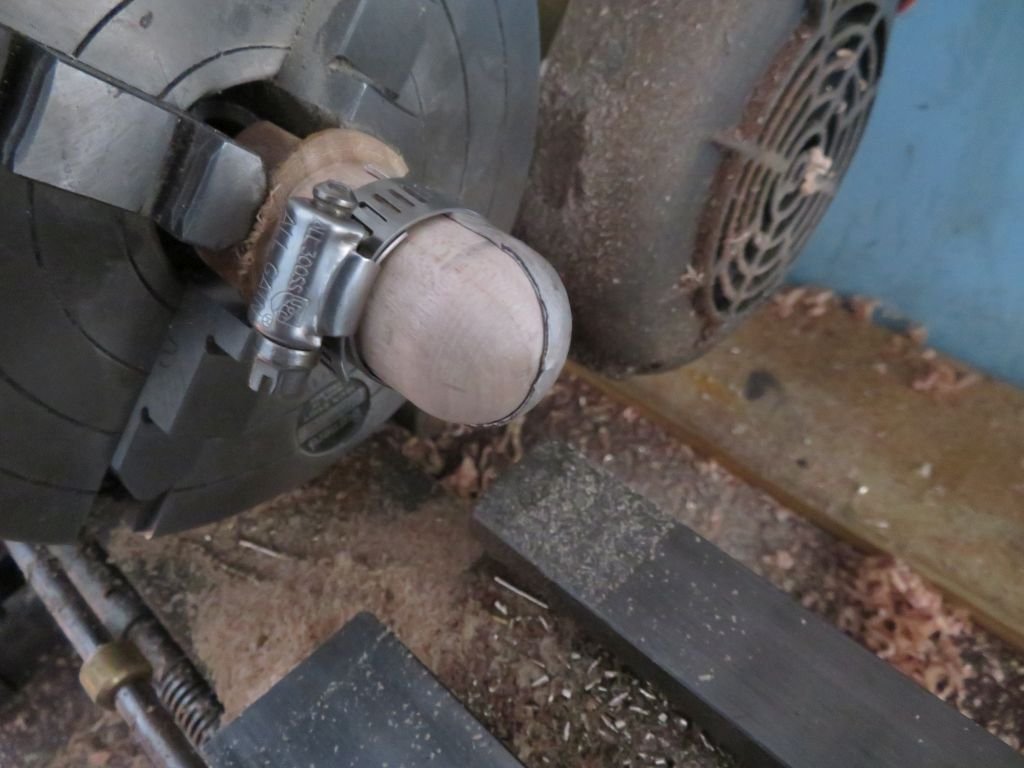
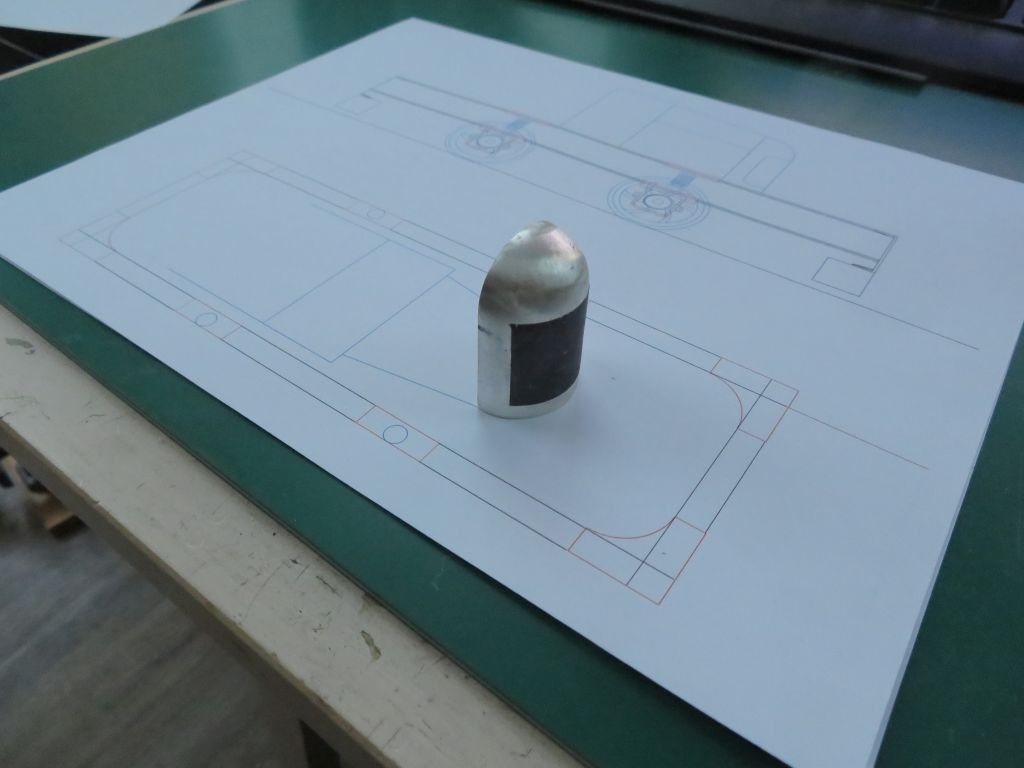
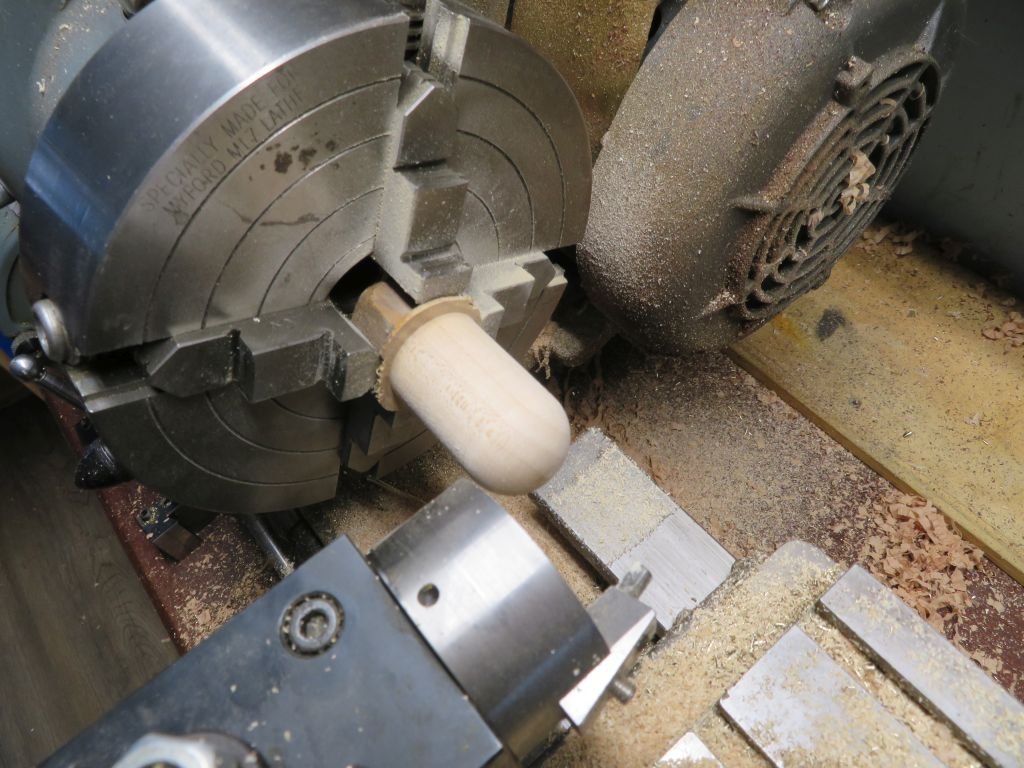
Did a little metal bashing to take my mind off stuff around the country. first a bit of maple turned down to 1 inch diameter, the using the ball turning attachment rounded the end. A old bit of silver approximately 1/32 inch thick was wrapped around and clamped with a hose clamp, my finger are not strong enough to hold it and tap with the leather headed mallet. About an hour later after many annealings I had it fitting snugly around the dowel. Another Half an hour of time with some 400 wet and dry. and now it looks like this. I know its not a boat, Ill get around to it. Michael


- 49 replies
-
- 18
-
-
Very nice work on the planking Harshil, your willingness to fix the small errors speak well to your future models. I find that for myself accepting well found critical comments, helps me improve my own skills. I am sure that one day it will be your turn to help others as well. Michael
-
Kieth it is such a joy to see such fine work. The Mahogany and Brass, well I am assuming it is Mahogany from the texture and colour, Seem to embody a level of craftsmanship that transports one back to a gentler time. Michael
-
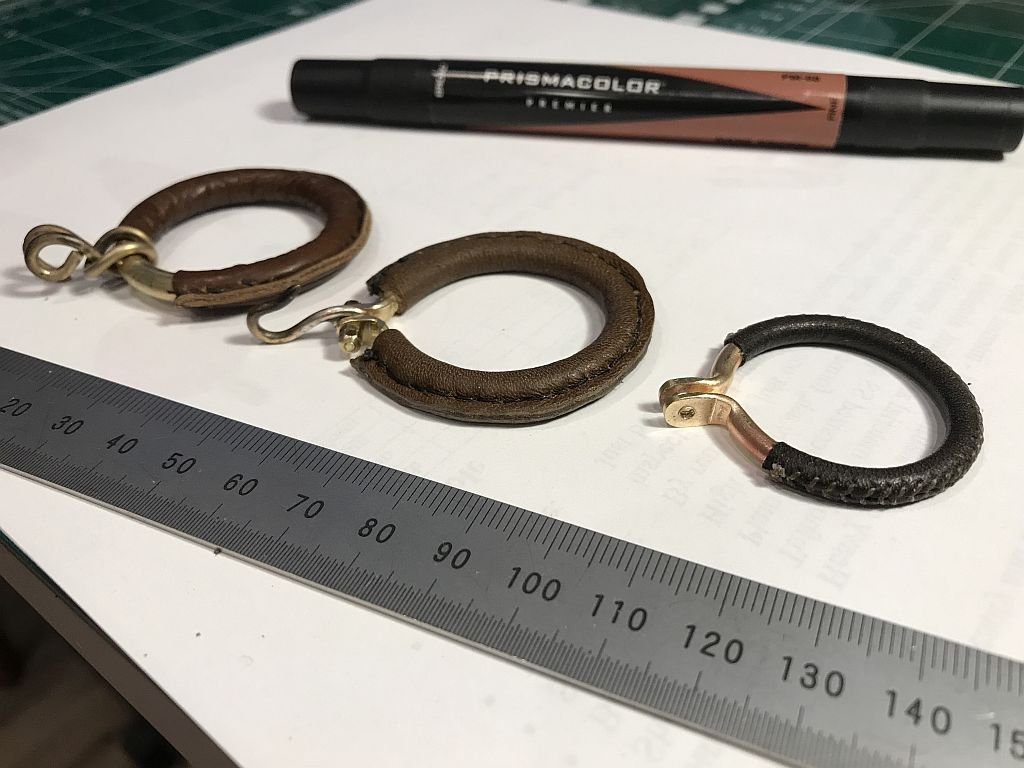
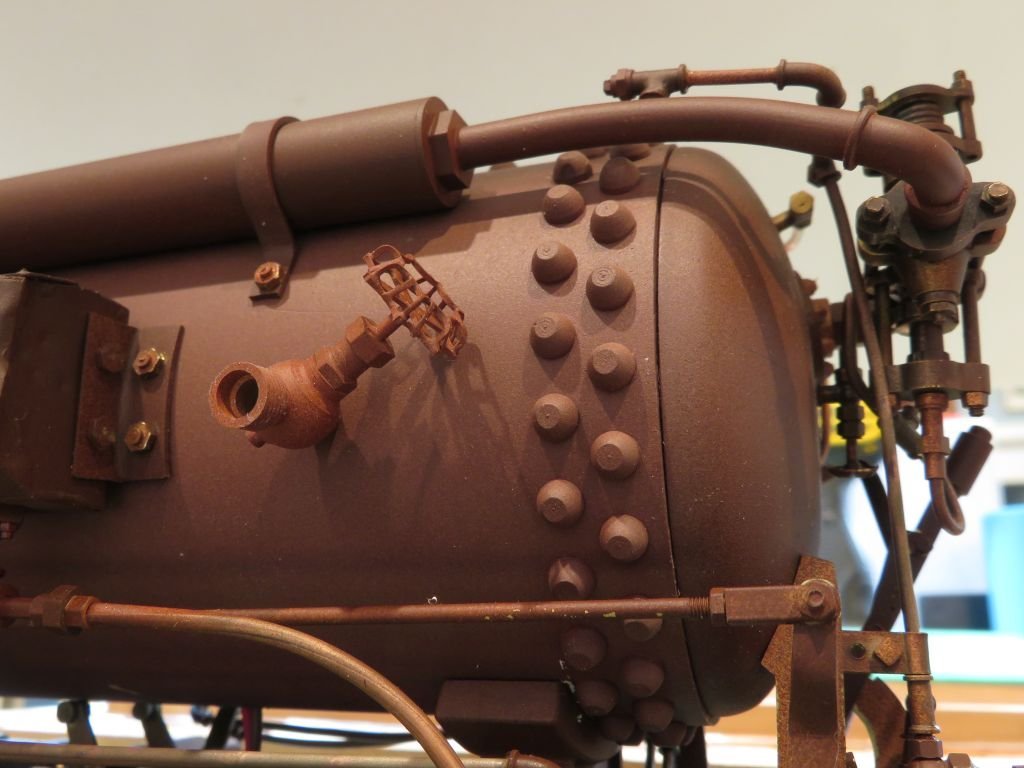
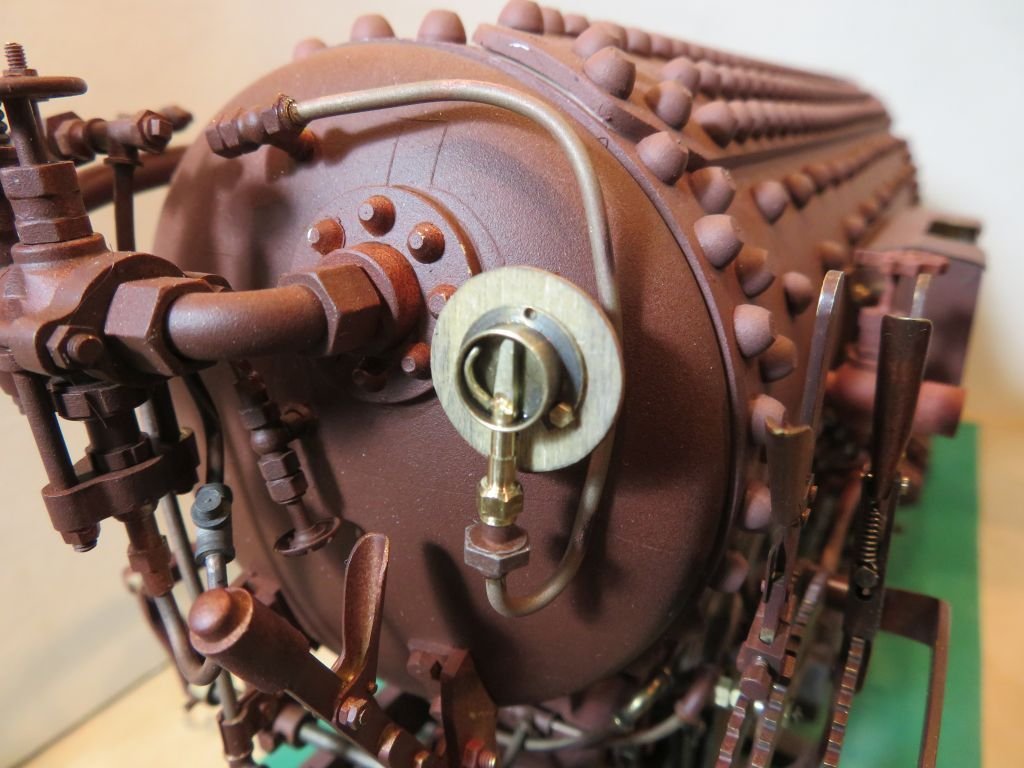
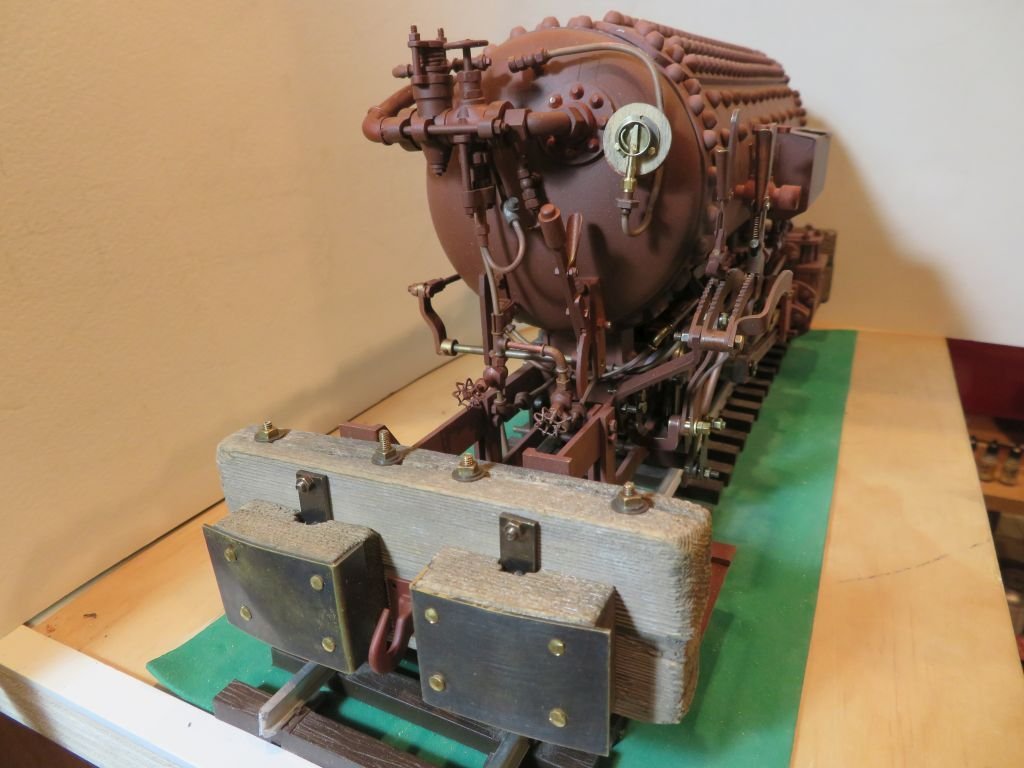
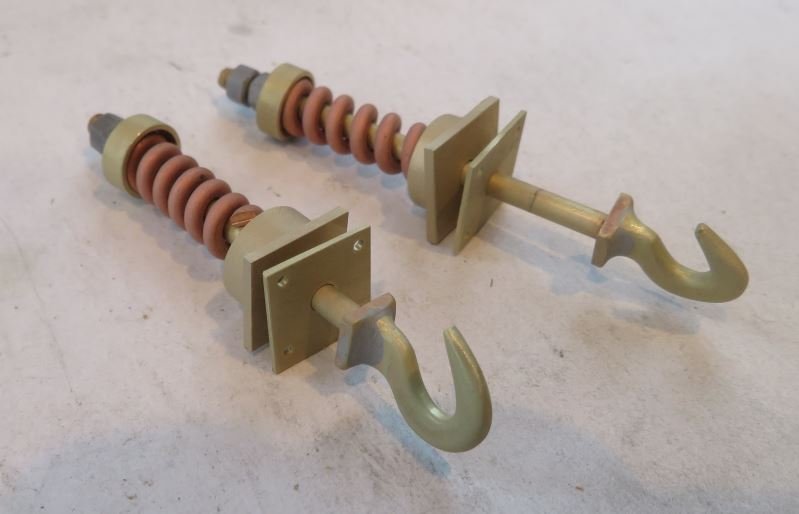
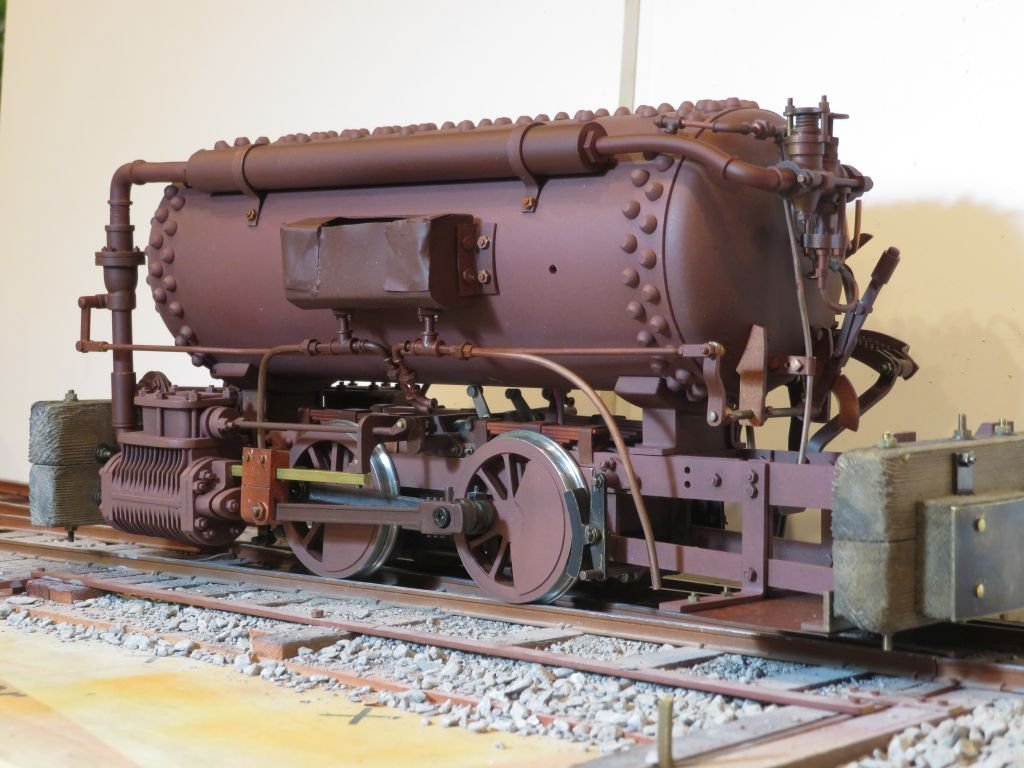
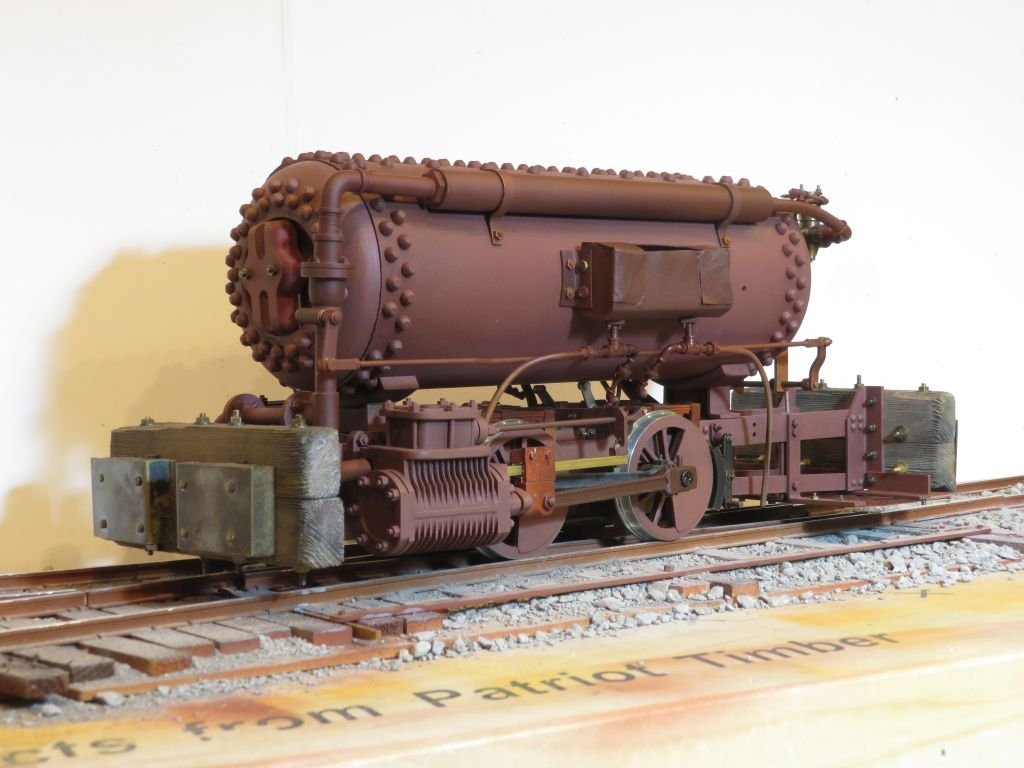
Thanks for the kind words Gentlemen! I have put the model on the track for storage for a while and need to get on with a couple of small commitments. here is the loco finished as far as construction with the large filler valves installed The tiny air pressure valve was a fiddly bit. The hooks were a combination for brass and copper. Regards Michael

- 96 replies
-
- 15
-
-

-
-
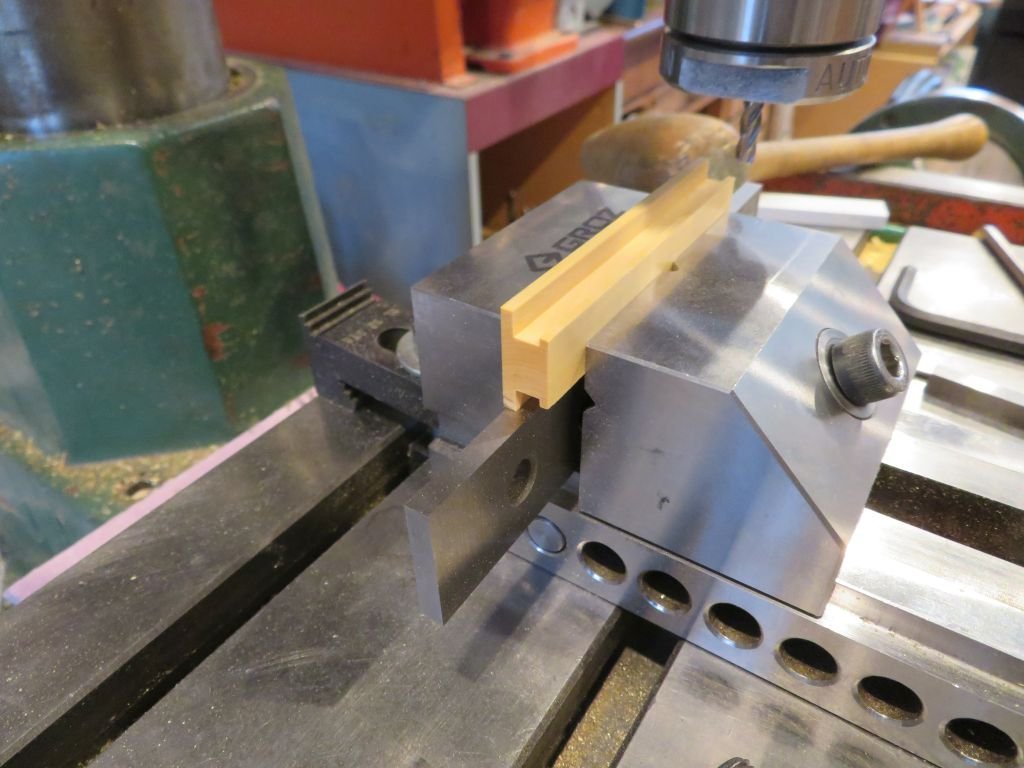
Nice work on the booms Keith, I note the clever use of the collet block to ensure the correct right angle orientations, I will file that away for future reference. Glad you had a safe holiday season. Michael
-
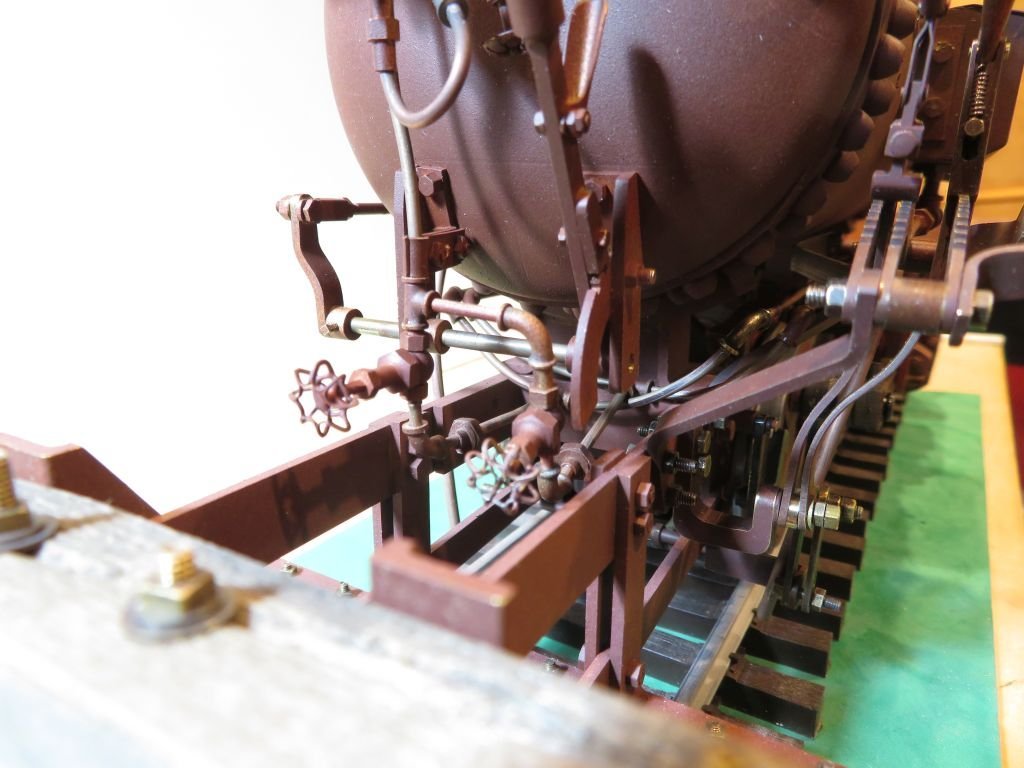
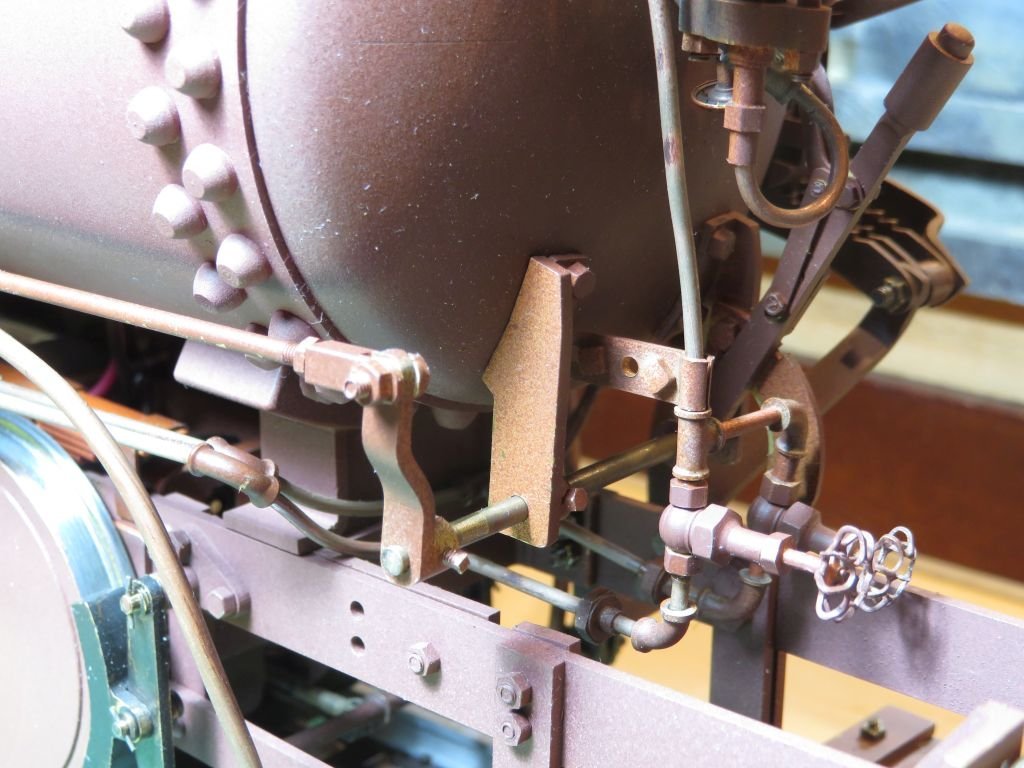
Thank you all for your kind comments, This Project is rapidly coming to a close, here are few picture taken over the last day or so.They include the sanding pipes and the air lines and valves for the sanders. Just a couple more large filler valves to go and a bit of painting and weathering. Then she can become a bit of a shelf queen for a while. I am particularly pleased with the 00x90 square headed locking bolt on the air valve lever hub in the last picture. Michael

- 96 replies
-
- 12
-