
HOLIDAY DONATION DRIVE - SUPPORT MSW - DO YOUR PART TO KEEP THIS GREAT FORUM GOING!
×


michael mott
-
Posts
5,195 -
Joined
-
Last visited
Content Type
Profiles
Forums
Gallery
Events
Everything posted by michael mott
-
 I'm stuck on the next steps with this build, there are a few things that I still am not sure about how to proceed. Michael
 -
Hi Greg, No the cutter is so "present" in the workshop, I just needed a little break I really want to get the cutter finished before I do any building on the Gill Smith boat. A few days of gentle drawing were in order. Michael
-
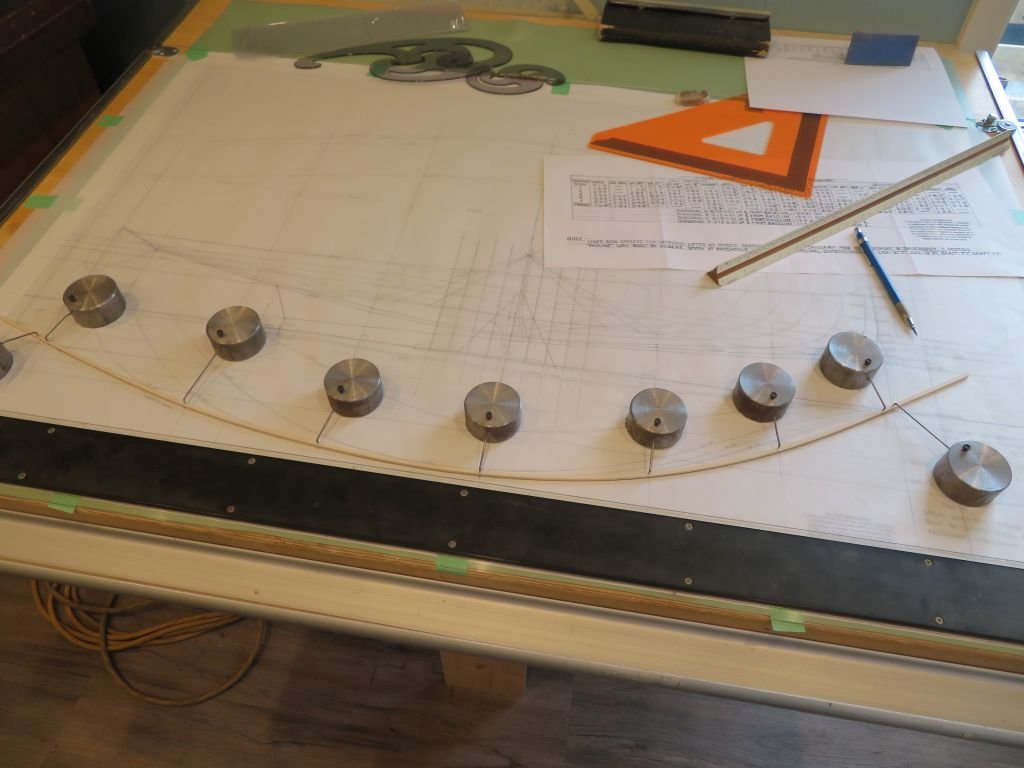
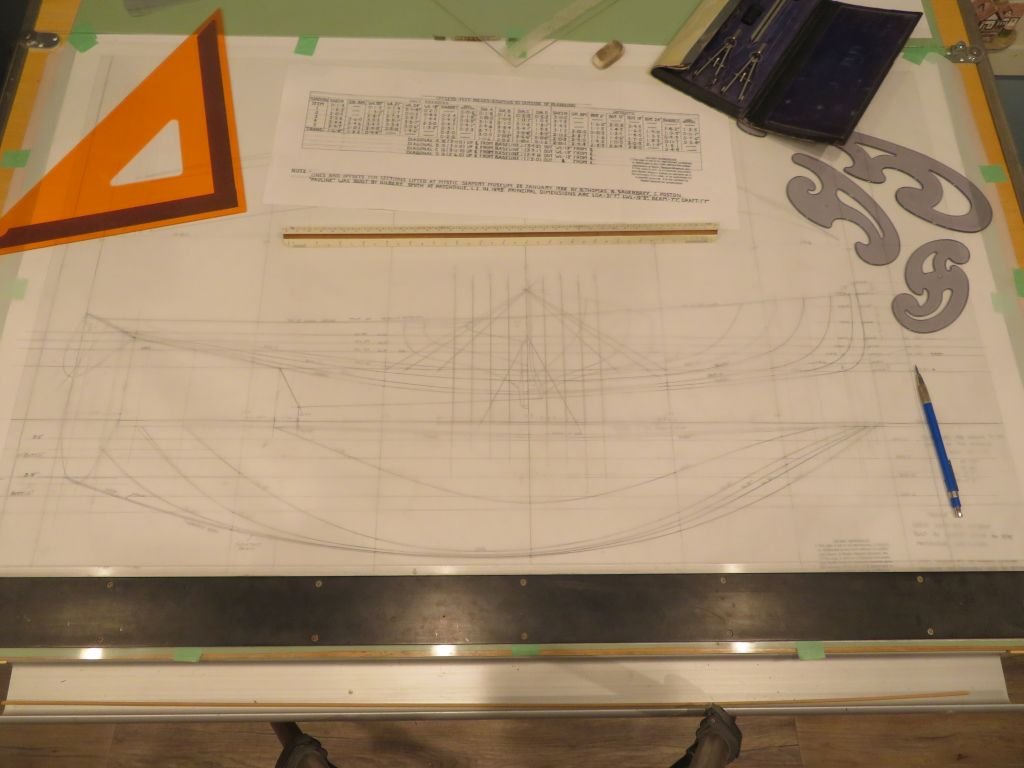
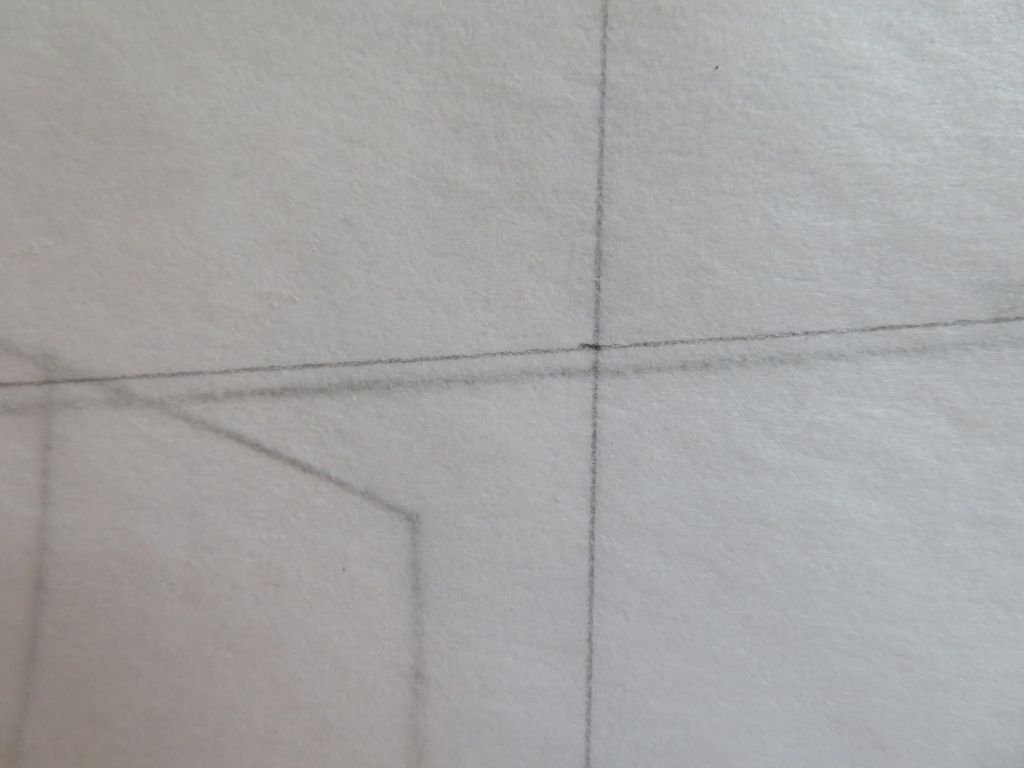
Just 2 more buttock lines, and then the diagonals and body plan all the waterlines were close but a couple differed a bit aft the end of the keel. I suppose I will be able to cross reference them once the body plan is done. That's it for today. Michael
-
Home made Drill Press Vise
michael mott replied to RichardG's topic in Modeling tools and Workshop Equipment
A nice looking vice Richard, I'm guessing the moving jaw is also a slide fit on the base. Michael -
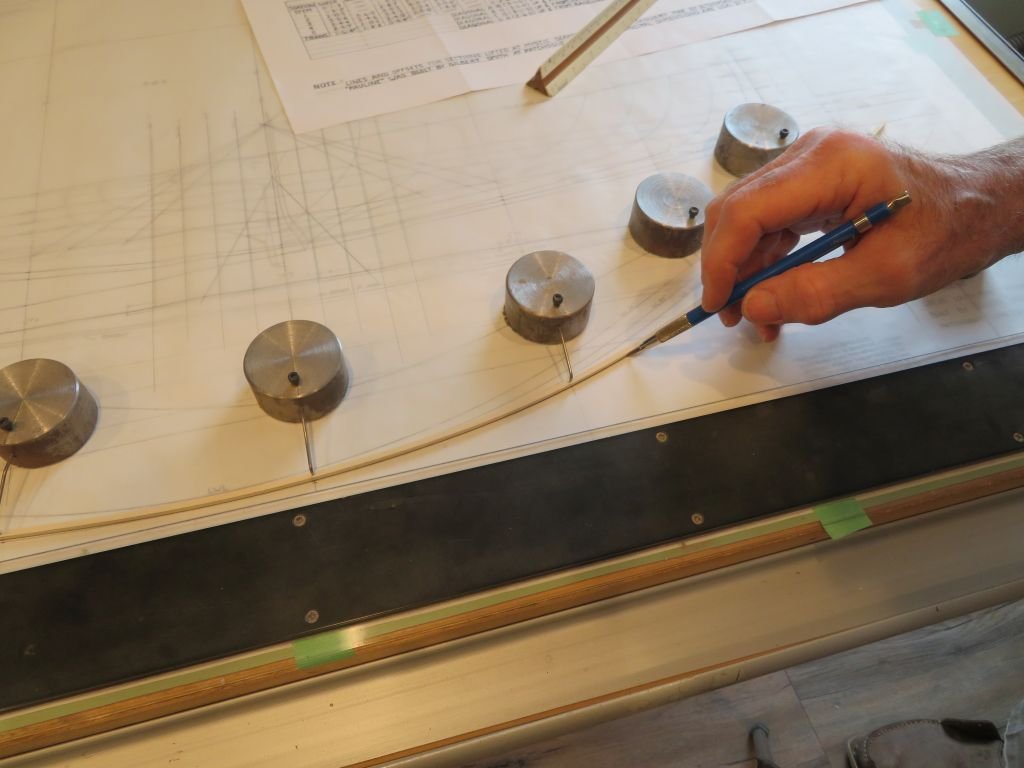
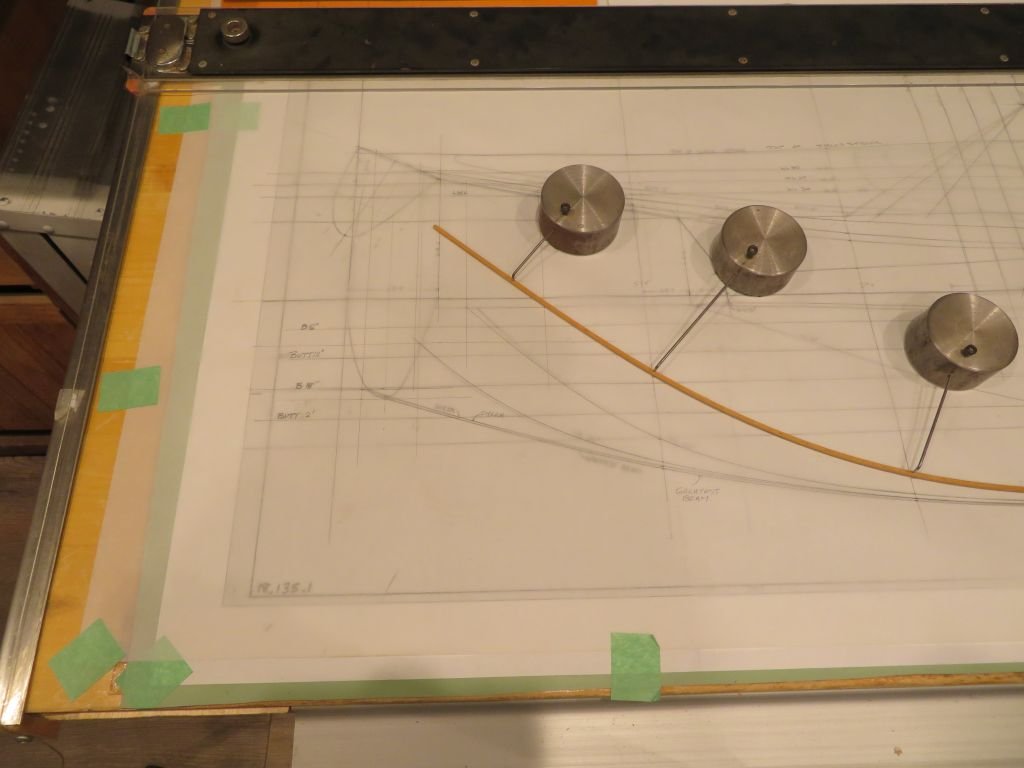
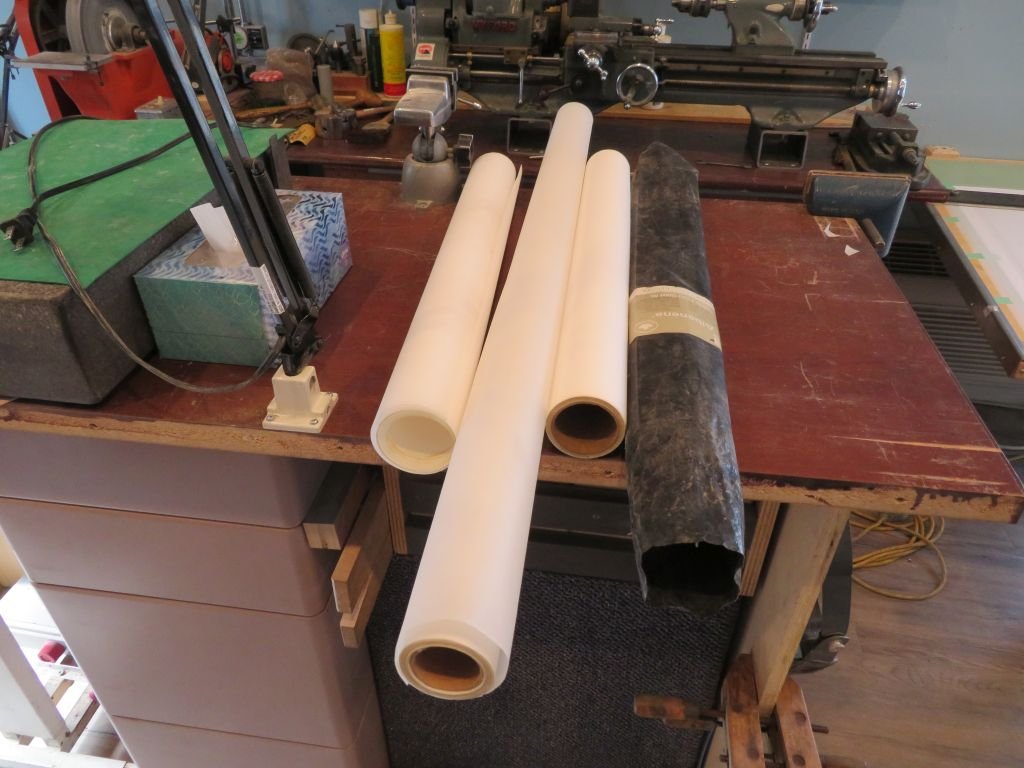
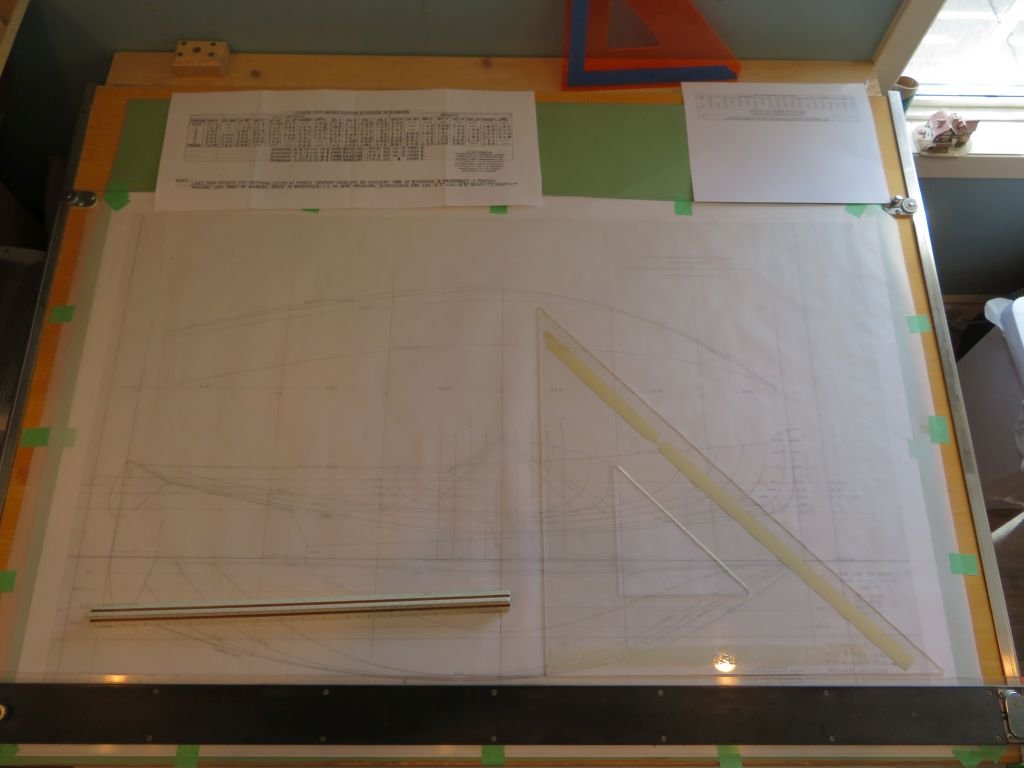
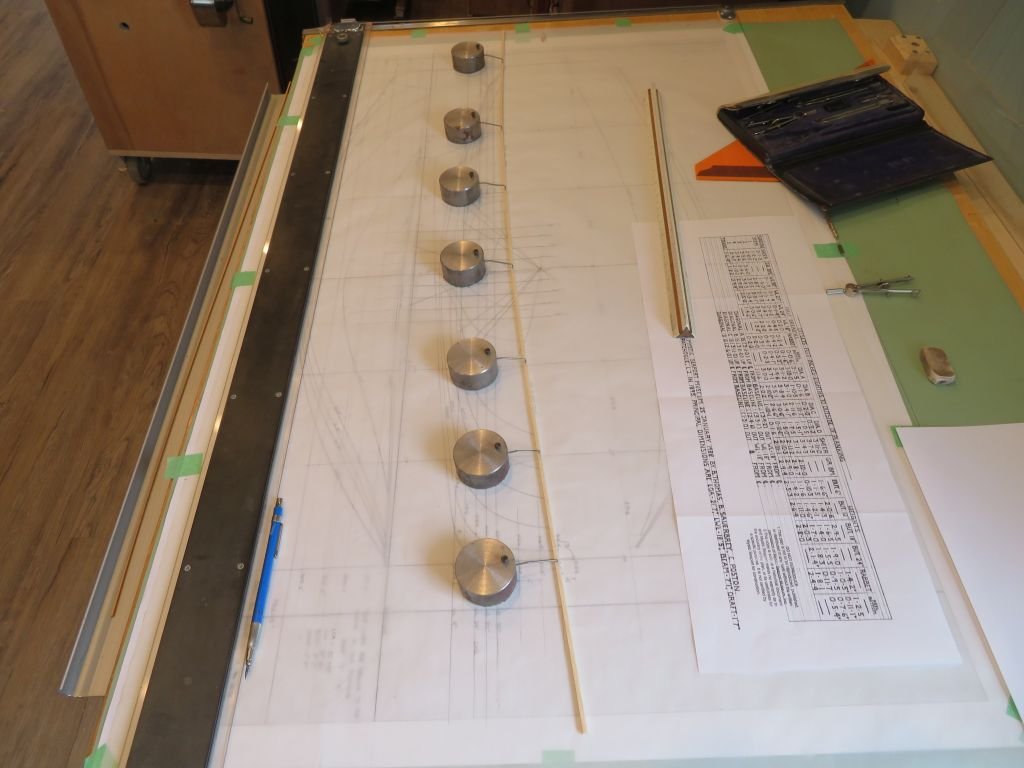
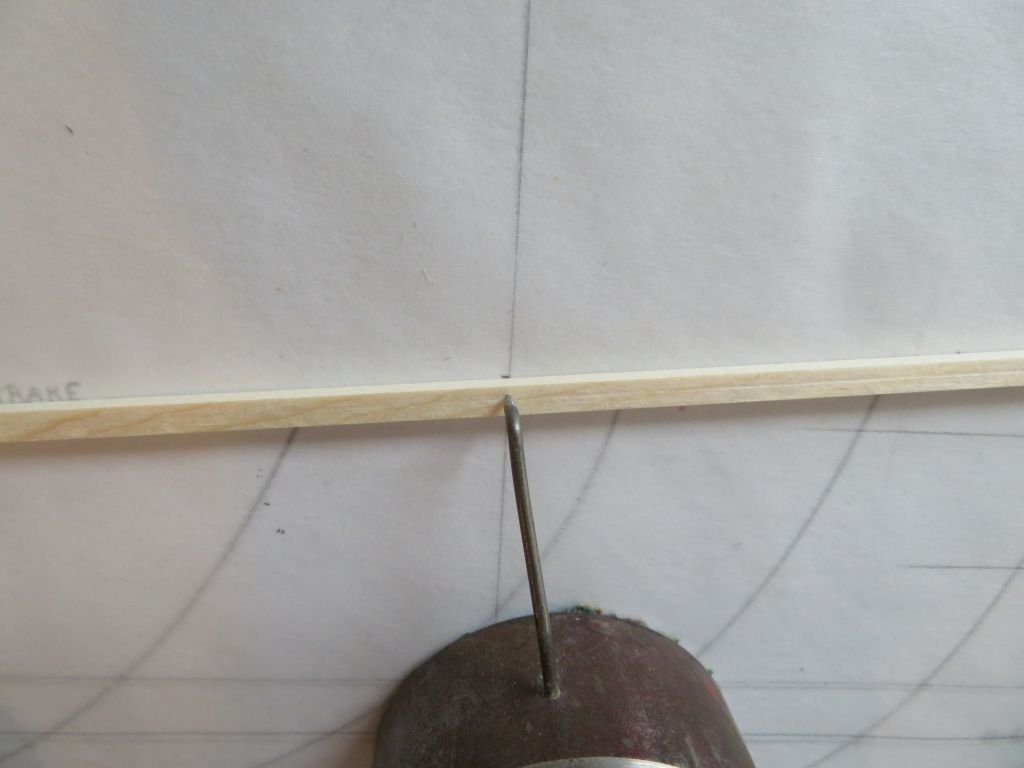
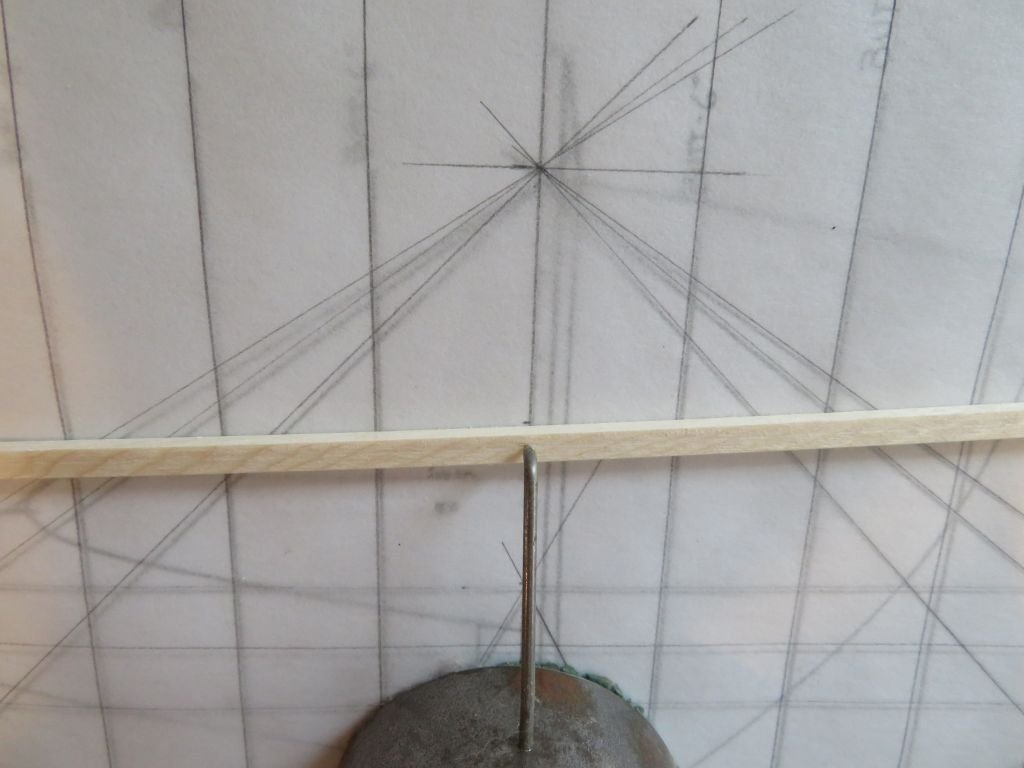
Thanks for the comments and interest. I had to make a start today....sort of like playing with a new toy. first the raw material I taped the lines drawing to the drawing board as a rough guide, and chose some Albalene drawing paper and set it over the drawing. next the baseline and the station lines, and diagonals were drawn according to the stated dimensions, using the table of offsets working out from the center line. Beginning with the sheer line, and marking off on the station lines I used a stick of clear pine 1/8th square as the stick for the ducks. These are slabs of 2" diameter steel with some shelf liner double sided taped to the underside to stop them sliding with some 1/16th steel rod shaped and pointed to grab the stick. As is clear the drawing is close but not as accurate as my line marked off from the table of offsets. The diagonals are off a bit on the print as well, of course this is all due most likely to the printing and paper stretch all the usual suspects. I am using a 4H for these lines, the trick being to keep the pencil sharp. This is so enjoyable, nice instrumental lute music playing in the background, a great way to spend the Saturday afternoon. Once the lines are drawn I will be able to plot the frames. Michael Michael
-
Yes, being George Daniels student back in the day would have been a brilliant career choice methinks. Michael
-
Thanks Tom, I will email my contact at the museum for permission to get a copy for my own use to build the model. Michael
-
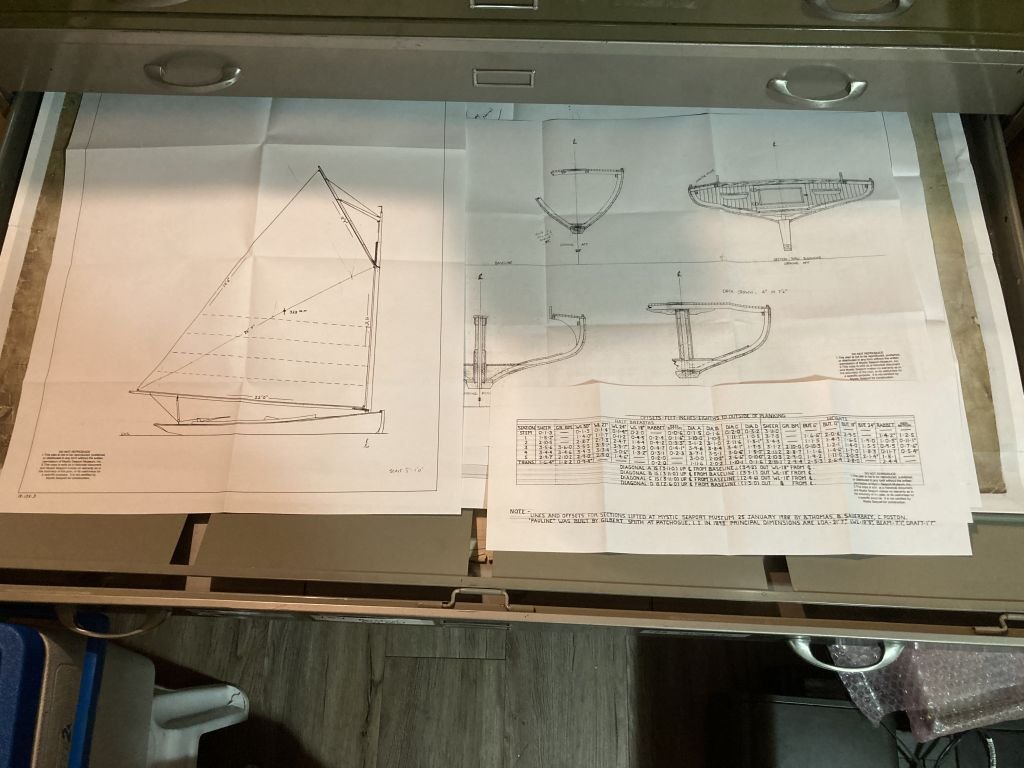
It was like an early birthday gift! The six drawings arrived today I opted to let them be folded because of the difference in the postage costs, as it was they cost $27 postal fees. Although the drawing state that they cannot be reproduced, I think that the obligatory picture of the plan chest drawer that they are now safely nestled in wont be infringing any rules. So with the table of offsets and the drawings as a guide I will be able to prepare a set of model building plans including the sawn oak frames. Still lots of preparatory work yet though. Today I am a happy camper. Michael
-
A thread full of opinions for sure!..... I couldn't resist, its been one of those days.🙂 Michael
-
Hi Dan, I just came across this log, Hats off to you sir! what a super job you are doing with a very challenging restoration. Given my very limited experience working with bone, I would not be able to take on such a project, As Druxey mentioned the smell is apparent, and for me the game changer. Very interesting work on the "cooked " rigging lines. Michael
- 95 replies
-
- 7
-

-
- POW
- Bone model
- (and 2 more)
-
It is always nice to use wood that you have prepared for yourself, and by air drying it it retains a particular character that kiln dried wood does not. Good luck with the stickering. I have used paraffin wax on the ends, the same stuff used for canning, just heat it up in a saucepan and paint it on with a pastry brush. If you cut it into thinner slabs than 1 inch it is good to put some weight on top or straps around the bundle to help with the drying flat. Michael
-
The plans from Mystic Seaport Museum are on their way, This is exciting. Michael
-
Bob thanks for the detailed information regarding the through hull outlets and the siphon loops. I had not really thought about this aspect of our modern small cruise boats let alone the older craft. I agree...But.... but my grandaughter would not. Seriously though The idea is to be able to show what can be seen relatively easily and a few things that need a little searching but still visible with perhaps a small dental type mirror. I do want to move on to the next project before I am too old to have fun. Thank you to everyone who is following along and showing their appreciation in one way or another. Michael
-
Your work on the masts and rigging so far is looking really great nice and tidy, Im sure you will have no trouble with the ratlines. Michael
- 950 replies
-
- 2
-

-
-
- syren
- model shipways
- (and 1 more)
-
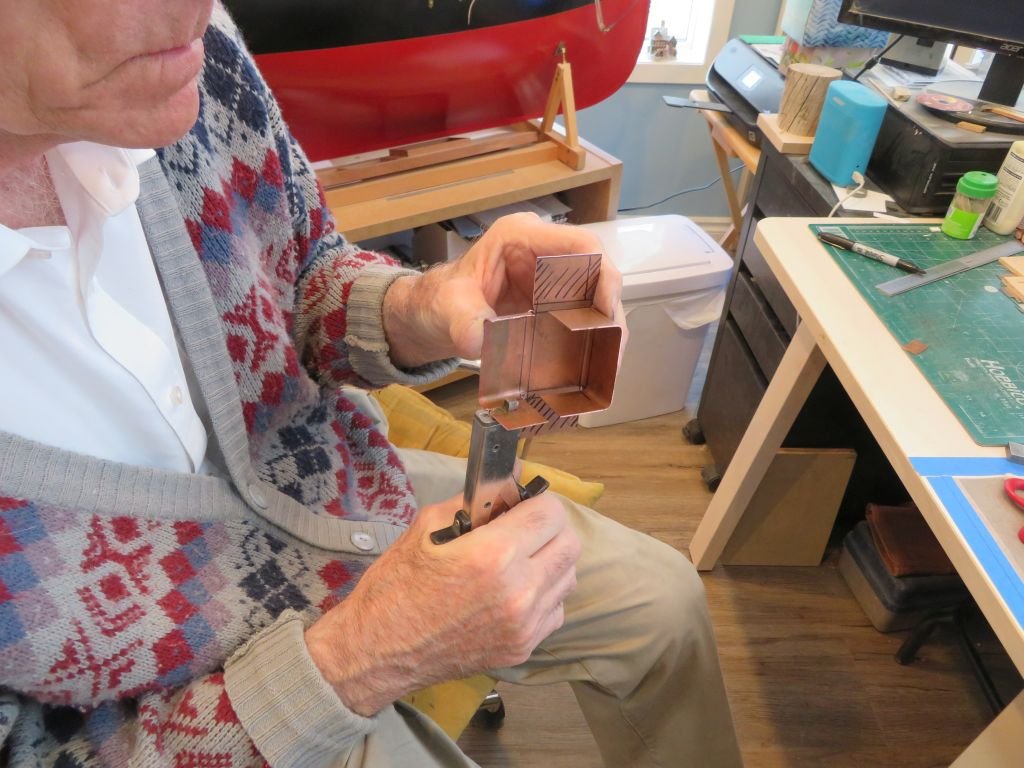
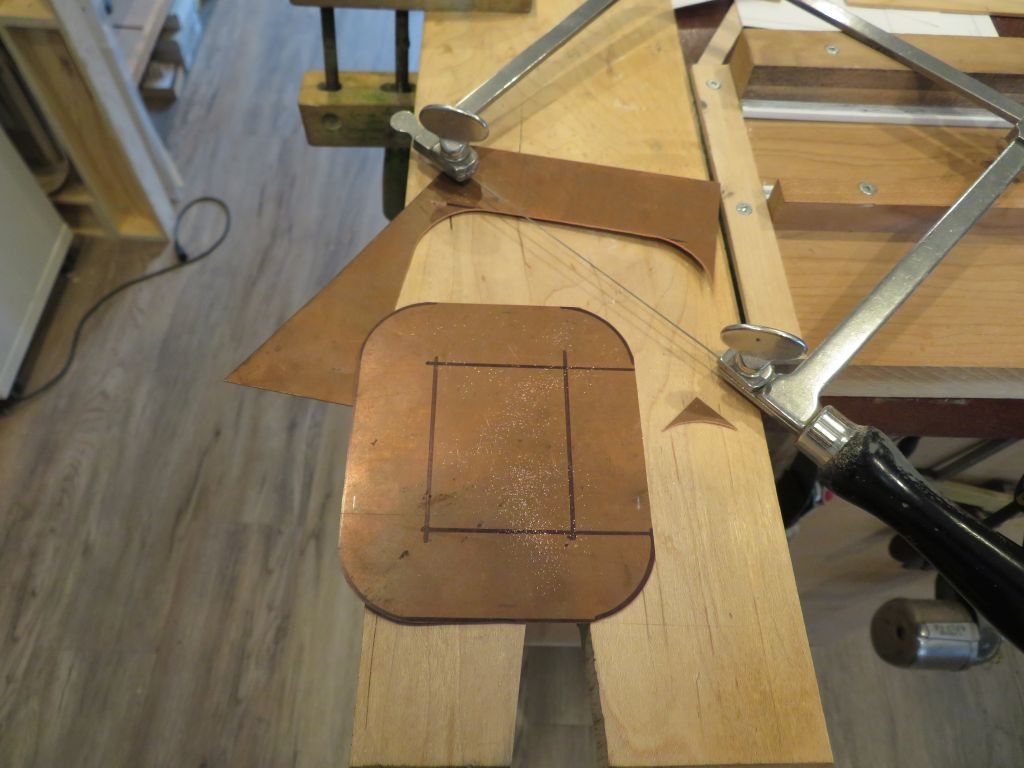
It depends on the thickness of the material and the number of teeth. The coarser blades are generally easier for the wood. In this case the blade was fine enough to also cut the copper because it was sharp and had not become dull from cutting metal before. This graphic representation shows the .031 copper and the #1 jewelers blade that has 47 teeth per inch next to the edge of the metal there need to be at least 2 teeth engaging with the metal or the blade will catch and there is a possibility of ripping off a tooth and or snapping the blade. I hope this answers your question. I also have some #8/0, #5/0, #3/0 The #8/0 is the finest. Michael

-
I'll have to wrap my head around this one! Just a never ending list of details...will it ever end?😉 Michael
-
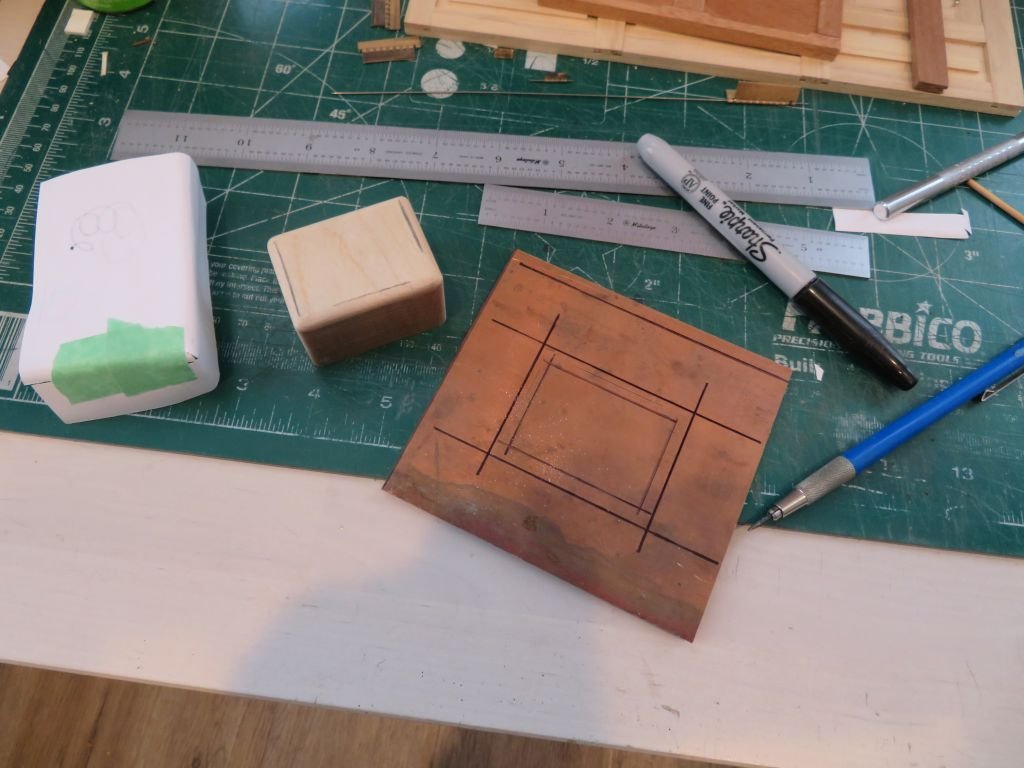
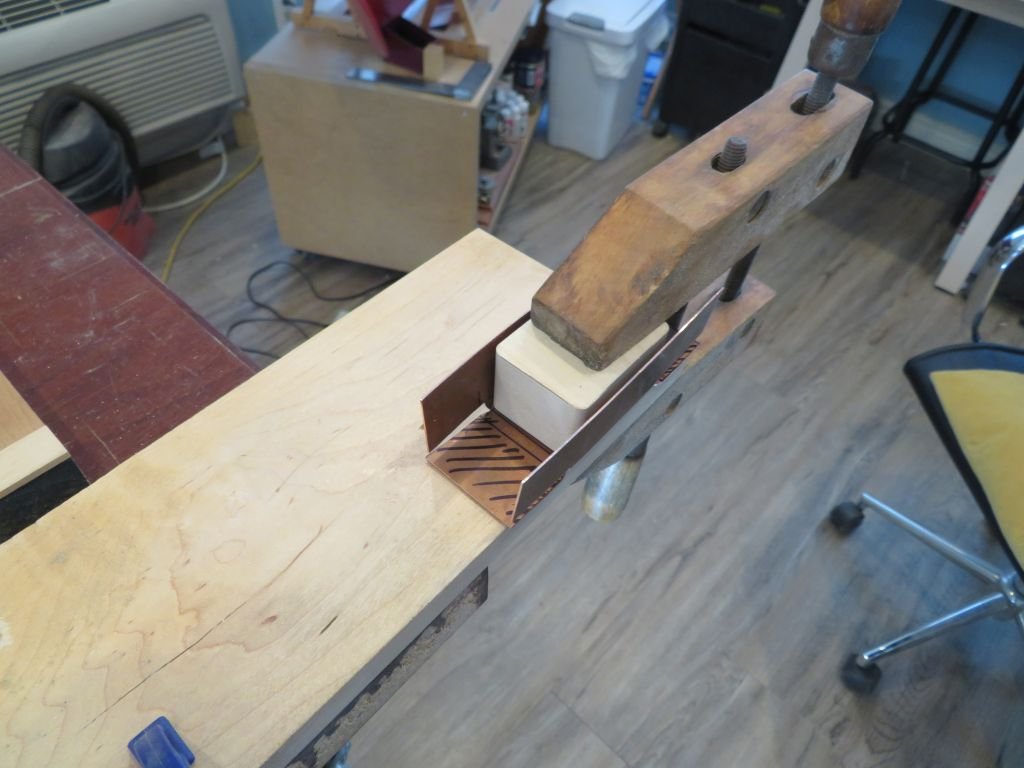
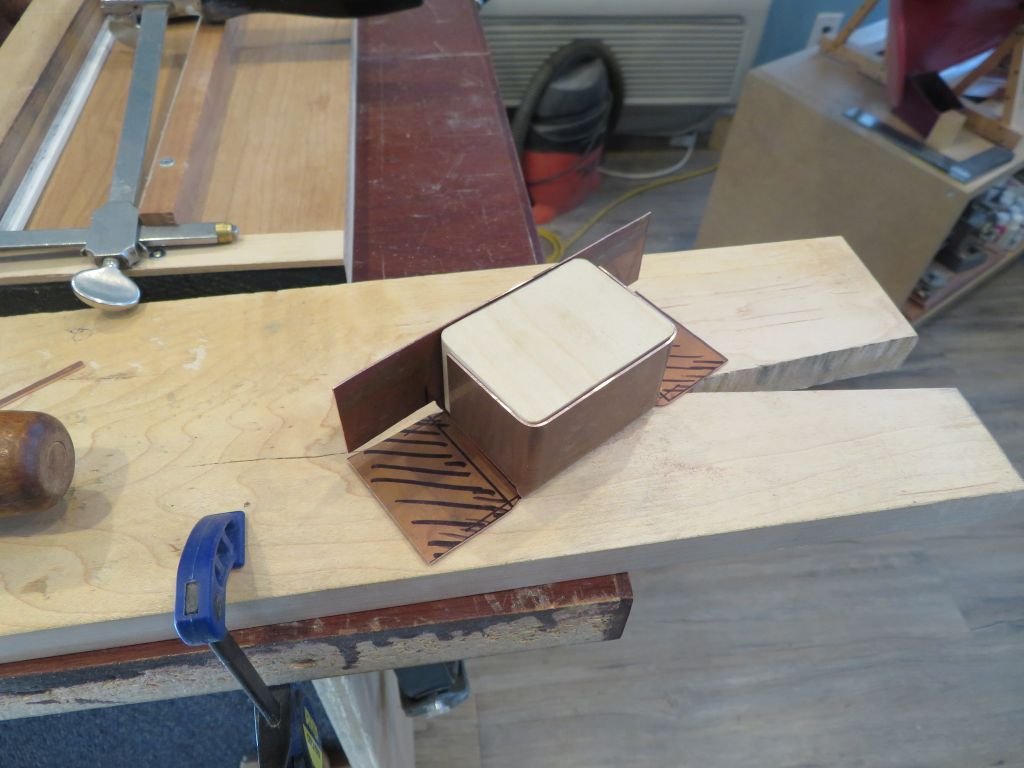
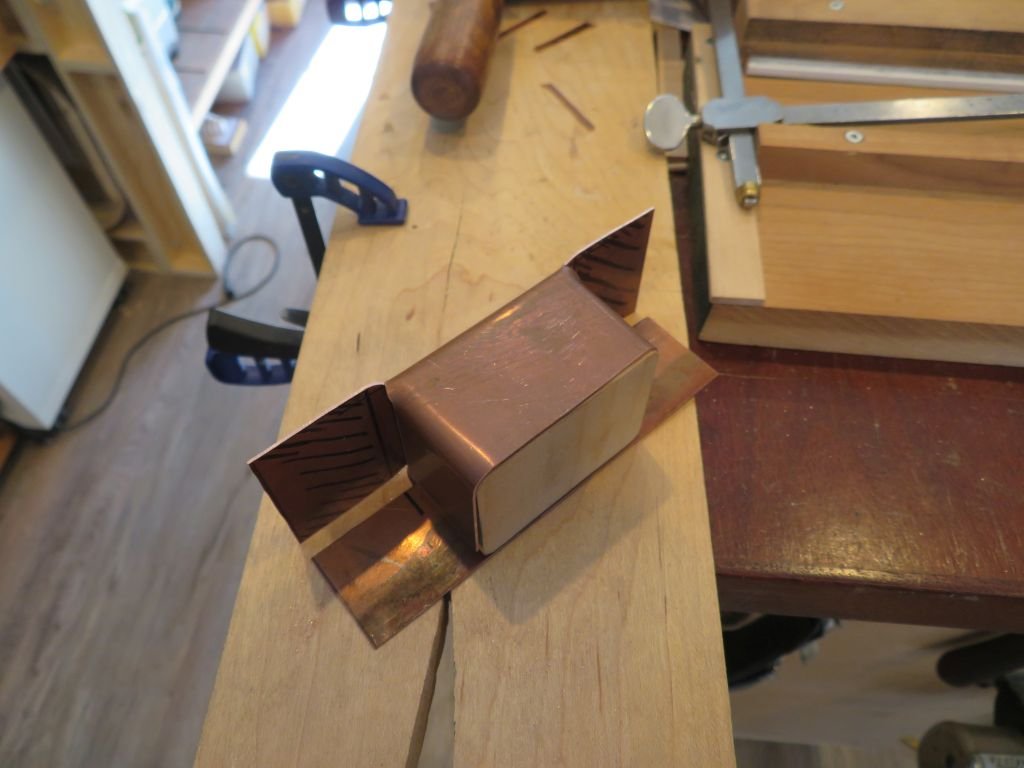
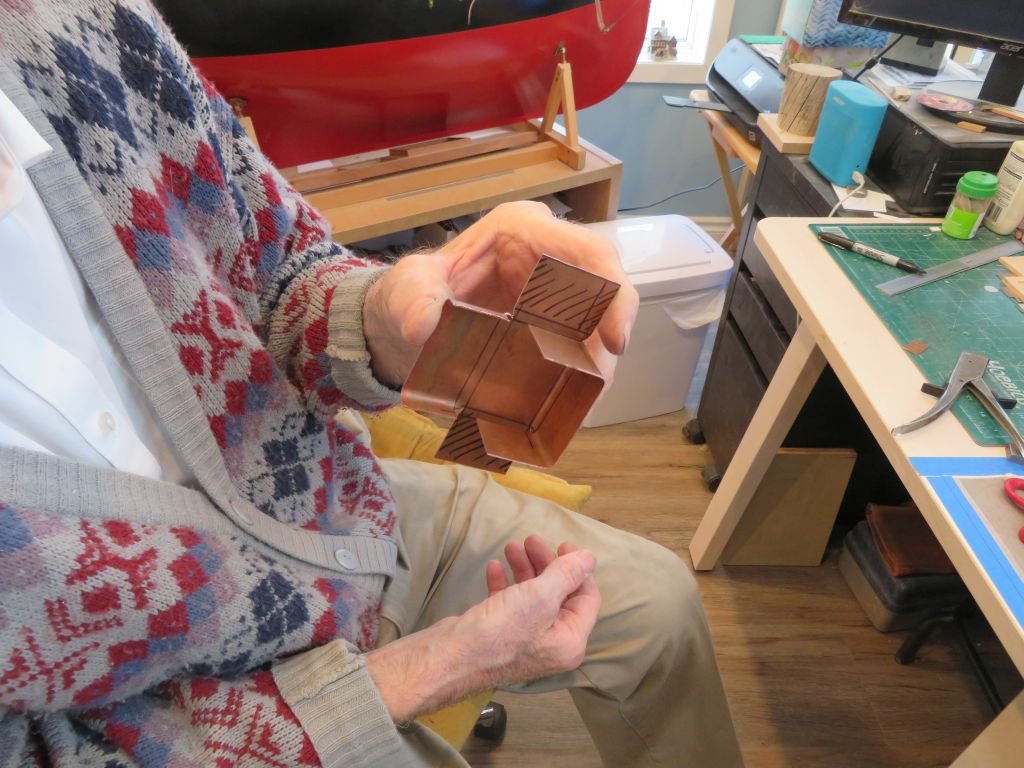
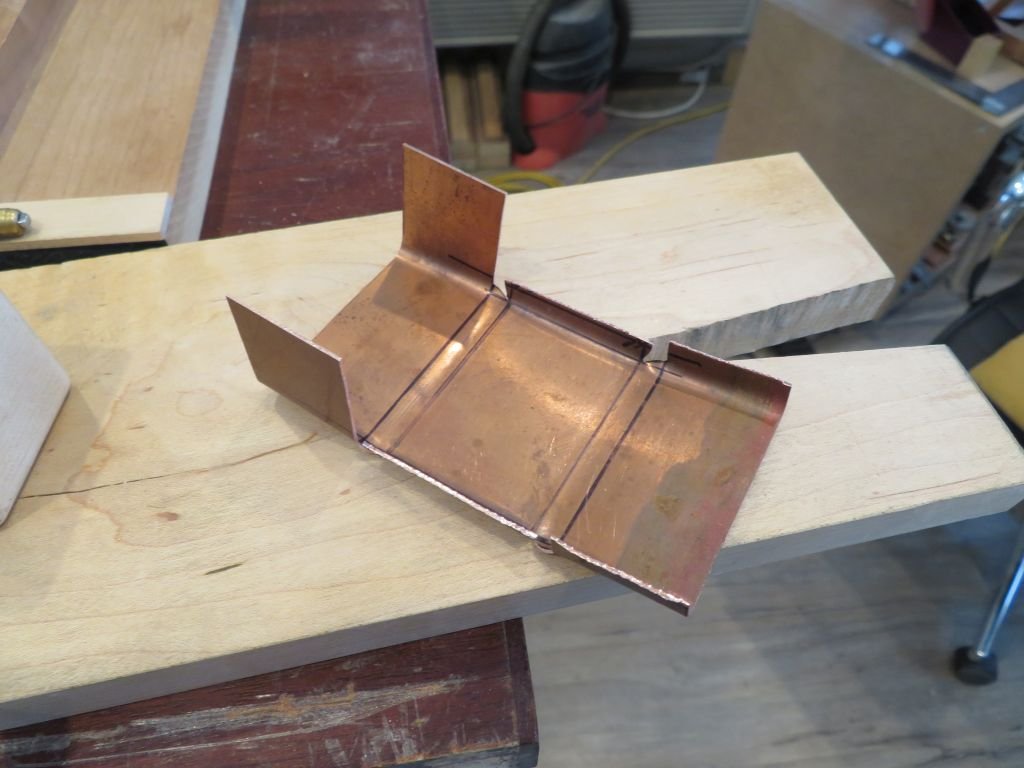
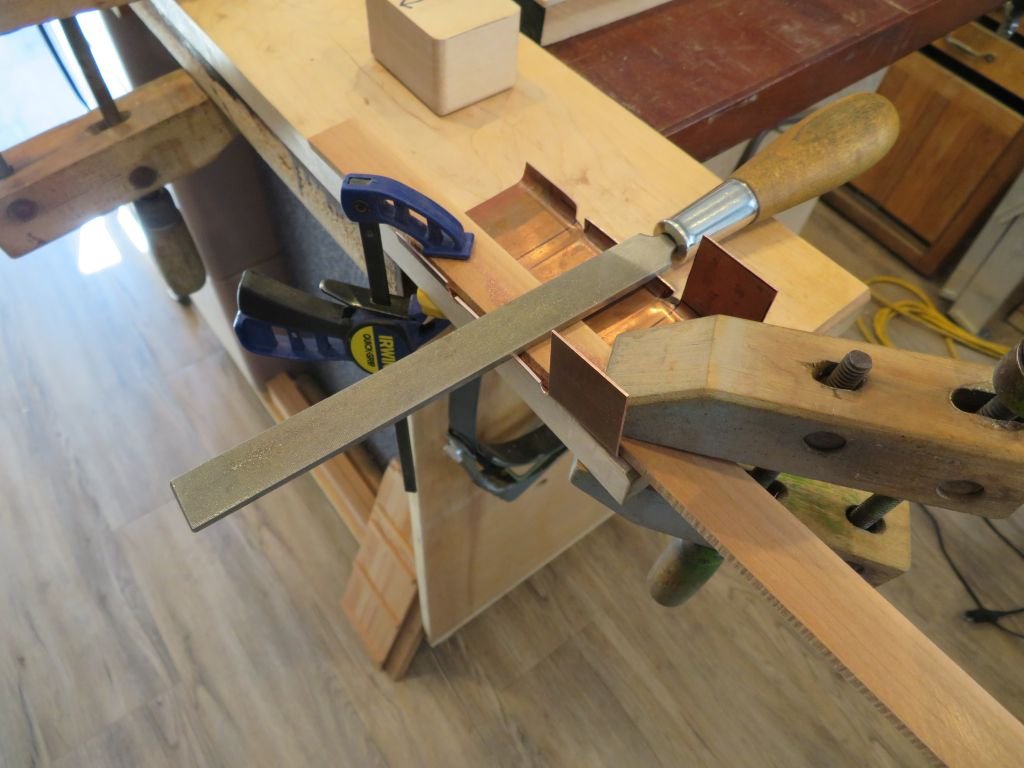
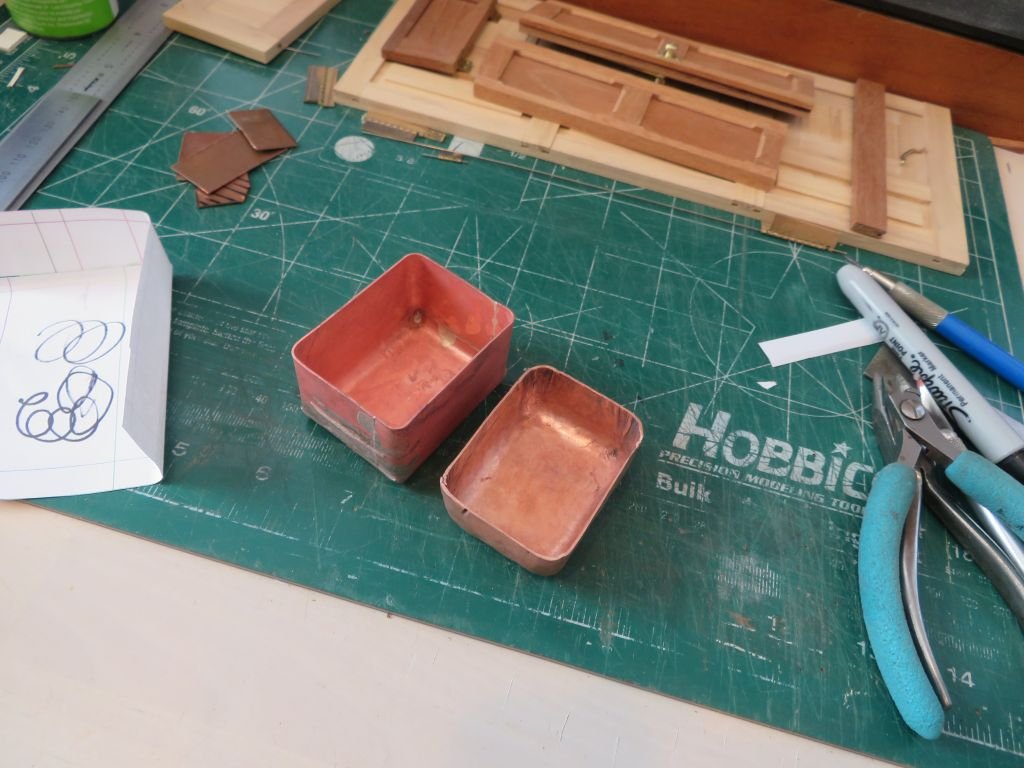
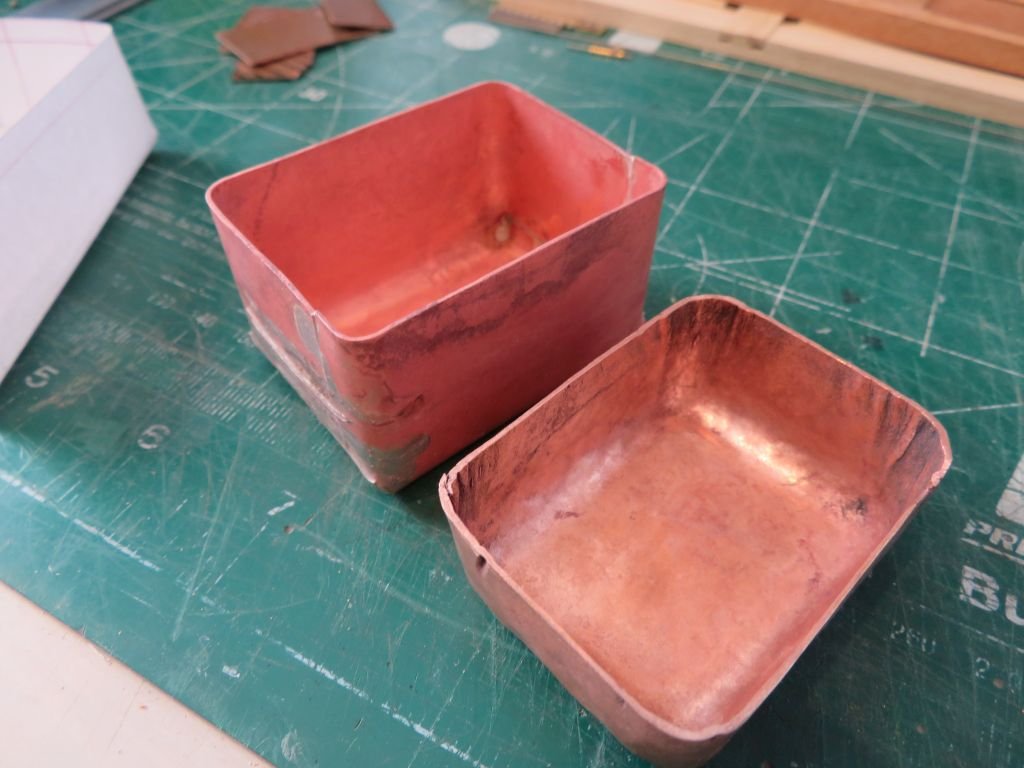
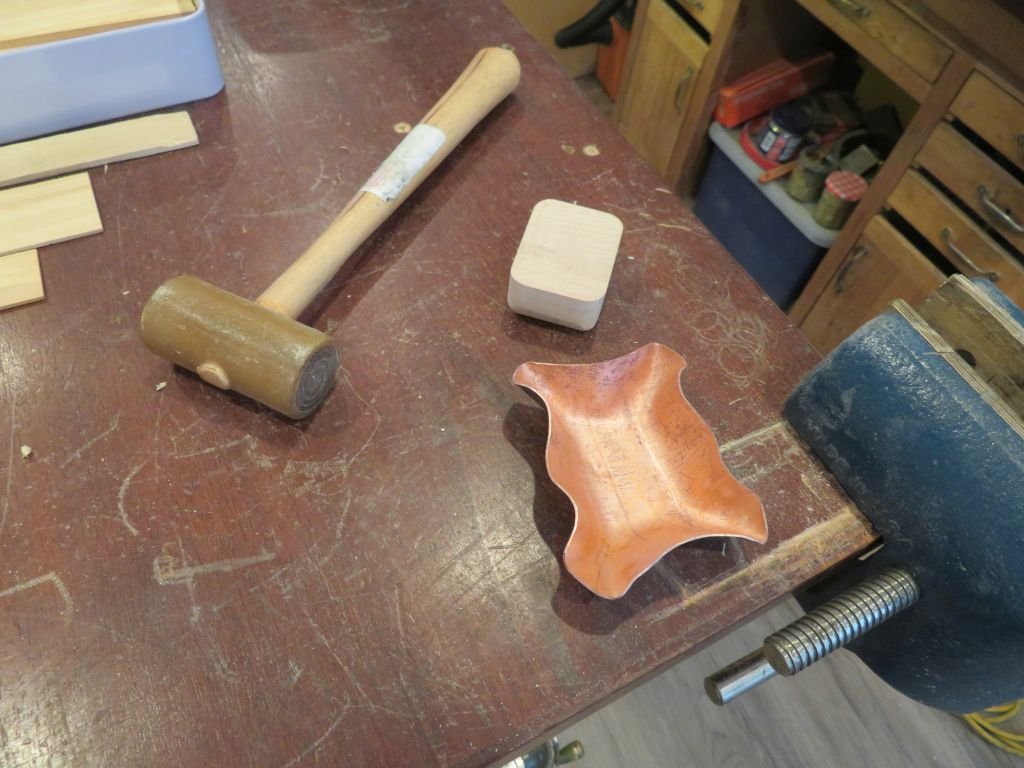
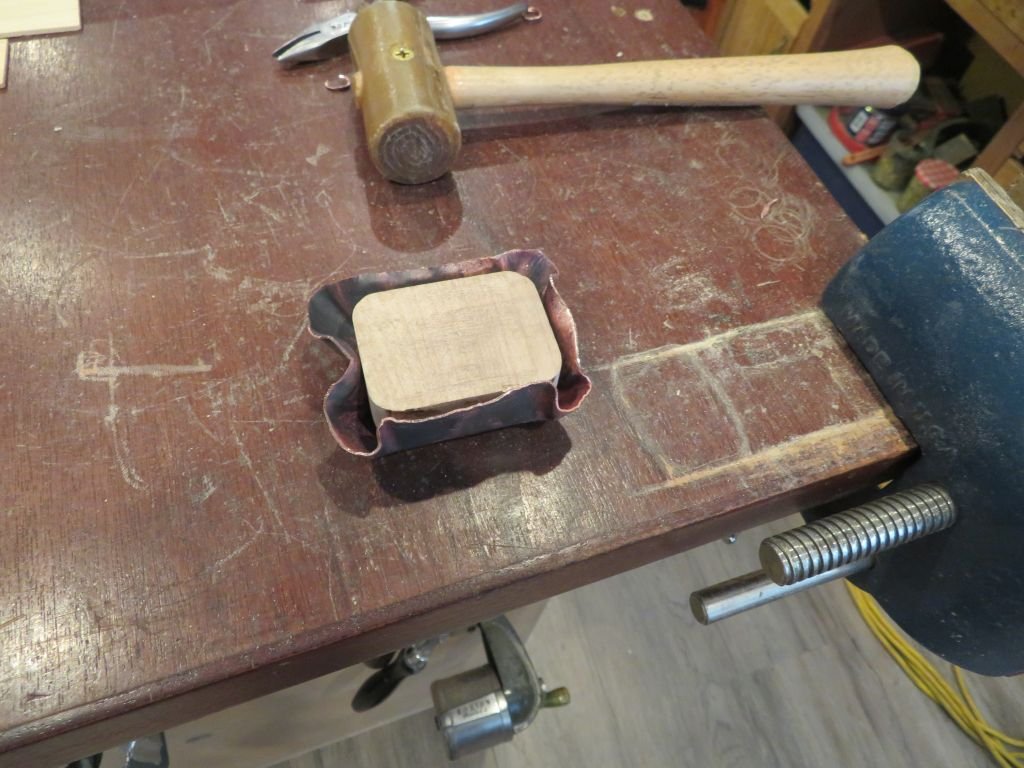
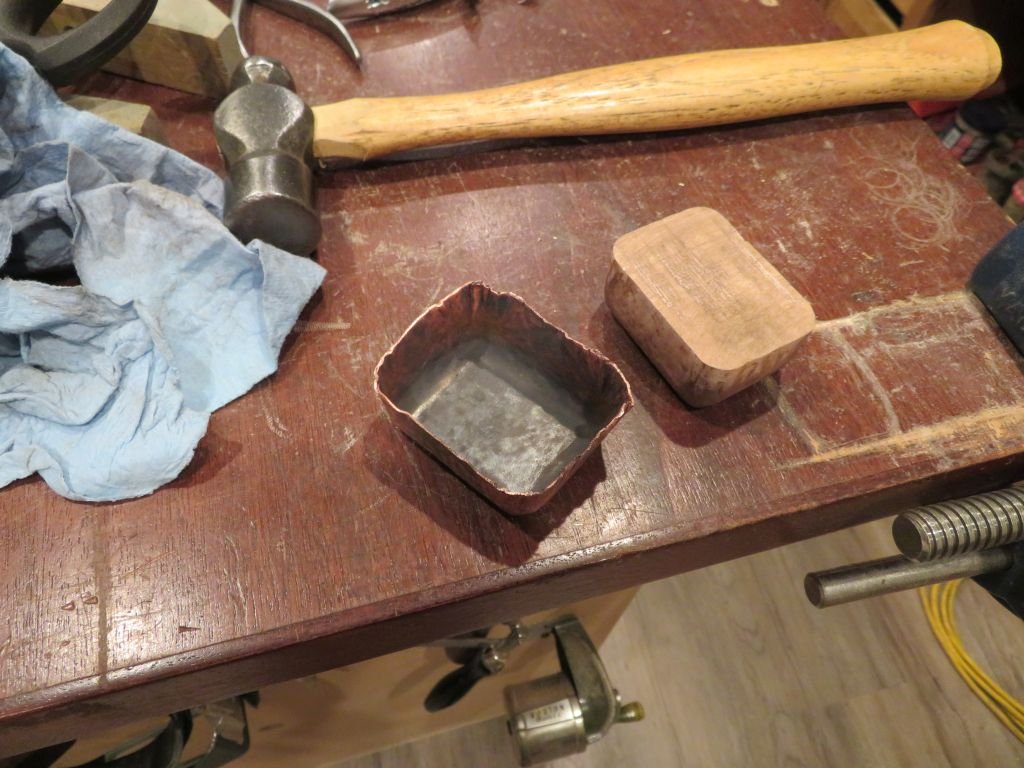
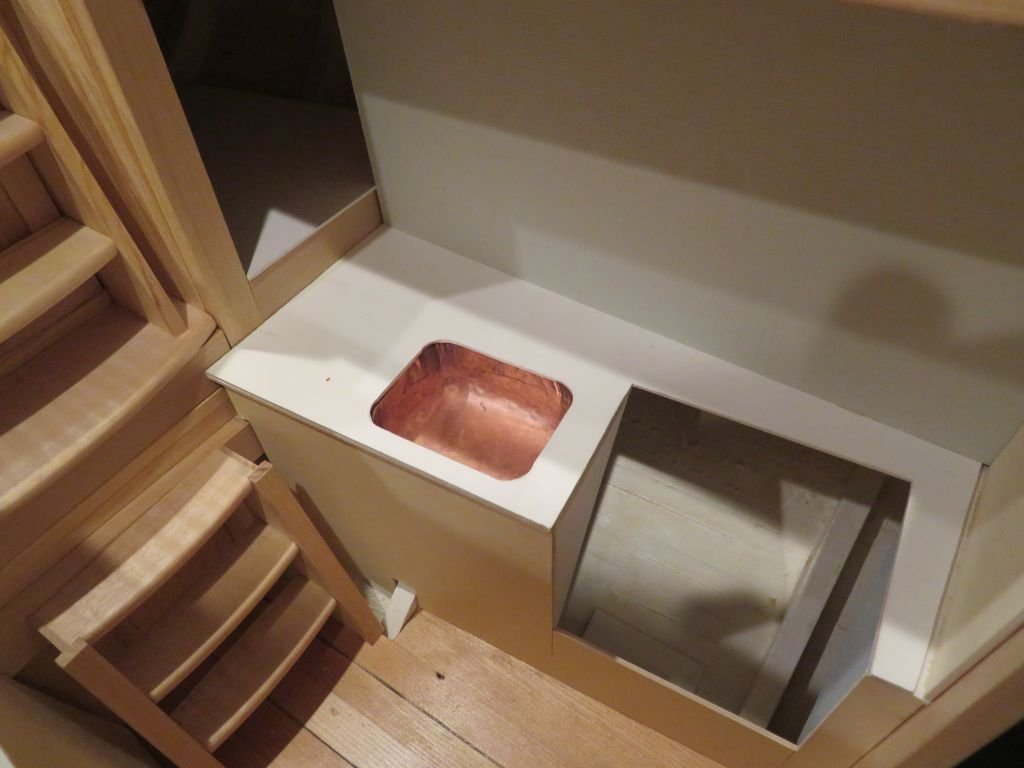
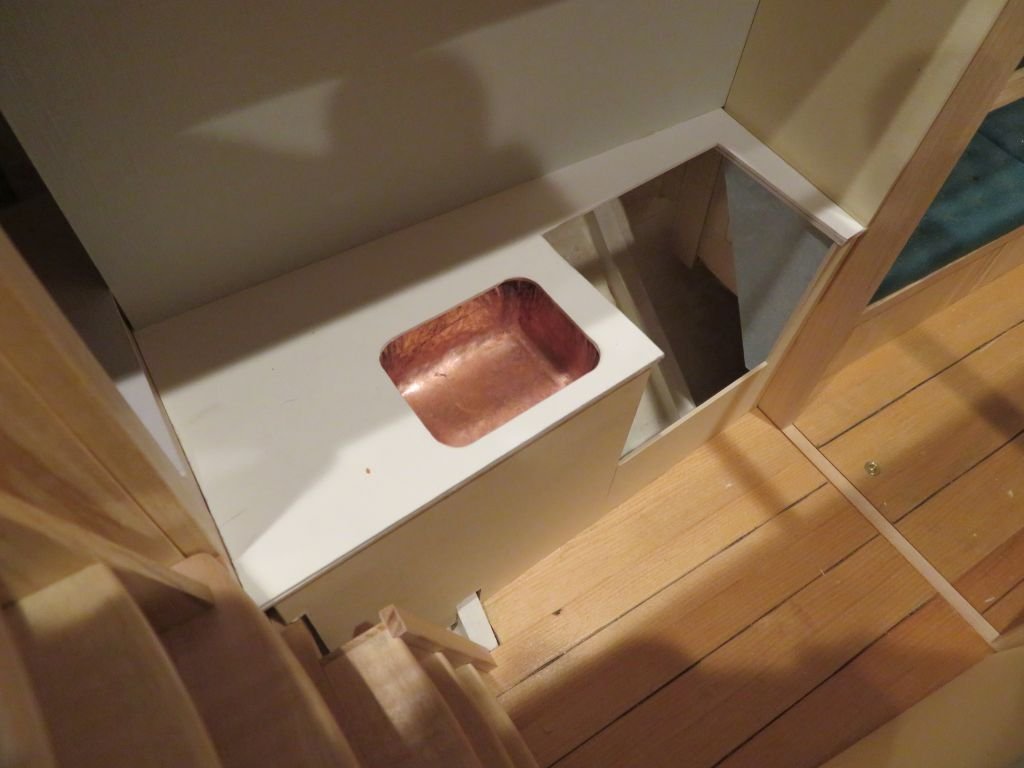
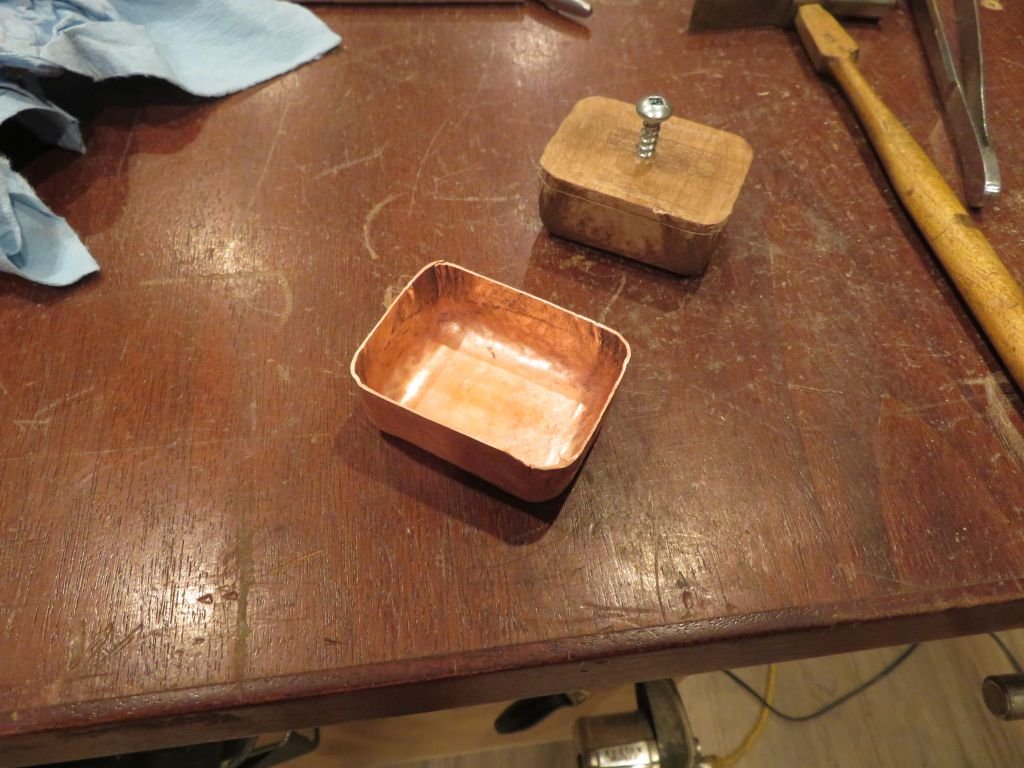
Well here is the truth about the new sink. First task was to start with a new former And cut a new sheet of copper .031" After laying out the cuts use jewelers saw. Then without any annealing begin the folds At this point I needed to do some cutting and used a small nibbler Then the trimmed edges need to be cleaned up this was done by first unfolding the metal a little Then using a bit of wood as a guide filed the edges. The refolded and wired the seams together and used easyflo silver solder to join the seams. My silver soldering skills still leave a lot to be desired but I am improving. and it looks better than the first one. I would do it differently if I had to do it again, making only clean corner joints...... but that's for another boat. Michael

-
Yes this is interesting, The model is really a vehicle for my learning about model ships and boats. And in reality it is just that, because I am using materials and ideas from all sort of times and styles. I spent some time today discussing the bashed up sink with the owner and he said "well I know we are on a budget but its not that tight, cant you find a better sink than that." So looking around I found this one Michael
-
Hi Vaddoc, I was not able to avoid "dog ears" as you say. I had to trim the edges a few times to remove excess material as it closed up Also I used some heavy needle nosed pliers a fer times to flatten out a couple of areas at the corners that were beginning to fold. I do not have the proper tools for serious metal smithing in a jewelers sense, so the final form is a bit crude. Sorry I did not take a few more pictures of some of the steps especially the trimming, to remove the excess, it was a lot of concentration during the work. Oh yes lots of stuff, And that is what is so great about this site I learn so much from all the wonderful things that the other members do. Oh oh.... I see another gauntlet.... I was looking at the web regarding stoves and it seems like the one in Integrity is a Taylor Stove there are some good photographs, it was also interesting reading about the pros and cons of the different fuel types, Old Style Alcohol, New Style Pressure Alcohol , plus the kerosene /diesel types and the LPG gas ones. Michael
-
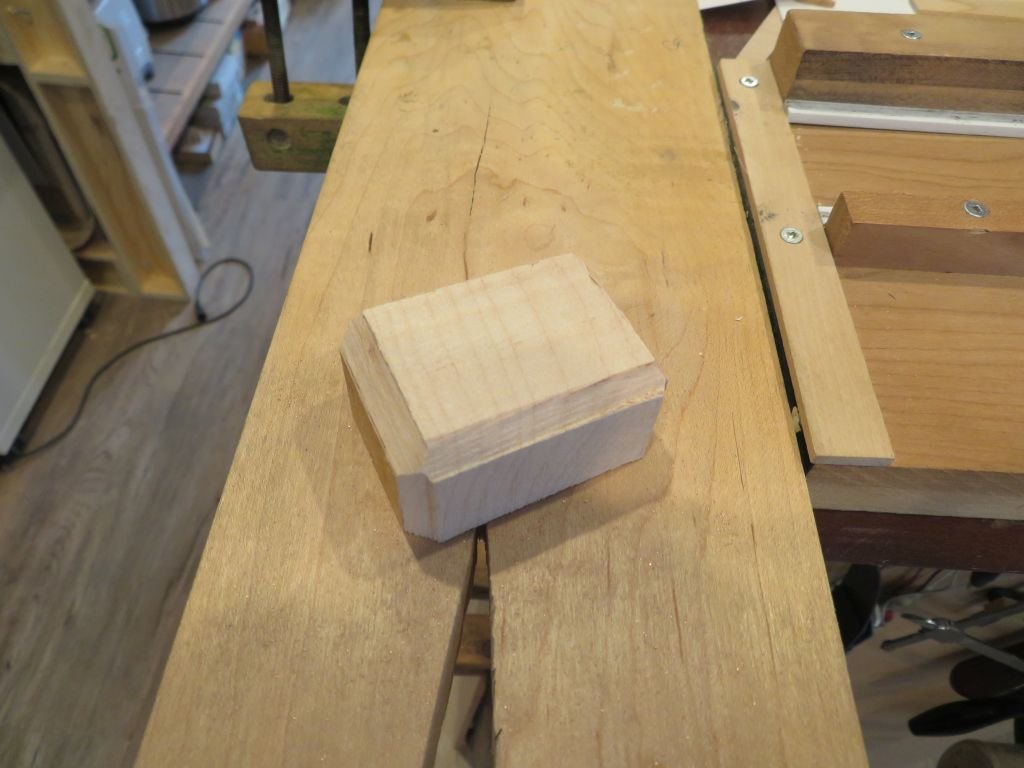
I had a long chat with the owner and he reminded me that we were on a budget with this refit so I mentioned that I would try to find a used copper sink, I found one on MYBAY it was the right price. Checked the fit Ok so here's how I did it Cut out a bit of copper sheet made up a former from some scrap maple 2x1.5x 3/4 then sanded it smooth. Annealed the copper and started bashing Many annealings and bashings later with a leather mallet and more bashings couple of different hammers but mostly with a too big ball pein. A couple of clean up hammerings and then cleaned up the top and dropped it into the pickle . I picked up the gauntlet Druxey you have a habit of dropping it.😉 I'm not going down that other rabbit hole Greg I think I read an article about that Model in a Scale ships or similar magazine I seem to recall it had gold and silver fittings. Eberhard, I have not figured it out yet I will be doing a bit of searching to see if I can find some better pictures of the type that is in Integrity. Michael

-
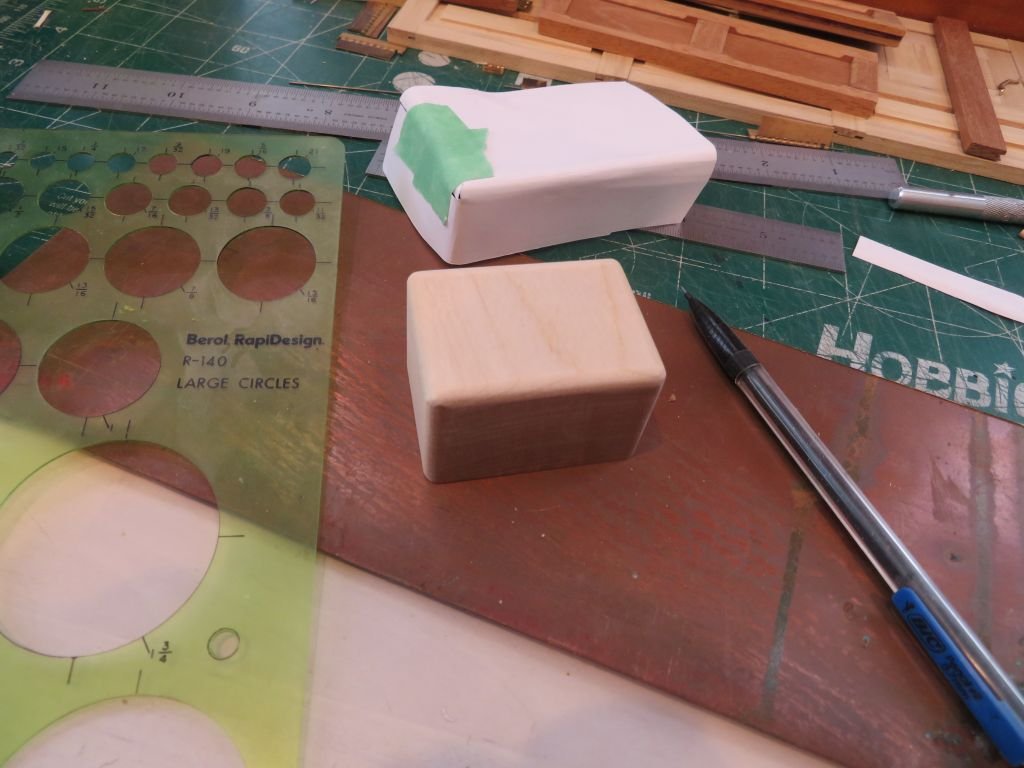
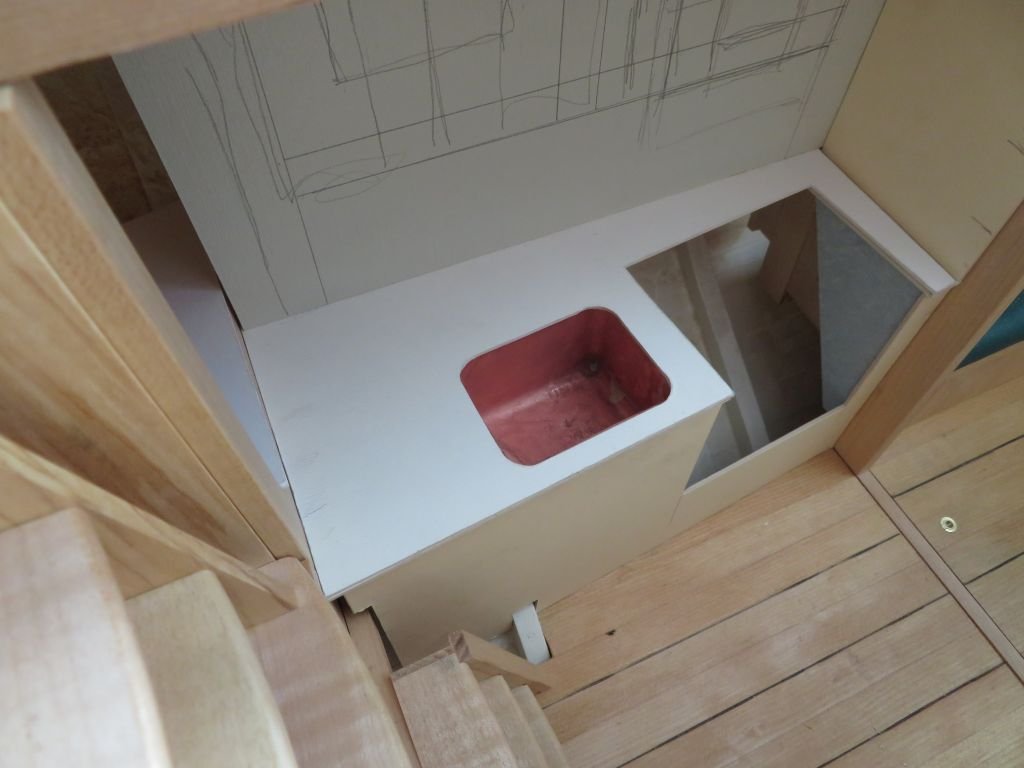
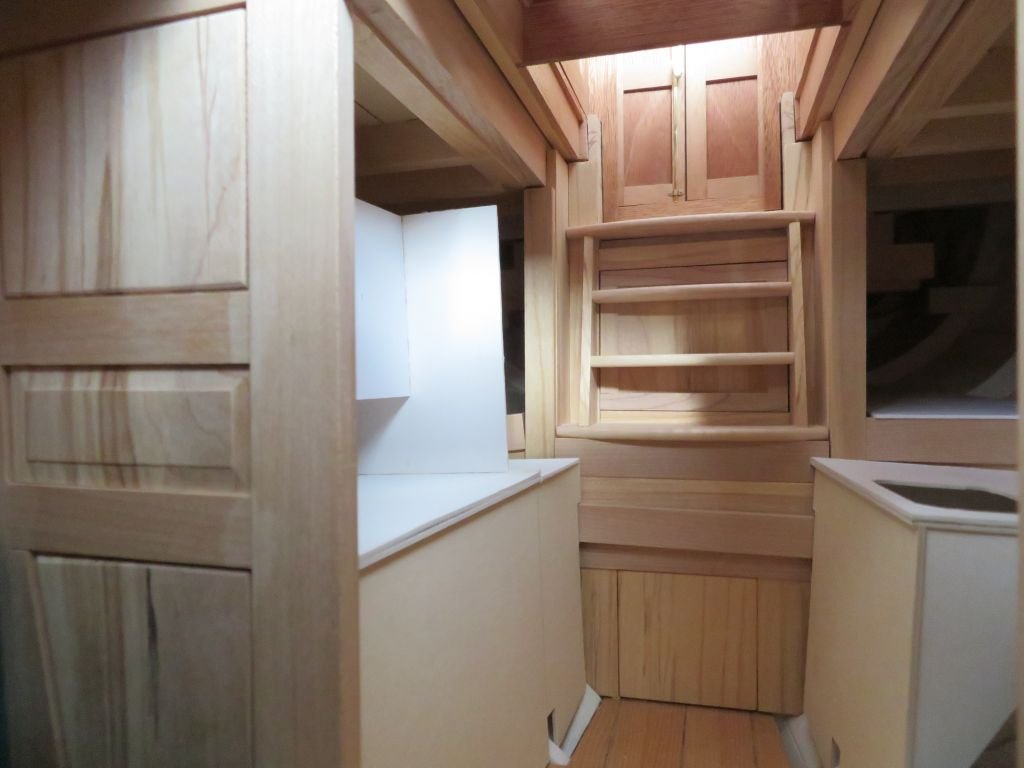
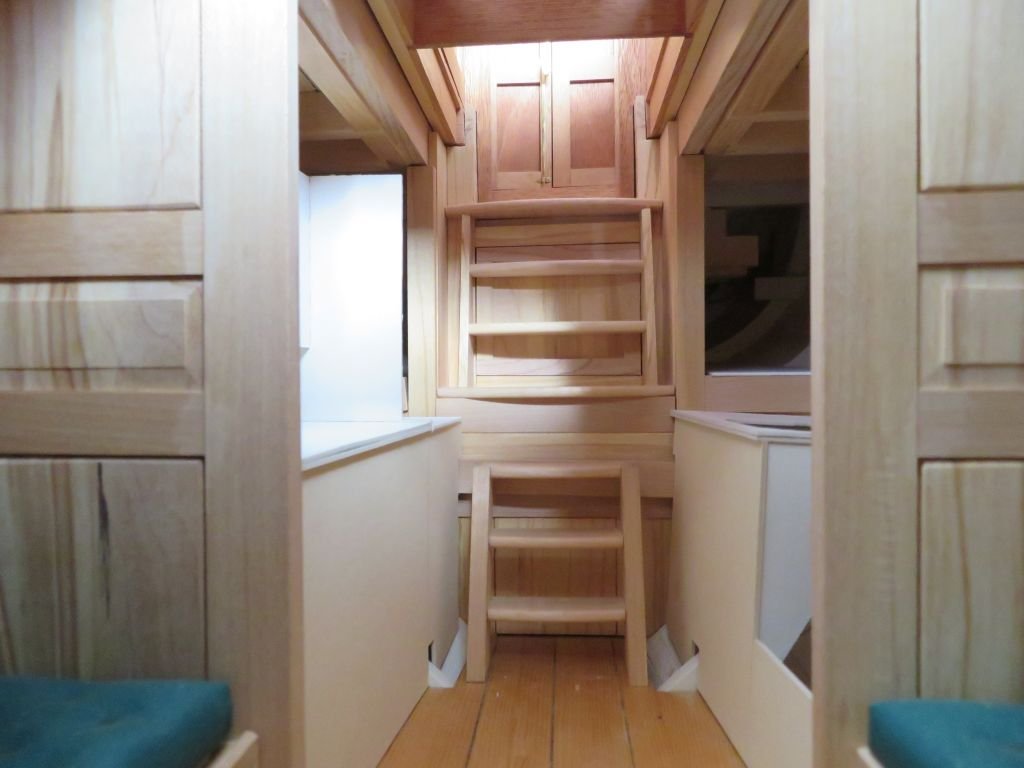
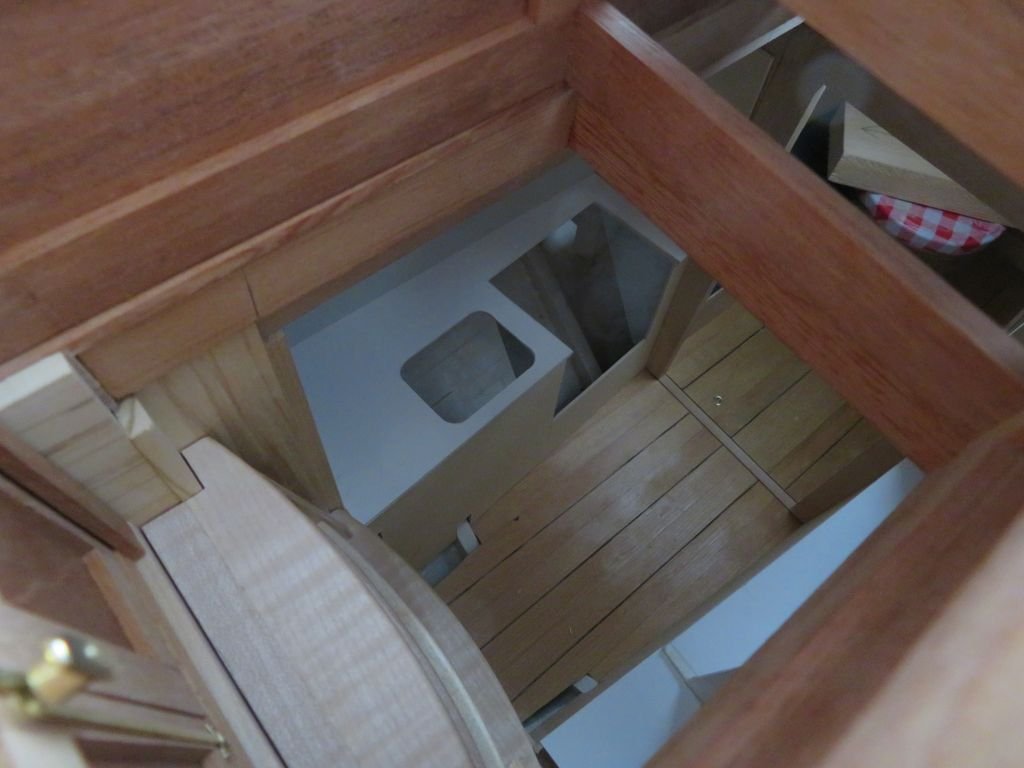
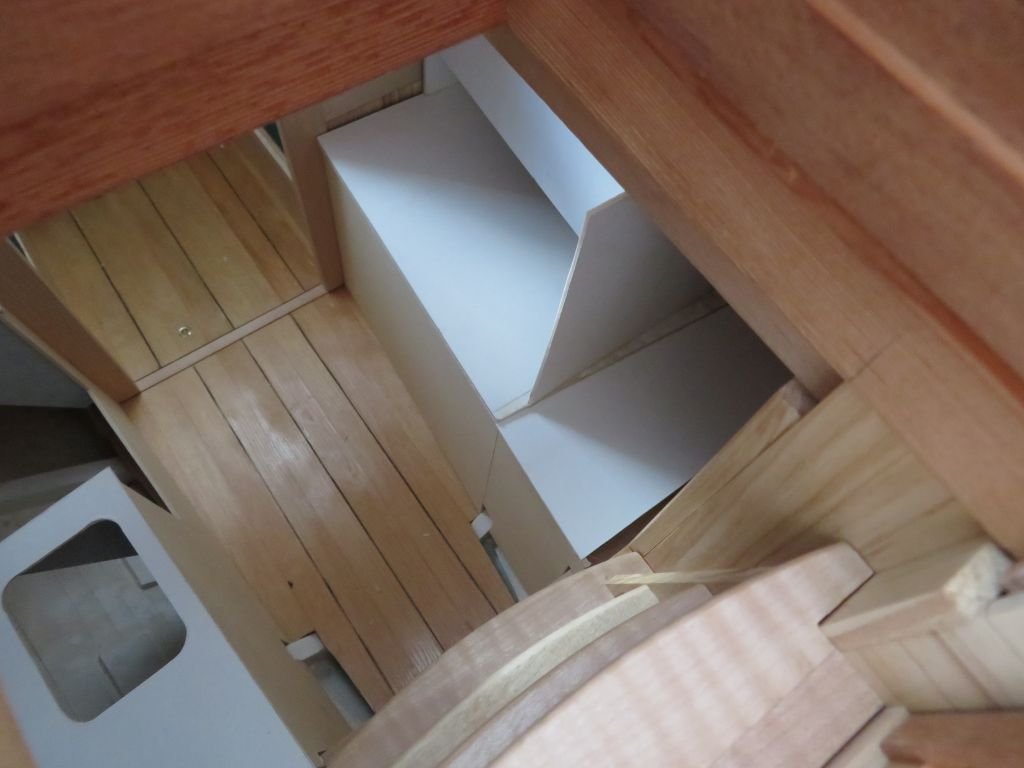
A little more fiddling with the design of the kitchen/chart area with some card mock ups. Not much to say about these pics other than it is fiddly work putting these card bits in and out, but they will help me build the wooden equivalents. I think that I will drape mold the sink out of styrene then spray it silver. My silver smith friend would cringe if she hear me say that. Michael

-
Just finished watching your presentation Eric, thanks for doing it and for the link, I learned a whole bunch of new things about the river boats. A great presentation. Michael
- 599 replies
-
- 4
-
-
- sidewheeler
- arabia
- (and 4 more)
-
Ah yes..... more, bigger, better! The issues of being land locked and with shallow lakes around my neck of the woods. I have built and sailed 2 full sized sailboats and recently gave away the last one Maria. I have watched with great admiration the likes of Luke Powell build beautiful cutters. Perhaps in another life. I was just thinking about why I do the work that I do this morning as I woke up, and I must say that there is really only one answer and that is because it makes me happy to be mucking about with ideas about how to do this or that with a bit of wood or brass or watercolour paint. Having the time to think about these things is a luxury that I know is not accessible to many, and that bothers me. One of the joys of this forum for me is being able to watch and follow along many of the builds both simple and complex that are presented here. I read a comment about life from an author of a new book this morning "Use Less Share More" It sums up for me many of the things that I follow on this forum. Yesterday when I showed the beautiful curved lines in a bit of crab apple pruning gives me as much pleasure as spending an Hour being awe struck by the beauty and complexity of Doris's Royal Katherine made of paper and card. or GB's little fishing vessel . I learn from each. It is such a wonderful journey this learning thing. So if you had told me in 1976 that I would be using bits of this 2 foot log of maple in a model of a sailboat that I had would be working on for 8 or more years, I would have said, hmmmm...interesting, where is your crystal ball? Off now to fiddle with a few bits of maple. Michael
