


michael mott
-
Posts
5,198 -
Joined
-
Last visited
Content Type
Profiles
Forums
Gallery
Events
Everything posted by michael mott
-
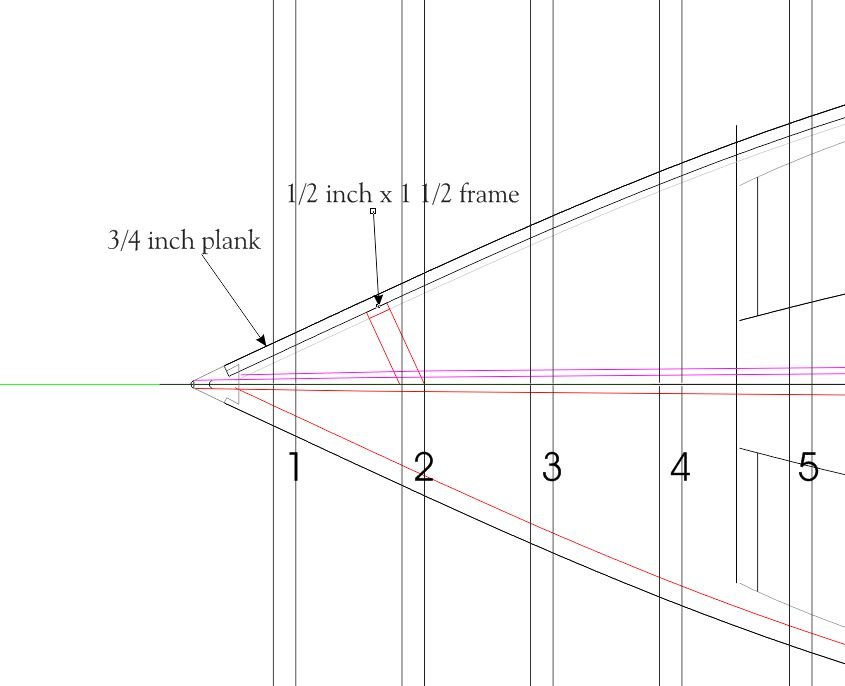
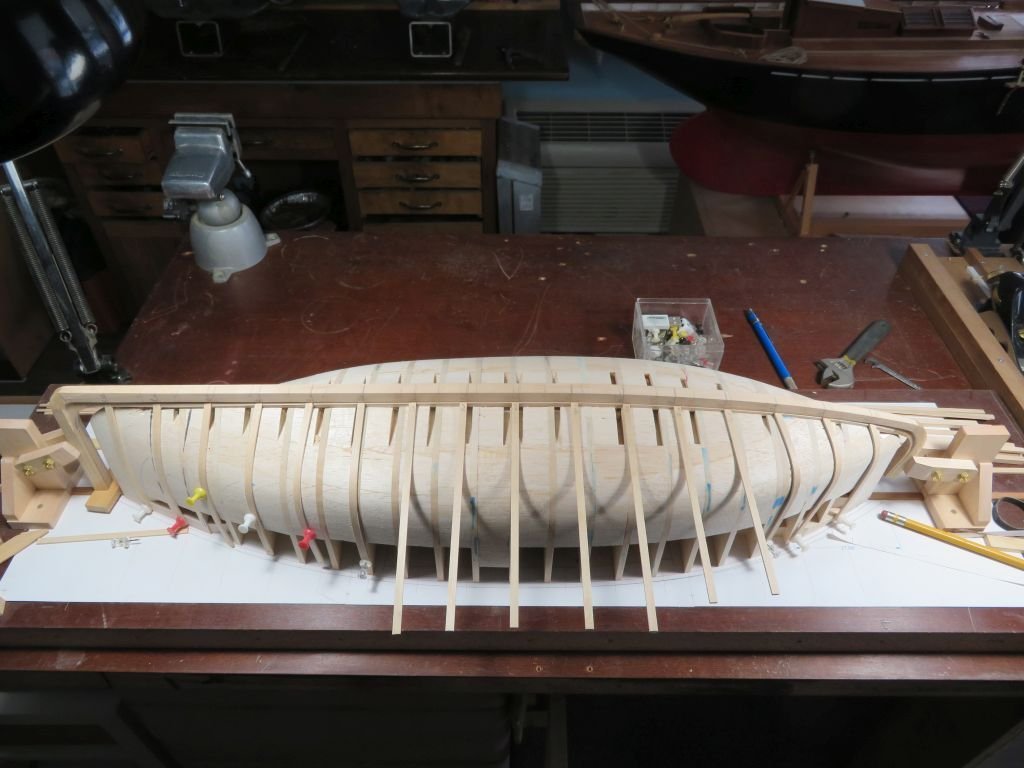
 Good morning Joe, I used the lines plan to create the form and because this was a form that was going to be shaped with a file and sanding the station lines are regularly spaced on the build board. the following entry that I posted earlier in post 841, hopefully illustrates an answer to your question. there are 16 frames and there were 21 station lines,. when some of the boat builders use 5 or 6 forms or molds to set the curves then set stringers to create the form before steaming and setting the ribs or frames. This is a relatively small boat at only 19 feet overall. As soon as I began to shape the frames the wanted to fall along the easy line and not the twisted one formed by the station lines, Design and form and function are three related principles that interact with each other in complex ways, the plan view of the rib below because of its shape wider than thick naturally did not want to twist. so giving in to function and form I let the frame follow its natural fall line so to speak. there is some slight twisting but it is minimal. I am assuming that the builders in 1909 used the mold and stringer method to form the lines then added the steam bent ribs after before planking. The owner told me that the frames on Skipjack are approx on 12 inch centers the spacing is closer to the real boat than the station lines that I drew in the beginning. there was obviously no need to add a frame at station 1. I hope this answers your question, and thanks for asking it. I think that one of my problems has been with the placement of station lines and the conjectured placement of the frames at the bow. and thinking that these are one and the same. I have been trying to reconcile a frame at position 1 and am beginning to think that I have this all wrong it makes more sense that the first frame would be at the place I have marked as 2 in this plan view Thanks for the welcome back to the shipyard. Michael
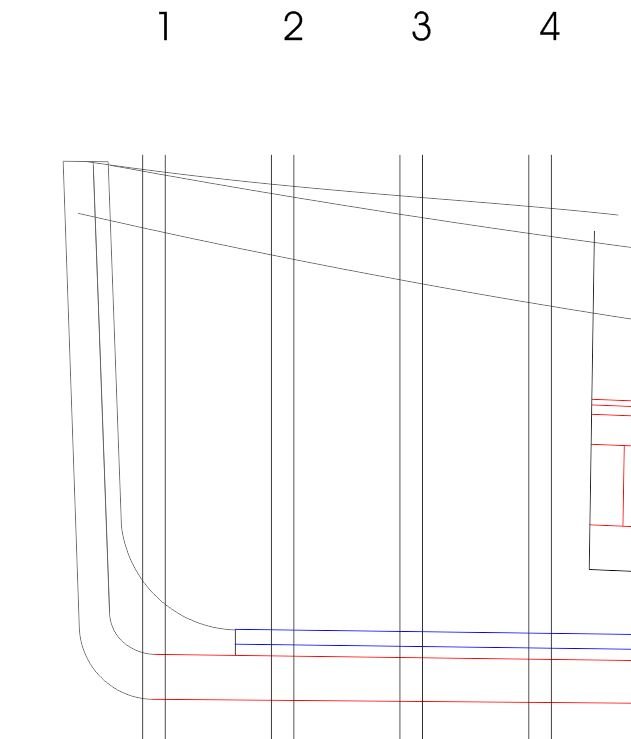
-
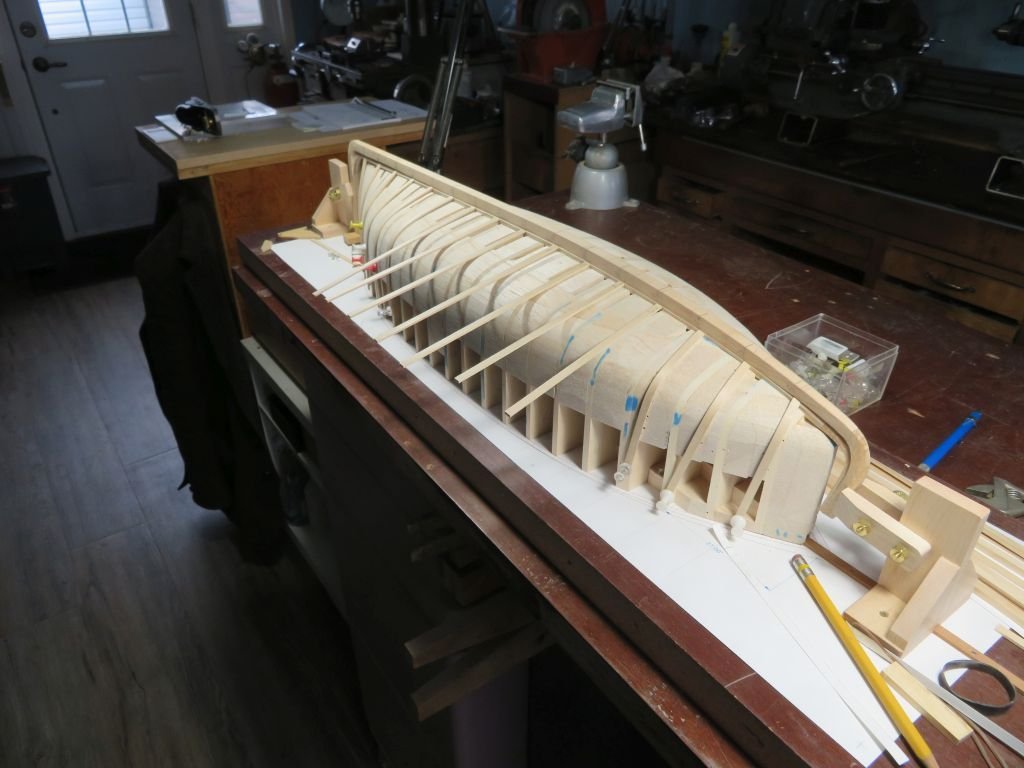
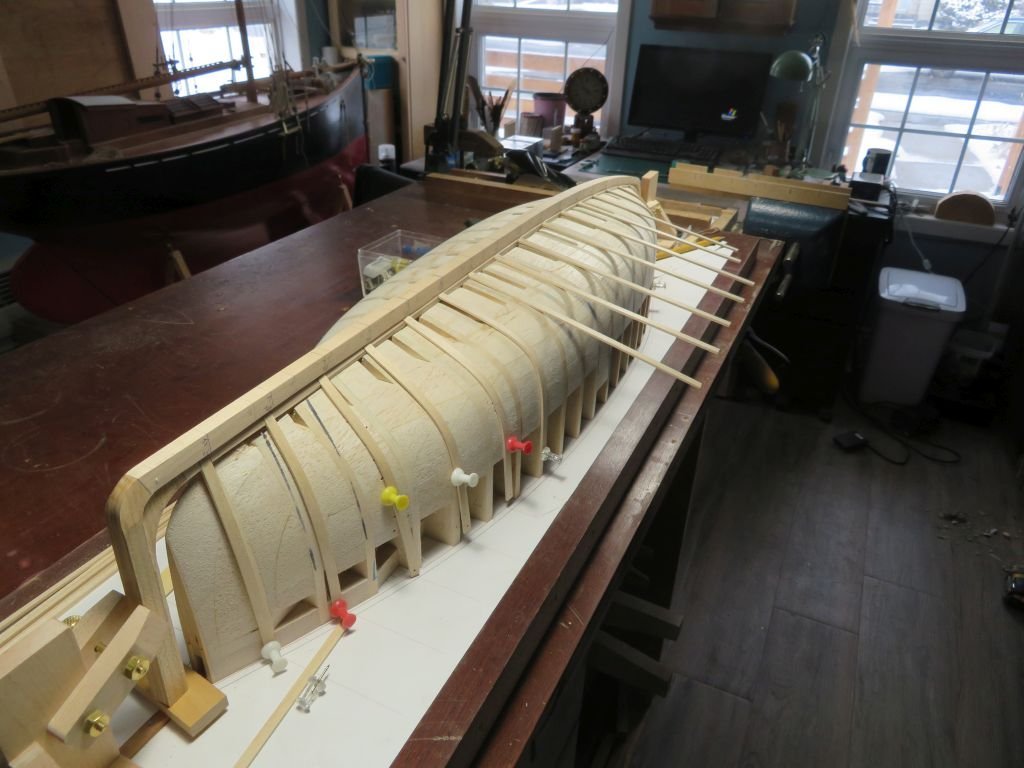
Well I woke up this morning with a hankering to cut wood, so I cleaned off the workbenches and then started cutting wood. I completed the notches on the starboard side now to get back to steaming. Feels good to be back in the shipyard. Michael
-
Metal bashing
michael mott replied to michael mott's topic in Metal Work, Soldering and Metal Fittings
Ah but they would not actually work like real rivets, which mine do. Michael -
Excellent work Harshil! Michael
-
Metal bashing
michael mott replied to michael mott's topic in Metal Work, Soldering and Metal Fittings
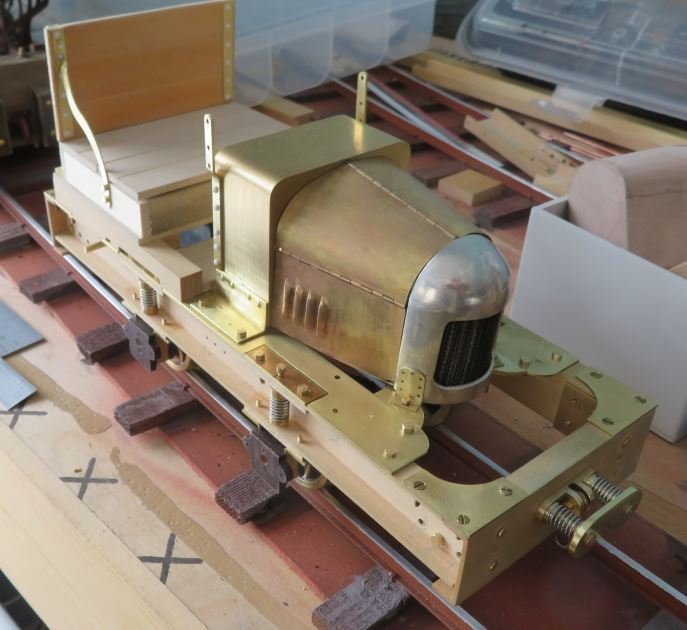
Hello Eberhard, actually no I did not. One of those impossible bits to figure out. The geometry reminds me a bit of motor cycle gear changing, but it eludes me. and the chap who supplied me with the only picture of this does not know either. the transmission that was used is the transmission that was on the Morris Cowley. My representation is a little bit heavy handed compared to the rather delicate linkages from the original. Unfortunately I cannot share the image. as I agreed not to. There does not seem to be any other information other than that one photograph which is also at an oblique angle. These cobbled together locos were all scrapped around the early 60's In the 16mm associations special publication on the Penrhyn Quarry there is a double page spread showing this loco but from the opposite side. and they are the only public pictures that I know of. The model railway narrow gauge enthusiasts who know quite a bit about the Welsh quarry locomotives and the miscellaneous constructions, have little information either. So my representation is a bit of guesswork as far as is goes. the three shafts connected in an intricate way. A few other model makers have done their own representations of this type of loco none have gone the same route as me. There are no photographs that I know of of the dashboard or the pedals that were used on the loco so my version is a compromise in order to use the switches that I had to hand, There obviously would not have any need for the steering wheel and associated parts, or how the transmission was set up to drive other than some conversion to a chain system to the two axles. A number of nuts and bolts are not fitted to the frames and wheel bearings because the whole thing has to be dissembled in order to paint it. Michael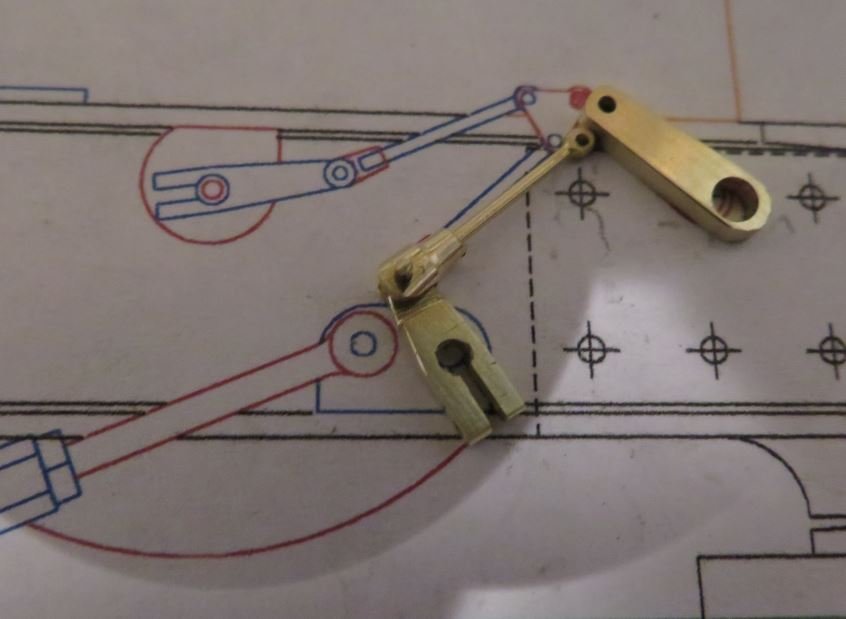
-
Metal bashing
michael mott replied to michael mott's topic in Metal Work, Soldering and Metal Fittings
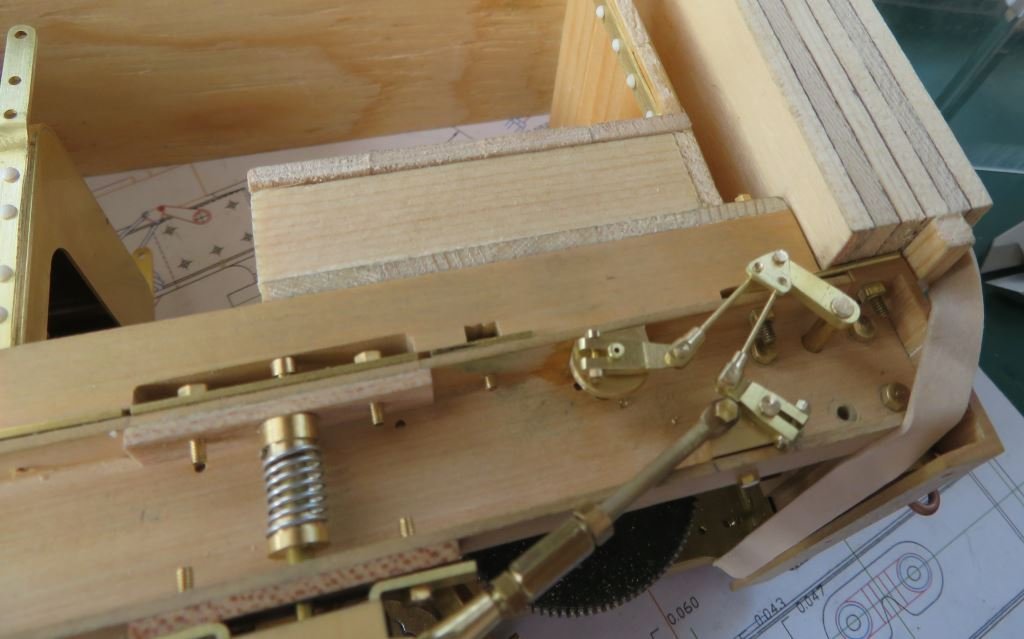
Thanks Mark, and thanks everyone for the likes and for you patience while I get this worked through my system, and then get back to the boats. A bit more work done, on the running gear. Fiddly bits for sure. Michael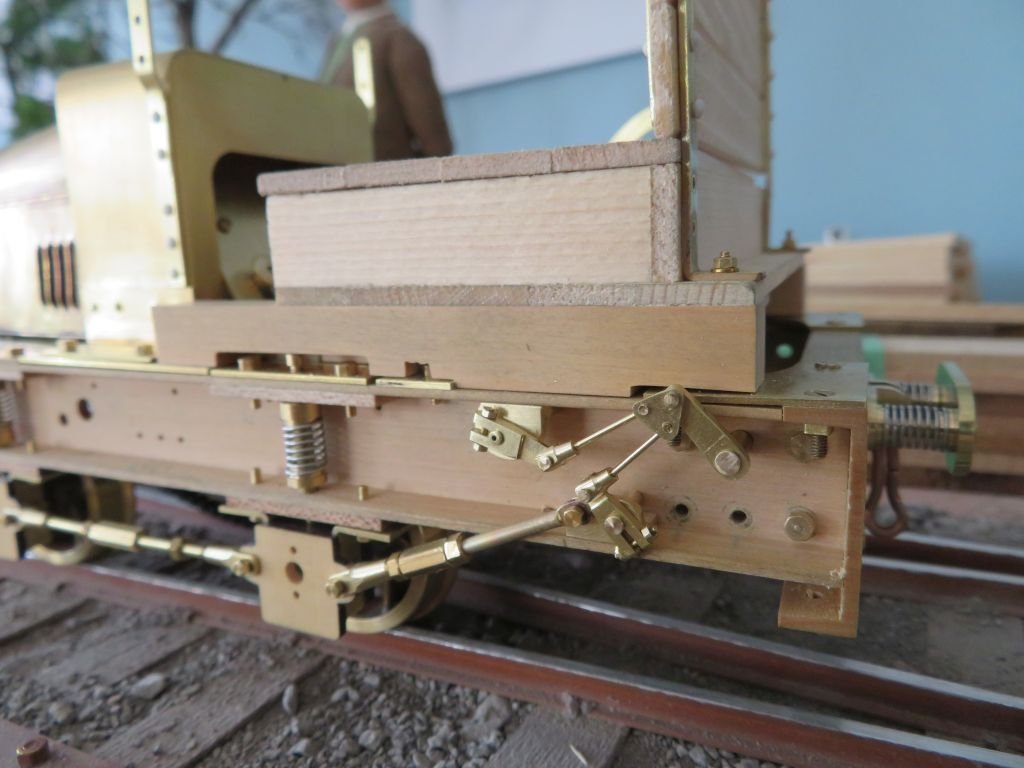
- 49 replies
-
- 11
-

-

-
Lots of nice work there Maury, The metal work is fiddly stuff but rewarding when it comes together well. Michael
-
A rather lovely little launch, Looking forward to how you do all the rest of it. Michael
-
Metal bashing
michael mott replied to michael mott's topic in Metal Work, Soldering and Metal Fittings
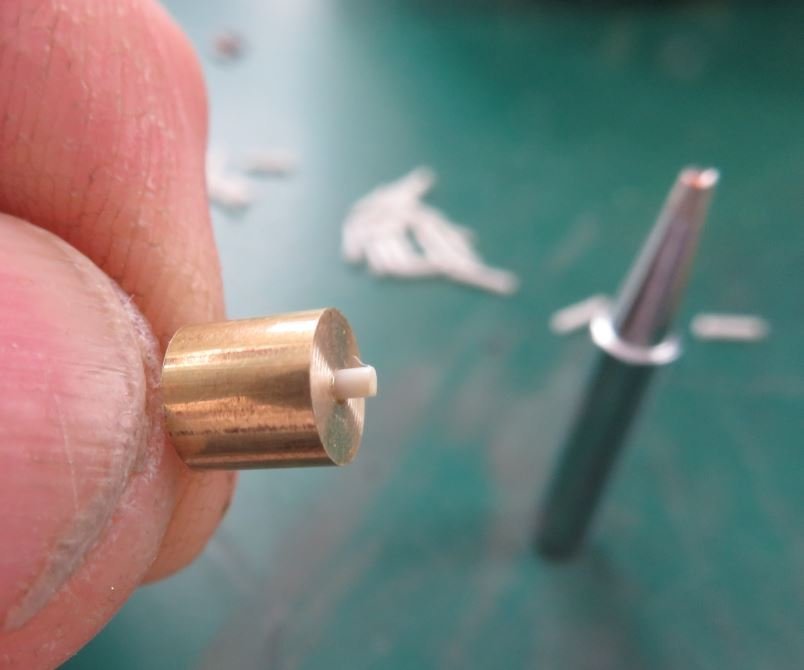
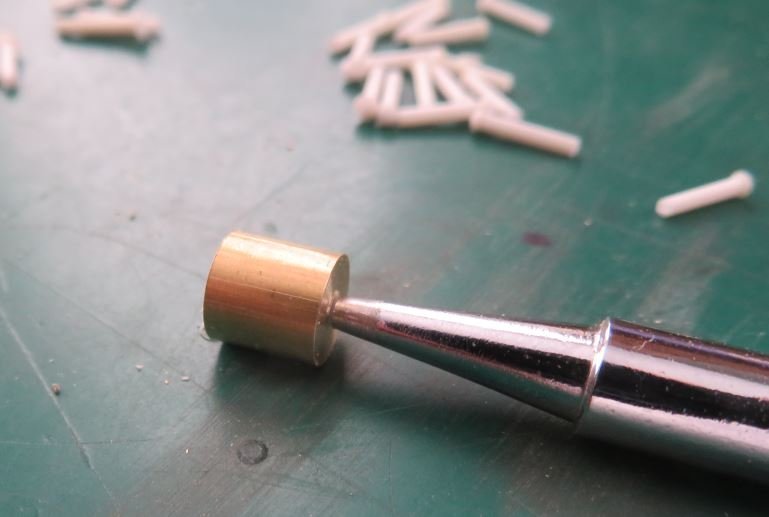
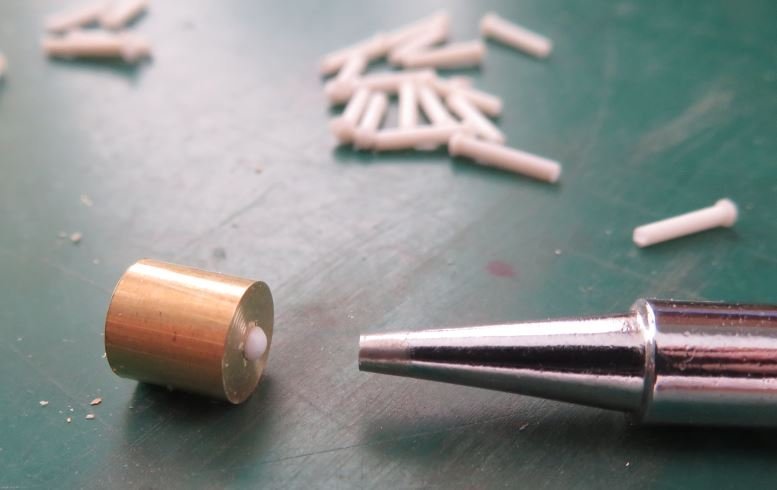
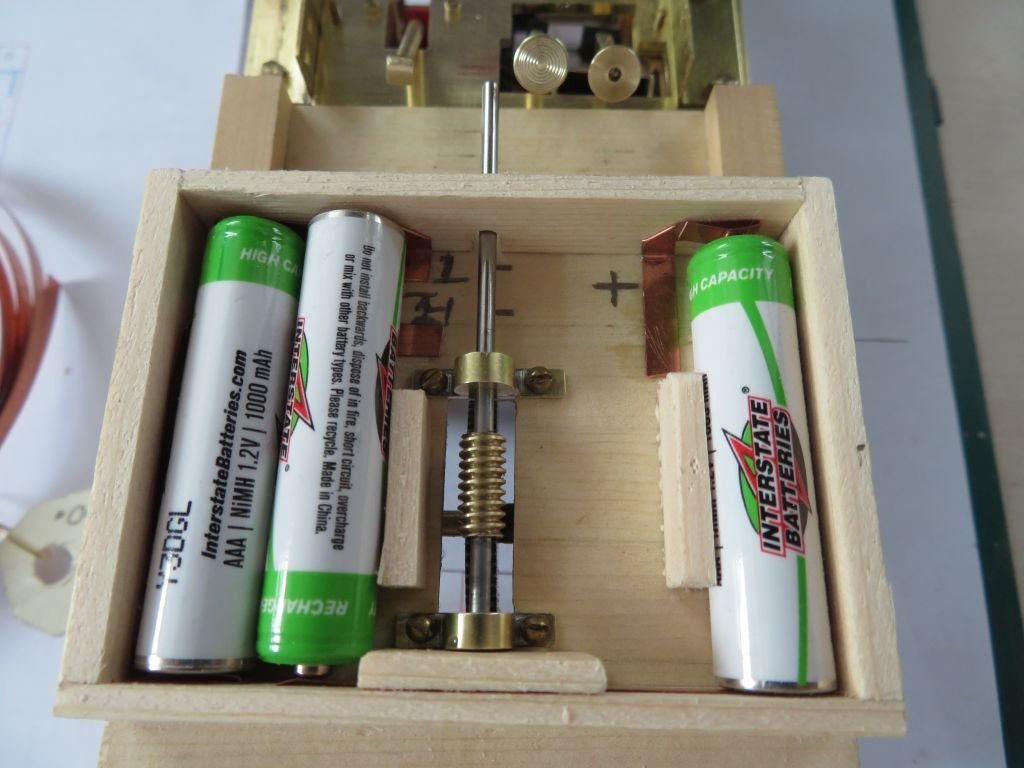
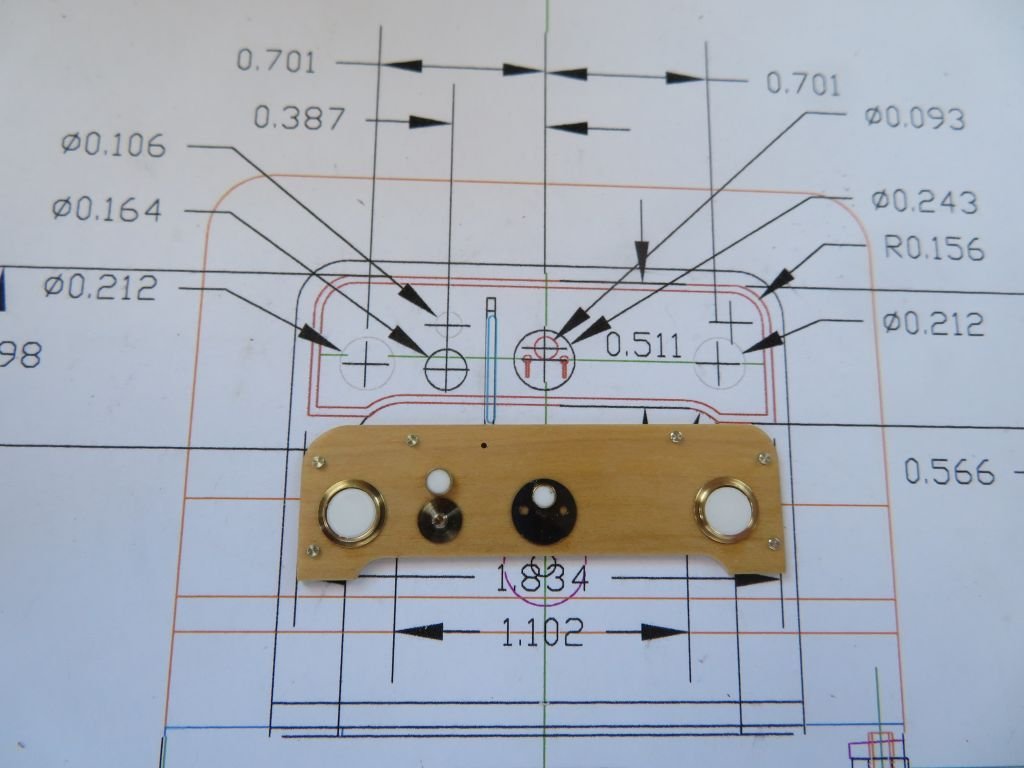
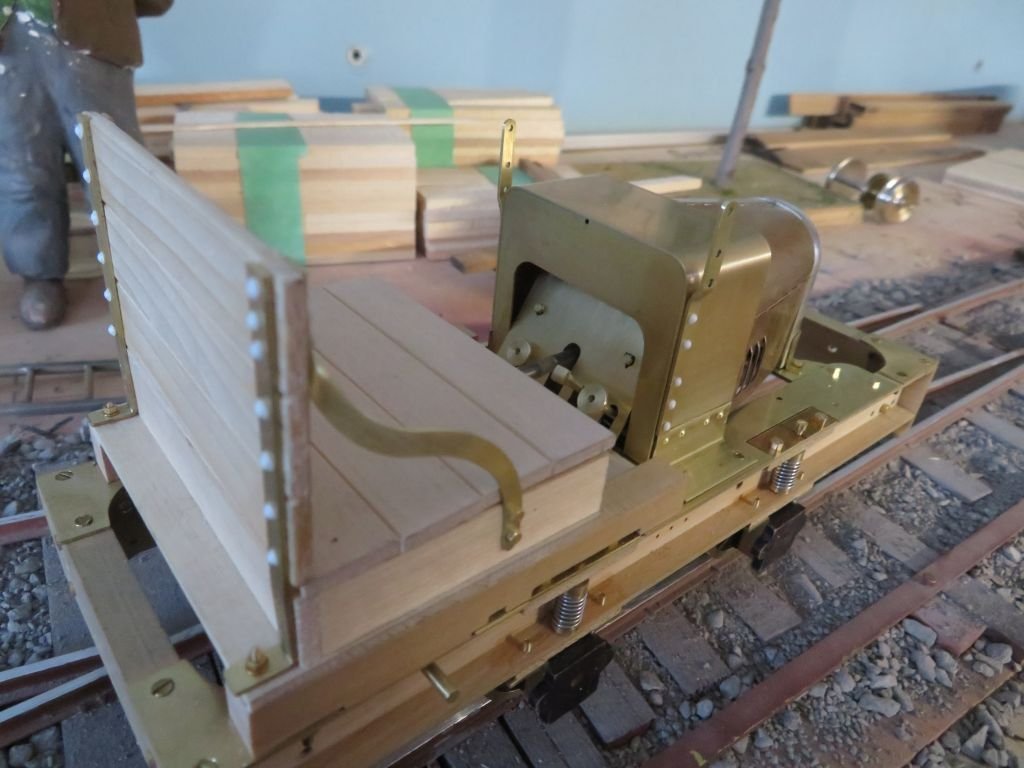
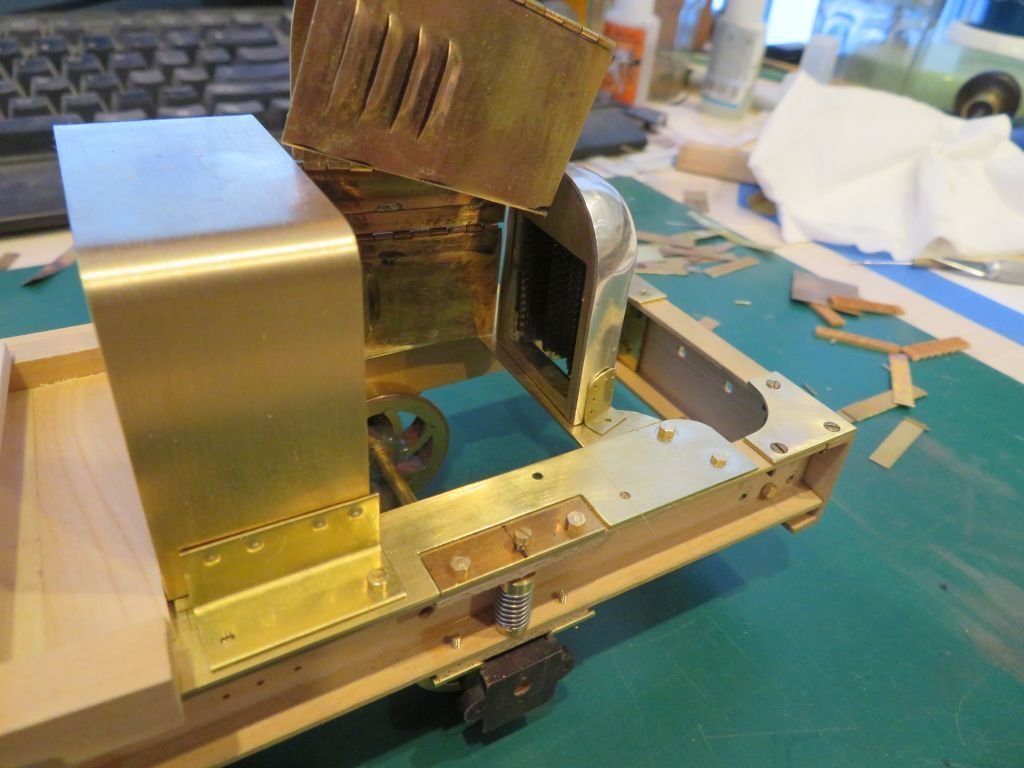
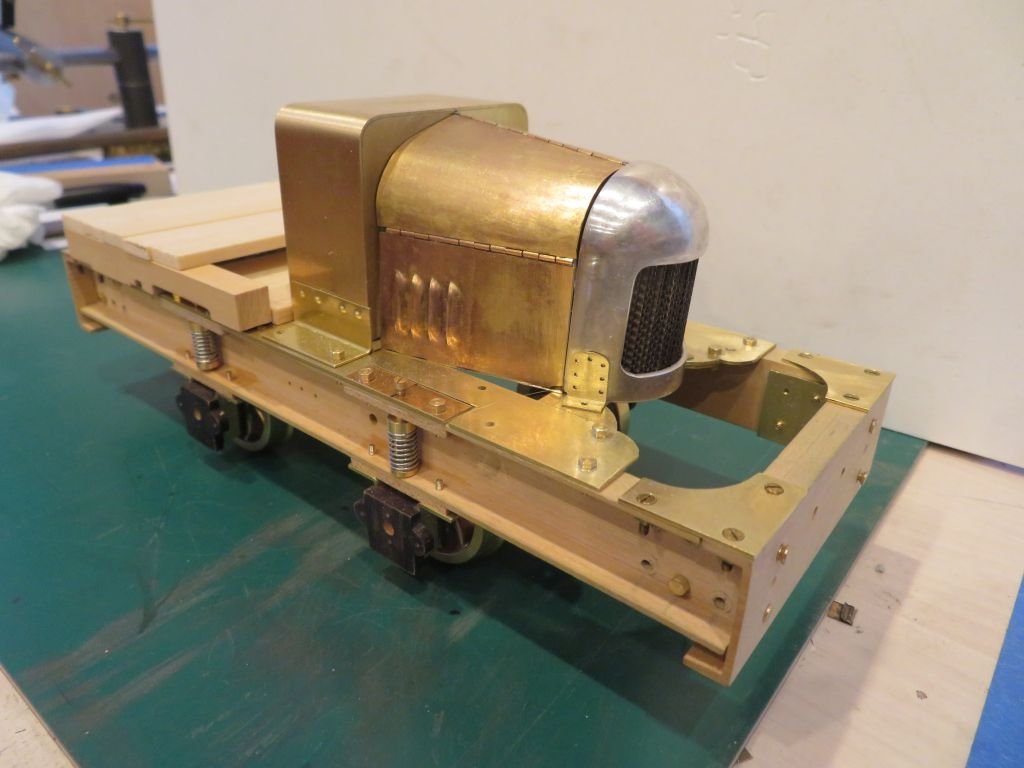
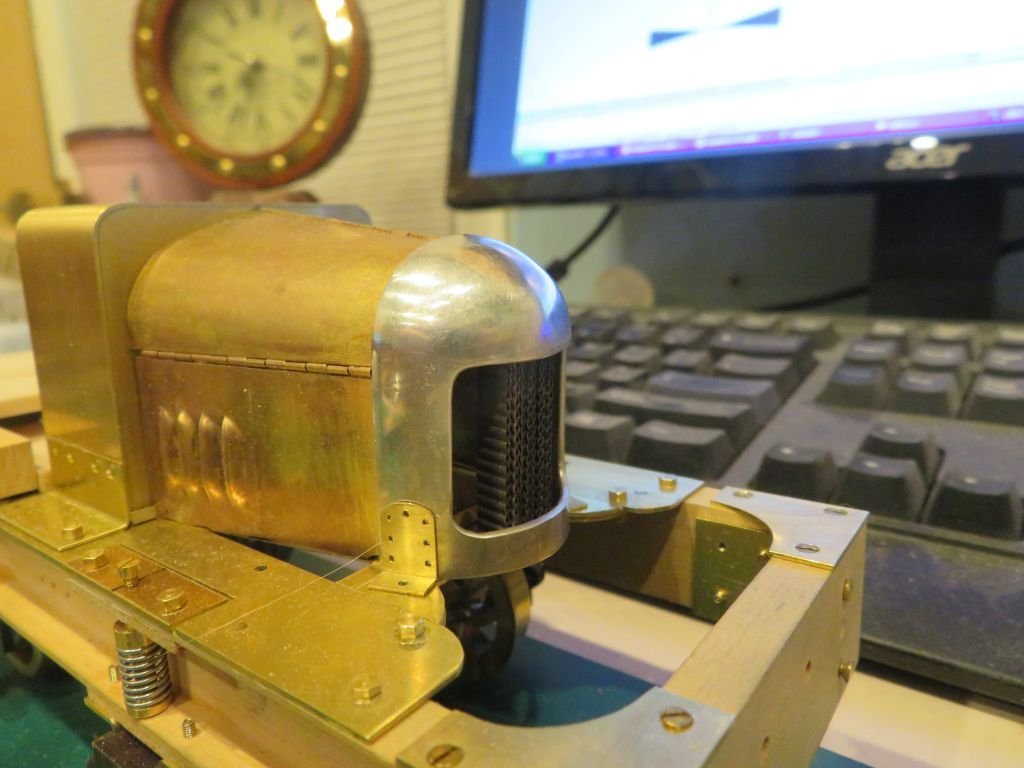
Well I still have not got my mojo back for the boats at the moment, I am thinking that as soon as this little project is finished I will get back to the hulls. Had a bit of fun working out how to make rivets, upsetting copper ones did not work out so well but a tip from a model railroader set me on a different path. Using the thermoforming aspects of styrene, I milled a hemispherical indentation into the end of a new soldering iron bit. I was unable to set the temperature any lower than 200F so had to keep turning it on and off at 100F. I made a small bush out of some 1/4 inch diameter brass rod and fed the styrene rod through it until a short stub was protruding (a bit of trial and error determined the correct amount. Then the warmed soldering iron was pushed onto the end with a rotating swiveling motion, which produced a nice rounded end that looked like a rivet and not an melted blob. Then buy using the keeper plate and cutting the pressed in rivets to the correct length I used the same procedure on the other end so the styrene acted as a true rivet. I attached the uprights for the windshield the same way by feeding the rivets out from the inside. The loco runs nicely on three AAA batteries with a small toy motor fed through a worm drive which is basically a short length of 10x24 bras machine screw, on a spare salvaged gear from something eons ago. The controls are through three tiny switches set under the floor boards and set up to represent the foot pedals of the Morris car with a bit of license. The one on the right is the forward reverse, the middle one is on off and the left one his high low speed. And of course we needed a dash board which is some Castello boxwood again with some nickel silver retaining screws around the edge these are .041" diameter and just decorative, the rest are a combination of brass and styrene rod turnings. It will get stuck on after the body shell has been painted. The most recent parts were the couplings and buffer combination. So it is getting close to being finished, but it is keeping my mind off the troubling news, as I focus on the various problem solving aspects of this model as there are only a couple of copyrighted photographs of the original machine and no drawings. Michael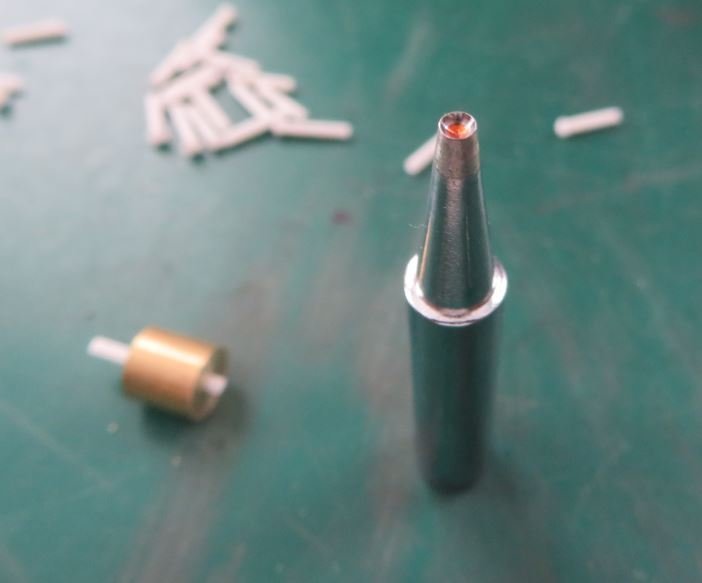


- 49 replies
-
- 13
-
-
-
copyright
michael mott replied to michael mott's topic in Using the MSW forum - **NO MODELING CONTENT IN THIS SUB-FORUM**
Thank you Kevin for your clarification I appreciate it. Michael -
copyright
michael mott replied to michael mott's topic in Using the MSW forum - **NO MODELING CONTENT IN THIS SUB-FORUM**
Thank you for the link to this intriguing story Mark. I can see how tricky the whole issue of copyright is. Michael -
copyright
michael mott replied to michael mott's topic in Using the MSW forum - **NO MODELING CONTENT IN THIS SUB-FORUM**
Thank you for your clarification, I understand it a little better now, So I could link to a picture on the web by using the link to the particular image that I wanted to use to clarify a question. Michael -
copyright
michael mott replied to michael mott's topic in Using the MSW forum - **NO MODELING CONTENT IN THIS SUB-FORUM**
Asking a question about copyright in all honesty, And this answer from the person noted as the MSW social Media Moderator is a bit disappointing to say the least. I thought my question was quite clear. One is told not to post images that one does not have permission to post, so forgive this old man for not being as savvy about the internet protocols, and for wanting to do the right thing. Michael -
A question arose when I linked to the google search to let the visitor to my thread see images on the google search page. I linked to the google search because I do not have any of my own pictures of the subject matter. Does linking to google search infringe on copyright? Thanks in advance Michael
-
Metal bashing
michael mott replied to michael mott's topic in Metal Work, Soldering and Metal Fittings
that is a good question, perhaps Admin can respond. -
Metal bashing
michael mott replied to michael mott's topic in Metal Work, Soldering and Metal Fittings
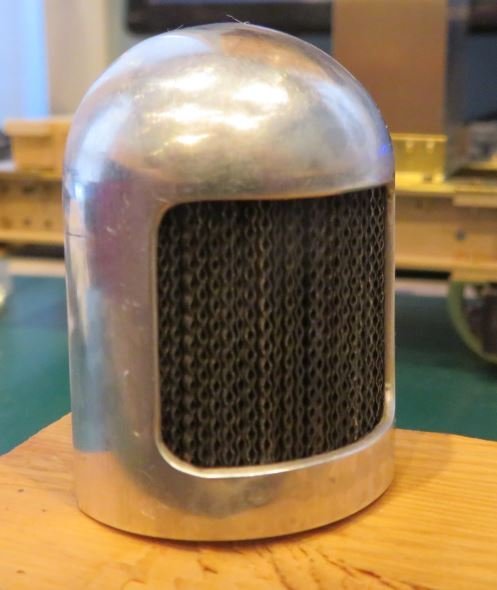
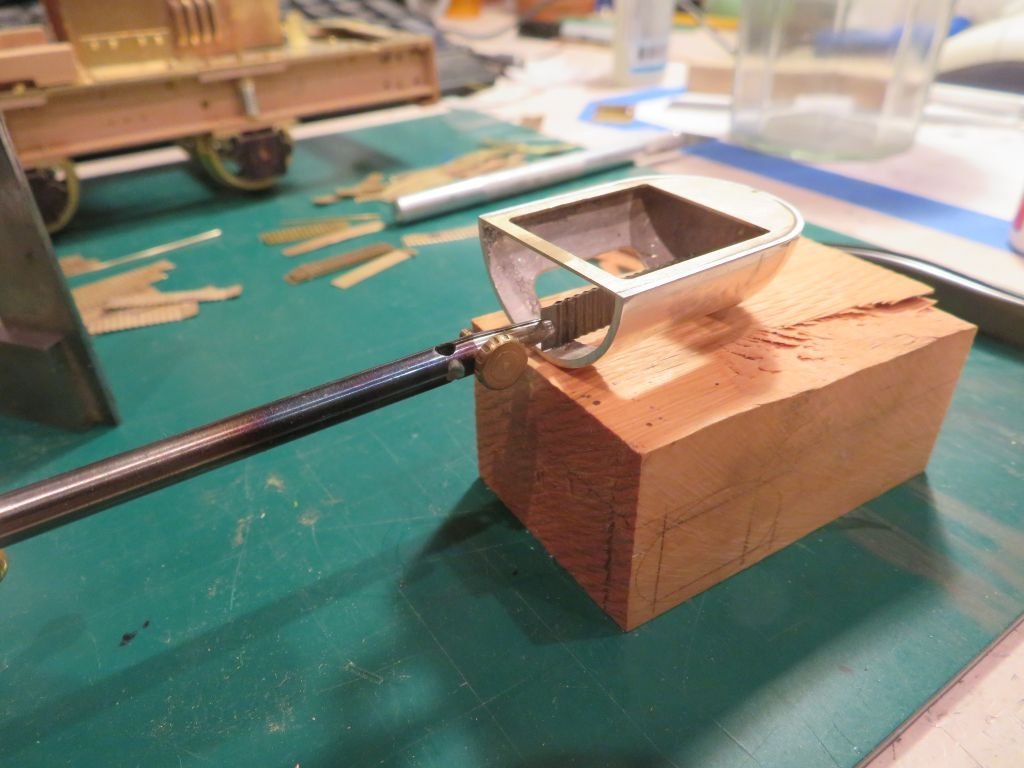
The leaves are now glued in to form the core. I will add a smear of epoxy to seal it all together. and from the outside There is a few bits to the engine, it will be simple and from wood and plastic. It wont be anything like a complex s the buffalo engine for Skipjack. now I can move on to the next challenge. Michael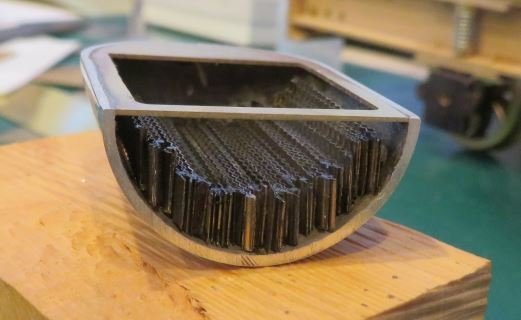
- 49 replies
-
- 12
-
-
When I saw this picture It had not clearly registered how small all this stuff is.... then the picture looking down onto the bow and workbench it clicked. Wow that is some fine work there Rob! Michael
- 3,560 replies
-
- 4
-
-
- clipper
- hull model
- (and 2 more)
-
Jut found this Nils a great looking start, as you have probably realized these types of vessels are my favorites, I shall follow along. Michael
- 180 replies
-
- 1
-
-
- pilot boat
- Elbe 5
- (and 3 more)
-
Rob superb work it just keeps getting better. Michael
- 3,560 replies
-
- 2
-
-
- clipper
- hull model
- (and 2 more)
-
Metal bashing
michael mott replied to michael mott's topic in Metal Work, Soldering and Metal Fittings
A bit of gluing today The first section was held in place with the old third hand. I used some medium thickness ACC. I do find that my third hand is really handy sometimes😉 After the first one set up a simple task of slowly adding the next set of Leaves. I had to have a look at the texture. Feels good! Some more tomorrow. Michael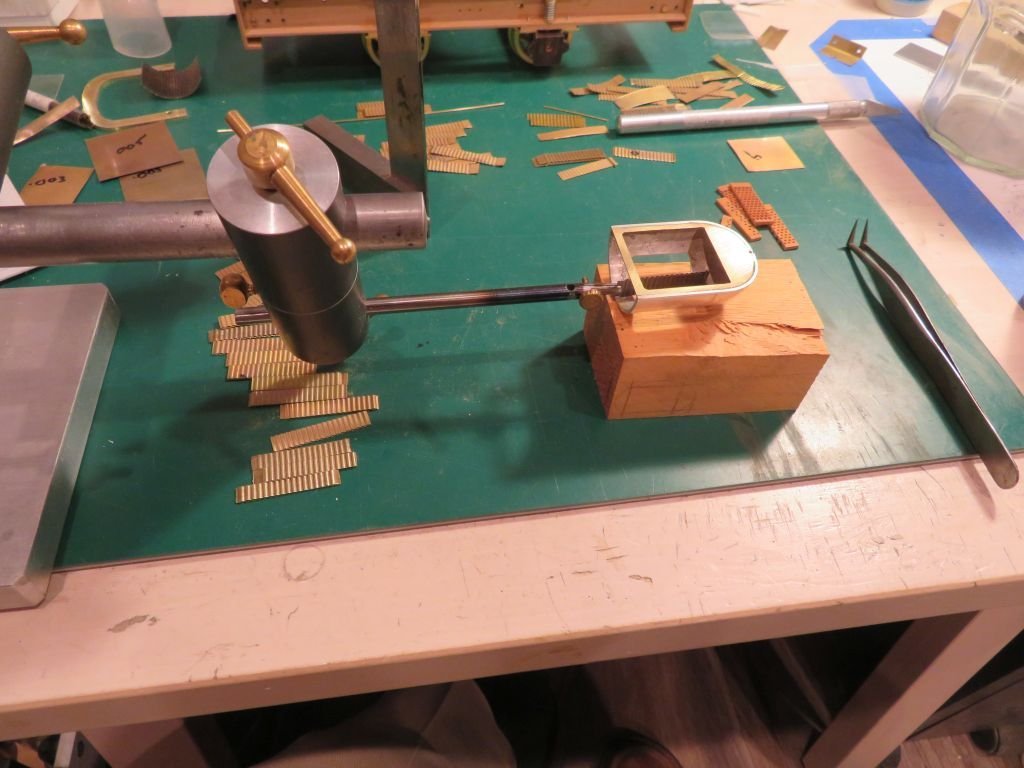
- 49 replies
-
- 12
-
-
-
Nice to see another cutter being built, as you say they are beautiful craft, one of these days I shall have to build a smaller one that can be displayed easily. I shall continue to follow along. Michael
-
Metal bashing
michael mott replied to michael mott's topic in Metal Work, Soldering and Metal Fittings
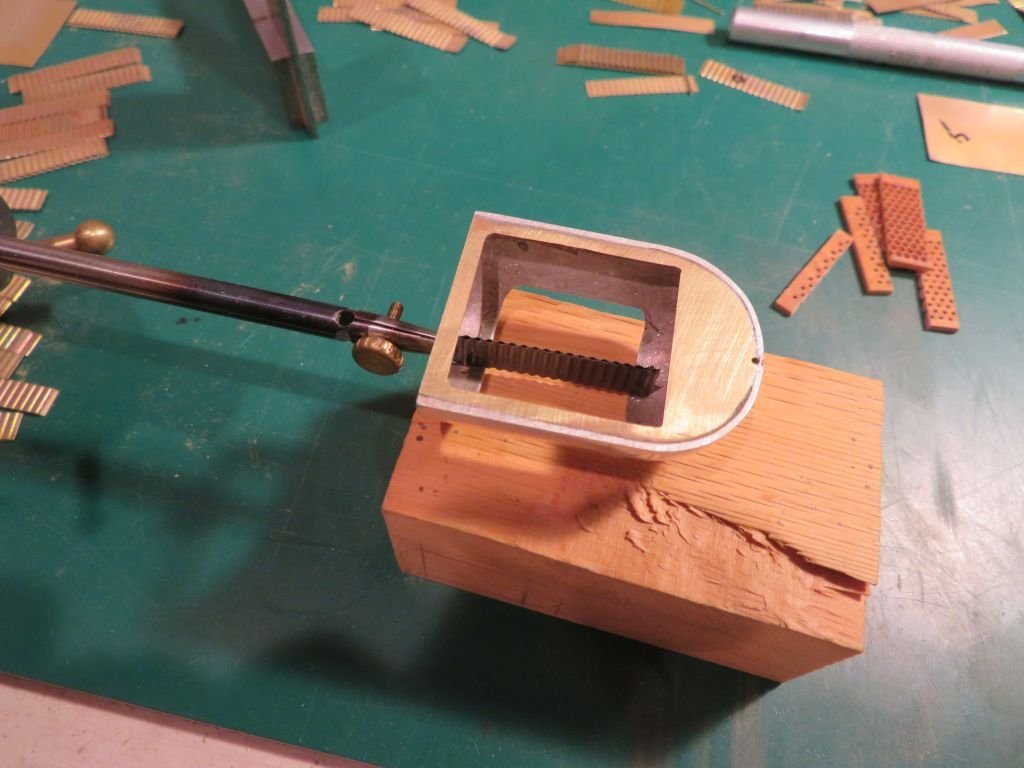
Hello all and thank you for your very kind remarks, Eberhard, I will definitely be able to apply this new knowledge about the punching into end grain with applications for my model boat building, if it works for hexagons it will also work for squares. watch this space for that. Reggiemon, thank you, my hands have healed. At the moment my mind is hurting, everyone in the world knows why. I will get back to some boat modeling soon enough. Rob As I do not have any of my own copyright pictures here is a link to the bullnose radiator images on Google, by simulating the core the appearance moves beyond a simple screen, I think that there were a few of the radiators that used a screen in front of the core but many did not. My representation will be a compromise in actual accuracy but it hopefully will emulate the correct look. Druxey, thank you, I do enjoy receiving and sharing knowledge. Harshil, thanks I hope I can apply the principle in some boats. Michael -
Lovely work on the furled sails Rob, they are very realistic looking. Michael
