Supplies of the Ship Modeler's Handbook are running out. Get your copy NOW before they are gone! Click on photo to order.
×


Siegfried
-
Posts
153 -
Joined
-
Last visited
Content Type
Profiles
Forums
Gallery
Events
Everything posted by Siegfried
-
 Hello Gerald, very interesting project. Seeing a sailing vessel afloat; I am sure I am not the only one here on this forum who's heart goes on to see this. Thanks for sharing this pictures. Daniel
 -
Hello Russ, wonderful build. It is a good example how interesting a little tiny vessel can be for modellers. Bravo. Daniel
-
Hello Jim, I found your log at least. What a great idea to build a vessel with a personal link to your family's history. I lean back and am keen to see further progress. May I ask you from which source/ship you've got the equivalent lines? It would be of a great interest. Daniel
-
Maravilloso, Carlos! A great build, especially your cutter looks great. Daniel
-
Thanks Russ, it is fiddly. And I did 7-8 layers of thin paints to get a deep white result. Daniel


-
HMS SUSSEX 1693 by 8sillones
Siegfried replied to 8sillones's topic in - Build logs for subjects built 1501 - 1750
What an extraordinary carving job. Verry impressive! Daniel -
One fine ship, Nils. a real beauty. Daniel
- 2,625 replies
-
- 4
-

-
- kaiser wilhelm der grosse
- passenger steamer
- (and 1 more)
-
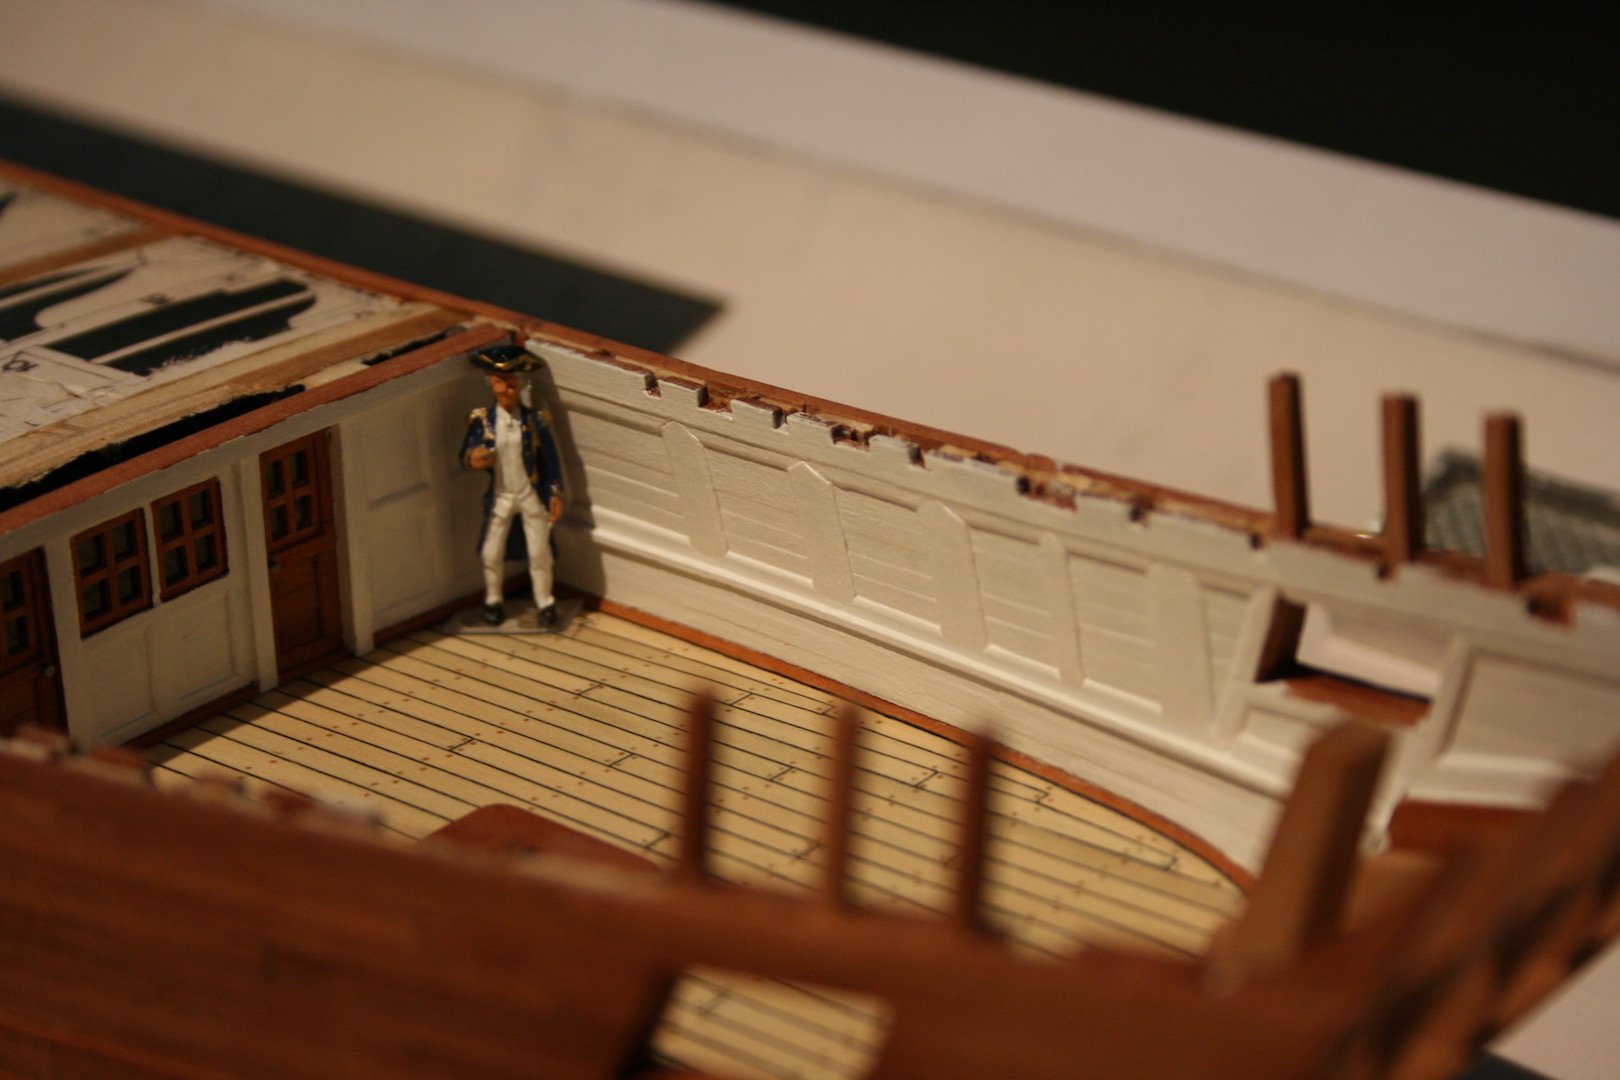
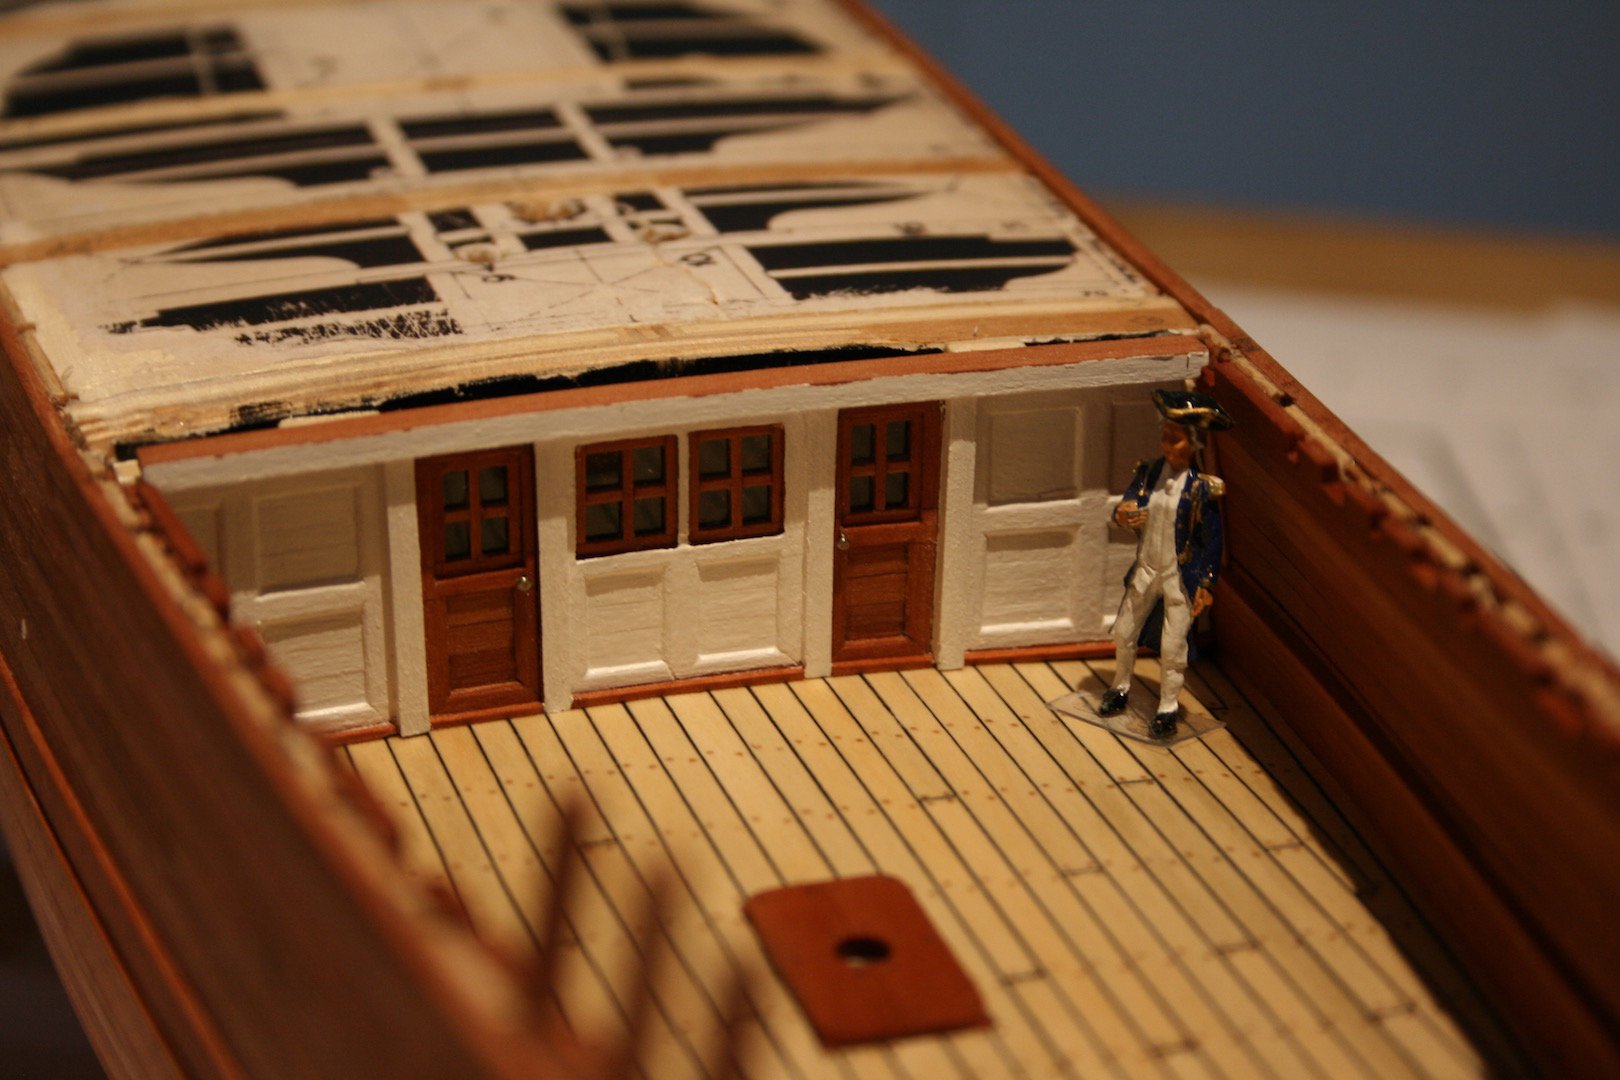
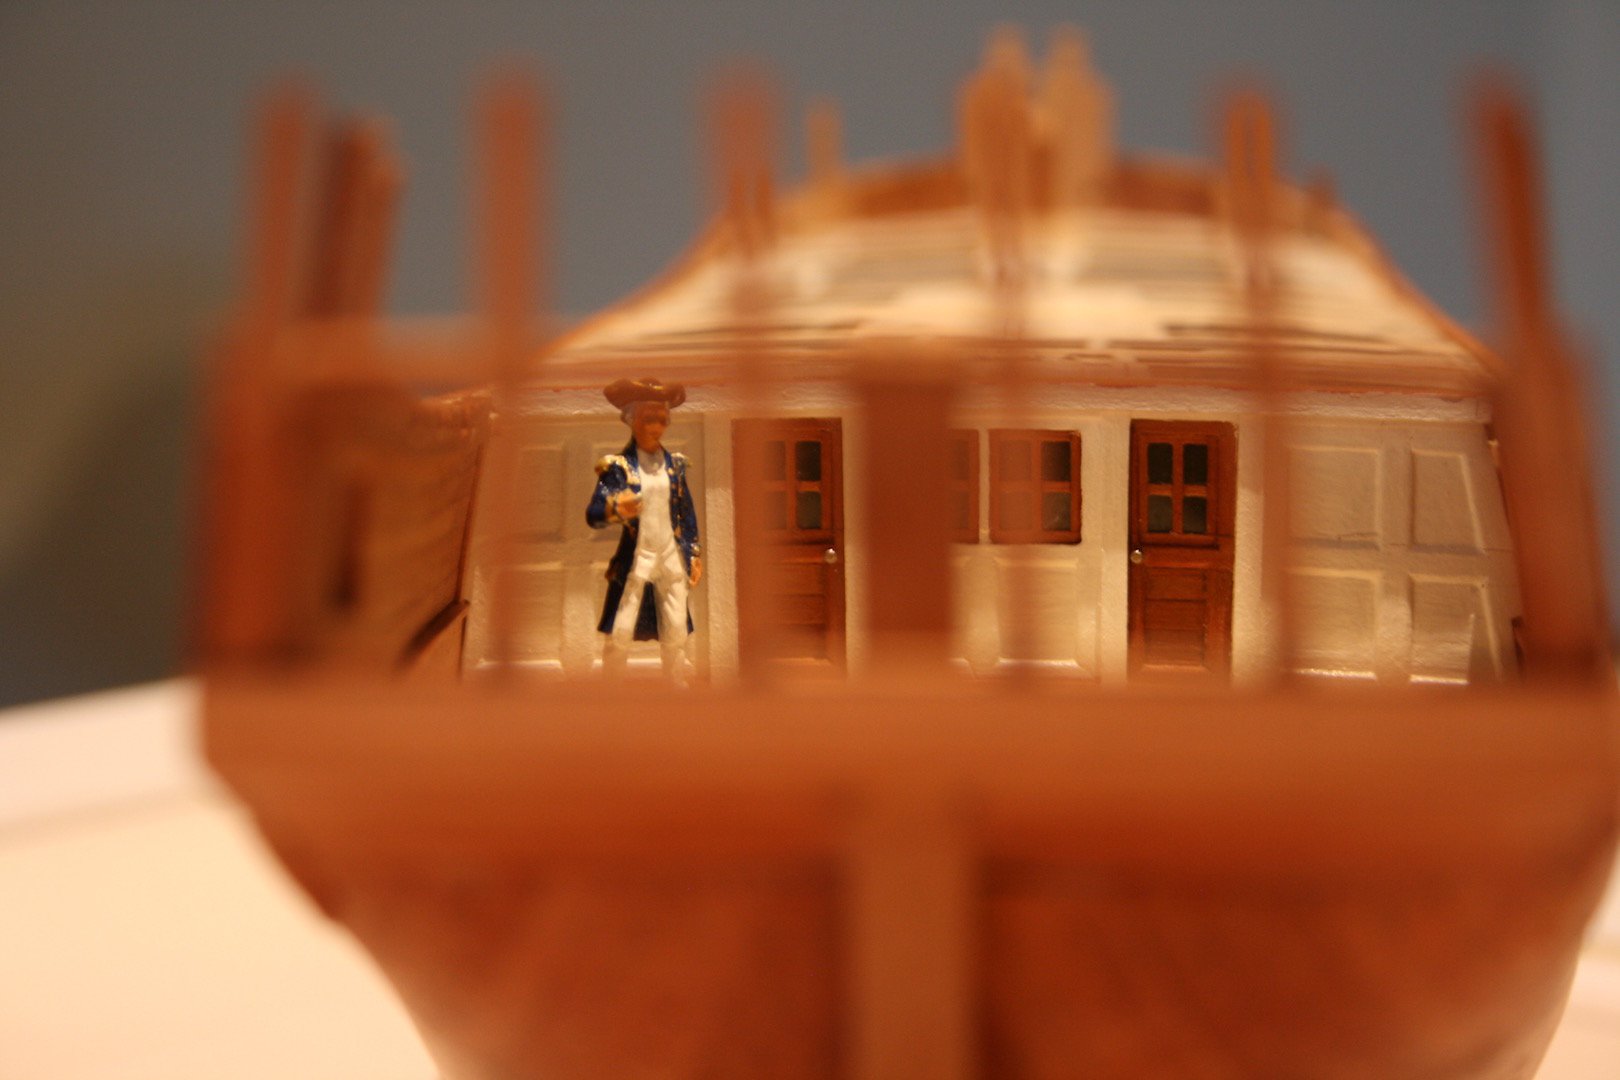
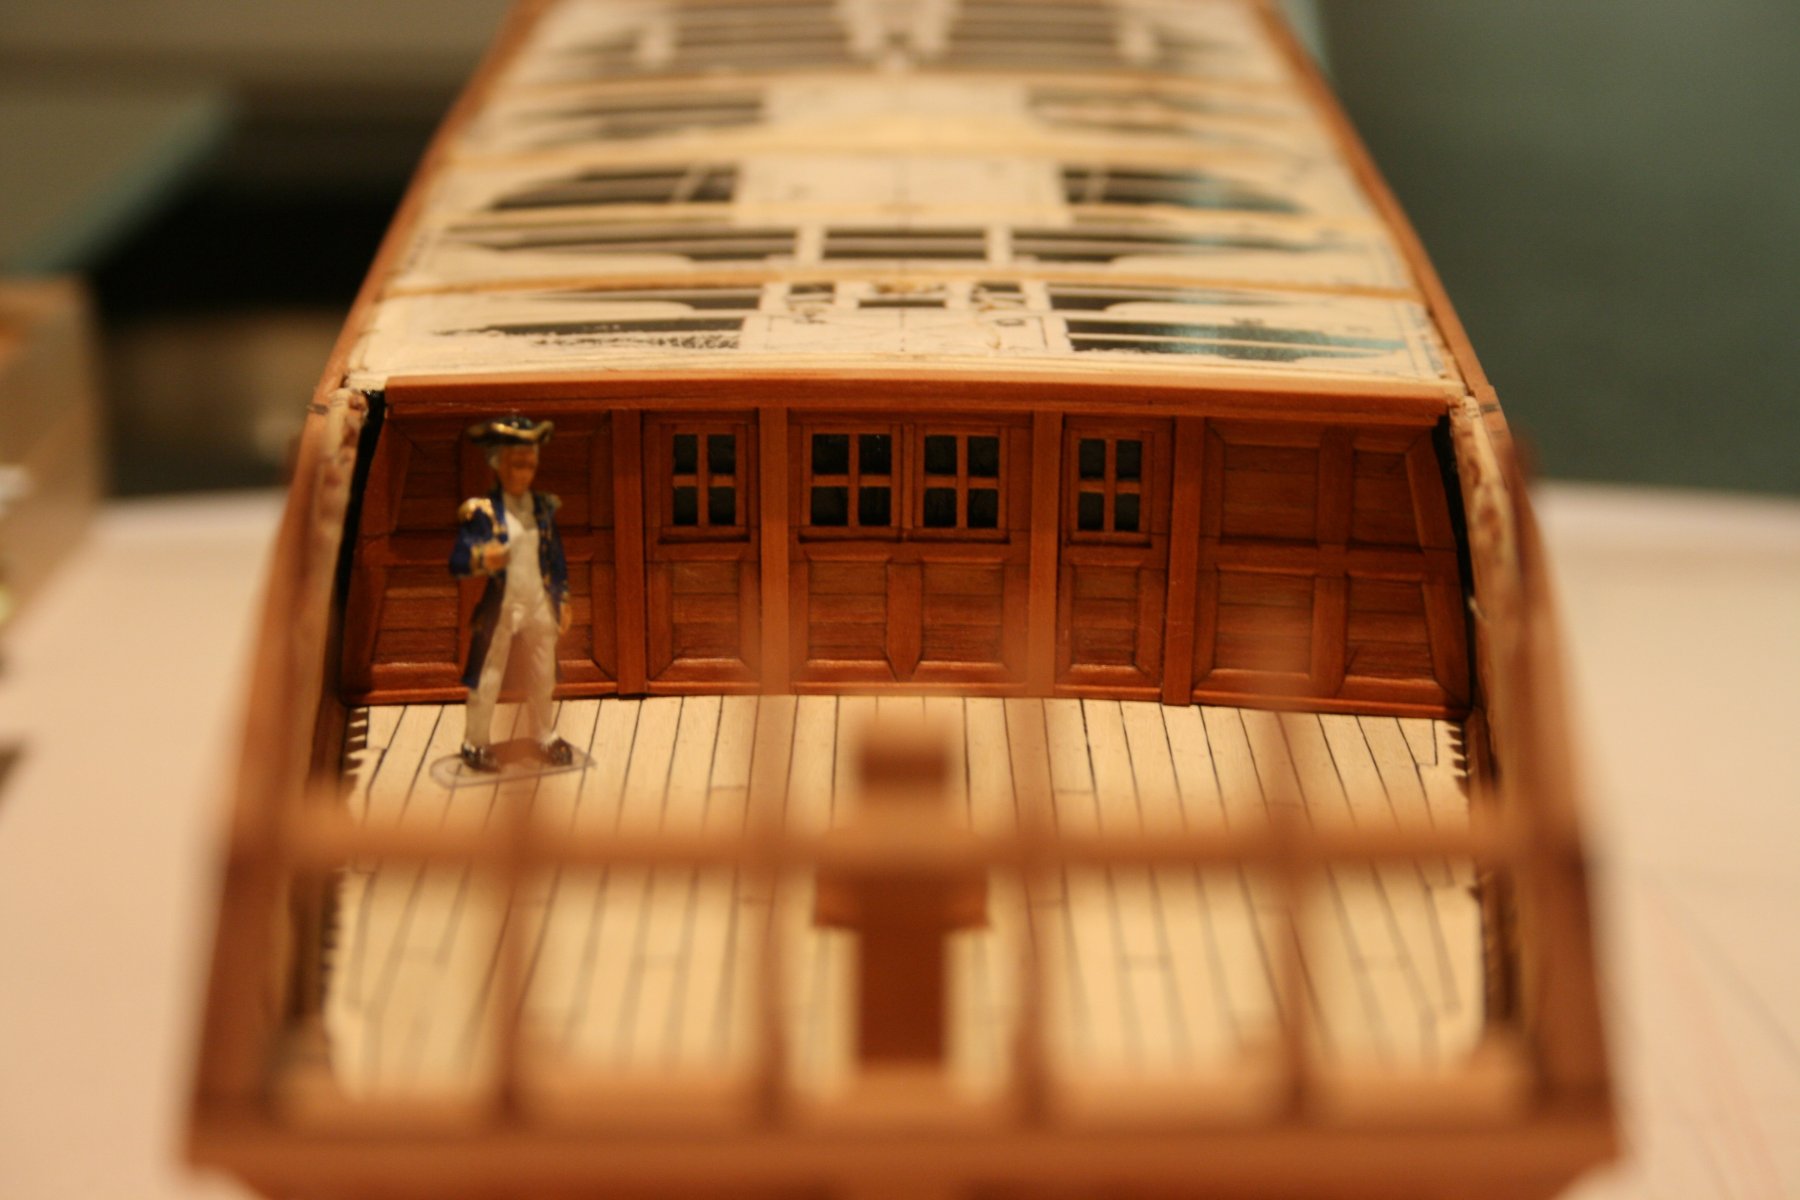
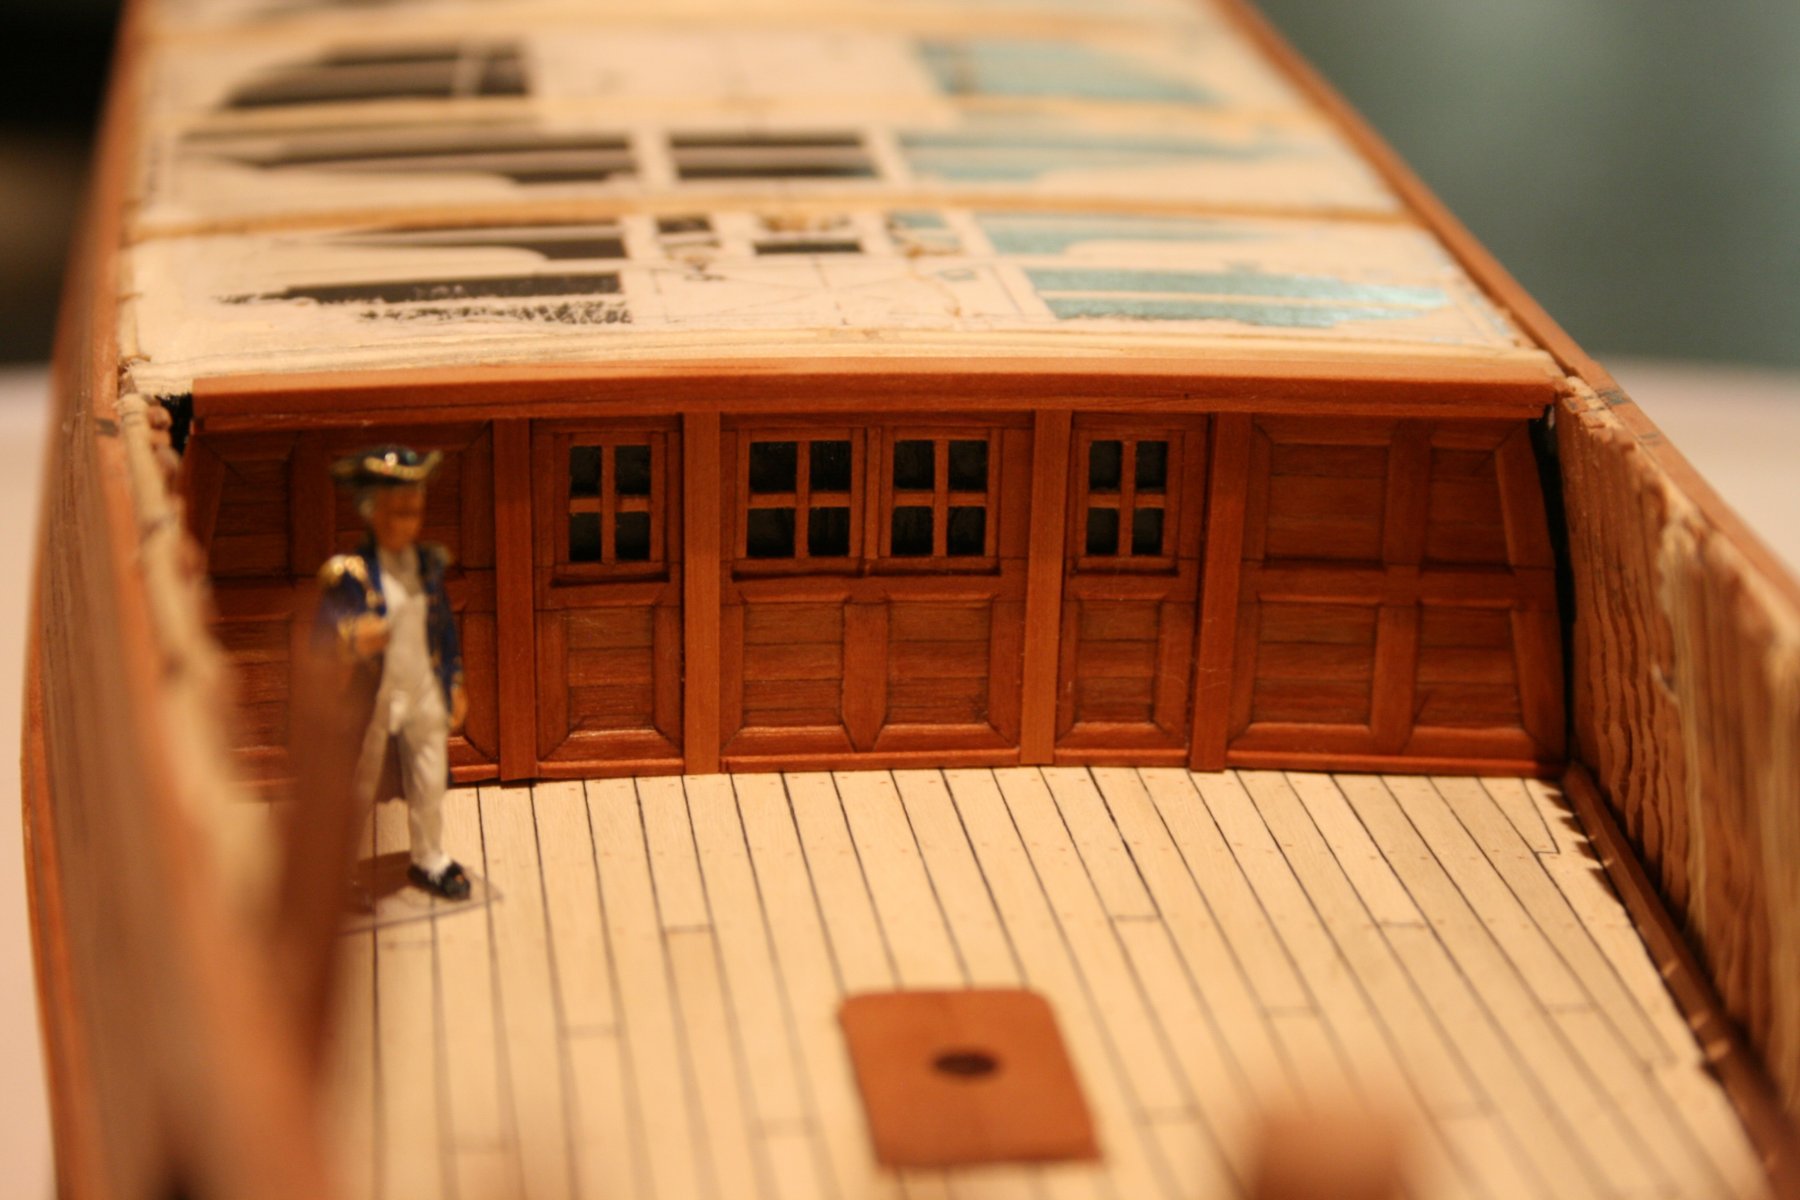
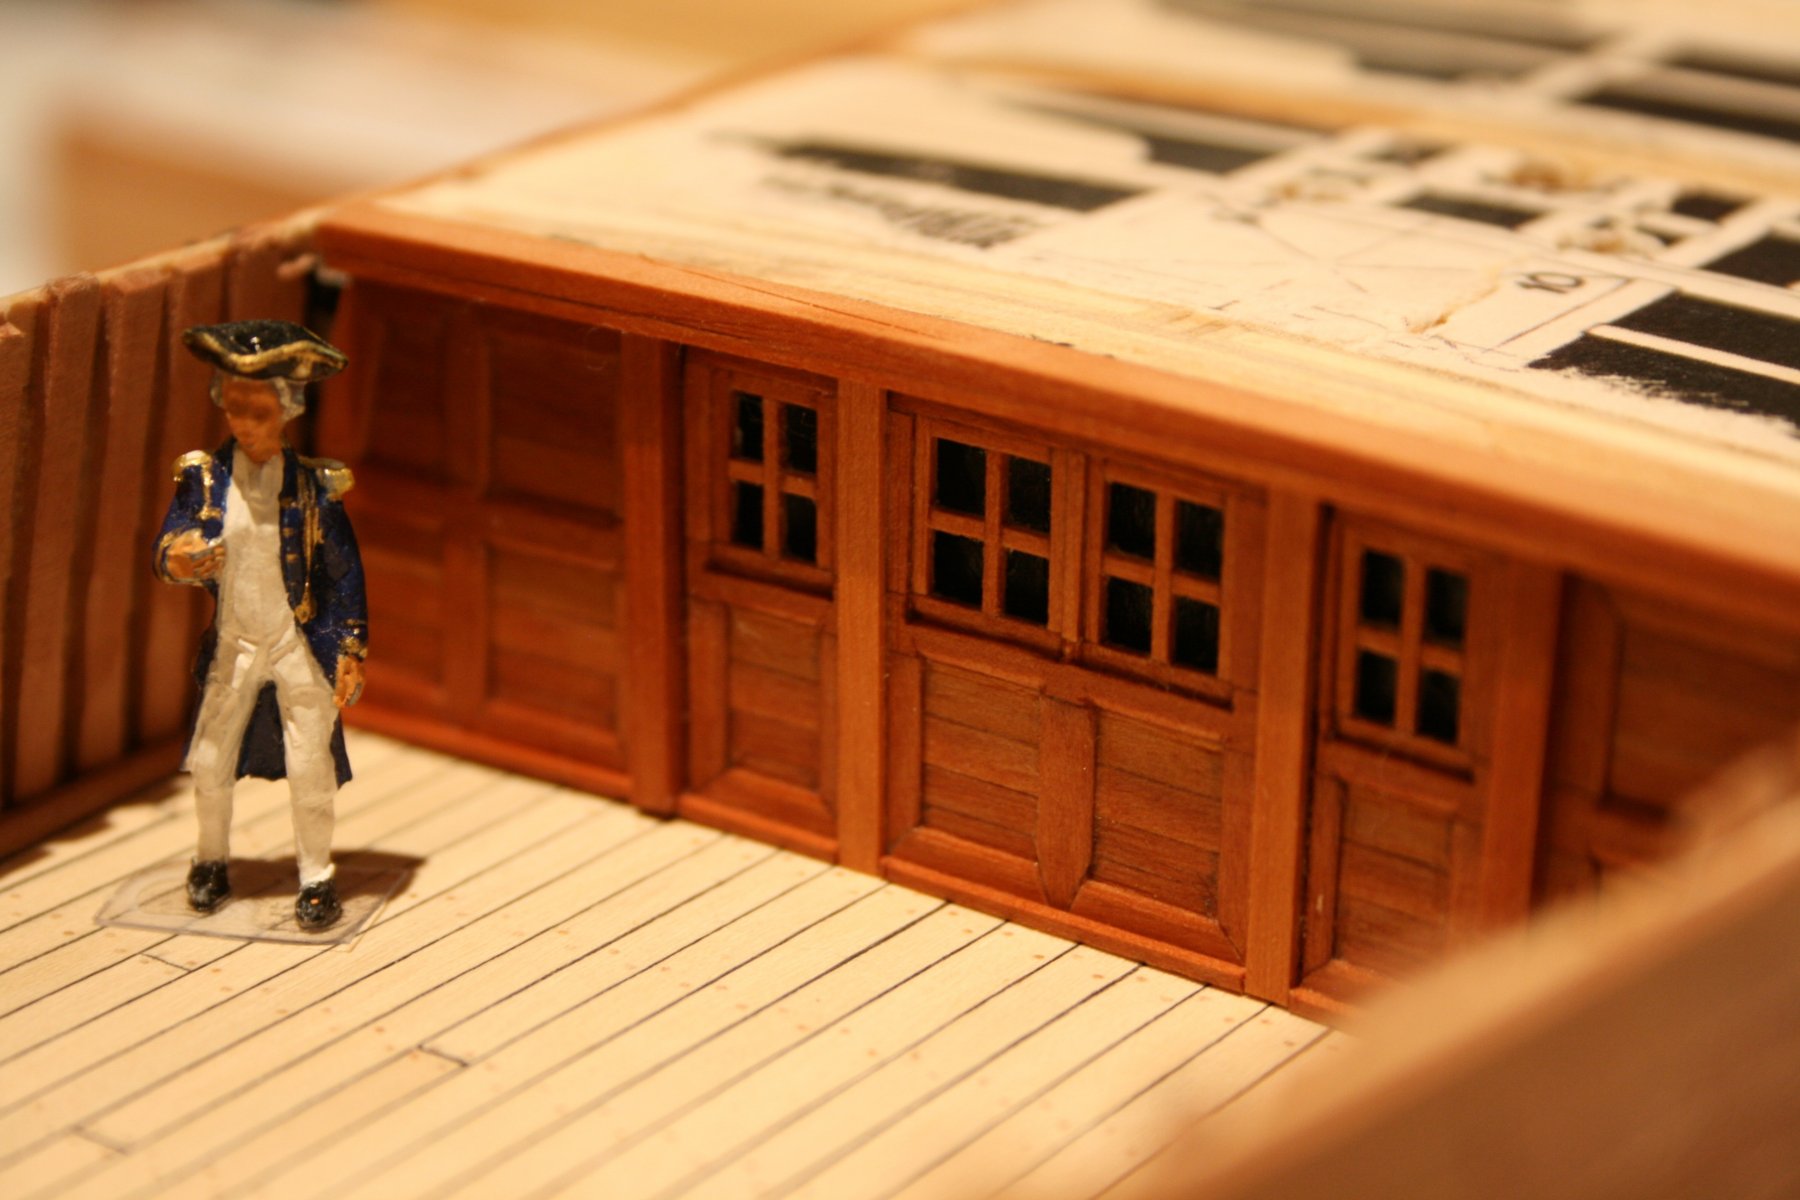
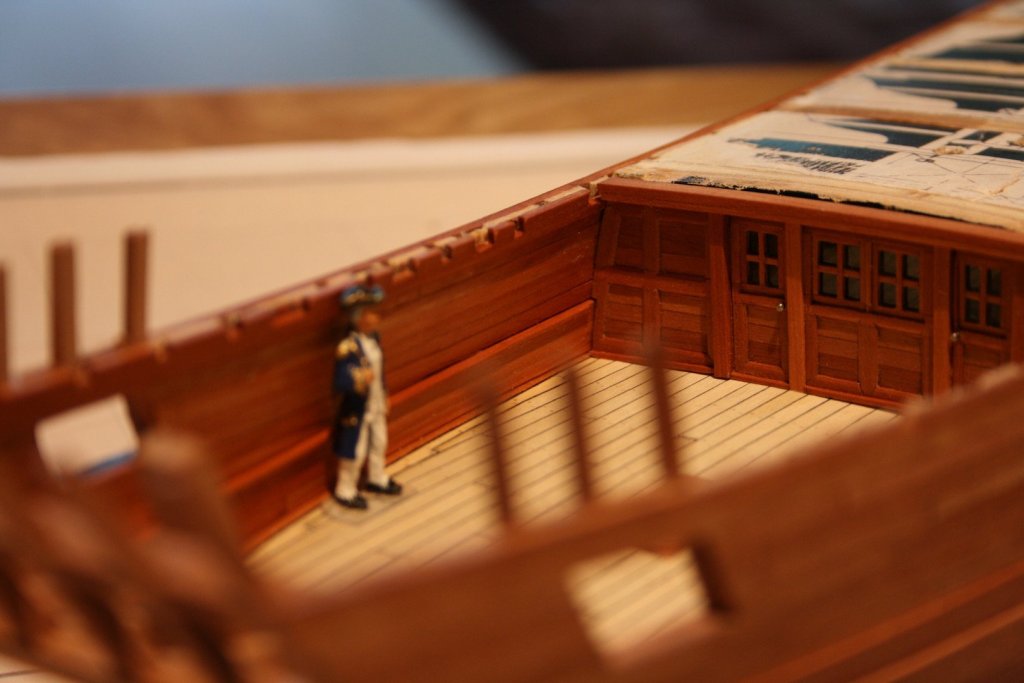
Thanks Russ, Meanwhile I did some progress on the starboard quickwork and decided to paint the cabin white, as it probably really was. Next step is the panelling of the rest of the cabin. Daniel


-
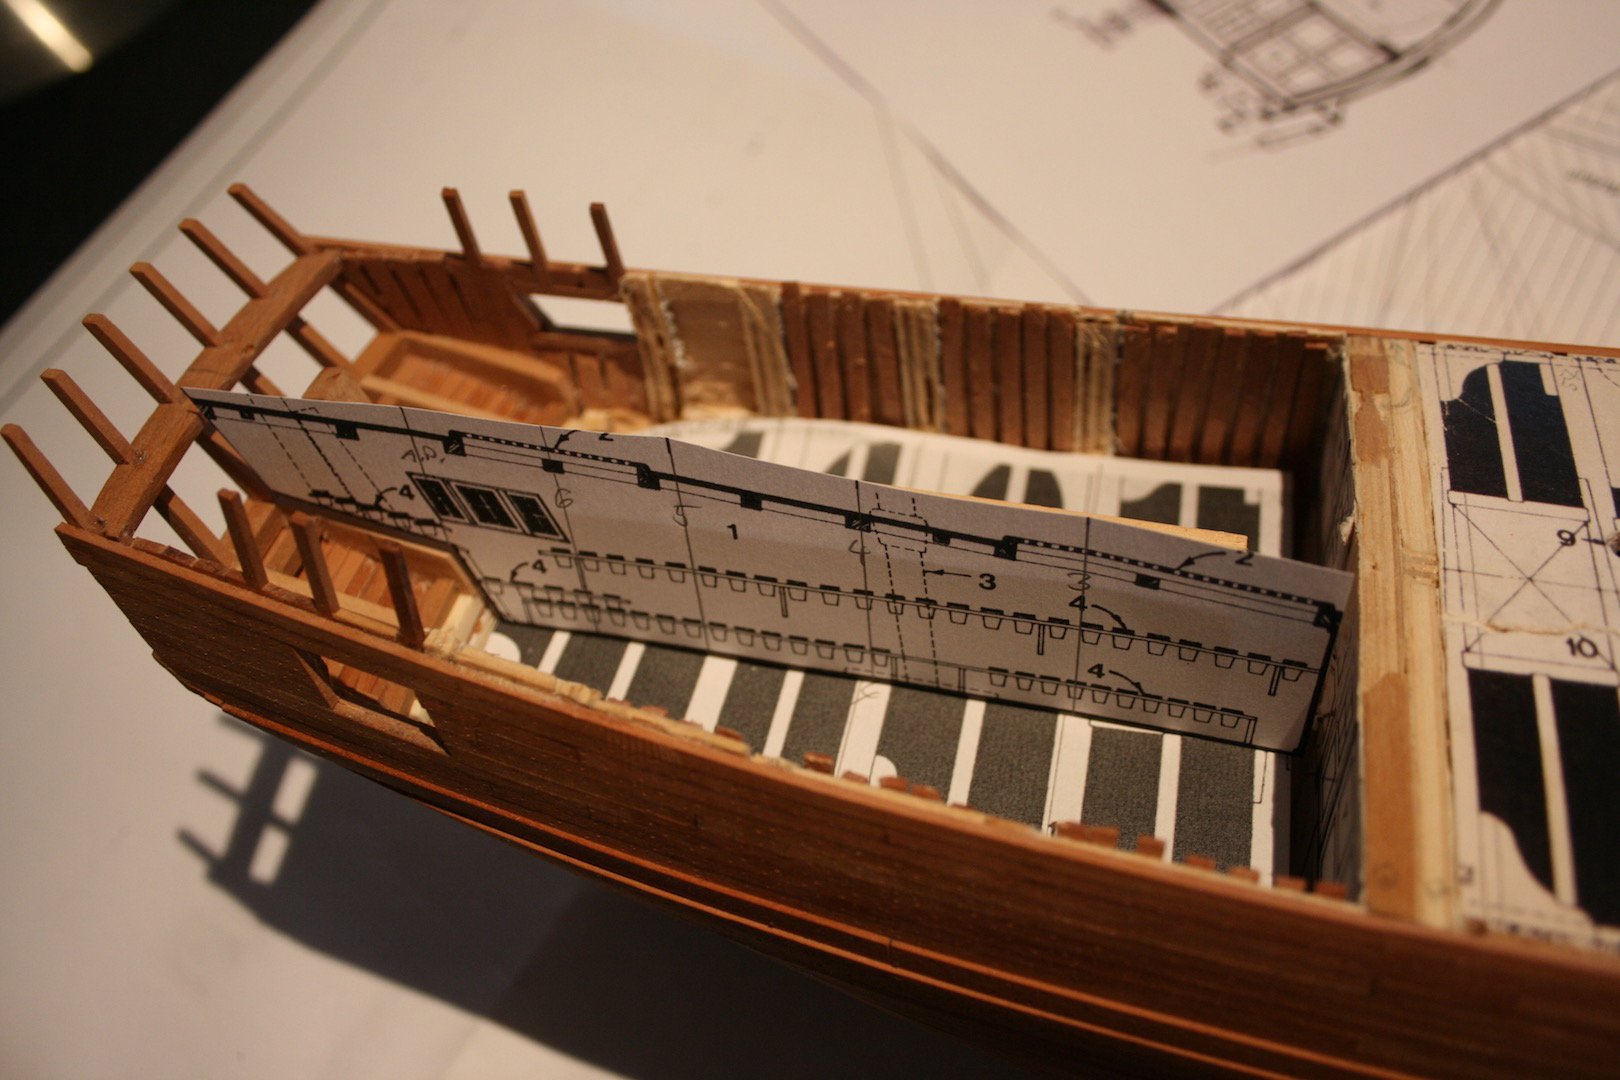
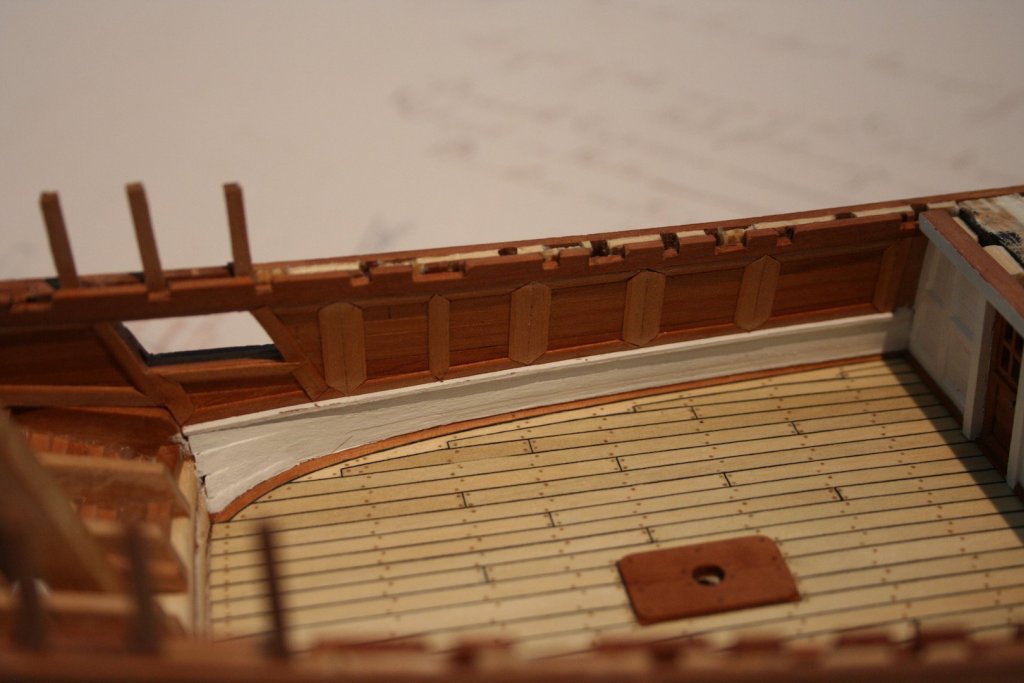
Hello Russ, You are right, we may never know the real appearance of the cabin. I did some research in my books and did some thinking about the logical options for the panelling. In the AOTS Bounty, the spirketting is noted with 3 strakes of 3in thickness (3/64 in 1-64 scale) whilst the quickwork for the inner planking is 2in thick only (1/32 in 1:64 scale). In correlation with the waterway there is no space to add some panelling onto the spirketting but on the quickwork. For the spirketting I've used two layers of 1/16 x 3/32 to get the bending at the stern in better shape. After a little sanding it became down to the matching thickness of 3/64. For the quickwork I used stripes of 1/32 x 3/32. When I will have finished the starboard planking of the cabin and finally fixed the partition panelling I will think about the panelling layout in correlation to the deck beams. As usual; one step after the next. Daniel


-
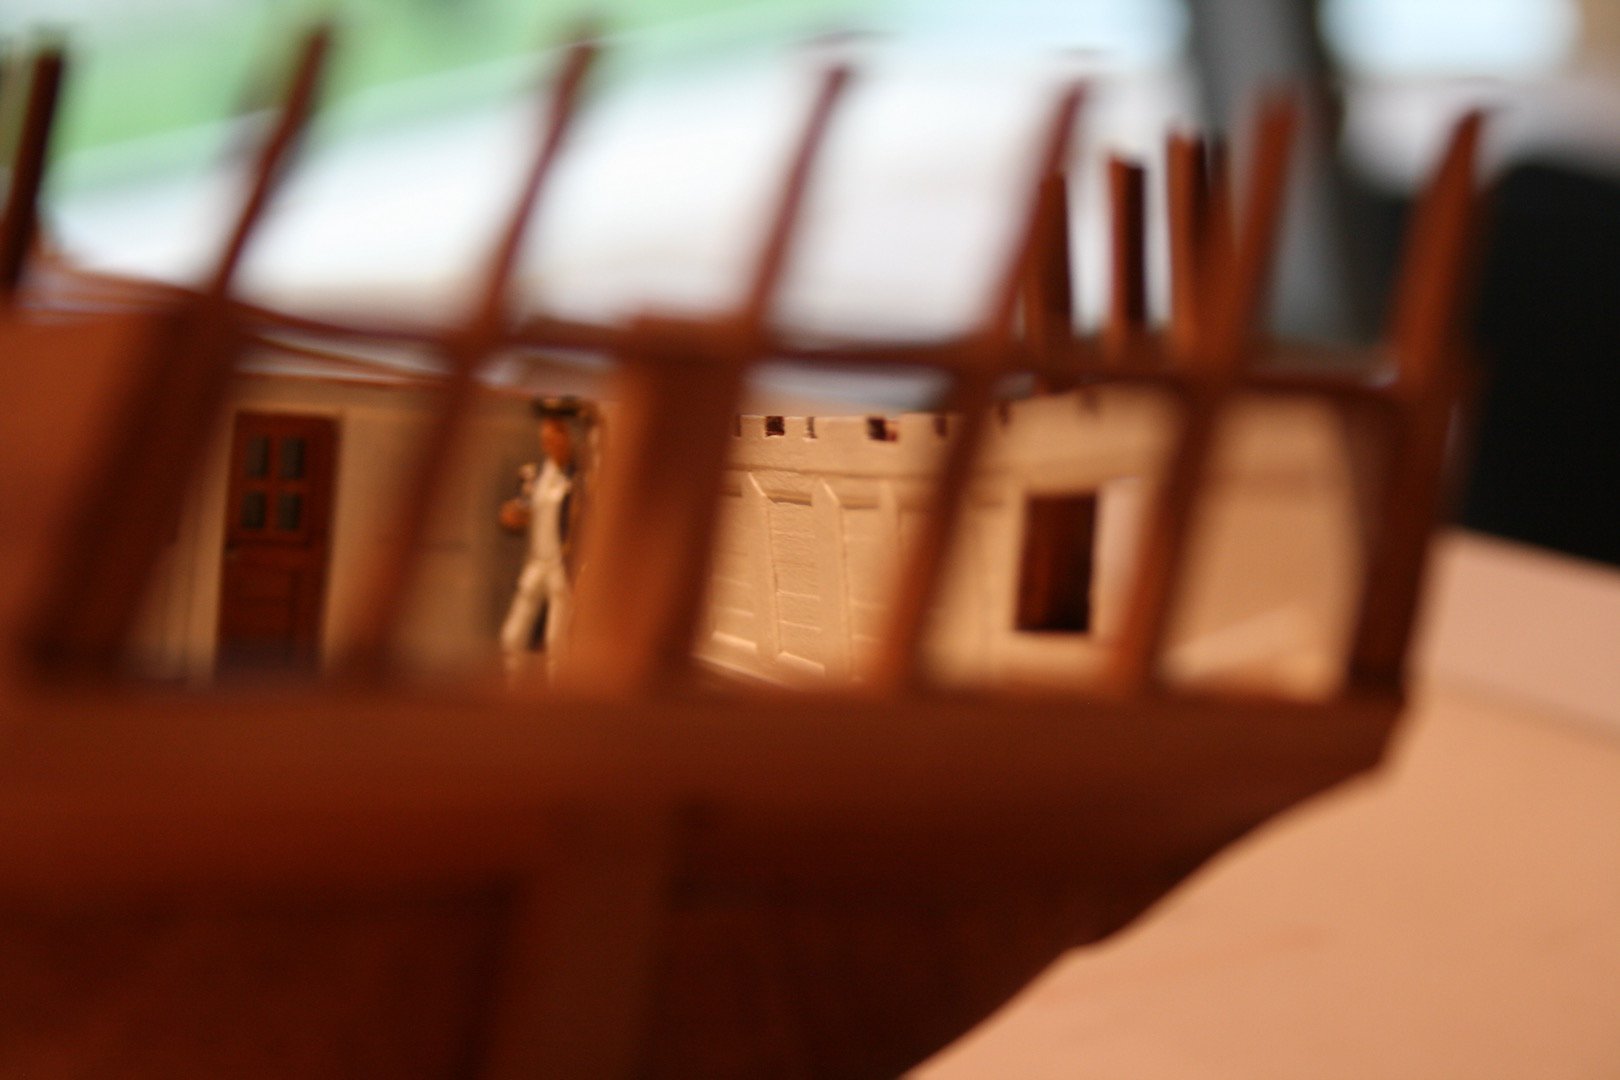
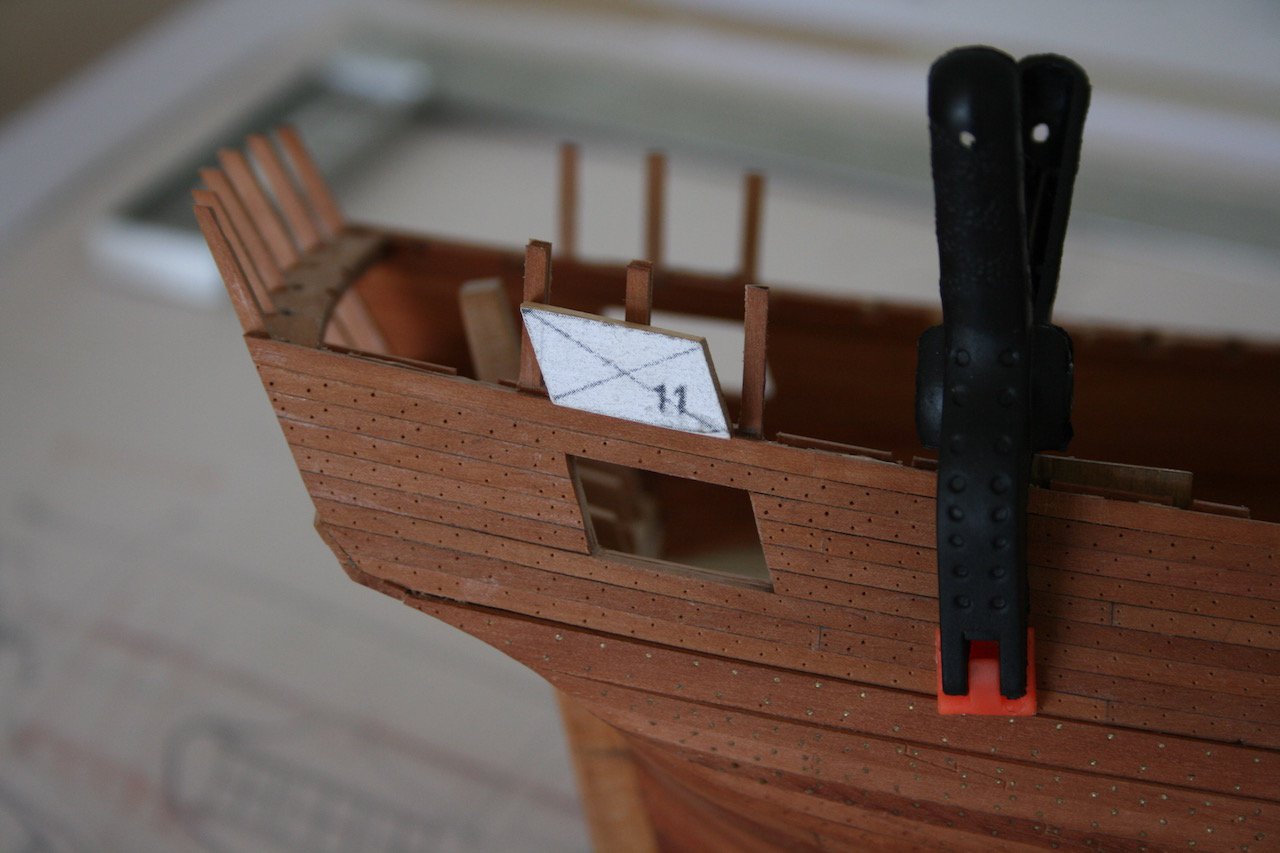
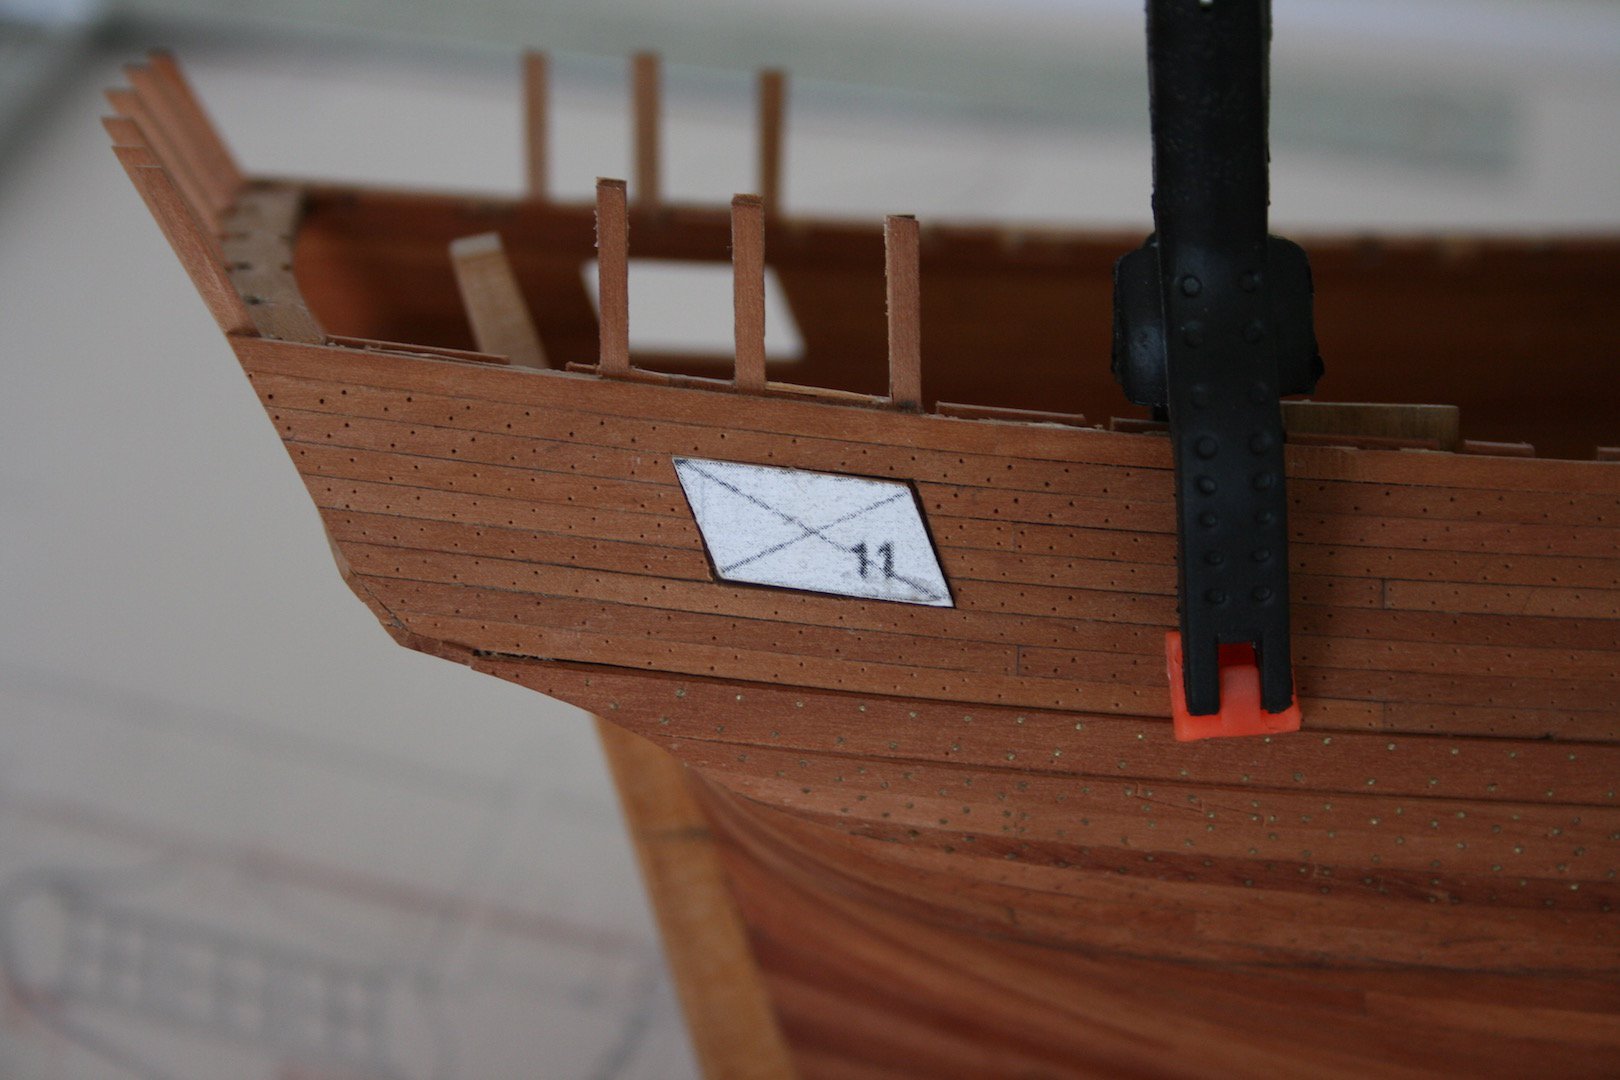
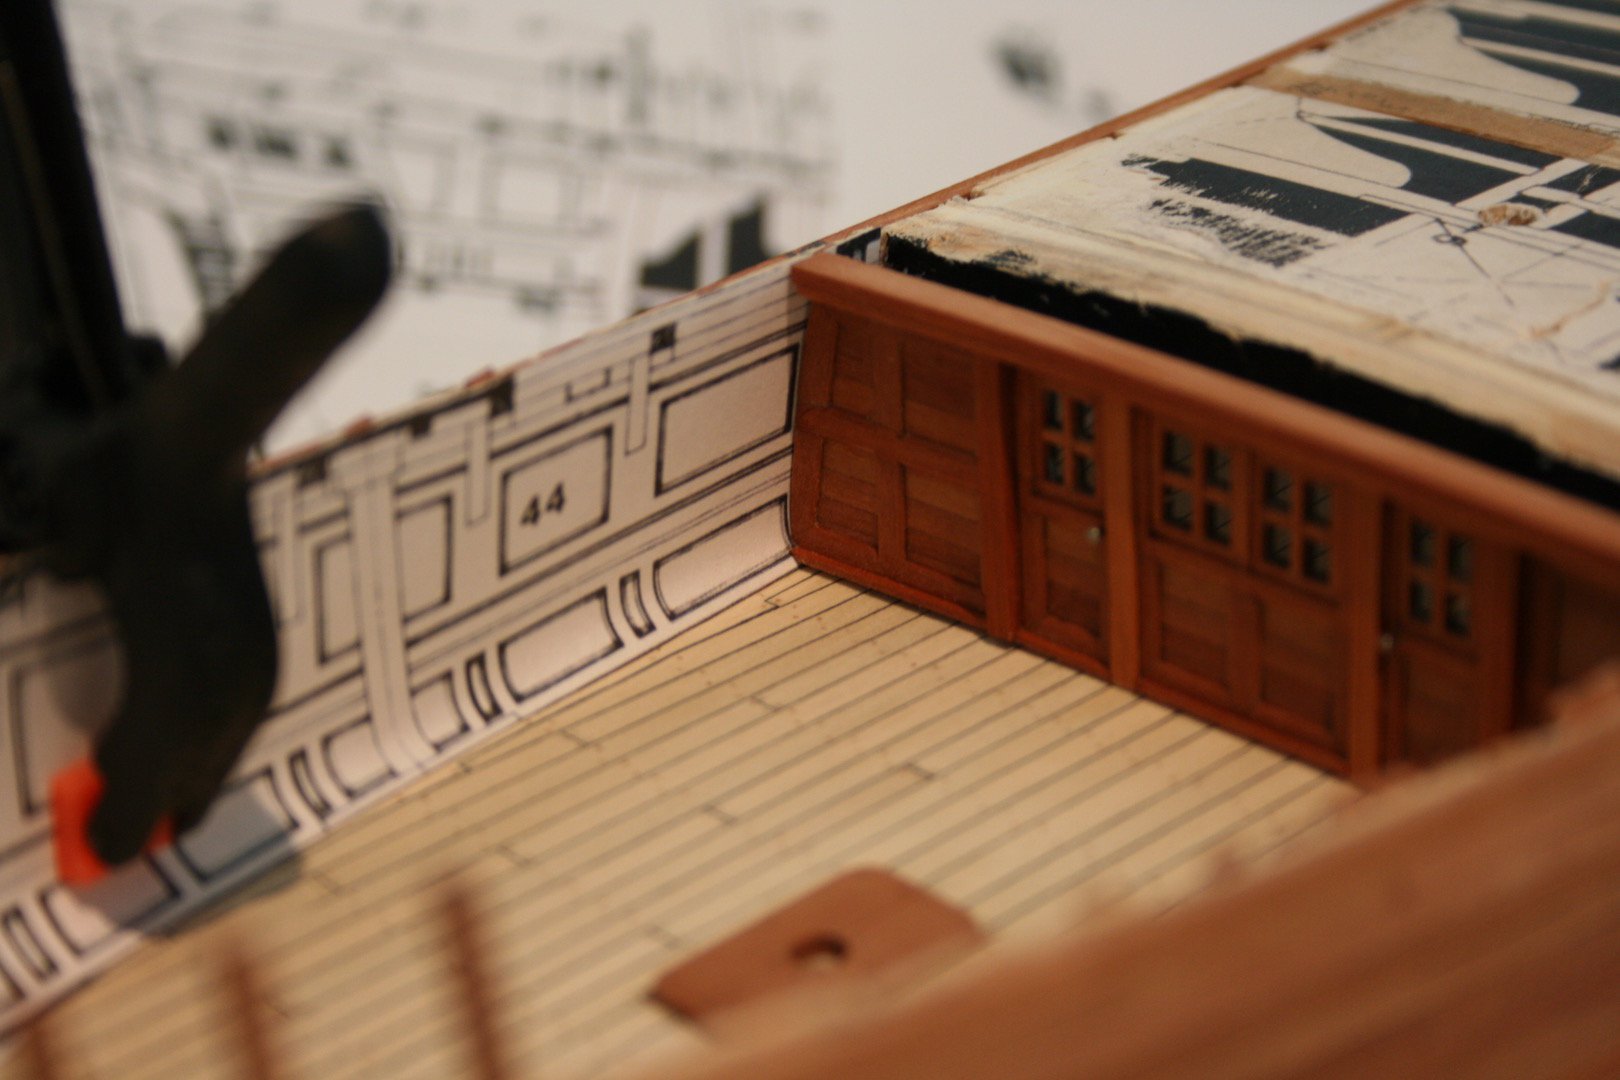
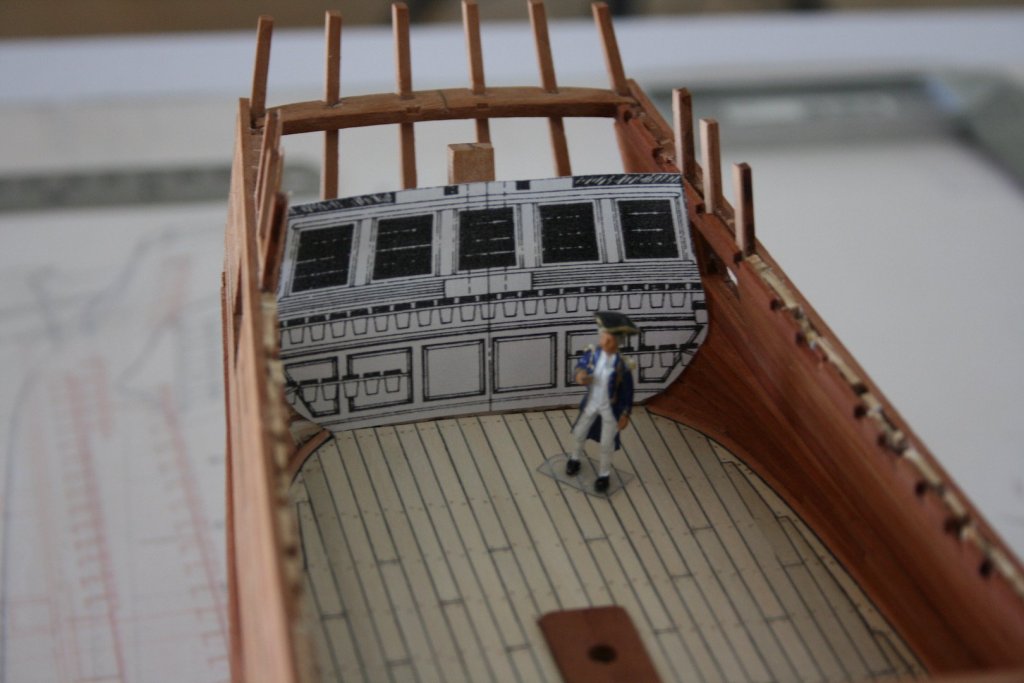
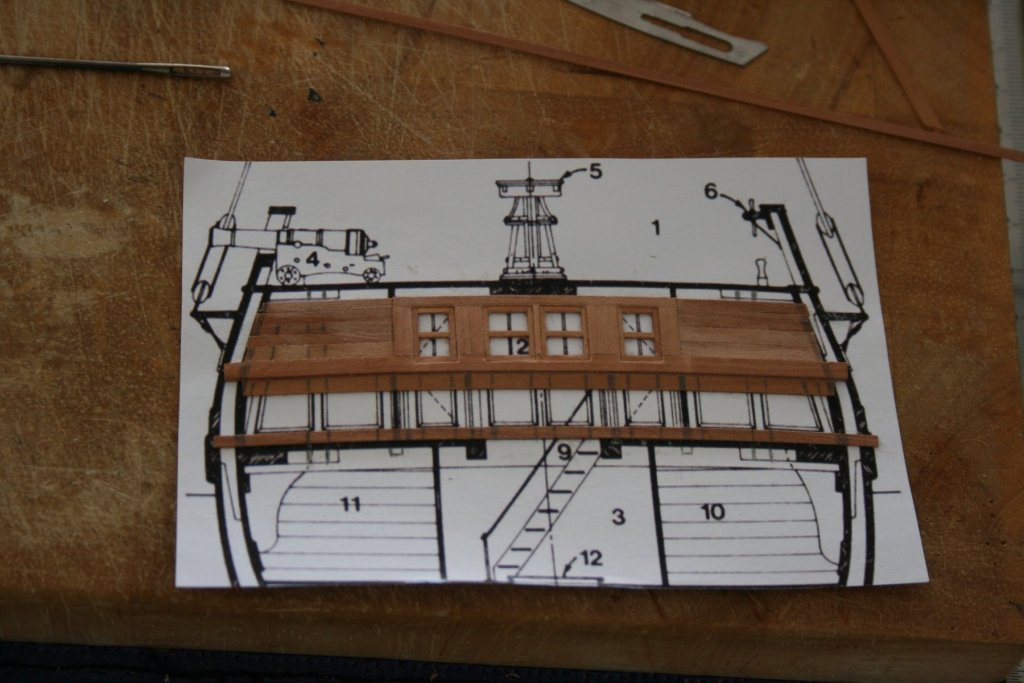
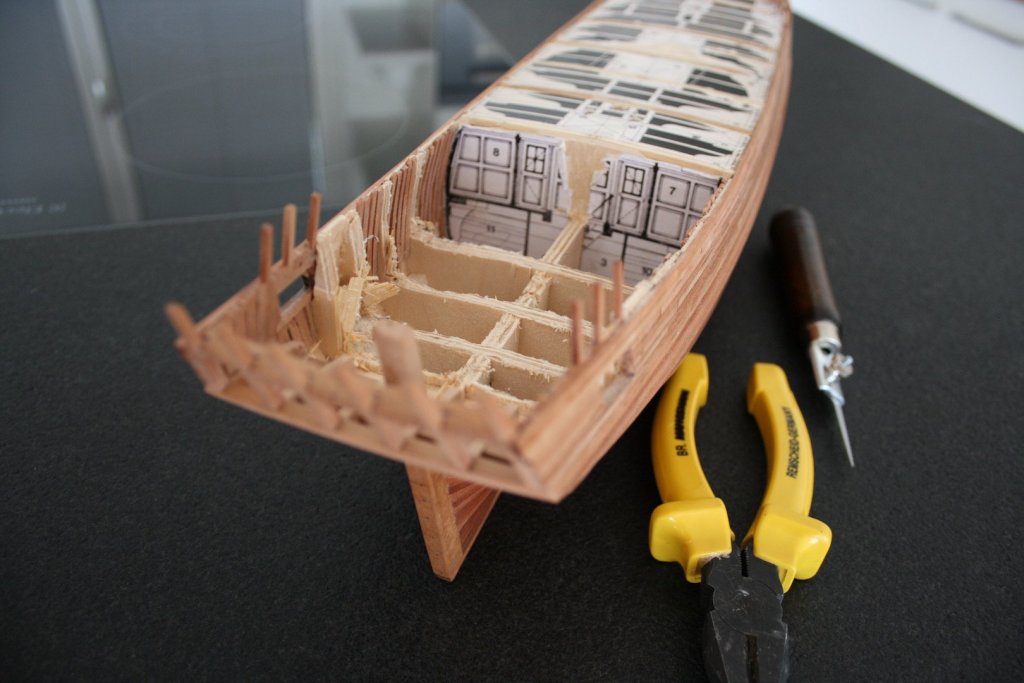
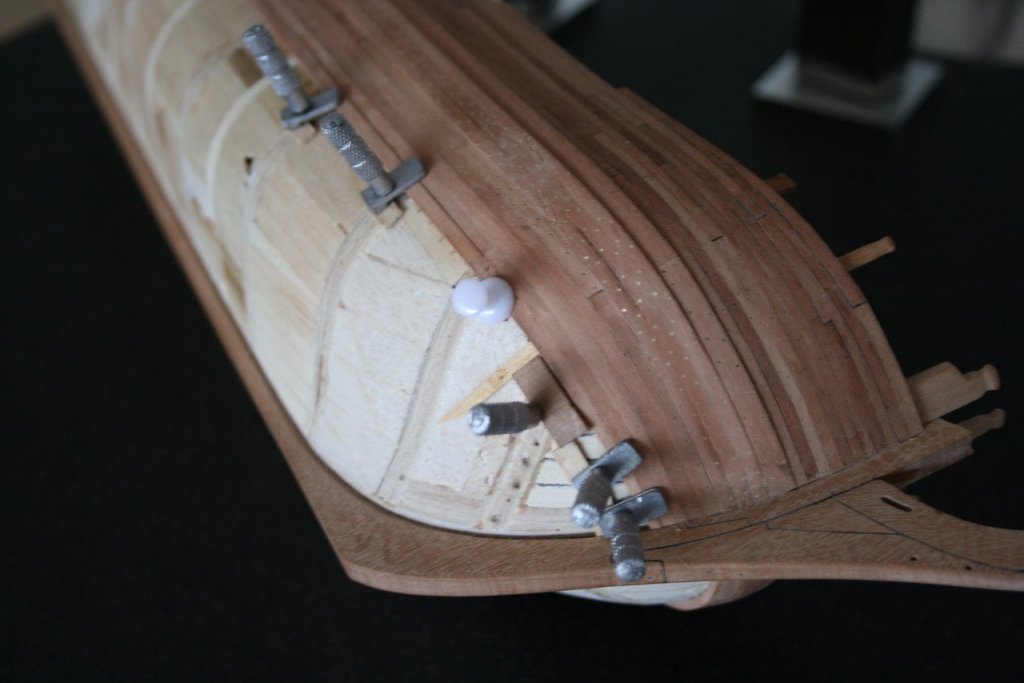
Hello, Next I am on to work on the inner planking of the great cabin. In his book AOTS Bounty McKay suggests additional paneling. Might it be real option or is this fiction? Additionally, his design for the inboard paneling does not correspond to his own design for the partition paneling as can be clearly seen on the second picture below. Sometimes all the information are up front but discrepancies became realised in the moment of doing. Has anyone an idea or recommendation regarding the inboard paneling? Thanks in advance, Daniel

-
Thanks Russ, This is exactly what I feel now. Daniel
-
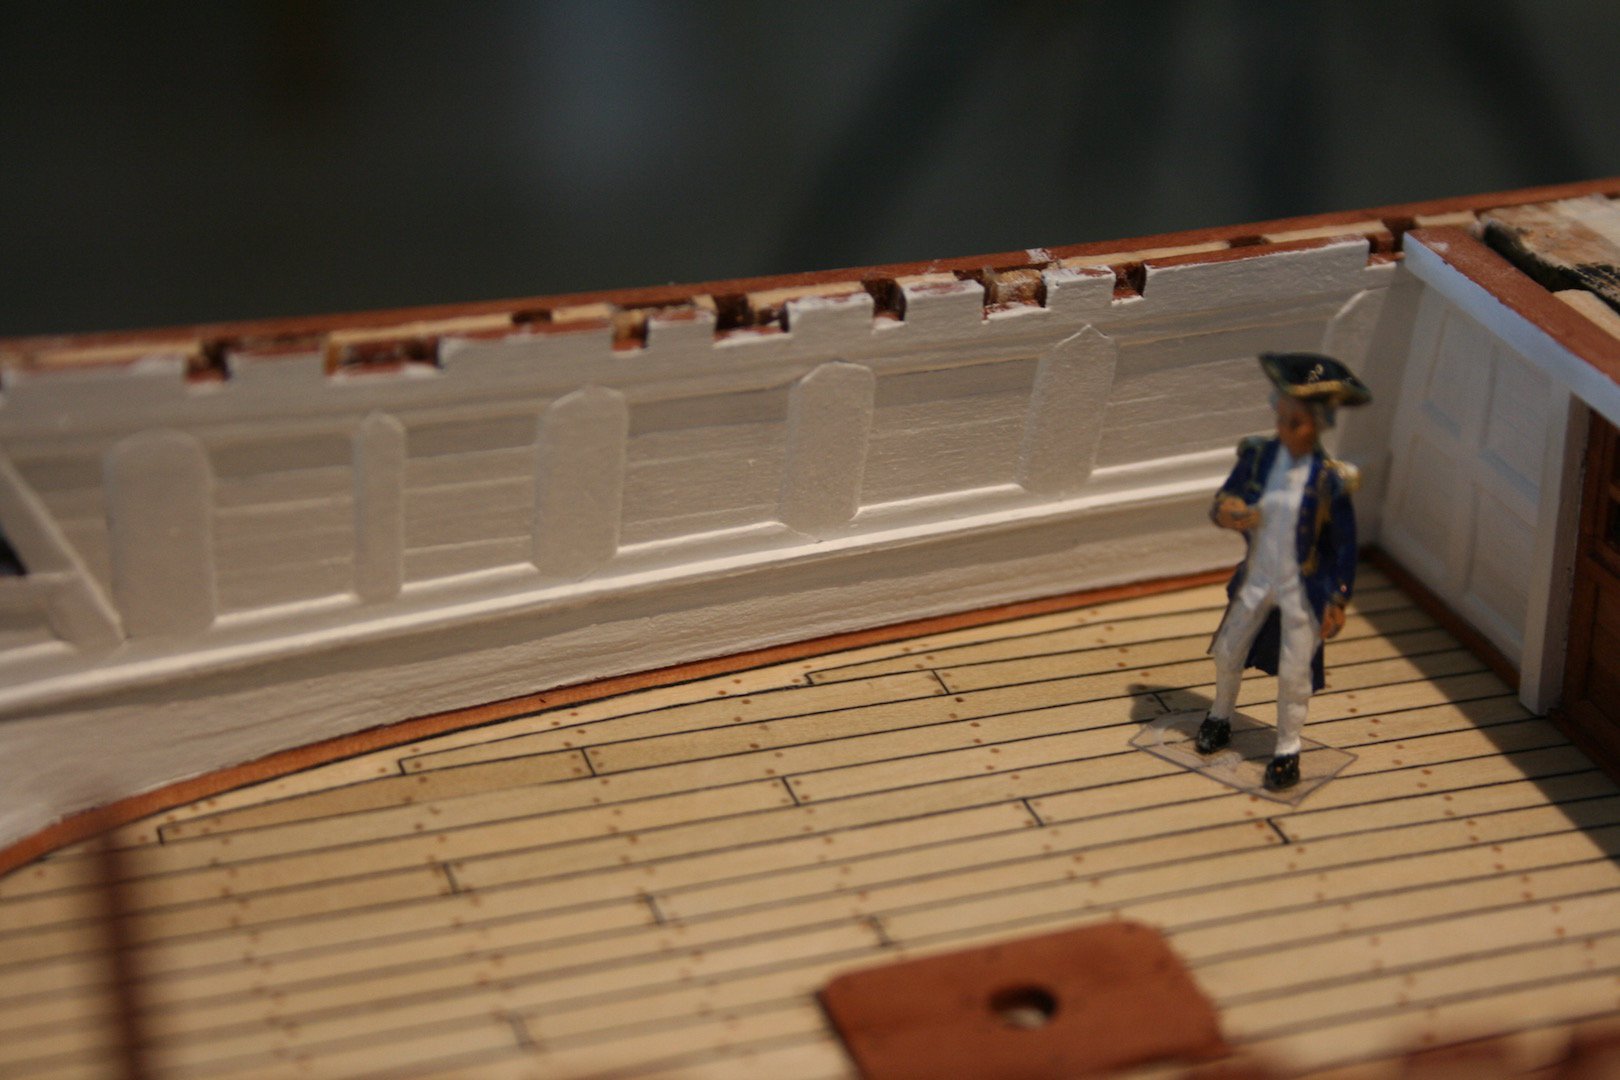
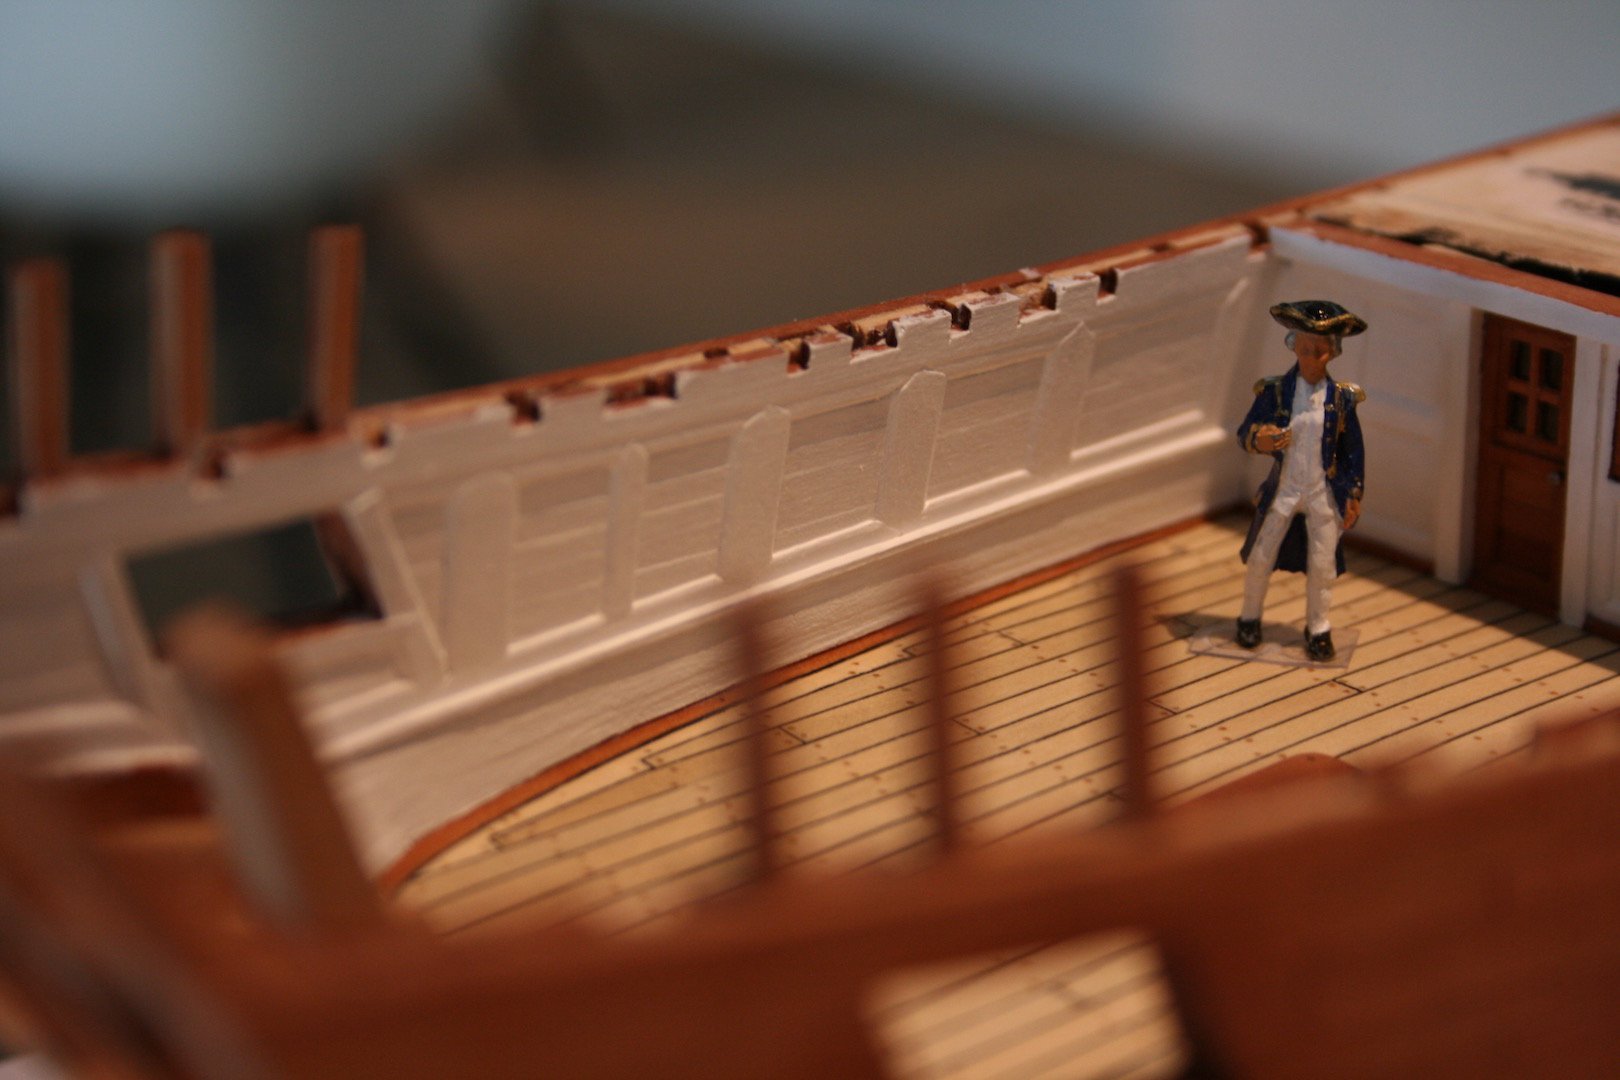
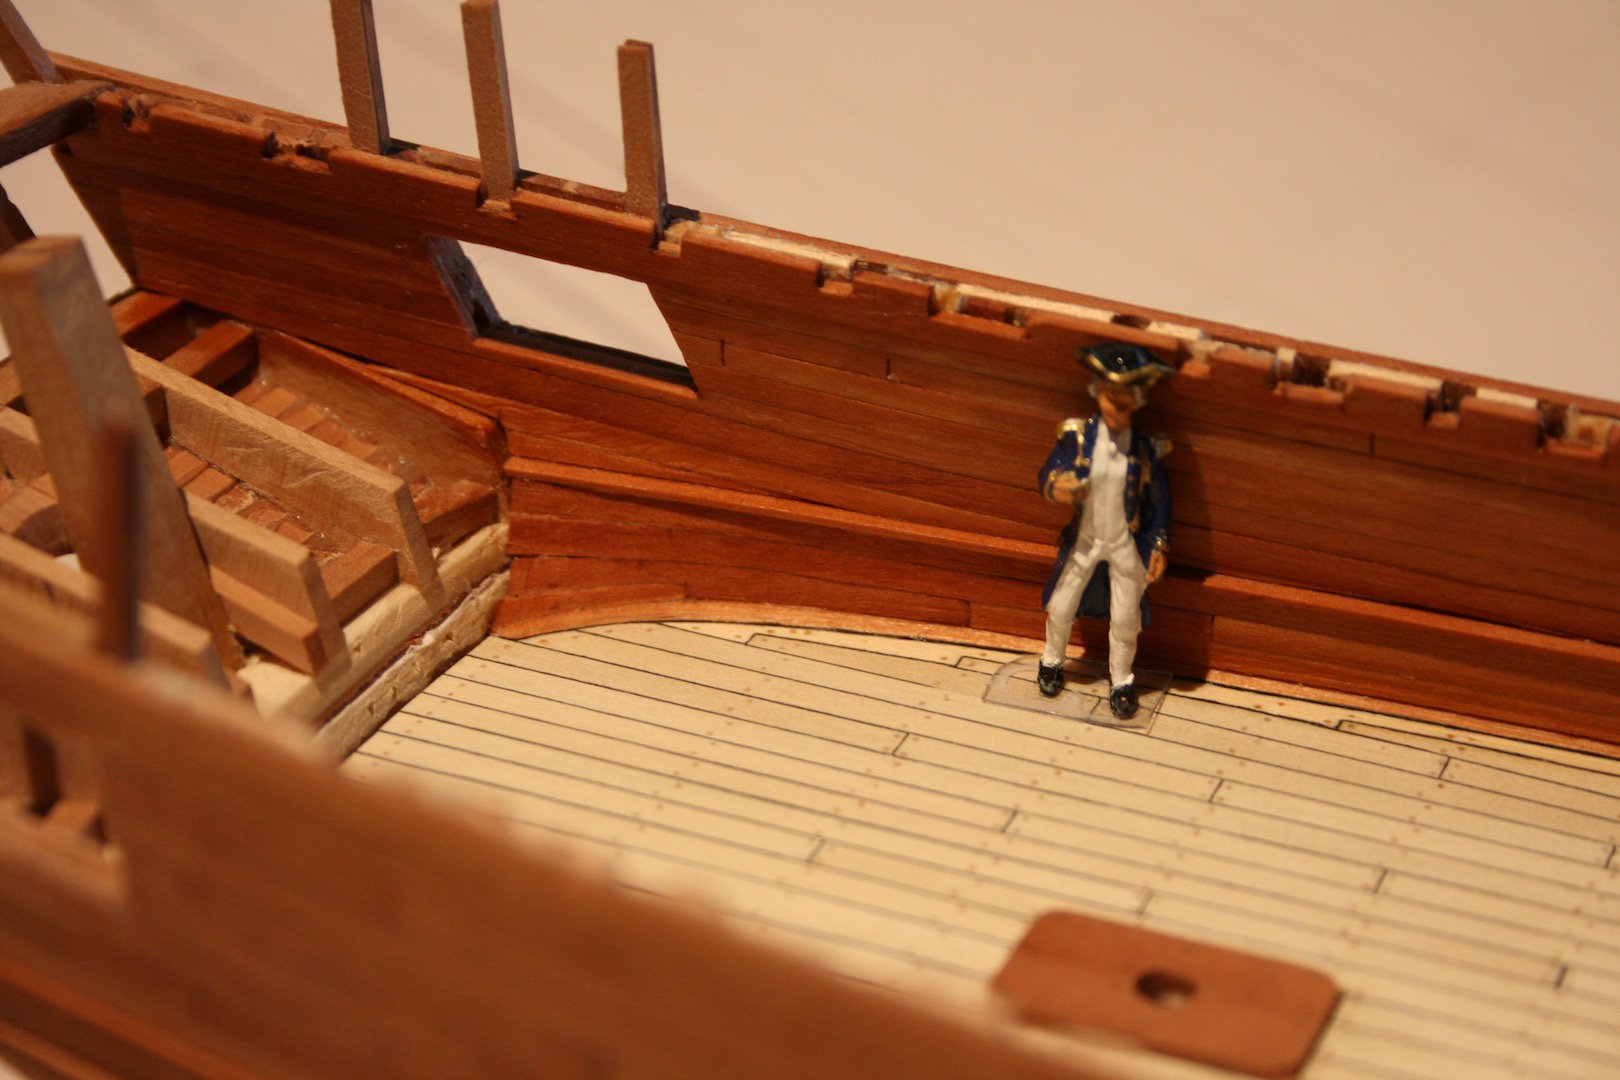
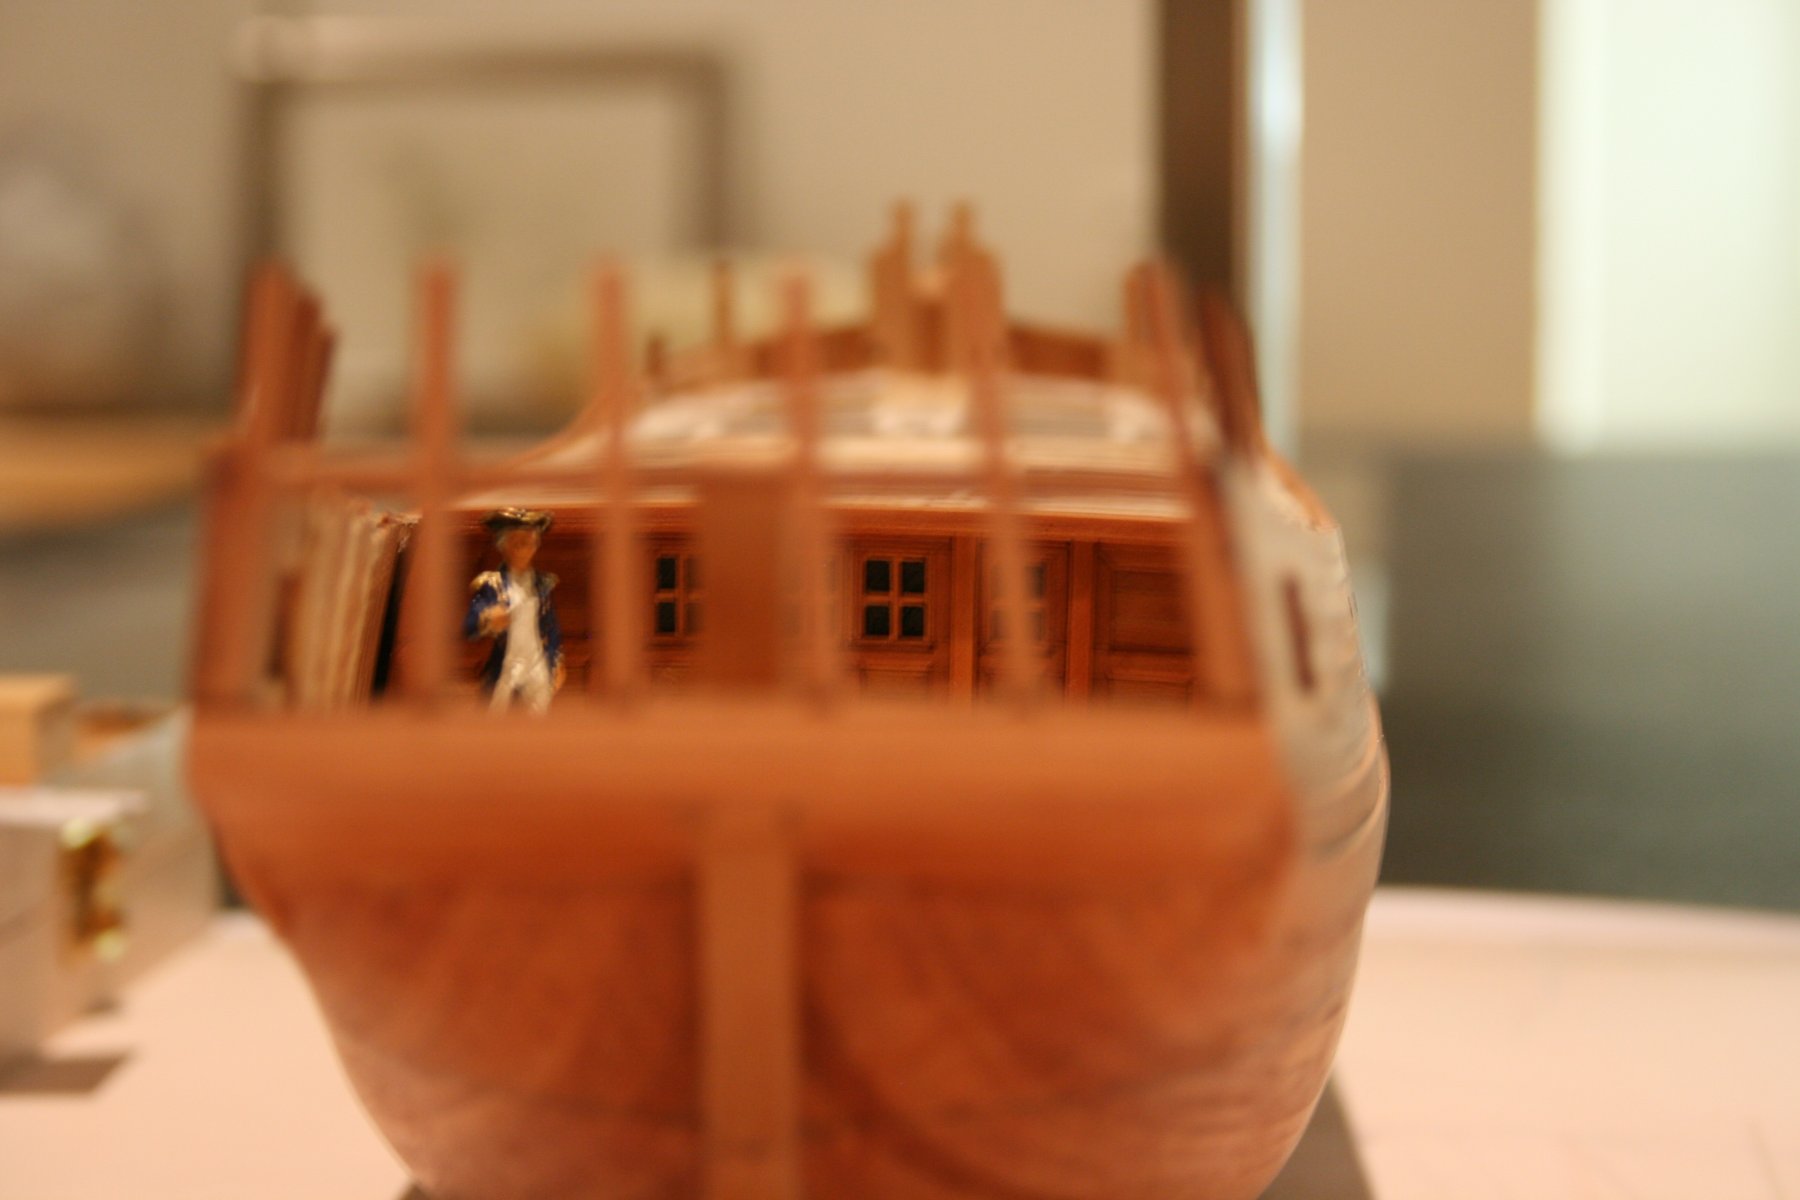
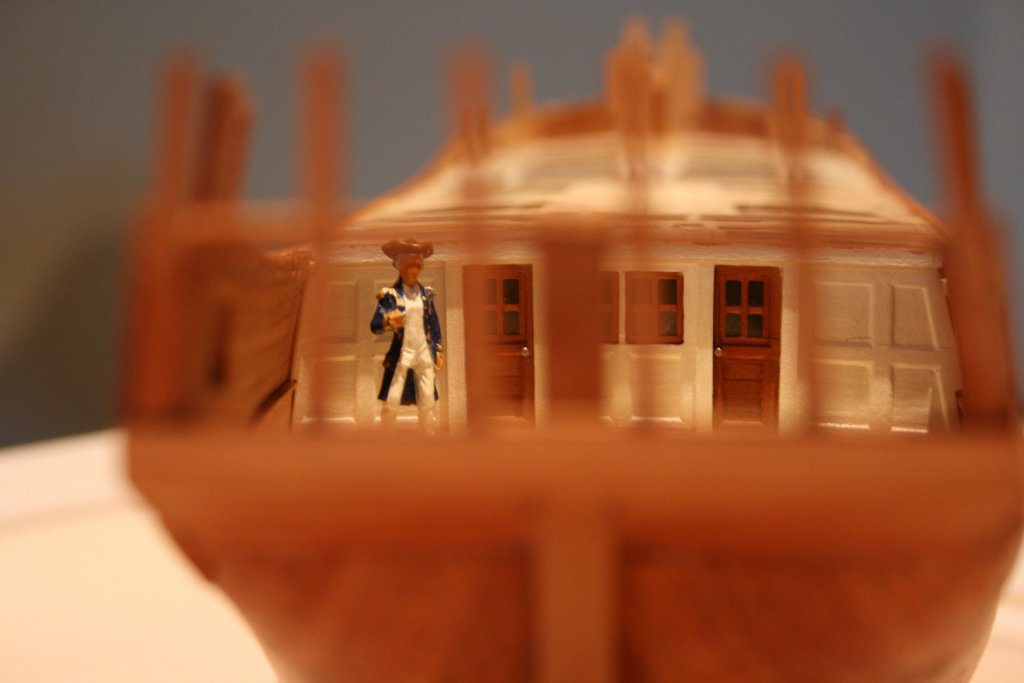
Hello Russ, Thank you for your information and your compliment. I definitively will copper her. But step by step. Meanwhile I did a little work on the partition panel to the great cabin and treated it with linseed oil. However, I suppose I need to paint it white. I couldn't found a source if the cabin was painted in a light colour as usual on Navy ships. But it might be a logical thing as a light surface would reflect incoming rays of light from the small stern windows much efficient than a wooden surface and too, it would be much better for the breadfruit plants. To bring as much as possible from those plants to the colonies was the mission. Daniel


-
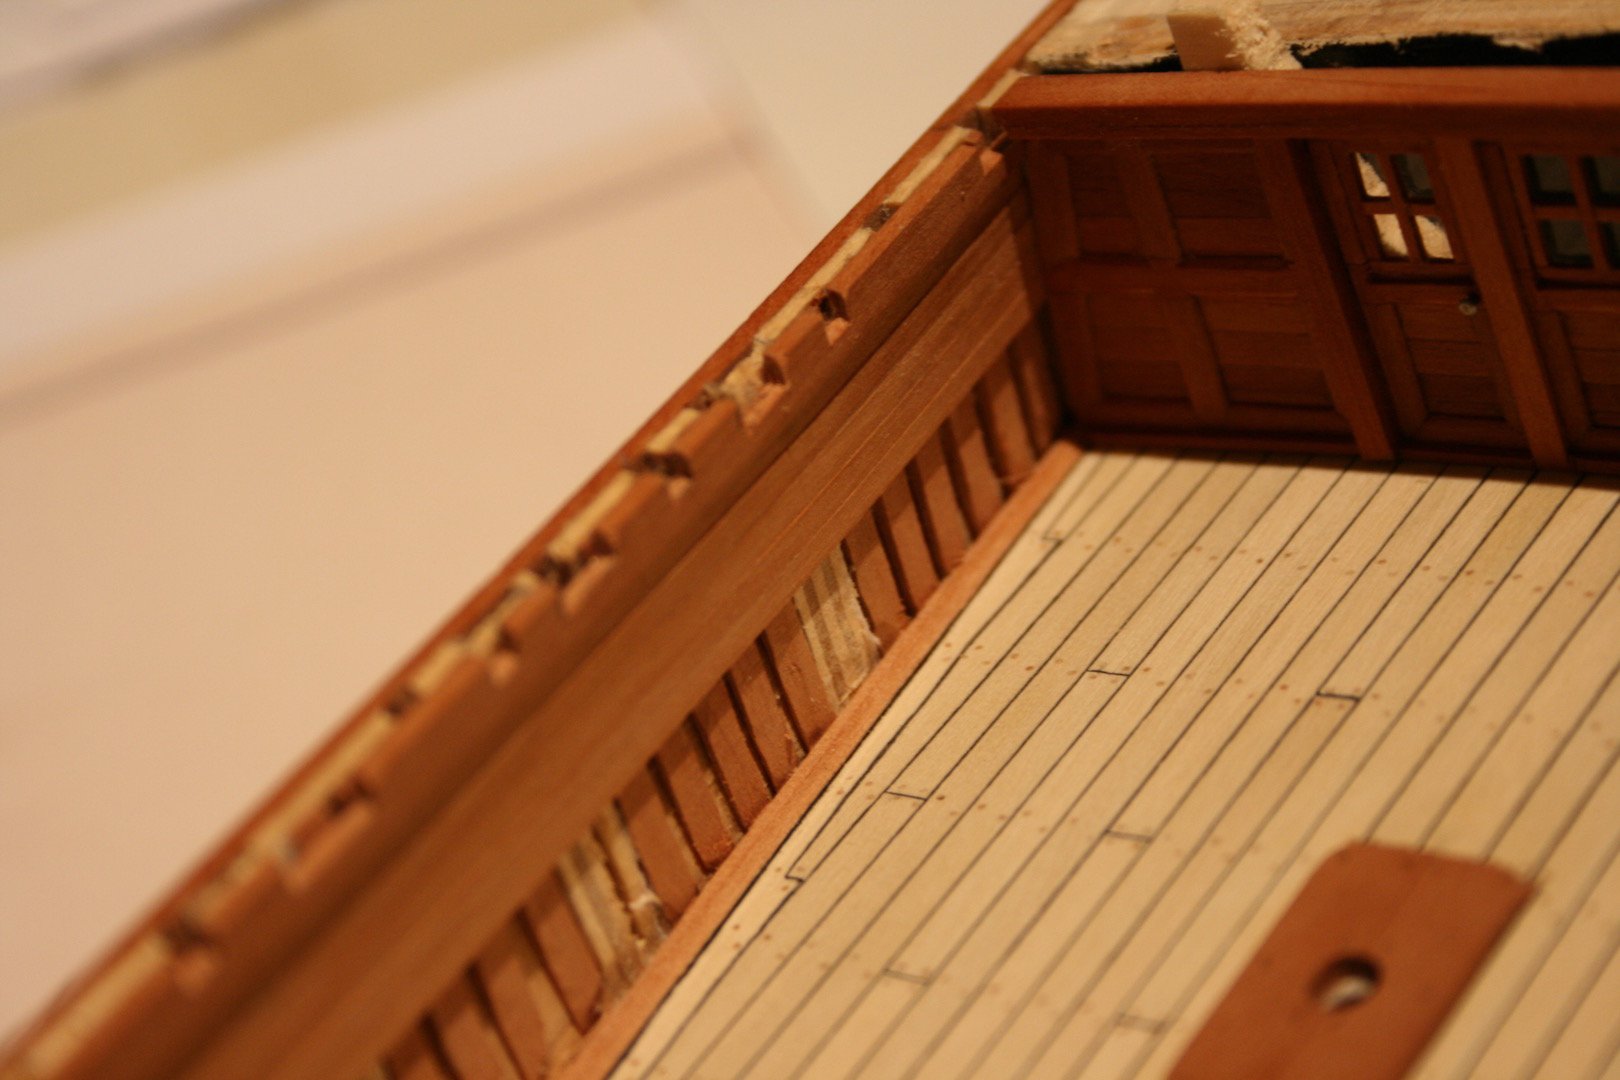
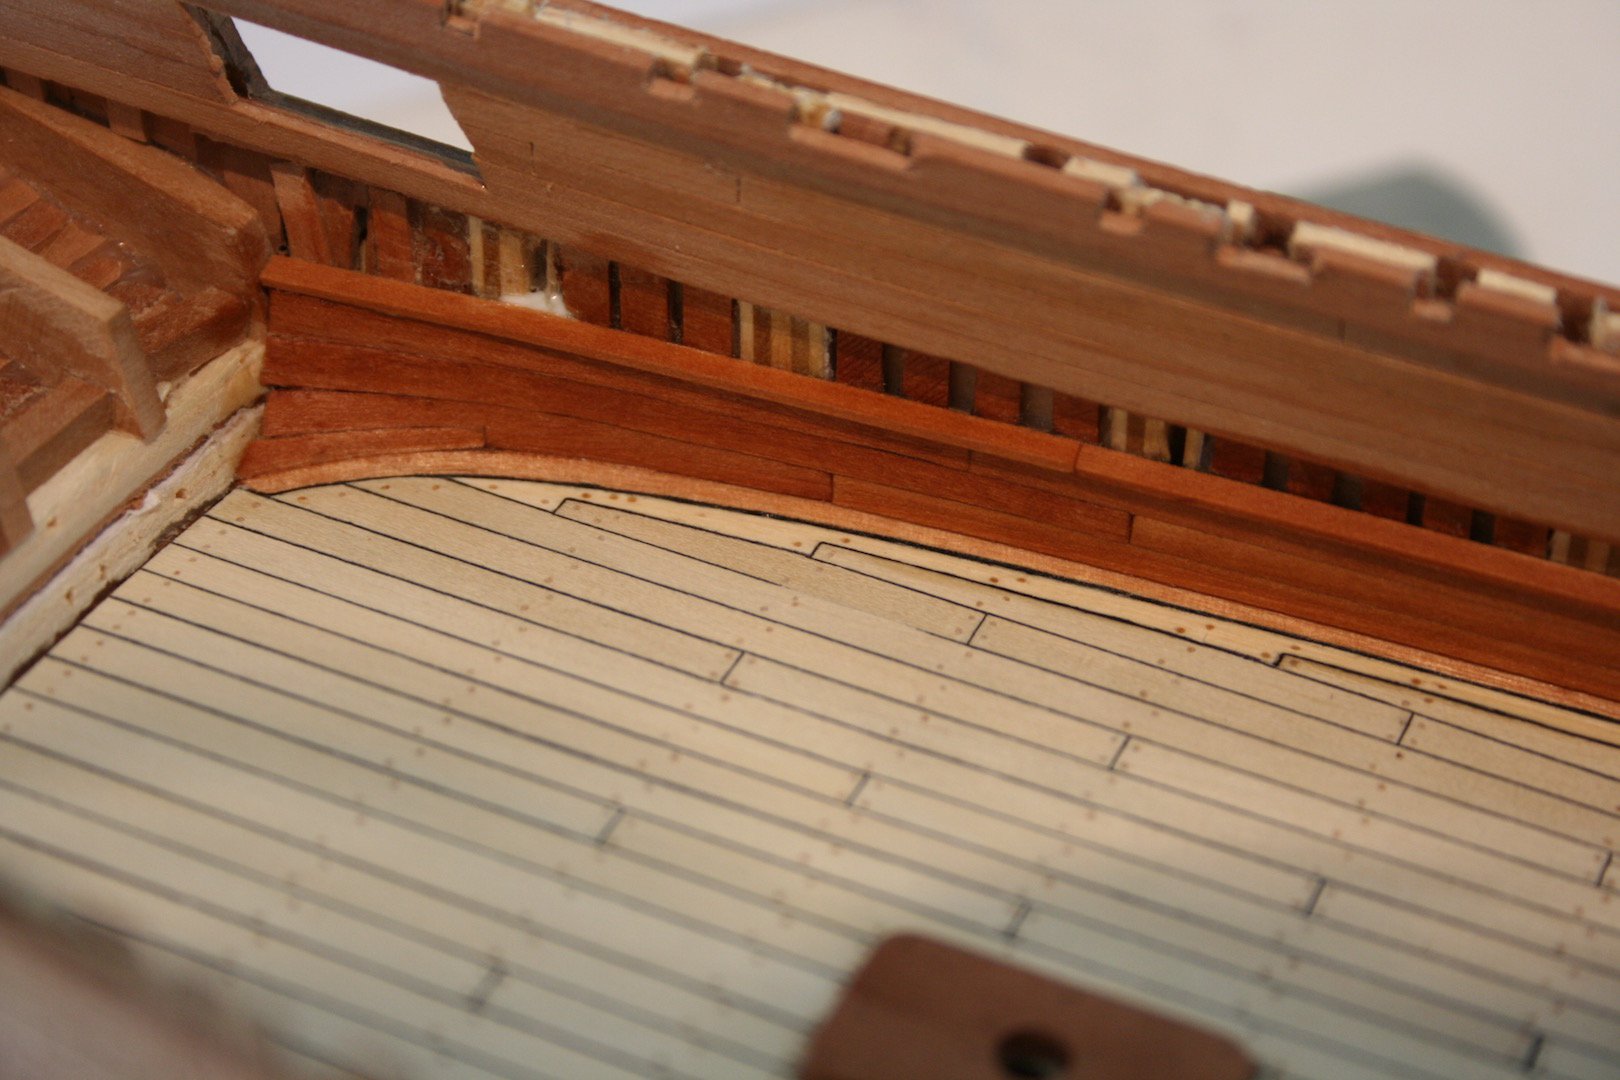
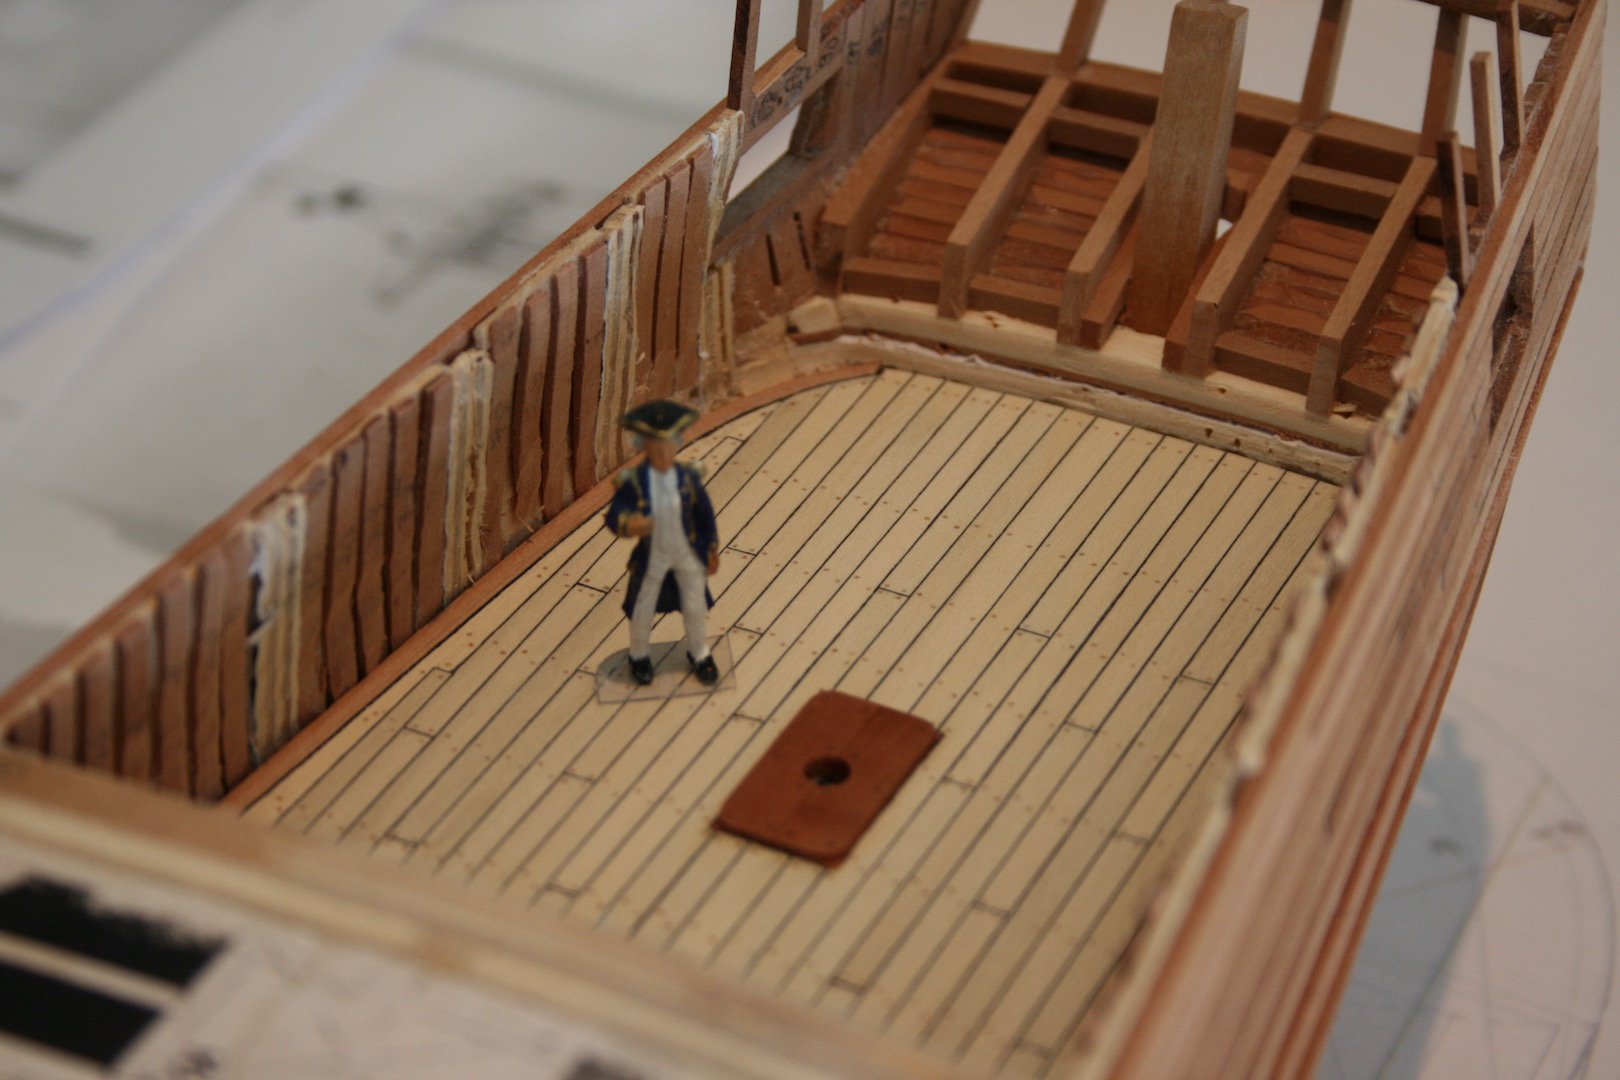
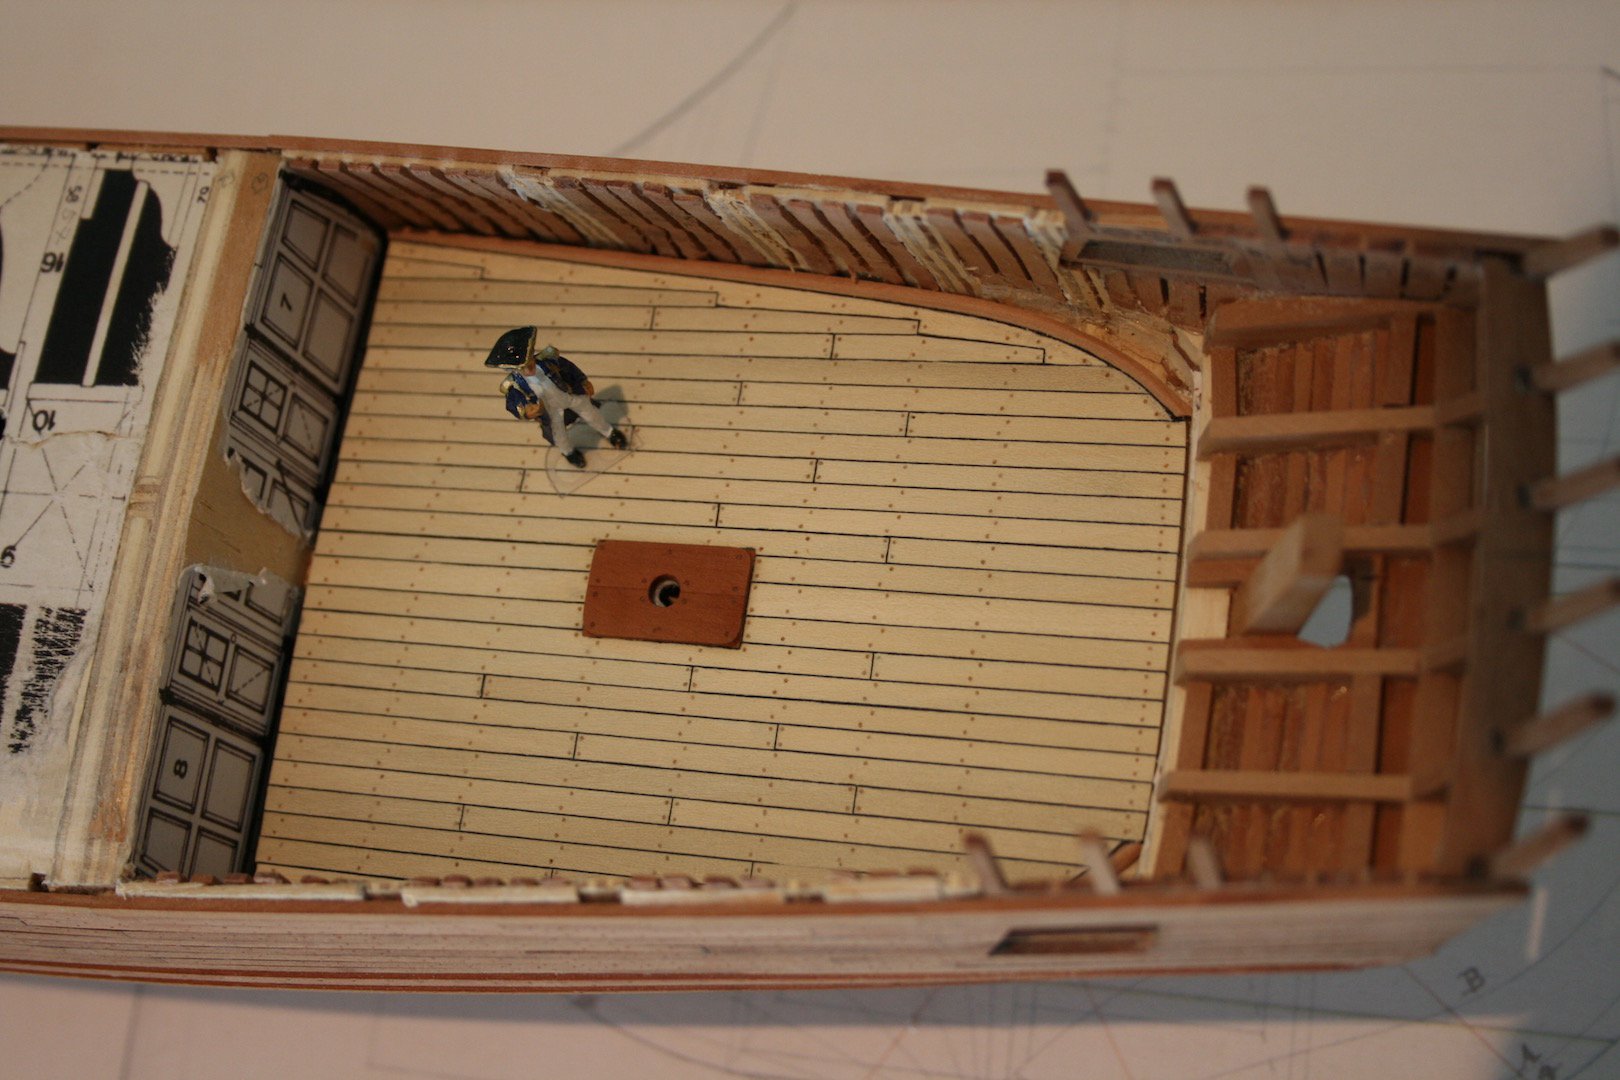
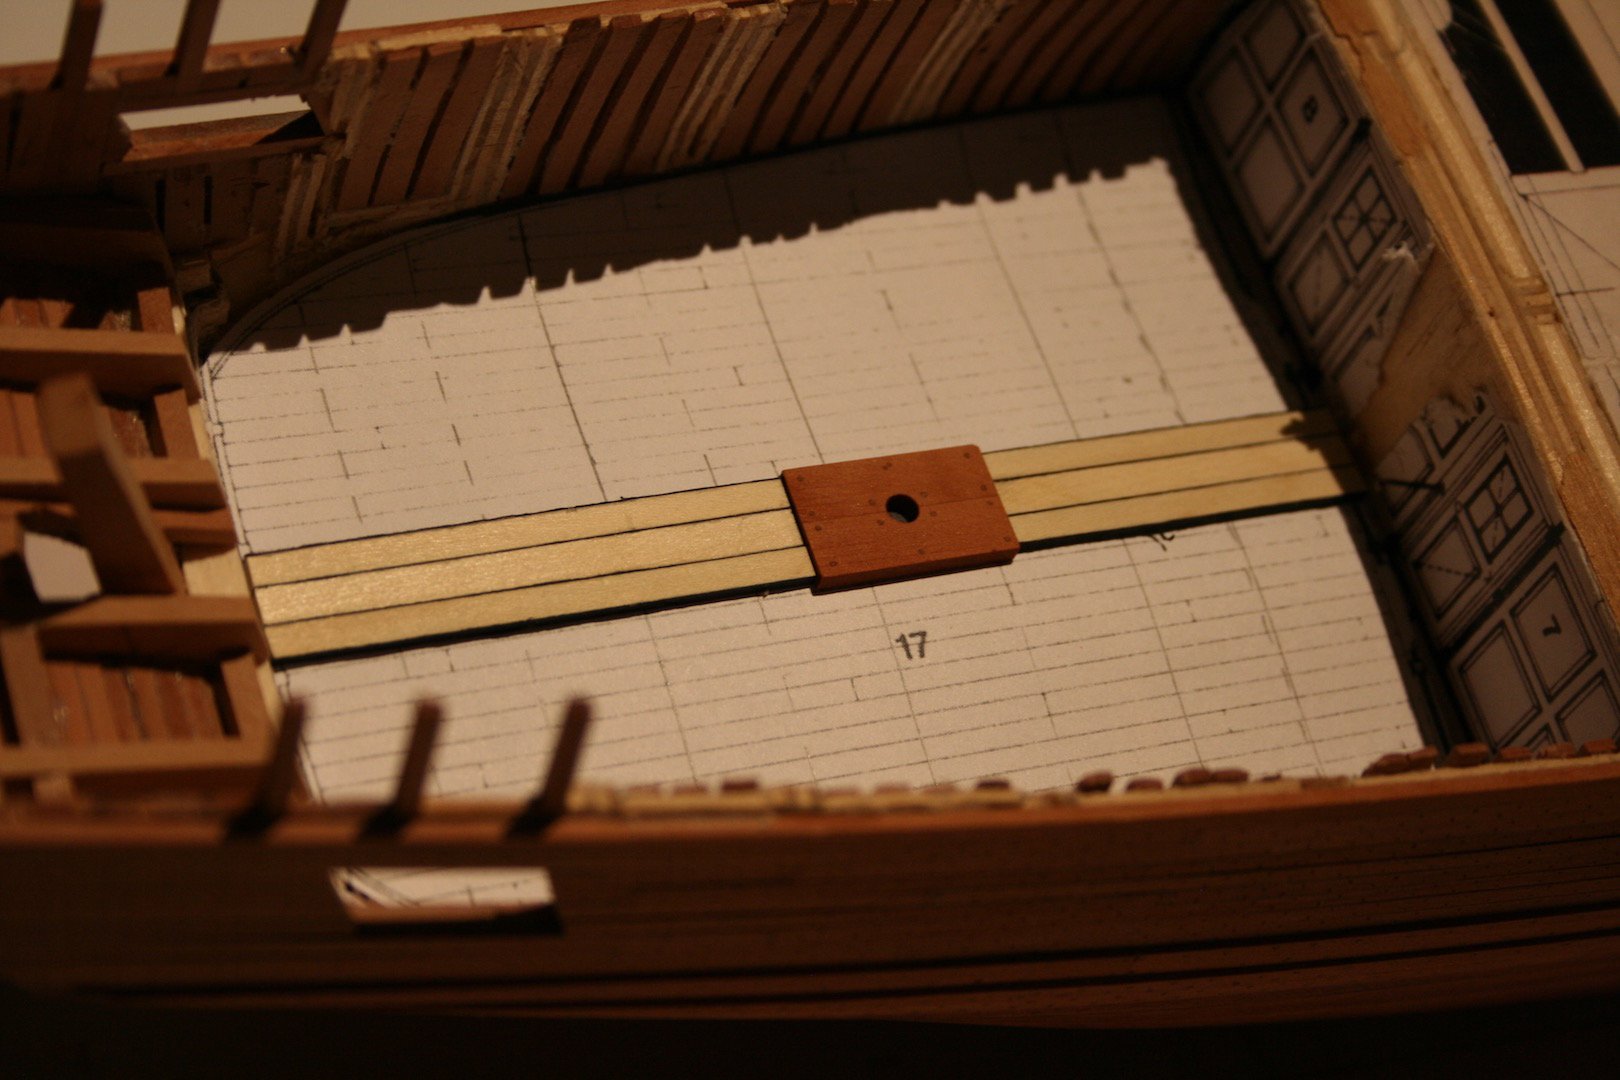
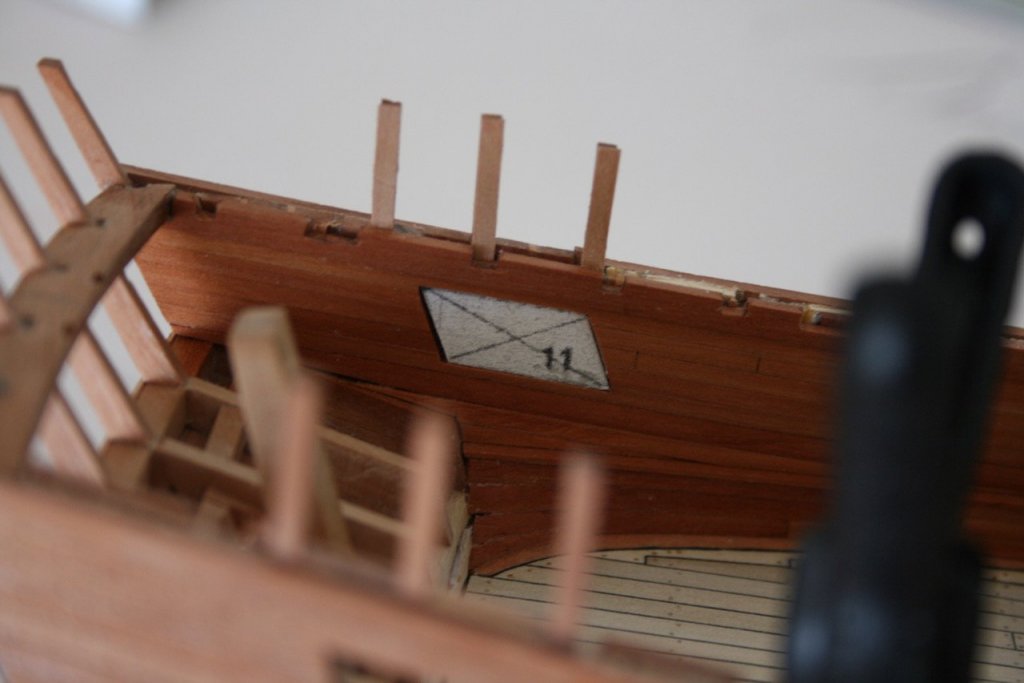
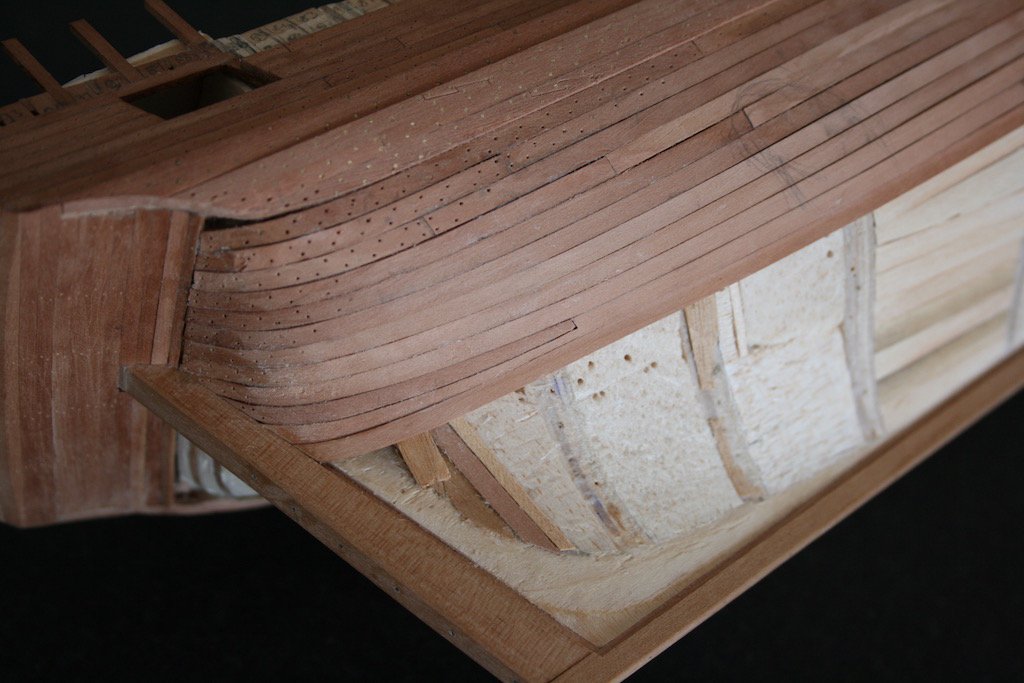
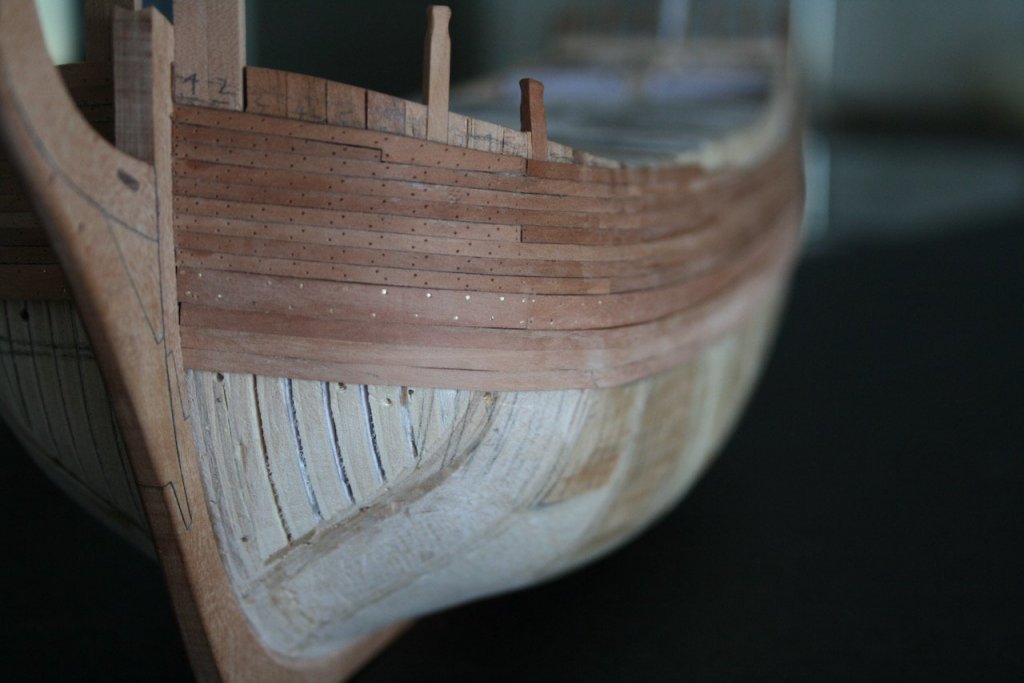
Hello, Meanwhile I could finish the planking for the great cabin as well as the waterway around it and fix it in place. Cheers, Daniel


-
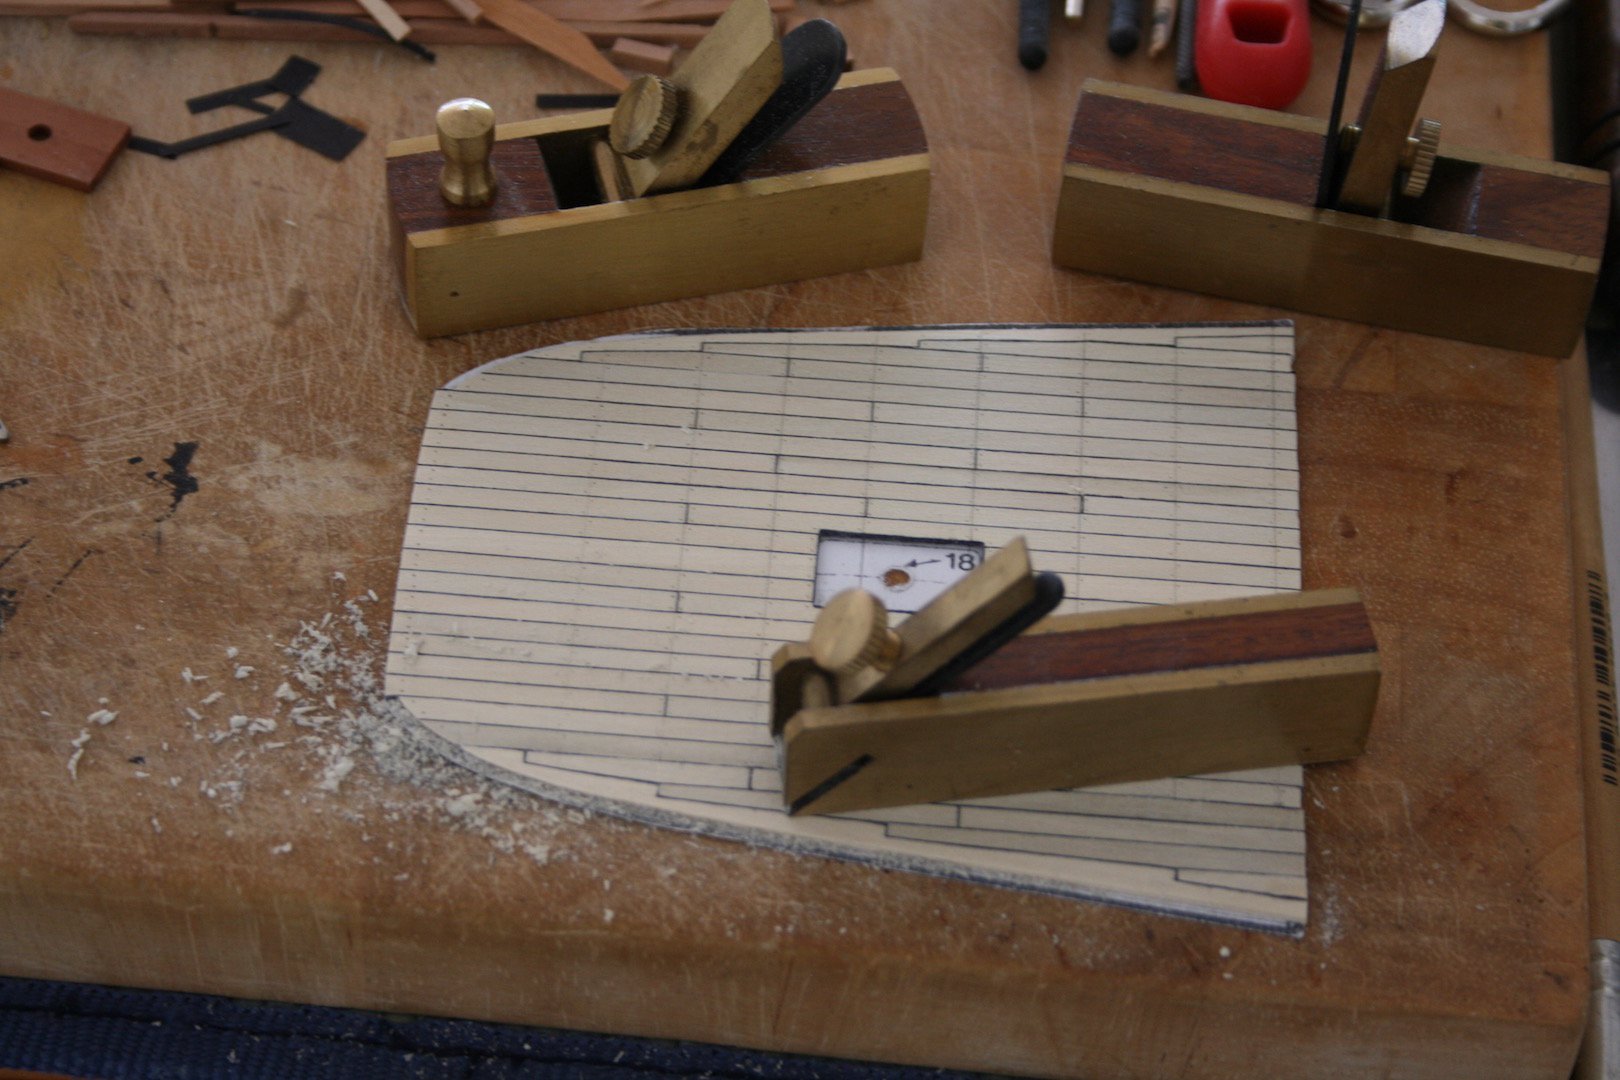
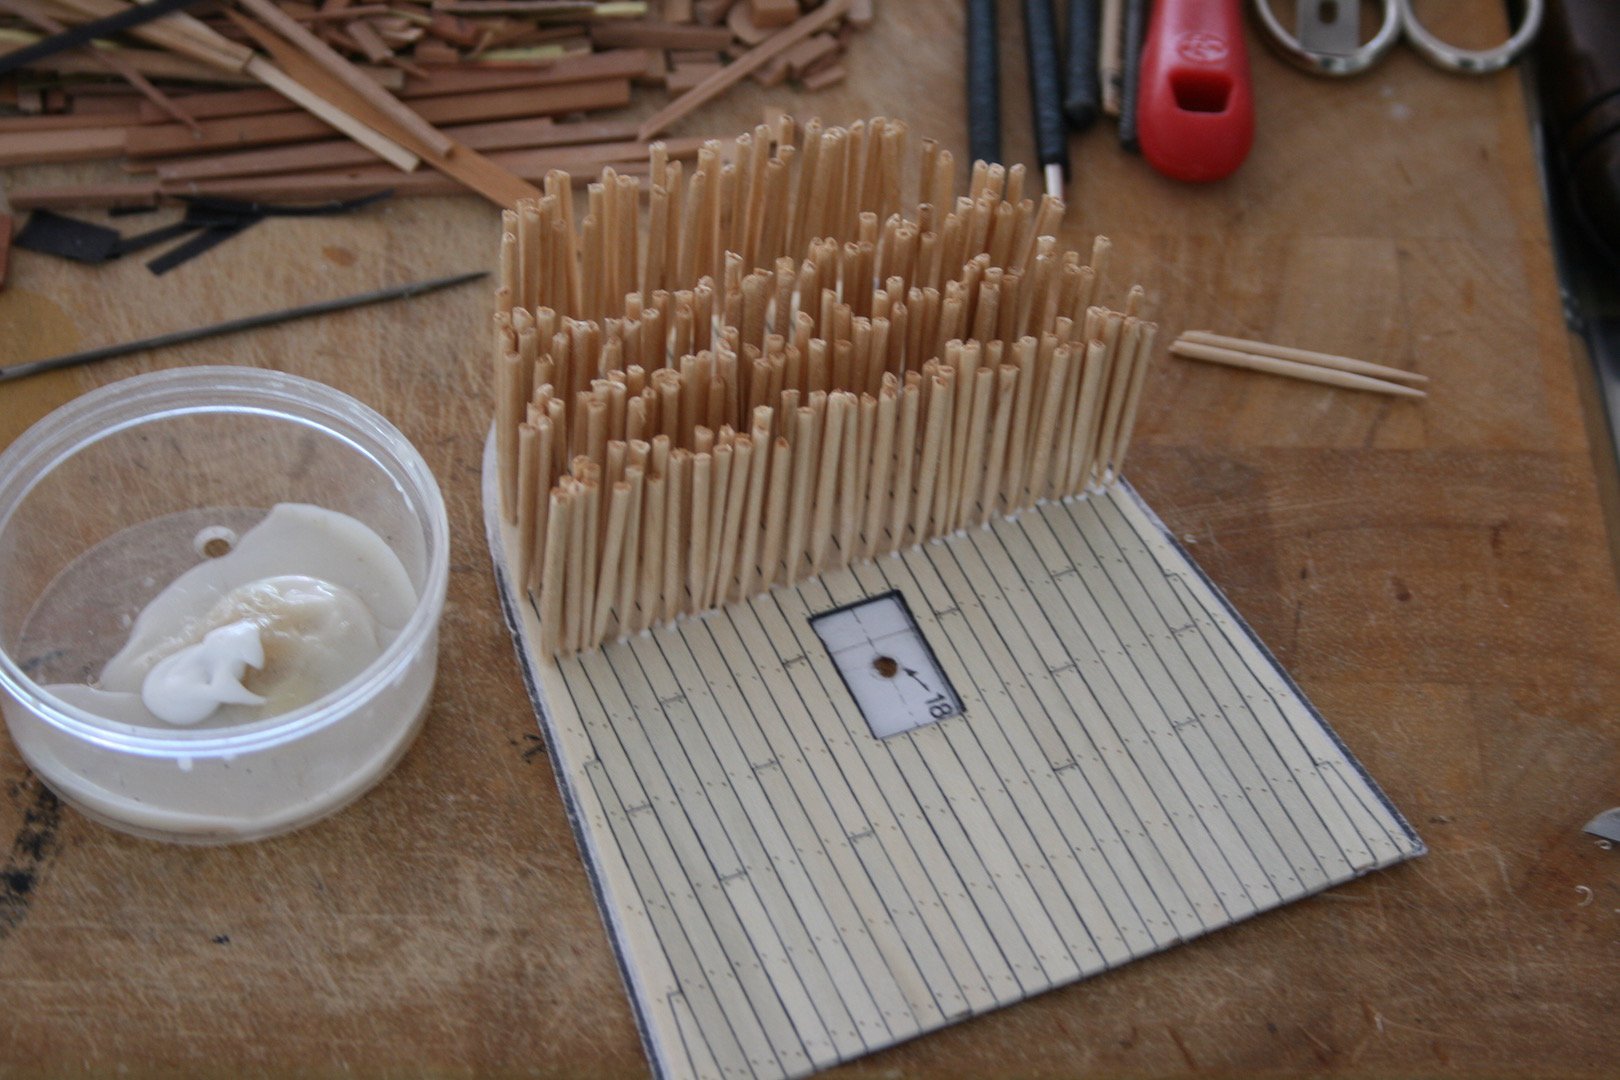
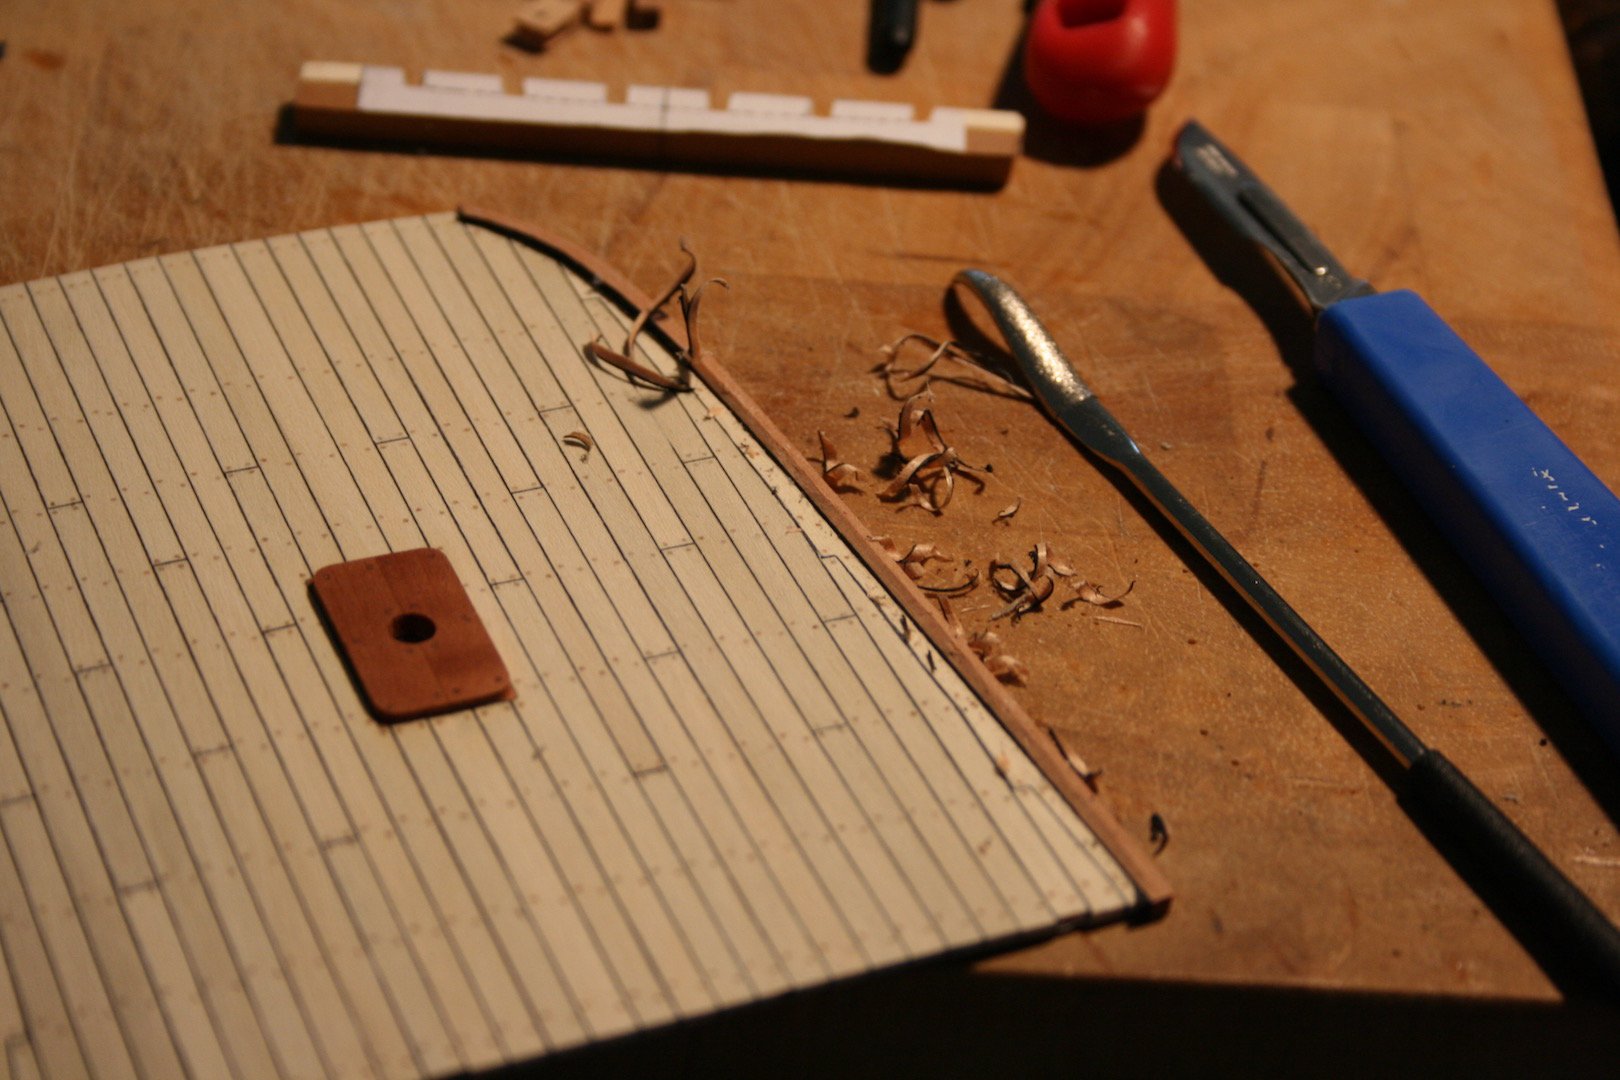
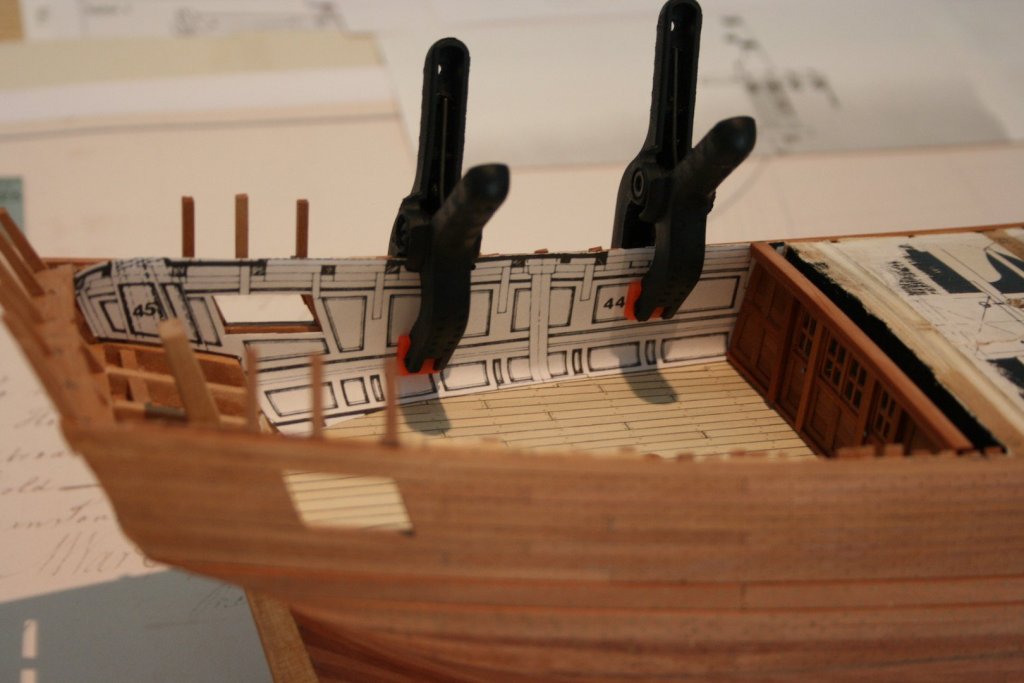
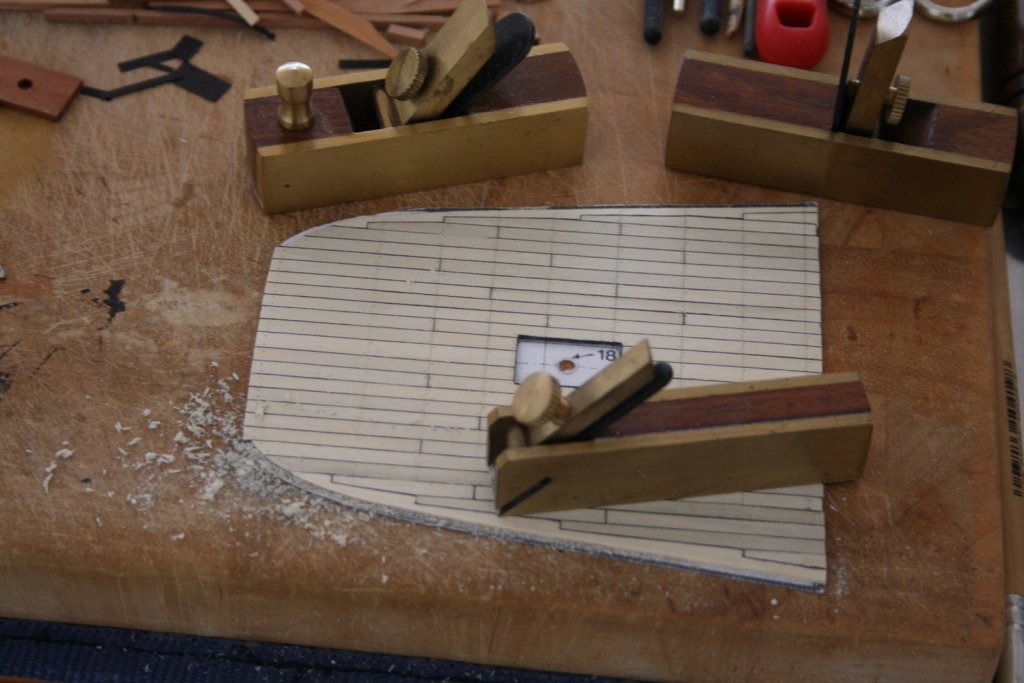
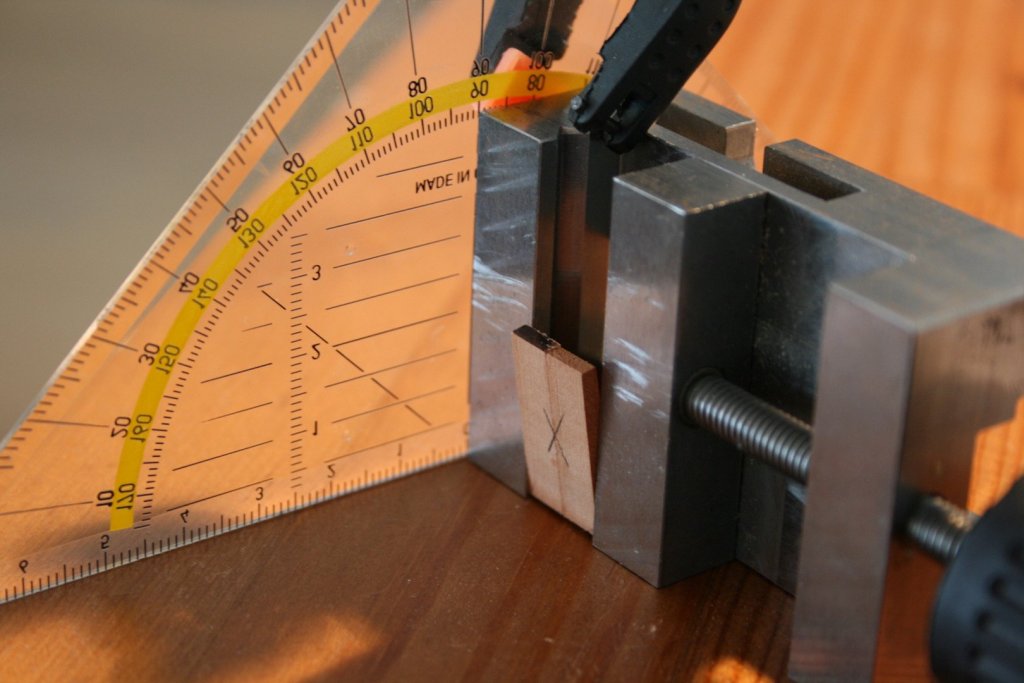
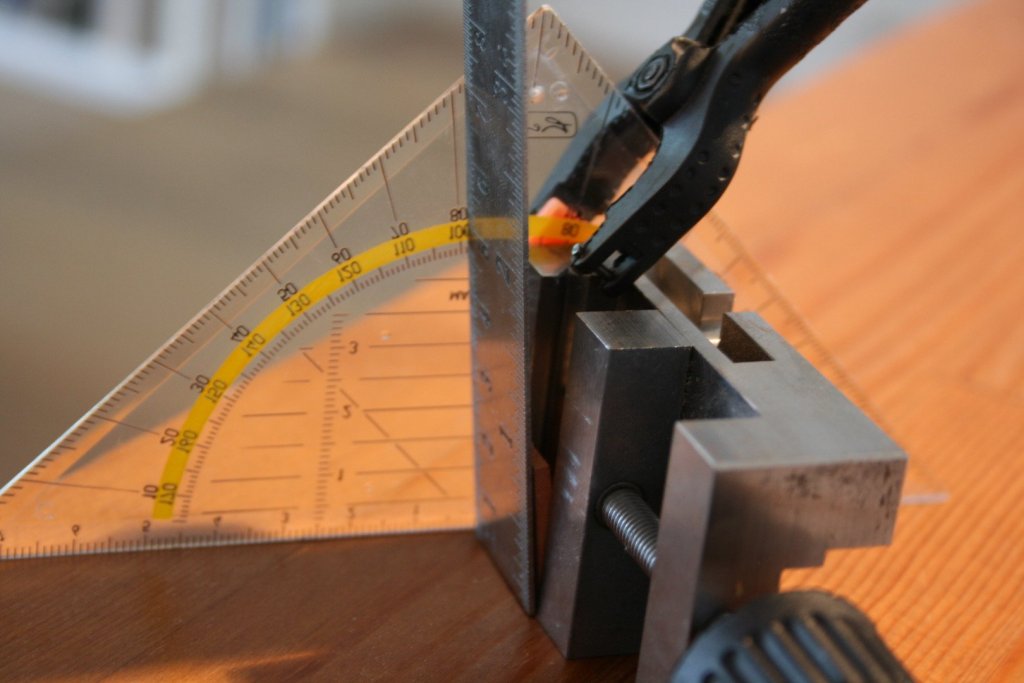
Hello, today I could cut the Holy stripes for the planking and have started with the deck-planking of the main cabin. Daniel


-
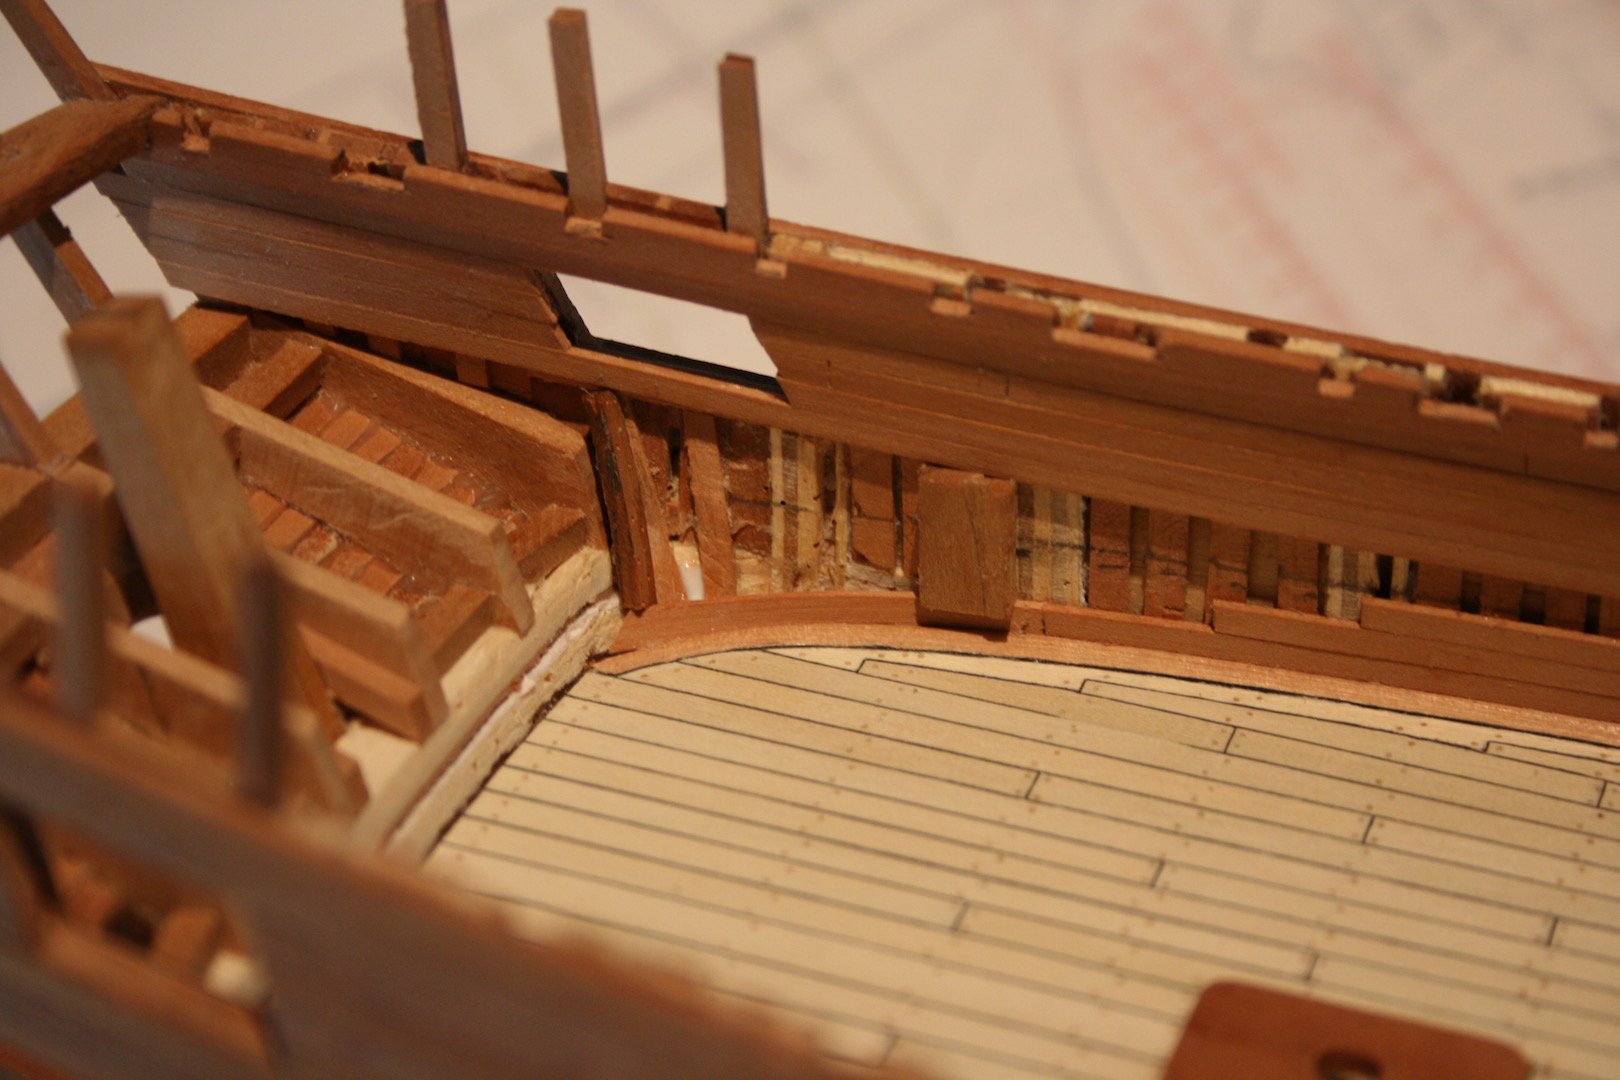
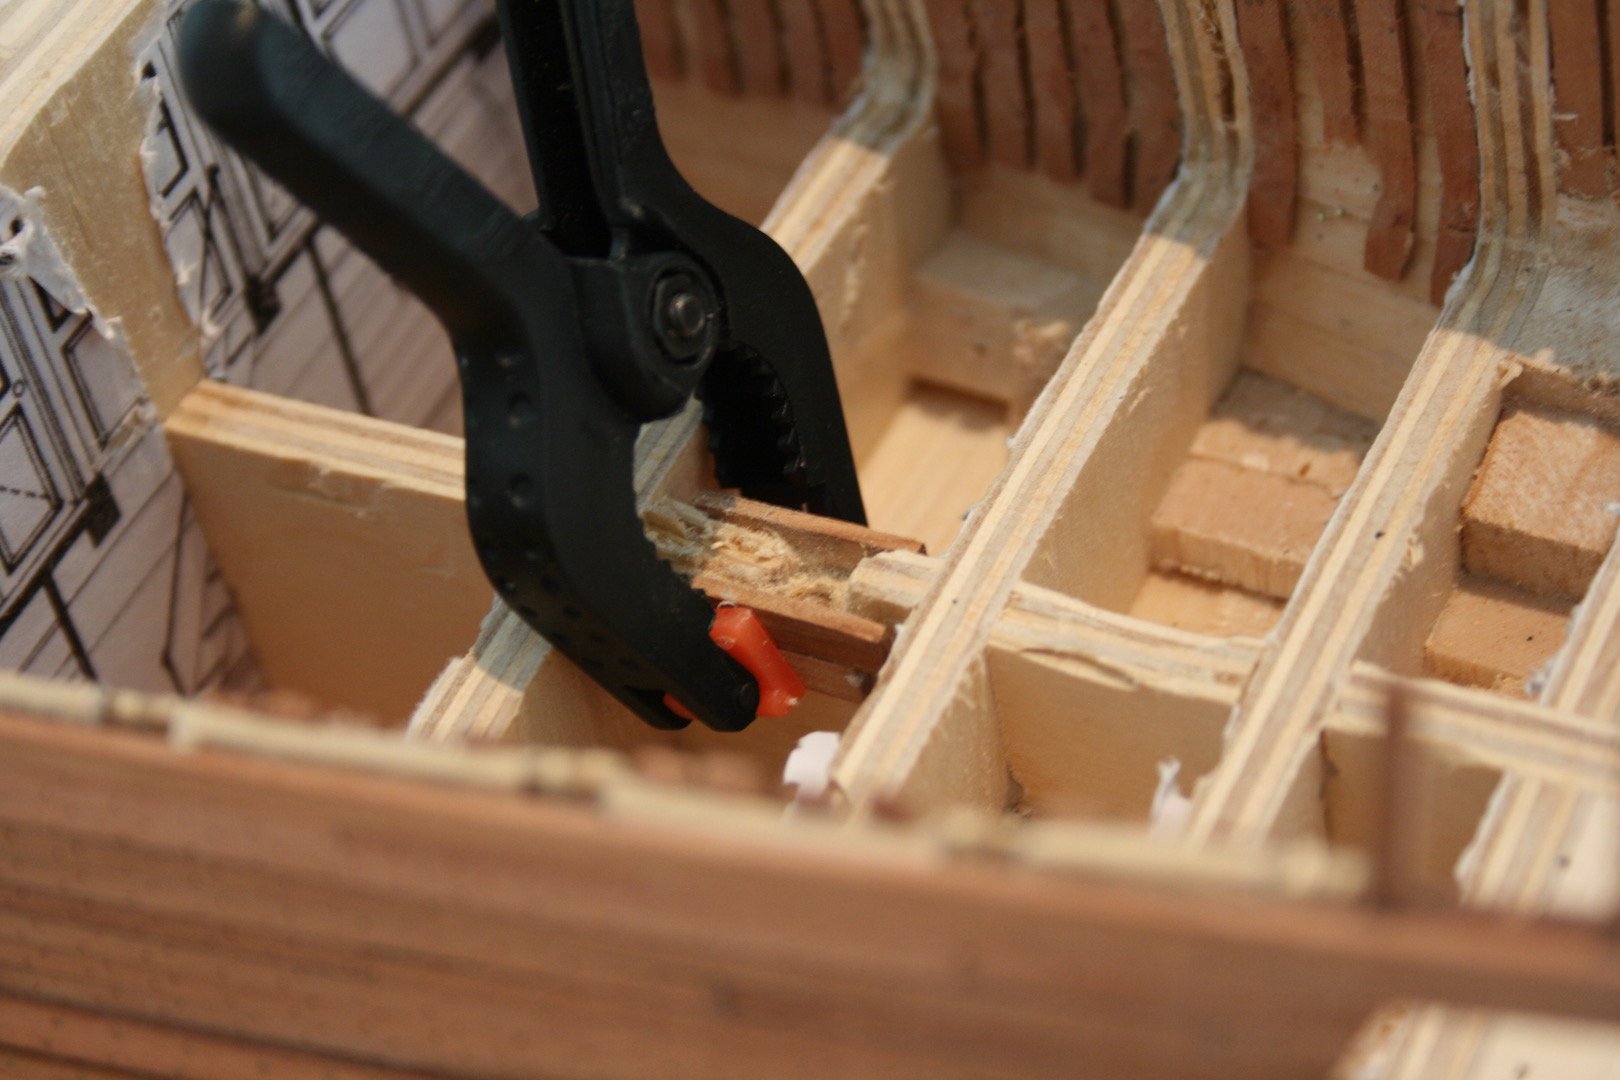
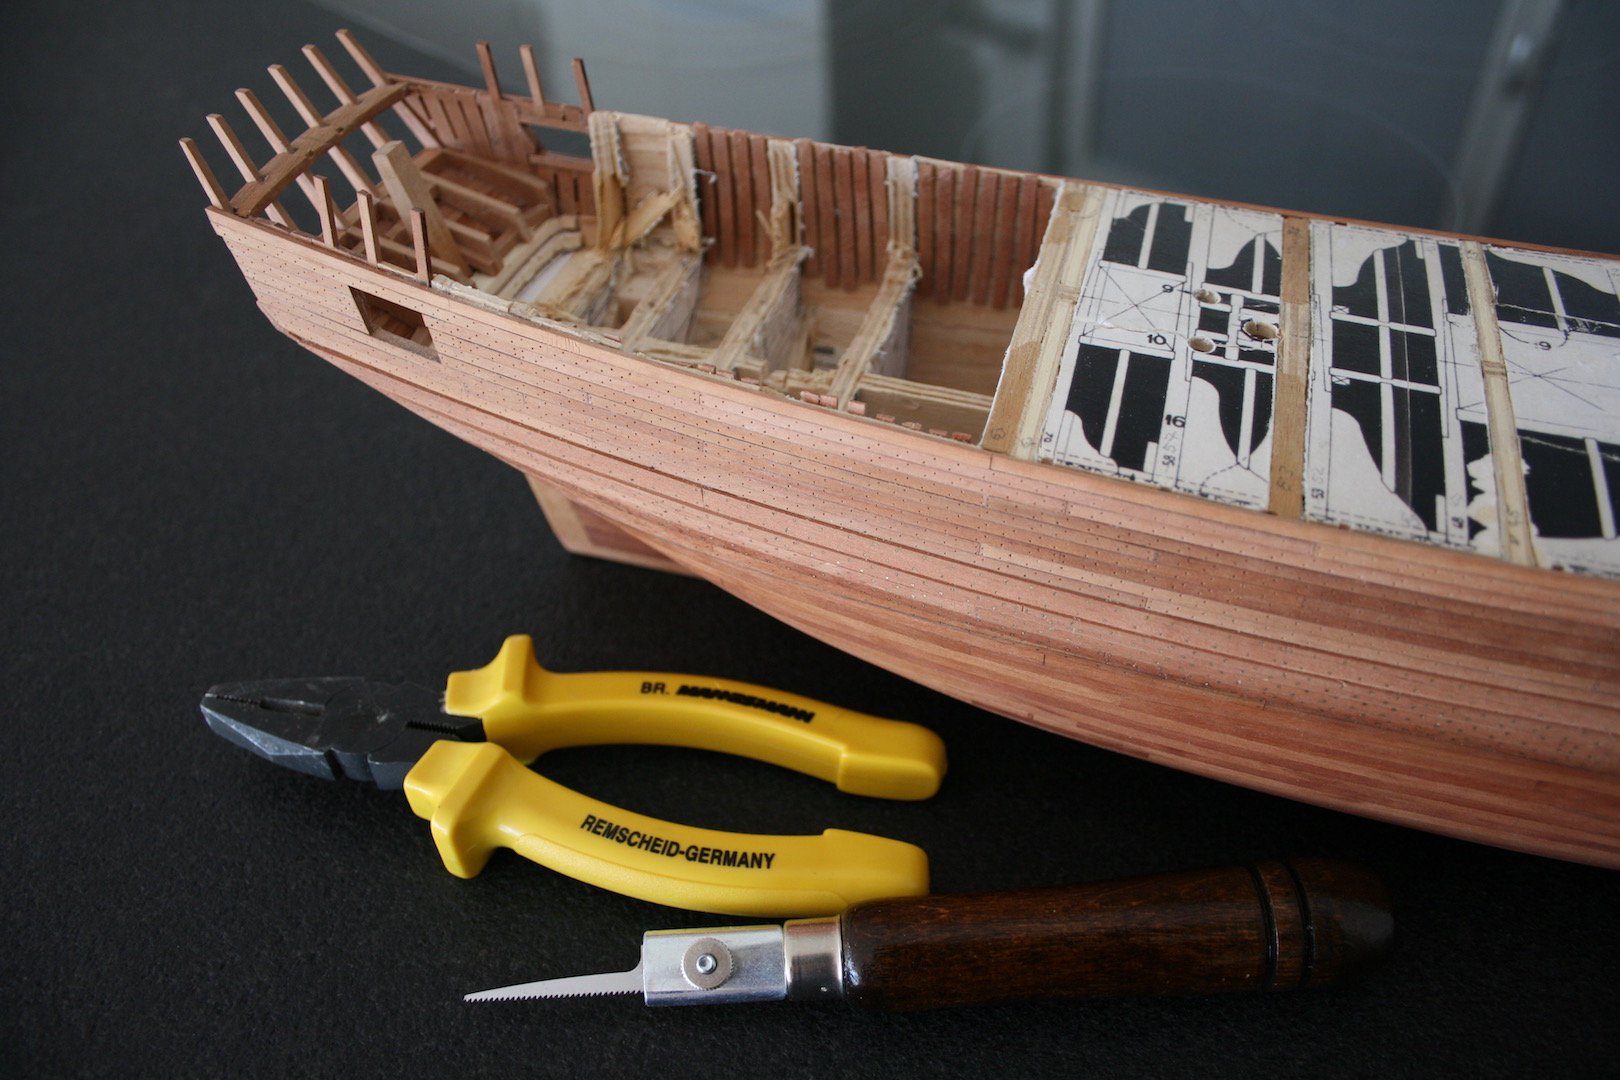
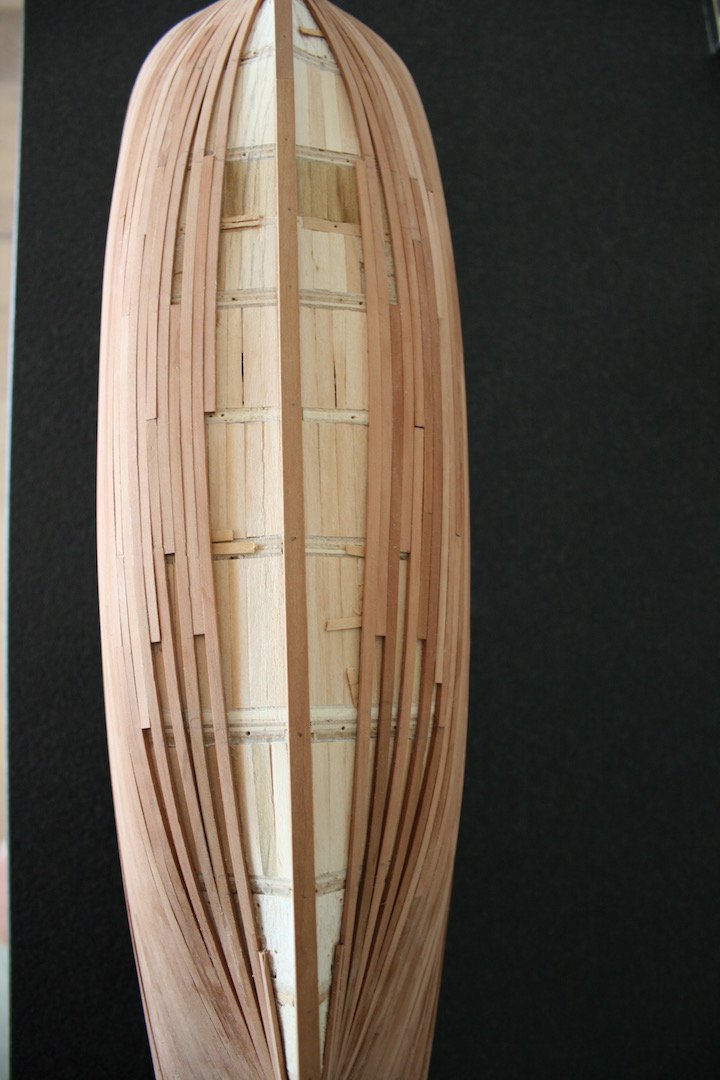
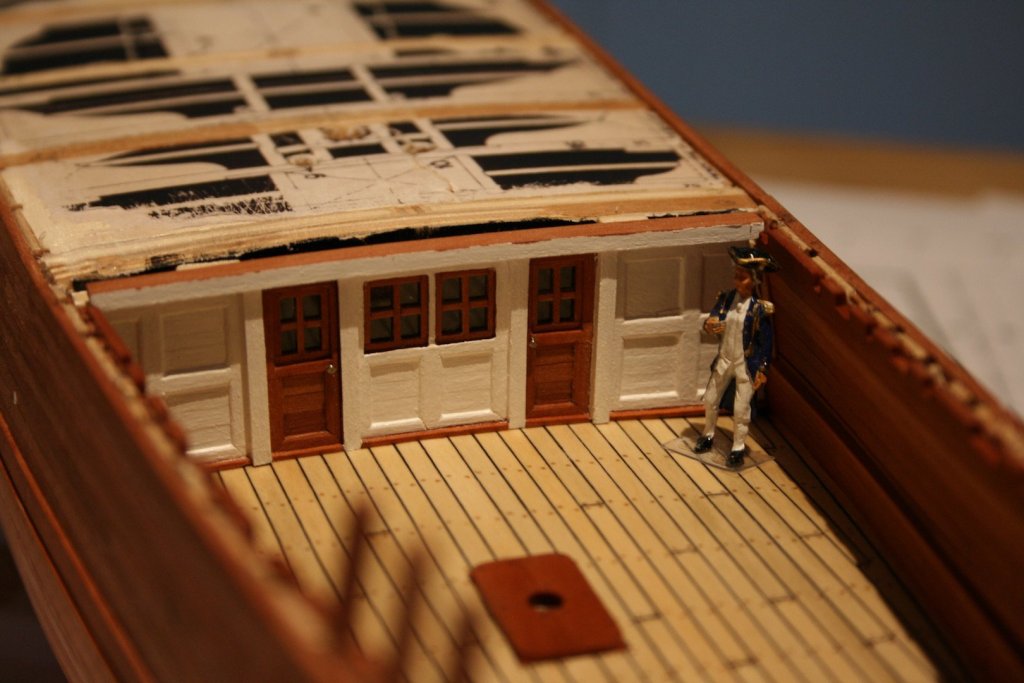
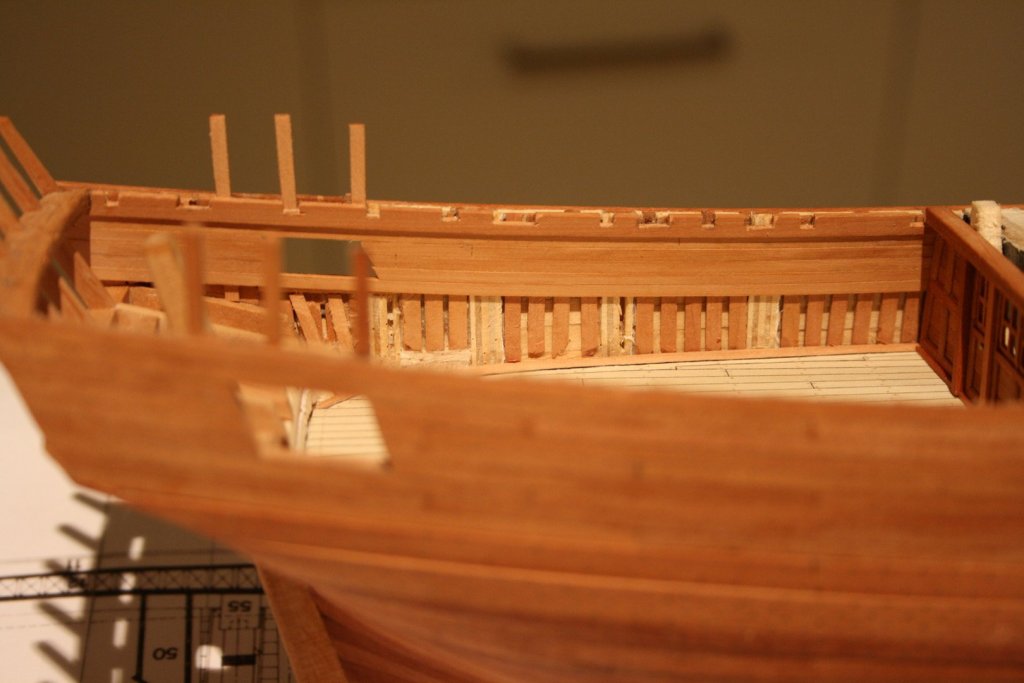
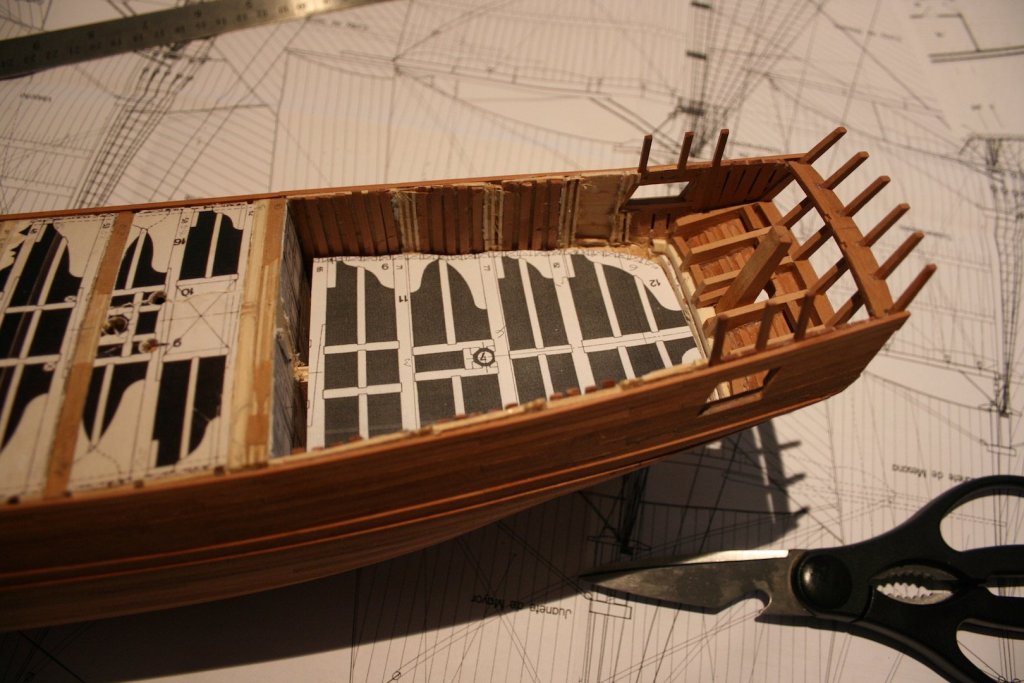
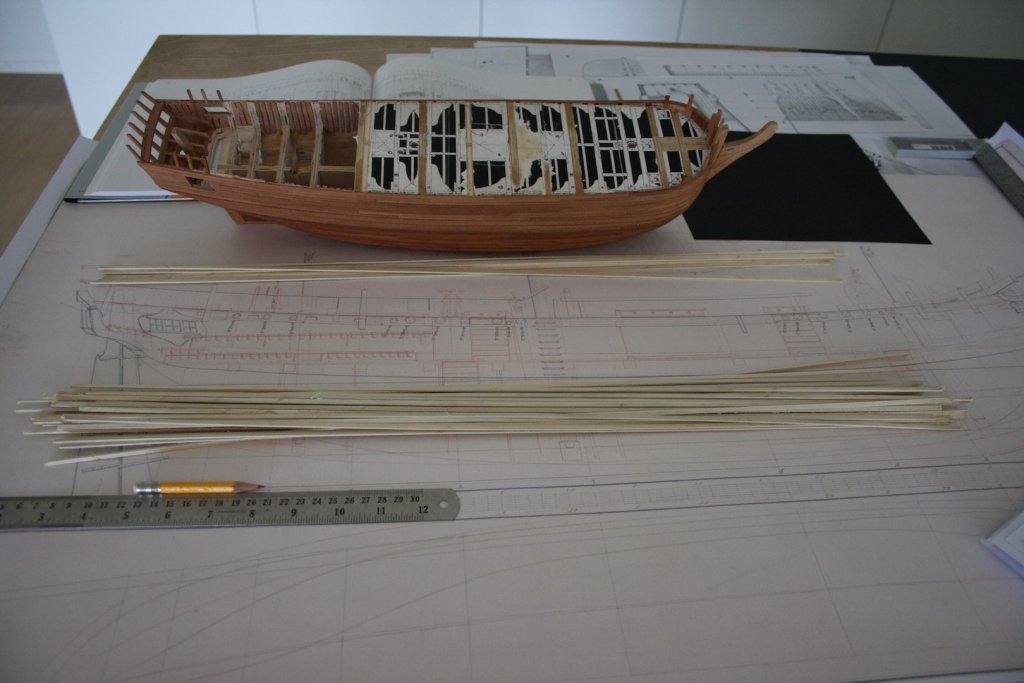
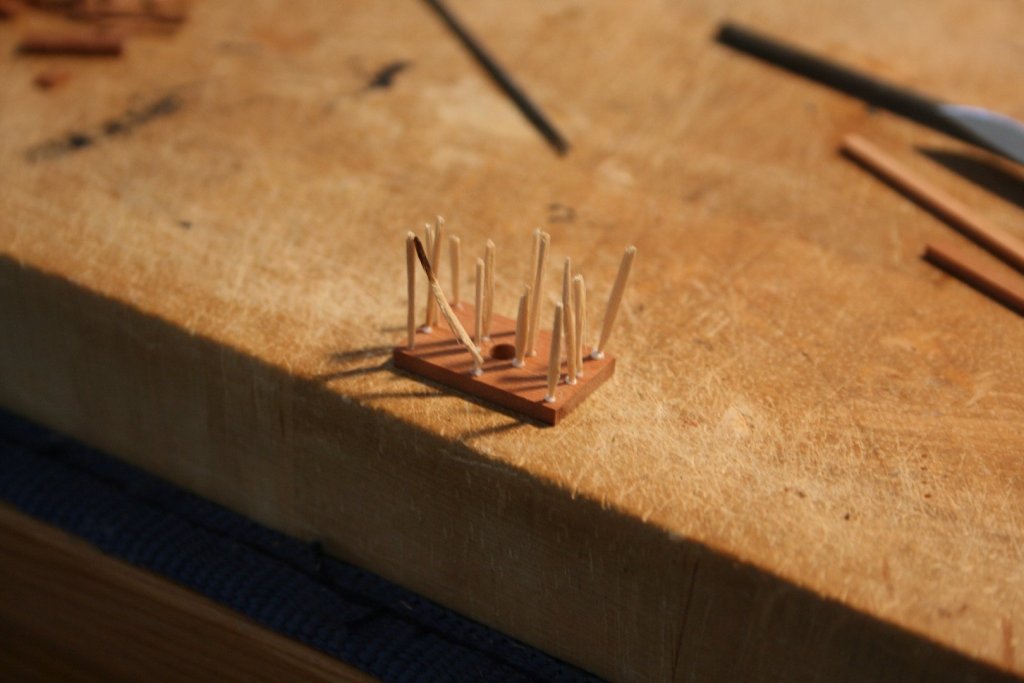
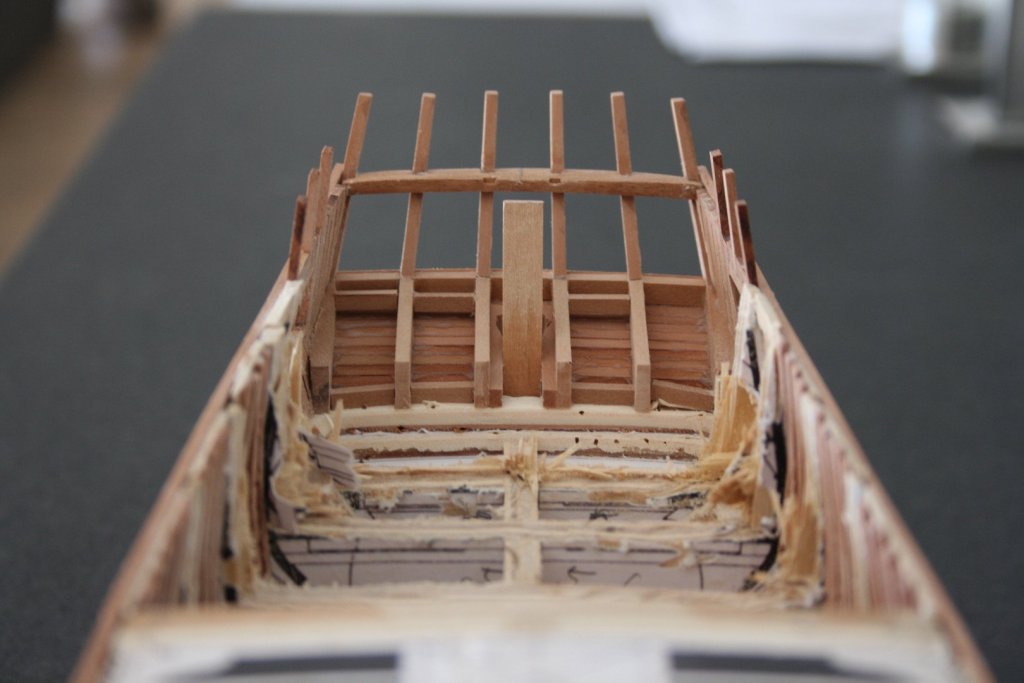
Hello, As I wanna show the main cabin / green house with all the breadfruit plants, I first finished the outer hull planking and have strengthen the whole construction with vertical strips simulating the frames of the ship whereupon I did some radical de-construction and have cut the bulkheads down to the level of the lower deck. A lot of sanding is needed yet, indeed. Daniel

-
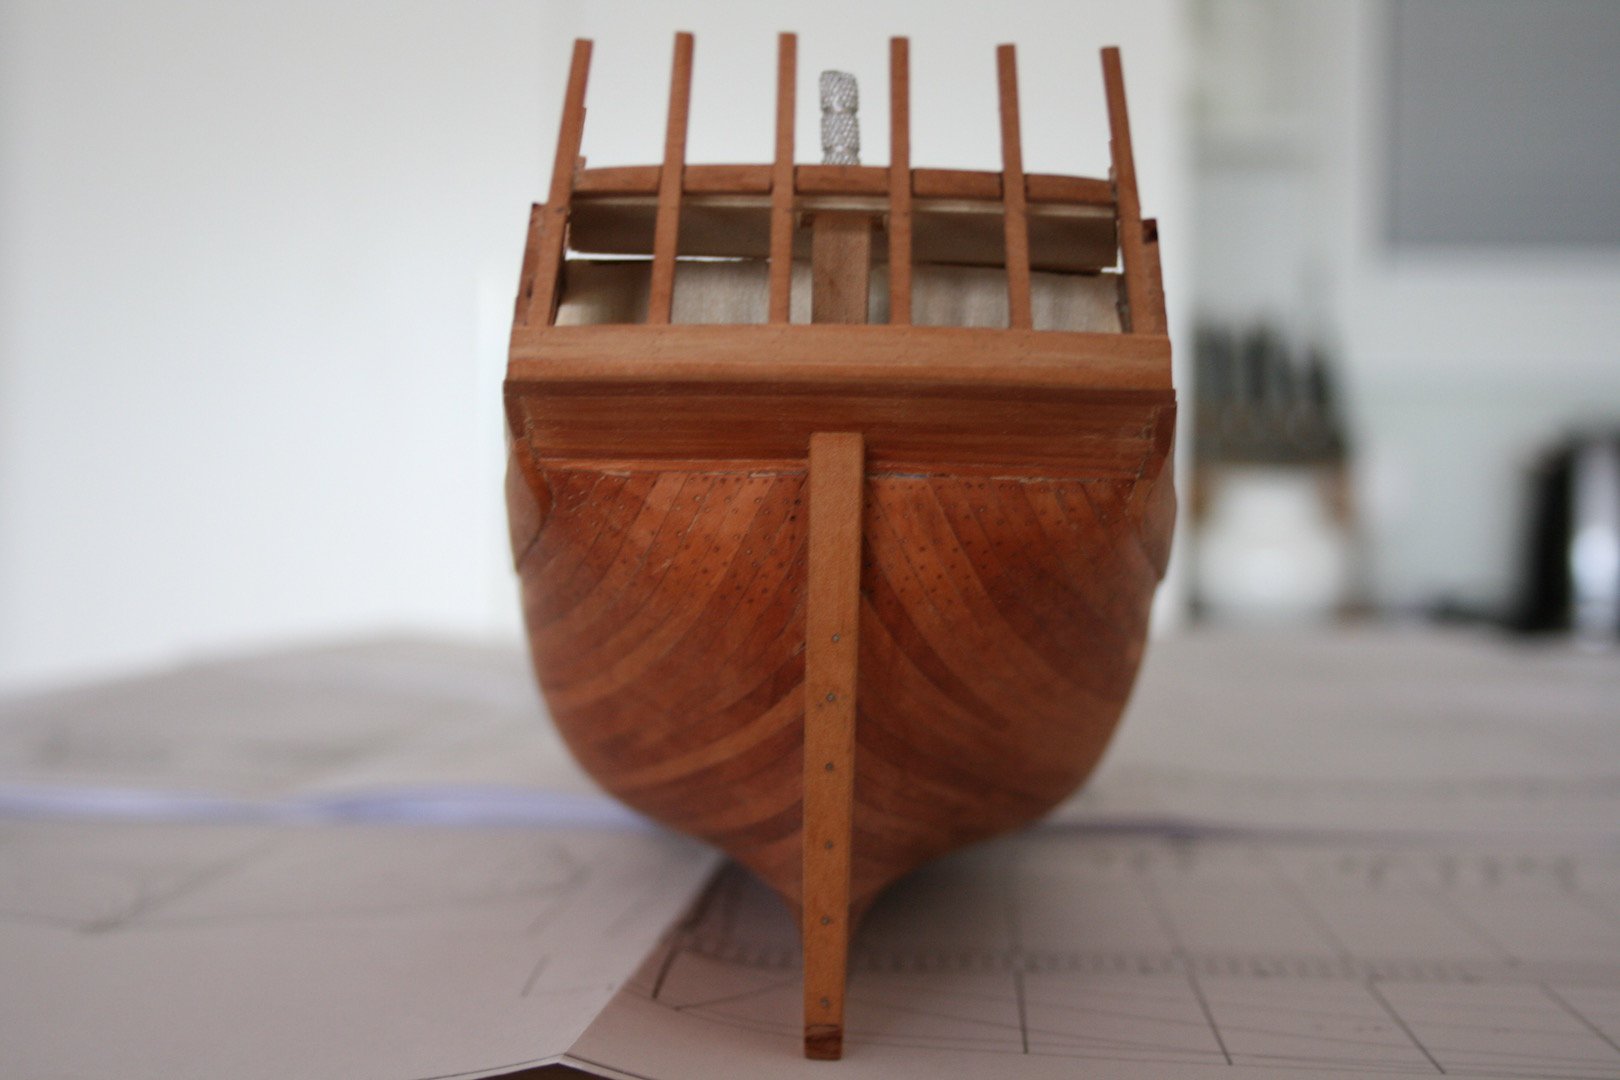
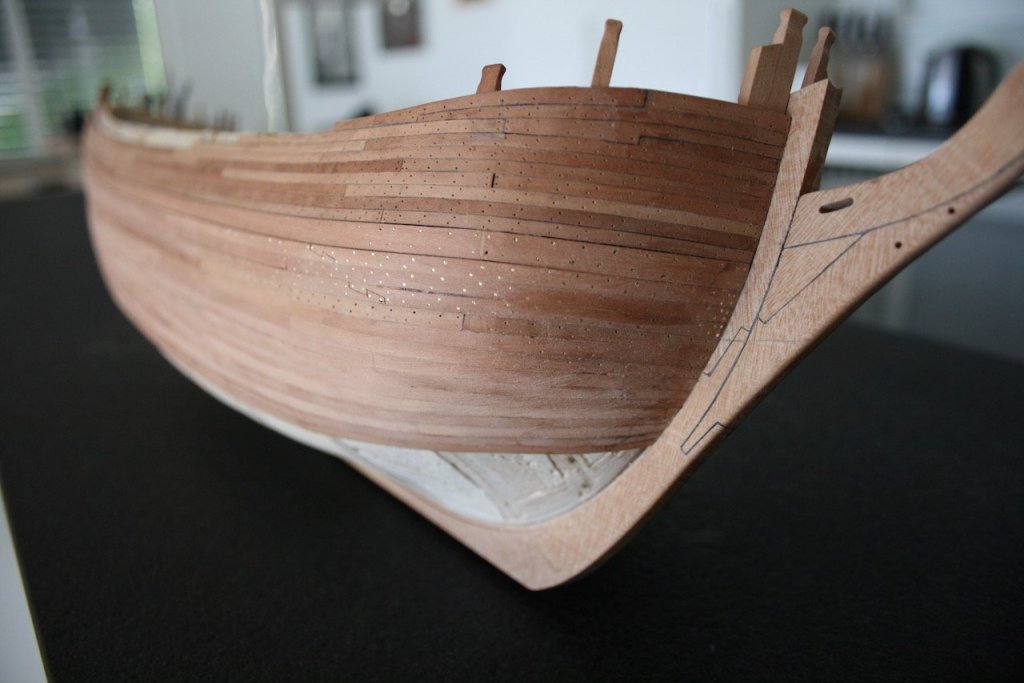
Hello, a little progress on the hull. The lower port side is sanded and as well as treated with a first coat of linseed oil. Waterline is marked. I am now on to think about installation of thin battens as upper end of the coppering. I don't know if this was common on merchant vessels. Has someone an idea? Daniel


-
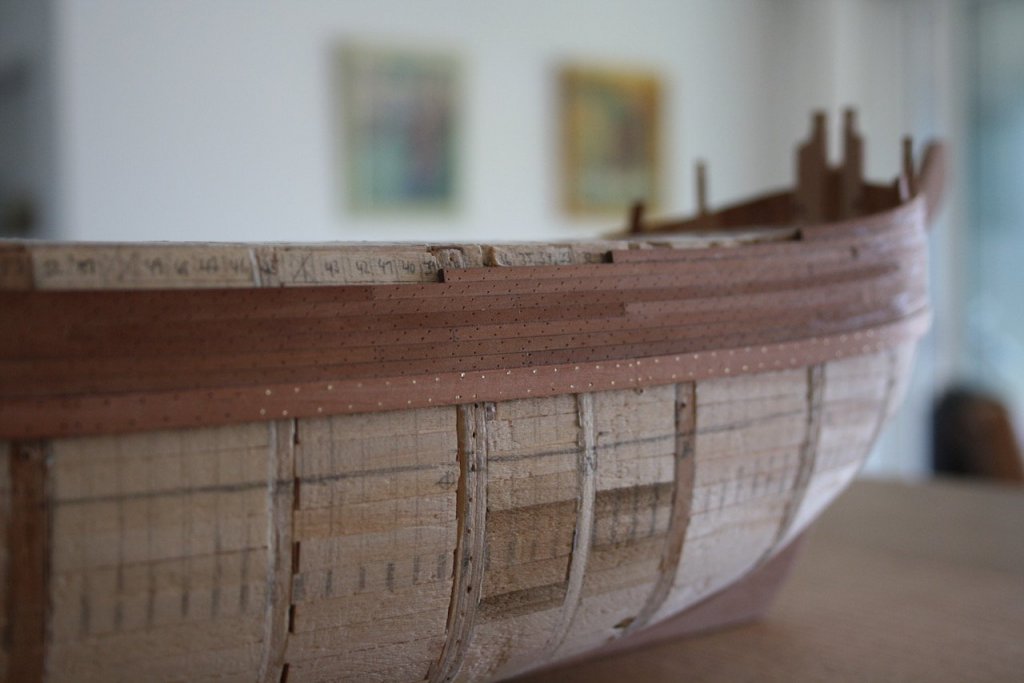
Hello Chris and Nils, Thank you for your nice comments and thank you to all the Likes too!! Traditionally I use brass wire for wales only as it get a coat of paint. After the paint job the nails became slightly visible. However, on my journey to the HMS Victory I've learned, that tree-nails are normally not visible on the painted part of a ship except the bolts. For the visible rest of the hull I us the old technique with cutdown tooth sticks. The underwater hull gets a coppering. Therefore I do no nailing here. I am now on to make some little research for the Spanish frigate Diana with 34 guns. Therefore I've been in Madrid at the Museo Naval and got a good set of plans there. For those, who where impressed by the Science Museum in London, the NMM in Greenwich or the Musée national de la Marine in Paris I really can recommend a visit in Madrid. It is a wonderful city and the museum is of a same quality as its opponents in France or England. By the way, a visit in Hamburgs Internationales Maritimes Museum is also worth a trip! As the most French ships (and it became common practice to English frigates at this time too), the Spanish Diana was fully painted. At the moment I do not know if she was painted in black with the common (yellow)ochre belt or if the belt was painted in red(ochre) as known from the famous Santisima Trinidad. Even when no tree-nailing is required, a bad done paint job can destroy the whole model. We will see. Best, Daniel
-
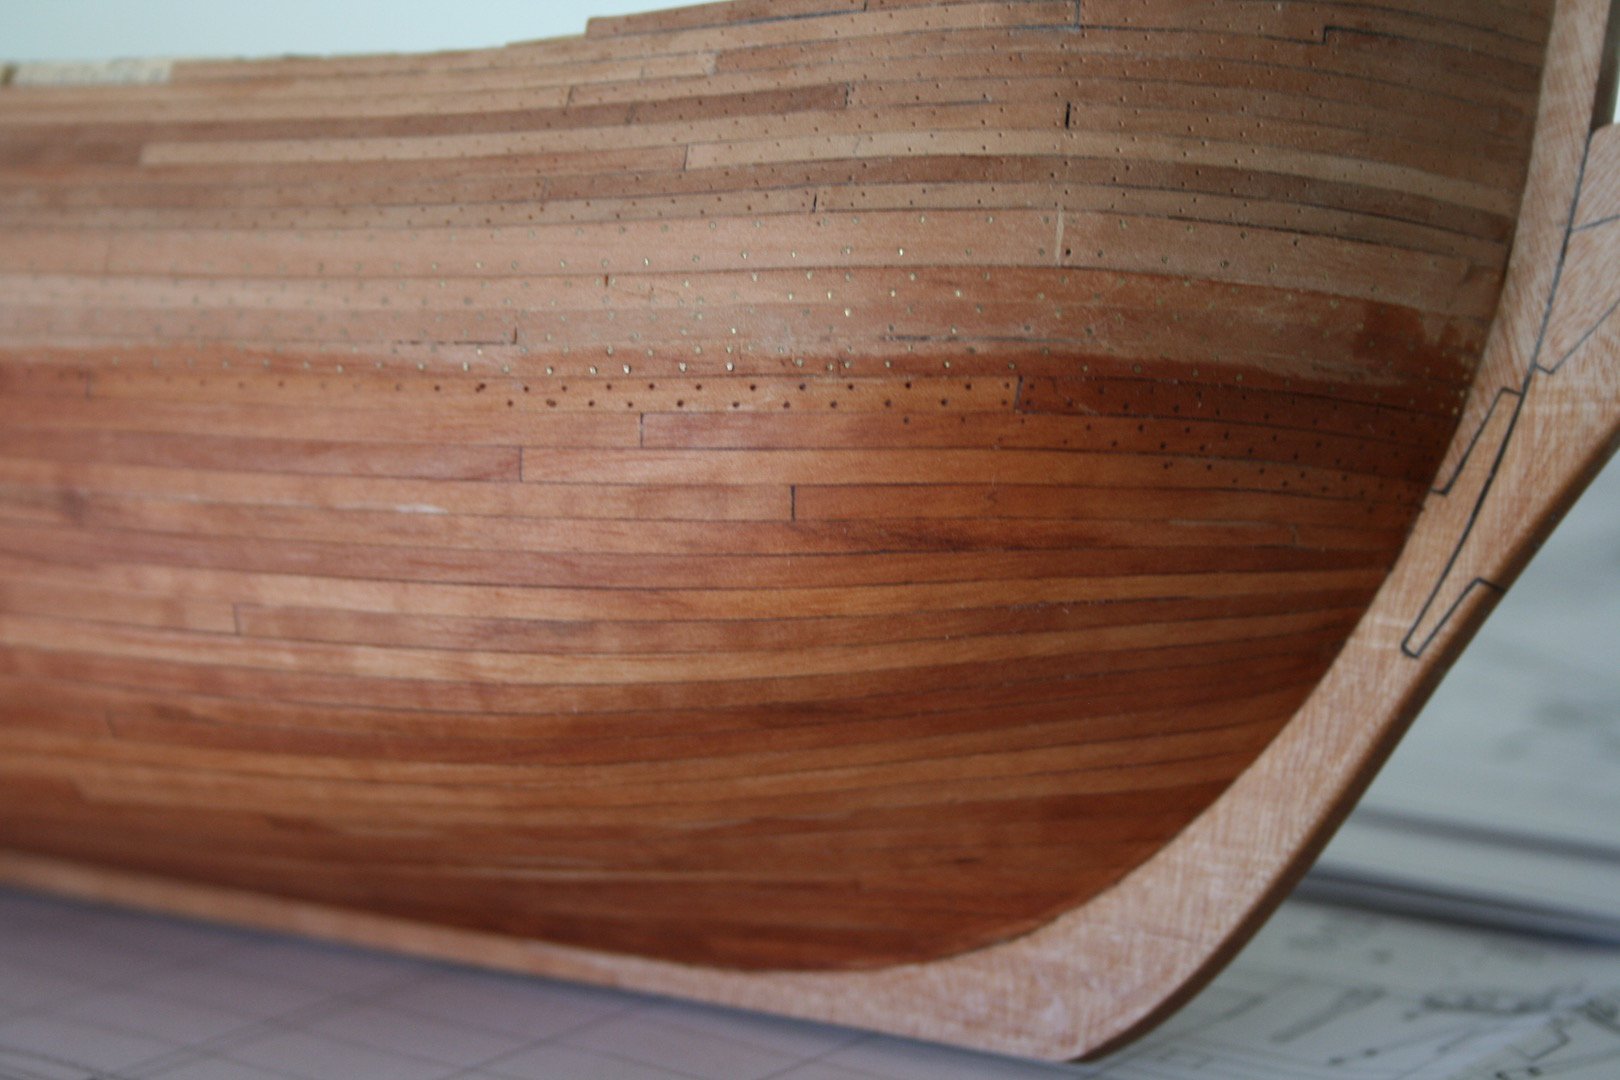
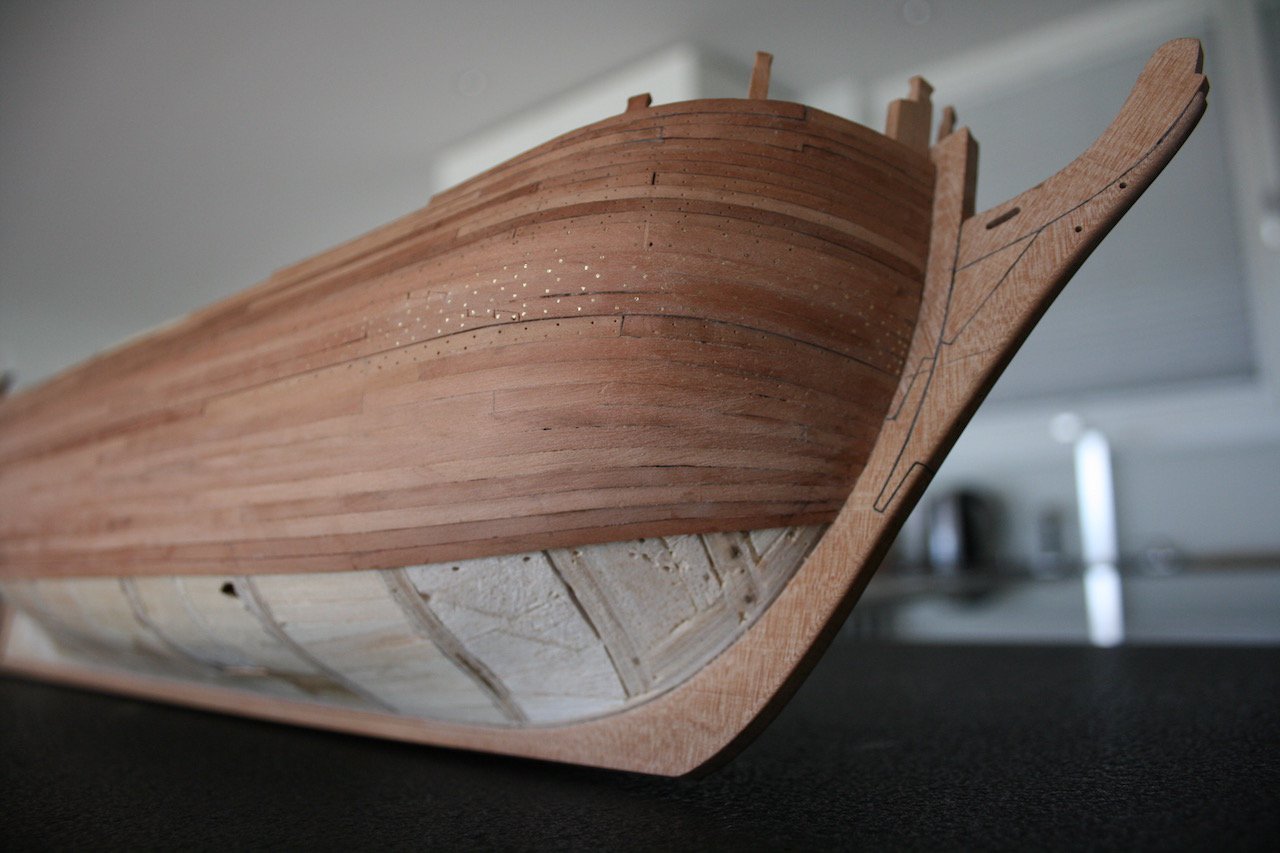
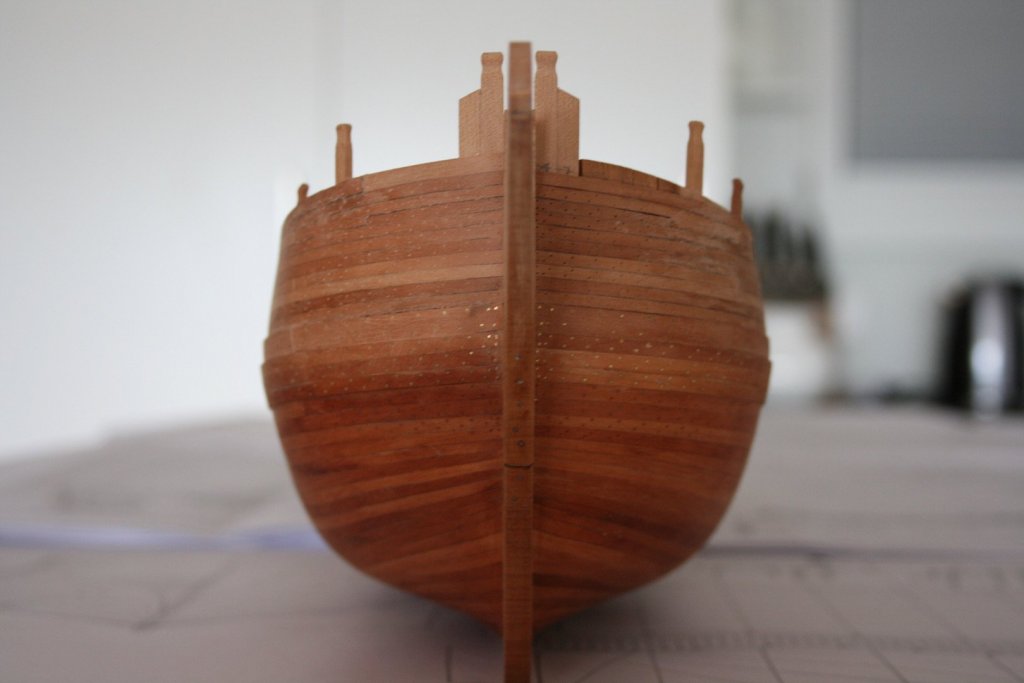
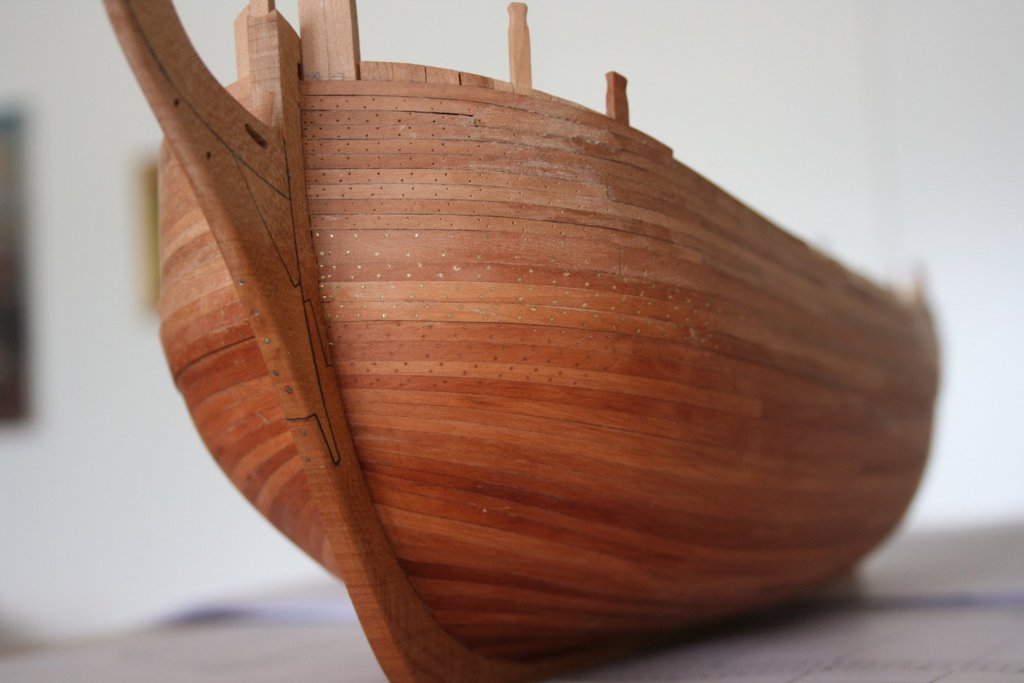
Hello Nils, thank you for your compliment During the last two weeks I had a little time to proceed on the planking. After sanding, the lower hull got a first coat of linseed oil. It is always a special moment, when the oil turns out the colour of the wood and the true lines of the hull became visible. Too bad, but later on the hull gets a copper sheeting. Cheers, Daniel


- 85 replies
-
- 10
-
-
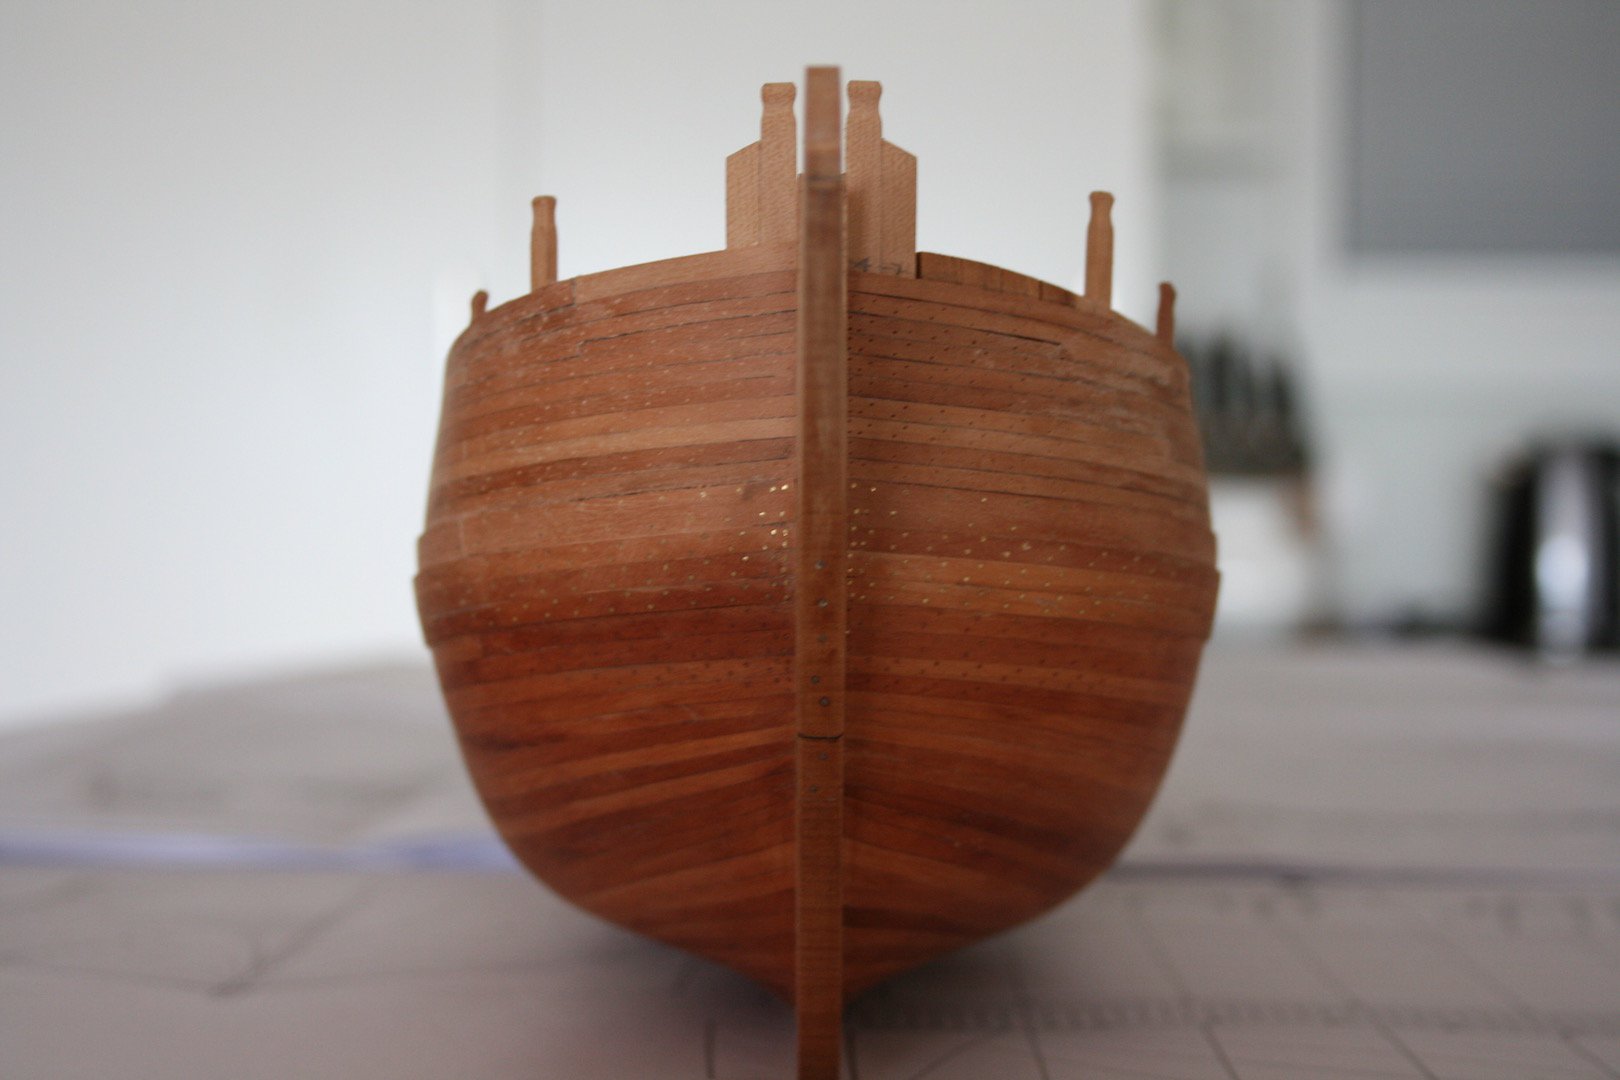
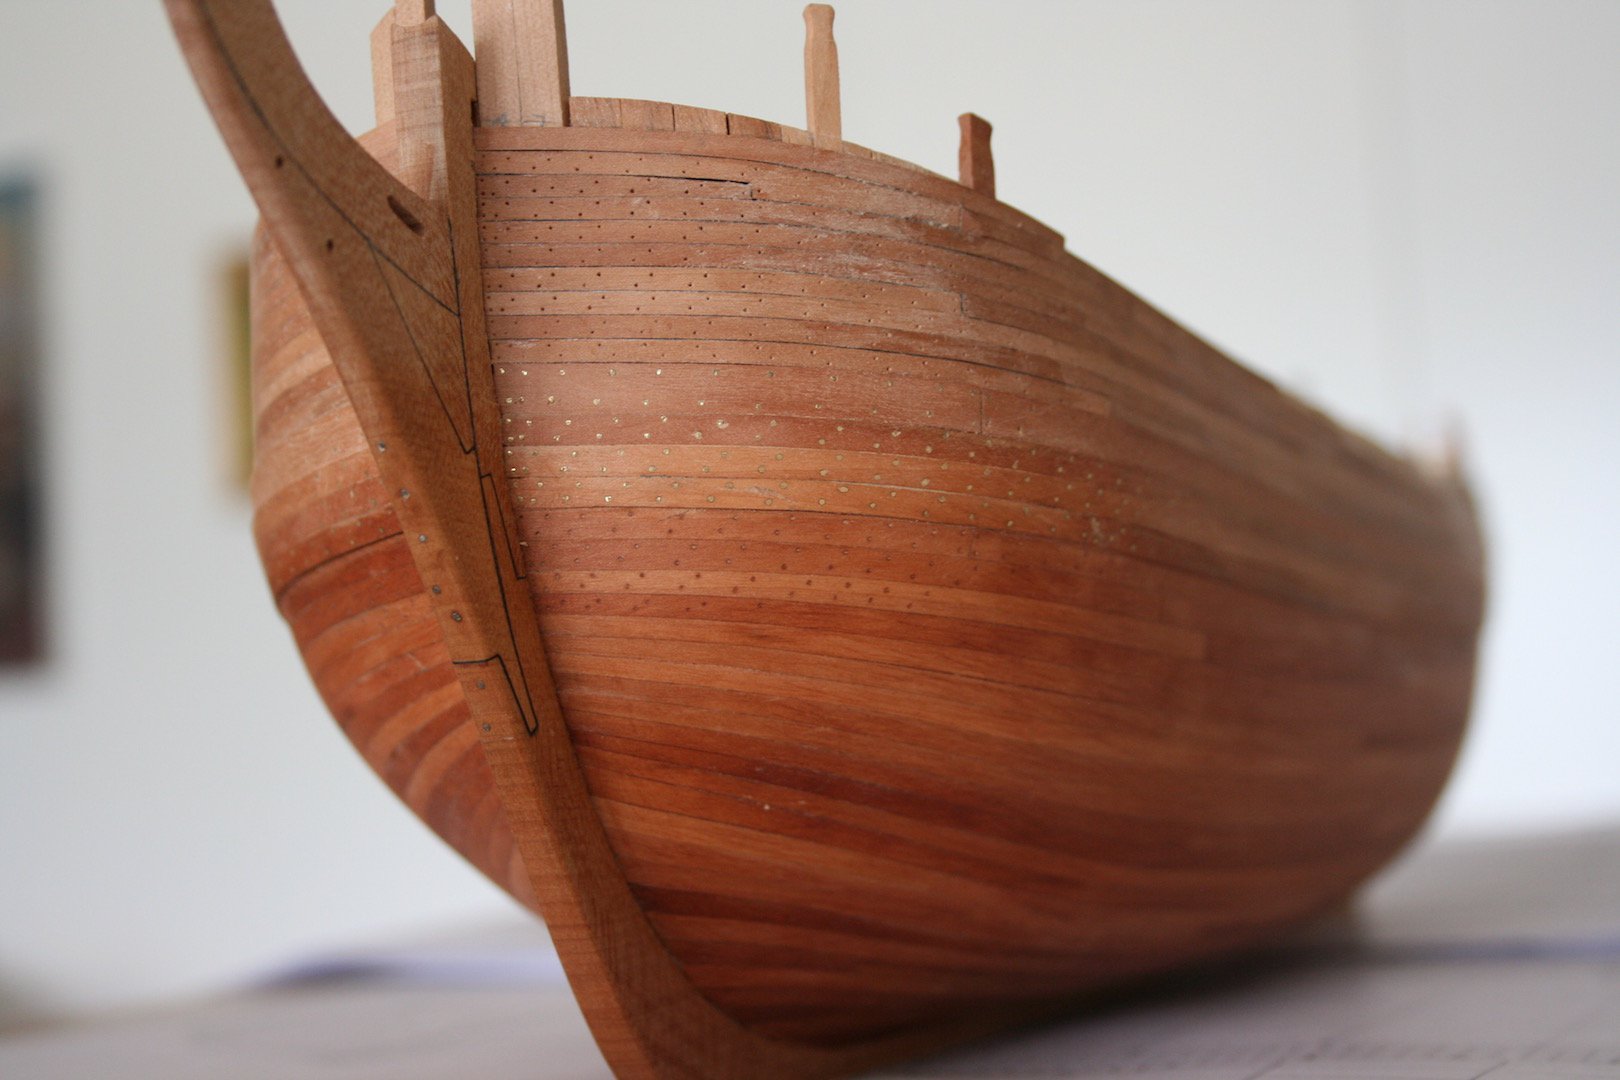
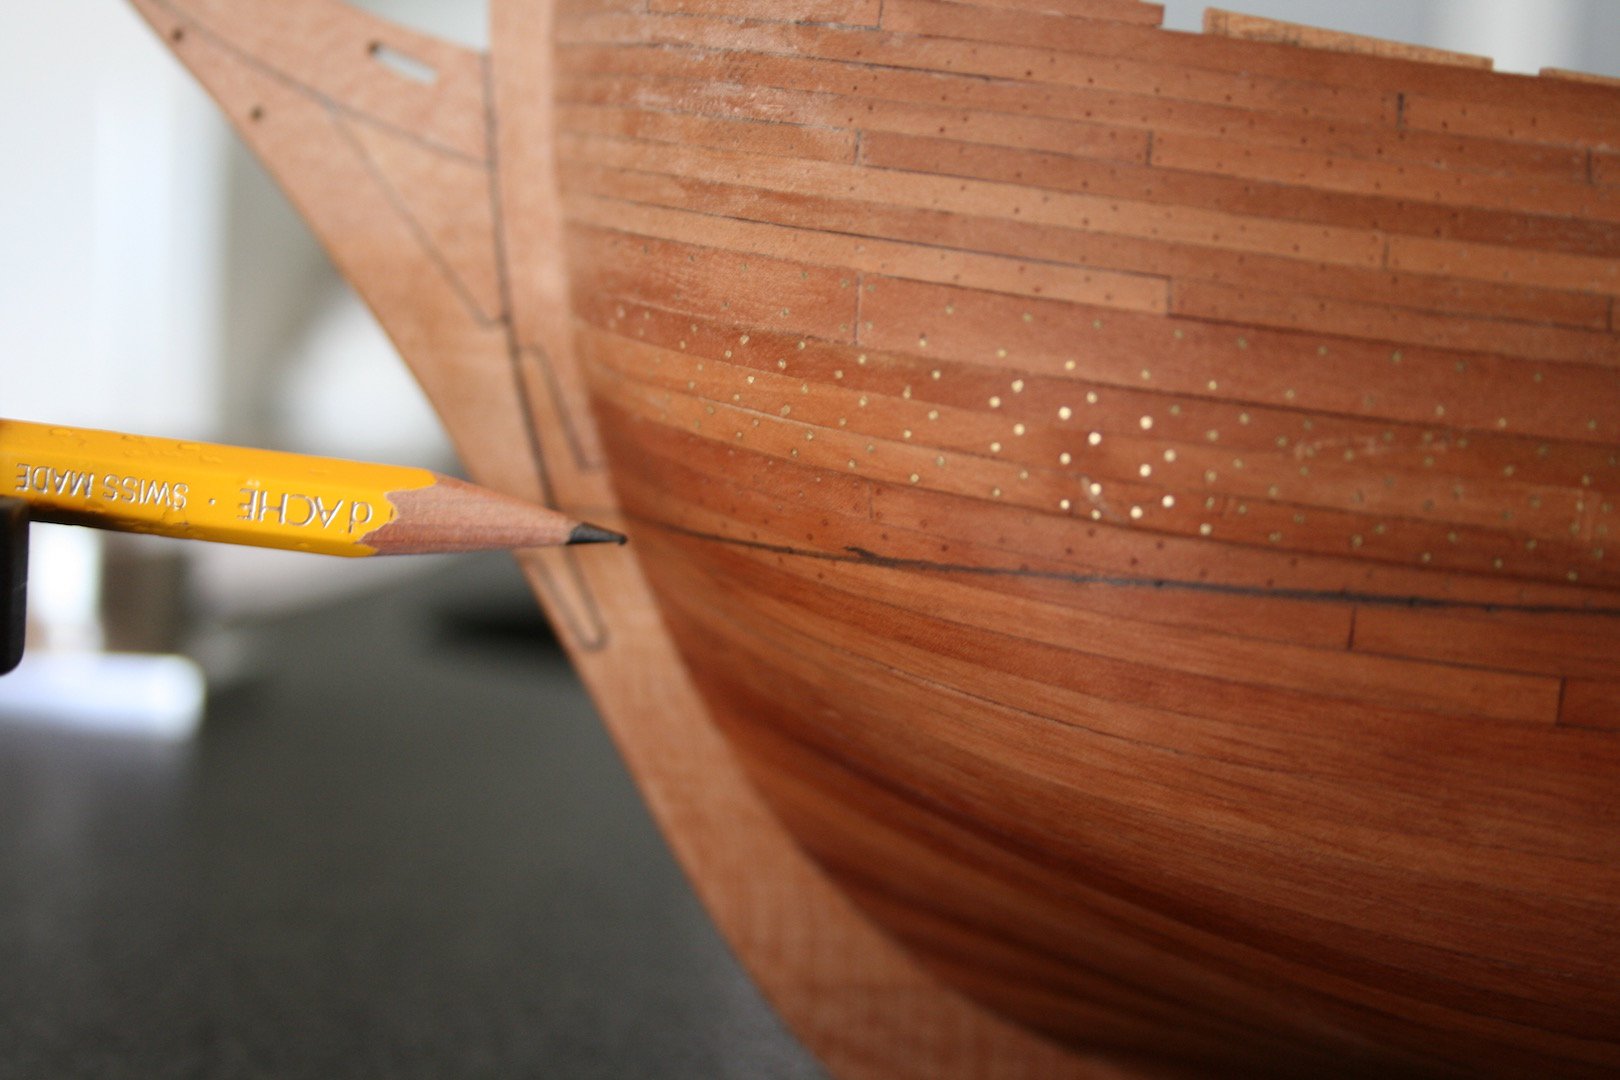
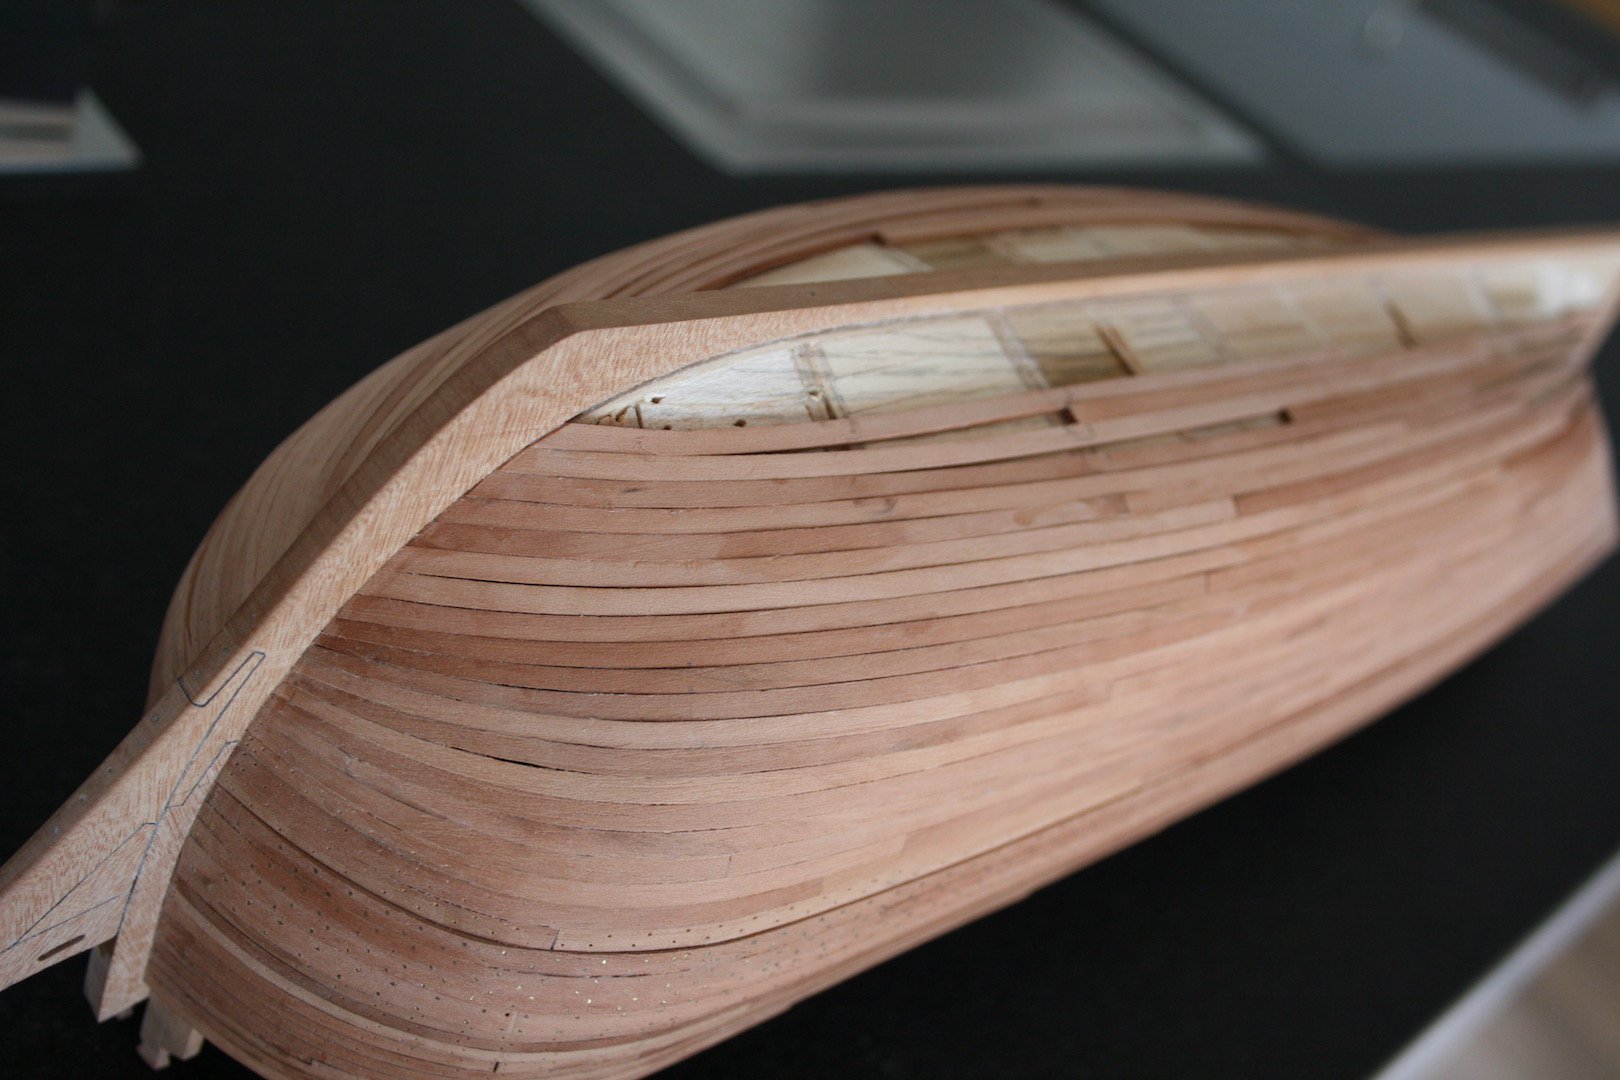
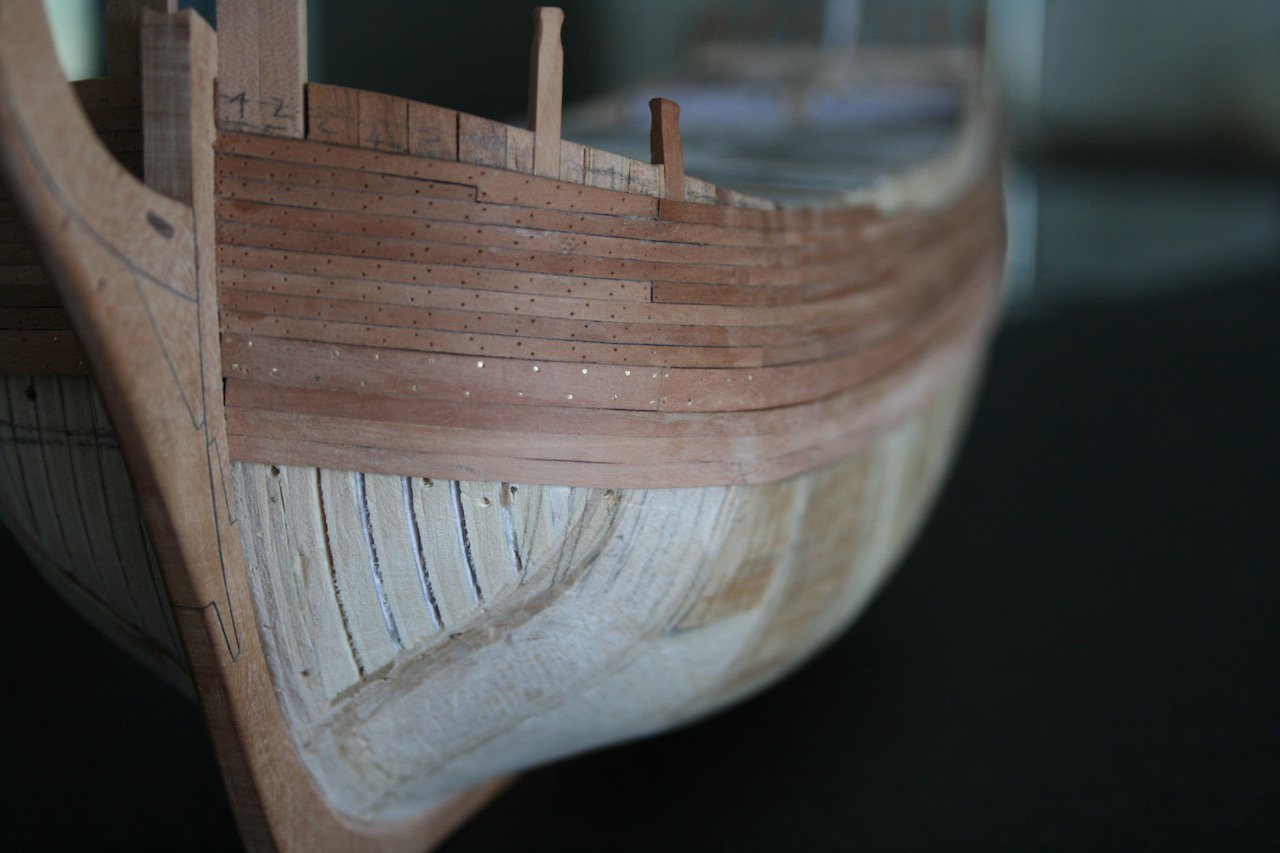
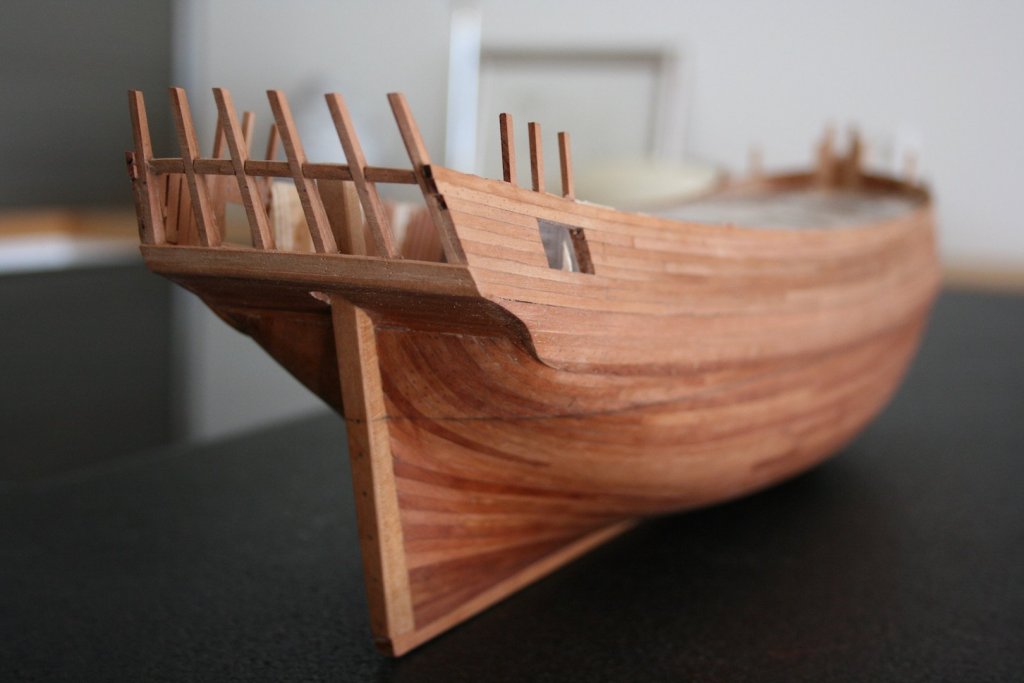
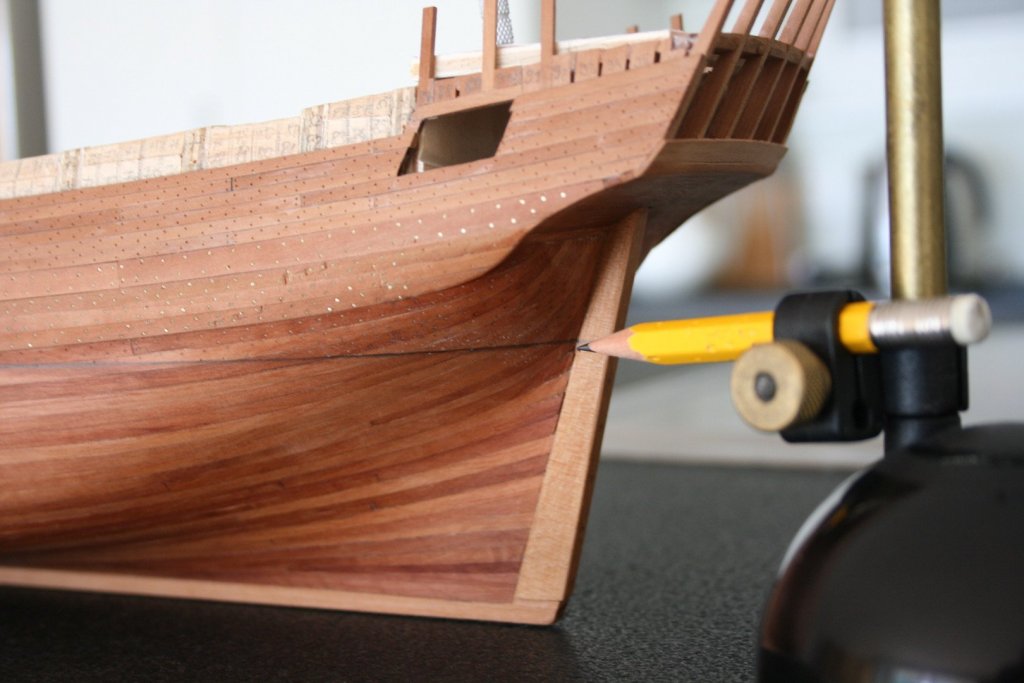
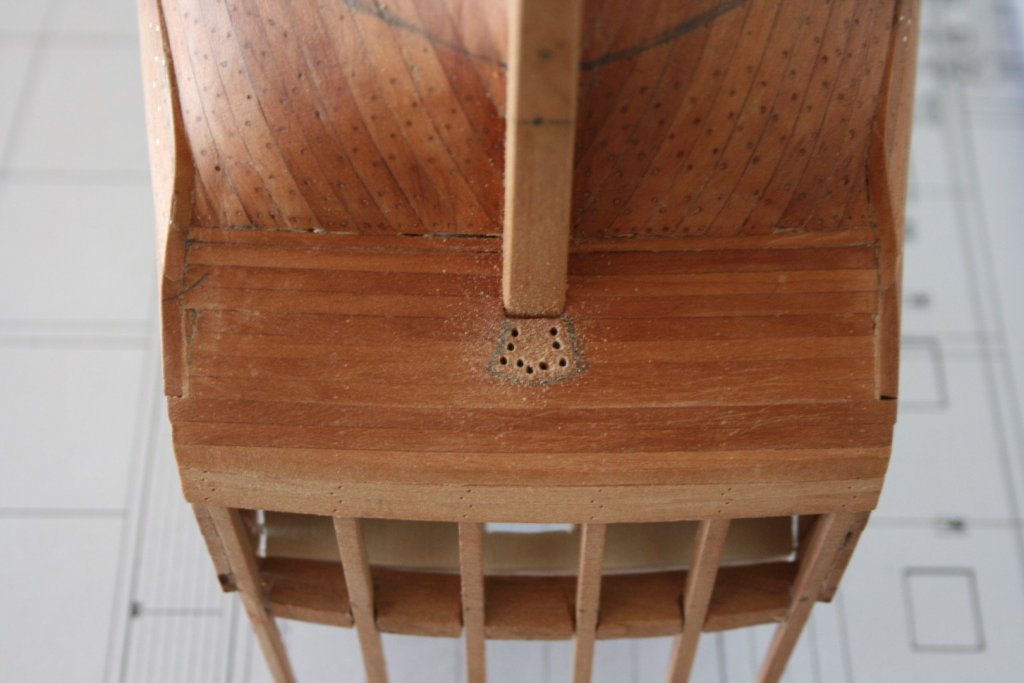
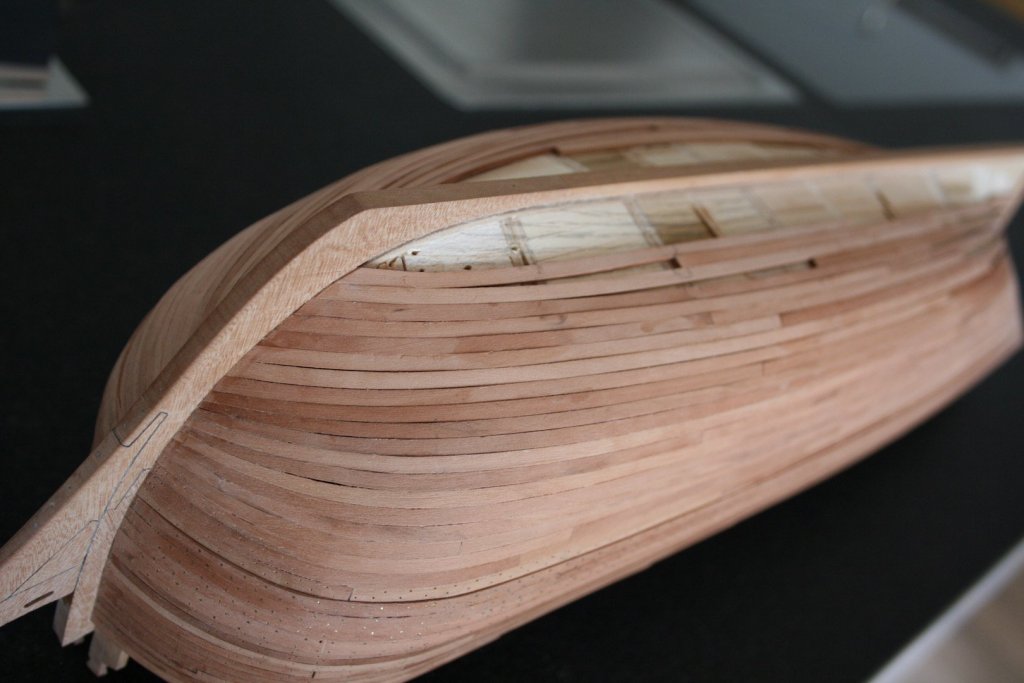
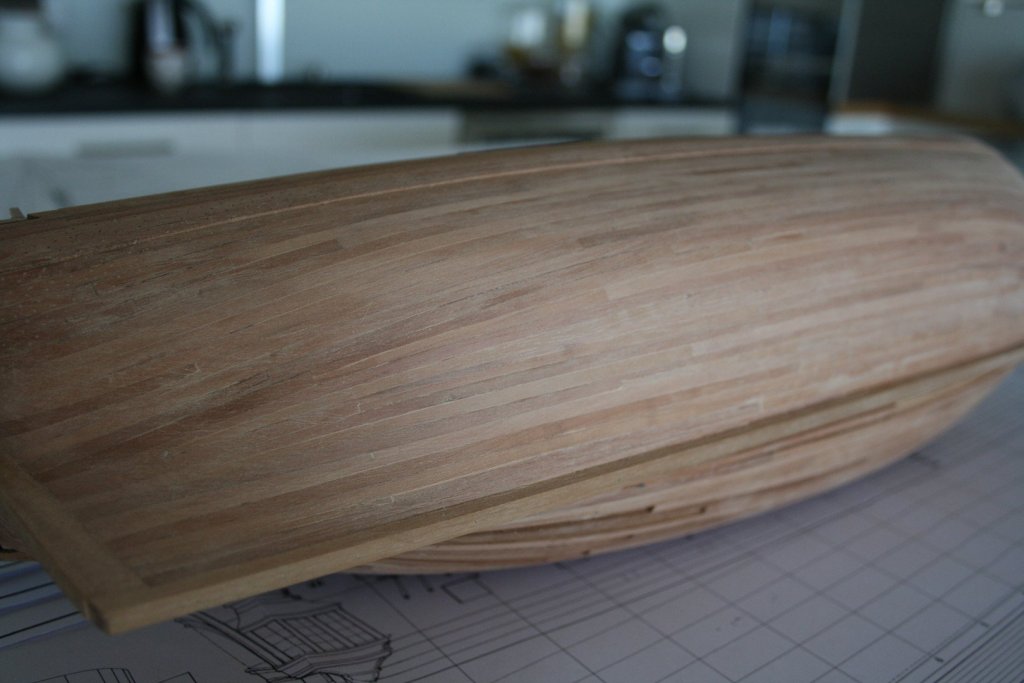
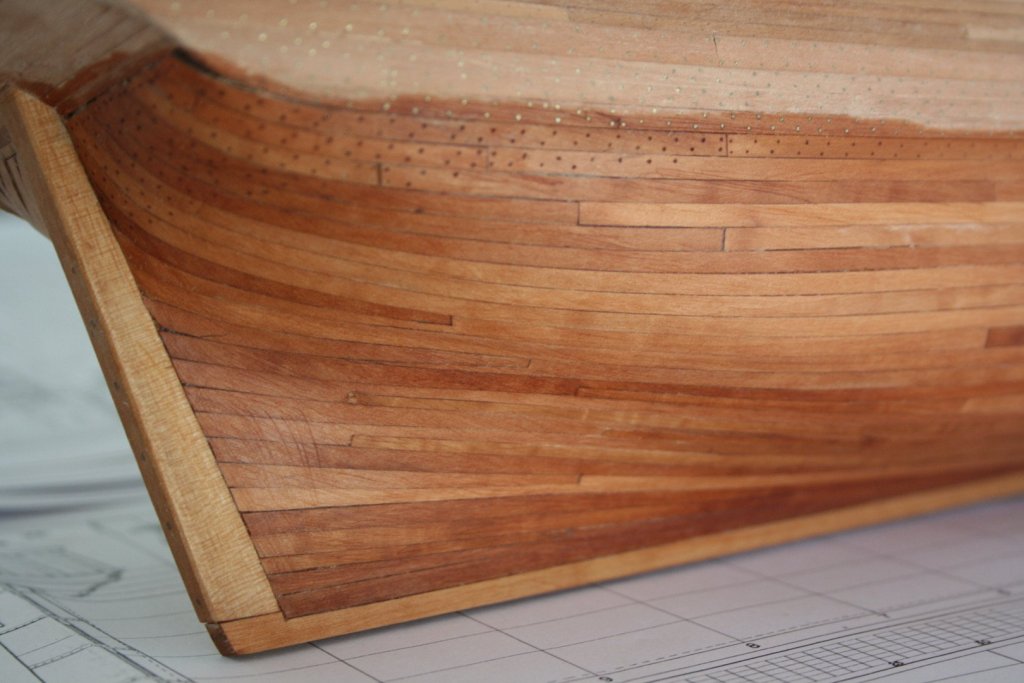
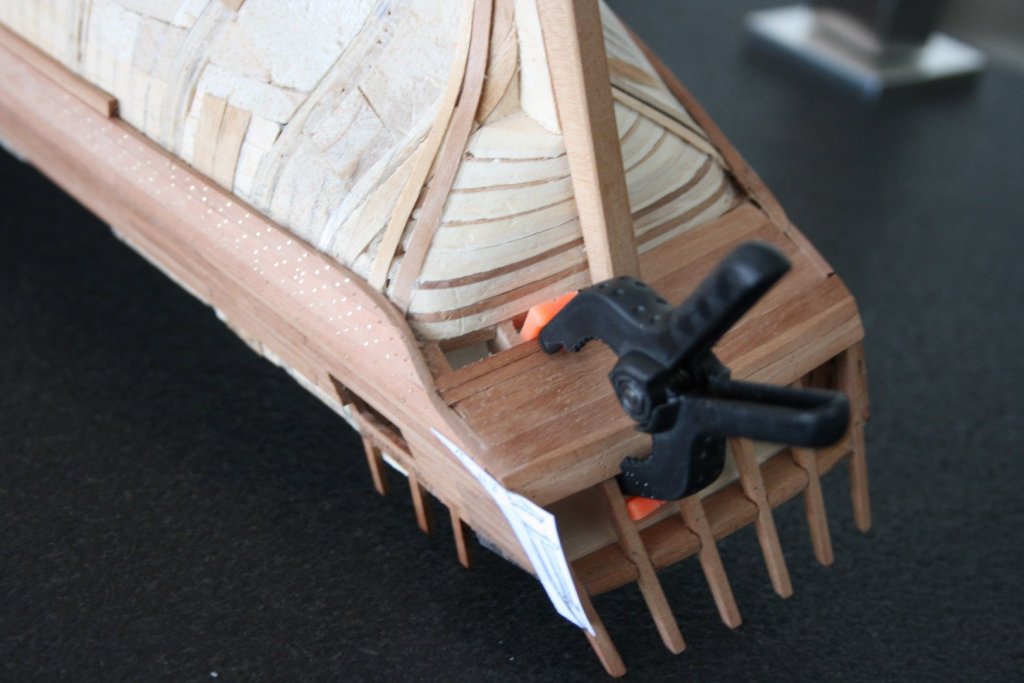
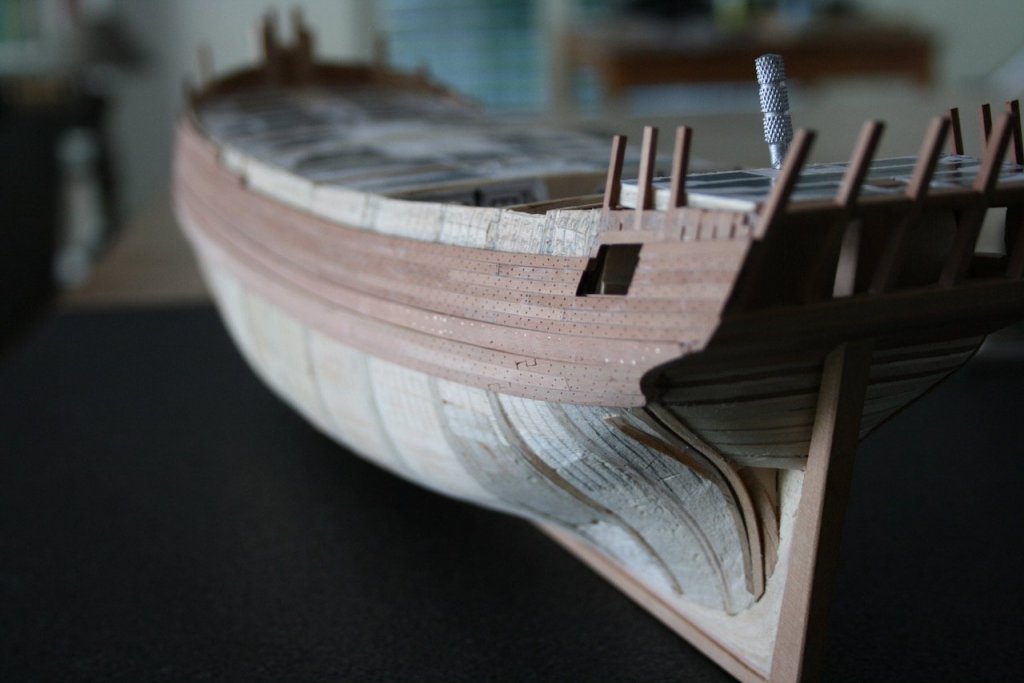
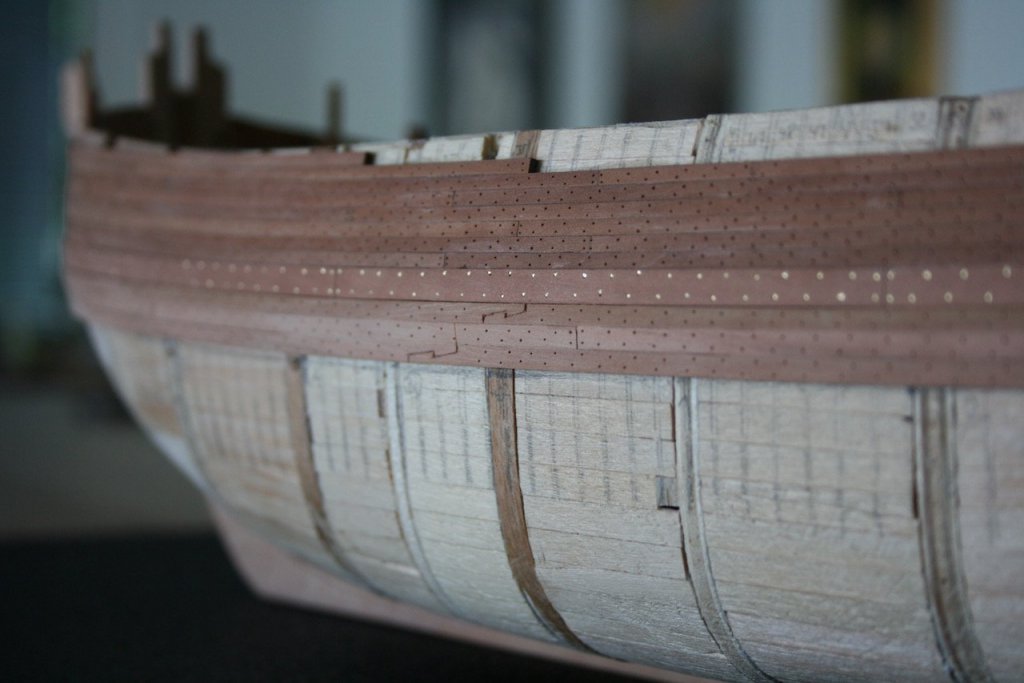
Hello, here some pictures of the slow progress for the planking on the lower hull. Bending the single planks is tricky job but I water the planks for ca. 30 minutes. First dropstrake was needed. McKay suggests three dropstrakes in his planking layout. I'll see, maybe two will be enough. To guarantee an identical planking layout I go on now with the planking job on the port side. Best, Daniel


-
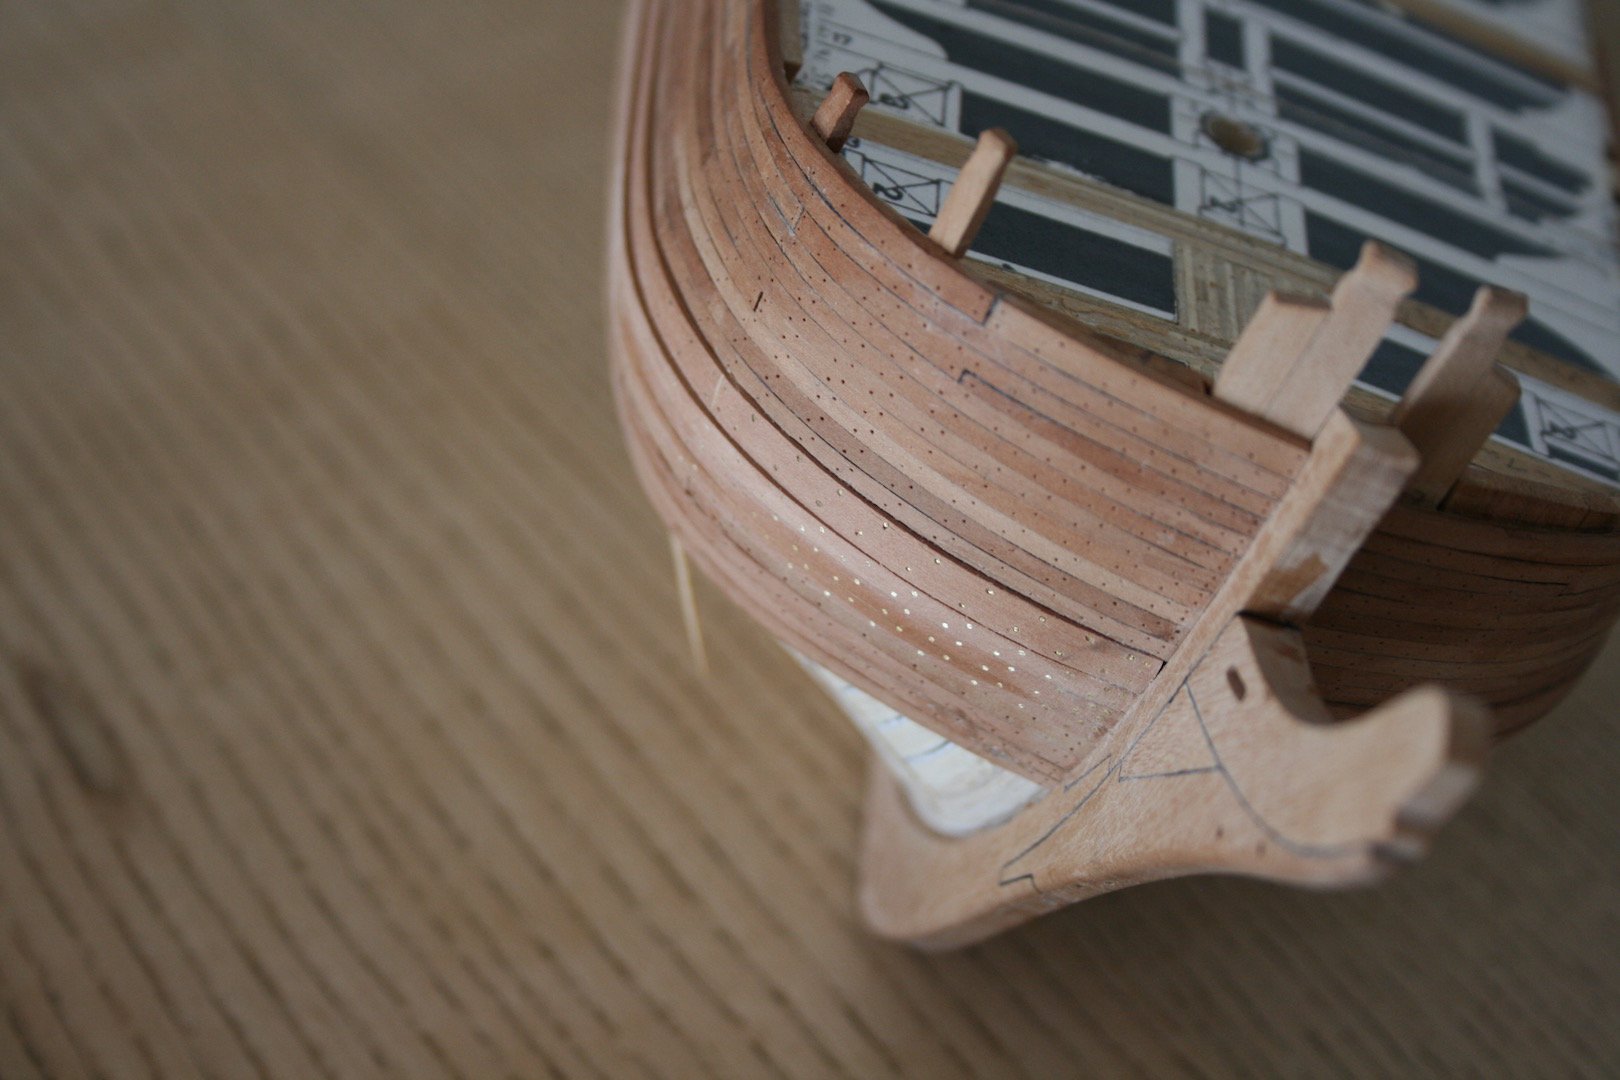
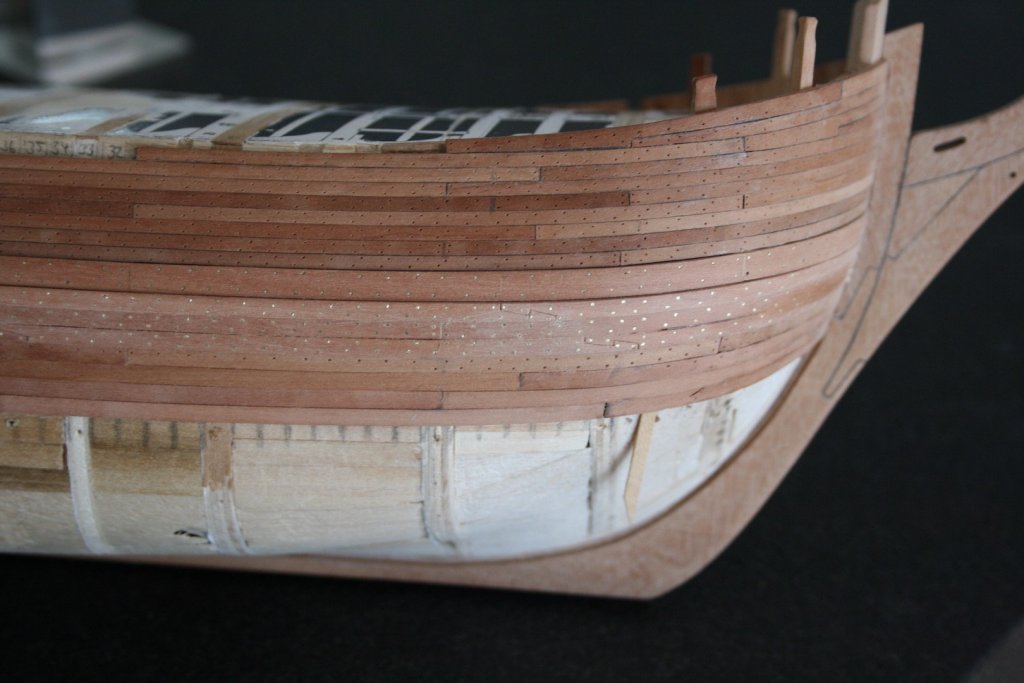
Hello Nils, Thank you vor your pleasant comment !! Meanwhile I've placed the wales on starboard including simulation bolts by 0.5 mm brass wire. Unfortunately I've sanded down the strakes on the lower stern too much and had to replace them after I have given the lower wales the right shape. Cheers, Daniel

-
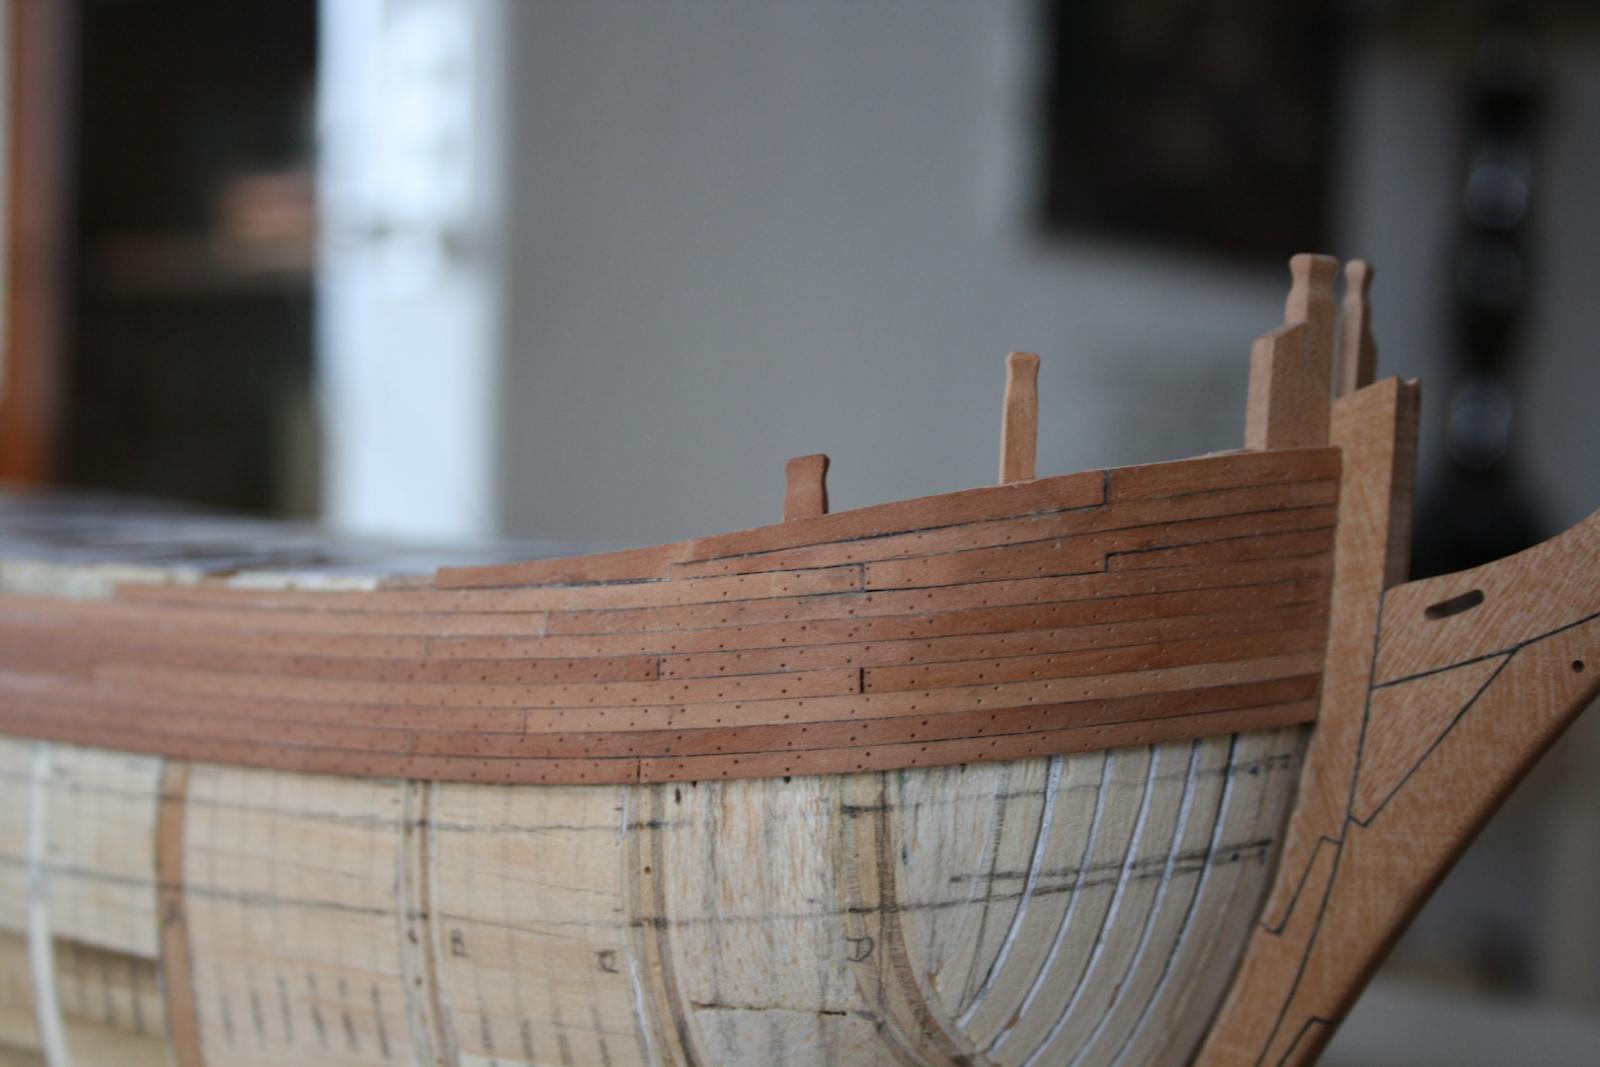
Hello, the wales on the portside are placed, Daniel
-
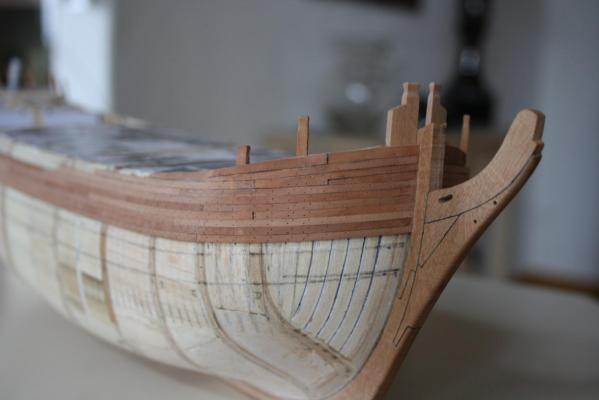
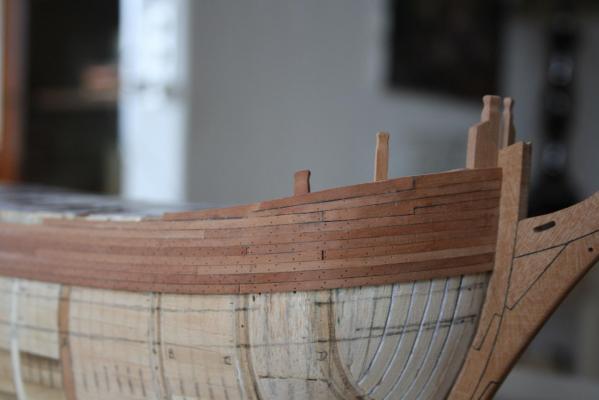
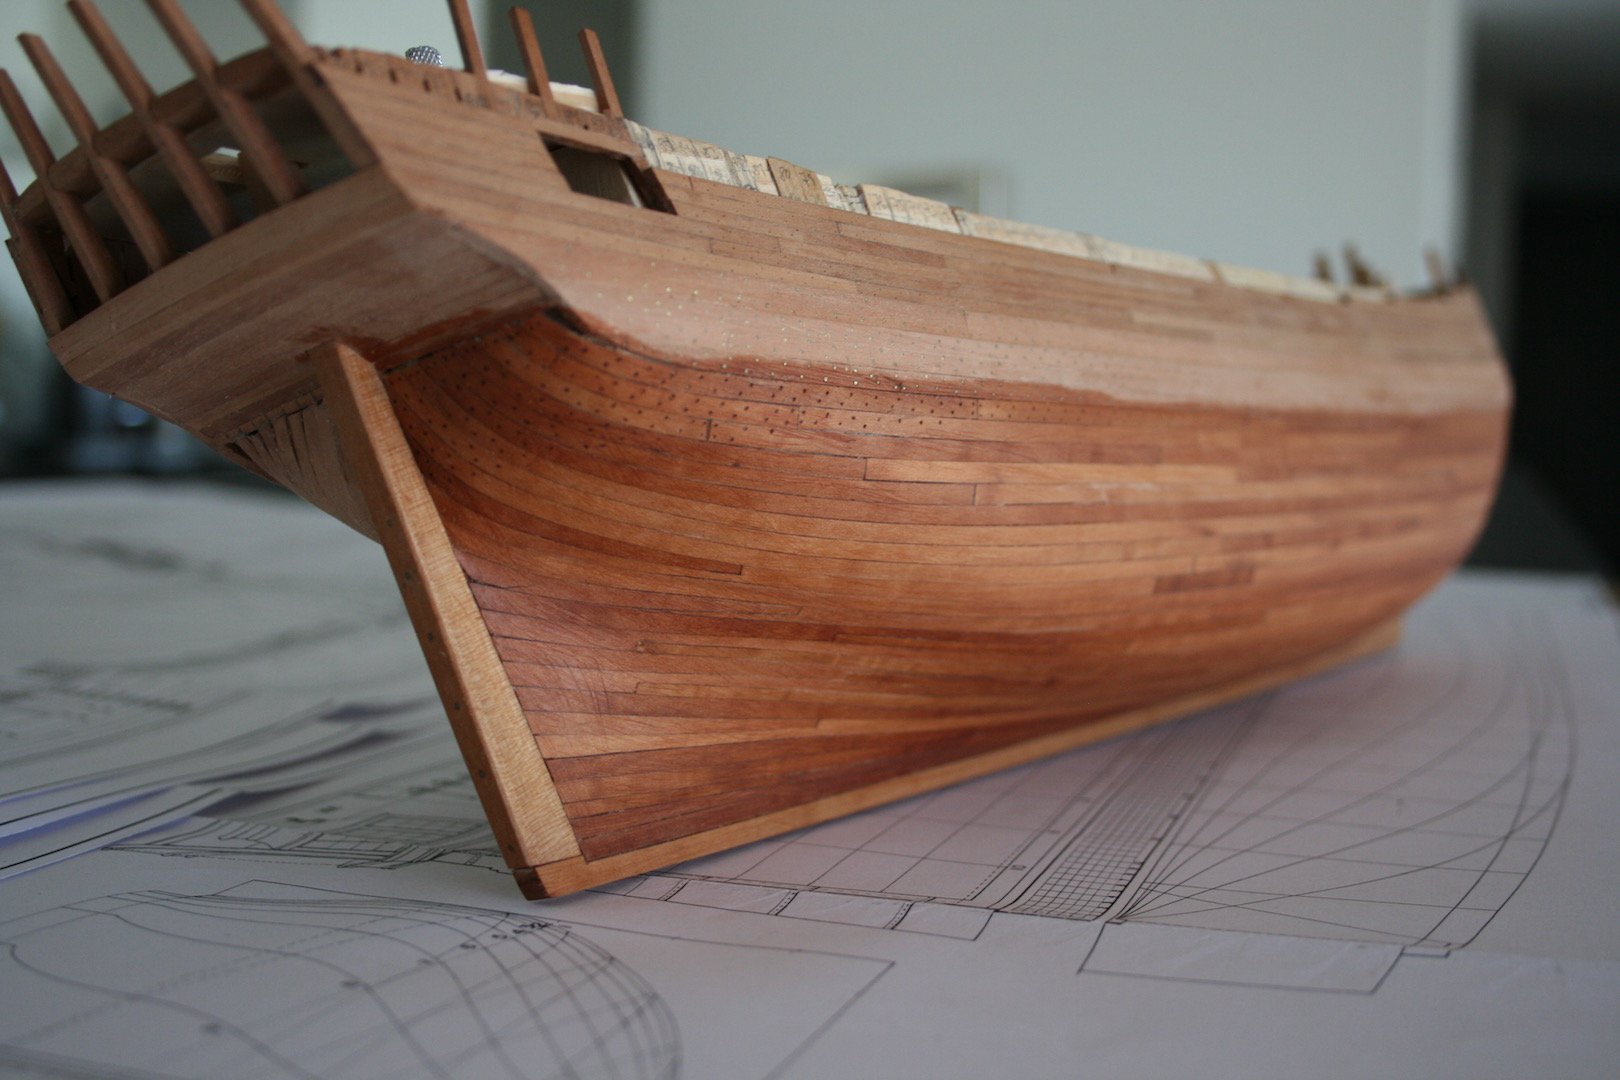
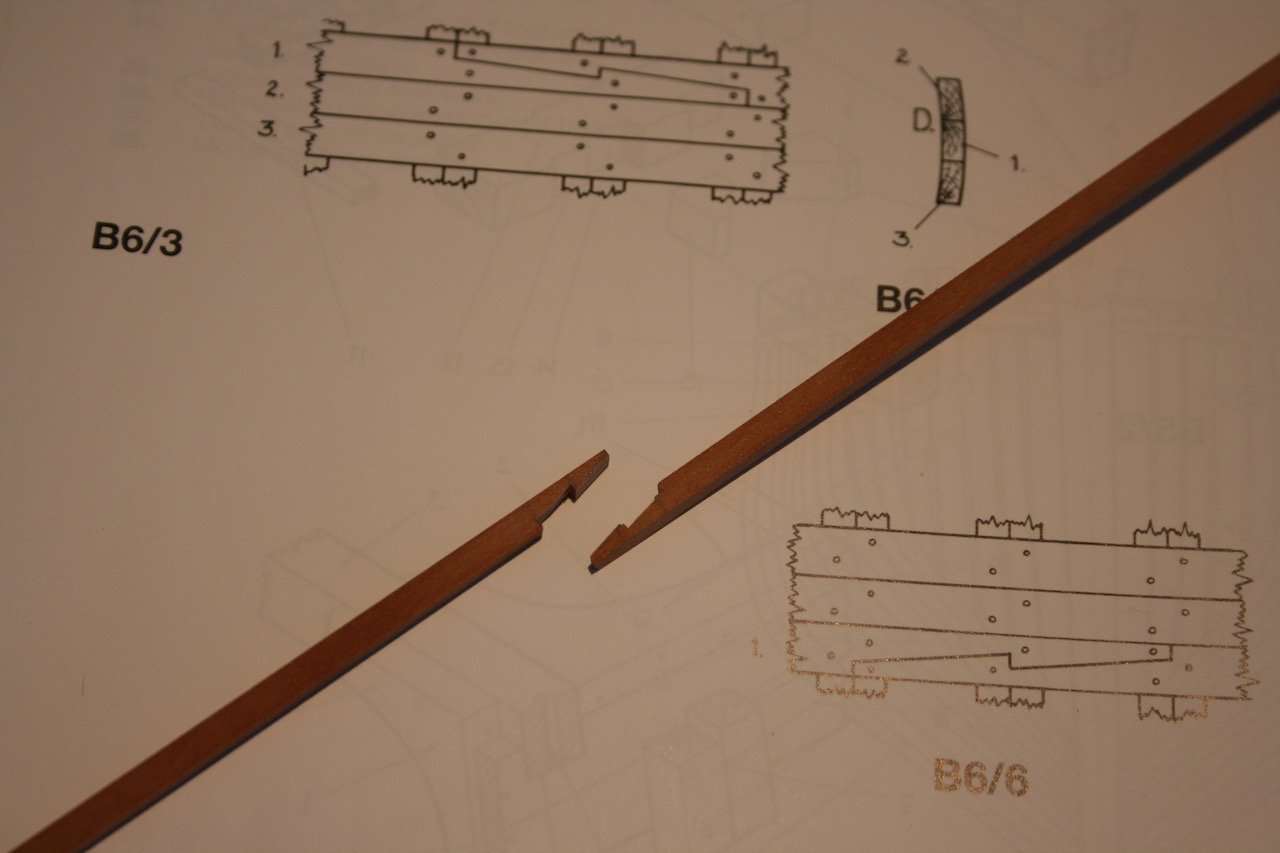
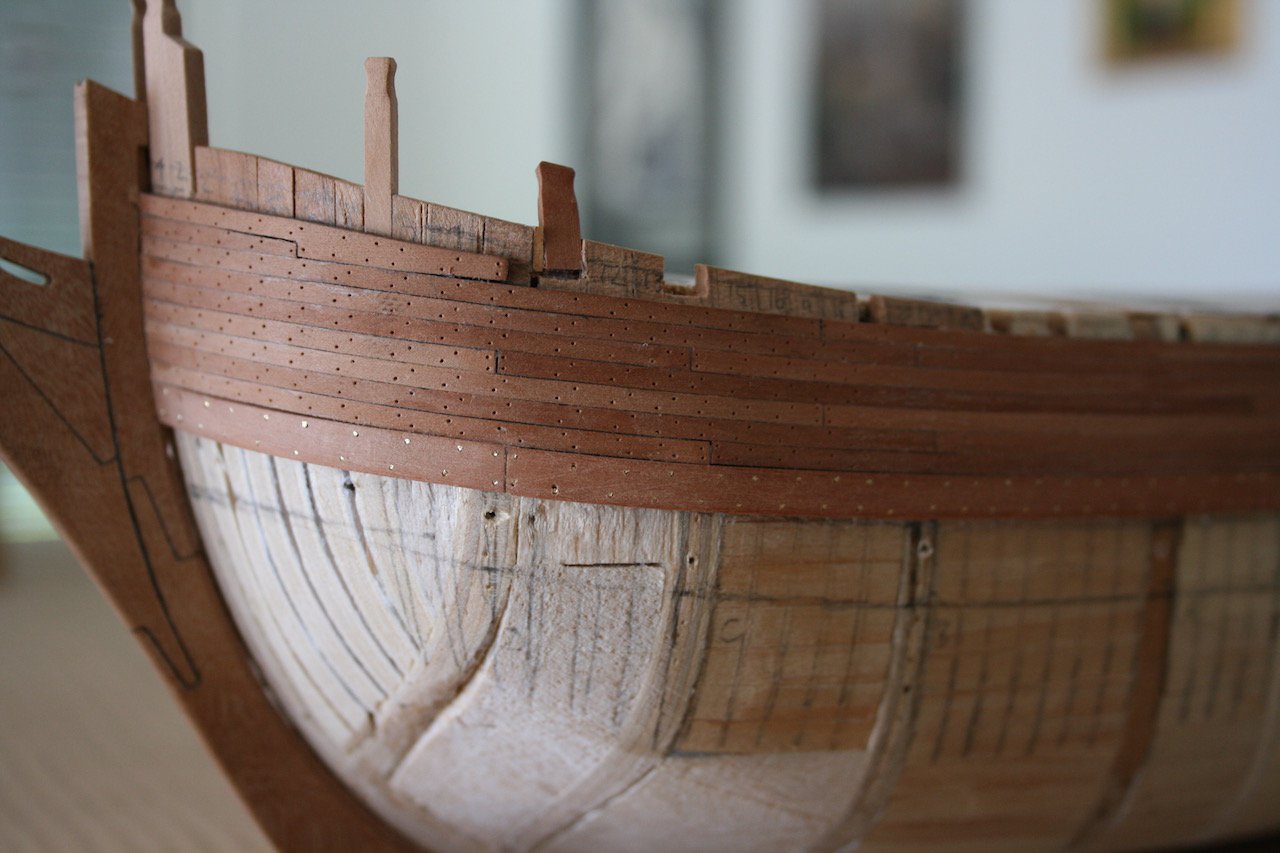
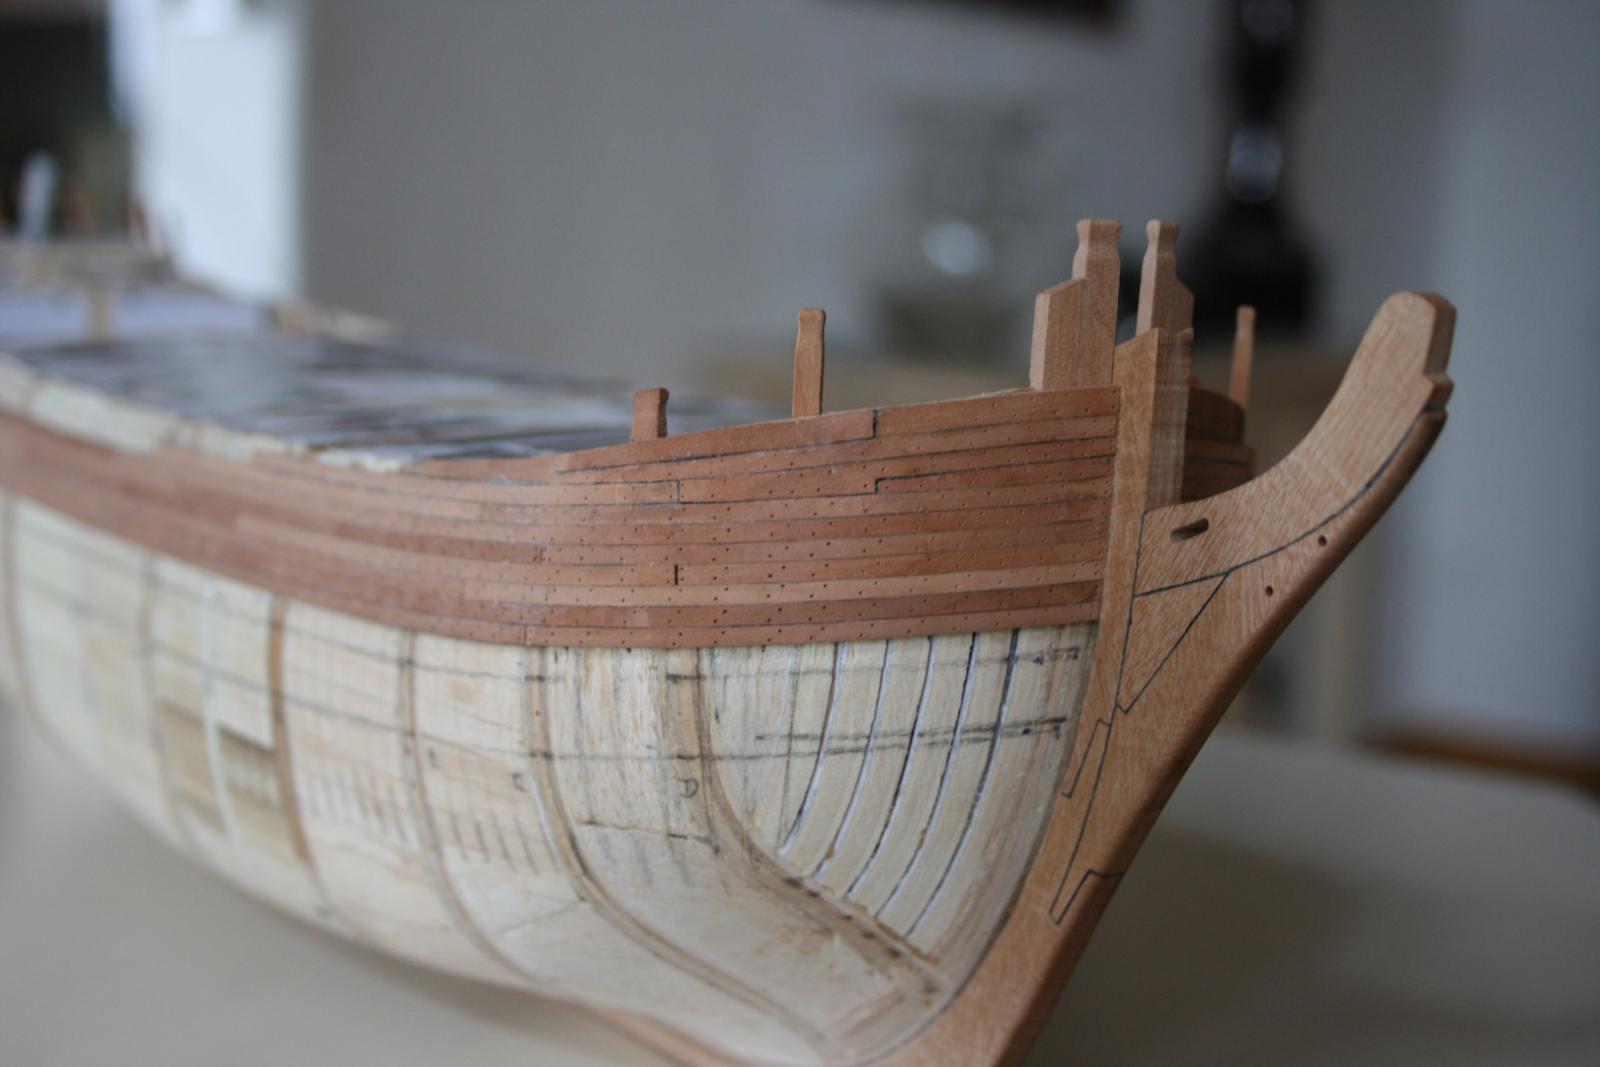
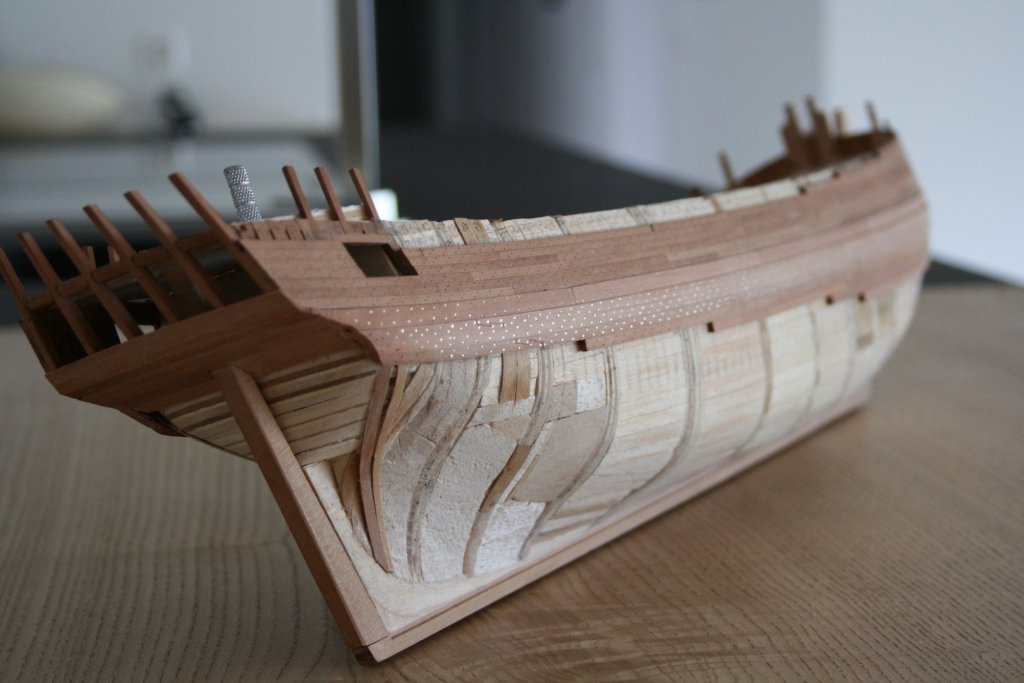
Hello, After more than one year I've had this week time to continue with my Bounty and mounted the strake above the wales including nailing. Later it gets a yellow ochre paint. Now I am on to prepare the wales. The upper and the lower wale will get a hook scarph, the wale in the middle will get a classic butt joint. It is because of an old idea we've discussed on this forum how could the get the hull of the original vessel much stronger for it's famous voyage in service for the admiralty and I've found this solution in the book AOTS Granado. Maybe the Bounty of 1787 never had this feature as it was a common practice of the admiralty to purchase a vessel just for one mission and to sell it later again. However, we know that Bethia/Bounty got an alteration to fitting her out for the circumnavigation. on the other hand, the fitting out just took 2-3 months untill she undocked from Deptford Yard. Daniel


-
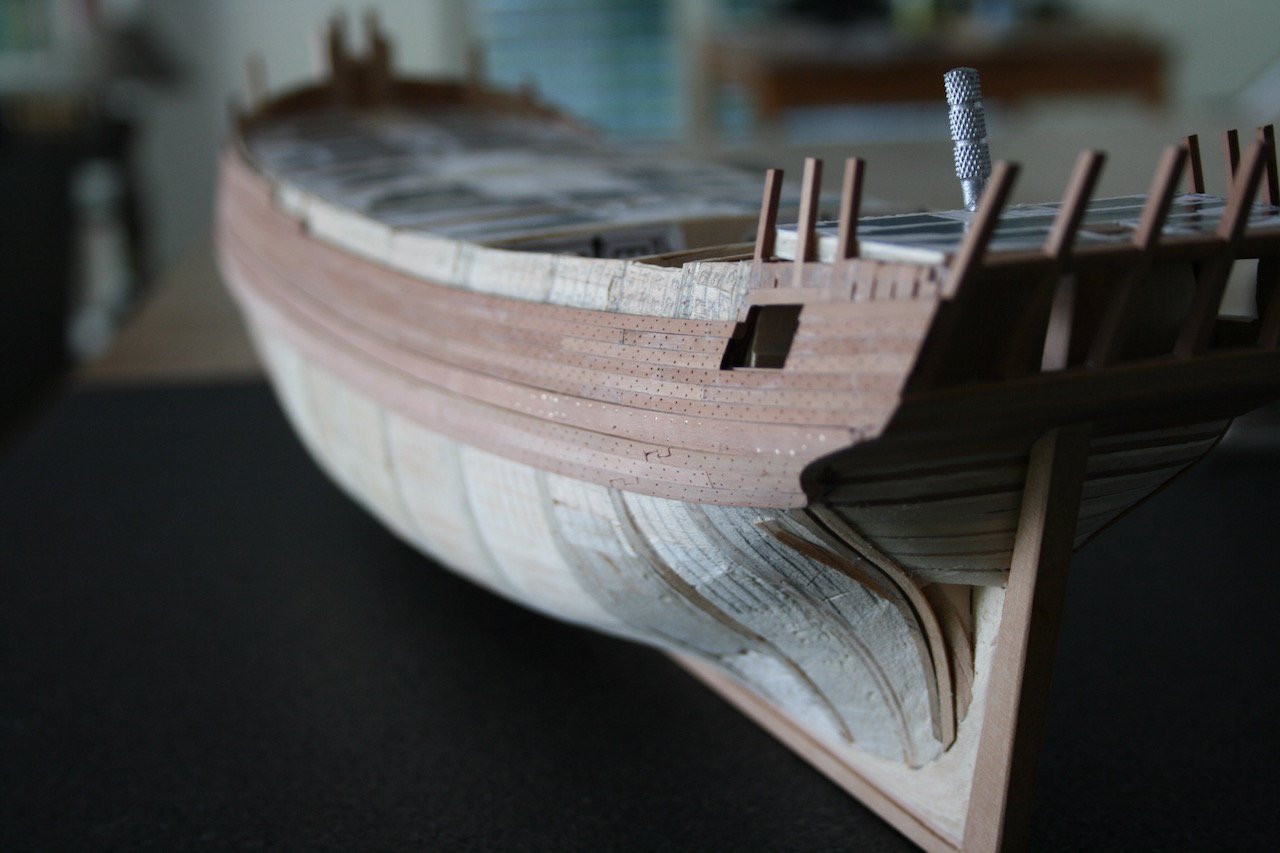
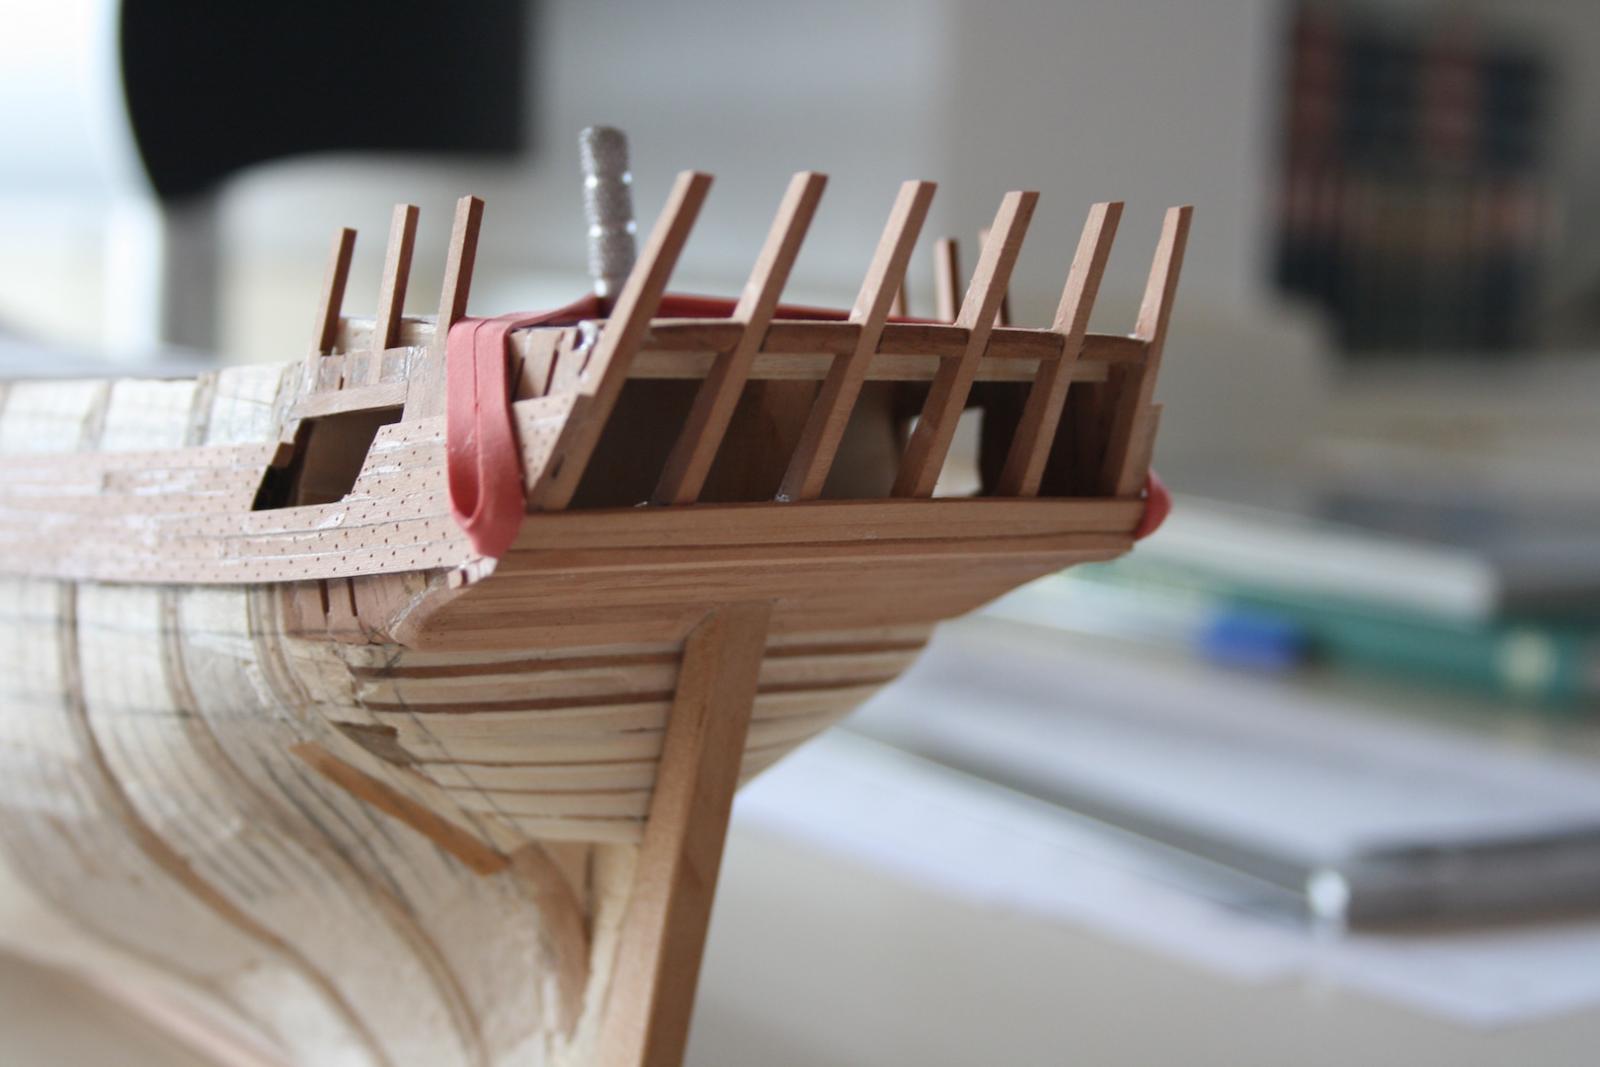
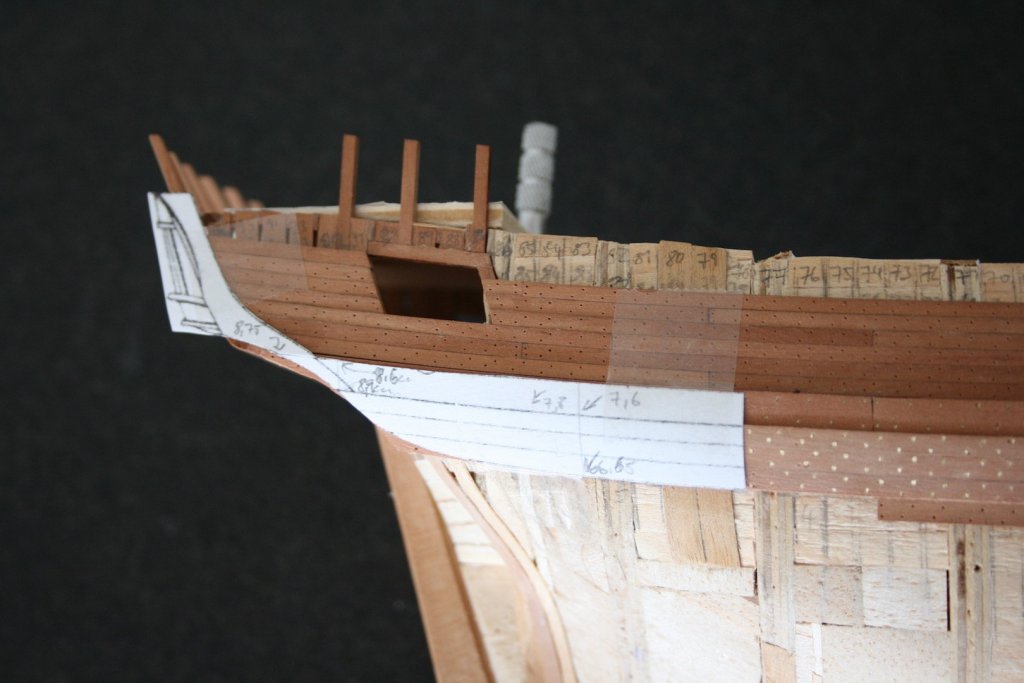
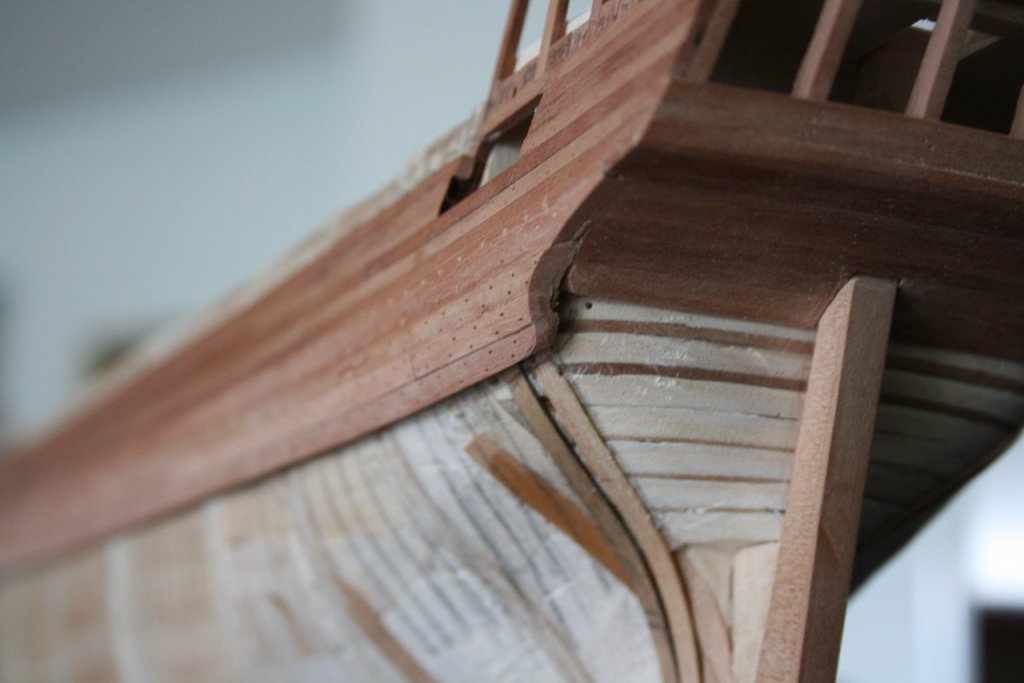
Hello Tony, Thank you for your input. TurboCAD offers also a Mac version. That's perfect. And I have to put it on my birthday list :-) Hello Dashicat, In all books, plans and AOTS I have only seen on Marquardt's Endeavour plans, that the wales are not running thinned flush into the rabbet. He has widen the rabbet to house the wales with the original width on his plans. That's why I had this question. But I will go on with thinning the wales as I find it a very interesting little detail. Regarding the wales I have in mind to fit the upper and lower wales butts with hooks. The middle strake will be standard. That scheme is seen on Granado. Anyhow there must be a reason why the Admiralty has chosen for Bethia, Earls of Pembrook and so on. There where probably a lot of potential ships. But I do assume, they where bought because both of them have been fitted more than less to the royal navy standards. As I do remember correct. Cook has chosen the Earl of Pembrook personally. And he was doubtless one of the best navigators of his time with excellent understanding about special demands on a ship. Am I right? Hello Lawrence, Now you can start your build soon and I am keen to see some progress on it. Because of my real job I had just limited space to do some progress on my build. This weekend I have solved the upper planking at the bow. On all plans it is clearly detective that the sheer is not running with the wales. It goes up at the bow. Following McKay the hull is 2-3 plank strake higher comparing to the mid section of the ship. He has suggested in his plans to thin the planks down to zero at its end. I doubt that was the right planking technique and have used some filler planks / joint butts as it is a common practice for the underwater hull. To me it makes much more sense as each plank can be fastened properly at the end. If you follow McKays draught, the top plank can't be fastened properly as there is not enough wood to fix it to the frames. Now it is looking a bit rough but after tree nailing and sanding it will turn out properly. Cheers, Daniel