Supplies of the Ship Modeler's Handbook are running out. Get your copy NOW before they are gone! Click on photo to order.
×


Siegfried
-
Posts
153 -
Joined
-
Last visited
Content Type
Profiles
Forums
Gallery
Events
Everything posted by Siegfried
-
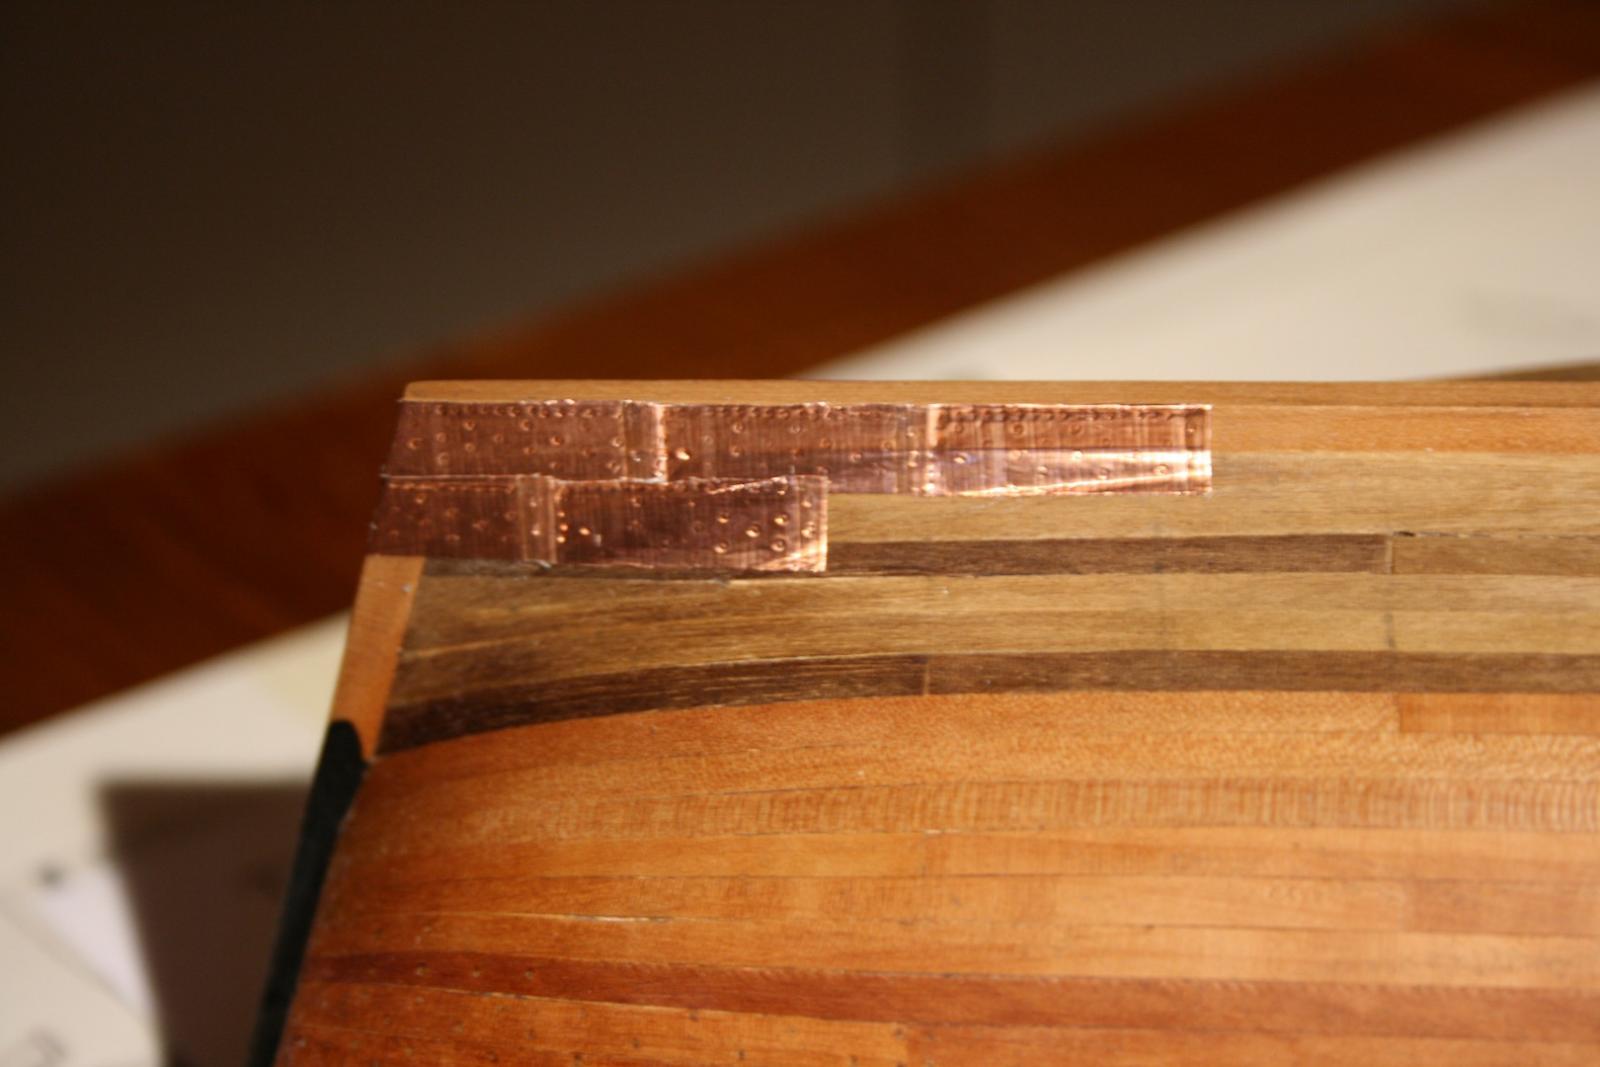
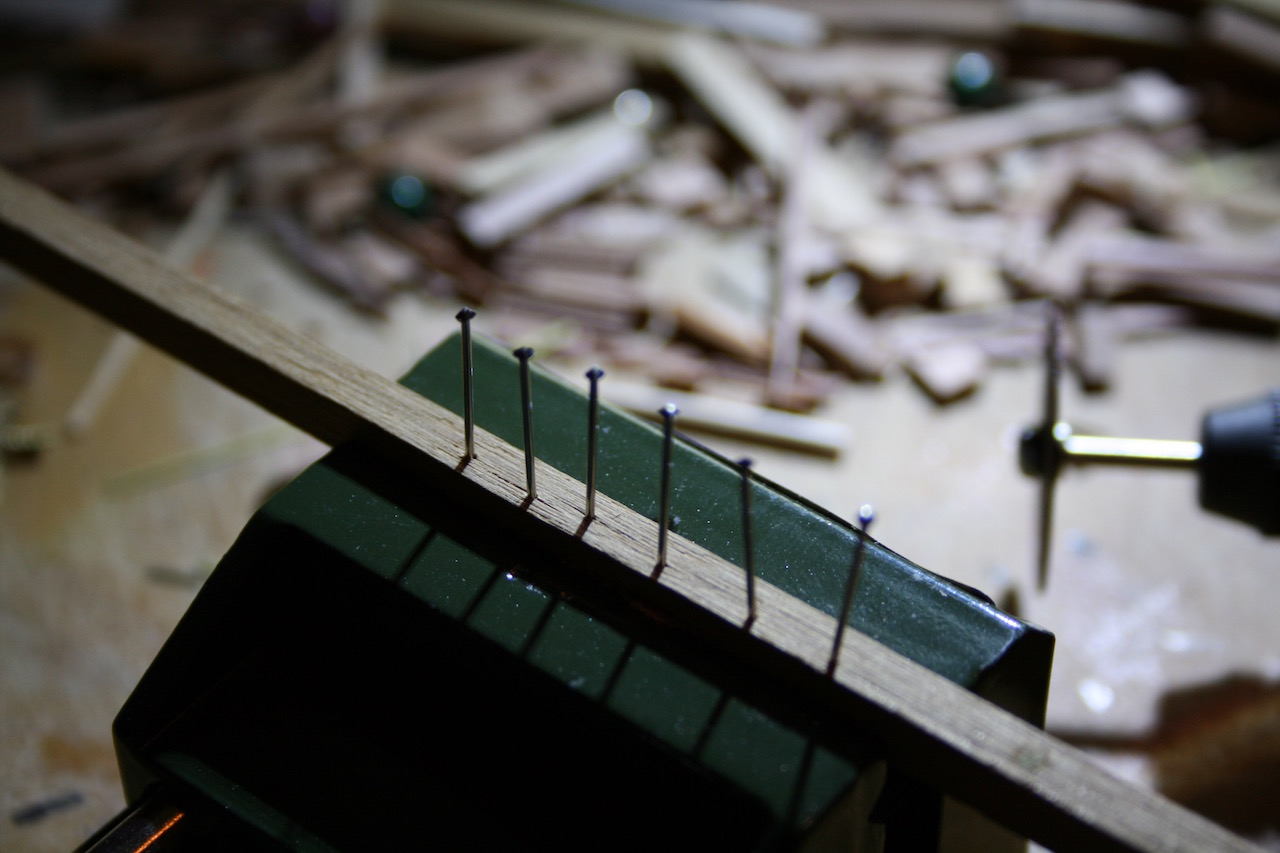
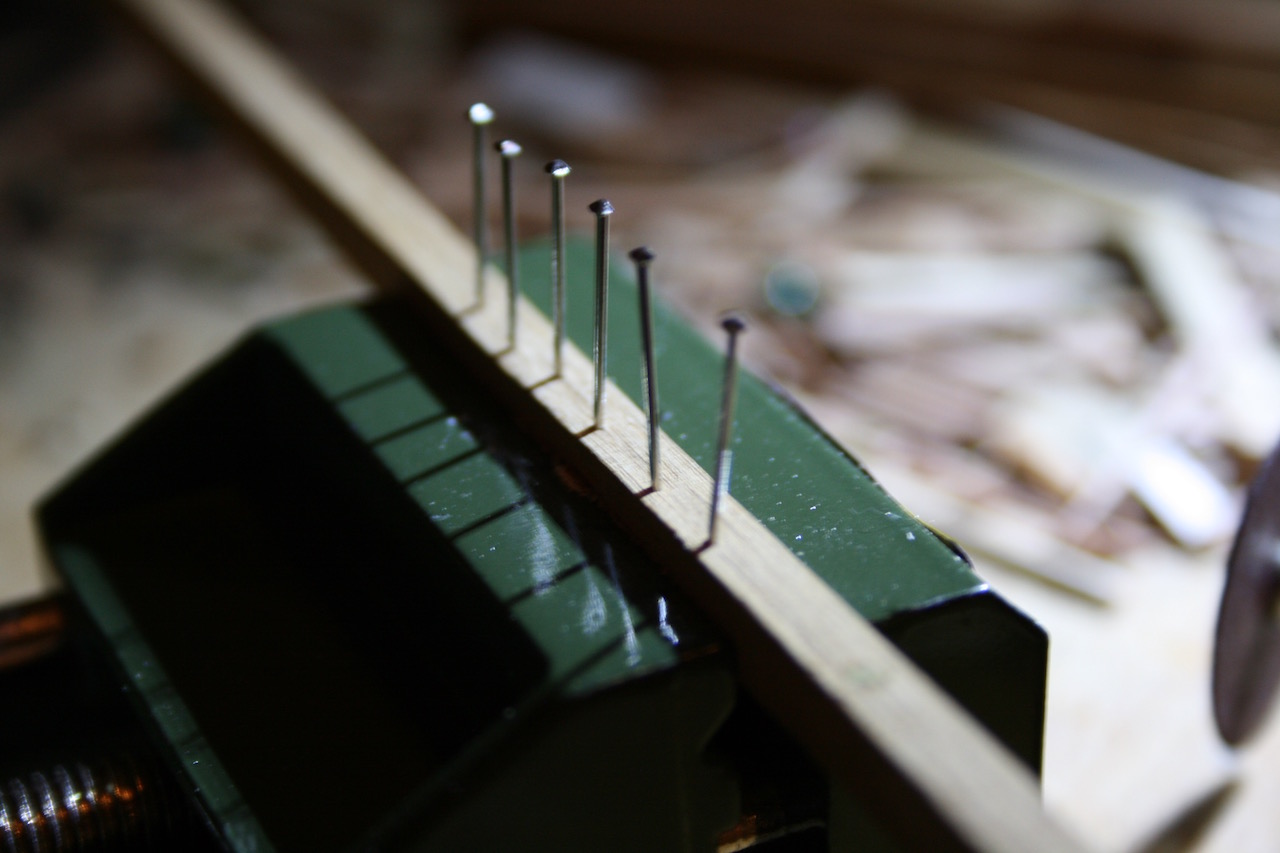
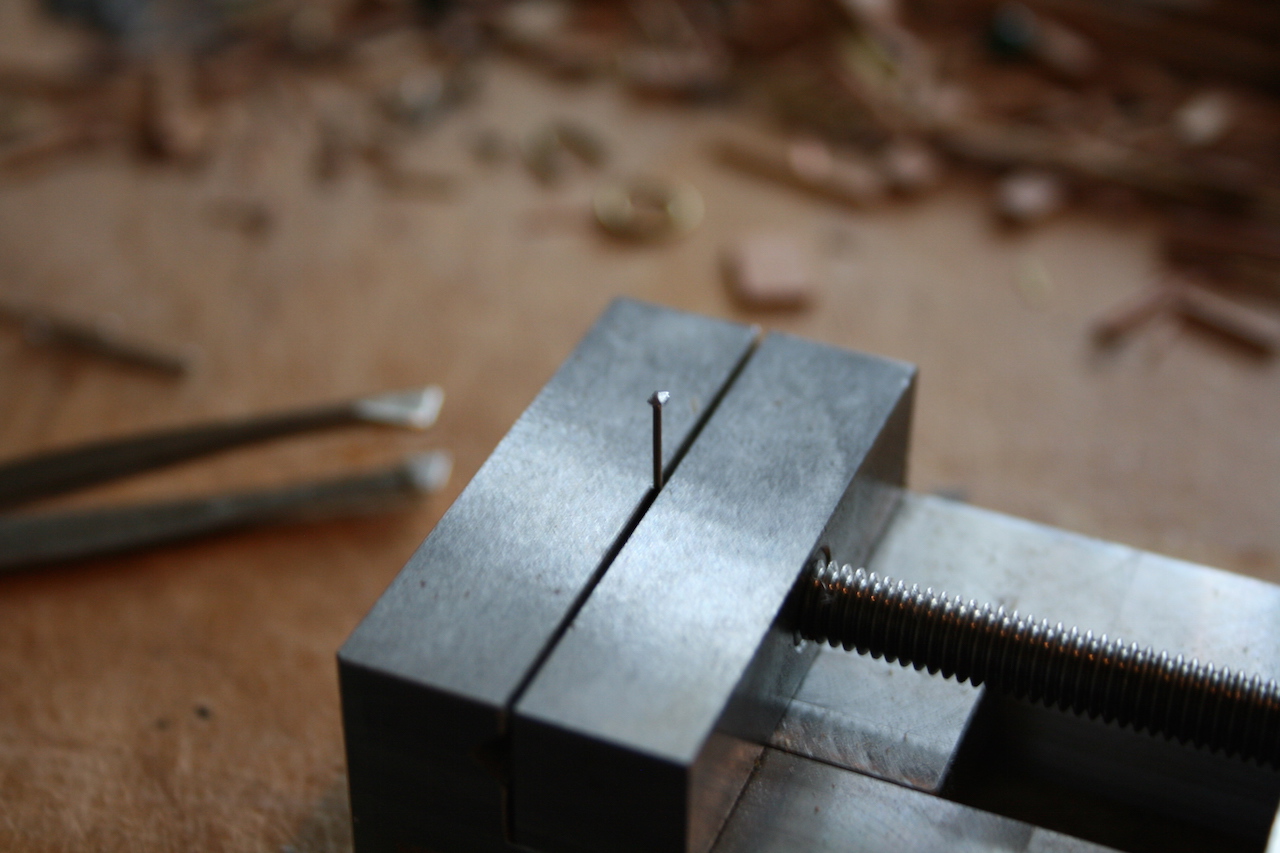
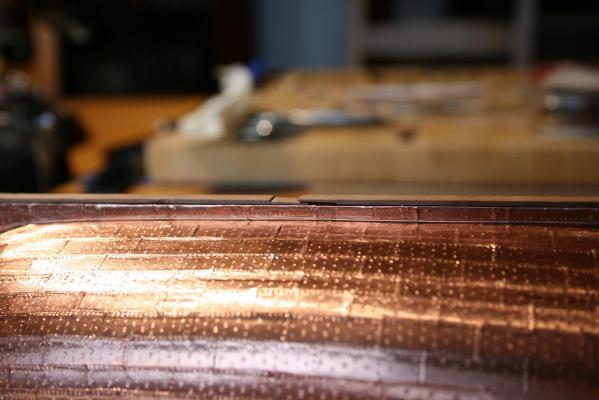
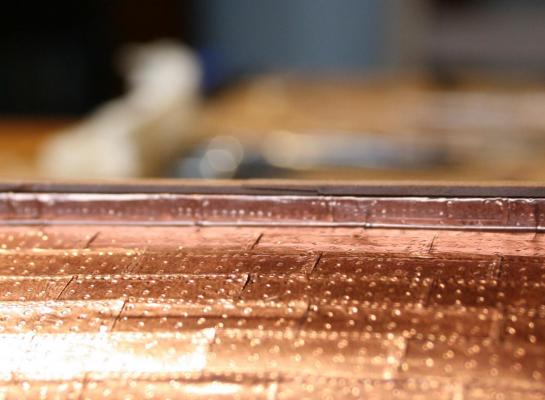
 Hi Nils, thank you for your comment. Meanwhile I've fixed the false keel with 0.4 mm copper nails... Daniel

-
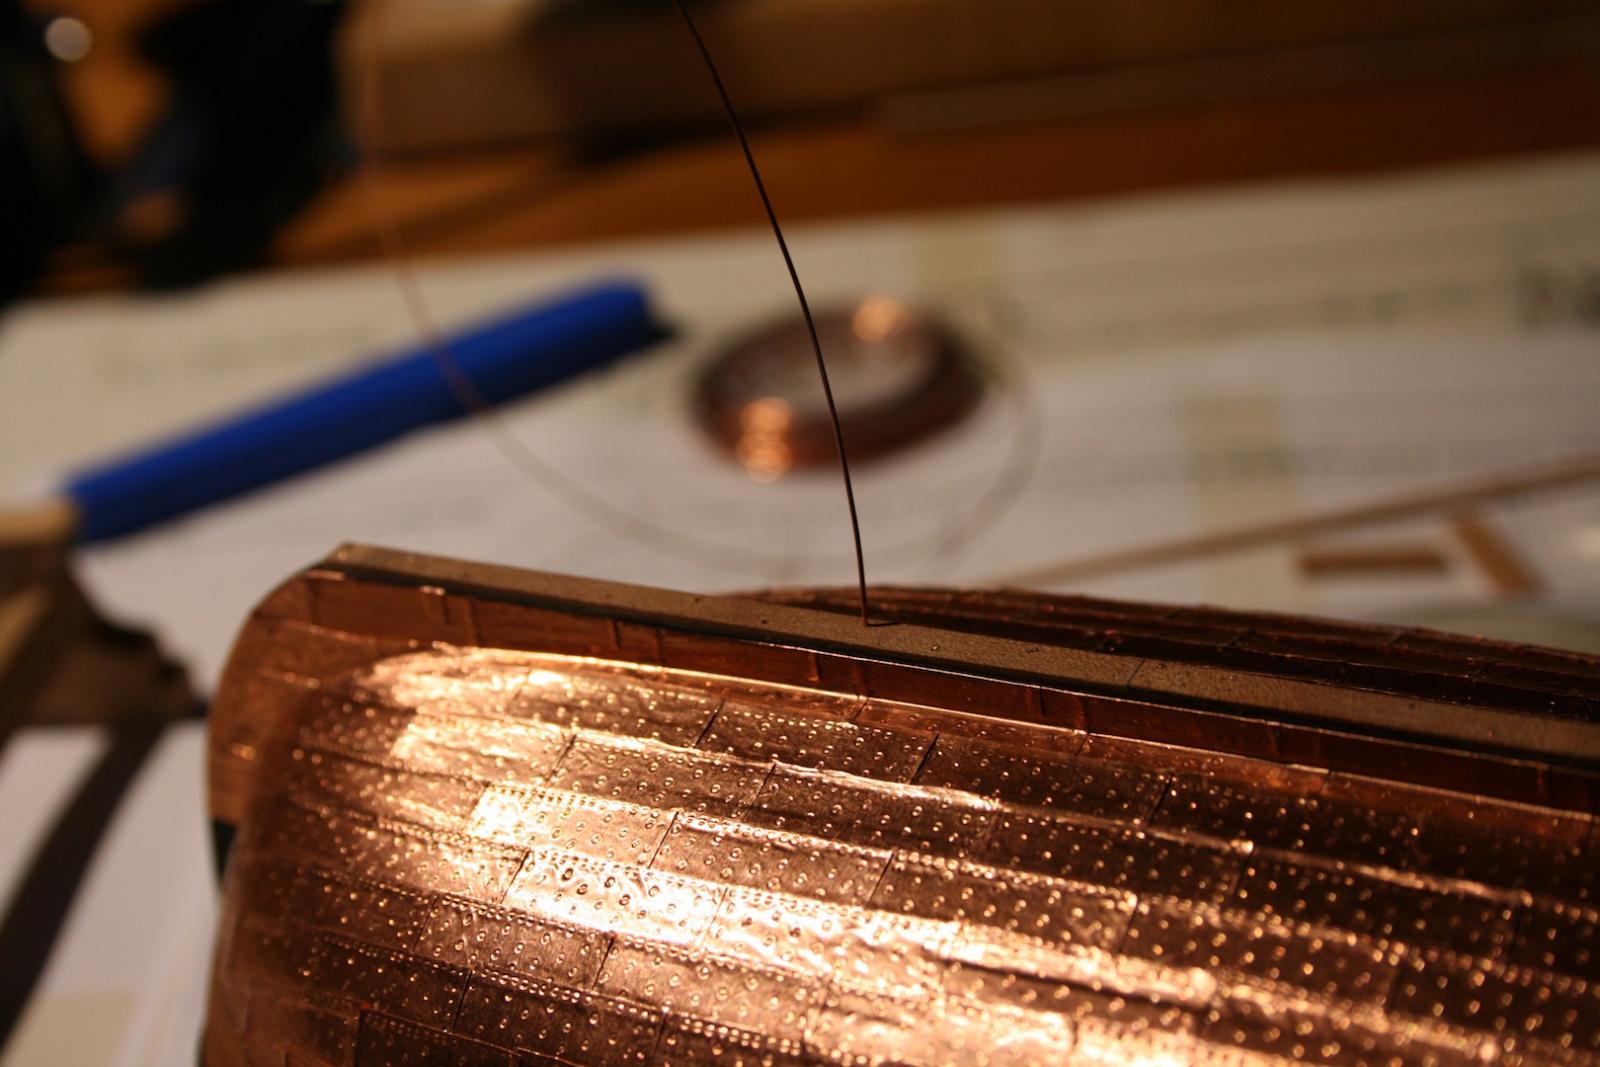
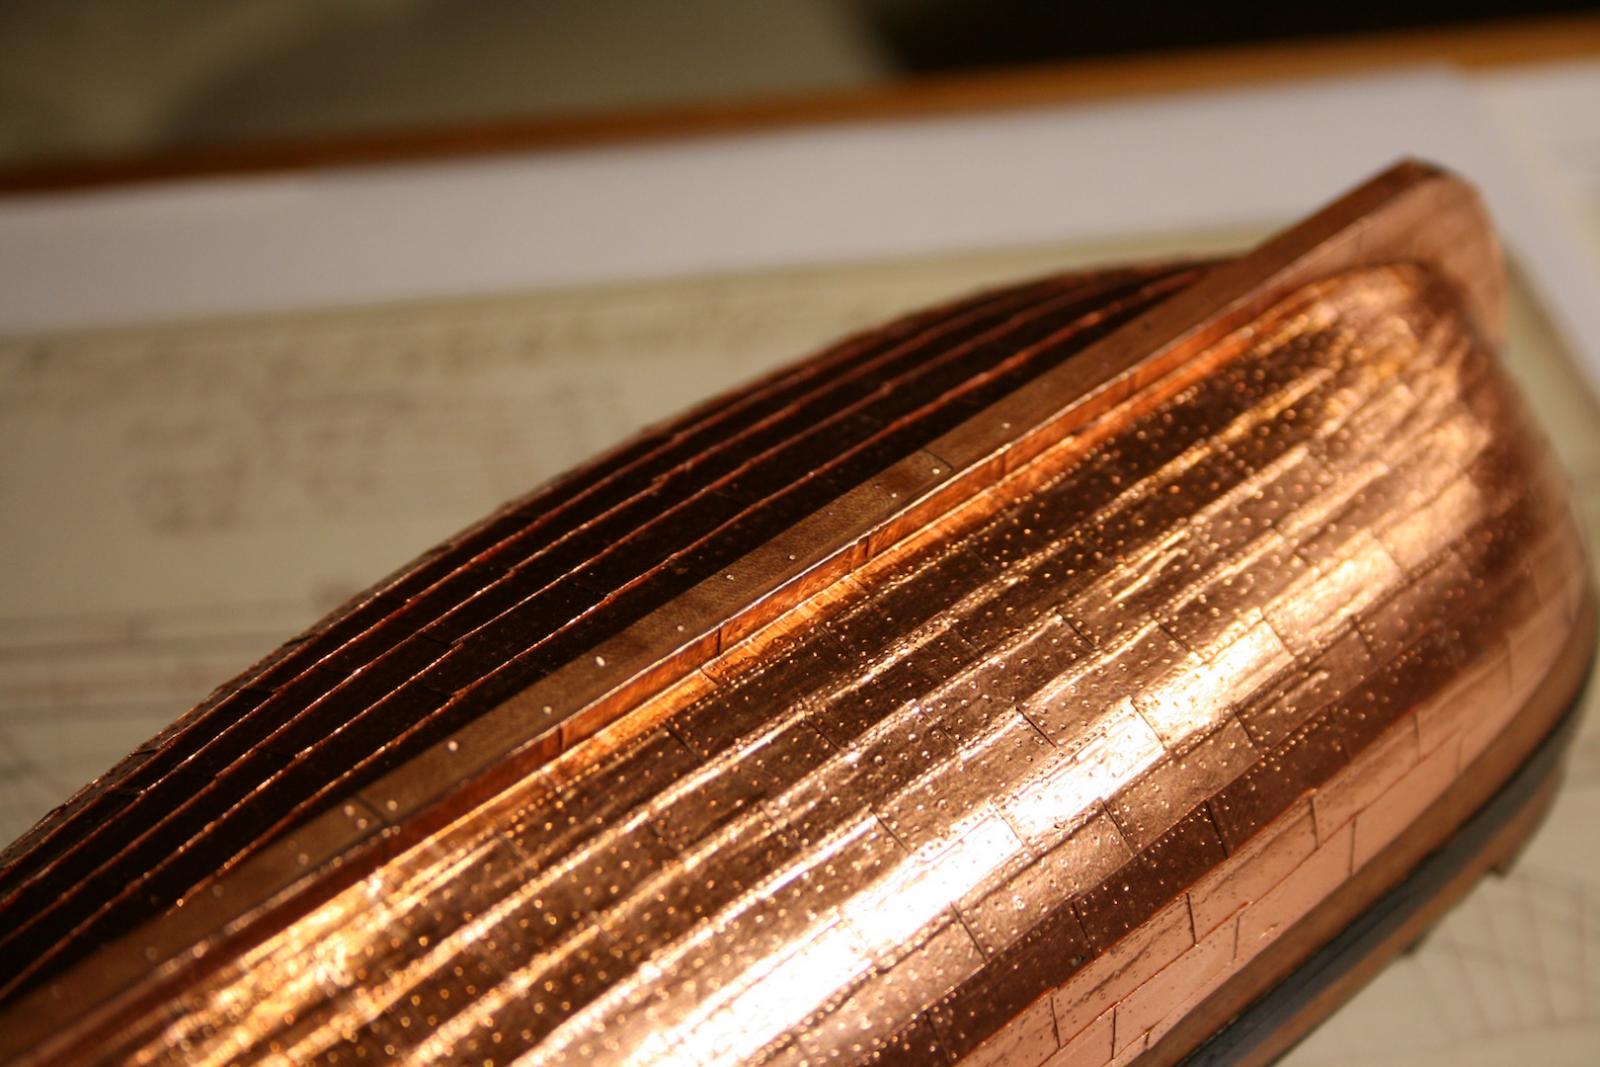
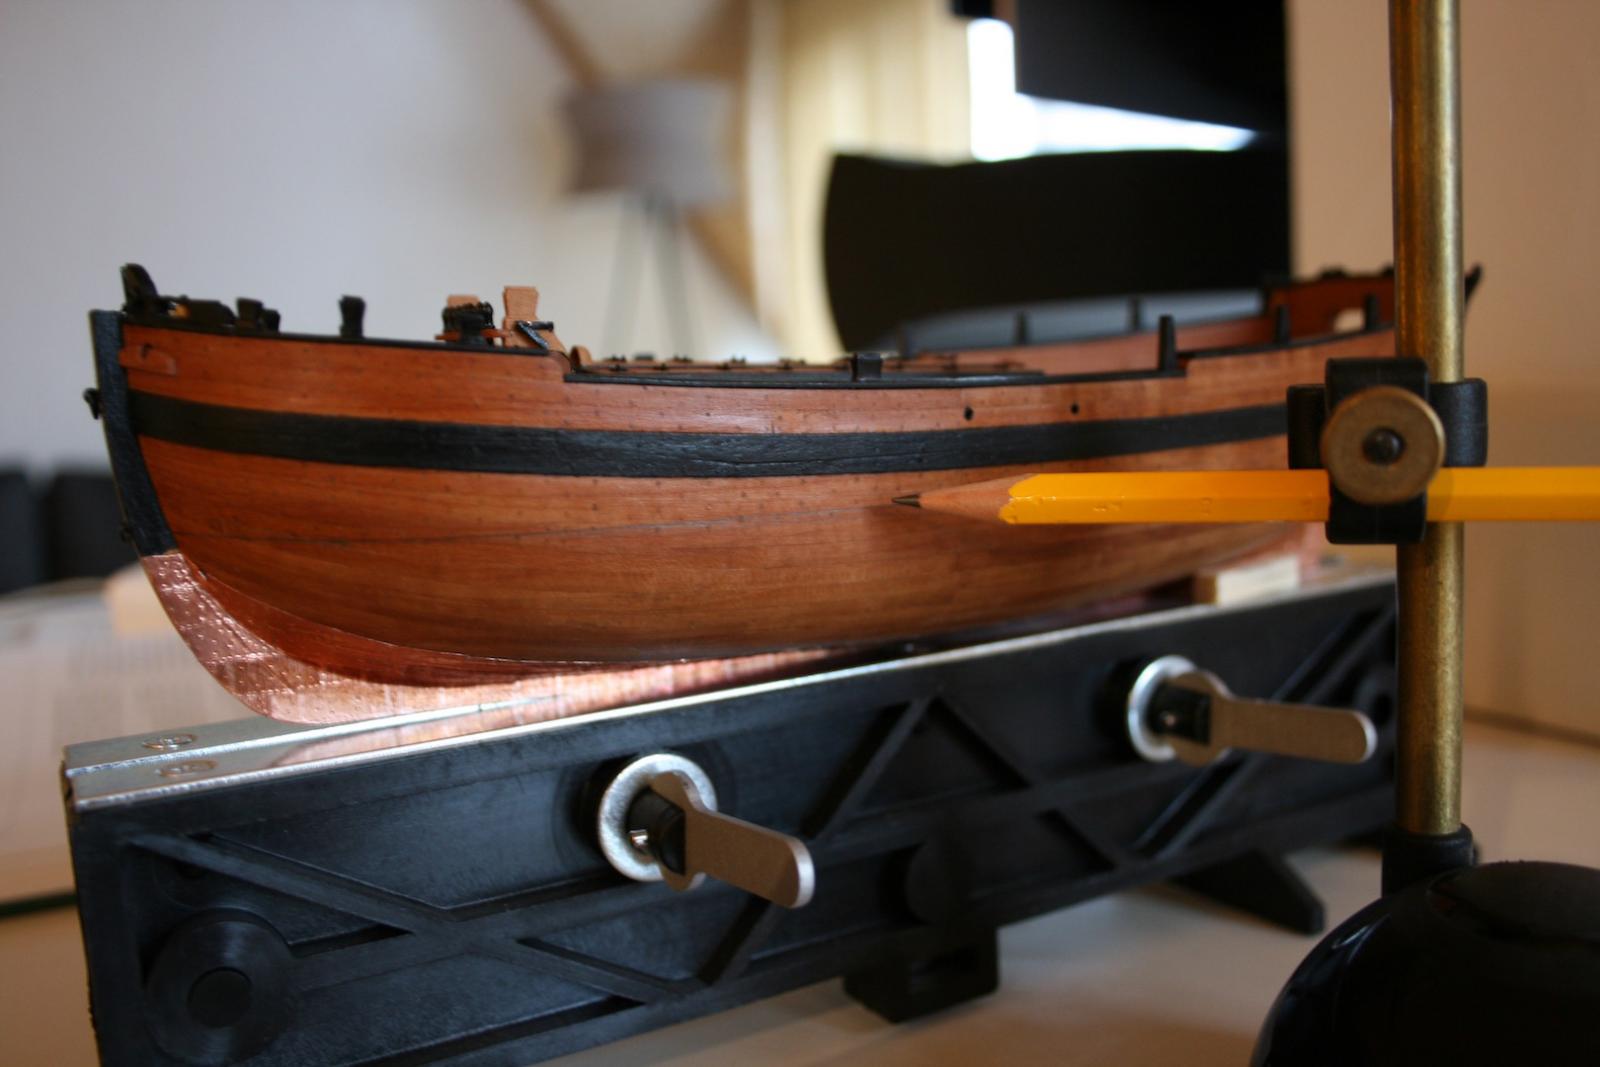
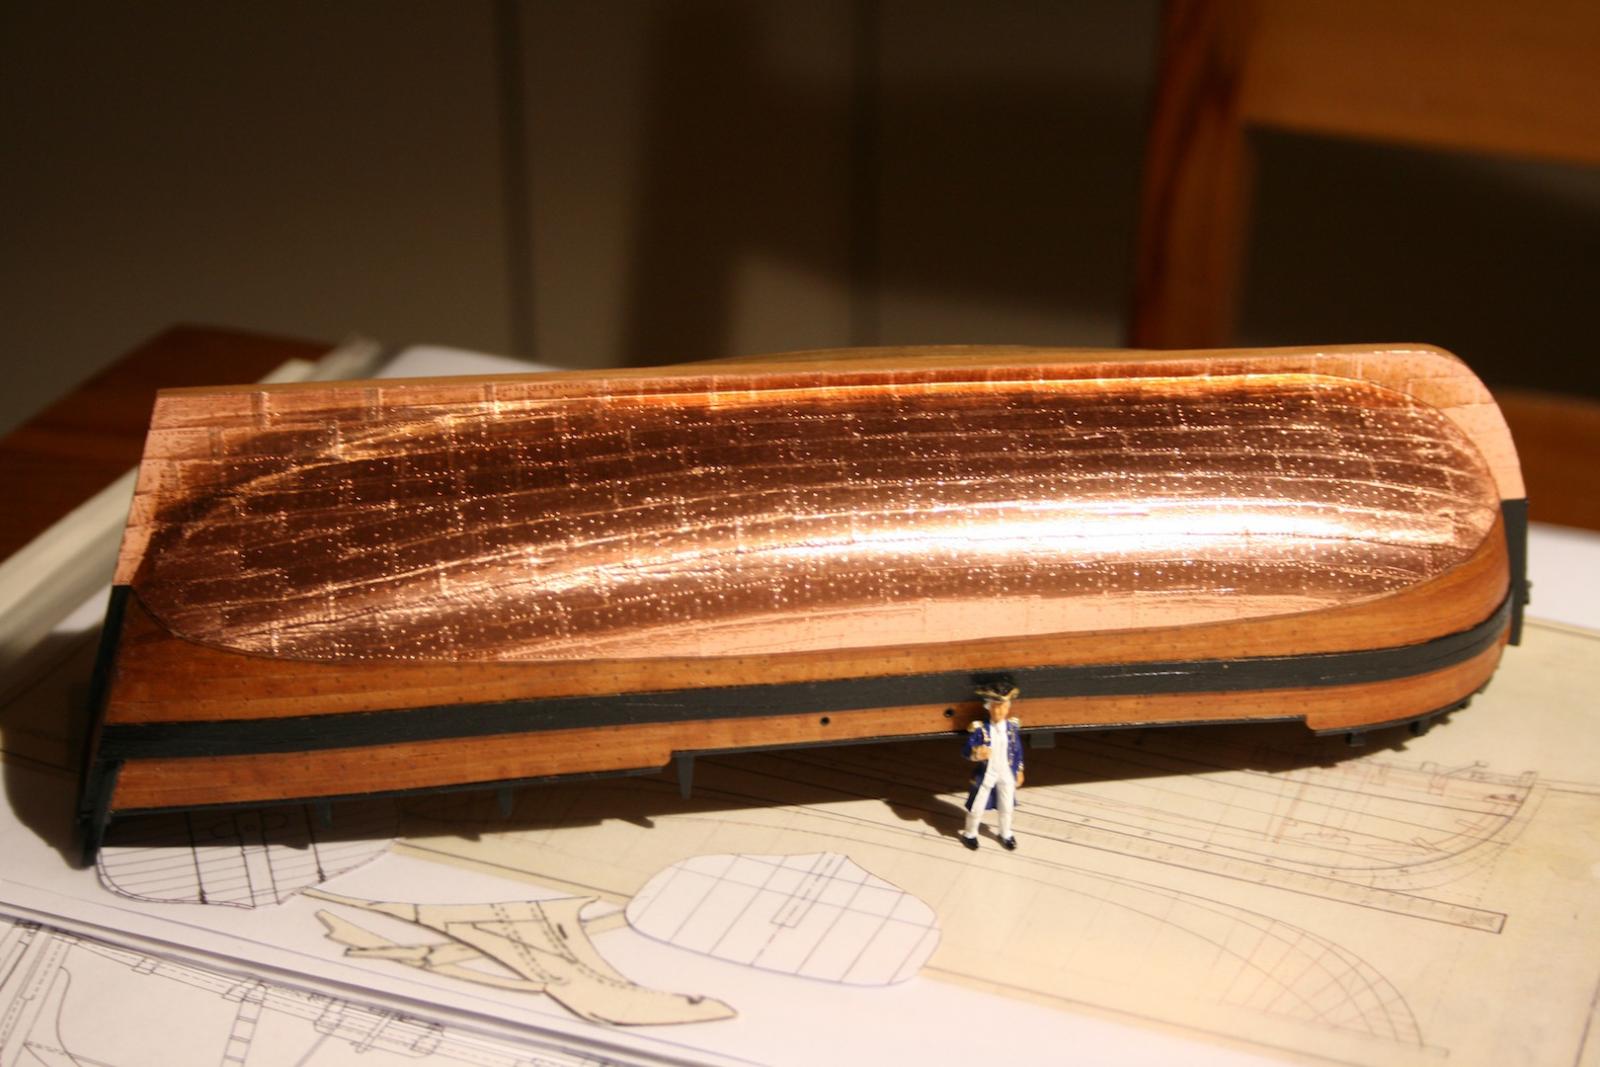
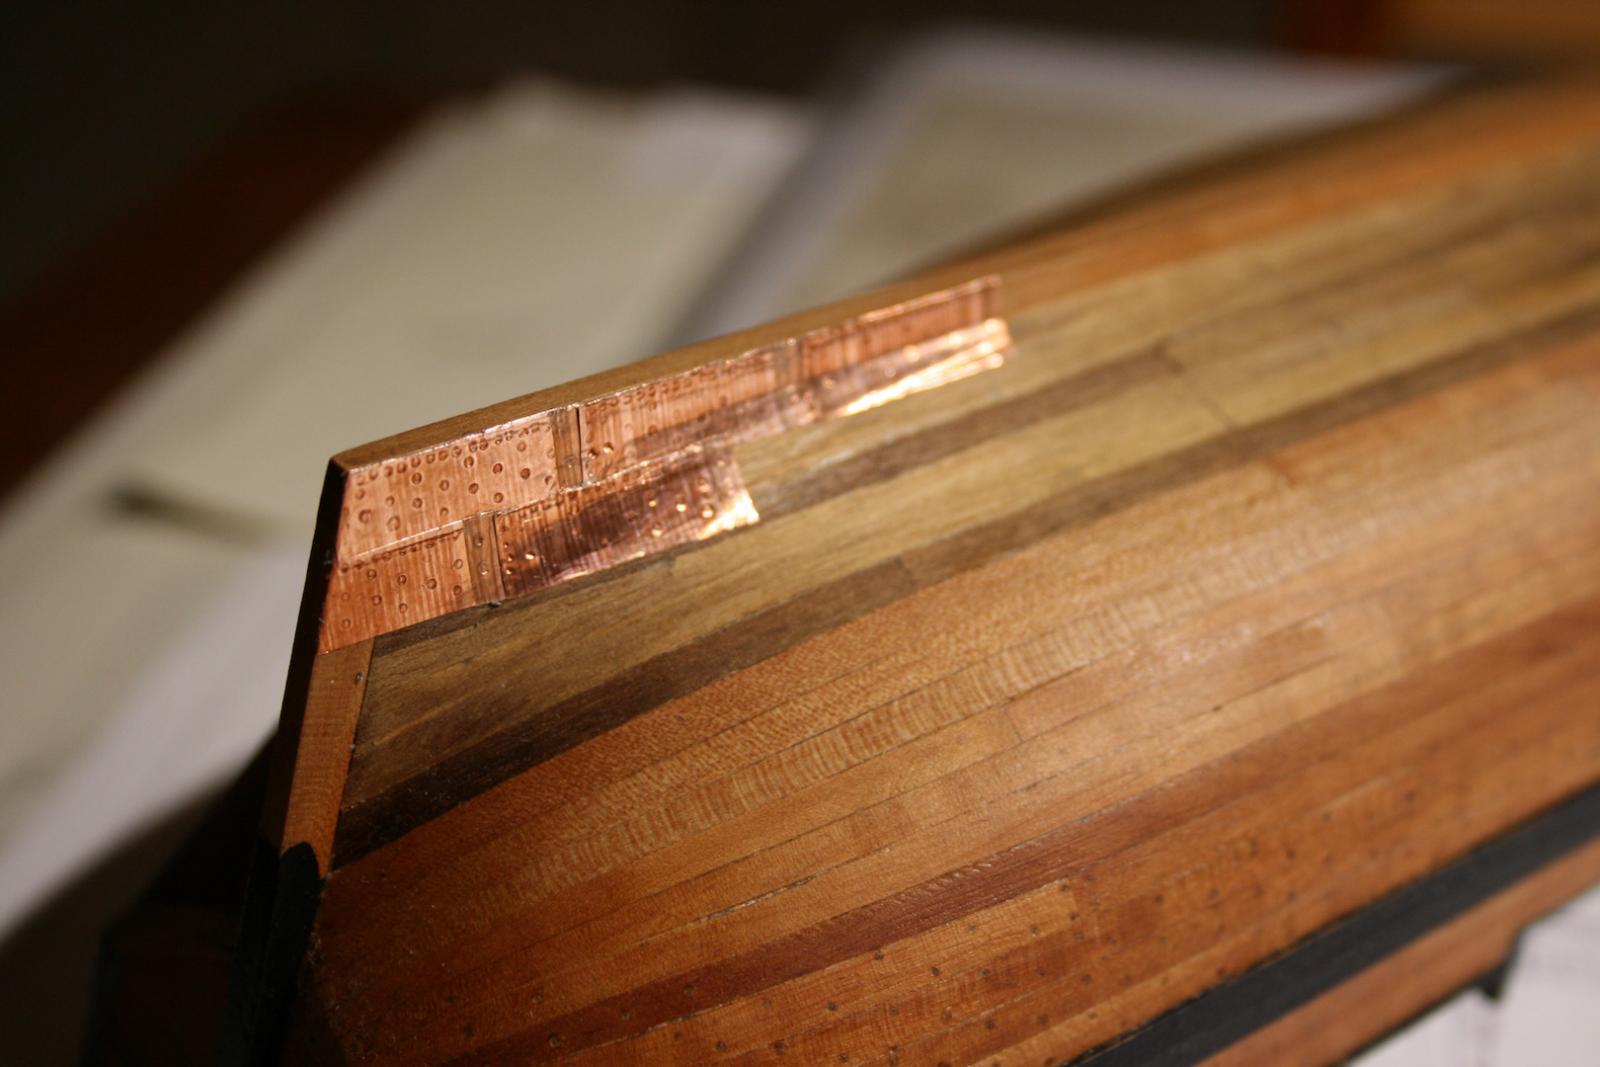
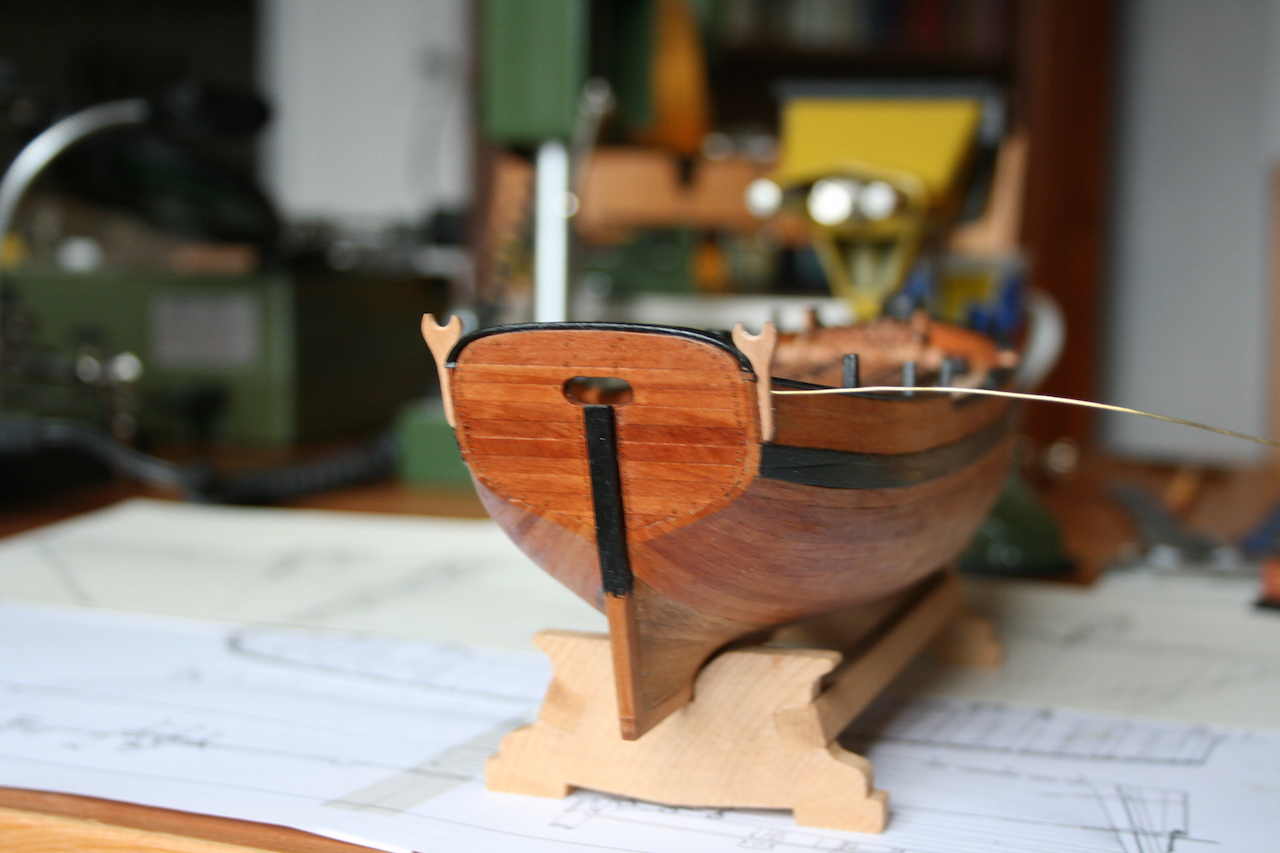
Thank you all for your likes. I am now proceeding with the under water hull and working on the false keel. I know, originally, it has to be fixed by copper nails to avoid chemical reaction between the copper plating under the false keel with different metal, e.g, brass or metal. Just one minor thing I don't know. Had the false keel any caulking between the wood and the copper? Does anybody out there know that? Thanks for feedback. Daniel

-
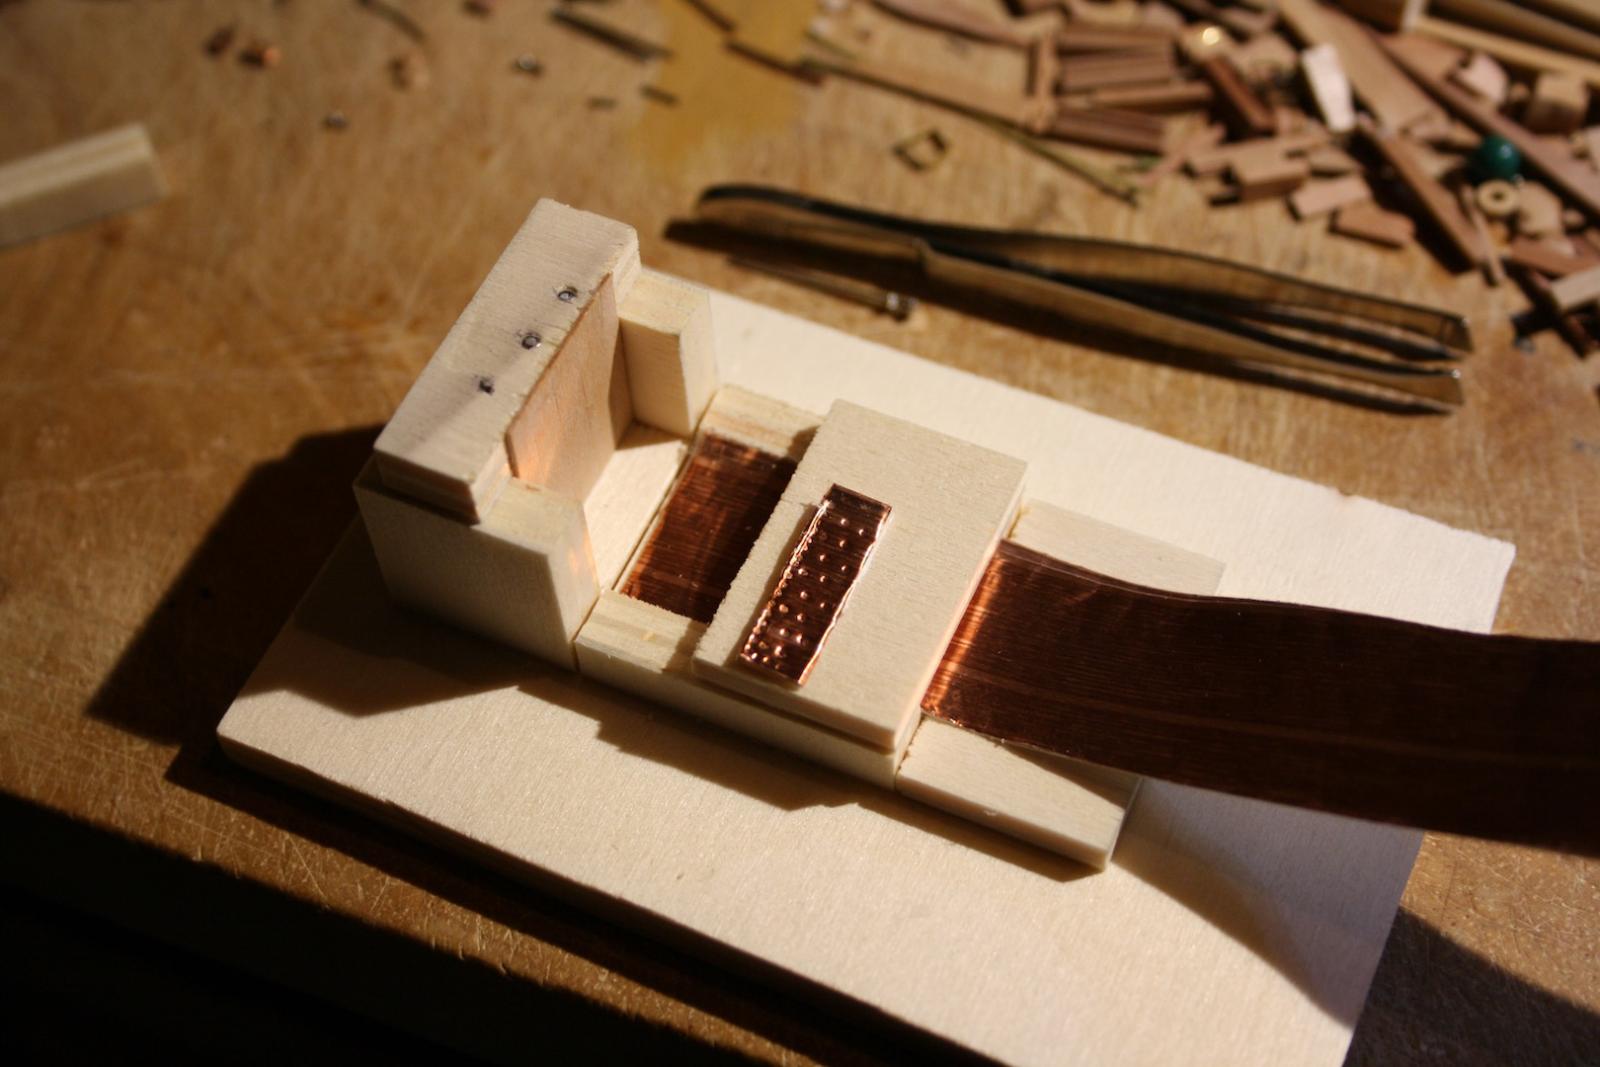
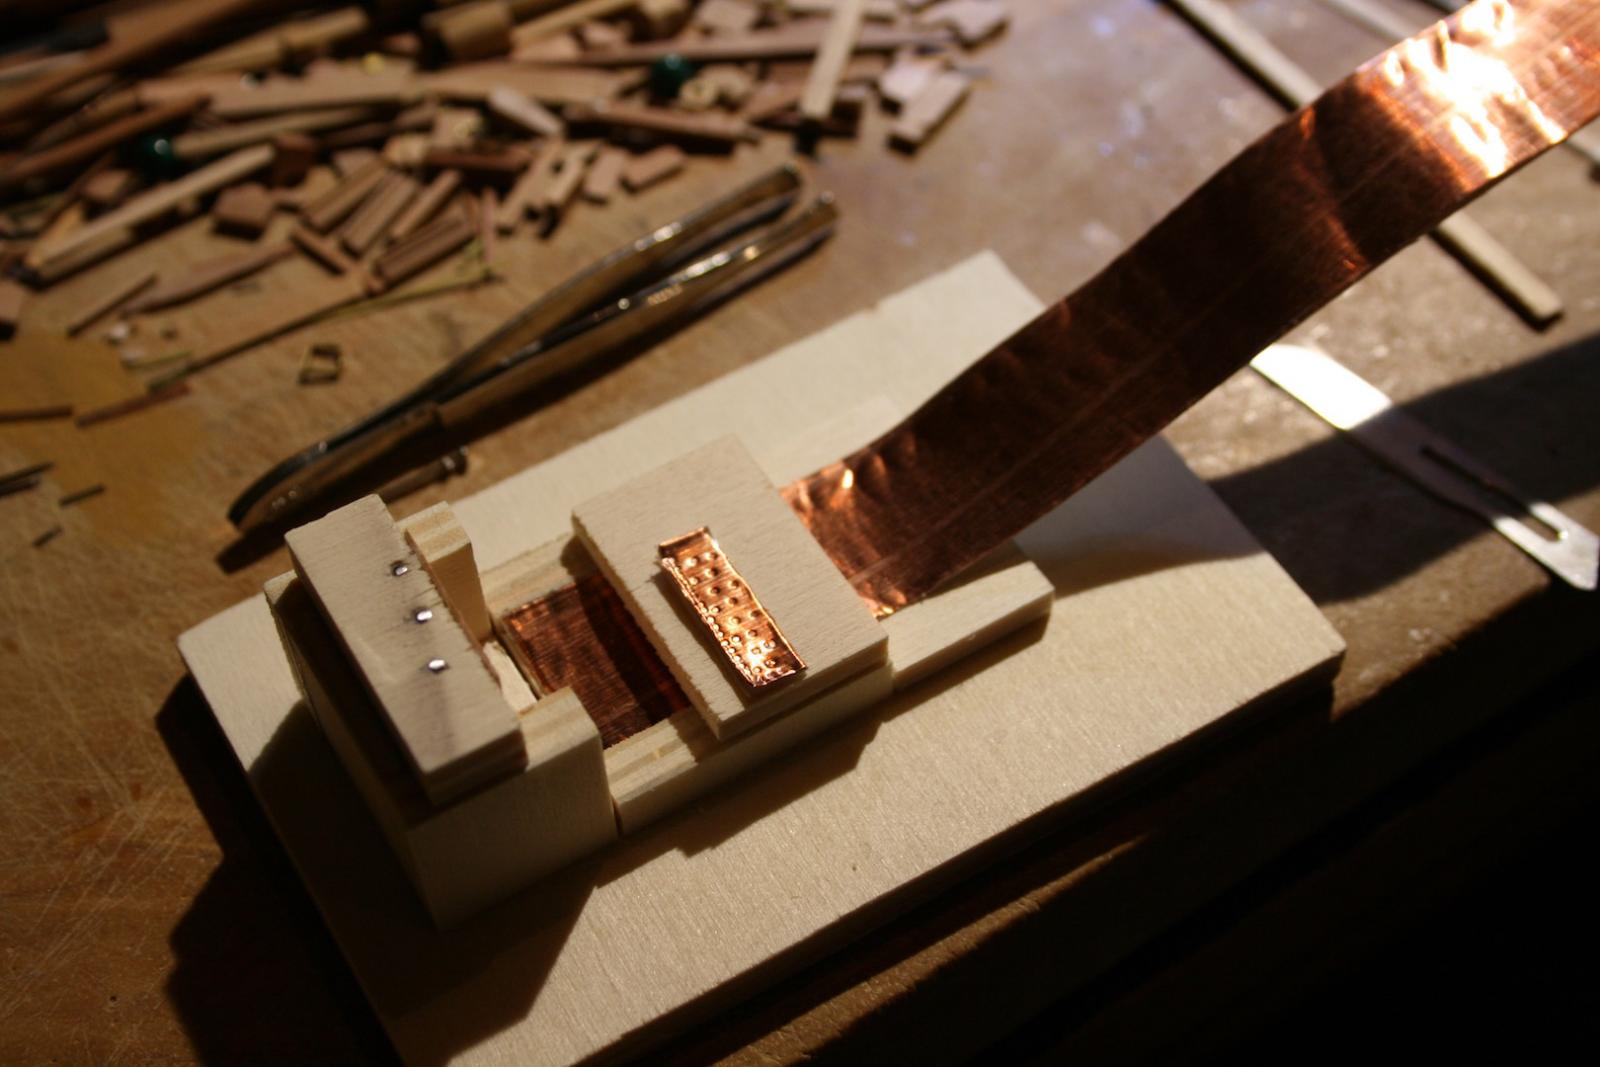
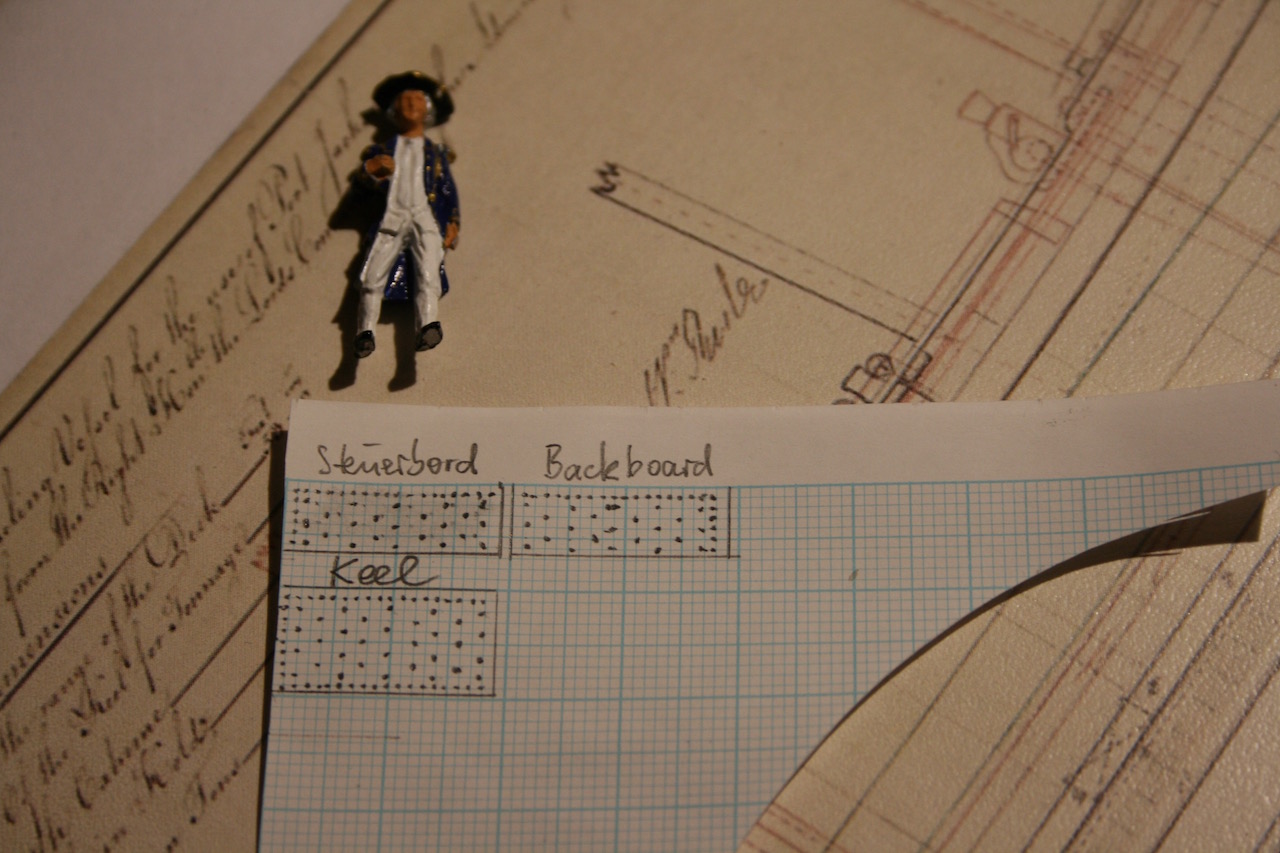
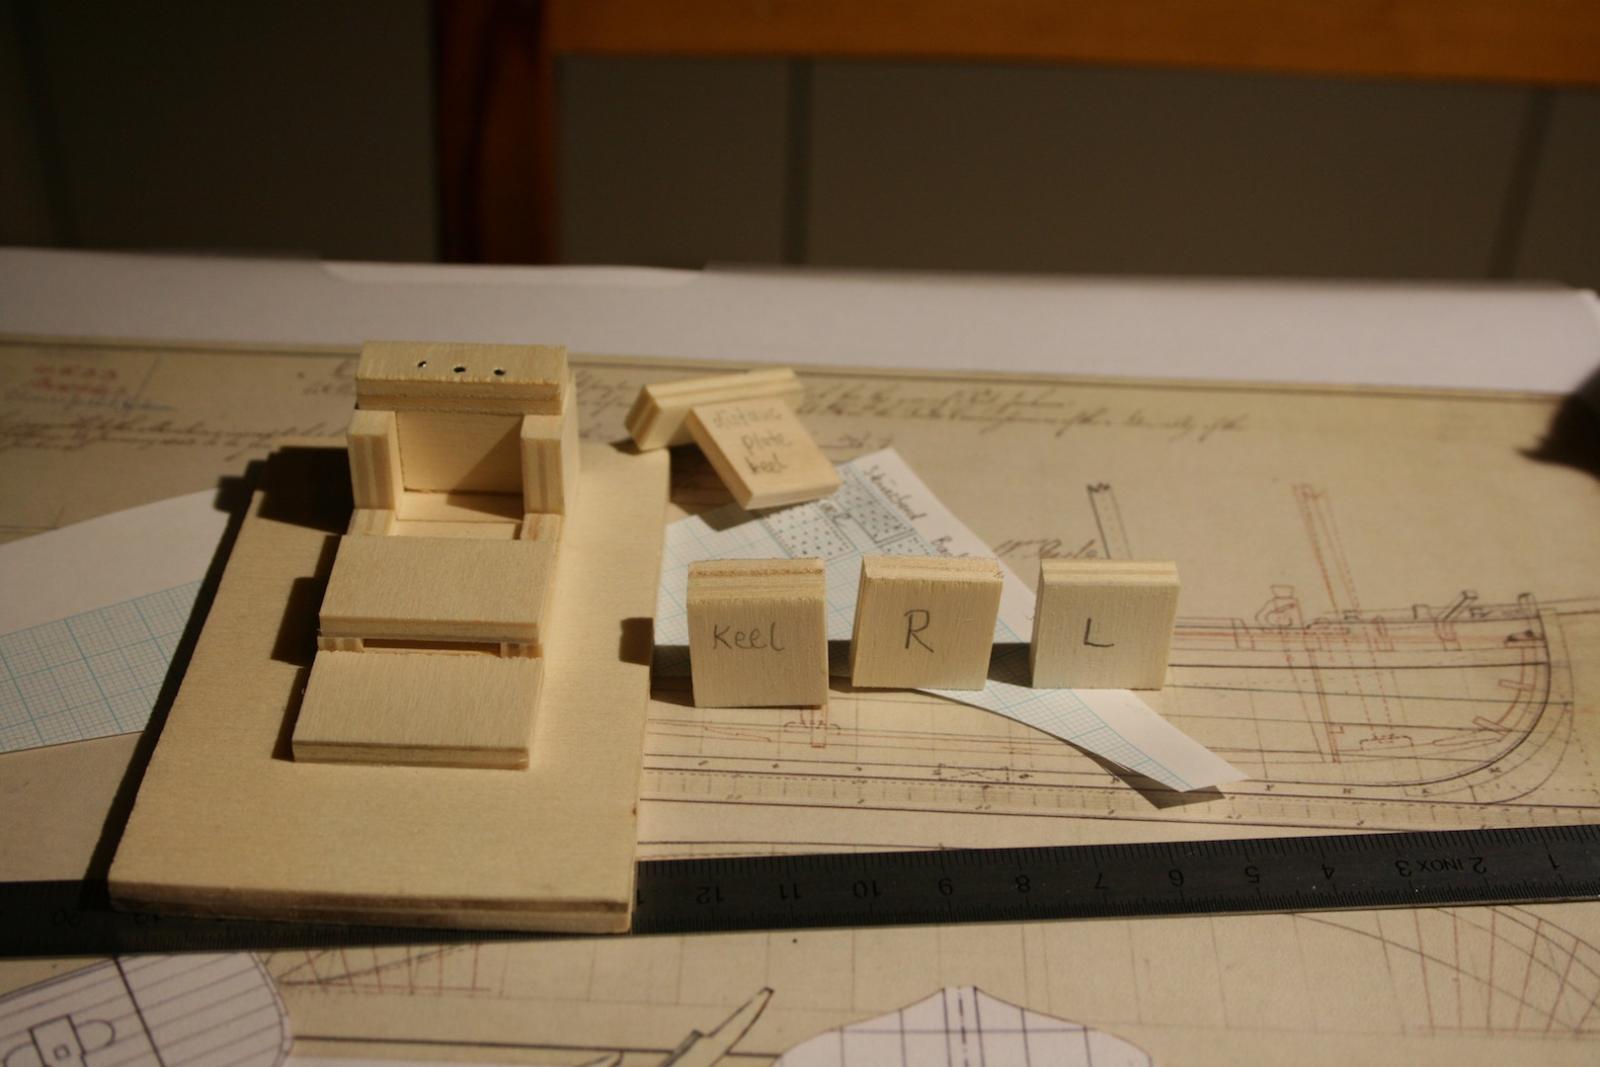
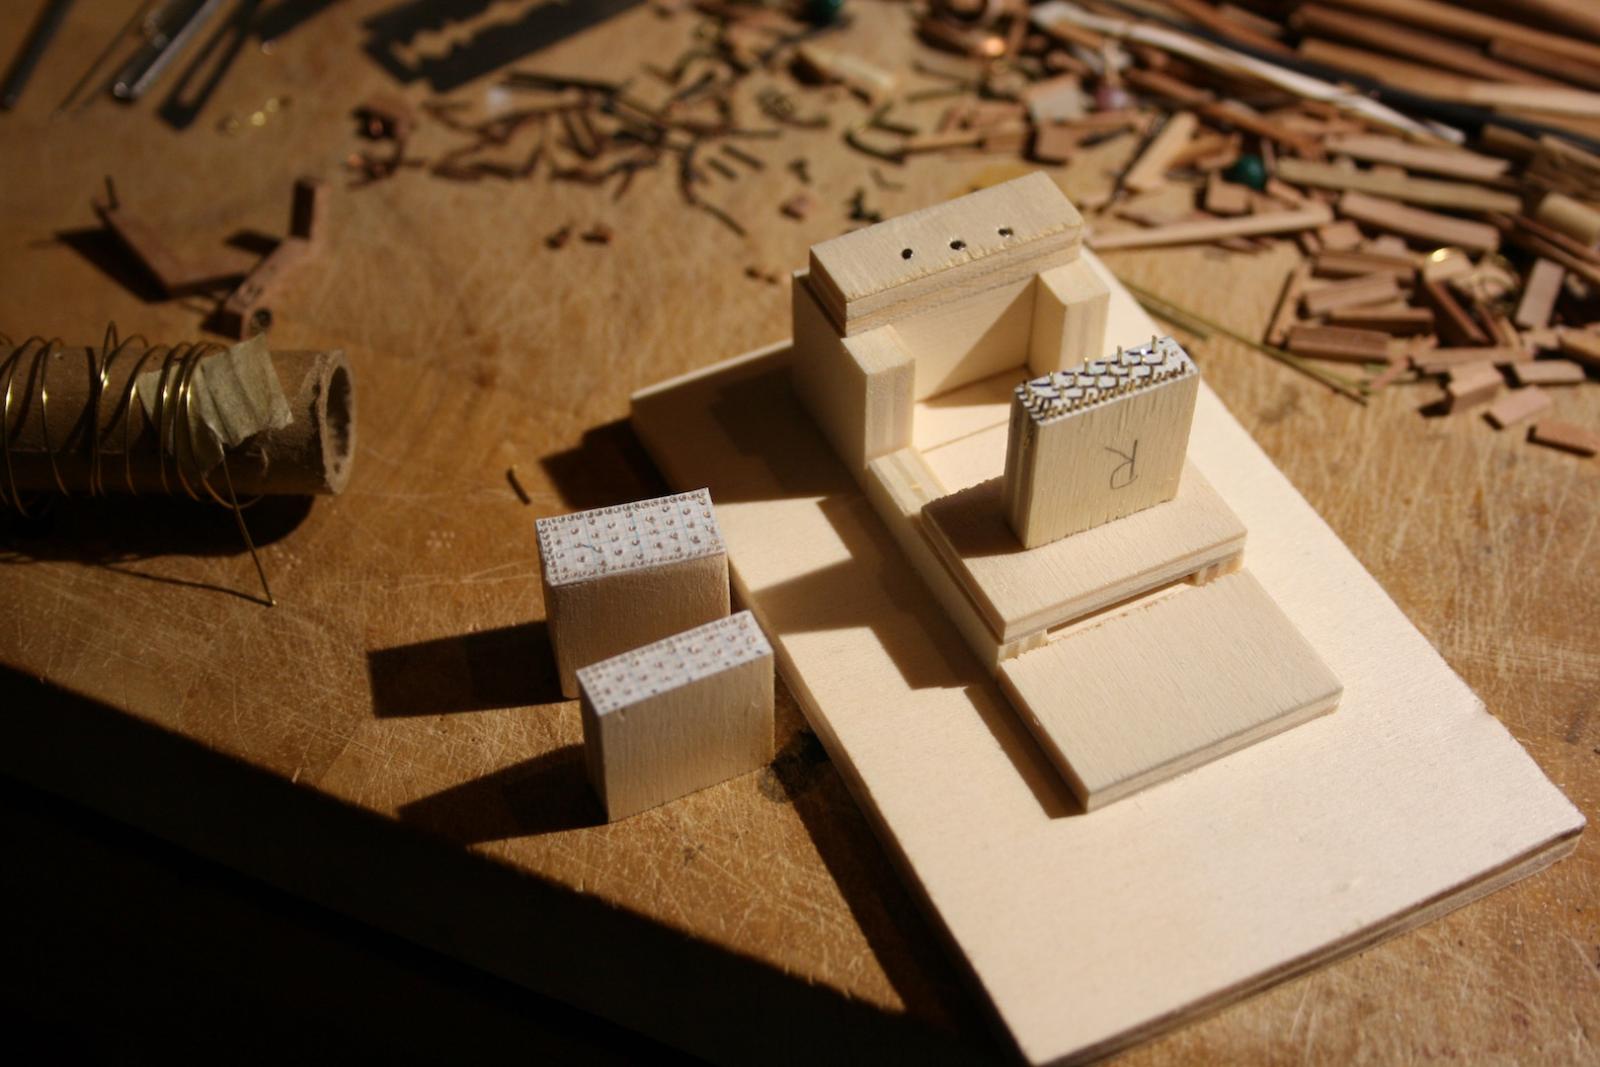
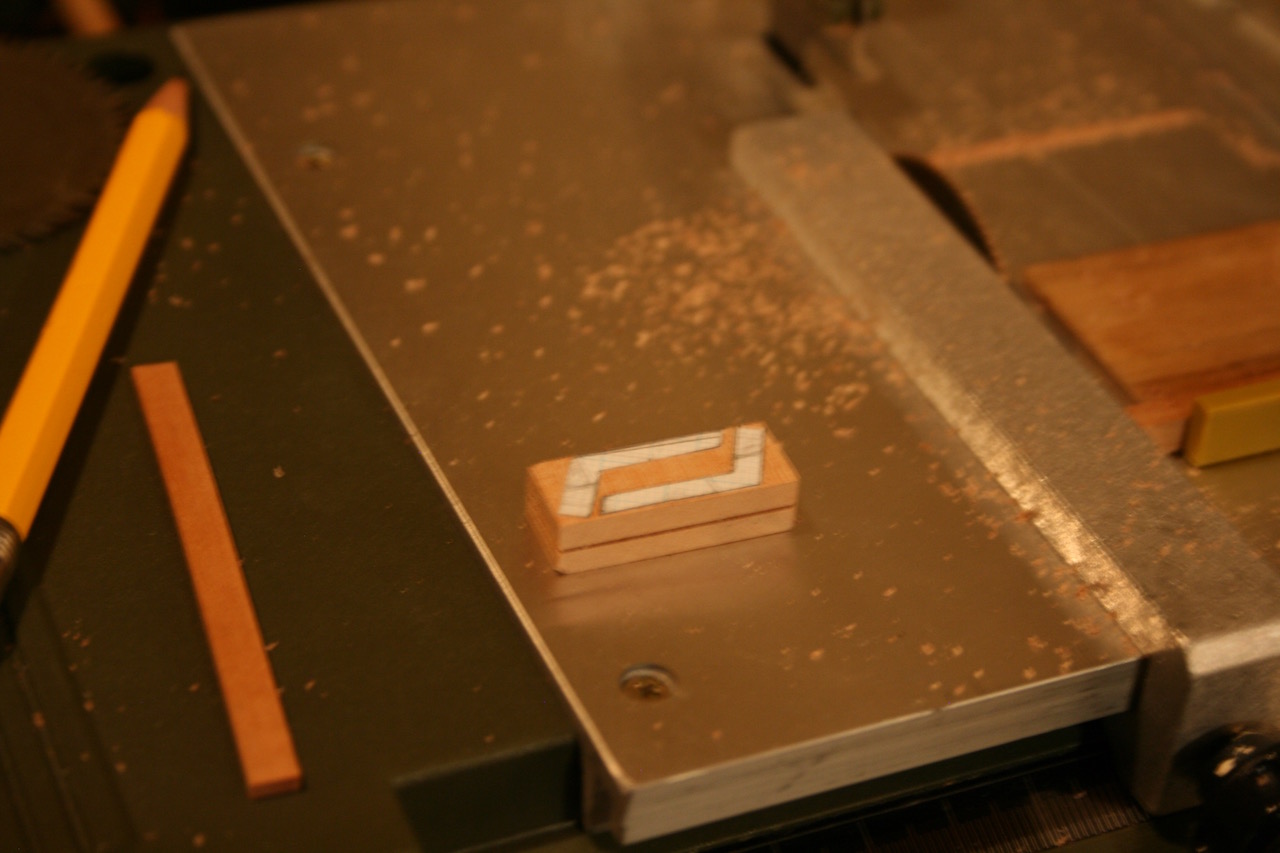
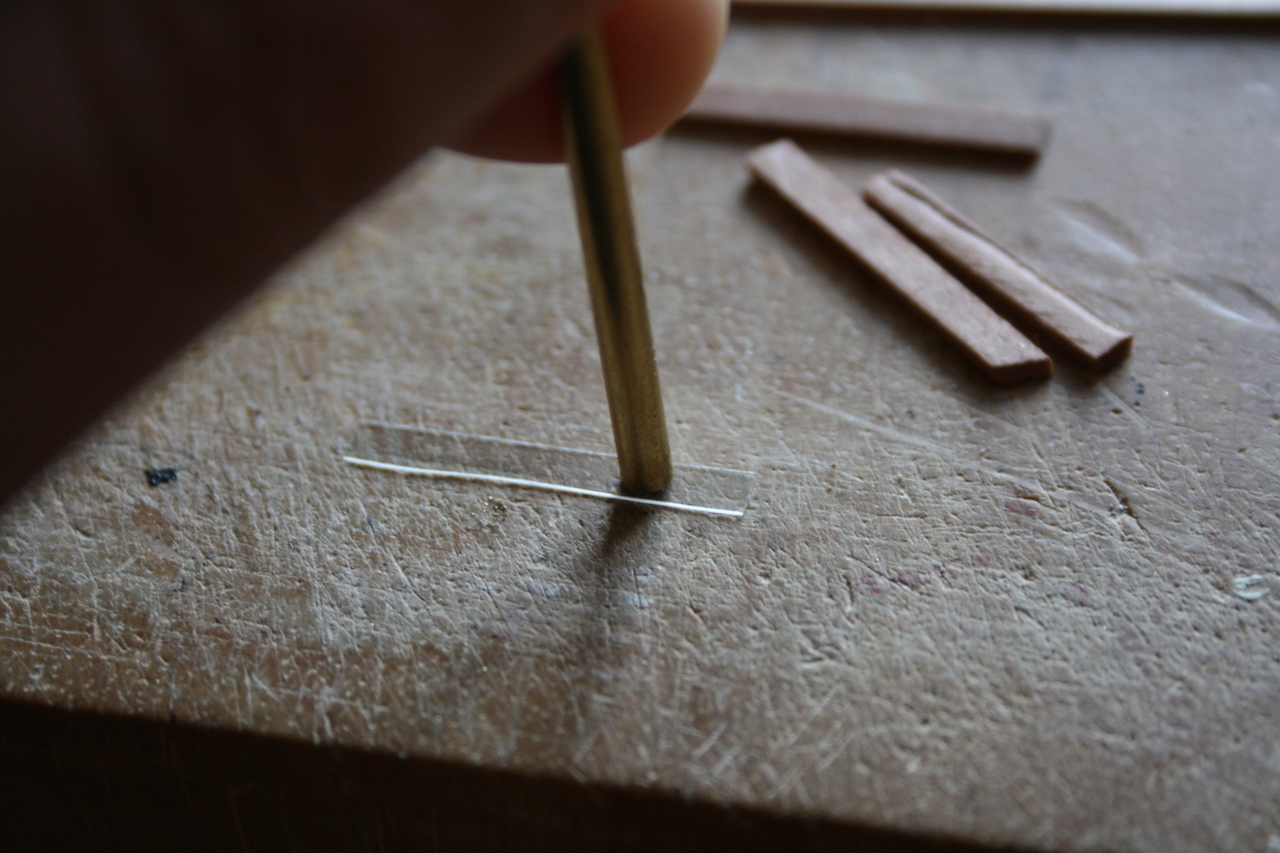
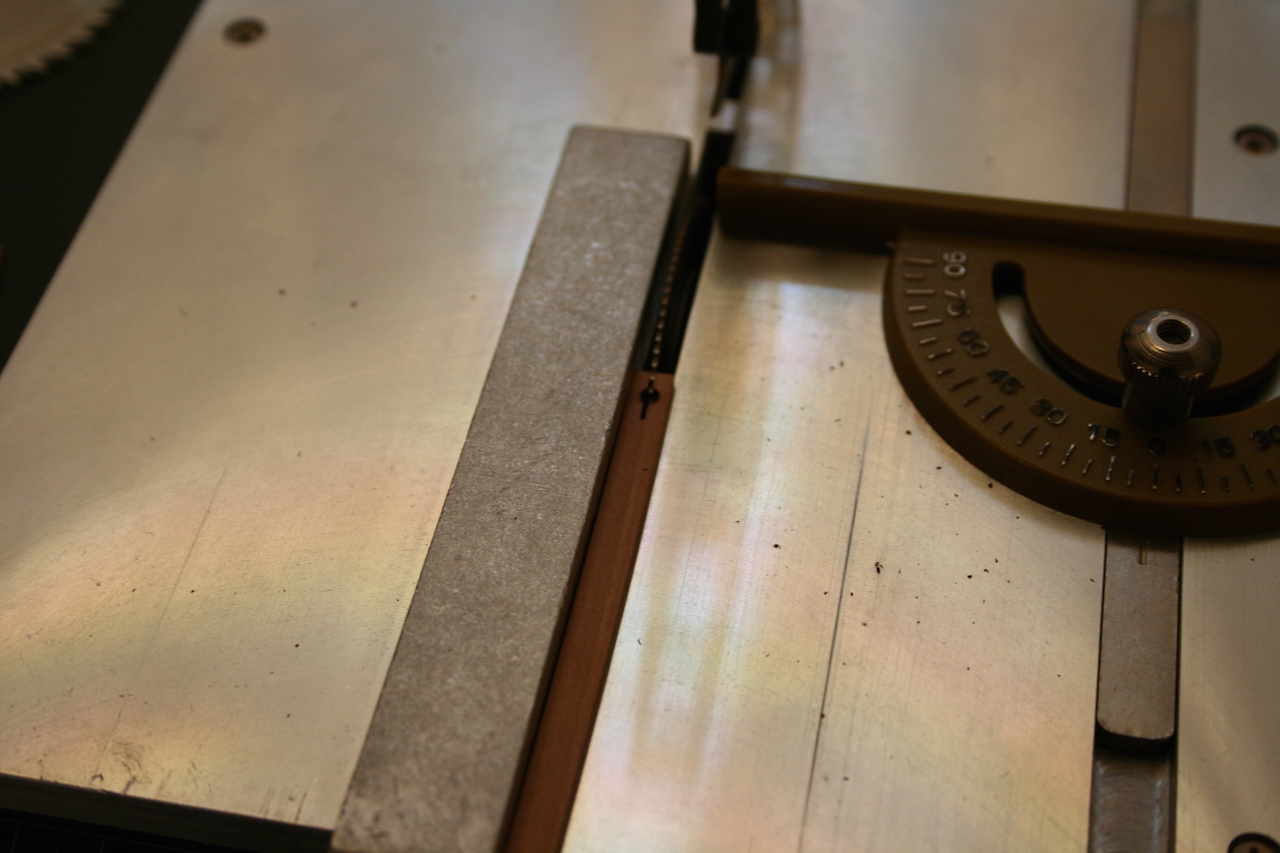
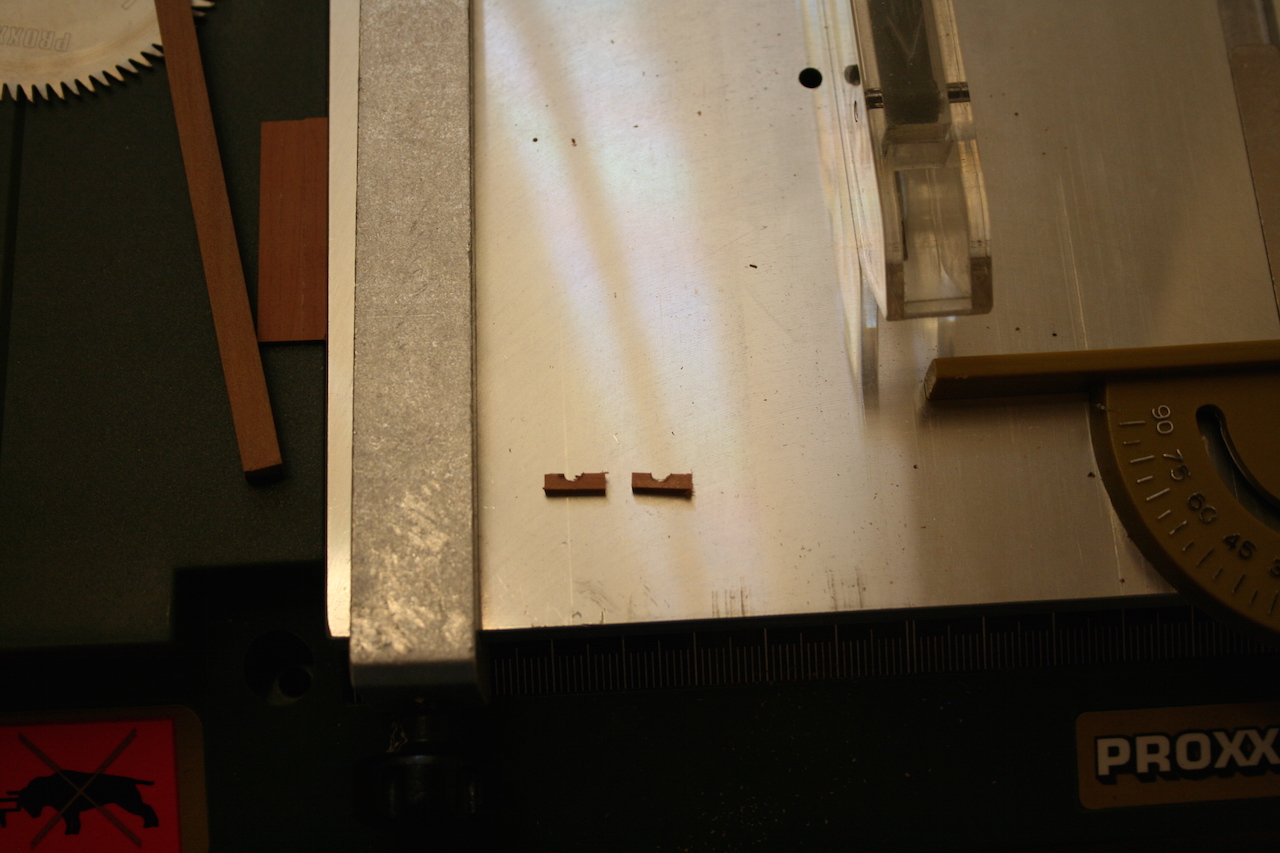
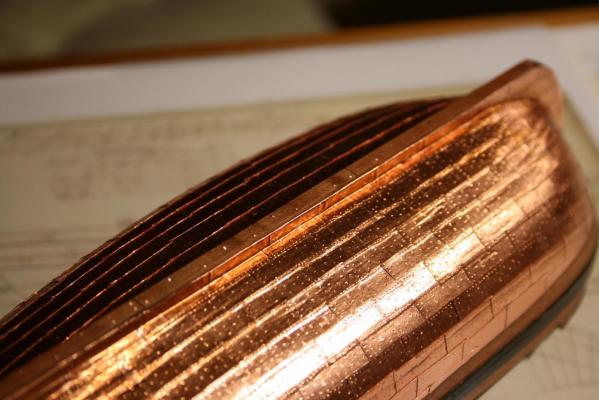
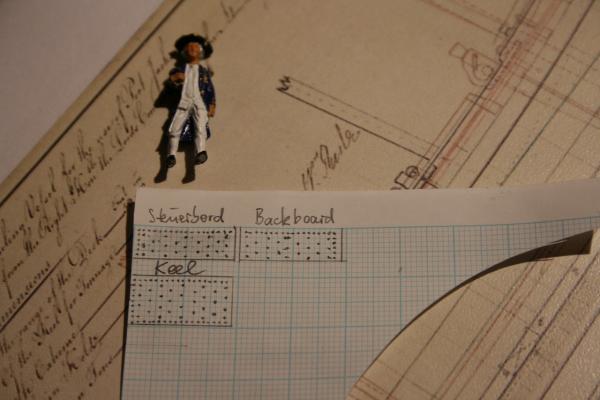
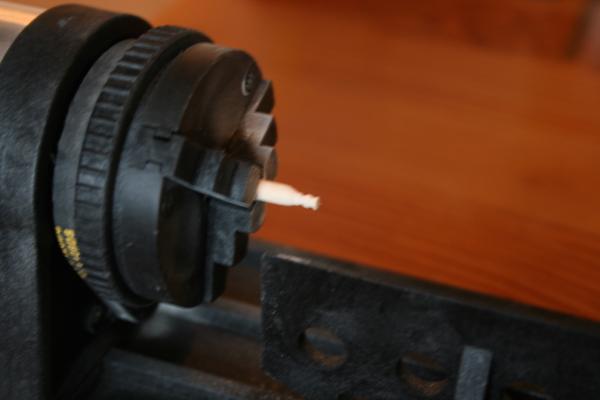
Hello all together, now I am working on the copper plating of the underwater hull and did in the first a jig with three stamps for the palates at the portside, starboard and for the keel. In 1:64 scale the size for the side plate measures 19 mm x 6.3 mm and for the sheets on the keel it is 19 mm x 9.2 mm. To make the jig flexible the rear panel of the jig can be adjusted by additional sheets to fit the different stamps. Daniel


-
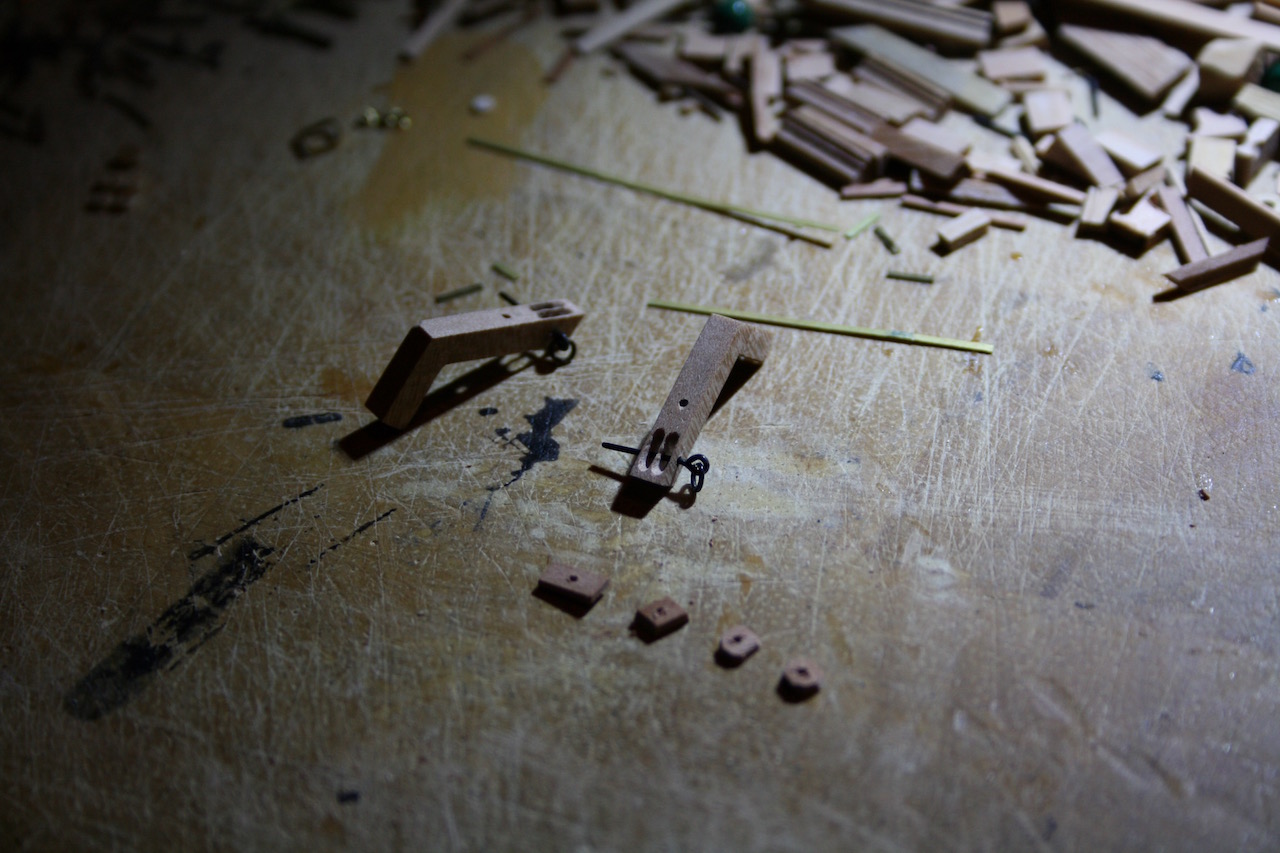
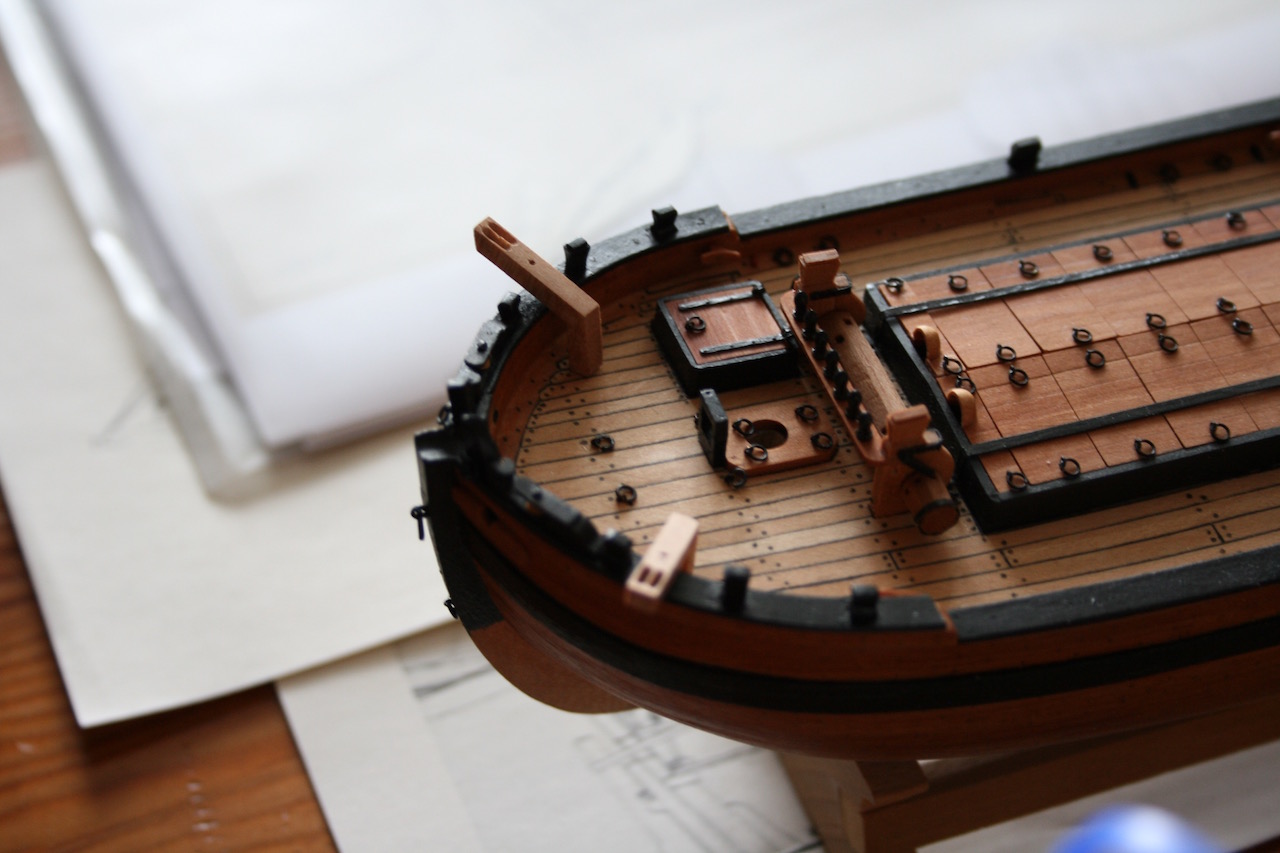
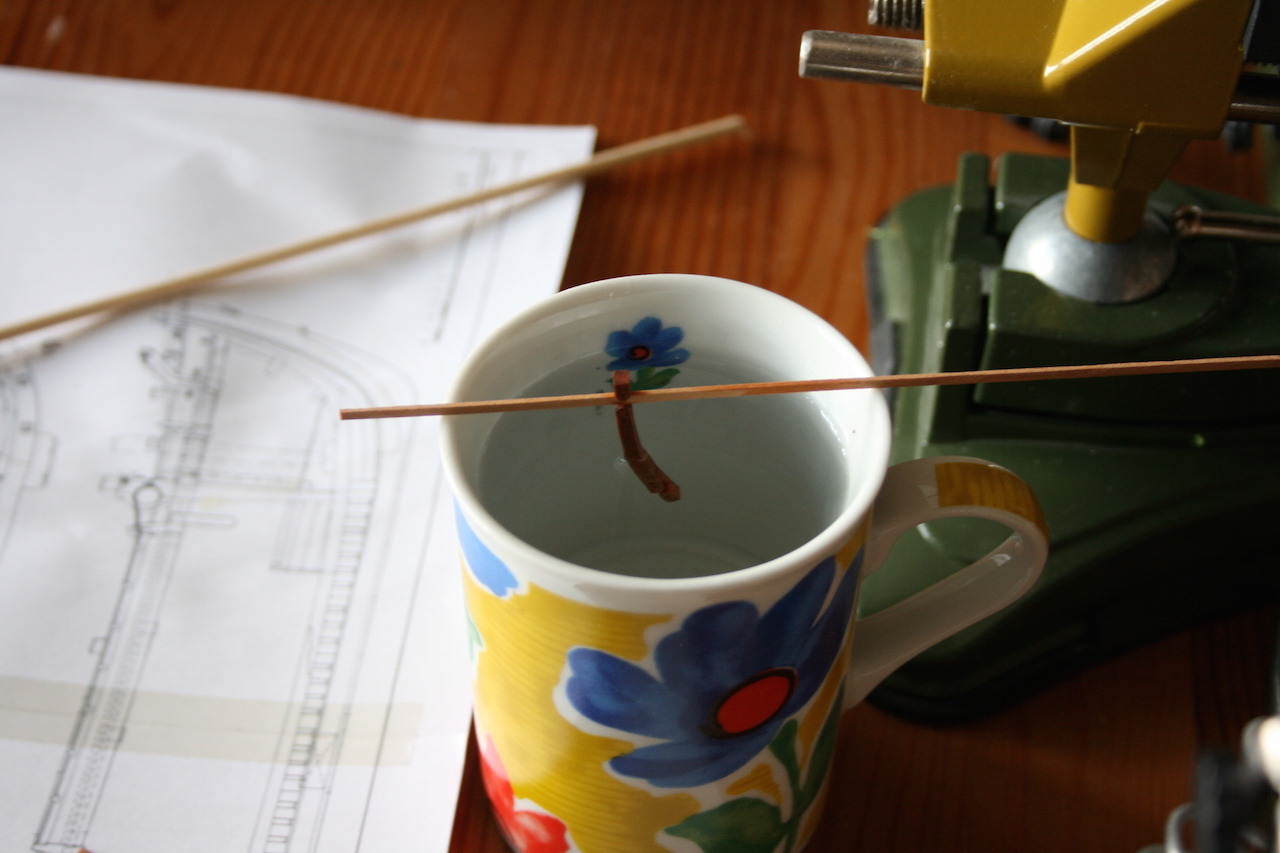
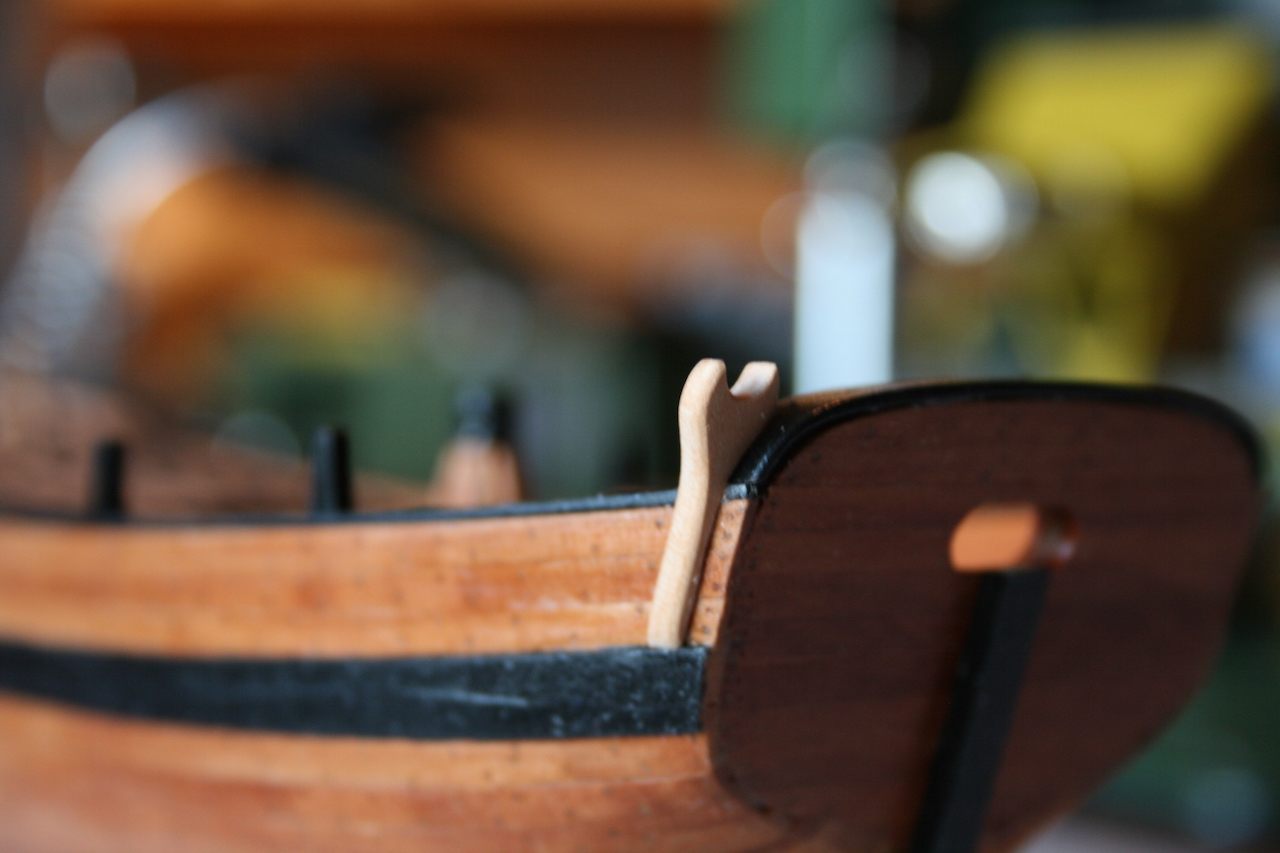
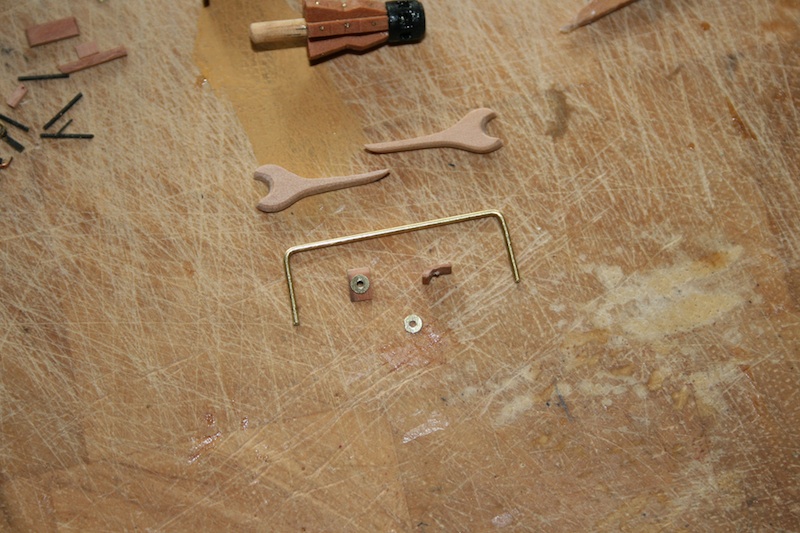
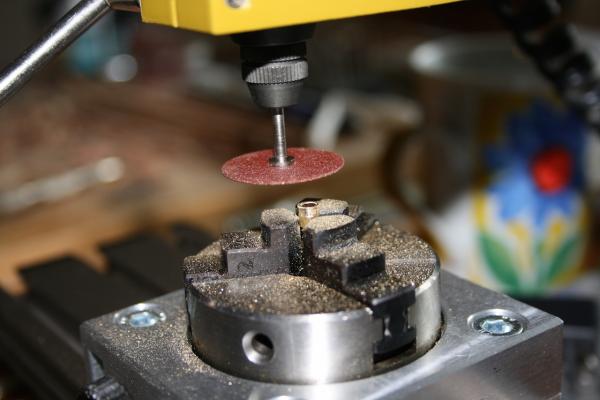
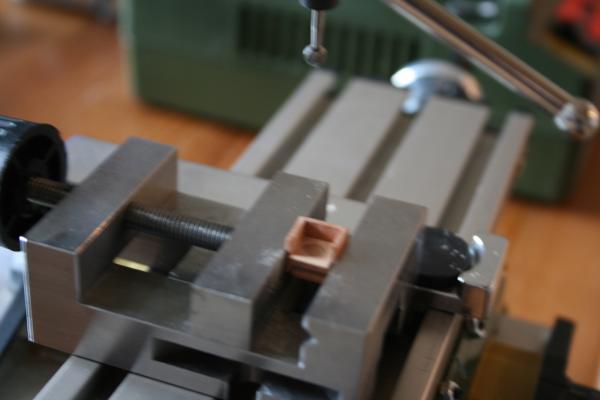
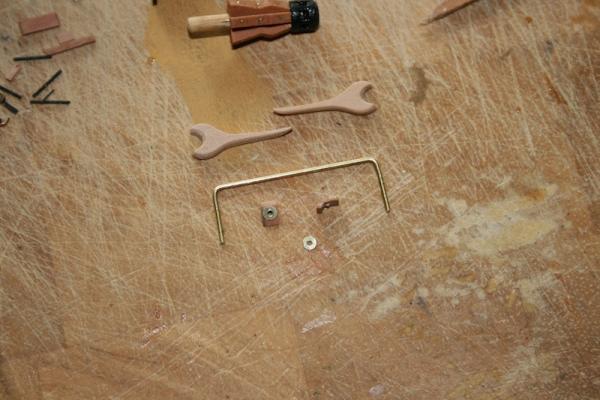
Hello, now I am working on the cat head. It is sitting in an iron band. On the original NMM draughts it is not recognisable, if it had a stopper notch in the head's face or if it was fitted with a site cleat. On Marquardt's draughts he has shown a side cleat. In his book Global Schooner her has preferred a notch option in the head's face. Hmmm... First, I had to calculate the angels of the draughts on Marquardt's plan and to transfer it to scale paper for getting the right shape of the cat heads. Daniel


-
...finally I paint the block in black and have made two sheaves with a convex profile fitted by a bolt made of fixing pin with a reshaped pin head in diamond / pyramid look. Enjoy your Sunday evening. Daniel


-
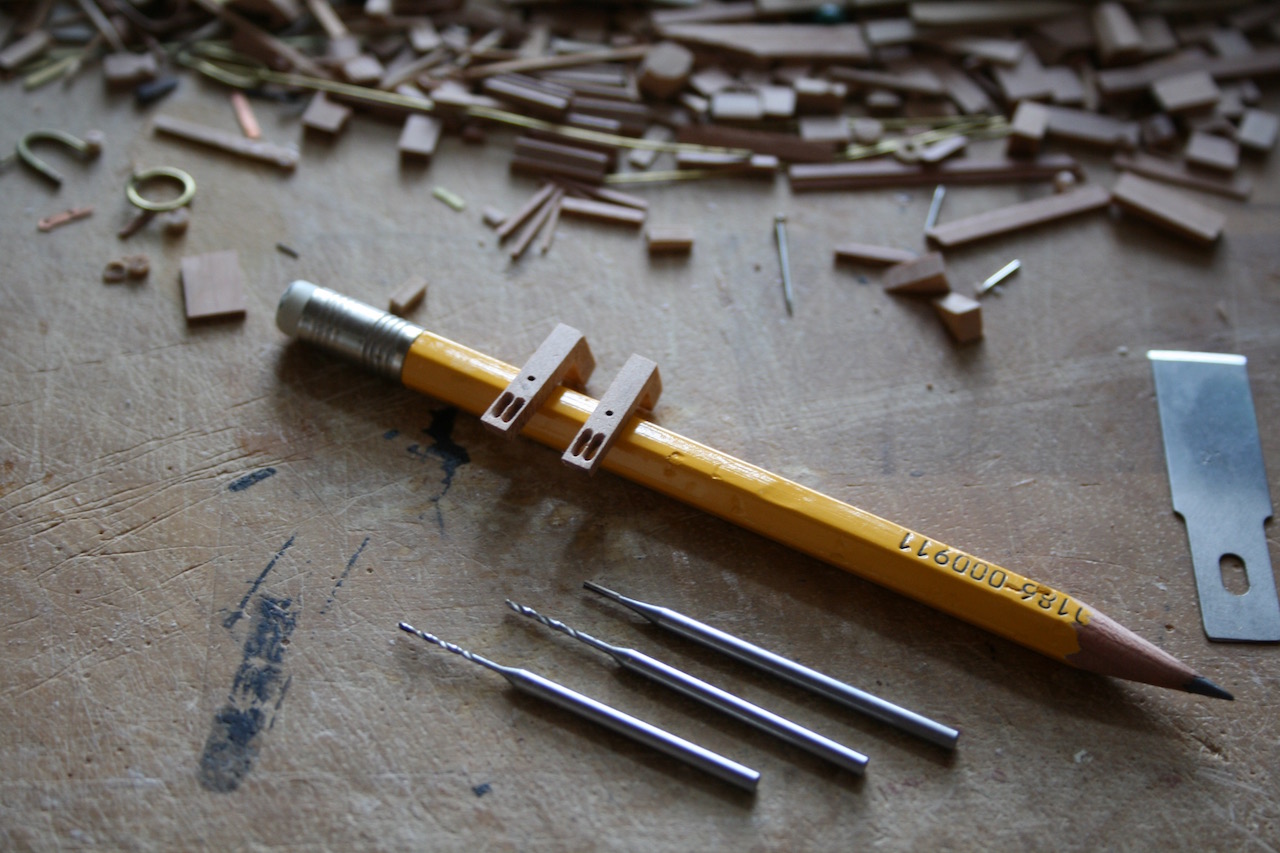
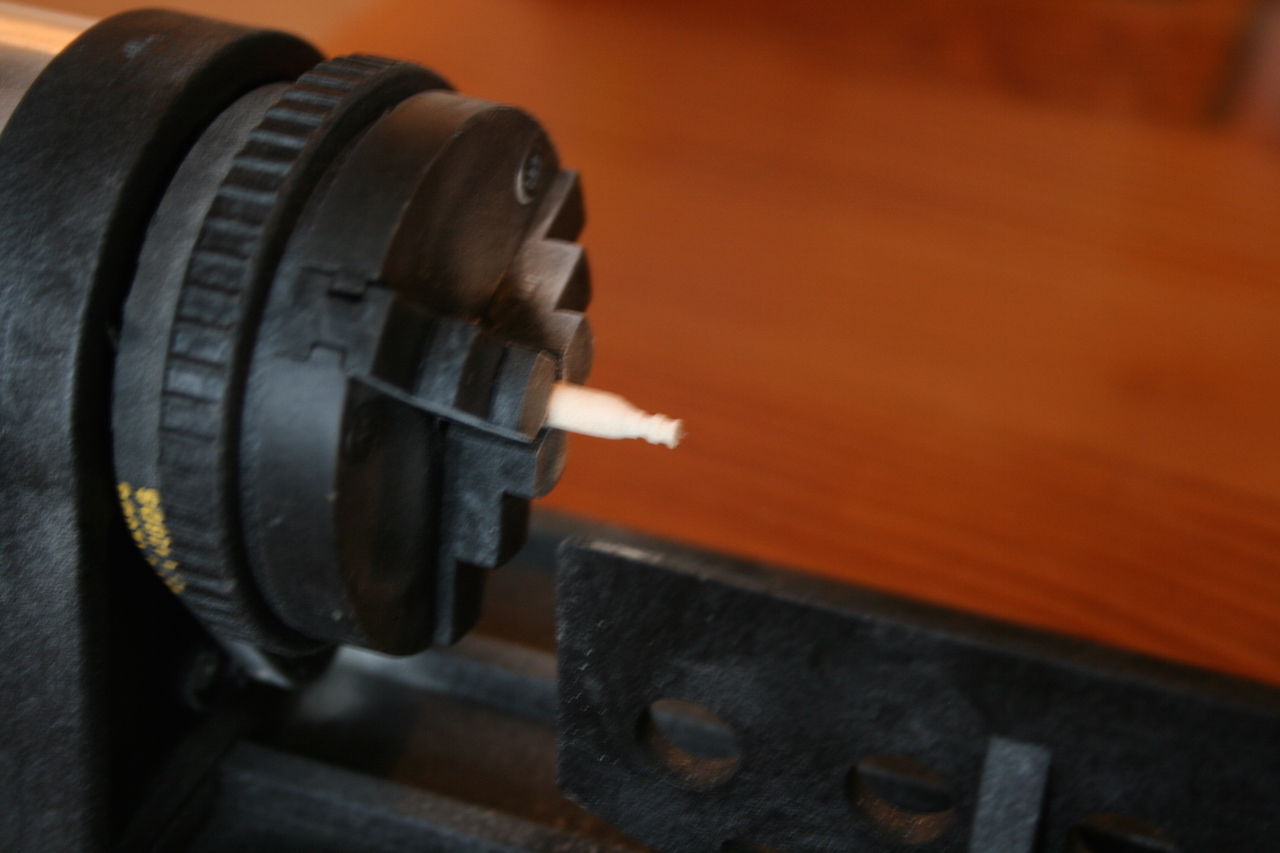
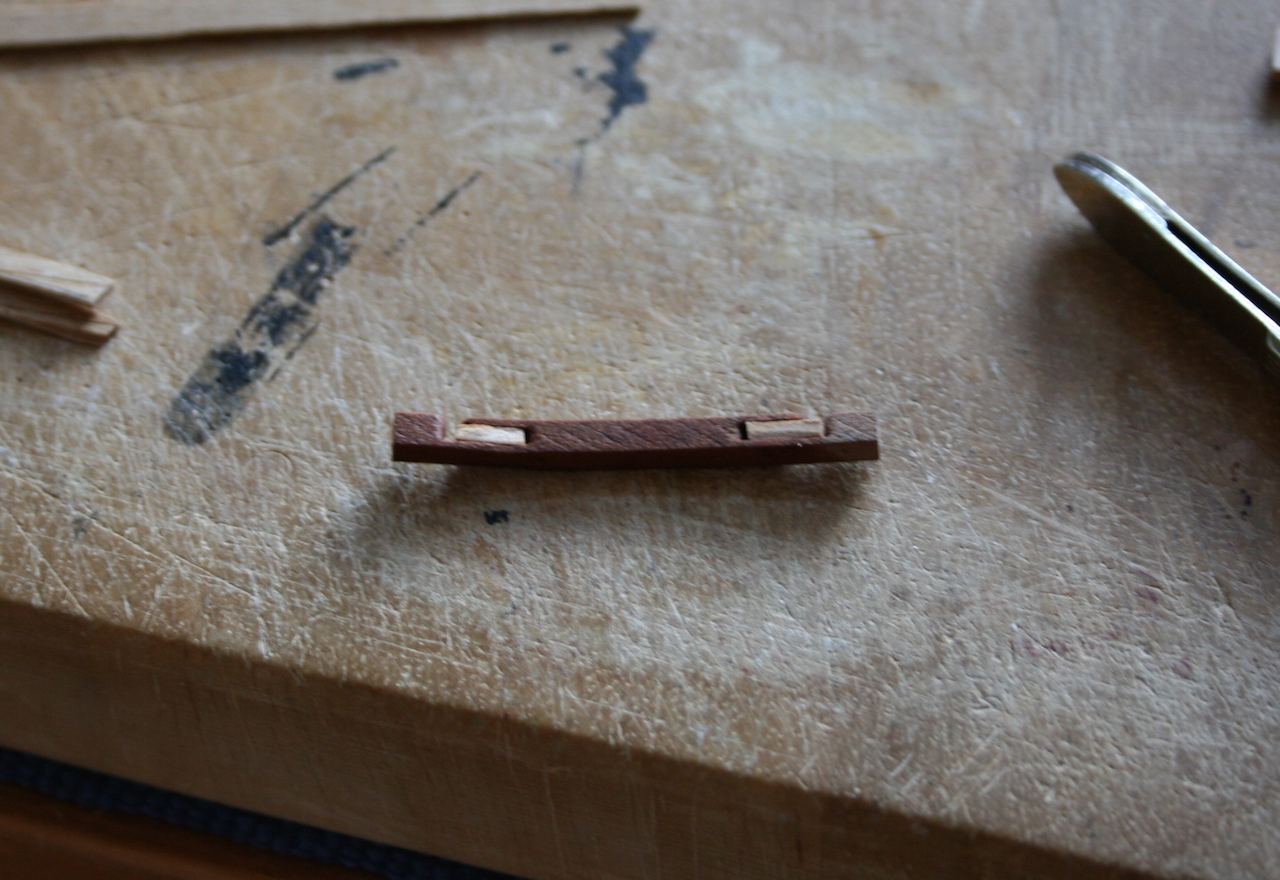
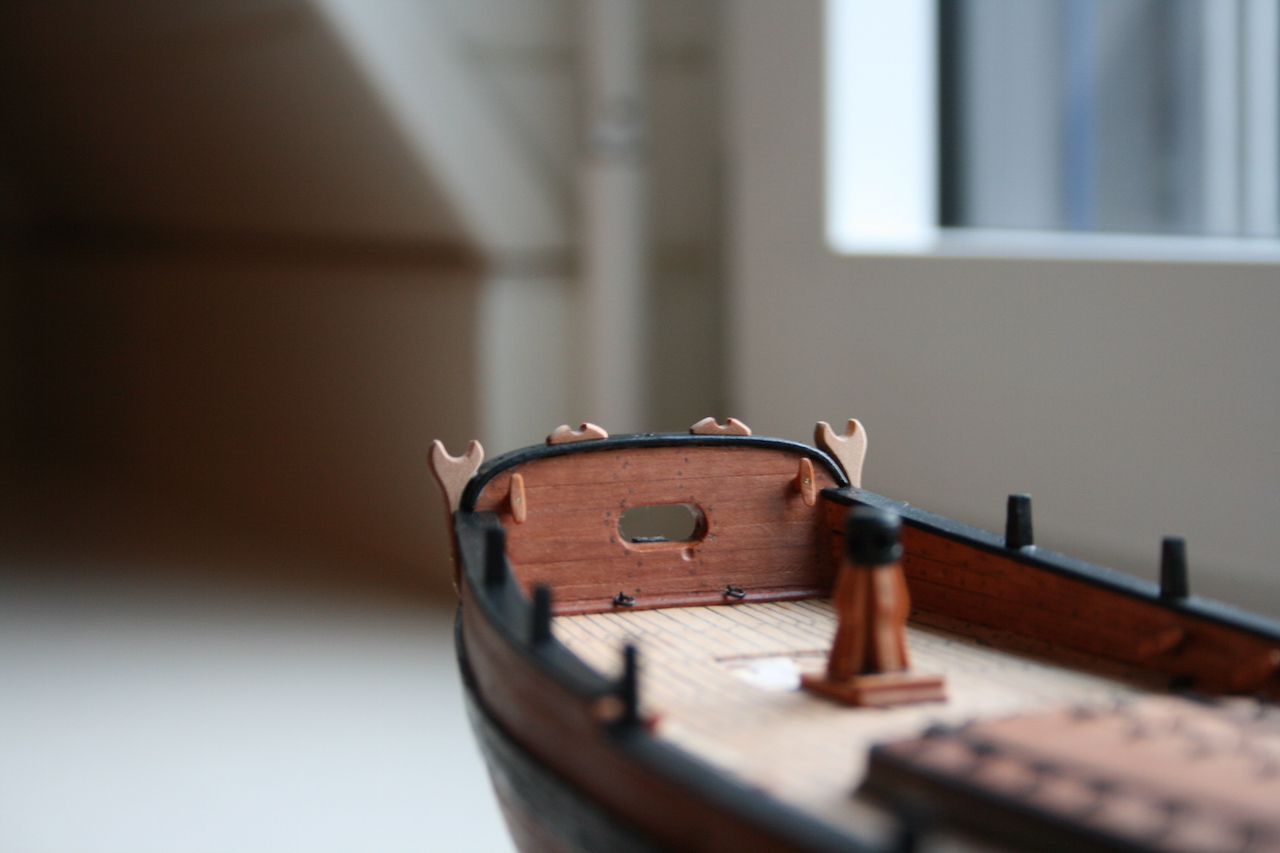
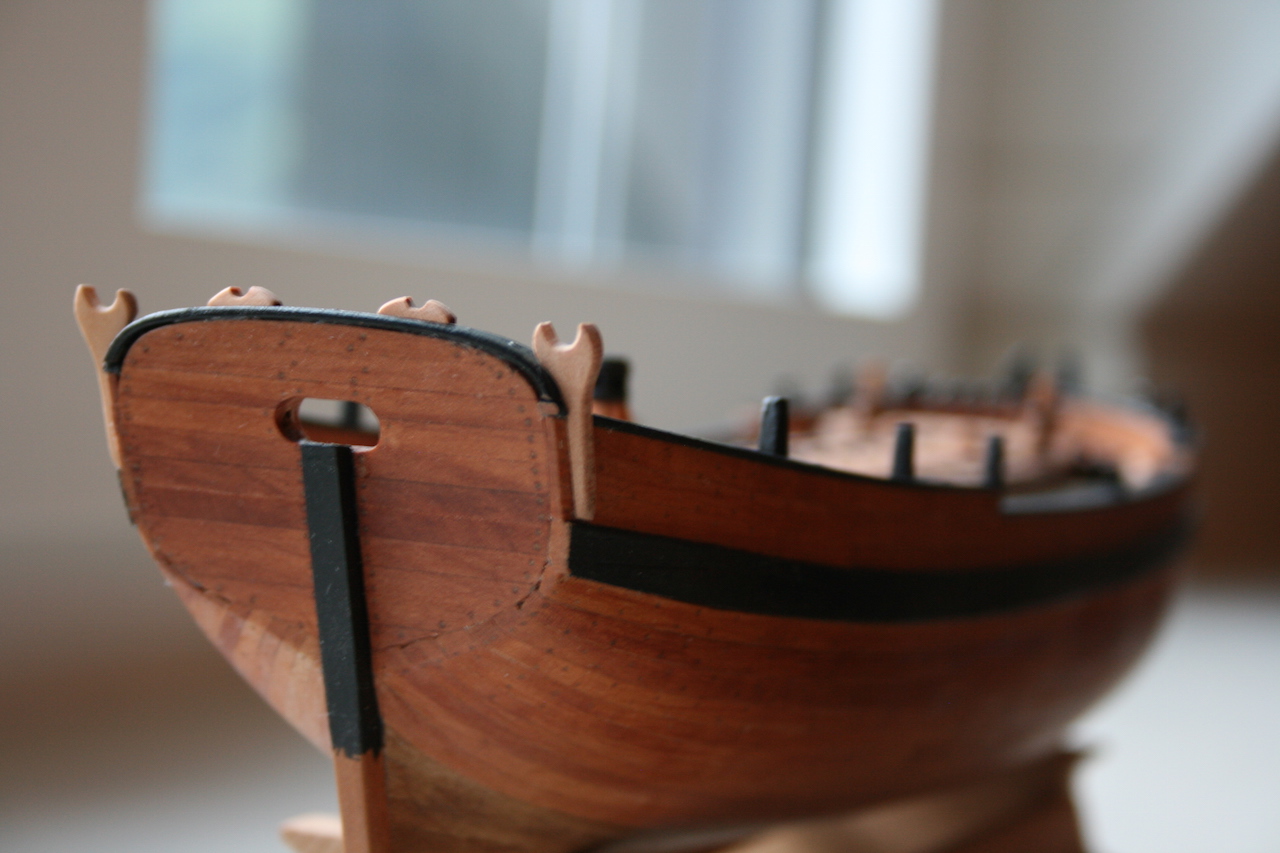
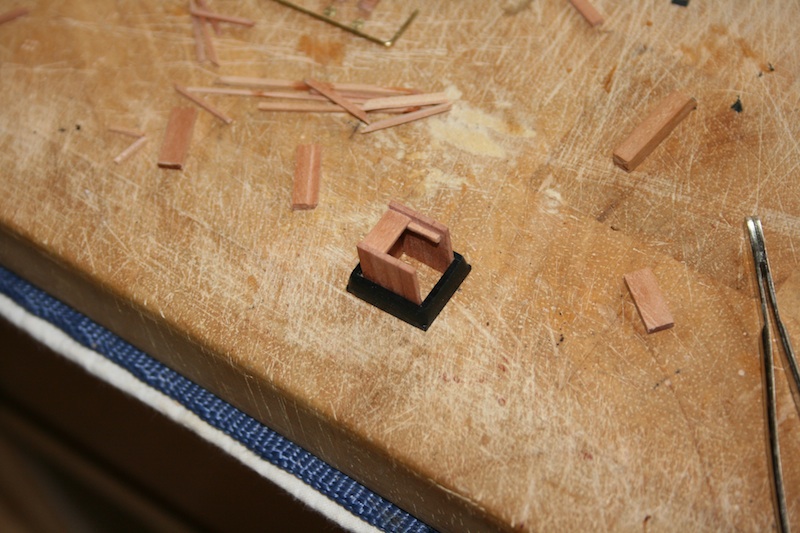
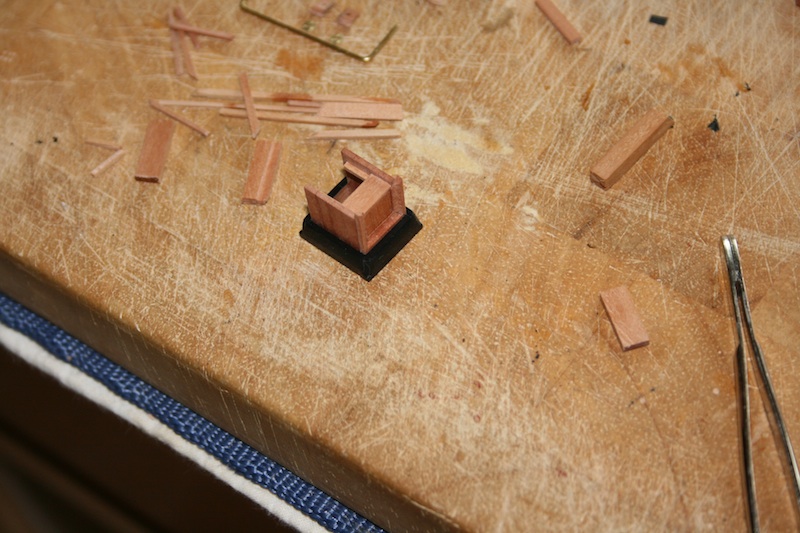
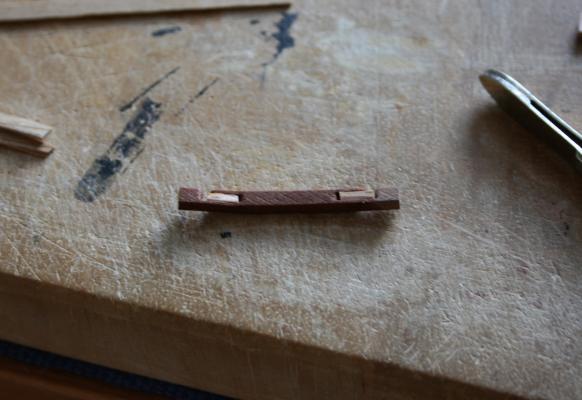
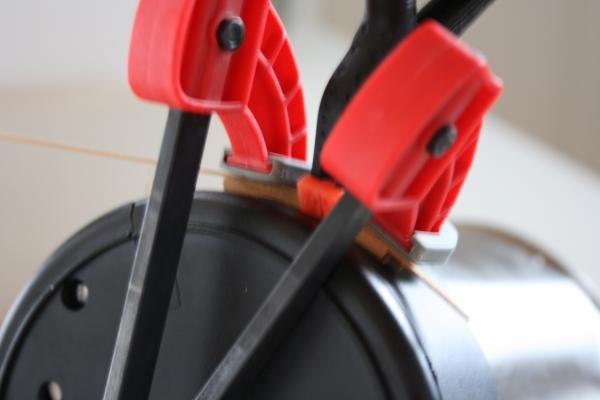
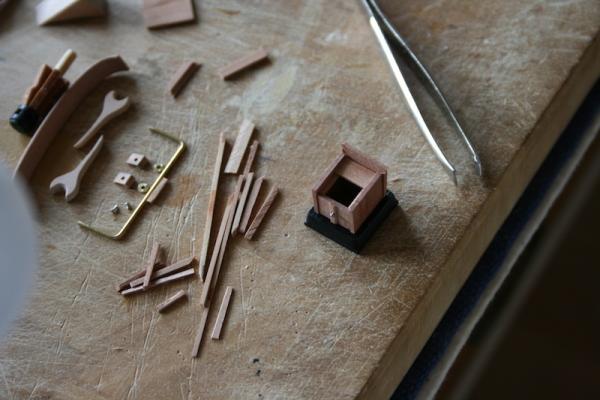
Hello, Yesterday and this morning I spend a few hours to work on a kind of cleat at the bow of the schooner. Honestly spoken, I do not have any idea which tackle it is for. Does someone have an answer? In the first I was starting to shape the notch for the block and then have water it to bending the wood into the right radius. For bending the wood I did use a simple water boiler as it has the same circumference as the bow of the ship. Lucky Daniel. Unfortunately the first try wasn't crowned with success as the open notch for the block get scrunched by the clamps while drying. For the second try I put it in water again for soaking and have made a little jig. Secondly I filled the notch with a little piece of spare wood to avoid that the open notch gets compressed again. It turned out well and after a little carving I could place both pieces onto the handrail. Next I have to turn the blocks on the turning lathe, fixing the wood by nails and to paint it black as it was common practice at this time. Alternatively I am thinking of to let it natural as the details might be better apparent. I am not really sure now. Cheers, Daniel


-
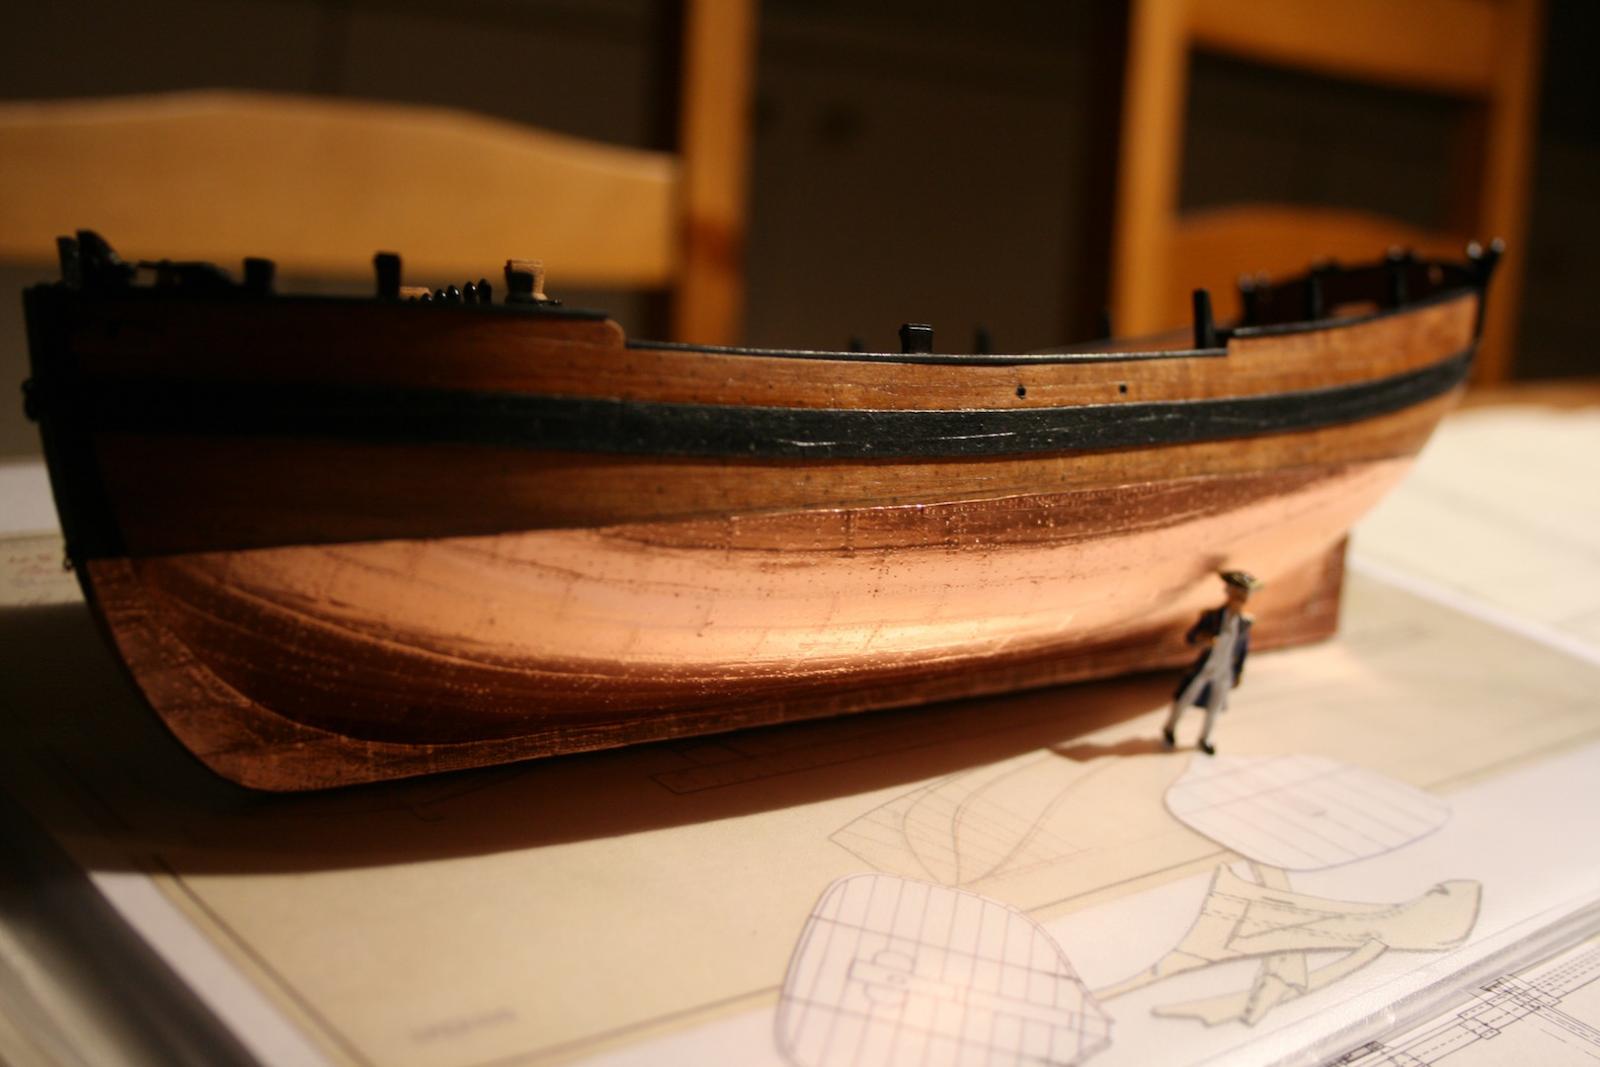
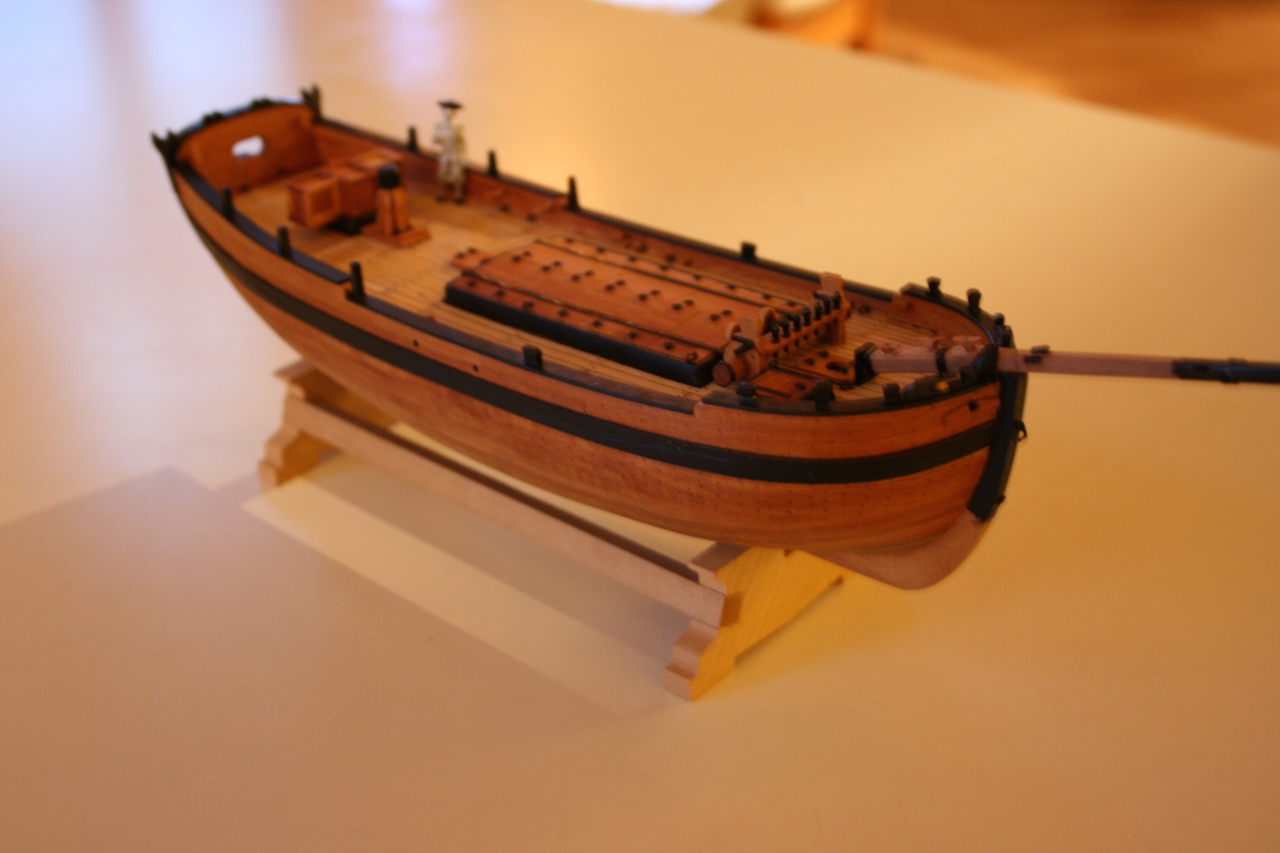
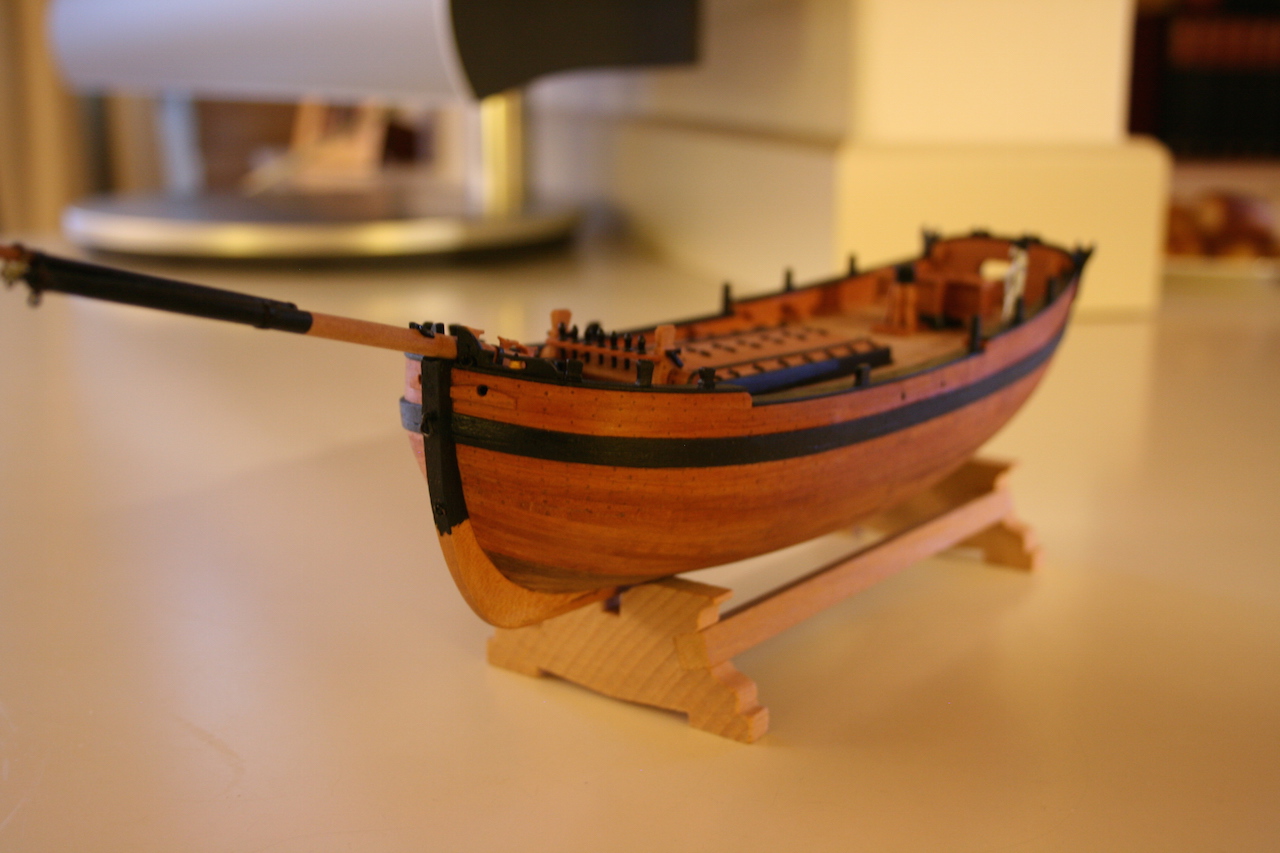
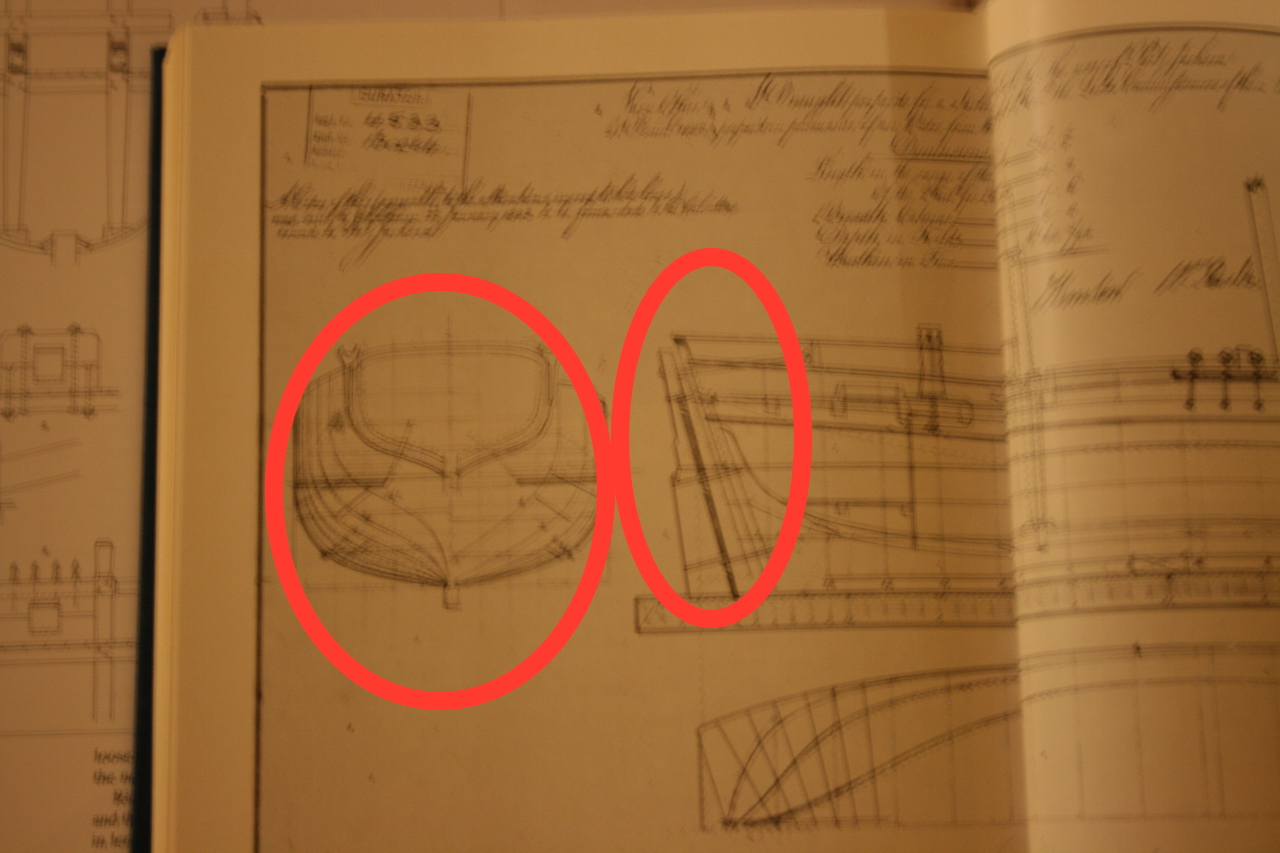
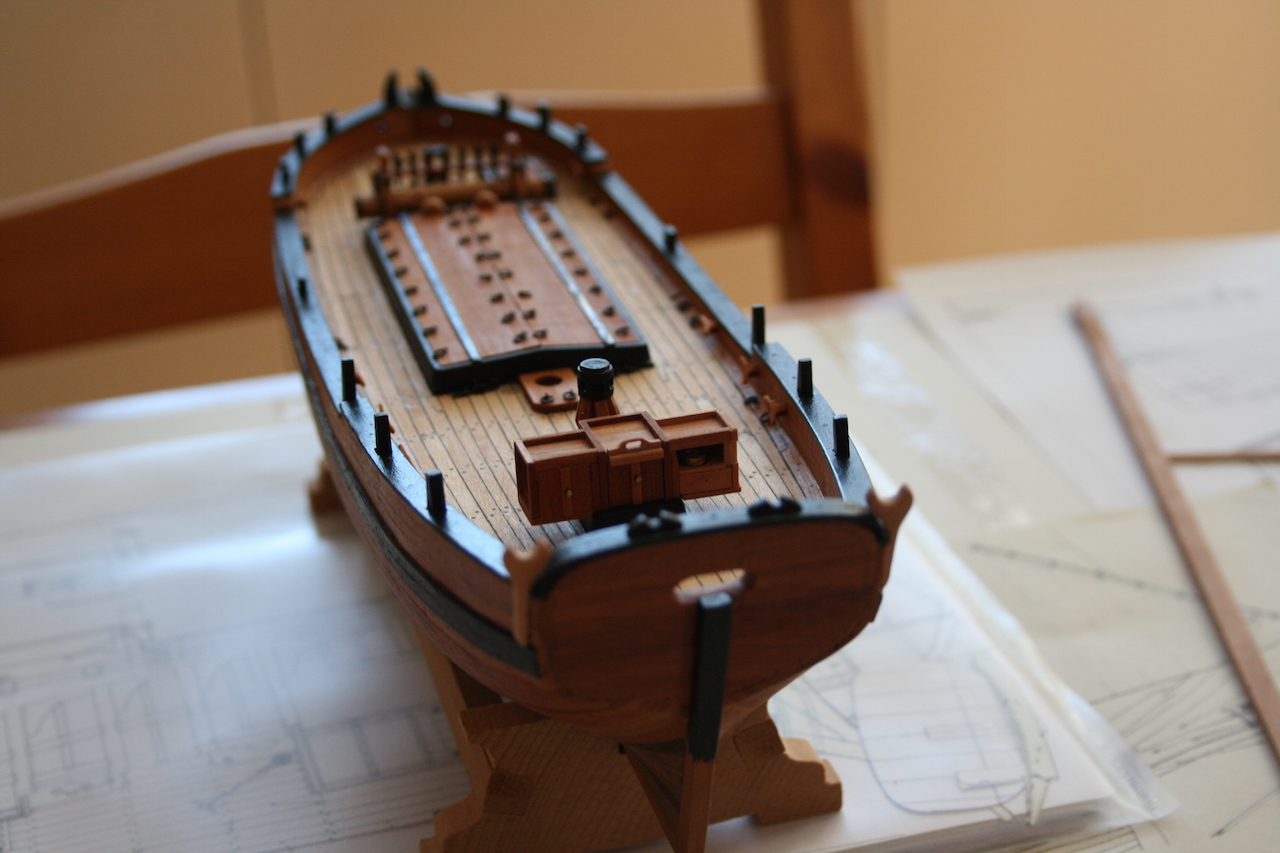
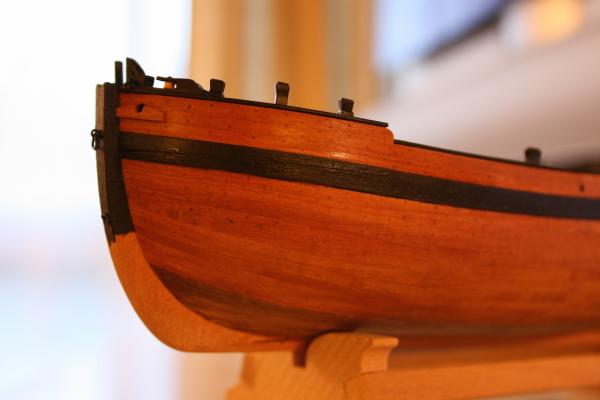
Hi Ginger, nice to hear from you again. Hope you are doing well. Meanwhile I made a decision about the colour scheme of the stern and have chosen a simple solution with as less as possible paint work but with a nice look. Hope this solution is acceptable under historical aspects. In the end there are very, very limited sources about the real ship. It is not clear yet, if the real ship was a one-to-one build after the admiralties design (the original draughts offers a configuration with a single mast and optional, marked with doted lines, one with two masts, furthermore it offers a much sharper underwater design of the frames, marked with doted lines too, in the aft-section - surely for making the ship faster). As it was in the end a cargo/supply vessel with a true mission for making profit and to load as much supplies as possible, I have chosen for the wider frame design as it makes more sense to me in terms of the circumstances in the colonies at that time. Daniel

-
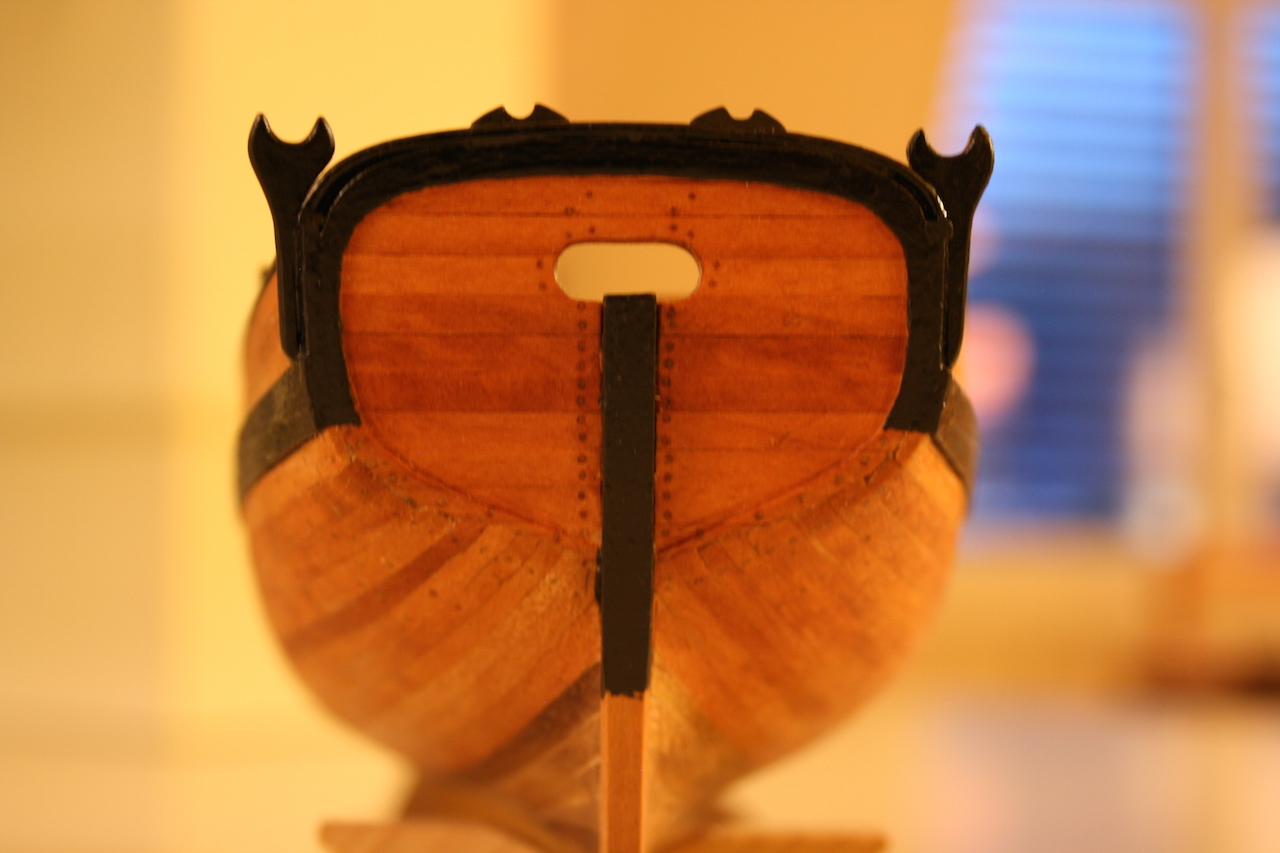
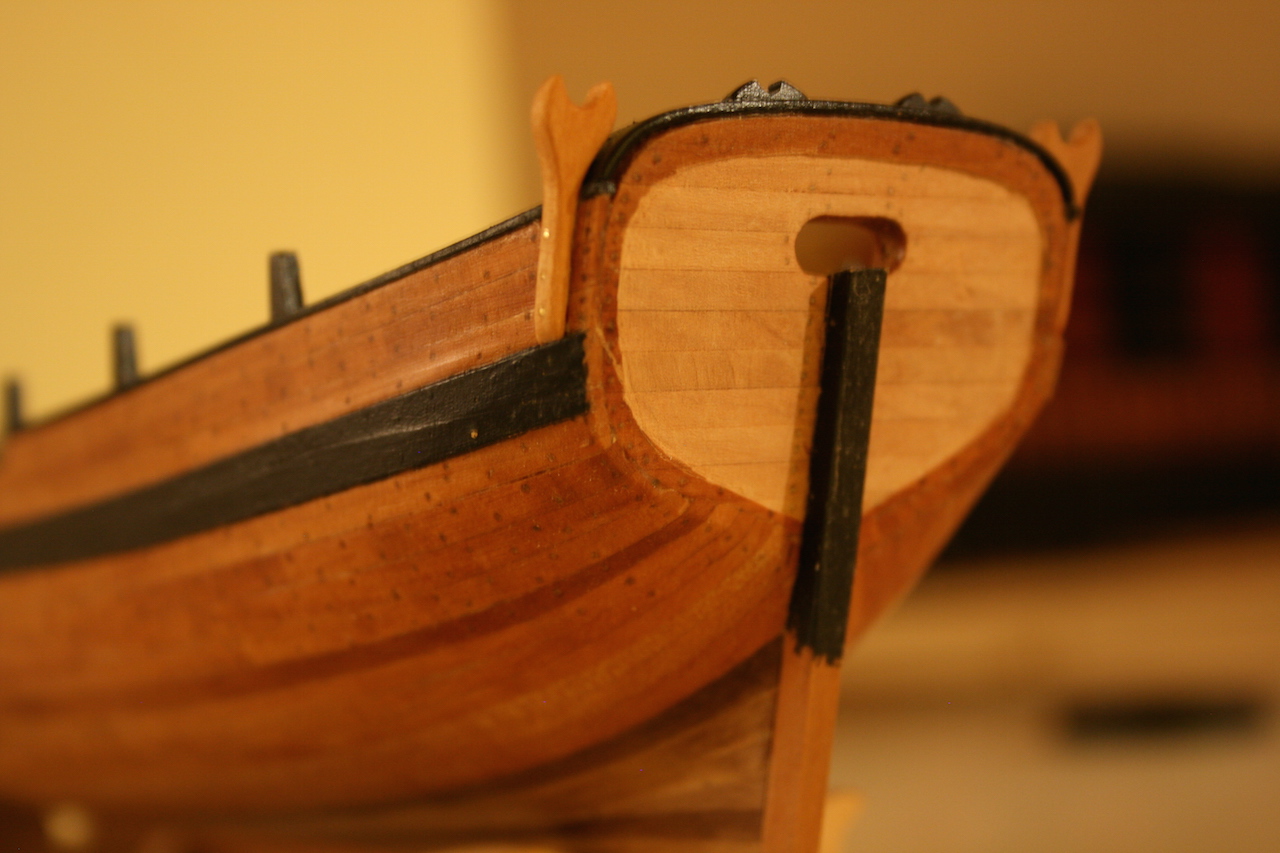
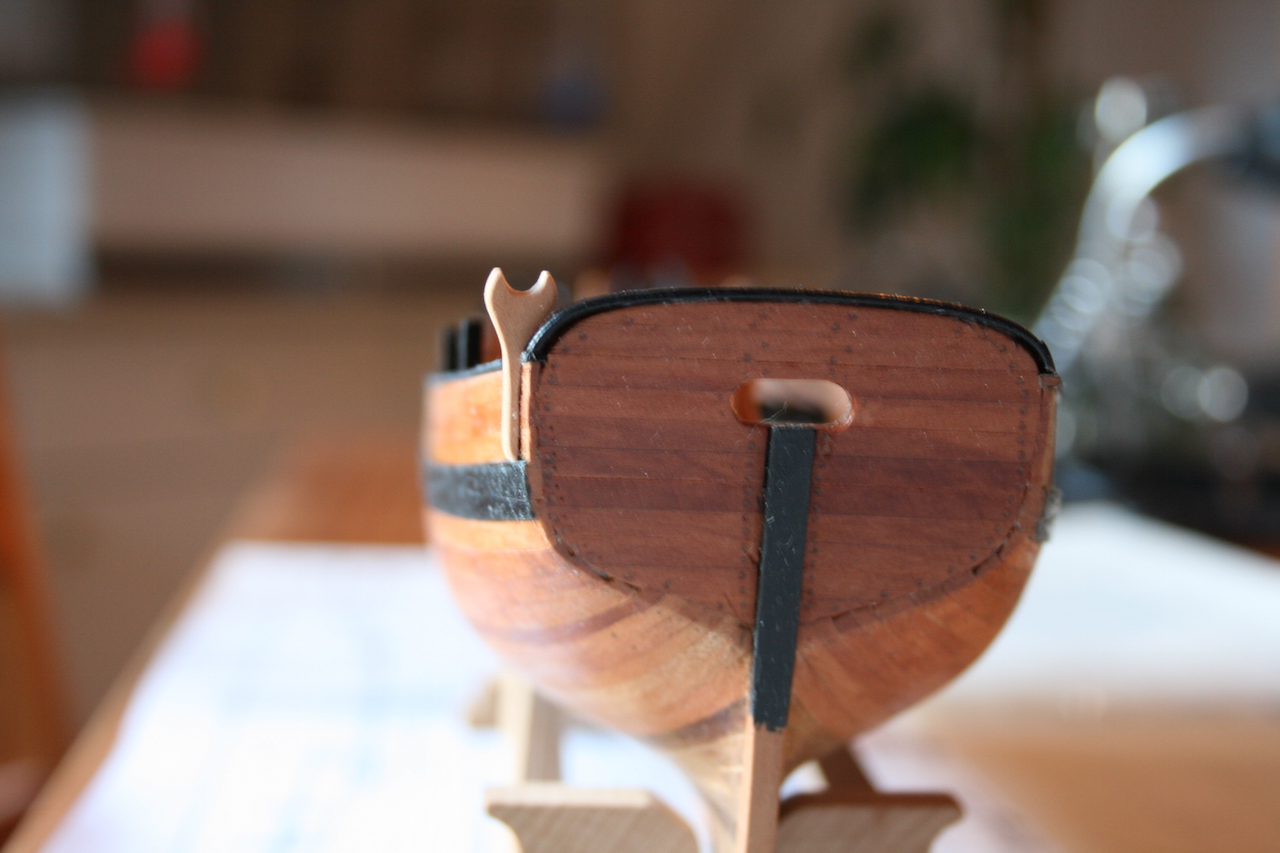
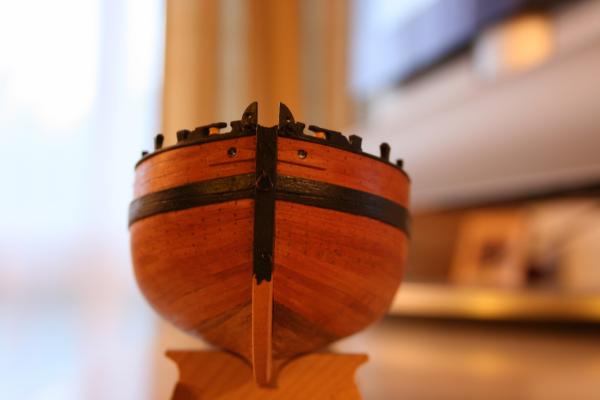
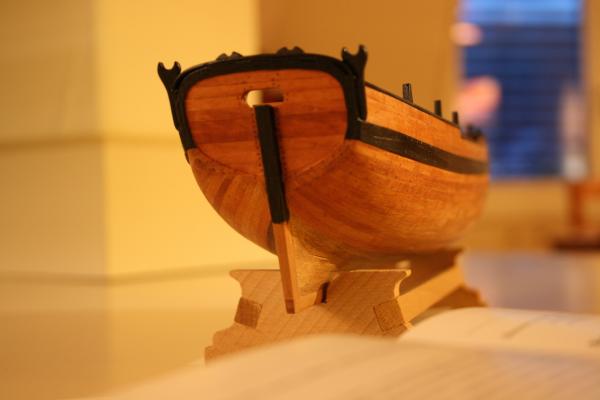
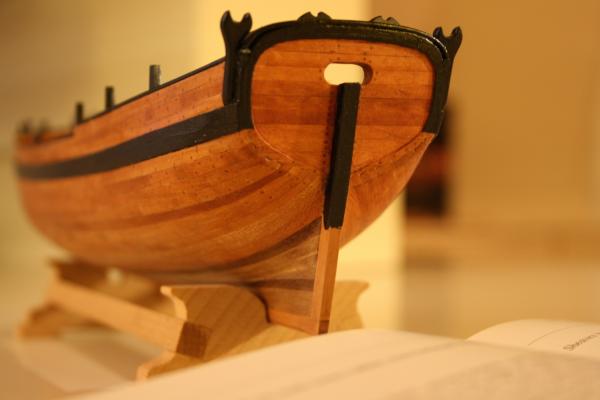
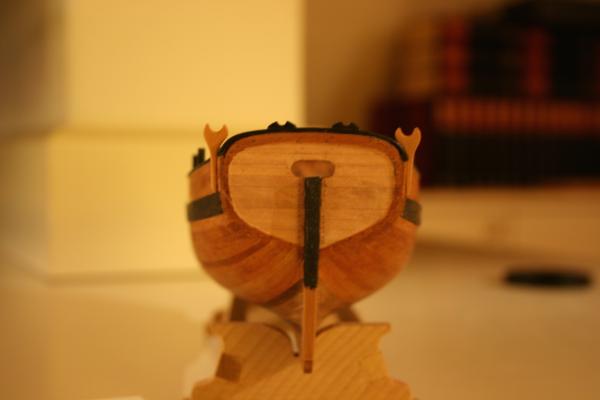
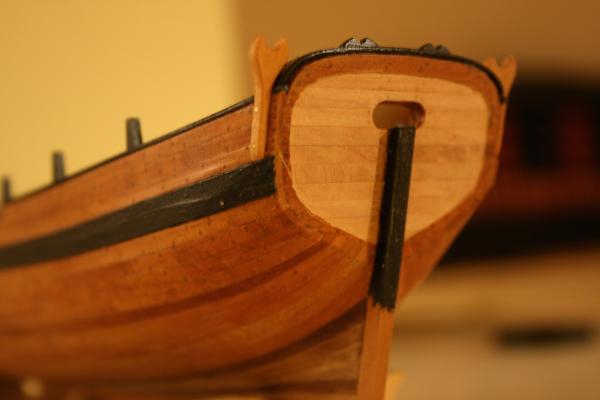
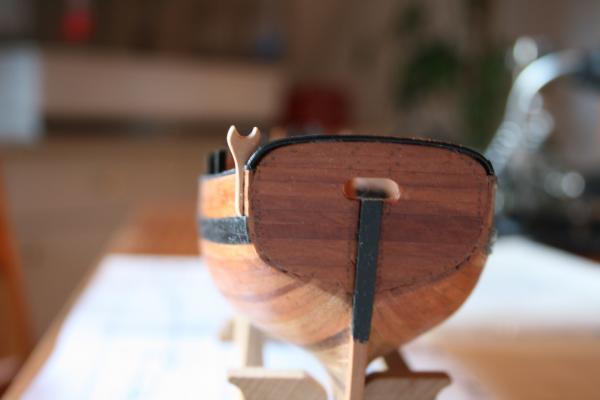
Hello, On the original draughts from the NMM is a little kind of frame at the stern recognisable that is not on the draughts of Mr Marquardt. It might be a little try to make the draughts of the ship much more good-looking. Indeed, as the ship has been assembled in the colonies, that detail finally didn't found its way to reality. However, I found it attractive and am going to realise it on my vessel. On the side view of the stern is no attached frame to see. That brought my to the reverse, that the frame might be carved to the planks of the stern and have started to do so. It needs a bit finish by sandig and a little fine tuning/reshape. My direct question is about the paint work on the stern I have to do now. I would like to give the ship its name at the stern by yellow-ochre letters on a black background as it was usual practice at this period. The upper part of the frame appears to small for it. That means I have to paint the entire stern and frame in black straight down to the level of the lower edge of the wales or, alternatively, to paint all of the stern in black. I have now clear idea now. Any suggestions? Daniel

-
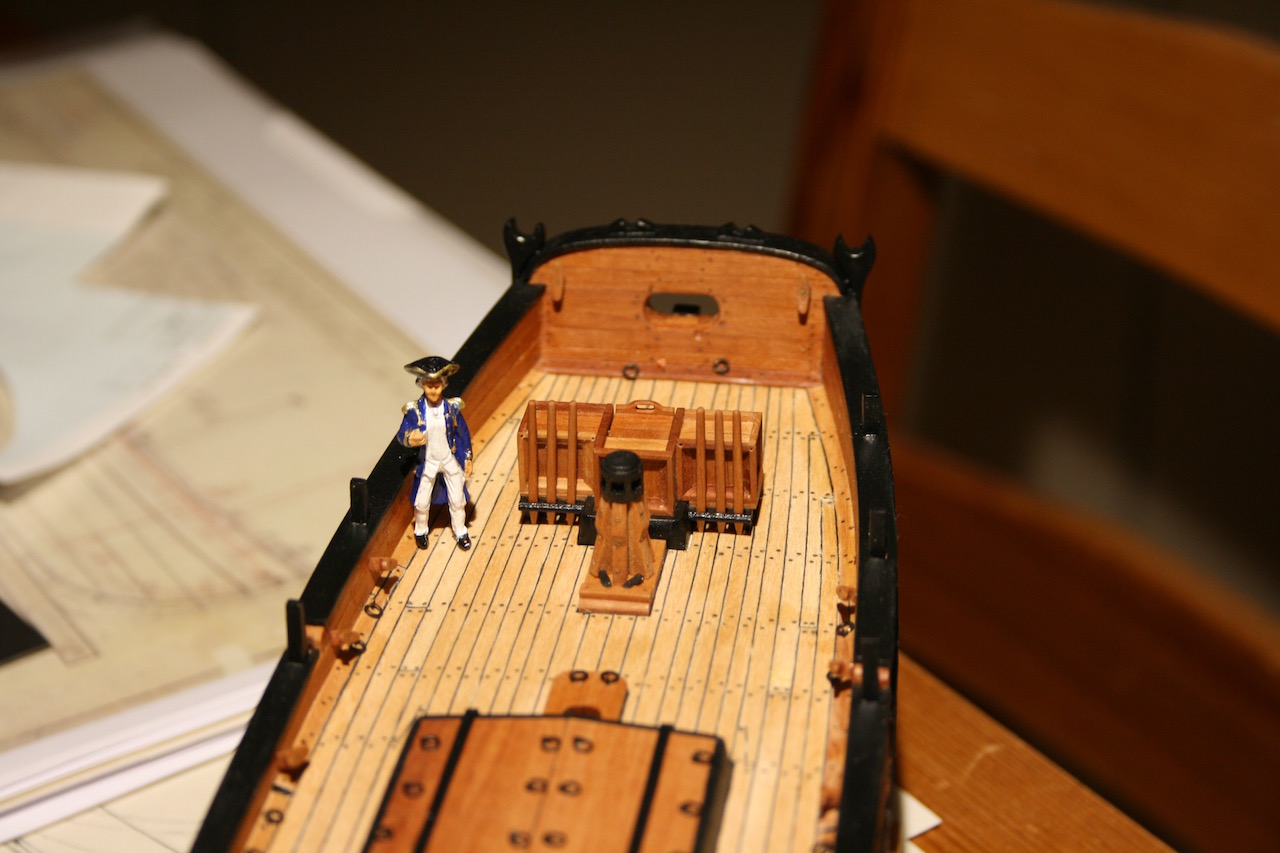
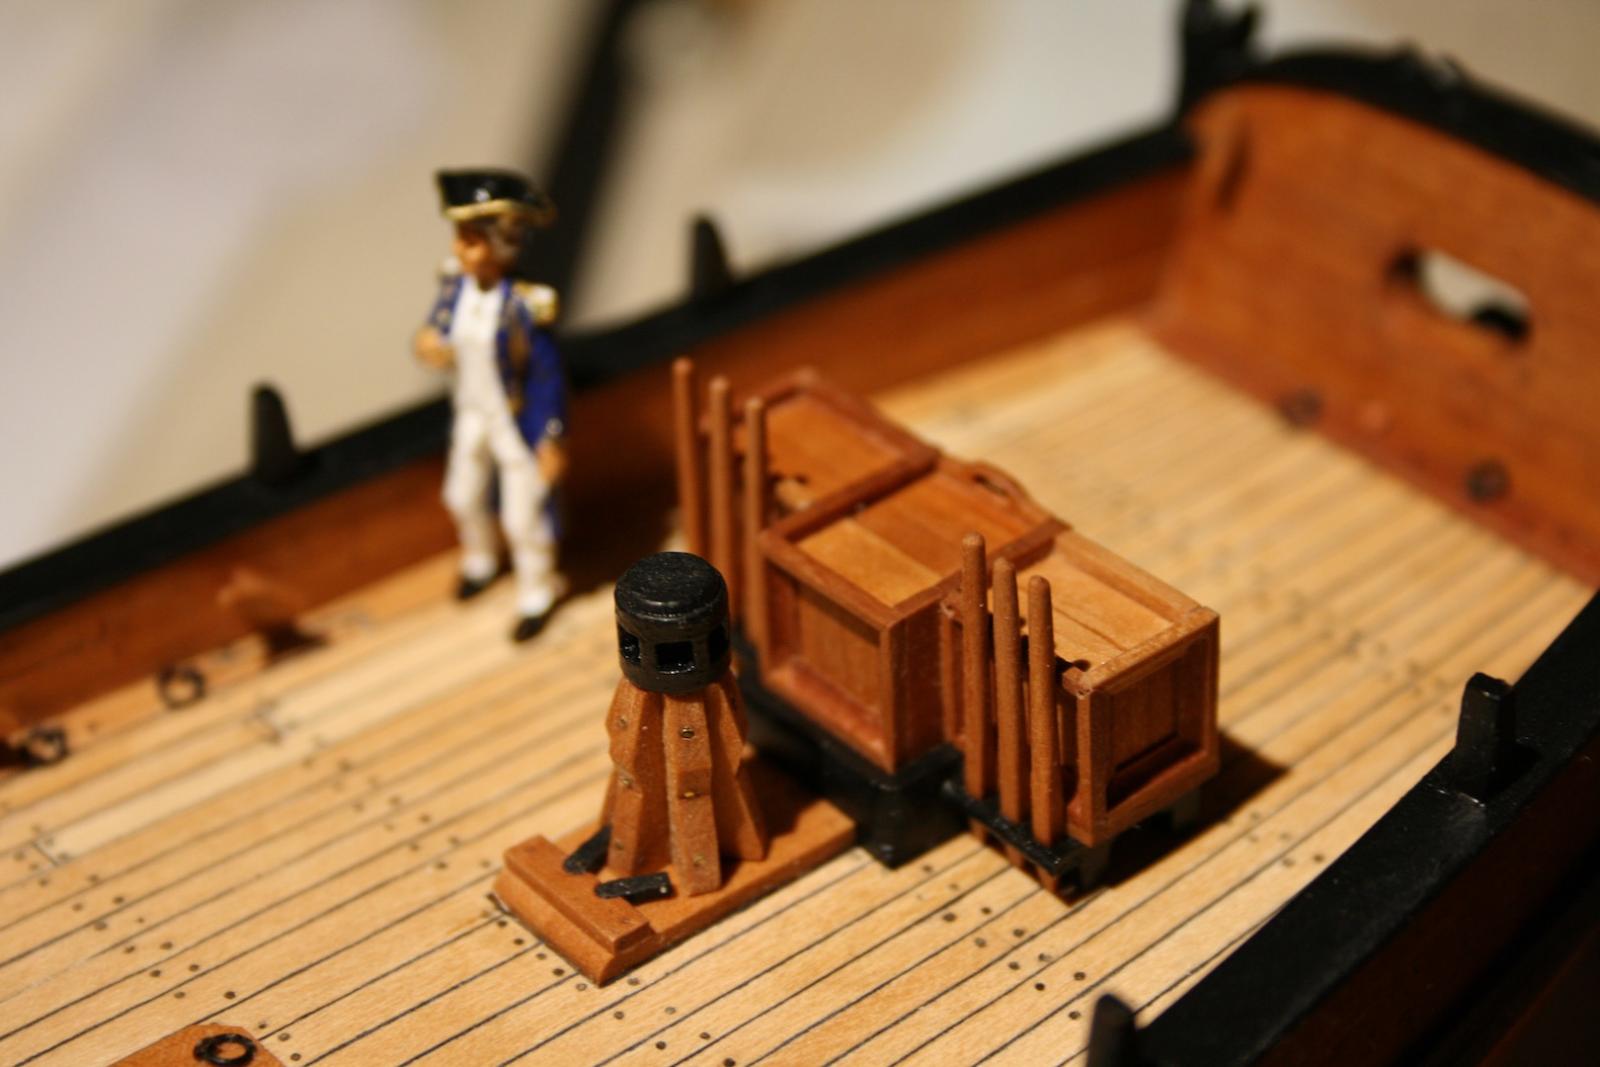
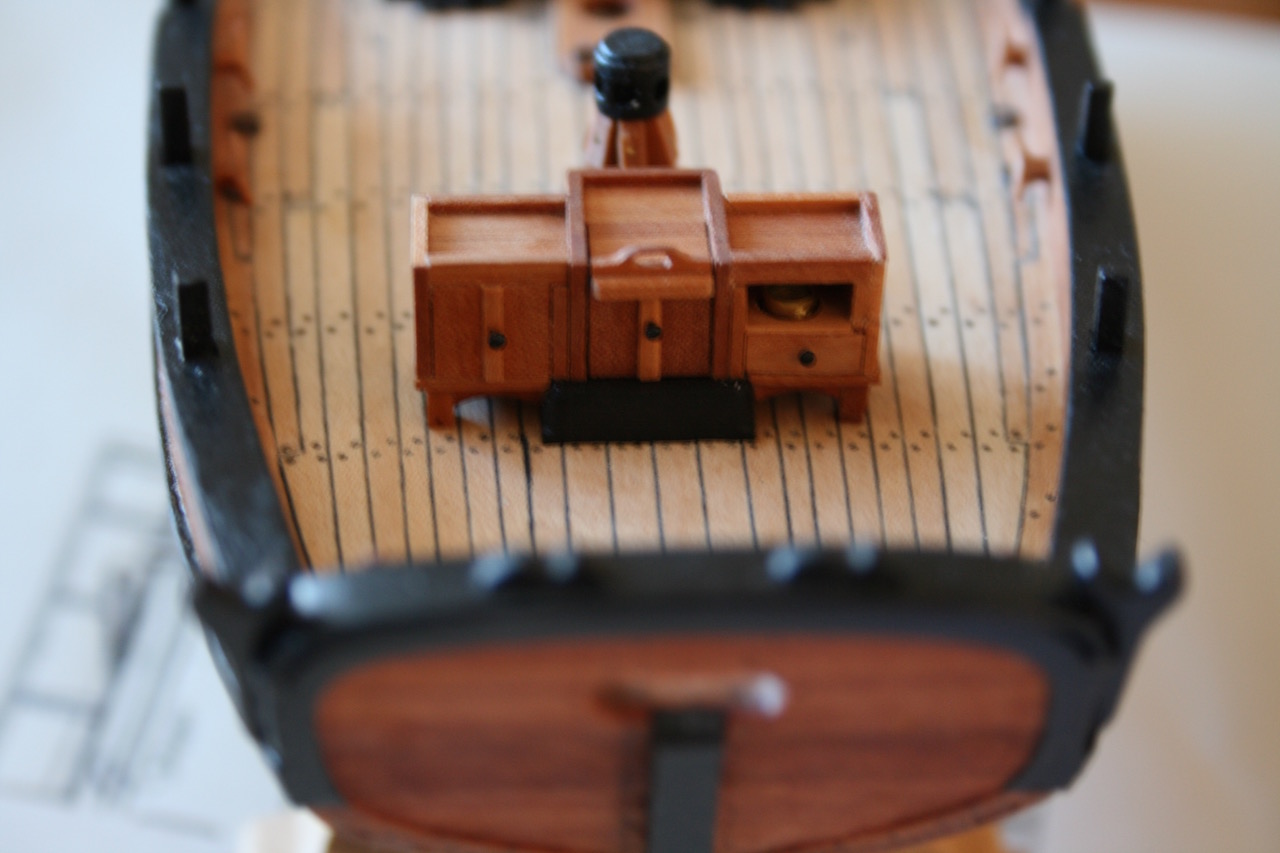
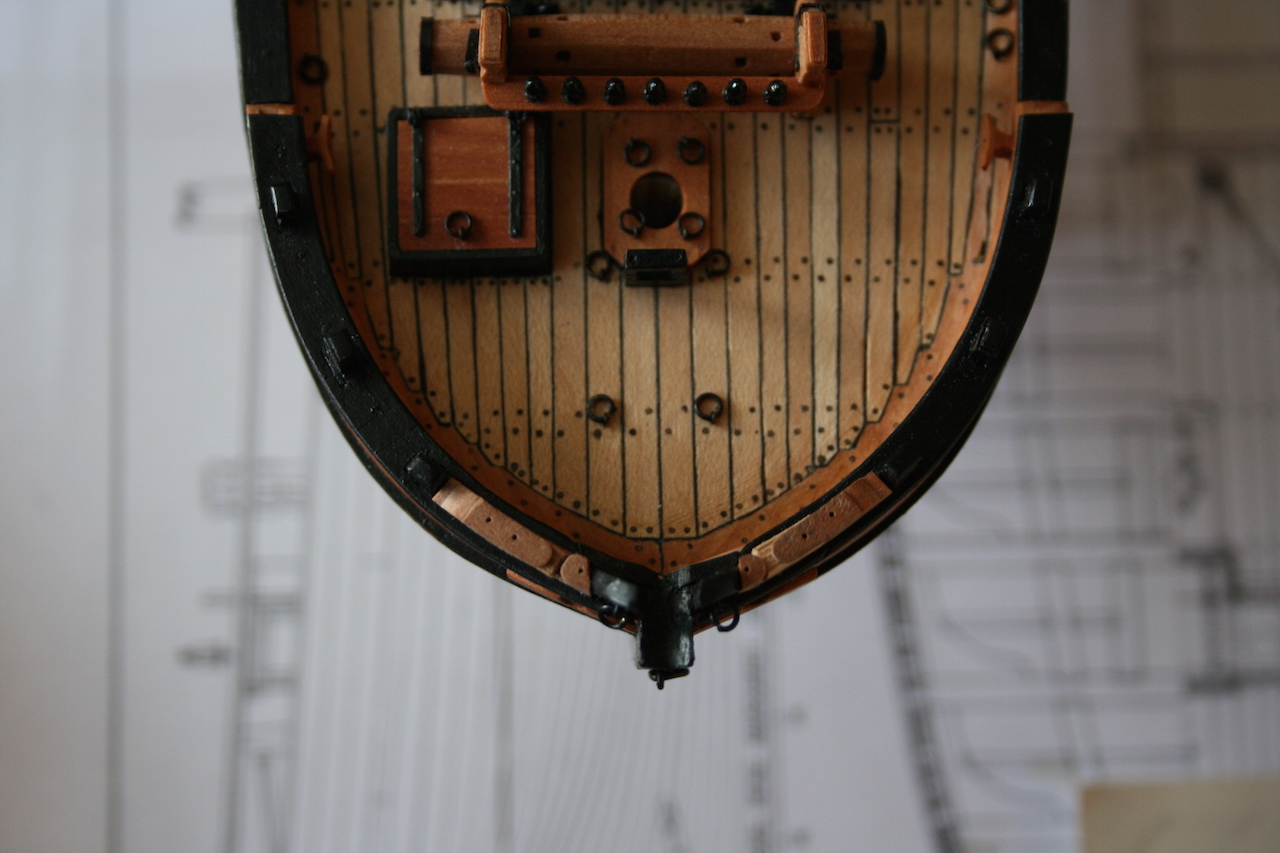
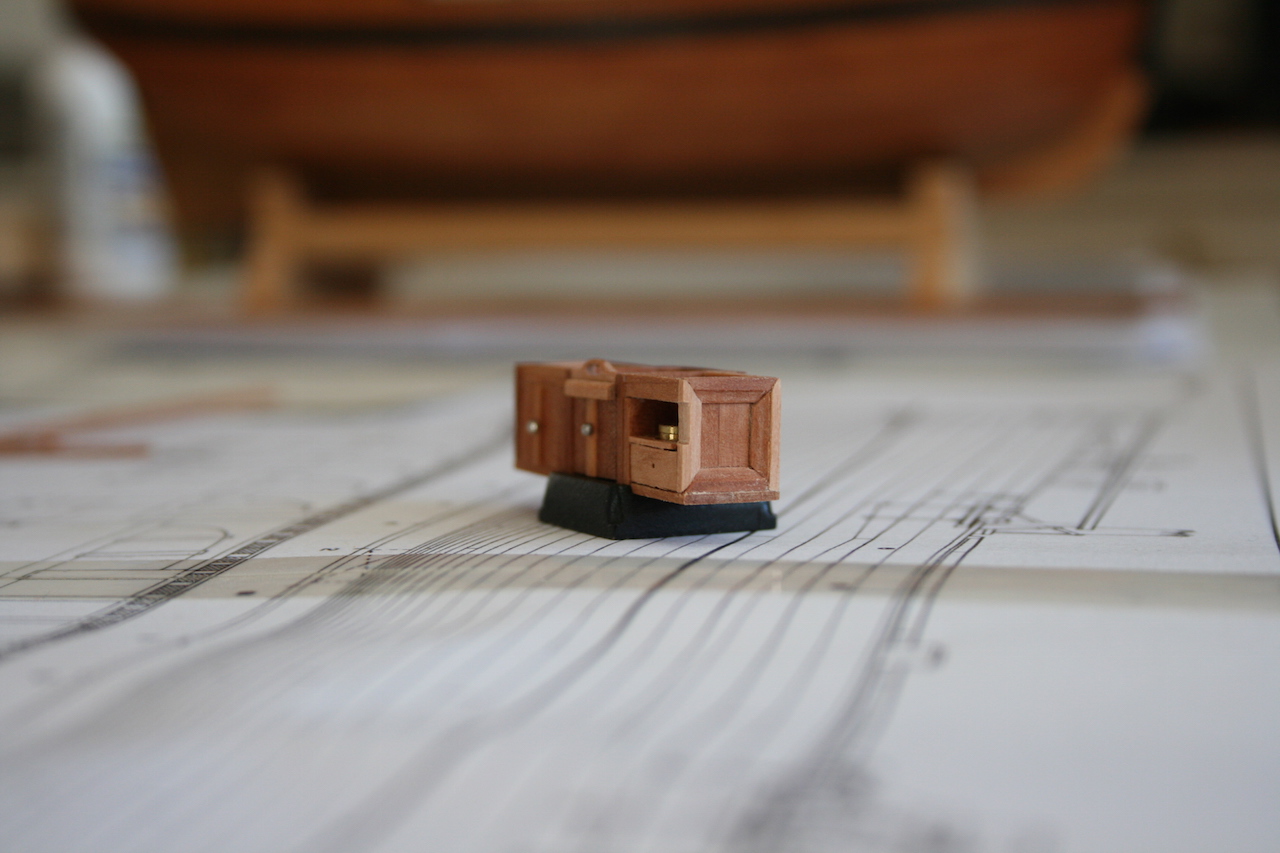
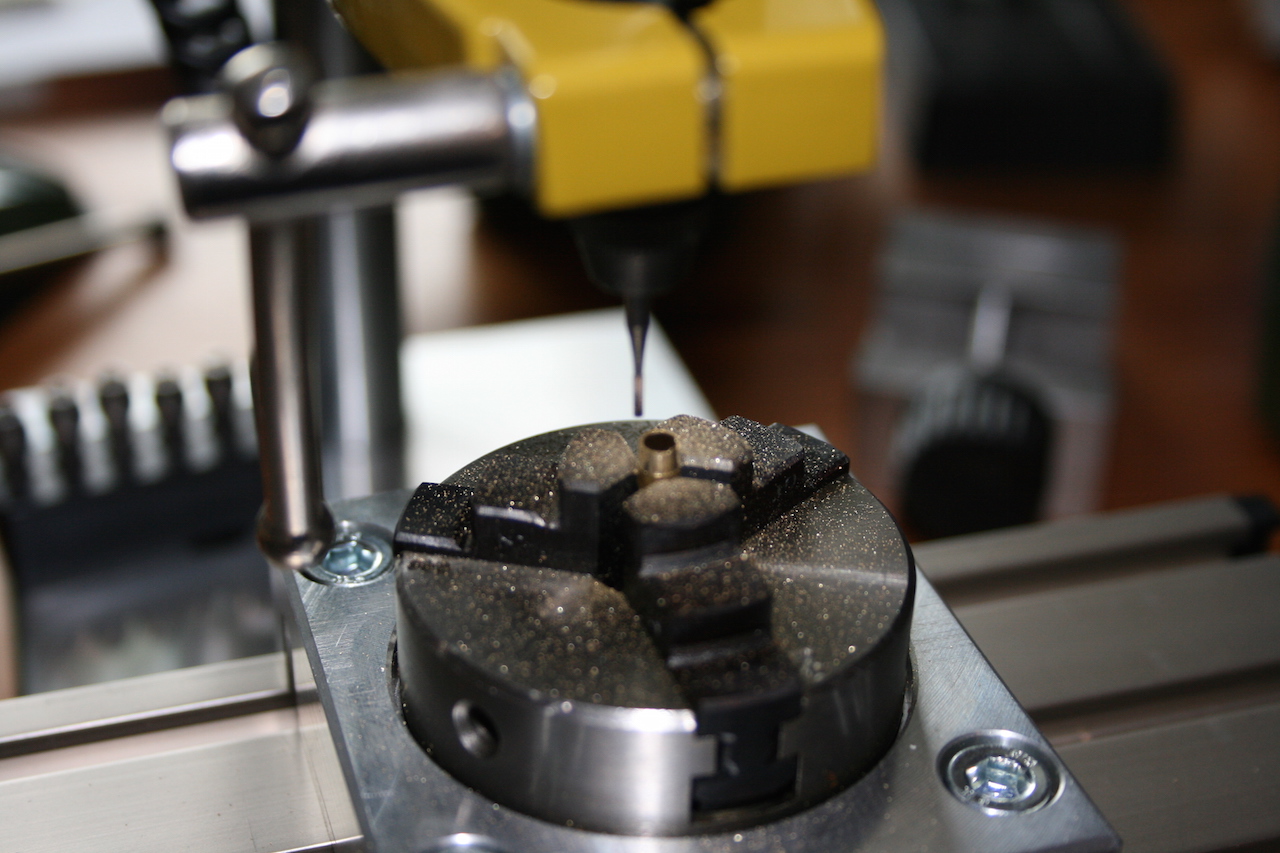
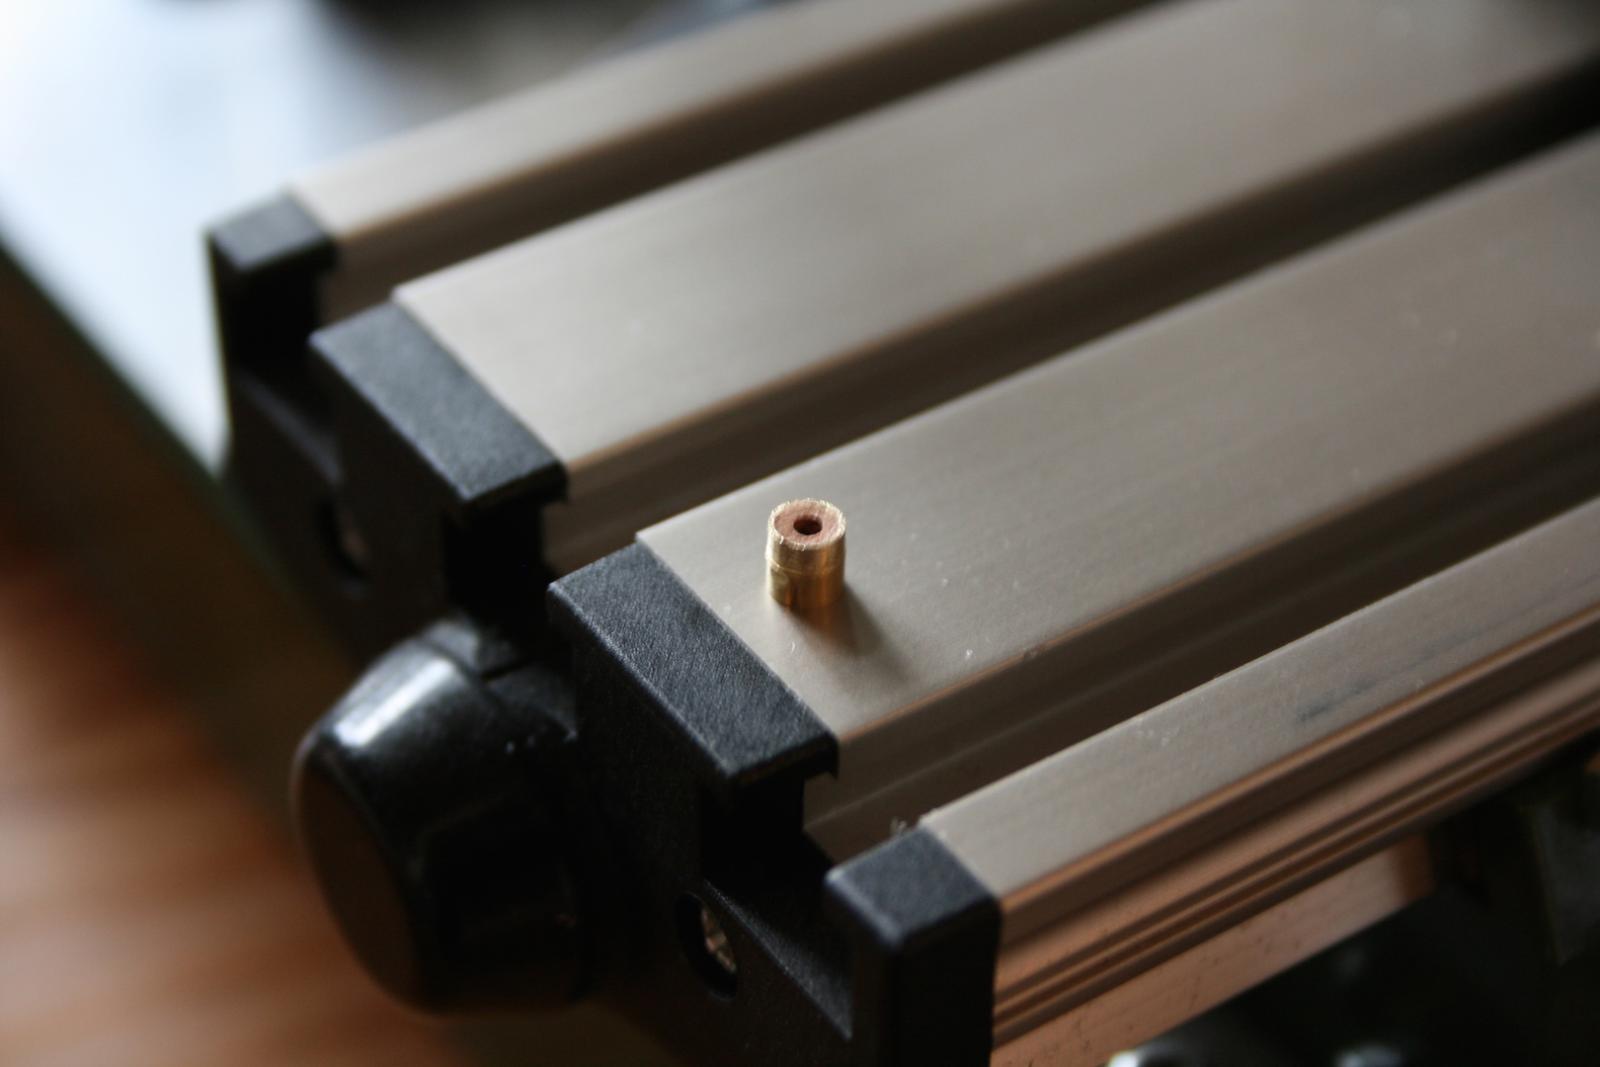
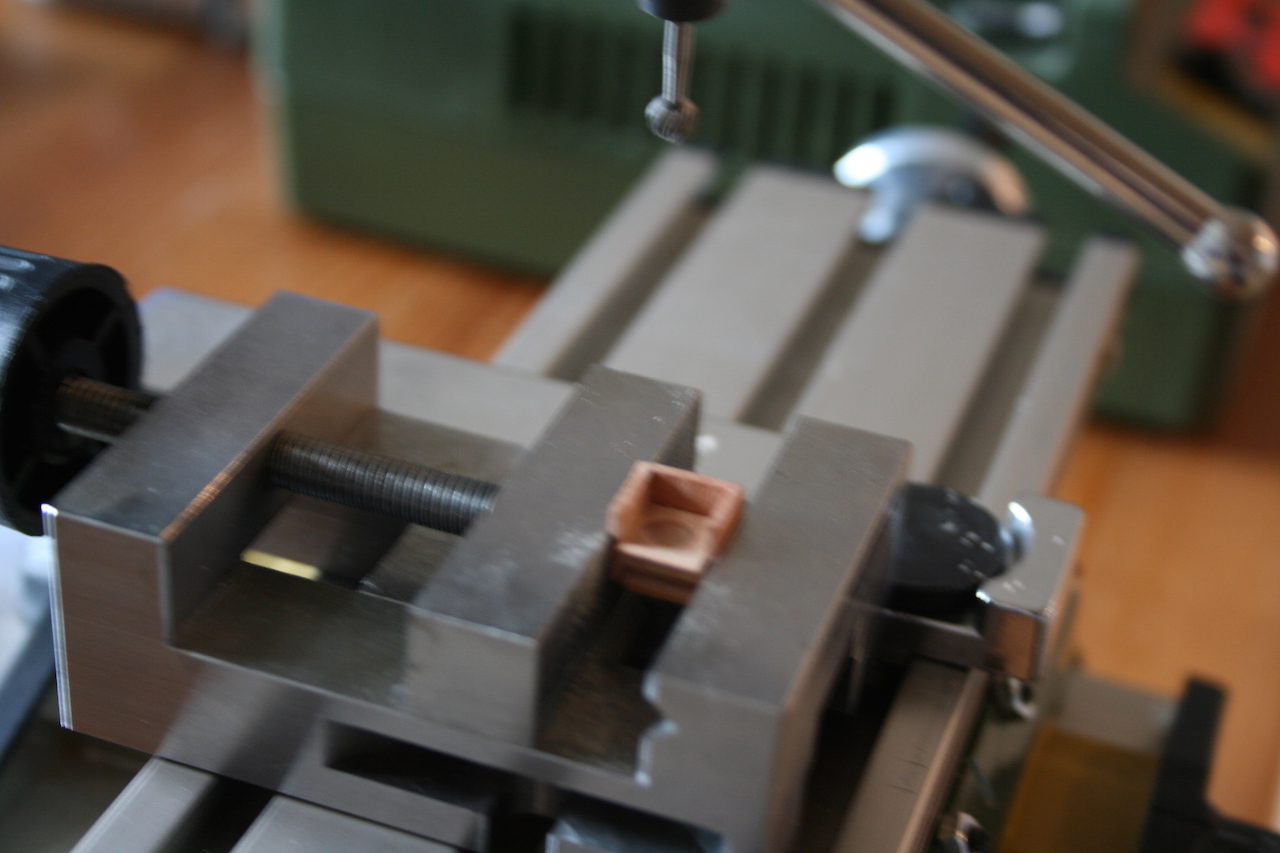
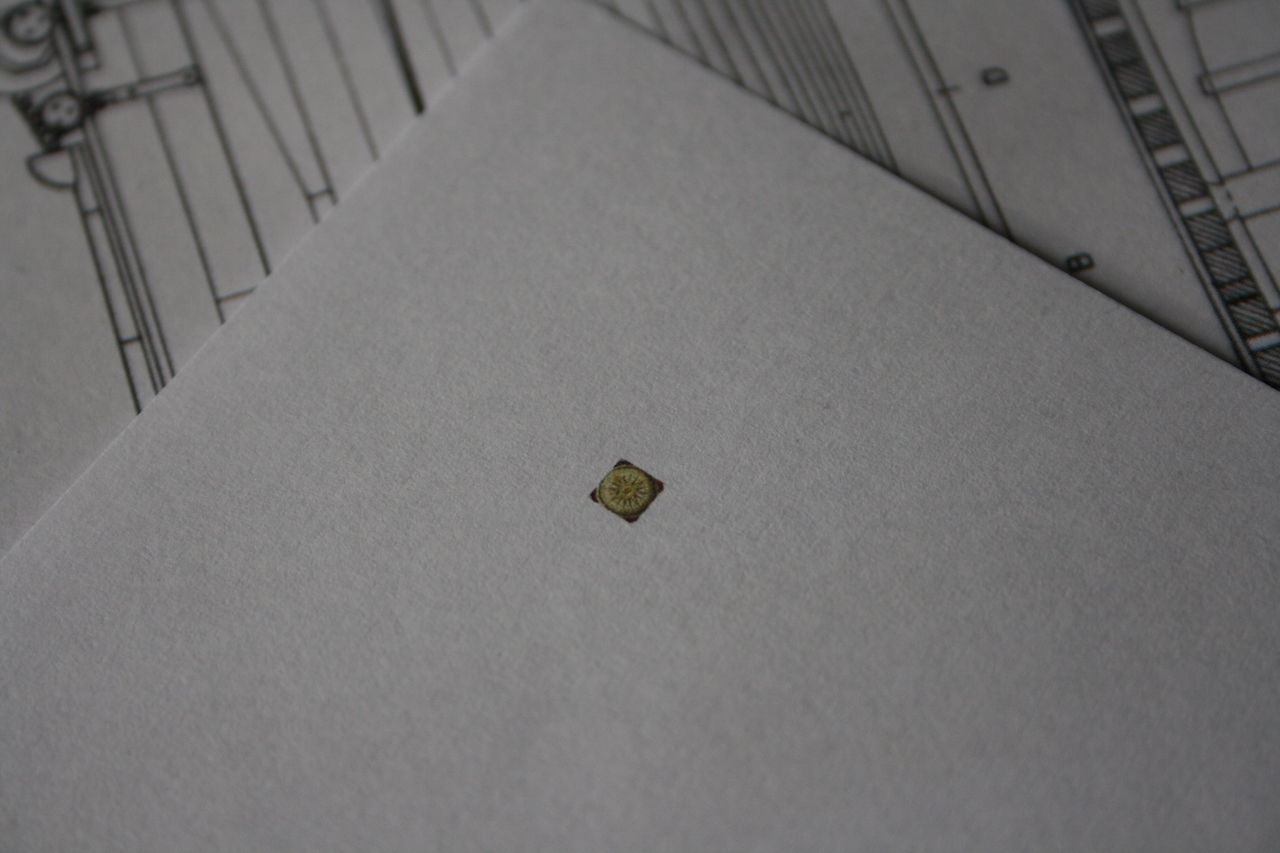
Hello, today I did some little work on the binnacle. making a 18th century marine compass...


-
Hello Frank, Thank you for sharing with us your inspirations in the design of jigs. I really like the way you working with it. The result on your ship is looking fantastic. Daniel
-
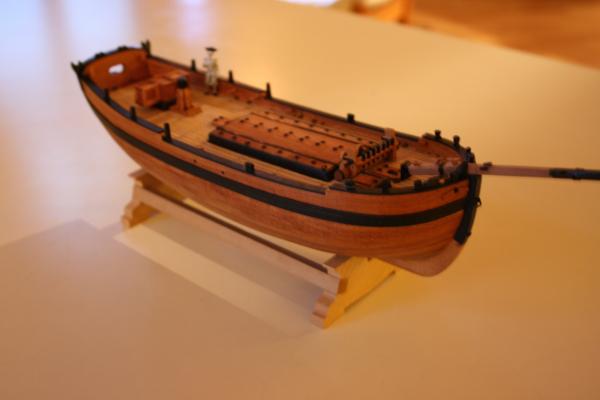
Hello all together, Attached a first little progress about my new work on the stern. Daniel

-
Hello folks, After exactly two years of absence I am back on in the hobby and keep going with my schooner. It is been a tough time in my business but now I have some space to bring my vessel afloat, hopefully. First pictures about the progress with my stern work follows soon. Cheers, Daniel
-
Hello Ginger, Thanks for the picture of this nice looking model of the Schooner for Port Jackson. You are right, she was one of the first assembled ships in Australia as ther spares where prebuild in England and shipped as a puzzle to the colony. She took part on the daily fight for the surviving of the colonists and it seems to be logical that Australians pay honer to her if they print her counterfeit on the 10$ note. Cheers, Daniel
-
Hello Gianpiero, It's a nice you have choosen. I asume that is the firstbuild log for a L'Amerante on MSW. I too have this amazing monographe. The ship is a real beauty with a lot of amazing details. Wish you all the best for your build! Cheers, Daniel
-
Hello all together, Thank you very much for you kind wishes. It has been a nice party with friends from Russia, Poland, Germany, Tunis, Spain, US and Switzerland and we have spoken a kind of Esperanto. Enjoy your weekend, Daniel
-
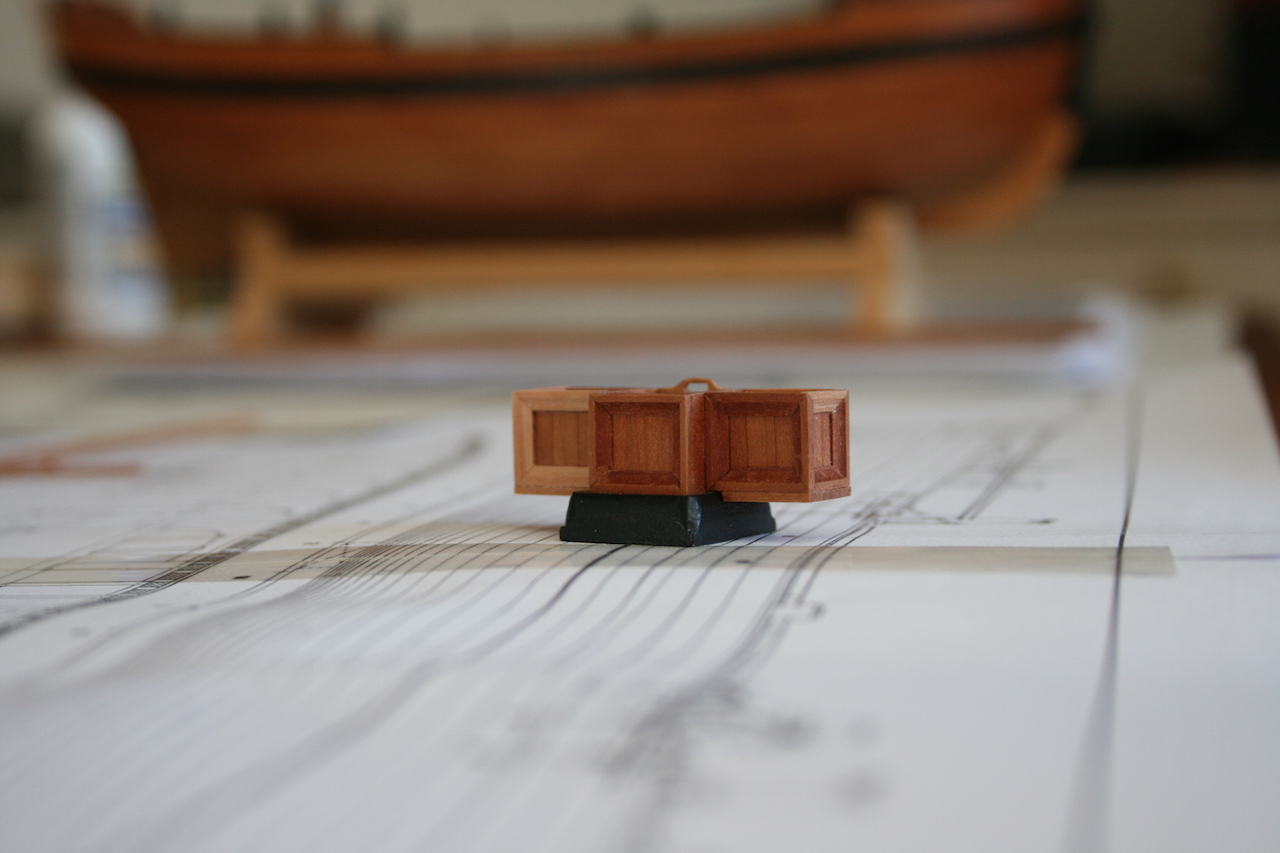
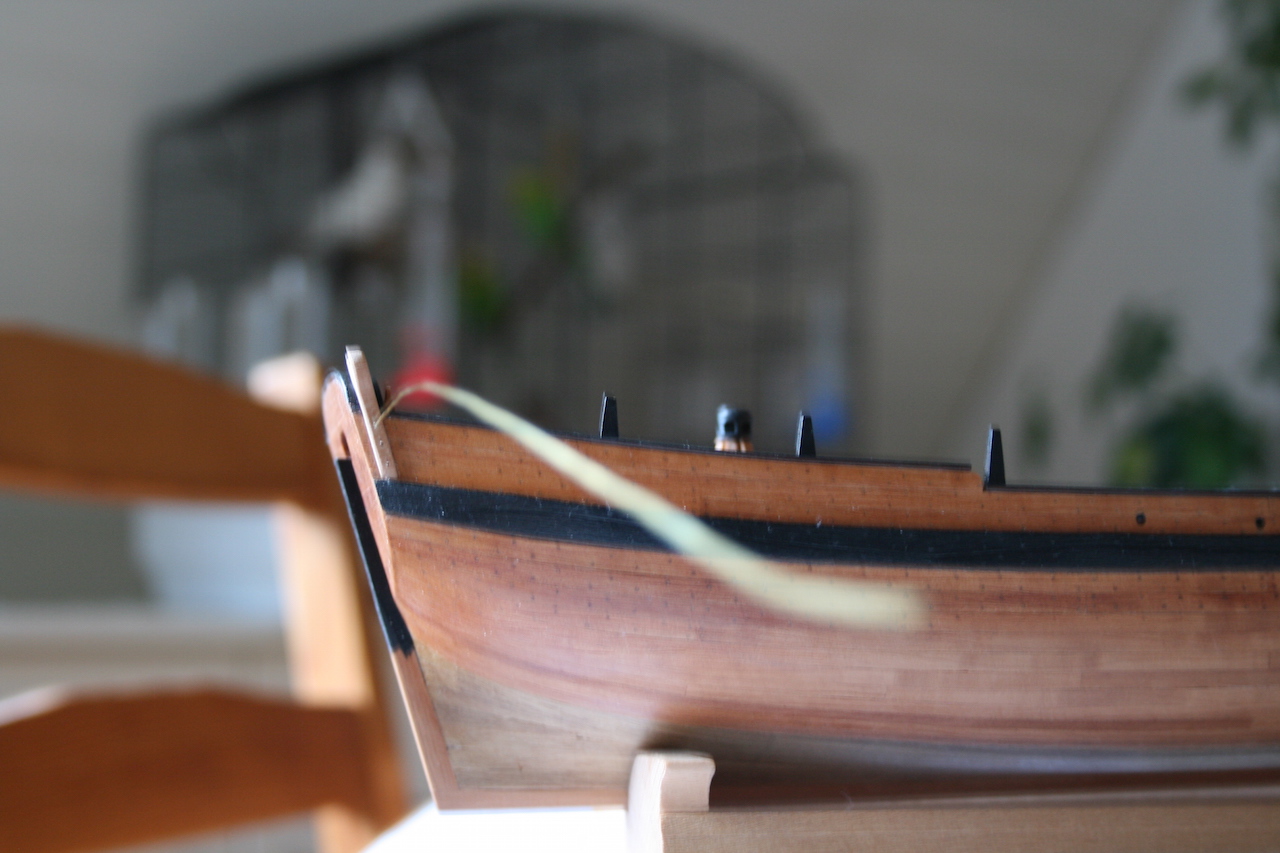
Hello, after coating the surface of the hull with a varnish I found a little time to starting the companion way and some other fittings for the stern. The knob for the wing door is a down drilled pinhead. Cheers, Daniel


-
...and how often are you on the lake with the Kon-Tiki? Daniel
-
Hi Gregor May be. I am living directly on the Platz der Auslandsschweizer. So I have a good view across the lake and try to be there each day. Especially on 1st August we always have a little Armada on front with fabulous fire works in the evening. This week it is misty but looks mystic. during the last weeks we have had great sunny weather, first snow on the Bristen and Mythen. If the weather becomes a bit better I have planned to do a hiking on the peak of the Mythen. I did this trip last year with a friend of mine who actually is a mountain-maniac. You can imaging I as an amateur was dead and completely knocked out. :mellow: Cheers, Daniel