Supplies of the Ship Modeler's Handbook are running out. Get your copy NOW before they are gone! Click on photo to order.
×


Siegfried
-
Posts
153 -
Joined
-
Last visited
Content Type
Profiles
Forums
Gallery
Events
Everything posted by Siegfried
-
 Jesus, Cobra, what have you done? I am so sorry. That hurts. Time to start a scratch build. Daniel
 -
Hi Mike, I do really like your diplomatic words. Sensational. You should work as ambassador. I could learn from you. Cheers, Daniel
-
Hello Nigel, My father has build the DeAgostini Victory and I have to say it is of a terrible quality. Nothing matches really, the cannons and the carriages are just a kind of a joke. In the beginning it looks like a good price quality ratio. But in the end after purchasing all booklets with all pieces it was much expensive as a perfect kit you can by directly, especially after all material replacements. What's about the CC kit? Sorry, I hate to disillusion you, but this is my personal experience. Cheers, Daniel
-
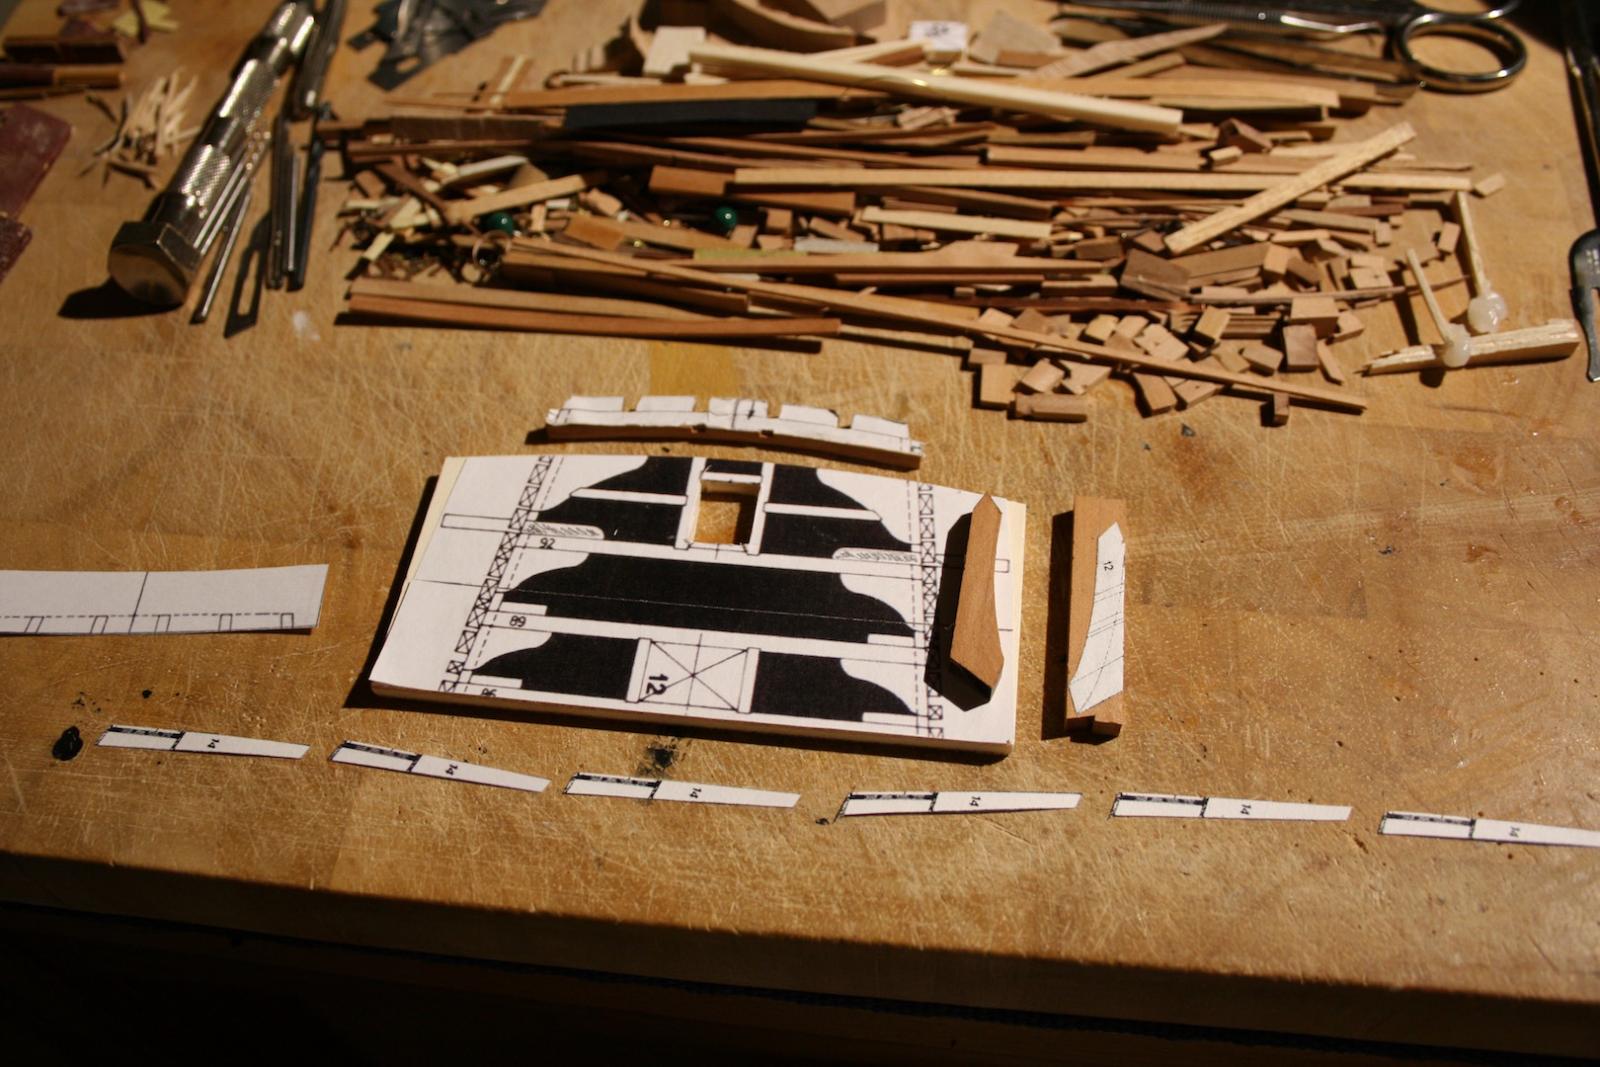
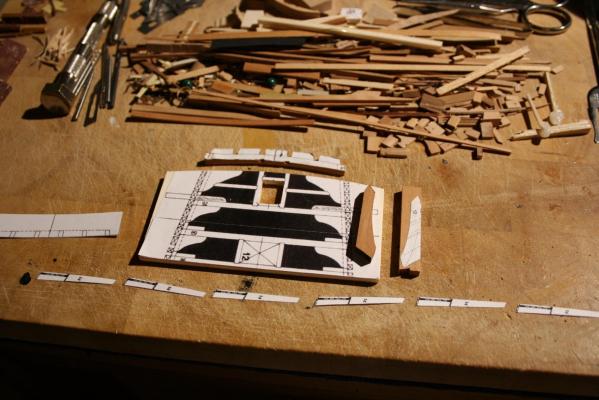
Hello, Because of some current questions I do post how to scale-up the drawings from a book at home without a CAD program. 1: scan it with care 2: make one print-out of the scan and compere it to the original source in the book, is it of the same size? (hold both pages by daylight agains a window) 3: to re-scale the pdfs you can do on the computer as follows a: go to file/print (don't use the printer button) b:chose the printer you wanna use c: chose the scale of the print out (standard is 100%), this is easy to calculate: 1:96 (or 1' = 1/8") to 1:12 (or 1' =1/1") = 800% (because 1:12 is 8 times larger than 1:96), (96/12=8) 1:96 (or 1/8) to 1:24 (or 1/2) = 400% (because 1:24 is 4 times larger than 1:96), (96/24=4) 1:96 (or 1/8) to 1:32 (or 3/8) = 300% (because 1:32 is 3 times larger than 1:96), (96/32=3) 1:96 (or 1/8) to 1:36 (or 1/3) = 266.66% (because 1:36 is 2.66 times larger than 1:96), (96/36=2.66) 1:96 (or 1/8) to 1:48 (or 1/4) = 200% (because 1:48 is 2 times larger than 1:96), (96/48=2) 1:96 (or 1/8) to 1:60 (or 1/5) = 160% (because 1:60 is 1.6 times larger than 1:96), (96/60=1.6) 1:96 (or 1/8) to 1:64 (or 3/16) = 150% (because 1:64 is 1.50 times larger than 1:96), (96/64=1.5) 1:96 (or 1/8) to 1:72 (or 1/6) = 133.33% (because 1:72 is 1.33 times larger than 1:96), (96/72=1.33) 4: print it out 5: assemble the pages together with a scotch Cheers, Daniel
-
Lawrence, I send you a PM, Daniel
-
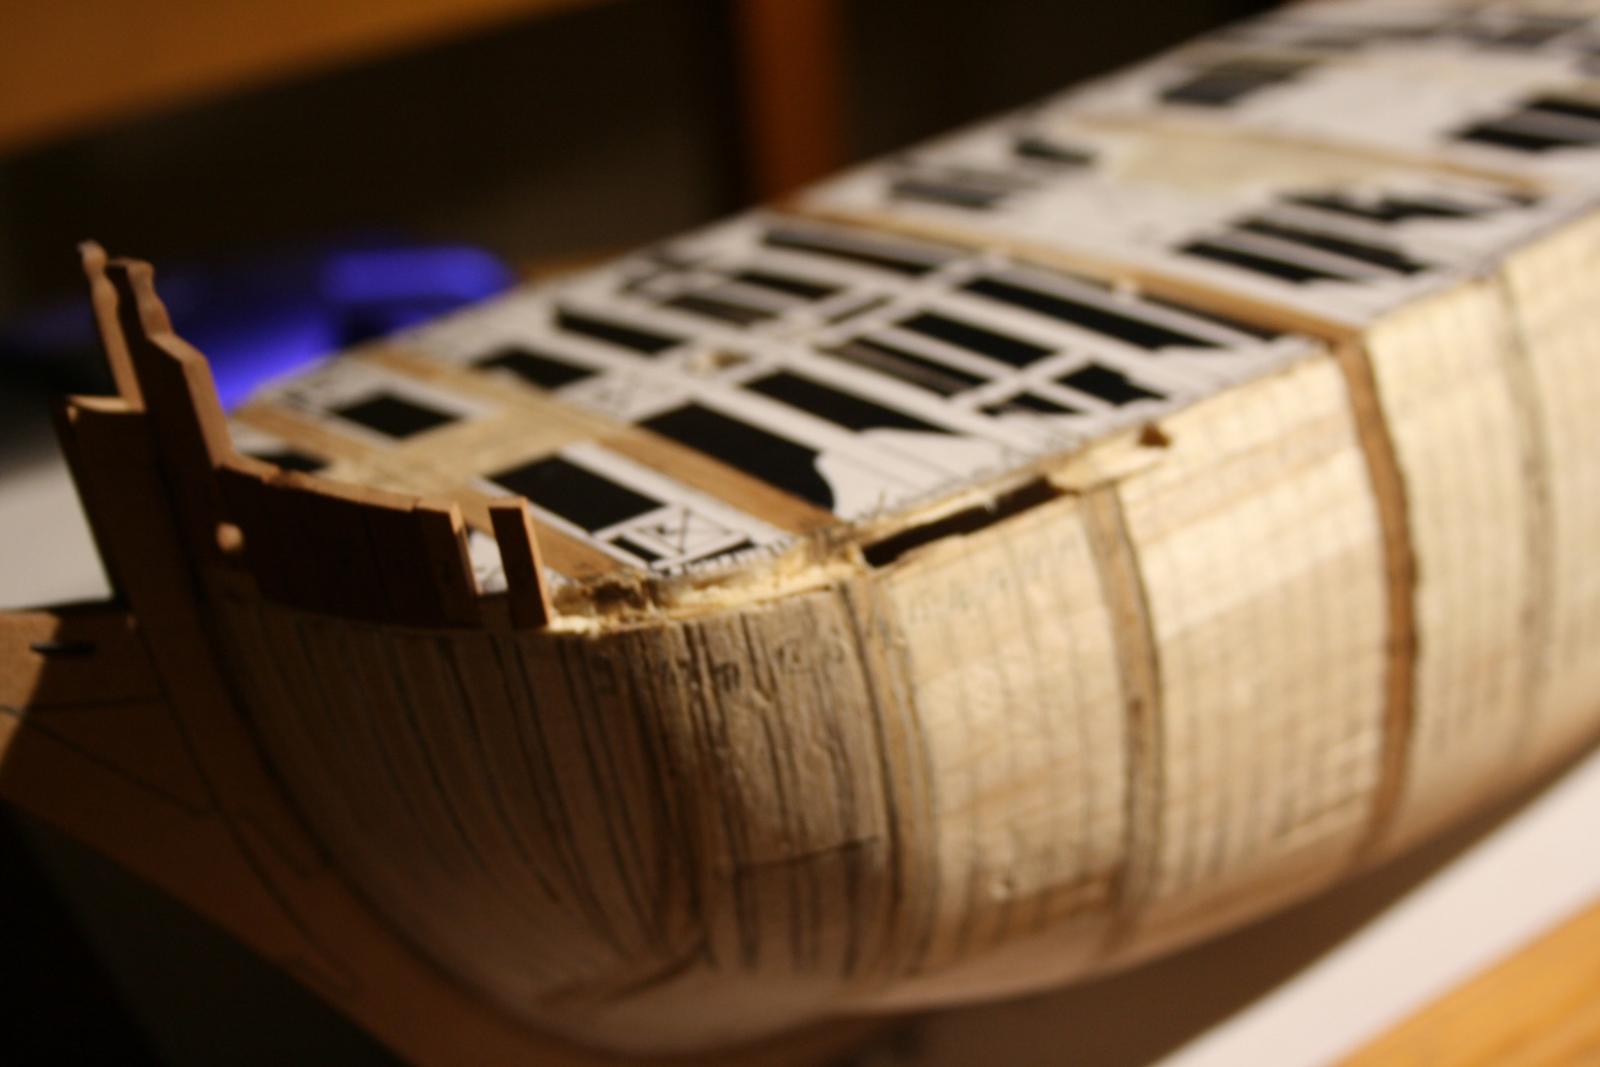
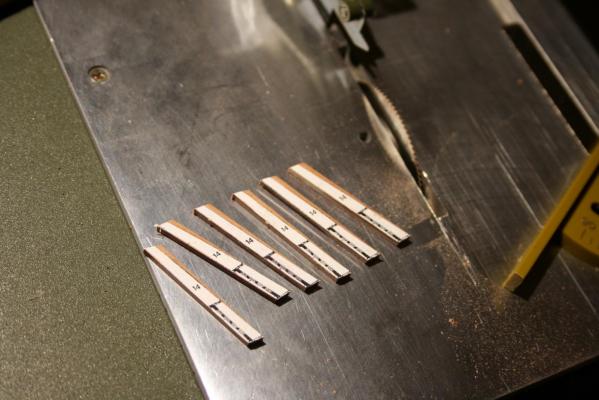
Hello Michael, Thank your for following my log. You are right, there are tons of a Bounty model dusting in living rooms. I just wanted to do my wish from the childhood as accurate as possible. McKays book in combination with the original drawings from the NMM offers a good source in company with another standard books about rigging from Marquardt, Lees, Petersson etc. Actually there are a lot of discrepancies between the Admiralty original draughts quickly taken off after her purchase and the draughts of McKay. I have to find my own way. By example, the original drawings doesn't show any figures at the stern and at the bow. Because of Bligh's log we know there was a women in a brown riding habit at the bow. Another point is the space between the upper whale and the sheer. Following McKay there has to be 10 strakes each 14 cm respectively 5 1/2" wide (2.2 mm in 1:64 scale).To me it was a strange thin strake. Normally I would go with a wide of 20 cm respectively 8". But that doesn't fit mathematically with the space left and so I made decision to use 9 strakes of 15,2 cm respectively 6". That means in scale 1:64 the strake has to be 3/32 wide and can be ordered easy at Crown Timberyard, Otherwise I had to use 10 strakes of 11/128 (equal to 2.2 mm). I assume that would be difficult to saw. I hope, my decision is not so far away from the real ship. Hi Robin, Thank you again for your comment regarding the wale planking technique. I had a look on your post and have answered my thoughts about it. As result I will go on with standard strake wales following the four shift planking layout of the hull. It probably makes the most sense. Hi Mark, You are right, overhauling or frequent repairs changes the look and the details of ships sometimes slowly but with massive effect on the original appearance of the ship. As we know, the colour scheme was depending on the captain's taste, rigging could change several times during construction and after the first test sales or first voyages. Sometimes no record left. But the most of us are able to identify a sailing vessel by minor characteristics. Even if the model is not absolutely historical correct. I assume most of us can identify an Endeavour, Bounty, Cruiser Class, Victory, Constitution, Syren, La Courone etc. Few days ago there was a post on Dubz Syren about his next project he is planning with Daniel Duzek. he just posted the timbers of the bow and the most followers directly recognised the Confederacy. Just because of few not assembled bow timbers. To me it is amazing as for the most people out there one sailing vessel is looking equal to the next one and differs in colour scheme or in size of armament only. Hi Lawrence, Thank for following my build log and for your warm comments. Bounty is worth it to make a good scratch build. Do you have McKays Anatomy of the Ship HM Armed Vessel Bounty? The housing abaft the rudder is also drawn on the original NMM draughts and the original purpose was to store flags (and some bottles of rum from the crew ) I do not know Amatis plans but I am sure, McKays book gives you a lot of additional information. Wish you a good start! Cheers, Daniel
-
Hello Robin, Thank you for your comment and you are right. The question about the wale layout drives me. I had some input from this forum about that point. The problem actually is, that there are no so much records or building contracts for merchantmen available as for ships/sloops of war. The reason is simple as those builds where private orders with no norms as requested and recorded by the Admiralty for ships of war. Therefore the ship building techniques for private builds are not as deep researched as with "governmental" orders. However, let's try to think logical. Other than warships with clear demands in terms of quality, life cycle, handling in action etc, merchantmen are build to make the max profit with as less as possible of investment.That means, it is build of modal quality. In other words, with the cheapest materials from the cheapest supplier on the most easiest way. That was the same in the 18th century as nowadays, isn't it? Therefore McKay's solution with classic strakes for the wales makes sense. As the ship was not build and even not bought for military service, there where no special need to strengthen the wales by hook or anchor top and butt planking as seen in Marquardt's drawings in AOTS Endeavour or on many frigates and ship of the lines. Has anyone out there another input about this point? Every idea is welcome. Cheers, Daniel
-
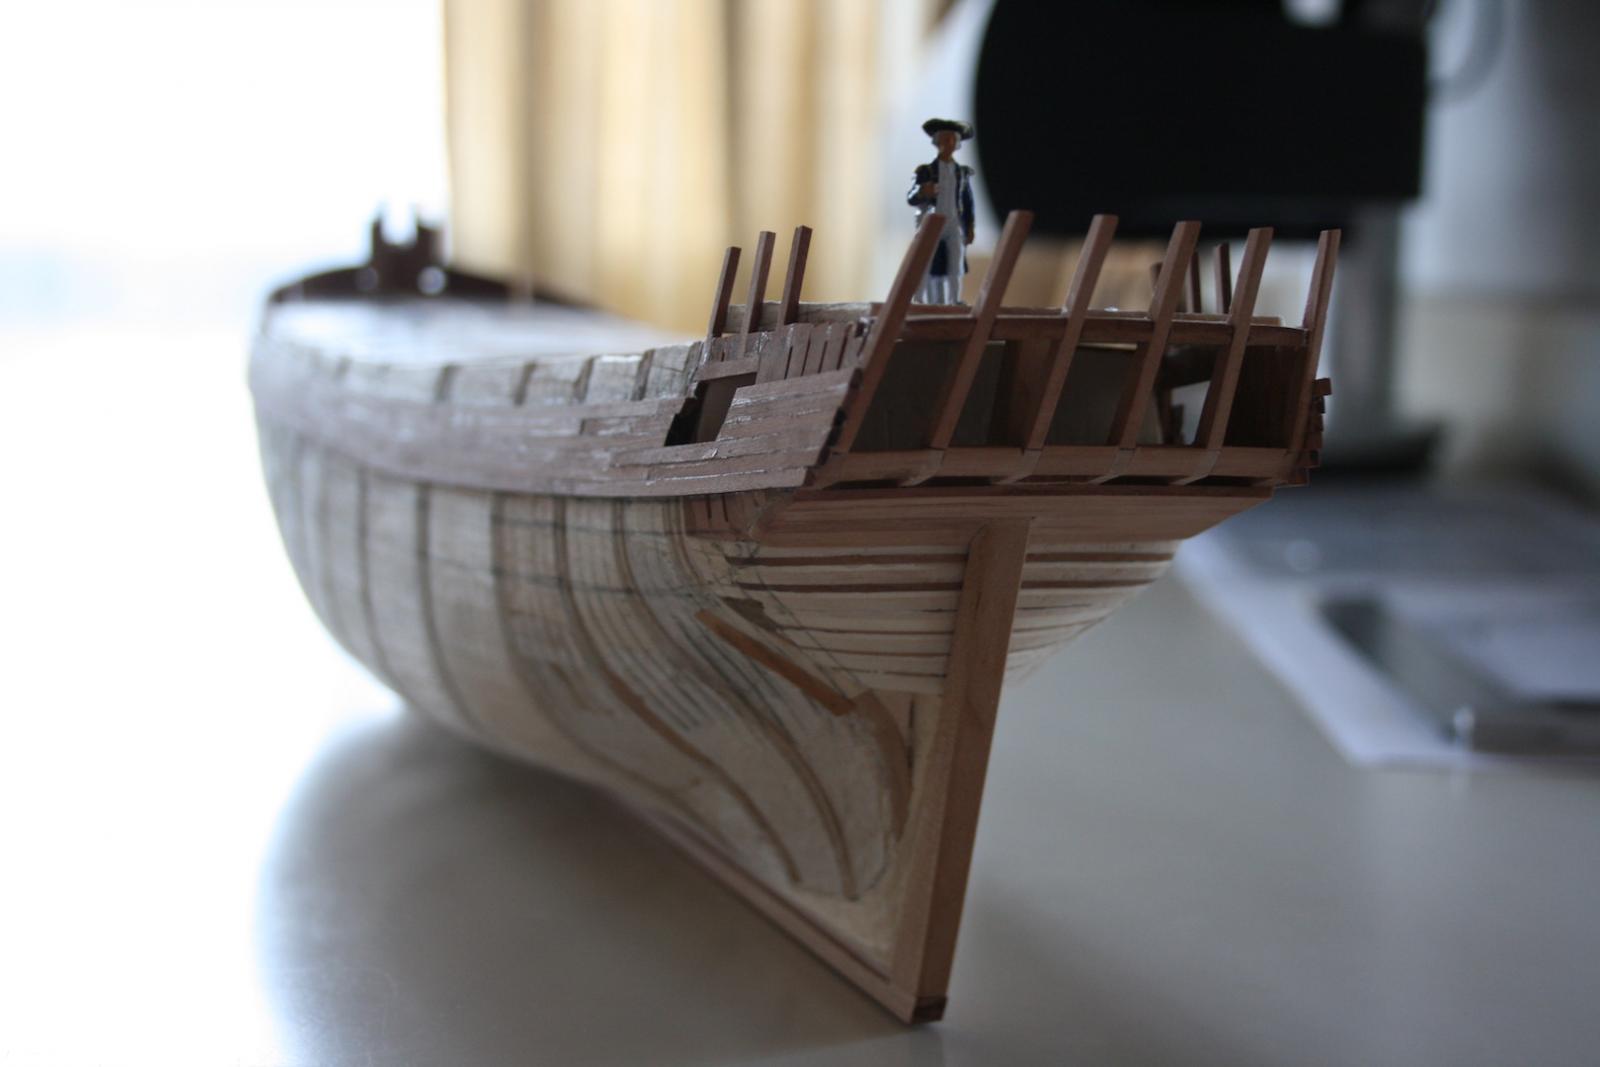
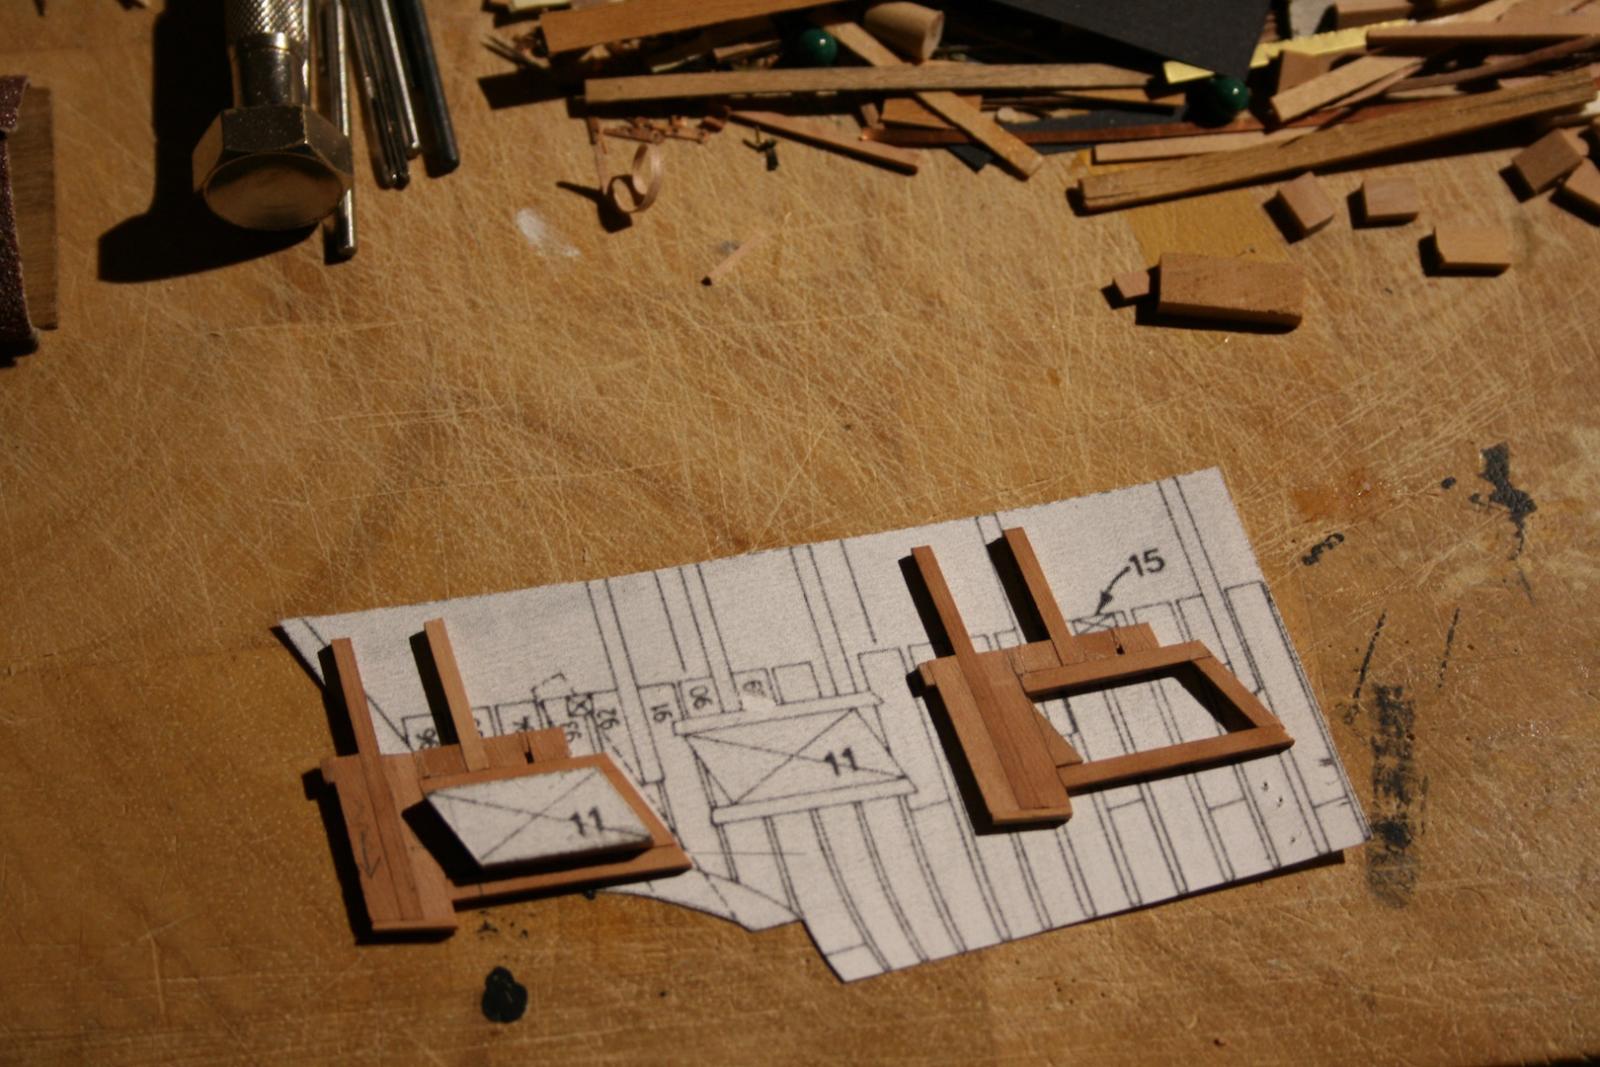
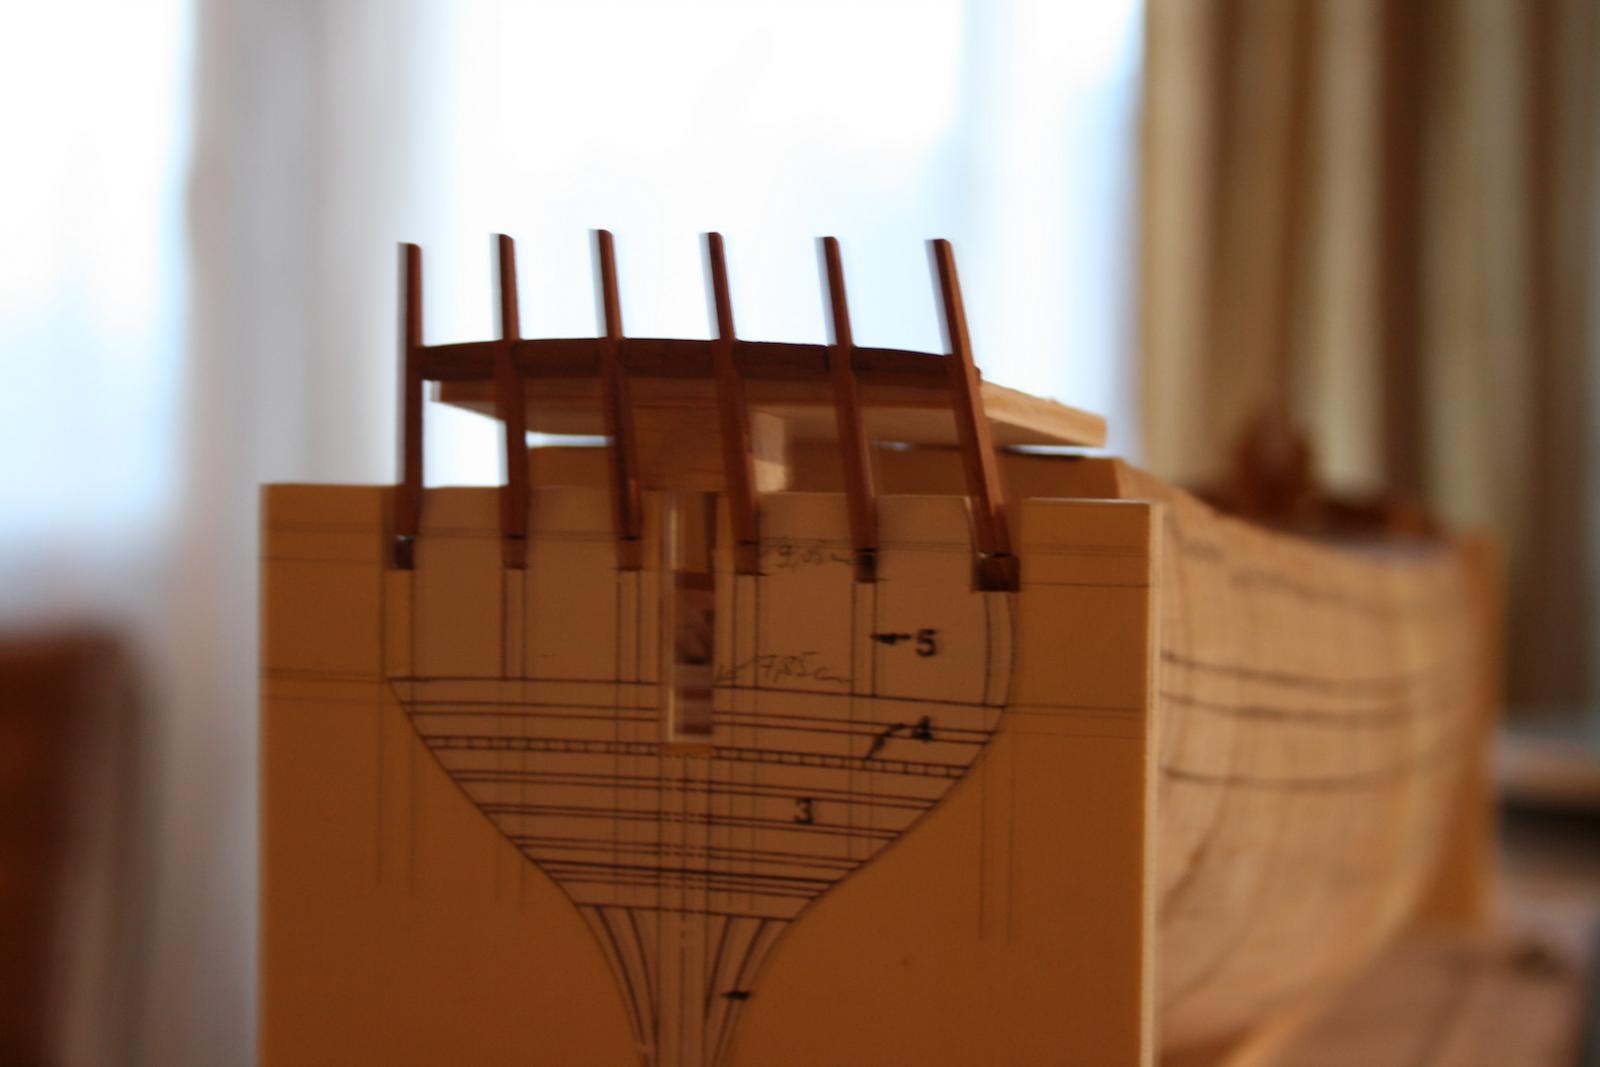
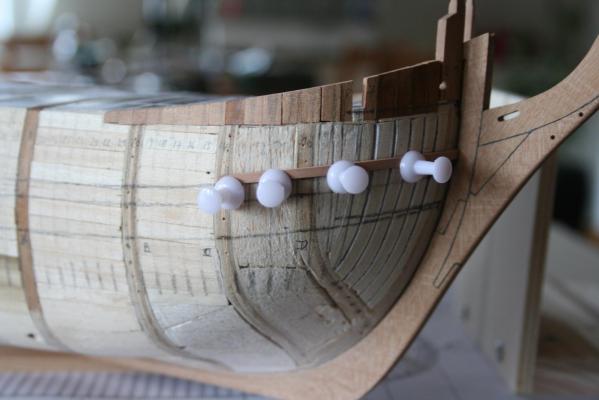
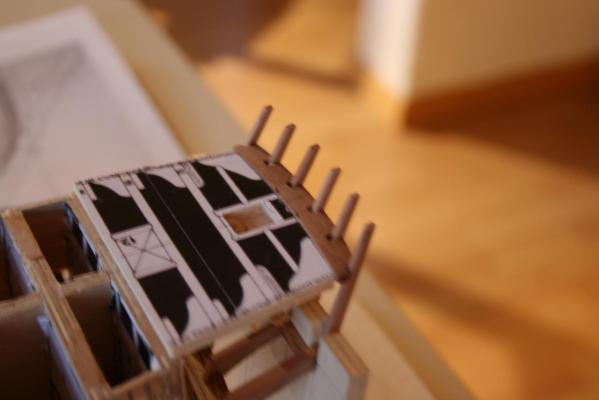
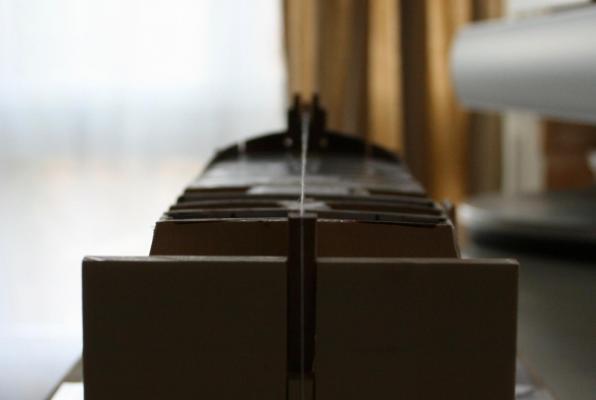
Hello, Thank you all for your likes! Before the upper strakes can be put in place I have to place all timber heads to assure a strong hold for the timbers. Cheers, Daniel

- 85 replies
-
- 13
-

-
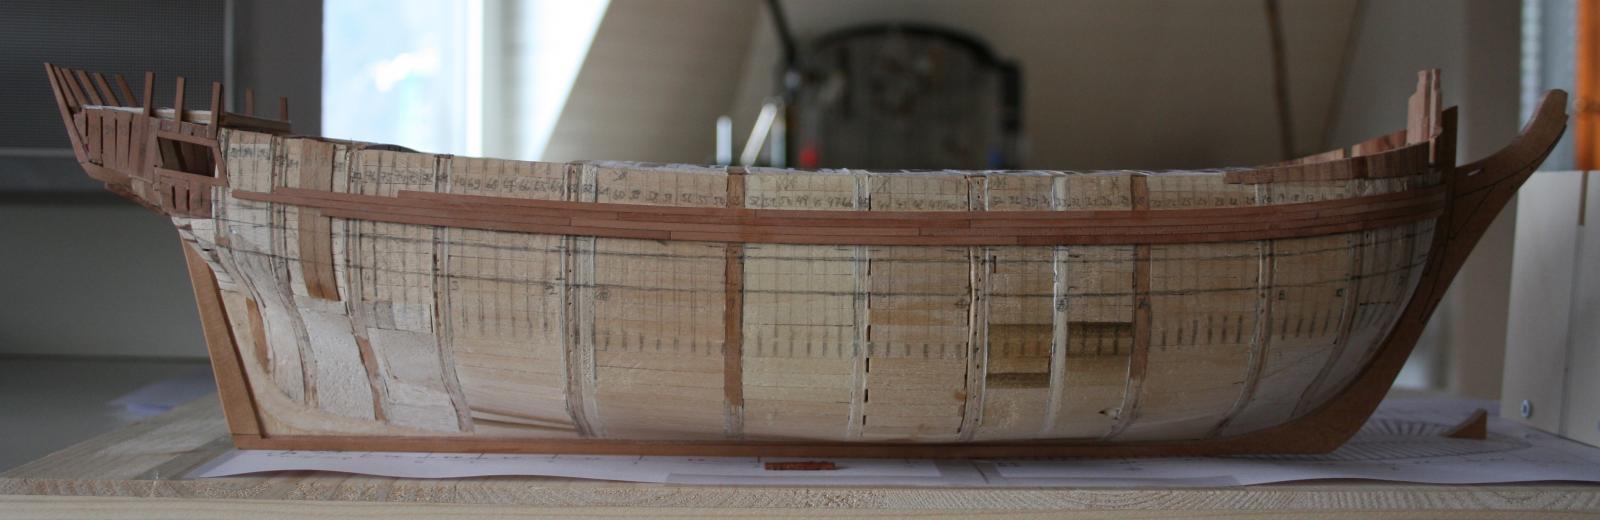
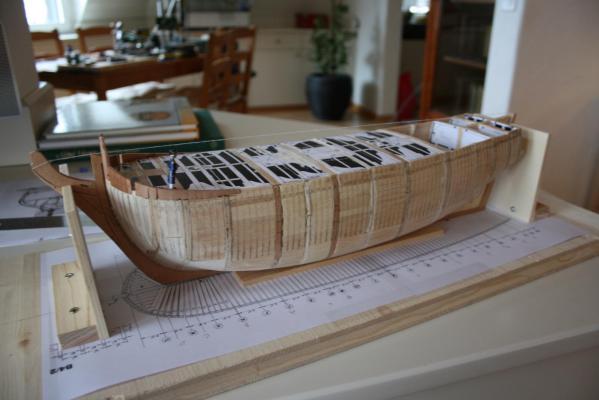
Hello Christian, Thanks for your interest and your compliment. During the last day I had a little time to start with the planking of the upper hull. It's going slowly and needs a lot of patience. The upper strakes shall be 3/32 wide x 3 /64 thick. Because of unavoidable sanding after the tree nailing I use 3/32 x 1/8. That gives 0,4 mm retrospectively 1/64 material to sand down. I think it shall be enough. The upper and lower sides of the strakes are treated with a pencil to give later on a slight effect of filling material. Cheers, Daniel

-
Wonderful build Wim! I really like it. Something special and a rare model in our western hemisphere. Fantastic craftsmanship. What's you next project? Cheers, Daniel
- 96 replies
-
- 2
-
-
- Turtle Ship;
- Korean Turtle War Ship
- (and 1 more)
-
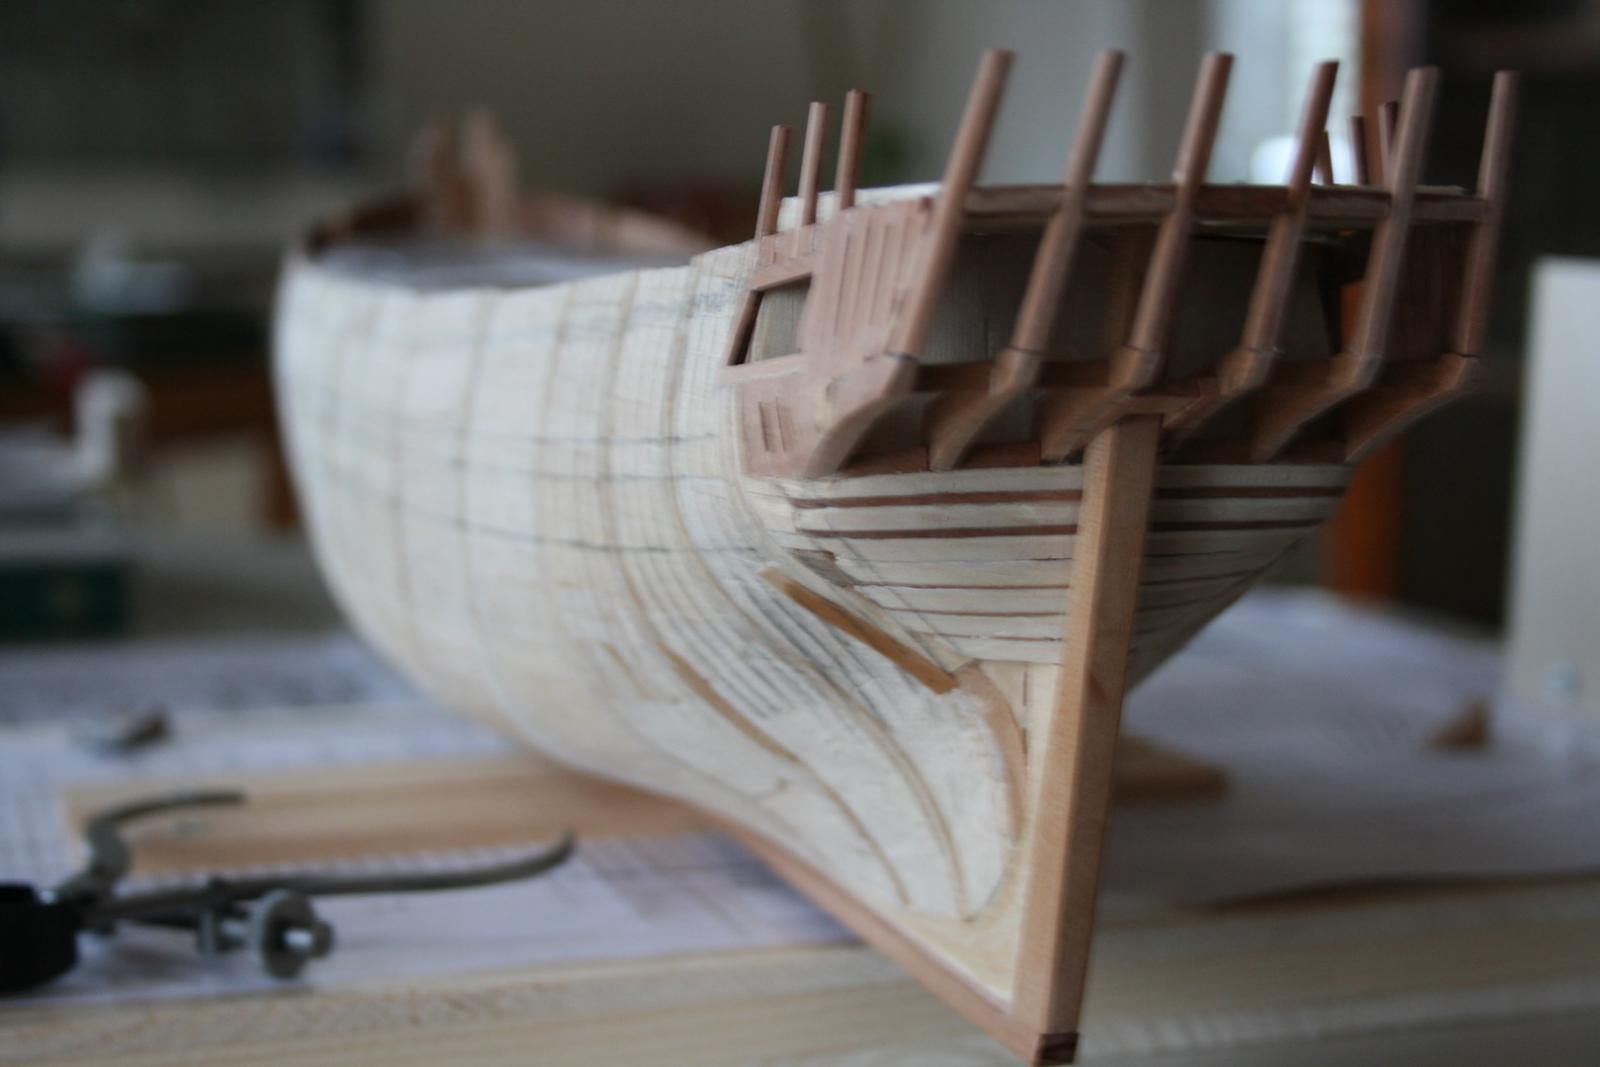
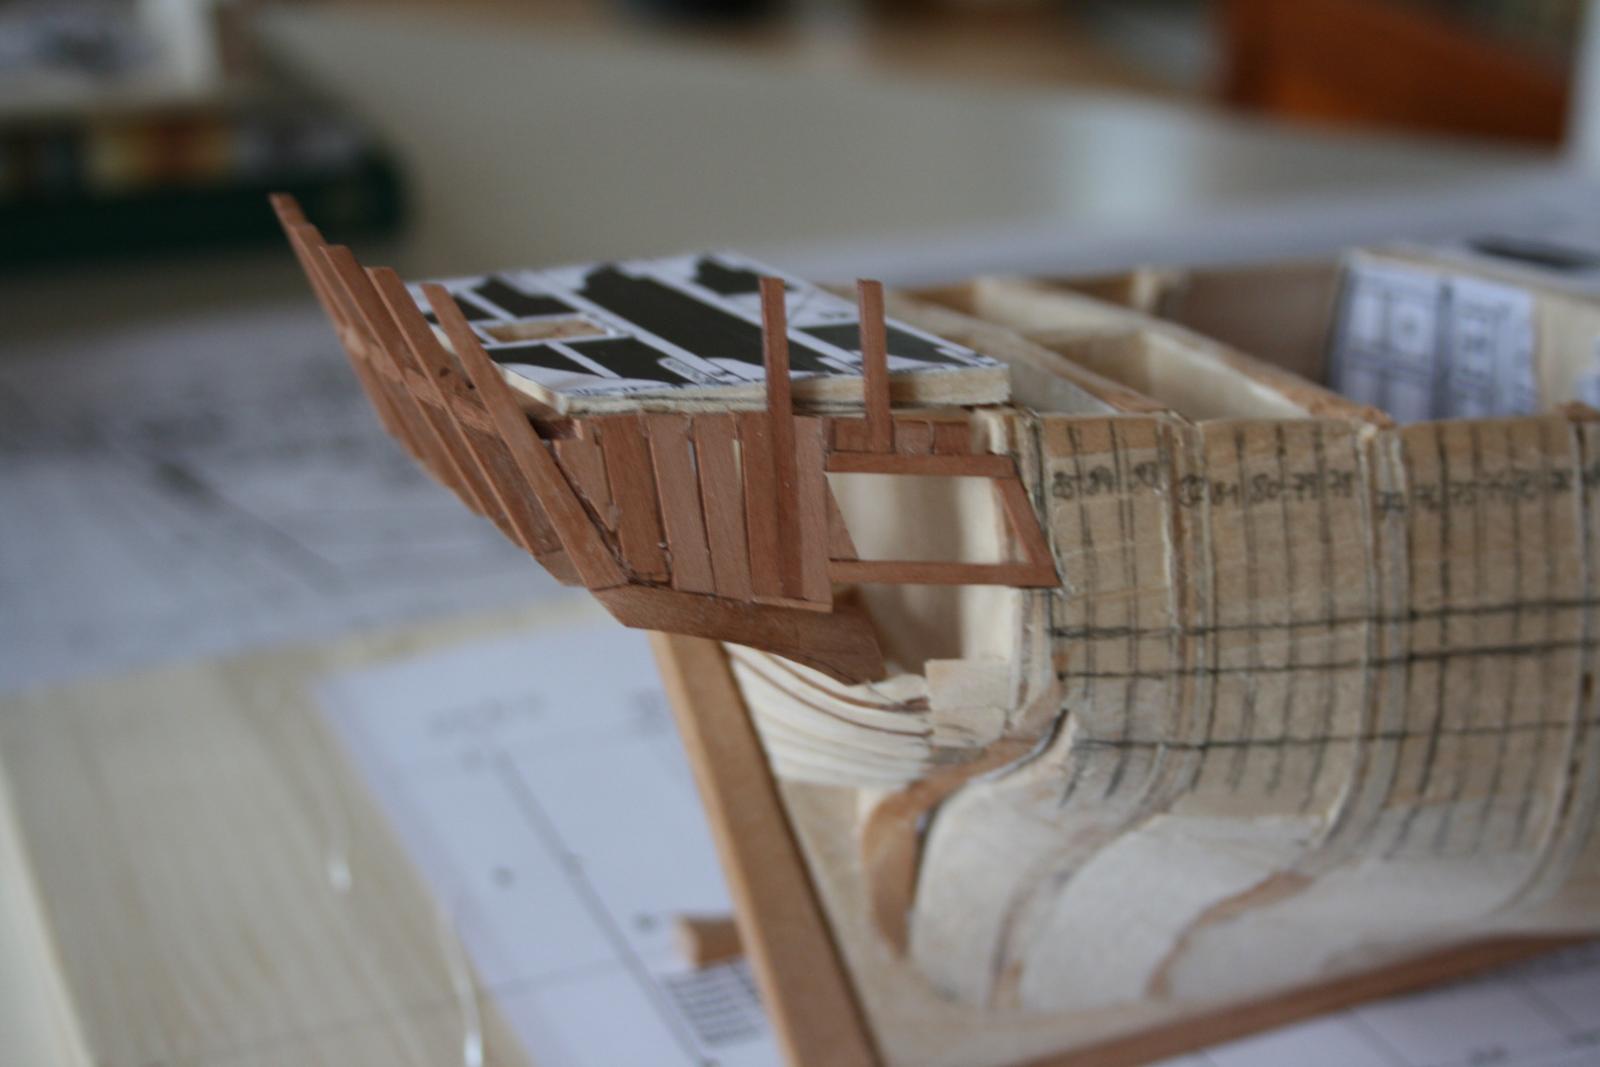
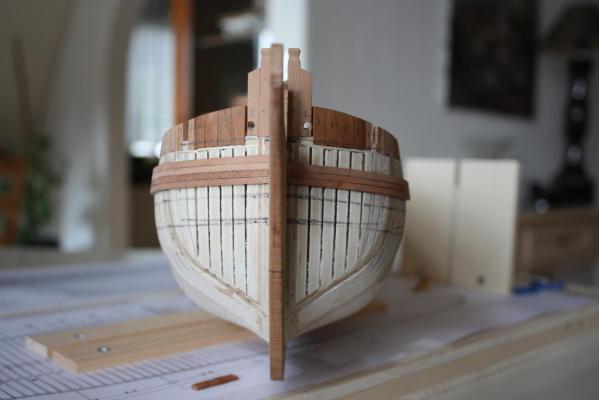
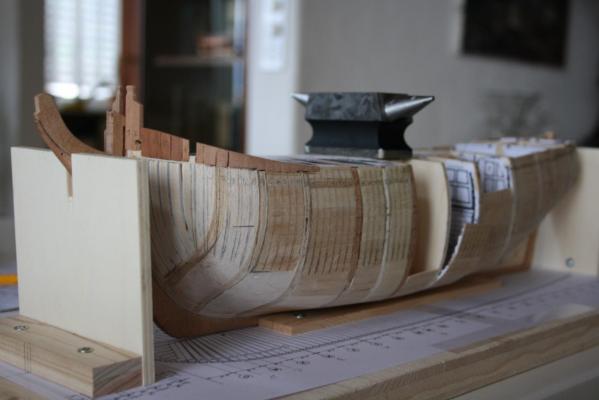
Hi Cobra, Thank you for your comment and many thanks for all the likes of the followers! Meanwhile the frame construction of the sterns it's finished and now I am ready to start with the wales. Cheers, Daniel


- 85 replies
-
- 12
-
-
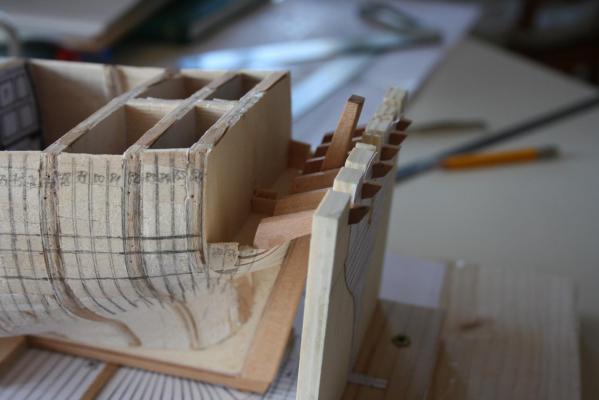
here we go with the stern frame... The pictures explain itself. Cheers Daniel


-
Very clean and beautiful work so far. Your decision to paint the underwater hull with brown stuff is right as it was explicit recorded in the letters of the shipyard. Marquardt has put this record in his AOTS Endeavour. By the way, Caldercraft/Admiralty offers a version of the kit with brown paint. You can order the colour as spare part. Cheers, Daniel
-
Hello Dick, This is an excellent project and I am follow it from the beginning on with great interest. It's not just ship modelling. It is a kind of historical research of pre Columbus ship building you are doing here. Do you mind it might worth to make a monographe out of it? I am sure some of us would be interested on it. Cheers, Daniel
-
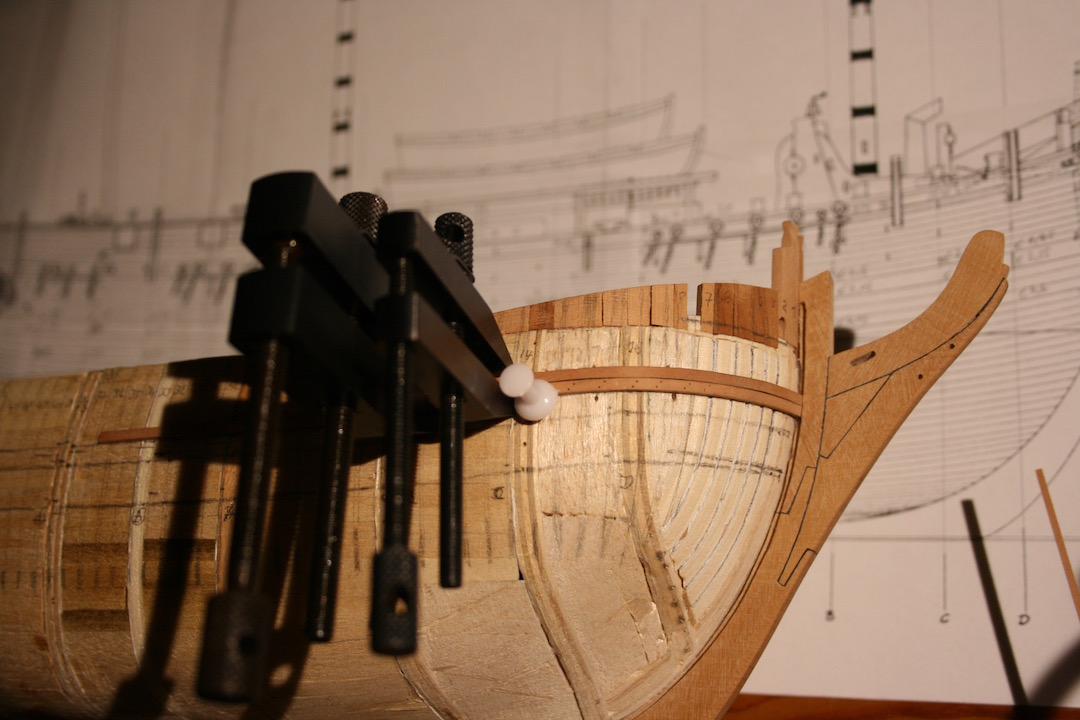
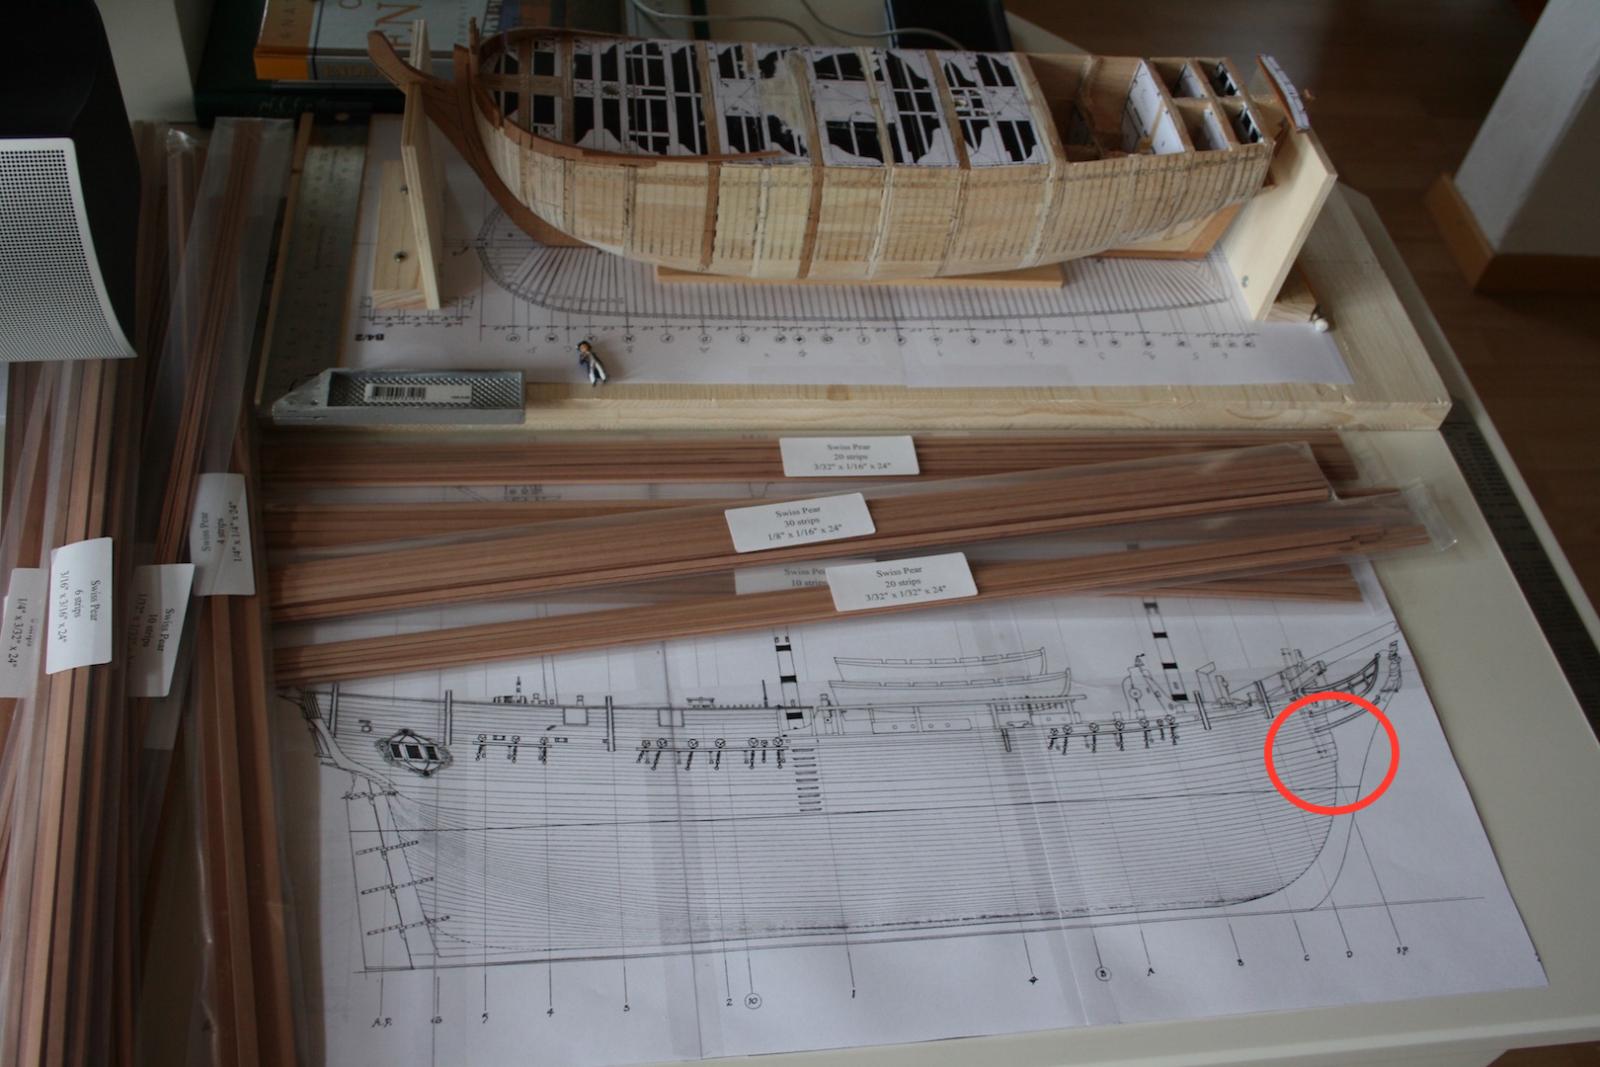
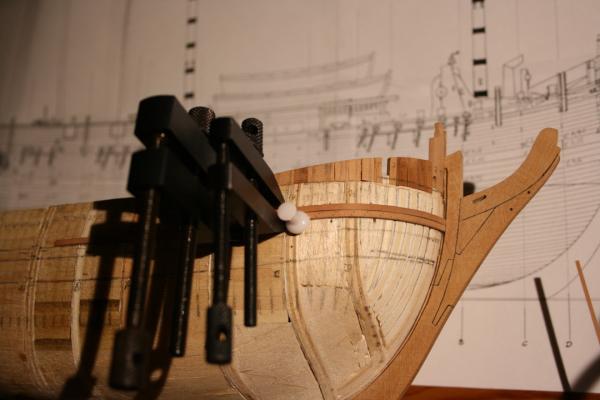
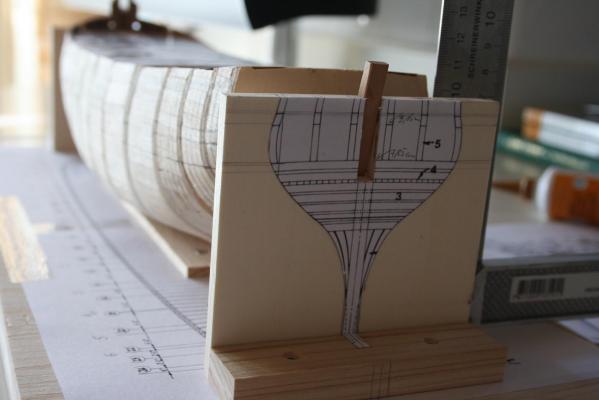
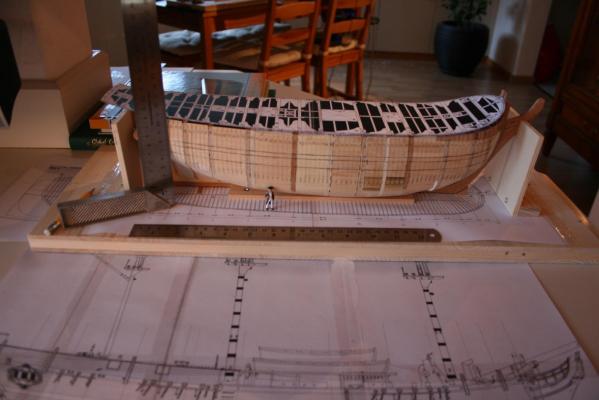
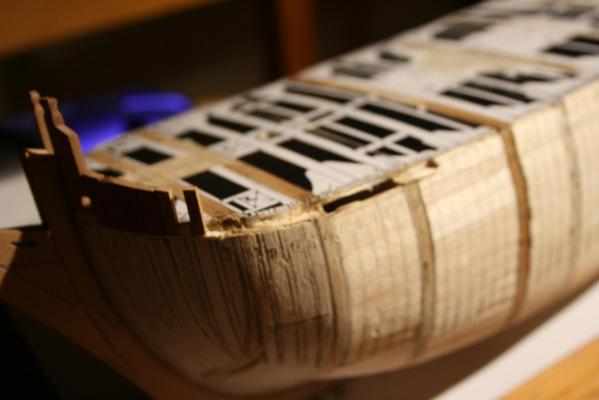
you are right, wood is moving but that's what I like on the material beside its warm and natural character. Working with wood brings men down to earth, sometimes ;-) Now I am thinking about how to start with the planking job. I probably start with the thicker strake above the wales. McKays AOTS Bounty offers no layout for the live and dead wood planking. As the Bounty was a Bark build for coal transport like the Endeavour, I will lean my layout on Marquardt's layout seen in his AOTS Endeavour. However, one major question is open yet. What was the right wale planking technique of the Bounty? Was it a small anchor top and butt planking as seen in AOTS Endeavour or was it a standard butt joint? Just hook and butt planking might be unusual on small vessels with no need for solid-built main wales as on frigates, man-o-wars or on bomb vessels. Another question is about the rabbet on the stem (see the red circle in the first picture). Was the rabbet for wales widened to fit with the size of the wales or thick stuff? I've never seen that on any build, even here on MSW. But it is a question that moves me. Otherwise it means, the en of the wales has to be cut down to slip properly into the rabbet. Has anyone out there an idea? Meanwhile I've marked the wales and the thick stuff above it on both sides. Cheers, Daniel PS: the pear strips from Crown Timberyard arrived yesterday by mail. It is expensive comparing to the strips offered by Krick. But last but not least because of the shipping costs from the US to Switzerland. It is the first time to me that I have ordered my wood at Crown Timberyard but the quality of the strips are of major quality! Very clean and crisp edges and no minor quality parts in it. It is worth each penny and surely I found my wood supplier for future projects too.

-
Hello Antony, That's an interesting project. I've seen a model of a turtle ship at the Schiffahrtsmuseum in Hamburg. Wish you a good start. Daniel
- 99 replies
-
- 5
-
-
- turtle ship
- korean
- (and 1 more)
-
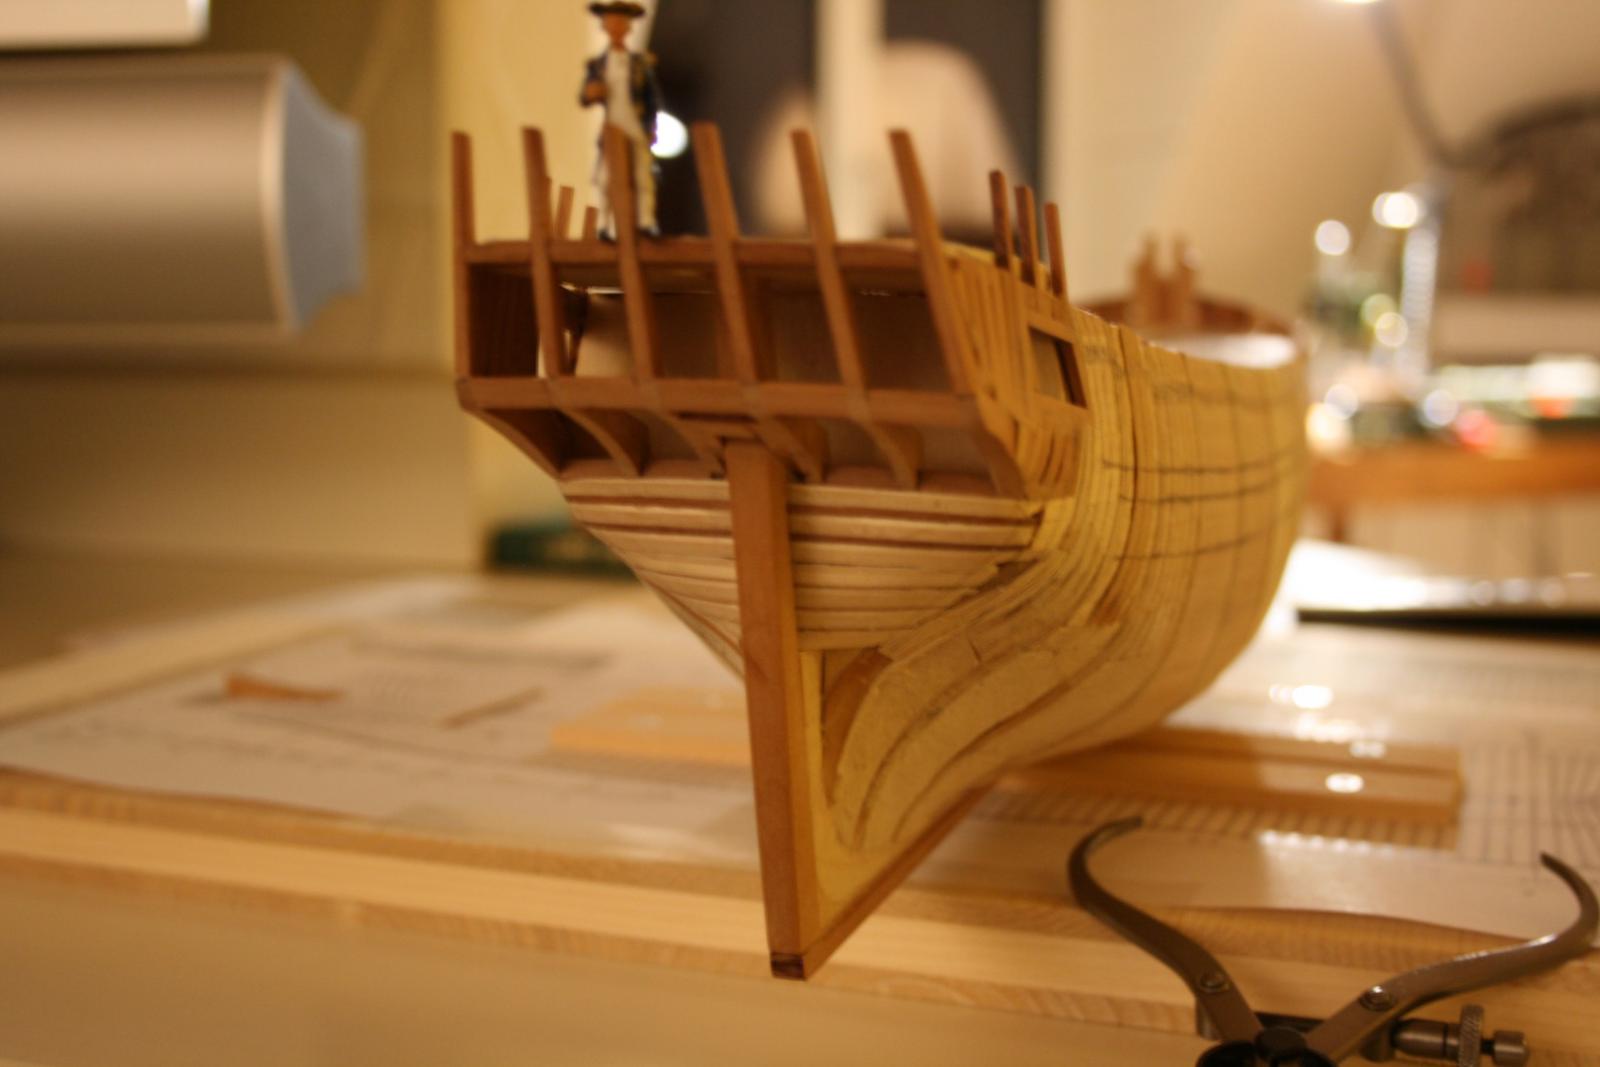
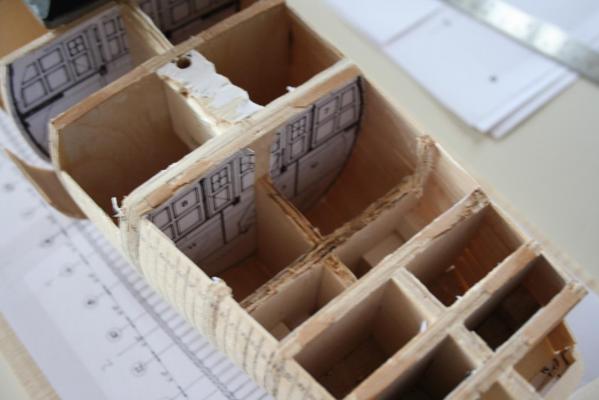
Hi Bob, Thank you for following my blog. As some of you already know, I don't fear any radical decision with my build. During placing the "1st planking" between the bulkheads the centrepiece warped approximately by 4 mm to the starboard. I just figured out that unfortunate fact as I have placed the hull in the jig for fixing the stern. The upper side didn't fit to the centreline. :-( Therefore I again had to cut the hull and have dismantled the deck beams and parts of the 1st planking. Last but not least everything went well and now I am starting to cut out the main cabin as I made the decision to show the plants. Cheers, Daniel
-
Hello Mark, Your Licorne is looking wonderful. You can say what ever you want. The British might have the most strongest and successful sailing vessels, but the French ships have the most beautiful lines, isn't it? Daniel
-
Hi Bob, the details on the lower decks are looking great. Does it all belong to the kit? Daniel
-
here we go... Daniel

-
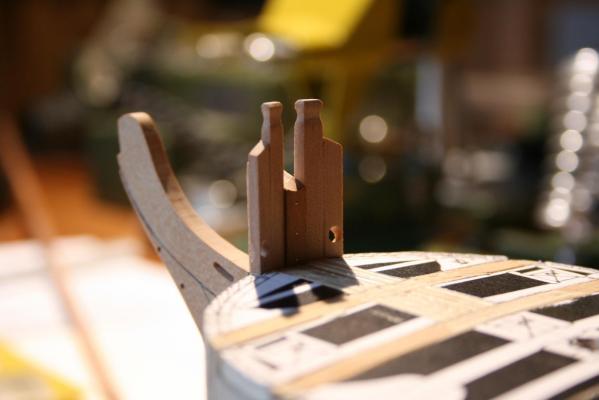
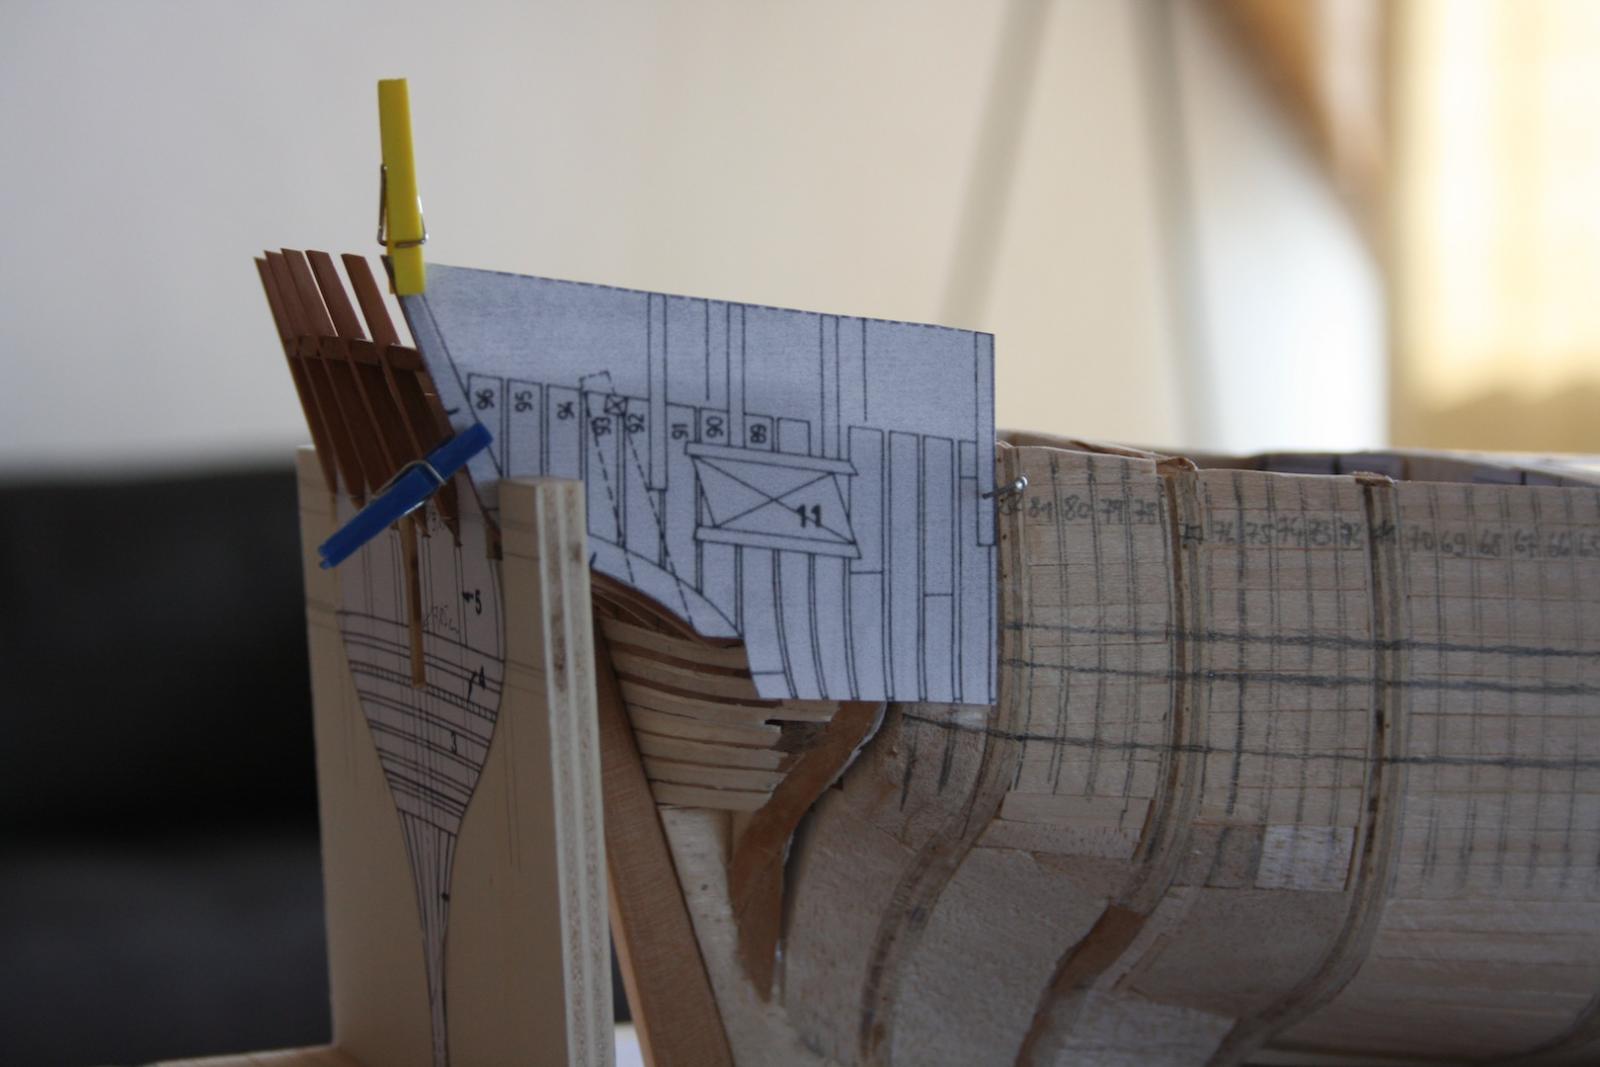
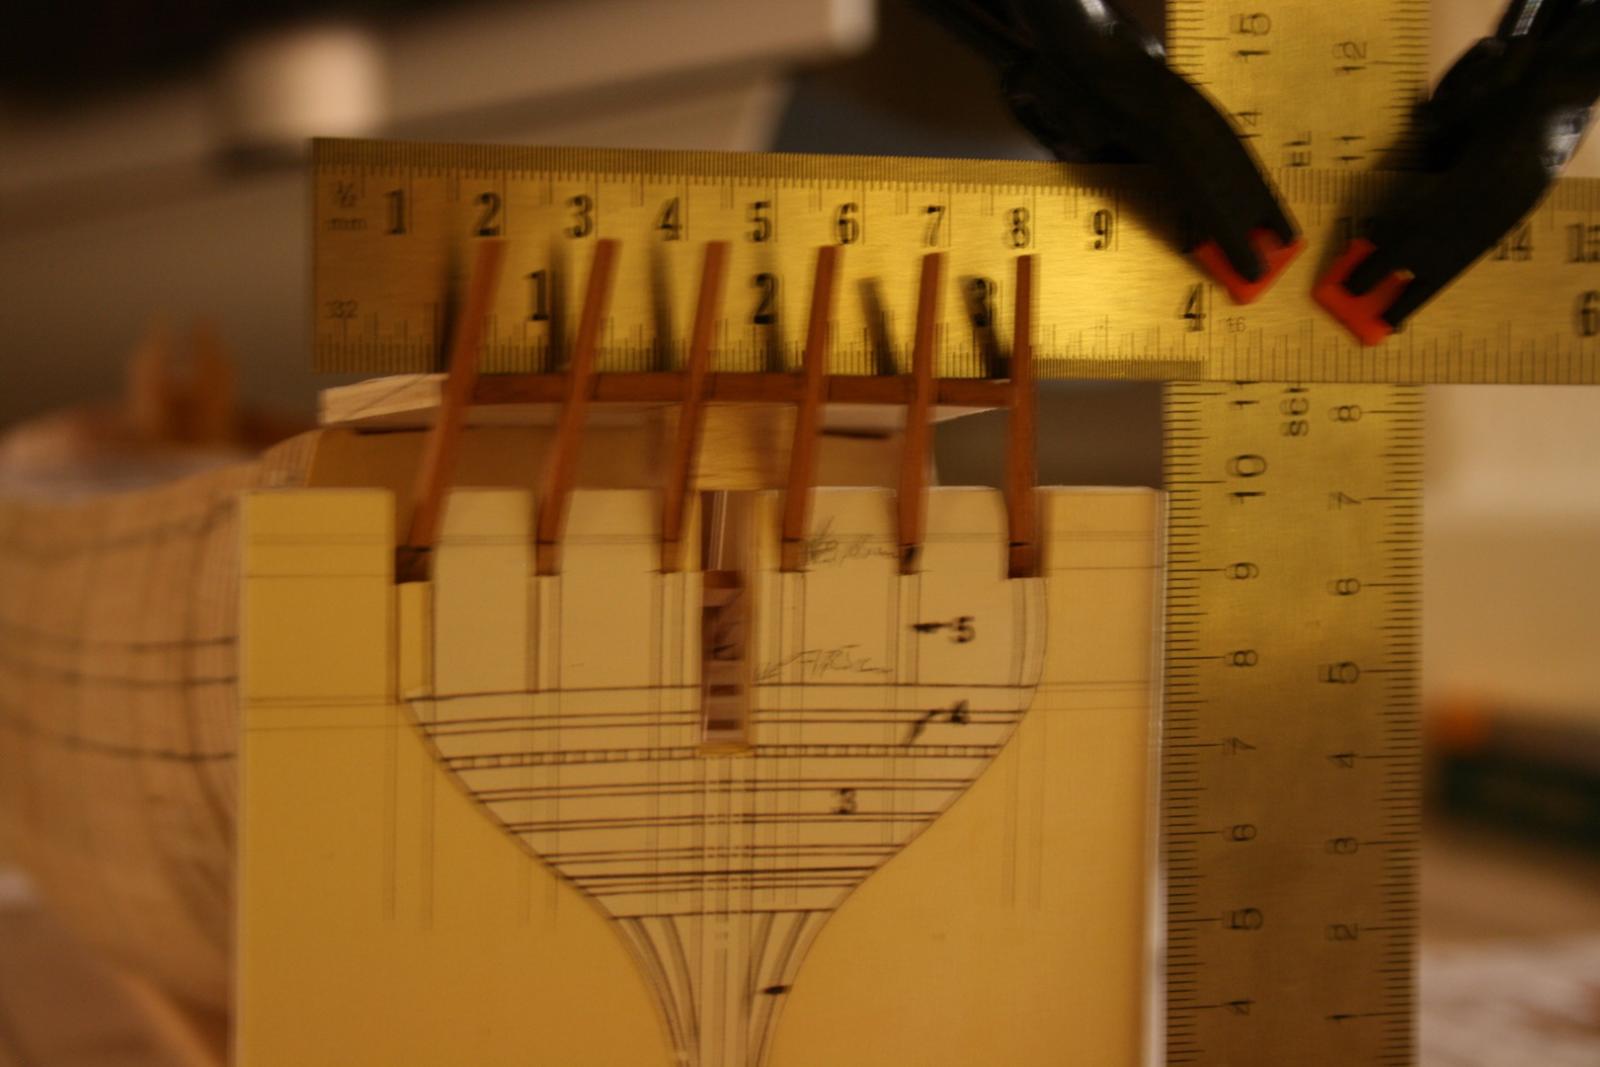
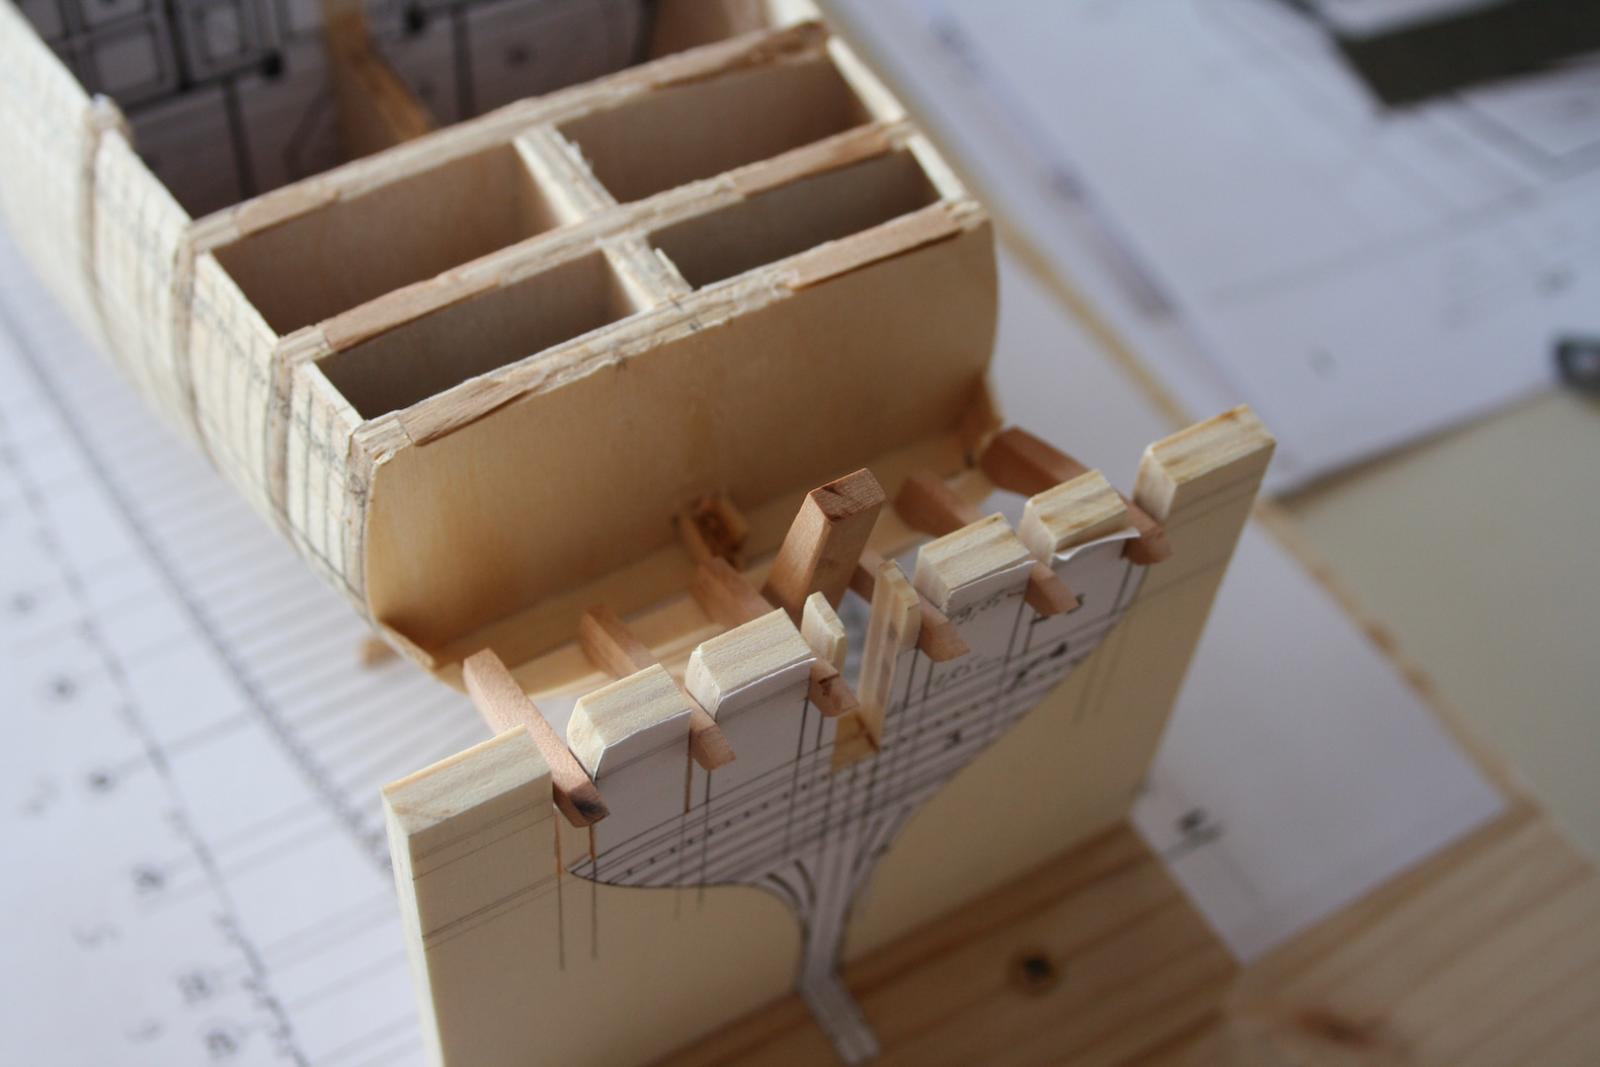
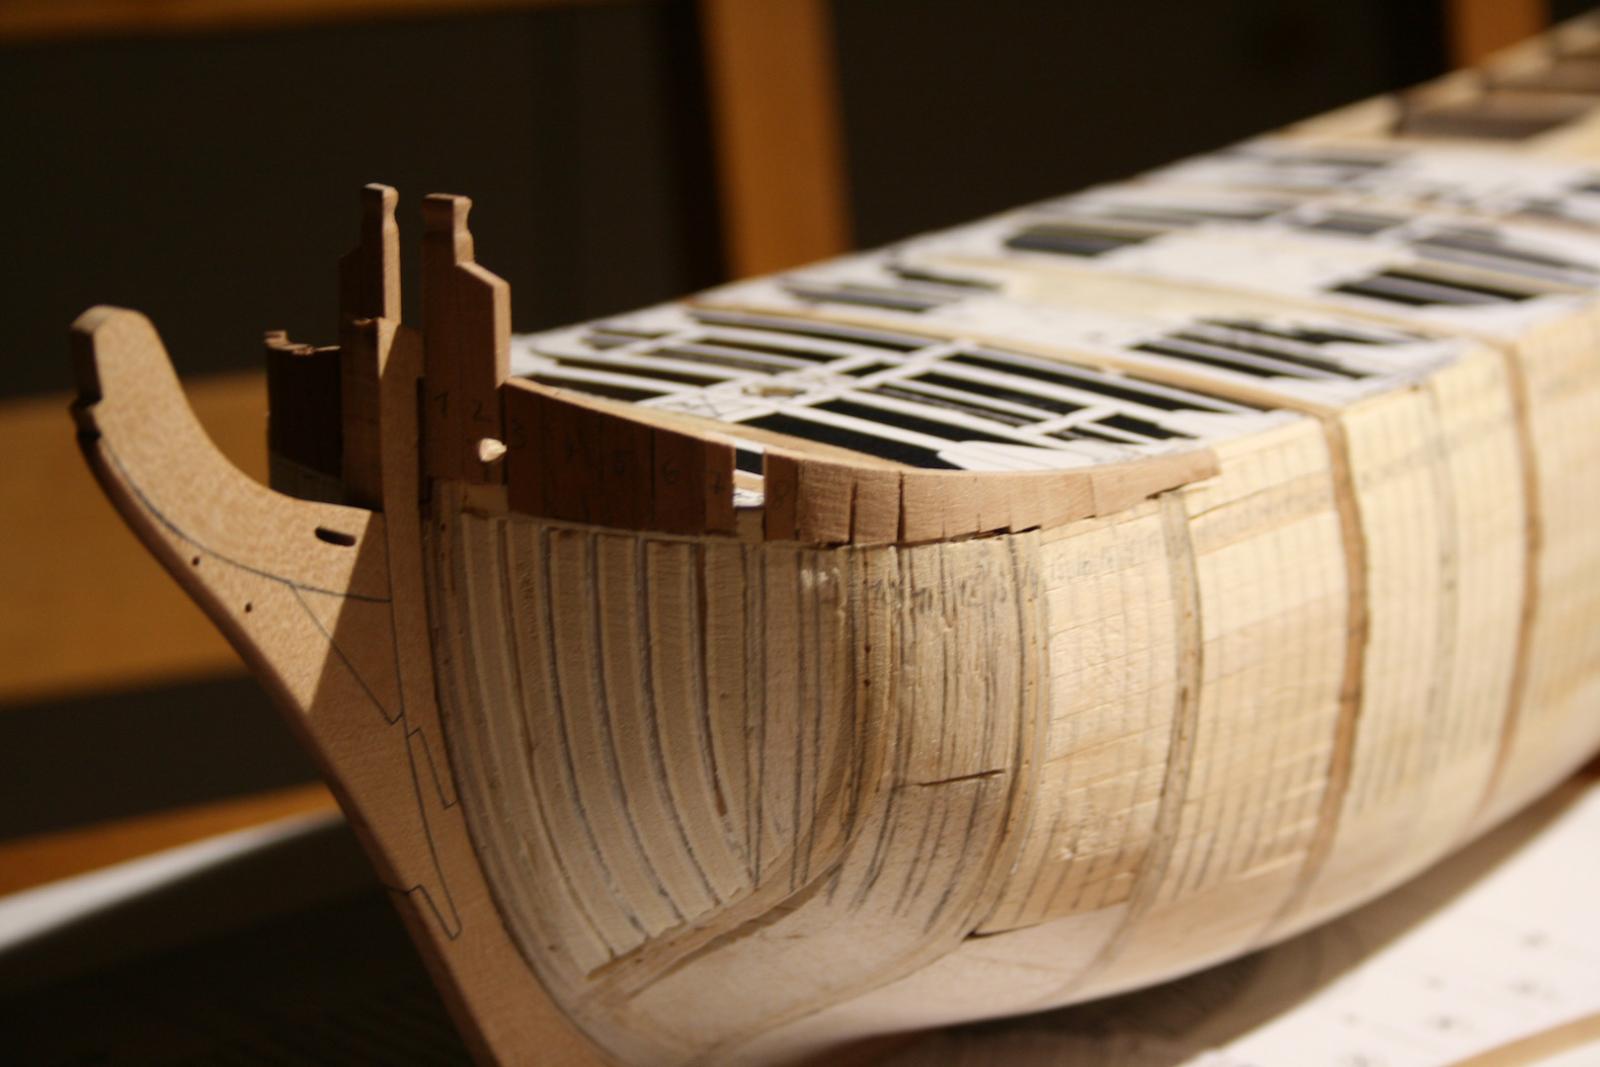
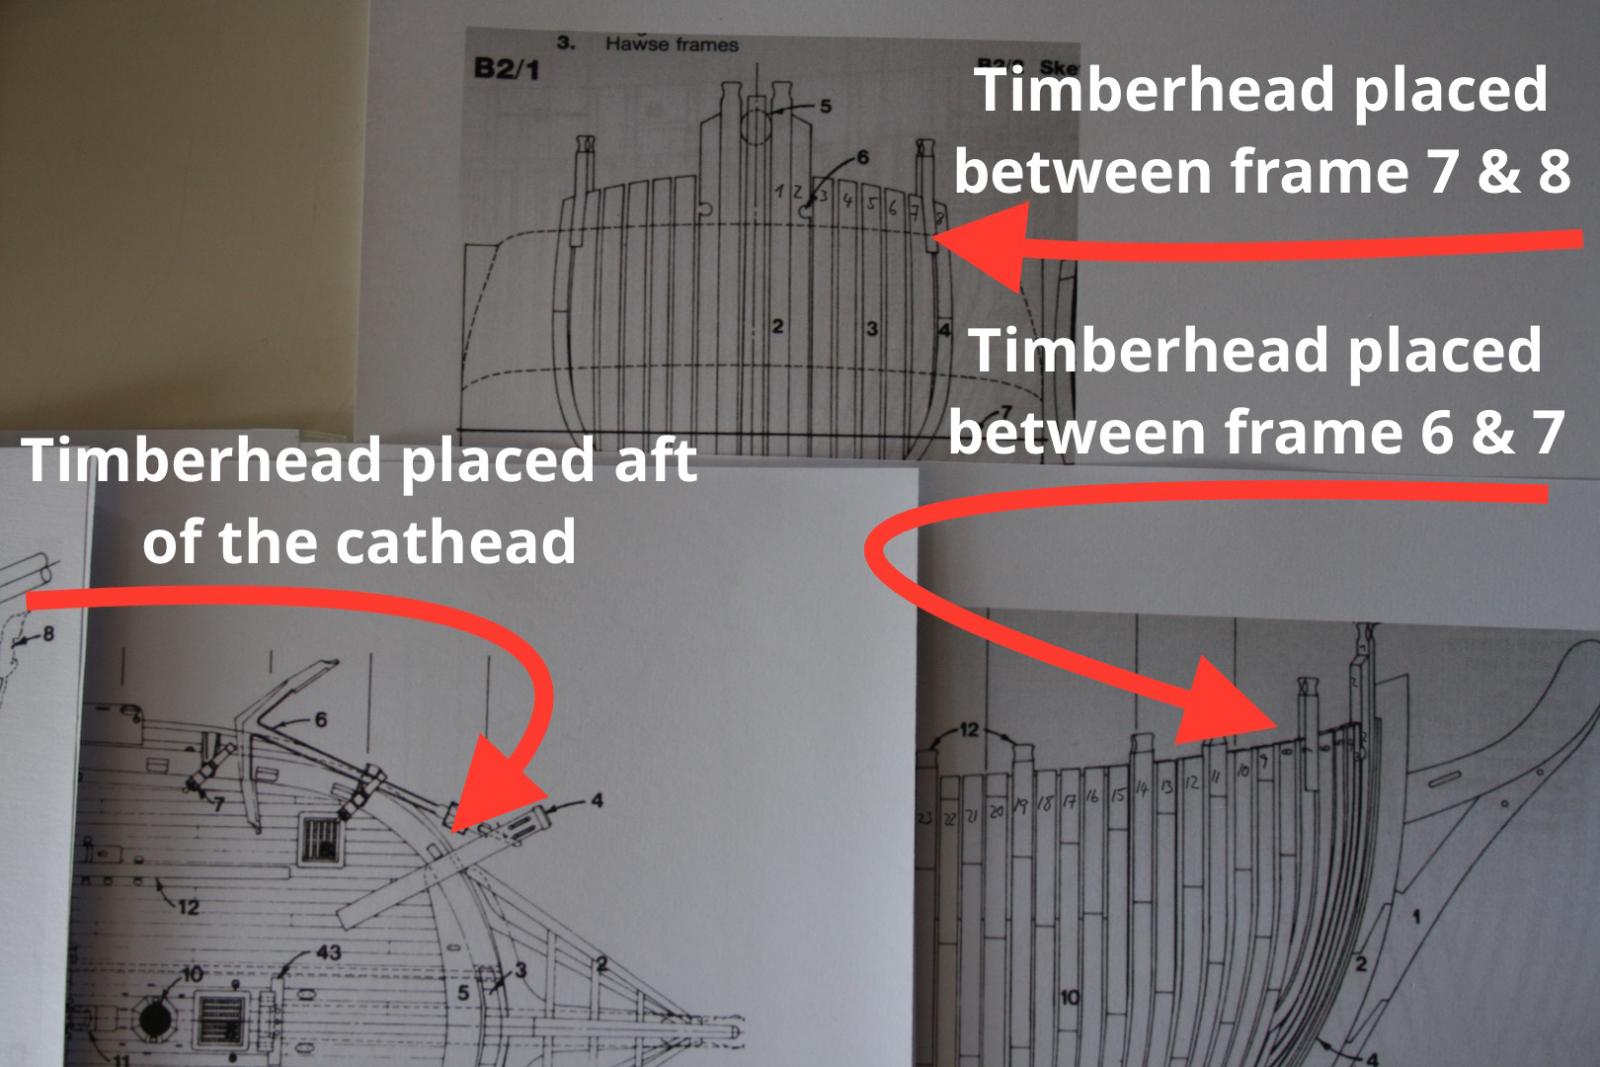
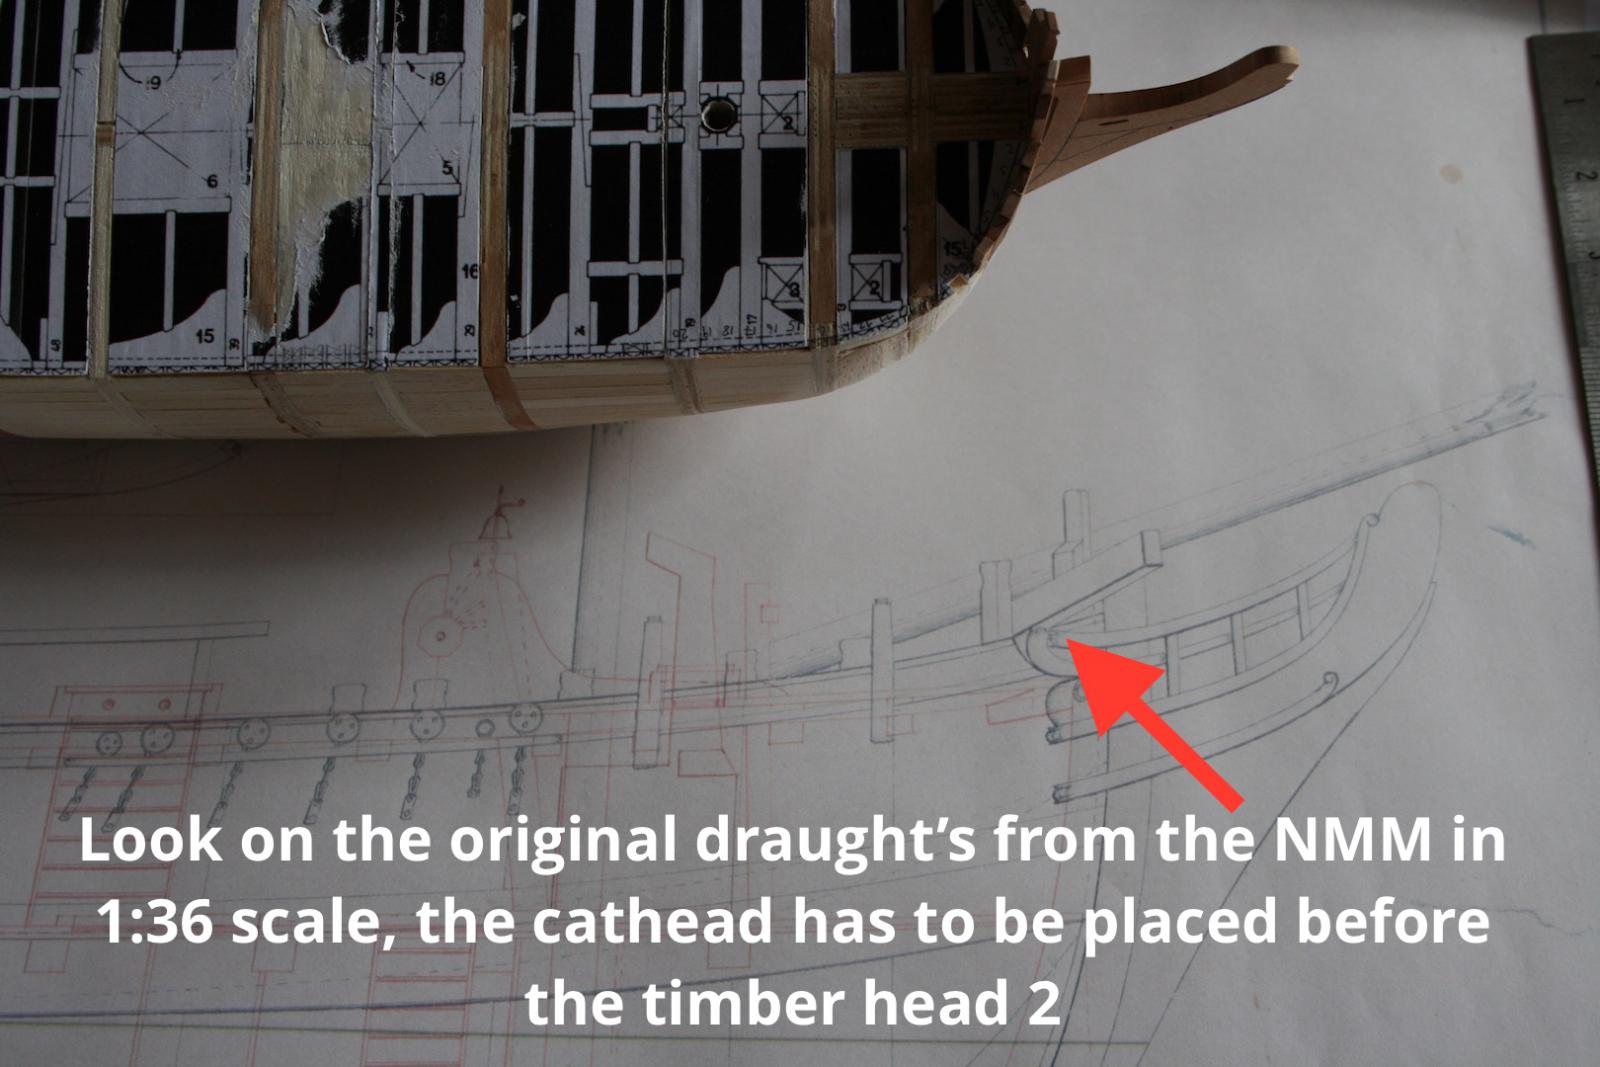
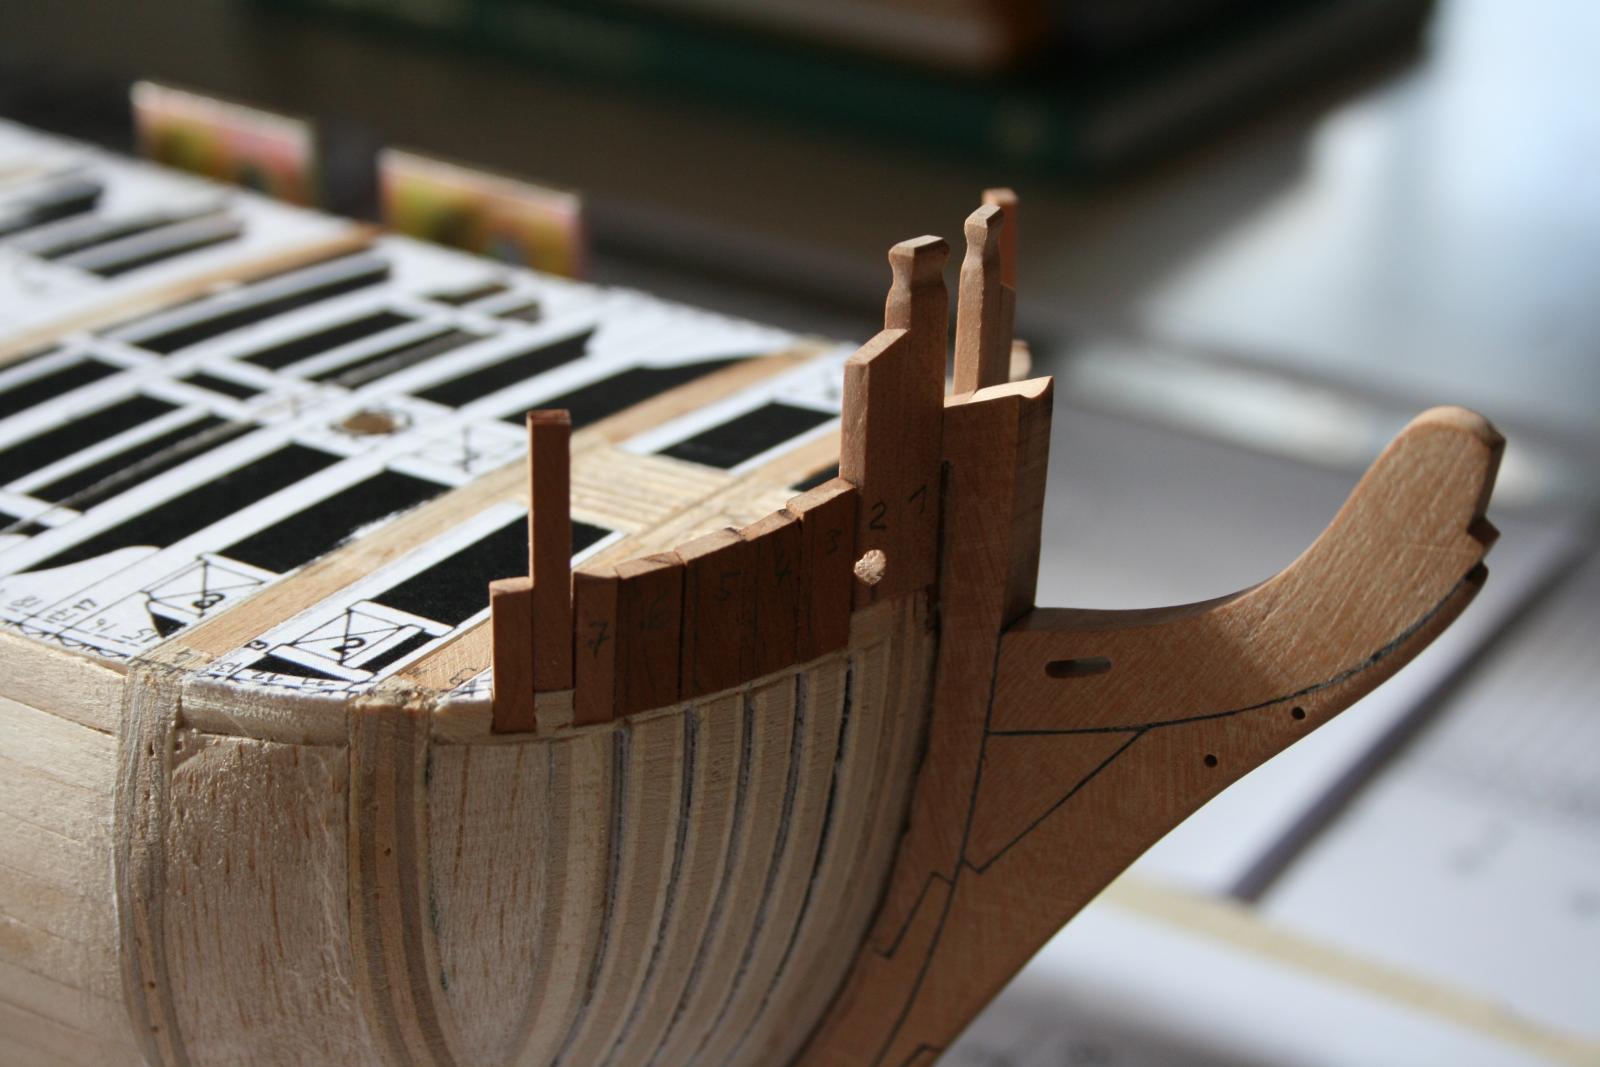
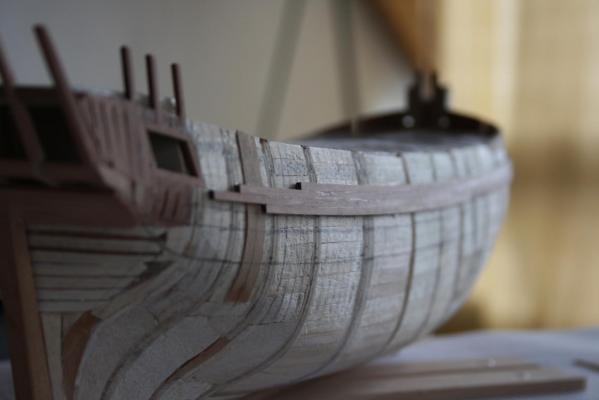
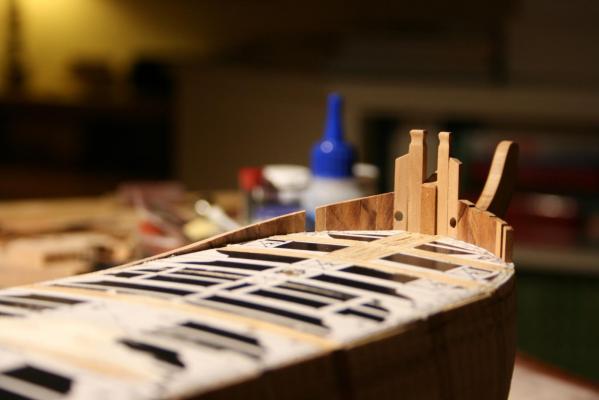
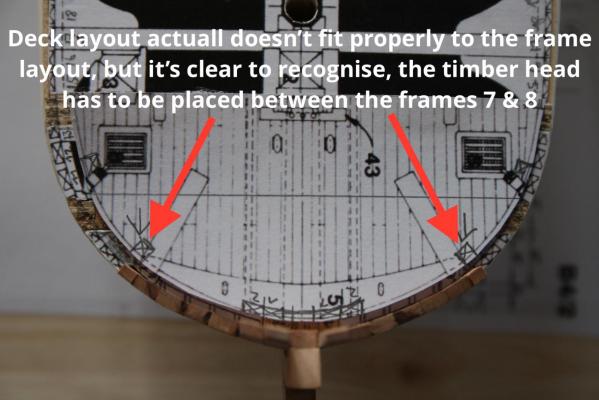
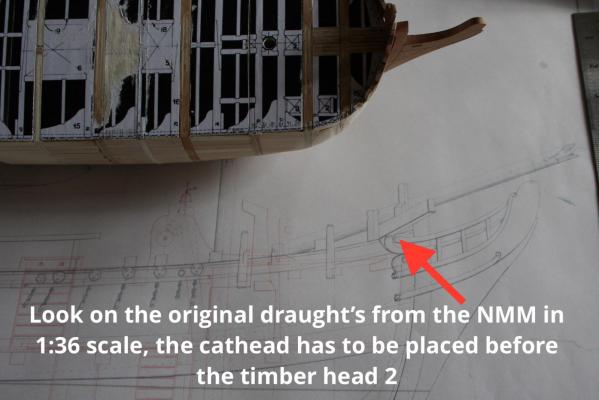
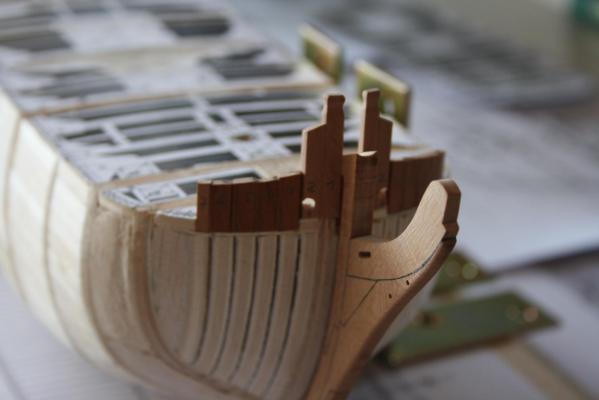
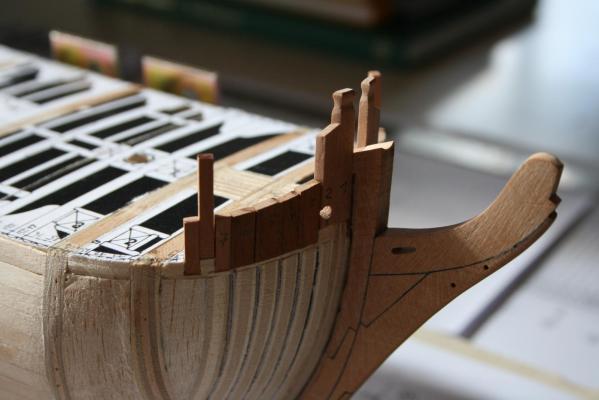
Hello, During the process on the work on the upper frames on the bow I've got a little bit confused as the framing plans in AOTS Bounty shows two different versions of the proper place of timber head 2. On the sideview, the timber head is placed between the frames 6 & 7. On the front view of the bow, the timber head is placed between the frames 7 & 8. After a quick check with the deck layout from AOTS and the original draught from NMM it is clearly recognisable, where the timber head 2 has to be placed. It has to be directly aft of the cathead. Therefore the front view of the AOTS is the right one. The timber head has to be placed between the frames 7 & 8. The timber heads in the last picture aren't fixed now as I want to get first the right run of the frame's upper end by sanding. Cheers, Daniel

-
Pandora by marsalv - FINISHED - 1:52
Siegfried replied to marsalv's topic in - Build logs for subjects built 1751 - 1800
Hello Marsalv, Great work and lovely paint job you did. Especially the Blue is looking very close to the colour on models of the NMM. May I ask you what kind of Blue from which manufacturer you have used for your build? Cheers, Daniel -
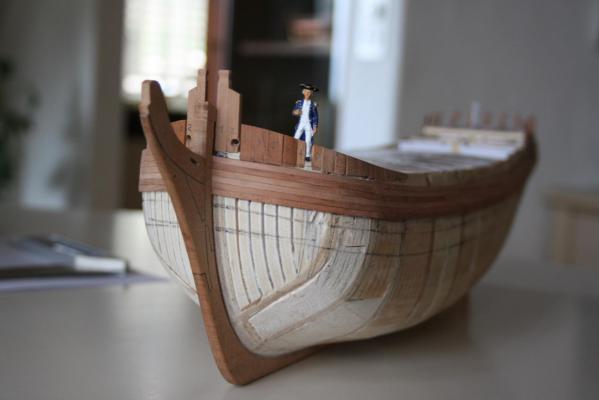
...now I am ready to start with the timber heads. Cheers, Daniel