jml1083
-
Posts
195 -
Joined
-
Last visited
Content Type
Profiles
Forums
Gallery
Events
Everything posted by jml1083
-

Echo by Rustyj - 1:48 - cross-section
jml1083 replied to Rustyj's topic in - Build logs for subjects built 1751 - 1800
Congratulations Rusty, that IS a milestone ! -
Echo by jml1083 - cross-section
jml1083 replied to jml1083's topic in - Build logs for subjects built 1751 - 1800
Good morning Druxey, It would seem that way but considering their age they have served me very well. Back in the late 70s and early 80s I picked up several industrial tools when local manufacturing plants either shut down or modernized. Although they were industrial machines I did not pay an industrial price for them My Rockwell scroll saw is a beast that if it weighed even 10 pounds more I would need help moving it. The sander was also very beefy but not as well made. It would have been a real hardship if I couldn't get the scroll saw back in action but I was able to mill a new part for it and it is running well. The sander is beyond all hope but my new Byrnes sander will arrive via UPS on Wednesday and then I expect to be back in action with all boilers online and the EOT calling for all ahead flank! I have two complete frames cut and should get a third cut tonight. Once the sander arrives I hope to start making progress I can post photos of. -
Echo by jml1083 - cross-section
jml1083 replied to jml1083's topic in - Build logs for subjects built 1751 - 1800
The scroll saw is fixed and in under an hour I cut all the components for the first frame. When I turned on my disk sander to work on the chocks there was a loud pop, a puff of blue smoke and the unmistakable smell of burn electrical. This would be a disaster if not for the fact I have a Byrnes sander on order - I believe my antique sander had somehow heard a replacement was in the works (it was very old, the face wobbled a bit and the table had a habit of not staying square to the face). I ordered the sander a couple weeks ago so hopefully it will arrive soon. In the mean time the plan is to continue cutting components and keeping them organized so that when the sander arrives I'll be in good shape to get several frames done is short order. I'll post some photos when I have something good enough for show & tell. My wife visited me in the shop the other night while I was cutting futtocks. She stood watching for awhile and then said "Do you really enjoy doing this?" to which I answered "Yes I really do!". To tell the truth at first I wasn't sure I would enjoy cutting all the pieces needed and to the tolerances required but now that I've started I can honestly say it's fun. It might be different it I was doing a complete Echo or Swan but the cross section is big enough to really get a feel for it but not so big that you'll still be cutting futtocks a year or two from now. Onward and upward! -
Echo by Maury S - FINISHED - Cross-Section
jml1083 replied to Maury S's topic in - Build logs for subjects built 1751 - 1800
Hi Maury, Really impressive progress! To answer your question about typing the ° (degree) symbol, it depends. On a regular keyboard press the <ALT> key and while holding it down press the 2 then press the 4 and then press the 8 key on the keypad on the right side of the keyboard. When you finish typing the 8 the ° symbol will appear. I haven't figured it out yet on a laptop as there is no keypad (just the numbers over the letters) and using the same key strokes on a laptop keyboard don't work. If you have a full size keyboard plugged into a laptop it should work but I don't know that for a fact. Hope this helps. -
Very nice work Ben! I'm looking forward to following your build.
-
Hi Bob, I am constantly looking stuff up in your log, as said above, posting in such detail is a very real help to those of us coming up behind you. I'm looking at getting into the rigging pretty soon and want to get in as many of the finer details as I can. The turnbuckles had me stumped as I couldn't find them for sale in a size I could use (and afford). Then I had the bright idea to use the advanced search feature in MSW 2.0 and there was your log entry on just what I needed !! Many thanks!
-
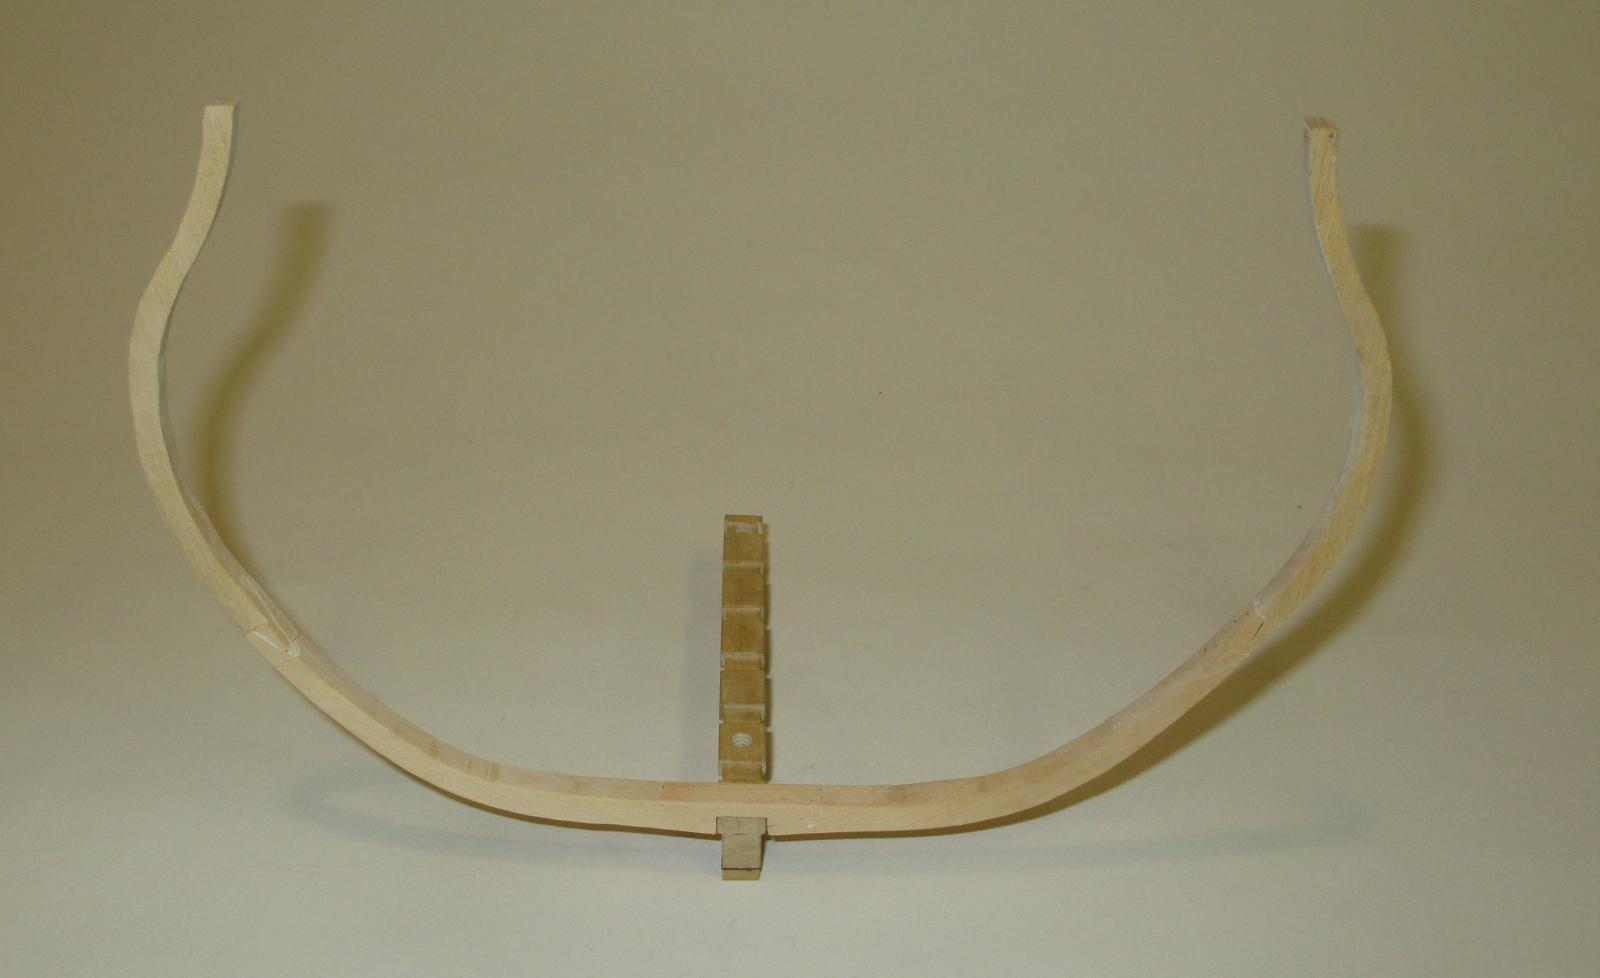
Thanks Dan. What I normally do when I'm bending wood is trace the curve from the drawing onto tracing paper then transfer that line onto a small piece of enameled steel. With the curve now laid out I start to clamp the wet wood to the plate. Once I'm satisfied that the bend is correct I use a heat gun (I think it is 750 watt) to dry the wood. With all the exposed wood dry I move the clamps to the dry areas so I can dry what was under the clamps. Chuck showed us this method at one of the SMS-NJ meetings. Thanks again for your input.
-
Thanks guys! I'm glad I asked. I have bass (lime), boxwood and walnut so I'll use one of those - it is going to be painted so my choice will be whichever I can get to cooperate with me most easily. Thanks again for the advice.
-
Hi all, I am about to construct the monkey board and rail on my Bluenose. The monkey board is 3/64" x 3/32". I was wondering if there is any advantage or disadvantage to using balsa wood for this? Balsa is very lightweight and easily bent. I thought of using basswood which I would wet and then bend and fix using a heat gun. The balsa seems to offer an easier alternative but rarely is easier better. Any thoughts? Thanks for any and all input.
-
Echo by jml1083 - cross-section
jml1083 replied to jml1083's topic in - Build logs for subjects built 1751 - 1800
Hi Guys, Yep, points well taken. The shop is a room built down in the basement, part of which is a root cellar. The area where the scroll saw is now located used to be (many moons ago) the garage. When my son moved back after college it quickly went from being a garge for my car to storage for his stuff. He is now married with a house of his own and my daughter also has a house of their own. I still own a bunch of their stuff and it is stored you know where. This area is also used for all sorts of other projects from snowblower reconstruction to building cabinets. There are clear paths between sections but he who strays into an uncharted area is at his own peril Last night that part kept bothering me so I headed back down to take a crack at making a new part (you are correct Mario, it wasn't hard to make). In short order I had a new part that fit very well and I was back in business. For a while. The old saying, "never overlook the obvious" was never more true. After using my shinny new part for a bit the blade slipped out. No problem, I'll just tighten the set screw a wee bit more. That only worked for a couple of strokes. I gave it one more try and the result was the same. Recognizing that I had over looked something (didn't know what yet) I took the blade holder assembly apart. It quickly became apparent that putting a hardened steel blade between two pieces of steel, one older than dirt (and made out of hardened steel) and my shinny new piece (made out of soft steel) was not a well thought out plan. The soft steel was pretty well scarred from the blade being pulled over the face. That piece is now scrap and I'll be out of the shop for a few days so version two will have to wait. Once I make it, it will be introduced to a propane torch and cold water before it goes back into the saw. Live and learn as they say. This would all be sort of fun if fixing saws is what I did to relax. Onward and upward! -
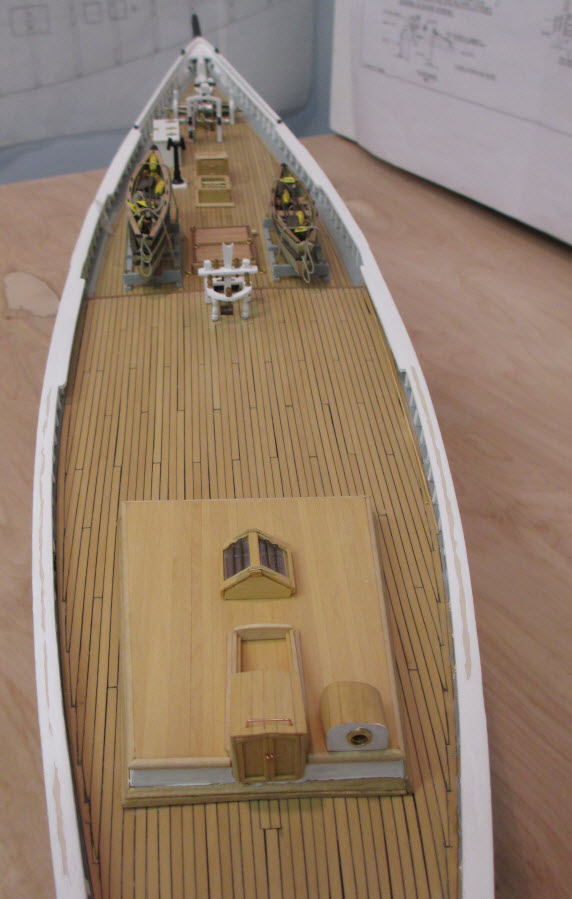
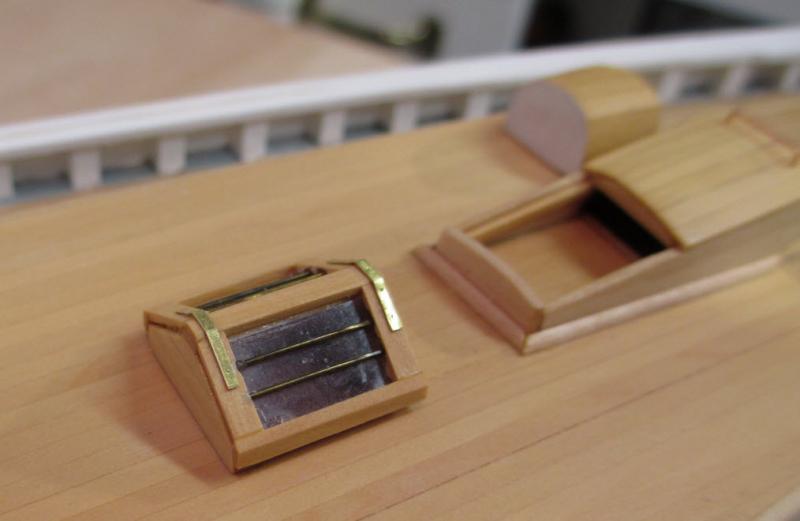
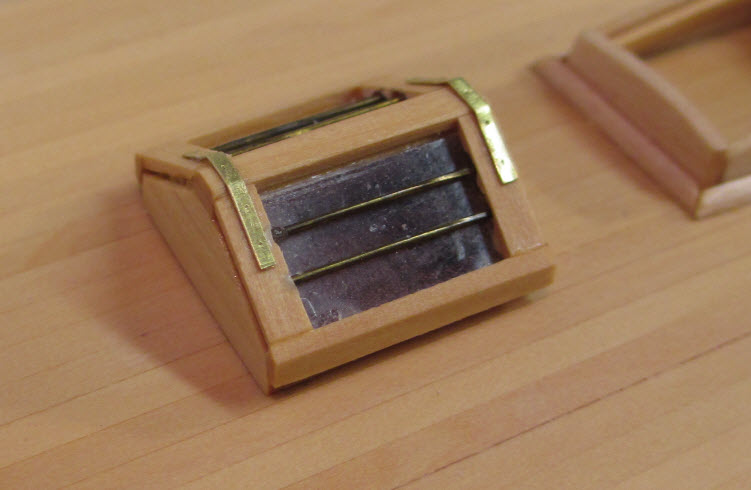
Hi guys, thanks for the kind words. Bob, the skylight was built with an interior core of 1/32" basswood by whatever the height was and the floor was made of the same. I cut the floor first so I had a rectangle the correct size, then I added the 4 sides. With this frame built I planked it using 1/32" x 3/32" boxwood. The floor was covered with a gold foil and the interior sides were covered with a dark purple foil. I collect foils from candy for use on interiors, they give them a bit more interest than just painting all the interiors black. The hinges on the two lights is made out of .005" brass I had. The bolts are simulated using a tiny nail with the point dulled. The bars are solid brass, I believe 1/64" diameter. I stripped the factory finish off the brass rods and then rolled them around in my fingers to tarnish them a bit. The "glass" is plastic that I save from those containers that are impossible to open without a chain saw. I've got quite a collection in various thicknesses. I found one piece that had some sort of film on it which nicely simulated what salt spray on glass looks like. The photos don't show it but when you look through the glass you get an impression of light and color in the space below. Overall, this skylight is my favorite feature so far. I haven't done the pumps yet. We can sometimes get really lost in the tiny details and that's the case with me and the pumps. I'm not sure how I want to display them and how crazy i want to get adding pins, etc that only a microscope would reveal. If i go with the pump handles installed I will most probably complete the pumps and put them asside until all deck work is done as I see those handles as being extremely fragile. If I go that route I'll put a pin in the center of each pump and then drill a hole in the deck to position them. After all other work is done a spot of epoxy and they're set. Time will tell.
-
Echo by jml1083 - cross-section
jml1083 replied to jml1083's topic in - Build logs for subjects built 1751 - 1800
Thanks Mario, but I'm going to adopt some of your attitude and your disaster with your Echo. Today I started to get serious on Echo v.2 when minor disaster struck. I use a very old industrial scroll saw. It's a Rockwell Delta 24" with cast iron base and frame. I bought it at an auction in the late 70's and initially used it for marquetry. At some point we moved and the scroll saw and all my veneer went into mothballs. Another 3 or 4 moves and the saw is almost completely forgotten about, almost but not quite. When I got back from the Echo workshop I realized it was time to dust the beast off and put it back to work. I filled the oil sump, checked the main spring and then disassembled and cleaned the blade holders. The bottom one was pretty straight forward but the upper one is made of 4 parts that fit together inside a small housing. With everything clean and ready for action I put in a new blade and cut my first futtock. It worked like a charm. As I was about half way through my second futtock there was a loud snap and the upper blade holder dropped down on the table. The problem is an hour ago there were 4 pieces, now there are only 3. I looked around the saw and it didn't land on the table or the base. Then I looked at the floor. The floor that is rough concrete with paint splatters from a thousand projects. The floor that hasn't been swept in years. Somewhere on THAT floor was my piece. My tiny 3/8 x 3/8 x 1/8 inch piece which is absolutely critical for holding the blade. Gone. I swept the floor in an area much larger than the part could have flown but no luck. Next I stuck a rare earth magnet on the end of a dowel and went fishing in the junk that came off the floor. Tacks, staples, flakes of rust, screws that had been run over a couple of times, everything you can imagine but the part I needed. The good news is that since I had just cleaned the part I know exactly what it looks like. The bad news is that I'm going to have to fabricate one if this saw is ever to see action again. Luckily I have my Bluenose to keep me busy while I ponder how to exactly how to do that. I'll keep you posted how it goes. -
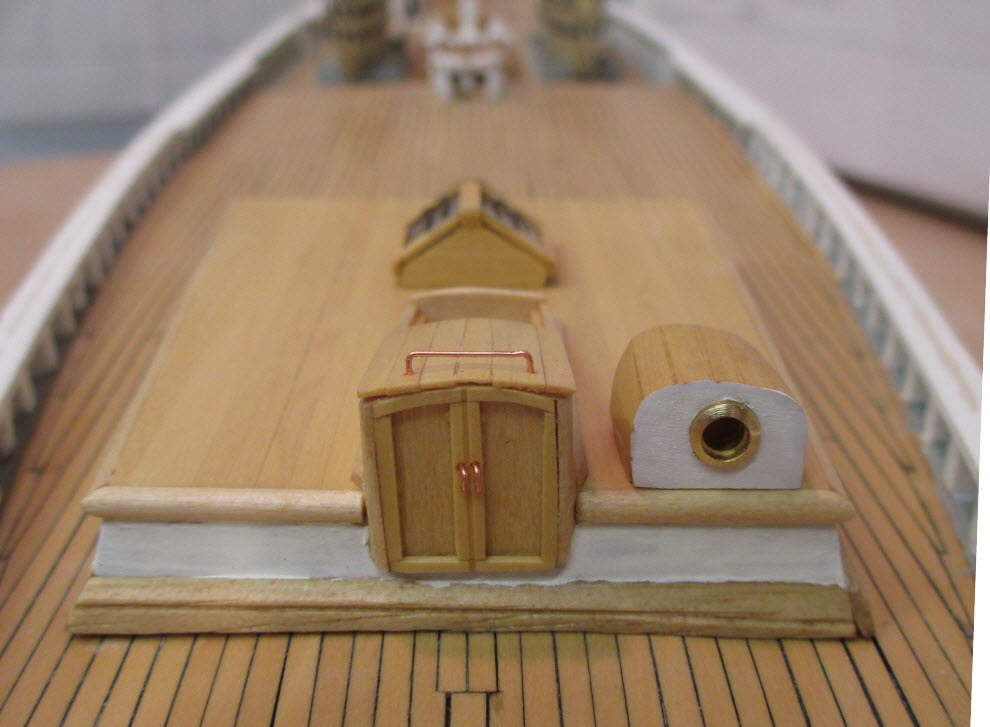
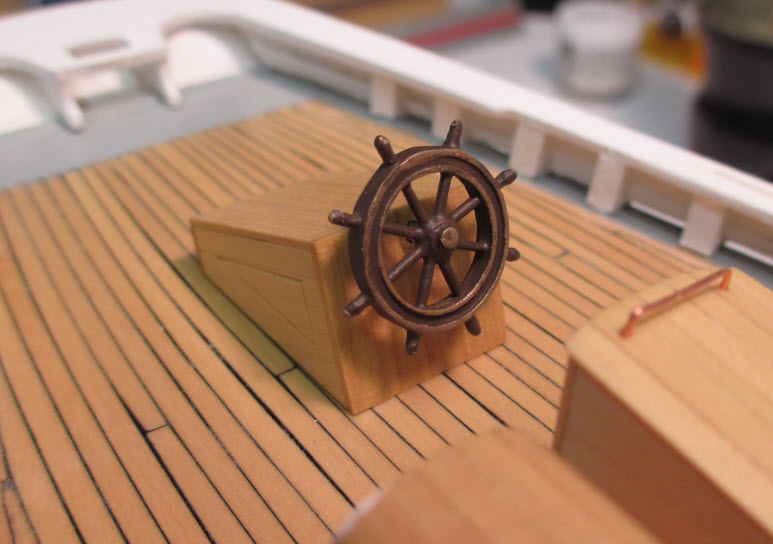
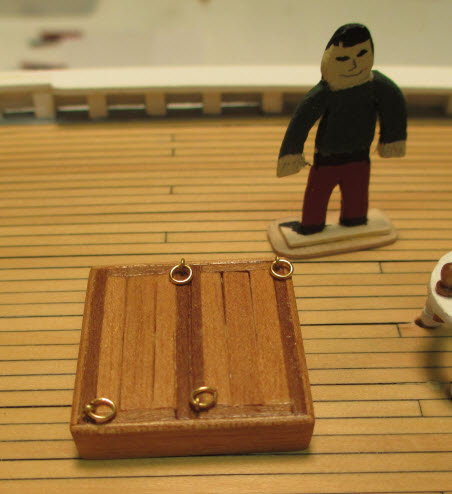
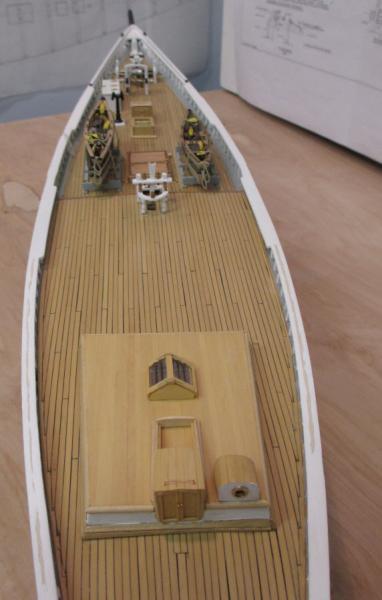
Not a lot to show for this week. Finally finished the wheel box and wheel. And the after cargo hatch.
-
Hi Bob, So sorry to see the damage that was done to your Conny! I'm sure you will rebuild it even better than before. I've been following your build for a long time, you are doing a great job.
-
Jay, So what you are saying is you are stashing spare parts below so that crew has them in the future, right?
-
Echo by Maury S - FINISHED - Cross-Section
jml1083 replied to Maury S's topic in - Build logs for subjects built 1751 - 1800
Hi Maury, very nice work indeed. -
Thanks Peter for posting such clear directions and photos. Your results speak for themselves. I'll soon be doing the rigging on my Bluenose and I will give this a try.
-
Thanks Elia, Hamilton and Alistair, Overall I'm happy with the way the cabin came out but the photos show details that weren't so evident in the as I was working. I went back and forth about painting the sides of the cabin white, I've seen photos both ways. I finally decided to add it as the hoisting equipment up forward is painted white I thought it would tie things together. Some of the white pain bled over to areas that shouldn't have paint on them so now I have to do some scraping to get rid of it. I didn't have time last night to scrape and post so since it had been so long between updates I went with the post first, fix later. There isn't much left to do on deck and then it's up in the rigging I'll be. I'm doing the masts and spars in boxwood. I'll have to dust off the lathe, it's been awhile.
-
After what seems like forever I have completed the cabin, compass housing and the skylight. maincabin1 maincabin2 skylight1 deck1 Next up is the aft cargo hatch and the pumps then the wheelbox.

-
Echo by jml1083 - cross-section
jml1083 replied to jml1083's topic in - Build logs for subjects built 1751 - 1800
Greg, you are correct. My goal for the weekend was not to create anything in particular or a set number of frames but to learn how to do it and to do it correctly. I was taking my time and trying to absorb it all. For me the pace of the workshop was perfect, not to fast but not too slow either. I think everyone profited greatly from it. You can be sure I'll be signing up for the spar building workshop in the fall. The other side of the frame looks worse so I glued this up as you see it here. Since I'm going to start over this will be a reminder to me to think about what I'm doing and try to anticipate problems. I am going to attempt something I always said I wouldn't do, I'm going to work on two models at the same time. I'm going to work on my Echo cross section at the same time I finish up my Bluenose. I'll be keeping logs on both. Ben & Jeff, I do feel lucky to live where I live as access to these workshops is fairly easy for me. Thanks Rusty, I'll see how successful I am at working on two builds at once. Time will tell. -
Hi all, Work continues on my Bluenose although lately progress has been slow. This is mainly due to my getting ready for the Echo Fully Framed Cross Section workshop last weekend - it was great. I have some vacation time I have to burn so I'll be down in the shop in the coming week. I have created the main cabin and the compass housing. I'm working on the skylight and should have it done by the weekend. Once that is done I'll post some photos.
-
Mario, I am crushed to see the damage your Echo has suffered. Your build was my inspiration and I will miss it. Hopefully you will be bowling 300 games quickly and get bored of all the news attention, then you'll be back building with us again. We have 4 cats but my shop is in the basement which can't be gotten to without going outside. I used to think that was a bad thing, now I'm not so sure. Good luck with the bowling, we'll keep a light on for you.
-
Echo by jml1083 - cross-section
jml1083 replied to jml1083's topic in - Build logs for subjects built 1751 - 1800
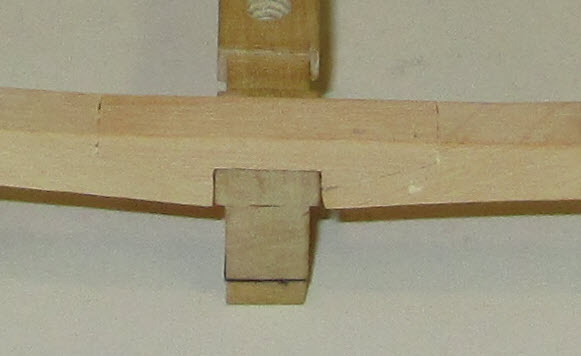
Hi all, I'm back from my weekend in Towson, MD for the Echo cross section workshop. I'll start off by saying "WOW!" This workshop was well worth the money I paid, and more. David and Greg are highly skilled gentlemen who know how to convey their years of experience to builders of all skill levels. As a rank beginner I worried that I'd be left in the dust by others much more knowledgeable than myself - that never happened. David and Greg gave a number of demos, each one taking us deeper and deeper into the skills needed for a build of this sort. In between demos everyone worked at their own pace and David and Greg were right there to answer any and all questions. The group had just 10 students and it really felt as if I was getting one-on-one instruction. This workshop was one of the best investments I could have made to further my ship building skills. Thank you David and Greg! As stated in a previous post I did purchase the full Echo cross section kit and work will commence on it very shortly. Jeff from Hobby Mill always provides more than enough material and I've decided that between the material I have left over from the home work and what was supplied with the full framing kit that I am going to build a new keel for my official build. Everything posted up to this point was getting ready for the workshop. Now that I've attended the workshop I think I can do better (maybe even much better) so I'm going to start from scratch. I did get one frame built during the workshop but did not raise it for a number of reasons. The primary one was I was worried about getting it home in one piece. Here is the final product from my weekend (raised frame at home). echo_a This is my cross chock. There is a slight blemish on the right side of the chock where the drill bit wandered too close to the side instead of going through the bottom. On the real deal I will be more mindful of this possible issue. For a first pass I'm pretty happy with it, even at this magnification the joints are not too noticeable. echo_b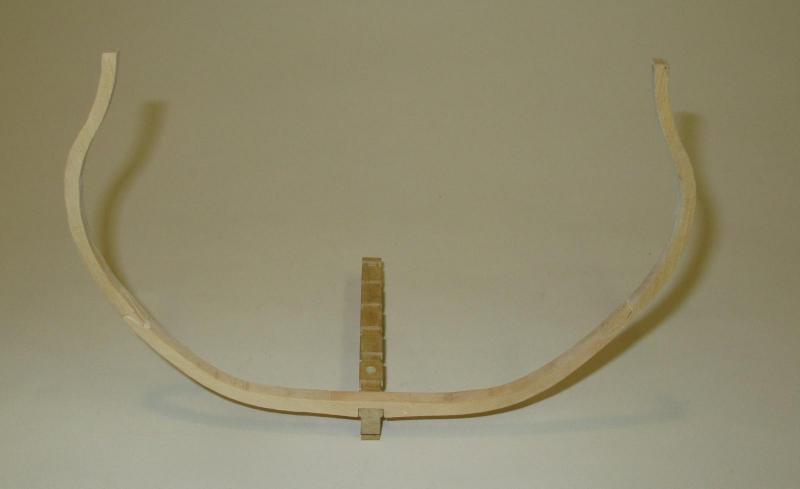
-
I like the term "chicken lips" Very descriptive and easy to remember.
-
Jeff, I've also used Llyod's blocks, they are first rate. I've purchased blocks from 2mm up to 7mm and they are beautiful.