

Gbmodeler
-
Posts
464 -
Joined
-
Last visited
Content Type
Profiles
Forums
Gallery
Events
Posts posted by Gbmodeler
-
-
 So, the next part of construction had me worried the most. That was removing the interior bulk heads (which is really destruction, not construction). Damaging the hull after expending all that time, effort, and materiel, was a major fear.
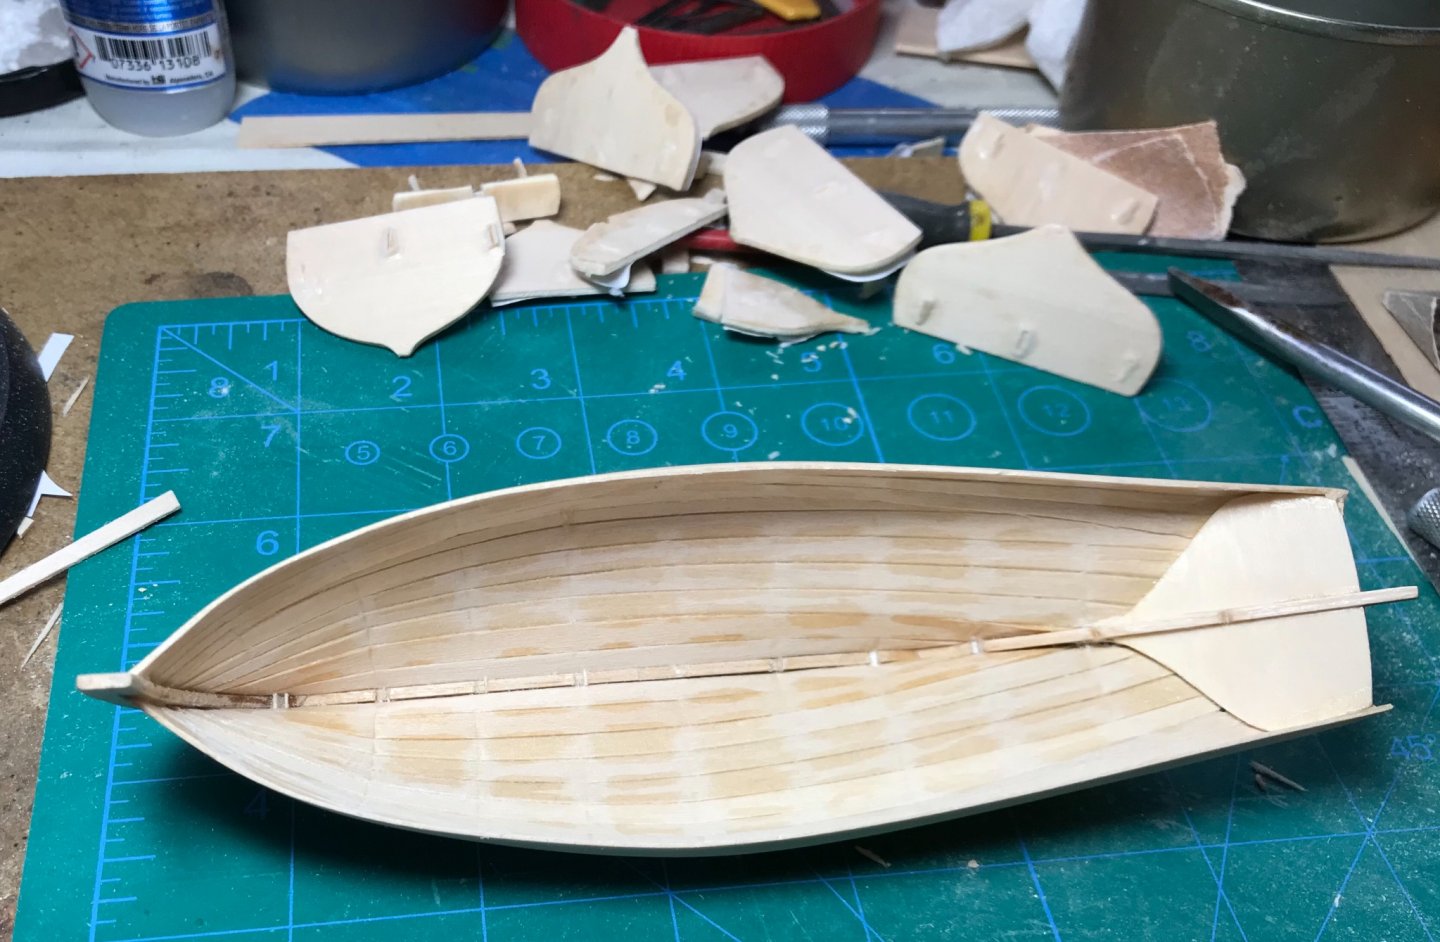
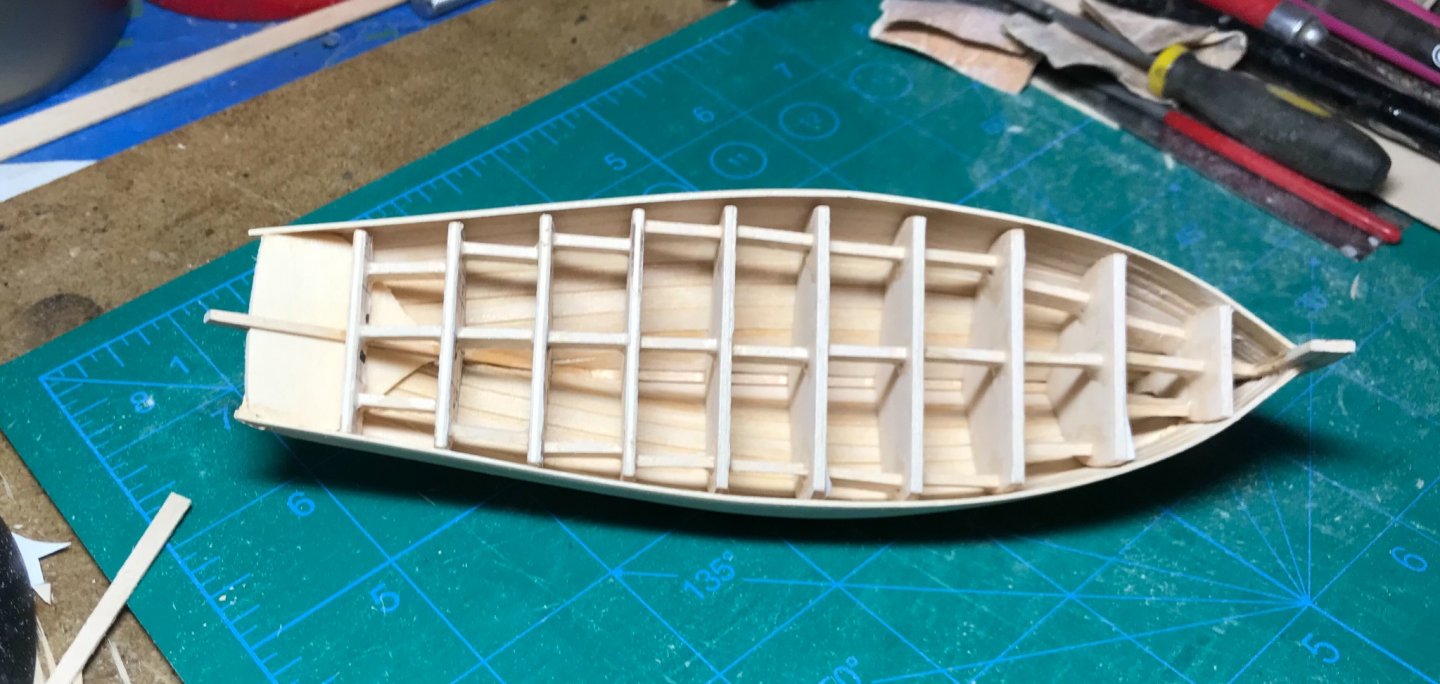
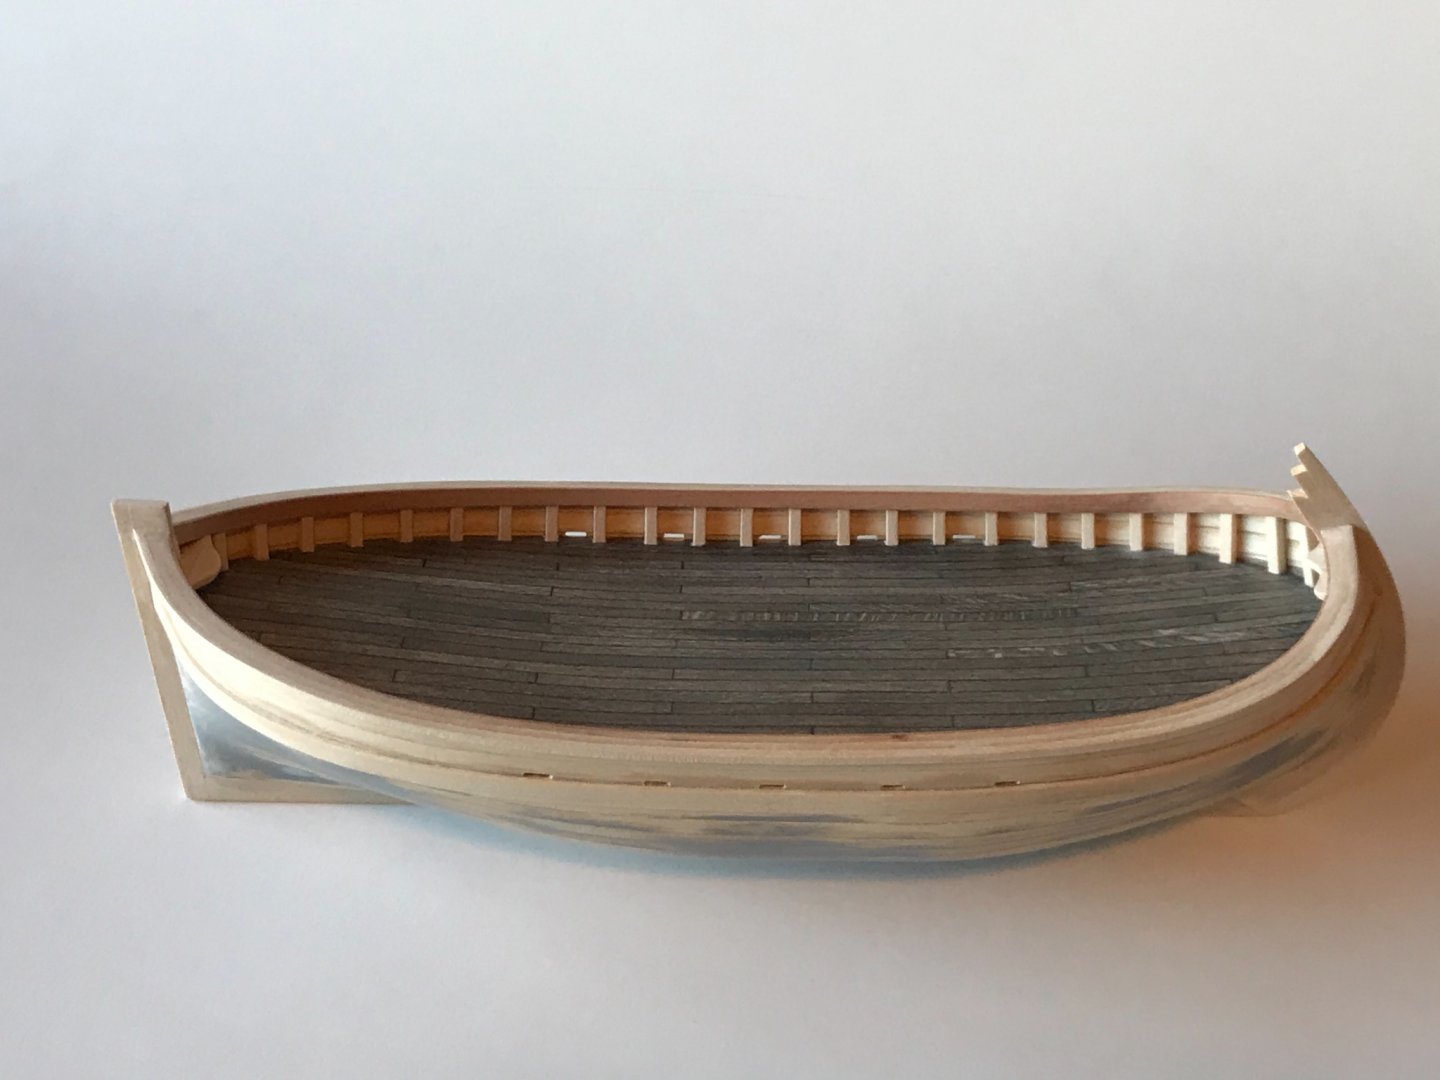
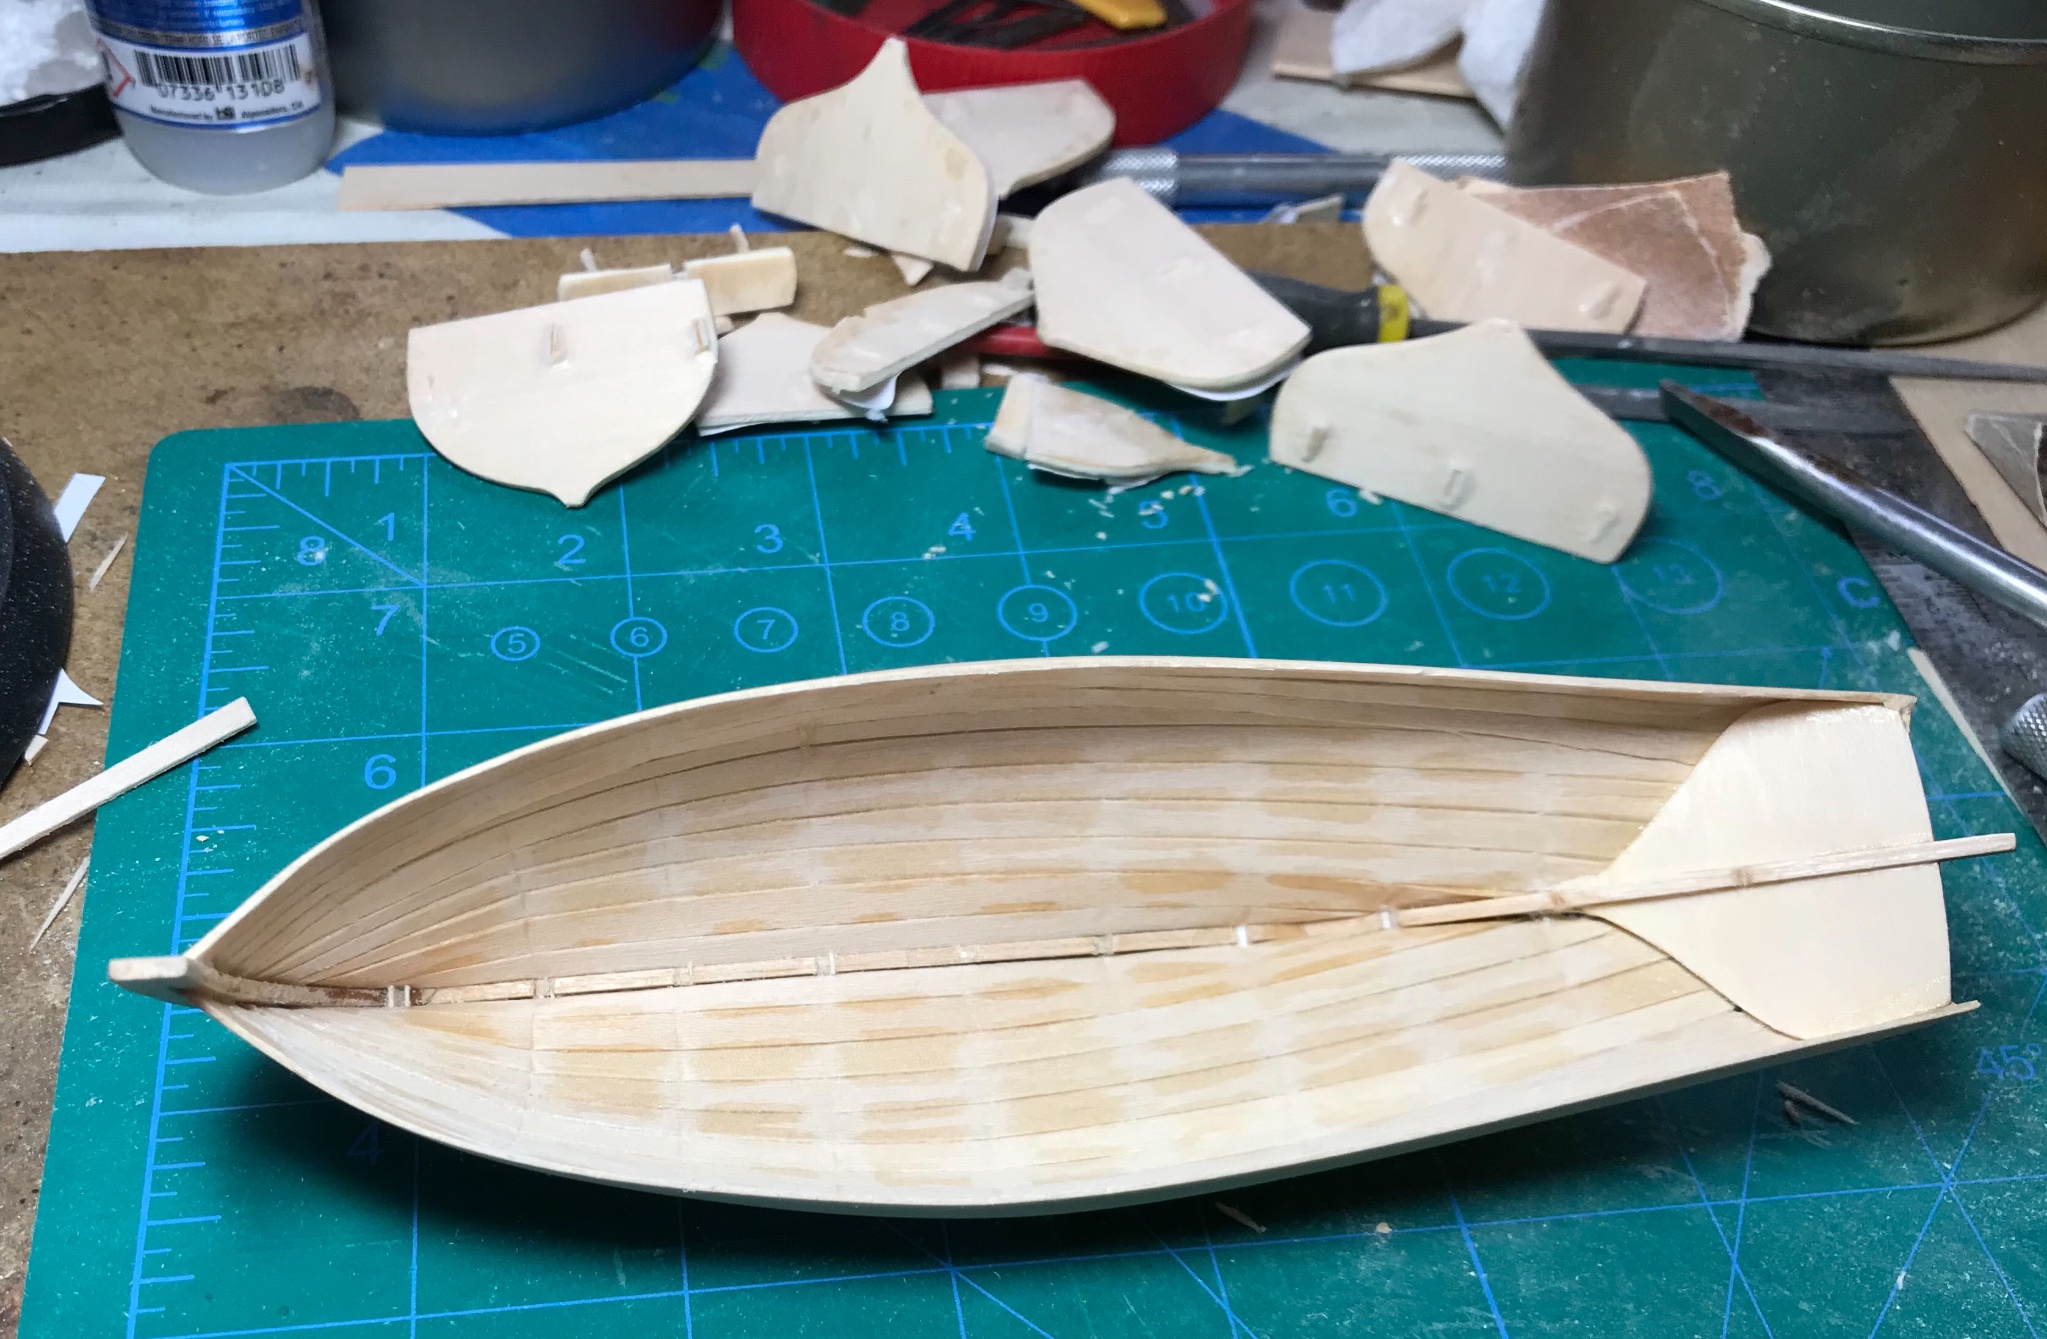
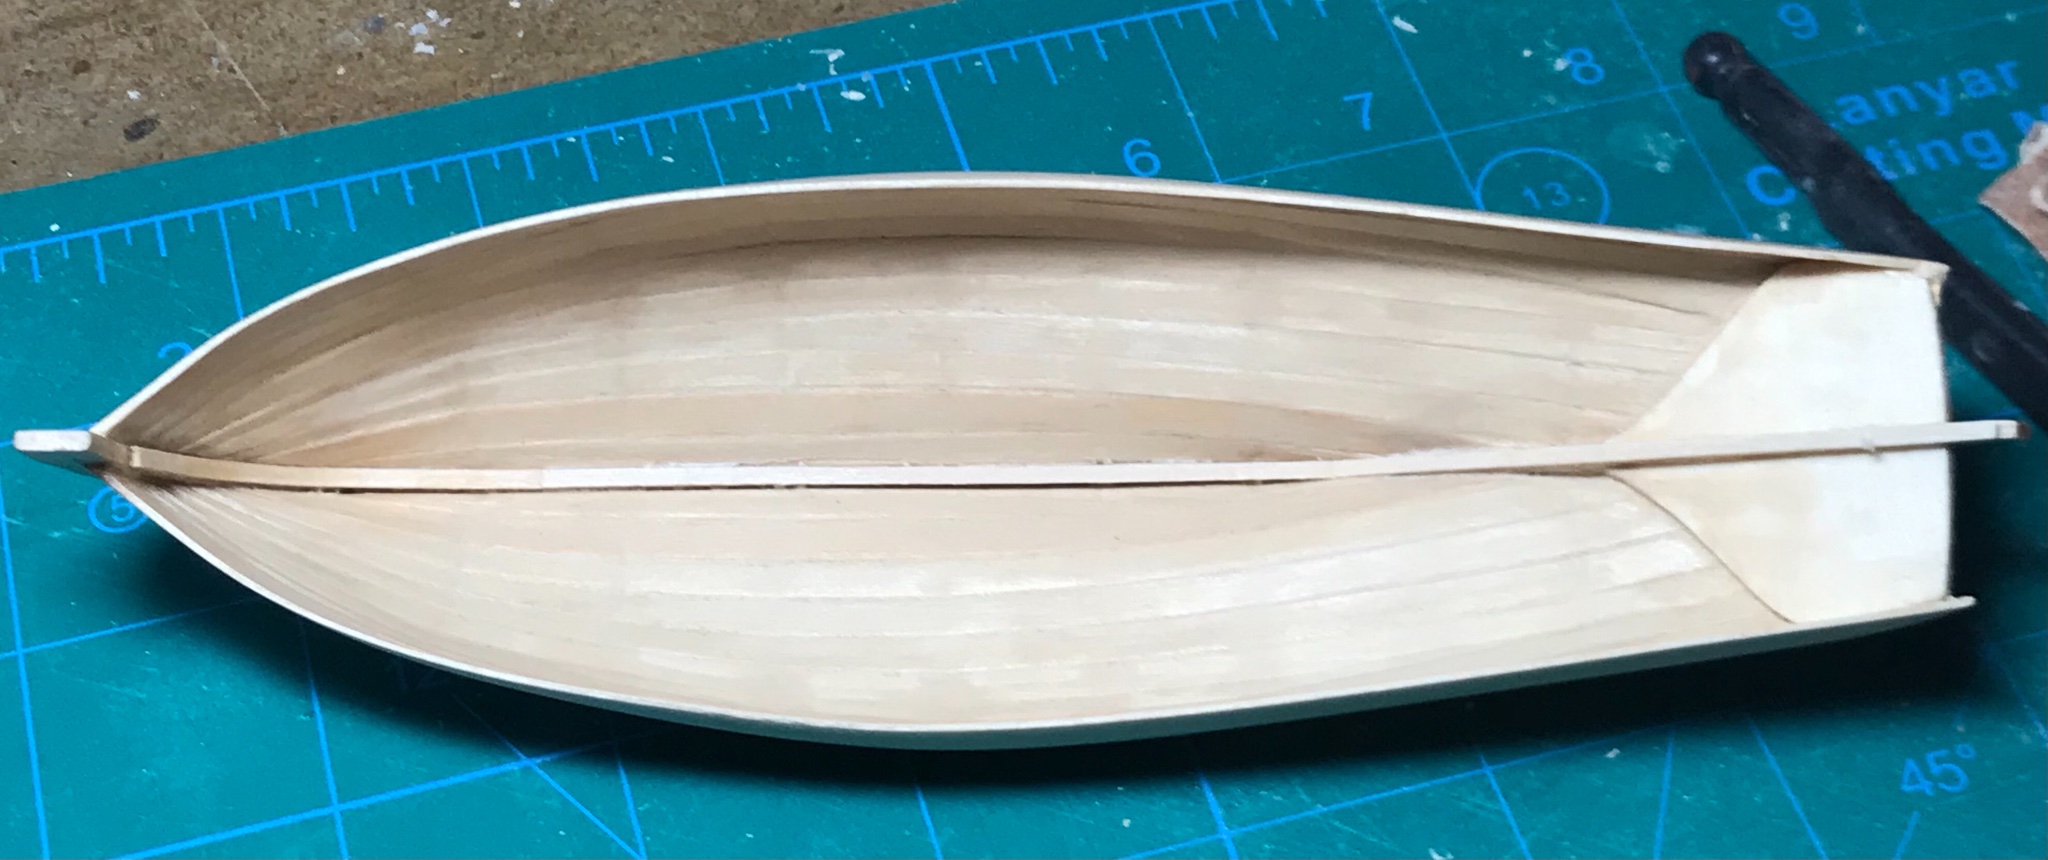
Removing the bulk head frame started with clipping the cross-braces with wire (sprue) cutters. For every action, there is an equal and opposite reaction, and the violence rendered by crunching the wood braces between the bulkheads was a legitimate concern. Fortunately, all went very well! With the braces clipped, all the bulkhead fell away with a little twist. In fact, one fell out without any encouragement. Since the bulkheads were only attached at one small spot along the keel, the beeswax impregnated edges must have worked. There was little or no glue stuck to the bulkheads.
Earlier, I did not fully explain the process I used for applying the beeswax. Before attaching the bulkheads to the keel, I rubbed the wax into the edges (except for the one small spot that would attach to the keel). Then, one at a time, I heated the edges of each bulkhead with a blow dryer to melt the wax into the wood. This requires using tongs or tweezers to not burn your fingers. Another coating of "cold" wax was applied after the bulkheads were attached and braced, just before planking begun.
After light sanding... and a strip of basswood for a keelson was applied.

- GrandpaPhil, bruce d, mtaylor and 10 others
-
 13
13
-
-
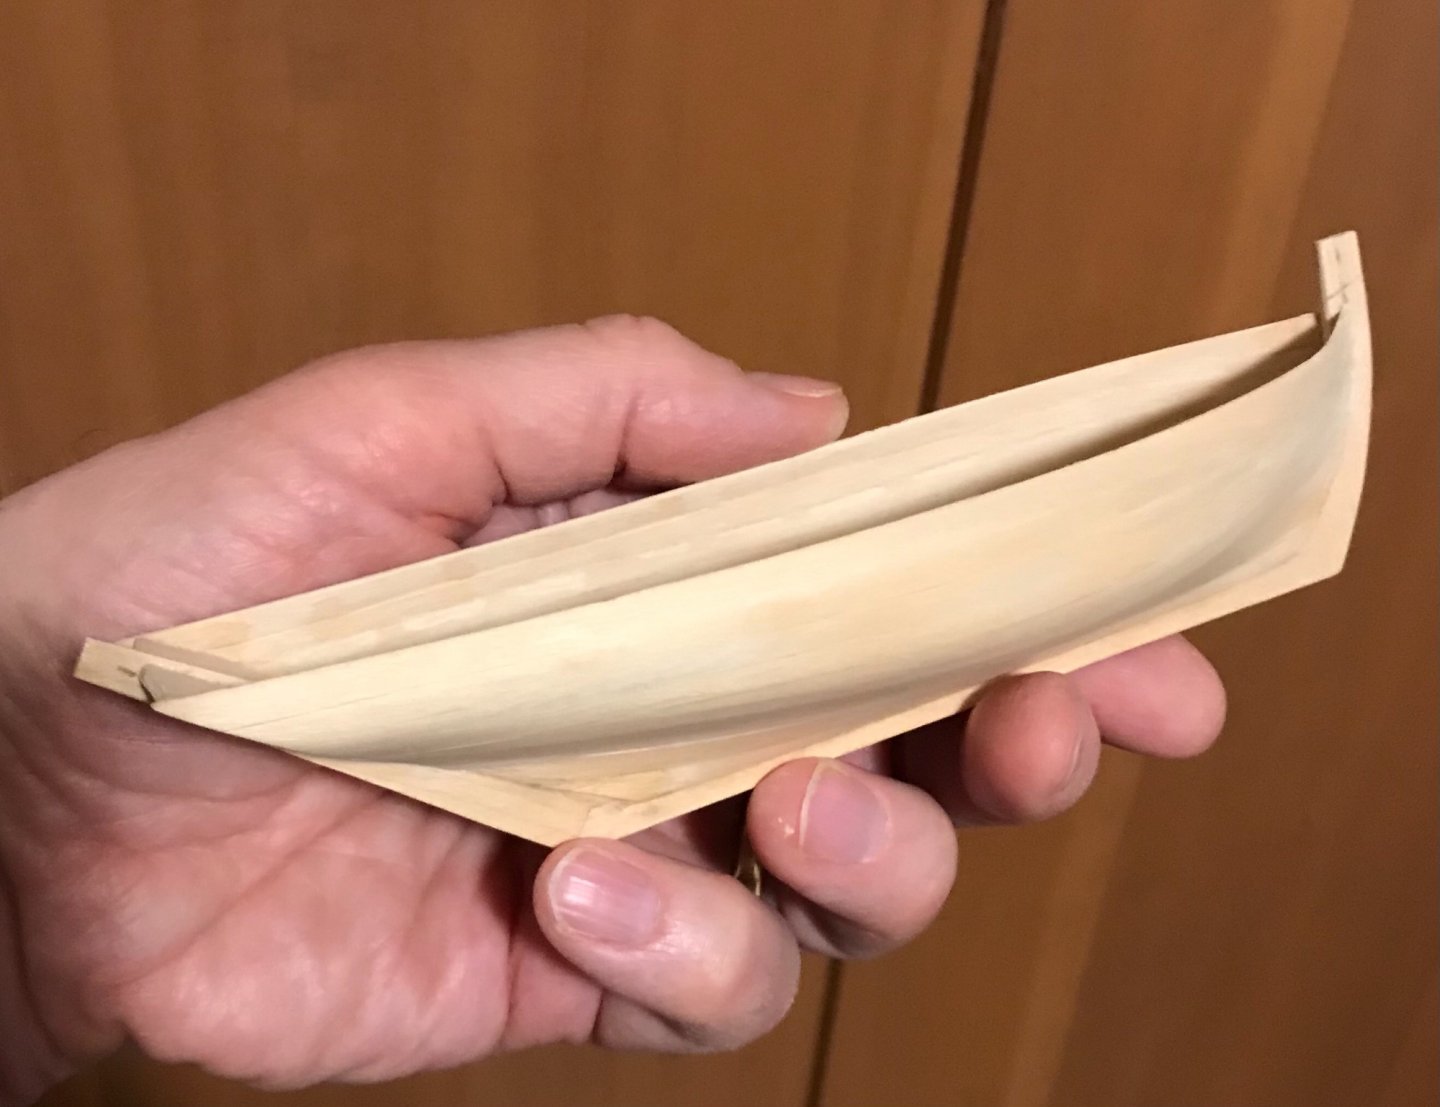
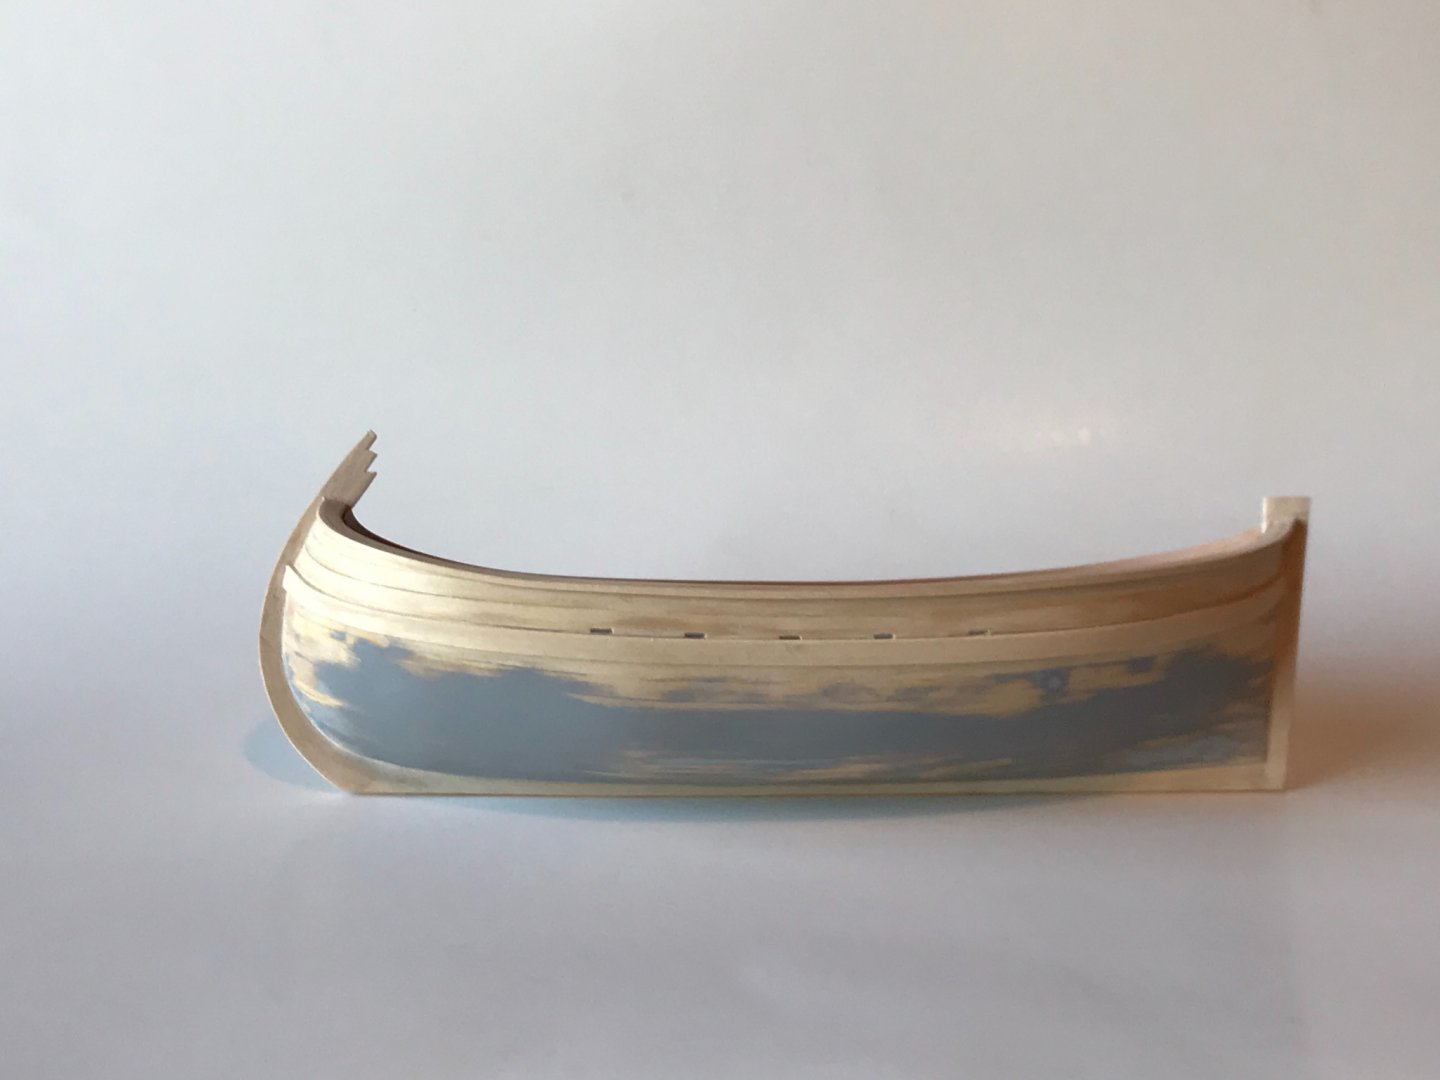
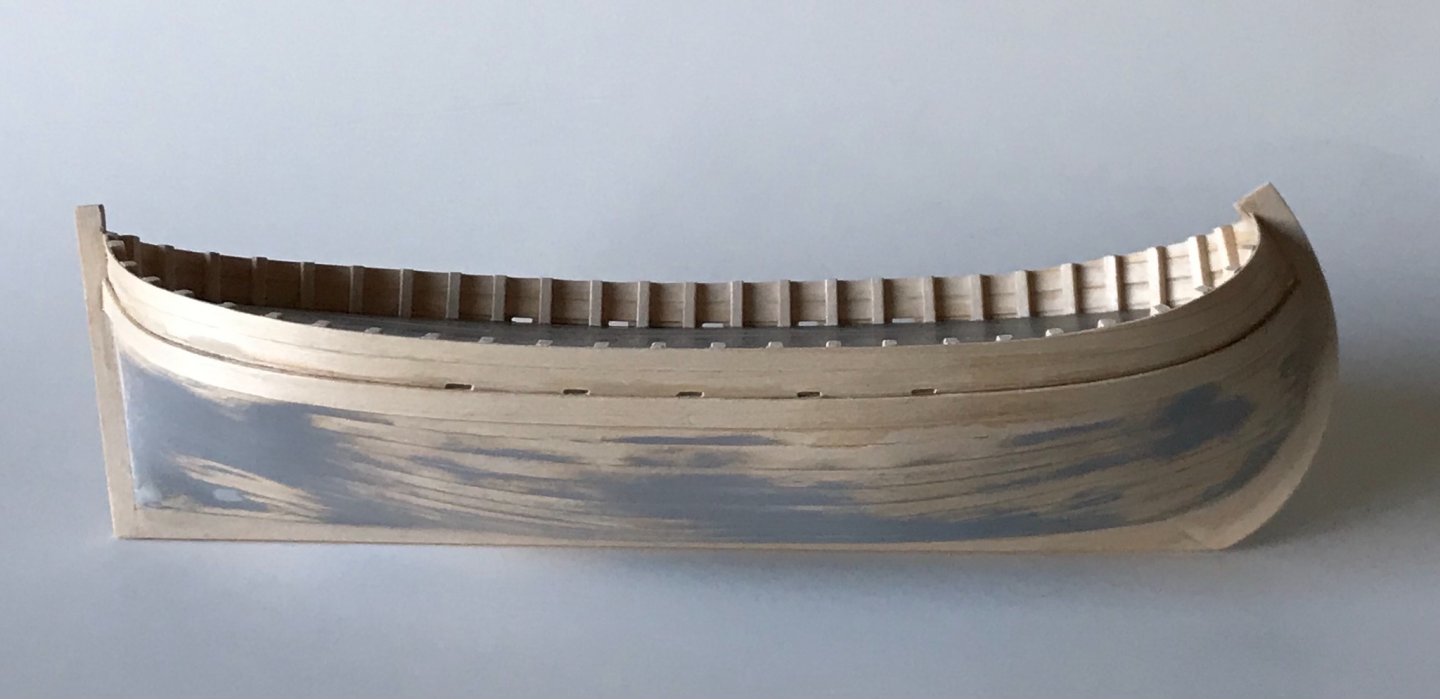
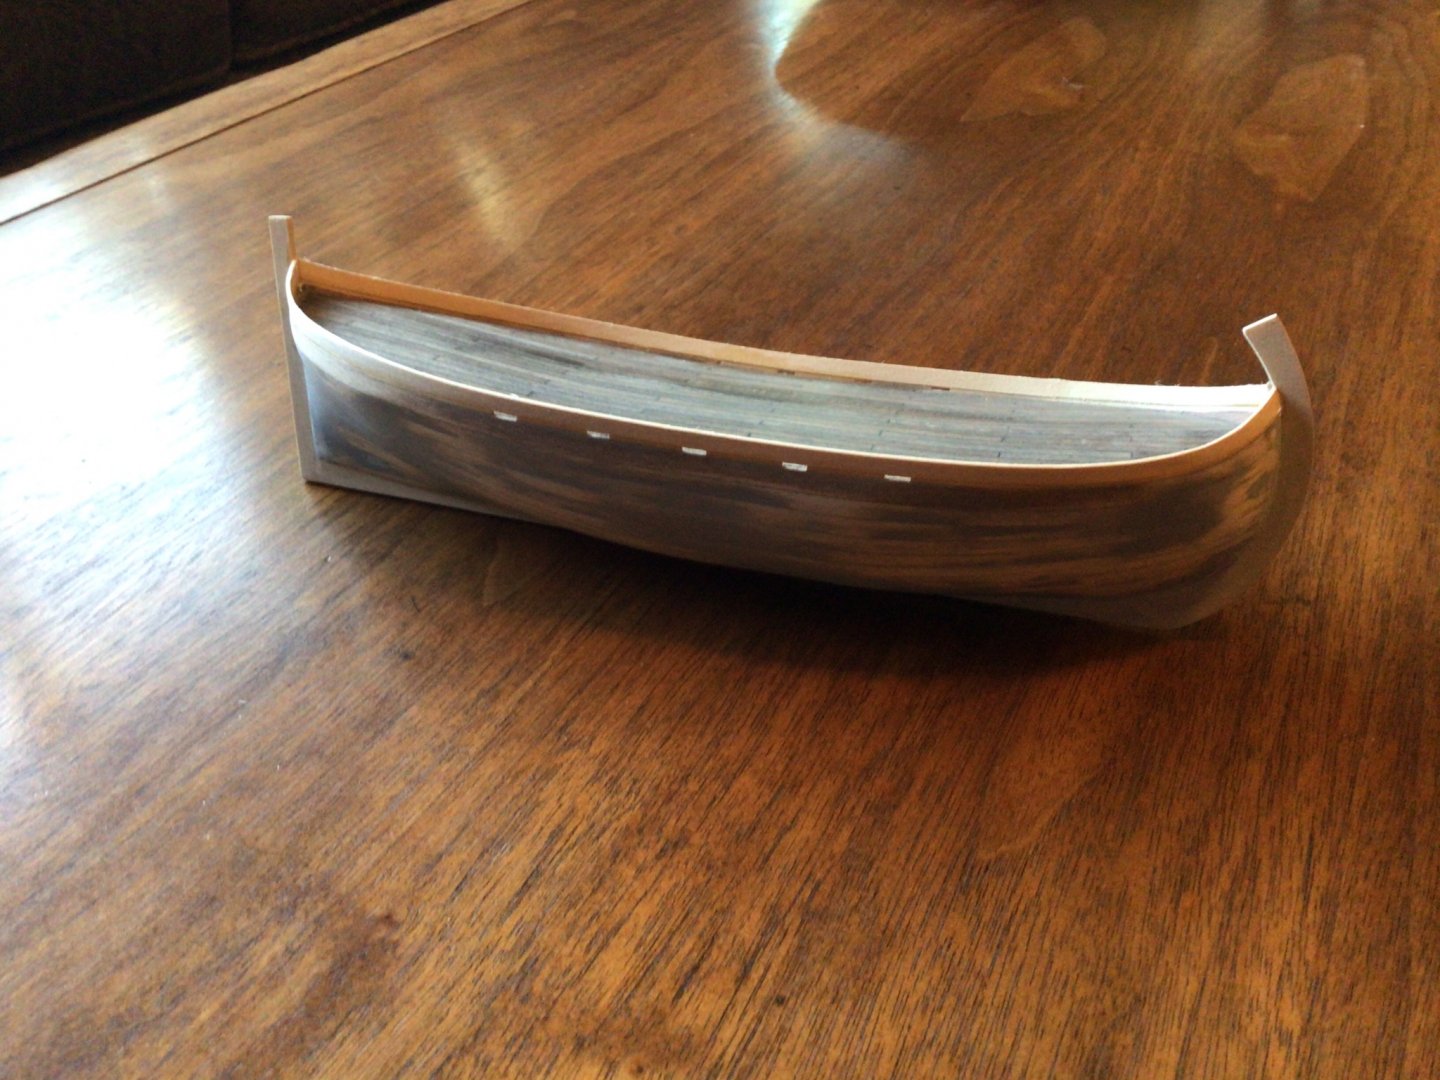
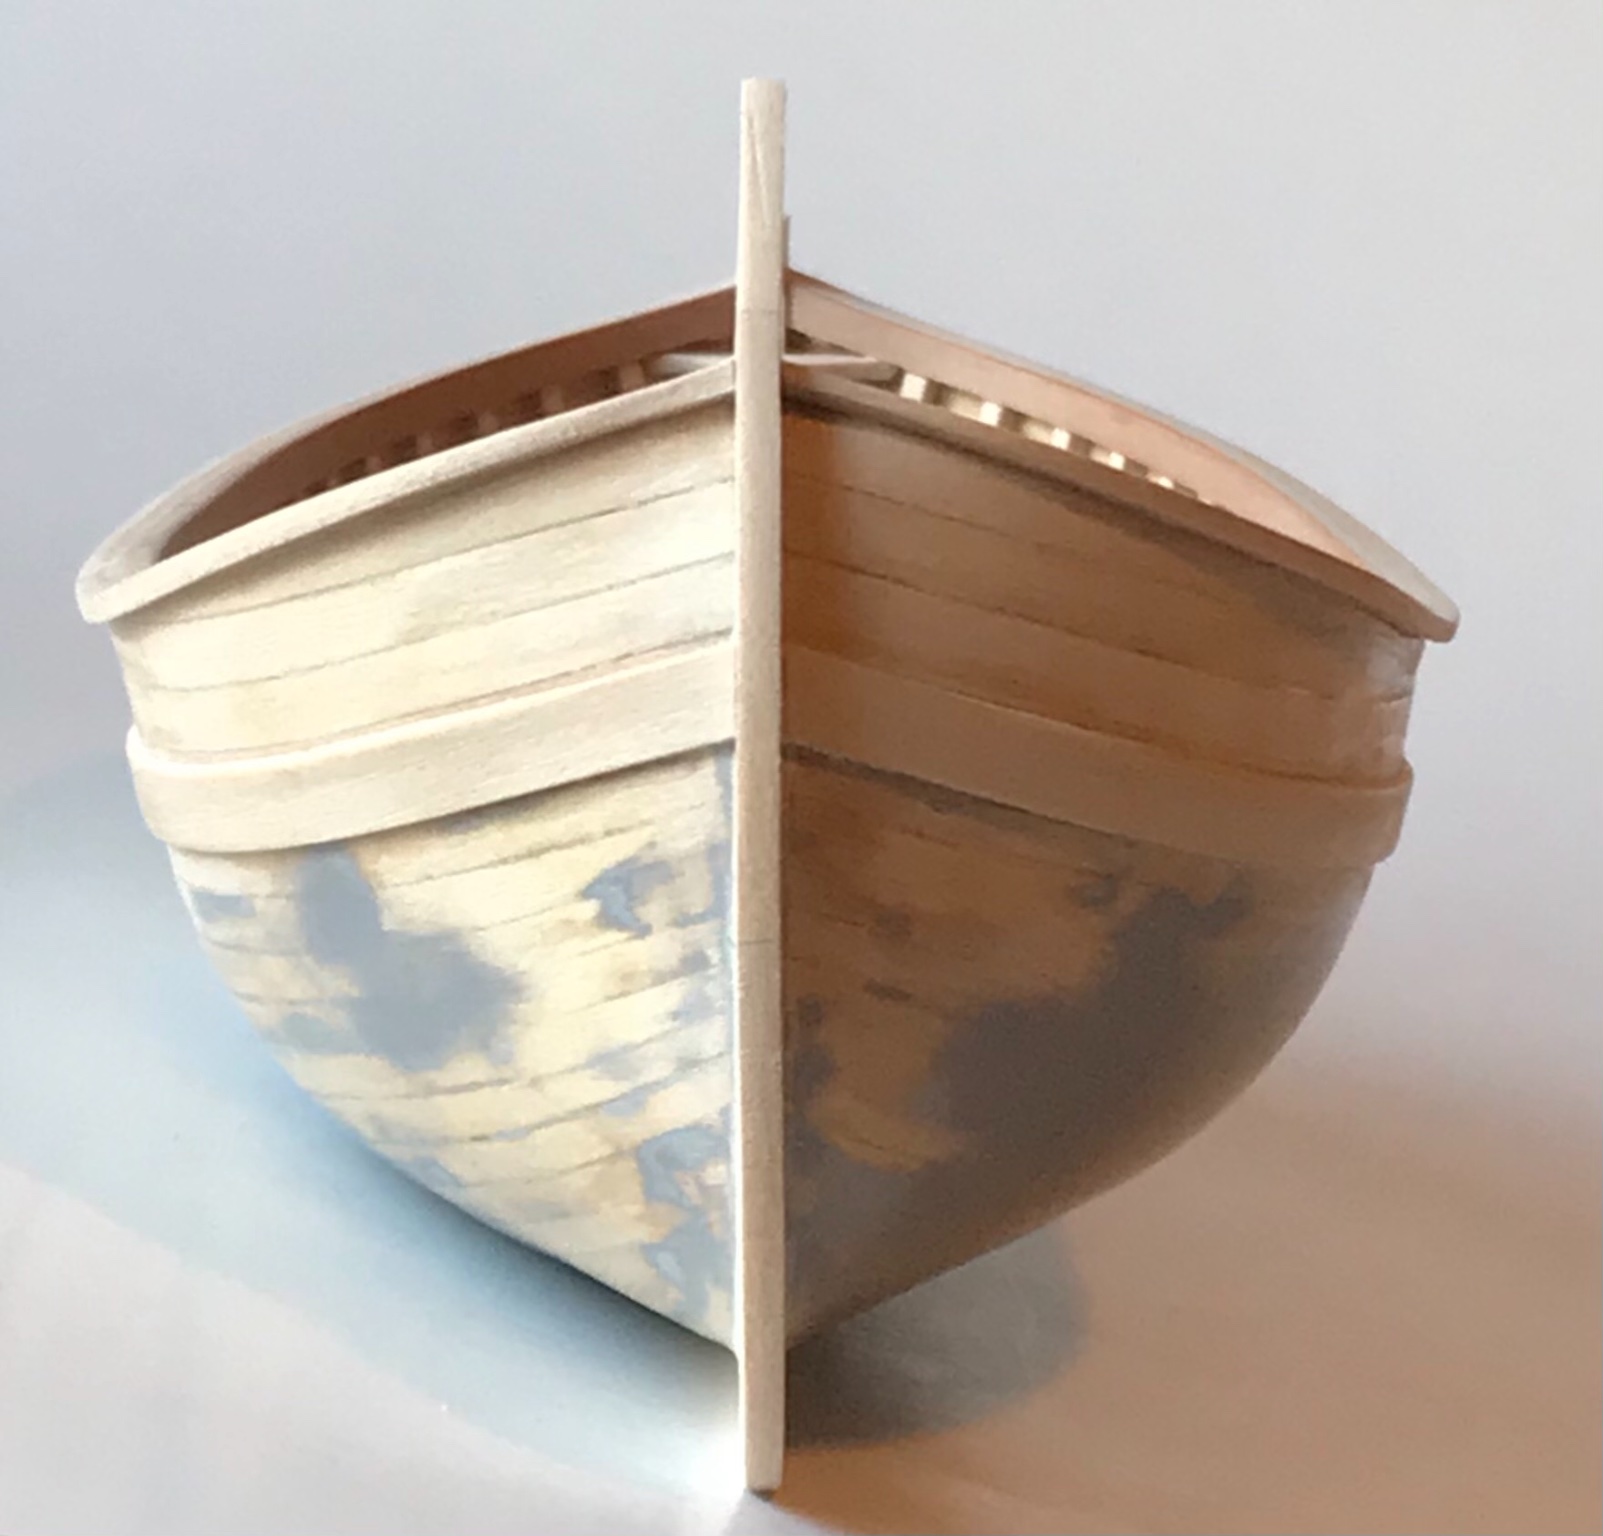
The planking has begun. Planking is not my strong suit, and hope I will improve as I gain more experience. All the wood in my model, so far, is basswood. The planking is 1/32" (0.8mm) thick basswood sheet cut to about 4mm (5/32") wide.
The outer edges of the bulkheads have been coated with beeswax to prevent the planks from sticking to them as they are glued on with CA glue. The bulkheads give shape and support during planking, but will be removed later to create an "open" hull. Therefore, each plank is only glued to the previous plank. This makes it very important that the garboard strake and upper wale are positioned very accurately. Planking goes down from the wale, and up from the garboard strake until they meet in the middle.

- GrandpaPhil, wefalck, Rik Thistle and 7 others
-
10
-
Thanks for all the information, Bob Cleek. Lots of good stuff there. Have you seen the "Traditional Boats of Ireland Project" web page. Lots of info there too. http://tradboats.ie/index.php
-
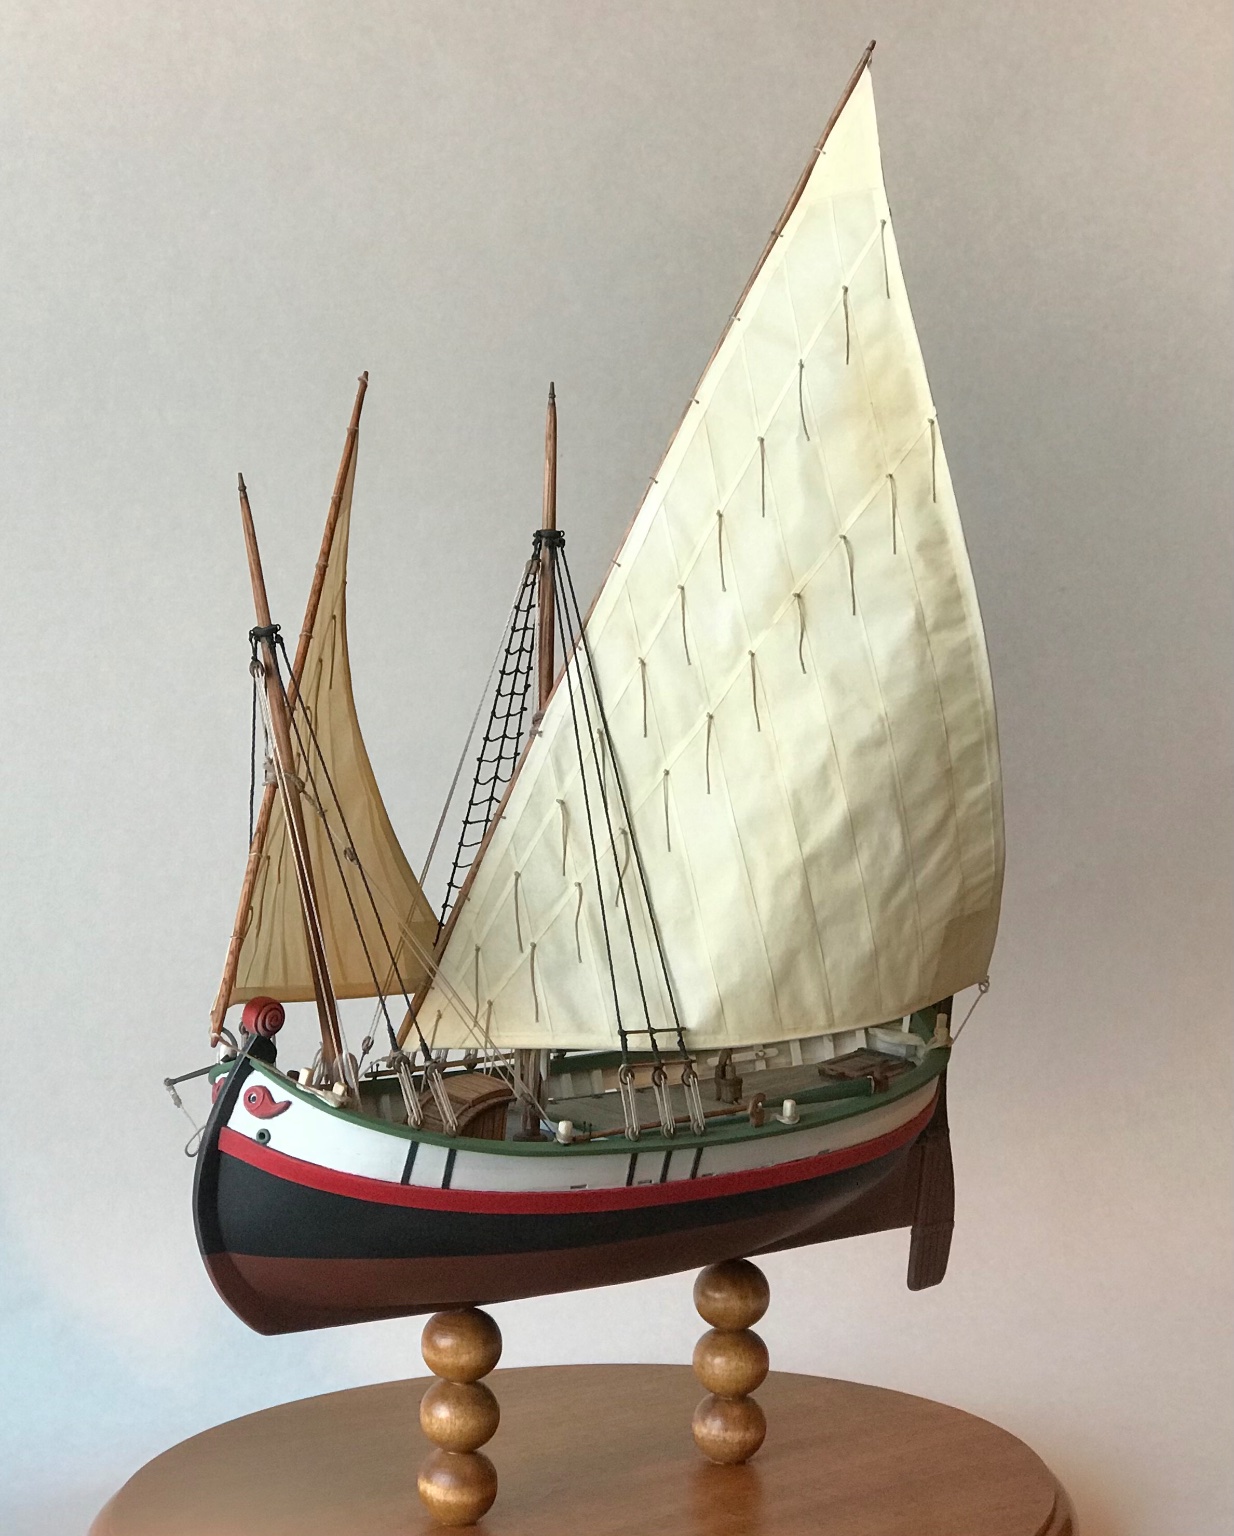
Started a new project: a "Galway Hooker." Evidently, these boats have been numerous in Ireland since the early 19th century, and are still being built today. In the past they were working boats, used for fishing and transporting cargo along the coasts of western Ireland. Today's boats are mostly used for pleasure and racing.
The hookers range in size from around 20 to 44 feet (6 to 14 meters), and are broken into four classes, based on size or rigging. There are a lot of information on the internet about Galway Hookers, including plans, drawings, and photos.
My model will be a fictional 26-foot (8-meter) boat from the late 19th century of the "gléoiteog" class. Gléoiteogs appear to have been the "real workhorses" of the era because their smaller size made them more affordable (Smylie, Mike. Traditional Fishing Boats of Britain & Ireland. Kindle ed., Amberley Publishing, 2012).
Gléoiteogs generally appear to be "open" boats (i.e. no deck), although they sometimes appear with short partial decks (more like shelves) fore and/or aft. Even the larger classes only had half-decks, from the mast forward. I plan to have a short fore deck. The big construction challenge for me will be making a boat that is mostly "open." In 1/48 scale, that is only about 6.5 inches (165mm) long.
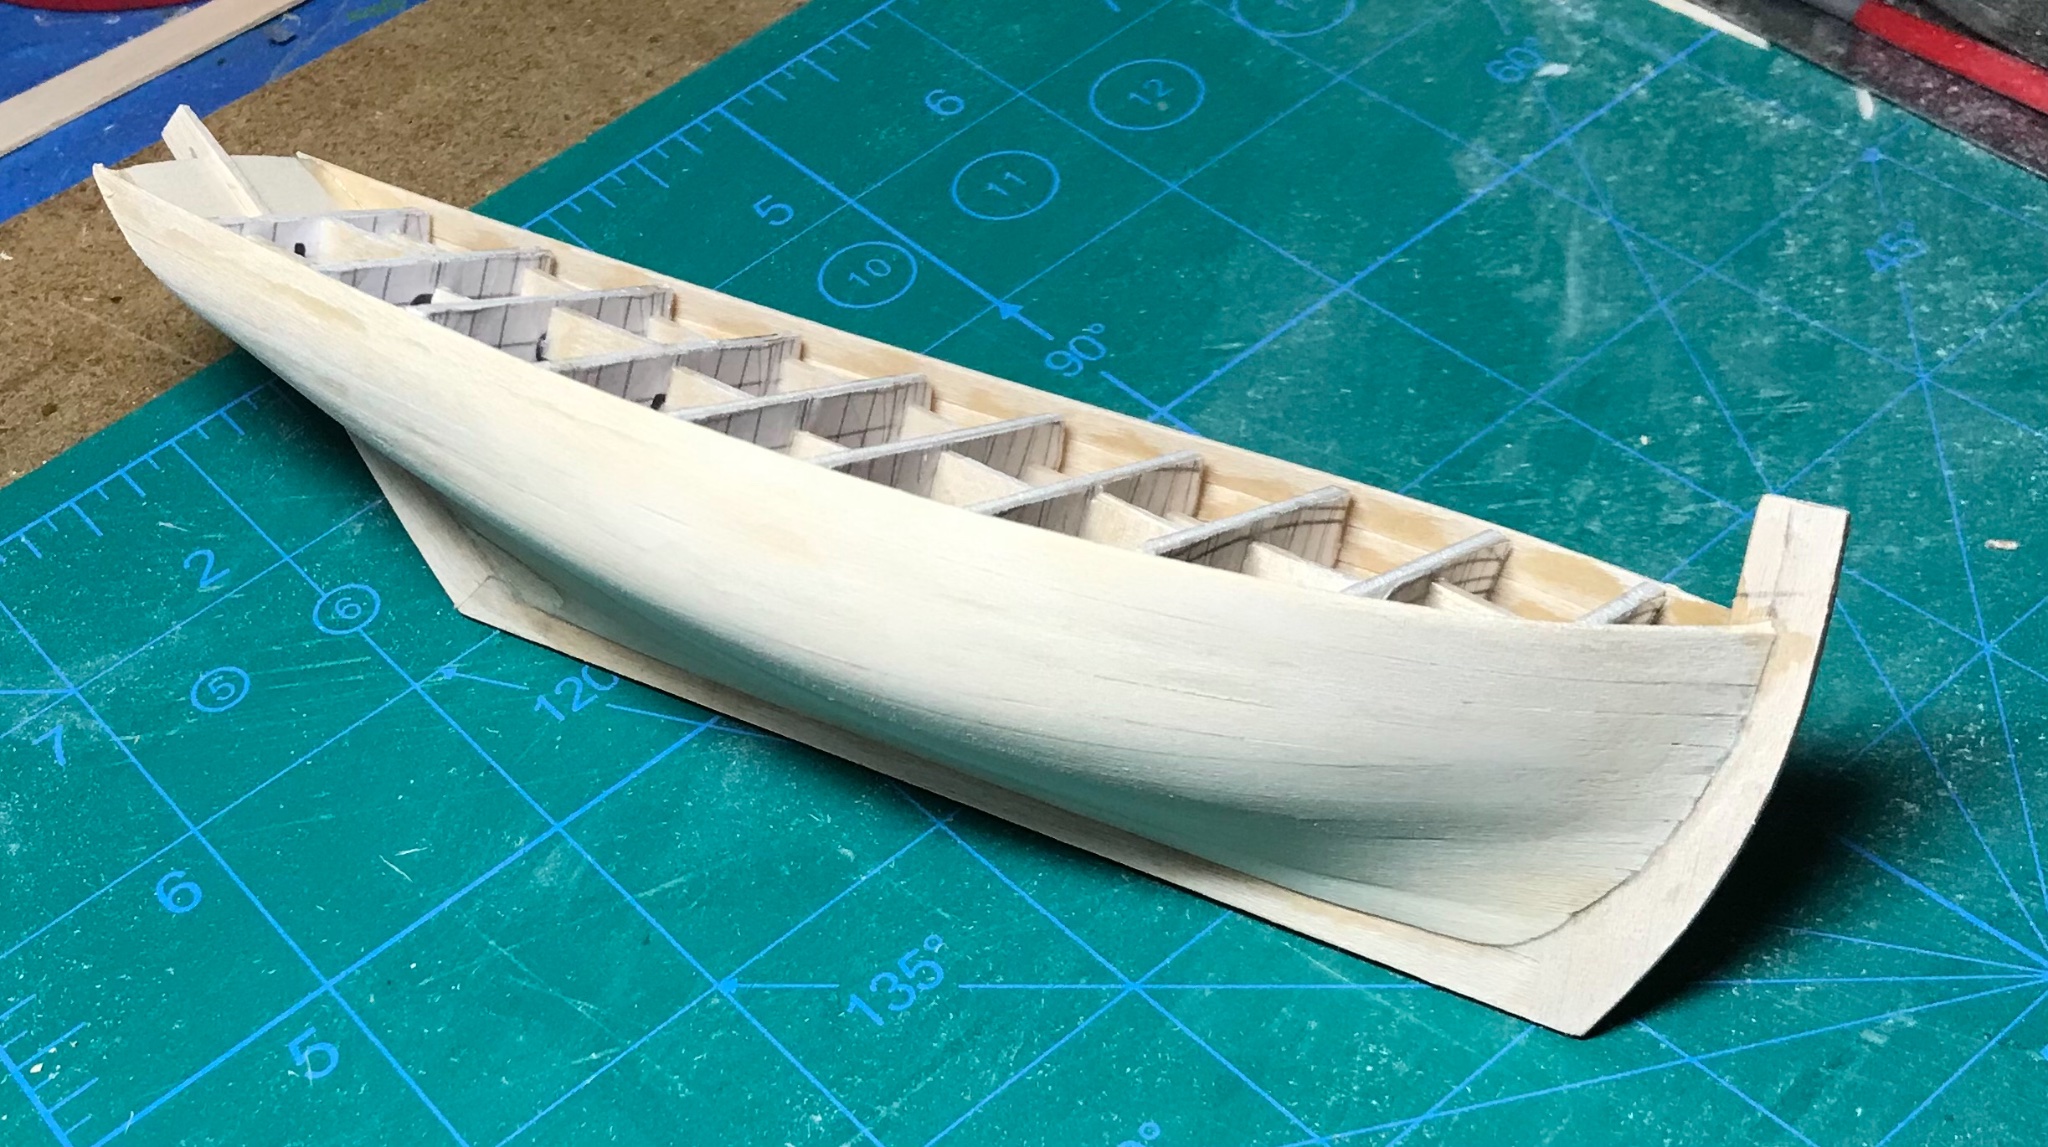
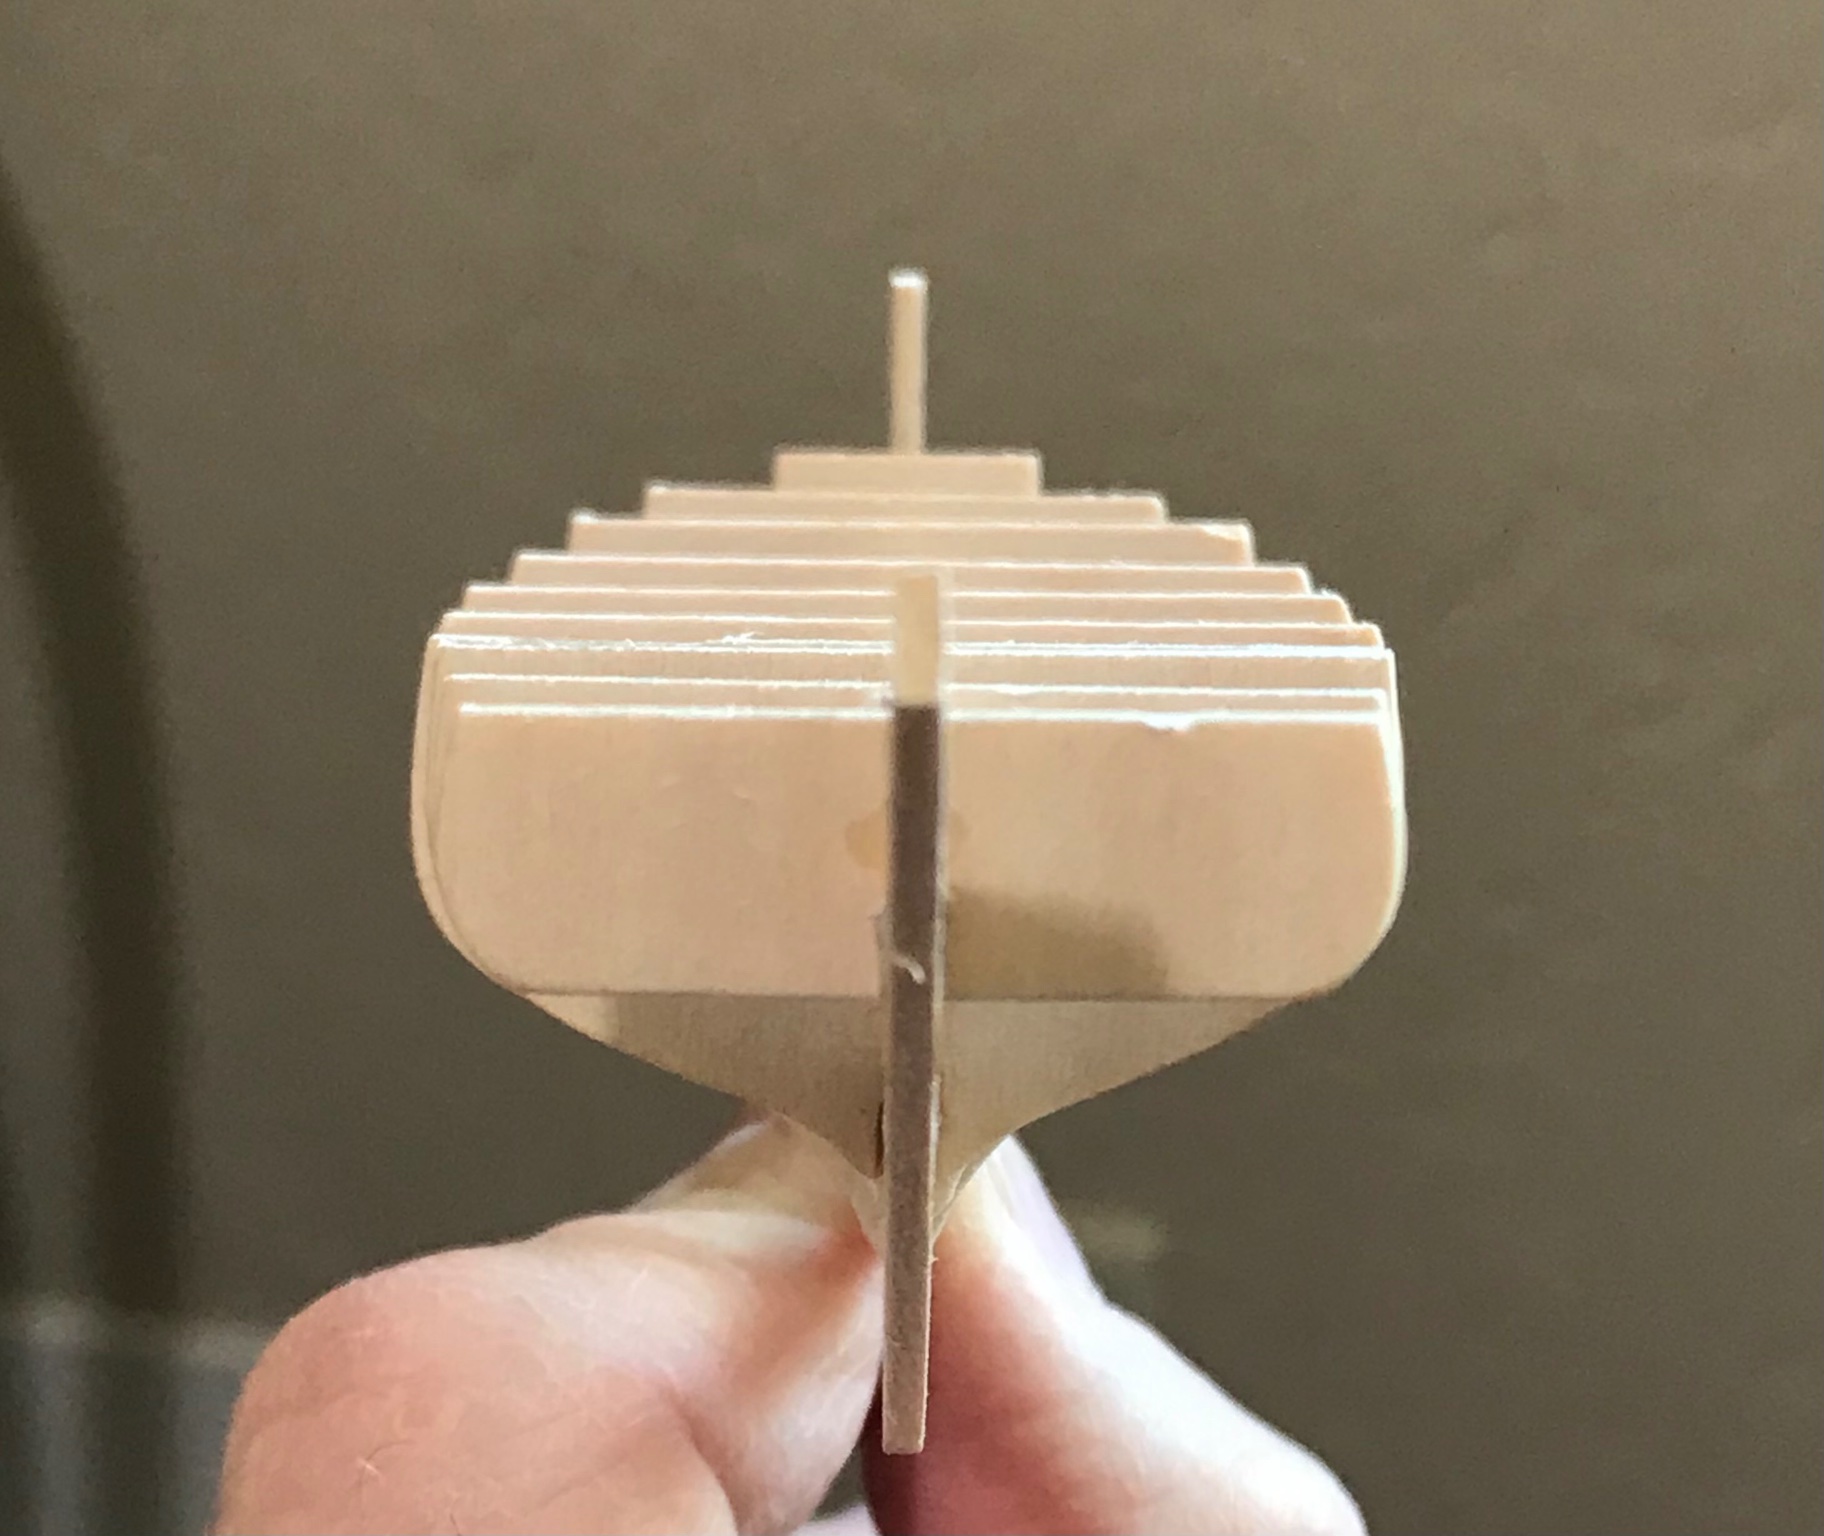
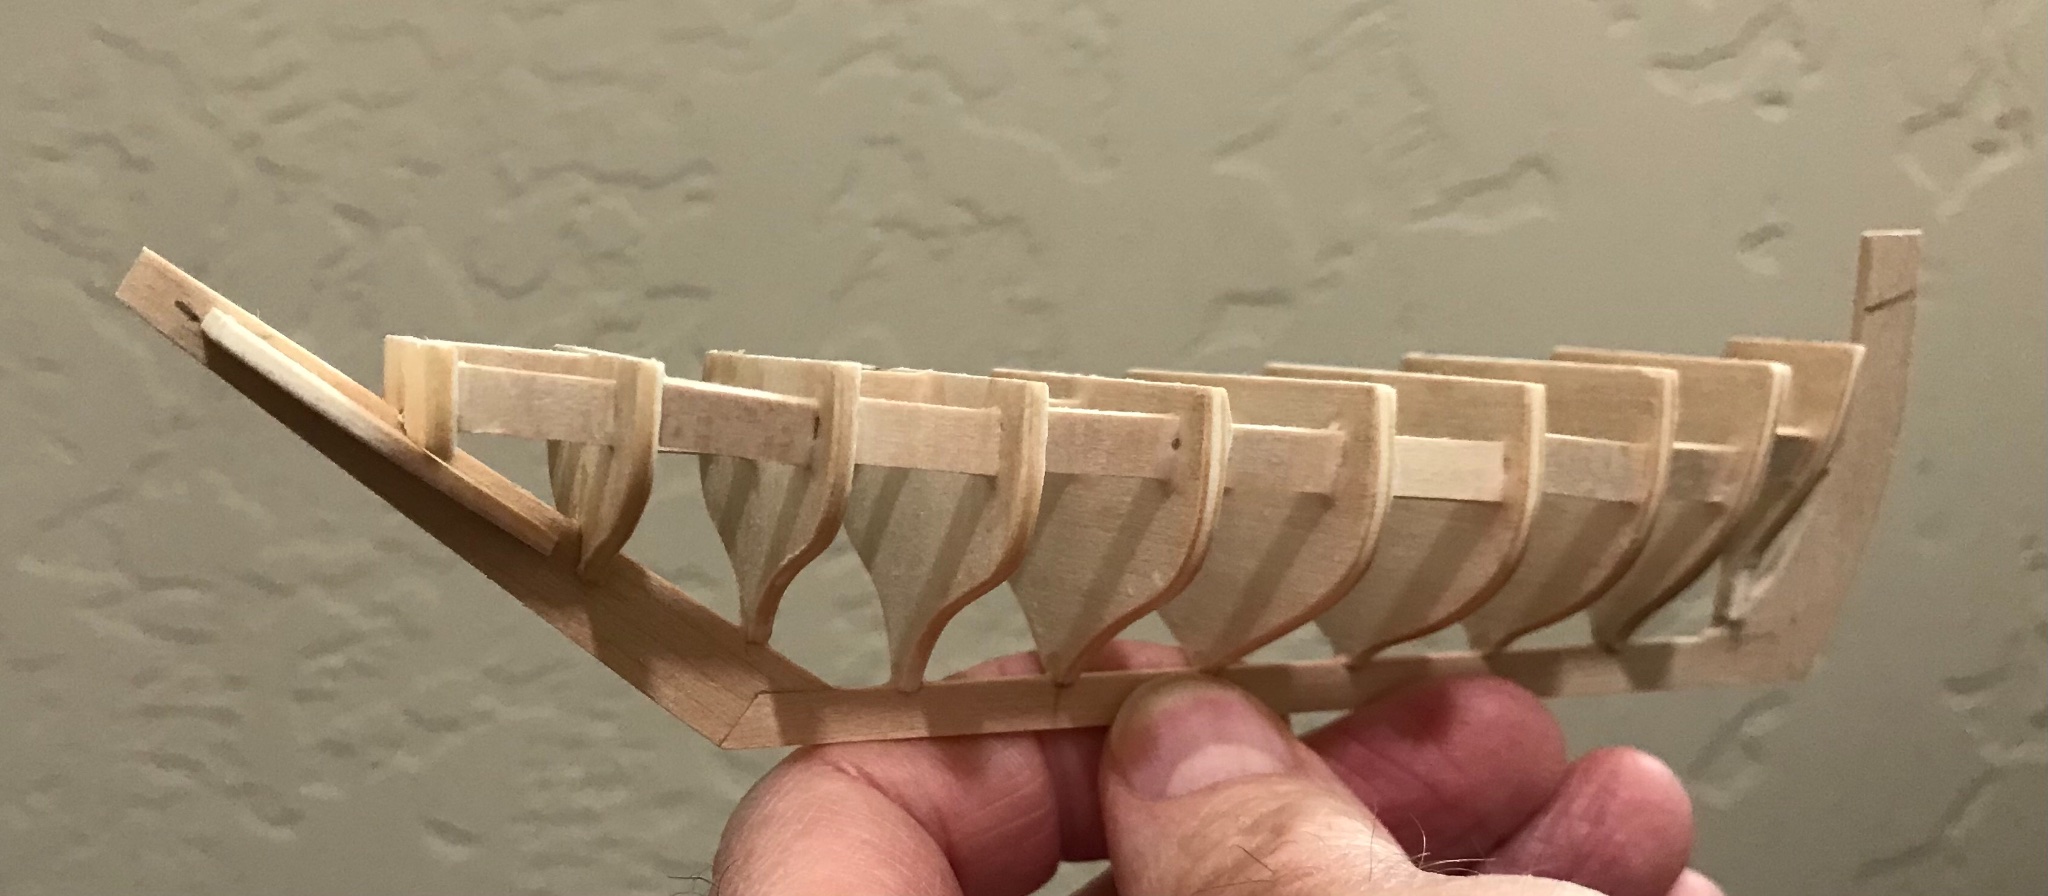
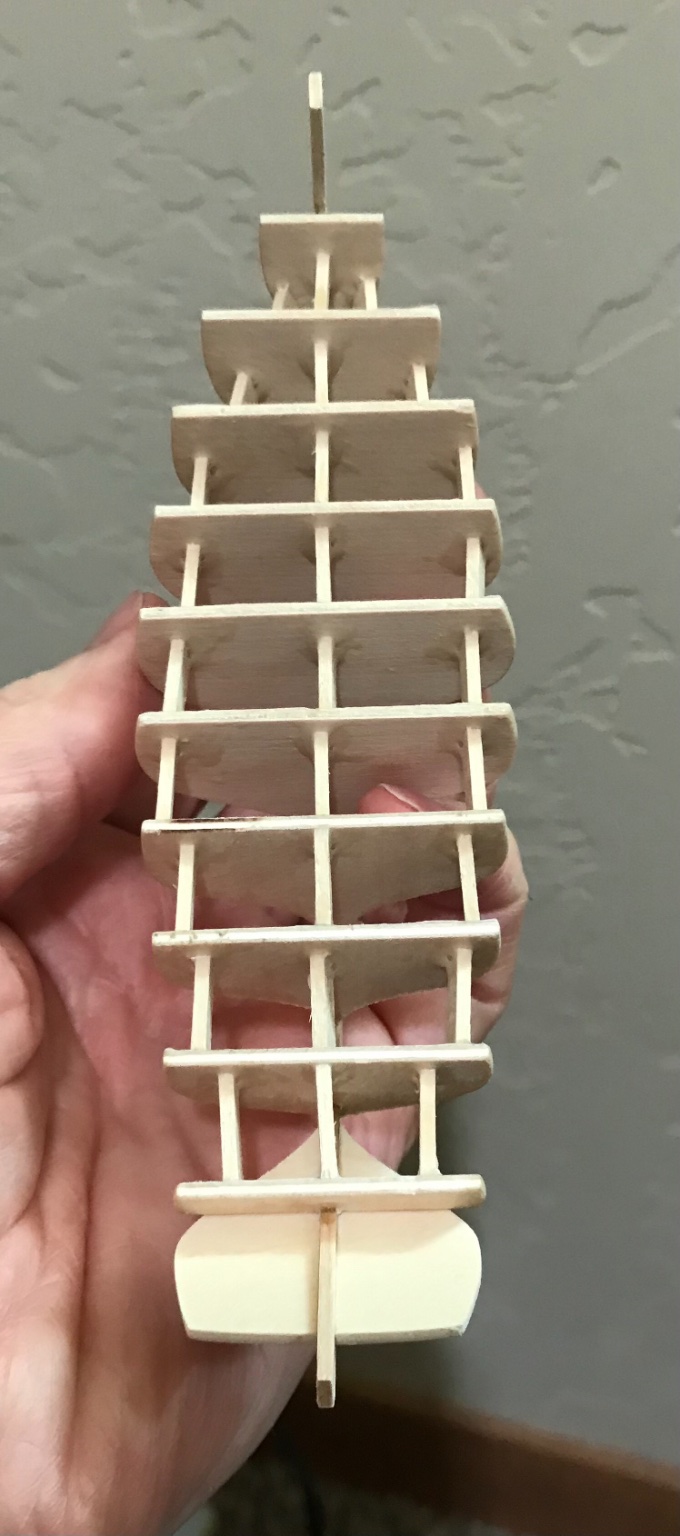
Model construction began with the keel, made from 1/16 inch (1.6mm) basswood sheet. I added notches for placement of bulkheads later.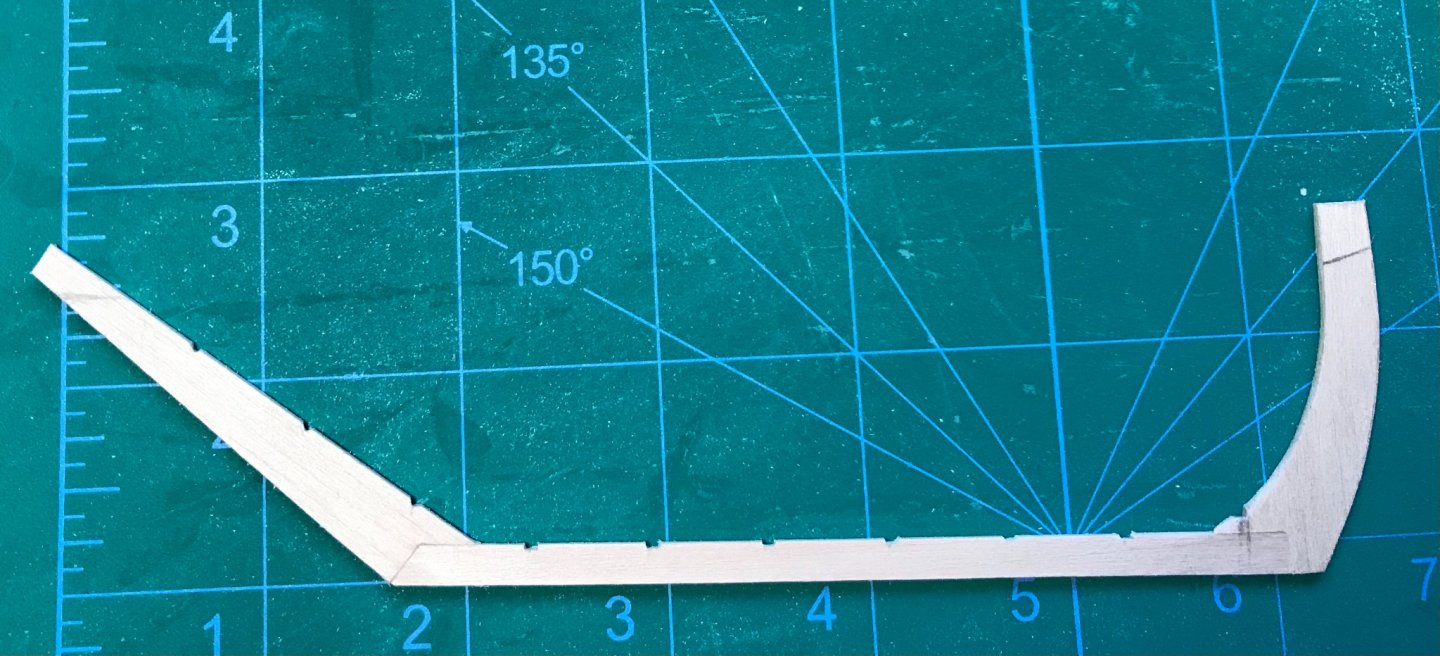
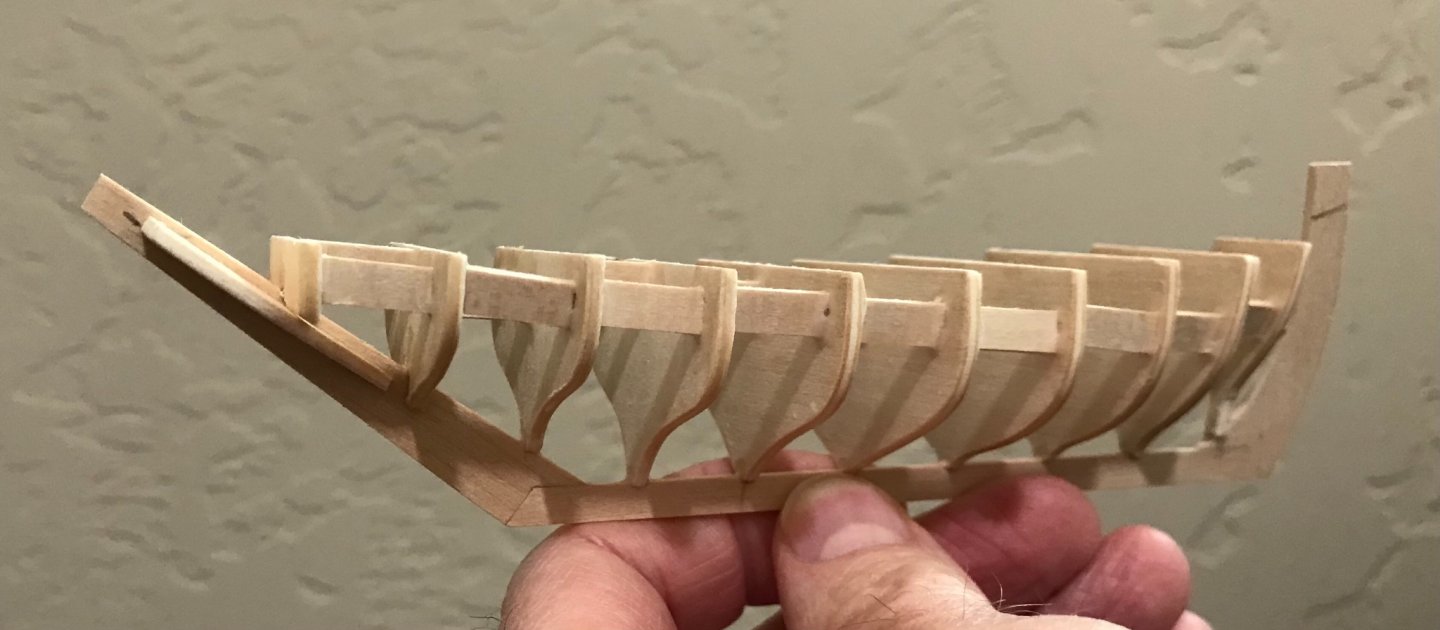
The bulkheads were sawn from thin (2mm?) basswood plywood and attached in the notches with CA glue. Braces between the bulkheads were added later.
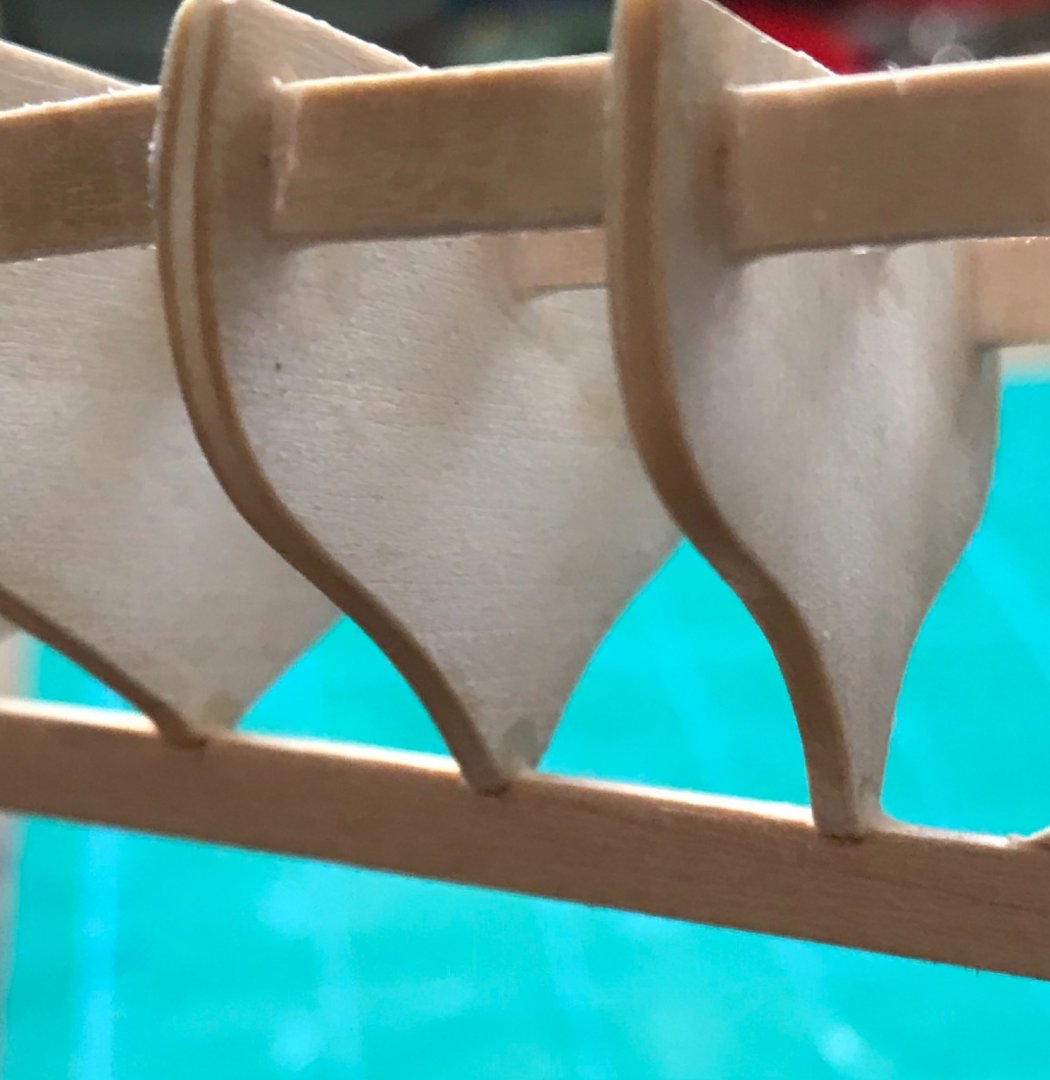
Everything was aligned by the "eyeball" method, which relies on a lot of luck...


-
-
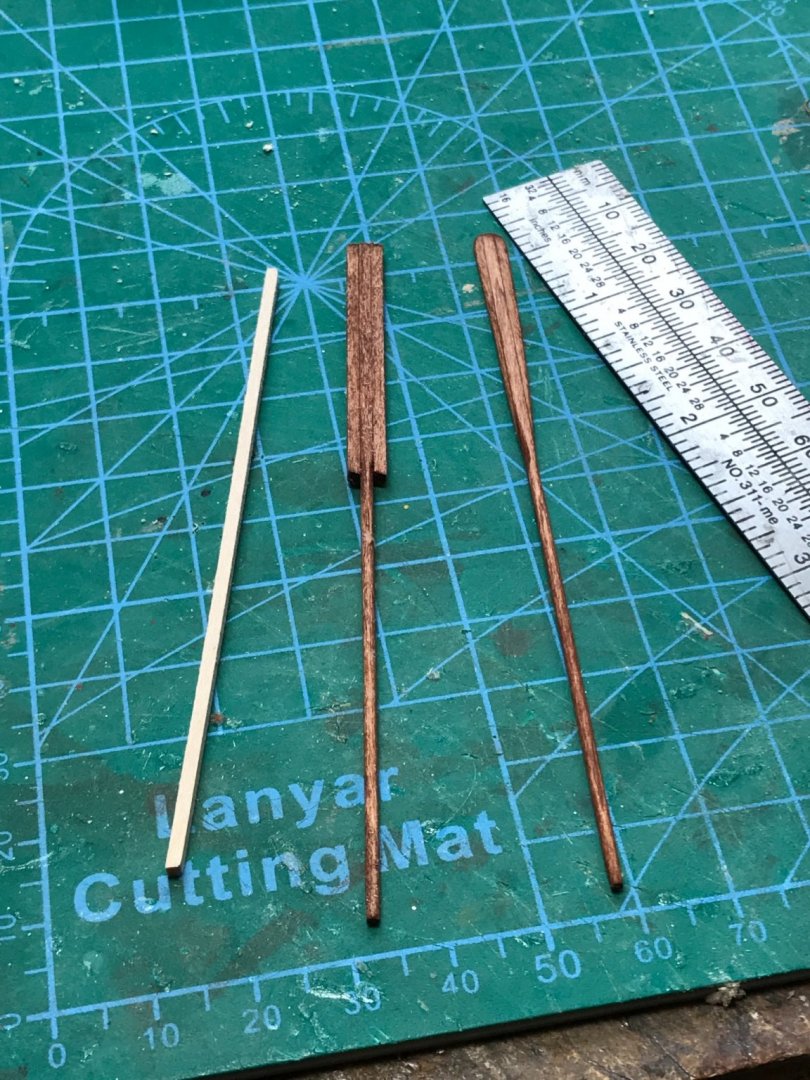
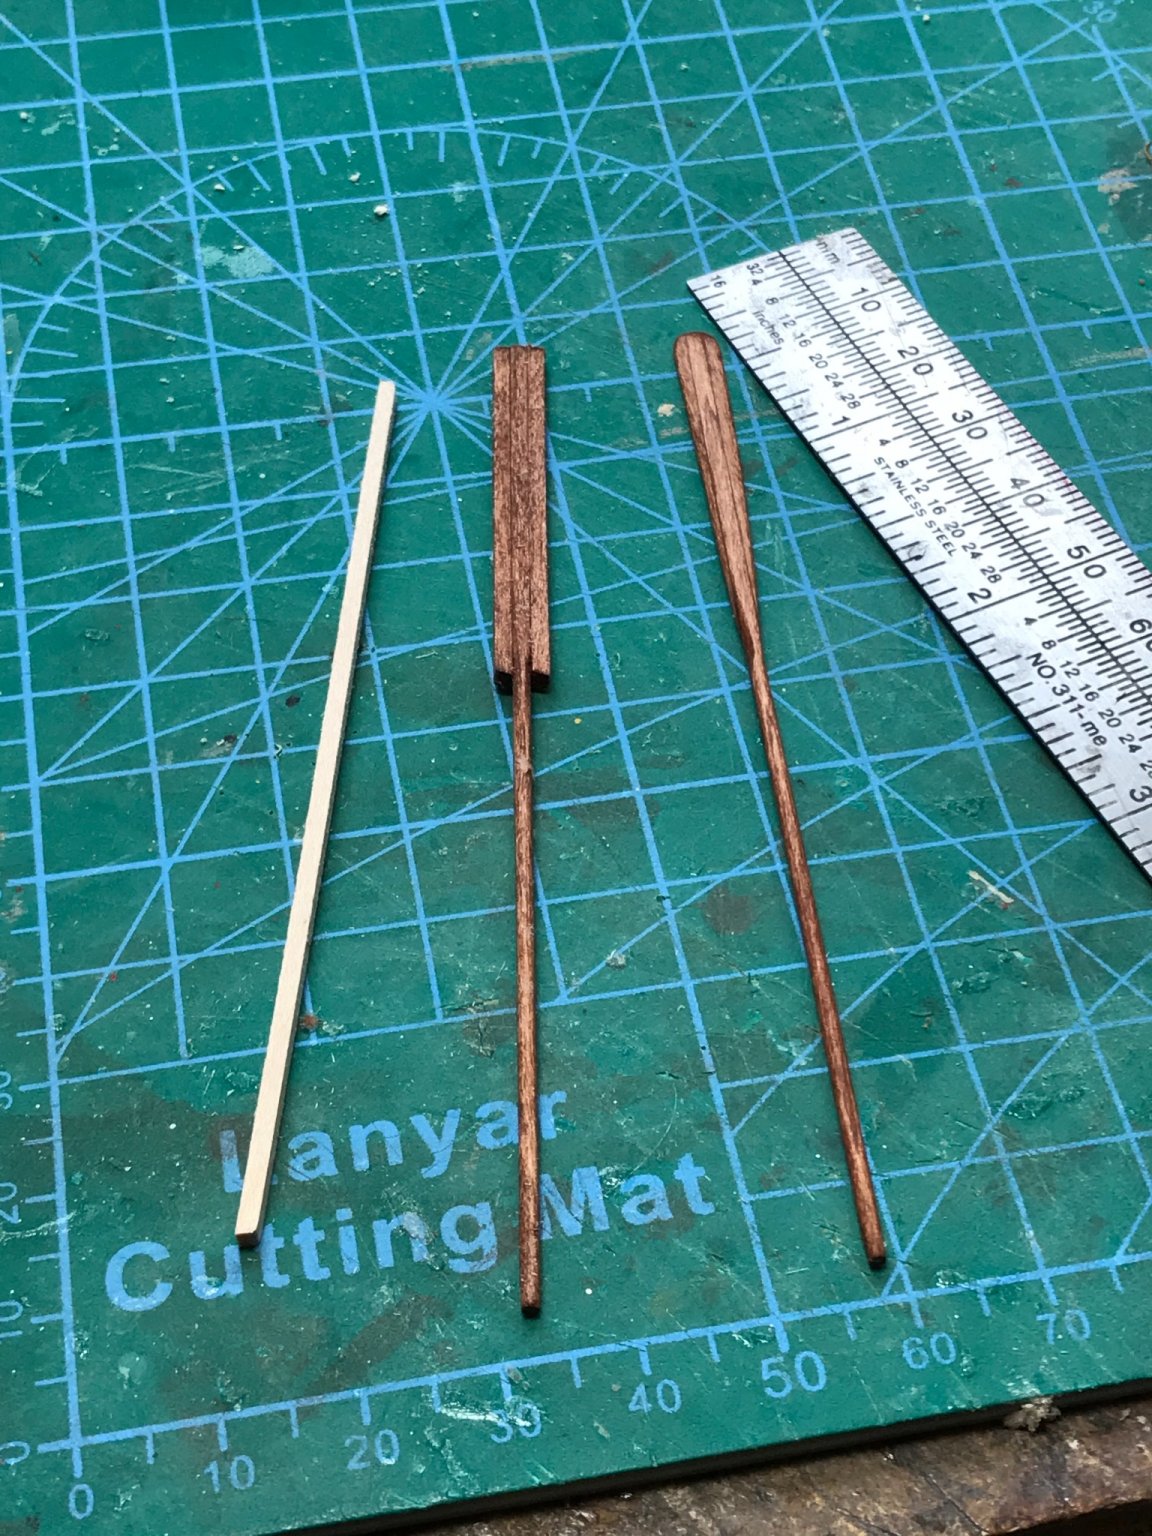
Building some oars (remi) from 1/16 inch (1.6mm) strip...
- BobG, mtaylor and GrandpaPhil
-
3
-
BobG, Thanasis, and Wefalck, thanks for the comments!
-
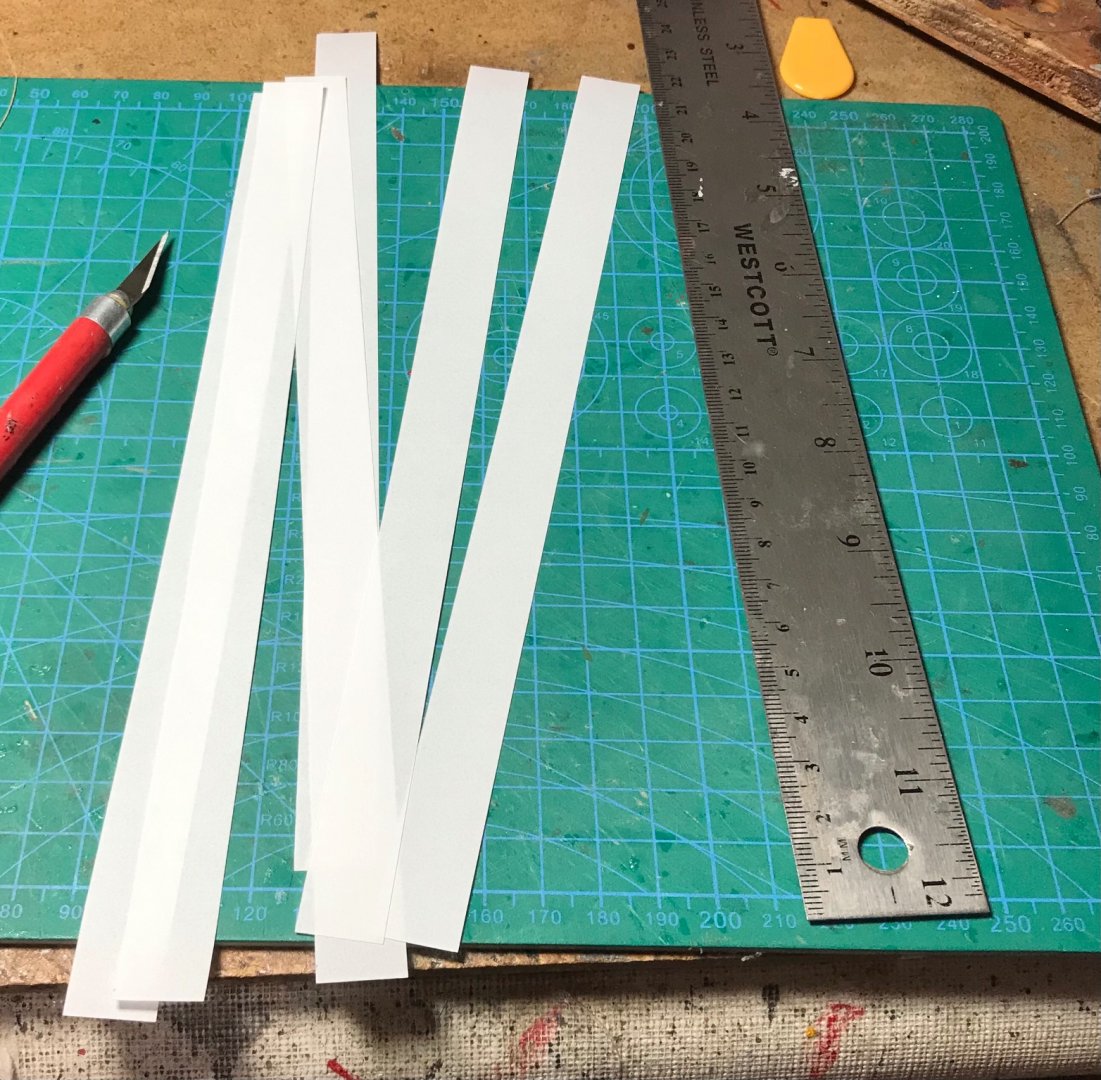
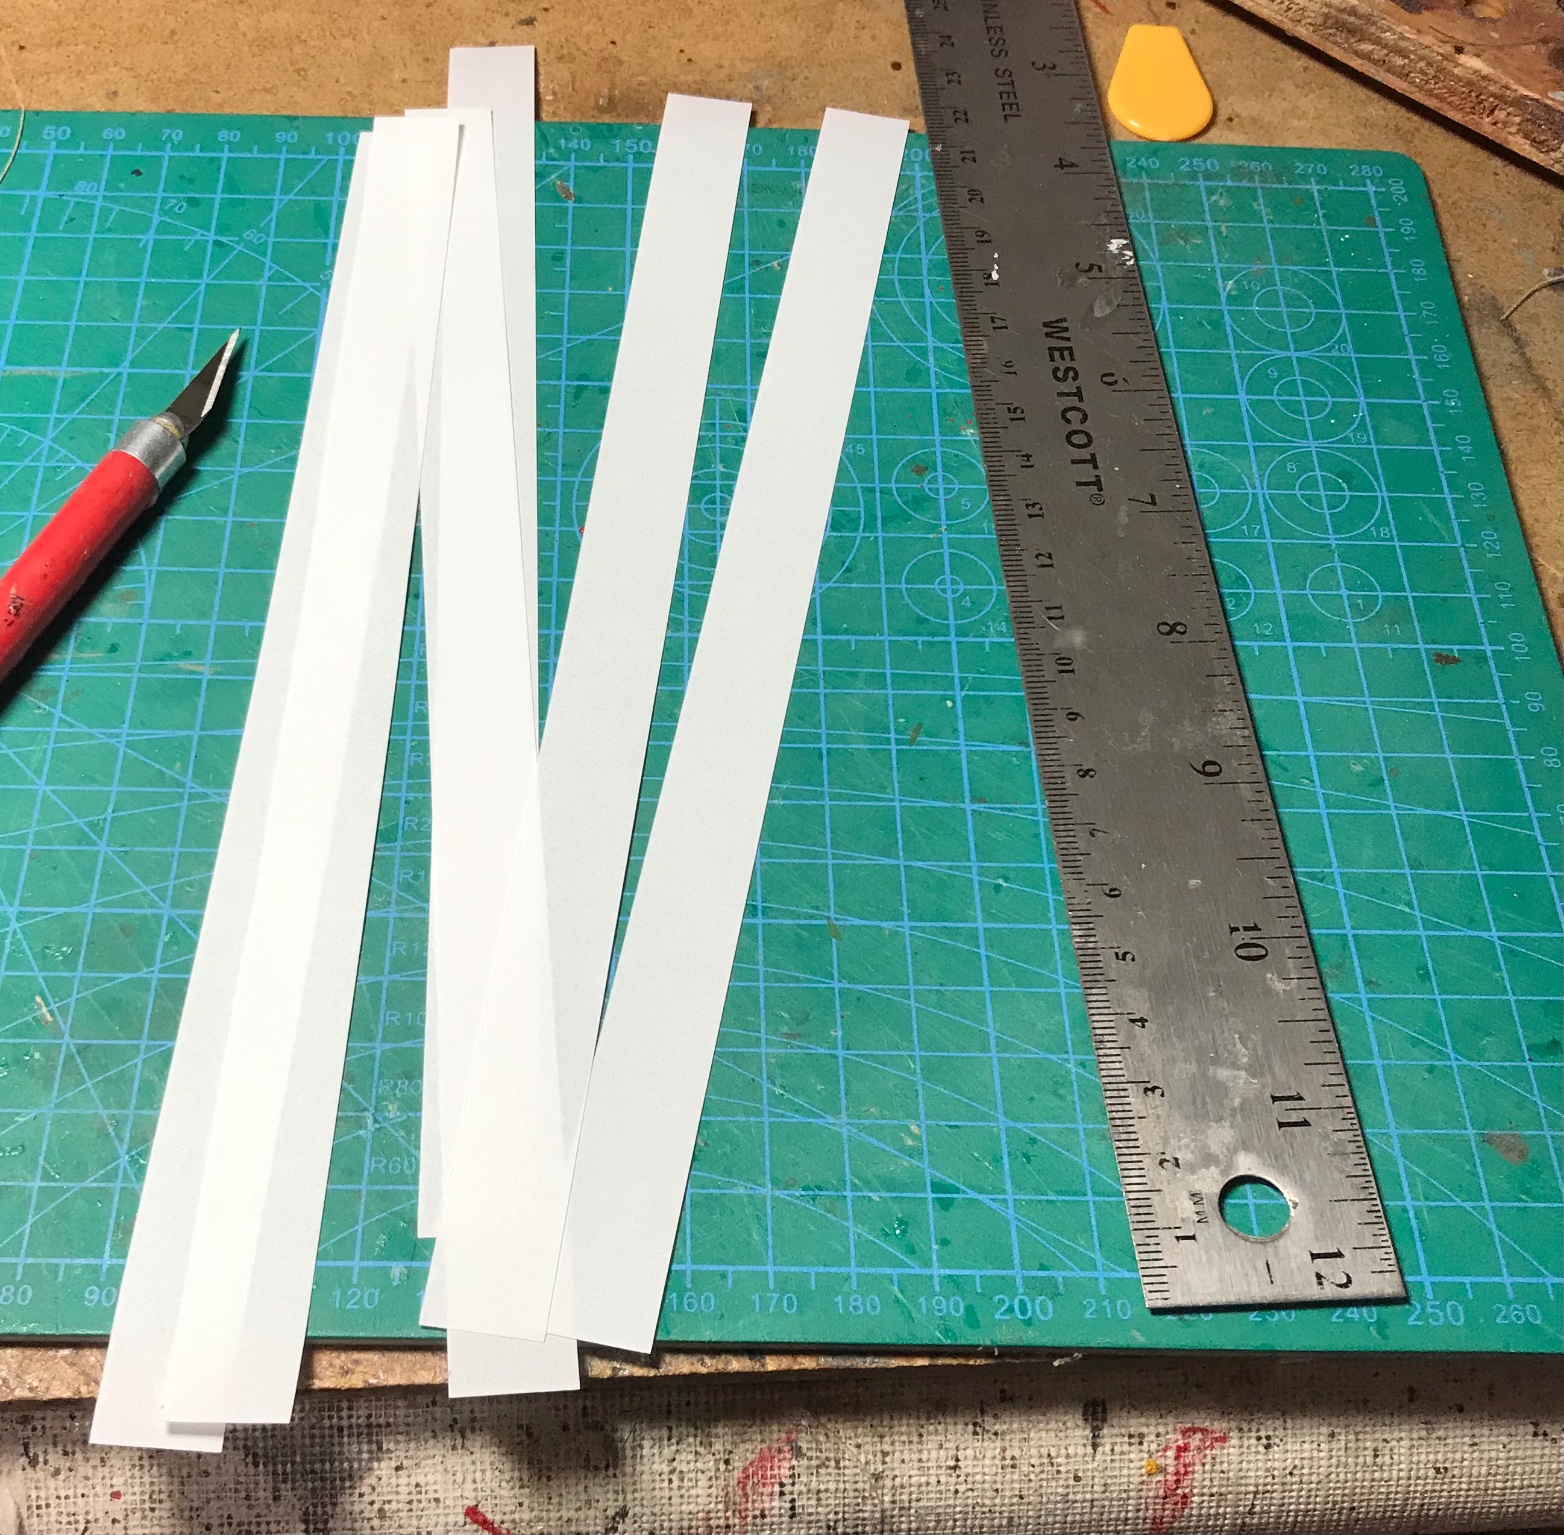
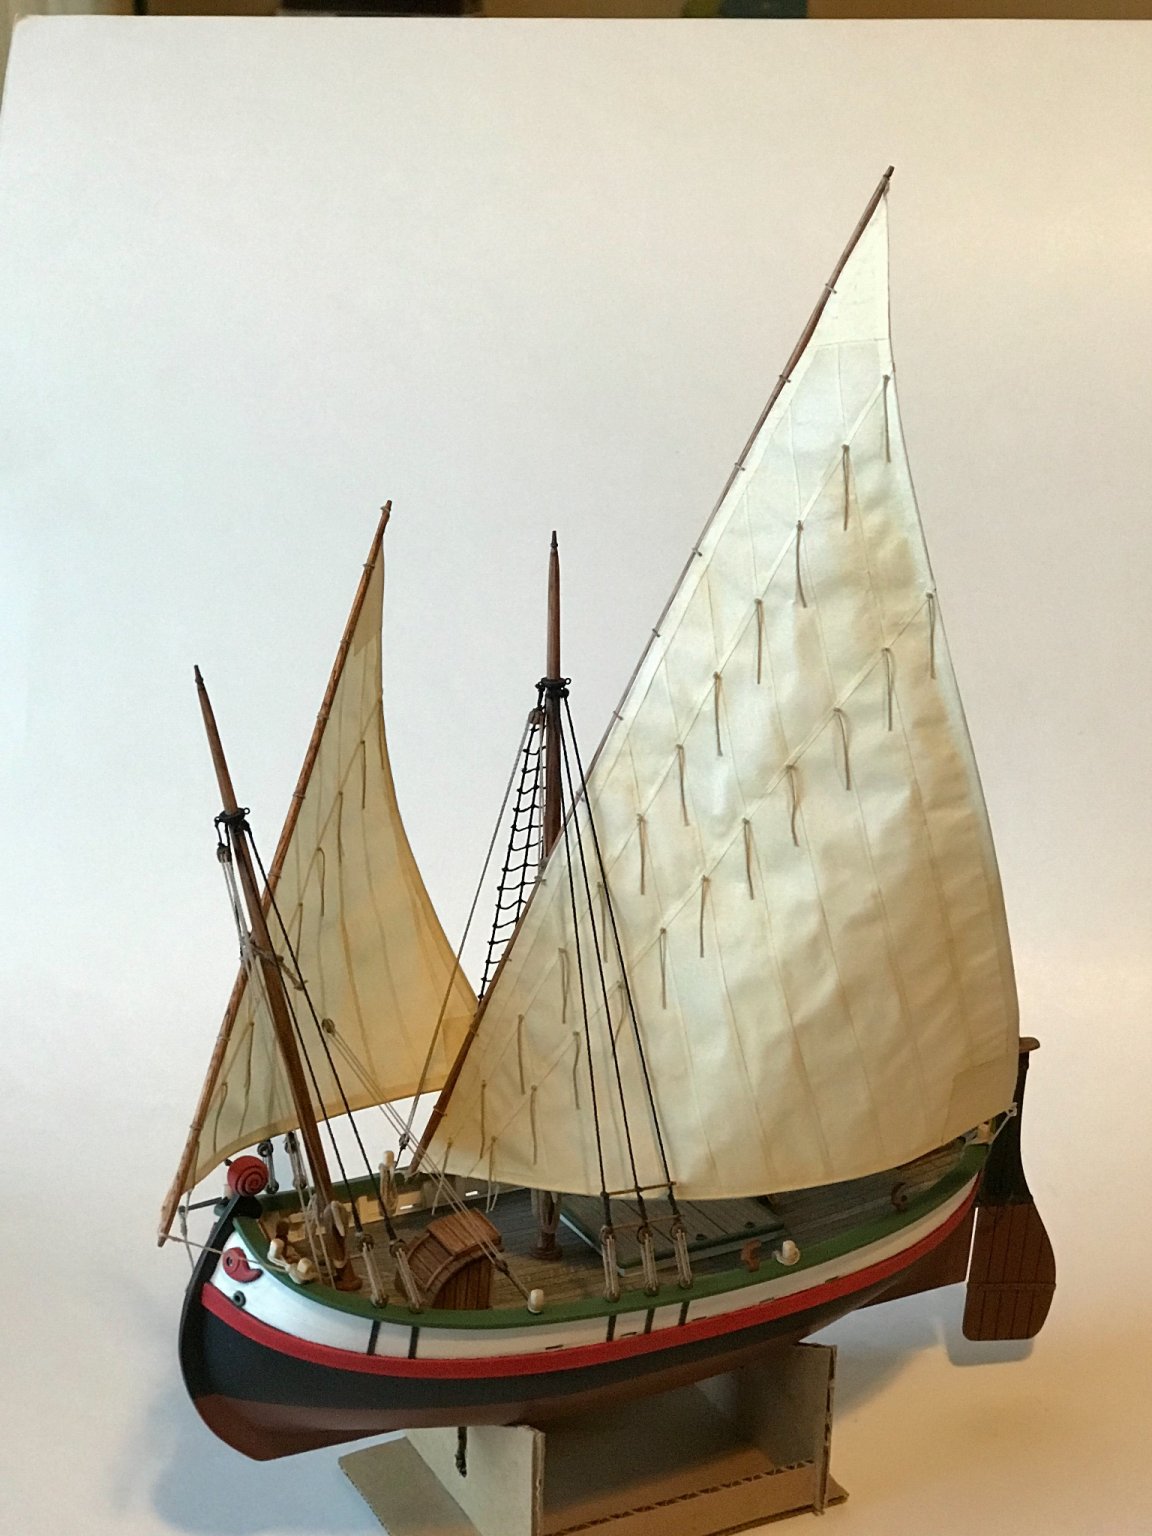
Constructing and adding the sails:
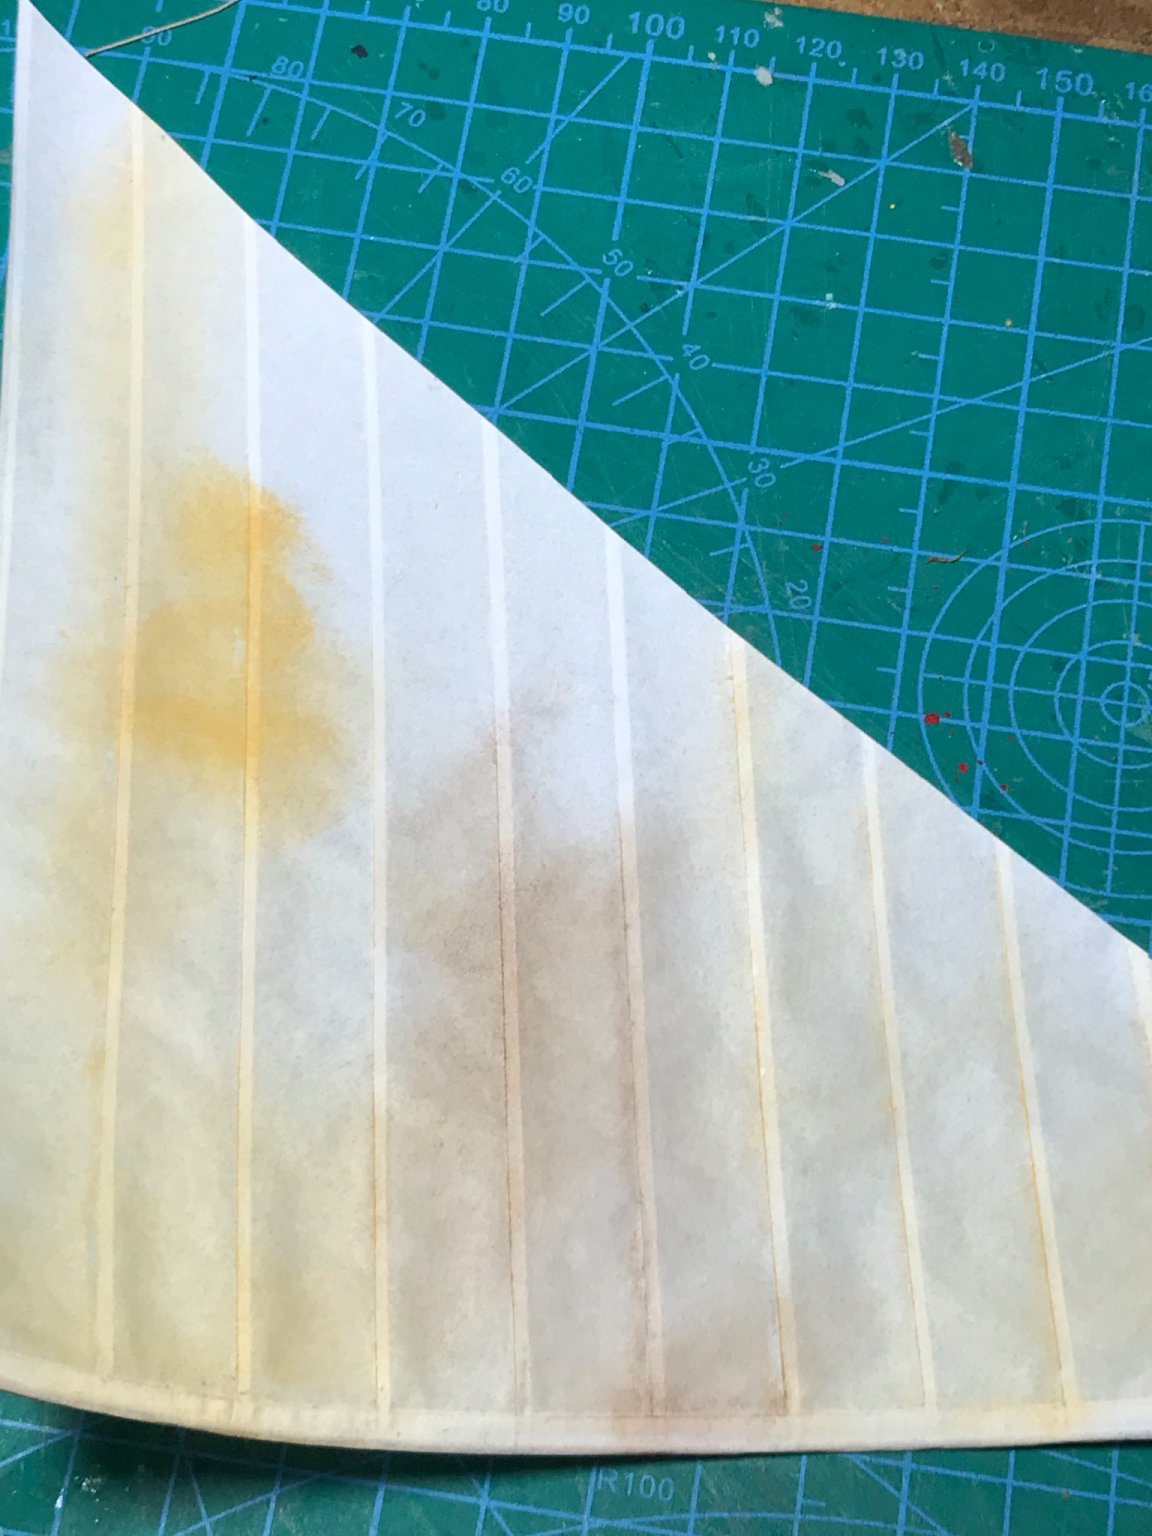
I like using "graphic layout marker" paper for sails on my boats. It is translucent, thin, and takes paint and dry pigments well. For this model, I started by making 15mm wide strips for sail panels (that would be about 28 inches (720mm) wide in scale).
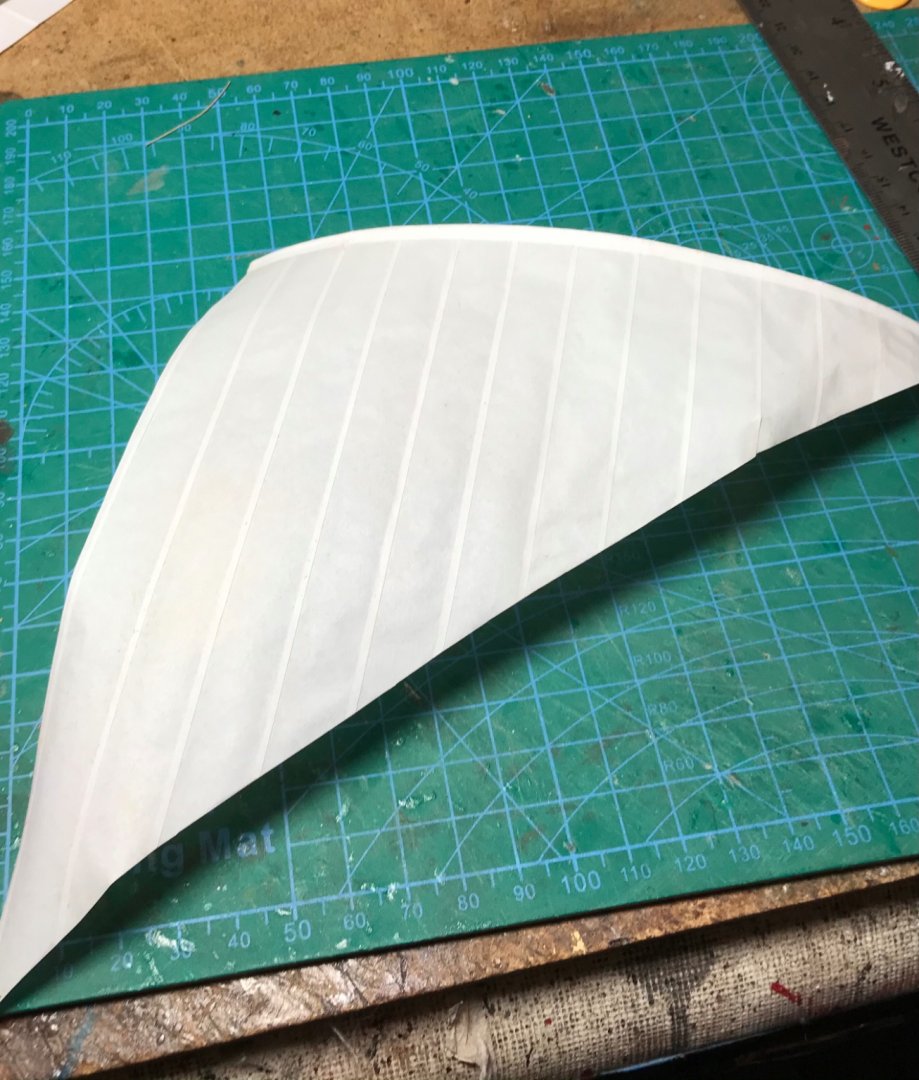
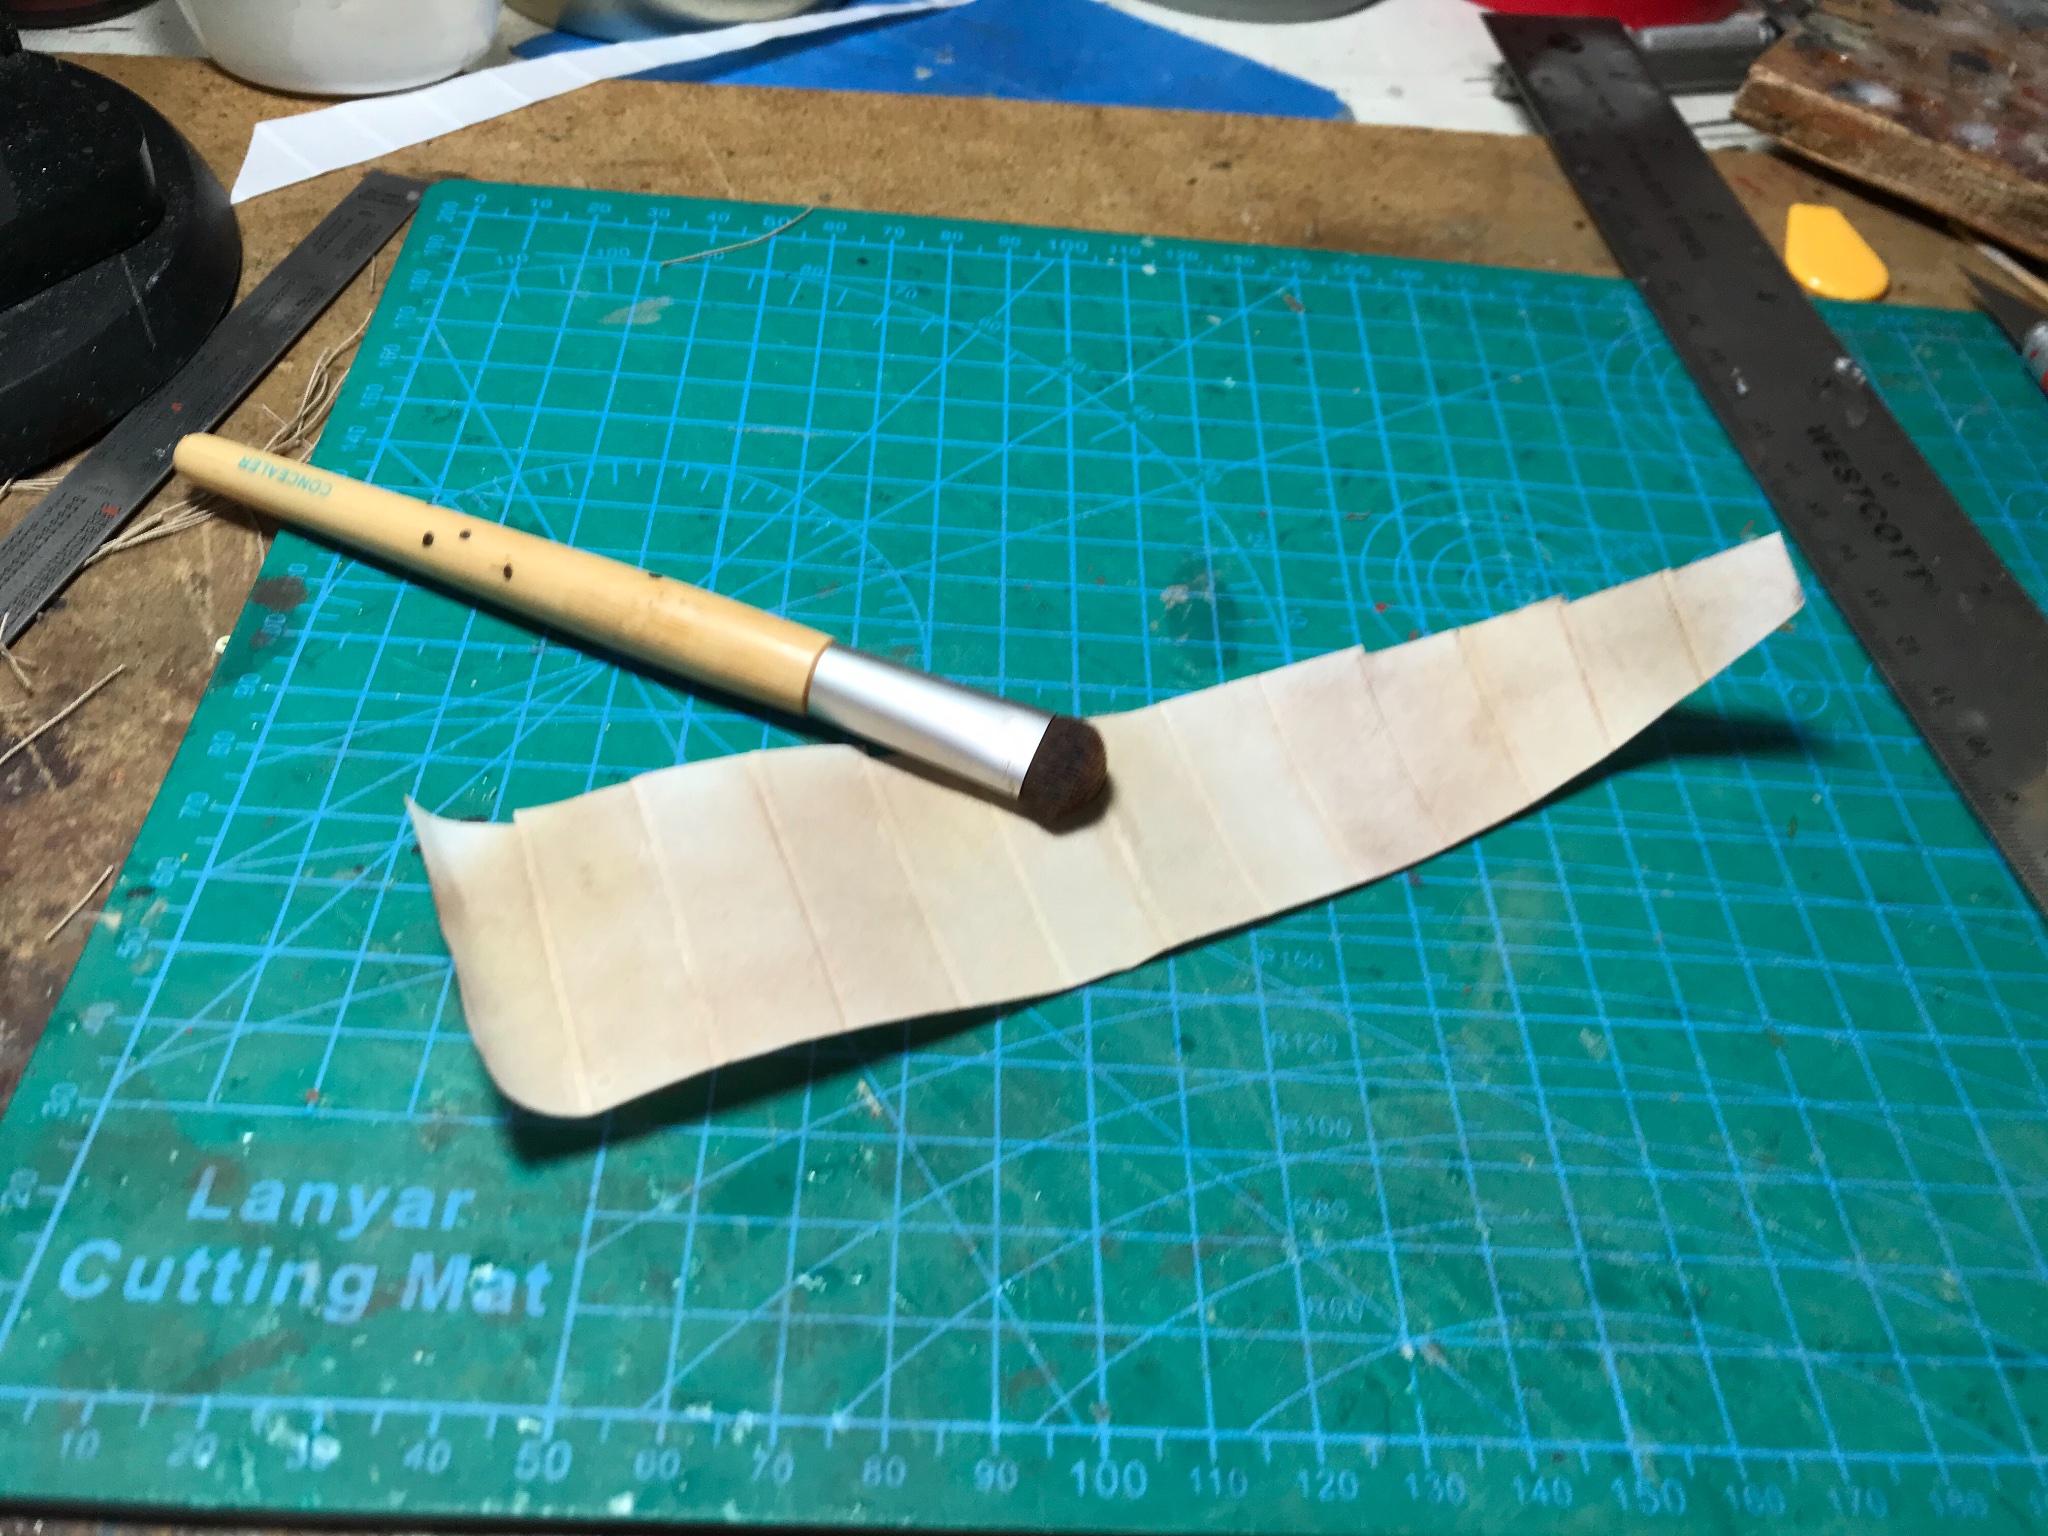
I overlap the panels about 1.5mm and glue them with diluted white glue using a small brush. Excess glue is removed by dabbing and/or rolling (not rubbing) with a cotton swab. Rubbing can raise the paper fibers and leave unsightly rough spots, or even holes in the paper.
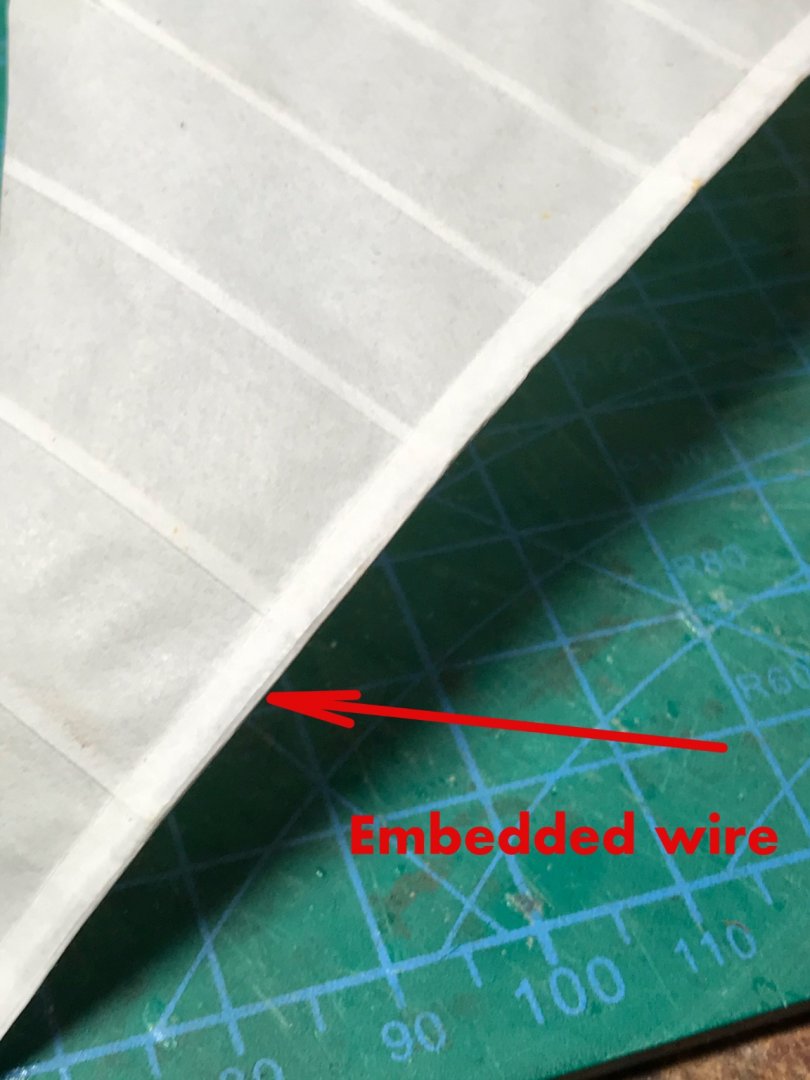
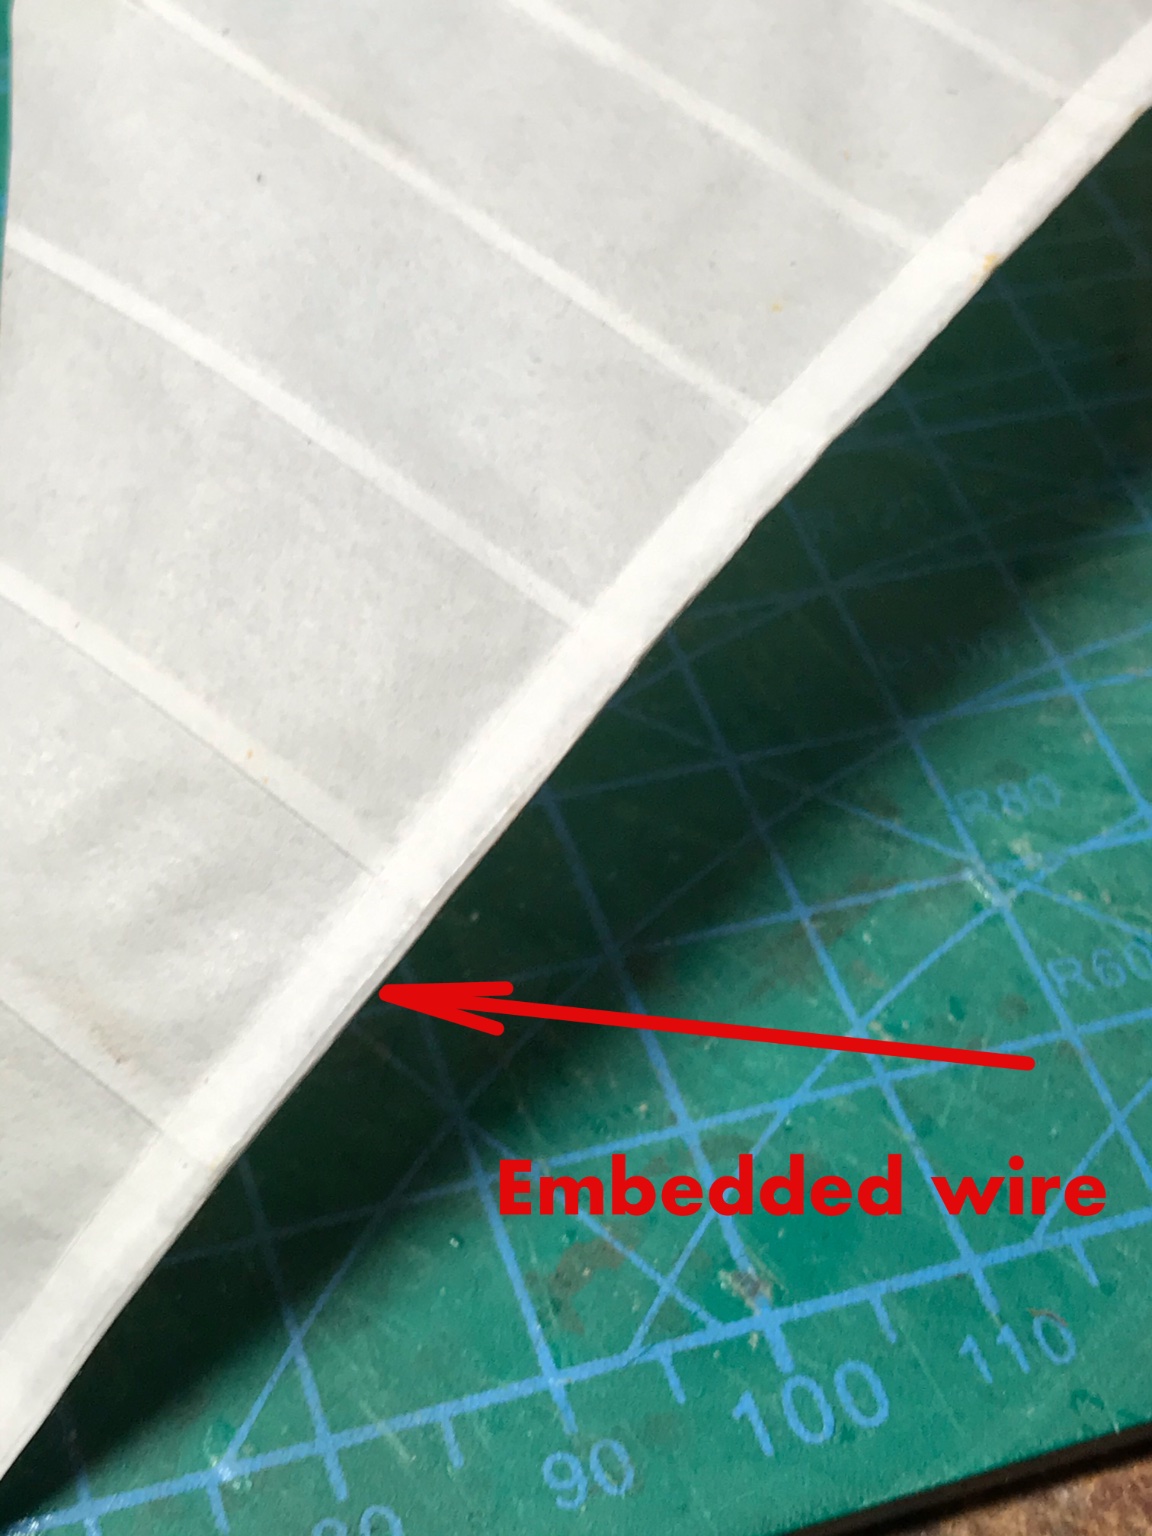
I have had some success with embedding thin copper or steel wire in the trim. This allows me to billow the sails later. For latine sails, I put the wire on two sides, but not along the side that attached to the spar (it's not needed).
Experimenting with dry powder pigments, you can get various effects. Here is a comparison of yellow ochre and burnt umber.
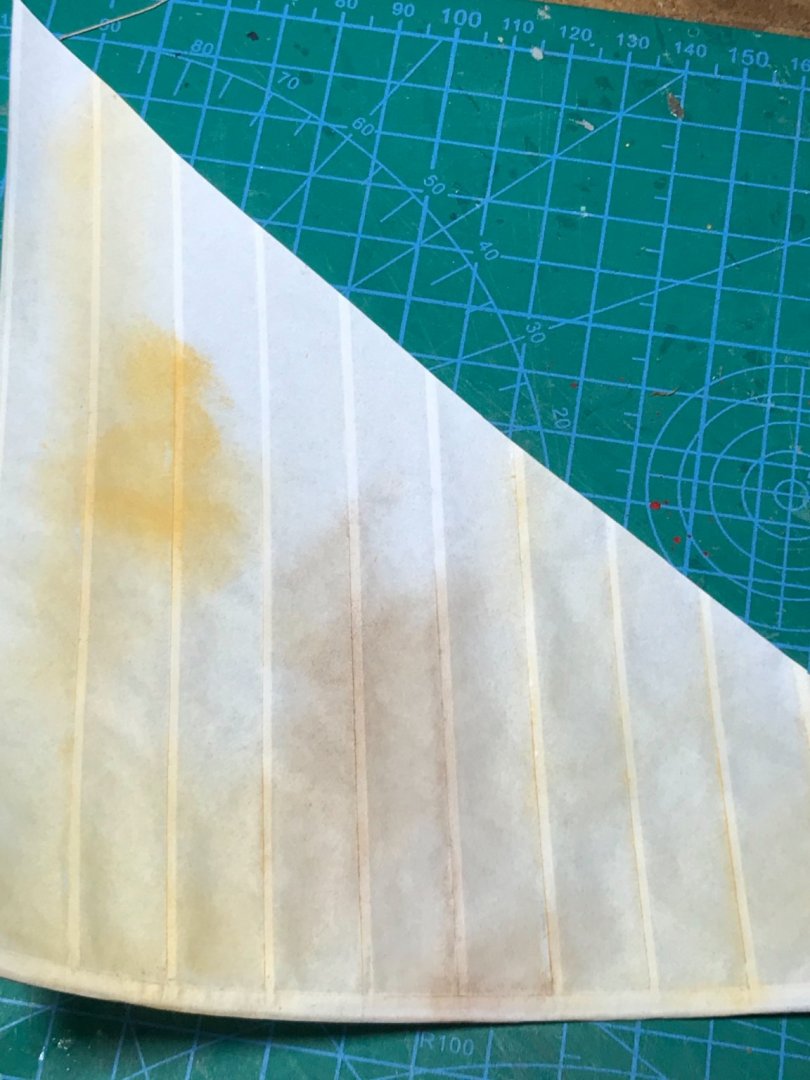
For this model, I liked mixing the two colors and diluting them with talcum powder. It may not look great, but it smells wonderful! The pigments are applied and blended with a make-up brush...

Getting close to being done!
- mtaylor, GrandpaPhil, BobG and 4 others
-
7
-
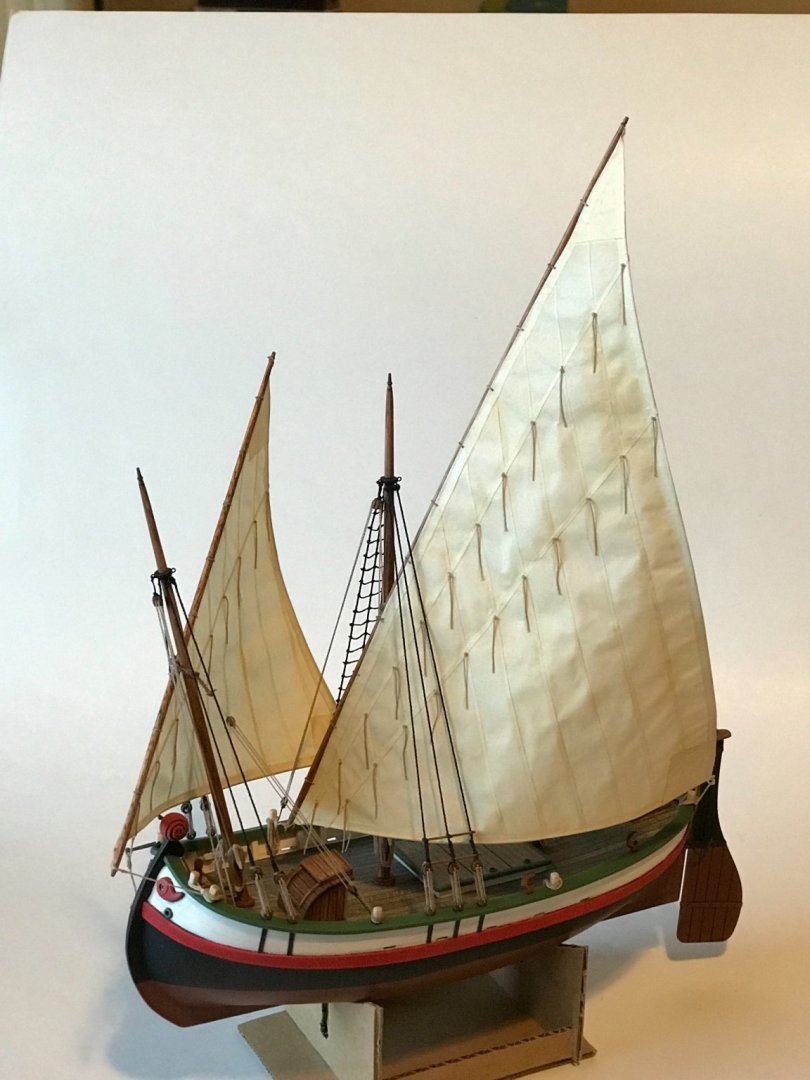
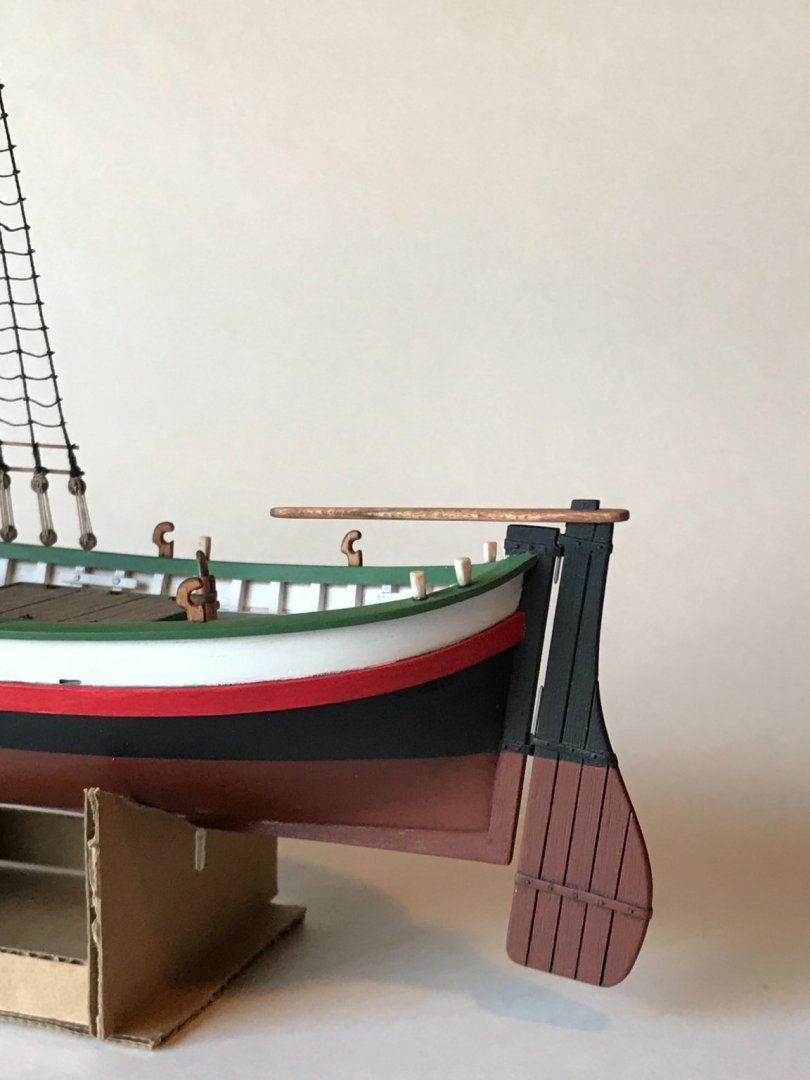
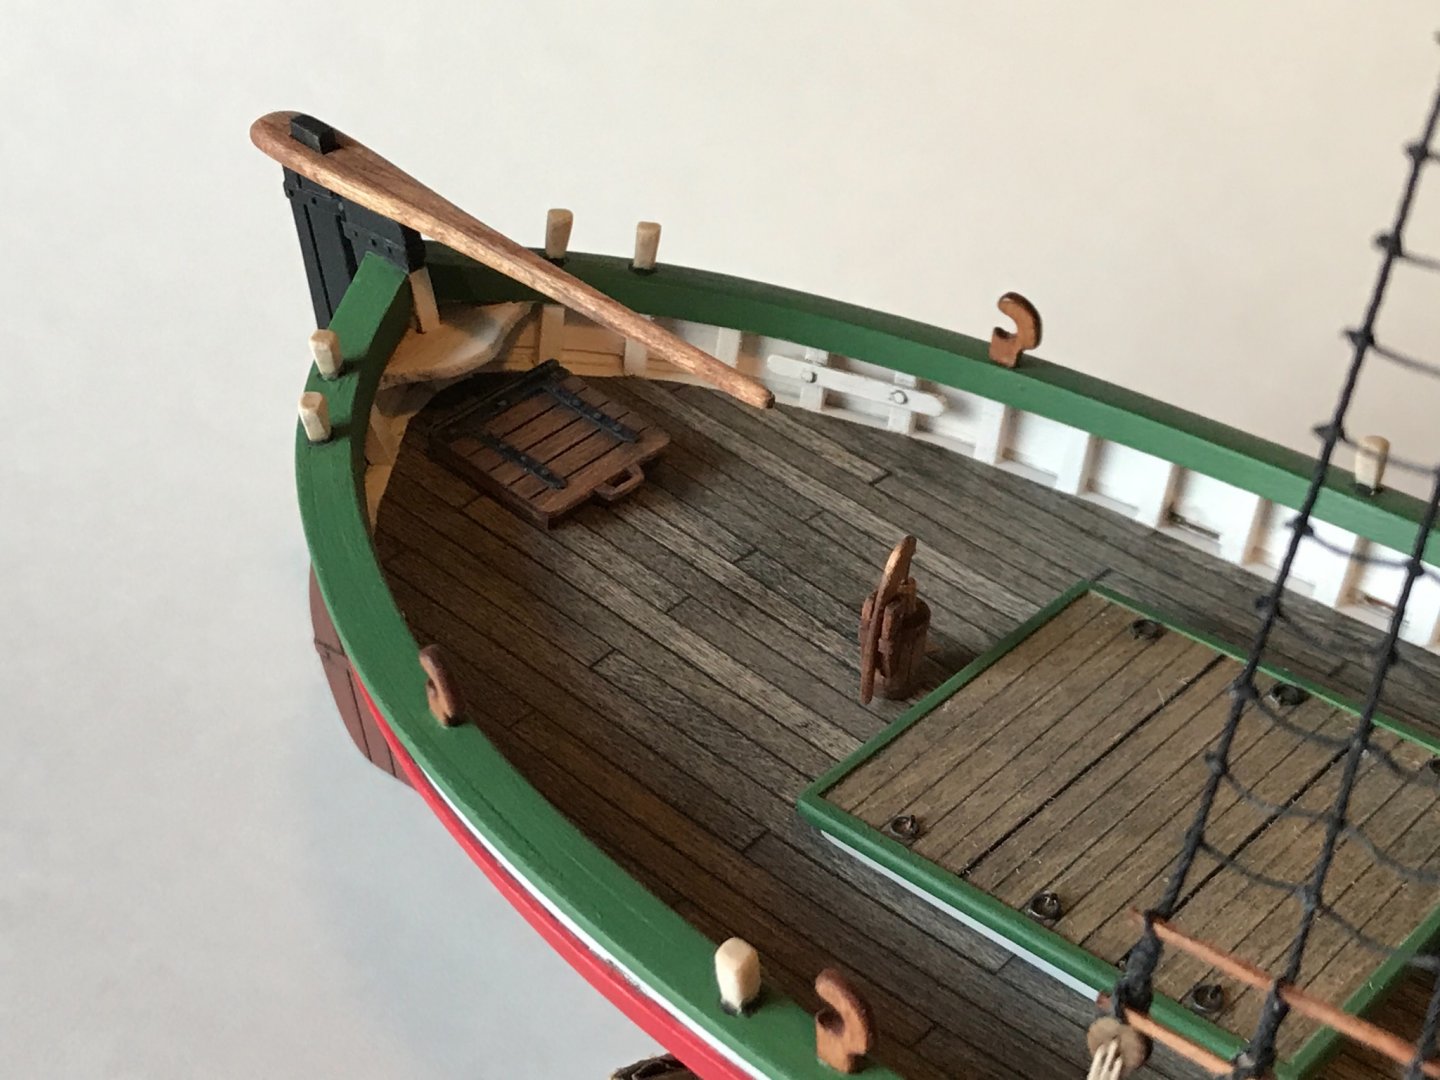
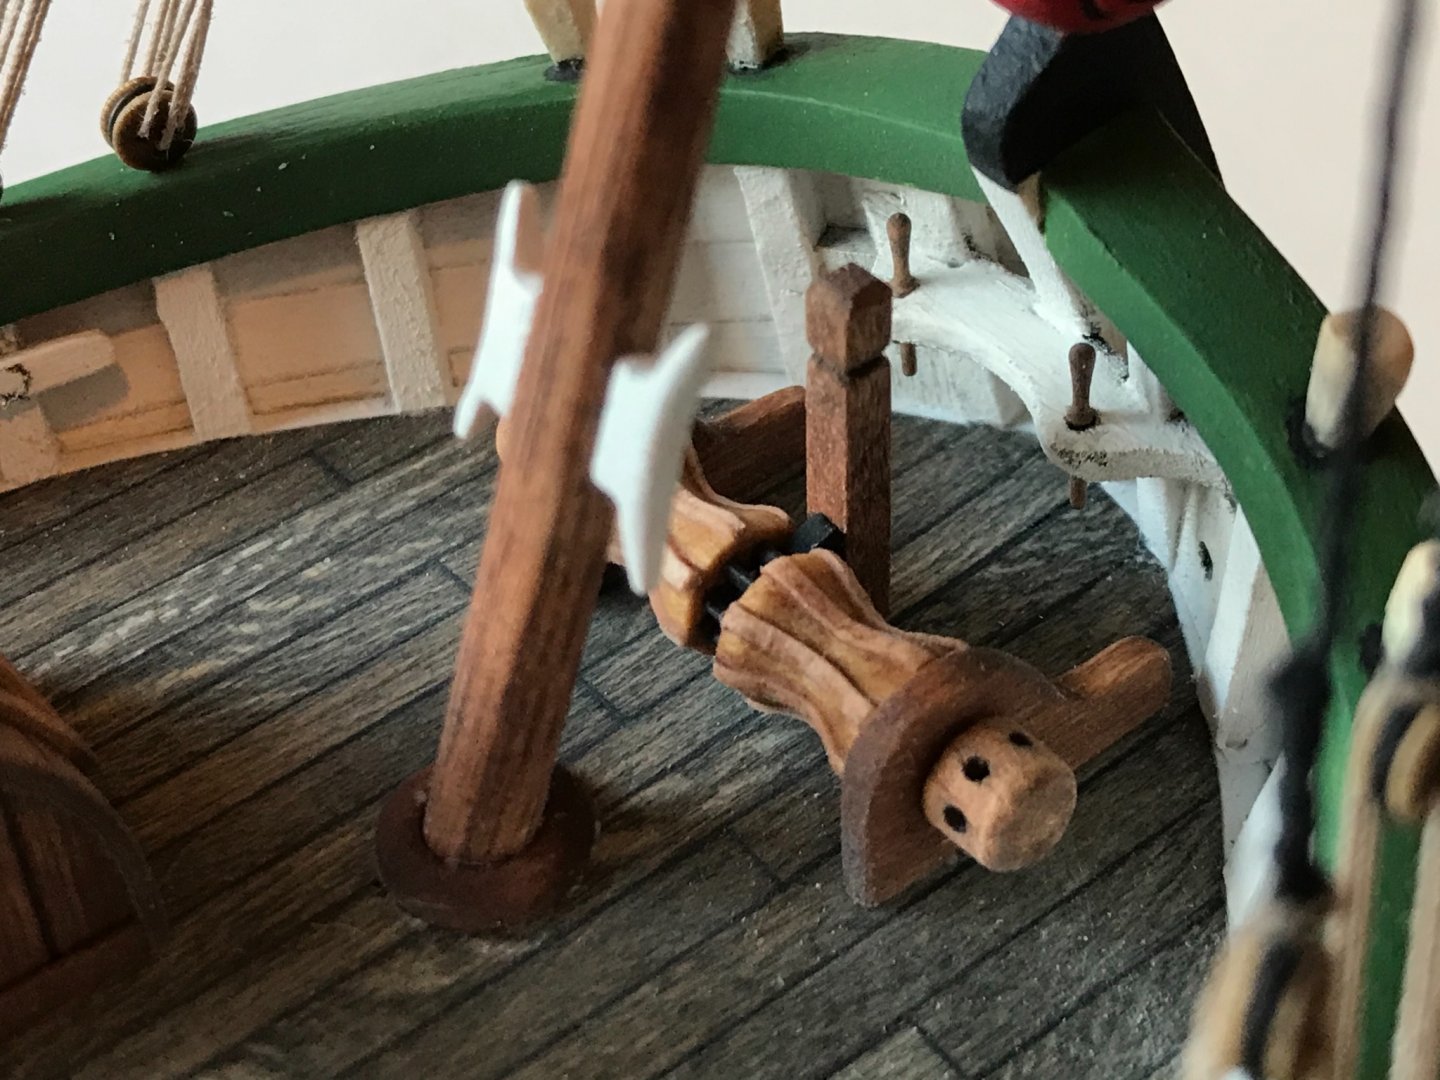
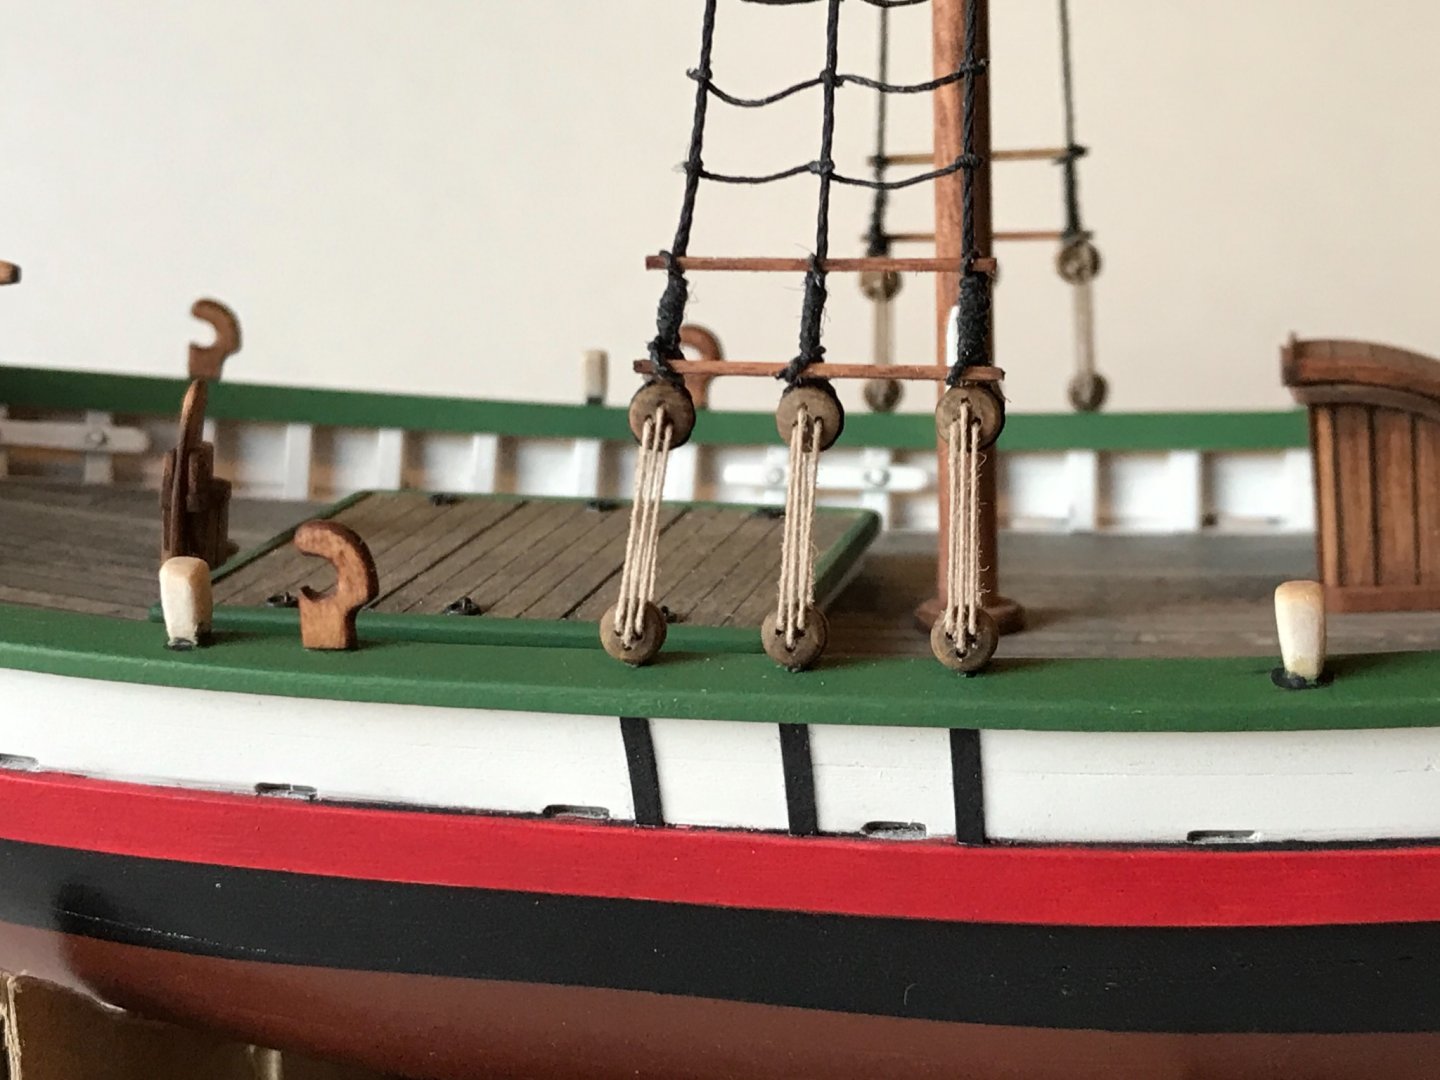
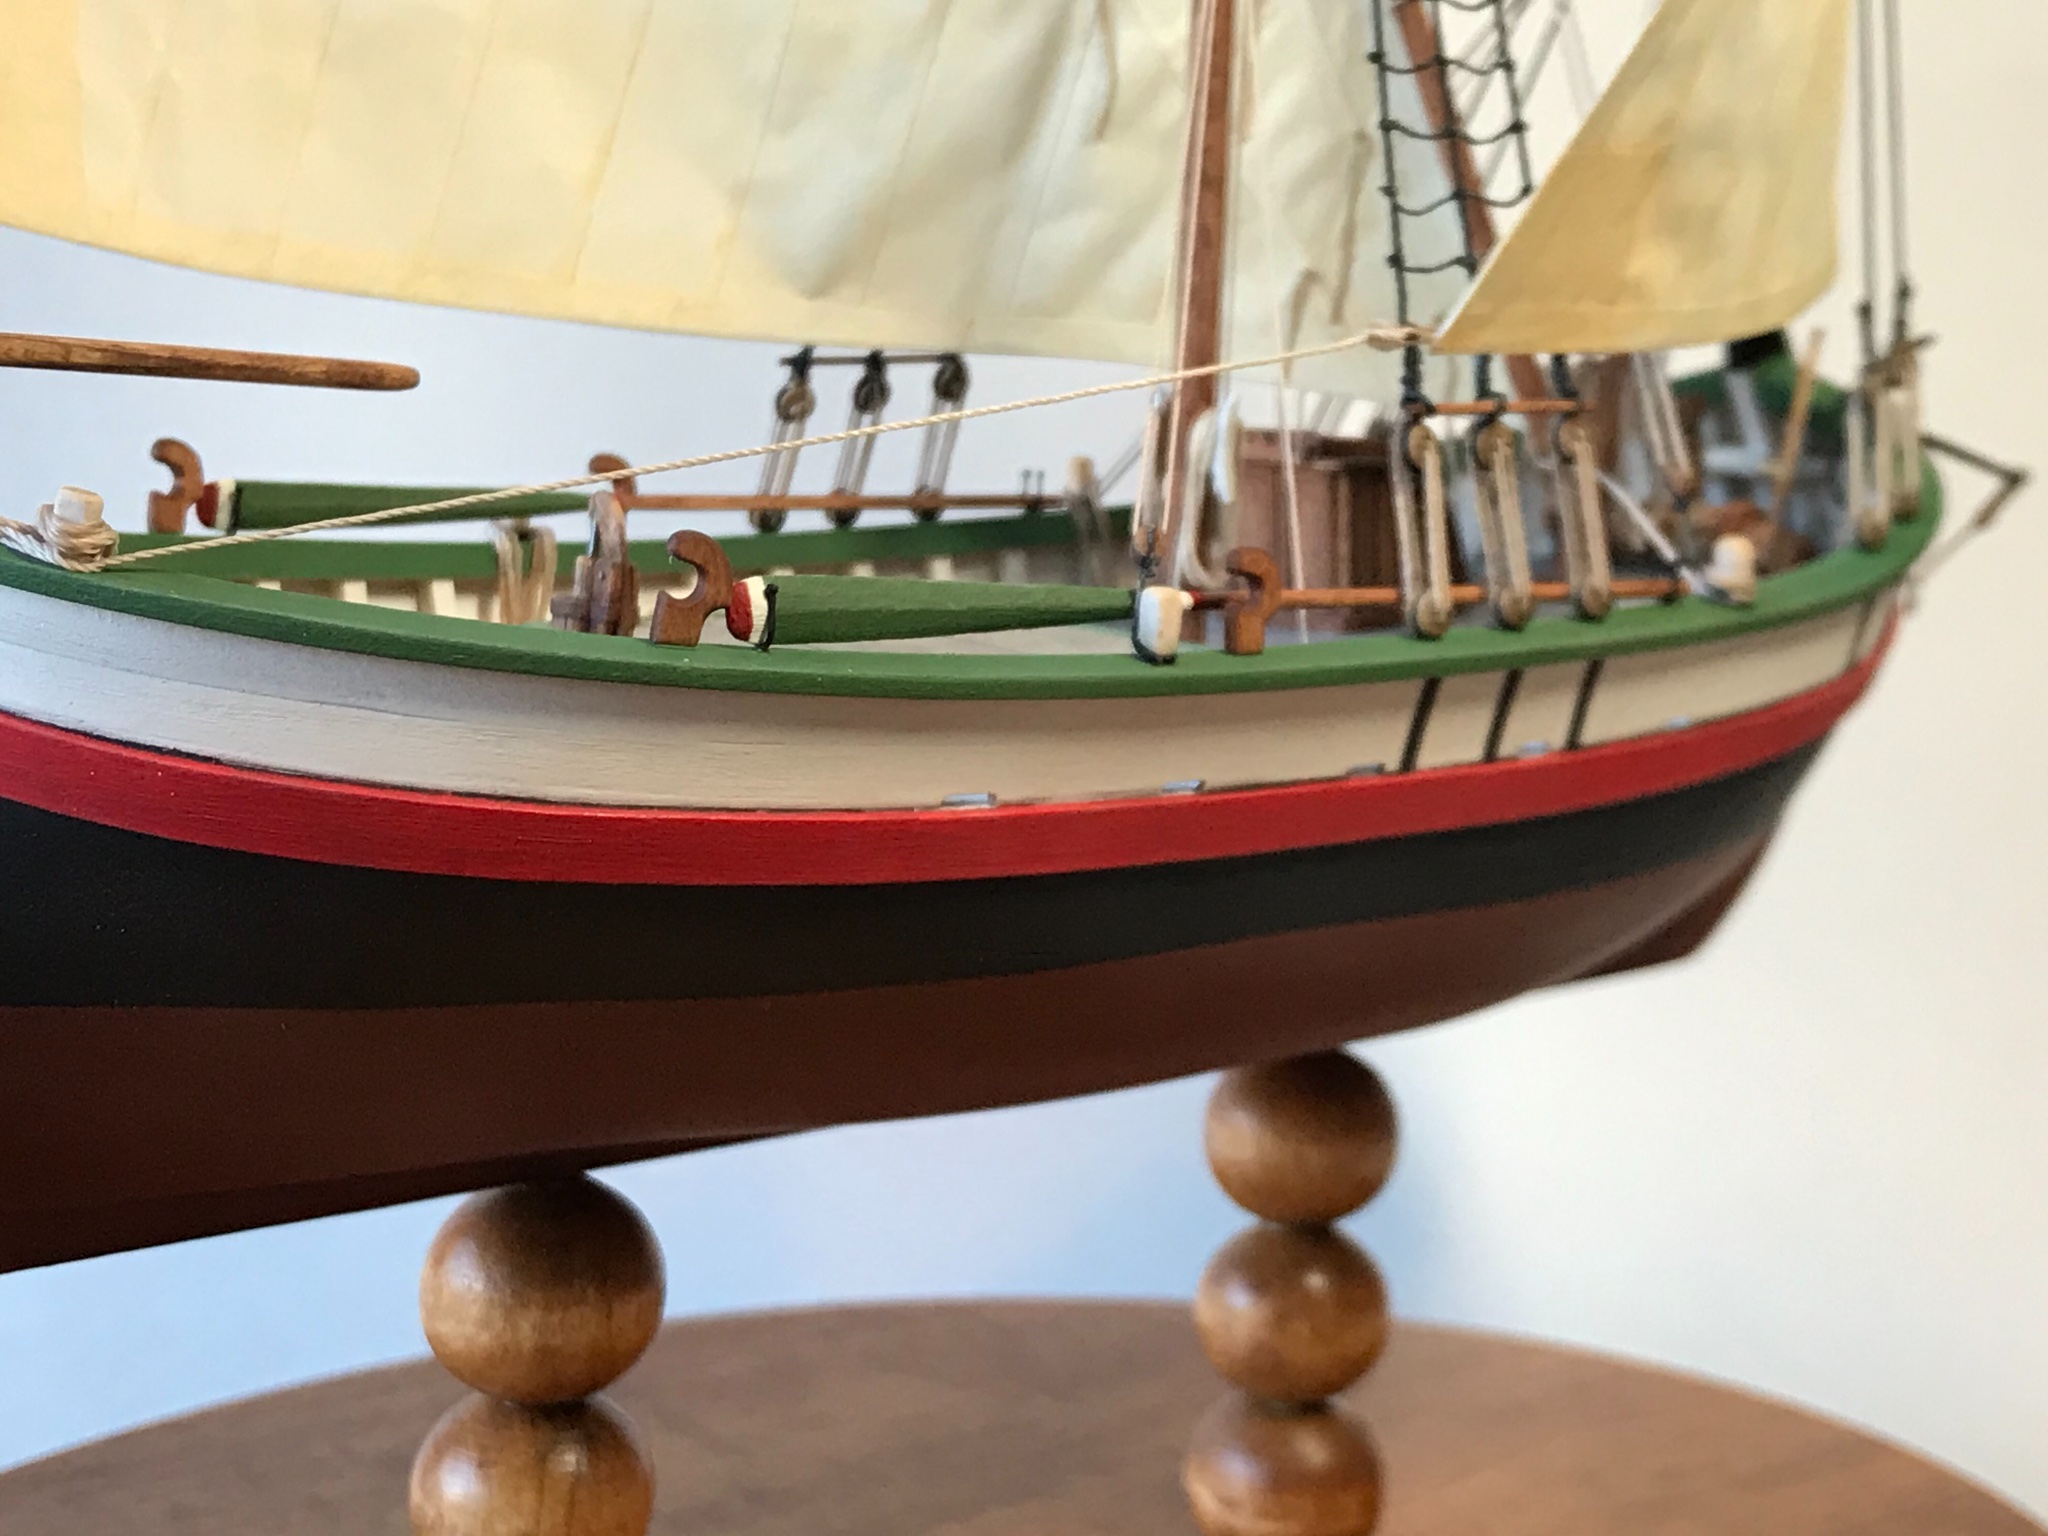
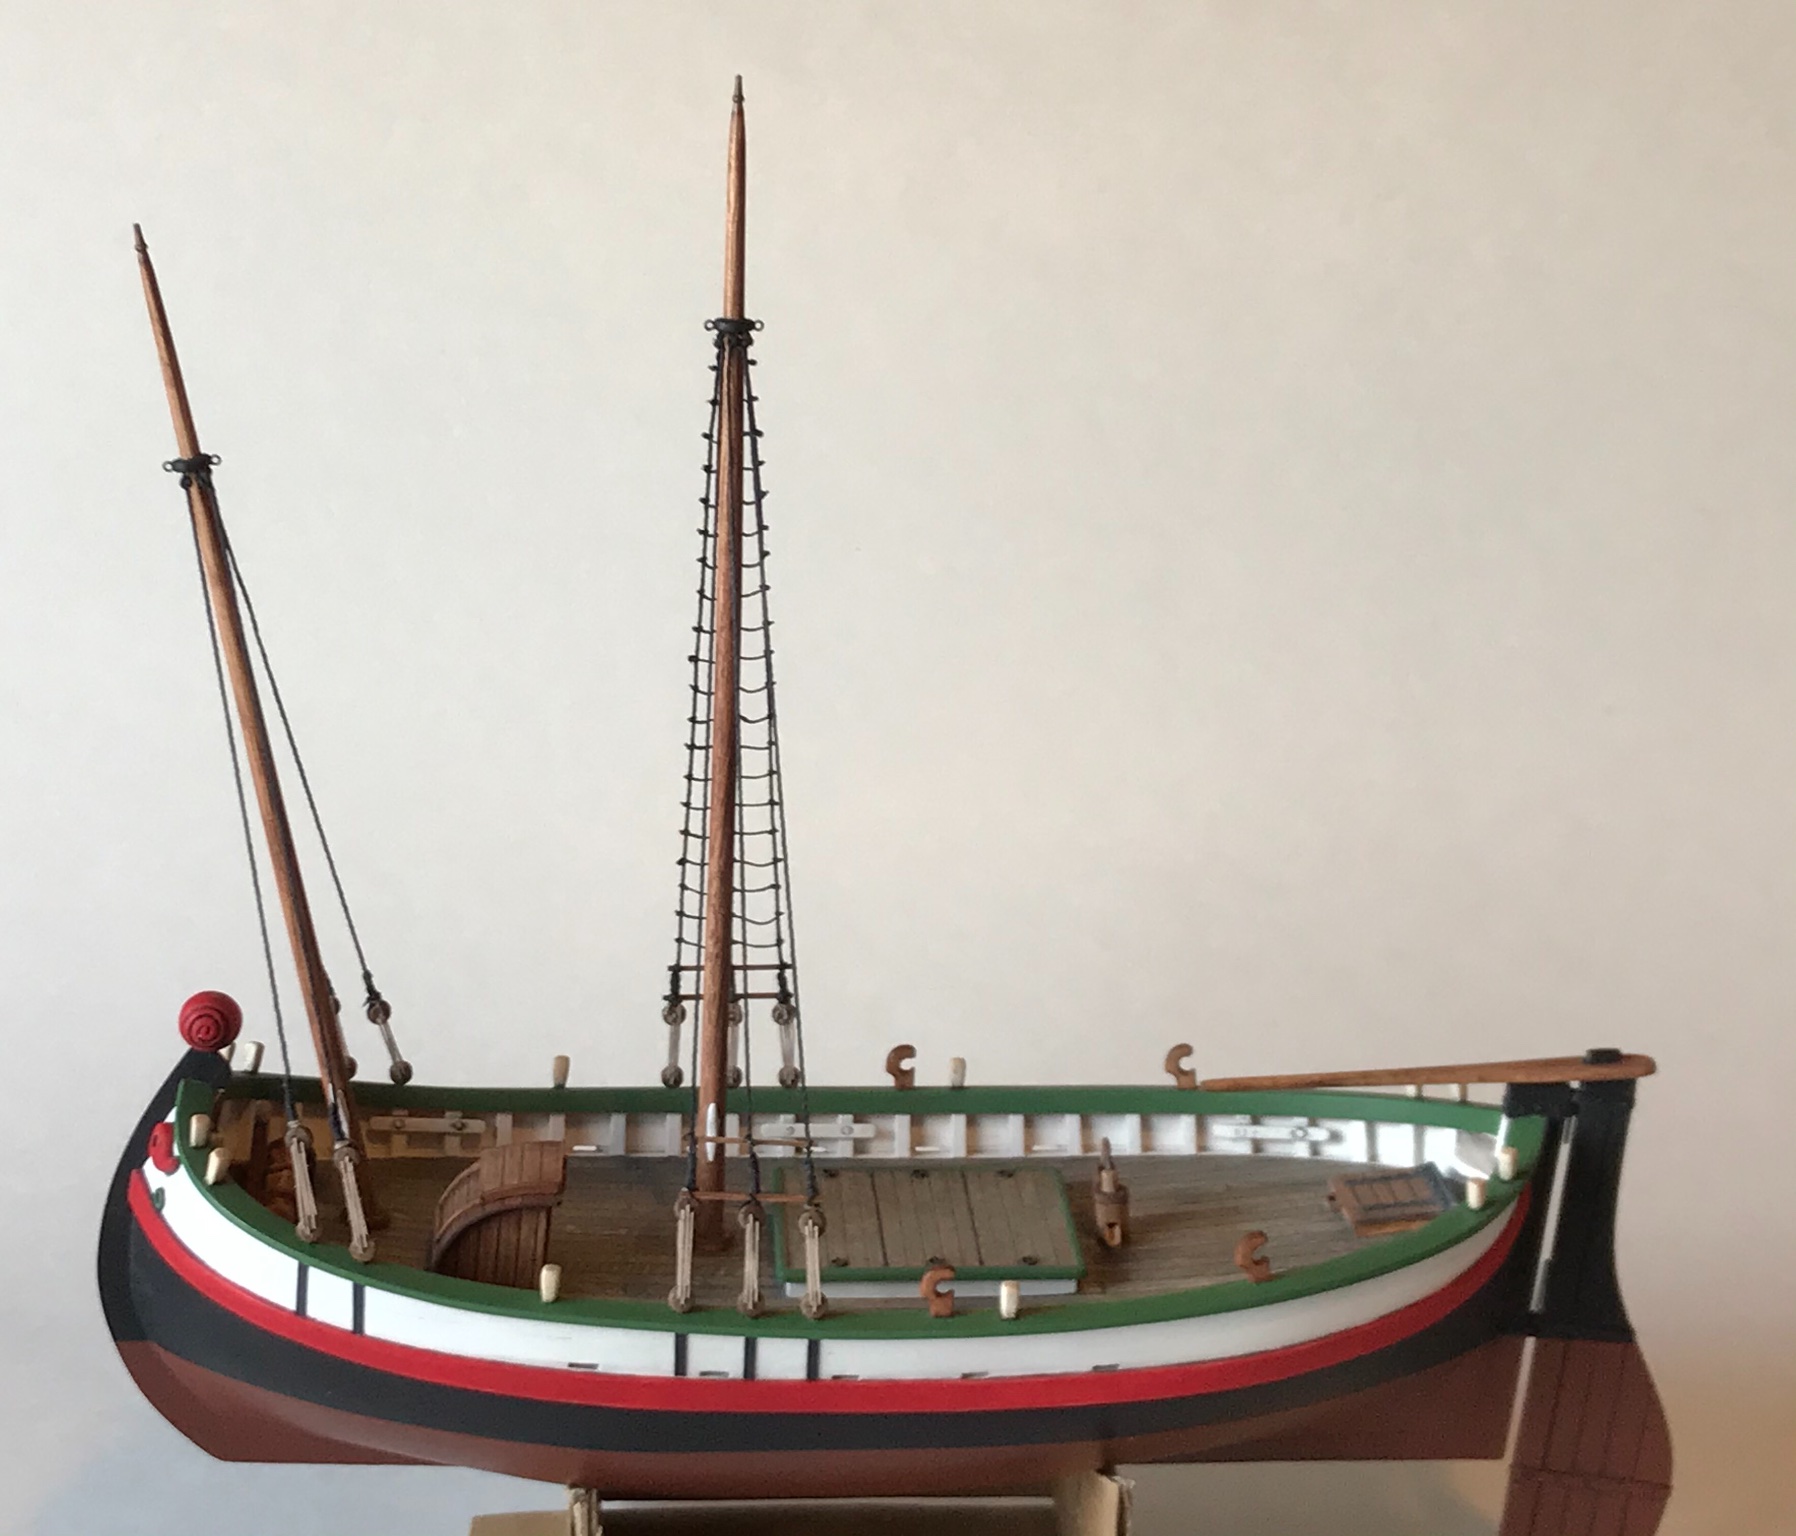
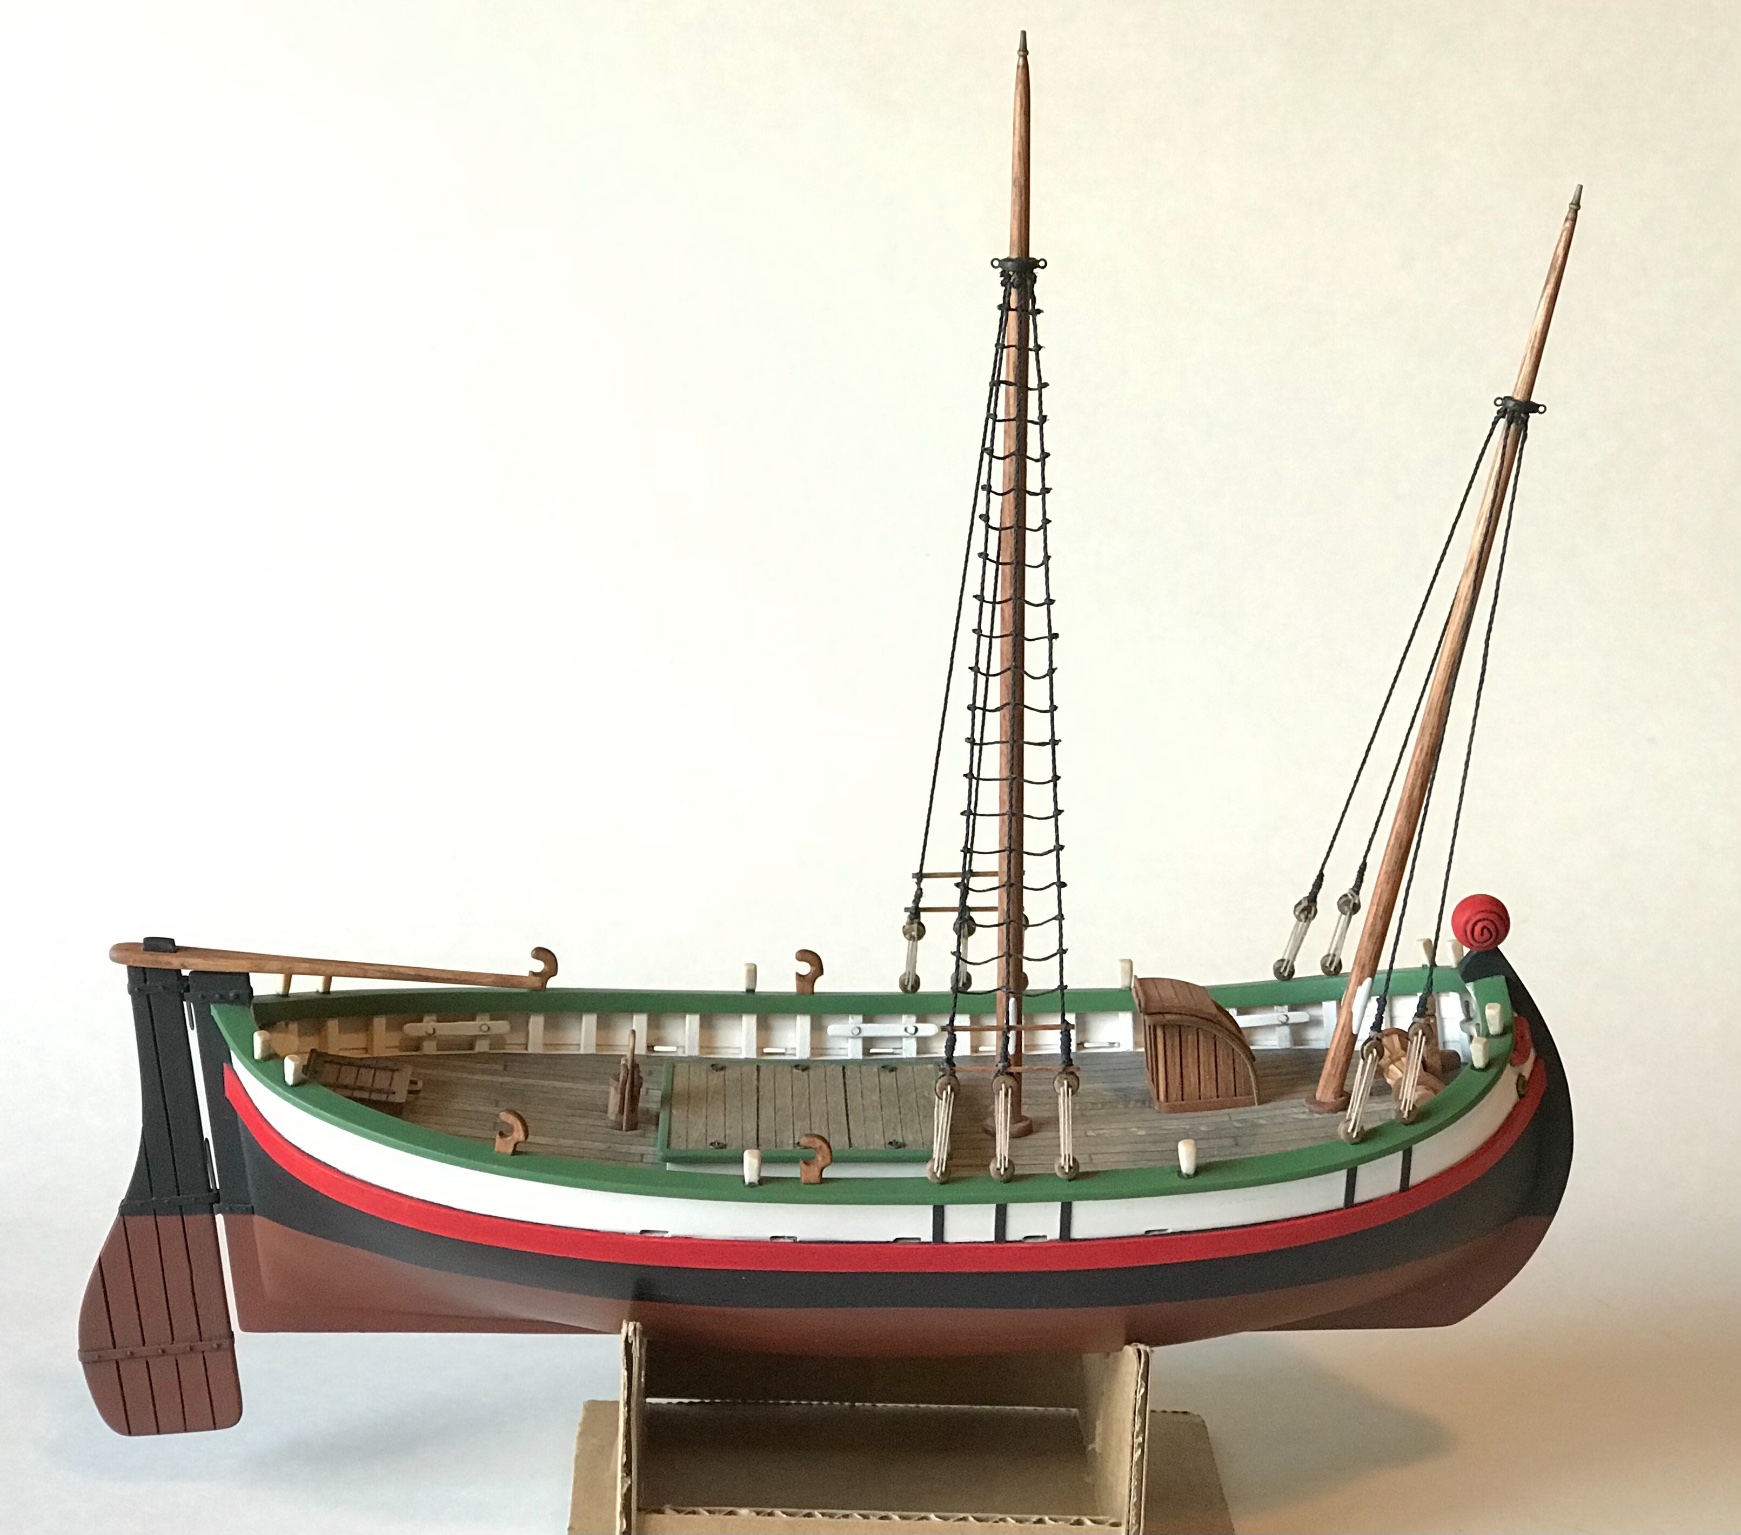
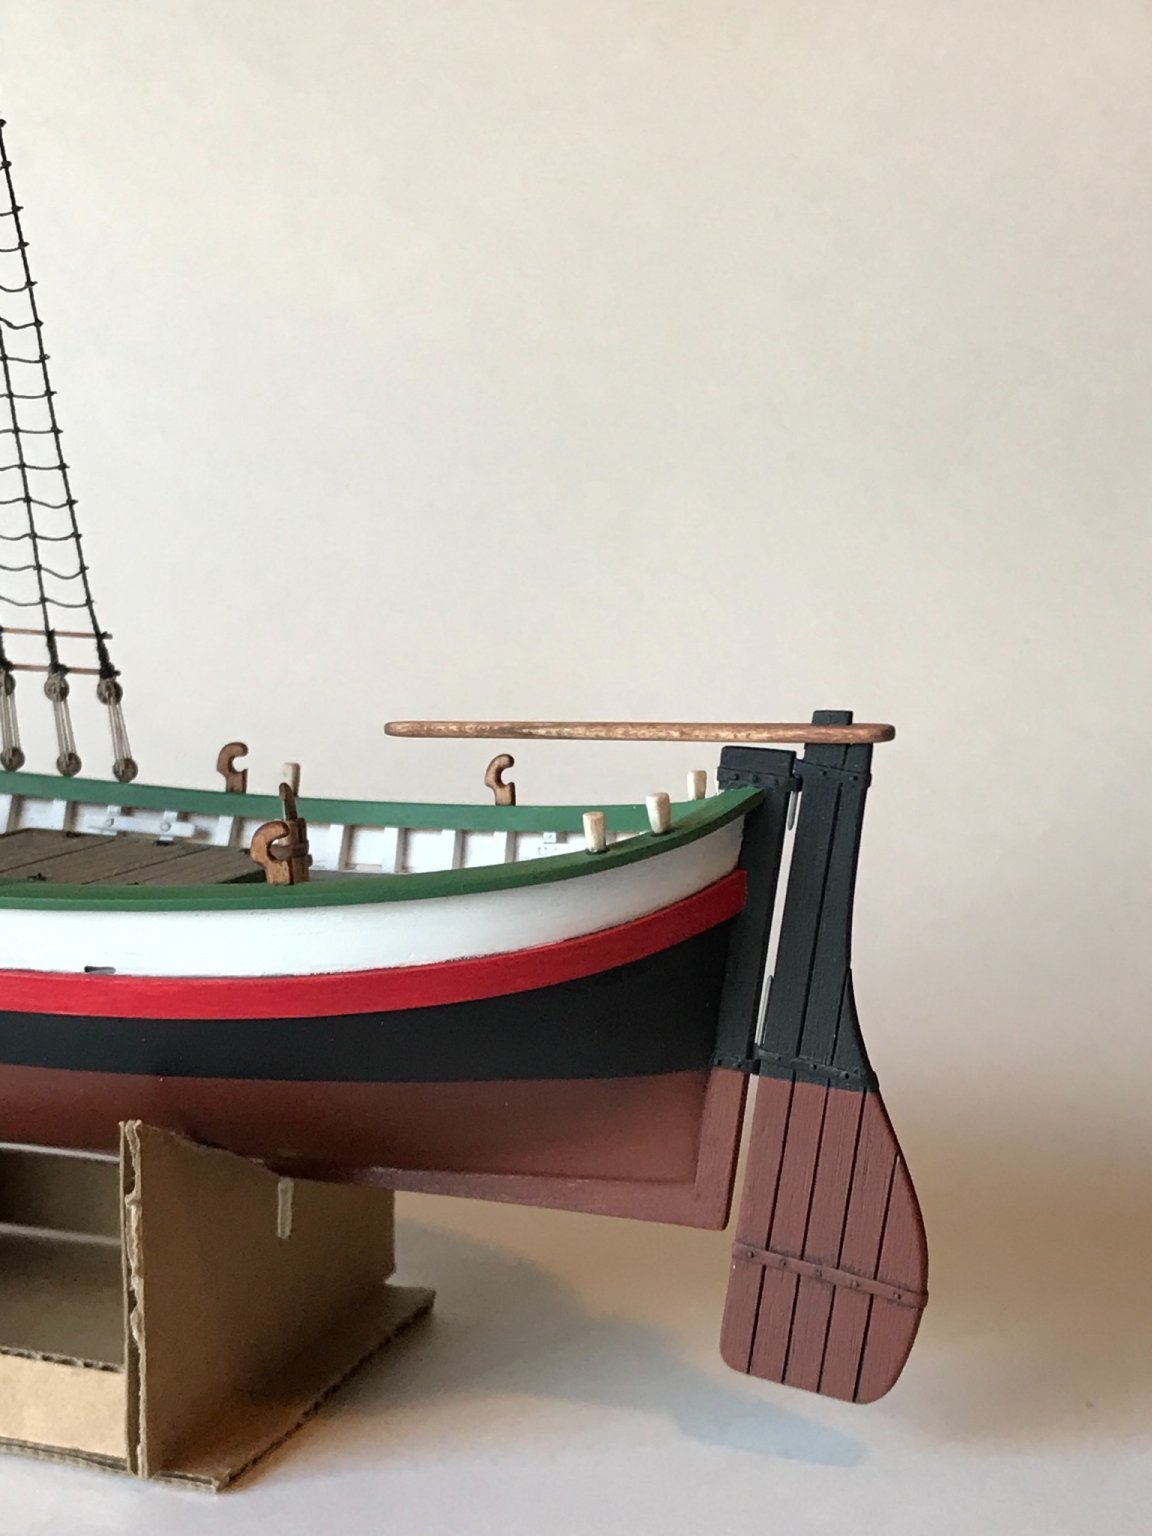
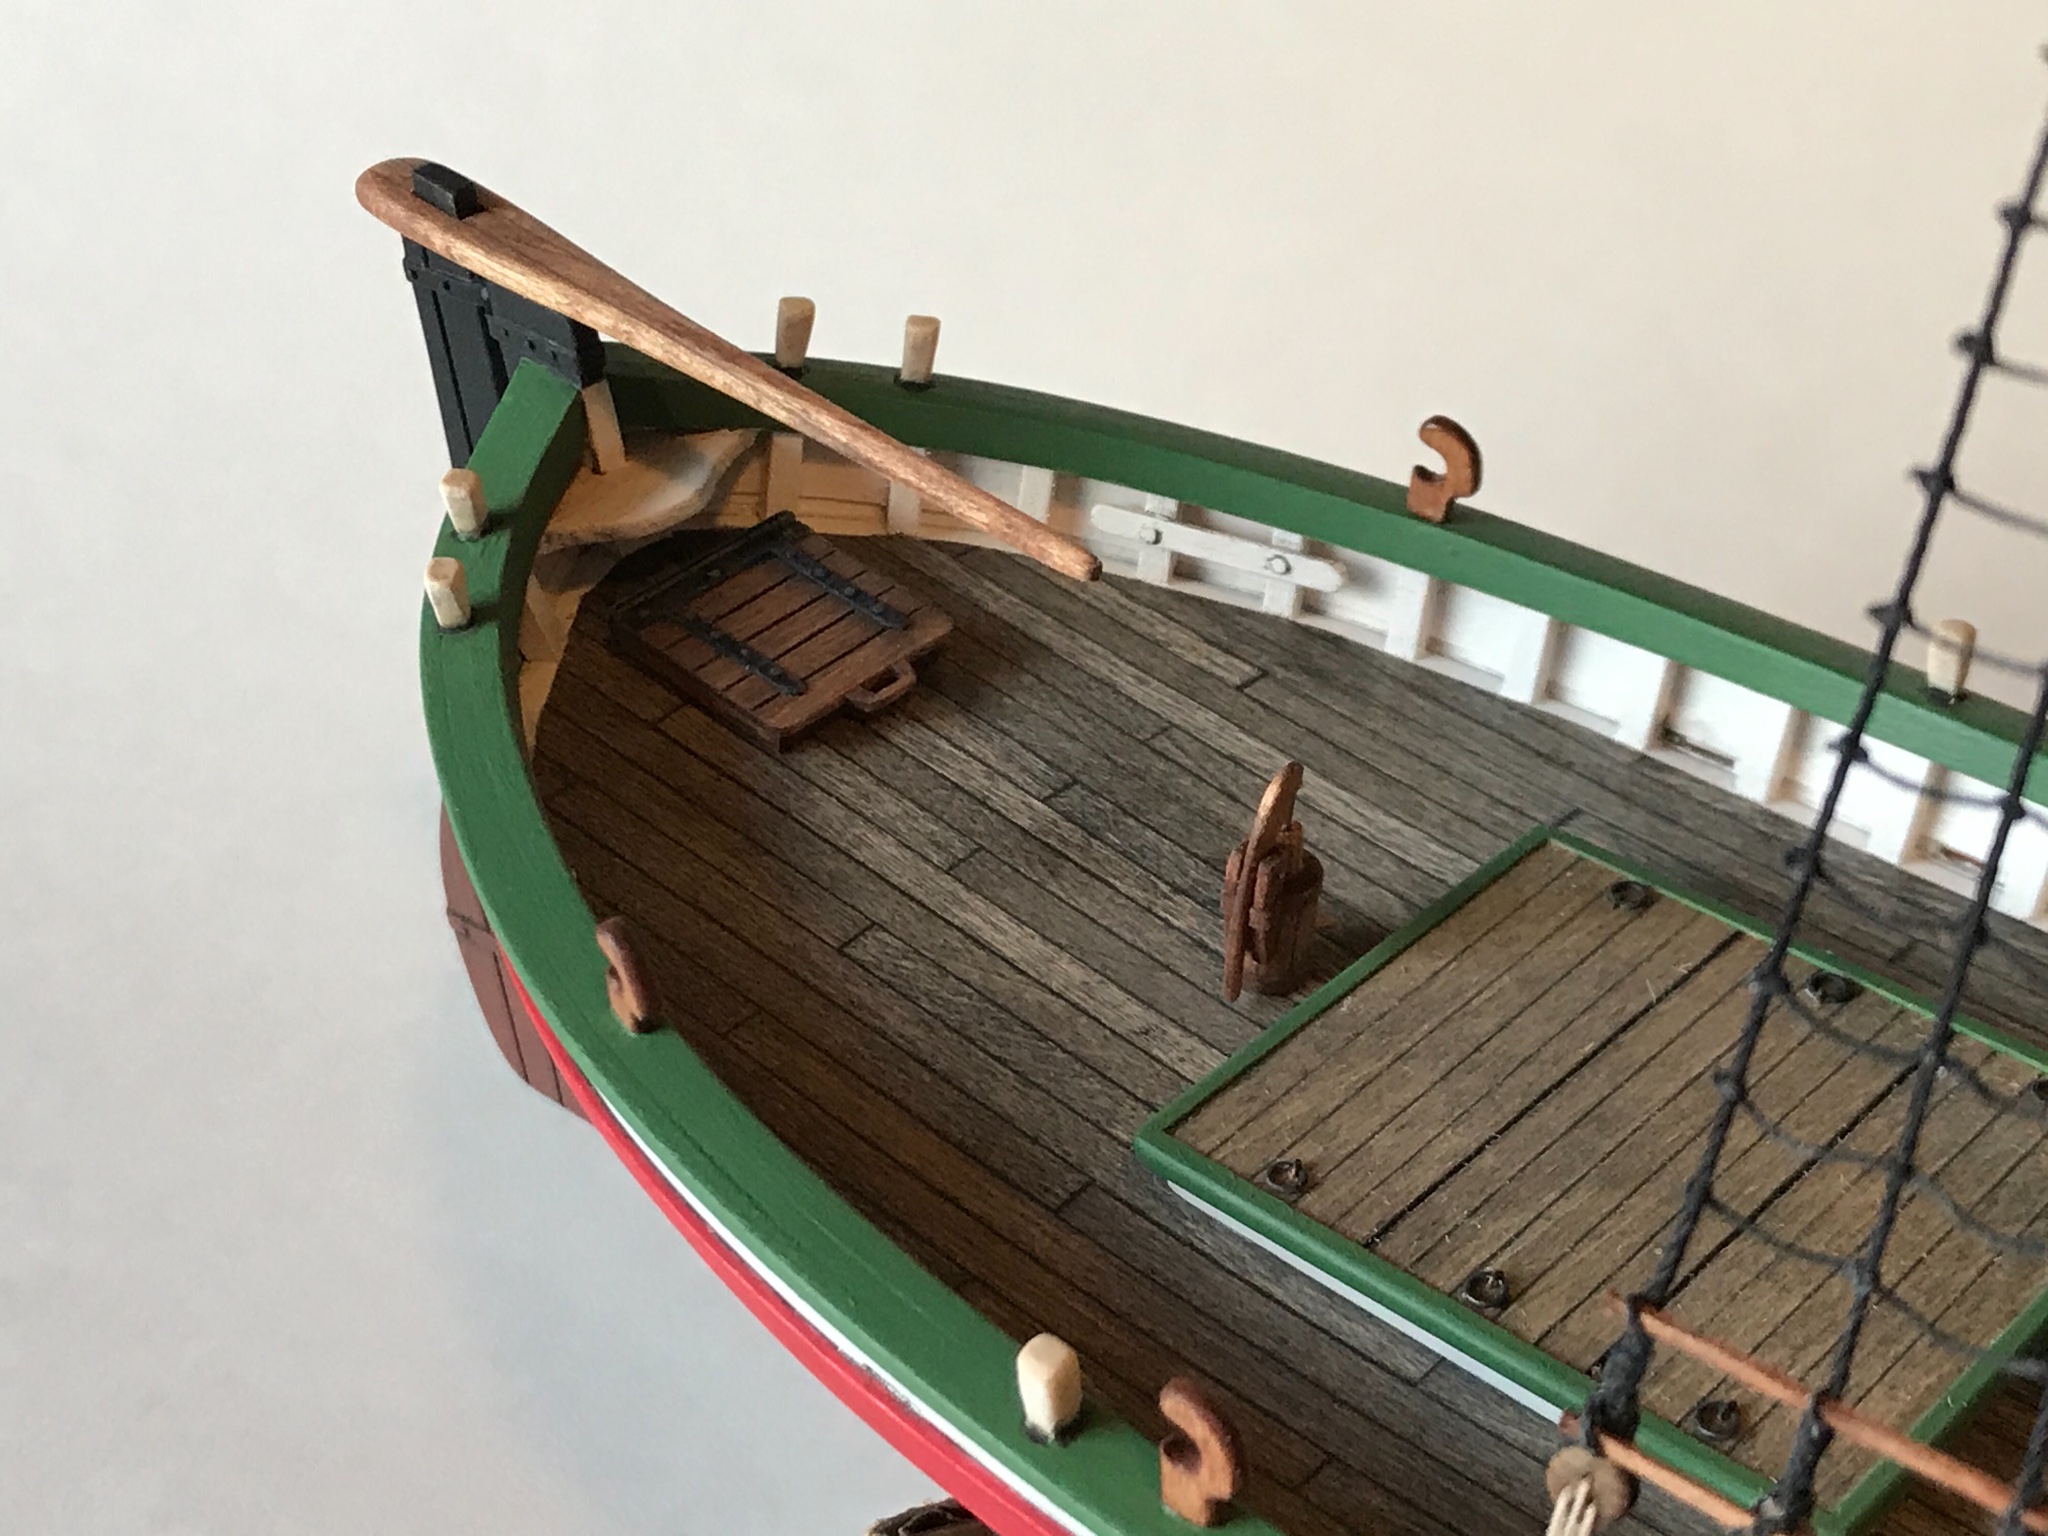
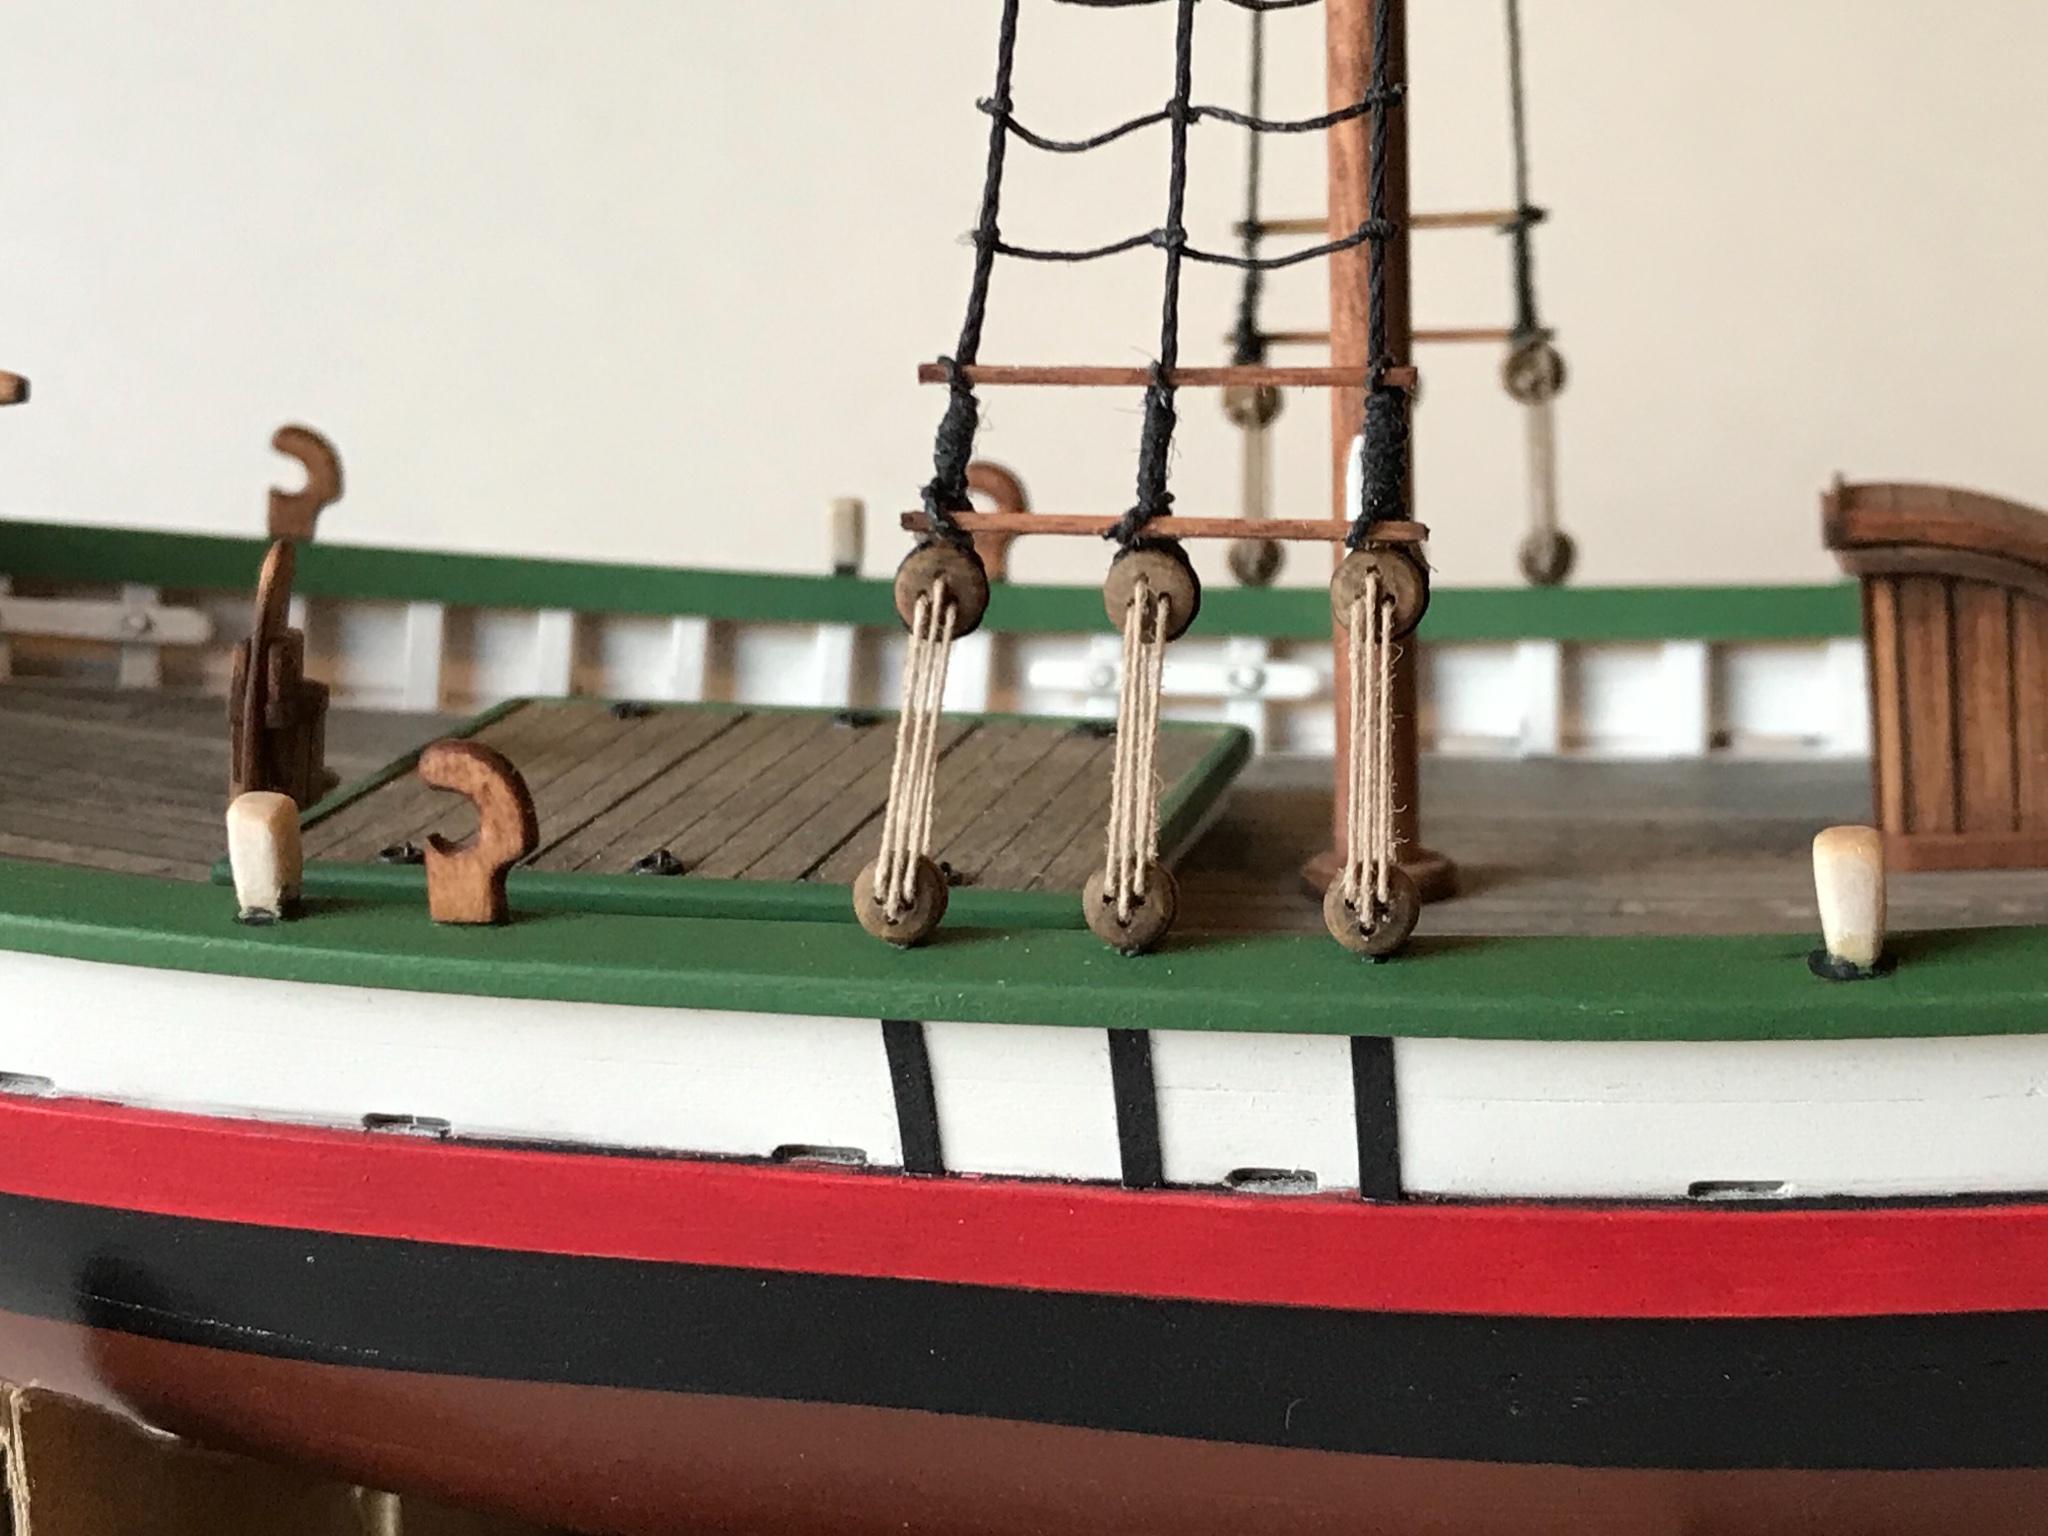
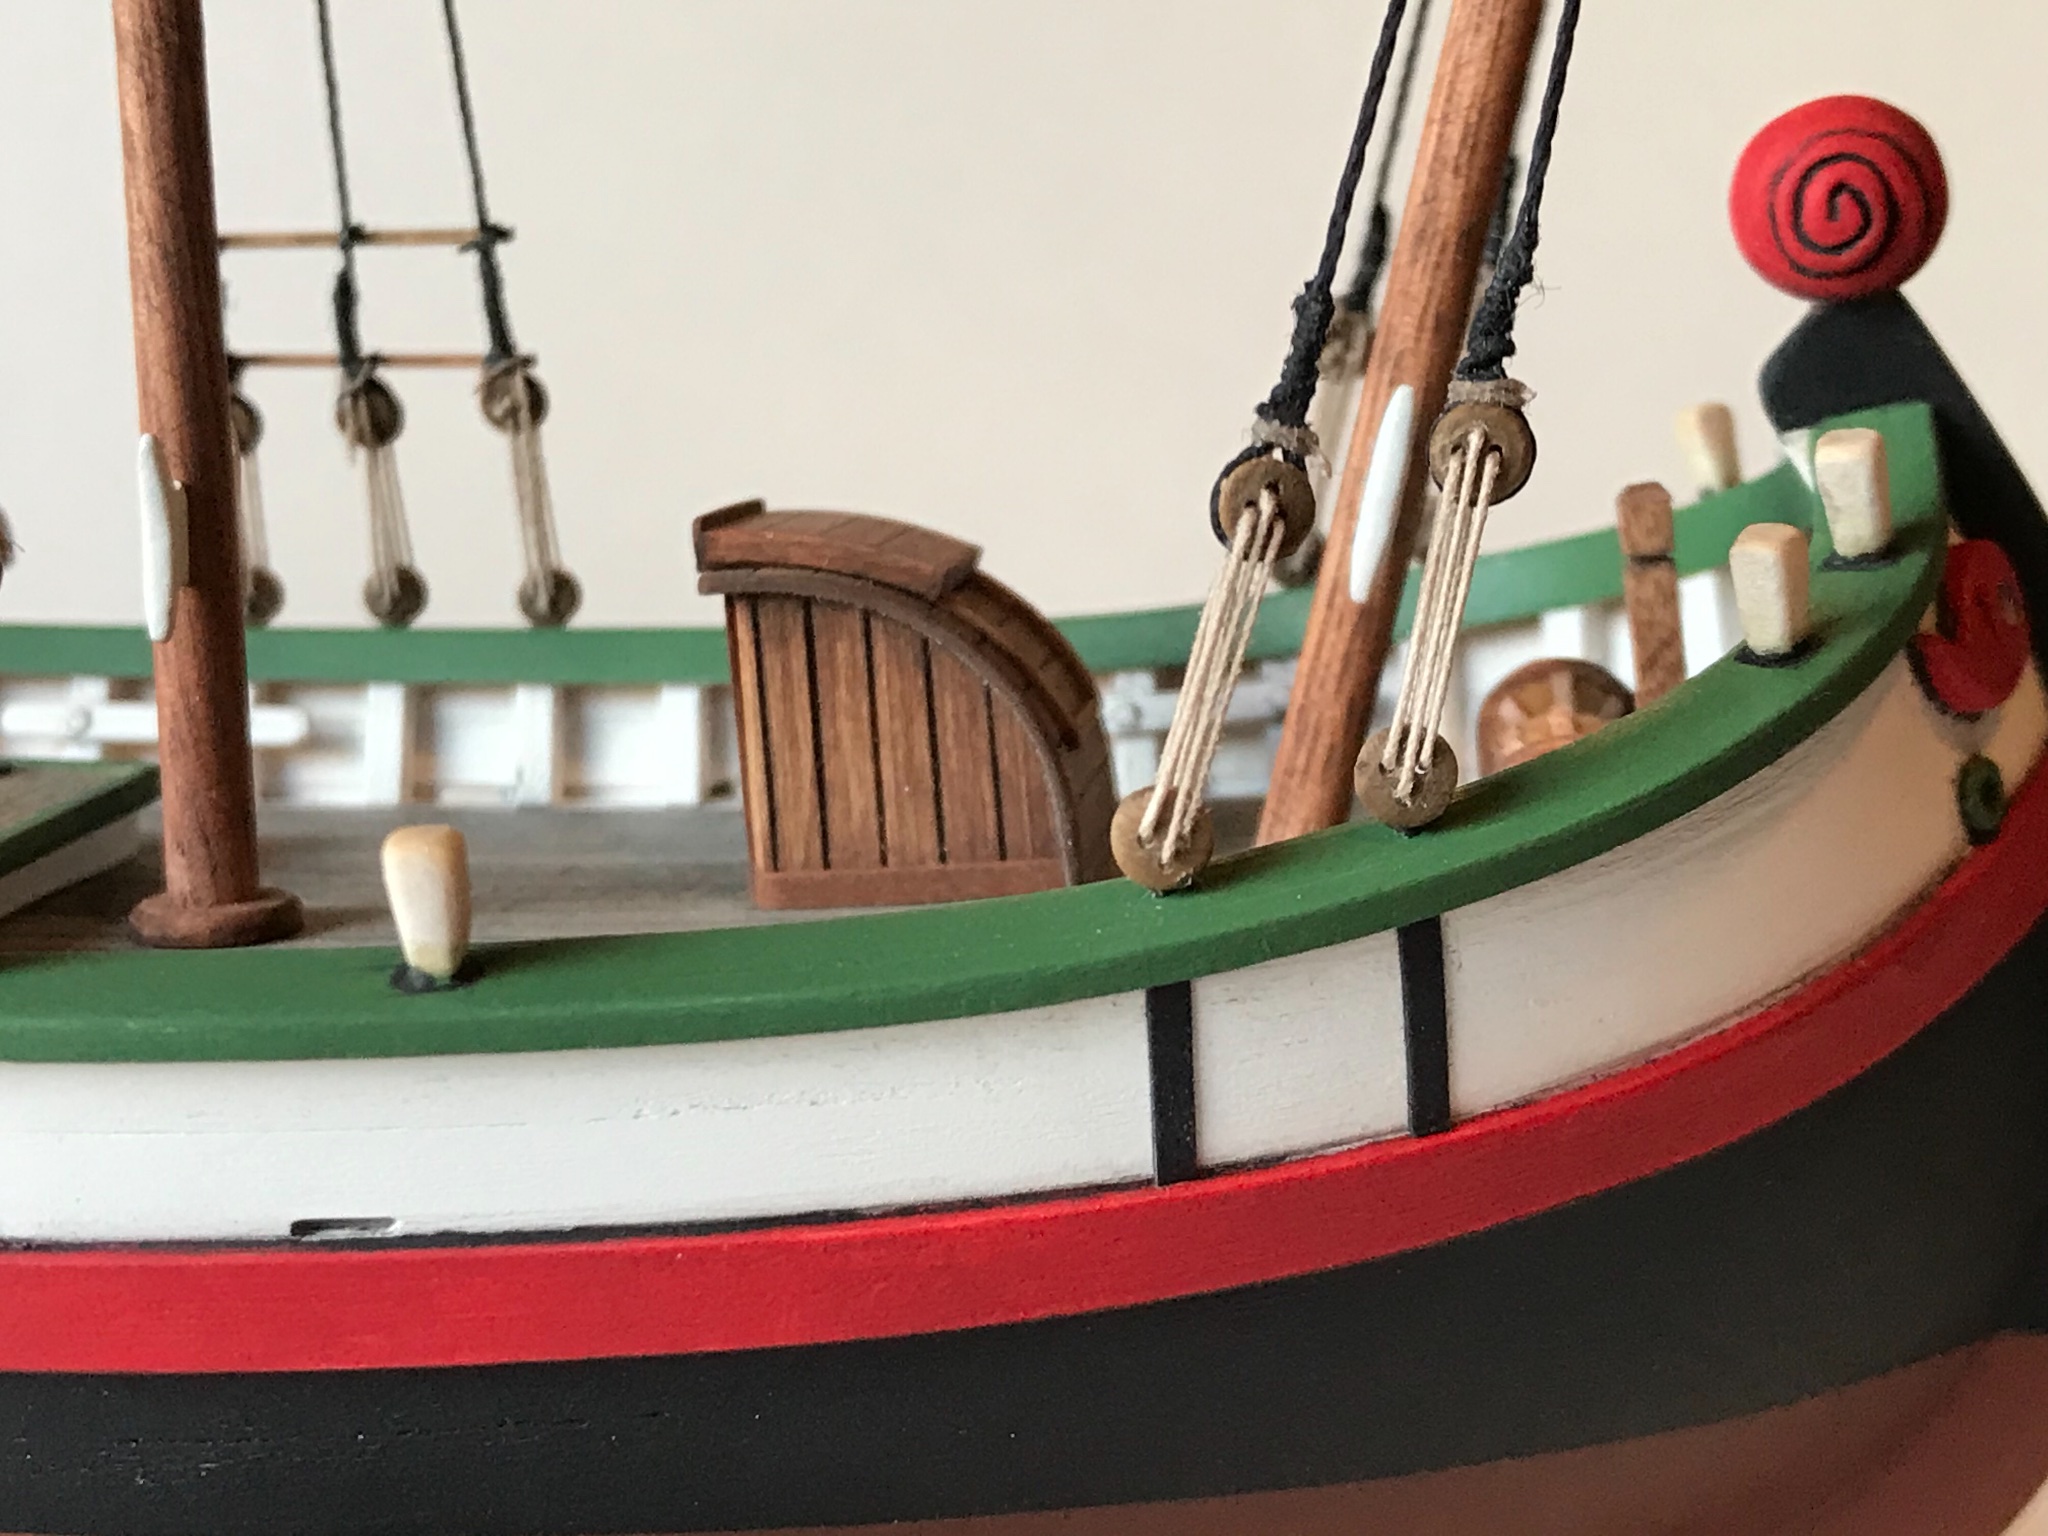
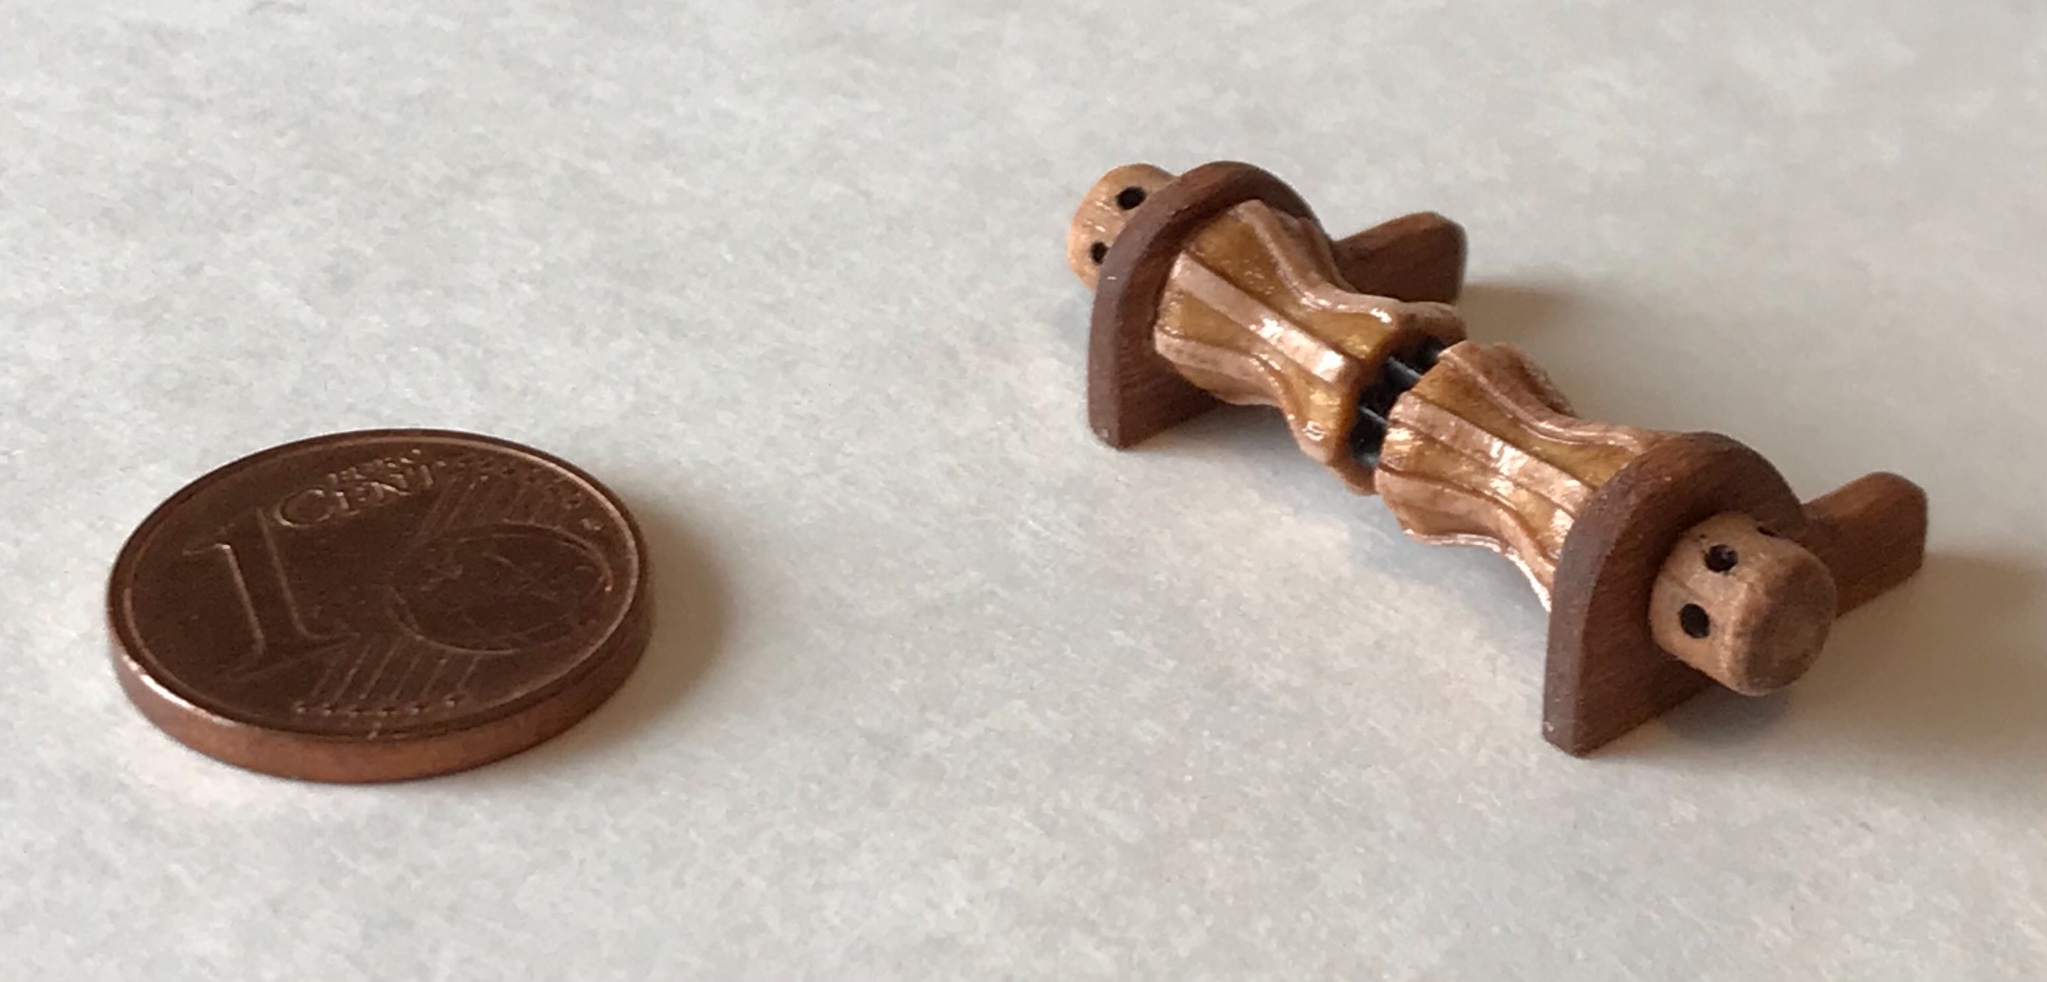
It's been a while since I last posted, but progress has been made. This update shows the addition of the bow ornament, rudder, tiller, forcolas (oar locks), masts, standing rigging, and the painted (and lightly weathered) hull. The rest of the rigging, spars, and sails remain to be added.
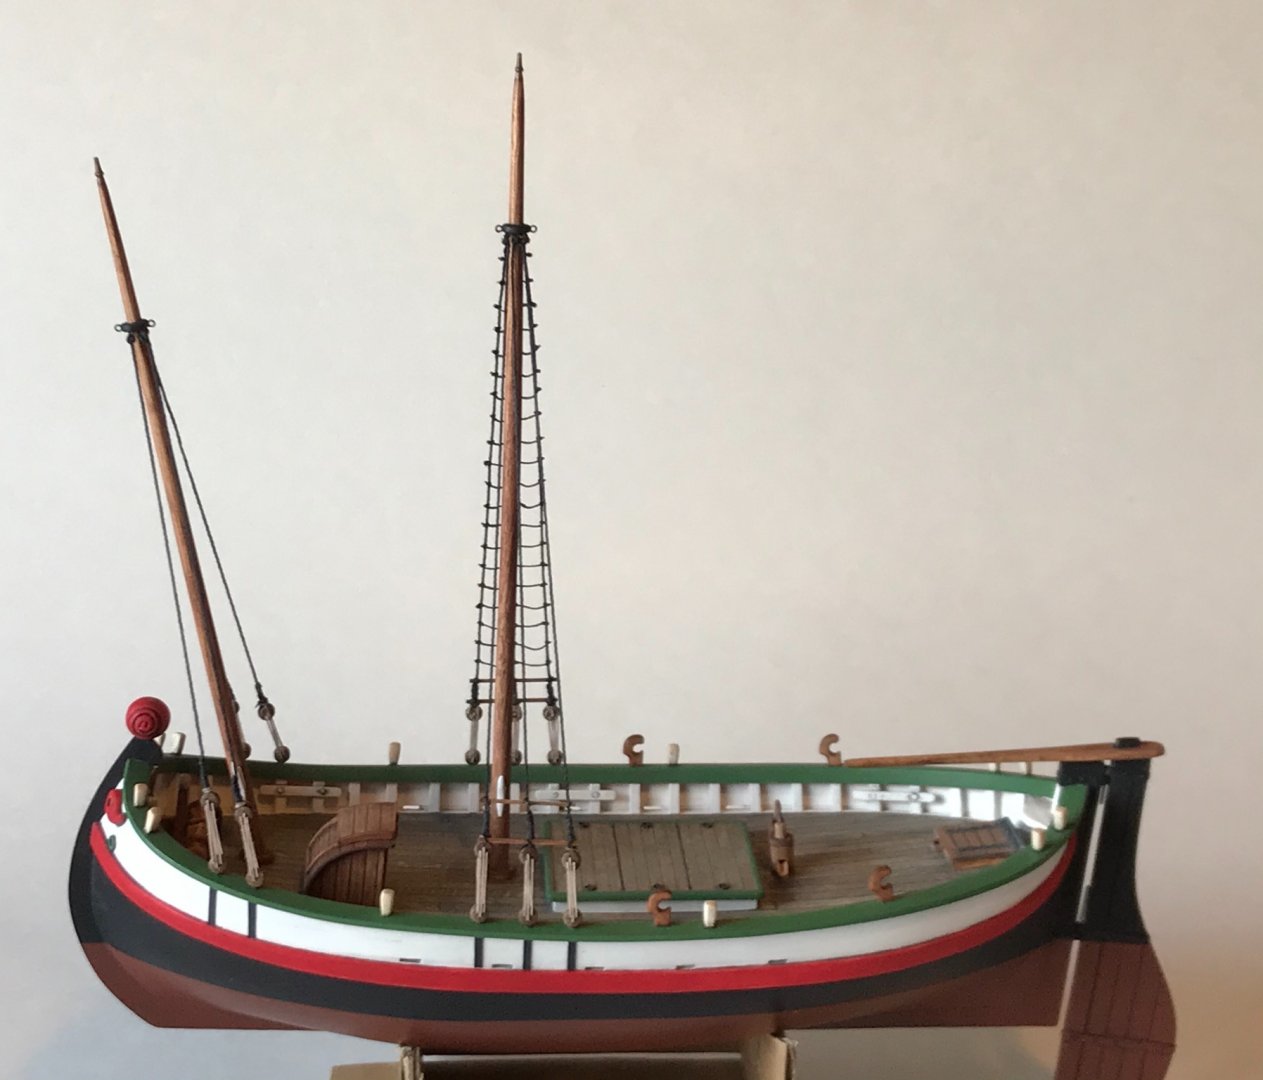

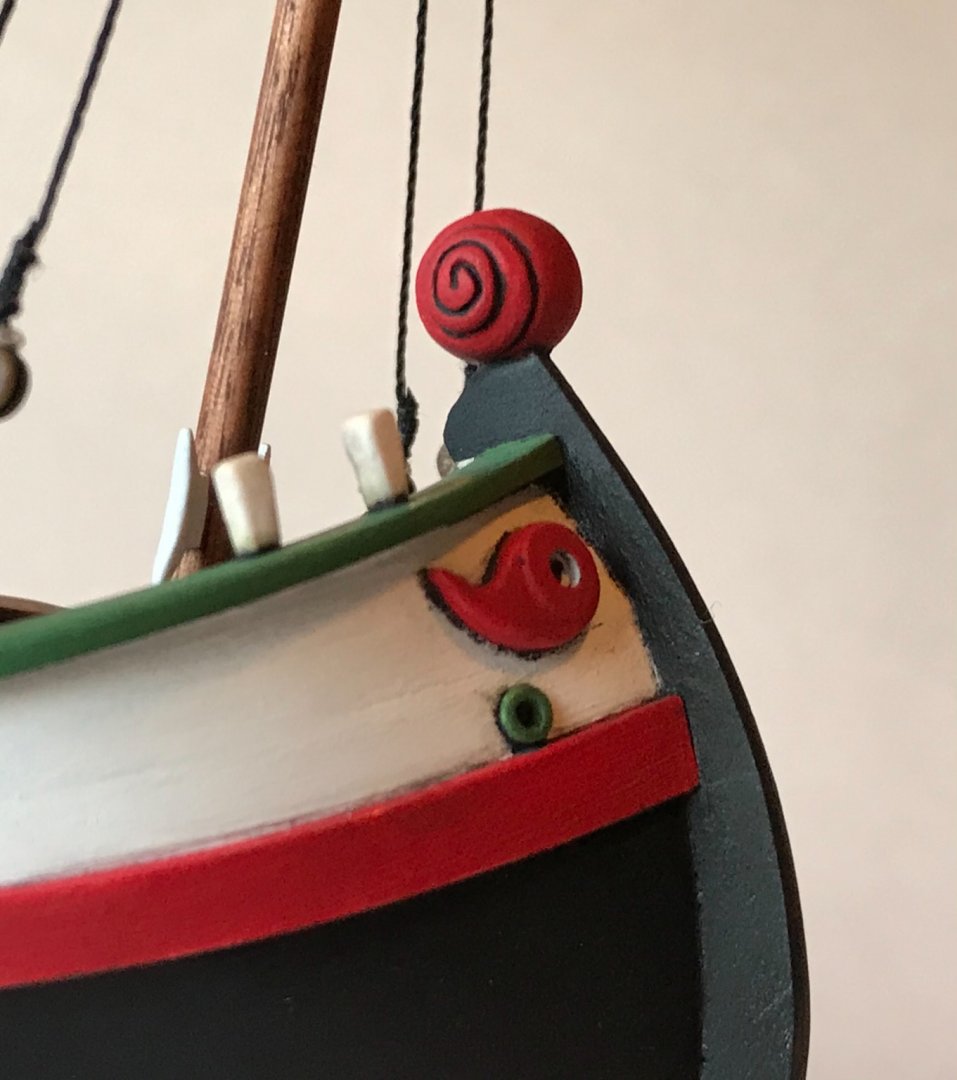
I decided to carve a "ram's horn" style bow ornament; made from a wooden bead.

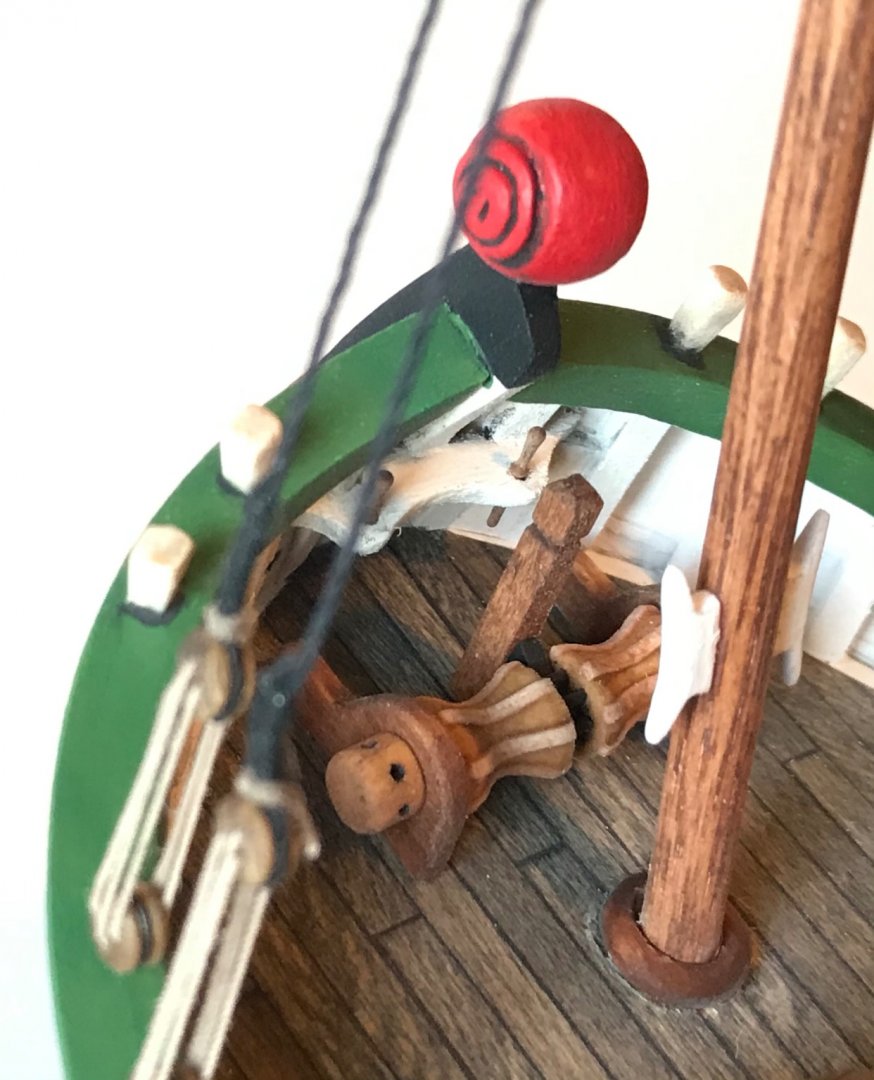
The large rudder was typical of these boats.
The forcolas are carved from basswood sheet.


- Moab, Rik Thistle, GrandpaPhil and 7 others
-
10
-
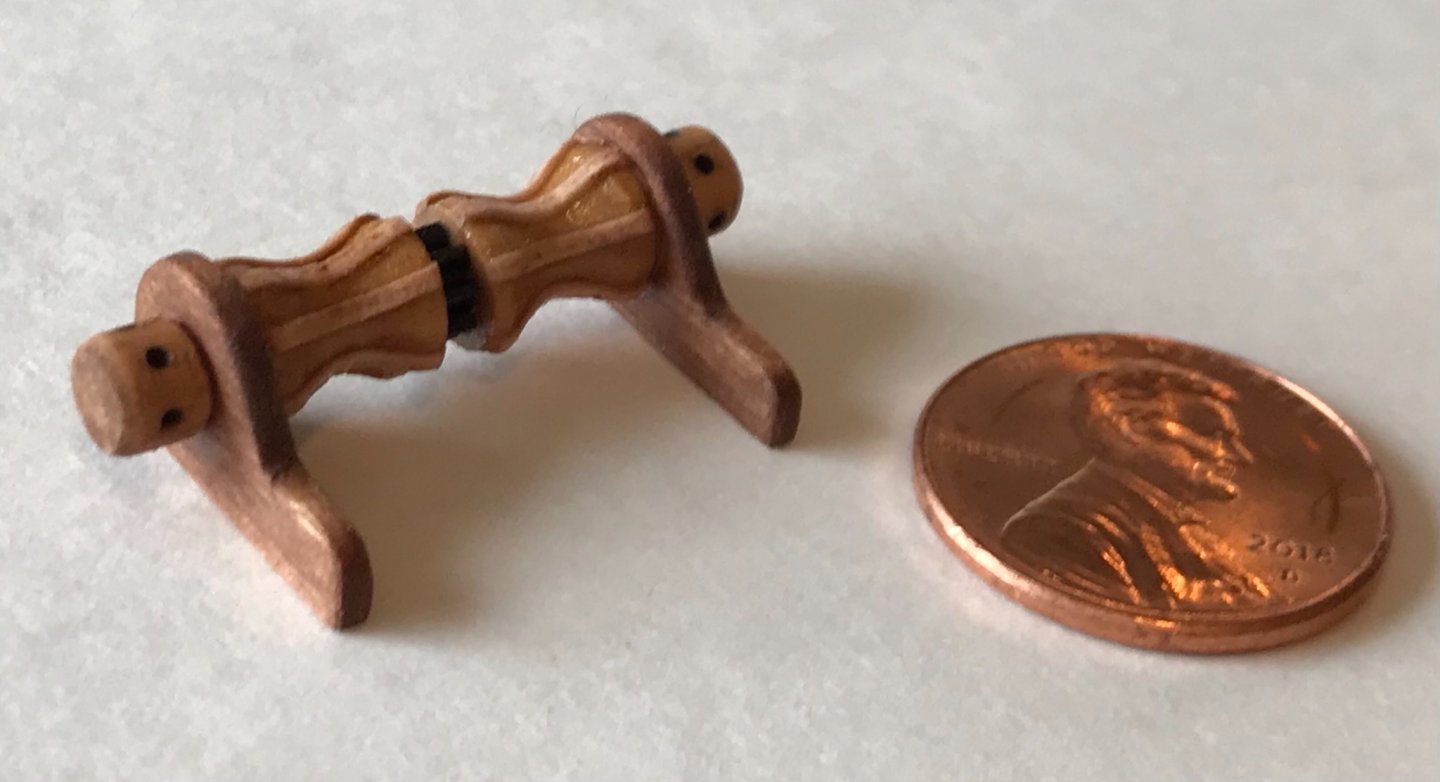
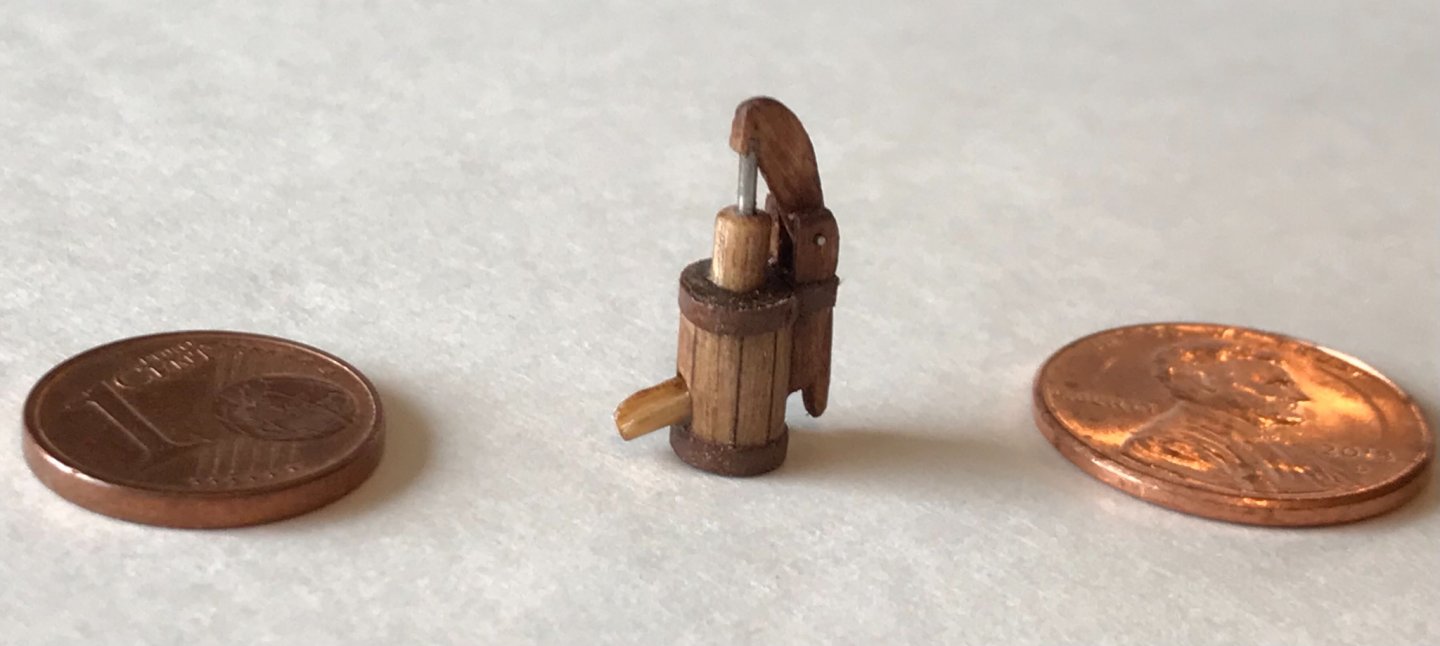
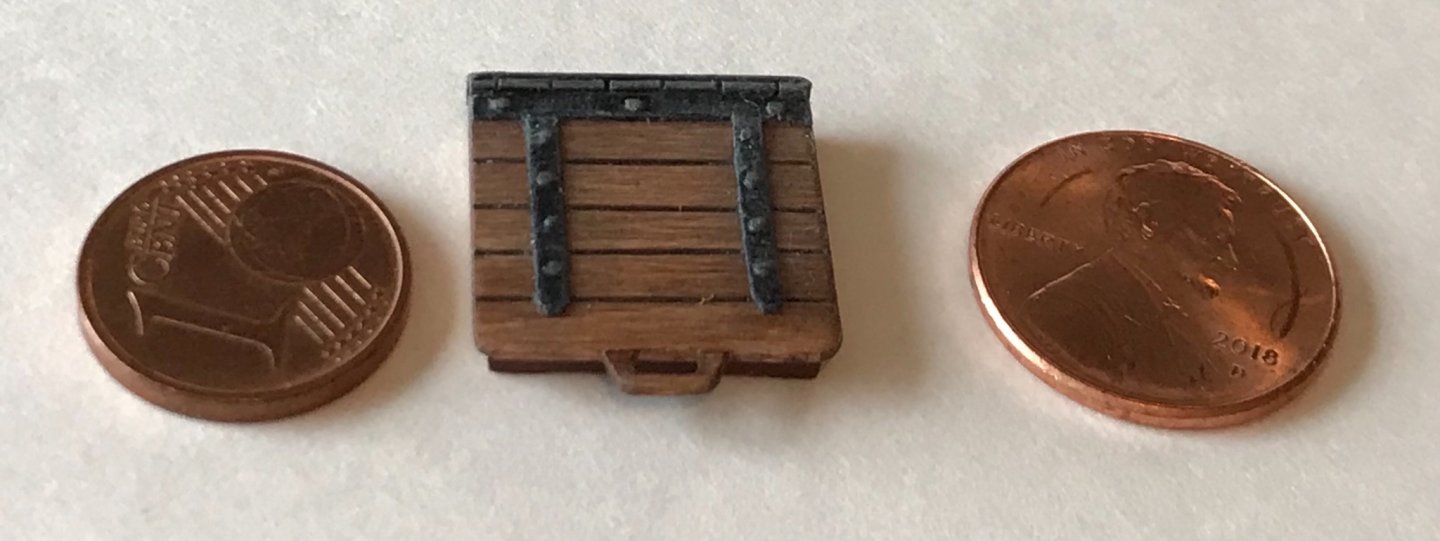
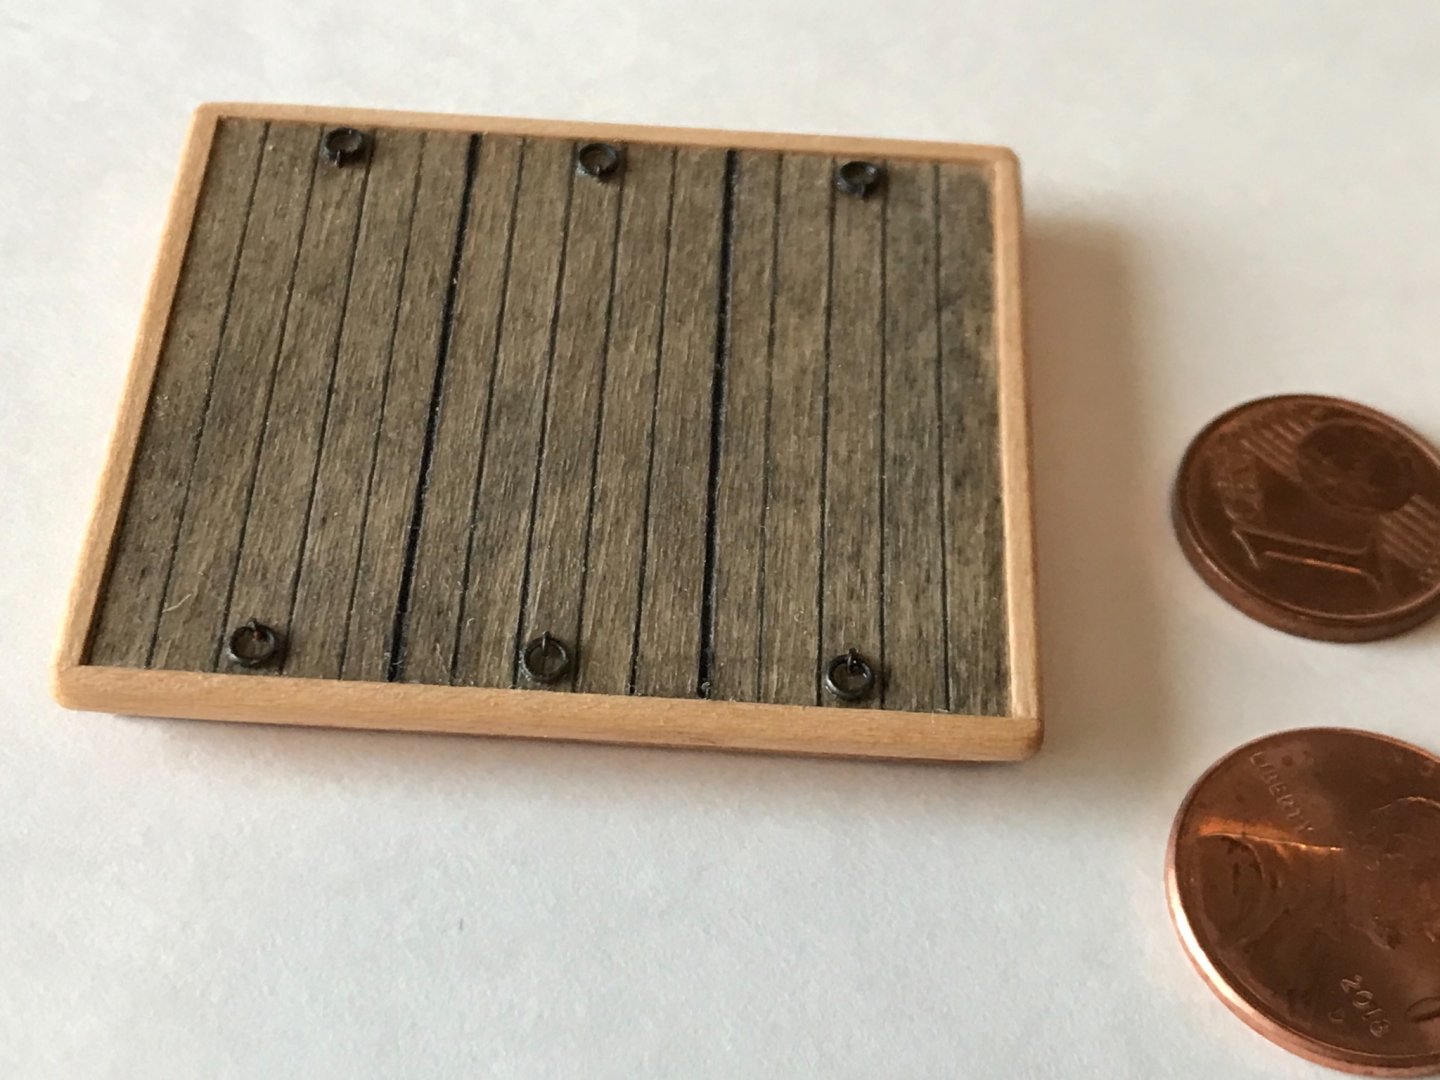
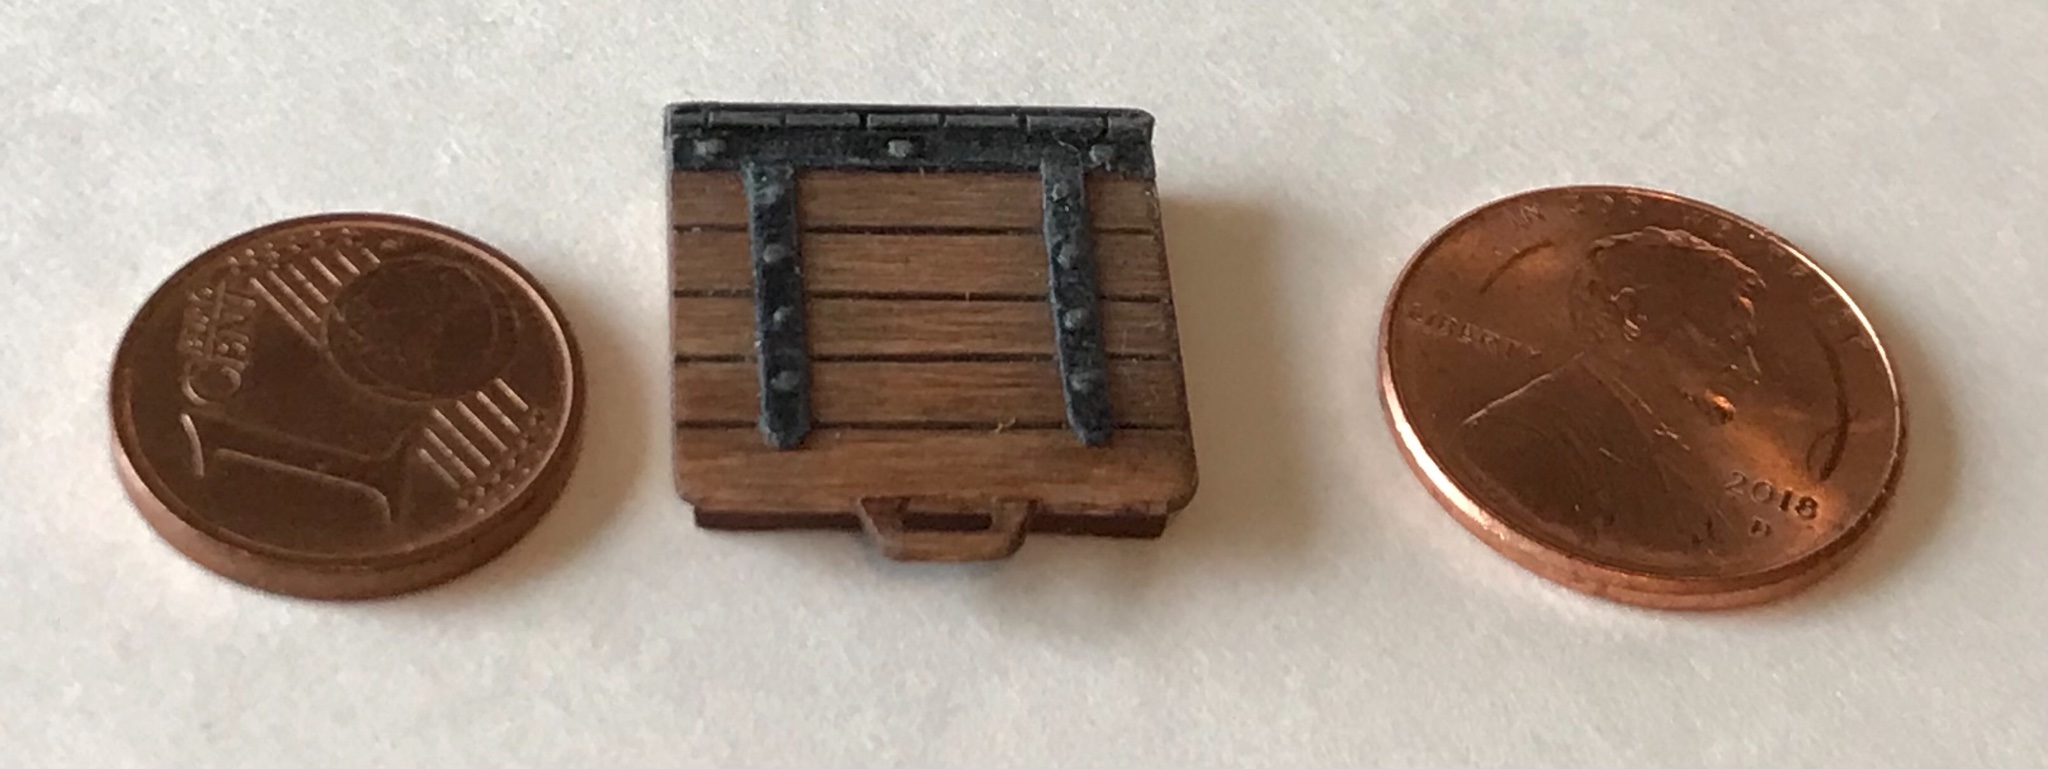
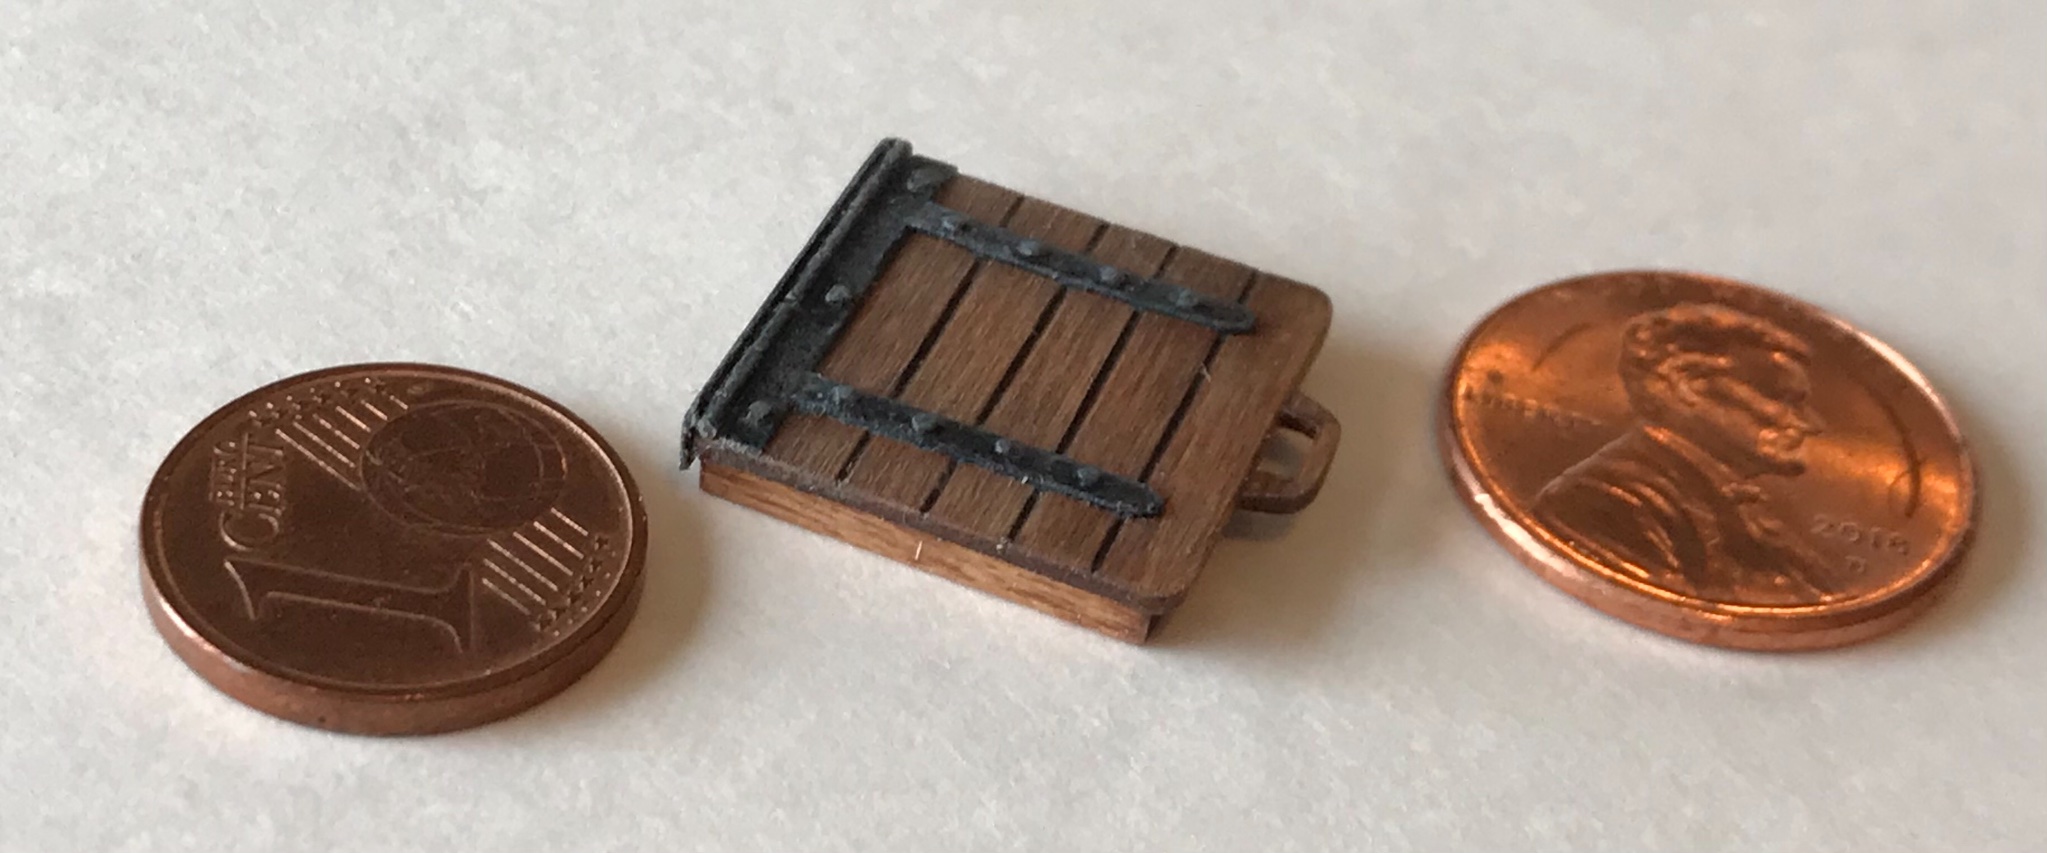
Thanks Thanasis! The hardware is made from heavy construction paper (black color). After gluing the strips of paper to the wood, small holes are drilled with a pin vise for the bolts. I use copper wire for the bolts/rivets. The actual hinges are plastic (styrene) rod, cut into short pieces and glued with CA to the wood/paper, with short gaps between them.
-
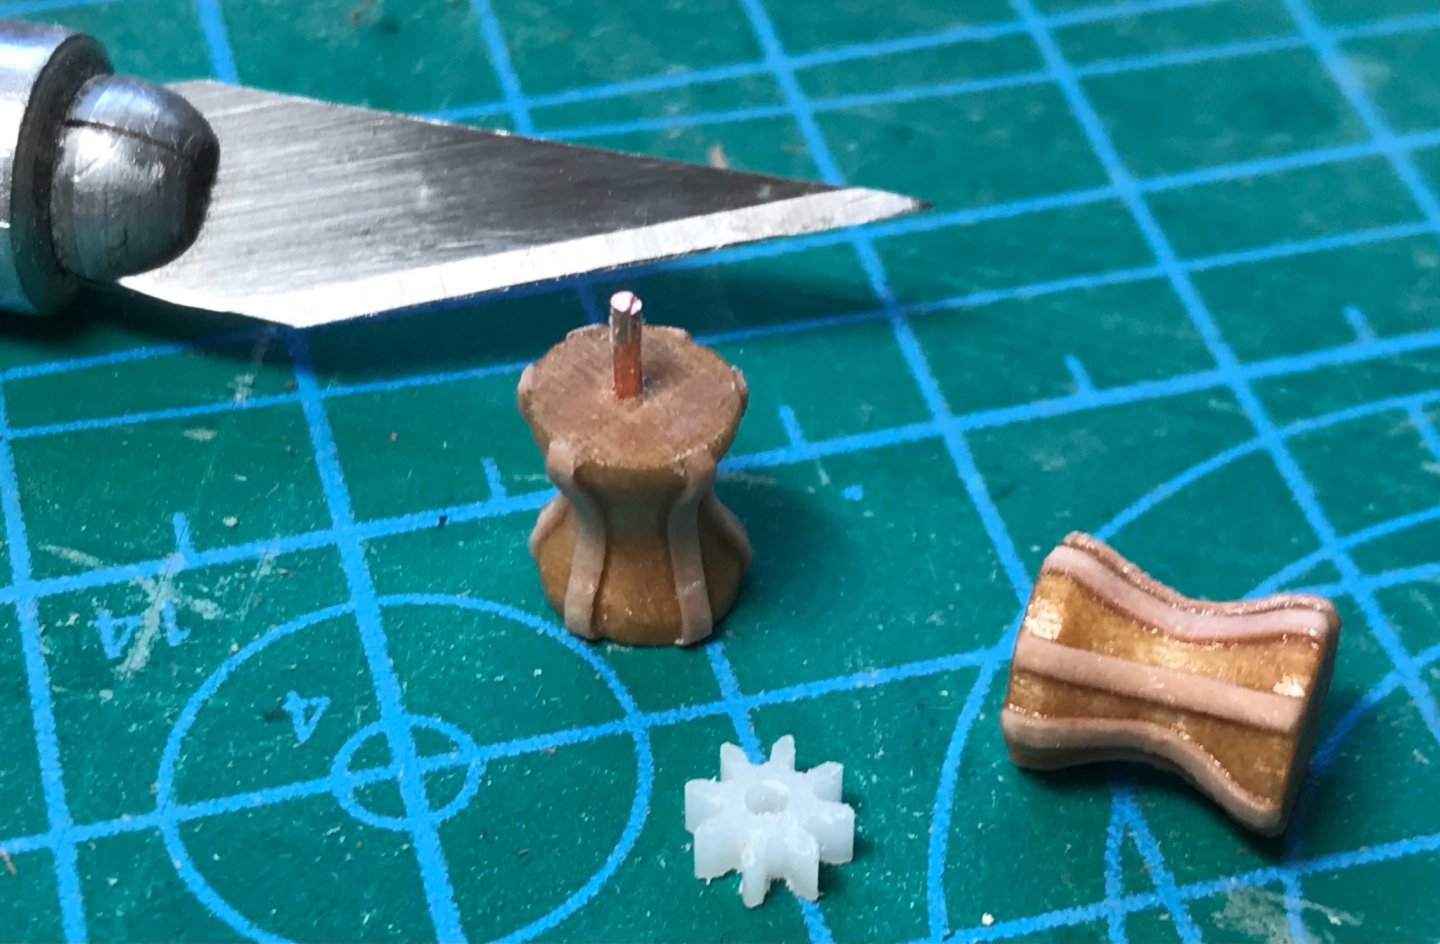
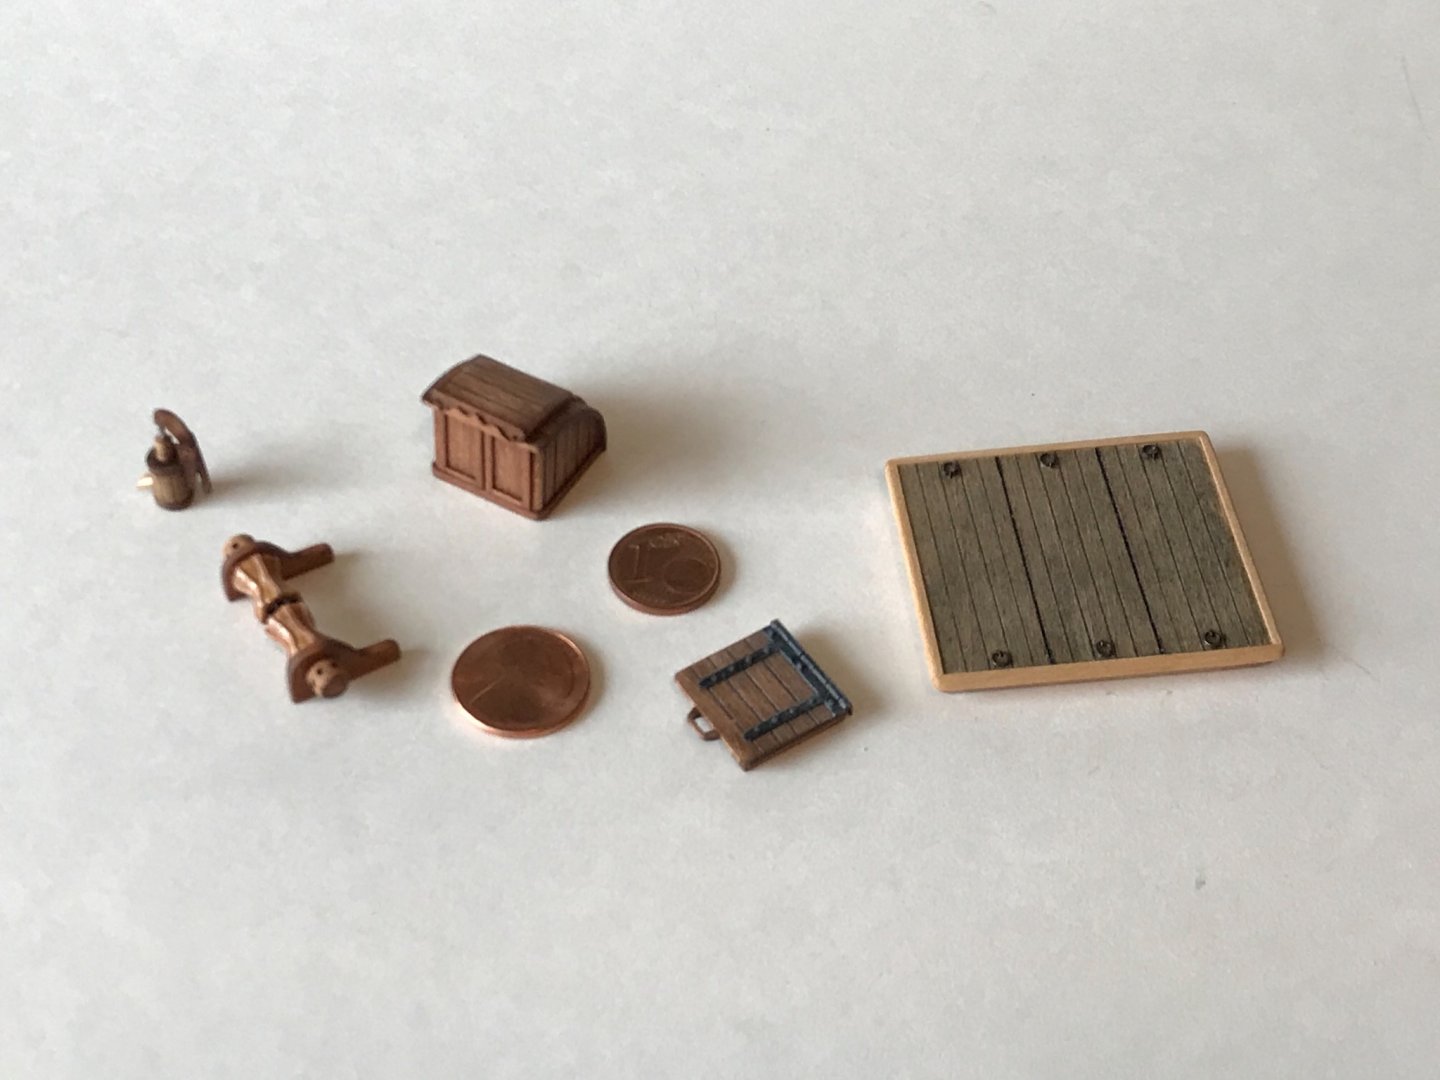
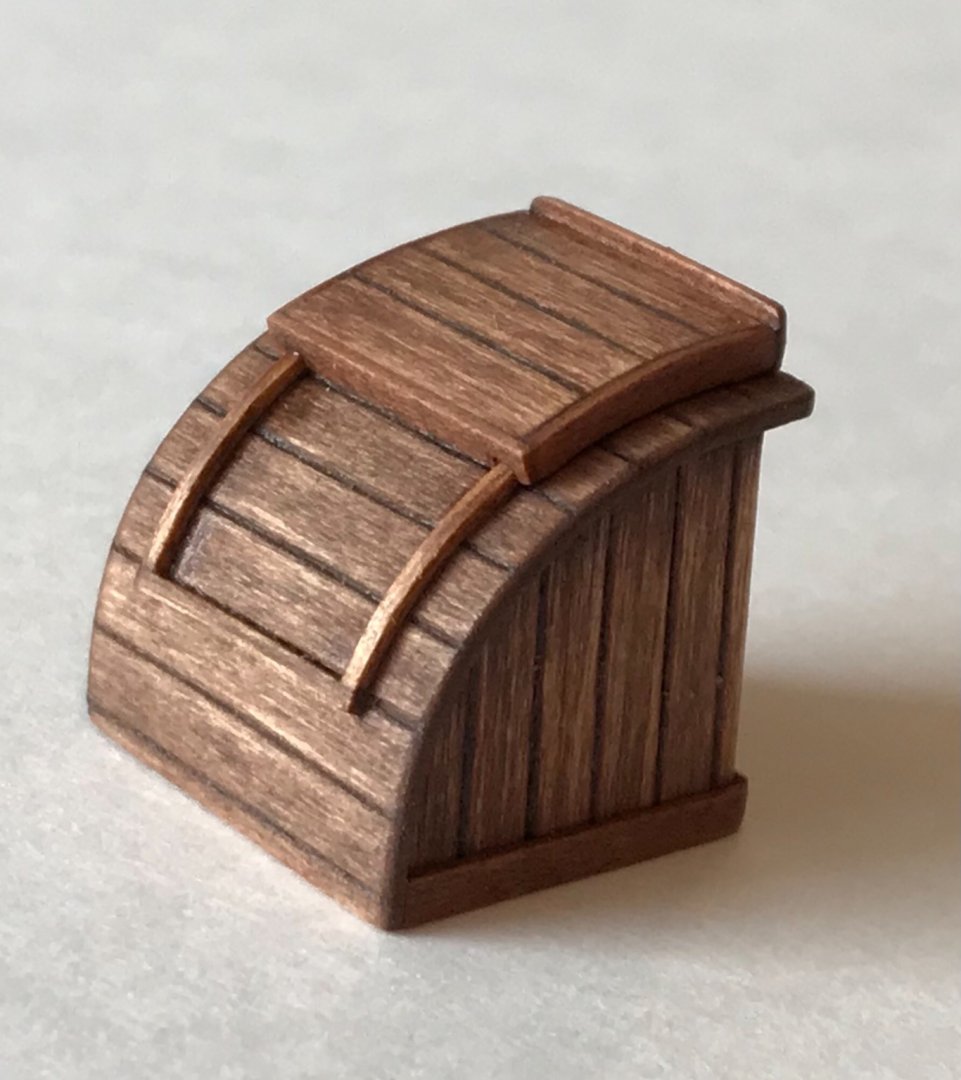
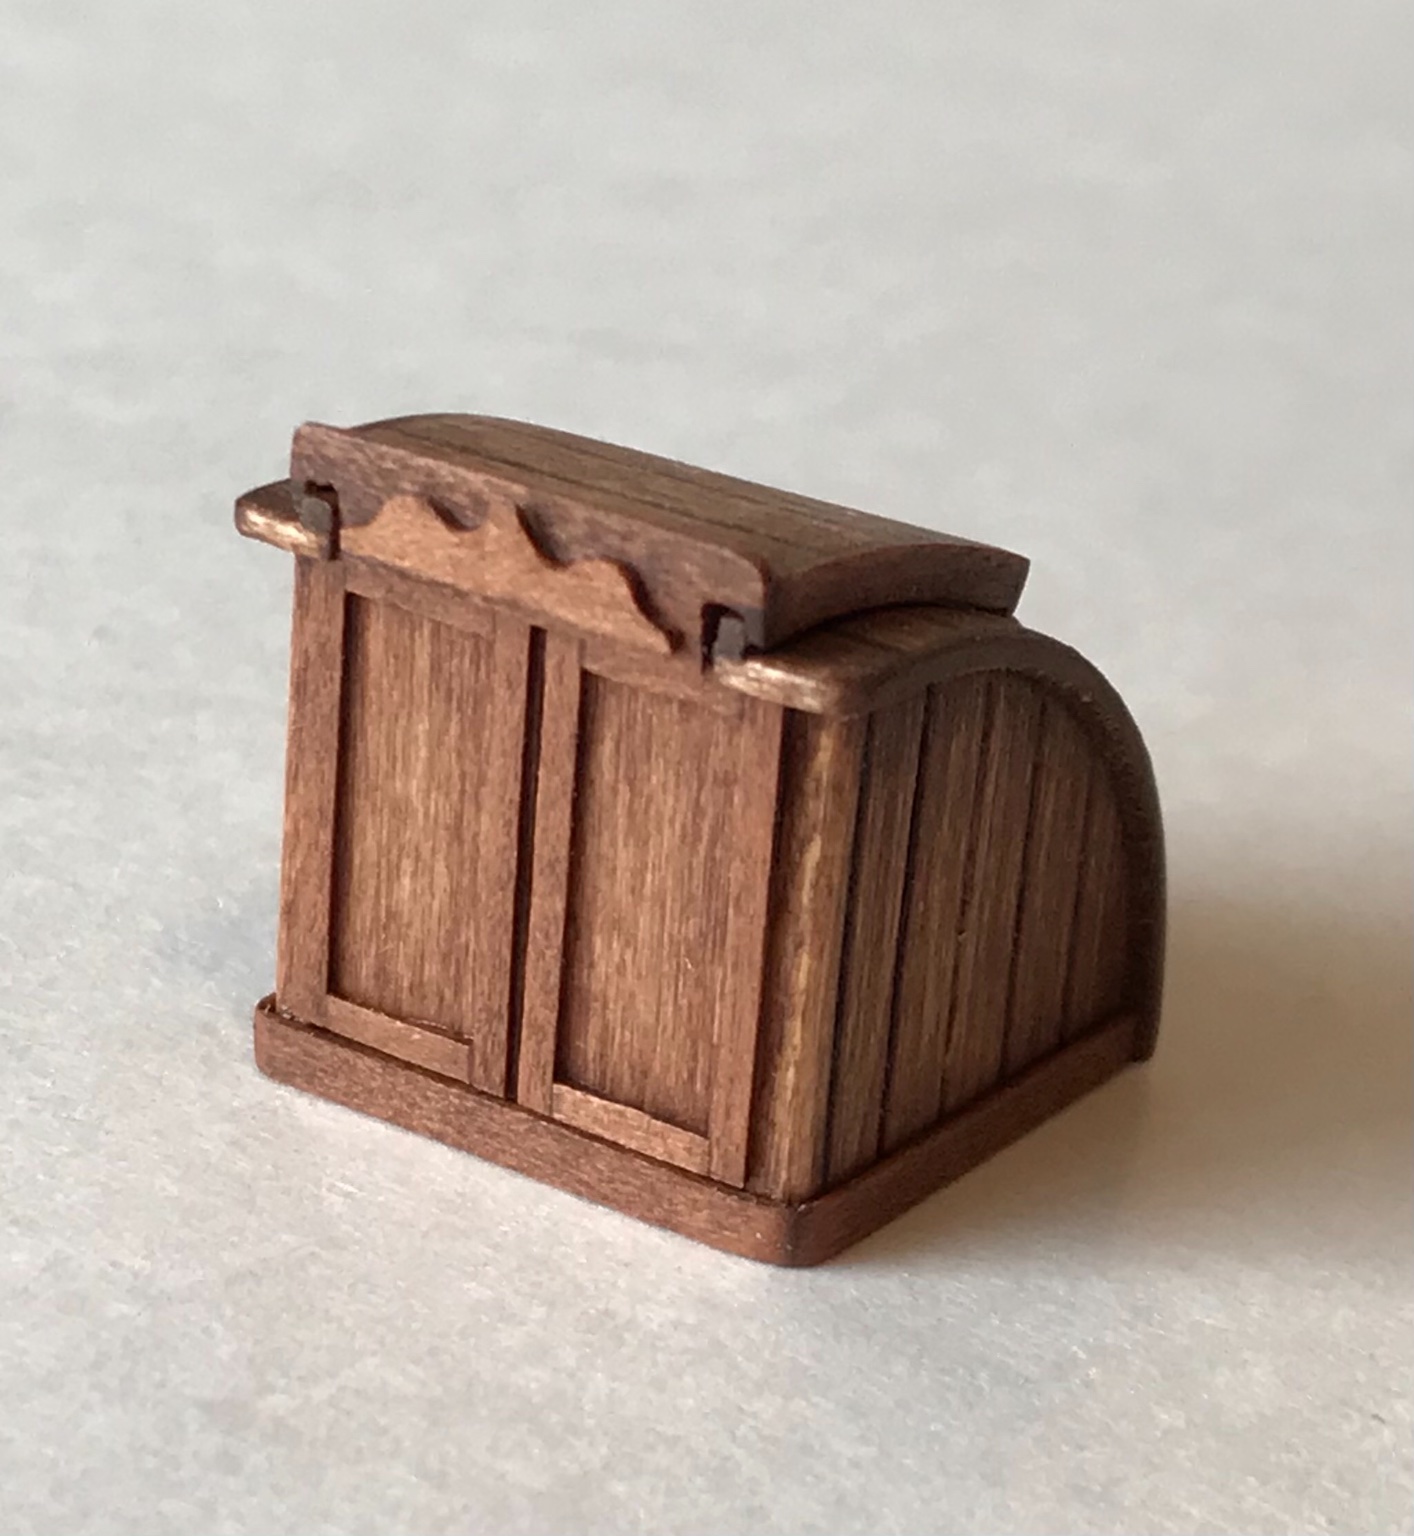
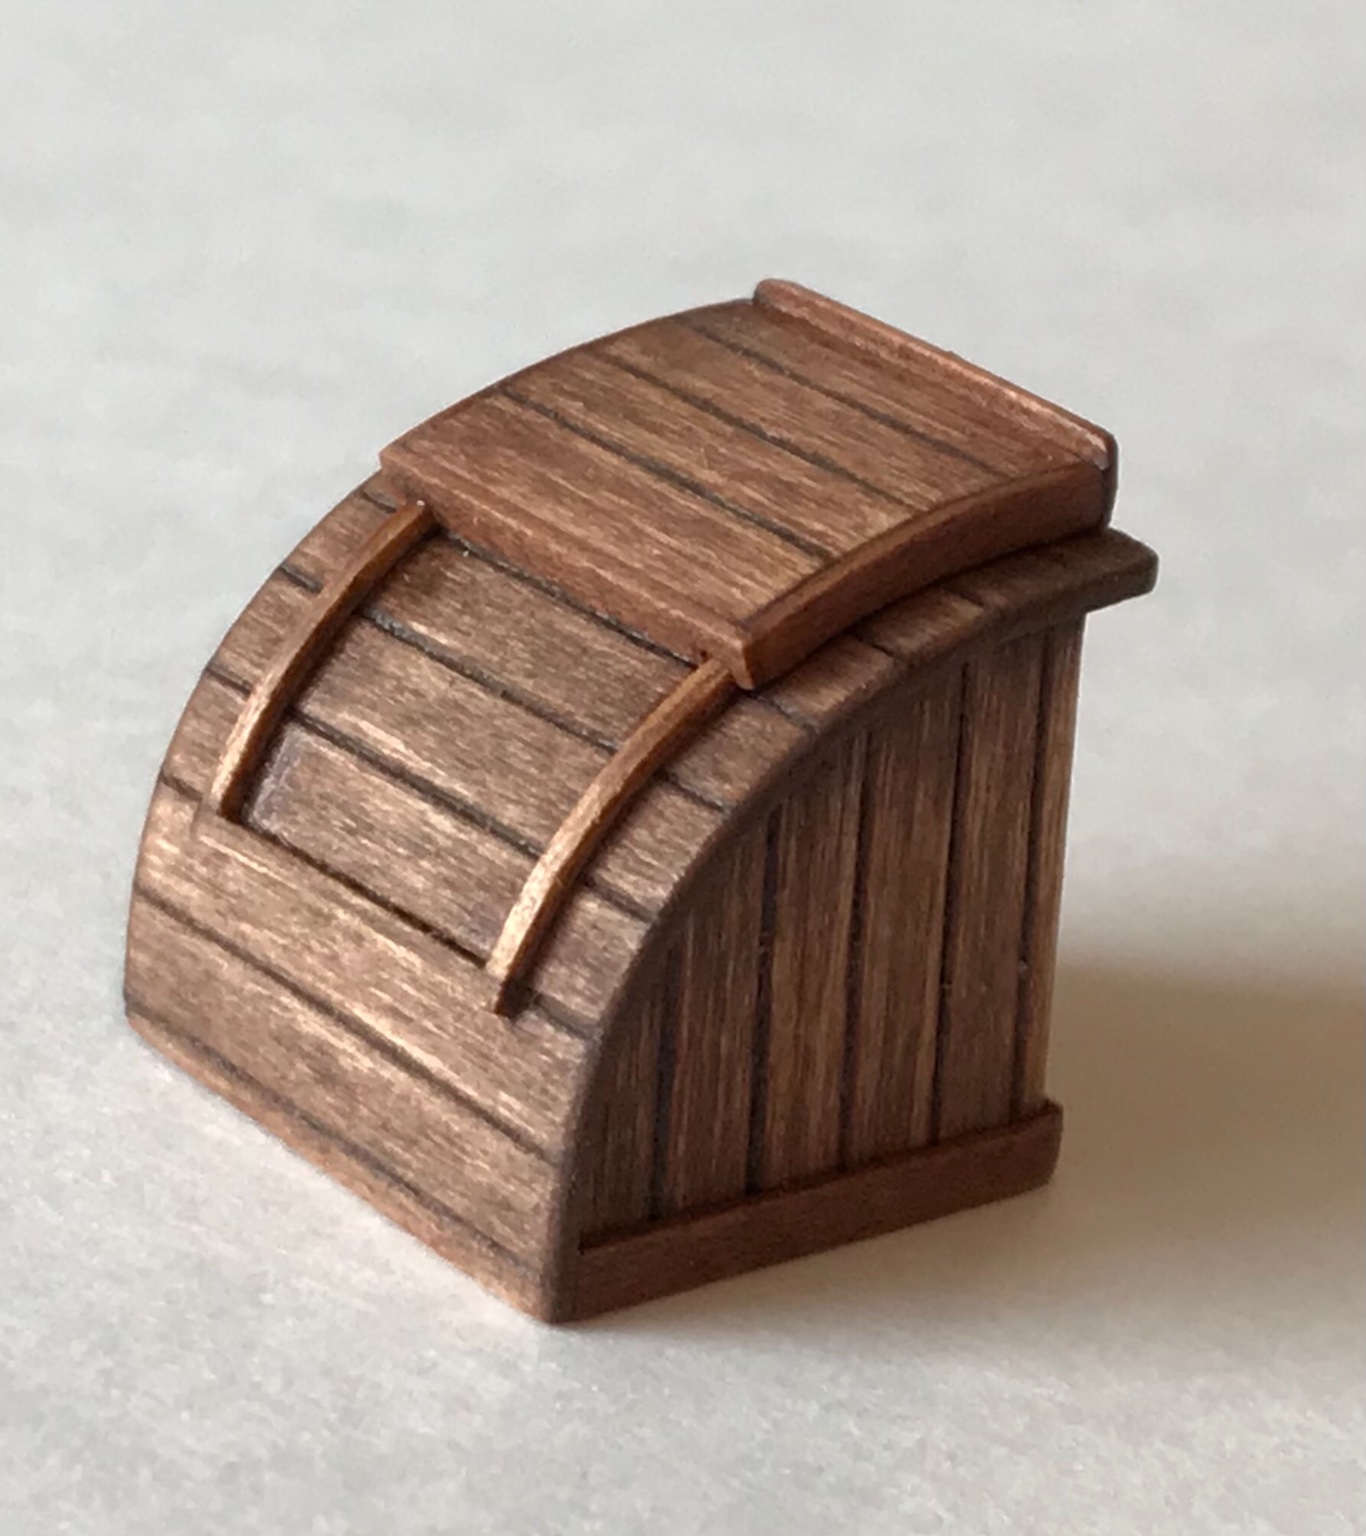
I haven't posted in a few days while working on deck houses and fittings. All are scratch-built and the main ingredients are basswood, pear veneer, bamboo, various papers, copper or steel wire, and CA and PA glue. The last photo shows the planned placement on the deck. Hope to start painting next!


- ccoyle, Thanasis, GrandpaPhil and 6 others
-
9
-
Here's an update on construction progress:
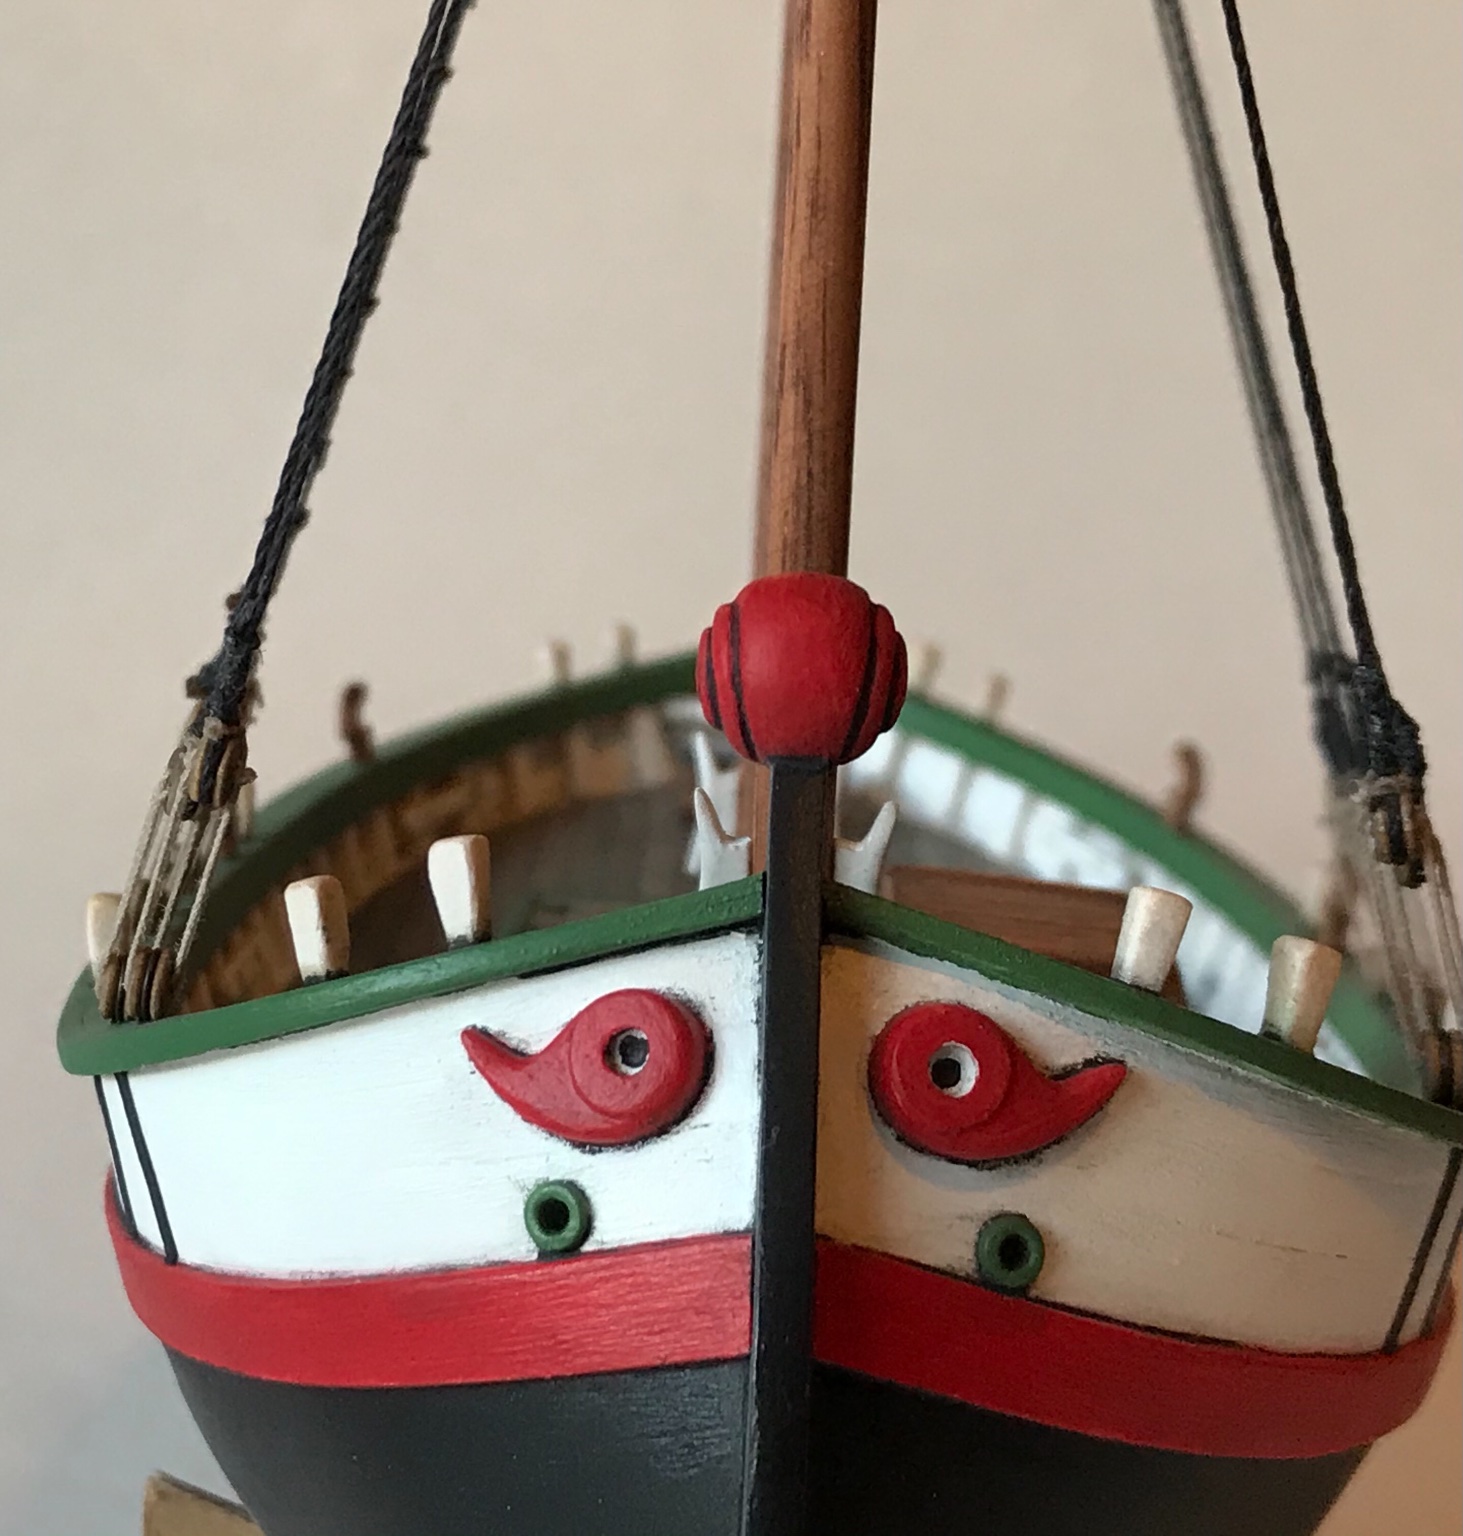
After studying many photos and drawings of the "eyes" and reading an article that mentioned the general placement of them, I decided I had them too far apart (too wide). Fortunately, a little water softened the PA glue, and I was able to reposition them.
Also been adding little bits and pieces, and planning where to step the masts and deck house arrangements. Stay tuned...

- GrandpaPhil, BobG and wefalck
-
3
-
I really like the pipe cleaner idea, and may use it! I have to experiment a little... Thanks Thanasis!
-
Thanasis, I never thanked you for your insights on the frames and "trincarino". Too late to do anything about the frame. I did plan to install a trincarino (although I did not know that is what it is called), but was going to use paint to represent it... Also, I have been intrigued by the curly hair stem post. What's your idea???
-
-
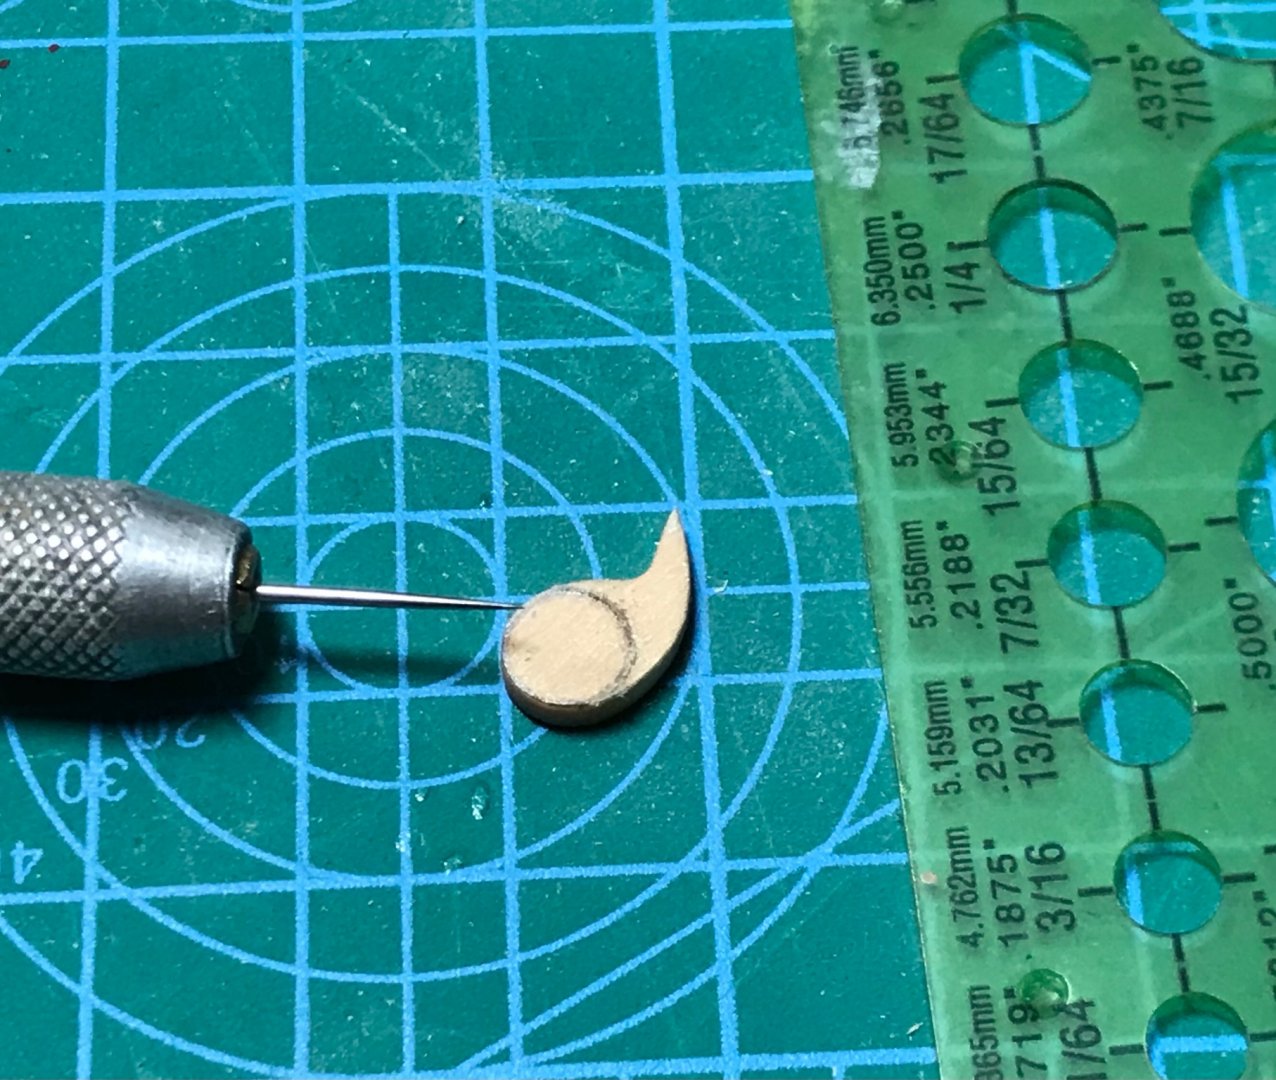
Since basswood can be so delicate and crumbles easily, especially in carving situations, the rough cut-out piece was coated in very thin (viscous) CA (super) glue. This can be a very dangerous operation, especially while handling such a small piece. The superglue spreads wildly and gets on fingers easily. One has to be extremely careful!
I imagine, if our models survive through the millennia, future archeologists will wonder why modelers in our age incorporated bits of skin, and in some cases whole fingers, into our model building! Perhaps by then, they can clone me back to life from one of my models, and ask me....

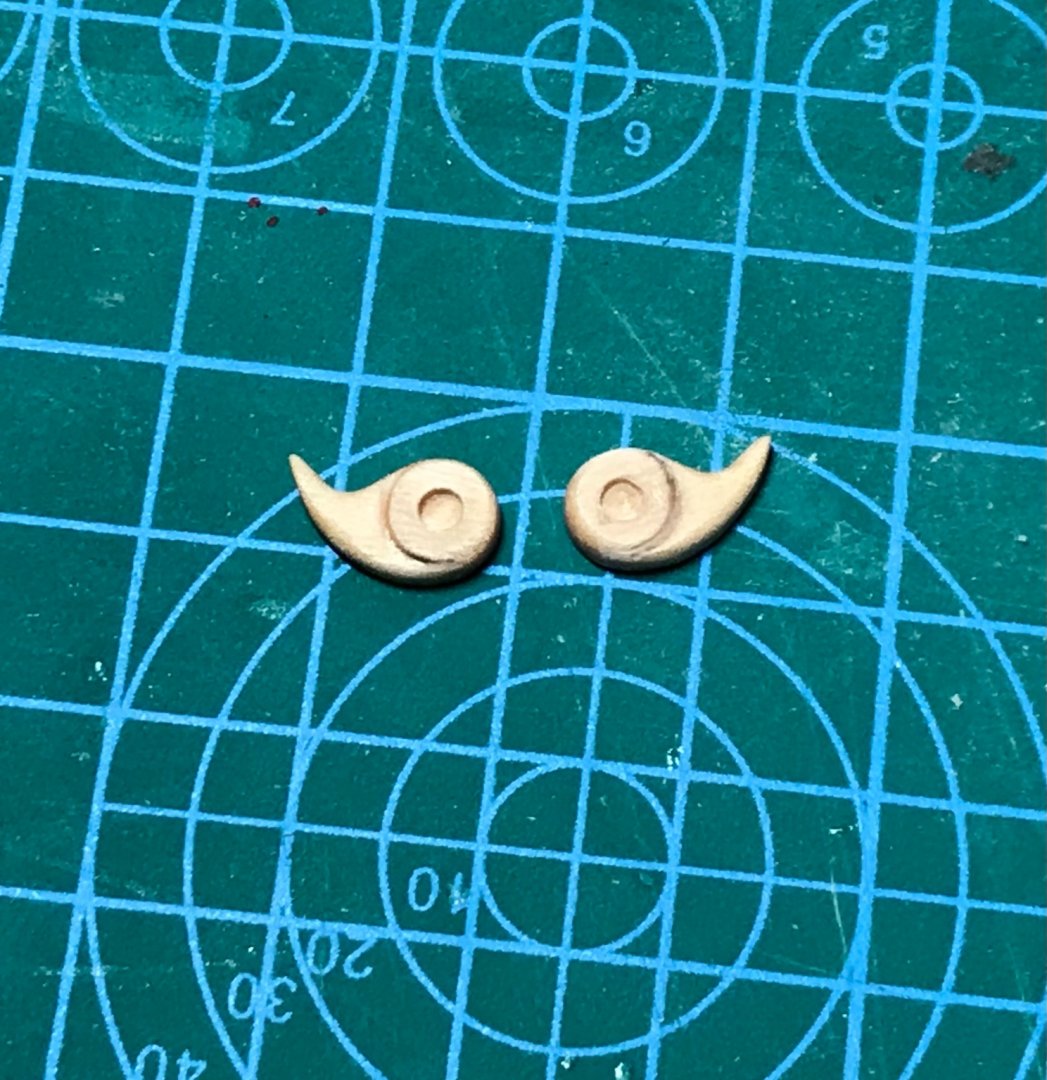
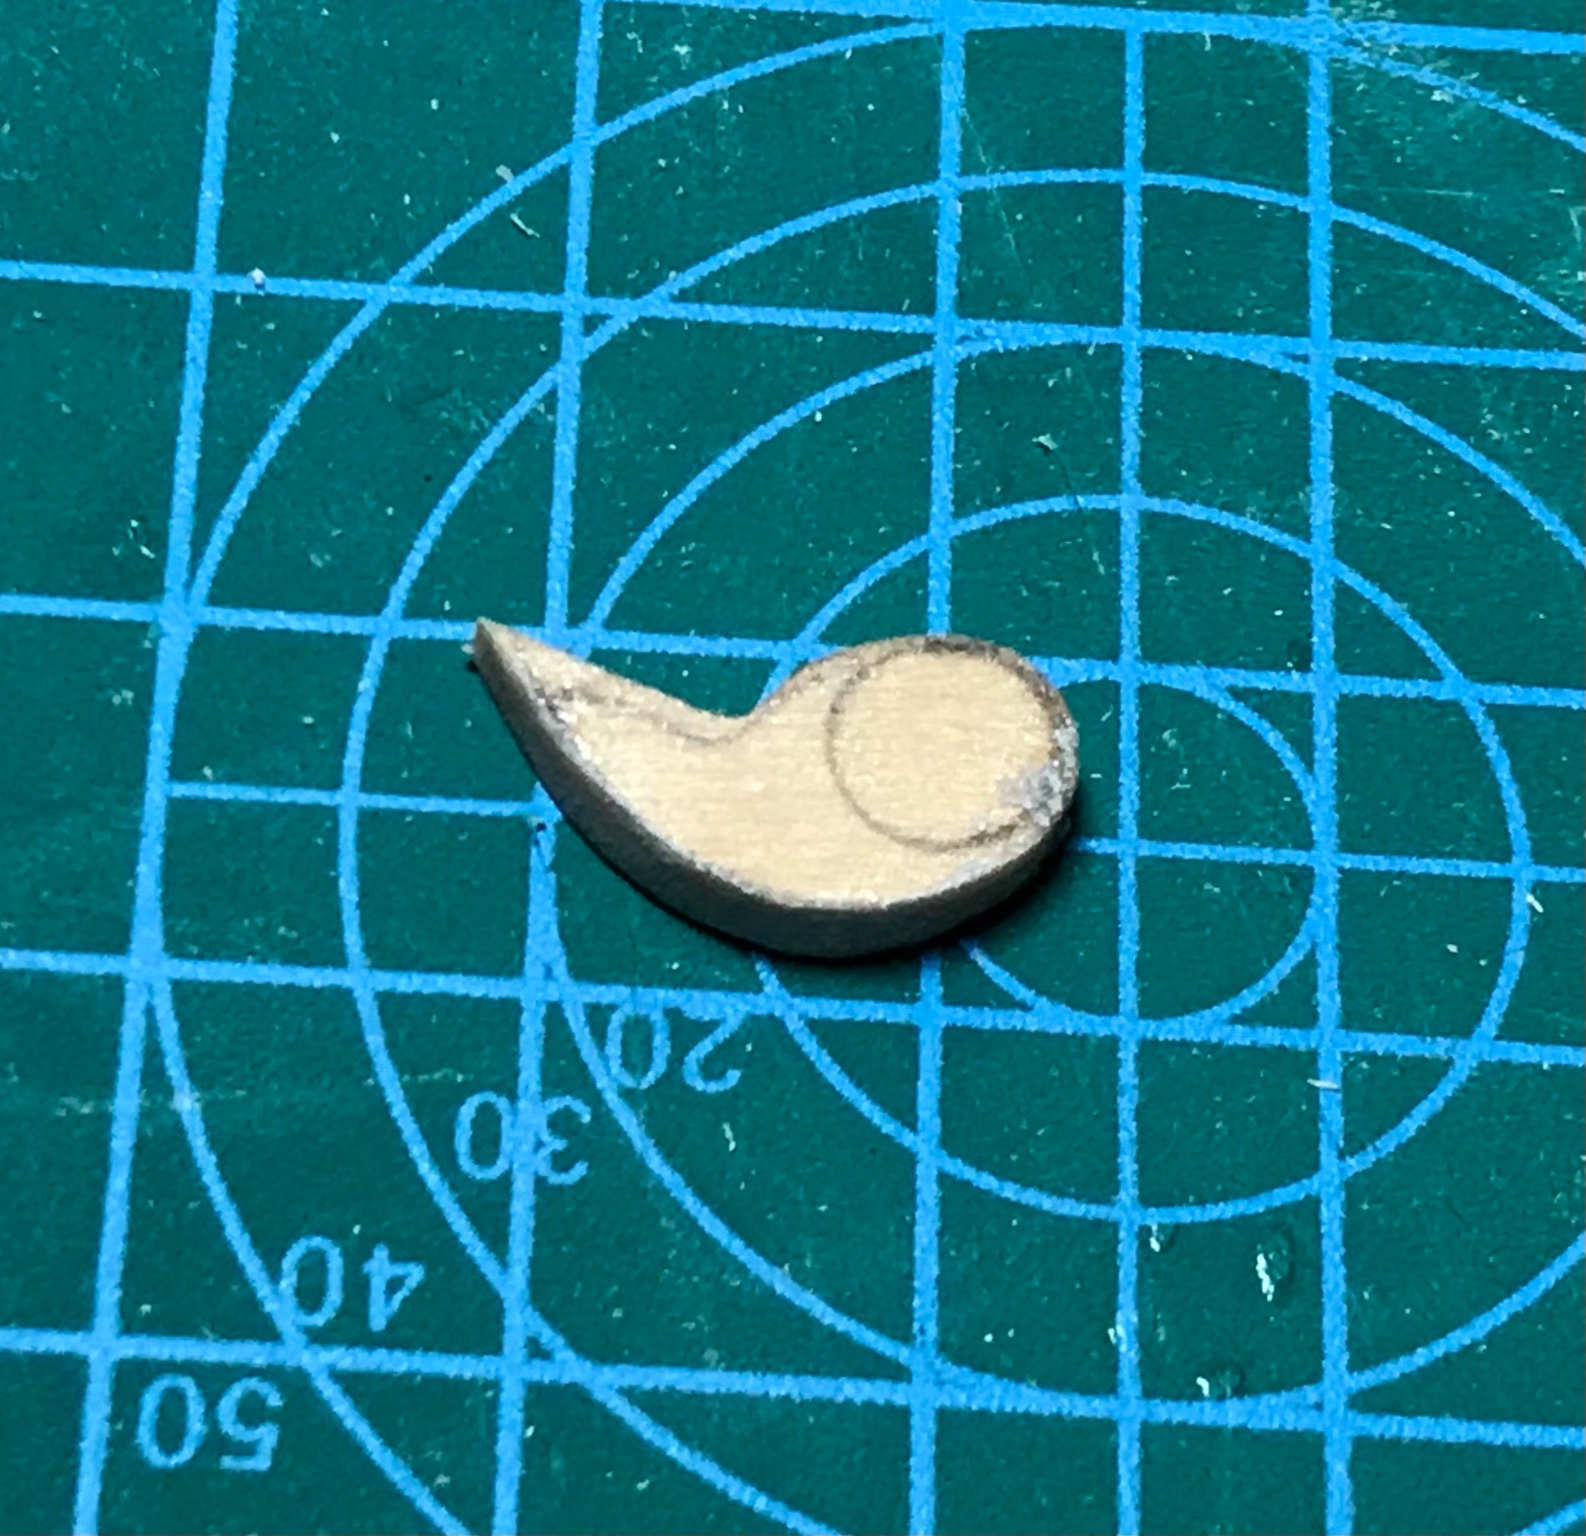
After impregnating the wood with CA, carving could be much more robust. I also wanted to add some 3-dimensional attributes to the eyes, so I scribed a semi-circle along the round edge to have a line from which to carve down the rest of the eye. This left an "eyeball" effect.
Pupils were drilled out by hand using drill bits, and the final smoothing applied...

- BobG, GrandpaPhil, mtaylor and 2 others
-
5
-
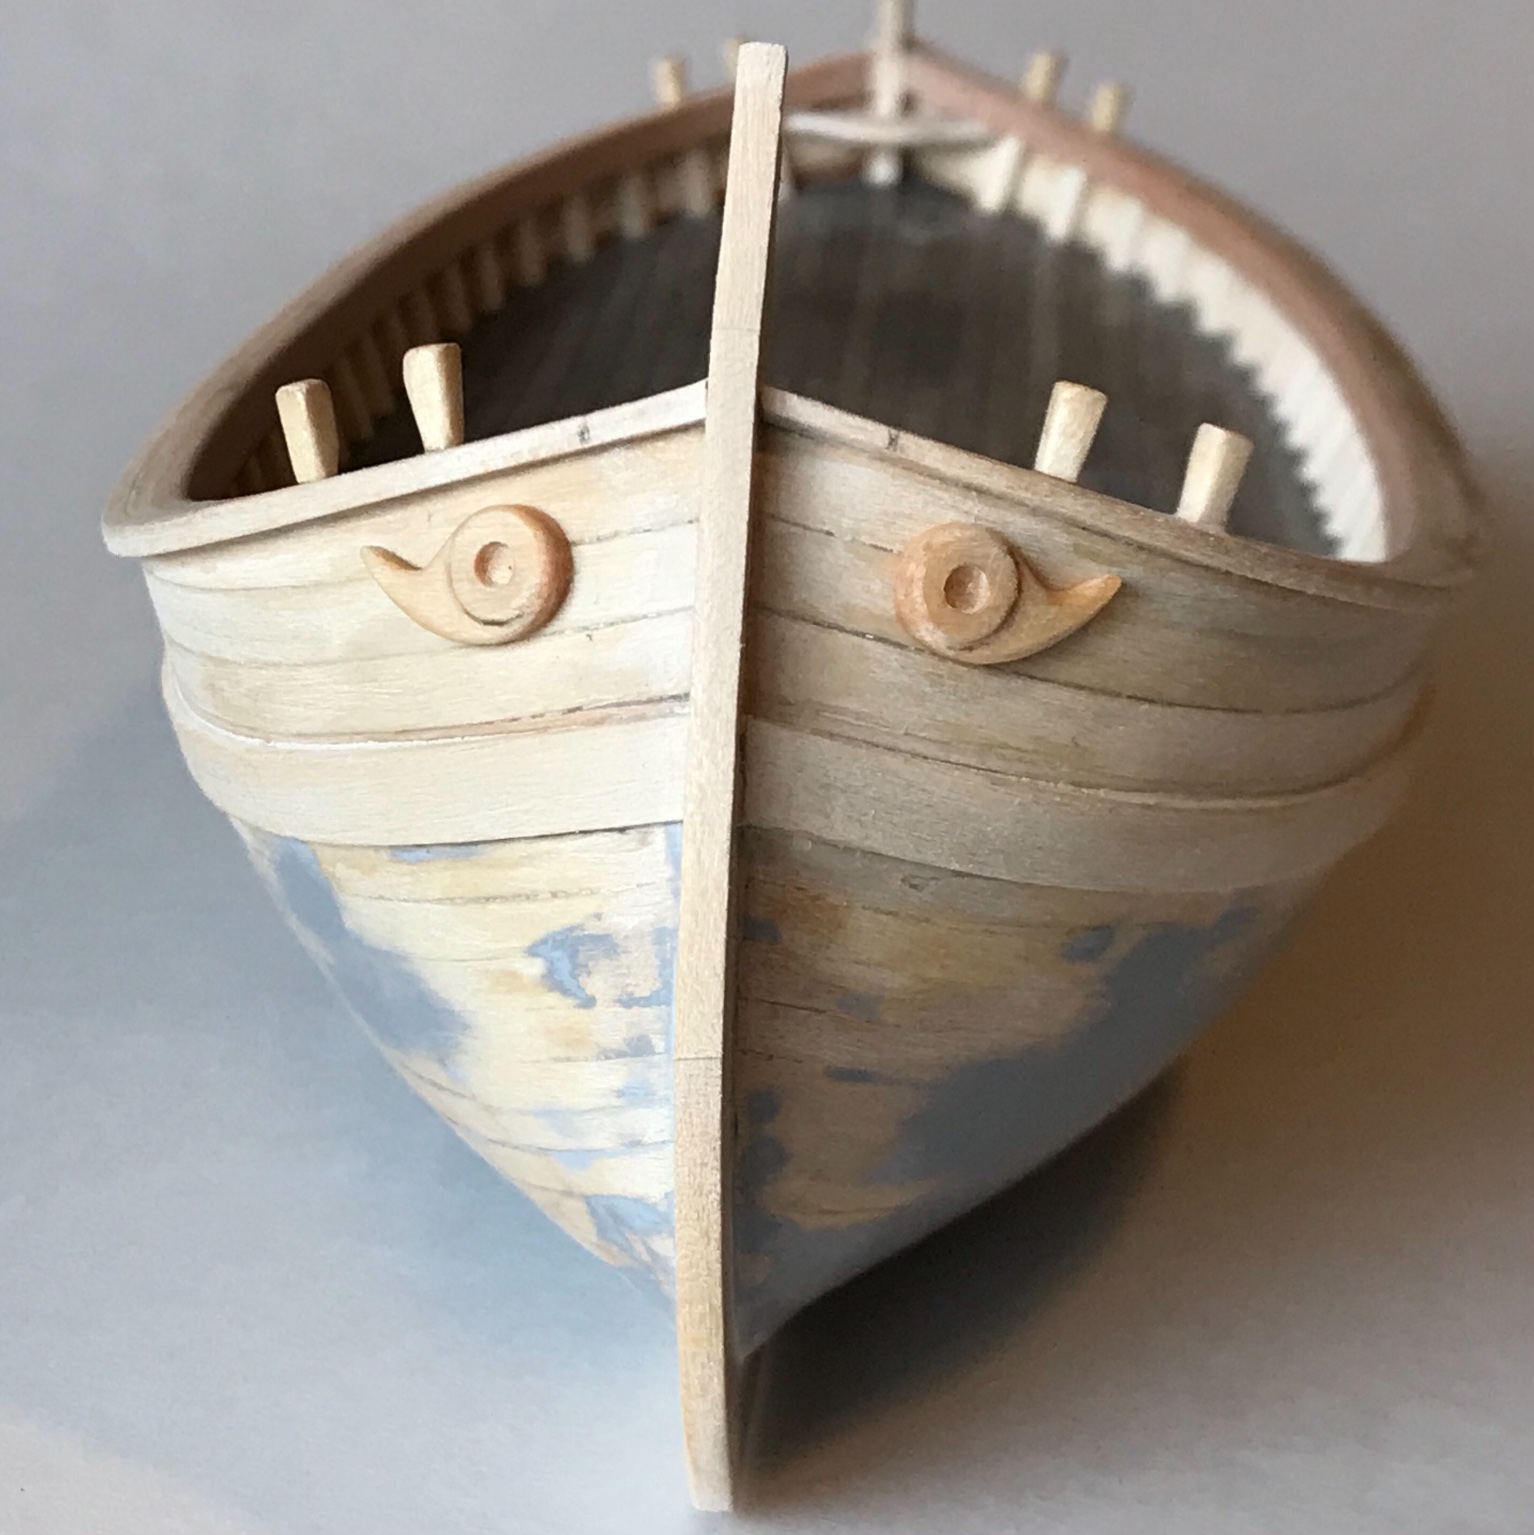
The adding of details (the building of deck houses, winches, etc.) is one of my favorite activities. A notable feature of the Brazzera and other Adriatic boats are the "eyes." I understand they are very important, since a boat without eyes can not see where it is going. This is new to me and looked like a fun project.
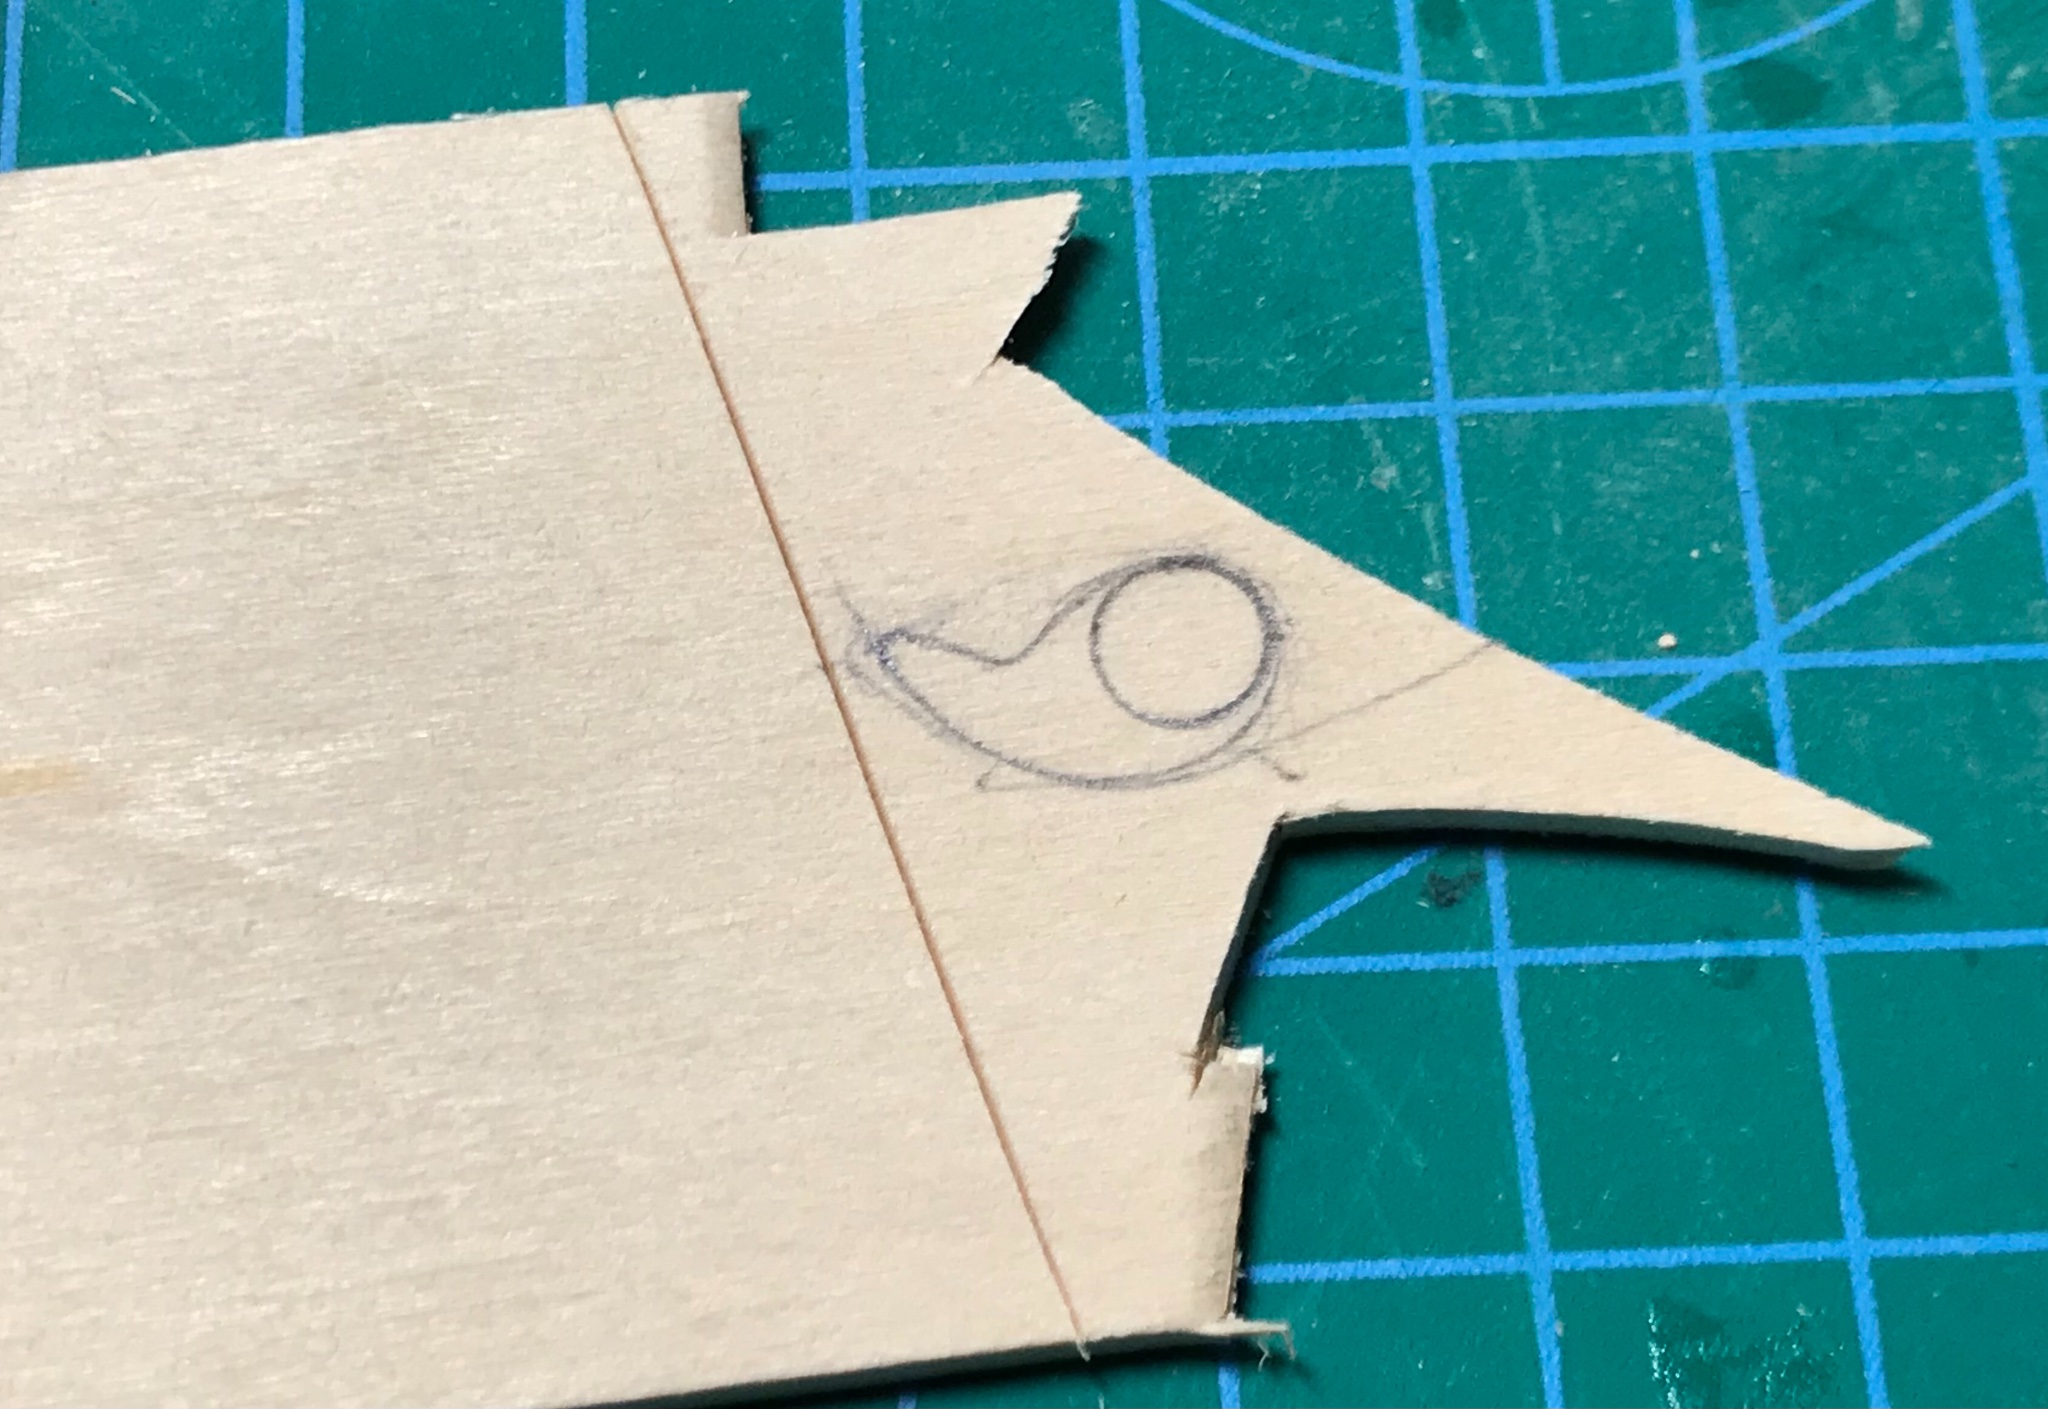
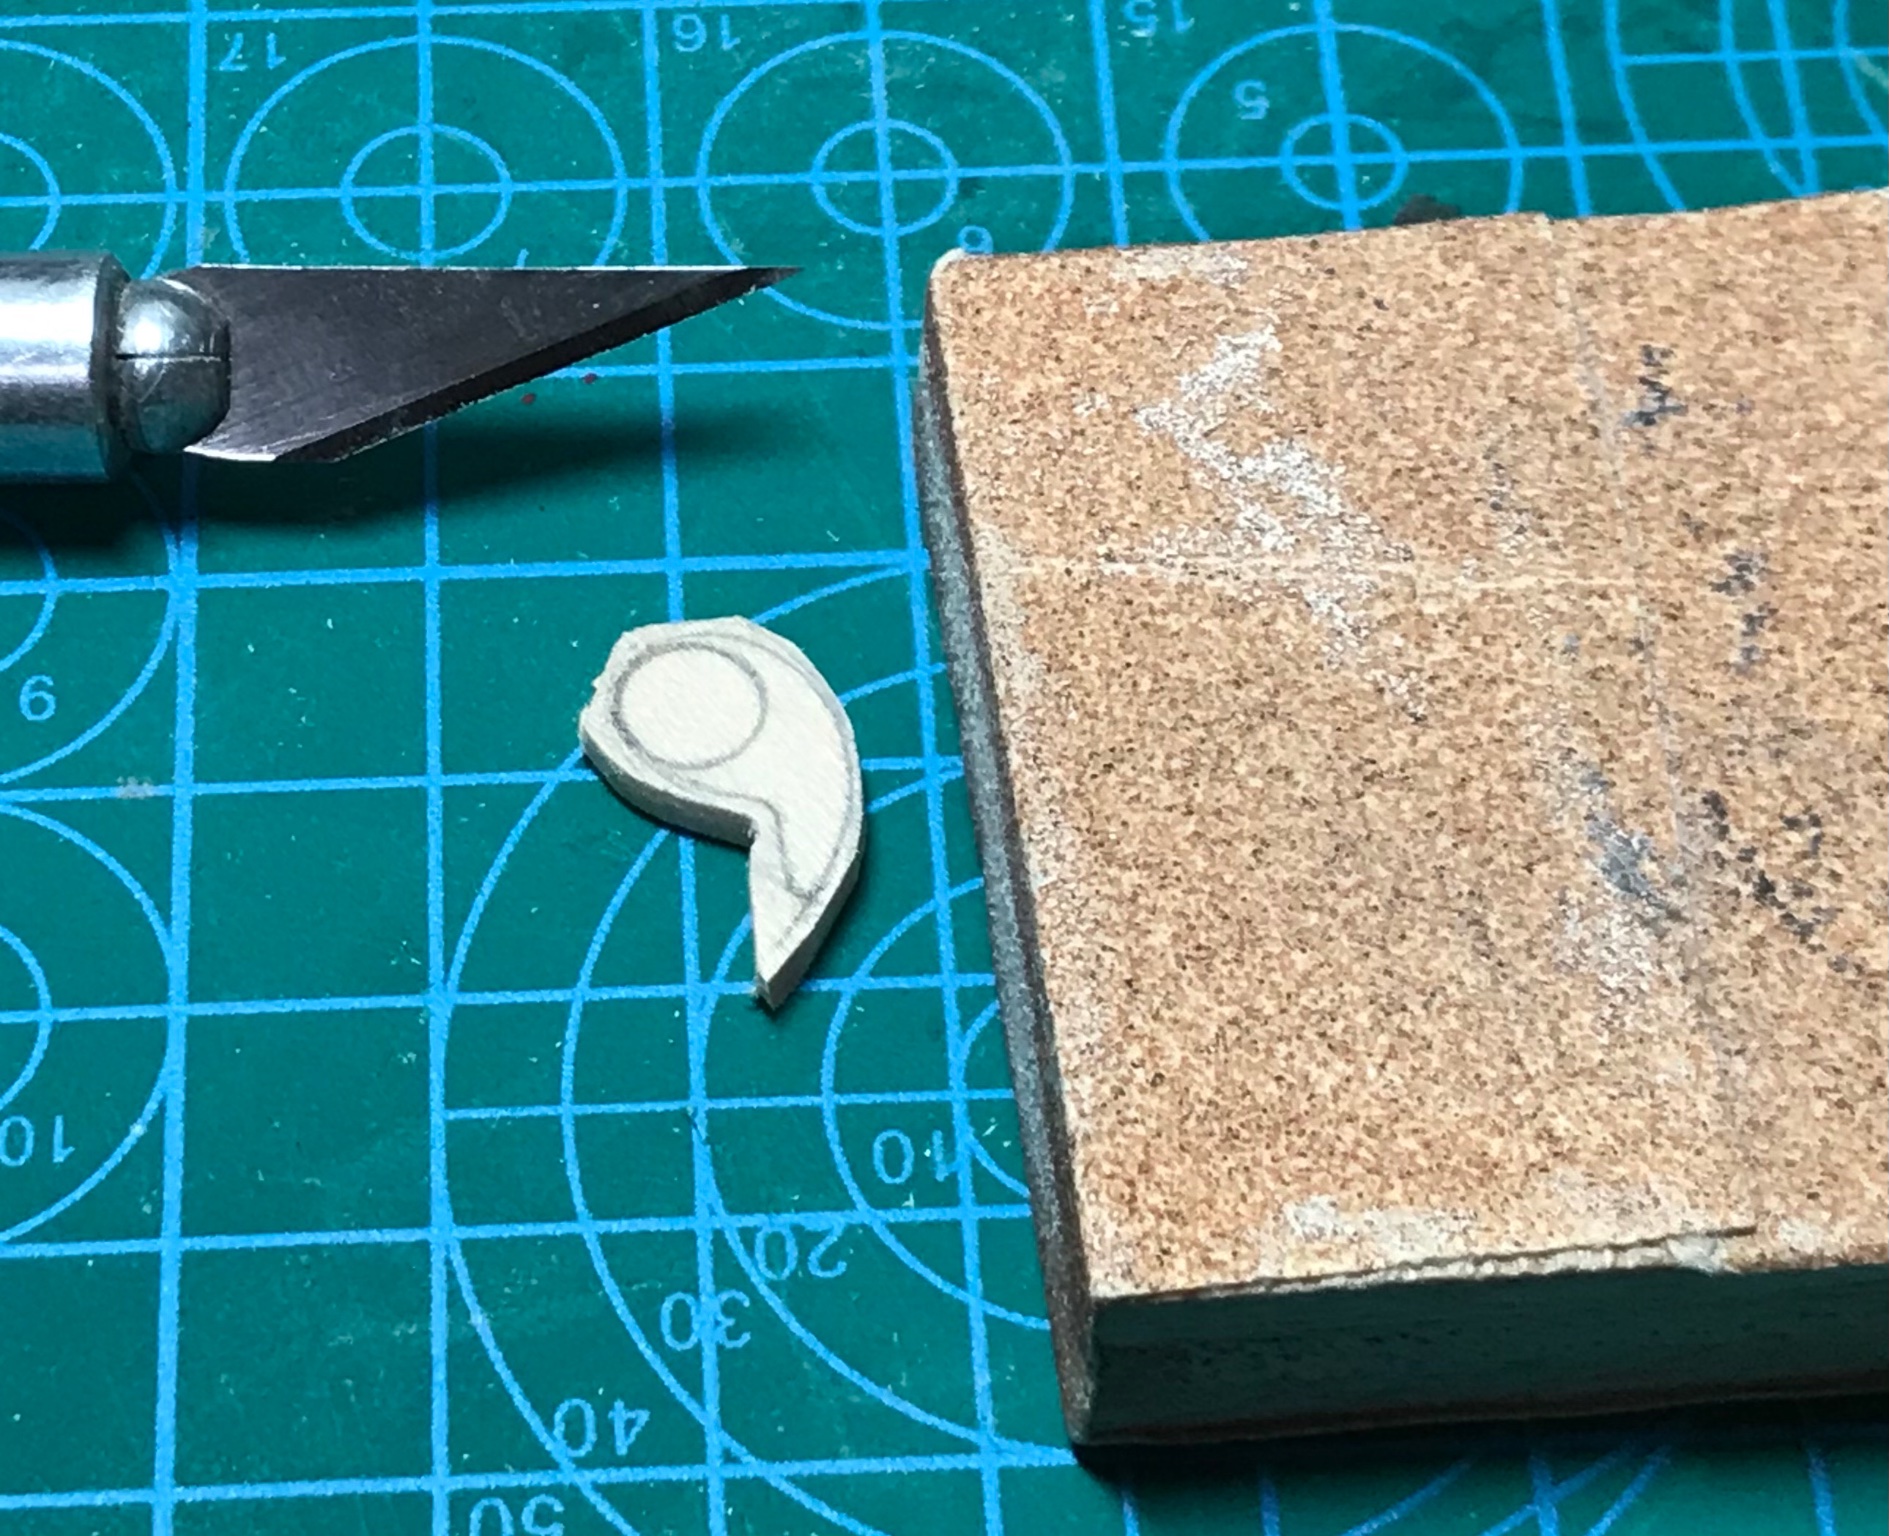
Since I mainly only have basswood to work with, I started there. The general outline of an eye was drawn freehand with pencil on a 1/8" (3.175mm) sheet of basswood and cut out:

Next, using a hobby knife and a homemade sanding block, the general shape of the piece was reached.

- mtaylor, GrandpaPhil and BobG
-
3
-
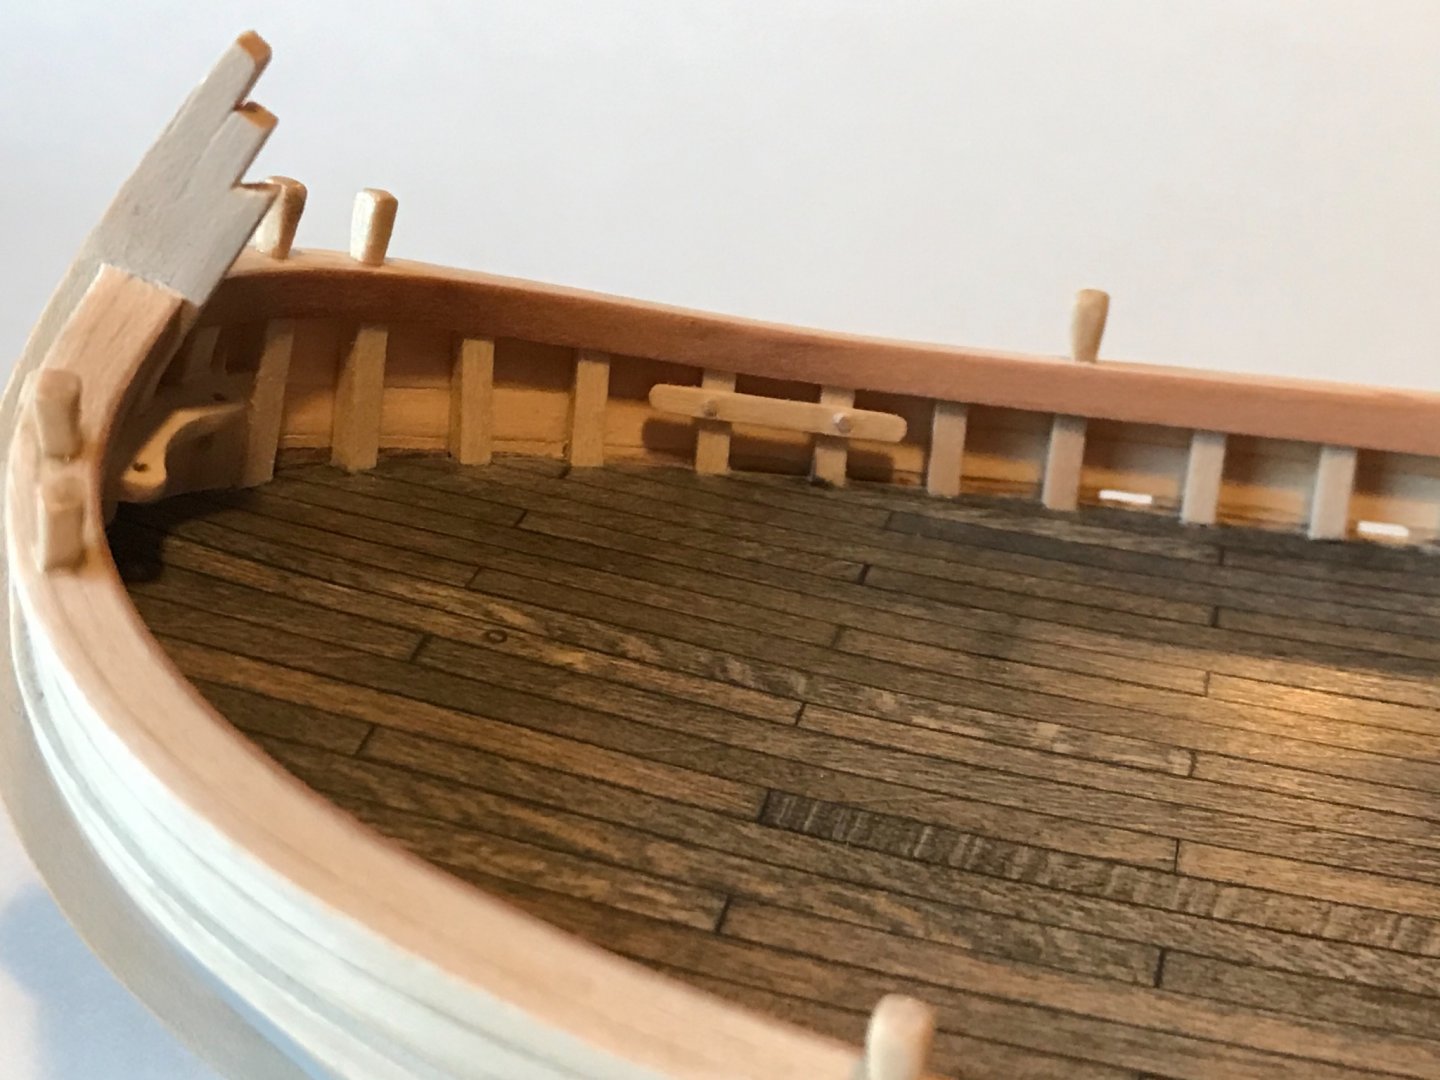
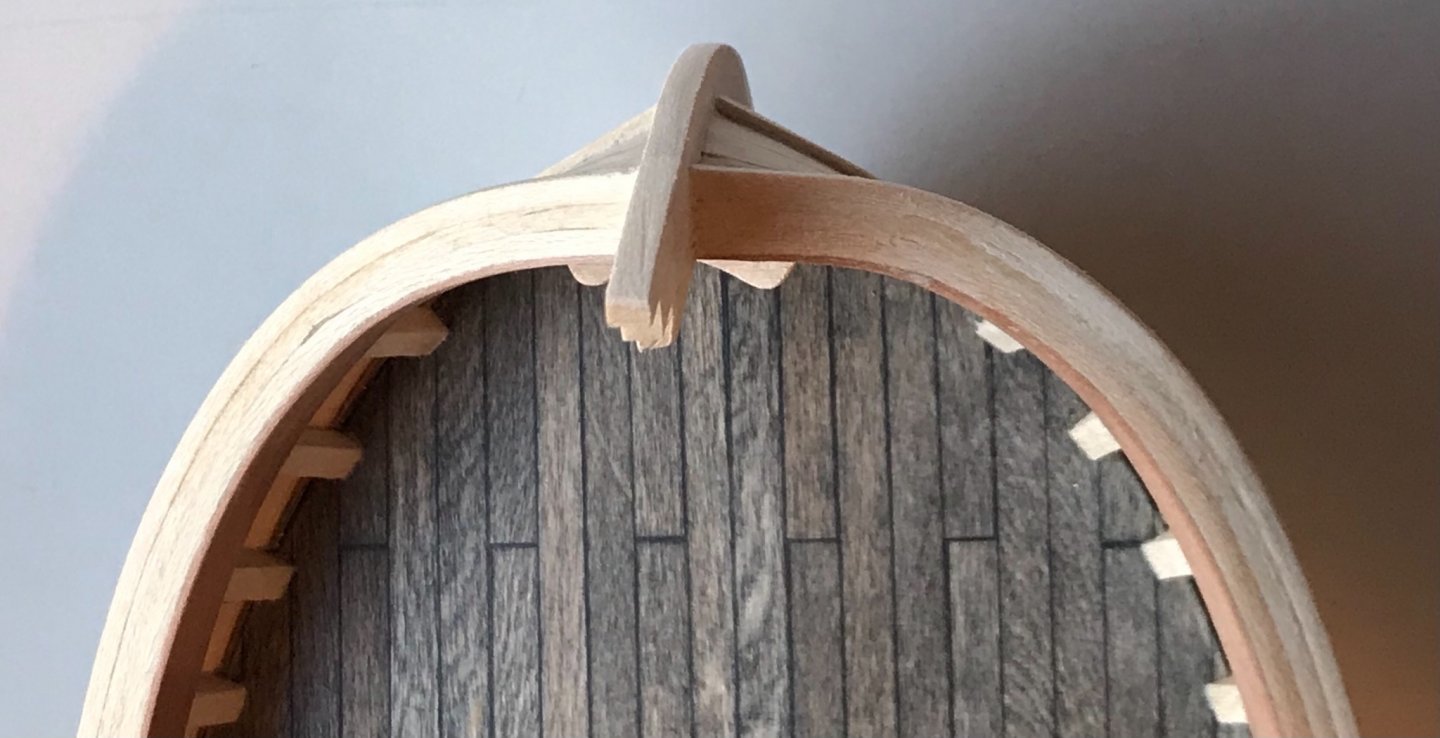
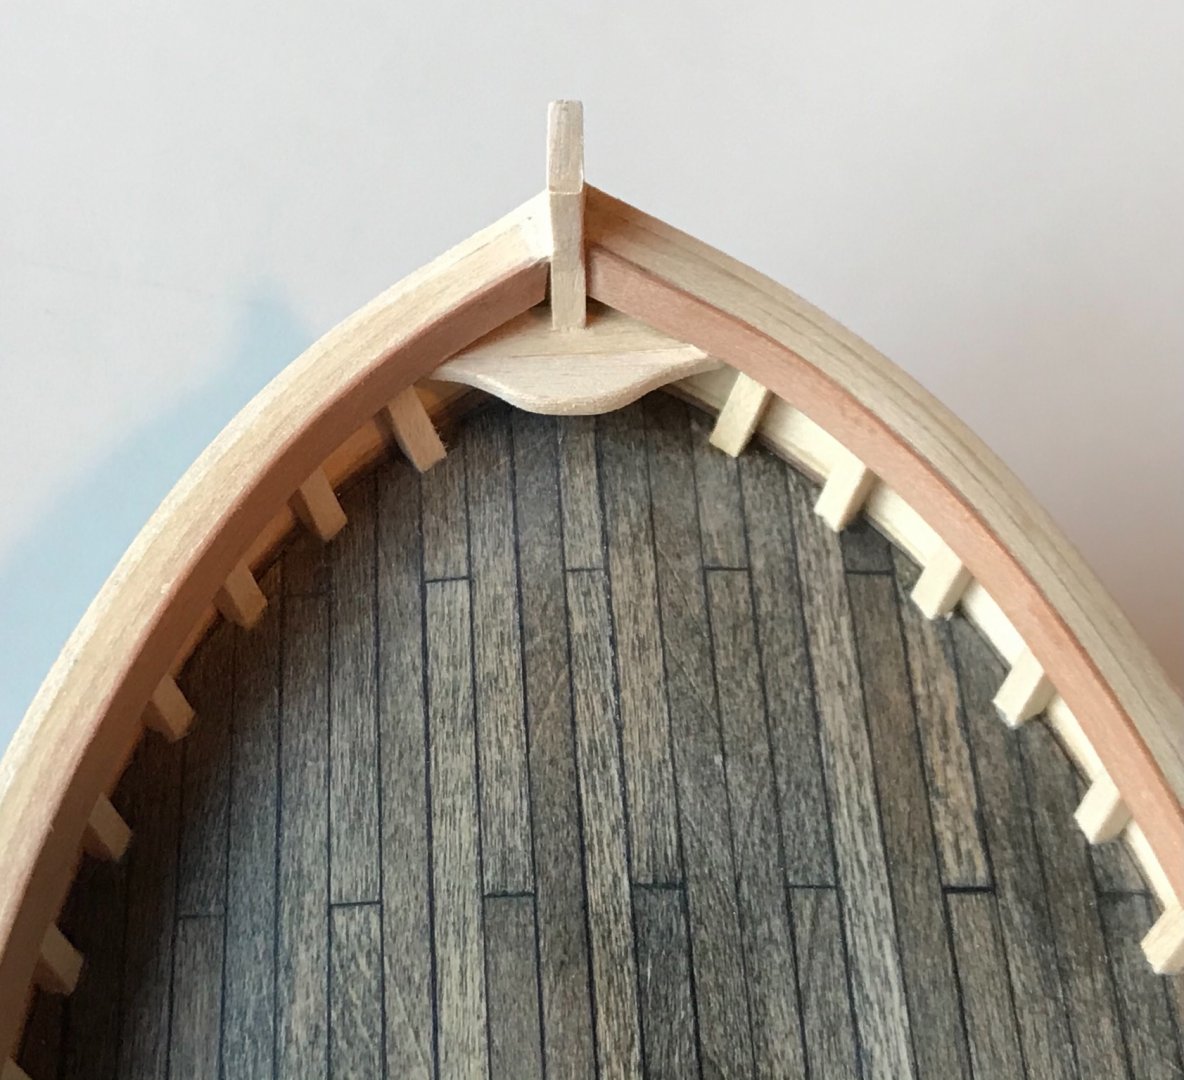
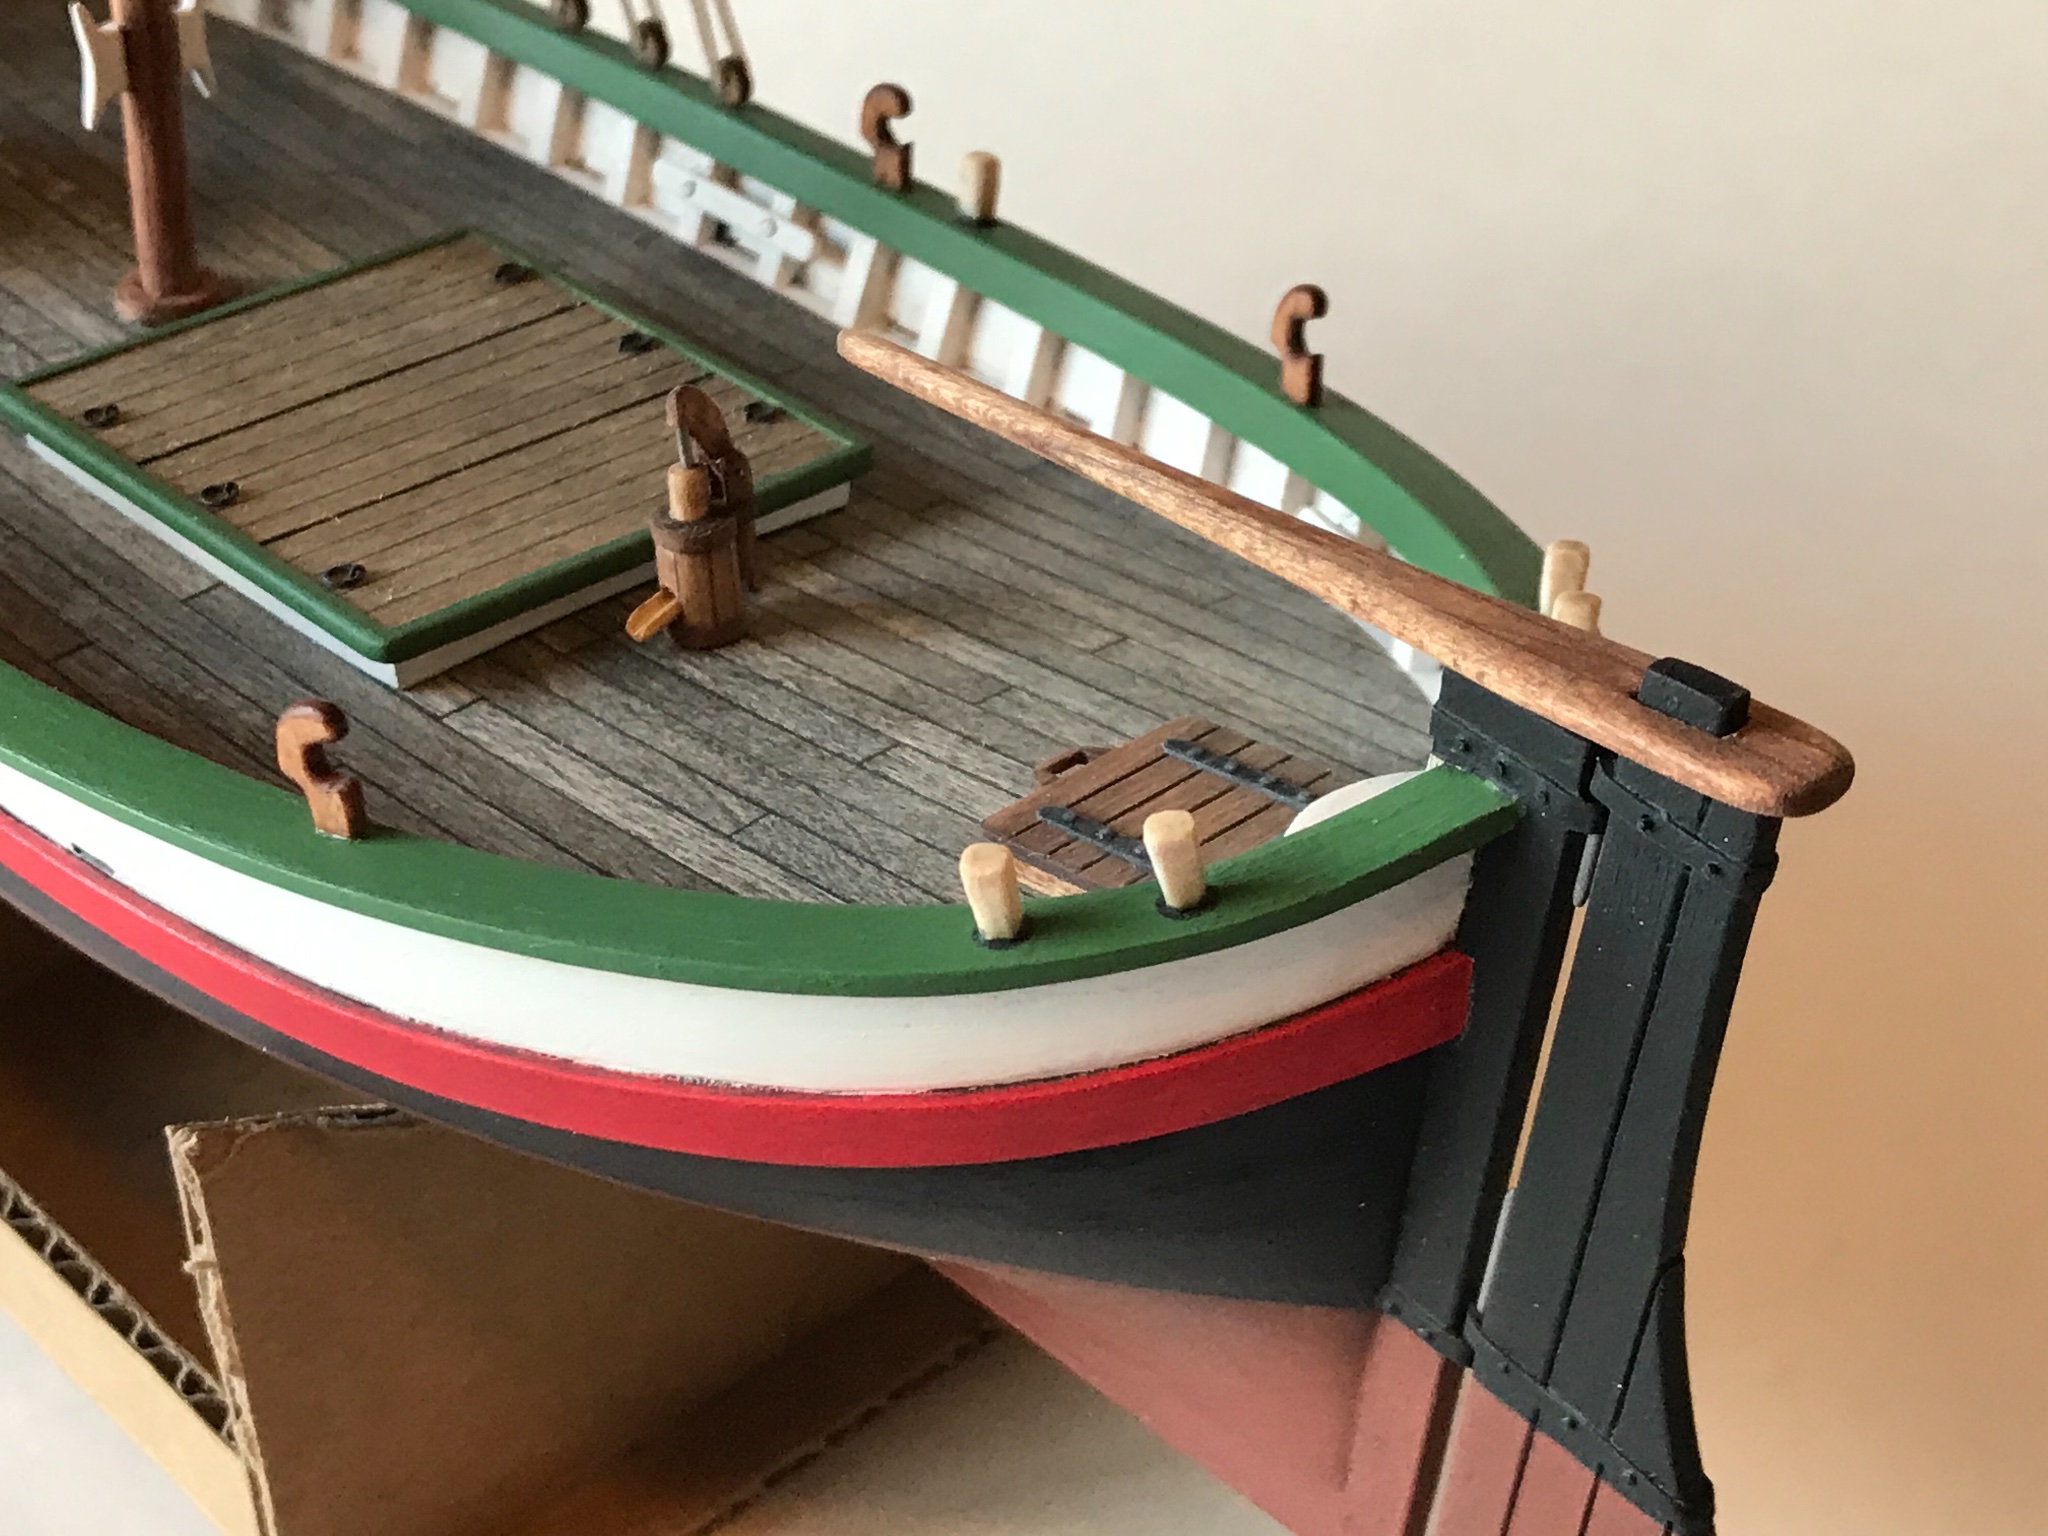
Finished up the thick railings that these stout little boats displayed, and for me, I think, the hardest part of the hull is finished. It took a lot of wood bending to get the bow done, but I really like the results. I used Chuck Passaro's planking method and I love it! (https://modelshipworld.com/topic/22975-chuck-passaros-planking-videos-where-are-they/?tab=comments#comment-679771). Wish I had seen it before planking the lower part of the hull... .
I see these boats had "crowns" on the top of the stempost, and am undecided what to place there. Anybody have any thoughts about what was "typical"?
Hard part done. Now for the detailing fun!!!
A 90 degree bend on the bow...
Bow. The rails were done in strips...
Stern...
I added some length to the sternpost... Pear wood veneer was used for the interior rail sides...
Bow shot...

Stern shot.

-
Thanks Thanasis!
I do plan to add a couple of frames (ribs) at the bow, with what appears to be a horizontal brace (is that the trincarino?). I think there is a similar feature aft? I have been debating whether to attempt the curved "notches" at the bow that some boats have, before I add those features. Also, the stem and stern posts are not finished off yet, but I agree with your observation. Thanks!
-
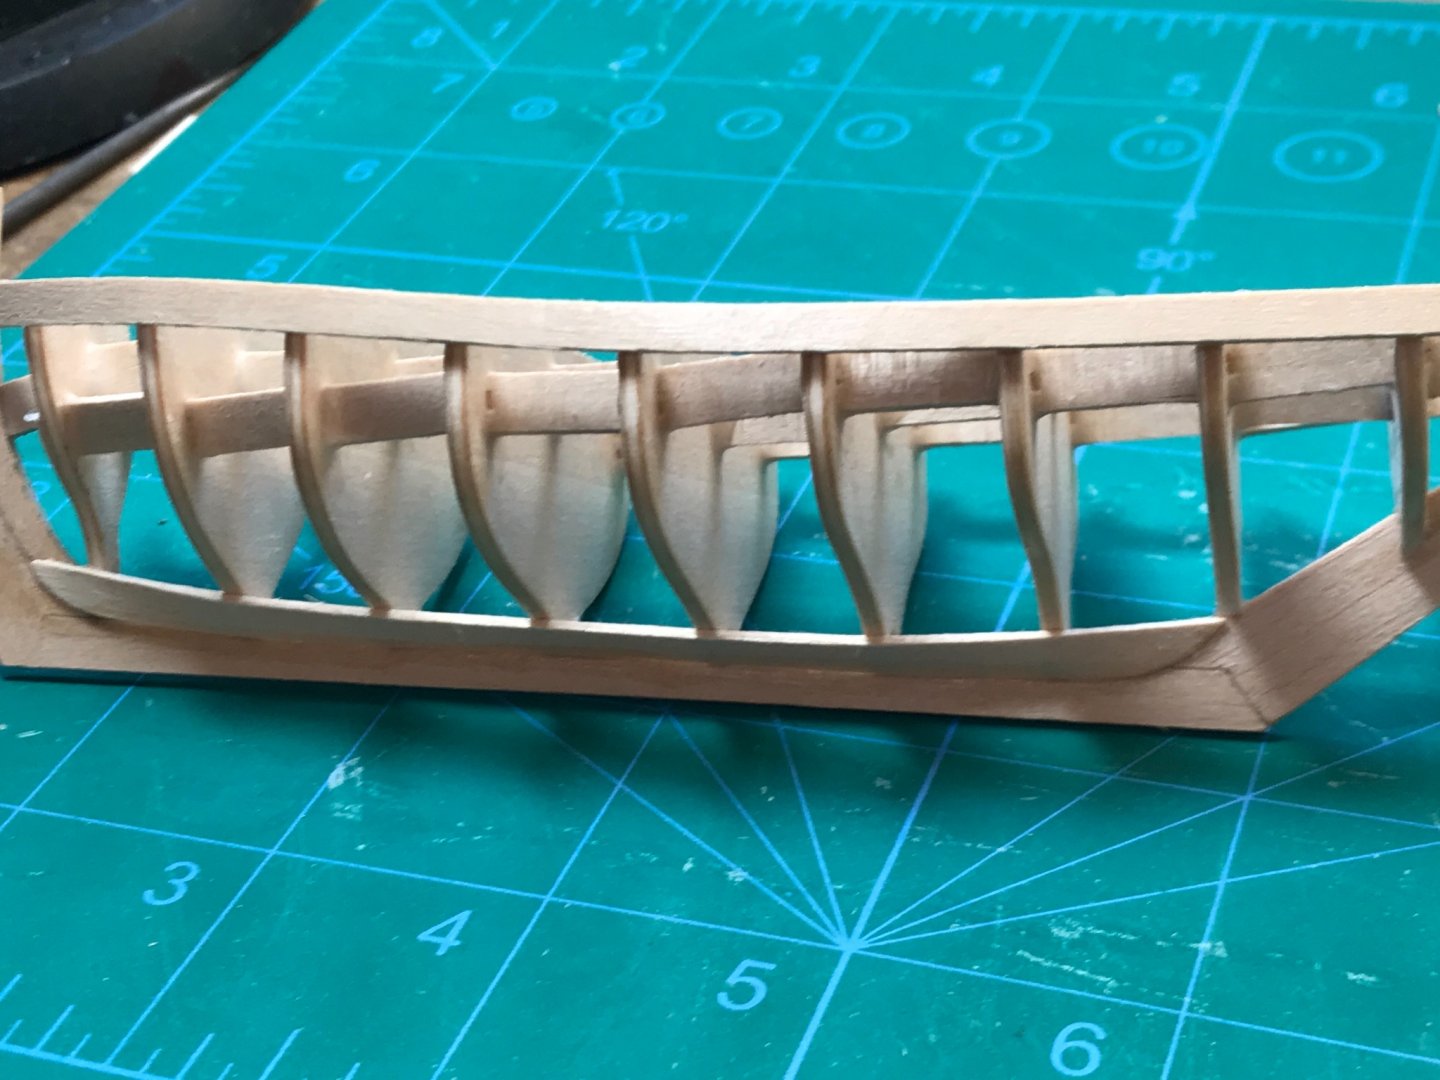
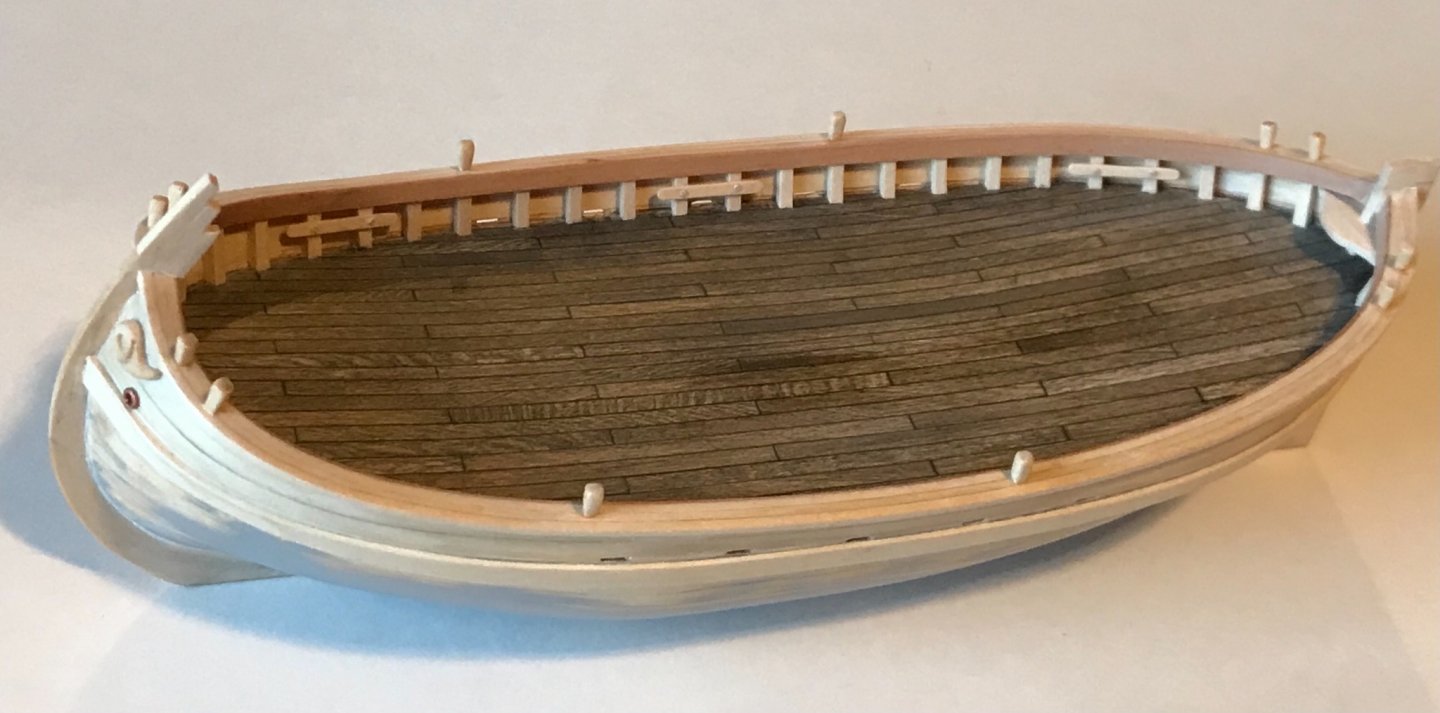
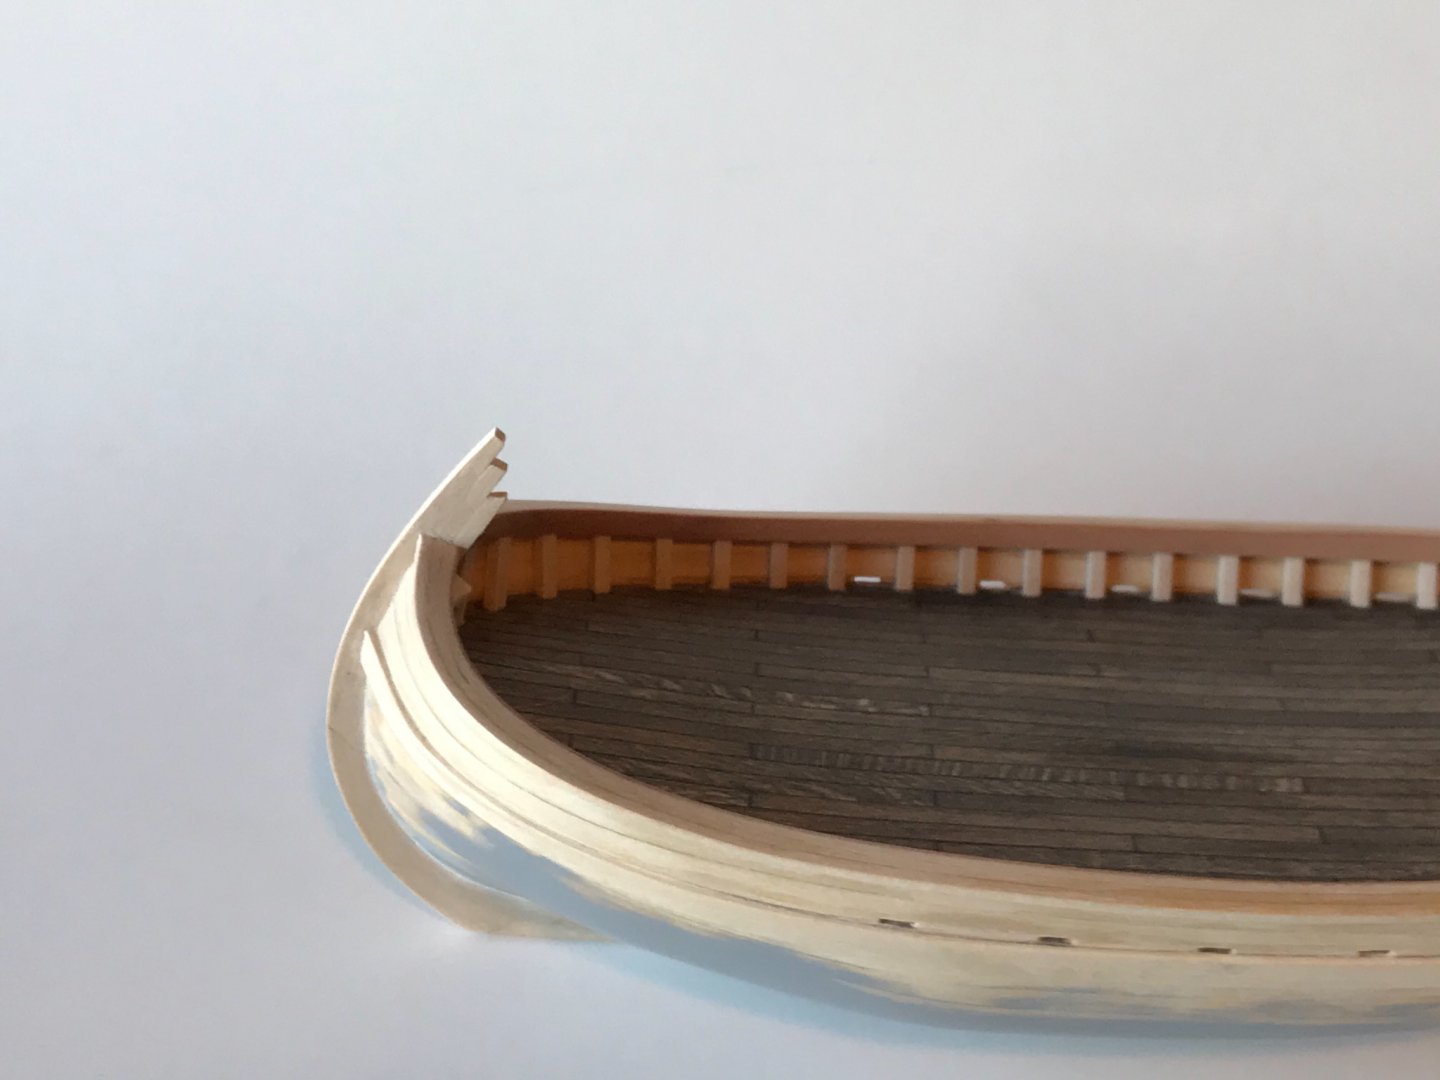
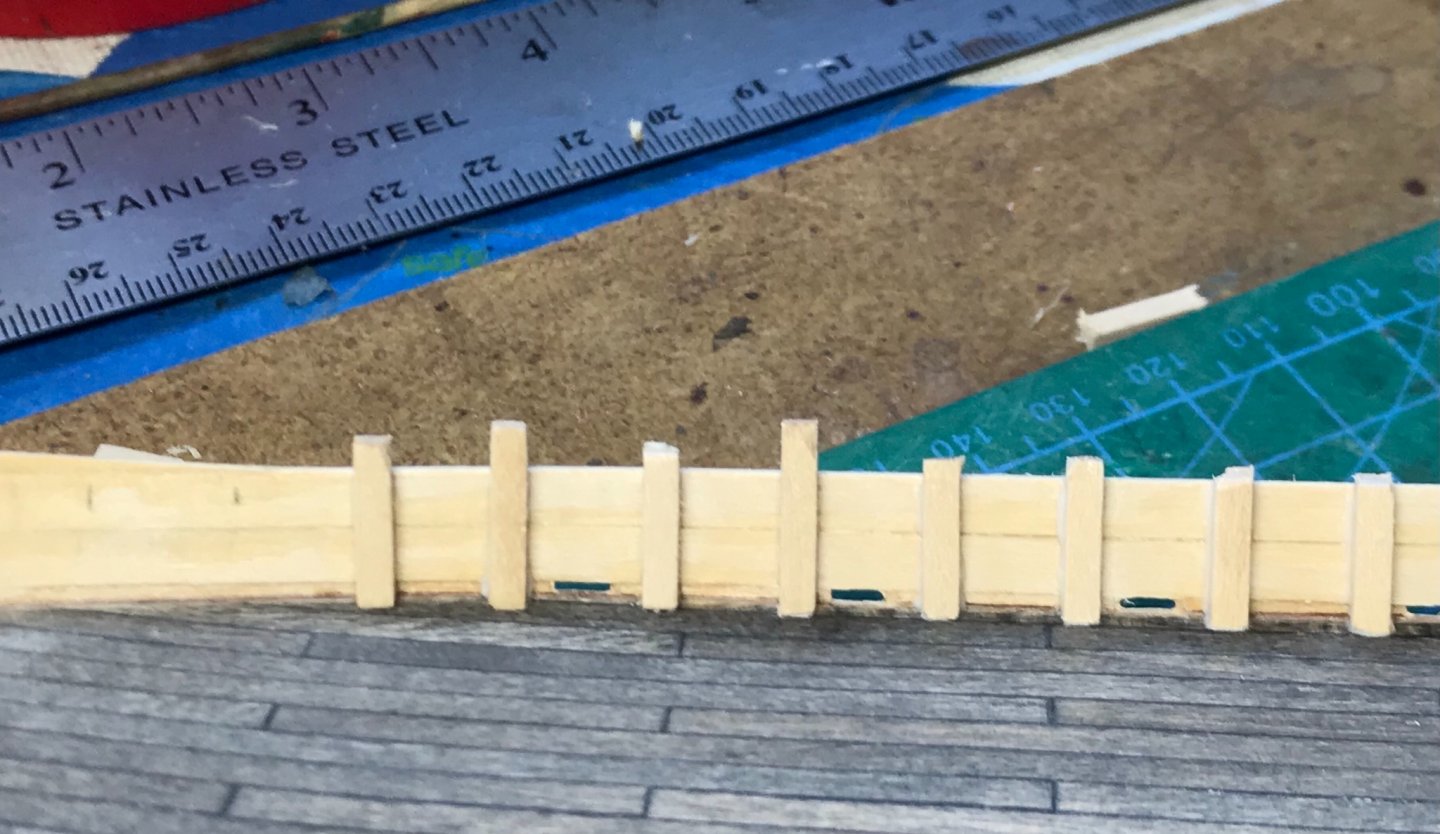
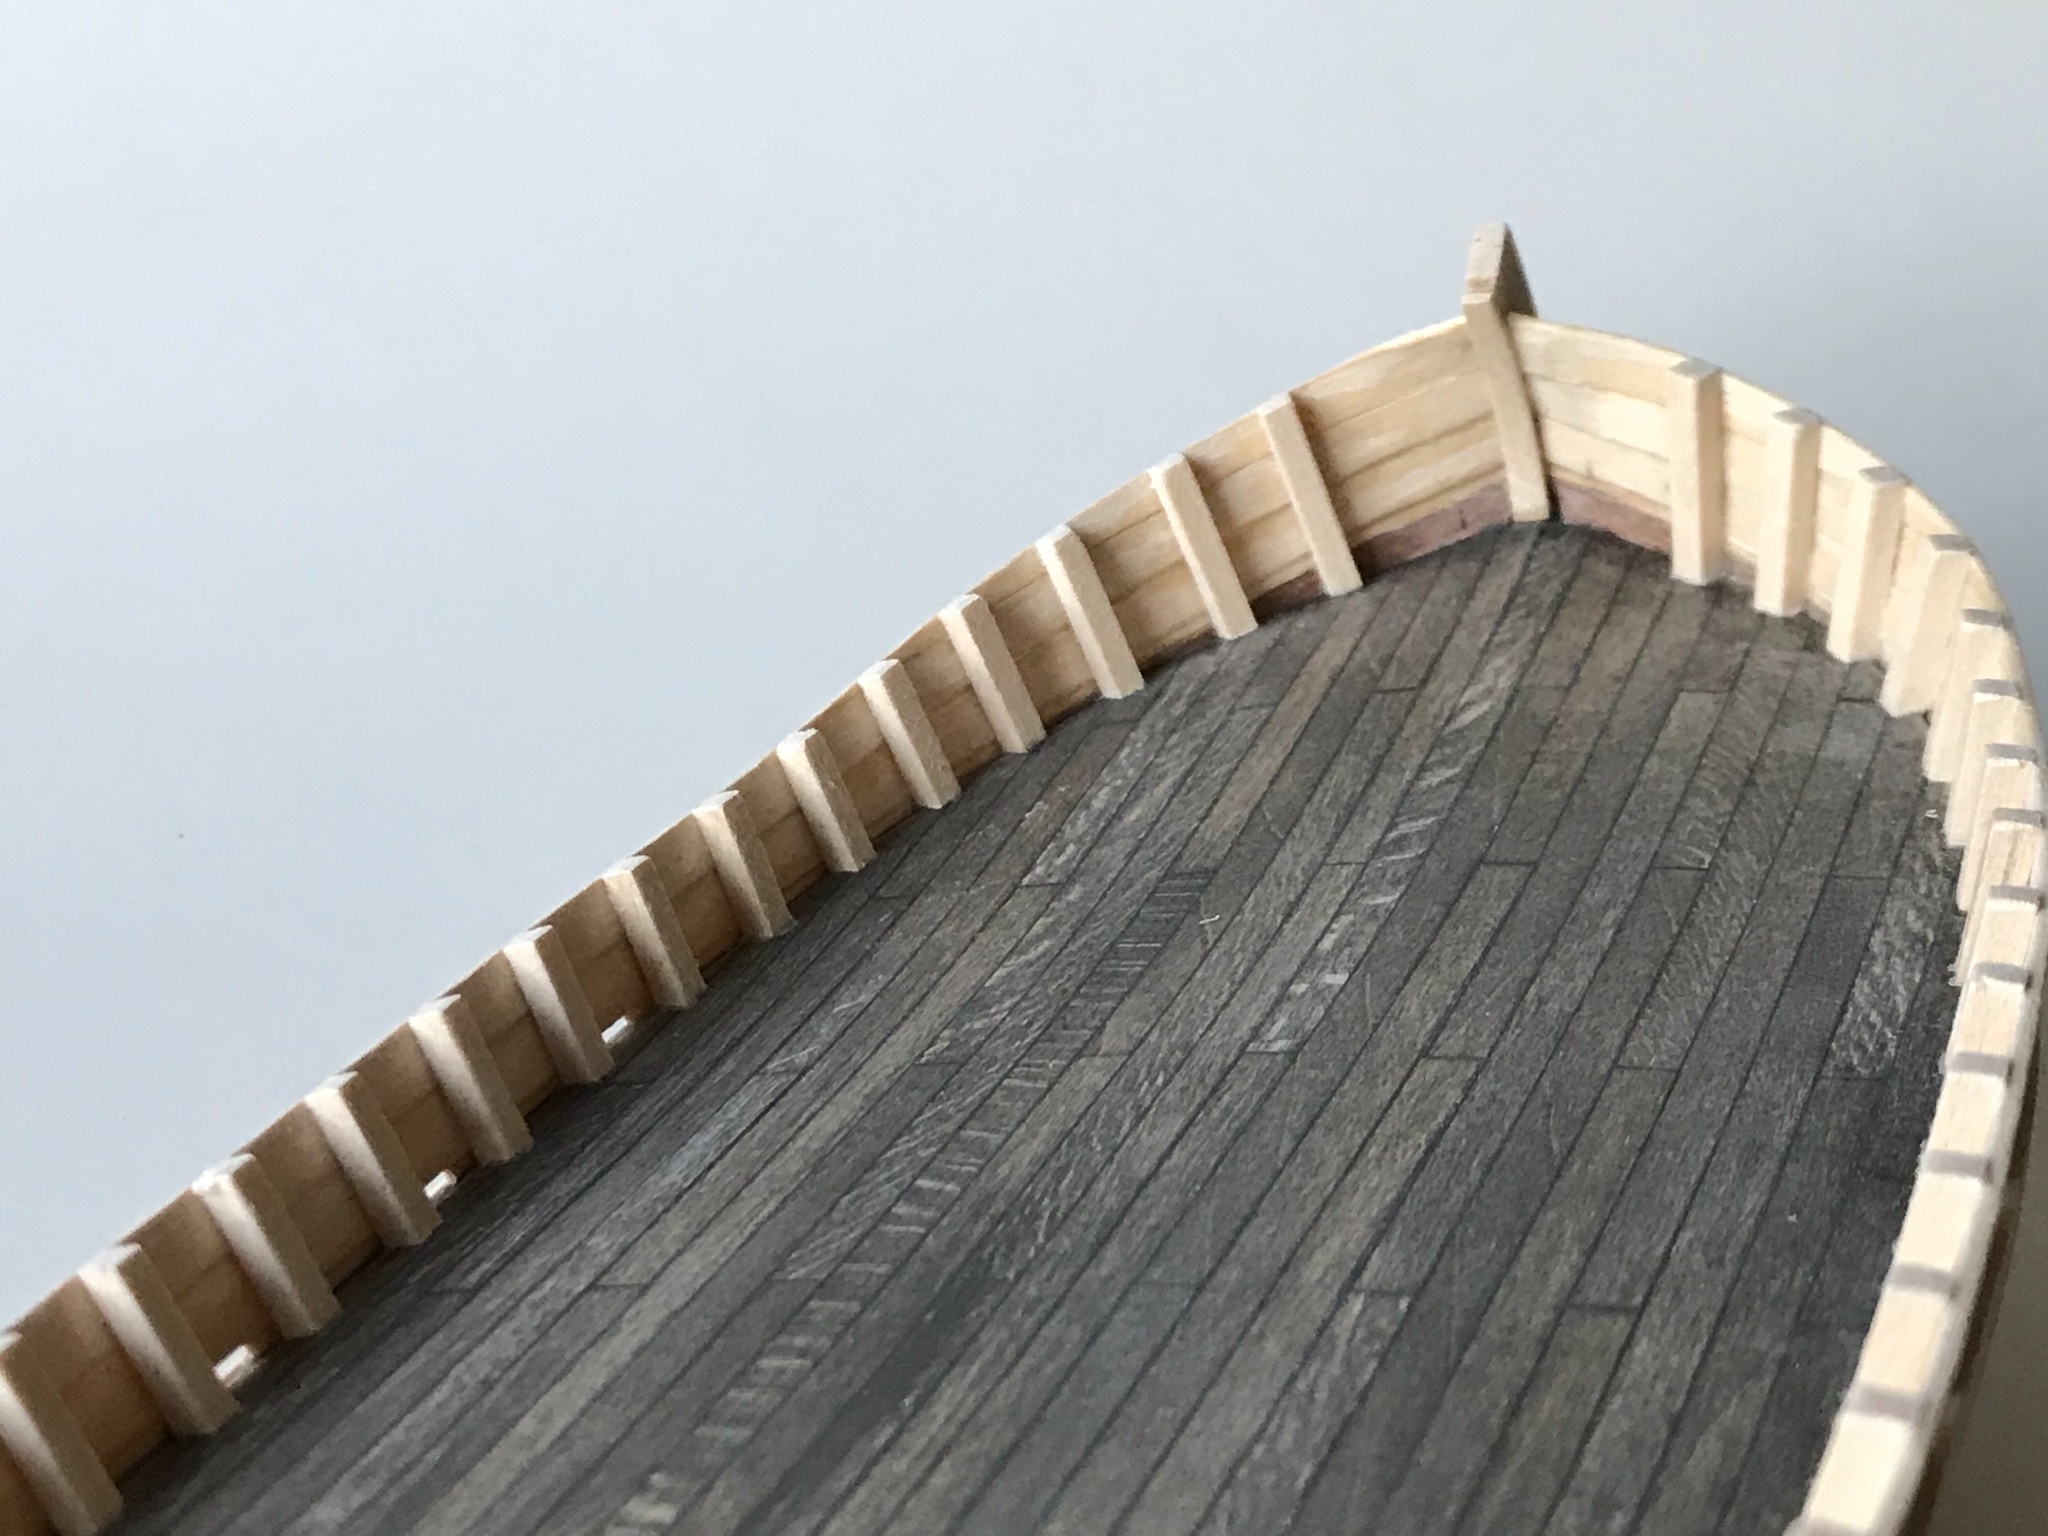
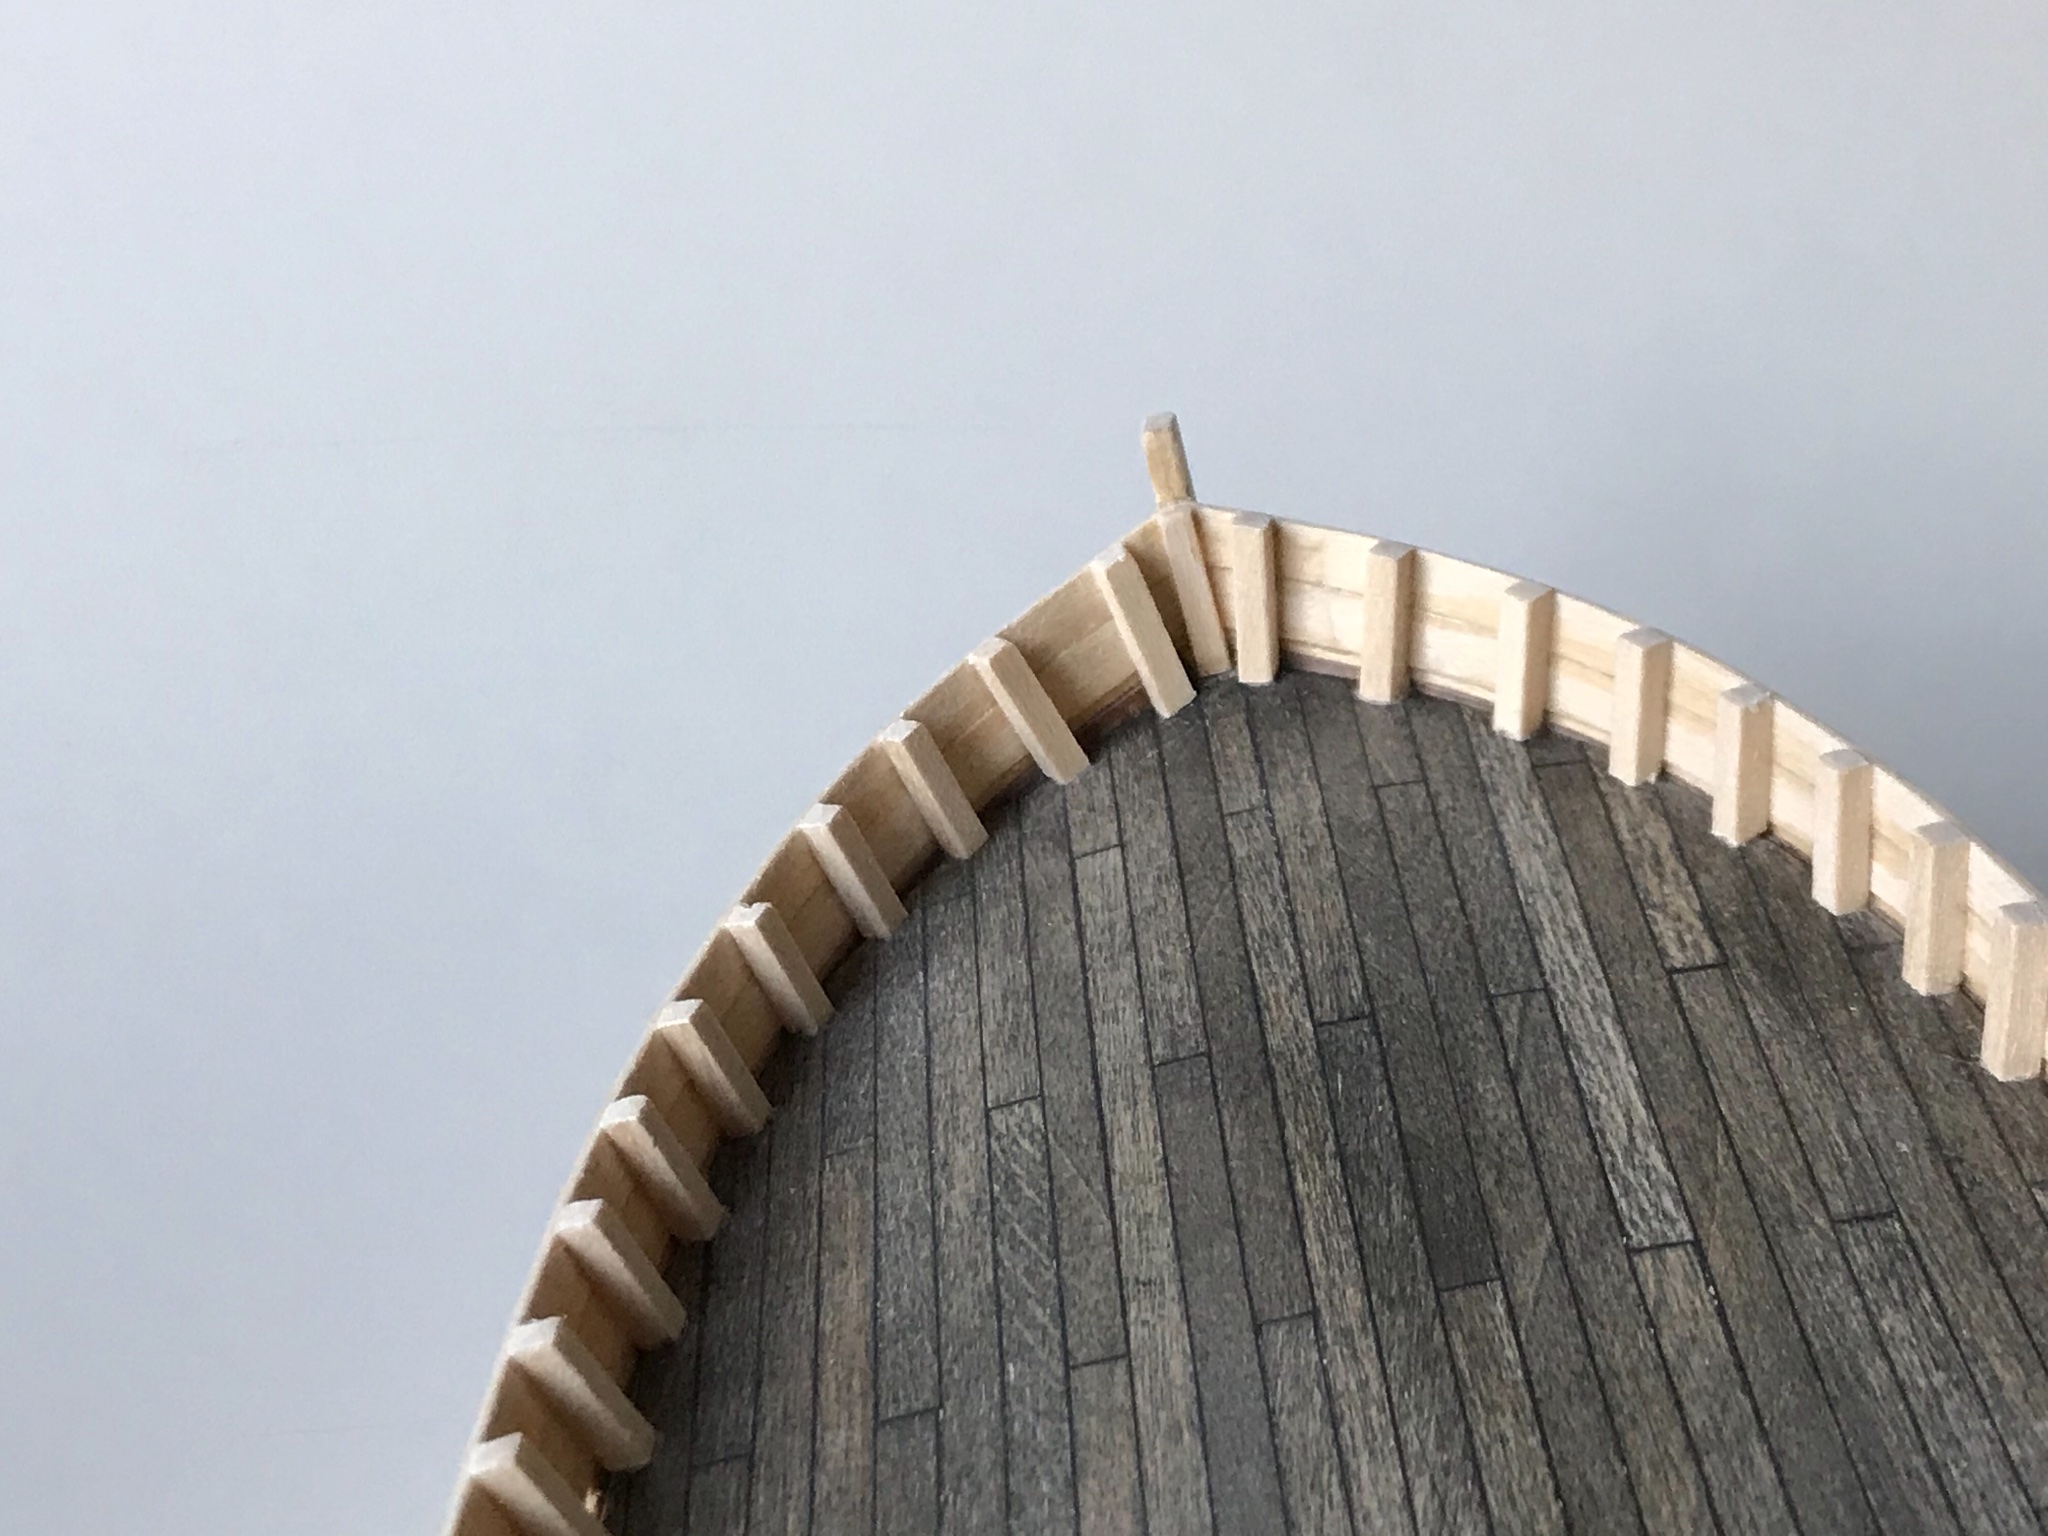
With the upper bulwarks planked, I started adding the false ribs, using 3/32 inch (2.4mm) basswood strips. Also added a thickened main-wale plank along the outer sides, at deck line, just below the scuppers.


- mtaylor, BobG, GrandpaPhil and 2 others
-
5
-
-
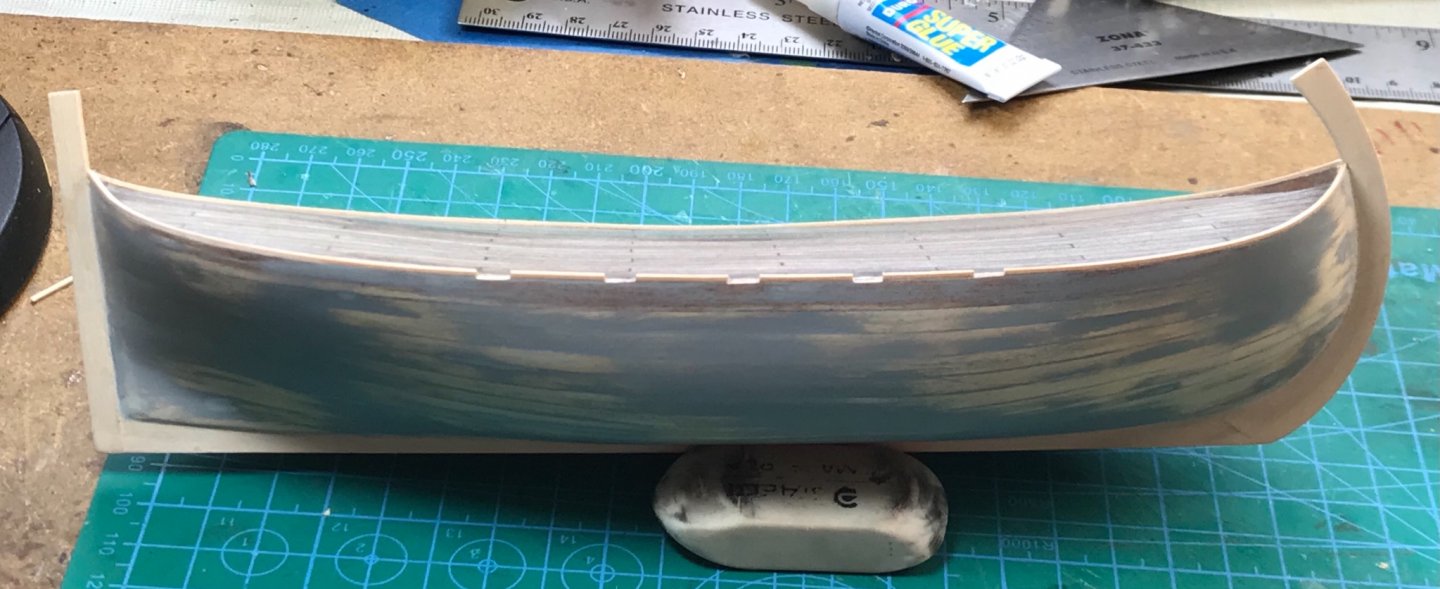
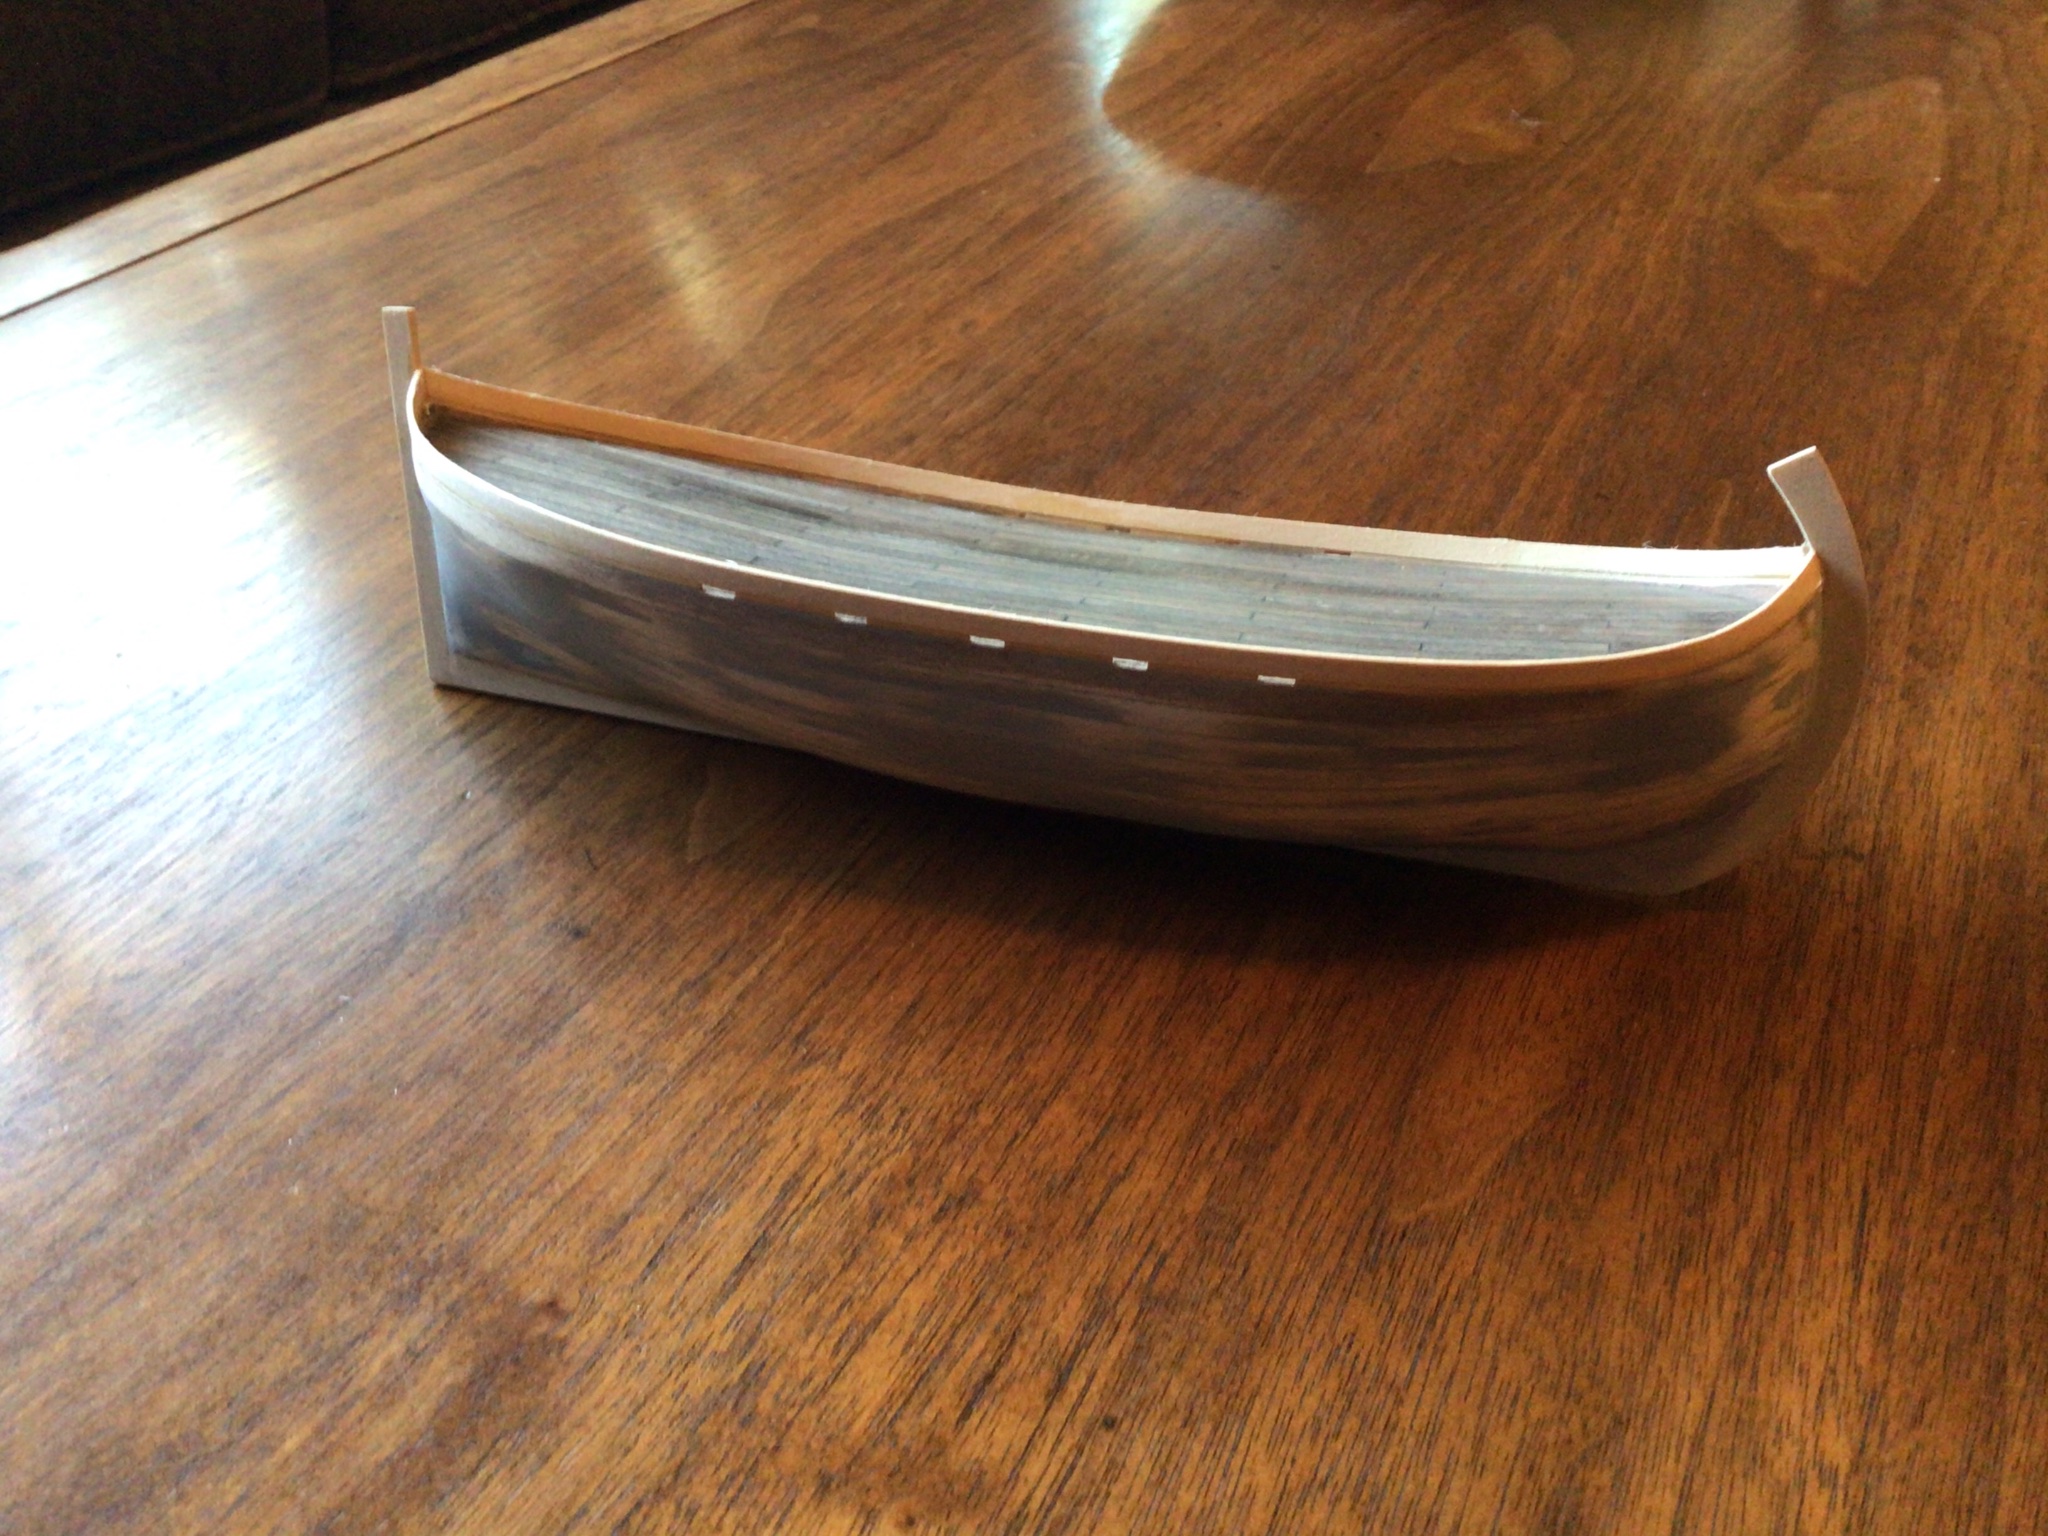
This one has been a tough one to plank. Mainly because of my inexperience and poor planking skills. It has driven me to study-up on the subject, and I'm almost anxious to start another project so I can apply what I've been learning...
Anyway, The Brazzera has been planked, filled, sanded, primed, and sanded again - from the deck line, down. I sawed off the plywood keel, stem post, and stern post and replaced them with nicer looking basswood. The stem post is probably too large, and I'm thinking I'll sand it down after planking above the deck...
First strake above the deck was a 1/32 strip, upon which to build scuppers! You can see the result here. After cutting out the holes, the first strake above the scuppers was added.
-


Galway Hooker by Gbmodeler - FINISHED - 1:48 scale - a small Irish fishing boat from the late 1800s
in - Build logs for subjects built 1851 - 1900
Posted
Thanks Jim Lad and druxey! Druxey, I think I envy the hull in your profile picture...