CDW
-
Posts
7,755 -
Joined
-
Last visited
Content Type
Profiles
Forums
Gallery
Events
Everything posted by CDW
-
 I've only managed to get half the decals on the model. Real life got in the way of modeling this past week. 🙂 The decals are a limited production, cottage industry set. Being as such, a sheet with the white background pieces are printed separately from the main, color sheet of decals. This requires twice as much time to apply the decals. White goes down first, then the color after the white have dried.
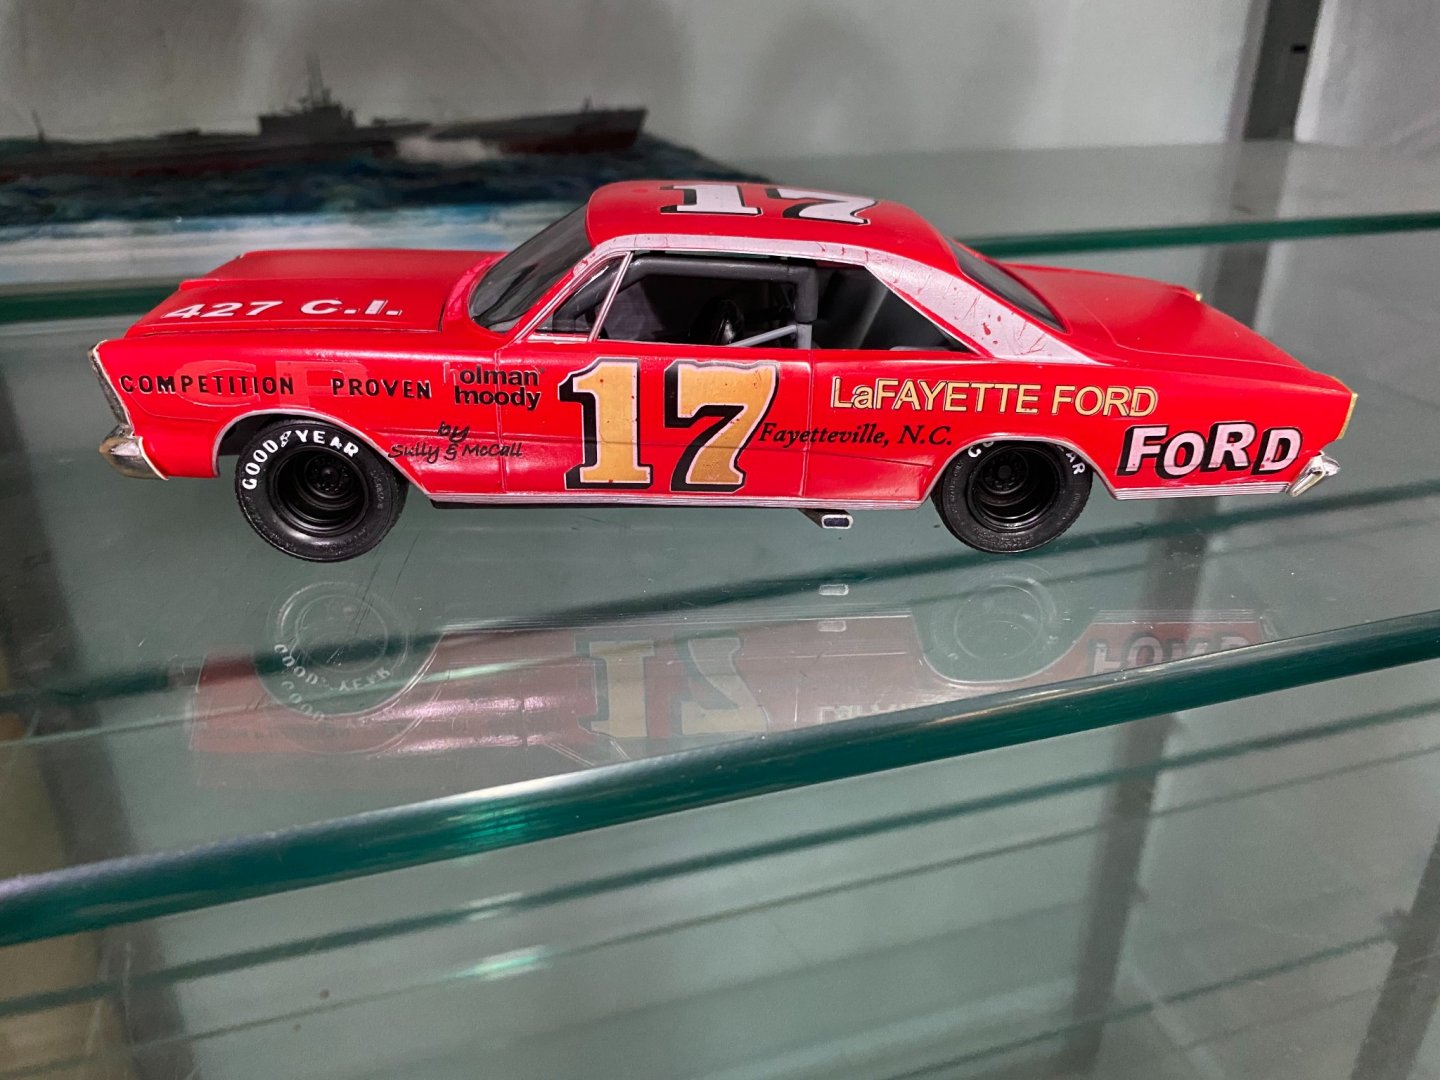


- 101 replies
-
- 10
-

-
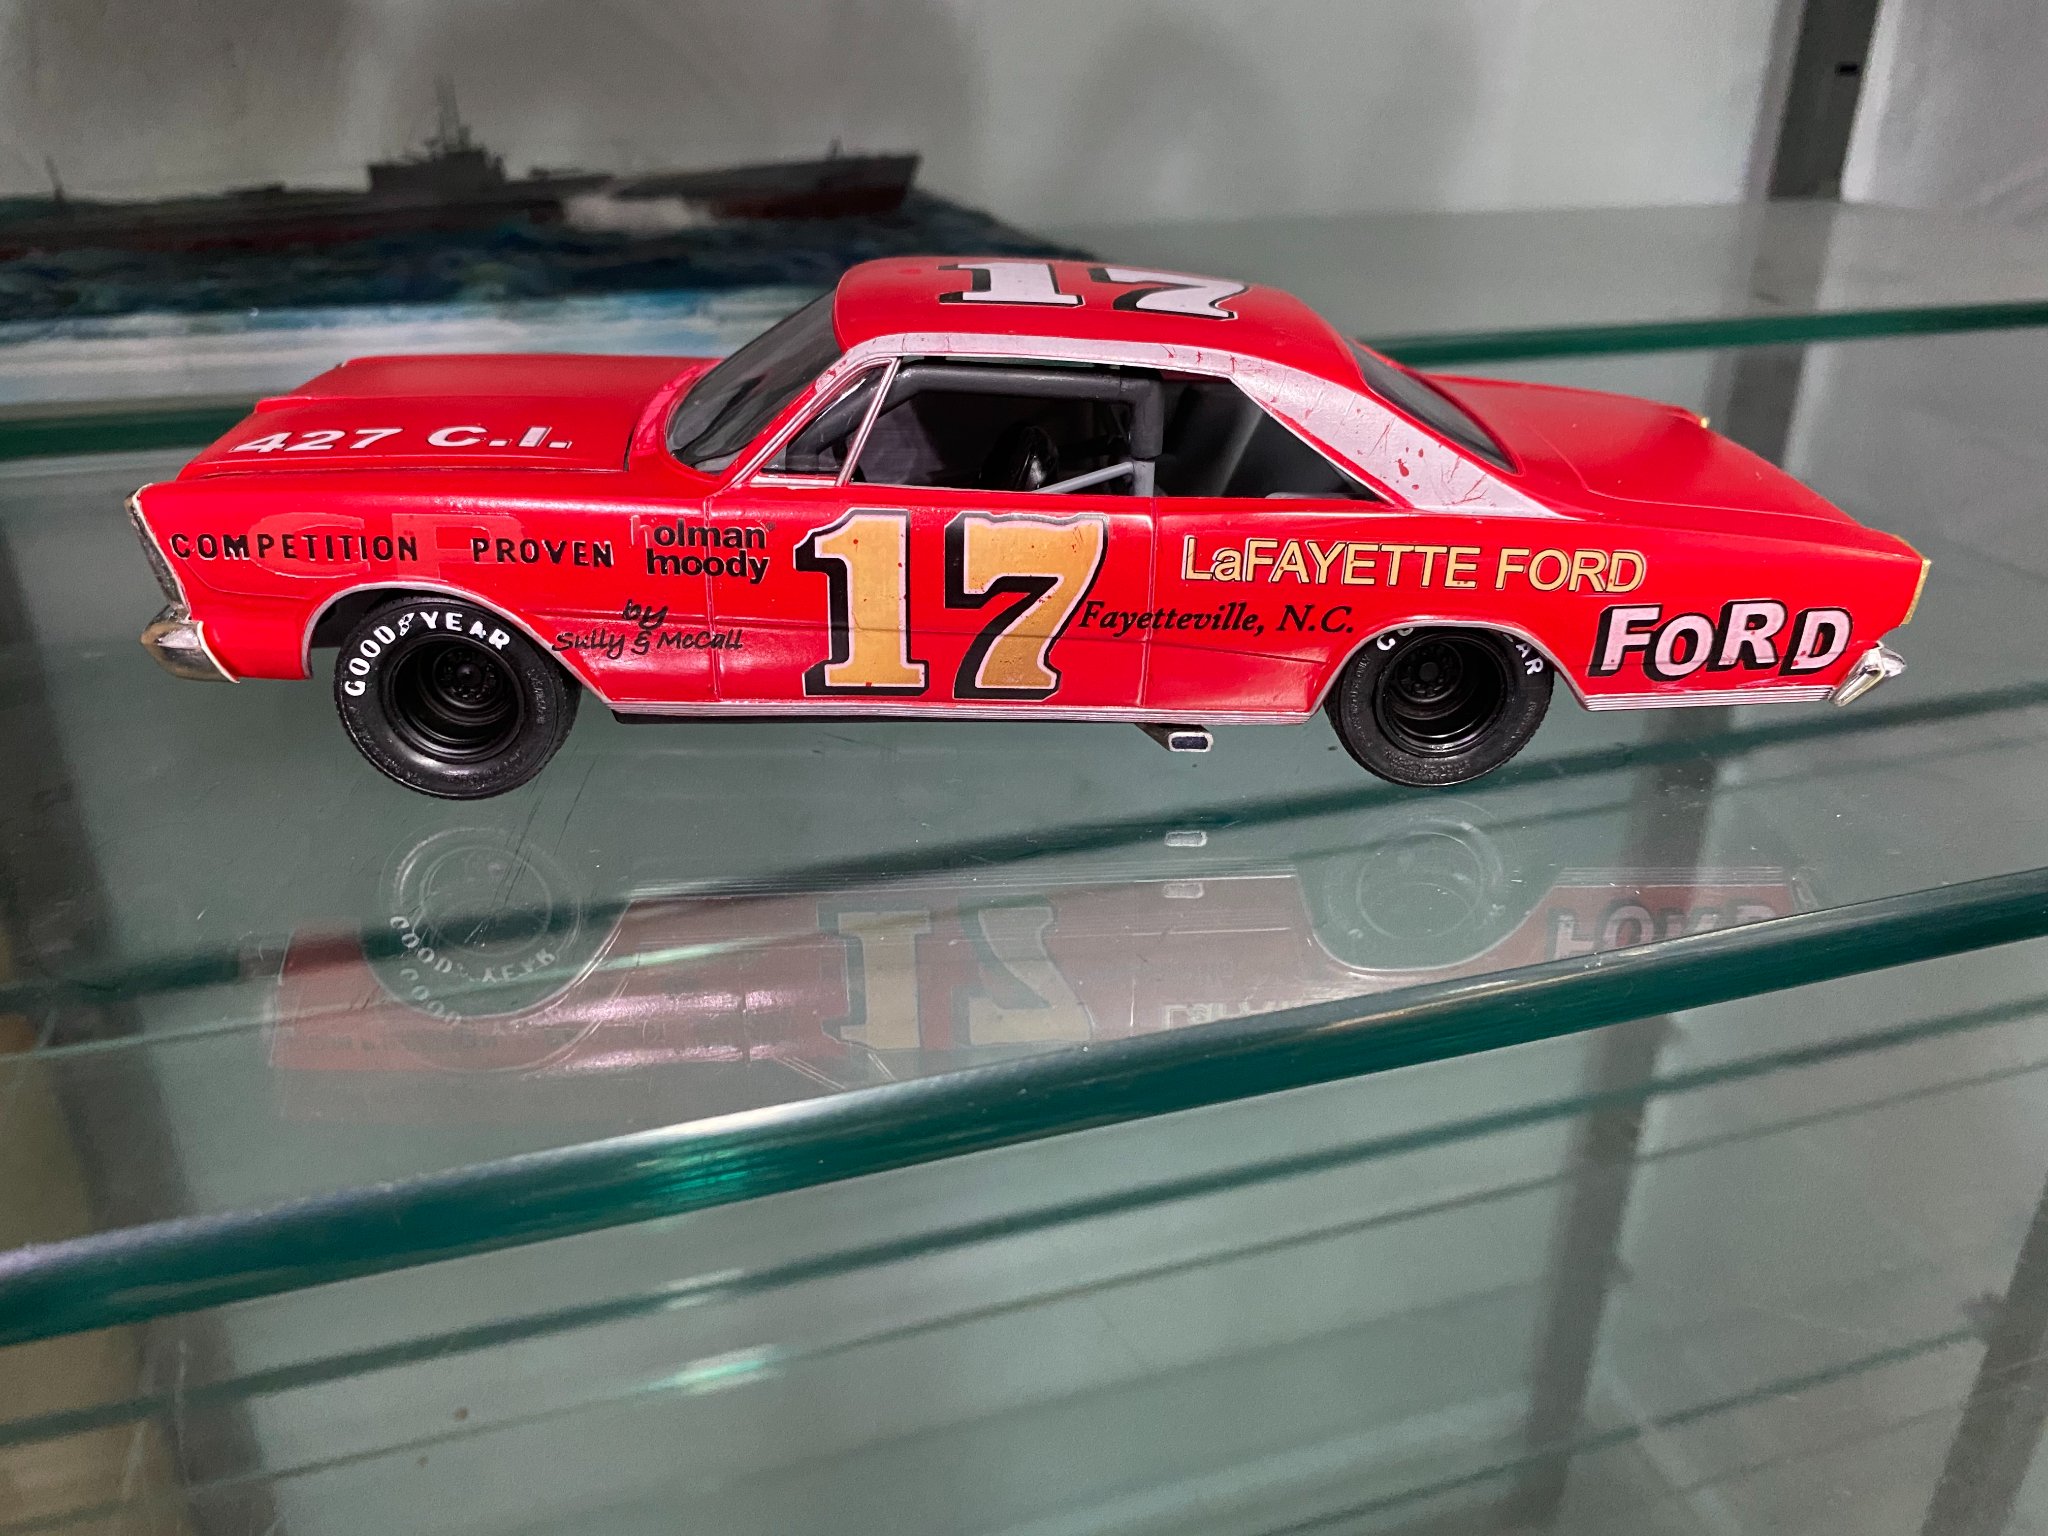
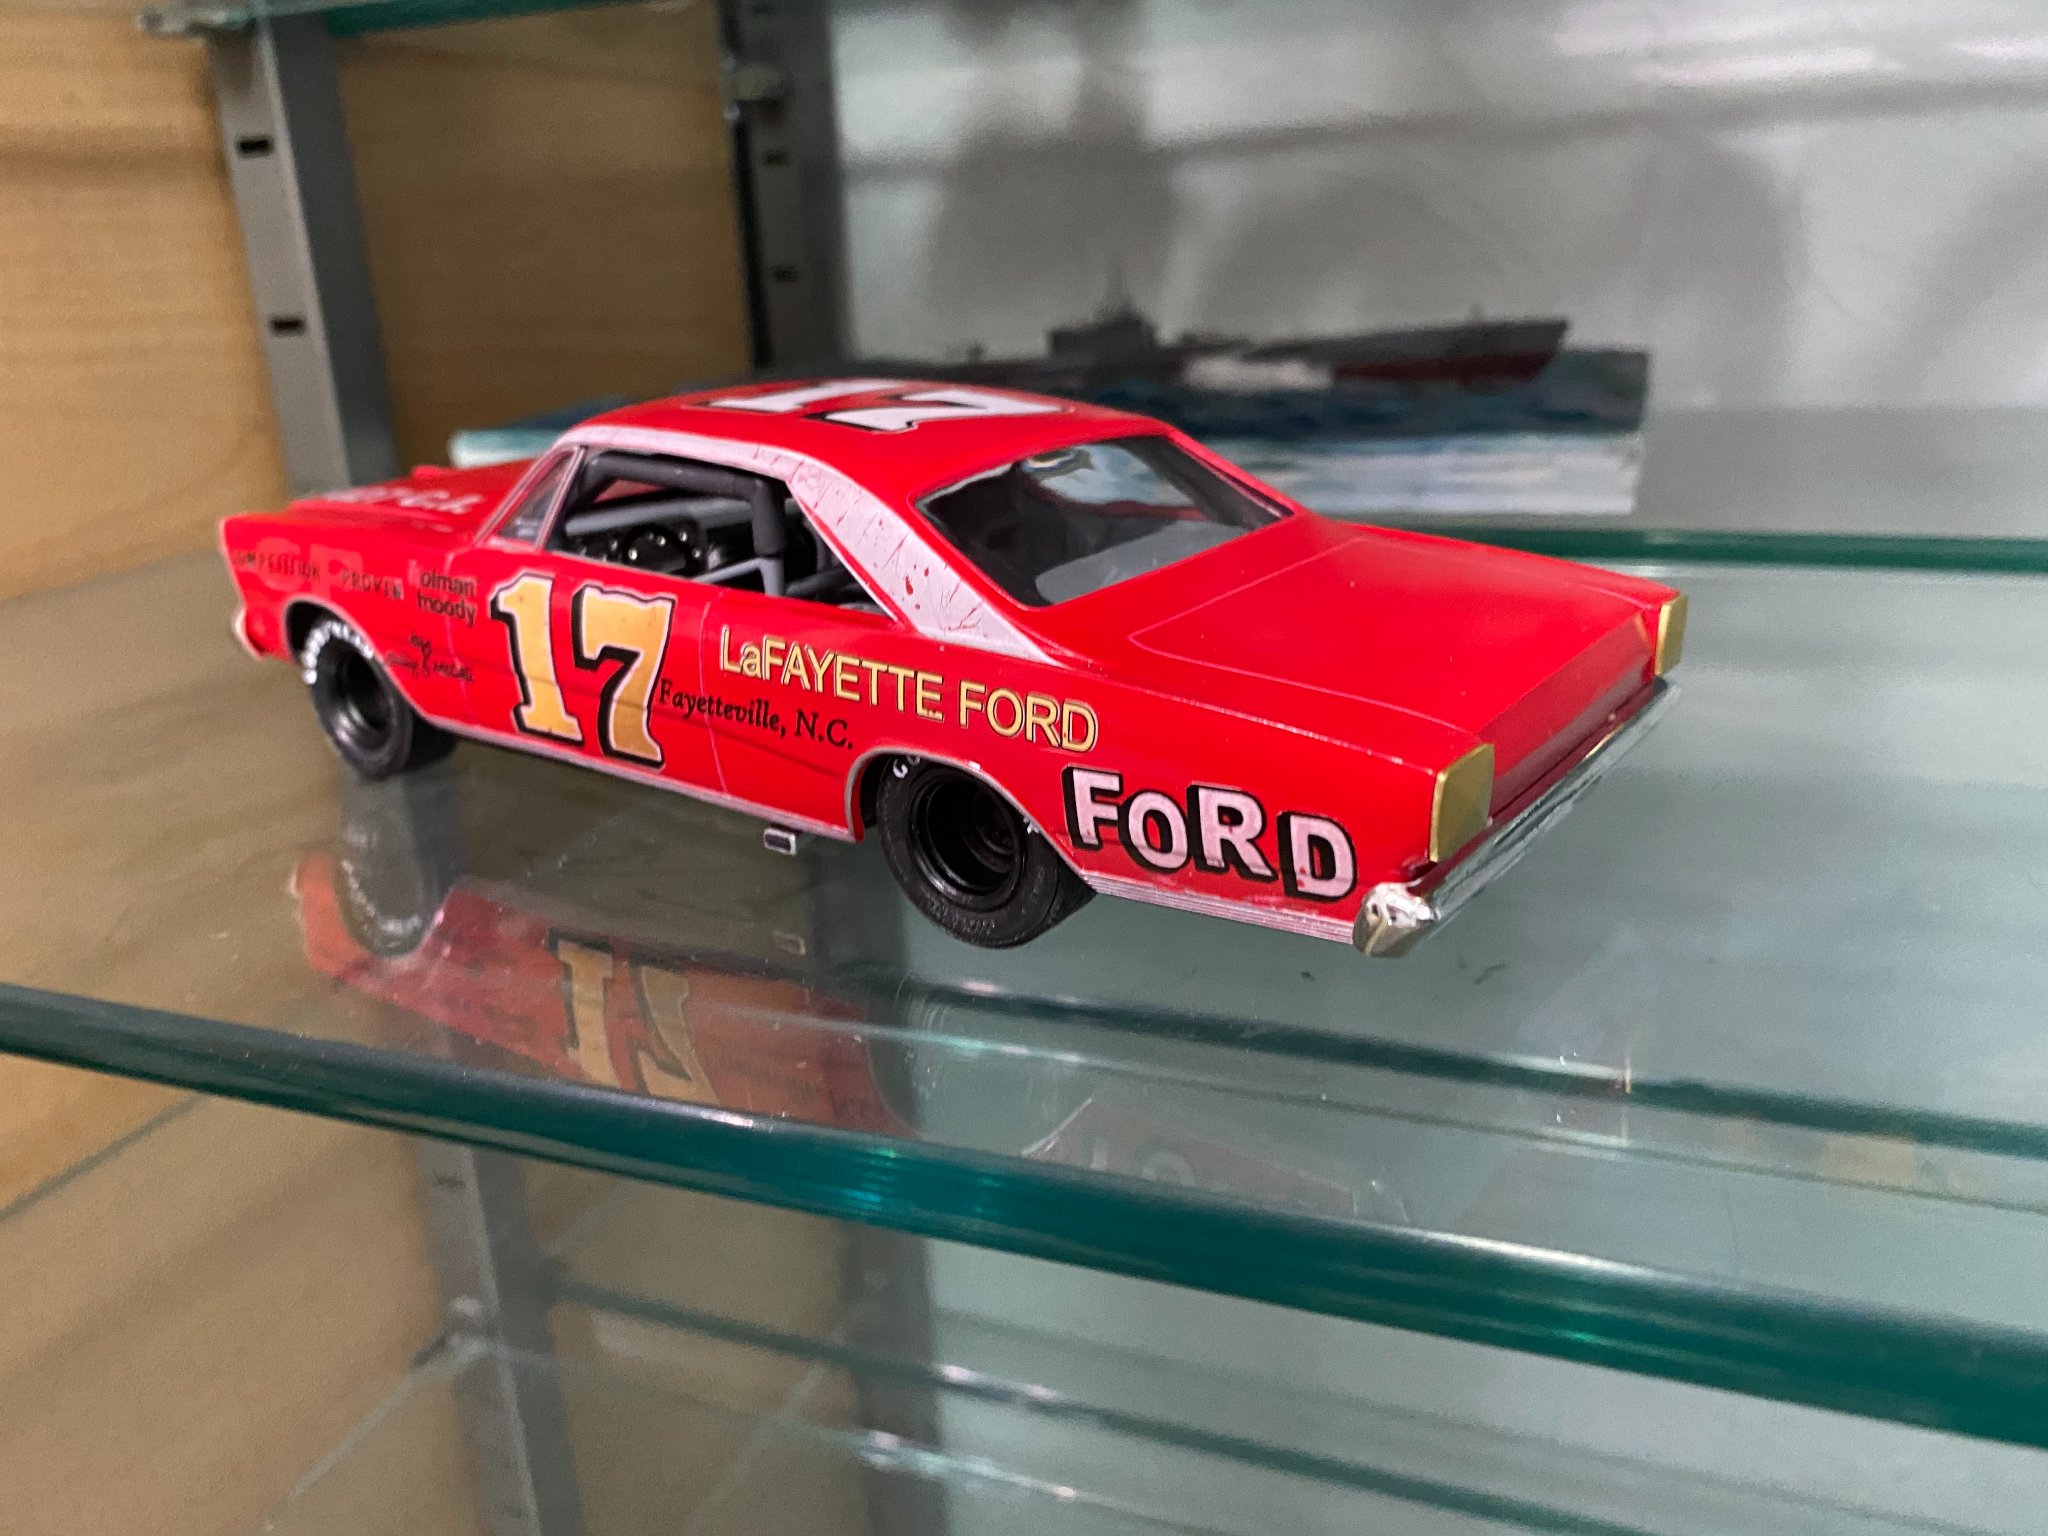
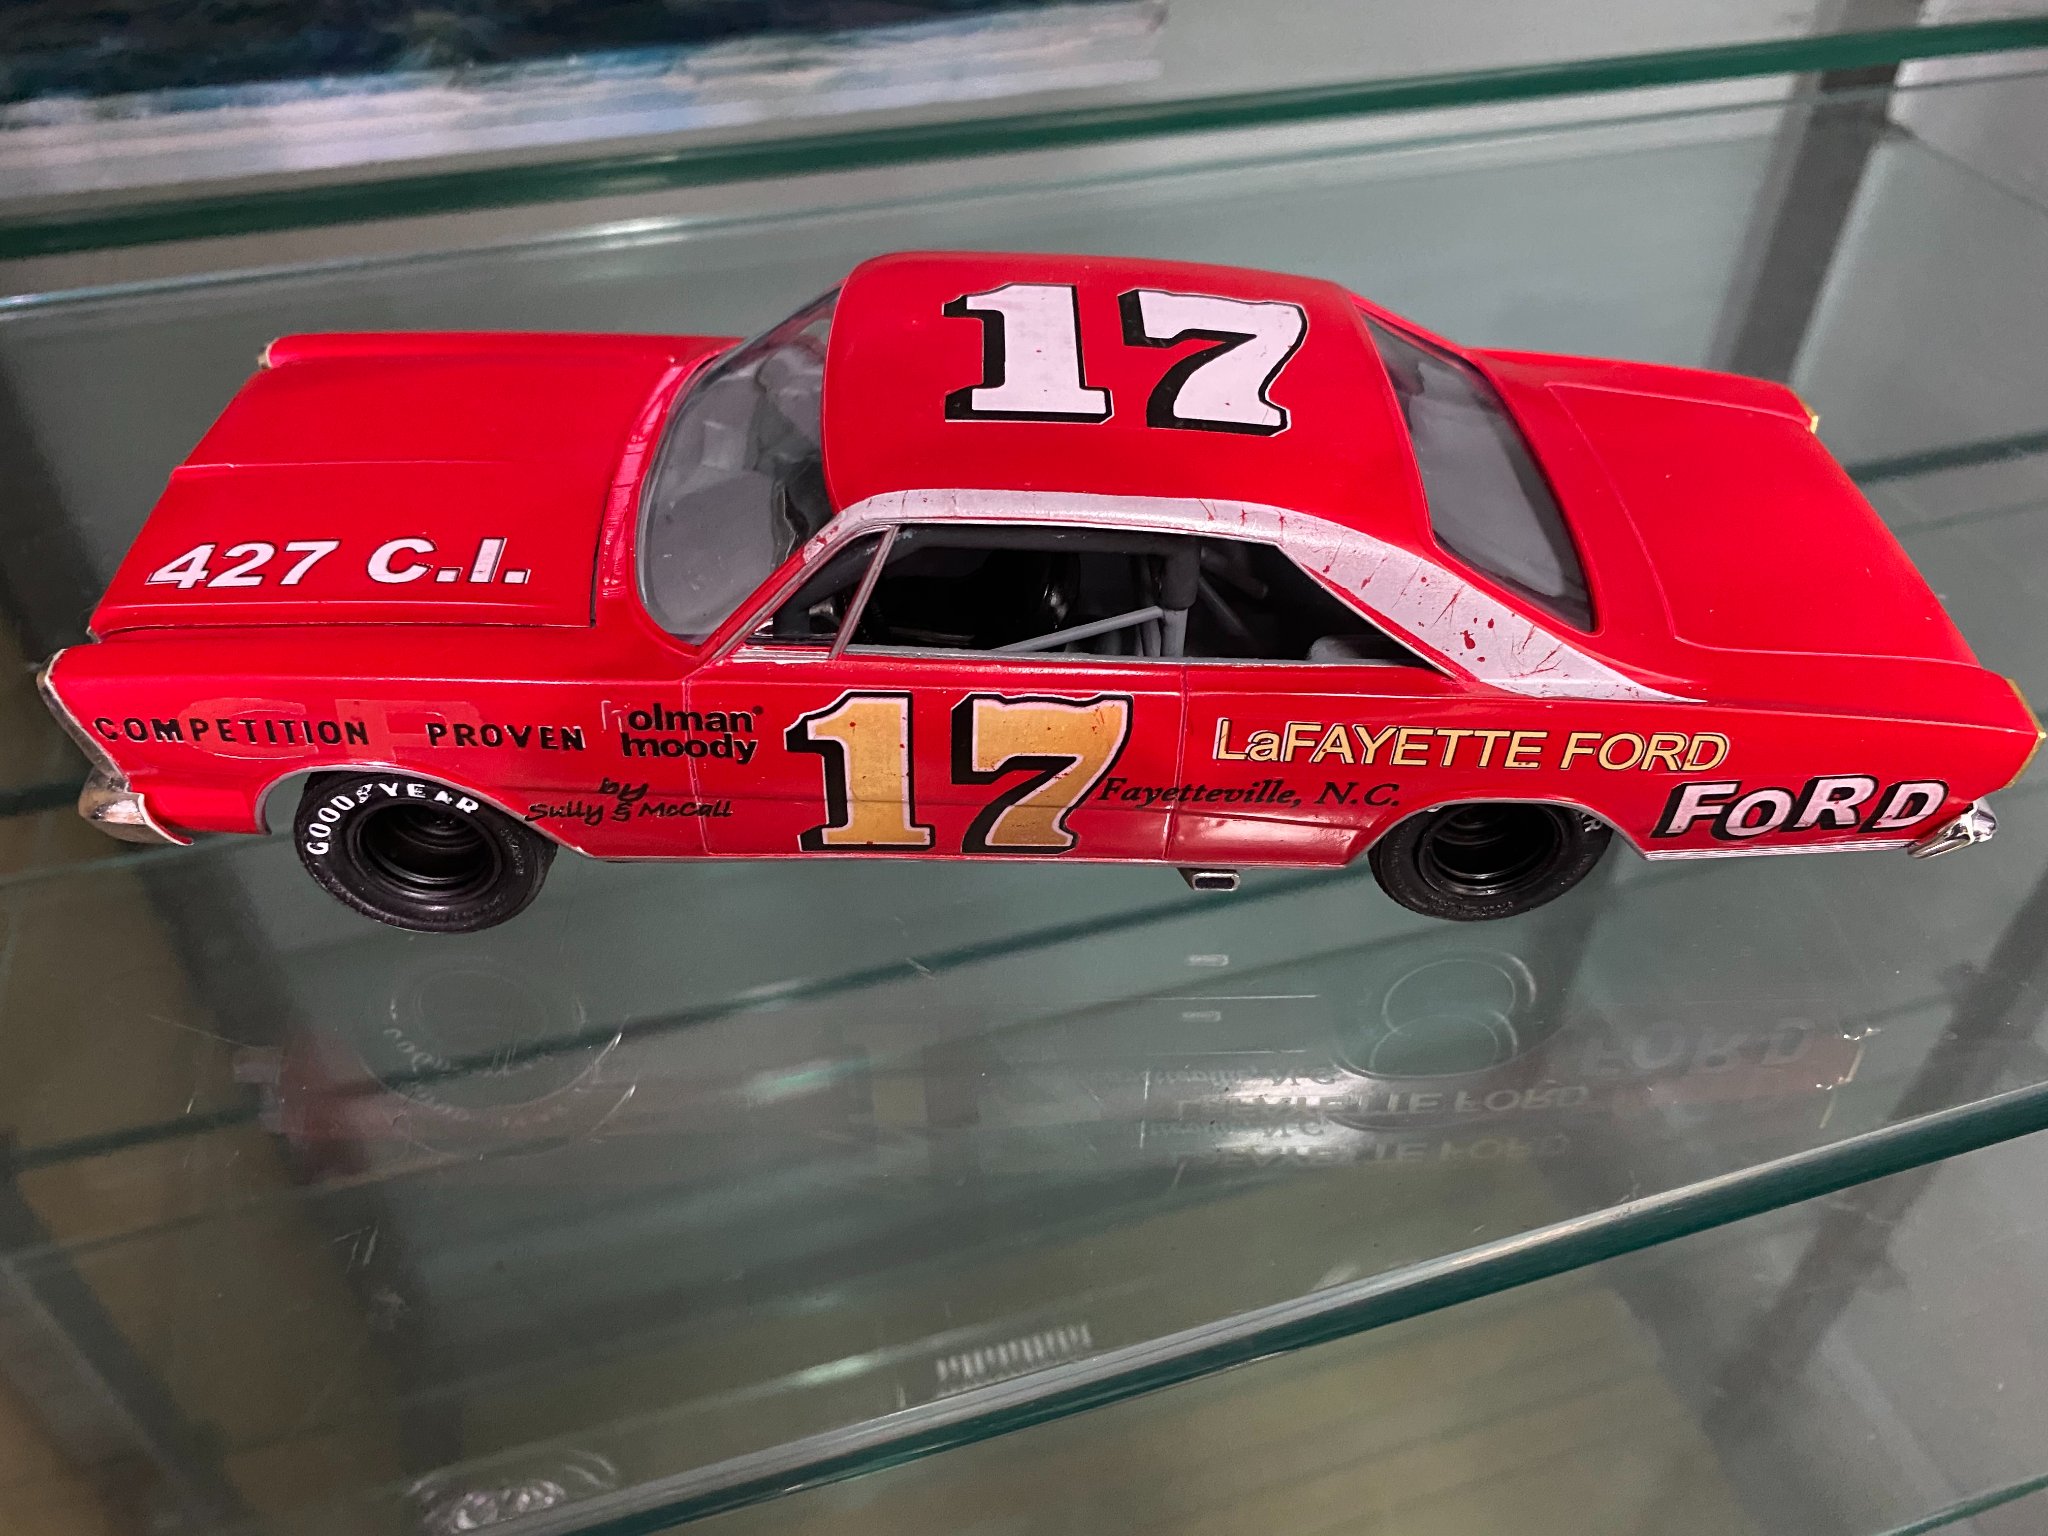
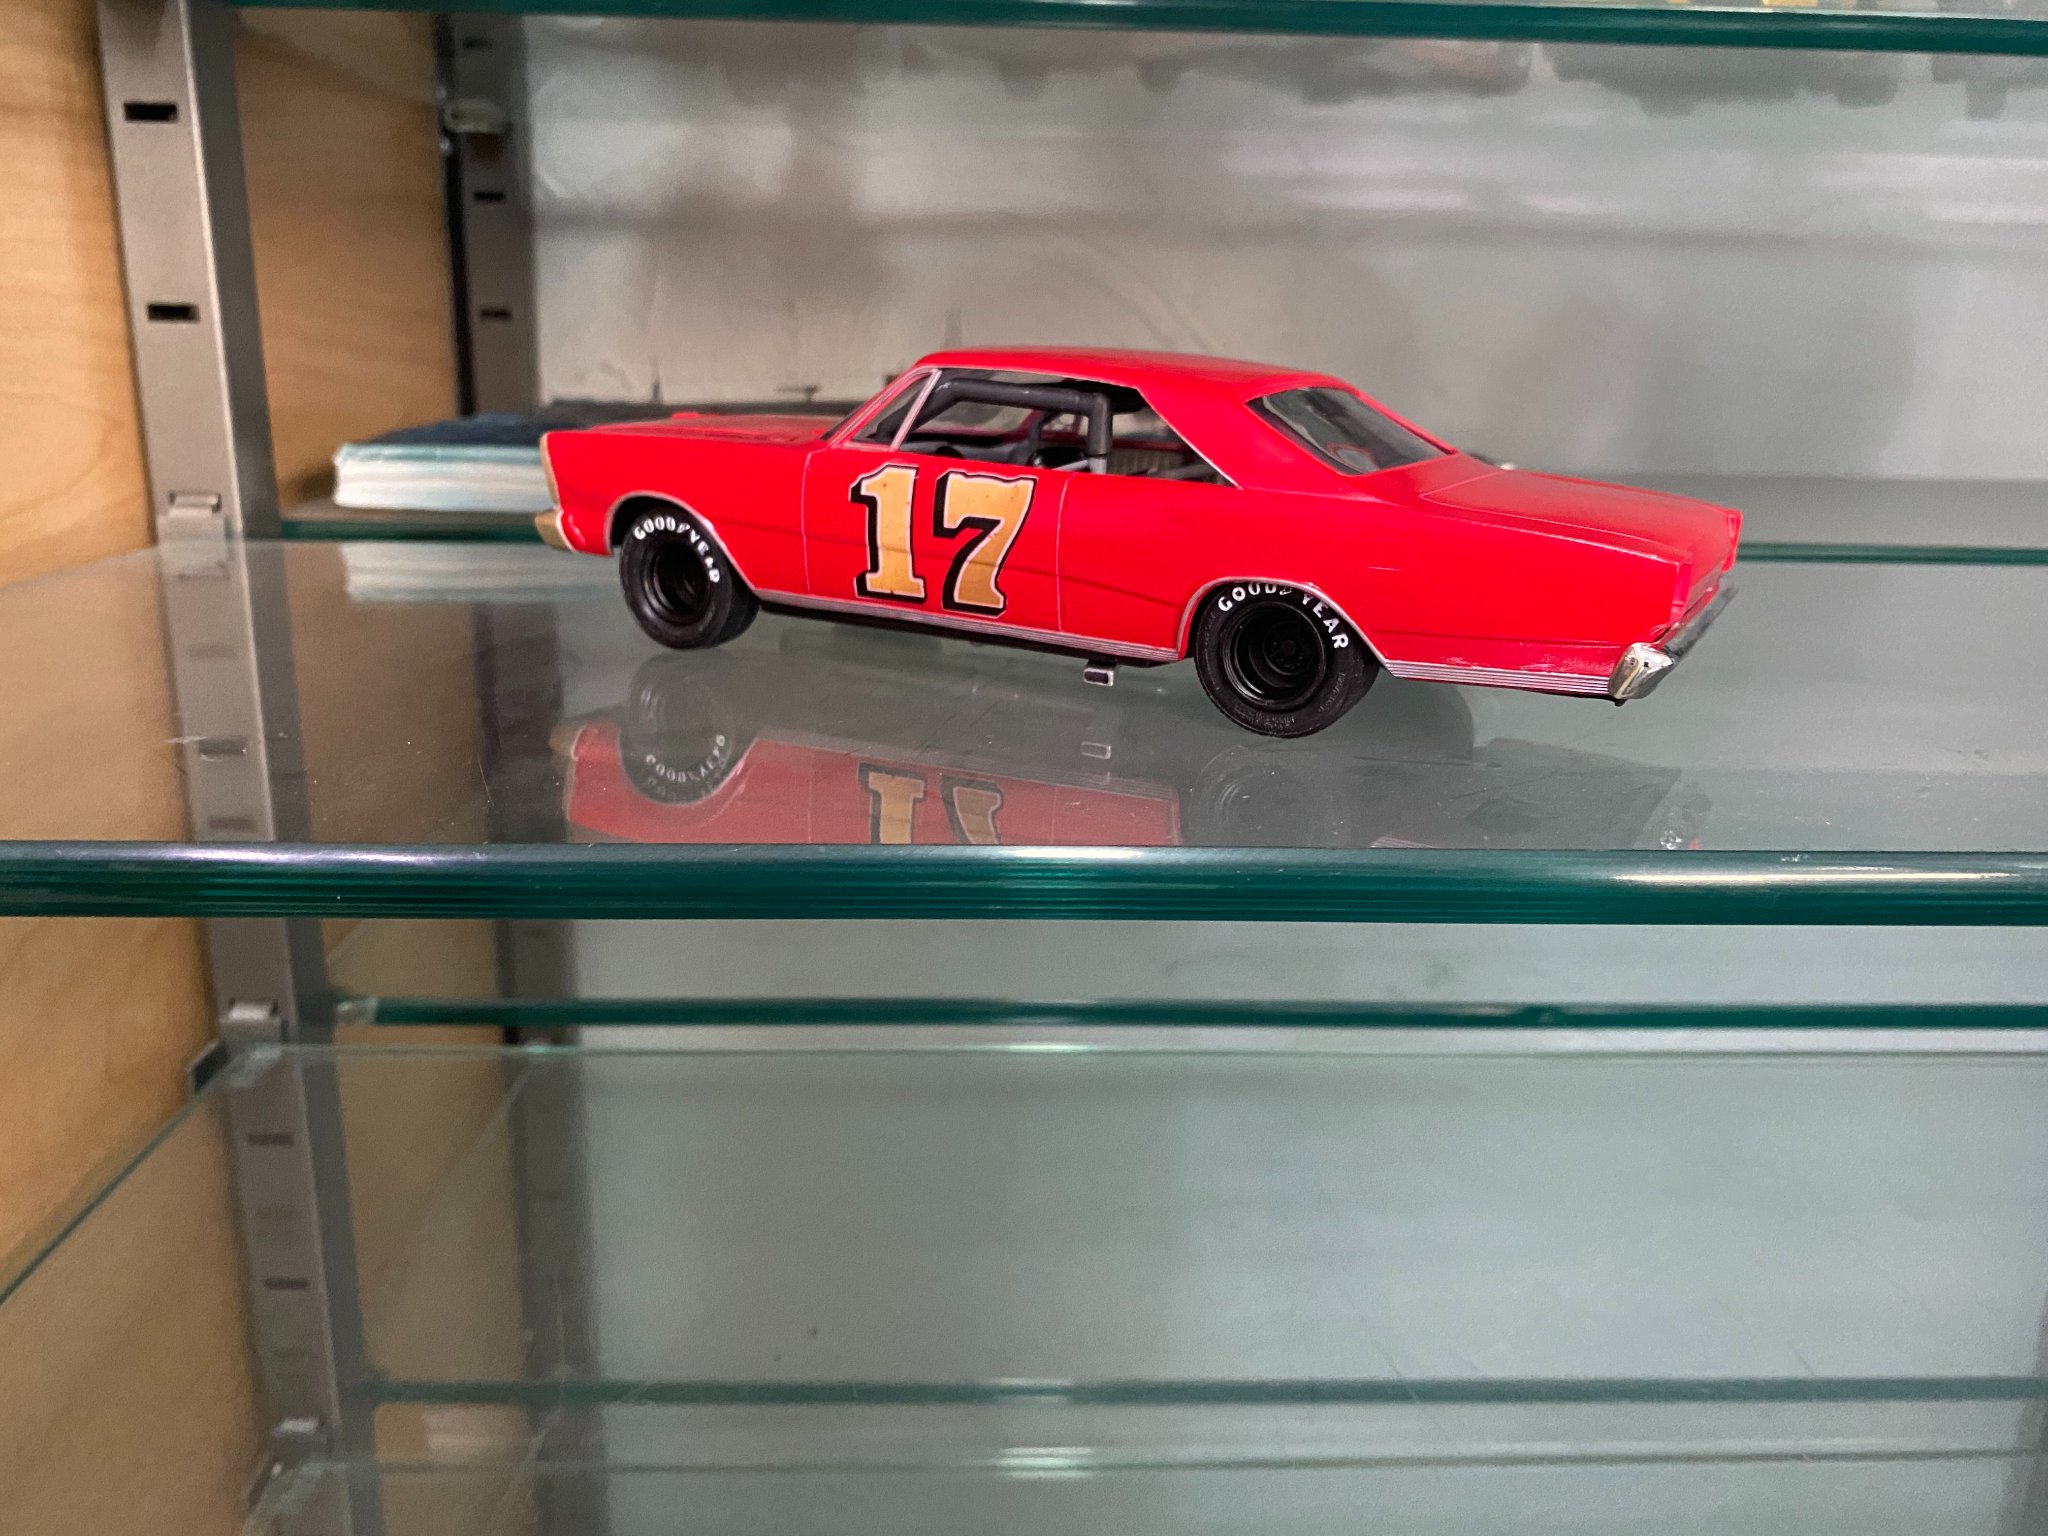
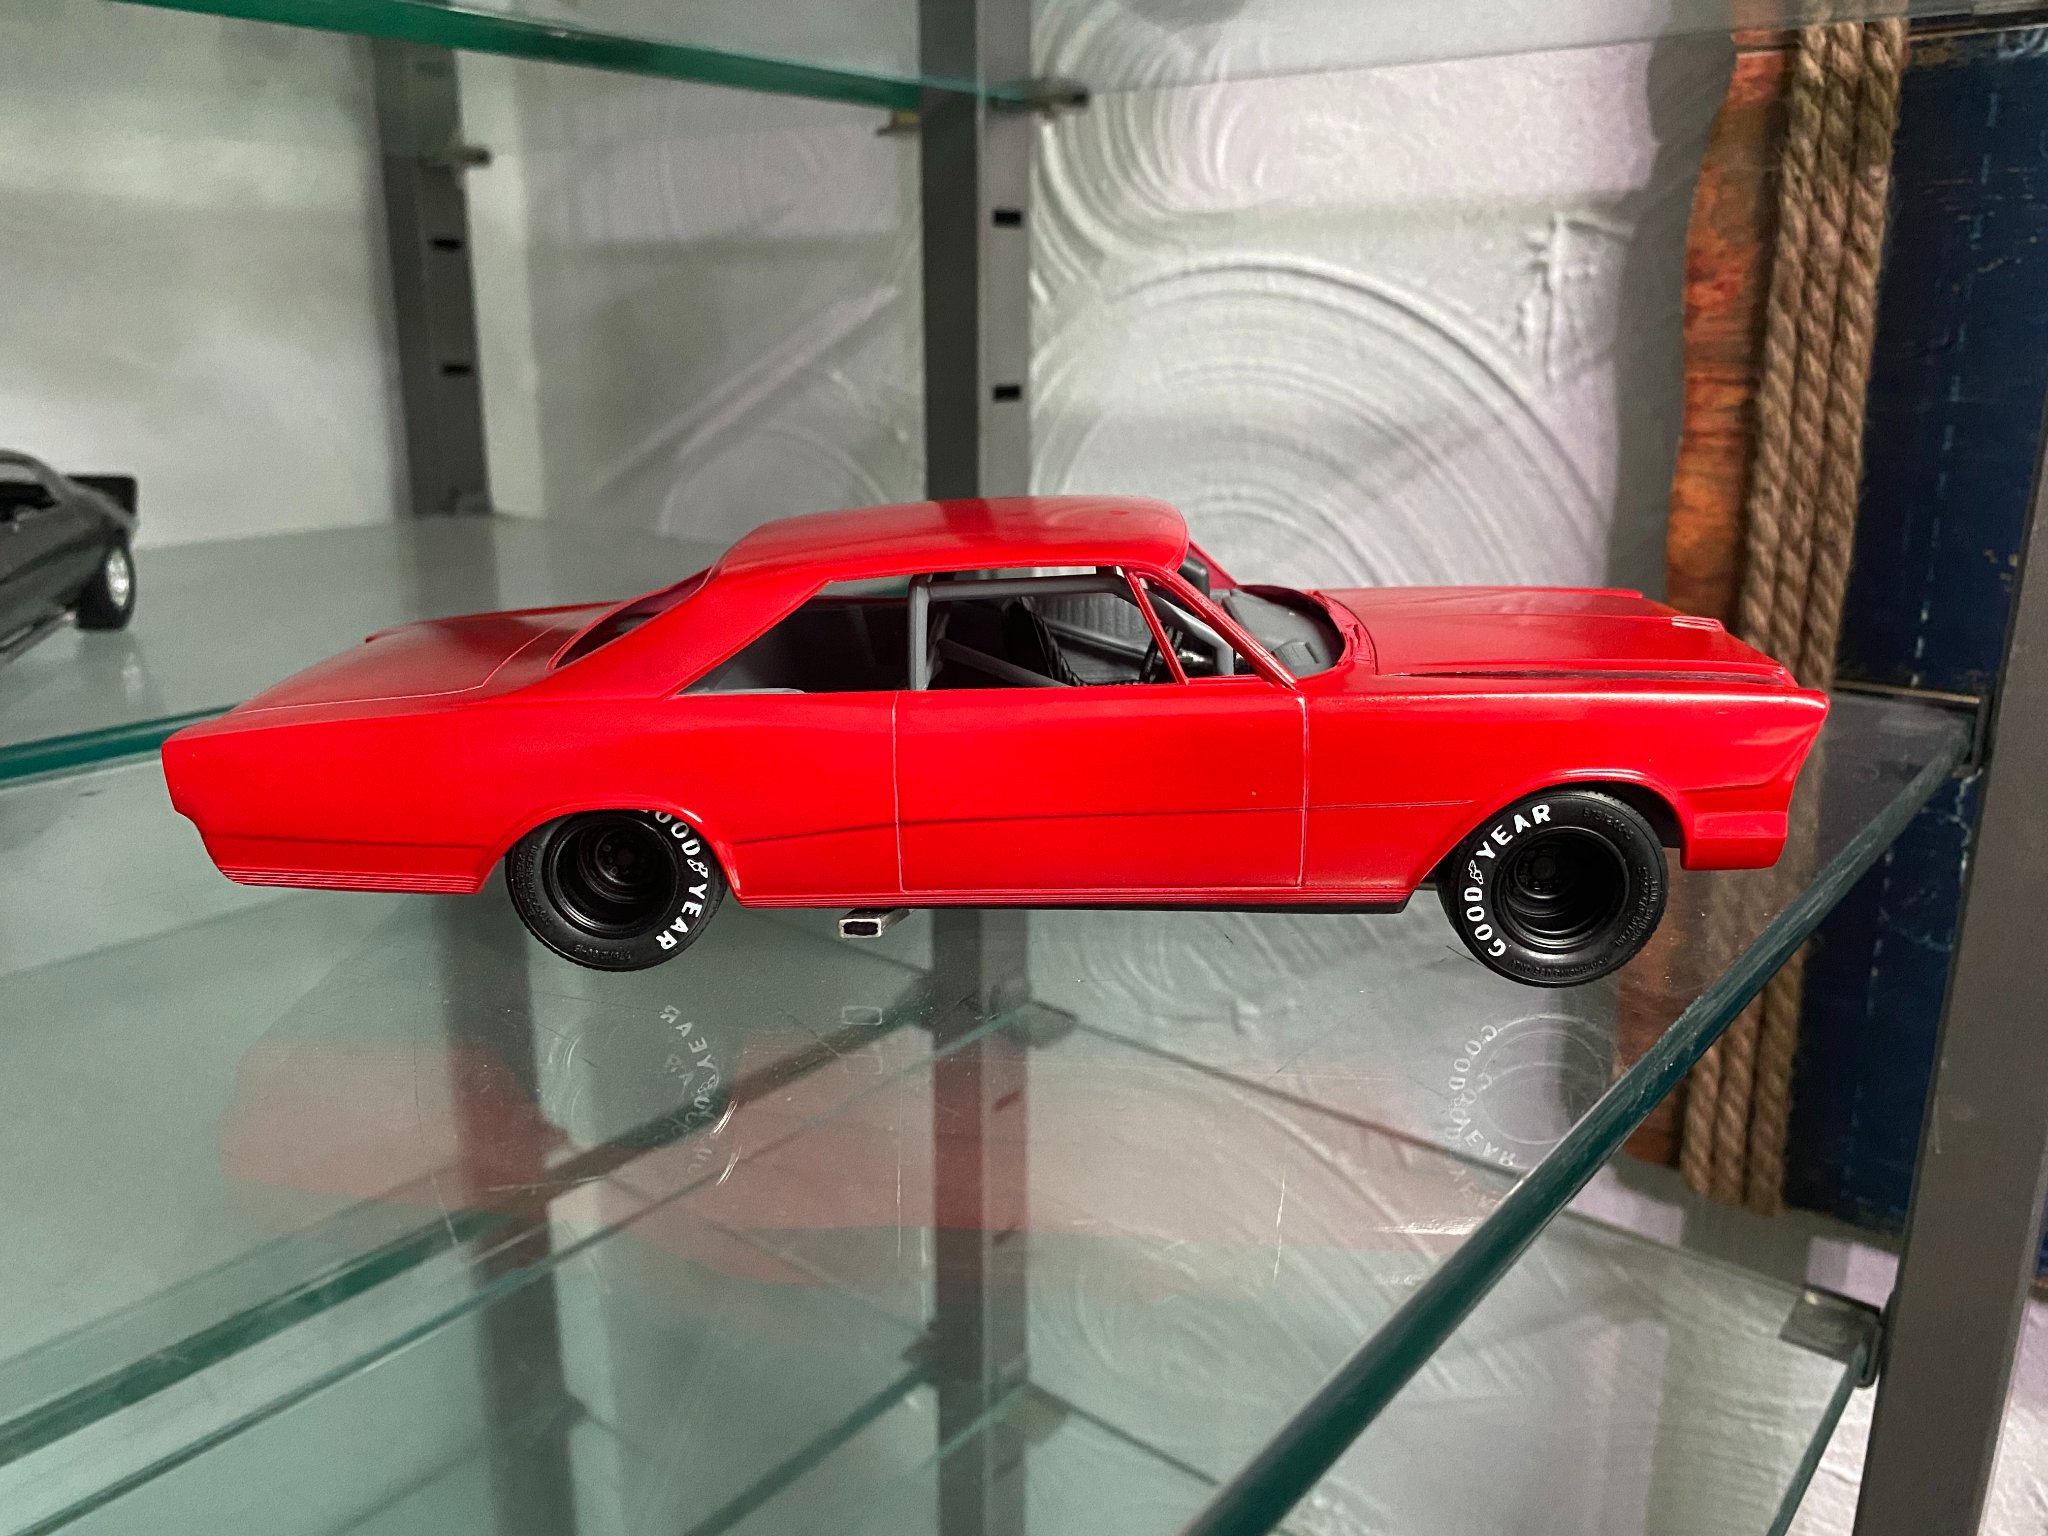
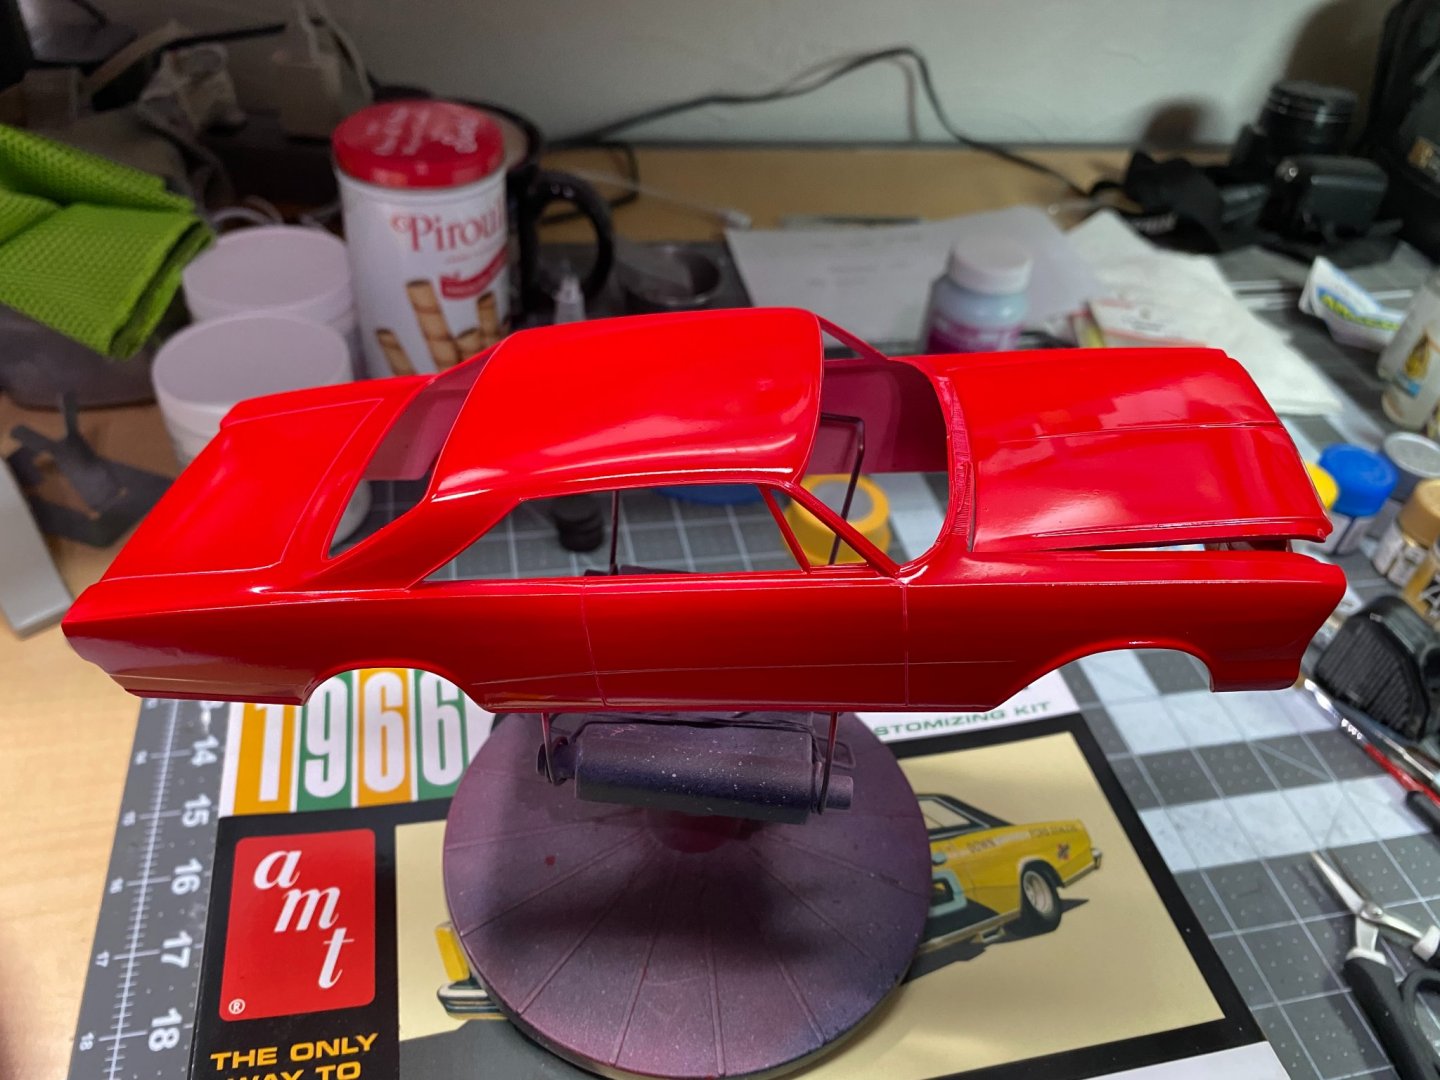
I think you're right. It does sit better with the glass and bumpers in place. Will finish up these decals over the next day or two then call this one done.

- 101 replies
-
- 12
-
-
This is interesting. I opened a different browser and then this link worked for me. Before that, the browser I currently use most often gave an error message when I tried to open that link. That's why I was asking if DeAgostini had gone oob.
-
That's possible, but I never heard or read that anywhere. Their products were exclusive to each company. I always wanted Hachette items, but could not get them in the USA.
-
Off-Subject BUT, Does anyone know...did DeAgostini Model Space in the USA go out of business? All I can find now is their website in the UK. But I did find now there is a USA website that is associated with Hachette: Agora Models https://www.agoramodels.com/us/bismarck/#buy-bismarck They run a business model similar to DeAgostini.
-
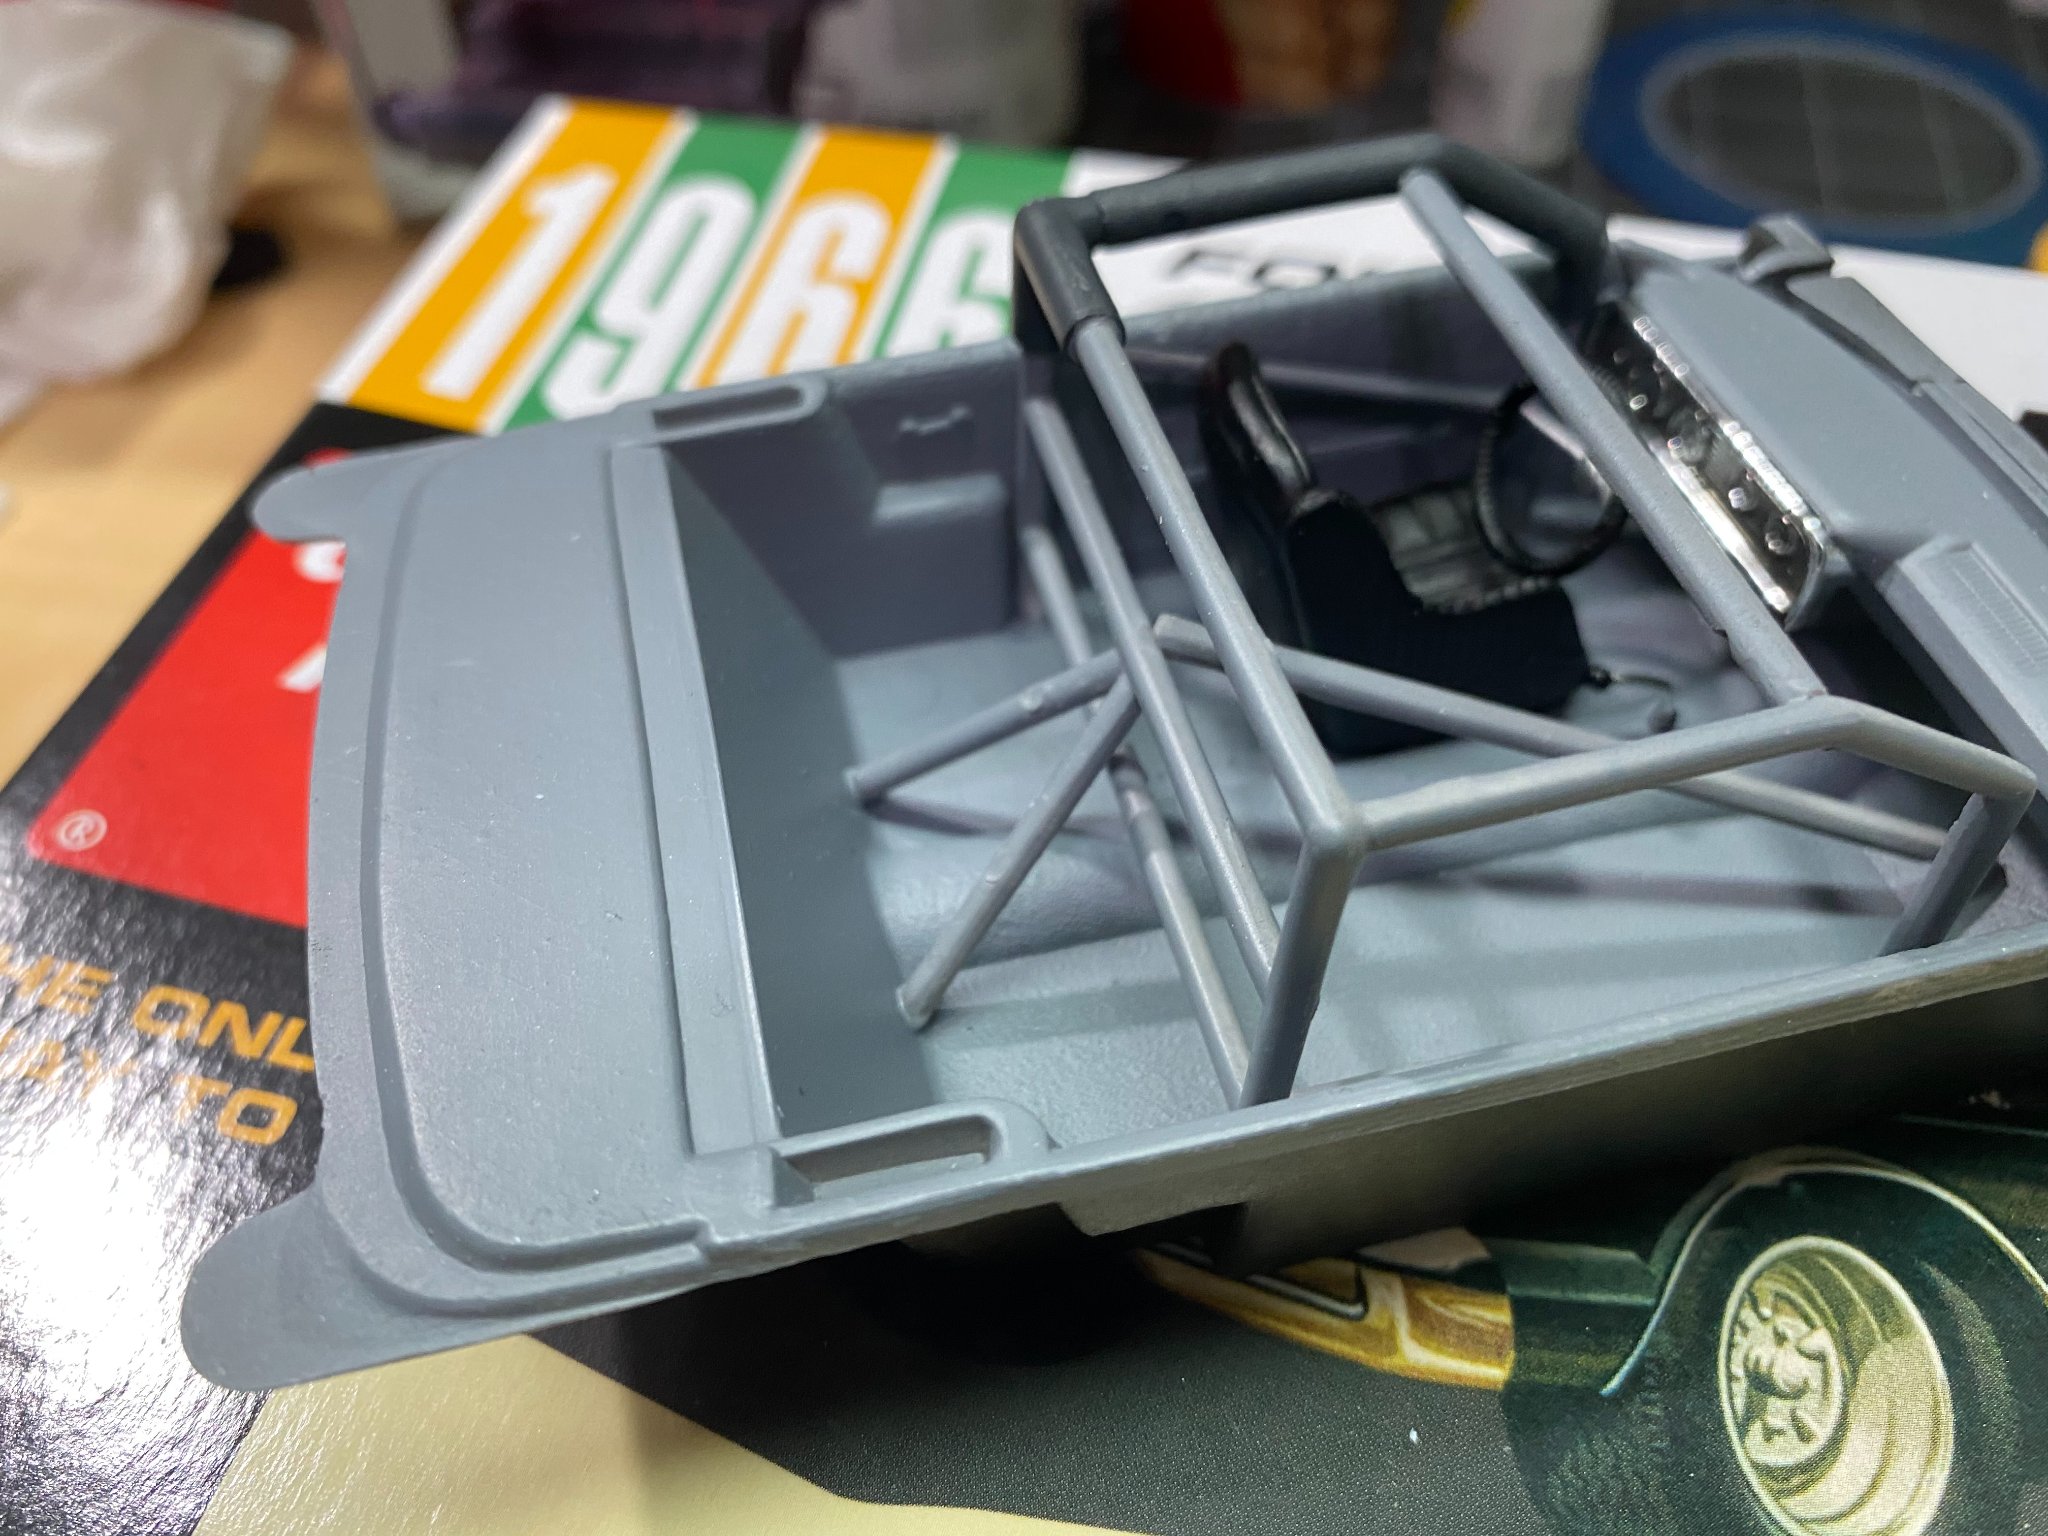
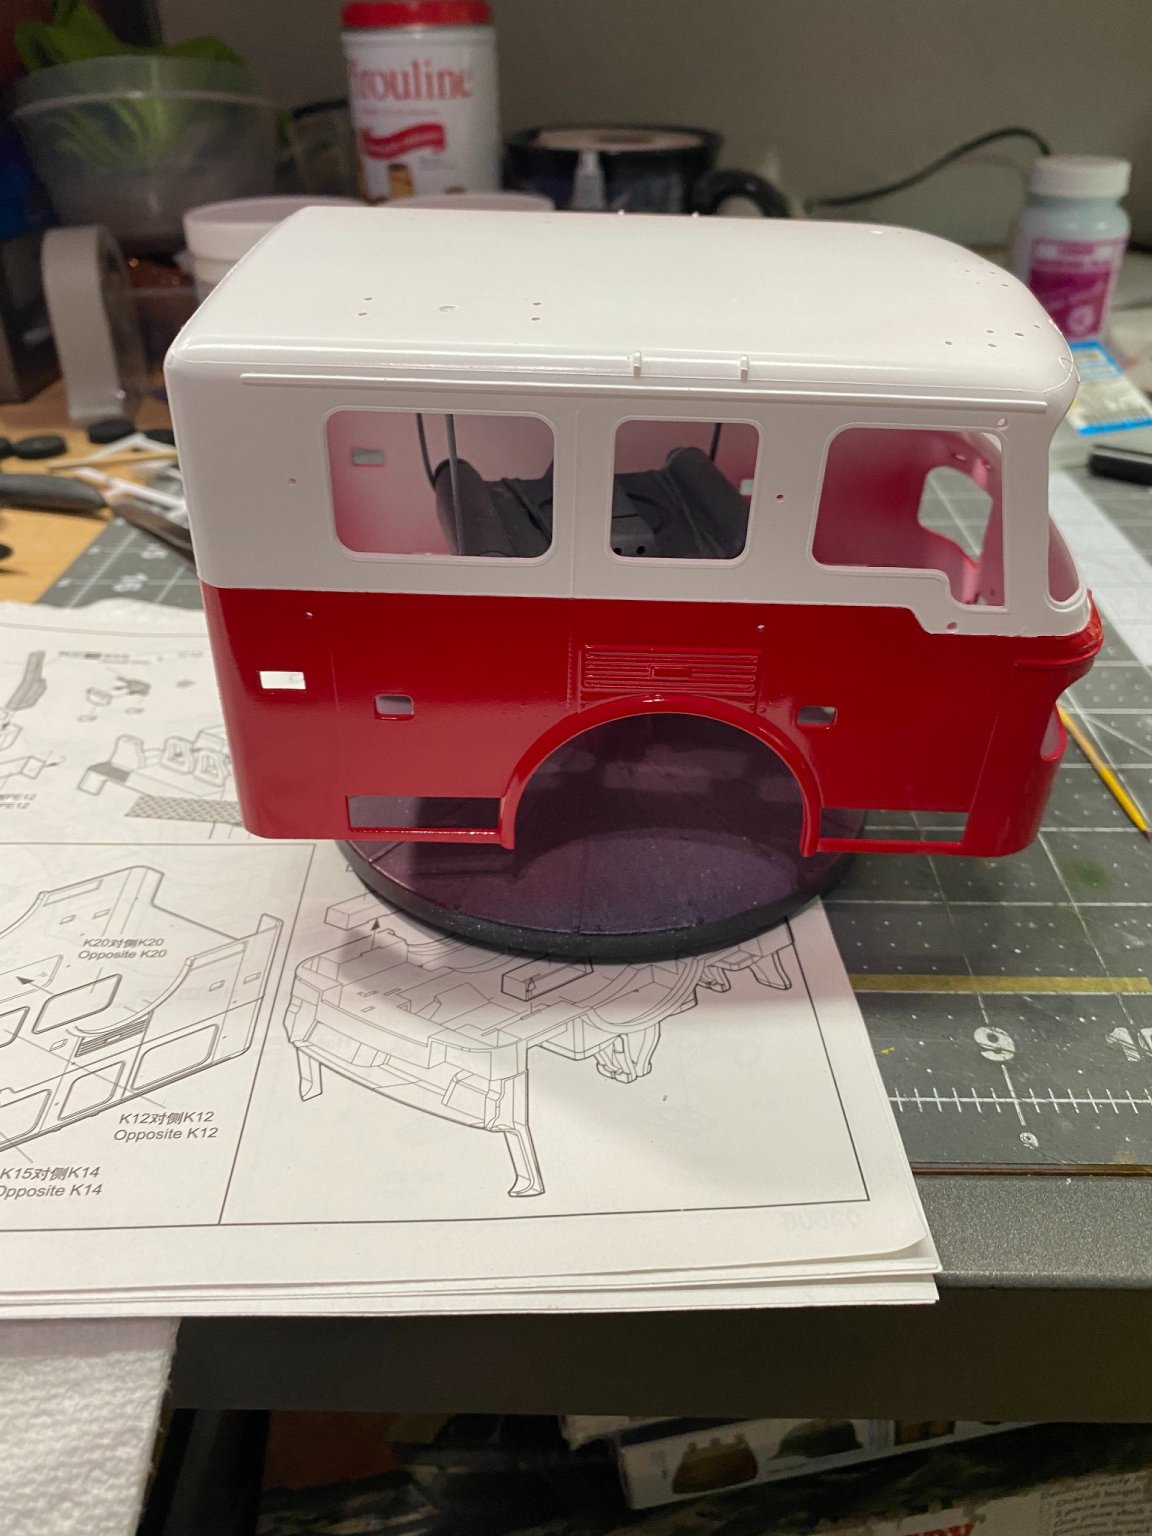
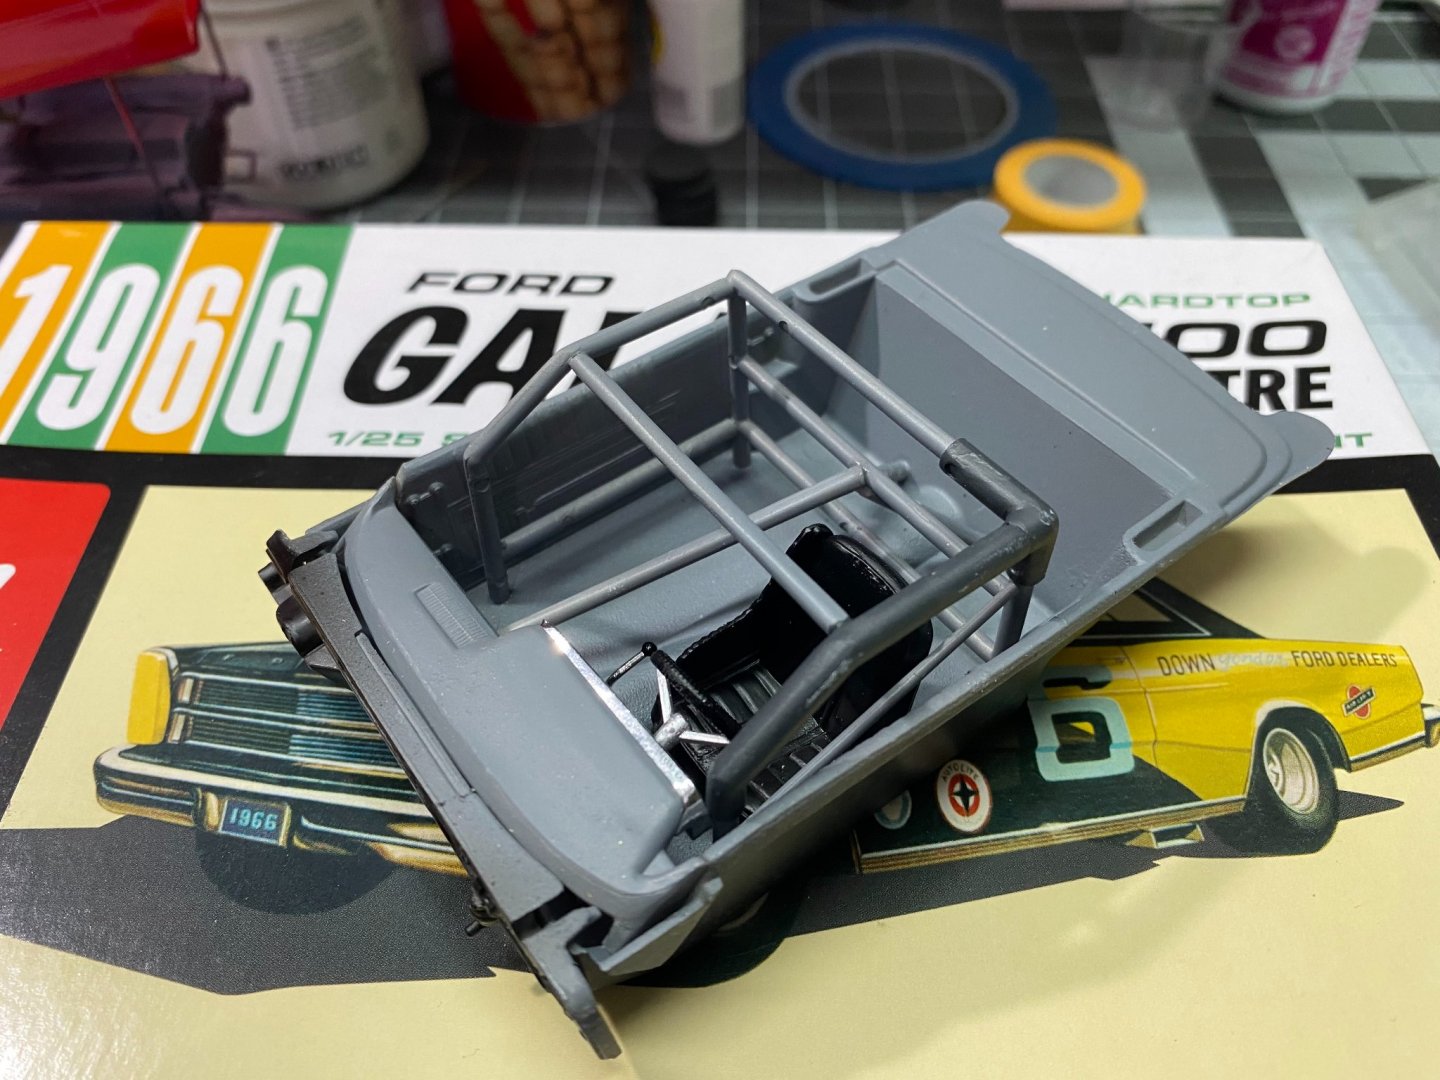
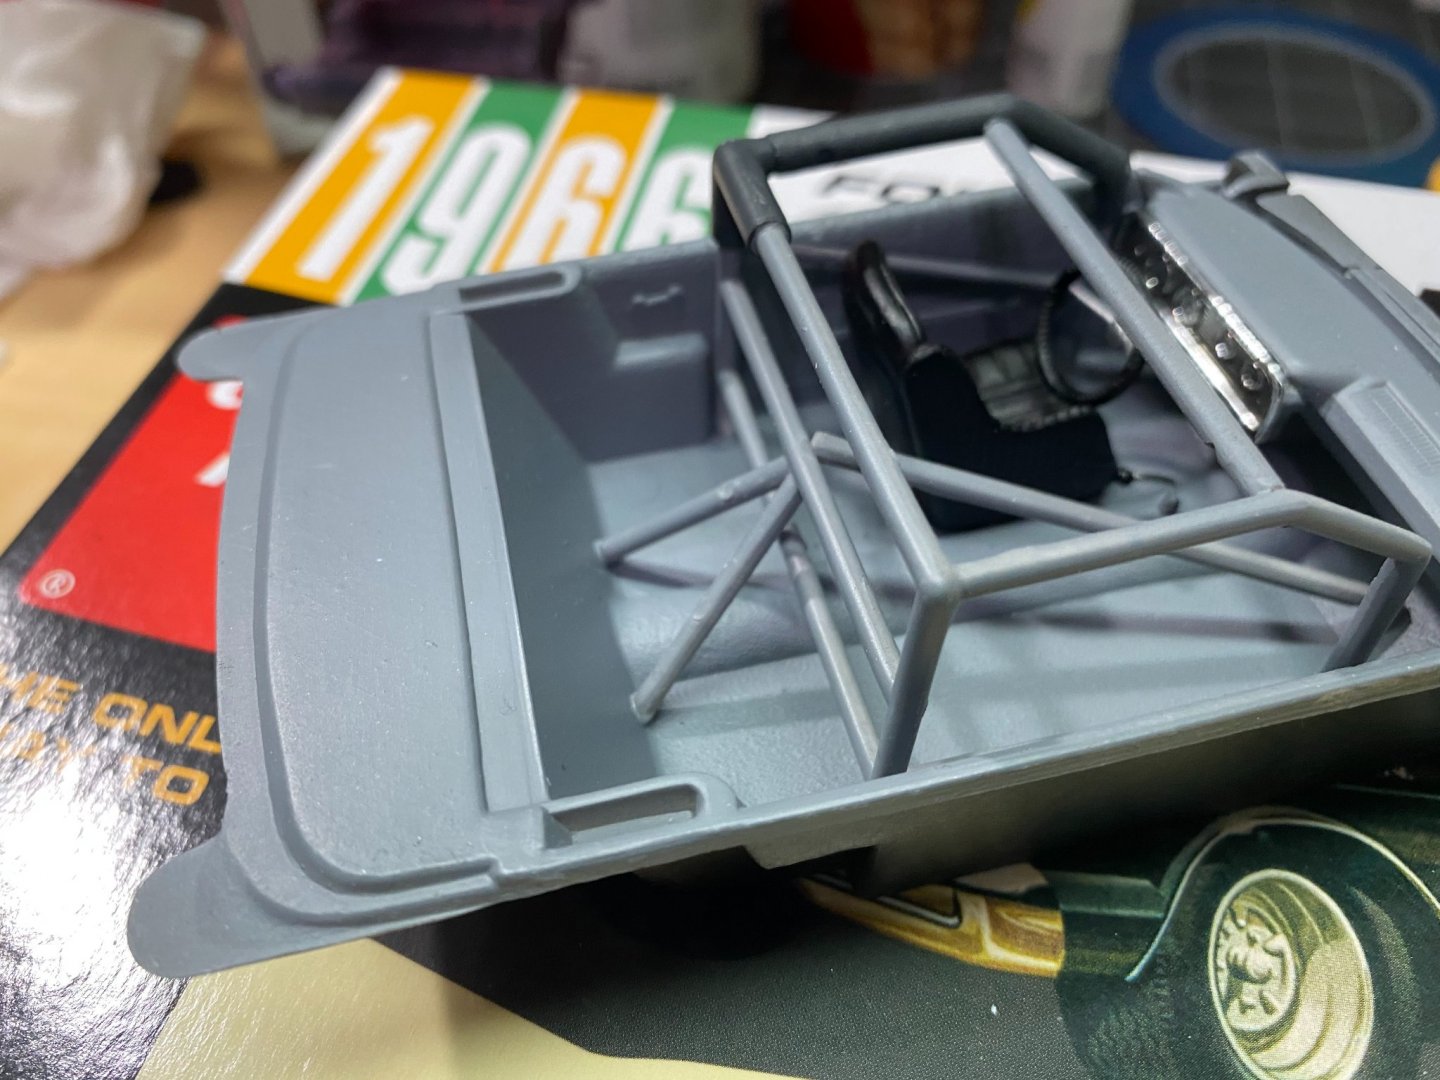
I will need to shim the chassis/interior tub/body fit back to front so the tires sit evenly within the wheel wells. As it sits here now, dry-fitted, there is too much rake from front to back. It should sit more level. It's been quite a while since I last worked on one of these very old molds from AMT. In retrospect, I should have worked much earlier to recognize where adjustments would be needed as these are not shake and bake kits like Tamiya, Hasegawa, Aoshima, or even the Revell Germany kits of the modern day. You cannot assume they will fit well. I should have remembered that.
-
Thanks!

-
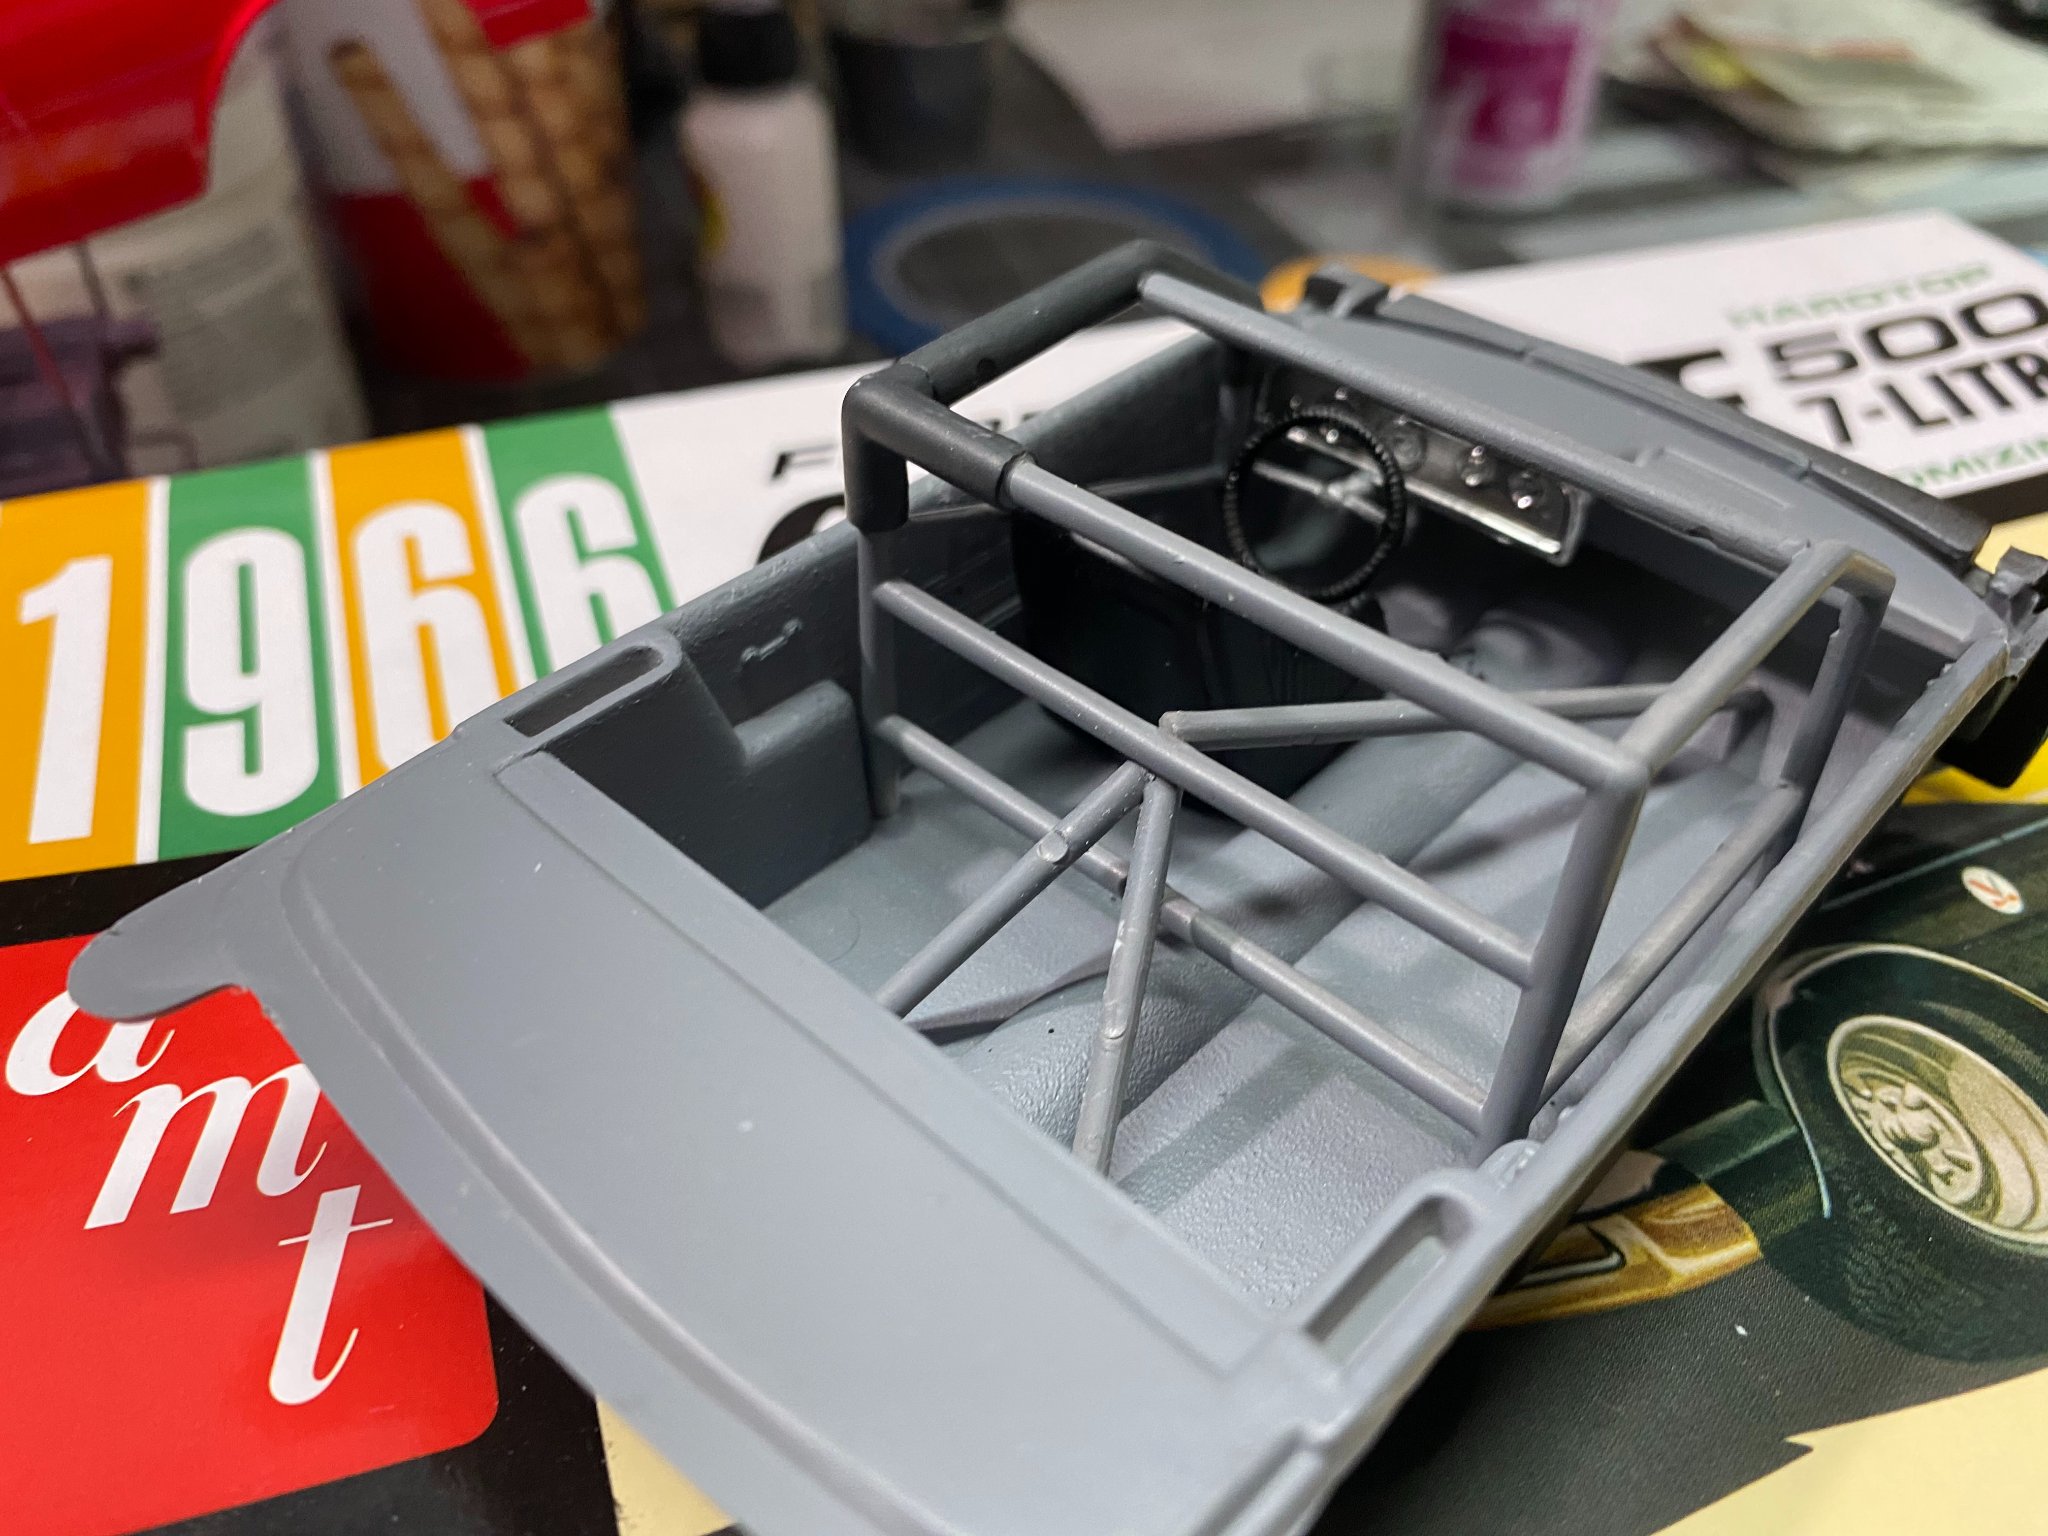
I used rubber bands to hold/force the windscreen panels into shape, seated against the frame rails then cemented them in place with liquid cement. It worked well with the only casualty when some cement found it's way onto one of the rubber bands due to capillary action then slightly defaced one windscreen. I think I can polish most of that out, but the windscreens themselves are in place and not warped now. I can relax a bit now. Replacement parts from Trumpeter have to come through Stevens International (USA Distributor), and they are well known for their lack of customer support/service. In other words, fuggitaboutit.
-
That may work. Clear plastic is very brittle and these are particularly thin. working a heat source trying to woo them into shape is risky. Once the paint on my coachwork is thoroughly dry, I may rather try masking them tightly in place while glue dries. I can force them into place, but it will take the glue to hold them in place afterward.
-
On a sour note...I just found out my front two windshield pieces don't fit properly. Seems one is warped quite a bit and the other is warped as well but not as badly. Not sure exactly how I will tackle this problem but I have to find a way to fix it. It's always something.
-
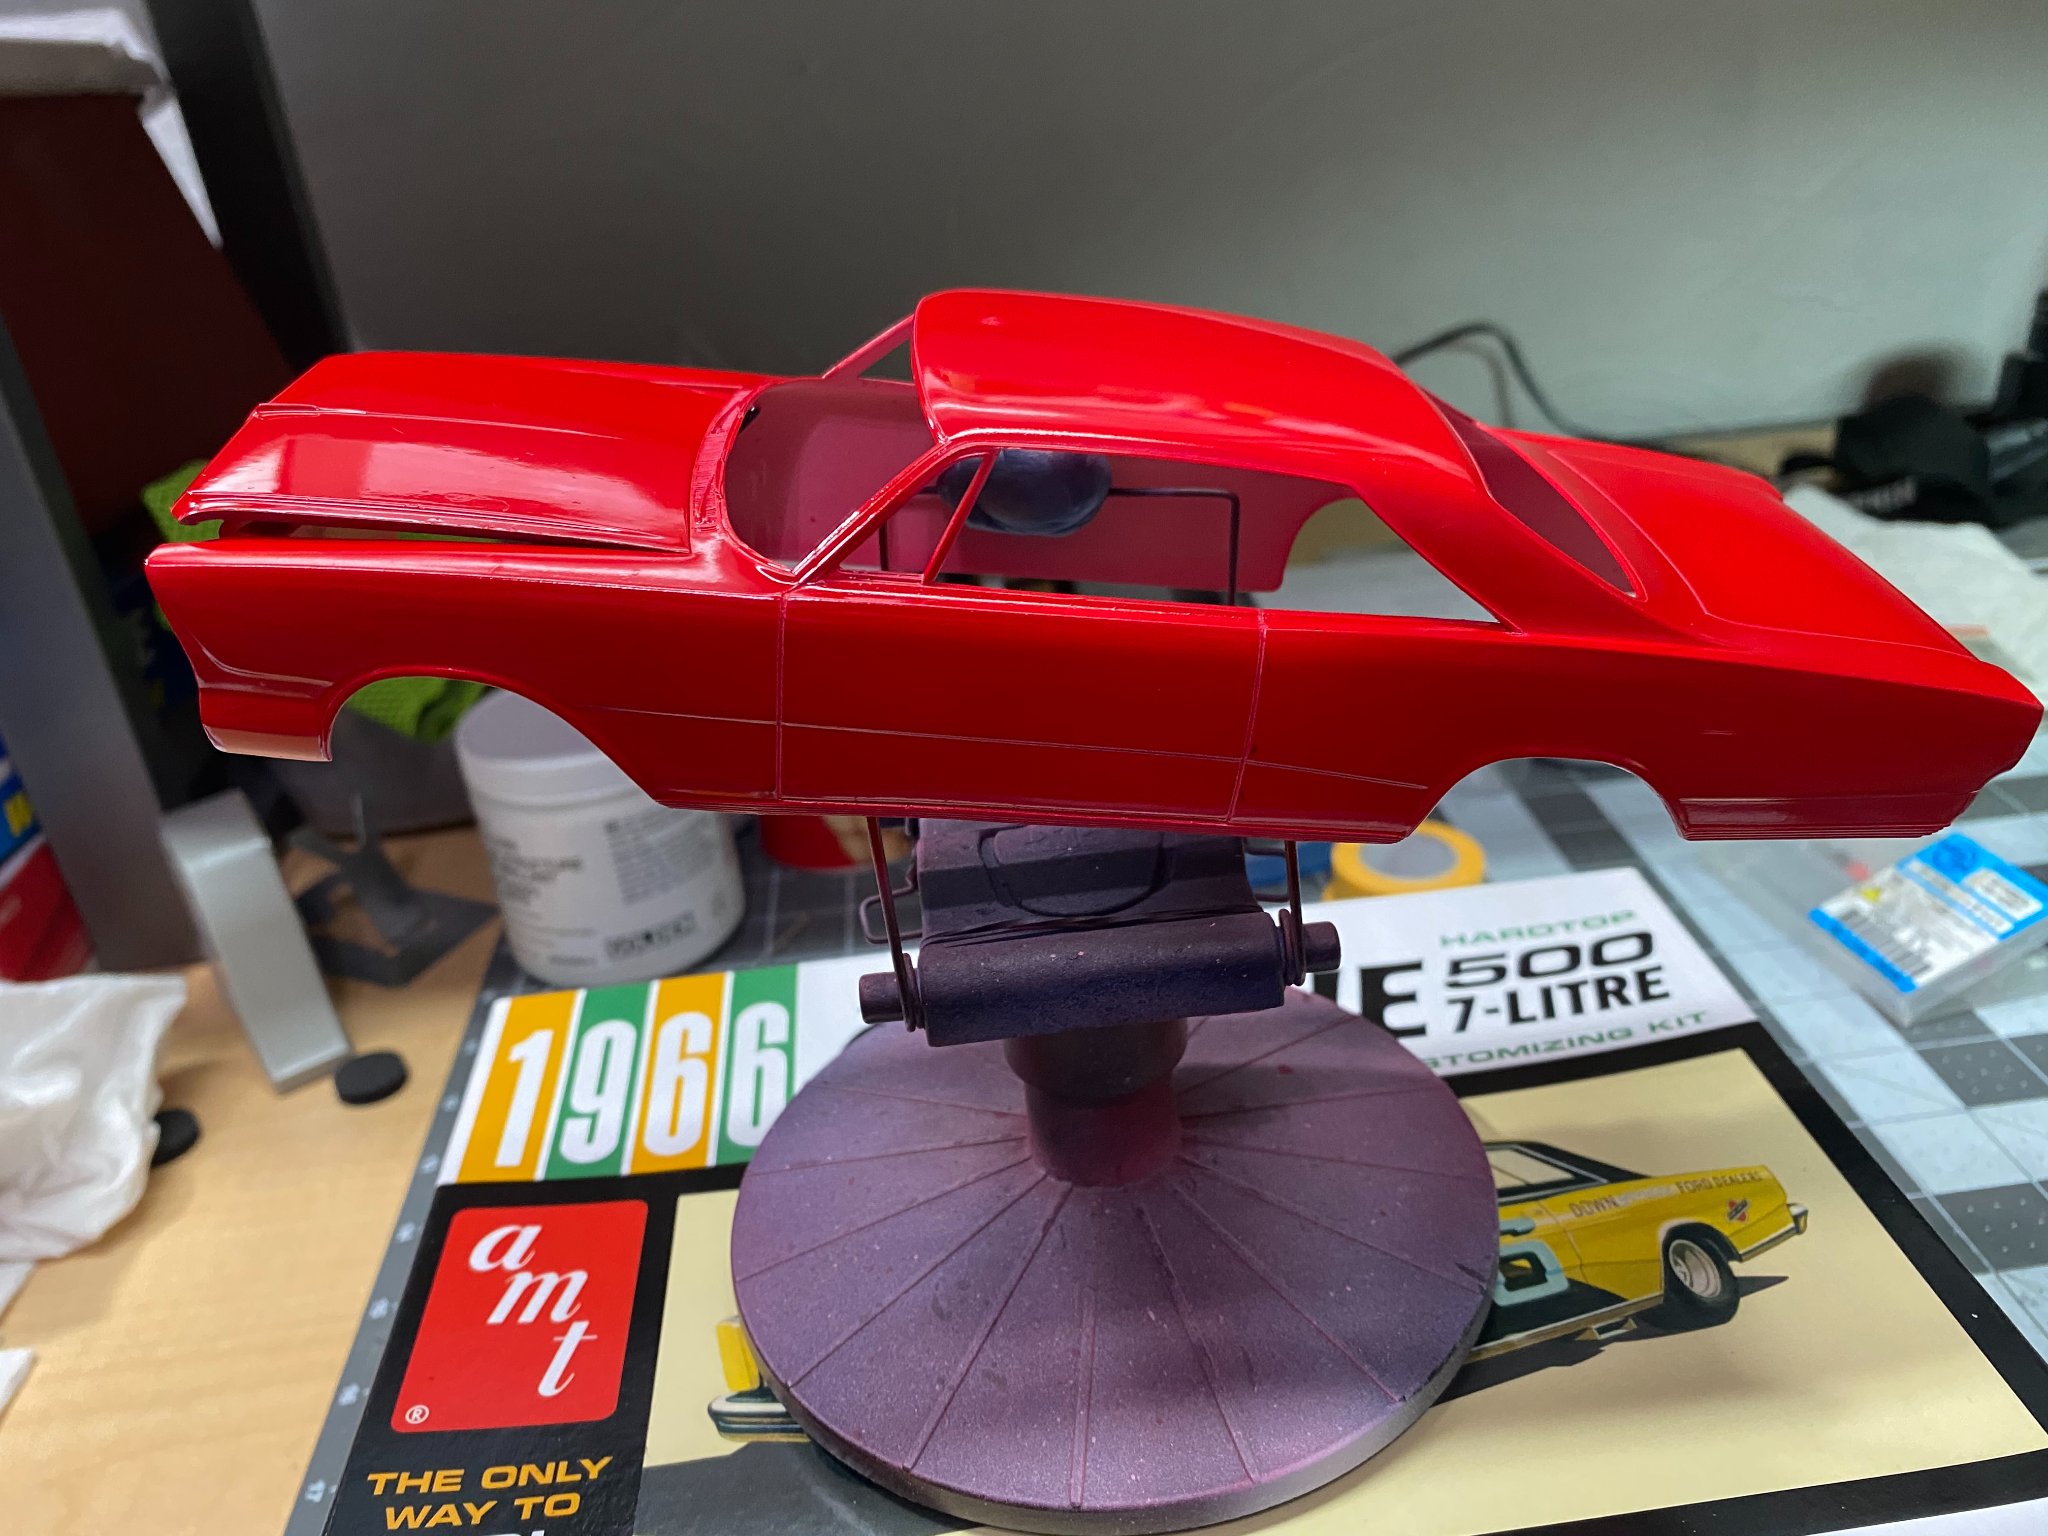
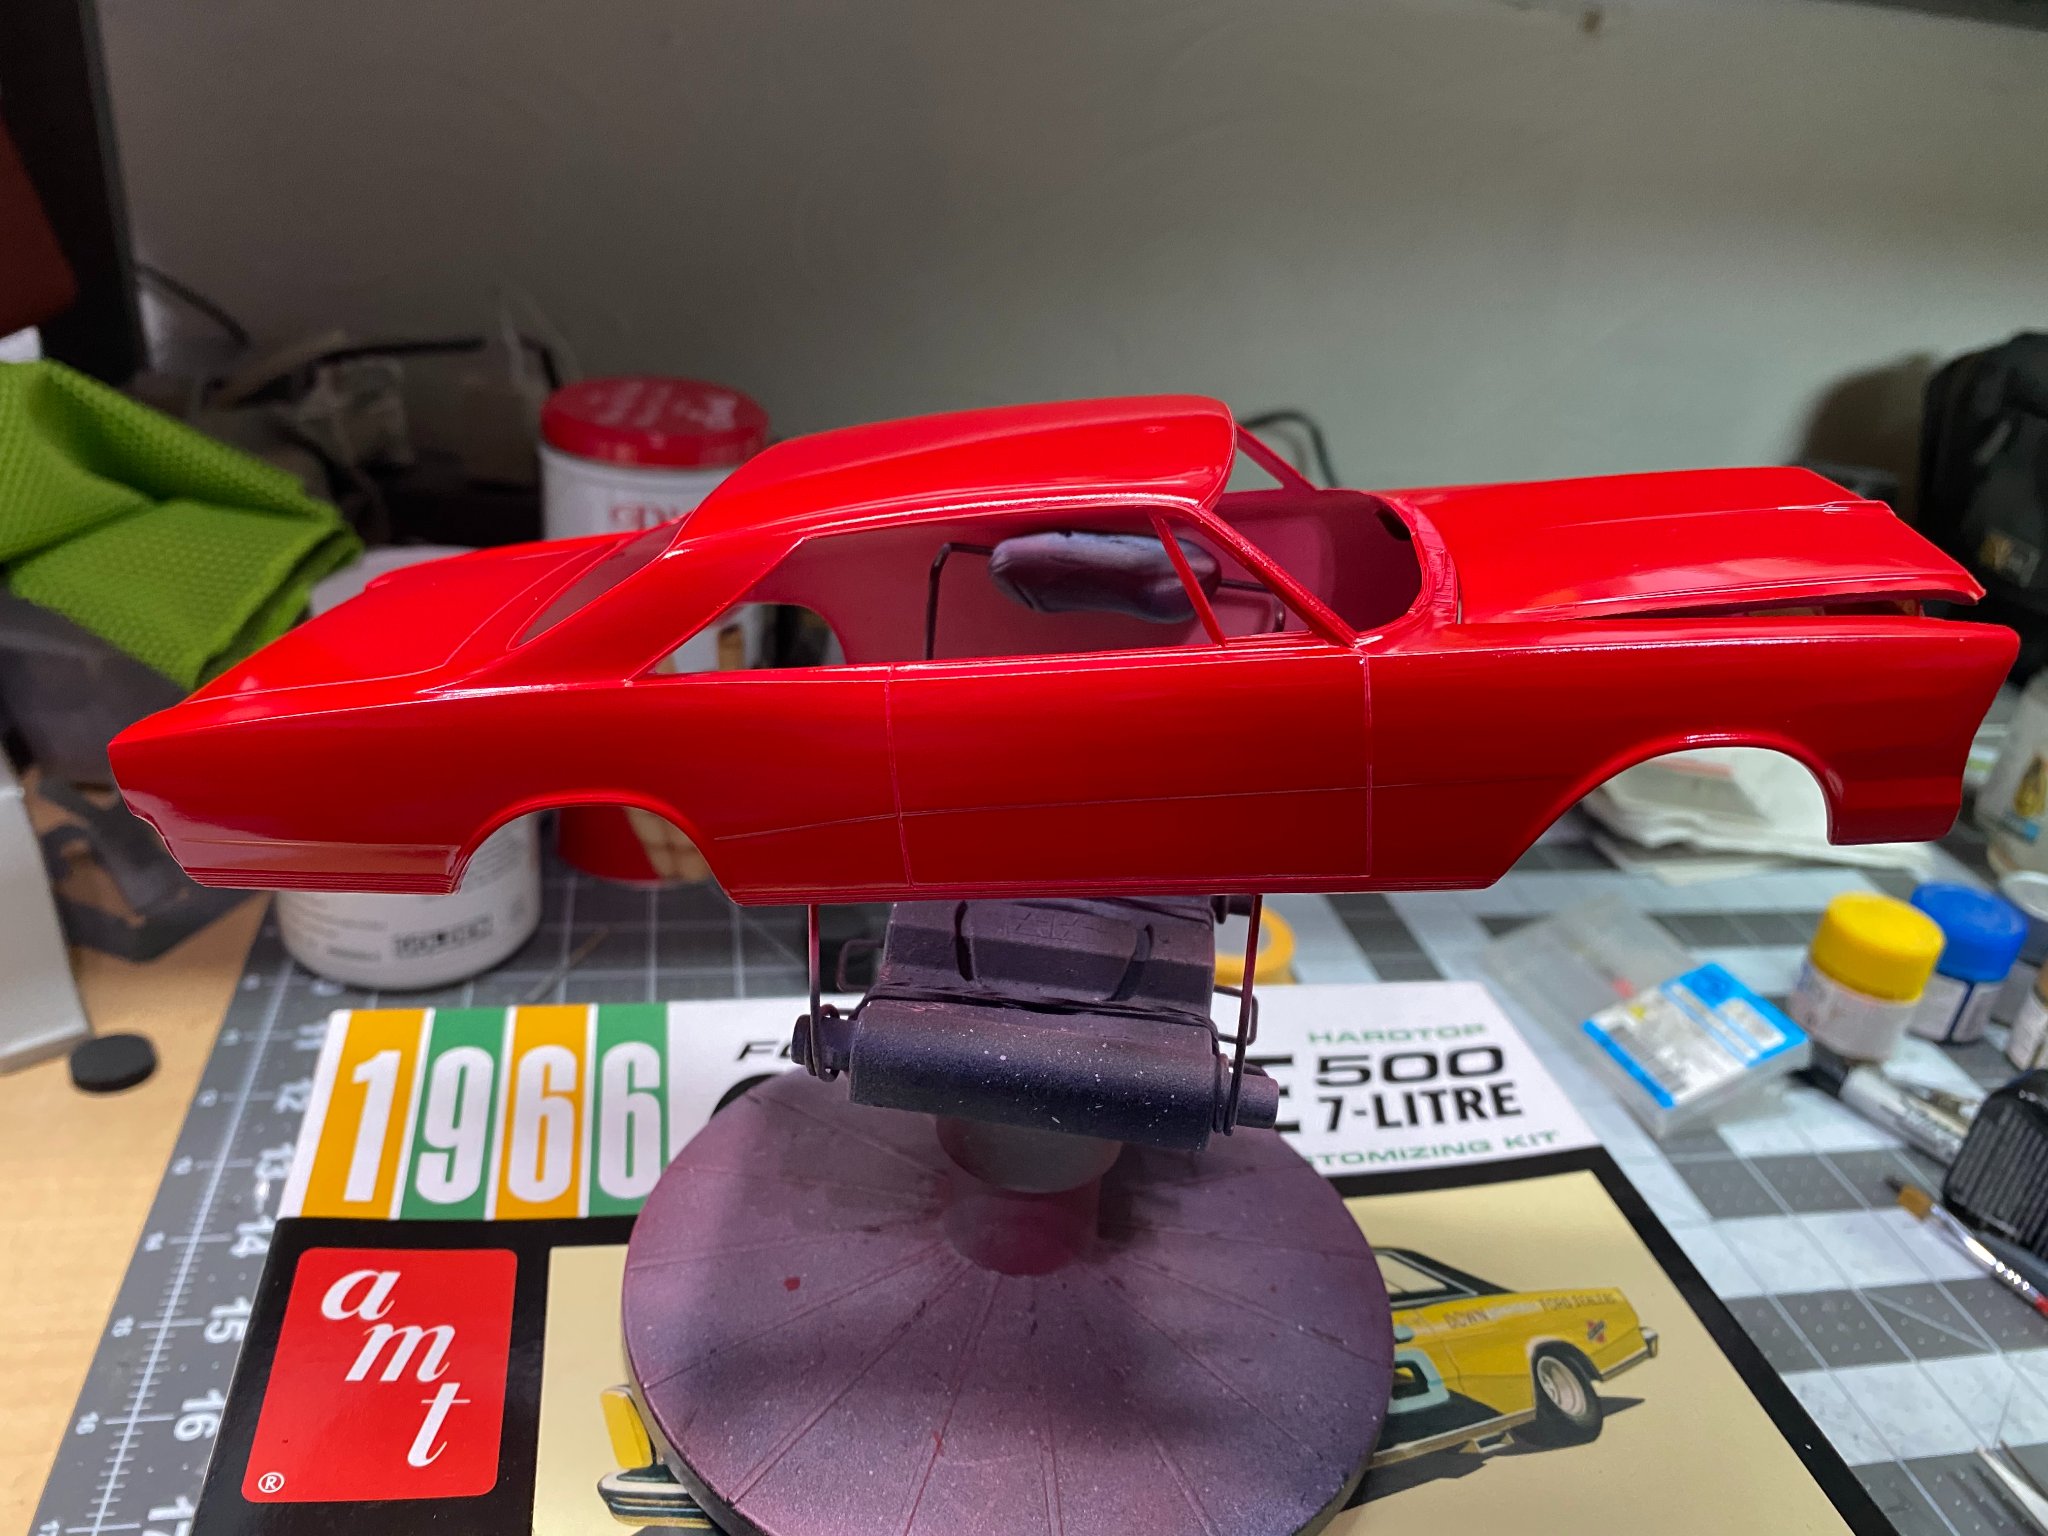
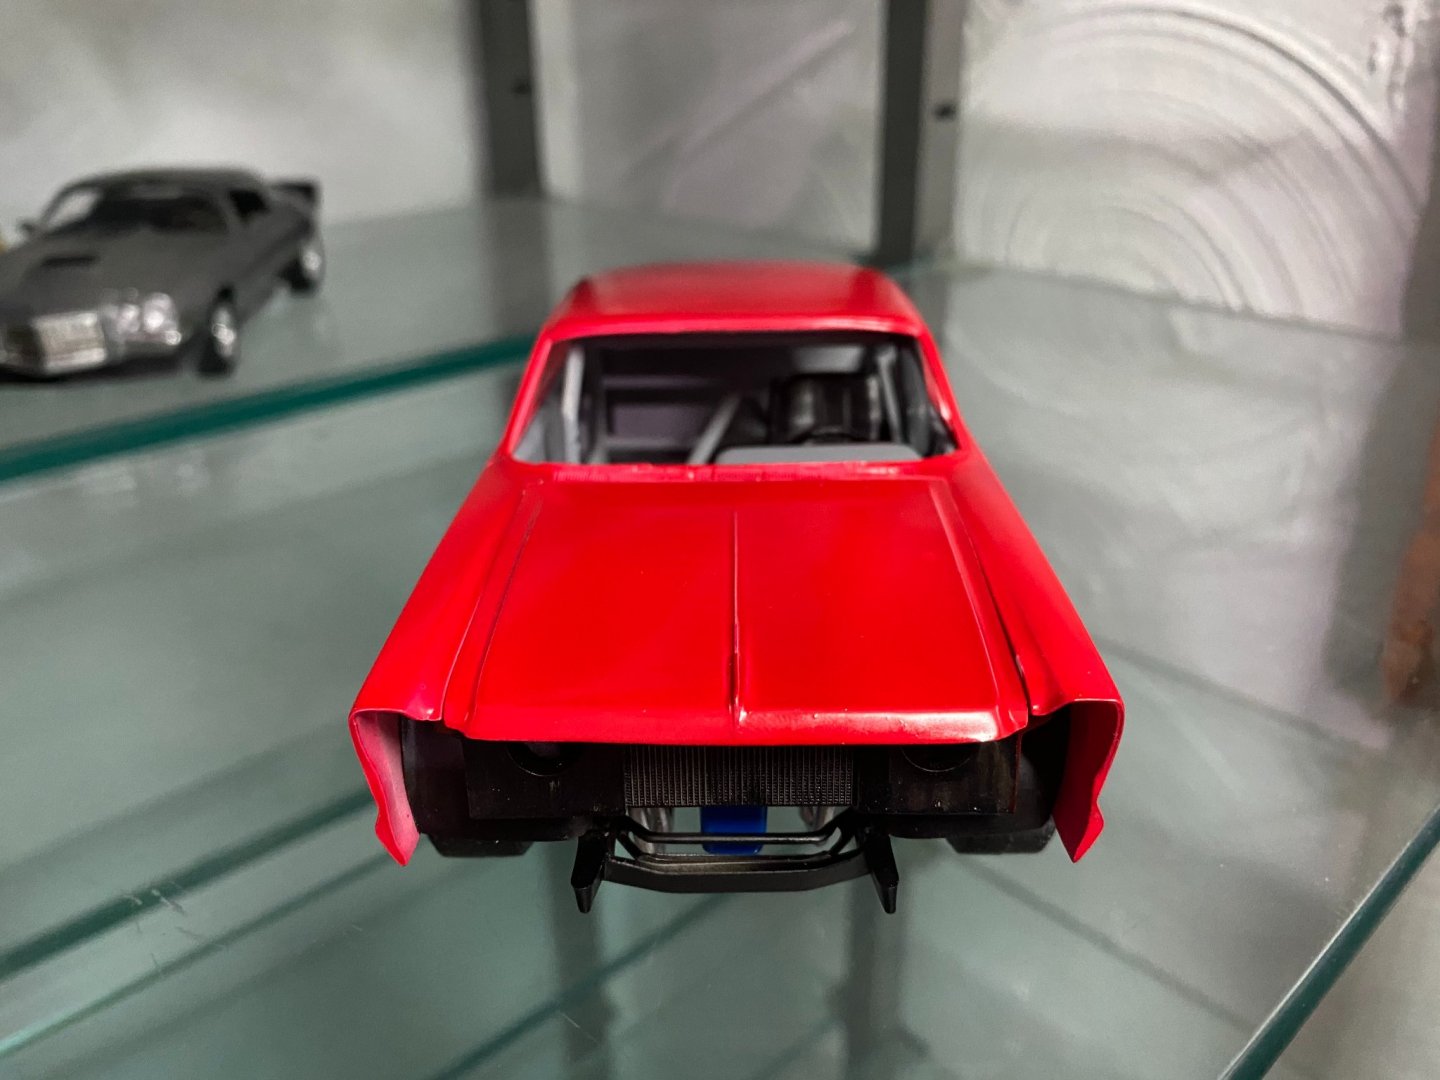
Thanks. It's just plain old Tamiya X-7 red. I use Mr Color 400 levelling thinner, and that makes it self level. The downside is a longer drying/curing time. Plus too, the weather being a little cooler (as well as my inside home temperature) adds a bit to the drying time.
-
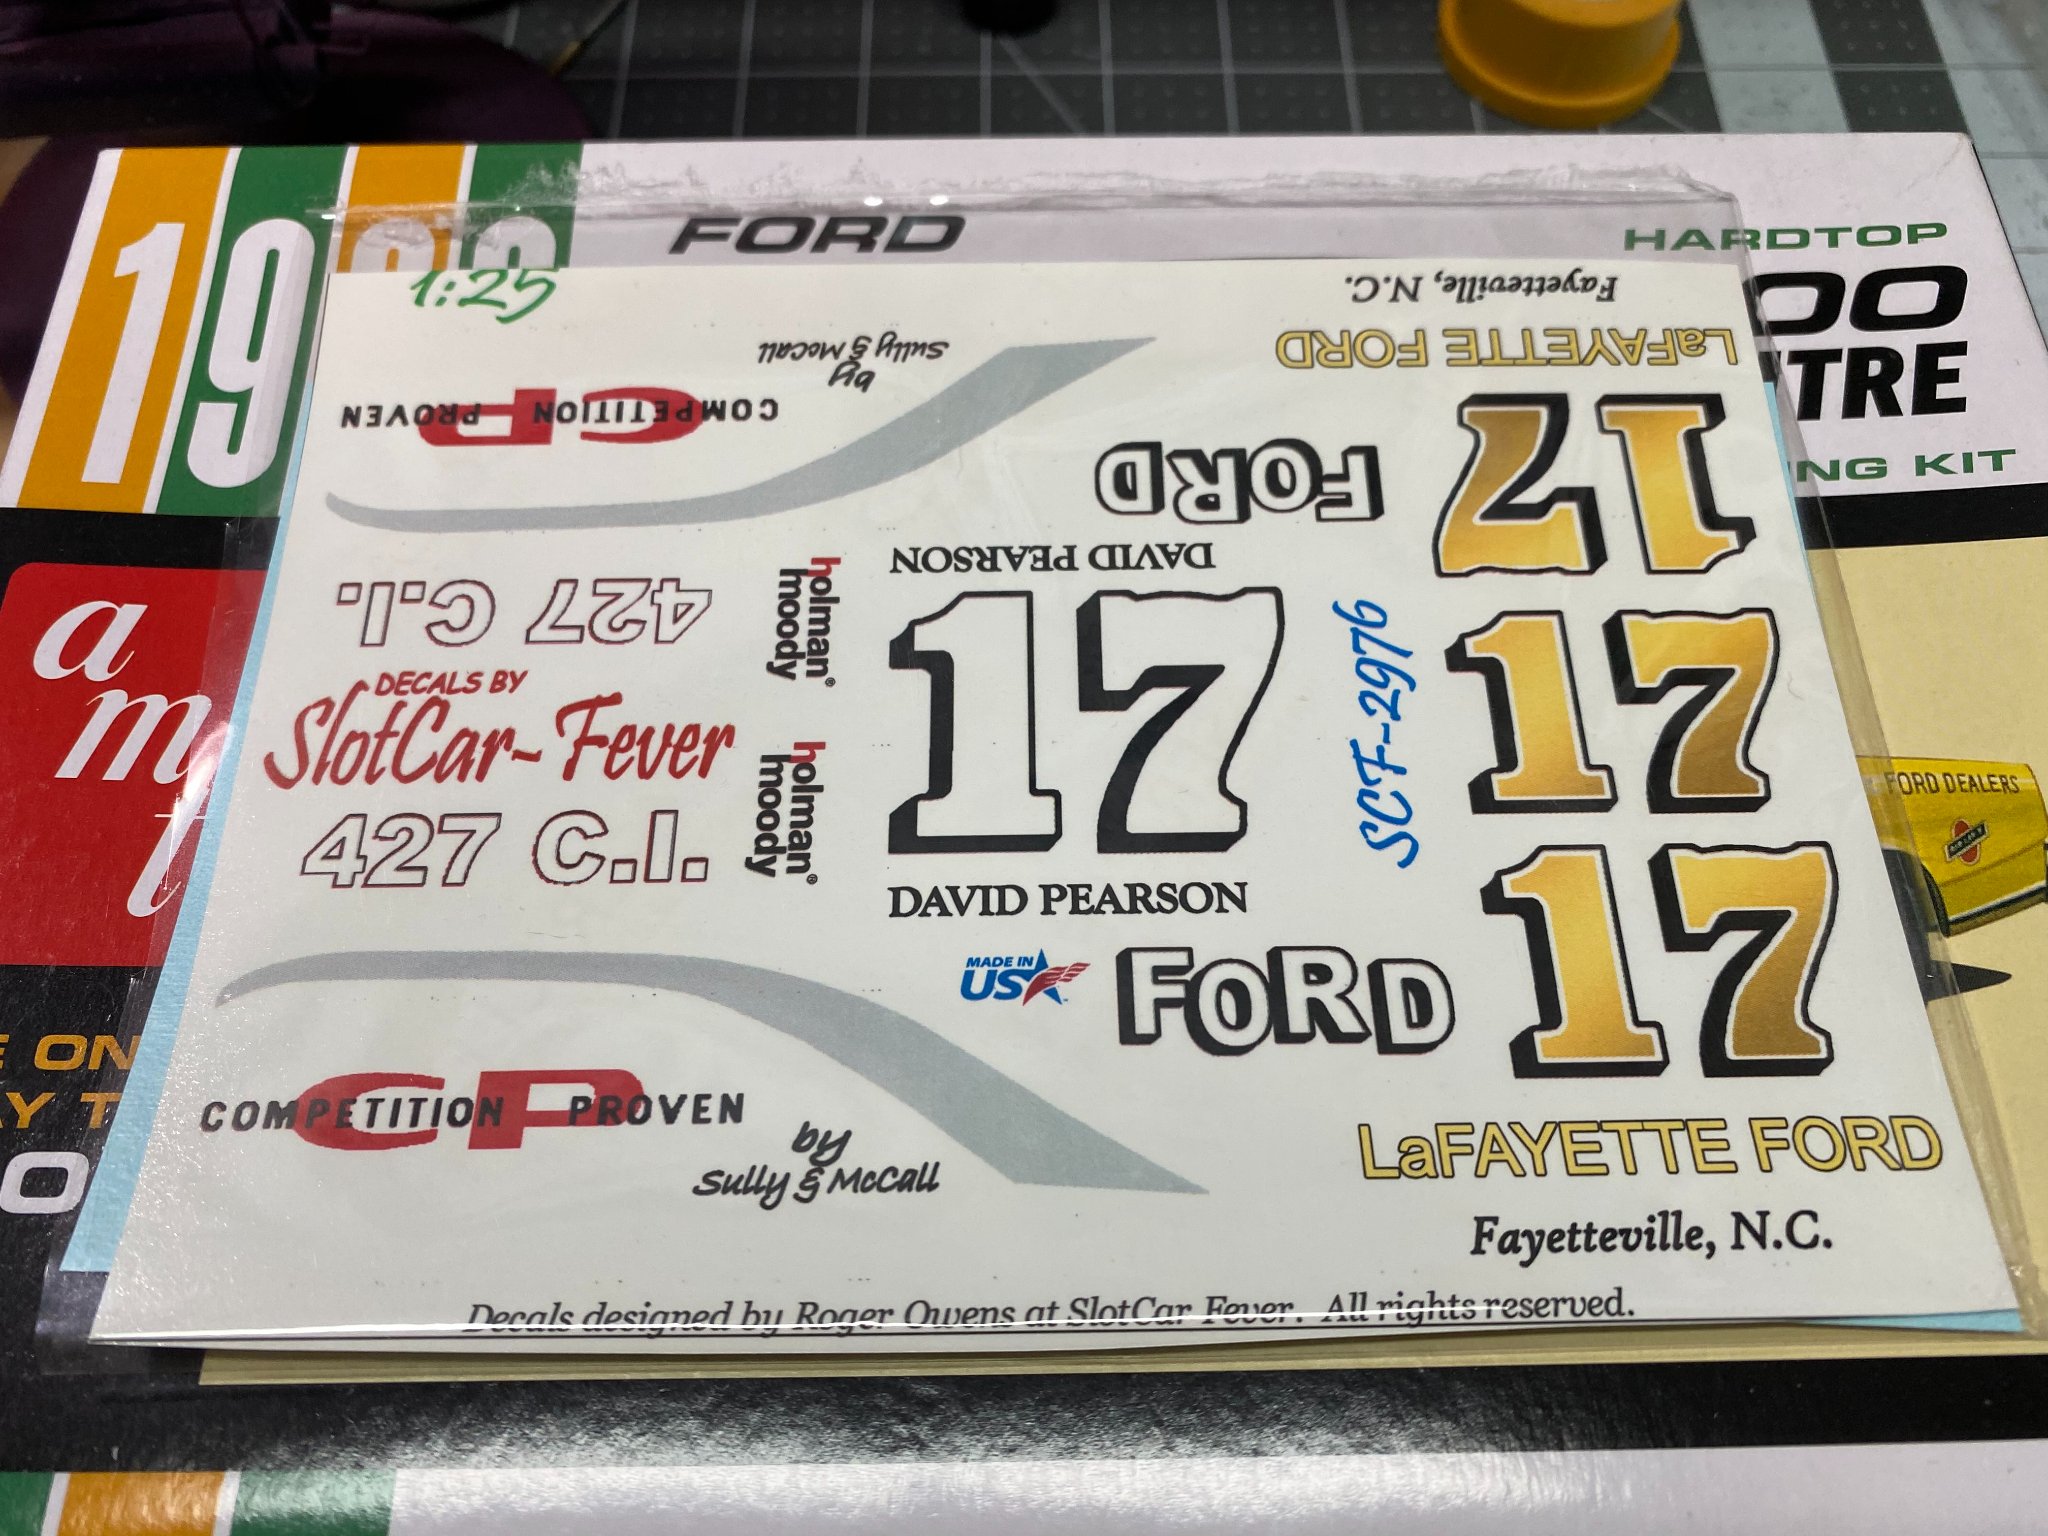
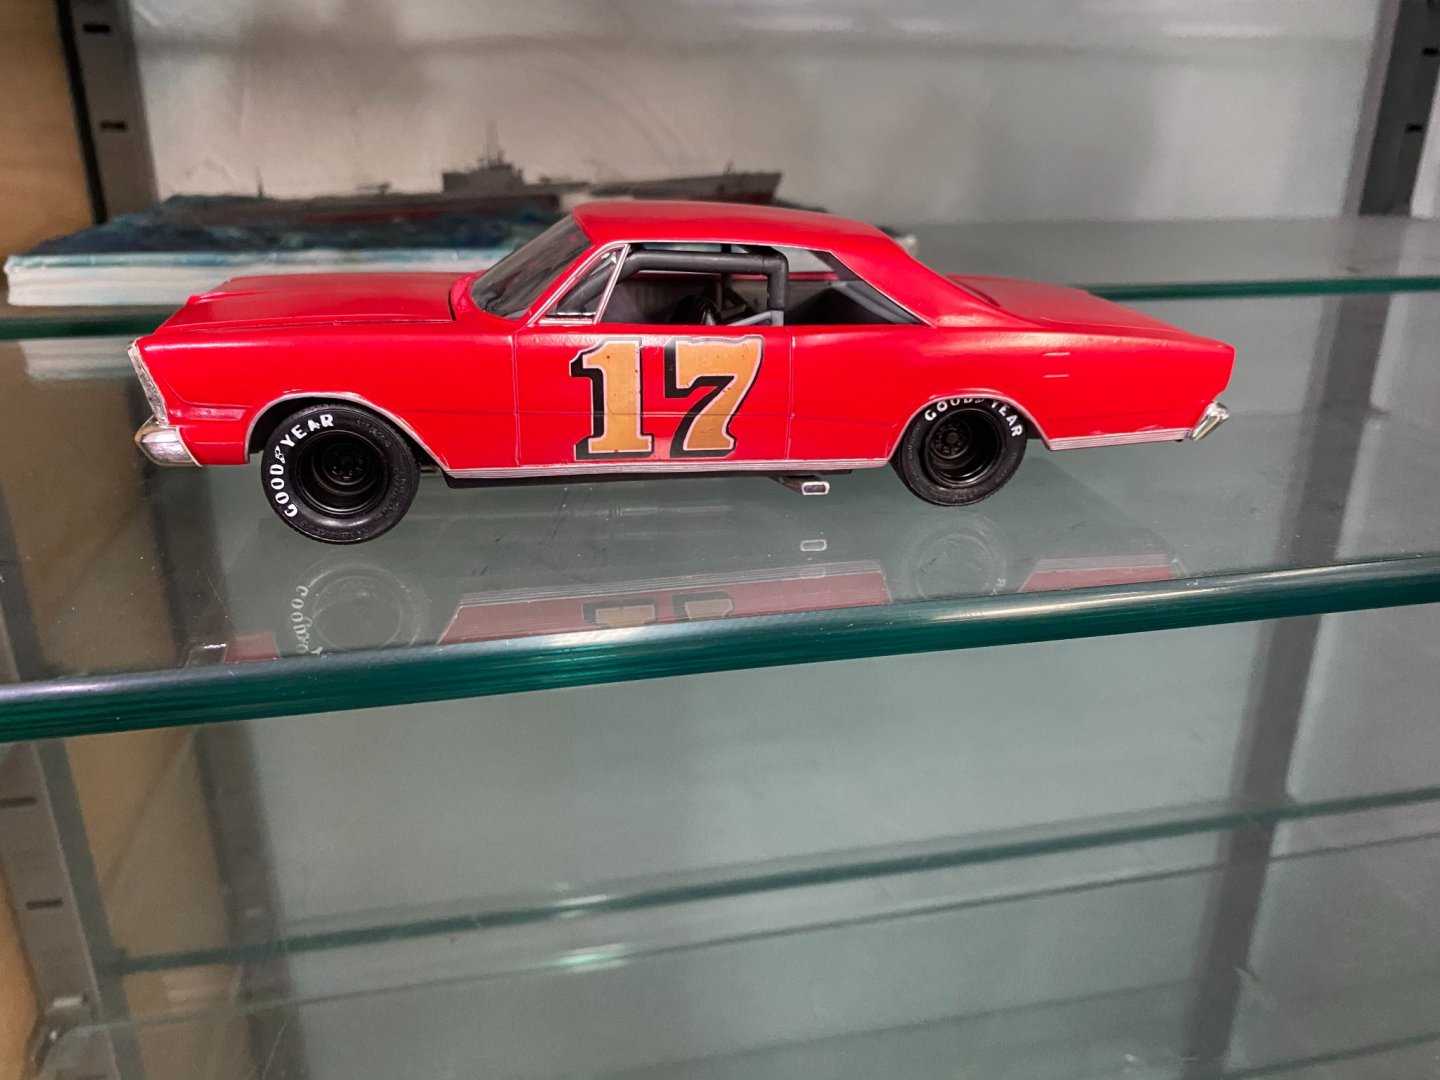
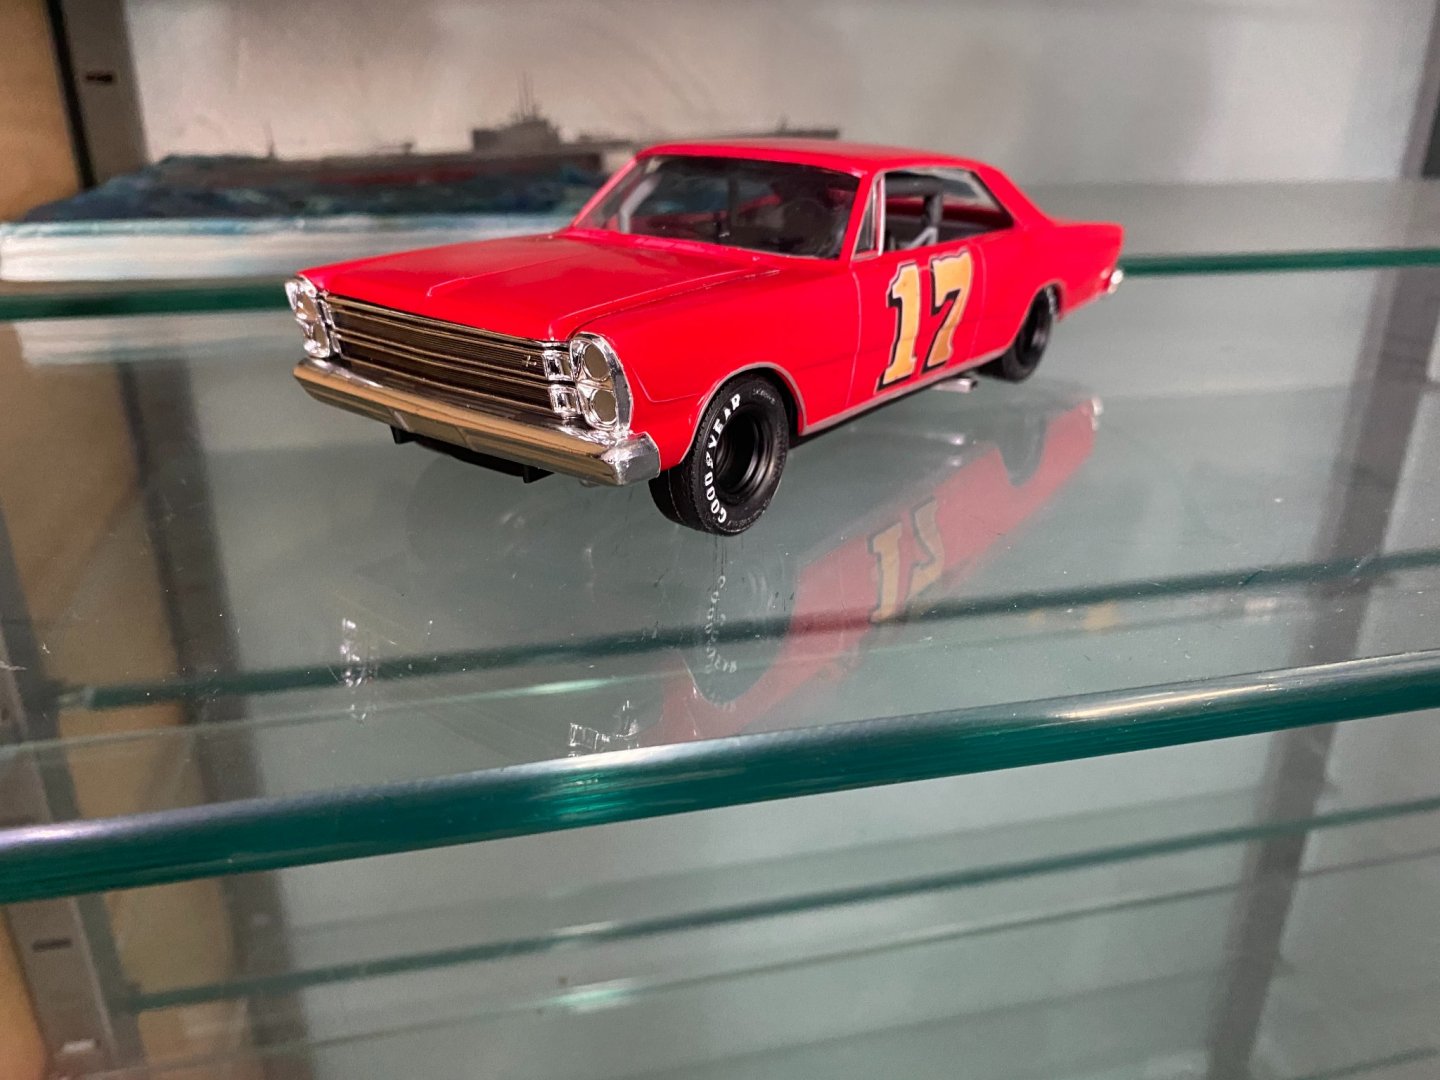
I got my decals in the mail this week, so restarted work on the Galaxie. The markings are for David Pearson's #17 car. Have to wait a couple of days for the paint to cure before I start handling it and placing decals.


- 101 replies
-
- 13
-
-
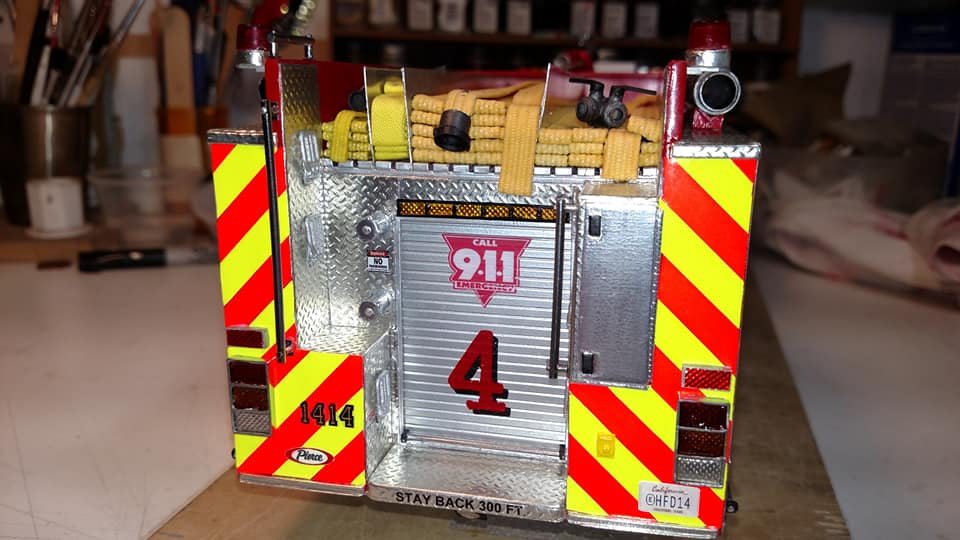
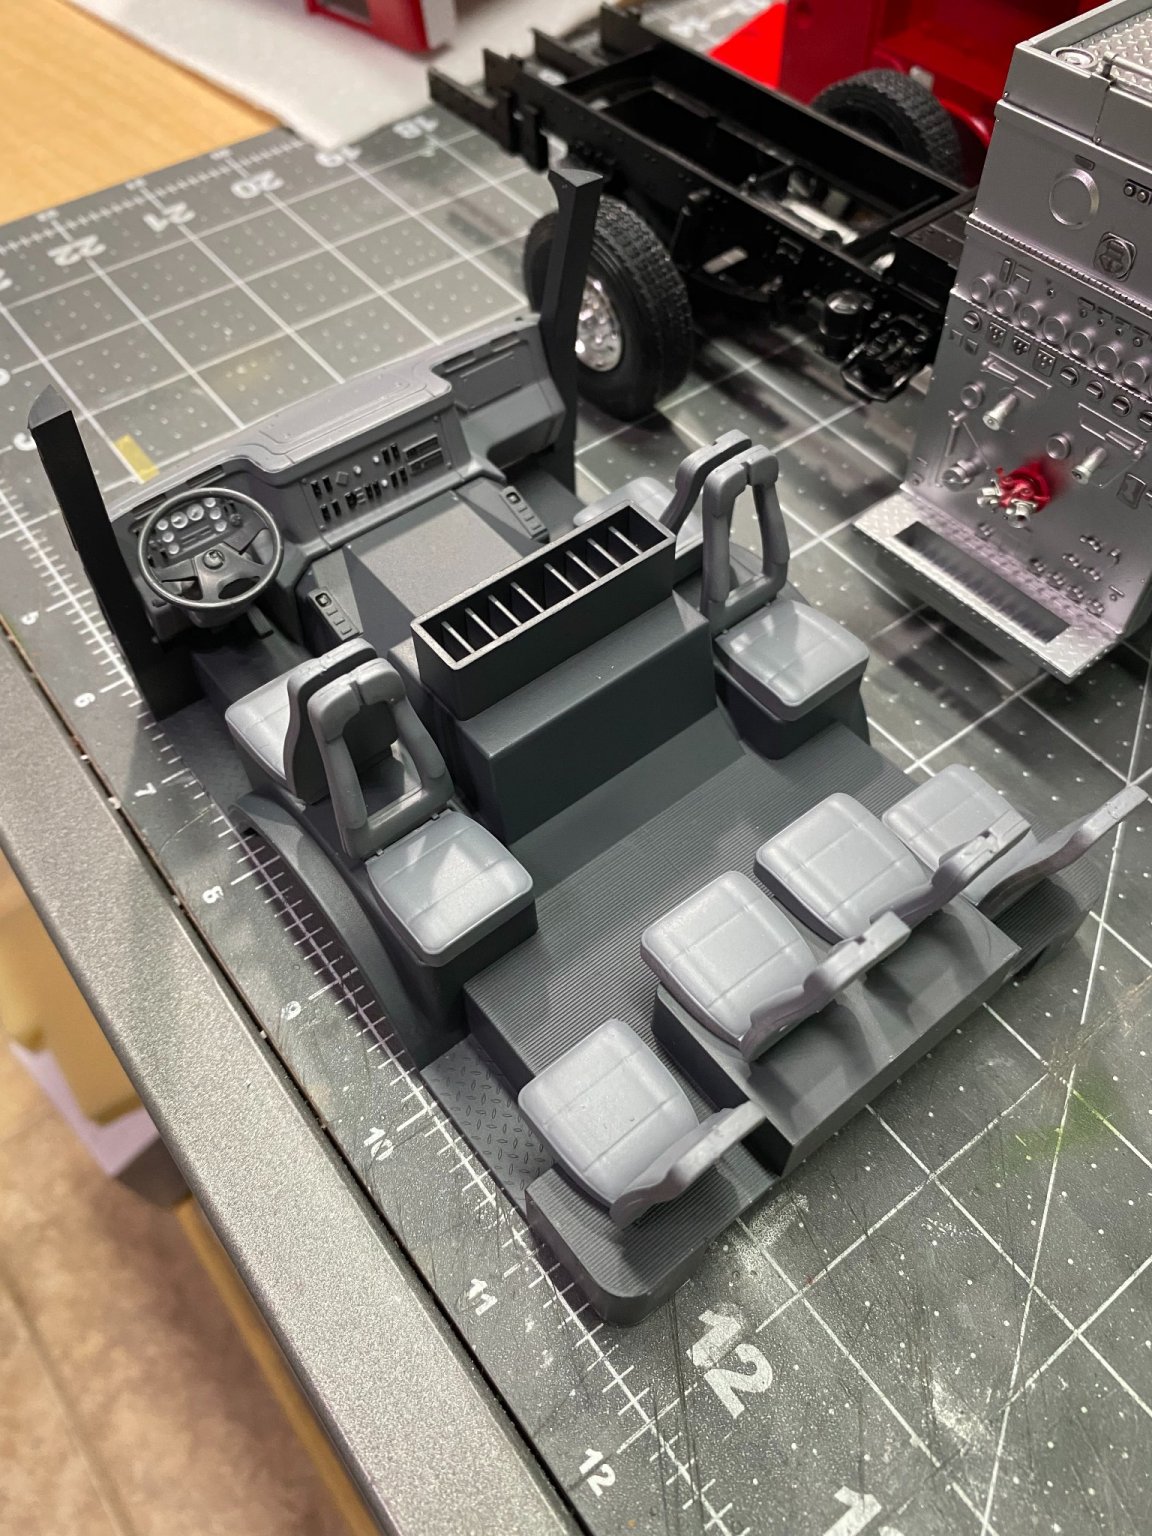
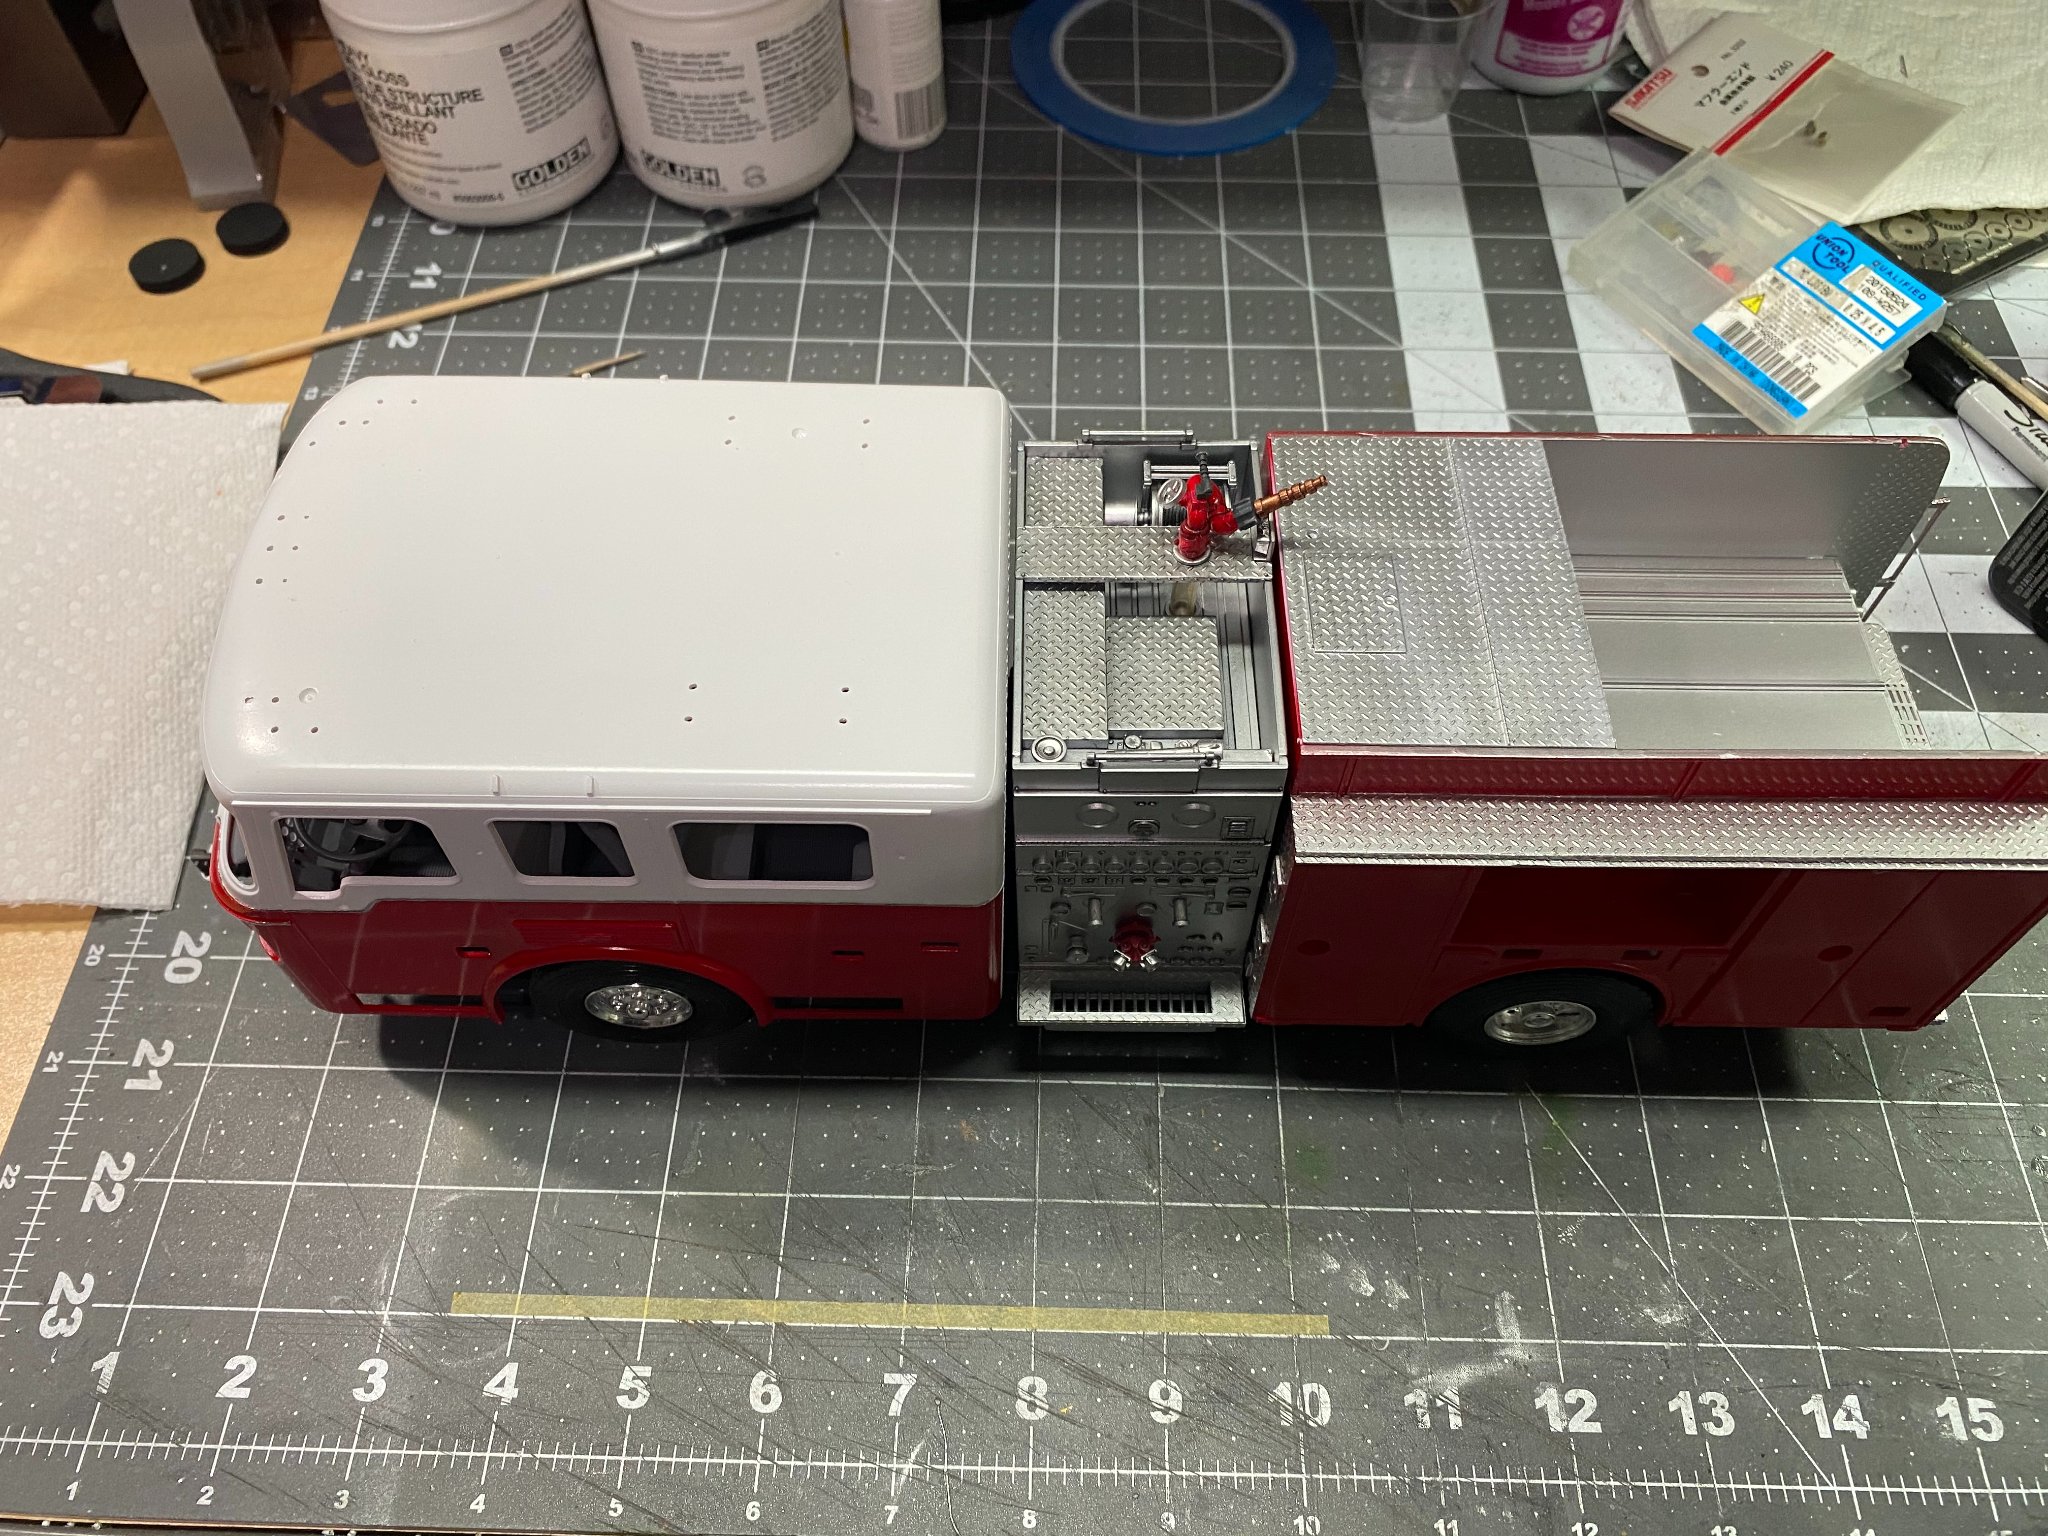
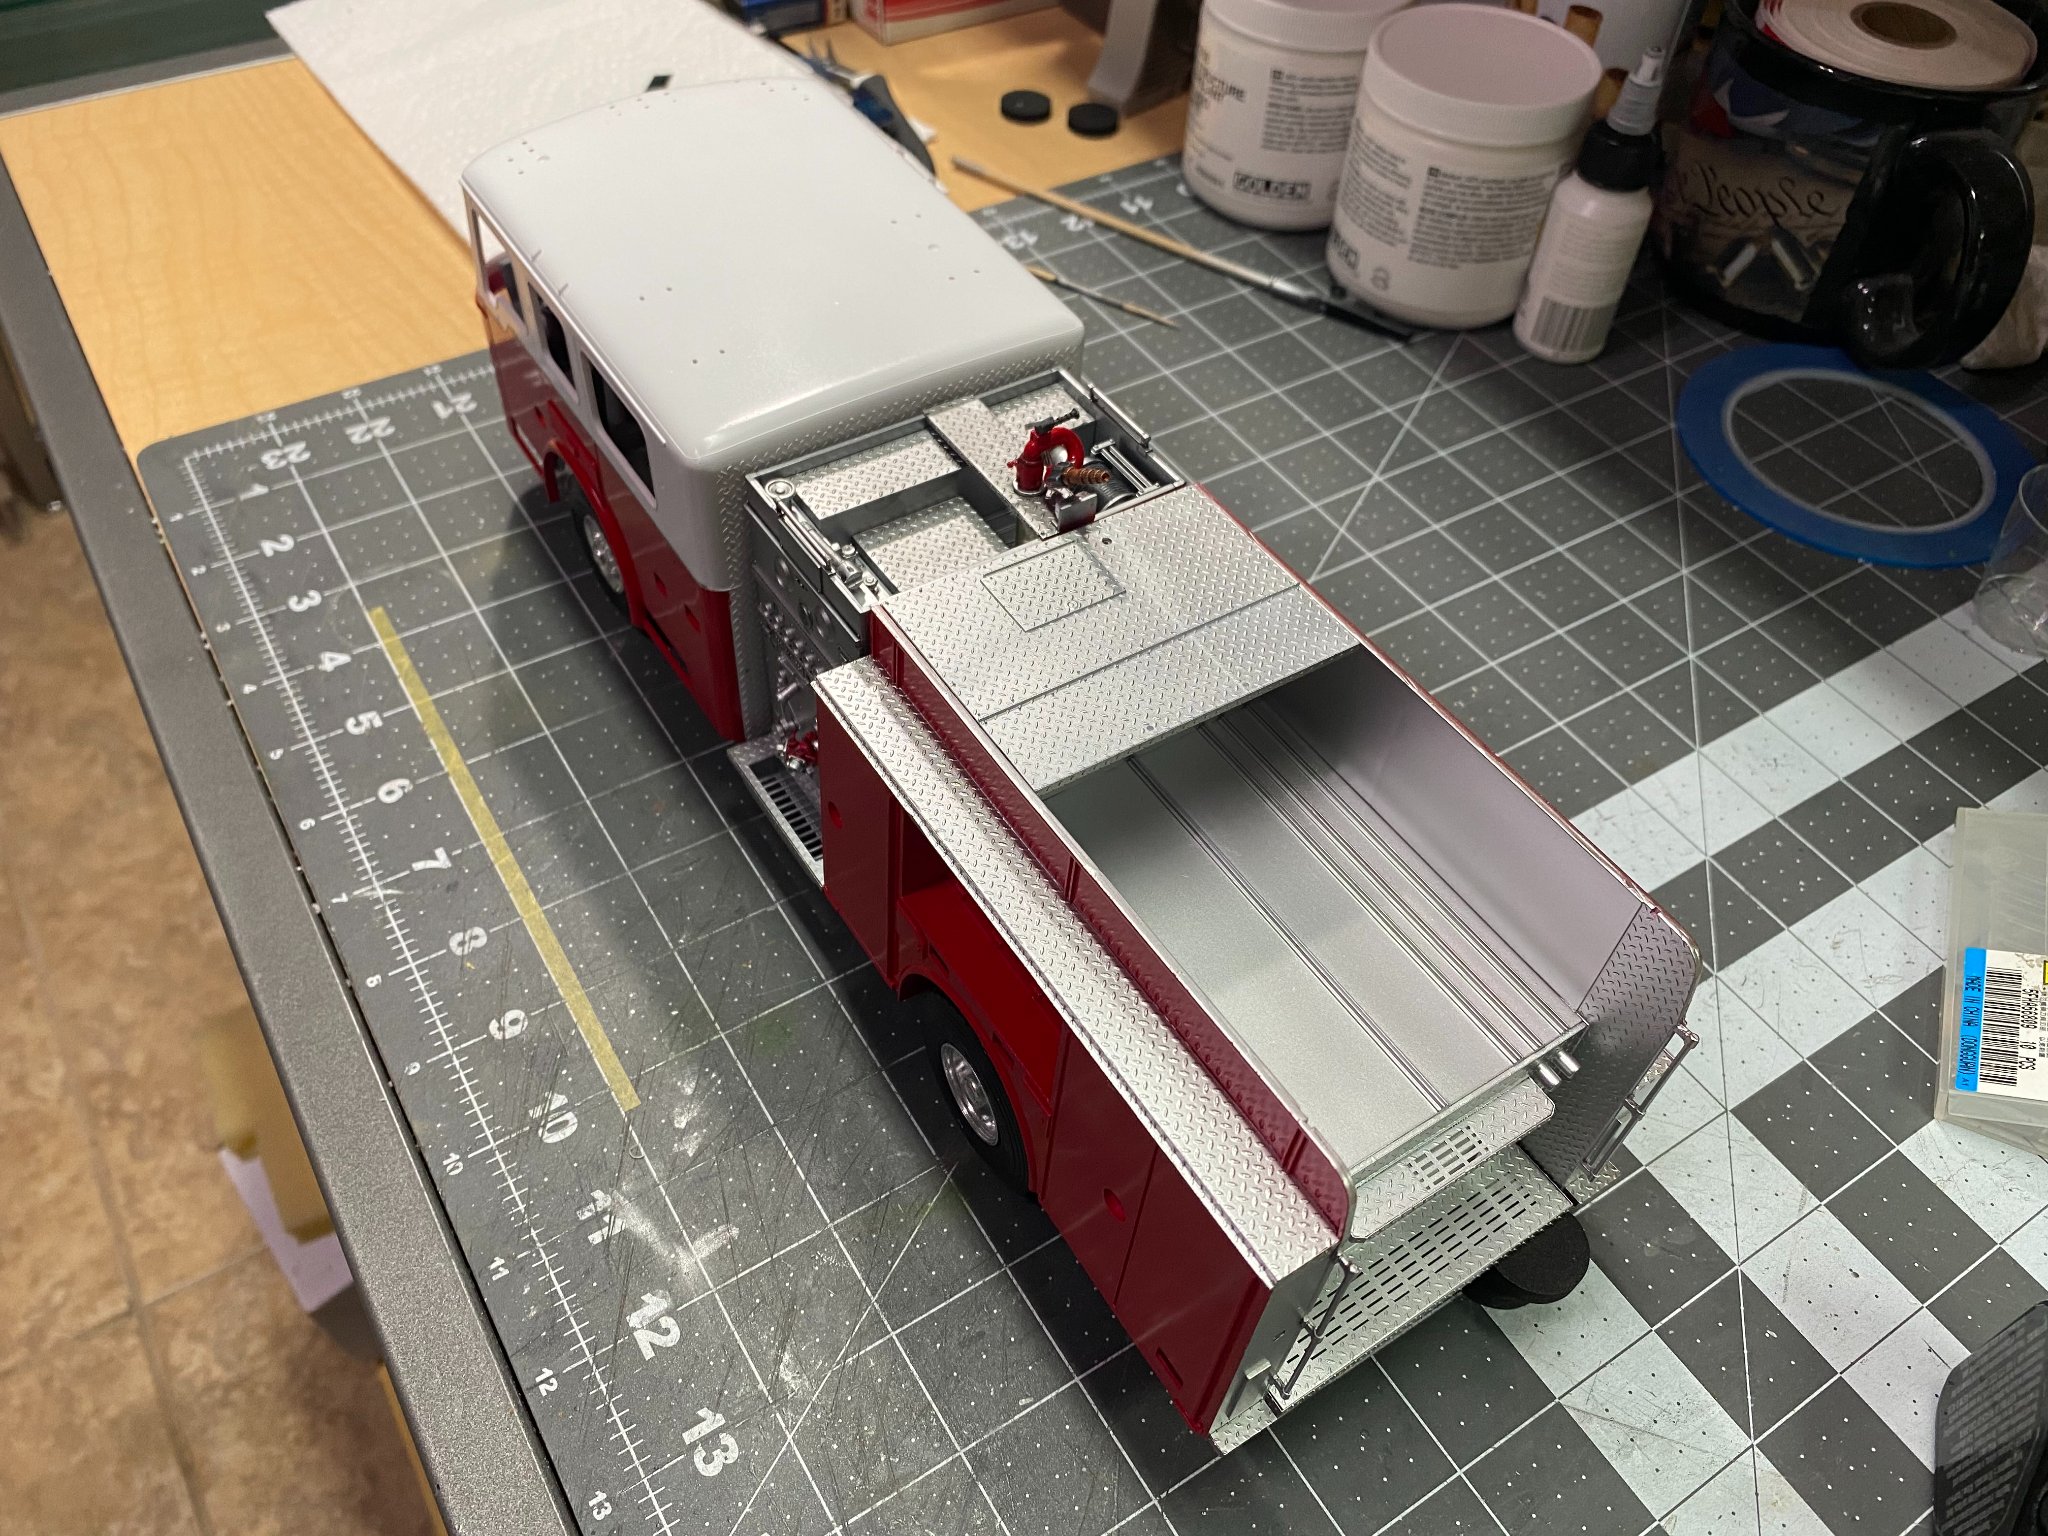
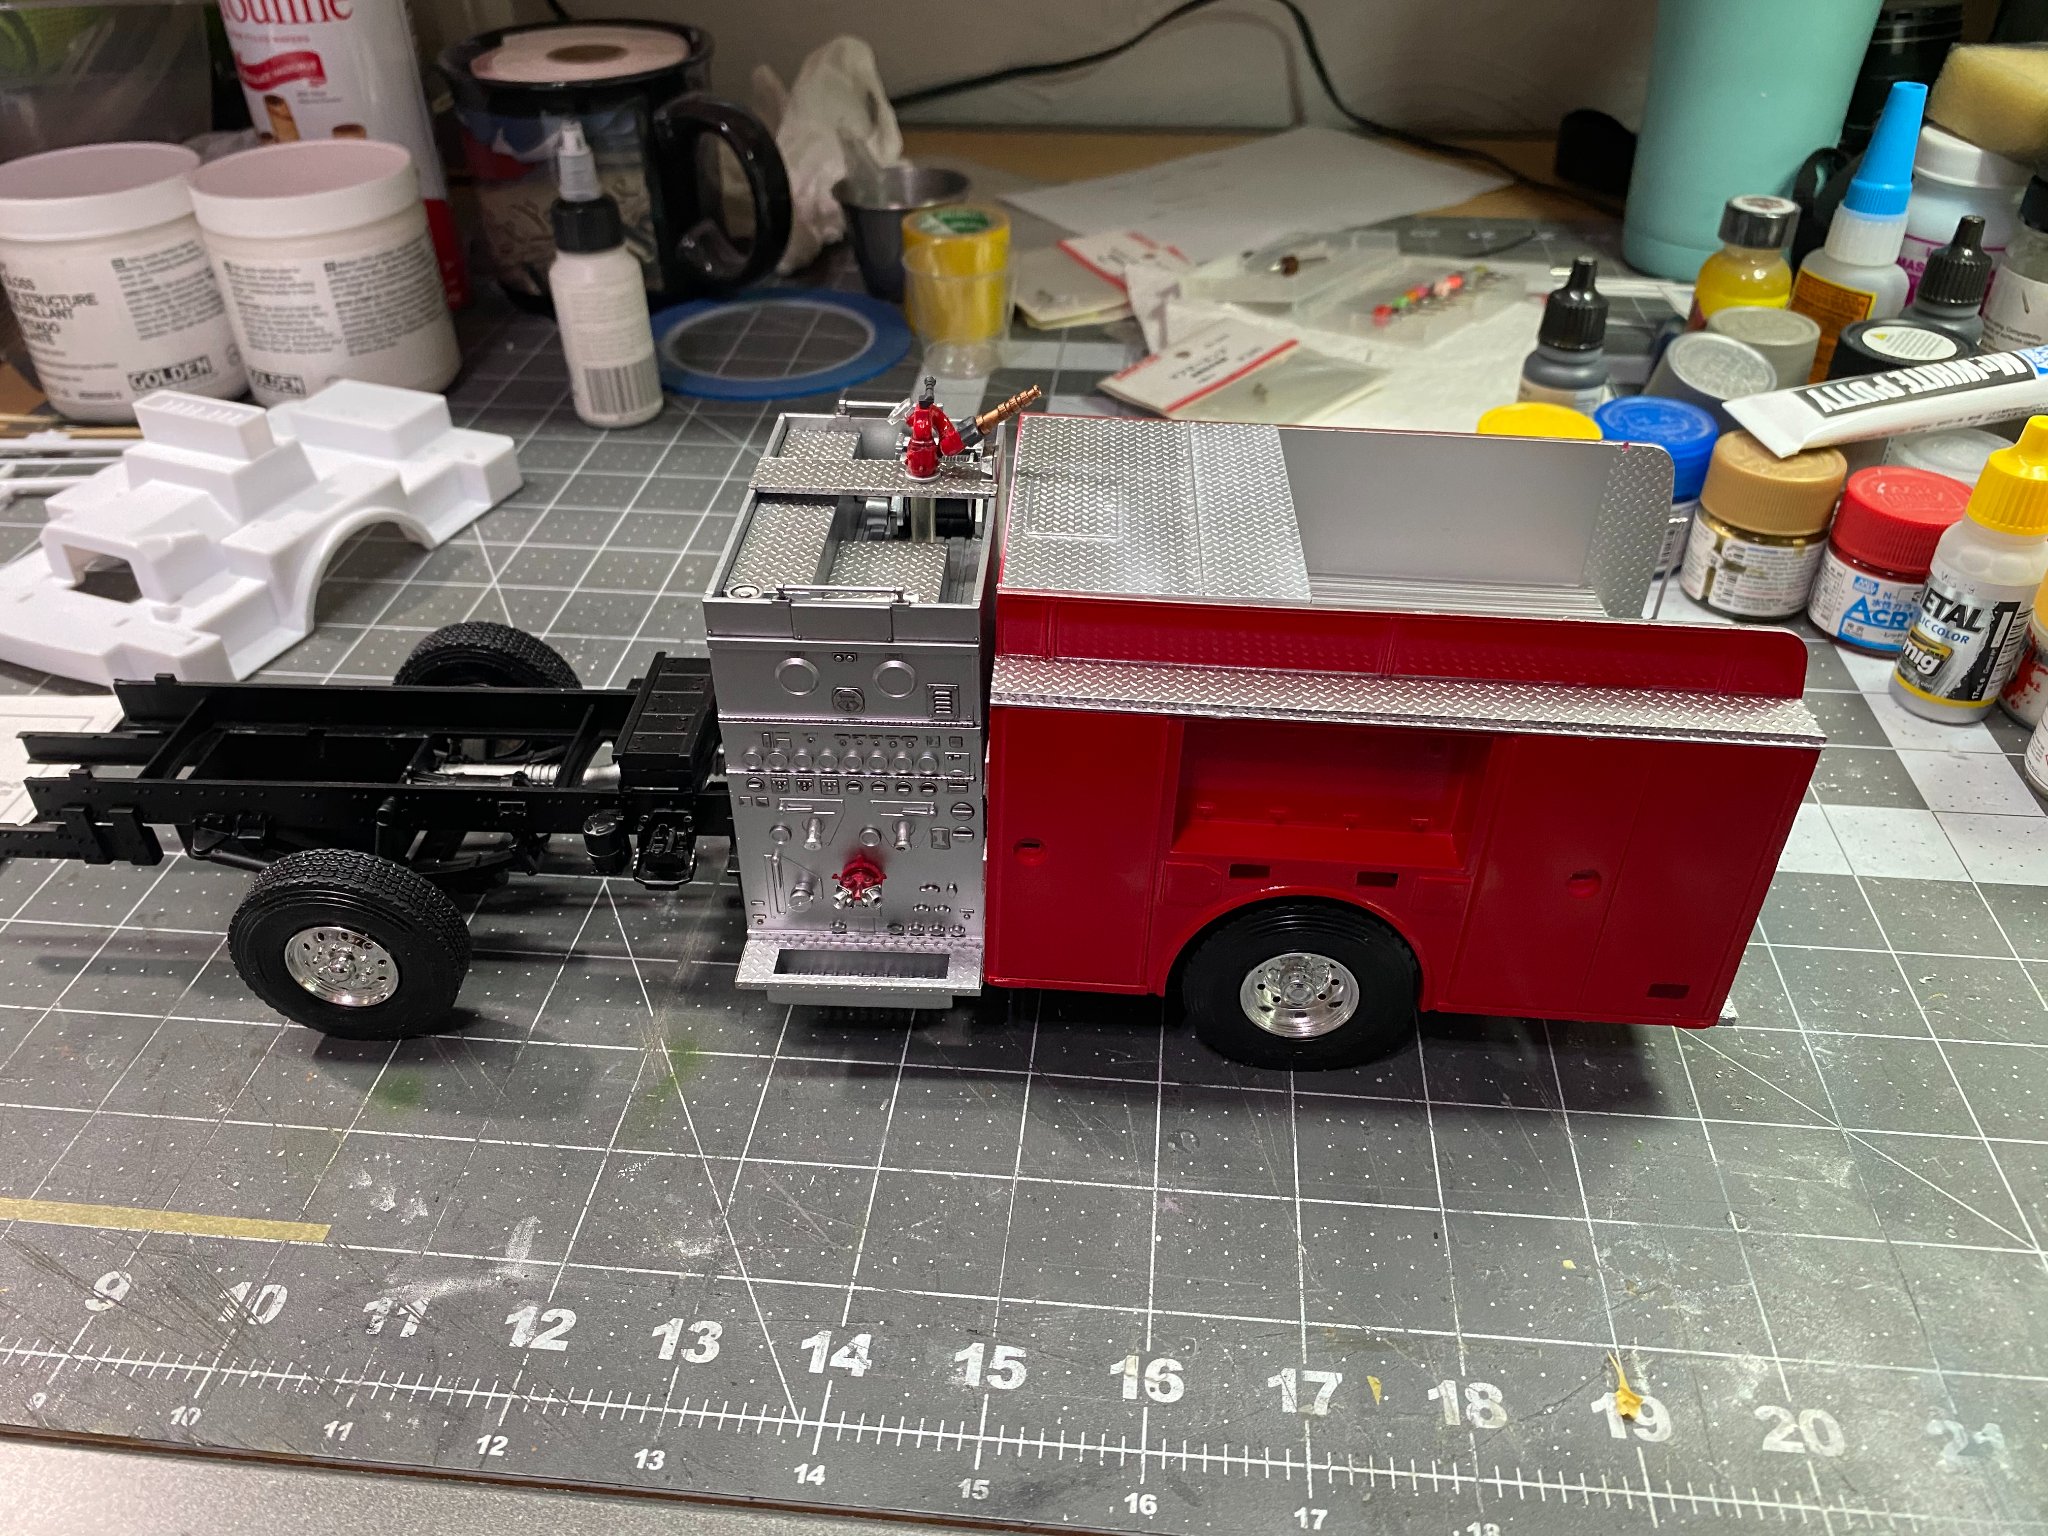
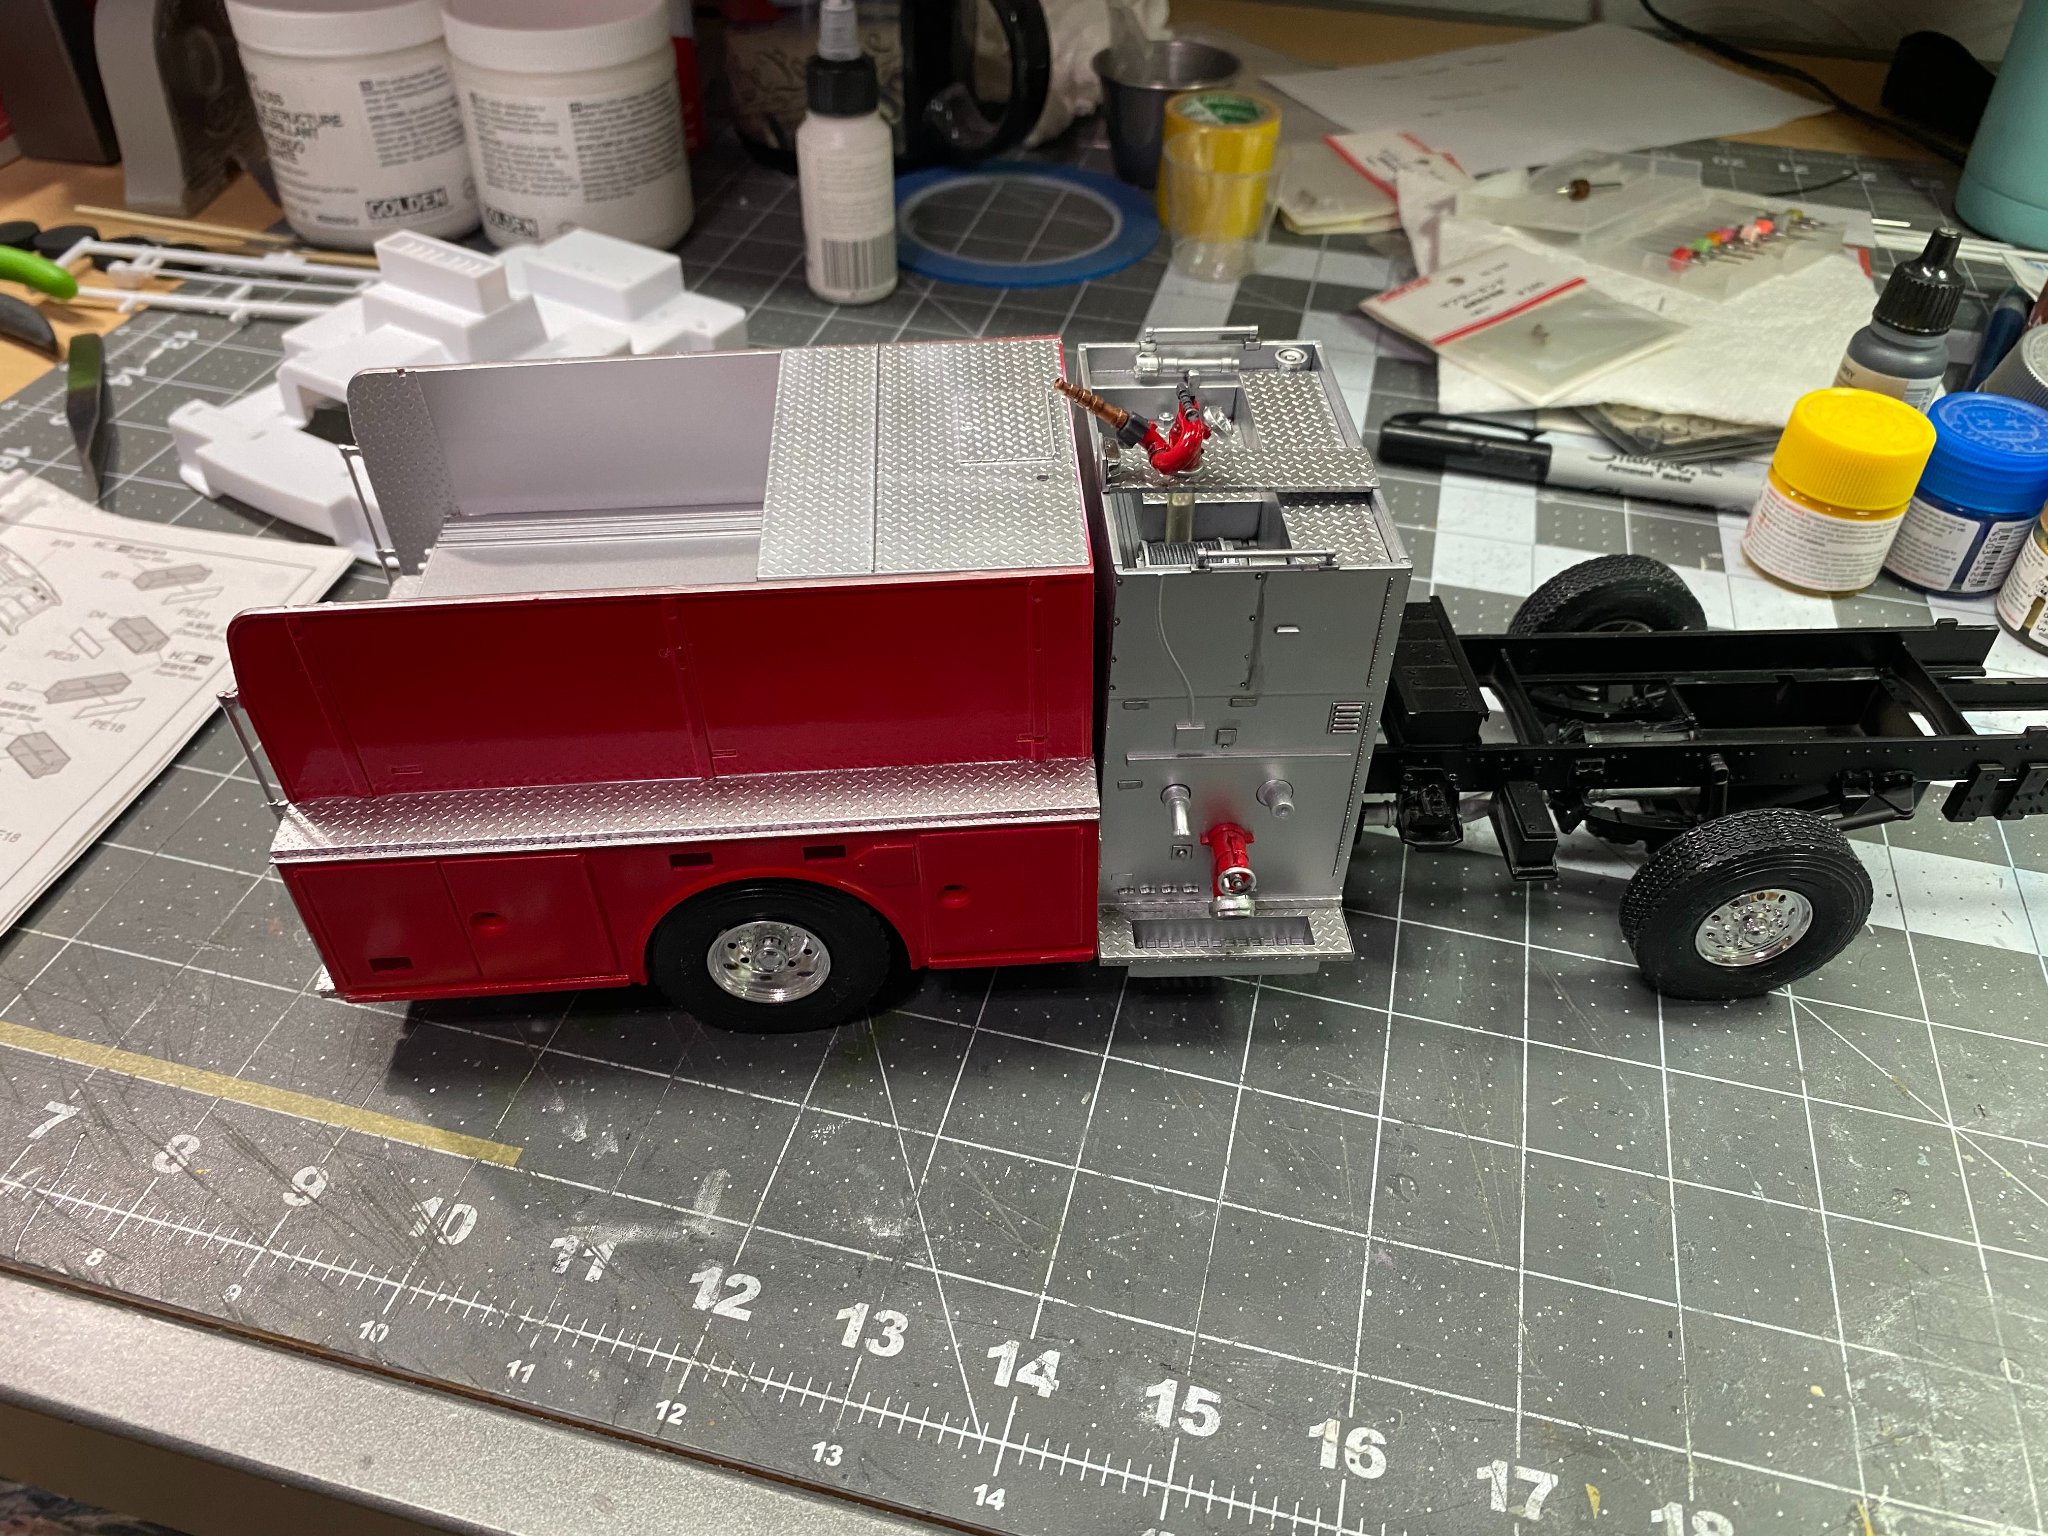
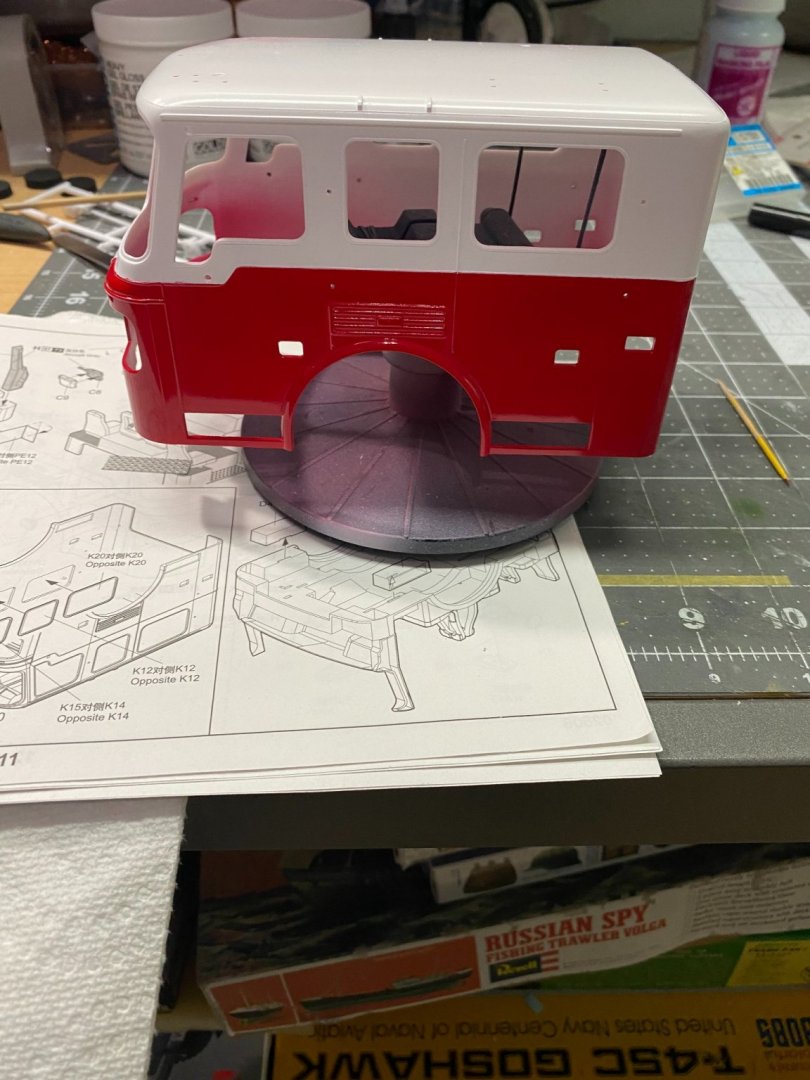
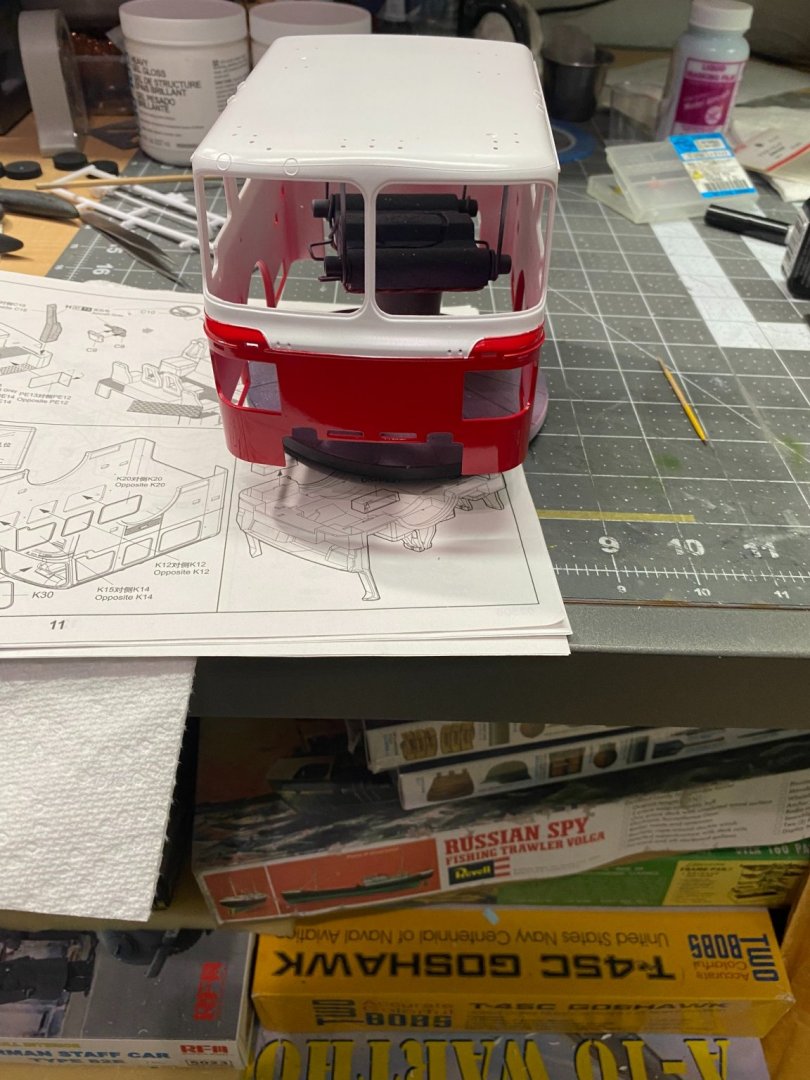
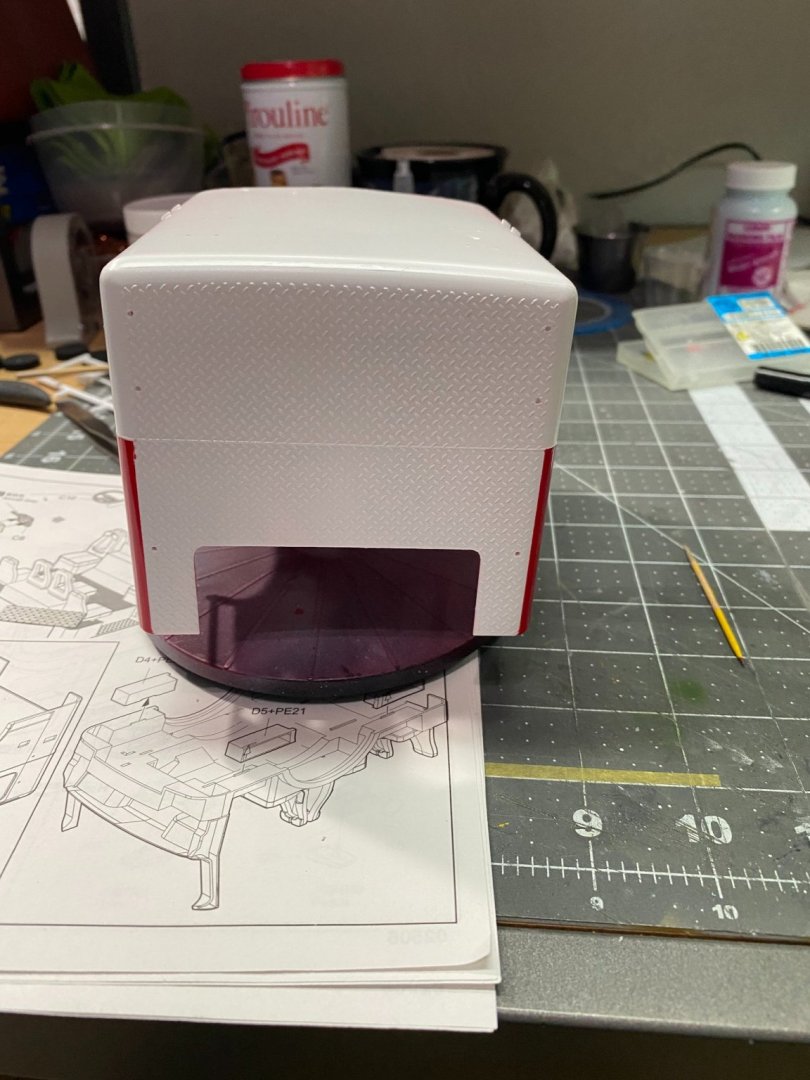
The kit has a basic interior. For the most part, it cannot be seen while sitting on the shelf so I chose not to spend a lot of time trying to detail it all out. It's painted in a two-tone gray. Notice that some of the seats have the hollow seat backs so the fire fighters can be seated with their breathing apparatus on their backs.


- 131 replies
-
- 11
-
-
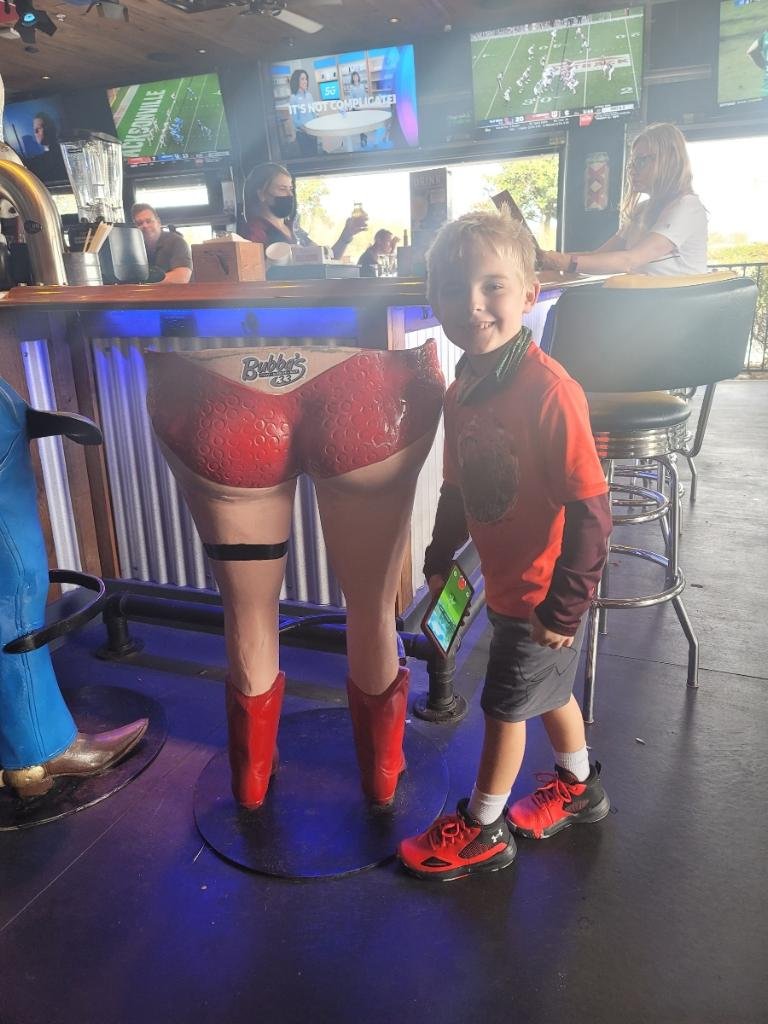
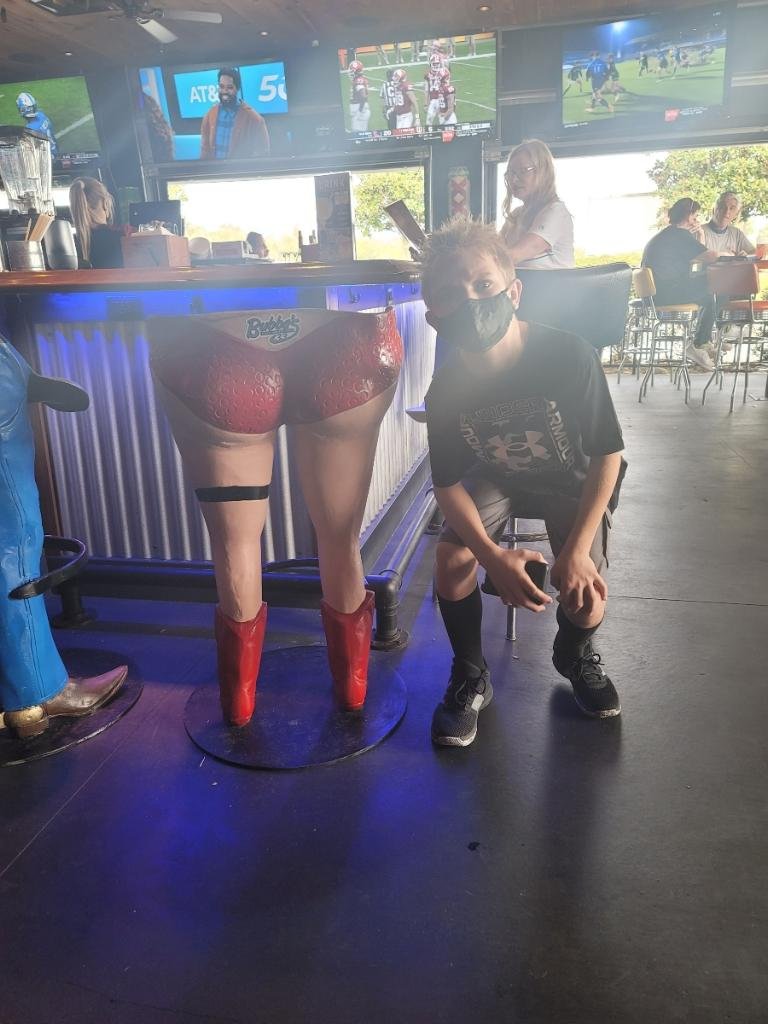
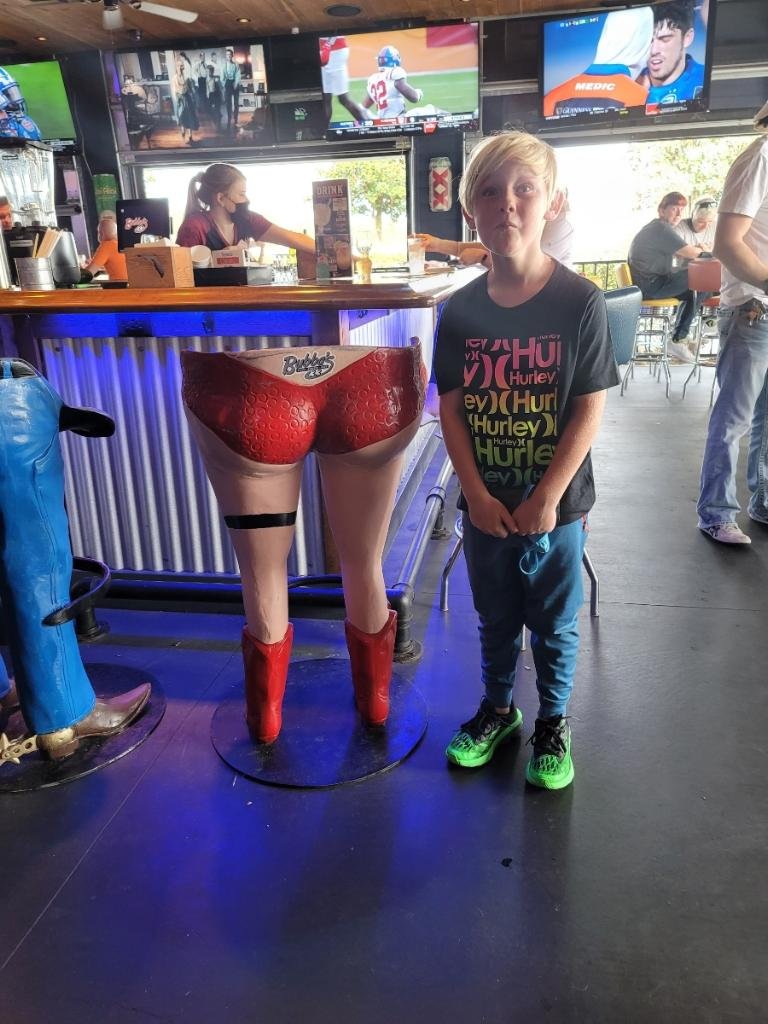
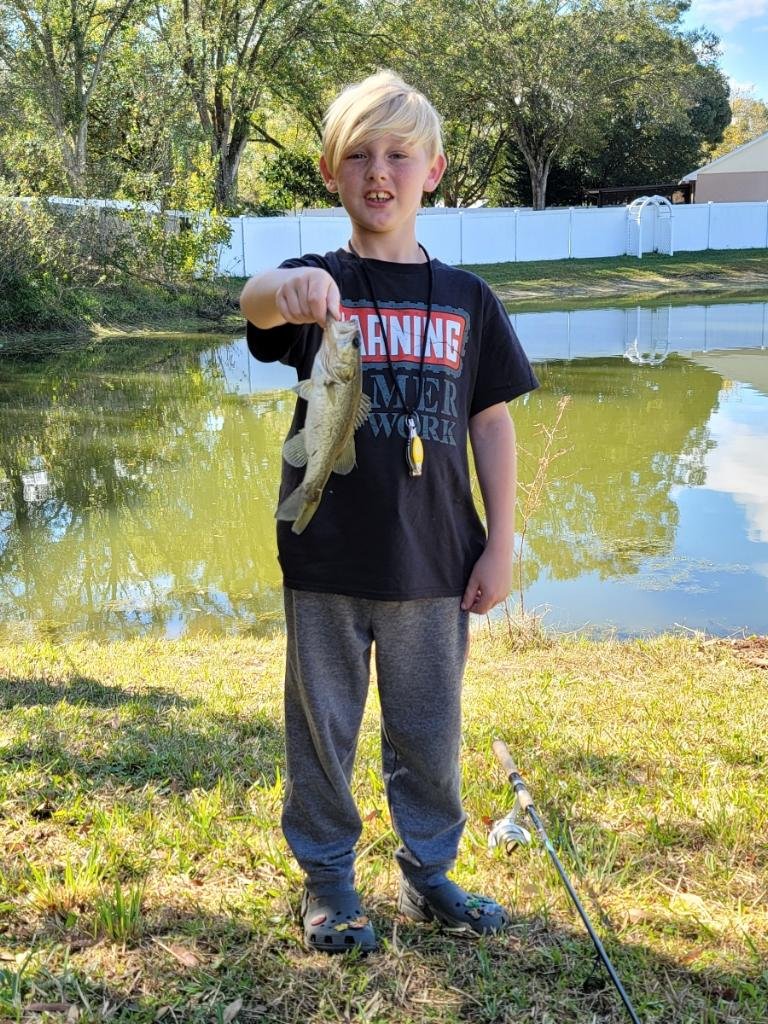
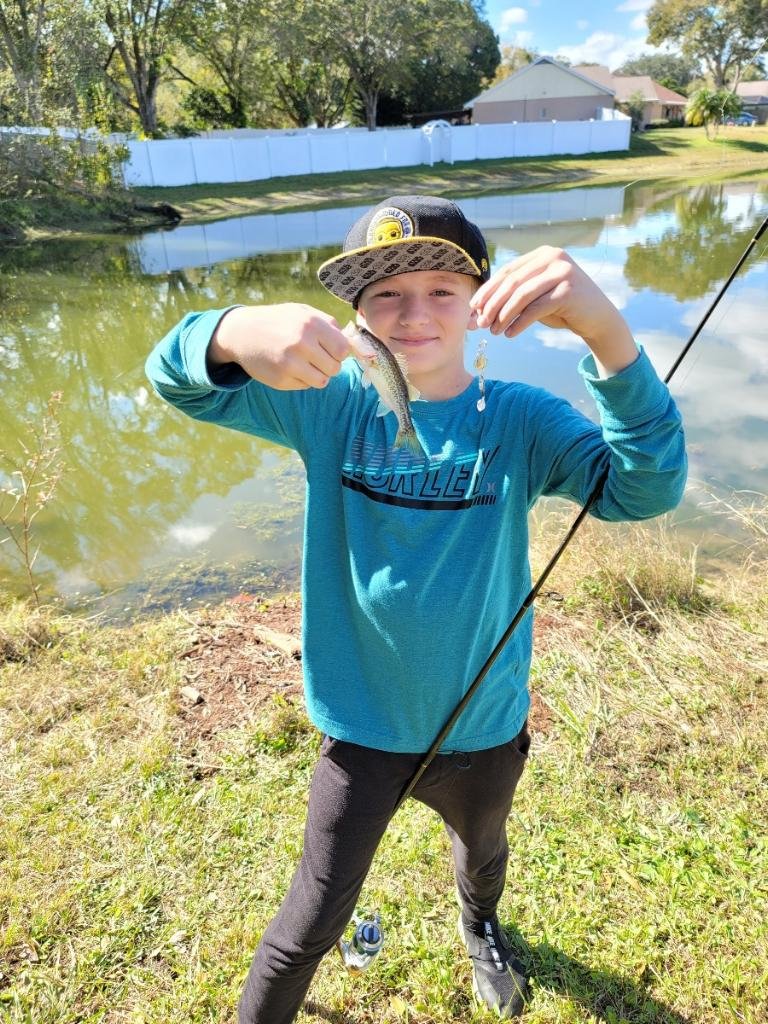
These boys have caught big fish and do it fairly regularly.

-
Even the greatest fisherman don't always catch the big fish, but it's perseverance and patience that marks their character. Two of my grandsons yesterday.
-
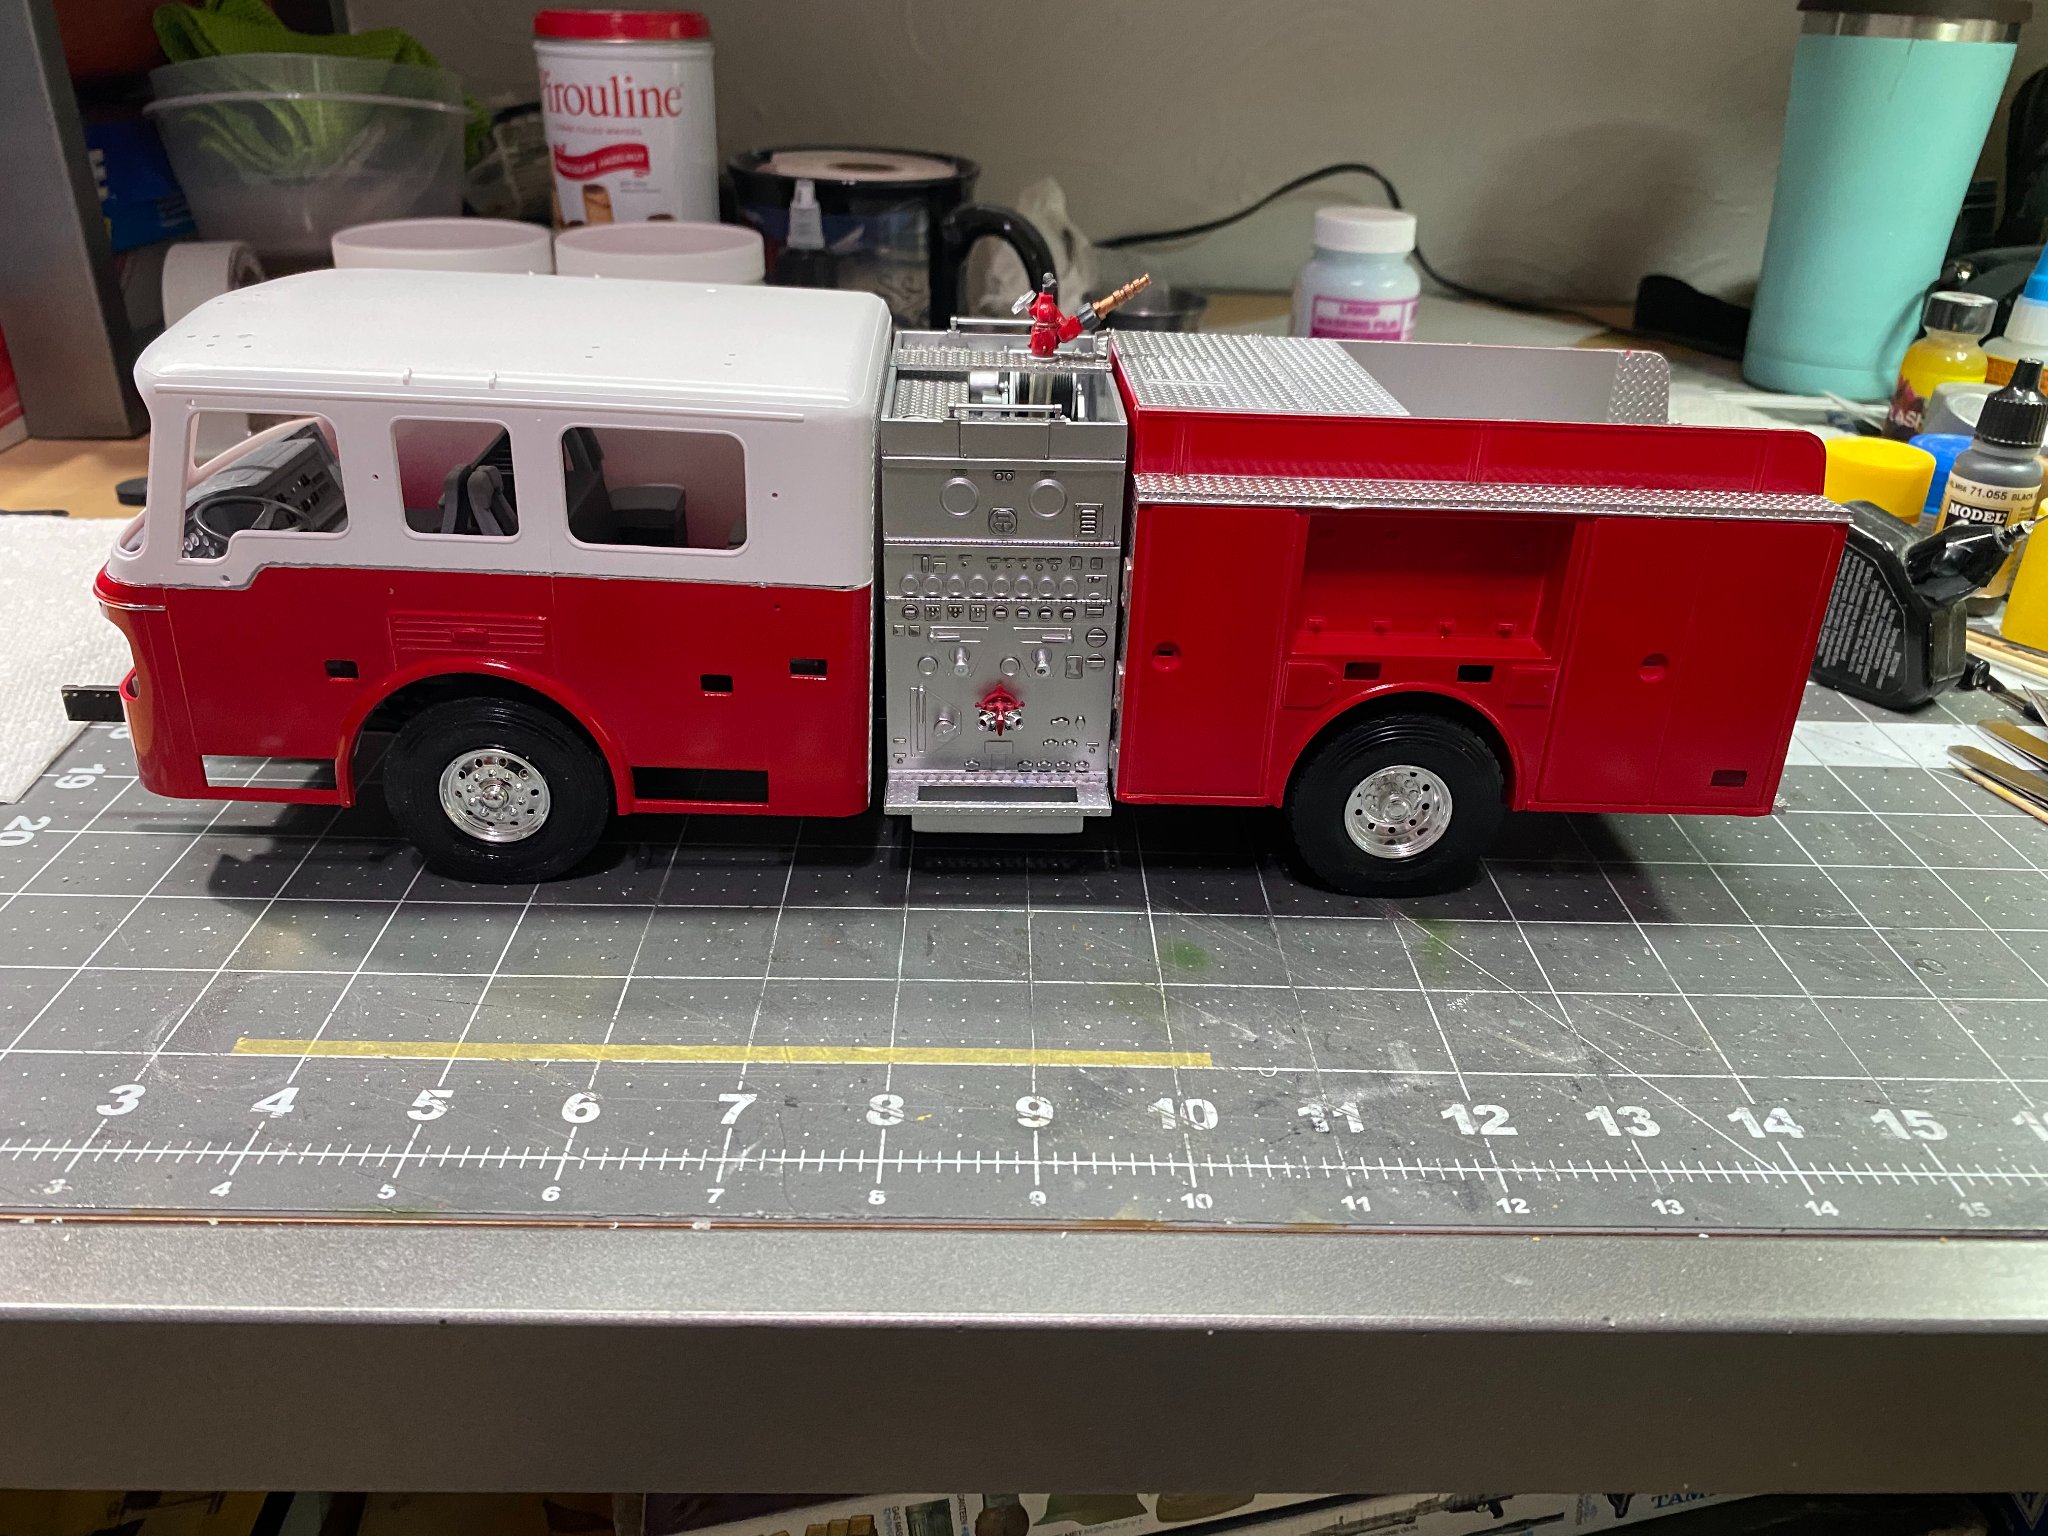
Will have to give this paint some time to cure before I apply chrome trim, accessories, interior, and decals. In the back of the cab where it's got the diamond plate texture, will mask that off and paint it aluminum. The decals will be as per the box art. I received some alternate decal lettering for Philadelphia, Scranton, and Baltimore, but I prefer the quality of the kit decals, College Park. The alternate decal sheet appears too small, out of scale. Maybe it's 1:32 scale instead of 1:24 scale.

- 131 replies
-
- 11
-
-
I agree 100% Yes, exactly right...no need to go crazy making hose, just enough to show it's there with the cover over the rest. Thanks!
-
Great idea! Typically, what is the length of a single FD fire hose section?
-
Okay, I put my thinking cap on and believe I may have come up with a solution for the hose. Going to do some more painting first, then experiment with an idea for scale hose. If some type of thin metallic flat stock was used to retain a flat shape, then covered with heat shrink, that just might make a convincing facsimile for fire hose. I have saved quite a bit of photo etch "sprues", and will try using them to cover with heat shrink to see how it looks. I could cut off some little sections of 1/8" ID brass tubing for the couplings.
-
Thanks! It looks great, but I am wondering it it's supple enough to lay flat or if it will tend to retain a round shape? Wish I had a sample piece to see it. https://www.wirecare.com/category/braided-sleeving/braided-sleeving-flame-retardant/flexo-clean-cut-fr-fray-resistant/ccf0.13tb-1-8-black-clean-cut-fr-10-ft-cuts
-
In the photo above, that looks like it could be some type of a light elastic. Don't know much about fabrics.
-
Whatever this modeler used looks convincing. Shoestrings? paracord? I'm not sure but the weave needs to look small enough to be convincing for scale. Will have to scratch some hose fittings.