CDW
-
Posts
7,760 -
Joined
-
Last visited
Content Type
Profiles
Forums
Gallery
Events
Everything posted by CDW
-
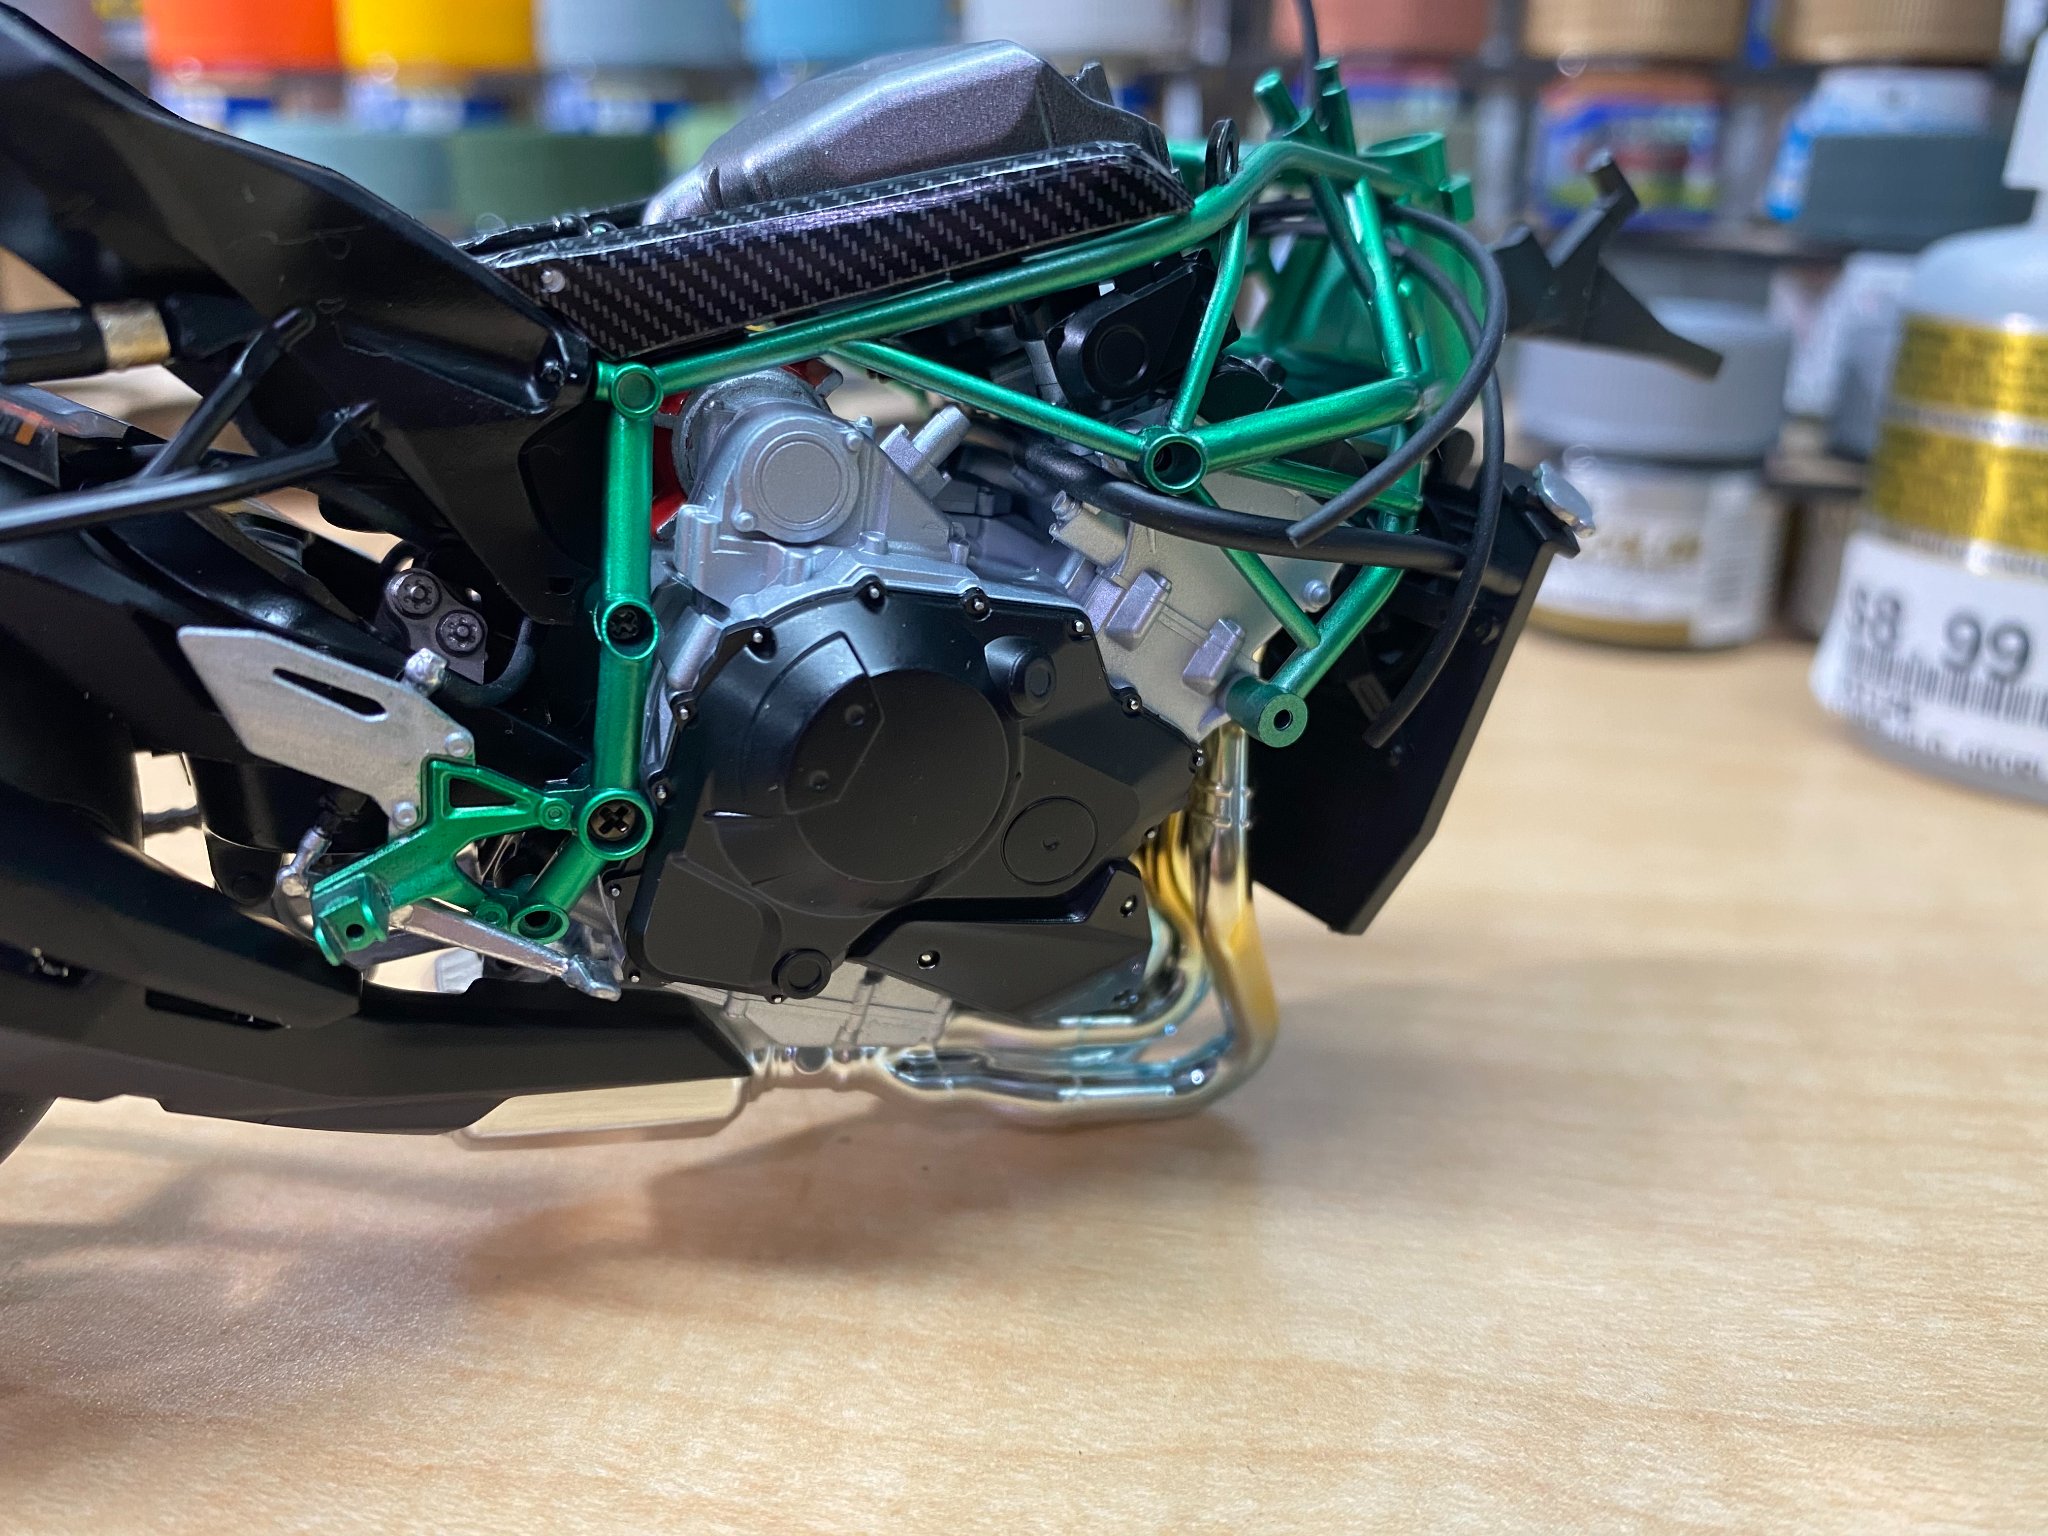
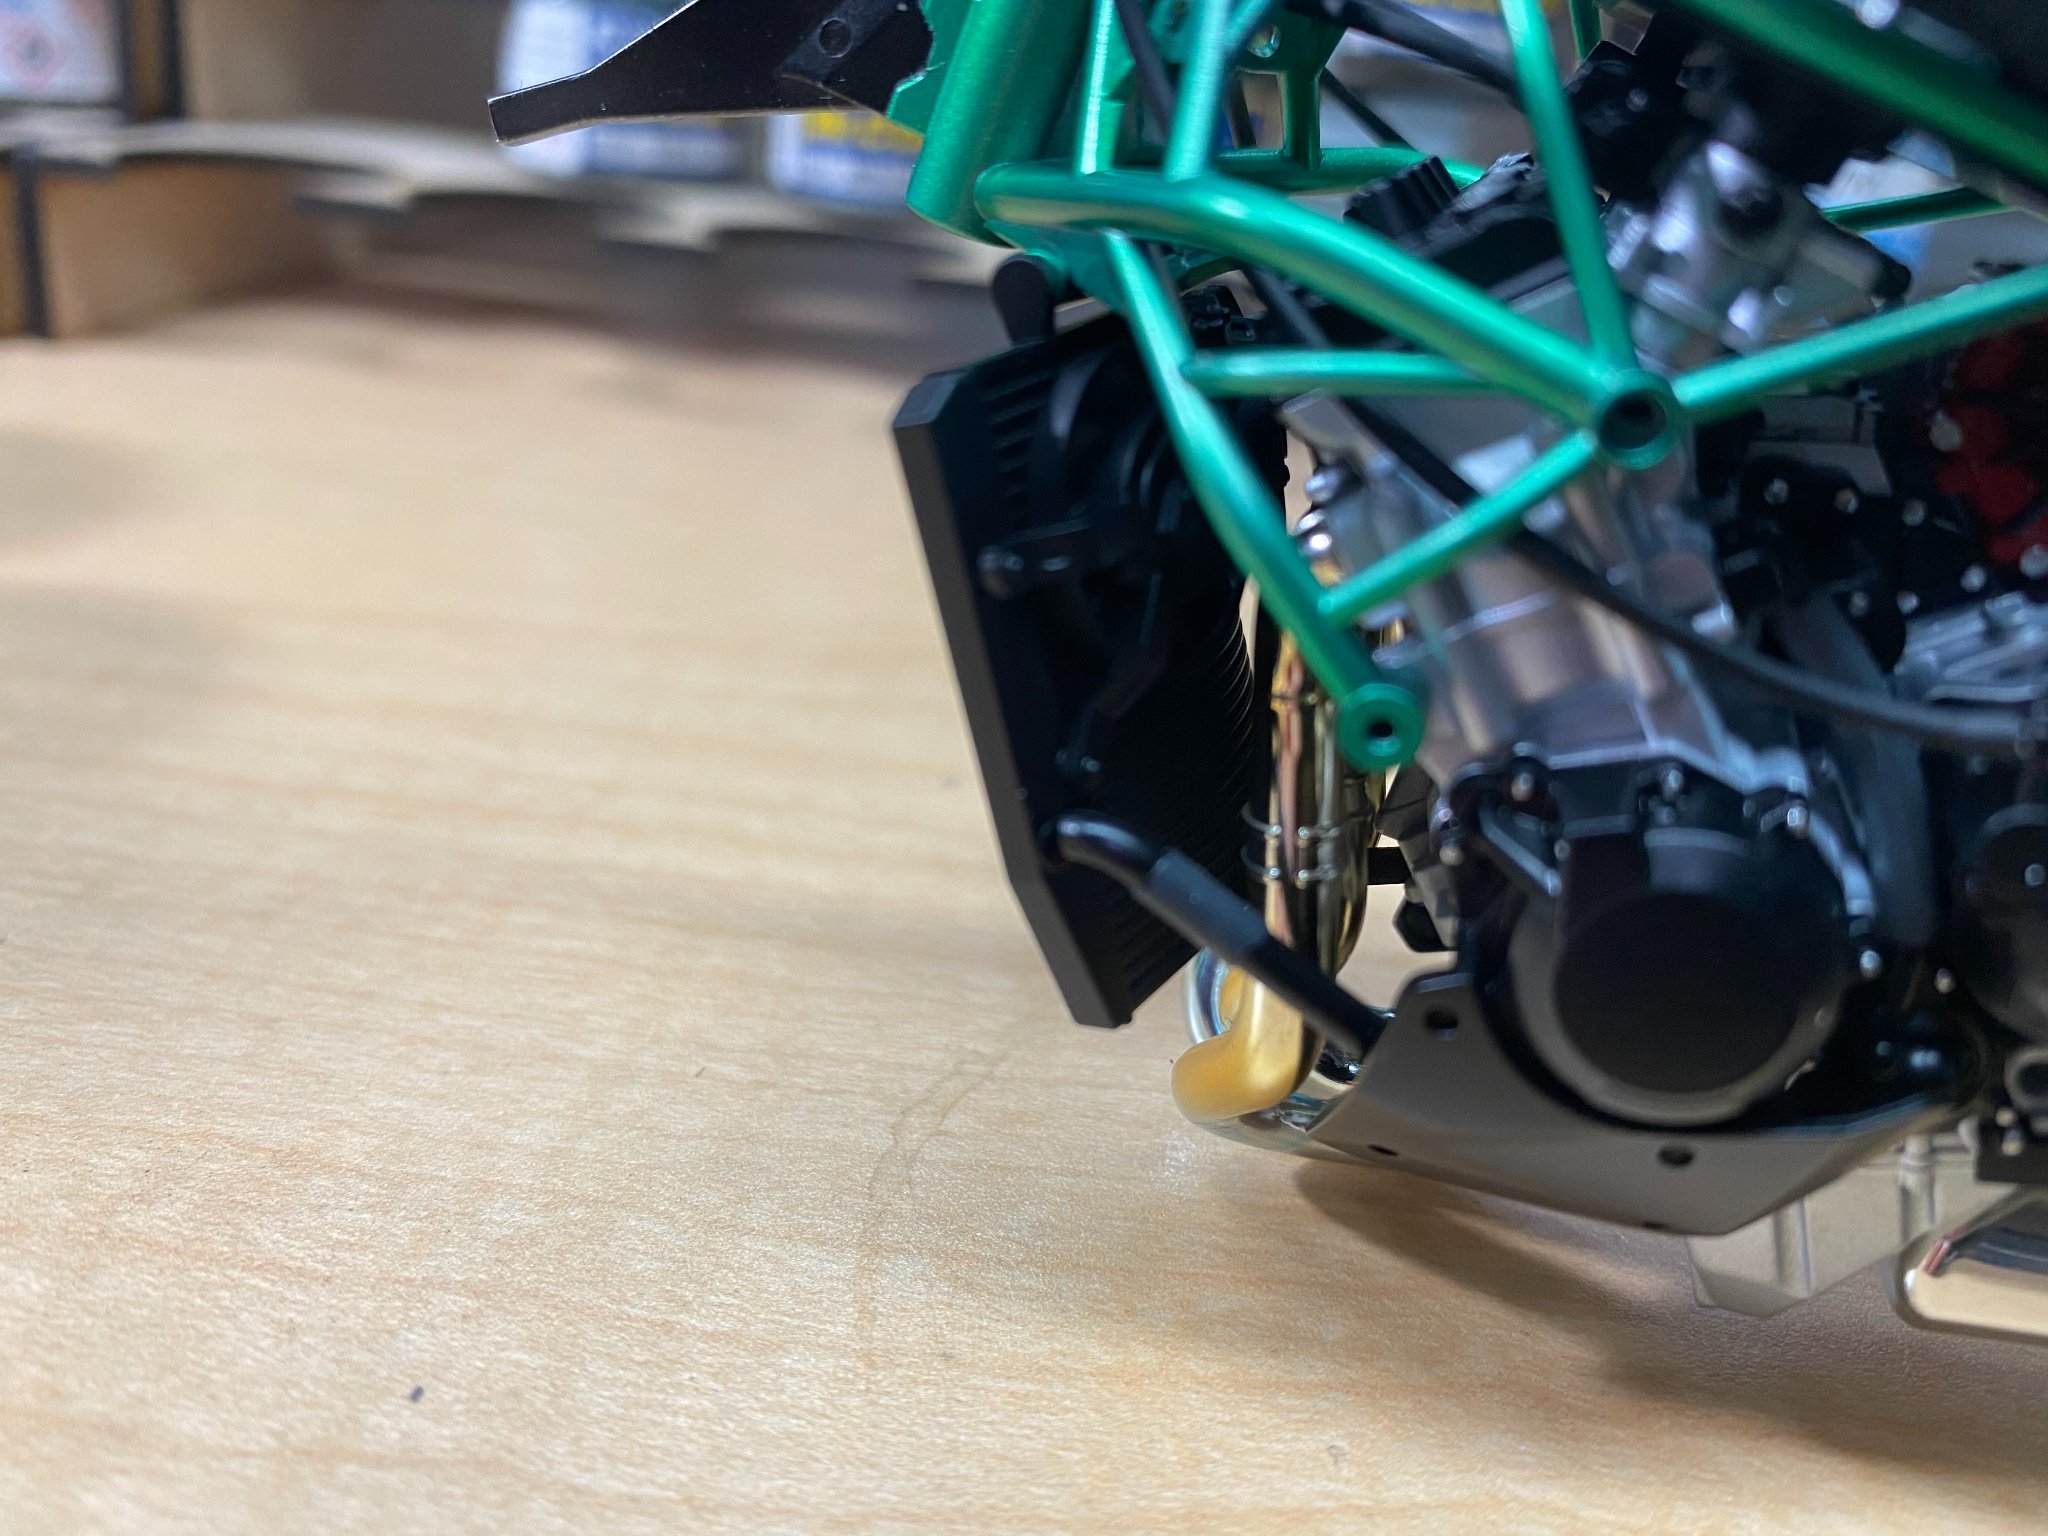
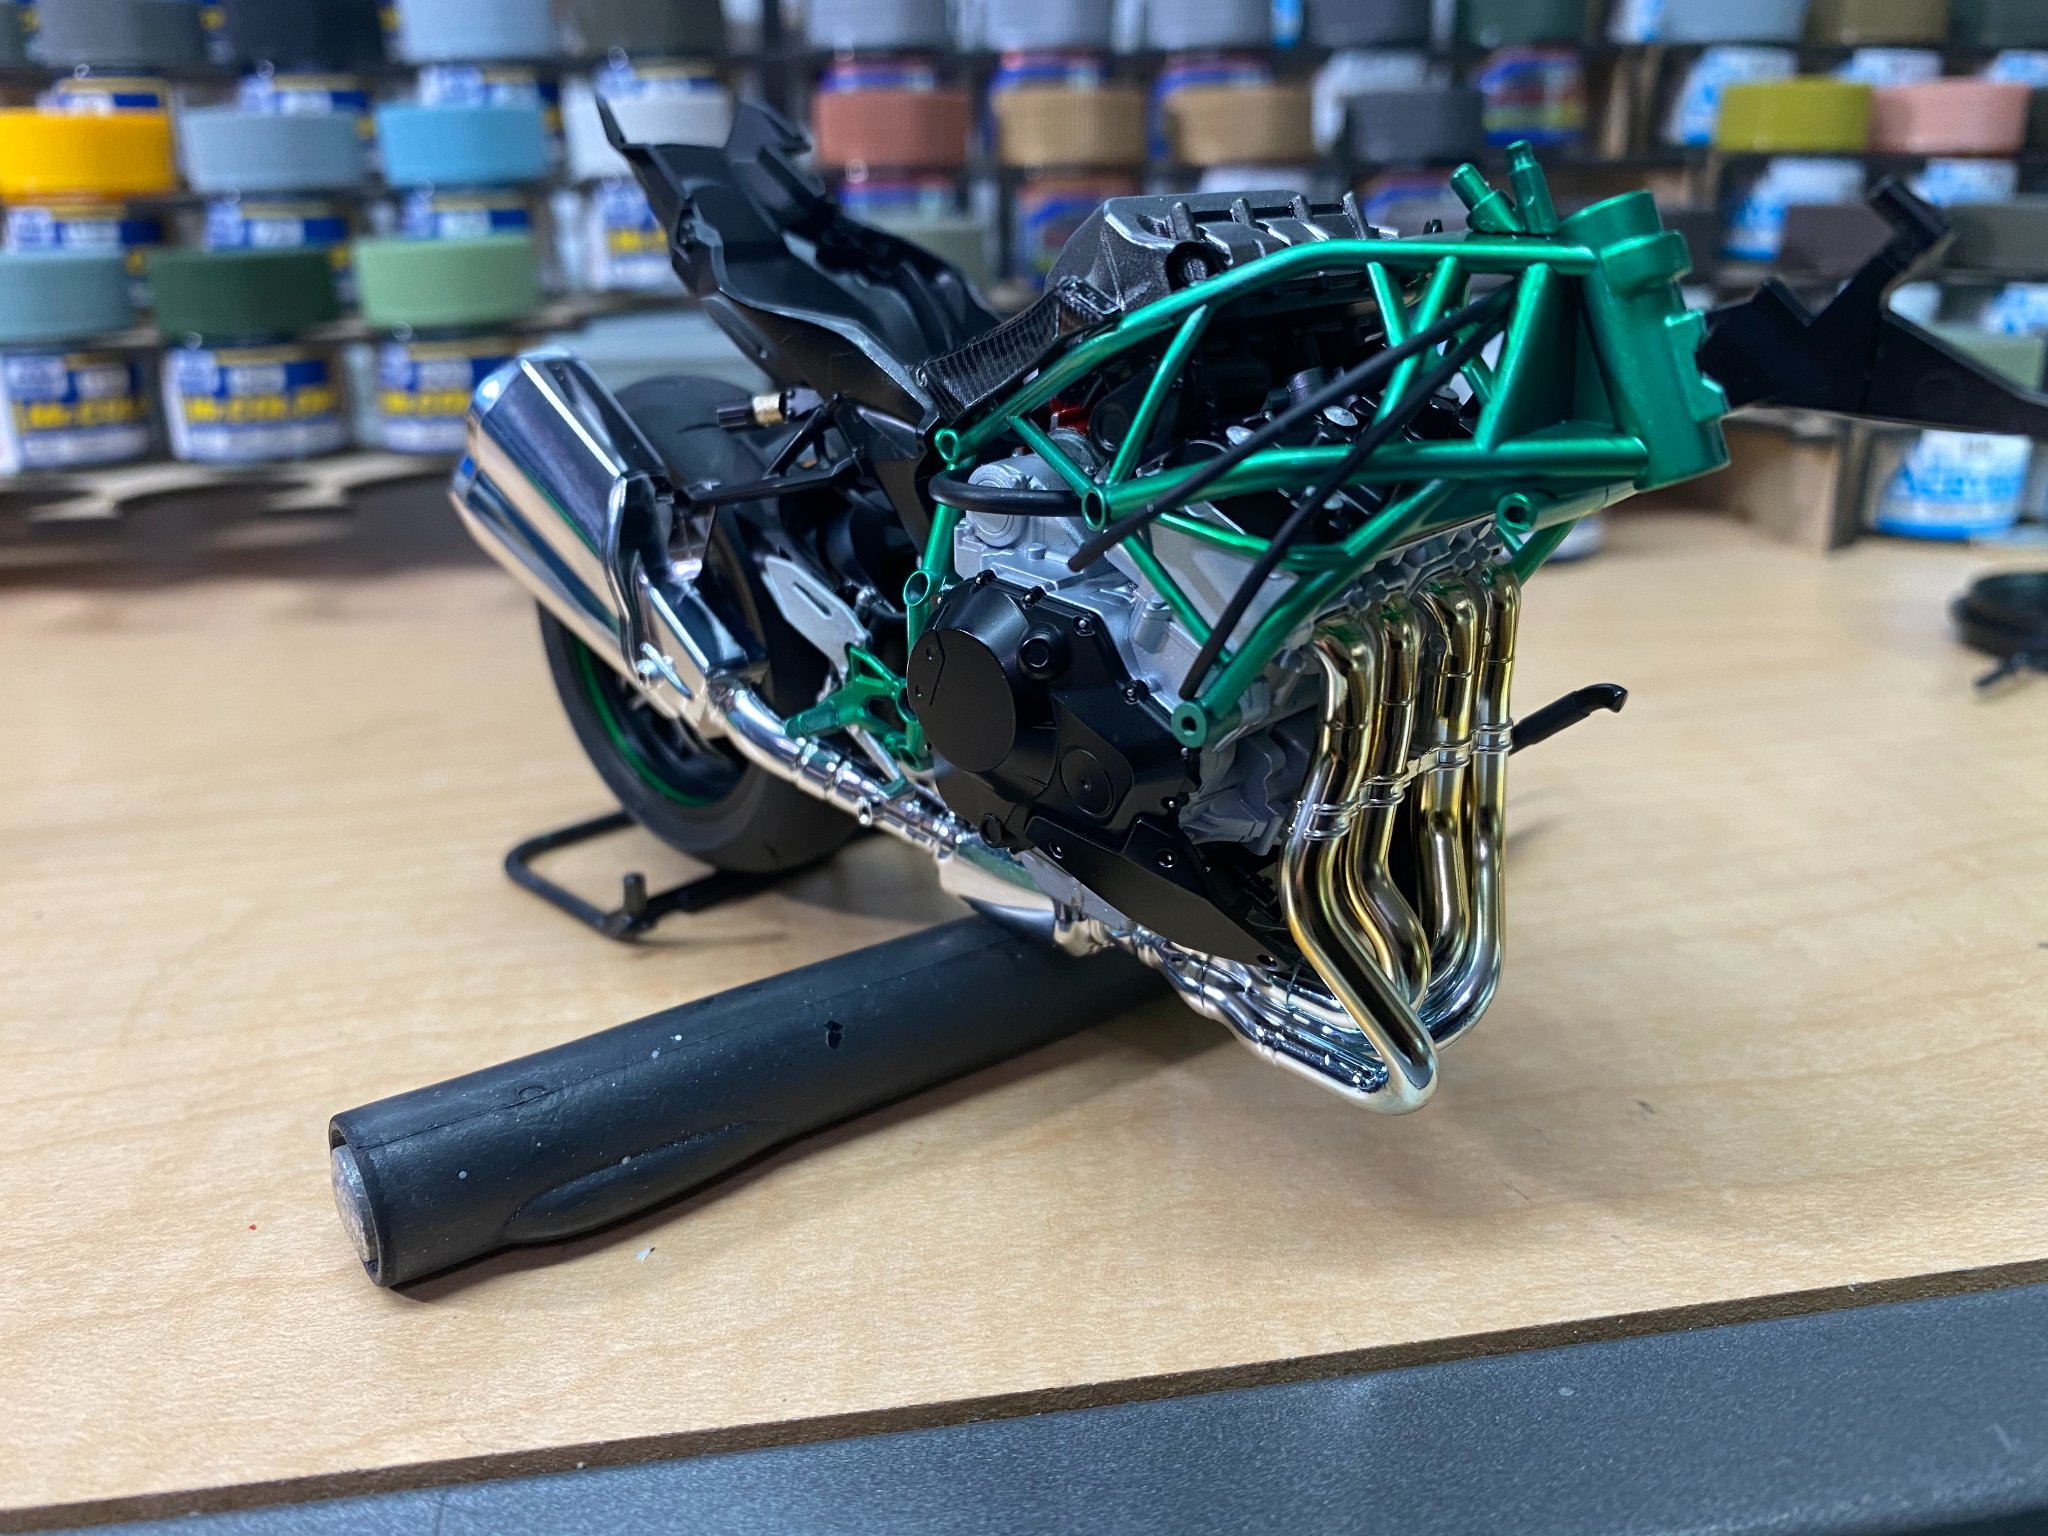
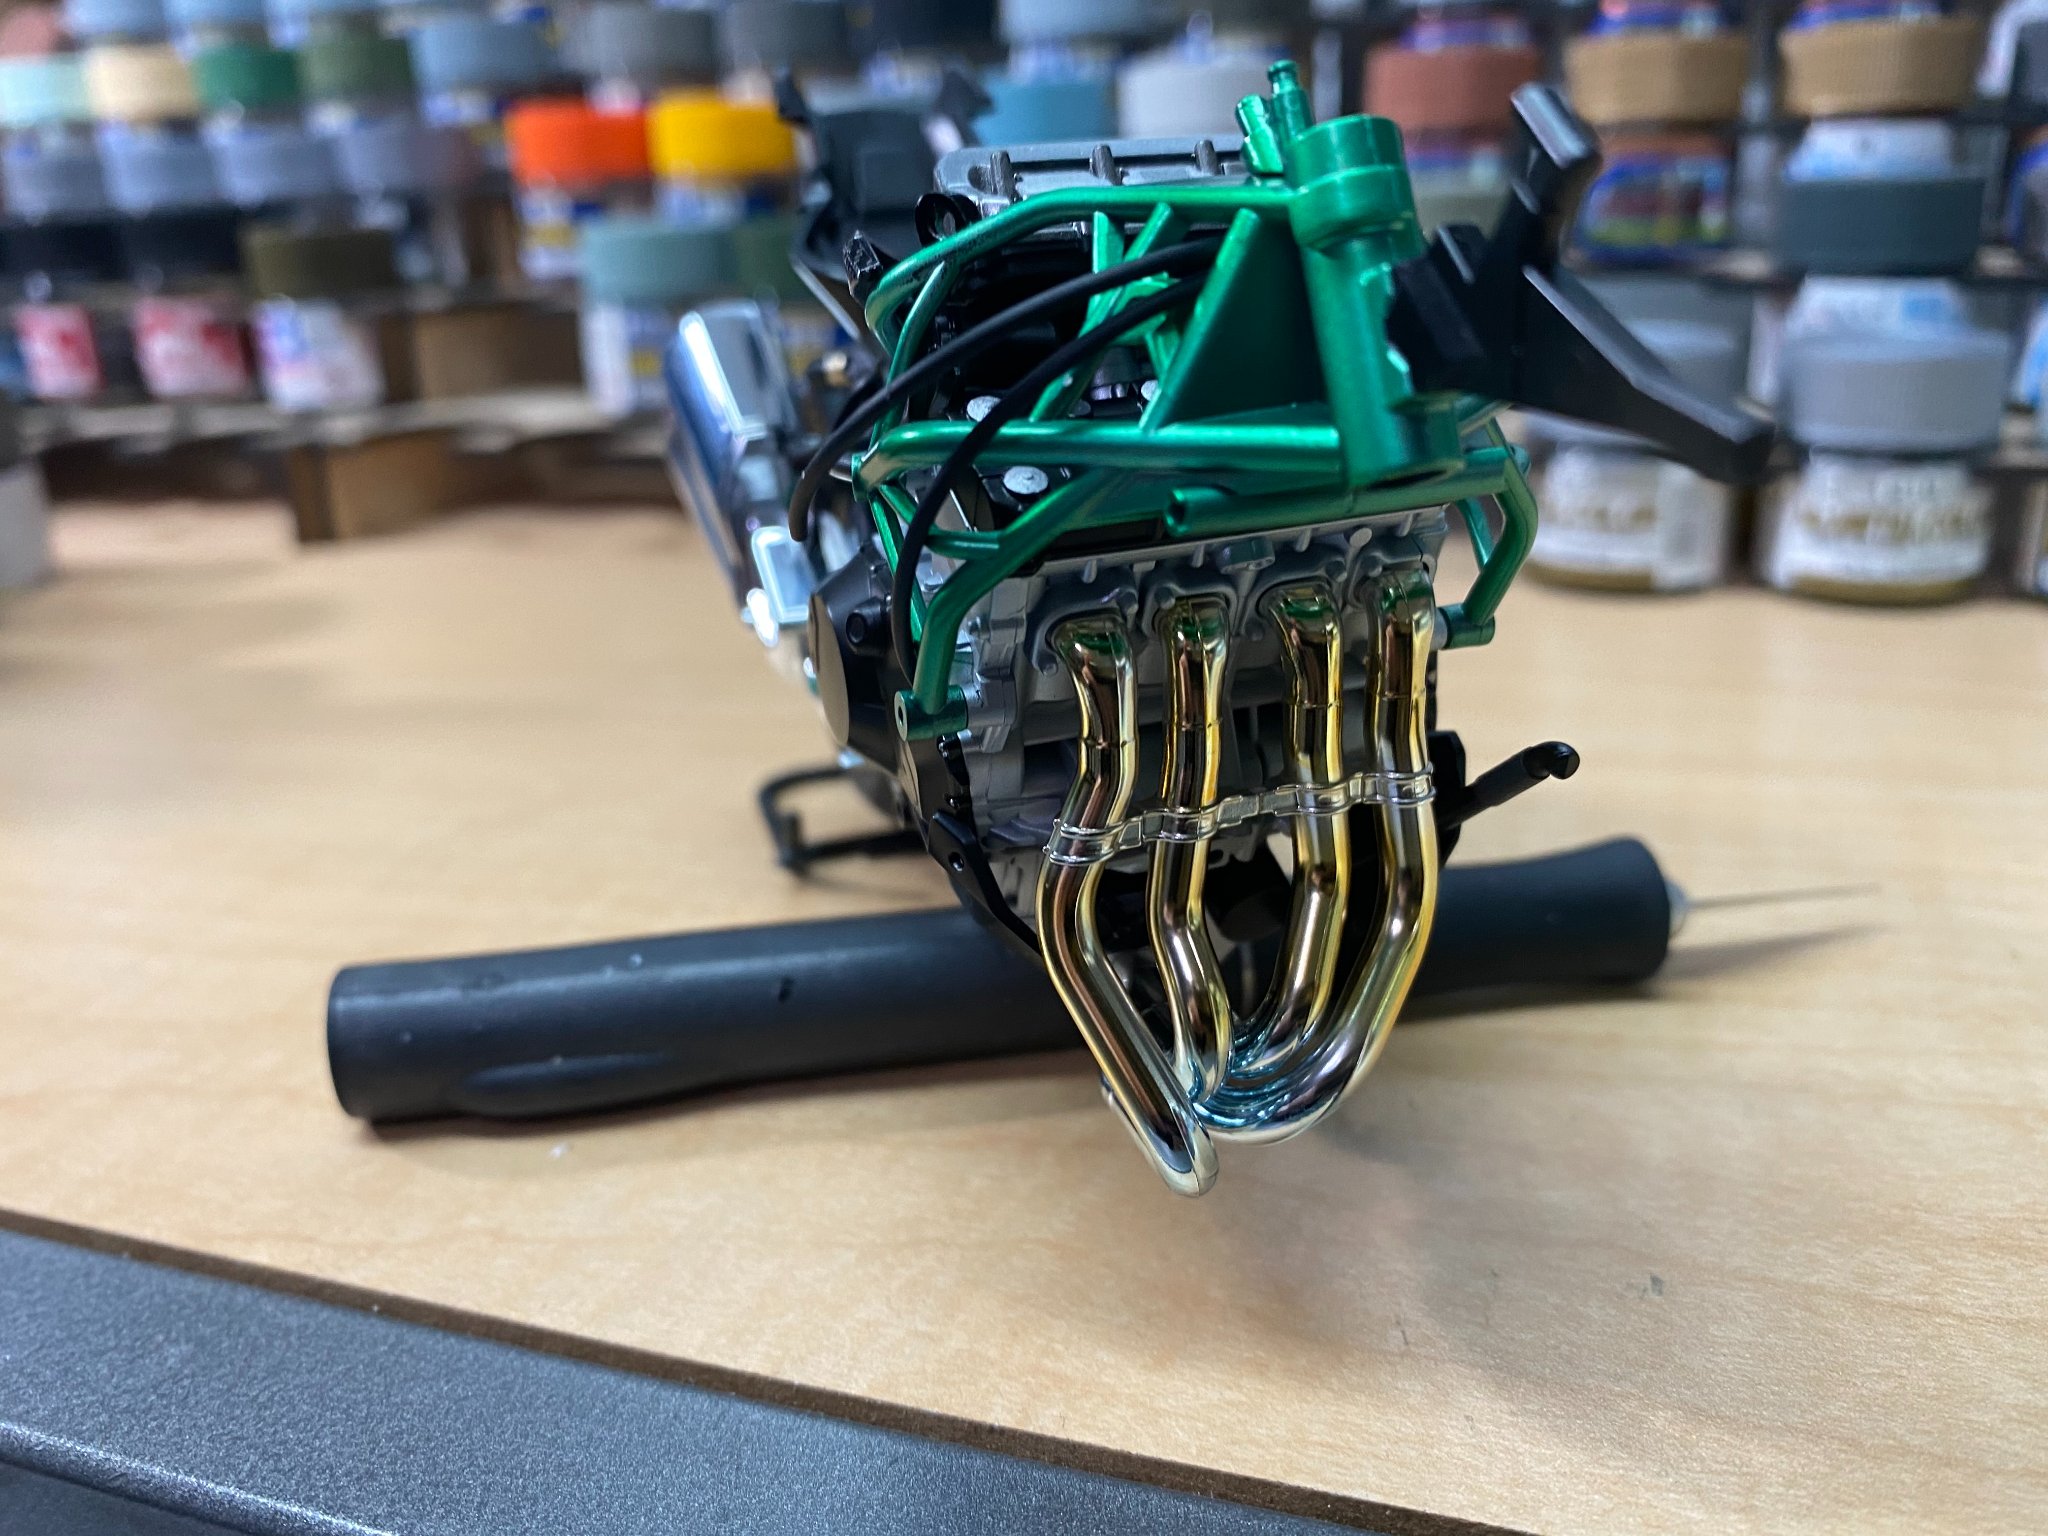
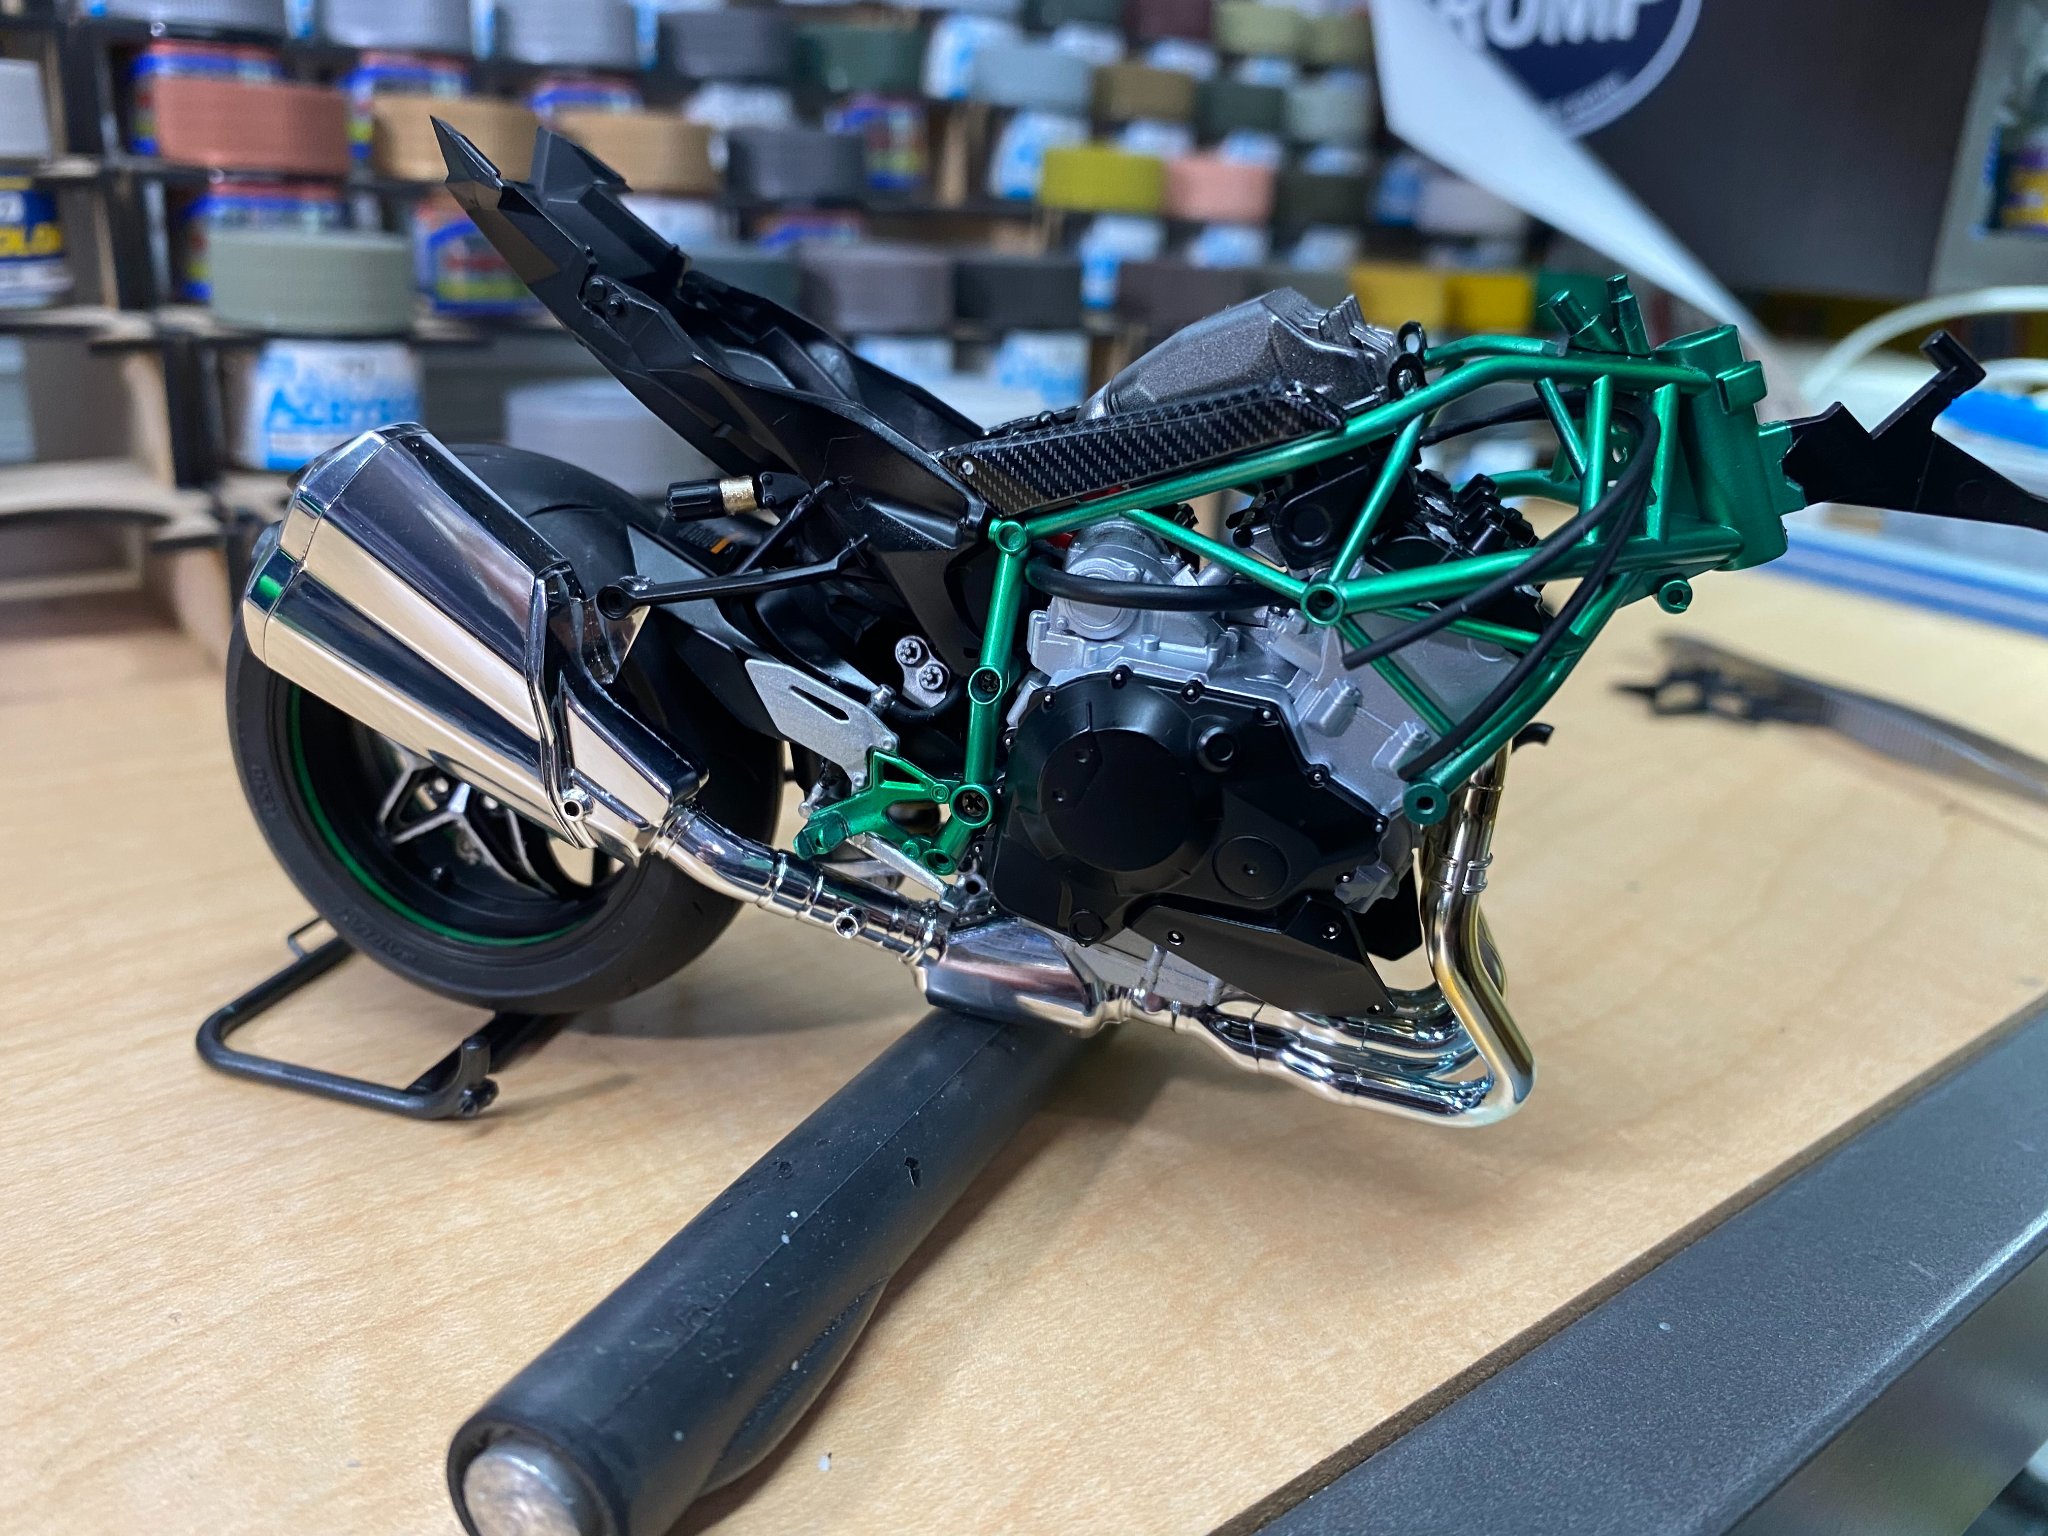
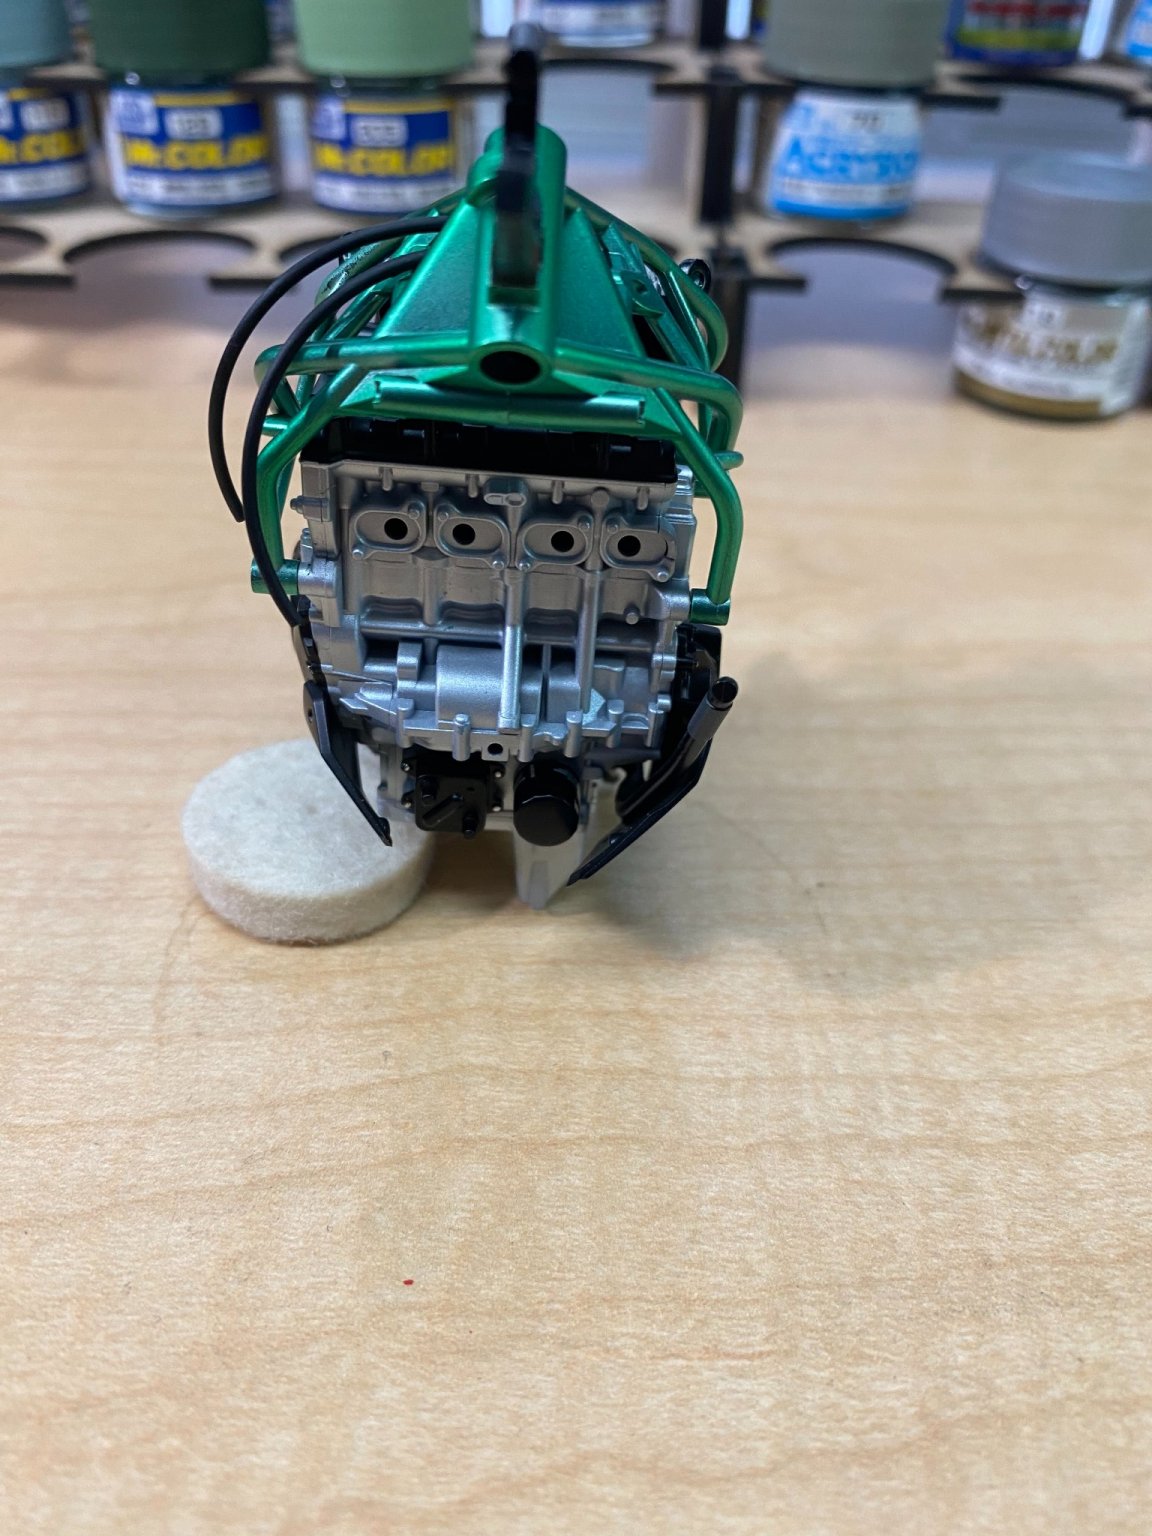
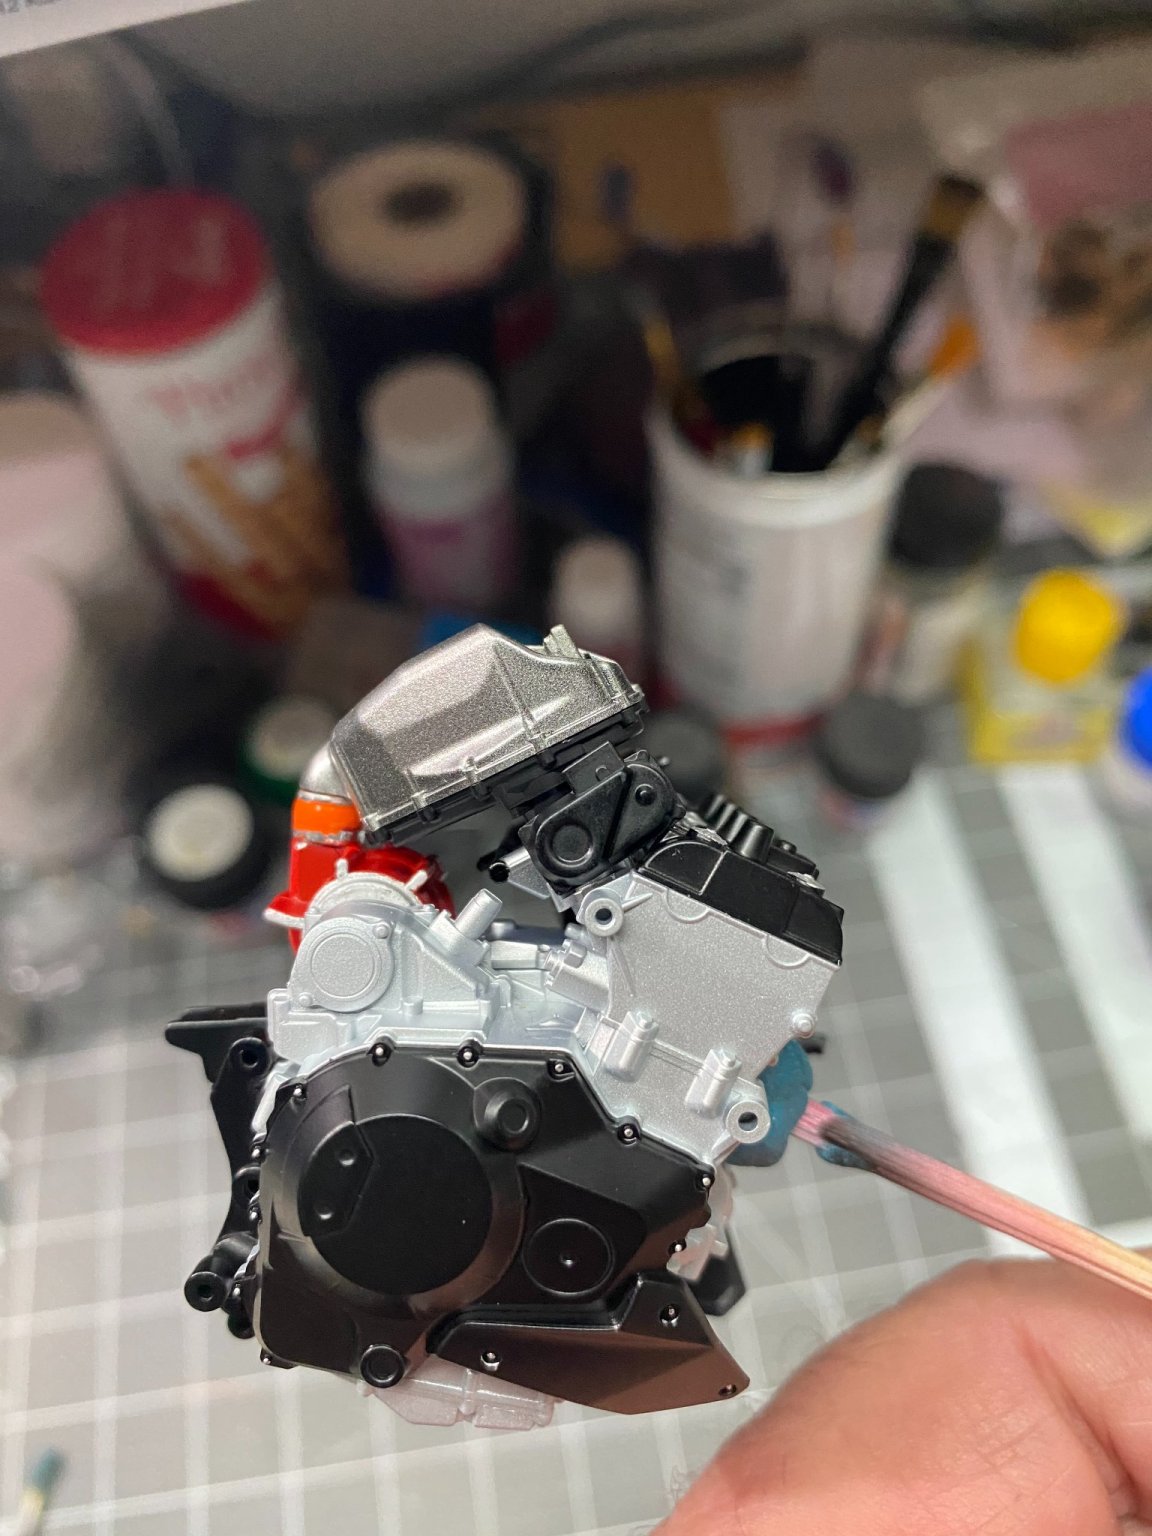
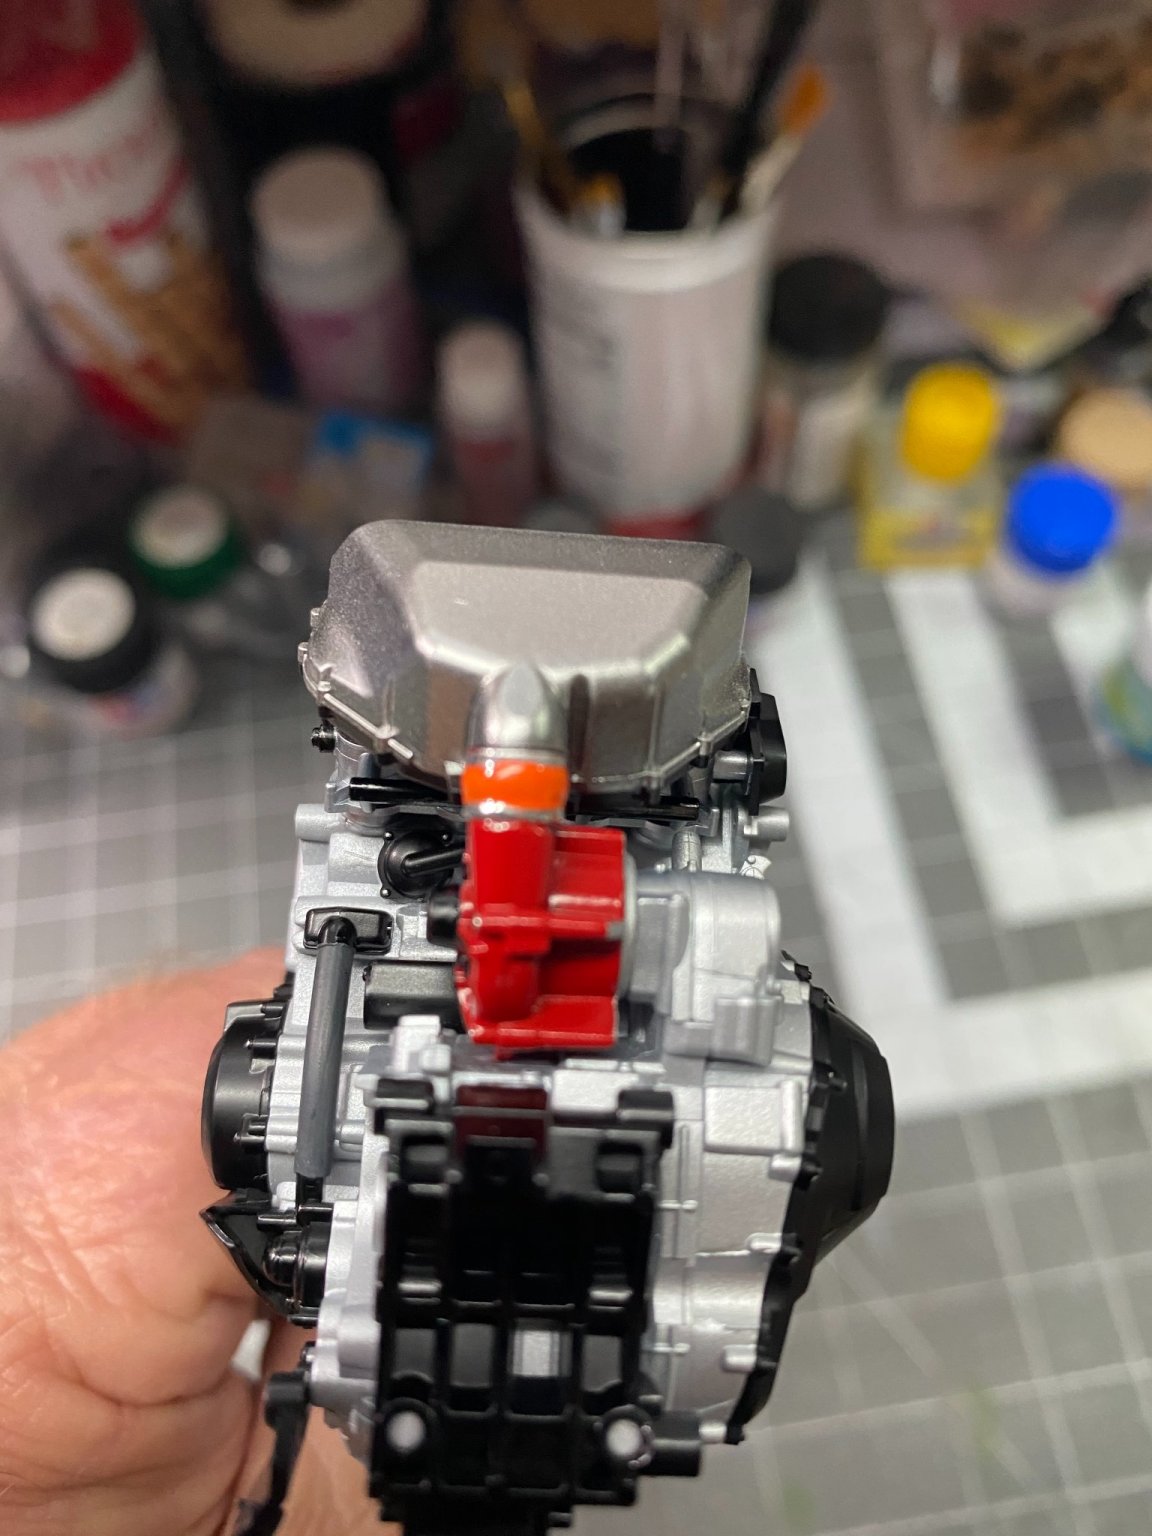
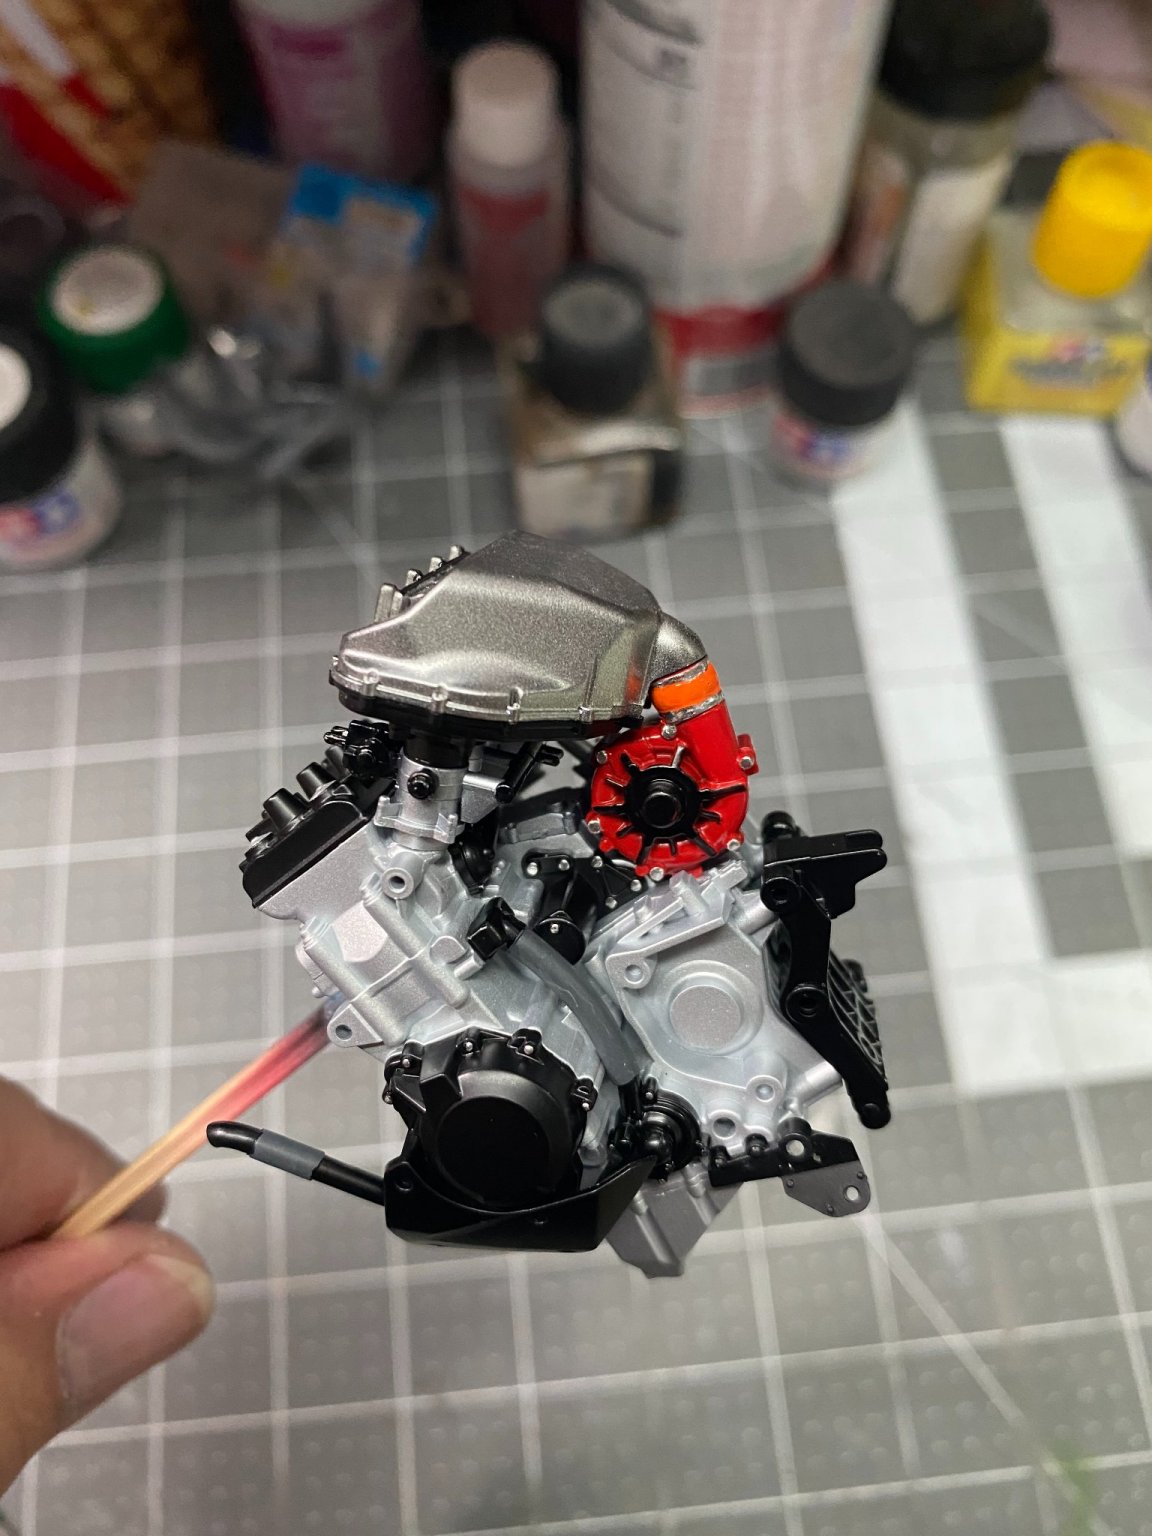
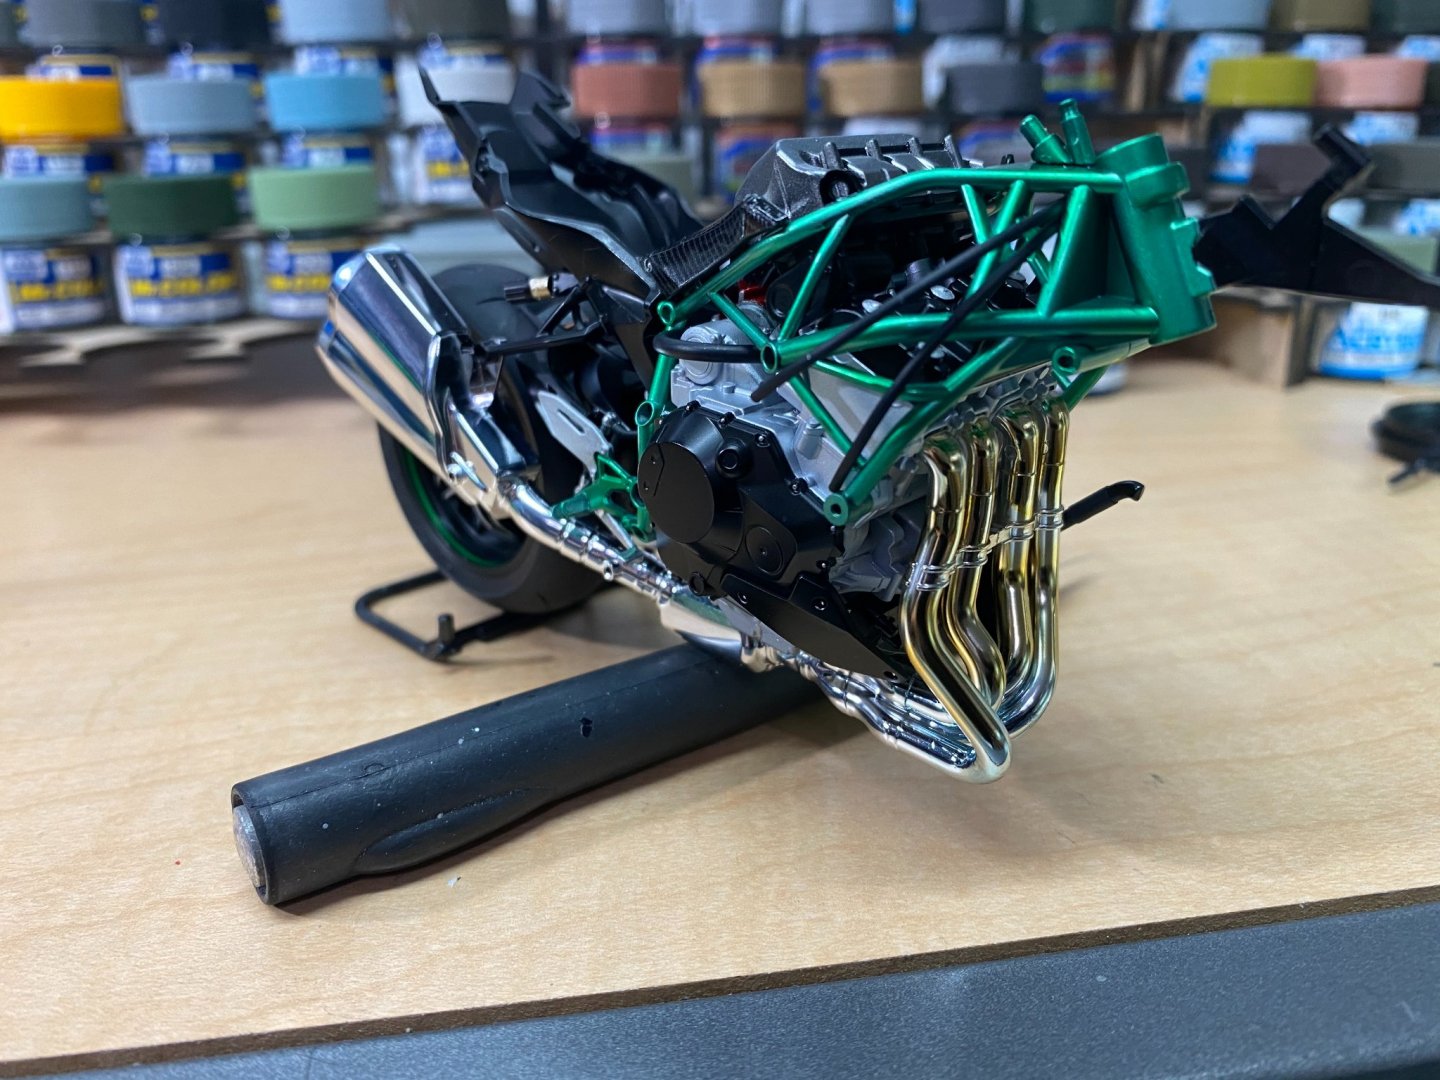
 Tamiya employs the use of micro size machine screws to strengthen the join of the engine, kick stand, and exhaust system to the frame. The water cooling system is installed.


- 85 replies
-
- 10
-

-
Thank you for the kind words, Lou. When I first started doing this in the 1960's with a hairy stick and Testor's Enamels, it was trial and error. When I got an airbrush in the 1970's it was still trial and error. Flash forward to the 2020's, and it's still trial and error. Practice, practice, practice. And in the 80's and 90's it was 1:1 cars and trucks, and that was trial and error, too. I love this hobby.
-
I am standing by watching how my youngest daughter handles her first winter in New Hampshire. So far she seems to be taking it in stride. My son in law is eager to move back to Florida in another couple of years.
-
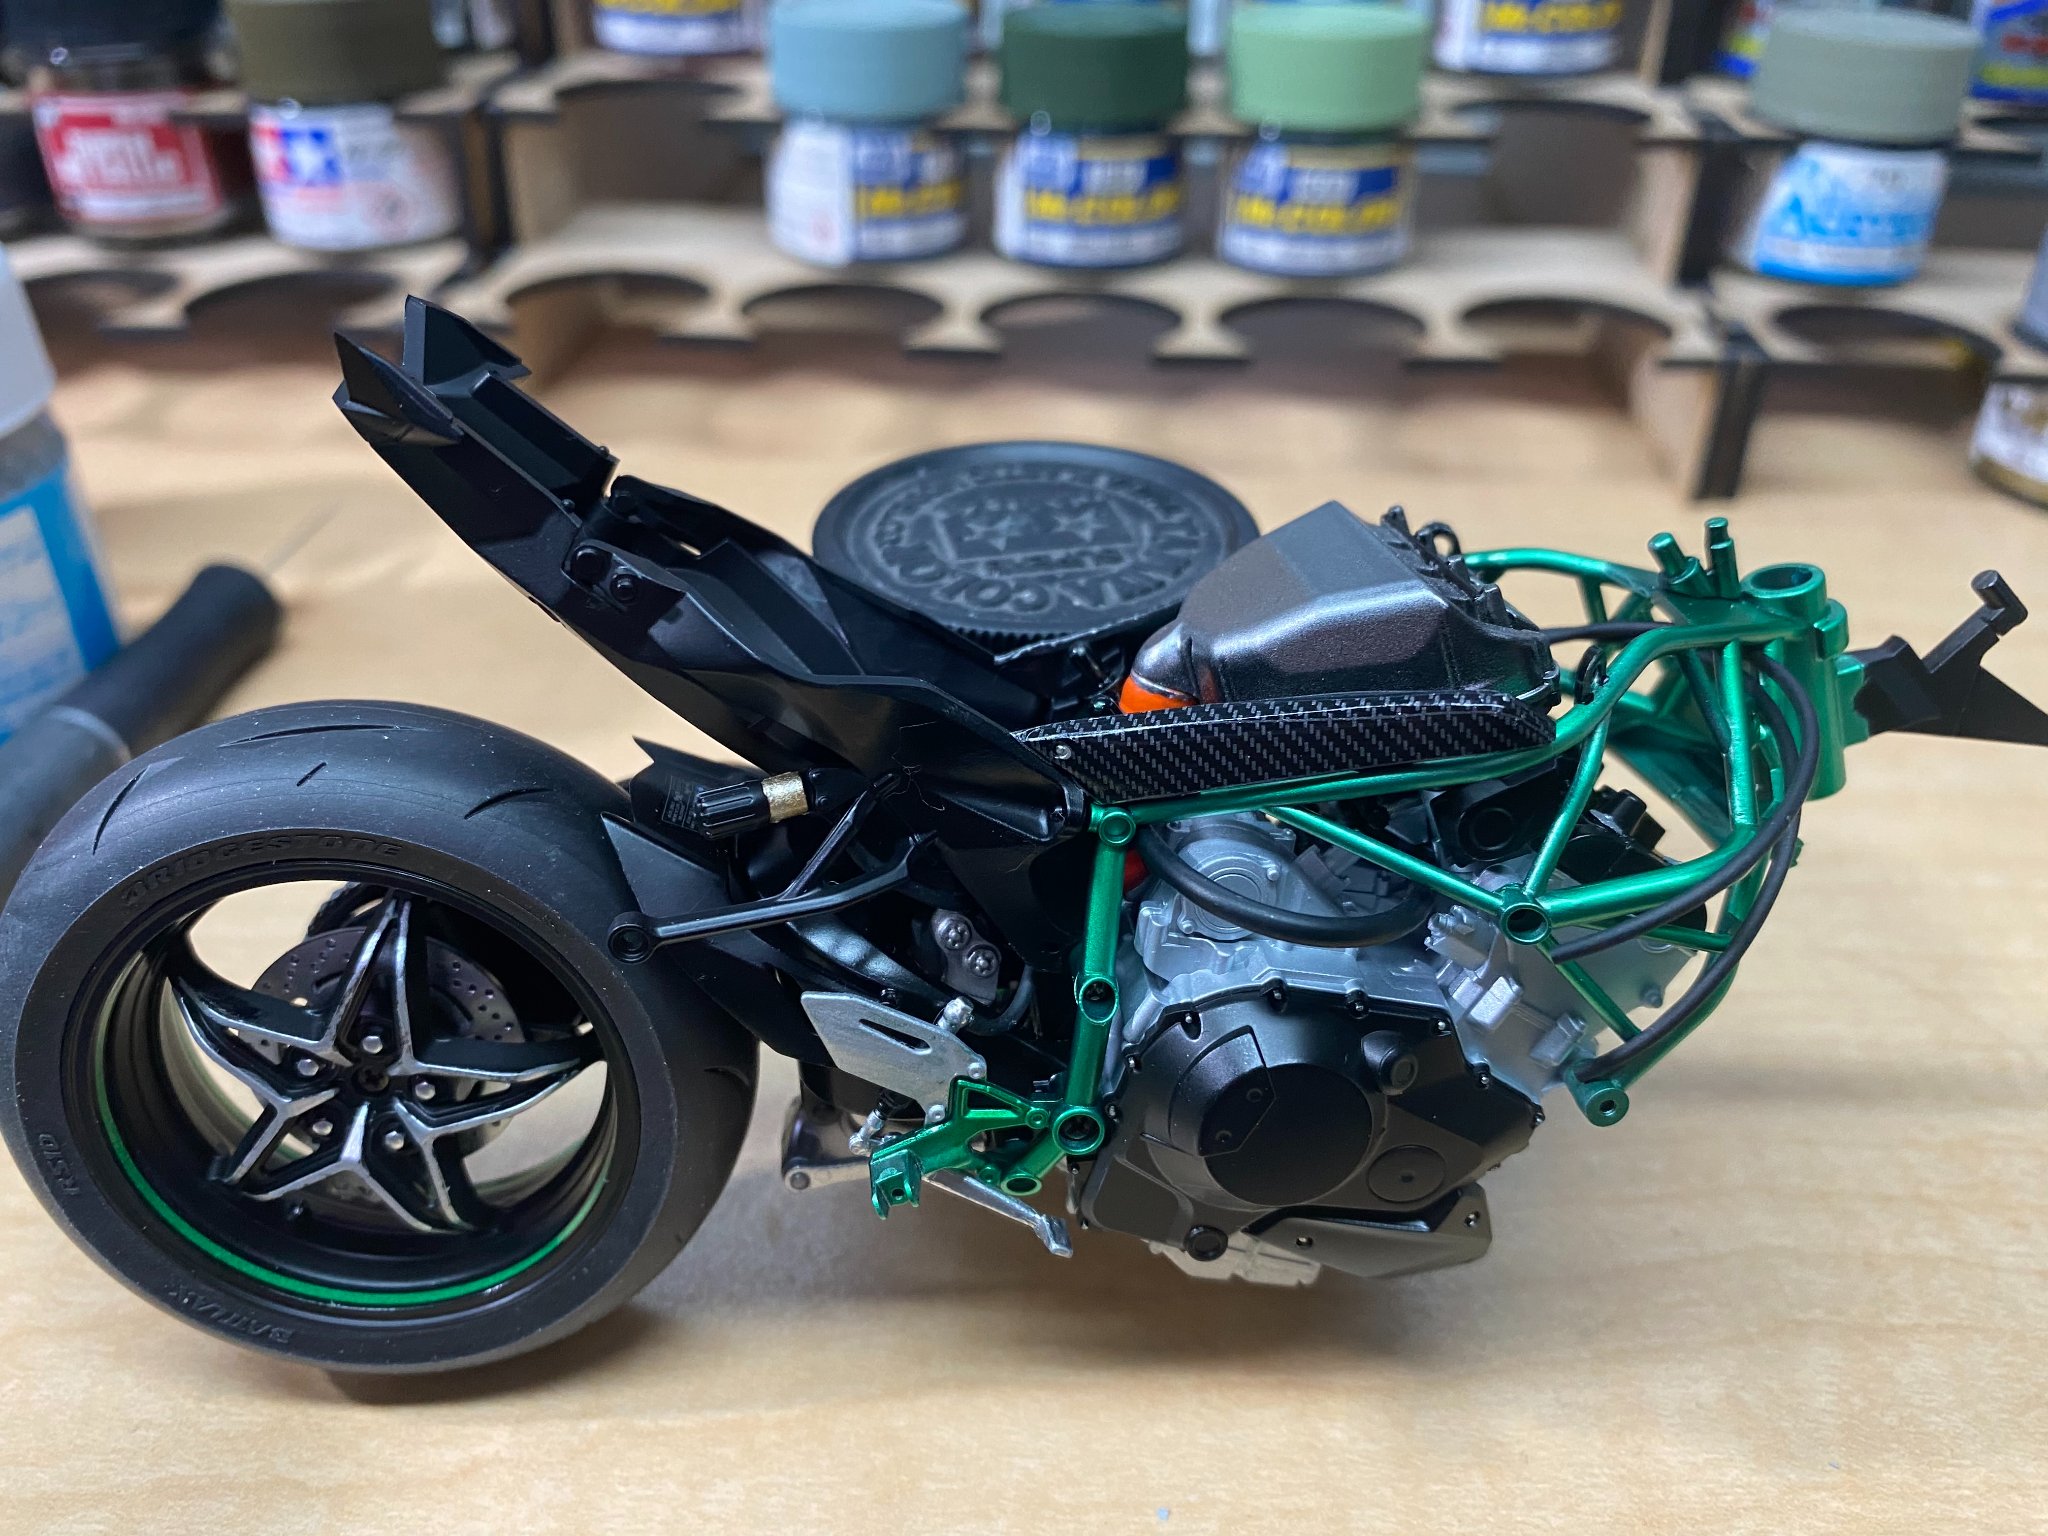
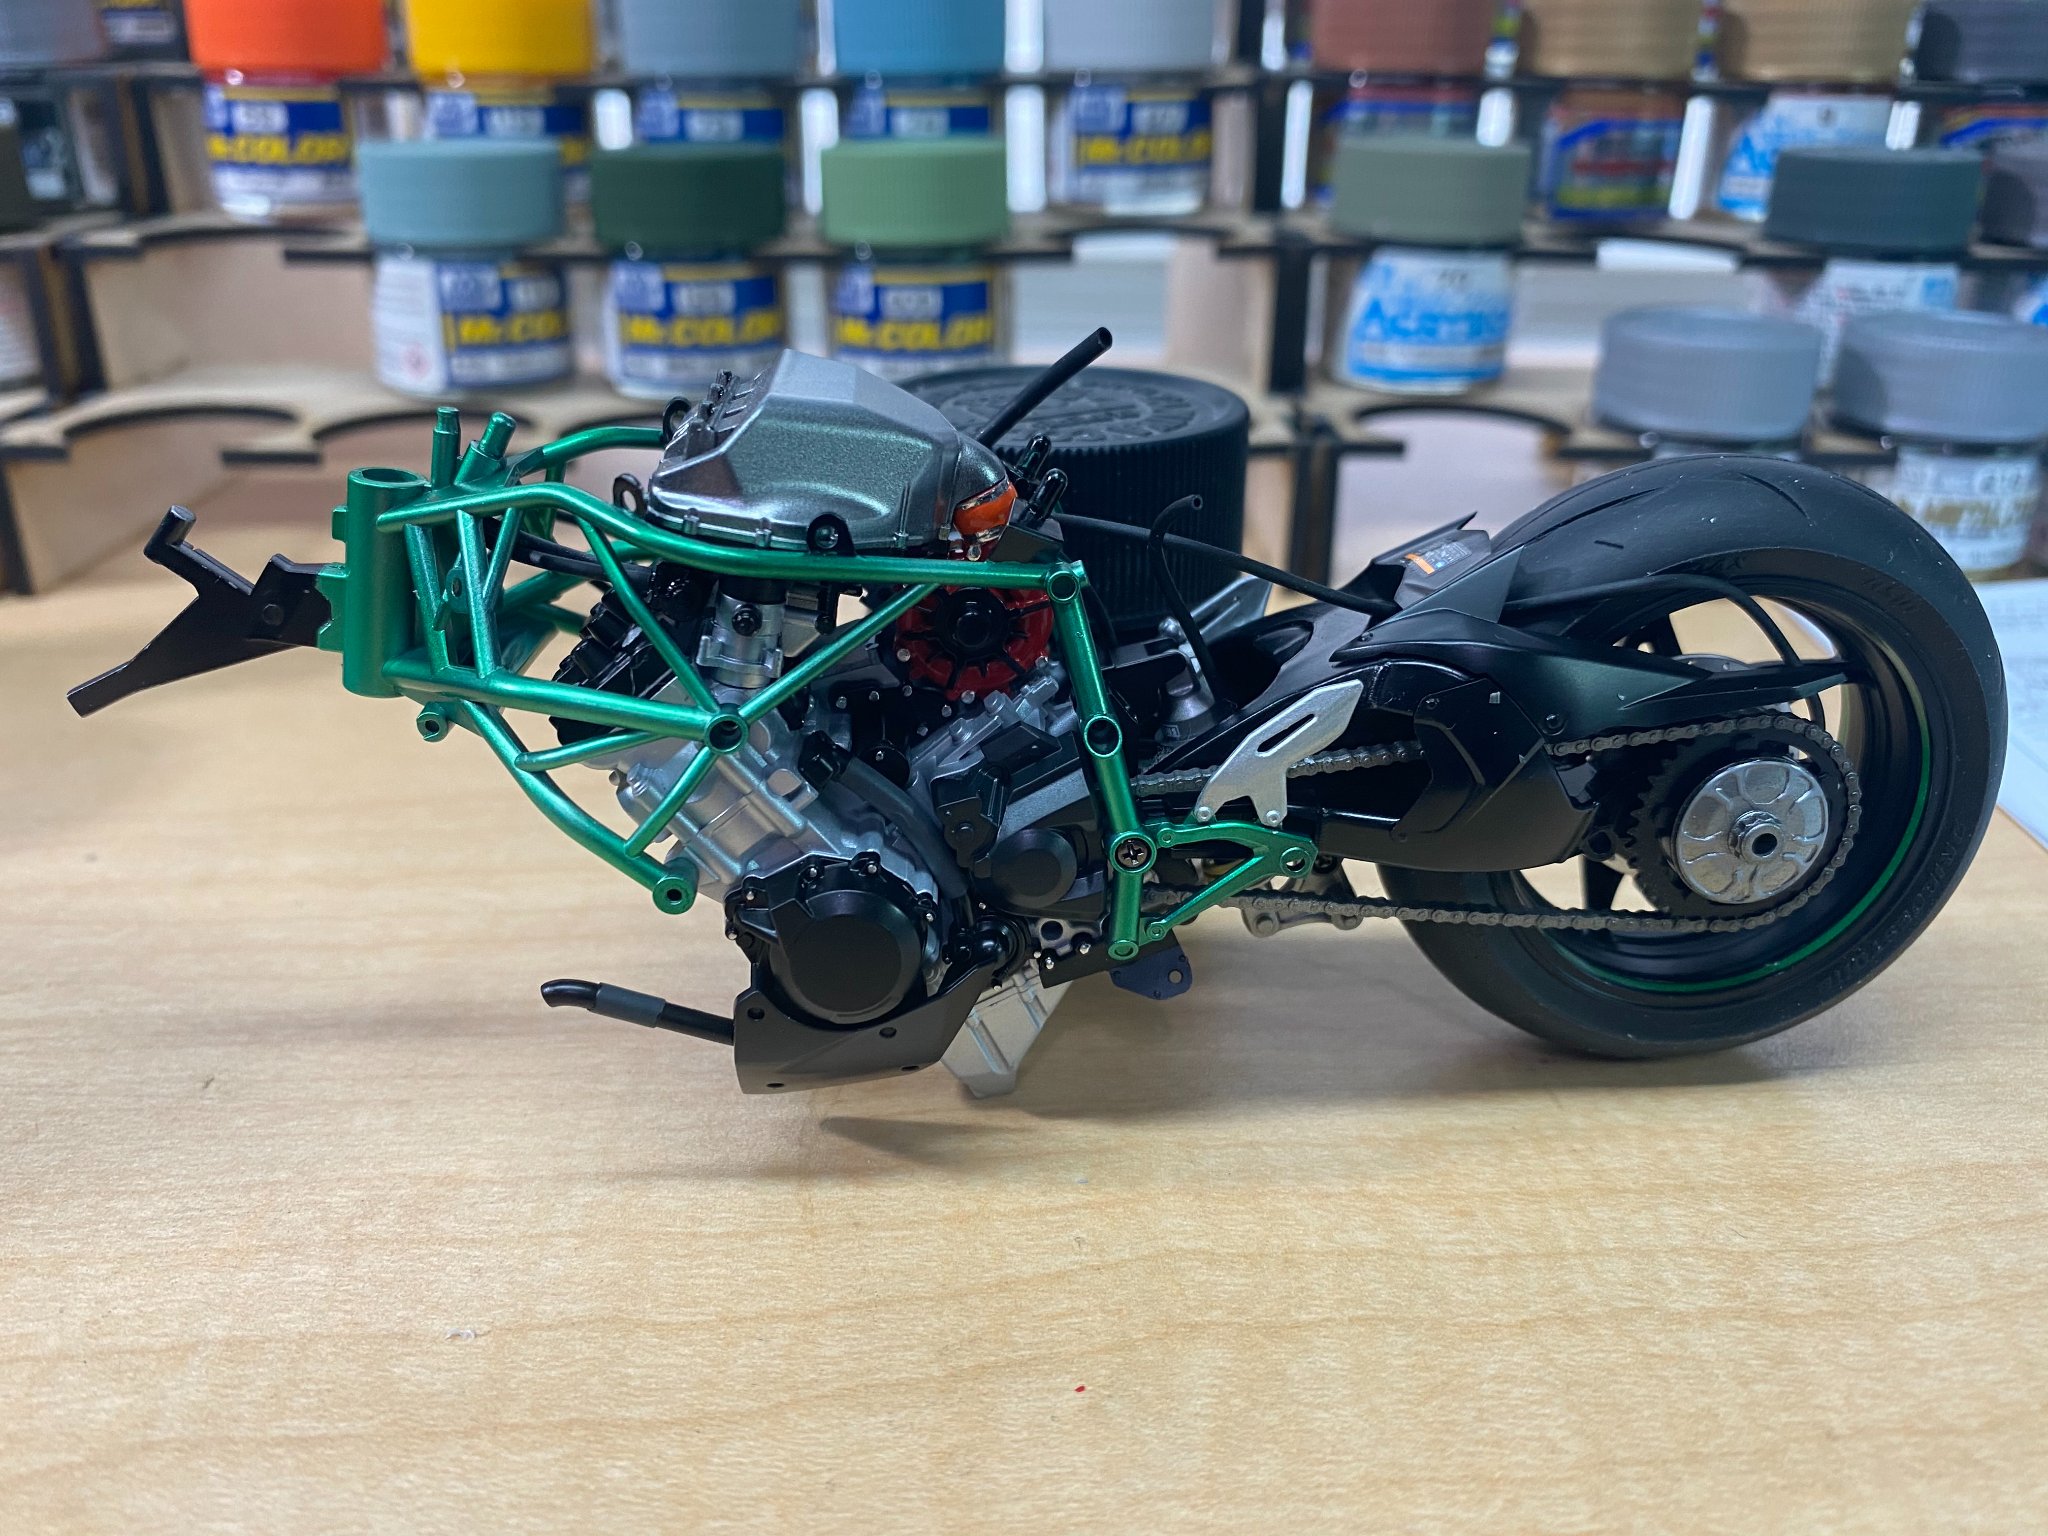
Exhaust system. Tamiya does exceptional chrome work in their kits. Maybe the best in the business. Discoloring done to match 1:1 photos using highly reduced Tamiya clear blue and clear orange shot through the airbrush in a very light mist coat.


-
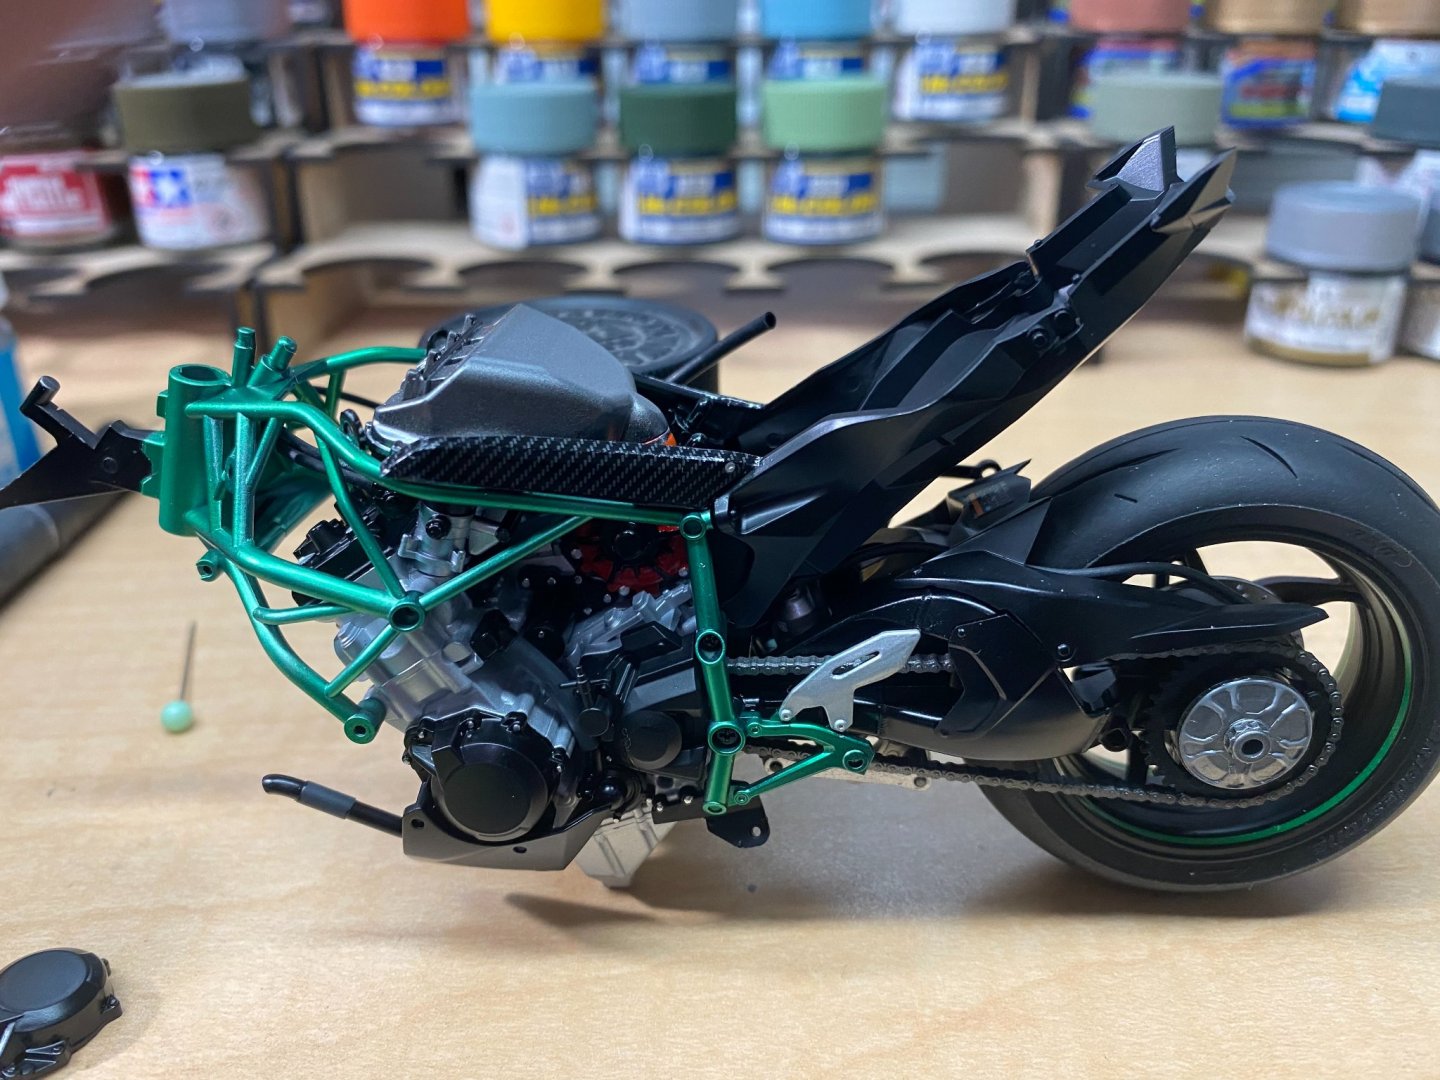
Be it ever so humble, the first carbon fiber decals were applied. The carbon fiber decals are on the thick side and require several coats of Microsol so they settle down and conform to shape. Time consuming, requires patience, can't rush it.

- 85 replies
-
- 11
-
-
Great news Jack!
-
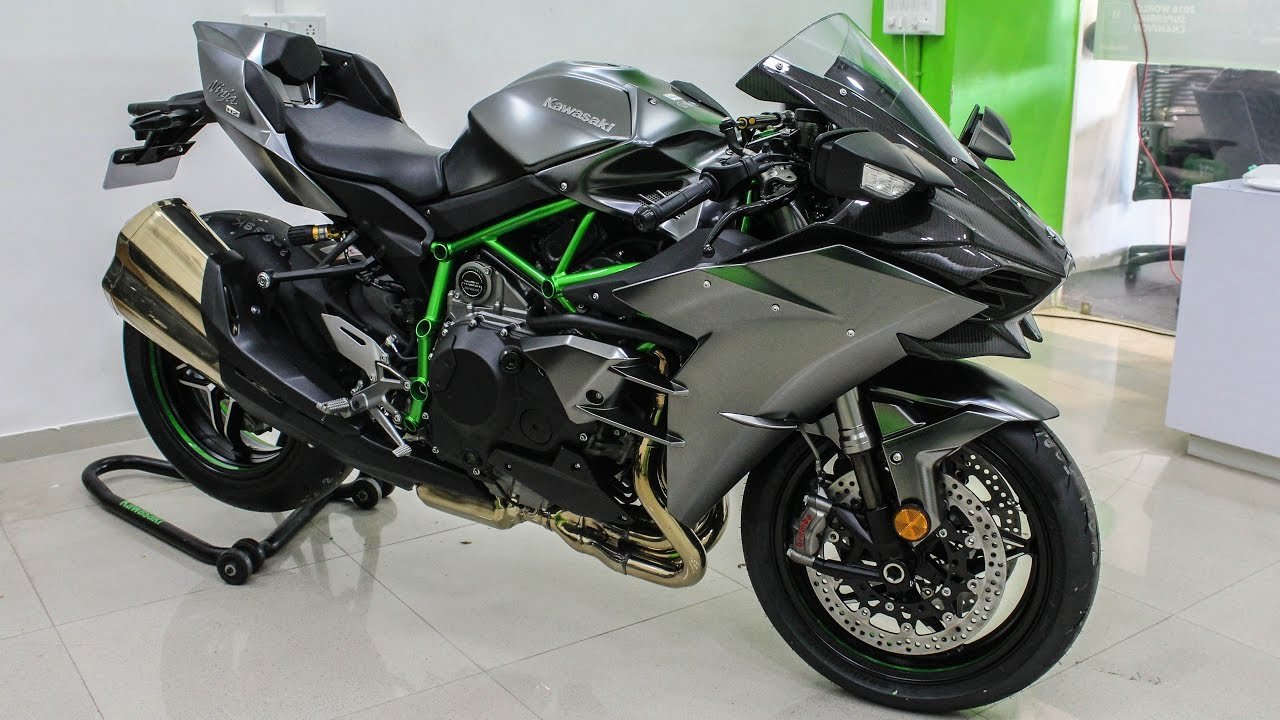
No, that's a photo of the 1:1 machine (the last photo I posted).
-
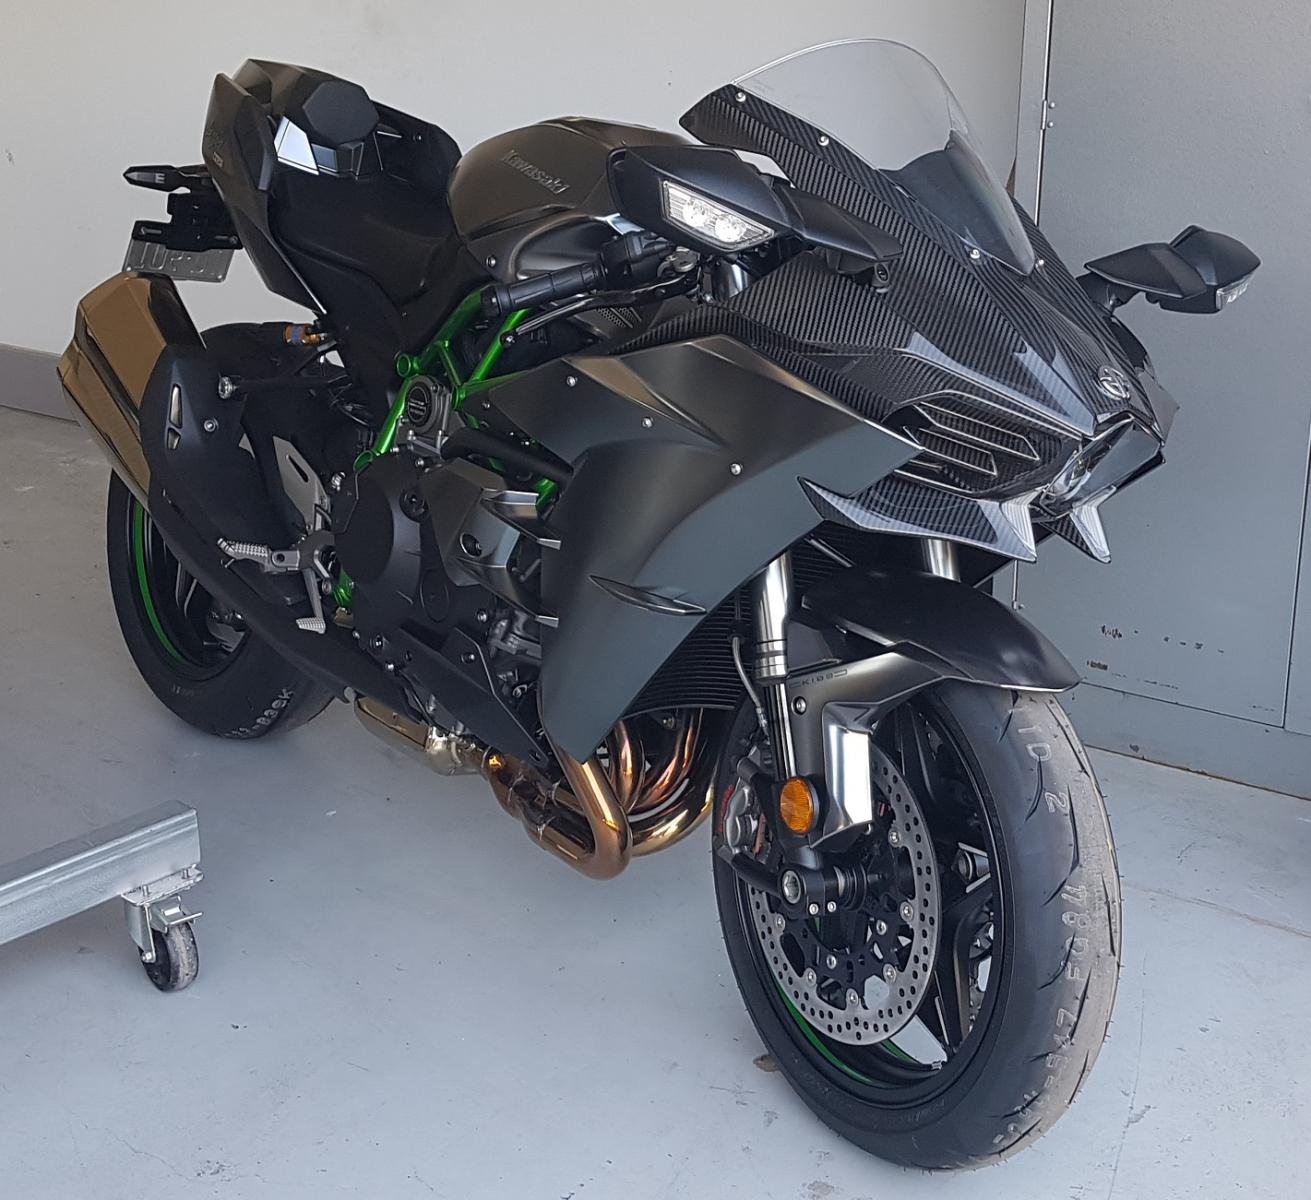
The kit decal sheet comes with the green color accents similar as seen in this photo, which differs from the photo in the previous photo (none). It might be that certain year models had color accents that were not applied to later or subsequent year models. Don't know for sure. I am not a Kawasaki expert at all. Builder's choice? I like the green accents. Breaks it up a bit. The side panel on the fairing seems to be a lighter shade of metallic gray, maybe silver. Decisions, decisions.
.jpg.9d697cf9f83e4aac28ec700d33357045.jpg)
-
While there are slight color variations that can be found in photos of the Ninja H2 on the net, this one particularly seems to match the color reference instructions with my model. Will most likely use this one as my guide for the remainder of the model.

-
Thanks Denis. It's something different. Unfamiliar parts to all of this requires careful study of the paint and decal placement guides. Just for fun, I searched the net for prices of used Ninja H2 bikes. Lowest price I found was just under $18,000 for a 2018 model and as much as $55,000 for a 2021! Can't imagine paying that much for a bike.
-
At this juncture, I need to take a detailed look at my Studio 27 carbon fiber decal sheet instructions. I am pretty sure I have carbon fiber decals that must go on some pieces now if not sooner. 🙂
-
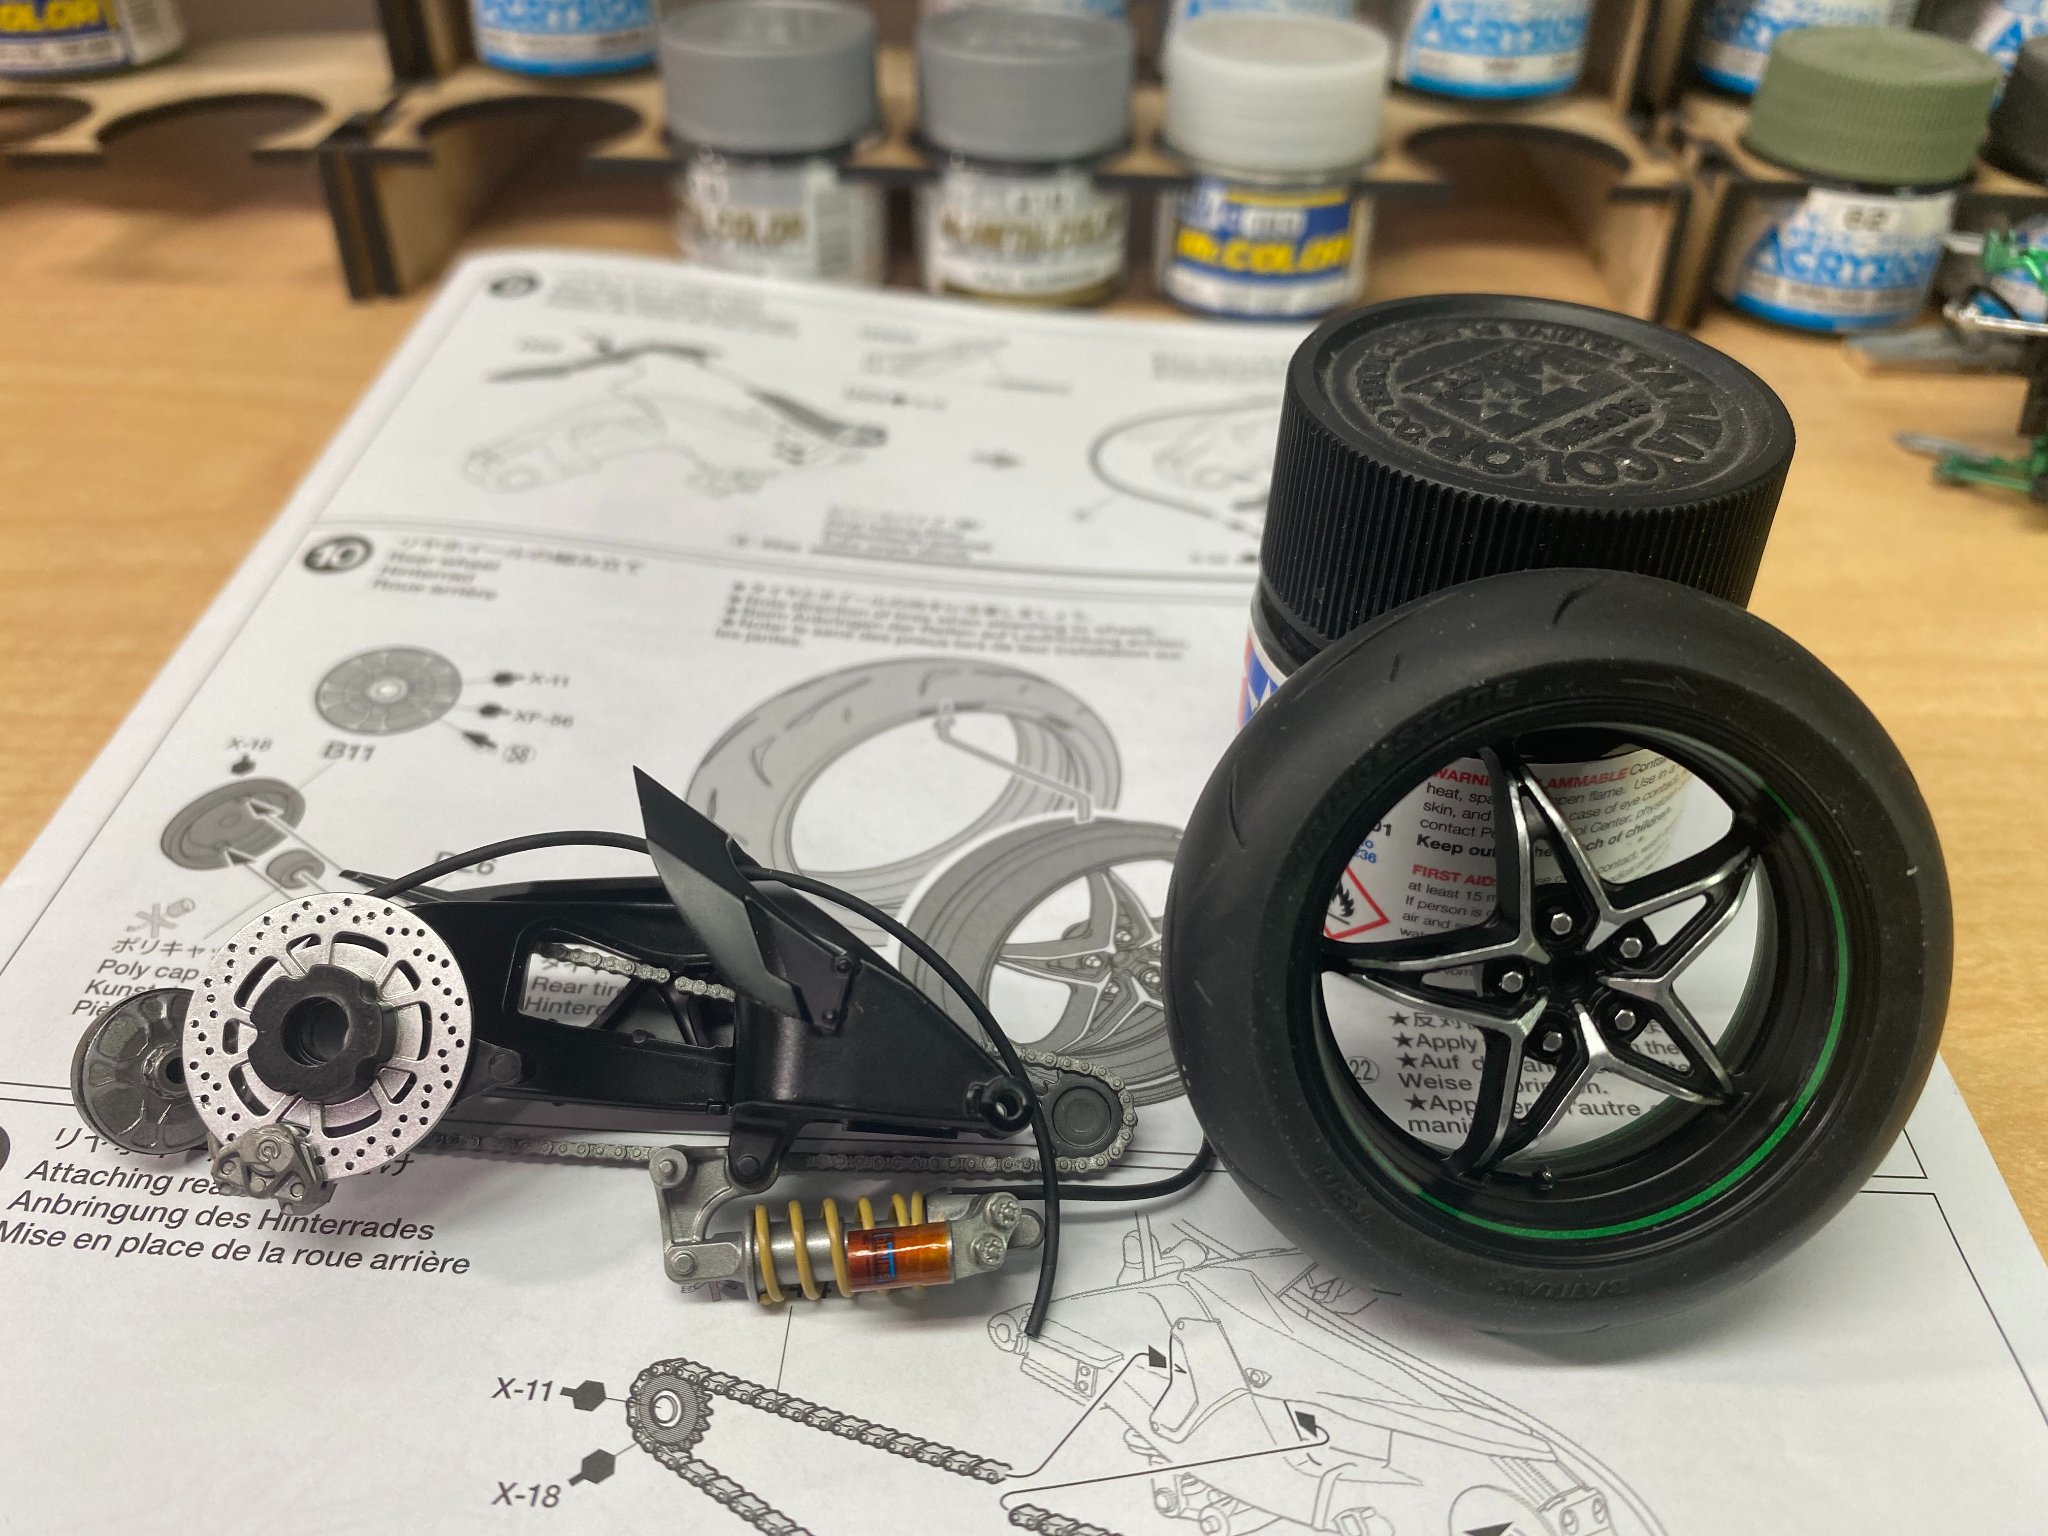
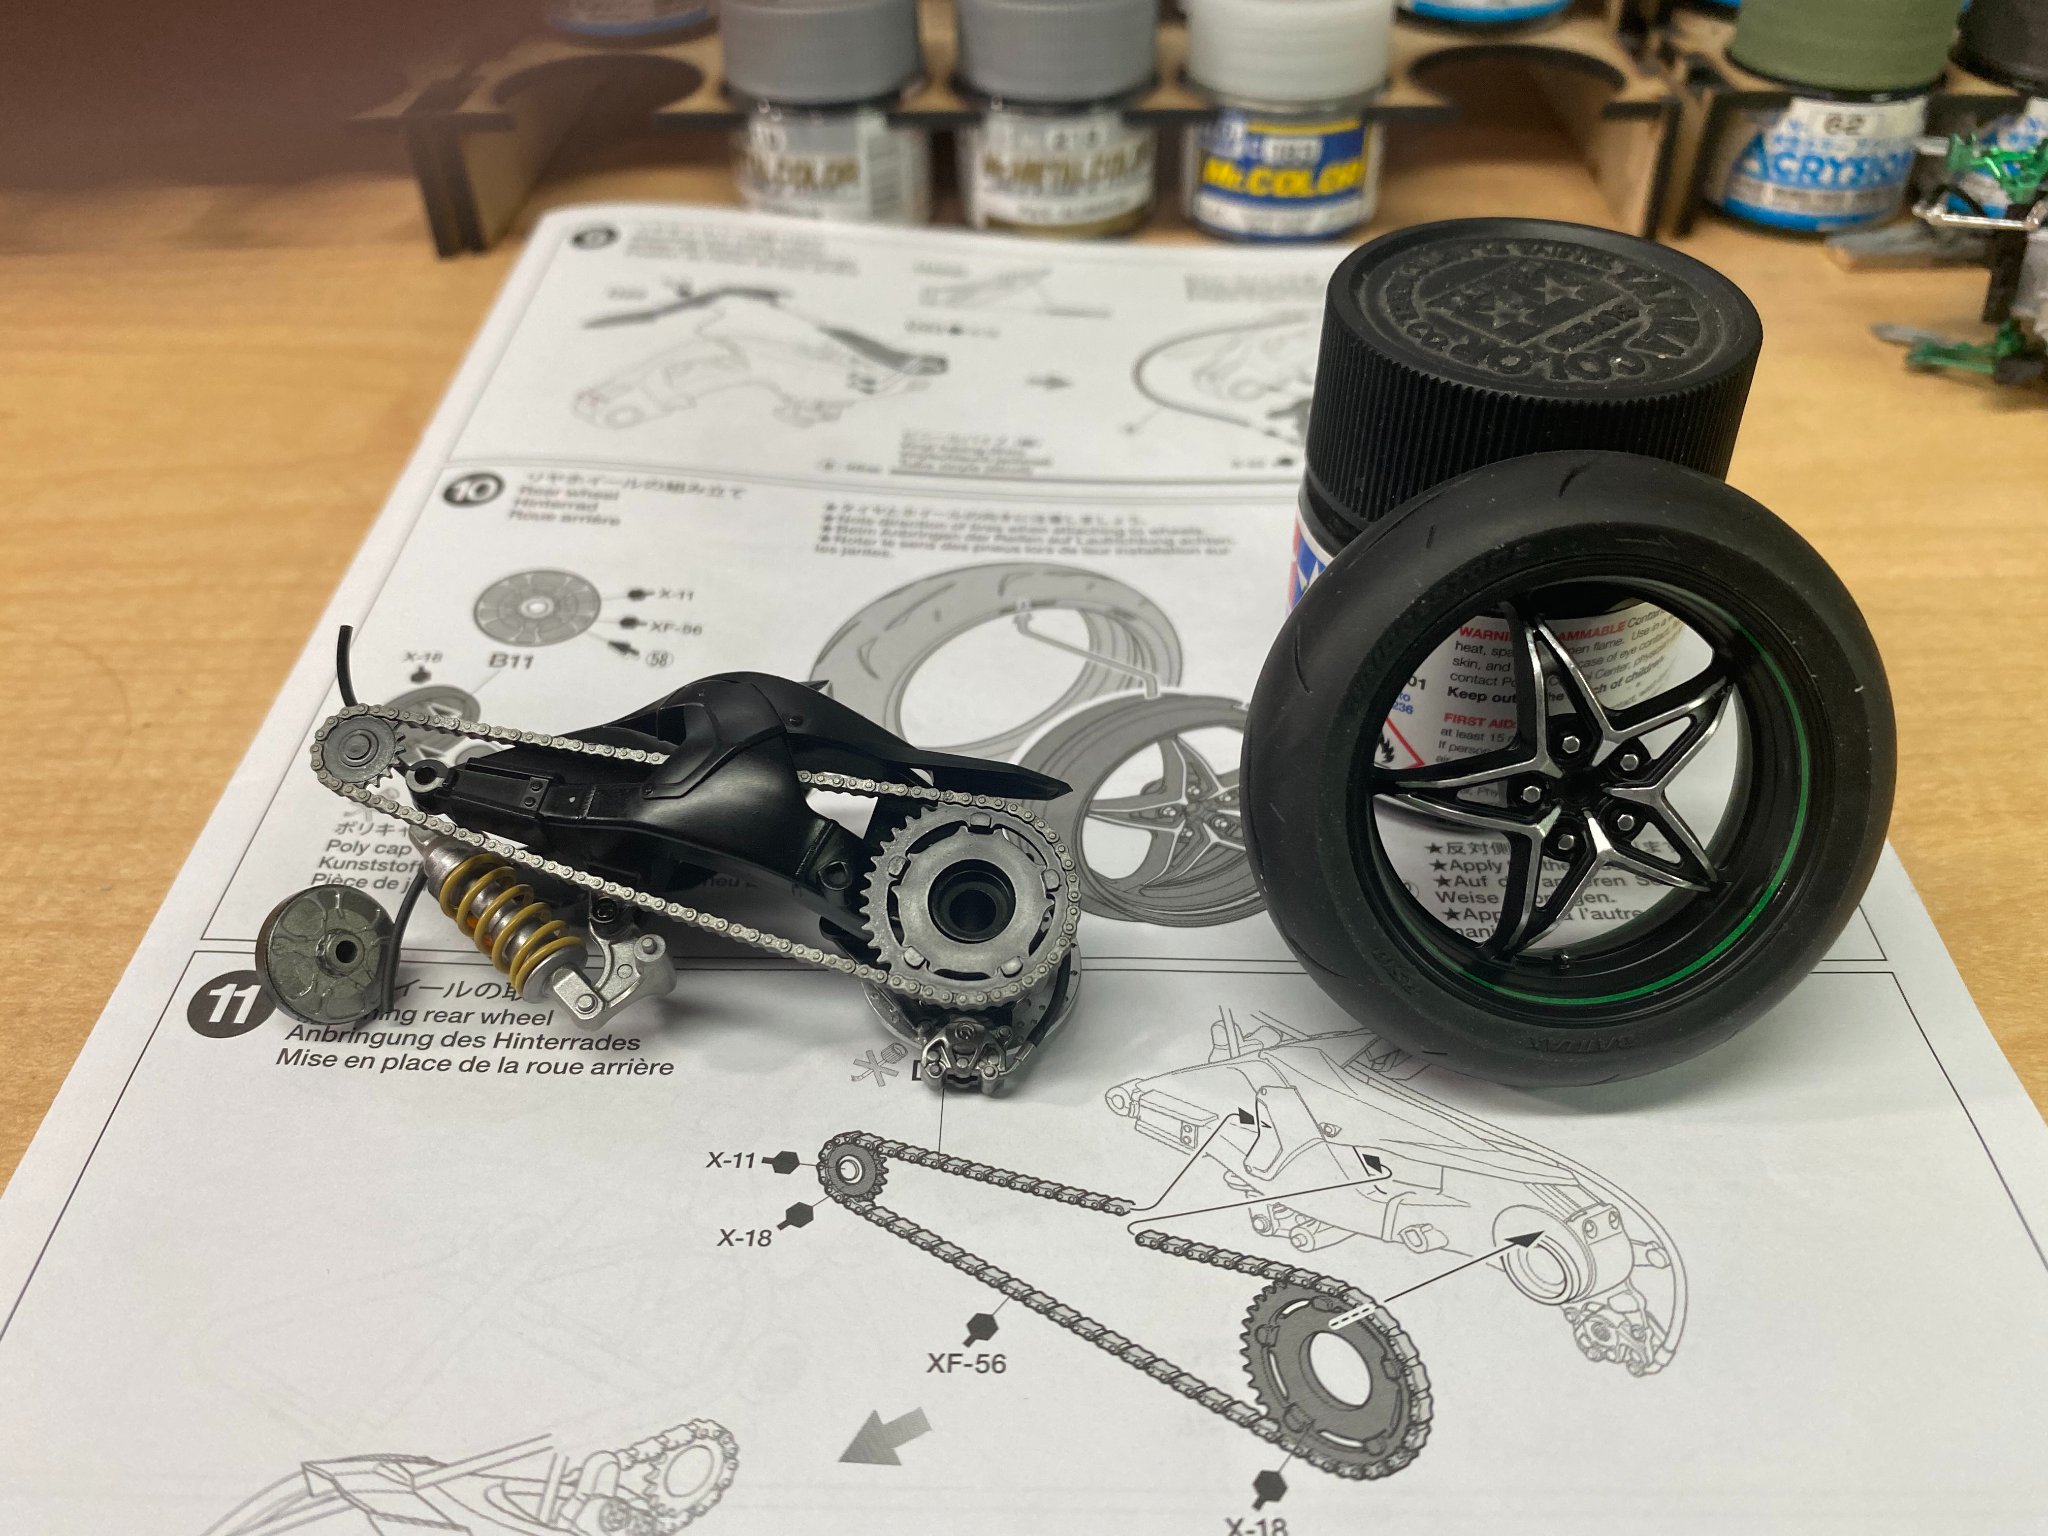
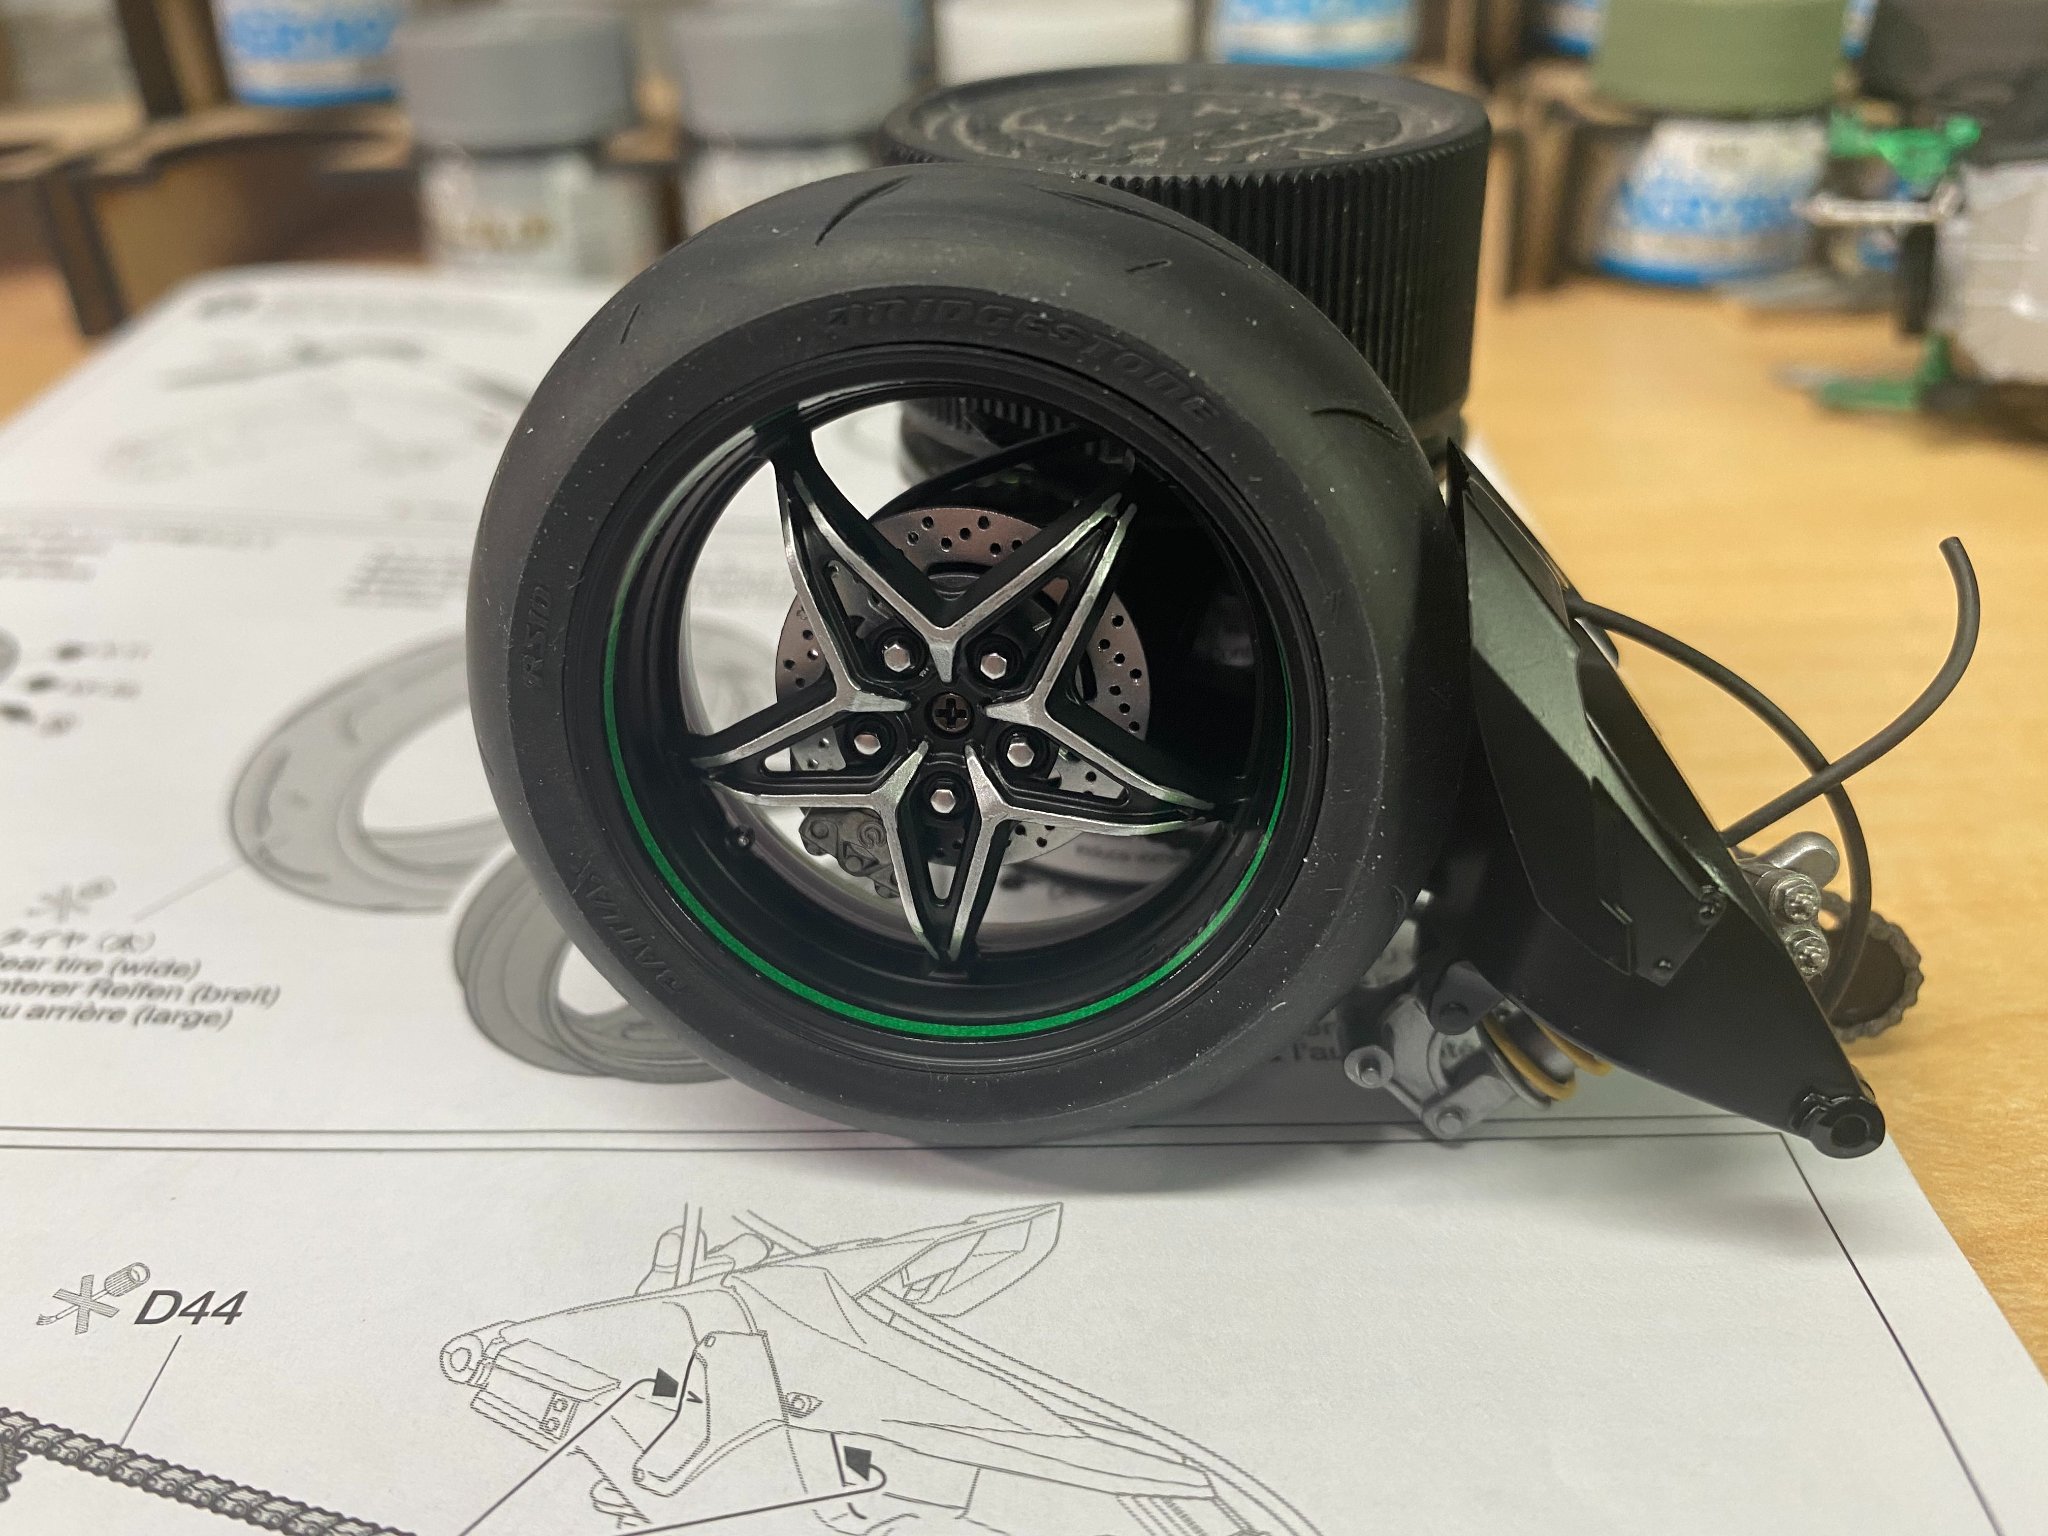
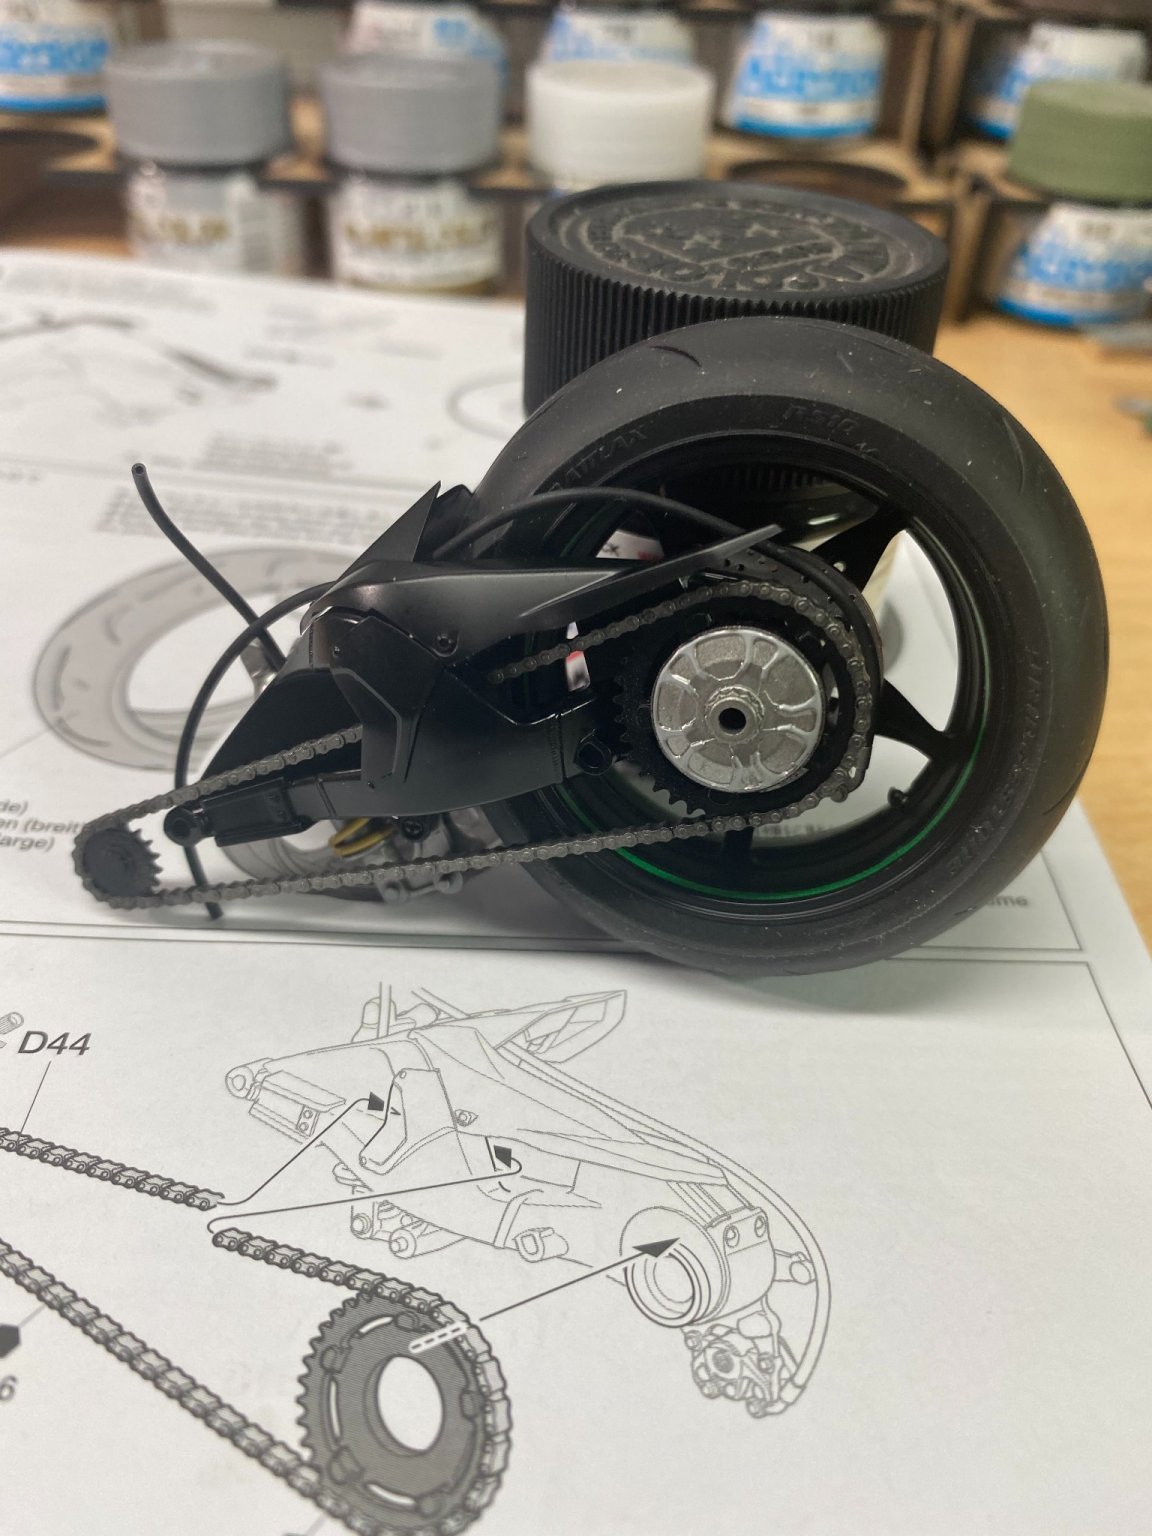
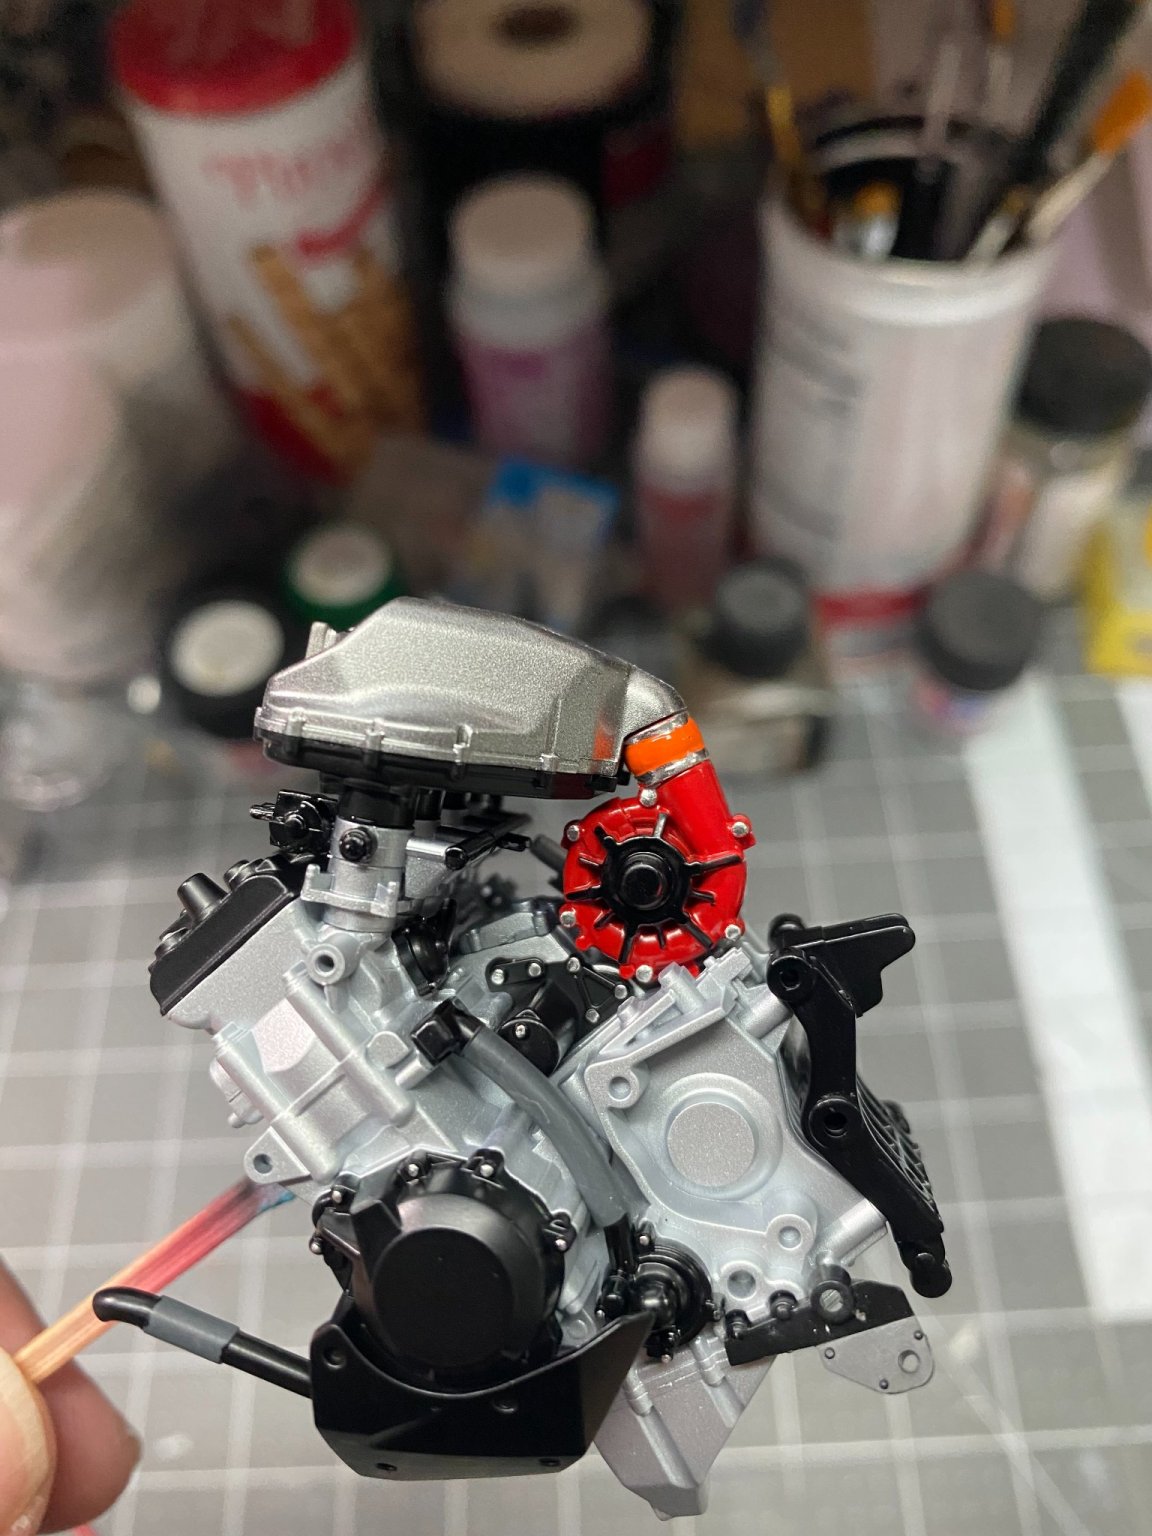
Moving ahead with the construction and painting of the swing arm, shock absorber, disk brake, drive chain, rear wheel and tire assemblies. There was quite a bit of detail painting as well as some decal work involved. All went together flawlessly albeit tedious due to the various steps involved in painting everything. All the lightening holes in the brake disks had to be drilled out one by one. Paints used are a combination of Tamiya, AK Extreme Metal, and even some Testors enamel for the chrome silver used on the wheel. Still need to add a couple of small decals in places.


- 85 replies
-
- 11
-
-
If you can't get anything, I'll send some over to you via priority mail. Won't take long at all. Post Office is just minutes from my house.
-
5/64 is an oddball. I have some 1/32 ply and 1/64 ply that I used for cowl skins on RC aircraft models I used to build, but I don't recall ever buying anything in 5/64 size. How much exactly do you need?
-
Jack It just so happens I have a 12" x 48" piece of 1/8" lite ply. I can cut off a 12" piece of it and send it to you if that will help. Craig
-
The young man posted these photos on his Facebook page
-
It will be a while. Not in a rush. Lots to do, need more research first.
-
I saw Bill Belichick in the stands watching the Bucs - Packers game this afternoon while Tom Brady lead Tampa Bay to the Super Bowl!

-
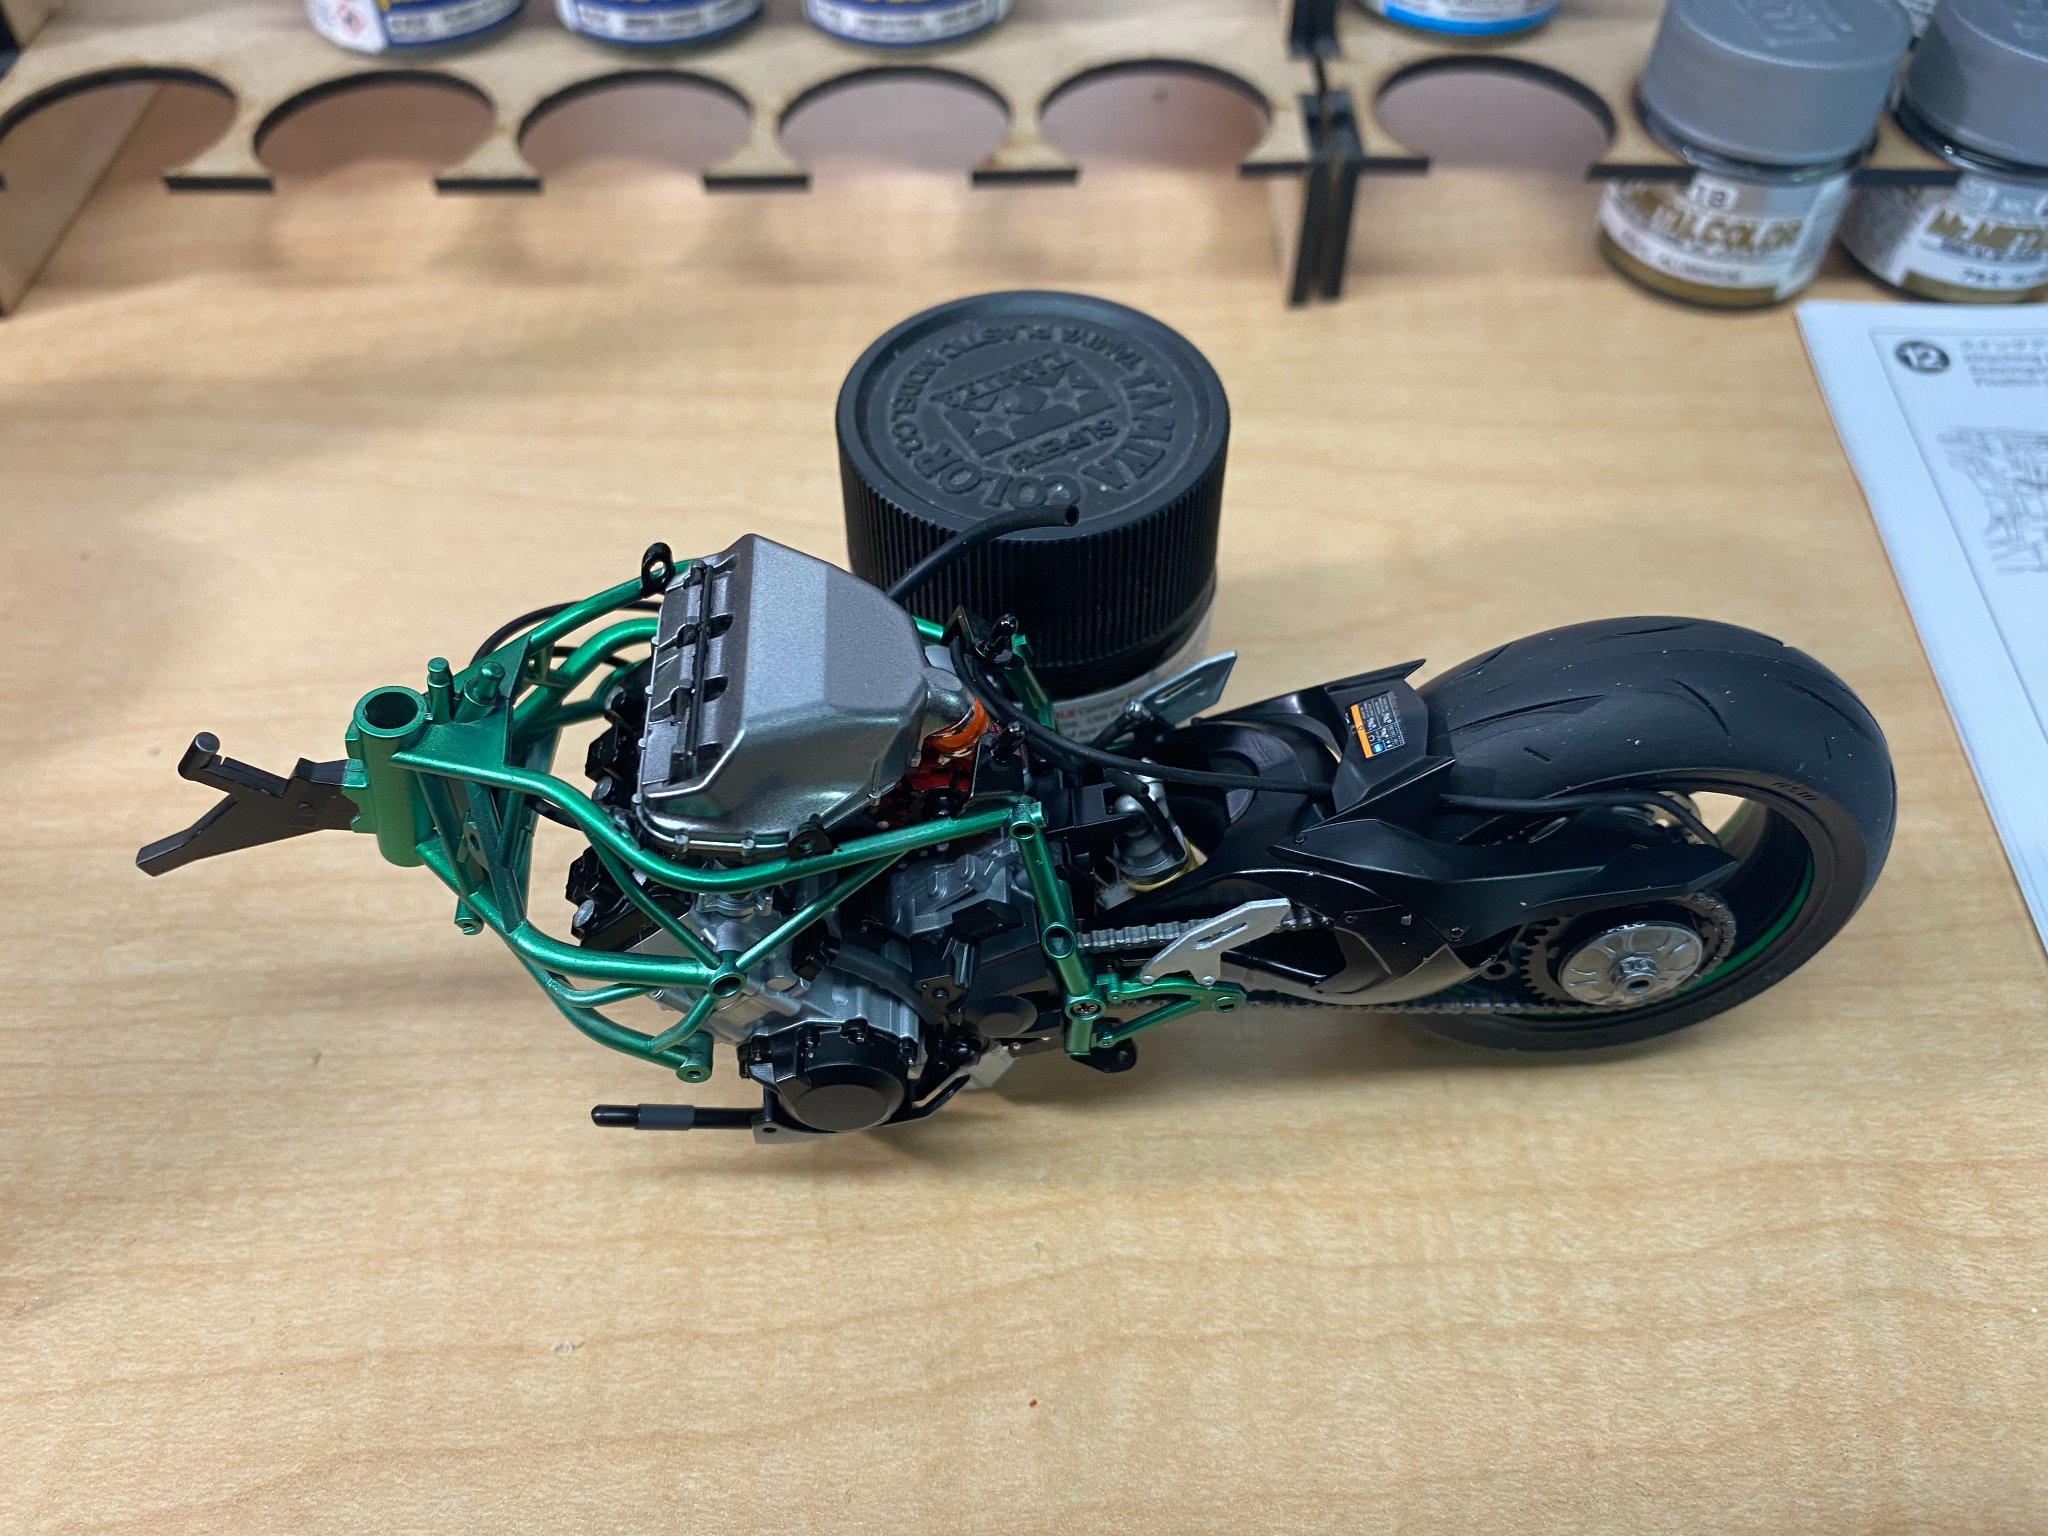
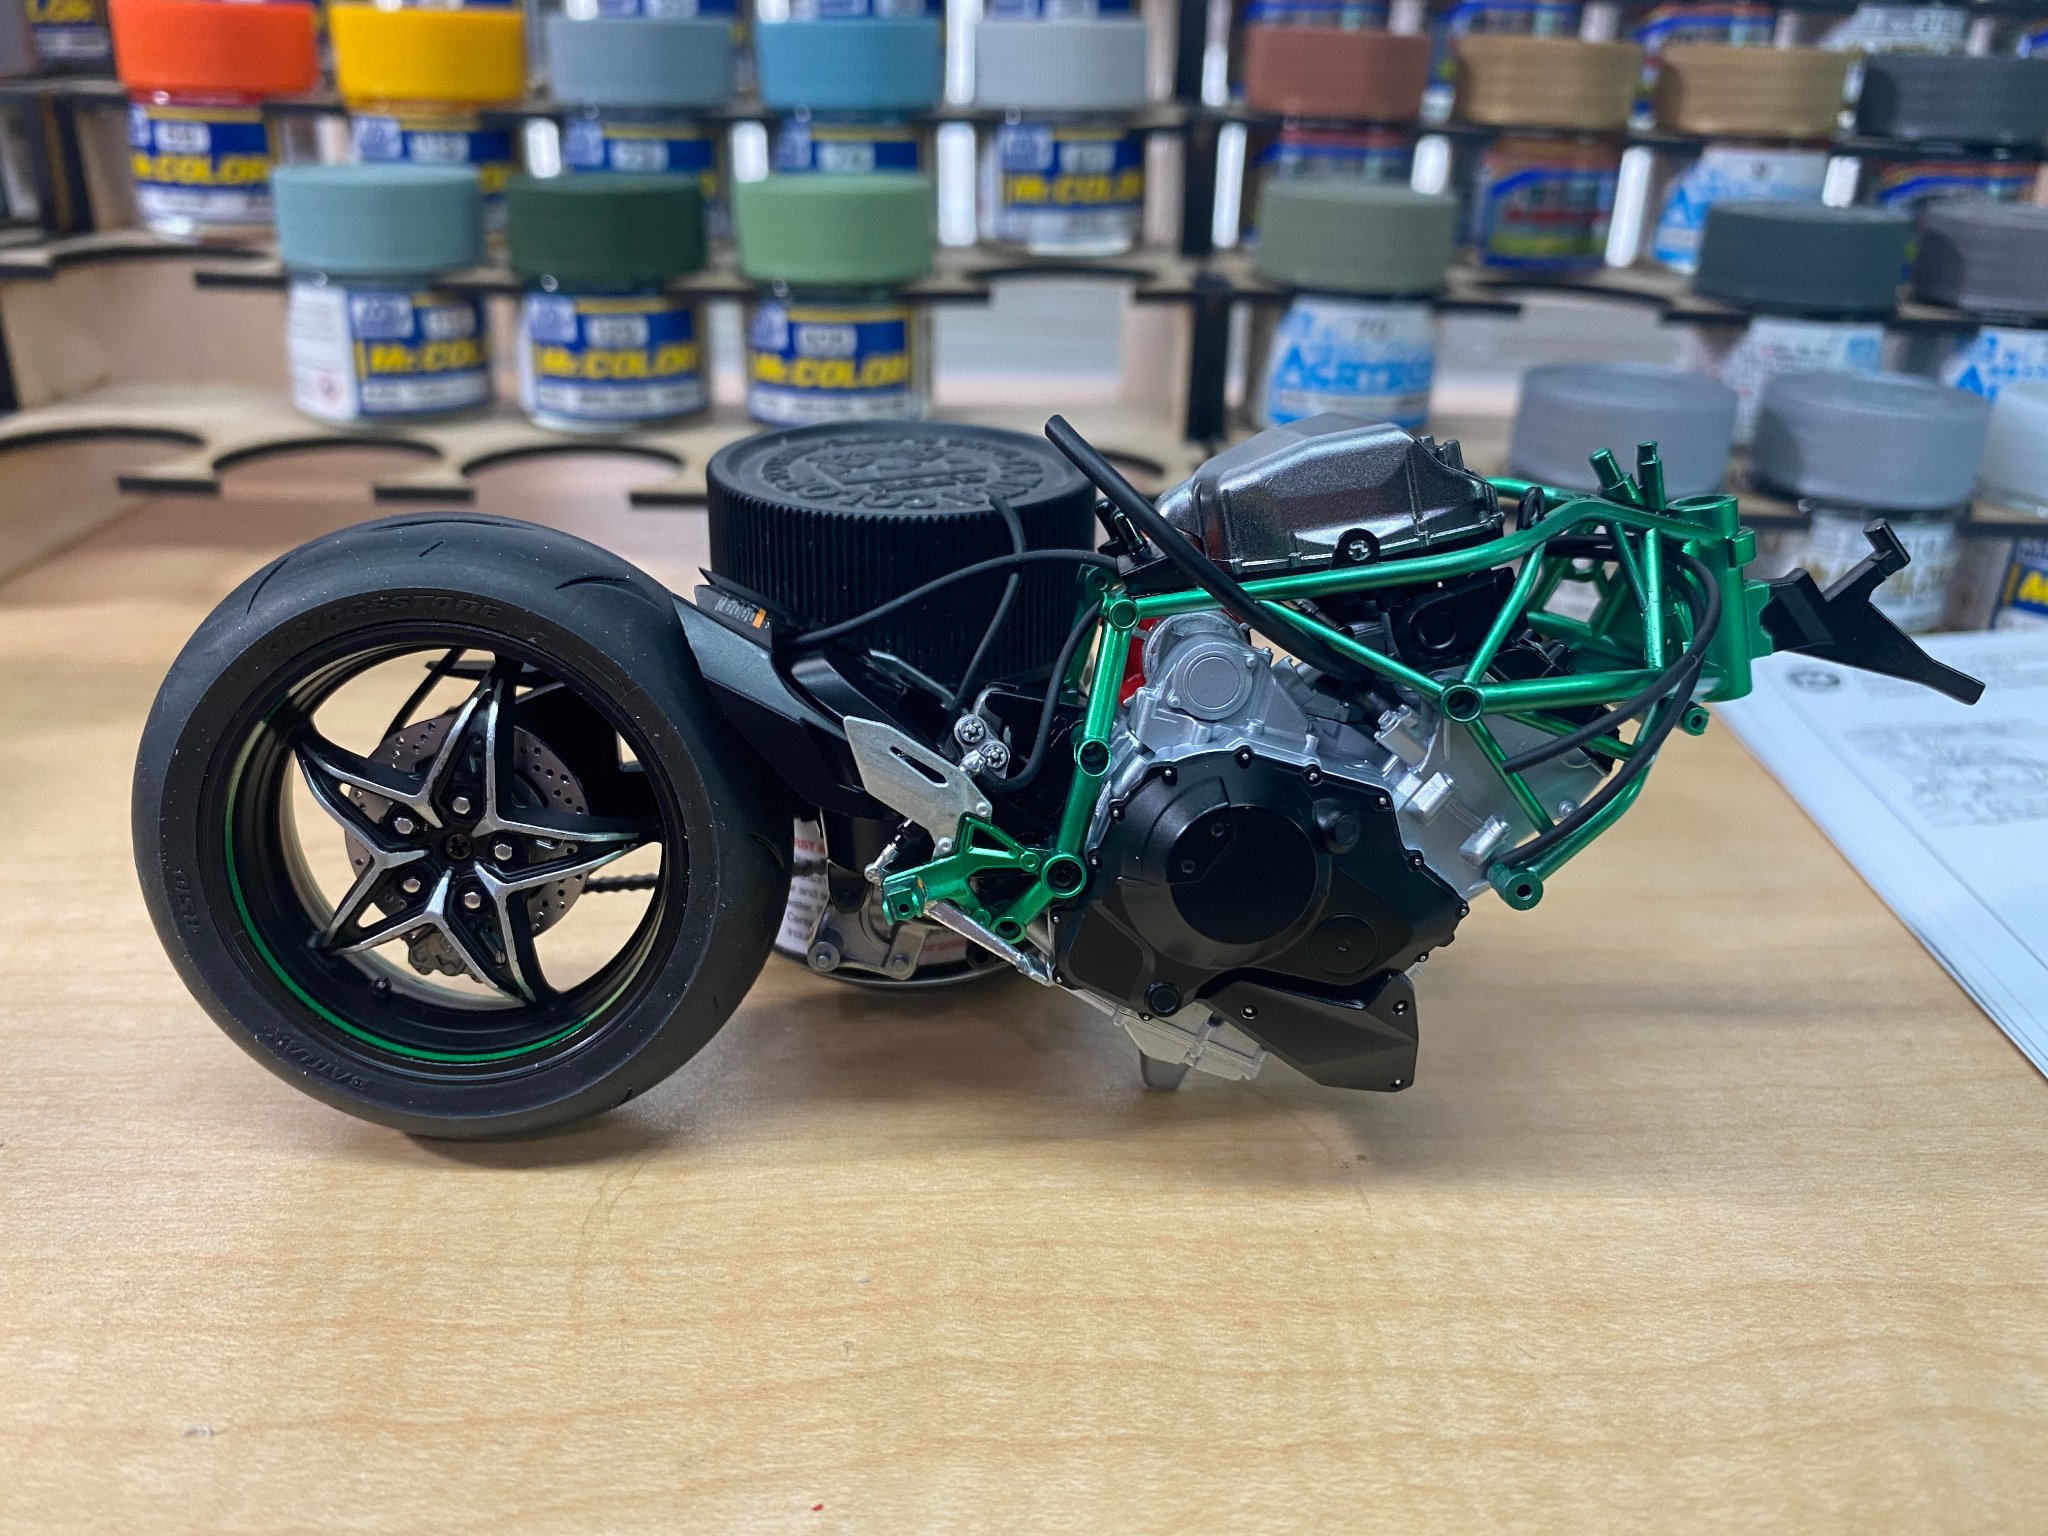
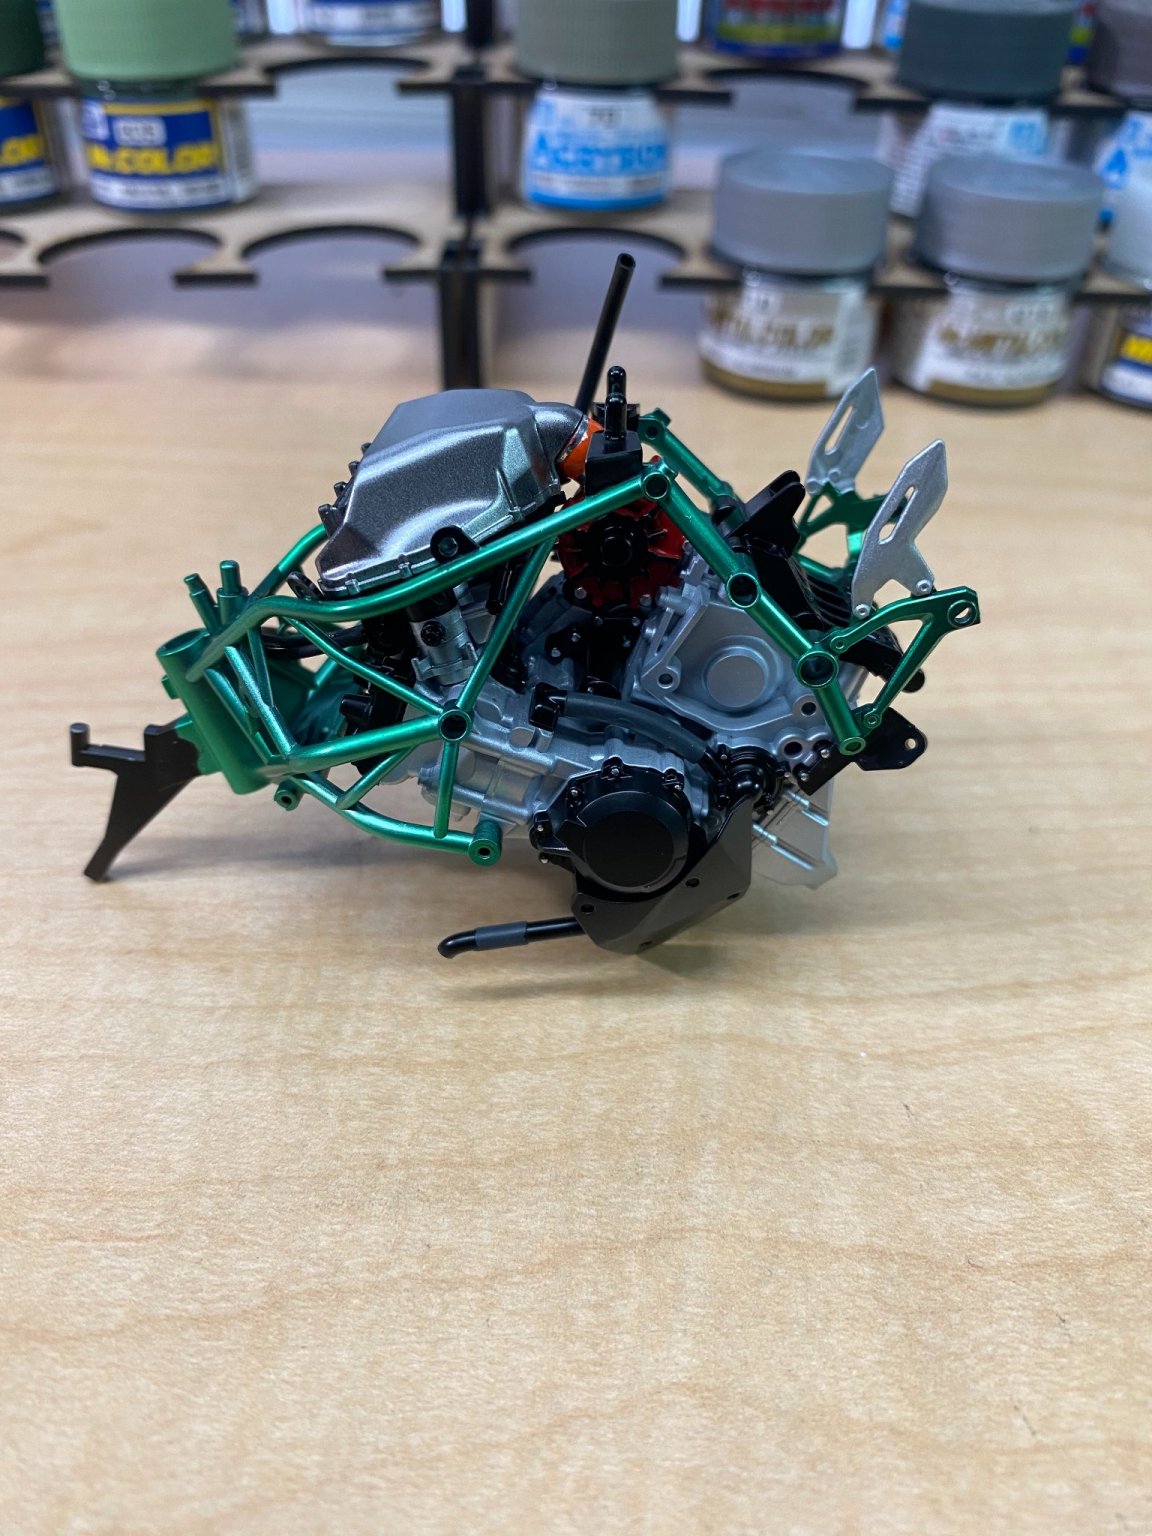
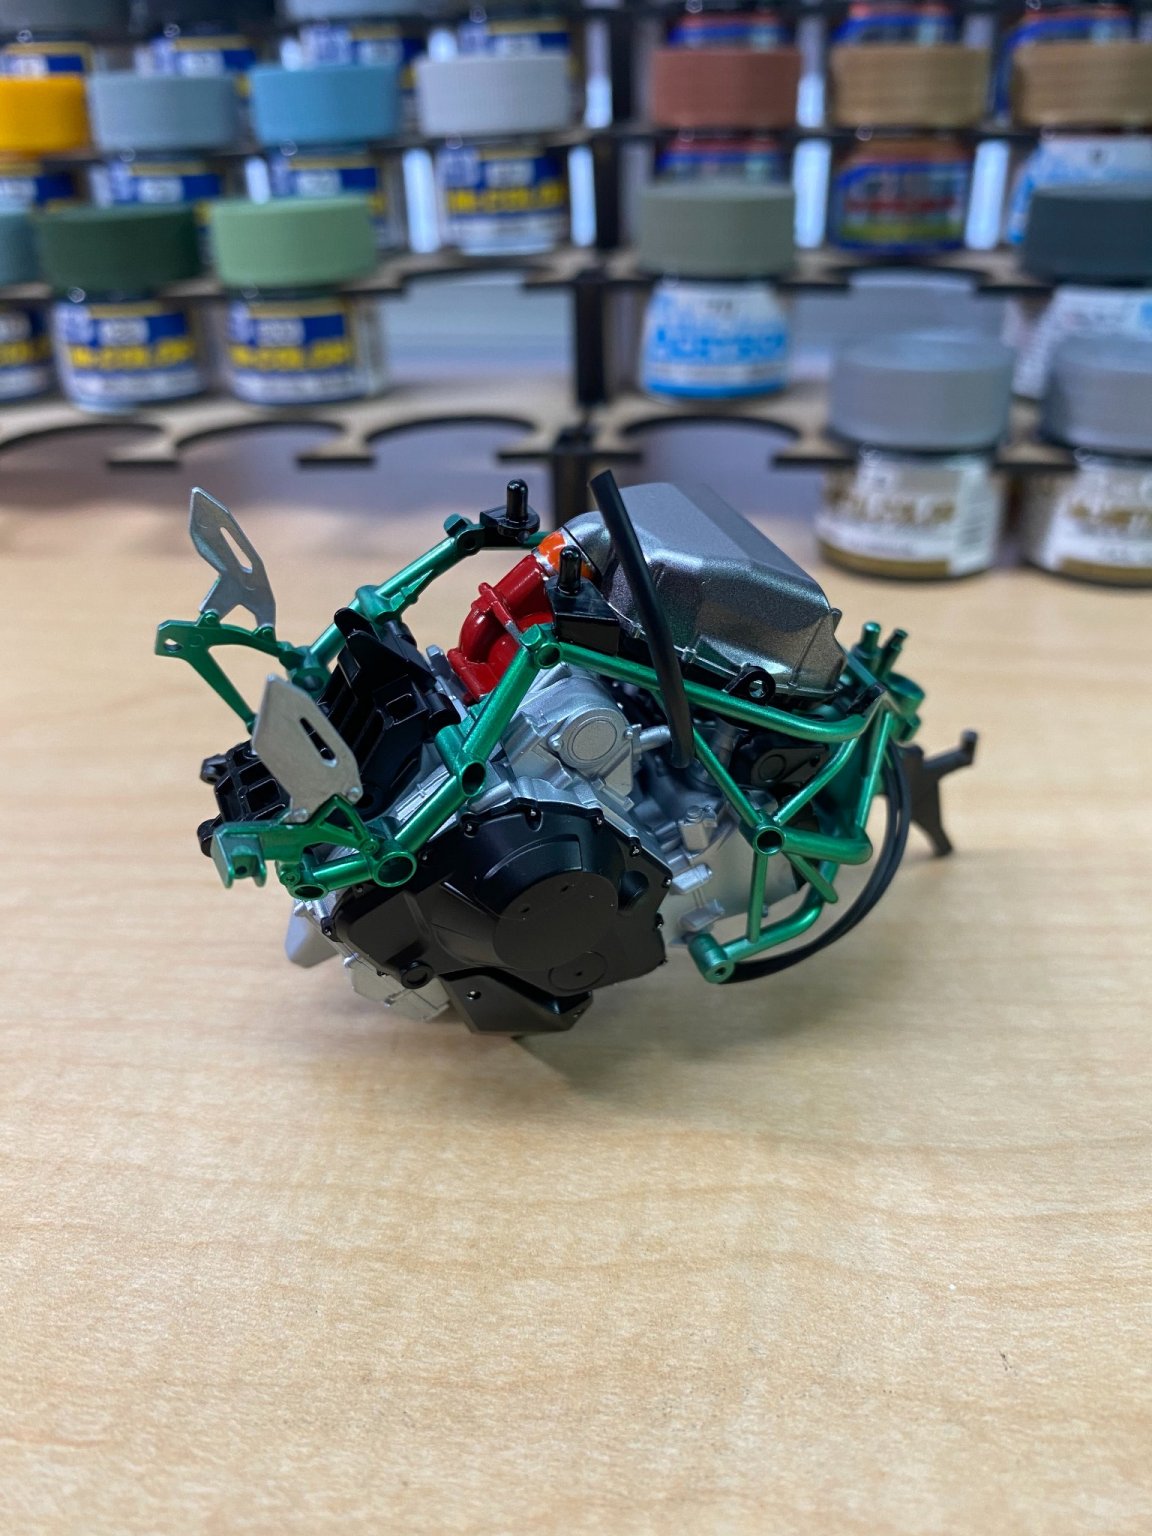
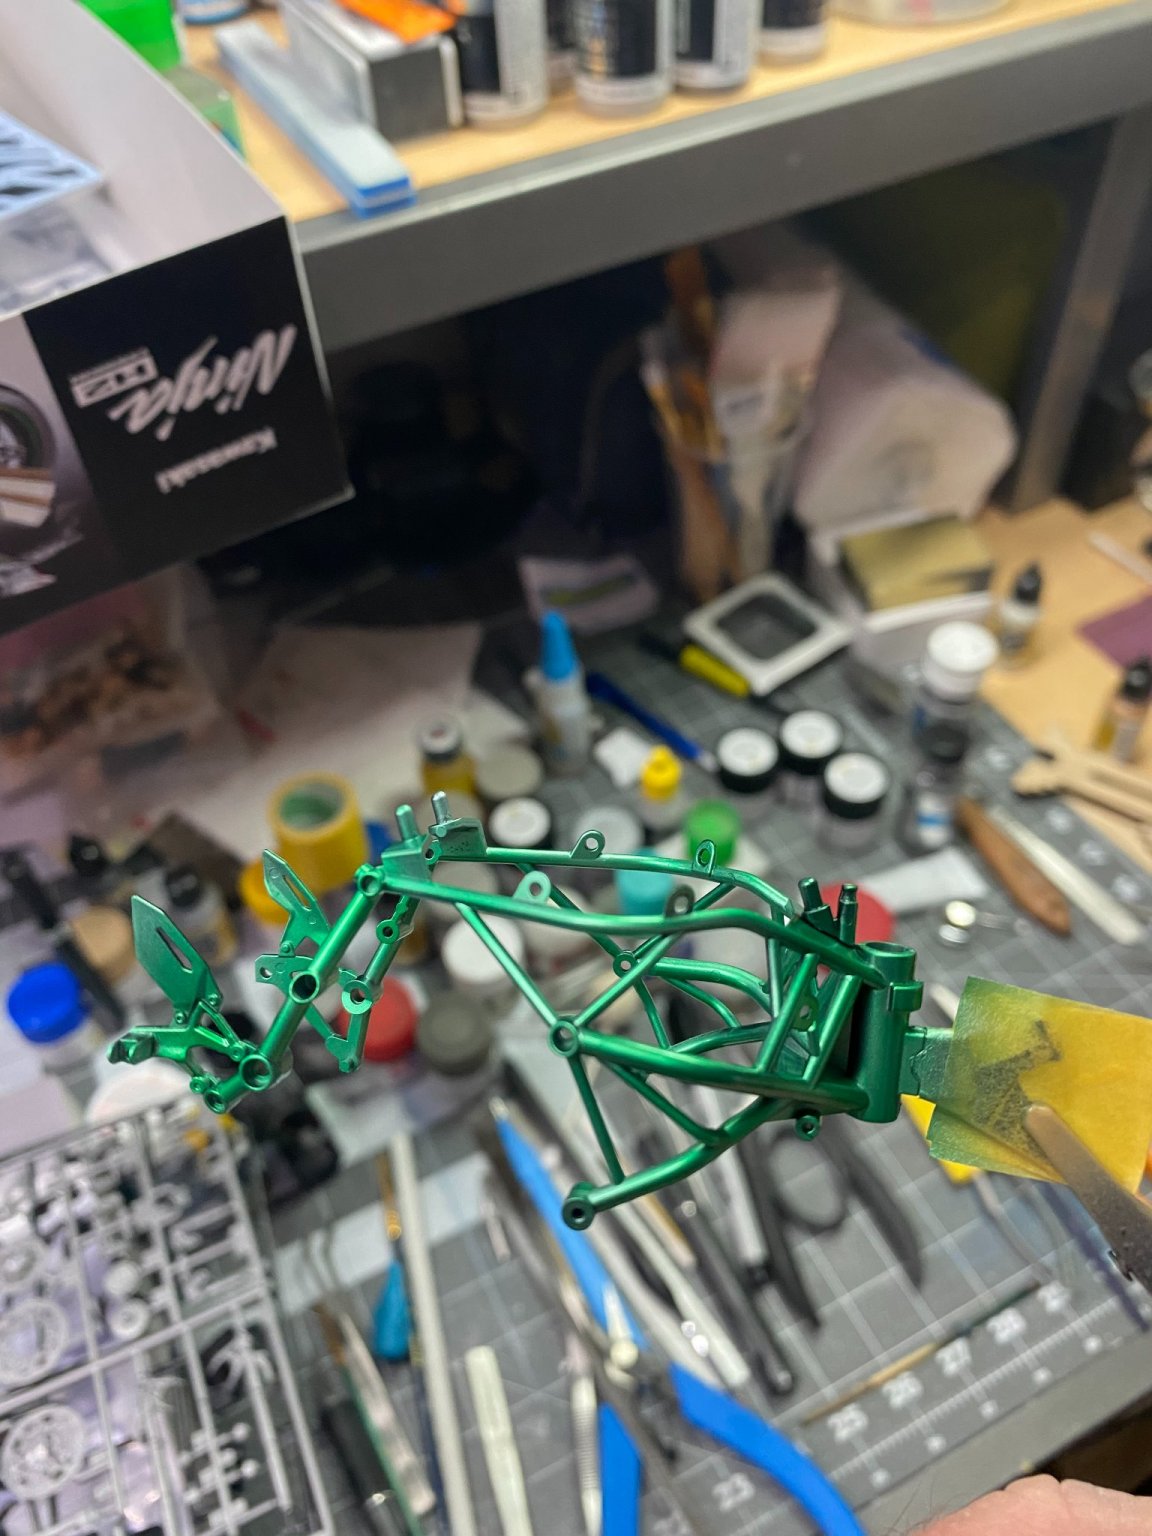
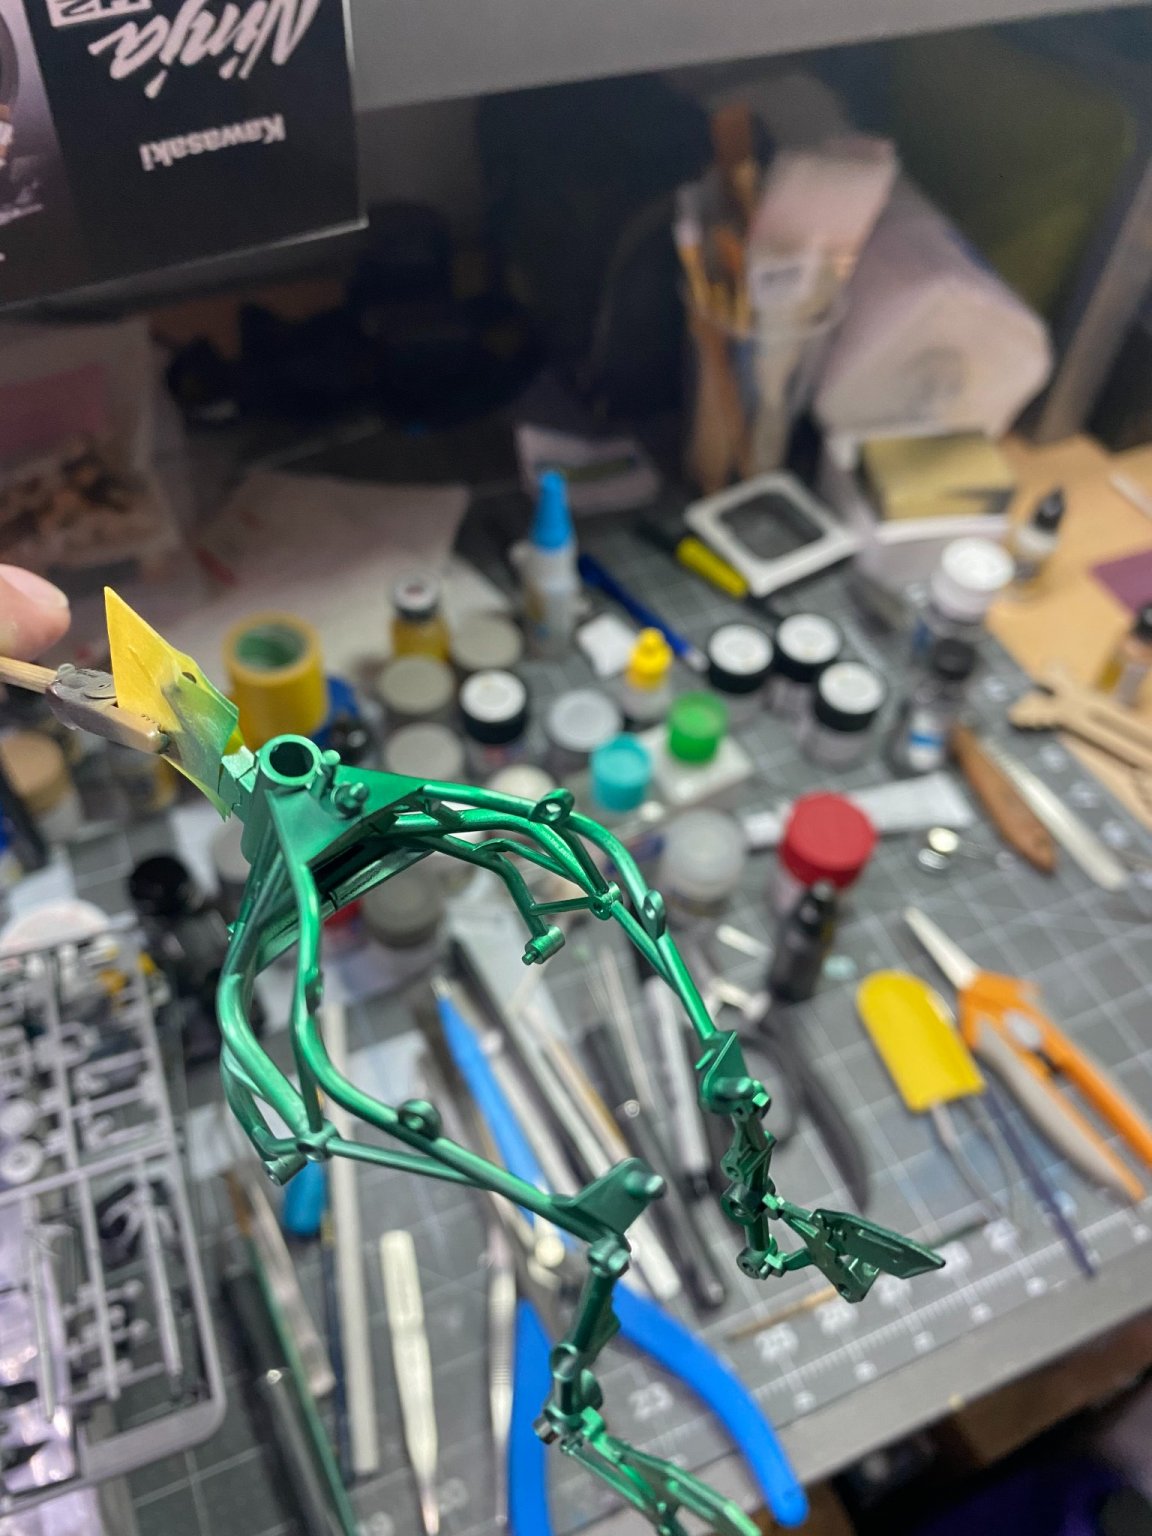
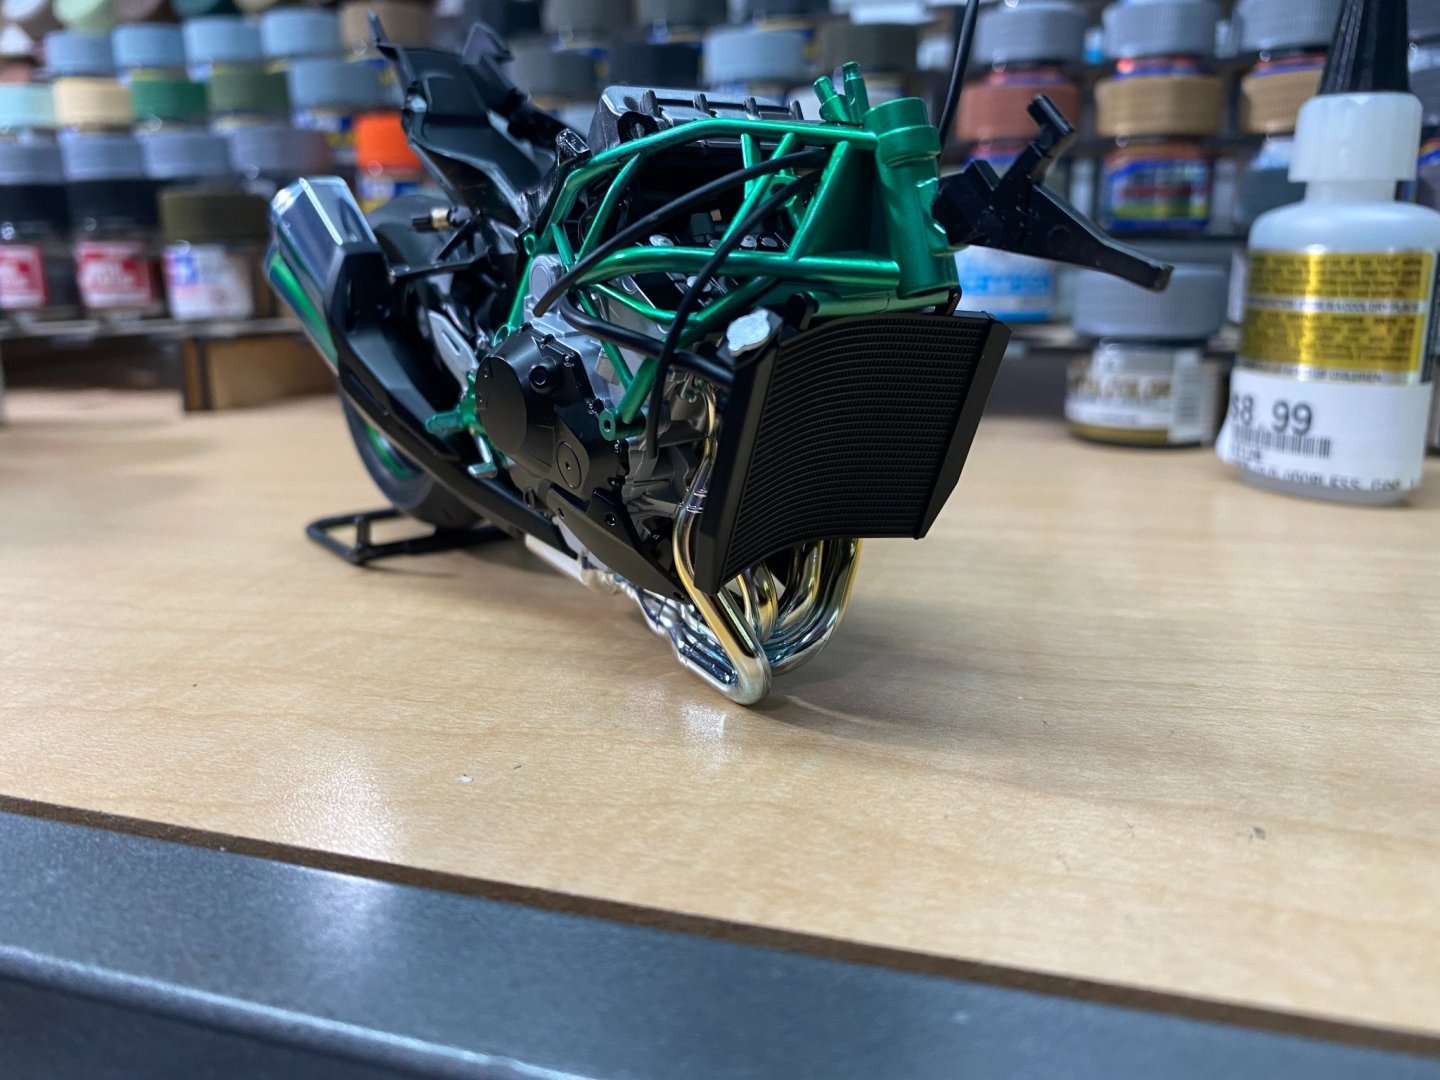
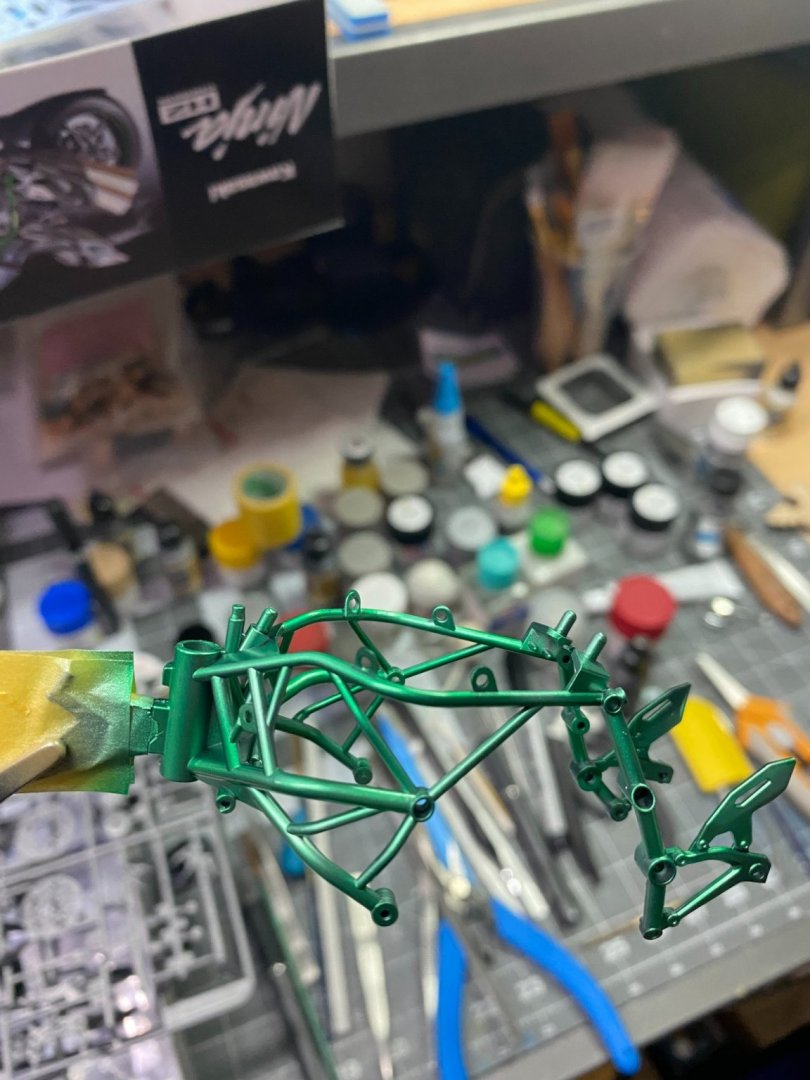
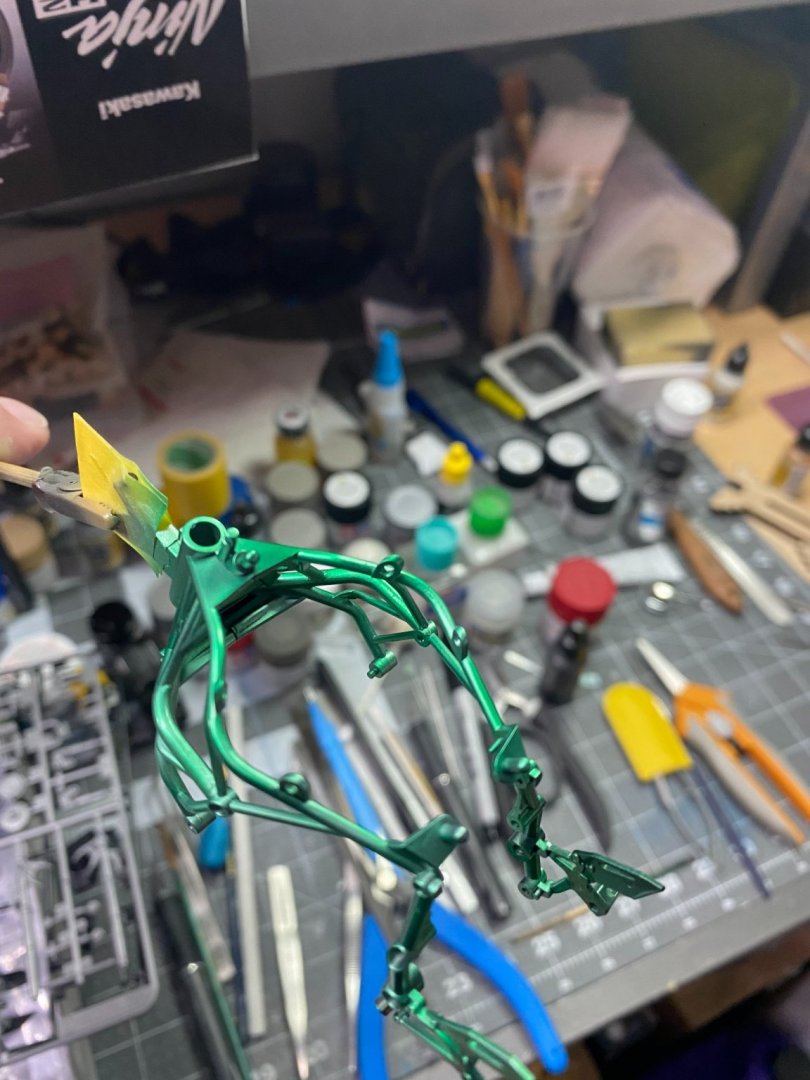
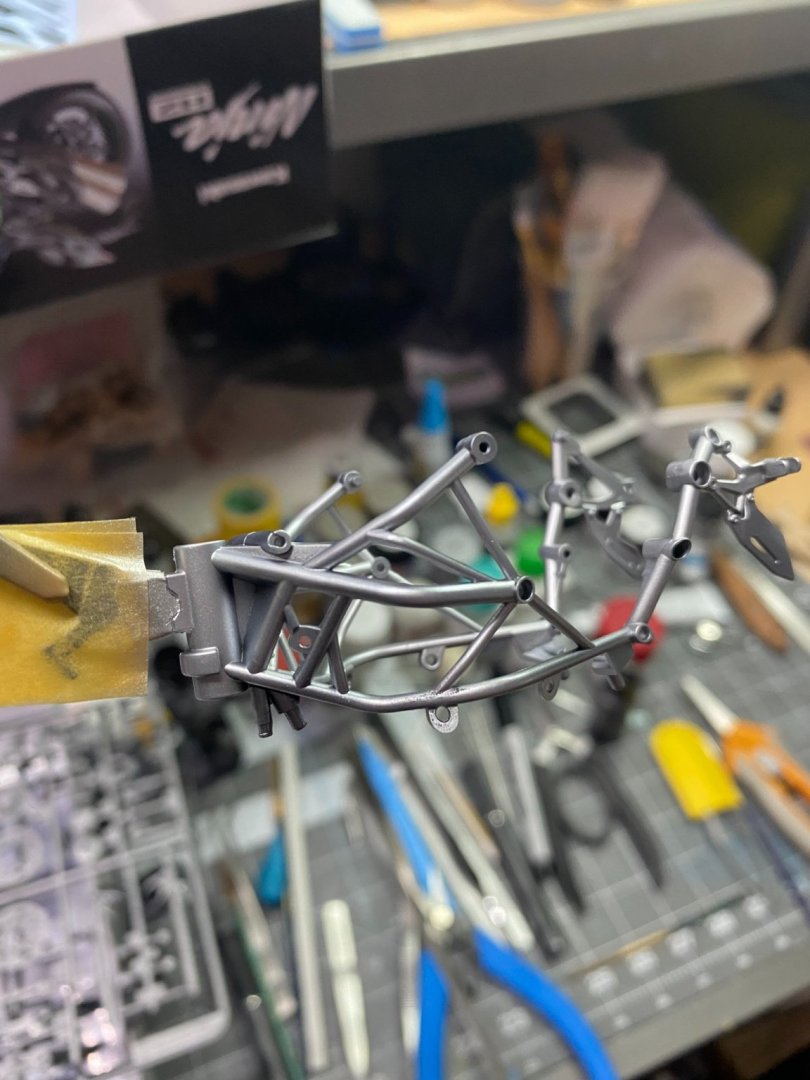
The transparent green over the silver. There will be some semi gloss black details brush painted unto the frame once the green has cured.

- 85 replies
-
- 12
-
-
I am thinking about starting my own YouTube channel for scale modeling. Will need to remake my space for that purpose and need lighting and proper video cameras. If any of you have any experience and suggestions for proper video camera equipment and lighting, I am all ears. 🙂
-
After assembling the two frame halves, the frame is given a black primer base, then a coat of white aluminum. The final frame color will be a transparent green over the silver. Pressing on.
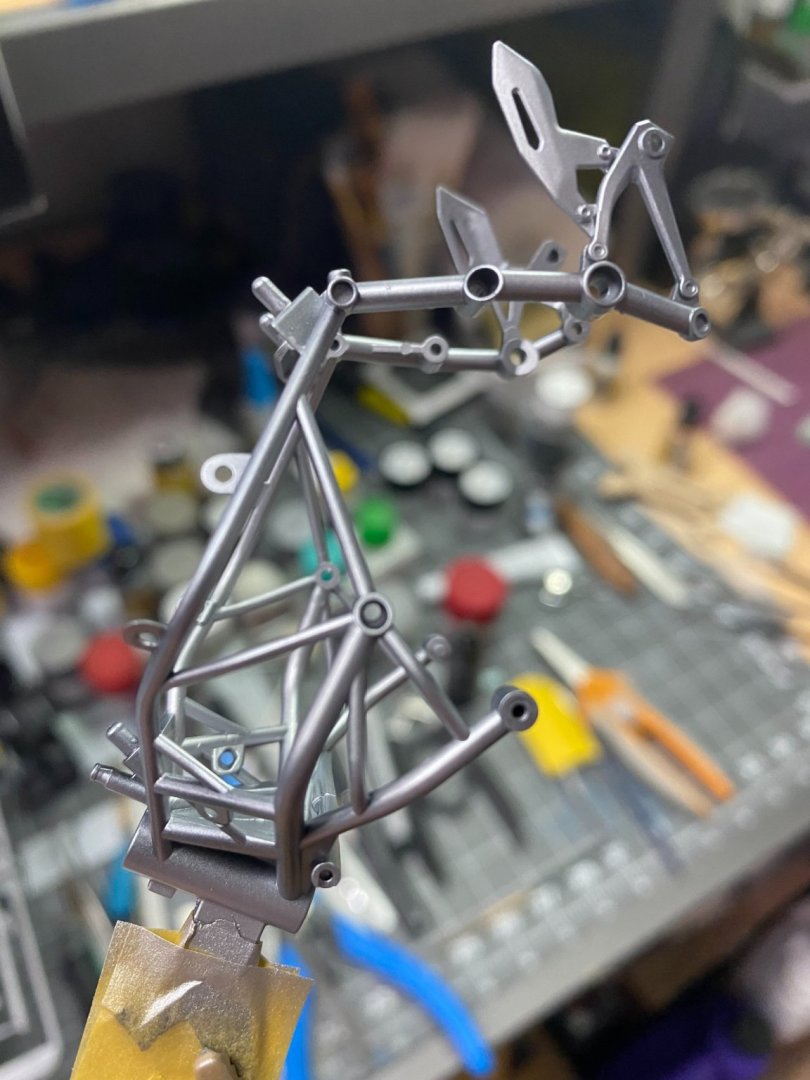
- 85 replies
-
- 10
-
-
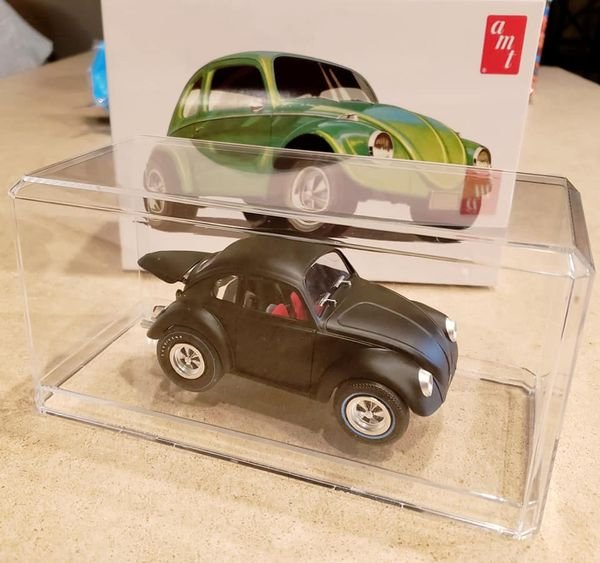
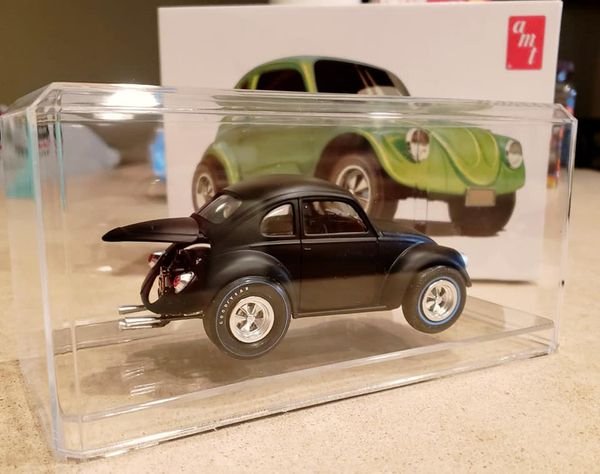
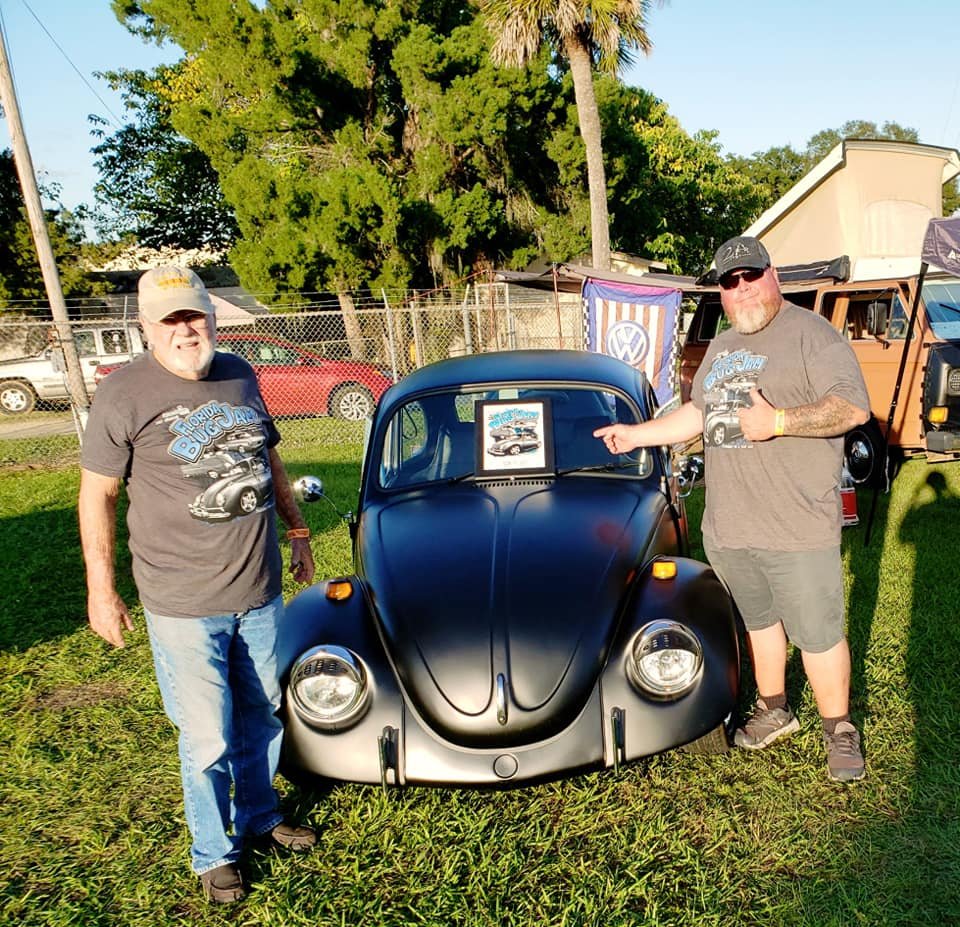
The young fellow on the right is my son's best friend. They went to school together from elementary through high schools. On the left is his dad. The Volkswagen is their project car and they take it to car shows/Volkswagen gatherings in the southeast USA. The young man practically grew up at my house. He was who I had in mind when I built the Volkswagen kit. I presented it to him today and he was thrilled.
- 28 replies
-
- 11
-
-