CDW
-
Posts
7,755 -
Joined
-
Last visited
Content Type
Profiles
Forums
Gallery
Events
Everything posted by CDW
-
 Did the Buccaneer typically fly with fighter escort? No defensive weapons on my Buc version.
 -
Man that's a lot of nice hardware on that deck!
-
I found and ordered that kit on Ebay from a seller in Estonia...$38 plus postage. Now I'm thinking about this to go with it: Black Dog 1/48 Engine & Folding Tail for Wessex UH-5 Helicopter (Italeri) A48172 | eBay
-
Another must-have RN aircraft is the Westland Wessex.
-
Weird how that is about ugly aircraft. Sometimes ugly makes them all the more attractive for some odd reason. Unique for sure as I can't think of anything else that looks like a Gannet, and the sheer size of it. Maybe the Wyvern is kinda-sorta like it. It's another ugly aircraft that's beautiful at the same time.
-
I already dropped a preorder on it at Hannants after it was posted here.
-
Be still my heart.
-
Here's a way to get a RN Phantom done without searching everywhere for the old Hasegawa kit: Hasegawa / Revell FG-1 Phantom Royal Navy 1:48 - build review - Scale Modelling Now Check out these super-nice landing gear for it: F-4 Phantom FG.1 Landing Gear For 1/48th Scale British Model SAC 48081 810121972687 | eBay
-
Trumpeter does a 1:48 Sea Vixen too. Not sure how it compares with the Airfix kit. Would need to read up on it. Yeah, I was thinking the Hasegawa RN Phantom is the only one I've seen in 1:48 and that was a LONG time ago.
-
Thanks OC. I love those RN Phantoms.
-
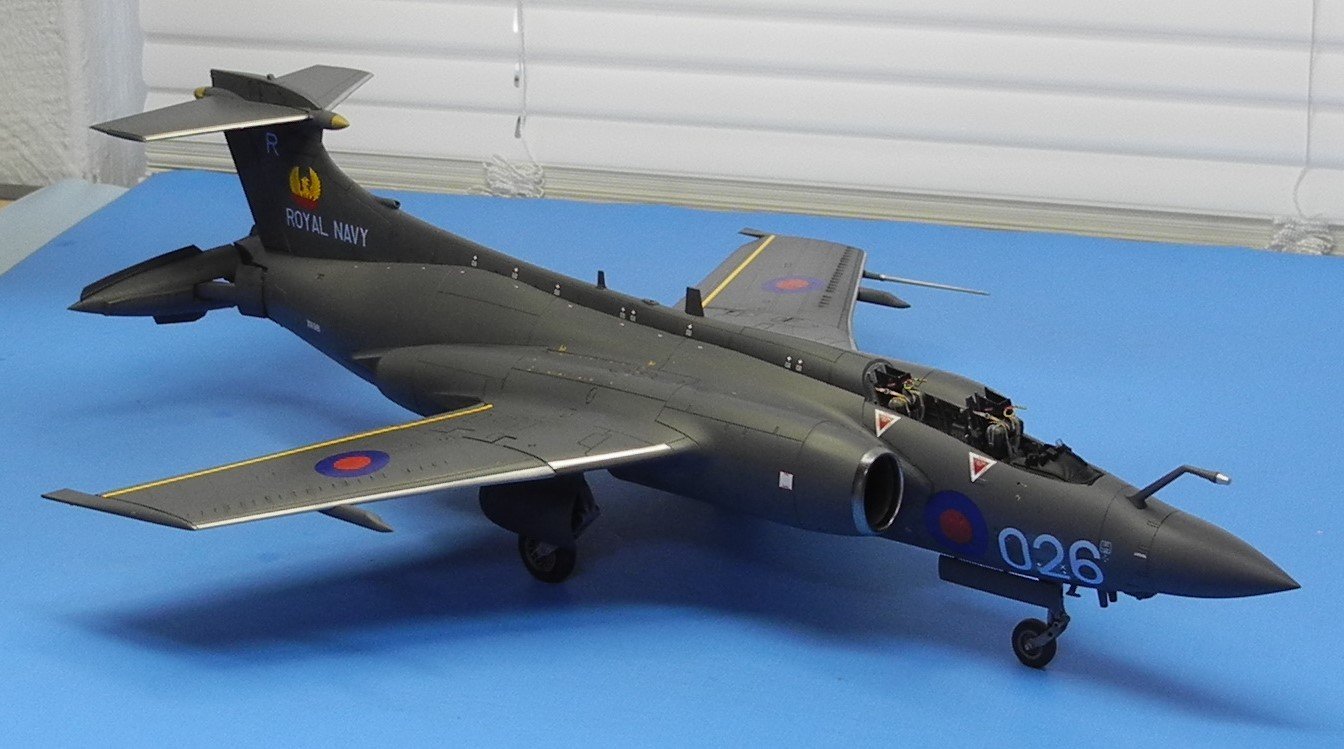
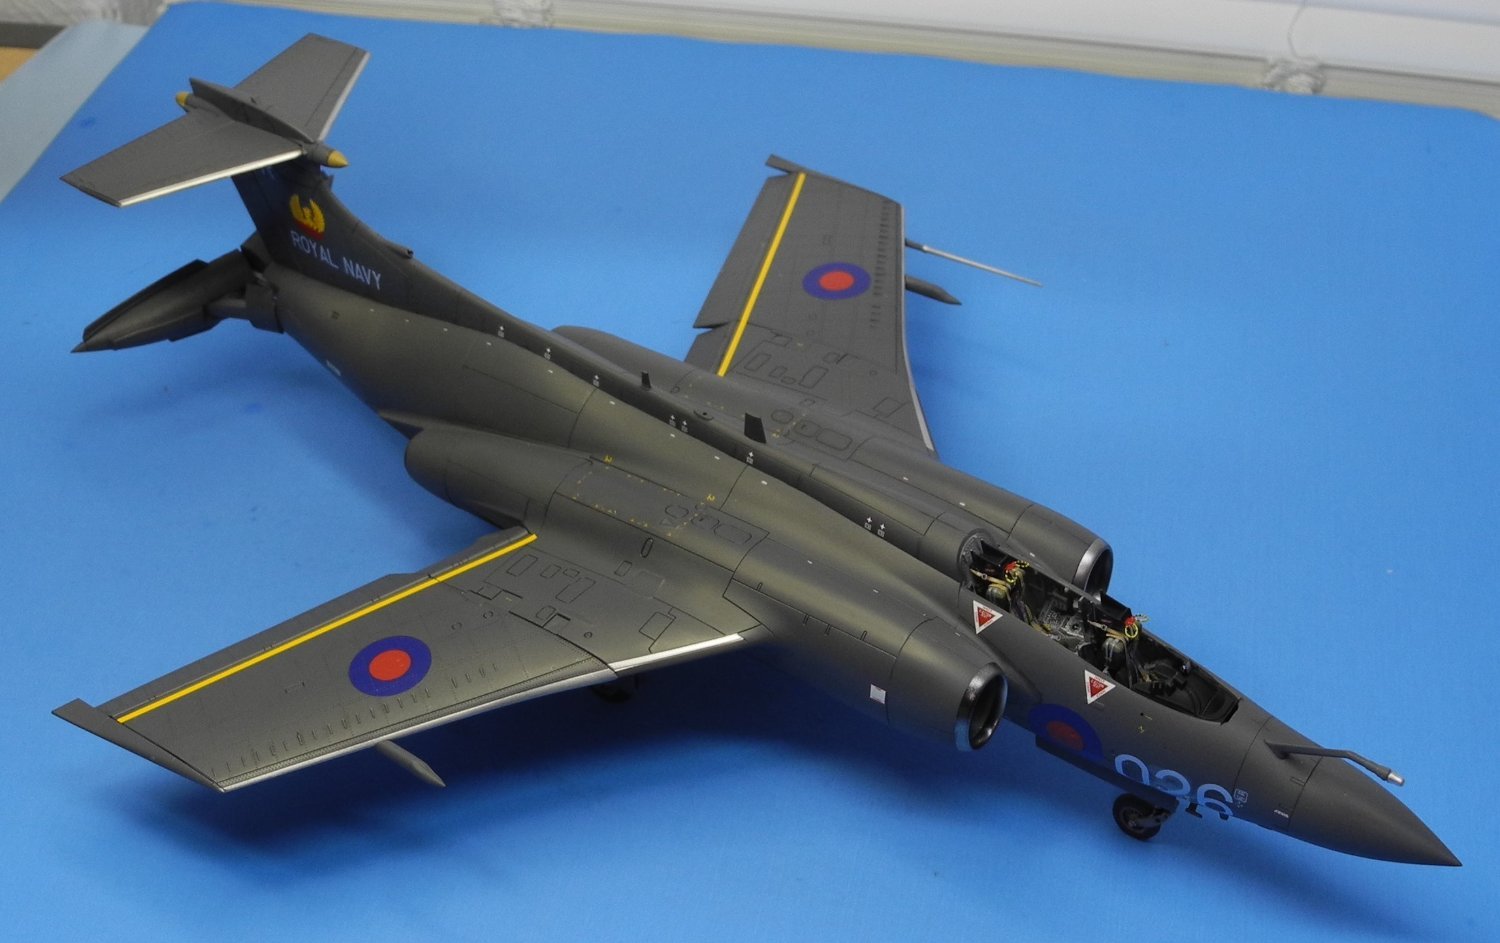
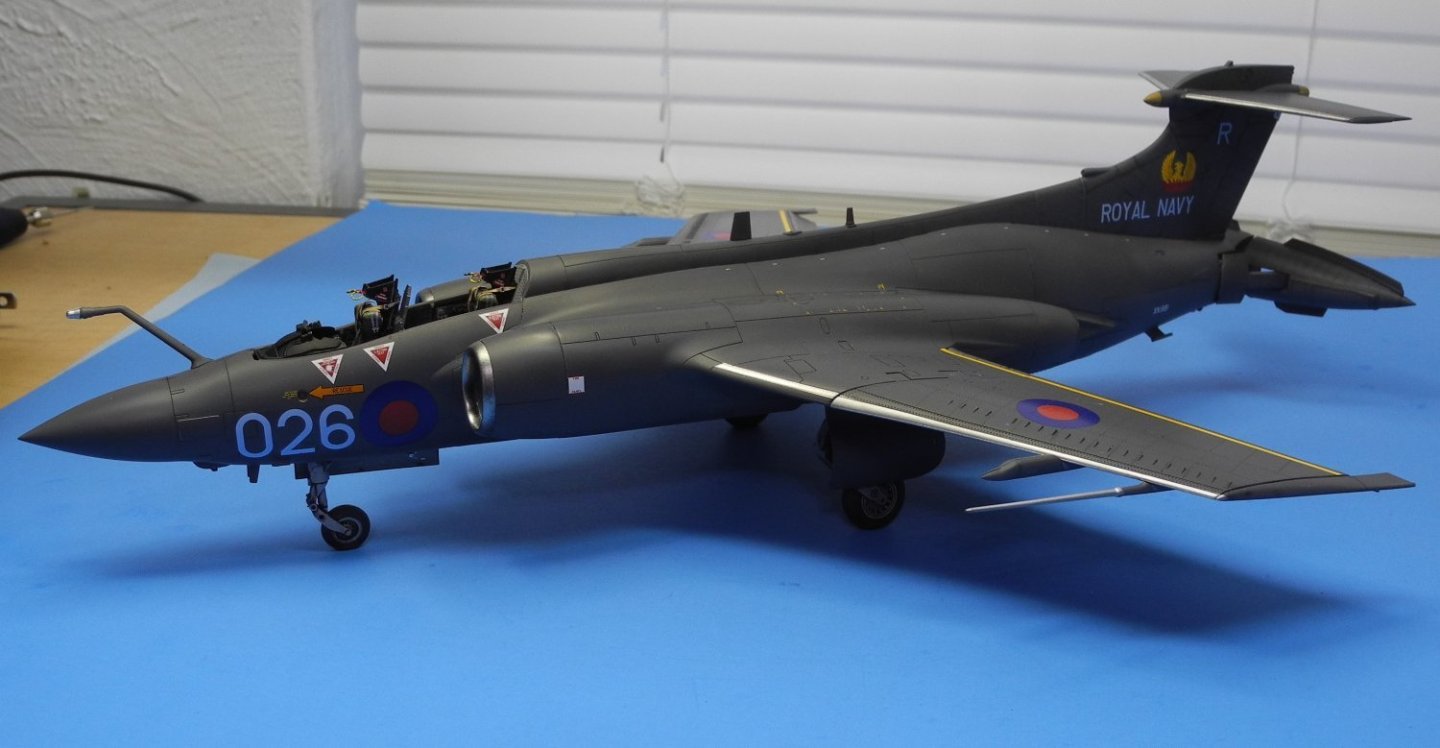
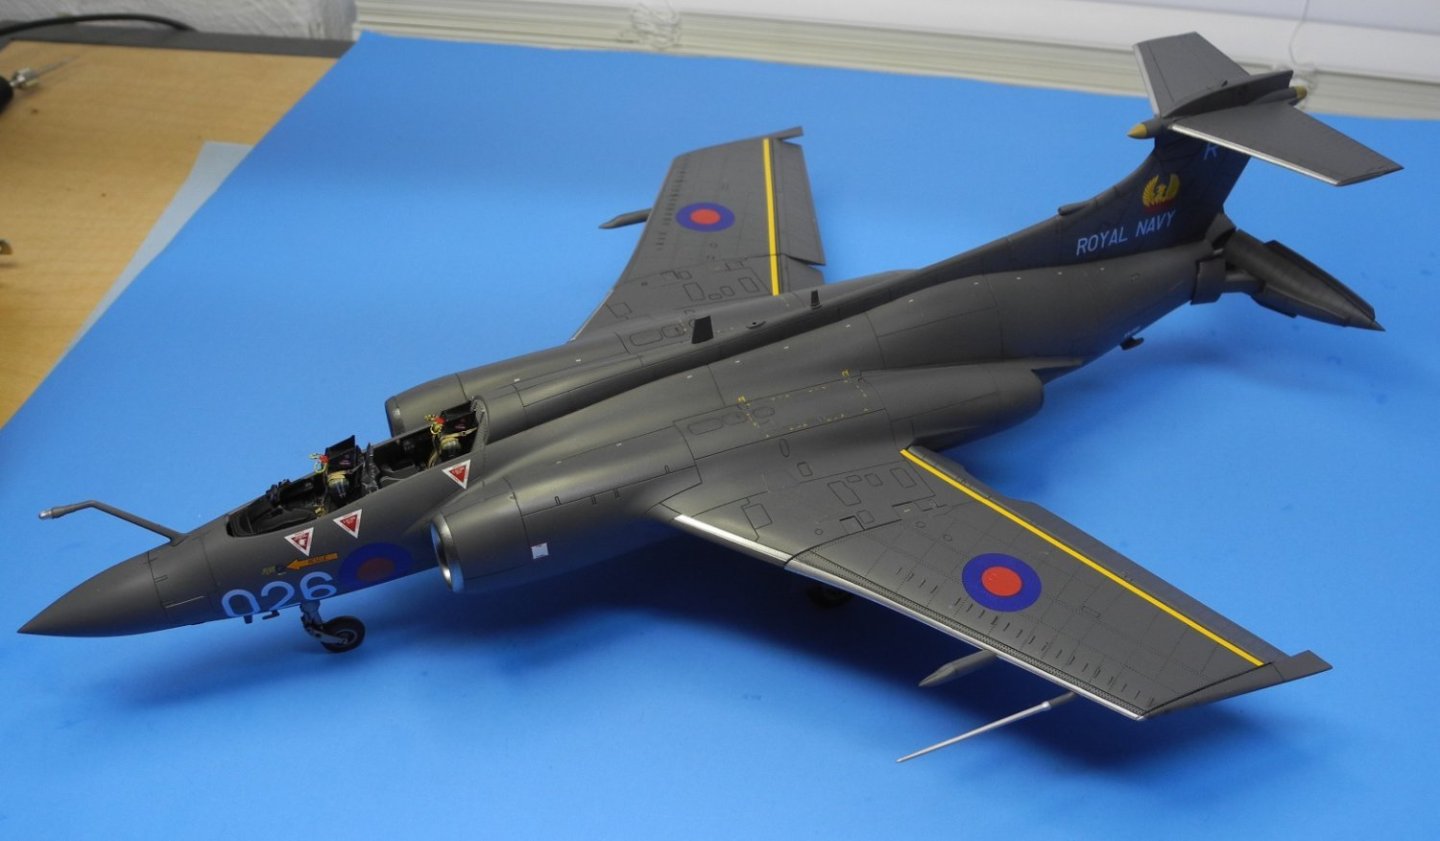
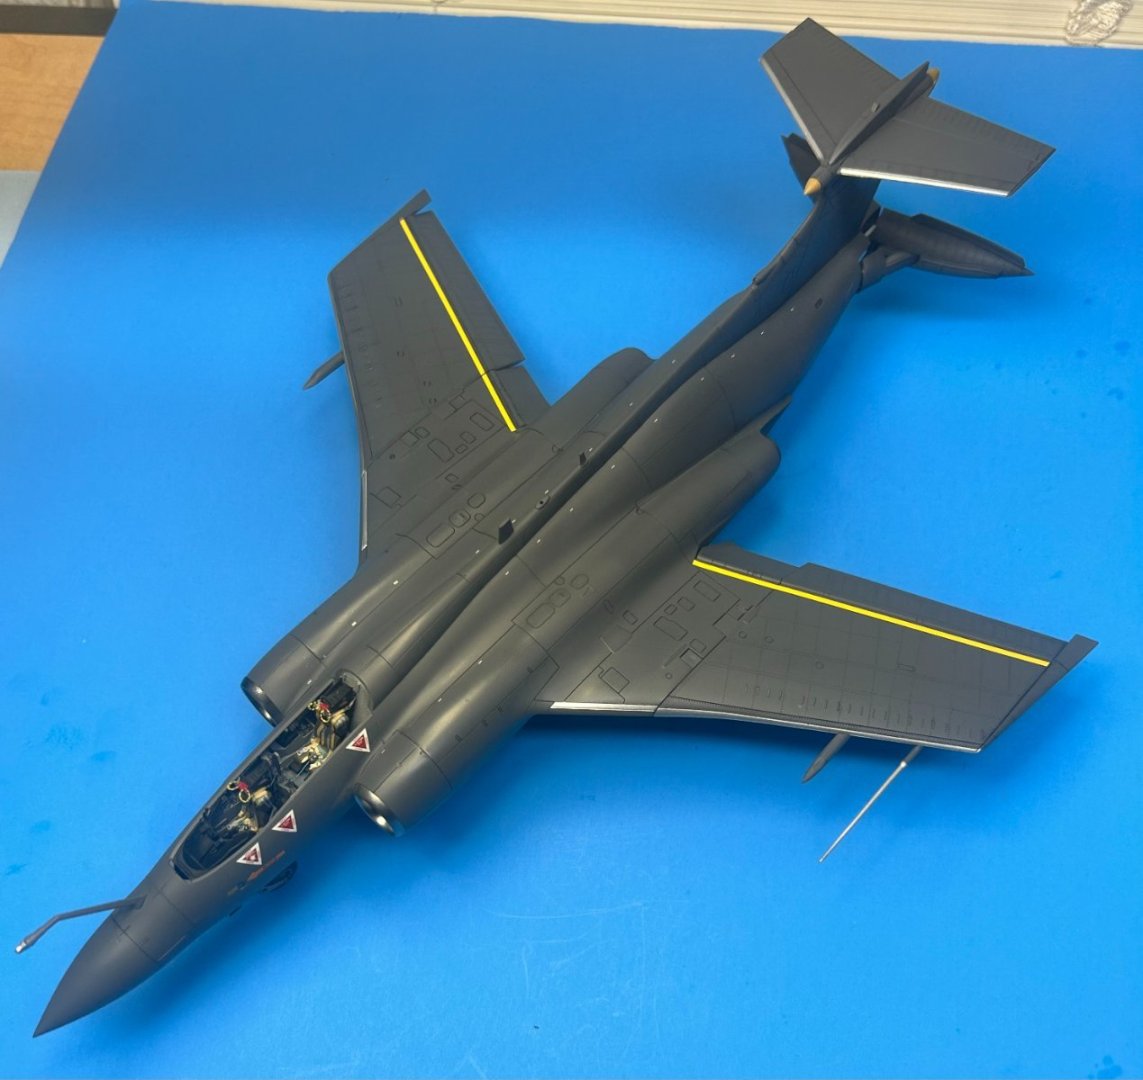
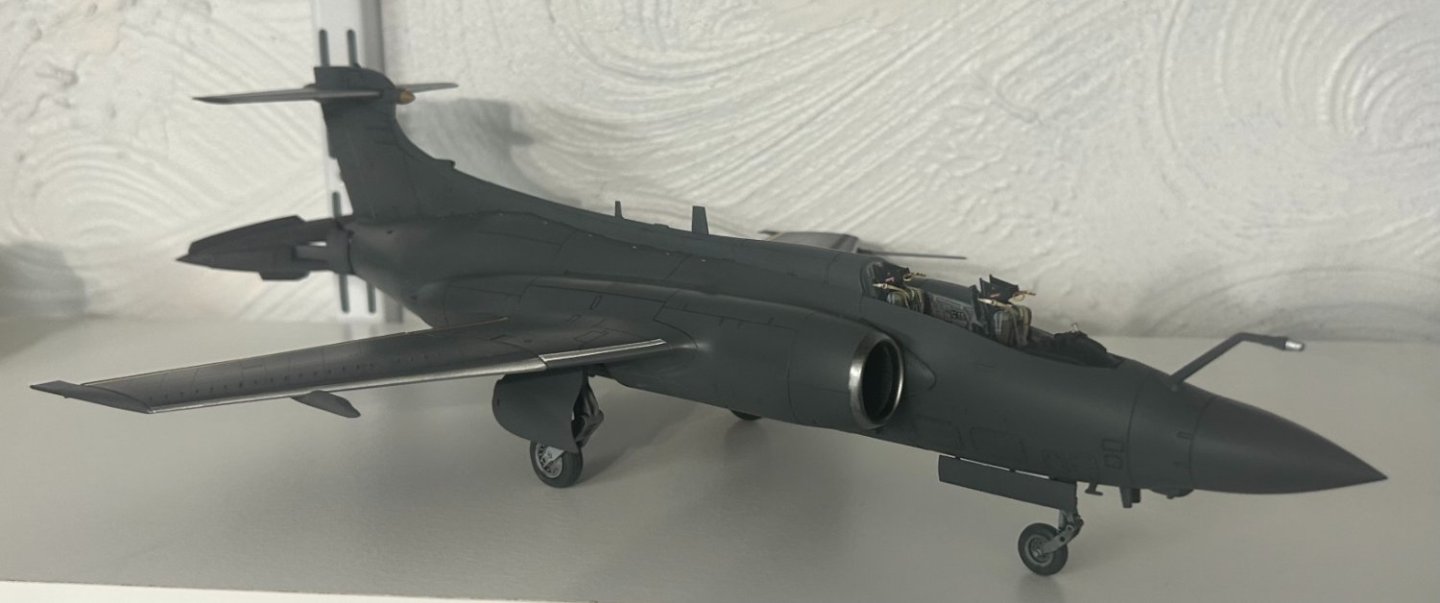
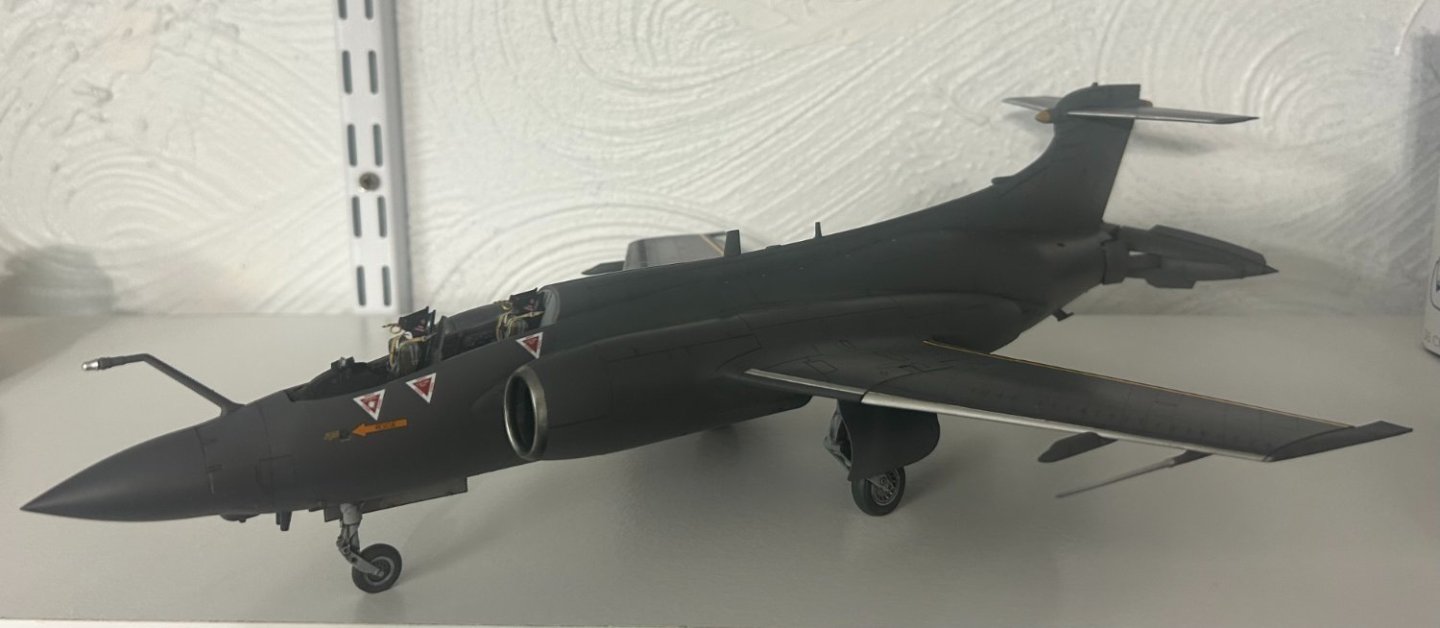
I may have finished the decals today had it not been for an errand or two as well as a visit to the eye doctor for a yearly exam. She's beginning to look very Royal Navy to me now. Need to finish my canopy (and some decals on it), pylons and weapons (decals on these too) before I can call it done. Will put a protective coat of satin varnish over everything before putting on the canopy.
- 332 replies
-
- 12
-

-
Honda RC166 Grand Prix Racer by CDW - FINISHED - Tamiya - 1/12
CDW replied to CDW's topic in Non-ship/categorised builds
I agree. Seems a shame covering up all that detail with a fairing. -
Climbing aboard
-
Honda RC166 Grand Prix Racer by CDW - FINISHED - Tamiya - 1/12
CDW replied to CDW's topic in Non-ship/categorised builds
It’s only been seven years since I last worked on it but I plan to resurrect this build to finish it once my Buccaneer (current project) is completed. 😀- 150 replies
-
- 10
-
-
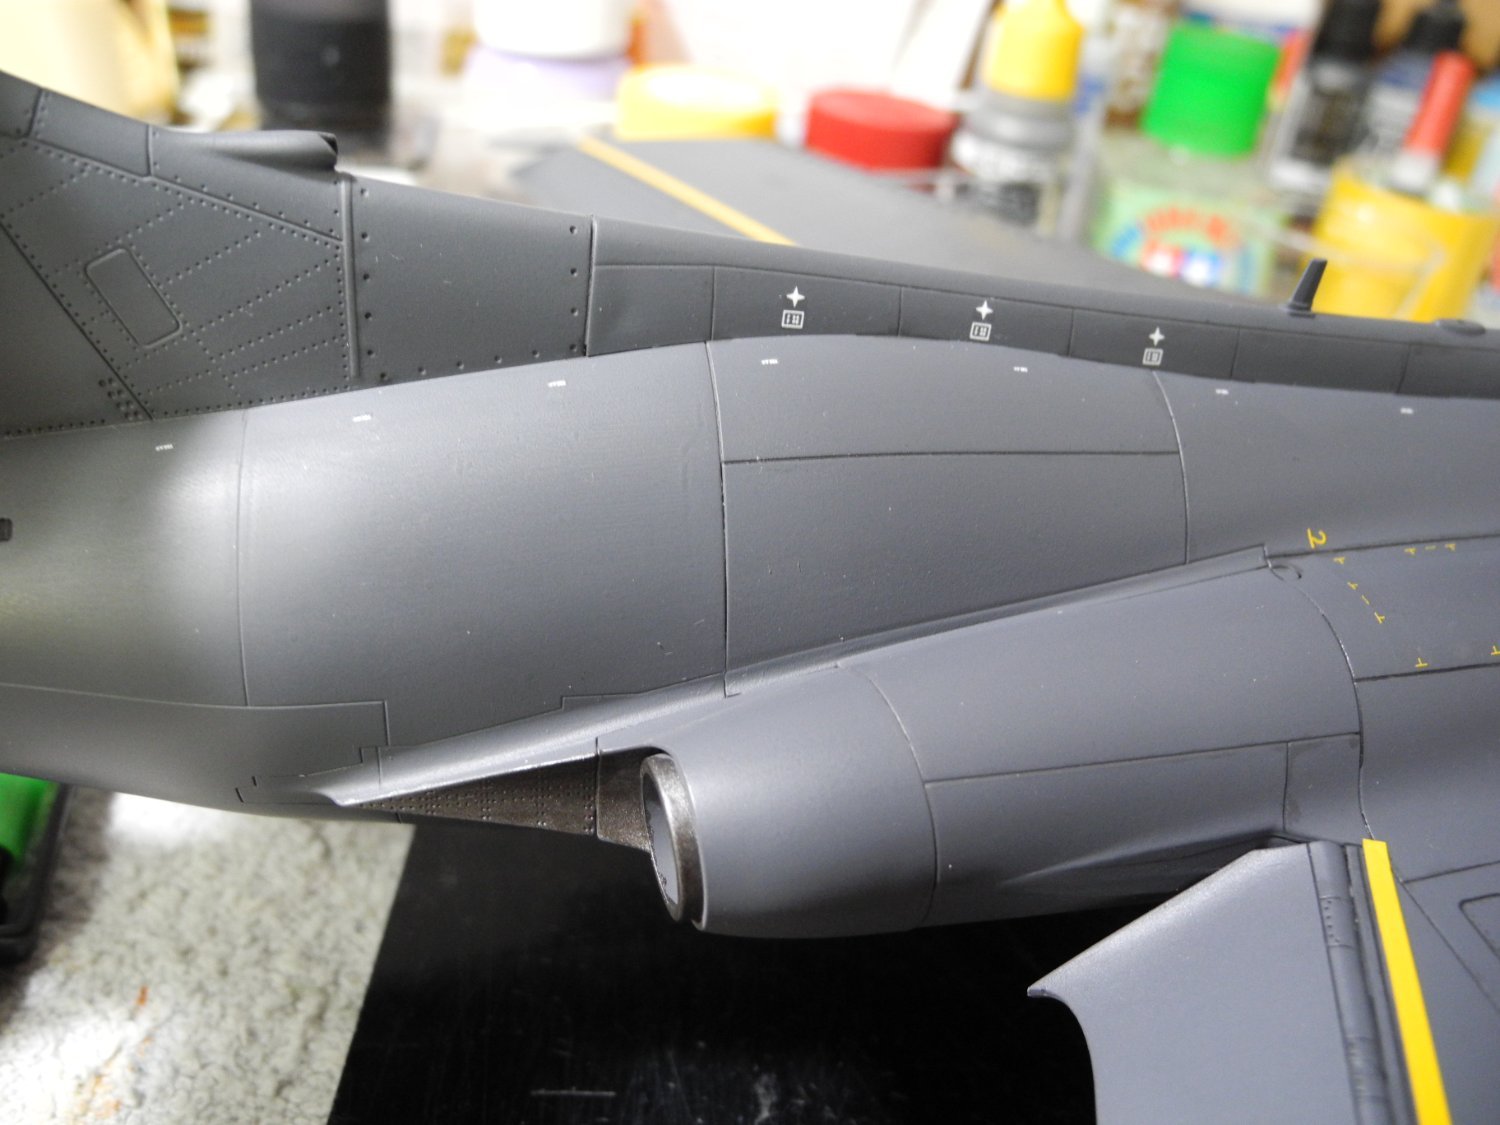
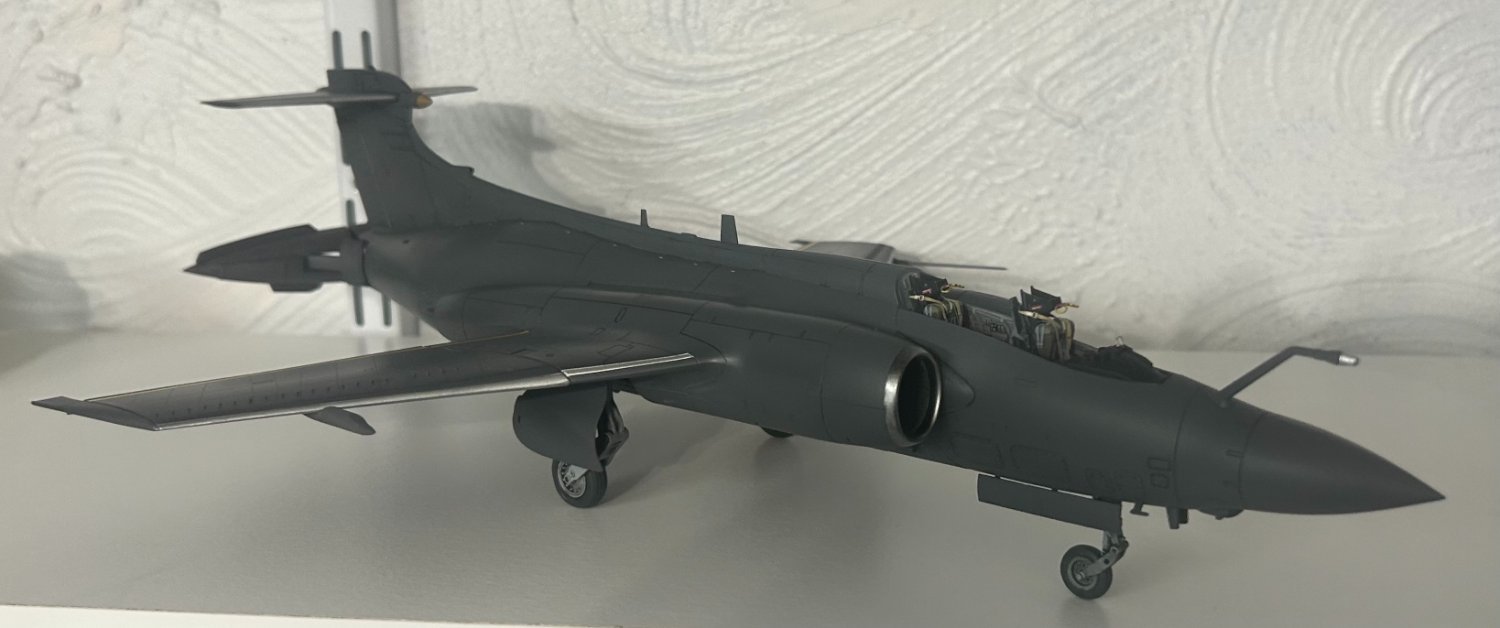
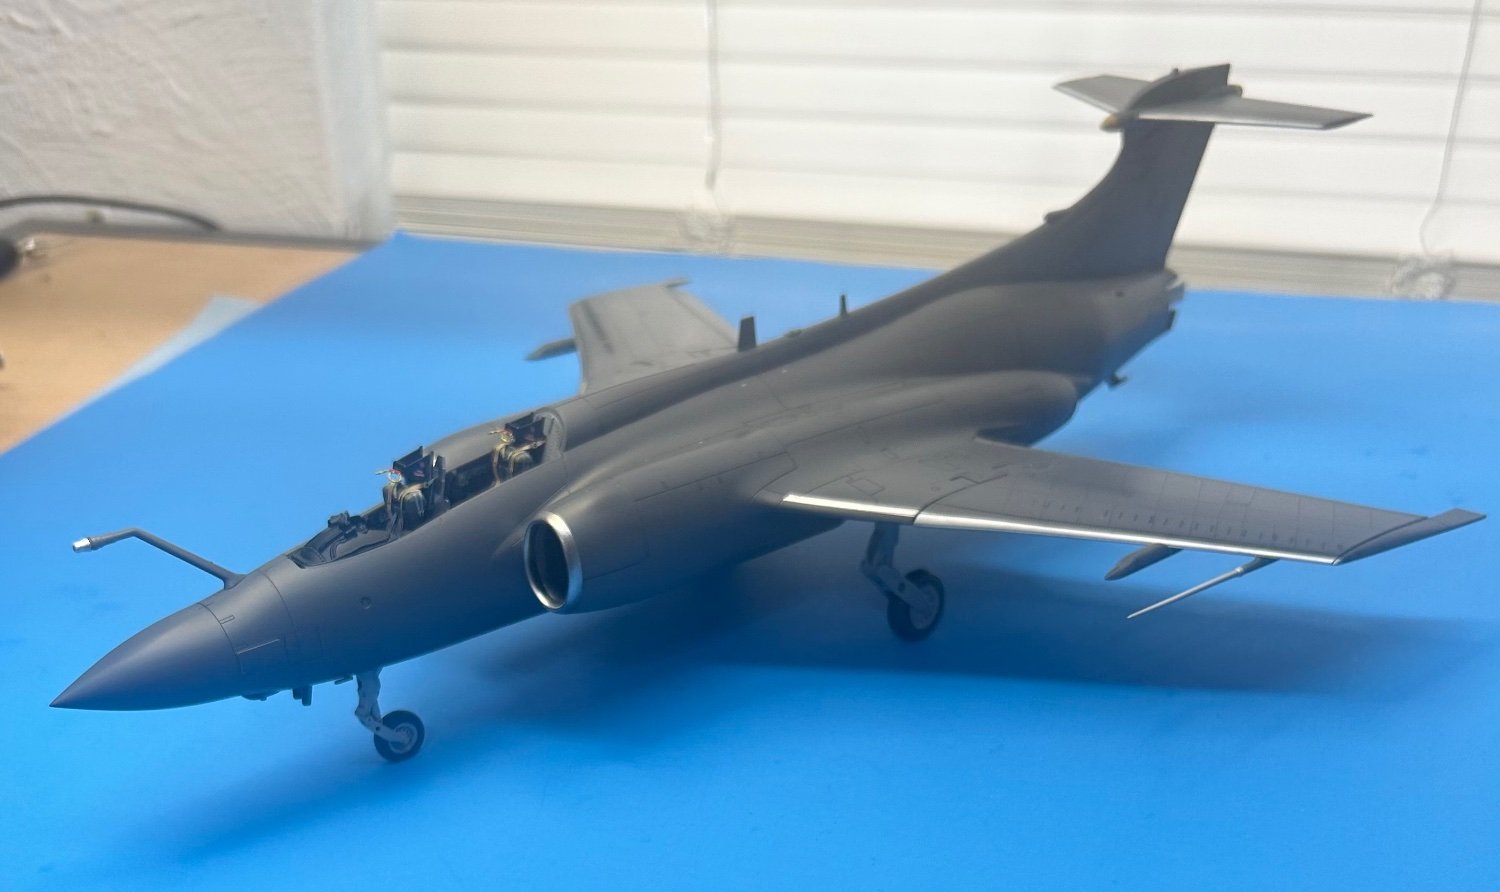
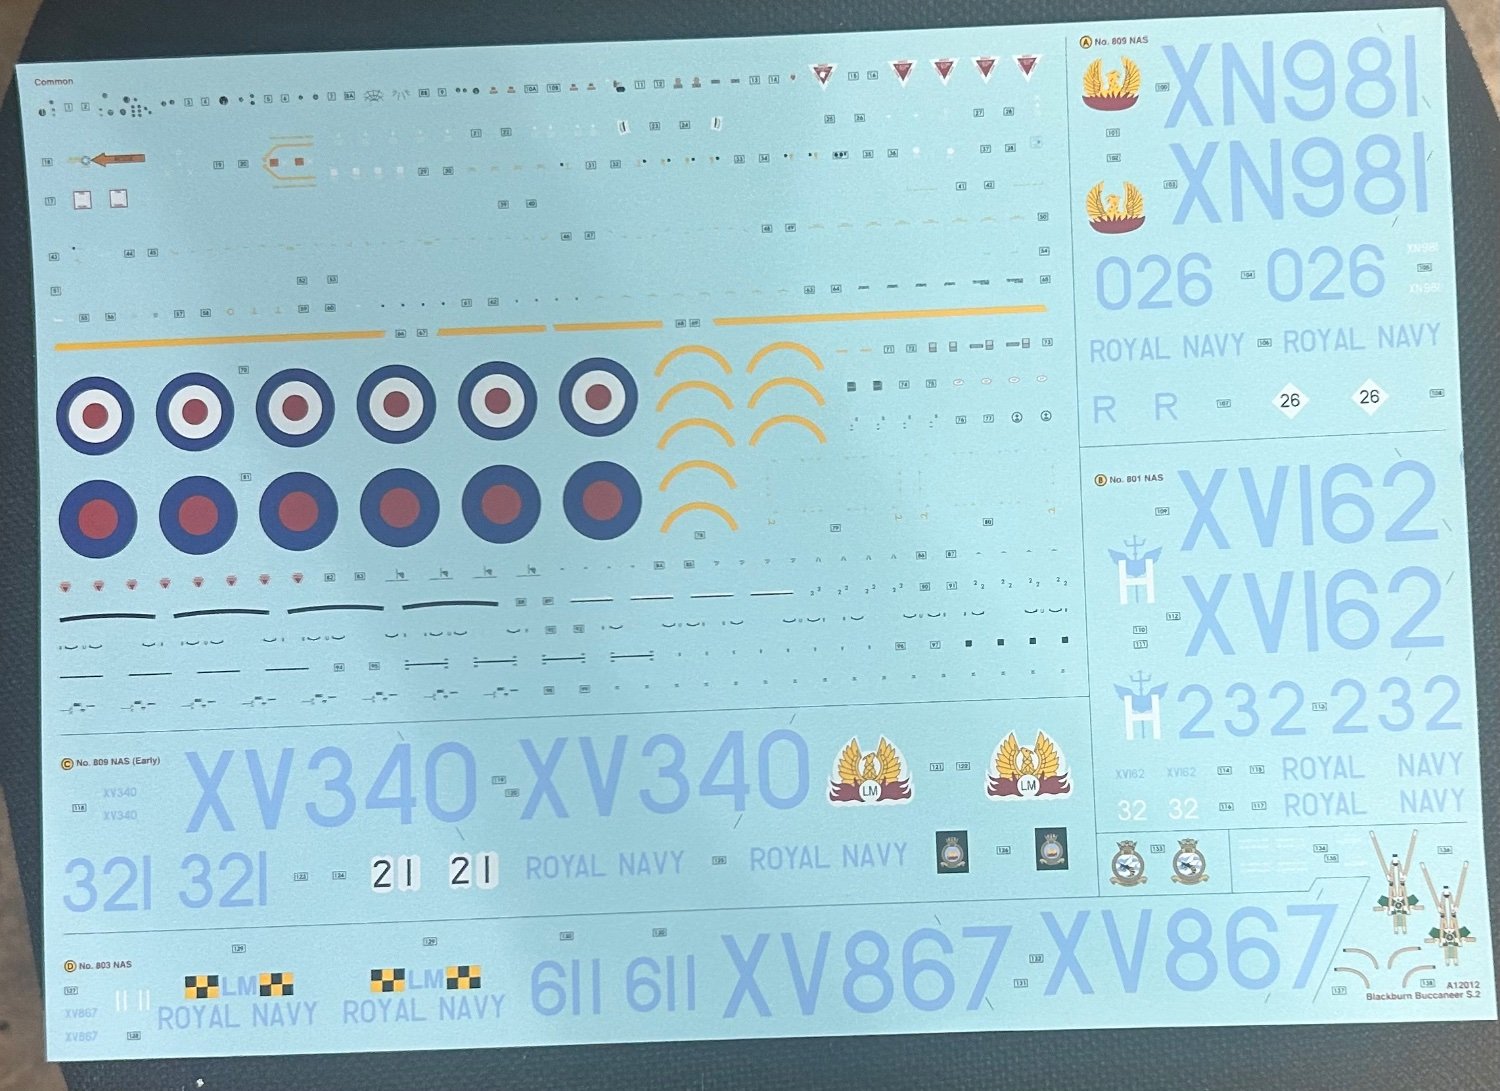
You are a veritable walking encyclopedia when it comes to cameras, Jack. Thanks! Alot of times, I'm being pragmatic and just use my iPhone to snap a photo, other times my Nikon but I need to take the time to study my Nikon camera and practice with it following your directions. There are tons of features and settings on this camera I have never used before. Reading the fine print...here are less than half the data decals that go on this model, probably closer to a third of them. Just going to need to exercise patience to get them all down.


- 332 replies
-
- 13
-
-
Thanks! Will you be applying all those small decals? I'm trying to do them all and they are very small to work with. It's a tedious challenge to be sure.
-
Background color and lighting make a huge difference in how gray appears in photographs. Doesn't look like the same color at all.

- 332 replies
-
- 12
-
-
That's a very good move on Airfix part. I remember the days when their decals were infamously bad but then again, so were just about everyone else's decals too.
-
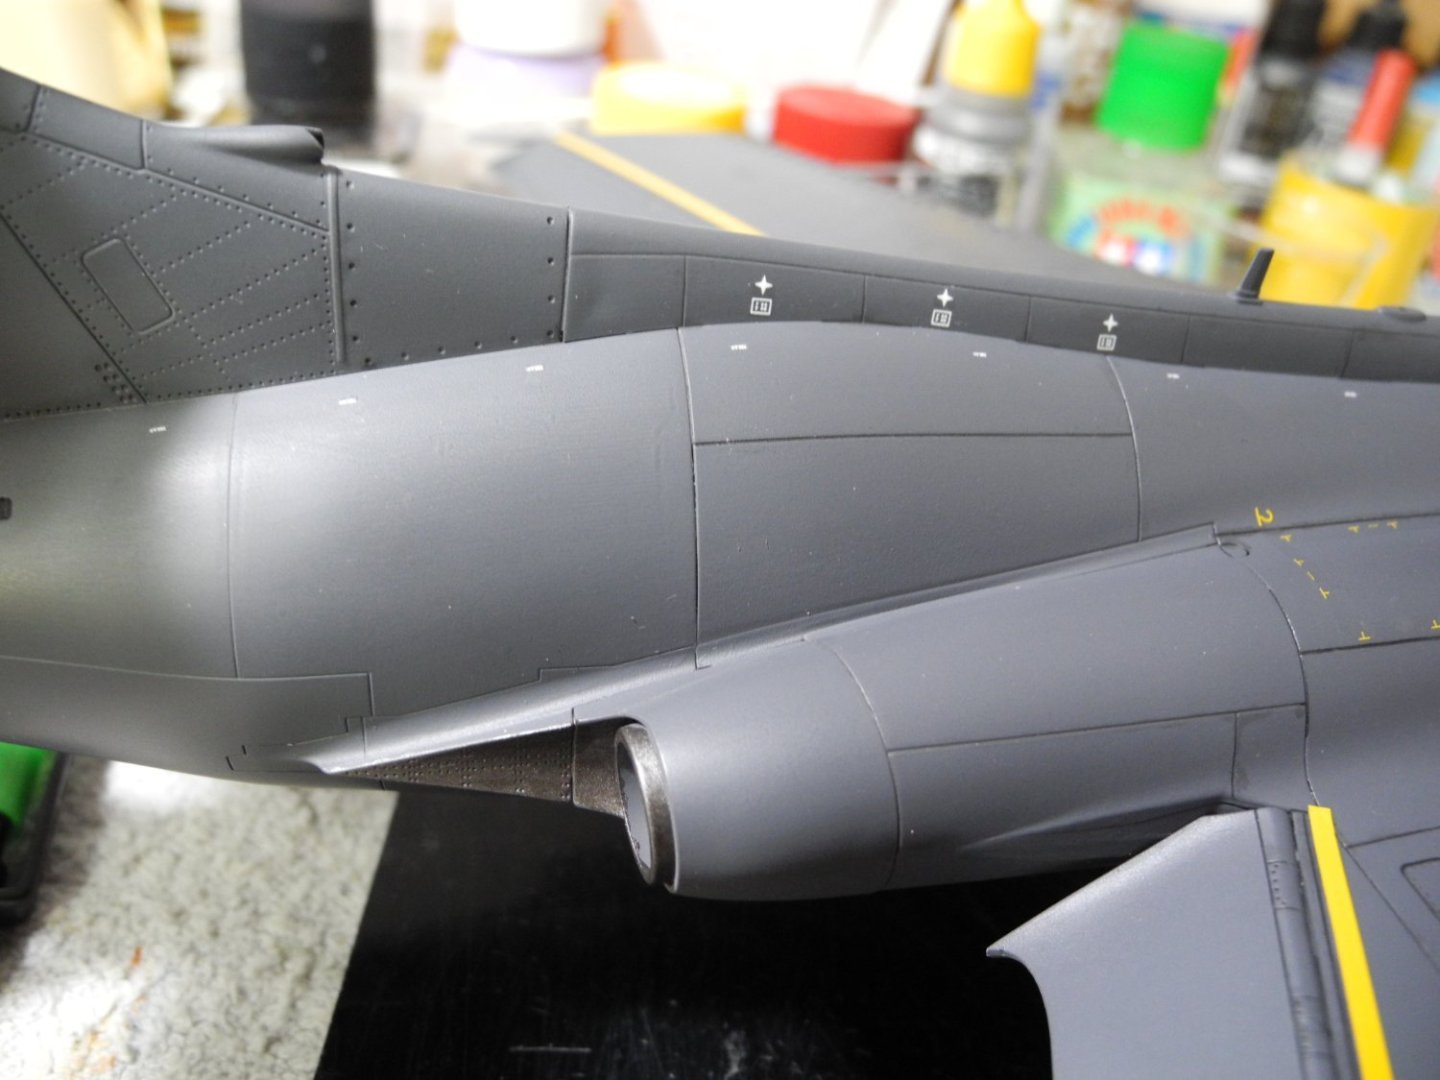
Huge decal sheet, measures over 9 x 13 inches. Not sure who makes the decals but the quality of the sheet is “Cartograf”-like. Very nice.

- 332 replies
-
- 11
-
-
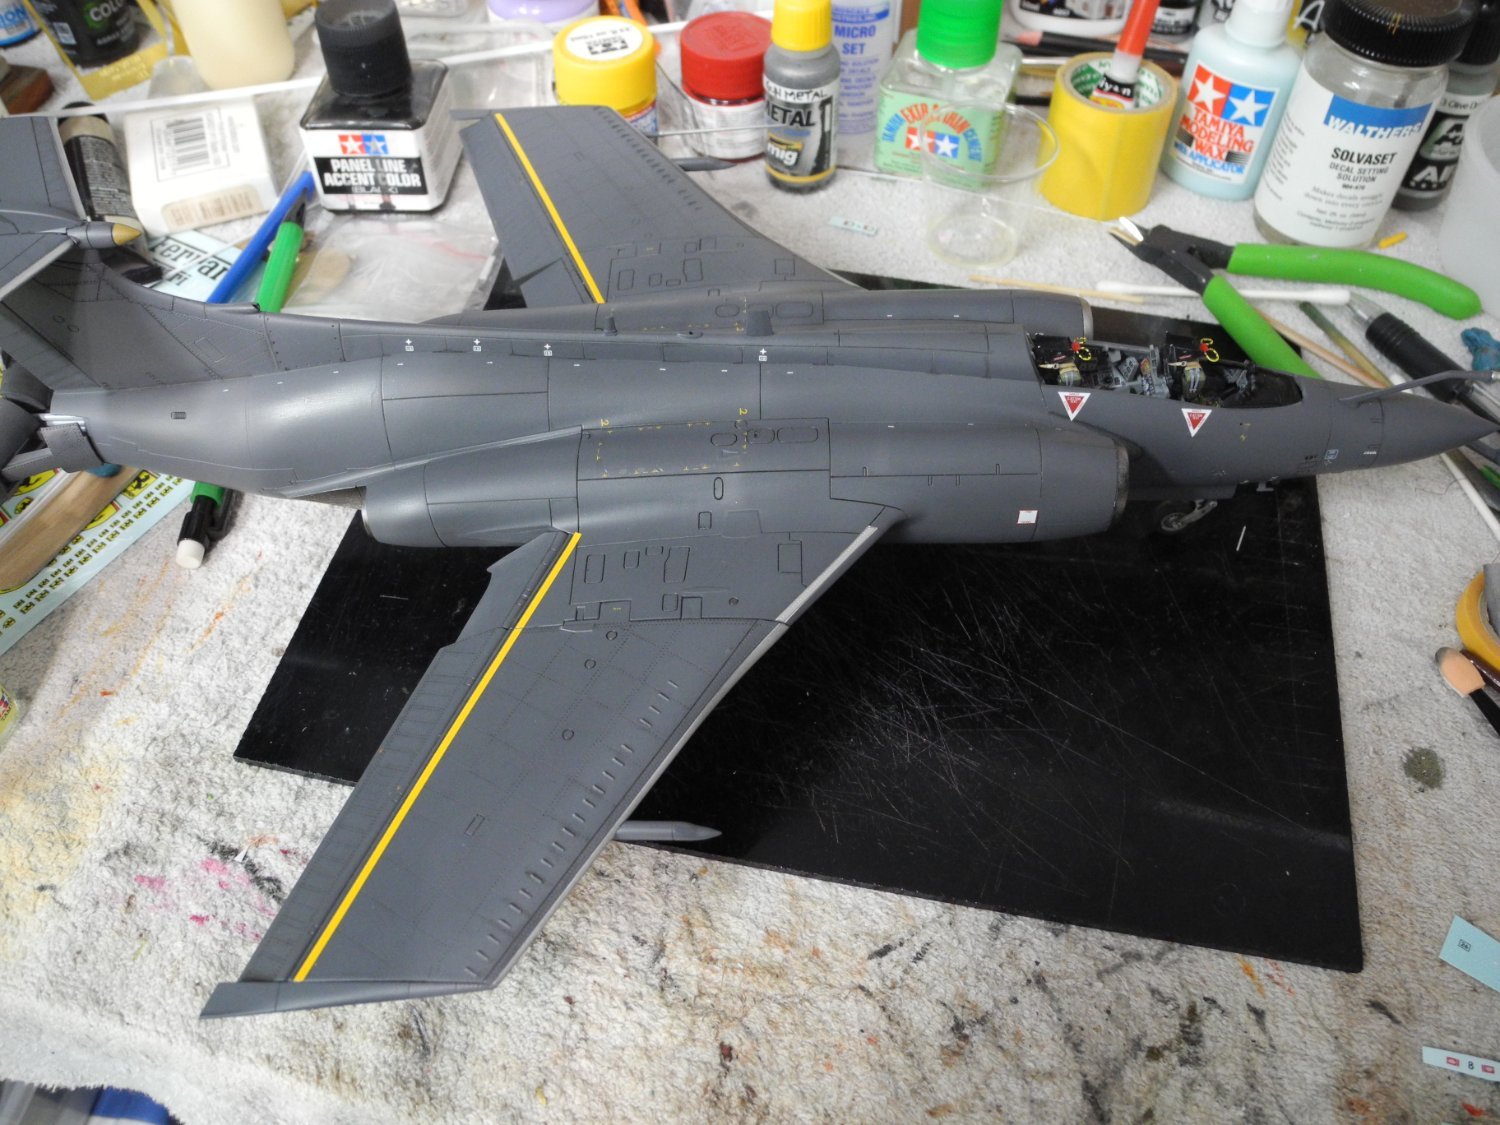
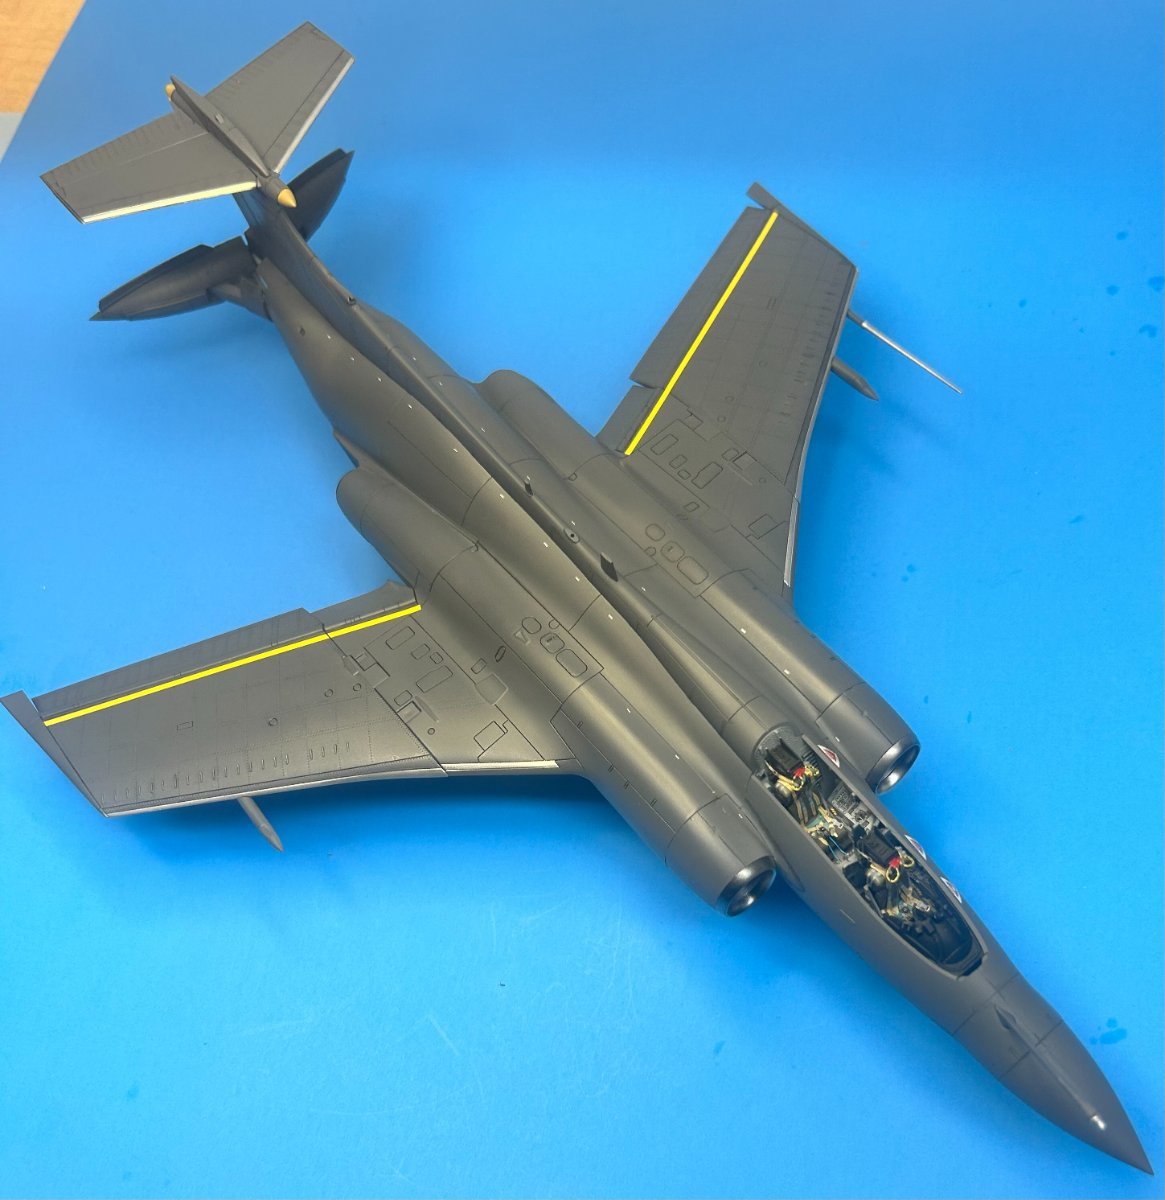
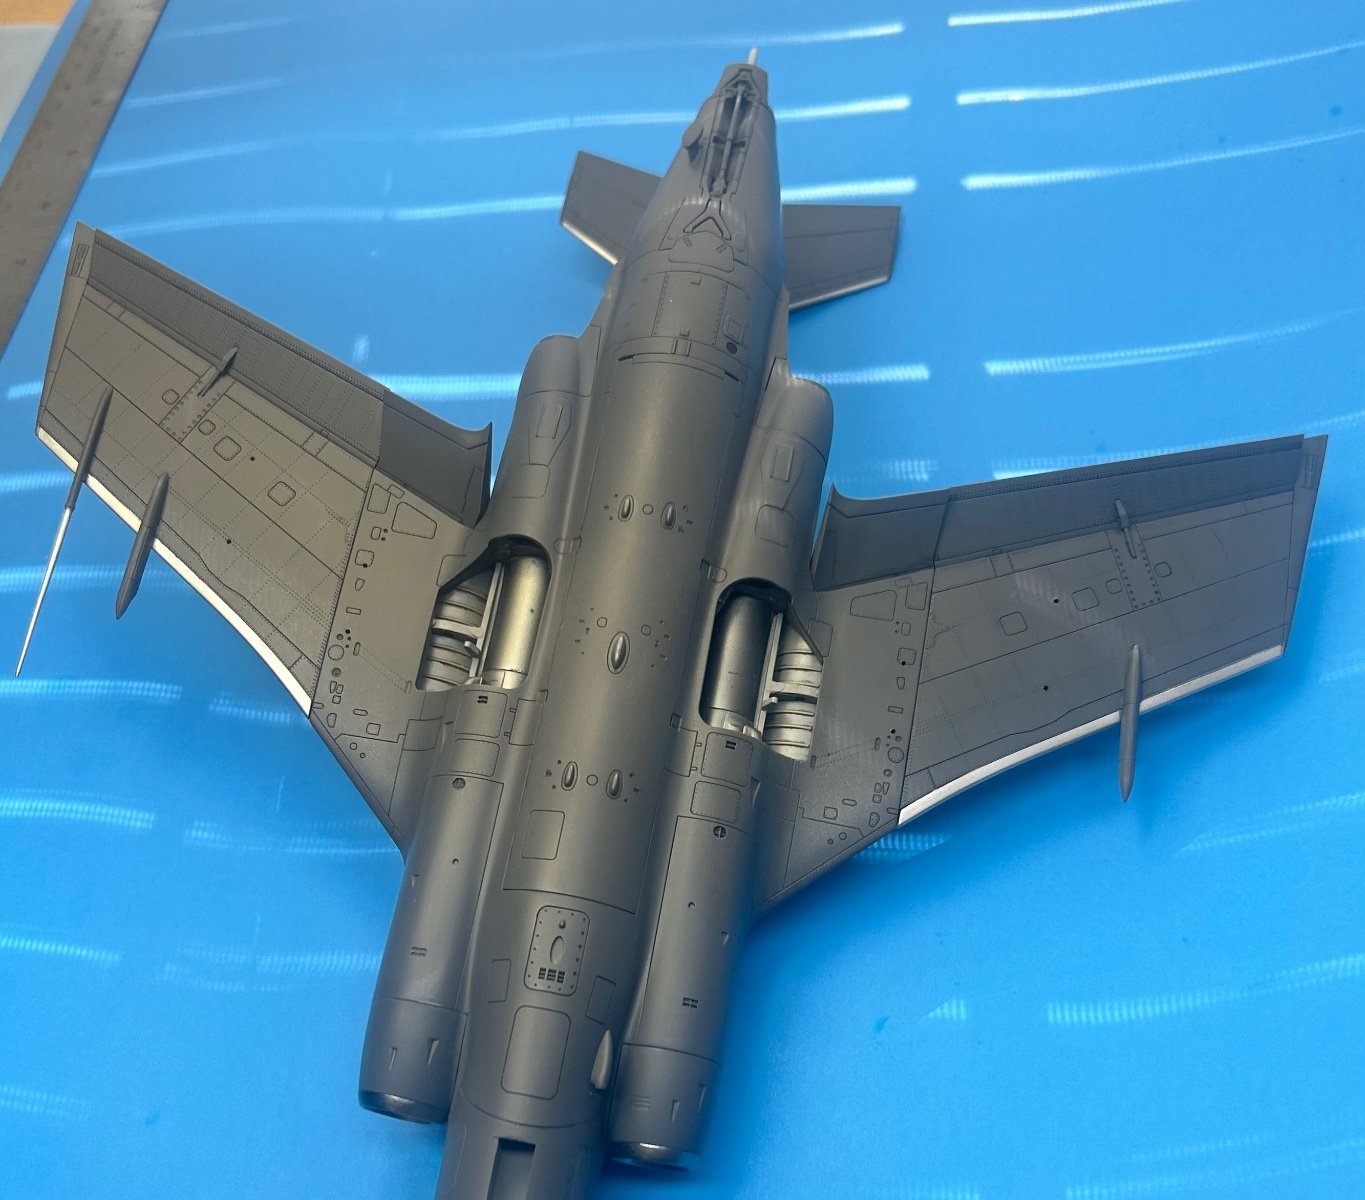
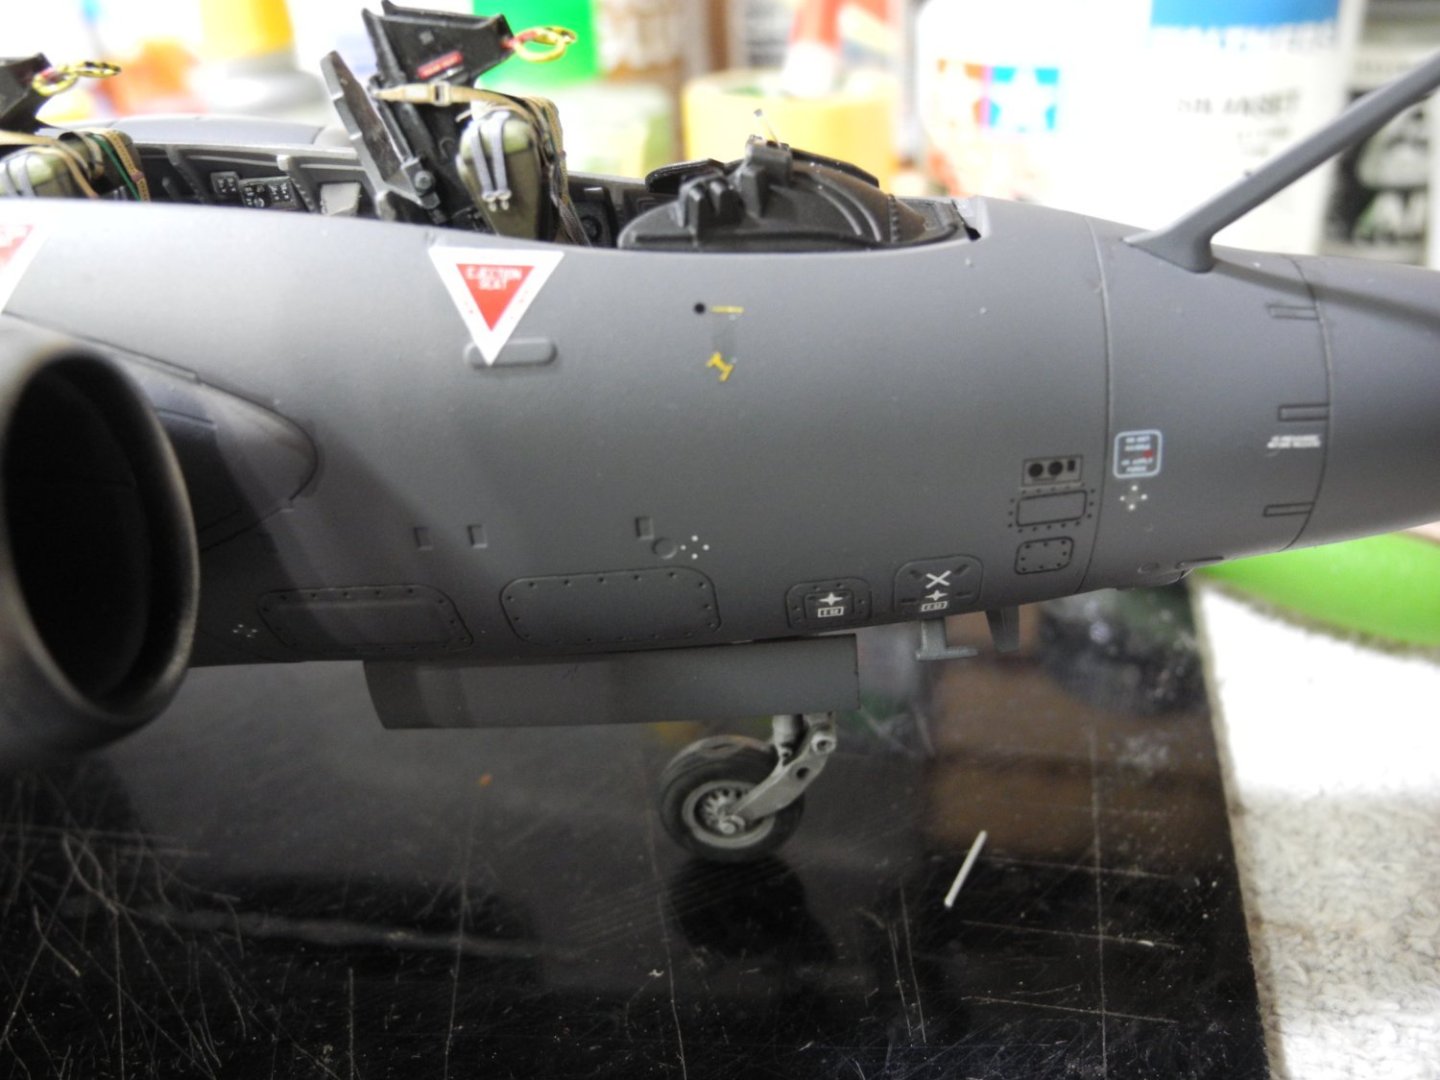
A few more small bits to mask and paint before I can begin decals. On a separate note, another added beauty of doing a wet sanding of the paint is that the decals go down so much better. Wet sanding is something I only do when using either Tamiya or Mr Color paints (lacquer). Doesn’t work for acrylic.
-
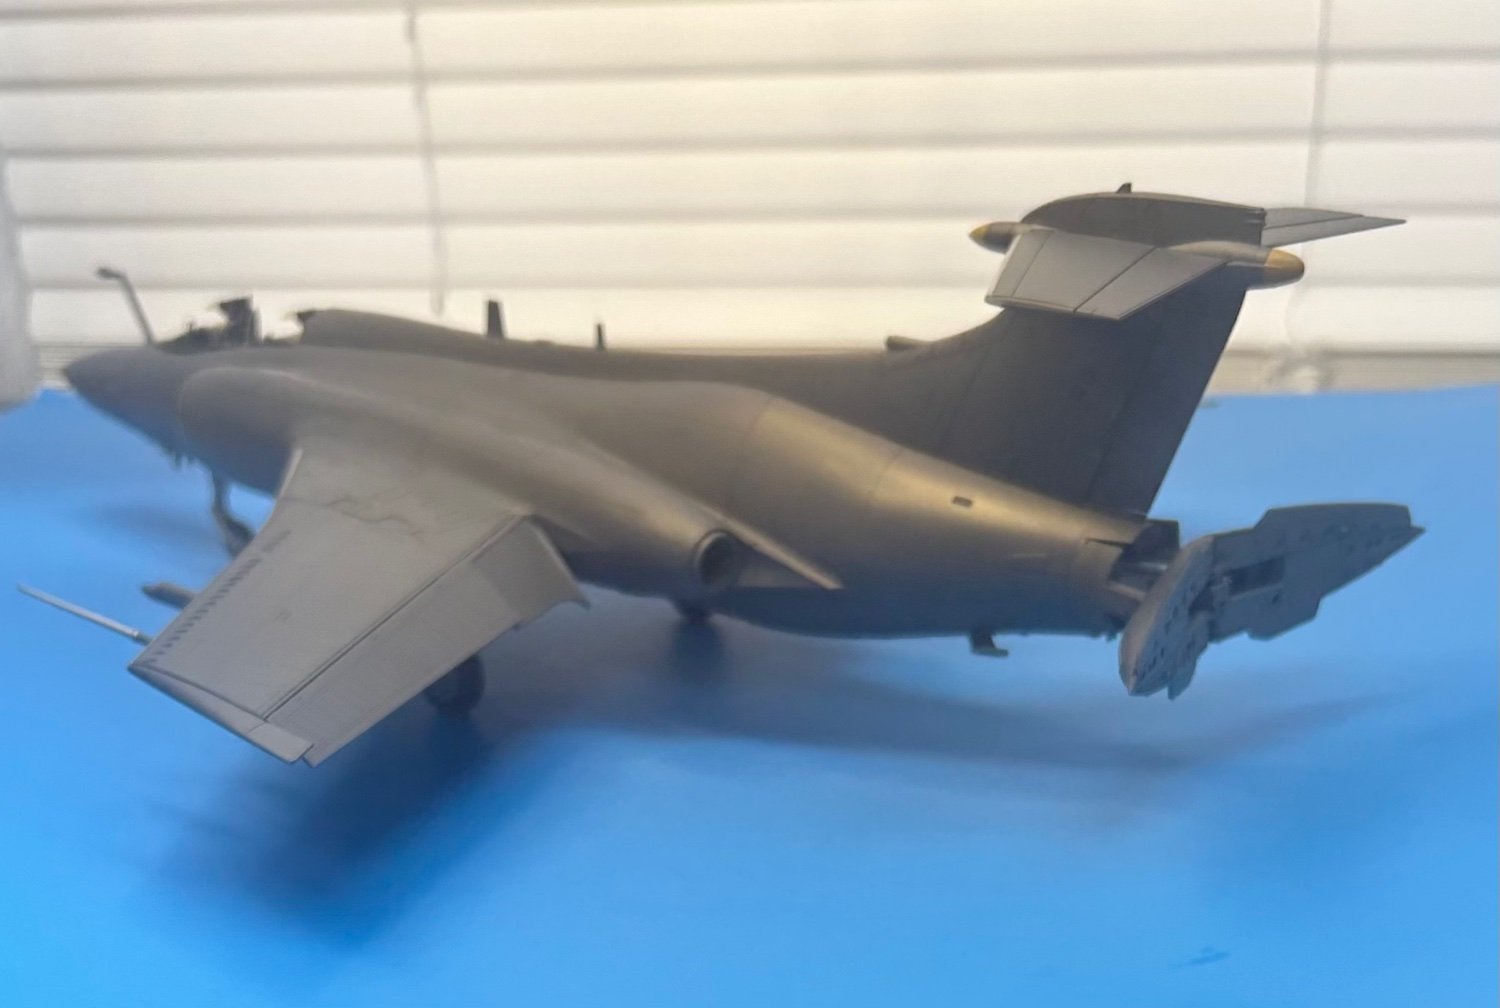
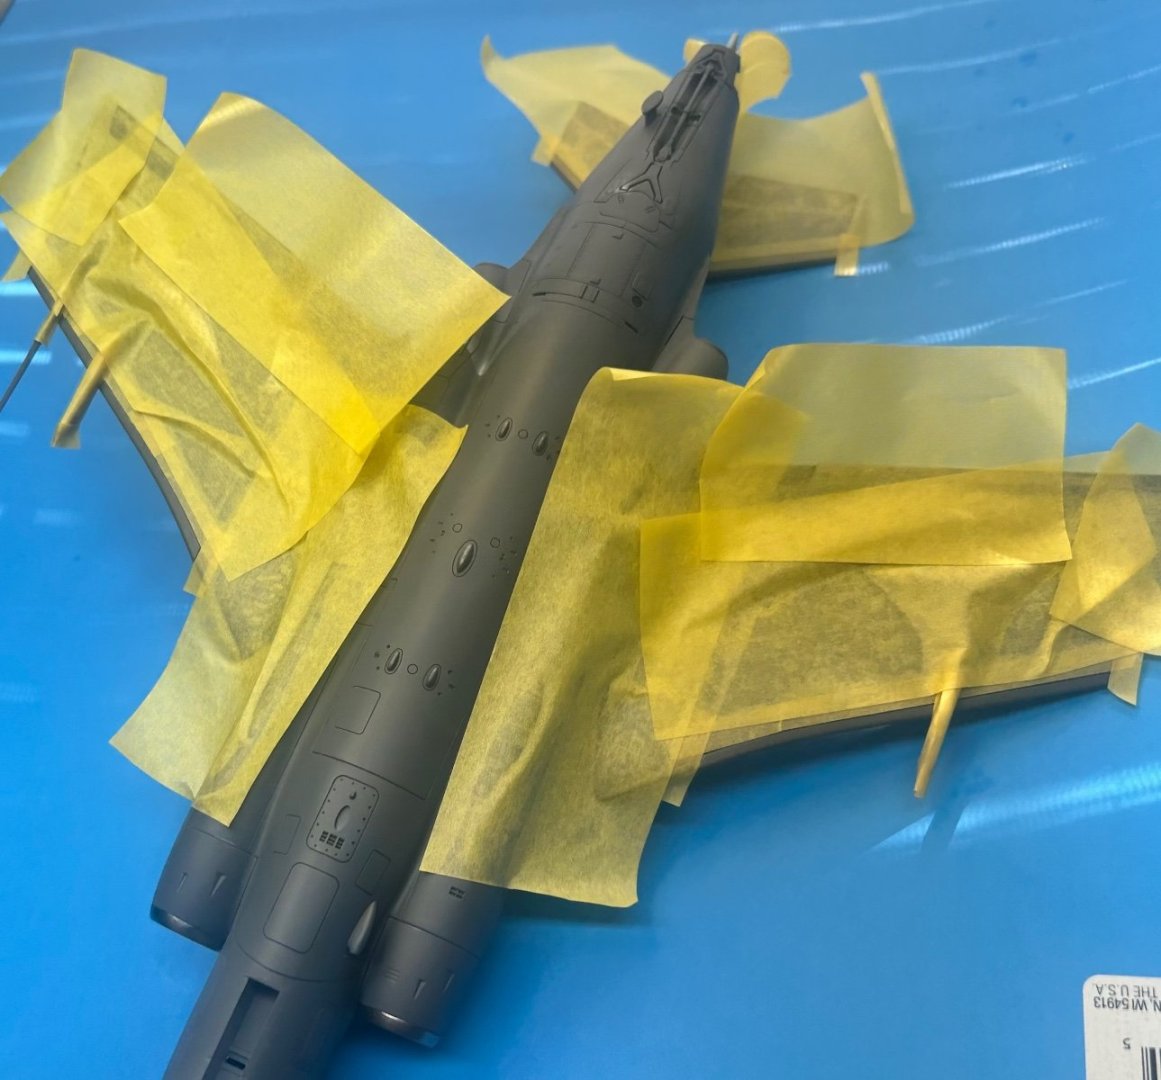
All this masking just for the small areas of the leading edges of the wings and stabilators. Ditto for the top side. You’re going to be there soon Arthur. 😀
- 332 replies
-
- 10
-