HOLIDAY DONATION DRIVE - SUPPORT MSW - DO YOUR PART TO KEEP THIS GREAT FORUM GOING! (89 donations so far out of 49,000 members - C'mon guys!)
×


JeffT
-
Posts
2,552 -
Joined
-
Last visited
Content Type
Profiles
Forums
Gallery
Events
Everything posted by JeffT
-
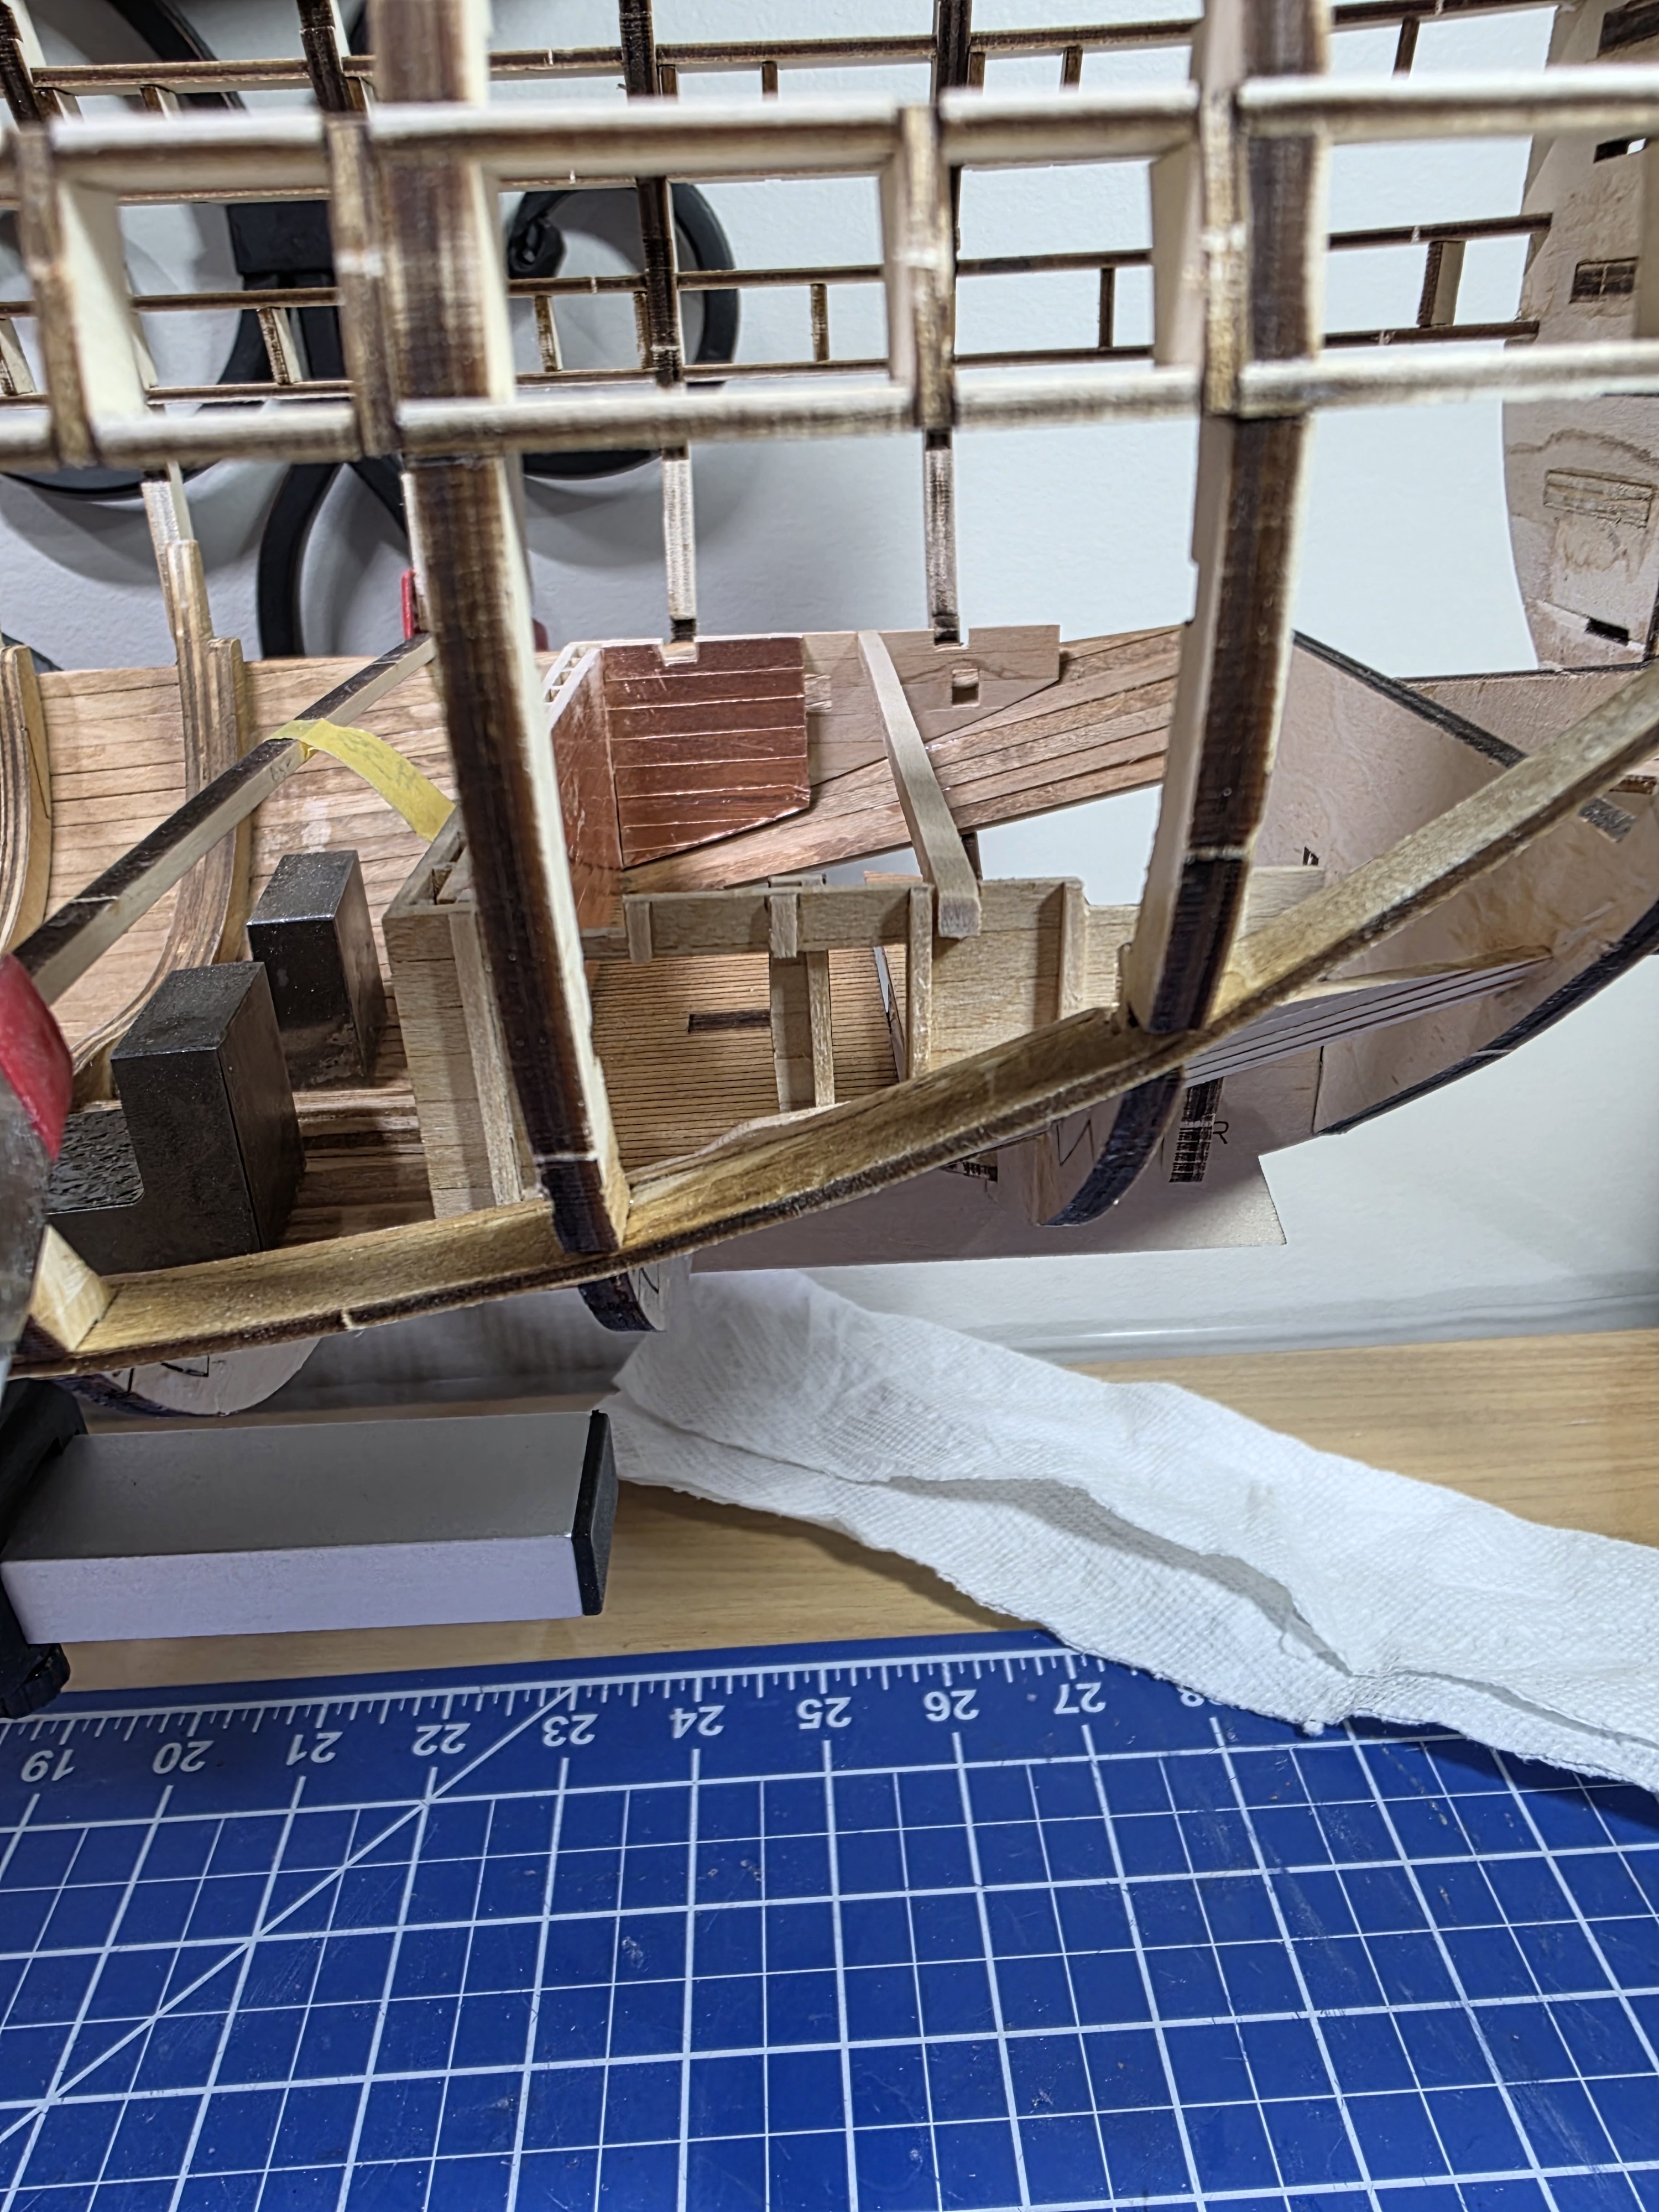
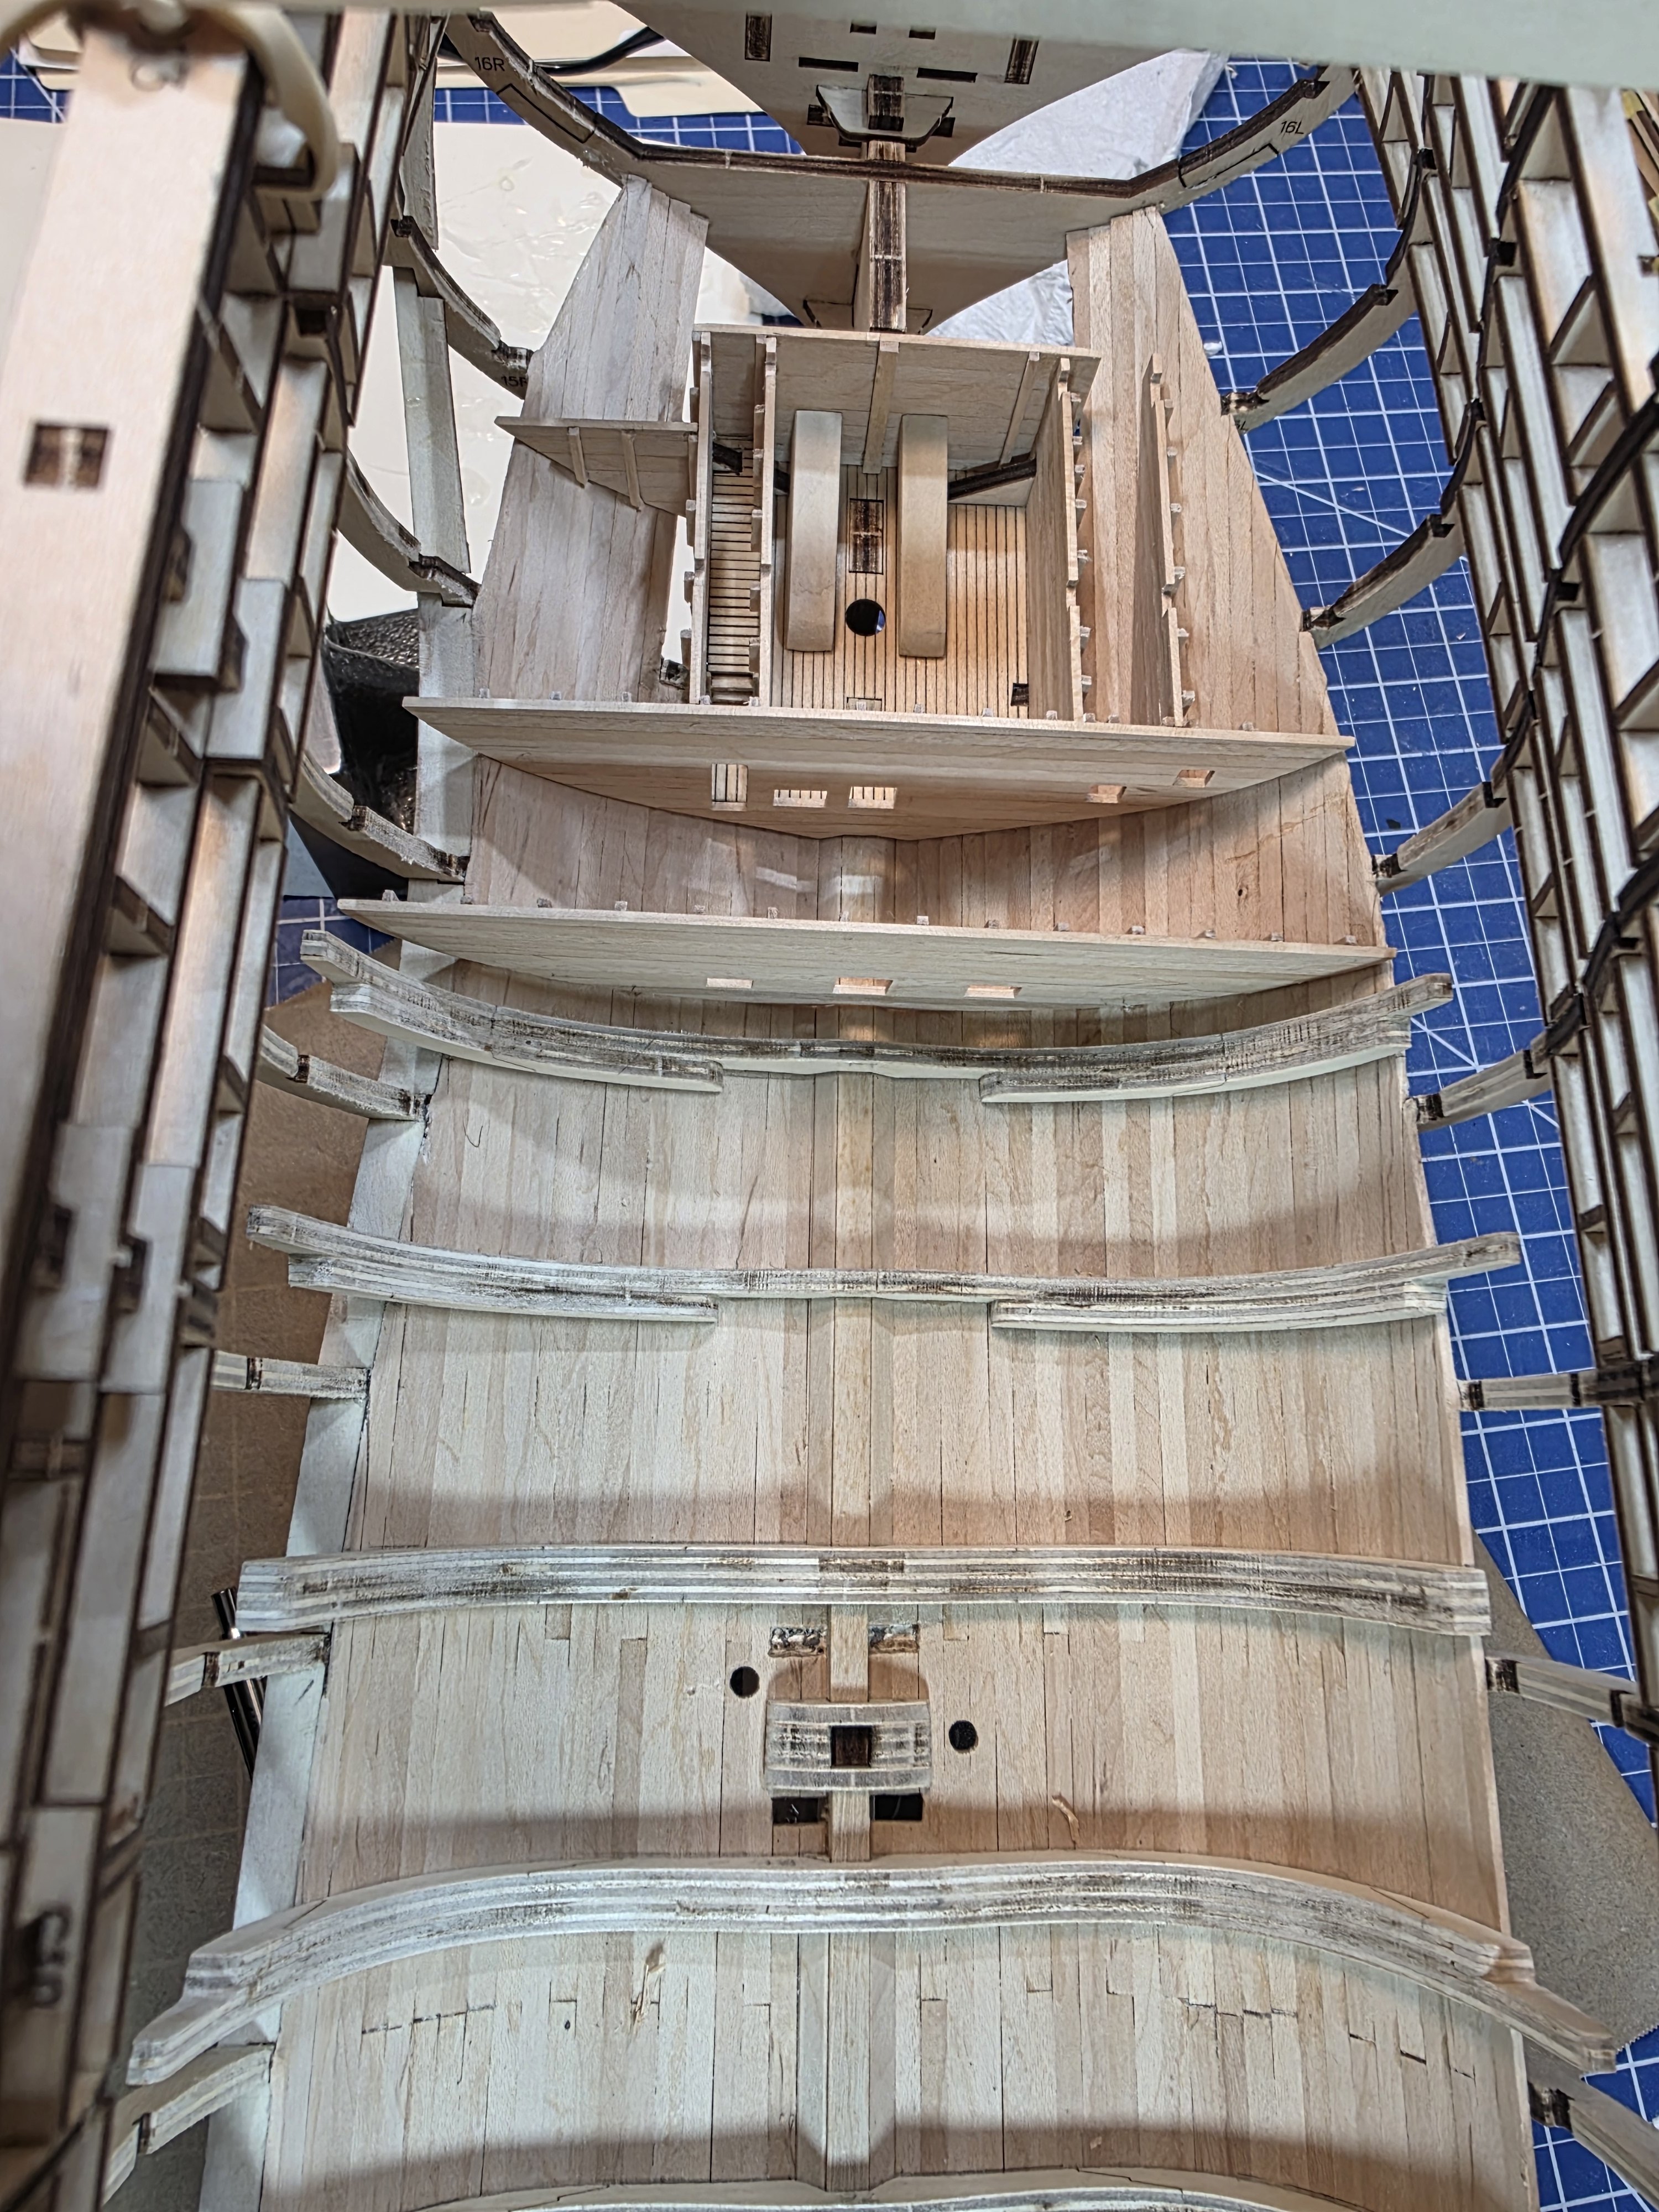
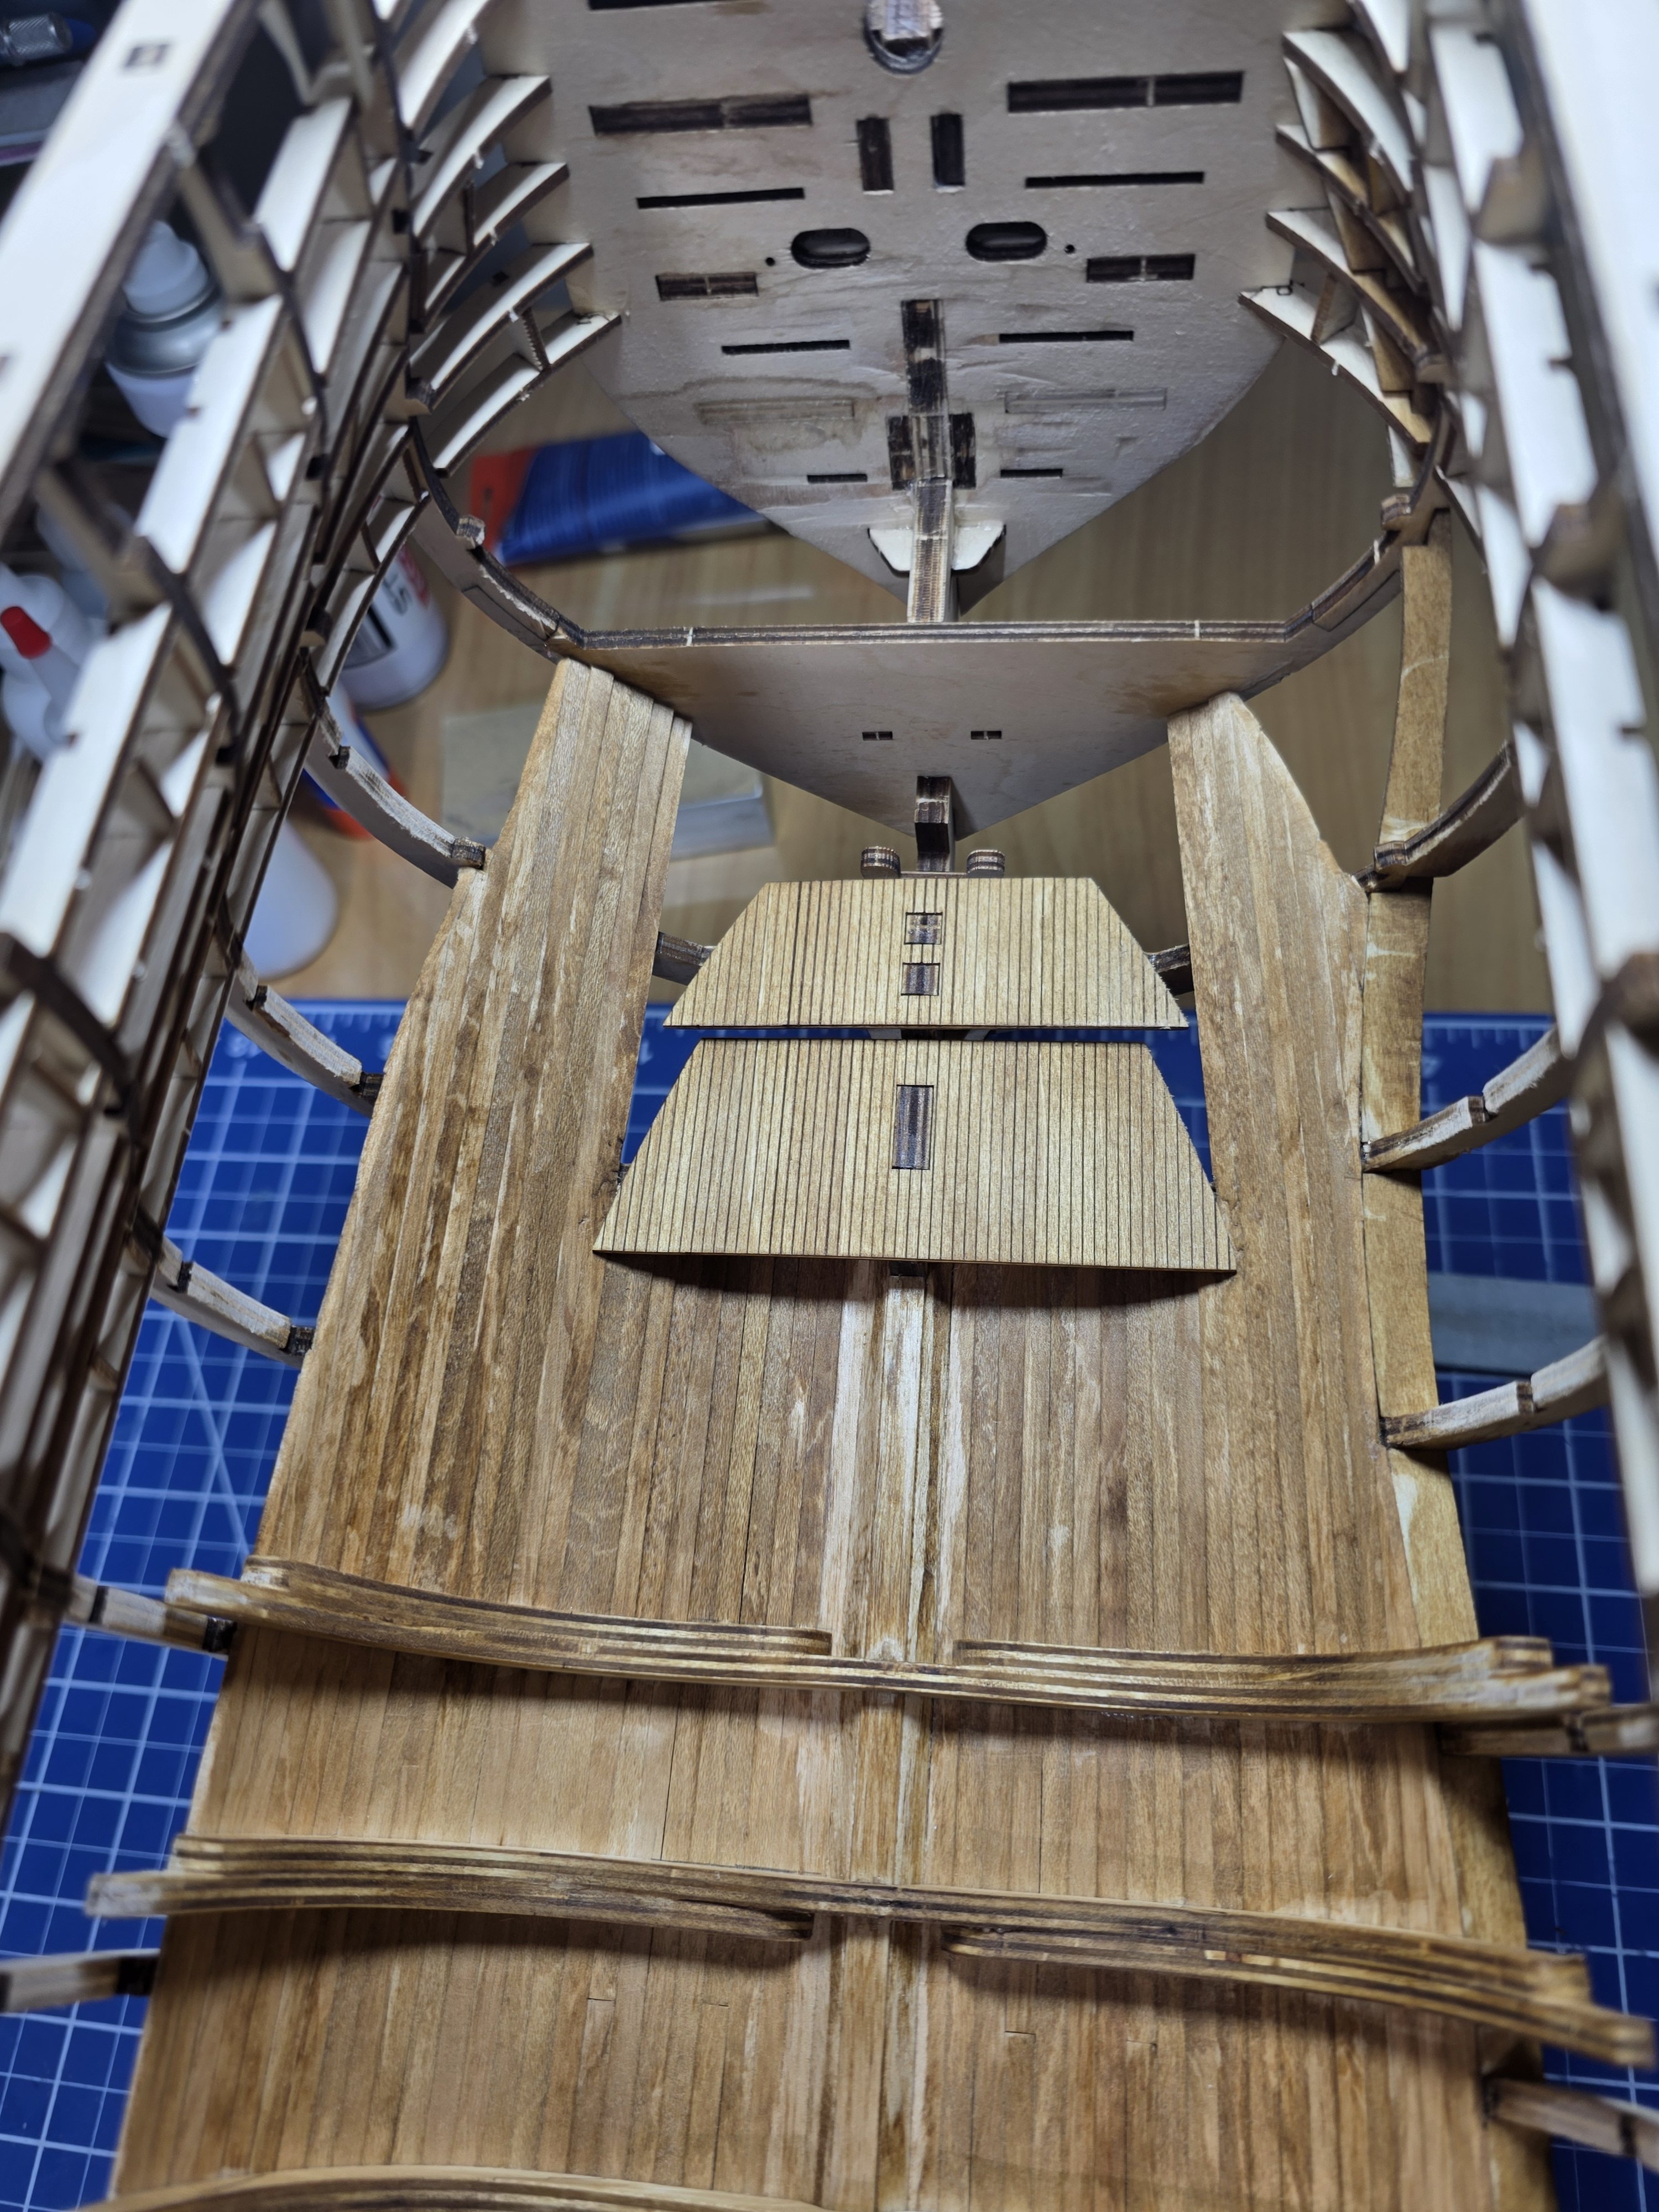
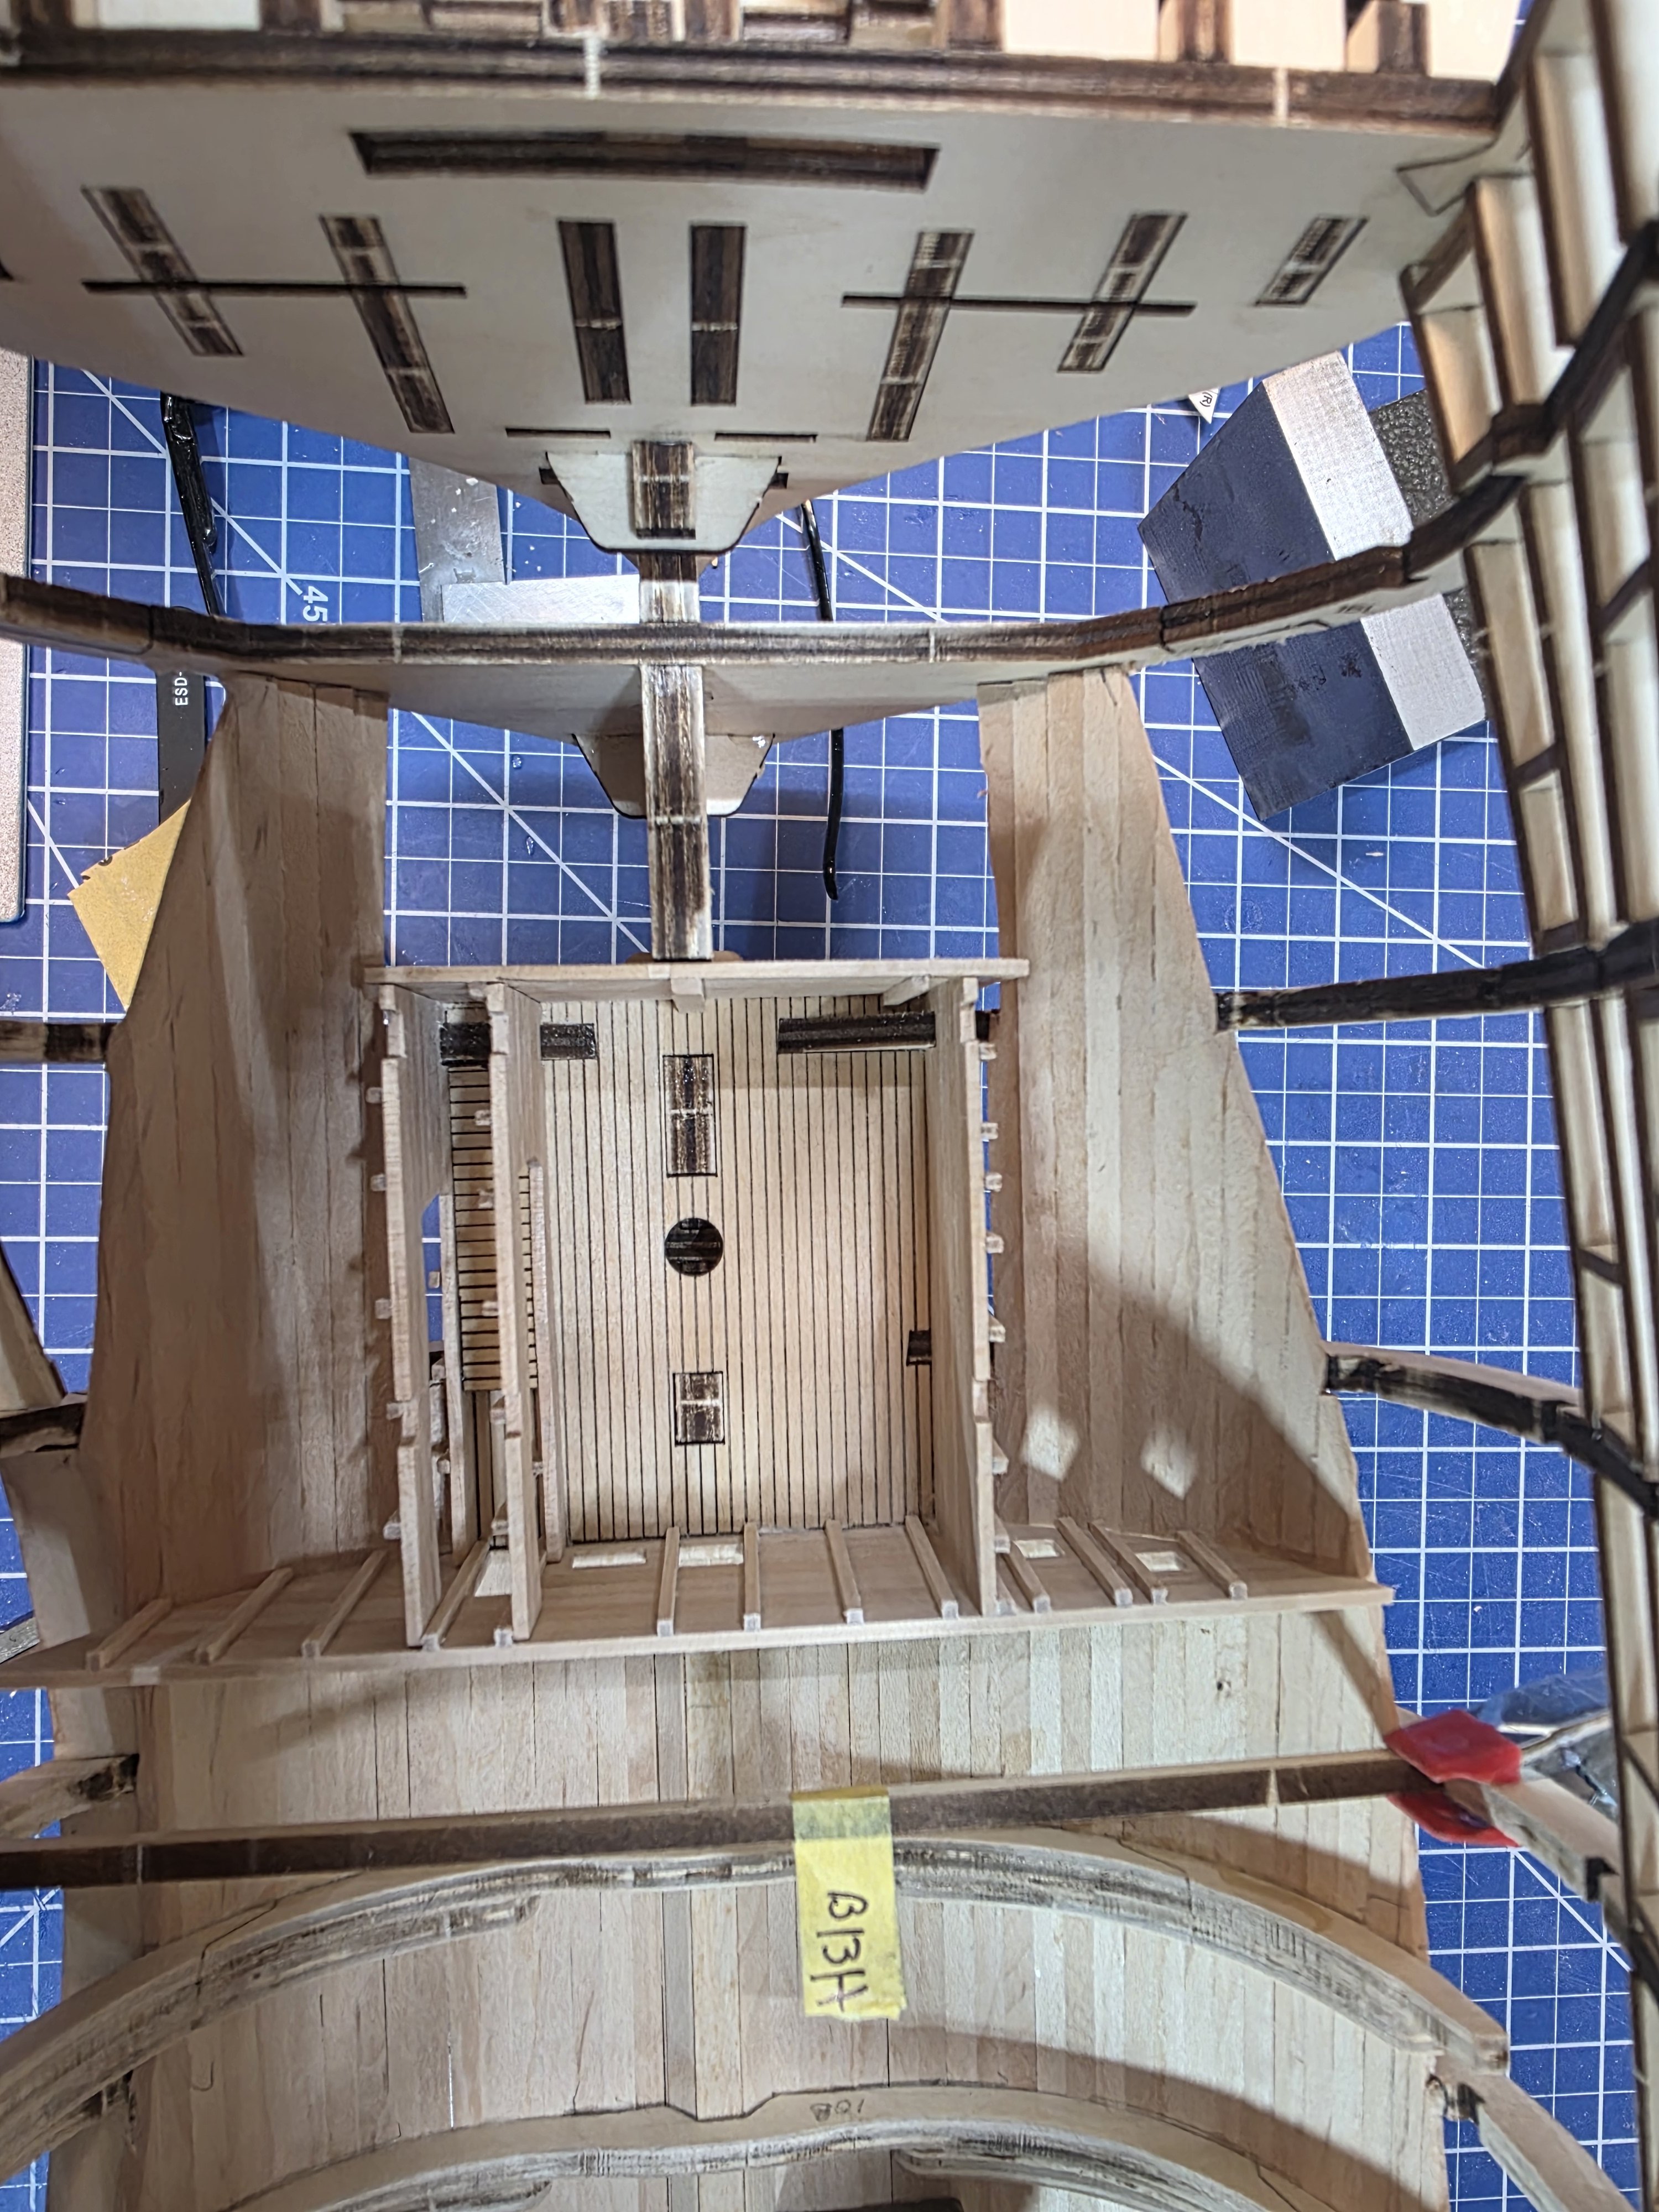
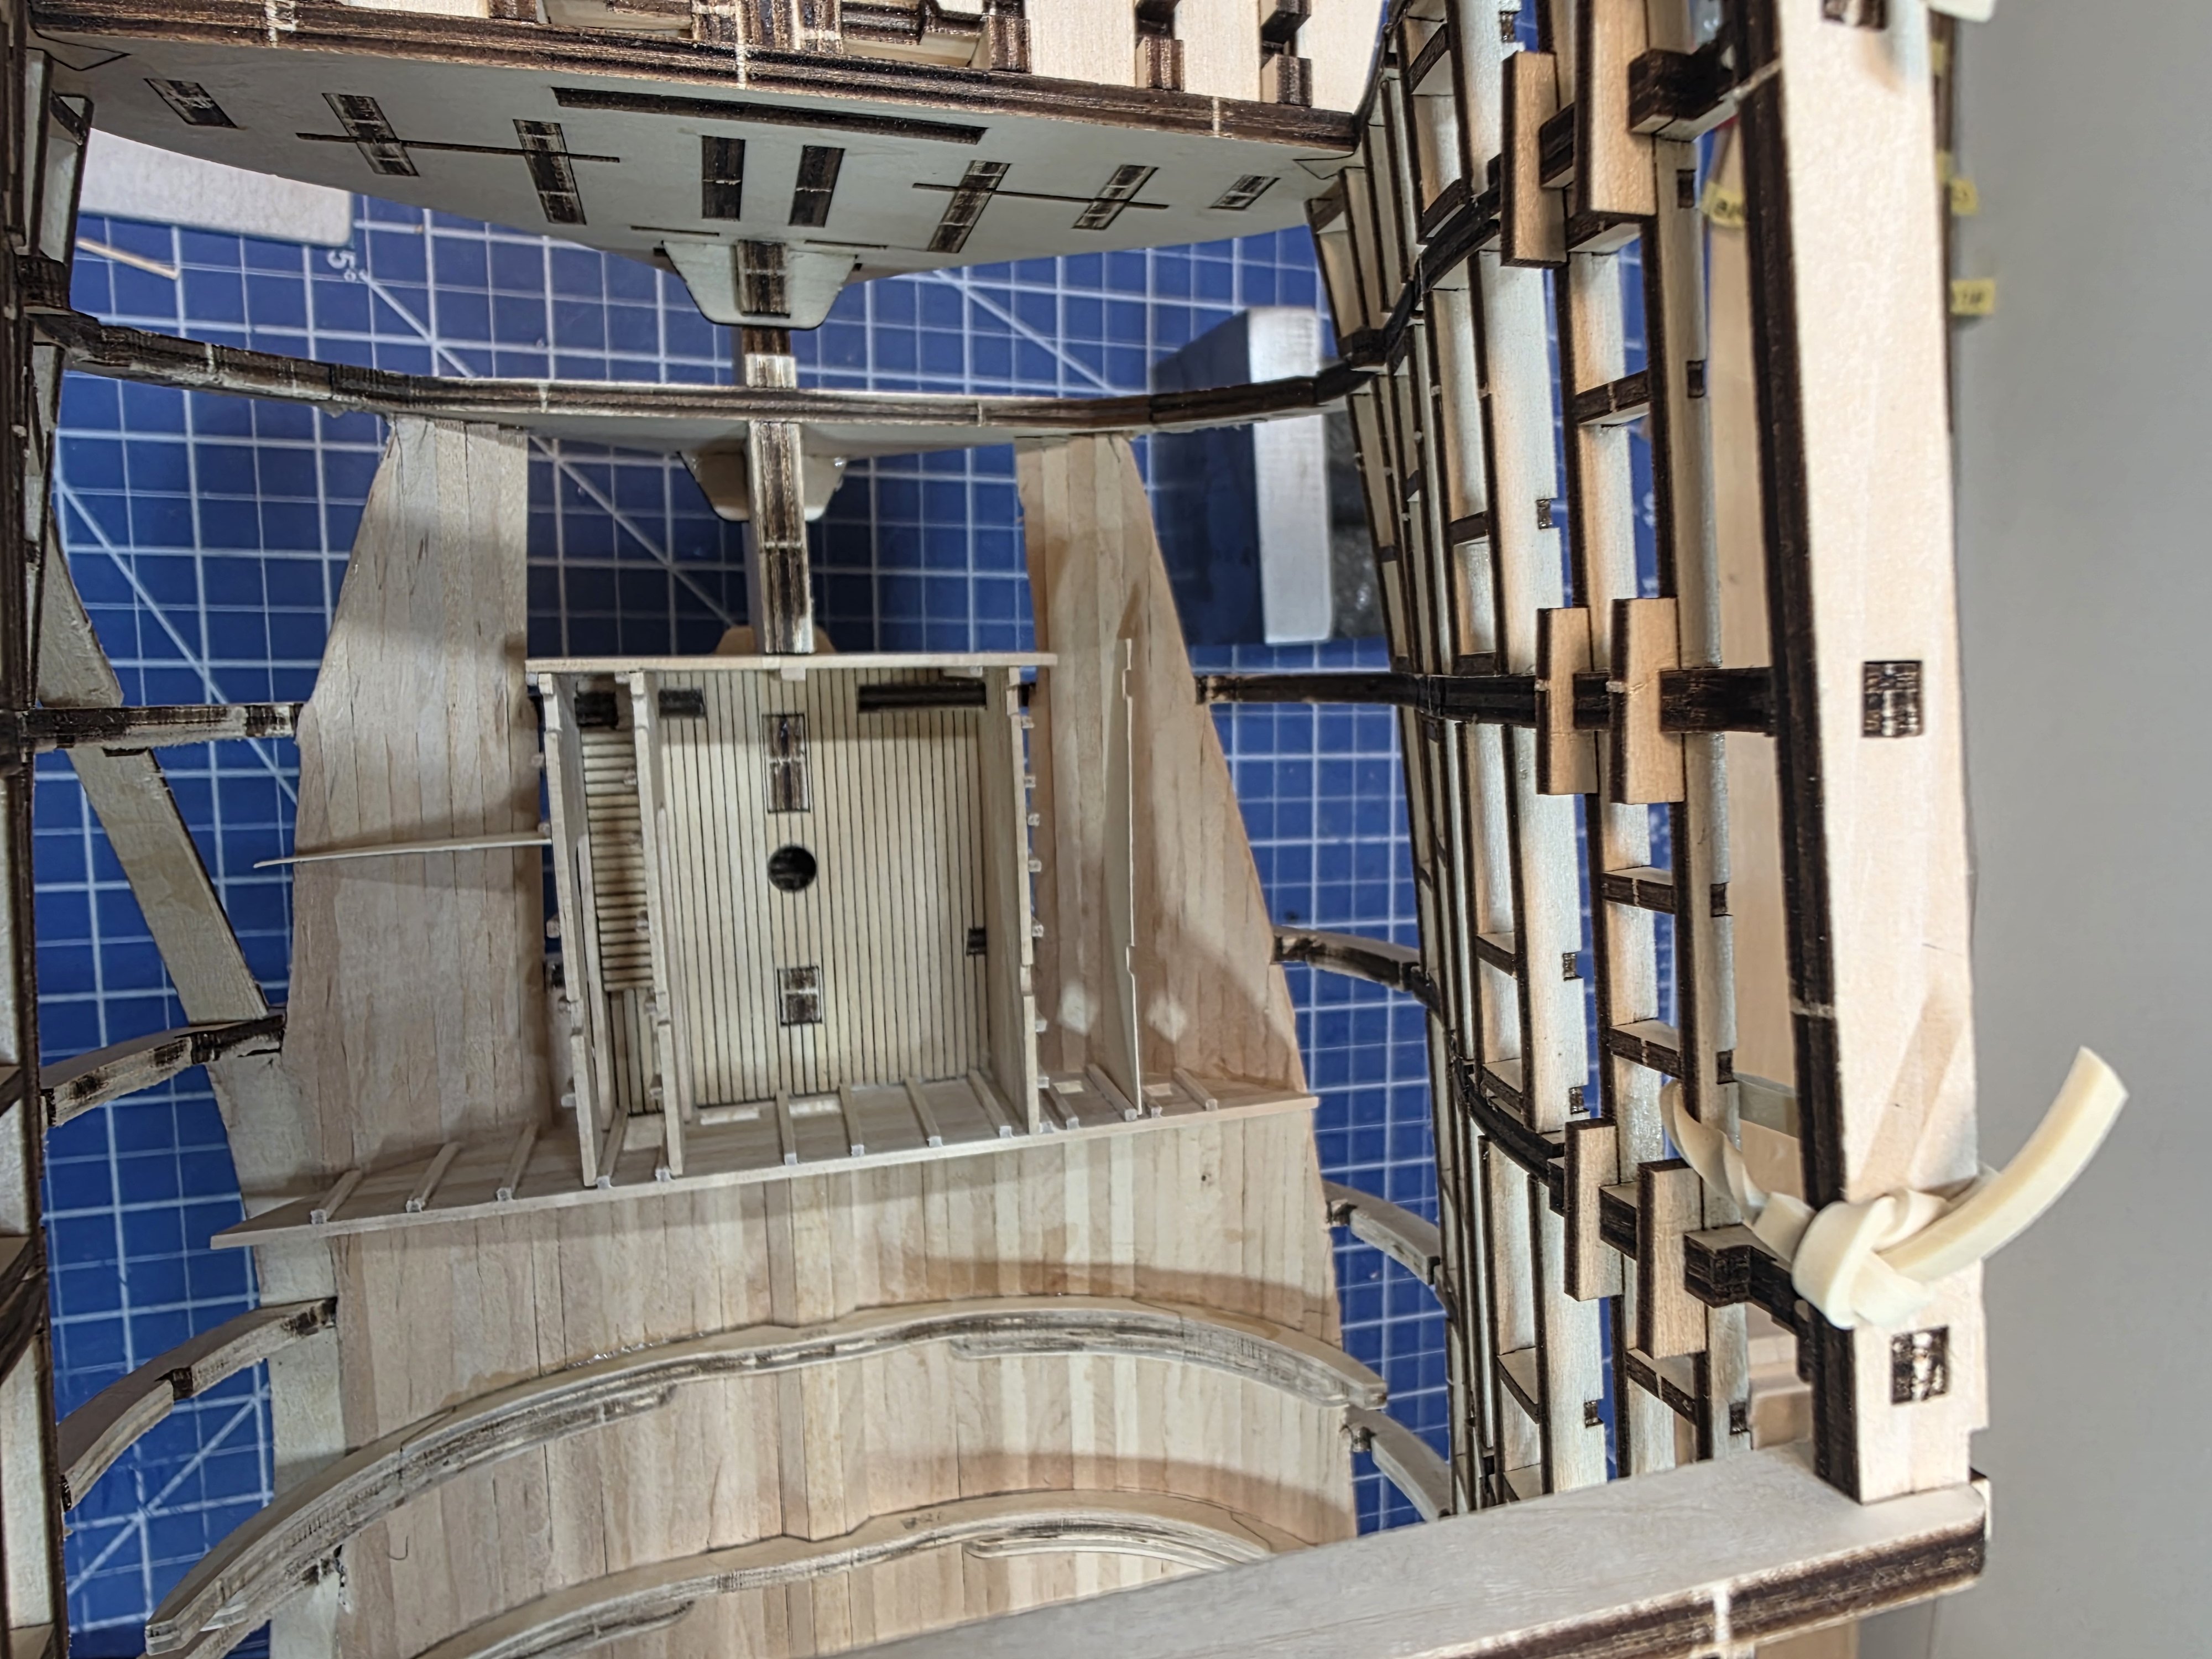
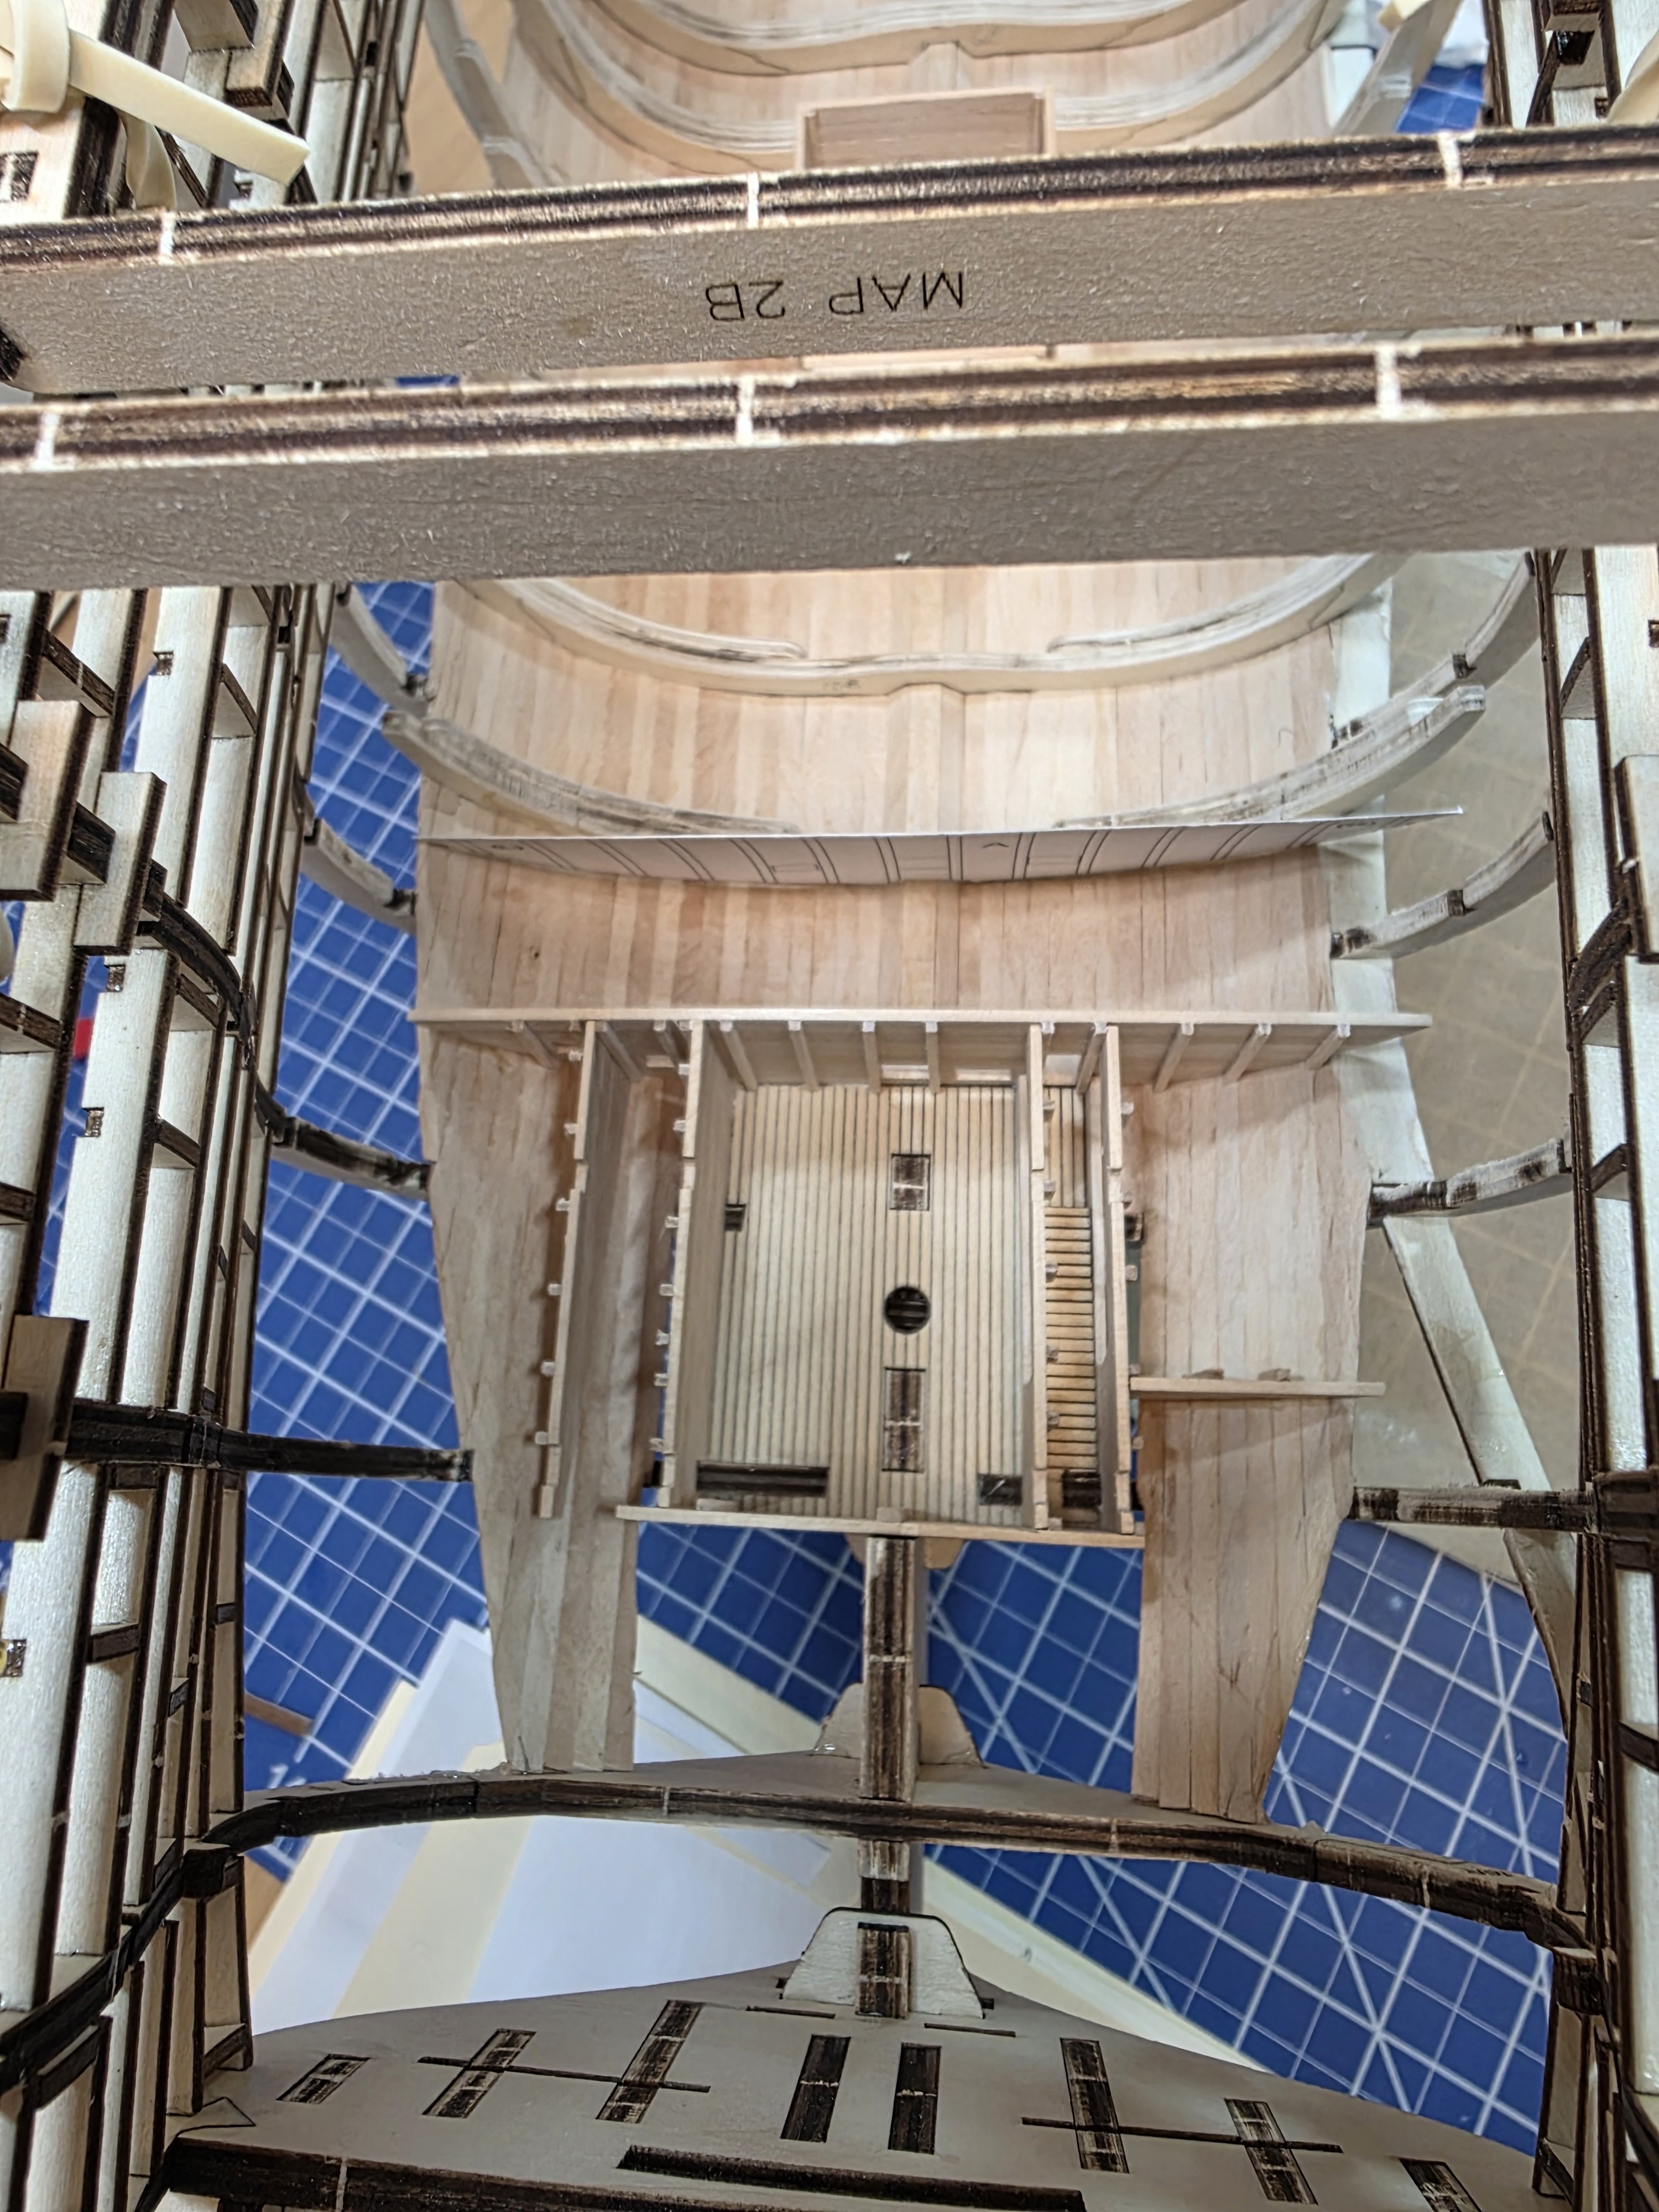
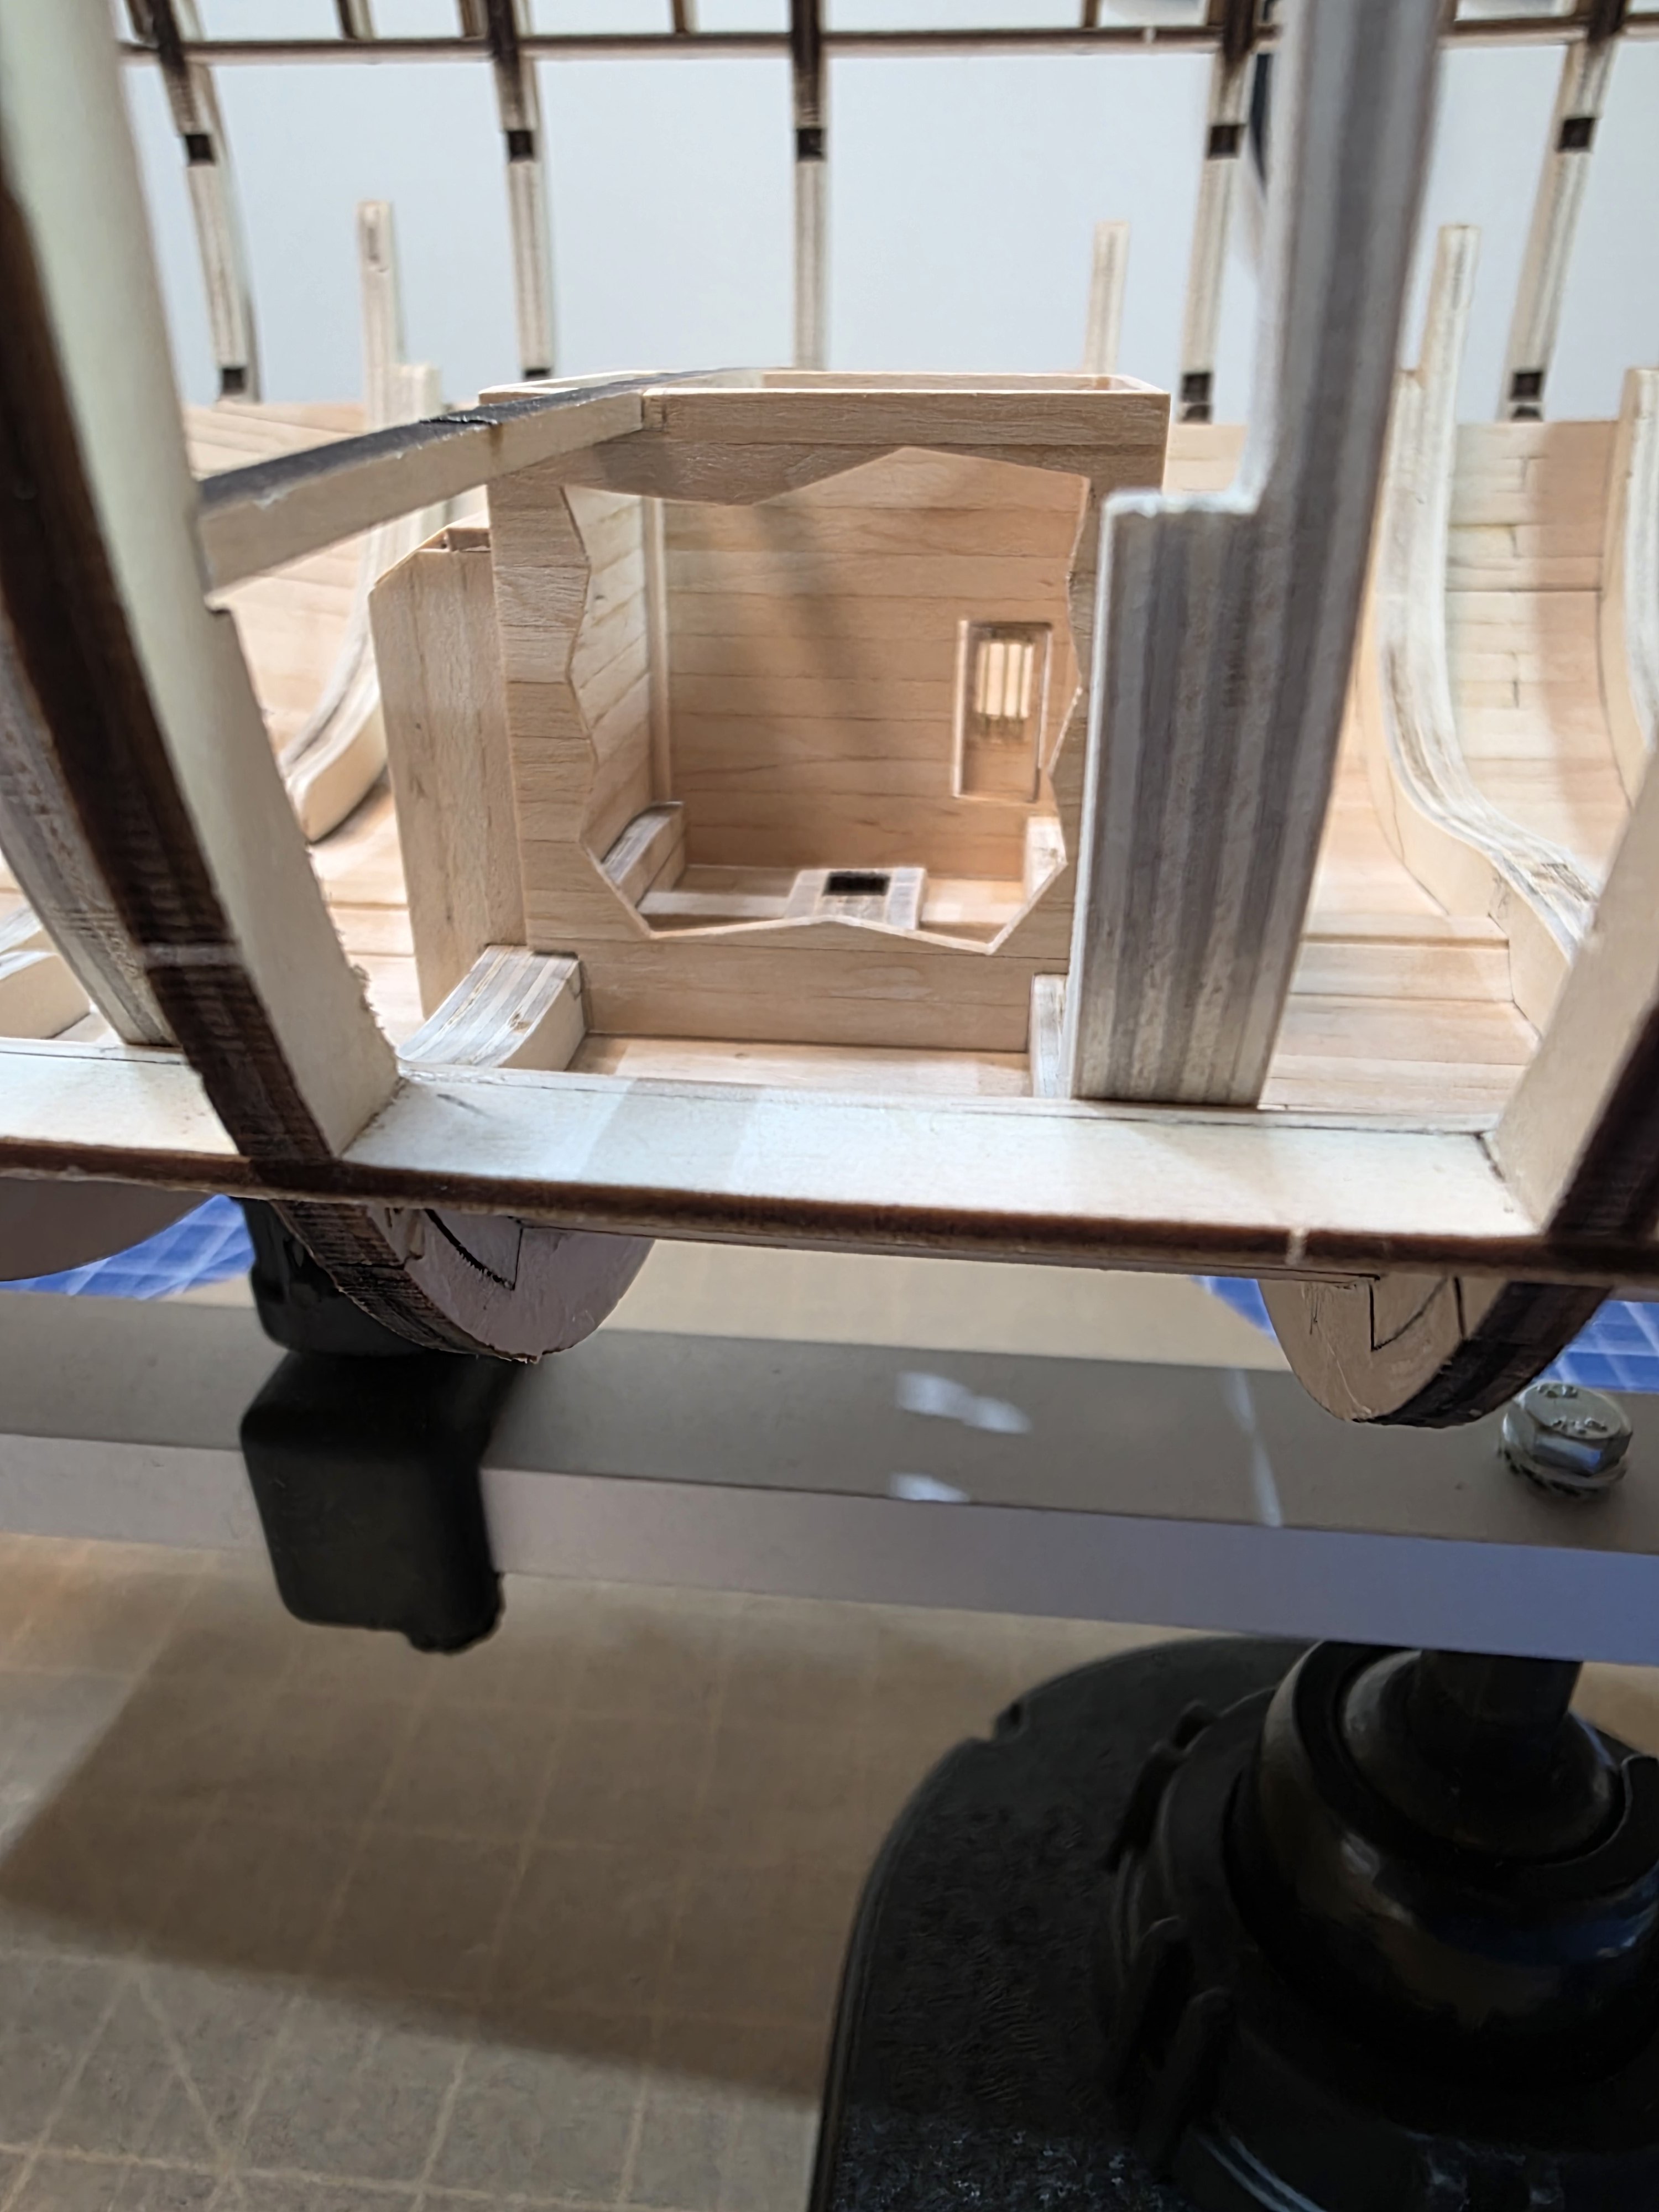
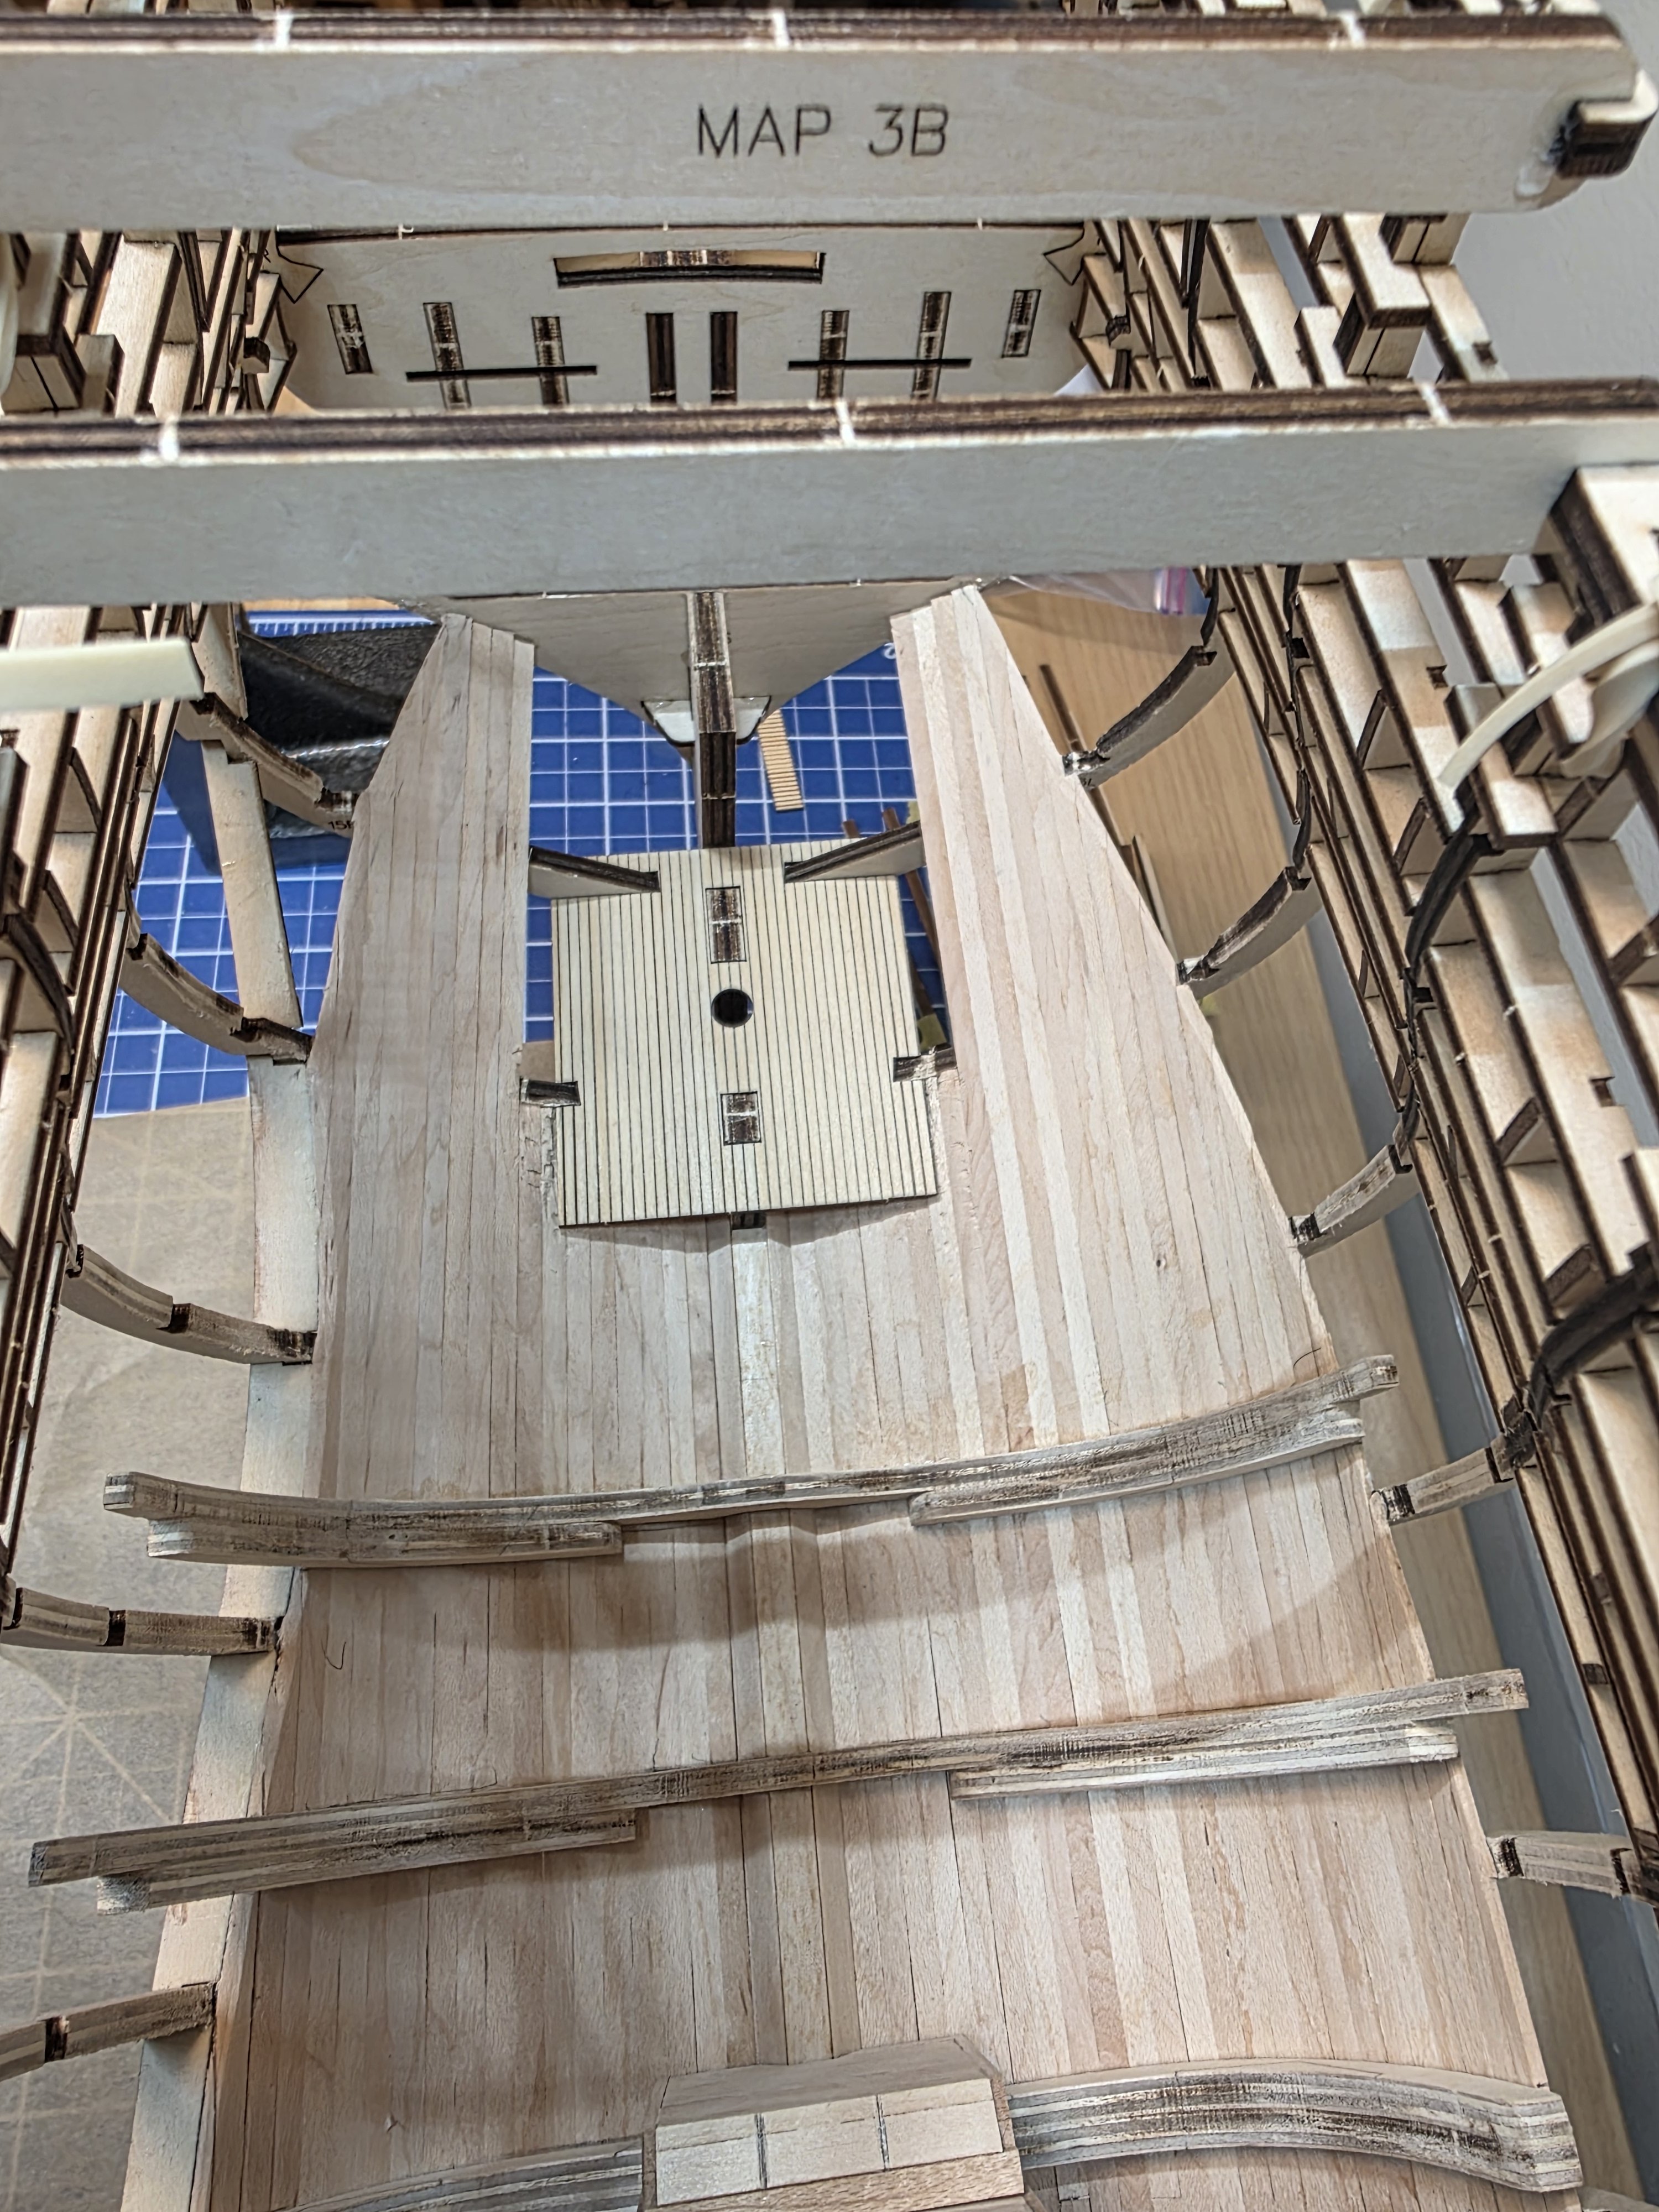
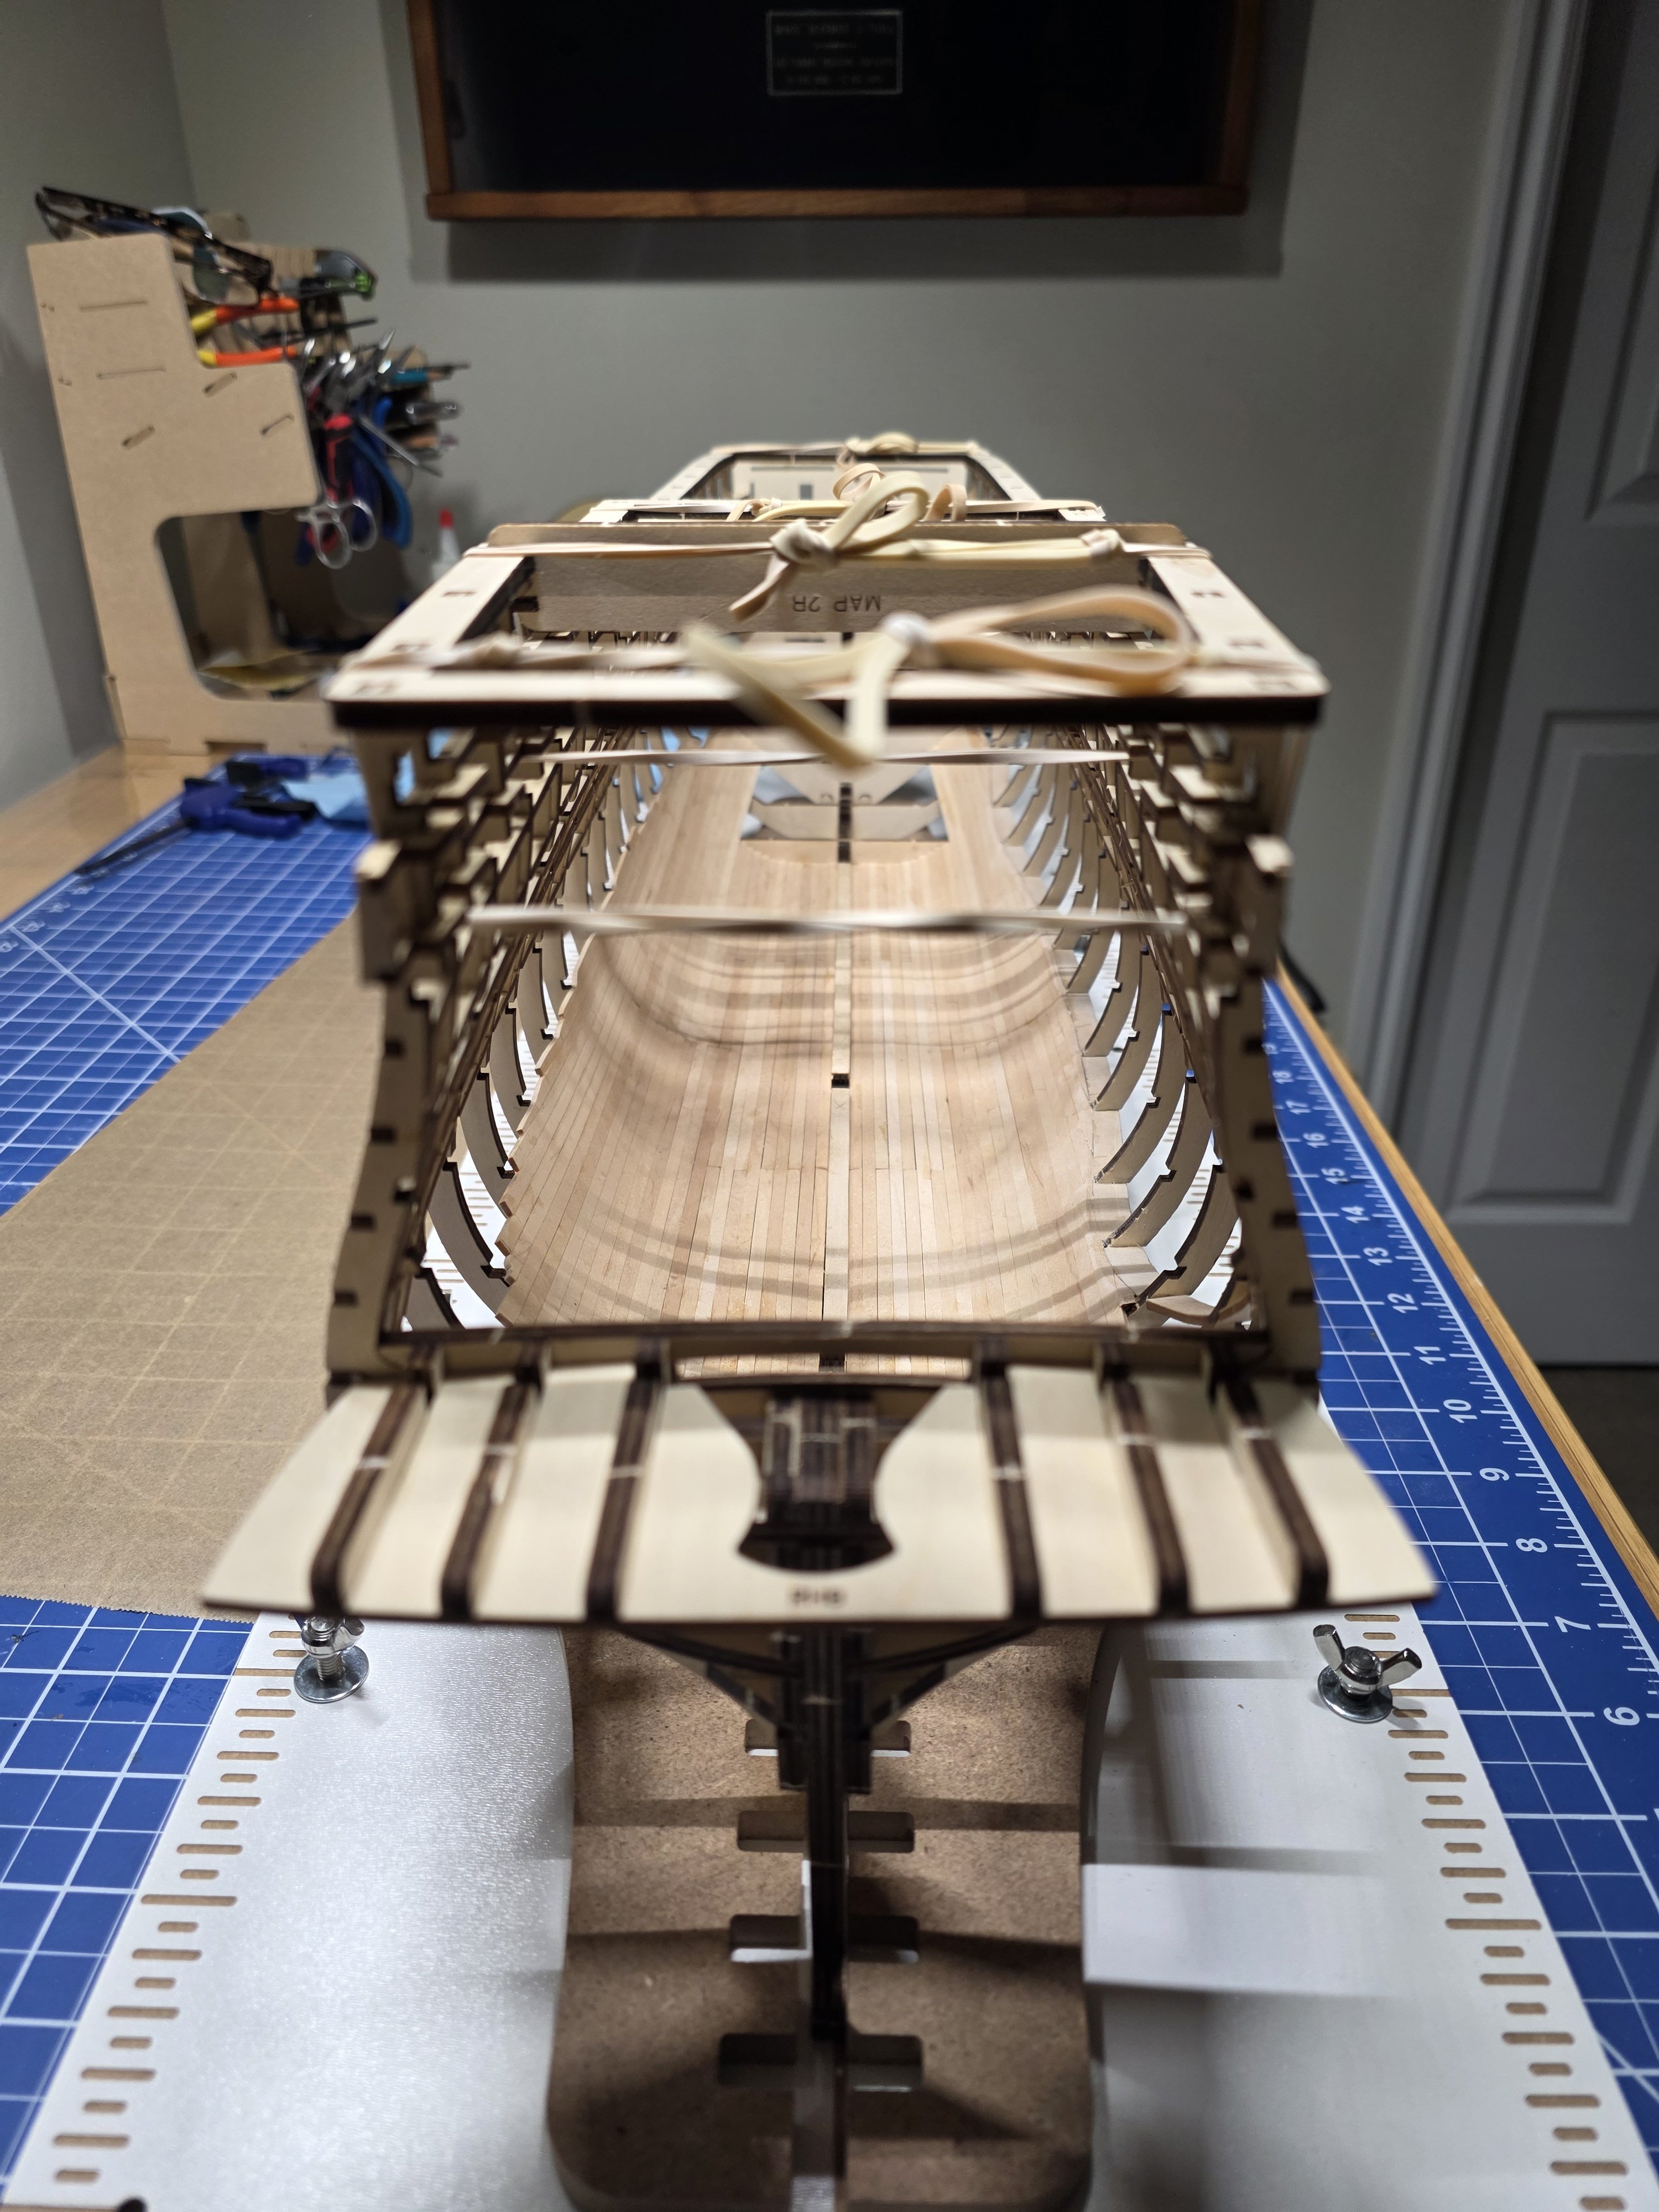
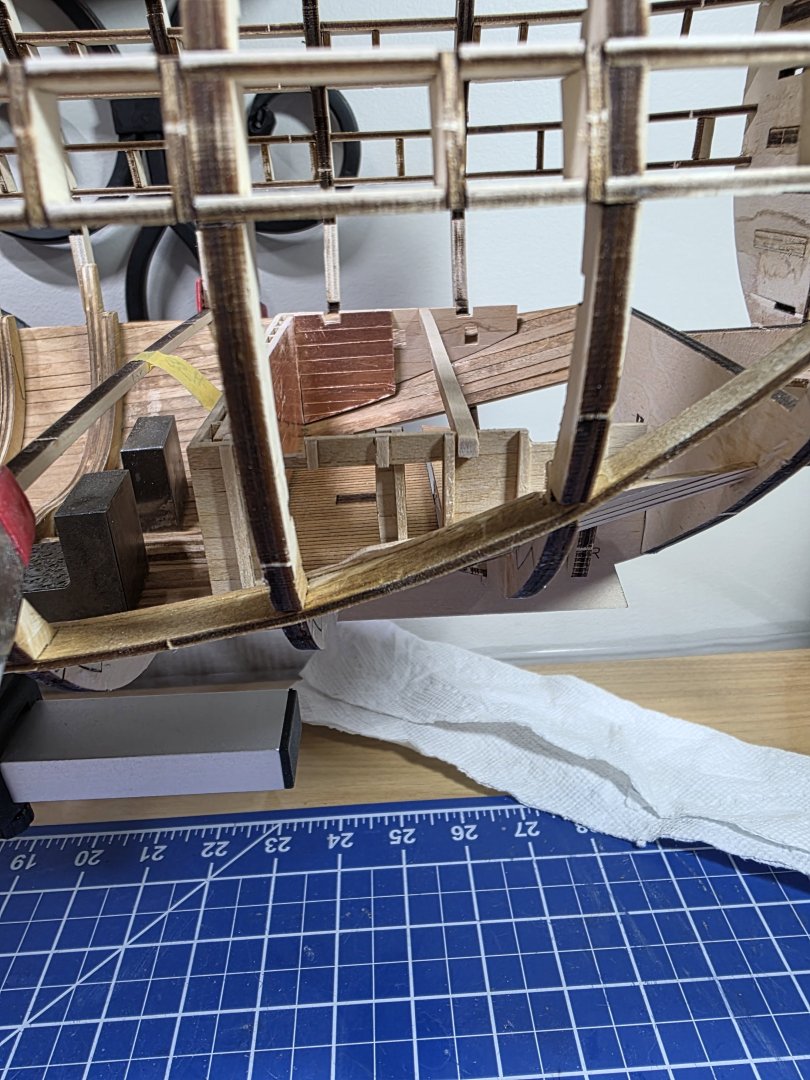
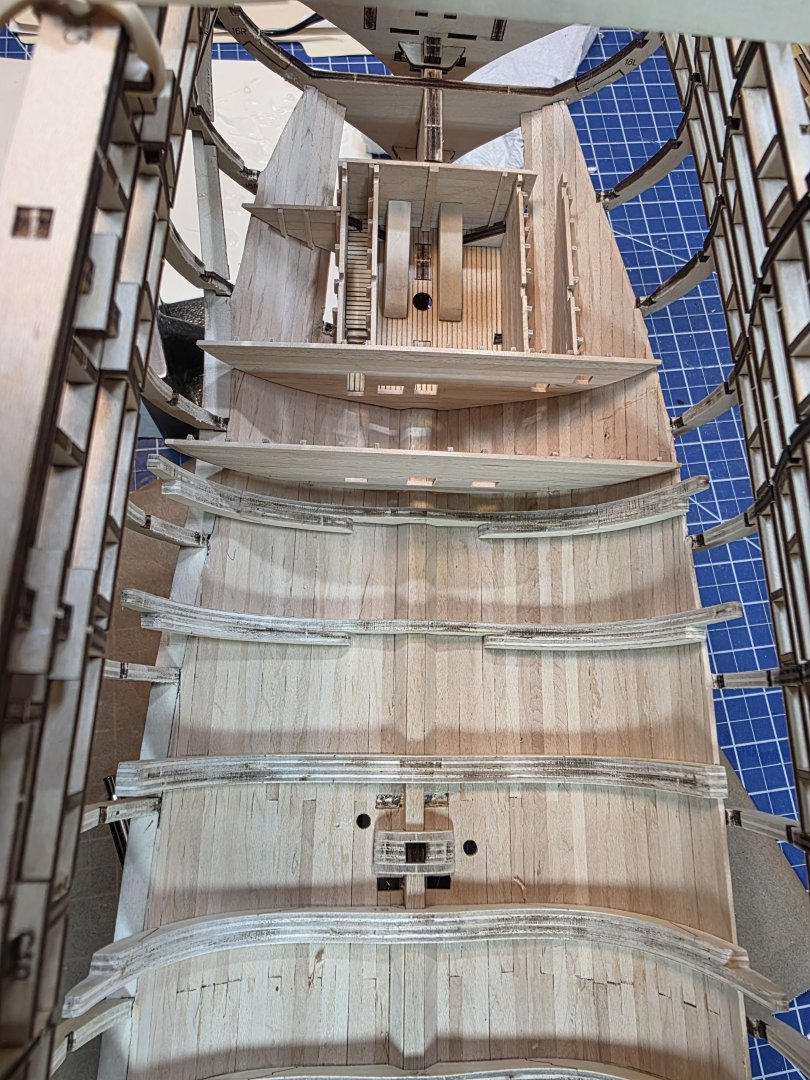
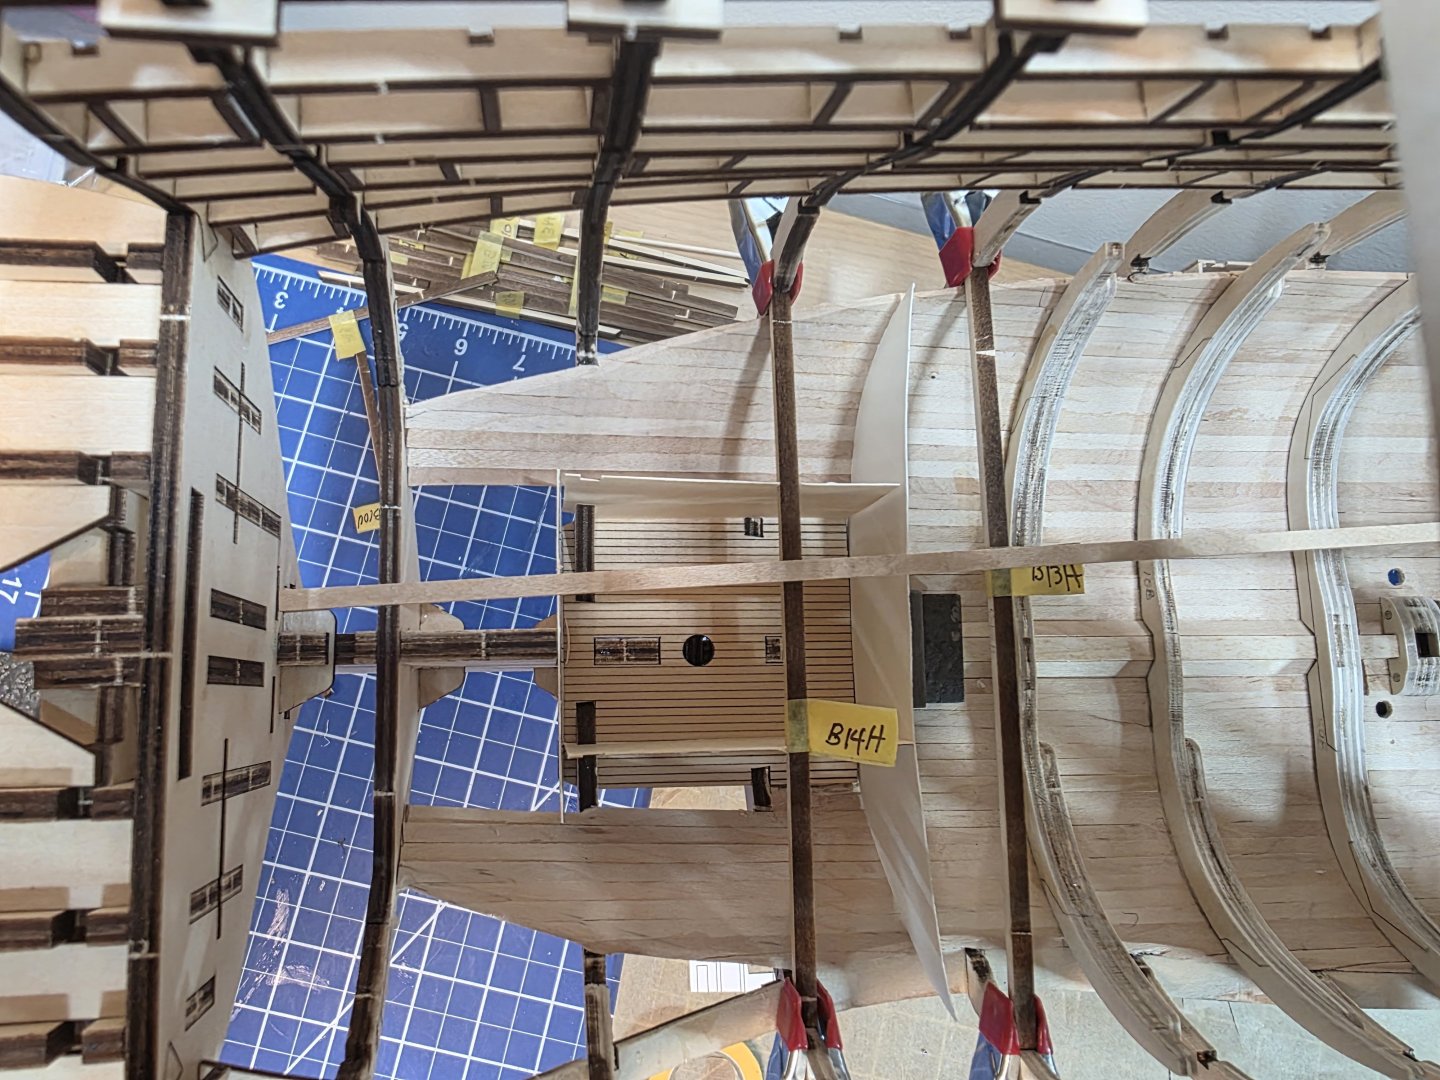
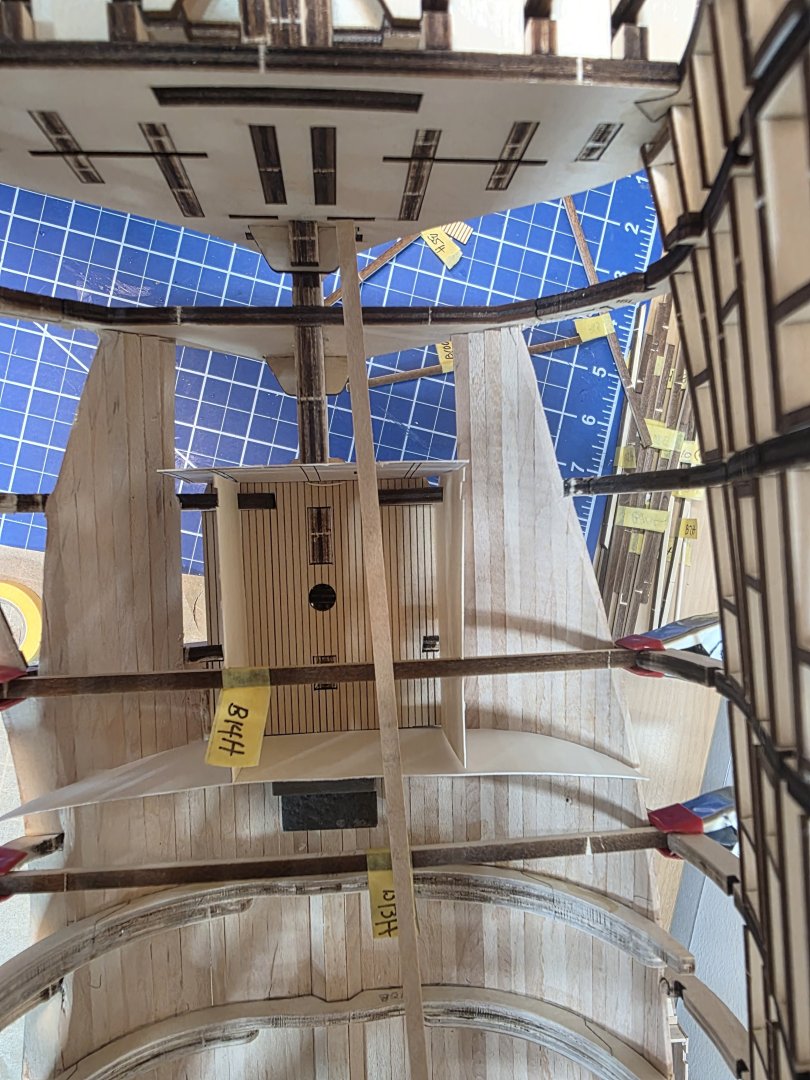
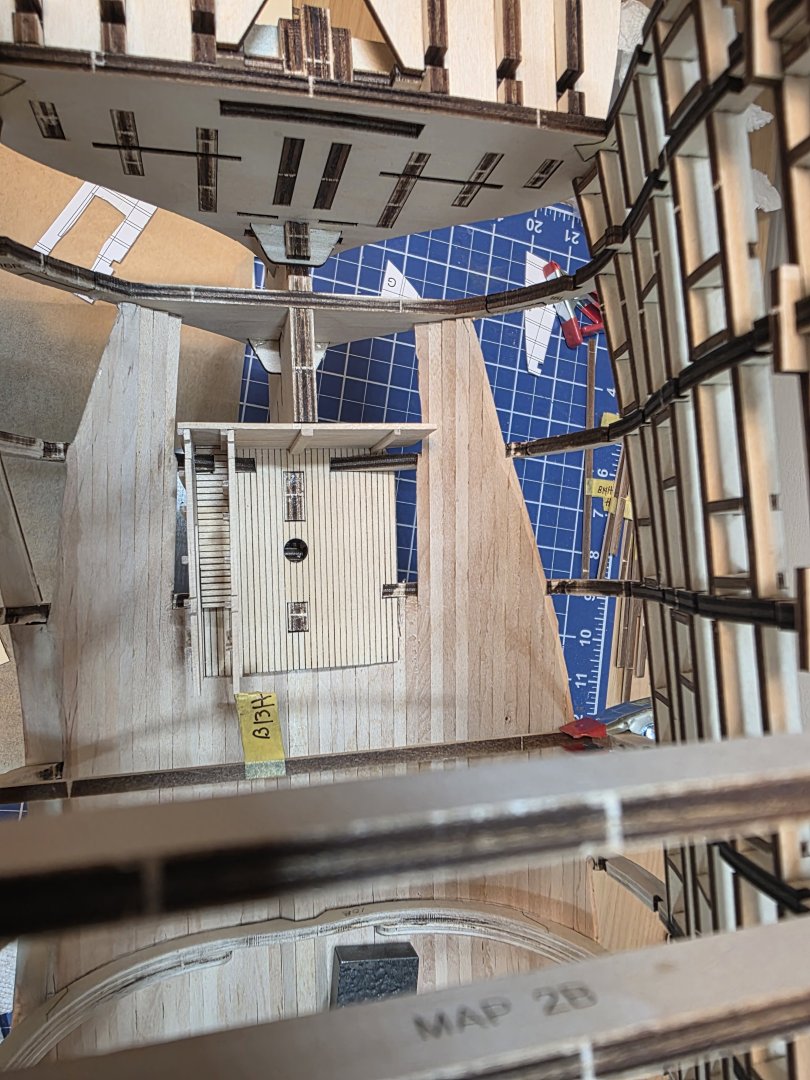
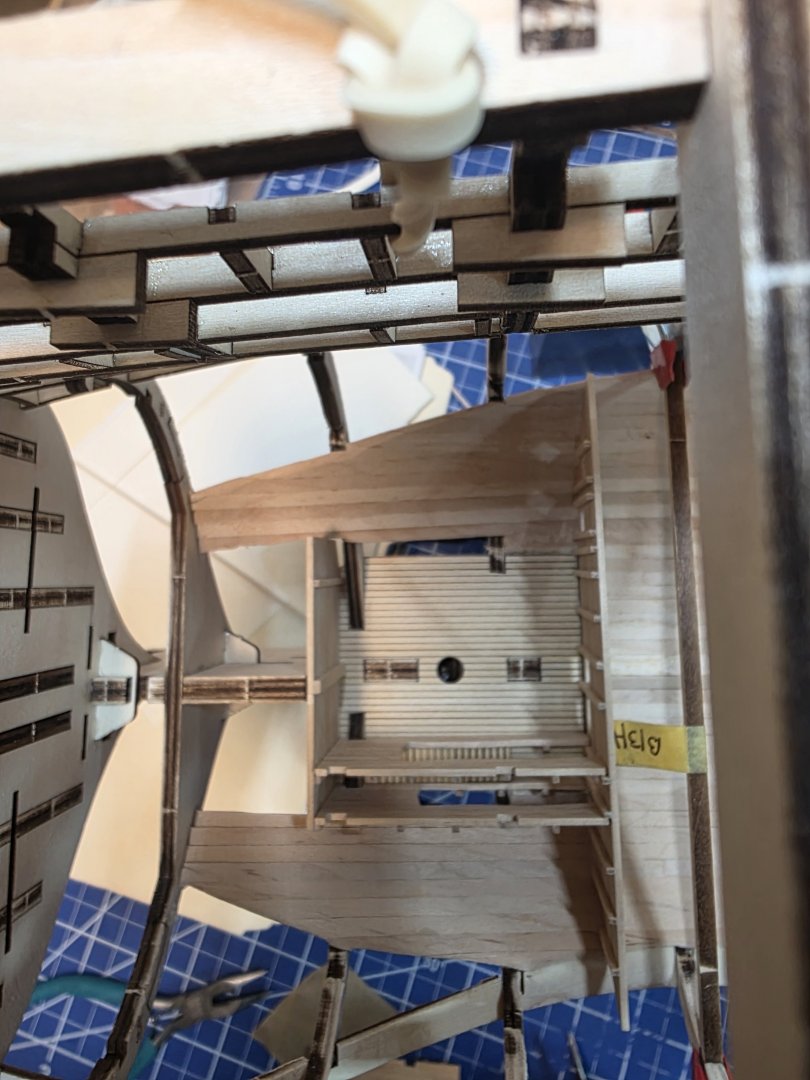
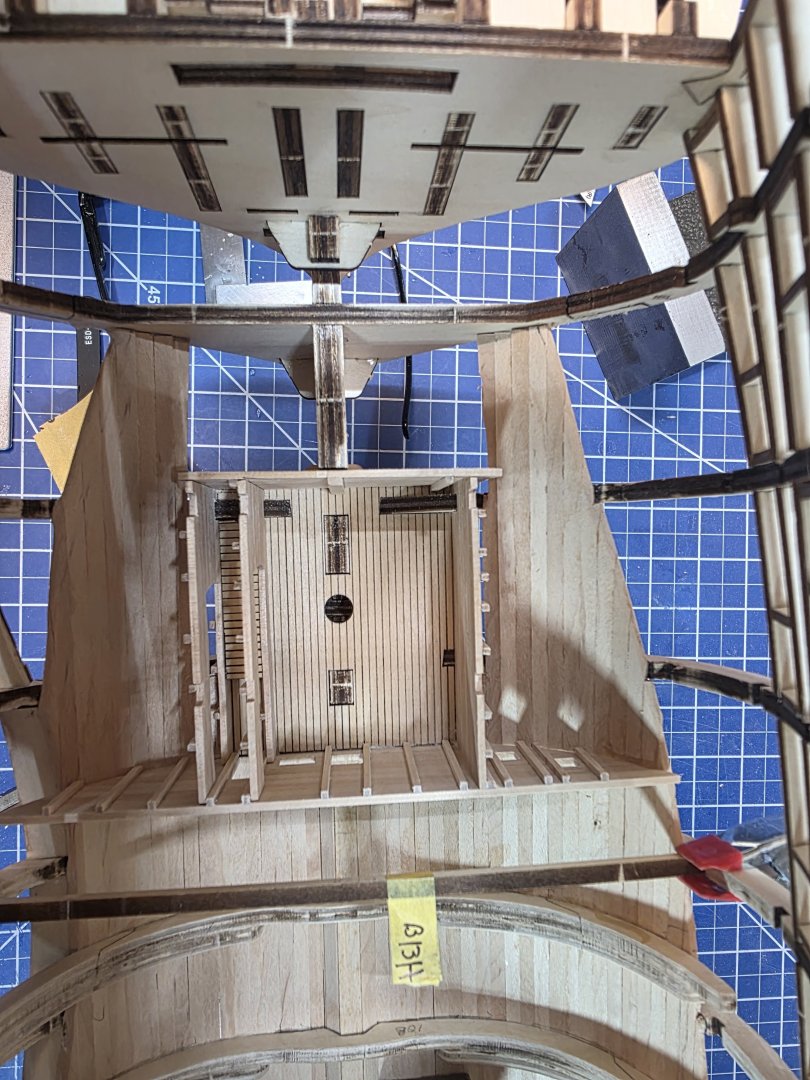
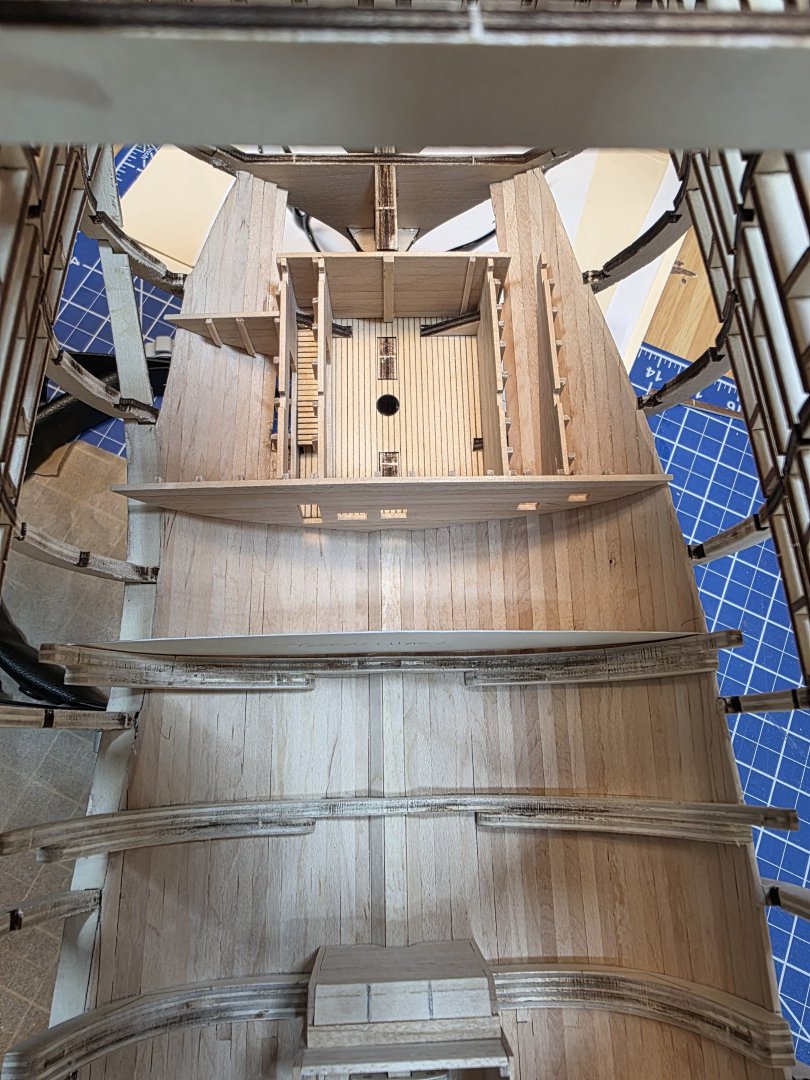
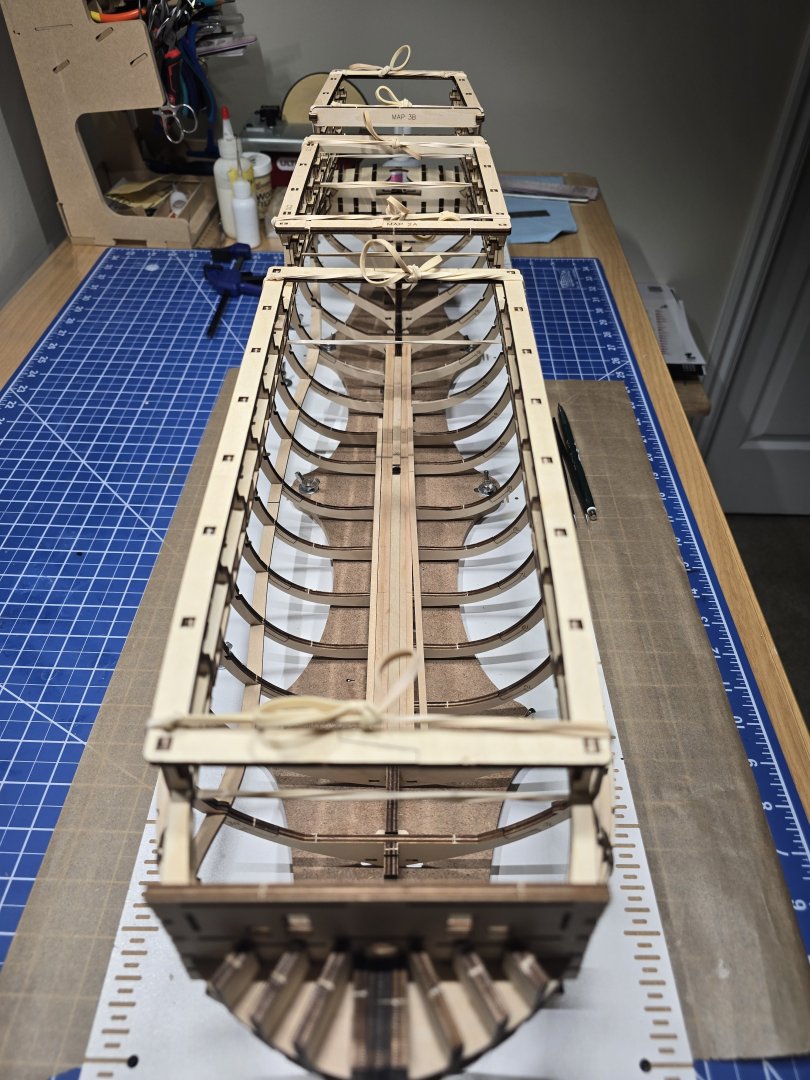
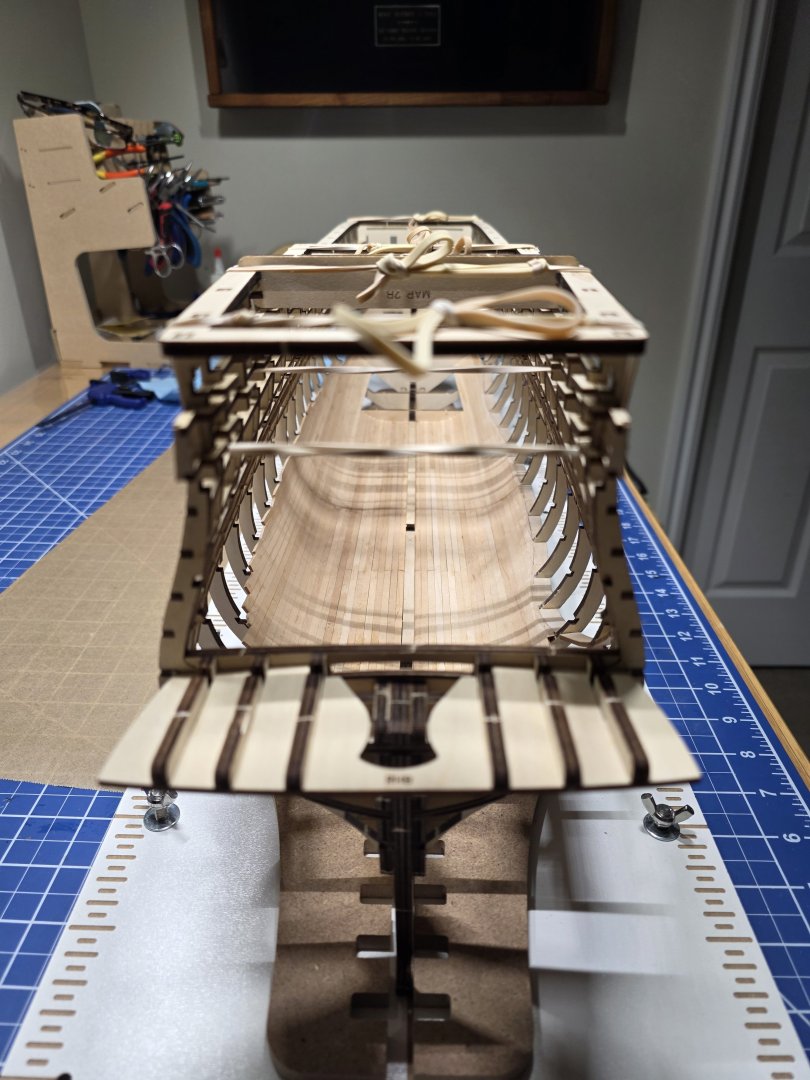
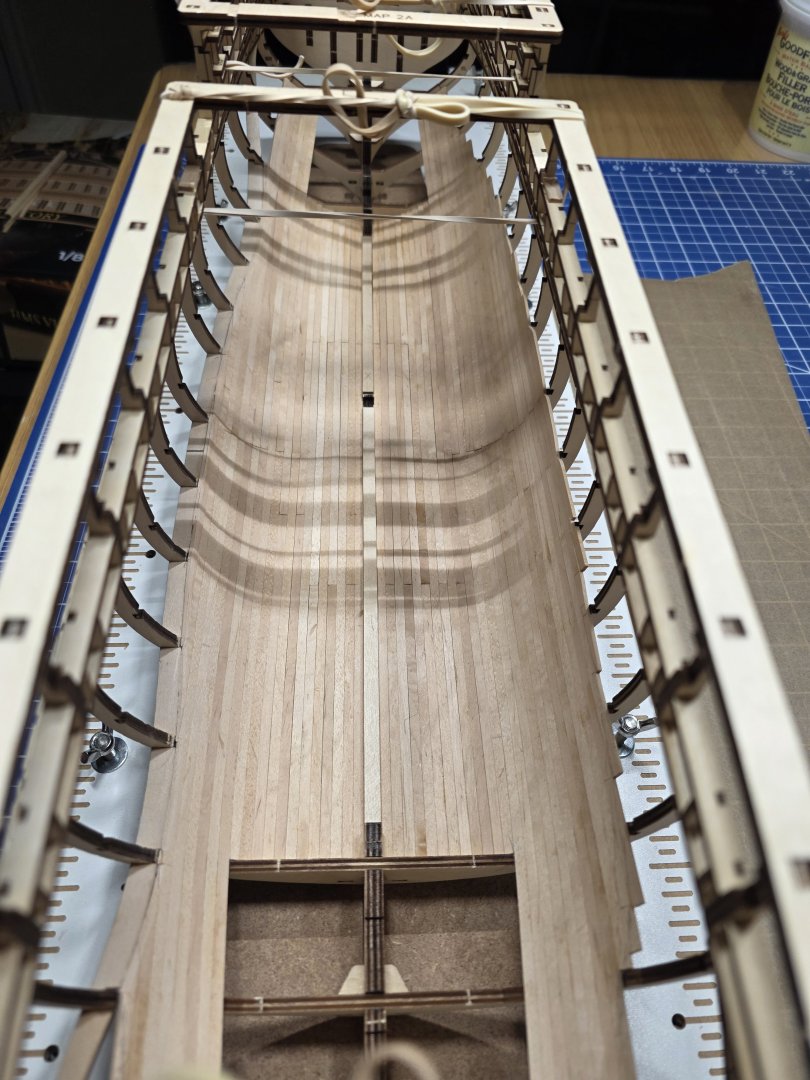
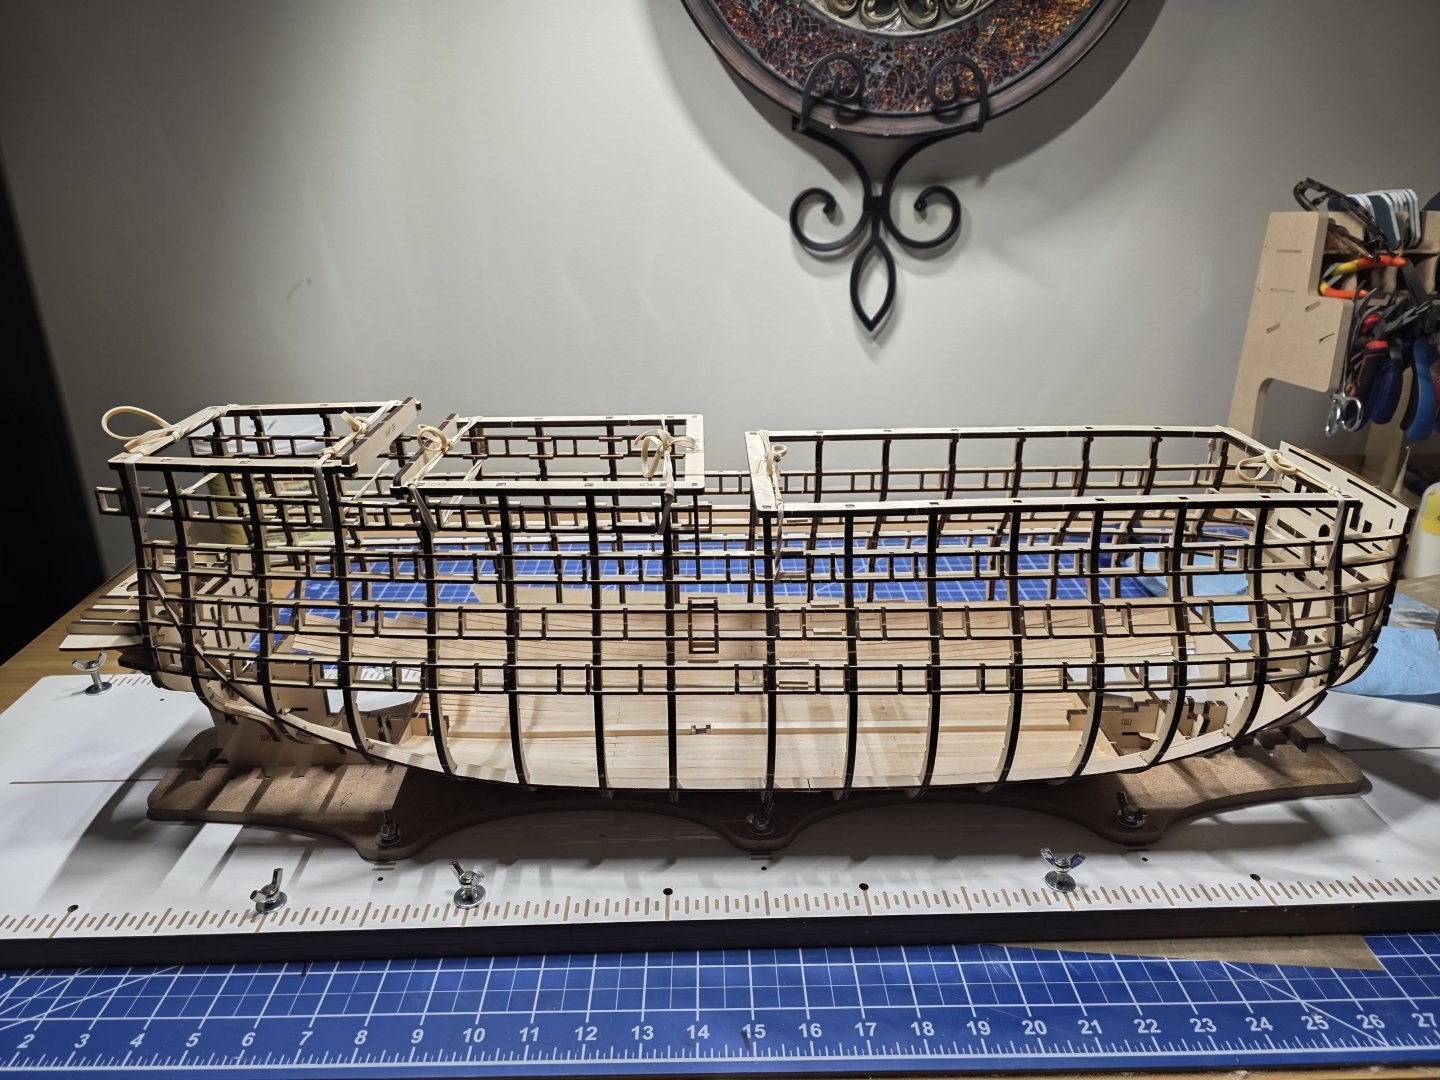
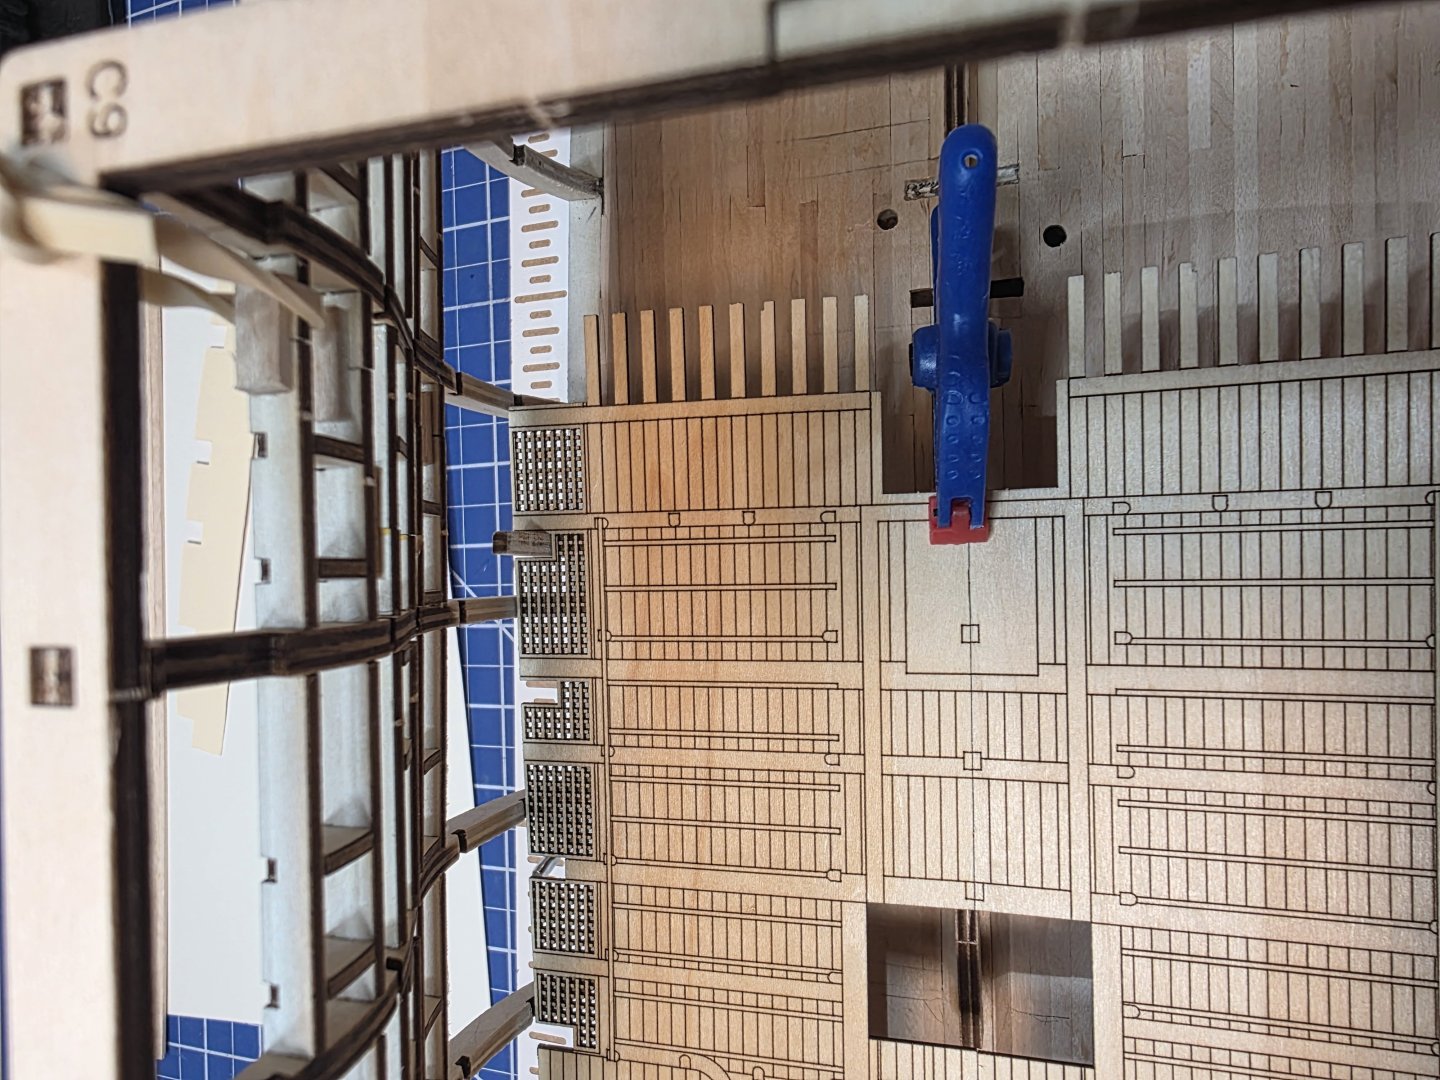
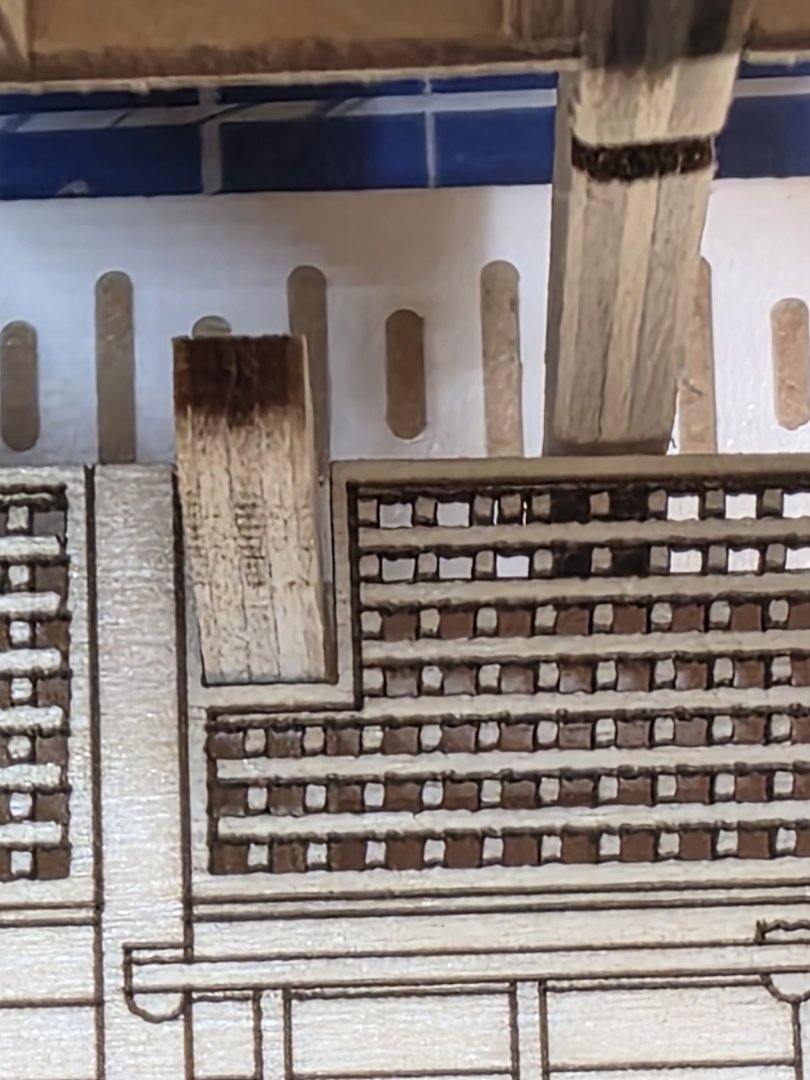
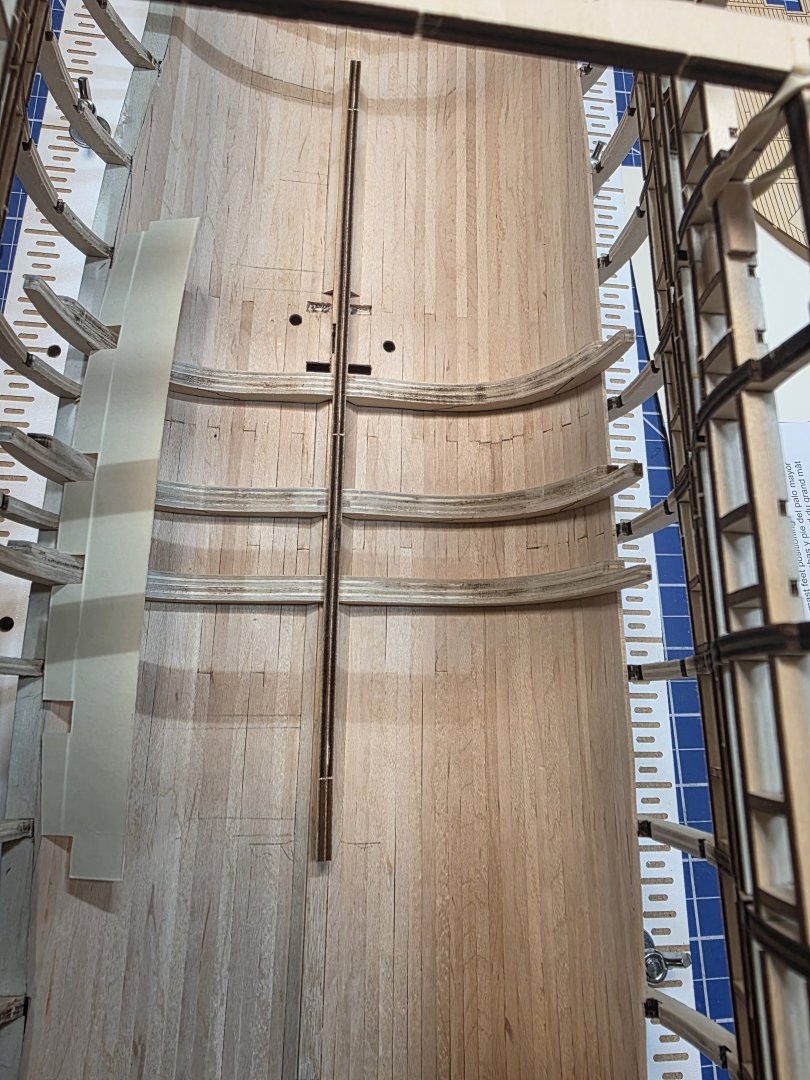
 The first part of video 6 is complete. All support posts are installed. The video calls for very specific heights for each post and I made each post to that height. I'm not sure if that will be the correct height for my model but I can shorten them later with a set of very sharp nippers if needed. A small jig is provided with the kit to help get the correct distance between posts where there are three posts across the frames. I tried this with the first frame but it was getting in my way more than anything else. I abandoned that and just determined the correct distance apart for the posts. I used a brass nail in the bottom of each post as seen in the video and did my best to get the posts aligned correctly. Next up are the flour sacks. The kit provides a template to make these from paper or cloth I guess. I feel like this would have been a great 3d resin part. I'm going to skip that step for now while I see if I can find some 3d parts that will work. Next up are the barrels, a part I don't recognize (part H25 in the kit) and the ballast material.
.thumb.jpg.5876549a6b3b467c16dbff7a069fd34e.jpg)
-
I signed up for their 3D experience/creator home online version. Its like $55 a year. Just got a 3D printer and i have no clue what to do with it so far.
-
I feel your pain.
-
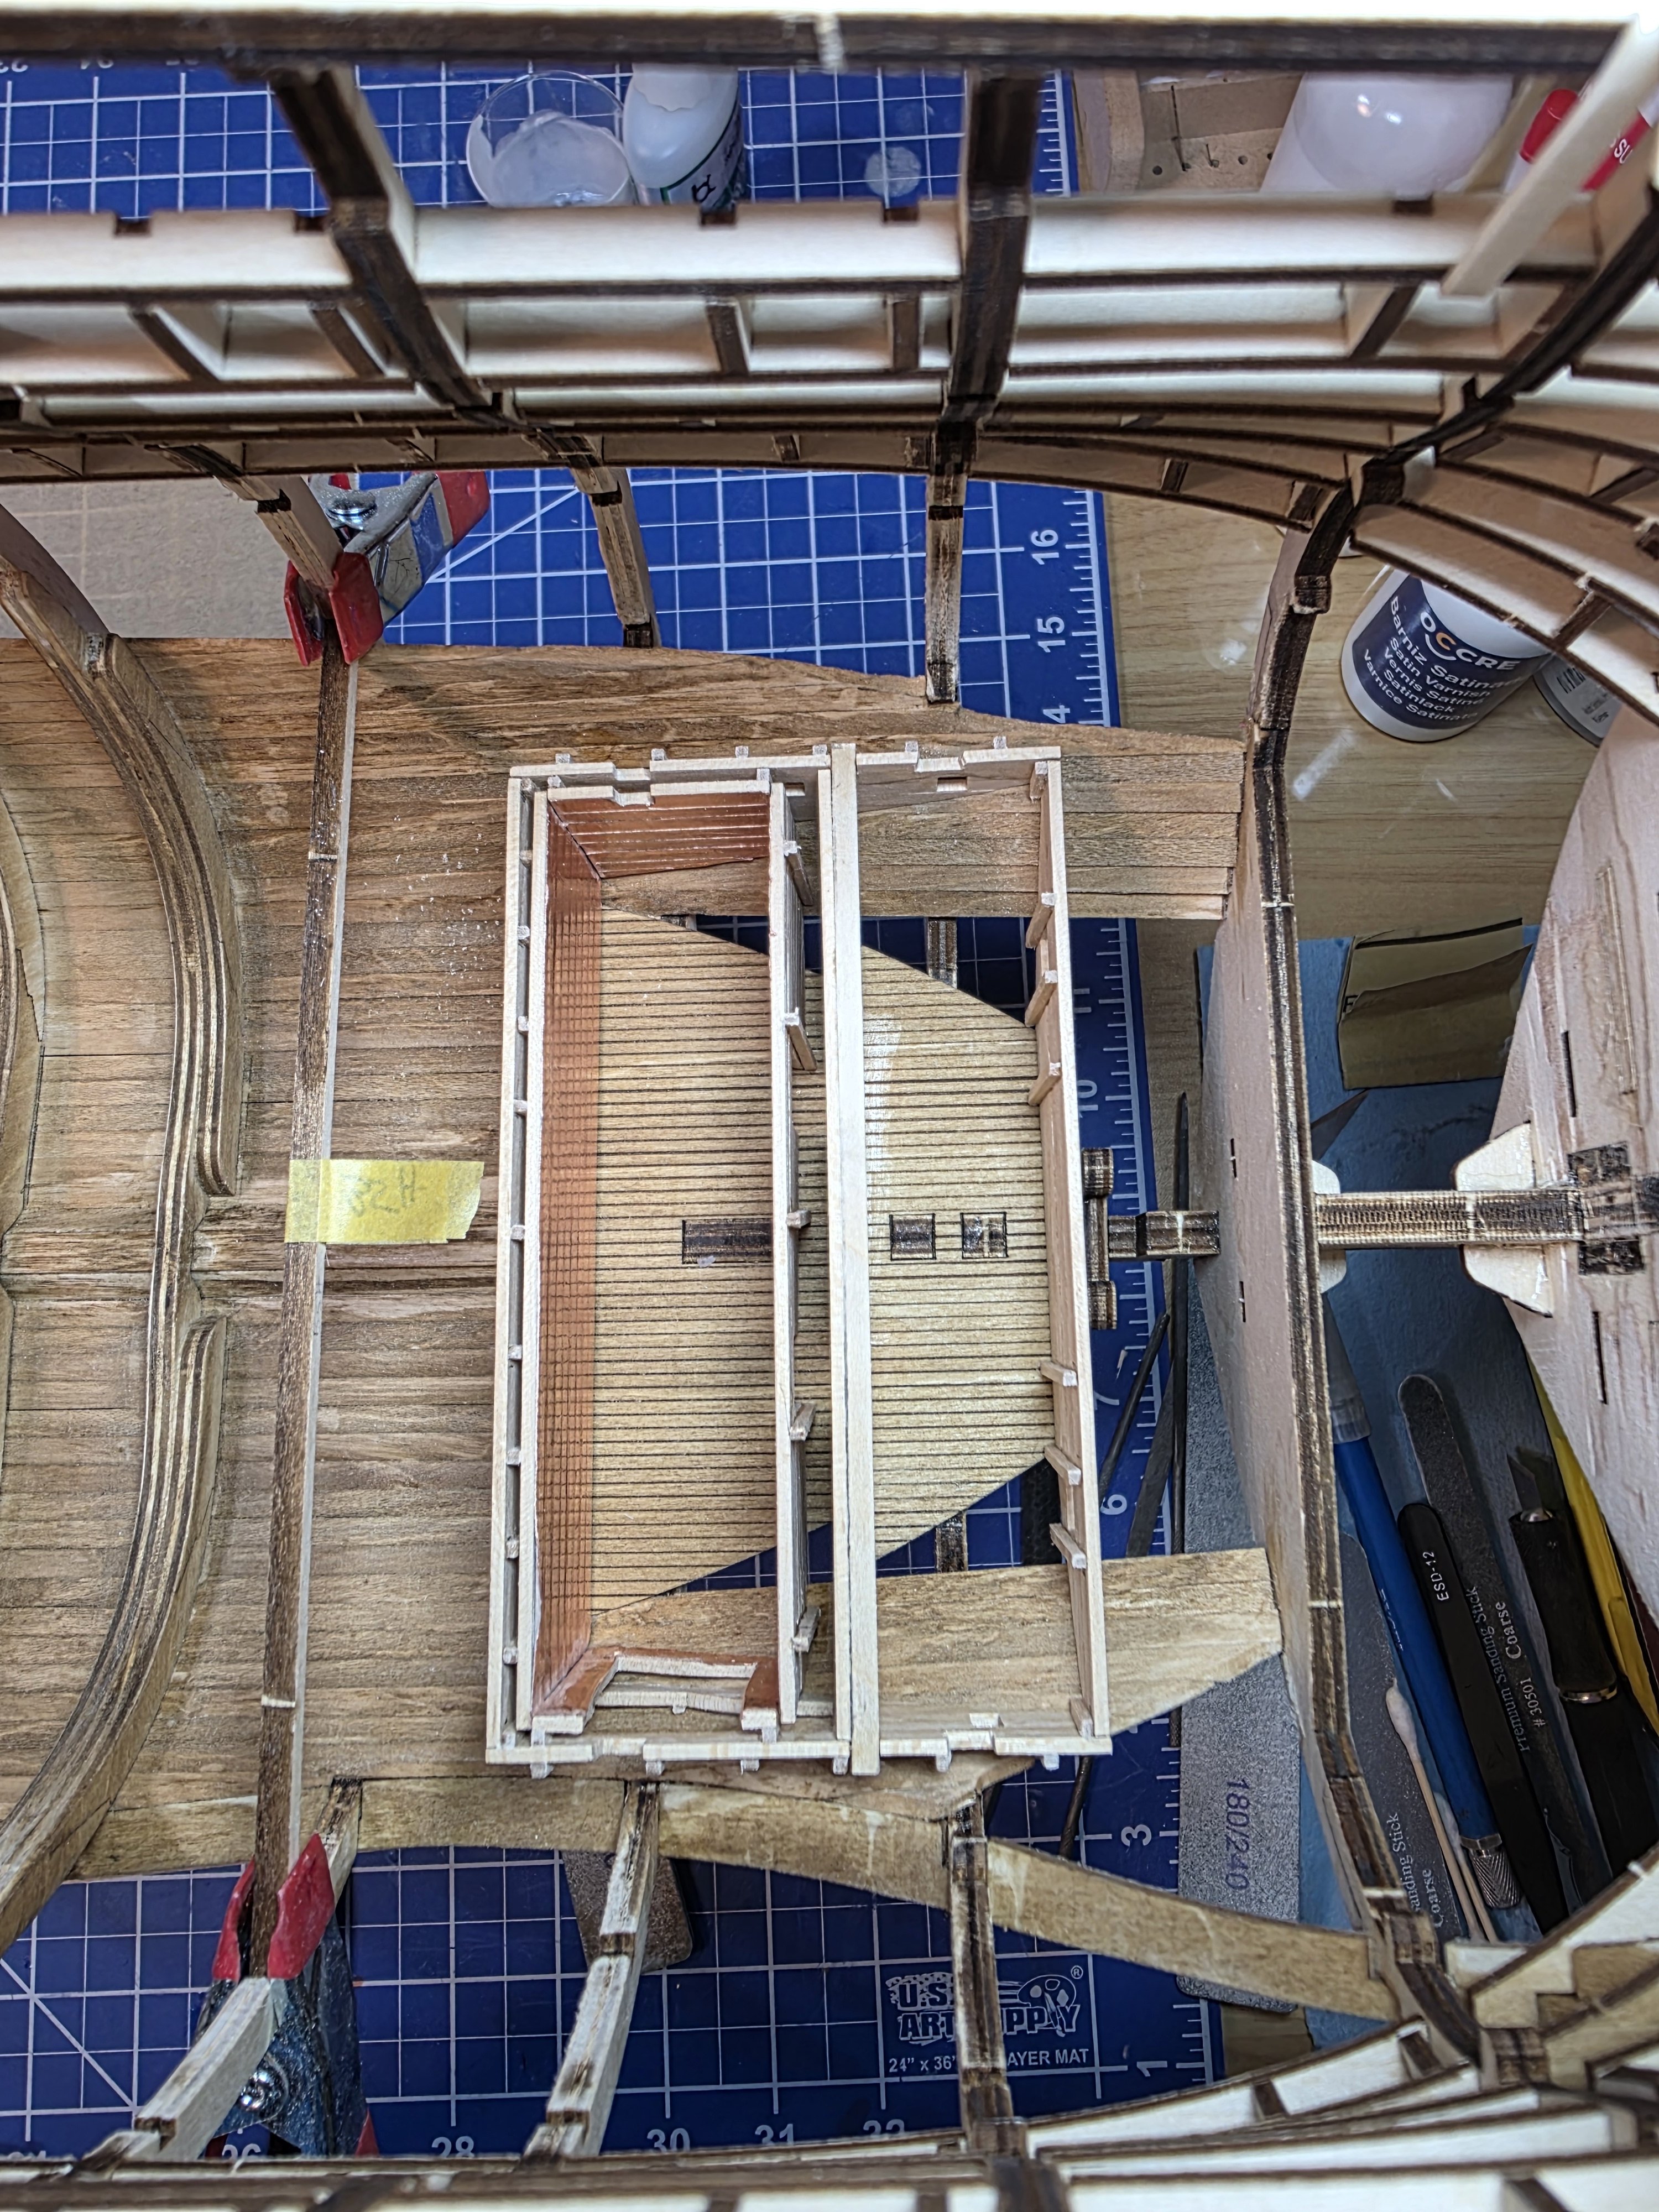
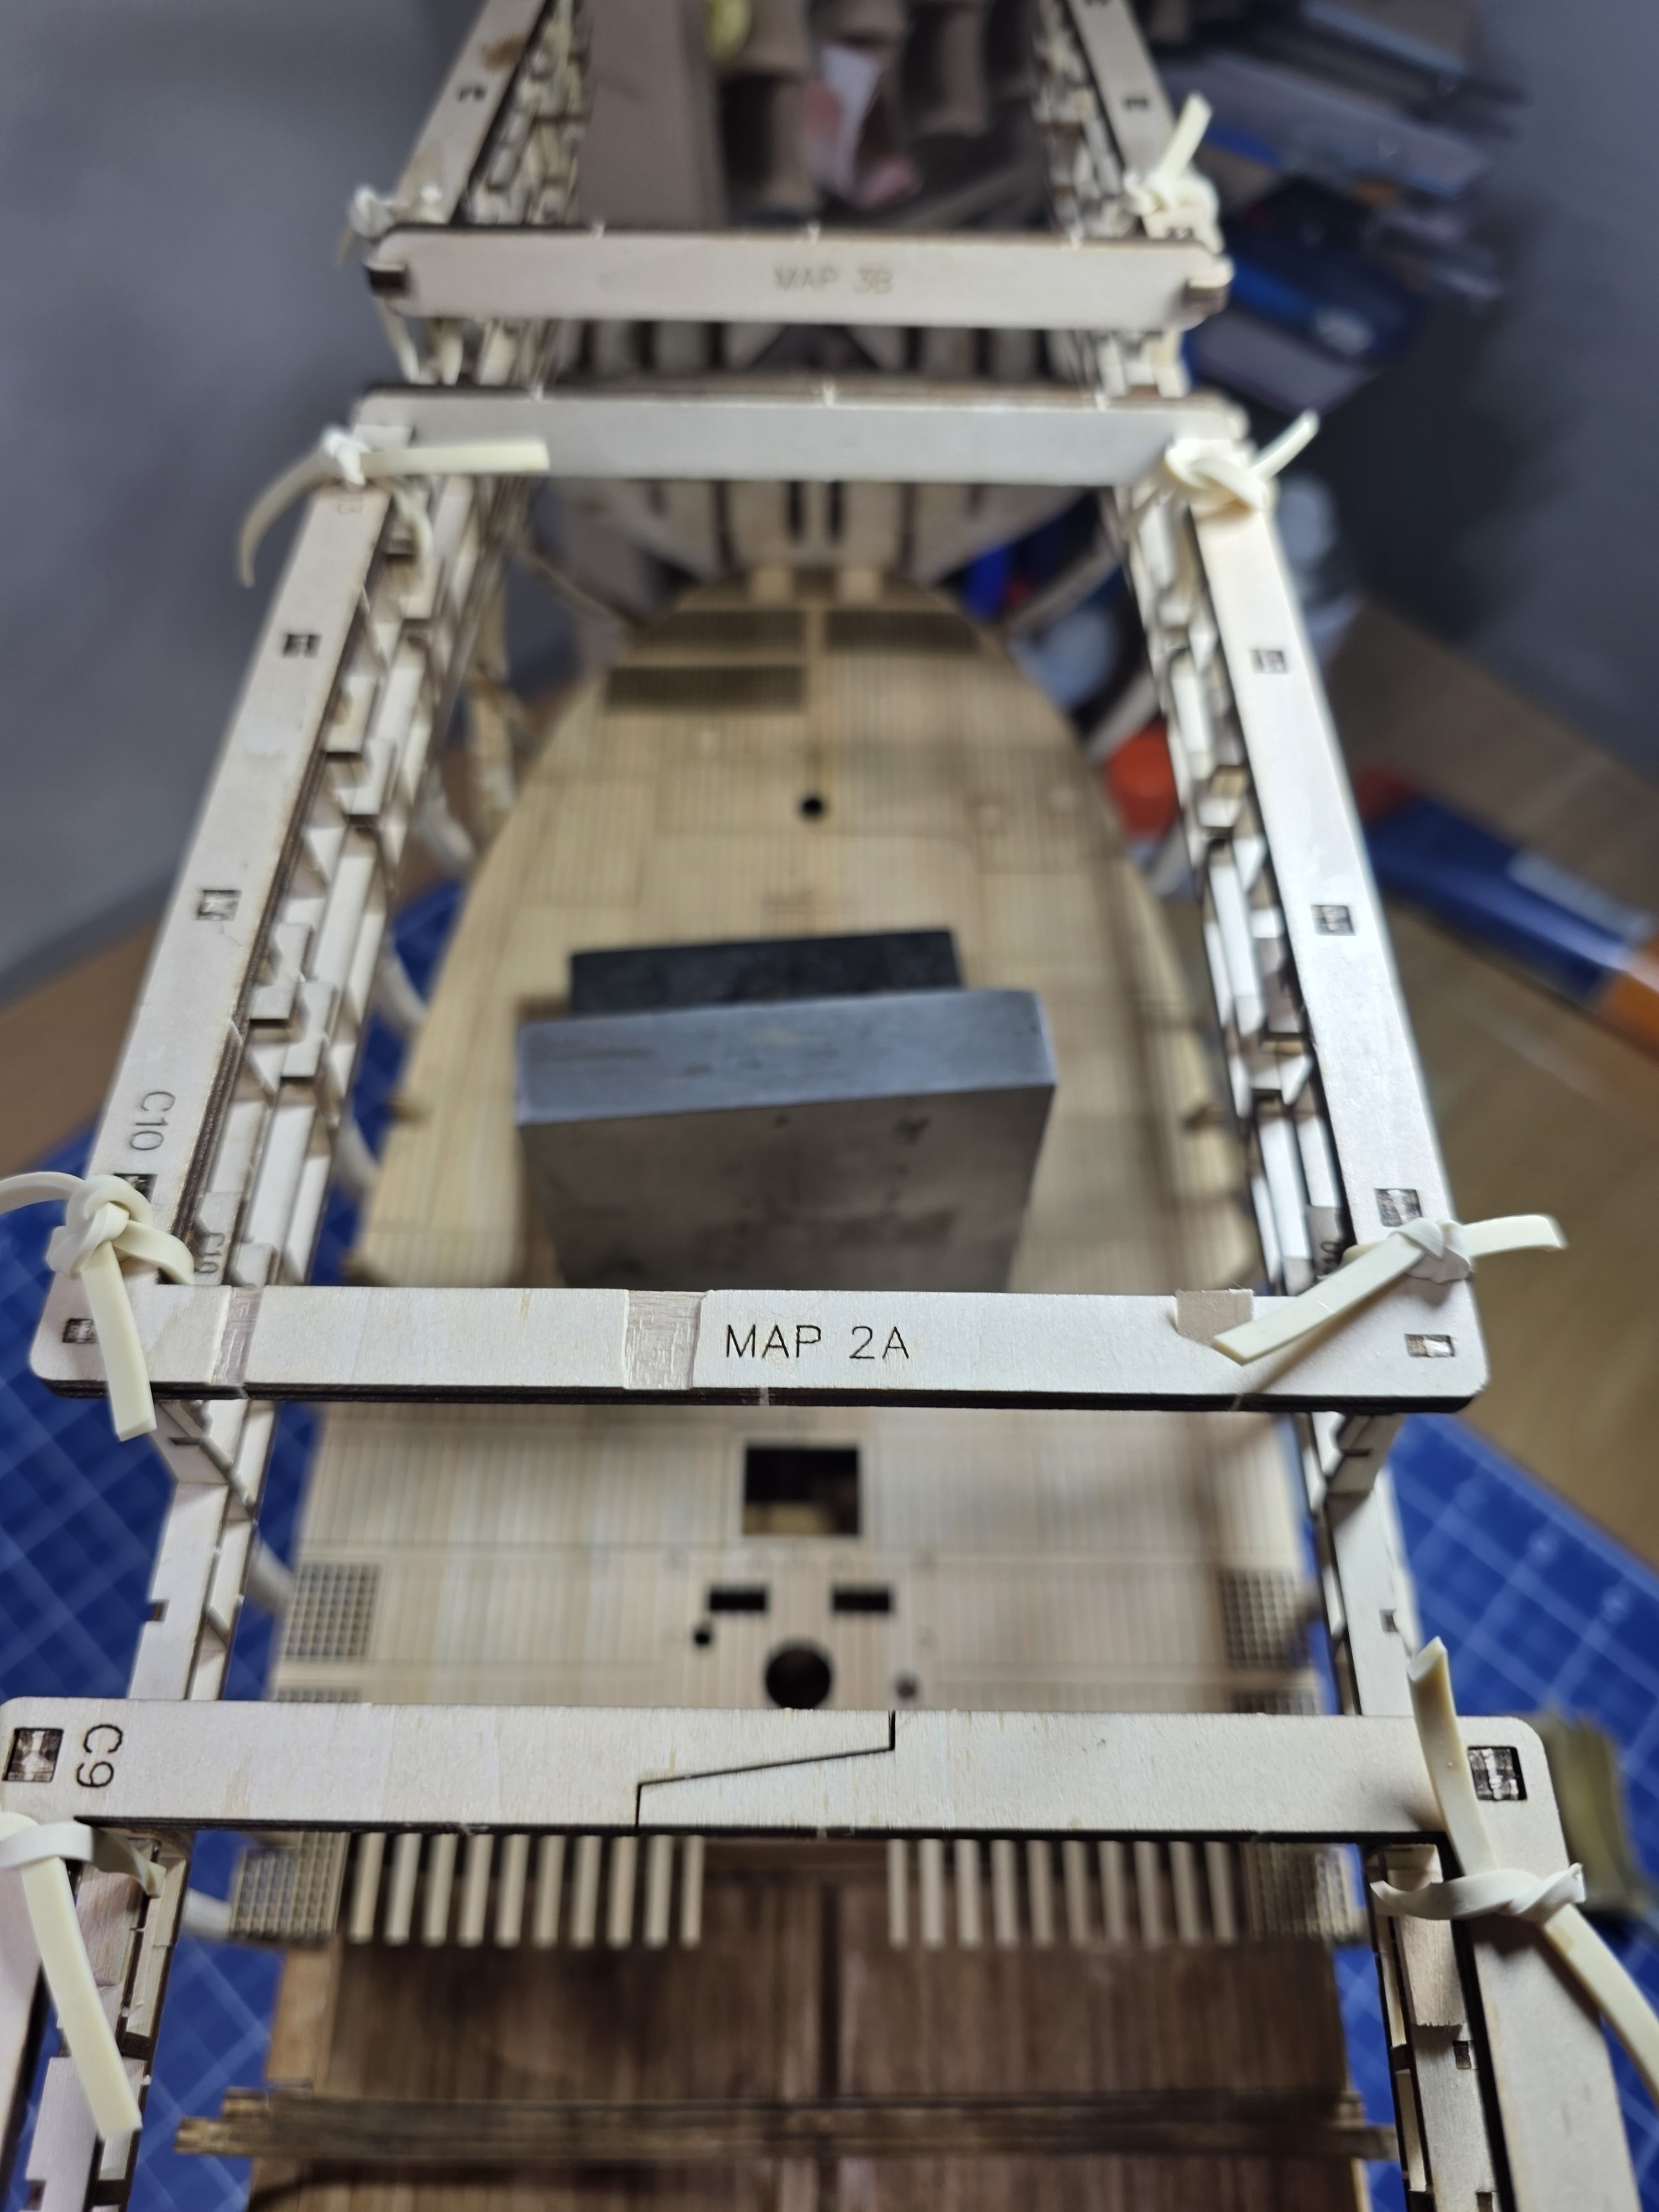
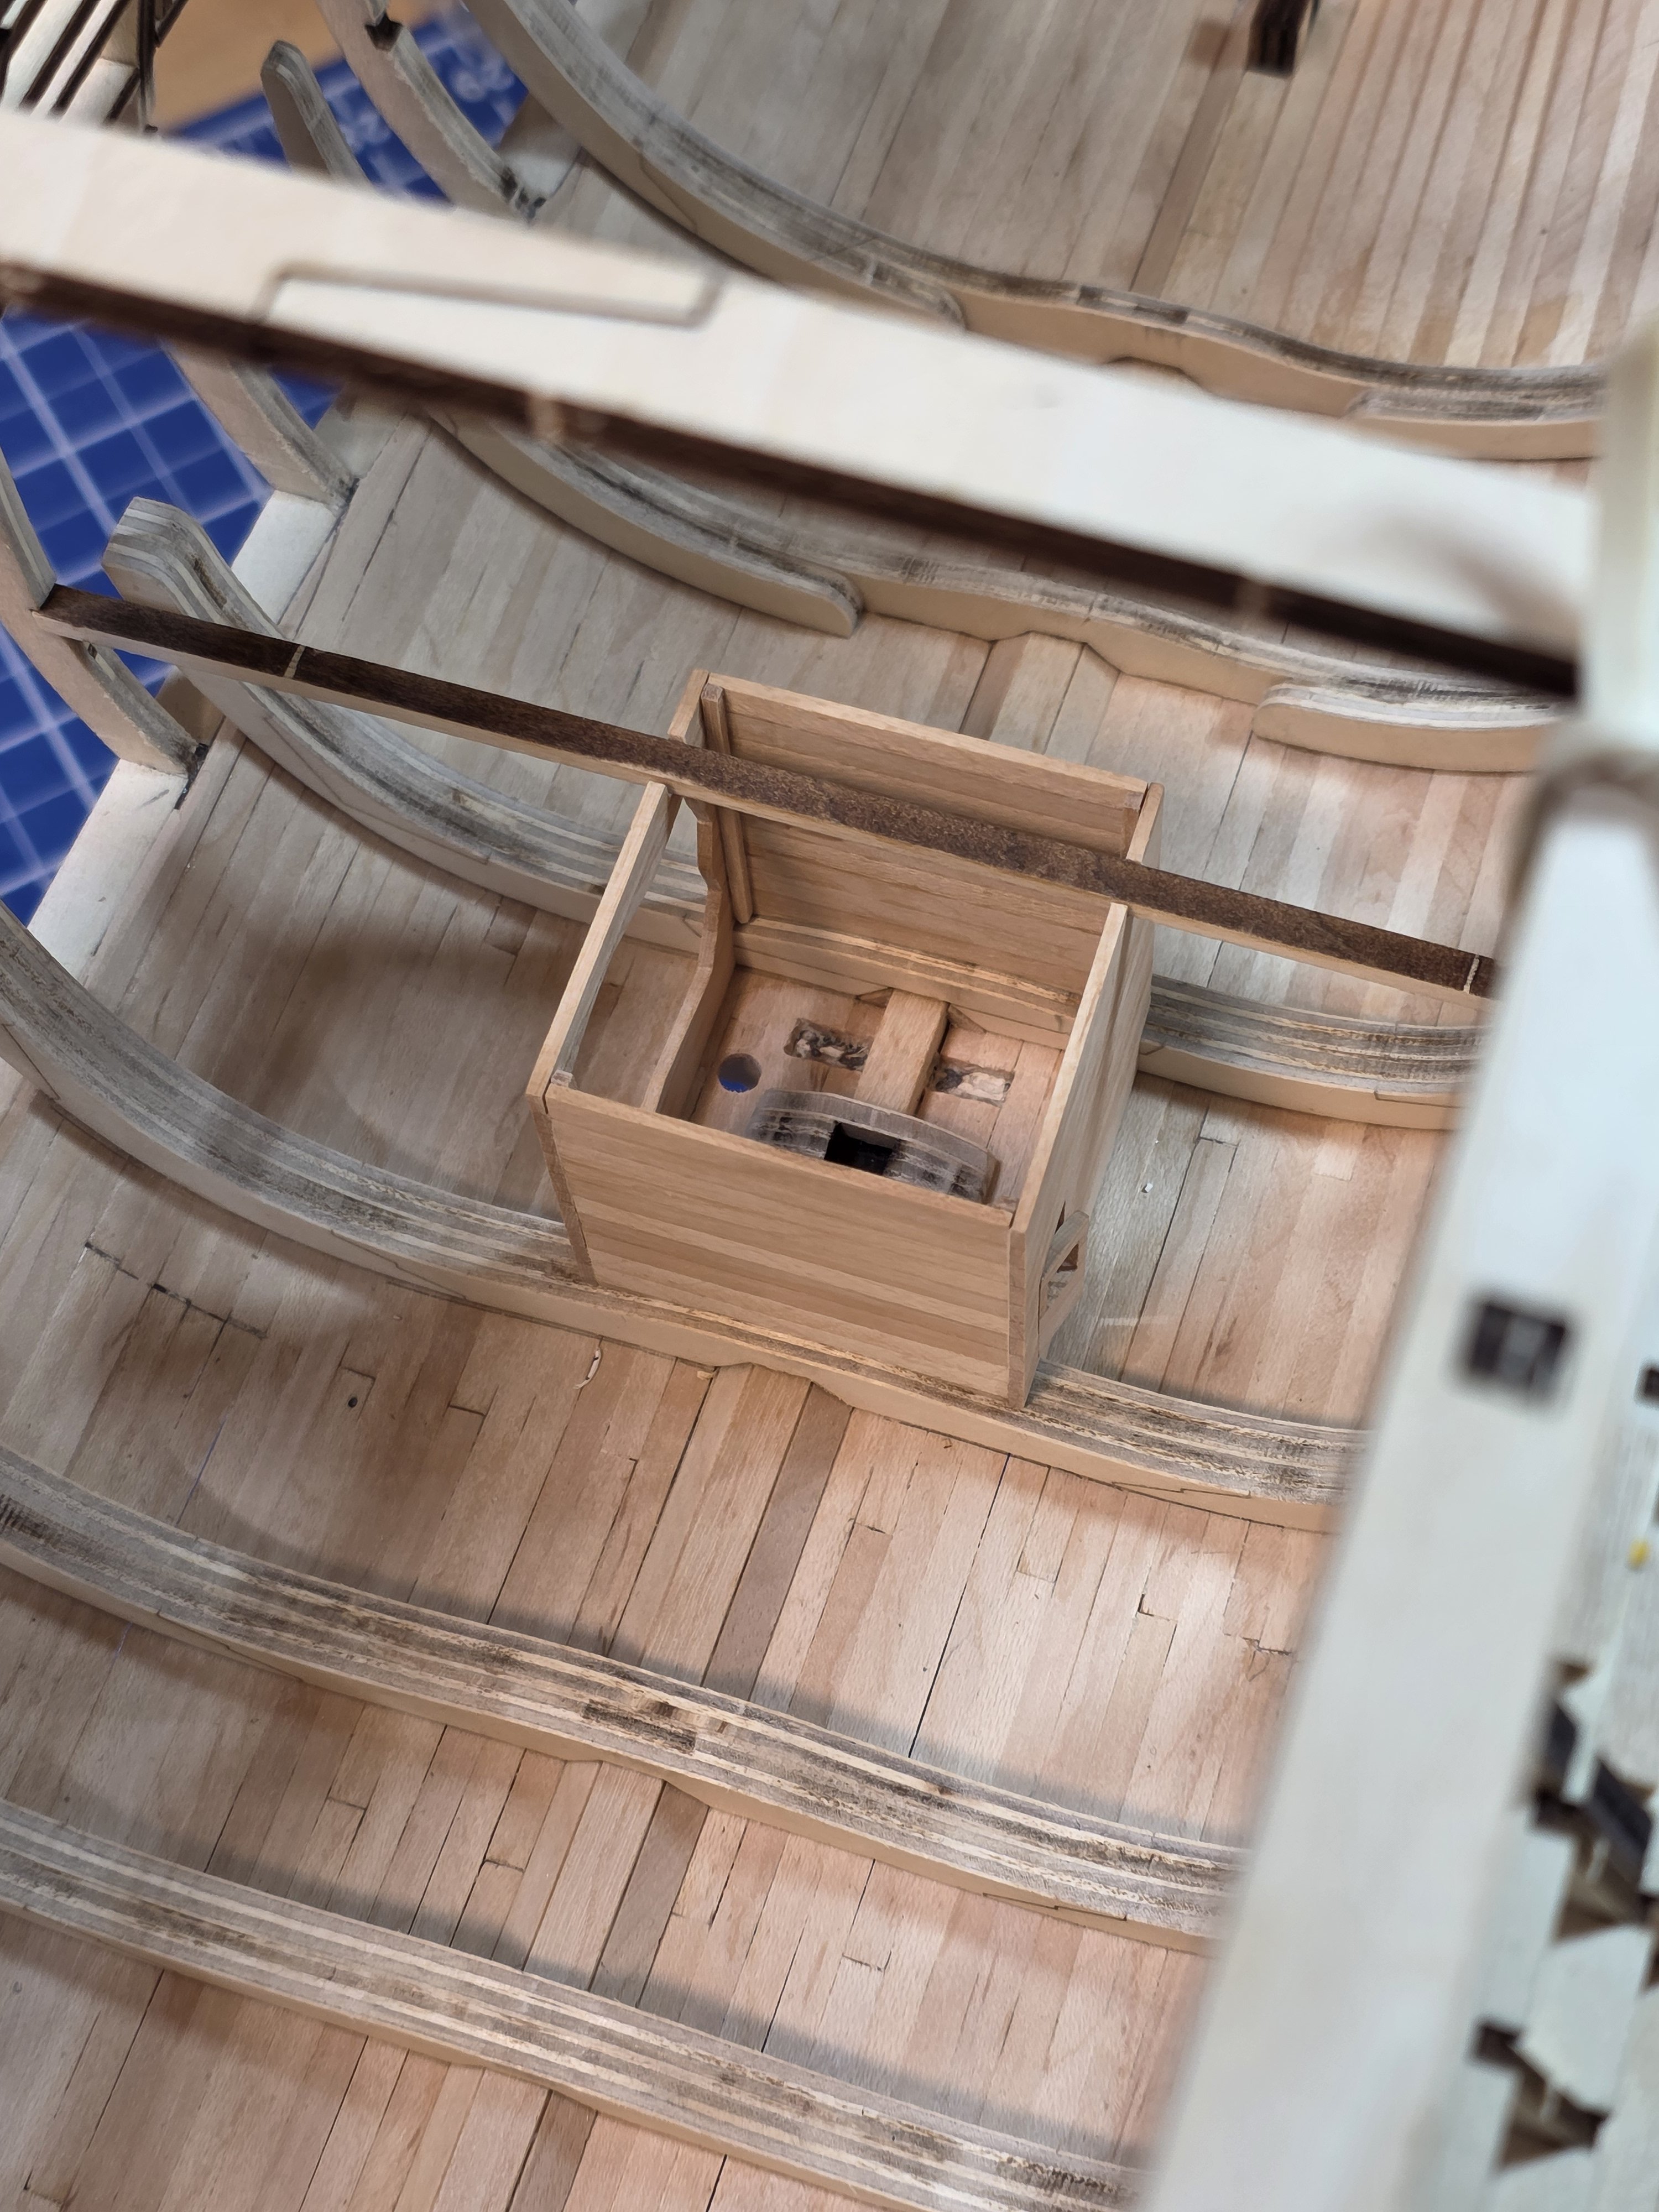
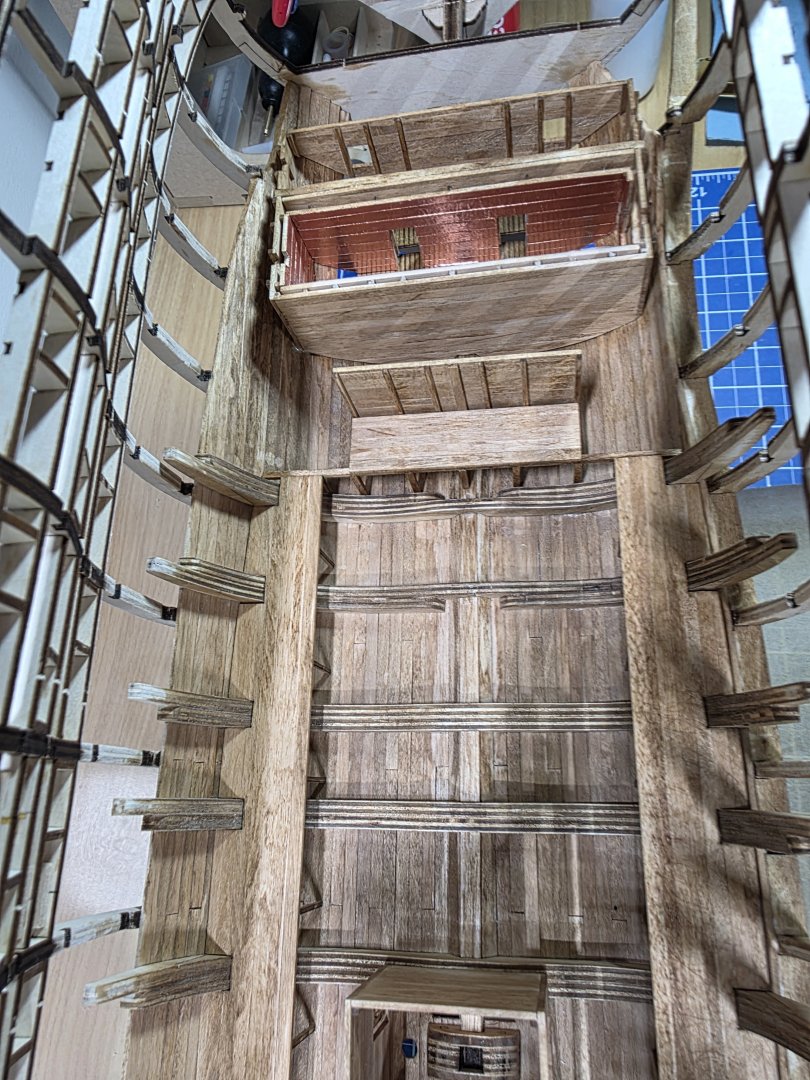
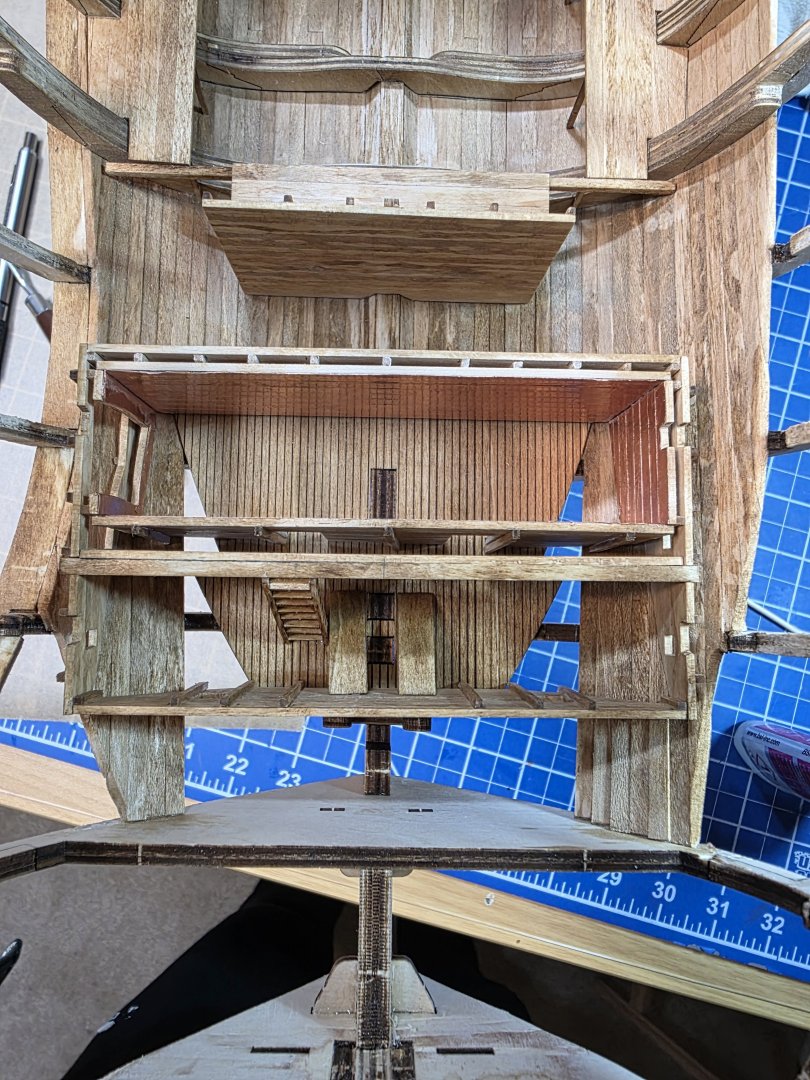
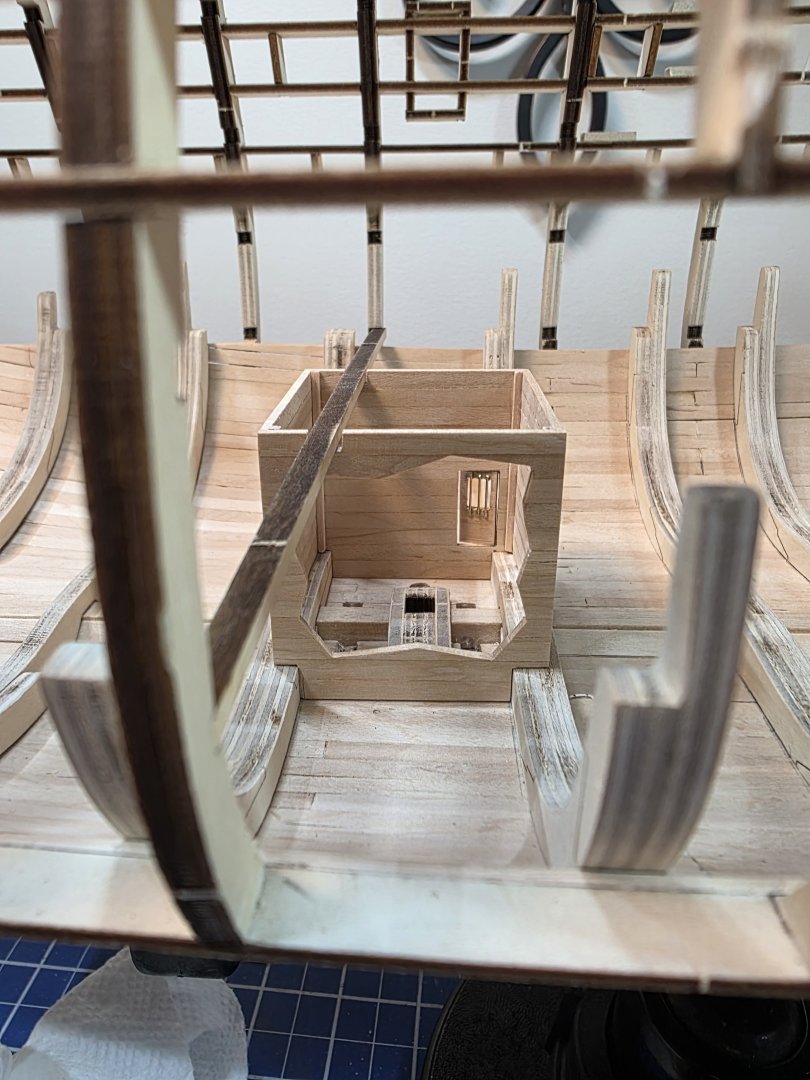
Video 5 is complete and this completes the primary structures in the hold. However, there quite a few details yet to complete the hold, such as support posts, flour sacks, barrels and ballast. This is covered in the next video. In addition, the lighting will need to be addressed. I haven't used lighting on a ship model before but this model seems to need it. I followed the order of assembly for the bow storage as seen in the video. I test fitted everything along the way. Some adjustments were needed along the way, again paying attention to the need to clear the deck. I glued the storage in before adding the final wall which is farthest to the right. There is a step up to that part of the decking so I wanted to make sure there was a good fit. Here are the other details that are added to the front compartment of the bow storage. Installed. The orlop deck doesn't have an opening that corresponds to the ladder but there is what appears to be a hatch cover there which you could open up if you choose to do so. I also installed the side walkways. This wall is just aft of the bow storage. The video would have you add the support posts after gluing the wall in but there is no way I would be able to see well enough to do that. I attached them before gluing the wall in. Just needed a little trial and error to get the proper length of the supports. Complete.

-
I cast my samsung phone to my big screen TV and use the phones camera to view small things.
-
Thanks Nearshore. Its definitely a challenge but if I can do it, you can. A big plus to making these parts is that if I screw one up then I can just make another. And, imperfections will be hidden nicely once the decks go on.
-
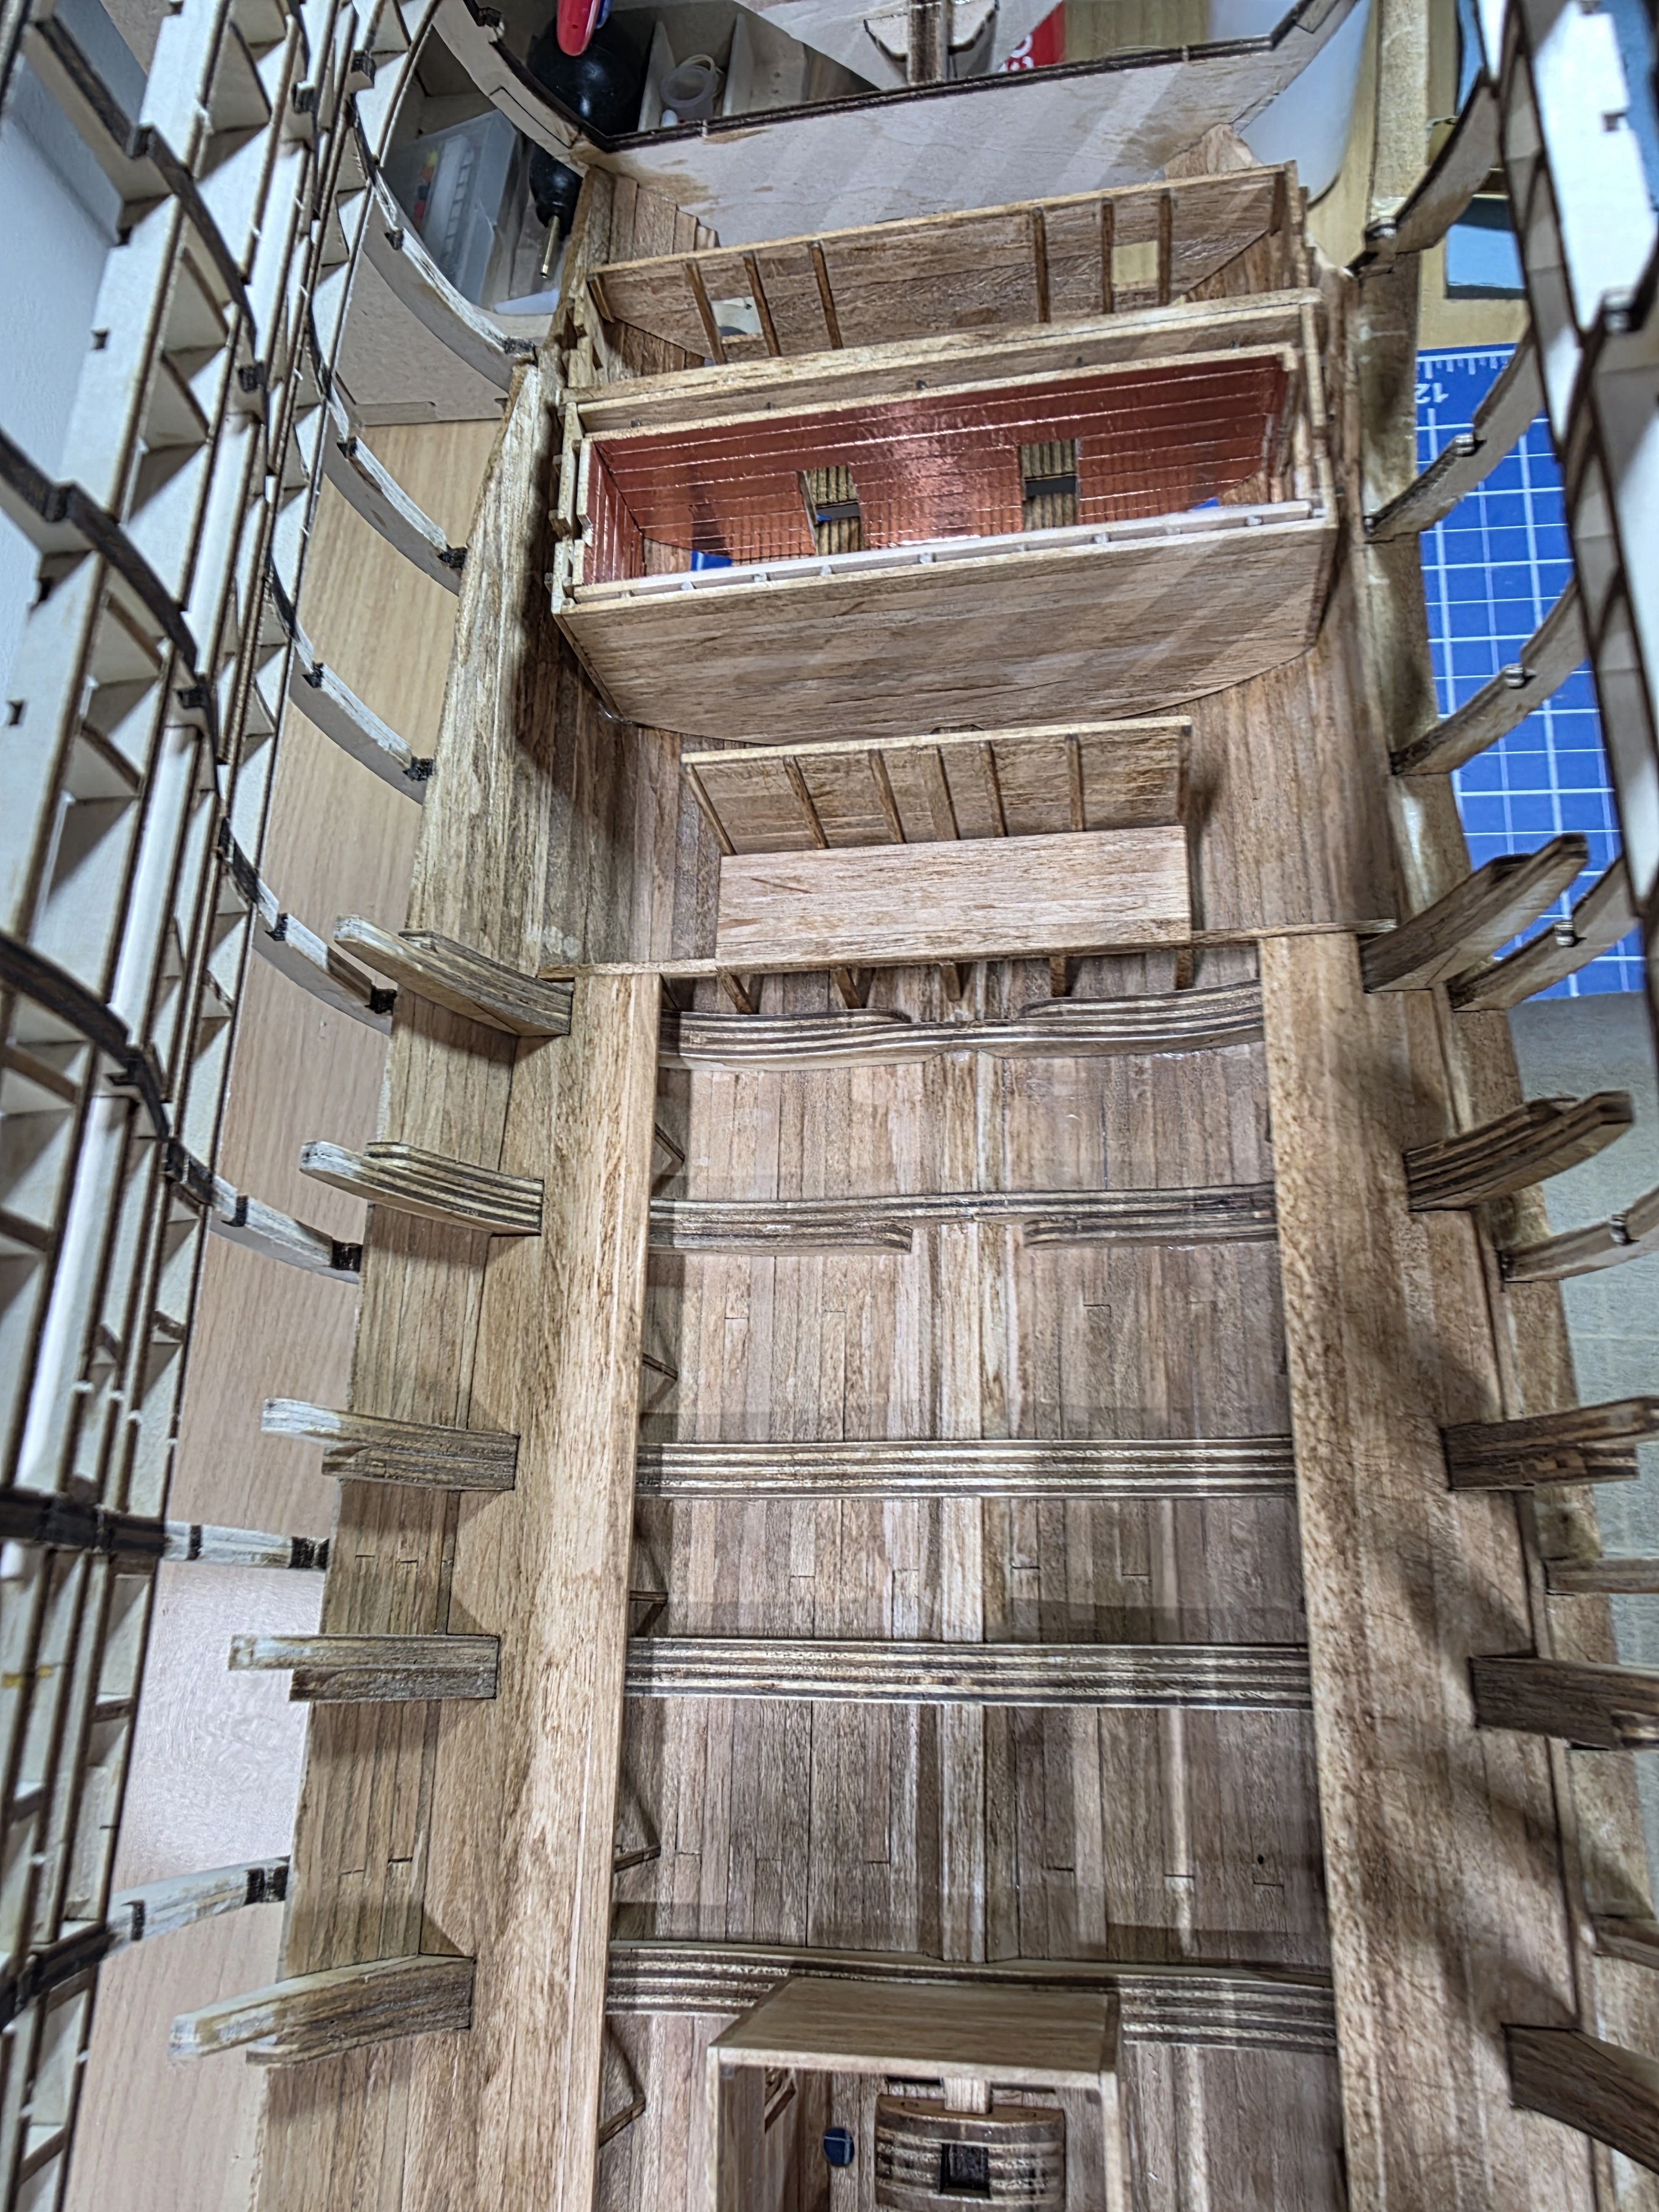
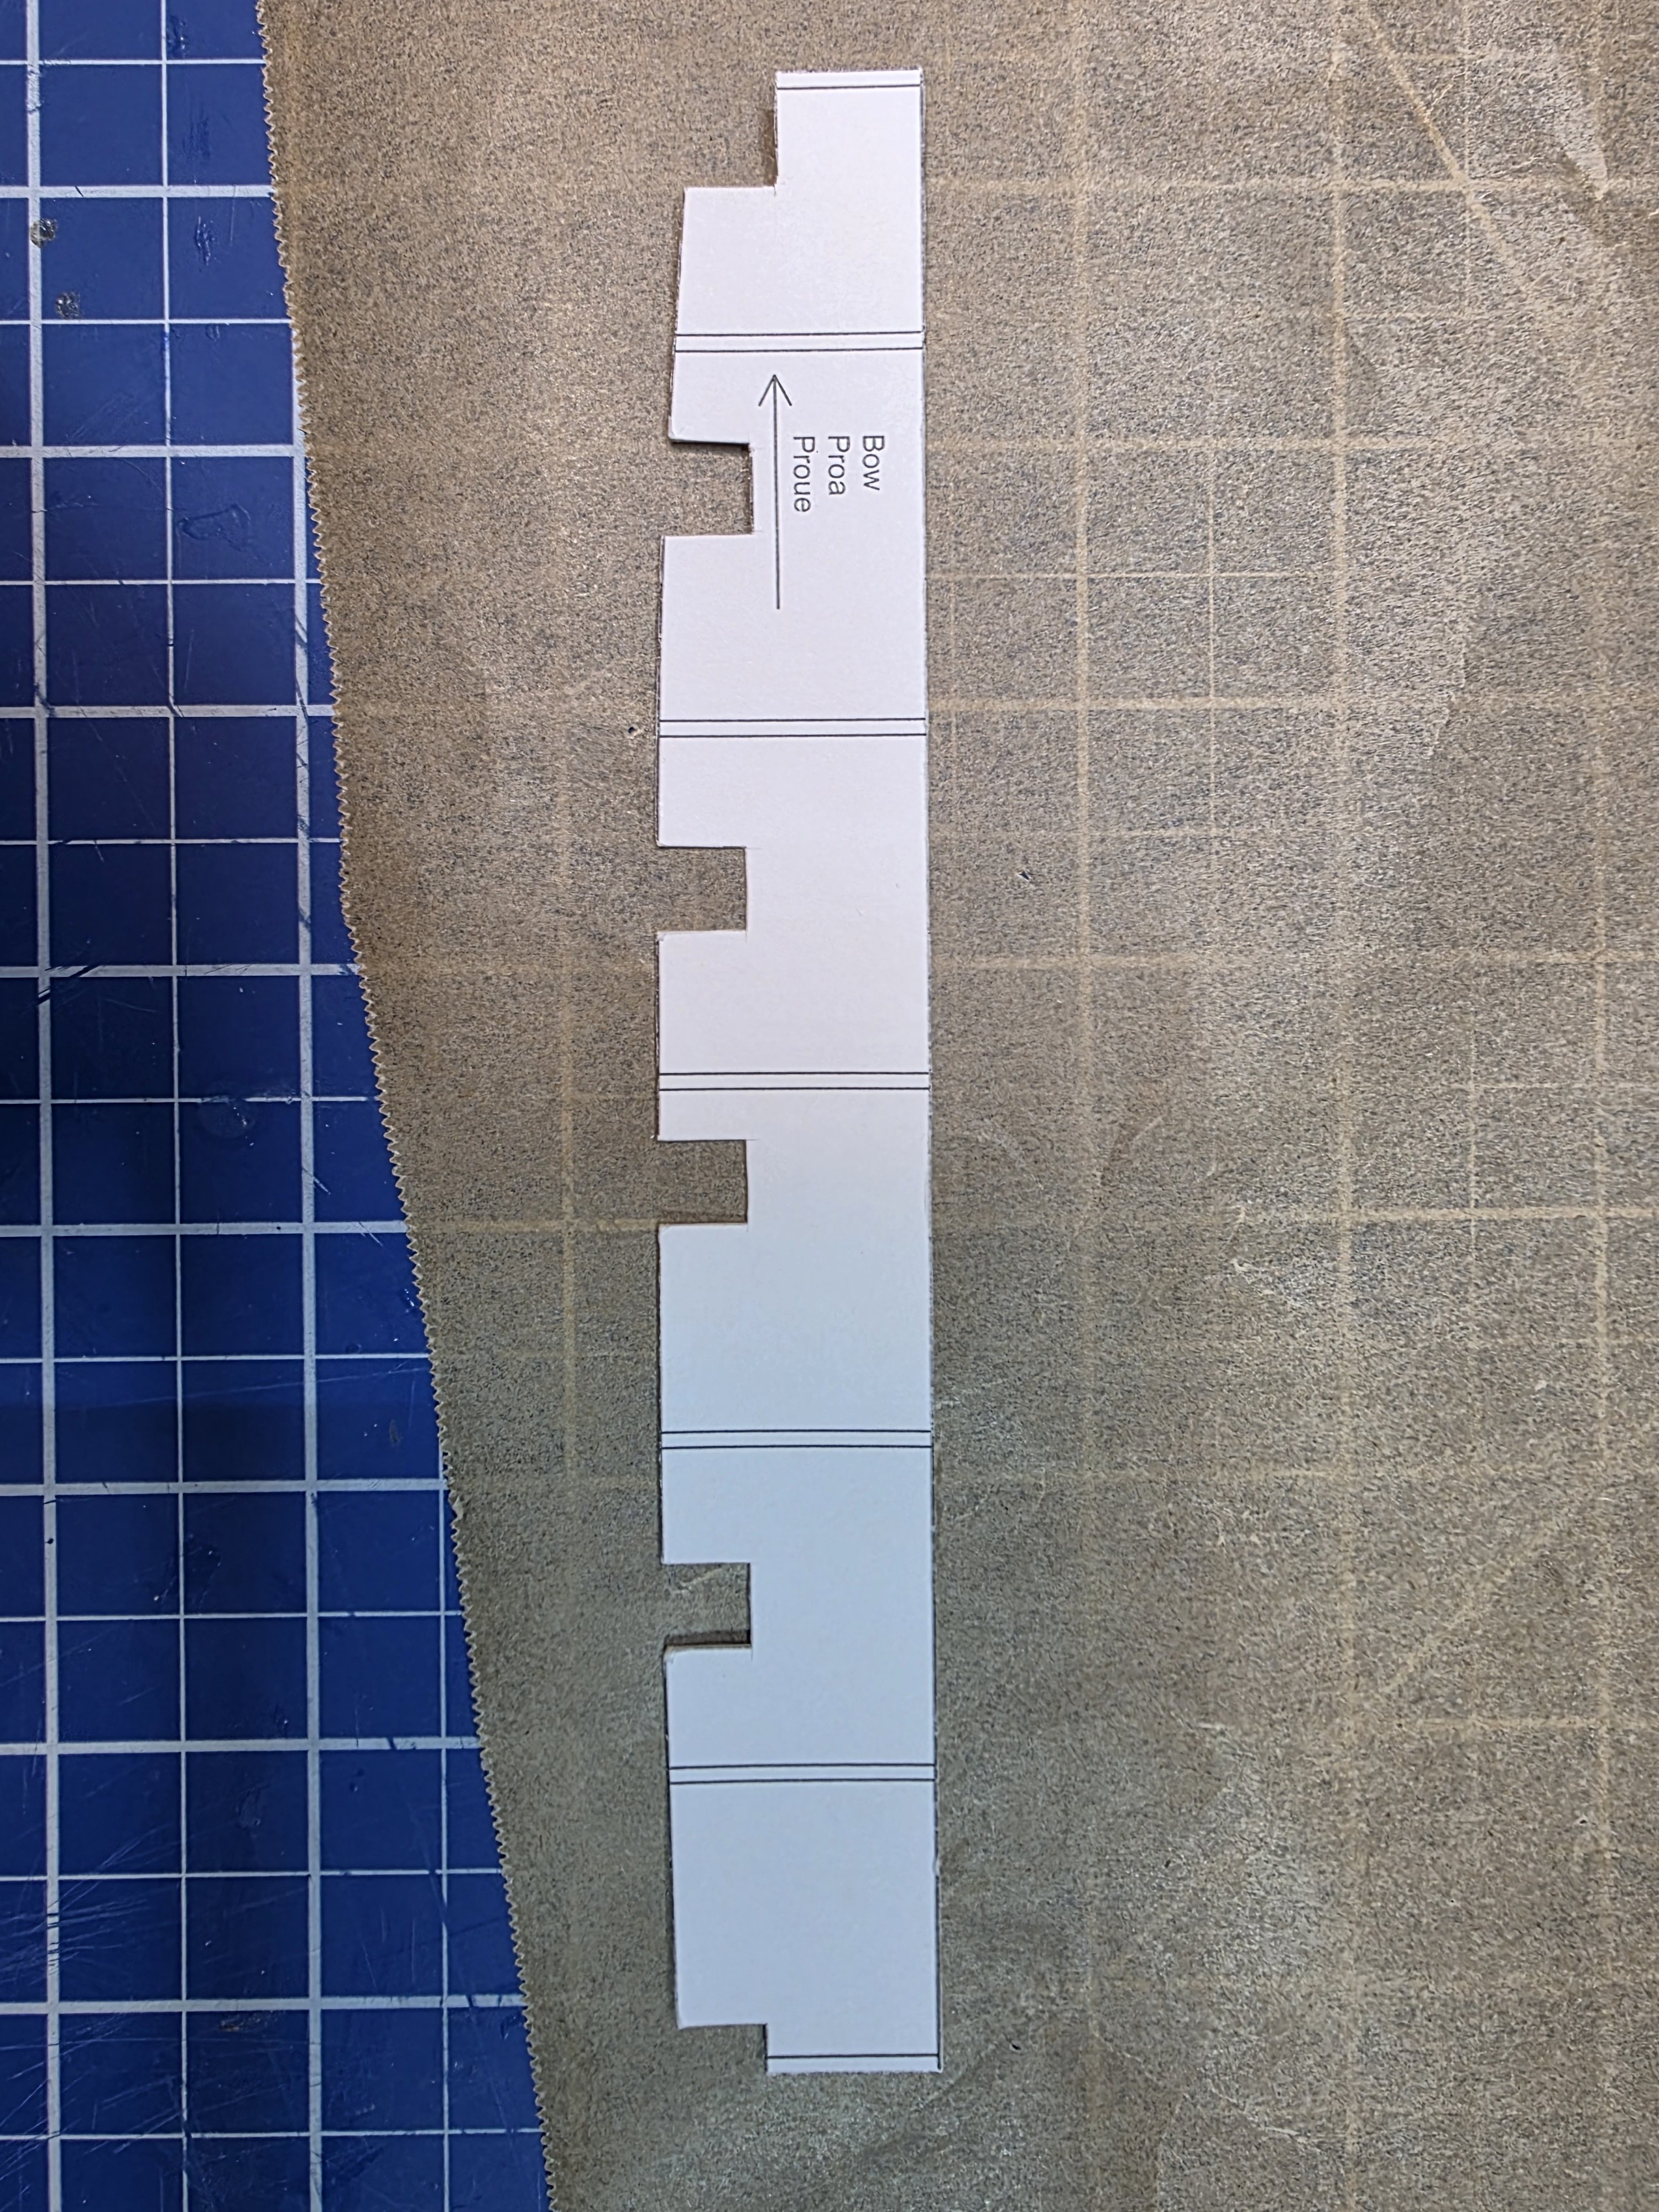
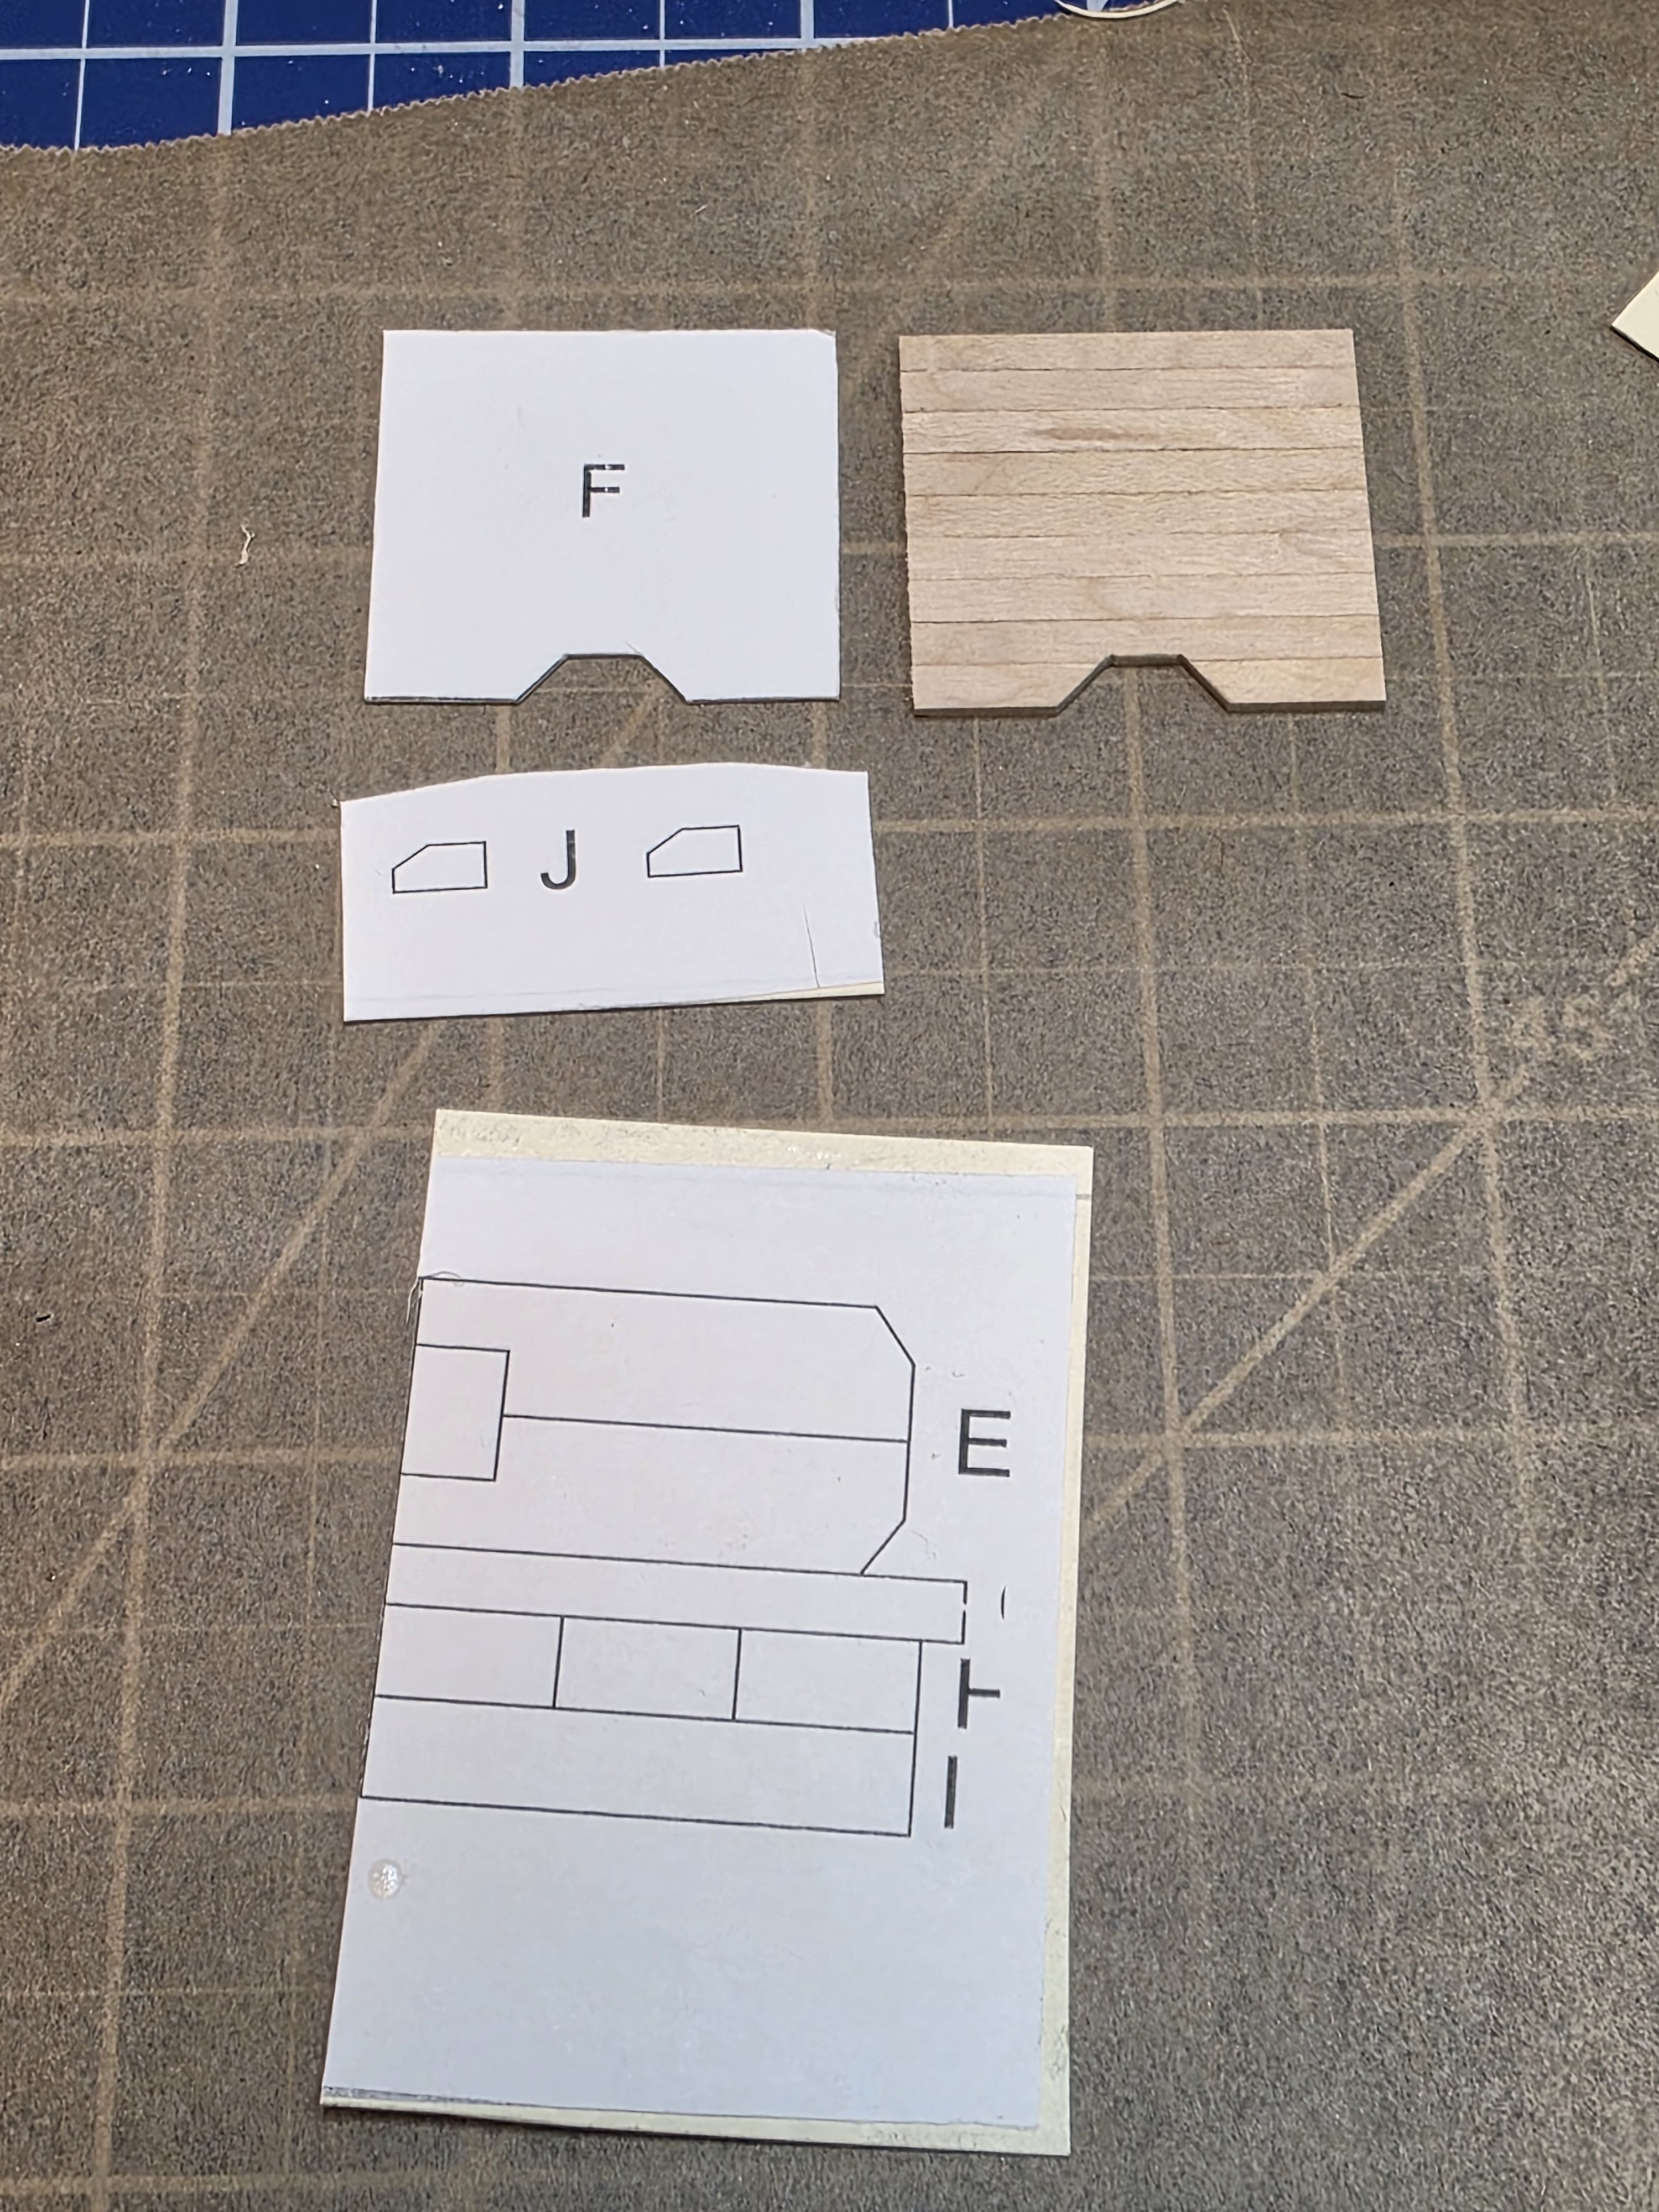
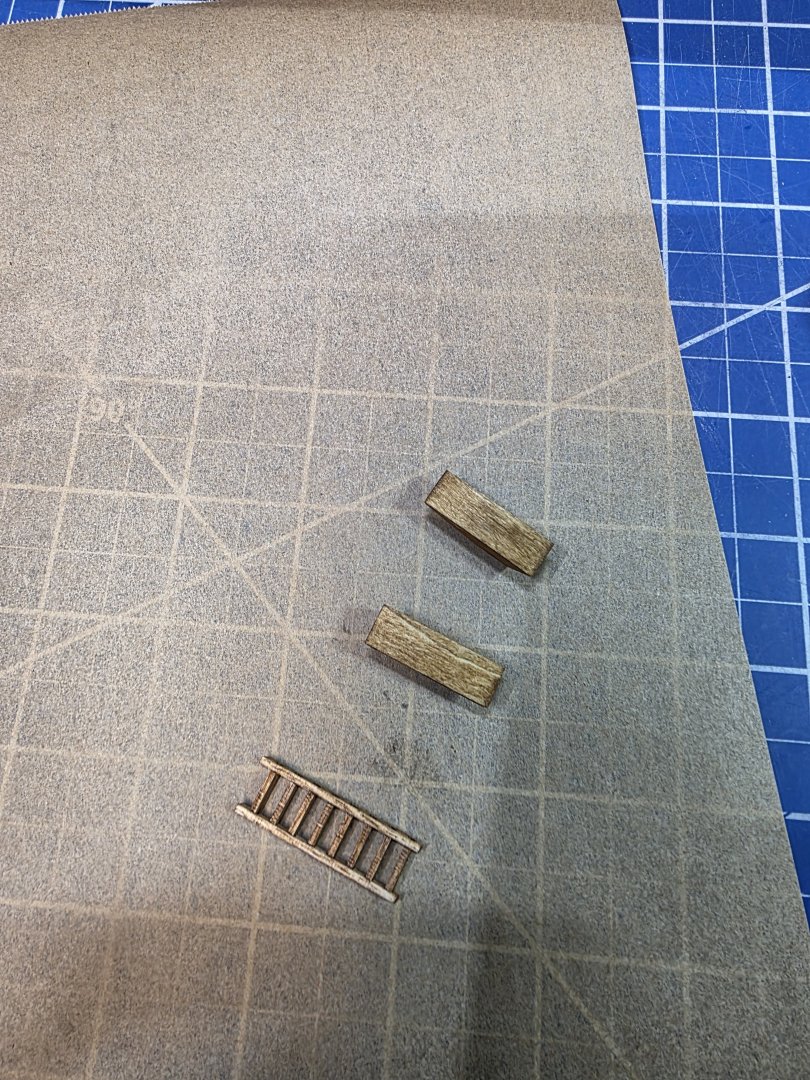
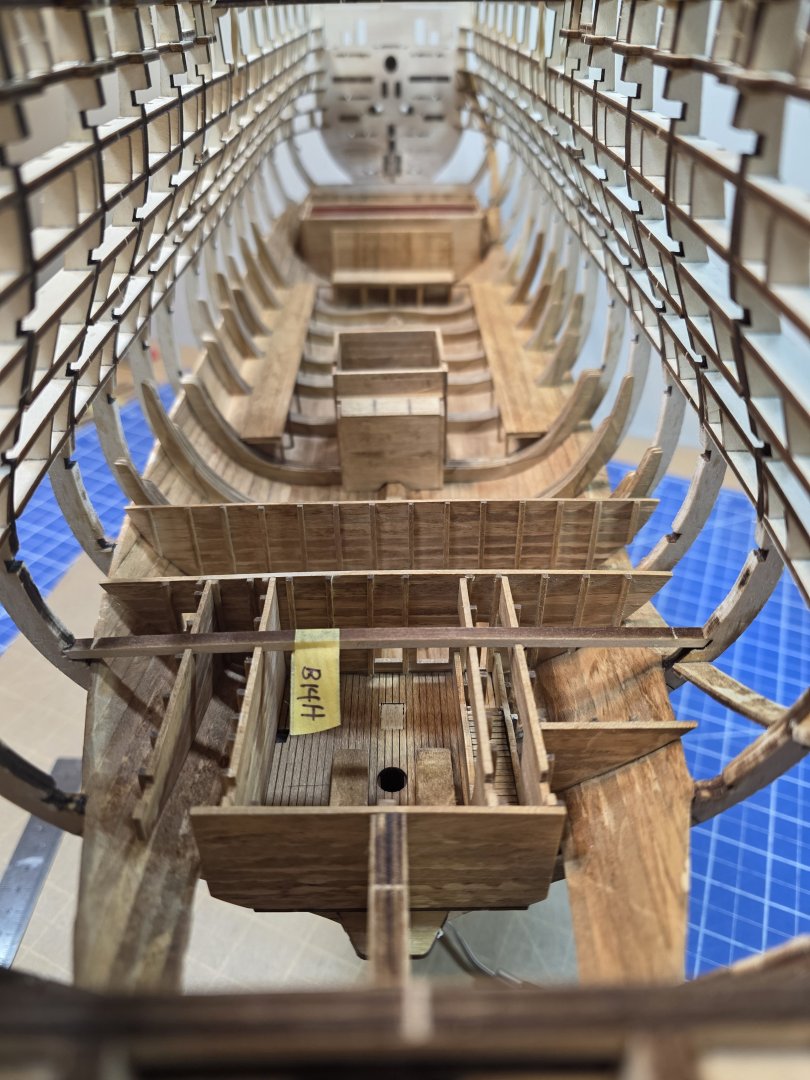
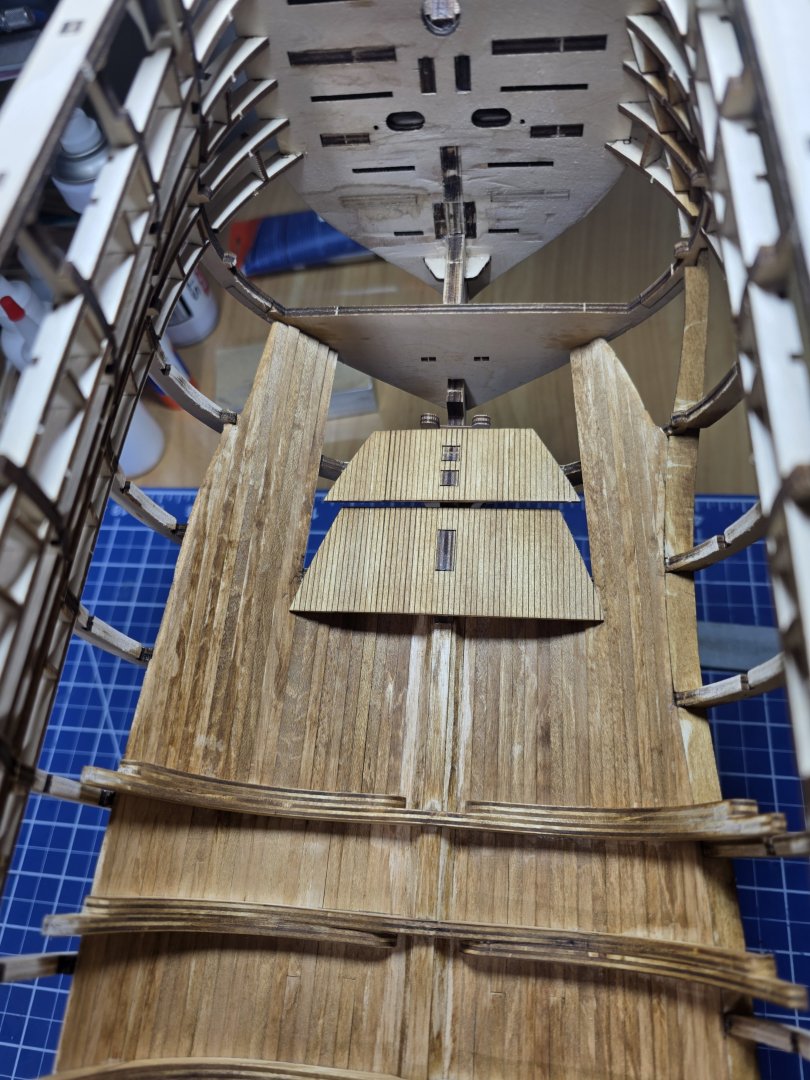
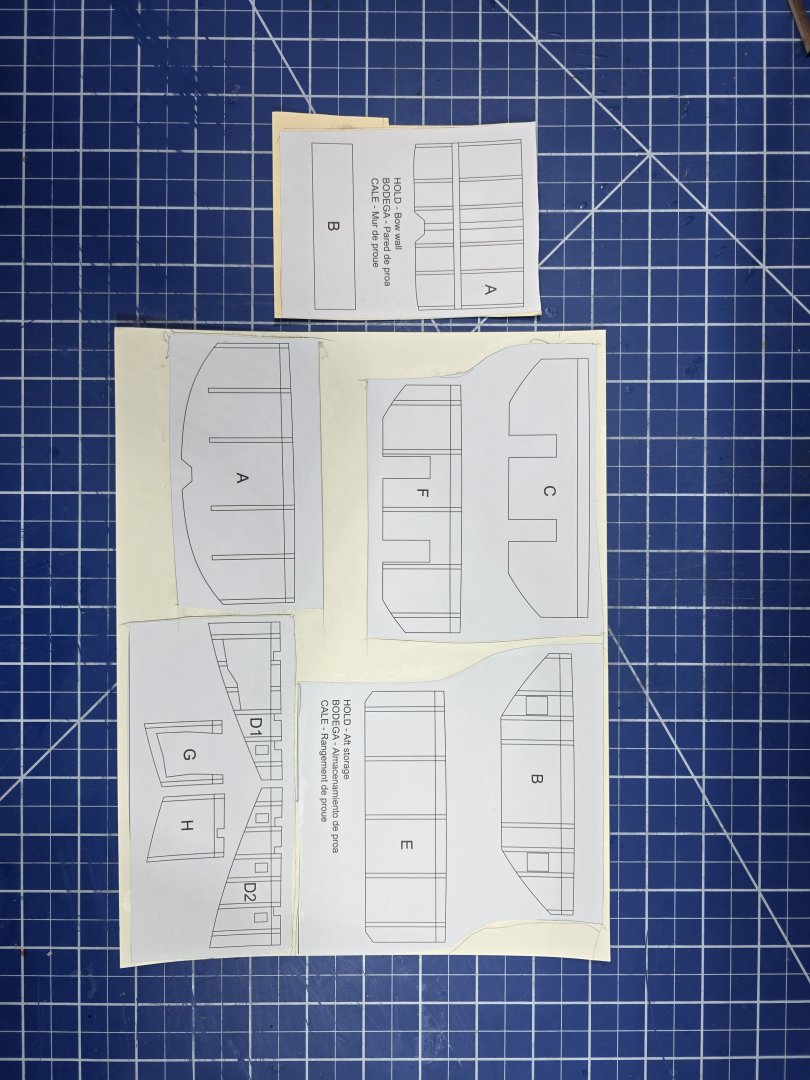
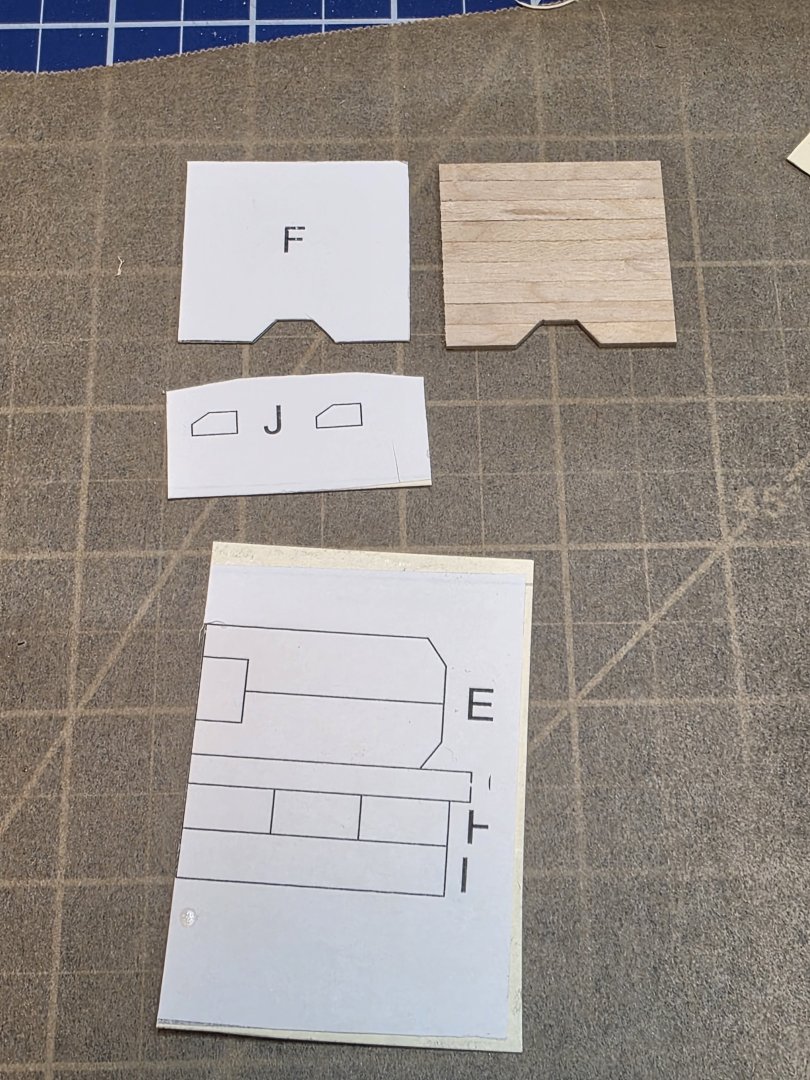
Completed the final stern parts and stained the hold. Stain turned out a lot darker than I expected but its probably more realistic. This wall needed to be 7 mm behind the frame so I used a spacer. This is the detail added to the stern hold. The worlds smallest ladder is at the end of the walkway. The ladder was almost scrapped as I just couldn't see it. I called in an assist from the calvary. Its hard to see even now. The wall is glued in place as well. Here it is after adding the ledge to the wall and staining. Looks rustic. This completes video part 4 except the side walkways which I'll work on next. Moving forward to the bow hold. I glued in the small decks. These are the templates for the bow hold, there are many. This is probably the most complicated structure to build. The smaller set of templates is a wall that sits aft of the bow hold. I test fit the deck to make sure there were no conflicts and all is good. It confirmed my suspicion that most of this will be nearly invisible once the decks go in. Thanks for looking!


-
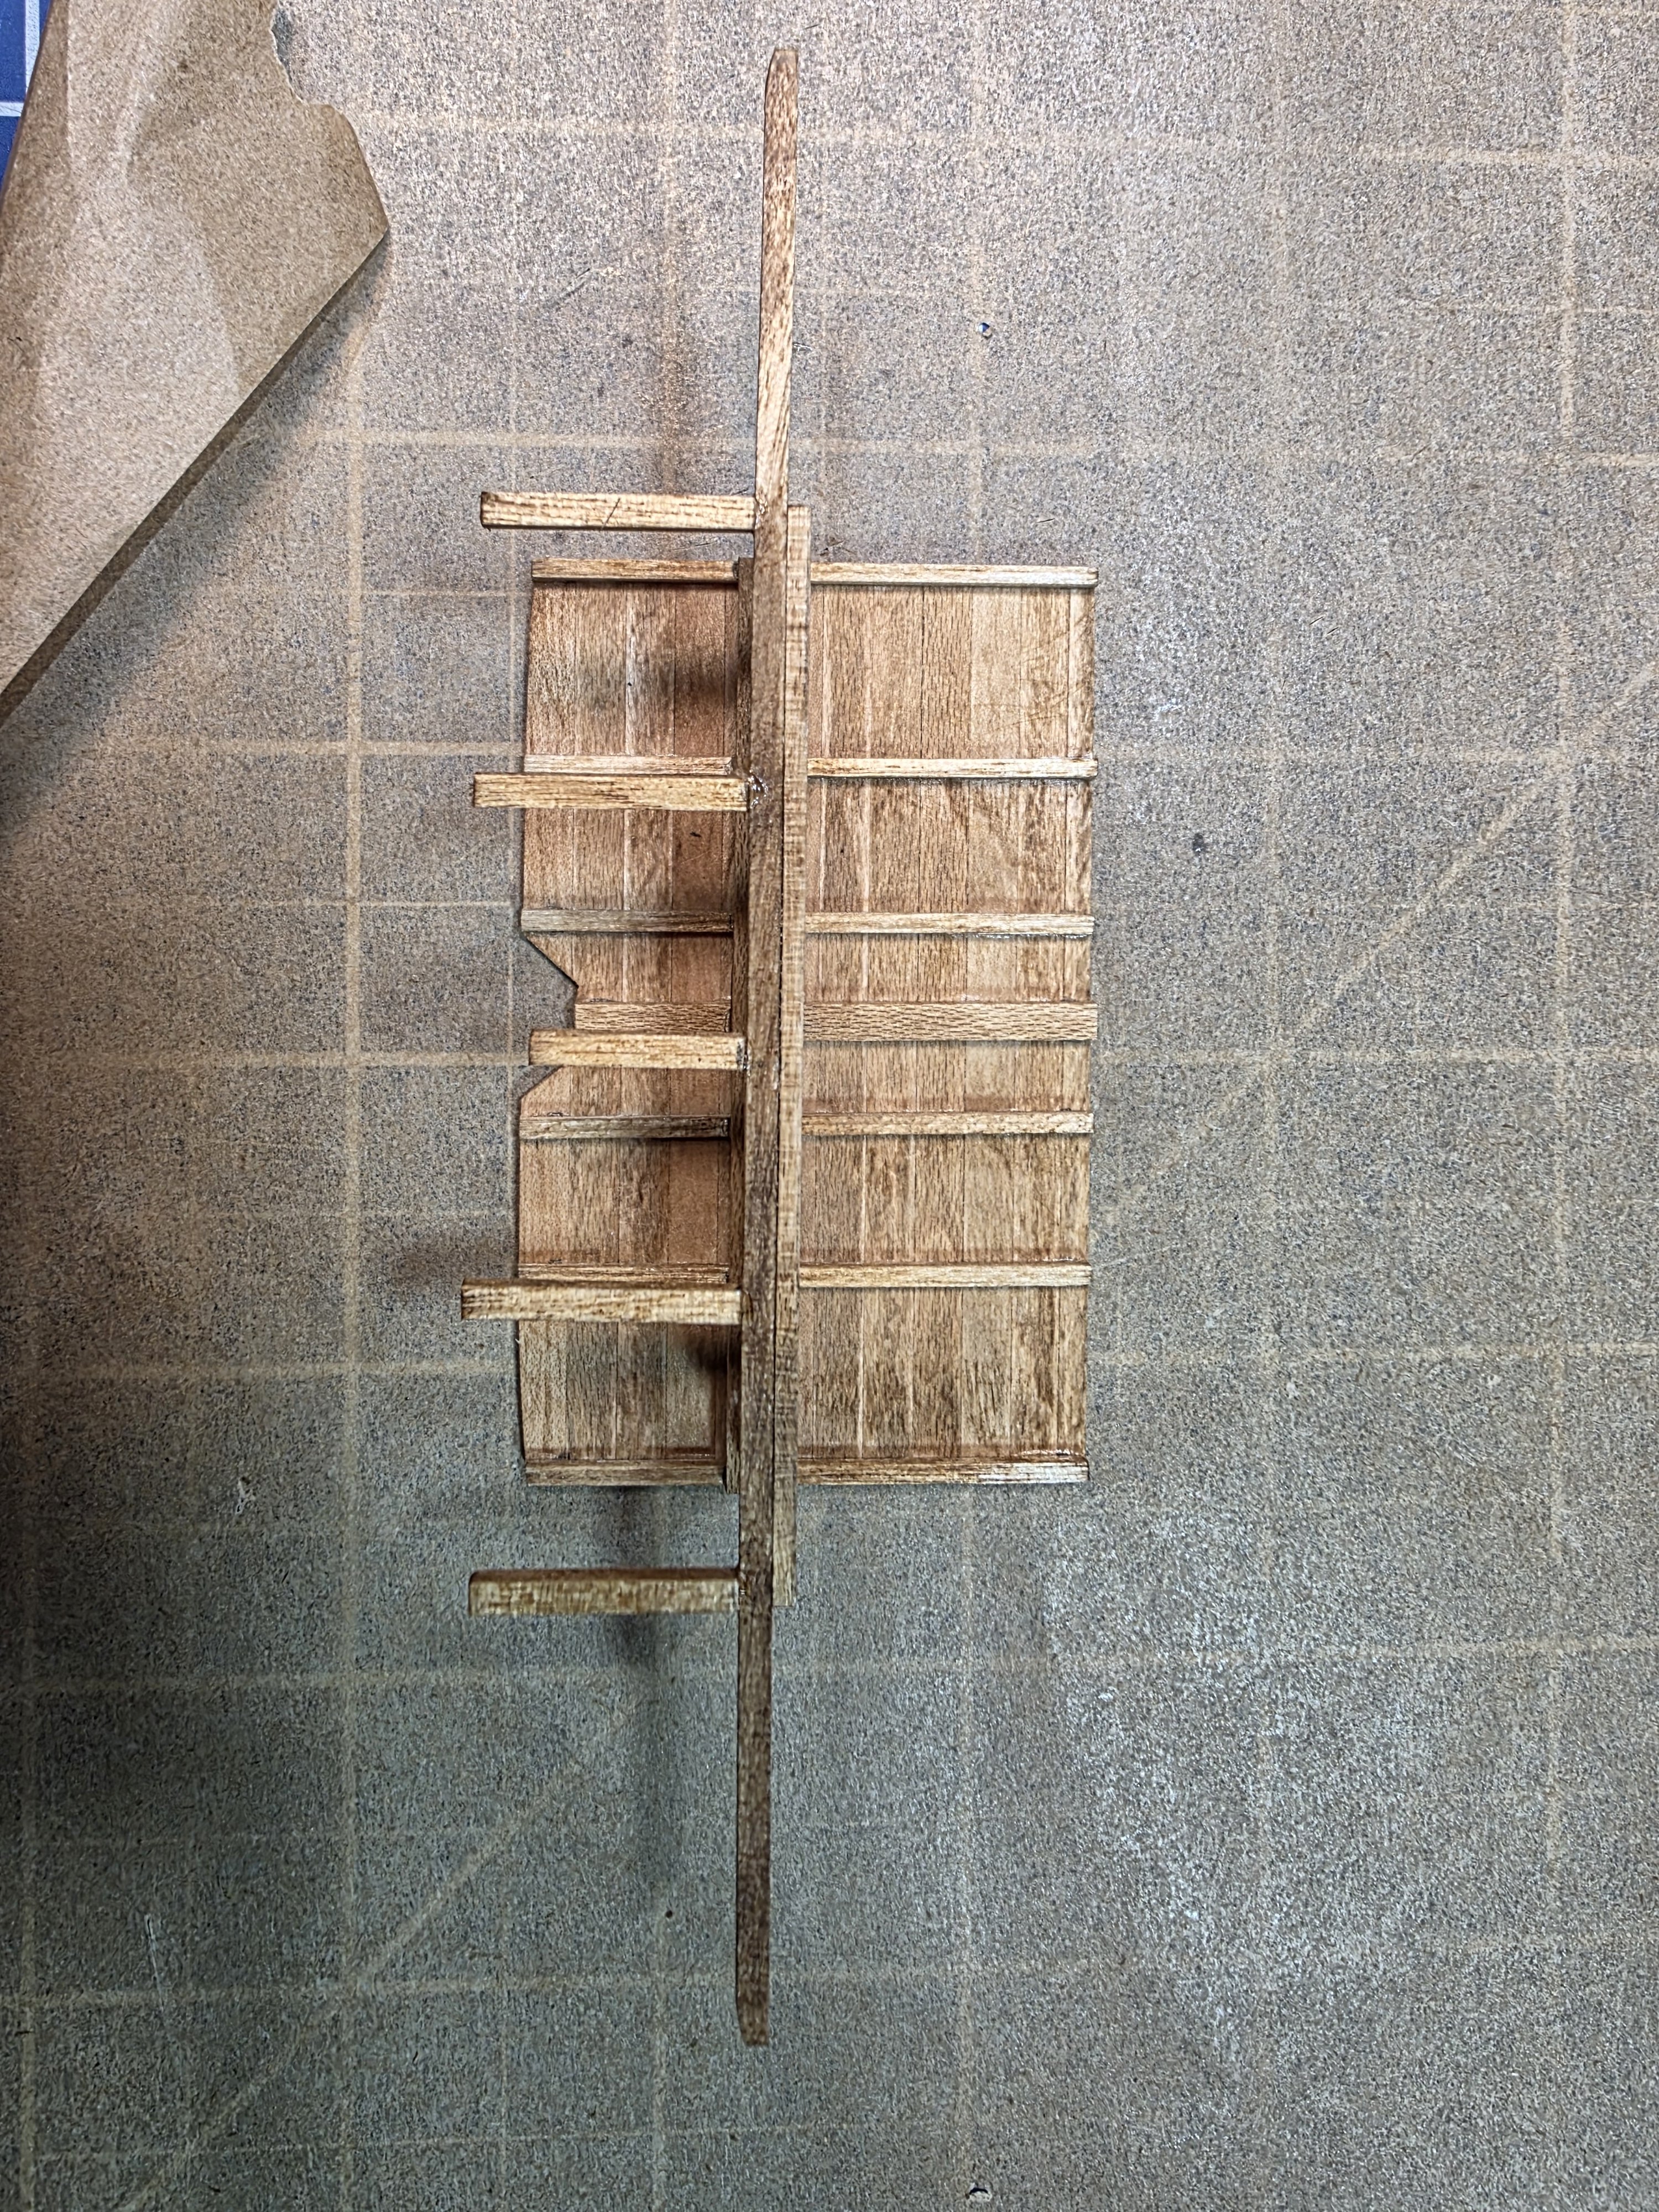
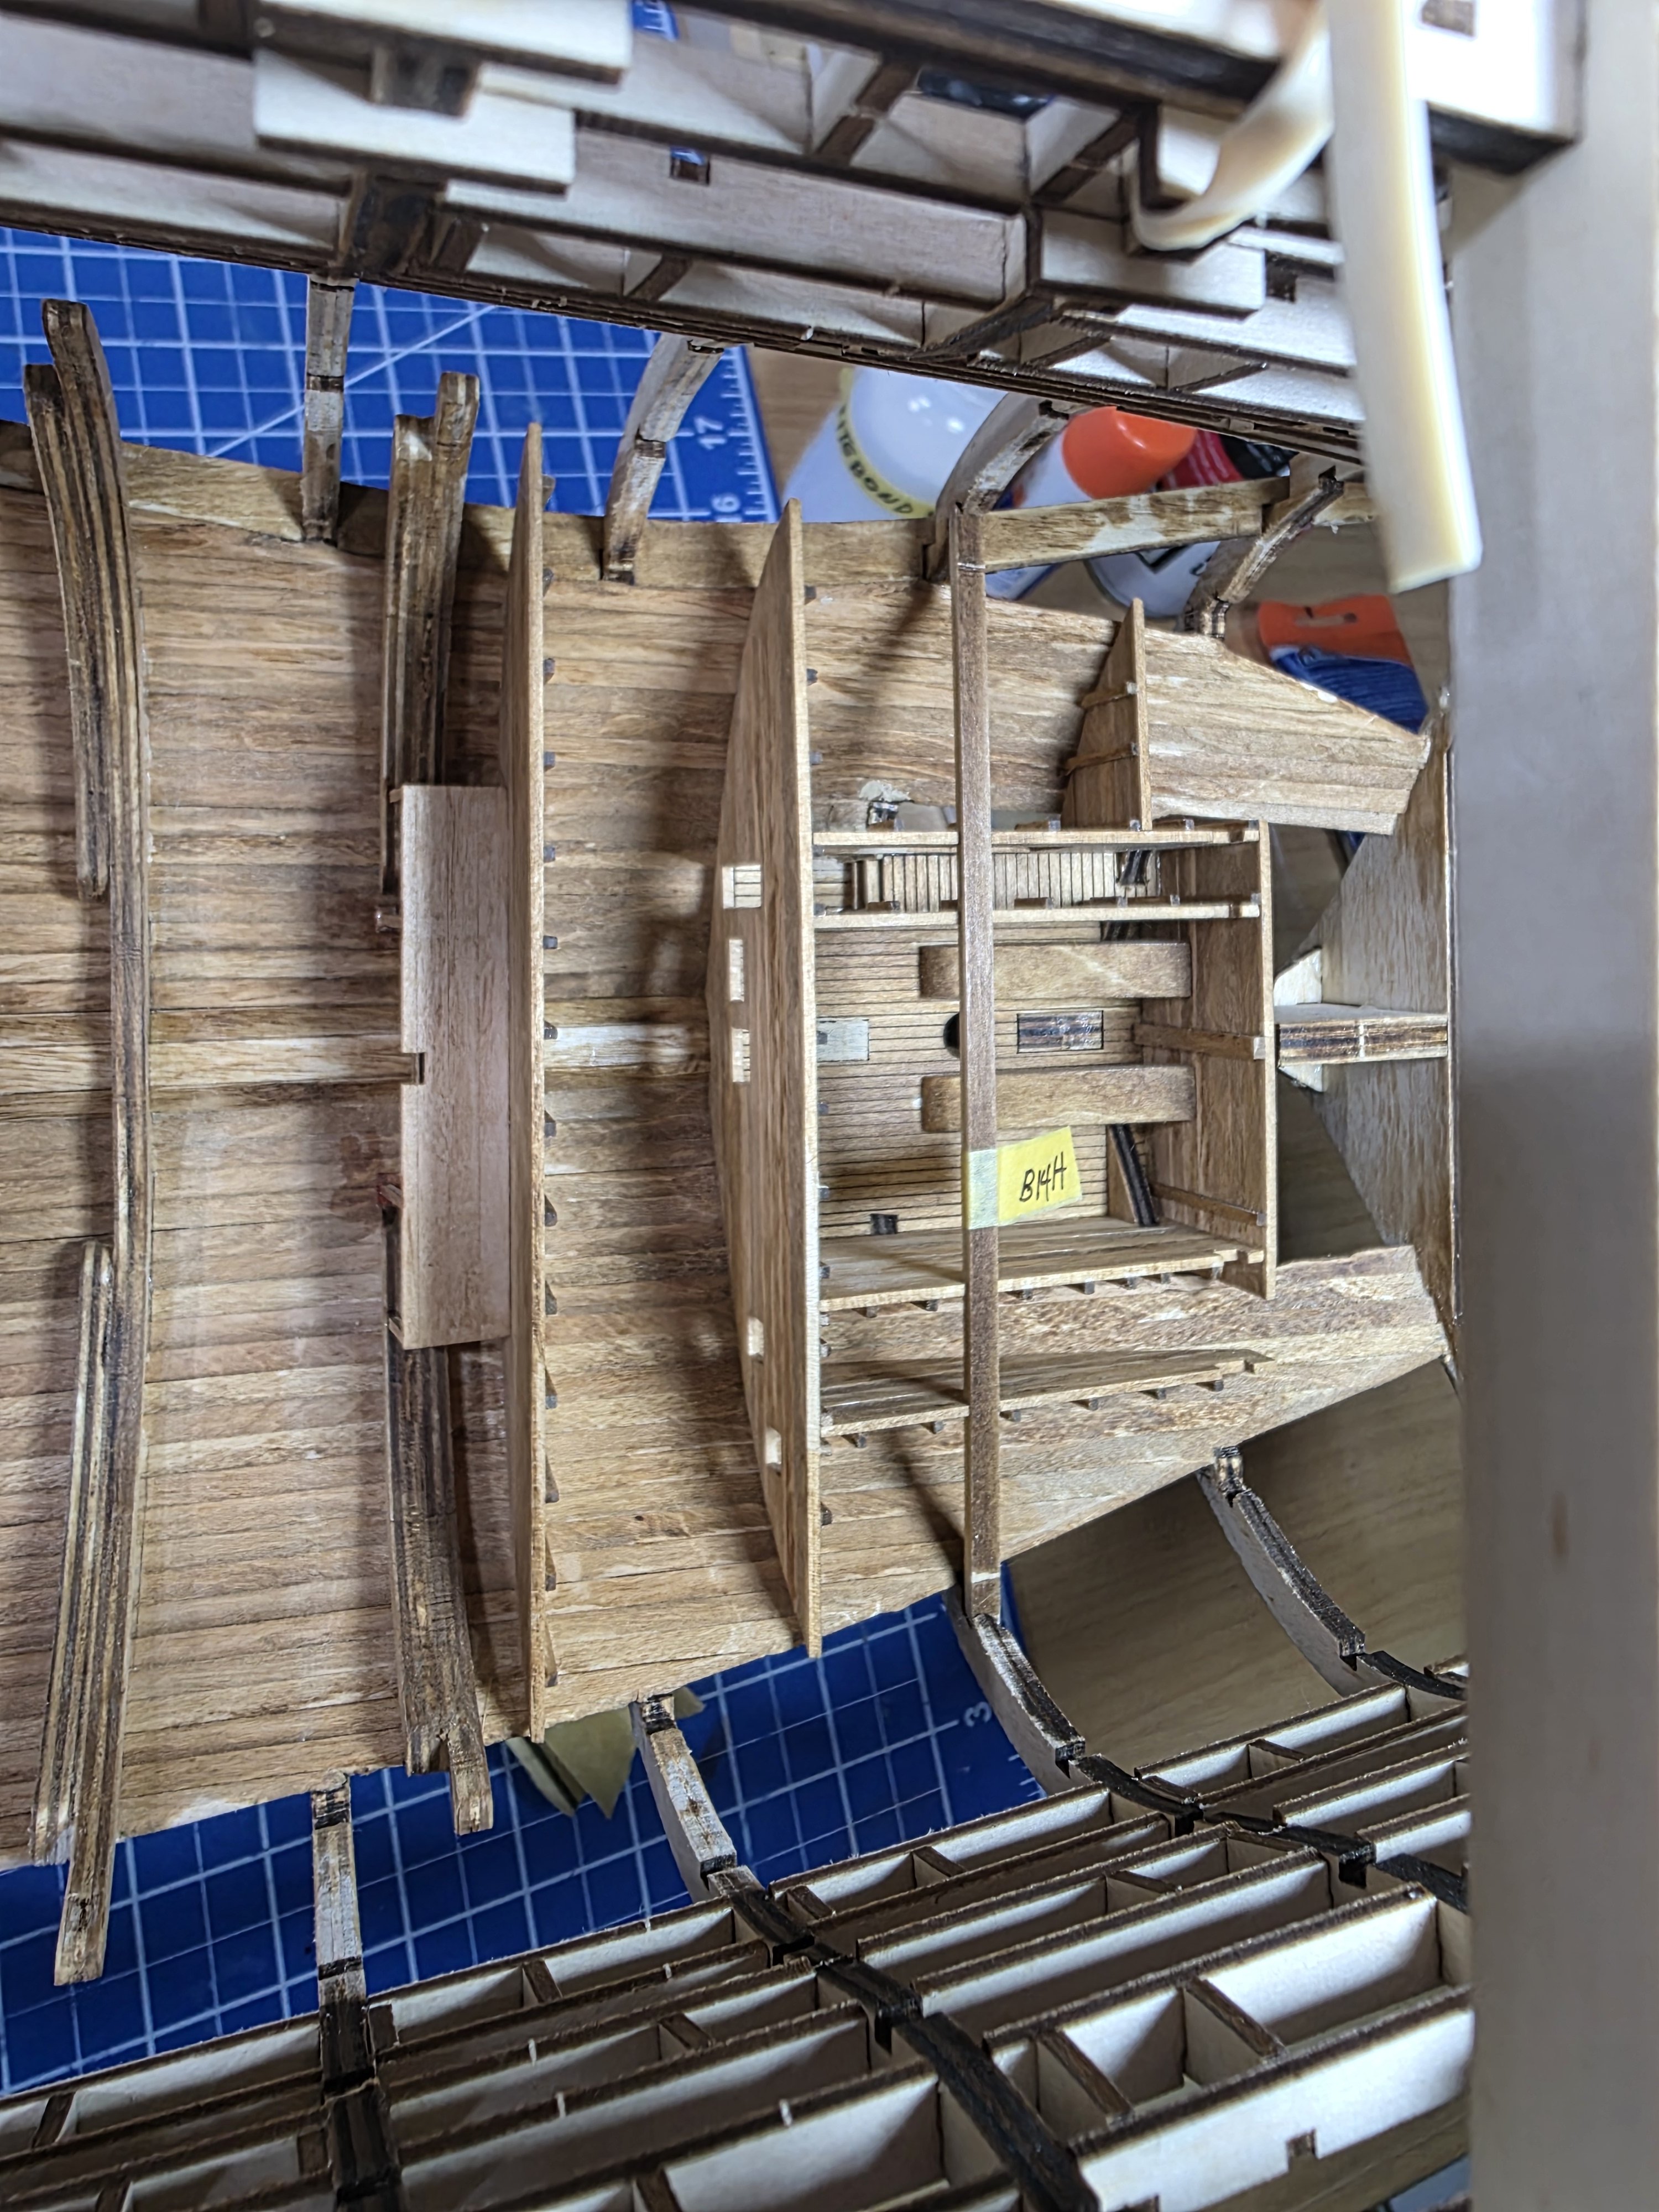
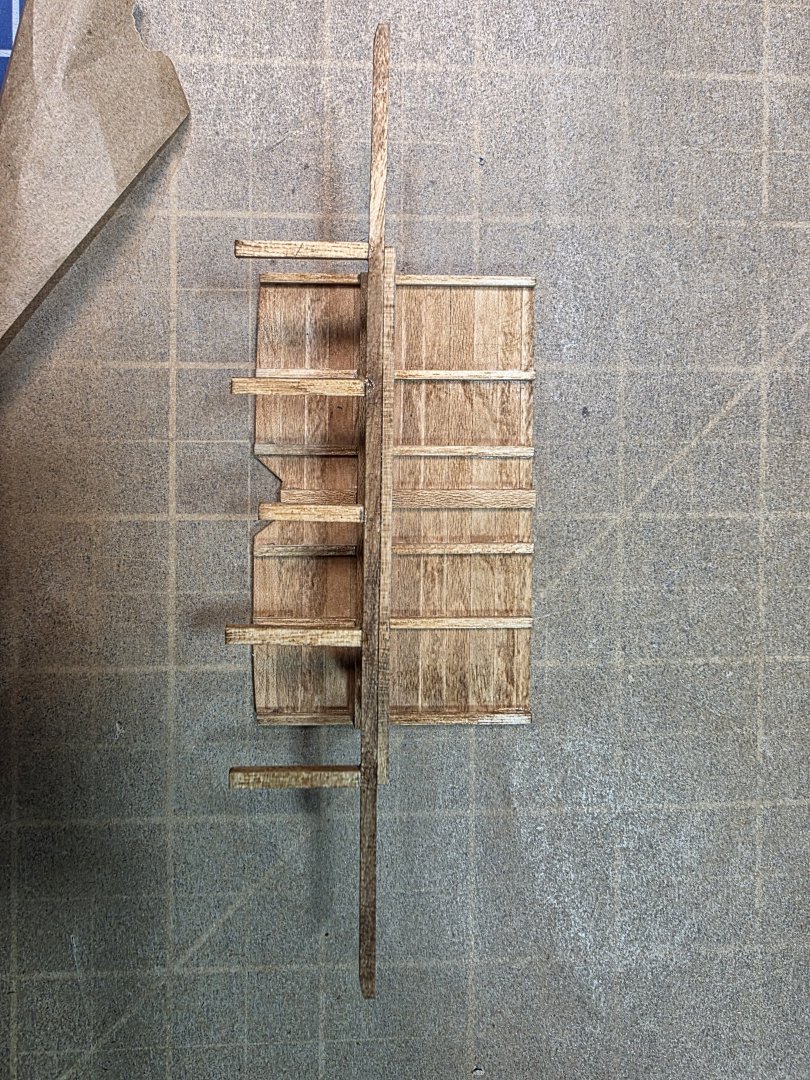
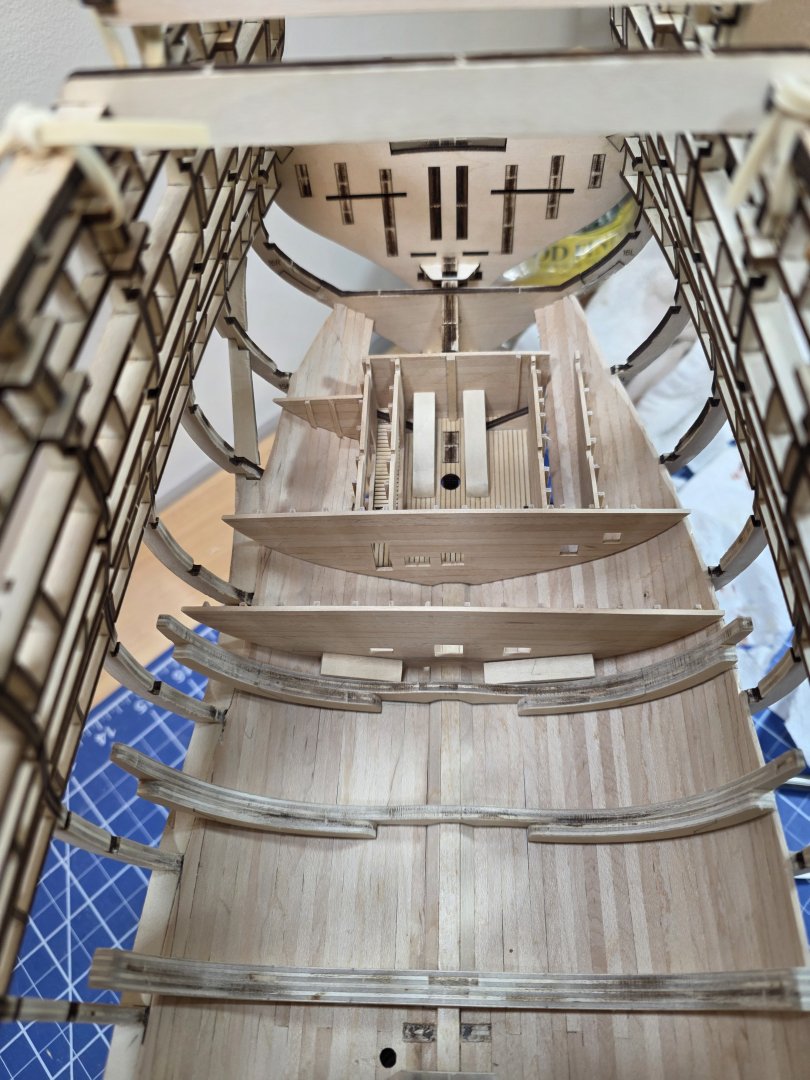
Pressing on to the rear compartments. I deviated from the build method in the video for this area. I just couldn't figure out how to assemble in that sequence and guarantee the finished structure would fit. Here I am checking the templates keeping in mind that the height is critical to ensuring the decks will fit on top properly. I temporarily positioned a couple of the deck supports to help with that. These parts are technically all the same shape. Here is the sequence of assembly I chose. I made the back wall first and then attached the two walls seen here along with the walkway. This helped me make sure they would sit perfectly on the deck. I glued these in here. Then i made the forward bulkhead and glued it on. And then made the last wall and glued it in. And finally made the last two parts and glued them in. From here I'll do some clean up and then there are two knees that are glued inside this area and a set of steps that lead up to the walkway. There is also another bulkhead to make just ahead of this area. The template is in the pictures. I will also get some staining done.


-
Sorry to hear that. I do understand the vision struggle.
-
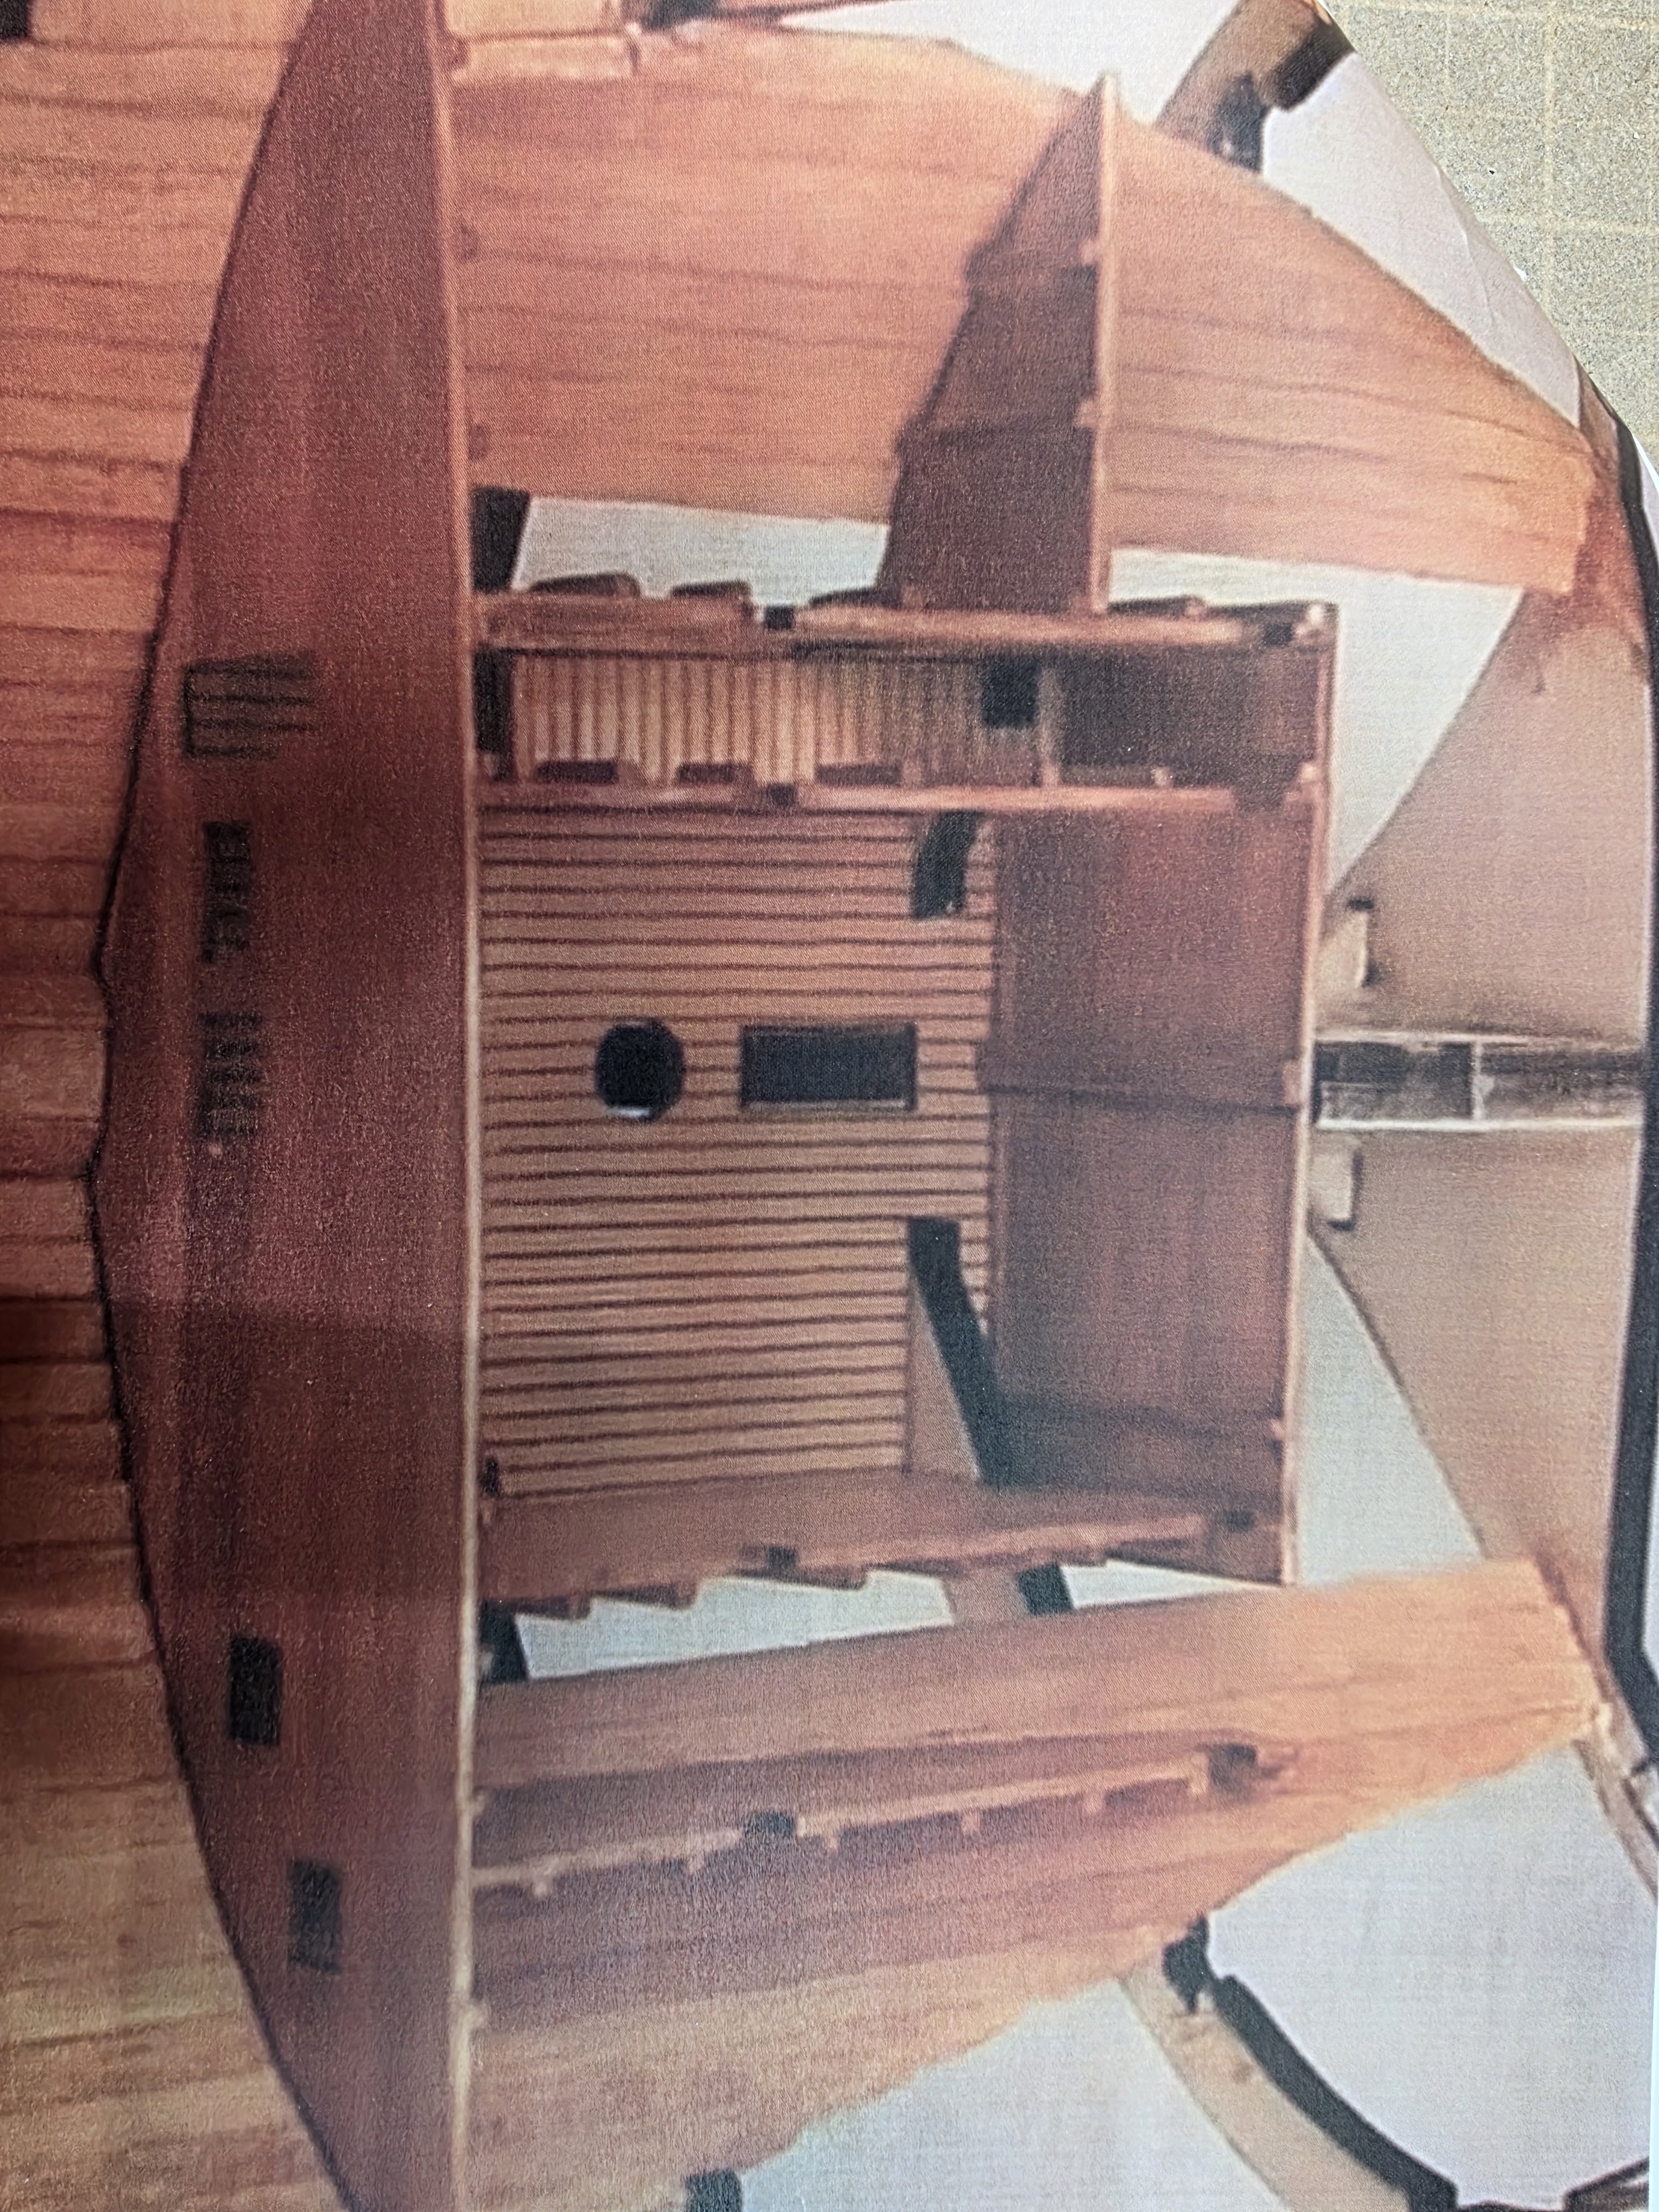
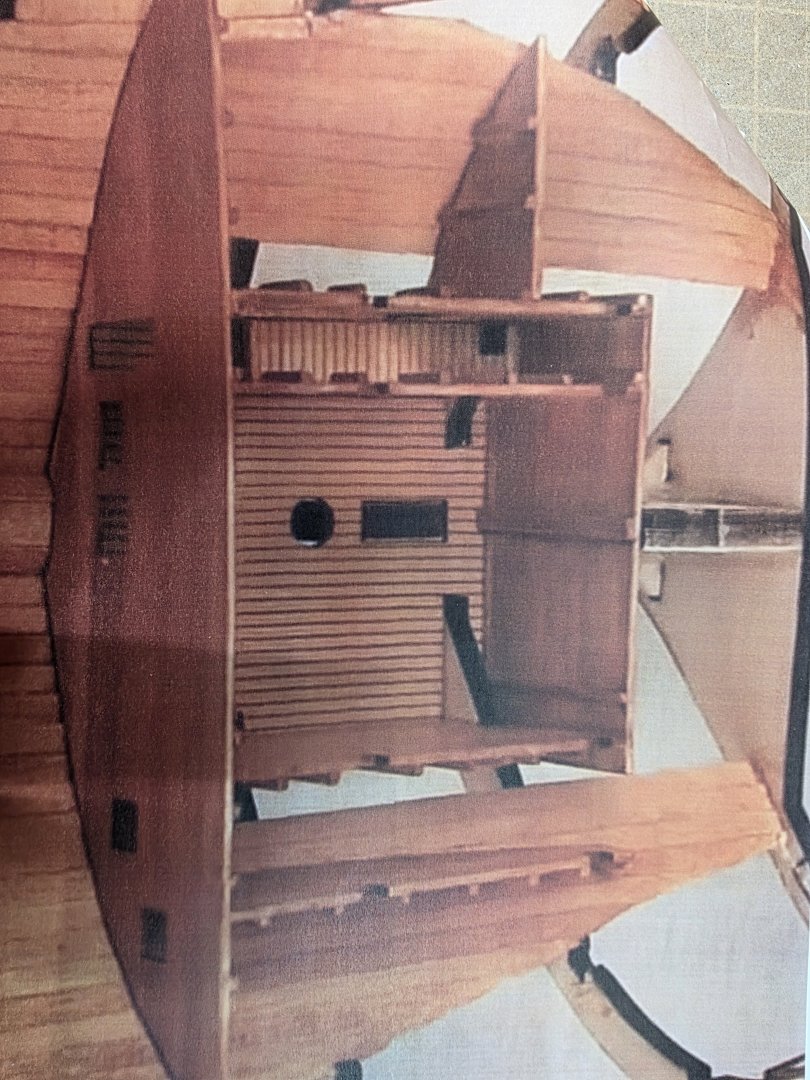
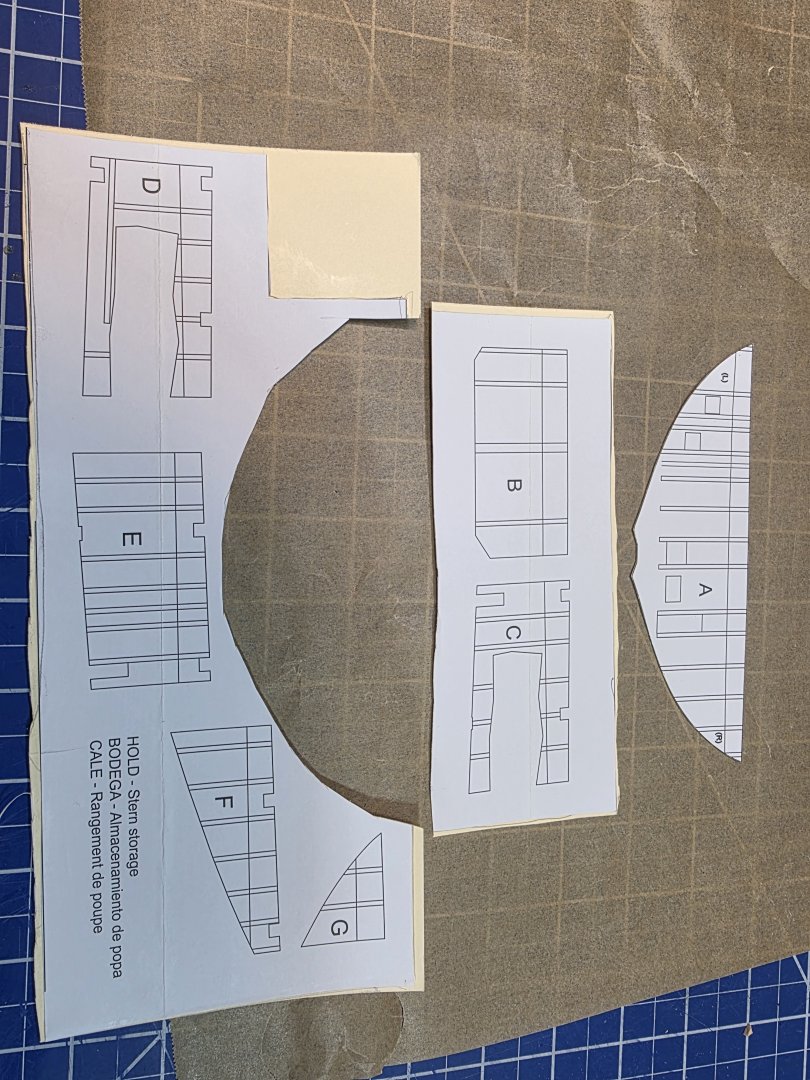
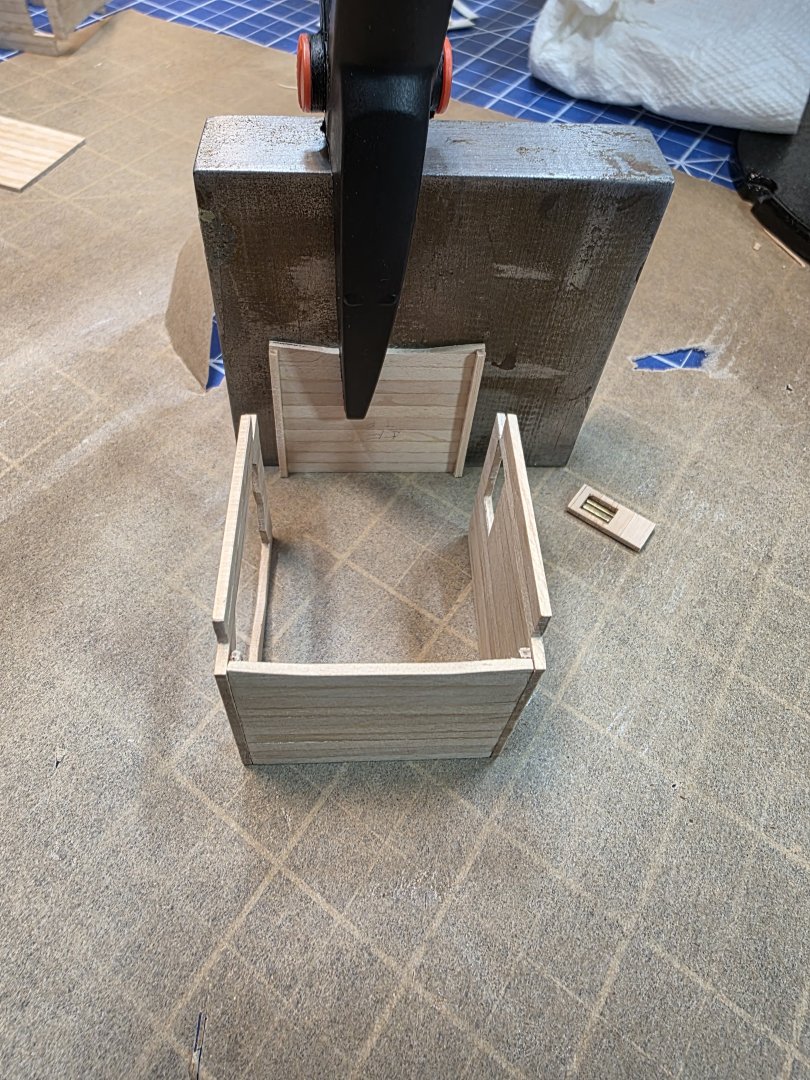
I finished the well and the shot locker. It ended up being more of a challenge than I expected, particularly the top of the locker. This was probably the the simplest structure to build. to build but maybe not. Again, not glued in. I'm moving it out of the way for the next structure. I haven't stained the hold yet but will do that soon. I plan to use an oak stain since the majority of the ship was constructed from oak. I don't have any so need to get some. The video would have you make the steps next but I'm moving that to later. Template for that is here. Instead, I'm going to work on the stern storage. This is a bit complicated. The picture below shows what this should look like. The video would have you assemble this entire structure off model and then drop it in. Will need to think about this very carefully. There is no drawing of this structure either. This also requires that a piece of decking be glued in. This was the easy part. Note the mast locator. I'm having a vision of the mast passing all the way down through all the decks into that location hole. It does line up well with the notch below due to the locator notches. Here are the templates for this stern structure.


-
Thanks Bob
-
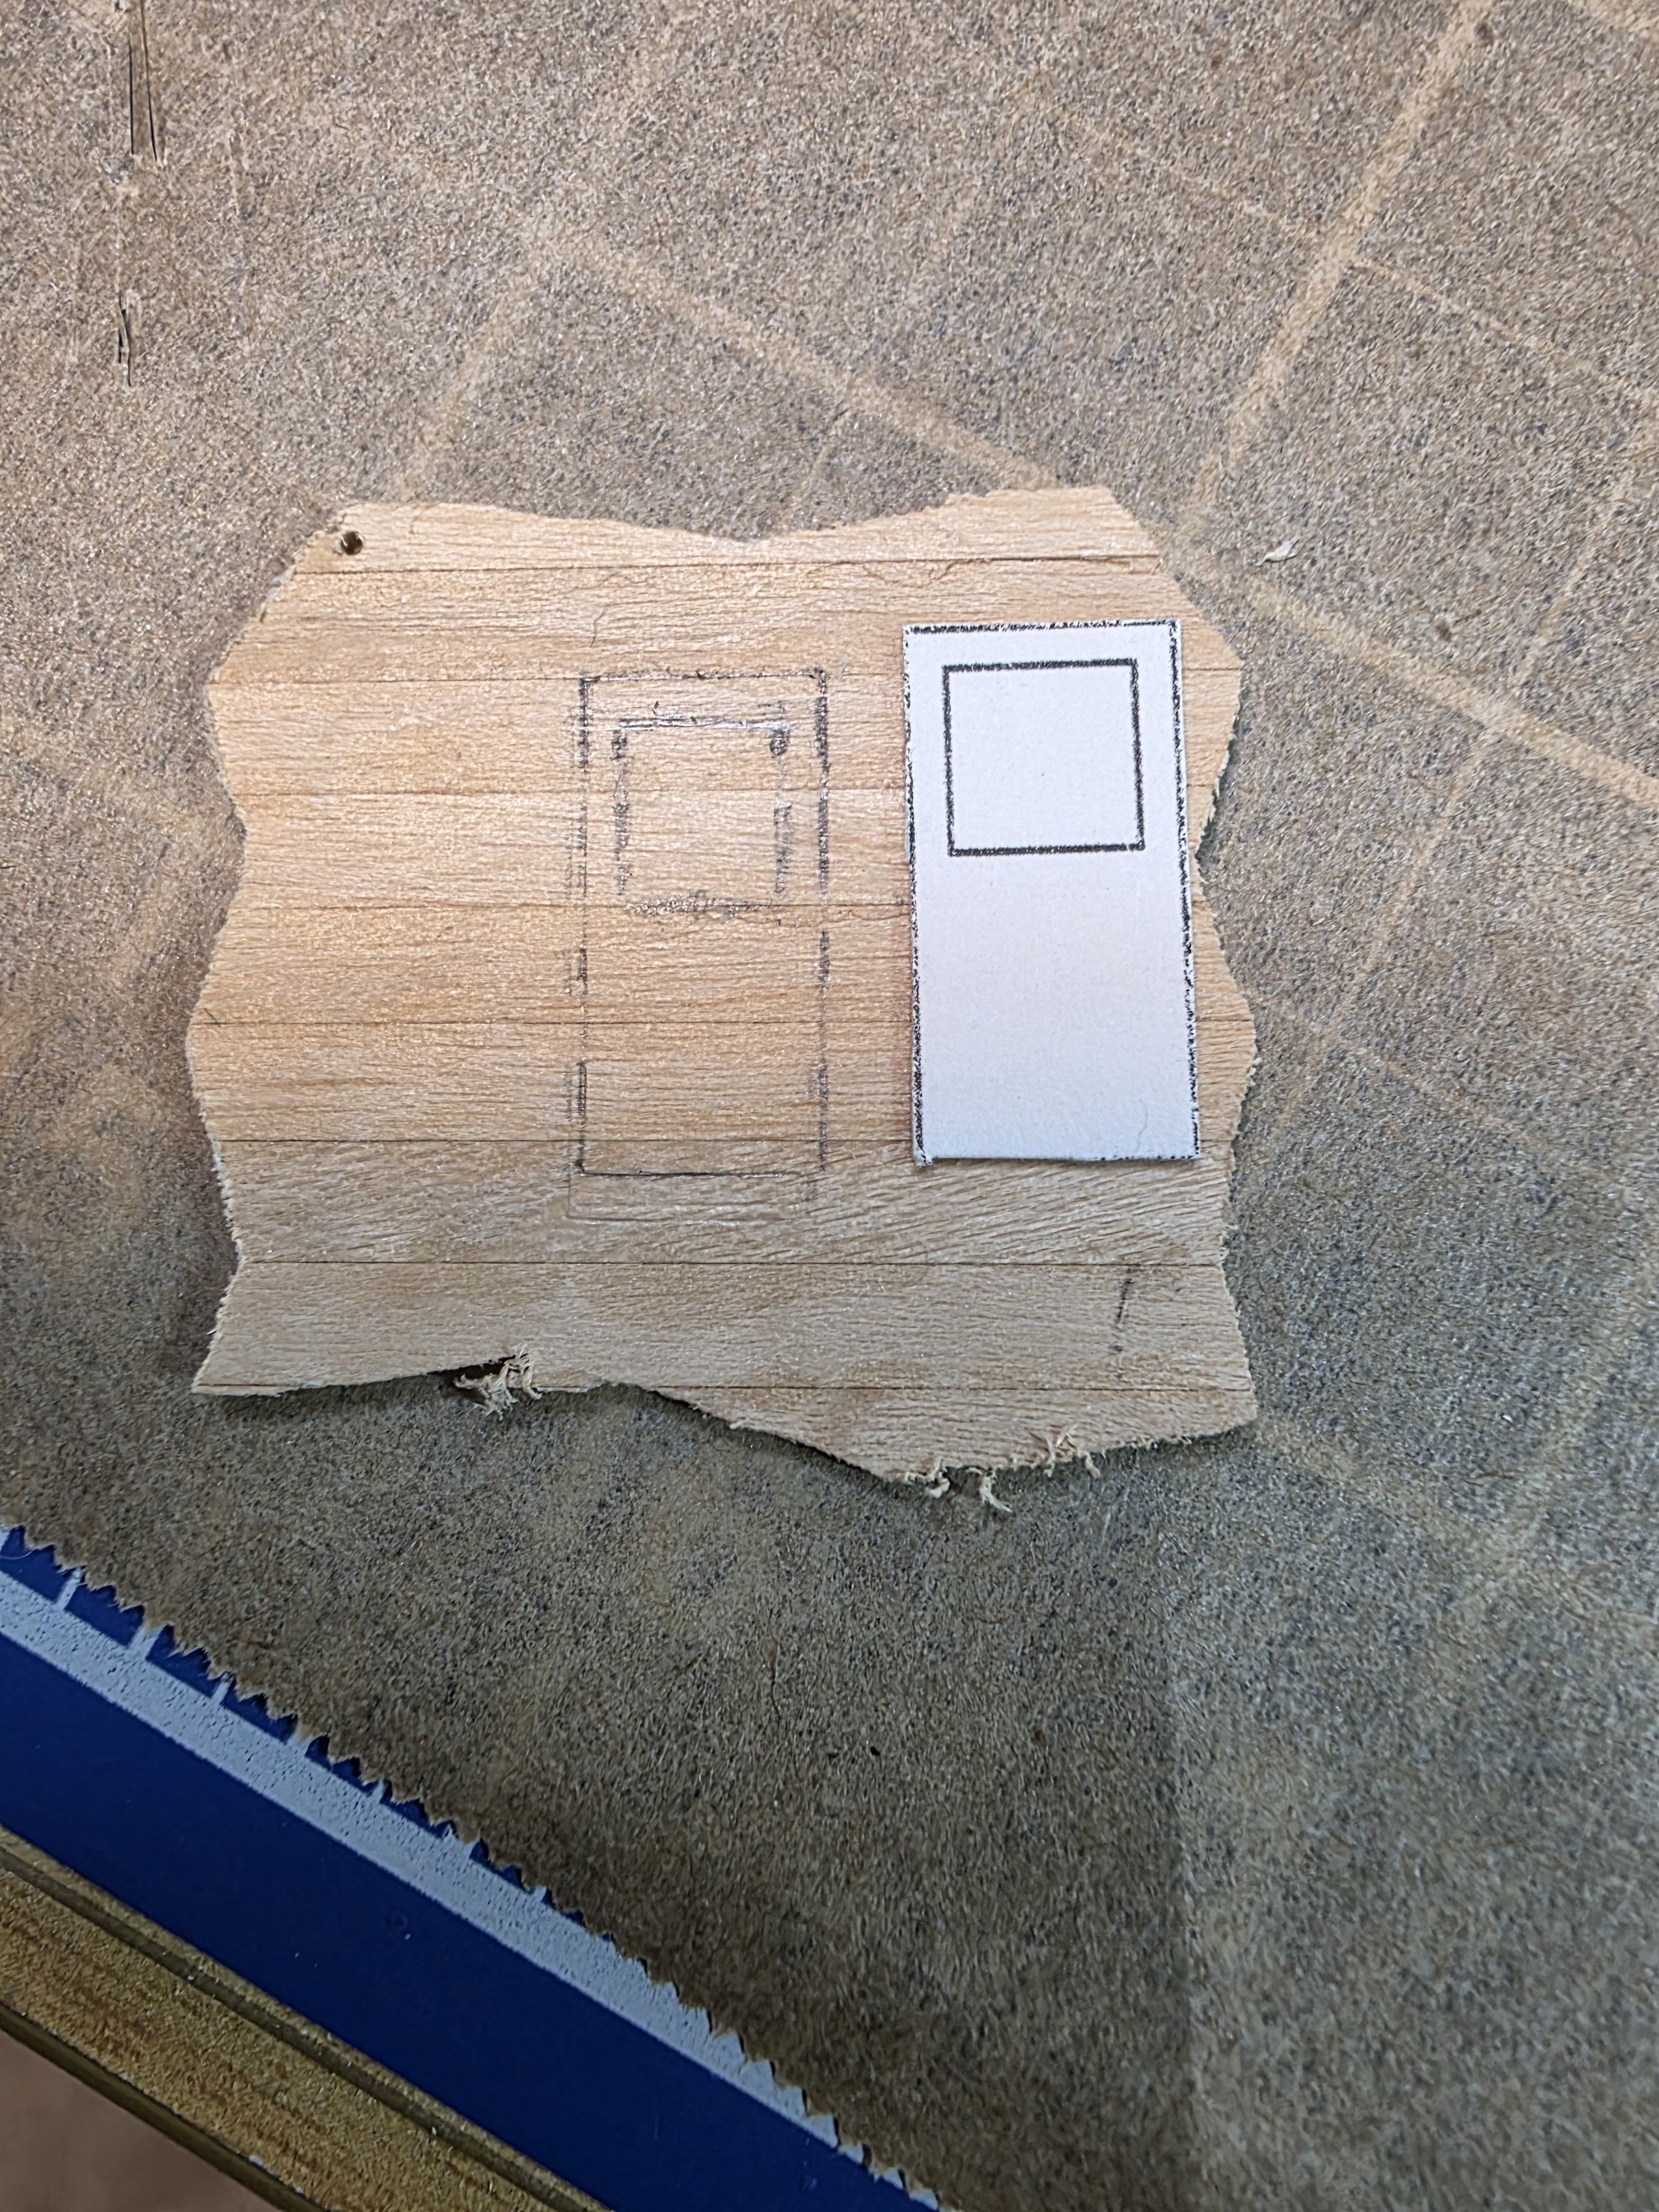
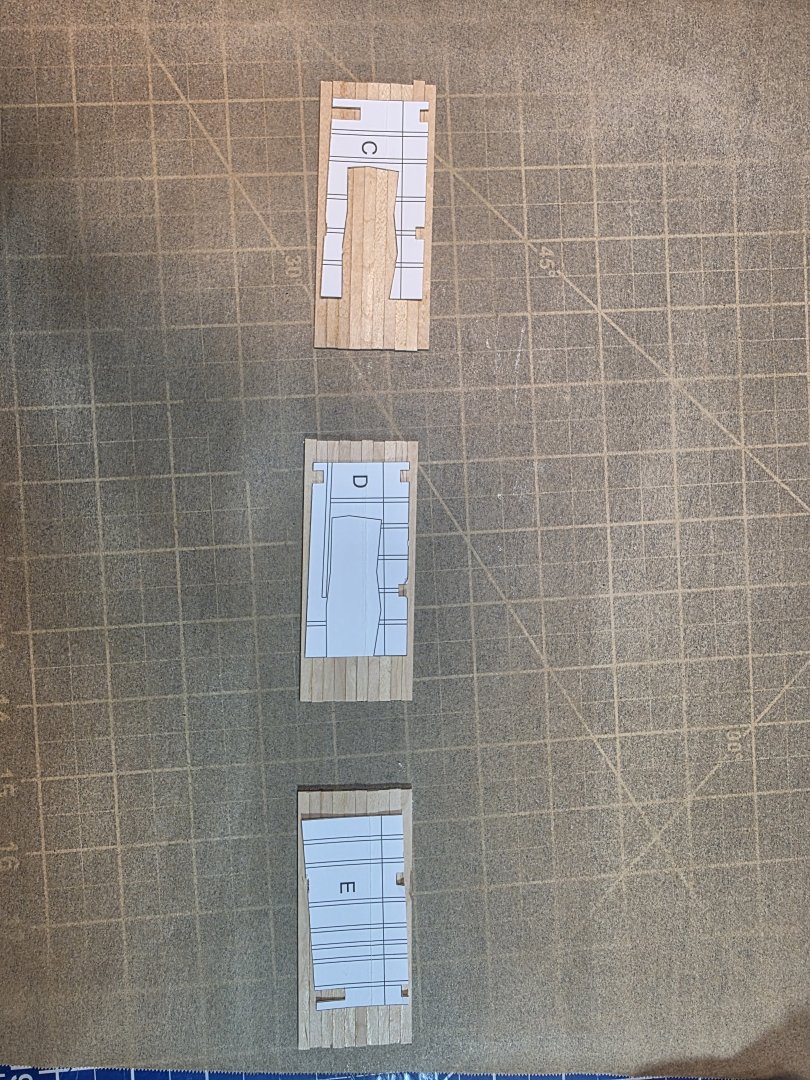
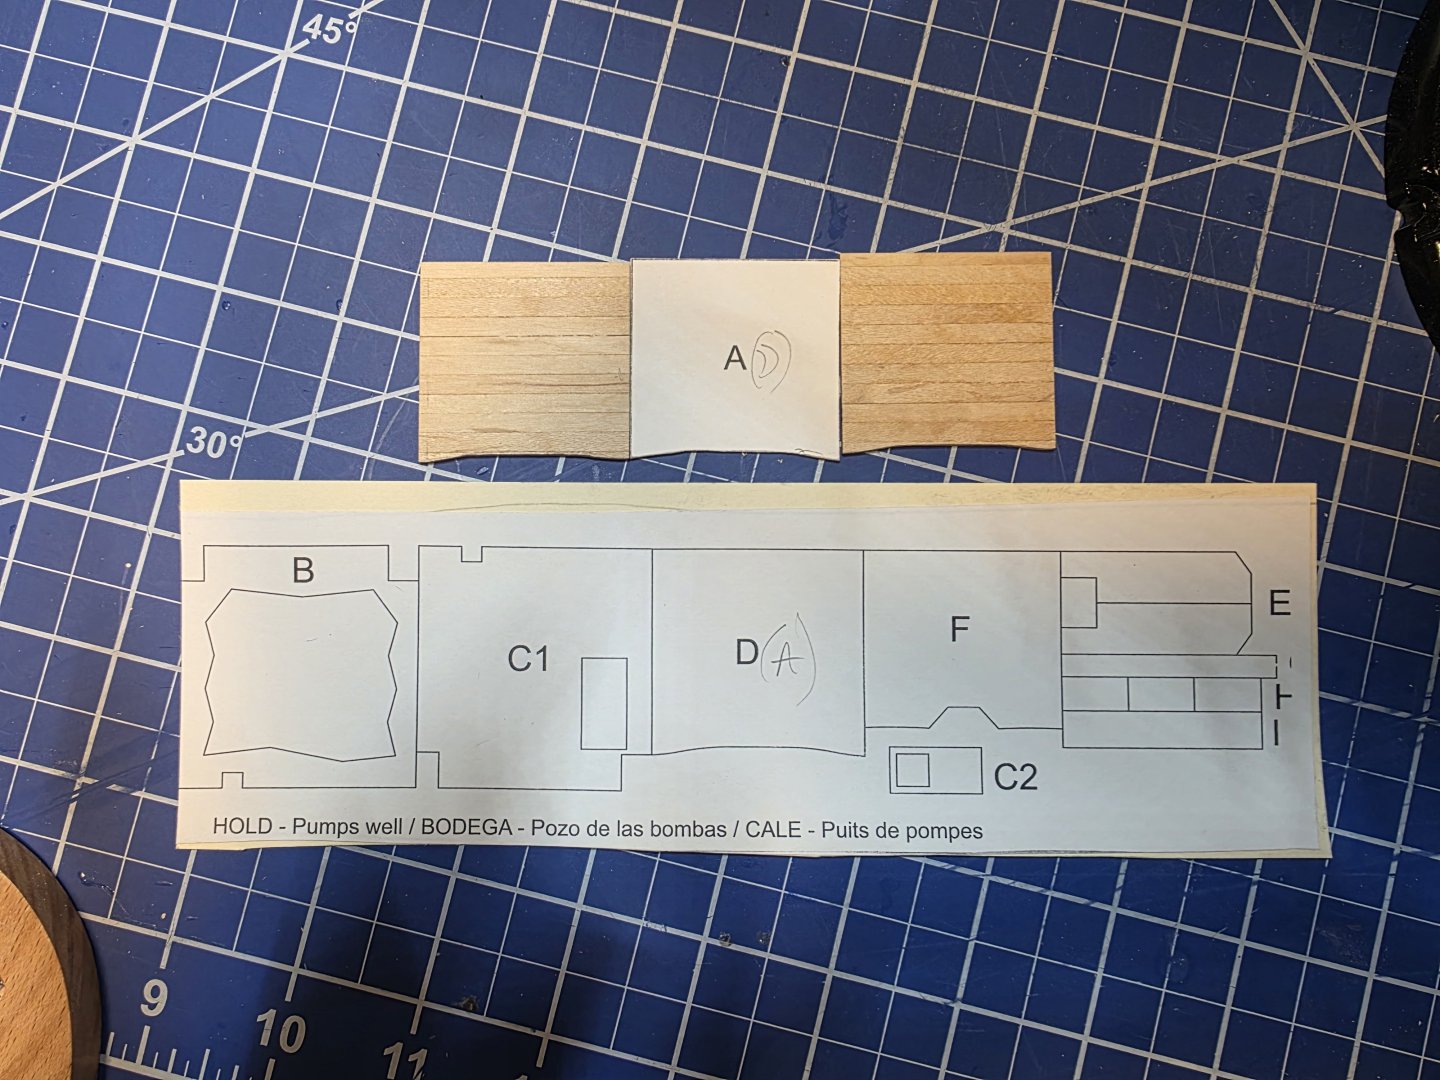
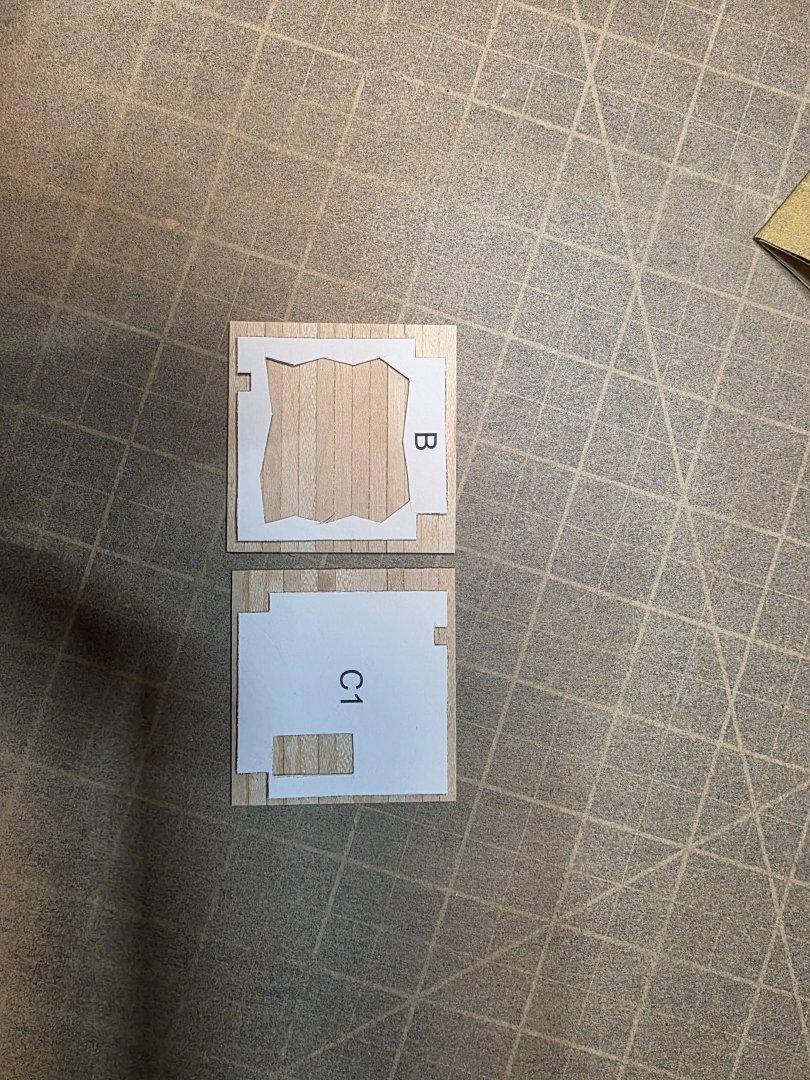
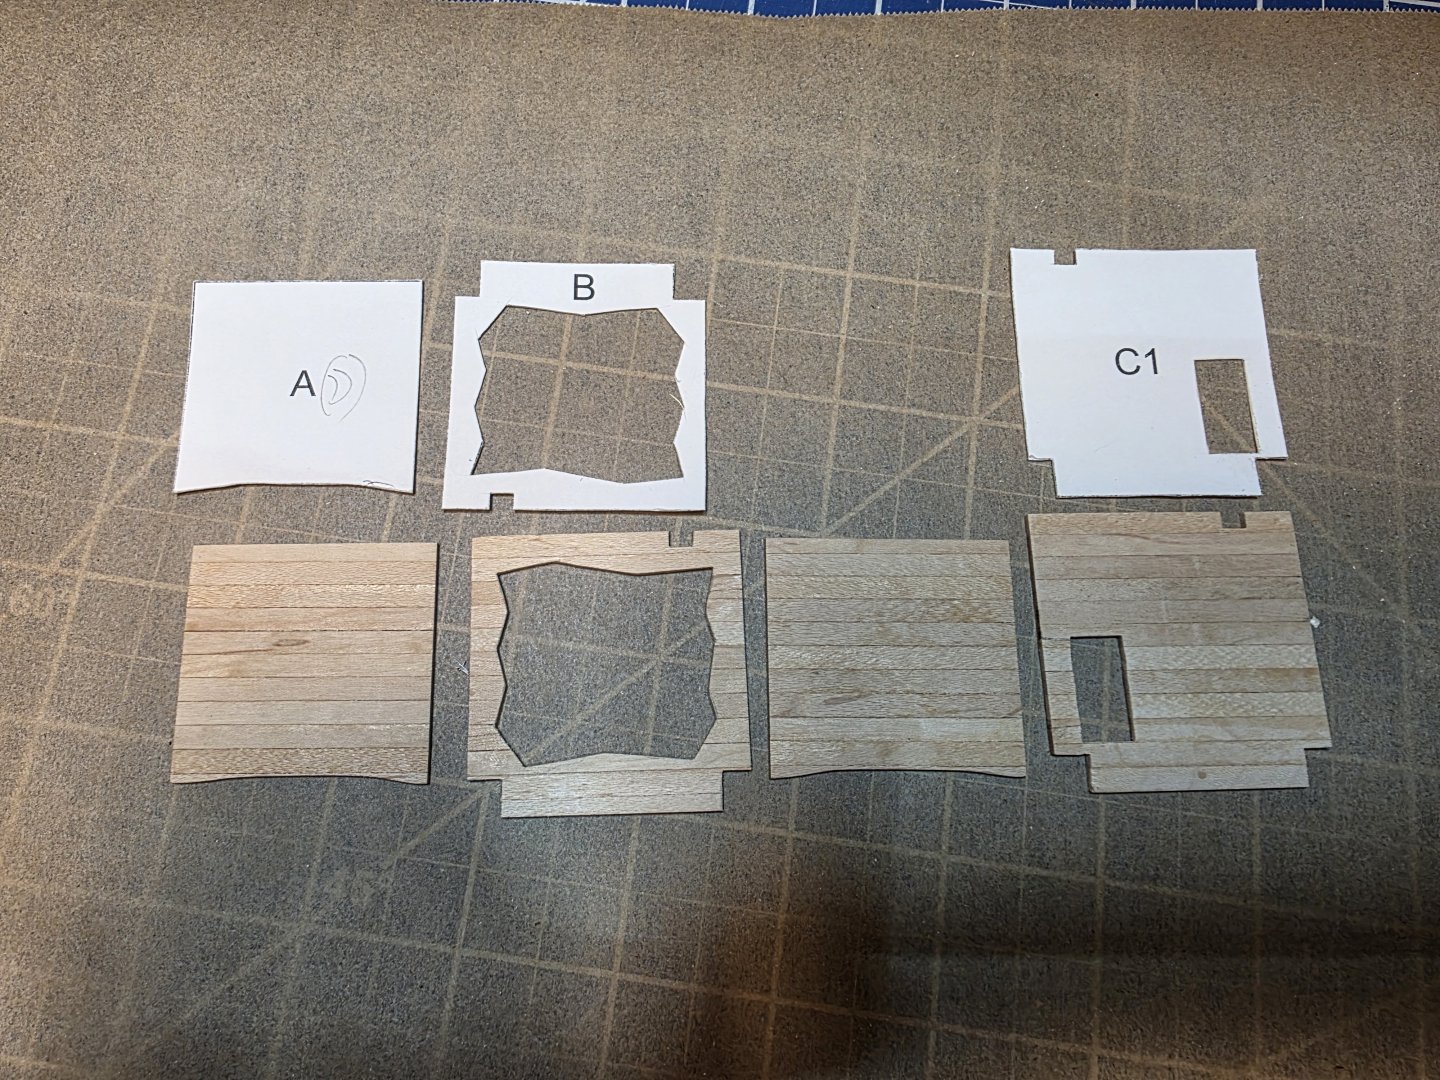
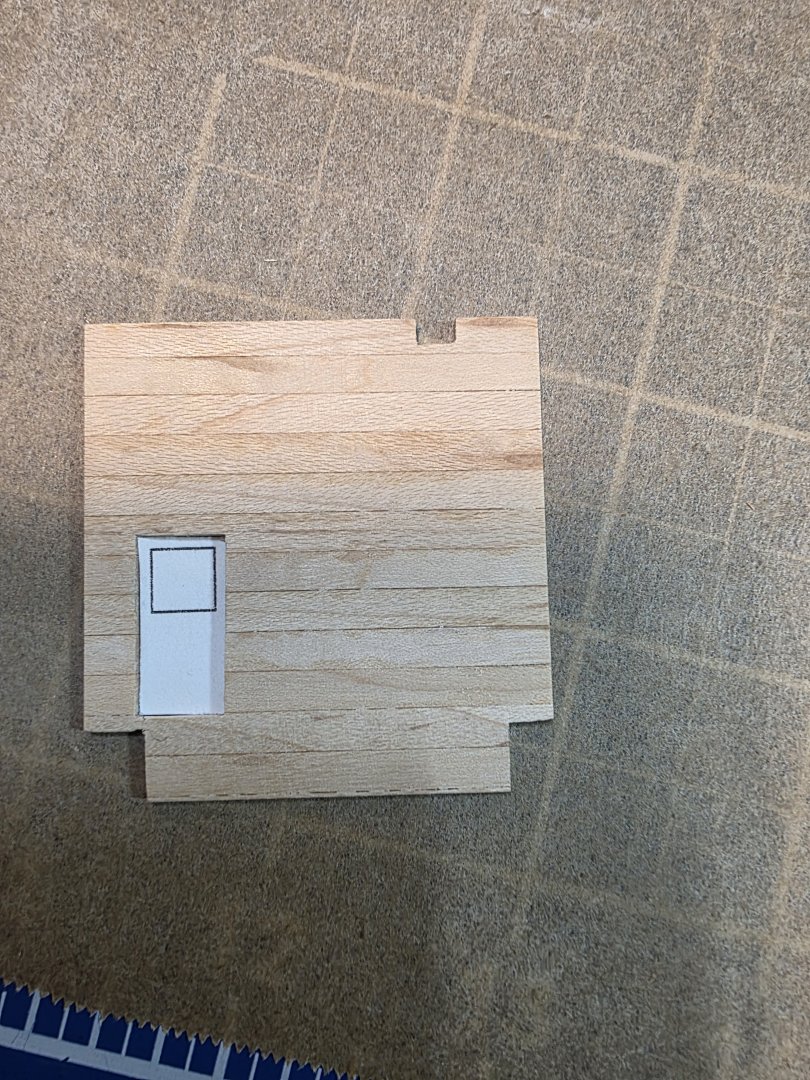
Update. Started work on the hold structures. This is the hold assembly drawing provided with the kit. There are no 1:1 drawings of the hold structures other than the templates. Starting with the pump well. I made the first two parts. I only used the "A" template as the A and D templates were virtually identical. I checked each template against there finished location and to make sure of the correct fit. As mentioned earlier, I glued the templates to cardstock and then glued enough planks together for each part. Here are all the parts for the pump well. I made sure the parts matched each other correctly. I used various tools to cut them out. Jewelers saw, Dremel scroll saw, exacto blades. It is necessary to make the door as well. This was a little troublesome as it was difficult to keep it from breaking, it took a couple of attempts. I ended up cutting out the window first and then the door. Glued all the parts together. Need to pay attention to the video for the correct orientation of the parts. The final well in place. I'm not gluing anything in until all the structures are made and placed. The position of some of them is critical to another structure later on so some adjustments may be necessary. Its necessary to make sure the proper fit of the deck cross beams as well. I made the slots in the structure a little too wide as its otherwise difficult to get the cross beam in. It does appear this cross beam is cut later. Its also important to make sure the height and shape of the structures in the hold don't interfere with the deck installation. It will be hard to see any of this later once the decks go in. This is actually the second pump well that I made. I didn't like the first one. There is a shot locker that attaches to the back of the well and here are the templates. Working this next.


-
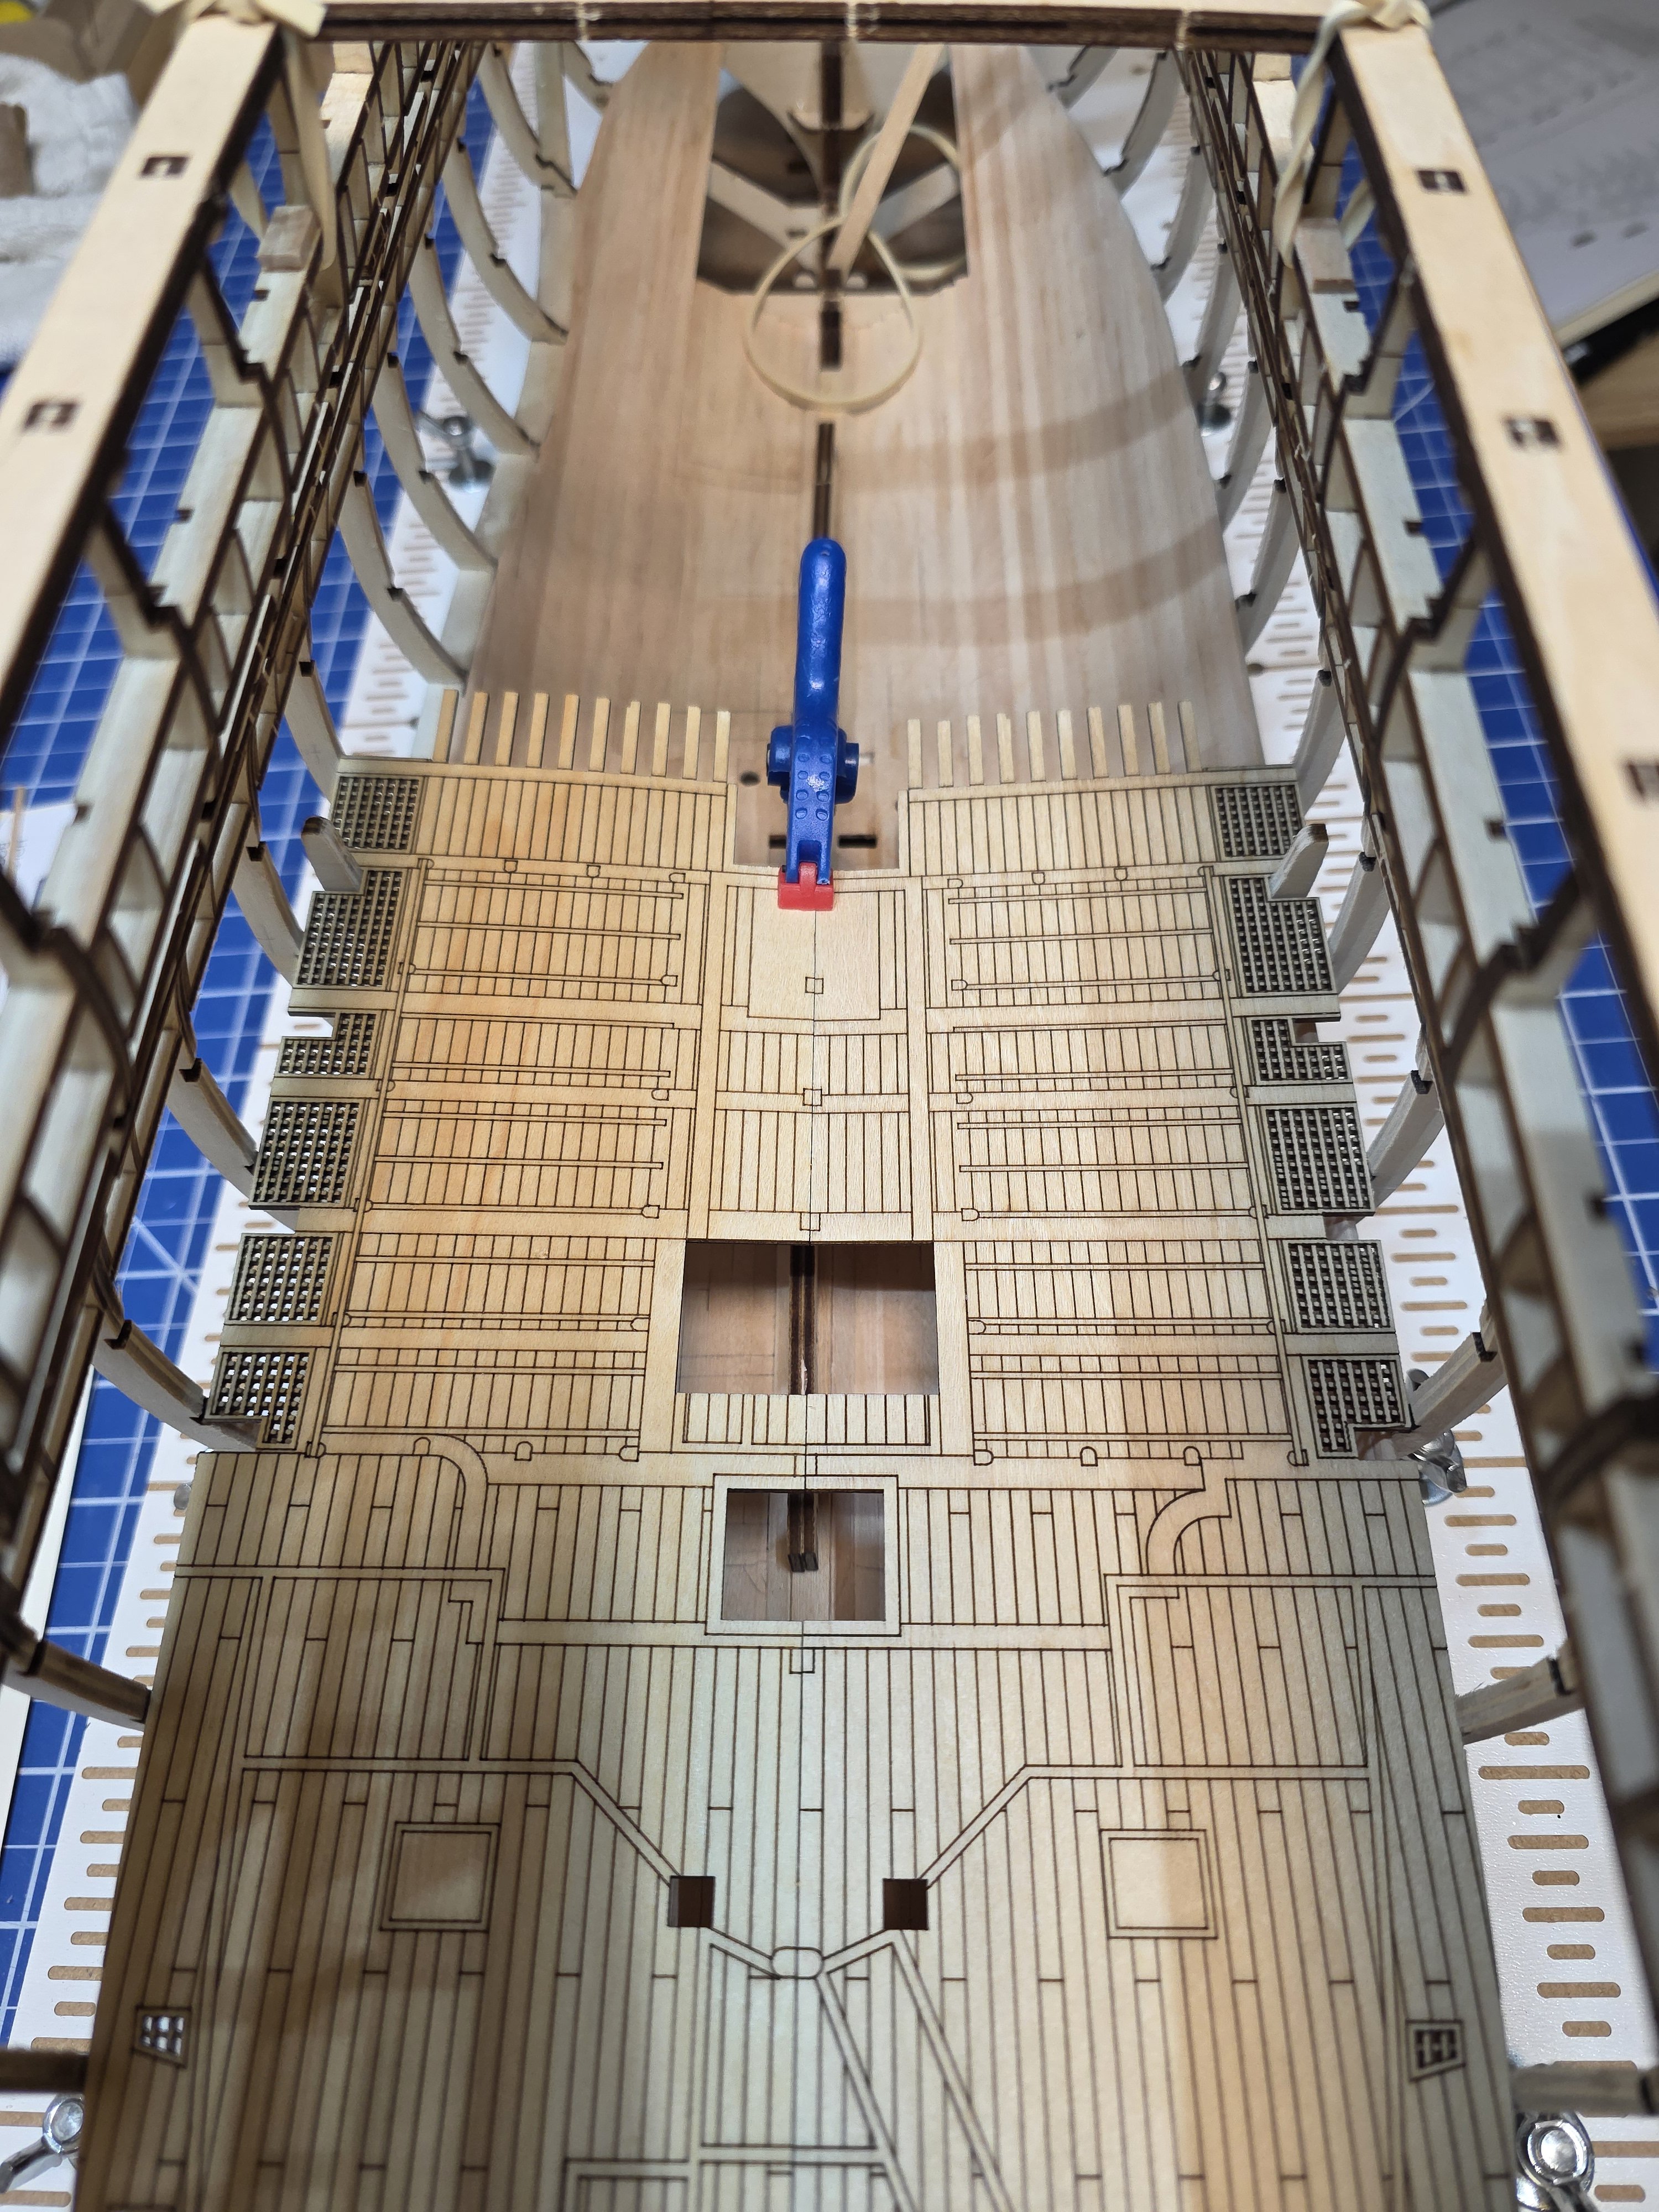
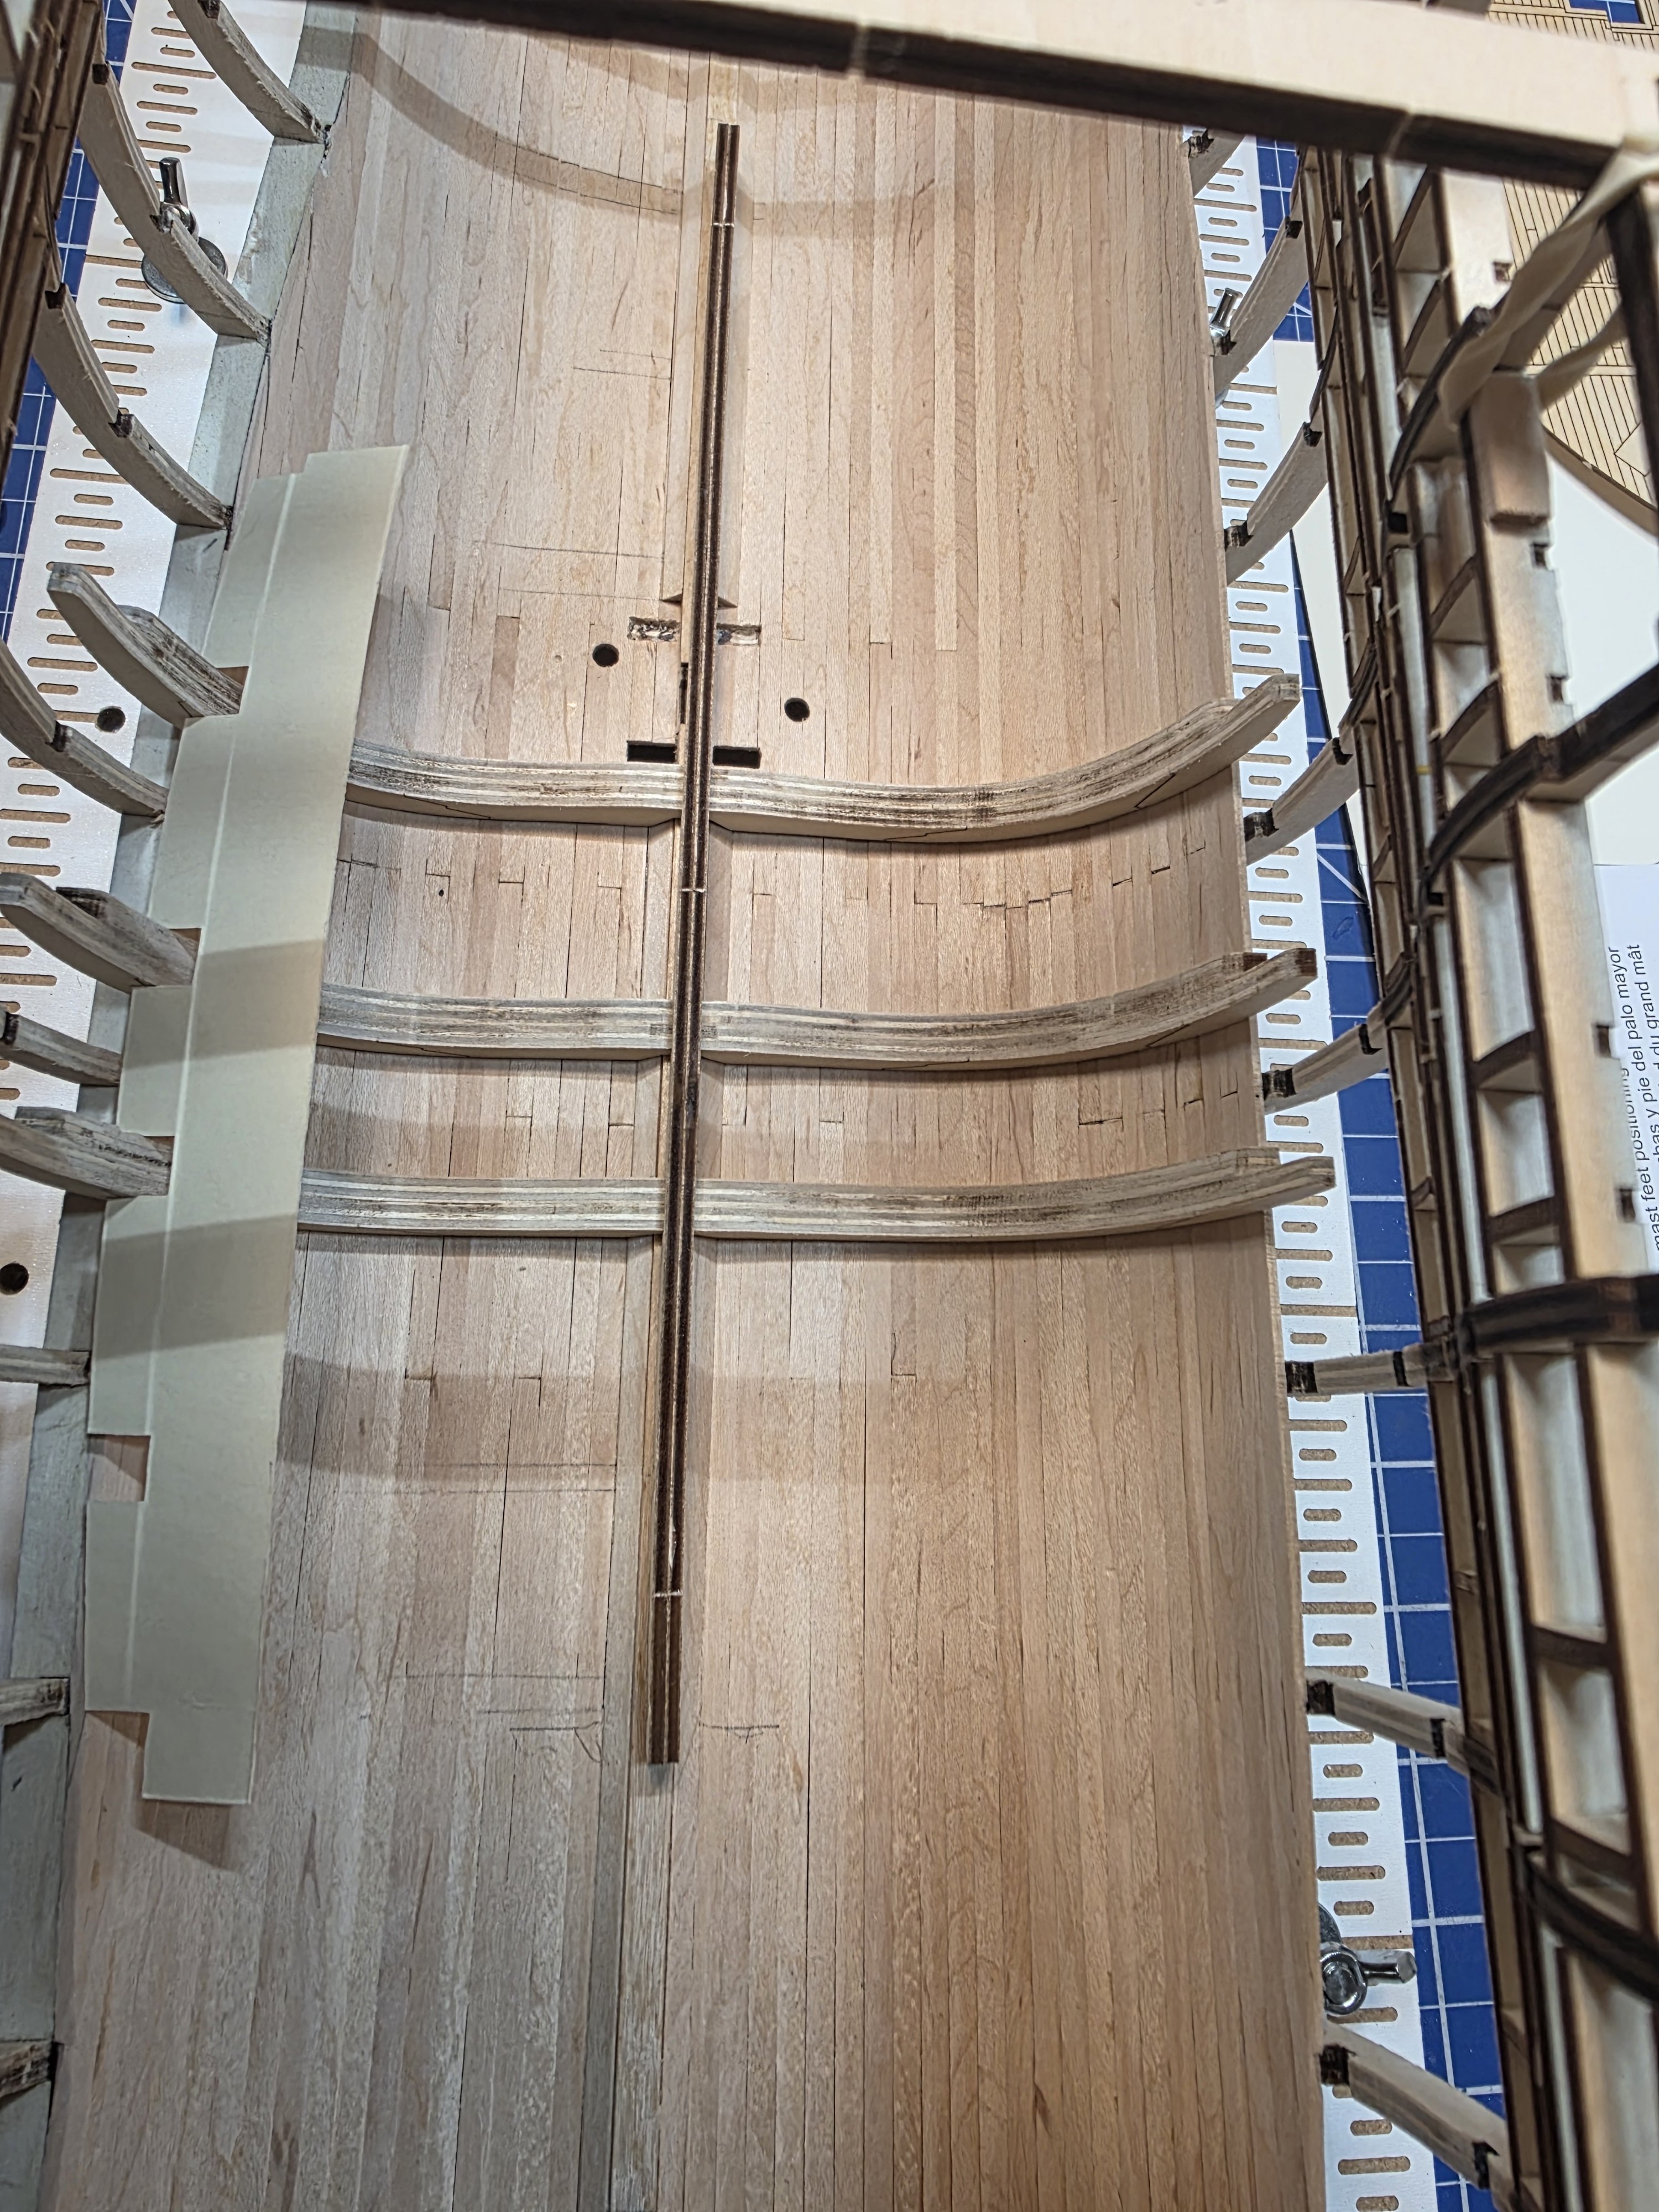
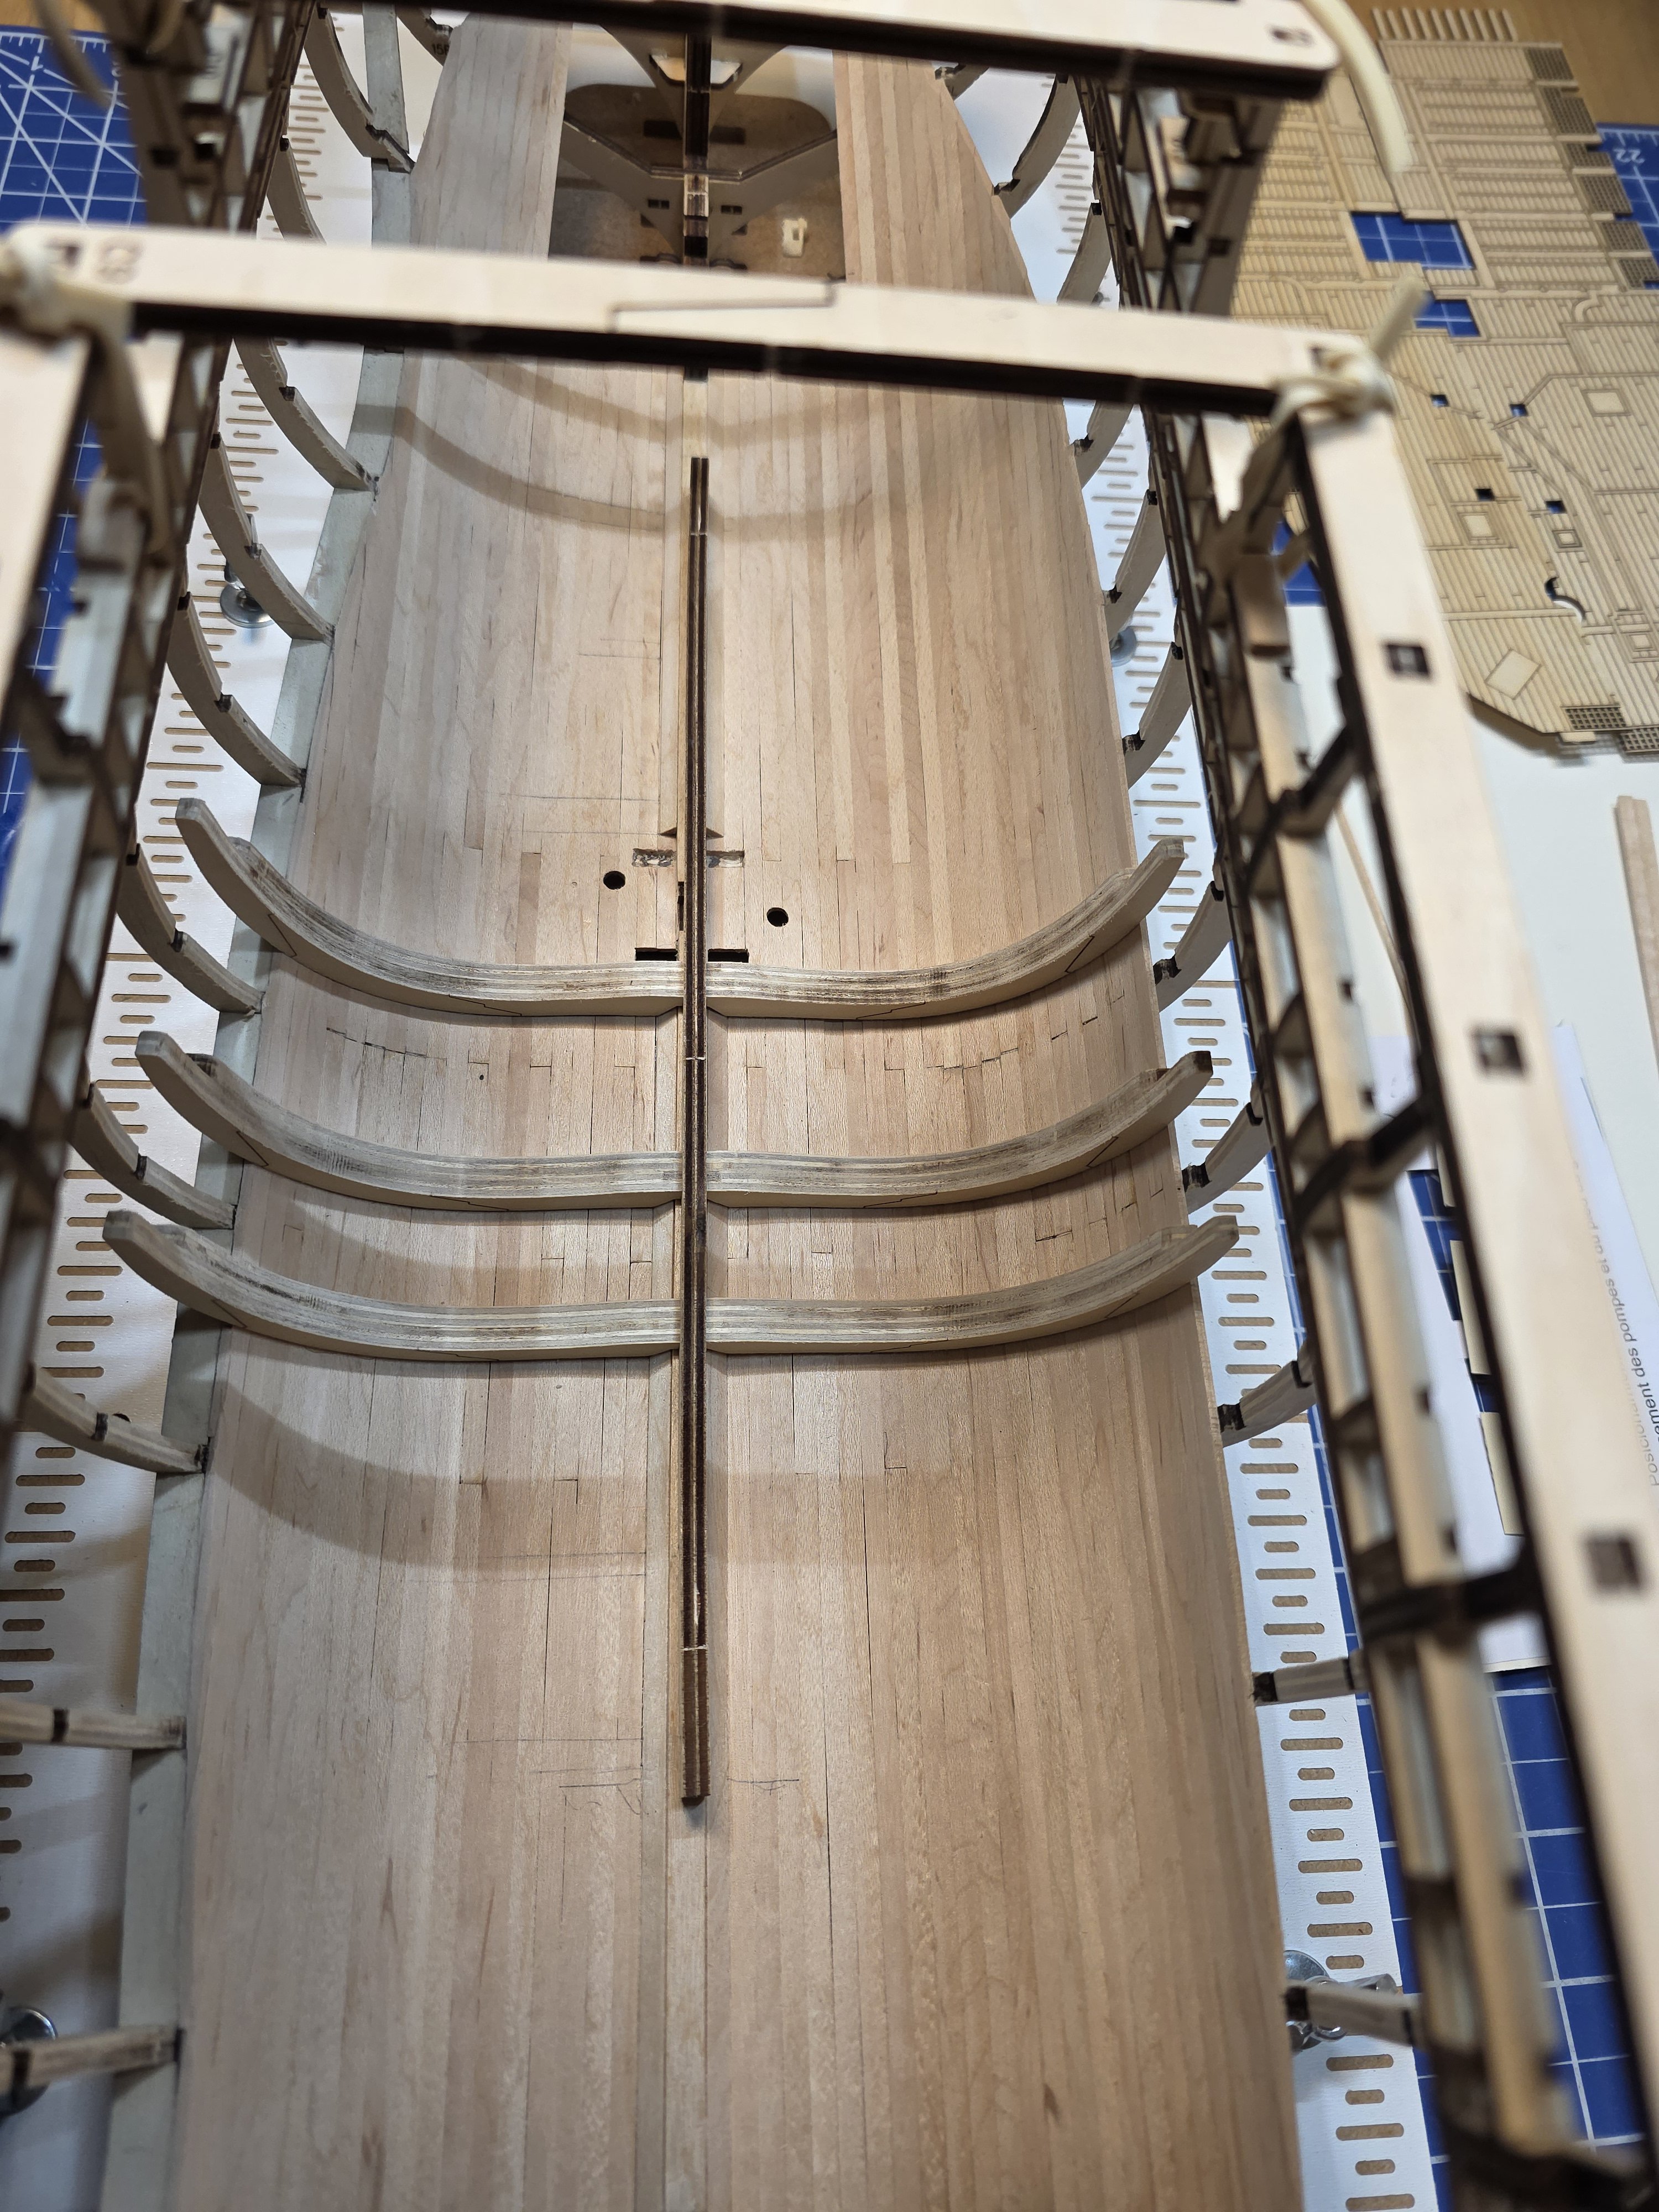
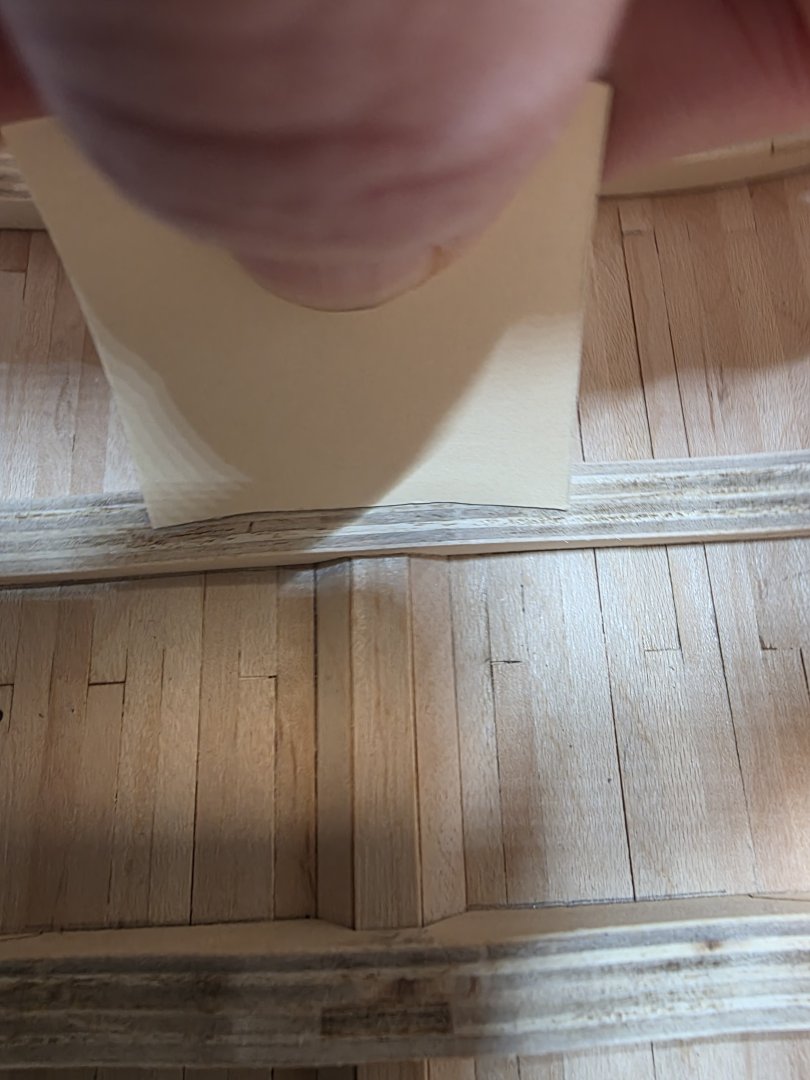
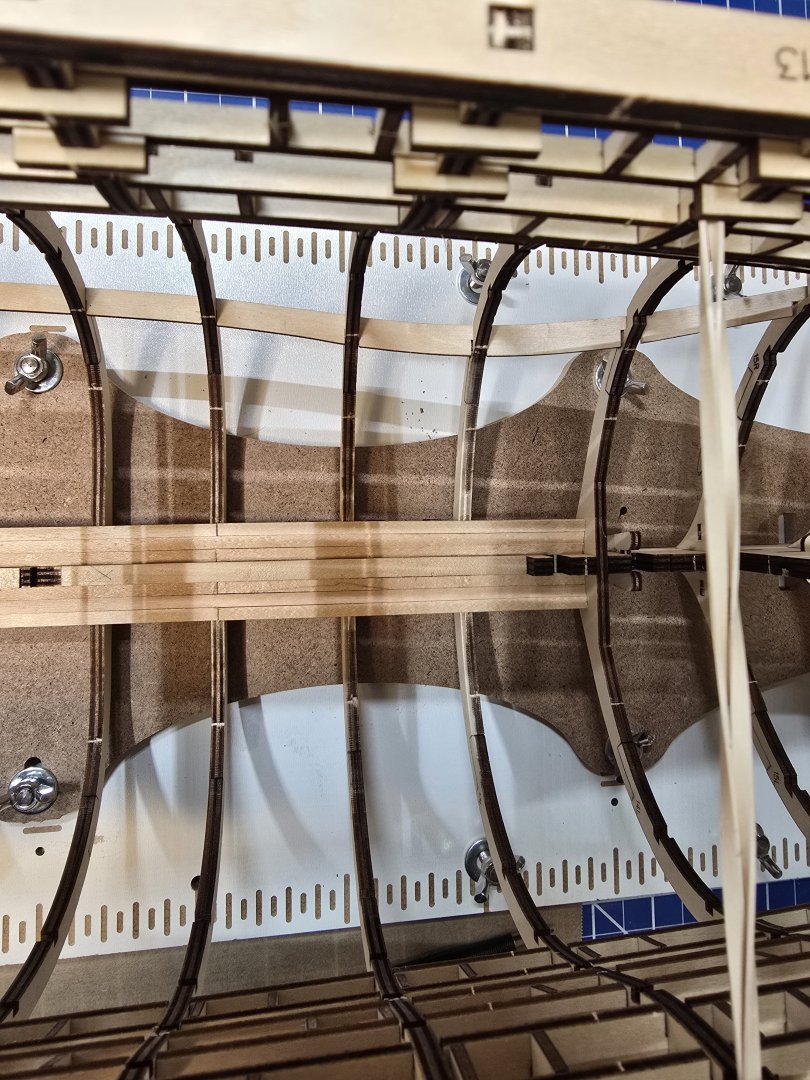
I have decided to take a shot at building this kit. This will be a test of my vision but I'll do my best. I have an opinion on a few things that I may state but its just my opinion. First of all, this is classified as an elite level kit by AL. My take is that this means that you need elite skills to build it and so far I believe that to be the case. The videos are great but they don't offer any insight on some things you need to pay very close attention to. This kit is complicated and requires a bit of scratch building to finish. I really think that a kit like this should have written instructions (my opinion). You must think far ahead before completing a step and I don't recommend following the order of construction in the videos. This is critical when installing the inner frames. It would also have been nice to have drawings to scale for a build like this, particularly of the hold area. The hold drawing is virtually useless for lack of a better way to say it. There are templates provided for the various structures that you will need to build. The first thing I did was glue these templates to a piece of cardstock with an Elmer's glue stick. They are too floppy otherwise. Also, in the video, they will have you glue a bunch of planks together to make a sheet to cut the parts from. I'm not doing it that way. I'm gluing just enough planks together to create a specific part as needed. I think there will be less wasted wood that way. In addition, in the video, the builder is gluing the planks on top of a sheet of paper creating a mess to clean up on the back of the planks. I'm doing this on top of a piece of parchment paper. The glue will stick but pops loose from the paper easily with no cleanup needed. And very conveniently, I can see that the builder is cutting out the parts with a laser cutter. I don't have that convenience. On with the build: Assembly of the hull is pretty straight forward and now in addition to the videos, you can use the written instructions for the full hull version to help you along. I do love this hull assembly method. The inner hold planking isn't too difficult but does require some thought on getting the planks to clear the bulkheads at the bow and stern as seen in the videos. The videos would have you glue in the mast step after finishing the planking but I left the mast step out for a reason that you will see in a minute. I live in a very arid environment so a lot of parts are warping badly. I was able to straighten the hull using the build board and then the planking holds it. Here is where things get interesting. In the videos, they have you draw a line using a provided template to position the inner frames. If you do this and nothing else, you will have big problems later. Specifically with installing the orlop deck (is that right?) pictured here. The frames must be positioned perfectly in order to fit this deck. You have about 1/2 mm of wiggle room all the way down the length of the ship to play with. If the top of the frames are off by more than that there will be troubles. The first thing to think about are these decks and how they will fit. The deck is assembled from 4 pieces. Mine didn't fit lengthwise or across the width. I suggest dealing with this before assembling anything in the hold. This required some fairing of the inside of the bulkheads to fit across the width. I didn't want to take anything off the decks in either direction on the length because of the various structures that are sitting on top of this deck. I do think my most forward bulkhead was slightly out of alignment top to bottom (not a kit problem, just my eyes). I ended up chiseling away some of the thickness on the hold side of the bulkhead to get the decks to fit lengthwise. I am using the orlop deck as a template to align the top of the bulkheads ad as you can see, there is very little room for error, almost none. The videos don't address this at all. I'm using the template provided in the kit to align the lower part of the frames and the paper template for the walkways. This why i didn't glue in the mast step.


-
QUICK-FIND INDEXES to BUILD LOGS FOR KITS
JeffT replied to Dan Vadas's topic in - Index of all kits by brand and subject
Okay, try now. They should be good. -
QUICK-FIND INDEXES to BUILD LOGS FOR KITS
JeffT replied to Dan Vadas's topic in - Index of all kits by brand and subject
I'll take a look. -
Moved build log to 1801-1850 category.
-
I have moved this build log to the 1751-1800 category.
-
This build log has been moved to the 1751-1800 category.
-
Thanks guys. I’m feeling optimistic that things will get better.
-
Hello everyone. Just wanted to let everyone know that my build is temporarily on hold. I'm the unlucky recipient of not one, but two autoimmune disorders, one of which is affecting my vision. My immune system has decided that my eyes are a foreign invader and is attacking them. As a result, I'm having vision difficulties. I have started treatment and I'm hopeful things will improve enough in a few weeks to get back to it.
-
Nicely done
-
I built this model years ago and I think I used Eduard or Toms modelworks PE. I had to buy the wood deck separately.
- 1 reply
-
- 1
-

-
Well that was fast. Looks very good.
.jpg.db2ec1f565e9df0016148d68a27040bc.jpg)