HOLIDAY DONATION DRIVE - SUPPORT MSW - DO YOUR PART TO KEEP THIS GREAT FORUM GOING! (Only 20 donations so far - C'mon guys!)
×


mikiek
-
Posts
2,276 -
Joined
-
Last visited
Content Type
Profiles
Forums
Gallery
Events
Everything posted by mikiek
-
 Tom - My build log on the first page and xken's Niagara log also on the first page explain the framing problem. Also a good reason not to install the rail yet. If you buy into the problem you will want to run a 3/32" square stick(s) on top of the timberheads for the length on the ship. Your rail will sit on top of that.
 -
It's a tough call with painting Tom. The longer you can hold off the better. But I do realize the desire to see some color to liven up the build. Then you have places that are going to be hard to get at later. Actually the inside of your waterway will be one of them. You are going to end up with nicks & scratches & splatters. Priming now can be a good thing. You might even get away with spraying at this point. Have you decided whether you are going to paint or stain the hull? How about the deck. Will you stain & finish or just finish? Most of that is personal preference, but could be influenced if you decide to substitute some of the wood with something nicer. I'll have to go back towards the start of my log and see what it was about framing the ports. I believe if you follow the plans everything ended up too low. I remember having to add some height with 3/32" square sticks. Almost everyone that has done Niagara has had the same problem. Those that didn't probably just didn't realize it. They say the memory is the first thing to go so I'm sorry I don't remember off the top of my head. The rail just sits on top of the timberheads. It really doesn't have much of anything to do with the port framing. I do remember one thing. I think I must have broken off every timberhead on that hull. Some more than once. Getting the rail on top of them did provide some protection. I will try to go back and get an idea of the problem with the port framing. It will make a big difference on your build.
-
I would hold off on painting. Glue and paint don't always mix well so painted surfaces may be problematic. You will most likely get all sorts of stains on the waterways (inner bulwarks as well) which means painting them again. I would also keep work on the rail to a minimum. You haven't even started the bulwarks yet and you are going to find that instructions are just plain wrong when it comes to adding frames to the bulwark for gun/oar ports. You will either have to raise or lower the top surface of the the timber heads and rails will just be in the way. The rails are rather thin and can easily break or split if you have to remove them once glued. I really suggest you follow the steps in order as stated in the instructions.
-
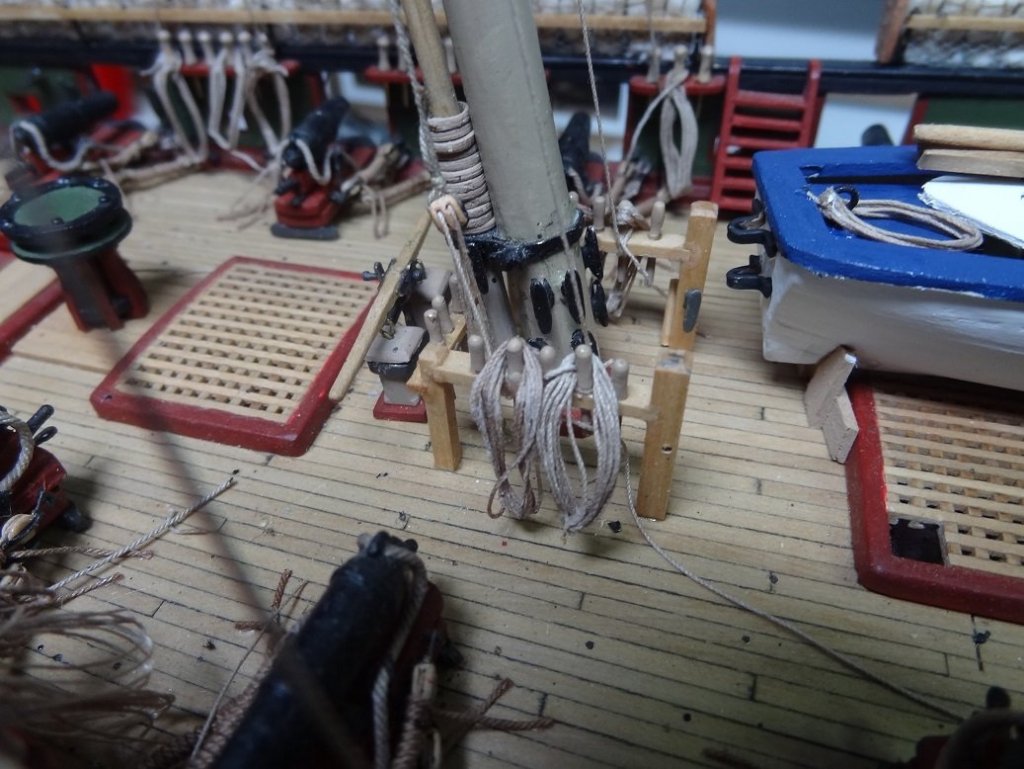
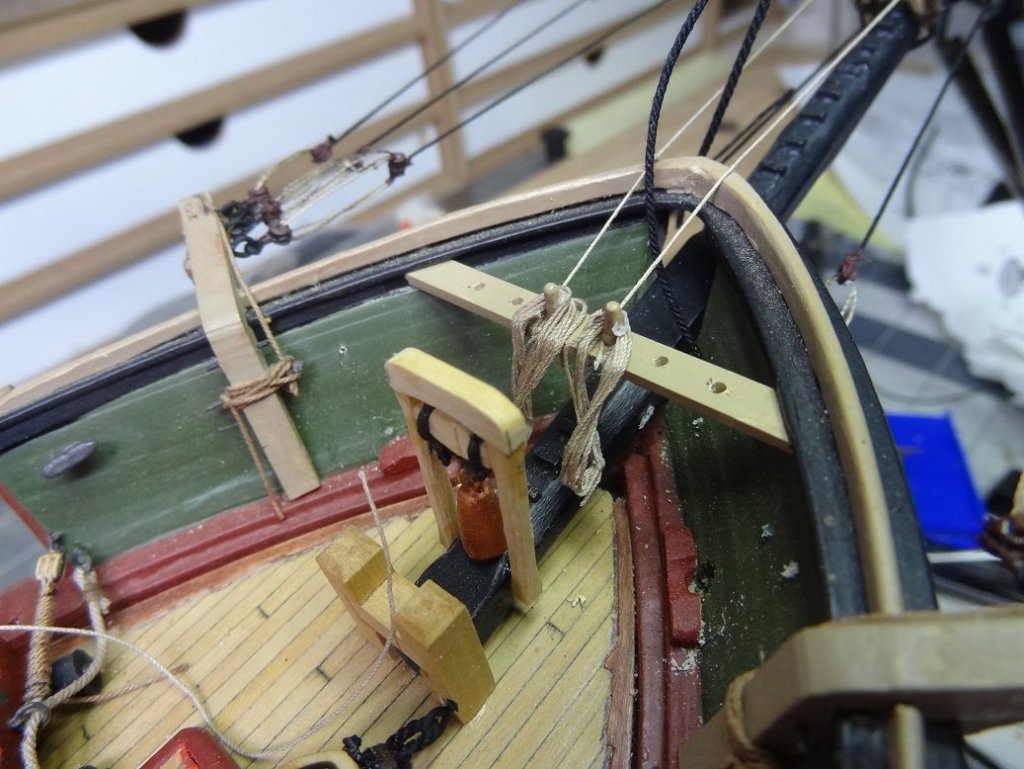
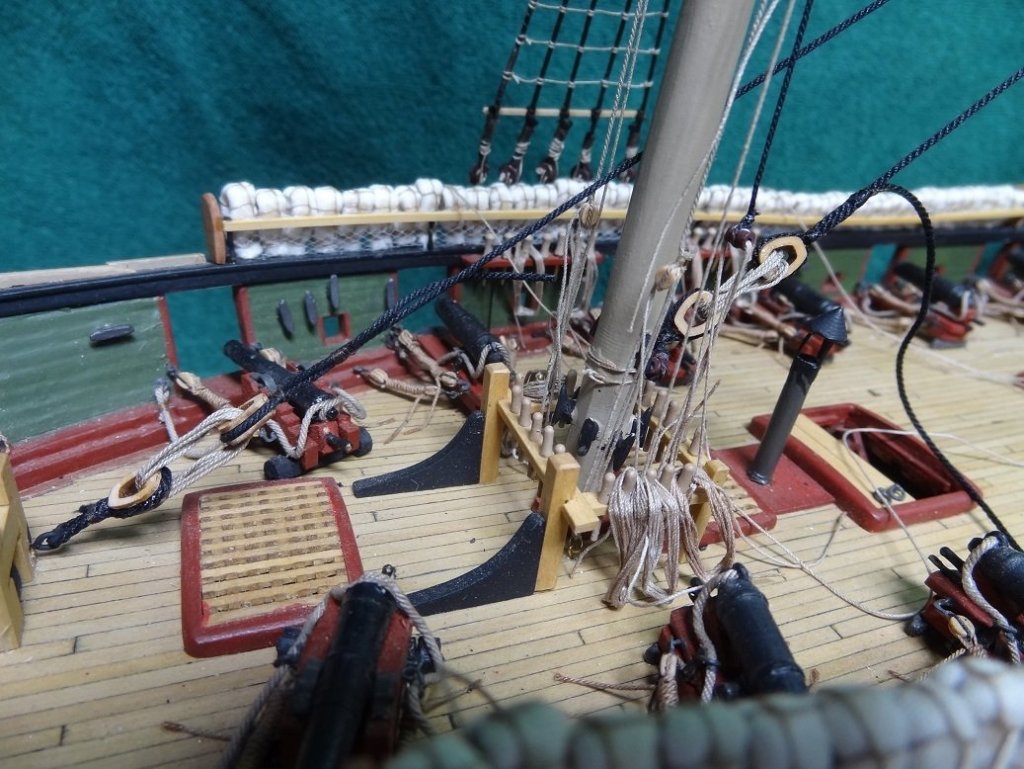
Very cool Elijah. I don't know what it is called but you can see they used the 'other' way to belay the ropes. They pull the end of the coil thru the loop then over the top of the coil and that's what gets belayed to the pin. The coil itself is hanging in front of the pin. There is a lot of debate as to whether this method was used or if the whole coil was laid over the pin. There's even a few that say you do a couple of figure 8's around the pin and the remainder is semi coiled and left underneath on the deck (this one I kinda doubt). From what I gather, the method shown in your pic is how it was supposed to be done, but once out of the harbor is another thing. The more I look at your pic it appears something is out of scale on my build. I think it may be the spacing of the pins. I don't think I could get that much of that size rope and have it look decent. The pins are just too close.
- 843 replies
-
- 3
-

-
- niagara
- model shipways
- (and 2 more)
-
Metal work resourcnes
mikiek replied to Kurt Johnson's topic in Metal Work, Soldering and Metal Fittings
I didn't find Model Building with Brass of much use. I was looking for basics. That wasn't it. Lot's of beautiful things shown, but not a lot of help as a 'how to' Your mileage may vary.... -
Getting to the running rigging on my current build and having a problem. Lots of the rigging, braces for instance, have a block at each end with 4"-5" of rope in between. I'm getting a lot of these twisted up and have not come up with a good way to prevent it (or fix it). Any ideas would be appreciated. BTW - most of the rope I use is from Syren, not the kit stuff.
-
Most of the rope you would serve will be the largest diameter in your build as it is usually shrouds that get served. In many cases thread works OK. The shrouds in my current build are 0.035" and a fine thread will do the job. I use Gutterman silk. The same thing Welfack mentioned hold true for seizing as well. It's very easy to use something too big for your scale. That's when the fly tying line really shines. Although I will say it takes a little practice.
-
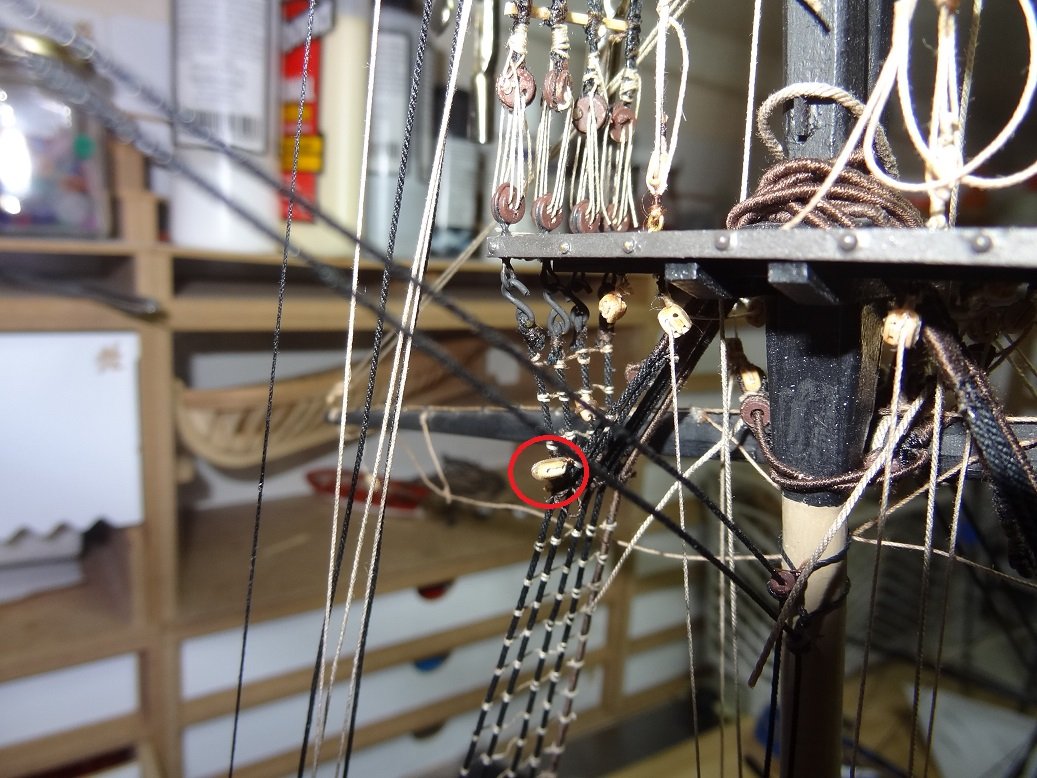
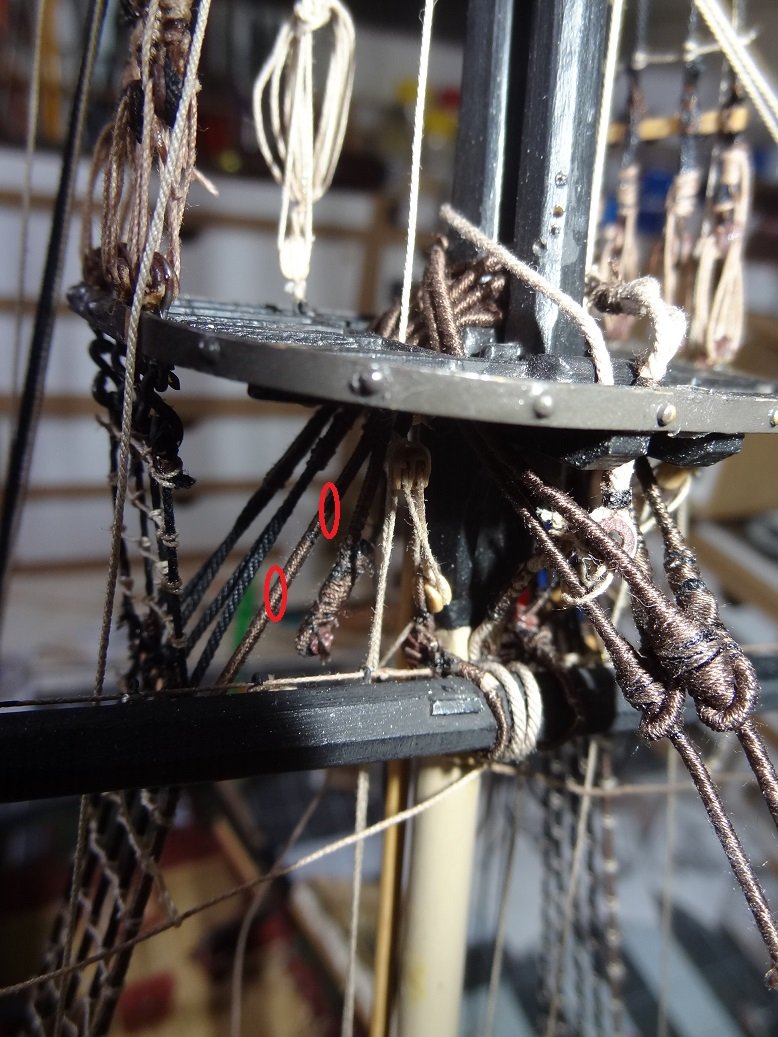
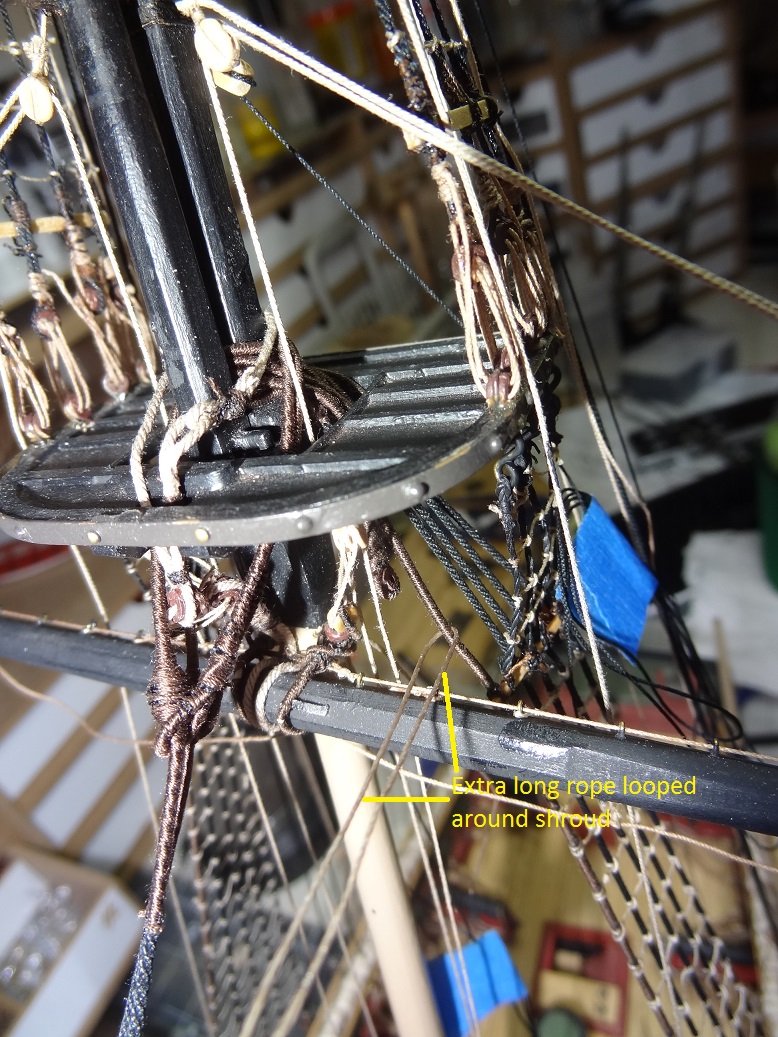
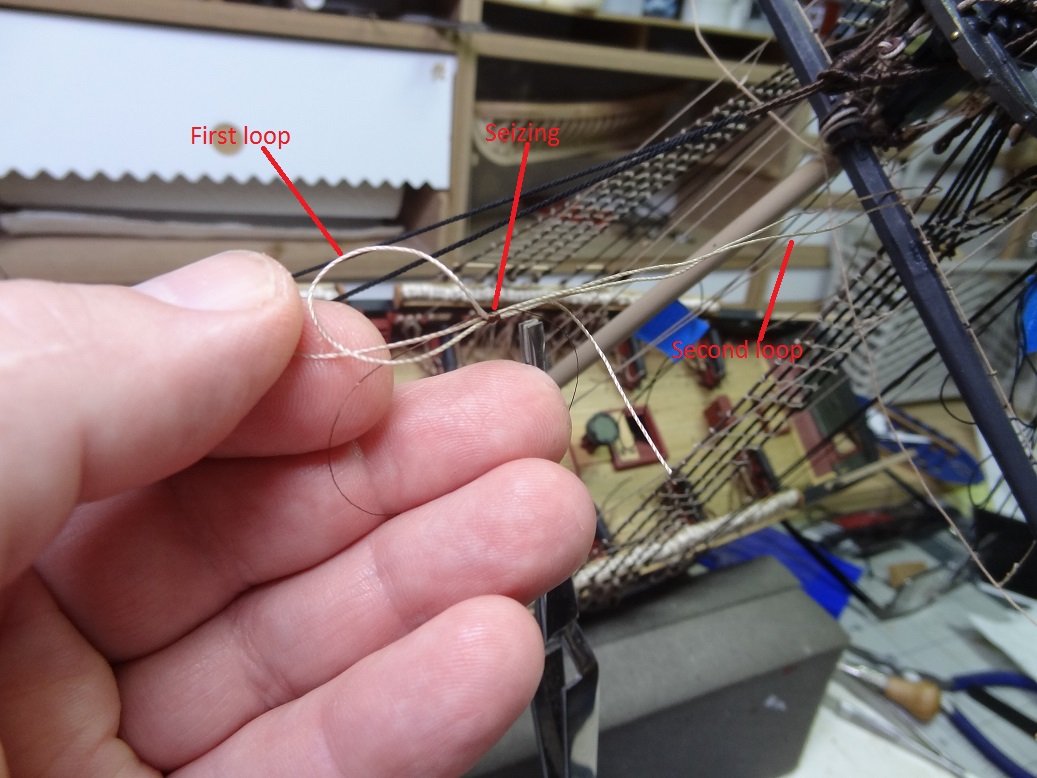
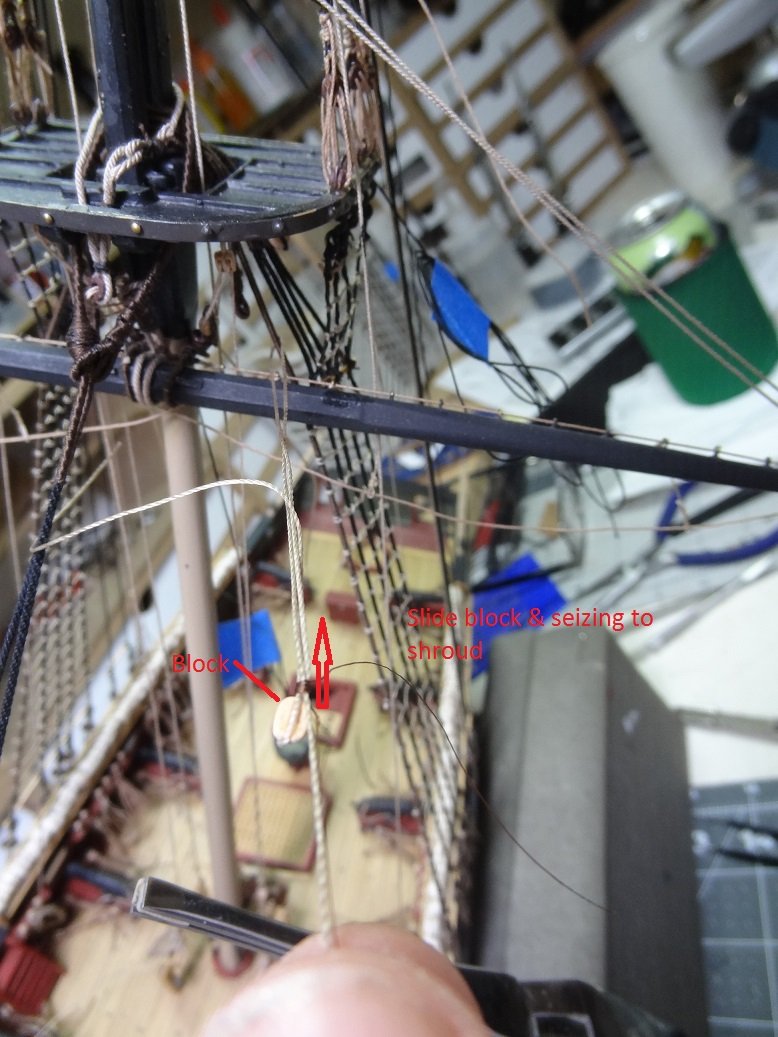
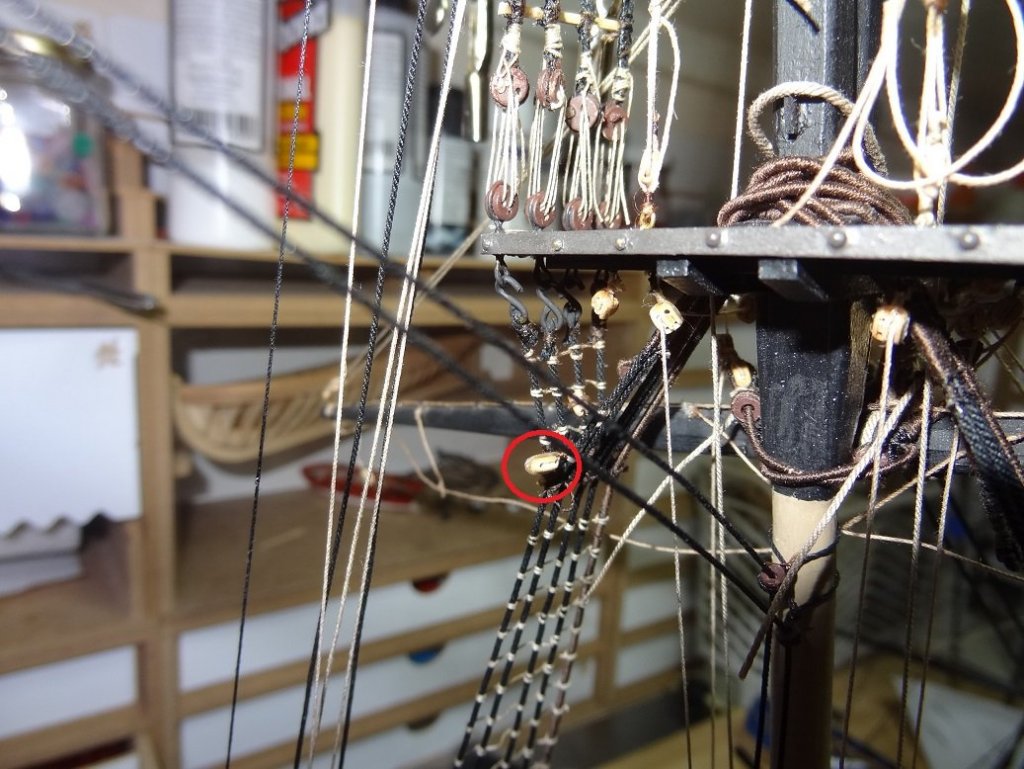
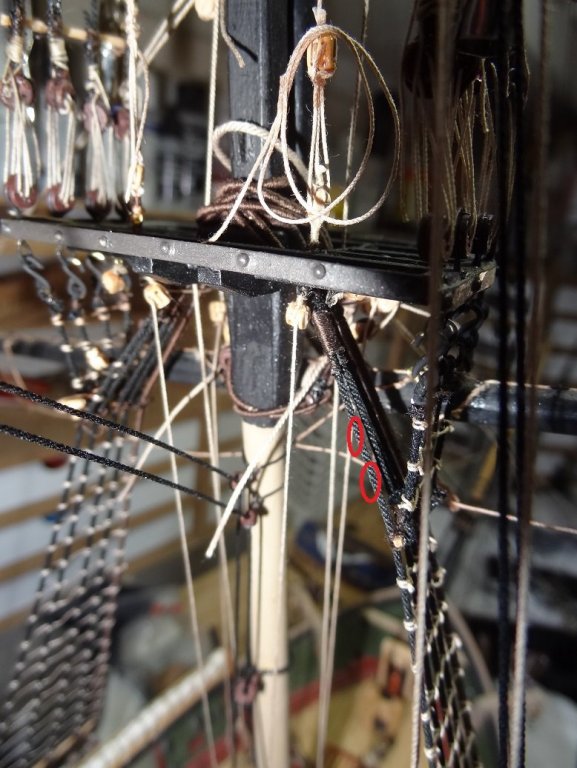
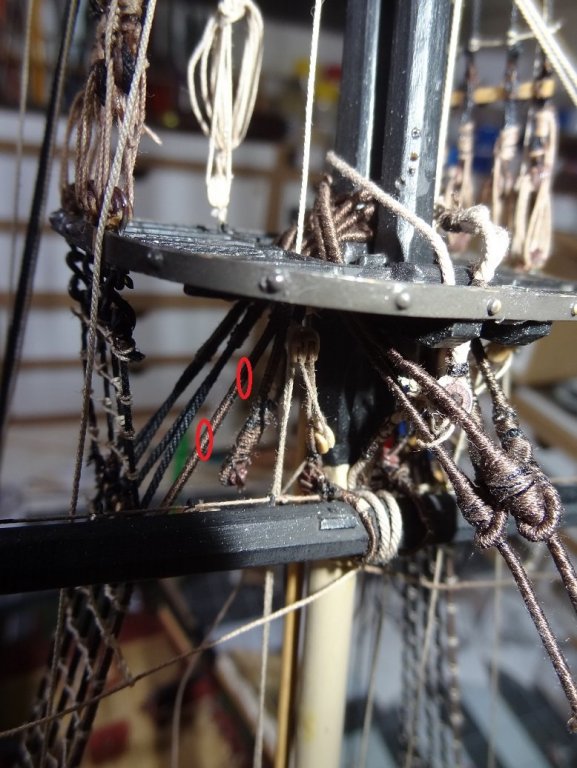
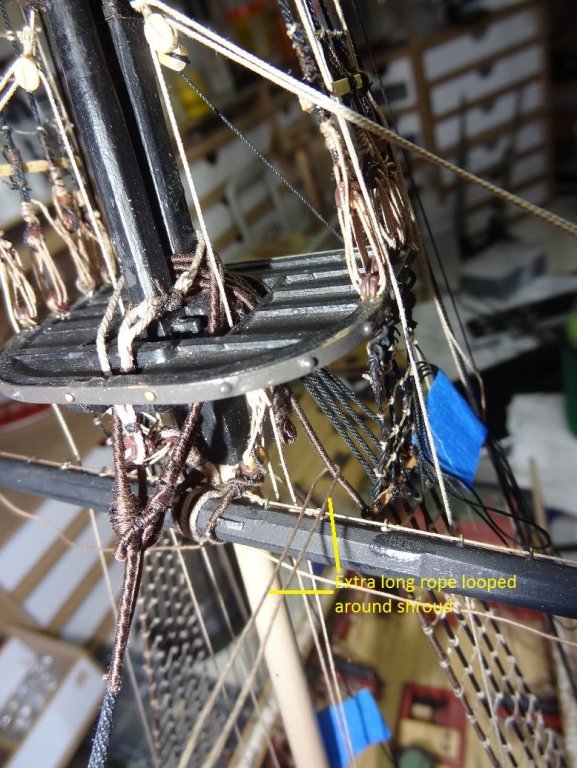
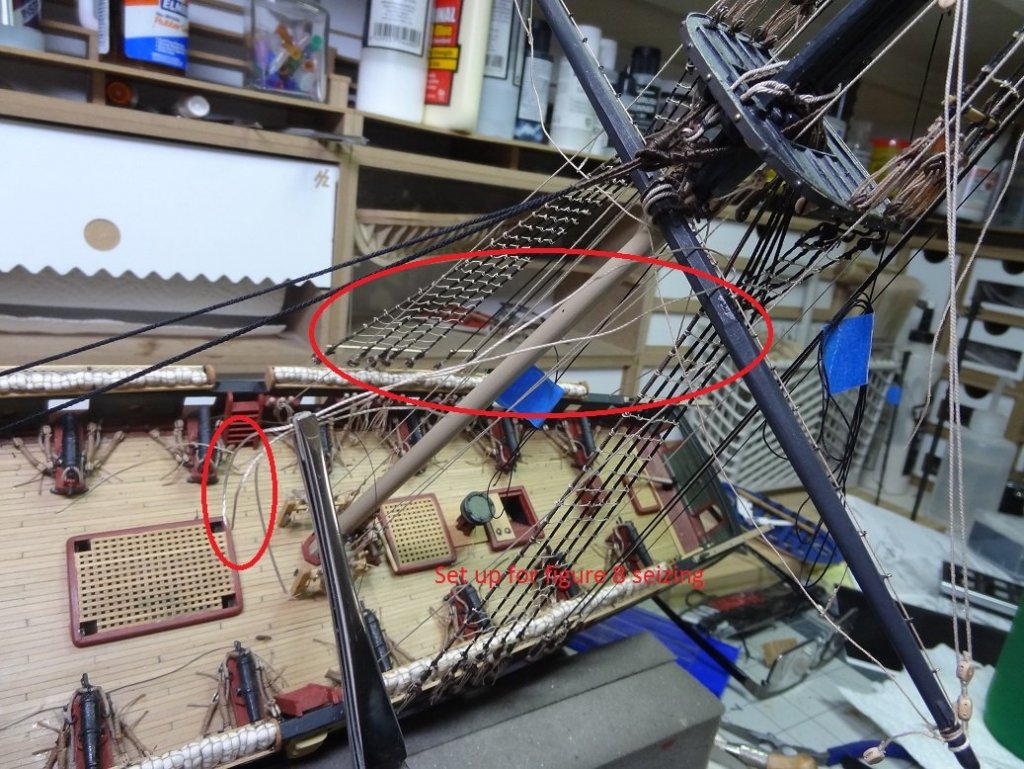
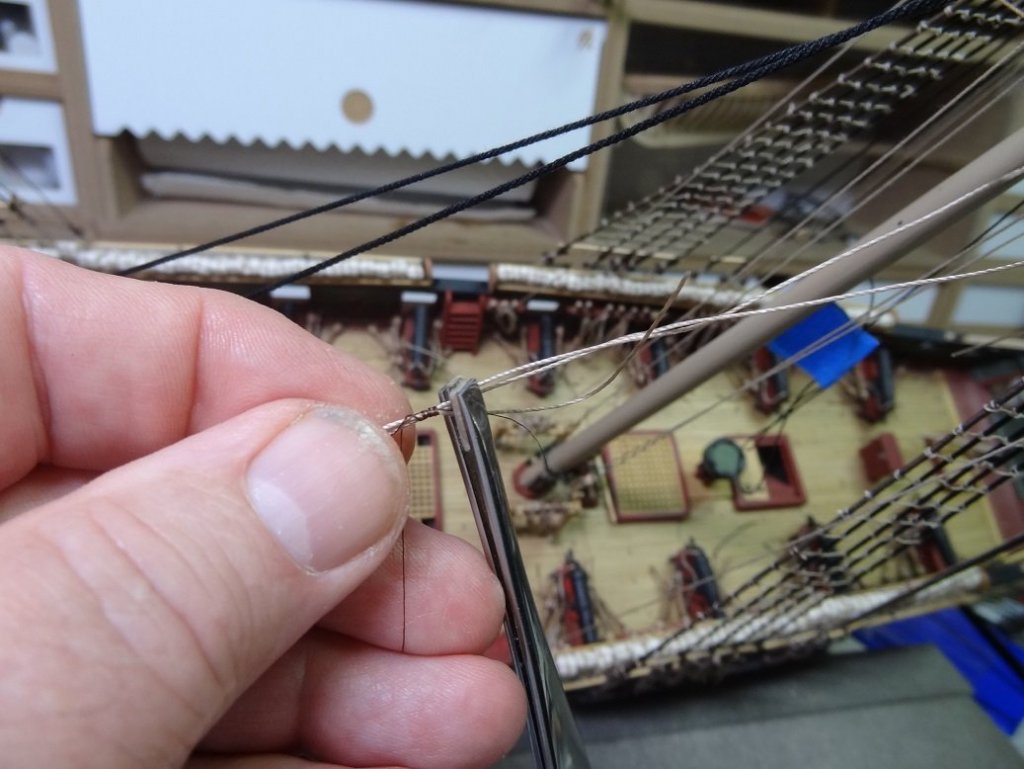
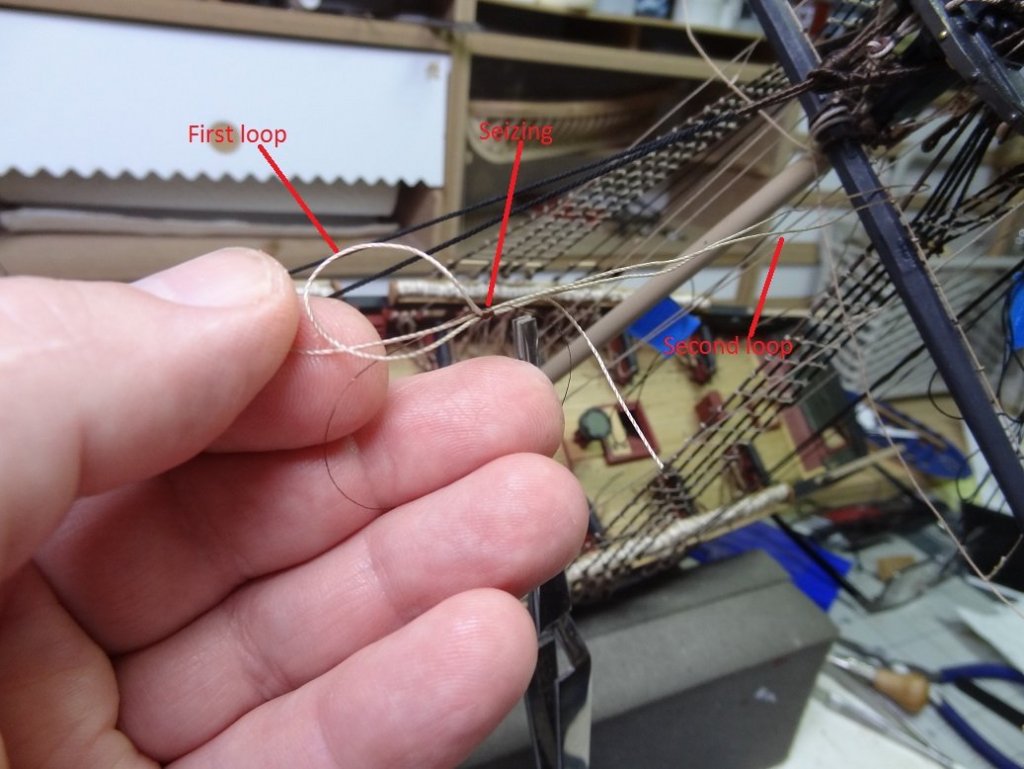
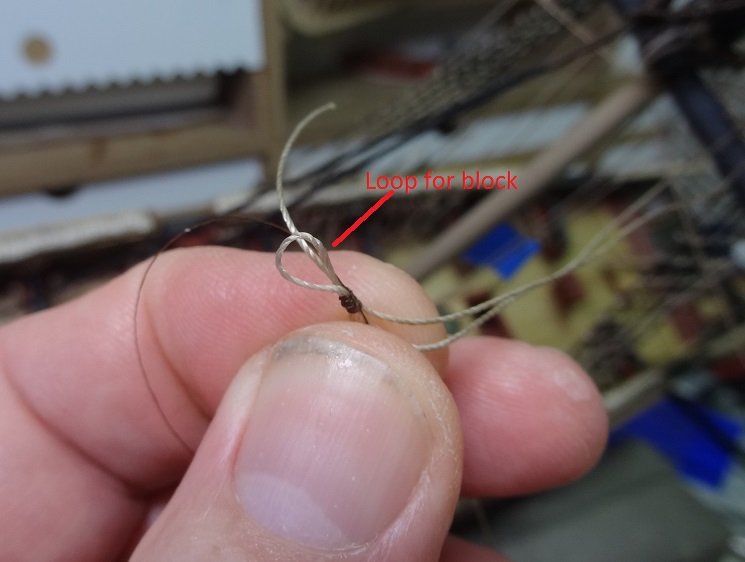
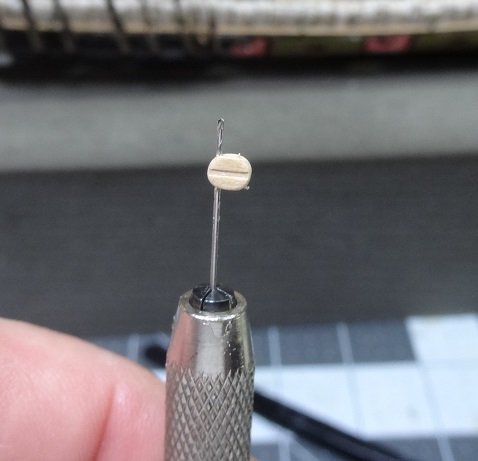
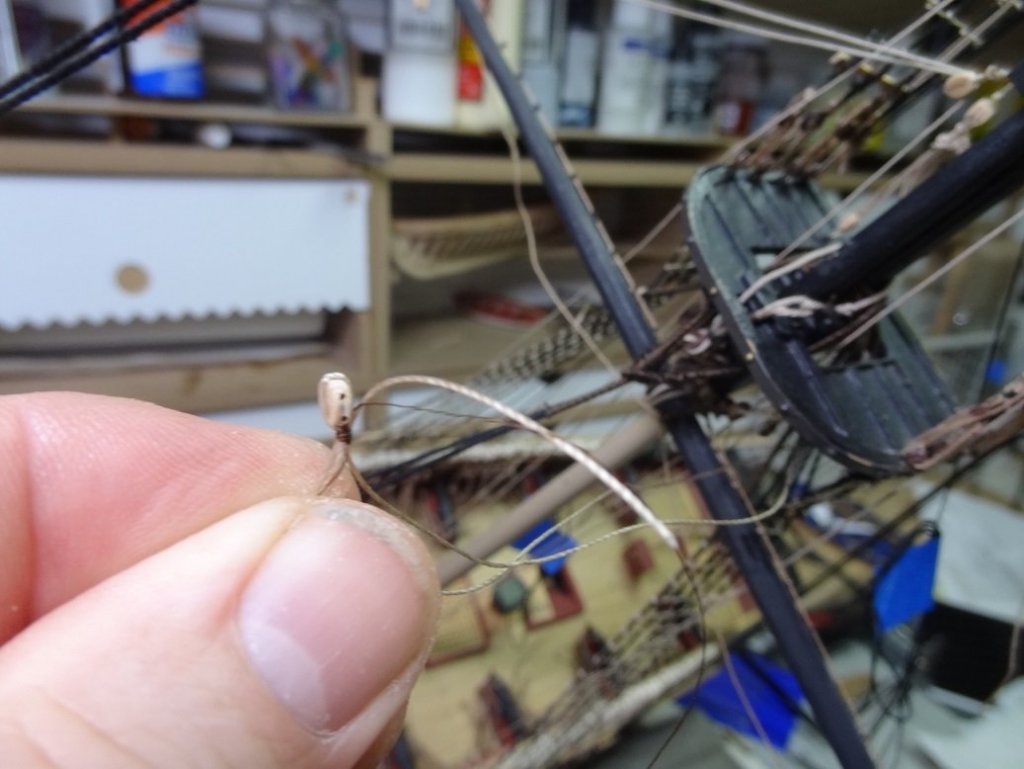
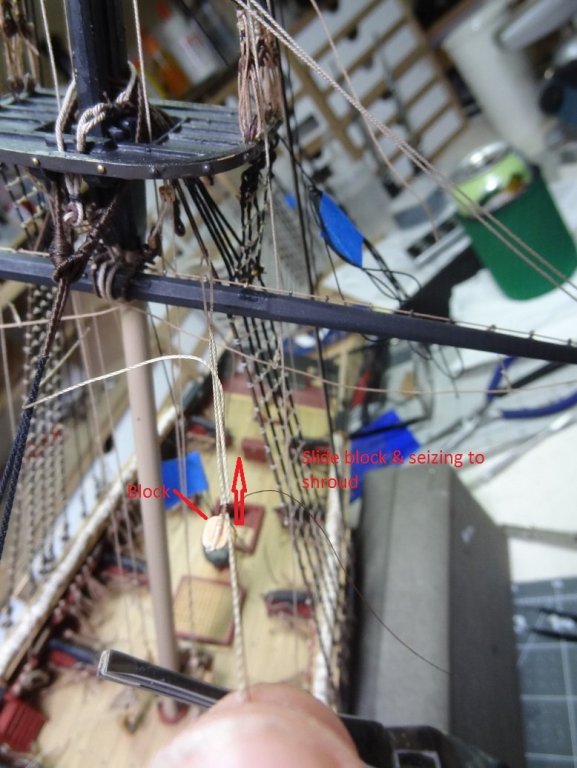
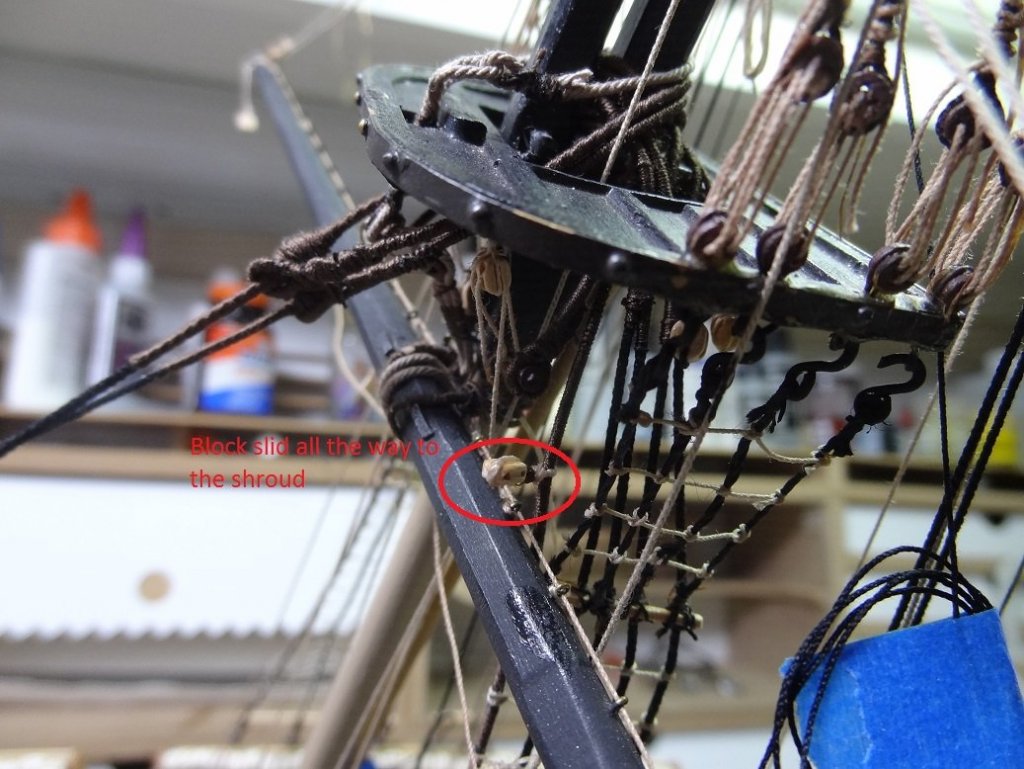
Worked thru probably one of the most difficult rigging tasks this morning. First off, it was my own doing - created a problem by adding the futtucks before this task. This made for precious little room under the main top. I was about to start the braces - working from the bottom up. So you have a rope seized to one end of the course yard - let's say the fore course. This rope goes back to a block on the main then down to the belay rail. Well it happens that this block is seized to a shroud right before the shroud loops around the mast head. In that area where the futtocks run outside or over the the shroud. Seems like a pretty difficult job, but one I'm sure we've all faced before. I've mentioned before the sliding seizing and this is how I tackled the problem. This technique can solve so many problems like this, I am amazed. The only downside is that sometimes you have to use a really long piece of rope and you will waste a lot of it. With this in mind I saved my Syren rope and used a piece from the kit. It wasn't going to show anyway. So the long rope is looped around the shroud in preparation for seizing. The catch here is I need 2 loops with a seizing in the middle. One loop around the shroud, at the other end a loop for a block. This is pretty common and is done with a figure 8 seizing. You can see the 2 loops below. Then you do your seizing. And when you're done you have your 2 loops. I will add here that the actual seizing technique I used is nothing new. You can find plenty of YouTubes showing it. So you make the loop for the block smaller by pulling on one of the ends. Prep your block by drilling out the holes. Syren blocks are good about that but the last thing you need is to have to try to drill one out after it's installed. Then insert the block in the loop and pull the end tight. So now you can take the other loose end and slide the block and seizing all the way up the the shroud. And there you go. The whole idea here is not to do all the twisting and contorting with all sorts of tools where the seizing will end up. Instead, that long piece of rope allows you to bring the work out to a manageable place and you can do your work right in front of you. When you are done, the sliding seizing allows you to slide the work where it needs to go. This will take a little practice, but I was able to do 8 of these buggers in no time at all. With very few one syllable words I might add. Hope it helps someone. BTW - I didn't invent this. It is just a compilation of several techniques I have come across.
- 843 replies
-
- 3
-
-
- niagara
- model shipways
- (and 2 more)
-
Thank you Don. There is a faint glimmer at the end of a dark hole.
- 843 replies
-
- 1
-
-
- niagara
- model shipways
- (and 2 more)
-
Hey Don - are there telltales on both sides of the sail? It's worth spending a little time trying to get a consistent angle and shape to them. You can keep them off the sail but stiffen them with some beeswax or glue/water. Or you can lay them to the sail which is typically how they would be if the sail is trimmed properly. In most cases they will all point/lay in the same direction.
- 653 replies
-
- 3
-
-
- trabakul
- marisstella
- (and 1 more)
-
Hey Steve - I imagine you could die them if you did it before you hang them. But at this point I'm afraid it's too late to do anything. I have some honest to gosh linen thread that I was going to try to use to make rope out of. It didn't work too well for that but the stuff is almost snow white. I have dyed material (sails) brown using walnut ink crystals. Works quite well and can produce various shades from light to dark. Unfortunately, again, at this point I think it is too late. I've heard of people doing their rats with the same color rope as their shrouds. That's an option, although I think I would want at least a little contrast between the two. I've tried to keep this build historically accurate. At least some what, but this probably ends up being more about aesthetics than reality. I believe all one color would make it tough to see all the detail (read work) that went into the rats.
- 843 replies
-
- 3
-
-
- niagara
- model shipways
- (and 2 more)
-
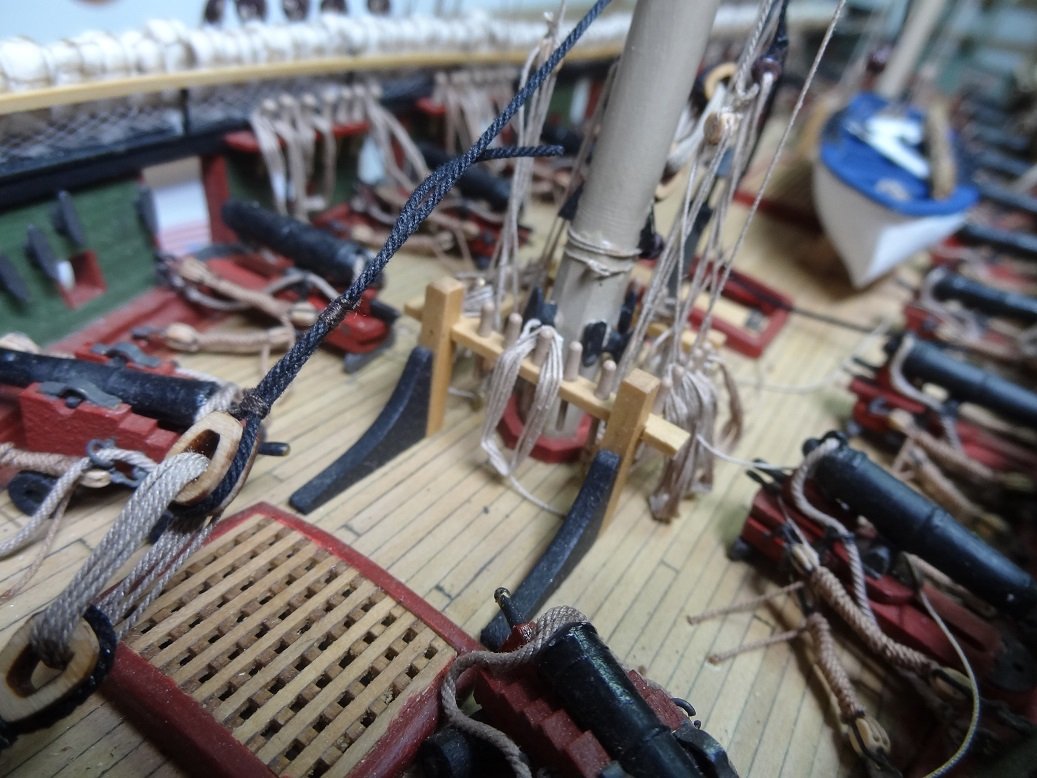
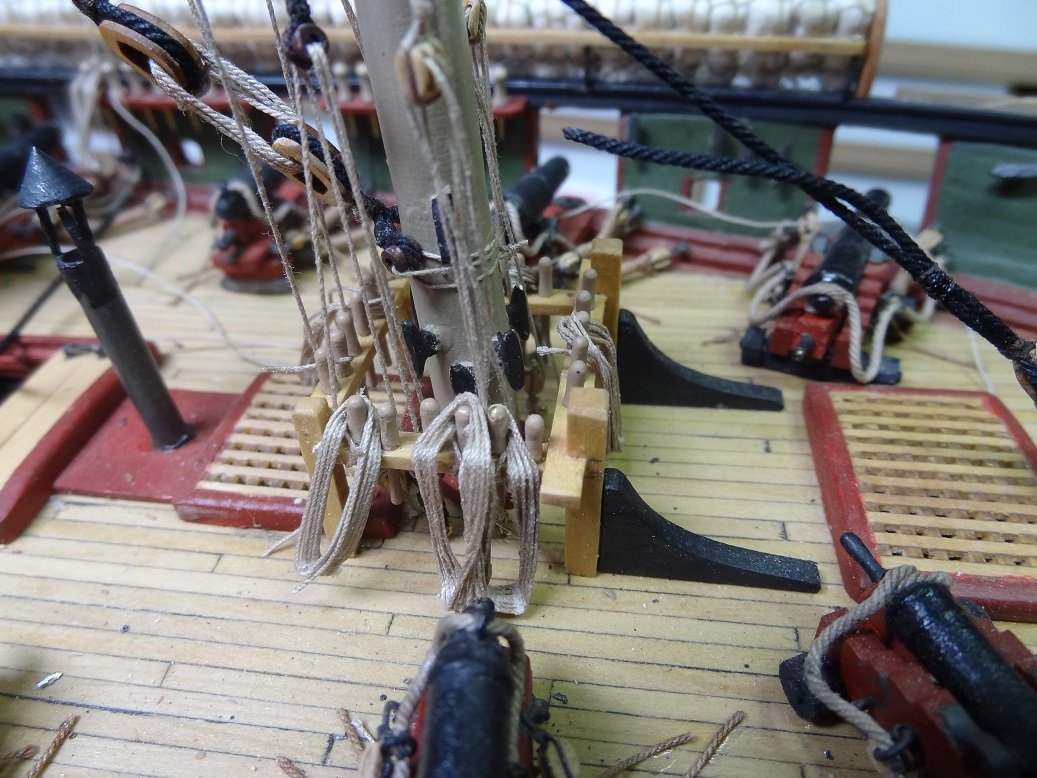
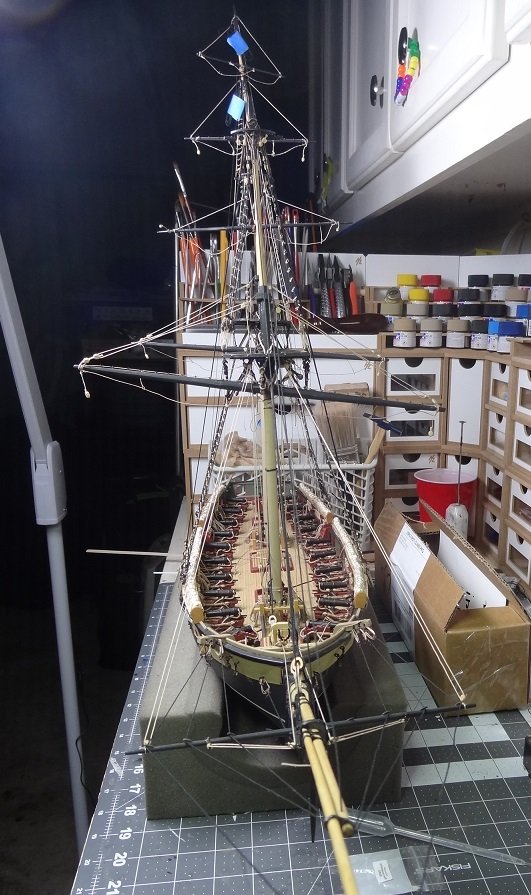
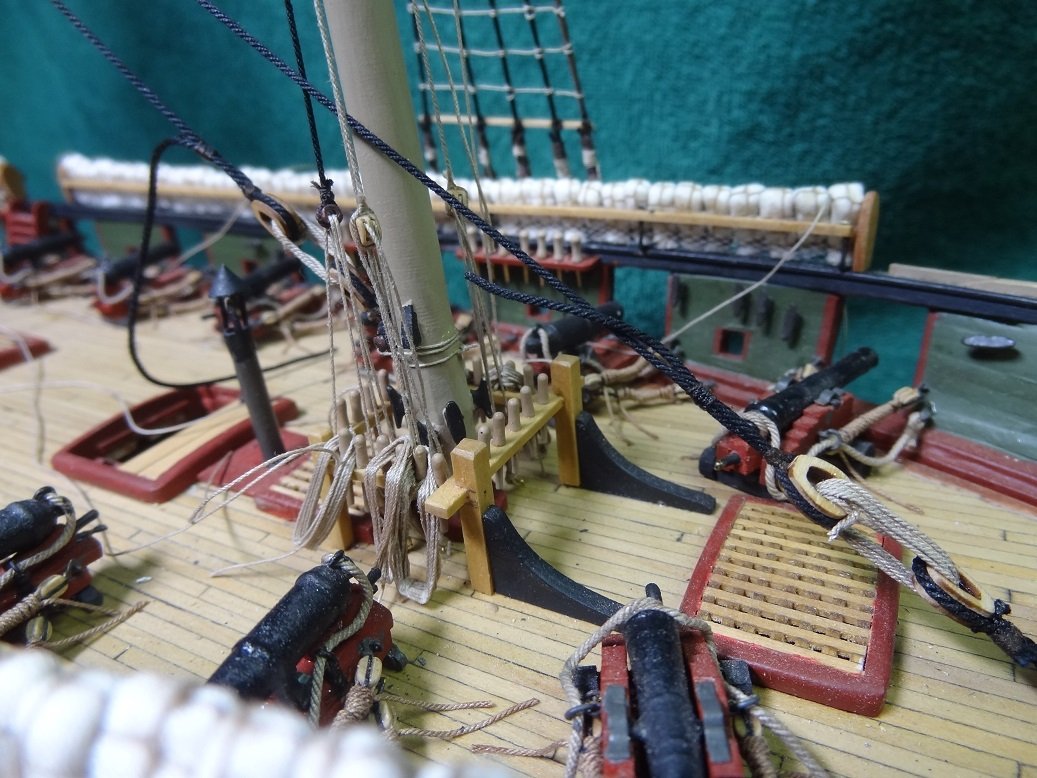
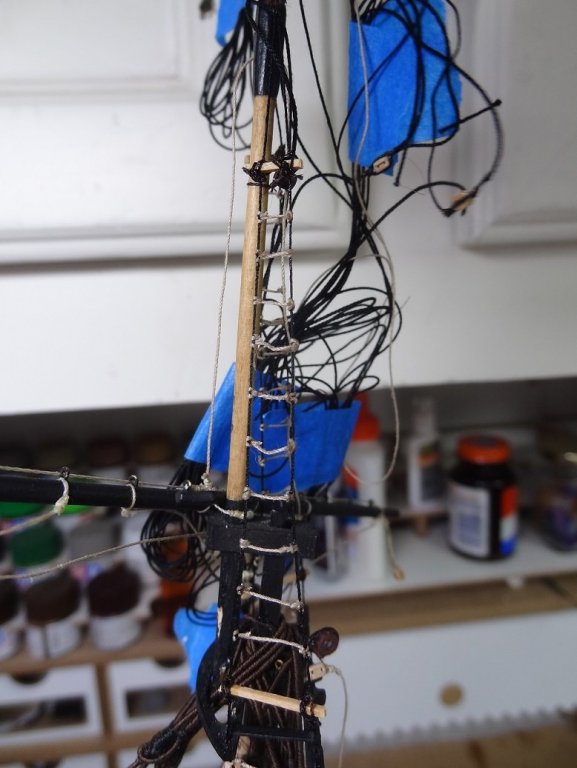
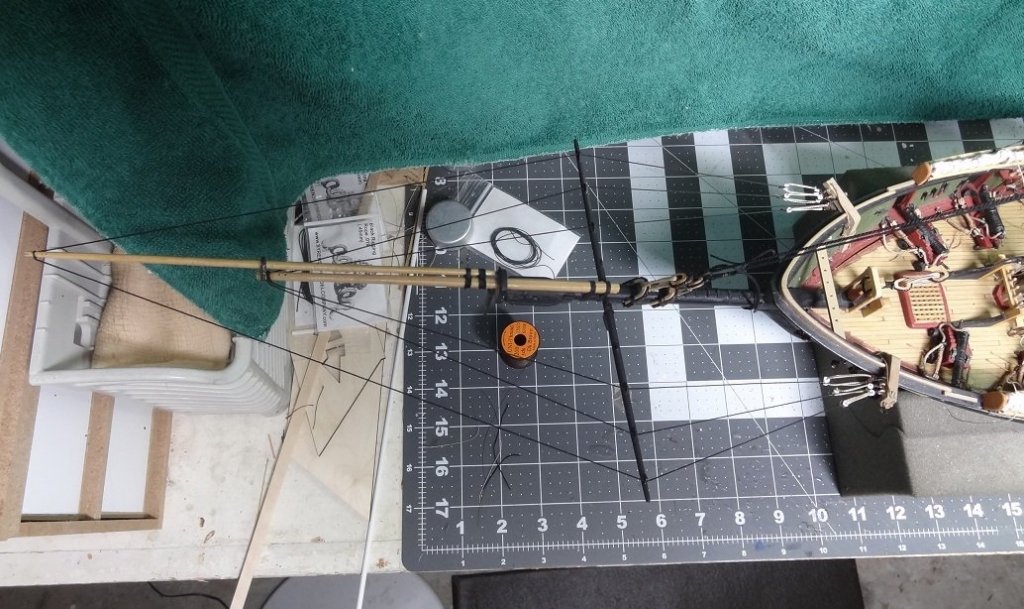
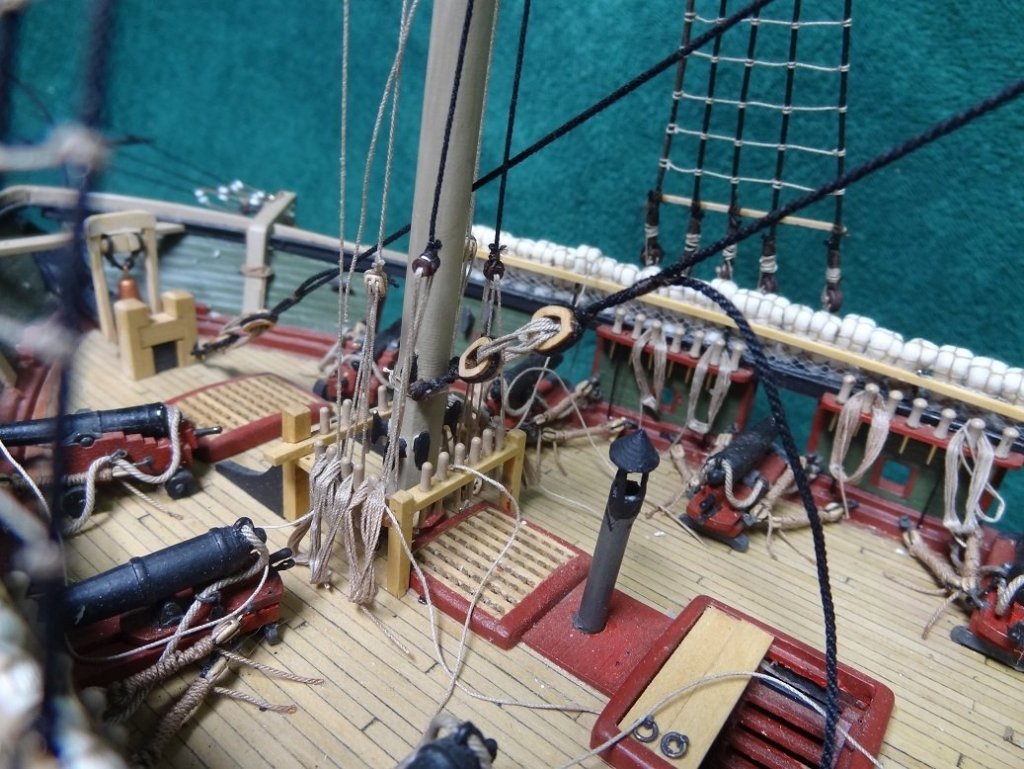
The good news - the rats are all done. The bad - I'm about to give up taking pix of the rigging. These suck, as usual. Just can't get the right angle and lighting. Good news - I came up with an easy way to tie cow hitches on the outer shrouds and half hitches on the shrouds in between. Bad news, it would take a video to show it. No way I can describe it verbally. Interestingly, 3 of the 4 steps are identical and the other one is just the reverse. Of course it took half a boat to get it figured out. I'm not overly crazy about the tan rats on black shrouds. Will use something a little darker (dirtier) next time. Will also probably go with dark brown for standing rig. So I added the top yard. Then inserted the top gallant mast and began fastening that down - shrouds & rats first. As the rigging goes up I have been working with rope coils on belay pins. A lot trickier then one would think. The ropes from the masts are wrapped around the pin 1 time then glued and cut. Coils are made separately on a jig with some straight pins stuck in it.Rope is wound around the pins and the ends are CA'd to the coil. Kinda half way hiding them. Next, something to smear on the coil so it will keep it's shape. I didn't like my first attempts at white glue & water - I think I had too much glue and the rope looked glued. Then I went on to my favorite, acrylic matte varnish. The rope looked OK but for some reason the coils began to twist as they dried which looked kinda dumb. There's a pic that shows this. So tonite I went back to white glue & water at about 1:4. We'll see how this works. Would love to not use anything but I am afraid that over time the coils might get kind of wild. Then there is the amount of rope used for a coil. In real life, many of the coils would have been huge. The rope having to go from the deck up to the 2nd or 3rd mast spar in some cases. The problem is, with that pin layout there just isn't room for huge coils, especially if they are side by side on the pins. You can see this in a few of the pix. So the approach I ended up with is all rope will be 0.012mm or less and no more than 6 turns around the pins in my jig. As I mentioned previously, since I am not rigging sails there are a lot of empty pins on the rails. I am going to fill some of those in with coils, just to fill out the rails a little. Lastly as you may notice, I have placed the coils directly around the pins. There seems to be some discussion as to whether coils would be placed like that (actually around the pin) or if the fall of the coil was pulled thru the center of the coil, up over and behind the coil and then wrapped around the pin. So the coil ends up hanging there. I can see points from both sides of the argument, but in the end I went for coils directly on the pins.


- 843 replies
-
- 5
-
-
- niagara
- model shipways
- (and 2 more)
-
Thanks buddy - I've learned a lot of do's and dont's during this task.
- 843 replies
-
- 3
-
-
- niagara
- model shipways
- (and 2 more)
-
A slight hitch in the plans. Was just about to start tying down the t' gallant when I realized I haven't raised the top yard yet. That's gotta be done before the t' gallant goes in. That rope parrel is a bear. I may end up cheating on this one. And if that wasn't enough, the square opening in the top where the t' gallant foot is supposed to go - I ran several of the stays thru there May have to redo a few of those. At least they're on top of the stack.
- 843 replies
-
- 3
-
-
- niagara
- model shipways
- (and 2 more)
-
Kinda like the difference between a t-shirt I pull out of the dryer and throw on and a t-shirt the admiral would wear.
- 653 replies
-
- 3
-
-
- trabakul
- marisstella
- (and 1 more)
-
I starched the heck out of my sails. Go lite else it'll scorch but do 2-3 applications. That sucker will stand up by itself after that. Of course there is no such thing as a flat sail but the residual starch in the material will let you shape it somewhat.
- 653 replies
-
- 3
-
-
- trabakul
- marisstella
- (and 1 more)
-
Now that's the ticket! Thanks Don. T' gallant will go on tonite.
- 843 replies
-
- 3
-
-
- niagara
- model shipways
- (and 2 more)
-
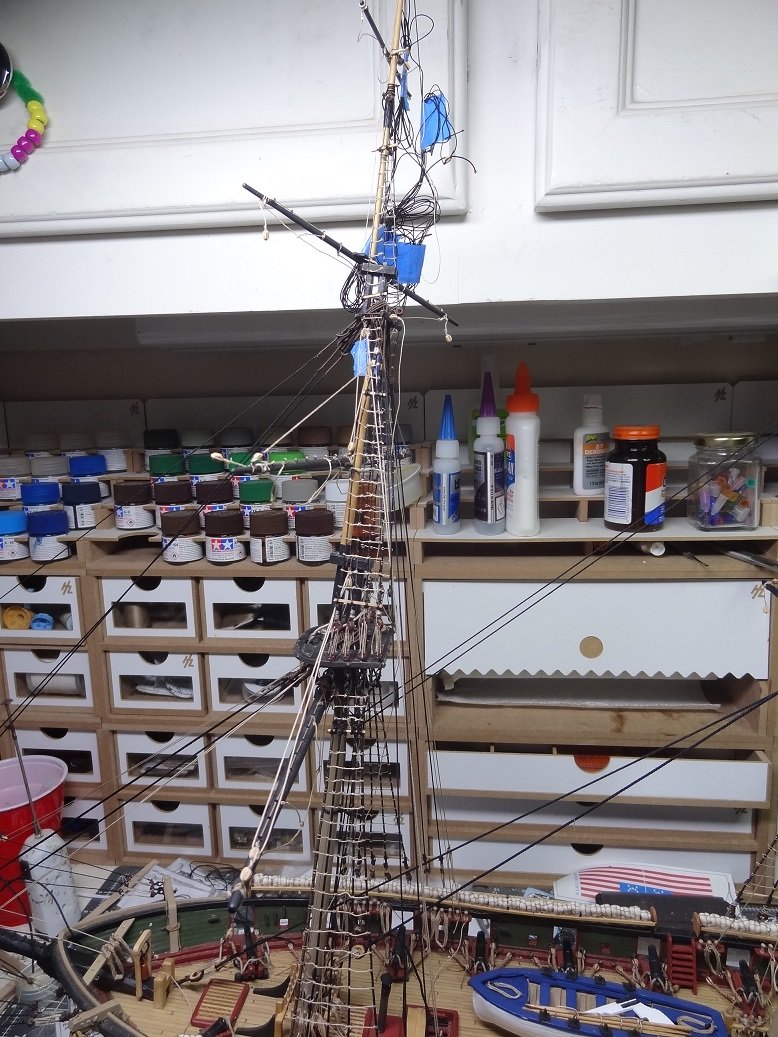
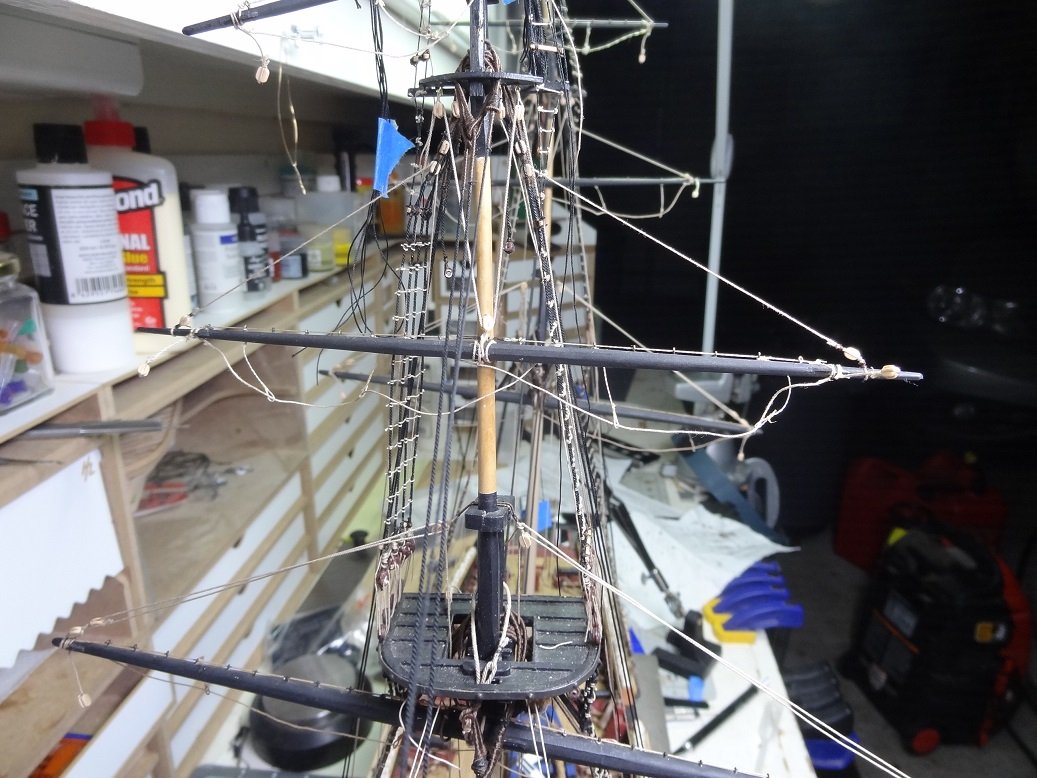
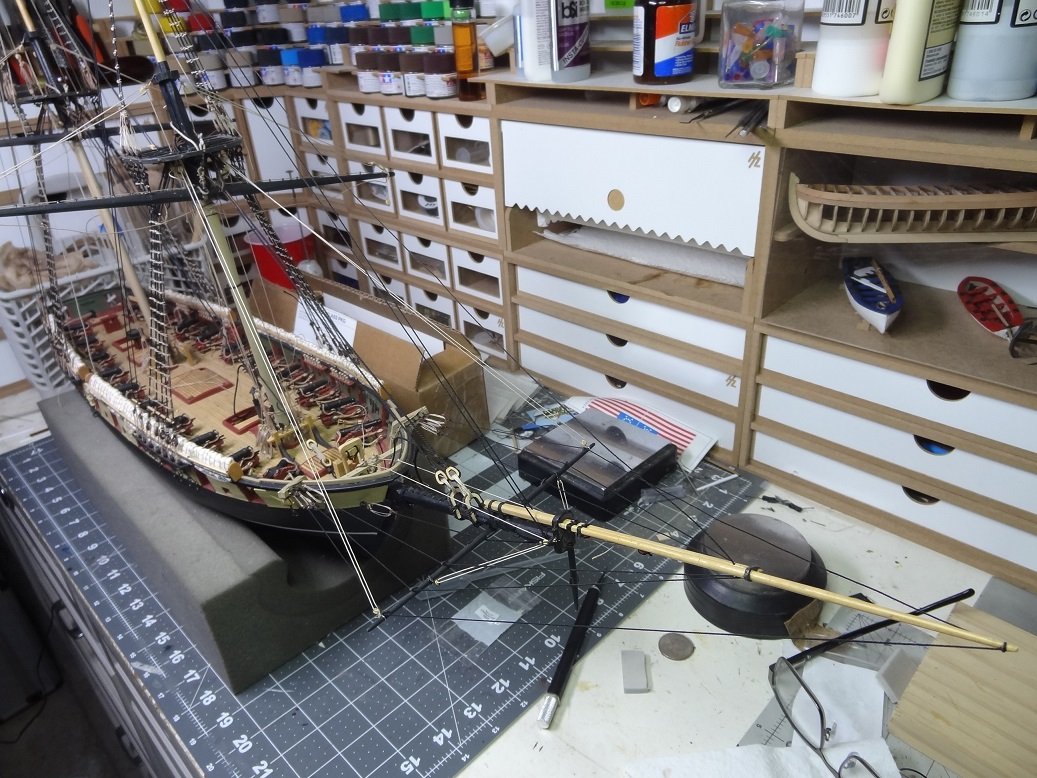
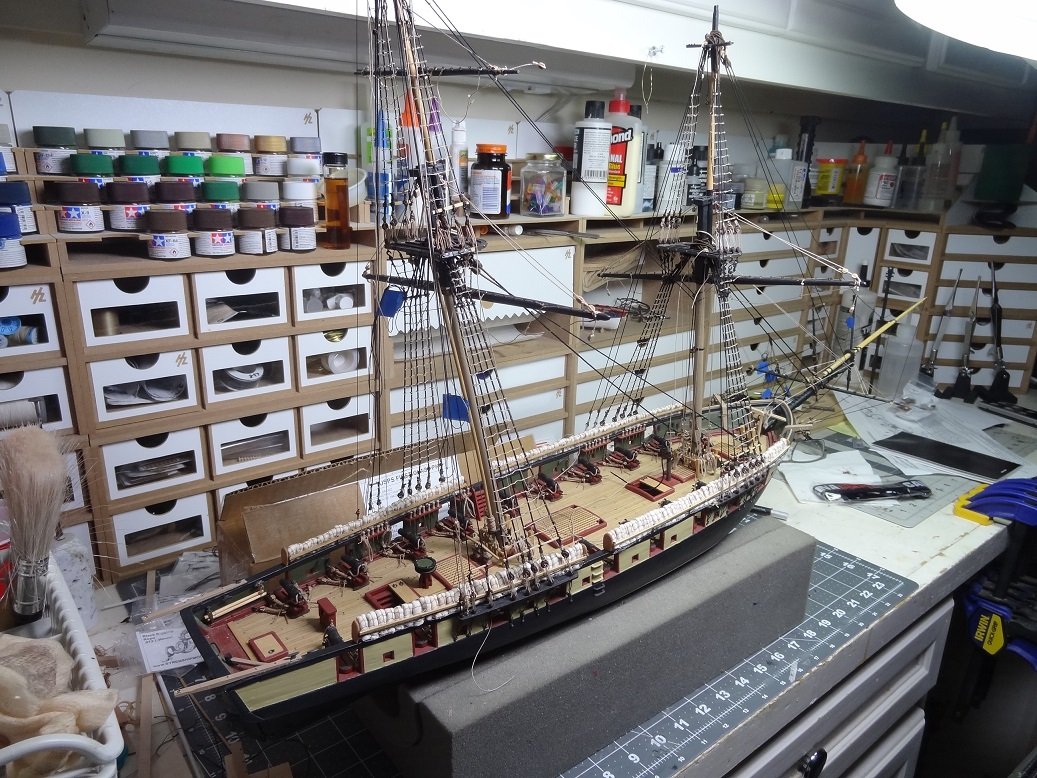
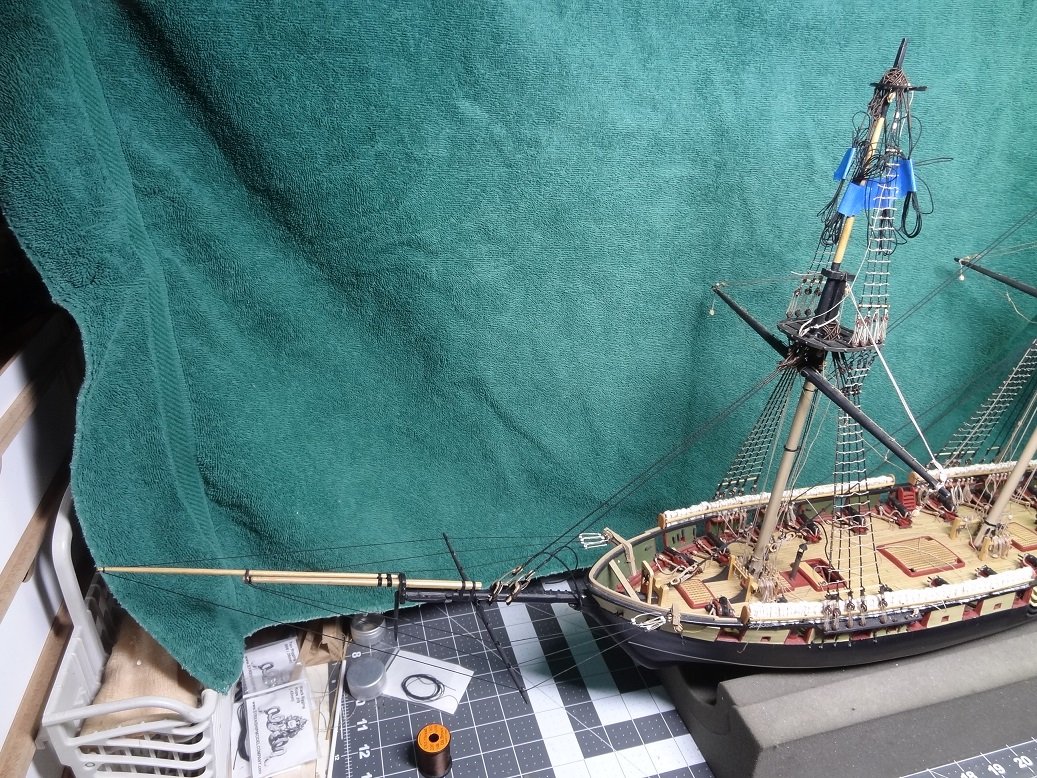
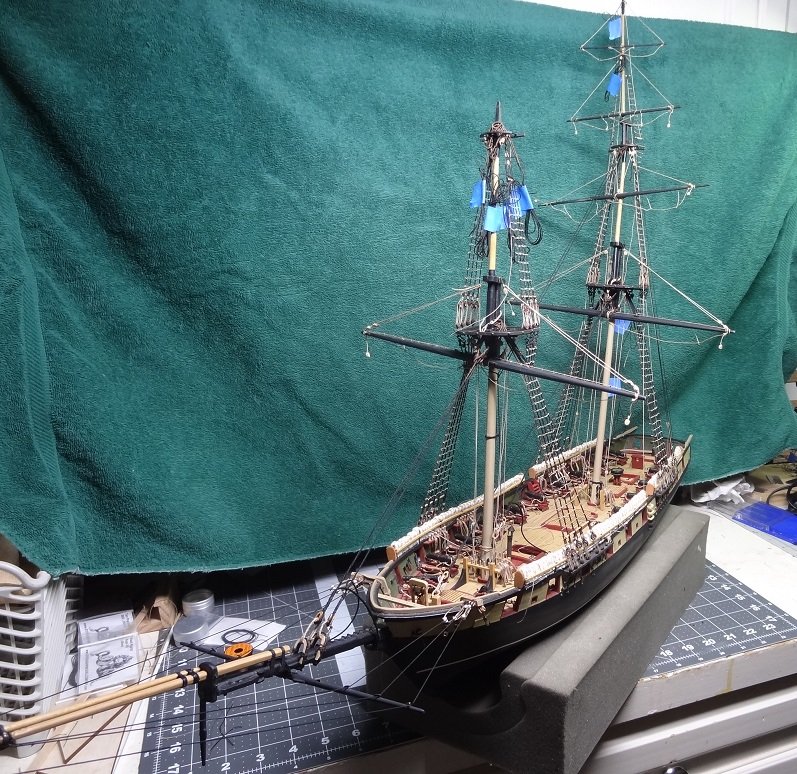
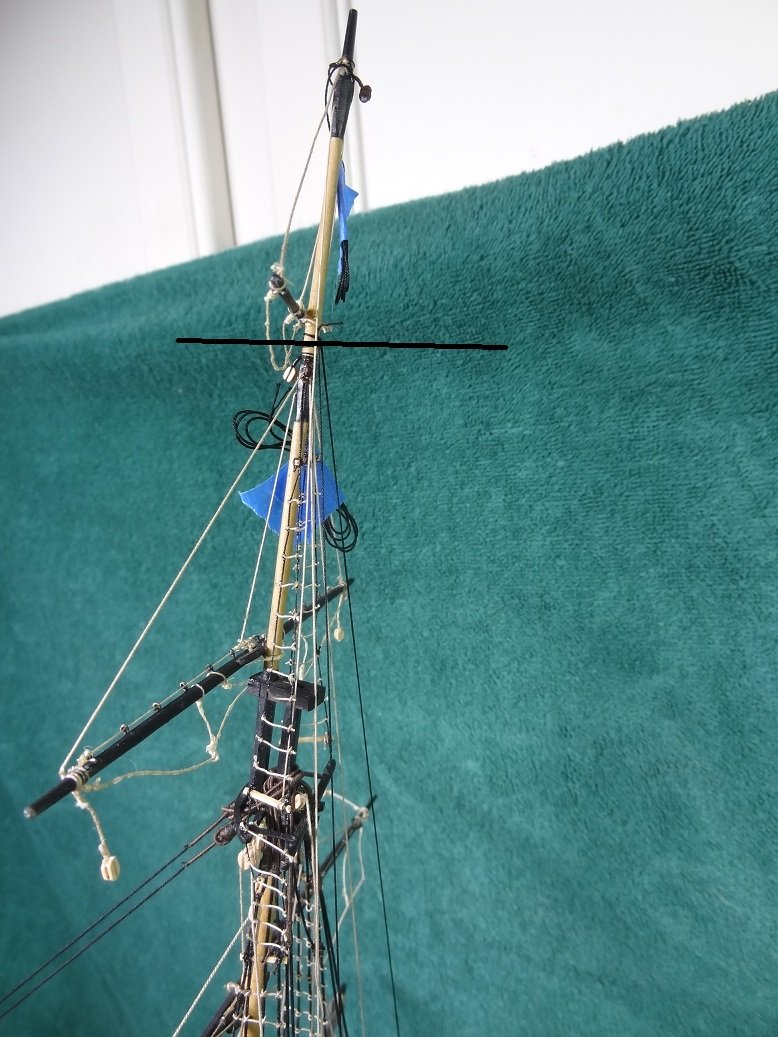
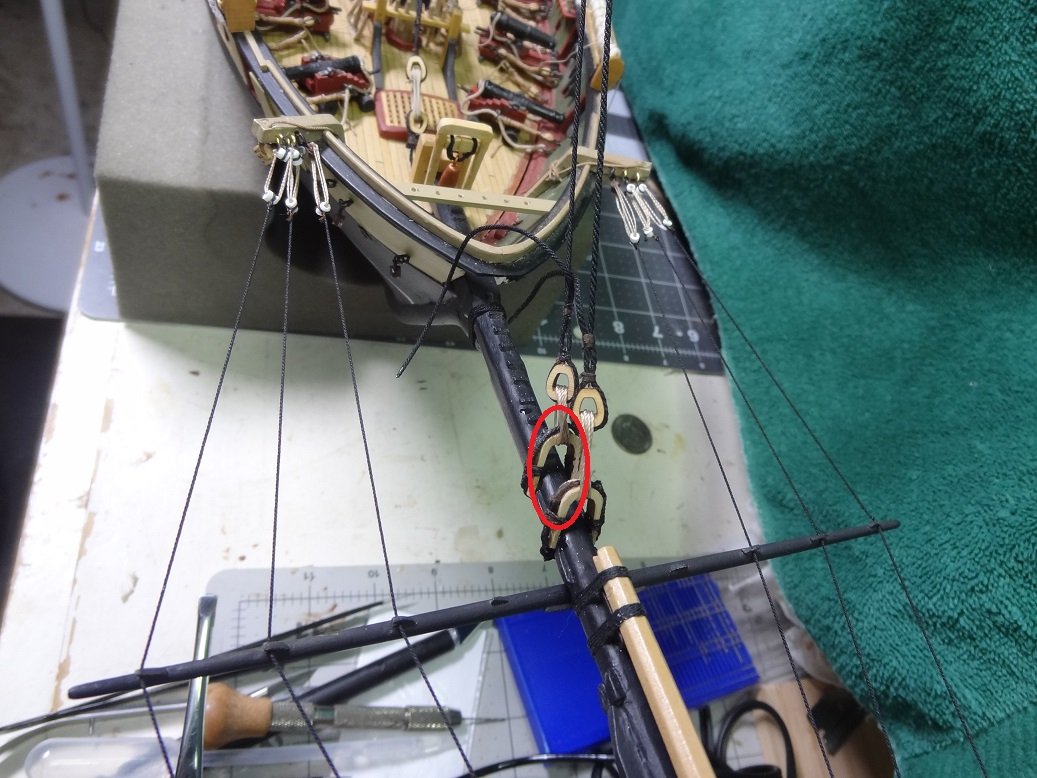
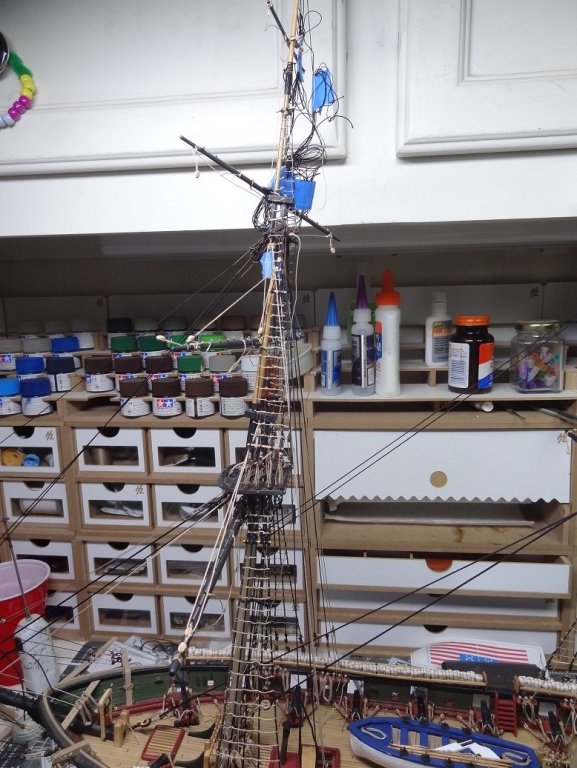
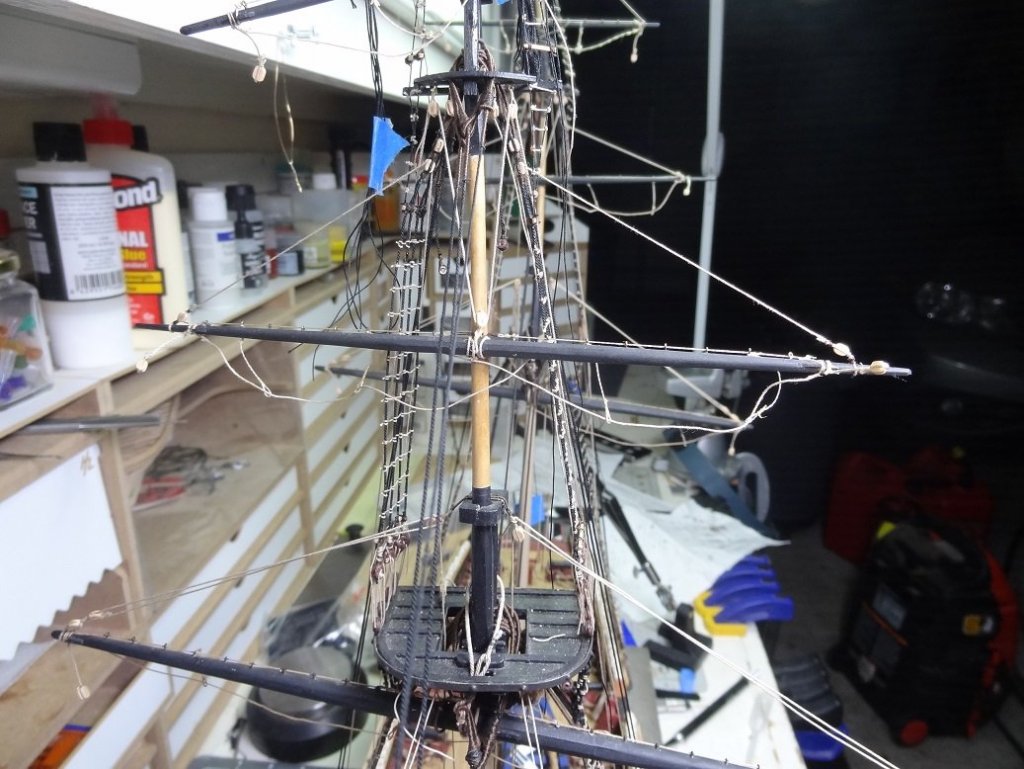
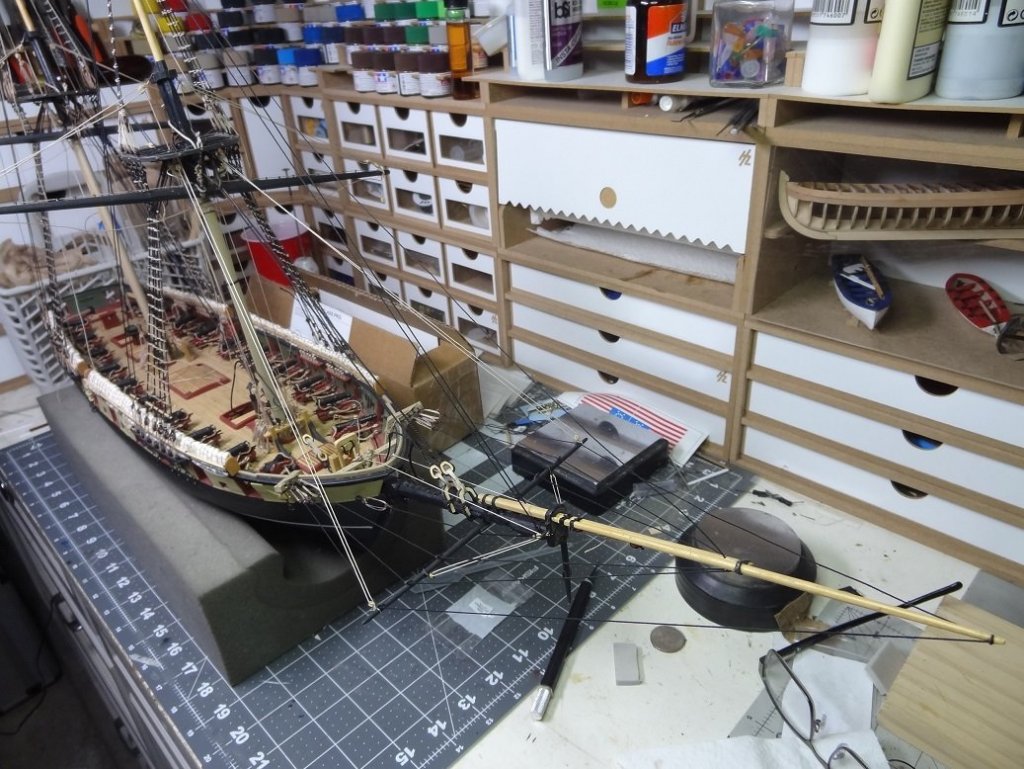
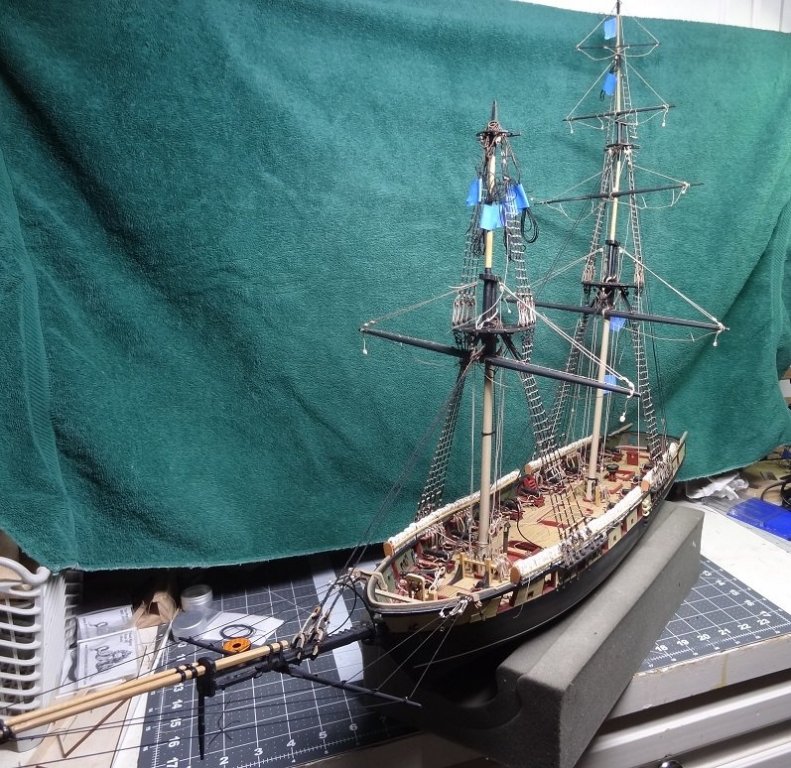
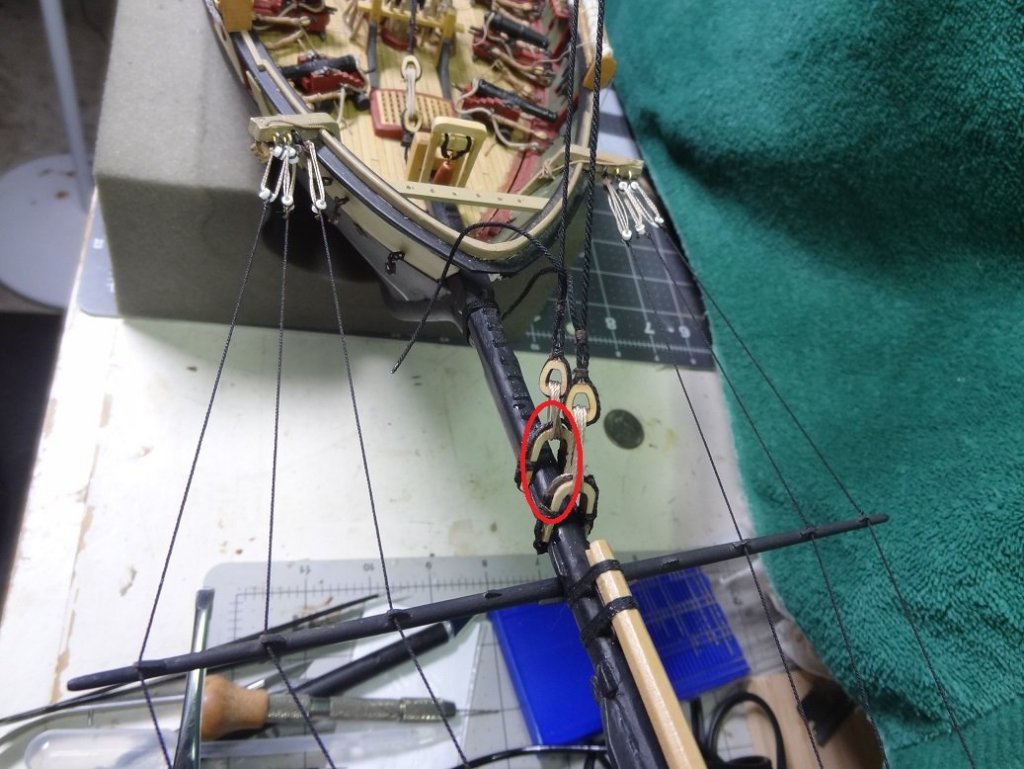
Well I've hit the point where I have to add the fore top gallant/royal to the mix. Nothing else I can do until then. I think the bowsprit came out OK. There will still be a few more ropes fixed to that when I add the last spar. The top gallant has a couple of backstays and some forestays and a couple of stays from the main still need to be fastened to it. I'll add the braces between the fore & main and probably call those two done. Which leaves me with the spanker. I think I have everything rigged on the boom and gaff. Just have to tie them off. Thinking about it, that'll be almost everything. I may need some pushing from you guys to finish off the last details. I'm pretty bad about not finishing things. If I am not mistaken, this week 2 years ago I started this build. Here's where she's at:


- 843 replies
-
- 7
-
-
- niagara
- model shipways
- (and 2 more)
-
I have not Maury. And at 1:64 (my current build) it's beginning to get difficult to do much. In most cases, I just make sure that what is left of the fall is out of sight. In a few situations where the plans call for "belay to itself" I've frapped the end.
-
Thanks for the likes and feedback everyone. Always good to have your support when I am in doubt about something. Don, I'll try to find that. It's exactly what I am envisioning for future square rigged builds. We do so much hard work adding detail to the decks. I just feel like rigging detracts from that. Lower masts with shrouds should be enough to give most people the idea of rigging and still leave a clear path to what's on deck.
- 843 replies
-
- 3
-
-
- niagara
- model shipways
- (and 2 more)
-
Dr Per - good of you to stop in! Thanks for your comments. Interestingly, the hearts from Syren even have the teeth (dont know the real name) on the inside and they really do grab the rope. Just wish they had some additional larger sizes.
- 843 replies
-
- 2
-
-
- niagara
- model shipways
- (and 2 more)
-
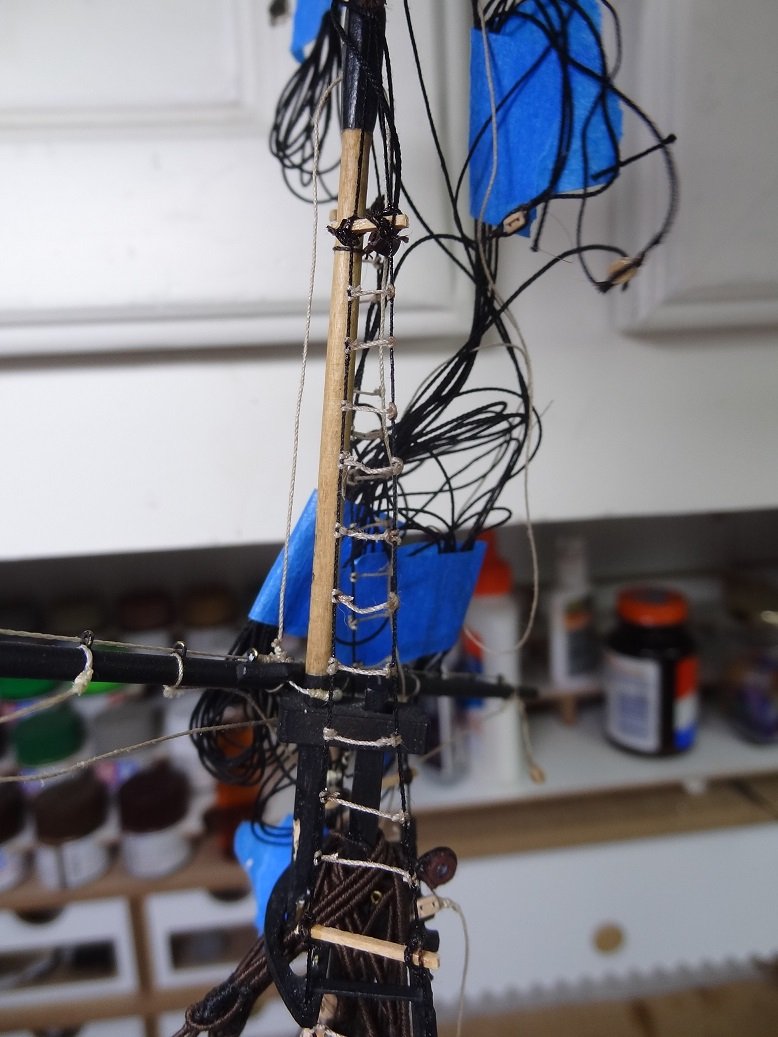
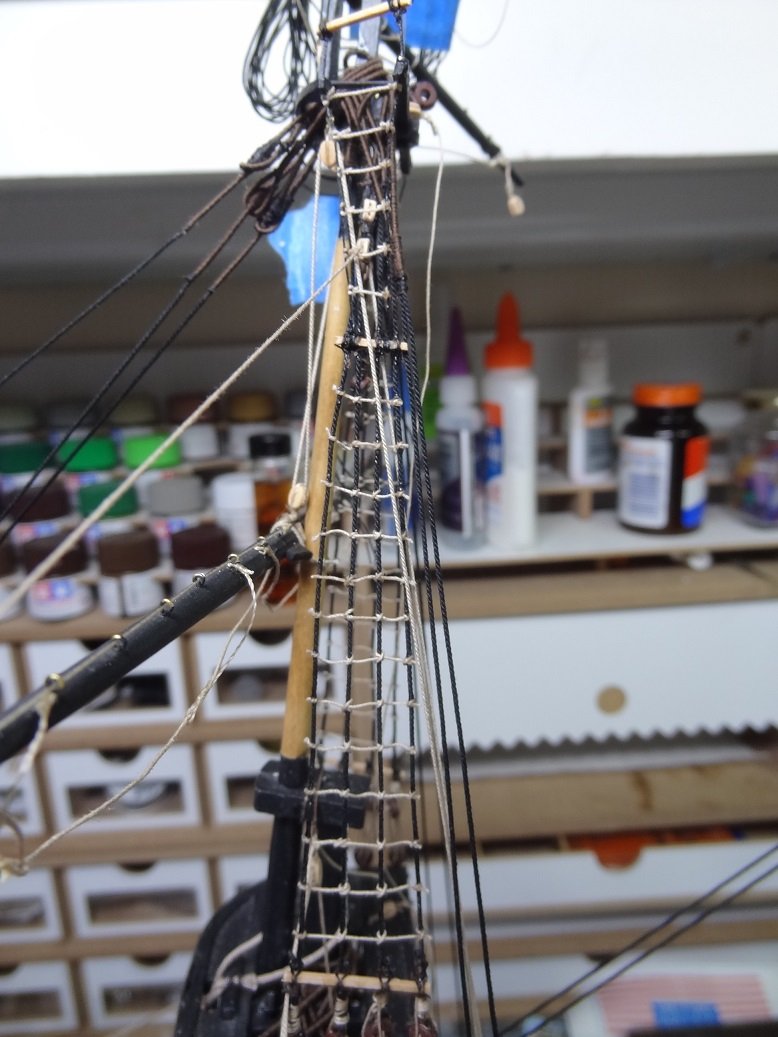
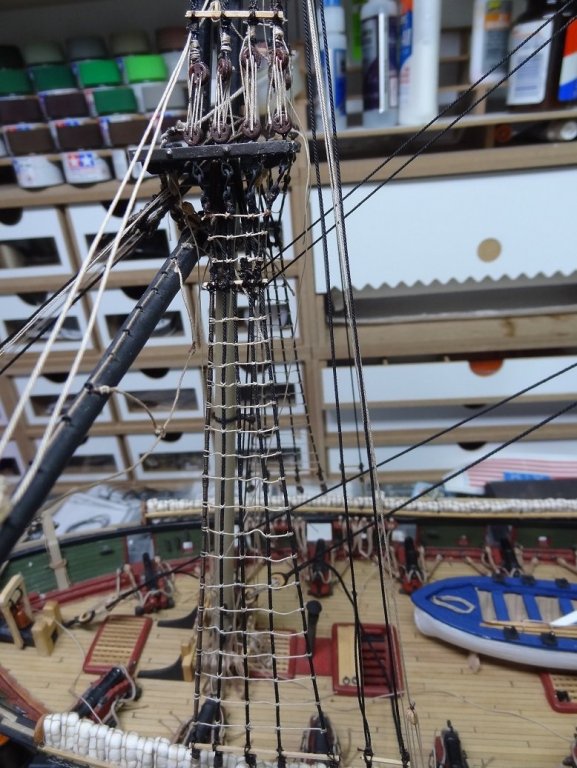
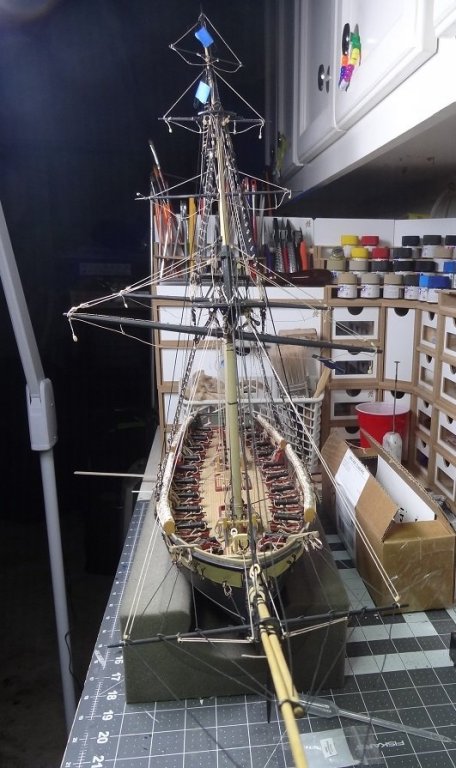
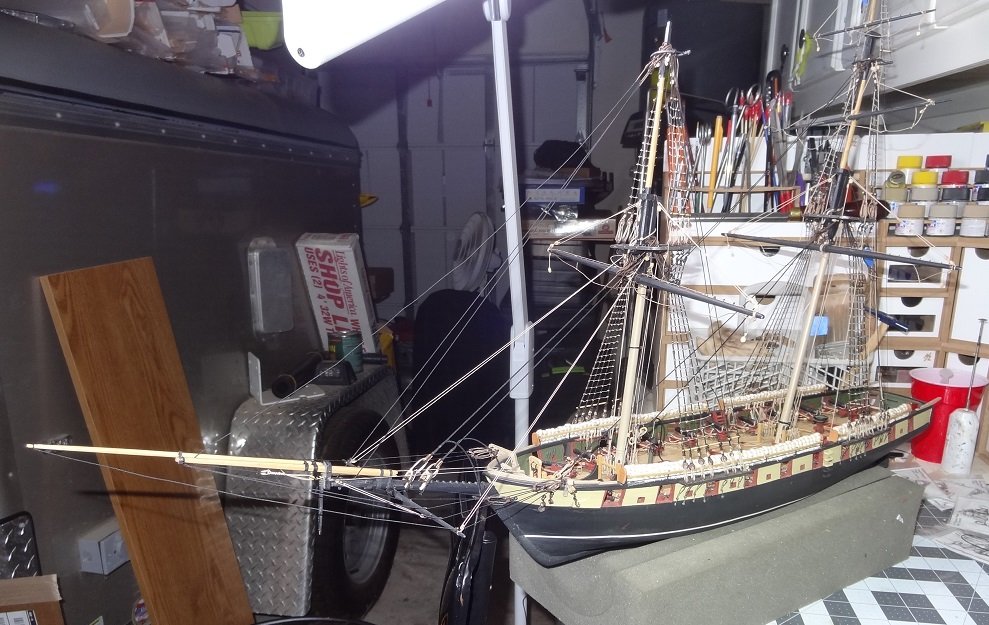
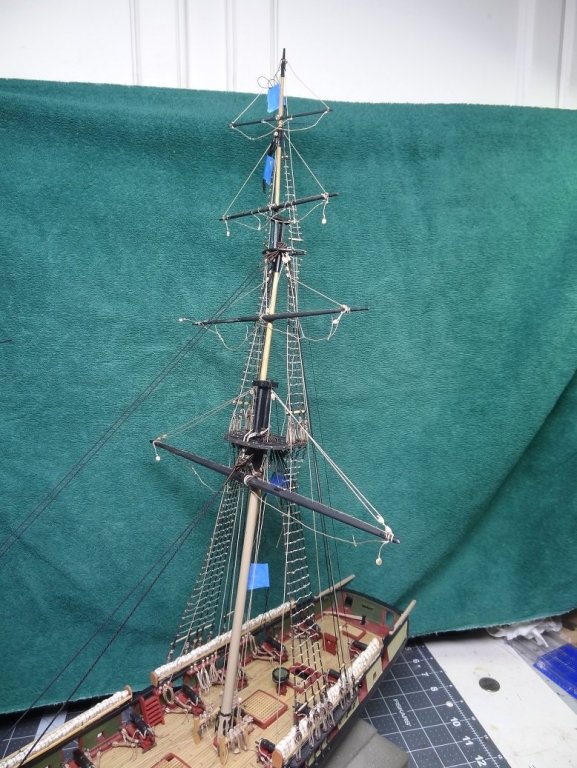
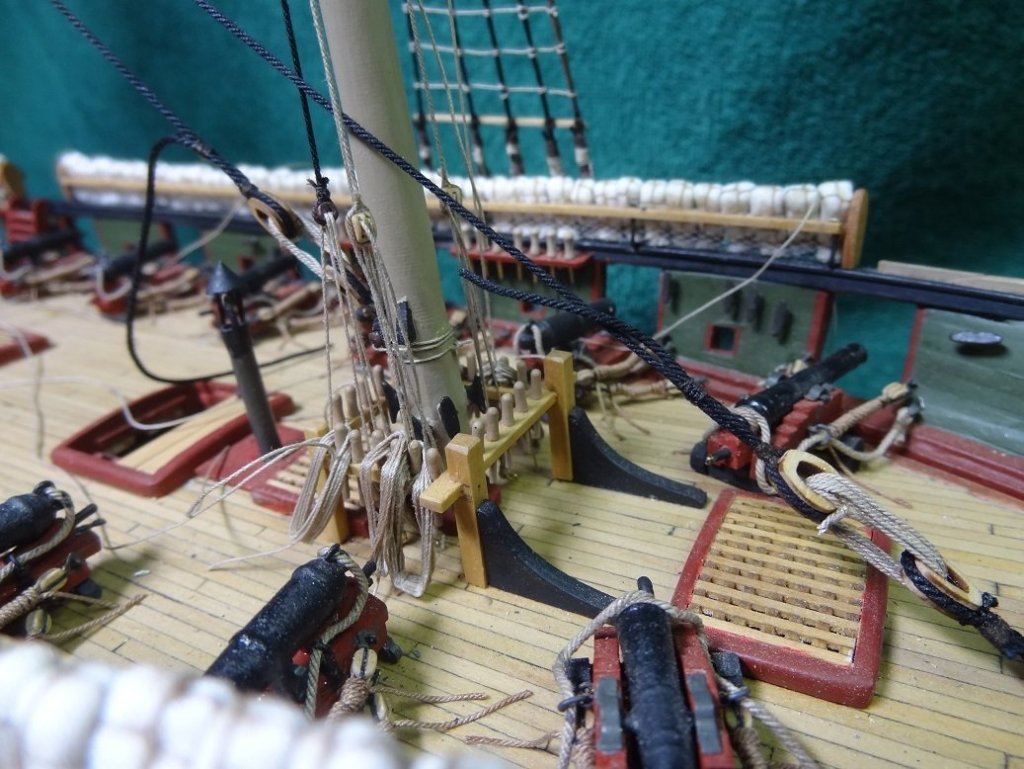
Thought I would show some pix of where I am. Rigging has been an interesting endeavor, however I believe I will research the admiralty style build. Maybe not exactly, but no more than the first spar for the masts and maybe it's shrouds and rats. Why? I think what I am ending up with now is too cluttered. It really detracts from all the deck details. Not to mention it doubles the size of the display case A few observations. As most of us do, I added as much rope as I could before stepping. For the main, I actually attached all 3 spars and rigged as much as I could to the side of the boat. That included ropes and yards. When I finally did step the main the top spars were constantly bumping the cabinets above my bench. In fact they were even bumping my lighting which clamps to the bench. For the fore mast - the 2nd mast to be stepped, I just stepped the lower spar did as much as I could do with that, then added the top mast and did the work there. As you can see from the pix I still haven't added the fore top gallant. I also seem to have gone backwards, stepping the main first then the fore. I didn't even bother with the bow sprit until just recently. This order worked out well. The two masts don't need the bowsprit for all that much. There is a question as to how much rigging to do. Most all of the standing rig needs to be done. But the running rig is another question since there will be no sails. Seems like there is a fine line between too much rope running around the boat and not enough. Given that I feel things are getting cluttered already I'll probably end up on the lite side. Personally I feel that most of the ropes that fasten to a sail should not be included in a build with no sails. So here's some shots of the boat - picture quality is still dubious. As you can see I have about 1" before the bow spars bump into the cabinets. Had a few "hold your breath" moments already. Since I'm eliminating a lot of the running rigging, I've come to realize there will be a lot of empty belay pins. IMO this looks sort of weird so I am adding some "dummy" coils to fill in the spaces. A real seaman would scoff at this but most people would never know. I gotta wonder who they sent up this high. Probably someone they didn't like very much. How the heck did they get all the way to the top? The rats don't go that far. I'm holding off on trimming the ends of the big ropes in case I have to rework something. Would hate to have to replace a stay now! I used 7mm hearts from Syren. I like the way they look but I wish they had some a little bigger. Cheap basswood part. Broke the thing 3 times while fitting the harness to it.


- 843 replies
-
- 4
-
-
- niagara
- model shipways
- (and 2 more)
-
You know if I was smart I would take some time off from these things too. Hasn't happened yet. Looks like you got a lot accomplished Matt
- 50 replies
-
- 1
-
-
- artesania latina
- Virginia
- (and 2 more)
-
Elijah - not sure from a scale perspective whether this would work but you might try the heads of pins (the sewing type) for your nails. I f you can go to a sewing or material shop, they may actually have different sized pin heads. Stay with it buddy. It's really fun to see how you have improved since Phantom. BTW - where is Phantom?
- 228 replies
-
- 4
-
-
- gunboat
- model shipways
- (and 1 more)
-
Odds are 10 to 1 I break that bow sprit before this build is over.
- 843 replies
-
- 2
-
-
- niagara
- model shipways
- (and 2 more)