


mikiek
-
Posts
2,276 -
Joined
-
Last visited
Content Type
Profiles
Forums
Gallery
Events
Posts posted by mikiek
-
-
As stated, be sure to recalculate the next layer. Don't try to follow the lay of the previous layer.
The garboards should go in straight - no bending. Yes there will be a lot of twisting and turning but no bending. If you find that it is wanting to bend up at the bow most likely it is pushed too far forward. You should be able to lay the next strake on the top edge of the garboard and it should sit flush. I usually try to pin the garboard in place then lay the next strake on top just to see how the two will mesh. Then adjust and glue the GB.
If the GB is bending all subsequent sticks will want to bend as well.
Another thing you can do is take the stick that will be your GB and put the bow end into your rabbet about midship. Lay as much of the edge in the rabbet towards the stern. Then start sliding the stick forwards in the rabbet toward the bow keeping a close eye on that leading end. You will either see the stick start to move upwards when it gets to the stem or it may just stop and not slide anymore. That's where it should lay. You can then do whatever shaping you need to do to the front end of the stick.
-
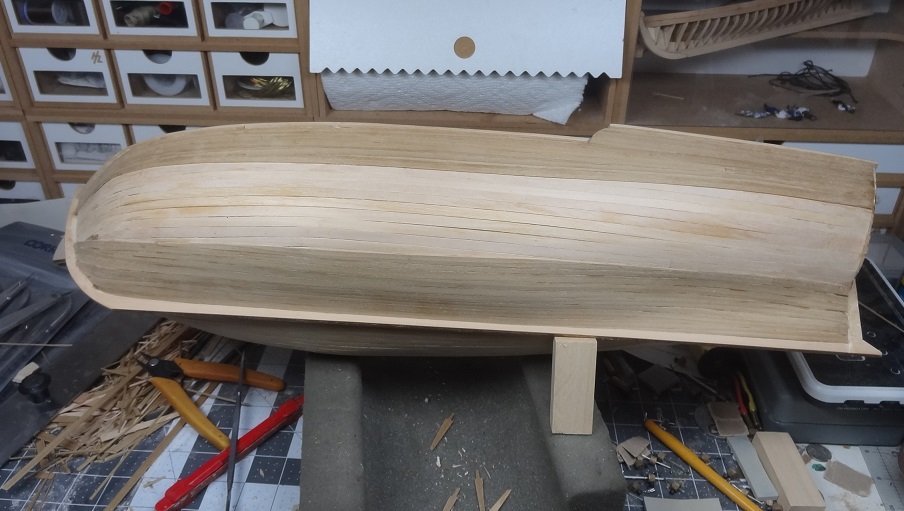
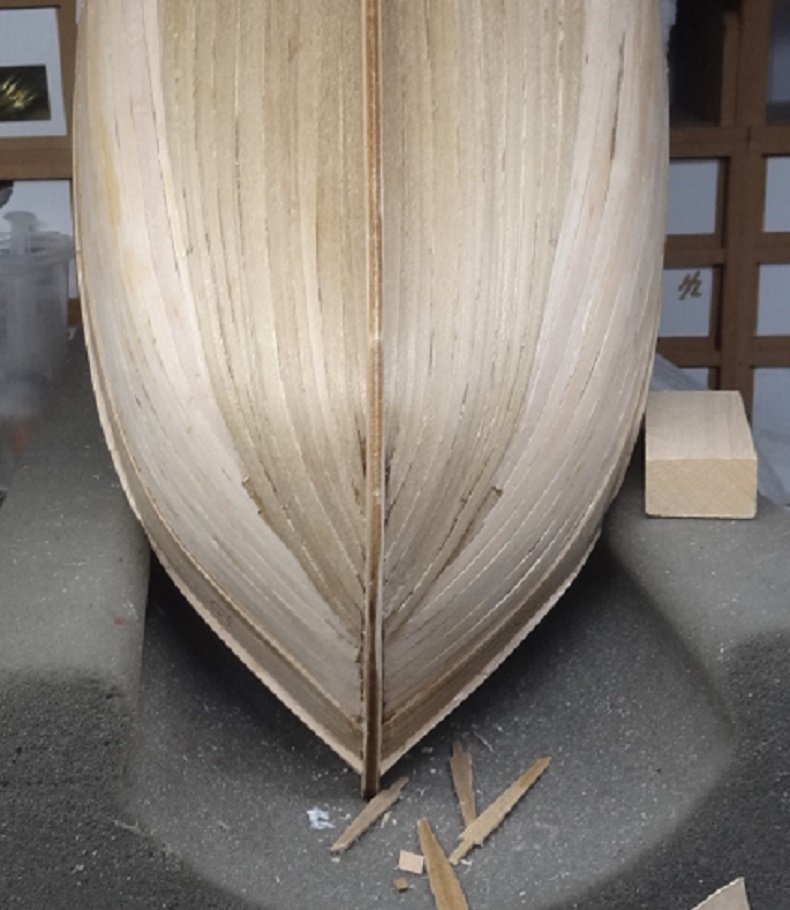
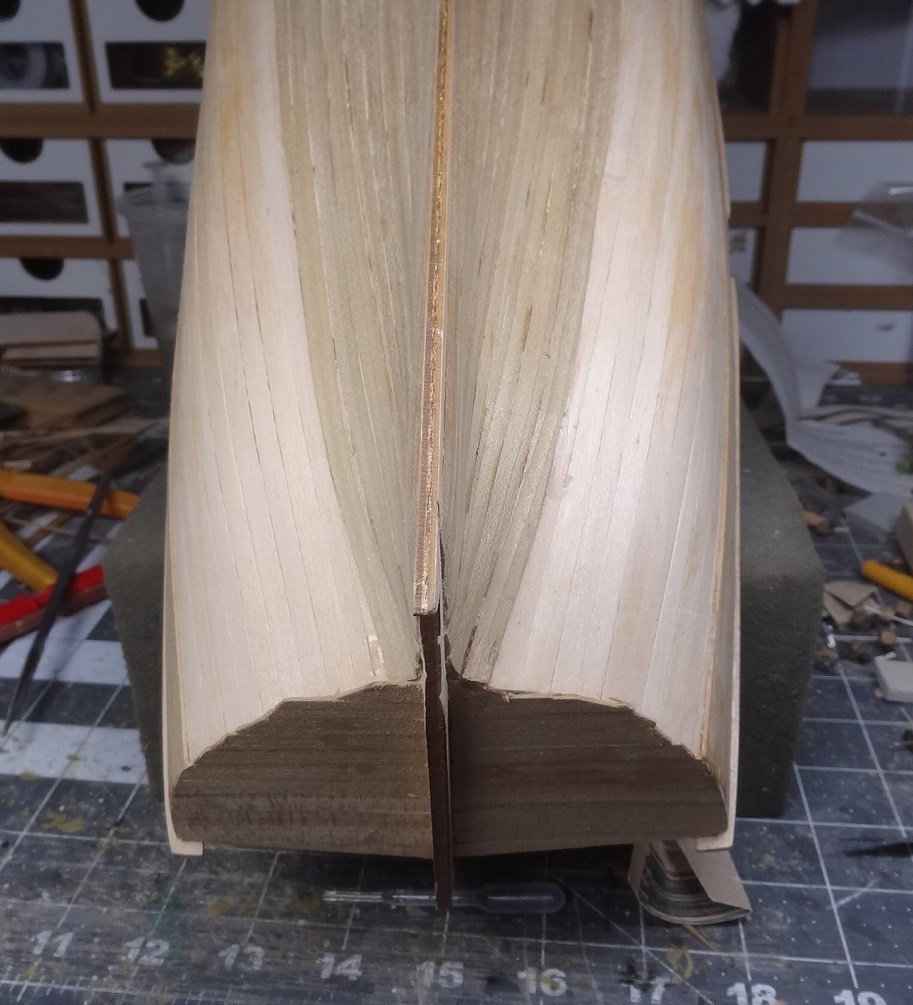
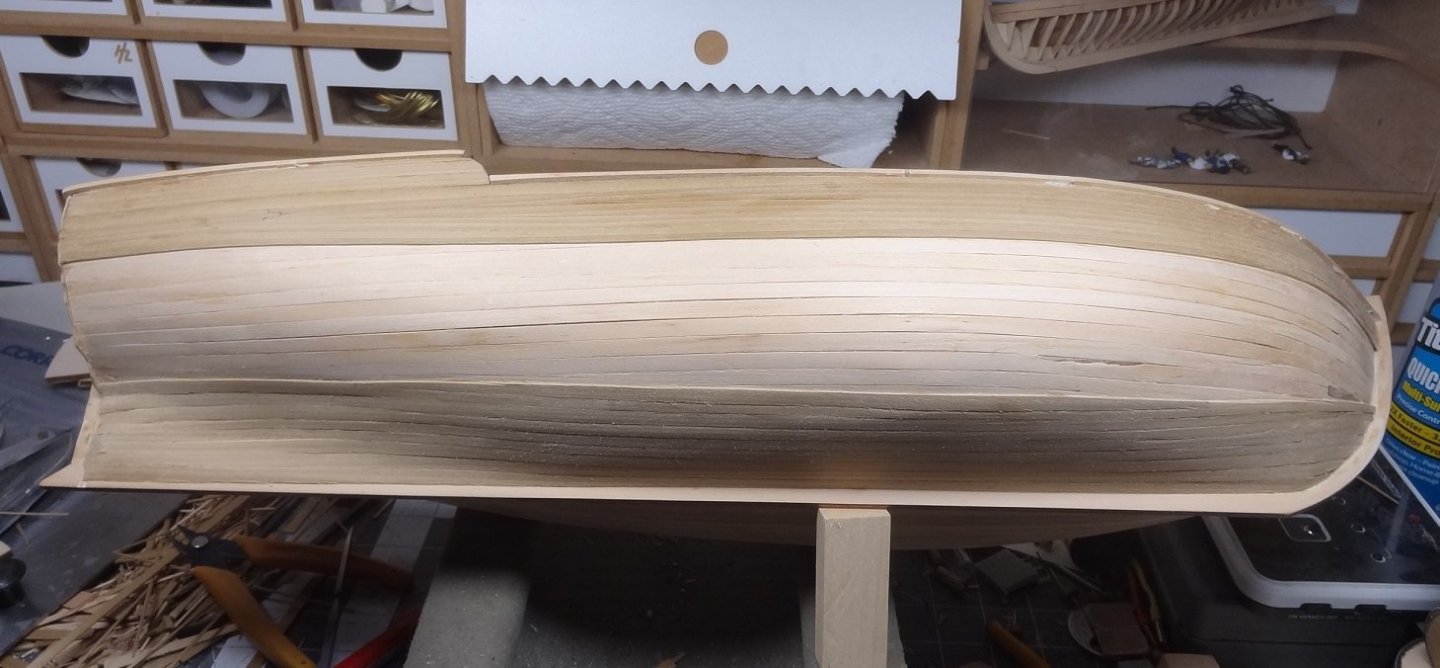
Checking the date from the last post - I have been lazy. I walk by the build almost every day and just keep walking. I want to begin some of the fun stuff - starting with the deck. But I know if I don't finish planking, it may never get done. Honestly the last layer (the 3rd) looks pretty decent.
I did a few sticks from top down, then the garboard and a few sticks bottom up. The one thing I have stuck to on this layer is to shape a stick for one side then make a matching stick for the opposing side. Then glue them both. This has helped to keep both sides fairly even, particularly at the bow & stern. I know that is always the recommended approach, but I rarely do it.
Interestingly, I have done this whole layer by eye. No bands, no plank markings, no dividers. Frankly I think it has come out the best of the 3 layers. I have added a few stealers, again just when my gut told me to do so. The area that is left to plank is pretty even from bow to stern. Sticks at the bow will need some tapering, but that is normal.
Here's a few pix:
Thanks for reading!
- ccoyle, CiscoH, GrandpaPhil and 1 other
-
 4
4
-
Another consideration, that applies to any build - where was it built? - What were the circumstances? - When was it built?
The answer to these questions should have a major impact on your painting decisions.
Many colors that we might consider totally available today were not available in some time periods. Reds & blues in particular. The 'blood red' that are called for in many builds was probably closer to a 'barn door red' as true red was extremely expensive.
- thibaultron and mtaylor
-
2
-
Mark - maybe I misunderstood. I thought that article was going to be posted in the NRG How To Library.
-
-
I'm not sure how far you plan to go on this restoration. A couple of your pics show the deck which looks pretty dirty. I can't really see what shape the deck furniture is in. Sadly I can't help you with the rigging.
But I would suggest getting any deck cleaning and repairs done before you start rigging. The more string you have running around the boat the harder it becomes to do that sort of work.
- Keith Black and mtaylor
-
2
-
-
-
As Welfacks photo shows, you will want to put some color randomness on your sticks. Nothing ever comes out perfectly in one shade. You'll want some sticks darker/lighter than others.
I also agree, you'll need to mix several colors to get you closer to what you want and it may be literally just a drop or two of some of the secondary colors. Keep good notes on how much base you started with and how many drops of additional colors. You may have to make another batch down the line.
-
-
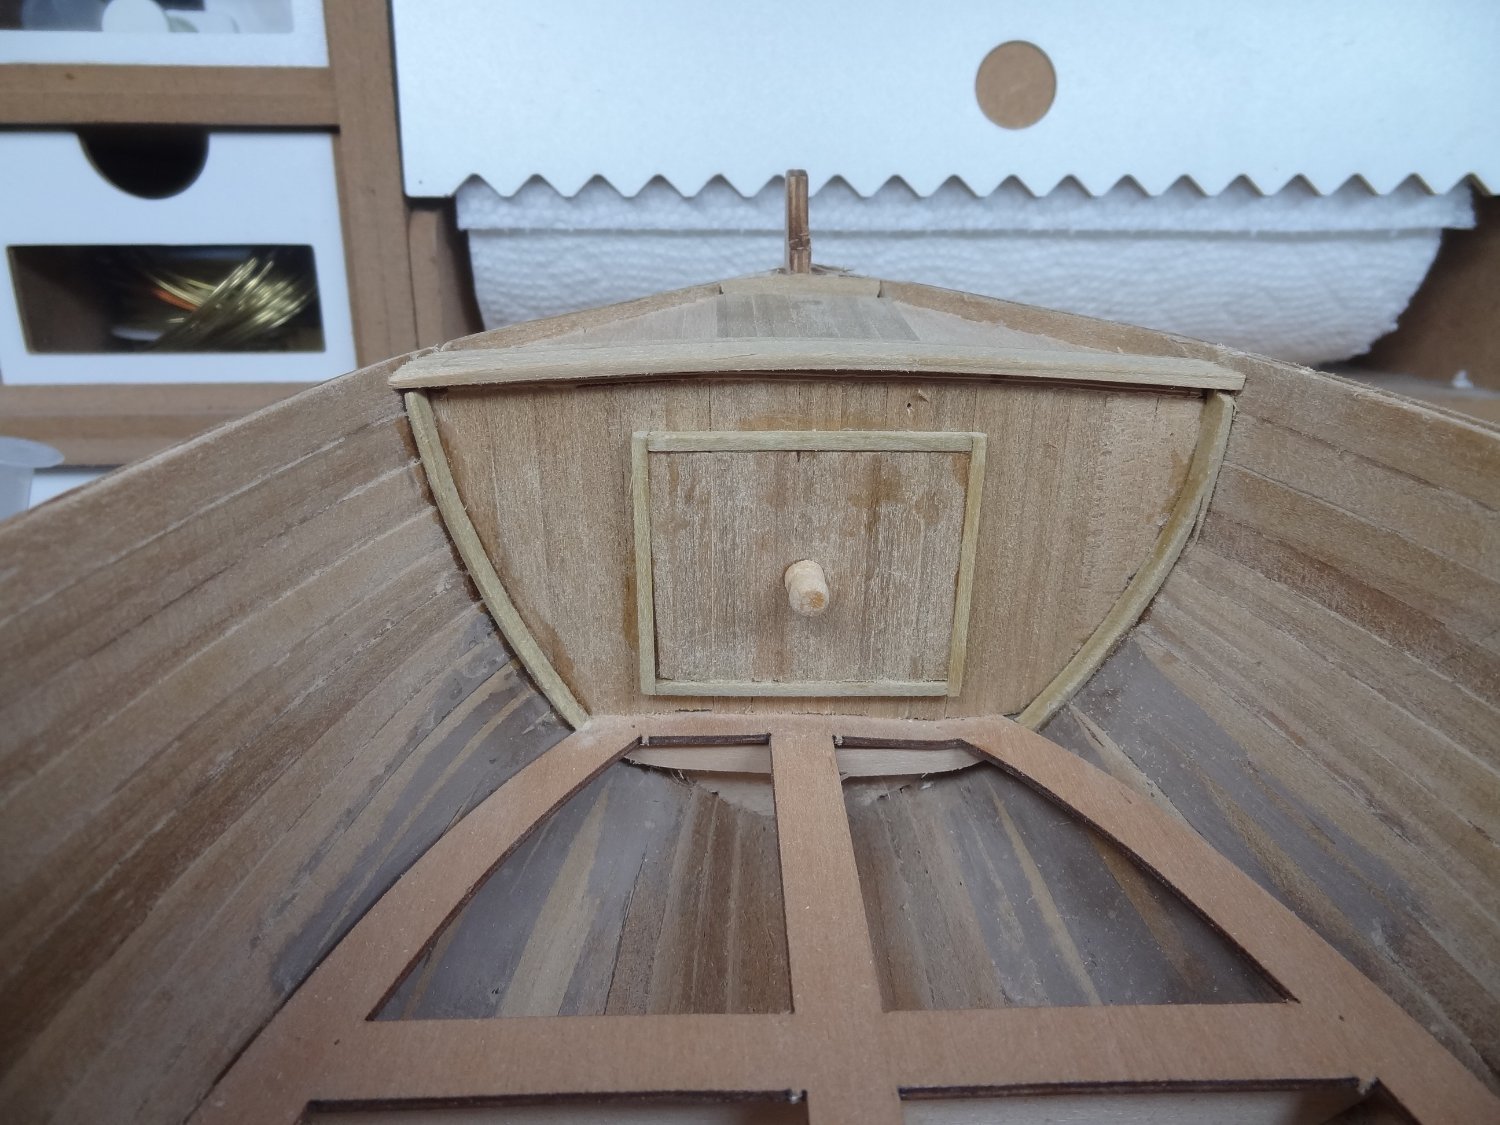
As usual I am bypassing all the difficult decisions that are in my face. The instructions call it something different, but I call it the waterways as would any credible plans. There is a stick that needs to wrap around the ribs from the inside.
Once this stick is in place, there is a gap between the stick and the inner hull.

The plans call for placing a shaped piece of stick placed in between each rib. YEAH RIGHT. Are you freaking kidding me? There is no way to even tell what that shape would be. This is a total joke.
Instead, I have cut 2x3mm sticks into pieces that fit between the ribs and then just glued them into place using white glue.

After 10-15 minutes (before the white glue dries) I just go in with a sharp knife blade and shear off the excess. A little sanding helps to smooth out the surface.
I just can't keep from thrashing the wood in this kit. Total garbage. As you see in the pics below, the more I sand the worse it gets.
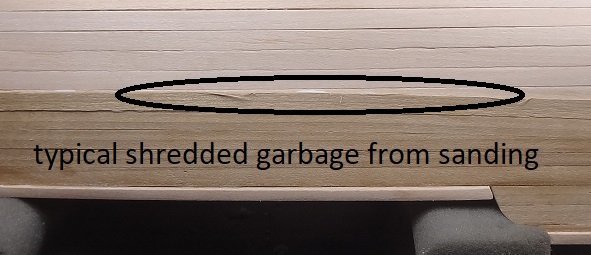
Honestly, I thought sanding was supposed to remove shreds and splinters. Not bring on more. 😒
- CiscoH and GrandpaPhil
-
2
-
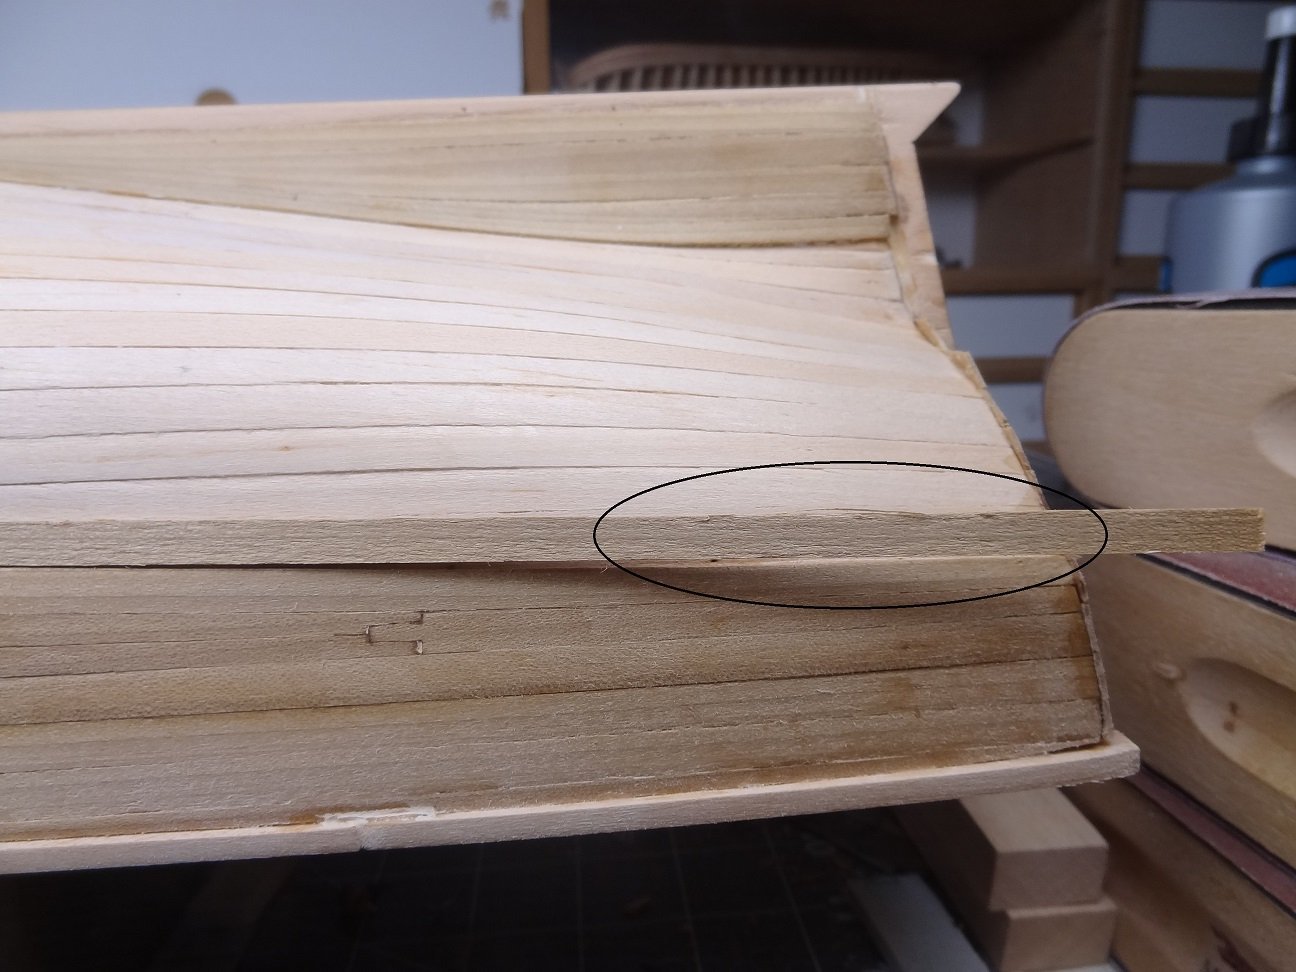
Been working on the cap rails. As mentioned above and according to the instructions, the bow end of the rails requires 4-5 trapezoidal pieces shaped in an effort to lay on top of the bow curvature. Sadly, there is no pattern provided so it's totally up to the builder to figure out the shape of each piece. In other words a WAG. I guess I got lucky - it came out reasonably well.

The ugly part is the curve between the upper and lower rail.

The kit provides a "wood ring" that you are supposed to cut out a chunk and lay it on the curved edge.
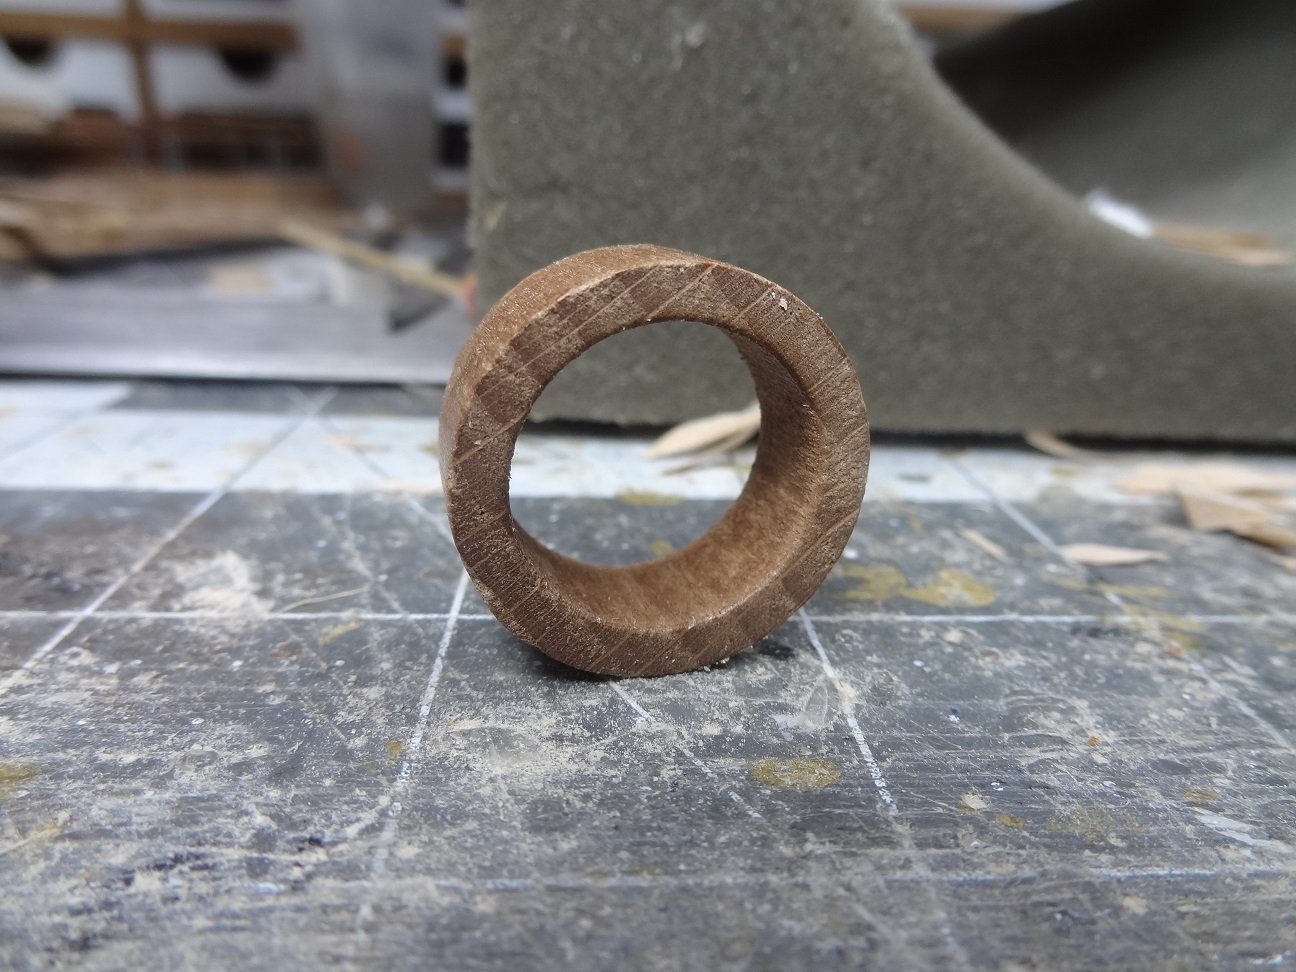
Unfortunately there was no direction at all on how to shape that curve. And the shape I ended up with doesn't come close to matching the ring. Will either require a buttload of sanding or I will dump the ring and try to bend something to fit the curve.
- Richard44, CiscoH and GrandpaPhil
-
3
-
Fantastic! The write-up will be a big help for many of us. Thank you to all that made this happen.
- starlight, thibaultron and mtaylor
-
3
-
I agree. I have used the article twice and I am aware of others that have used it as well. It would be a great addition to the library.
- thibaultron and mtaylor
-
2
-
Went ahead and colored the inner hull. Probably the first time of many. I used Minwax PreStain and then Minwax Natural stain. This stain doesn't have any color but it adds a "wet" look to the wood. I use it probably more than any other. I think it did help to revitalize the dead looking walnut.
If I decide that's what I want, I will lay down a couple coats of matte varnish.

I have also started work on the cap rails. Instructions call for making several trapezoidal pieces up at the bow in order to get the correct bend. I was tempted to try to just bend an entire stick, but the sticks are 3.5x10mm and they are not interested in edge bending 😒
- GrandpaPhil, Paul Le Wol, CiscoH and 1 other
-
4
-
He-he - so much for "back to planking". I have added the ribs to the inner hull. The drawing was kinda confusing. One drawing showed the hull with no ribs, the next showed the hull with ribs in place. No mention of size or spacing. I finally noticed a side drawing and determined I needed 2x3mm sticks. There is a full scale drawing that showed the ribs on 19mm centers. Rightly or wrongly that's what I went with.
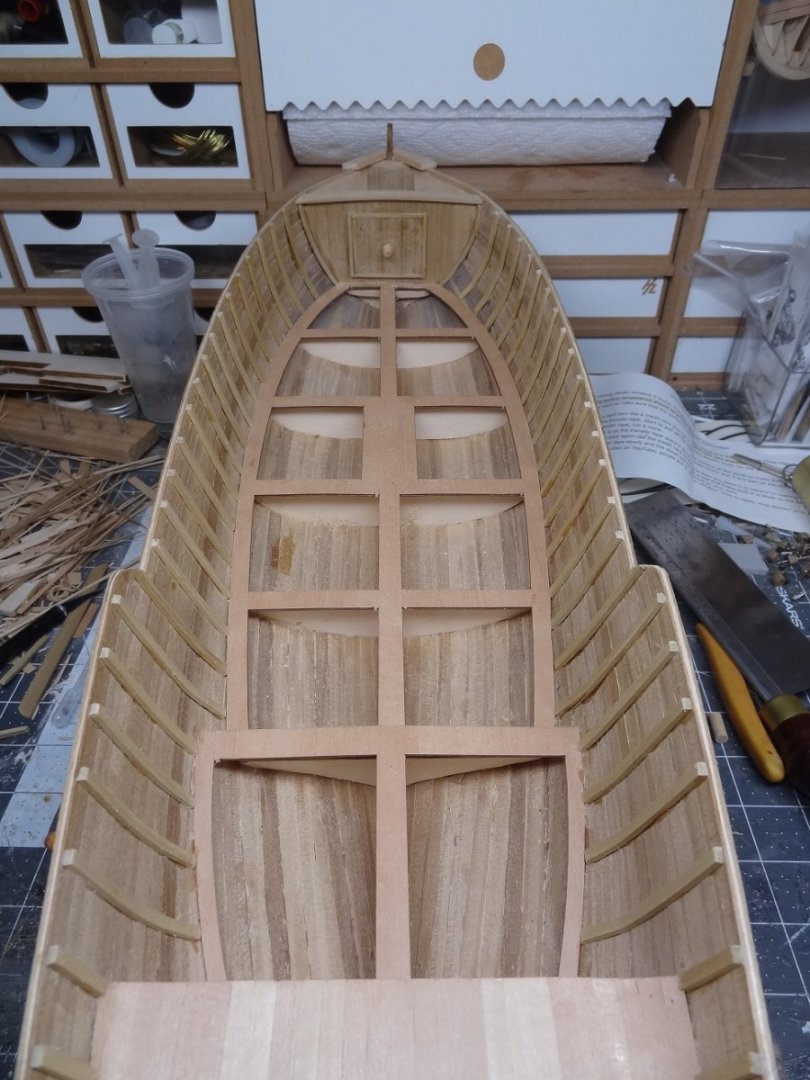

The rib size looks a little wimpy IMO but it is what it is. I thought I would have to physically bend a few of them to fit but it turned out that brute force and gluing with CA worked OK.
I'm thinking pretty soon I need to stain & finish the inner hull. There's a whole bunch of stuff that will be going on the decks and inner hull. Trying to color them later will be problematic. I suspect I will go with my old stand in - Natural stain with a satin finish. It will be interesting to see if that revives the walnut or not. It looks pretty shabby at this point.
-
Mark - The name sounds familiar. I believe that is the one. It showed a 4 plank pattern, 5 plank and I believe all the way up to 8. I would be really grateful if you can find it. I'll abide by any requirements you have. If you would prefer to email it to me I can PM you my email.
Many thanks...
- thibaultron and mtaylor
-
2
-
"If I'm understanding you correctly you would know when the garboard is in its proper place when the next plank up can rest on it without bending."
This is correct. Another thing you can do is take the stick that will be your GB and put the bow end into your rabbet about midship. Lay as much of the edge in the rabbet towards the stern. Then start sliding the stick forwards in the rabbet toward the bow keeping a close eye on that leading end. You will either see the stick start to move upwards when it gets to the stem or it may just stop and not slide anymore. That's where it should lay. You can then do whatever shaping you need to do to the front end of the stick.
- Oldsalt1950, CiscoH and Dave_E
-
3
-
Was just out on the NRG site looking for this article. Sometime back, it was in the How To articles. Don't see it now. Does this ring a bell for anyone?
Thanks in advance...
-
I prefer painting and usually with a brush. There are some alligator clips that have a stick coming out the back. Clamp the piece then hold the stick between thumb and forefinger. You can easily rotate the piece by rolling the stick between your fingers. Stab the stick in a piece of styrofoam to let it dry. As with any paint job go light or you may end up with drip marks.
Tamiya makes a great color called Rubber Black. It's even flatter than their Flat Black. Imagine the color of a clean car tire (no ArmorAll 😀) and that's about what it looks like.
There's a lot less fuss using paint.
-
" I realized when I bent the bow end of the port garboard strake to fit into the rabbit it had the unintended effect of bending the tip upwards as well due to Obscure Geometry. So of course all the subsequent planking follow this upward curve. "
The garboards should go in straight - no bending. Yes there will be a lot of twisting and turning but no bending. I you find that it is wanting to bend up at the bow most likely it is pushed too far forward. You should be able to lay the next strake on the top edge of the garboard and it should sit flush. I usually try to pin the garboard in place then lay the next strake on top just to see how the two will mesh. Then adjust and glue the GB.
As you found out, if the GB is bending all subsequent sticks will want to bend as well.
-
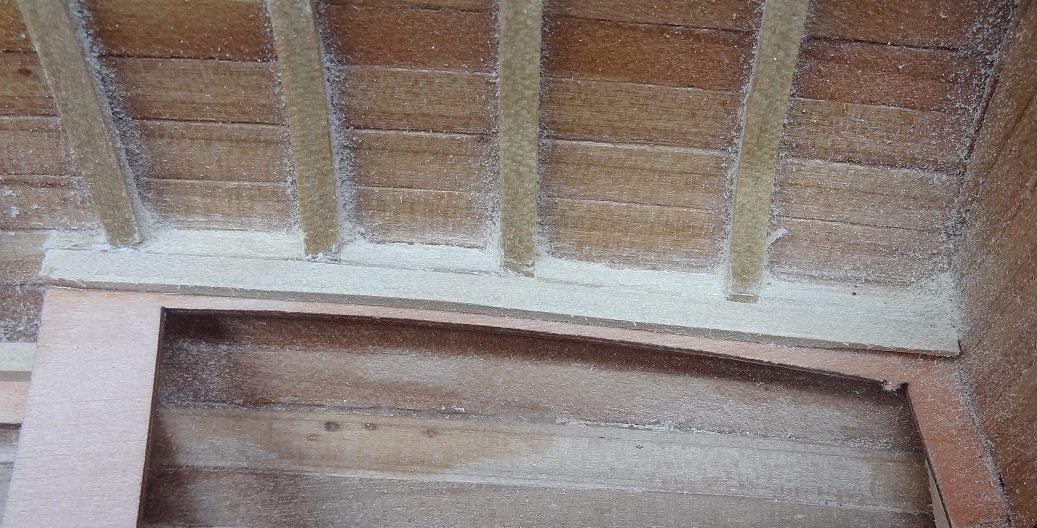
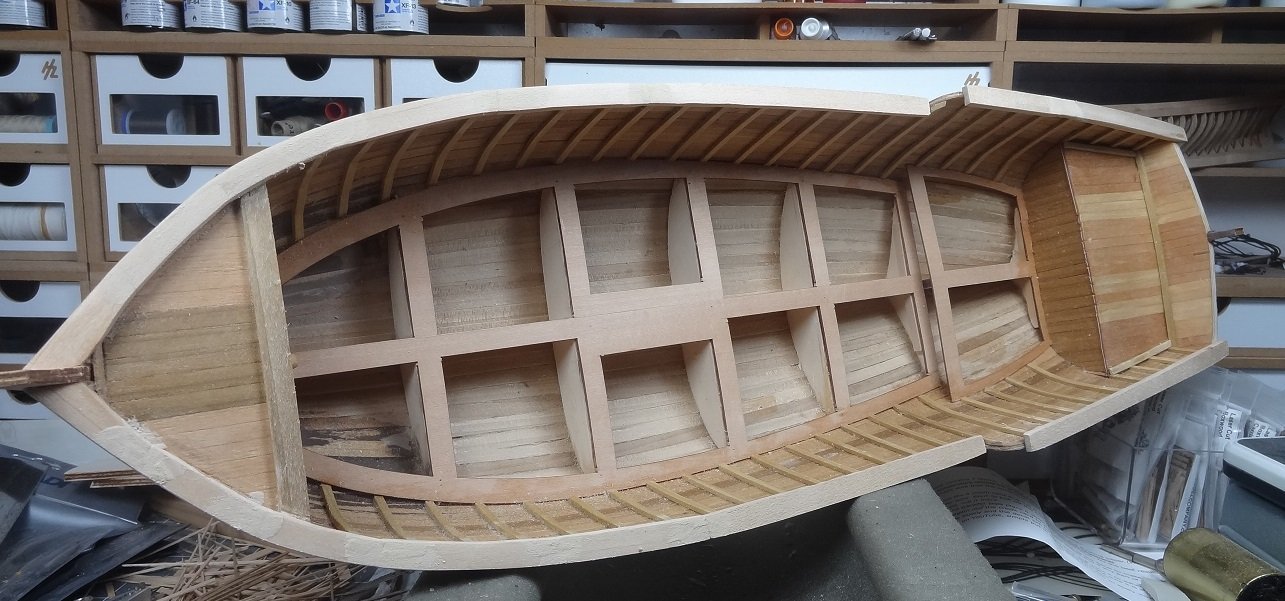
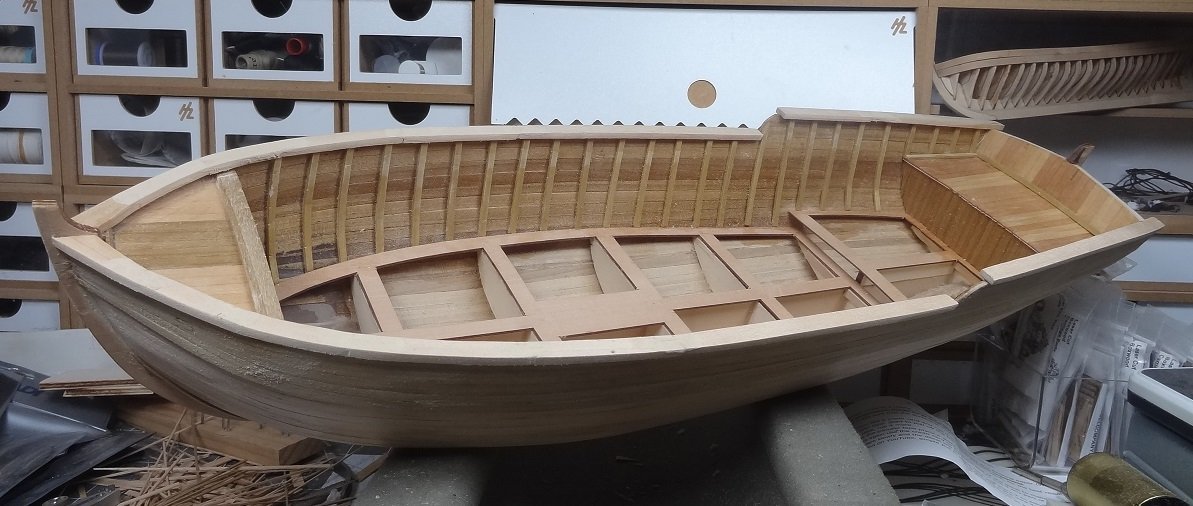
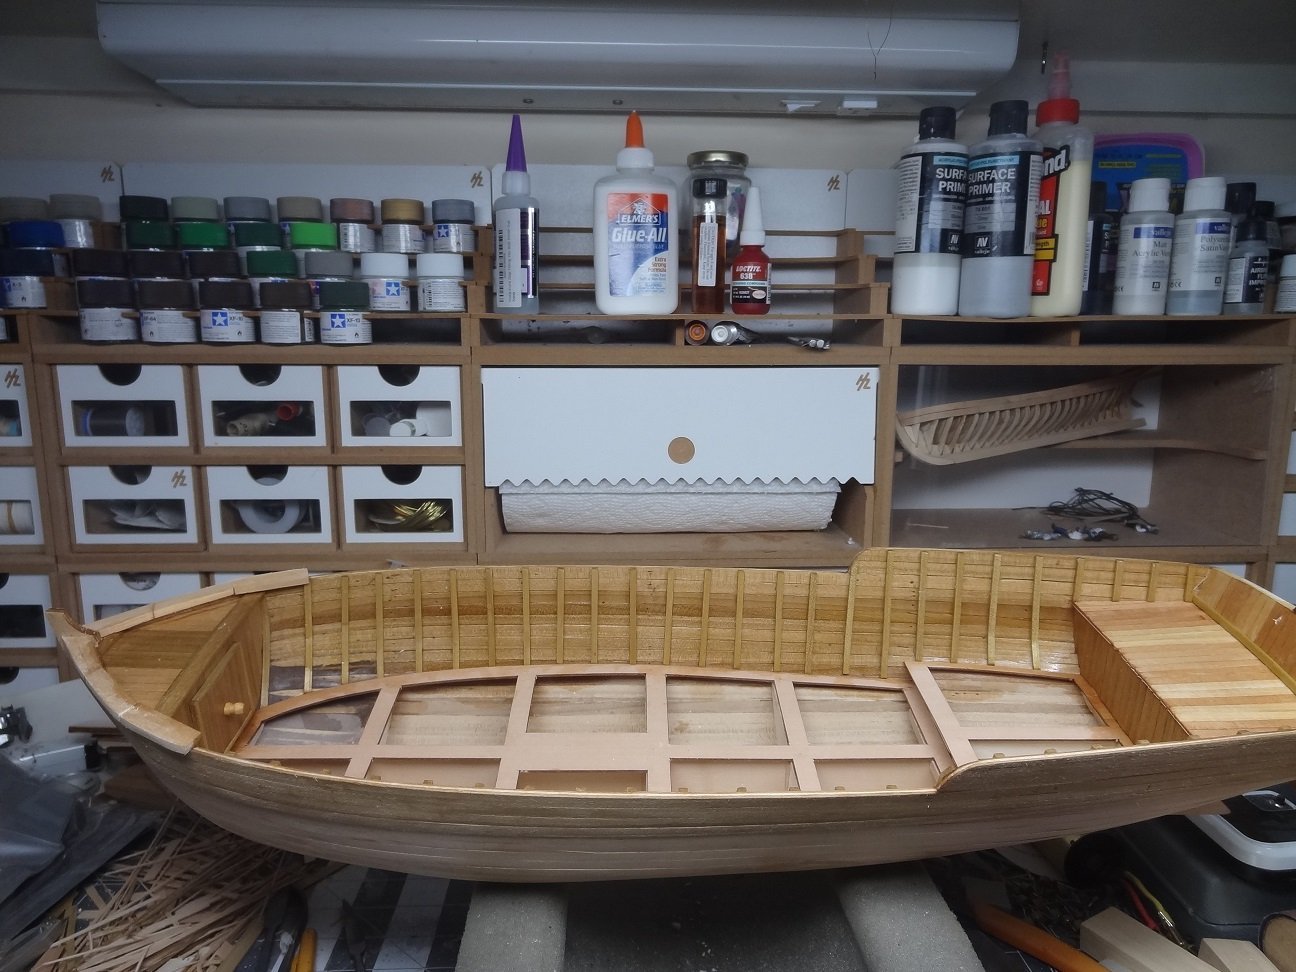
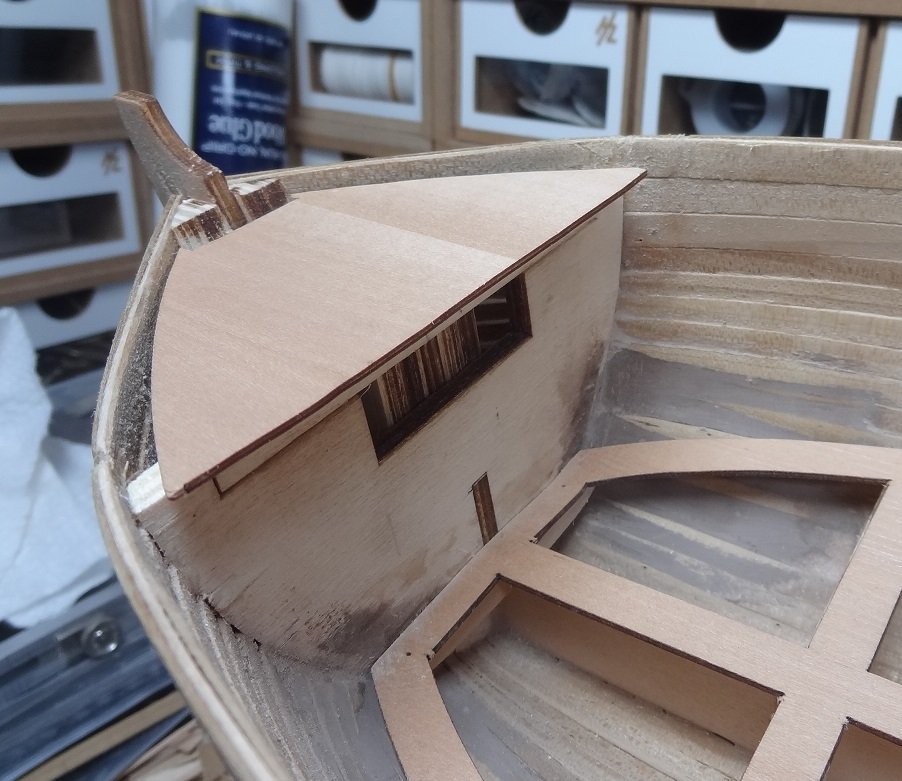
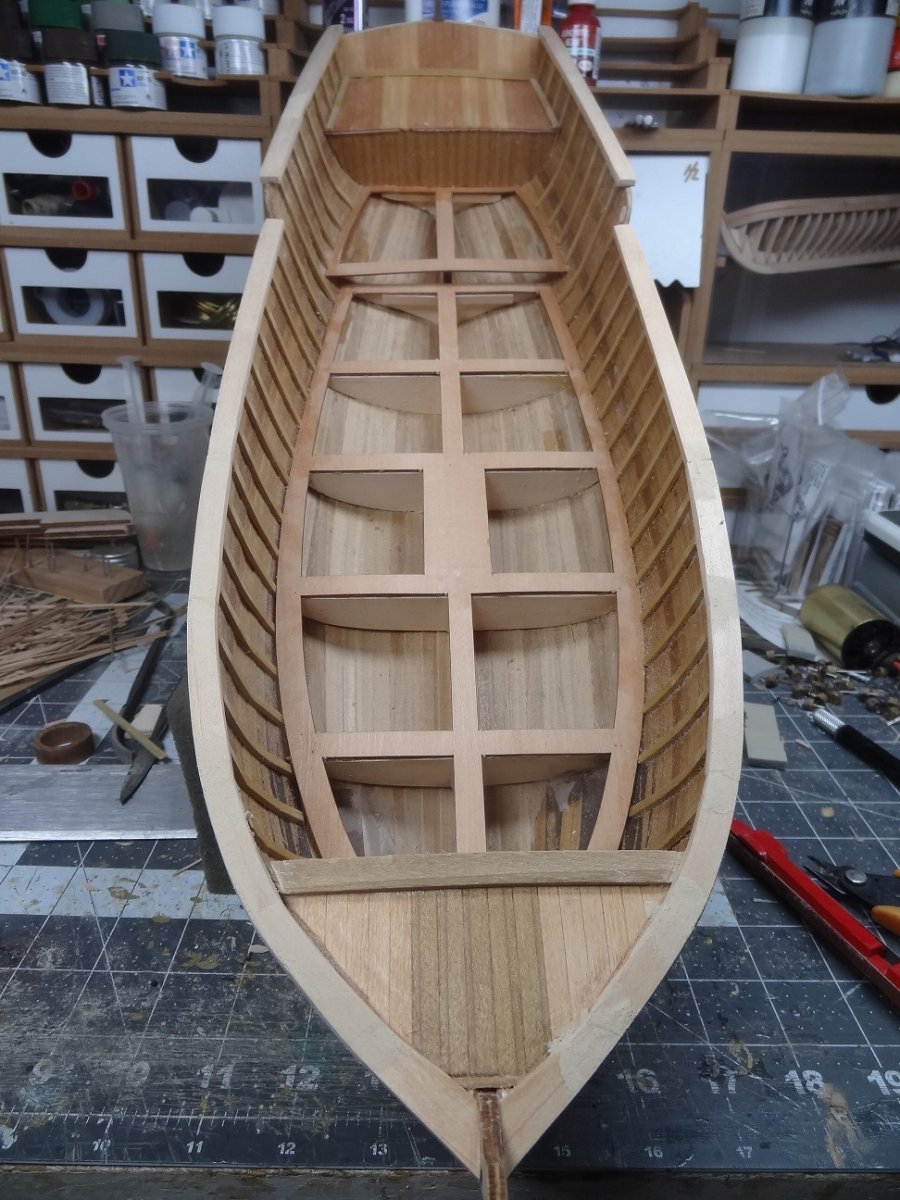
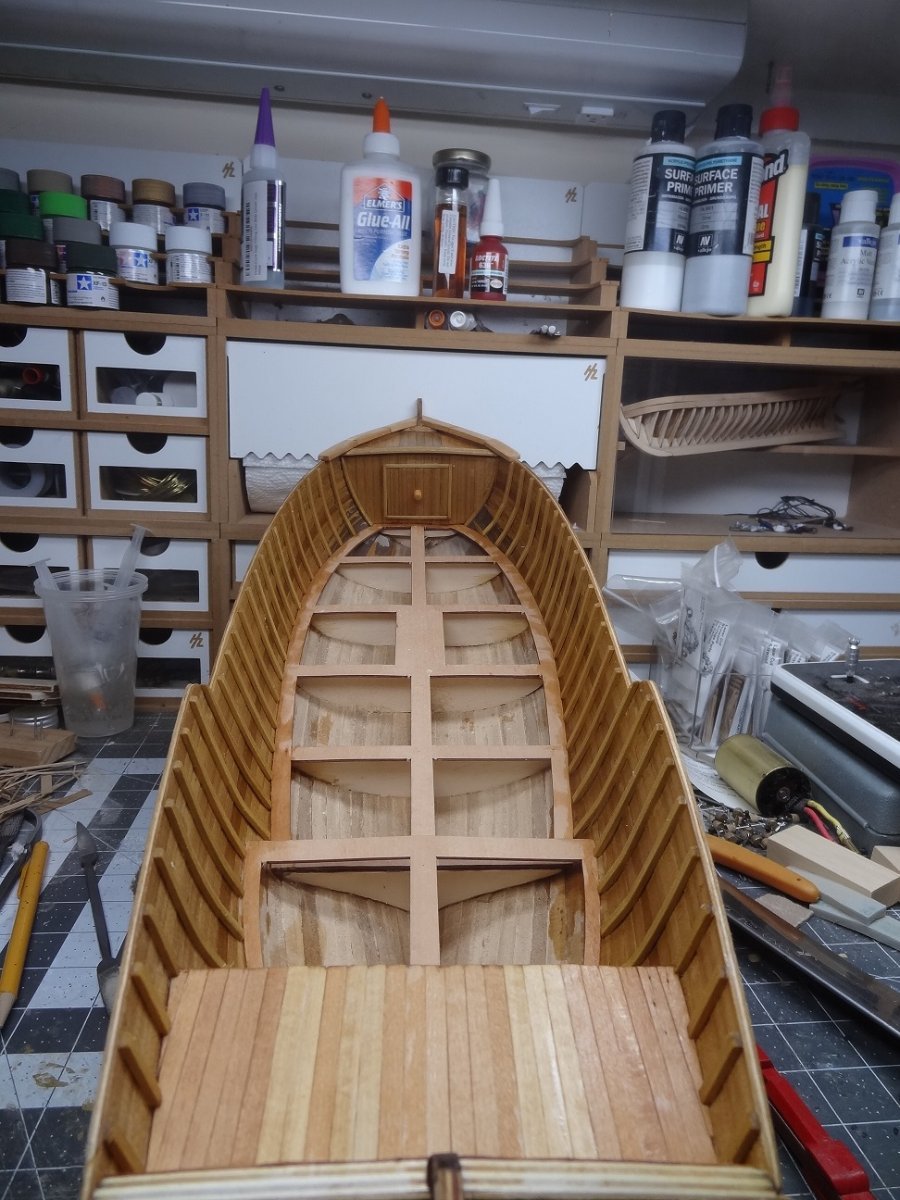
Still more going on with the hull interior. I will have to get back to the exterior very soon (see below). It has been fun working on the innards of the boat. A nice break from finishing the 3rd layer planking. A few pics of what has been done:
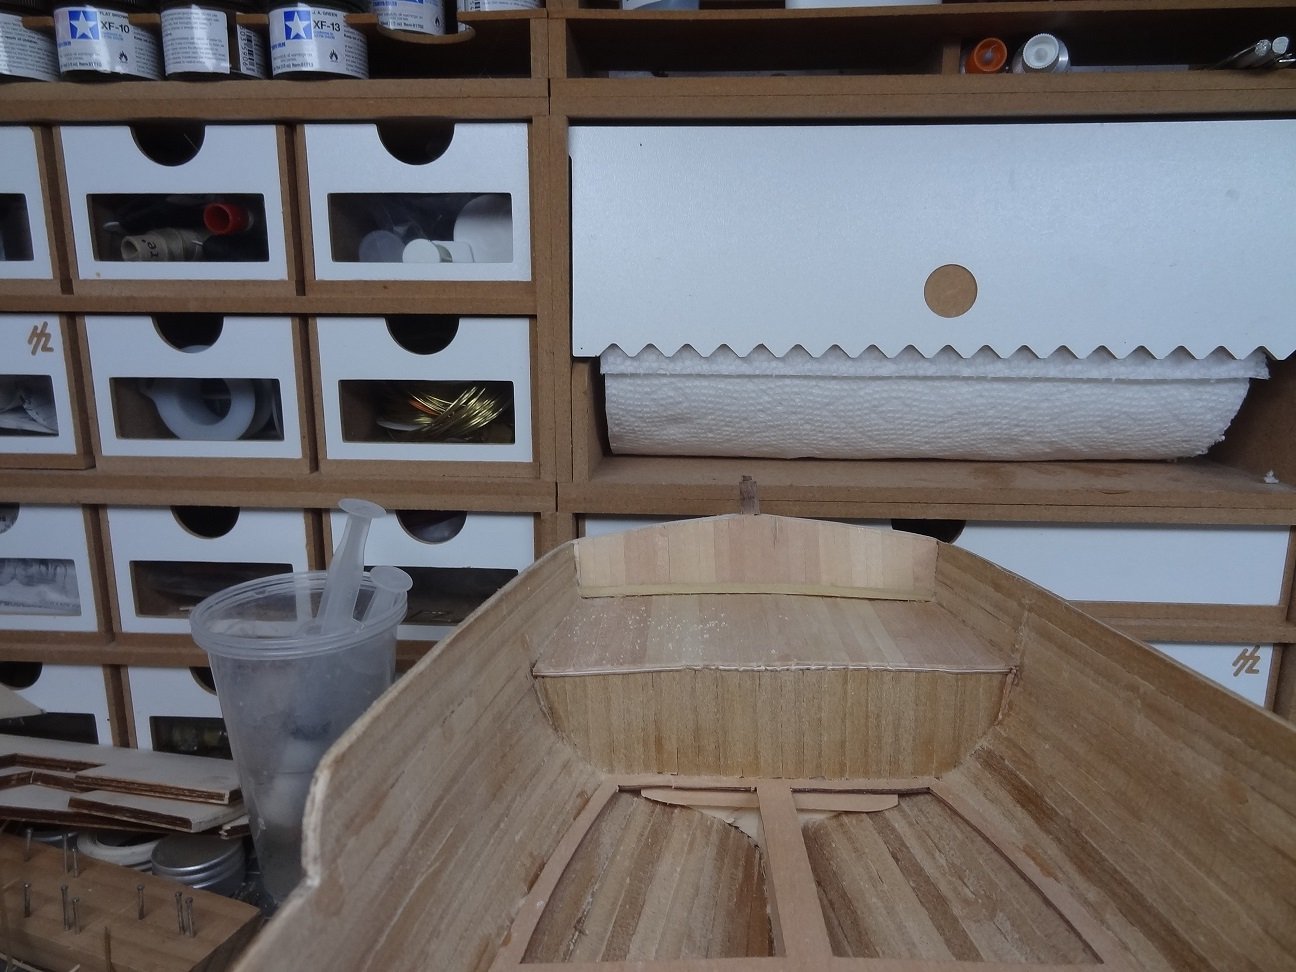

The biggest problem I see is that the instructions (if you can call them that) specify limewood for a lot of the trim. This wood is hideously ugly and when laid on top of some shredded walnut looks absolutely pathetic. And somewhere down the line I expect the instructions to say "just paint all the limewood". I say this because the limewood pieces look totally hideous. They are going to have to be colored somehow and it would be way easier to paint them before they are glued to the build.
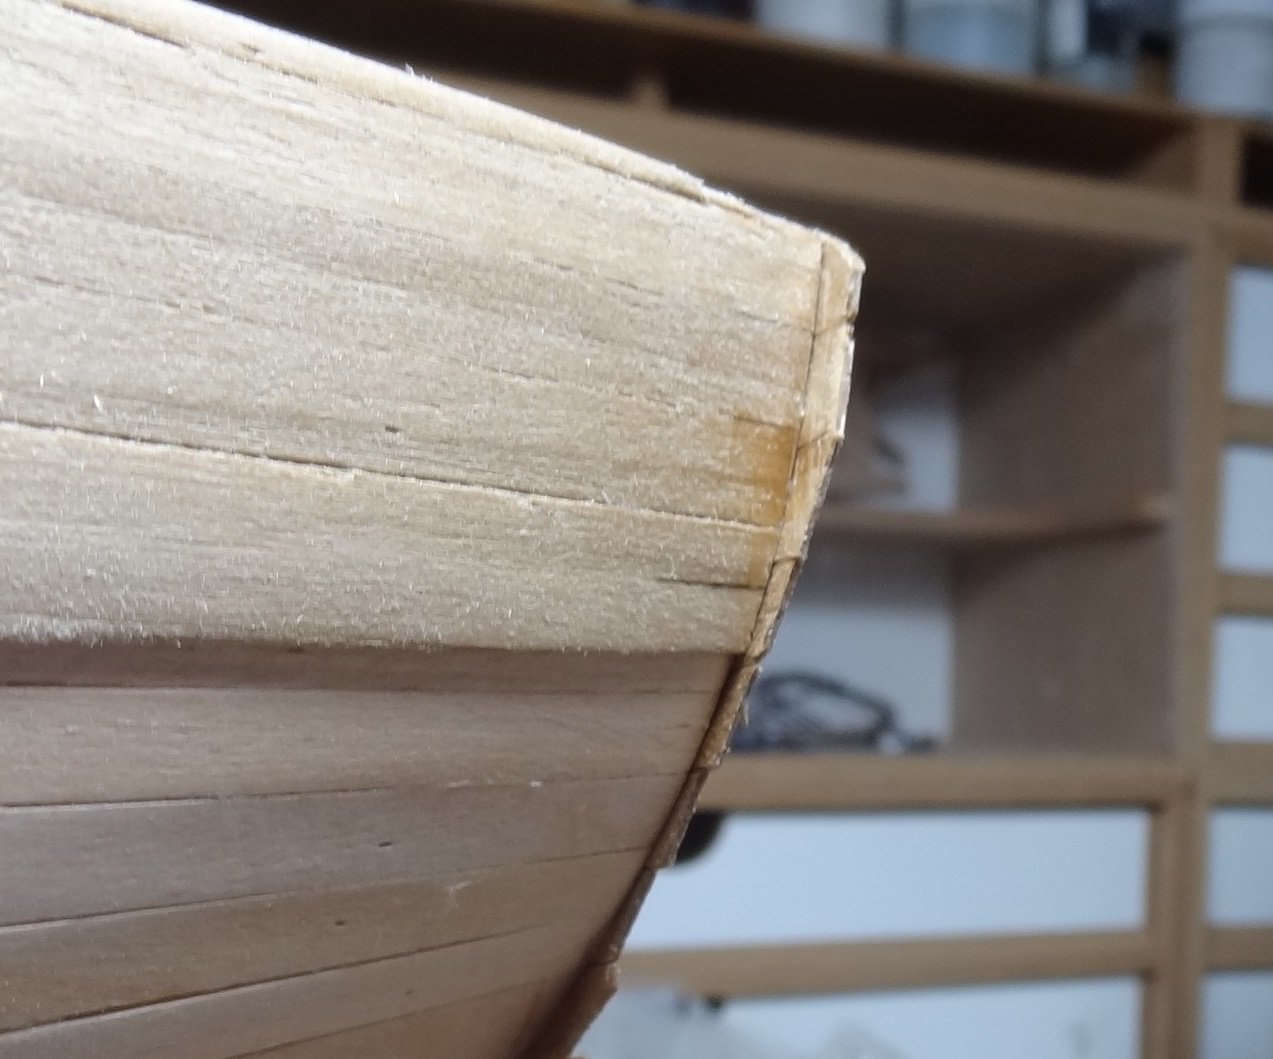
I did finish off planking the transom and was about to trim up the edges when I realized that I can't do that until I complete the 3rd planking.

So, sadly I will need to get back to the 3rd planking. Yup, I'm a procrastinator for sure, but the time has come. 😒
-
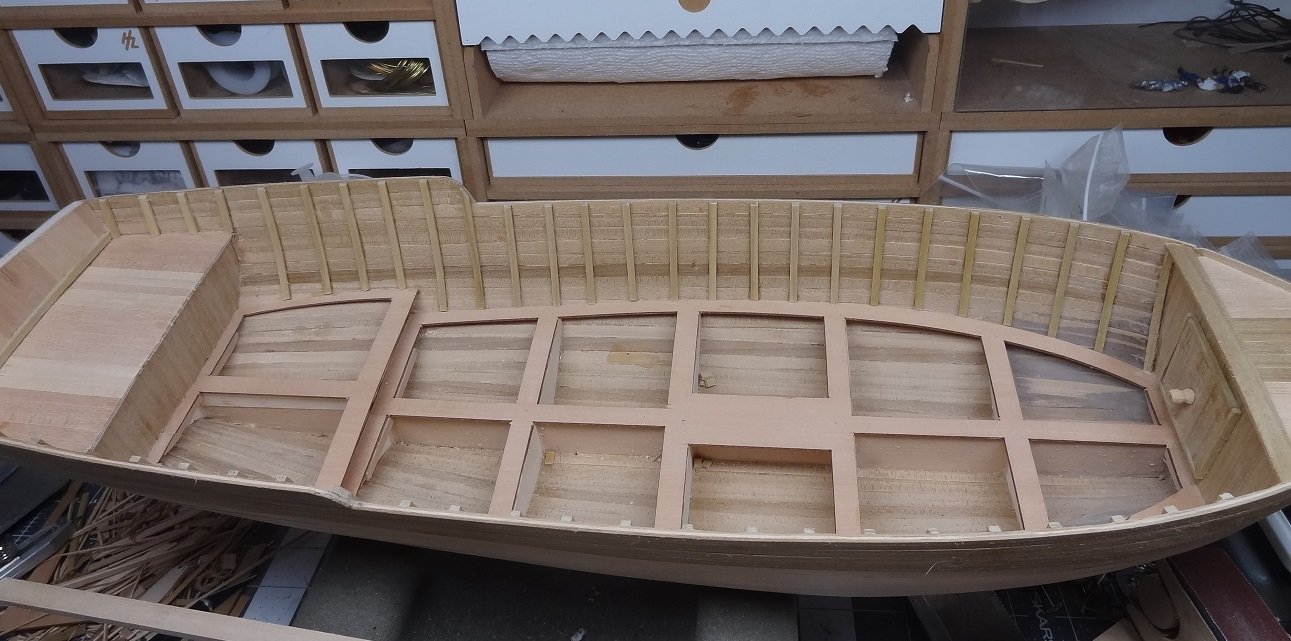
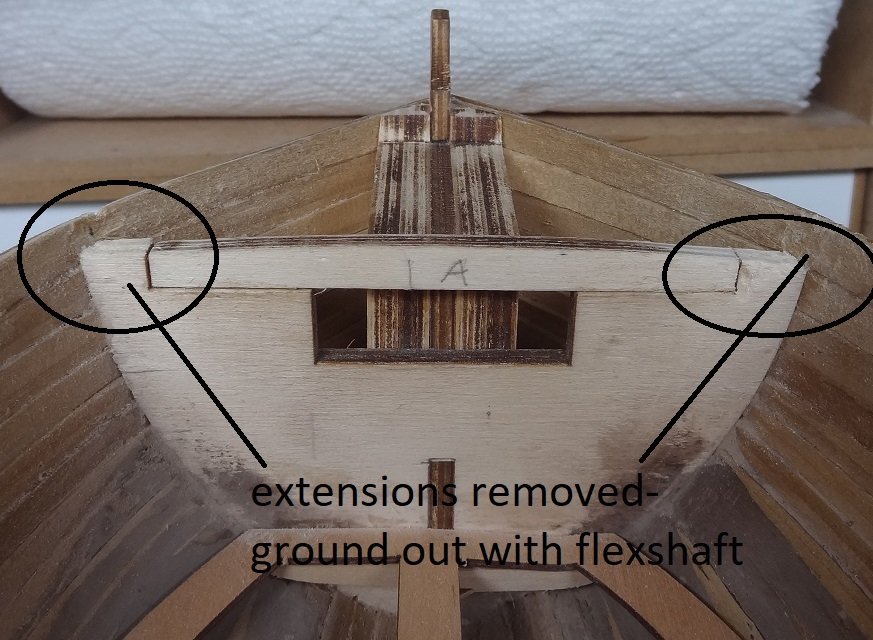
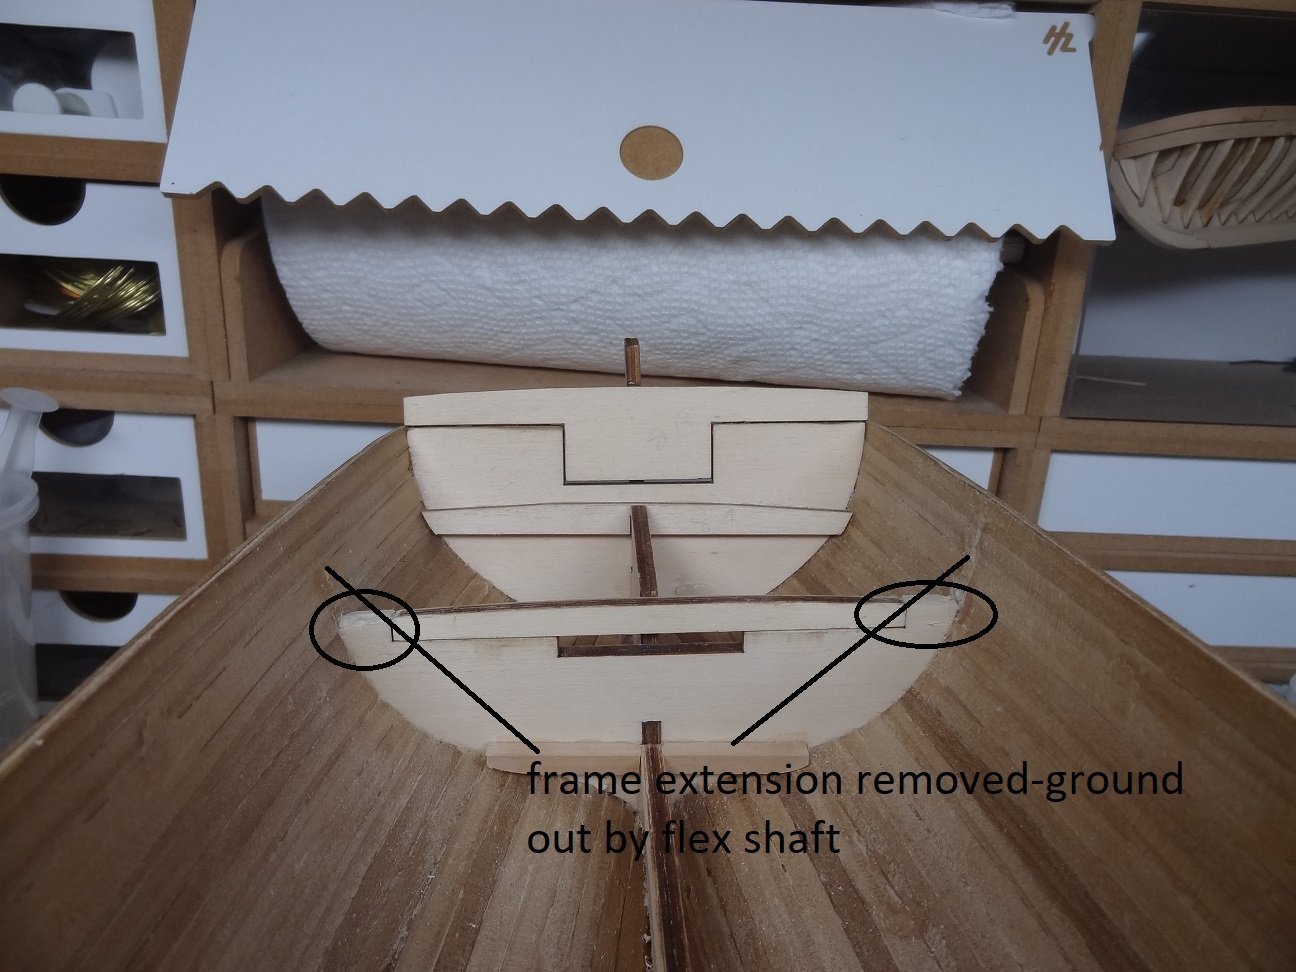
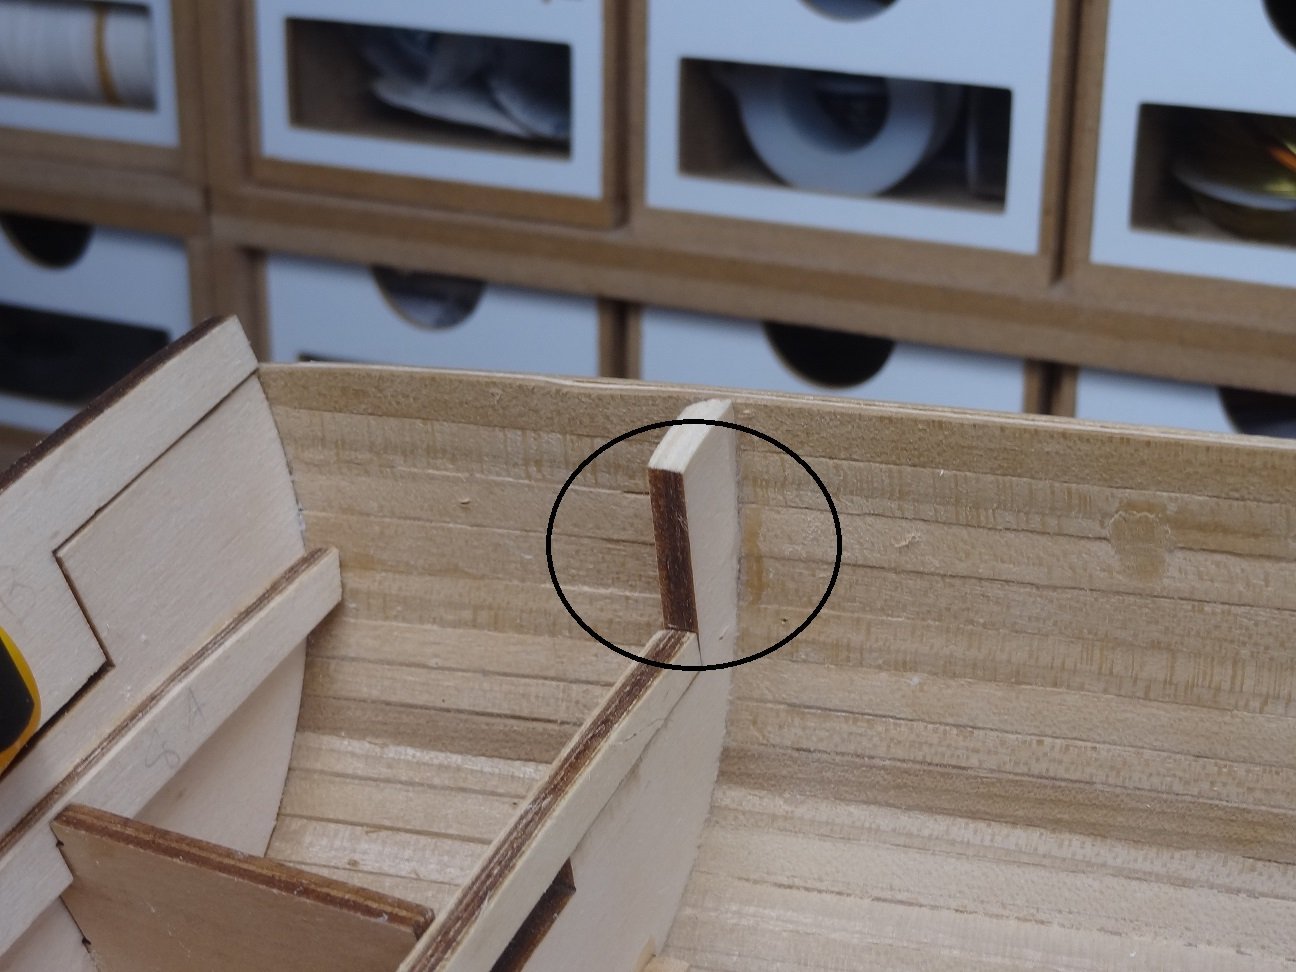
As stated above I had to grind out all the extensions. The planking at all those points, broke off easier than I had anticipated. It took a little sanding to remove all the crusty glue remains from the inner hull.
As I have begun to apply the various deck base pieces a few pics will show how pathetic the fit actually is. Some I was able to sand down to make a reasonable fit. Others just simply suck.
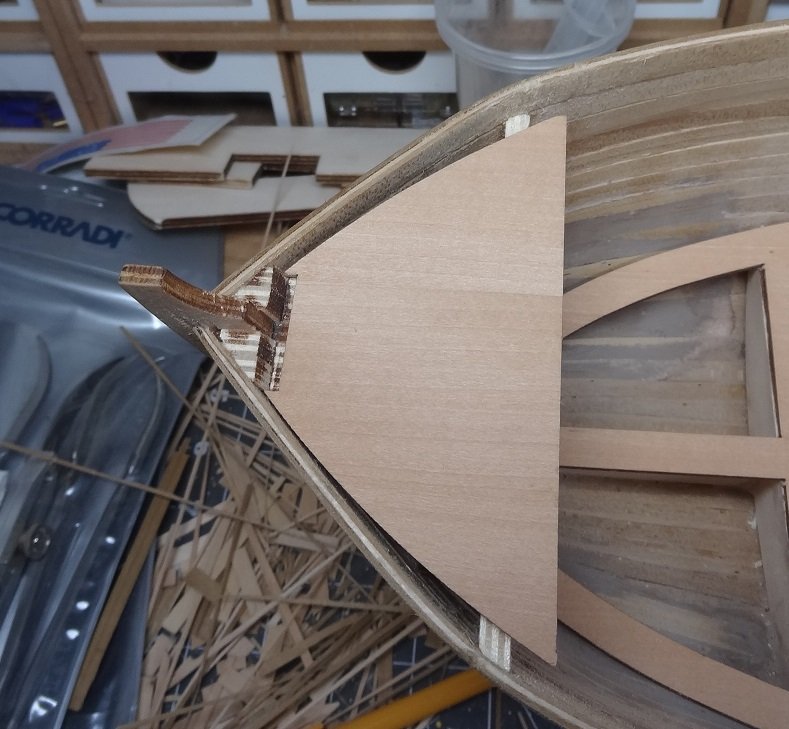
Most likely the deck planking will end up covering the big gaps.
And then there are some frame pieces that have some sort of chunk taken out of them and then a separate piece that fills in the same chunk. This has happened on multiple occasions.
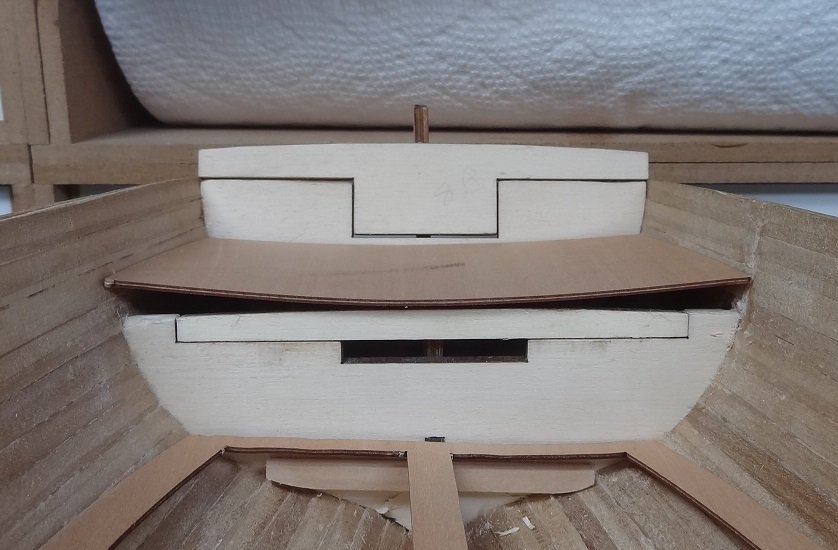
I mean really WHY? How stupid can it get?
My laziness has me working on the hull interior rather than finishing the 3rd hull layer. I discovered one big screw up this evening. While working on the interior I have been using wood from the same bundle that was supposed to be used for the final planking. WRONG! I kinda happened to remember that there was another bundle of sticks still remaining in the kit box. Some of those sticks are supposed to be used for all the decking planks. So I have been using the wrong sticks to plank all the decks. Hopefully I will have enough plank sticks to finish the hull.
The fun never ends.....
Apparently the editor has gone bonkers again. Not sure why the above pic has been embedded again. I can't delete it.
-
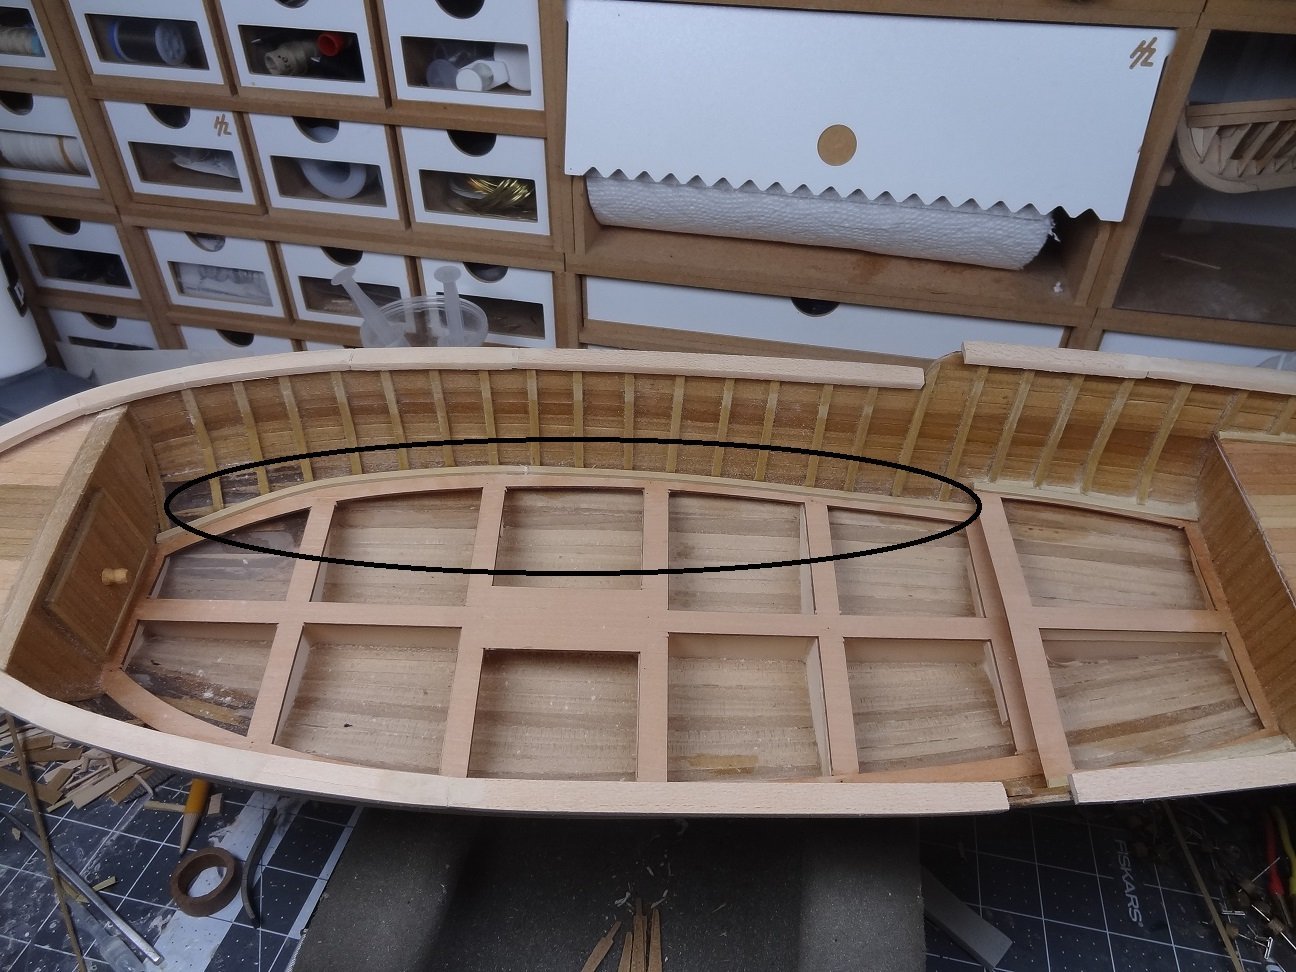
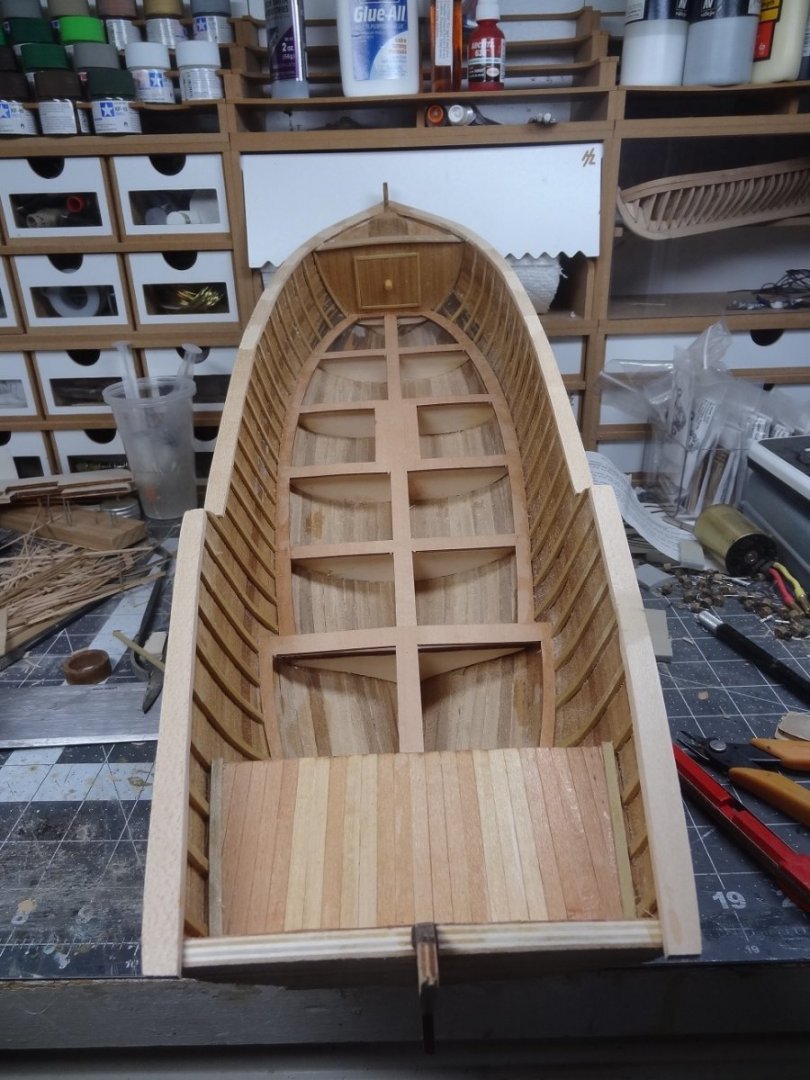
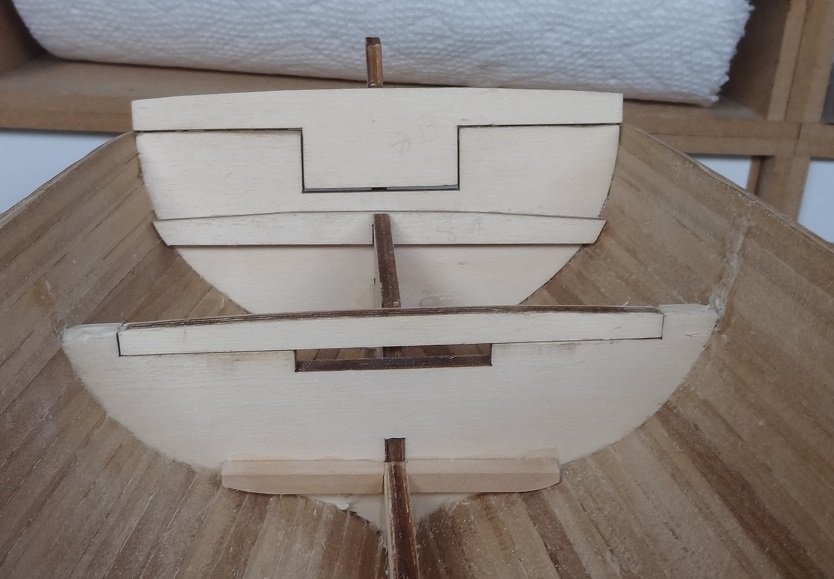
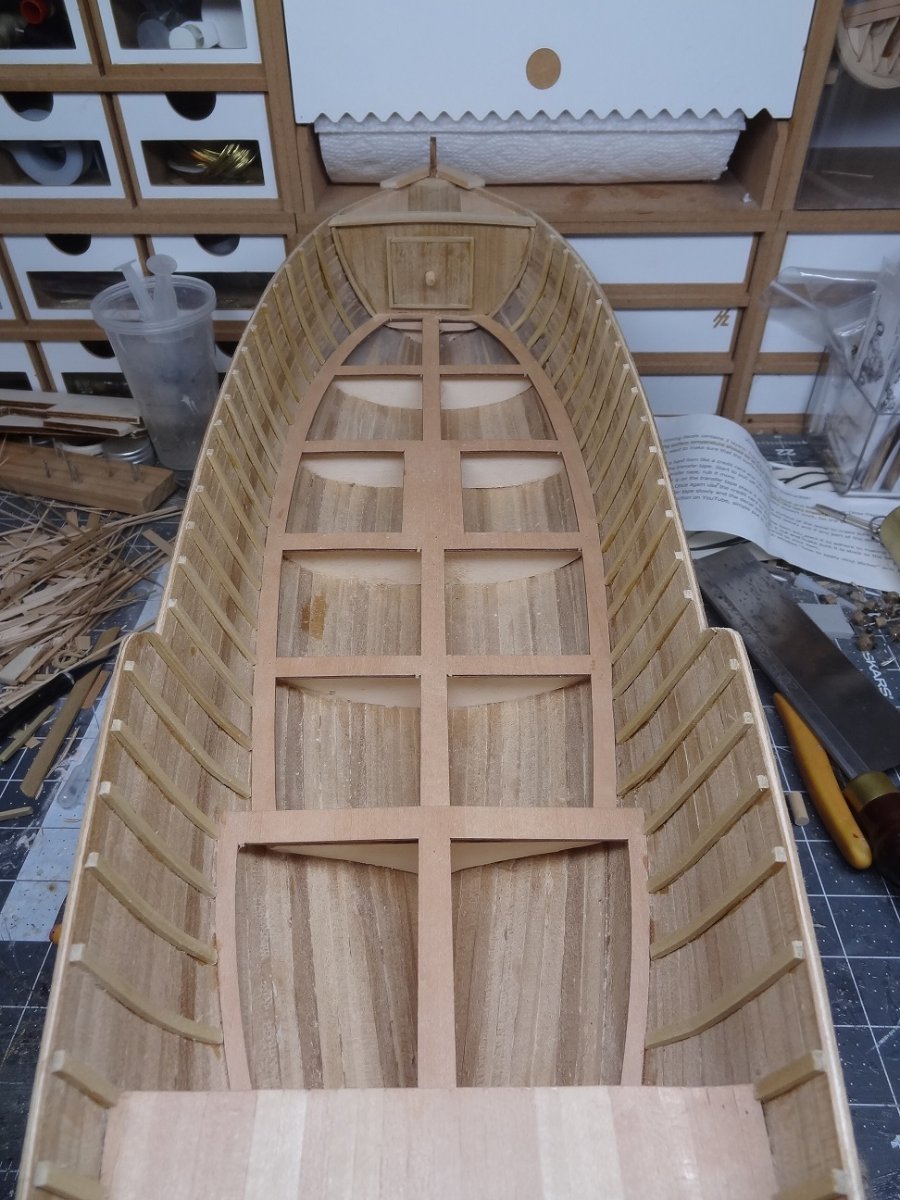
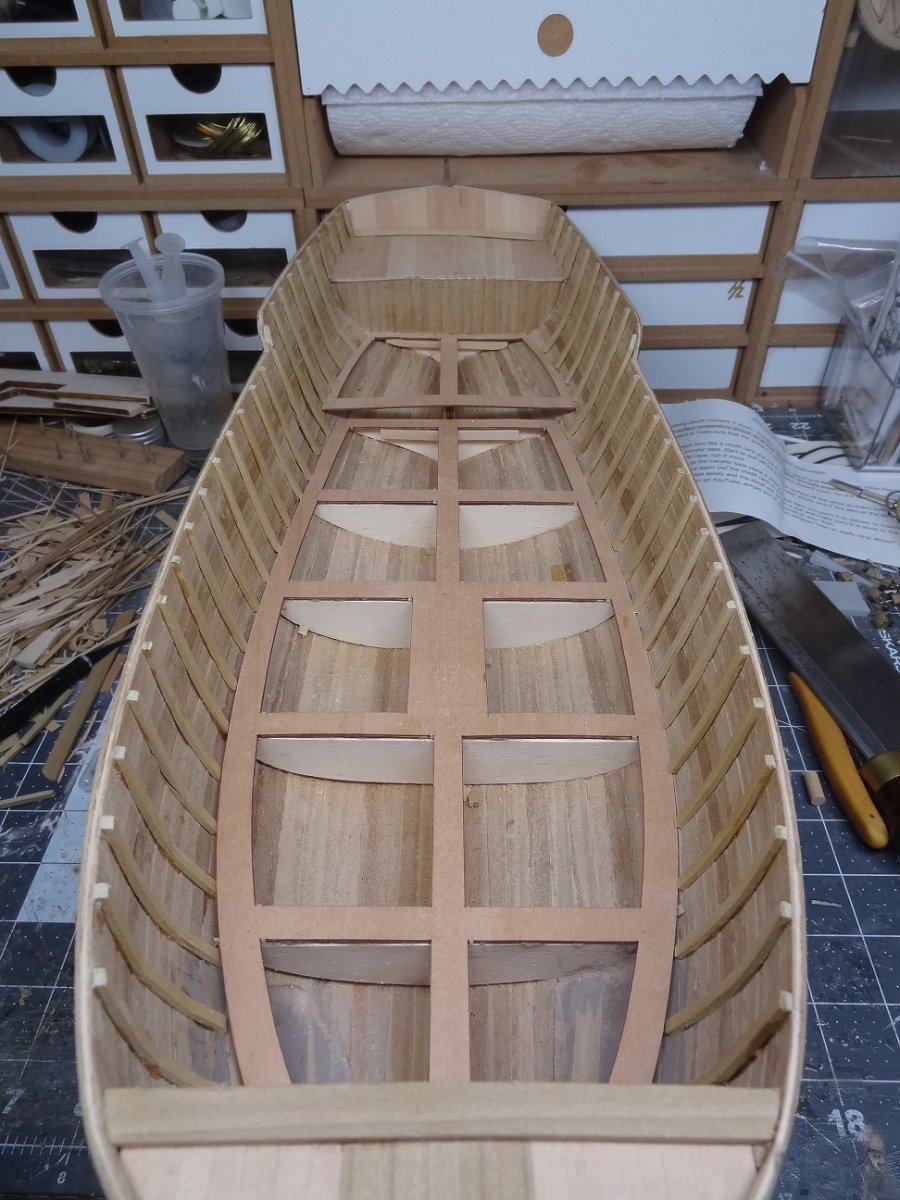
While still futzing with the 3rd plank layer, I have realized that I can start working on the interior components. There are 4 "deck" levels. Each has a base layer cut from a laser template. Every base will be be planked. Here is the biggest base.
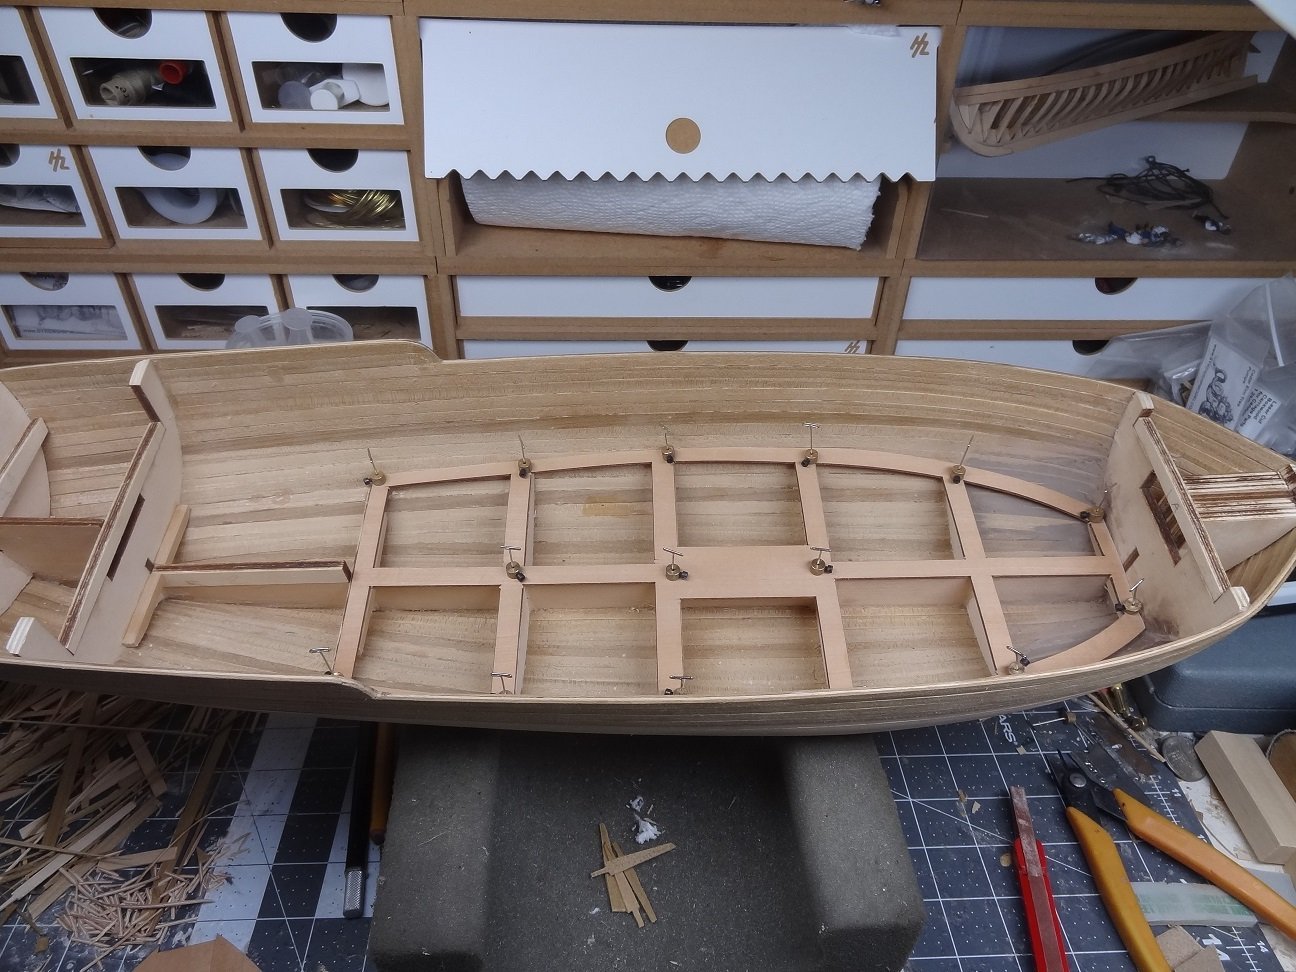
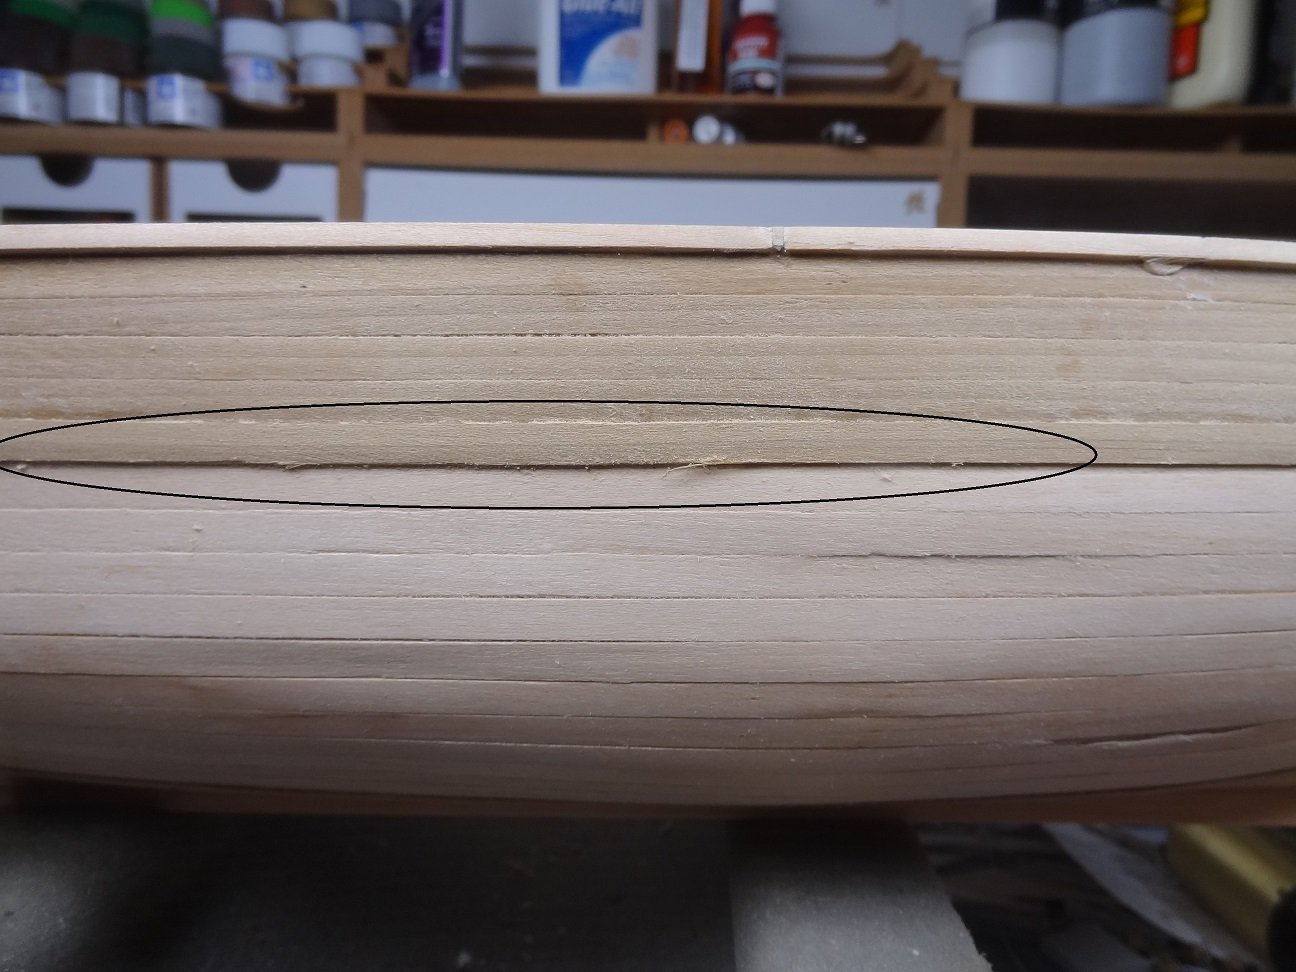
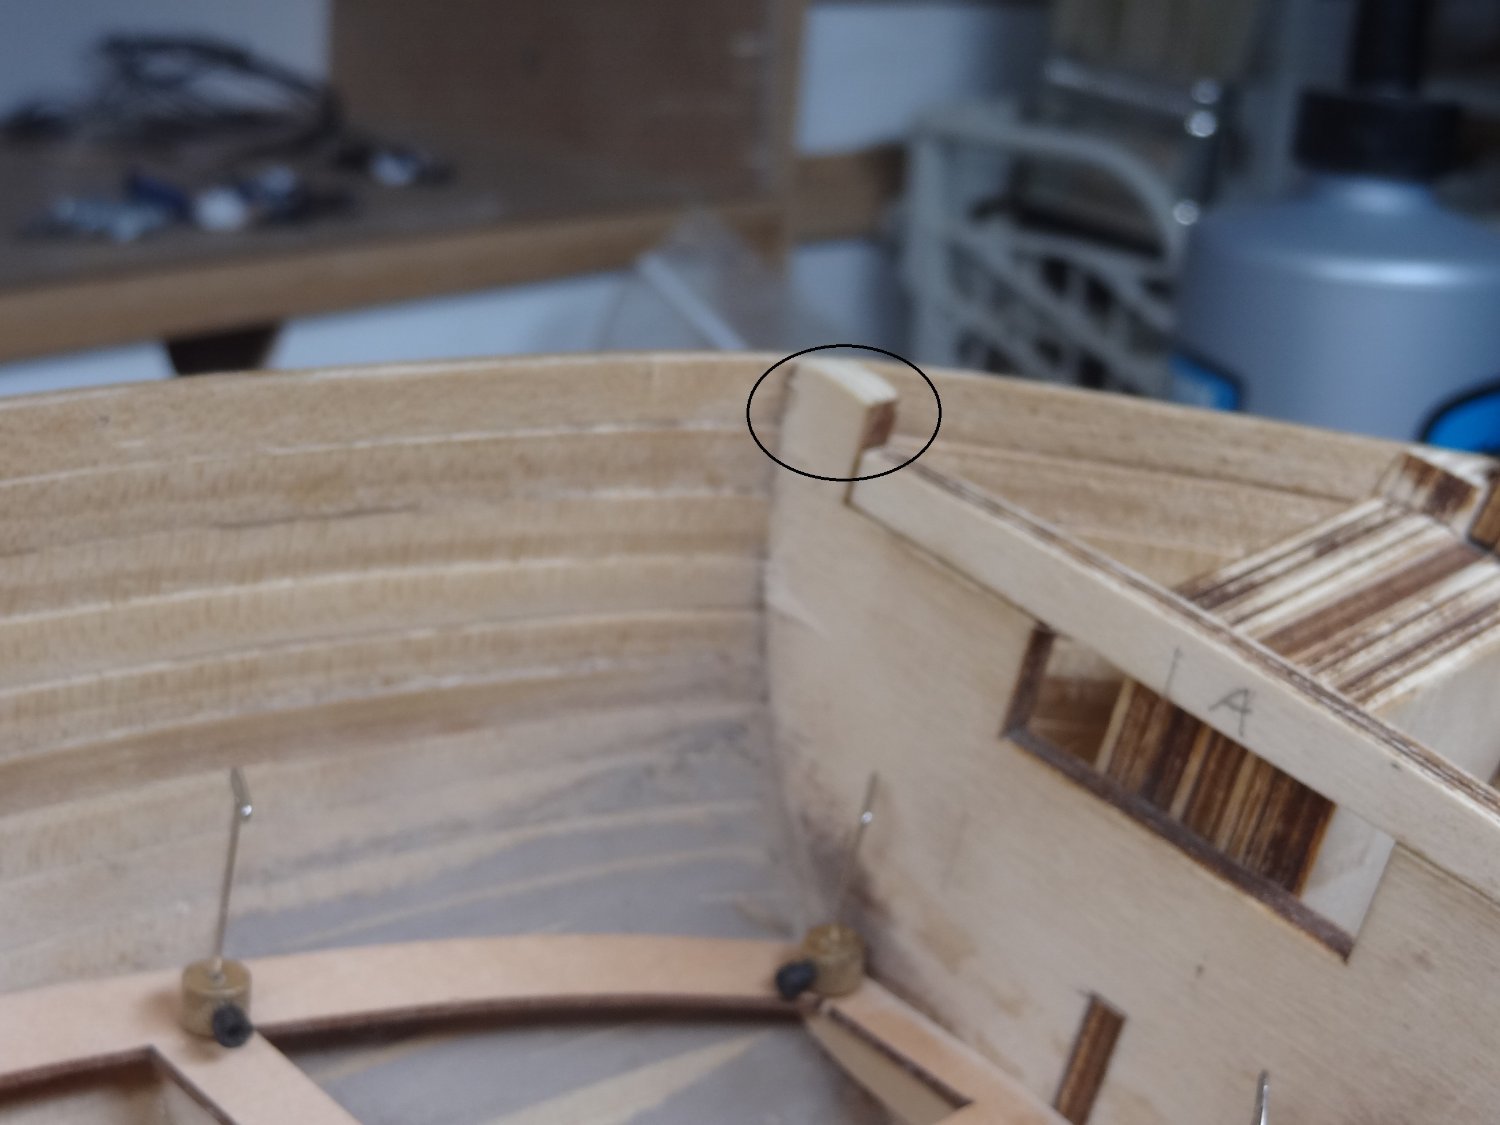
There is one serious problem that is coming up and I am not sure how to handle it. As I have mentioned from the start of this thread, most of the frames are breakaway, cut to allow for the top 2/3 of the frame to be broken off. You can see this in the above pic. You can also see that in the few remaining full frames (the 1st and the last) there is some extension at the sides.

Well now surprise, all of the circled material needs to be removed. The problem is that it is all plywood. Thick stuff. It will not be removed with a knife. Given the position, it will also not be removed with some sort of handsaw. So WTF? The only thing I can think of is to break out the Foredom flex shaft and grind it all away.
If anyone has a better idea please let me know.
I guess I need to rag on Panart a bit more. According to plans, those frame extensions looked like they were going to be permanent and like a fool I glued plank strakes to them. Now not only do the extensions have to go, but all the strakes have to be unattached from them. Another pitiful design decision.
I will already start to warn anyone - Panart kits are extremely difficult to work with. Materials are sub par, instructions/plans are really bad - they often contradict each other. If you are a beginner, I would look elsewhere for something to build.


Old NRG Article on Deck Plank Spacing
in NAUTICAL RESEARCH GUILD - News & Information
Posted · Edited by mikiek
Kurt - obviously your call, but I have to ask how will the rest of the world find this article? Ok, I got it from a PM but that doesn't help the masses. You say the same info is available elsewhere - then where? It seems like this is an easy move to the NRG How To forum.
Please Understand - I am not trying to create a stir, but the article used to be in the NRG forum. Why can't it be added? And frankly why was it removed?
In the end, our site is trying to help modelers understand situations and how to deal with them. Ulises write-up is quite valuable in a number of situations.