
HOLIDAY DONATION DRIVE - SUPPORT MSW - DO YOUR PART TO KEEP THIS GREAT FORUM GOING! (Only 13 donations so far - C'mon guys!)
×


mikiek
-
Posts
2,276 -
Joined
-
Last visited
Content Type
Profiles
Forums
Gallery
Events
Everything posted by mikiek
-
 Hey Tom - As you finish out the guns, don't forget to be aware of a few eyebolts/rings that should be on your deck in between a few of the guns. You don't need to do anything with them right now but make sure they are still accessible. I believe there are also a few on the inner bulwark as well. Just make sure you can still reach them.
 -
Yeah - no kidding. I'm ready to buy and still don't see the page. It's 12:13am CDT. No purchase options available.
-
Midnite in what part of the world? 🙂
-
Will you update your site web page for Flirt then? I realize I am a few hours early but I don't see a way to order.
-
Per - I can understand your friends obsession. It happened to me with Naval Action as well. Fortunately I was able to see the light and limit my involvement there now.
-
Hello Per and Darrell. Thank you for looking in. As I'm sure you guys know, it's a good feeling to get to this point. It has left me with NO excuses to not clean my workbench, which I did last nite. I can actually see the countertop again.
- 136 replies
-
- 1
-

-
- enterprise
- constructo
- (and 1 more)
-
Your blanket makes an interesting diorama 😜
-
I thank everyone for the likes and comments. And now a bit of good news, rigging is finished. Kinda sorta. I got shorted 4 pins. These are the white wooden ones - no idea what size. I do happen to have some walnut pins in the same size but they would look a little funky next to the white ones so I'm painting them to match. Should be dry in an hour. Ropes are already threaded thru the pinrail so all I have to do is drop the pins in place. On a side note, speaking of paint. I haven't painted anything in probably 2 years. All my paints - Tamiya - are sitting in the garage which gets pretty hot and fairly cold at times. Tamiya uses a different type of top on their jars. None of the metal top with cardboard seal inside. It's all plastic and apparently seals very well as the bottle I used had the paint in perfect condition. I was impressed. If I remember you can buy just the bottles to store colors you have mixed. I still have jars of colors that I used for Niagara. So next is the usual tidying up. I'm gonna use a compressor and blow some air around to clean up the deck. Then tighten sail rigging, clip the excess rope and make and hang the coils on the pins. I do need to check what kind of stand comes with the kit. This one is gonna go to my father for display at his place. He has been waiting a long time for me to finish this. So have I for that matter.
- 136 replies
-
- 2
-
-
- enterprise
- constructo
- (and 1 more)
-
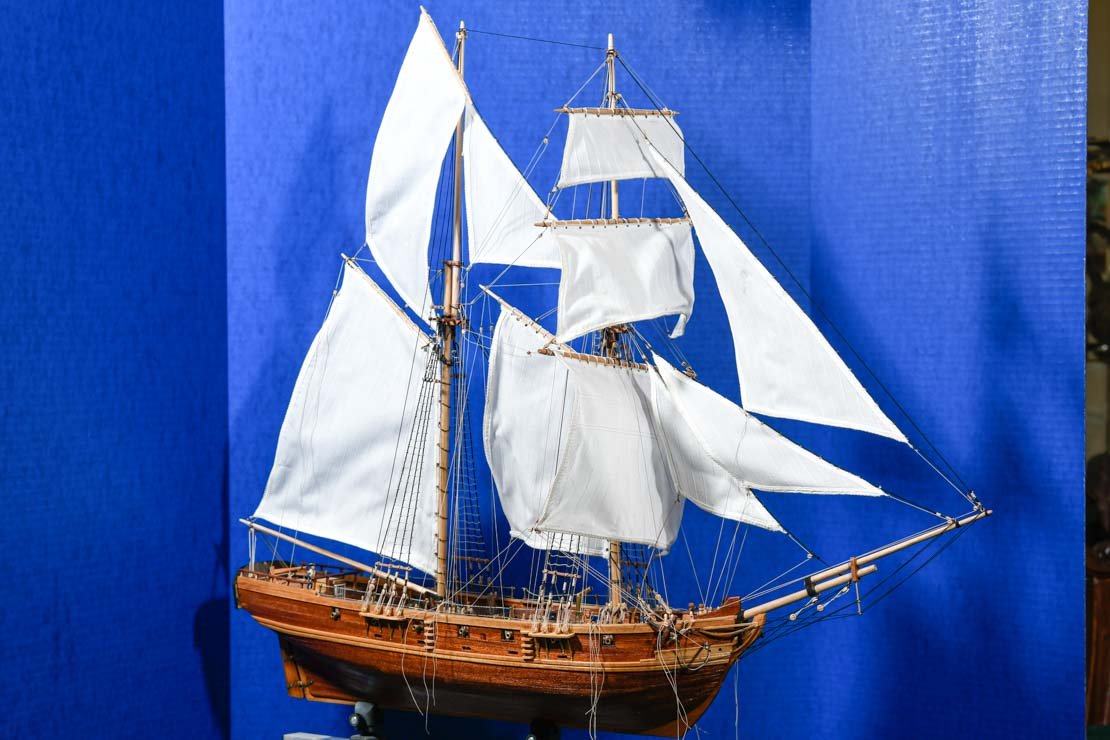
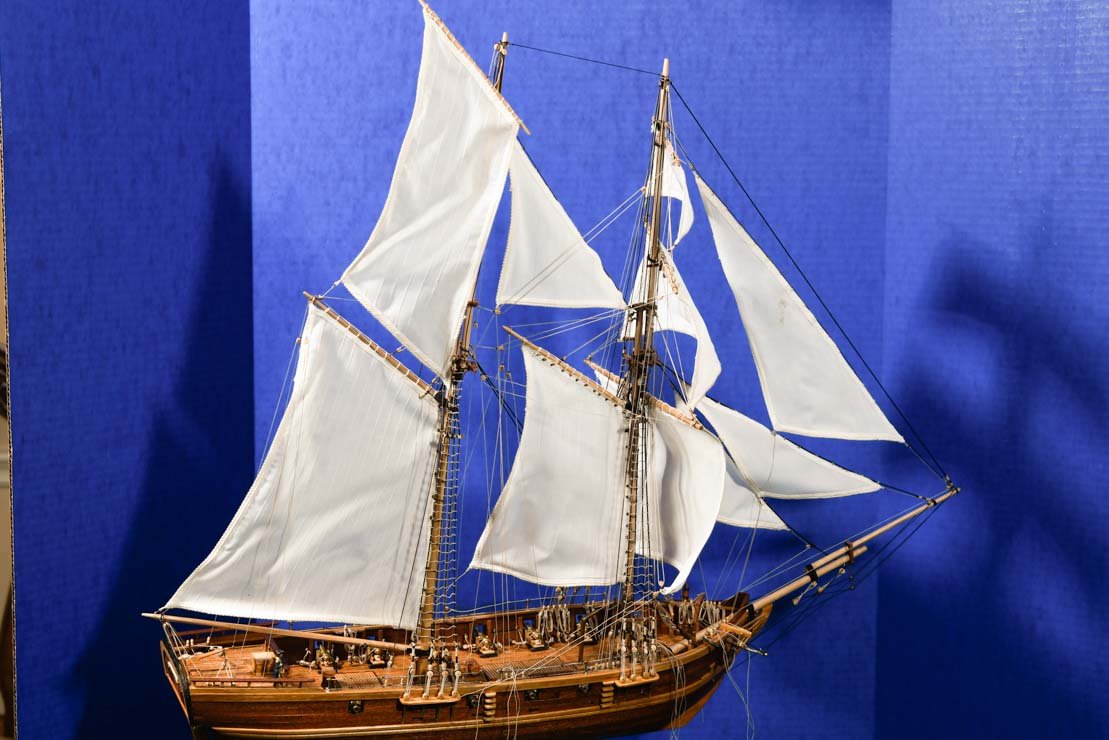
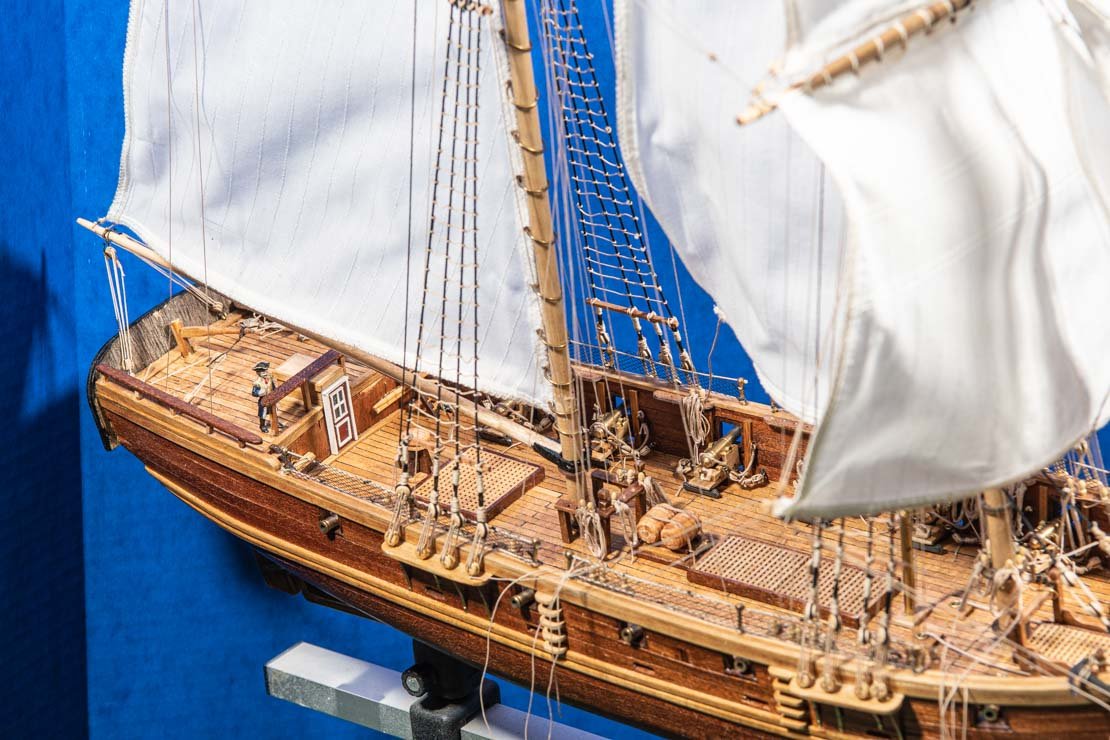
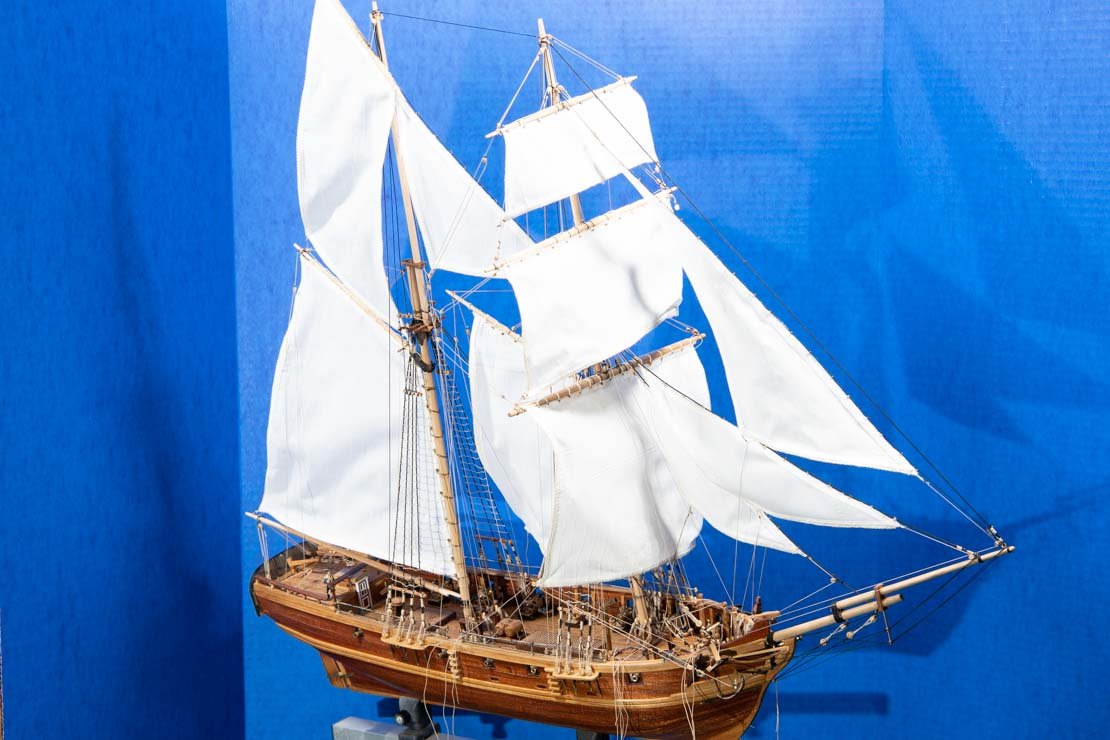
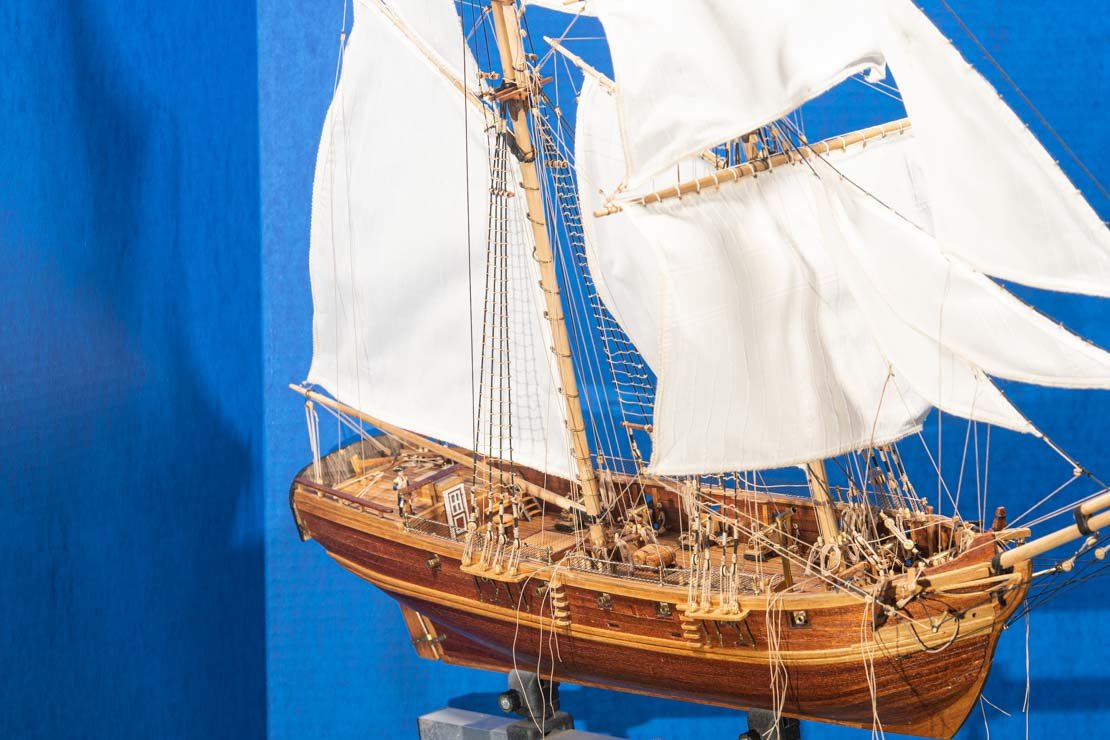
Of course I can't stand it. Wanna keep on keeping on. So I finished the starboard side (excess rope still in excess) Some of the sails are crooked because I need to brace the port side so I can even them out. I also wanted to take some pix so one thing led to another. So here's Enterprise from the starboard.

- 136 replies
-
- 6
-
-
- enterprise
- constructo
- (and 1 more)
-
The interior or your boat, both materials & colors is so cool looking. I'd love to see you take a few macro photos of that. I suspect it would be very realistic. Glad you got the cap rail off.
- 228 replies
-
- 3
-
-
- gunboat
- model shipways
- (and 1 more)
-
Wow Elijah - I'll consider myself lucky this time. All I had to do was snip a rope and restrop some blocks. I was reviewing the plans for the braces and came across a pleasant surprise. I guess I wasn't thinking but I had expected braces to be a weeks worth of work. At least given my limited availability. The plans show only 6 more ropes to install! Two per yard. I forget that Niagara was double masted with 4 yards per mast. Enterprise only has 1 mast with square sails and only 3 yards on that mast. I got most of the starboard side done tonite. I could be finished rigging tomorrow!! I do still see a good 1-2 weeks of cleanup, tightening rigging and placing coils. But the little light in the dark looks more like a headlight now.
- 136 replies
-
- 2
-
-
- enterprise
- constructo
- (and 1 more)
-
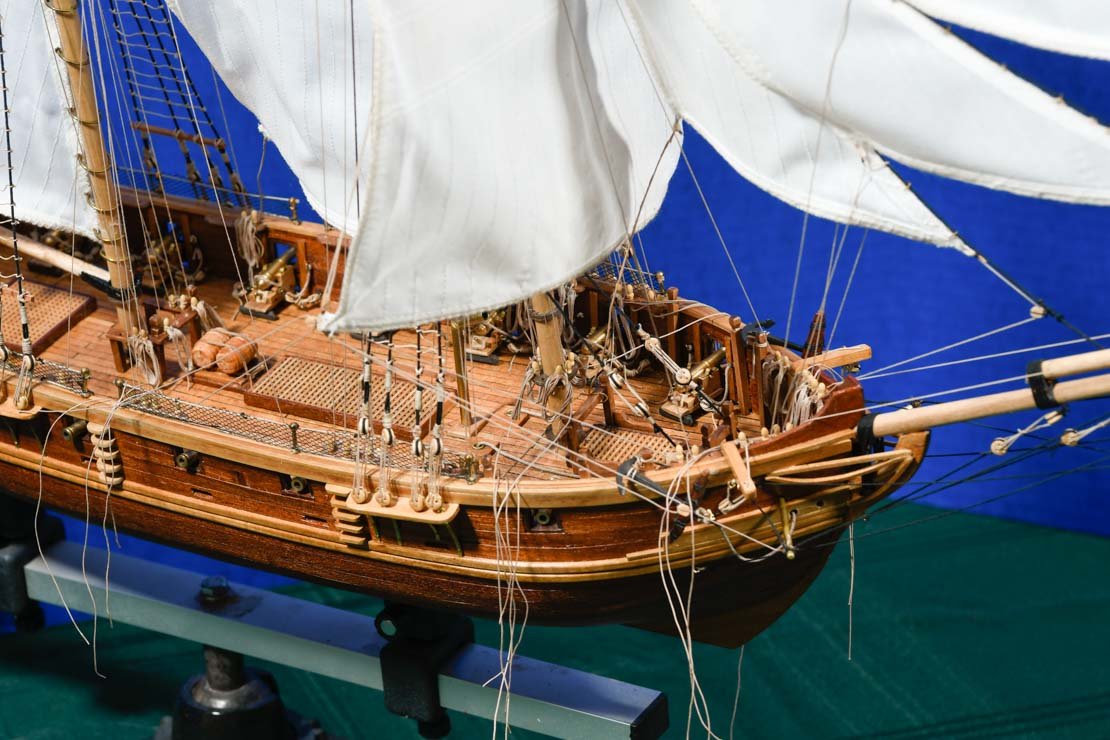
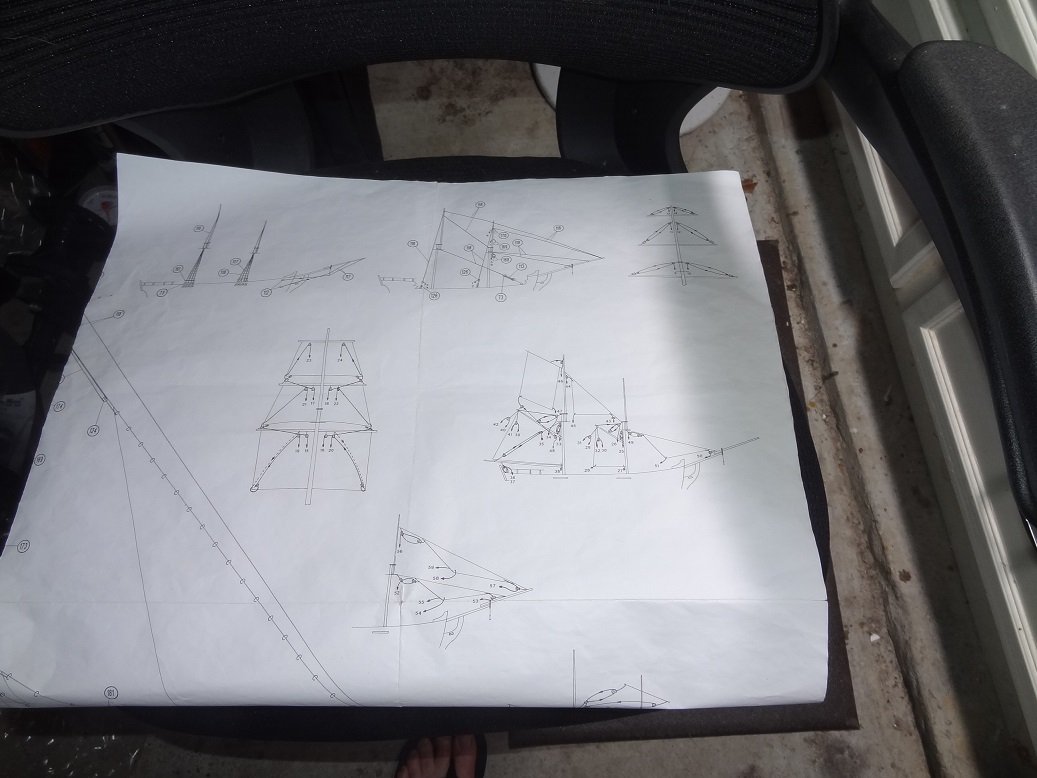
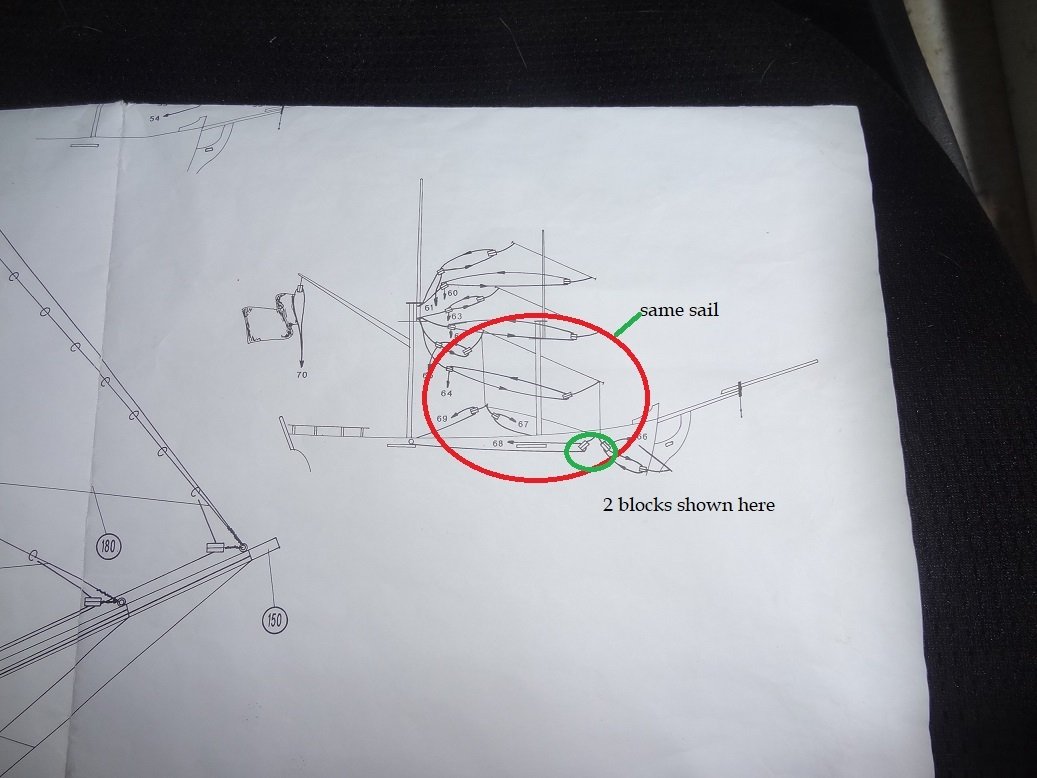
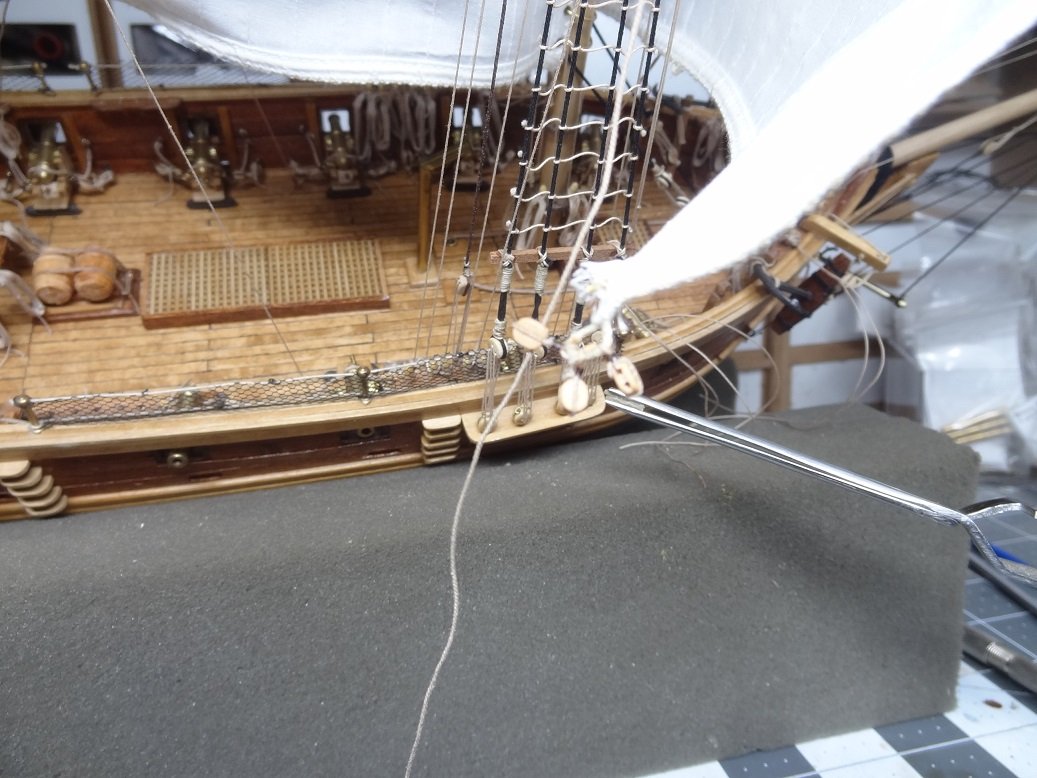
MORE REWORK ☹️😩😠 - the rigging plans were done a little different than some. Instead of one large drawing with all the rigging shown, Constructo chose to break out the drawings into smaller units. There are I think 8 drawings all together. I like this approach as it helps me localize my effort on a certain sail or mast and the drawings are much simpler and less crowded. A lot harder to overlook something. Or so he thought. It turns out that in several places - the foot of the fore mainsail for instance - different rigging is shown in more than one drawing. The clew of that sail shows 1 block hanging there in one drawing. So that's what I did. Unbeknownst to me there was another drawing showing 2 more blocks hanging off that same corner. So I had to remove the original block and strop 3 more to the eyeloop in the corner of the sail. That might have been easy if the sail was not installed yet (remember I have installed this sail twice so far) but when it is mounted and the eyeloop is about 8 inches in the air it gets interesting. And no way was I going to pull that sail a 3rd time. The Lauck Street seizing method saved my bacon again and I was able to get 3 blocks stroped to the eyeloop with the sail still hanging. A little piece of magic but it worked. Some of the various rigging drawings in the plan One drawing showing the sail corners I was referring to. Another drawing showing the same corners. Three blocks stroped to the sail eyelit. I can see the hem is getting frayed from all the abuse. But this time it should be right.

- 136 replies
-
- 4
-
-
- enterprise
- constructo
- (and 1 more)
-
Hi Rowboat - it will definitely take a few tries to get your technique worked out. But I think it will be worth it. Frapping can be used elsewhere - not just the gun tackles. So it's worth perfecting. I looked around on the site that I bought my kit from for the sail upgrade but did not see it. The other possibility, although unlikely, is that I bought the kit and most all my kits made in EU from a shop in the UK. Cornwall Models. It's been a while since I have bought another one but when I was buying them the euro kits are much cheaper from there. They don't pay import fees that we pay when a euro kit is shipped to a US shop for resale. They have a few kits that are literally 1/2 the price of the same kit by the same manufacturer sold in the US. Shipping is a little more maybe 10% but their turnaround is way better than any US shop I have purchased from. Orders usually arrive in 3 days by UPS. They have a huge selection of kits too. But any way maybe the euro version of the Constructo kit has different sails than the one they wholesale to the US. Sorry and the length of the Niagara log. I do have a tendency to run my mouth sometimes. And I did a whole lot of experimenting on the side for that build. A lot of that had to do with the fact that out of the box the kit is modelled after the current day replica which is not the same as the historical original. Given there are no plans for the original there was a lot of debate about historical accuracy in the log. Everything from the deck furniture to the colors of the boat.
- 136 replies
-
- 2
-
-
- enterprise
- constructo
- (and 1 more)
-
A scissor end might be pretty useful. I guess Amazon's supply is pretty limited. I don't remember seeing scissors or locking varieties there.
-
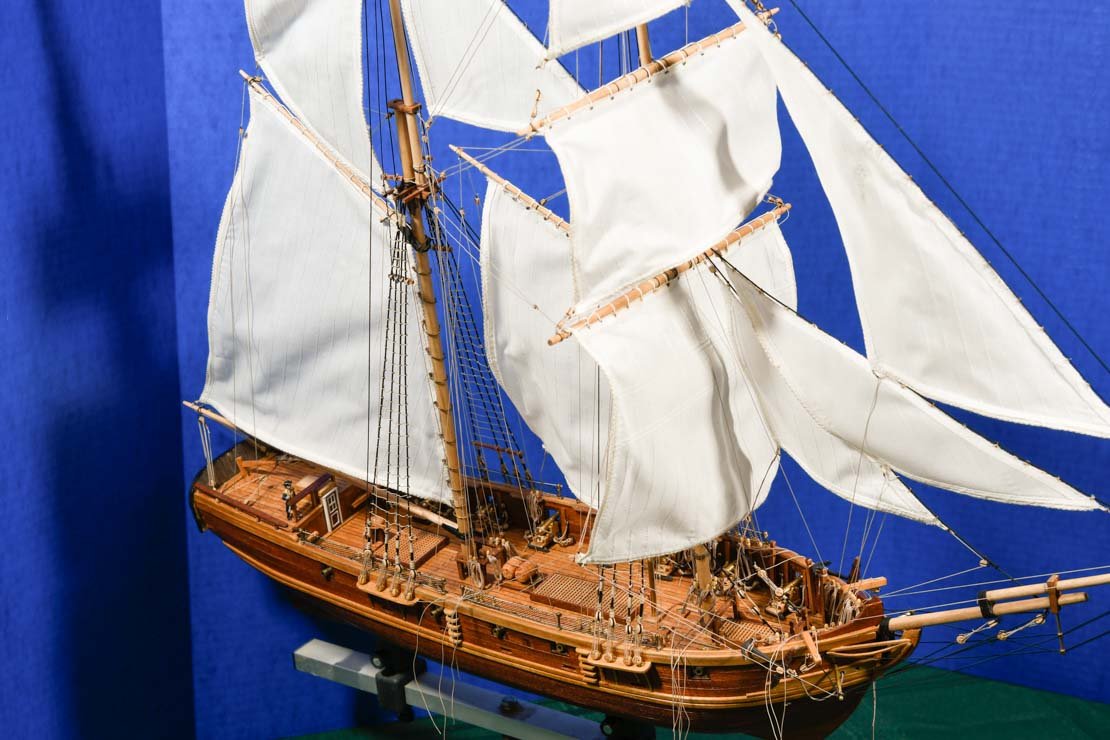
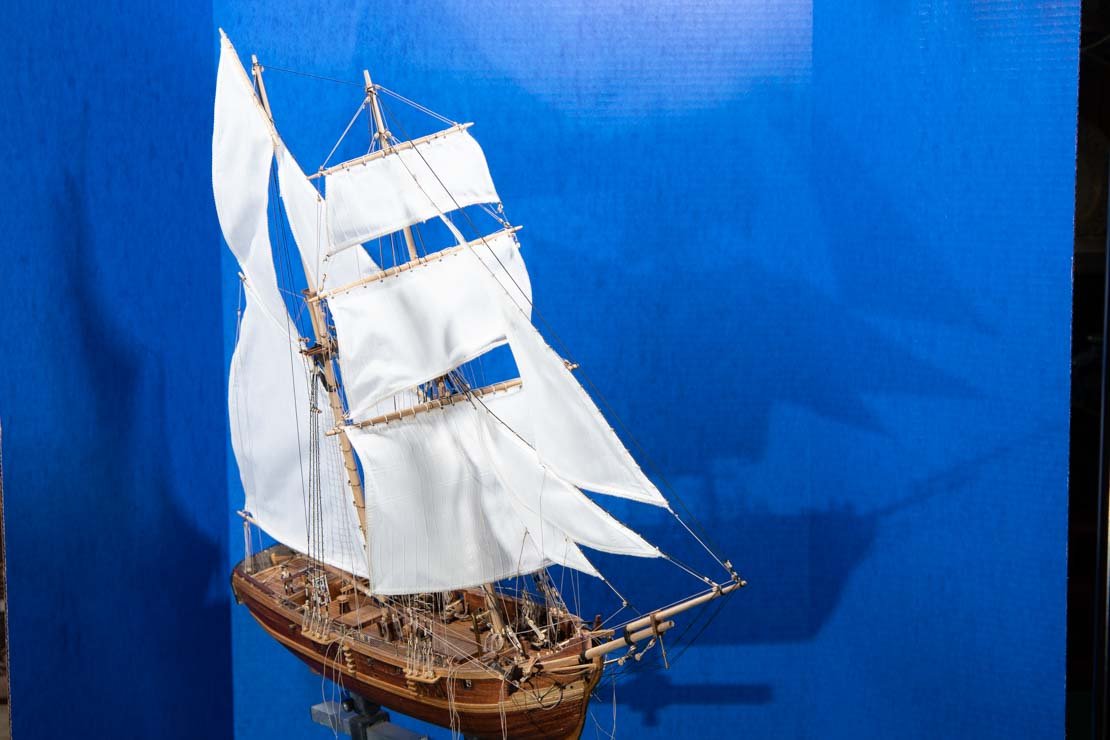
Hey Elijah - good to see you and I hope you are well. I went back to look at that pic again and as usual, I'm seeing all sorts of little things that don't look right. For one, my sails are starting to appear wrinkled. They had such a good shape to them after I starched and ironed the heck out them when I first put them on. They don't look so smooth now. Probably from big fat hands brushing them around.
- 136 replies
-
- 2
-
-
- enterprise
- constructo
- (and 1 more)
-
Good progress tonite. I have pinned and/or repinned all loose ropes. So everything is fastened down now. Next step will be a readjustment of all the ropes I can work with - the ones where I didn't glue the pins. The alligator forceps which I mentioned a while back were a huge help tonite. I posted a thread on them in the tools forum. Check it out. So a quick readjust and then I'll start in on the braces. The bad thing there is I will have to seize ropes to the yard tips - not an easy task when they are all installed. That's the last real task. After that more adjusting and finalizing the ropes/pins and then hanging coils on the pins. There is definitely a light shining in the darkness.
- 136 replies
-
- 2
-
-
- enterprise
- constructo
- (and 1 more)
-
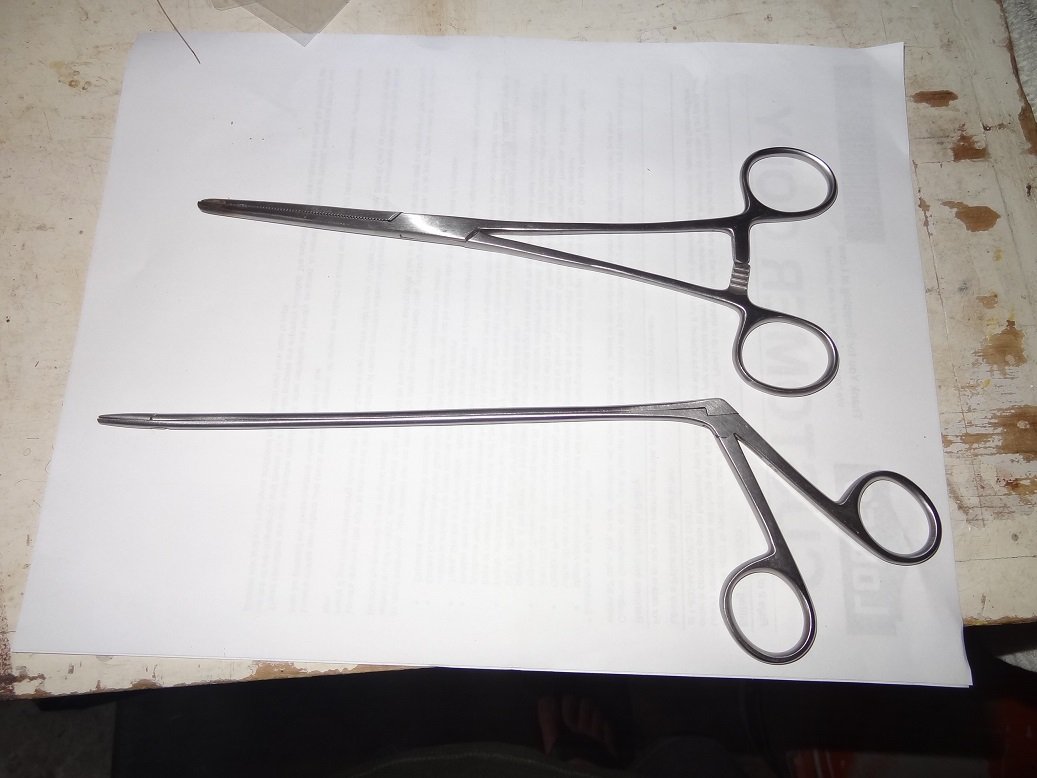
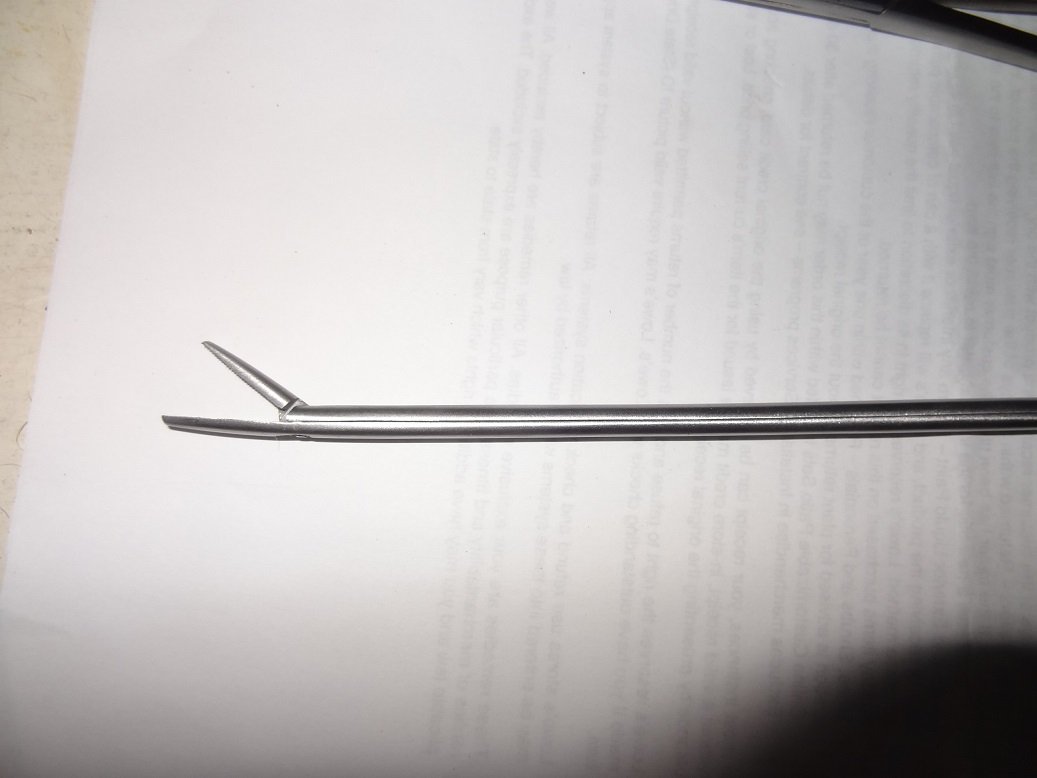
I did a quick search of this forum to be sure these haven't been posted before. Searching for alligator pulled up some threads that were referring to clips so maybe I am safe. This tool is an incredible help for rigging. I had never seen or heard of them before. I had to take my dad to the ear doctor and the guy had a whole tray of them. As soon as I saw them I perked up and my eyes opened pretty wide. Immediately all sorts of ideas are going thru my head. I'll put up the pix and see if you have the same reaction - assuming you haven't seen them before. I've put them next to the hemo's I have tried to use for similar tasks in the past just so you can see the difference in how they work. With the alligators I can literally reach into the boat from the starboard side and grab ropes on the port side. I have been using them all evening as I pin running rigging. The beauty of these is when you open them wide they don't spread open at the other end like regular hemo's or forceps will and that leaves you much more ability to work in tight spaces - see the comparison picture. They come in several sizes and are available on Amazon for a reasonable price. I am finding the longer ones are the most useful. As I am finishing up rigging on a build I have really been able to put a pair thru its paces and they are a real winner. I am able to grab some ropes, pins, etc that would have been impossible to do without them. Hope this helps some of you.....

-
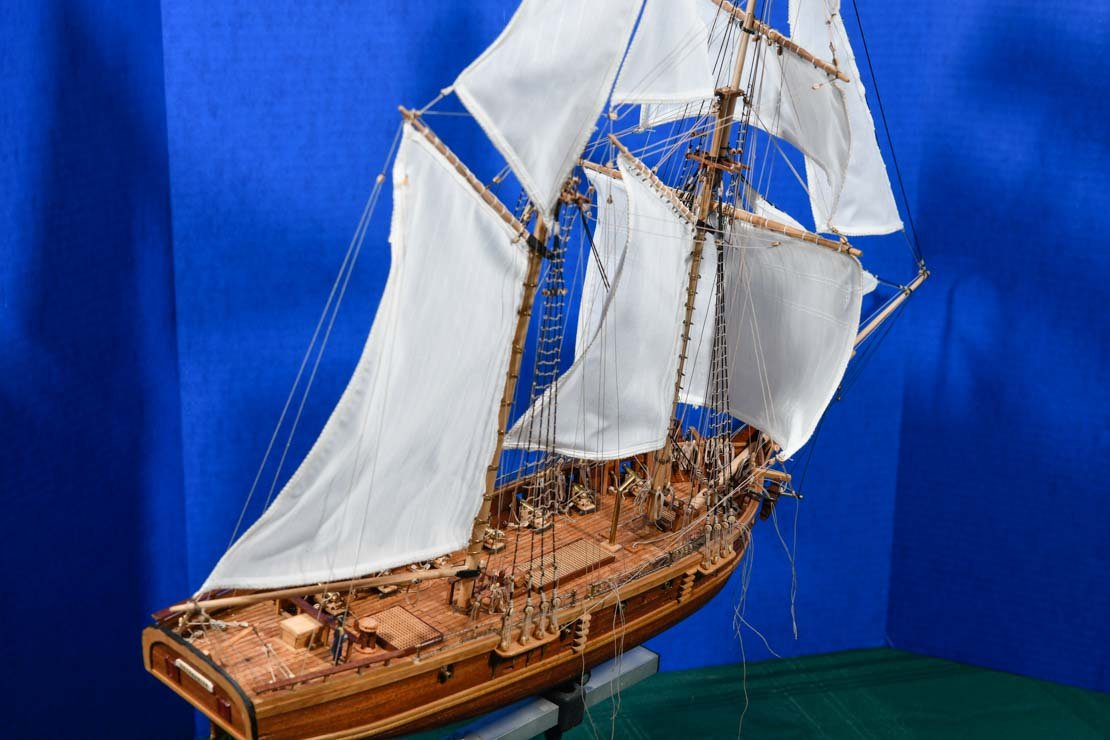
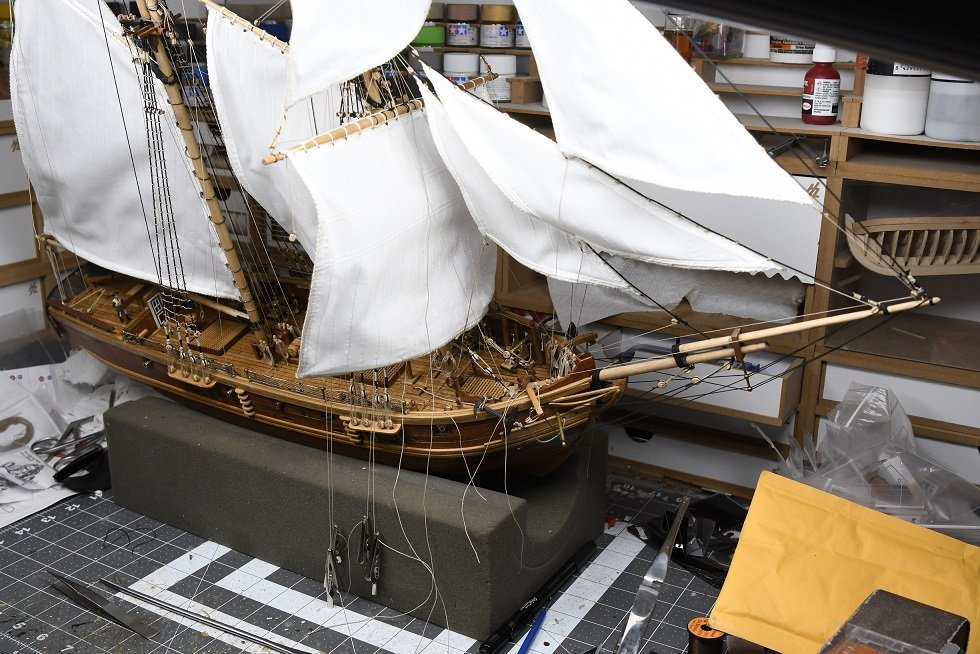
The mainsail is back on again but as you can see from the pic I have ropes dangling everywhere again. I hate re-doing stuff. Actually it's not quite as bad as it looks, the ropes with clips on the end need to be pinned but the others are just excess rope after being pinned. As I said earlier, from now on I will not trim ropes, glue pins or put rope coils on until the very last minute. This leaves room for a final re-tightening of everything and it's really going to need it. That may end up being the biggest lesson I learn from this rigging. So I better get used to leaving a mess until the final stages of rigging.
- 136 replies
-
- 5
-
-
- enterprise
- constructo
- (and 1 more)
-
Makes ya wonder where the model manufacturers get their ideas from 🤔 It's not too late to run the clew line down the back side of the sail.
-
I posted my question over in the rigging forum and got an answer. Kinda like I thought the rope (clew) is siezed to the yard and then run down the front of the sail to the corner. It is then fed into the block at the corner and run back up to a block on the yard, then down to the bitts. Hopefully I can seize a rope to the yard without taking the sail off 🤨 I need to get going on that - there are only 4 more loose ropes to pin down. That will be a pretty big milestone although there is still the braces to install. And I also gotta figure out something to do with the coils hanging on the pins. I'm leaning towards taking them all off and recoiling most of them. Then I still need to find a better way to make them naturally bend over the rail and hang down.
- 136 replies
-
- 2
-
-
- enterprise
- constructo
- (and 1 more)
-
Rowboat - the Niagara log on page 15 shows another way you could frap those tackles. Just a couple of pieces of thick wire stuck into a piece of wood. If you scroll down a bit farther there is a pic of a real gun with tackles frapped. That was the pic that set the hook for me. It's an awesome look and the deck isn't all cluttered. There is a trick you will be running into when you start pinning your rigging. The rope that falls from a sail or yard is pinned into the rail and then cut right under the rail. The coil that hangs over the pin is a second piece of rope. I debated doing something similar with the fraps. Lace up the blocks and cut the end near where it comes out of the block. Then use a second piece of rope to do the winding. No one will know but you. In the end however, I went with a single rope.
- 136 replies
-
- 2
-
-
- enterprise
- constructo
- (and 1 more)
-
Rowboat - thank you for the kind words. Niagara offered a lot of opportunity for many different types of construction and techniques. As far as how to for frapping, the 3rd hand tool will be your best bet. Just lace up your 2 blocks with rope then put the blocks in the alligator clips. Get the clips the distance you want the blocks to be - probably about 1". Take the rope as it comes out the last hole and pull it up to the opposite block. At that point tie a half hitch around the ropes right under the block and put a spot of CA to hold it there. Then just start winding the rope towards the other block. Not too tight. when you are done winding you can put in another half hitch the keep the rope from unwinding. The trick is having enough rope to wind almost back to the other block and dangle an inch or so to the deck without having too much throw away. So keep track of how much rope you use on the first few you do. I'll try to find some pix tonite.
- 136 replies
-
- 2
-
-
- enterprise
- constructo
- (and 1 more)
-
Hey Allan - This was not the only rigging diagram for the build. Instead of 1 drawing with everything, Constructo has about 8-9 separate drawings. Each with a small portion of the rigging. So it is possible that some of what you guys say are missing, may be on another drawing. I kind of like that approach as I can tackle small portions of the rigging and I'm certain that I have overlooked something - assuming the drawings haven't overlooked something. Unfortunately, none of the lines are labeled so it is difficult to follow along with what you guys are saying. I think my original question is resolved - I will sieze a line to the yard, run it down the front to the corner, lace it thru the block at the corner then up the backside to the block on the yard. It just seemed weird that a rope would be stretched down in front of a sail, possibly keeping it from filling completely. Probably just me thinking too much. Thanks to all for the feedback
-
Per & Allan - thank you for clearing that up. It's kinda what I thought but it just seems odd to have a rope laying on the front side of the sail. Seems like under a strong wind the ropes might keep the sail from filling completely. Allan - the thing you describe with the tack block. That isn't shown on these plans is it?
-
Per - there is no indication of how the rope is tied off. I'm guessing a loop siezed around the yard?