mikiek
-
Posts
2,276 -
Joined
-
Last visited
Content Type
Profiles
Forums
Gallery
Events
Everything posted by mikiek
-
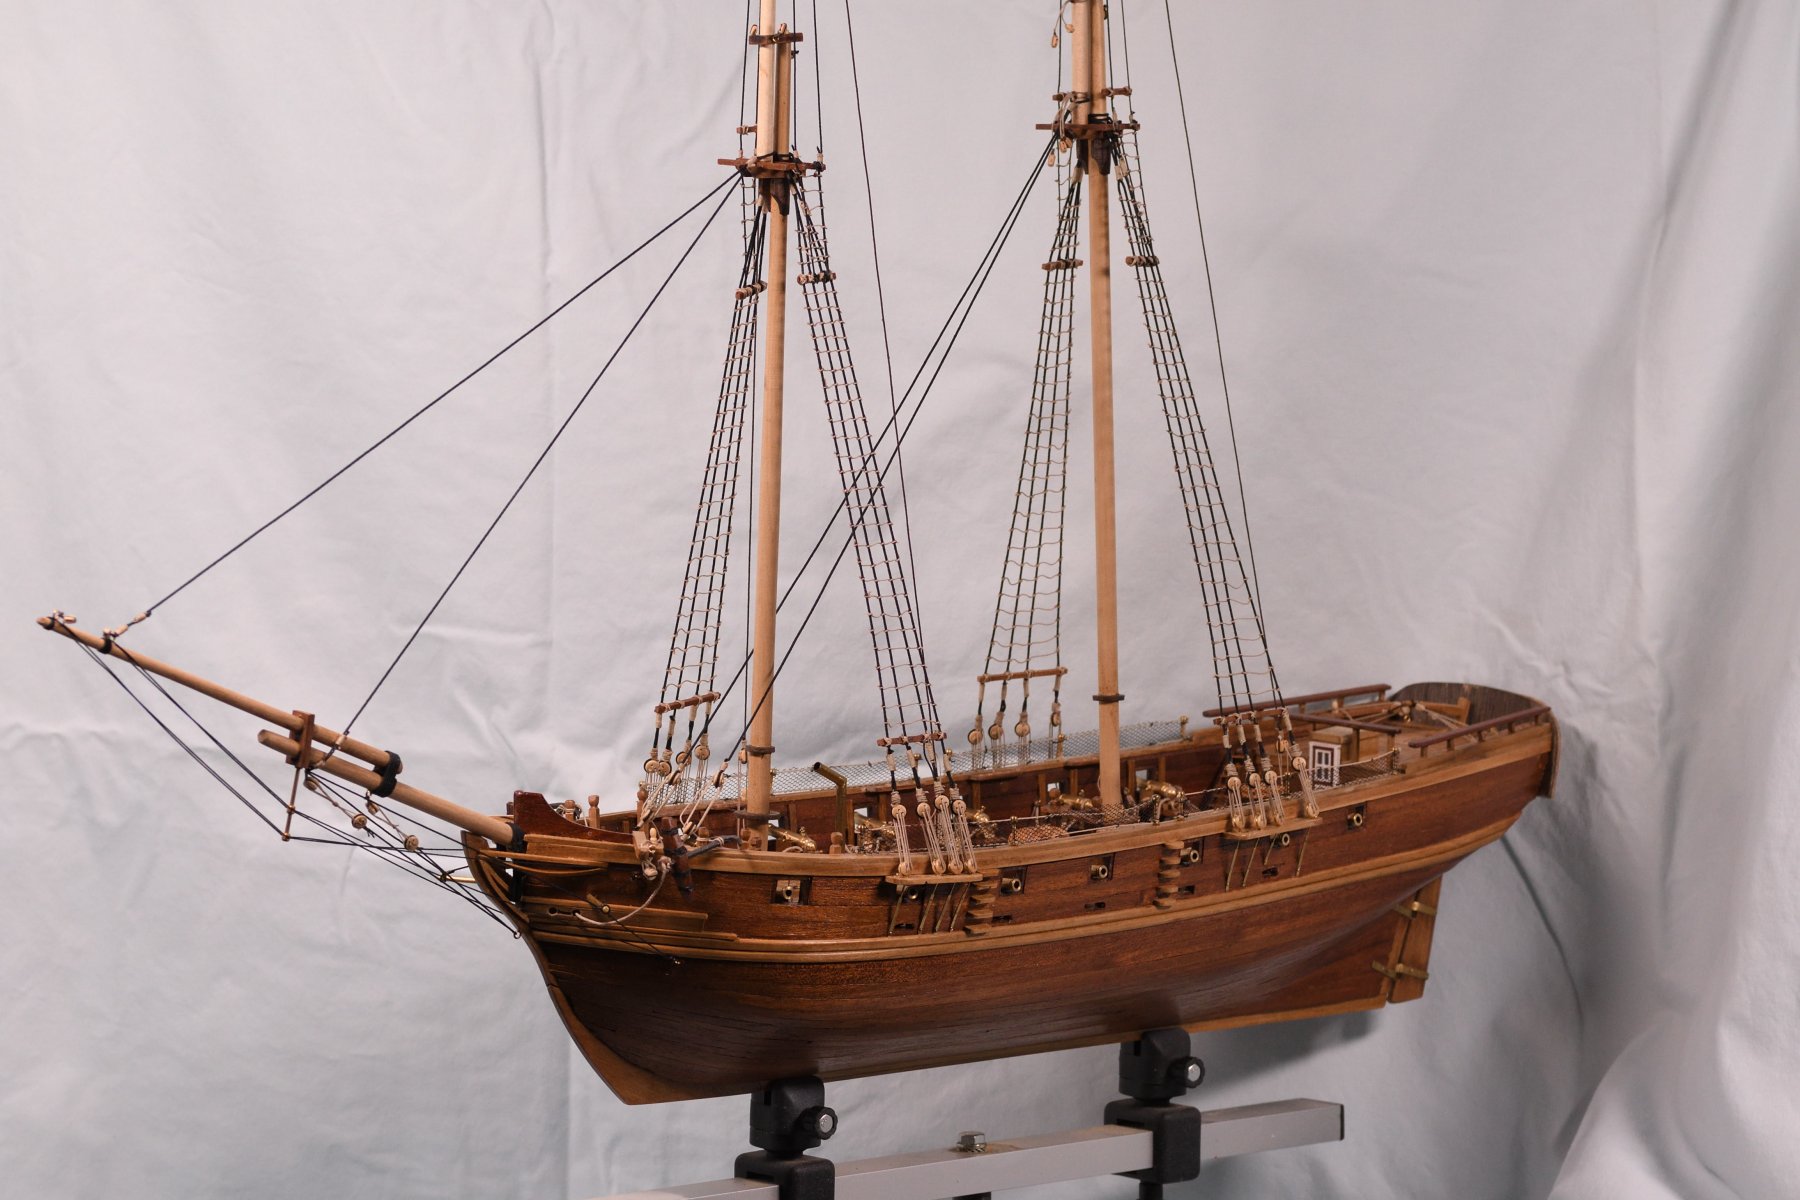
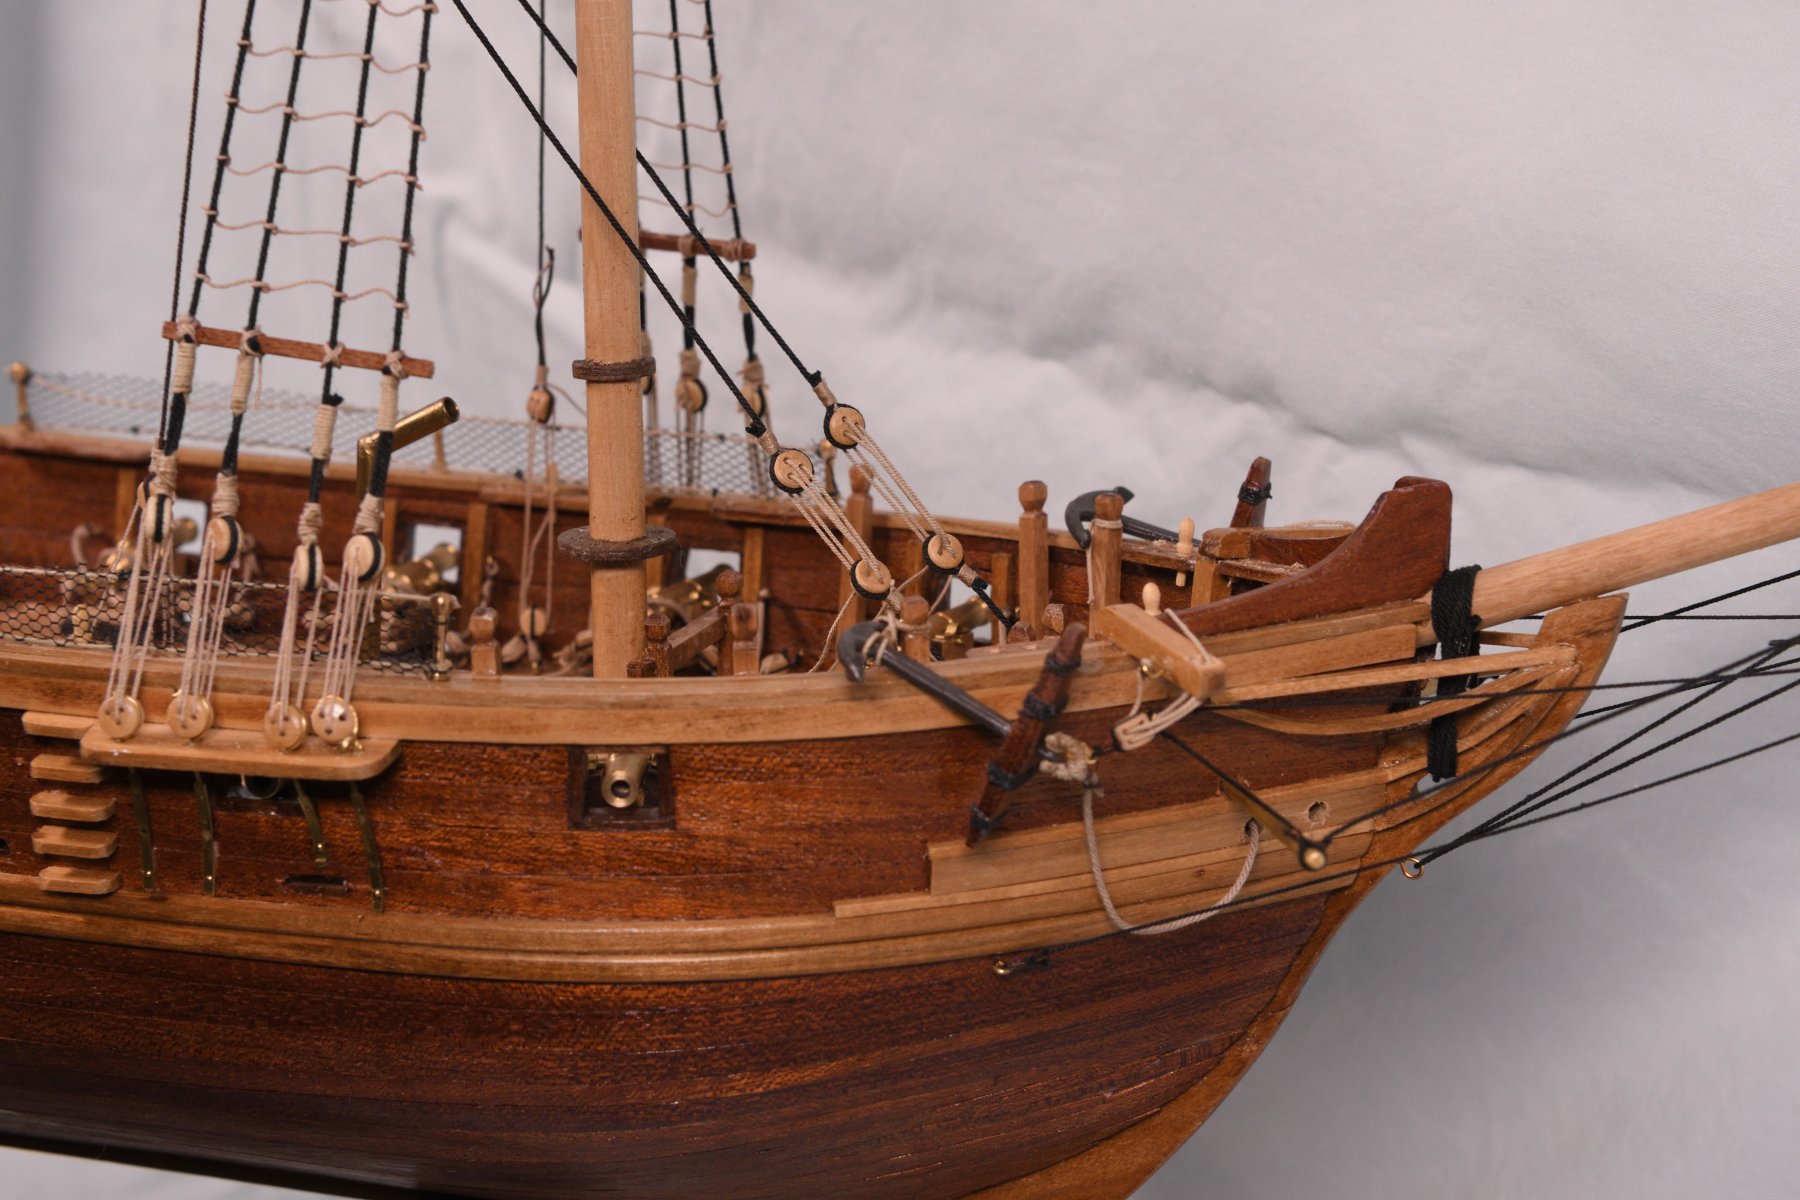
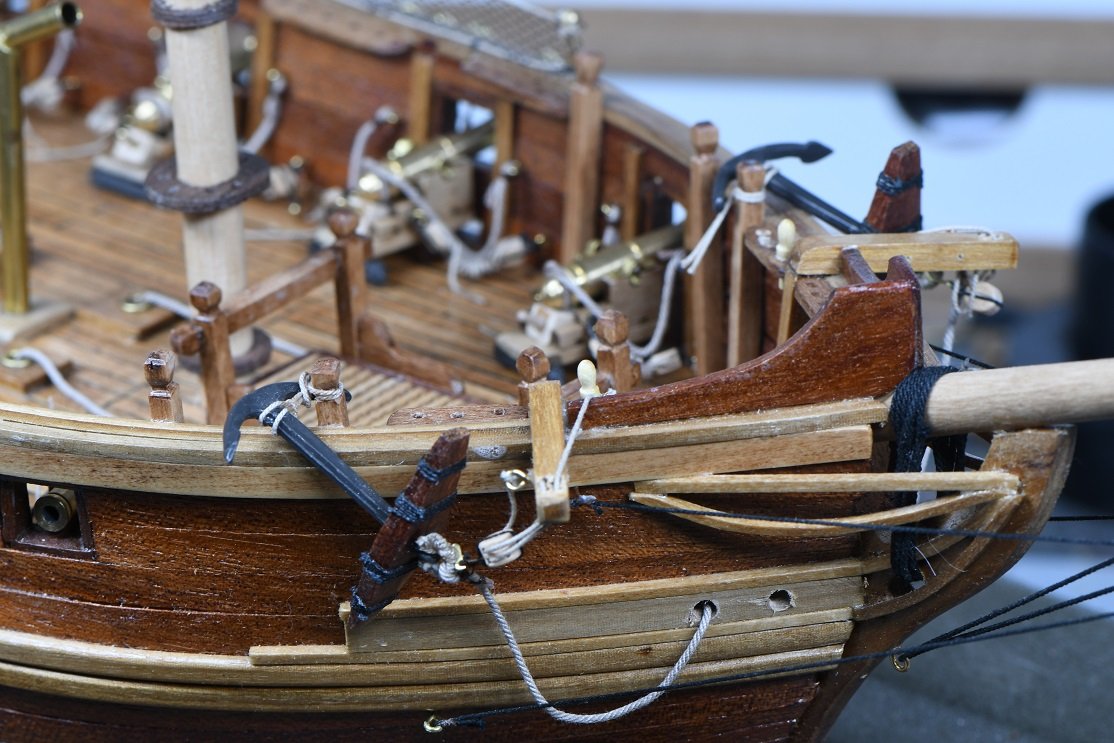
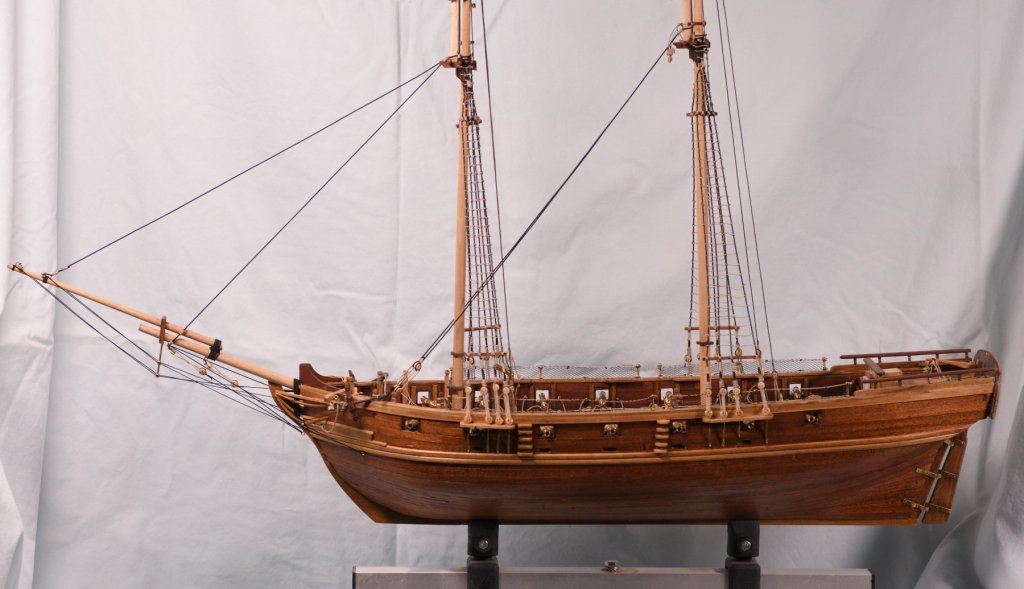
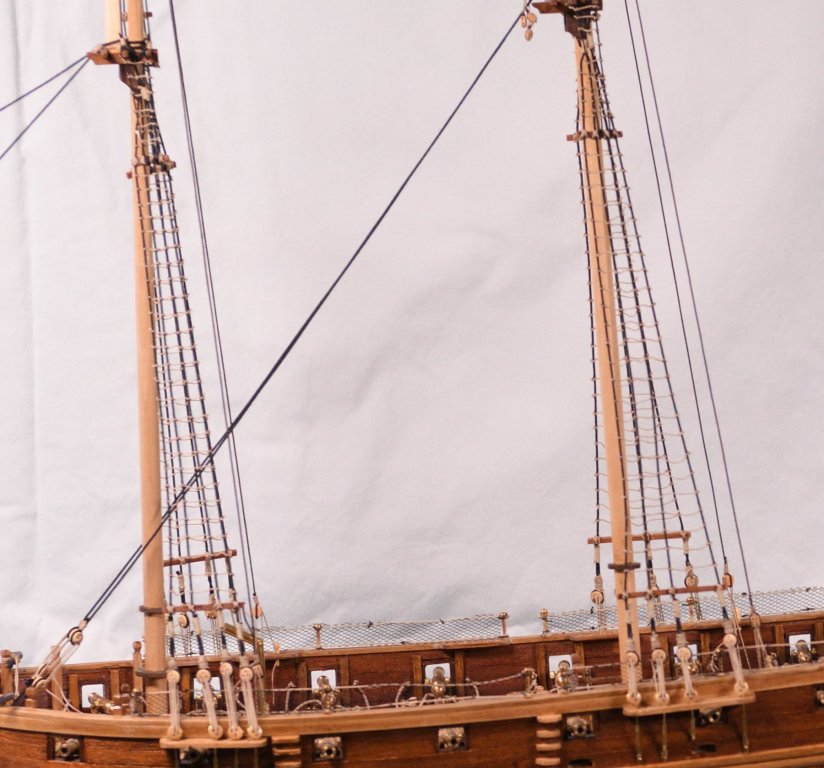
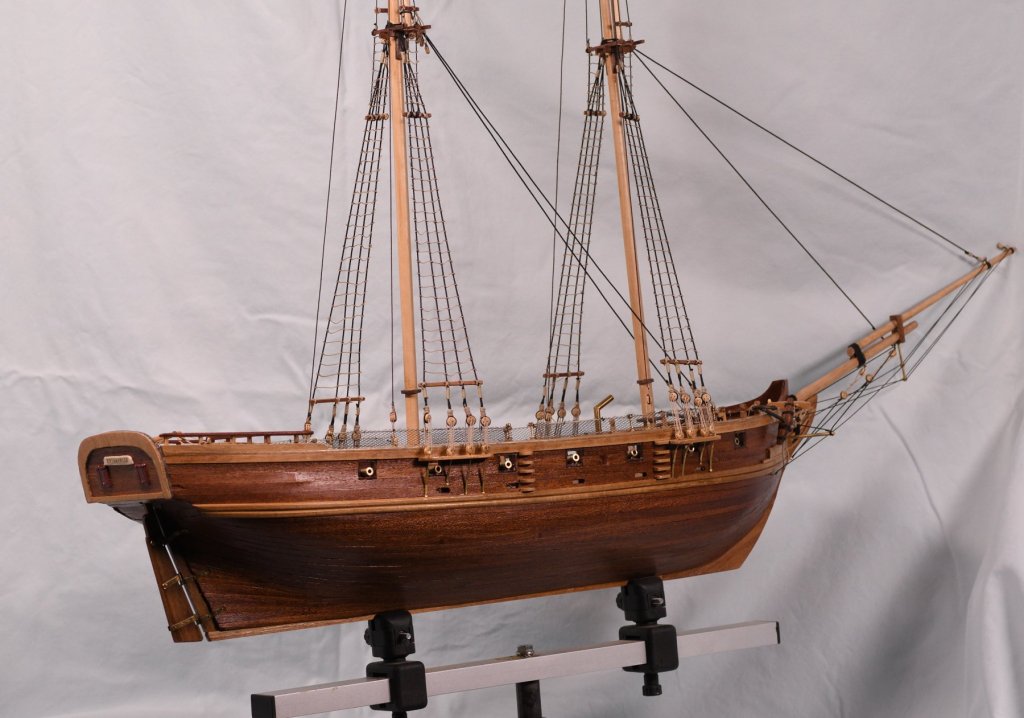
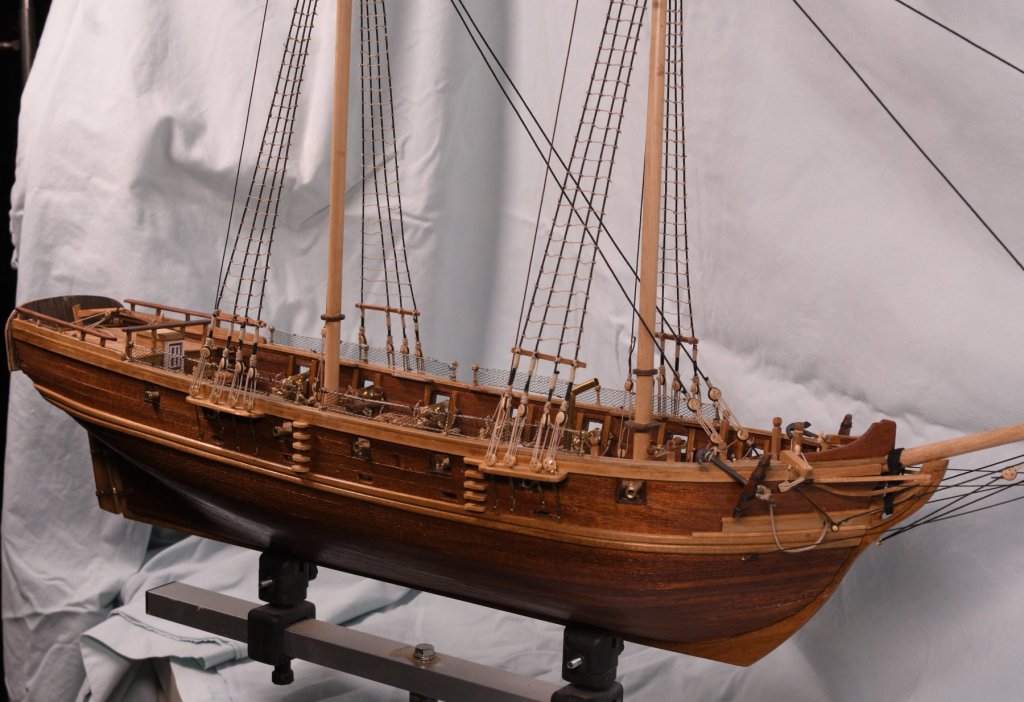
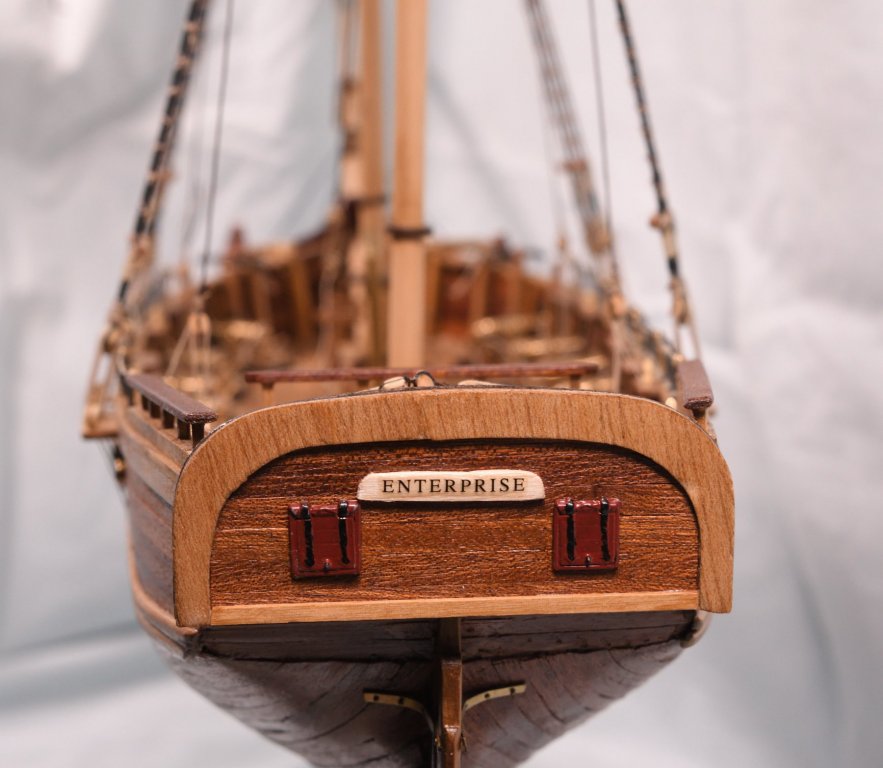
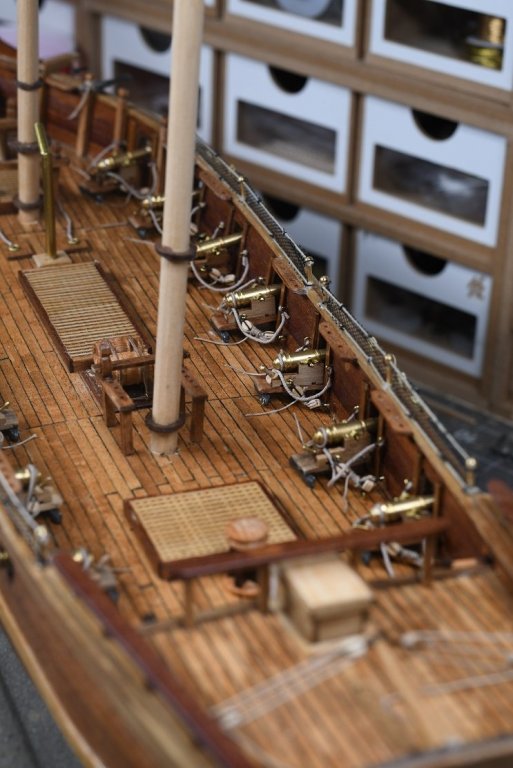
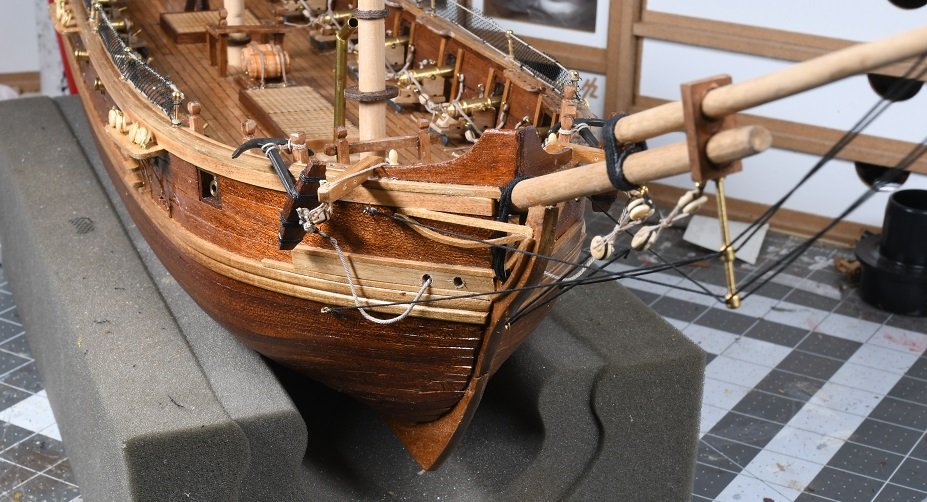
 Getting some progress made on the rigging. Shrouds & ratlines are in. Got a few more stays to put in. The instructions are getting worse - the book is just too general for rigging steps and the rig plan is very inaccurate and incomplete. Shrouds & stays are pretty much common sense - not too hard to figure how they should run. Running rig is a different animal however. The thing i don't like is the plans say to drill holes in the upper masts to run the stays thru. IMO drilling 3-4 .35mm holes in close proximity in a .5mm stick is not a wise thing to do. I have elected to seize all shrouds & stays instead. I'm thinking ahead to the sails also. I was dreading having to stitch a hem around each of them like I had to do the last time I did sails. Lucked out here. I guess I ordered the deluxe sail kit with the boat. I have to say these sails look quite nice and come already hemmed with the rope (dont know the proper term) stitched around the edge. All very professionally done! That saves a month or more of work and I doubt I could have matched the way they came. The only additional thing I'm doing is inserting a piece of wire into the hems. This will allow me to shape the sails somewhat and they will hold the shape. I'll post pix of that as I get more serious with the sails. At the moment I'm just inserting all the wire. On the philosophical side. I've always used Syren rope for every build. None can argue it's quality or the extra bang it adds to a build. I use tan for running rigging and black for standing. A while back Syren made the decision to discontinue black rope and offer a dark brown instead. I didn't think much of it at the time except that I like to seize my black rope with a dark brown fly line. I liked that there was enough contrast to see the seizing but it didnt stick out like a sore thumb like seizing black with tan does. Unfortunately, my brown fly line becomes invisible on the dark brown rope. So I guess when I make the switch to brown rope I'll have to find a new seizing color. Now for the philosophy - if you think about it Syren has a lot of influence on how our builds look. Granted using Syren products is totally the builders choice, but I think many, many of us do. I try to imagine all the builds that must be on display with Syren ropes & blocks. And we have used black rope for standing rigging almost as a best practice. Now just like that, black is out, brown is in. Within a year, there will be no more boats built with black rope - at least black Syren rope. Brown is the new black and just like that black standing rigging disappears. I will say, after my soapbox rant, that this is not an indictment of Syren or Chuck in any way. Obviously they are free to offer what they choose. I will continue to buy Syren products (brown rope included) and support them. It was just an observation I had that I wanted to share. Now for a few pix. All the new camera gear and photography research I am doing is beginning to make me think in a different way as I take boat pix now. There's a lot more to it than just snapping away. Lens, light, distance, depth of field all must be considered. These pix may be a slight improvement over previous ones, but I think I am seeing the light on what it takes to produce something better than a snapshot. To me the photo side of our hobby is overlooked but is critical. A good photo can make a crappy build look good. A bad photo makes the best build look mediocre. This was my first attempt at a shoot of Enterprise. I think things will get better. One thing I haven't worked out is size, so I apologize if your viewer makes you scroll around to see it all.


- 136 replies
-
- 5
-

-
- enterprise
- constructo
- (and 1 more)
-
Man - you guys are amazing! Great feedback. I happen to have the Roosevelt book gathering dust somewhere. The NWAOS link took me to Amazon where they have that book plus several more. They'll be taking more of my $$$. Haven't chatted with a few of you in a while. It's good to hear from you all! Thanks again....
-
OK - I'll narrow it down a bit - although anything would be a start. My interest was ships of sail, and I don't really care about galley warfare - ramming, etc. Lets keep it between 1600 and 1825. I have come up with zilch so I am not going to be picky when it comes to British tactics, French, Spanish or whatever. If you know of anything, let me know.
-
Has anyone come across any books or literature that describe typical tactics when ships like ours went into action? I'm curious from a fleet perspective and also just solo.
-
Tom - check the plans. Recheck the plans and recheck the plans. Identify all that bulwark hardware and get it in NOW! Once the guns & tackles are in place it's almost impossible to put in eyebolts and the like.
-
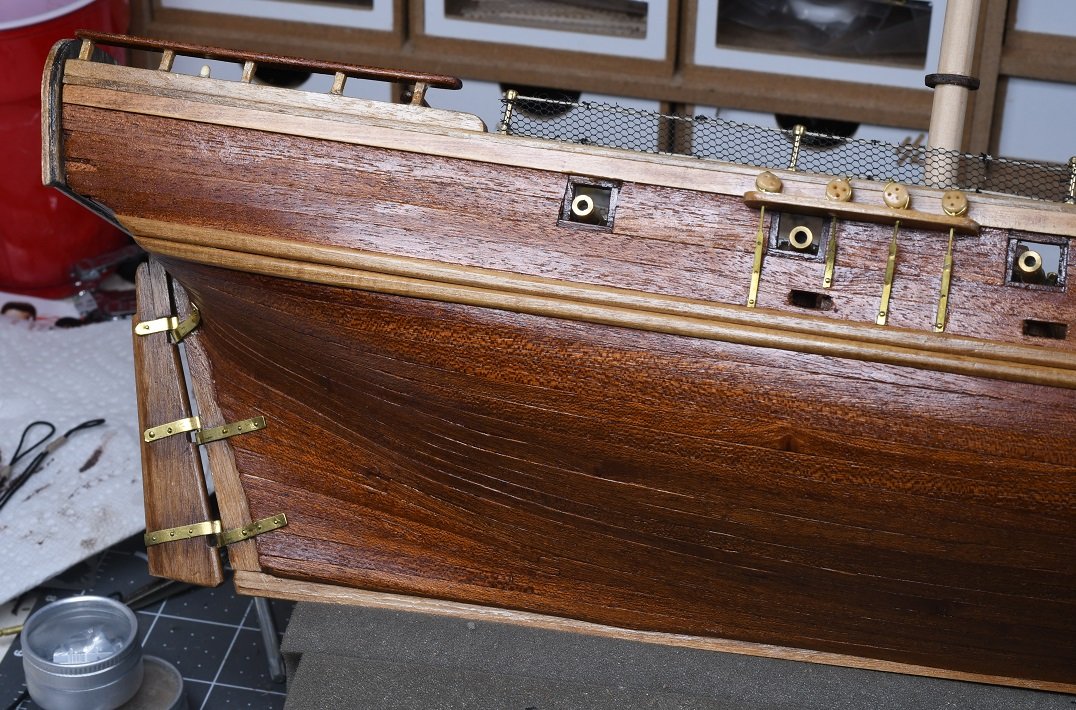
One other anchor related item that all ships with big anchors had - anchor lining. An extra layer of wood on the external hull on the area behind where the anchor is tied off. The lining is just additional protection to keep an anchor from tearing thru the bulwarks. Post 449 in my log shows a simple one.
-
Hey Ron - rudder colors are usually just an extension of the hull colors. Speaking of that, yours came out quite well. A good water line and that green/blue is not too garish. Thats kinda what steered me away from the green. Catheads look good. I found when I finished those with the anchors and tackle (the triple blocks) it really changed the complexion of the bow. Check out the anchor puddin and give that a try if you're up for it. It's not in the guide, but is a common thing to do on anchors of that size. It was one of those little details that only you will notice, but it does add a nice touch.
-
Thank you Sam. You know i started rigging - lower shrouds are done - but the order of rigging here is quite different than my last project. Seems to go against common wisdom. They want all masts stepped first. Then shrouds go in with the rats. Stays next, but everything done on the boat. ' I will say the rigging doesn't look too difficult, I guess the schooner rig was simpler than 3 sectioned masts square rigged. I'm gonna follow the guide as best I can and see how this method pans out. I do have to say the kit rope is hideous, very frayed & fuzzy. So I'm going with a combination of Syren and some leftovers. My next picture milestone will be after the deadeyes are all laced up. I'm figuring a week or so for that. Only holdup might be the channel deadeyes seem very loose - I didn't care for how the guide tells me to put them in but I went for it anyway. I'm hoping all those deadeyes don't have to be reinstalled.
- 136 replies
-
- 2
-
-
- enterprise
- constructo
- (and 1 more)
-
Hey Ron - looks like you worked thru the rail problem OK. I kinda remember the same thing happening.
-
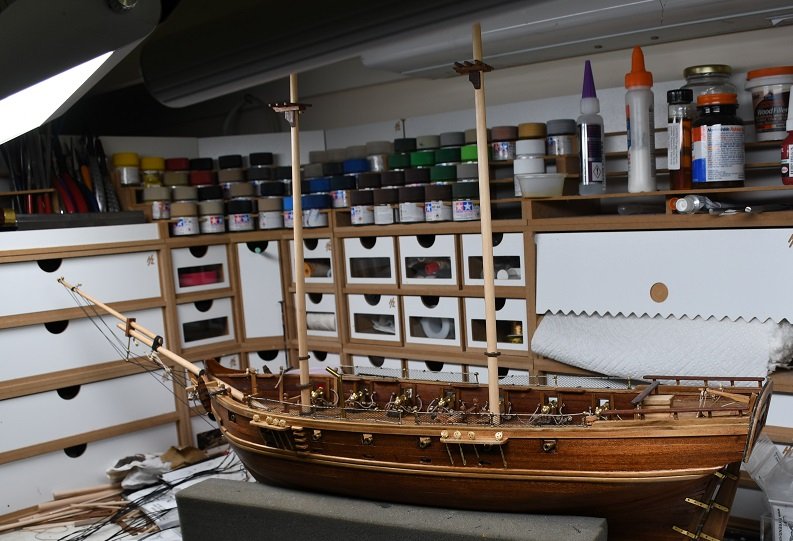
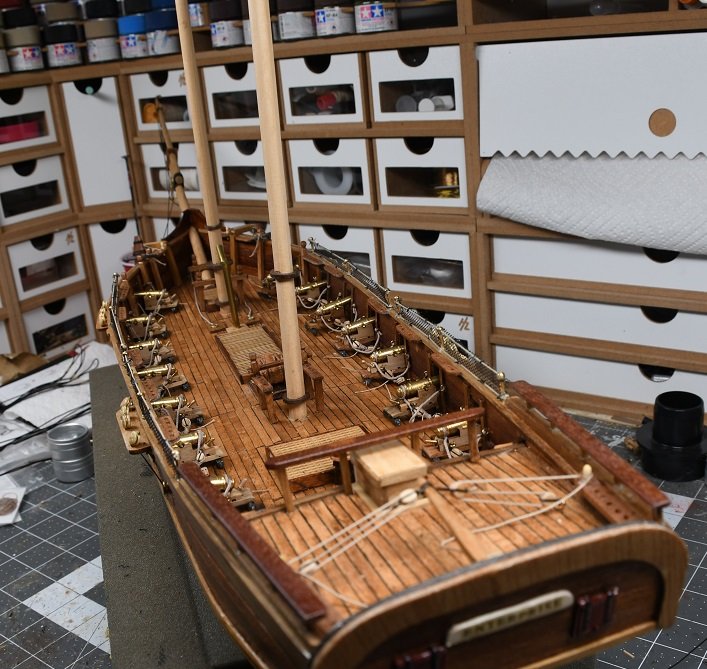
Man this is gonna be a challenge. Been so long I dont remember how to post pix. Here goes....easy enough. Lets get them here... My pix have always sucked and I have told myself it must be the camera. Well these are from a brand new DSLR and I must say - they still suck! But I do see some things that might improve them. Anyways here's Enterprise - hull & deck completed and dressed. I have started the shrouds (not shown here) so rigging has officially started. Hope it doesn't take another year to post pix of that 😜


- 136 replies
-
- 6
-
-
- enterprise
- constructo
- (and 1 more)
-
Nice Ron! If you have difficulty with that type of coil, I have seen some builds (and real life) where the rope was just neatly piled. IMO the formal coils look a bit too contrived. They also take up a heck of a lot of deck space. If rope is laying on a deck for any length of time it's gonna move around. You're about to hit a big milestone with finishing the guns.....
-
Hey Sam - thanks for asking. I have been distracted by some other things and neglected Enterprise. That said, work has continued sporadically. The hull and all the trimmings are done except for the posts/webbing that mount to the handrail. This is in progress. Most of the spars are done and the main & fore masts have tops and shrouds. I will post pix this weekend
- 136 replies
-
- 4
-
-
- enterprise
- constructo
- (and 1 more)
-
Tom - what type of paint are you using (the green)? Seems like your first coat always comes out kinda light. The other structure was the same way. Are you priming first? re: forceps - I have the set you have and have never had an issue with them releasing what they hold. A few notes on that - 1. The very fine pointed tweezers are not the best choice for working with rope for that very reason. 2. Based on Sam's picture, be careful when squeezing them, as the "elbows" eventually come in contact with each other and all the squeeze pressure gets transfered to them rather than to the tips. 3. Make sure there is a slight concave bend to the area right before the points to keep the points touching but nothing else.
-
Very true. But the other half of the statement goes something like "and my next build will be just far enough off that I forgot it all" 😕 Elijah - your attention to detail has grown by leaps & bounds as has your execution of putting together the small parts. It's a pleasure watching you work....
- 228 replies
-
- 3
-
-
- gunboat
- model shipways
- (and 1 more)
-
It's coming along Tom. The one suggestion I have is use as few different colors/stains as possible. Keep a consistent tone with your structures. Use the same color for all frames, coamings, etc. - possibly even the roofs. Use the same color for all structure siding.
-
Tom - the holes for Enterprise would be approx between your foremast & the forward hatch, so the anchor line does run a little ways down the deck. If you're using the big thick line I think it looks kinda cool for it to run down the deck a bit. I did end up gluing the rope to the deck as I could not get it lay perfectly flat. In your case I dont see the bits where the bowsprit will fasten to so its hard to say exactly where the best spot might be. You might be able to put the holes slightly in front of the forward hatch. I think if it was me, I would go ahead and finish this item now. Once the bit is in place it might be harder to measure and get a drill in there. I forgot to mention in addition to the little piece of wood over the hole the Enterprise kit supplied two metal pieces that fit into the holes of the wood pieces. These metal pieces look just like the ones we put in the Niagara hawser - a very short piece of tube that is flared out on one end. It adds a nice touch. I think that piece can be found at craft stores. Again, in the last photo too, your deck color is fantastic.
-
Hey Tom - Great color on your deck. Maybe I didnt see it as well in previous pix. re the anchor line, Enterprise (my current build) just has holes drilled thru the deck a few inches back from the hawsers and maybe 1/2" on either side of the centerline. The holes are dressed up a little with a square piece of 1/8"stick maybe 3/8"x3/8". Cut those, maybe round the edges a little and glue on top of the deck holes. Obviously the hole has to go thru those as well. I used a walnut stick just to get a spot of contrast on the deck. If that doesnt make sense let me know and I'll post a pic for you.
-
Hey Ron - i think the anchor (the metal part) is supposed to be 90 degrees offset from the wood part? Sort of like give the anchors a quarter turn.
-
I think Burton Pendants were used to hoist items from dock to hold. They would have been secured when underway. Believe it or not I've had several people ask that question about loading. I was able to show just how it was done. Syren makes grates that are a good substitute for kit pieces. The come either in a flat frame or slightly curved frame to lay on the centerline of the deck. Are you sure thats how those pieces are supposed to lay Tom? If you stay with those I seem to remember strips laid across to form a grid. You lay one set of the strips pointed side up and the other set at 90 degrees pointed side down. They will mesh together that way. Also you may want to cut the corners out of a few forward grates. The anchor lines will run from the hawsers, down the deck and into the cutouts. These would also have been where balls were handed from below deck up to the gun deck.
-
A suggestion Tom. Up at the bow be careful of how much you install right now. You still have the bitts and the bowsprit to get into that area and there is no wiggle room for those. Get those in first. Other parts can be placed around them in a pinch.
-
Ron - it was a crowded ship! 20 guns, 4-5 guys per gun. Just aint no getting around it. There are some things you can do to give the appearance of less crowded/cluttered. Keep loose rope to a minimum is the biggest. If you make coils with the excess they will be lying on the deck - more clutter. Consider frapping - check my log, it's what I did and I personally like the look. The kit supplied blocks look rather bulky also. Your guns look great dont touch them. Remember Niagara was designed to be a small fresh water boat with as many guns as they could possibly cram on deck.
-
Hey Ron - your mount is correct. A pin in the front (your toothpick) held this style of carriage in place. It also allowed the gun crew to pivot the nade to the port or starboard by pulling the tackle on one side or another. You can actually have that functional on your guns. I have found that people find it interesting to see how that works. The real tackles had a fair amount of excess rope after it is laced thru the blocks. This was normal. When the gun recoils, that excess is shortened as the slide moves backwards. There are several ways to deal with the excess in your build, depending on how you will display the status of your boat. 1. Excess is laid in a flat coil on deck. This was the formal look and typically used during inspections and for visitors. 2. Excess is in a small pile on deck. More typical of a action status, when the gun was in use. 3. Excess is frapped. Used while in transit. The excess is wrapped around the rope that runs between the 2 blocks of the tackle. You will need to decide how you will do it before too long. There are good tricks to use for each method.
-
Never enough time - why didn't I think of that one? It's good to see this project resurrected Don.
-
Suggest not permanently fastening the bowspars yet. Once you do she gets rather unwieldy to work with. Don't forget the quions under the gun barrels. If you have something like a 1'x6' board with holes to store and work on the other spars you can make a few holes for the bow spars as well. Personally, I like the look of the hull sticks being somewhat visible so don't fill in too much. If you do have gaps you want to fill try a craft syringe & needle to apply a thin line of white glue down in the gap. Paint over it afterwards. Keep it up Tom.
-
Ya think she's big now? One thing to think about - as you put masts and especially bow spars in place it gets incredibly hard to turn the boat around on your bench without breaking something. Drill holes for each section of each mast (main, top, top gallant, t.g.royal) for each mast and bow spars. A 1"x6"x18" board with holes drilled in it is great for working with the individual spars and also good for storage when you want that stuff out of the way. If it hasn't been said already rig these spars individually before assembling a mast. I found that I could hang about 80% of the rigging before assembly & installation. The big trick is guesstimating how long some of the ropes should be. Measure, measure again and then add about 15-20%. Warning - you will end up with a huge bowl of spaghetti. This can be mitigated somewhat by taking logical groups of ropes (for instance the t.g.royal port side shrouds) coiling them and then wrap with a piece of masking tape. They still dangle around but they shouldn't get tangled that way.