EJ_L
-
Posts
2,246 -
Joined
-
Last visited
Content Type
Profiles
Forums
Gallery
Events
Everything posted by EJ_L
-
Welcome to MSW! You do have some great looking models already so thank you for sharing those with us.
-
Welcome to MSW Shawn! Great to have you with us. I too wish I would have found this site sooner than I did as I completely built my first wooden ship before discovering this great place. As you said take it as a learning experience which I did and combined with the knowledge and inspiration I got here, ship number two was 1000 times better. Just remember that we are all learning and growing as modelers. Even the most experienced among us still learns new tricks. Nothing to be ashamed of when you have to redo things, it all goes into the experience. I wish you the best of luck on your build and look forward to seeing pictures of it!
-
 Ship's boat looks great and those waves are excellent. Nice job with them. You will have yourself a nice scene when you are all done.
 -
Very nice Ken. Regardless of if your crew appreciates the railings or not, they are another excellent detail that adds a little something more. Well done!
- 481 replies
-
- 1
-

-
- rattlesnake
- model shipways
- (and 1 more)
-
Got the current band wrapped around the bow. Now I get to start back over on the other side.

-
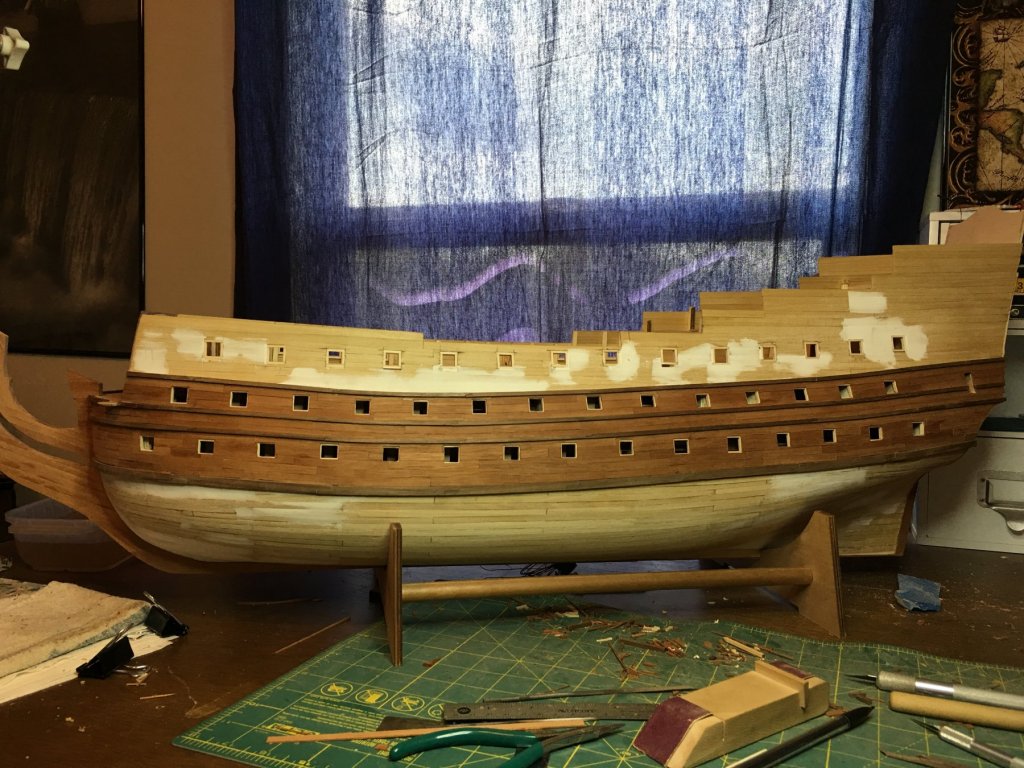
Thanks Michael for the compliment! The wood however was not from the kit. The walnut and Mahogany I am using for the second planking came from Crown Timberyard as I wanted the same wood that I used on La Couronne. I really liked the quality and finish it made on her and hope to do the same or even better on this one. That being said, the wood that was in the kit was not the worst that I have seen and I will be using a lot of it for various other areas and items on the build. Plus the kit wanted me to plank the entire hull in walnut and while I like walnut, I prefer it for accents and not the main planking.
-
SOLEIL ROYAL 1669 by michel saunier
EJ_L replied to michel saunier's topic in - Build logs for subjects built 1501 - 1750
Michel, I just read through your build and I am deeply amazed at the work you are doing! Just incredible! I will be following along closely as you are an inspiration to me for my own work. -
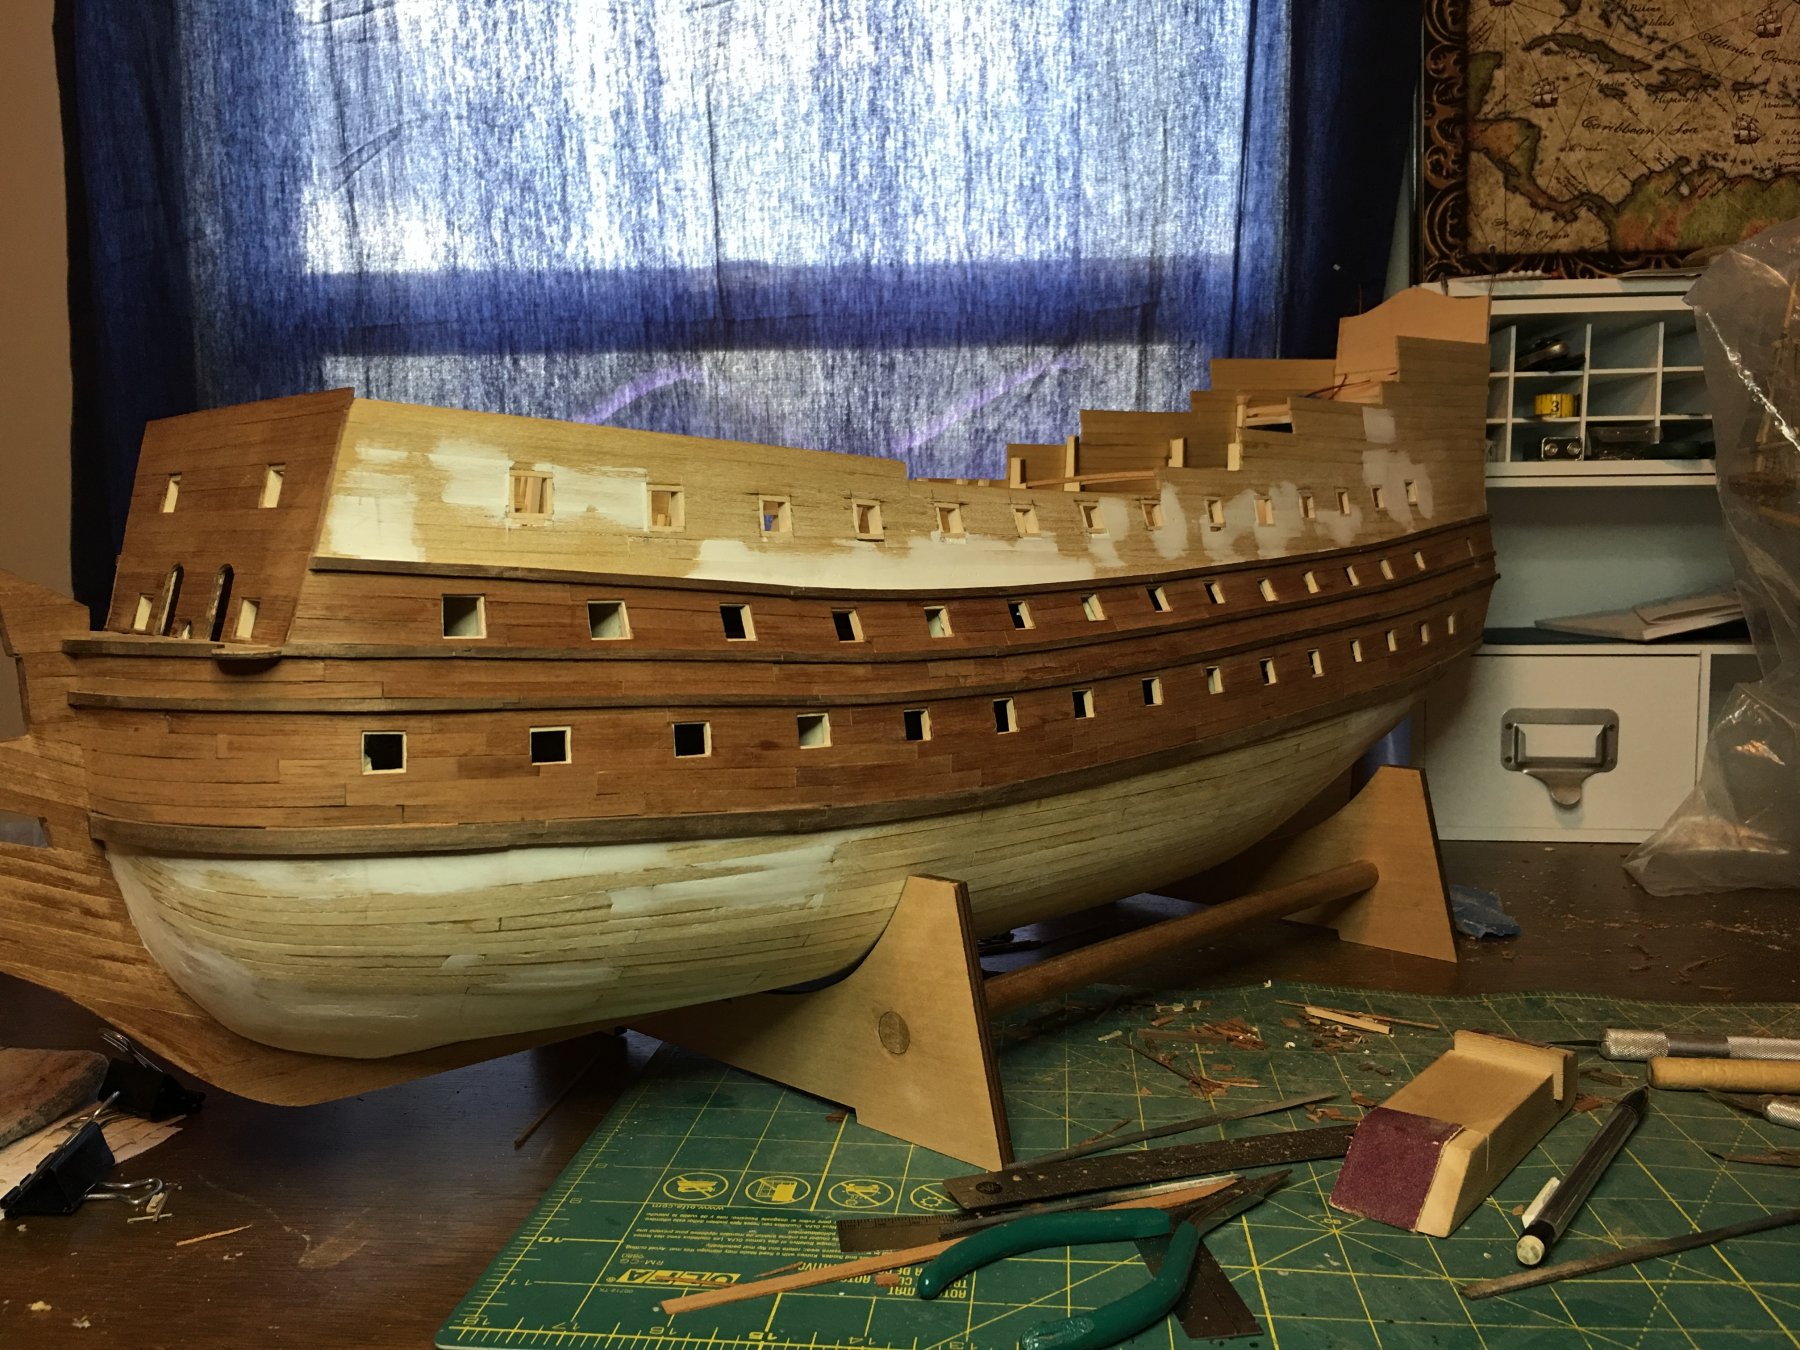
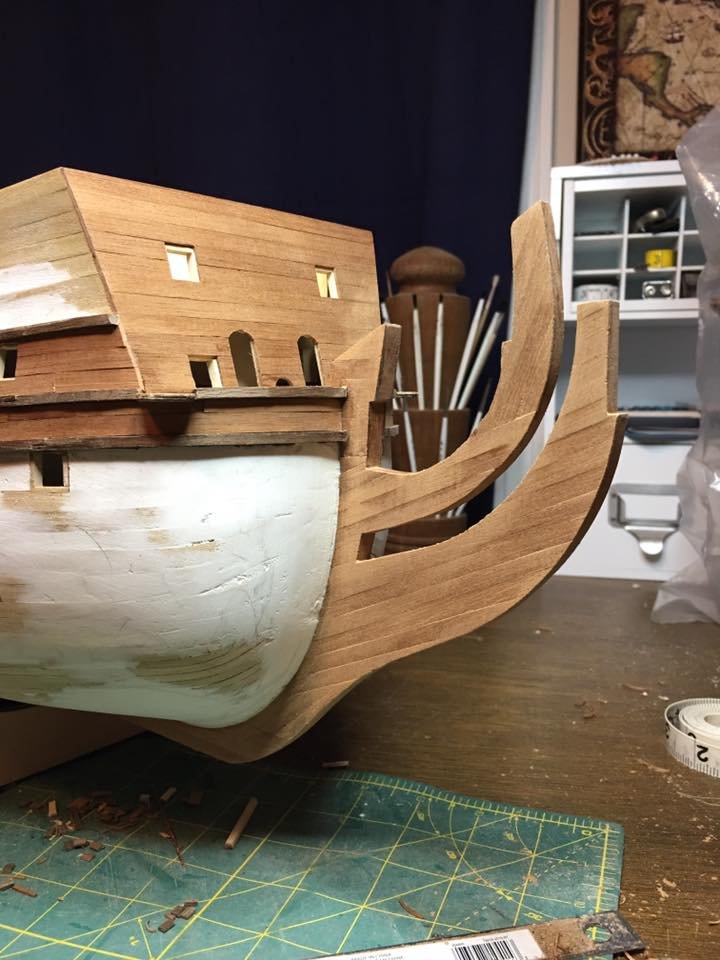
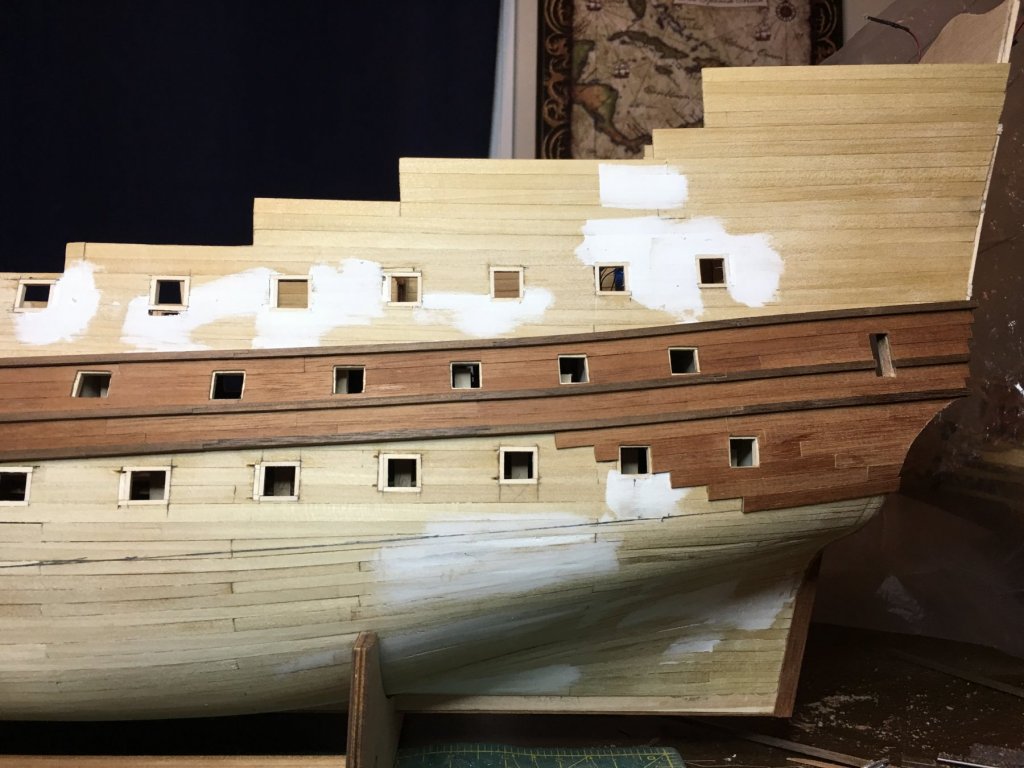
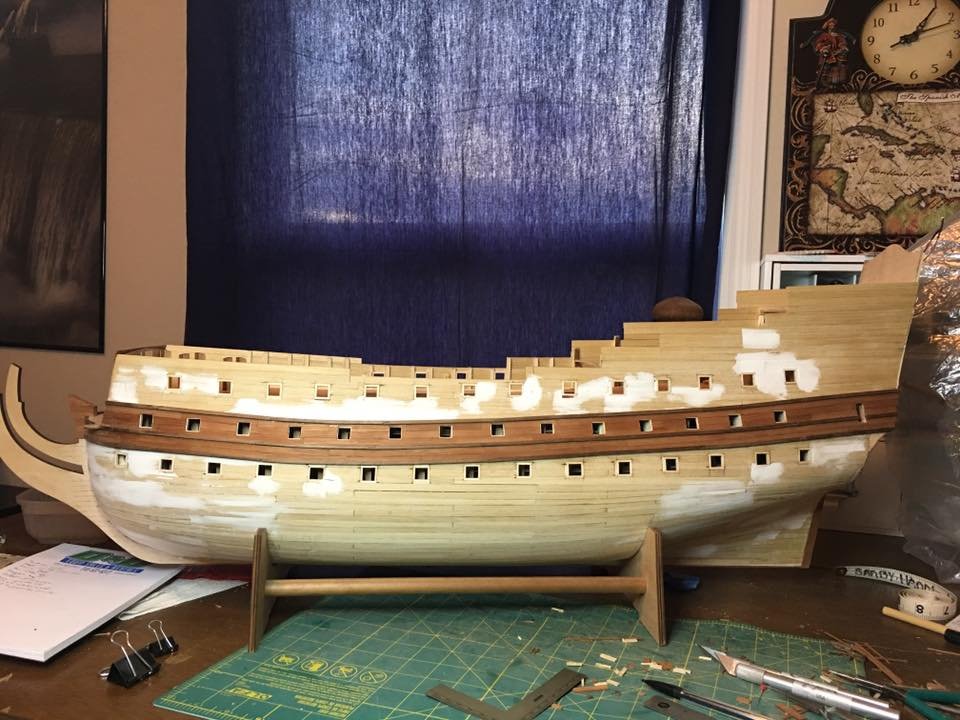
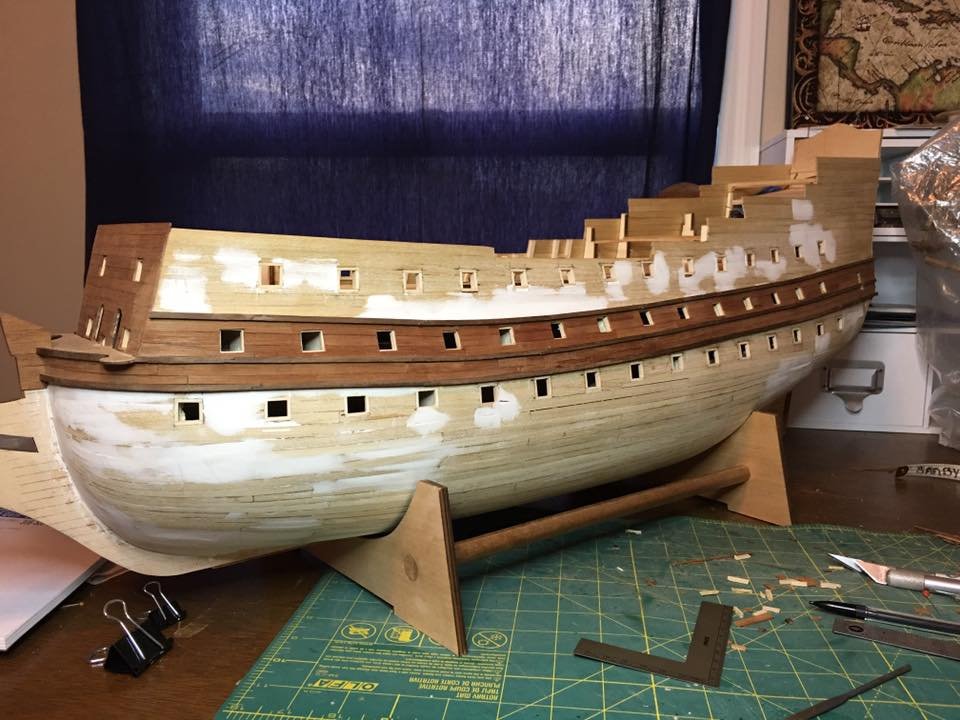
Another small "bite" has been taken out of this elephant. (Thanks Popeye for that analogy. Rather fitting in this build) rest of the stem and knees are covered and I've started the next band of planks. These will cover the space around the lower gun deck ports down to the first of the larger wales. Piece by piece she is growing more by the day!

-
Moving along quite nicely. Planking is looking good. Smooth and even. AS you go lower be sure to take your time and measure and lay out your pattern before laying the planks. The bow and stern will start to narrow and you will have to taper the planks to accommodate both the narrowing space and the curves of the hull to avoid using drop planks and/or stealers. It's always best if you can draw it out with pencil first so adjustments can be made before you lay down wood. Saves a lot of money and frustration. Keep up the good work!
-
Small Update, stem and knees have been covered on one side. Now to rotate her around and repeat. Few more hours marked down, few more boards cut up and a lot more sanding dust over everything and S.R. has a little more color. Starting to really respect the size of this ship when I can sit here for hours and feel like I've laid a mile of planks only to see that I have gone a few inches across her hull. Fortunately I enjoy it and will be back tomorrow to go some more!

-
Thanks Marc and welcome! Be sure to let us know when your build starts as I know I would like to follow along and I'm sure others will want to also.
-
I like the straight route myself, mostly as it will make displaying it easier as the angled look tends to take up more space. I think the angle would look better if the display board was big enough to fully surround the ship in both length and width.
-
I was thinking something like that for the gilded pieces. Might look better than just gold paint. More things to test out and see!
-
Welcome to MSW! If you have not done so already set up a build log so we can follow along and help out when needed. Cutting down the hull to a waterline display does eliminate some of the trickier curves to plank over and from the sounds of the intended use of the model, may make gaming easier as well. I wish you the best of luck on your build and I look forward to seeing your work!
-
Welcome to MSW Brian! While I cannot help you on the color problems, I can say that I would love to see some of your work. Best of luck on your current and future builds!
-
I agree with you on Doris' talent and incredible Royal Caroline build. Every time I look at it I am in awe of the work she put into it. I have seen some of her videos on her sculptures and will be watching them even more as the time to start gets closer or I need a break from planking... I know I keep saying "carving" but I have seen some great work in clay that may be the medium I use especially on the decorations that require a lot of repetition. Plenty of options out there to choose from so we shall see what I decide upon. More than likely S.R. will have an assortment of materials by the time she is done.
-
Looking good Don! I'm loving all your details and extras you have put into her.
- 653 replies
-
- 2
-
-
- trabakul
- marisstella
- (and 1 more)
-
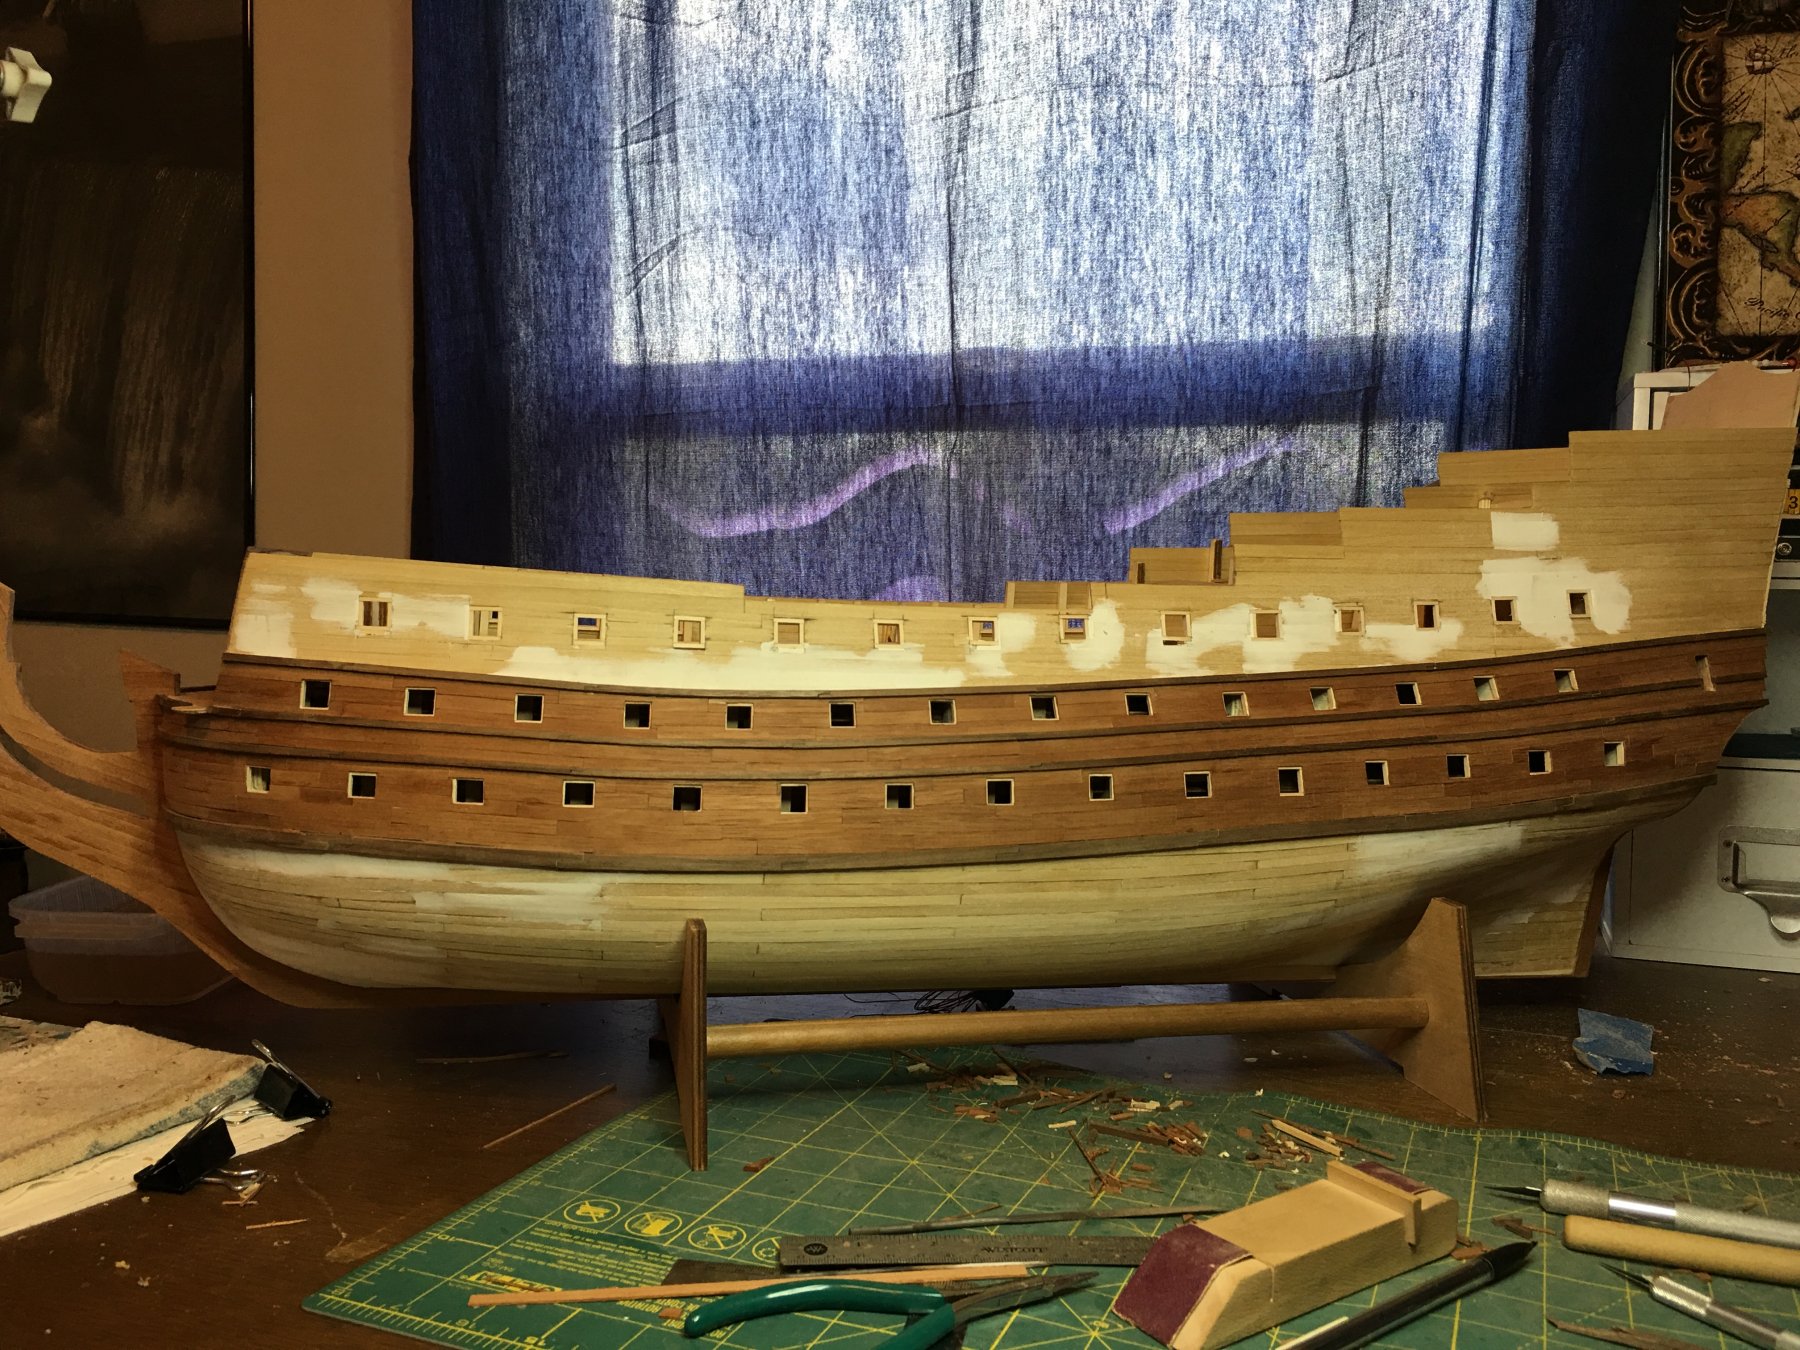
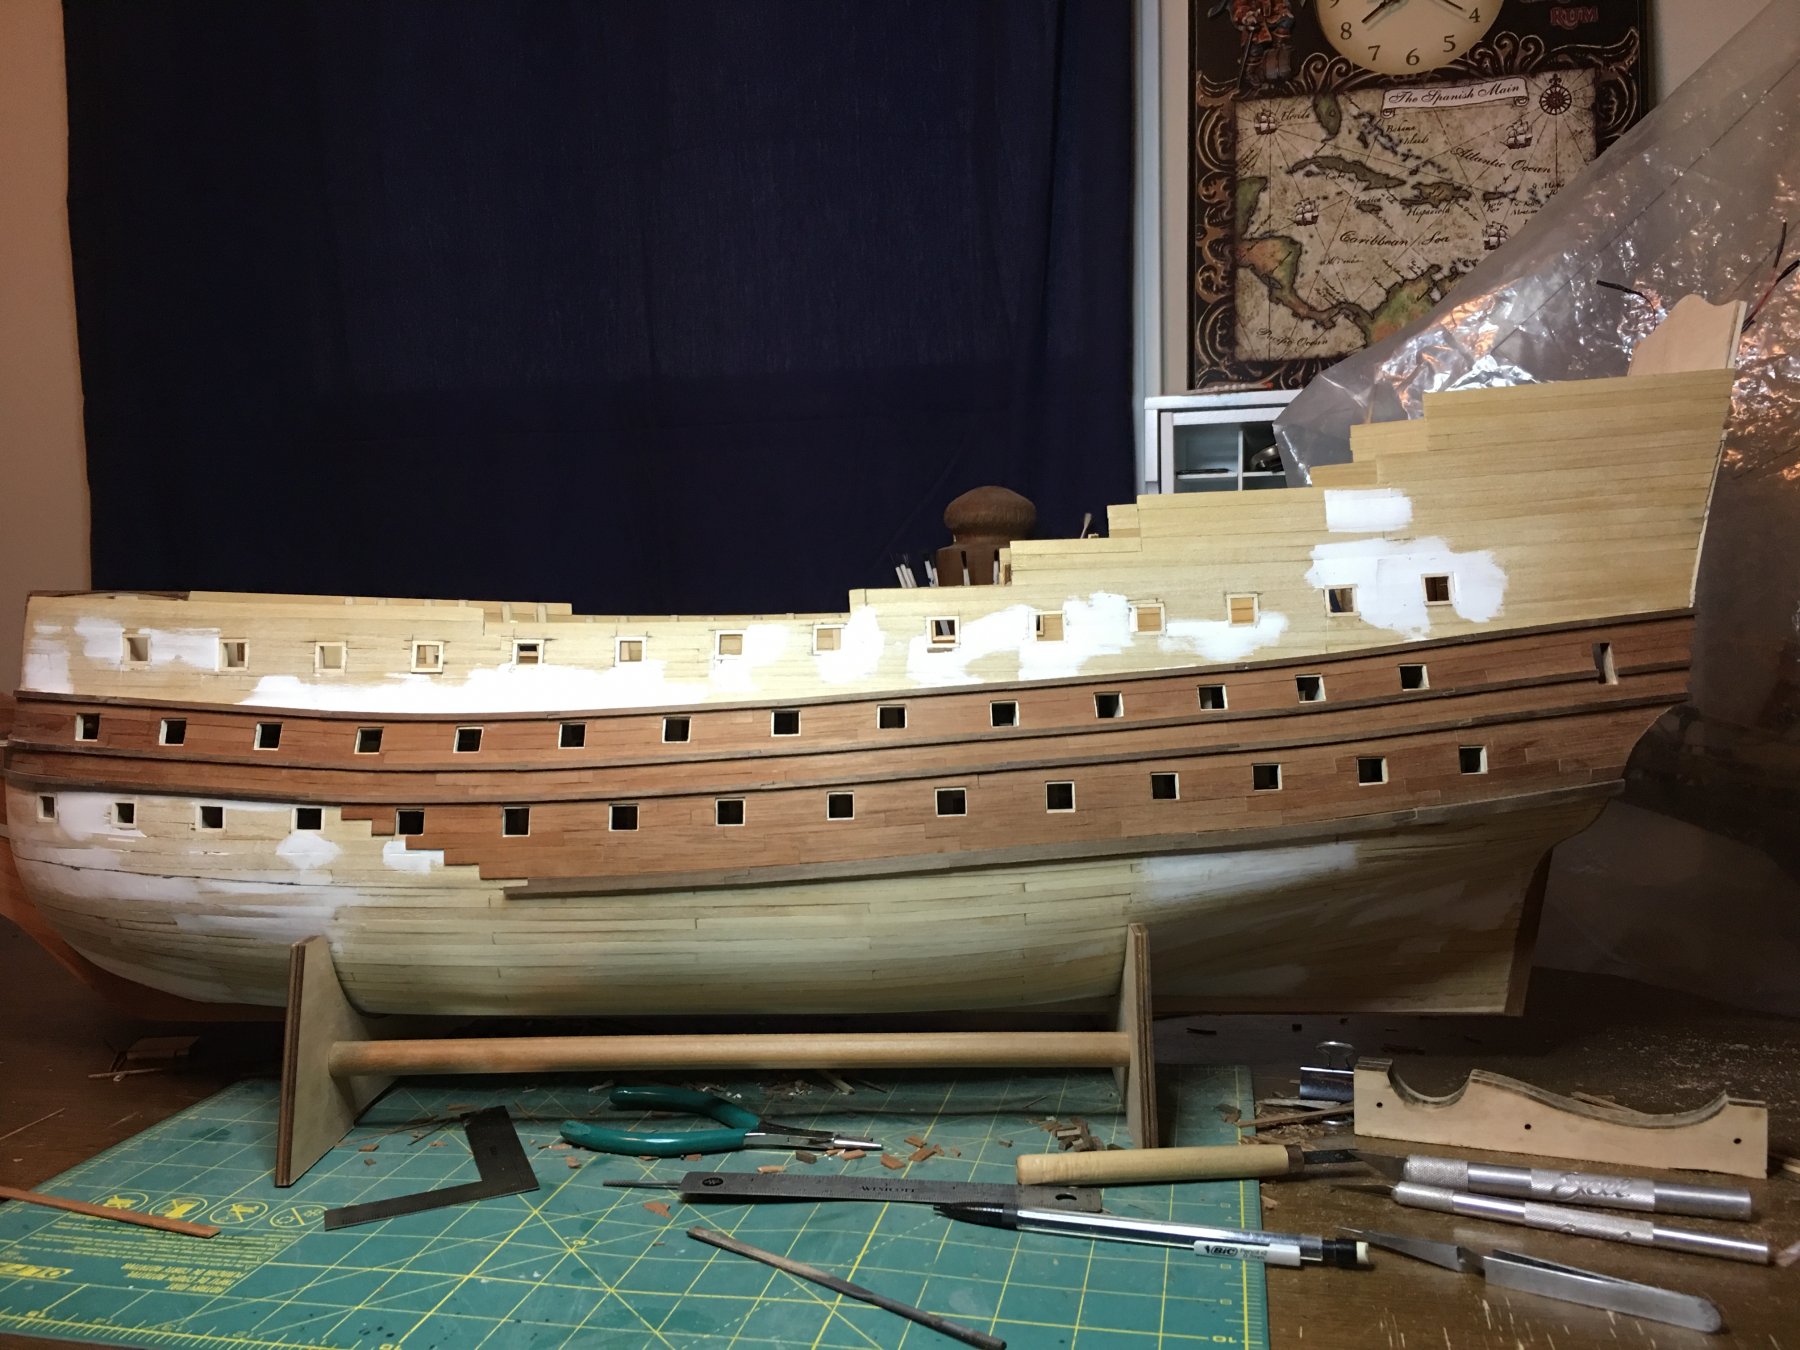
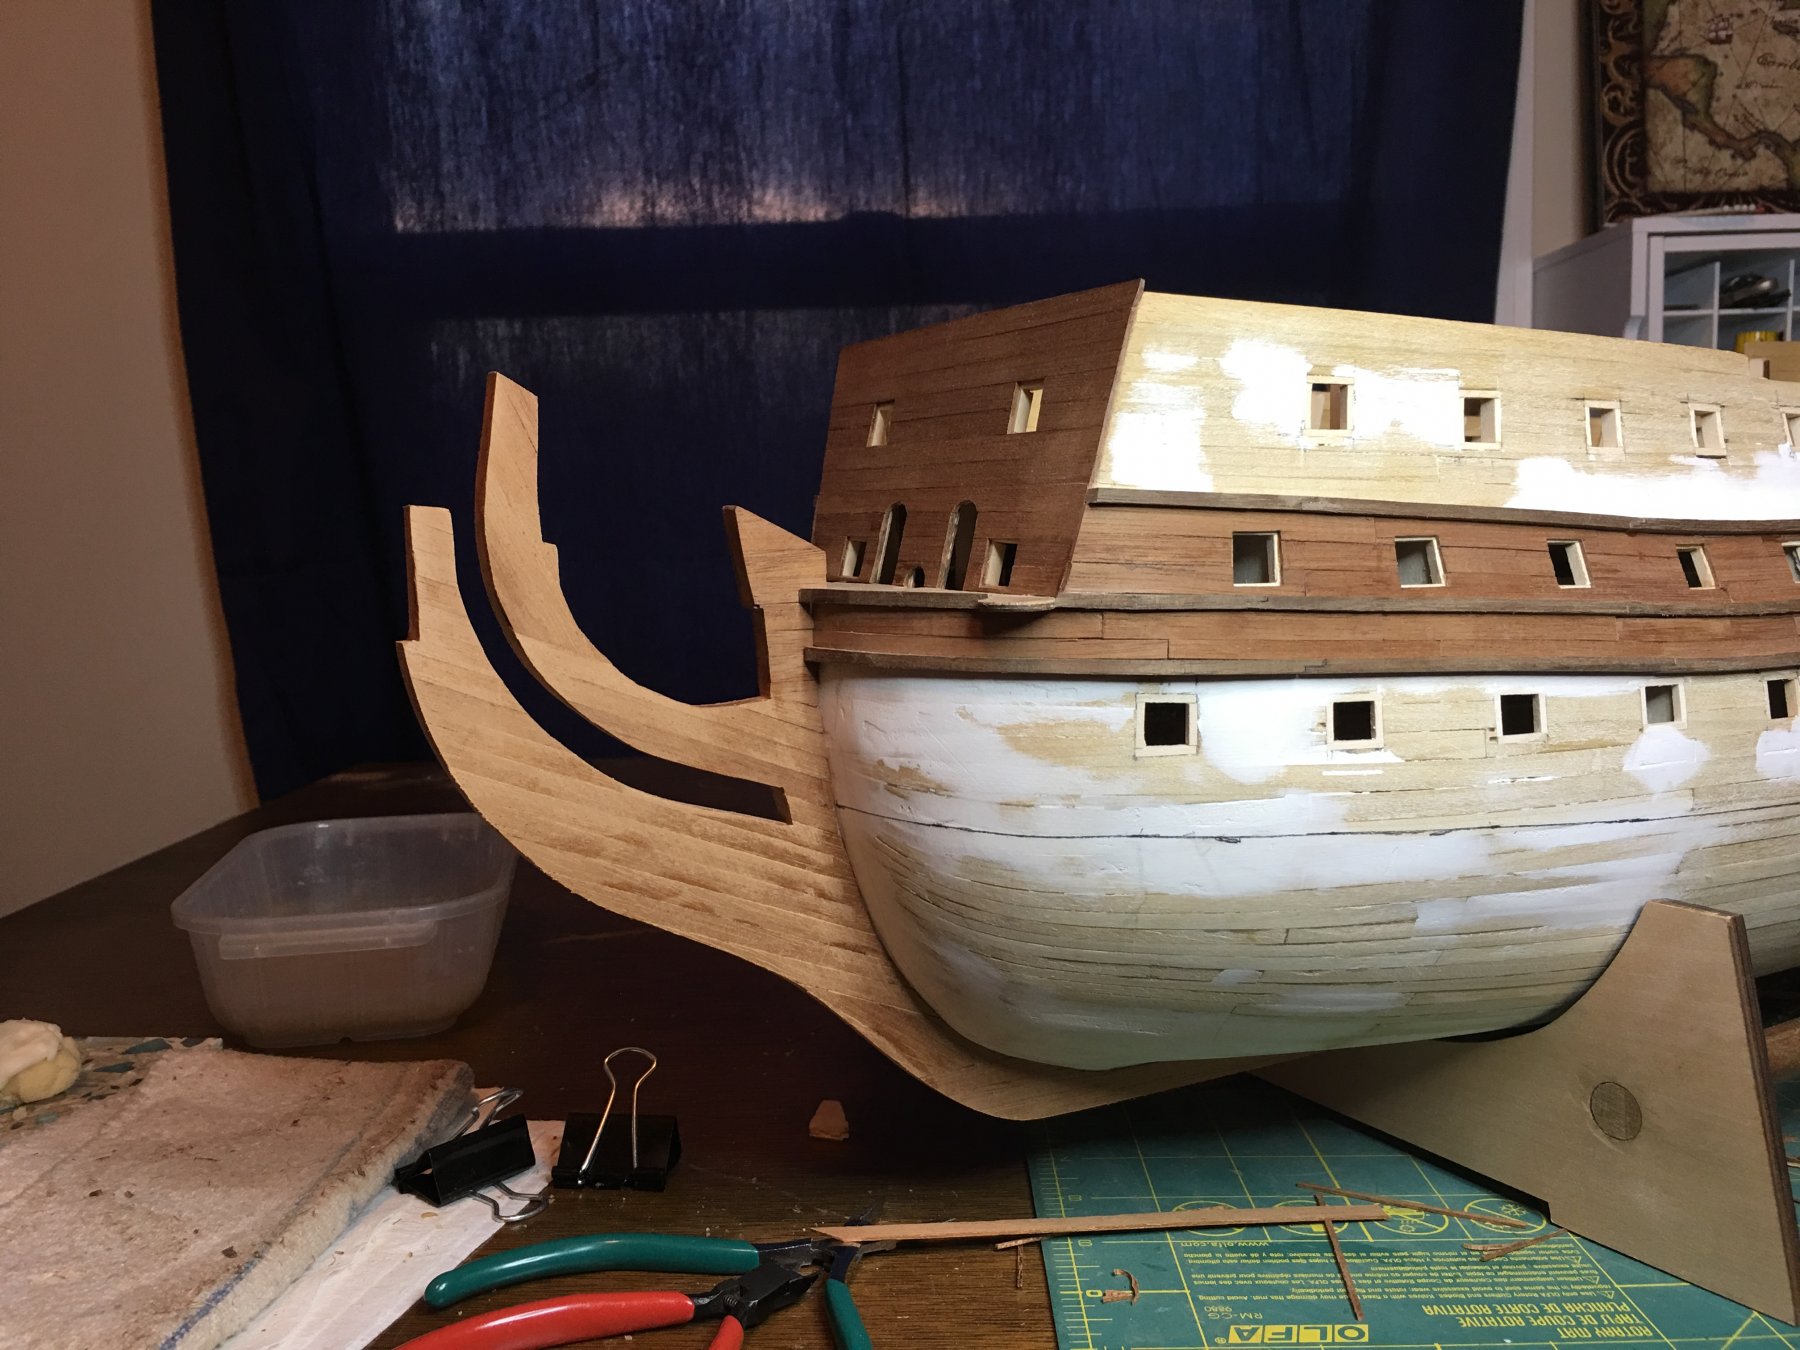
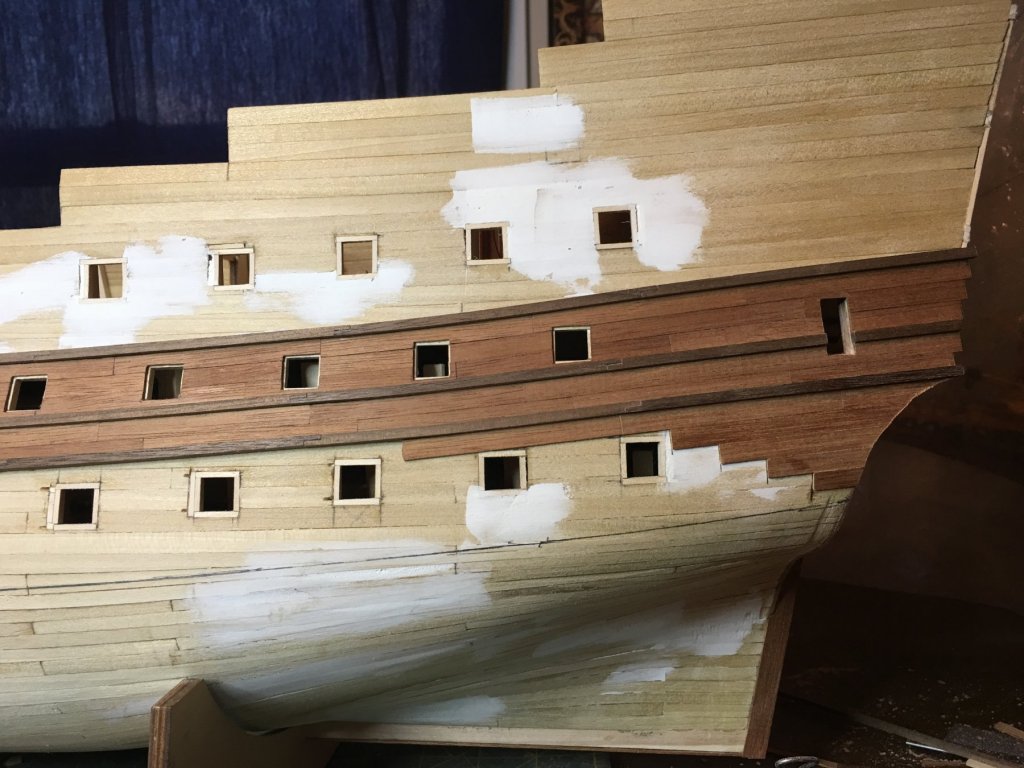
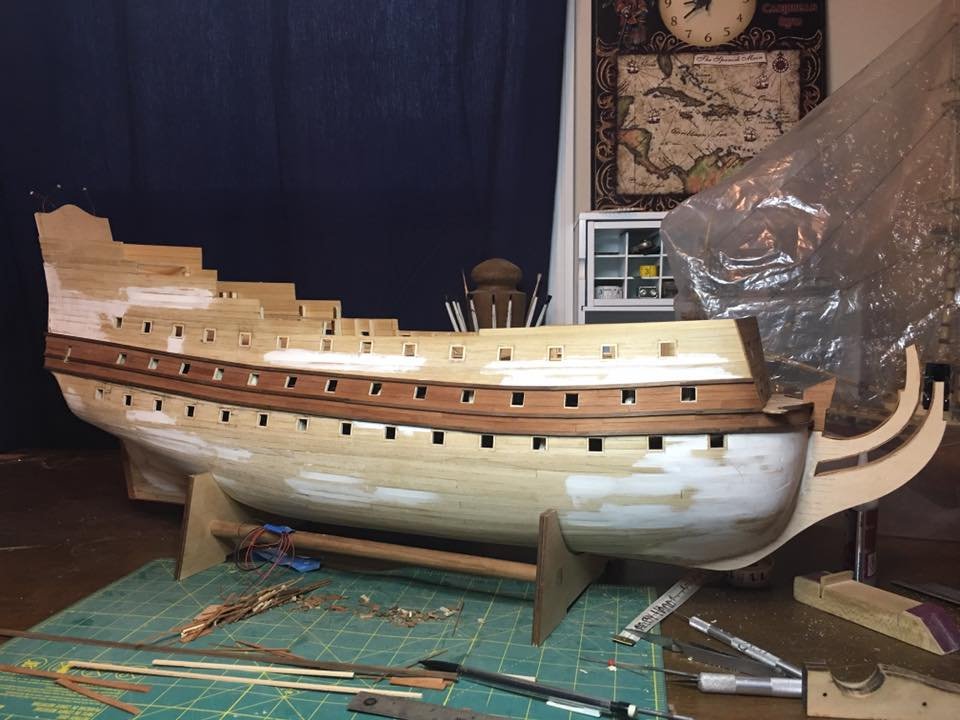
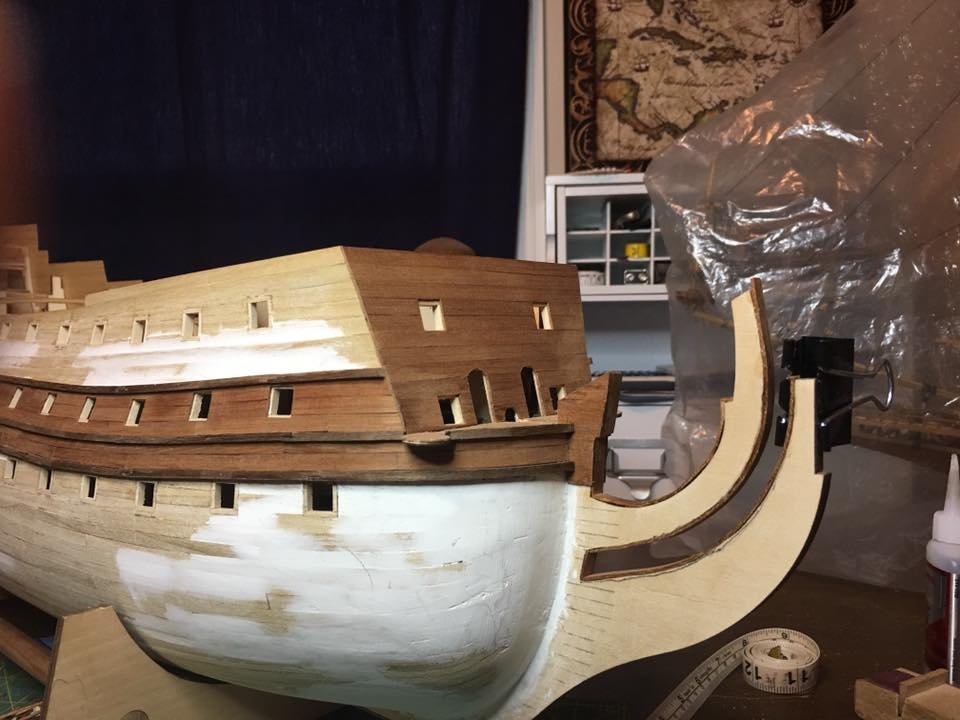
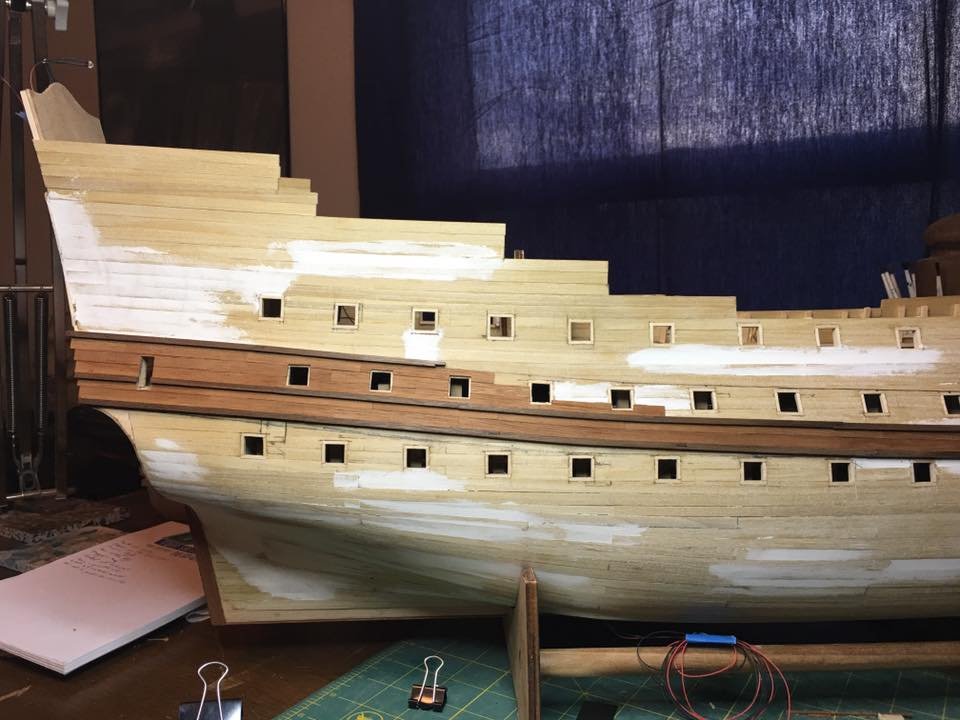
Thank you Don and Tom for the nice words and to all who are following along and hit the like button. Tom, to answer the question simply, no I am not planning on using the cast port decorations on the upper row. I originally did have the ports oversized to accept them as you are right in that they need to be opened up more on the top in order to fit. I'm not overly fond of the way they look however as the details seem blurred and not as crisp as I would like. Plus I don't like how the sills and stops are also gilded on the cast pieces. My thinking right now with those is that my own skills can make something on par with those but I'm hoping I might be able to turn out something better still. I may regret that decision later but that is the plan as of today. Truthfully, making my own carvings and/or molds for decorations has always been a goal of mine. I've always used the kit's cast pieces and while there really is nothing wrong with doing that and they make a great looking model, it is more of a personal point of pride to be able to say that I made all the decorations. I know full well that I am a beginner with carving at best so they may not come out that good or I may be making decorations for this ship for the next 40 years but I want to try. In the end I may find out that I just need to use what is in the kit and that will be good enough. Time will tell so stay tuned! On to today's update, starboard planking has caught up to port side planking. Now I have to do some more work on the stem post and knees before continuing with the hull planking. I've started to fit the curved edge pieces in place and will soon start on the sides. At this time I will go ahead and take the veneer all the way down to the keel so the stem will be complete. Once done with that work I will mark off the next run which will take me down below the lower gun deck to the first of the wider wales.
-
My edit button is down at the bottom of my posts below my signature. See picture below. The new layout can take a little getting used to and there was some delays on functions getting out as the update progressed. All the old things are there, they just may look different or be in new places. I think I have found them all, or at least everything that I use so ask if you can't find it.
- 608 replies
-
- 2
-
-
- la couronne
- corel
- (and 1 more)
-
Truly is an awesome build Ken! I've found many of those extra bits of thread that didn't get cut off when reviewing the pictures. That magnification and focused view help spotting some of those easier.
- 481 replies
-
- 1
-
-
- rattlesnake
- model shipways
- (and 1 more)
-
I think when they did the last update to the site it cleared the old likes off of all the threads. The fancy cup is the new like button. Took me a minute to figure that out too. Works just like the old button just a new symbol.
- 608 replies
-
- 1
-
-
- la couronne
- corel
- (and 1 more)
-
Had a busy weekend but also got in some good hours in the shipyard and manged to finish up the second set of planking on the port side and start on the second set on the starboard. Moving along nicely.
- 961 replies
-
- 14
-
-
Welcome to MSW Michael! Great to have you with us. I wish you all the best of luck on your build and look forward to seeing more of your work!
-
May have to put that color up for consideration as well! I can easily get a lot of grabber blue from my dad's Mustang shop. I'm hoping to have some test strips painted in the next few weeks, (admiral is now out of school and so my build times will be a little tighter again till her new job starts). That may not always be a bad thing though..... I am hoping to make it to the hobby store today or tomorrow and look to see what I can readily find. May have to order in some colors if they do not carry what I need. Then I have to find where I put the airbrush when I moved. I know where my compressor is at but I guess I have not yet unpacked the box the actual nozzle is in. How that happened I will never know... I hate moving... The planking has gotten a little further since the last picture. I might have that row done this weekend. You can be sure that I will upload a picture when it is done!