HOLIDAY DONATION DRIVE - SUPPORT MSW - DO YOUR PART TO KEEP THIS GREAT FORUM GOING! (78 donations so far out of 49,000 members - C'mon guys!)
×


6ohiocav
-
Posts
543 -
Joined
-
Last visited
Content Type
Profiles
Forums
Gallery
Events
Everything posted by 6ohiocav
-
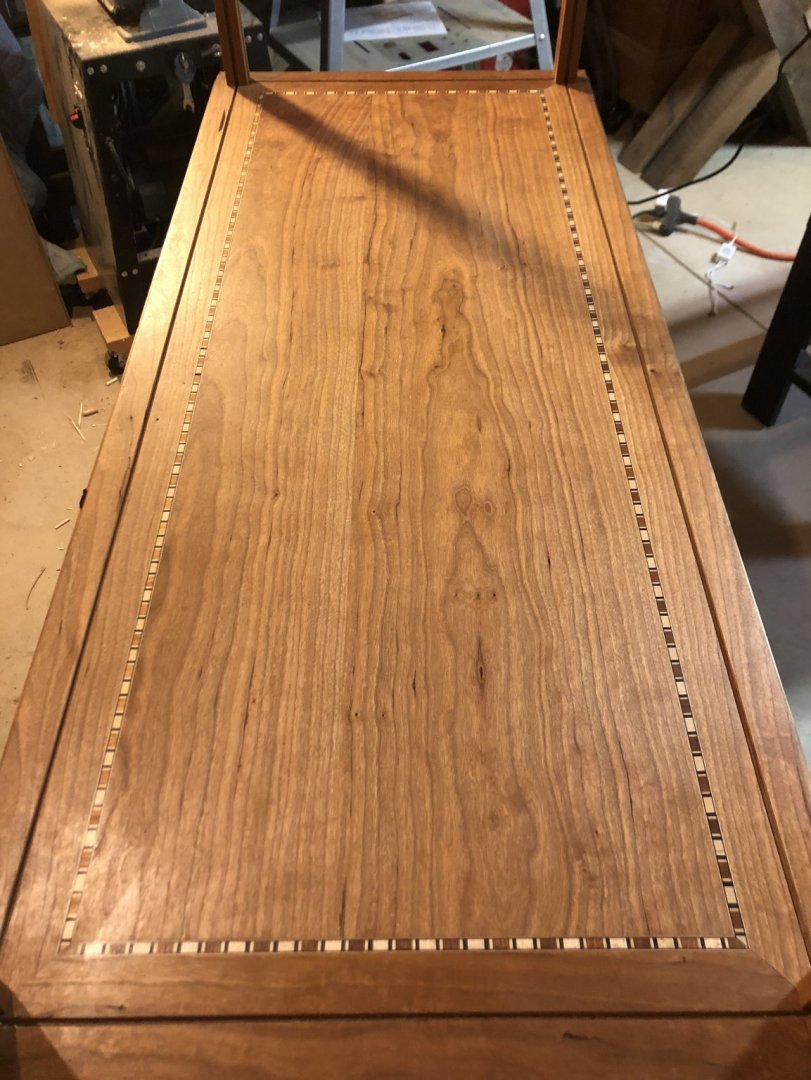
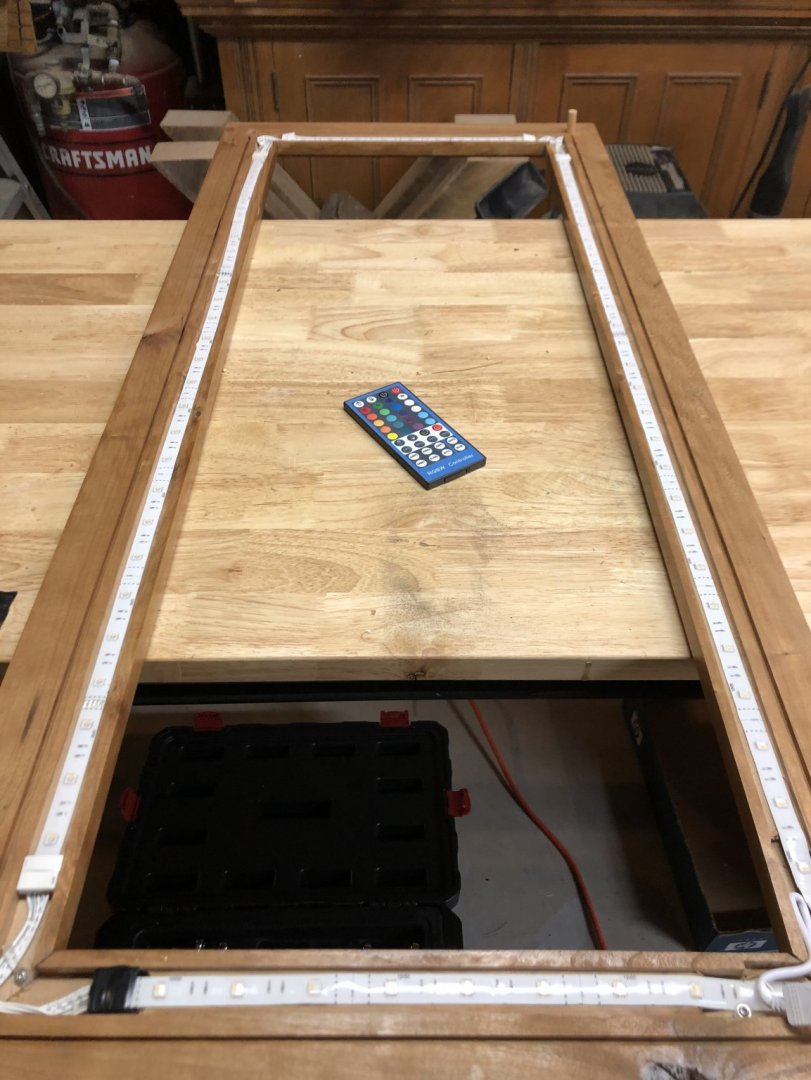
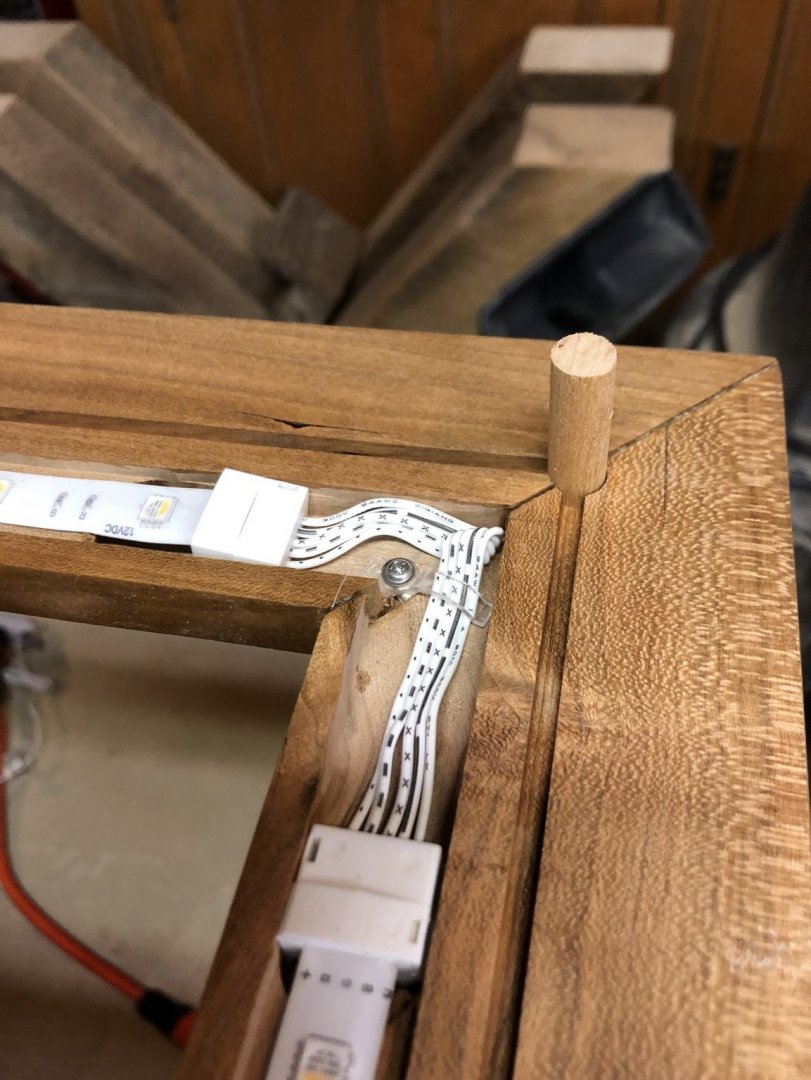
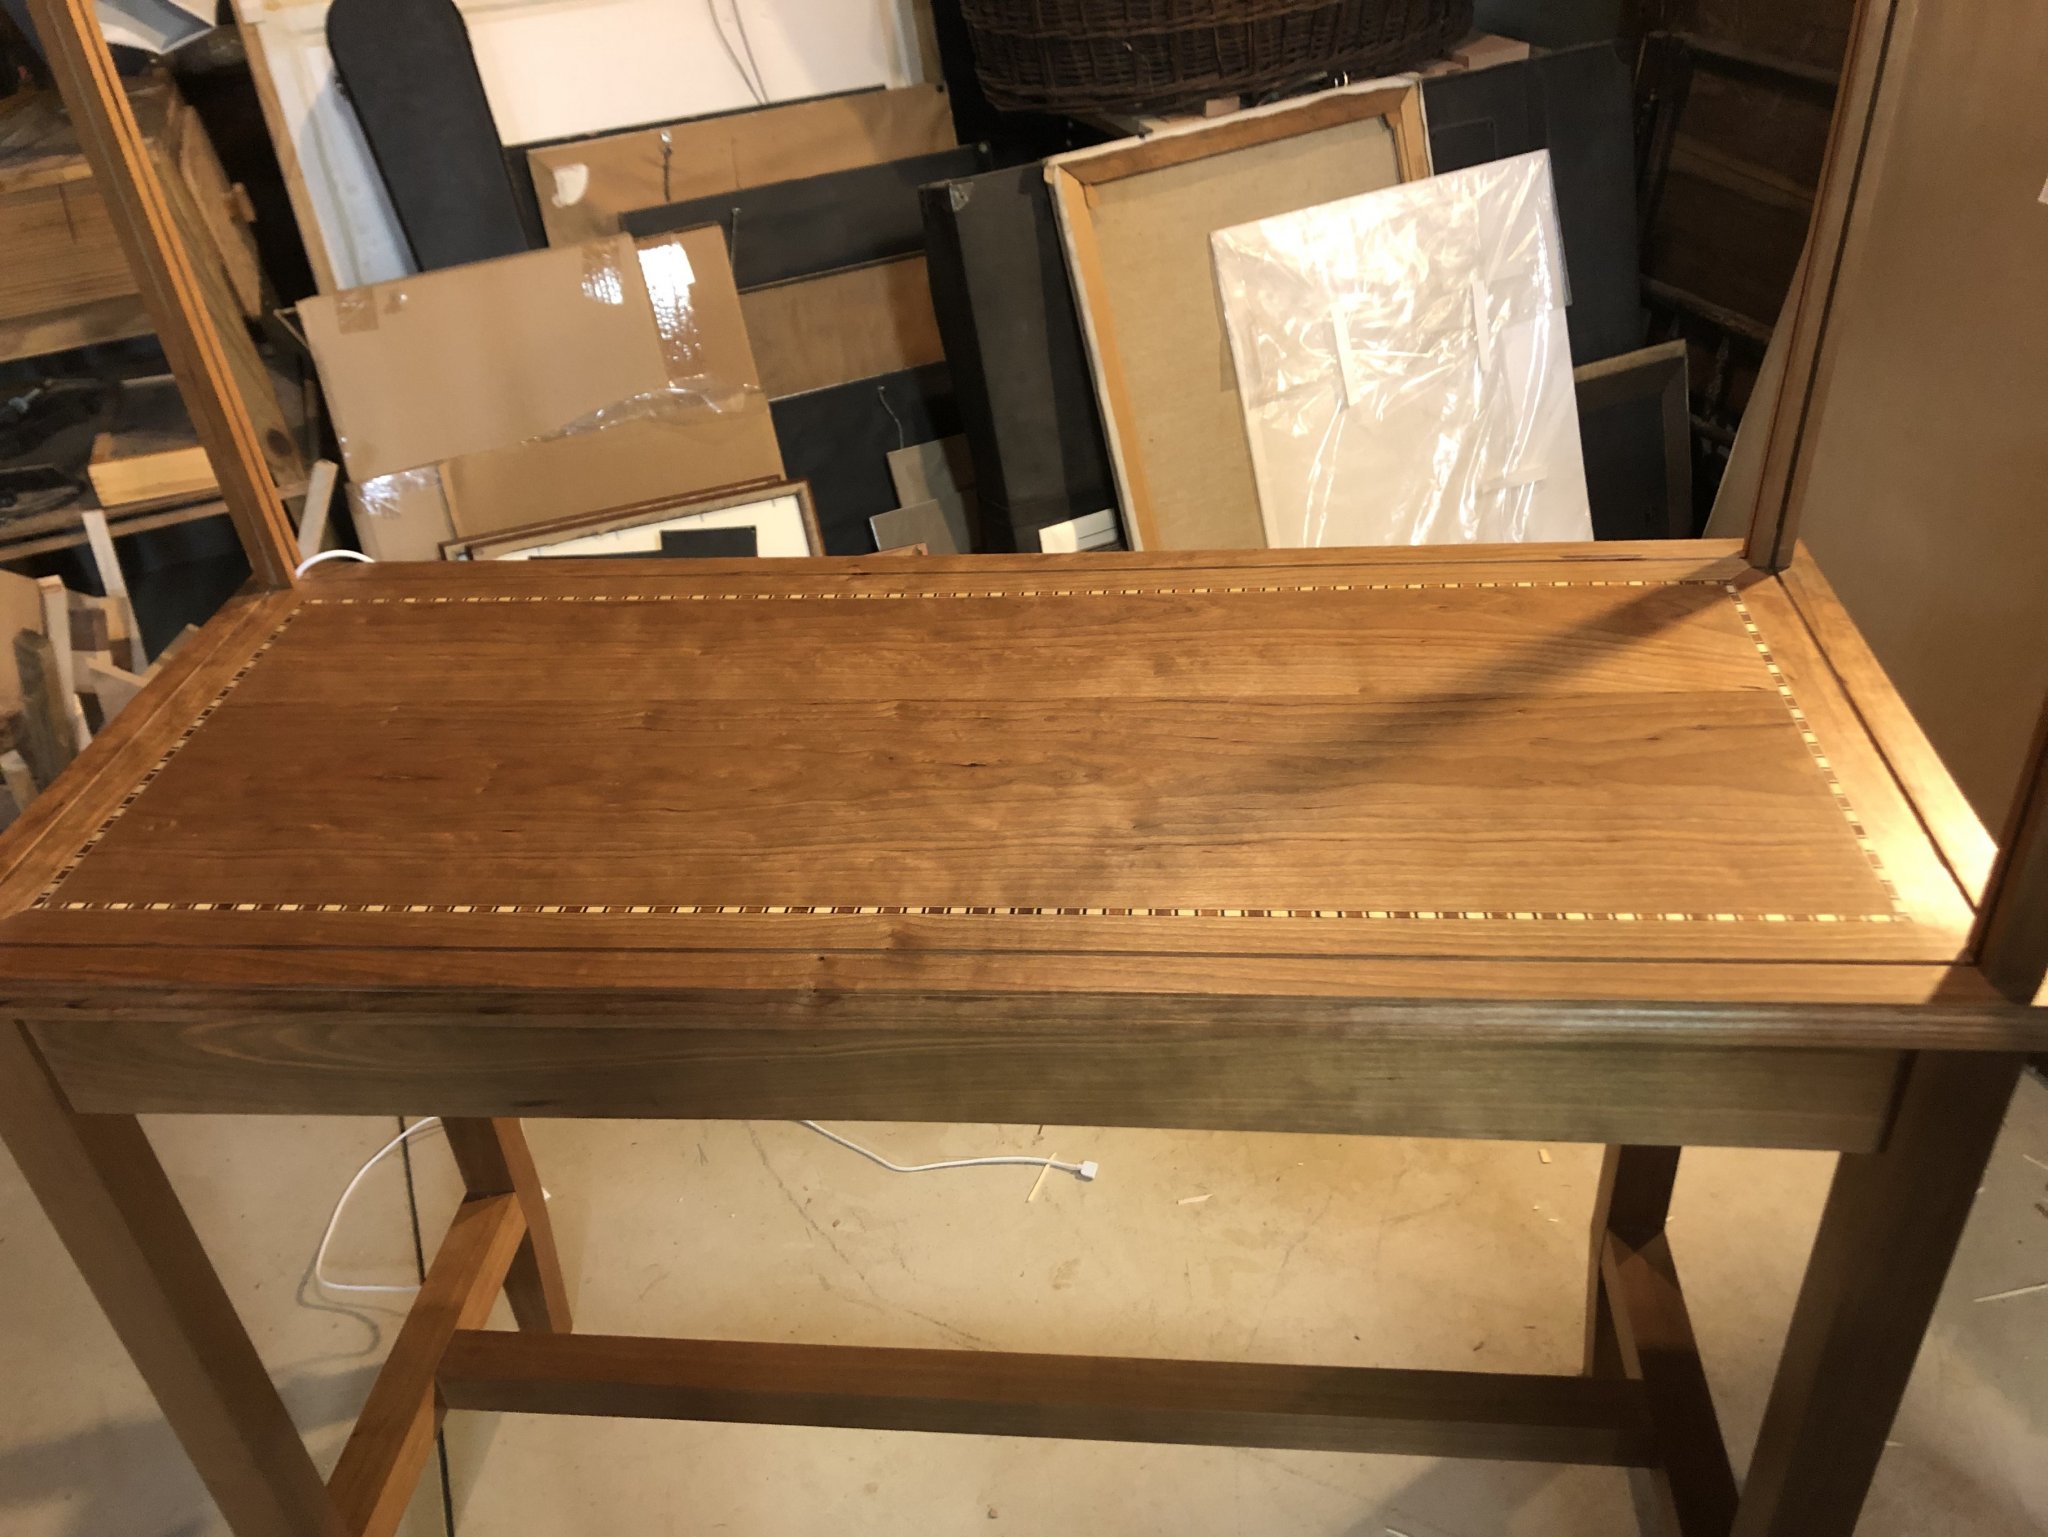
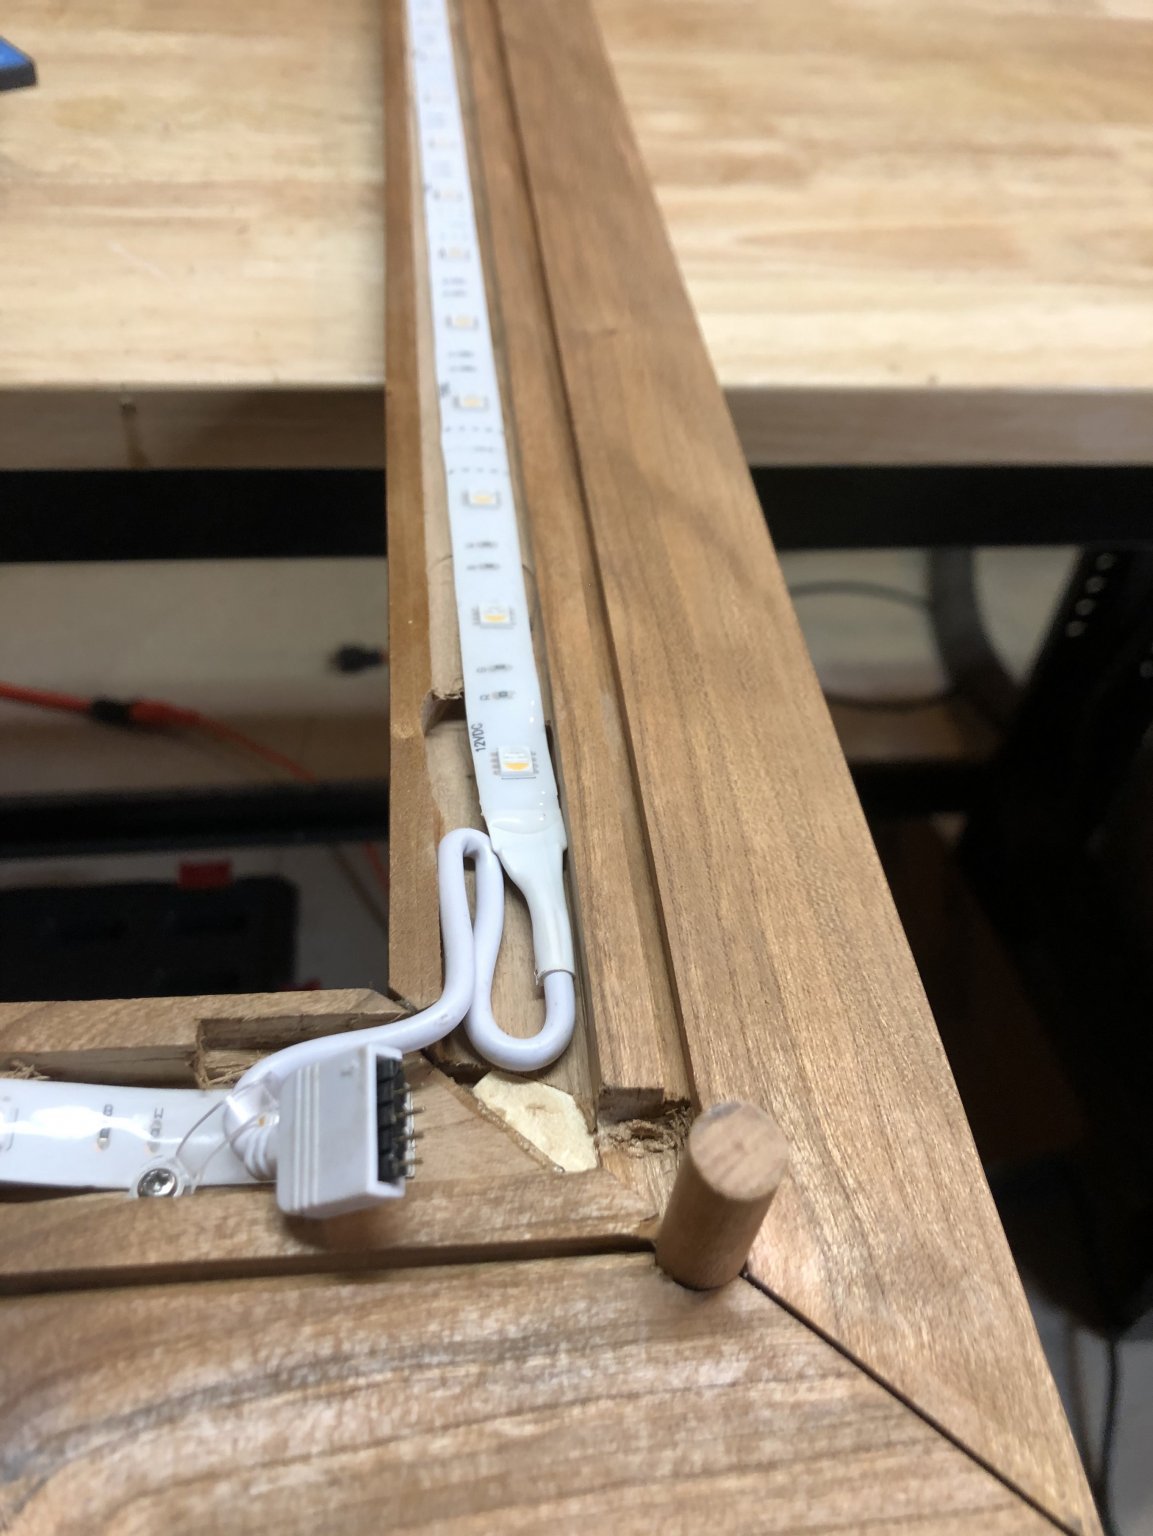
 DISPLAY CASE While I was away from my log, I did work on building a display case and table. I had some great cherry that I harvested from my farm, and used that for the base. It has great grain. I added a decorative inlay. I also decided to add LED strap lighting. That took some figuring. I decided to run the cord down one of the corner posts inside the groove for the glass. I cut a channel along the top rails. The strap lighting has adhesive that adhered to the bottom of the channel. I had to purchase corner splices. I have added photos. When I dry fitted everything together and checked out the lighting, I realized that the channel was not deep enough to hide the glare from the LED light emitters. I will be adding some thin trim pieces to fix this. I love the lighting. While it is LED, the system has a remote that gives me the ability to change the lighting quite a bit. I can set it with a low warm glow or bright LED. When I get everything put together and put the case in place, I will experiment to see what lighting looks best. Next up, mounting the ship…. A daunting challenge that I should have considered a long time ago. More on that later.


- 648 replies
-
- 9
-

-
- niagara
- model shipways
- (and 1 more)
-
Looking good Tom. I like the support rods.
-
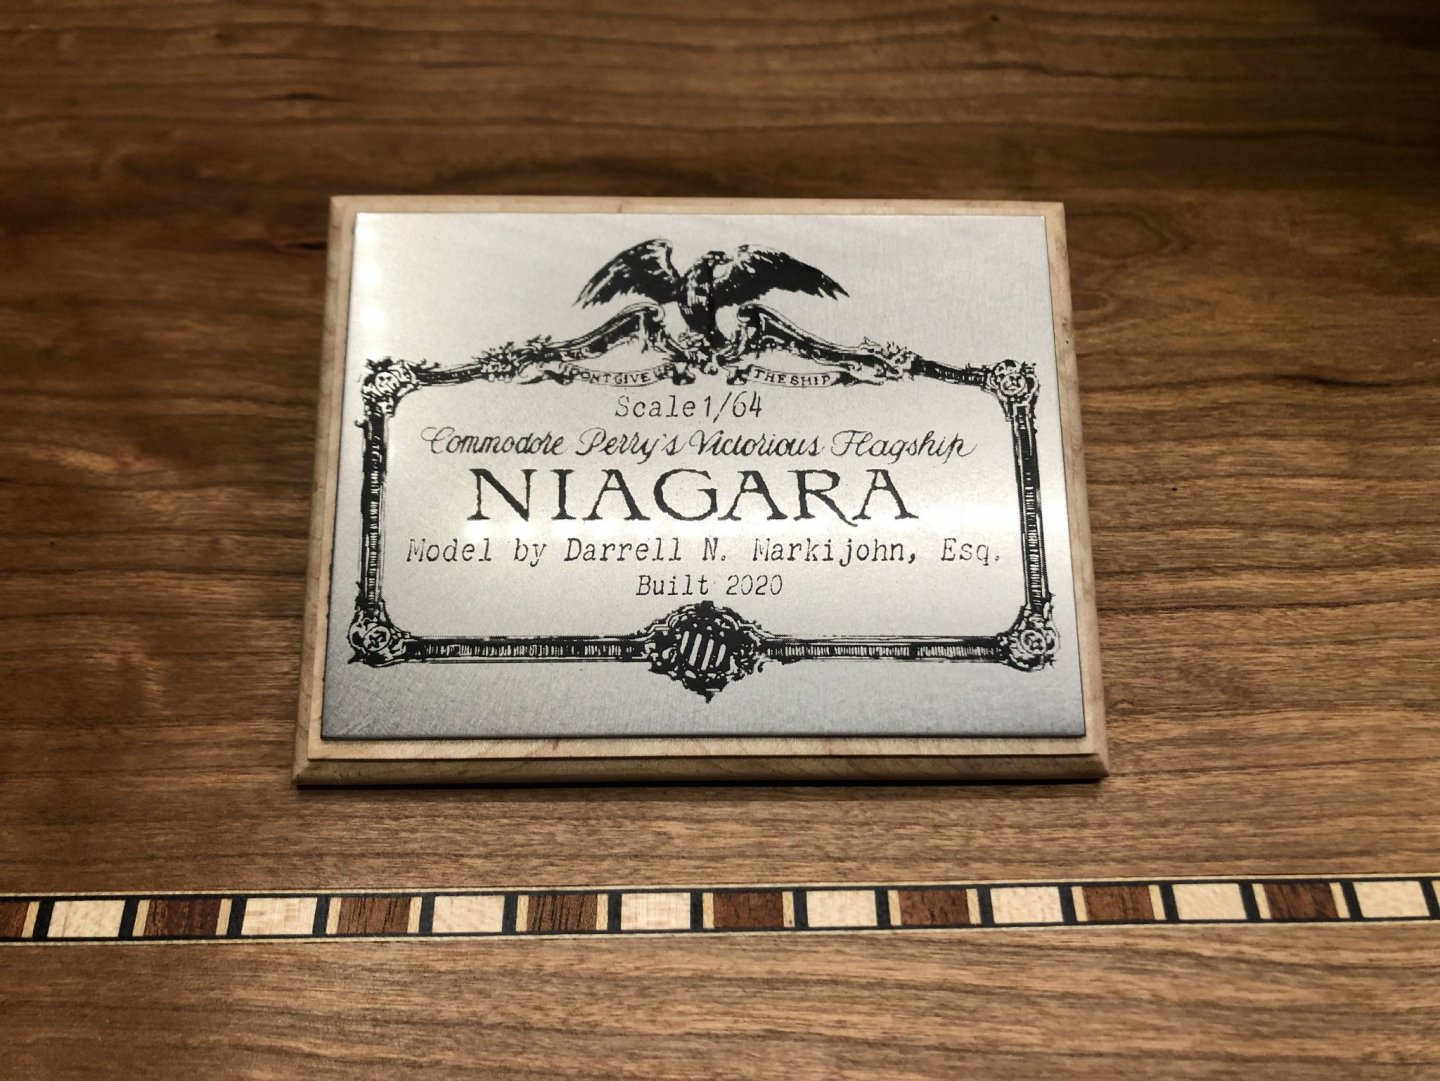
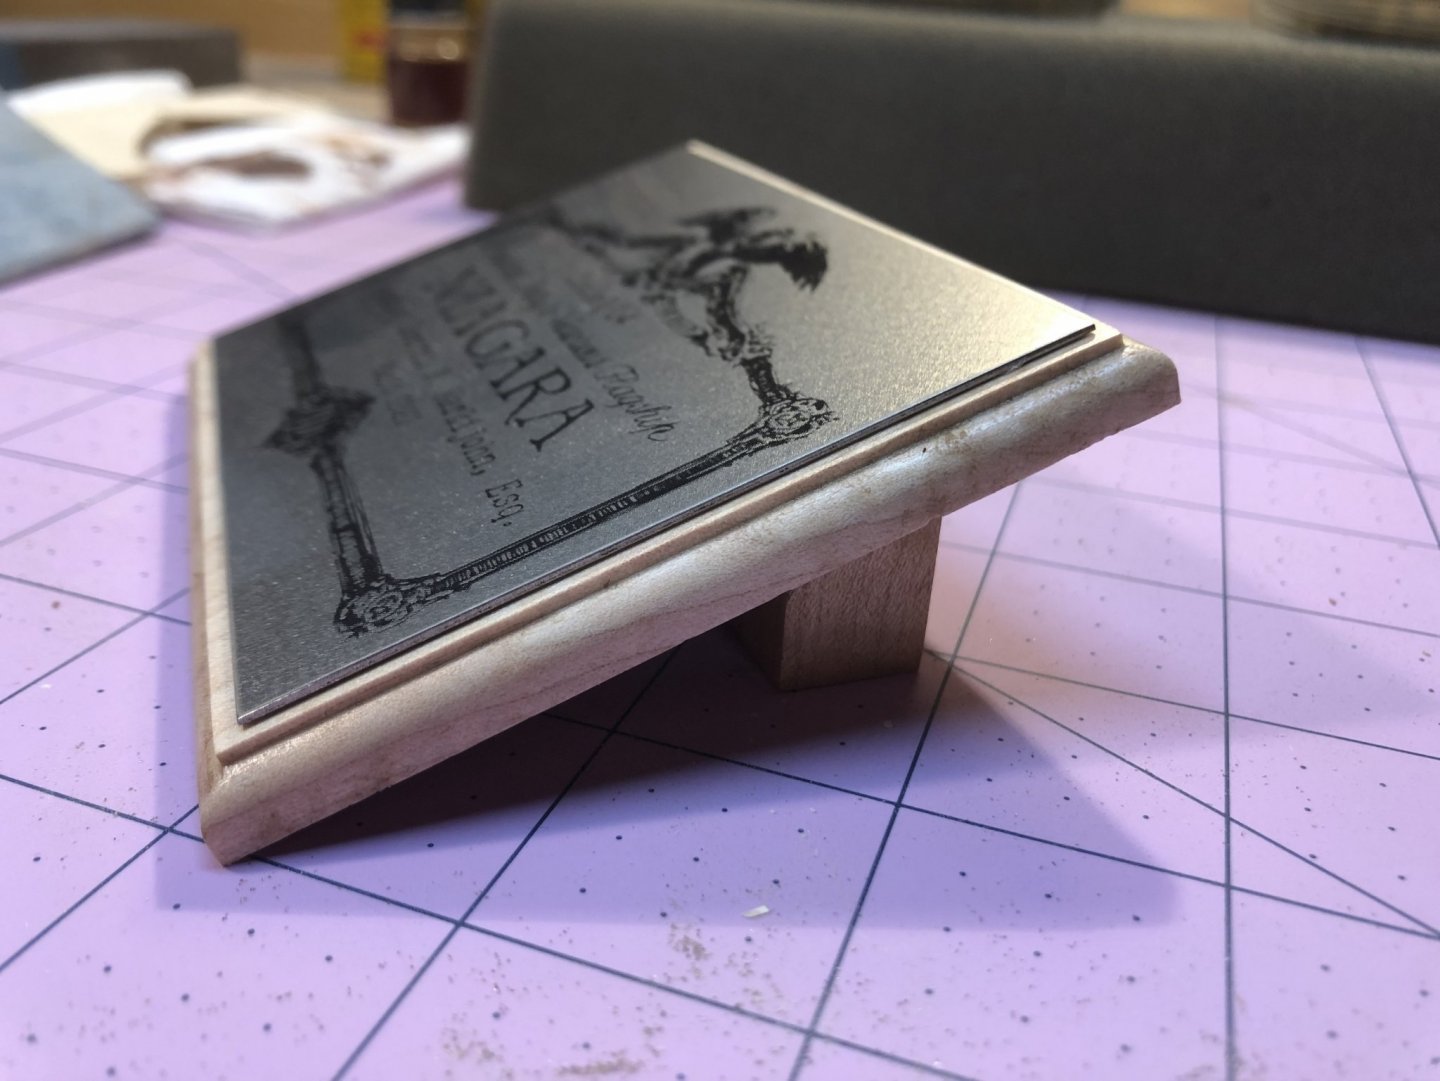
NAMEPLATE I put the nameplate together. I scanned the image from the original rebuild plans from the Commonwealth of Pennsylvania, manipulated it on my computer and added my name, scale and date. I sent it to a trophy shop who burned the stainless steel plate. I made the base from some tiger maple I had in my scrap pile.
- 648 replies
-
- 7
-
-

-
- niagara
- model shipways
- (and 1 more)
-
Hey Mike, (Meddo) The boats are indeed stuck to the ship. But I must say, I built them exactly to plans, and the lowering lines are hooked to rings secured to the bottom of the keel. When I rigged them to the davits, I thought I would just let them hang. Except that they kept rolling over to the side. So that begs a question - unless kept totally balance from port to starboard, how in the heck did the crew lower these guys with tipping them over? Mikiek, Great to hear from you. It has been a while. I am glad you have stopped in to urge me to the finish line. I missed your careful eye and sage advice. Sea Hoss, Thanks for the compliments. Having a forum member leave comments on my log is even better than successfully spinning a tiny oar in a cordless drill and not breaking it.
- 648 replies
-
- 2
-
-
- niagara
- model shipways
- (and 1 more)
-
Mike, I thought about adding ballast to the little boats. I grabbed some lead slip shots from my fishing tackle box, but thought it might look a little dumb to see a pile of "cannon balls" in my ship's boats. In the end, I finally bit the bullet and glued them down. It was hard to put glue on the stern and channels. Hope the ship doesn't get in trouble because the crew will have a hard time launching these boats. The finish line is in sight. Sounds like the club is going to give a visual meeting a try. Hope so.
- 648 replies
-
- 2
-
-
- niagara
- model shipways
- (and 1 more)
-
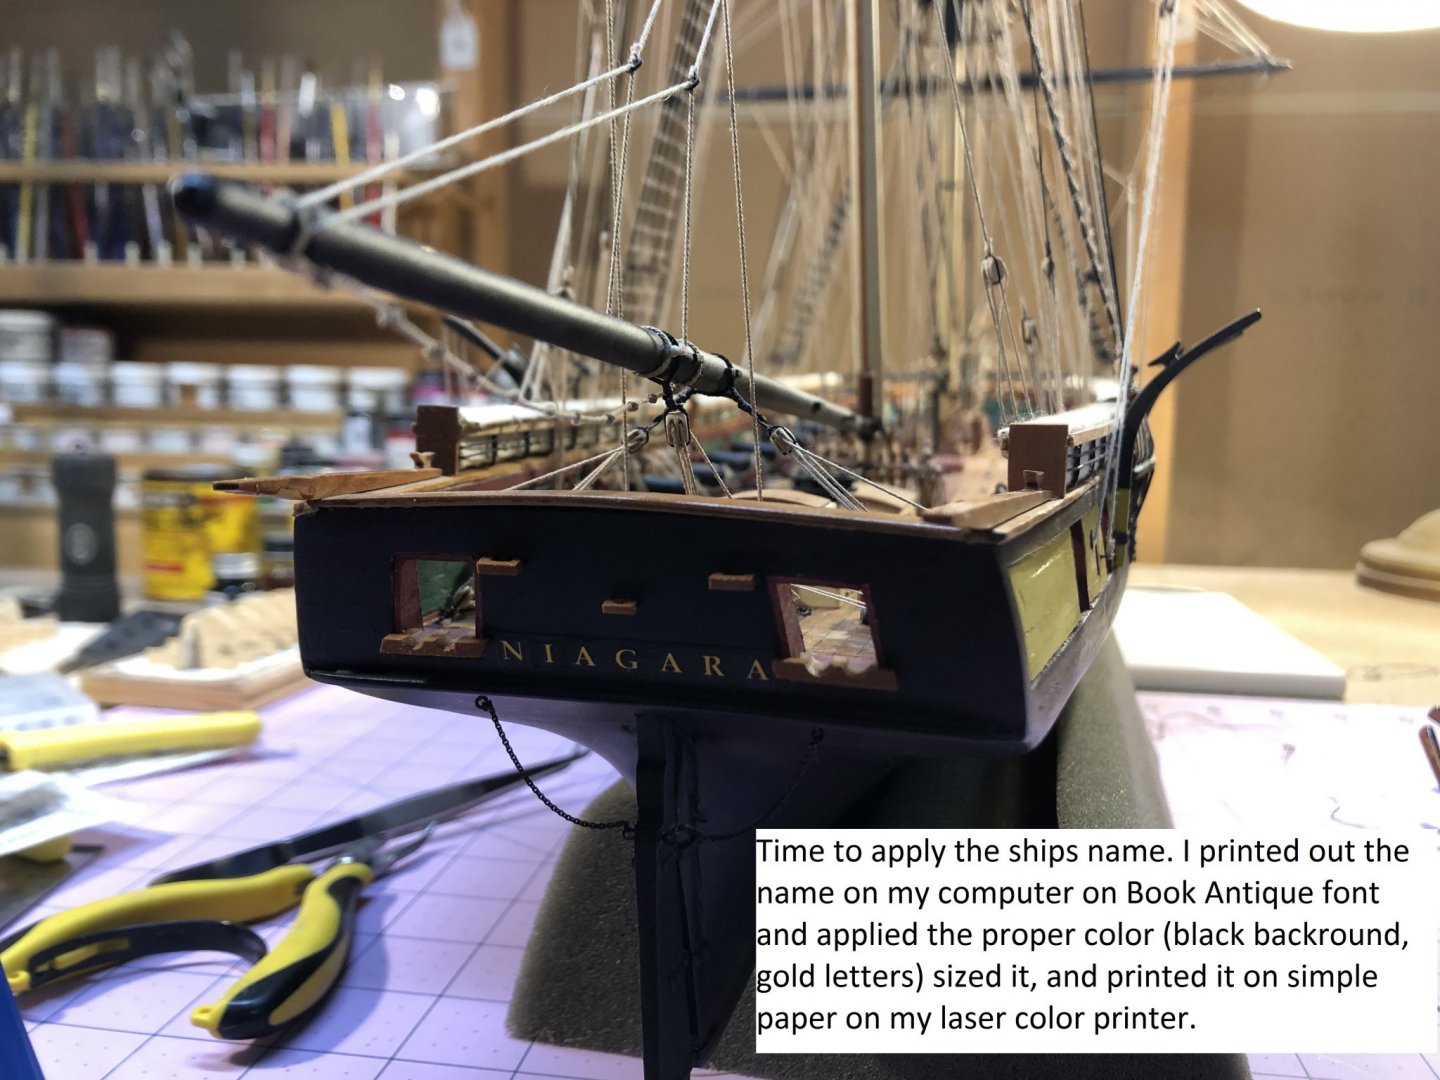
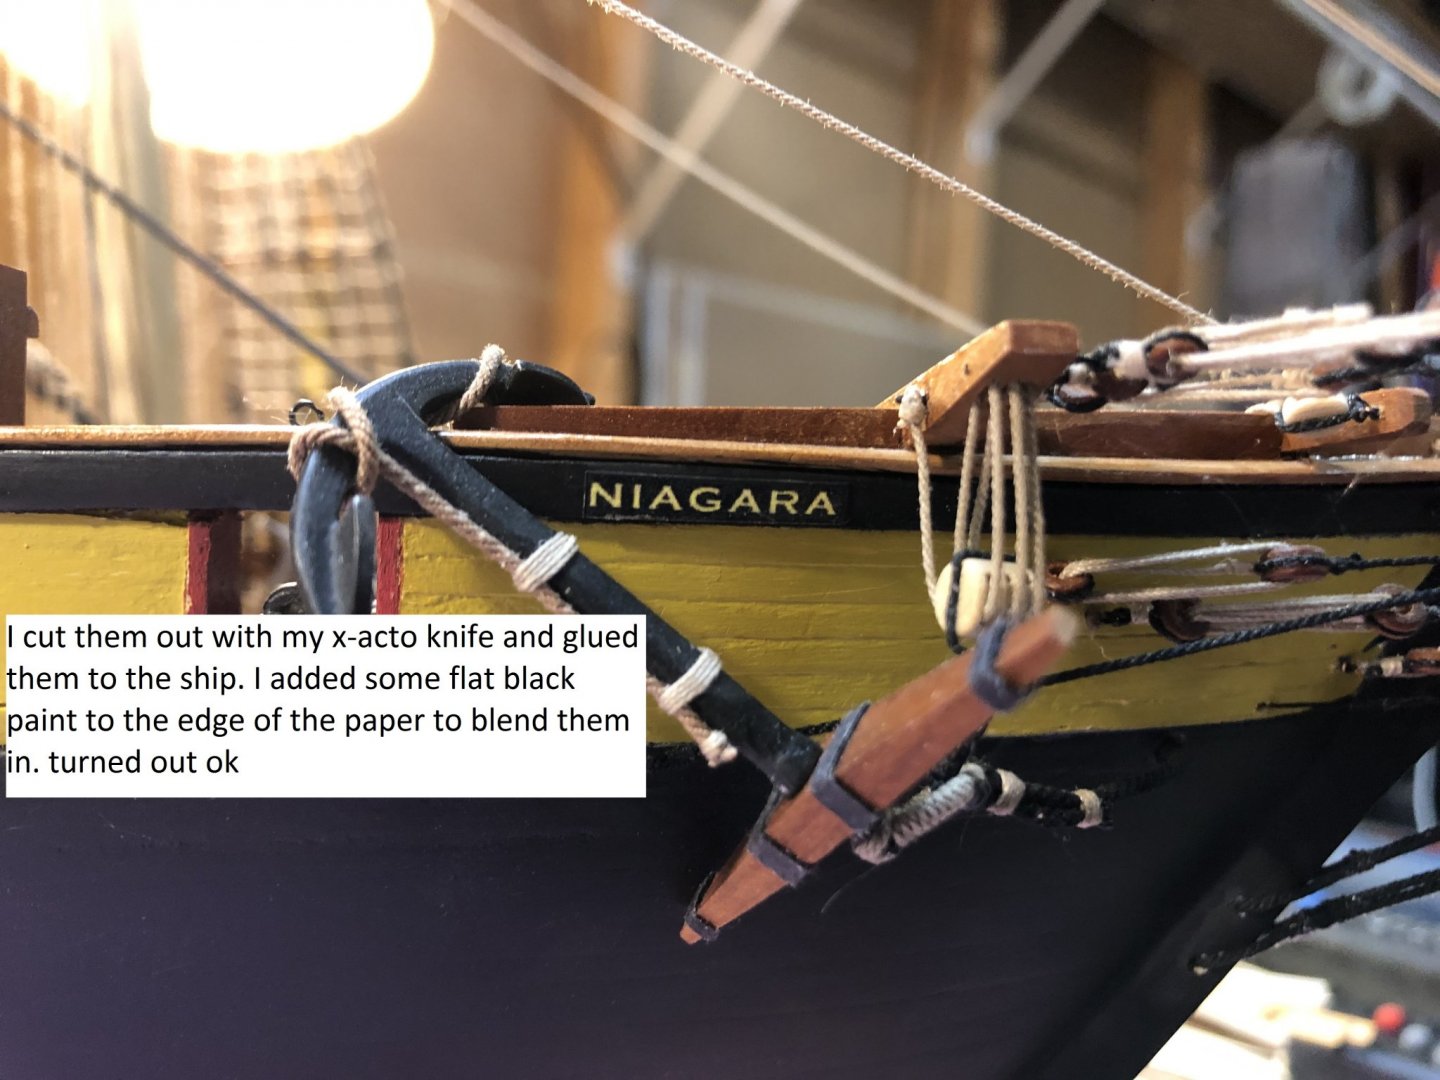
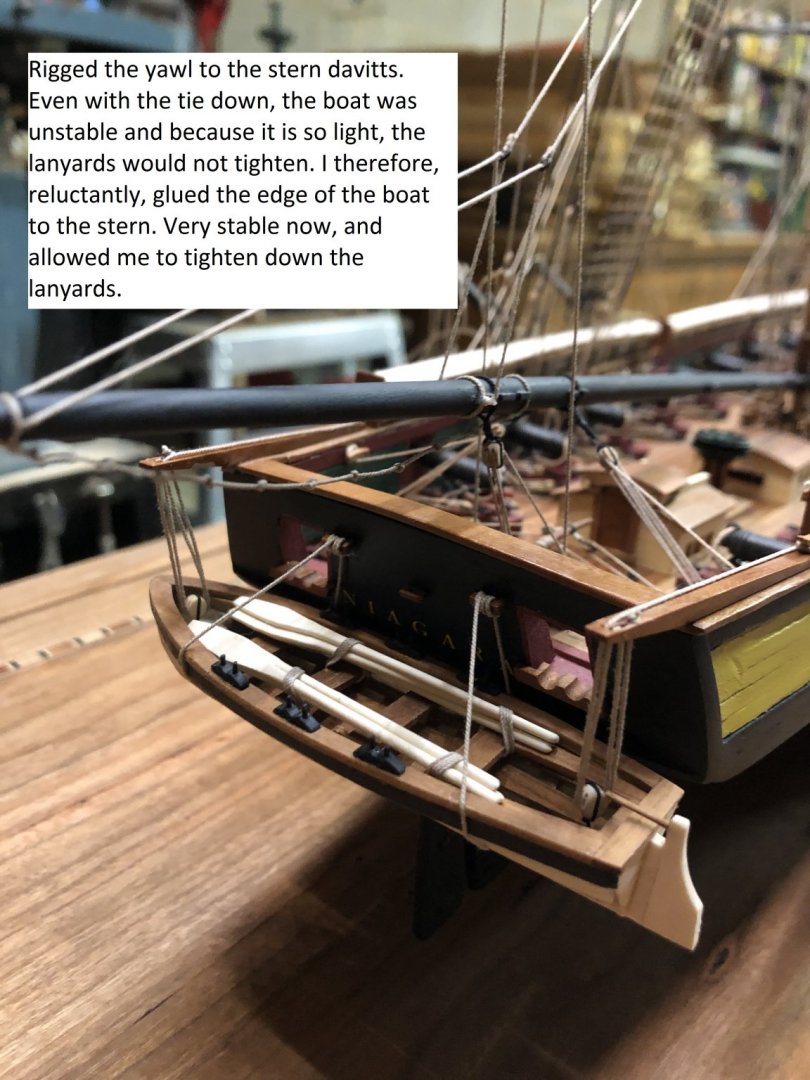
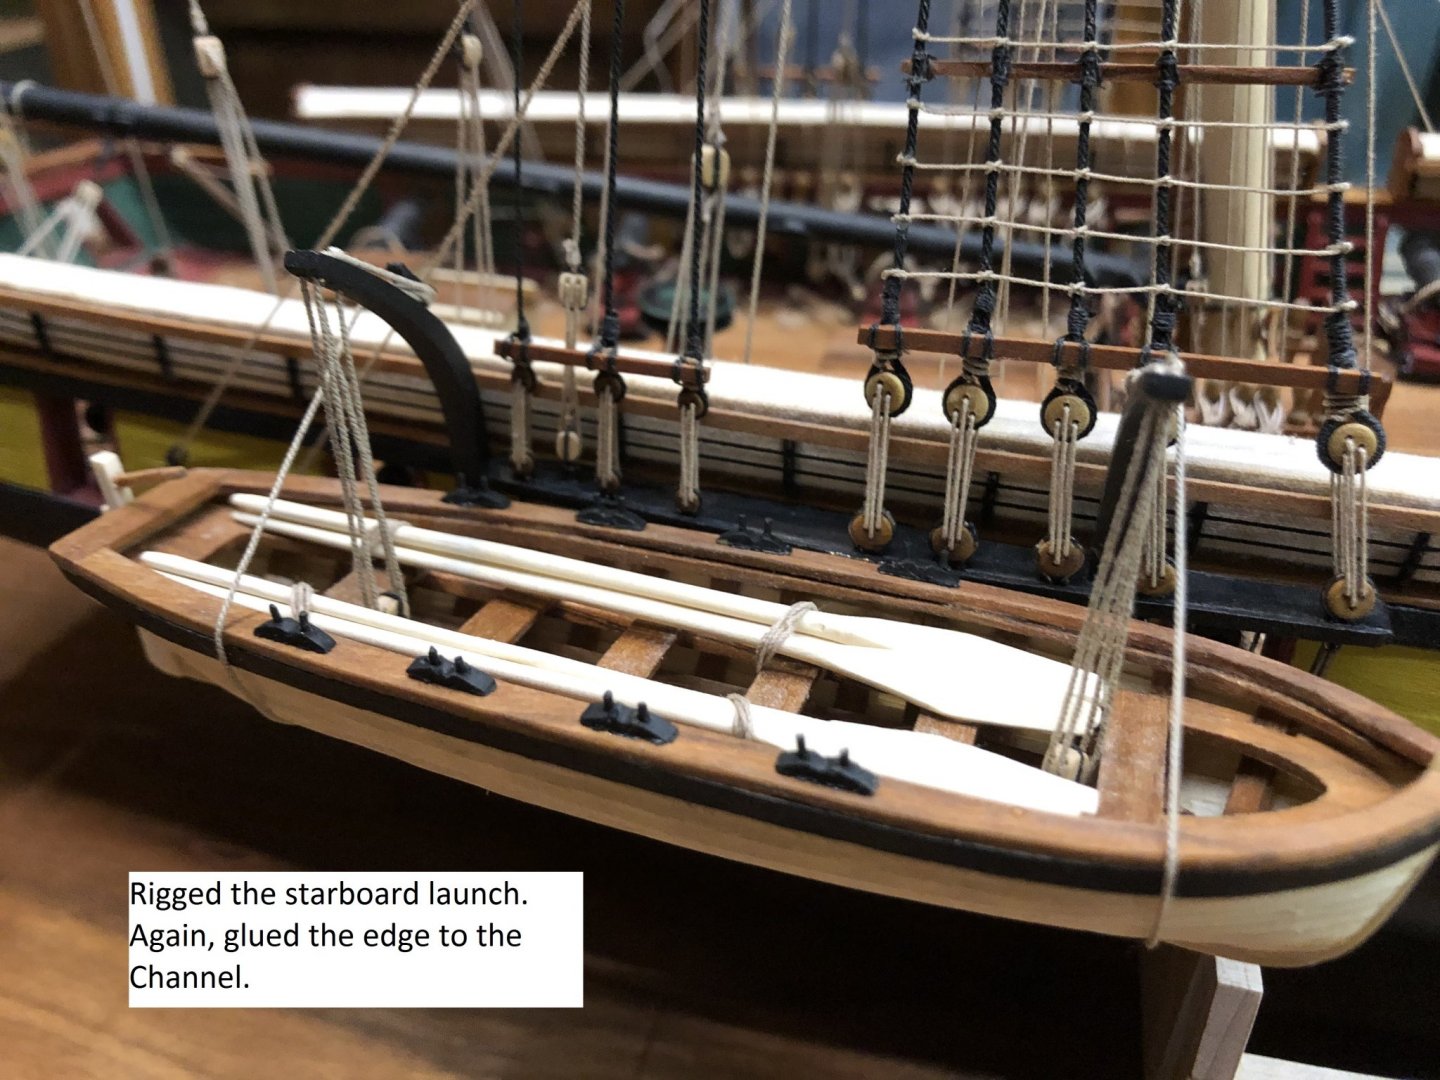
APPLYING THE SHIP'S NAME AND RIGGING THE SHIP'S BOATS I spent the last couple of days experimenting with "painting" the ships name on the stern and bow. Thought about decals and letter stencils but in the end, took the simple way out. Since the hull is painted flat black, I printed out the name in gold letters on a black field from my computer. I used Book Antique font. It turned out ok. Then I rigged the ships boats to the davits. That was terribly tedious.... of course so is everything else I have done on this build. Here are some photos.
- 648 replies
-
- 9
-
-
- niagara
- model shipways
- (and 1 more)
-
HMS Victory by Helli - Caldercraft
6ohiocav replied to Helli's topic in - Kit build logs for subjects built from 1751 - 1800
Helli, You didn't do all of this work in 5 days??? Your slacking off. Just kidding of course. Your log caught my eye since it was evident that you would be downloading a ton of content in a short period of time to catch up to your year and a half building process. Getting all of that fresh content all at once is great for a viewer. That will definitely keep me checking in often. And let me repeat.... your work is superb. -
HMS Victory by Helli - Caldercraft
6ohiocav replied to Helli's topic in - Kit build logs for subjects built from 1751 - 1800
Helli, Incredible work. Perhaps your first model ship, but obviously, not your first model. This kit is sitting on my shelf, and as I am about to finally finish my current project, you are giving me the incentive to tackle this monster. Your build log is only 5 days old, and I already have a lot of catching up to do. I will be following along. -
Mike, I was excited and ready to go to the March Meeting.... and then of course...... I think the April meeting may also be in jeopardy. Do you think the guys would be amenable to a virtual meeting of some sort. My firm has a dedicated conference call service. I am hoping to finally finish the Niagara by then. Stay safe.
- 648 replies
-
- 3
-
-
- niagara
- model shipways
- (and 1 more)
-
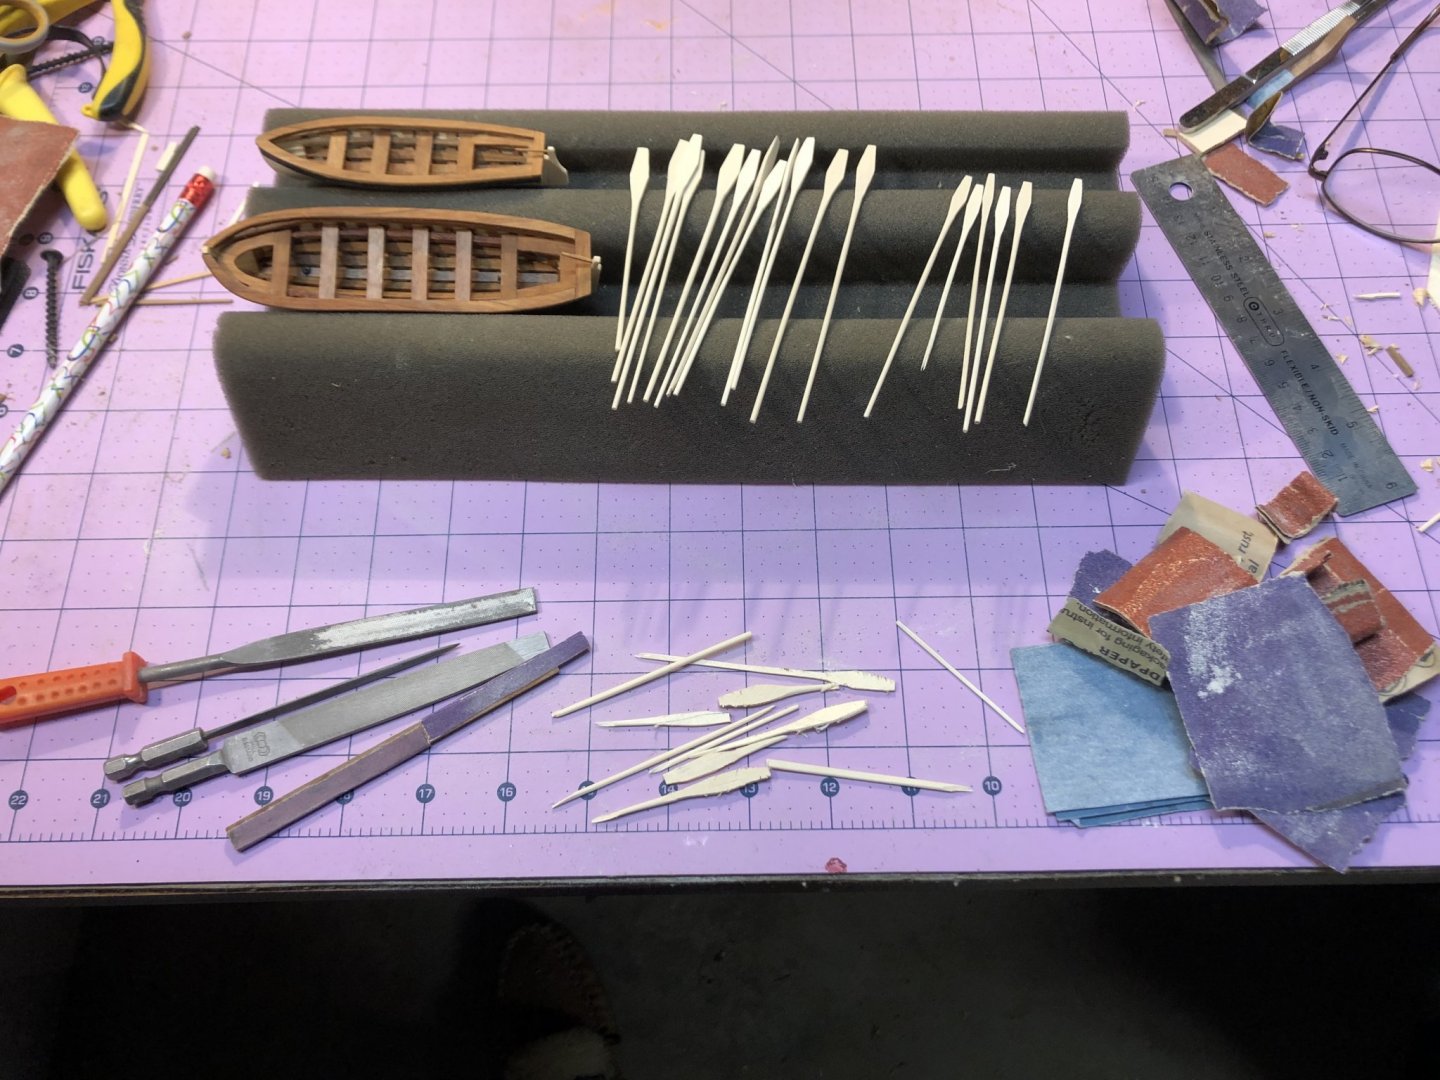
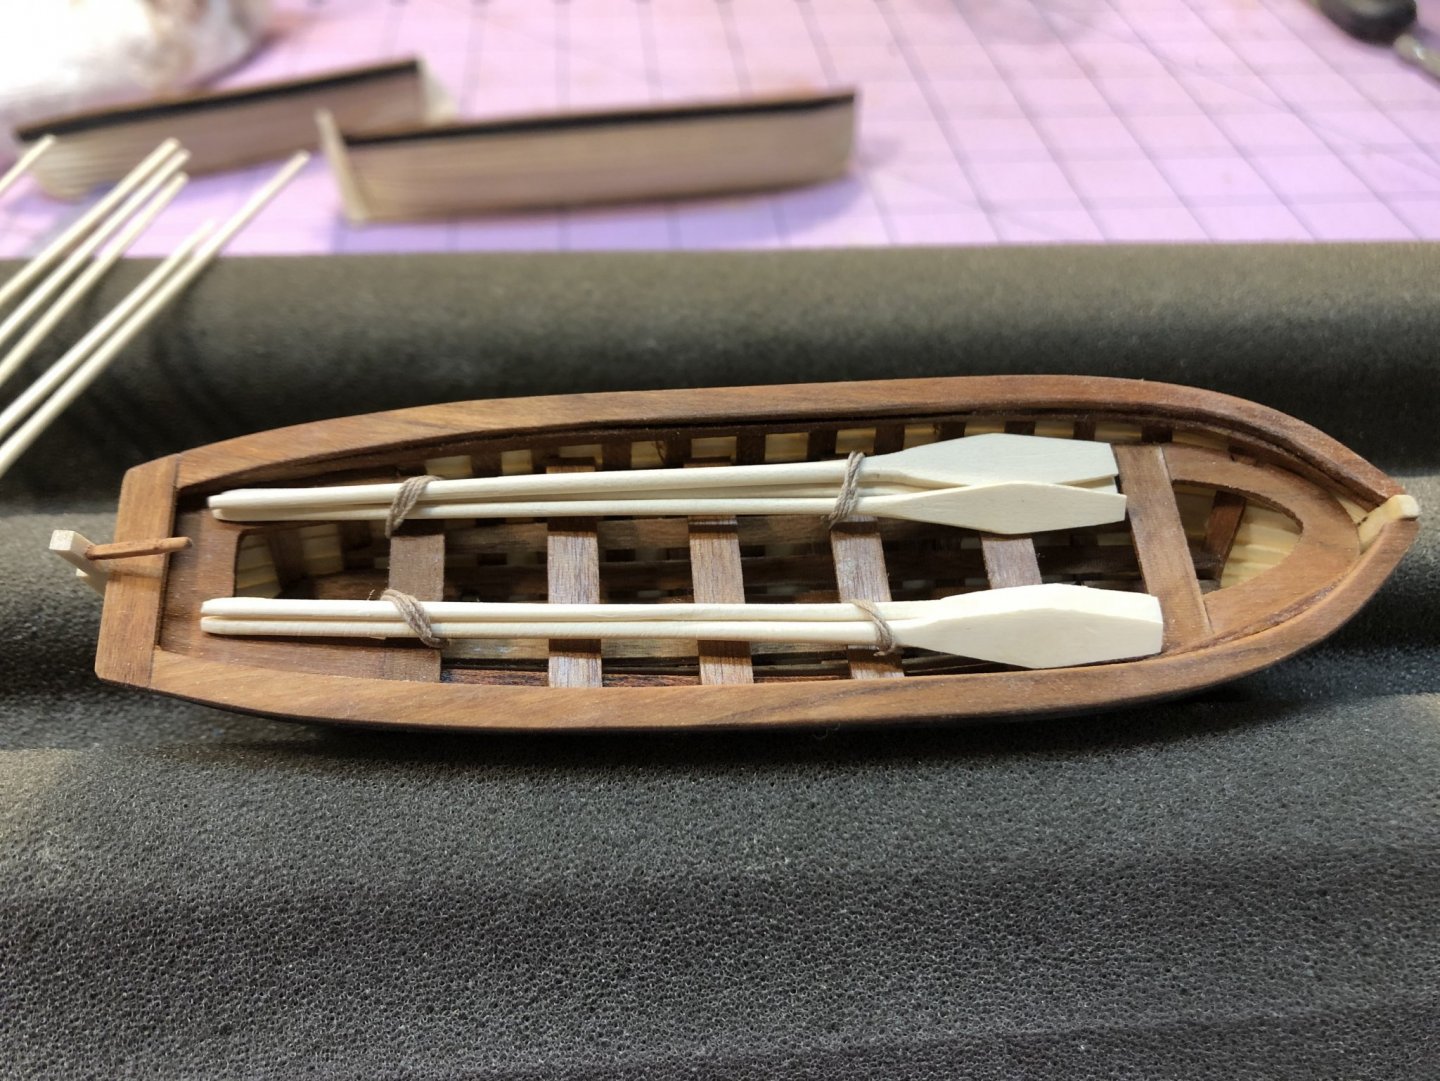
OARS I knocked out 20 oars on Sunday. I traced them onto Holly, cut them on the jig saw, mounted them into a cordless drill, rounded the handles with sand paper, and shaped the paddle with files. This is a delicate and mundane process with about a 30% failure rate. It takes 30 to come up with 20. I gathered them up and lashed them to the boats. Next up, oar locks and rigging the boats to the davits.
- 648 replies
-
- 5
-
-
- niagara
- model shipways
- (and 1 more)
-
Jerry, Good to see you back at it. I loved your Star Trek transporter accident metaphor. Can't wait to see you launch this girl.
- 97 replies
-
- 2
-
-
- macedonian
- frigate
- (and 2 more)
-
Mike, Hey friend, I have been lost at see for a while, but found my way back to my Niagara and catching up on my friend's builds. Your Enterprise looks great. I admire your courage to include sails. Now that I am working from home, I will find time to finally get my ship finished. Looking forward to chatting with you.
- 136 replies
-
- 2
-
-
- enterprise
- constructo
- (and 1 more)
-
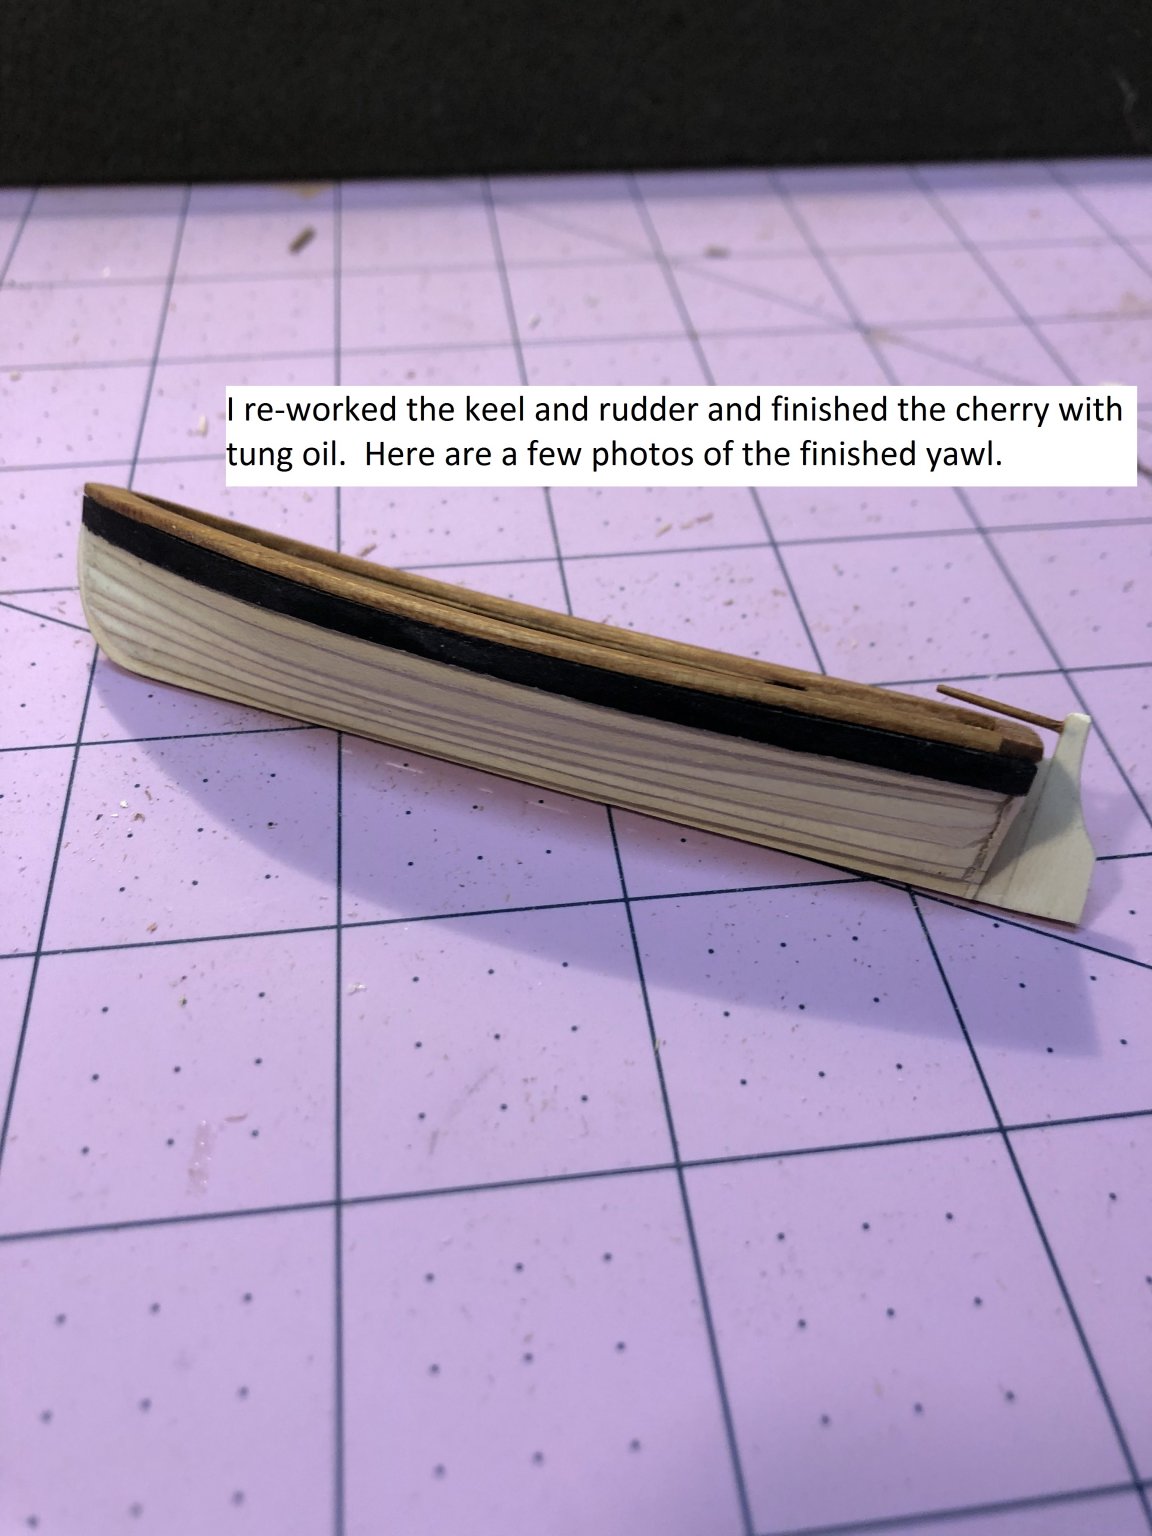
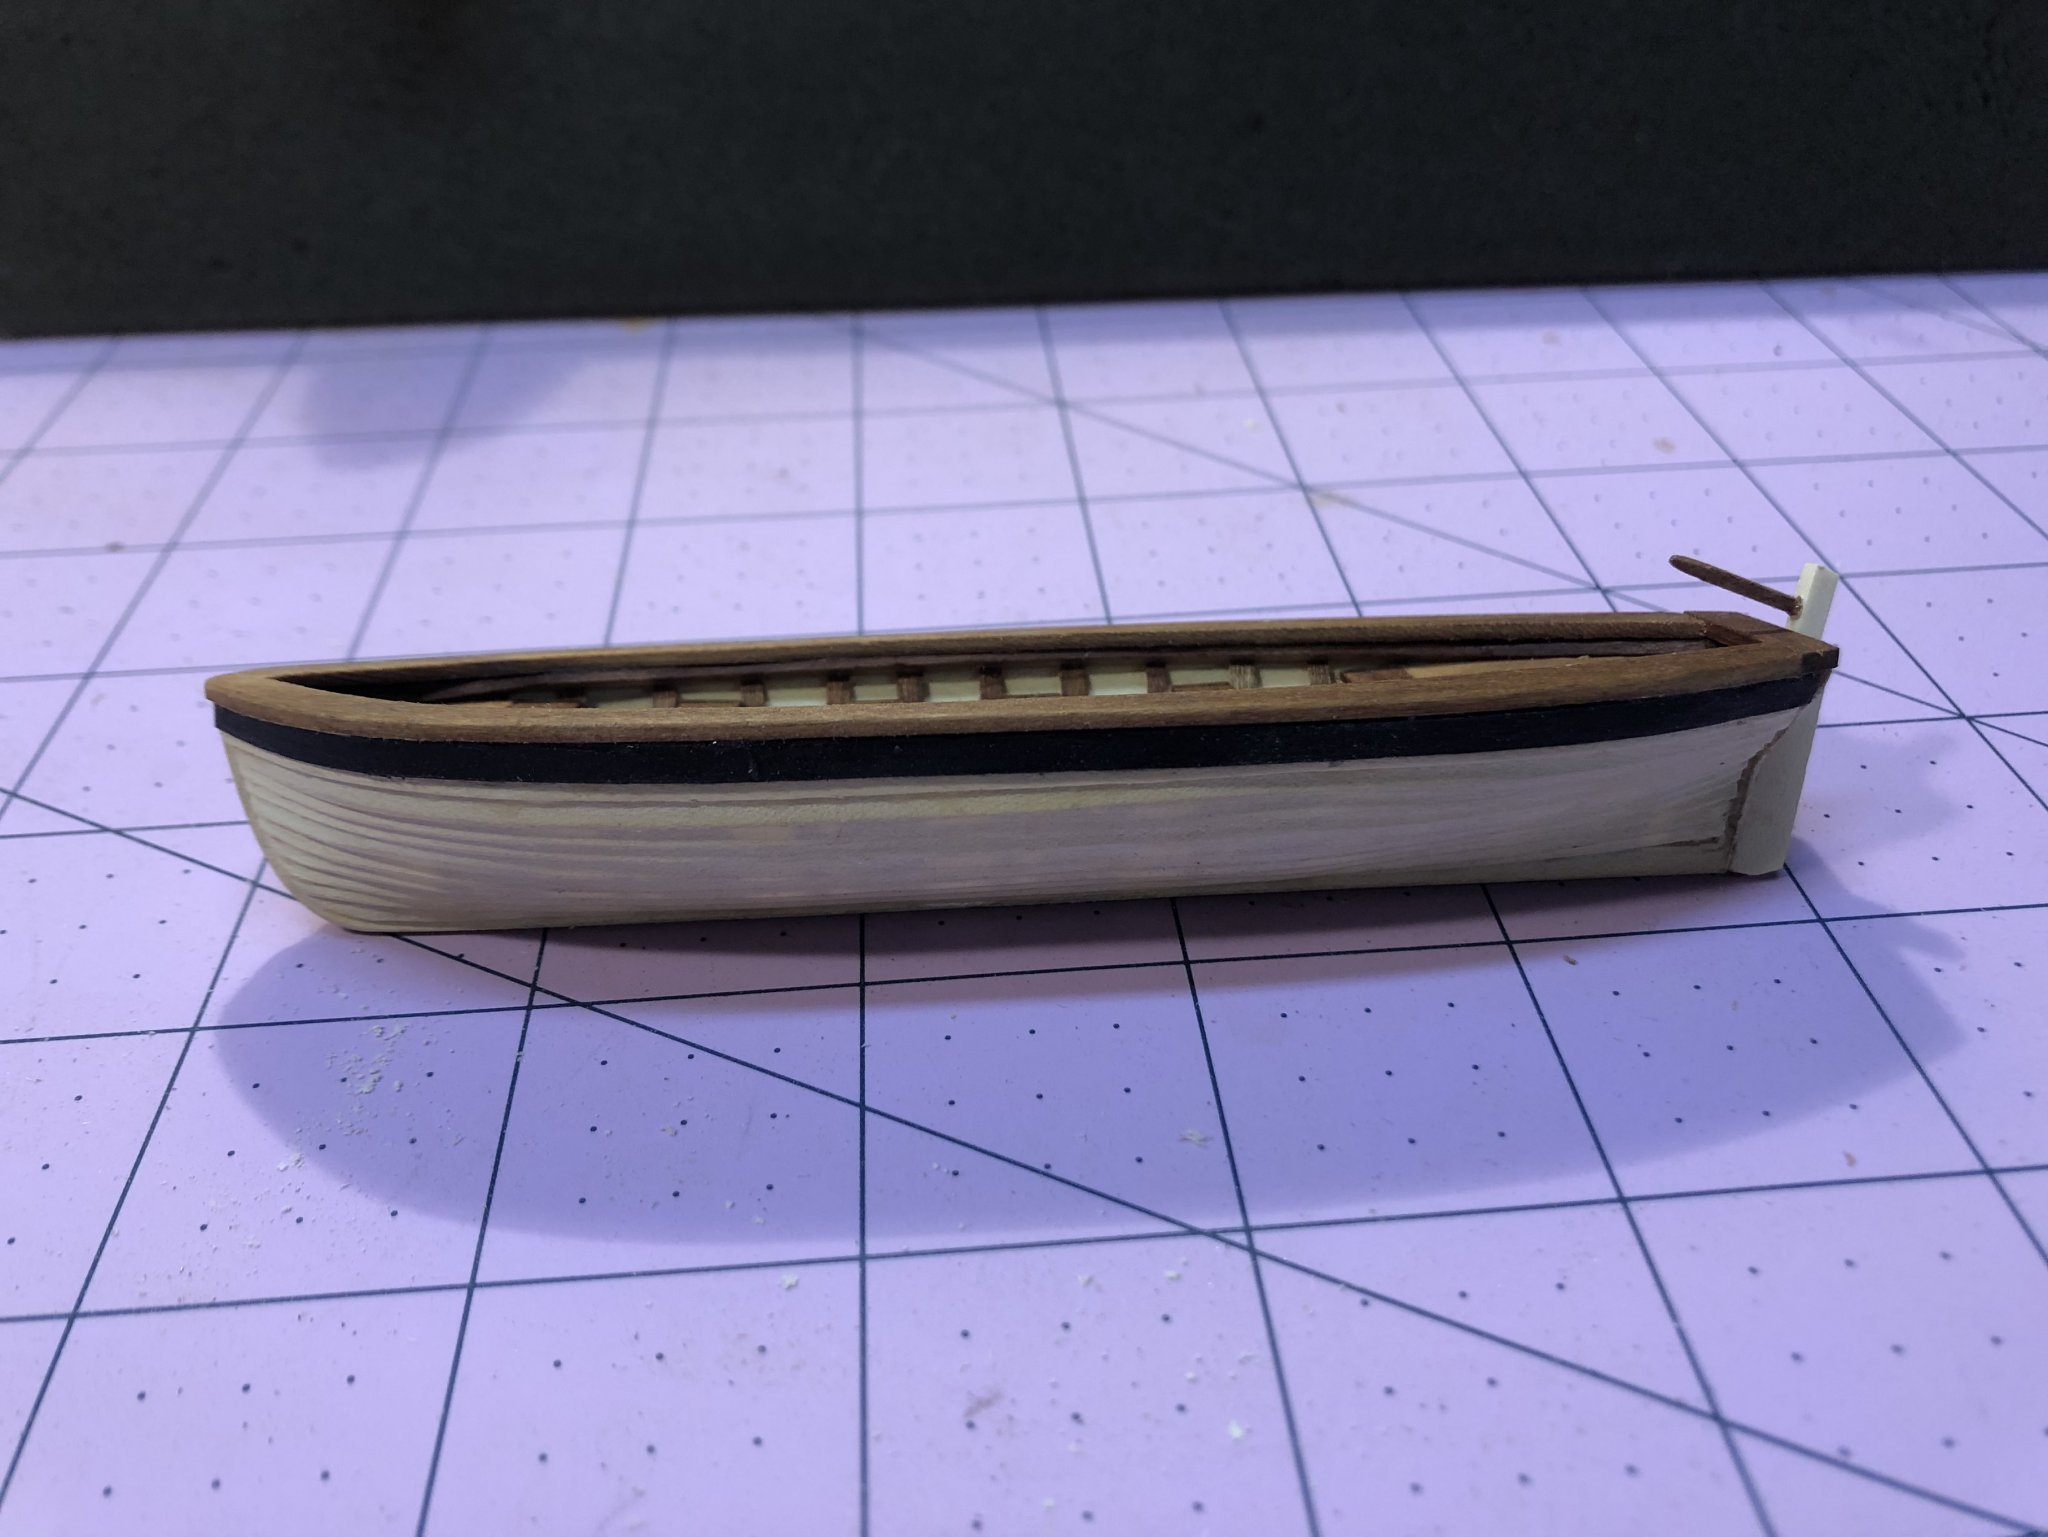
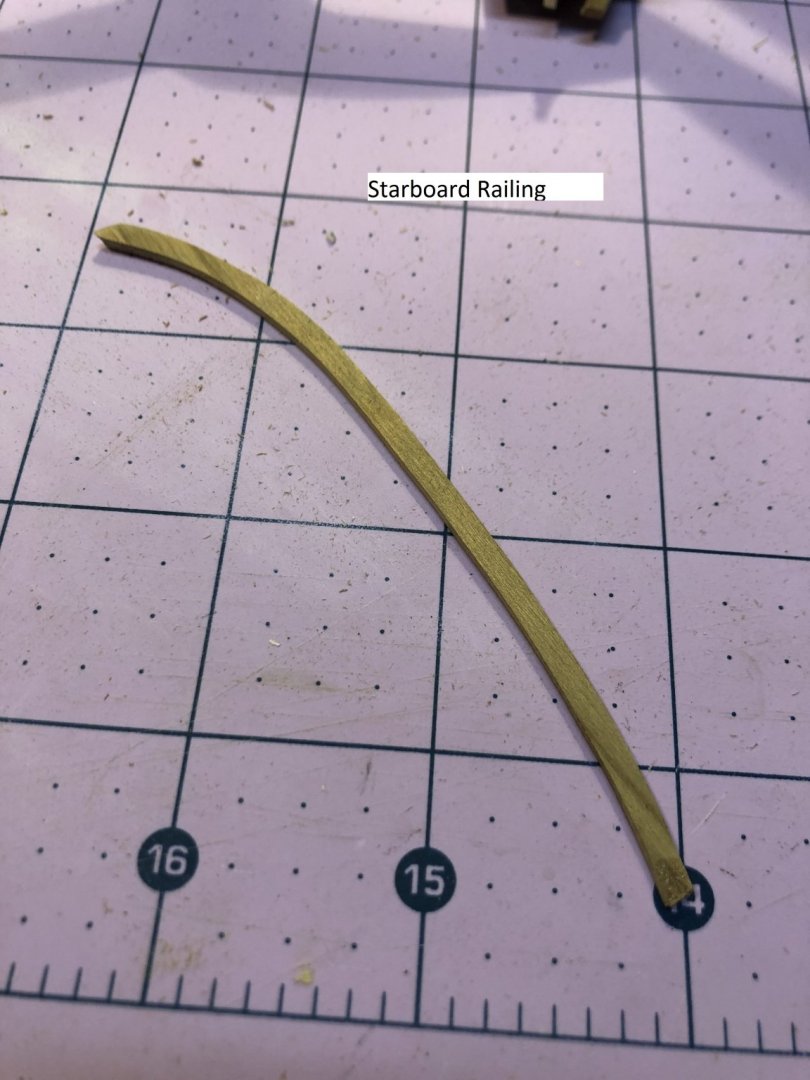
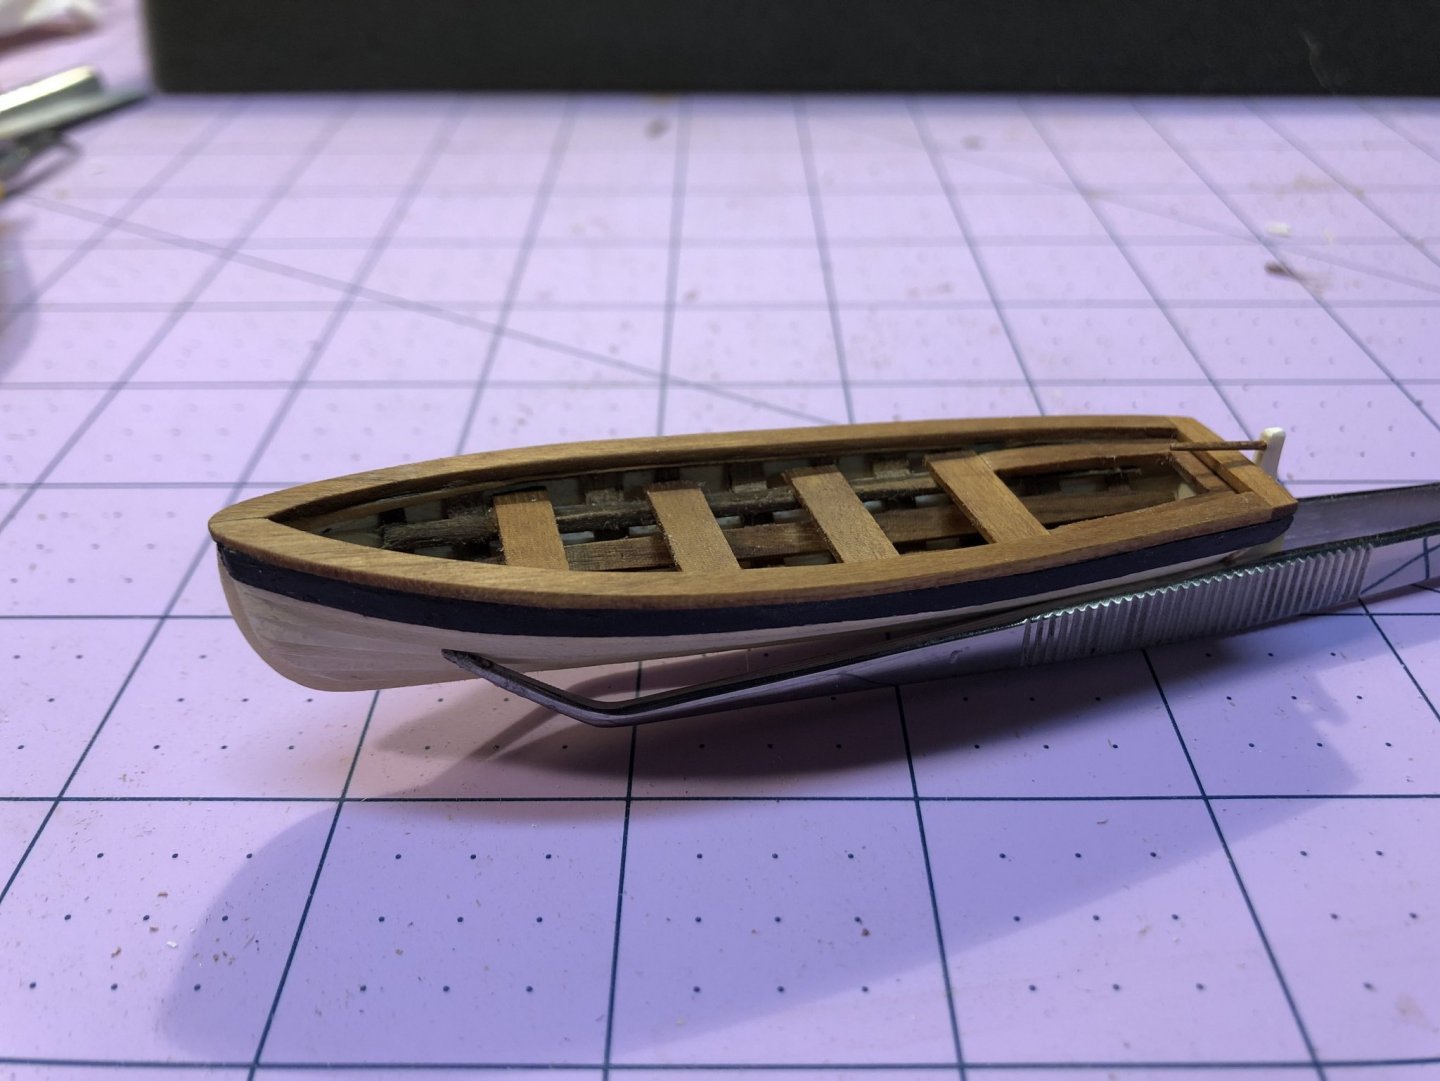
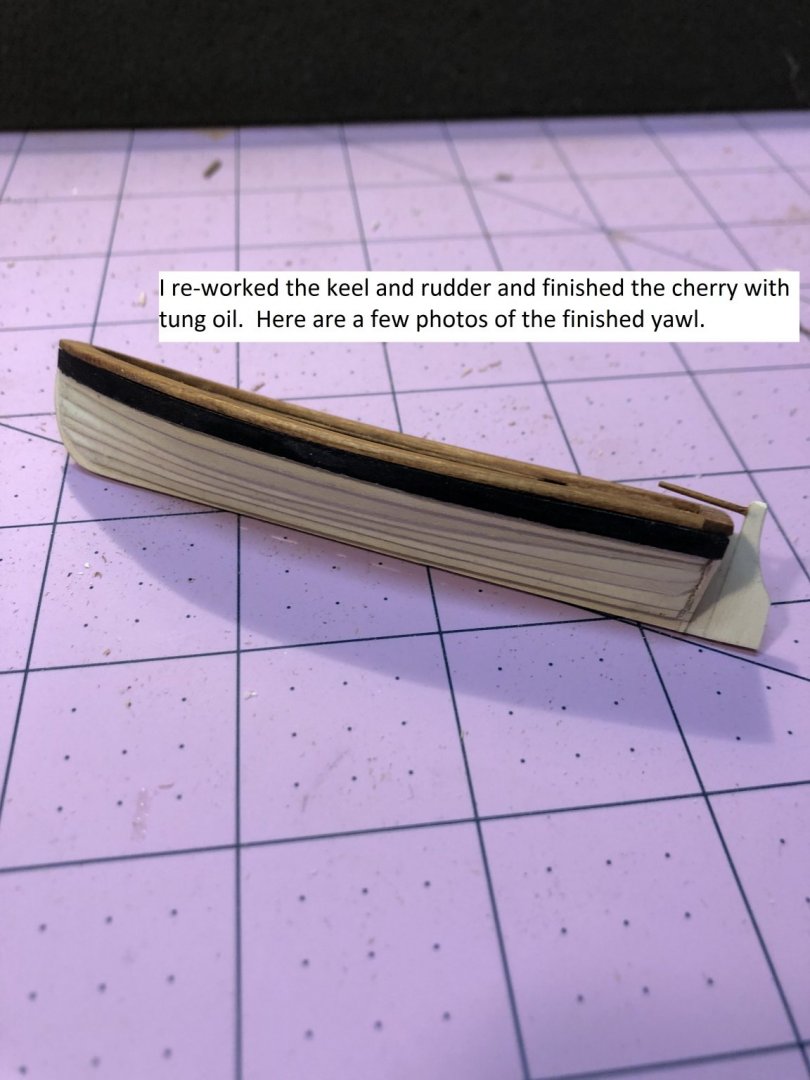
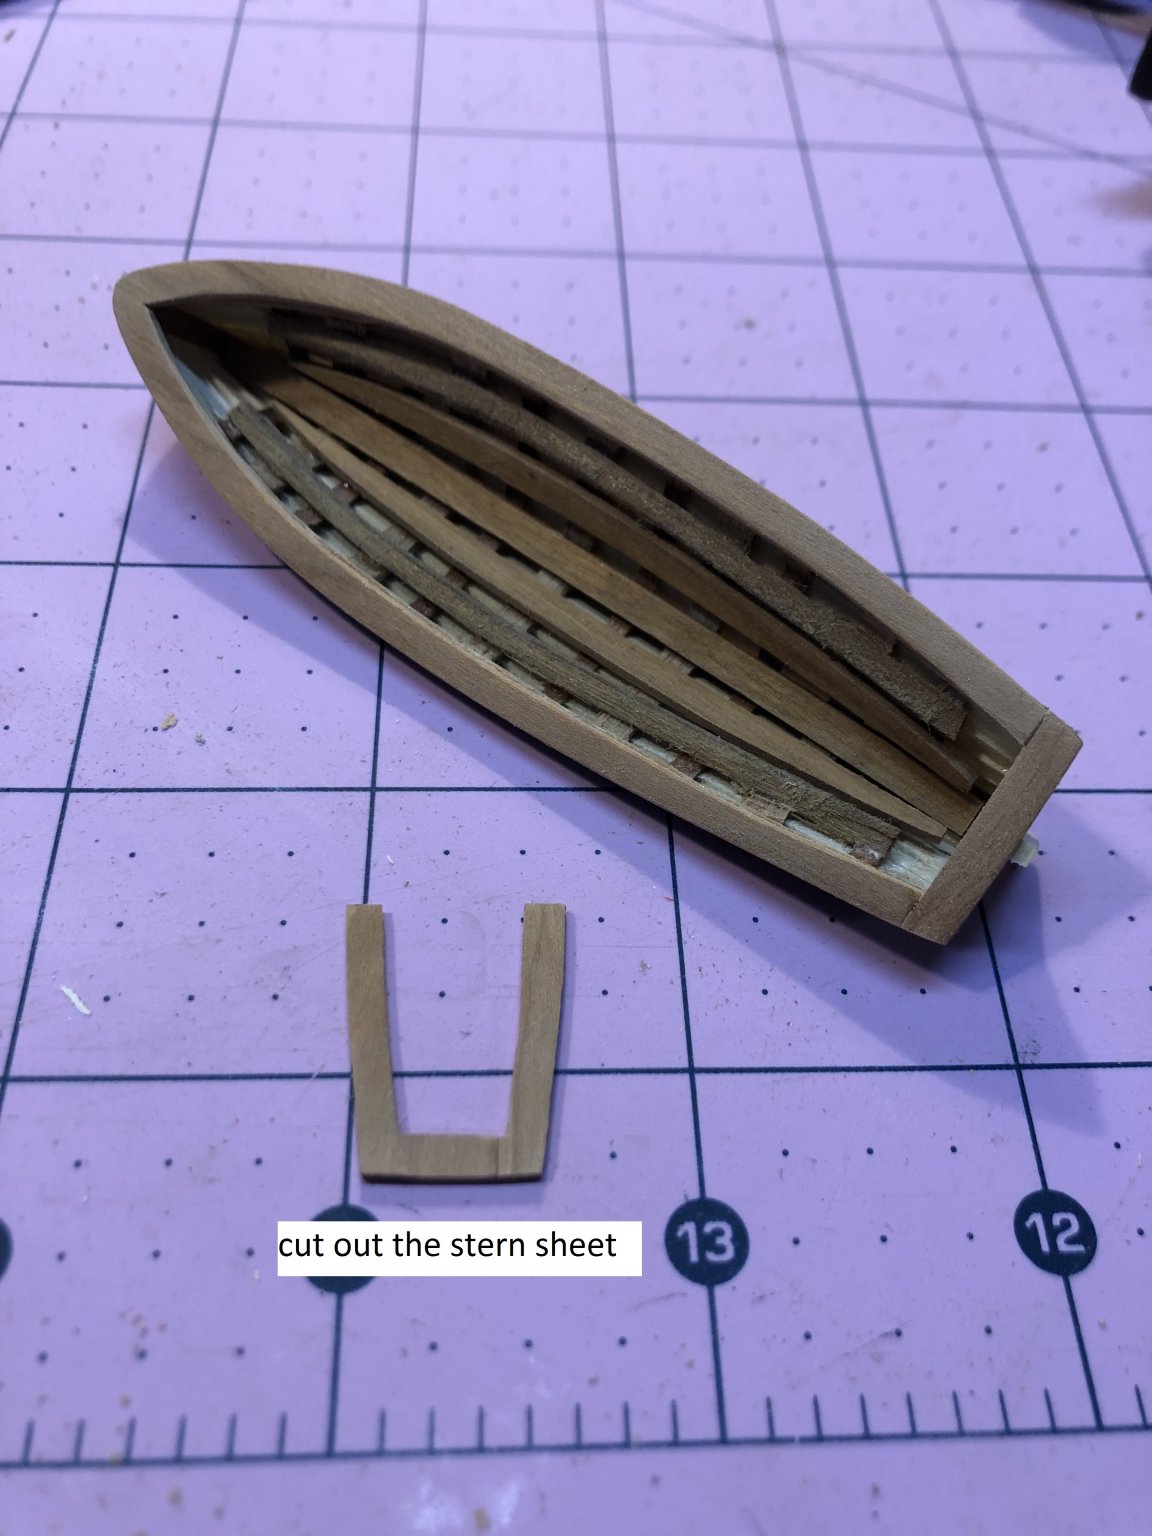
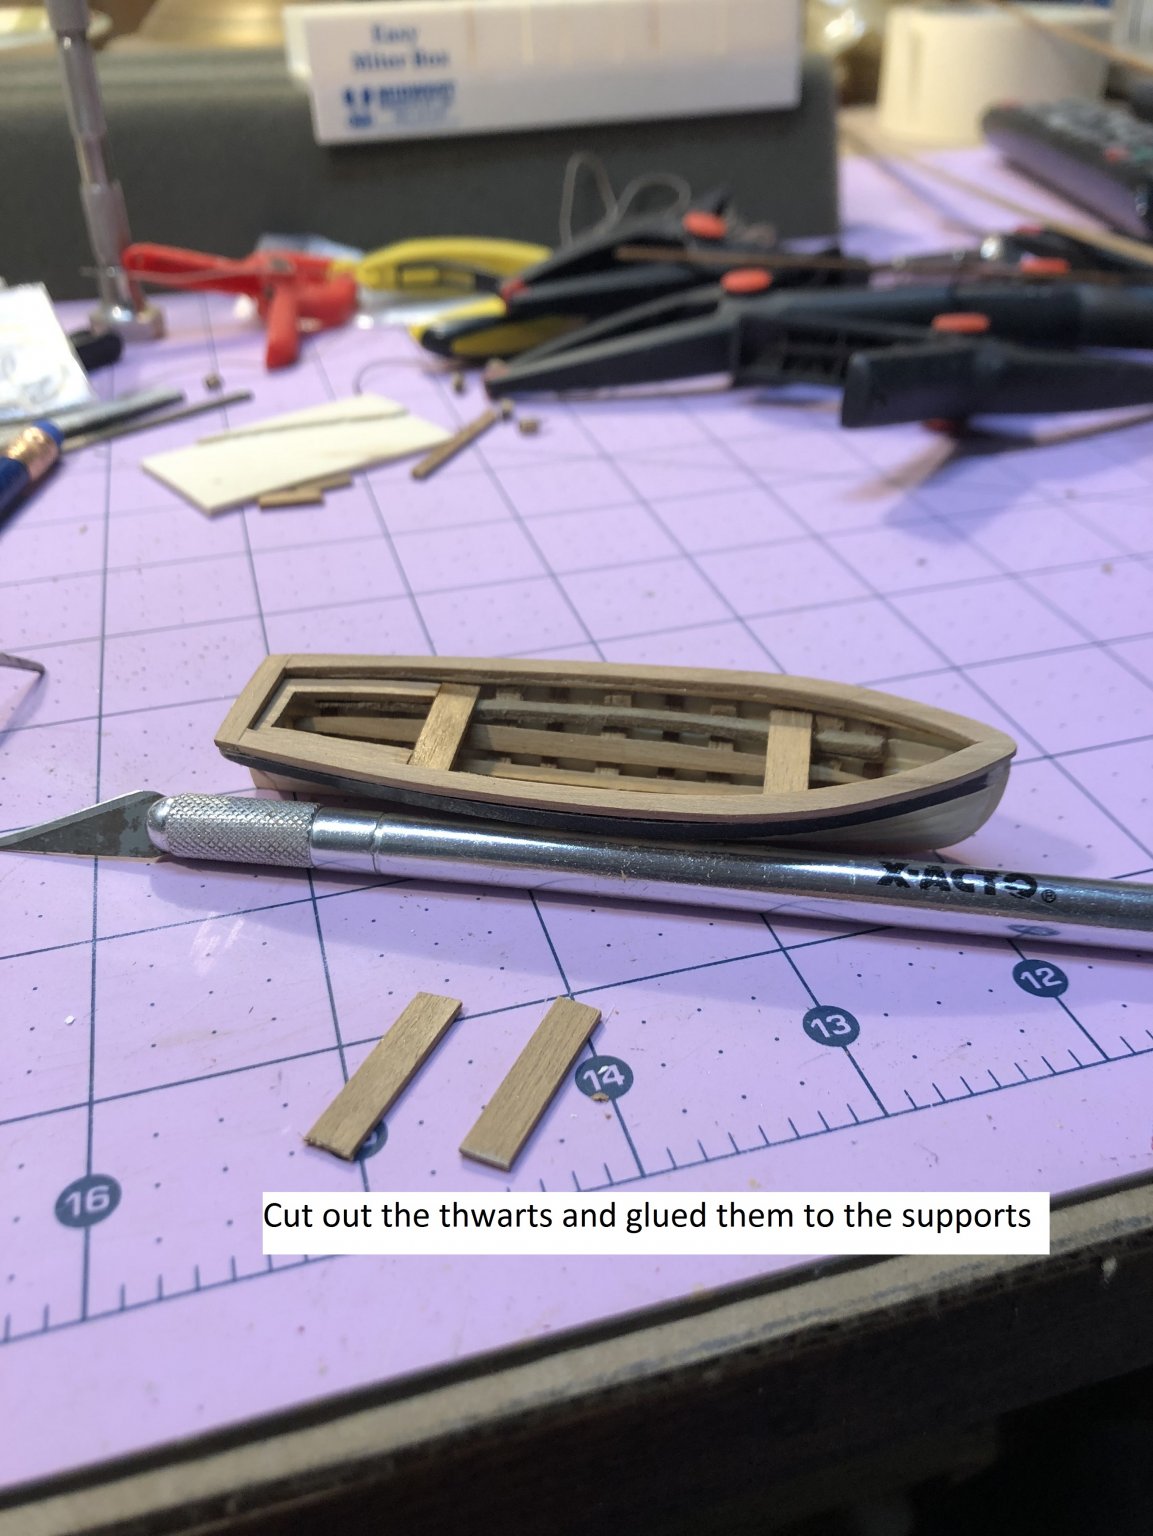
YAWL - CONTINUED I cut out the railings, stern sheet and thwarts. I finished the cherry with tung oil and touched up everything. I ended up cutting off the Keel/rudder combo and re-worked the entire system to look better. it also gave me the opportunity to plank the stern. Here are the photos. up next...... 20 teeny tiny oars. ugh.

.thumb.jpg.52421832798b311979f7ff8b2627c5ee.jpg)
.thumb.jpg.2bdb3653db8709c9f1d992320f2c7e9a.jpg)
- 648 replies
-
- 5
-
-
- niagara
- model shipways
- (and 1 more)
-
Jason, I can empathize with the challenge of picking up the reins after a long break and having to hone old skills. We are in about the same boat (pun intended). We stopped at about the same time and about at the same stage of our first builds. Your model is outstanding. Let's encourage each other to finally cross the finish line. I am trying to convert my State's order to "shelter in place" to "park my butt in the shipyard." By the way, rigging from forward to aft and lower to higher is definitely the approach. It will keep your standing rigging taught as you continually pull the masts back to the stern and gives yourself as much room as possible for your hands and tools. Good luck.
- 800 replies
-
- 2
-
-
- snake
- caldercraft
- (and 1 more)
-
Mark, Thanks for the well wishes. If I face any rough seas going forward, I at least now have some life boats LOL.
- 648 replies
-
- 2
-
-
- niagara
- model shipways
- (and 1 more)
-
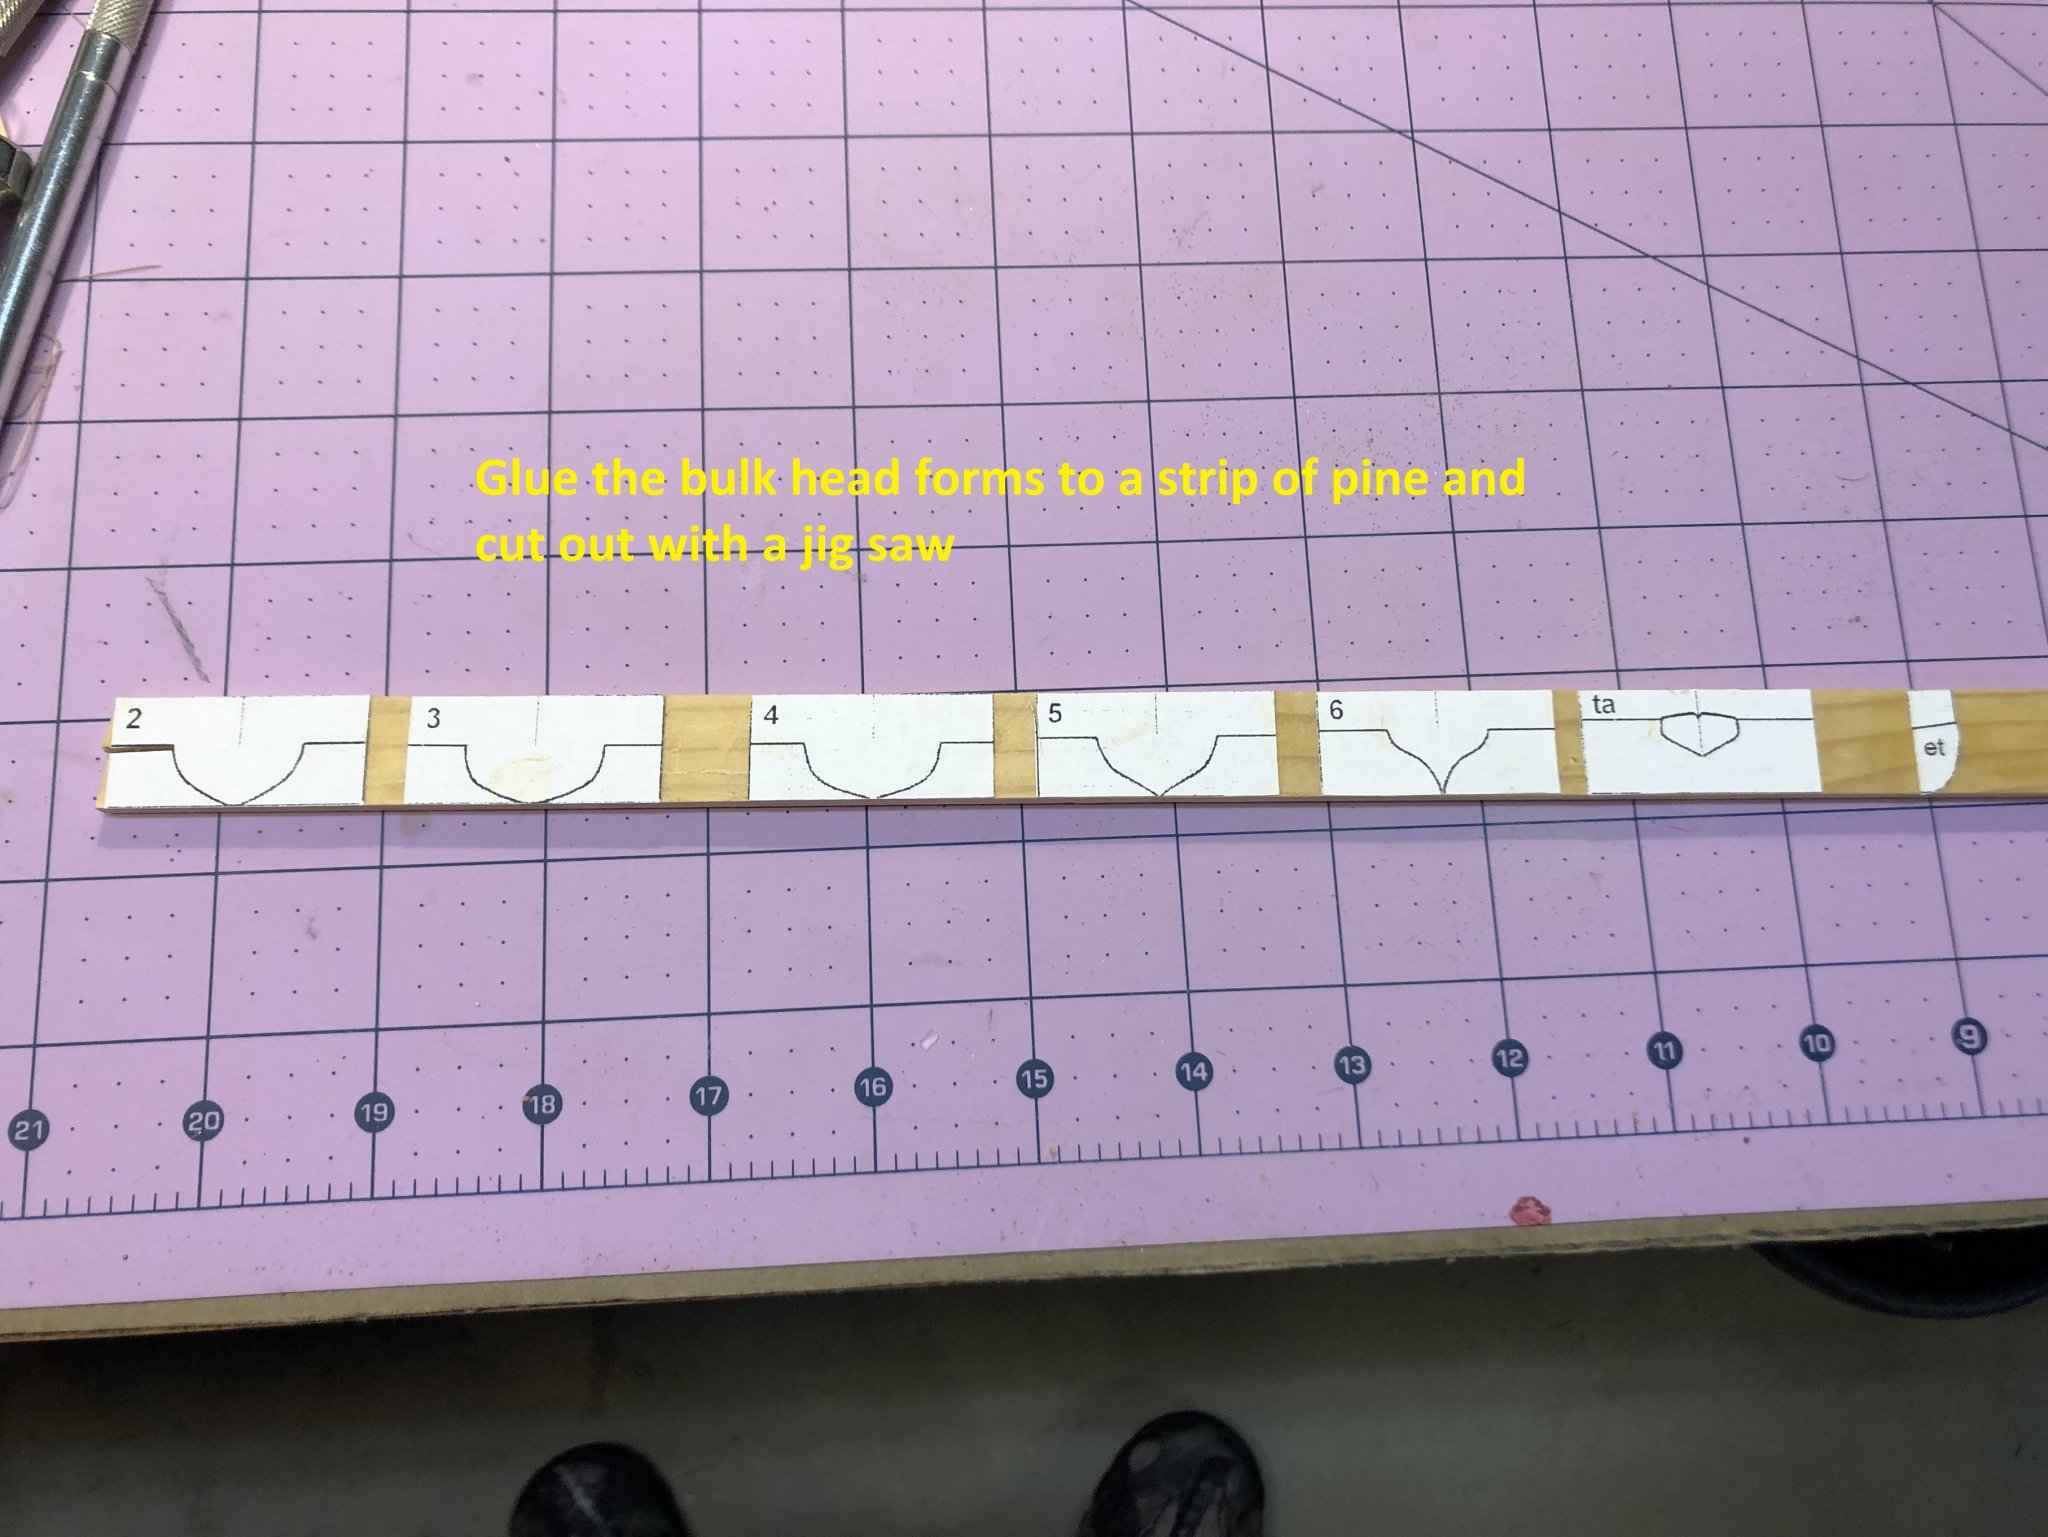
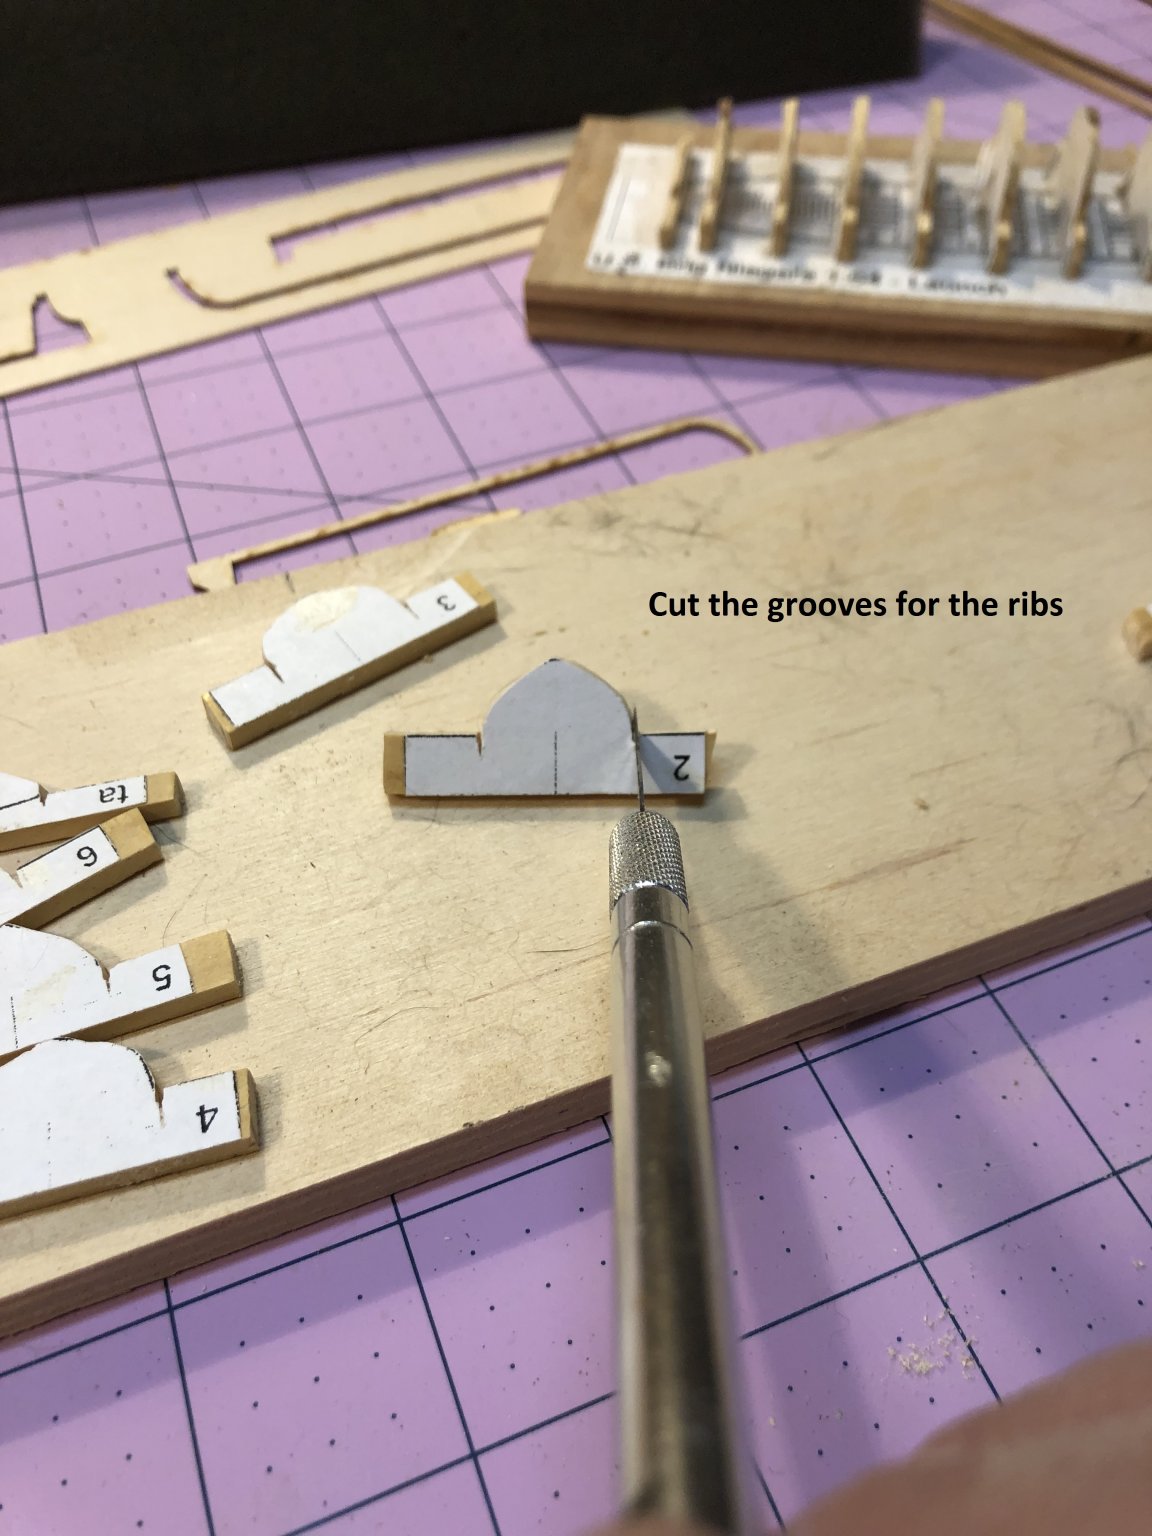
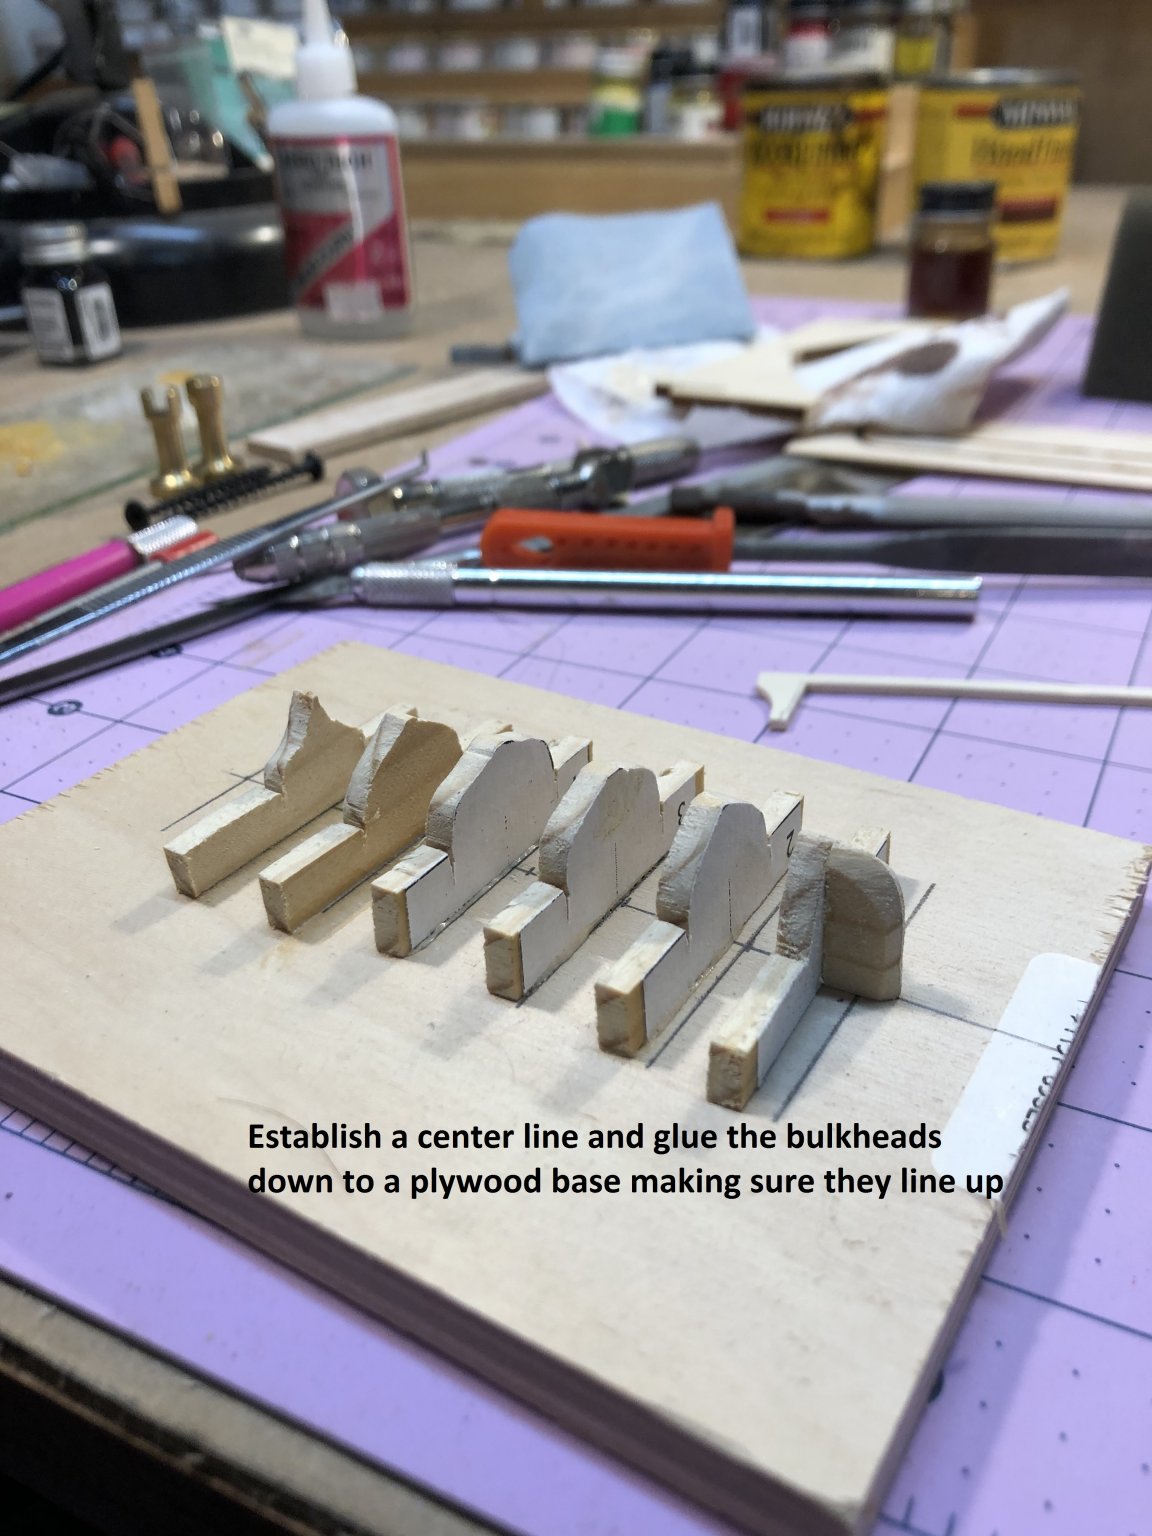
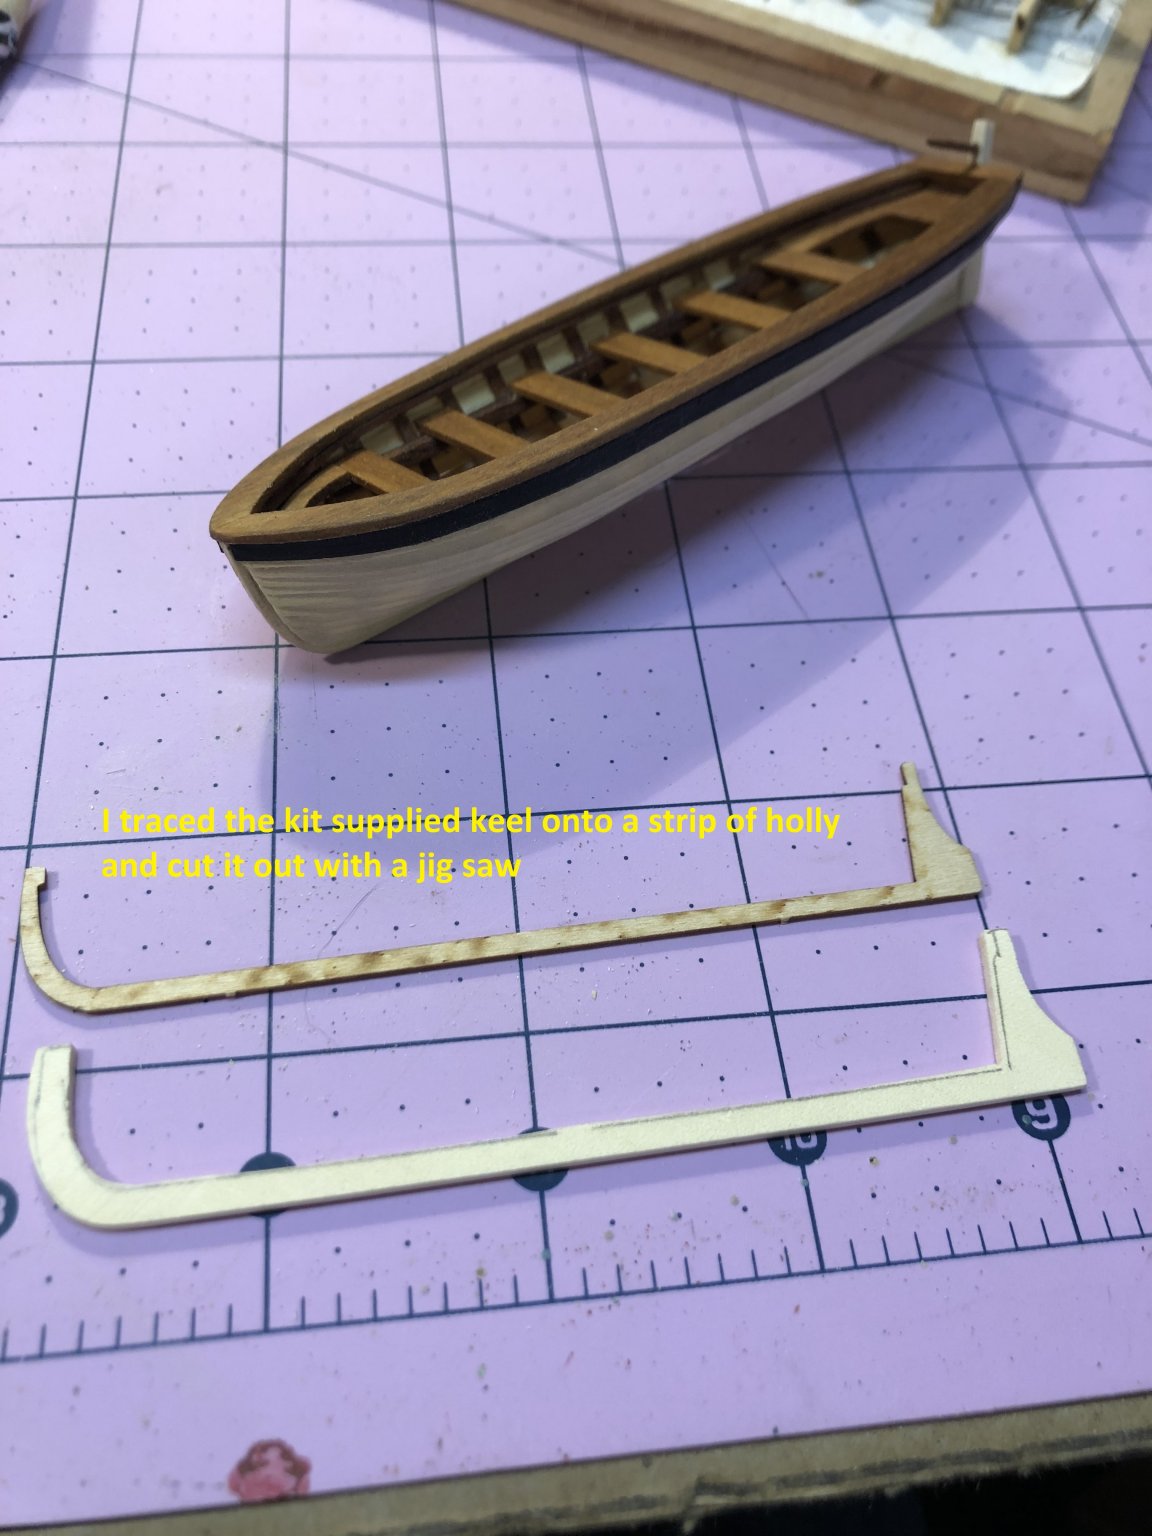
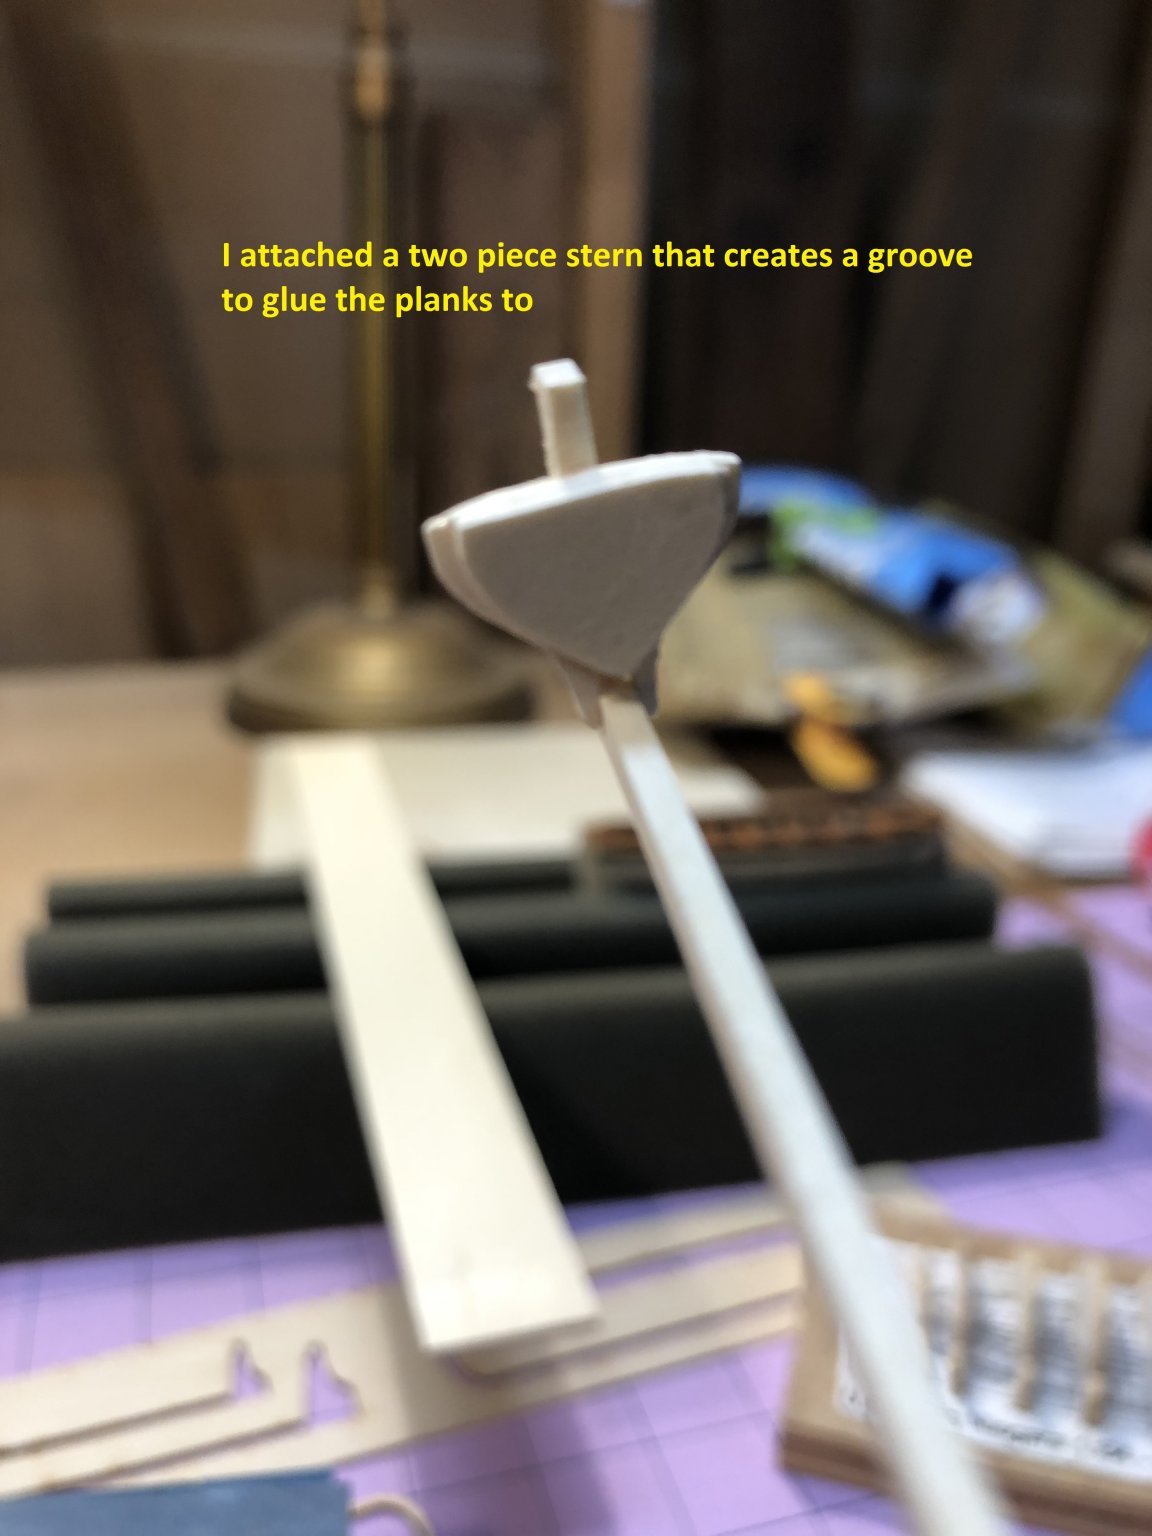
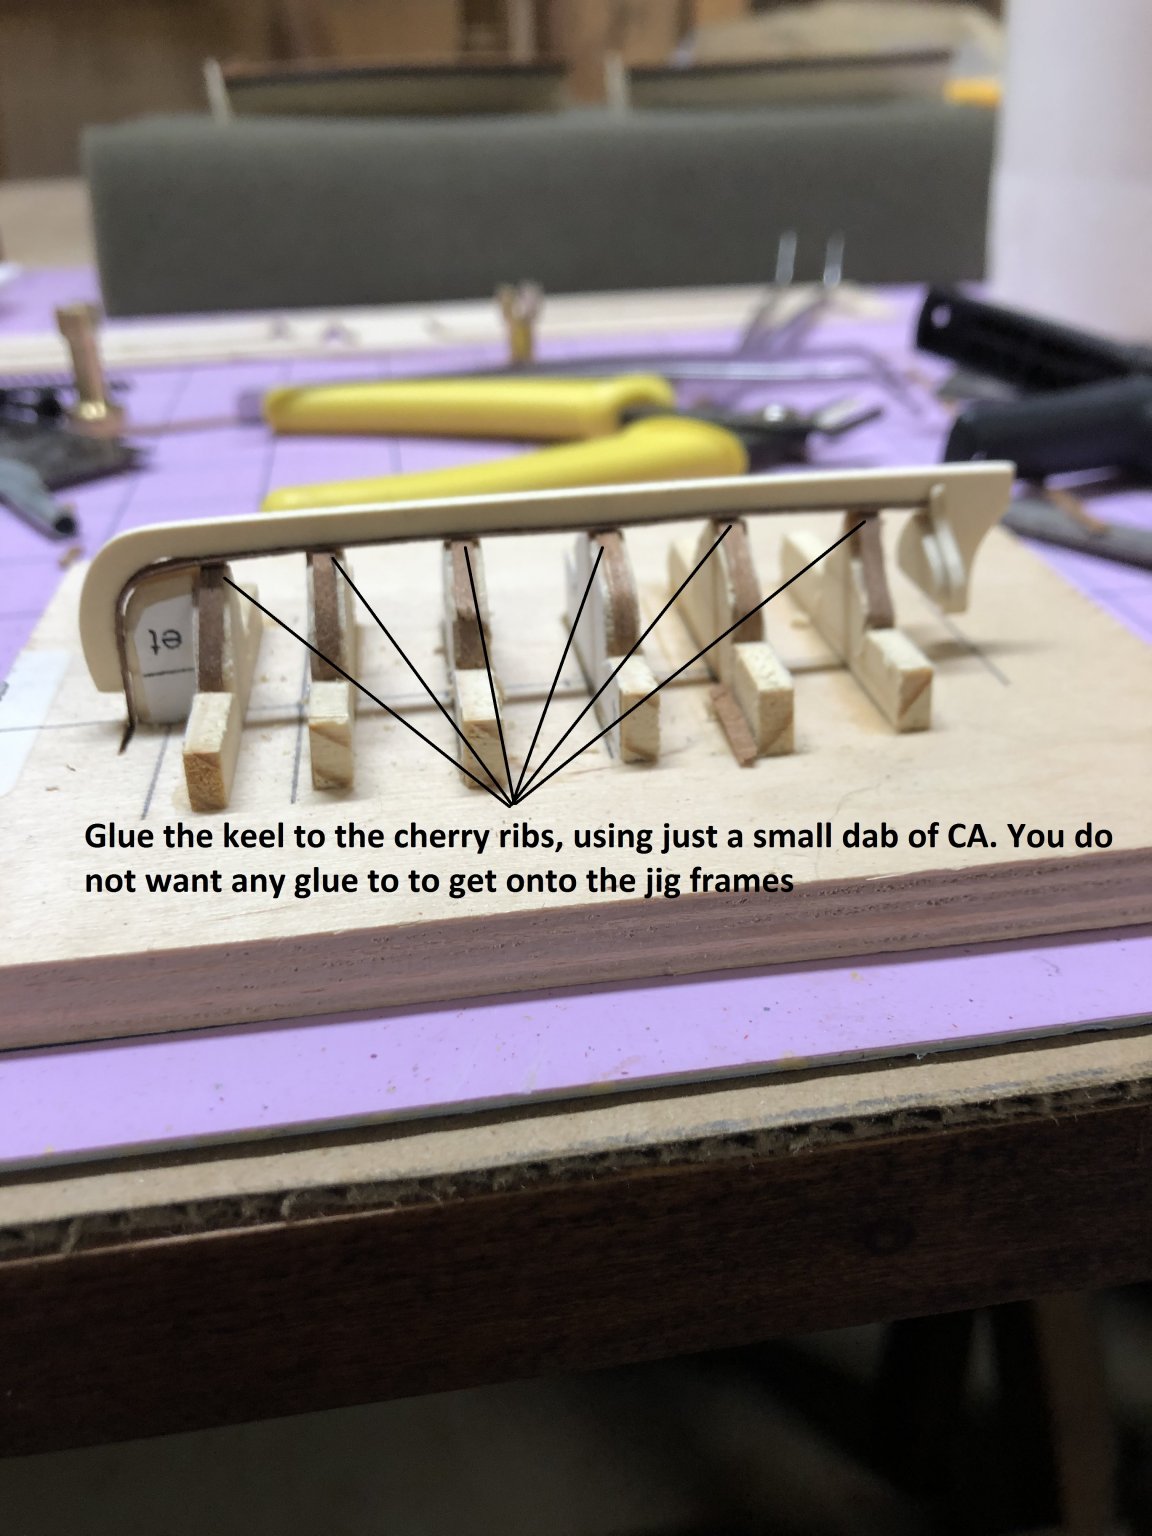
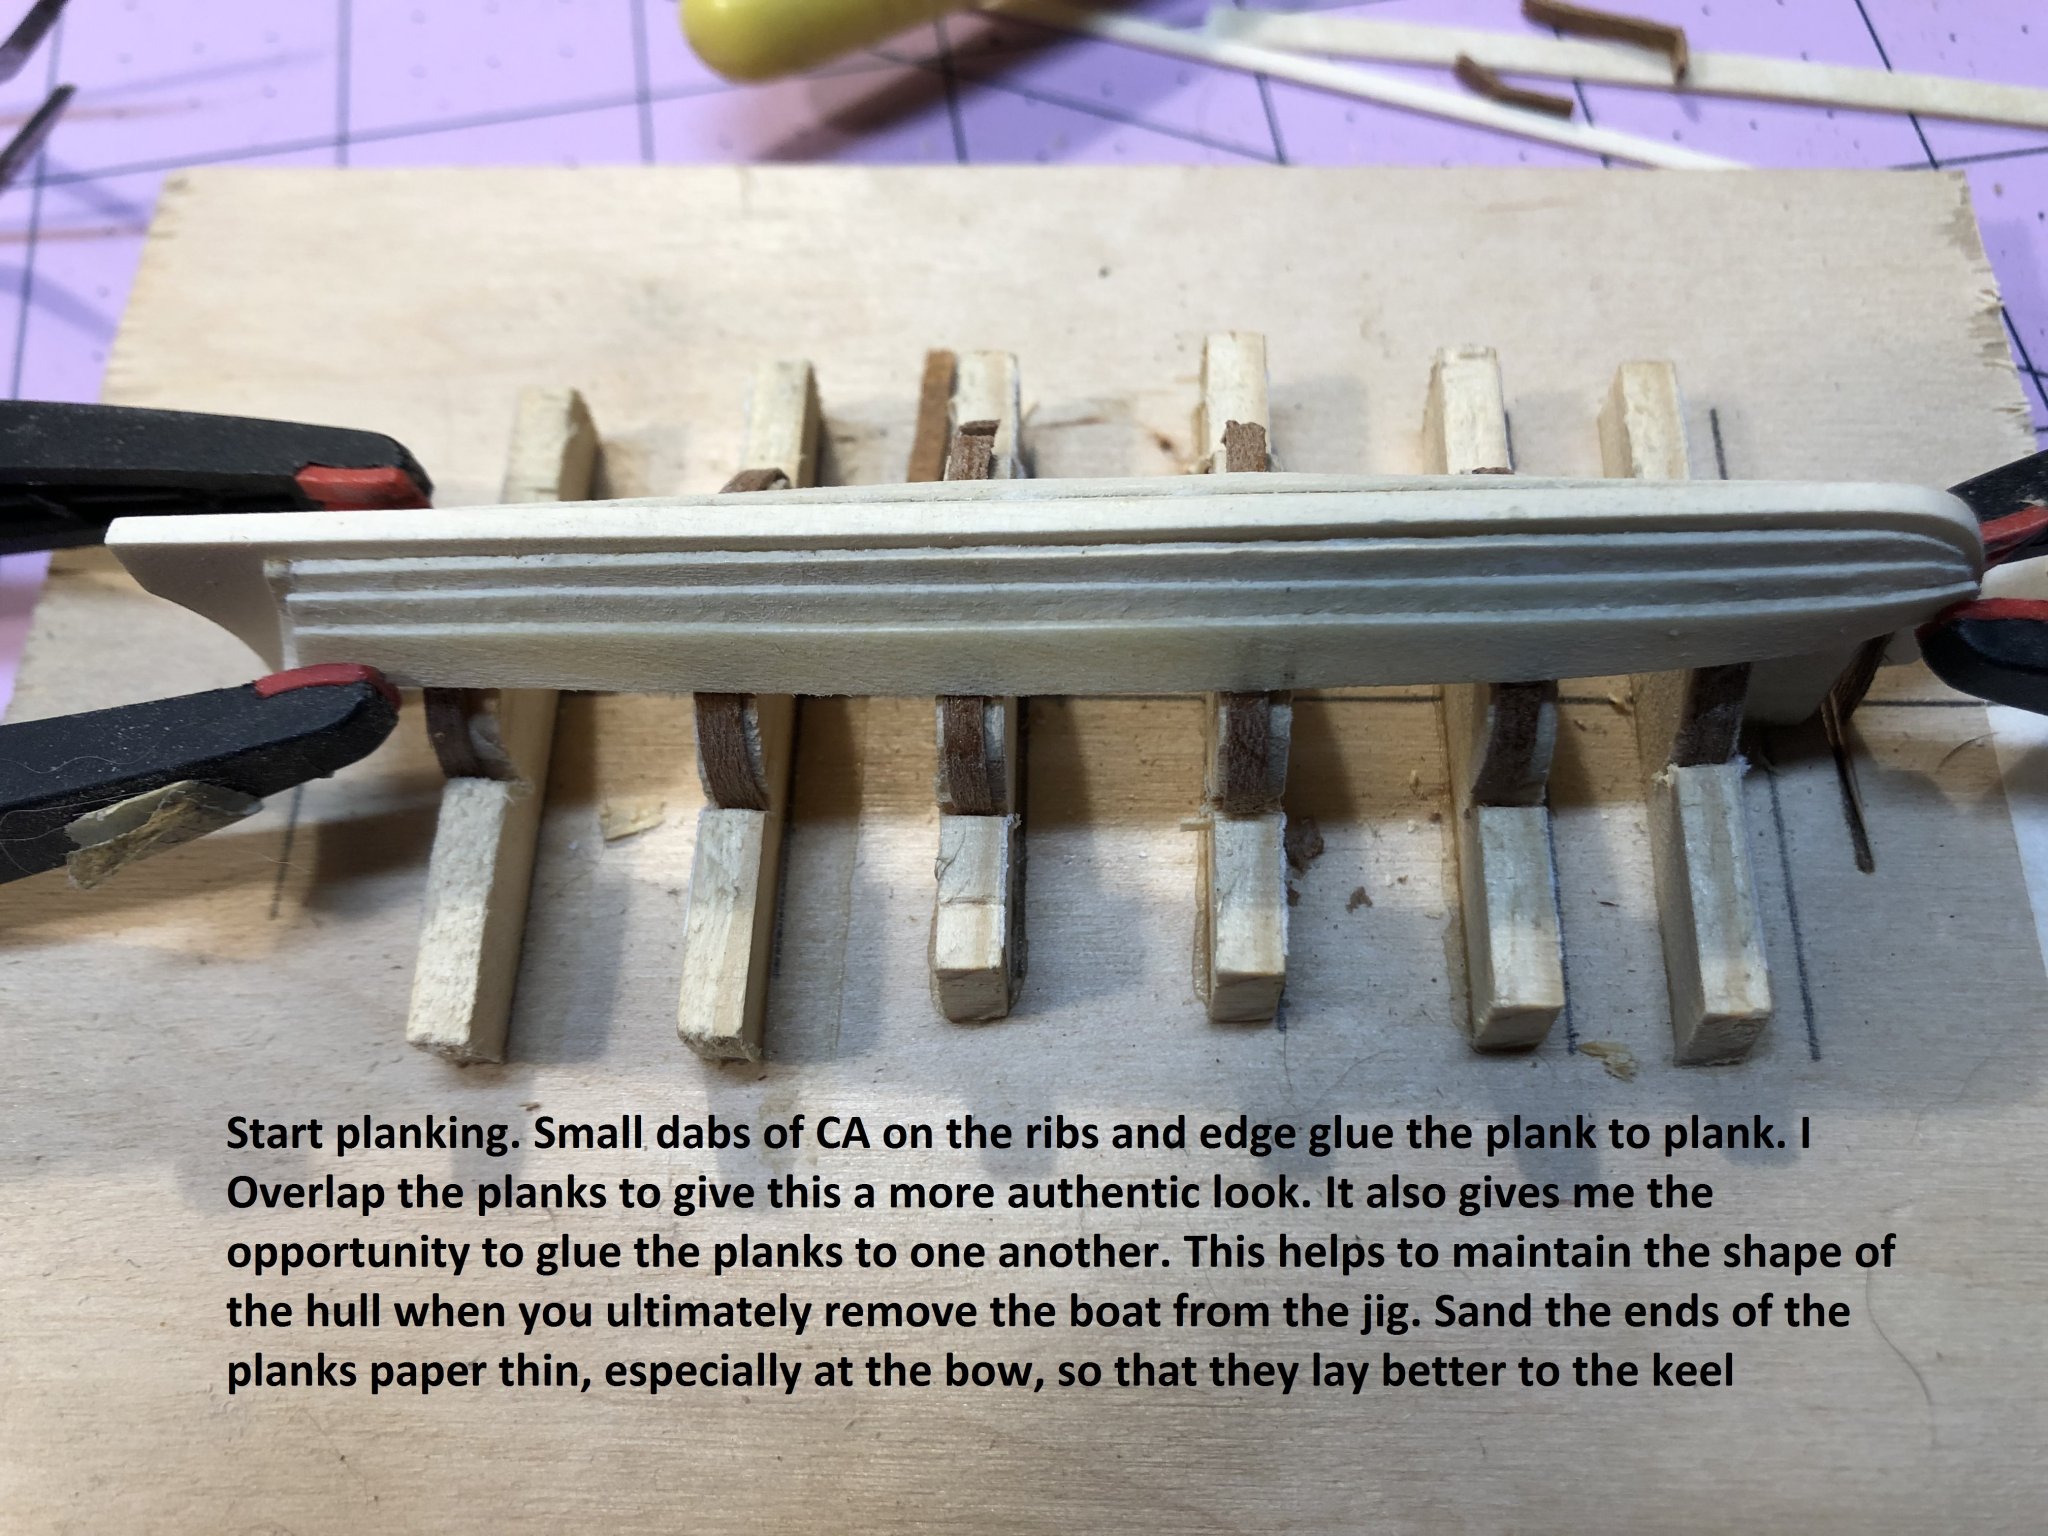
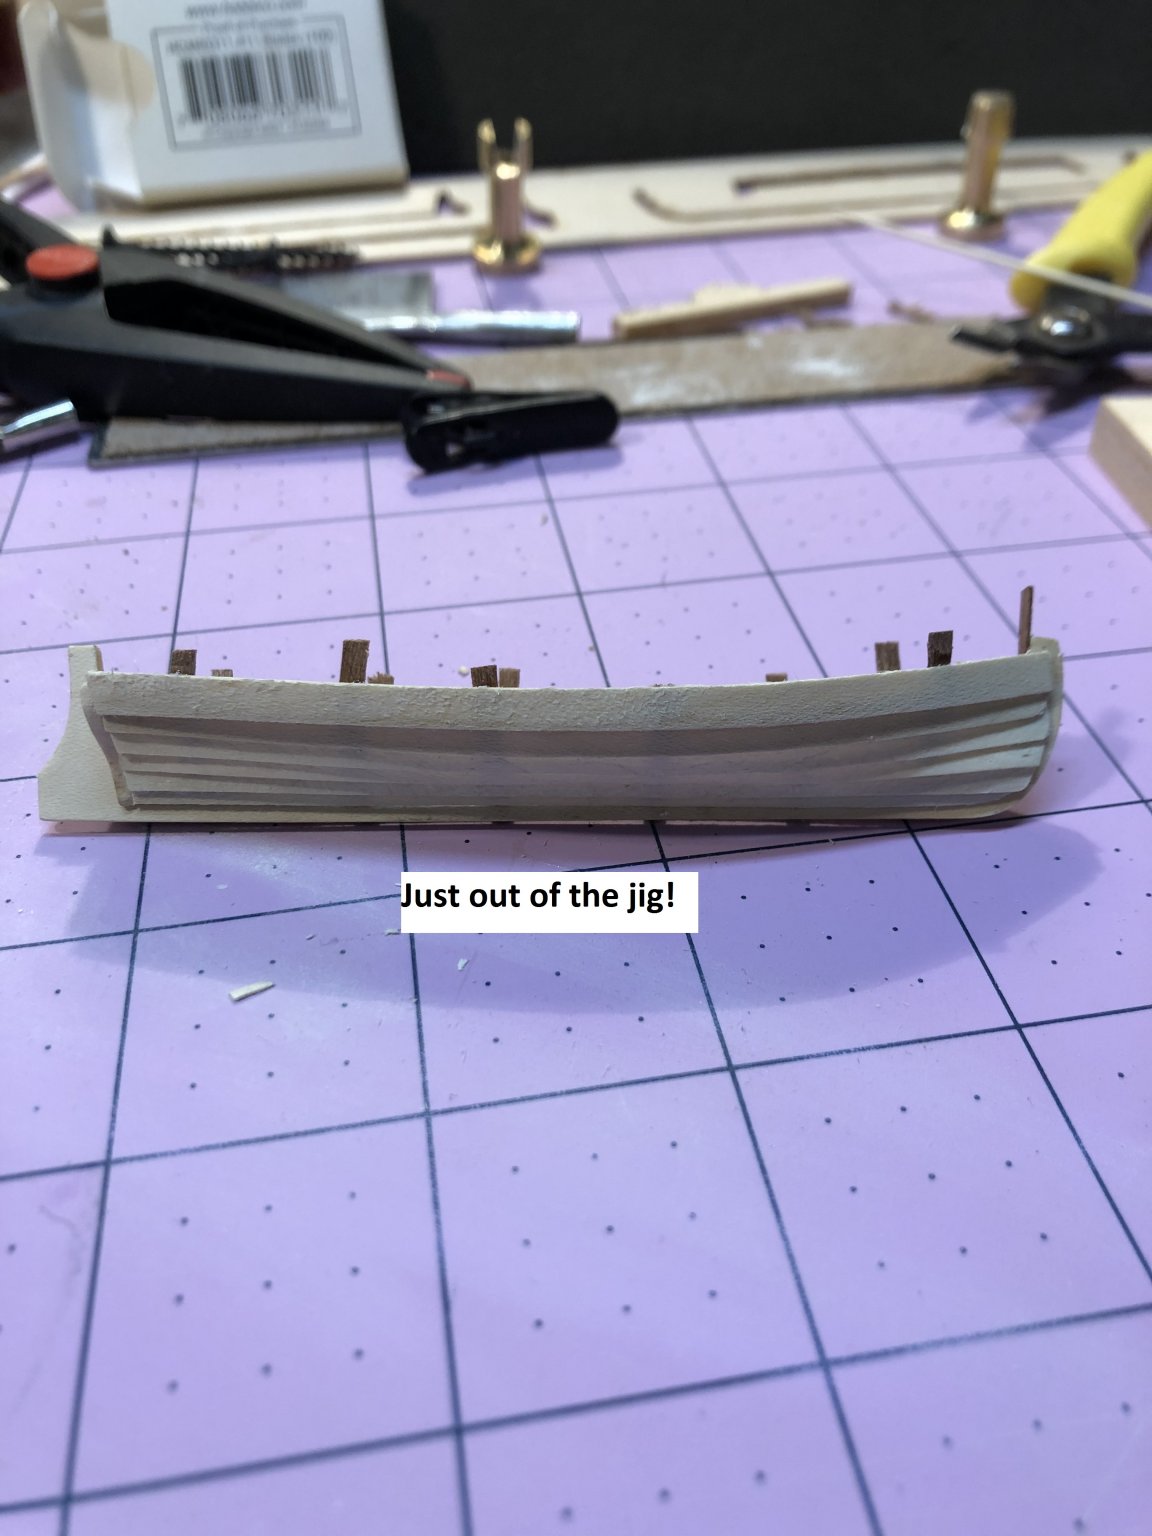
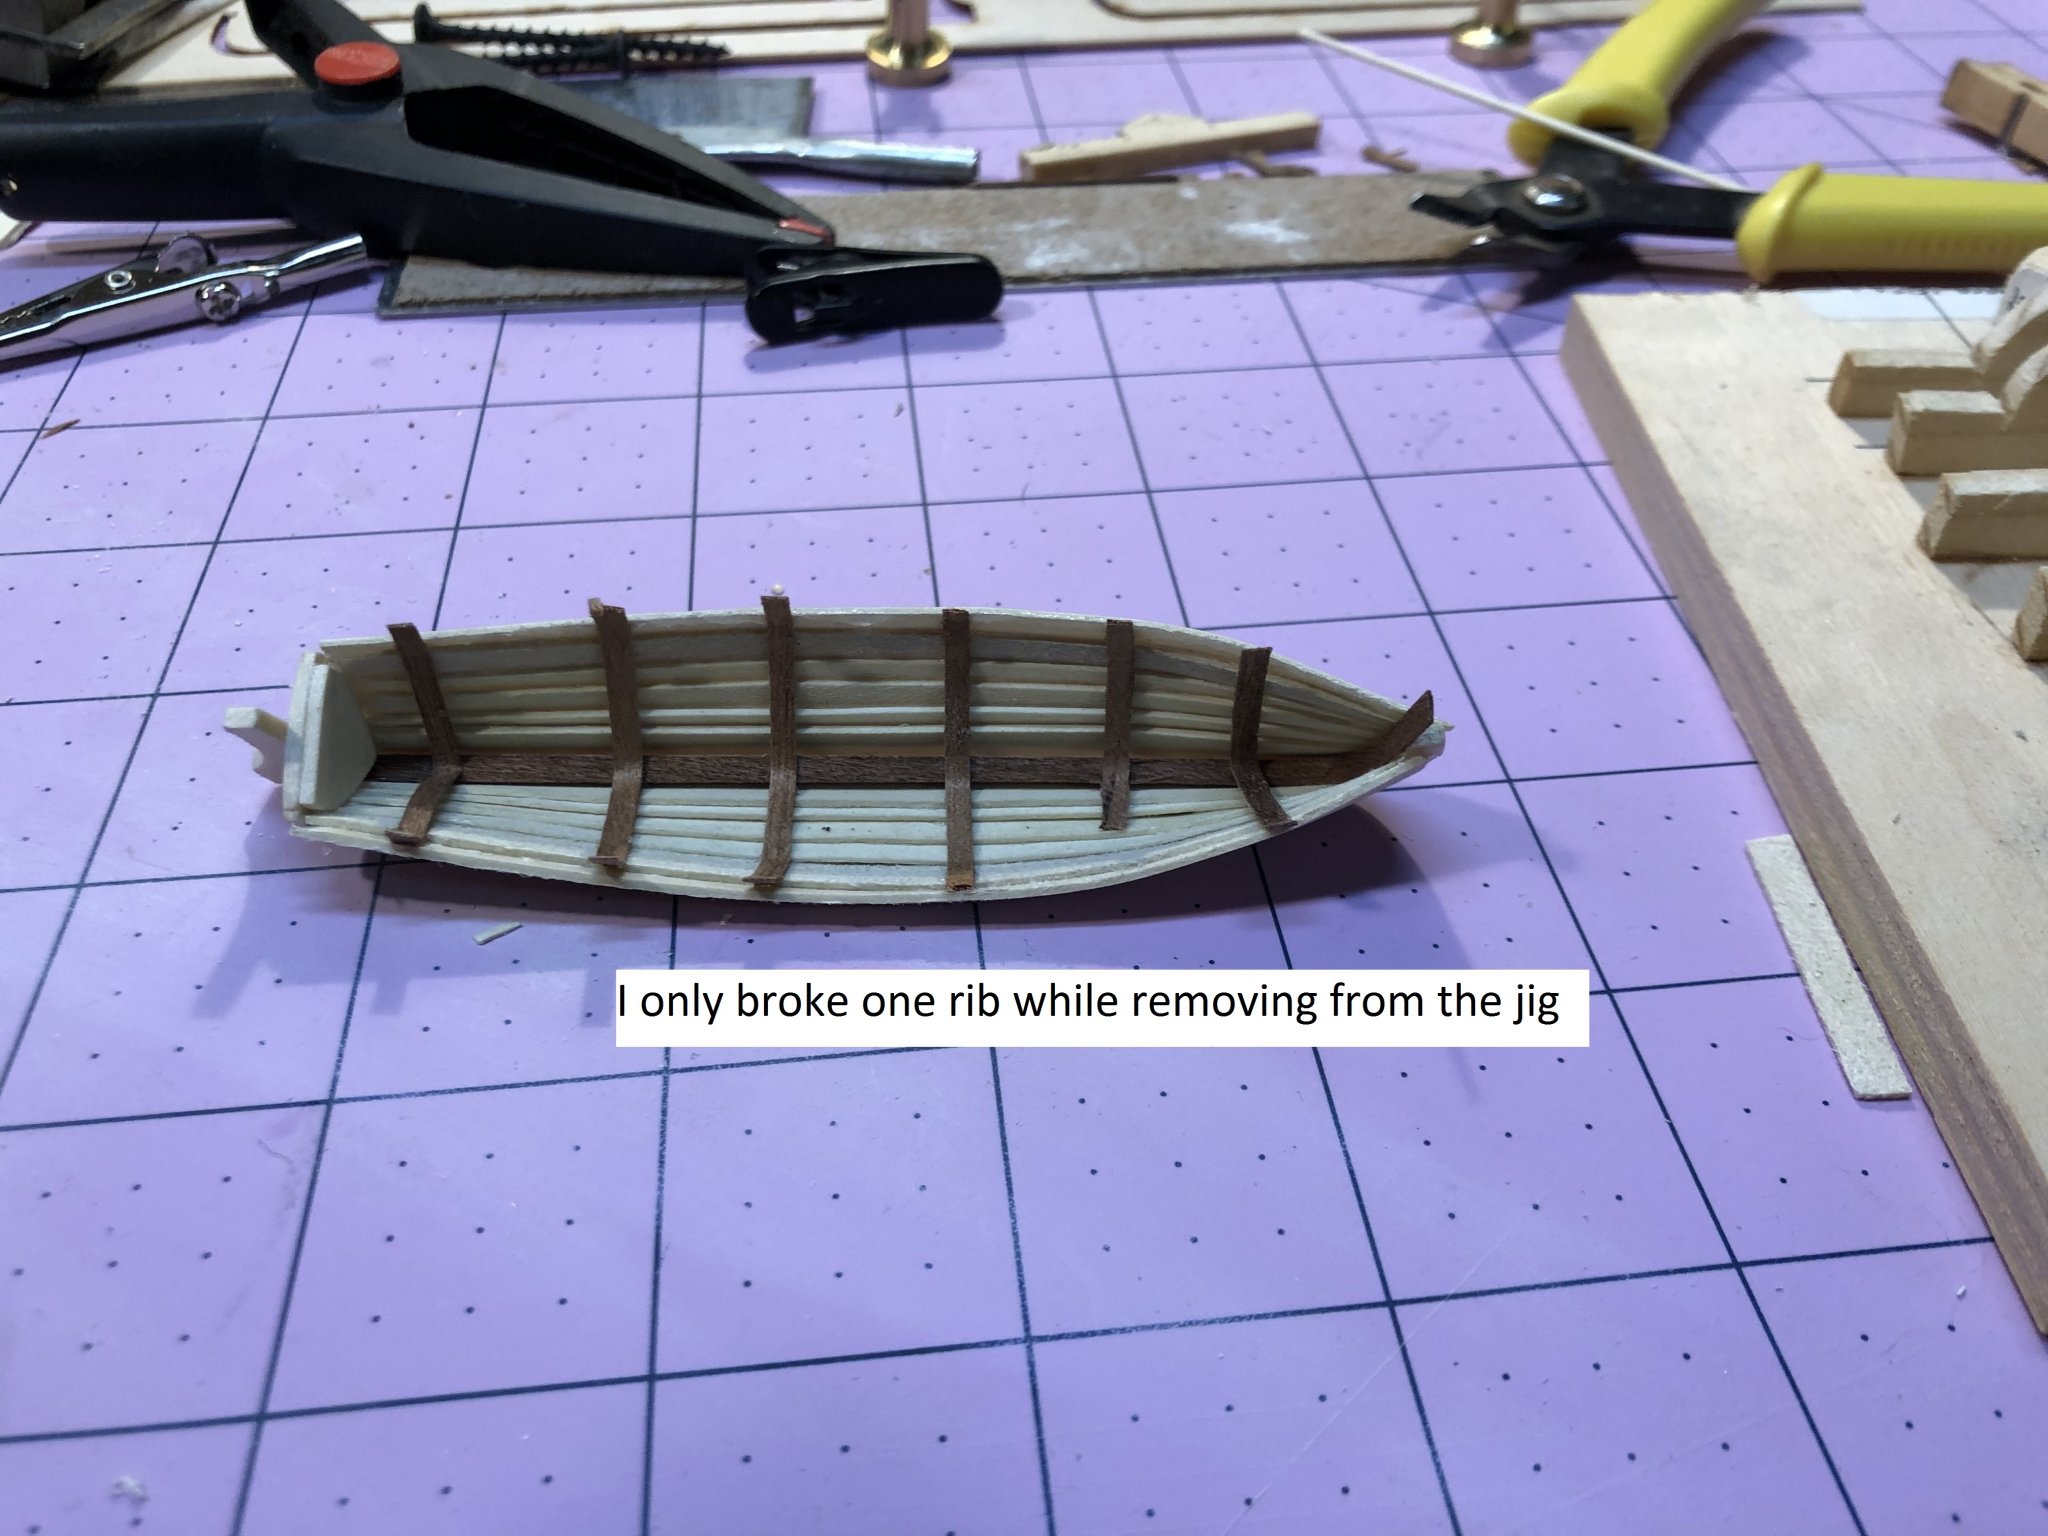
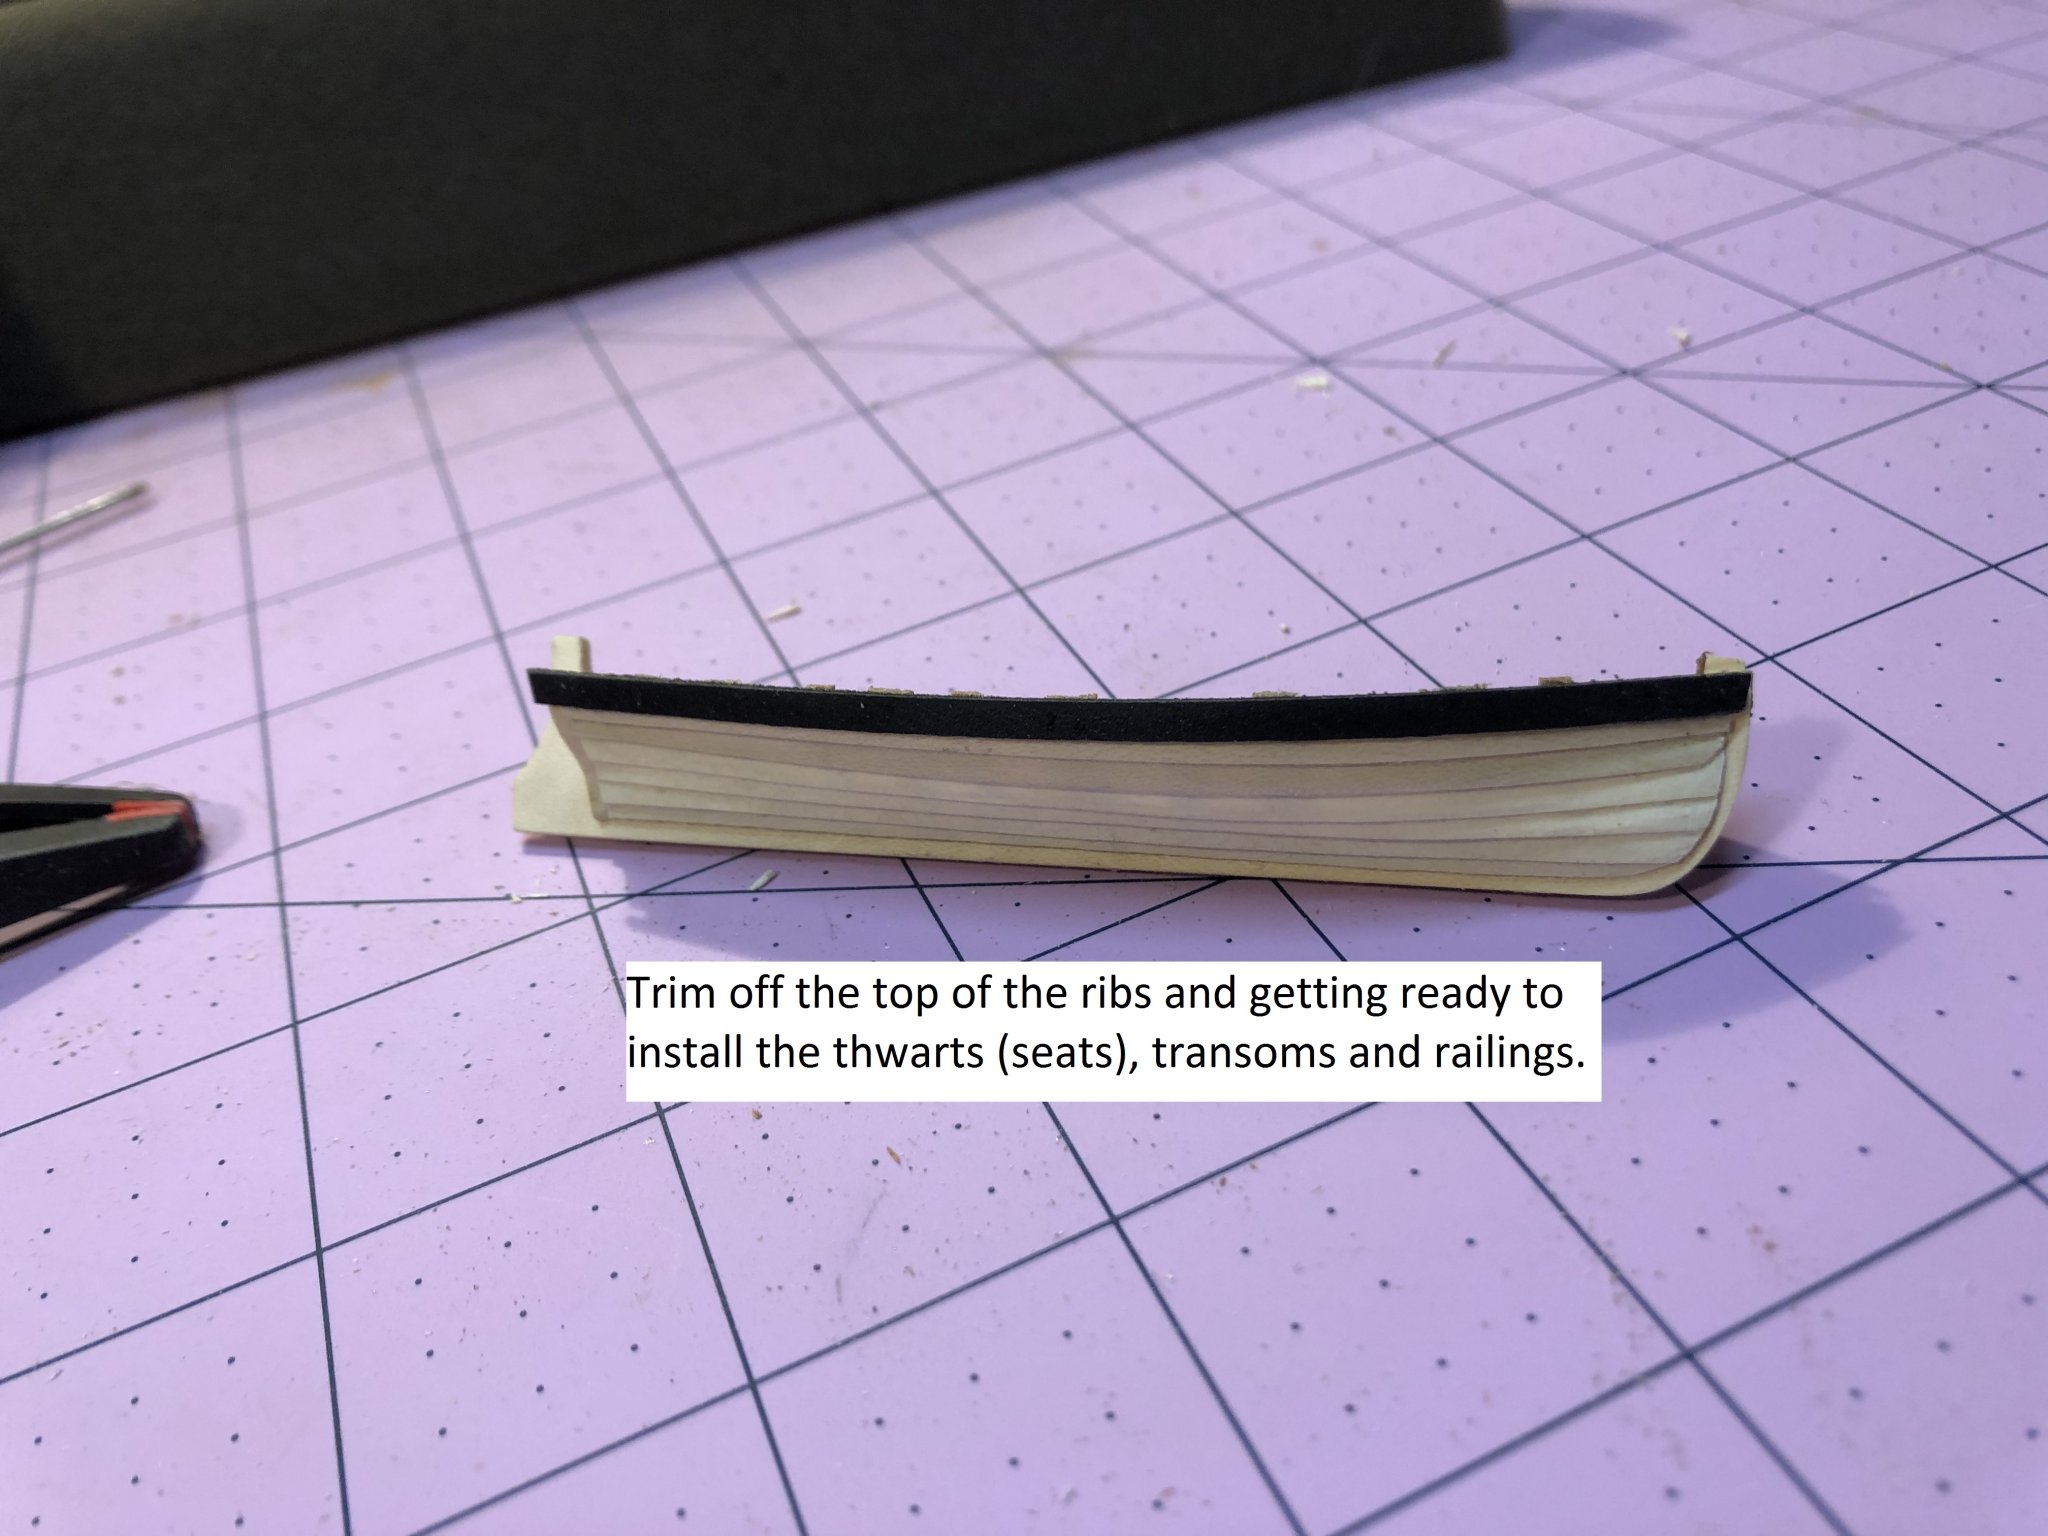
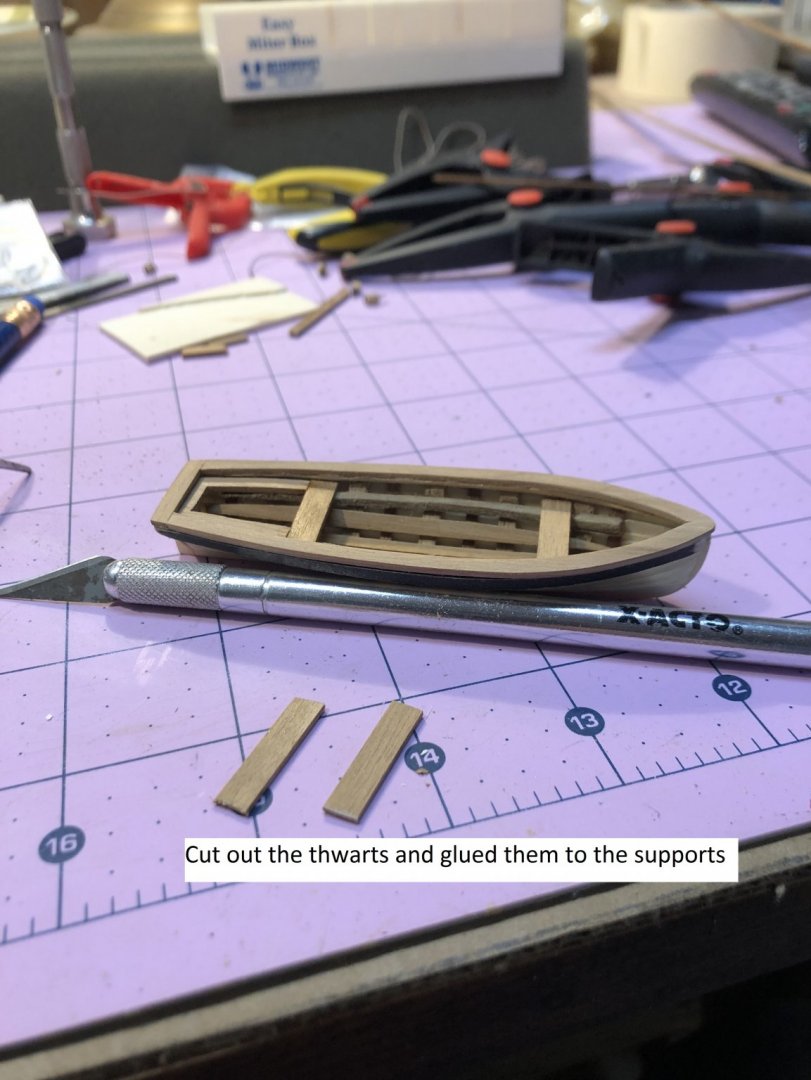
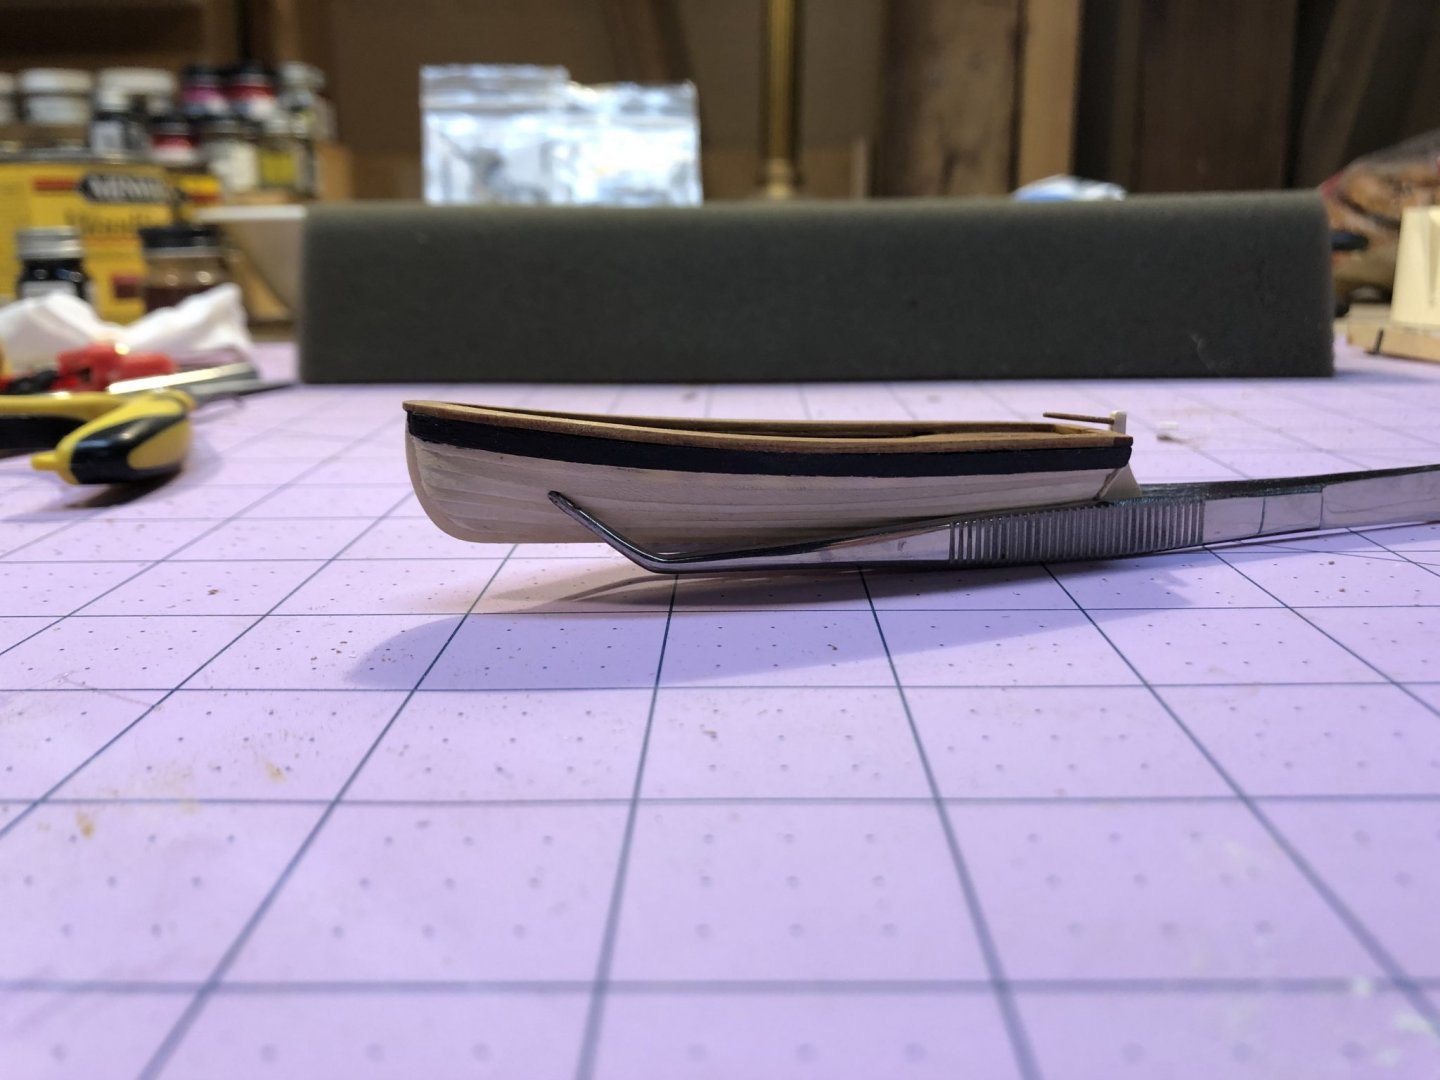
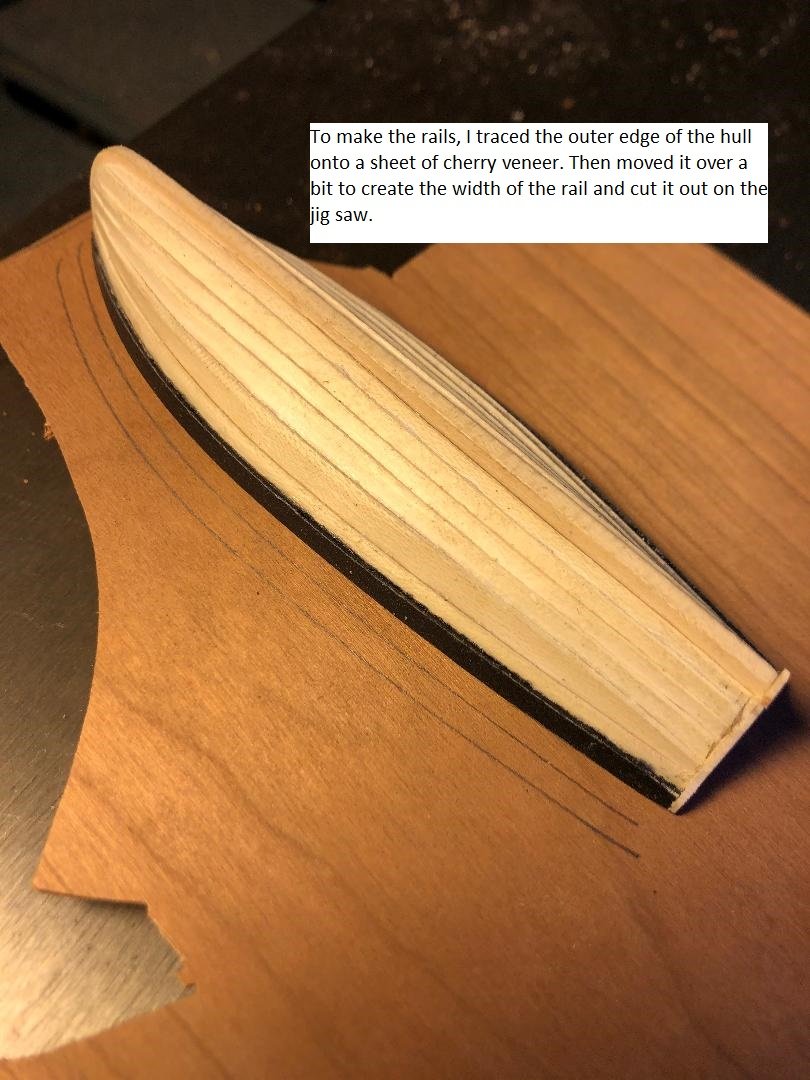
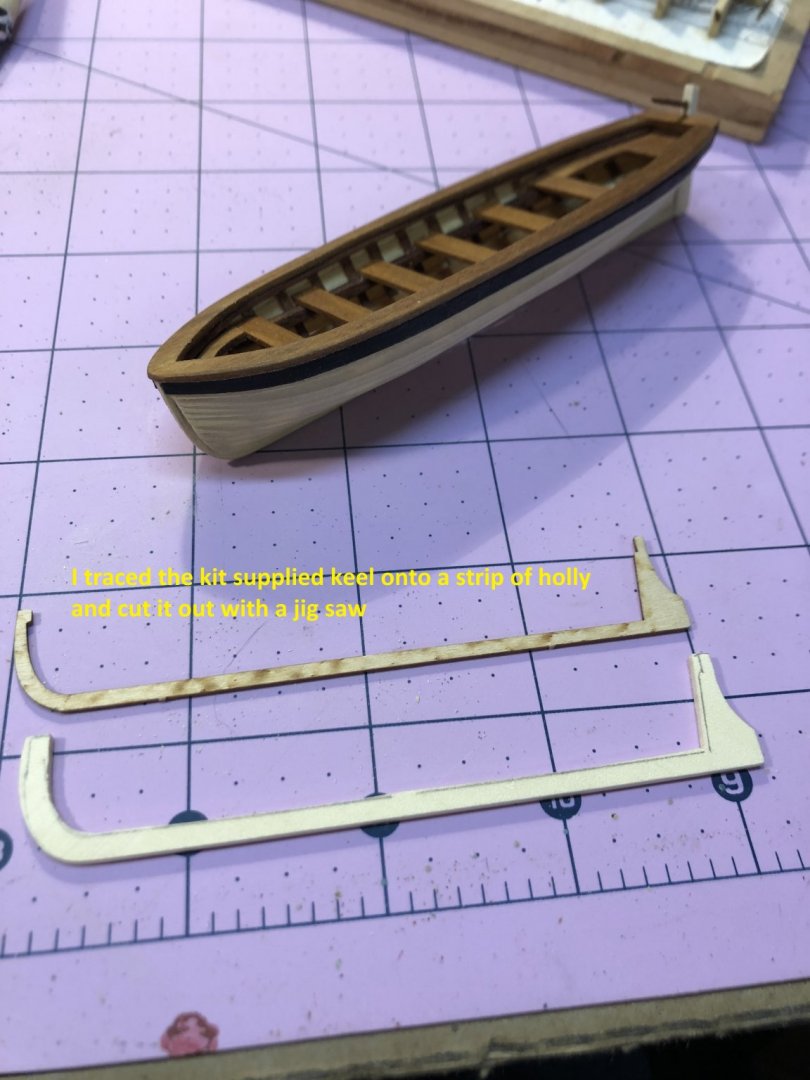
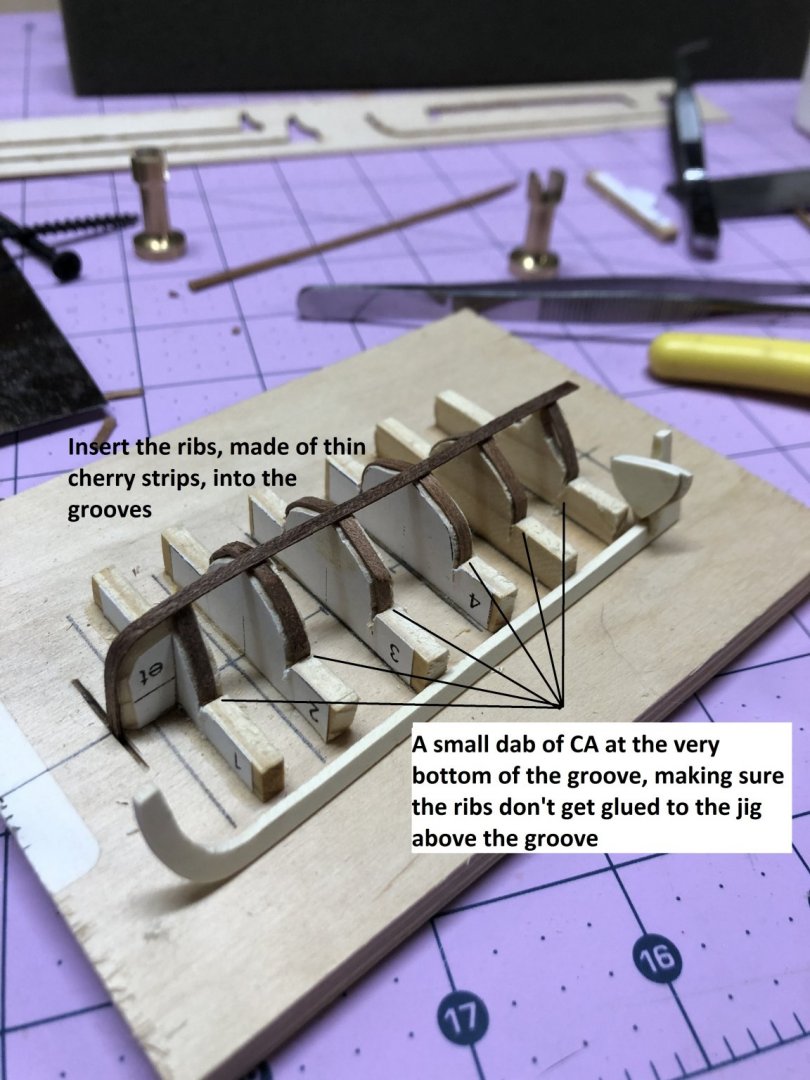
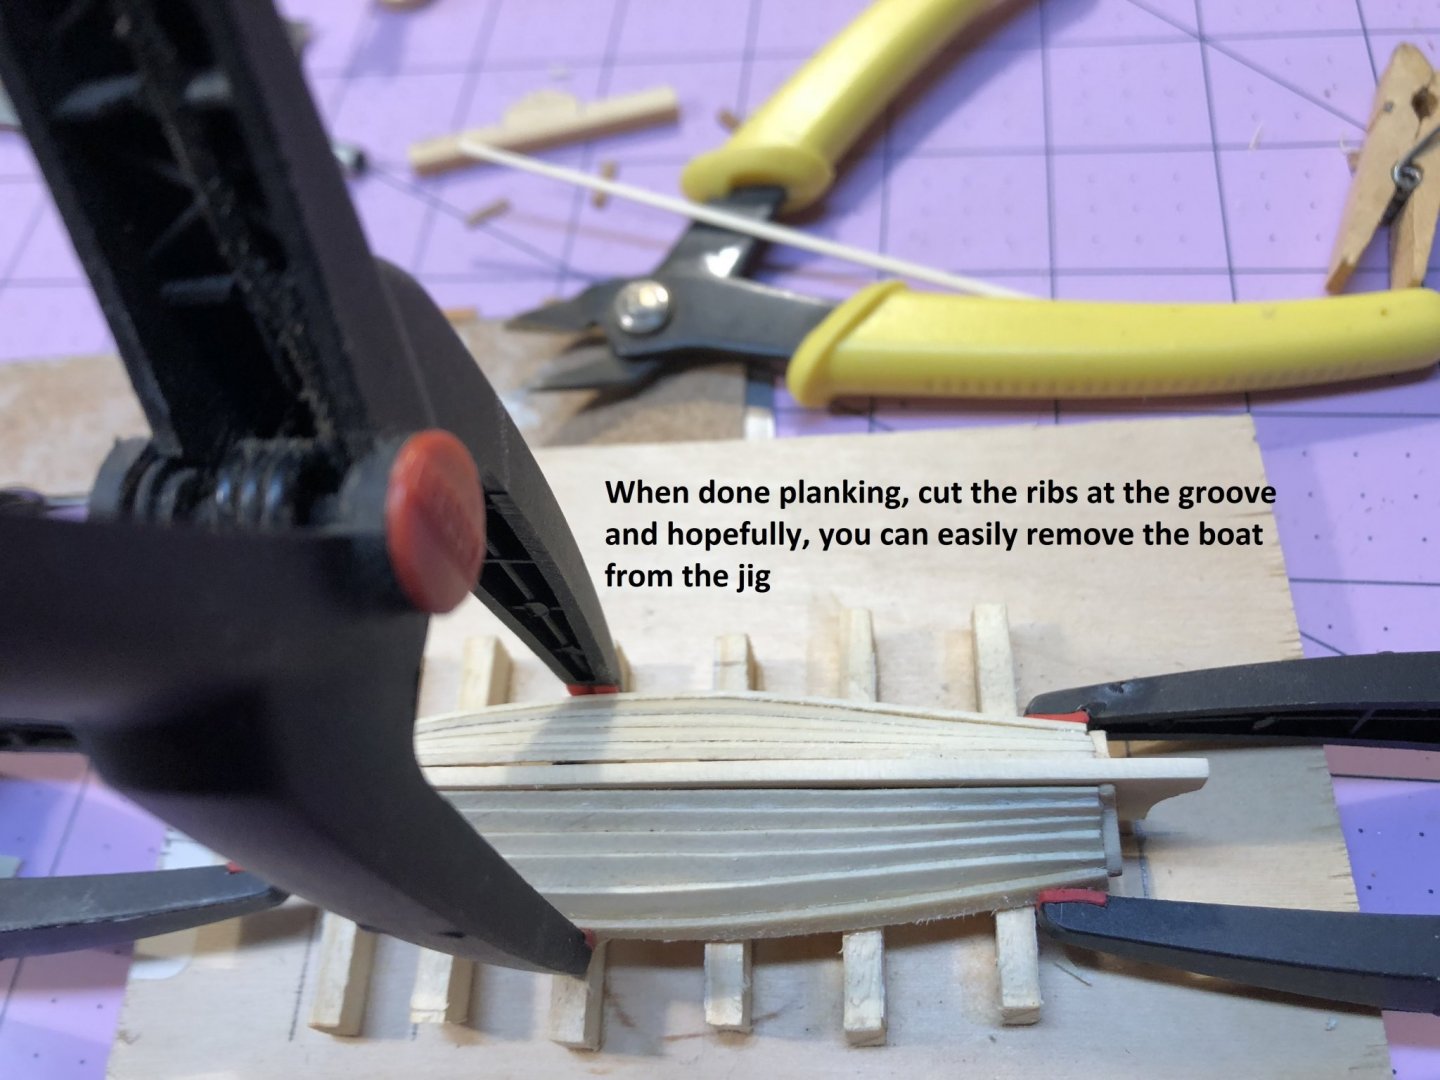
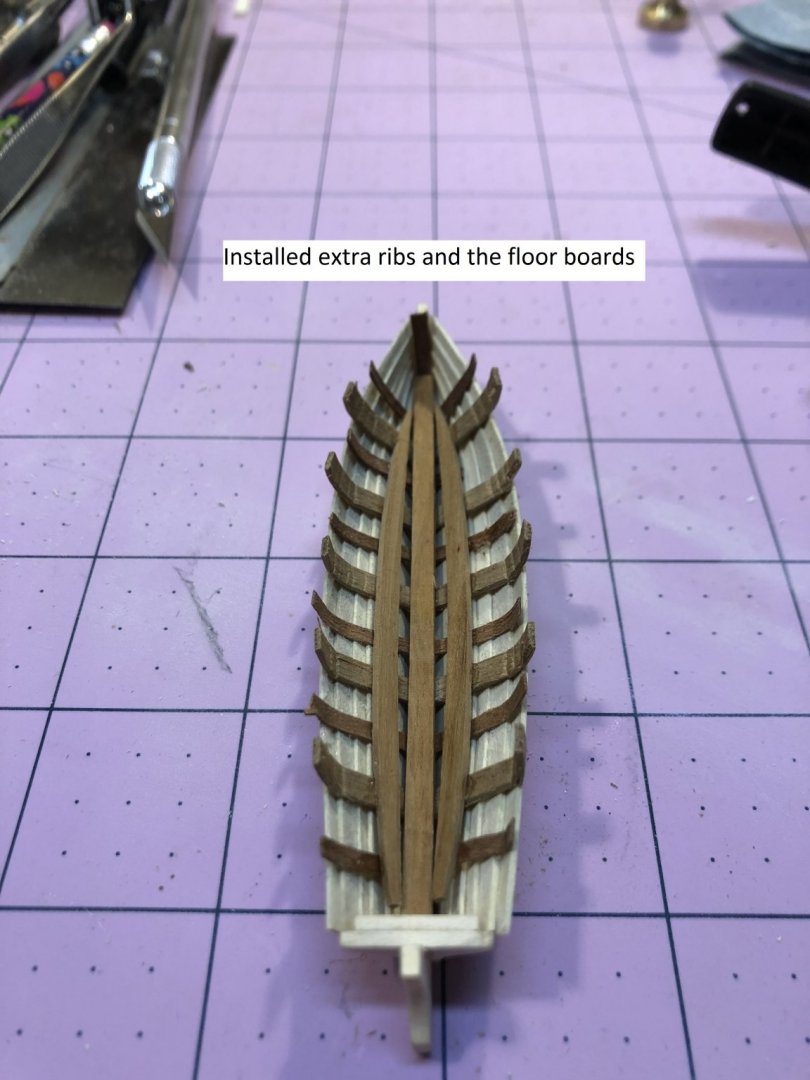
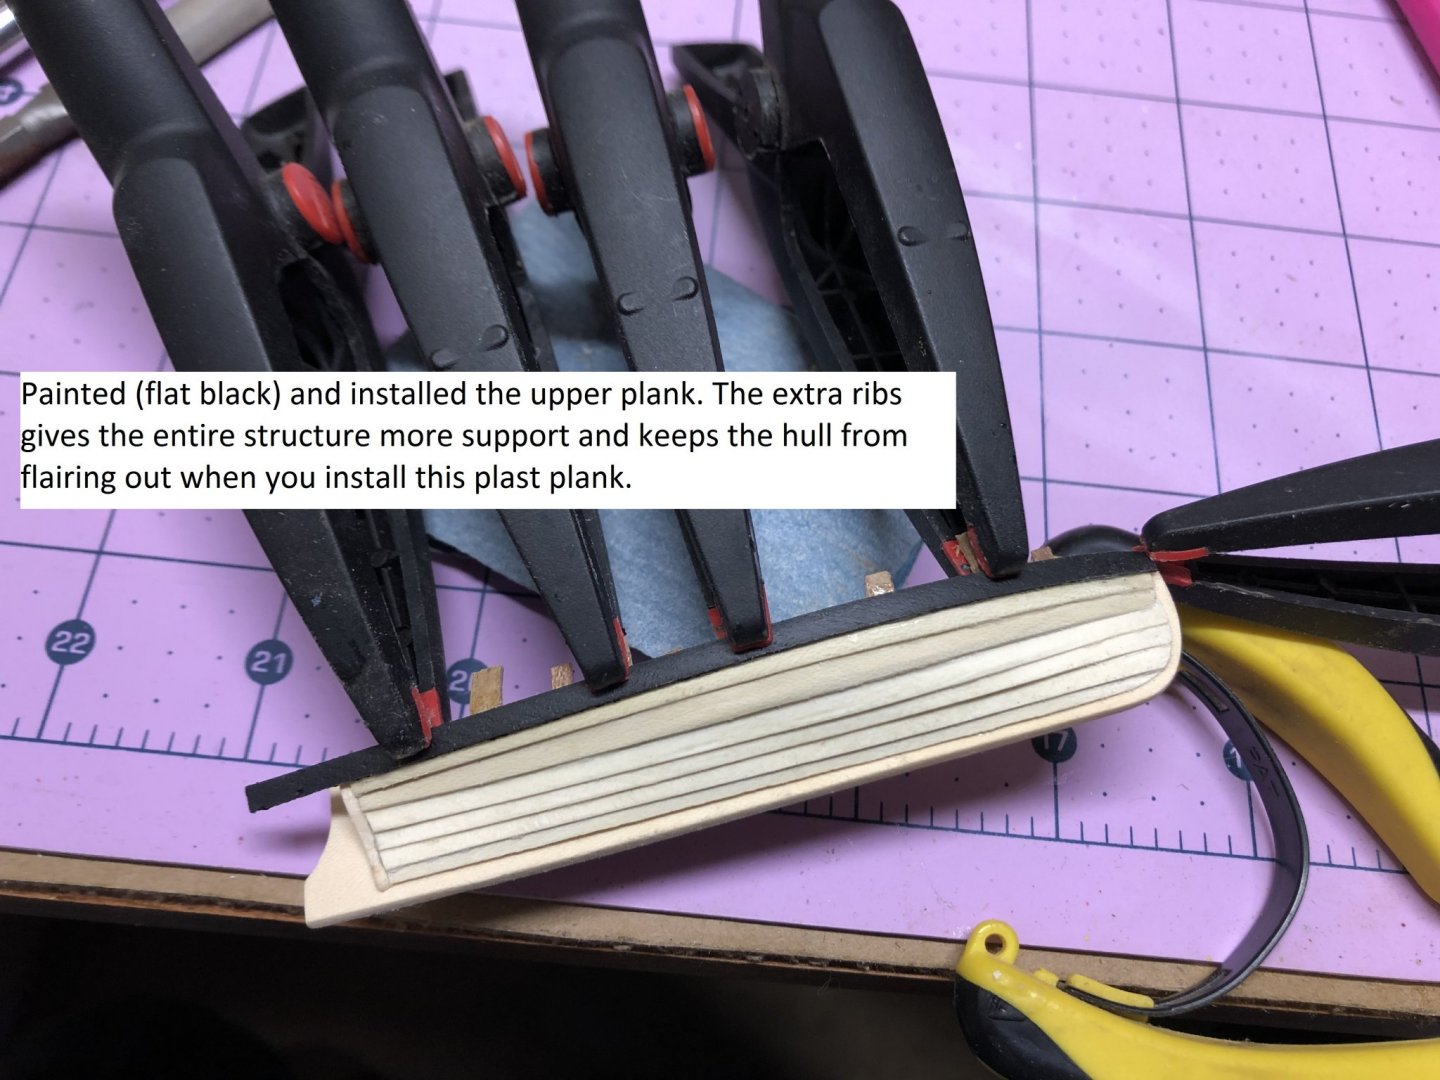
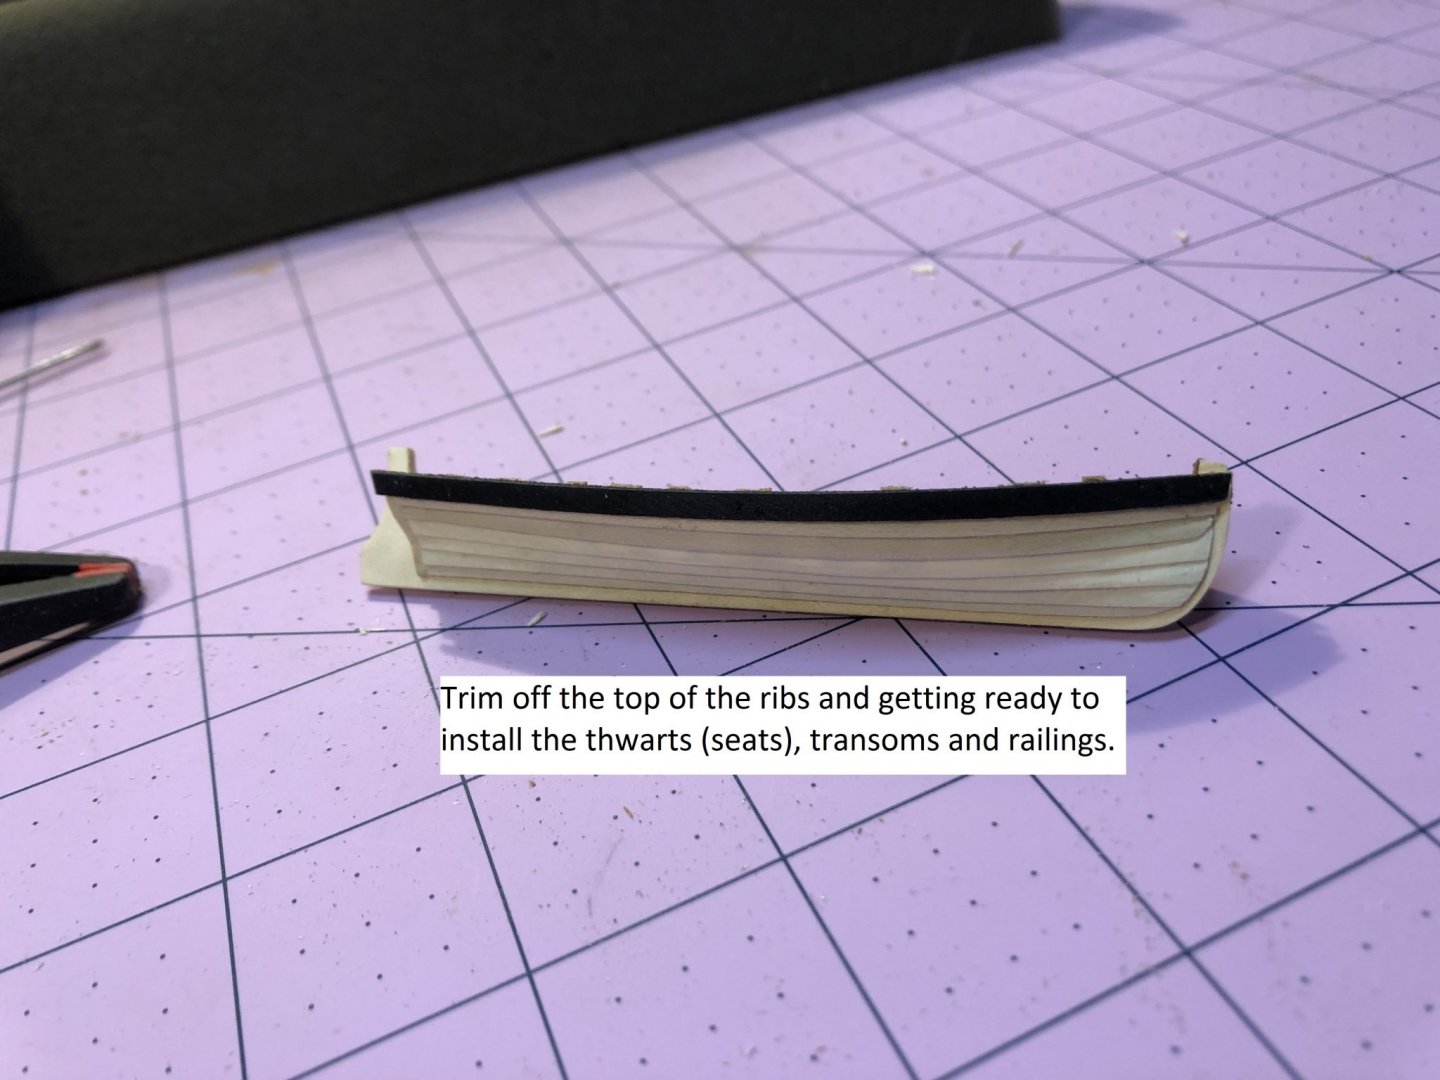
YAWL CONSTRUCTION Now that I have built three of these ship’s boats from a jig, and learned a little,, I thought I might share some of the hard lessons. I wanted the boats to be white, so I choose holly for the keel and planks. Anytime I can avoid using paint is a good thing. I used cherry for the ribs, floor boards, thwarts, transoms and railing. I obtained the jig plans from Hubert Sicard’s website. I am attaching a series of photos to show how I did the small yawl boat. By the way, smaller is harder.


- 648 replies
-
- 7
-
-
- niagara
- model shipways
- (and 1 more)
-
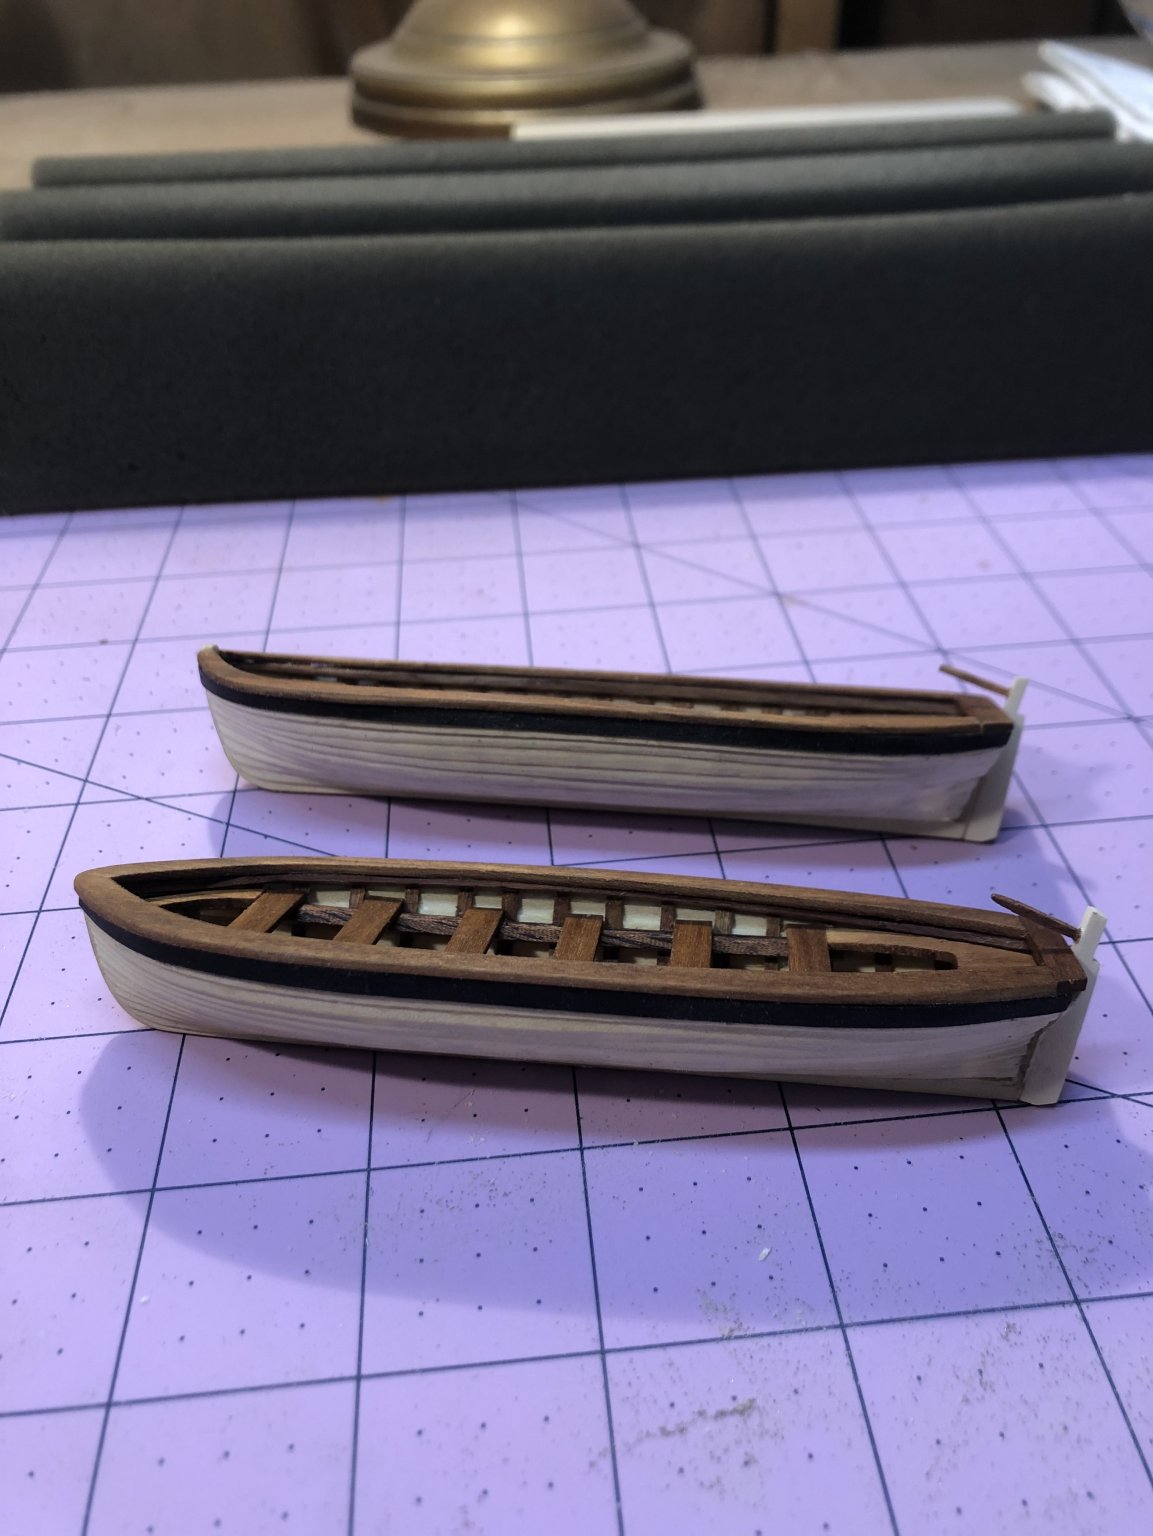
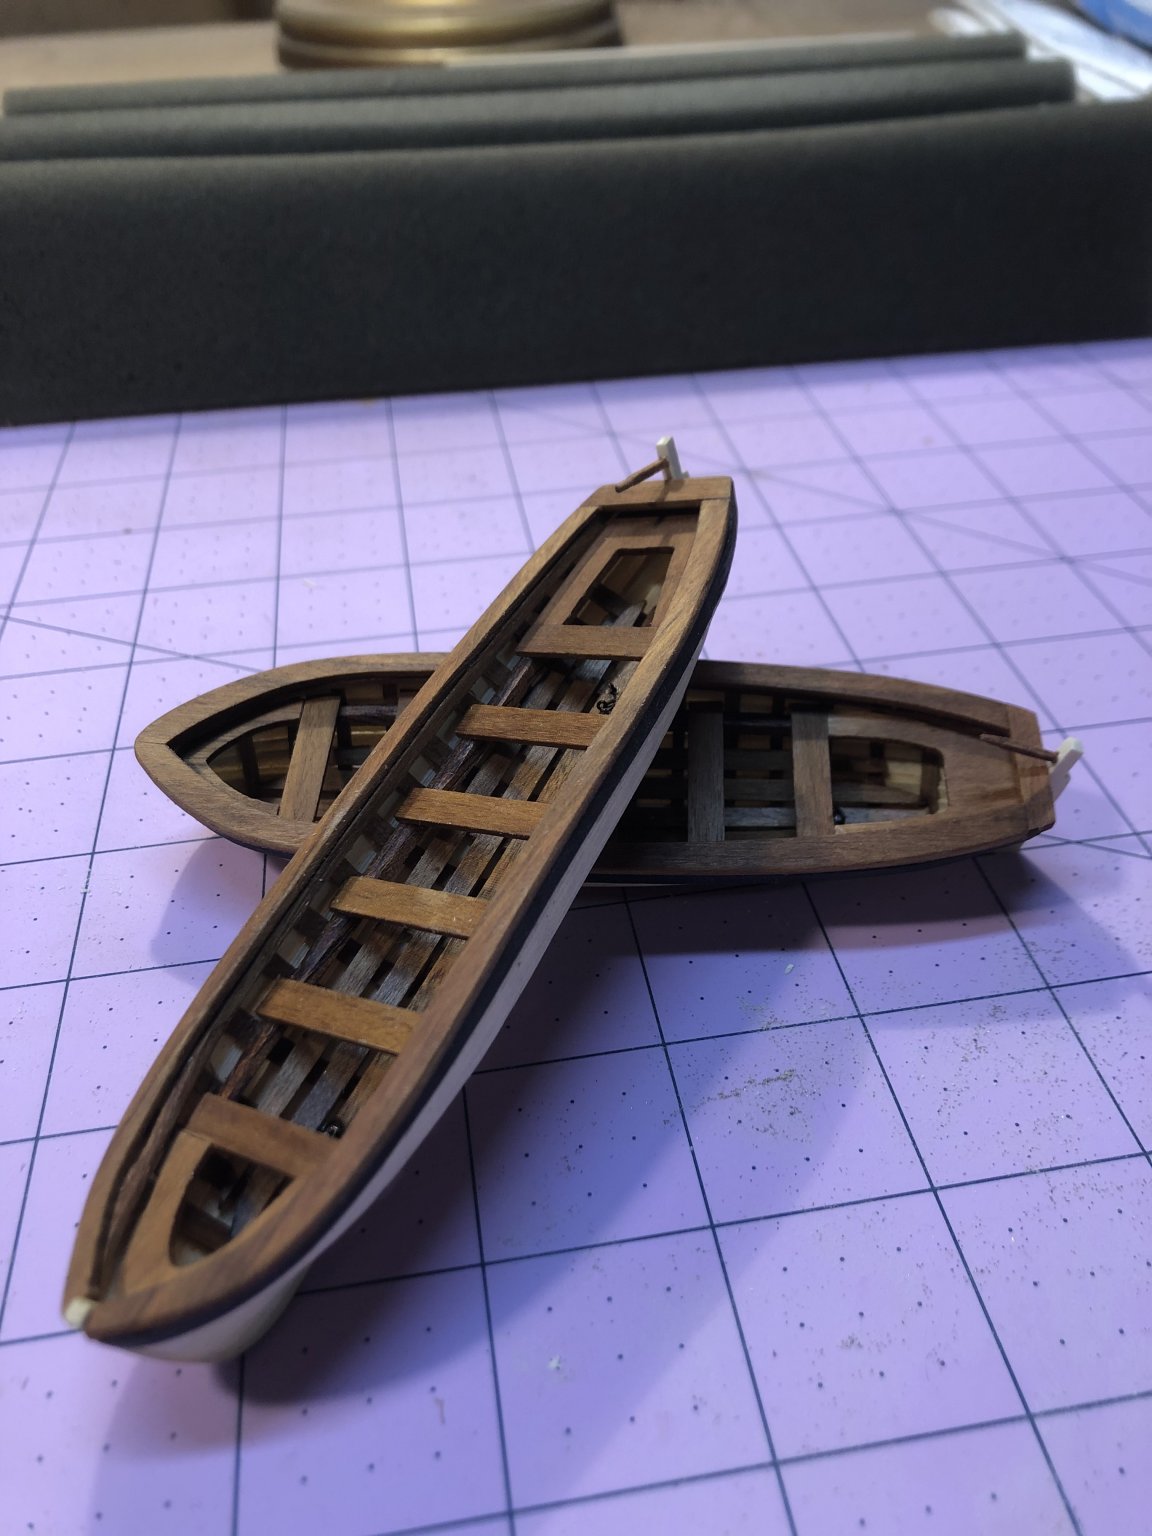
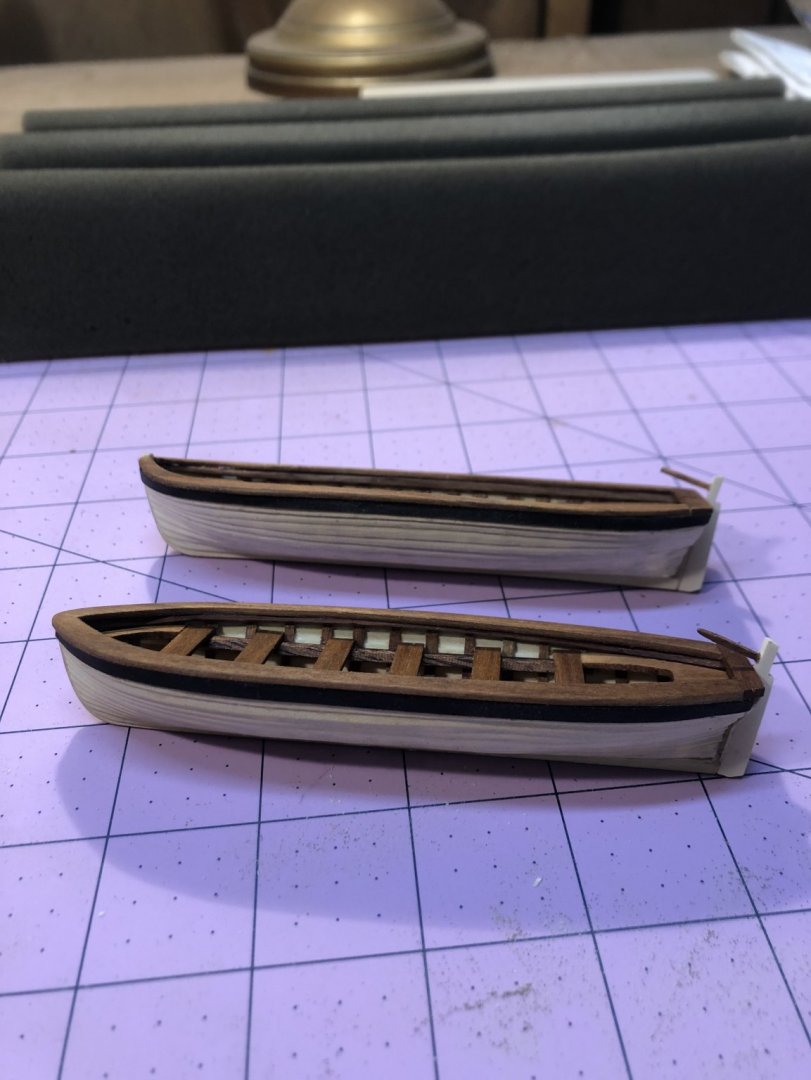
Well…… It has been nearly 2 years since I last posted to my build log. A home remodeling project (still at it) and a family illness has kept me away from my Niagara. But now, I find myself sheltering at home, like a lot of my fellow Americans, and some time to finally FINISH this project. It has been so long that I posted, I had a hard time finding my log. I note that I was working on my ship’s boats, and now have finally just about finished them. Here are some photos of the two launches. I still have to add the rails and oar locks. I built these from scratch using a jig. The planks are holly, and the remainder is cherry. I am now working on building the small skiff. I have to build the jig, cut planks, etc…. I will be posting pictures of the process. I am also in the process of building the display case, with LED lighting. That has been quite a challenge. I AM BACK. And I will finish.


- 648 replies
-
- 9
-
-
- niagara
- model shipways
- (and 1 more)
-
Gary, This looks great. I know it takes some time to cut and shape the rails, but it is well worth the effort. Love the Cedar.
-
Welcome back. Capstan looks great. Scale on the bolts looks fine to me.
-
Tom, The jury is in. I agree. Stain looks great as is.
-
Thanks all! Some great ideas. Keep them coming.
-
Our modeling club, Shipwrights of Central Ohio, in conjunction with the Ohio State Fair, is sponsoring a building seminar for kids ages 8-12. the plan is to conduct the program at next year's Ohio State Fair in August 2019. We are probably going to create a very basic wood kit from scratch for the seminar. It will require some assembly and painting. Our plan is to then let the participants take something home with them to build on their own with their parents and bring back to a future club meeting for display. My question is whether anyone is aware of a commercial wood kit that could serve the purpose of a take home kit. It still has to be pretty basic and modest in price. Or, has anyone done such a thing, and if so, what did you do, and what worked or did not work. Our club spent an entire meeting trying to come up with ideas on how to get young folks interested in shipbuilding. I have a hunch that many of you have pondered that challenge. Any suggestions would be helpful. Thanks
-
Gary, Your pump and rails look great. Not easy to do.
-
My Sear's Craftsman does the job. Pretty low tech item so you should find a suitable unit on the used market for minimal cost. For ship building, I use mine a lot.
- 367 replies
-
- 1
-
-
- model shipways
- niagara
- (and 1 more)


.jpg.175648fad31ffa533e5a5b285db1108a.jpg)
.jpg.5f9a7f1010e4f6cf79b80f97e5473022.jpg)