6ohiocav
-
Posts
543 -
Joined
-
Last visited
Content Type
Profiles
Forums
Gallery
Events
Everything posted by 6ohiocav
-
 Elijah, Glad to see you are back at it. Your gunboat is exquisite. The staining looks spot on. I get nervous when I apply any finishes since a lot of hard work can be ruined in short order. You have met the challenge. I will follow along if you don't mind.
- 228 replies
-
- 2
-

-
- gunboat
- model shipways
- (and 1 more)
-
Looking good Ron.
-
Mike, Looks great. I was just getting interested in your build report at our Shipwrights of Central Ohio virtual meeting when the feed shut down. Glad to see you are making steady progress
- 221 replies
-
- 1
-
-
- queen anne barge
- Syren Ship Model Company
- (and 1 more)
-
Derek, Ingenious jig. Can you please send your measurements either as a post or a private e-mail if your prefer. I have masts that are part octagon, part round, and your marking system with proper apportionment will make this task easier and more precise. Love your build.
- 725 replies
-
- 1
-
-
- vanguard models
- speedy
- (and 1 more)
-
Tom, I will be following along if you don't mind and look forward to seeing how you decide to finish you plank project. Good luck.
- 21 replies
-
- 1
-
-
- mercury
- victory models
- (and 1 more)
-
Tom, Copper or no copper, your Pegasus is simply amazing. Great recovery. You attempted to plate and then painted a finished ship. I fully agree with Capt. Hook and commend you for your courage and skill in English and German. By the way, how did you apply the white paint?
-
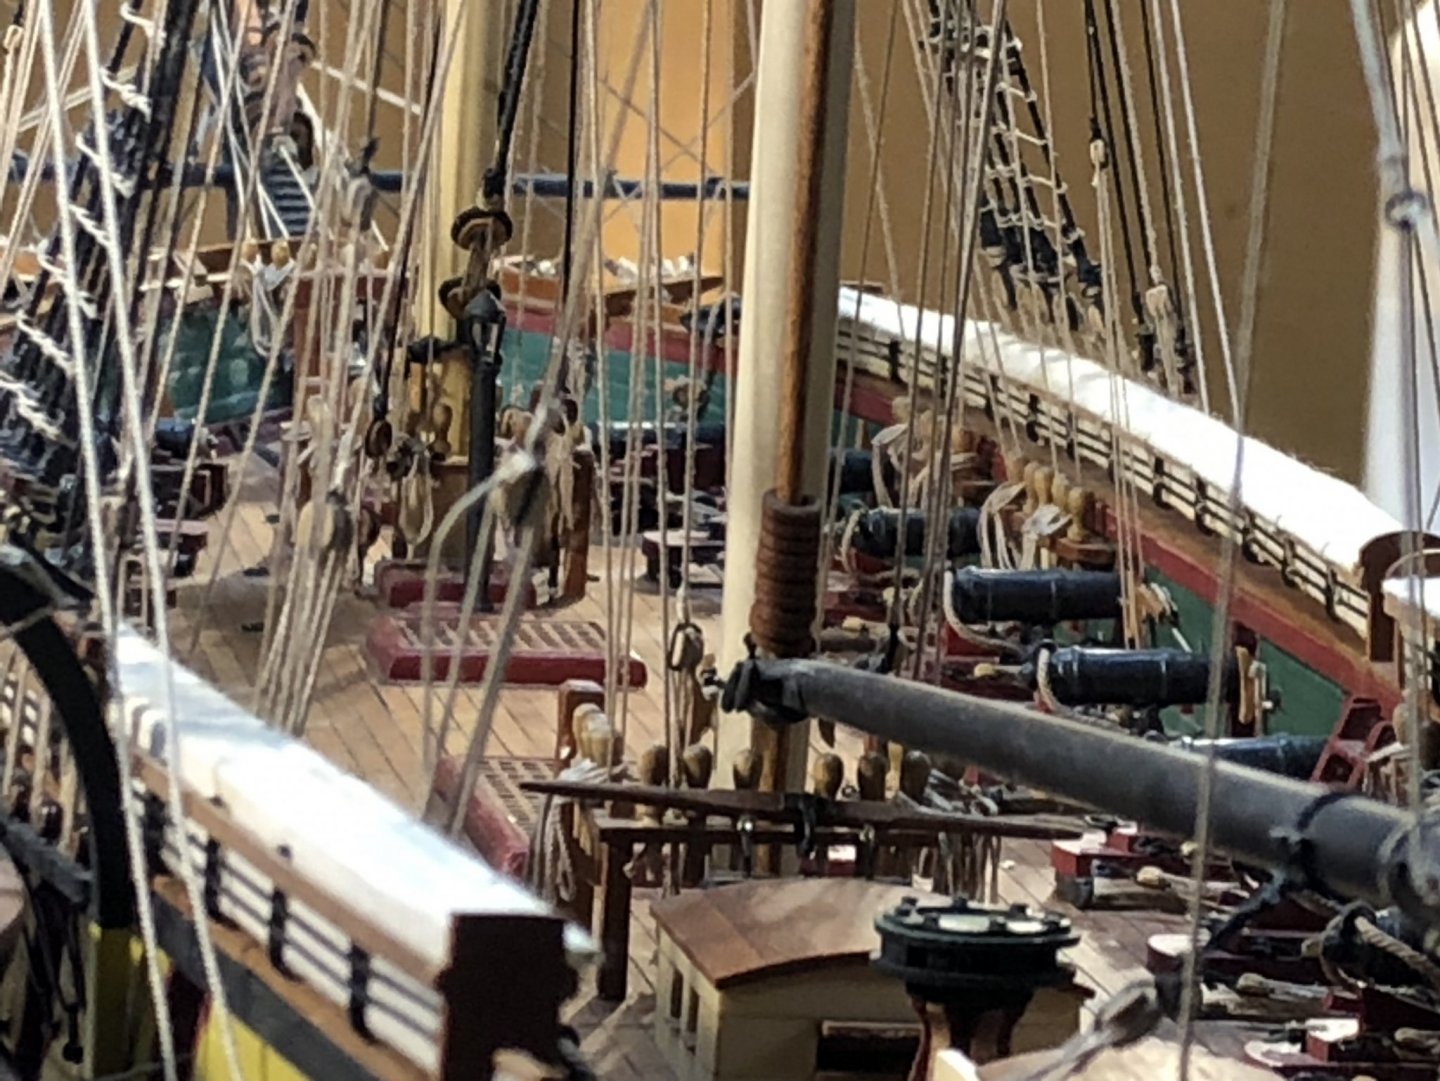
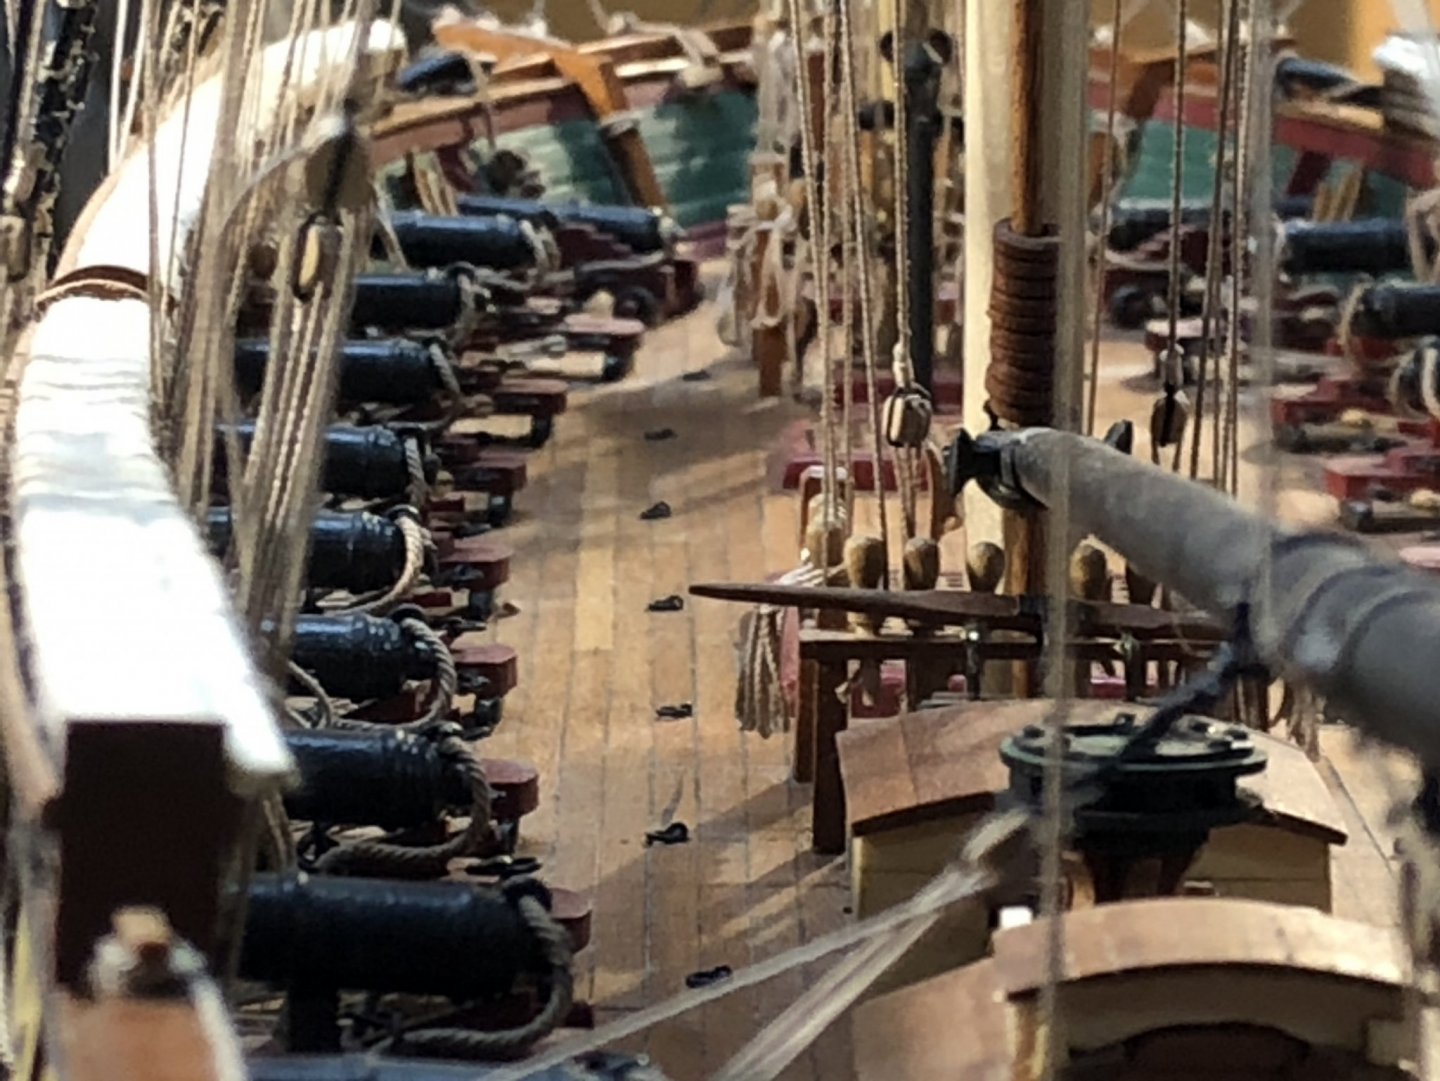
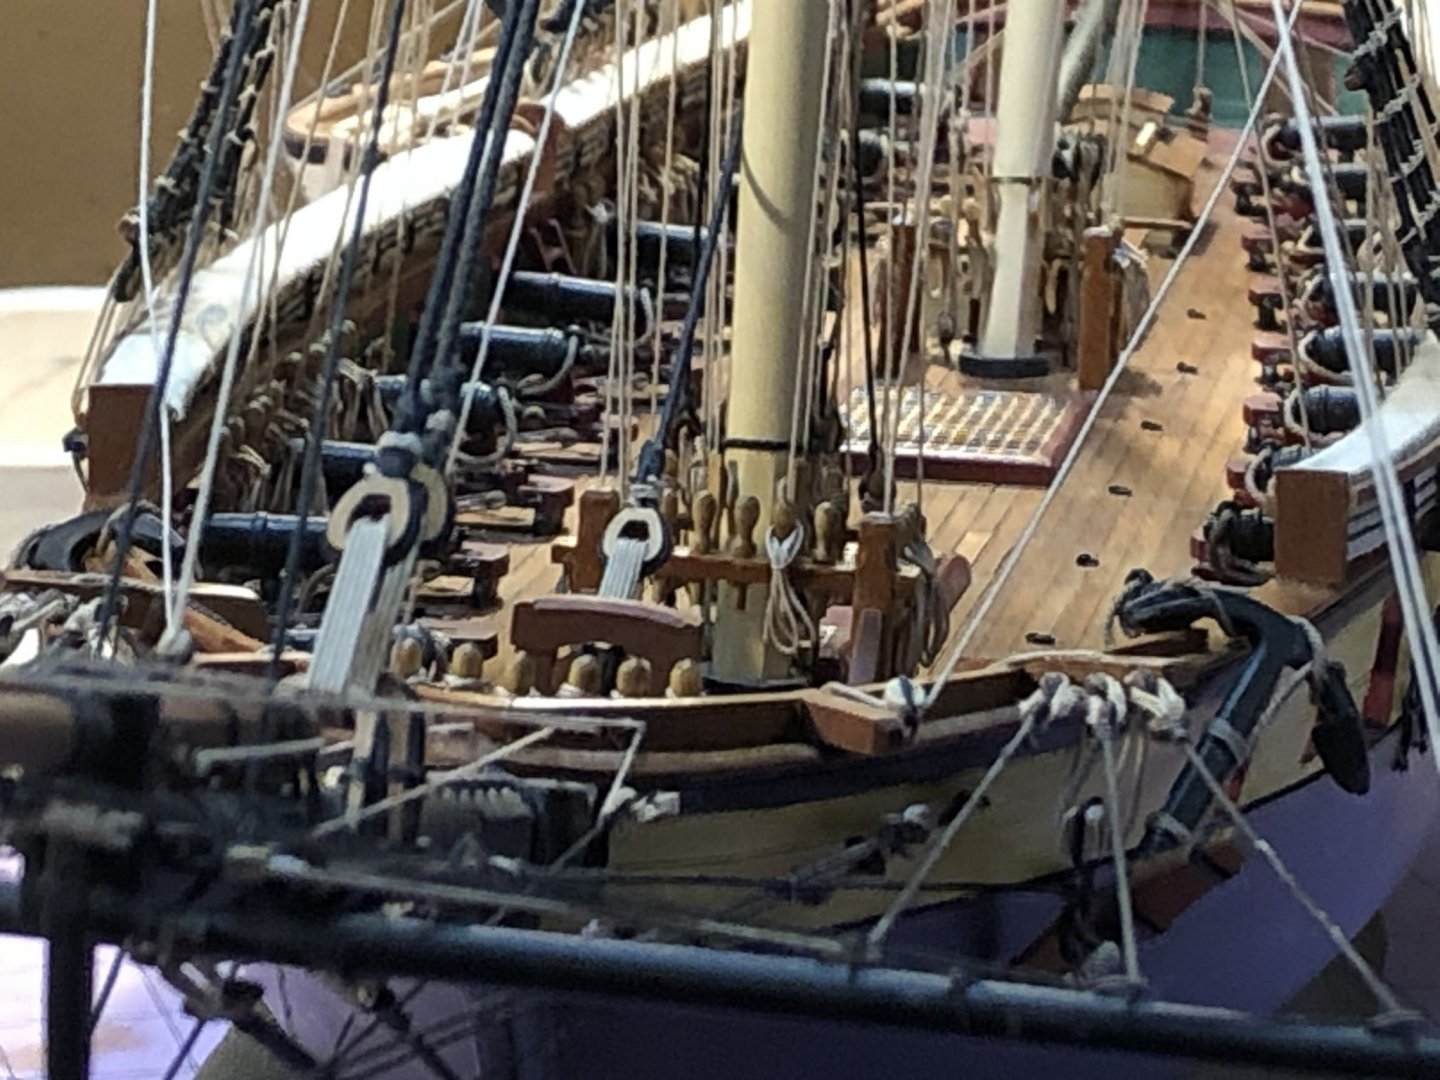
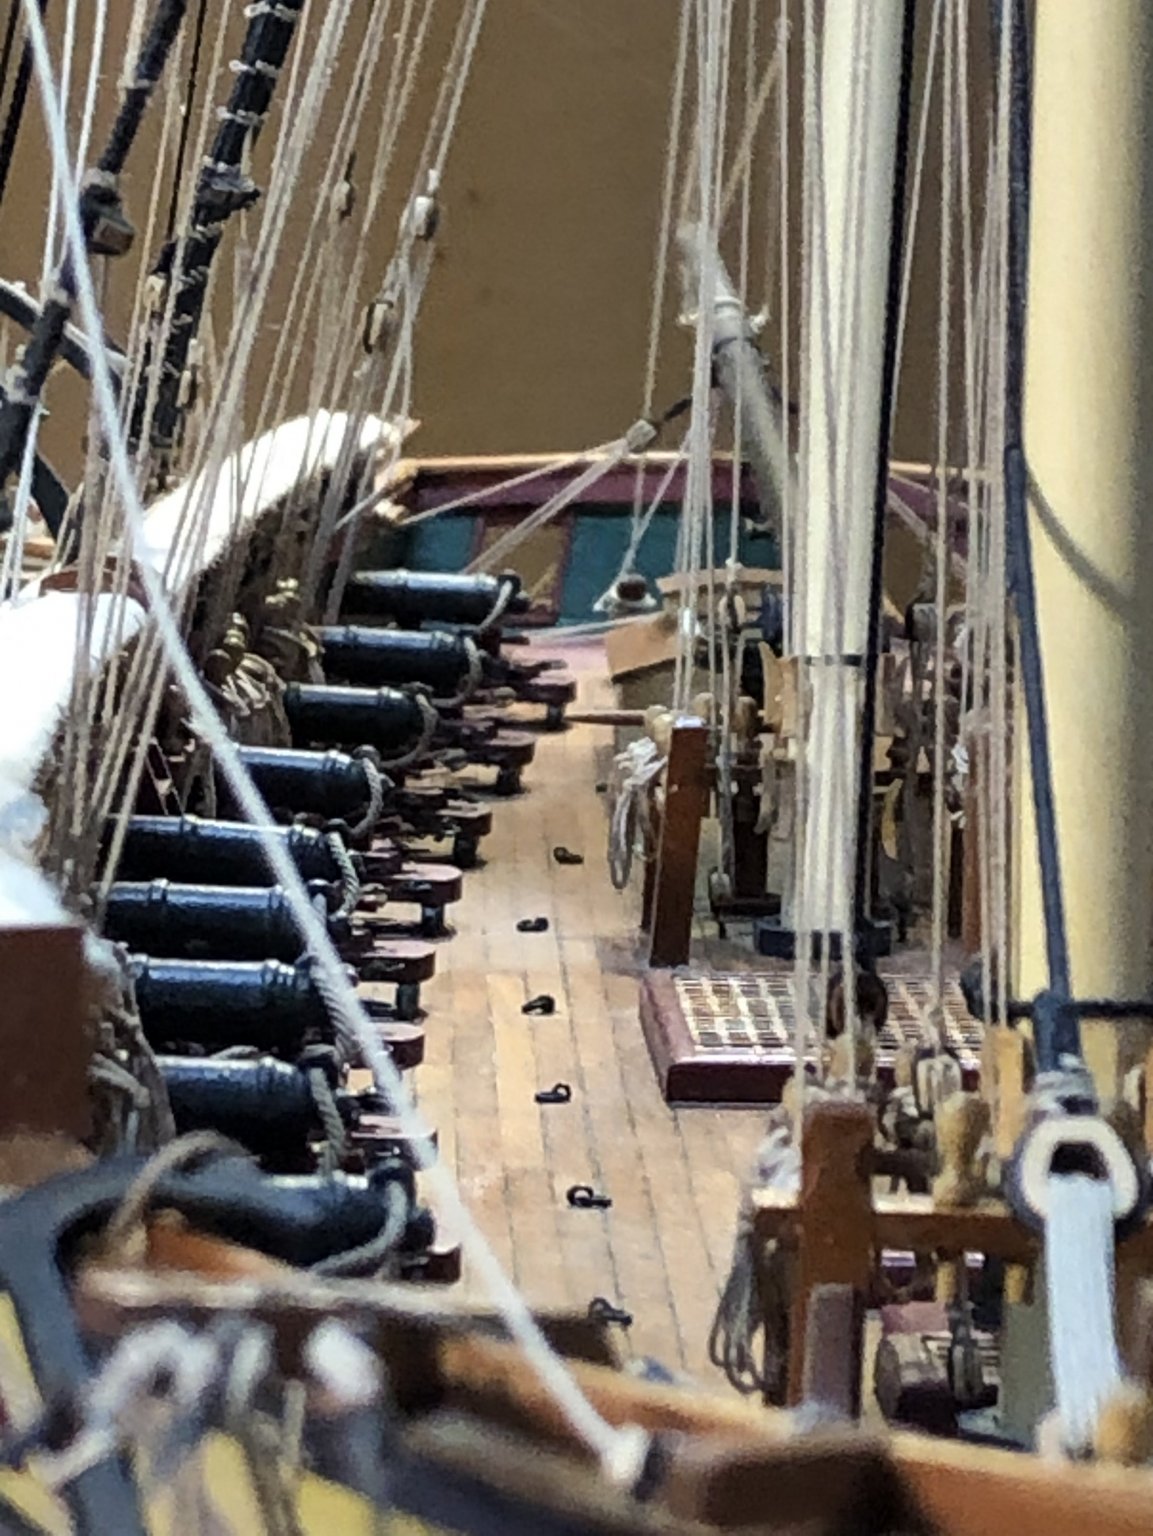
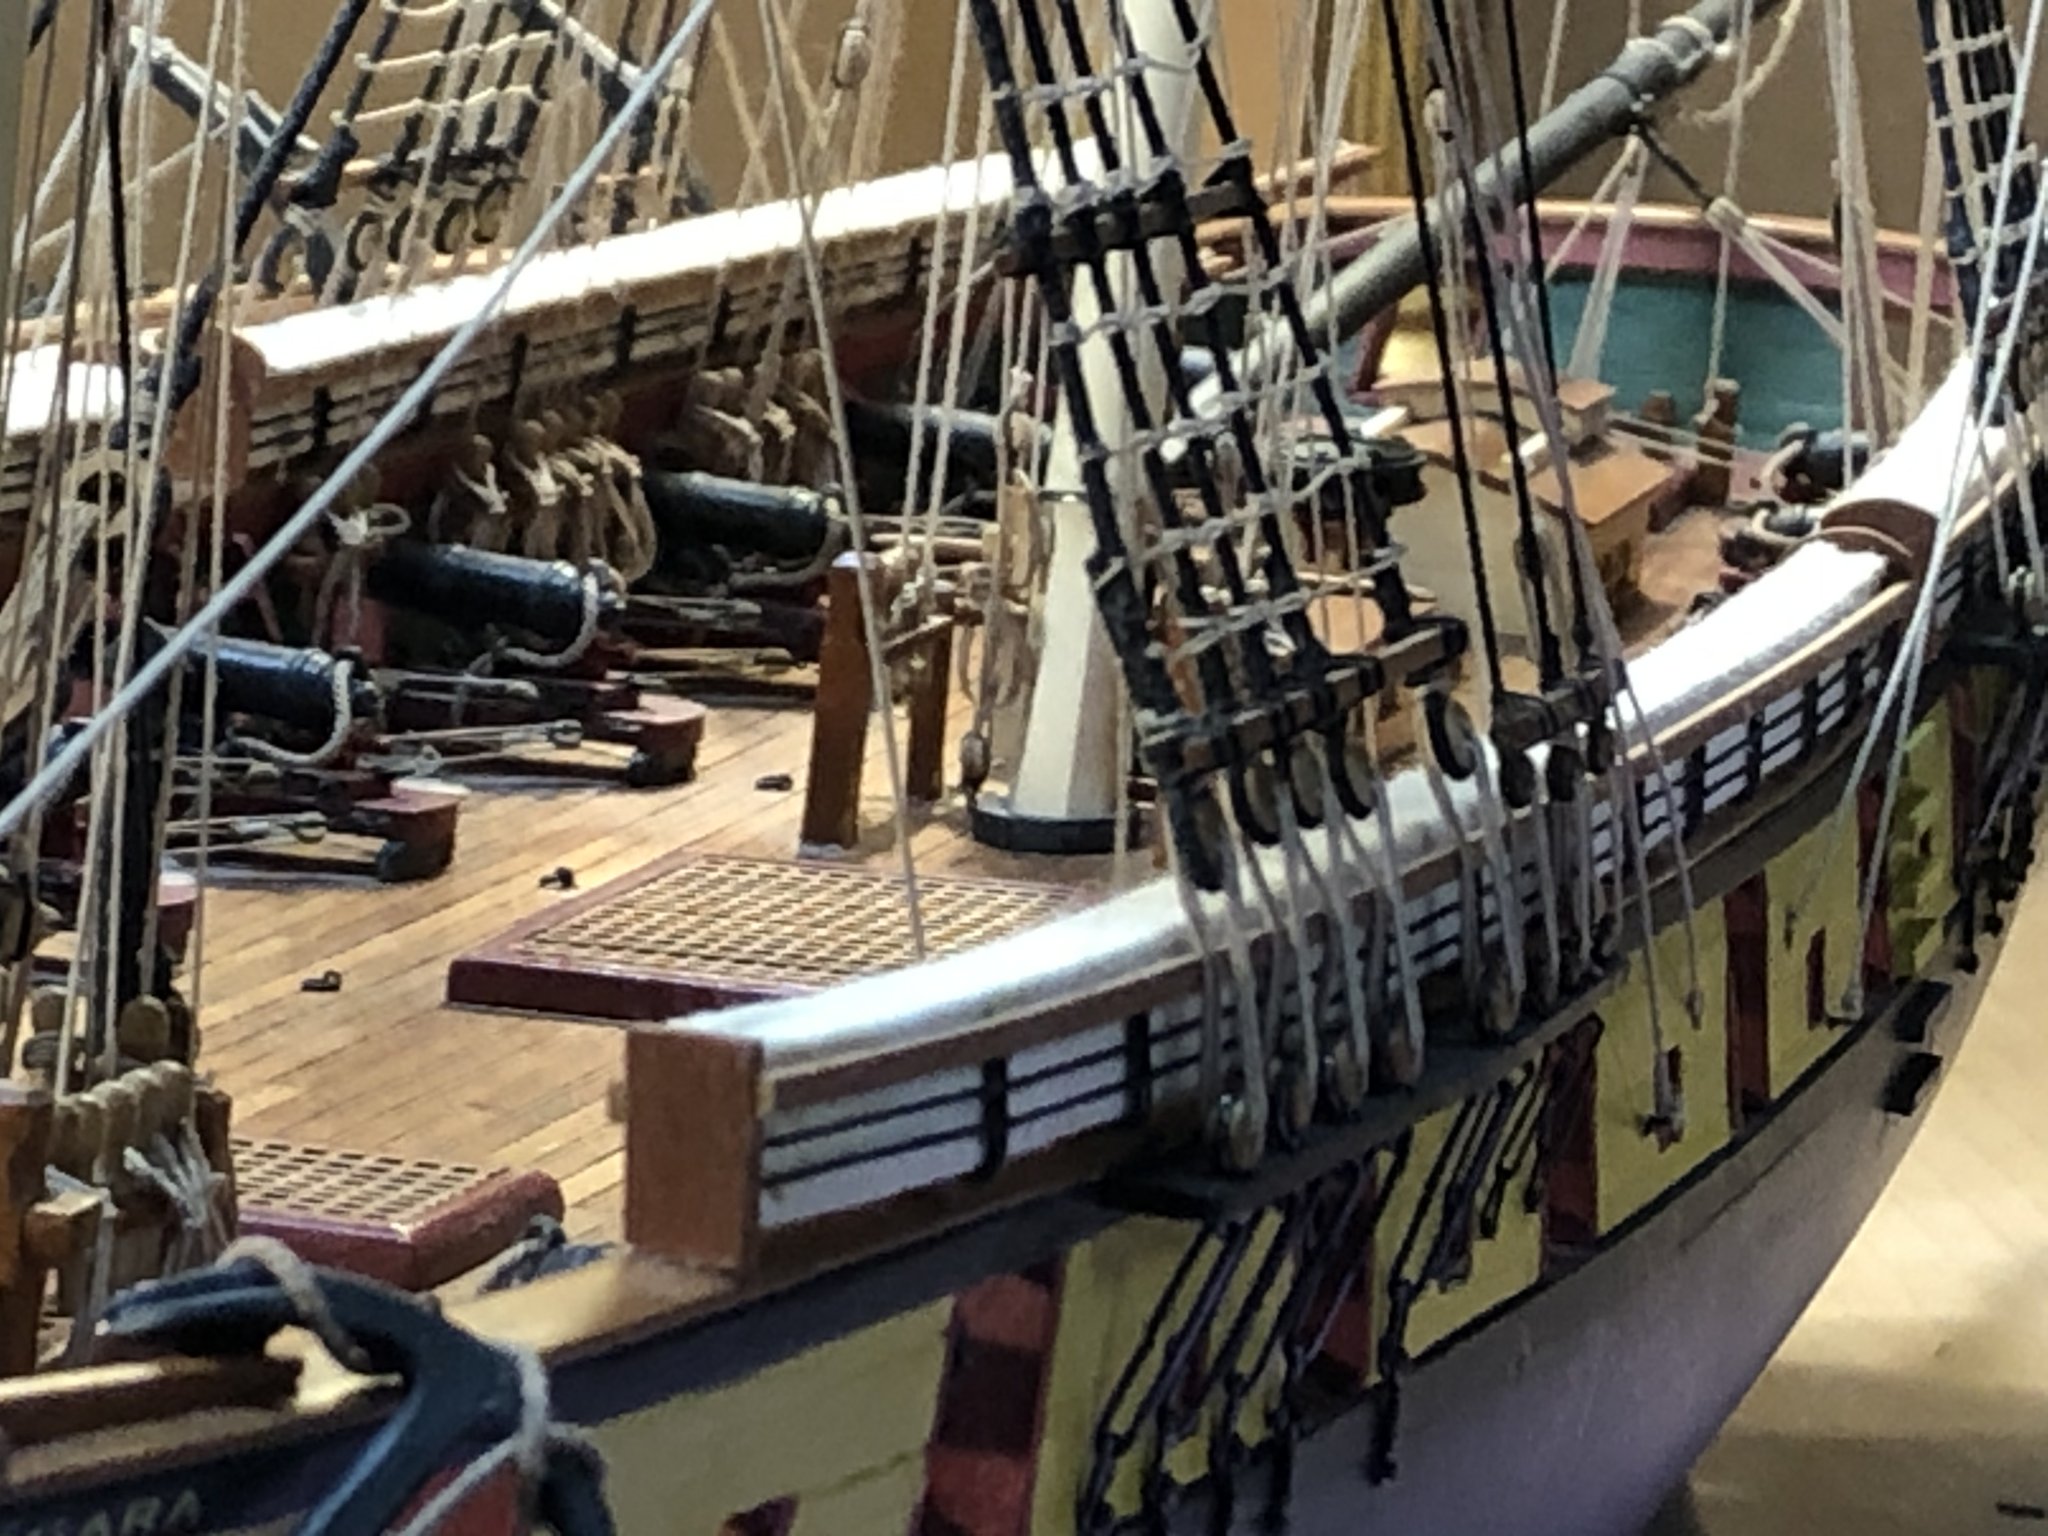
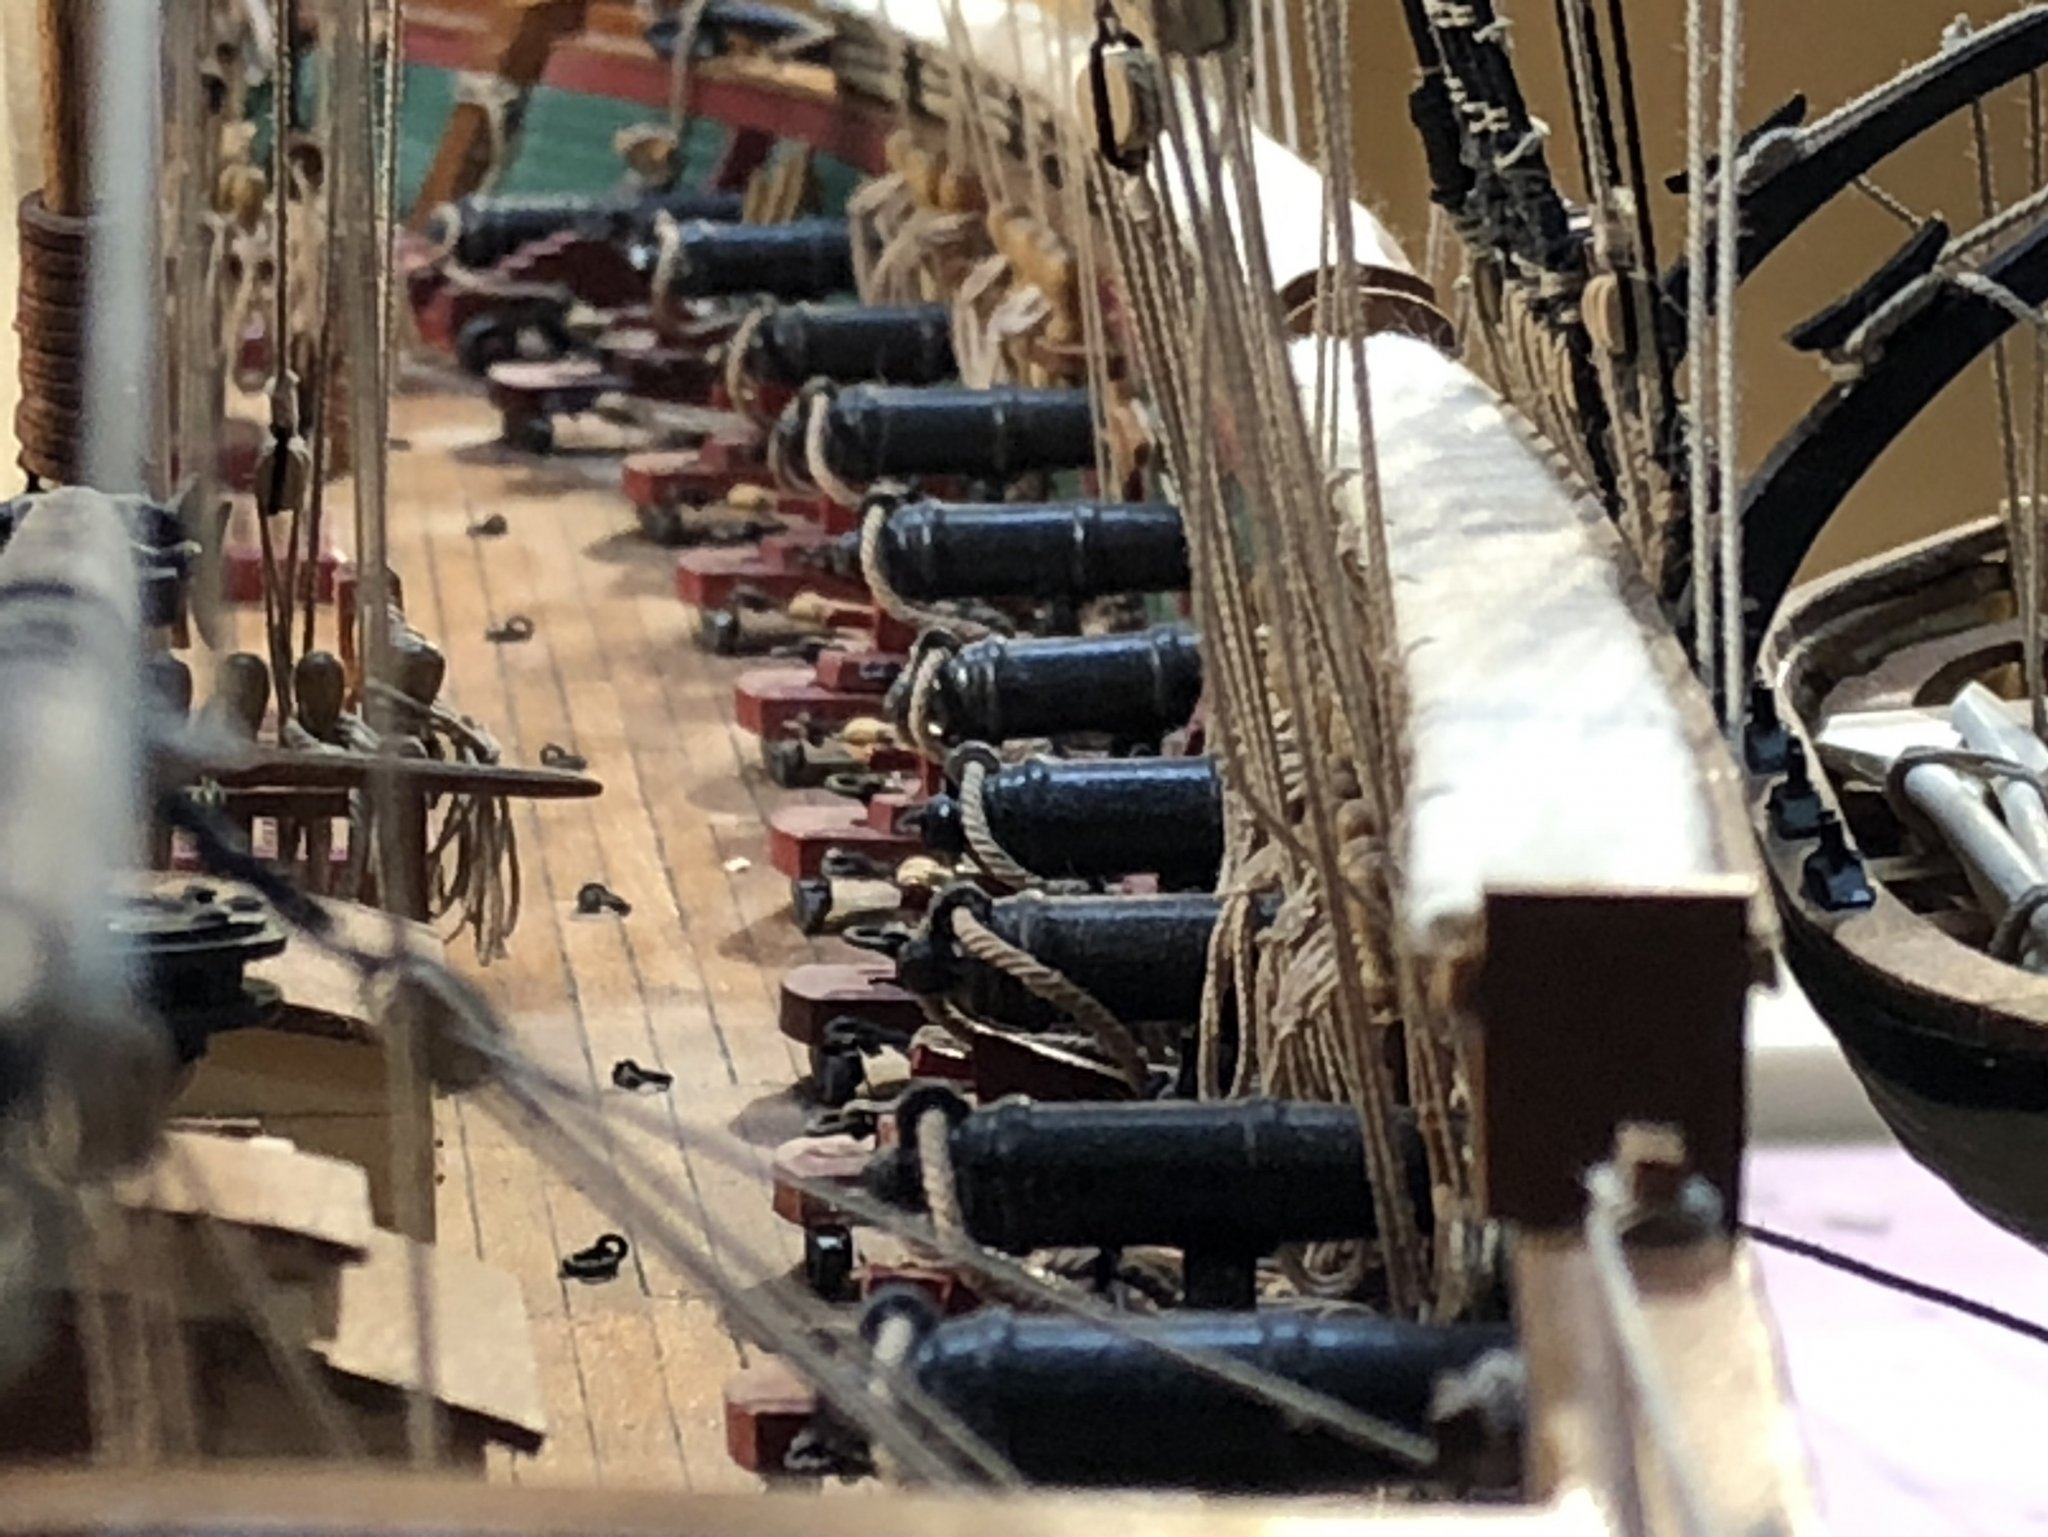
All, Thanks everyone for all of the comments. I know I have said this many times before, but I attribute the success of this project to the many build logs that I reviewed and the suggestions and recommendations of my fellow modelers Mike, I think the key to photographs of model ships fall into three categories. Granted, I have no skill in photography and took my shots with my I Phone 8. But these things helped I think. 1. Paint choices. The key to authentic photos is the paint choices. I read somewhere on this site years ago that we should avoid bright colors. I muted all of the paints I chose. I added drops of flat black paint to my reds and greens. It does not take much, but it dulled the sheen and I believe gave the ship a more realistic look. I used flat black for the hull. I strongly recommend all modelers to consider doing the same. 2. Lighting. The close up shots of the deck were taken on my bench with a single soft bulb light. I turned off all of the other lights in the shop. The light was set up behind my left shoulder. The single light in a darkened room dulled the light and created more life-like shadows. The photos in the display case were taken under LED strip lighting, with the shop completely dark. I used the soft light option on my lighting system. 3. Zoom. I zoomed my phone in as far as I could, which allowed me to take the photos from some distance. That allows more of the shot to be in focus. I would like to think I planned all of this in advance, but honestly, the photos just turned out pretty good. Trust me, the photos make the model look better than it is. Mike M. I have not yet decided what's up next, but I have some choices. I have a partially completed Corel Wappon Van Hamburg that I acquired from a family in the area after the patriarch and shipwright passed away. I have to repair some of the planking and deck, and will de-mast the ship and start over with the masts and yards and rigging. The many carved figurines need stripped and re-painted (Yuk) as well. Unfortunately, I only have the plans, and a loose box of parts that I am not sure even go to the Wappon. So there will be a lot of scratch work. This thing at 1/50 scale is a monster. I will have to build a larger bench. I plan on starting a restoration log on the project. I also have a few kits on the shelf to chose from as well. My son is begging me to build the MS Constitution. Plenty to keep me busy. I am getting ready to transport my Niagara and its display case to my office for its final destination. Again, thanks all.
- 648 replies
-
- 2
-
-
- niagara
- model shipways
- (and 1 more)
-
Looking good Tom. I agree with Mike on the breech ropes, and fully understand the challenge of replicating the weight. There does have to be more slack to allow the gun to recoil after firing.
-
Ron, Looking good! Very uniform. Once you mount them and rig the deadeyes with lanyards, it will be almost impossible to see any imperfections in the wires. By the way, more expensive kits provide all of these parts pre-made. The MS kit forces us to develop skills that will come in handy for the future.
-
Mike, Duh, an actual armrest for a seat. I thought that was some special naval item that I had never heard of. What kind of wood is that made of that would cause it to curl when painted on one side. Looks like you fixed it up good.
- 221 replies
-
- 1
-
-
- queen anne barge
- Syren Ship Model Company
- (and 1 more)
-
Love this build Mike. What is the armrest?
-
Steve, Your Crown Timber cherry planking looks fantastic. Great choice of wood. I will be following along.
-
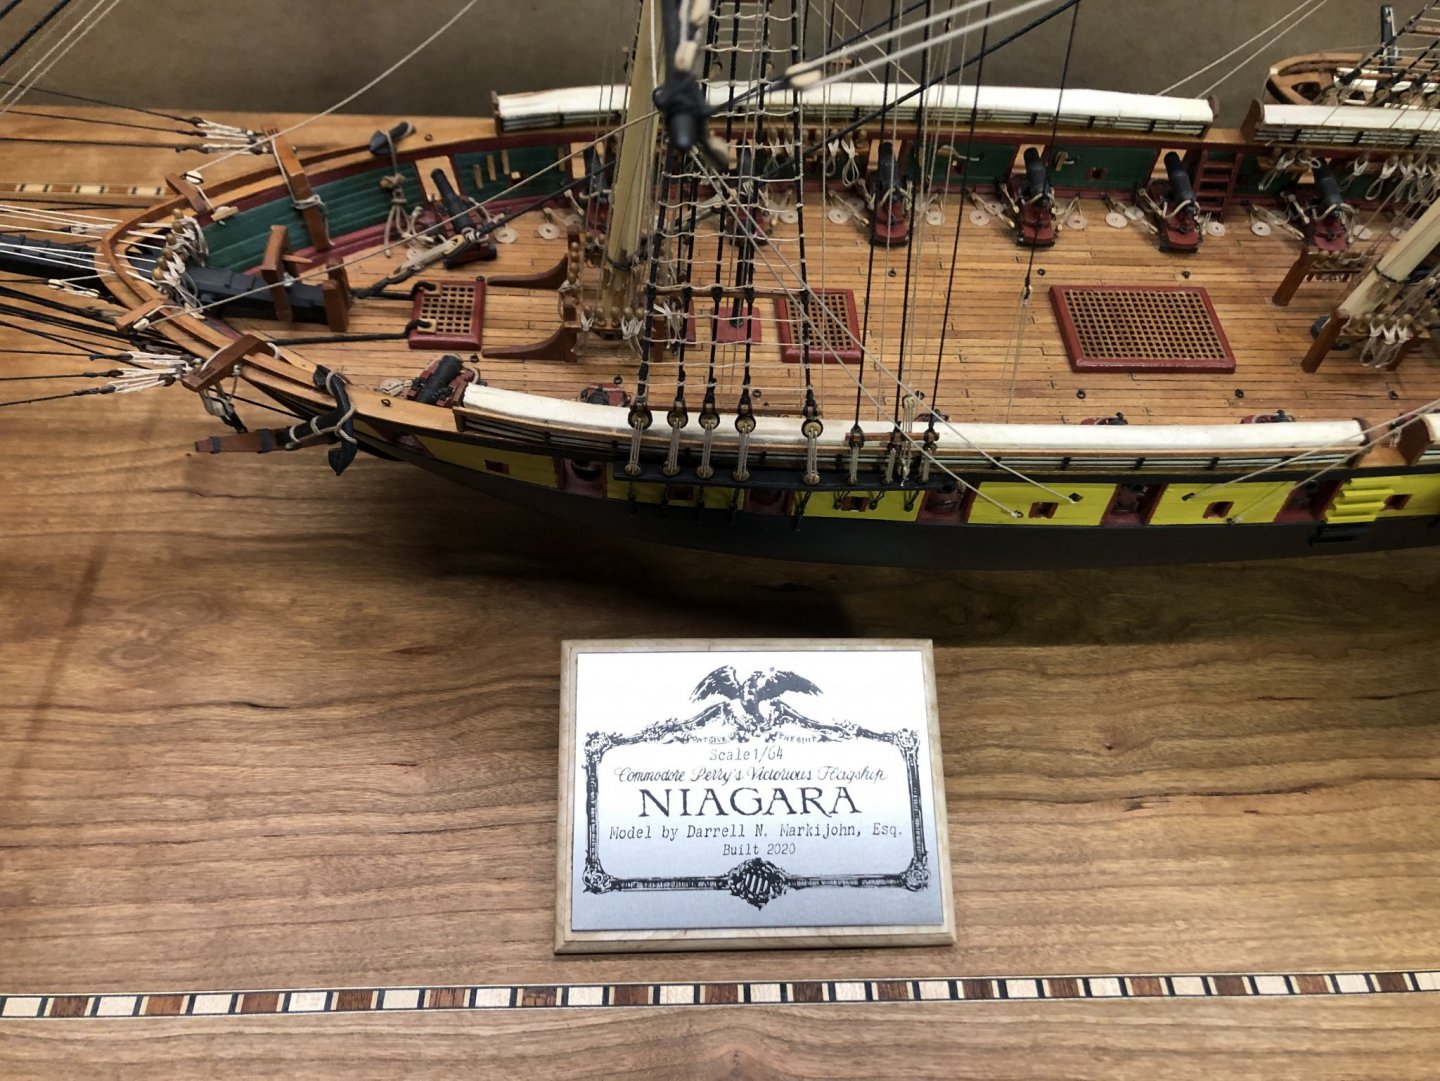
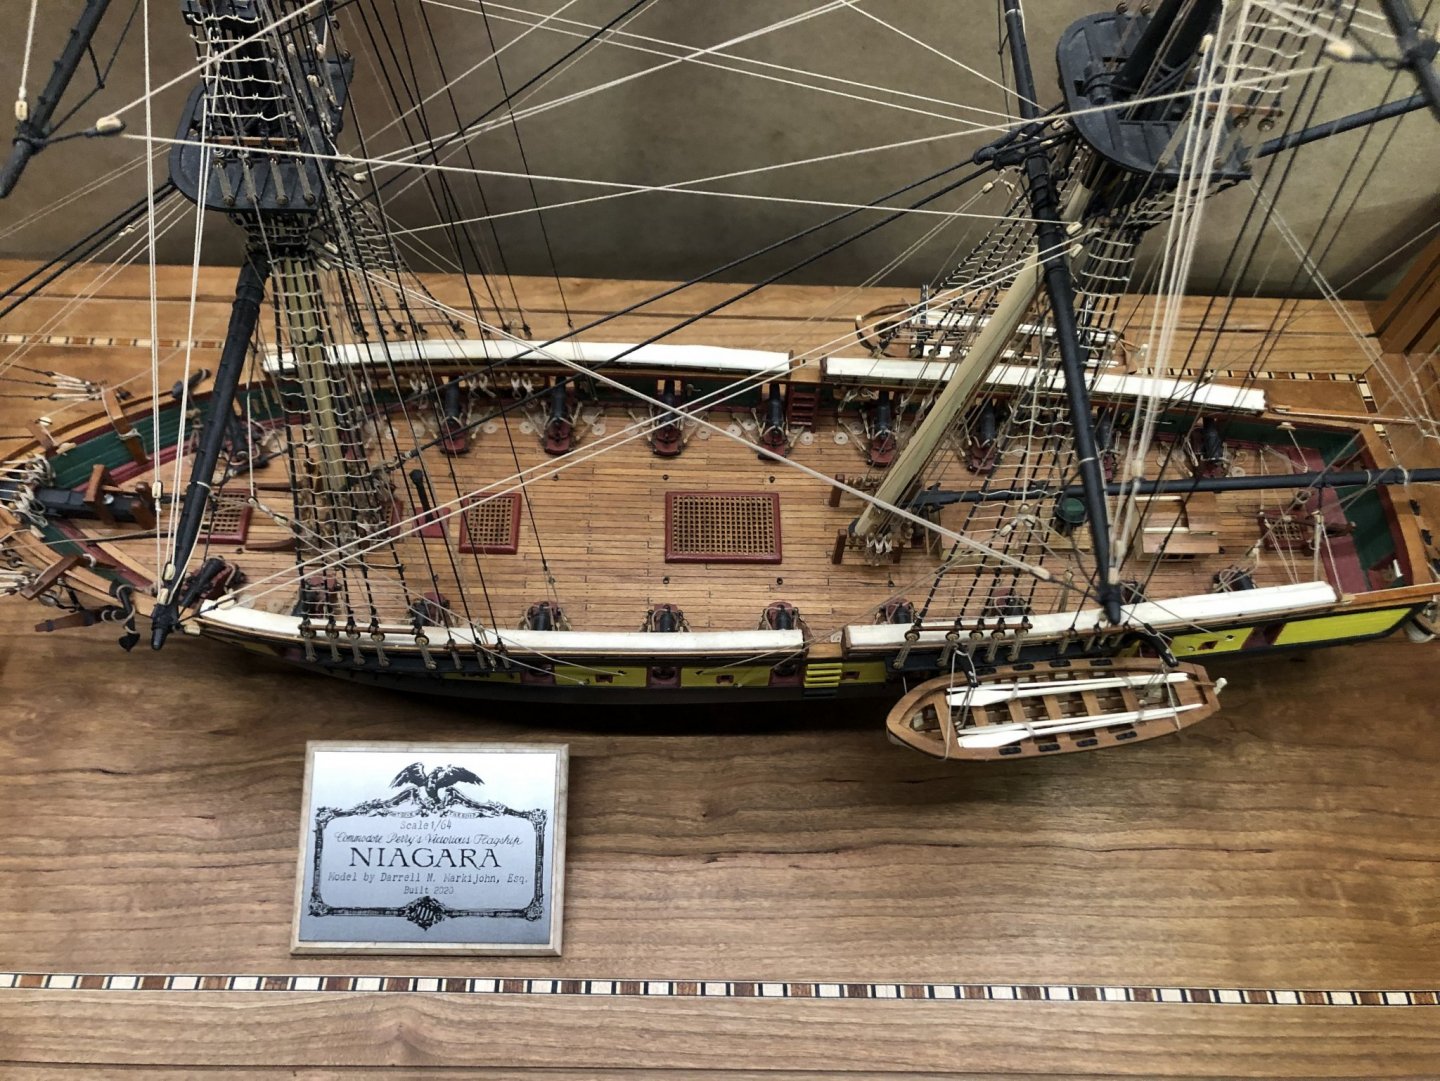
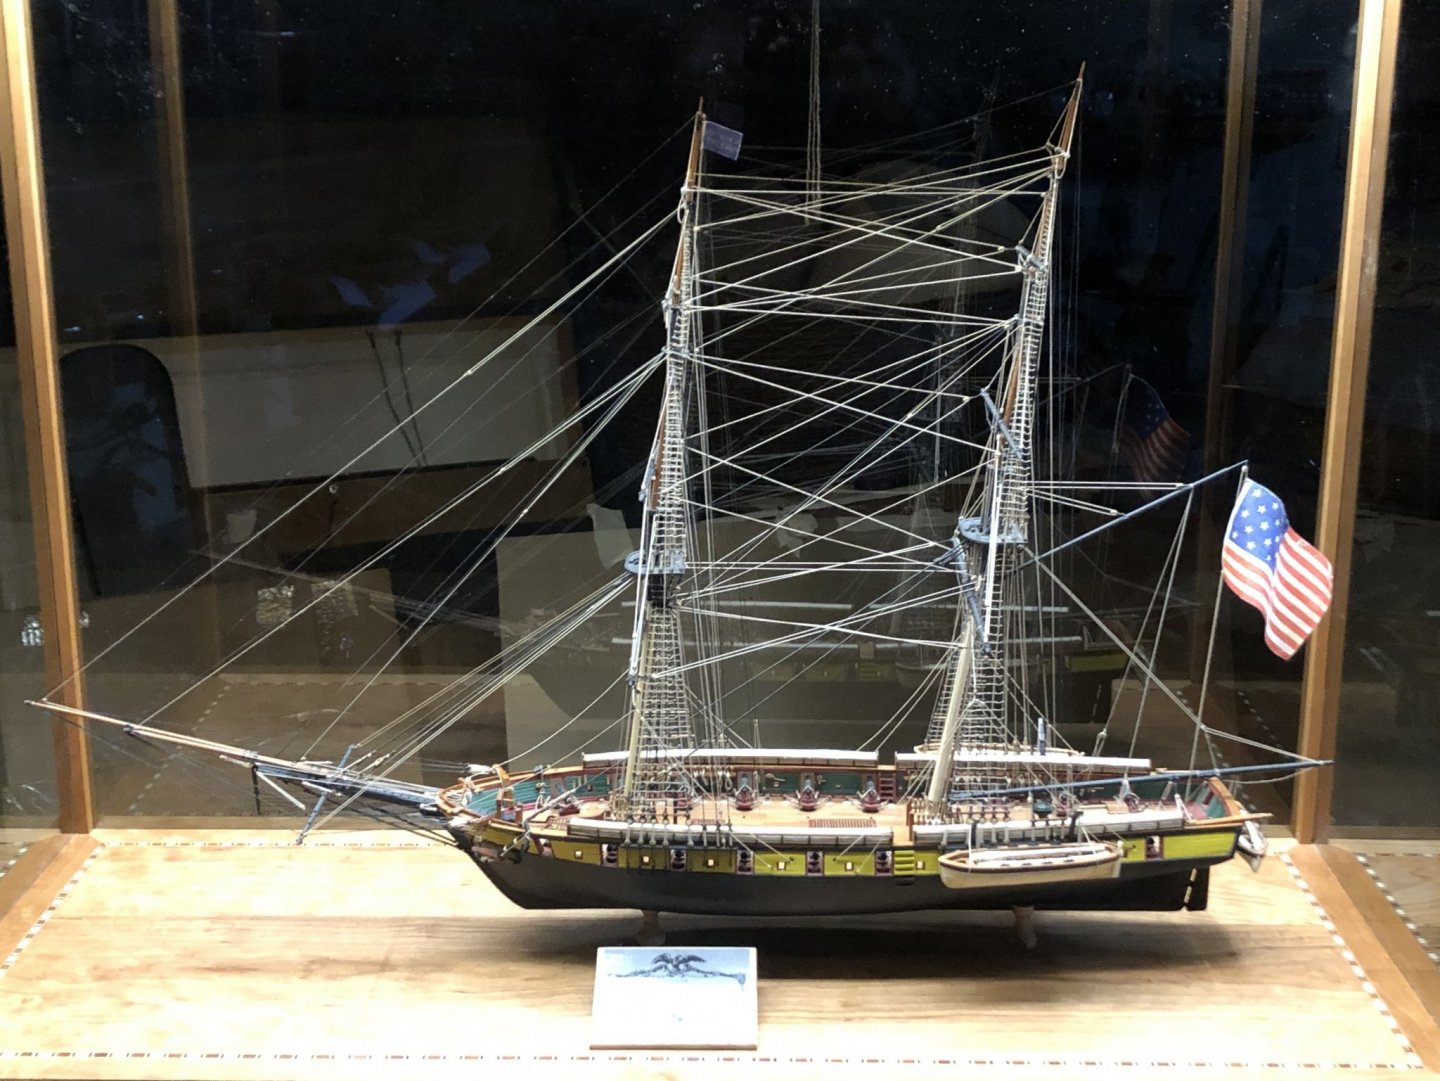
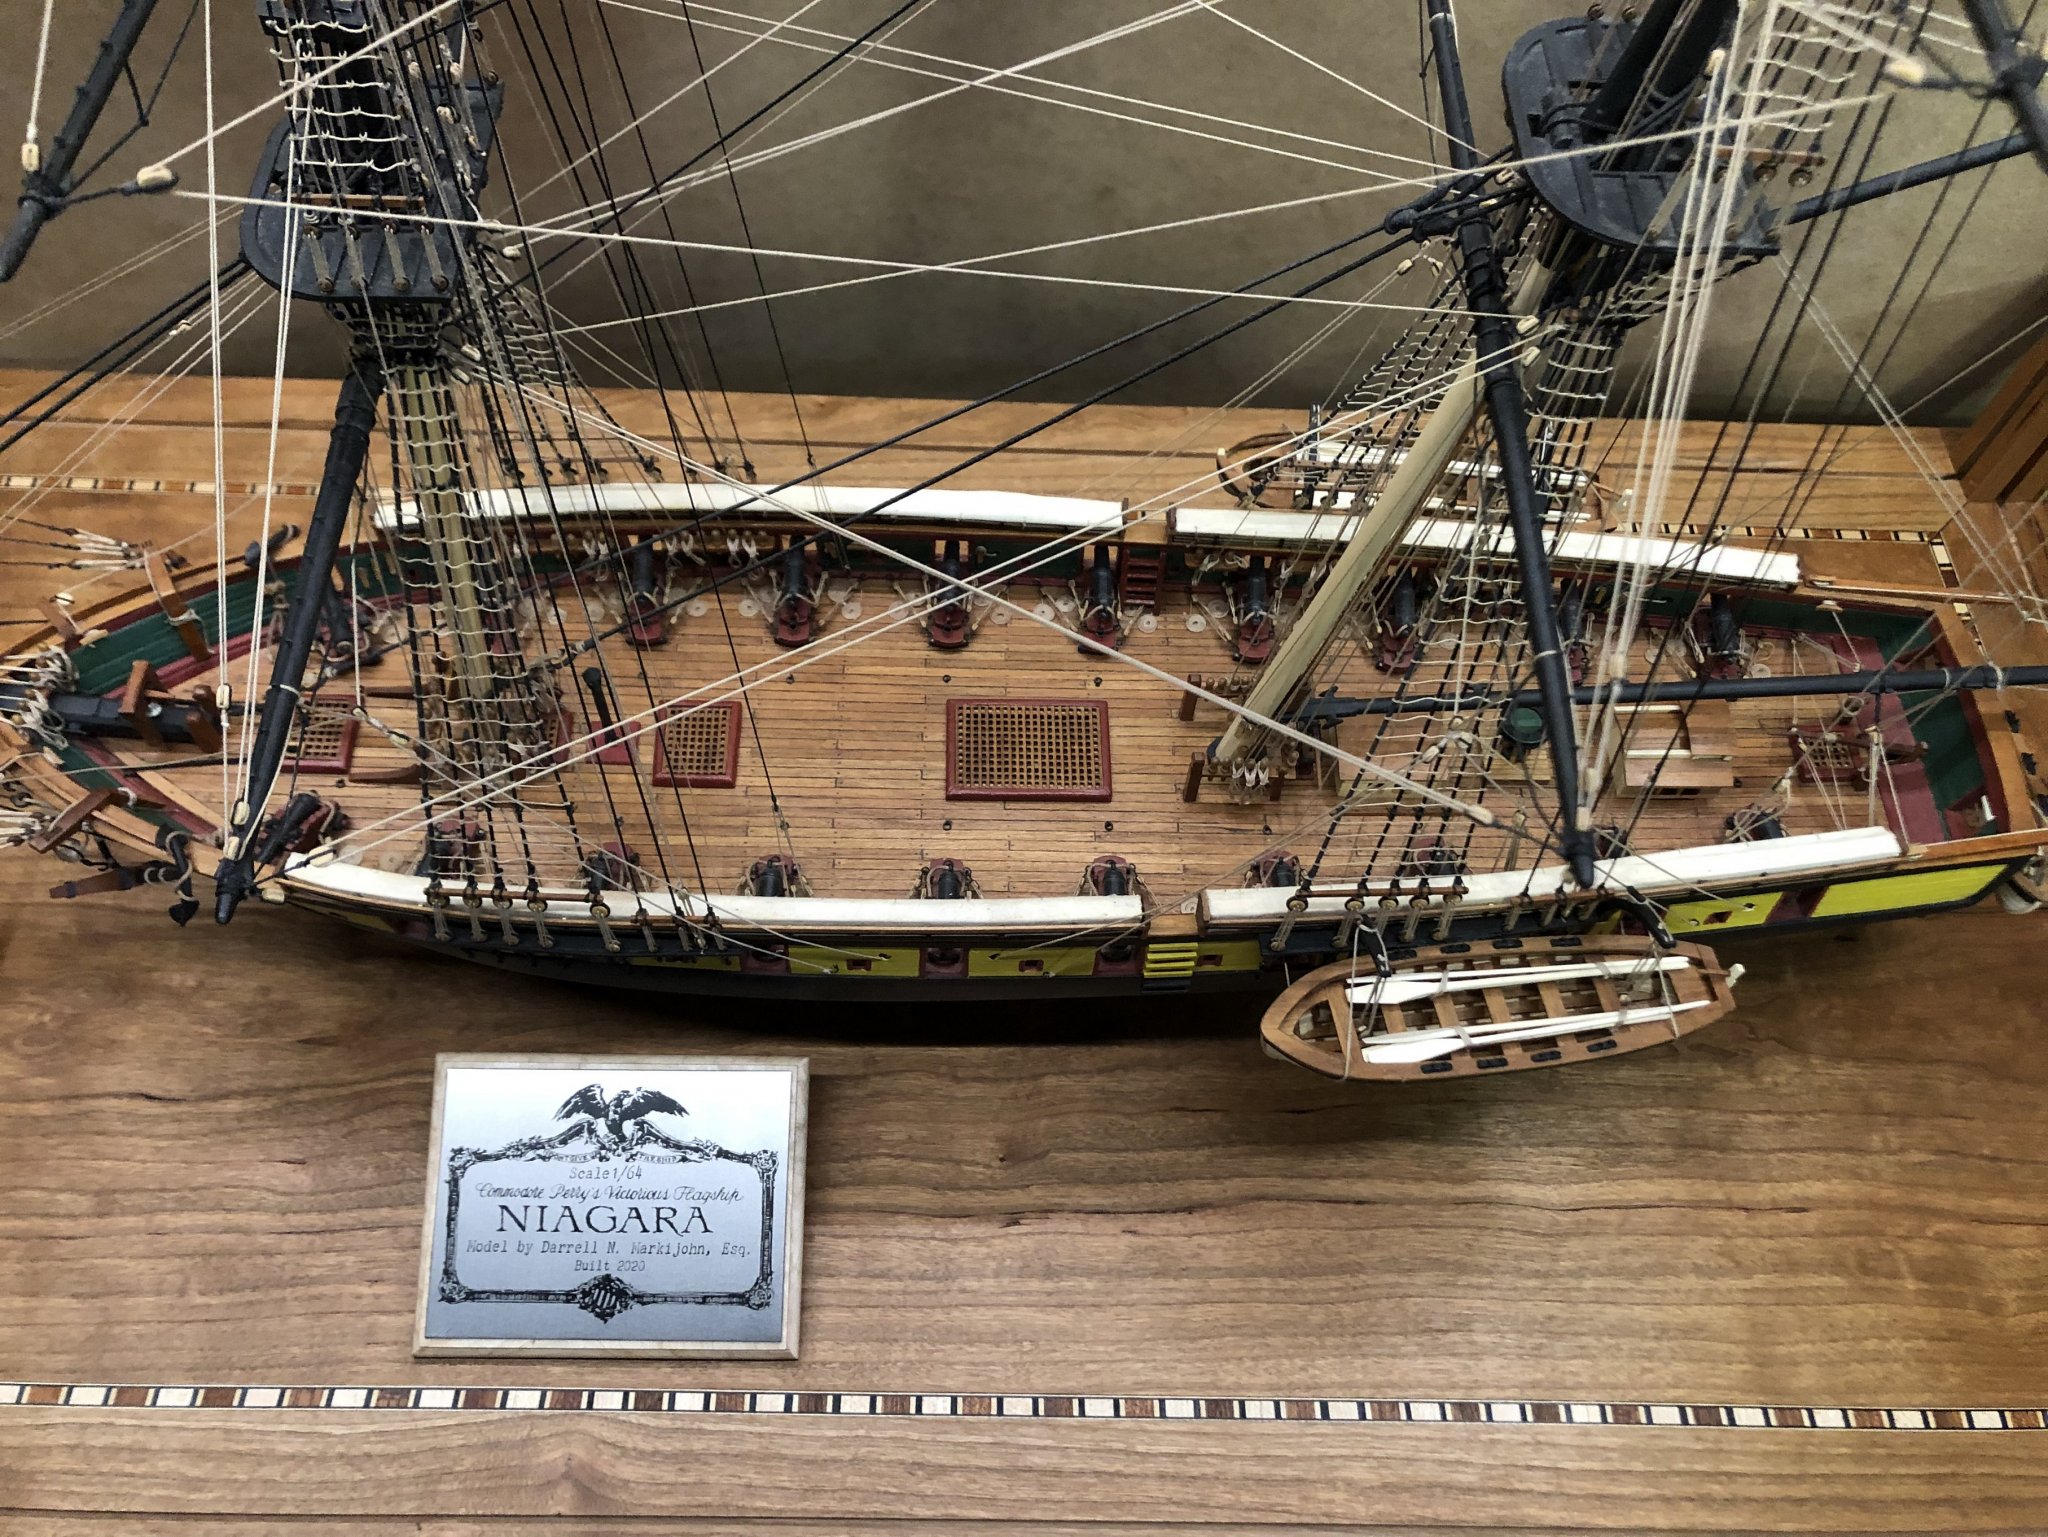
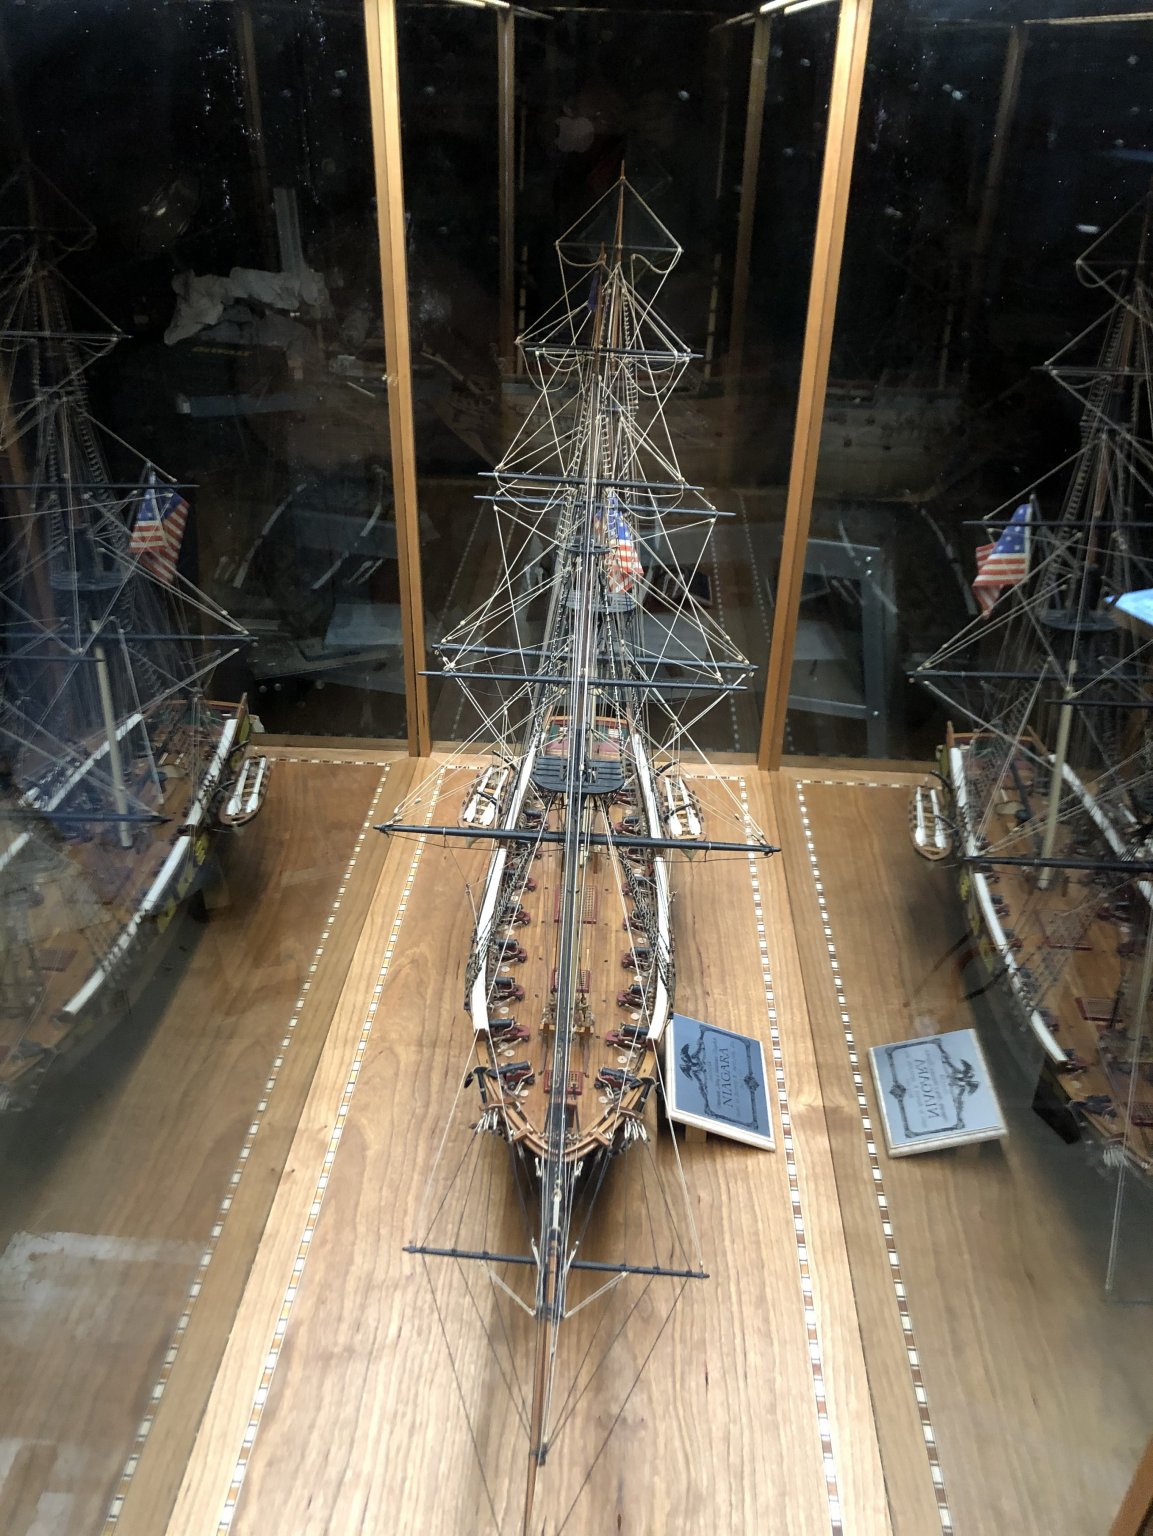
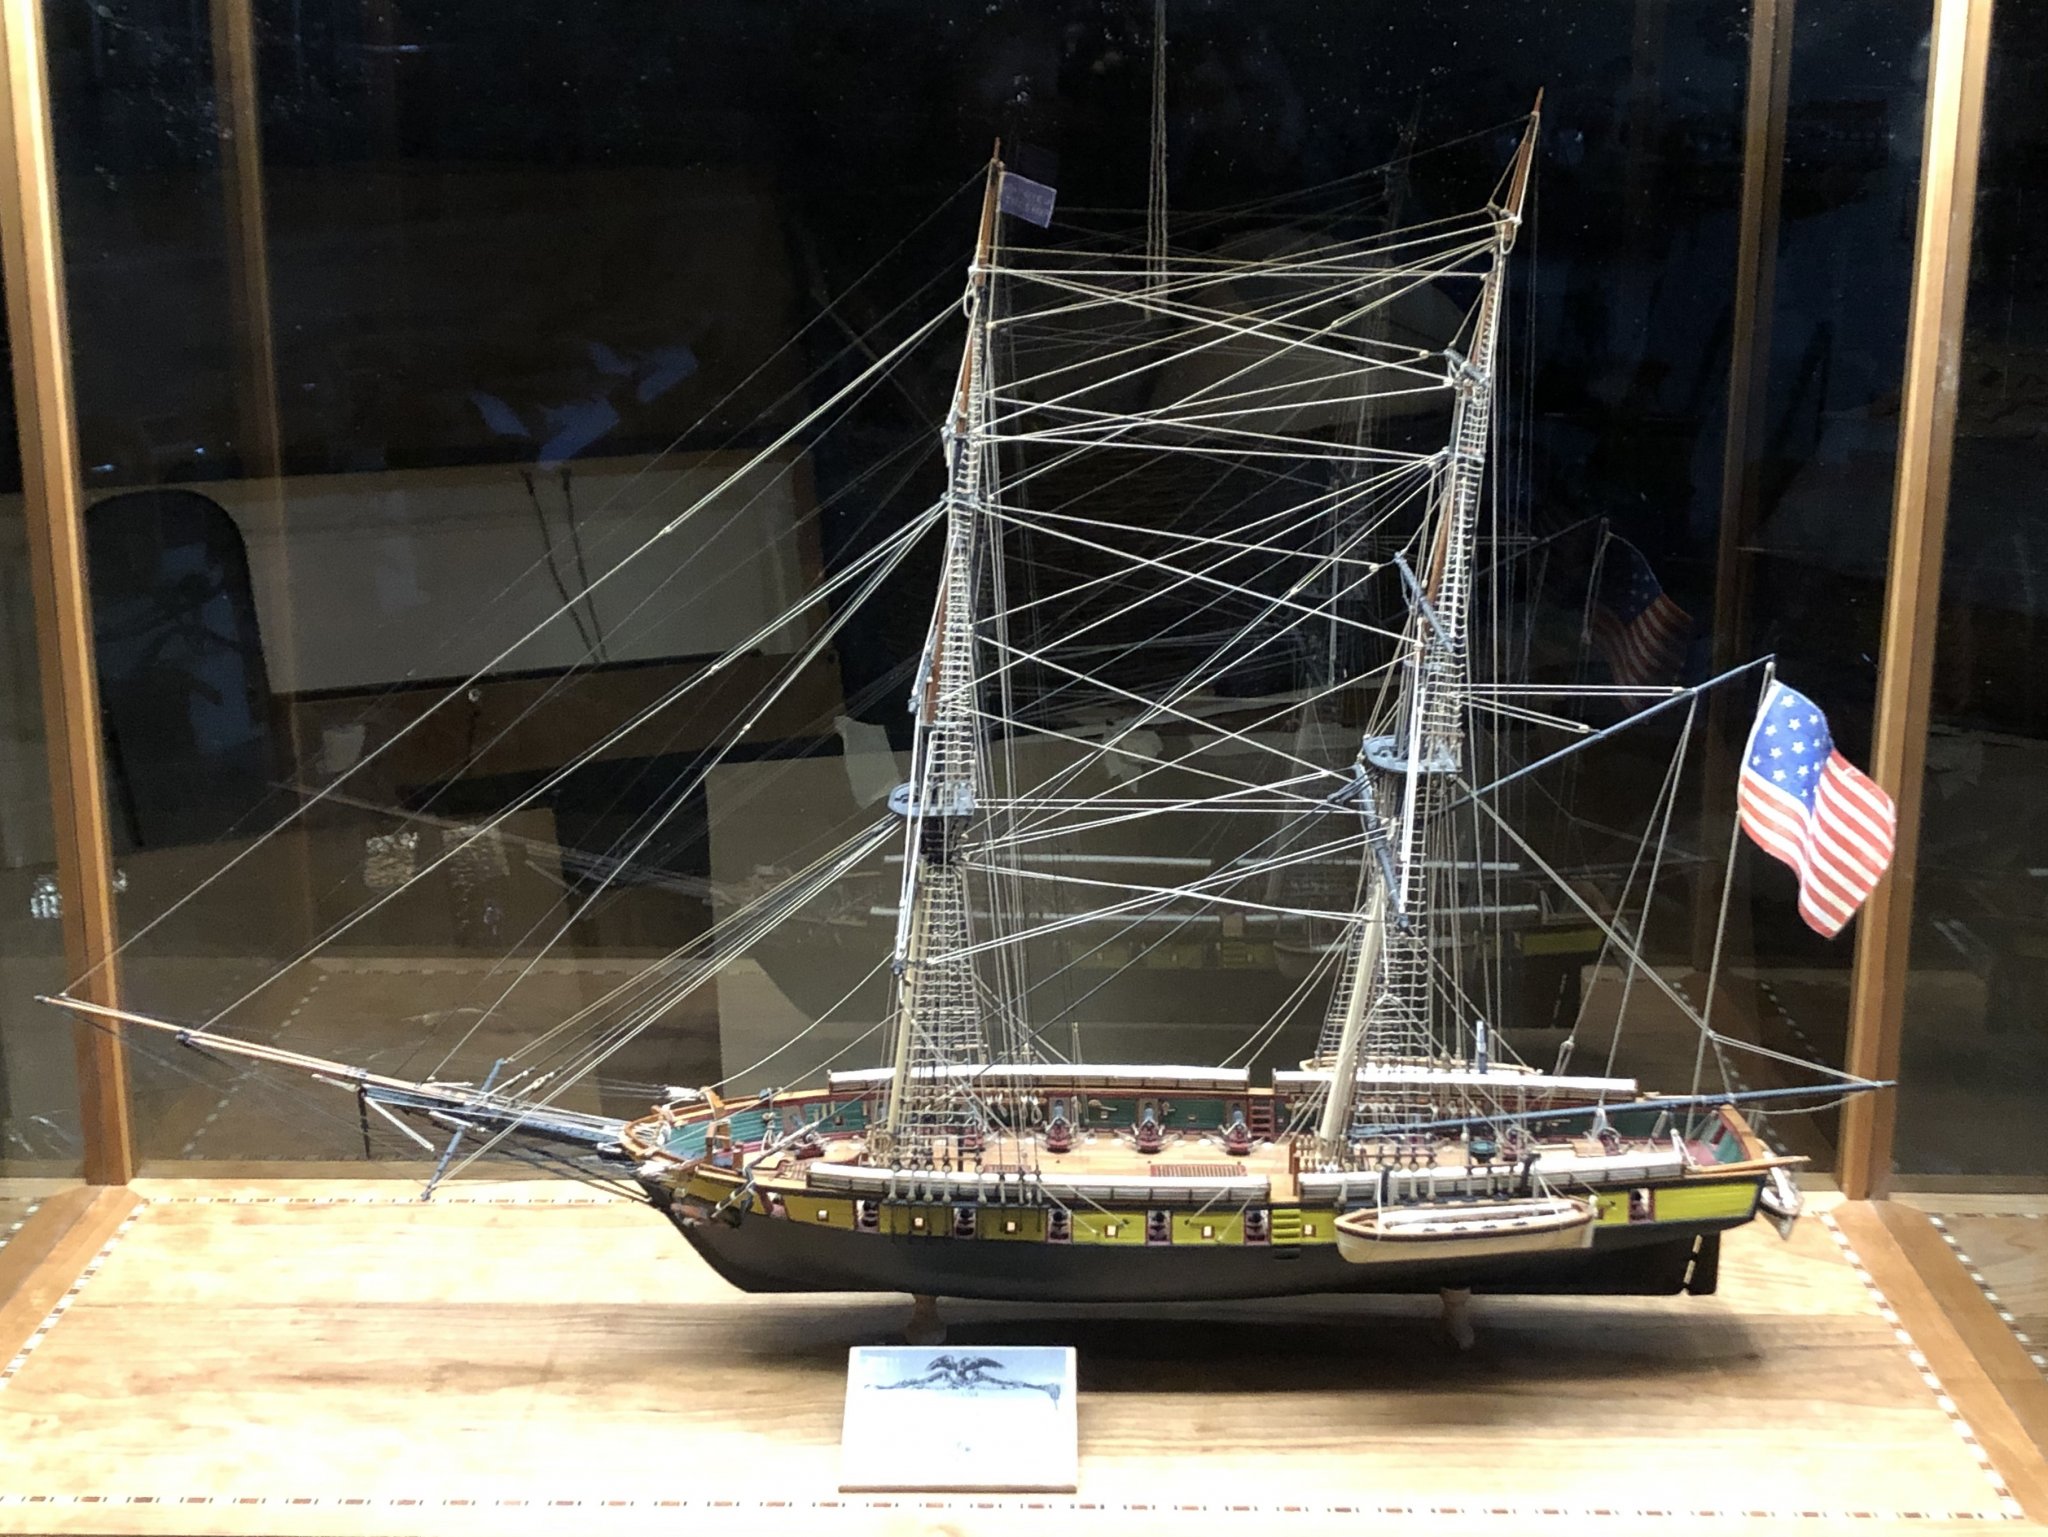
FINISHED! I spent the weekend cleaning off dust and touching up paint in preparation of placing the Niagara in its glass enclosure. While I designed the case with an option of removing the ship, it will not be an easy process, and I don’t have plans on doing so. So sealing it away knowing I will not be able to work on it, or tweak something, was a tough moment. This was a great project. I give credit to the folks at Model Shipways for putting together a great kit. This was my first wooden ship build, and I would recommend the Niagara for any first timer. There are easier kits out there (and a lot more harder ones) to cut your teeth on, but the Niagara is a good choice. It is reasonably priced (I bought mine at a half off sale). The instructions and plan sheets are good overall, and if followed, will produce an end product you will be proud of.. The kit lacks expensive wood, and some critical parts, but again, for the price, it is still a good purchase. With the exception of the hull planking, I swapped out all of the basswood lumber and laser cut parts with hardwoods (cherry and holly mostly). Those parts that the kit requires the builder to engineer and produce tested my model skills and have made me a better builder. I have seen the term kit “bashing” when someone “goes off the plan.” I guess I did this with this kit, but I can’t say I bashed it, I would rather say I enhanced it. Thanks Model Shipways. I also have to give credit to Chuck Passaro and his Syren products. I used his rope, blocks, hooks, and hearts for all of the rigging. These products make any ship look great, even for us amateurs. I also give credit to Model Ship World and my fellow Niagara builders. I would never have purchased this kit, let alone make the effort to build it, without the wealth of information and full color pictures available on this site. Builders like Bahamas Diver, Xken, Patrickmil, Greatgalleons, Mikiek, and others who sailed the lakes with their Niagara Builds were inspirations and great teachers. My project would have sunk to the bottom of Lake Erie without their guidance. They had my back. I can't forget my fellow members of the Shipwrights of the Central Ohio modelling club. The long drive to our monthly meetings is always worth the trip. Great knowledge, experience and fellowship. Thanks Bill for everything you do for our club And finally, to those of you out there that stopped in to see this project and lent advice and words of encouragement. As I am sure you all know, getting an “atta boy” from an experienced shipwright is energizing. Here are some final photos as I mark my build log officially FINISHED.


- 648 replies
-
- 22
-
-
- niagara
- model shipways
- (and 1 more)
-
Ron, That brings back memories of similar frustration. I would not worry much about non-union. I tried to place the joint at 5 o'clock on the deadeye so that if it failed, you wouldn't see it very well. I too had failures. I tried to re-solder the joint while in the deadeye, but of course all I did was burn up the deadeye. In the end, I decided not to worry about the non unions. We are dealing with aesthetics rather than function. Even if the joint does not hold, I simply pinched them close enough to make it look like they were. Line up the unions so that they sit in the channels. When they are rigged with lanyards and placed in the channels, you can't even see the union, whether it is soldered on not. All I can say is that my black 24 gauge wire is stiff. I would stick with black. There is no way that I am aware of to effectively blacken wire while in a wooden deadeye without affecting the deadeye. I hope this helps some. Happy Easter
-
What is the best way to neutralize wood glue?
-
Tom, Thanks for the look. I raise my glass to all of my fellow Niagara builders. Ken, Mark, Alan, Steve and Mike, Trust me, I needed that glass of Jamison after the mounting process. I only broke off the tip off the dolphin striker, yanked the port side course brace from its pin, and loosened one of the hammock rails......there are just no handles to grab onto when you take a jack hammer to your ship.....so we put in for repairs and were able to make everything right again.
- 648 replies
-
- 3
-
-
- niagara
- model shipways
- (and 1 more)
-
Ron, If you do indeed remove the chain plates and redo them, you might want to check out post 211 and 212 of my log. I used a few tips I picked up from other build logs to make all of the iron work. Uniformity is a challenge and catches even the eye of the amateur. For the long chains, while not shown in my log, I drove 2 small nails into a scrap board. I set the distance between the nails to the length of the iron and wrapped a stiff wire around them. I tried to solder the ends together where they joined and found that half of them failed. However, the wire I used was stiff enough that once I bent the ends together, there was actually no need to solder as long as they lined up. From experience, if you have already decided you don't like the look of your work, you have to redo it. Good luck and stay safe
-
Tom, The cannon assembly line.... I remember it well. I built some jigs to help to speed up the process and give the carriages and eye bolts on the bullwarks some uniformity. I love your choices of blocks and rope. Syren is the best, and your scale is spot on. If I remember, I think I installed and rigged the base carriages for the cannonades onto the deck first, then installed and rigged the slides. Give that some thought. Best of luck.
-
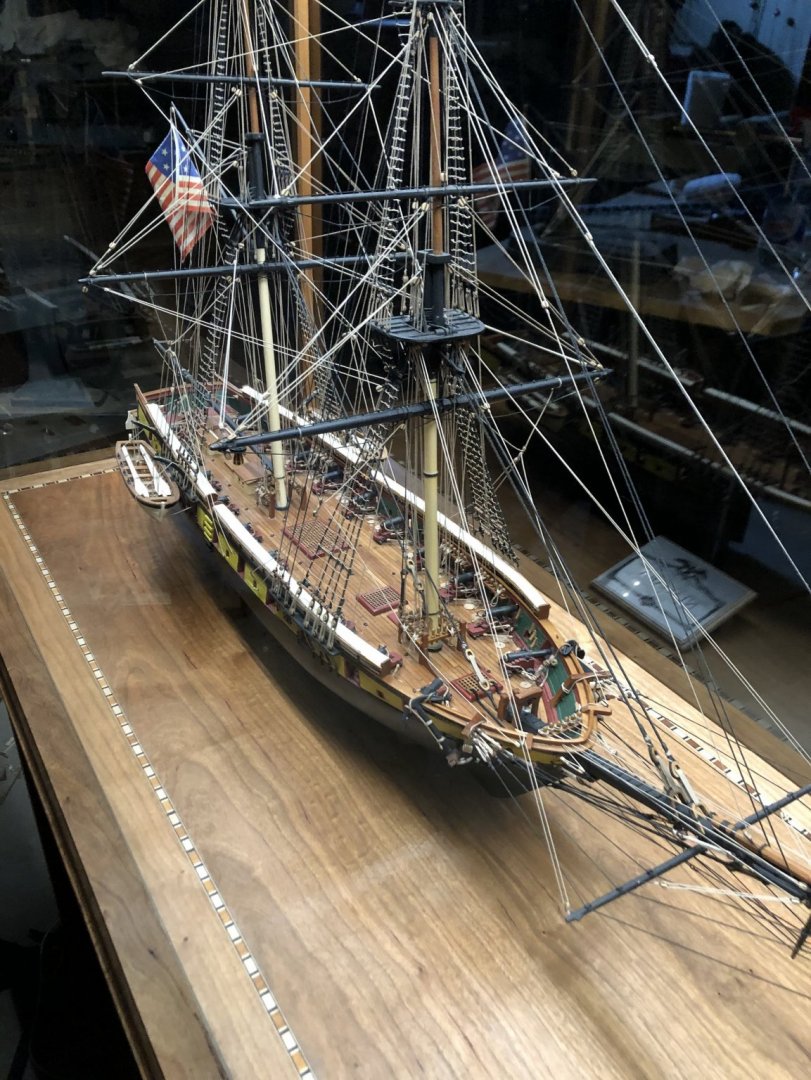
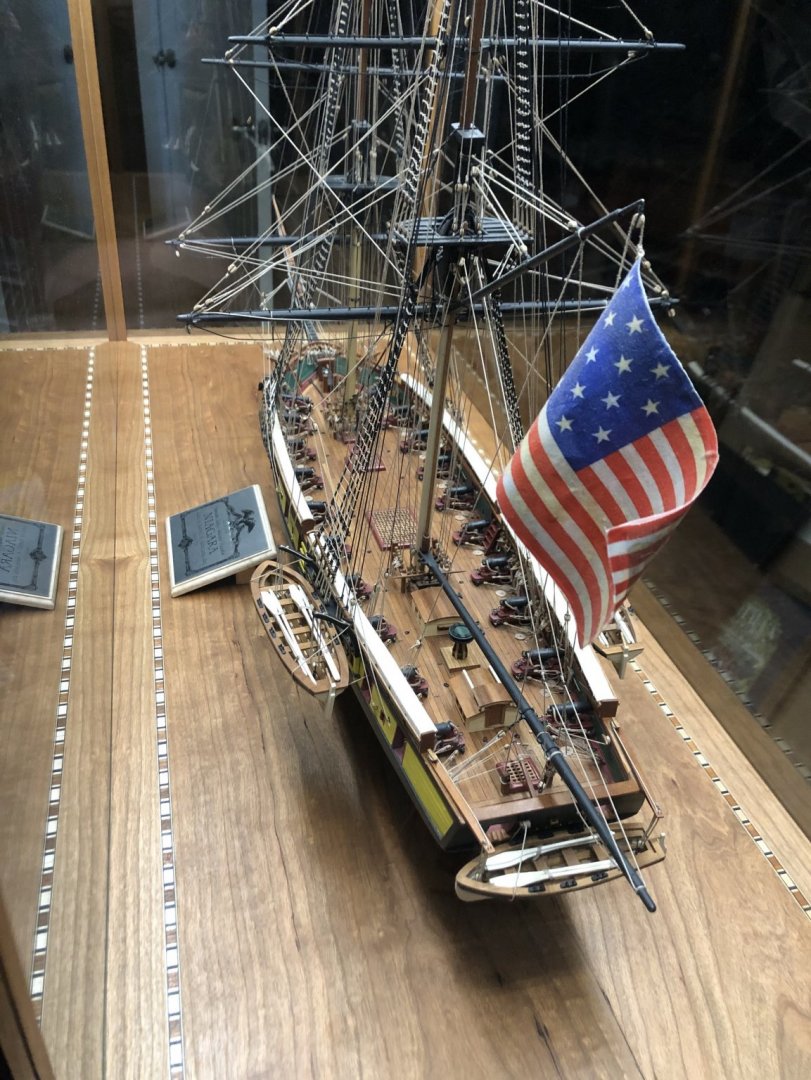
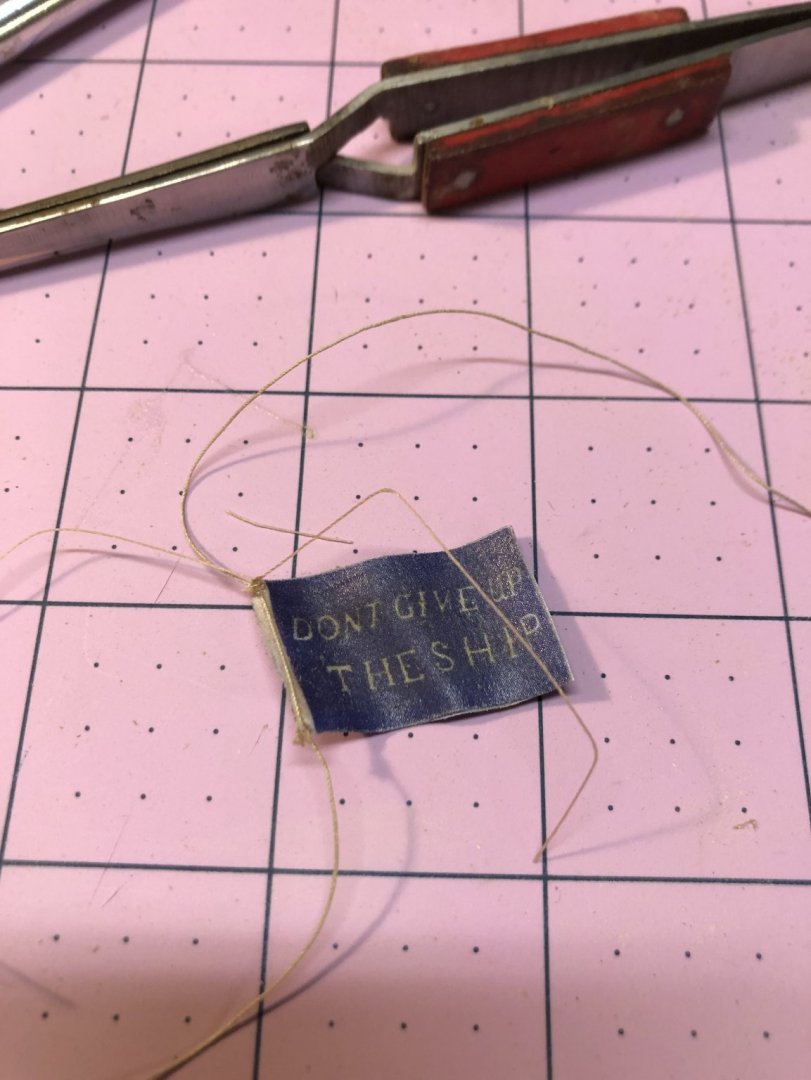
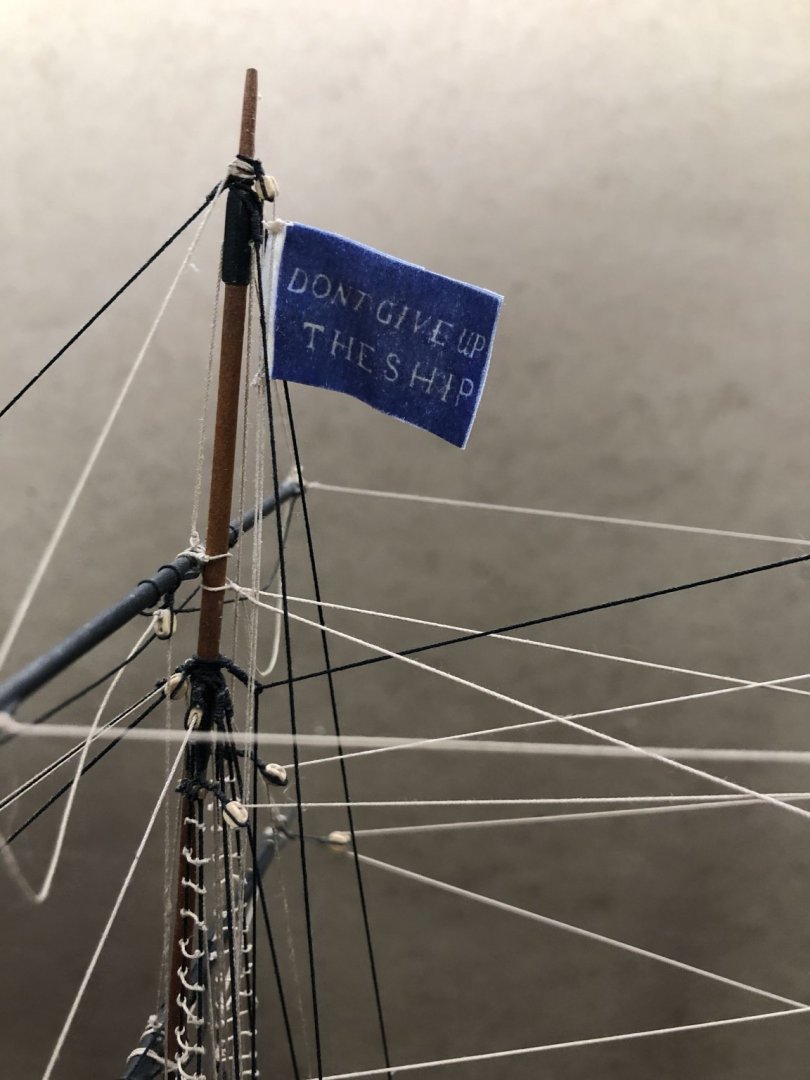
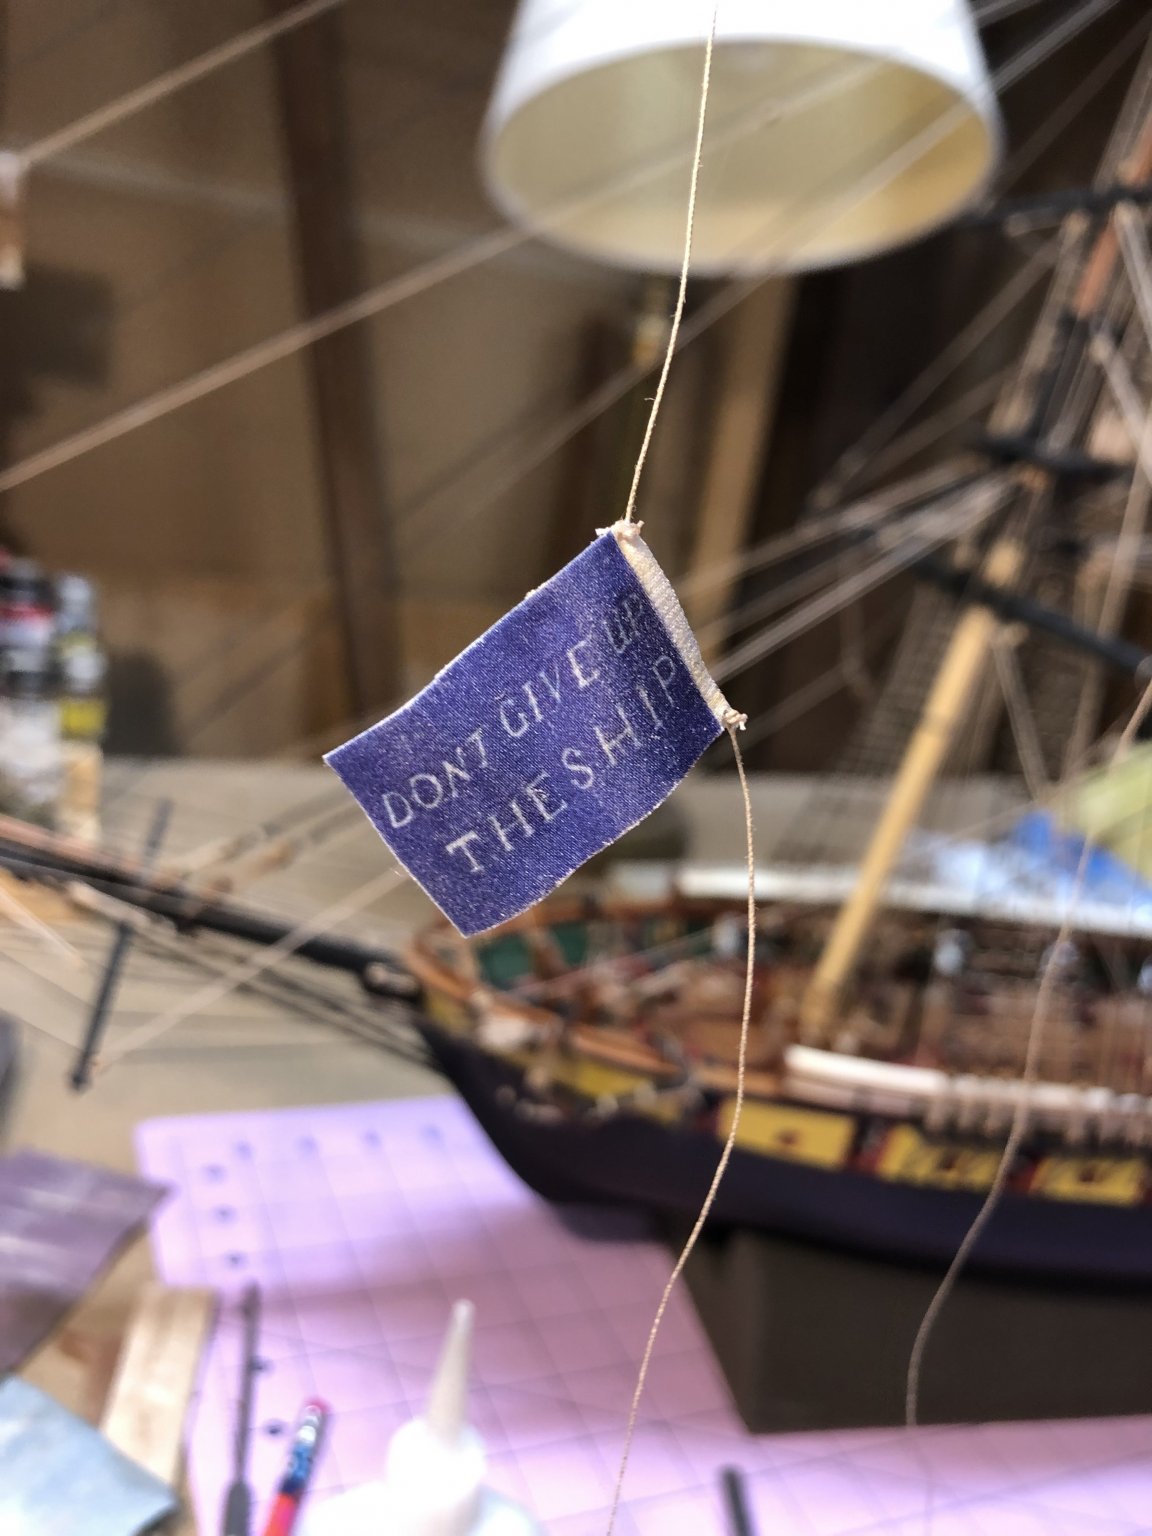
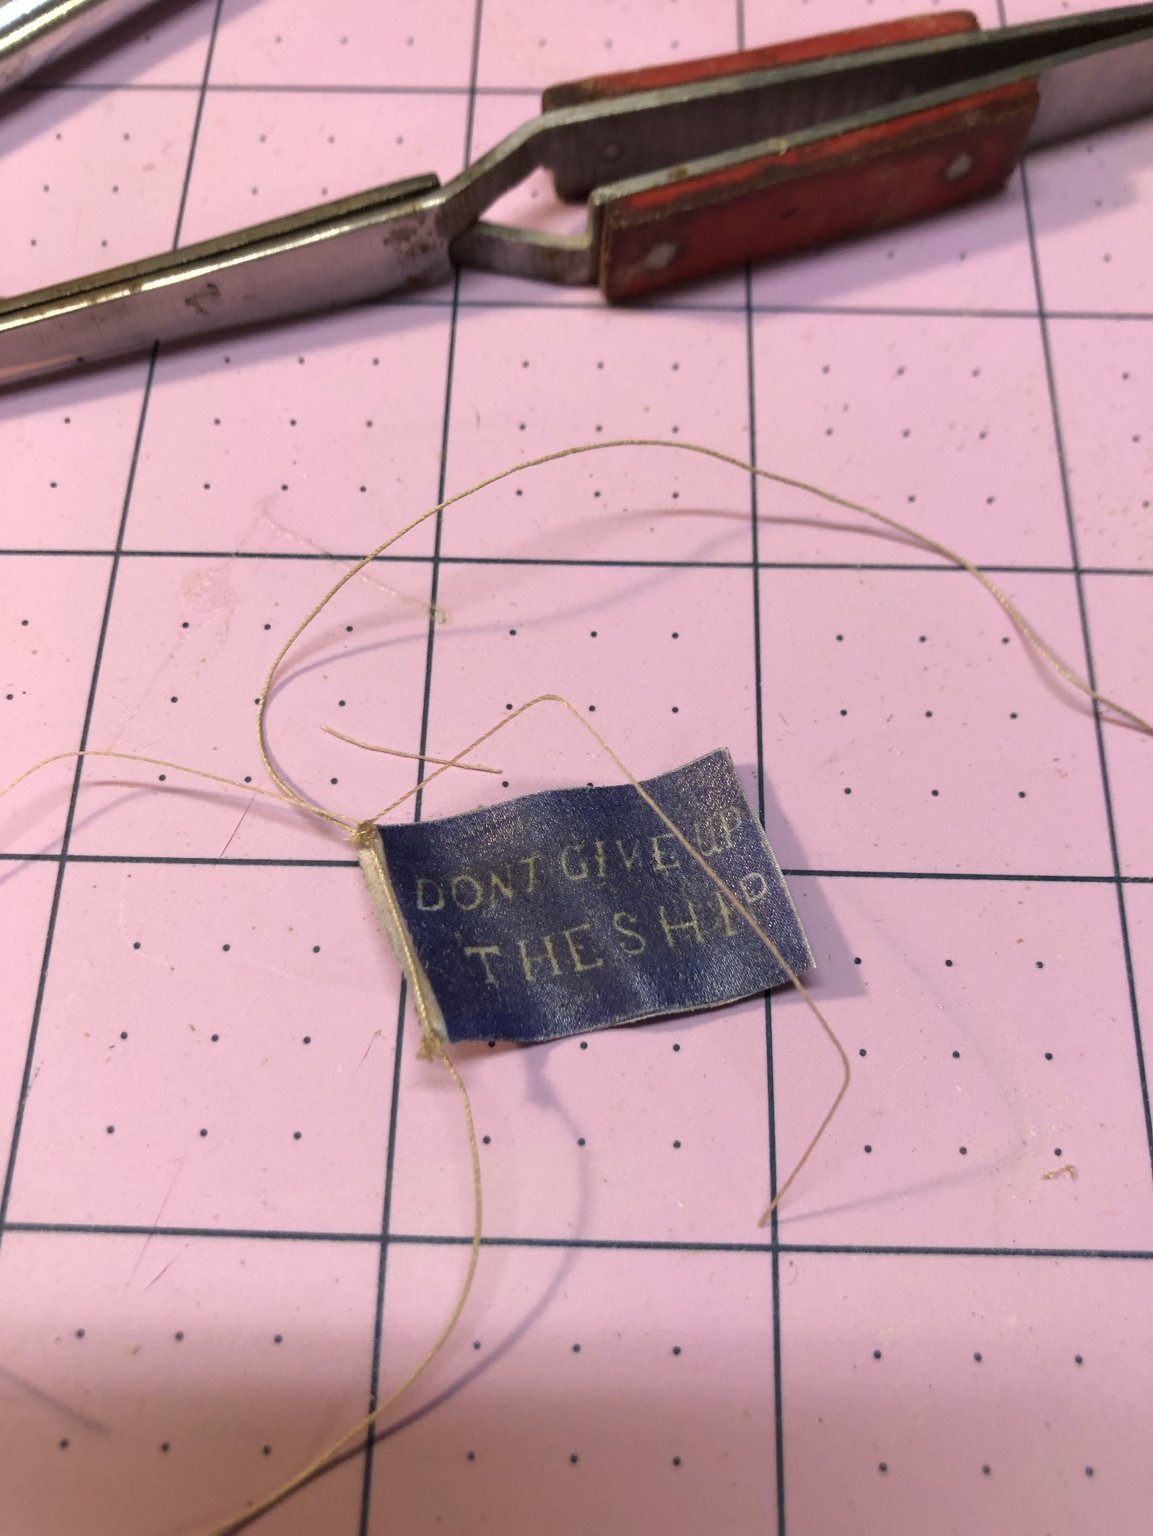
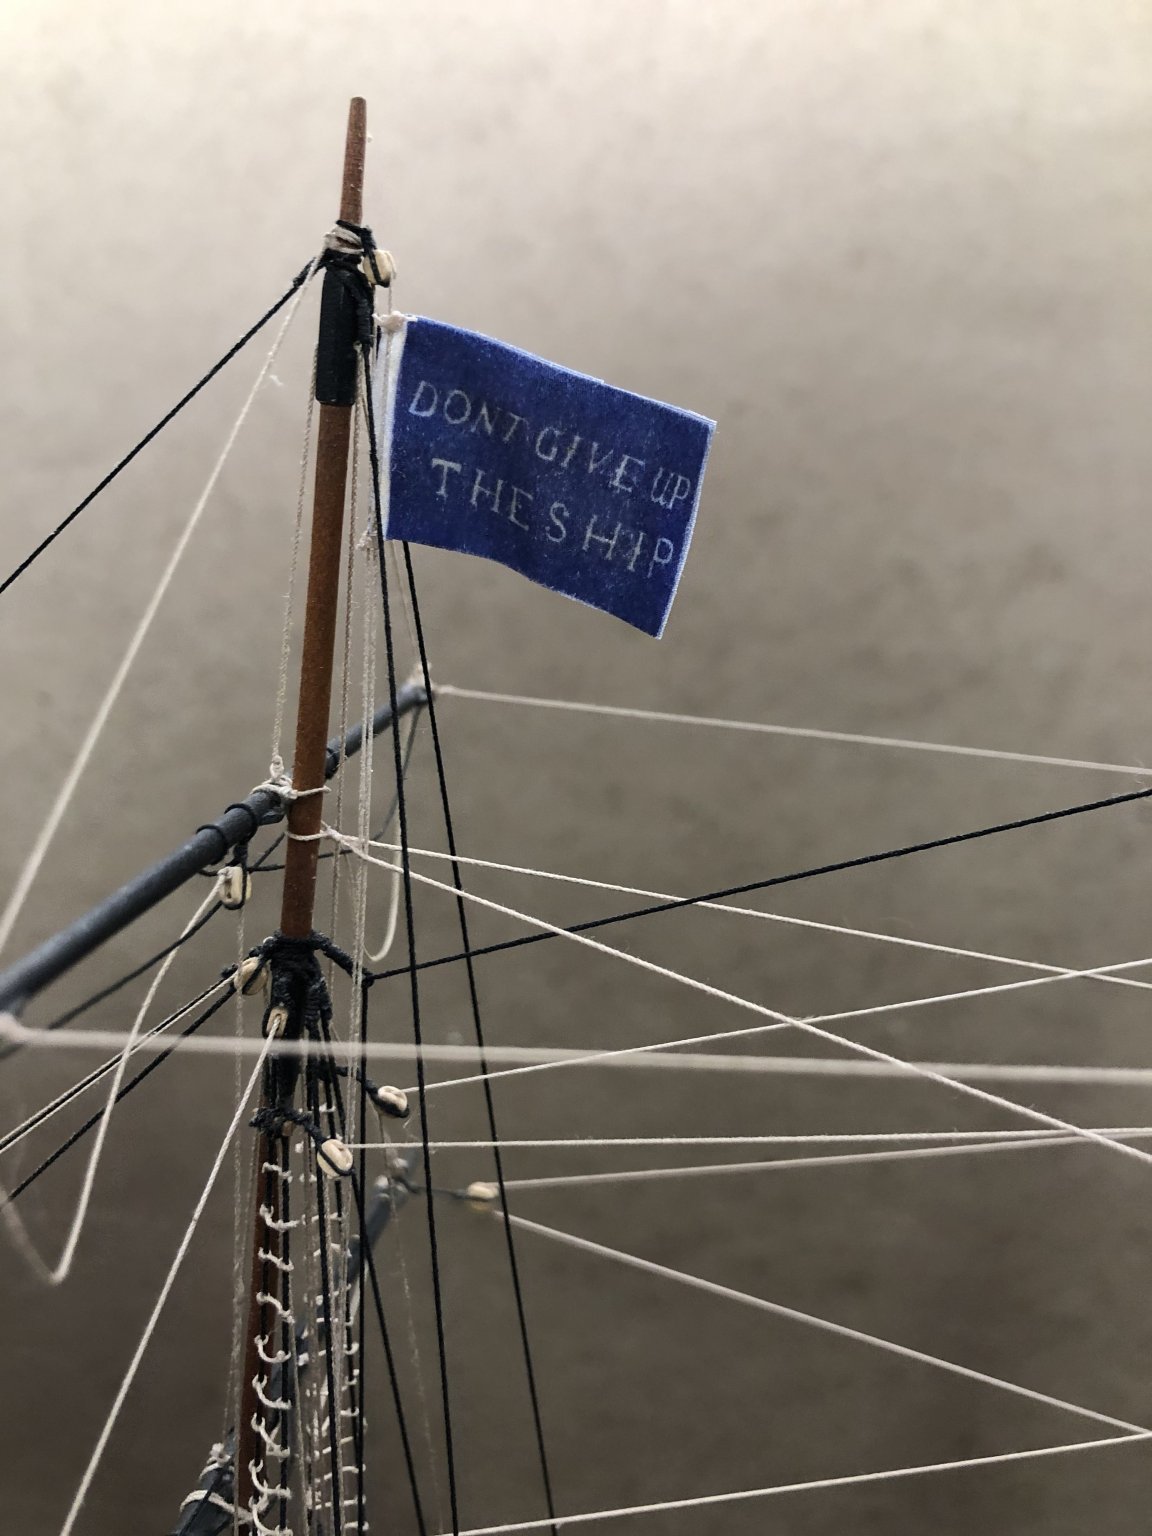
RAISING THE FLAG It is time to raise the flag! The shipwrights from Presque Isle have turned the US Brig Niagara over to the US Great Lakes Command and Capt. Oliver Hazard Perry. Capt. Perry's flag carried the famous quote "Don't give up the Ship" uttered by his late friend, Capt. James Lawrence as he lay dying on the deck of his ship the USS Chesapeake in battle with the HMS Shannon. I printed an image of the flag onto printable fabric, cut it out, rigged it to lanyards, and ran them through a block on top of the foremast. We christen this ship the US Brig Niagara. I hoist this flag in honor to all of the sailors who fought and died for Country or Crown in the Battle of Lake Erie, a lake where I grew up. And with that, this project is over. Once I button up the display case and take some final photos, I will mark this build log "FINISHED"


- 648 replies
-
- 9
-
-
- niagara
- model shipways
- (and 1 more)
-
Mike, I actually made a cradle out of some curly maple. I used the laser cut template from the bulkheads to trace the vertical supports and cut them out on the band saw. Before I came up with a method to secure the hull, I decided I didn't really like my design. I thought it was too intrusive. That's when I turned to pedestals. The key though is to do this early in a build.
.thumb.jpg.d4eb81731346d942eaf07b96477a2f34.jpg)
- 648 replies
-
- 4
-
-
- niagara
- model shipways
- (and 1 more)
-
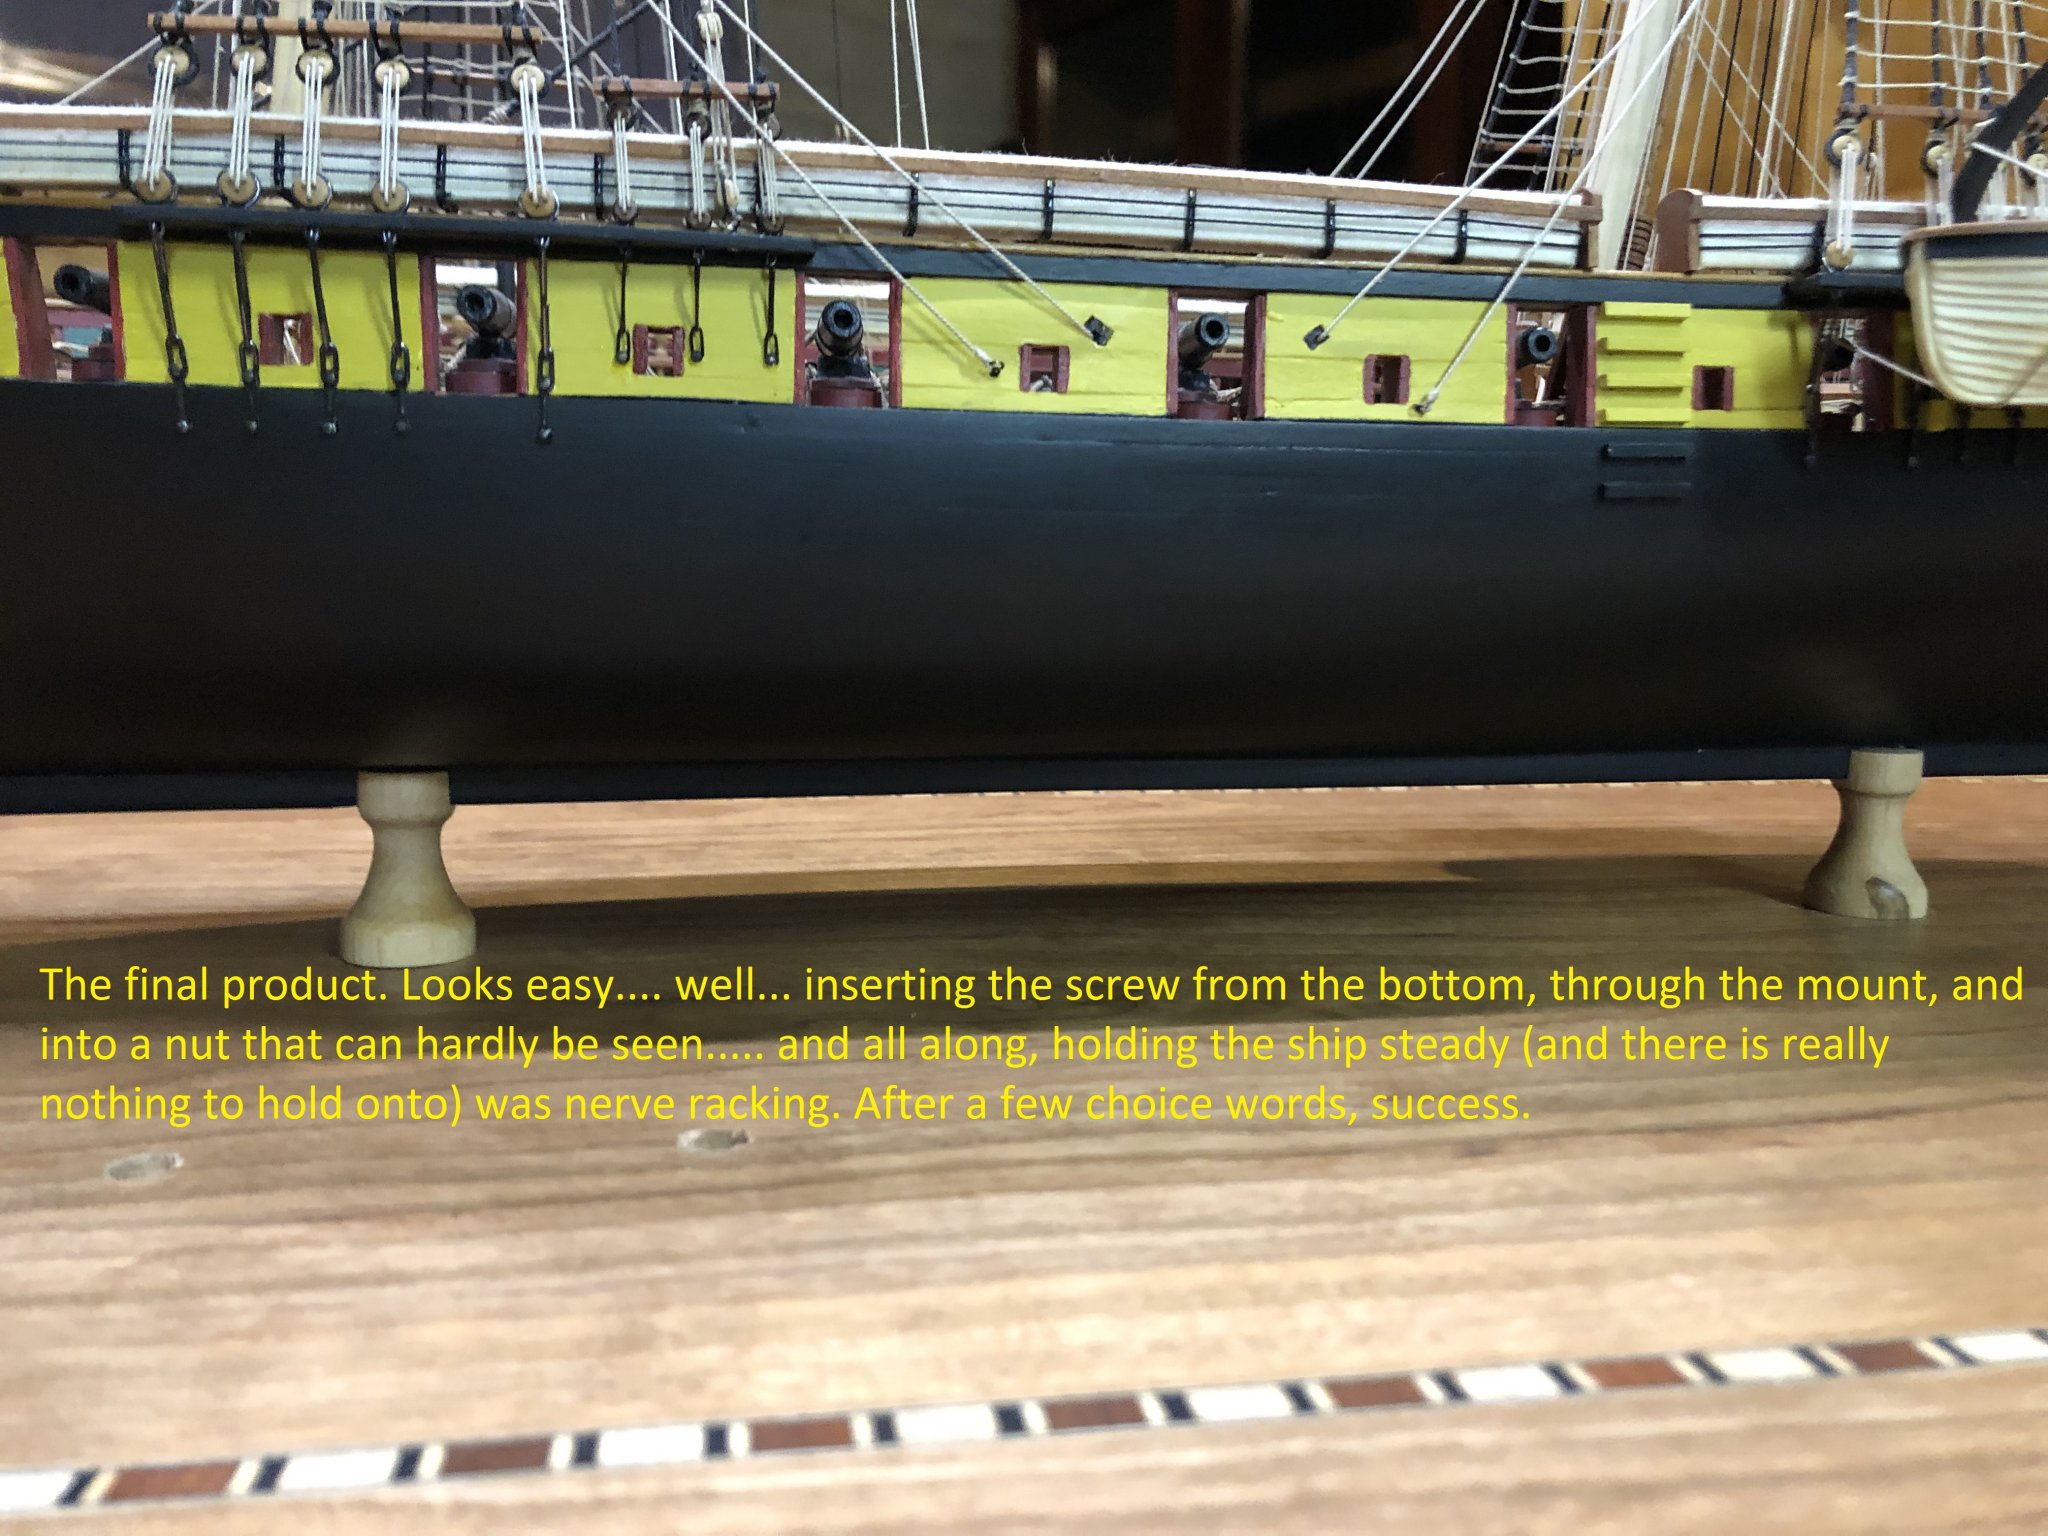
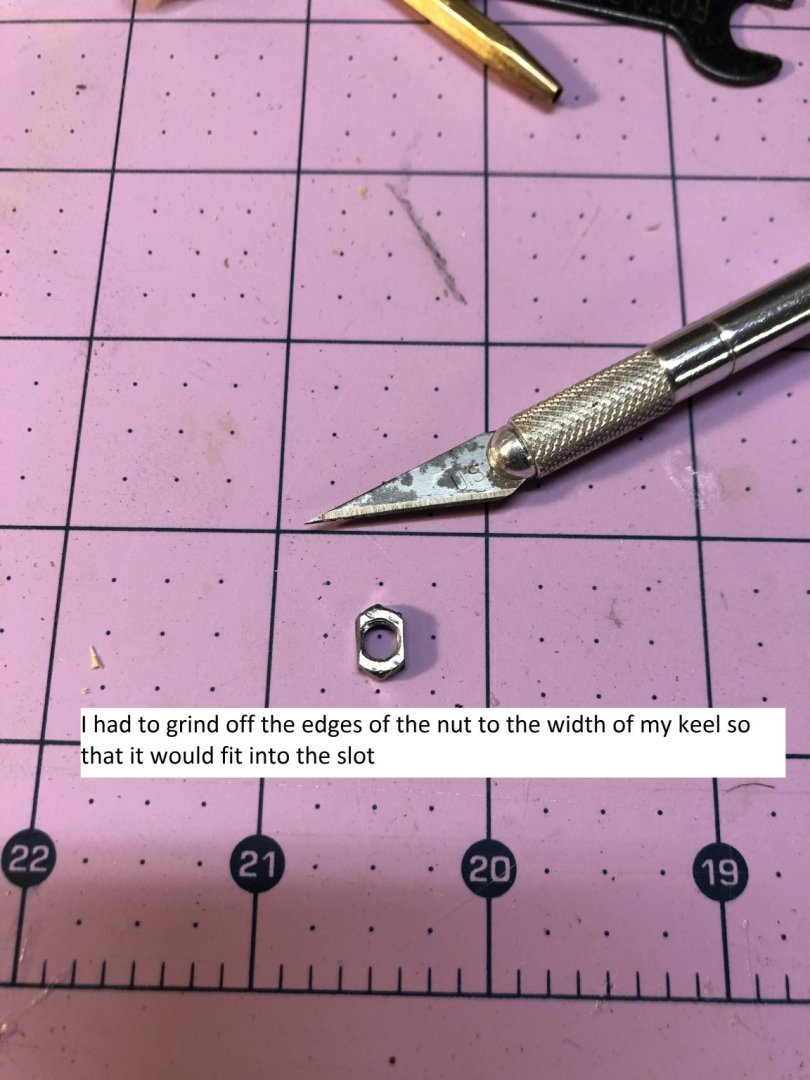
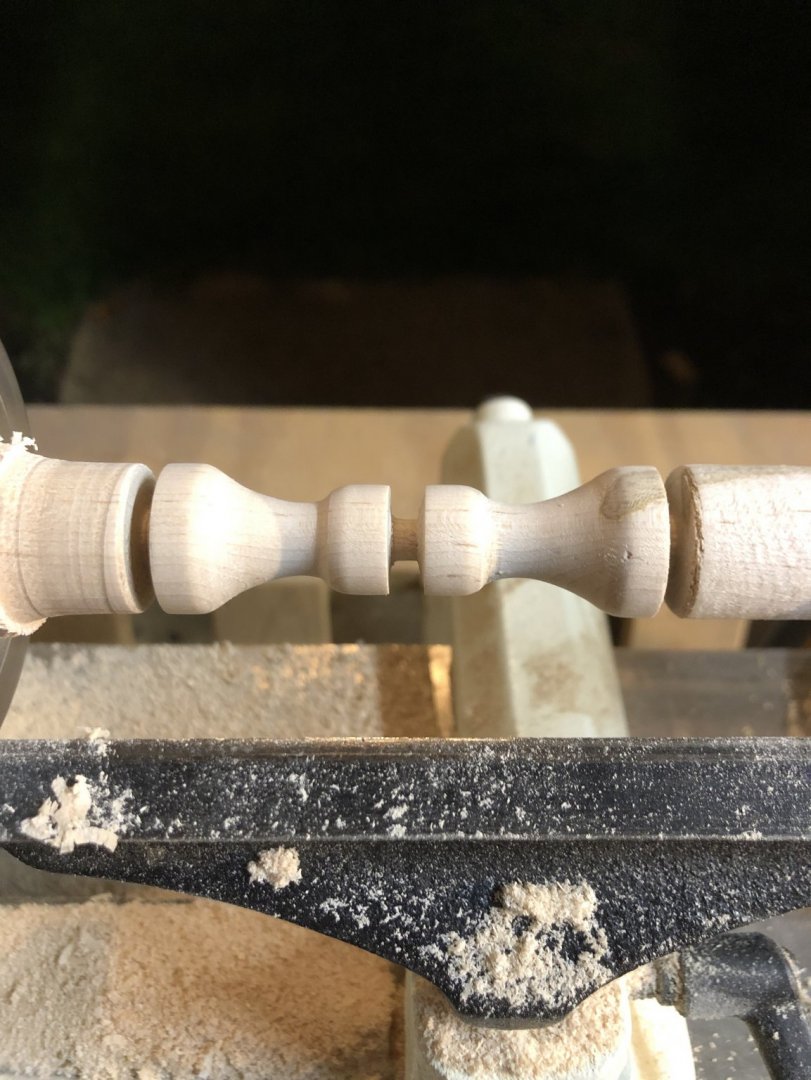
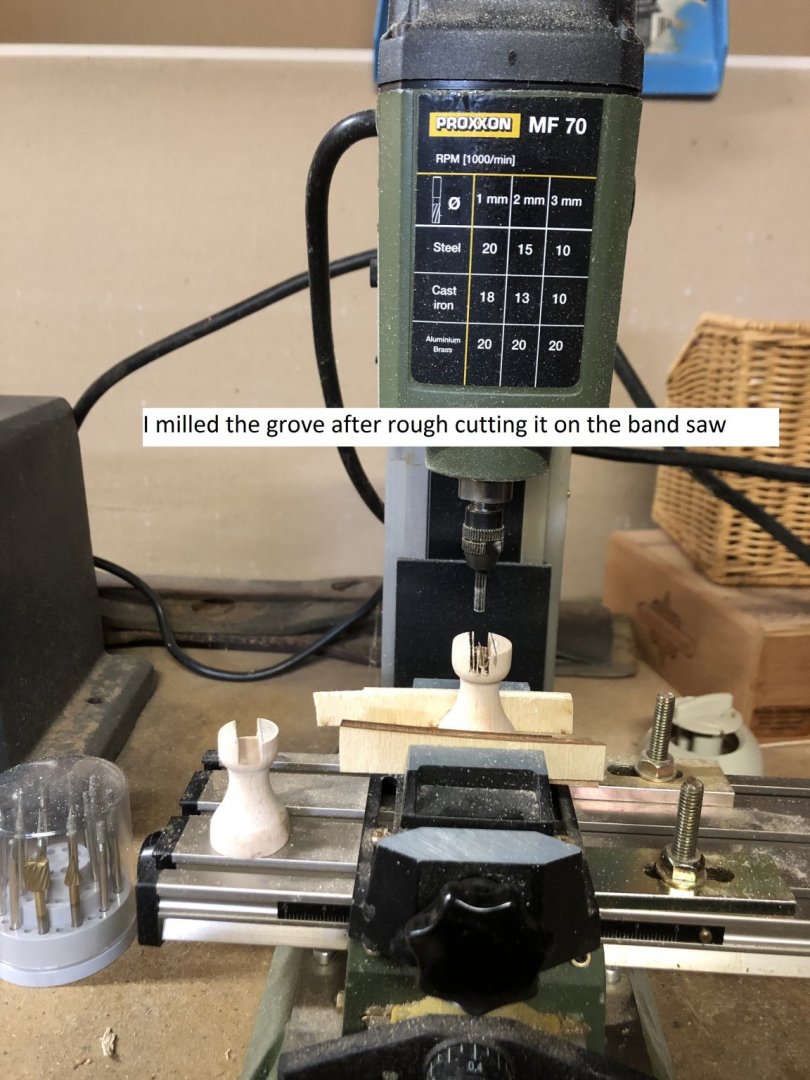
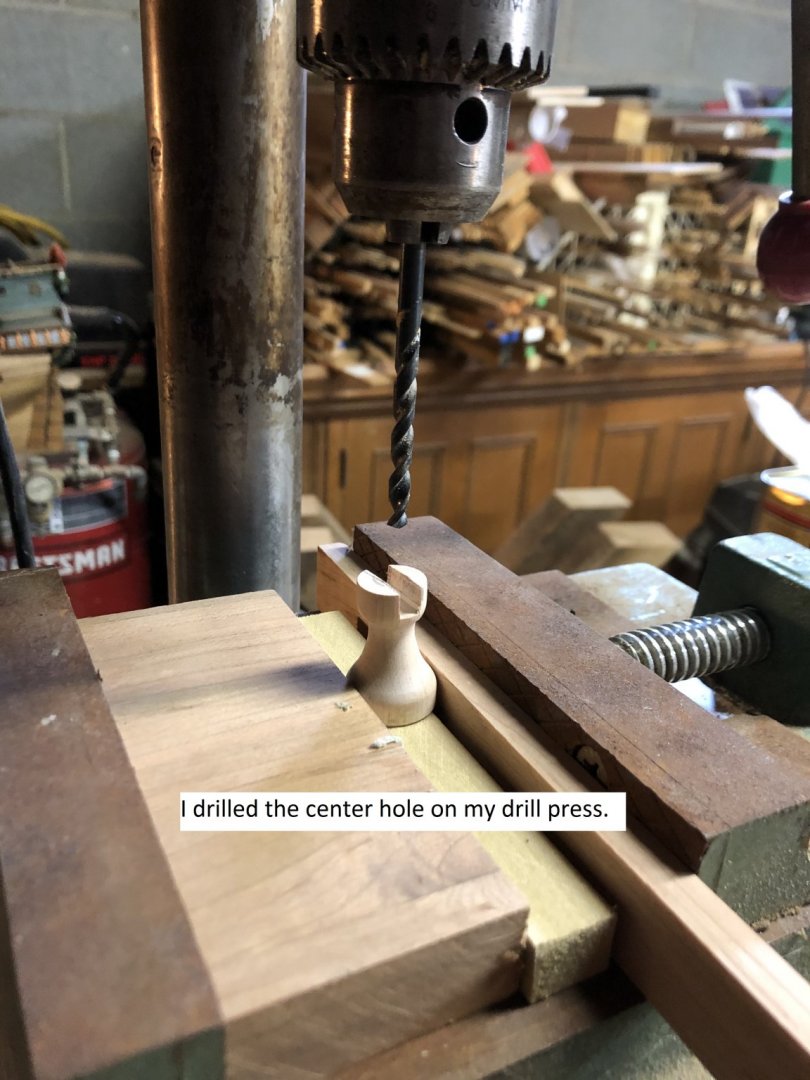
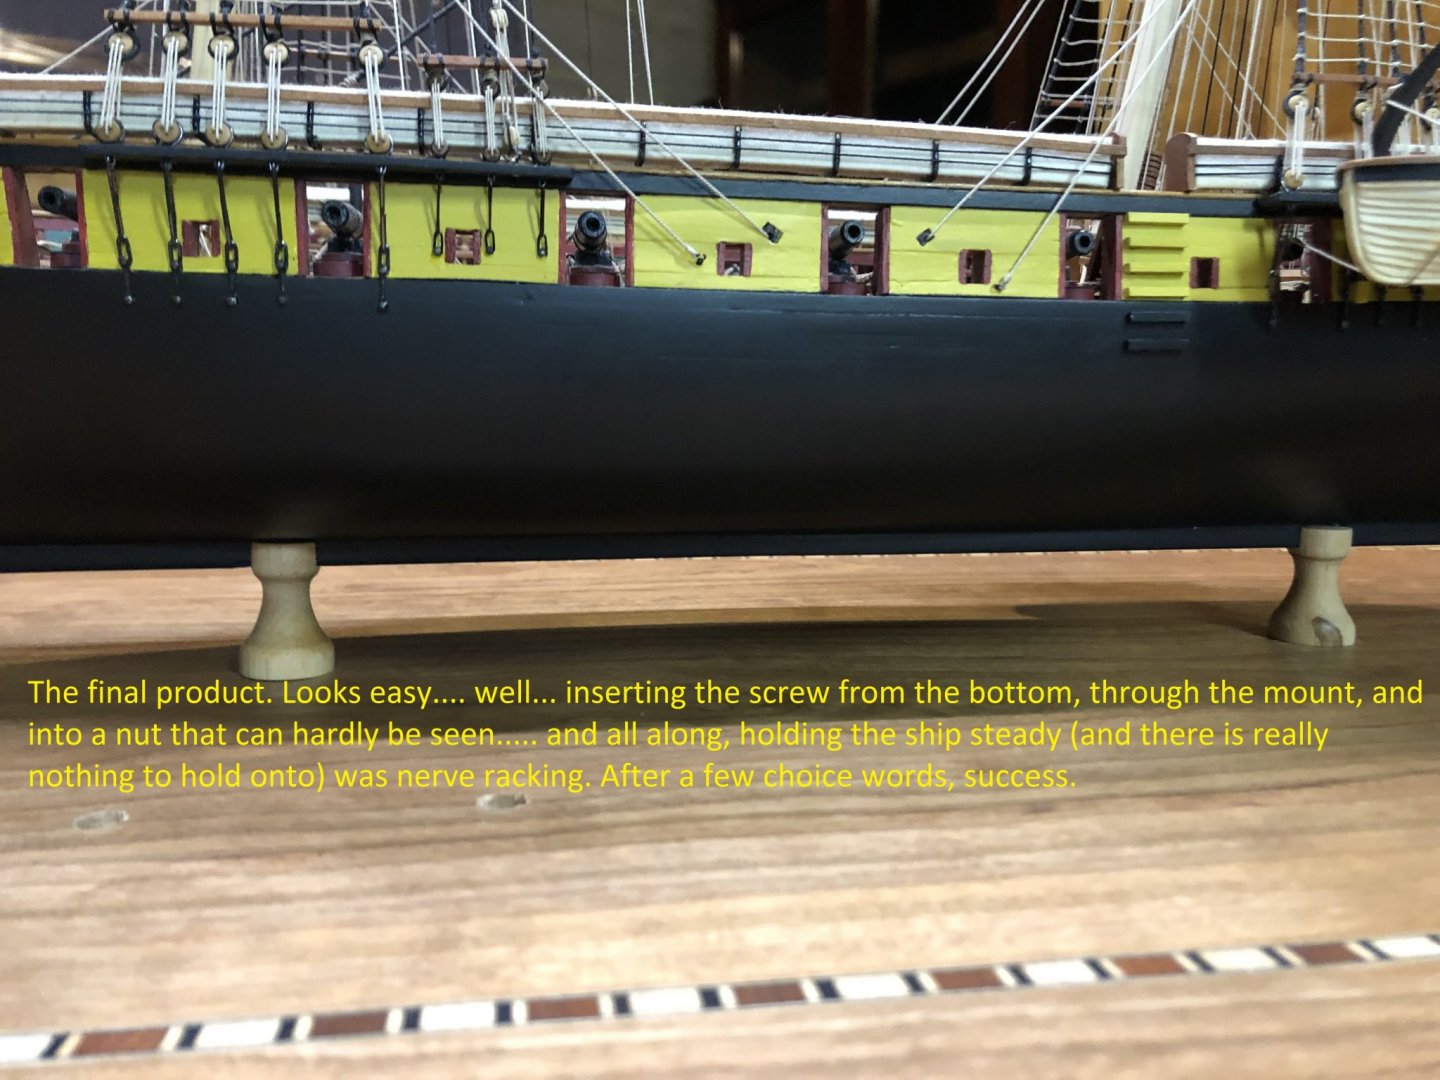
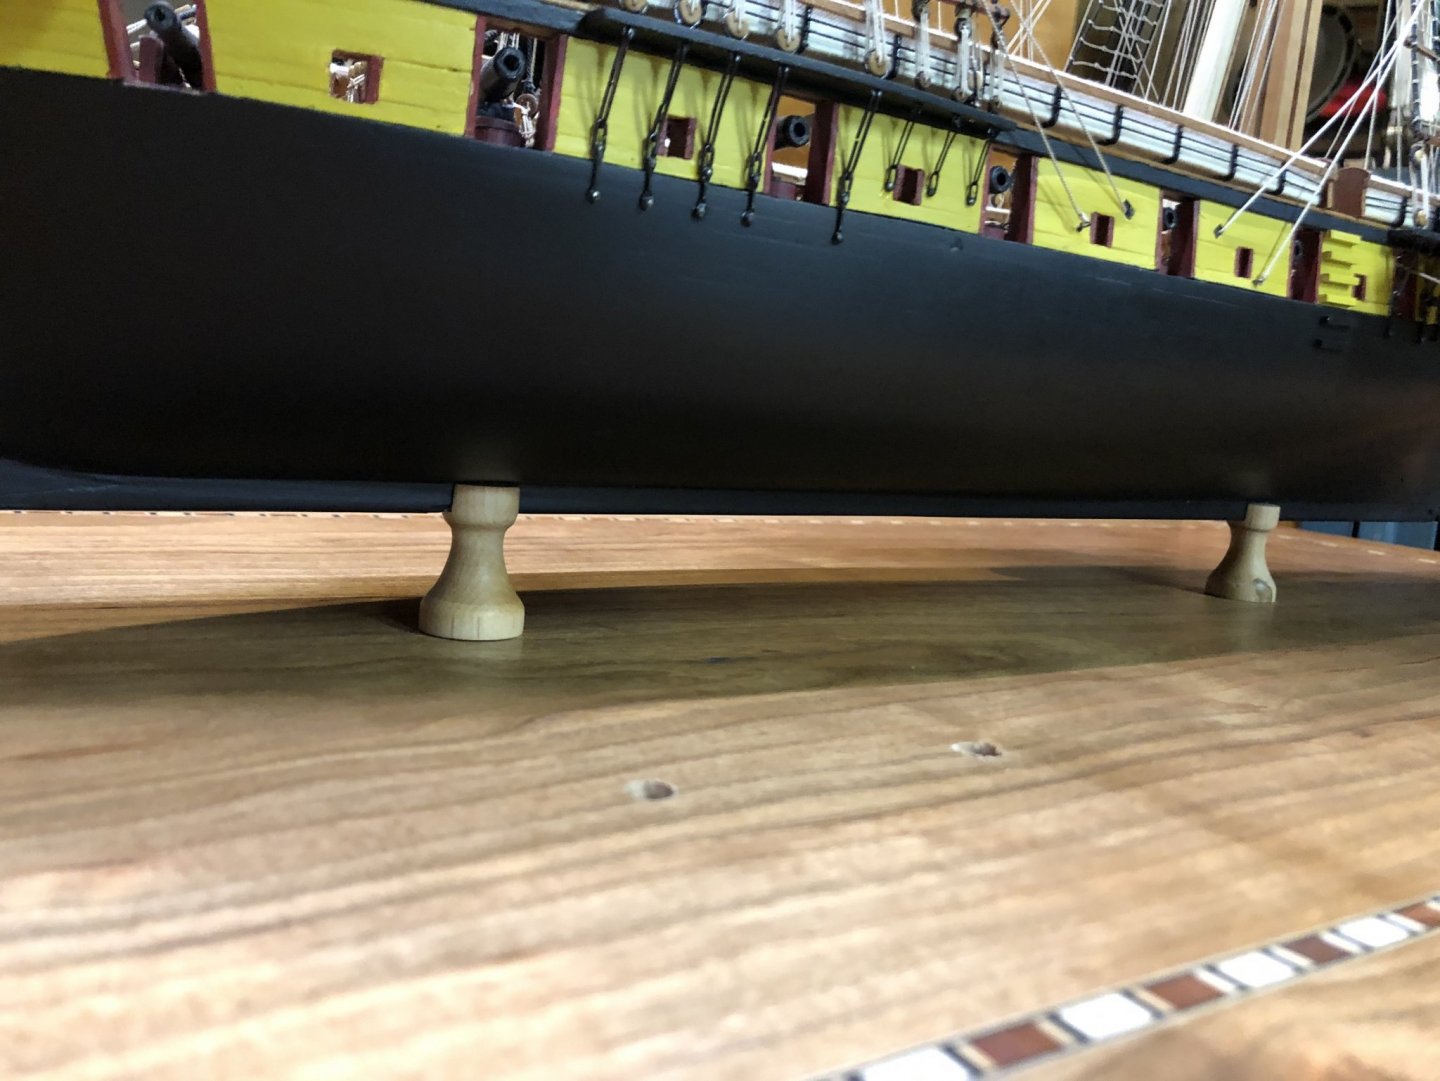
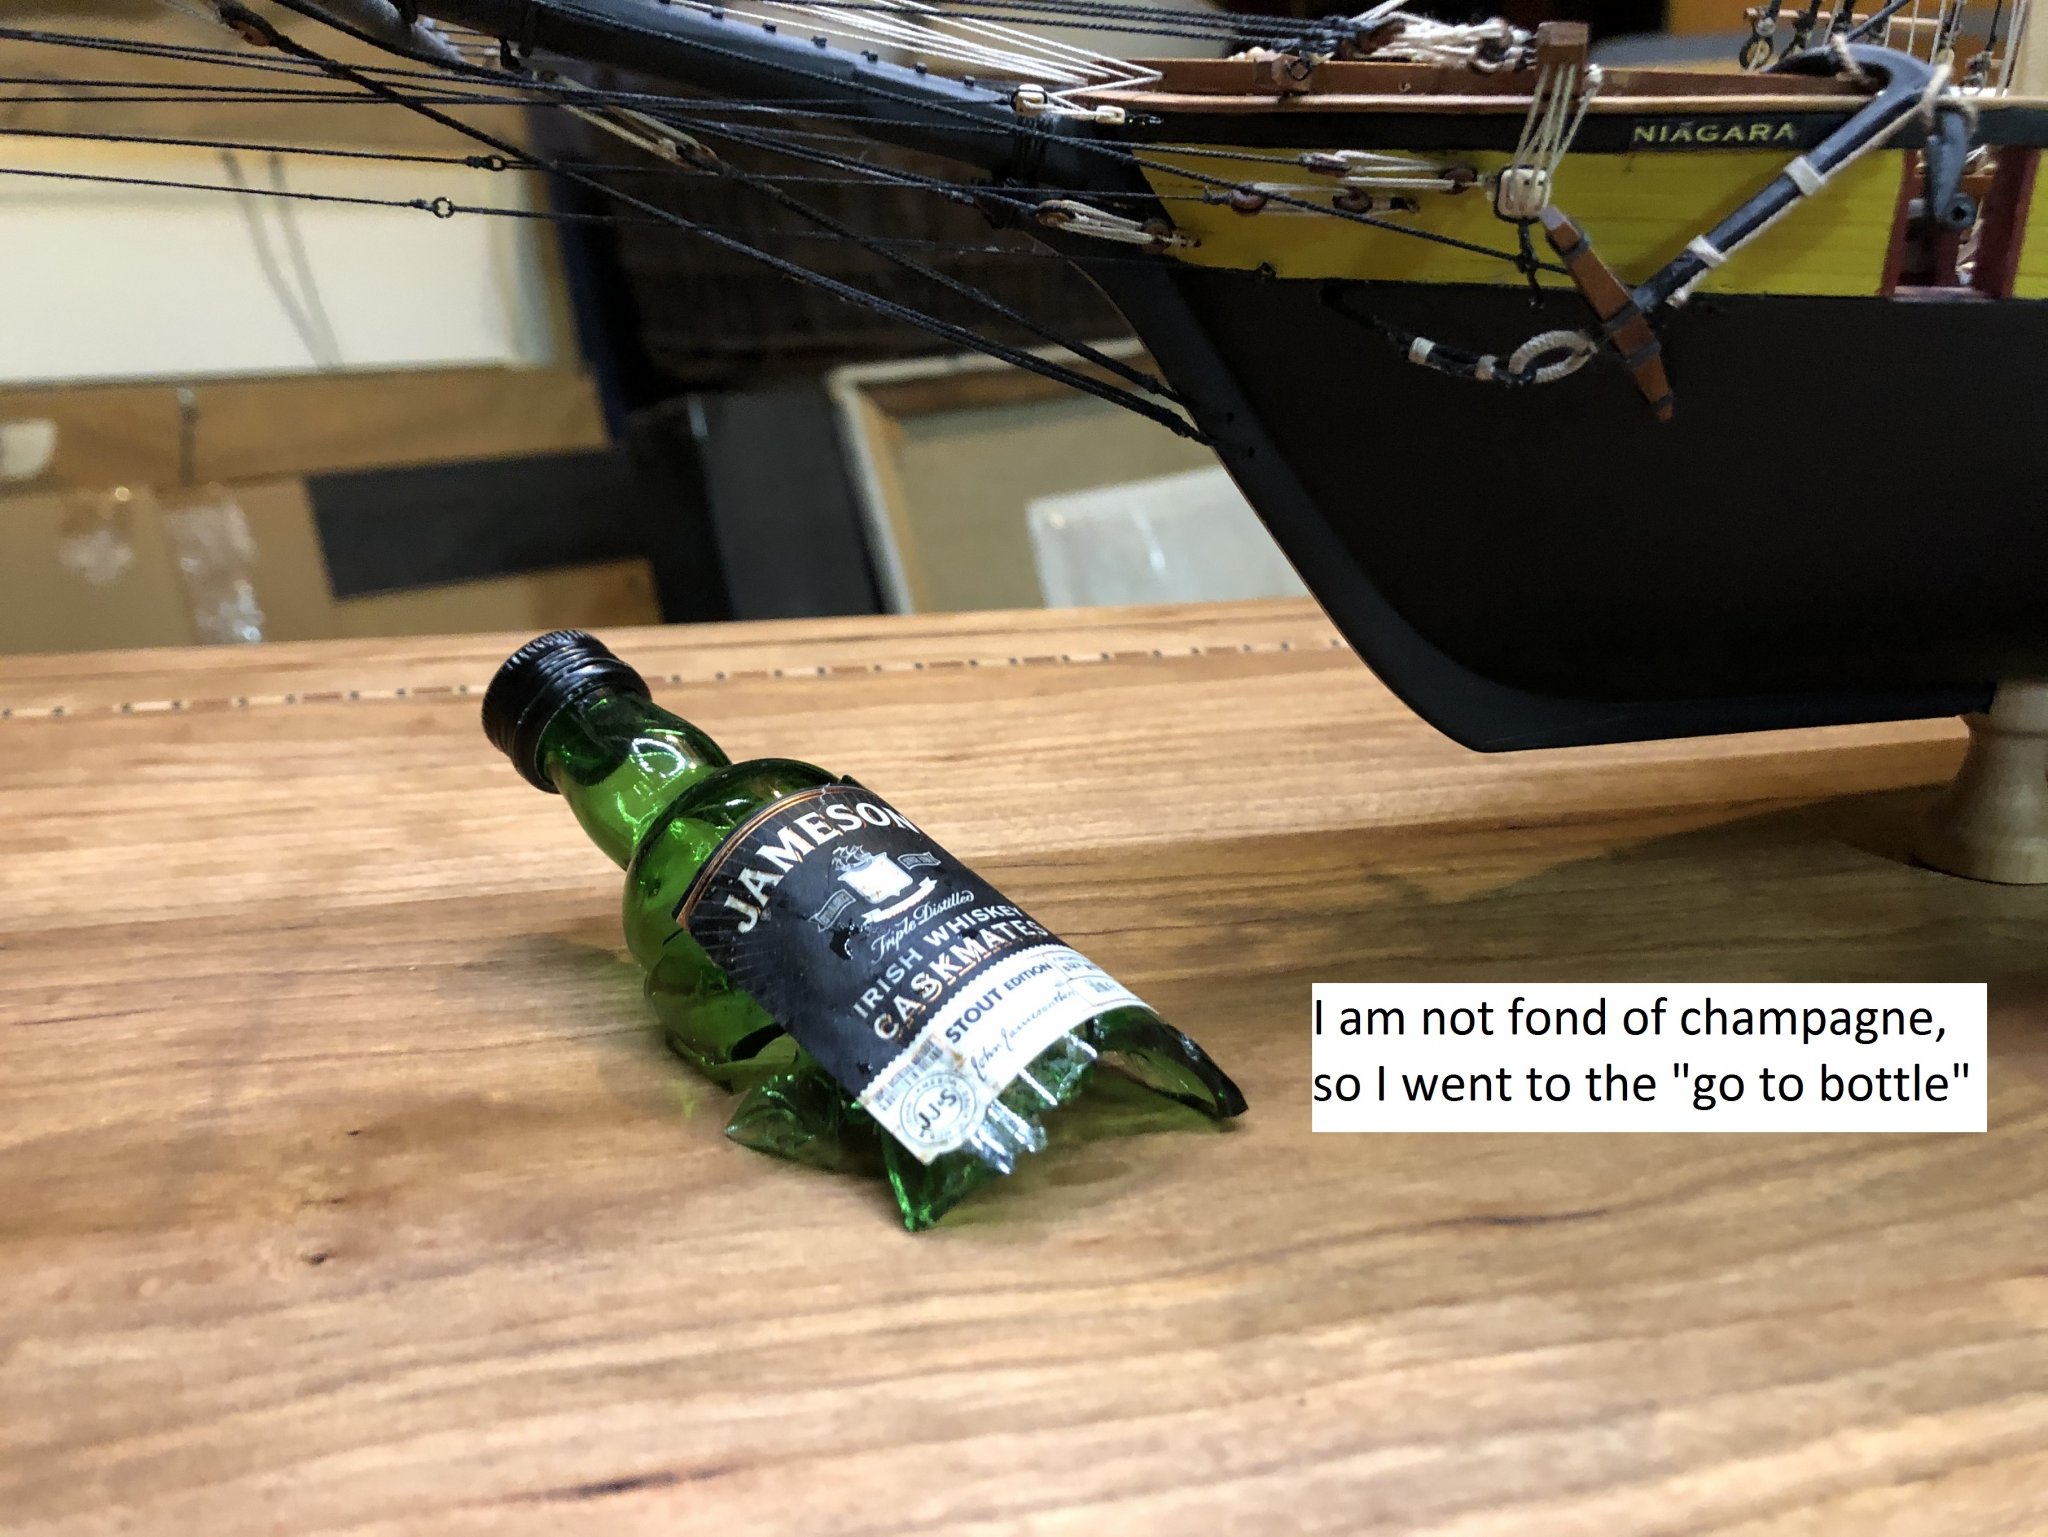
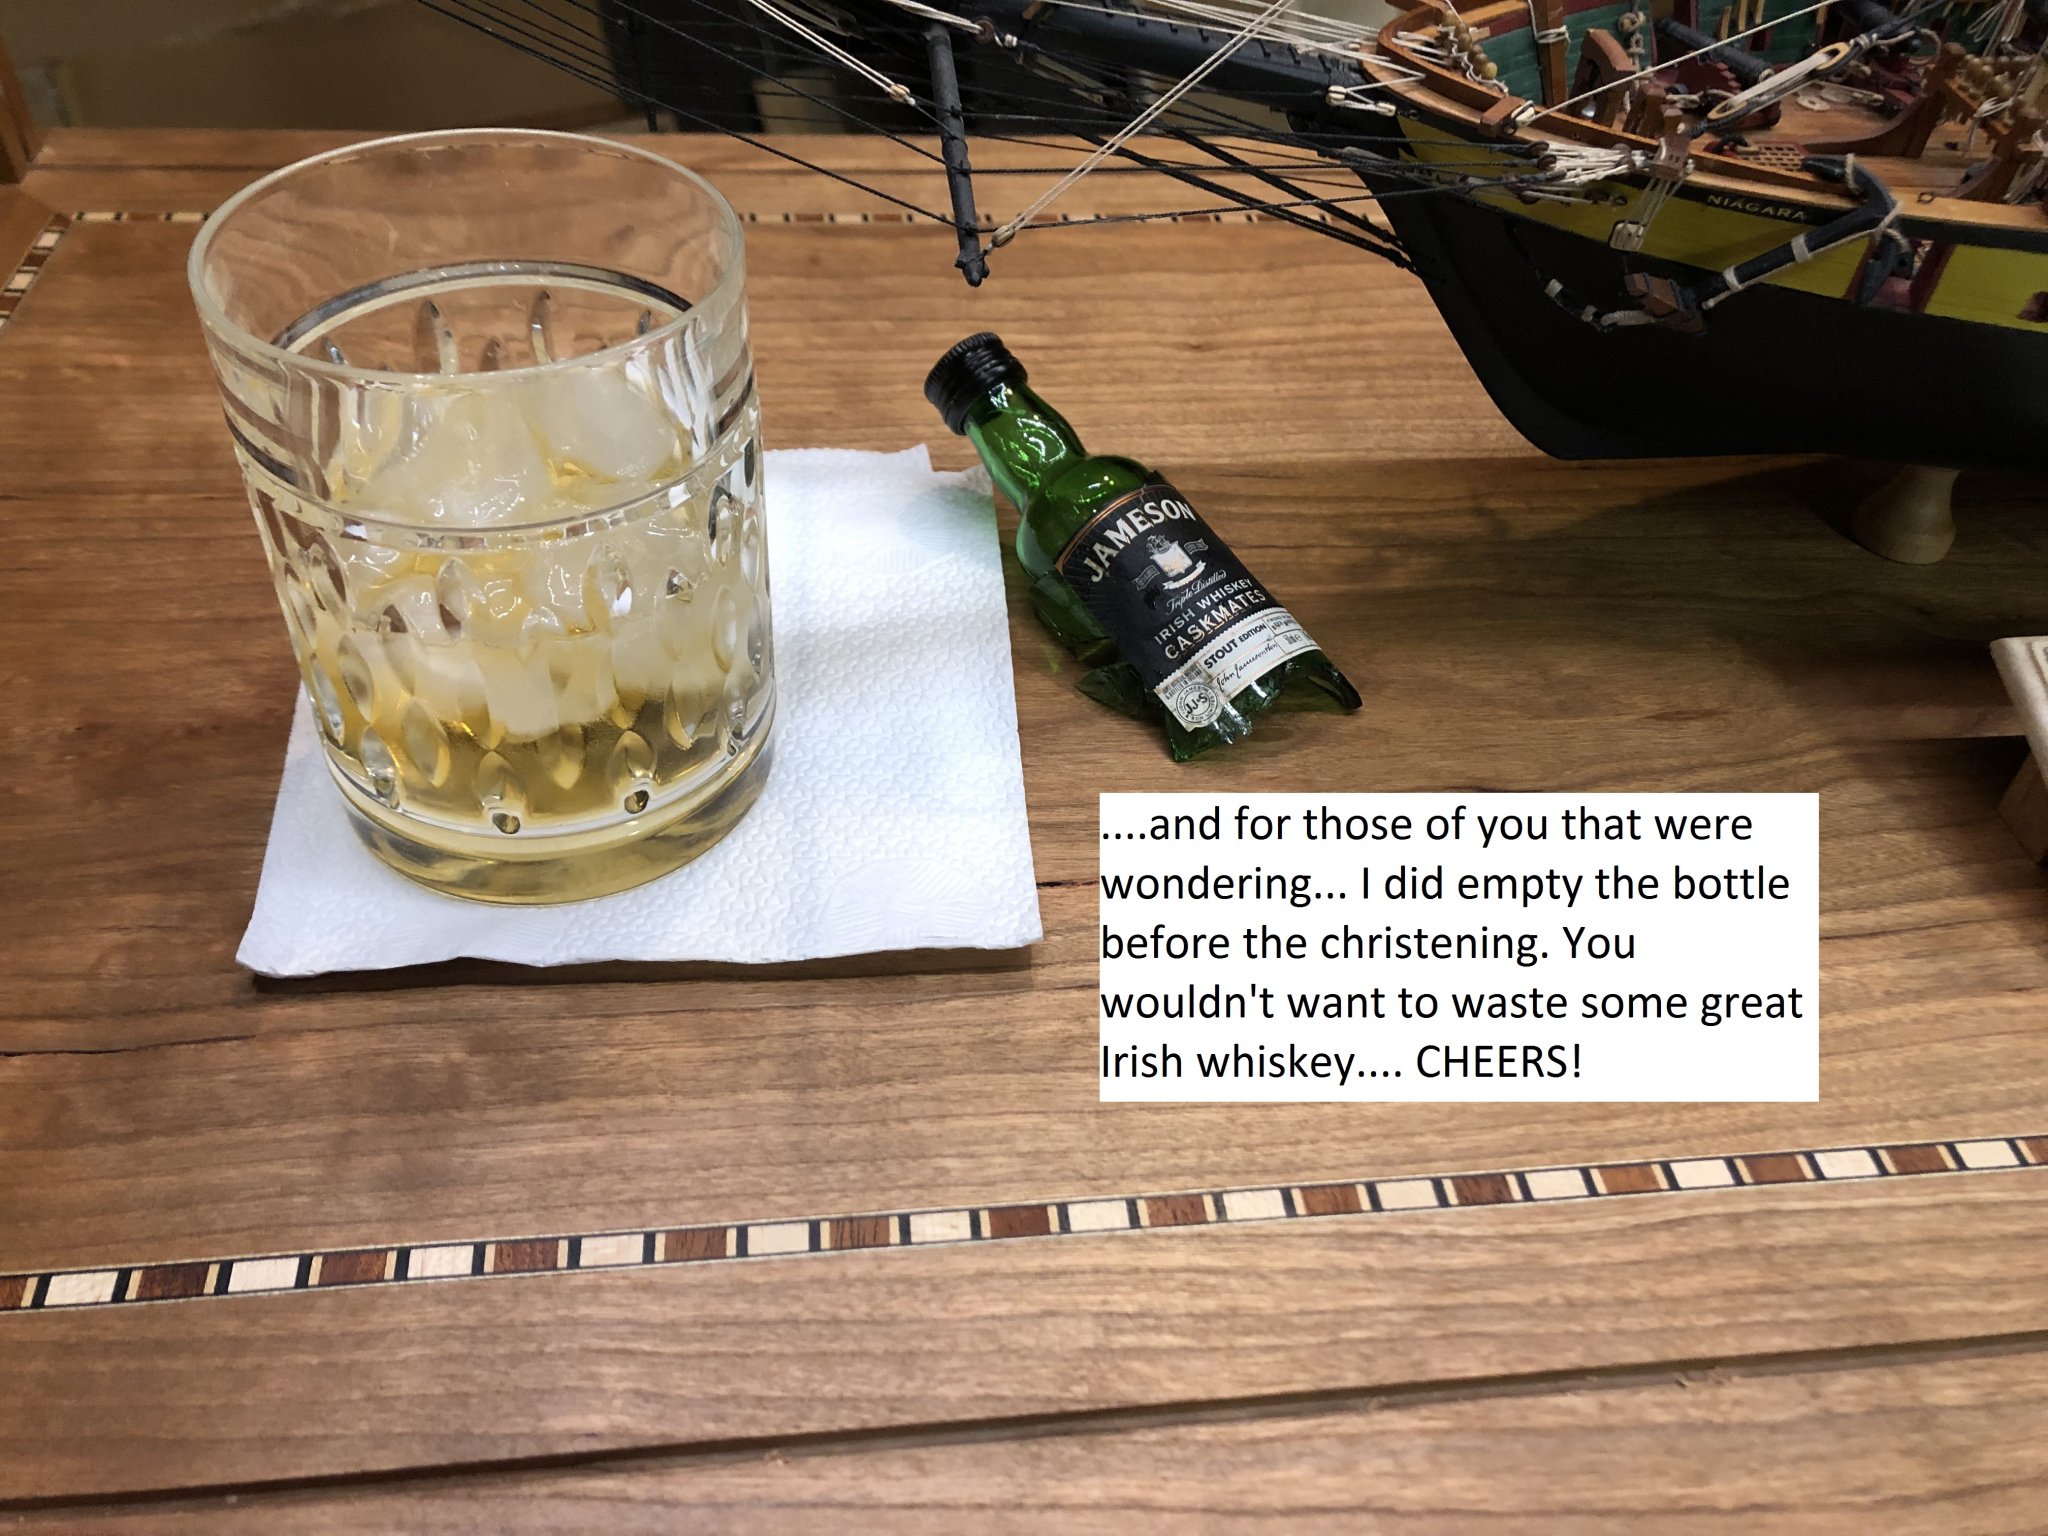
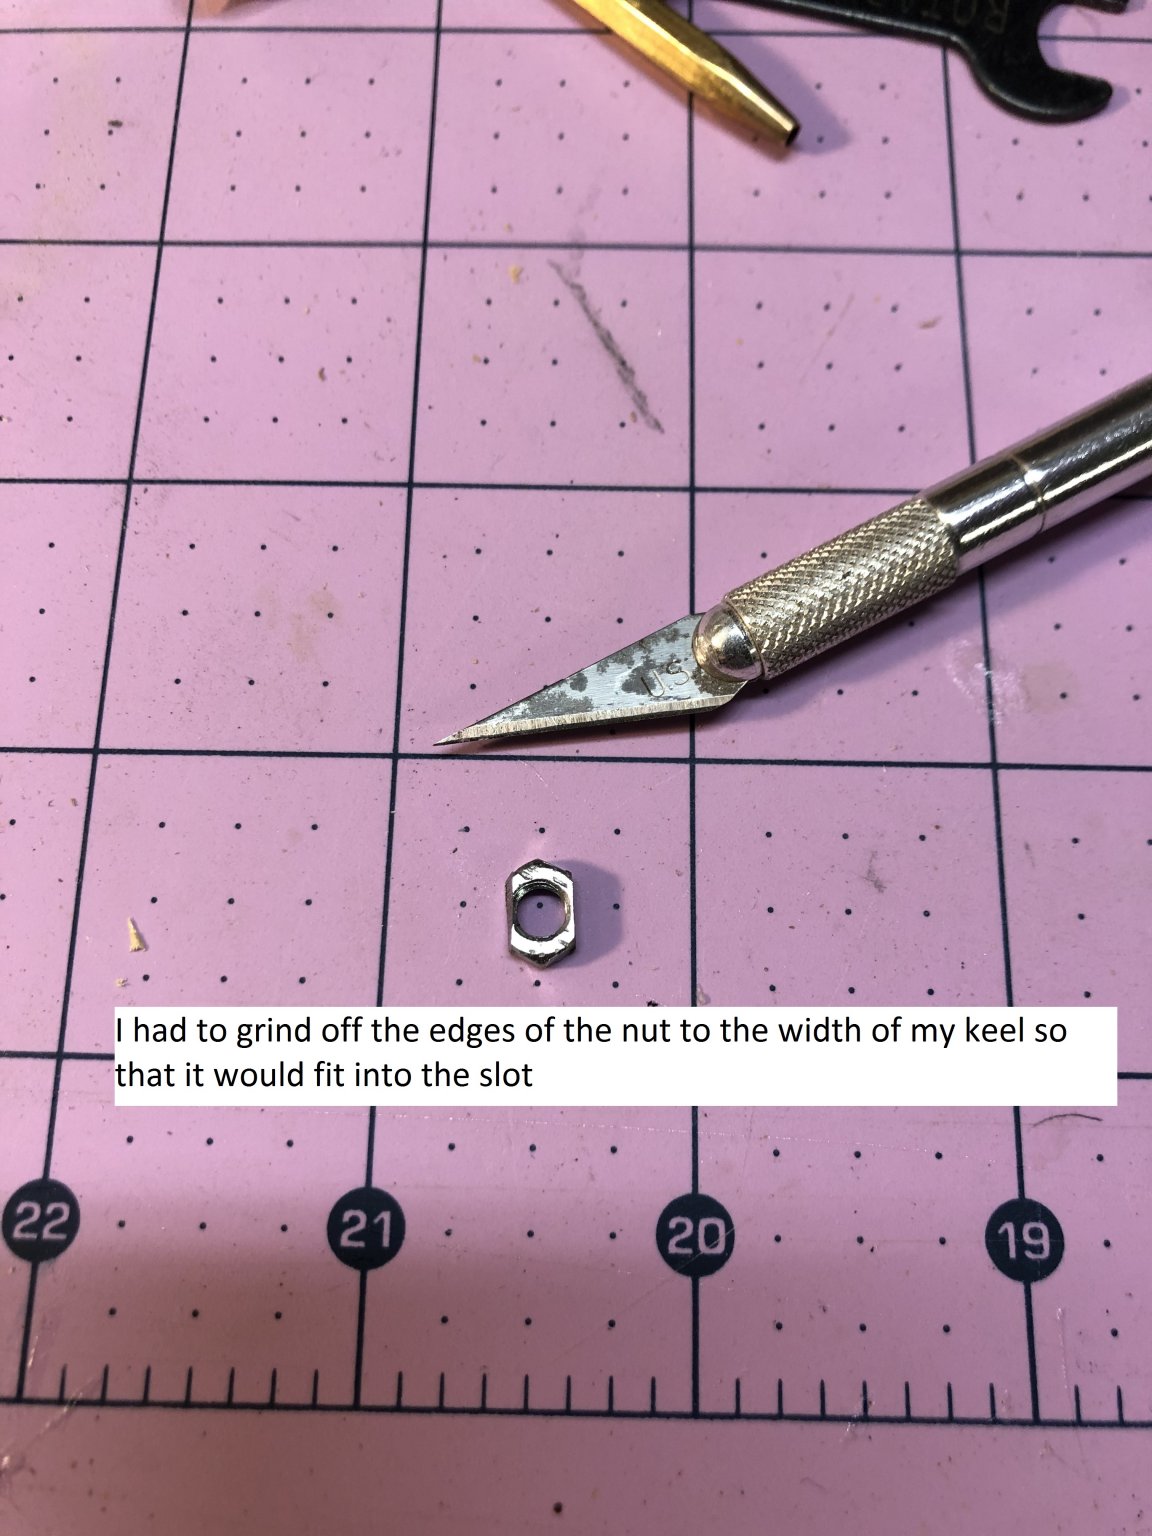
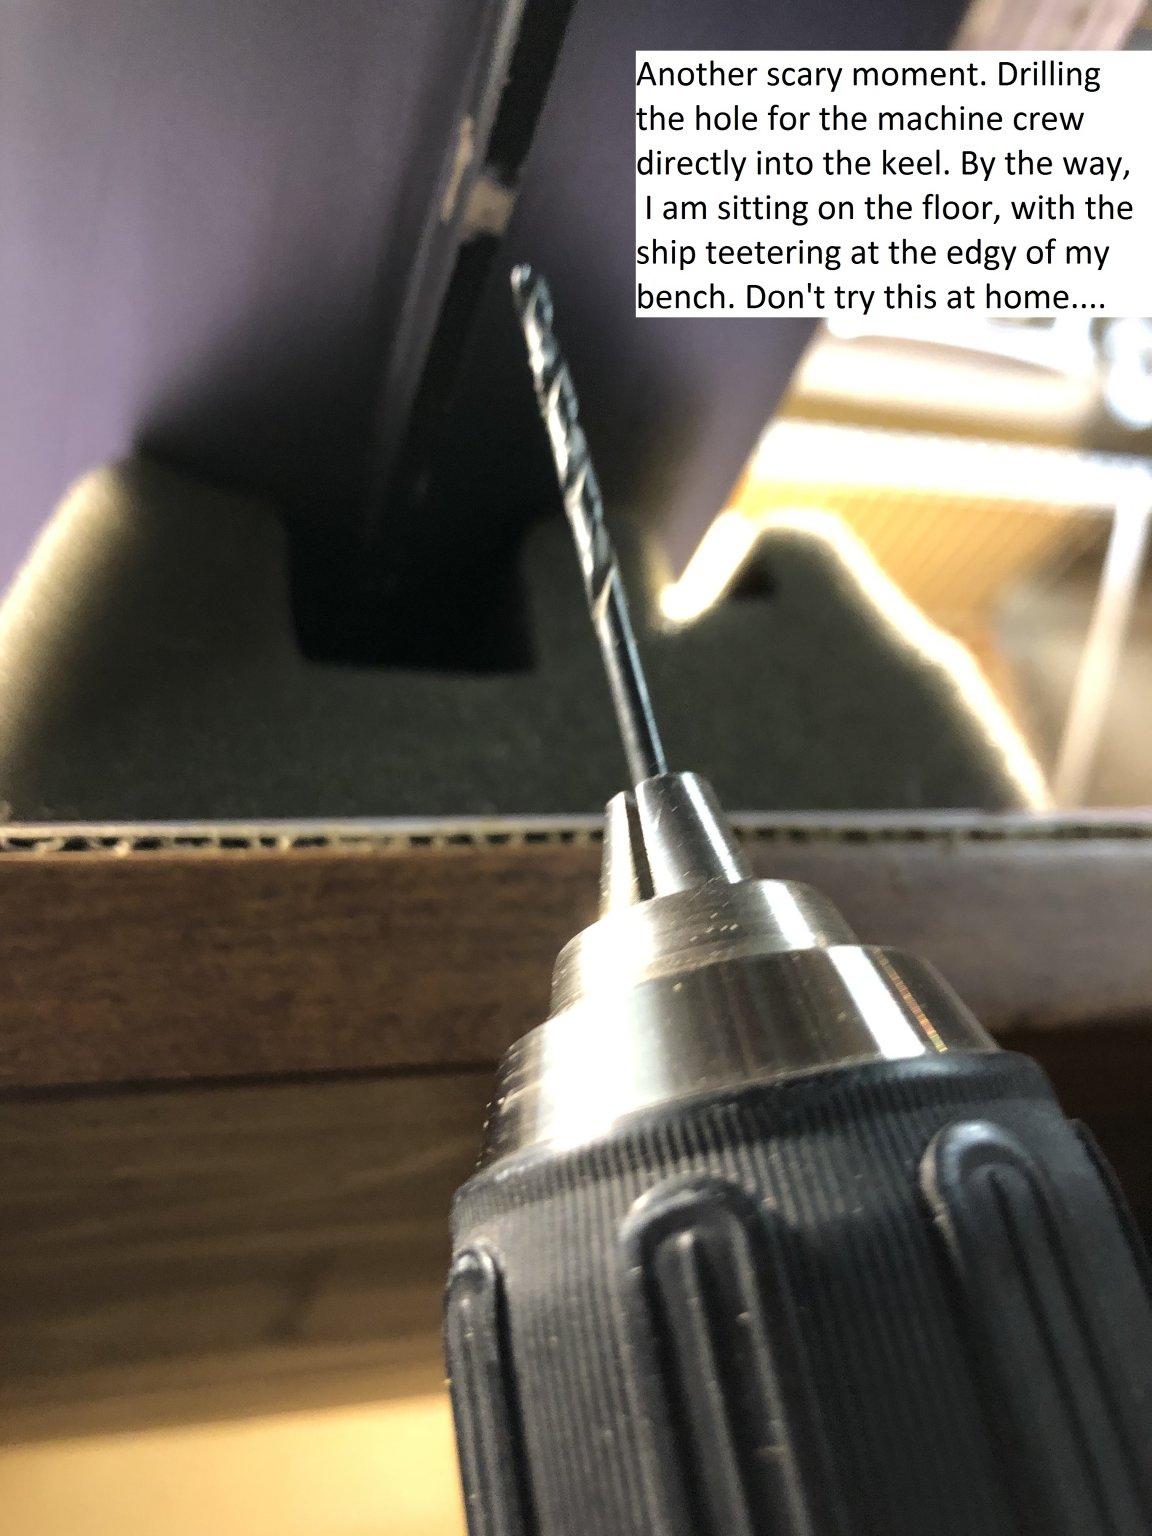
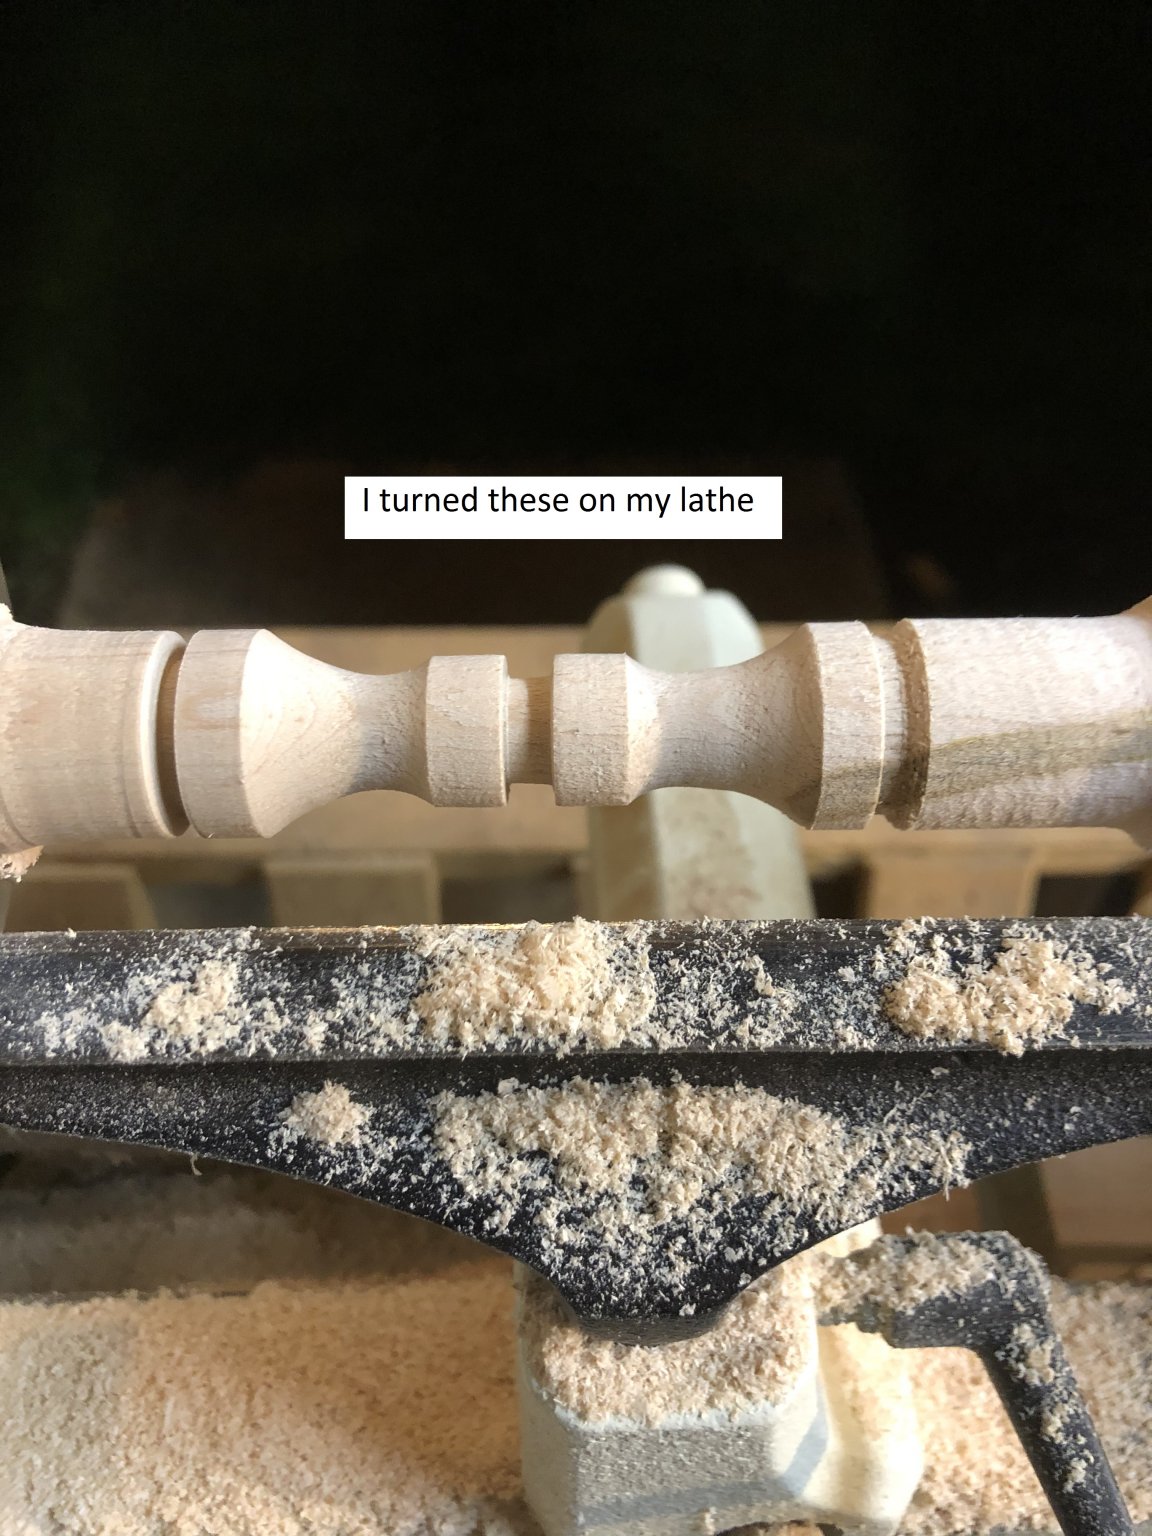
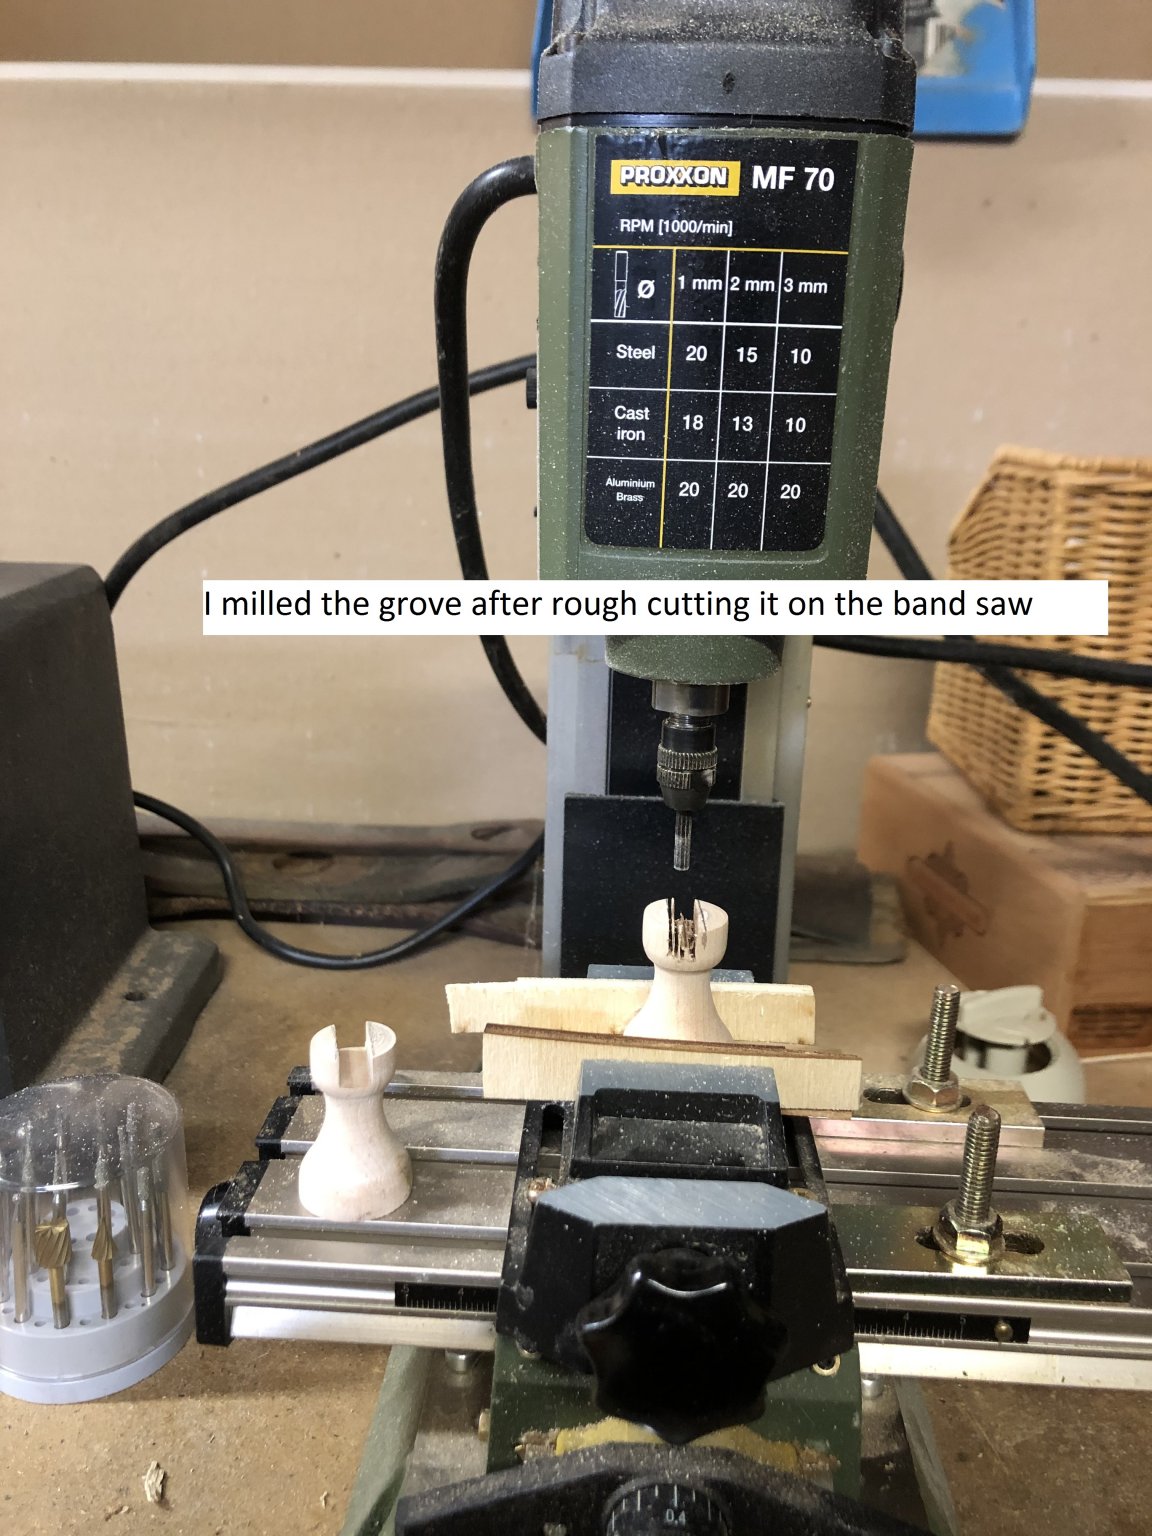
MOUNTING PEDESTALS I worked on a method of mounting my ship to its display base. And yes, like experienced model ship builders, this was something I should have done long long ago. Kudos to those that incorporate mounting bolts and threaded nuts to their hulls before it is planked. Being my first wooden ship model, when I started this project years ago, I was a lot younger, but not wiser. Just finishing the project was too much to comprehend let alone that there would be a time when I would have to actually mount it to something. I ordered some brass pedestals with long wood screws. But screwing wood screws into a quarter inch wide plywood keel with no backing was not going to do it. So I opted to mortise a notch and glue in a stainless steel nut that would accept a two inch machine screw. The diameter of the screw was wider than the hole in my brass pedestals, so I would have to create new ones. I opted to turn them on my lathe from some spalted maple. This was a long process, and a scary one as well. Working on the bottom of the hull of a finished rigged sailing ship is ridiculous. Taking a drill to the hull, while sitting on the floor, with the ship hanging off the edge of the bench is not for the faint of heart. I paid for my ignorance. Here are a series of photos that show how I did it. In the end, the ship is stable enough, as long as it is not hit with any rough seas.
.thumb.jpg.625f5b115b4dc077e1acb7cea80c0c2c.jpg)
.thumb.jpg.326b5f45f60235133c17dd4ddd17e5cb.jpg)

.thumb.jpg.1e95e979eff564533fad1b1fe6b69975.jpg)

.thumb.jpg.ed4a34ce99c67c1c9acb72ce5af76847.jpg)
- 648 replies
-
- 12
-
-
- niagara
- model shipways
- (and 1 more)
-
I have done a lot of testing. If you want to see all of the faults in living color, you can crank up the light intensity. It actually has convinced me that I need to install a similar lighting system for my work bench. My choices with this system however are endless. It has a warm light function, and I believe that will be the one I chose for the display. Besides that, I can change the light to green, blue, or red, or any combination of all three. I can make it blink, I can program it make it change color. In fact, I can turn my Niagara into a Christmas Tree if I wanted. Having said that, I do like the system and I wanted a remote to turn it off and on. The extra features just came a long with the package.
- 648 replies
-
- 2
-
-
- niagara
- model shipways
- (and 1 more)


.jpg.89bb406b959ff0279b3b99fadcbca64e.jpg)
.jpg.fb4fc5c5badab0b88f07aea452025d21.jpg)
.jpg.8b0e1ded7c20c0464e03b226462c2f5b.jpg)
.jpg.e81b6ec99a123242a3a827fe5b22149b.jpg)


.jpg.b7f99775c08db3772163766c3e85af17.jpg)