
HOLIDAY DONATION DRIVE - SUPPORT MSW - DO YOUR PART TO KEEP THIS GREAT FORUM GOING! (Only 13 donations so far - C'mon guys!)
×


Overworked724
-
Posts
1,258 -
Joined
-
Last visited
Content Type
Profiles
Forums
Gallery
Events
Everything posted by Overworked724
-
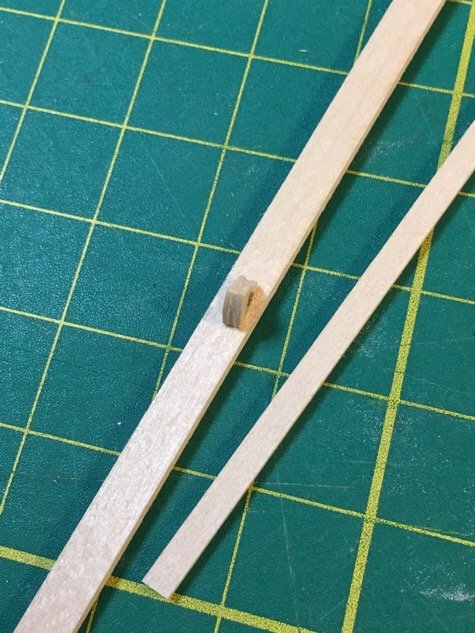
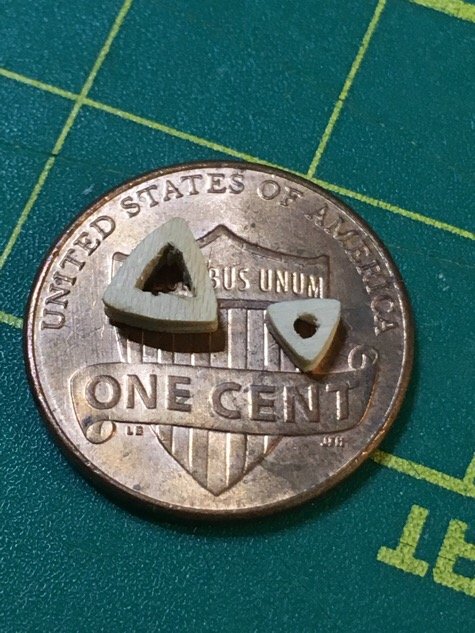
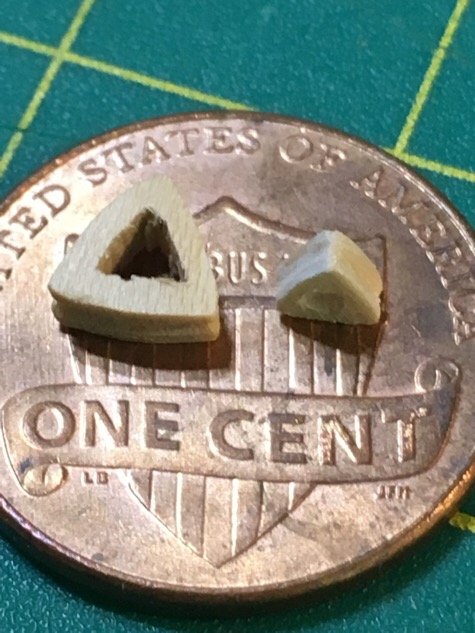
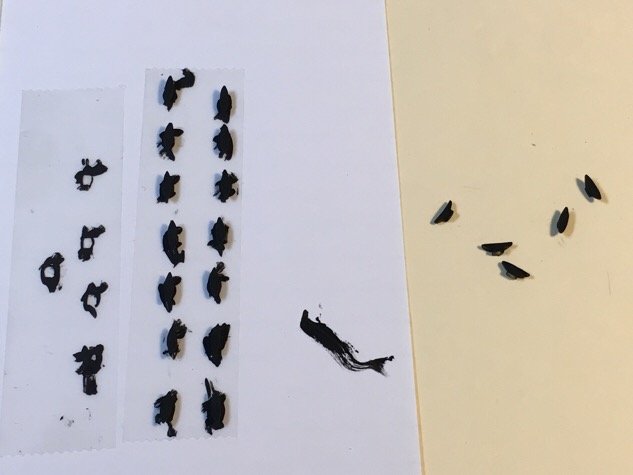
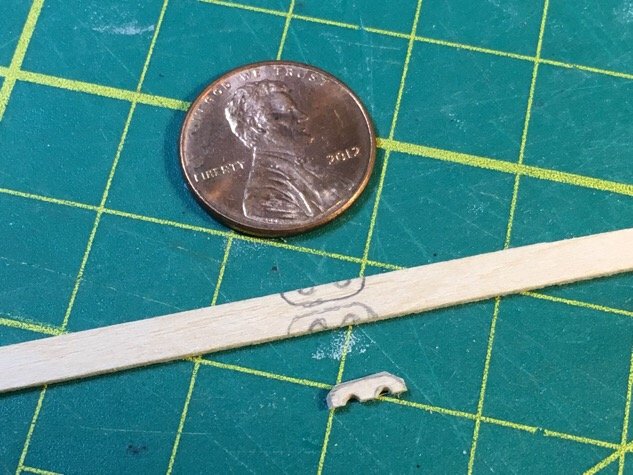
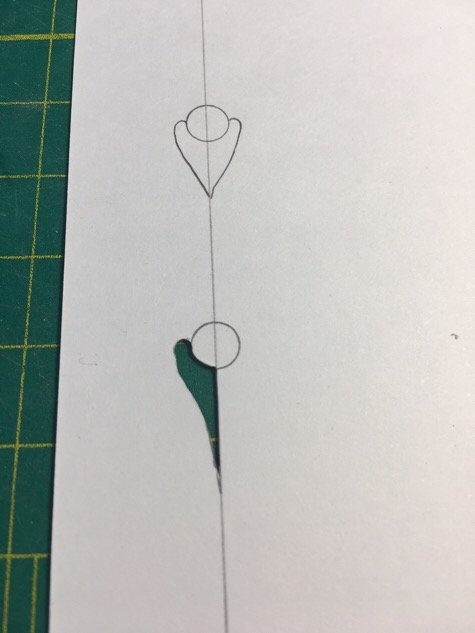
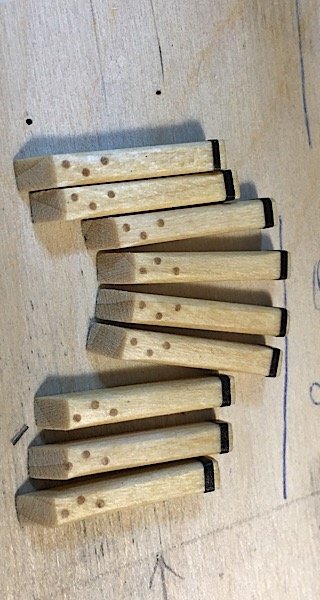
 Finally got the technique for making semi-decent closed-heart collars! These things are TINY! 3mm on a side is about the limit of my capability. Started with larger stock stock to get the technique down. Then went to smaller stock wood strip to try to repeat at a smaller scale. Proof is in the pudding. 😎 Moving on to the open heart collars!
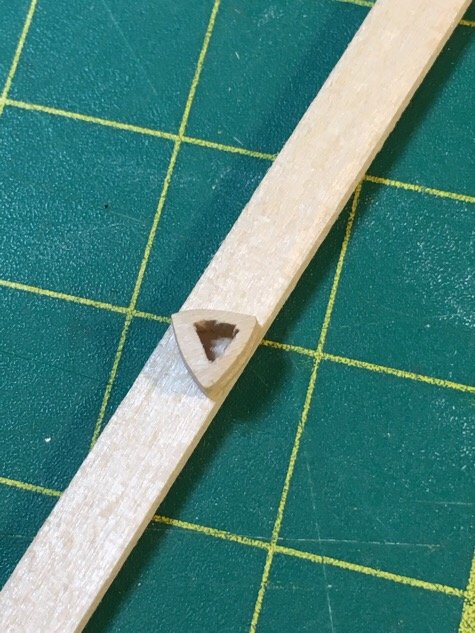
- 449 replies
-
- 2
-

-
- sultana
- model shipways
- (and 2 more)
-
Funny thing...writing about my 'building blocks' (pardon the second pun) has just given me a flurry of creative inspiration!
- 449 replies
-
- 2
-
-
- sultana
- model shipways
- (and 2 more)
-
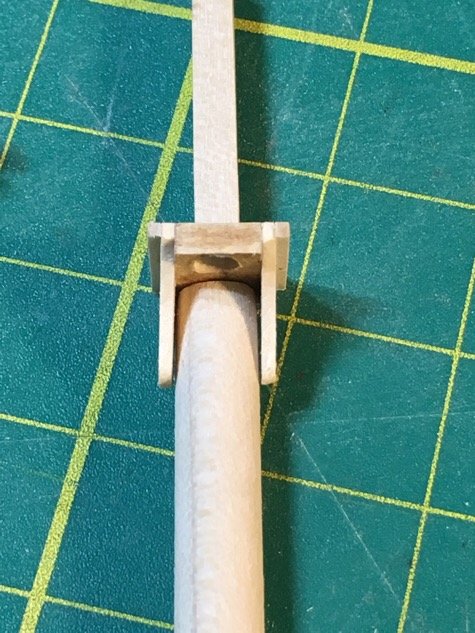
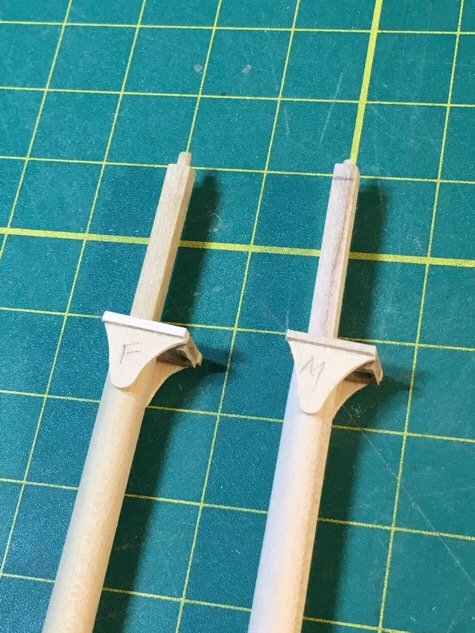
Time to vent a bit. The main and fore mast have a fixture above the cleats near their base. The main mast has a 'boom rest' on the plans. As Chuck's practicum references, the ship plans call for a wrap around boom rest for the main mast, and they omit any such feature on the fore mast. Chuck improvised and put in a chuck (pardon the pun) on the foremast to hold up the mast hoops. On the main mast, he put a 1/2 boom rest which serves the same purpose, plus also holding up the ship's main boom. Both features point aft (to the back of the ship). Making the chuck on the fore mast is not a problem. Easy enough to make. It's the boom rest on the main mast which is a bit of a problem. I have basswood sheets, and trying to carve out a semi-decent 1/2 (or whole for that matter) circle which wrap around the mast is quite difficult for me. Not certain how best to accomplish this task, as I have tried a number of ways - never to a satisfactory result. (often accompanied by a lot of swearing) So...this is the main issue that has held up my progress on the masts. Something as stupid and inconsequential as a simple 1/2 circle 'boom rest'. Ok...yes...I have made some 'passable' boom rests. Am I happy with them?...No. I think I have a solution, but have not yet attempted. We shall see. But, I had the same issue of hand making my open and closed heart collars as Chuck described in his practicum. I tried making the collars but my results were...um...substandard. Since I required these little bits to finish up 'pre-rigging' my bowsprit, I got similarly stalled until I could get them made. I am sure it would be a useful skill. Perhaps I am simply using the wrong tools/wood/technique to get to the final 'acceptable' end result. But in the interim - I want to move forward with my model!!! And. since Model Shipways omitted inclusion of these vital parts of the kit - I opted to try ordering some of appropriate size. (Believe me - the relief of ordering the parts for a few buck vs. creating a half-assed approximation of those tiny pieces was indescribable...cheers to me for problem solved!) OK....my vent is over...moving on.
- 449 replies
-
- 1
-
-
- sultana
- model shipways
- (and 2 more)
-
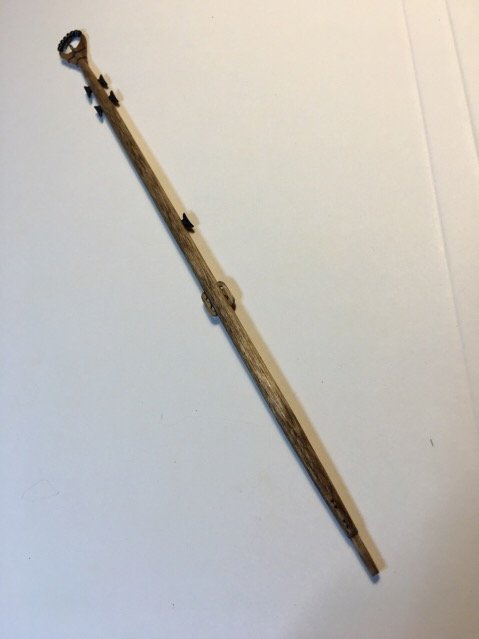
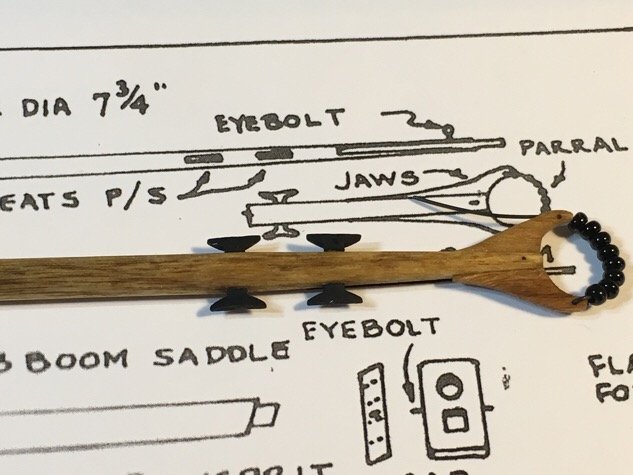
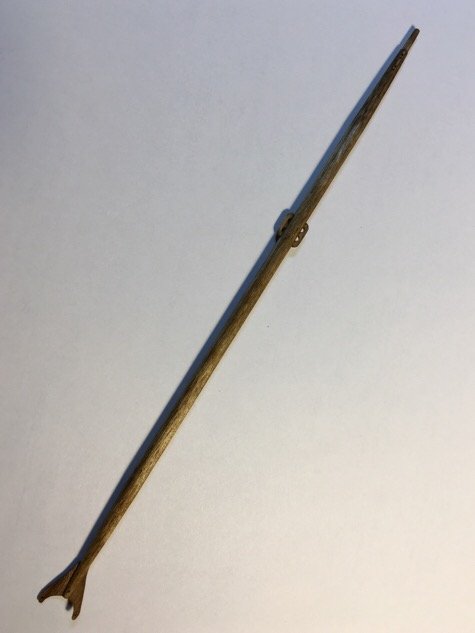
Ok. Main boom is done. The parrels using black beads was awesome idea (whoever’s it was!). The metal bands turned out stellar using my Tamiya/Sharpie/Razorblade technique. 😁 One thing to note is that I used black wire for holding parrels between the jaws of the yolk. Easy to crimp once it’s on the mast. Moving on to the next set of sticks!

- 449 replies
-
- 5
-
-
- sultana
- model shipways
- (and 2 more)
-
Finishing up the main boom. Surprised at how well those beads I got at JoAnn fabrics finished the look!! The cleats I got from Syren (Chuck’s company). I tried making my own cleats but it’s a skill. Preferred to have them look good and they were cheap. Laser cut parts, shaped with sanding then painted. Used wood glue to apply to stained boom. Only thing left is the metal bands which I’ll put on this evening. Then it’s on to the next set of sticks!!! Moving on...

- 449 replies
-
- 3
-
-
- sultana
- model shipways
- (and 2 more)
-
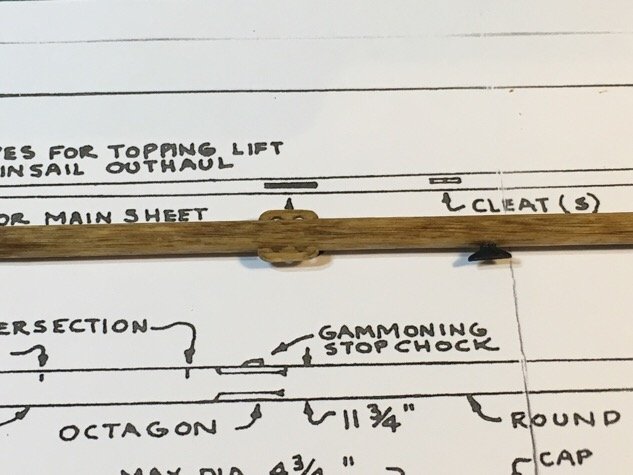
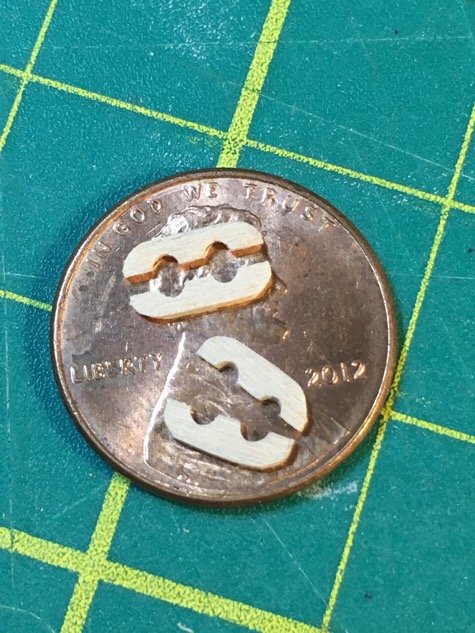
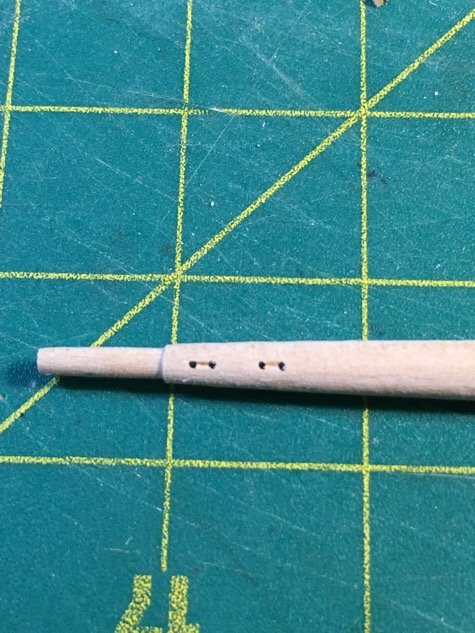
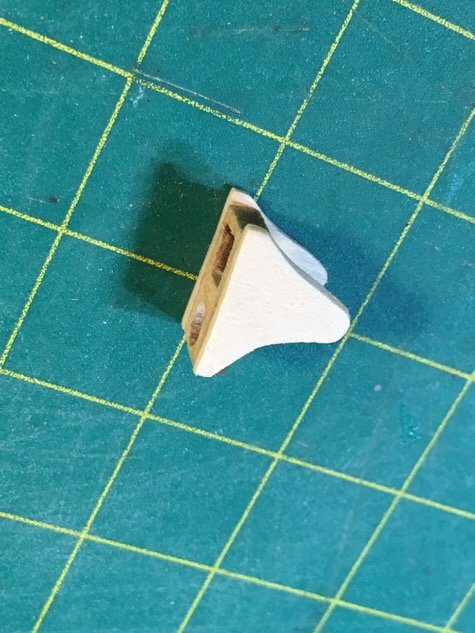
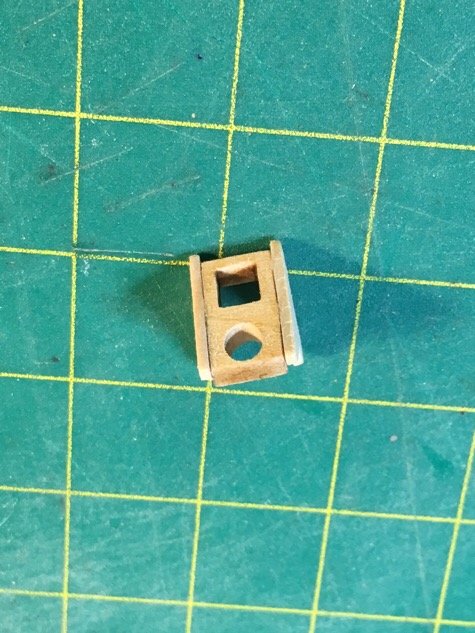
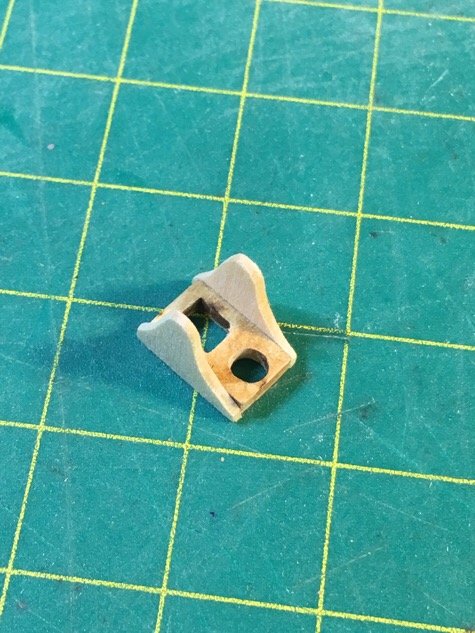
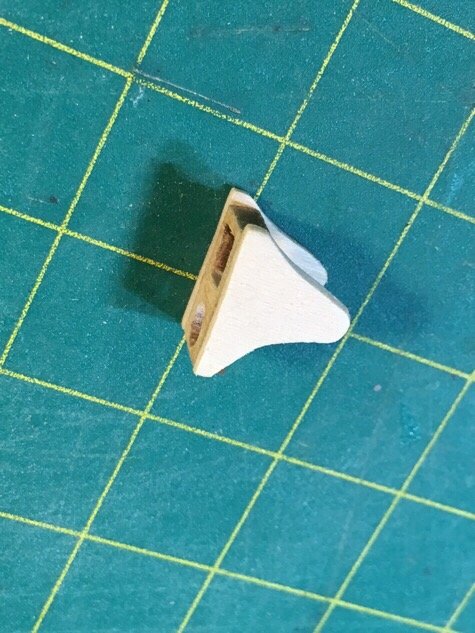
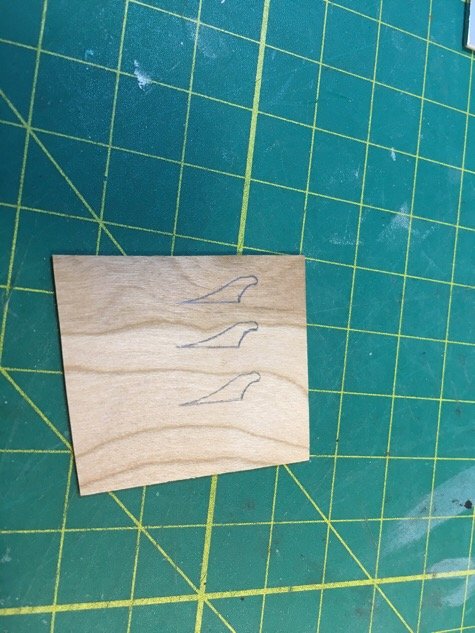
Worked a bit on the main boom this evening. Got the chocks for main sheet and foot ropes made. They are tiny...but easy to make. Drilled in the sheaves. And stained. Painted my cleats black, and have my tape (simulated iron banding) and eye bolts ready. Should be able to finish the boom tomorrow. Moving on!
- 449 replies
-
- 3
-
-
- sultana
- model shipways
- (and 2 more)
-
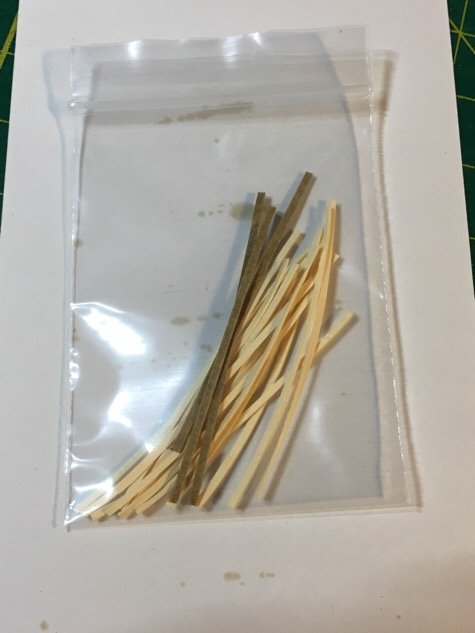
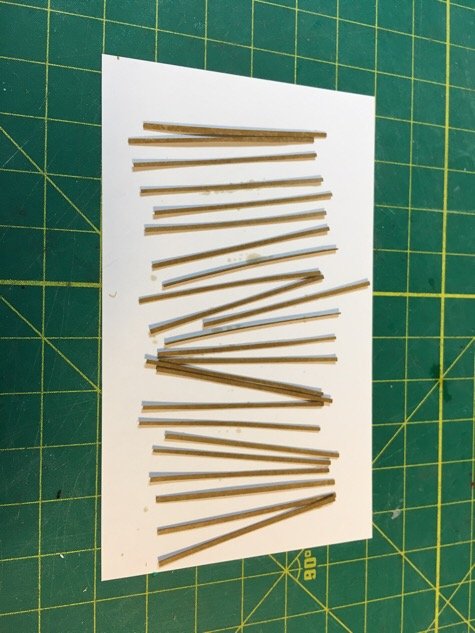
Well, I’ll give the ol’ college try!!! Got the mast hoops stained, formed, and ready for when I step the masts. Good progress...but I’m getting used to making spares just in case. You can see how well the Golden Oak darkened the manila folder paper. It saturated it very quickly and dried just as fast. Moving on!!!
- 449 replies
-
- 3
-
-
- sultana
- model shipways
- (and 2 more)
-
Well...I type my content. Then go to upload photos. And click the pics (iPad) in photos I want to upload. But the chronology in my iPad is not the chronology I end up with in the post. How do I post content, then add a photo. Then post more content, then add another photo? I’d like to post photos as I explain in my blog...but I only know how to post them all in one big dump at the end of a post.
- 449 replies
-
- 2
-
-
- sultana
- model shipways
- (and 2 more)
-
WILL SOMEONE TELL ME HOW TO KEEP THE PICS IN the ORDER I AM POSTING THEM IN MY REPLY!!! Good grief.
- 449 replies
-
- 3
-
-
- sultana
- model shipways
- (and 2 more)
-
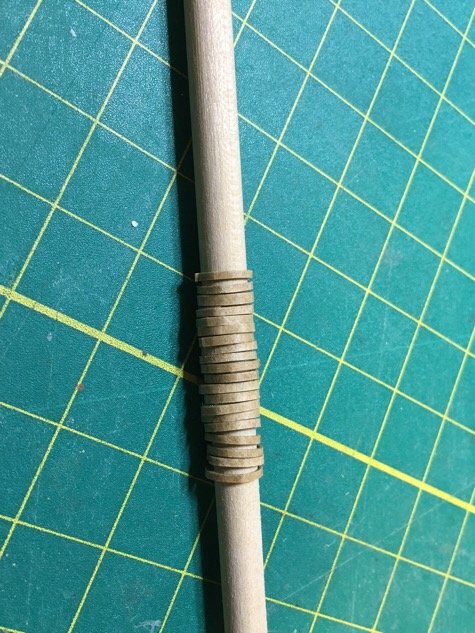
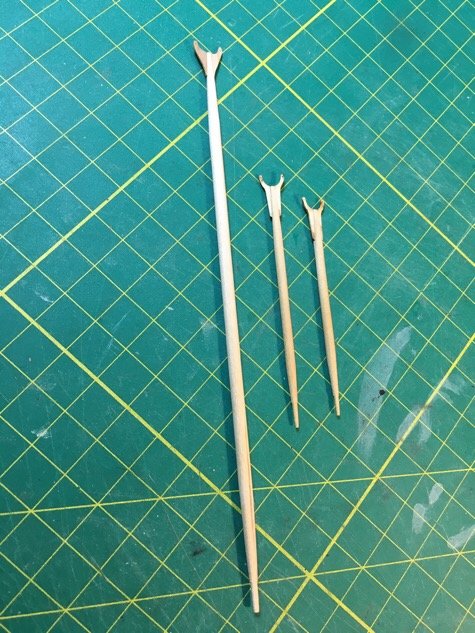
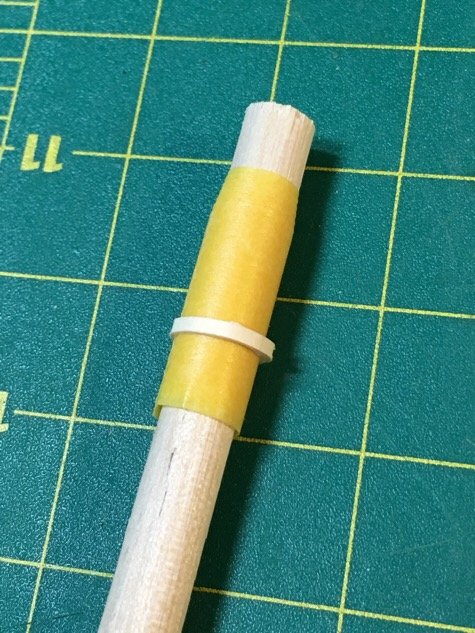
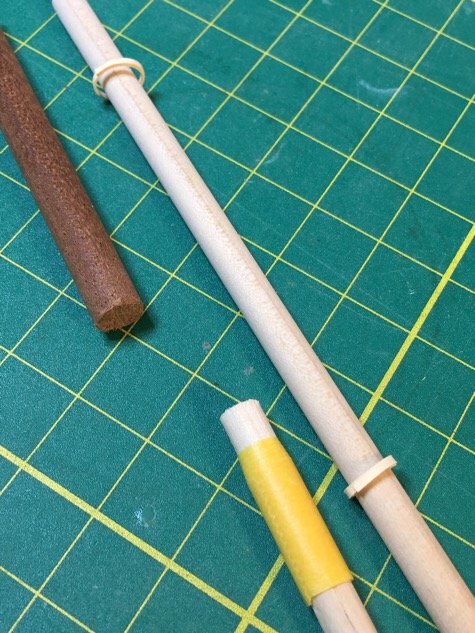
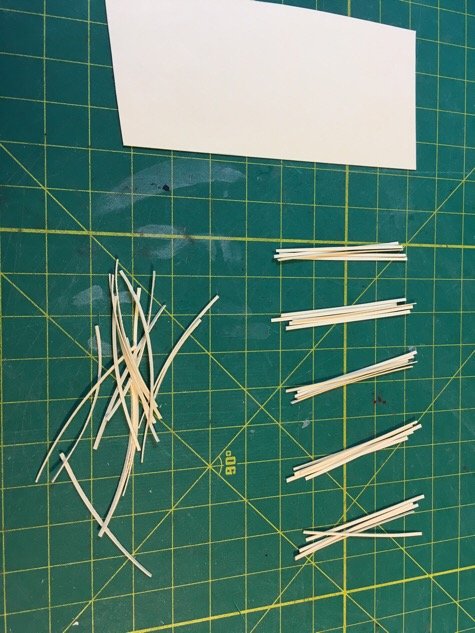
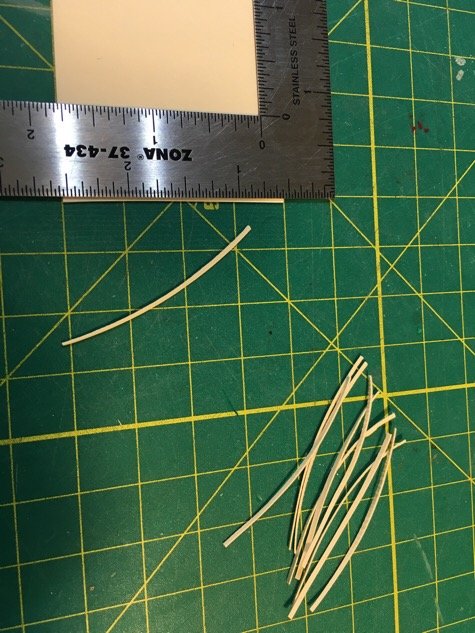
Sunday shipyard saw me ignoring the trestle trees and jumping on shaping the last of my ‘sticks’, namely the gaffs and main boom, and taking a swipe at the mast hoops. Followed Chuck’s advice on the mast hoops. Manila folder trimmed to 1 mm thick strips. When I trimmed with a razor or scissors they tended to twist. After some practice, could trim them off without having them curl up. Not certain if that matters. Next thing was a ‘larger dowel to shape the hoops. The smallest I had was still too big. So adapted using Tamiya tape around a dowel with same diameter as the masts. Worked like a charm. Using carpenters glue and NOT CA glue. Seems to work much better. Stained the strips in Golden Oak stain. Will post pics of the hoops later after the stain dries. Got the fore and main gaffs started and finally got the main boom on a decent track. Chuck painted his fore and main gaffs black...seriously thinking whether to follow this...the gaffs after they are stained might be complimentary to the main boom. Jury is out on this one.... Moving on!!!
- 449 replies
-
- 5
-
-
- sultana
- model shipways
- (and 2 more)
-
Ok!!! Made my own path to the bibs and cross trees. Used the kit blocks for lower part but glad I made the mast caps myself. Nice result. Will paint tomorrow!!! Moving on!
- 449 replies
-
- 2
-
-
- sultana
- model shipways
- (and 2 more)
-
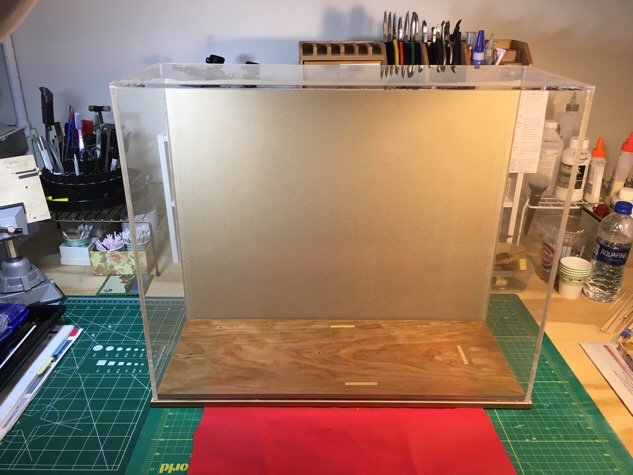
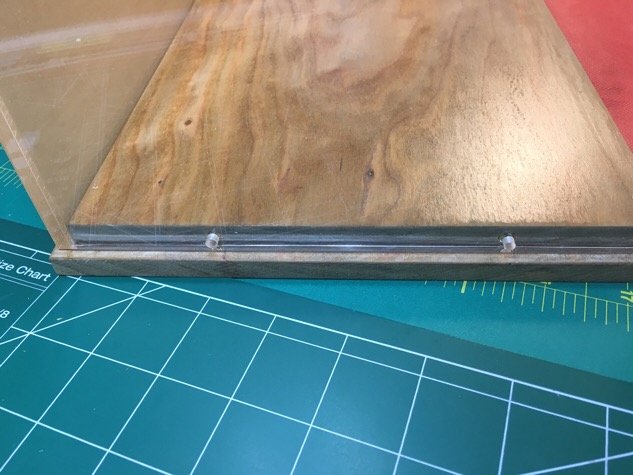
The tape on the base is there to make it easy to align the mounted ship in the correct orientation so I can slip the screws in without difficulty. Tried it. Works like a charm. Simple is good.
- 449 replies
-
- 2
-
-
- sultana
- model shipways
- (and 2 more)
-
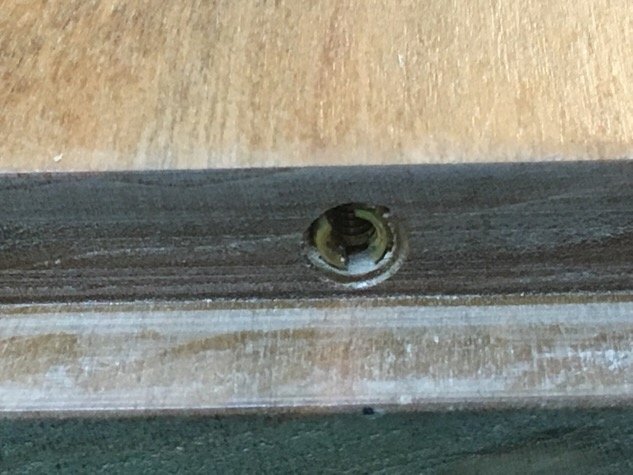
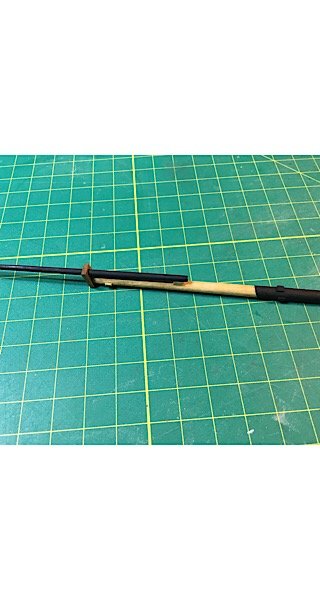
Ok. Work got in the way but am back at it...albeit gradually. Pics show the inserts and screws for a solid attachment of the case to the base. I realized I can always remake the base if I want...but it’s a good fit and solid. Can also create a cherry boundary to hide the nuts if I wish. Will tackle it later. Made the parrel arms for the boom and gaffs. Also prepped the main and fore topmasts. Completed the swivel gun stocks and guns. Turned out very nice!...no pics because the more I post the more I’m tempted to glue them in place!!! I plan to put them on LAST. I don’t trust my ability to not accidentally knock them off...and they will go on easily. Moving on...

- 449 replies
-
- 2
-
-
- sultana
- model shipways
- (and 2 more)
-
It’s a learning process!!! Part of the fun is planning well in advance. But your build is coming along very nicely! I continue to watch! Enjoy your build, fellow shipwright!!!!
- 360 replies
-
- 1
-
-
- sultana
- model shipways
- (and 1 more)
-
One way to overcome this effect is to stain the wood before cutting/shaping. Good note for future. I will be doing this for next build.
- 360 replies
-
- 1
-
-
- sultana
- model shipways
- (and 1 more)
-
Beware though...glue can effect the evenness of the stain.
- 360 replies
-
- 1
-
-
- sultana
- model shipways
- (and 1 more)
-
Agree. Stain gives warm tone and is both subtle and natural. If I could have a do over, I might have stayed with stain rather than paint. In the end, it is your ship. Enjoy it!!!
- 360 replies
-
- 1
-
-
- sultana
- model shipways
- (and 1 more)
-
Ok. Finally decided how to connect my plexiglass case to the cherry wood base. Firstly, as I’ve never drilled holes in plexiglass, I was a bit anxious. Secondly, once the holes are drilled, what screws do I use. Finally decided to get some brass nuts (#6, 3/4”) and some inserts. Drilled to holes and sunk in the inserts. Voila. It’s not glamorous...but it IS stable...and symmetrical. I can always create a new base/case...but I realized I had some paralysis by analysis...so finally decided to move forward and make progress since I was obviously over thinking. Pics later...beer now.
- 449 replies
-
- 3
-
-
- sultana
- model shipways
- (and 2 more)
-
TaDaaaaa!!!! (ooops....just noticed a nick in the paint when looking at the photos!)
- 449 replies
-
- 3
-
-
- sultana
- model shipways
- (and 2 more)
-
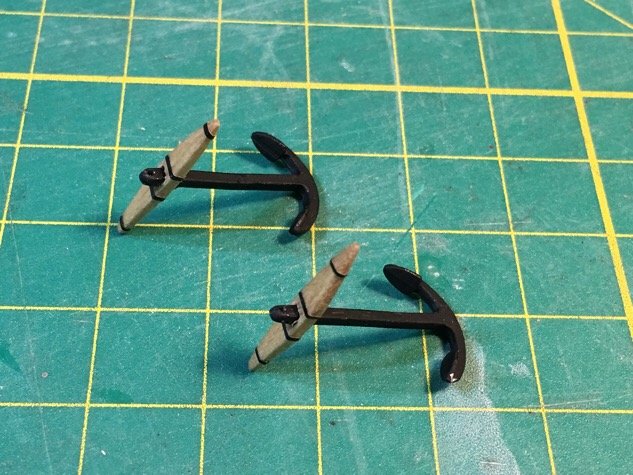
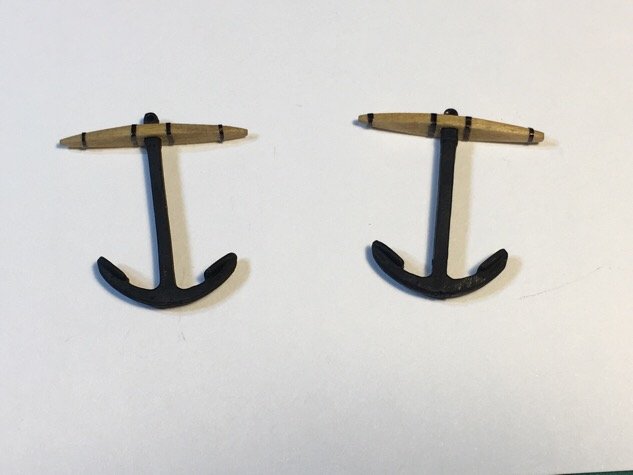
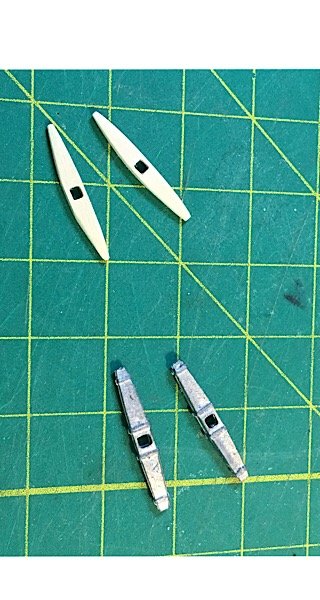
Hi Lou! Thanks for nitpicking! Good catch on my anchors. And yes...they are not glued yet. But laying them flat makes a better picture with my phone! (Or at least that’s my excuse! 😁)
- 449 replies
-
- 1
-
-
- sultana
- model shipways
- (and 2 more)
-
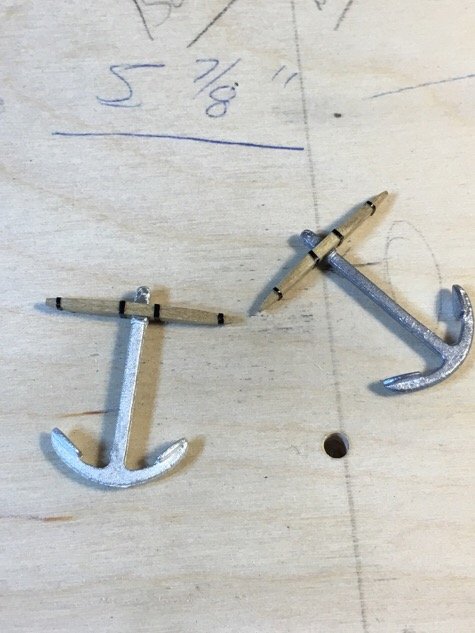
Anchors are ready. Look fairly decent! Still working on the guns and stocks. Anchors away!!!!
- 449 replies
-
- 2
-
-
- sultana
- model shipways
- (and 2 more)
-
Thanks, Lou! In truth, every time I take a departure from Chuck’s practicum, I am doubting whether it will result in long term benefits versus what he recommended. I’m starting to realize that there is no one way to achieve your result. Damn the torpedoes!
- 449 replies
-
- 1
-
-
- sultana
- model shipways
- (and 2 more)
-
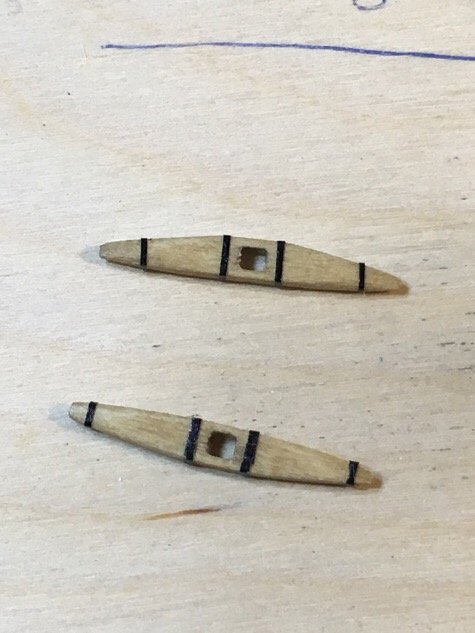
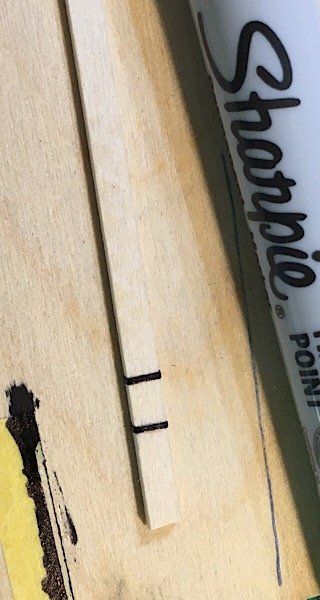
Off to the weekend shipyard. Been racking my brains trying to figure out how best to simulate the metal bands around the top of the gunstocks and the anchors. Chuck Passaro used accent tape used in modeling. I tried that but the tape I have is simply too thick and I can’t seem to get the tape to on accurately. Black thread is an option like I used on the windlass, but these bits are much smaller, and the thread would stick out like a sore thumb. Finally decided I would try something ridiculous. Tamiya tape which, I use when painting, accepts back ink from a sharpie. It’s also the perfect thickness and is easy to trim to size and apply to the pieces. So...waaalaaa. Not a bad result. Also prepped the anchor stocks (or whatever they are) and have stained them. Will add the tape later. Some good progress. Tomorrow is painting day.

- 449 replies
-
- 3
-
-
- sultana
- model shipways
- (and 2 more)
-
Here it is painted. Looks pretty decent. Will rig her up later. Busy week ahead. - Plan to finish the bowsprit and masts and step them all together. - Will fit out and finish the gun stocks, and paint the guns - Prep the boom and fore/main gaffs - Make the anchors Then it’s all rigging. Getting close to the part I have been dreading!!!
- 449 replies
-
- 2
-
-
- sultana
- model shipways
- (and 2 more)